aydingocer
-
Posts
916 -
Joined
-
Last visited


.thumb.jpeg.ffac2f8a24d212961a83eab4efb06a6c.jpeg)

-
 DonSangria reacted to a post in a topic:
HMS Sphinx 1775 by aydingocer - FINISHED - Vanguard Models - 1:64 - Revision #2
DonSangria reacted to a post in a topic:
HMS Sphinx 1775 by aydingocer - FINISHED - Vanguard Models - 1:64 - Revision #2
-
Pitan reacted to a post in a topic:
HMS Sphinx 1775 by aydingocer - FINISHED - Vanguard Models - 1:64 - Revision #2
-
rcweir reacted to a post in a topic:
HMS Sphinx 1775 by aydingocer - FINISHED - Vanguard Models - 1:64 - Revision #2
-
aydingocer reacted to a post in a topic:
HMS Sphinx 1775 by aydingocer - FINISHED - Vanguard Models - 1:64 - Revision #2
-
aydingocer reacted to a post in a topic:
HMS Sphinx 1775 by aydingocer - FINISHED - Vanguard Models - 1:64 - Revision #2
-
Thukydides reacted to a post in a topic:
HMS Sphinx 1775 by aydingocer - FINISHED - Vanguard Models - 1:64 - Revision #2
-
 Ryland Craze reacted to a post in a topic:
HMS Sphinx 1775 by aydingocer - FINISHED - Vanguard Models - 1:64 - Revision #2
Ryland Craze reacted to a post in a topic:
HMS Sphinx 1775 by aydingocer - FINISHED - Vanguard Models - 1:64 - Revision #2
-
aydingocer reacted to a post in a topic:
HMS Sphinx 1775 by aydingocer - FINISHED - Vanguard Models - 1:64 - Revision #2
-
aydingocer reacted to a post in a topic:
HMS Sphinx 1775 by aydingocer - FINISHED - Vanguard Models - 1:64 - Revision #2
-
aydingocer reacted to a post in a topic:
HMS Sphinx 1775 by aydingocer - FINISHED - Vanguard Models - 1:64 - Revision #2
-
Glenn-UK reacted to a post in a topic:
HMS Sphinx 1775 by aydingocer - FINISHED - Vanguard Models - 1:64 - Revision #2
-
DavidG reacted to a post in a topic:
HMS Sphinx 1775 by aydingocer - FINISHED - Vanguard Models - 1:64 - Revision #2
-
En-Dan reacted to a post in a topic:
HMS Sphinx 1775 by aydingocer - FINISHED - Vanguard Models - 1:64 - Revision #2
-
DB789 reacted to a post in a topic:
HMS Sphinx 1775 by aydingocer - FINISHED - Vanguard Models - 1:64 - Revision #2
-
brunnels reacted to a post in a topic:
HMS Sphinx 1775 by aydingocer - FINISHED - Vanguard Models - 1:64 - Revision #2
-
aydingocer reacted to a post in a topic:
HMS Sphinx 1775 by aydingocer - FINISHED - Vanguard Models - 1:64 - Revision #2
-
aydingocer reacted to a post in a topic:
HMS Sphinx 1775 by aydingocer - FINISHED - Vanguard Models - 1:64 - Revision #2
-
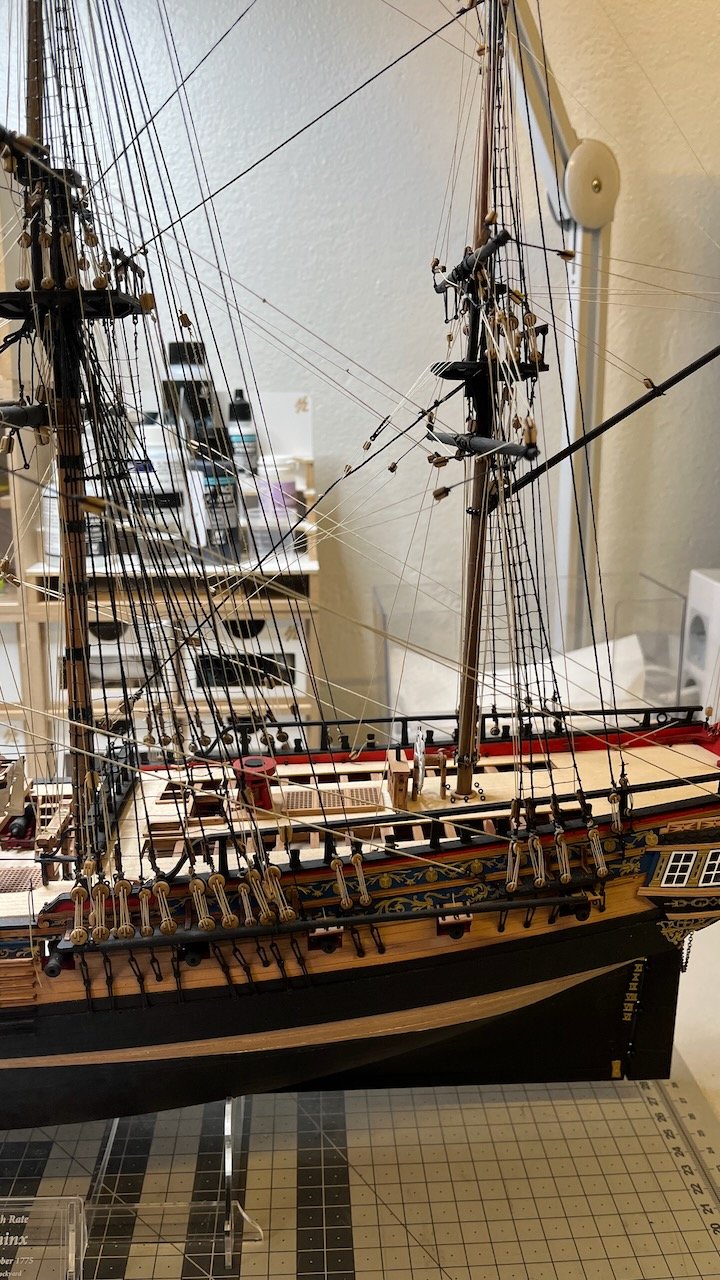
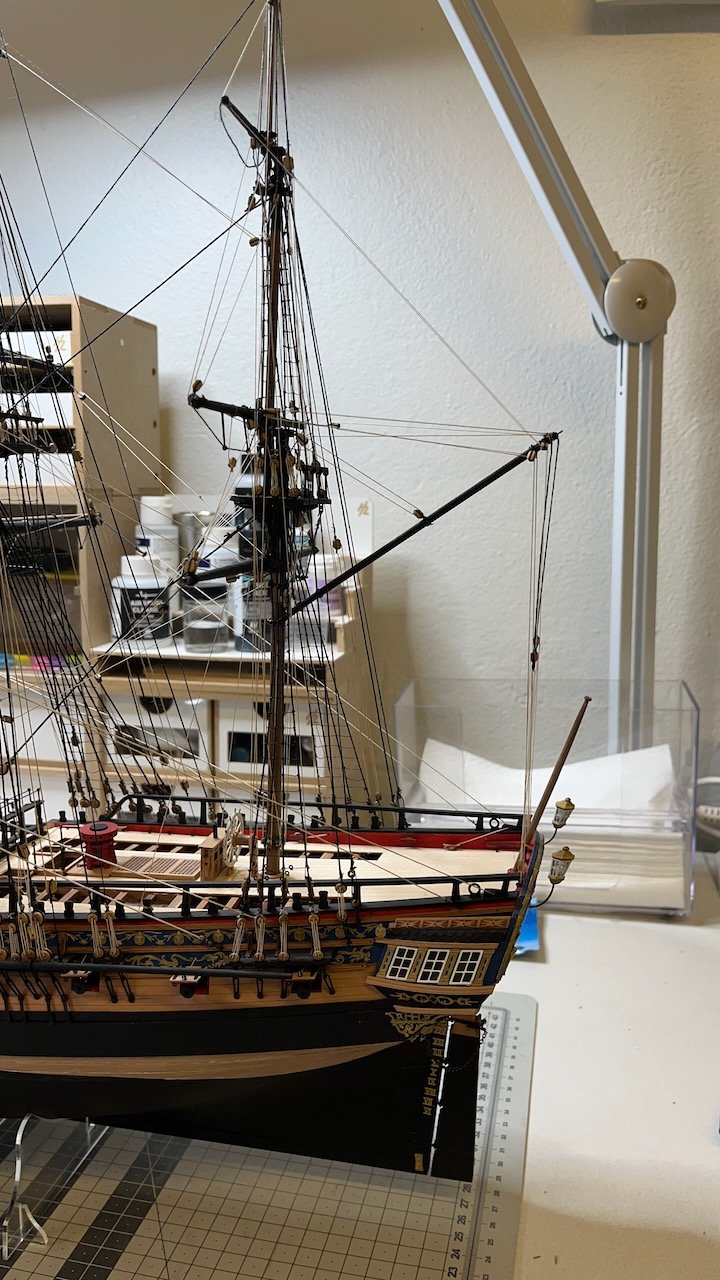
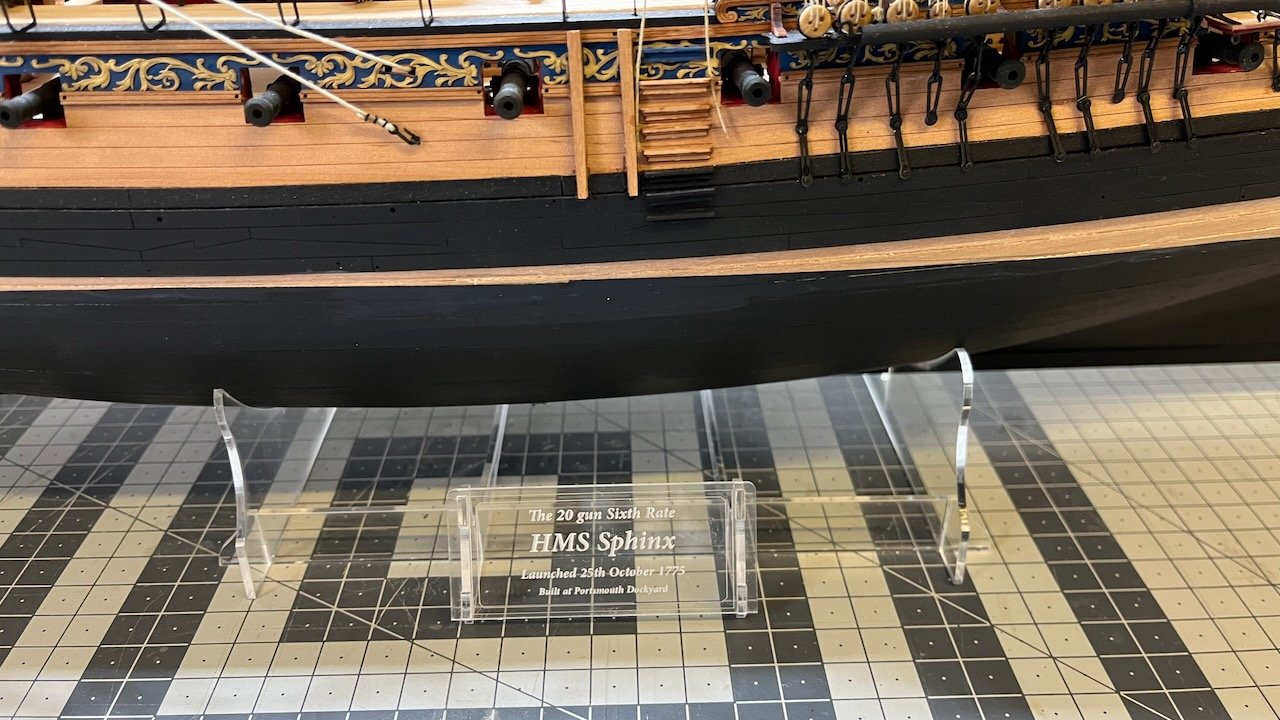
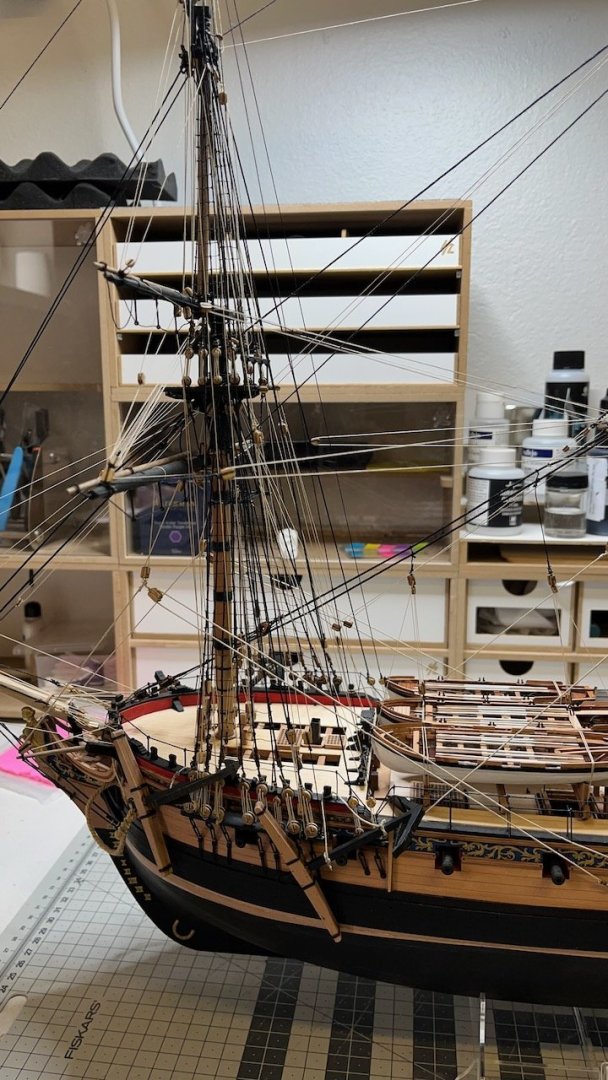
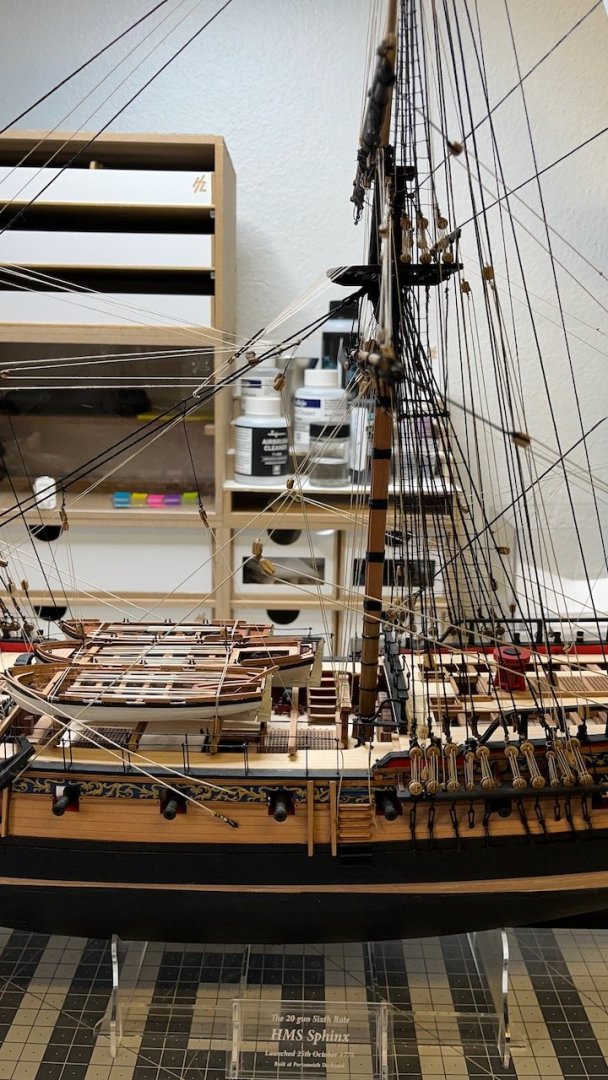
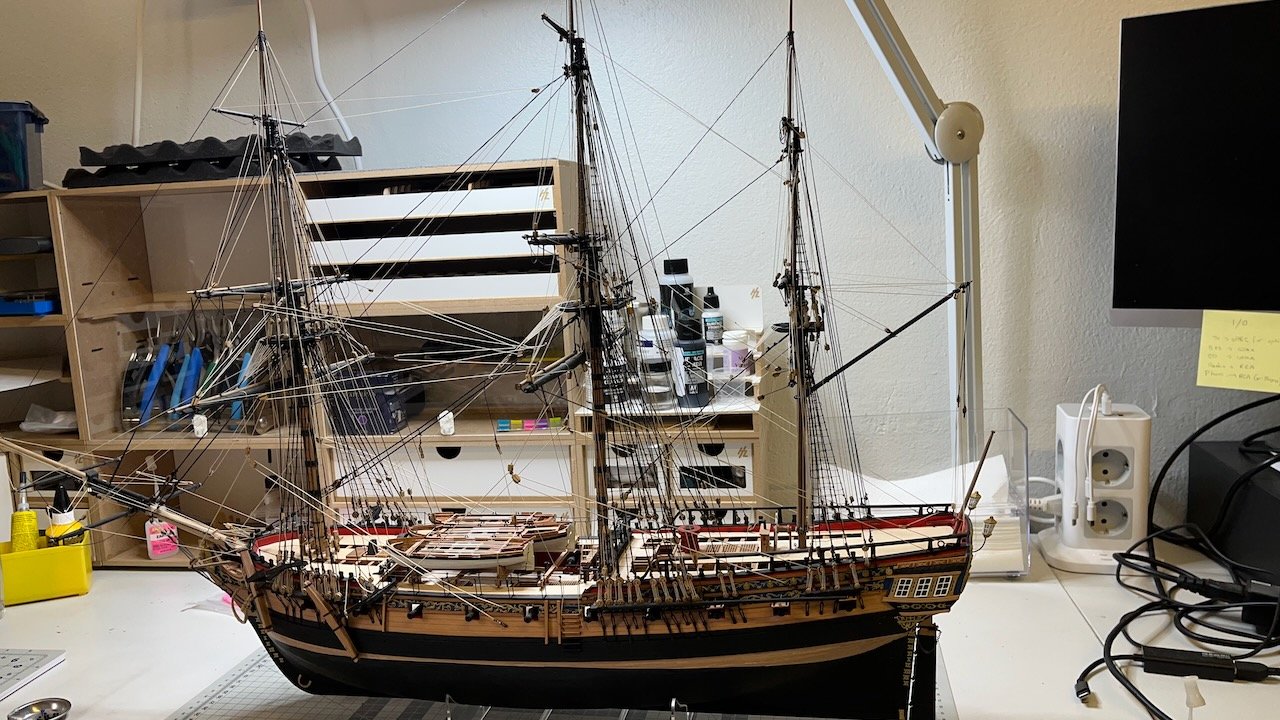
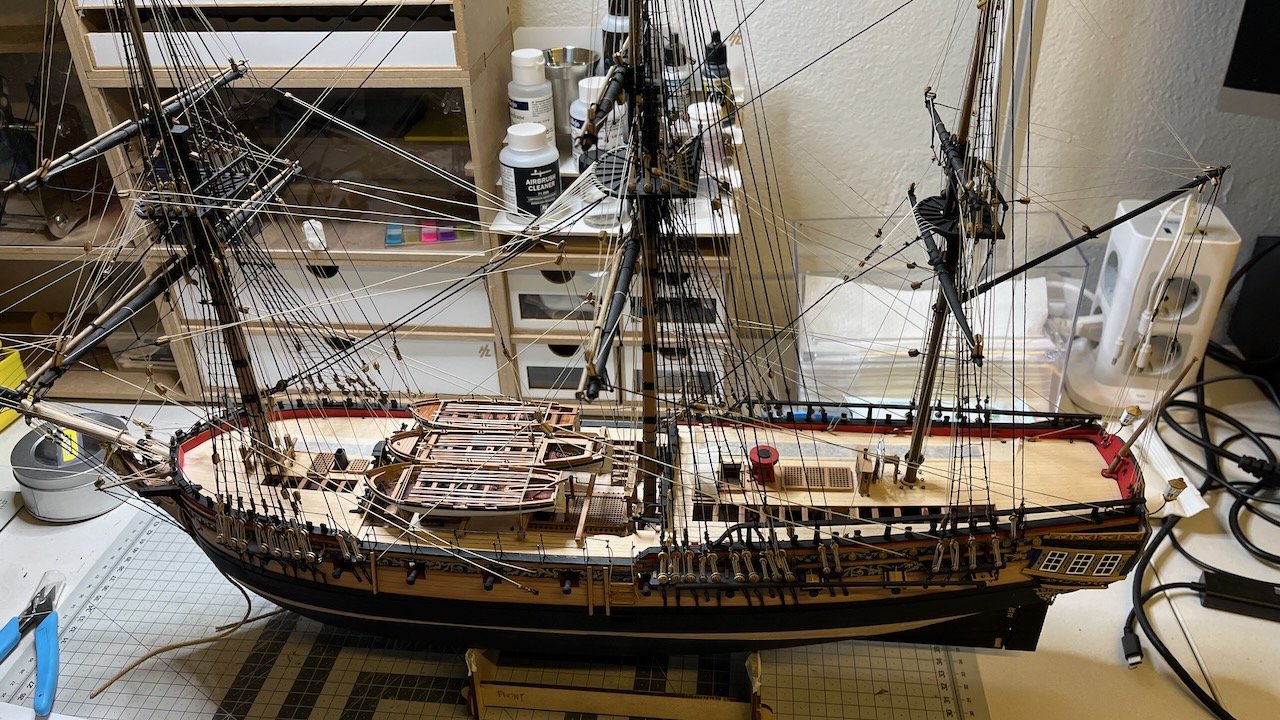
 Build day 190: 2 hrs / Total 404 hours SPHINX IS COMPLETE! 3 years since the start, sitting 190 times in front of it, 404 hours of fun, blood, sweat and tears, and my Sphinx is finally complete. The final tasks were to hook the anchors and assemble the cradle. Without a doubt, Sphinx was the best quality and accurate kit I have ever built and I wanted to give it the care it deserved. I don't remember skipping any step, including every detail of rigging. The result has been more than satisfying. I want to thank @chris watton for making such a beautiful ship with an amazing quality and accuracy available to us, the model ship hobbyists. I want to thank @James H for the great instructions and invaluable support during my build. Last but not the least, I want to thank you, all the fellow Modelshipworld members here who have been following me throughout for the courage you provided. A lot of the time my motivation to sit at the table to do the ship was knowing that there is someone waiting to see some progress. I am finishing my build log with exactly 1000 photos. I put here a few quickly taken photos of the finished model, but I asked a friend of mine with a good camera to take high quality photos of the finished model. Needless to say, I will share them here as soon as they are ready. Thanks for watching! Aydin. Photos 992 - 1000:
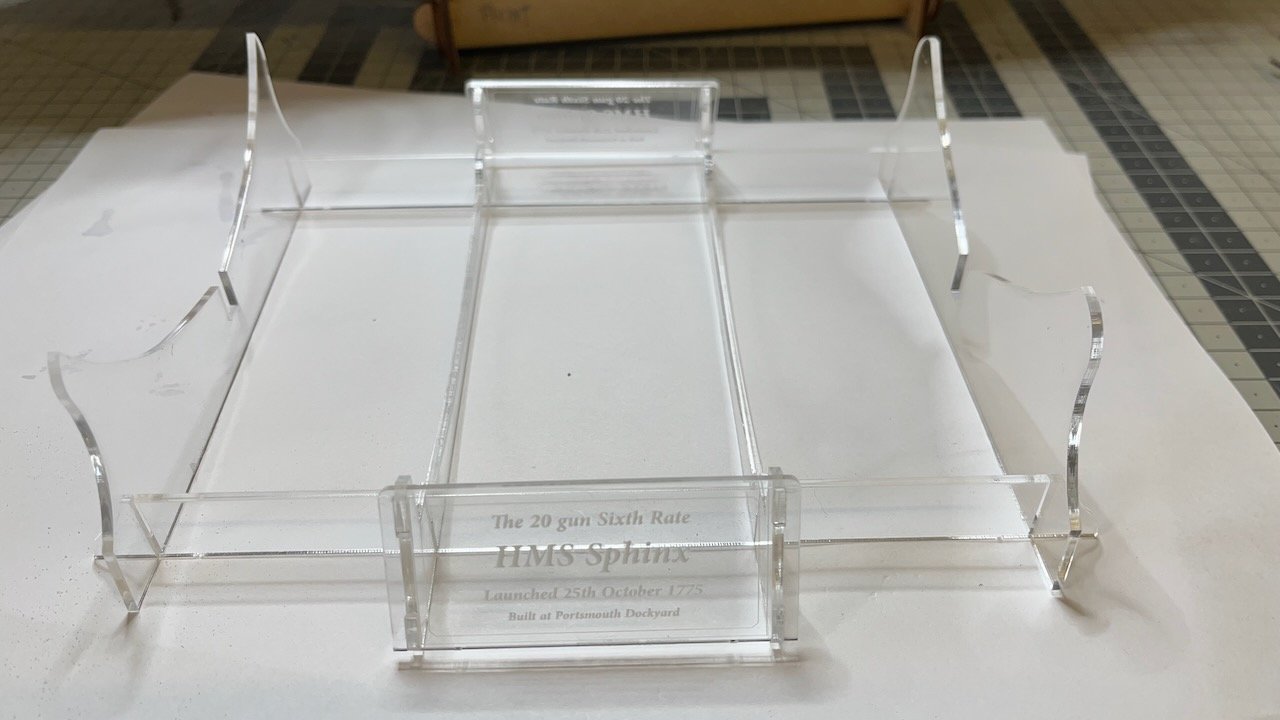


- 426 replies
-
- 14
-
-
-
- Vanguard Models
- Sphinx
- (and 1 more)
-
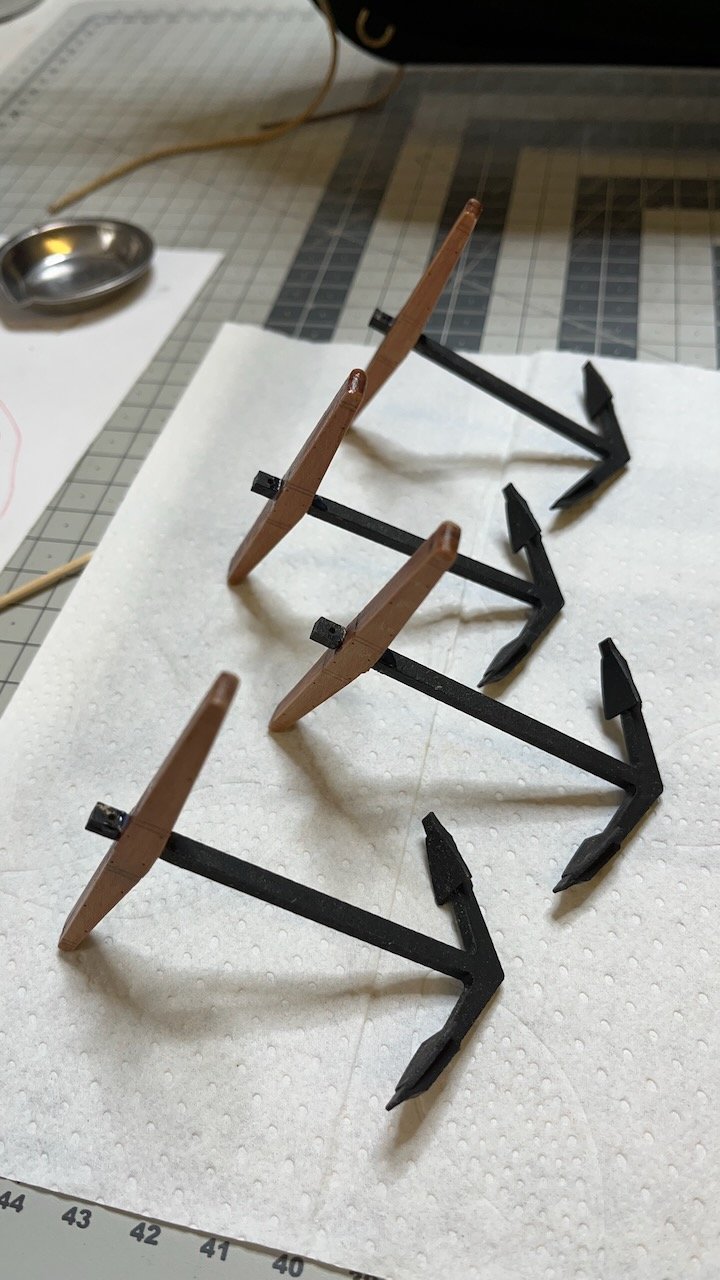
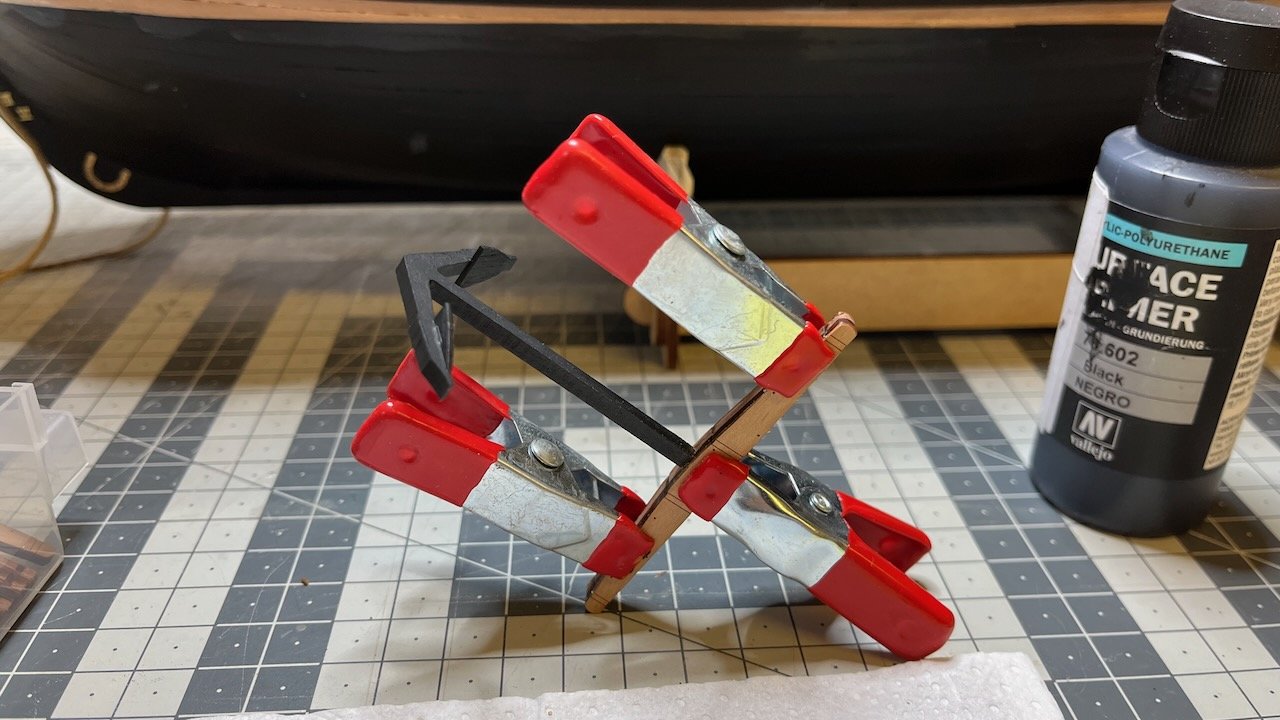
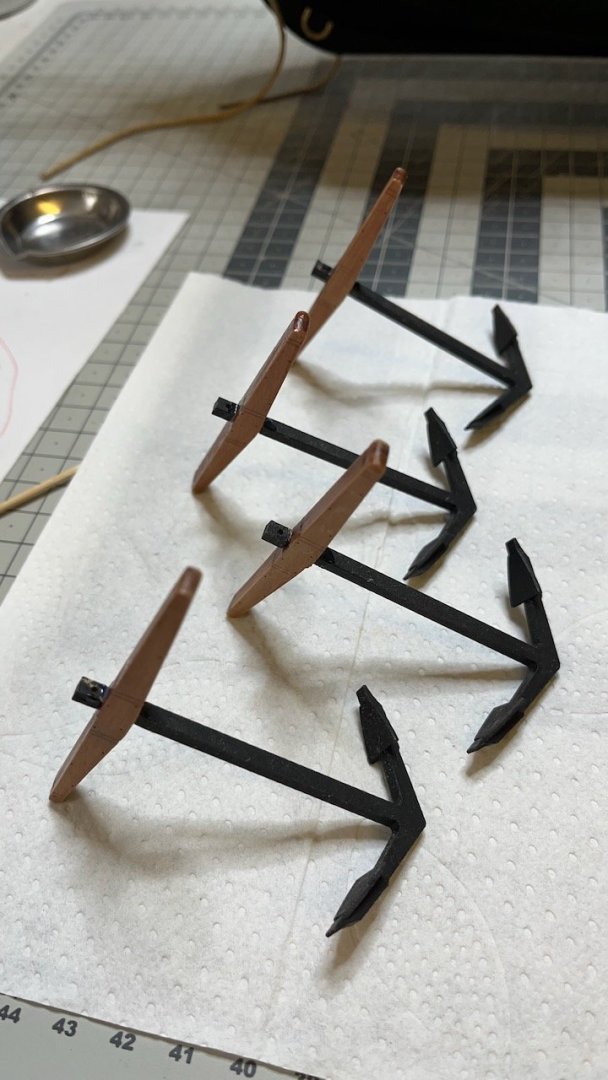
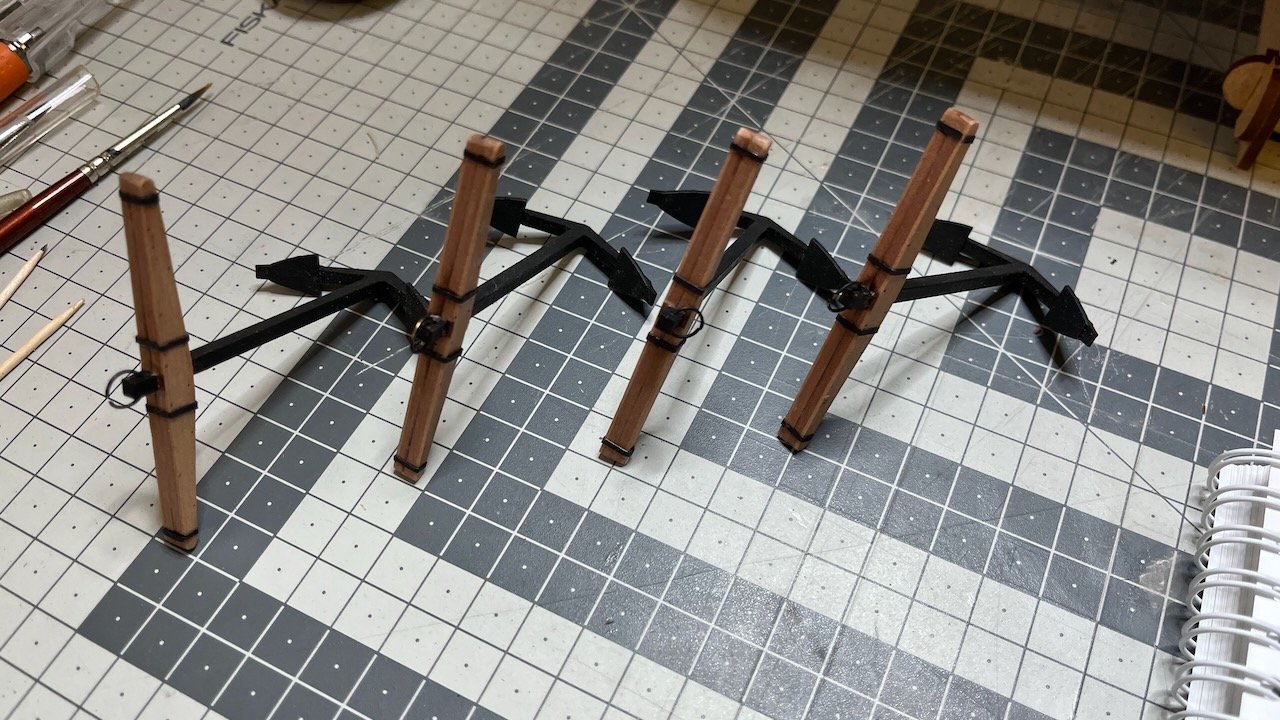
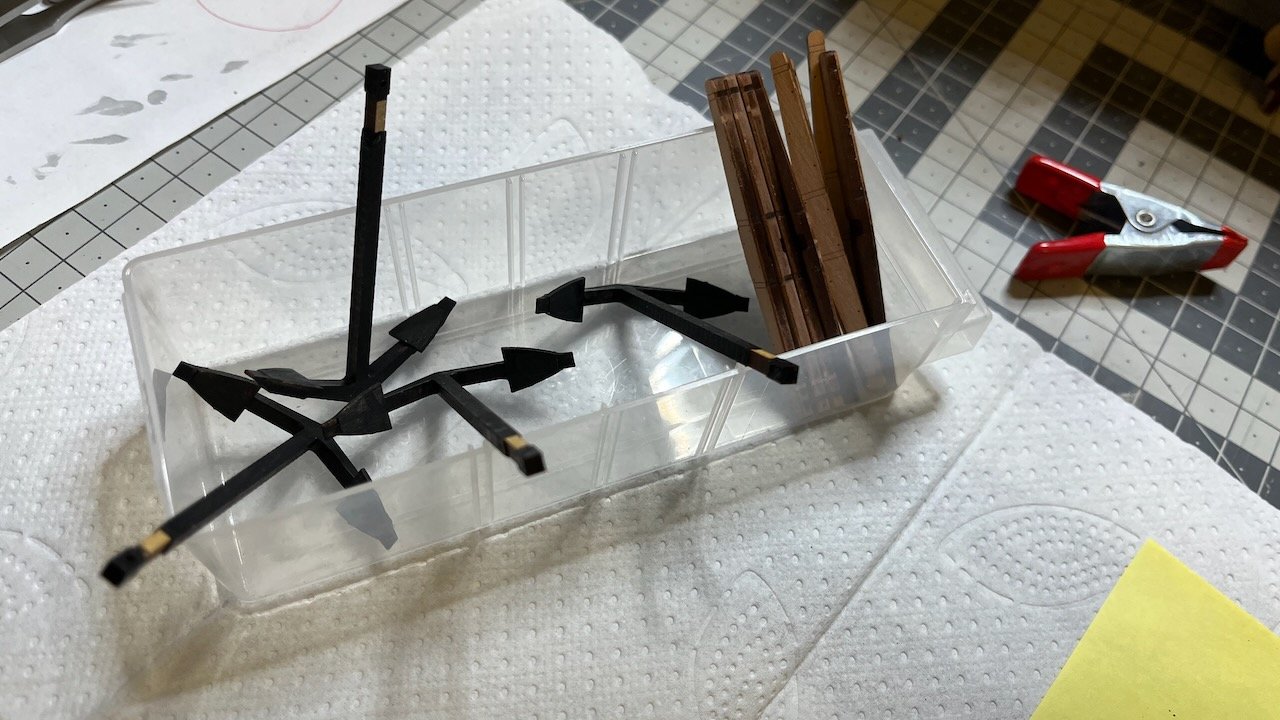
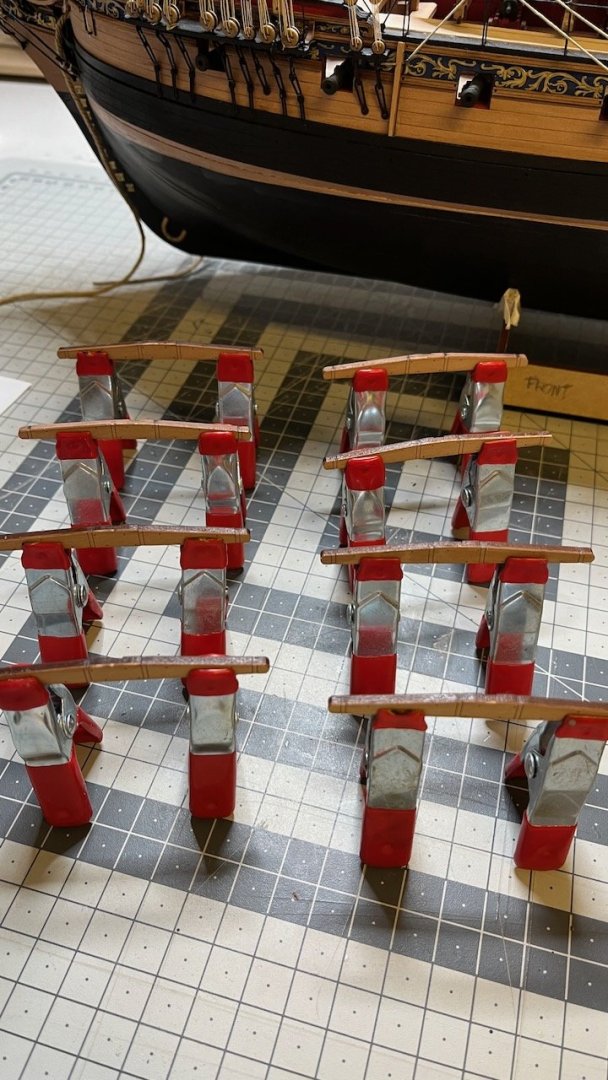
Build day 189: 3 hrs / Total 402 hours Photos 984 - 991: Anchors complete (mounting on the hull pending) It took longer than anticipated. In addition to painting, there was a good amount of filing to fit the stocks to the anchors as well as sanding to remove the char stains. I also used a thin felt tip pen to make the nail patterns more visible.

- 426 replies
-
- 5
-
-
- Vanguard Models
- Sphinx
- (and 1 more)
-
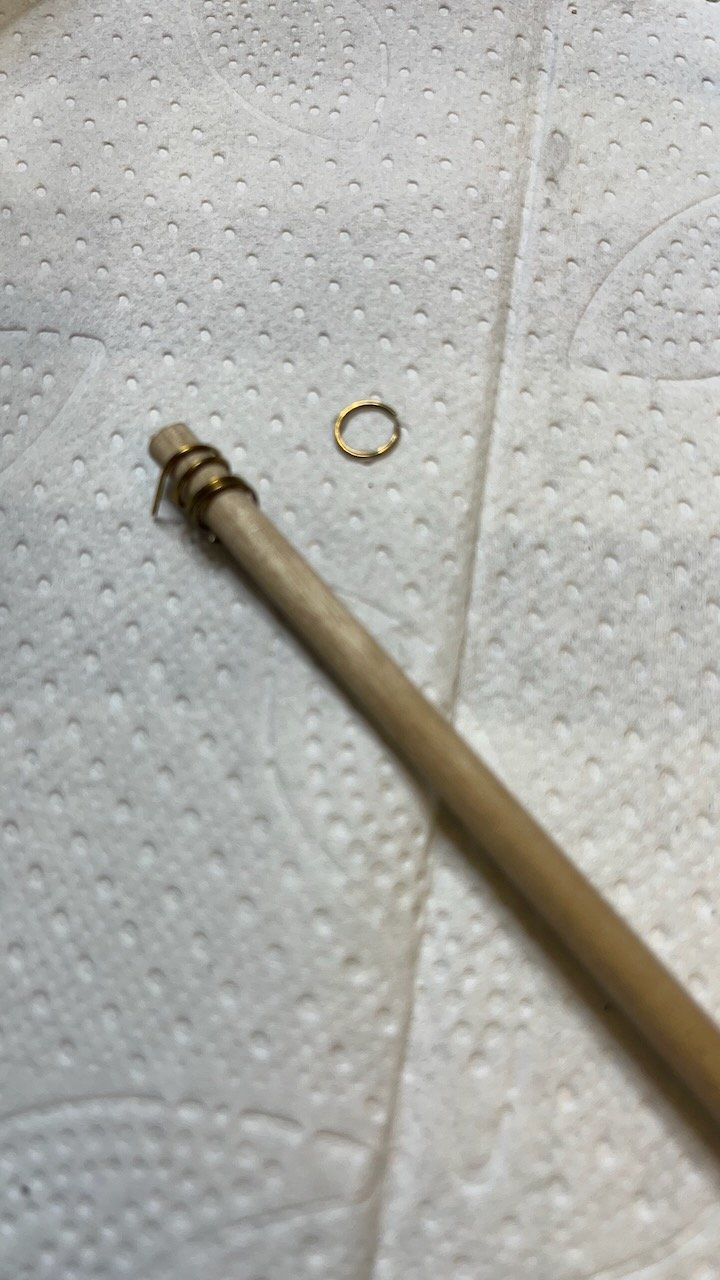
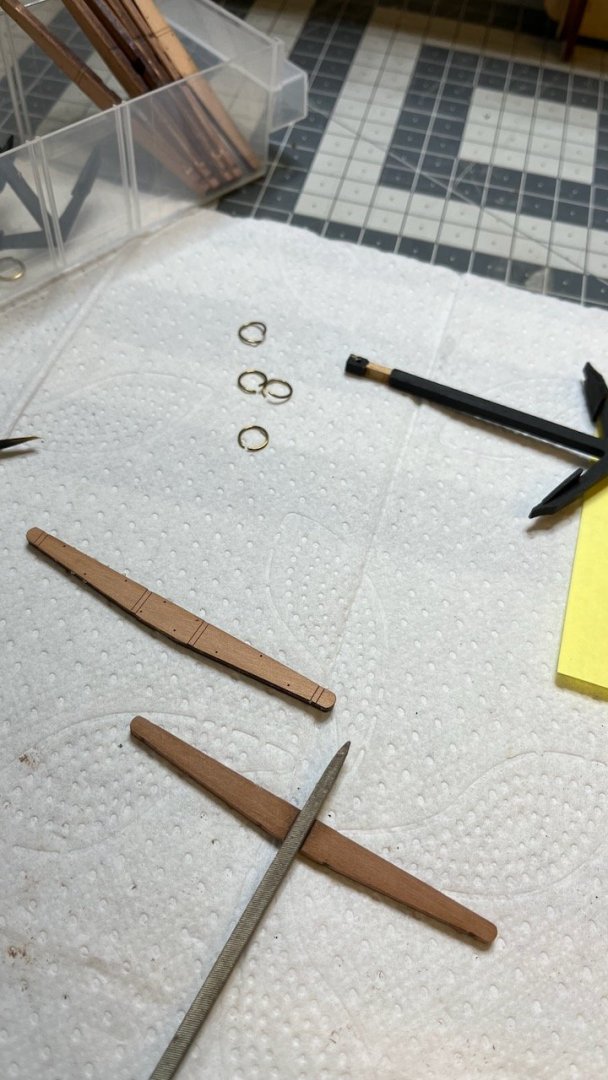
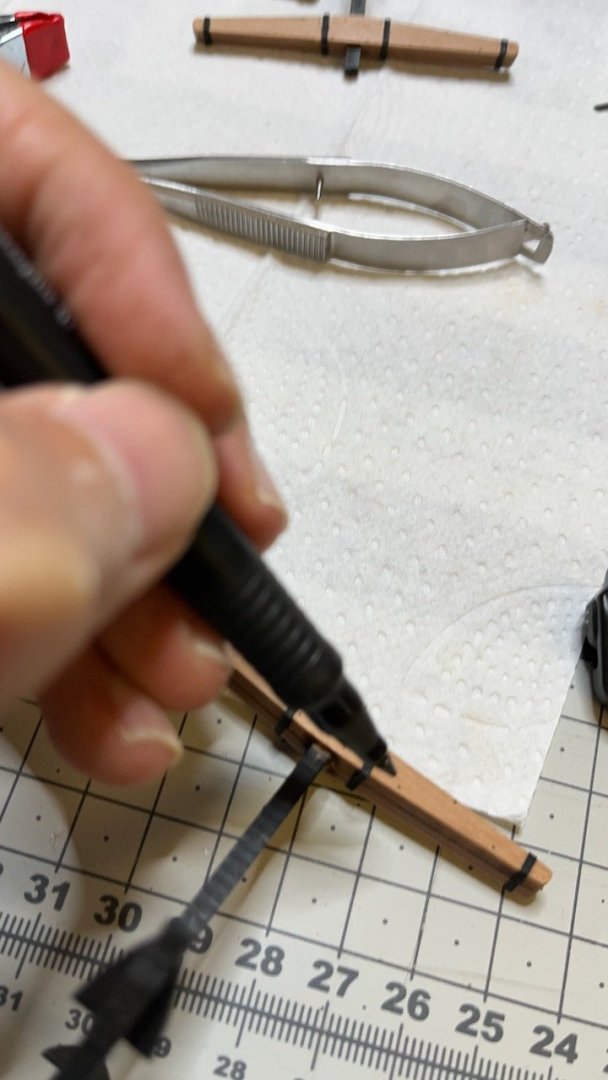
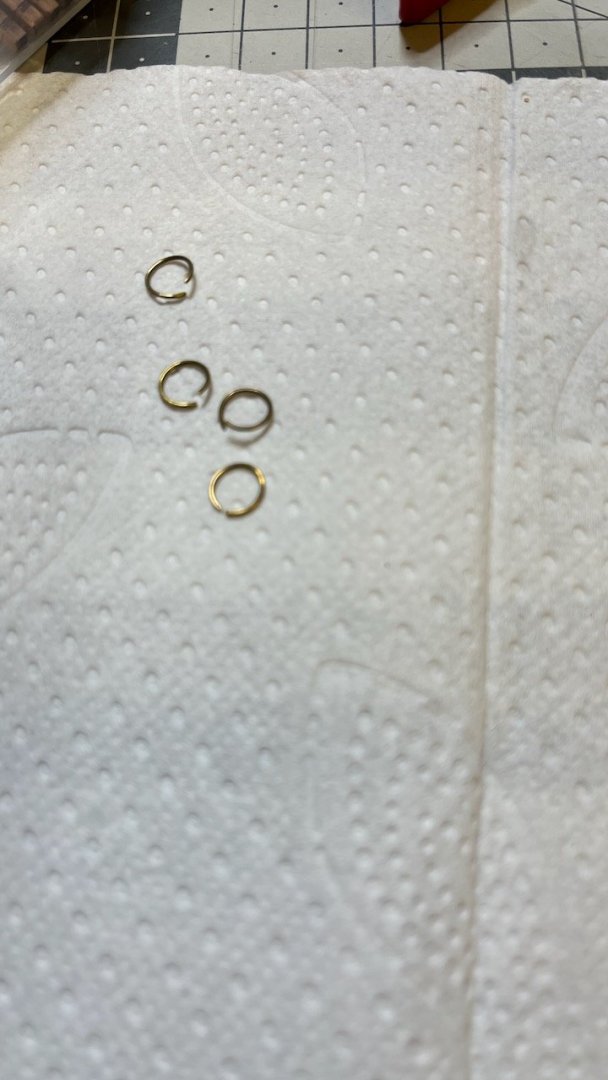
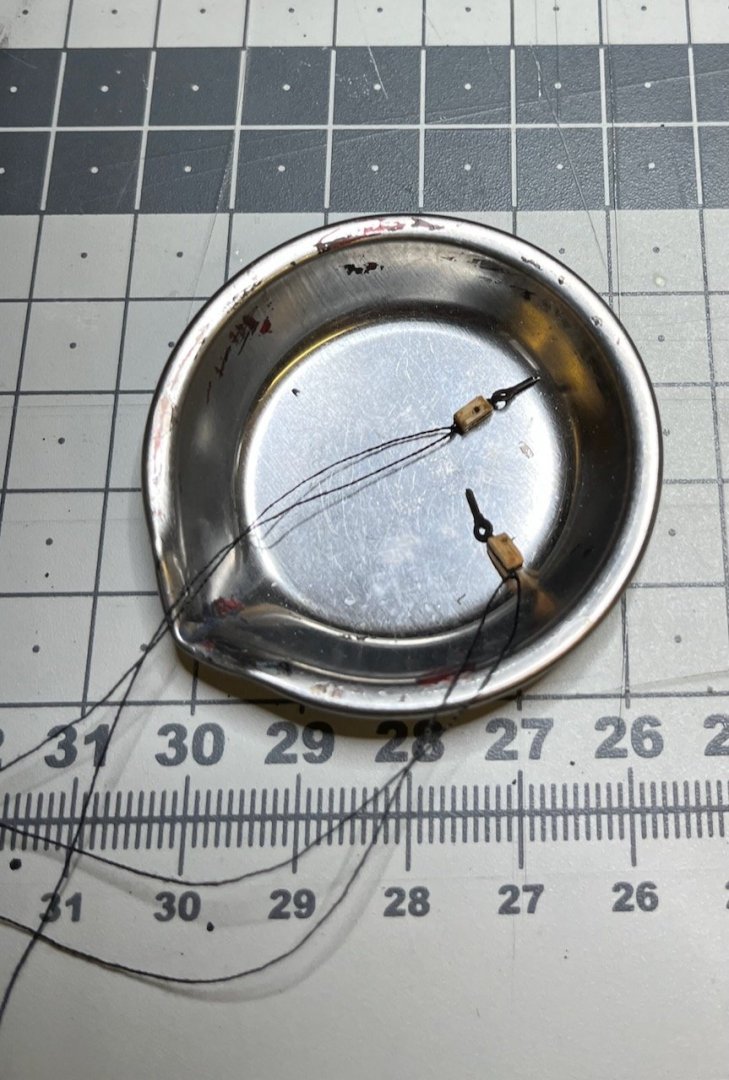
Photo 981: Painting the anchors using black primer - the black paint will follow later. Photos 982 - 983: Anchor hoops, made from a straight wire by rolling around a suitable wooden rod and then cutting them off. This is all for today. I hope to complete the anchors tomorrow. Paint job consumes time while waiting to dry.

- 426 replies
-
- 6
-
-
- Vanguard Models
- Sphinx
- (and 1 more)
-
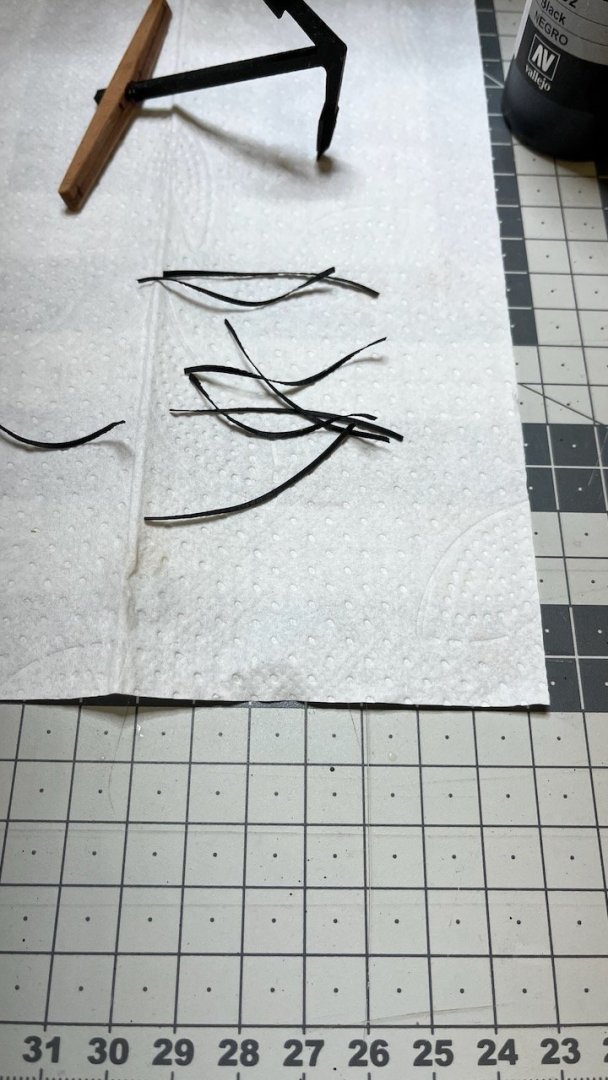
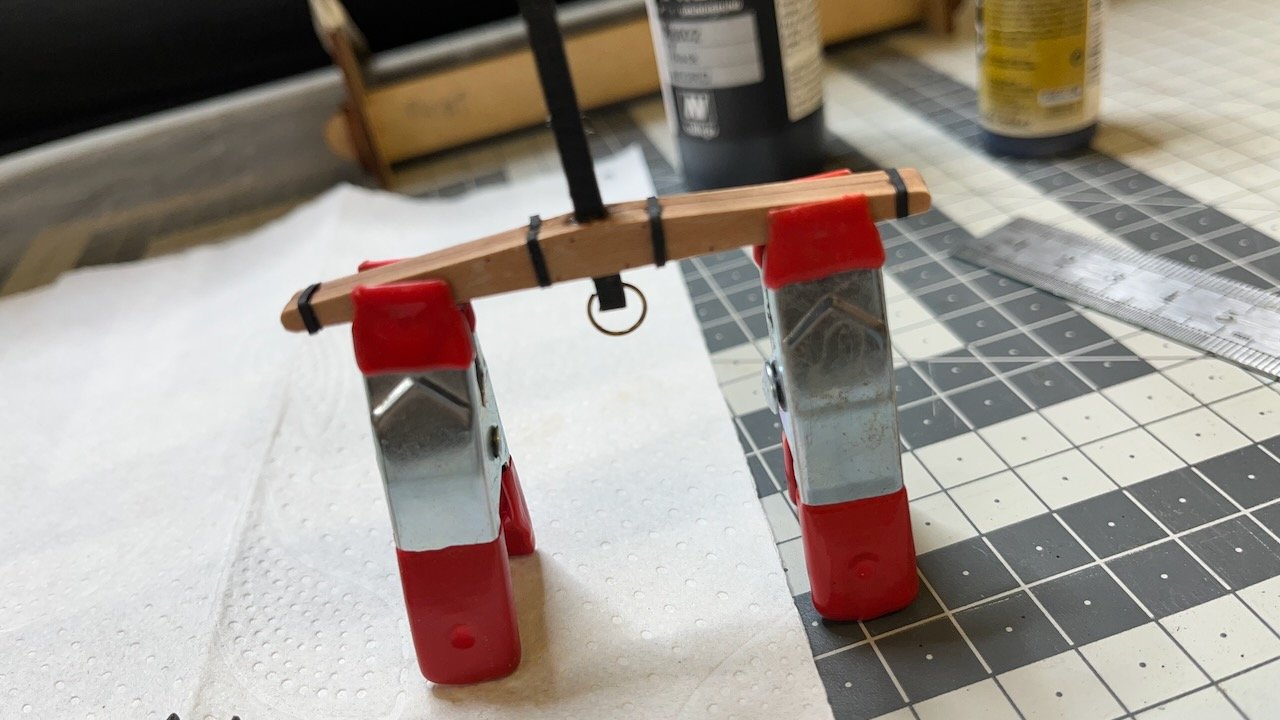
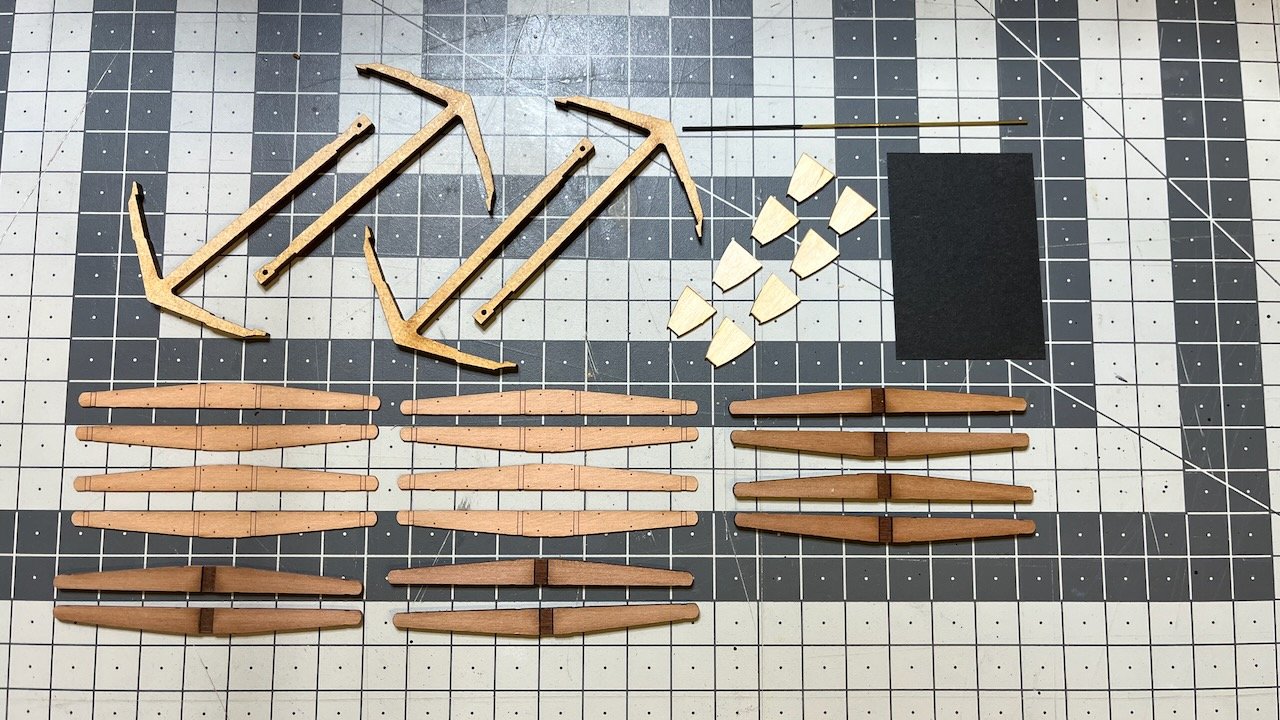
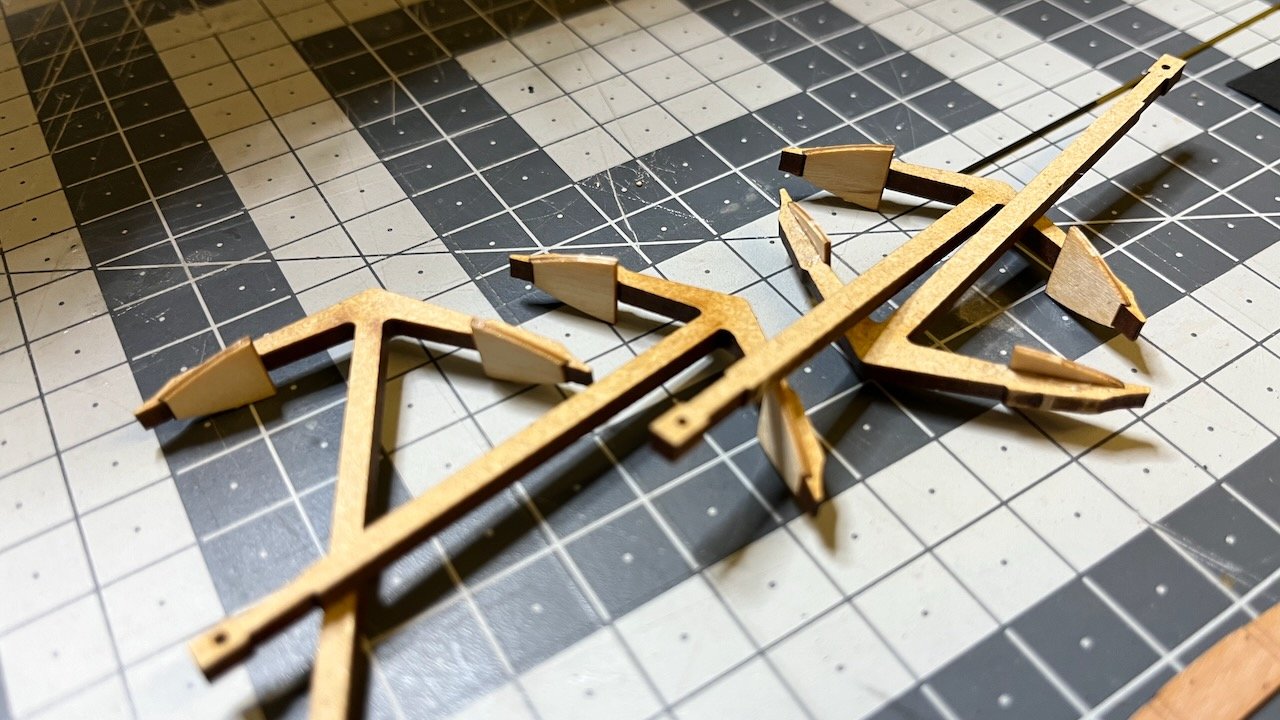
Build day 188/2: 2 hrs / Total 399 hours Just 1 hour to hit the 400 hour mark! Next in line is the anchors. I somehow thought there would be two, but actually there are 4 anchors! Photo 978: Parts that make the anchors: Photos 979 - 980: Assembly starts. The laser cut chars will be cleaned later in the process.
- 426 replies
-
- 3
-
-
- Vanguard Models
- Sphinx
- (and 1 more)
-
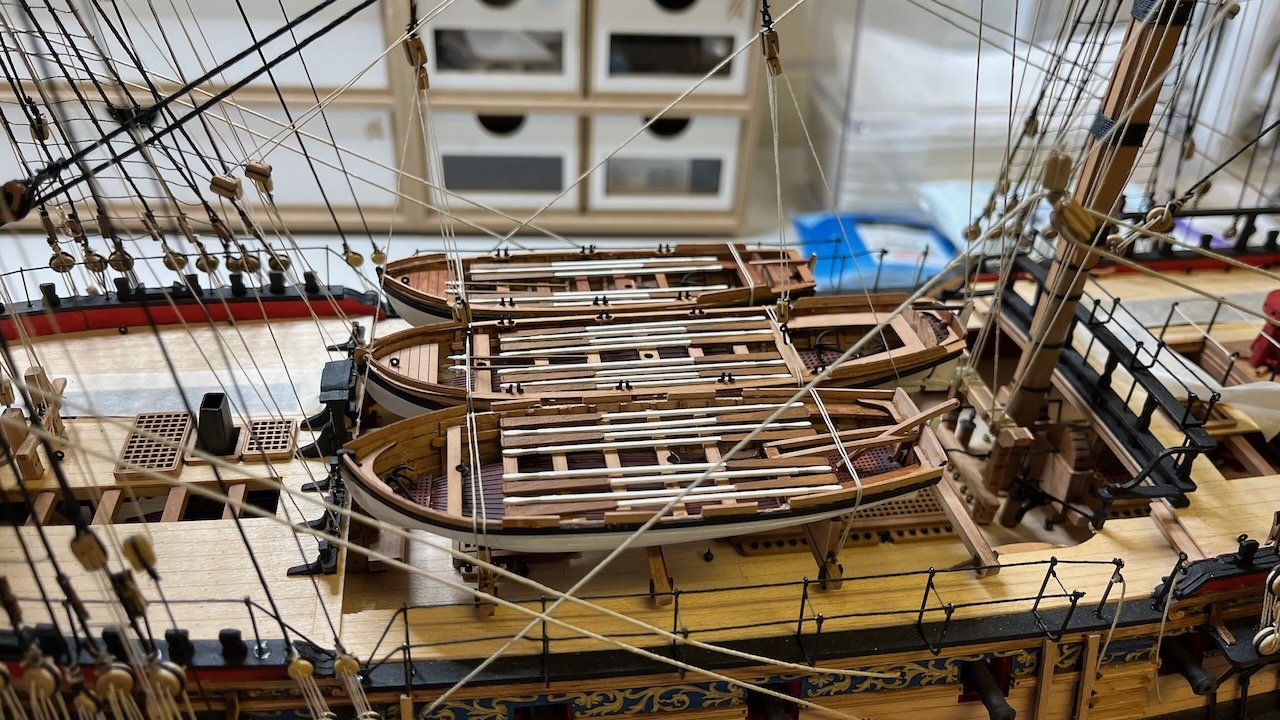
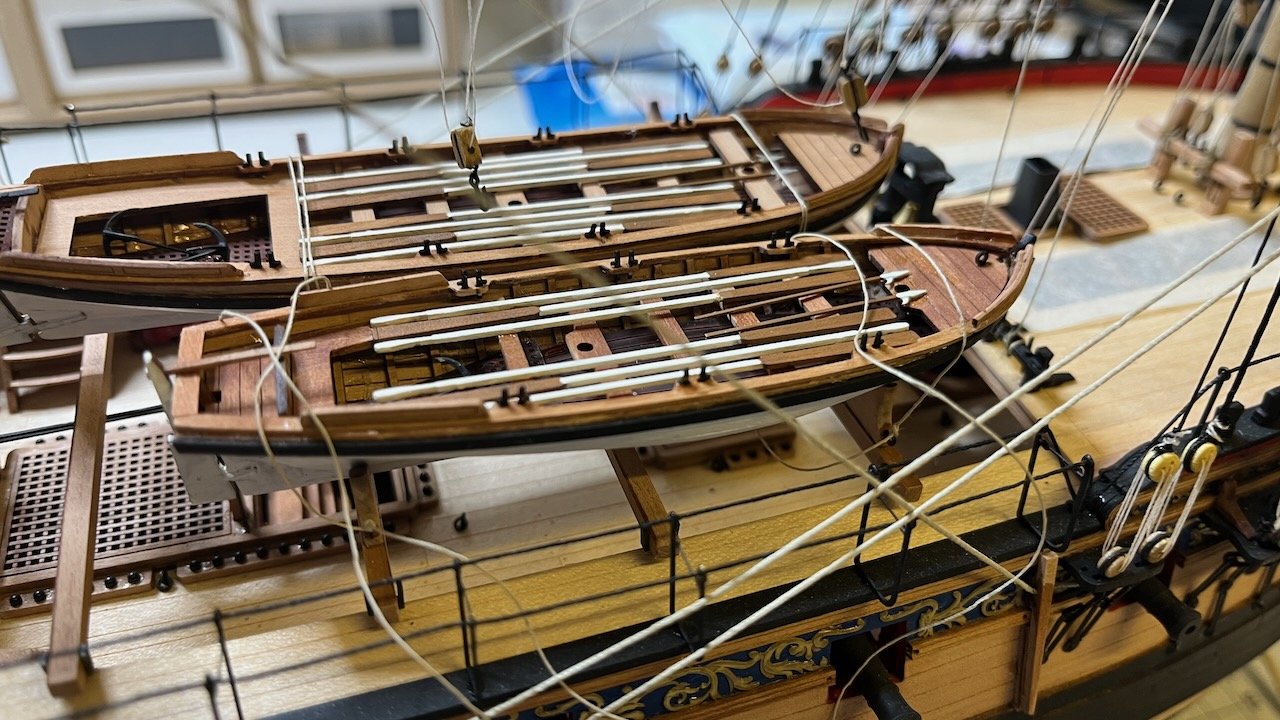
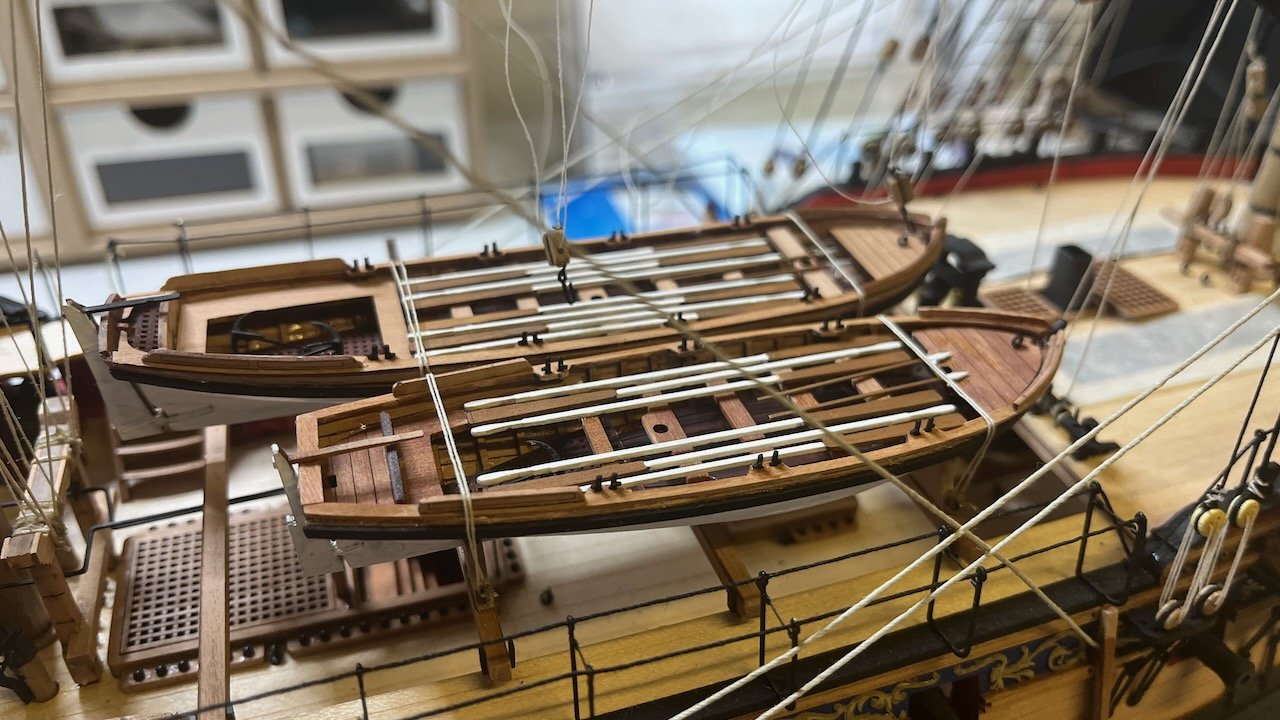
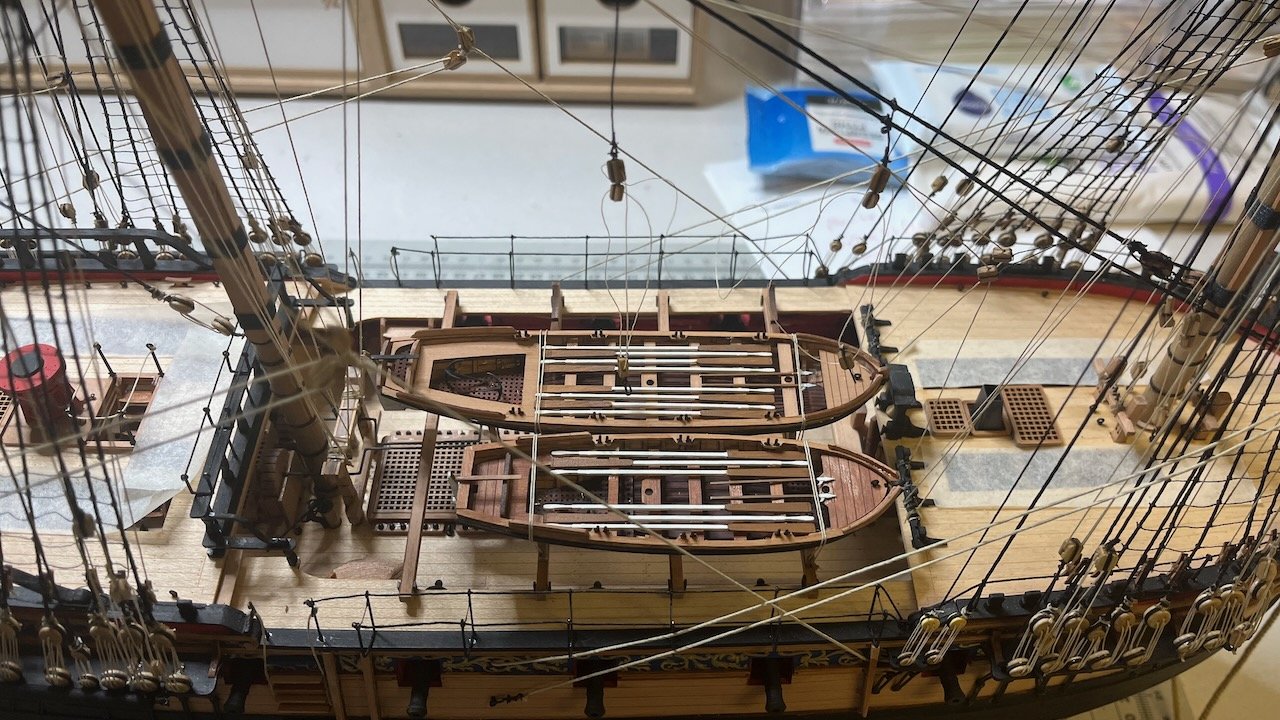
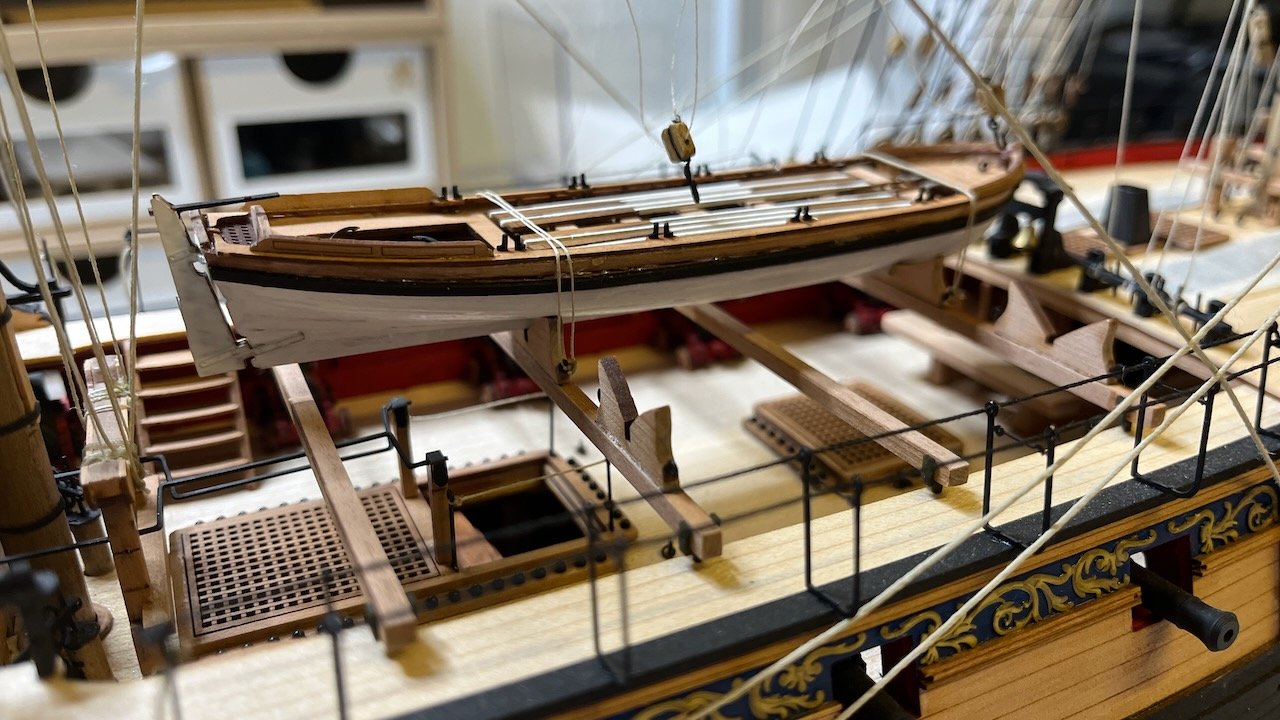
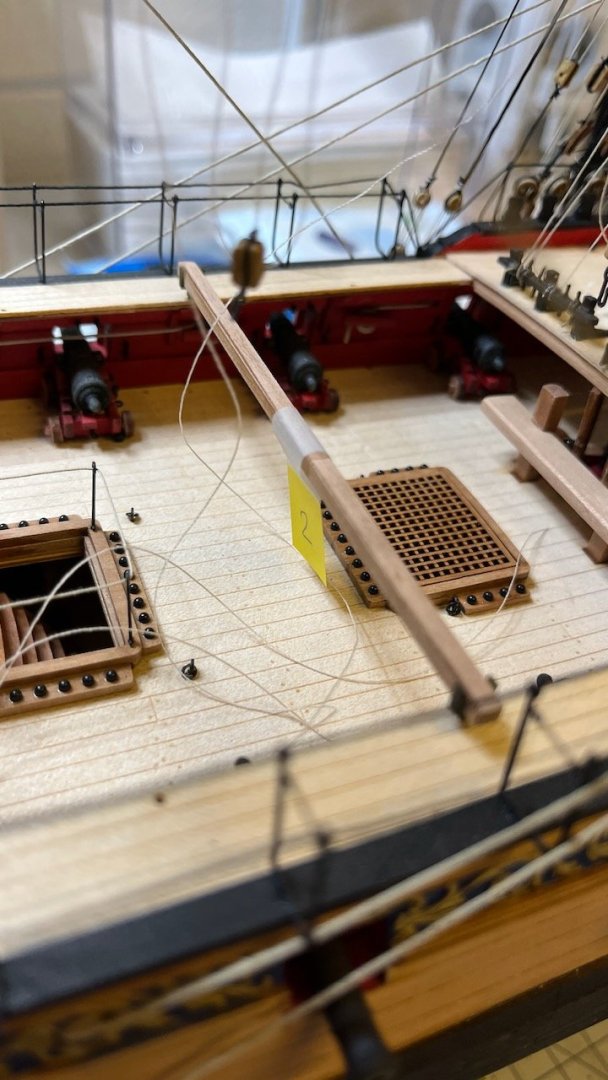
Photos 975 - 977: The 3rd boat in place using the similar approach as the 2nd boat. The 2nd and 3rd photos show the Main Stay and Fore Hatch Tackles hooked and tightened. Boats are now mounted properly in place!
- 426 replies
-
- 4
-
-
- Vanguard Models
- Sphinx
- (and 1 more)
-
Photo 971: The threads for the second boat. Photo 972: Second boat on the cradle, with threads loose. Photos 973 - 974: 2nd boat in place.

- 426 replies
-
- 2
-
-
- Vanguard Models
- Sphinx
- (and 1 more)
-
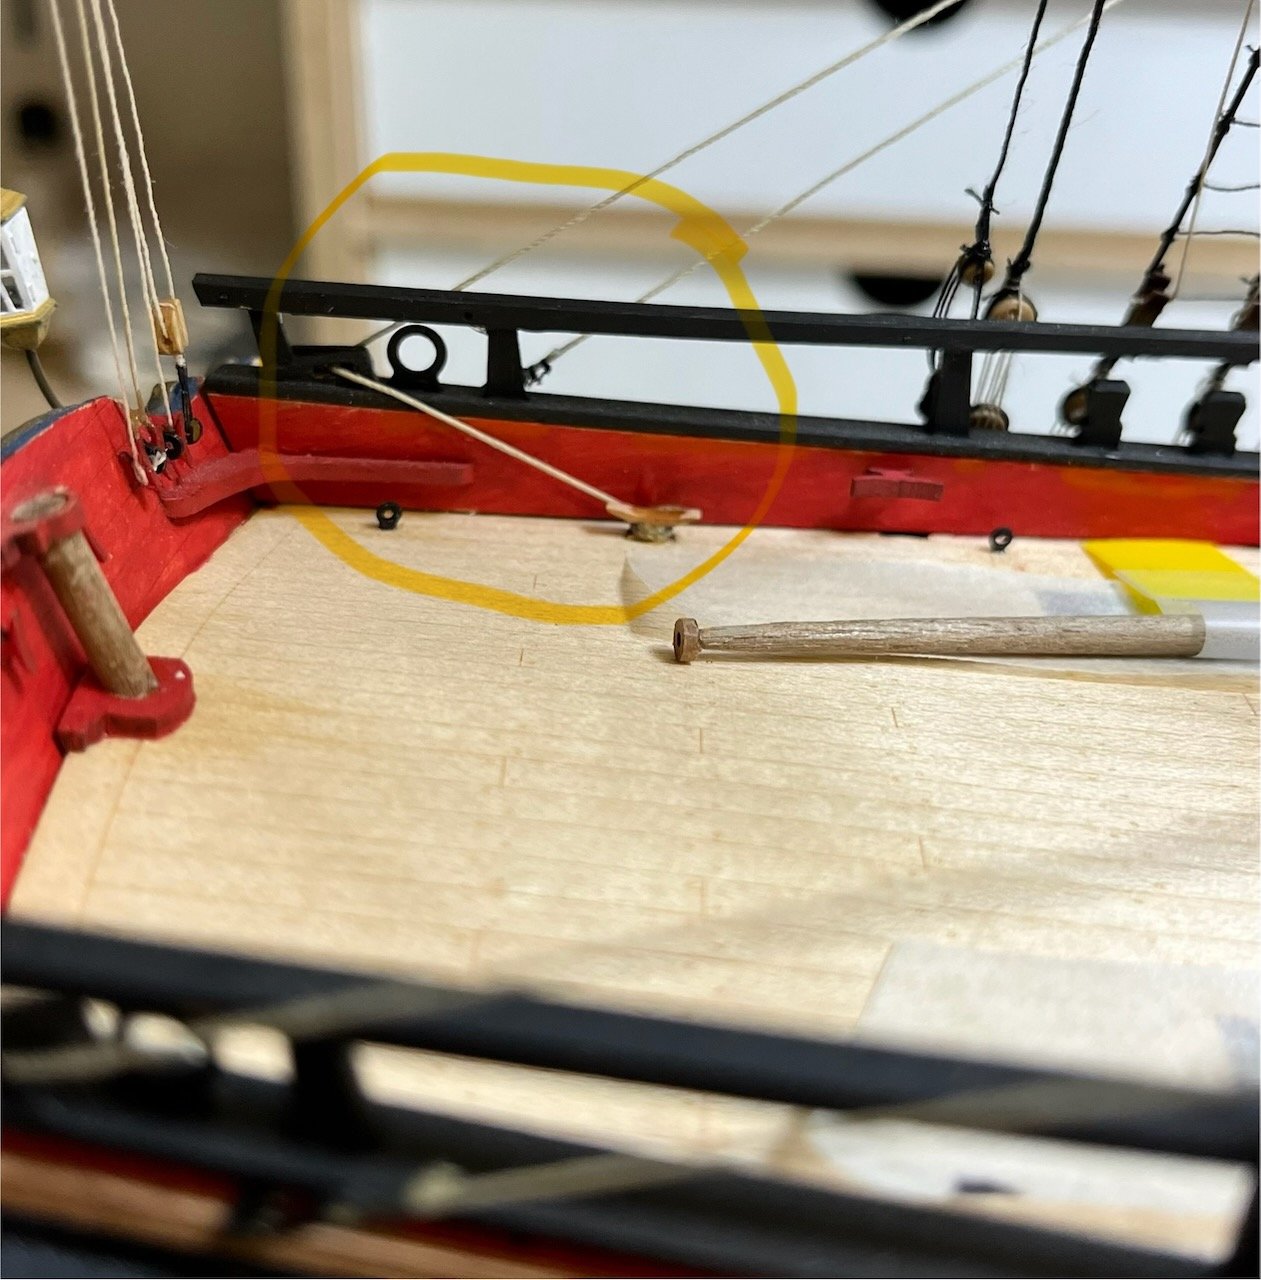
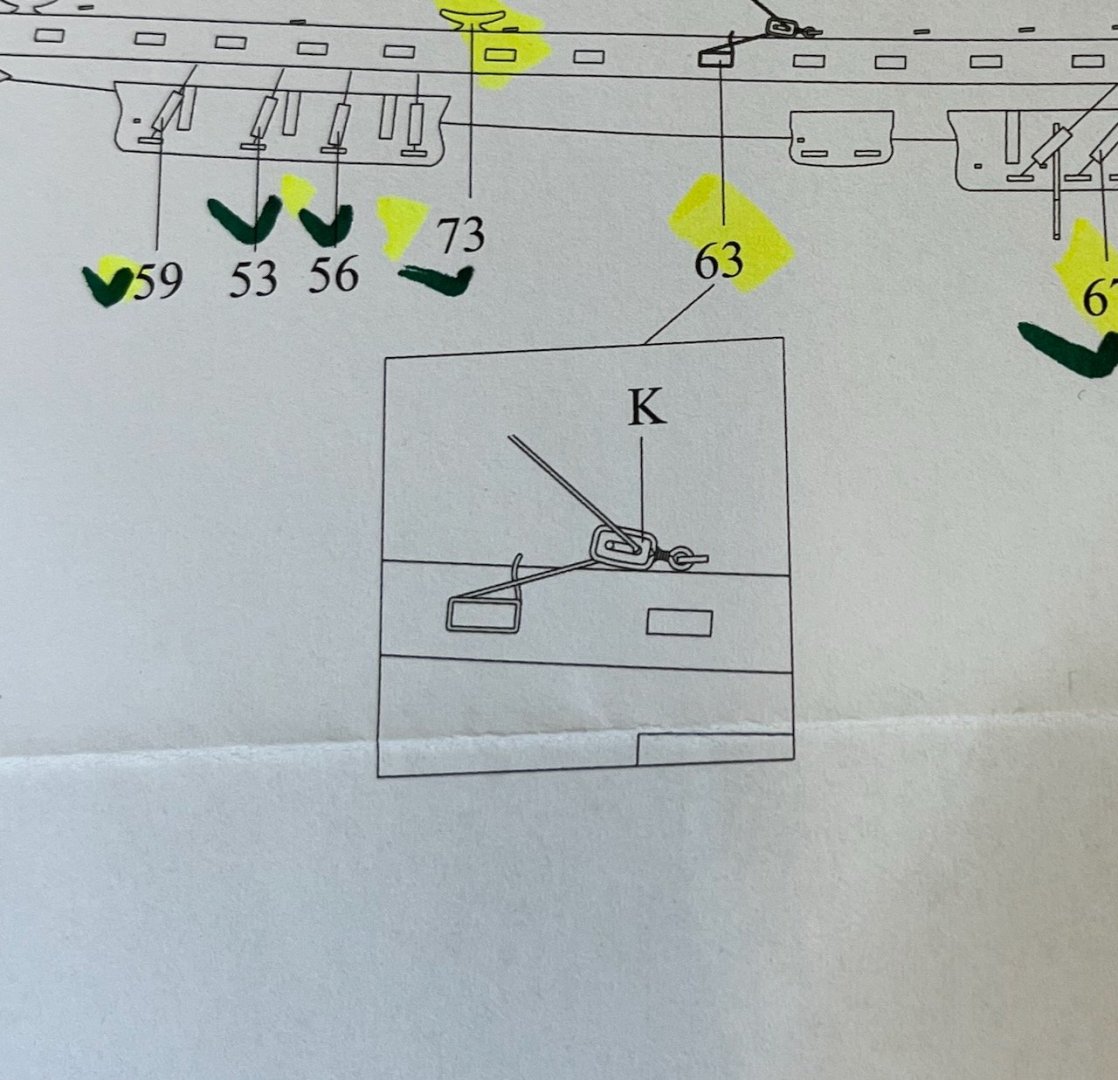
Photo 970: The structure is in place. Note the Main Stay and Fore Hatch Tackles are still hanging loose, until all the boats have been mounted.
- 426 replies
-
- 3
-
-
- Vanguard Models
- Sphinx
- (and 1 more)
-
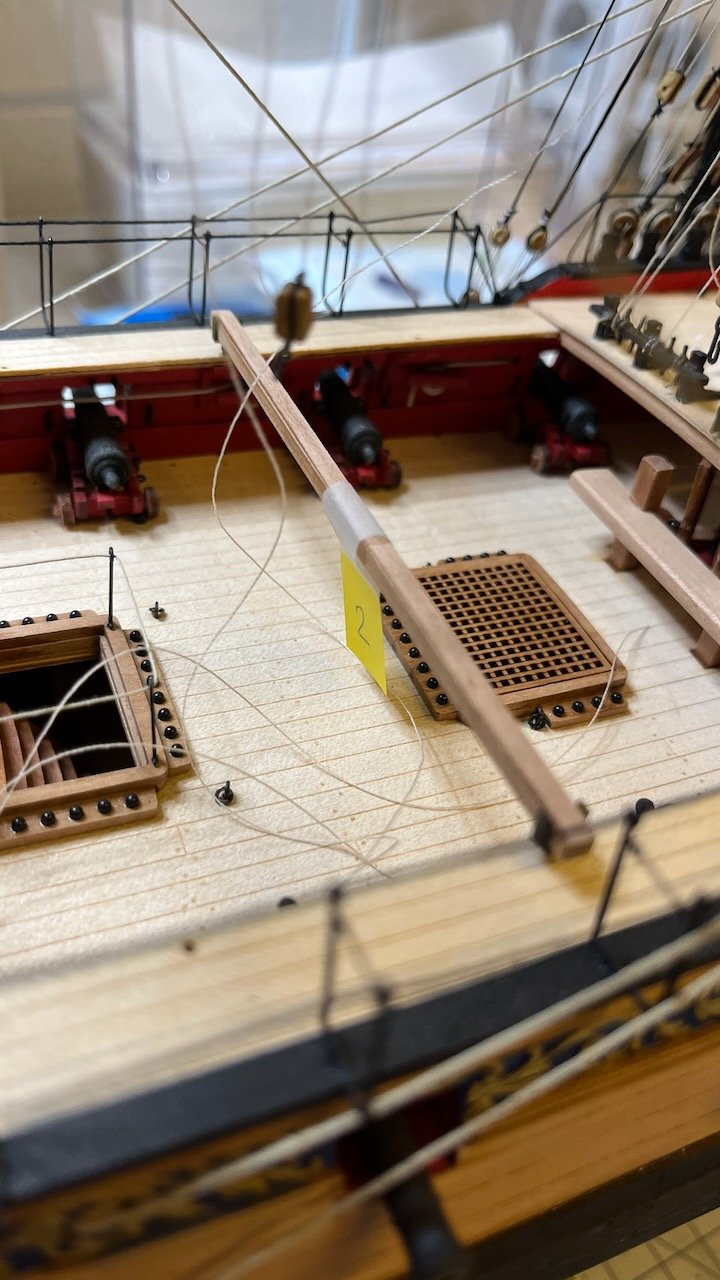
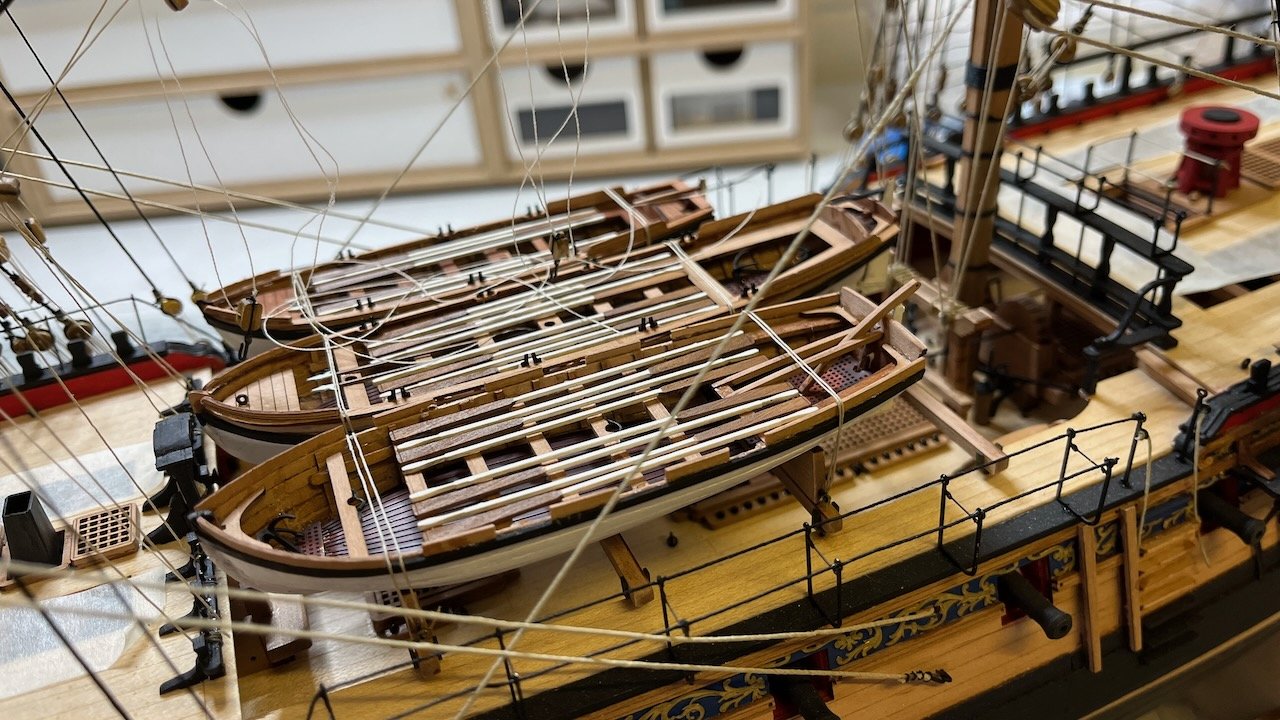
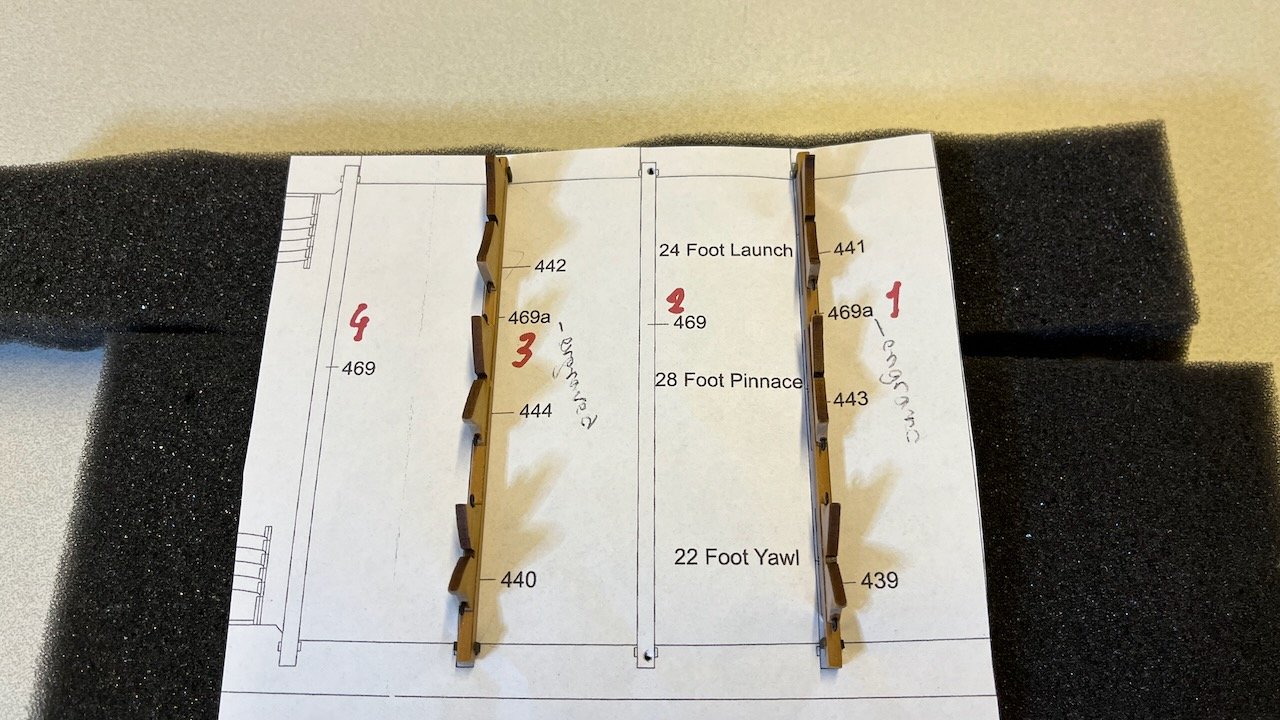
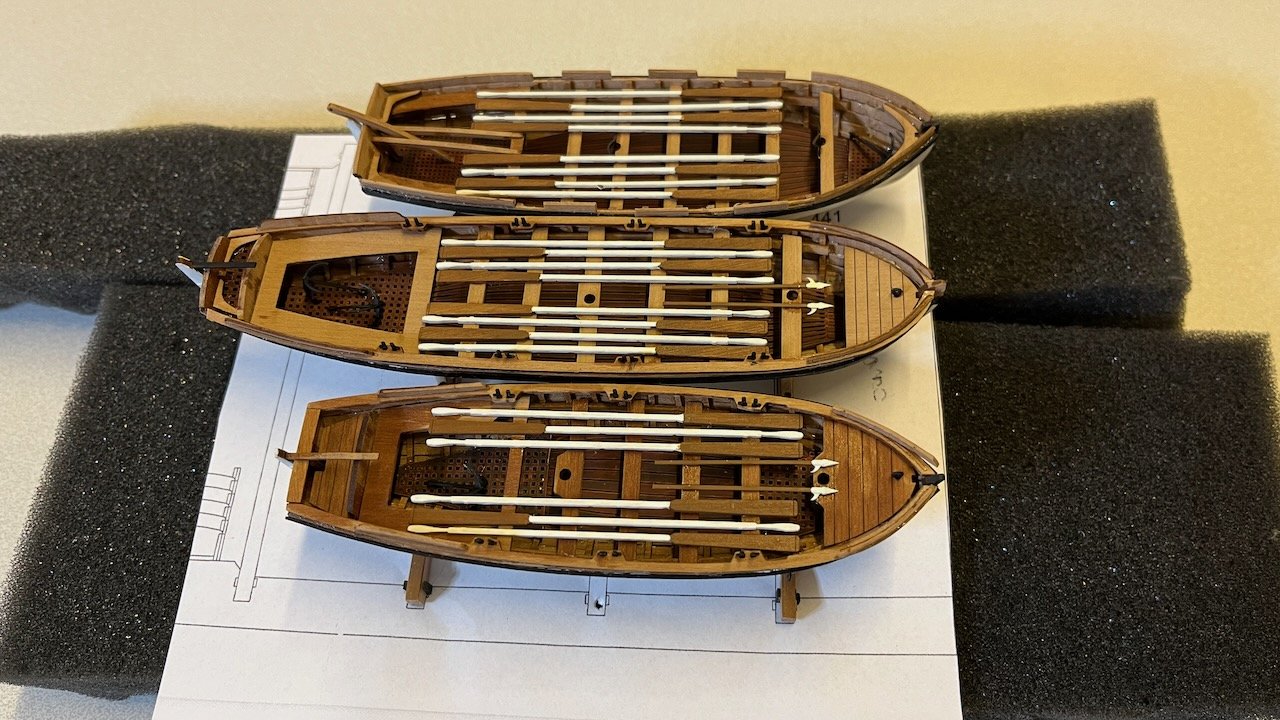
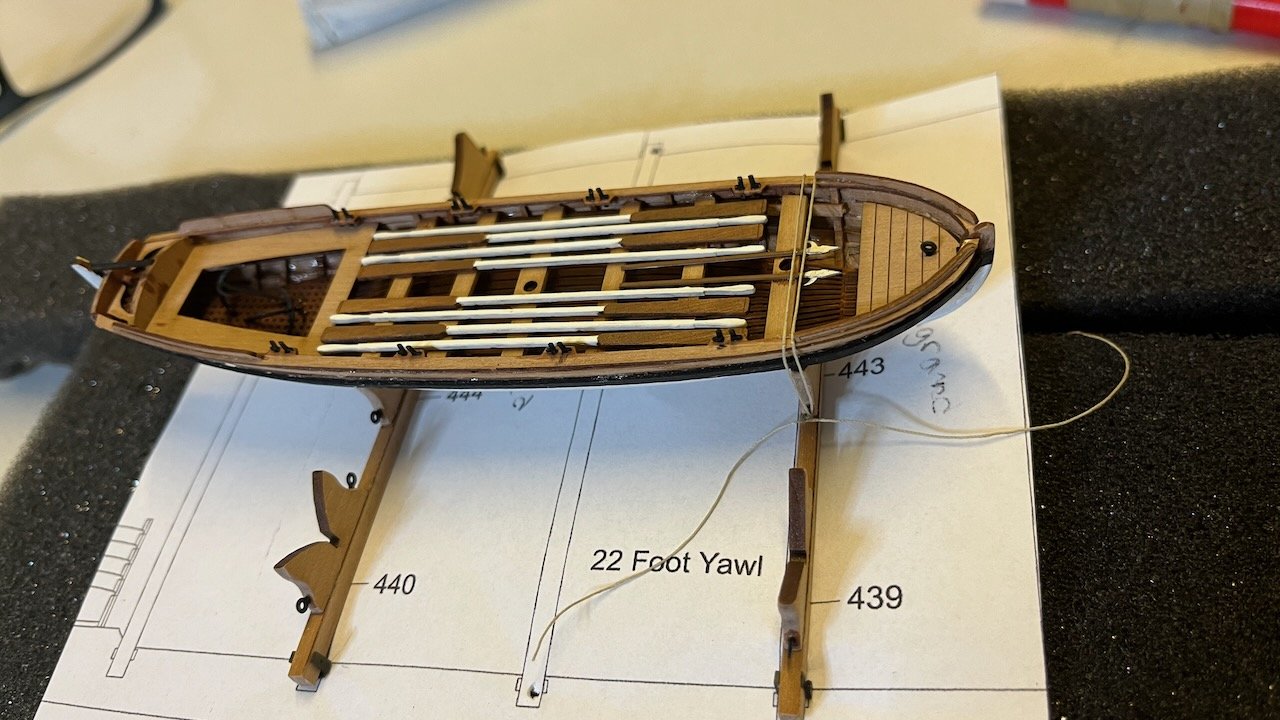
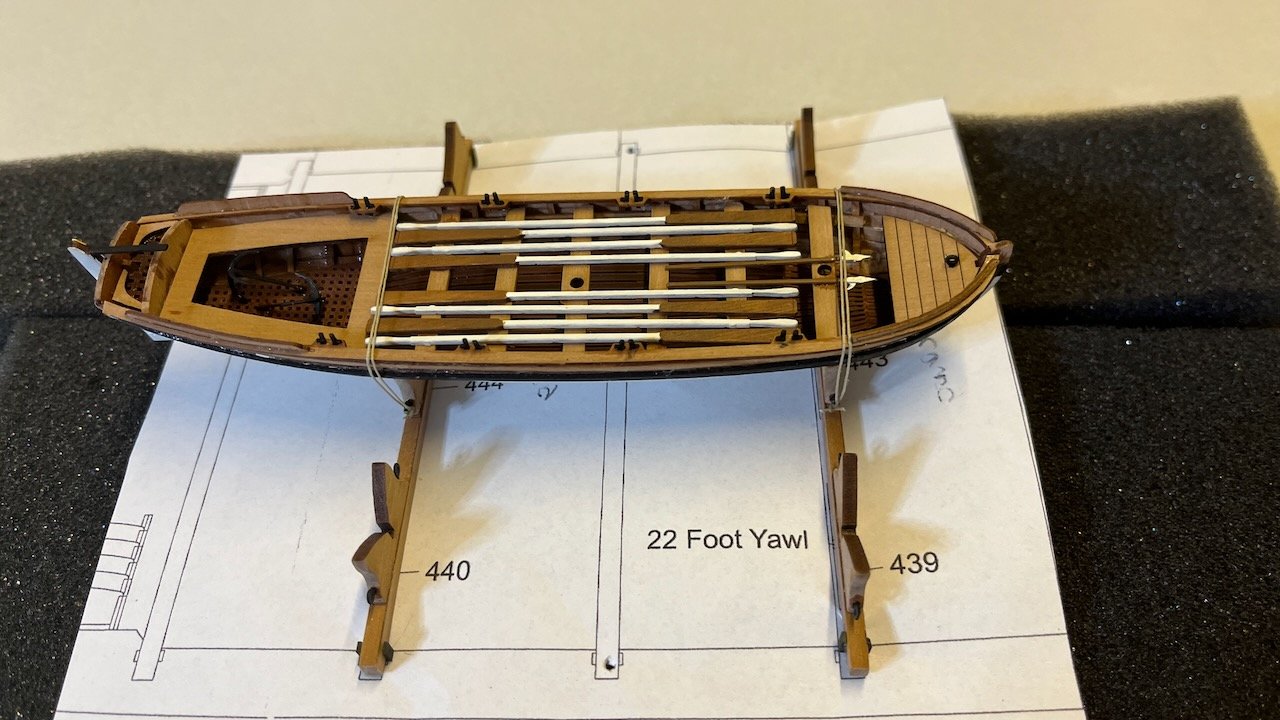
The boats will sit only on beams "1" and "3". That's why I am installing the other two already on the deck. These "1" and "3" will need special care so here's what I did: Photo 966: I took a photocopy of the plan and put it on a piece of soft sponge. Then I mounted the two beams on it, matching their exact location that'd be on the deck. I am mounting the 28 foot pinnace (the boat in the middle) already on dry-dock, as otherwise it would be heck of a challenge to lash it on the beam, while on deck. Photo 967: Dry-fitting the boats to ensure the beams' alignment. Photo 968: Rigging the 28 foot pinnace in place: Photo 969: Pinnace is rigged. Next task is to move the structure to the deck and secure these two beams in their place.
- 426 replies
-
- 3
-
-
- Vanguard Models
- Sphinx
- (and 1 more)
-
Photo 965: I am dry-fitting the beams one by one on the deck to ensure that they'll sit nicely. I needed to expand a few of the fitting holes using a micro drill.
- 426 replies
-
- 2
-
-
- Vanguard Models
- Sphinx
- (and 1 more)
-
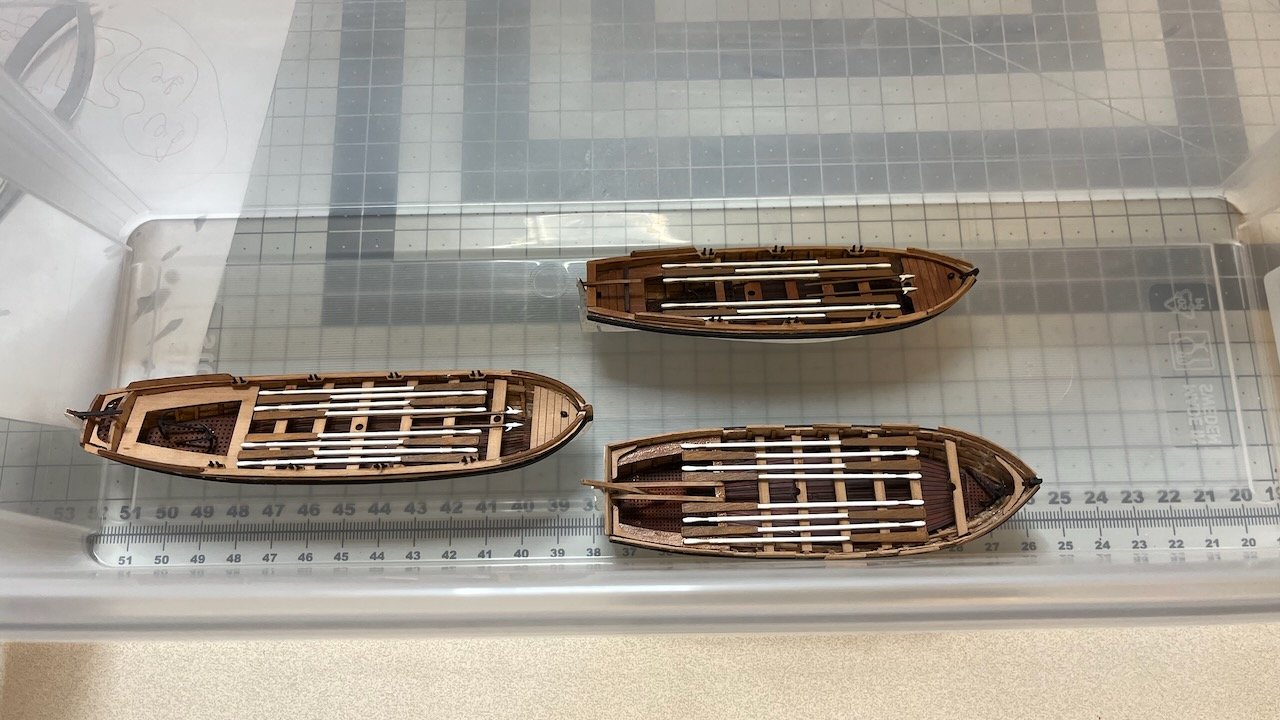
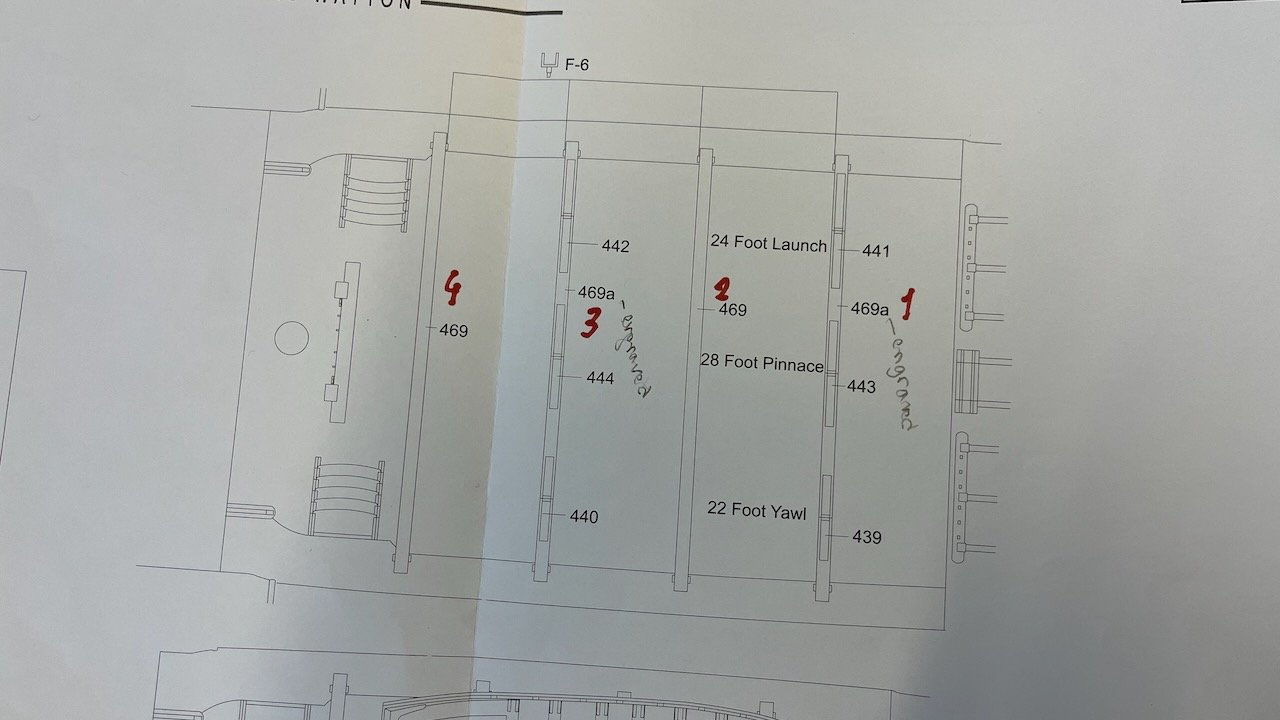
Build day 188/1: 2,5 hrs / Total 397 hours Having completed rigging, I think have 4 tasks remaining to finish Sphinx: 1. Mount the boats 2. Fix the broken ensign pole 3. Make the anchors 4. Assemble the acrylic display cradle I want to share more details about the boats. I will be glad if my way of doing it gives some hint for the builders who view this log. The way I see it, they are rather big structures to fit into the place properly with all the rigging going on around the ship. Without careful planning, I am sure it will be a failure to mount them properly. I am especially talking about their rigging to the beams. So, here we are: Photos 962-964: I had built the boats and beams. They have been waiting for this moment in a plastic box all this time. Now they are seeing the light of the day. I am also glad I had labelled the beams with numbers as well as on the plan. It will help a lot.

- 426 replies
-
- 3
-
-
- Vanguard Models
- Sphinx
- (and 1 more)
-
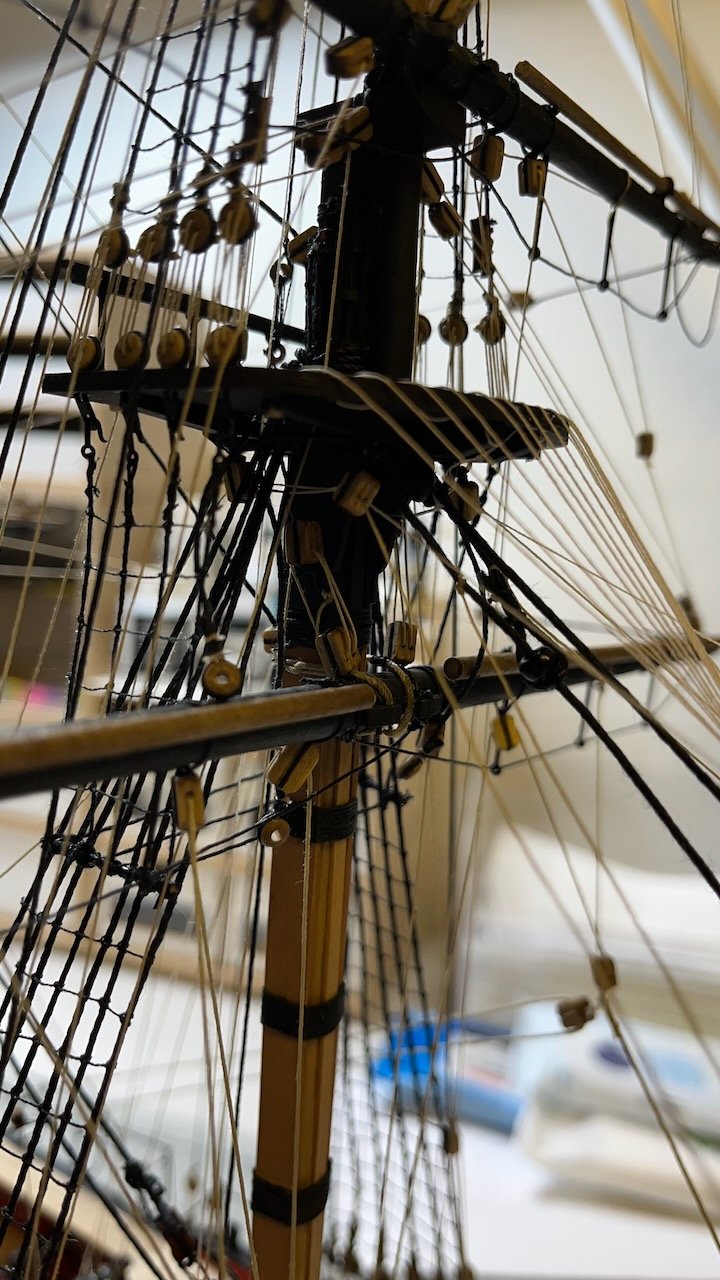
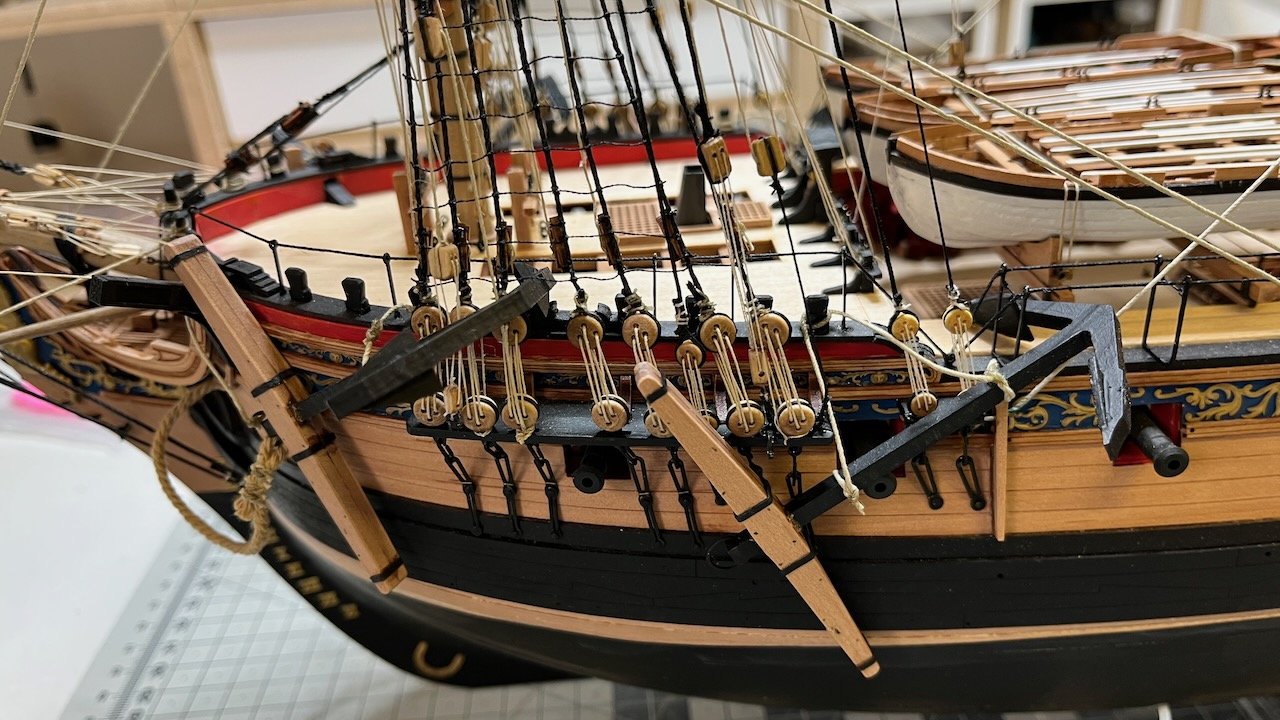
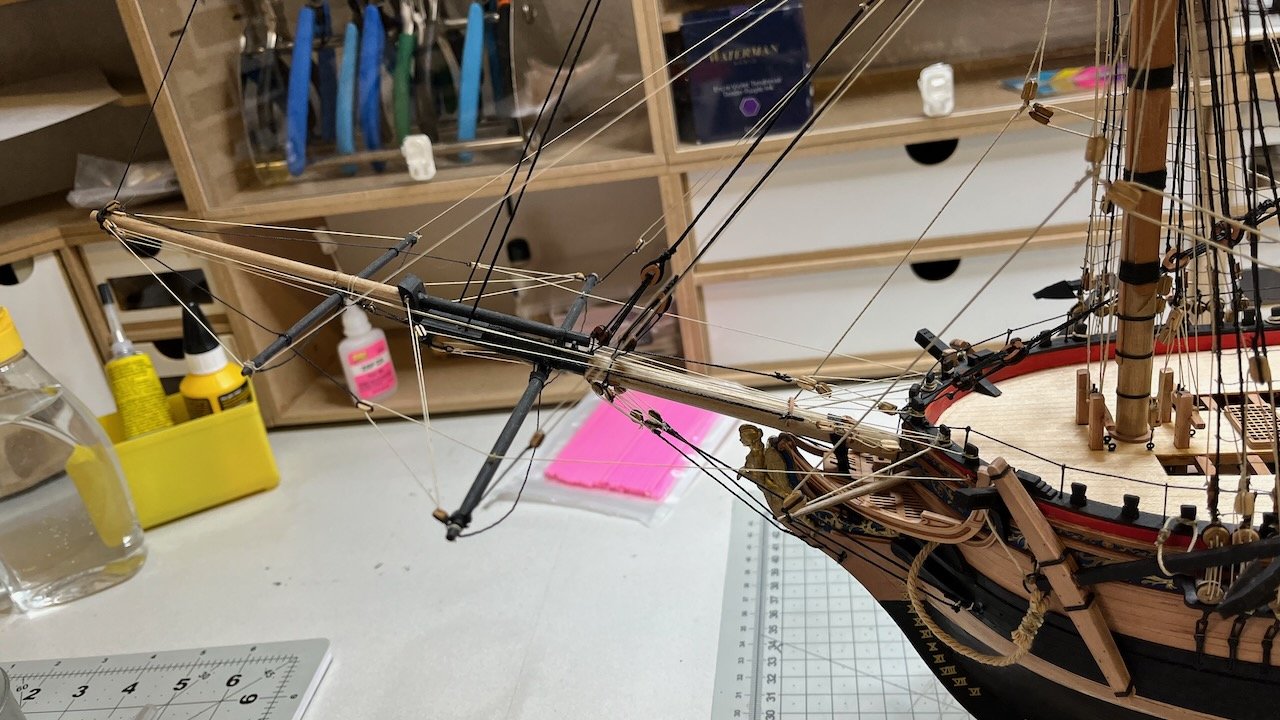
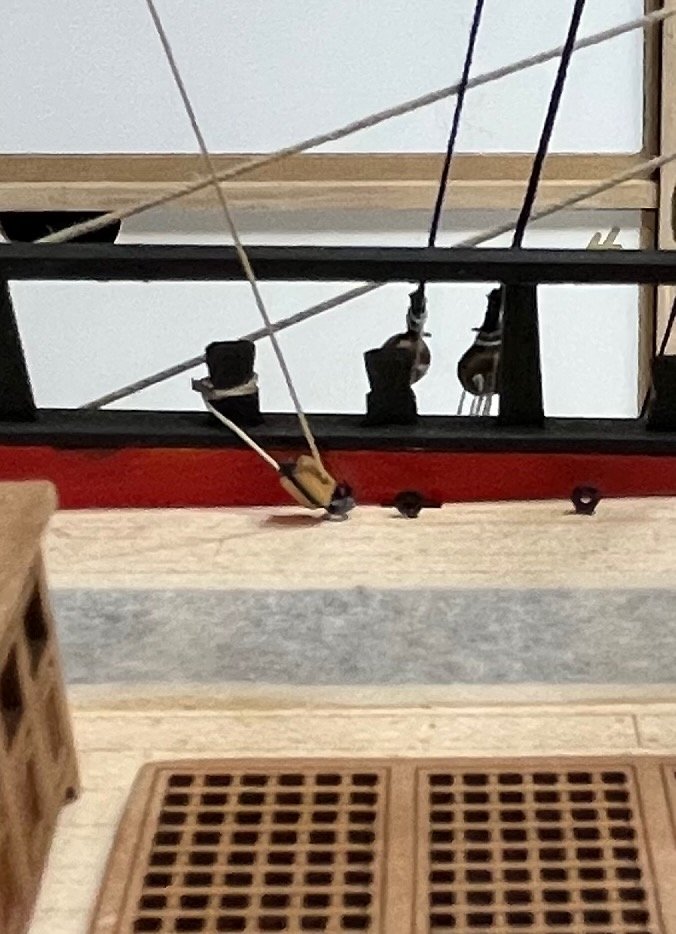
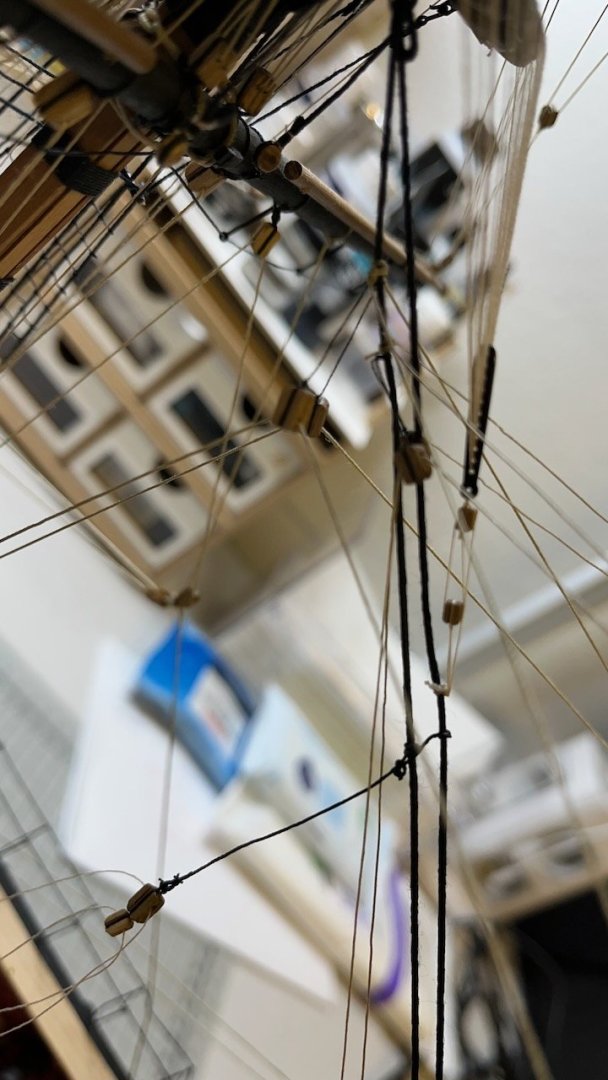
Build day 186-187: 5,5 hrs in 2 days / Total 394,5 hours Started and completed Main and Fore braces in these two days. With this, rigging is complete, not counting that of mounting the boats. Photos 956-961: Some photos showing a few details.


- 426 replies
-
- 3
-
-
- Vanguard Models
- Sphinx
- (and 1 more)
-
aydingocer reacted to a post in a topic:
HMS Sphinx 1775 by Glenn-UK - FINISHED - Vanguard Models - 1:64 - V2 Kit by Glenn Shelton
-
Indeed, the plans look intimidating at first... but they are excellent. And as you wrote, one step at a time.
- 426 replies
-
- 1
-
-
- Vanguard Models
- Sphinx
- (and 1 more)
-
Build day 185/2: 1 hr / Total 389 hours Photo 955: Started and completed Mizzen yard braces. One photo showing the connections with gaff and stern.

- 426 replies
-
- 4
-
-
- Vanguard Models
- Sphinx
- (and 1 more)