HOLIDAY DONATION DRIVE - SUPPORT MSW - DO YOUR PART TO KEEP THIS GREAT FORUM GOING! (Only 24 donations so far out of 49,000 members - C'mon guys!)
×


aydingocer
-
Posts
916 -
Joined
-
Last visited
Content Type
Profiles
Forums
Gallery
Events
Everything posted by aydingocer
-
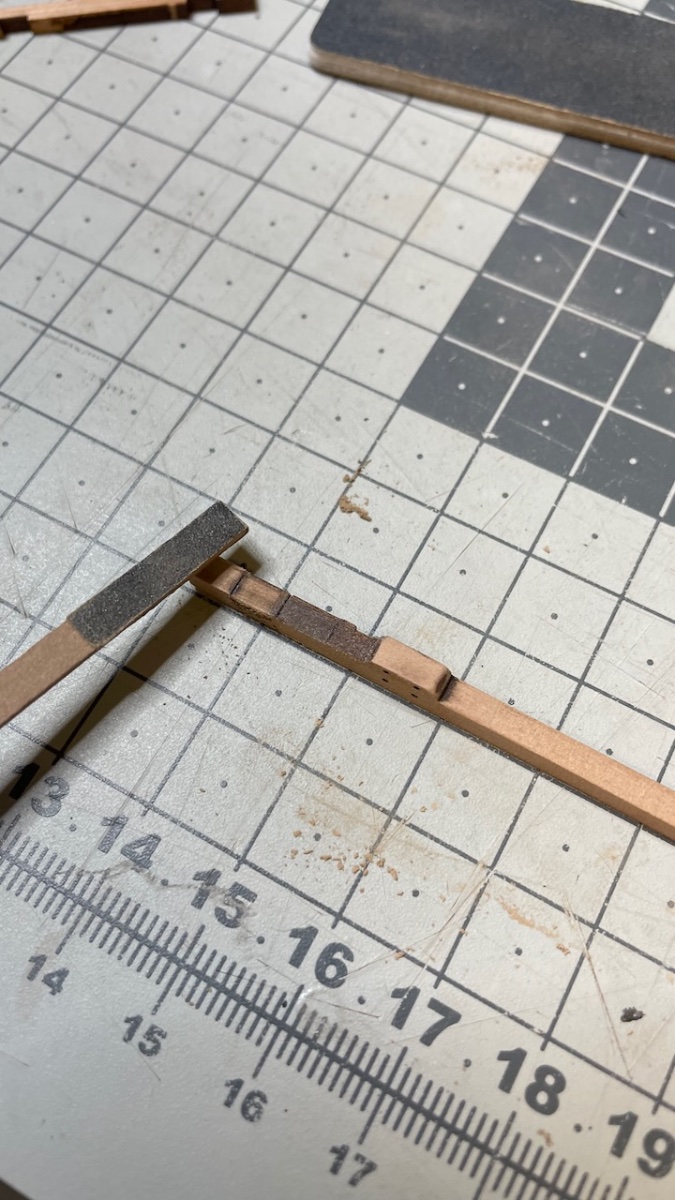
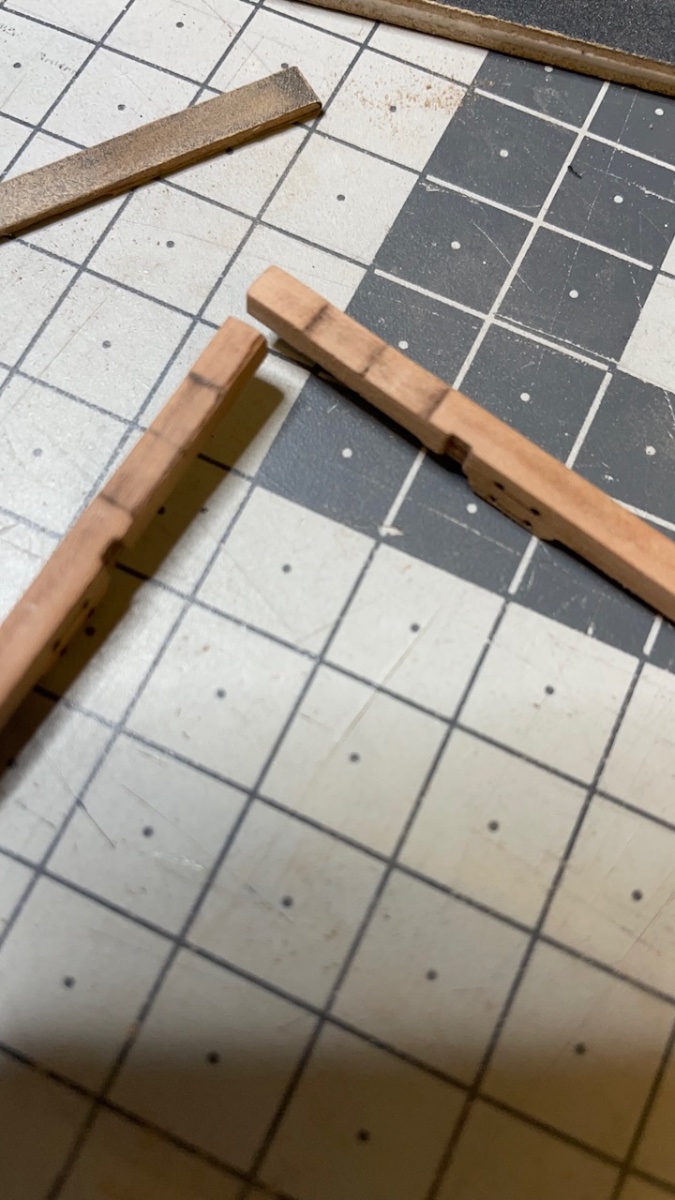
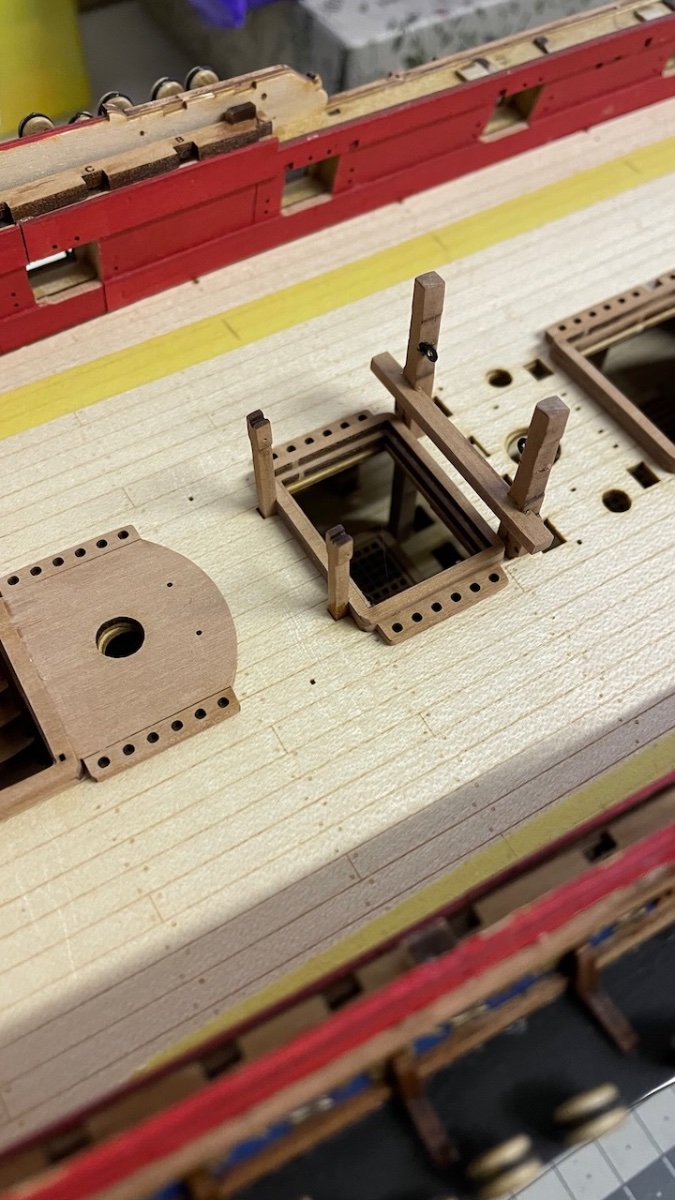
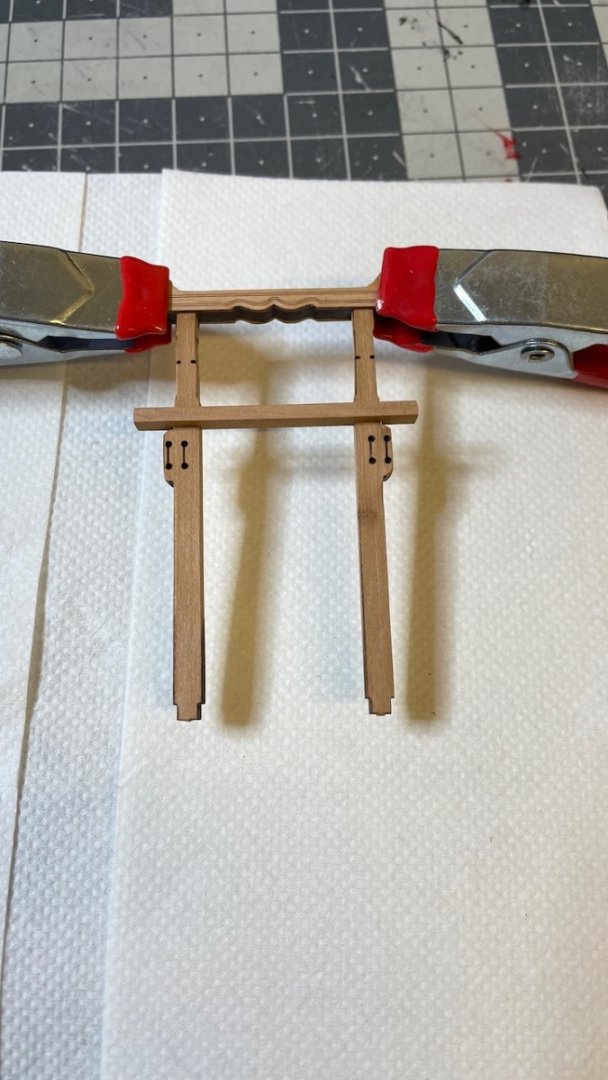
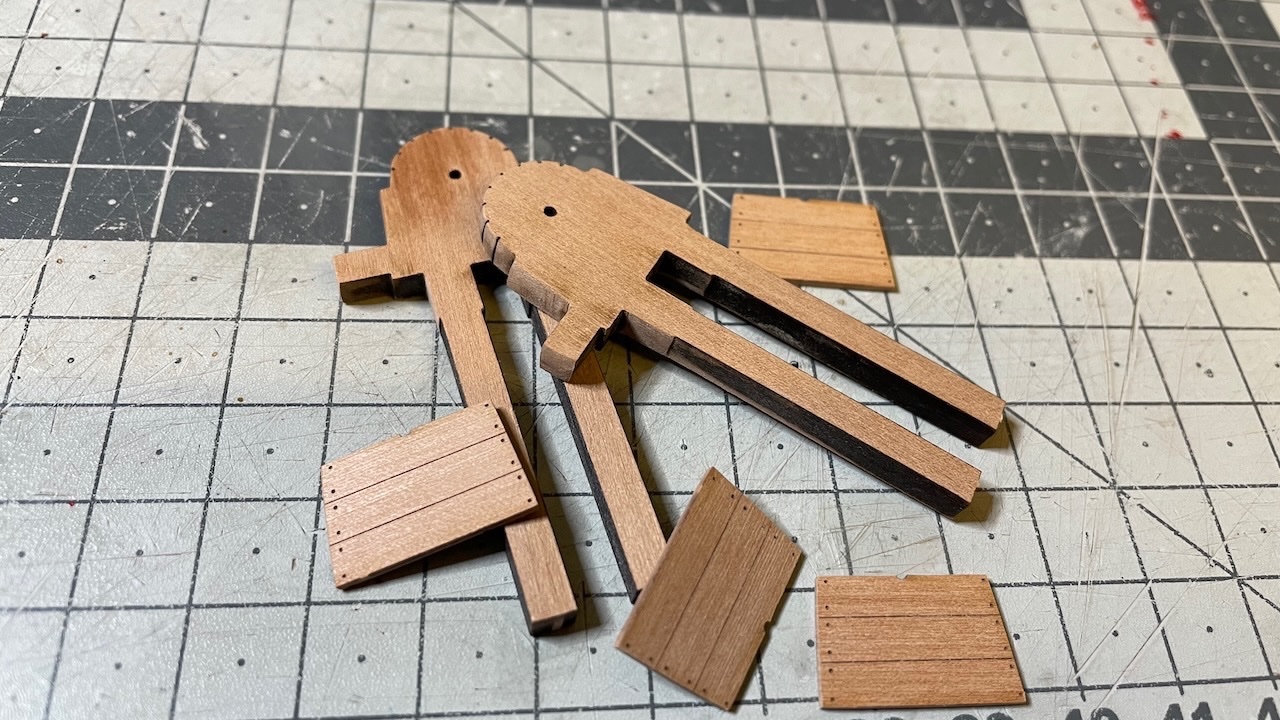
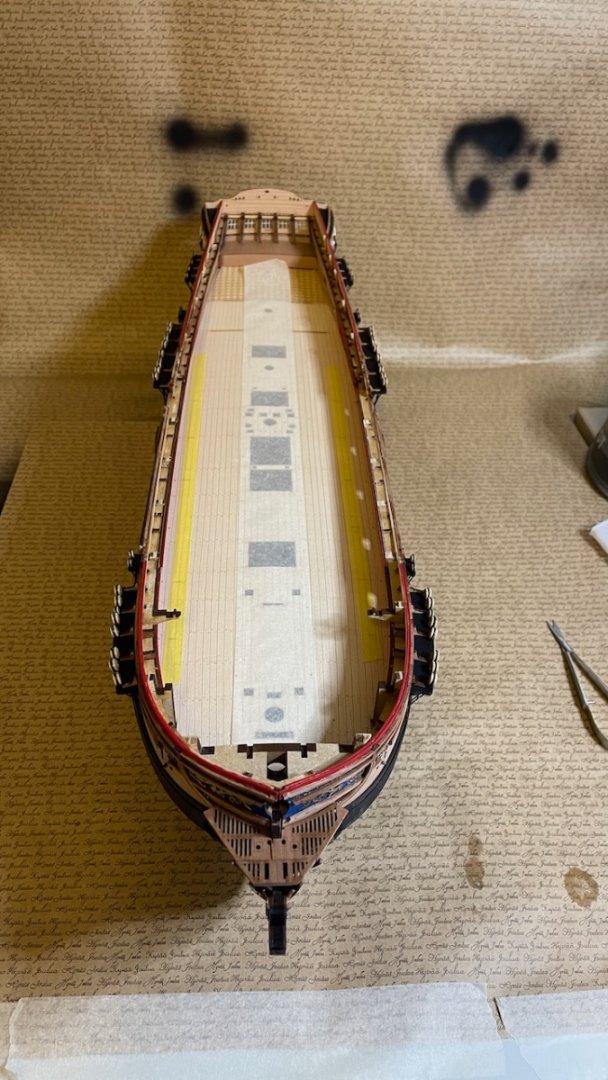
 Build Day 54: 2 hrs / Total 123.5 hours During the deck work most of the time goes removing the laser char from the edges. Not so much fun, but has significant impact on the end result. Photo 538: Fore mast base cleaned, rounded and glued in place. Photos 539-540: Fore Ridings Bitts and Bowsprit support. Check from the plan to ensure that the bowsprit support height is correct. The Bowsprit will fit there later.
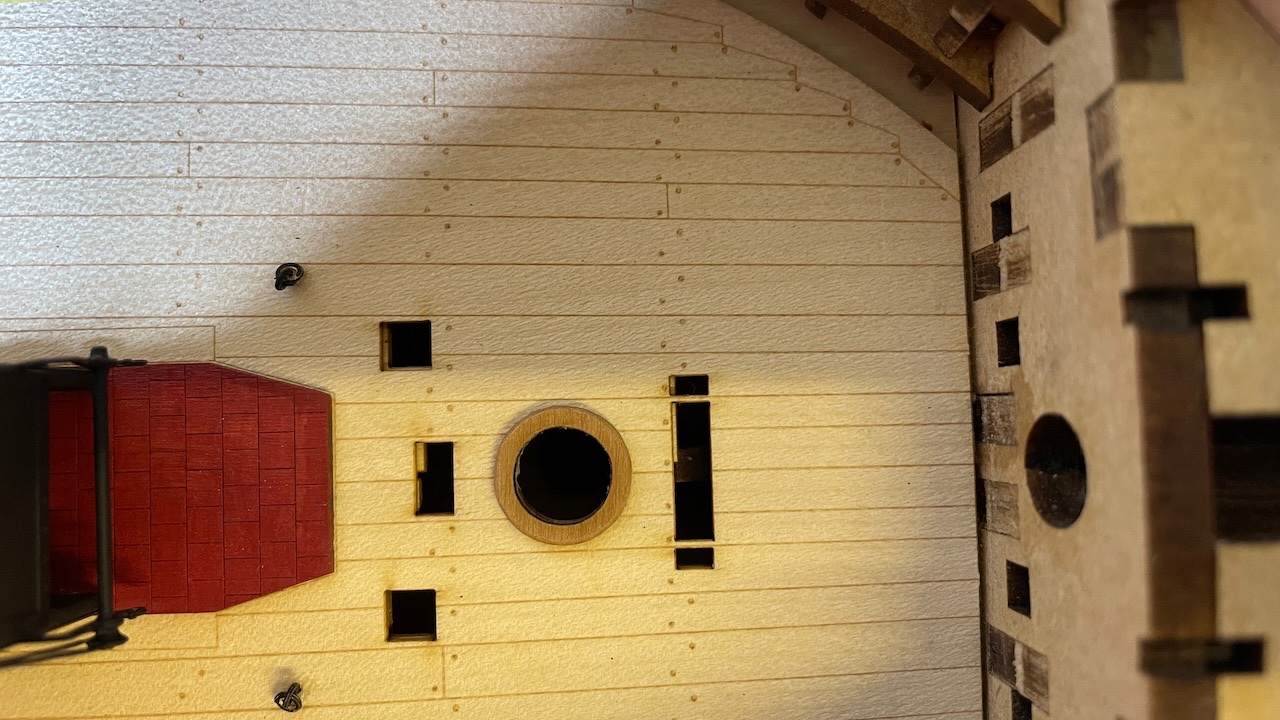
- 426 replies
-
- 3
-

-
- Vanguard Models
- Sphinx
- (and 1 more)
-
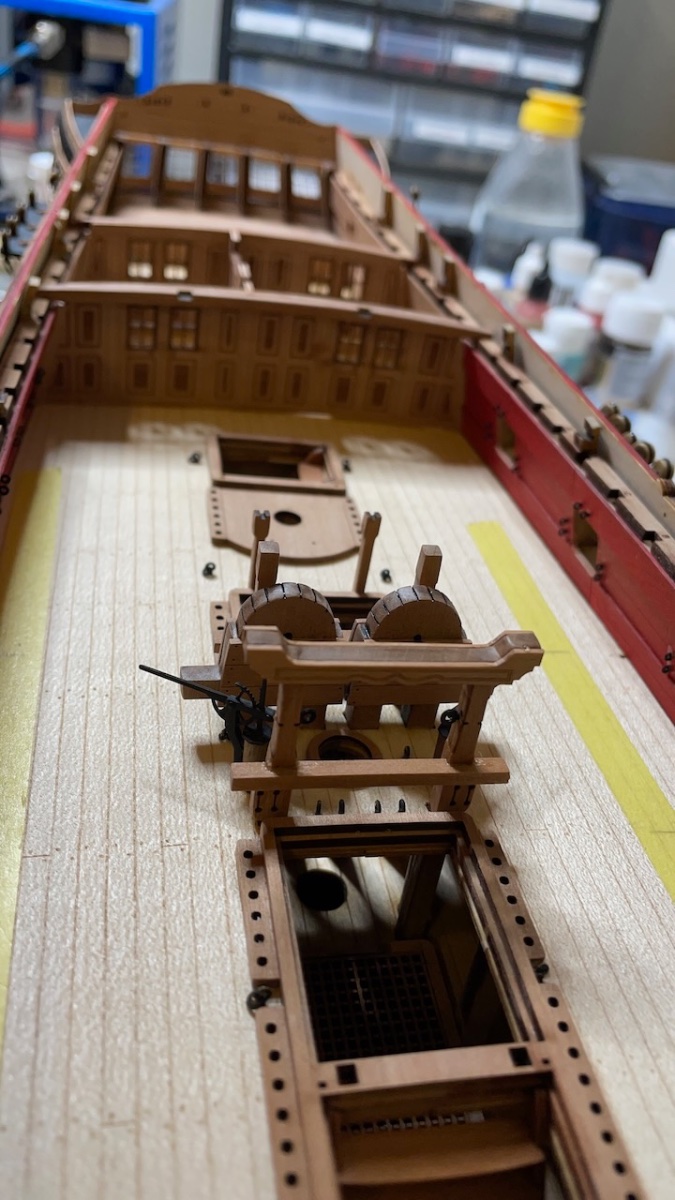
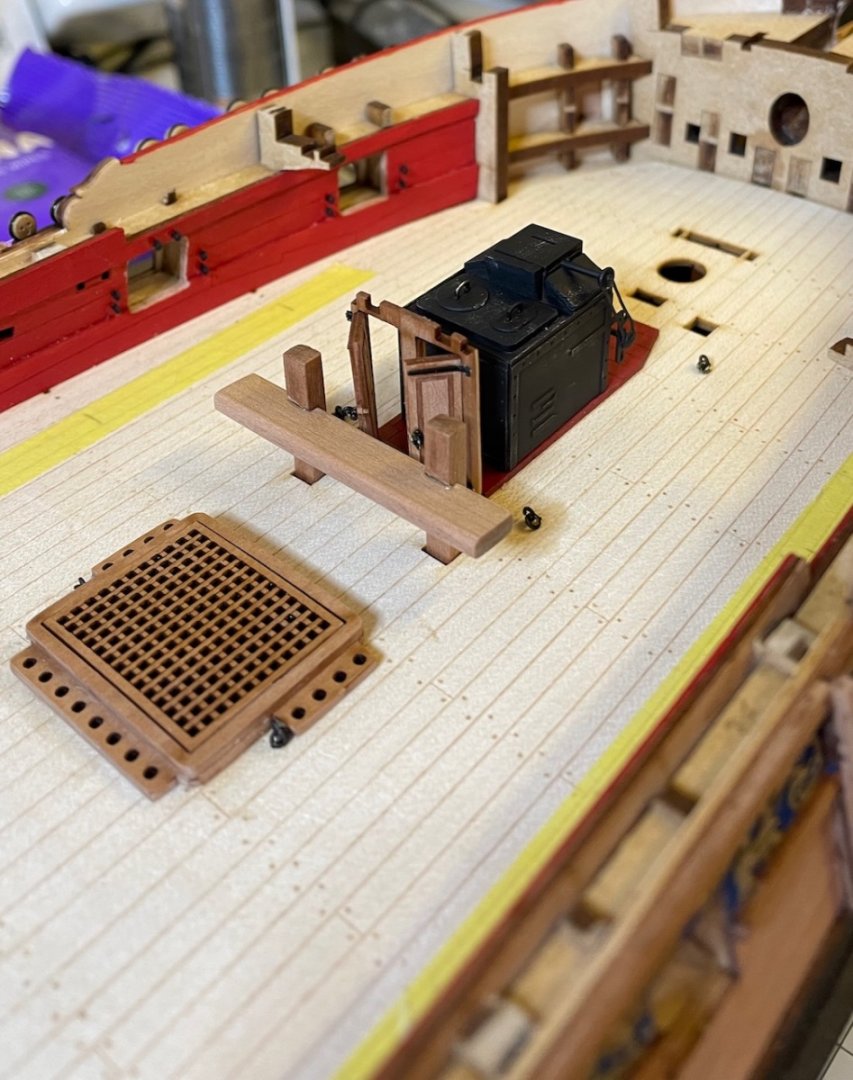
Build Day 53: 1.5 hrs / Total 121.5 hours Photo 537: Riding Bitts and Gallery Doors right behind the stove.
- 426 replies
-
- 5
-
-
- Vanguard Models
- Sphinx
- (and 1 more)
-
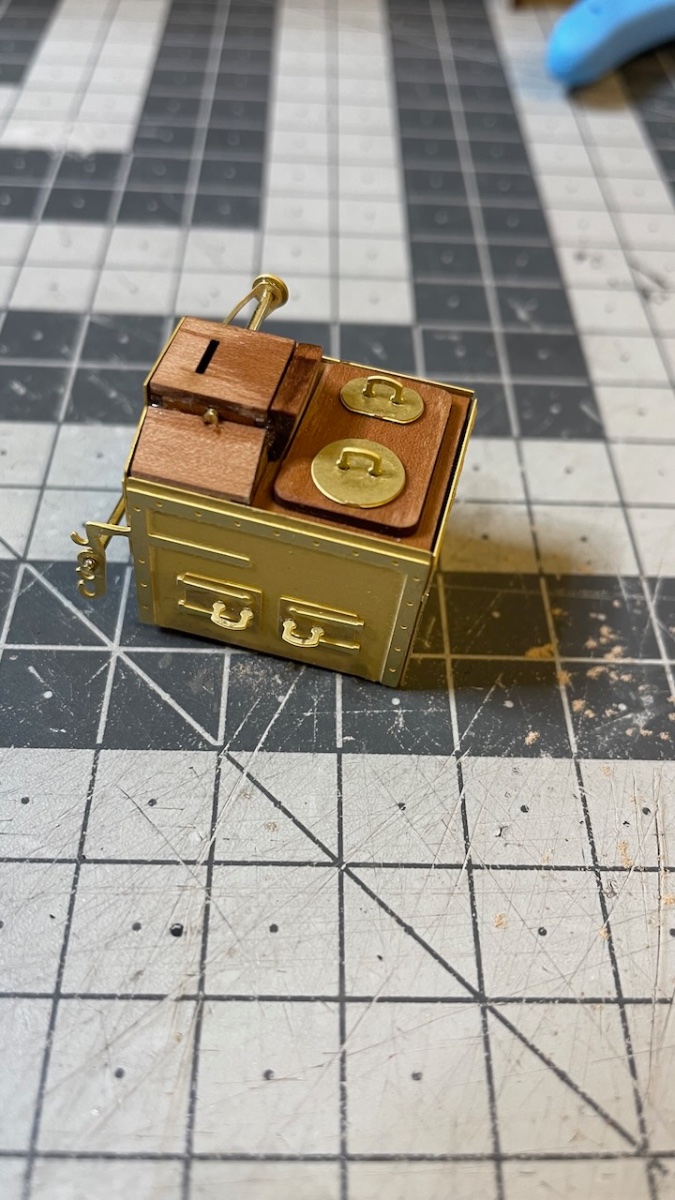
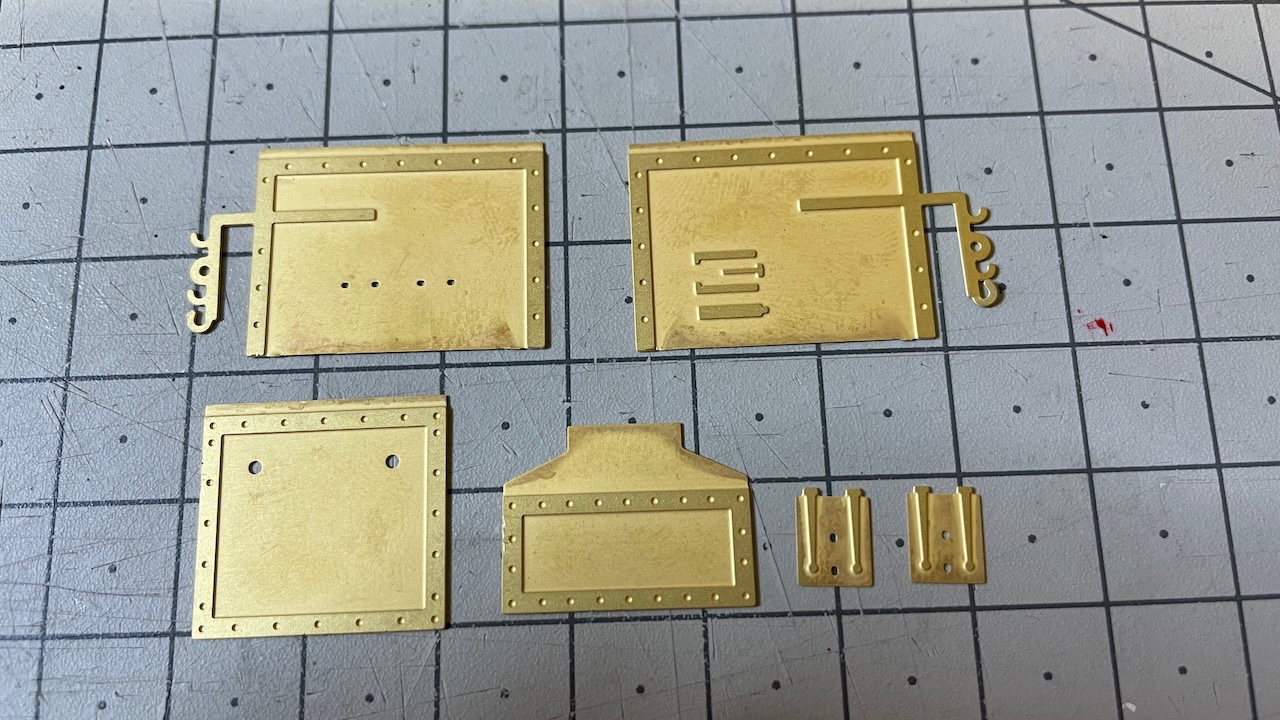
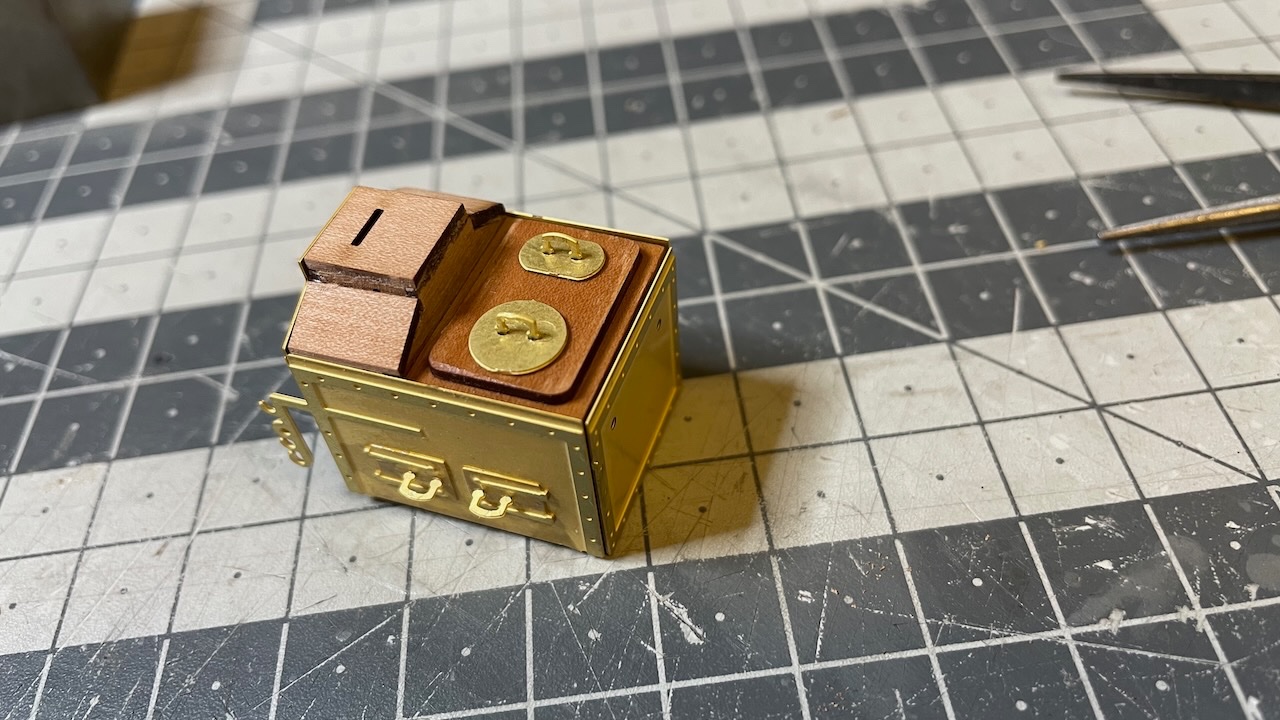
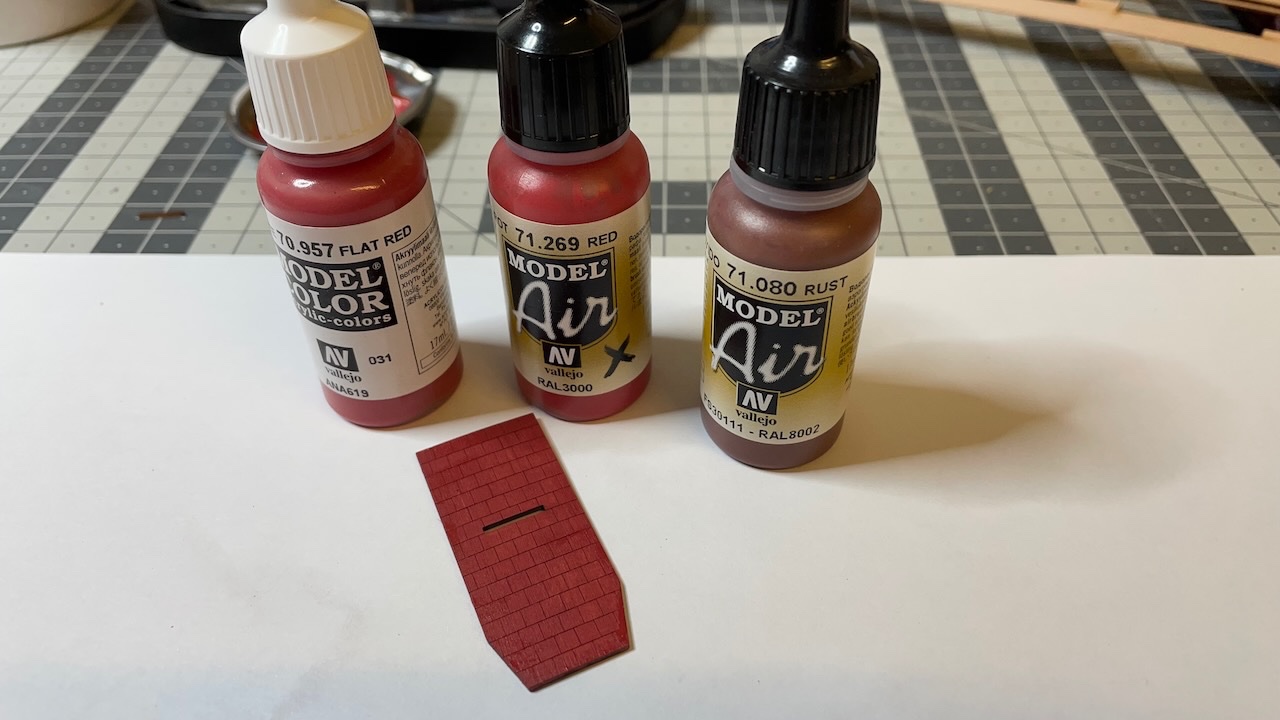
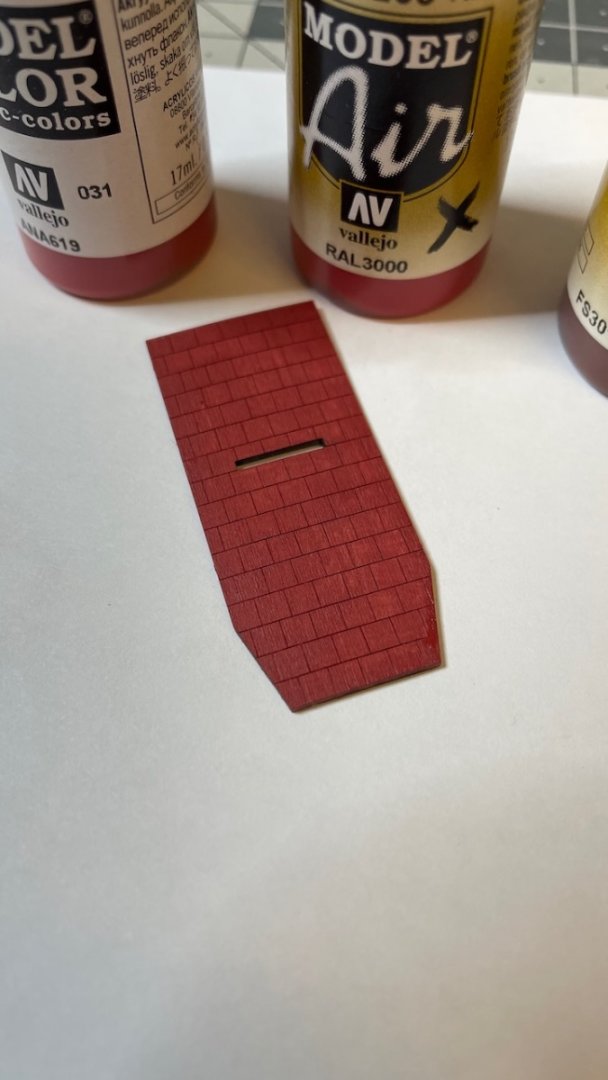
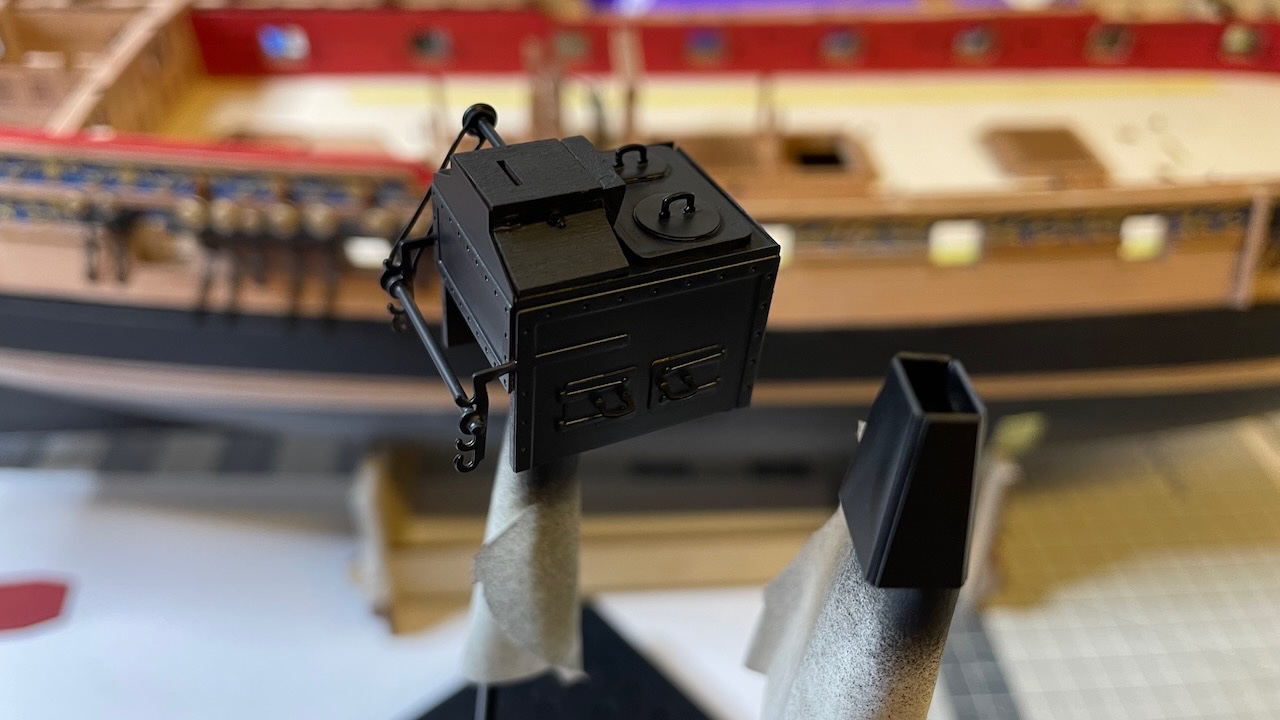
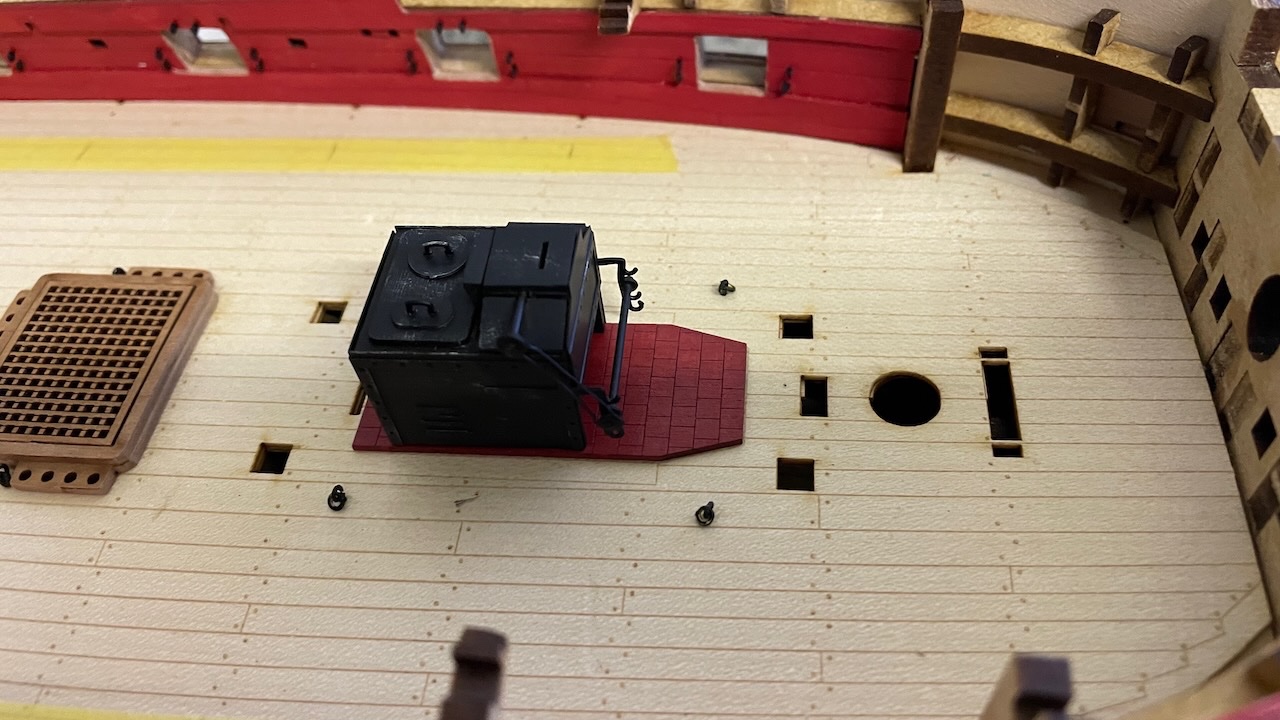
Build Day 52: 3 hrs / Total 120 hours Below a sequence of photos showing the stove construction and installation. I used a mixture of two red and one rust color in my paint stock to get the floor brick colour under the stove. The actual color looks a bit different than in the photo, and I am happy with the result. For the stove, after painting matt black with airbrush, I gently applied steel color by barely touching with an almost dry brush. This gave the stove the metal and used look I wanted. Photos 528-536


- 426 replies
-
- 9
-
-

-
- Vanguard Models
- Sphinx
- (and 1 more)
-
Photos 525-527: Main Topsail Sheet Bitts and Gallows. No surprises here. Removing the char, gluing the parts, inserting the eyebolts and installing in place.

- 426 replies
-
- 4
-
-
- Vanguard Models
- Sphinx
- (and 1 more)
-
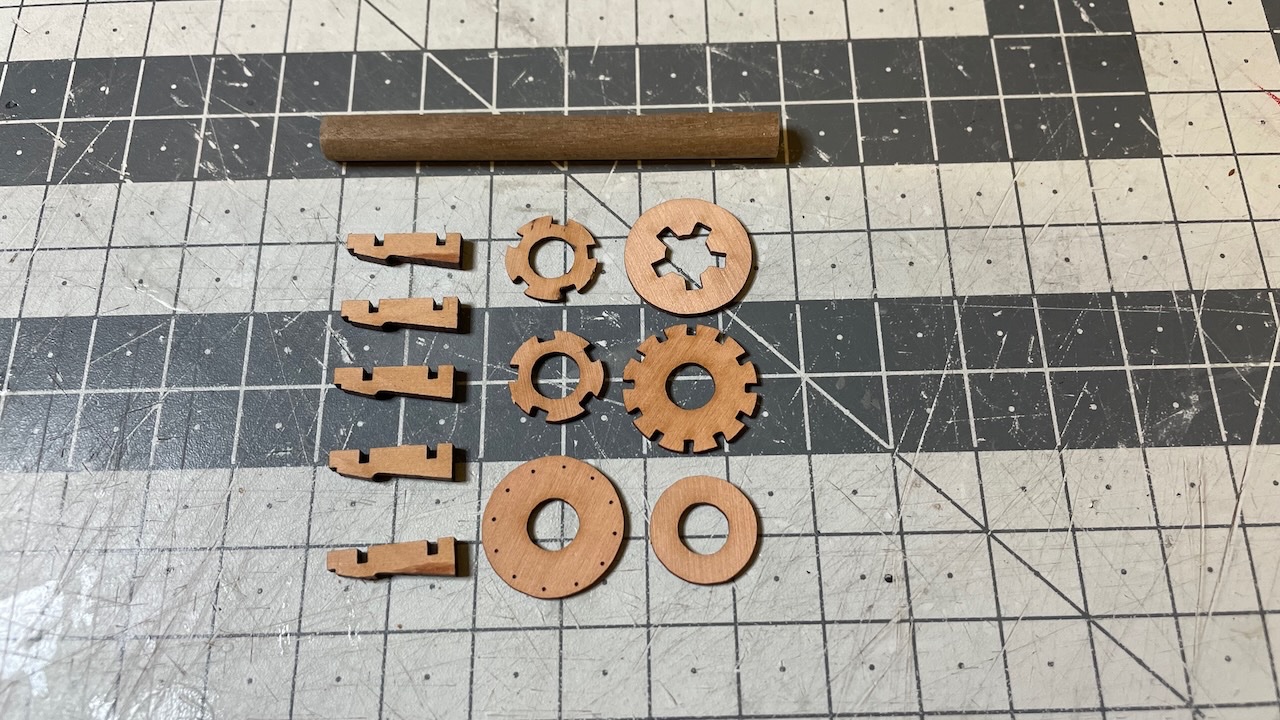
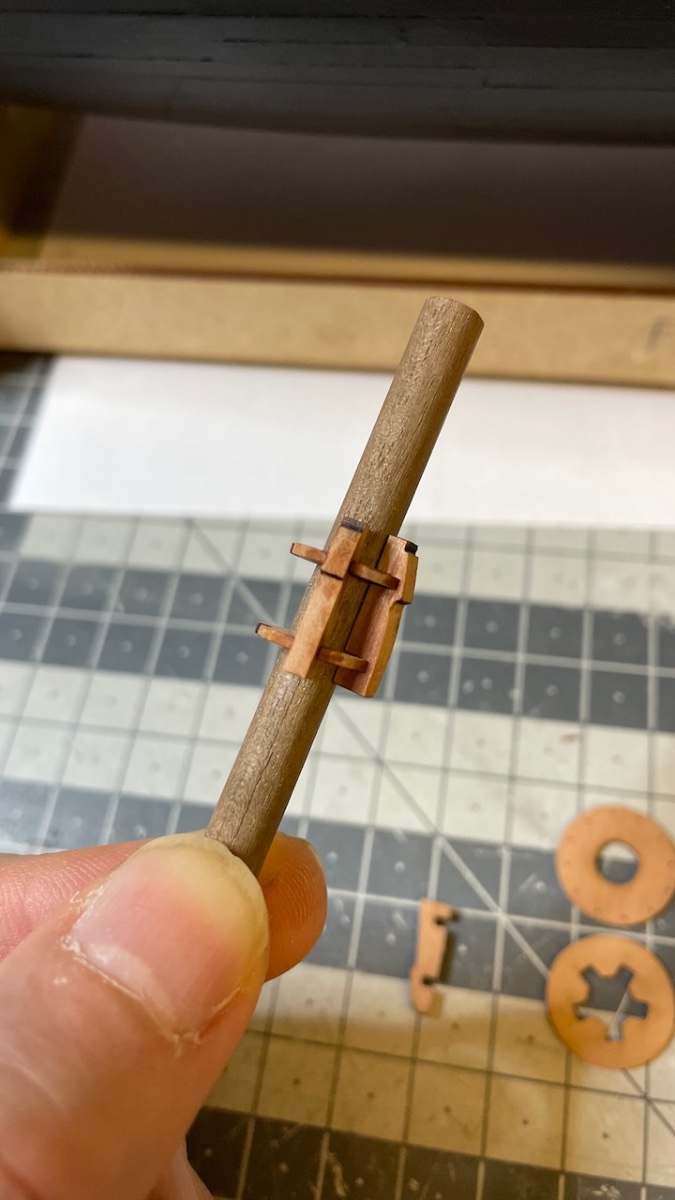
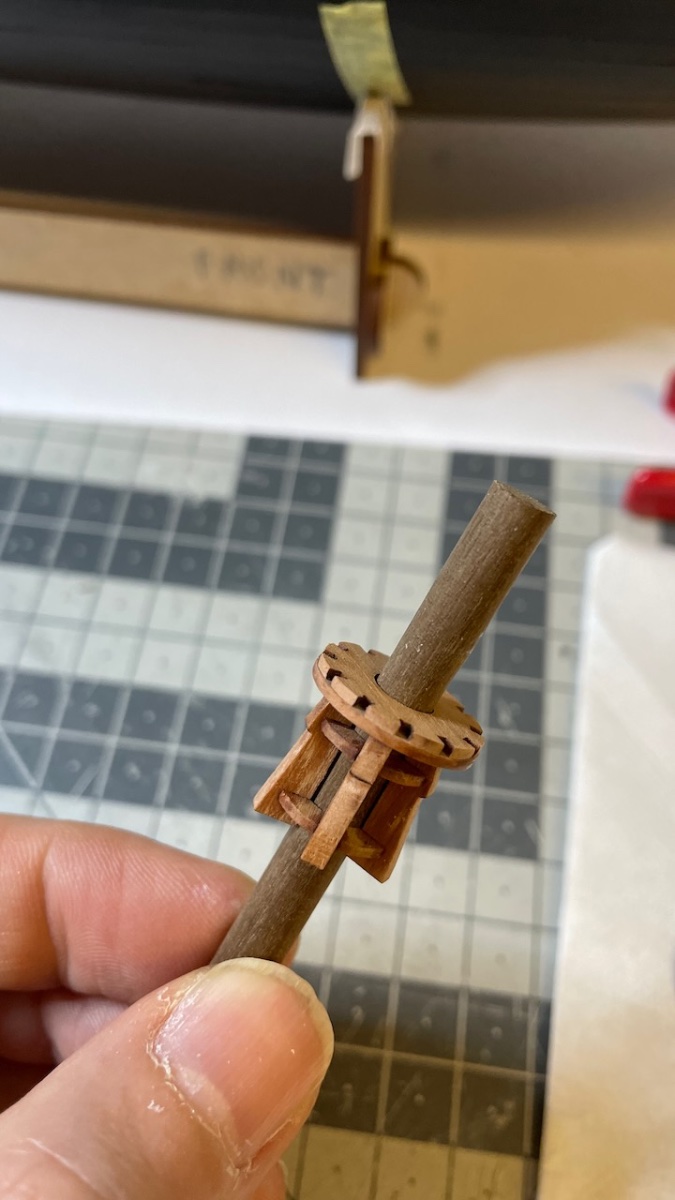
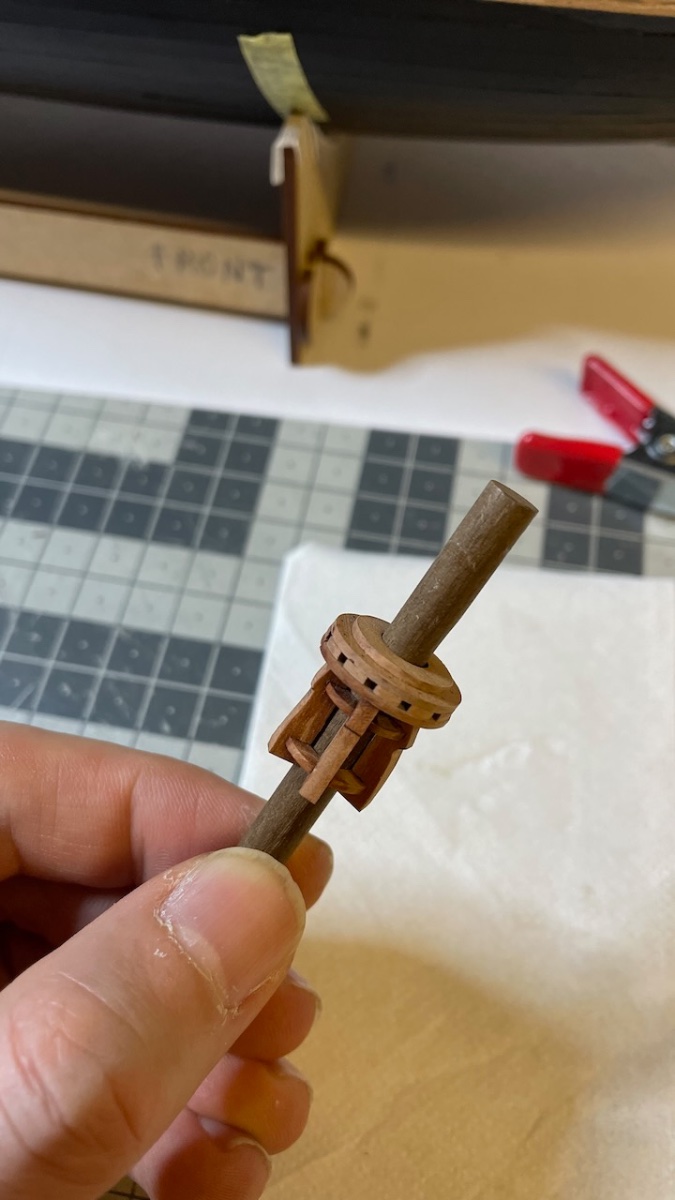
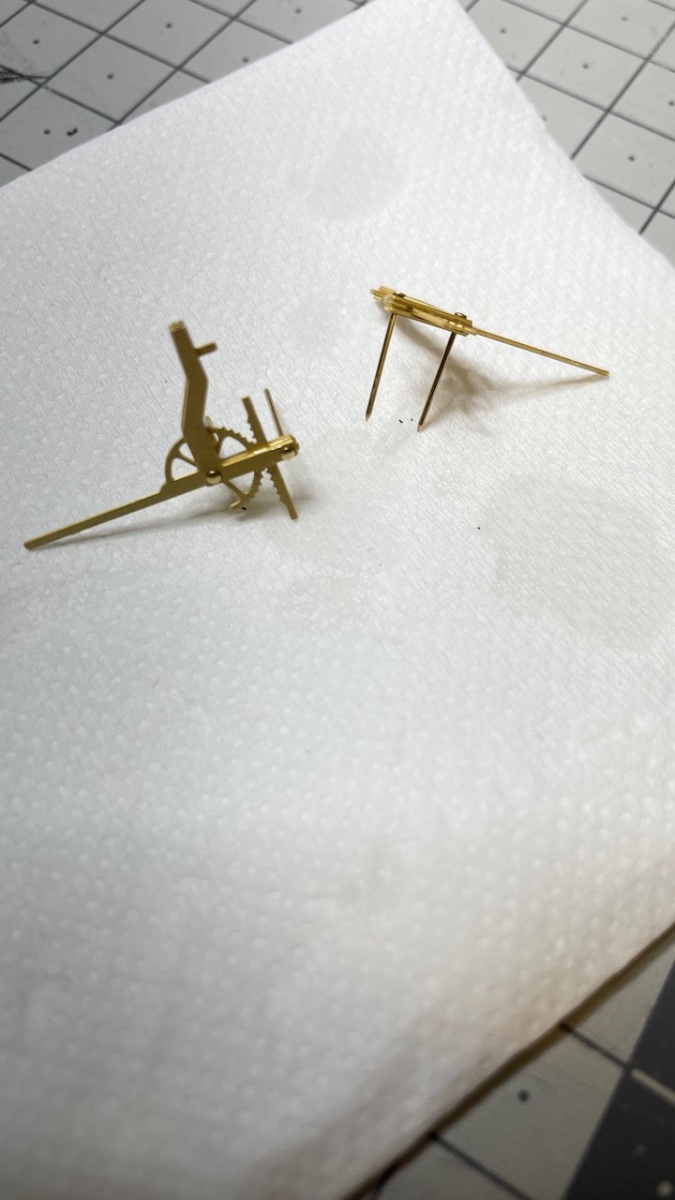
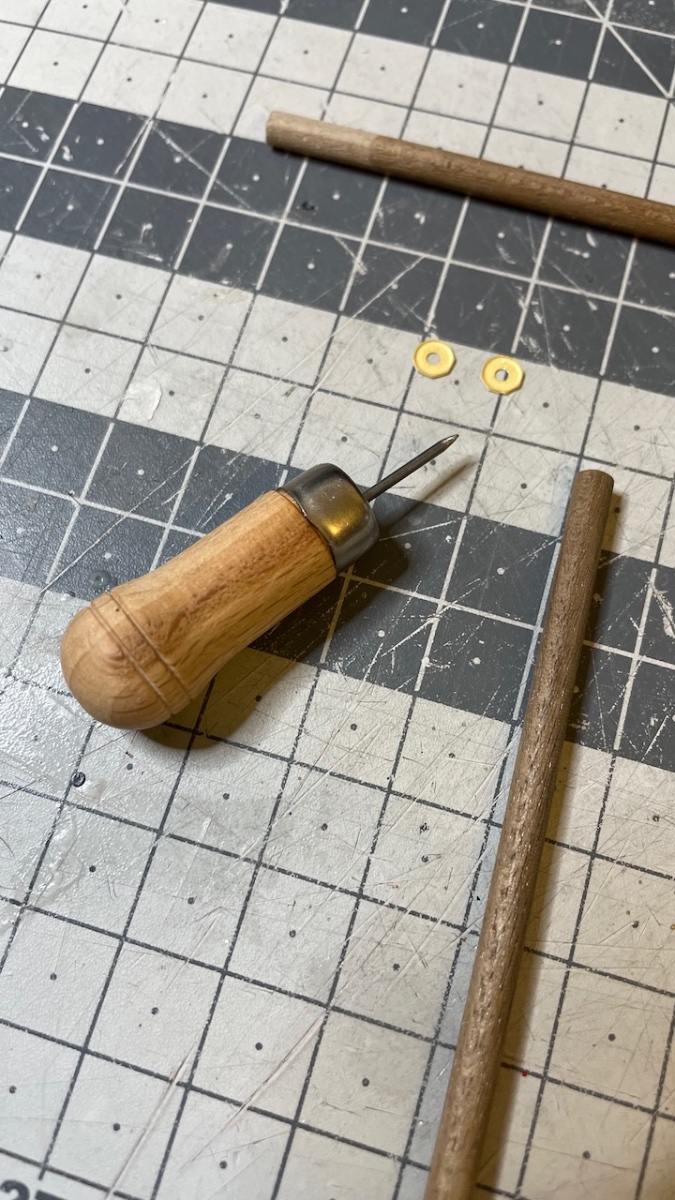
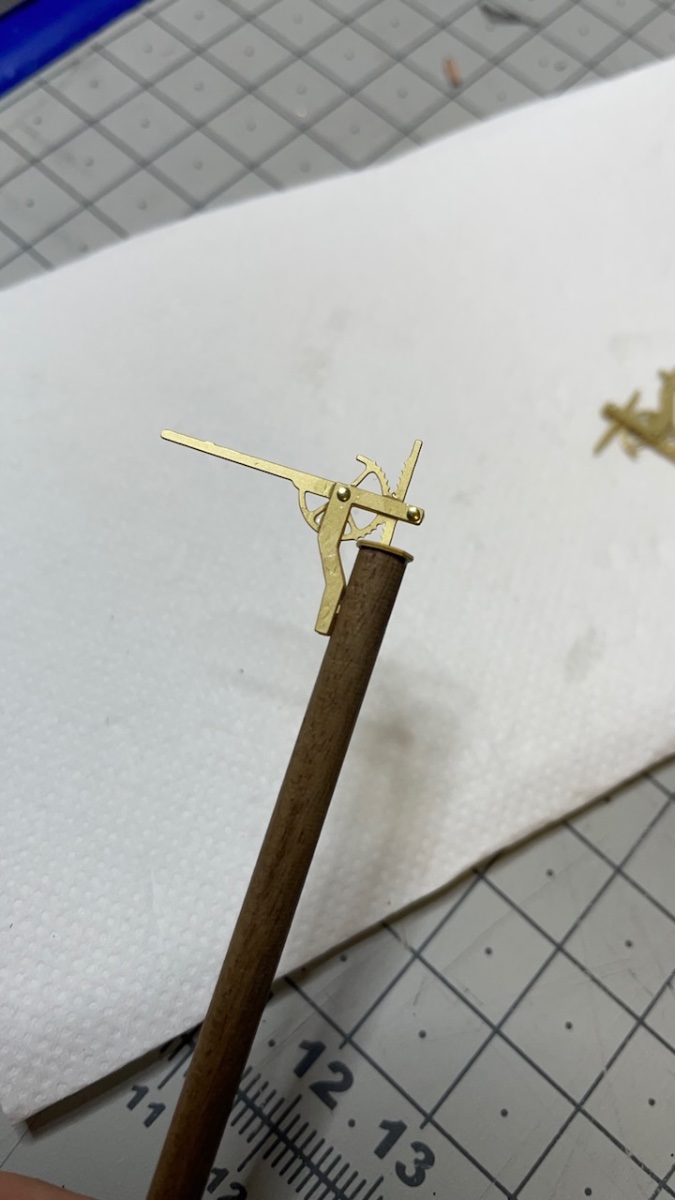
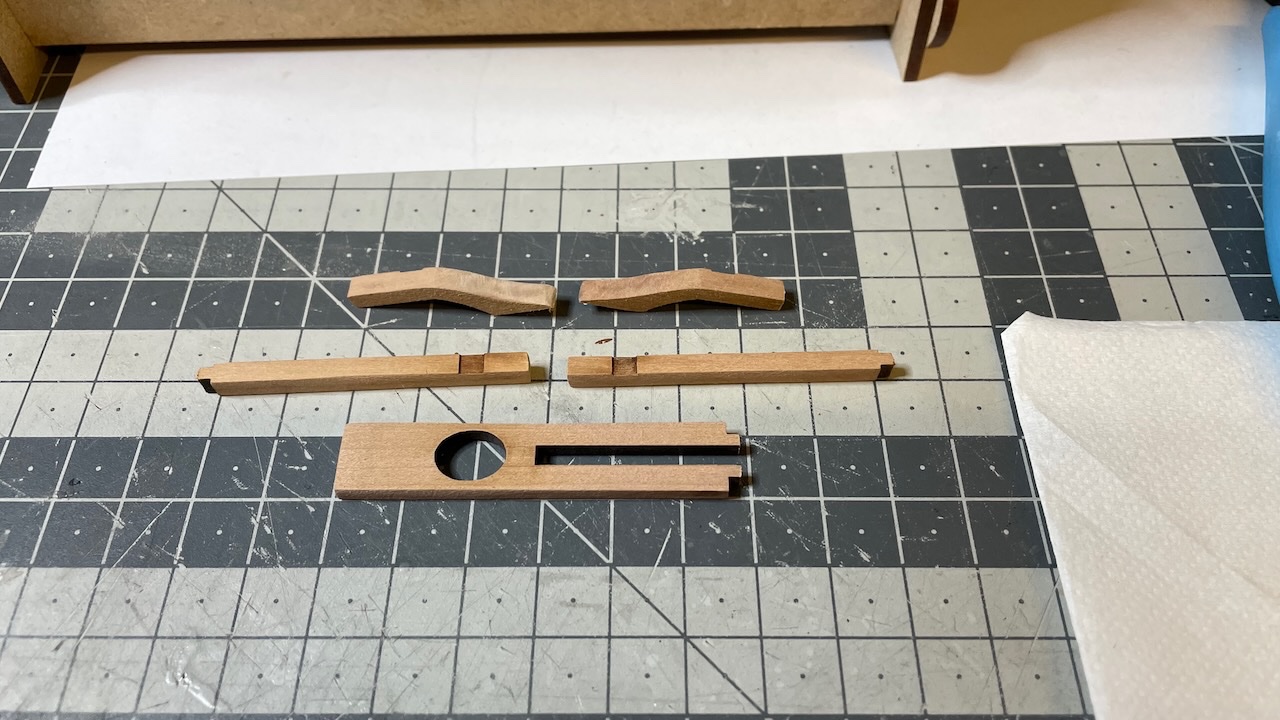
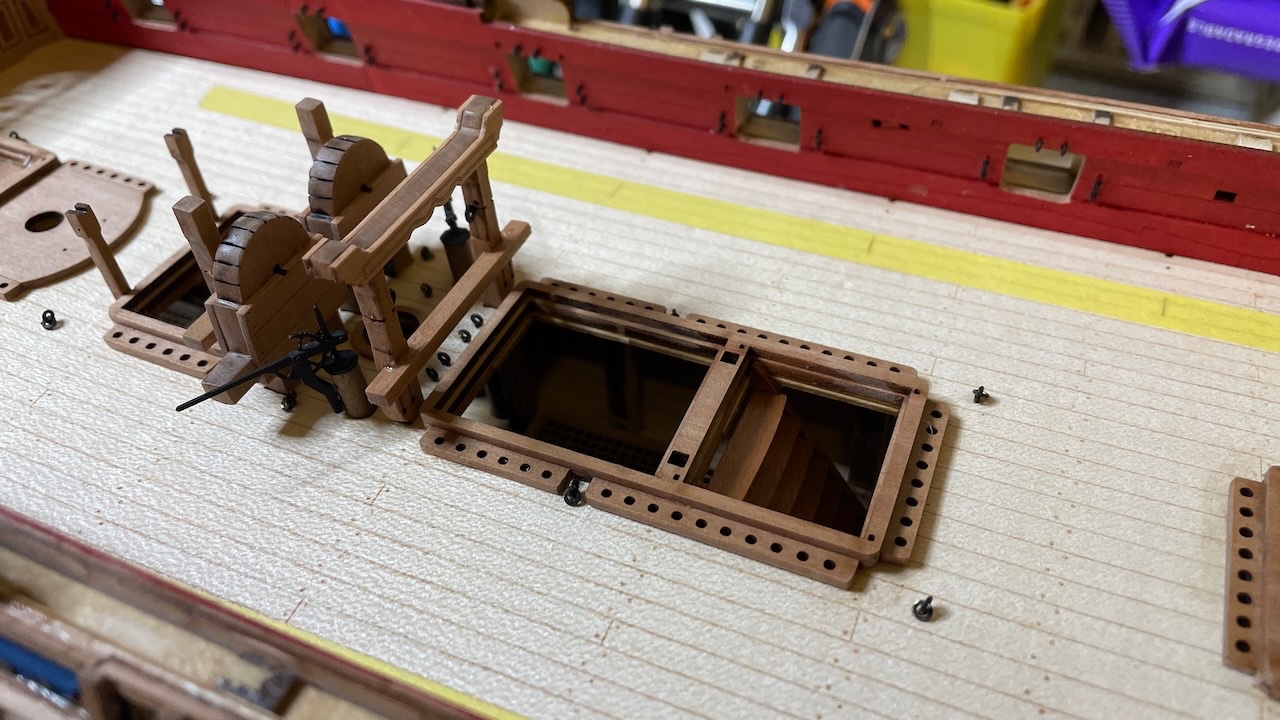
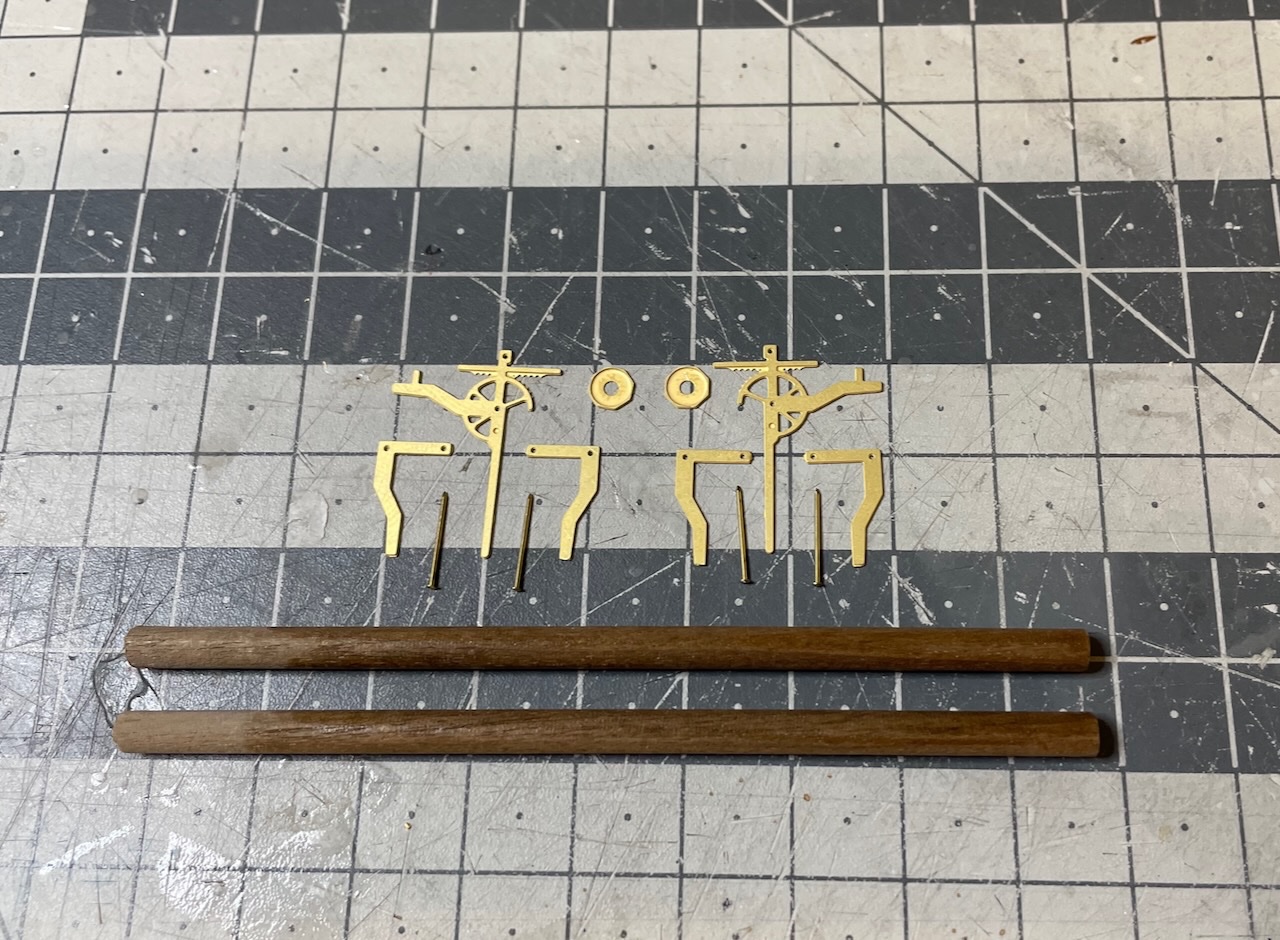
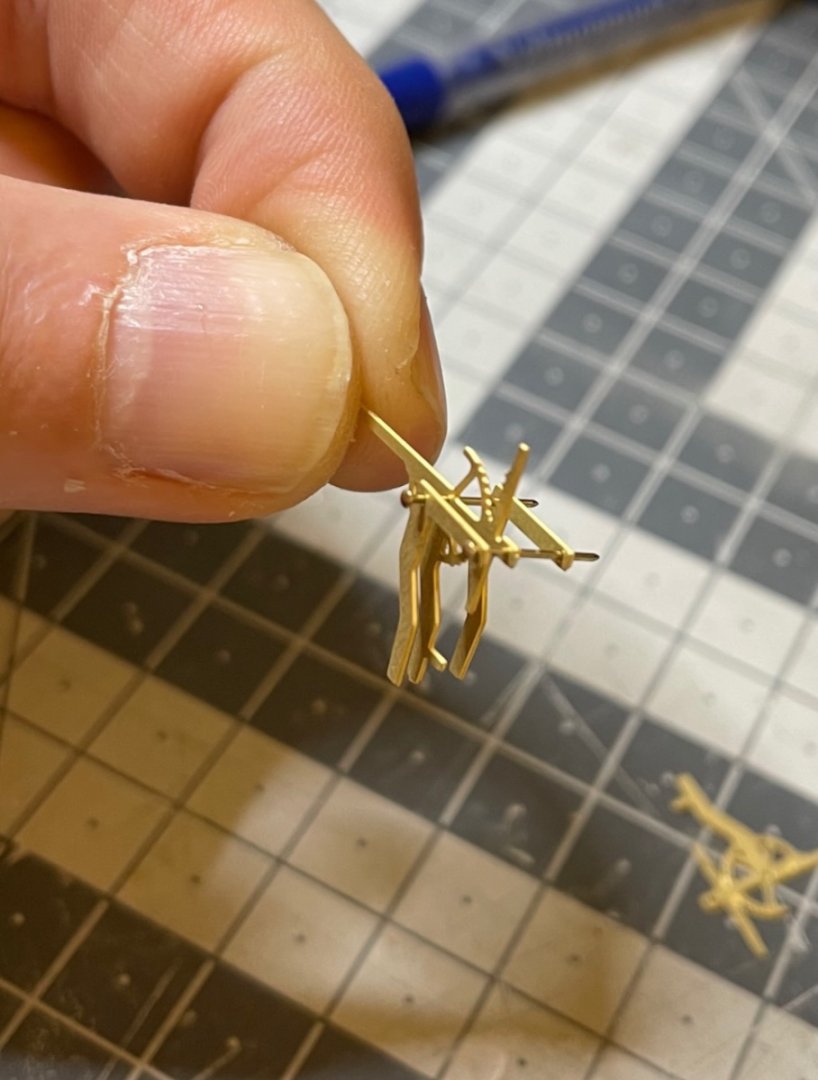
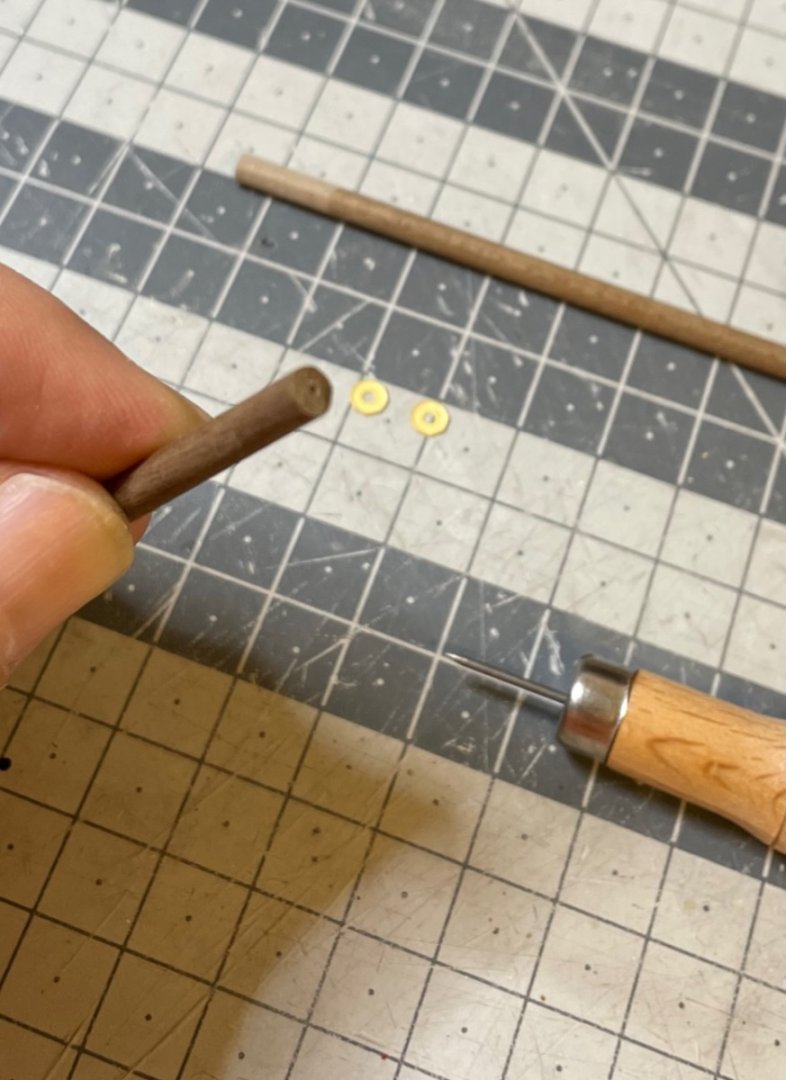
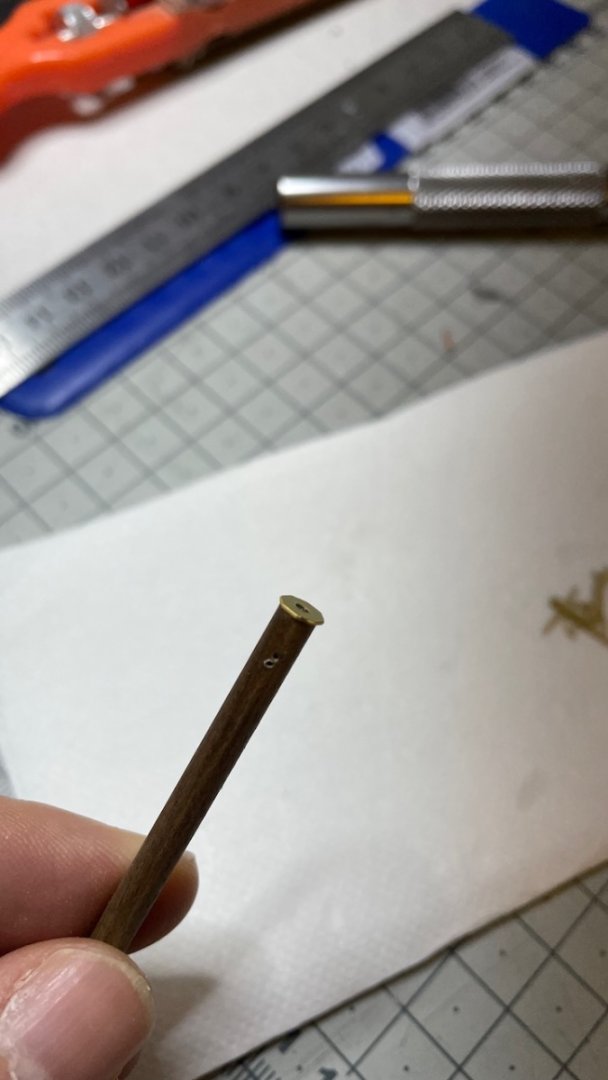
Next is the construction of hand pumps. Photo 516: These are the parts. Wood from 4mm dowel. Visible area varnished. Photo 517: This is the positioning of PE parts, before gluing together. Photo 518: Glued together. The excess pin tips will be trimmed. I had to use a 0.6mm hand drill very gently to open the holes just a little in order to avoid the risk of bending the parts accidentally by having to push the pins too hard. Photo 519: I use this "micro" marker to mark the drill spot, in this case to mark the center of the tip of the dowel... Photo 520: ... like this. Photo 521: The top cap glued, another hole on the side after some measurements. Photo 522 - 523: The pumps installed on the dowel. Photo 524: .. .and installed in place. Follow the plan to ensure correct orientation.


- 426 replies
-
- 5
-
-
- Vanguard Models
- Sphinx
- (and 1 more)
-
Build Day 51: 4 hrs / Total 117 hours Photo 515: Remaining 2-piece eyebolts (16 of them) in position.

- 426 replies
-
- 2
-
-
- Vanguard Models
- Sphinx
- (and 1 more)
-
Photos 513-514: Chain pump main patterns, cleaned and glued in place.

- 426 replies
-
- 8
-
-
- Vanguard Models
- Sphinx
- (and 1 more)
-
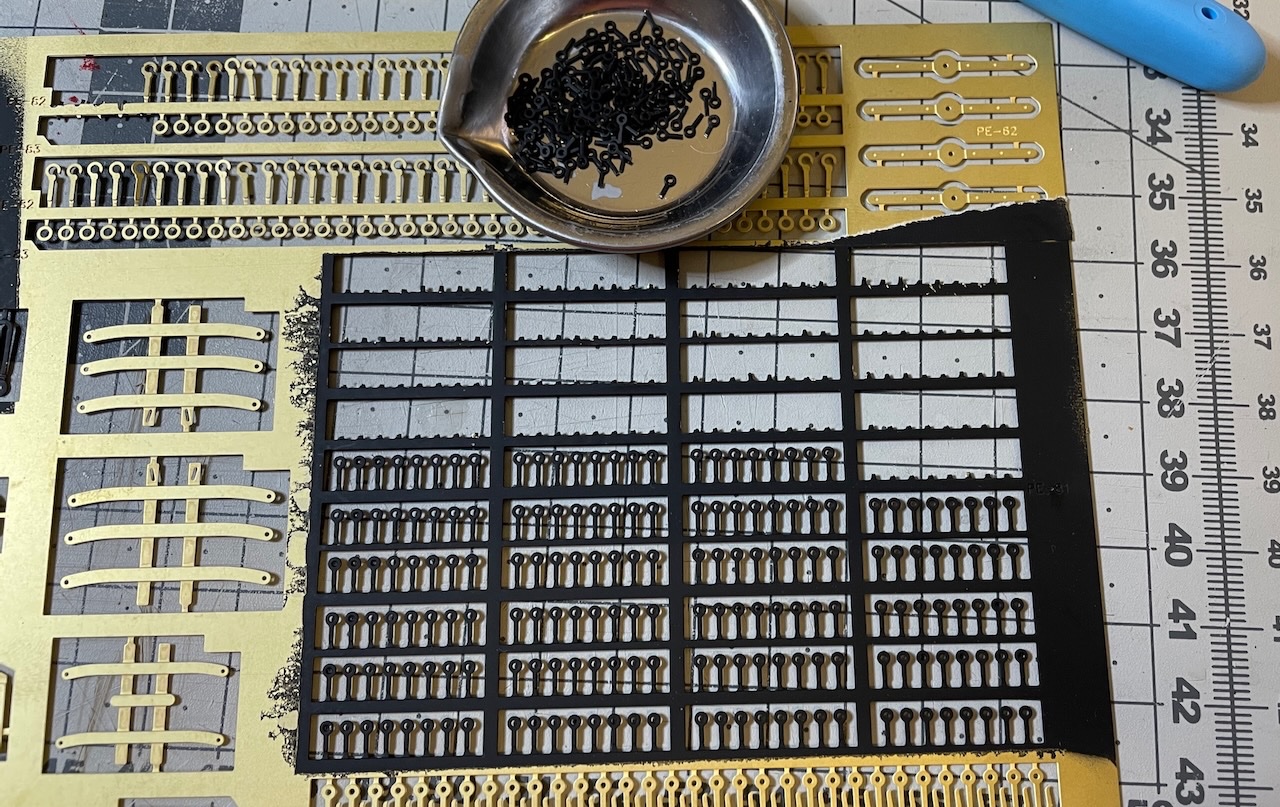
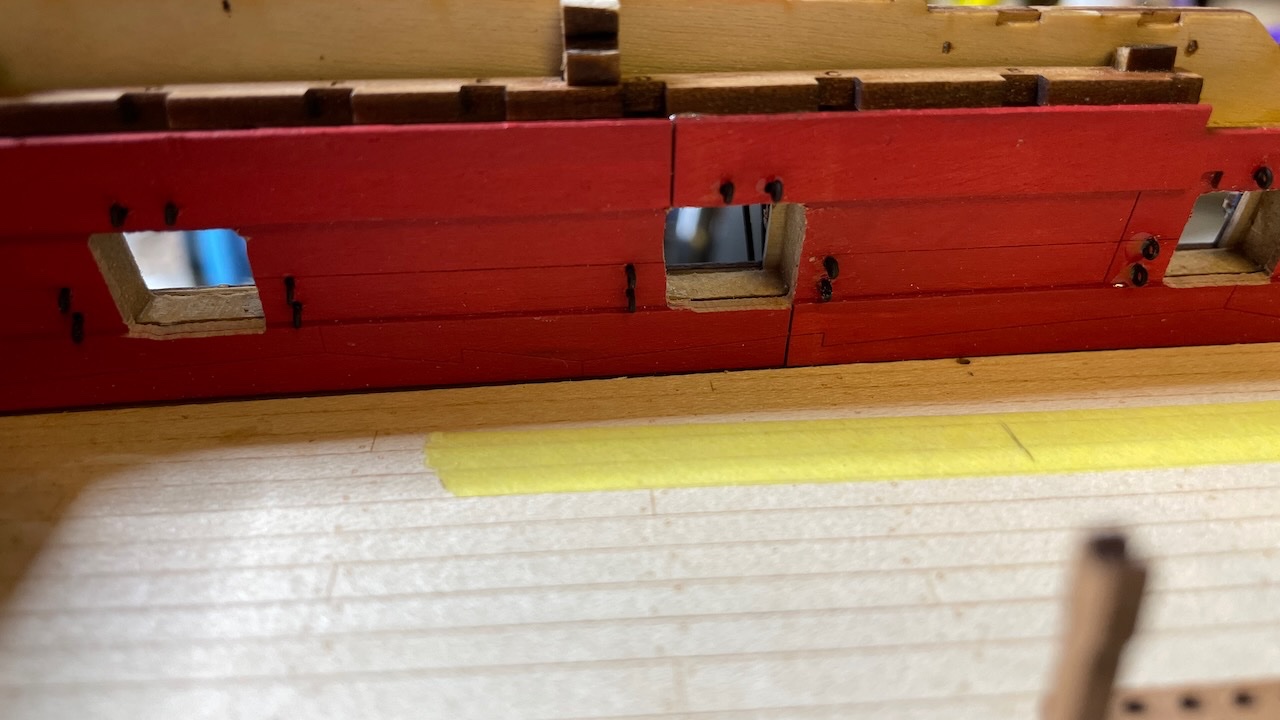
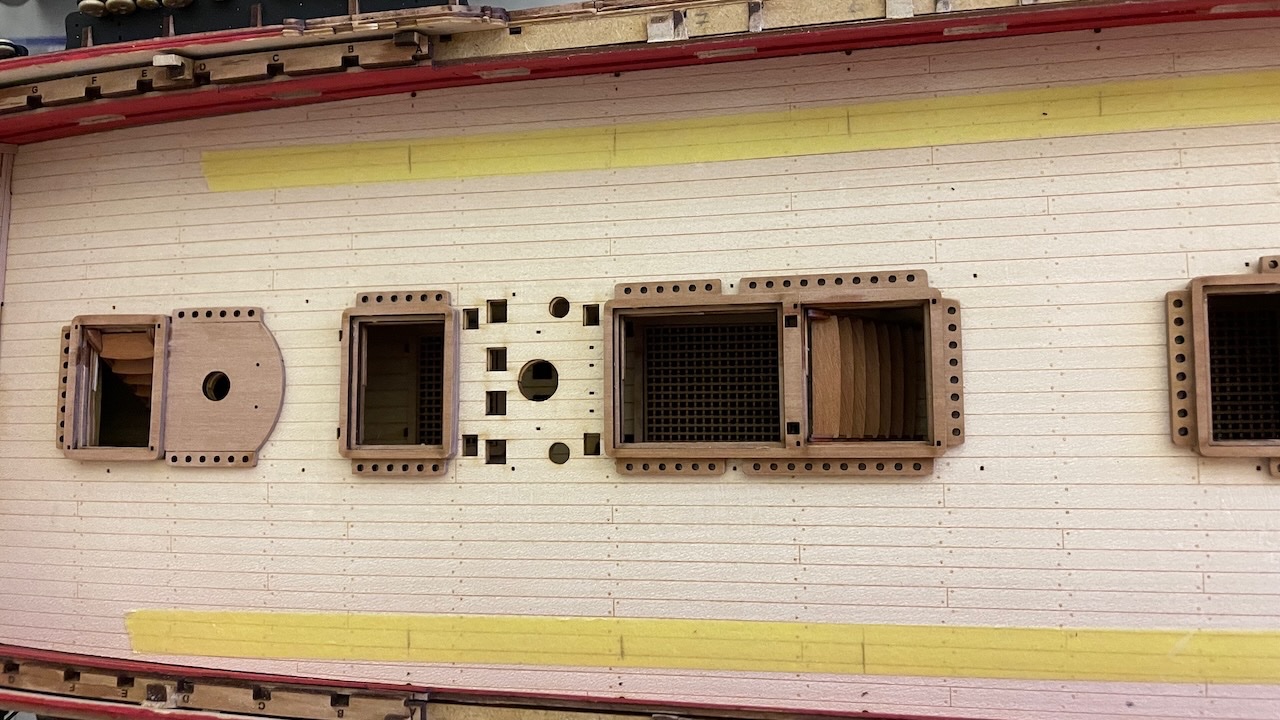
Before I forget and too late, I need to pin the eyebolts around inner gun ports. Photos 511-512: The eyebolts are on the PE sheet, not stock. Extraordinary for a model kit and I like it. I had already spray painted them earlier.
- 426 replies
-
- 3
-
-
- Vanguard Models
- Sphinx
- (and 1 more)
-
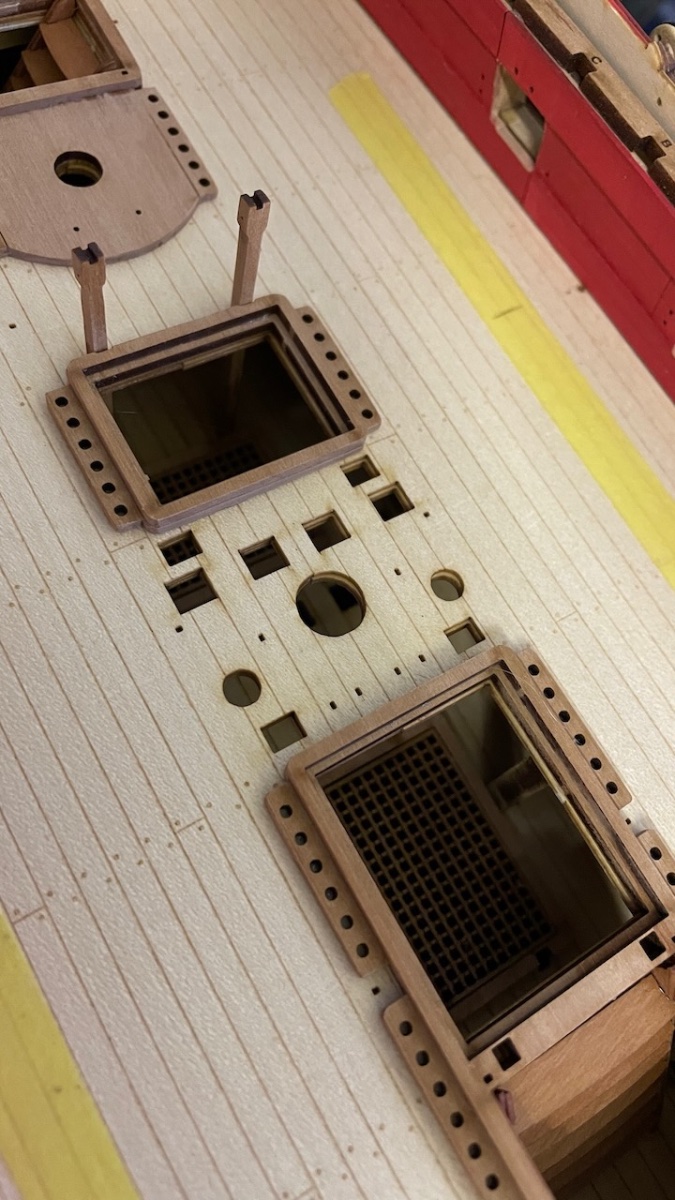
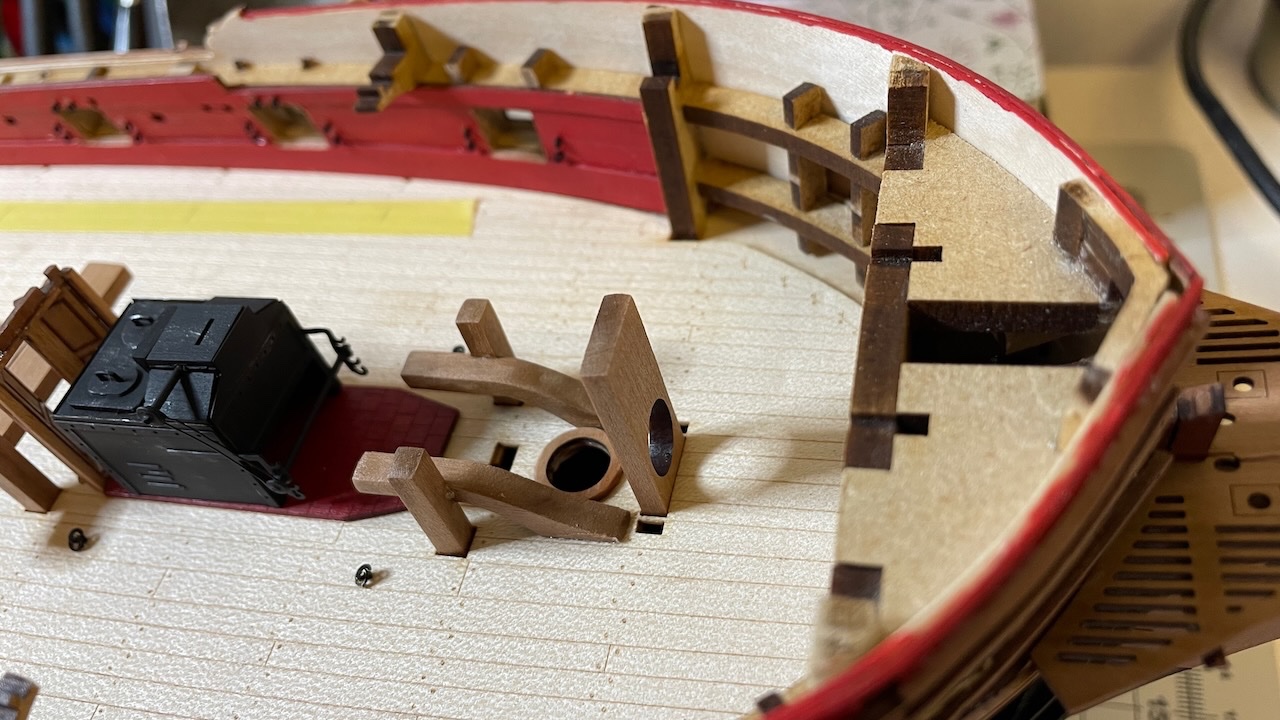
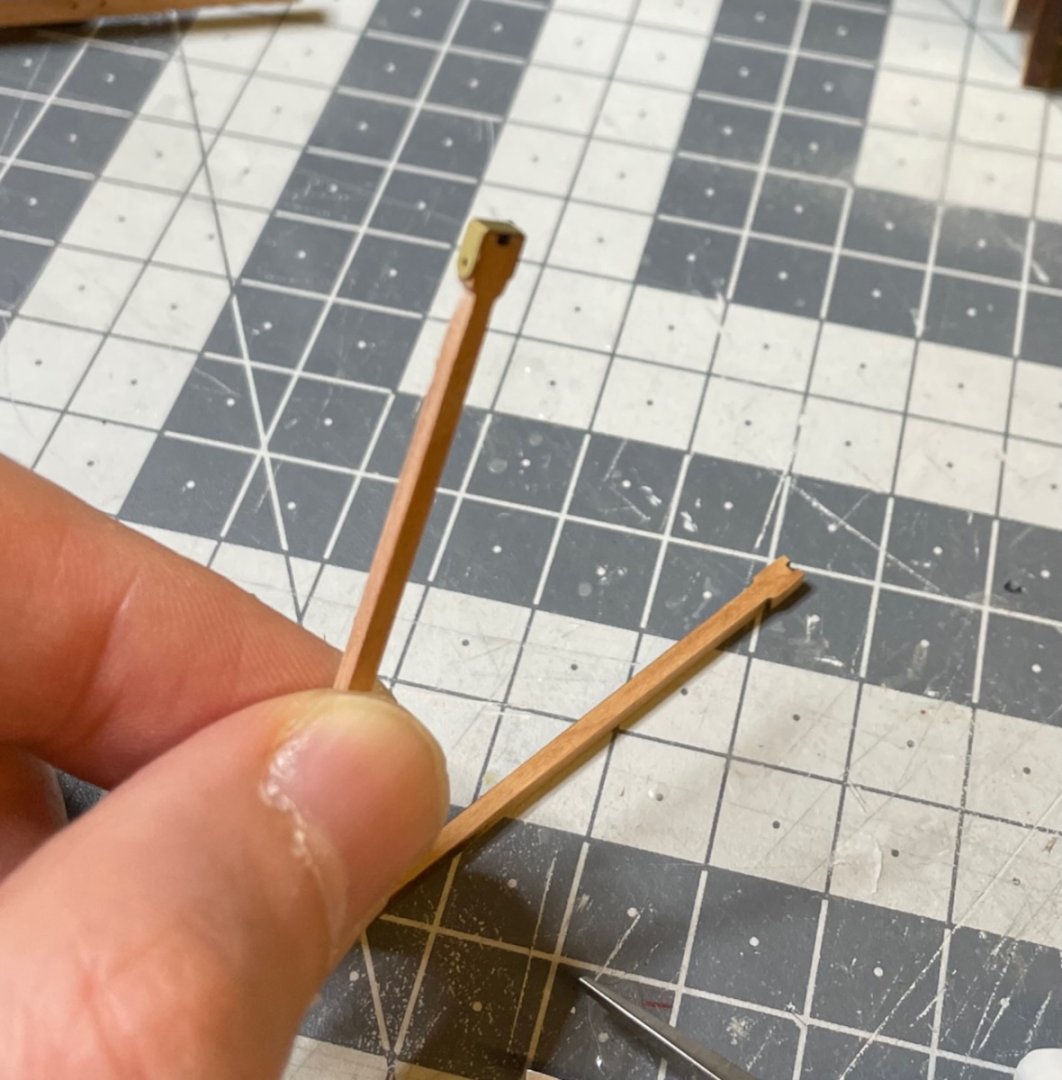
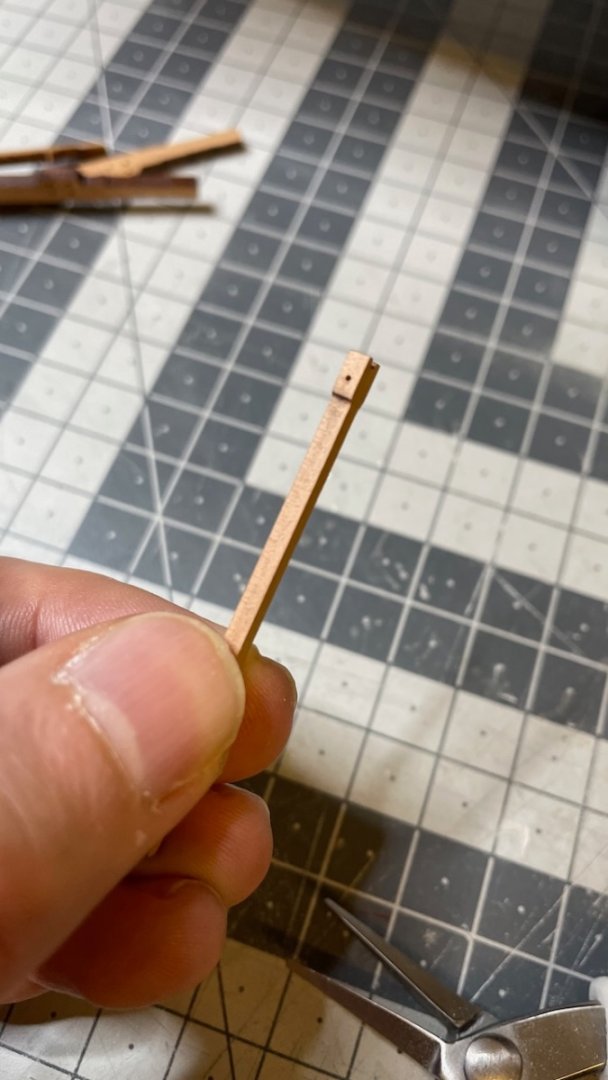
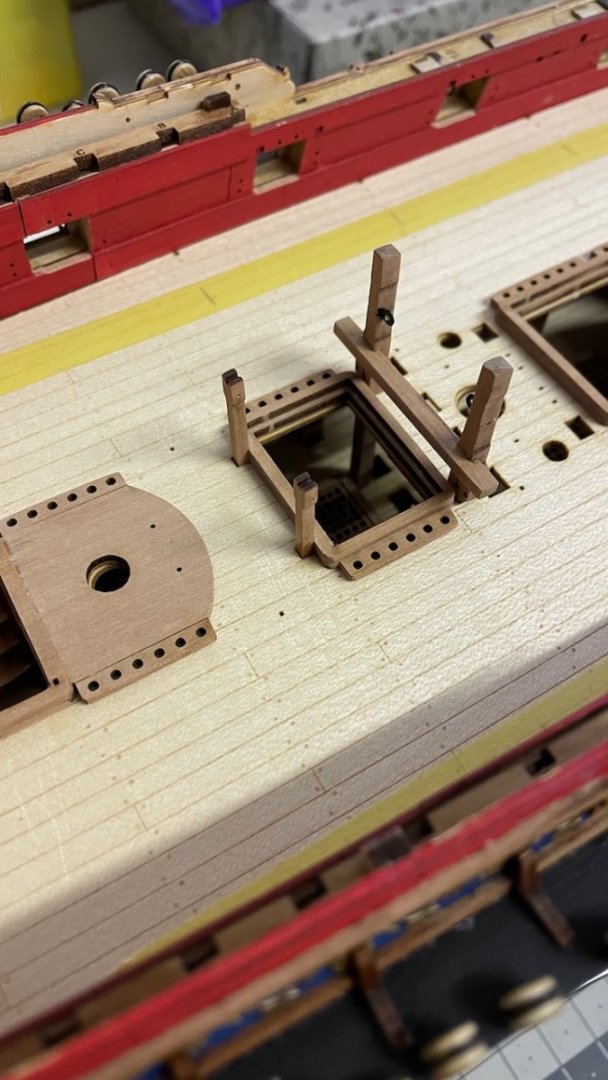
Build Day 50: 2.5 hrs / Total 113 hours 50 build days are behind! (champaigne!) Checking my first post from June 21st of this year, on the average I have been spending time with this model almost once every four days and posting about 10 photos per build session. I continue adding the constructions on the deck, many with exotic names beyond my ship building vocabulary, I have to double check to make sure I spell them correctly 😆. For example next ones are "Chain Pump Handle Stanchion", "Main Jeer Bitt Posts" and "Main Bitts Cross Beam". I also apply matt varnish on these constructions as I glue them in place. I haven't applied any varnish on the deck surface, at least not yet. Any ideas when is the good time? Or do you apply it at all? I consider it mainly for protective purposes. Photos 505-506: Use the photo etched part for a reference to drill and put it aside for now. It will be glued back later. Photo 507: Glued in place. The feet go down all the way to the holes in the lower deck. With just a tiny amount of filing, I can say they fit extremely precisely. Photos 508-510: Cleaned the and glued the next ones in place, same way as the previous parts.


- 426 replies
-
- 5
-
-
-
- Vanguard Models
- Sphinx
- (and 1 more)
-
Drawings on the Plan sheet and the photos in the manual show the correct orientation. If you just follow them and just ignore the engraving on the part, then you'll be fine.
- 426 replies
-
- 2
-
-
- Vanguard Models
- Sphinx
- (and 1 more)
-
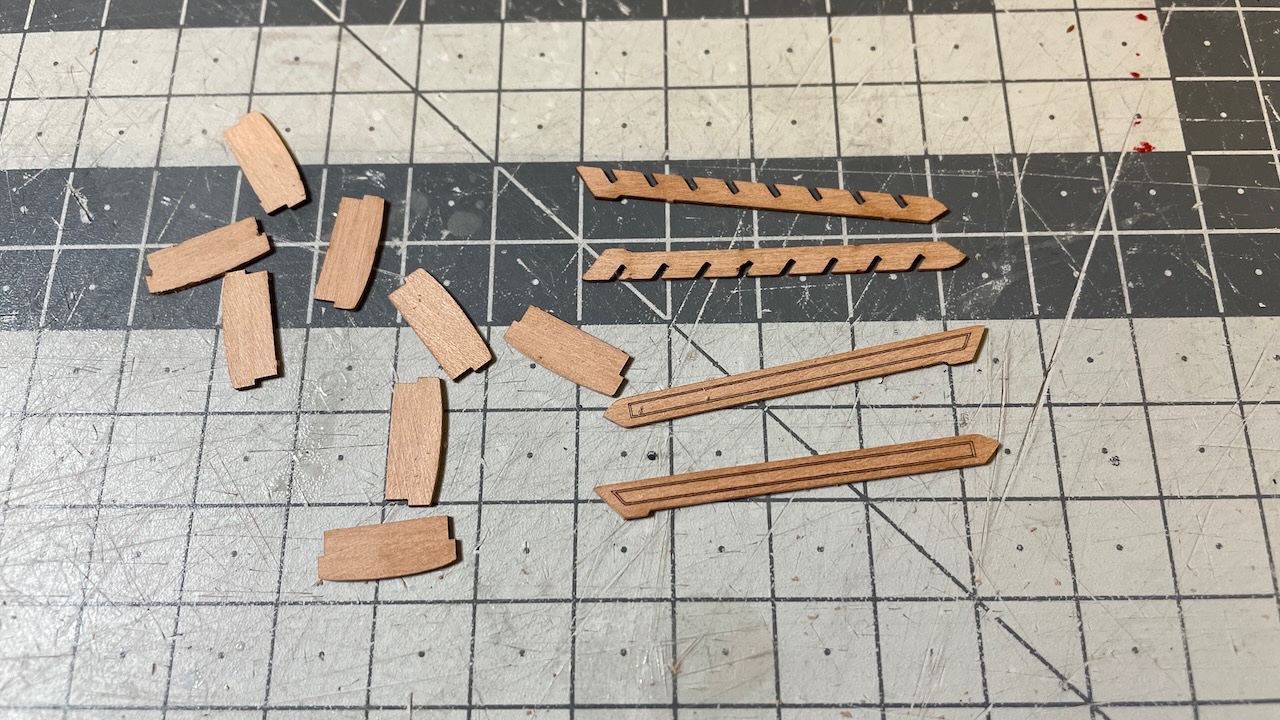
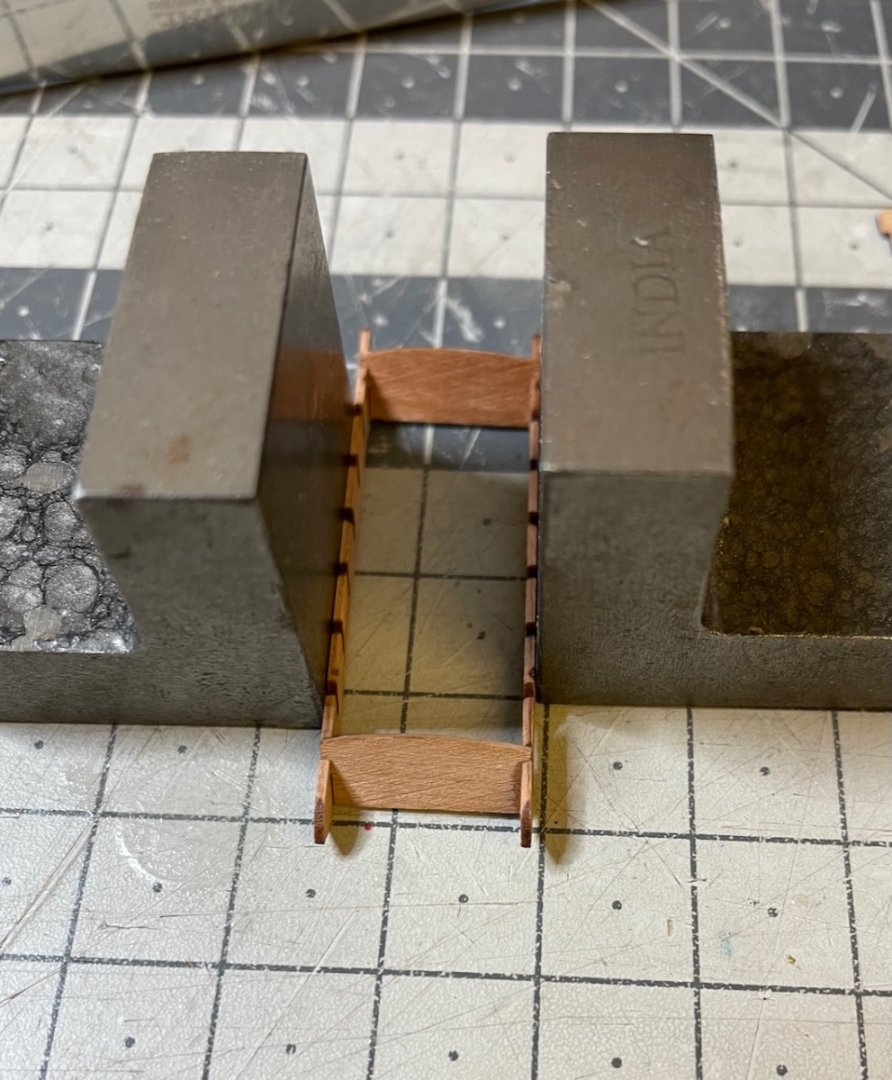
Photo 502: Stairs. I really like that the stairs are laser cut. They look much more realistic as opposed to those in some other models, where you cut from wooden strips, making it like a "model kit". Photo 503: I use right angles to align them properly while the glue is drying. Photo 504: Coamings and stairs in place.
- 426 replies
-
- 4
-
-
- Vanguard Models
- Sphinx
- (and 1 more)
-
Build Day 49: 1.5 hrs / Total 110.5 hours Photos 499-501: Coamings. Got rid of the char from the outer edges as well as the inner edges where the stairs will fit. Keeping the inner cut-outs in place while sanding the outer edge helps prevent accidentally breaking them.

- 426 replies
-
- 3
-
-
- Vanguard Models
- Sphinx
- (and 1 more)
-
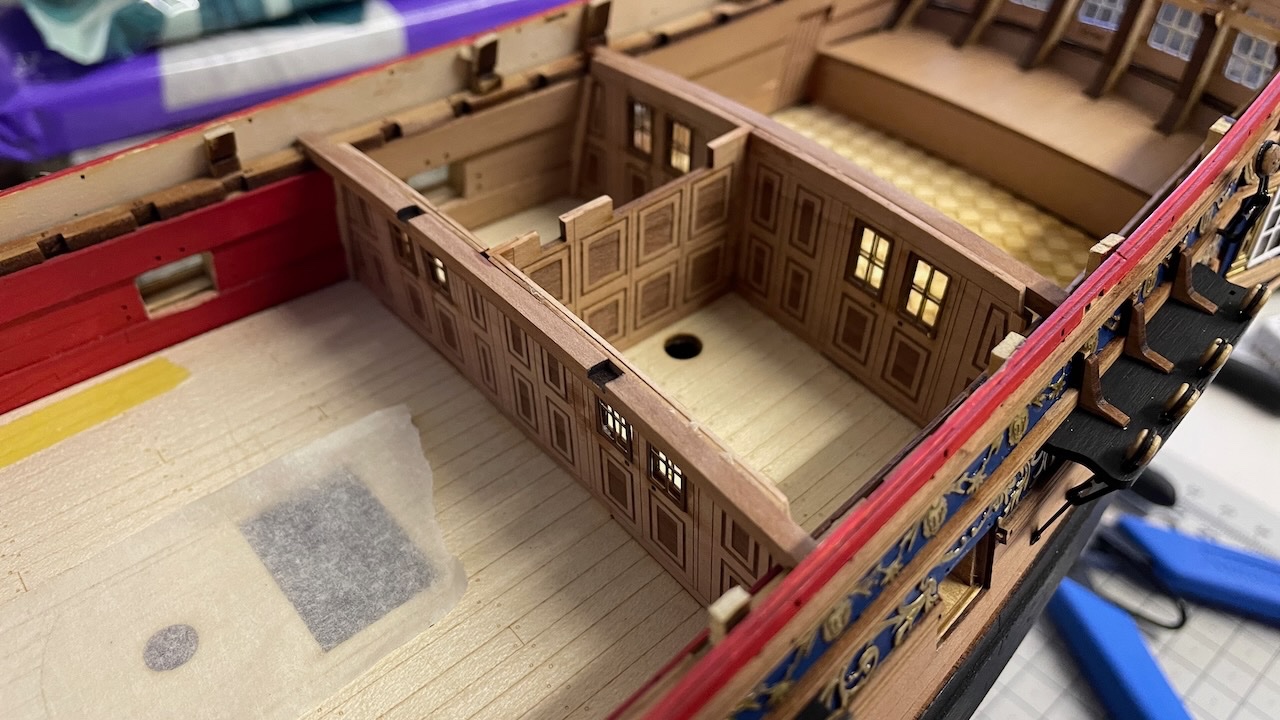
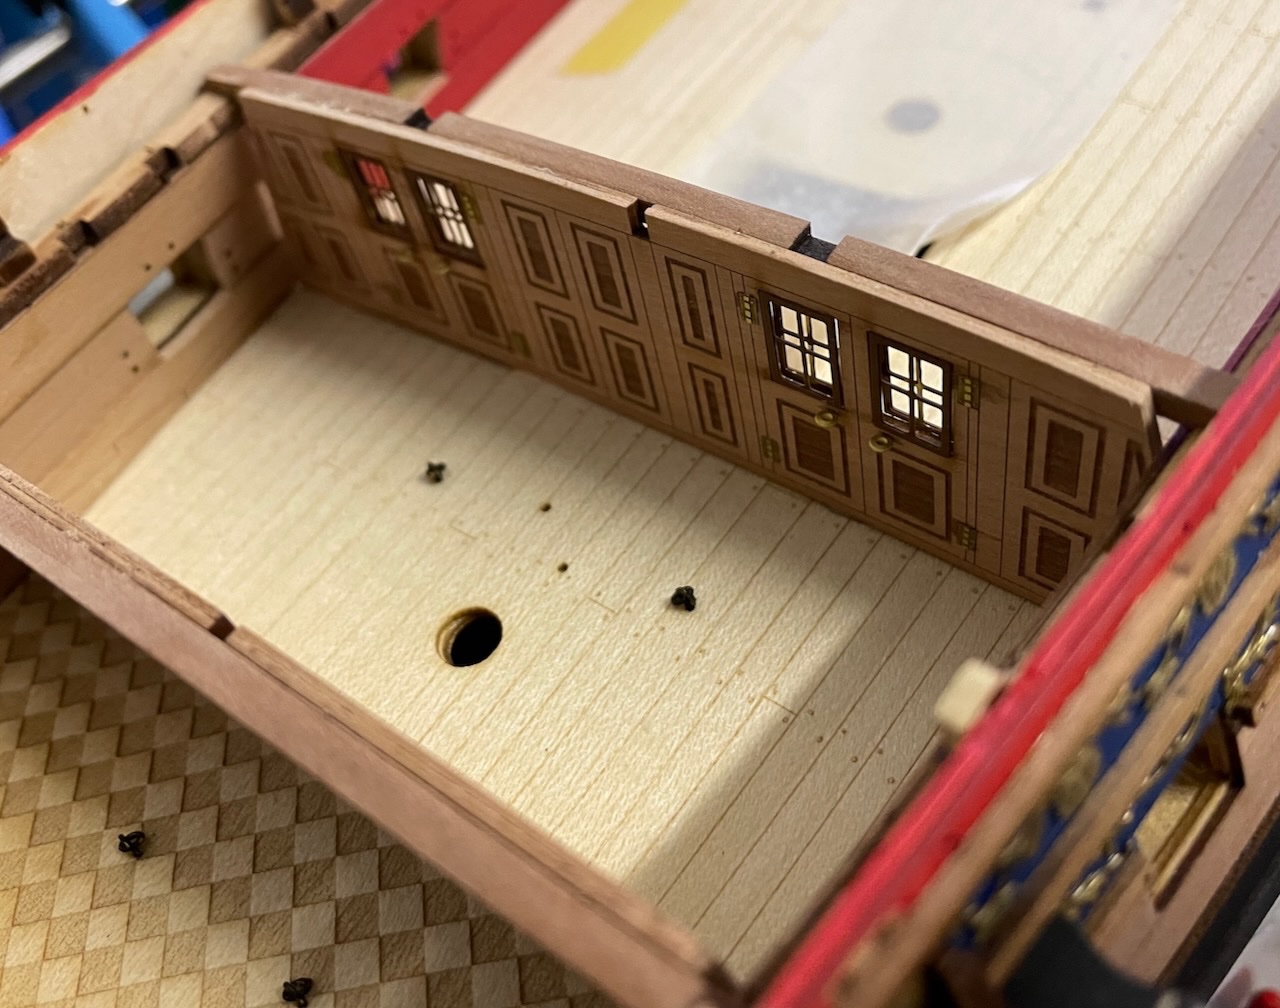
Build Day 48: 3.5 hrs / Total 109 hours Photo 498: Finalized the cabin, with the glitch I wrote above.
- 426 replies
-
- 4
-
-
- Vanguard Models
- Sphinx
- (and 1 more)
-
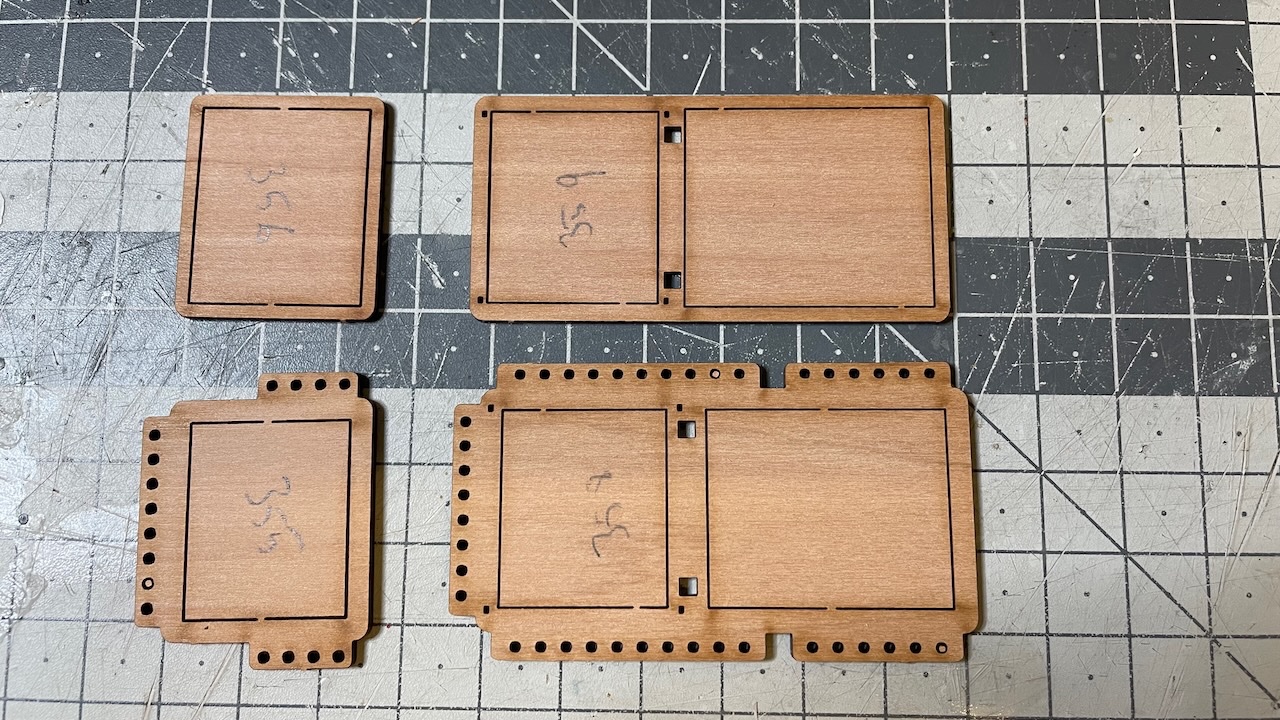
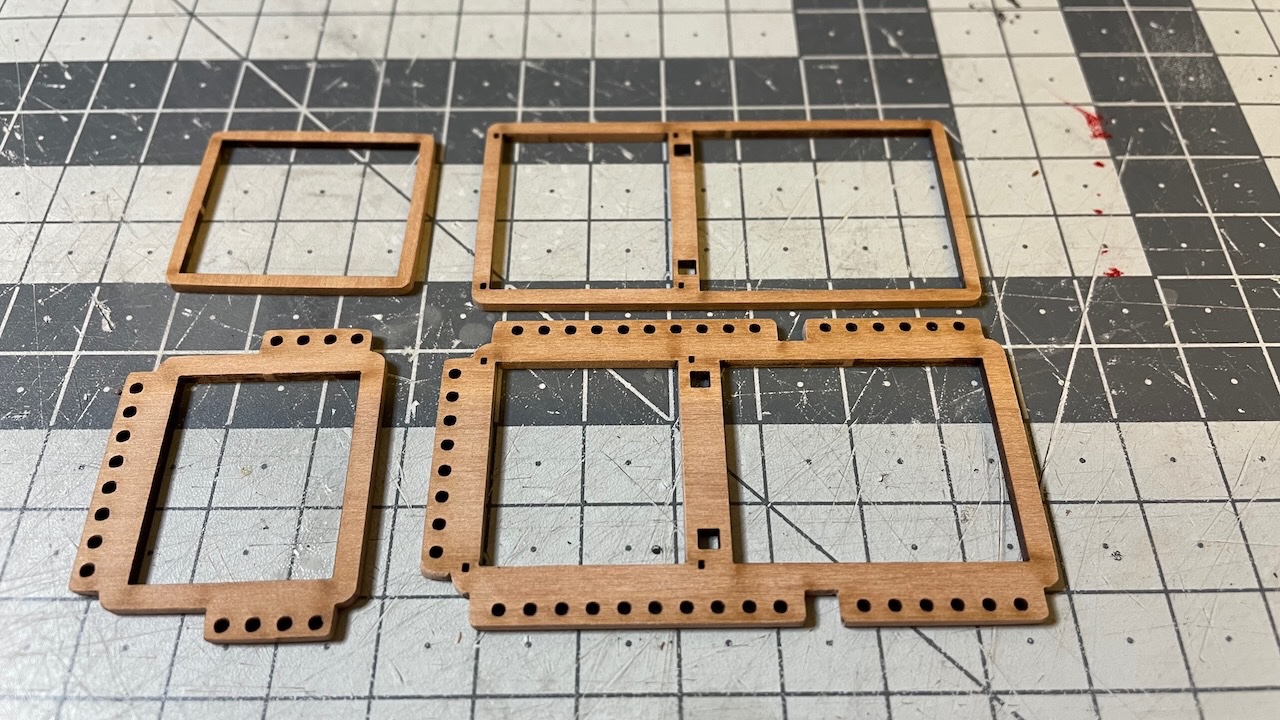
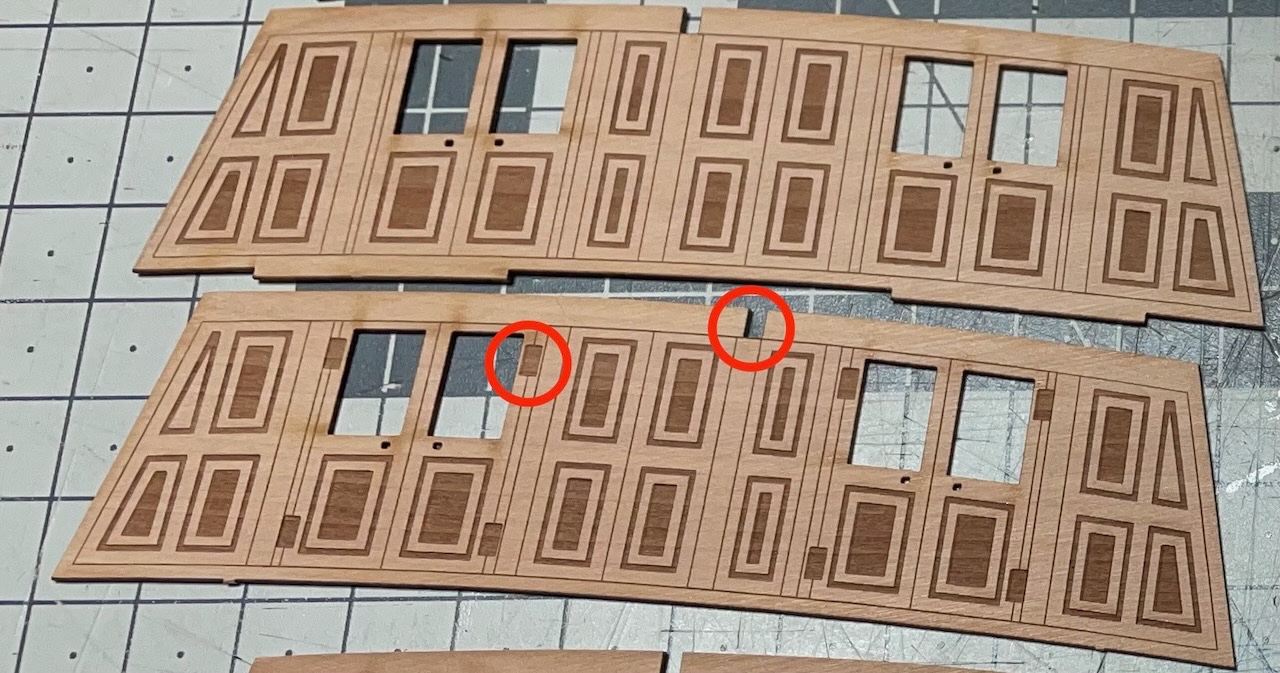
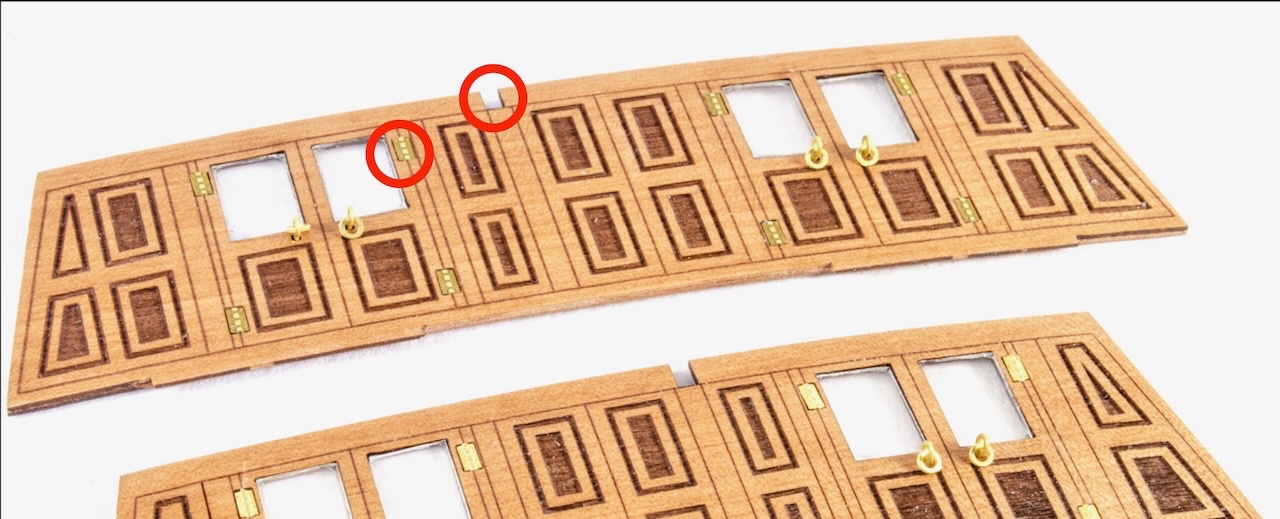
Forward bulkhead screen parts have a problem that ended up me installing door handles and hinges on the wrong side... unless the problem is with me: The engravings for the hinges are on the different side than in the manual. Photo 495: This is how they look in the manual. i.e. the hinge engravings are on the part where the slot is closer to the left. Photo 496: Whereas in the kit they are on the opposite facing part, i.e. where the slot is closer to the right. This is the side where I didn't suspect and glued the hinges and door handles. Photo 497: As a result my Forward Bulkhead Screen door handles and hinges are now facing backwards, while they should be facing outwards. I don't mind too much as they won't be too visible in the final, though. I would just like to know if it is me or the kit. 🤔
- 426 replies
-
- 2
-
-
- Vanguard Models
- Sphinx
- (and 1 more)
-
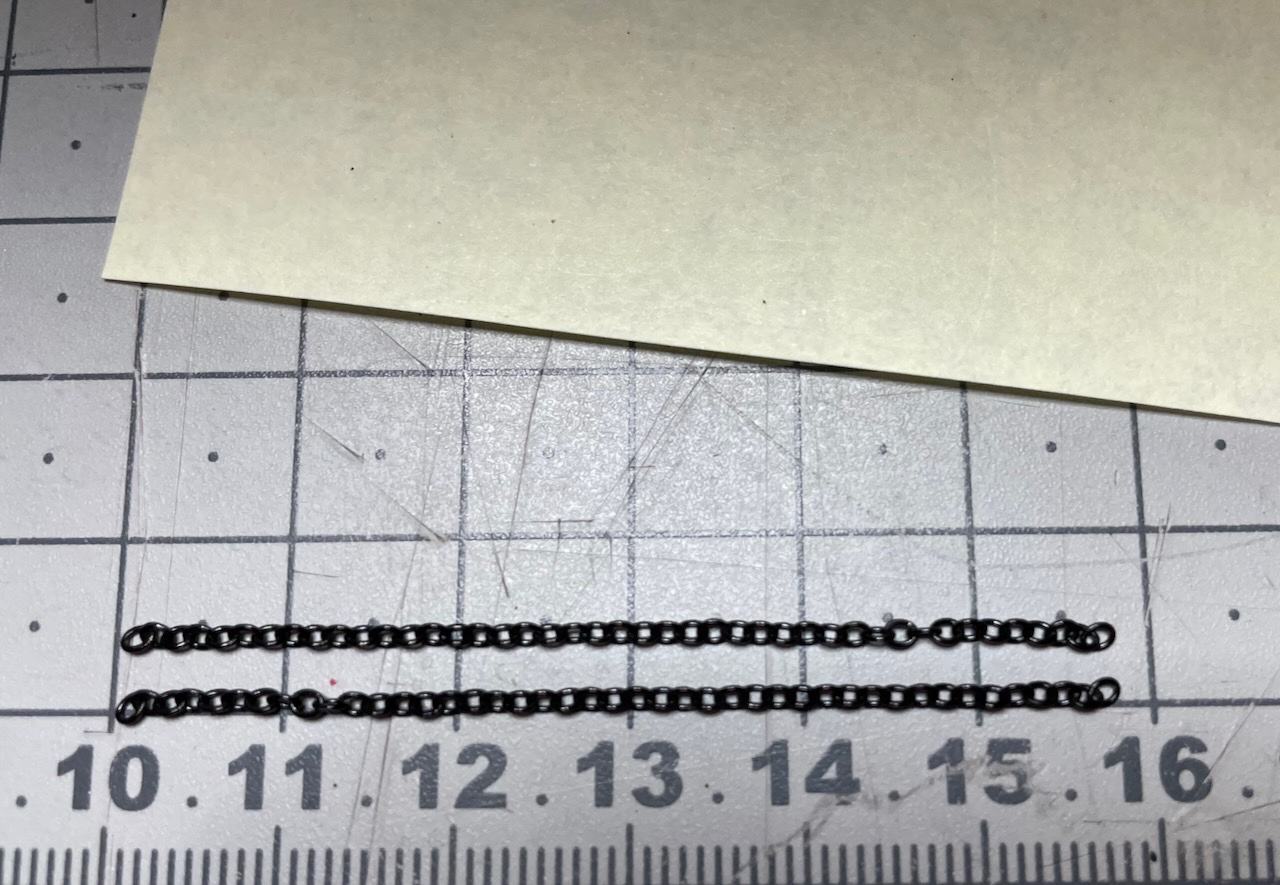
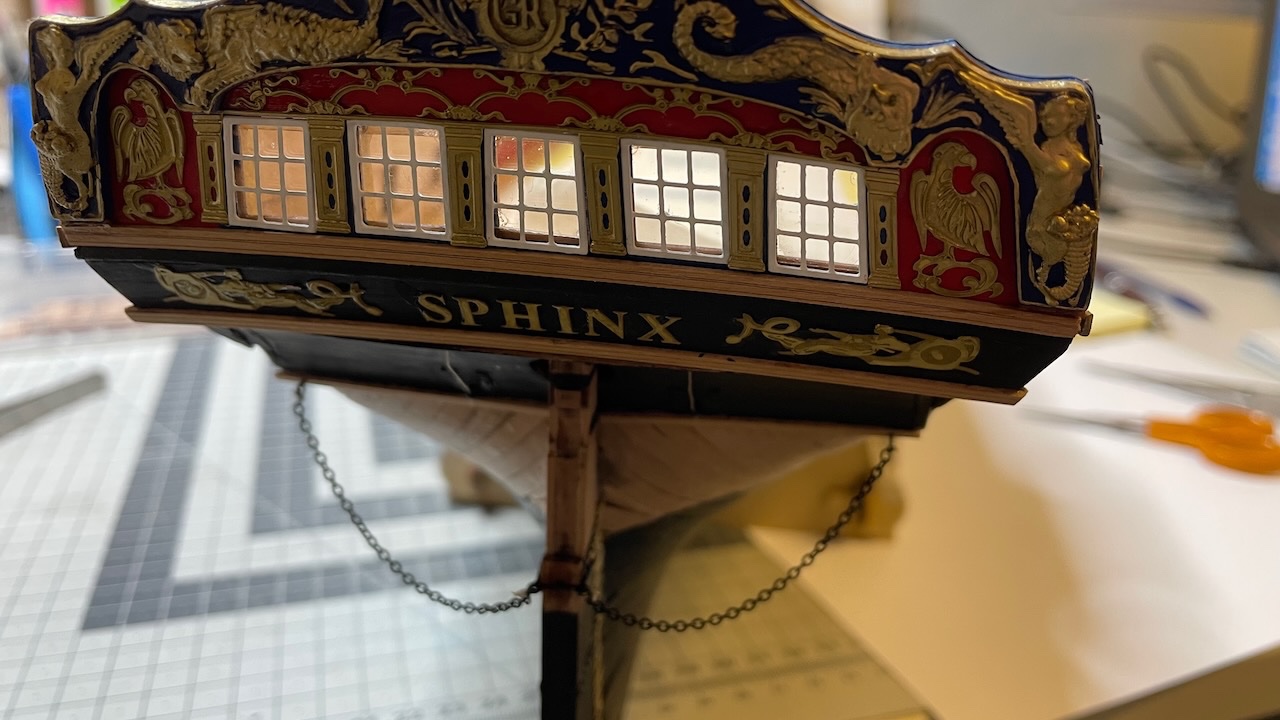
Build Day 47: 0.5 hrs / Total 105.5 hours Photos 493-494: Short progress today. Rudder chains cut to a little shorter than 6cm and rigged to place.
- 426 replies
-
- 4
-
-
- Vanguard Models
- Sphinx
- (and 1 more)
-
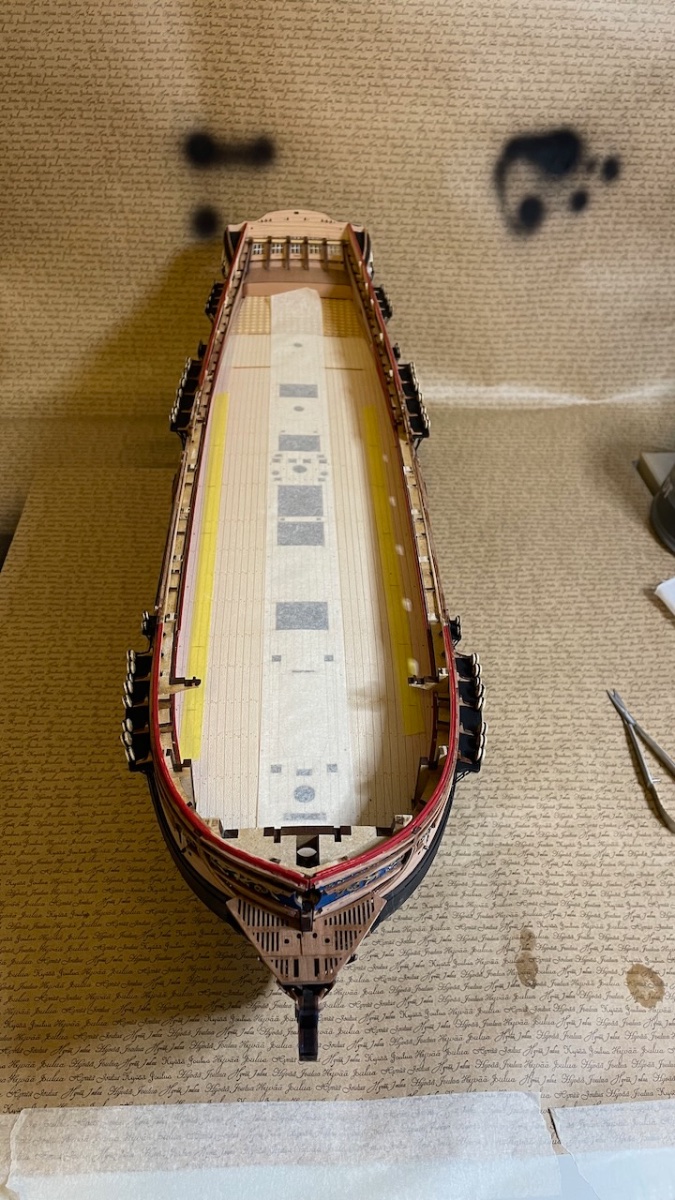
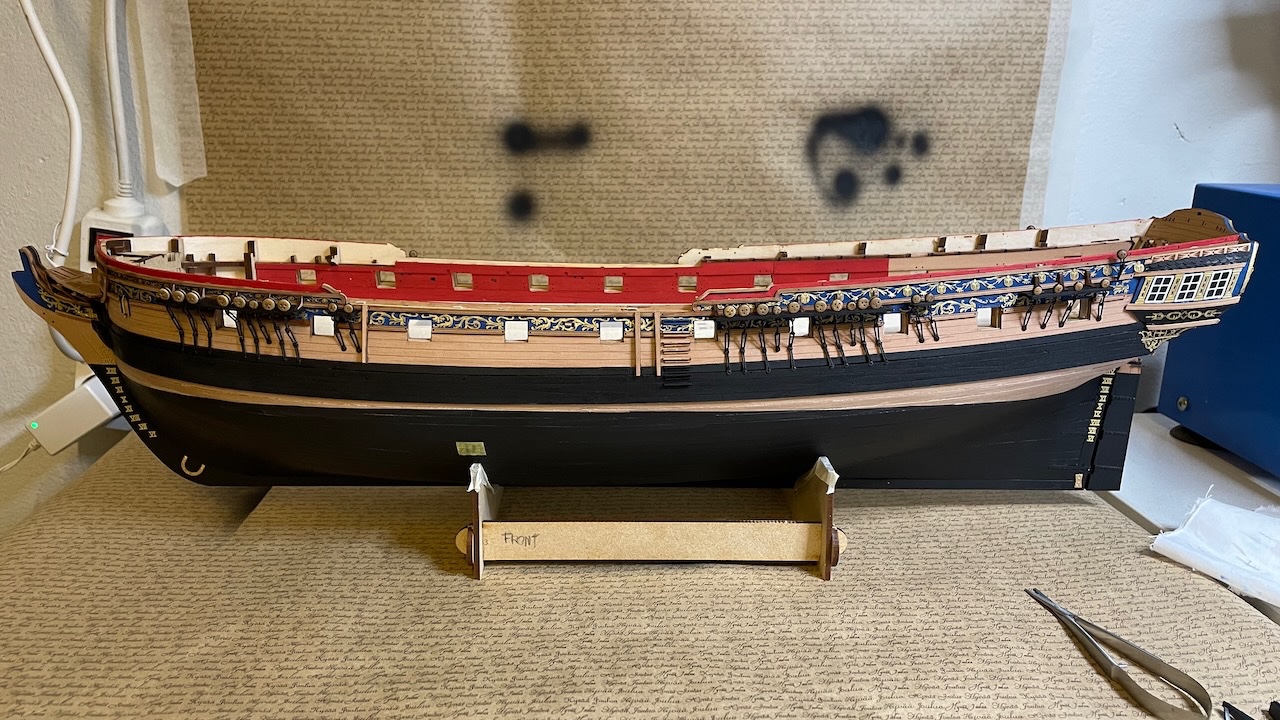
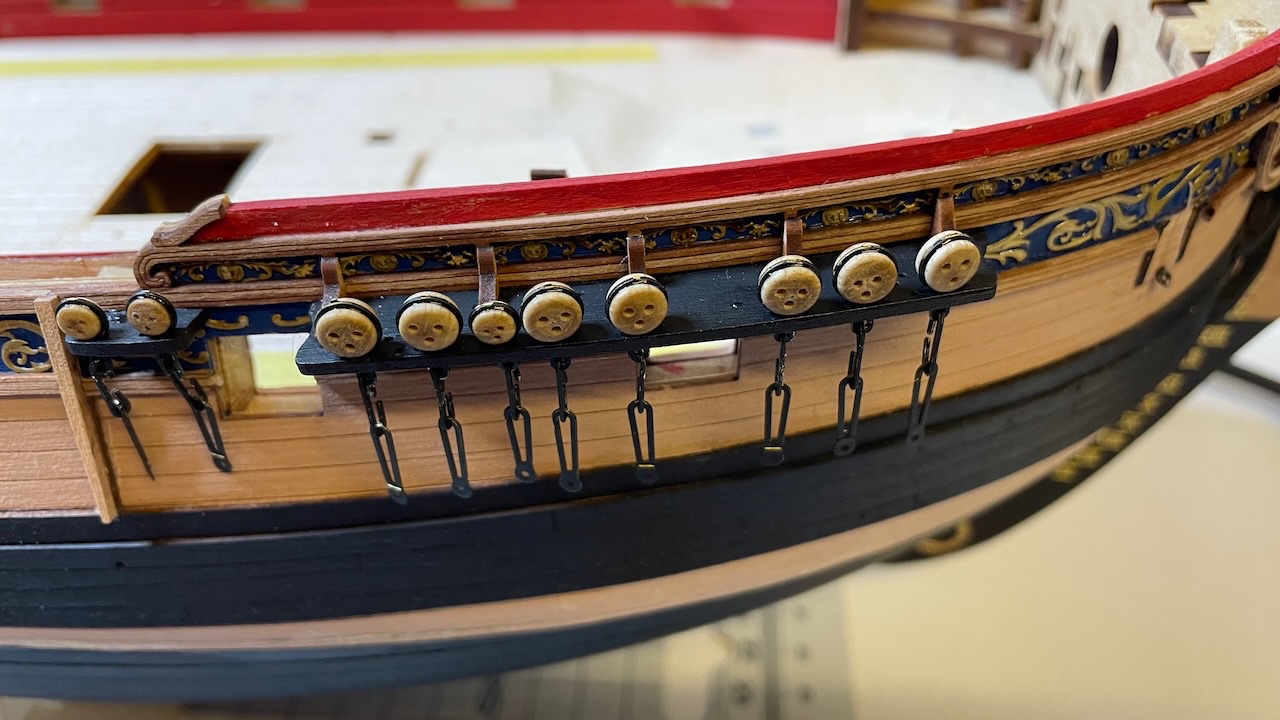
Photos 493-494: Two photos showing the current state of my Sphinx with the deadeyes installed on channels.
- 426 replies
-
- 7
-
-
- Vanguard Models
- Sphinx
- (and 1 more)
-
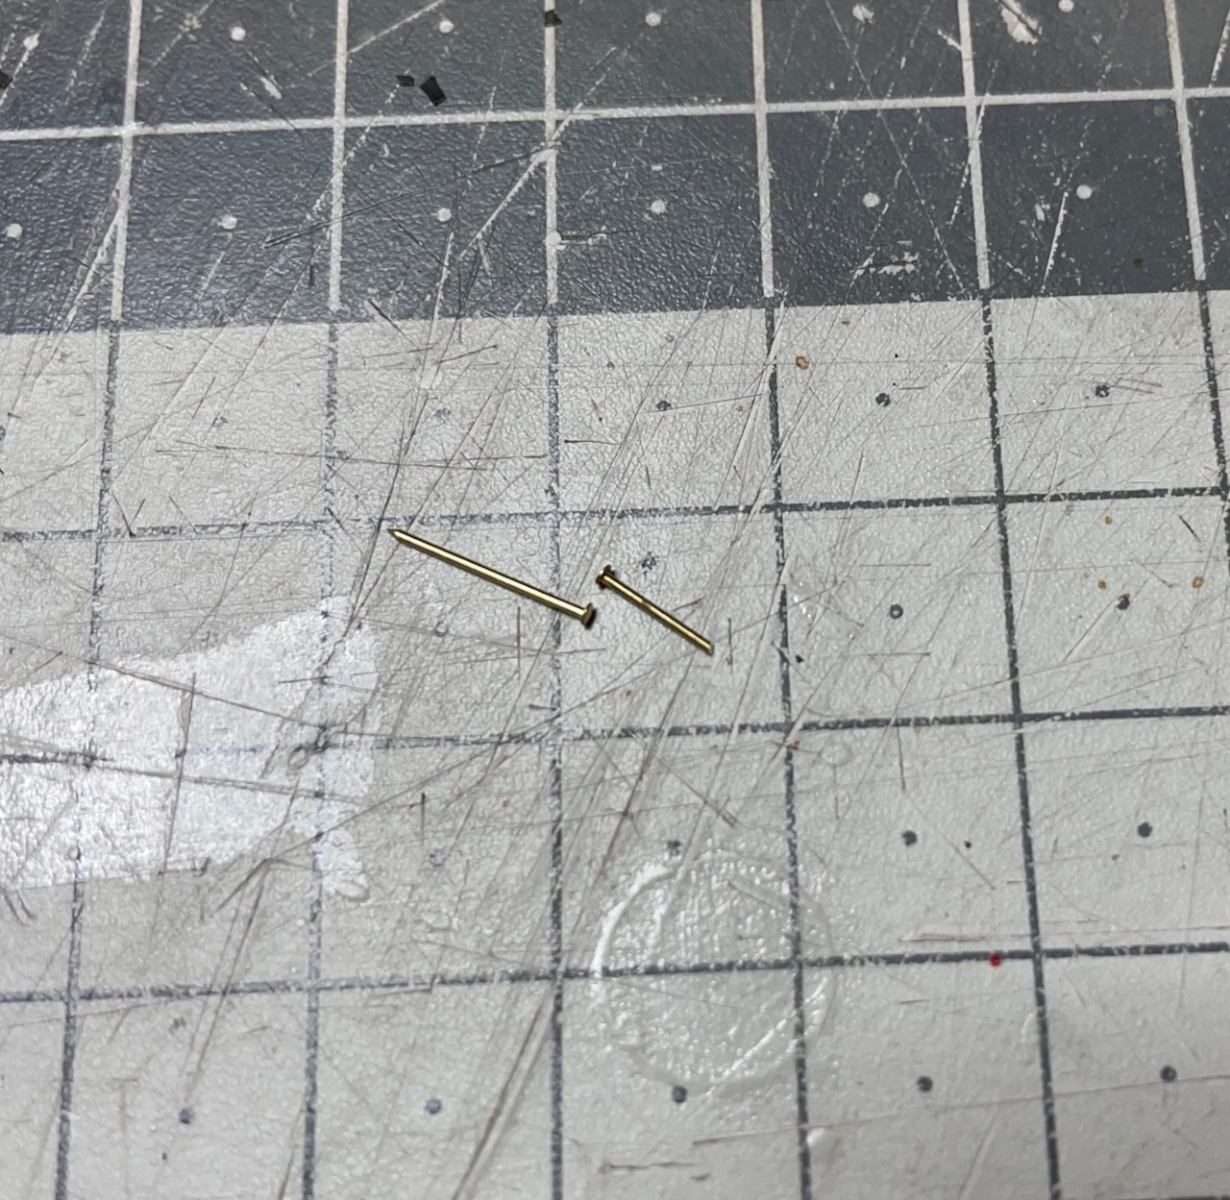
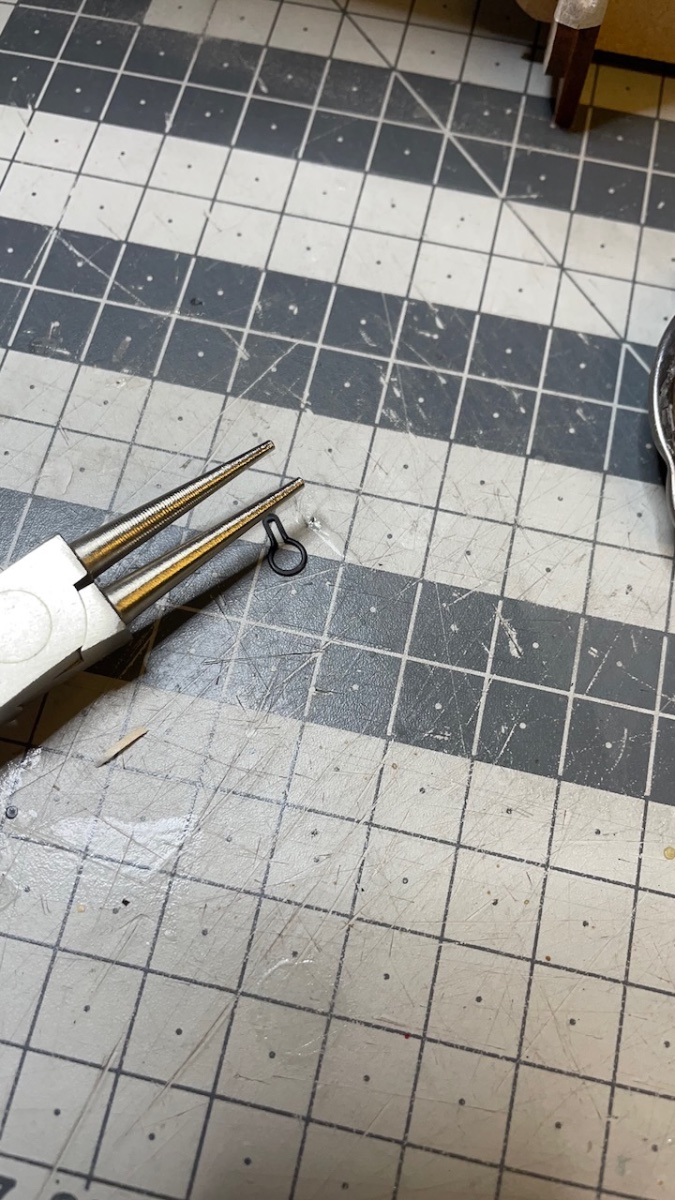
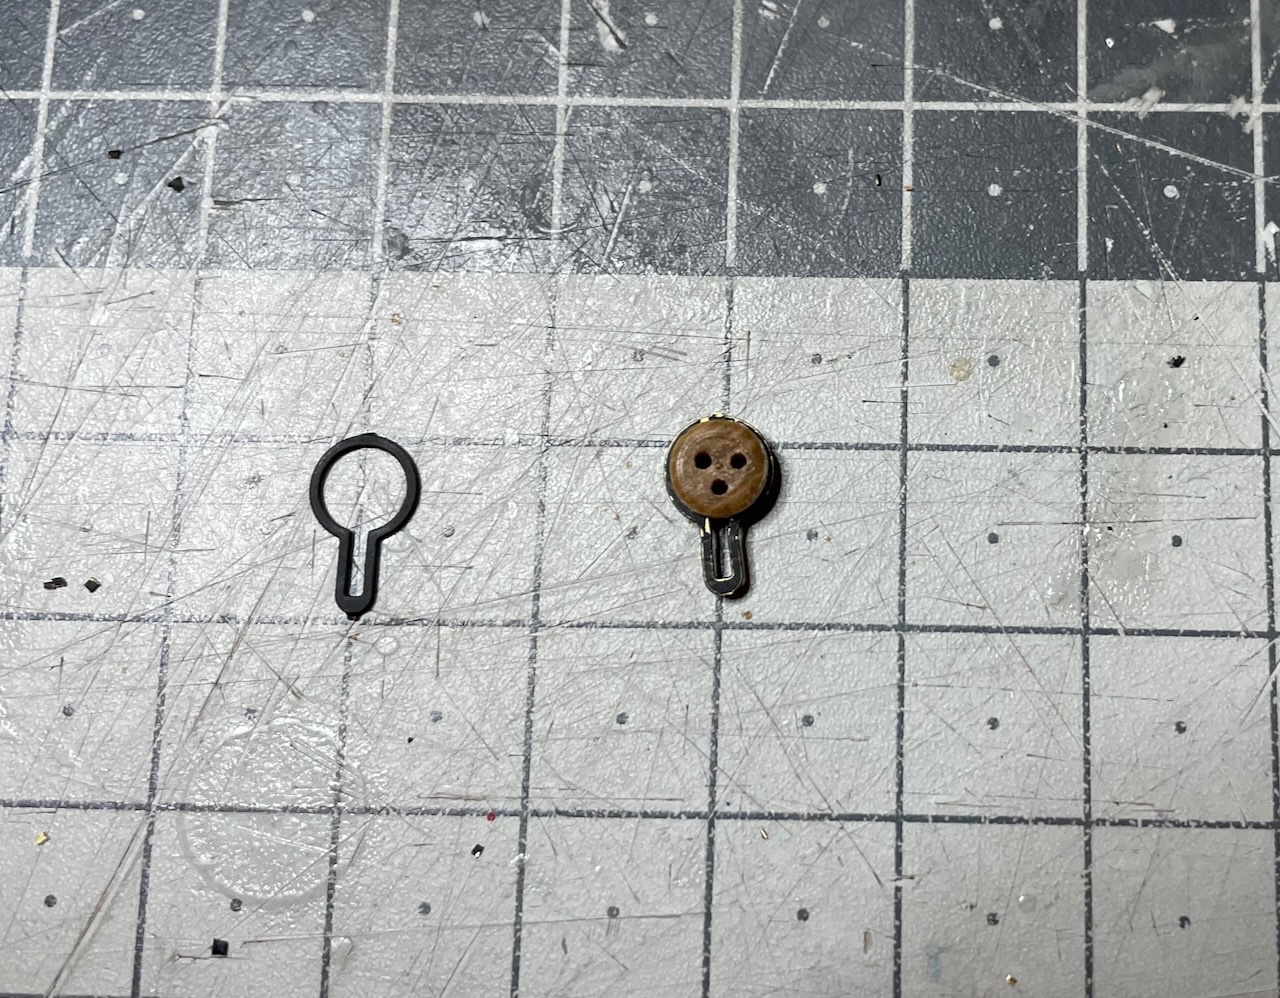
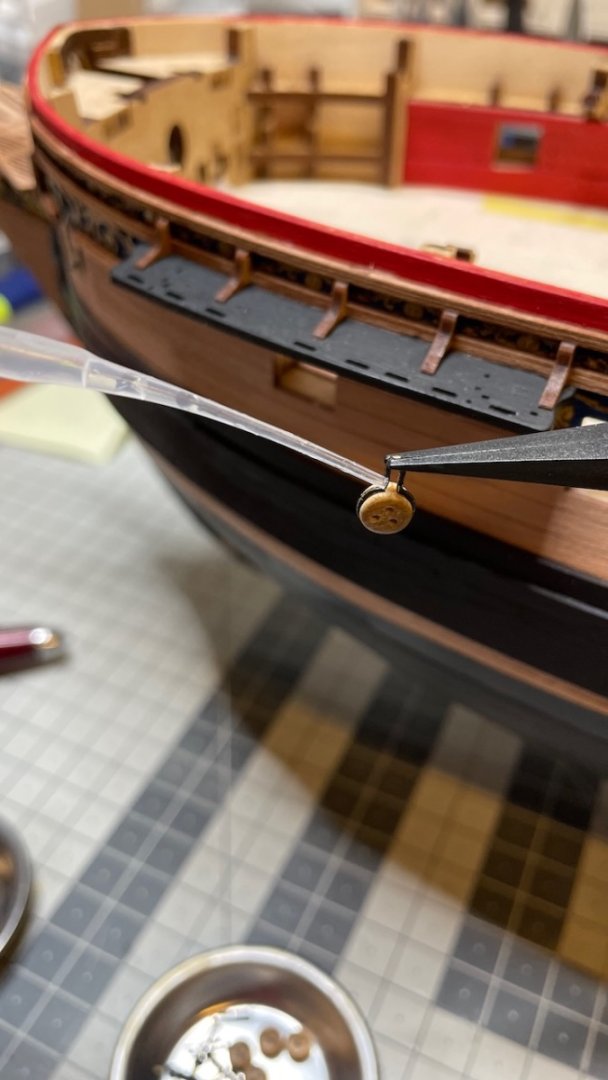
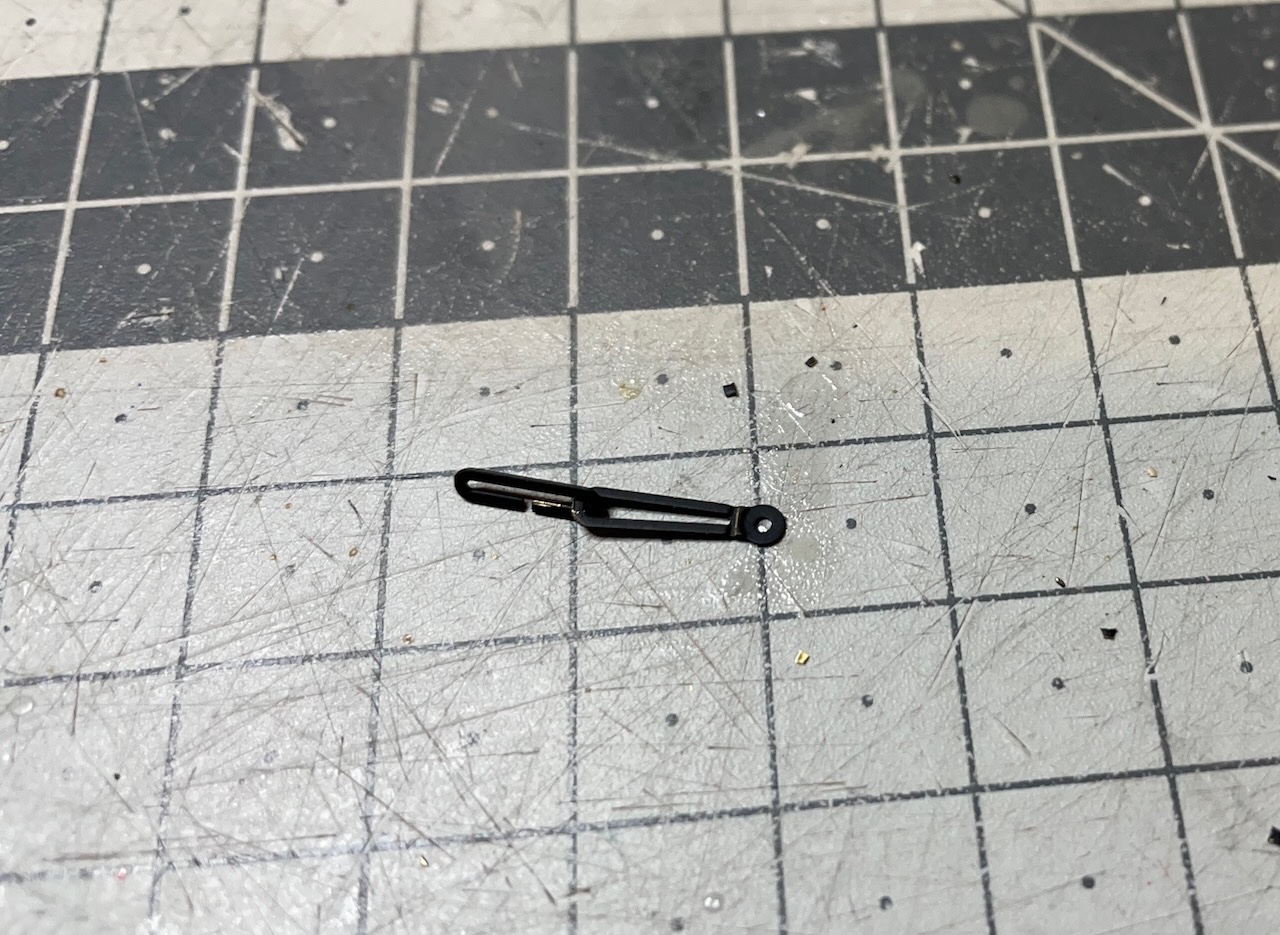
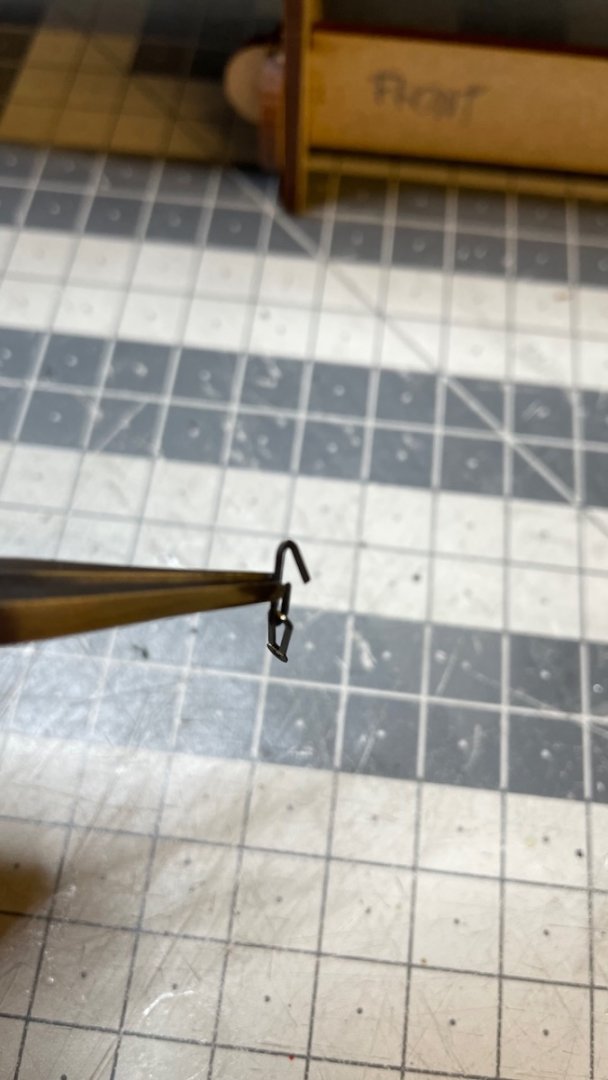
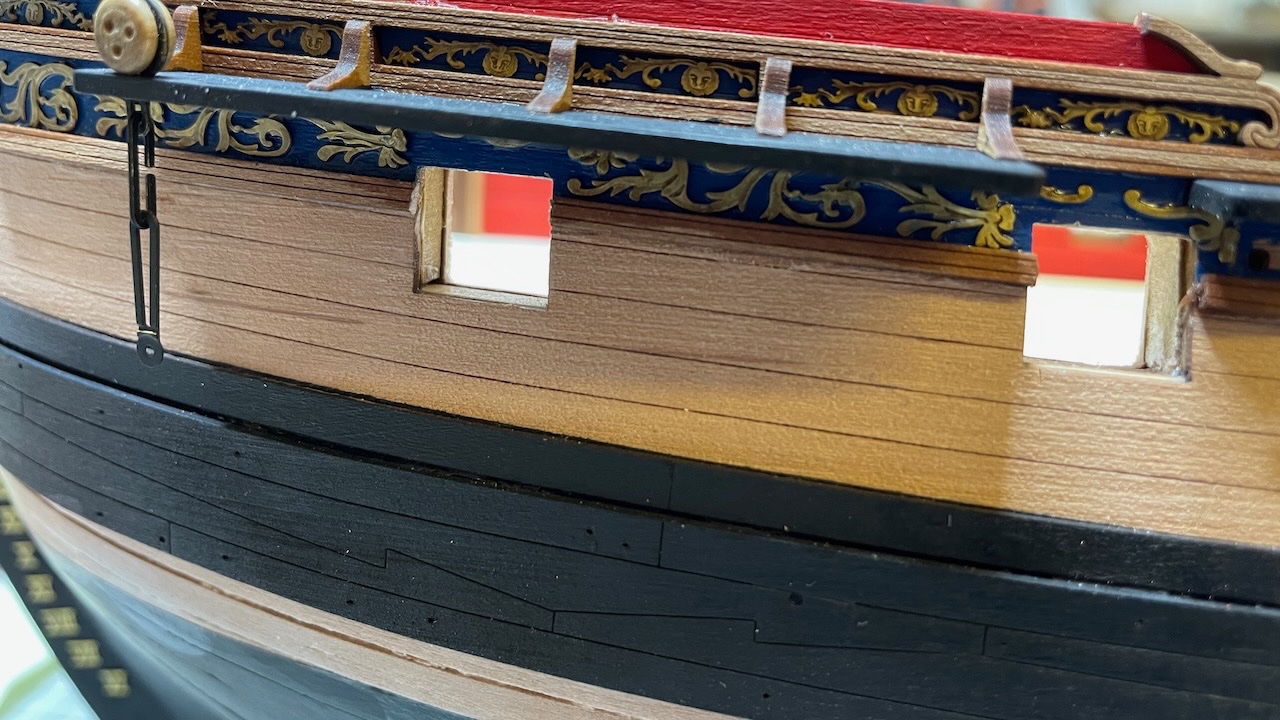
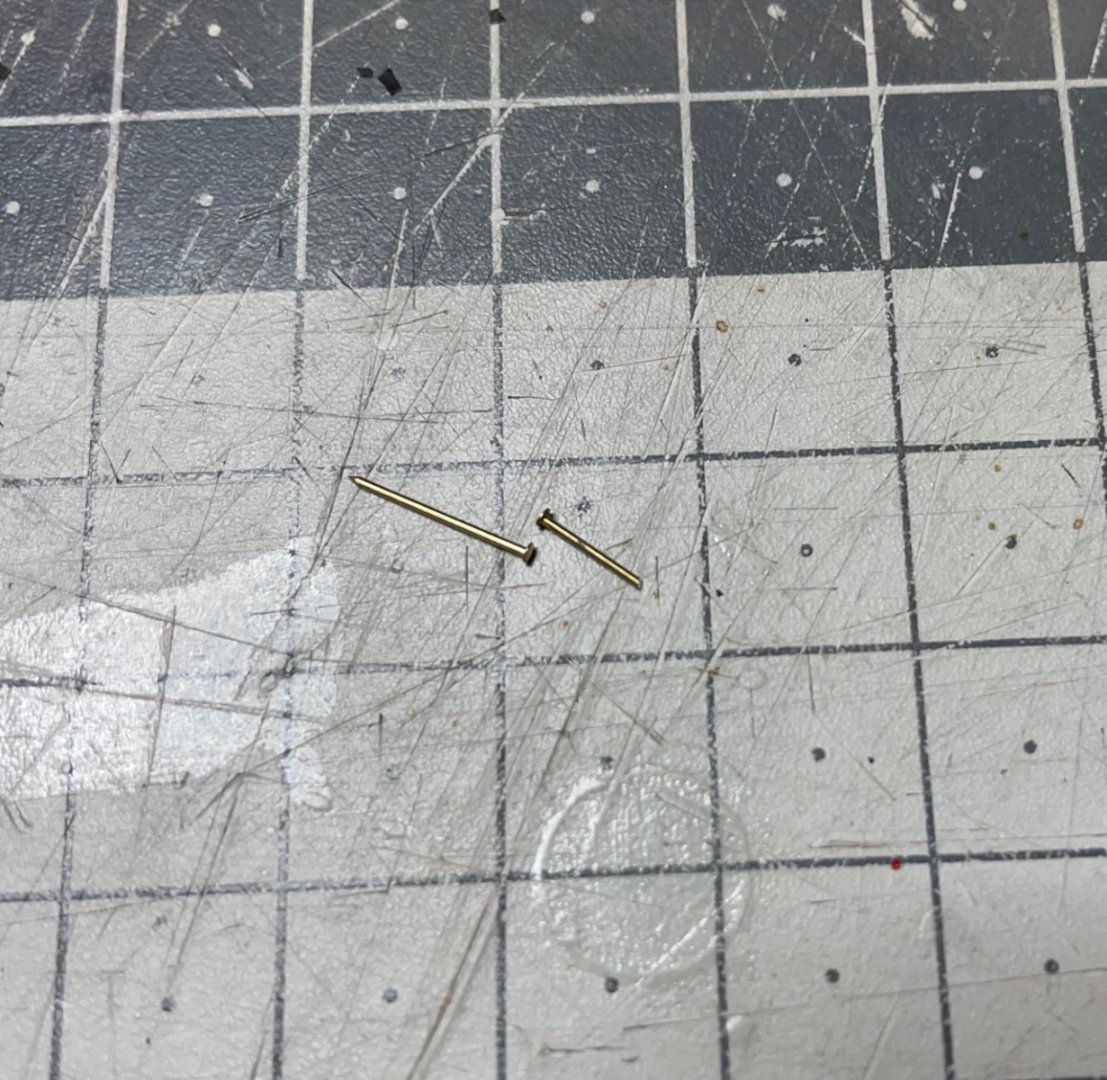
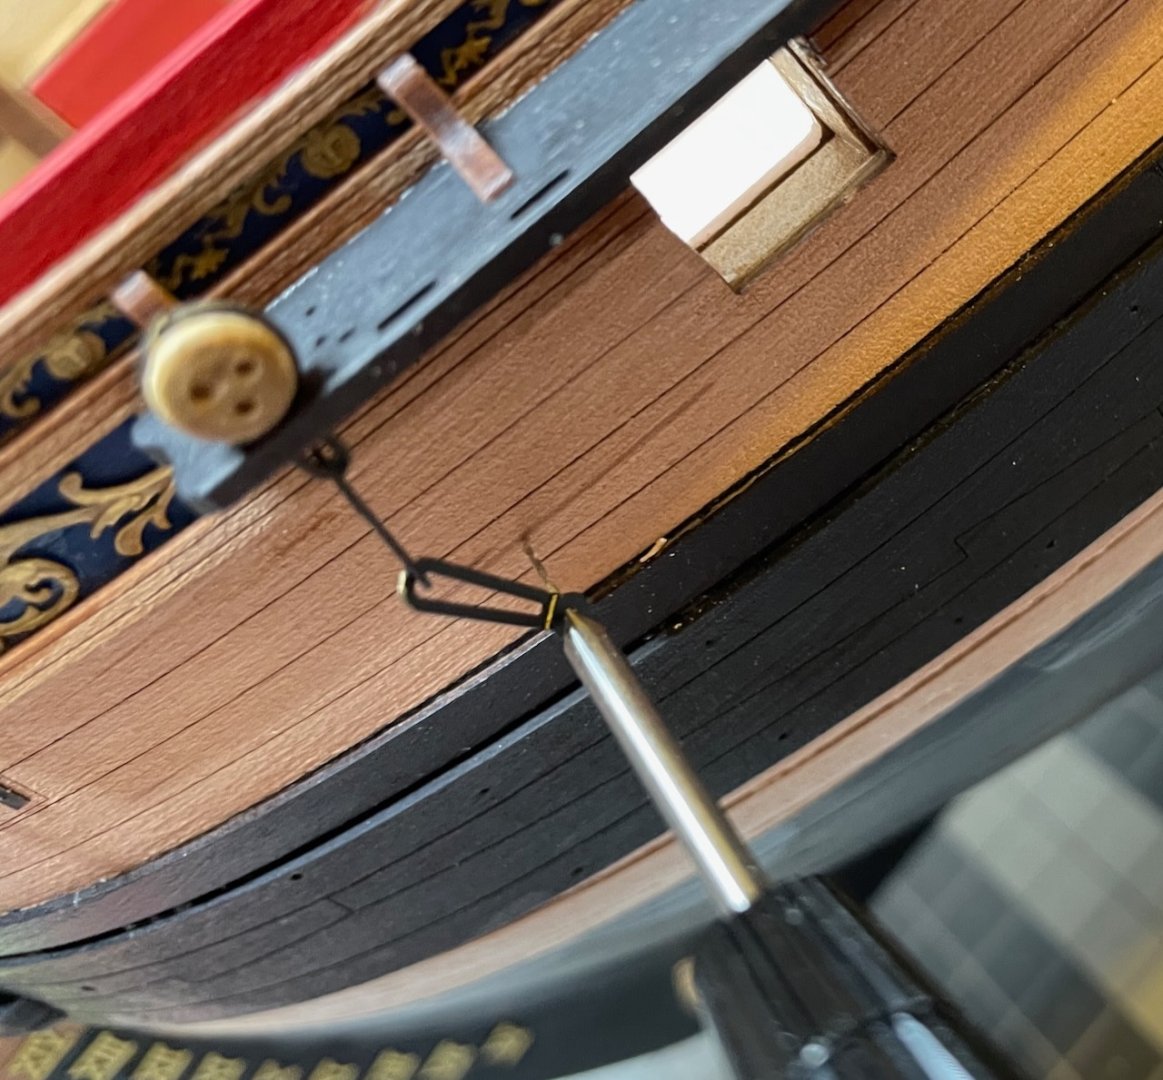
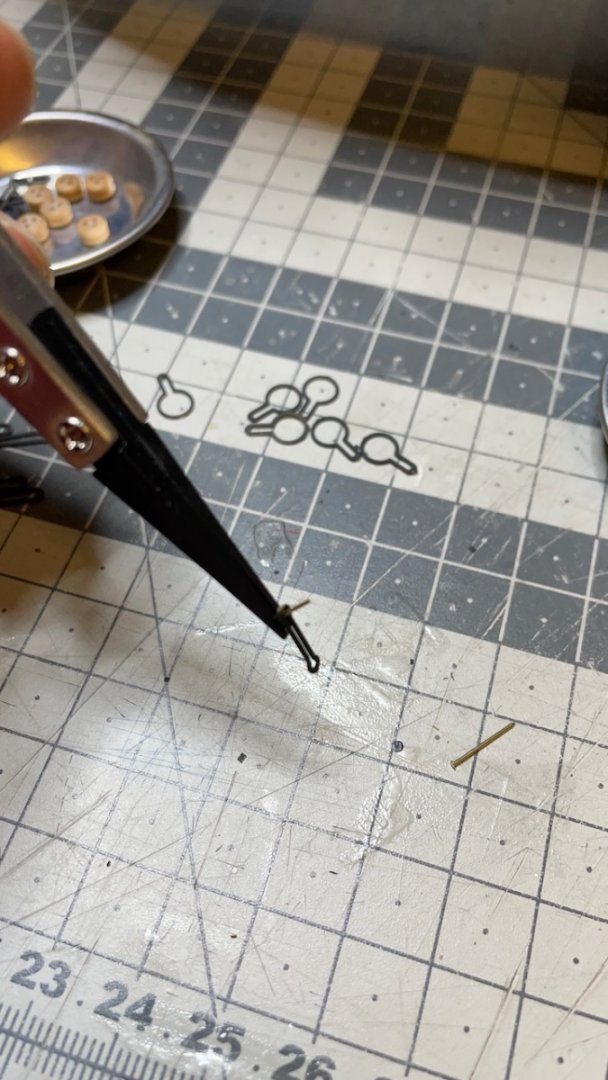
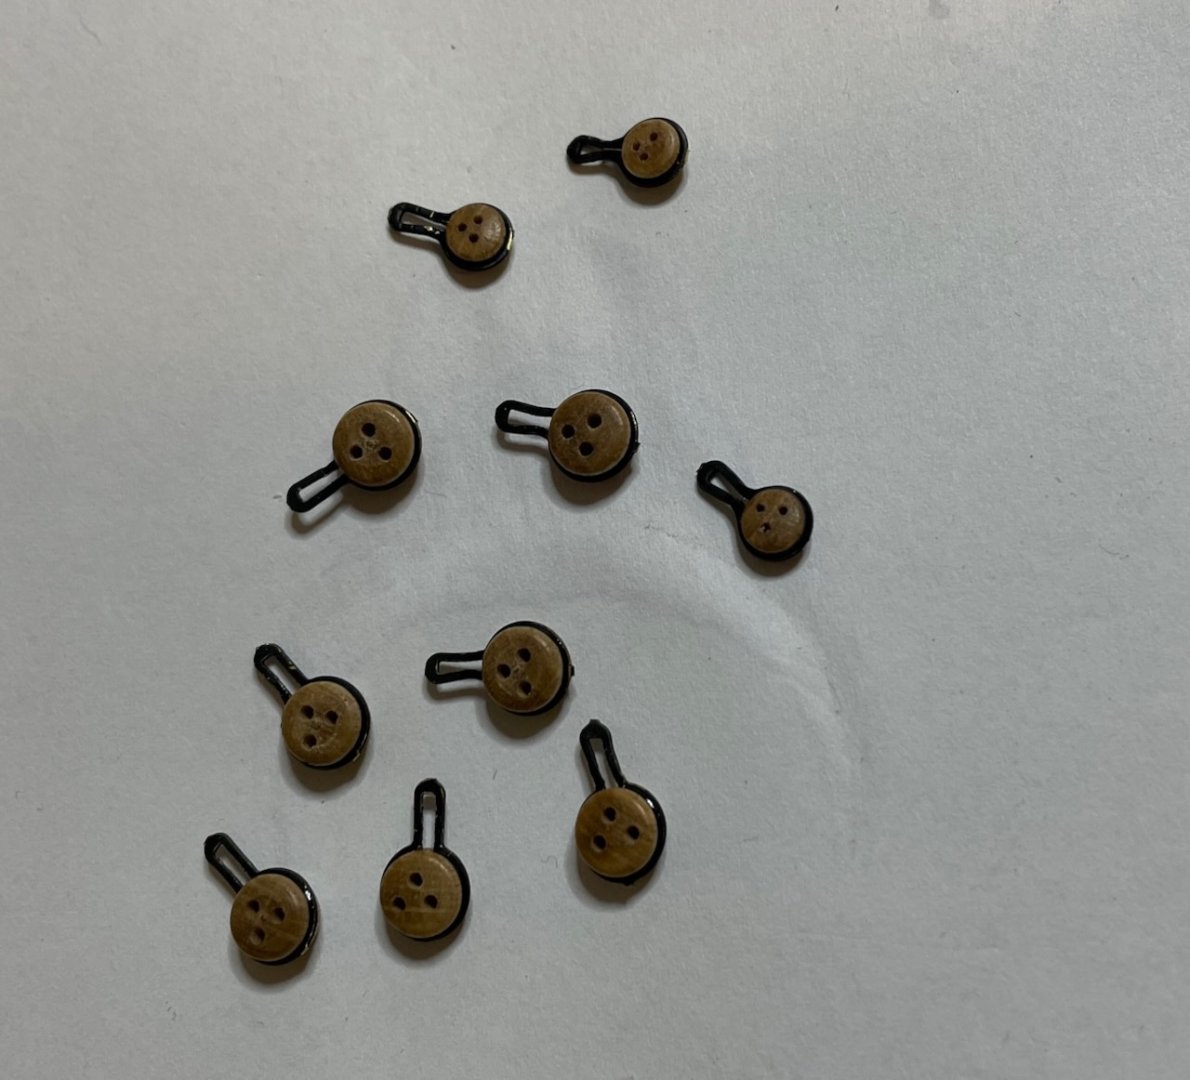
Build Day 45-46: 7 hrs in two days / Total 105 hours 100 hours completed today! I spent altogether 8 hours for deadeye installation. Here I share my installation sequence, after the parts have been painted, removed from the sheet and trimmed. This is a 5mm deadeye structure. The 3mm deadeye structure has one less number of parts. Photo: 479: Open the deadeye strops with a tweezer (or as I used above, a wire bender) Left: unopened Right: opened Photo 480: Insert the deadeye and squeeze back the strop. A single hole in the deadeyes should be on the bottom, like in the photo. Photo 481: A tiny drop of thin CA glue to further secure the deadeye. Photo 482: Insert the deadeye int its slot on the channel. Other components shall be fitted from underneath, as they won't fit through the slot. Photos 483-484: Take these two chainplate components and combine them as in the photos. Note the open side of the elliptic part should face inwards (i.e. towards the hull) when installed and the longer part actually has an engraved front face, though barely noticable, which should face outside when installed. Photo 485: Open the upper part of the elliptic part a little, in order to insert it through the loop under the deadeye. Photo 486: Deadeye structure in place, hanging freely at the moment. Photo 487: You'll need two nails, one shortened and one full size. The shorter one is to be used in the upper part, so that it won't get through the other side of the deck. Photo 488: Position the hole and drill a 0.5mm hole to help insert the nail easily. This is helpful especially for trimmed nails, as their tips are not that sharp after cutting off. I tried to insert the nail without drilling first a few times but they bent all the time. Photo 489: Now insert the short nail through the last piece... Photo 490: ... and insert it to the hole you drilled. Photo 491: Finally insert the second nail to the lower opening of the bottom lower part. Photo 492: This is how it looks. Now repeat the above steps for 50+ times


- 426 replies
-
- 6
-
-
- Vanguard Models
- Sphinx
- (and 1 more)
-
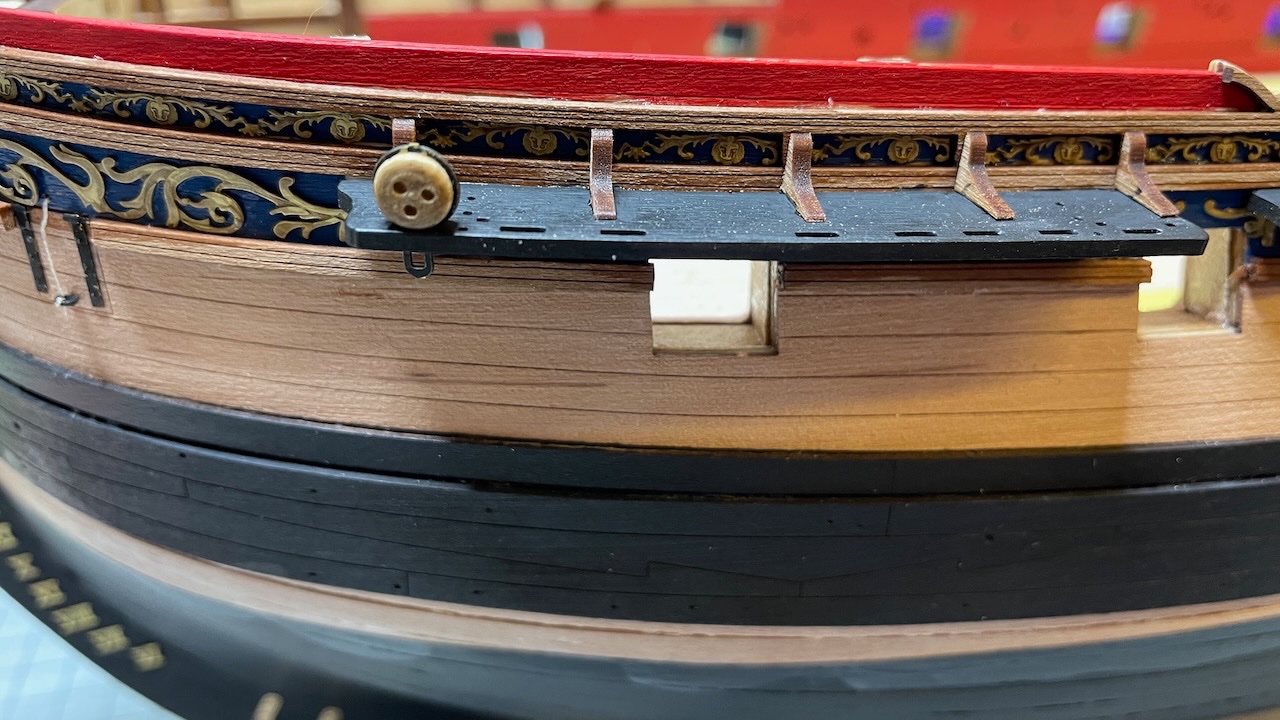
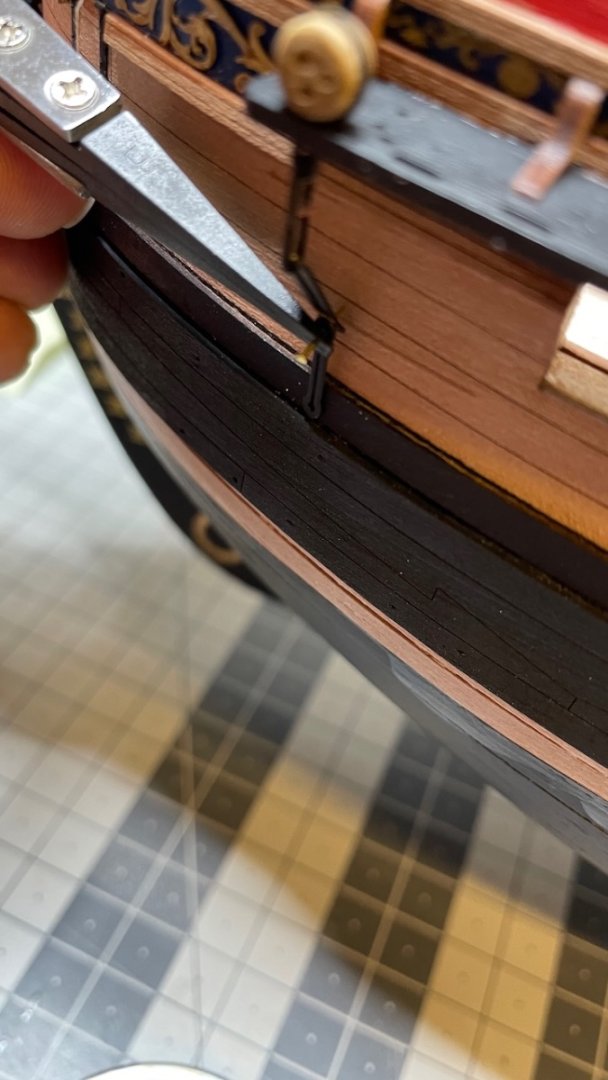
Photo 478: First chainplates nailed in place. I will touch the nails with black paint once all deadeyes are complete.
- 426 replies
-
- 7
-
-
- Vanguard Models
- Sphinx
- (and 1 more)
-
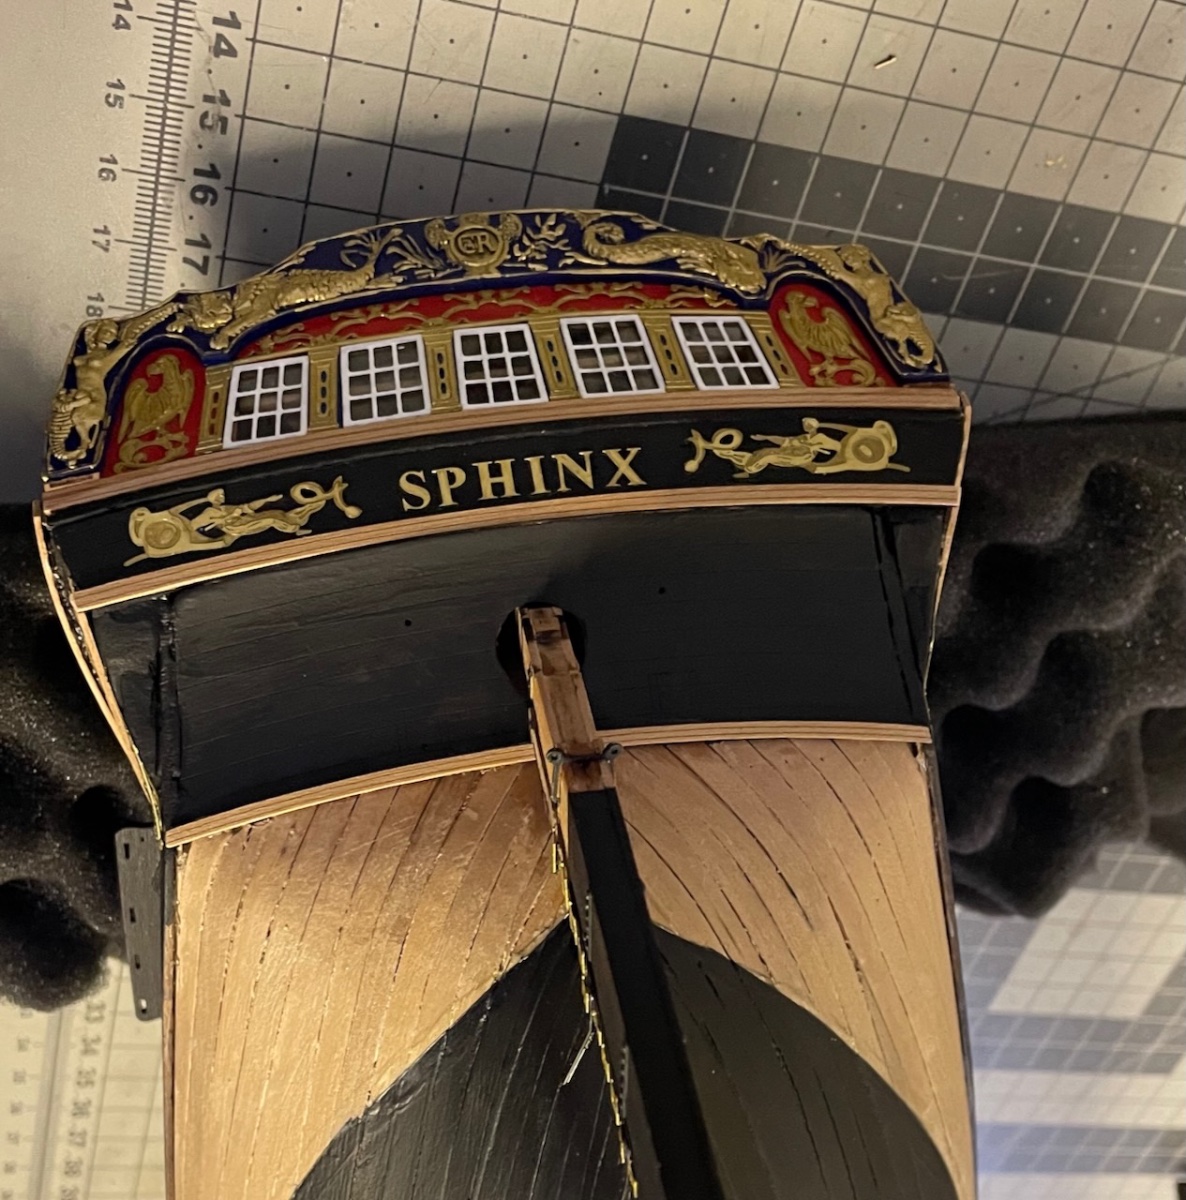
Photo 477: Here is a look at the black lower stern.

- 426 replies
-
- 8
-
-
- Vanguard Models
- Sphinx
- (and 1 more)
-
Yes it looks much better than the glue stains for sure
- 426 replies
-
- 3
-
-
- Vanguard Models
- Sphinx
- (and 1 more)
-
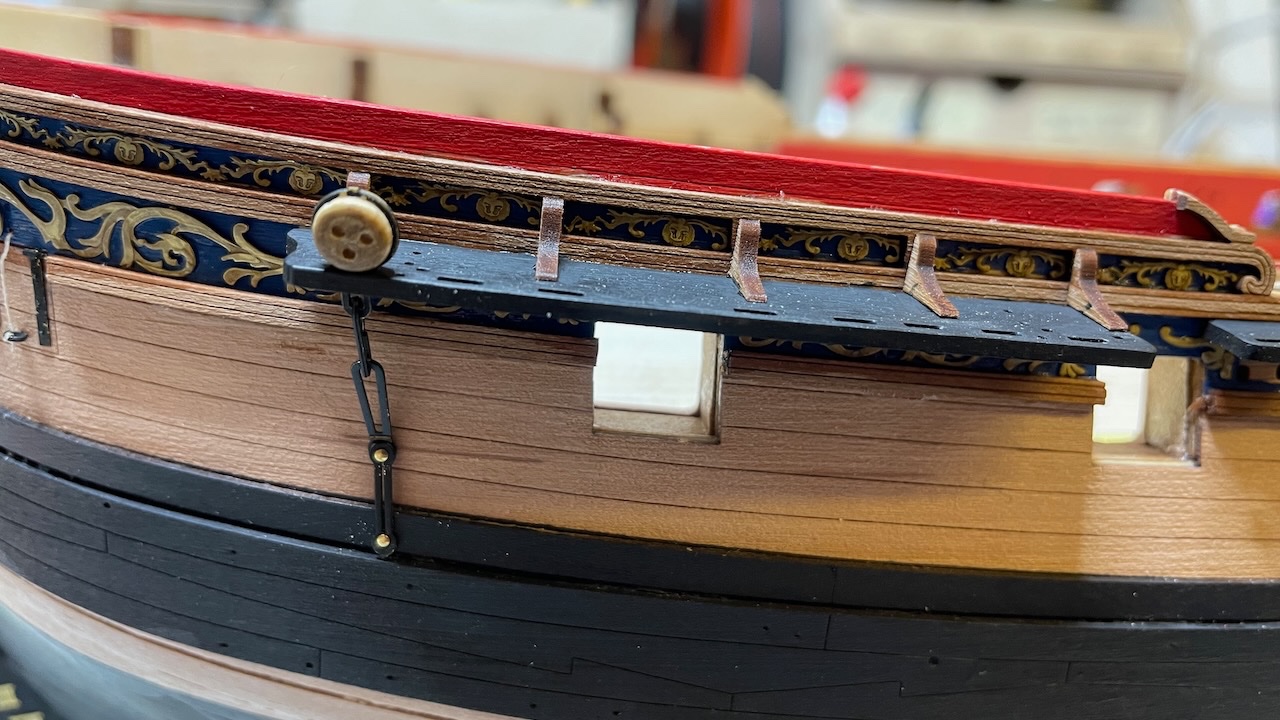
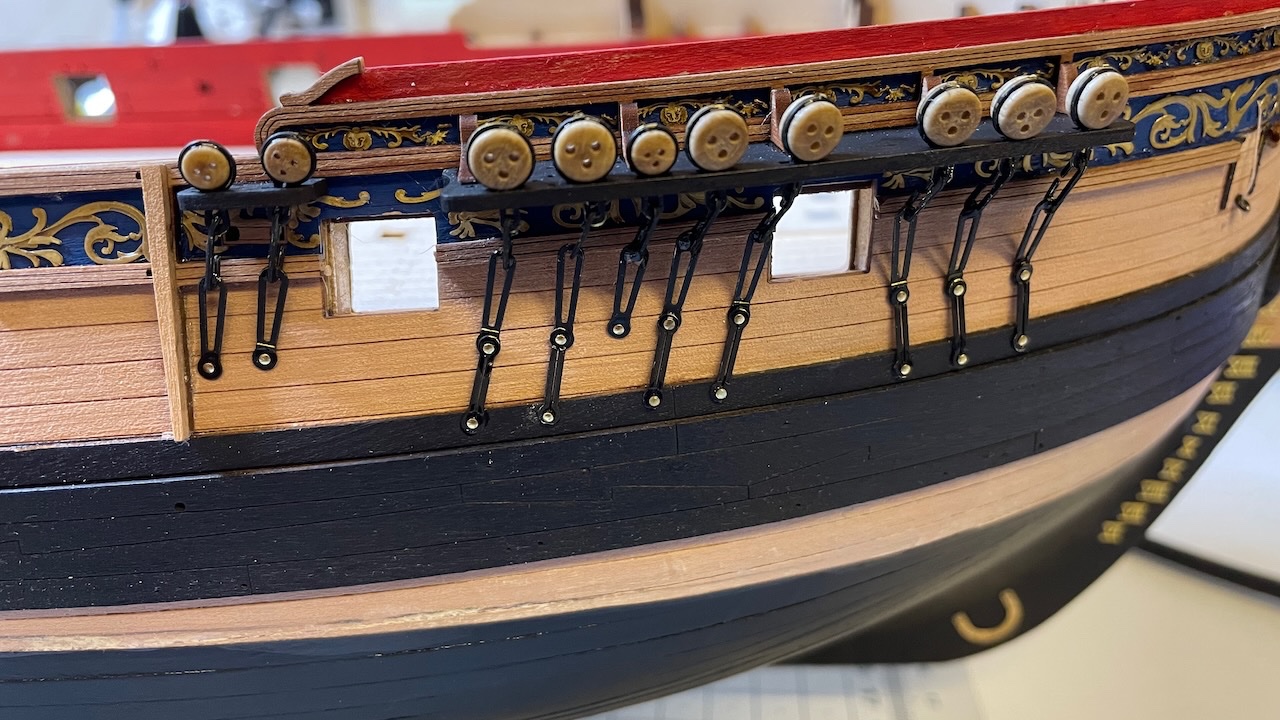
Photo 476: Deadeyes on the starboard fore channel. Chainplates hanging freely at the moment. They'll be fixed to the hull as next step.
- 426 replies
-
- 4
-
-
- Vanguard Models
- Sphinx
- (and 1 more)
-
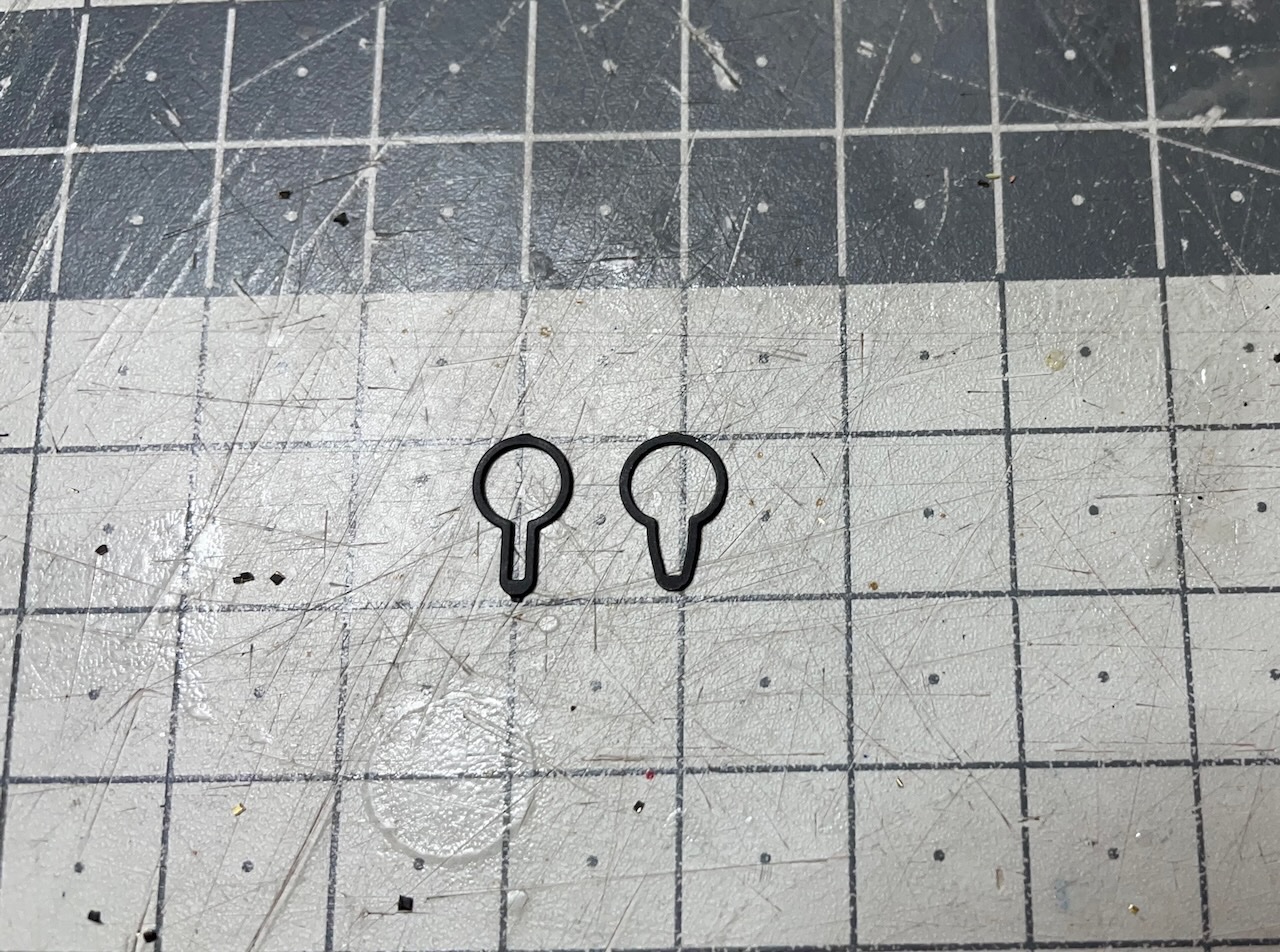
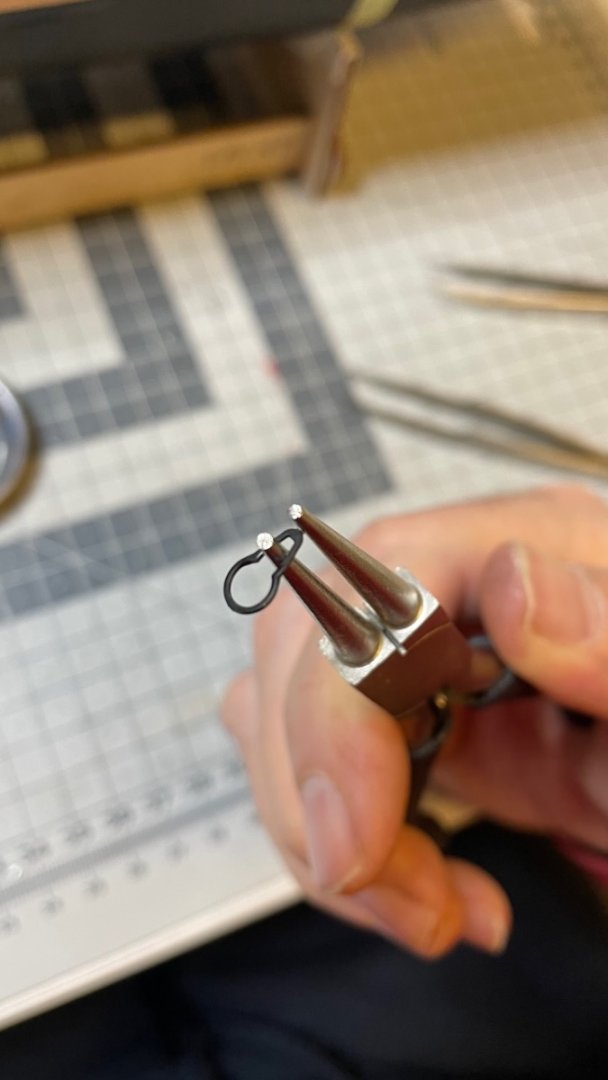
Photos 473-474: I use this wire bender that I found in my toolbox, to open the strops for fitting the deadeyes in. It worked better than tweezers for me. Photo: 475: First deadeyes fitted in their strops.

- 426 replies
-
- 2
-
-
- Vanguard Models
- Sphinx
- (and 1 more)
-
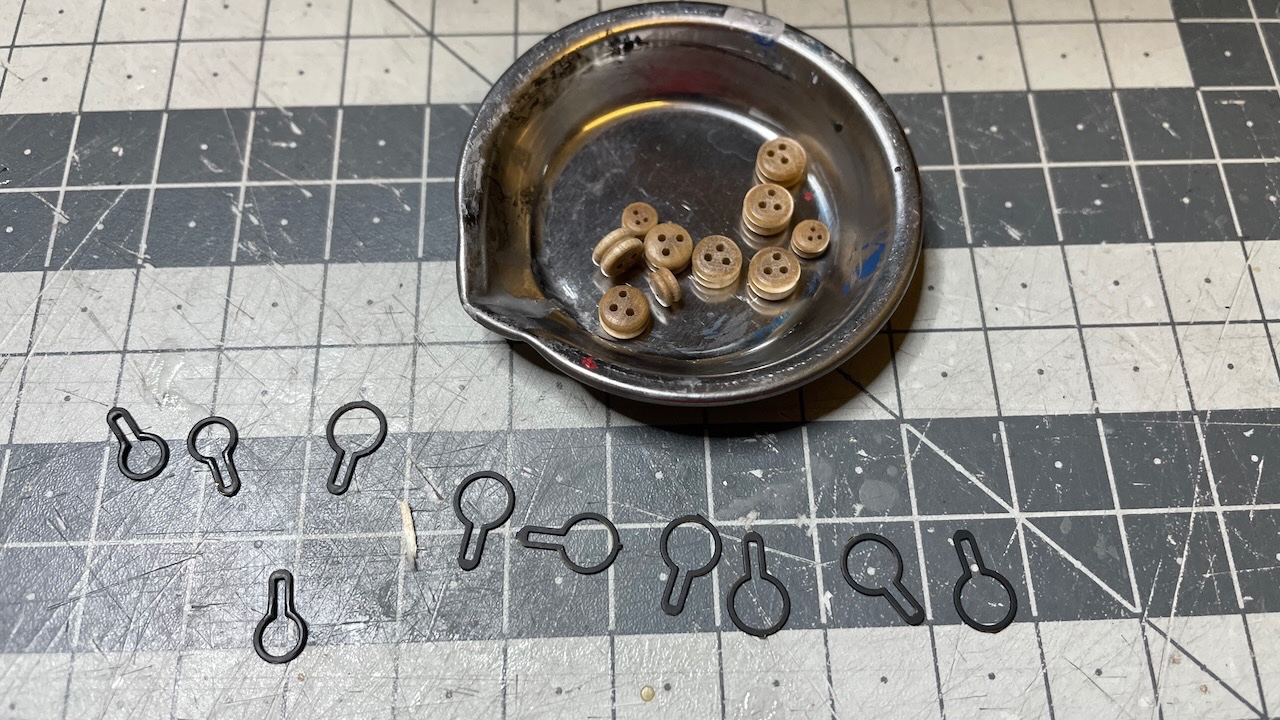
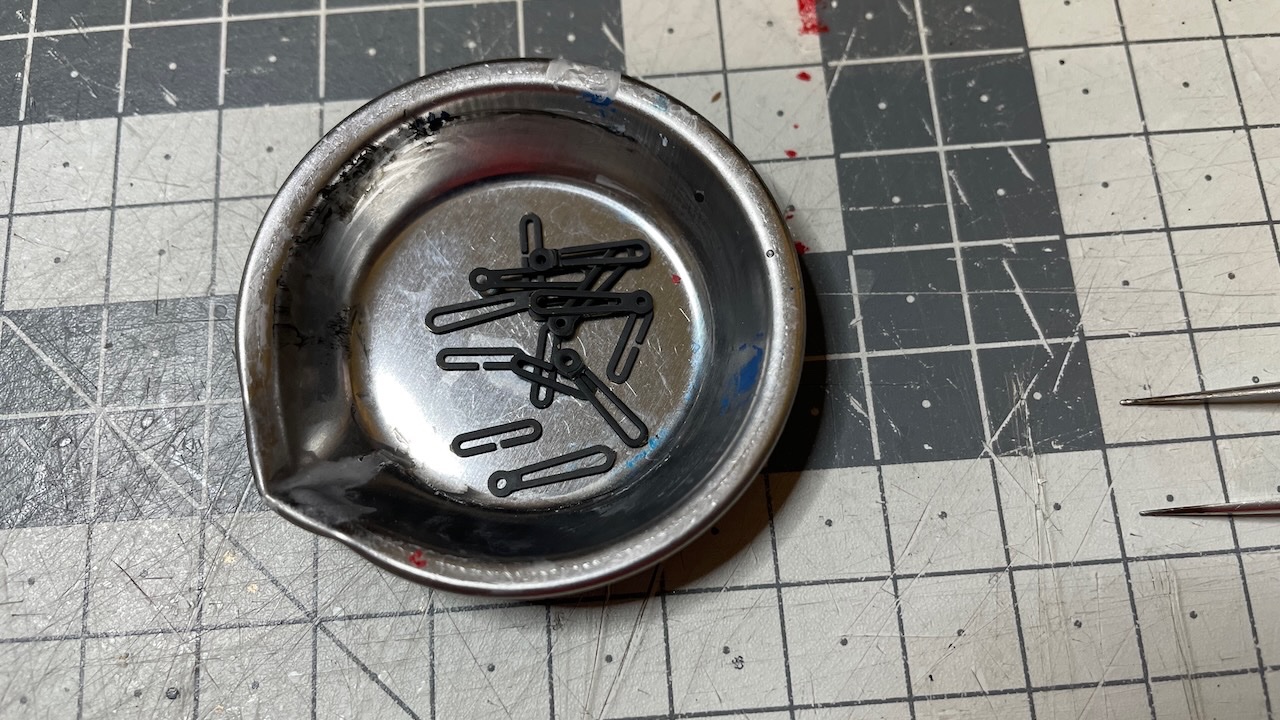
Build Day 45 continued: 1 hour / Total 98 hours Moving on to deadeyes. There are quite many of them and here I refer to the plan for correct installation. Photos 471-472: Deadeyes, strops and chainplates etc. 5mm and 3mm deadeyes use separate parts and in order not to get them mixed I remove them from the PE sheet in small amounts as I need them.
- 426 replies
-
- 2
-
-
- Vanguard Models
- Sphinx
- (and 1 more)