

ioannis
-
Posts
67 -
Joined
-
Last visited
Reputation Activity
-

 ioannis got a reaction from mattsayers148 in Pirate Ship by JesseLee - FINISHED - BOTTLE
Interesting, next plz!
-
 ioannis got a reaction from Canute in Syren by JesseLee - FINISHED - Model Shipways - scale: 1:64
very nice jesse. You did well with planking ,I could say stern and bow beautifully as the wives rear
-
 ioannis got a reaction from JesseLee in Syren by JesseLee - FINISHED - Model Shipways - scale: 1:64
very nice jesse. You did well with planking ,I could say stern and bow beautifully as the wives rear
-
 ioannis got a reaction from Piet in Pirate Ship by JesseLee - FINISHED - BOTTLE
Interesting, next plz!
-
 ioannis got a reaction from mtaylor in Syren by JesseLee - FINISHED - Model Shipways - scale: 1:64
very nice jesse. You did well with planking ,I could say stern and bow beautifully as the wives rear
-
 ioannis reacted to JesseLee in Syren by JesseLee - FINISHED - Model Shipways - scale: 1:64
Finished the hull planking
-
 ioannis got a reaction from IgorSky in Pirate Ship by JesseLee - FINISHED - BOTTLE
Interesting, next plz!
-
ioannis reacted to Mirabell61 in SS Andrea Doria 1952 by shipmodel - FINISHED - 1/16" scale
Hi Dan,
I just read your introduction to this ship, very interesting to get an Impression of your intensive research (well done !) on this ship and it`s last fatal journey.
Trust this will be a very ambitious and by no means easy Task, but certainly you shall be keellaying this italian Beauty asap, Will stay tuned and watching to this interesting build log and wish you all the best with your ongoing research.
BTW. I share your doubts for the Sub waterline hull shape, it`s a bit too much "Pear-shape" cross section in my opinion on that Frame plan, whereby the pic of the launching from the slip Shows a much more slender hull like it must have been for 1951 fashions
Nils
-
ioannis reacted to shipmodel in SS Andrea Doria 1952 by shipmodel - FINISHED - 1/16" scale
SS ANDREA DORIA (1952)
Good day to all, especially those who followed my build log of the Queen Anne's Revenge (1710). I hope you will enjoy this one as well, and I look forward to your comments and critiques.
This project is another large jump across time and techniques. It is the ocean liner SS Andrea Doria, the pride of the postwar Italian Line. Her likeness will be built to the scale of 1/16” = 1’ and will reflect her appearance at the height of her service life, the fateful night of July 25, 1956.
This is my fourth liner model and it uses many of the techniques that I have developed for this type of ship. Some, I hope, can have broader applications, so even if you are only into sailing ships you are most welcome to pull up a chair and grab some popcorn.
The essential elements of the model will be scratch built. This includes the large components such as the hull, decks, superstructures, and funnel, as well as the complex and unique elements such as the cargo cranes and swimming pools. But for some simple fittings aftermarket castings are acceptable as long as they are accurate or can be made so. Likewise, photoetched brass pieces such as railings will be used.
The ship herself and her tragic story are known to many. SS Andrea Doria was the pride of the Italian merchant marine in a country struggling to renew its economy and reputation after WW II. Launched in 1951 she began service in 1953 for the Italian Line (Societa di Navigazione Italia). For more than three years she led her country’s liners as the largest and fastest ship in the fleet and one of the most elegant, with an outdoor swimming pool for each of the three classes of passenger.
On the night of July 25, 1956 all that changed. Sailing towards New York City, eight days out of Genoa, she was running in heavy fog in the Labrador Current just south of Nantucket, Mass. Coming towards her was the liner SS Stockholm, outbound from New York for home. She was not in fog but in the dark night could not see either the fog or the Andrea Doria.
Although both were spotted on the other’s radar, this was still a somewhat new technology and the positions and speeds of the ships were incorrectly plotted on each bridge. As a result, the ships turned towards each other rather than away. At 11:10 pm the icebreaker bow of the Stockholm sliced into the starboard side of the Doria and into dozens of passenger cabins with families asleep in their bunks. More importantly, it sliced into the engineering spaces below the waterline.
SOS calls were immediately put out by both ships and soon a number of others were racing to the site of the collision. The Stockholm was still seaworthy, although her bow was completely crushed.
49 people, many of them children in third class, died immediately aboard the Andrea Doria, and five crewmen aboard the Stockholm. Yet, miraculously, 14 year old Linda Morgan was lifted from her bed and deposited into the wreckage of the Stockholm’s bow where she was found with only a broken arm and some scrapes.
Andrea Doria soon began to list. This might not have been fatal because she had been designed with eleven watertight compartments with bulkheads that extended well above the waterline, only one of which had been breached in the initial collision. But five of the starboard fuel tanks were located there and they quickly filled with water. On the port side the tanks, which were empty at the end of the crossing, acted like balloons to raise that side. Even this might have been survivable, but a design flaw in an access tunnel allowed water to blast into one of the lower control rooms, and then into the generator room, cutting off power. Without power water ballast could not be shifted to port to compensate and the list steadily increased.
Thirty minutes after the collision Captain Calamai ordered that the ship be abandoned. The list made it impossible to launch the port side lifeboats, but by reusing the starboard ones all of the passengers and crew were eventually evacuated to the safety of the rescuing ships. All, that is, but three who were fatally injured or died during the evacuation, bringing the final death toll to 57, the greatest loss of life in American waters in over 40 years.
All through the night the list increased, and in the early morning hours she turned over and sank. The aerial photography of the sinking won a Pulitzer Prize for Harry Trask.
Now she sits in about 190 feet of water, on her starboard side. This is too deep for the recreational diver but easily reachable on a mixed gas technical dive. It used to be a fairly well-visited site, but the deterioration of the wreck is so severe now that only the most experienced should think about trying it.
The model begins, as all models do, with the plans and research. I was fortunate that a set of plans was available from Taubman’s Plans Service, a division of Loyalhannah Dockyard. Expensive, but if they were as advertised, they would be worth it. While waiting for them to arrive I went on an internet search.
I quickly found a poster in quite high resolution on a public site which had been printed as an advertisement for the ship and which showed the cabins on the passenger decks and the layout of the upper decks and deck structures. Although I did not need to know the cabin locations or layouts, the poster was clearly copied from the engineering plans and was quite exact. However, the deck plans did not go below “C” deck just above the waterline and had no lengthwise or midships cross-sectional plans, so the shape of the lower hull was still a mystery.
Also, due to the many times it was reproduced, I guess, the deck plans bent to starboard, a defect that had to be corrected.
When the Taubman’s plans showed up they were a good news, bad news thing. They were clearly the engineering drawings, imprinted with the logo of the Bologne Society of Marine Architechts, the name of the builders and the date in 1952 when they were drawn. They included a longitudinal cross section that showed many of the deck house details including window and doorway locations, mast details and the interior of the large single funnel.
An exterior illustration showed the locations of most of the portholes, doors and windows. This was supported by another illustration, this one in color, that was located on the net.
But there was a plan for only one deck below the “C” deck, the “D” deck, although it had some indication of the hull shape of the rudder post below the counter. There was still no midship section, so the lower hull shape was still questionable.
I did find some section plans on the internet, but they were redrawn for a model kit from Amati, and I had some questions about their accuracy, although they did show the bulb at the bow below the waterline, which did not appear on any of the other plans.
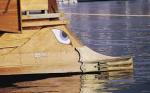
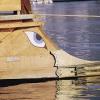
However, when in doubt I always refer to photographs, if available. Here is one of the ship being launched, which I used to compare and contrast with the plans in hand.
This was one of several thousand images that I viewed on the net. These were culled to about two hundred after eliminating duplicates and those that were of such low resolution to be useless. Of those, about three dozen were saved as the most relevant, useful, and detailed. Here are a few, and more will be posted as the areas of detail are built.
More posted soon
Dan
-
ioannis got a reaction from mtaylor in Pirate Ship by JesseLee - FINISHED - BOTTLE
Interesting, next plz!
-
ioannis reacted to jack.aubrey in HMS Guadeloupe by jack.aubrey - 1:48 scale - ex French Le Nisus - Brick de 24
The last drawing reproduced in the previous message, with the three views of the hull, becomes the starting point for further processing of the project.
In this case with a simple AutoCAD copy & paste command I have set up two new tables, that are proposed here below, and where all the bulkheads that make up the hull are drawn.
The first drawing shows the bulkheads from amidships (bulkhead #M2) to the bow (bulkhead #VIIIa); for a total of nine bulkheads:
Brick%20de%2024%20Plans/V001BodyPlanFromM2toVIII_zpsf000dd51.jpg
The second drawing, instead, shows the bulkheads aft from amidships (#M1) to stern (#XIII); 14 bulkheads in total:
Brick%20de%2024%20Plans/V001BodyPlanFromM1toXIII_zps6a56b536.jpg
Now the various hull elements are printable on a single sheet of A4 paper and, when glued onto a plywood tablet of 5mm thick, will be ready for cutting with the saw. Now only the plywood is missing to start. But there's no hurry . .
Note that the bulkheads #M1 and #M2, although there are two, are perfectly equal.
See you soon, Jack.Aubrey.
-
ioannis reacted to JesseLee in Pirate Ship by JesseLee - FINISHED - BOTTLE
The putty & some tools I will be using........
-
ioannis reacted to JesseLee in Pirate Ship by JesseLee - FINISHED - BOTTLE
Since my Syren build will be a very long term project I will work on some smaller builds on the side starting with this one. I love hot sauce & save bottles of every different kind I try. This one has a pirate Captain Rodney on the label. I though it would be cool to put a pirate ship in it. The bottle will stand up on this one because the label is staying on. It will be one of my hot sauce bottles & a ship in a bottle at the same time. Because of the labels the ship will only be able to be viewed from 2 sides instead of all the way around. Thought it would be fun to do something a little different in between the steps of my big build. Here are some pics of the bottle, the basic shape of the hull block, the ship on my flimsy jig with bowsprit cut & fitted on & my very sketchy plans.
-
 ioannis got a reaction from Omega1234 in Cutter Abythistos by ioannis - FINISHED - Scale 1:48 - RADIO
I will check it again.but two of the fotoes are jpg format.
Thank you.
-
ioannis got a reaction from IgorSky in Cutter Abythistos by ioannis - FINISHED - Scale 1:48 - RADIO
Dear forum and modelers
Scratch build ABYTHISTOS –French 1784- was really a dream for me.
The building Idea has come 3 years ago while me and my son were watching photos and video from R/c models, and old time ships.
Yea I used to have a 2 mast wooden ship but I was not the builder ,I knew how to sail her how paint her and repair any engine easy damage but build one? how do we start? …sure from keel but then?…
Thanks to all people on this forum that keep on writing giving ideas tips solutions, and answers
I have spend almost a month reading and watching your articles and tips before I decide to build my project
I have found scanned on the internet a collection of plans
Easy to imagine .Difficult to build ?
What wood or other material to use for a certain part on the ship on the other hand. from where do we start? A plan to begin and a thought how is going to be at the end?
manual skills required patents
and ingenuity but most of all, patience
A cutter, nice curves with single deck one mast and less construction details comparison with a warship
CUTTERS de 4 CARONADE de 12 [1784]
I have acquired a set of plans body, sheer ,half breadth to start plus a general plan for riggings I choose enlarge photo method you can alter plans to any size you desire, then copy to a memory stick and, you have as much copies as you need for photo copying
But important point ,the lines on the original drawing must be very fine
MODEL SPECIFICATIONS
NAME -ABYTHISTOS-
LOA:0.73 cm bowsprit included
LBP:0.44 cm
MAX,BREADTH :0.17,5cm
MAST HEIGHT measured from deck roof :0.65 cm
Bowsprit length:0.21 cm
DRAFT Keel to white waterline :0.15 cm ,
Water line to upper deck top rail :0.10cm
Watertight compartments 3
1 electric motor 6v , 1 gig LOA 0.10cm
4 Sails./ 2 anchors continental type18th century/
1 French gun x18pounder
First day I bought various strait pieces of wood and finally
After watching a lot of dif ships plans I decided the cutter
The build method I used I call it COPY-PASTE
Choosing the keel, a strait piece of wood [beam]0.80 mm thick
Lots of calculations with Microsoft world program till I reduce the plan dimensions from the original minimize to the desired plan and also couple of photocopies I will need them to cut and glue on wood pieces so I have exactly similarity according to original ships plans
More building details I took also from other similar cutter ships
KEEL assemblage
The backbone of the whole ship. It also includes the rudder post and the stem mounted together with glue and a dowel
Small angle pieces of wood vertical installed on keel as floor will secure in place the ribs-frames.
Keel assemblage procedure finished
next step I made an adjustable keel holder using a baseboard and 2 aluminum angle to snug the keel as picture below
Tips
I made my own carpenters wood saw machine simply and cheap way without limits
I used an electrical hand saw with RPM adjustment
And screw it at the 4 hole edges of its base as photo below
Mine has open holes at the metal basein case there are not in yours just remove the base [allen screw usually used]and make the necessary holes with your drill
Tightly fasten with screw or chuck the two ends of an angle iron or wood ,parallel to blade and set your cutting mm distance according to desired
There are 2 types of blade Choose long blades. And For hard wood try iron blade and not the blade type for wood REMEMBER start slowly with low RPM don’t rush and .in case of hard wood also lubricate the blade with oil drops.[i use a wet with transparent -no cooking- oil
piece of cloth] You may destroy the first wood piece till you find the better way but when you do you will be rewarded
…sand paper will do the rest
and don’t forget to remove wood dust close to blade after, use
I have not used plank from storehouse Timber balsa wood is soft and fragile for planking
unknown behavior to sea water
Seawater ?
Yes me and my son wanted to sail with
So I need harder and good quality wood
Dry furnished Pitch pine medium hard long fibred tough doesn’t break easily with the tip I mention before I manage to cut several 2mm thick planking
good white glue quality 2 types express and waterproof
FRAMES
Making frames copy paste method with cheap plywood…
A keyhole saw is good for accurate plywood cutting
A triangle piece of plywood has been removed from the interior of each frame so I can freely move my fingers between
George my son came forward as volunteer to help me cut out frames –piece of cake- he said.
Well he did well but I had to cut 4 pieces twice due to his badly cut
The above picture 7 shows how does the frame look like after I have cut them to right size
With some careful sanding the resulting pieces are nice and accurate
On the same picture 7 you can see the frame on top and middle of witch I drilled a hole [blue arrow]
CENTER LINE
I have discovered a new method to connect frame with keel
Picture below –a long machine screw will connect at middle all frames top
Assembling the stern with frames most difficult for me
Due to the curvature
stern has been cutted for propeller use
even my wife’s clothespin in use
Plank on frame
Plank bending has been made with the simply way of ,wetting them first
And place them later bowing and buckling on the wooden board with rustproof nails
Holding the plank in position on the model while the glue dries is a test for my nerve
by the way thats my roof garden next to my small workshop
Some who favored the old ships
Thats from today ,during my trip i met this yacht waiting outside Hydra island Greece
a little further away and meeting her you can see the sailors up in masts
well thats enough for today i have lots of things to do more .I must work my solar oven also.
Im back
uffff..... in every step i must think about leaving space for servos motor shaft how to set up steering.Never did it again.The whole building is in my mind ,but next steps have been made longer
After placing frames things are getting better with hull planking. When job finish plywood frames will be removed and replaced by real wood pieces
Planking, clean work pleasant time lots of pinball holes
A small sandpaper machine will give a fine surface
Looks a bit ugly but timber is 2 mm thick,this ship is going to meet poseidon at see water so must avoid any bending
Picture below showing
Extra strength
Small plywood supports have been set vertical between frames [as guides and stoppers] to avoid movements
Patience and ..planking finished
Before I remove plywood frames I replaced them with new 2mm thick ribs made of curved solid wood [blue arrows picture above]
I did glue them tight to inner hull planking
Hull has completely covered by planking
I m starting to remove Plywood frames.Τhe inner part must be clear.
Now I have free space enough for motor shaft servos steering
I have painted the internal with first a coat of white waterproof glue and the next day a second coat of fat oil primer Before the electric equipment installation
The interior has been sealed’ I could also use polyester.
Gives you hardness but also weight.
Once I made a small boat i used liquid polyester it smells awful and also its hazardous
Patience
Now sitting on a chair I’m holding the ship on one hand
On the other hand a special bosh electric tool a handy multi sander
and rolling it slowly with low rpm in all around the sides
don’t forget wood planking is tough for this timber
last sanding and my hands replaced the tool by a very thin sand paper 180 grit so at the end of the day I had the desired smooth shape
Now I have got strength to continue
I will need to putty the body but that’s not urgent
I kept some wood dust I will need it later. to make my own colored putty
Hmm ,,midnight again and everybody on this house went to sleep all ? no ..except..my partnerships 2westy dogs watch carefully every step i do Quiet.. time… to consider my next steps…
Deck construction
I forgot to mention that deck beam supports of wood have been added at all around last upper planking
Beams will guide me and support the roof deck later
A plywood piece of 1.3mm thick took place as deck flat base on top of which I did glue with fine barbeque round wooden meat sticks --wonderful result ideal for decks you may try it--
The special bosh multi sander with 100 grit first 180 later sand paper gave me the desired flat deck surface ready to varnish
Deck divided in 2 pieces for reasons of installation servo..moteur,,battery
Forward deck piece is 1/3 of the whole length glued to beams
Aft deck piece 2/3 of the total length can be easily remove
With 4 inox screw of 6mm
Time for putty and ballast keel
as ballast a weight of 1.2 kg 0.8mm thick long lead[yellow line under ship]
glued with epoxy and 3 inox screw under wooden keel
and under the lead a thin false keel 2mm has been added to protect the lead
RUDDER CONTRUCTION DETAILS
this plan showing how connected the steering wheel
[red letters -hole fore secure pin -]
[orange letters- inox tubes or hard plastic filled with grease-]
I know i post pure and sort details but i always hurry to do something else and my hands are still covered with glue. CHEERS.
-
 ioannis got a reaction from GLakie in Cutty Sark by NenadM
Im still learning from you nice tips .well done Nenad Живели
-
ioannis reacted to Dimitris71 in Amerigo Vespucci by Dimitris71 - Mantua - 1:100 scale
Hello Shipmates, Elia-Patrick-Greg-Boyd-Bob-Edwin-Tasmanian-Nigel-Frank-Rich I do thank you for your nice words and comments!!! :) Summer has arrived to Greece (temperature is 30 plus degrees Celsius) so more time to spend outside.Little progress regarding the ship. I installed the starboard stair and wooden stanchions and I just begun to build the 1st boat out of ten :( !!
Kind Regards
Dimitris
-
ioannis reacted to NenadM in Cutty Sark by NenadM
Back to work until next week and next trip to the central Serbia
More foredeck details
Basement Cu foil 0,5x2x2mm
Brass wire 0,5mm
Left side done
Tomorrow next side
-
-
-
ioannis reacted to NenadM in Cutty Sark by NenadM
Last working on Her until come back from vacation
Ant workers, ghosts, wizards and dwarfs activated ... and after three cracked attempts, and two self-suicide jumps of parts from desk to floor, here are bollards for fore deck
Scale is ok, but their base is only 8x4 mm. I dropped my eyes to floor
Glued and on position (as a paletyes too)
-
ioannis reacted to NenadM in Cutty Sark by NenadM
Hi Tass, thanks for kind words
Here is "fake riveting school"
All you need is drop of classic wood glue and thinned toothpick
Testing on 0,5x4mm veneer
Take a thinny drop of glue on the same top of toothpick, and just "write" your rivets
When dry, make another pass at same points
And that is all.
After paintong you have your rivets
Instead wood glue, you can use acrylic paint or putty. Just play a little and make experiments until you got desired look
-
ioannis reacted to NenadM in Cutty Sark by NenadM
Link to content is in signature
Introduction
This log is intend to be personal track record of first "serious" attempt to scratch building of my very old Cutty Sark kit, started long ago and forgotten somewhere in house, mixed with some personal observations and notes
Edits notes and remarks will be inserted later, to show points what are dangerous place (for dummy as me) to bump in undesired situation caused by in-patience, an-experience and God¨s will
I am not a master, rather novice with too much ambition, but think in MSW there is enough room for all of us to share and learn, to keep a good time together
My long lasting journey in wonderful world of ship modeling started long long ago in, I think, usual way. As almost every kid I tried myself in some cheep plastic plane models, fast and furious, short life each ( they can not fly...) Then after a while in paper car models ( my own creation), made about 30 pieces, no one leave ( they can not drive). Then, in a high school I made some no-name (or forgoten name) plastic kit ships, also no one leave ( they can not stay above heater ...). Last one, "Stella" ( Heller) died and rest in peace during cleaning dust few years ago
This little Heller model on some way entered me door to "yellow brick road": Heller original colors in kit, by my opinion, were on such a type that model rather looks as toy, so I experimented with colors to catch color of wood, added extra details on deck and extra ropes ... joy in playing, and obviously first sign with arrow to entrance for something that on MSW is called "dark side"
And then, once upon a time ... very long ago during the study of law, I make my first step for modelling ships in wood.
I got done Columbus Santa Maria (If I remember well, also TEHNODIDAKTA Pula, but I am not so sure about manufacturer from this time distance) , made it, with a lot of improvisation, and with extra added ropes which to me it belongs ... but it looked nice for me. In that time I do not know nothing about real ship modelling, made it without necessary thinking, with half of brain, and in unnecessary hurry. Santa Maria got her way with my first wife more about 30 years ago.
Somewhere on that days, my twin brother made little and simple Heller`s Cutty Sark, and maybe that moment I fall in love with sail ships and their beauty
Then I finished law study, went in Army for one year, Navy in Pula, Croatia, former Yugoslavia ... and that was this ...
35 years ago only "Tehnodidakta" from Pula had made wooden models in kit. ( It was impossible for us mortals to order and pay kit from other country, even to know something more about ships, models, modeling techniques, tools and so). I was delighted with that discovery, and I bought wooden kit with plans and materials for "Cutty Sark". If I remember well, only few models were there ( Santa Maria, domestic ship "Jadran", some ships from old Dubrovnik, Bounty - not sure, and some domestic smaller historical models). And as every youth, wanting to be different and to choose the greatest of offered kits, a beautiful and extremely complex model with many sails and ropes, I bought it, knowing not in what I am just entering. To say again, I did not know absolutely nothing about Cutty Sark, and having no idea what serious modelling really is
To write about Cutty Sark is unnecessarily, there is so much written and published, sure on much better way I can do. Also, She is still alive in her Museum
I started working on model in 1984. and it kept me up until 1985-6, when I met friend with a really nice model of Cutty done, and I realized - or should I do it right, or it does not work anyway. And she went in deepest dark in my attic to collect dust and to cry silently in her dark corner
Then came usual things: got a steady job, got a wife, divorced, abandoned study for doctorate, and another wife, and two little children, start and finish building my house, become a attorney, etc etc etc... and, after "only" three very fast decades, finally the time has come to proceed, if I do not want to watch TV or read a book, or work, and there is no other homework to do. Children ( 22 and 24) are not children any more, and they need me only for money ( joke), they are adults now with their own life ( students finishing their study) ... and, suddenly, I find that appears a few hours in day exclusively concerned only for me. Amazing discovery
In meantime, trying to interest my son, we (I) made some simply plastic, I think Revell Pirate ship toy Jolly Roger. Failed attempt, made in less than a week, but I enjoy making it
The real trigger of my come back in wooden ship modeling was a appearance in Serbia of DeAgostini`s specialized periodical journal ( in 100 appearances) with successive parts of galleon, and I like it very much, but do not like many simplification of details which are important for me. Drawing boards on the deck with a graphite pen ? No, thanks. Waiting two weeks for single part ? No thanks. And then I remembered that I already have a plans of Cutty, the one of the nicest sail ship ever. Of course, the one with the most complicated rigging ...
For difference, now, after 30 years I finally have a working corner and a mini-workshop in heat-room near the garage (and not to forget, continuous war with my daughters Persian cat and long cat hair eveeeeeerywhere).
All rest wooden parts were 30 years old, and they have dried up and became largely and almost unusable. In fact, there are left only plans, some old strips and veneer, and some plastic / metal parts that I should see if I'll ever use them.
So, I made up my mind, dig on mess of old things in attic of house, FIND Her, and a few months ago I started from the beginning, only with saved old blueprint sheets ( old misfit try of Cutty went in trash) with the big important difference that exists today „His Majesty the Internet“ and a millions of pictures of finished models and details of the models, which is of invaluable help. Not to forget , today in Serbia there are affordable many required tools like Dremel/Einhel tools, and so. A great help is the fact that "my" ship still exists reconstructed in Greenwich, and there are available many photos of her details for research
Edit on september 23.2013: At the begin of this month I find Campbell plans, and from that time my work goes mainly by them, and my dedication and way of looking to my work rapidly change from day to day
Beginning
And so ... my first brave steps toward swamp, with more braveness than a brain presence
I did not mention "swamp" accidentally. As time goes by, I decided to do some steps in building in my own way (?), not in way which is ordinary, and in sheets. (for example - making my own dead-eyes ( later - blocks ?) and, later - ropes, my way of planking, etc etc). What a confident fool ... but ... that is just me - whole life I discover hot water again and again ...
Later I discovered that sheets have mistakes and insufficient instructions, my hands and experience are mainly not precise as I want, patience ... what is that ? But they are much better than 30 years ago, and my imagination and improvisation still exist, and I learn every day
Really significant stage of my build is finding MSW, and here are first steps ...
First decision was that I do not want to pay somebody for laser cut. What then rest for me to do ? Using paper with photo copy of plans to transfer plan to plywood.
A "bit" of cutting and a "bit" of glue, and my way (?) to hold angle of 900 and to assume required stiffness skeleton for further work . Later, when time to mount deck come, I found that ship's ribs are not well drawn in plan, or I did not cut and mount them properly. Not provide proper and sufficient longitudinal and transverse slope of the deck. Yes, it will be quite a job to fit it
There was a lot of my unexperience in this , very very very significant stage of building. In POB building (I discovered later) the crucial thing is right dimensions, position and angle of ribs. EVERYTHING later depends. Consequences can be, and in my build are - catastrophic. Months of lost time trying to correct mess, and all time re-examining myself - was it better to go from start. If that happen - to hell with everything, and start over without more thinking. If you do not do this - be sure that at moment you think that succed in correcting one part, another part will protrude out and jump right on your hand. And when fix this, third part will hit directly to your face. And when fix this, you discover that first corrected part is not good. Some kind of perpetuum mobil and never lasting process. You will spend months instead week or two to make keel and ribs again, this time with thinking and measuring. And as you are impatience full running to start planking on this messed bulkhead construction, as I was, be sure that you will have great enjoyment in unnecessary work
And there is stern from one piece (it was corrected later in proper angles) - not just one correction, smart learns from others' mistakes, and fool ...
In that stage, I have not idea how complex are curvatures of whole ship, and how much time I have to spend on it ... to lose them ... and to find them ... and to lose them again ... And, oh, what a self-confident ... Later I concluded that keel is little distorted, mainly by "my way" of assuming "right" angles, but there is no way to correct this ....
Deck mounted with many previous corrections of ribs to assume slope. This was big big big MISTAKE. Right order is : first planking hull, and after that - deck mounting. See posts #240 and connected future posts. If you want to follow lines on upper side of ribs that lead to longitudinal and latitudinal curvature of deck, do not this. Deck can not be from one single piece of veneer 1mm width, as I did. You can not twist it in proper way. There is no way to do it. I tried, and result is - months of trying to correct mess and find lose lines. You can not correct it at all never again. So, better is to plank with strip by strip. For consequences, see later post http://modelshipworld.com/index.php?/topic/2501-cutty-sark-by-nenad-m-tehnodidakta-19711983-campbell-plans/page-42#entry156687
Holder for dead-eyes and wedges in one peace, not in four parts as in plan. It is much easier ( ha, ha ha !!!) way to follow the line from planes. Also mistake from same reason.I lose proper lines of hull, and this hang over my head all the time ... And holders must be redone completly
Whole deck planting with veneer, also not in original plan. In original kit was wooden plate 2mm with 1mm deep and 1 mm wide grooves carved full-length of plate. I mounted that on old Cutty. What a joke !
First two pictures represent deck from kit, then part of a sheet, and at last picture is my try
Edit Martch 31. 2014 : Fore and Aft deck - third time re-planked, main deck - second time re-planked
Fool made dead-eyes rather than use plastic from kit ( For details - post #16). 66x designated only above deck. There will be so much more latter. Enormous work, and enormous lost time. Yes, I have to make them again in better way
And twisted rope handmade instead wire. More elegant an more real, as I thought - obviously on that time I had no right idea what all this will be to the end
Plastic dead-eye from kit at left, and self-made in center and right on picture
Preventive cover with light sadoline, and view from the future bow - Once again mistake, I had to remove all traces of sadoline
And then, when I join to MSW, was a time just start planking, planking, planking ... and to discover that ALL first moves on this chees table are just - wrong
-
ioannis reacted to tbezanis in HMS Looe 1741 by tbezanis - scale 1:52 - POF - 44-gun fifth rate
Finished framing the bow and stern.....Cut-in the gun ports....beginning to fair the hull.
-
ioannis reacted to tbezanis in HMS Looe 1741 by tbezanis - scale 1:52 - POF - 44-gun fifth rate
A few images on progress with the Looe build. I found a copy of Winfield's 50 Gun Ship (thanks Antony). The early 1700's establishment (page 34 top) is nearly identical to the RMG Looe drawing. So, I'm using that extremely informative book as a reference for deck layout and the limited amount of detail that I'm capable of doing. Also included pictures of our Commemorative Plaque.