


gjdale
-
Posts
4,874 -
Joined
-
Last visited
Content Type
Profiles
Forums
Gallery
Events
Posts posted by gjdale
-
-
Mobbsie,
Thanks for your contribution on the use of terminology "spars" and "yards". An interesting consideration.
-
Marc (keel hauled),
Very happy to share my spreadsheet. Please send me a PM with your email address and let me know what OS you are using. My spreadsheet was created on a Mac using Numbers, but I can convert to other forms for you.
-
-
Sorry guys I hate to disappoint you, I already crossed that bridge, not enough links in the PE set to make a working one.....
Aw c'mon Remco - what sort of excuse is that!!!

-
-
Hey Rob - congratulations!!! This saw is your new best friend! You won't be disappointed.
-
And he's off! Congratulations on starting your scratch build Aldo. I'll follow your progress with great interest,
-
David,
Why not reconsider the scratch build idea. If you go with something like a swan class, you can buy the timber as a "package" from Hobbymill in the US. (Check out Danny Vadas's log). Or if you want to try something a little smaller to "get your feet wet" you could do an Echo cross section - again with a timber package from Hobbymill. Just a thought for you.....
-
I somehow get the feeling of déjà vu looking at your log Augie! Oh yes - it was my log!
. (Some might say déjà poo - the feeling you've seen this s@$# before :D )Seriously though, nice work - looking forward to the bling.
-
Outstanding Gary! The amount of detail is just mind-boggling!
-
-
Mighty fine looking bow sprit there Sjors. Just be careful when Anja says "Honey, just pass me the ...." Oops.....
-
Beautifully done Remco, but if I'm not mistaken Greg has just issued you another "challenge". I look forward to your response!

-
Thanks Mark and John - your encouragement is always appreciated.

Thanks Kevin - you're not really that far behind me. As I read somewhere else (I think it was Andy [realworkingsailor] who said it), "string is in the air". You'll be in amongst the ratlines before you know it mate!
As far as info from MSW 1.0 being lost, at least with your kit you have the excellent example of Gil Middleton's build to follow and I'm sure he'd be only too happy to flag any particular issues he's found for you. -
That's a very nice start Adam. Looking forward to following this one!
-
Hi all,
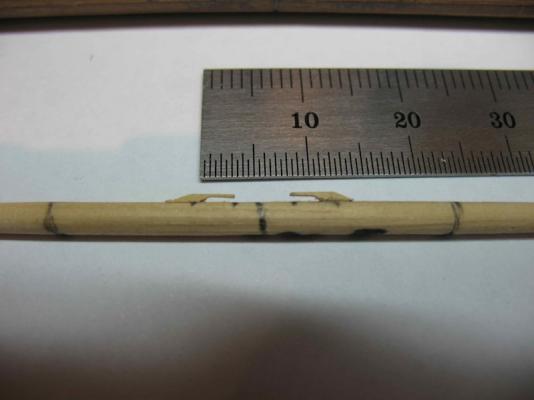
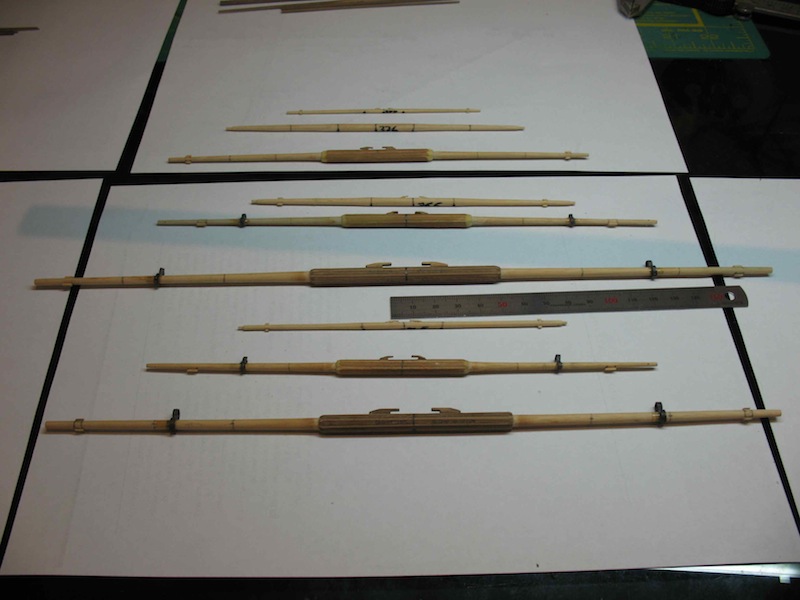
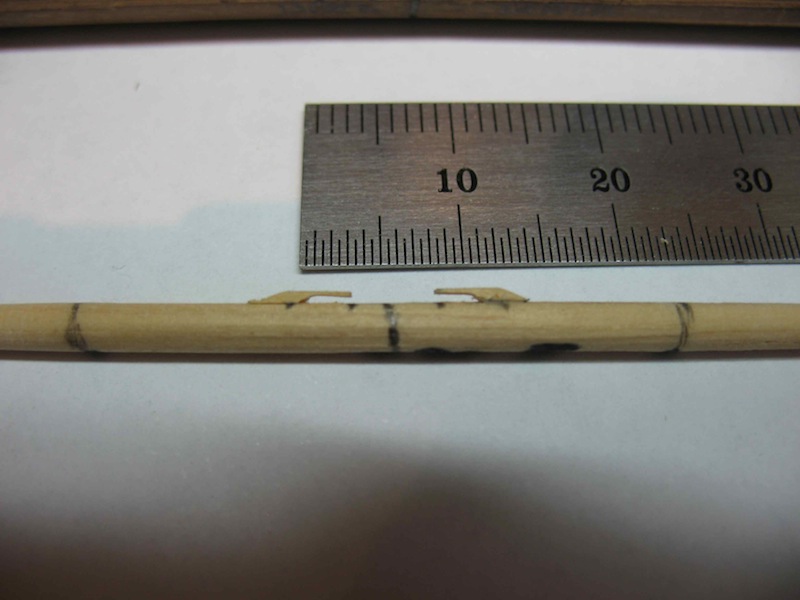
Not a lot of shipyard time over the Easter Weekend, with house guests taking up most of my time/attention. Have managed a little progress with the Yards though. I've added the octagonal sections to the yard centres, as well as the Quarter Boom irons (for the stunsl booms). I decided to add both Sling Cleats and Stop Cleats to the yards. These are not catered for within the kit instructions, but following the advice in Longridge (pp 199 - 203 and associated diagrams), I was able to work out what was needed and make up a spreadsheet to convert all the sizes to my scale of 1:90. Adding these details at this scale presented something of a challenge, and so in some cases, there will be the "suggestion" of an item rather than the fact (for example the Snatch Blocks on the topsail yards). While I am sure that Remco would likely be able to produce a working facsimile at this scale, we mere mortals will have to settle for an approximation.
Pics below to show some of the hardware added.
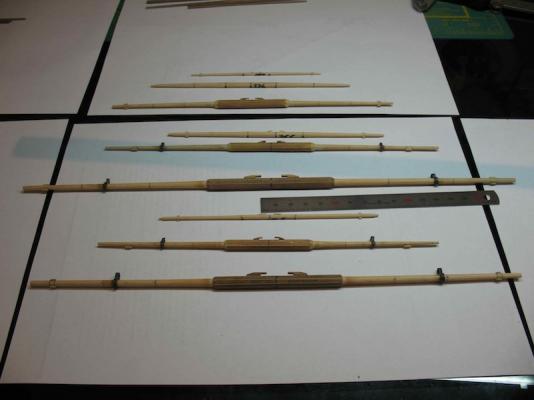
All the yards have now received their first coat of paint. After painting, there are a "few" blocks to strop and add before fitting to the masts.
-
Hi Aldo,
Great to see an update - and what a way to make an entrance! Your April Fool's joke got us all I think!!! Nice work on the bitts, but I'm inclined to agree that the first version with the sheaves looked pretty darn good too.
And sneaking over to the dark side too I see. Well, if life wasn't already busy enough for you, it will be now!
-
Hi Augie,
Welcome - grab some popcorn from Sjors and take a seat! Thanks for the good words. I've been enjoying your build for a while now and it's good to see others at about the same building stage. Different ships maybe, but the problems (and solutions) are often the same.
-
Thanks for dropping in Guy and offering your opinion on oxidisation of copper.
-
Thanks for stopping by Aldo and the kind words of encouragement. Hope to see an update on your Peggy Sue soon!
-
Impeccable work as always Alexandru - just outstanding!
-
Nice to see your log back Clare. This is a really interesting build - I'm glad you've decided to re-post.
-
Hey Aldo - 'bout time for an update my friend! And you-know-who will be wanting pictures to go with it!
-
Hi Kevin,
Good to hear that some of your earlier re-work is starting to pay off for you - that must be a good feeling. She's looking great!

HMS Victory by Shipyard sid - FINISHED - Caldercraft
in - Kit build logs for subjects built from 1751 - 1800
Posted
Looking great David.