

etubino
-
Posts
129 -
Joined
-
Last visited
Reputation Activity
-

 etubino reacted to alpayed in Planking Model Ships
Hi everyone.
Here is a booklet I produced 30 years ago which I have revised and updated.
Enjoy.
Regards
Allan
PLANKING_COLOUR.pdf
-
etubino reacted to USNCHief013107 in Dapper Tom by USNCHief013107 - Model Shipways - 1:76 - first build
Fixed it. Finished the bow section and now onto the transom extension pieces. That is about as far as I can go until I get the waterline drawing jig and the rest of my supplies.
-
etubino reacted to USNCHief013107 in Dapper Tom by USNCHief013107 - Model Shipways - 1:76 - first build
Ooopppsss! Crud!!!! Slipped with the gouge. The good thing is I had just swept the floor so it was easy to find the chunk that was removed and glue it back in. Break time while it dries.
-
etubino reacted to USNCHief013107 in Dapper Tom by USNCHief013107 - Model Shipways - 1:76 - first build
Started whittling down the bulwarks early this AM. I figured since I was the only one up, it is a good excuse.
-
etubino reacted to yvesvidal in Pride of Baltimore II by Fuji - Model Shipways - 1:64
The magazine SAIL (Jan/Feb 2024) issue has some fantastic pictures of Pride of Baltimore 2 in action and an excellent story from a week on board the vessel.
Yves
-
 etubino got a reaction from catopower in HMS Mercury by catopower - Shipyard - 1/96 scale - CARD
Quiet improvement!
-
etubino reacted to Chris H in Atlantic by Chris H - BlueJacket Shipcrafters - 1:96 Scale
It's been about a year and a half since my last post! We had a daughter in December so been very busy with baby duty and had alot less time to work on the boat and post. But while I haven't been actively updating my build log -- i have been making very slow but steady progress toward completing the boat.
Hard to remember all the steps since the last post but will try to summarize the work. In general I started to do a bit of hopping around in terms of steps. I wanted to get all the parts built and ready before glueing.
Adding the Ports
I used a small compass to help with positioning all the ports and anchor slots.
Painting the base
To paint the hull, I first primed and sanded the entire hull. I did about 3-5 coats to get it smooth and polished.
I found getting a good straight waterline to be a bit tricky. I tried a bunch of different methods such as measuring from the top, using a pencil on a stand but ended up mounting a laser level on a tripod and then tracing it across. Probably a bit excessive but did make for the straightest line.
I then used moving paper to block off the under water part fo the boat for first painting the black top.
After about 8 -10 coats on the top and bottom, the hull came out really nice & smooth
I had a bit of bleed under the painting tape but nothing that won't be covered by the water line tape.
Deck Parts
Making the chainplates intimidated me so i skipped them initially and built all the cabins. This took forever but was a good task during the baby's naptimes. I didn't capture many pictures of the sanding and shaping.
I wasn't 100% satisfied with the precision of the cutting and shaping but overall they look great from a few feet away.
I wanted a more mahogany color for the deck cabins so I did purchase a different brown than the one supplied in the kit which I really like.
I found the fife-rails to be impossible. It took me several weeks to get them together. I couldn't seem to find a strategy for gluing the parts together that (1) didn't have ton of excess glue and (2) was well shaped. So far i think this is my least elegant piece. After many failed attempts, i was able to get them together after buying a new stand that let me shape grips to hold them in place while the glue dried. They aren't particularly square or flat but at this point i'm happy they are staying together.
Here's a pick of all the little bits, cleats and other parts getting painted. I did end up doing more than 1 coat just to make sure everything was properly covered. I found an un-thinned first coat followed by a second coat that was thinned worked well without loosing too many details.
Chainplates
I now came back to the chainplates. I used scrap wood and brass. I felt they were okay -- not particularly even once i got them glued and assembled but painted black you can't really notice on the hull unless you look very closely. I used an extra piece from the fife rail to make small little notches for the nails into the hull.
Launches
Sanding, priming and painting the launches was pretty straight forward. Did use some wood filler to try and smooth out the hulls before priming.
Sail Yards and masts
I used a power drill to help shape the sail yards and masts. Just put one end in the jig and held the other with sandpaper -- this worked well and shaping was relatively fast.
I then shaped and filed the spreaders, trucks and other parts of the masts. I painted them all separately before putting them back together again. I noticed this created a bit of a problem because the black paint rubbed off whenever there was friction as i slid the spreaders on. Didn't grab a picture -- but will do so next time.
Placed all the pieces on the boat, but haven't glued most down -- starting to really come together and can now envision the final state which certainly helps motivate me to keep working on it.
I've now got the masts, boom, gaff, bowsprits ready and just need to work on fixing up the bow and getting all the bolts glued.
-
etubino reacted to Jond in Elizabeth Howard by Jond - 1:48 - The White Ghost - Schooner
2 First up are the sources for drawings.
I went to the Smithsonian catalogue and ordered the McManus design for both Oriole and Elizabeth Howard as prepared by Howard Chapelle. Note this is actually very easy to do once you have hold of their catalogue. It is unfortunate that it is not on line….[I think].
1. Here are the hull plans they shipped. They are basically at 1:32 scale just off a hair.
Before we get to the hull let’s gather all the other info we plan to use. There are no surviving drawings of the on-deck configuration nor sail plans, but artistic license should warrant a “close enough: / generic finishing above deck. So let’s find some photos. Here is before bowsprit and racing with a bowsprit.
2. this view is one of two images I am after….note there is no bowsprit in the image. This shows the working vessel.
3 here we are racing in all her glory….the likely choice. The other option having no deck plans could have been to use the great hull drawings and do all the in between framing and show it in the yard under construction. I chose not to follow that approach for the "White Ghost" of Maine. I think it is the sailing image of such a short lived thoroughbred racer to be the better way to go, so off we go.
To complete my outreach at this point for the above deck, I will use two photo documents and will annotate them. Once again, I have taken a broadside photo and embedded it in cad and scaled it. I found it strange with the subtle roll to starboard of the hull in this image, the masts are absolutely plum. I will add a bit of a rake as can be seen above.
4 . here is screen shot.
5 by example of the next steps, here is the spar plan.
6 here is the first sail plan. I will later do one for each sail. Where like this mainsail where they are larger than tabloid 11”x17” my printer limits, I have added coordinates to lay out the pattern manually. Smaller sails will simply be printed. To place furniture on deck I will use the 1919 photo of her in the water swamped to give running on deck dimensions for the cabins that are visible. There are also a few online images for Bulwarks etc.
7 Here is the partially annotated photo of on deck.
8 here is sample of online deck views . Yes that is Columbia with I assume Captain Ben Pine ahead of us.
I will then use Gertrude Theobald and Columbia plans that I have rolled up somewhere [ the once upon a time to build list] for added guidance. More on that when we get there.
Cheers
-
etubino reacted to Caferacer in Benjamin W Latham by Caferacer - FINISHED - Model Shipways
Decking time! It went easier and quicker than I expected, however the strips provided by MSW are not the same. I think it will all sand down fine, but I bought extra 1/16x1/16, so I should have been more selective. In order to bend the planksheer I built up the transom with balsa. Worked great, in addition to soaking the plank for a while, I "pre-curved" it with my hand. I know they sell pliers for this, but just gently bending it to "loosen" the fibers of the plank, it took the tight curve of the stern well.
-
etubino reacted to Caferacer in Benjamin W Latham by Caferacer - FINISHED - Model Shipways
Thanks Jacques, I'm starting back to work on the hull. I think I'm going to plank the deck, before finishing the monkey board or top rail. I think having the deck "clear" will allow me to plank using full pieces.
Meanwhile, I've been doing a few other details. The boom rest, and the foresail boom, rail thingie. Also the pintles.. almost out of brass strips.
-
etubino reacted to Caferacer in Benjamin W Latham by Caferacer - FINISHED - Model Shipways
And we're almost caught up to where I'm at. (planking the hull) I remade the windlass brake bar, it wasn't the right size and didn't fit into the pivot casting right, I also made new links. In general the castings are OK in this kit, other kits I have tossed most of them as the scale it wrong, or they just don't look right. The MS Sultana for example, I build up the windlass from scratch as it was all wrong. The Latham windlass is very good in this kit, as were most of the brake parts.
-
etubino reacted to Caferacer in Benjamin W Latham by Caferacer - FINISHED - Model Shipways
I also have utilized my 3D printer, I made a frame to build the gutting trays, it held the sides square.
-
etubino reacted to Caferacer in Benjamin W Latham by Caferacer - FINISHED - Model Shipways
Like a crazy person, I did fully plank the cabin. I also constructed the sky light in a way that I used painted copper wire for the bars. On all the furniture, I'm leaving off the bottom trim, until they are on the deck, this way I can match the contour of the deck when they are in place. All the furniture is built measuring from the deck surface. This way I can make full length deck planks and not "work around" hatchways or cabins, if needed I could carve away the deck planks, but I want them to be full runs so they curve and fitment is tight. The ports on the cabin are leather rivets. They are the right size and I will add a flat finish to them. A bit of a short cut, but one that I think worked well.
-
etubino reacted to Caferacer in Benjamin W Latham by Caferacer - FINISHED - Model Shipways
I made a great discovery! Durhams putty, my son had this can, he made game miniatures. This worked great to finish the anchors to the drawing's design, and blend in the attachment of the ring. I'm really please with how well it adheres and how fine it can be sanded
-
etubino reacted to Caferacer in Benjamin W Latham by Caferacer - FINISHED - Model Shipways
All the hardware is made from copper wire, I did not make all the oars, they are so small... I made as many as I could stand to.
-
etubino reacted to Caferacer in Benjamin W Latham by Caferacer - FINISHED - Model Shipways
The Seine boat went well, a similar build up as the Armed Longboat by Model Shipways, but much smaller. Carving away the bulkheads took some time. No idea why one photo is posting upside down.. I have tried a few times to fix it, weird.
-
etubino reacted to Caferacer in Benjamin W Latham by Caferacer - FINISHED - Model Shipways
OK the ship.. Actually the Dory... What I generally do is while parts are setting up, while researching or just taking a break form the hull, I have been working on furniture and the other boats. The Dory was frustrating as it was the first fully scratch built hull I have made, after a bunch of false starts I created a spine that held the keel and "false" bulkheads. I was then able to get the planks to curve well. I'm not convinced about the interior finish, I have added several coats of danish oil, but as it's displayed upright on the deck I might sand it down and refinish.
-
etubino reacted to Caferacer in Benjamin W Latham by Caferacer - FINISHED - Model Shipways
I didn't take too many photos of the start, I live in Arizona so generally work on the model in the summer, in the winter there are lots of garage and outside projects to work on. For example last year I rebuilt the "craft room" my wife's office and where I work on my models and sometimes watches. This was my first time building cabinets, and I was pretty pleased with the results, my wife and I now have large stable surfaces and drawers.
-
etubino reacted to Thukydides in HM Cutter Alert by Thukydides - FINISHED - Vanguard Models - 1:64 - first build
Log #76: Anchor Cable & Rails
I have a fairly small update for today.
I had intended to show pictures of my work on the yards, but after two days of work and 6 failed attempts at rigging blocks to a standard I am willing to accept I decided I would postpone an update on them till the next log post.
In the meantime I decided to secure the anchor cable to the windlass before too many ropes start to clutter the deck.
It is delicate work at this point trying to do this sort of thing without catching anything. I have to make sure I am fully in the zone for this and at all times am aware of where my hands are.
At this point I also replaced the belaying pins which I had previously broken when trying to get the bowsprit in place.
I also decided to get the rope that runs through the stantions in place and to add some knotted ropes to help with anyone trying to get on the ship.
And here is the current status of her. Thanks for stopping by.
-
etubino reacted to Henke in HMS Agamemnon by Henke - Caldercraft - 1:64
Dear friends,
Although there is a sort of hiatus in my Agamemnon build I thought I could show something else. A relative of mine sent me a picture.
It depicts my father with one of his model boats. I think the photo is taken around 1947-48. He later became a naval architect but unfortunately passed away many years ago far too early. Later in life he a built a sailing boat in scale 1:1. Is there a particular ship modelling gene which is passed on for generations?
Does anyone recognize the model?
I hope I am not getting off topic in my build log?
Best regards
Henrik
-
etubino reacted to Henke in HMS Agamemnon by Henke - Caldercraft - 1:64
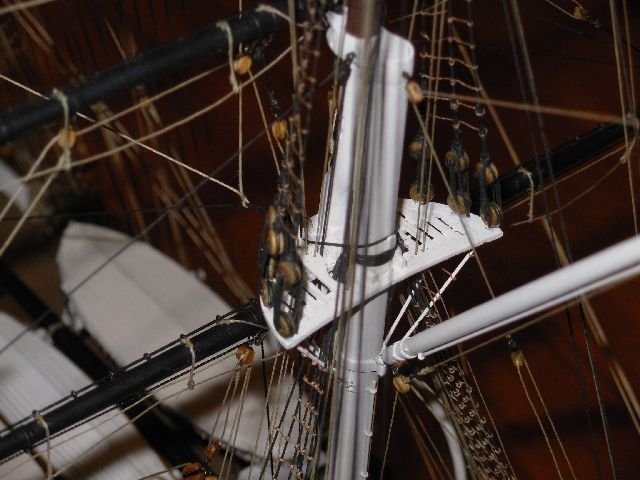
As usual thanks for all likes and nice comments. It is very kind of you all. Here comes a picture from the first dry fitting of the fore-topmast or to be honest a piece of 8 mm dowel which eventually will turn out to be a fore-topmast.
Best regards
Henrik
-
etubino reacted to schooner in ALFRED by schooner - FINISHED - BlueJacket Shipcrafters - 1:96 - Continental Navy Frigate
Rigging intentions and starting the lower shrouds
As I get ready to start the rigging I thought it might be a good time to explain my plan for going about it, always subject to change since my plans/intentions/assumptions are blissfully free of relevant experience, this being my first real rigging job.
Resources
The kit’s instructions contain a general discussion of how to go about the rigging but they assume a level of experience/knowledge that I don’t have. The rigging diagram is one sheet of plans that shows all the standing and some of the running rigging - it is a real spaghetti pile that I find hard to pick out individual lines from but it is useful for figuring out shroud lengths and deadeye spacing. The instructions do contain good info with regard to line sizes and the belaying diagram is fine.
I will be using a mix of kit-supplied Brittania metal blocks and wood ones from SYREN Ship Model Co. For rigging line I will be using a lot from SYREN with the sizes being the closest match available to the kit’s.
I’ll be using Lennarth Peterson’s Rigging Period Ship Models as my primary reference for what to rig. The book is based on the late 18th century Royal Navy Frigate HMS Melampus. It has almost NO text but is made up of a clear diagram for each rigging line. It has the advantage that they are arranged in a sequence that makes sense for rigging a model with minimal interference between new and previously-rigged lines. The book does not contain any information about line or block sizes nor are the diagrams to any consistent scale so dimensions are not useful. It does have diagrams of all sails and their rigging for those who want to go that far and it does have belaying diagrams although I will be using the kit instructions since ALFRED had a lot fewer belaying pins than MELAMPUS. The differences between ALFRED and MELAMPUS are mainly ones of subtraction; ALFRED did not have a spanker boom, martingales, boomkins, flying jib, spirit sail topsail yard or royal yards.
General plan of attack
This is going to be a challenging rigging job because of space constraints. To start with ALFRED was a small ship and at 1:96 (1/8”) scale there is little room to work on belaying rigging, for example there is less than one inch separating the aftermost deadeye on the main chains from the forward most on the mizzen chains. Because of this I plan on including all of the standing rigging but only those running rigging lines that are associated with controlling and securing the yards (i.e halyards/slings/jeers, lifts, and braces). I will also attempt to rig each mast as much as possible, including the upper shrouds and the yards, before stepping them so that I can secure the running rigging lines that are tied off around the mast bases and many of the stays before securing the shrouds.
Starting the lower shrouds
After dry fitting each mast in place I used a piece of line to determine the shroud length for each mast, leaving what I hope is enough extra to allow for seizing around the deadeyes. I held off attaching the topmasts so that I could make up the shrouds off the mast and then slip them over the masthead before the mast caps are installed. The shroud loops are secured with an unglued seizing that can be cinched up to the mast head and then brushed with diluted white glue.
All 16 shrouds were easy to make up in this manner and were added to the masts, alternating each pair, starboard to port and forward to aft. They are all labeled with a small piece of tape holding the pairs together.
-
etubino reacted to schooner in ALFRED by schooner - FINISHED - BlueJacket Shipcrafters - 1:96 - Continental Navy Frigate
Foot ropes and Burton Pendants
I’d originally planned (hoped) to use some very small eyebolts I have on hand for the foot rope stirrups (the vertical lines that hold up the inner portions of the foot ropes). Unfortunately at this scale the upper yards are too thin to withstand drilling with even a #74 bit so I had to go with thread. After some trial and error I finally settled on making the stirrups by starting with an overhand knot tied around a needle to form an eye and spot glued to hold it. The stirrup was then led down the aft side of the yard and tied off to the eye would be 2-3 scale feet below the bottom of the yard. The foot rope was then tied off and one end, threaded thru the stirrups and secured at the other end. Once fabricated the stirrups were weighted with some small clothespins and everything was brushed with diluted white glue to stiffen them.
Next up was what has got to be the easiest part of the whole rigging process - the Burton Pendants which were anchoring points for blocks when handling heavy loads on deck. Two bullseyes were seized at opposite ends of a piece of line, they are then looped over the crosstrees of the tops and upper shrouds. The Fore and Main masts get 4 lower ones and 2 upper, the Mizzen just gets 2 lower ones. The pendants will all get the white glue treatment to keep them hanging vertical.
Next up will be adding the lower shrouds to the masts.
-
etubino reacted to schooner in ALFRED by schooner - FINISHED - BlueJacket Shipcrafters - 1:96 - Continental Navy Frigate
Back to the Shipyard
So, after a six month diversion into the world of radio control while building the SEGUIN, followed by an extended road trip out to the West Coast, it’s finally time to get going again with the ALFRED.
Before starting on the masting and rigging I wanted to do 2 things.
First up was fixing the upper head rails. My first attempt left them pretty straight without any of the “swoop” normally seen on the headrails of period ships (swoop being my term for vertical curvature):
So I removed them (the lower headrails had to be left alone since they conform to the outer edge of the PE grating) and replaced them with the same mix of Brittania metal from BlueJacket faced with plastic channel pieces from Stripstyrene; I’m much happier with the re-do:
The other thing I wanted to do was to mount the model on its pedestals and display board because it would be a real nightmare trying to do it with all the masts and rigging in place. Since the masting and rigging should not require placing any serious pressure on the hull I think now is the time to do it:
Now I can put the hull on the shelf and work on the upper masts.
-
etubino reacted to schooner in ALFRED by schooner - FINISHED - BlueJacket Shipcrafters - 1:96 - Continental Navy Frigate
Deadeyes and Chainplates
The deadeye/chainplate rigs consist of 3 or 4 parts (small deadeyes get 3). The kit provides Britannia metal deadeyes that come pre-stropped (thank goodness), the next part below them is the Mid-link, which are all the same size so it is easy to mass produce them by wrapping 24 gage wire 9 or 10 time around a dowel and then cutting them free and using pliers to bend them into more of an oval shape. The next part is the Toe Links, that took me the most time to make since for the large deadeyes they have to be custom fabricated out of wire so that the bottom of the last piece (the chainplate) can reach to or near the blackstrake which is the first strake above the wales. I was getting ready to fabricate the bottom pieces (the chainplates) I when was rooting around the bottom of the box and found the remnant of the PE fret and lo and behold there they were (the parts list does not break down the PE fret parts and when I inventoried the kit 2 years ago I had no idea what they were).
Here are the 4 parts, along with 2 pins from the BlueJacket catalog (F0040) that just fit inside the chainplate holes. I cut all but the top 1/4” off each pin so I would not have to drill as deep.
The orientation of the assemblies was determined by running a line from the mast top, across each deadeye and a pencil mark made on the hull just above the wales:
The wire was fabricated by bending around pins and then shaping using pliers:
Here’s the finished assemblies mounted on the model: