


RGL
-
Posts
5,118 -
Joined
-
Last visited
Reputation Activity
-

 RGL got a reaction from coxswain in VARYAG by RGL -FINISHED - Artwox - 1/350 - Plastic, resin and photoetch - Protected Cruiser
The stern gallery. This is fiddly as the platform has 8 individual struts underneath. The Atrxwox fret is nicer but about 1/2 as this as the Eduard fret (the darker one is eduard) and is paper thin and very fragile. The latticework is finer, more detailed and has extra struts.
There is also a stern torpedo tube with the fret from eduad which is not not even mentioned in the Artwox kit but is in all the reference stuff.
I have a stern nameplate and coat of arms which i will attach after painting. Both aftermarket.
-
RGL got a reaction from coxswain in VARYAG by RGL -FINISHED - Artwox - 1/350 - Plastic, resin and photoetch - Protected Cruiser
A bit more work with resin, the Bow Torpedo tube, it's tiny and about .5mm this which needs to be filed down flat off a piece or resin cast. Then the small anchor braces, I have not put the anchor on and will not until I have painted it as it will just bend the anchor when I handle it.
-
RGL got a reaction from coxswain in VARYAG by RGL -FINISHED - Artwox - 1/350 - Plastic, resin and photoetch - Protected Cruiser
I have never worked with resin, and I was some what apprehensive. The prop shafts are on a sprue for want of a better word I supose. I eventually cut them off and accidentally clipped off a little noggin on the end of one, thinking crap, scratch build here were come. 1 obscure photo in the instructions set me right that it was supposed to be cut off. Who knew!
The instructions also told me to use a 1mm rod (not provided or numbered) so luckily had and used 1mm steel rod to align them onto the hull untill I can get some 1mm brass rod and blacken it. It has not been glued in but will act as a prace for protectioon. The braces have to be drilled all the way though to have one continious shaft. .
really happy to take resin tips from the pros.
-
RGL got a reaction from coxswain in VARYAG by RGL -FINISHED - Artwox - 1/350 - Plastic, resin and photoetch - Protected Cruiser
Bilge keel added, its a piece of resin for each side. Thought I may as well get the resin bits on the hull done as I have ordered a photo etch tool and do not want to touch the stuff till it gets here. I was going to add the small anchors to the hull but there is no reference to them at all in the Artwox instructions (Serioulsy they are fairly crap). The photos from Artwox show the anchor and a set of braces but make no reference to them. As you can see from the book and the enlarged photos on the fret, they are there. The Eduard anchor is nothing but that, a small anchor.
-
 RGL got a reaction from RRLittle in VARYAG by RGL -FINISHED - Artwox - 1/350 - Plastic, resin and photoetch - Protected Cruiser
Time to join the hull pieces togeather, which go with a minimum of fuss and putty to hide the seams. I could not find a decent set of pedestals anywhere on the net (there was one set at $85 before shipping from the US - no thanks).
I then had a mind storm and remembered I had some $2 brass rod which I had in my spares.
I cut down each to an easy working size (and can be cut down further and polished up when the model is finished. I then used some offcut wood pieces, cut into 4 square pieces, 2 of which I drilled to the diameter of the rod, then stuck one drilled piece to a not drilled piece to make a sturdy slot to hold the rod. Both pieces were then glued onto the inner hull each.
An offcut of a floorboard aligned with the rods as a base will allow me to go hands off with the model.
The rods are not glued (they done't need to be as the model can slide on and off depending what I need to do with it.
-
RGL got a reaction from RRLittle in VARYAG by RGL -FINISHED - Artwox - 1/350 - Plastic, resin and photoetch - Protected Cruiser
Thanks, I just looked at your Olympia and I have a lot to learn. I just attacjed the lifering cage at the stern. The eduard fret is a lot easier to use with this little bugger, I destroyed the Artwox one.
-
RGL got a reaction from coxswain in VARYAG by RGL -FINISHED - Artwox - 1/350 - Plastic, resin and photoetch - Protected Cruiser
There is a small boom arm on either side that is obviously used to lower small things. The eduard photo etch shows a large arm and the Artwox is smaller arm with a block attached. Easy choice. First set of spares i suppose.
-
RGL got a reaction from coxswain in VARYAG by RGL -FINISHED - Artwox - 1/350 - Plastic, resin and photoetch - Protected Cruiser
Steps complete. I did not shave off the hull steps that were on the original hull as I wanted a guide. It worked out that the prt side has less steps than the starbord side so I actually had enough. Note for beginners I suppose, I scribed a line above the bulges that are supposed to be steps and using a pin ran some CA and then used tweazers to place the individual steps. i did not do this on the starboard side so the alignment is not as good.
-
RGL got a reaction from coxswain in VARYAG by RGL -FINISHED - Artwox - 1/350 - Plastic, resin and photoetch - Protected Cruiser
A quick update, I ordered and received the Varyag nameplate fret from Northstar models which includes the coat of arms and nameplate for the stern (Eduardo & Artwox have omitted both) as well as the ship's wheel and telegraph.
The steps included in the Eduardo fret are nice but are 10 short, so the only place in the world that has them in stock are North Star (Latvia!)
I love internet shopping but it will probably take a month to arrive which will cause me the re think my building plan.
I'm really keen to figure out how to rig it and have ordered the Varyag book. Wooden ships really teach you to plan months if not years ahead when it comes to rigging as the belaying points are completely inaccessible once something is stuck on the hull so it has to be done before it is attached. Nice to have a new distraction. Wish it was in a bigger scale.
-
RGL got a reaction from coxswain in VARYAG by RGL -FINISHED - Artwox - 1/350 - Plastic, resin and photoetch - Protected Cruiser
Ok, 2 days work on half a hull. I've used Dafi's scaling system of a Tic Tac as everyones coins are different. Drilled out the portholes and started on the photo etch. The Artwox fret has the hatches, the Eduard Fret has the footrails and the steps. I need to get some really fine grain sandpaper for a bit of tidy up from the CA.
You can see at the bow how I've started to sand off the scrollwork as the Artwox kit leaves it as is but Eduard provide one.
It's been such a long time since I've usd Photo etch I've forgotten how fiddley it is. The steps are microscopic, and whilst they look a little out of line, in the broad view it won't really matter.
-
RGL got a reaction from coxswain in VARYAG by RGL -FINISHED - Artwox - 1/350 - Plastic, resin and photoetch - Protected Cruiser
The contents of the box; lots of resin, 2 sheets of photoetch, a false brass deck, a wooden deck, the hull, lots of little brass rods, and instructions. Also is the Eduard frets. As I progress I will compare the pair, but I have already noted that the wheelhouse for the Artwox kit is resin where the Eduard is photoetch, and Eduard includes the Bow decorations where as Artwox omits it. Eduard also does not included the hatches on the hull. Neither kit has a decent rendition of the rails on the hull. Artvox does not bother and it is only representative with Eduard. The steps on the hull are not included in the Artwox and the Eduard fret has them.
-
RGL got a reaction from coxswain in VARYAG by RGL -FINISHED - Artwox - 1/350 - Plastic, resin and photoetch - Protected Cruiser
I needed a change of scenery after a 10 year build on my Endeavour. I couldn't face another long term challange. Months ago I found the Artwox Varyag on the net on an overseas site and liked it a lot, but shipping to Oz is usually a nightmare. I found the kit at BNA Models at a reasonable price and thought that itn would be a nice change as I have not done a plastic model this century.
I suppose the advantage of a late 1800's early 1900's kit has the advantage of real photos. Also the aftermarket range of goodies for plastic kits is great, as plastic is a lot more unforgiving than wood.
The Artwox kit only has the original Zvesda hull, with their own false deck, wooden deck, resin, photoetch and barrels.
The instructions are fairly good but without other references I would be lost. After having done a tall ship model, I now know how important the rigging plans are (the kit has none) and I have orderd the Kagero book.
There are some things missing from the Artwox photoetch fret which are included in the Eduard kit and vice versa, so I also got that.
-
 RGL reacted to ianmajor in HMS Unicorn by ianmajor - Corel - Scale 1:75, 1748 to 1771
I turned to the wheel supports. I looked at a variety of sources. I took inspiration from the entry in EdT's Naiad log <here>
along with the picture of Guadeloupe.
The first thing I did was to draw a diagram of a support 8 times full size (attached - click on it to see detail and use if you wish).
I have included my original free hand diagram here which has more dimensions on it than the clean version.
Two copies were then printed reduced to the required size and pasted on to a piece of box wood that I had milled to 7mm / 2mm cross section (as per EdT's method).
I drilled the 0.5, 1.5 and 3mm holes in each support then using a fret saw cut out the central teardrop shaped holes. The supports were then roughly fretted out.
I turned a filing button 4mm in diameter with a 1.5mm stub. This is in the middle of the next photo along with my 1mm mill bit.
The button was clamped vertically in the "V" of the machine vice on the milling machine. Each support was mounted (one at a time) via its 1.5mm hole on the stub. This allowed the mill bit to be advanced up to the support and by swinging the support blank from side to side to shape the head.
The two supports were glued back to back and their outside shape produced by hand filing.
They were then clamped to the mill and the front profile was milled, first one support and then flipped over to do the second.
The supports were cut to length, checked for square then separated and cleaned up.
Finally a close up of the completed wheel in its supports - it shows the flaws up in a cruel way.
It's confession time again. When reducing the diagram on my printer I used a 9% size setting. What I did not notice was the printer software accepted the 9% then quietly set it to 10% (obviously the minimum). Later when working on the support it looked too long. It was - by 2mm. So rather than ditch it I modified the base design on the fly. It is still a little too tall but hopefully no-one will notice.:-)
I will now make card mock ups of a tiller and binnacle to try them with the wheel for size on the quarter deck. This will help me decide on whether to clear the area behind the mizen and to fit a visible tiller.
-
RGL reacted to DaveRow in HMB Endeavour by DaveRow - FINISHED - Corel - Scale 1:60 - First Build Kit
From the Shipyard.
Hope Dave's happy with this one - Deck Skylight.
Bit more paint touch up if I can get into the tight places.
White lids to reflect the light into the hull.
The bars over the top were a killer.
Used black card for the metal frame and hinges.
Hopefully it assimilates in with the other deck features.
Dave R
-
 RGL got a reaction from popeye the sailor in VARYAG by RGL -FINISHED - Artwox - 1/350 - Plastic, resin and photoetch - Protected Cruiser
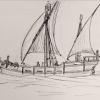
Second last post, just a scale comparison. 1/60 Vs 1/350.
-
 RGL got a reaction from Old Collingwood in HMS Warspite by Old Collingwood - FINISHED - Academy - 1/350 scale - PLASTIC
I love this shop but they are all waaaay too big!
-
 RGL got a reaction from Ras Ambrioso in VARYAG by RGL -FINISHED - Artwox - 1/350 - Plastic, resin and photoetch - Protected Cruiser
Second last post, just a scale comparison. 1/60 Vs 1/350.
-
RGL got a reaction from popeye the sailor in VARYAG by RGL -FINISHED - Artwox - 1/350 - Plastic, resin and photoetch - Protected Cruiser
OK, third last post for this build: I affixed the ships boats, I got to the stage where I had to draw a line, the kit does not include cradles (which it really should) and fabricating them at this scale is quite hard and I think I'd probably just make a mess of it.
I have made a temporary base where I'll park the old girl for a while, I only have to add the rope coils when they arrive.
It's a really nice and very different kit, the Artwox resin is nice, but it is missing many deck fittings and I think the creators went of the Kagareo book a little too much for accuracy when the plans are available. I would like to see some of the resin made available commercially, such as the ships boats and the fairleads. No sea steps, just the original Zvesda bumps on the hull, no mast ladders, no stand for the model at all.
The guns have all been replaced, the kit ones are just too inaccurate. The masts are wrong, the instructions are atrocious, some of thr alignments are not explained and you don't find out till way too late, and some oif the details left on teh fret I'm still scratching my head over.
Whilst I'm a mutt at the photo etch thing, the frets are too thin. I think it they were as thick as the Eduard ones it would be a step ahead,as the detail is very nice.
-
 RGL got a reaction from Canute in HMS Warspite by Old Collingwood - FINISHED - Academy - 1/350 scale - PLASTIC
I love this shop but they are all waaaay too big!
-
RGL got a reaction from Canute in HMS Warspite by Old Collingwood - FINISHED - Academy - 1/350 scale - PLASTIC
Let me know if you can find 1/350 fairleads! I can't find any at all.
-
 RGL got a reaction from mtaylor in HMS Warspite by Old Collingwood - FINISHED - Academy - 1/350 scale - PLASTIC
Let me know if you can find 1/350 fairleads! I can't find any at all.
-
RGL got a reaction from Old Collingwood in HMS Warspite by Old Collingwood - FINISHED - Academy - 1/350 scale - PLASTIC
Let me know if you can find 1/350 fairleads! I can't find any at all.
-
RGL got a reaction from popeye the sailor in VARYAG by RGL -FINISHED - Artwox - 1/350 - Plastic, resin and photoetch - Protected Cruiser
Thank you, let's see how well I can bash the Emden.
-
 RGL got a reaction from GrandpaPhil in VARYAG by RGL -FINISHED - Artwox - 1/350 - Plastic, resin and photoetch - Protected Cruiser
Second last post, just a scale comparison. 1/60 Vs 1/350.
-
 RGL got a reaction from ccoyle in VARYAG by RGL -FINISHED - Artwox - 1/350 - Plastic, resin and photoetch - Protected Cruiser
Thank you, let's see how well I can bash the Emden.