
Tim Curtis
-
Posts
231 -
Joined
-
Last visited
Content Type
Profiles
Forums
Gallery
Events
Everything posted by Tim Curtis
-
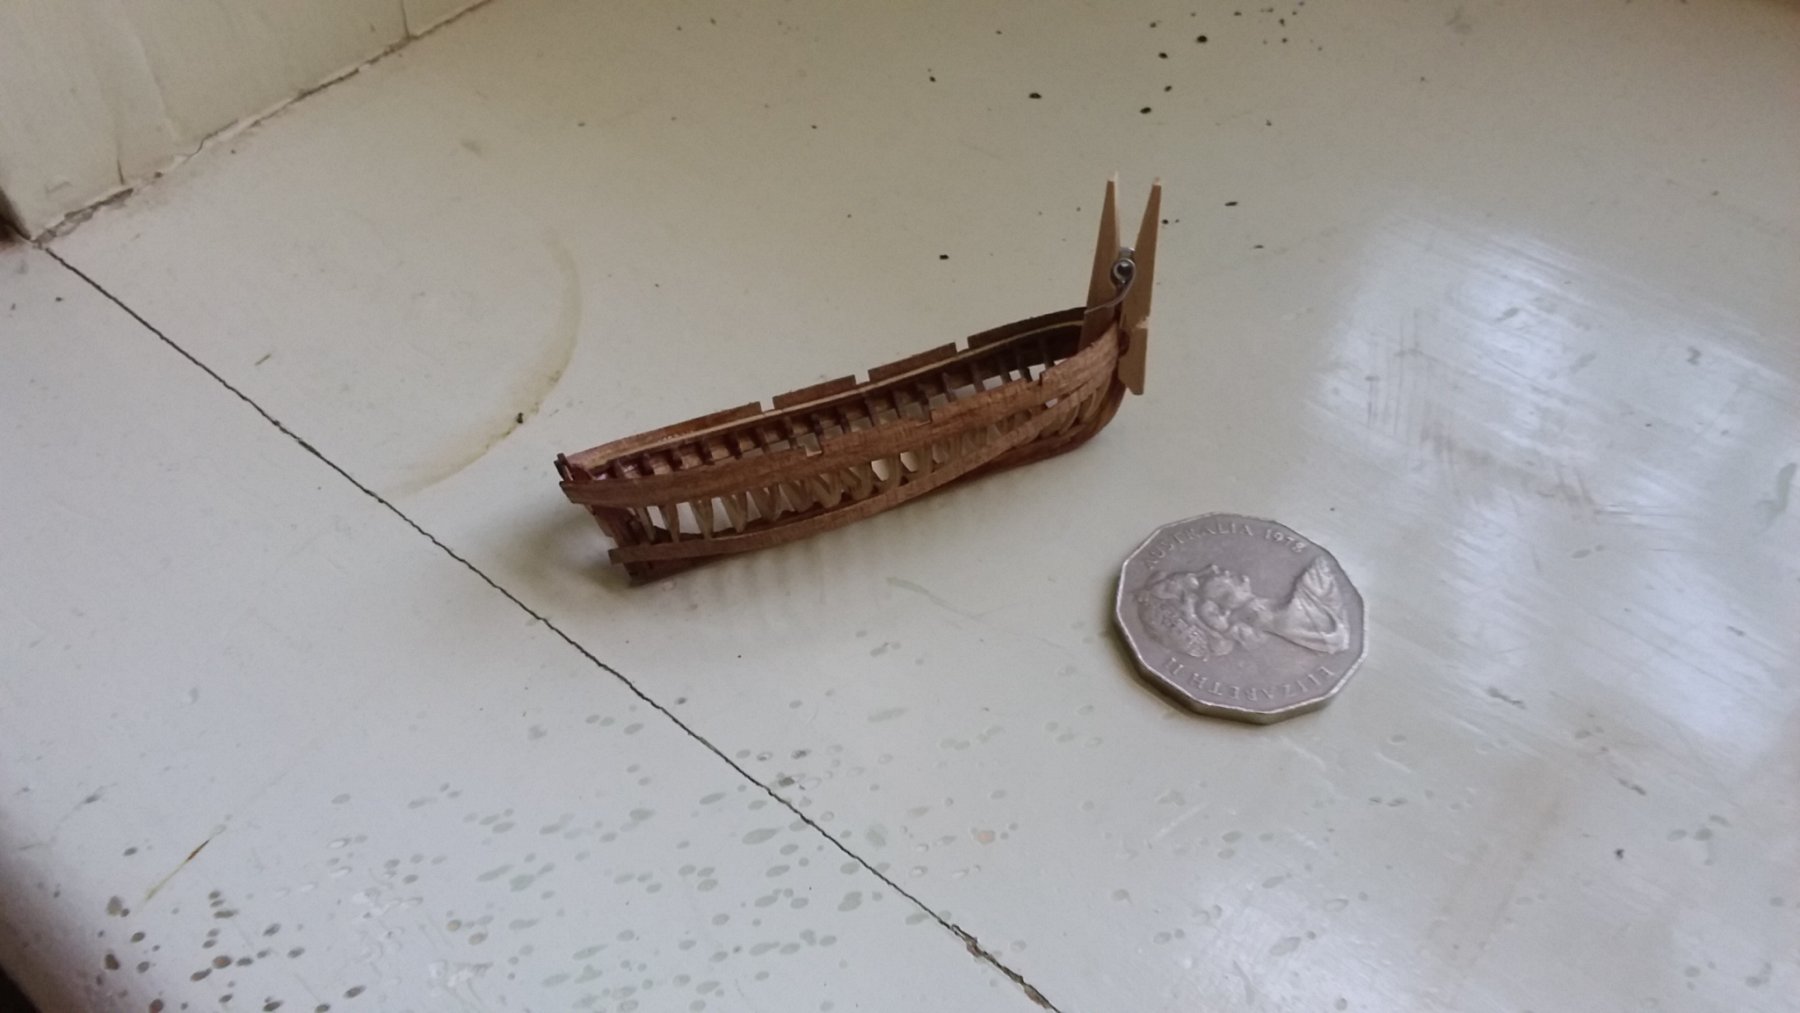
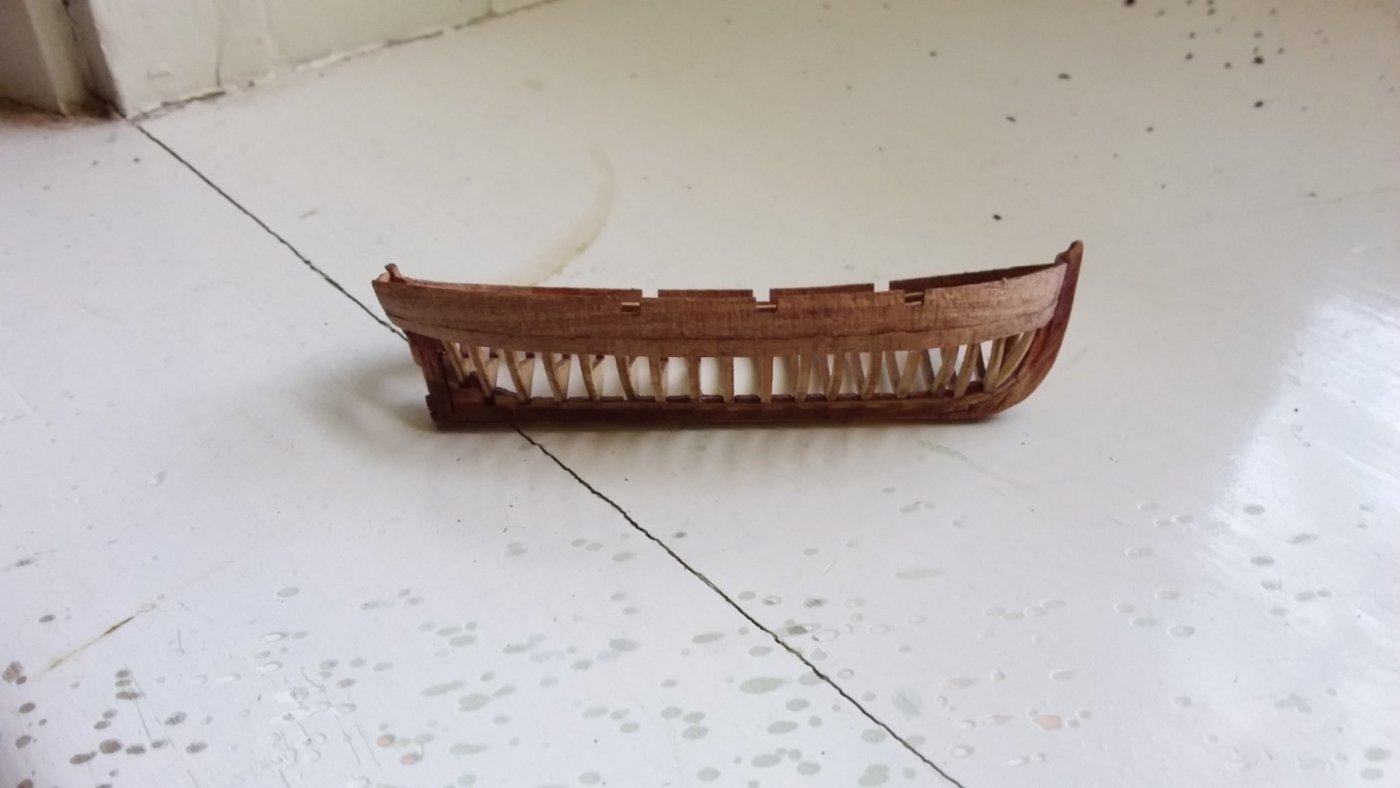
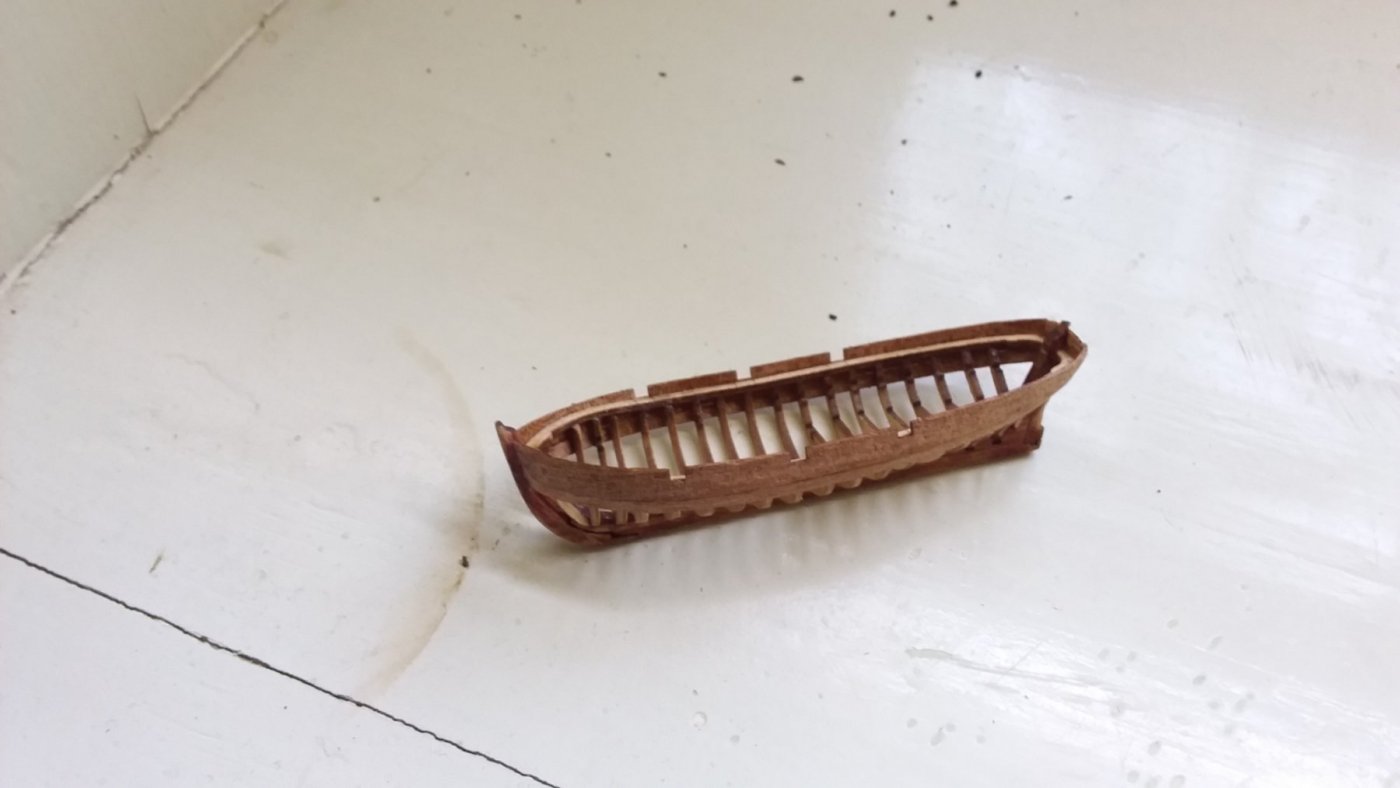
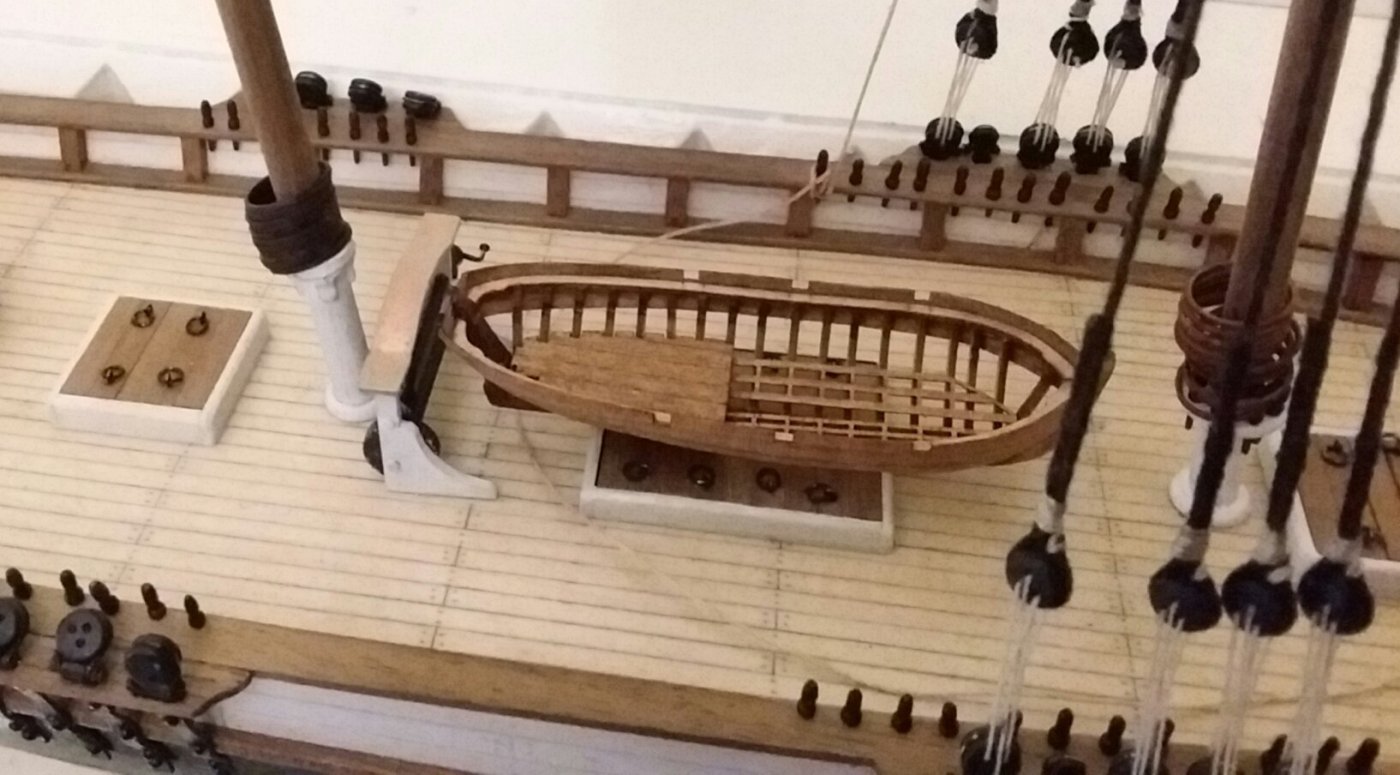
 Finally I have bought a little lifeboat kit online (don't worry - its not from one of the banned manufacturers - I checked) and I am in the midst of putting it together. Its probably a couple of decades too old in it's design. But I found it hard to find a good quality little kit of the right size. This was as close as I could find. About $18 AUD. I like it. Not finished yet, but making progress. Its about 80mm long, so the planking is quite tricky. I have been using the steamer on my coffee machine and a bit of CA (no pins) and a few miniature clothes pegs to bend the planks - and it seems to go pretty well.
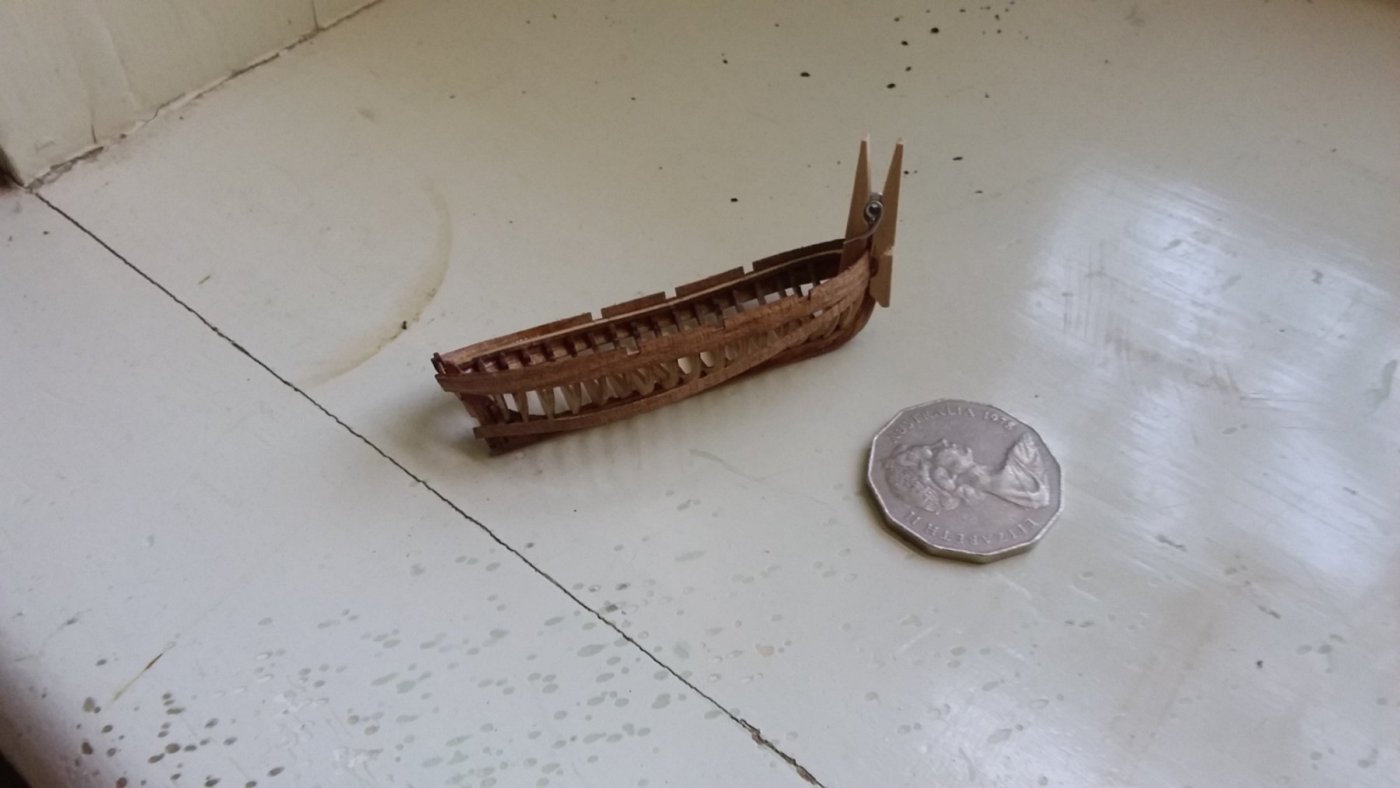
- 115 replies
-
- 6
-

-
- Scottish Maid
- artesania latina
- (and 1 more)
-
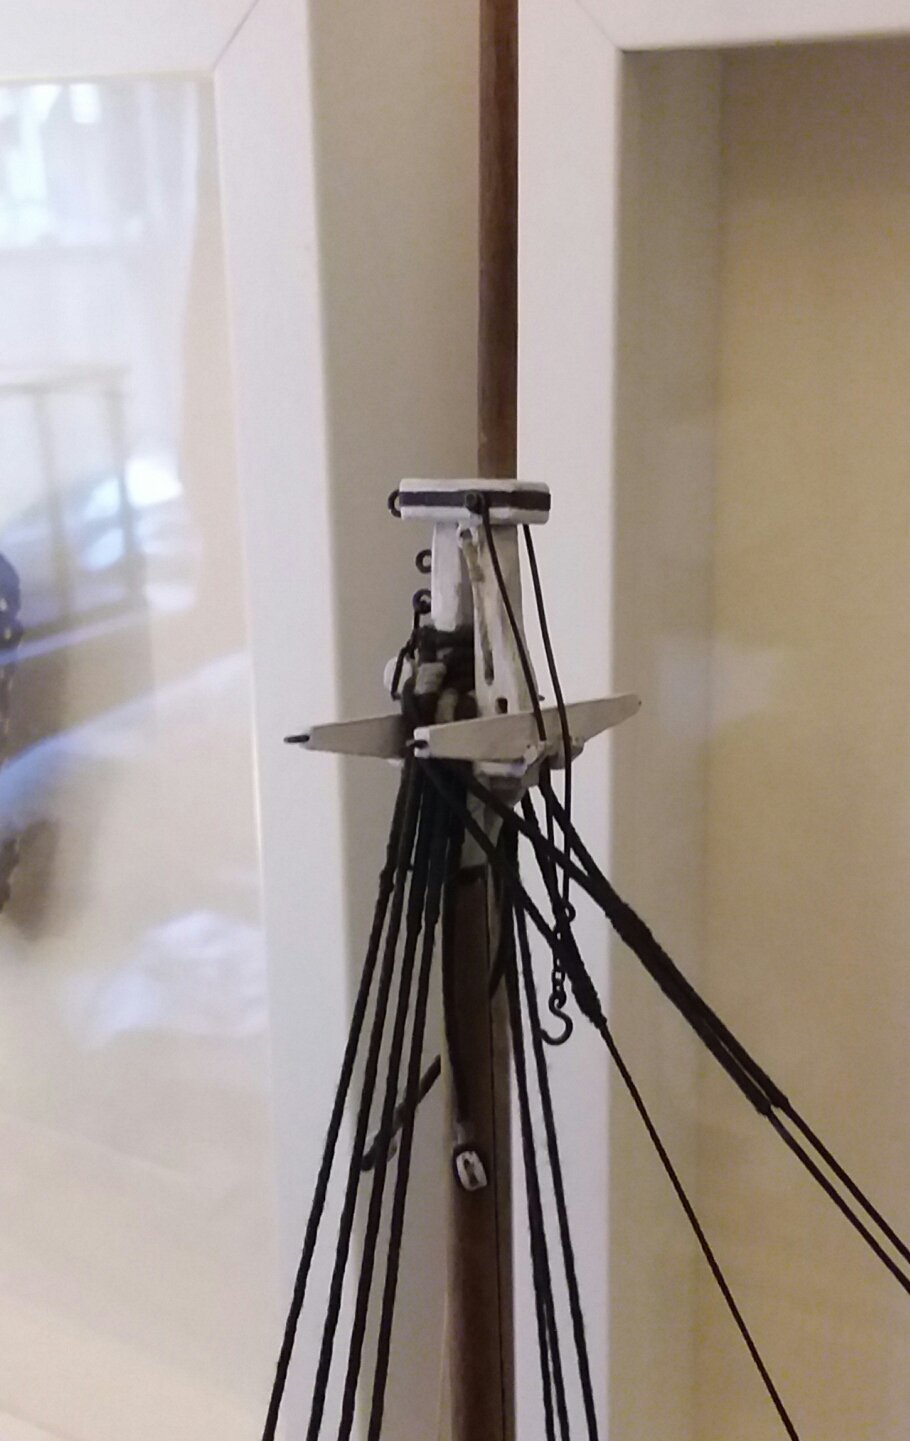
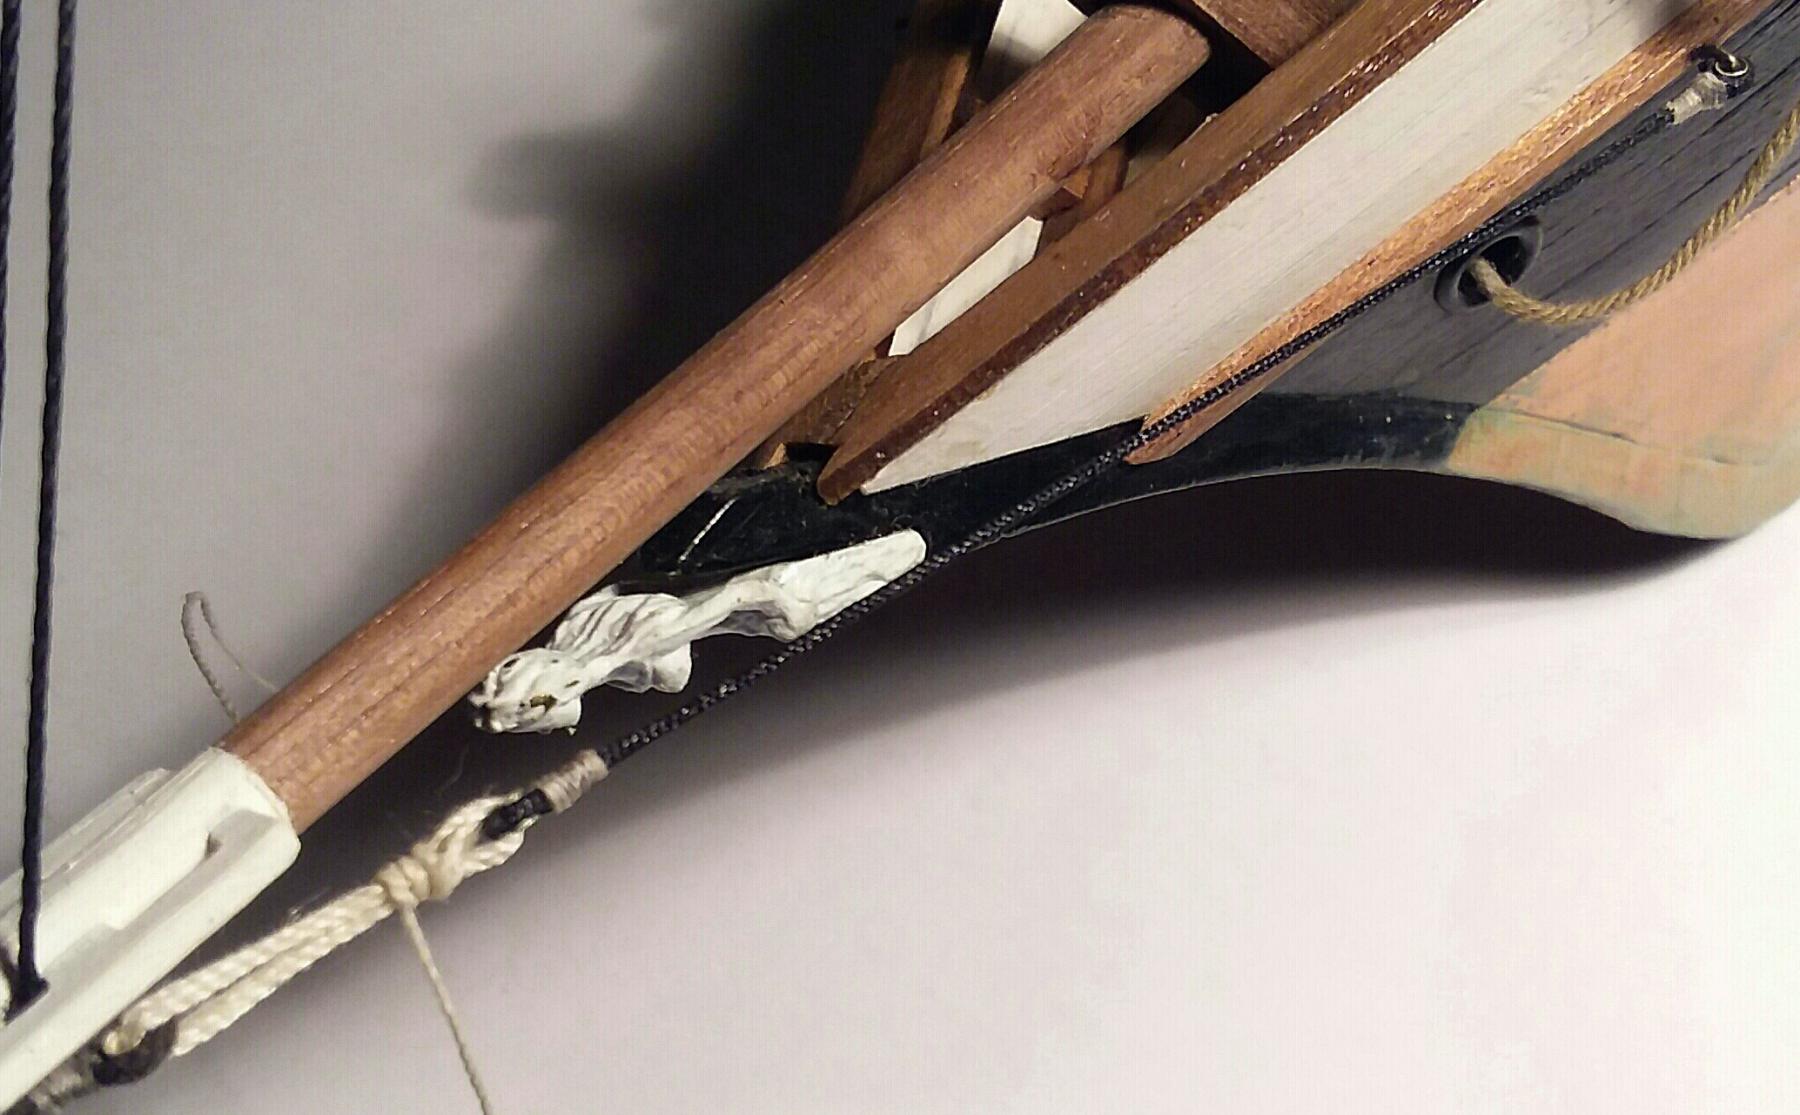
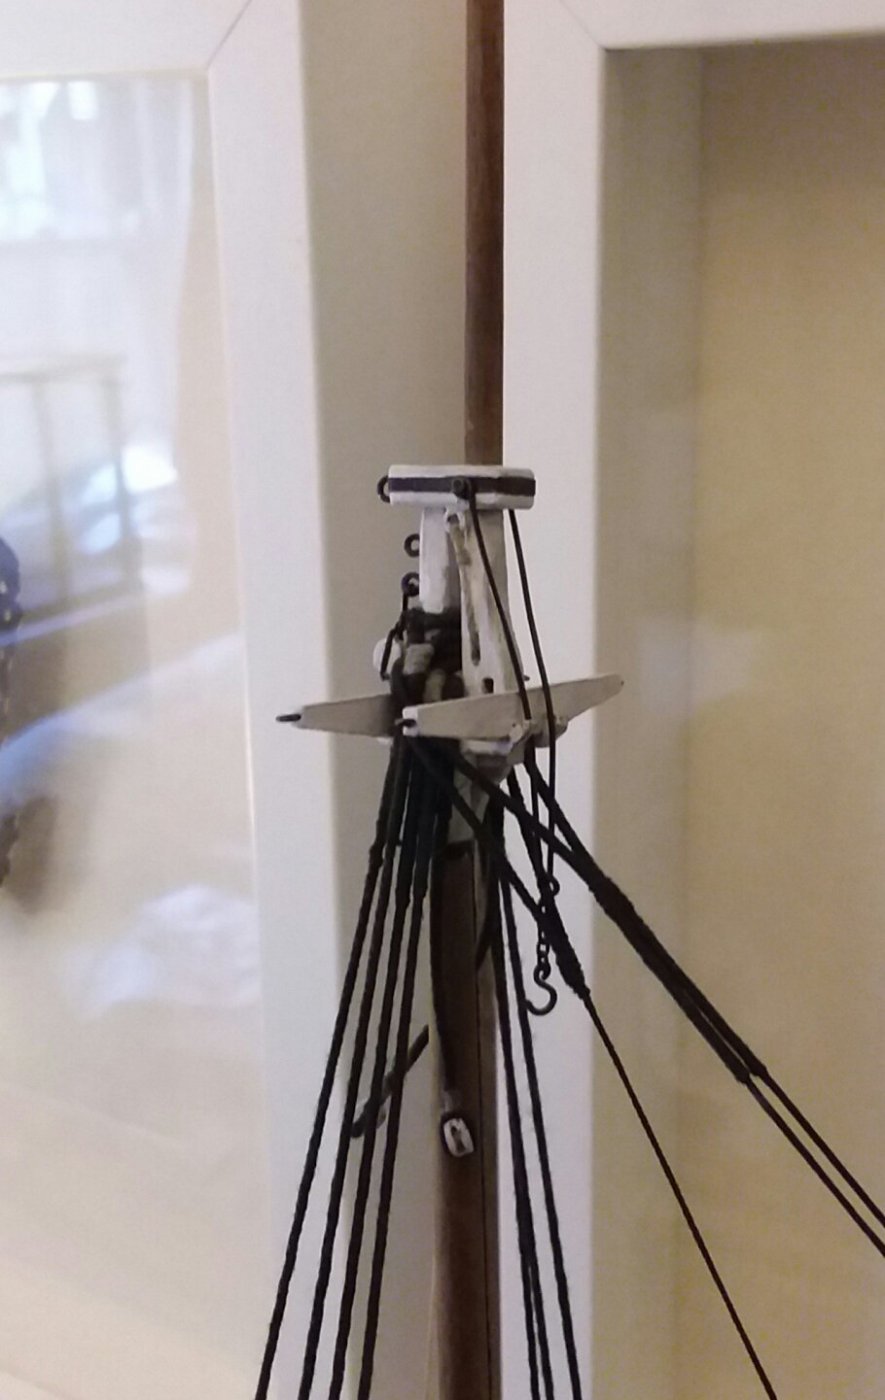
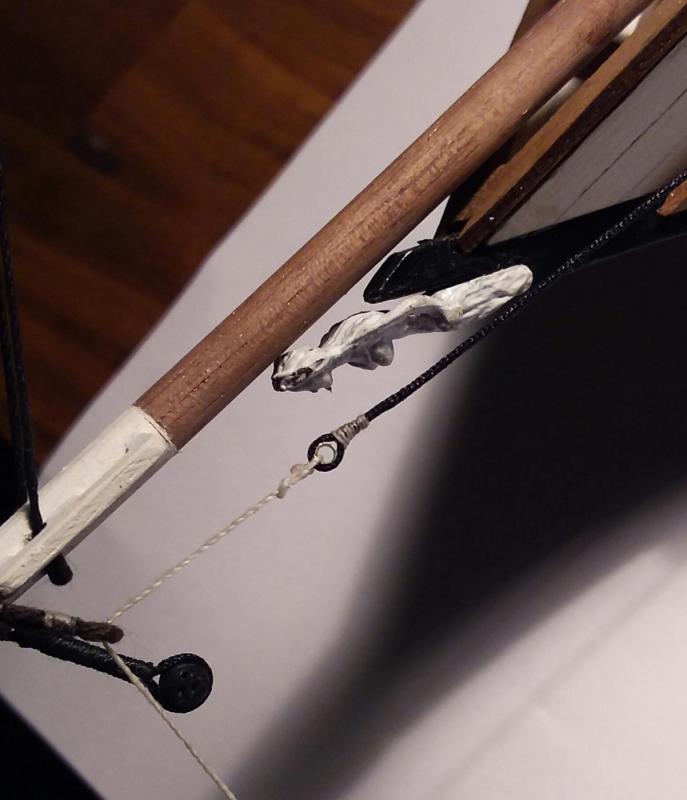
Next I have created an iron sling for the lower yard on the foremast. Davis says this is likely to have been used rather than a rope sling after about 1820 (in his Ship Model Builders Assistant). Its just a bit of blackened brass wire, and a chain, and a home made hook.
- 115 replies
-
- 3
-
-
- Scottish Maid
- artesania latina
- (and 1 more)
-
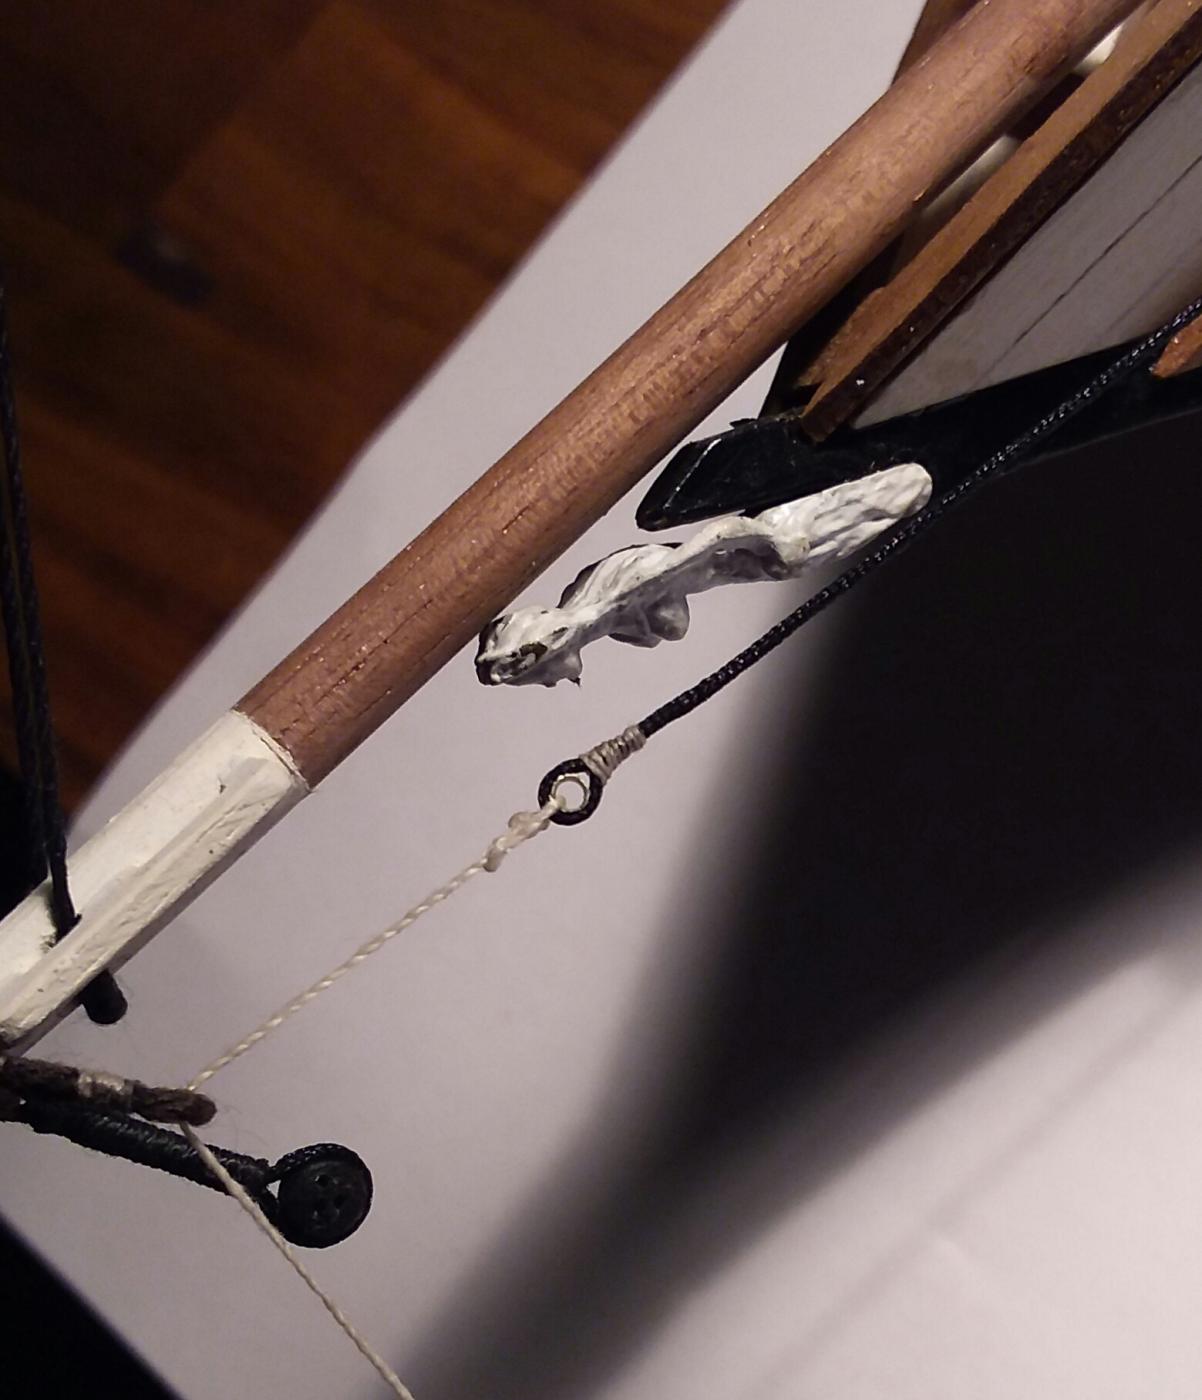
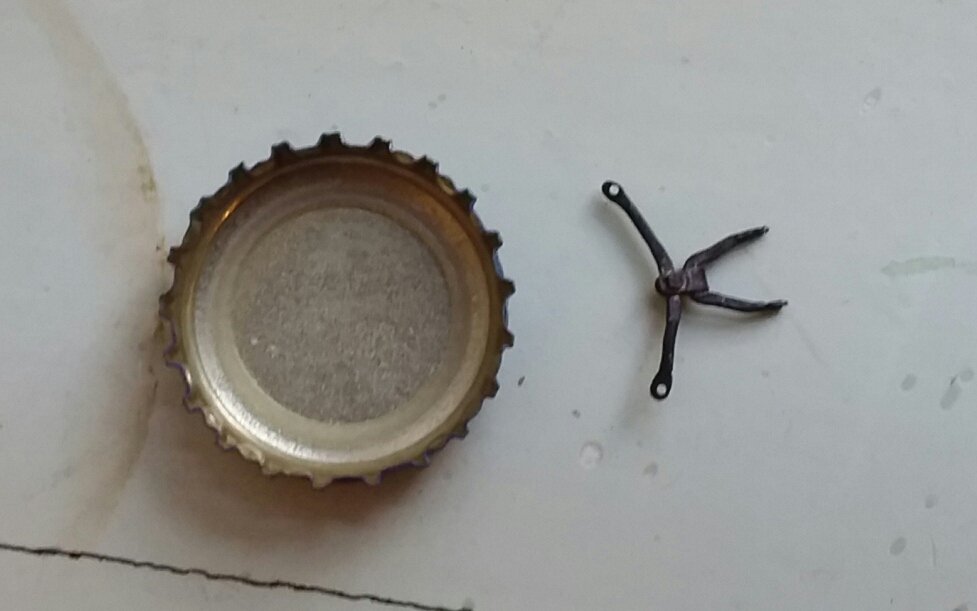
Have been slowly plodding along on my Scottish Maid. Here are a few things that have happened. Firstly, here is my first attempt at a Cranse Iron, which I will use on the lower yard on the foremast. I don't know how to solder, so it is made with a few strips of brass, some brass wire and a brass pin and a bit of CA. The armof the iron rotates but not quite as much as it should!

- 115 replies
-
- 4
-
-
- Scottish Maid
- artesania latina
- (and 1 more)
-
Rob. How did you make the winches? They look very clean with high level of detail. Interested to know how you did it. Sorry...just saw your post above, but how about the wheels? Thanks, Tim
- 1,208 replies
-
- 2
-
-
- great republic
- clipper
- (and 1 more)
-
Thanks Jesse. Appreciate your encouragement. I am slighlty stumbling along, and learning as I go. Tim
- 115 replies
-
- 1
-
-
- Scottish Maid
- artesania latina
- (and 1 more)
-
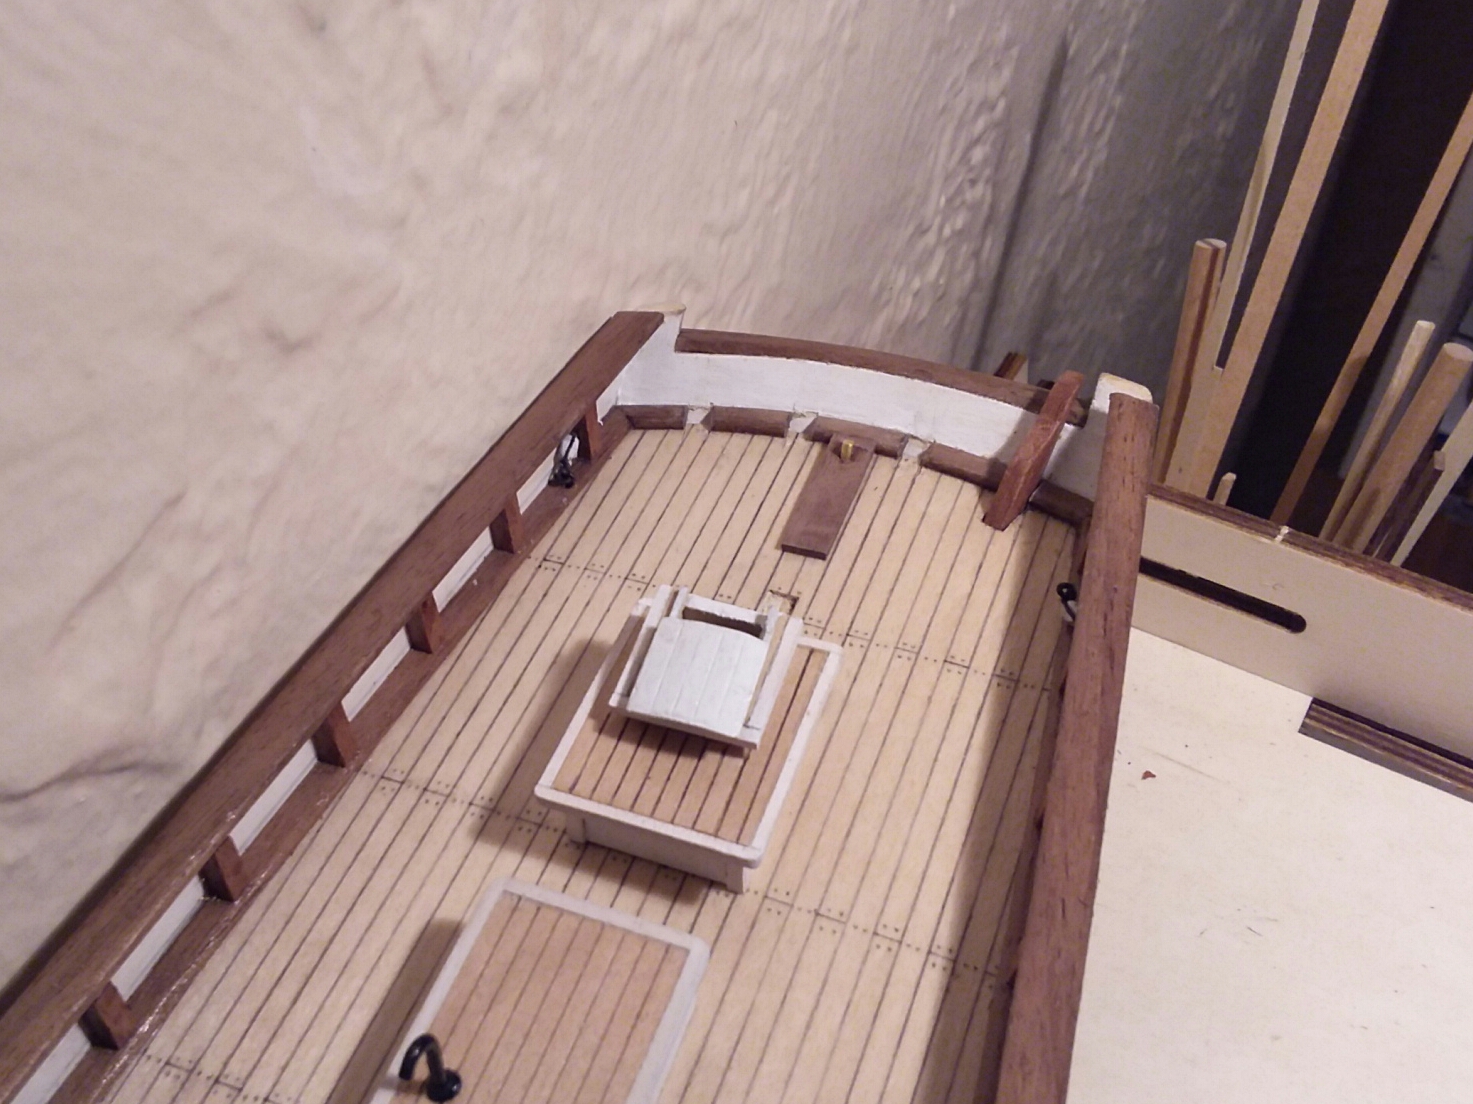
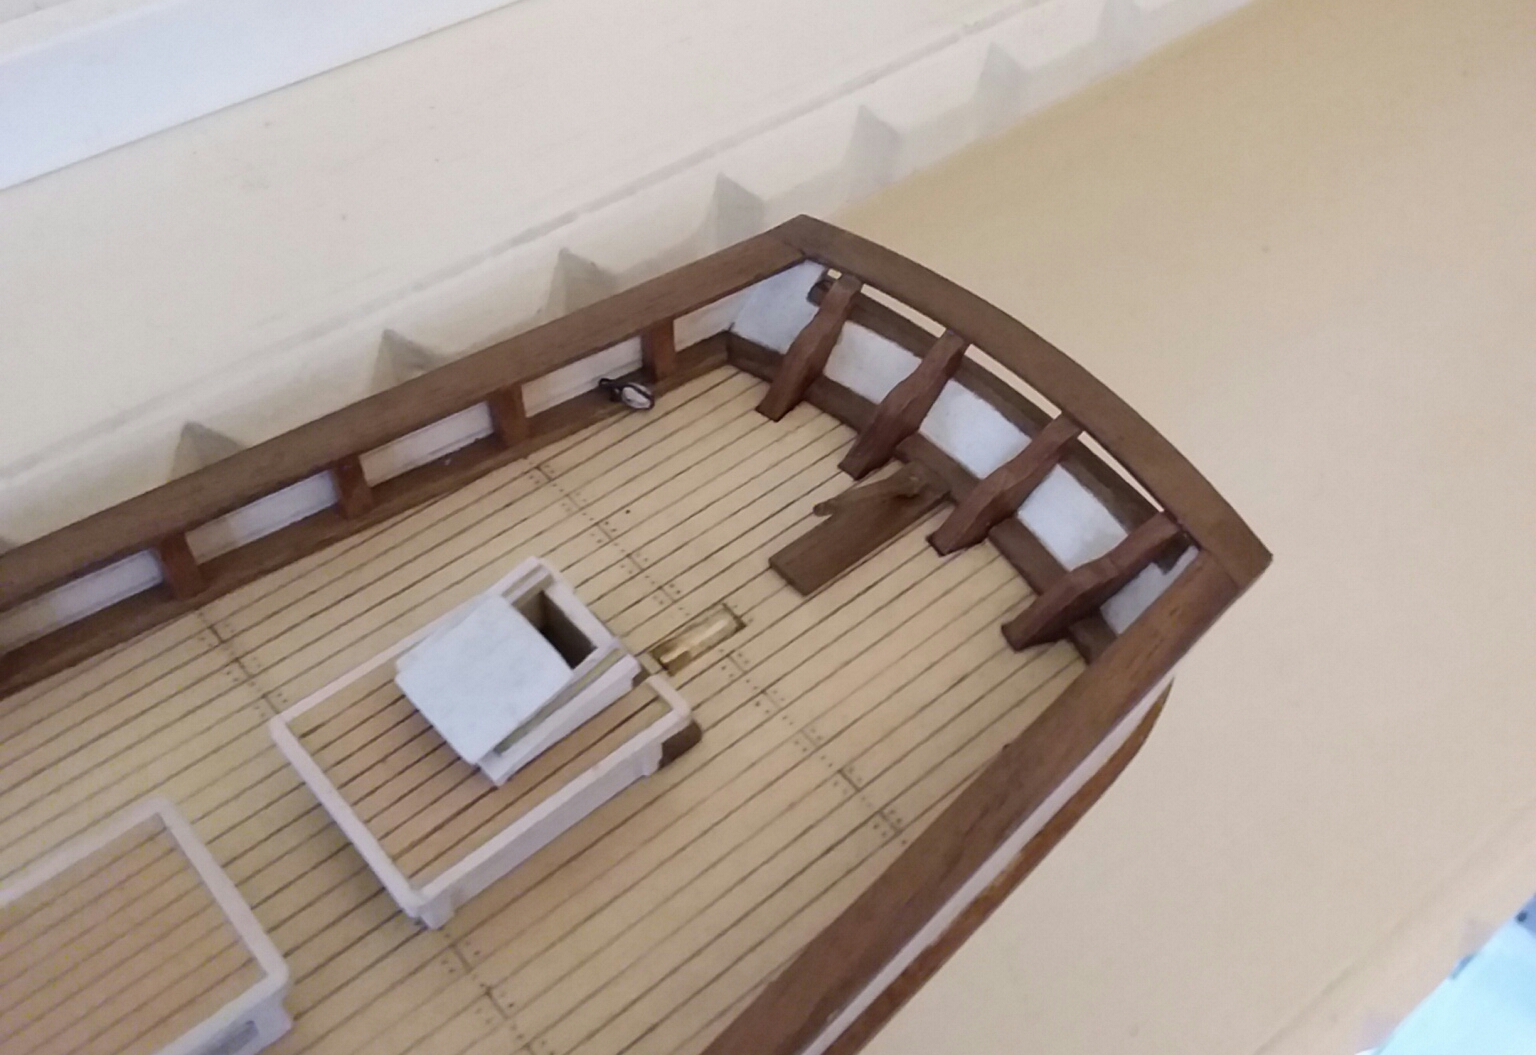
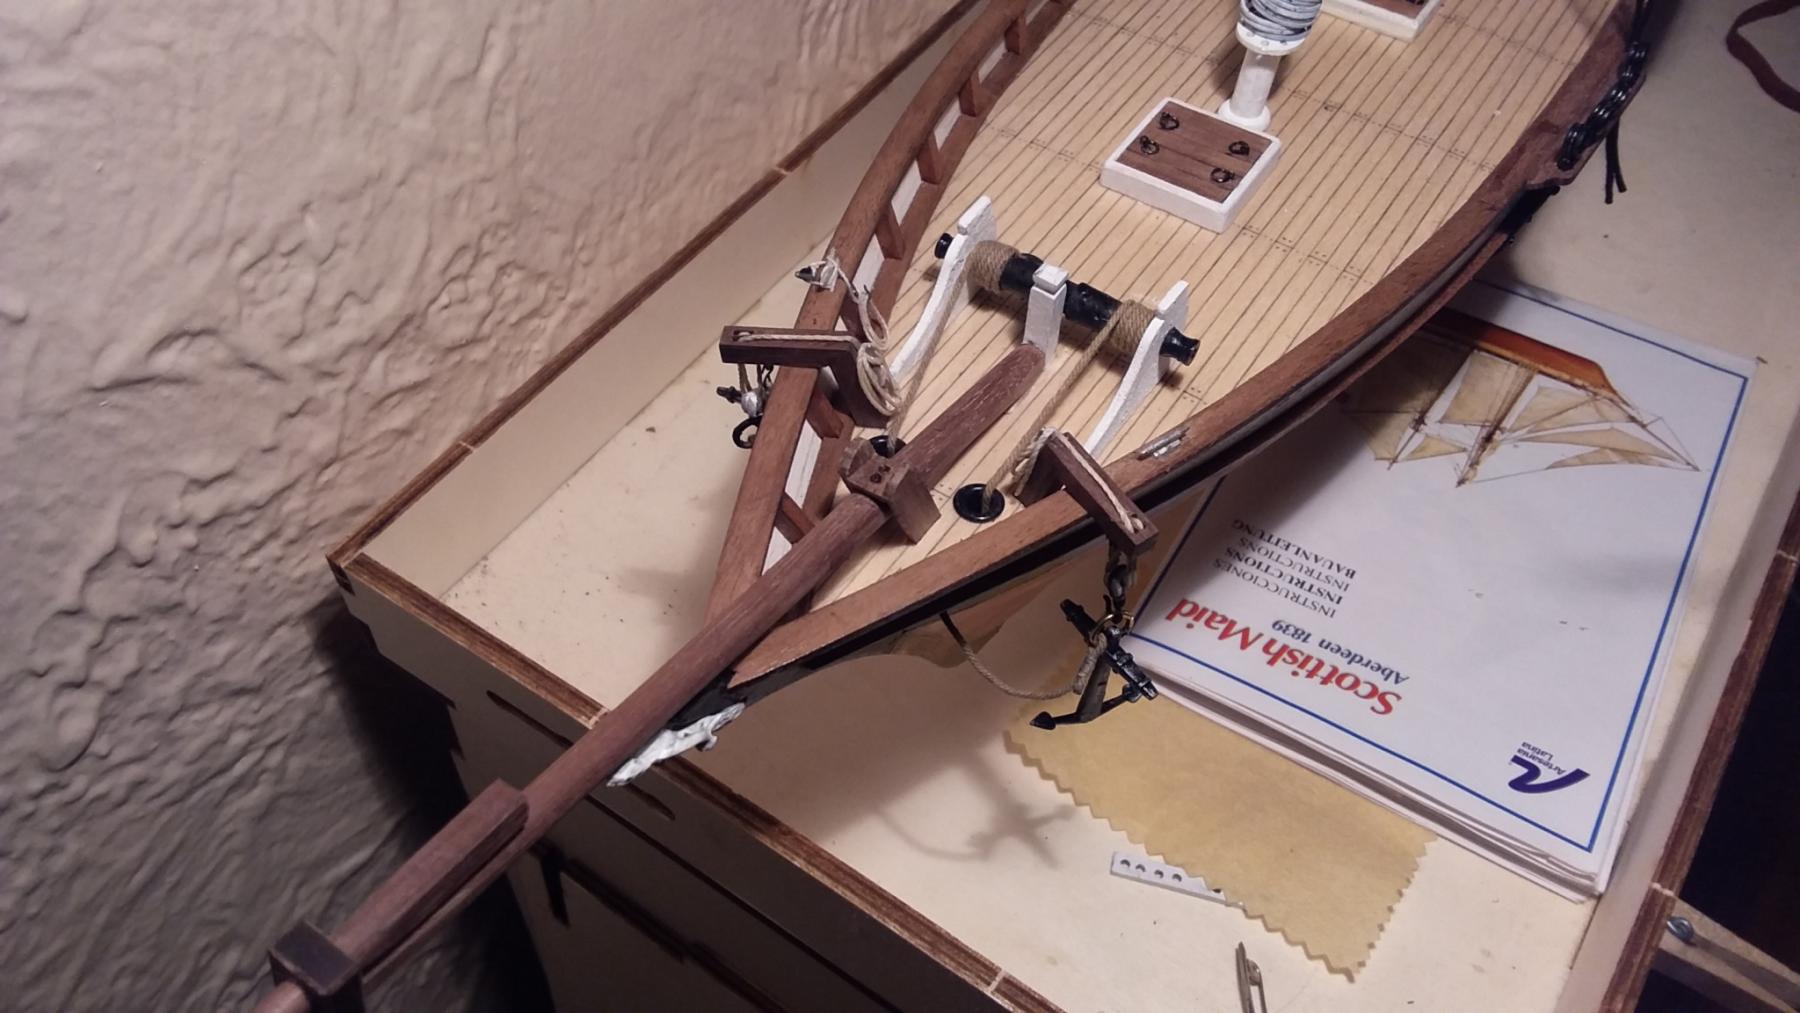
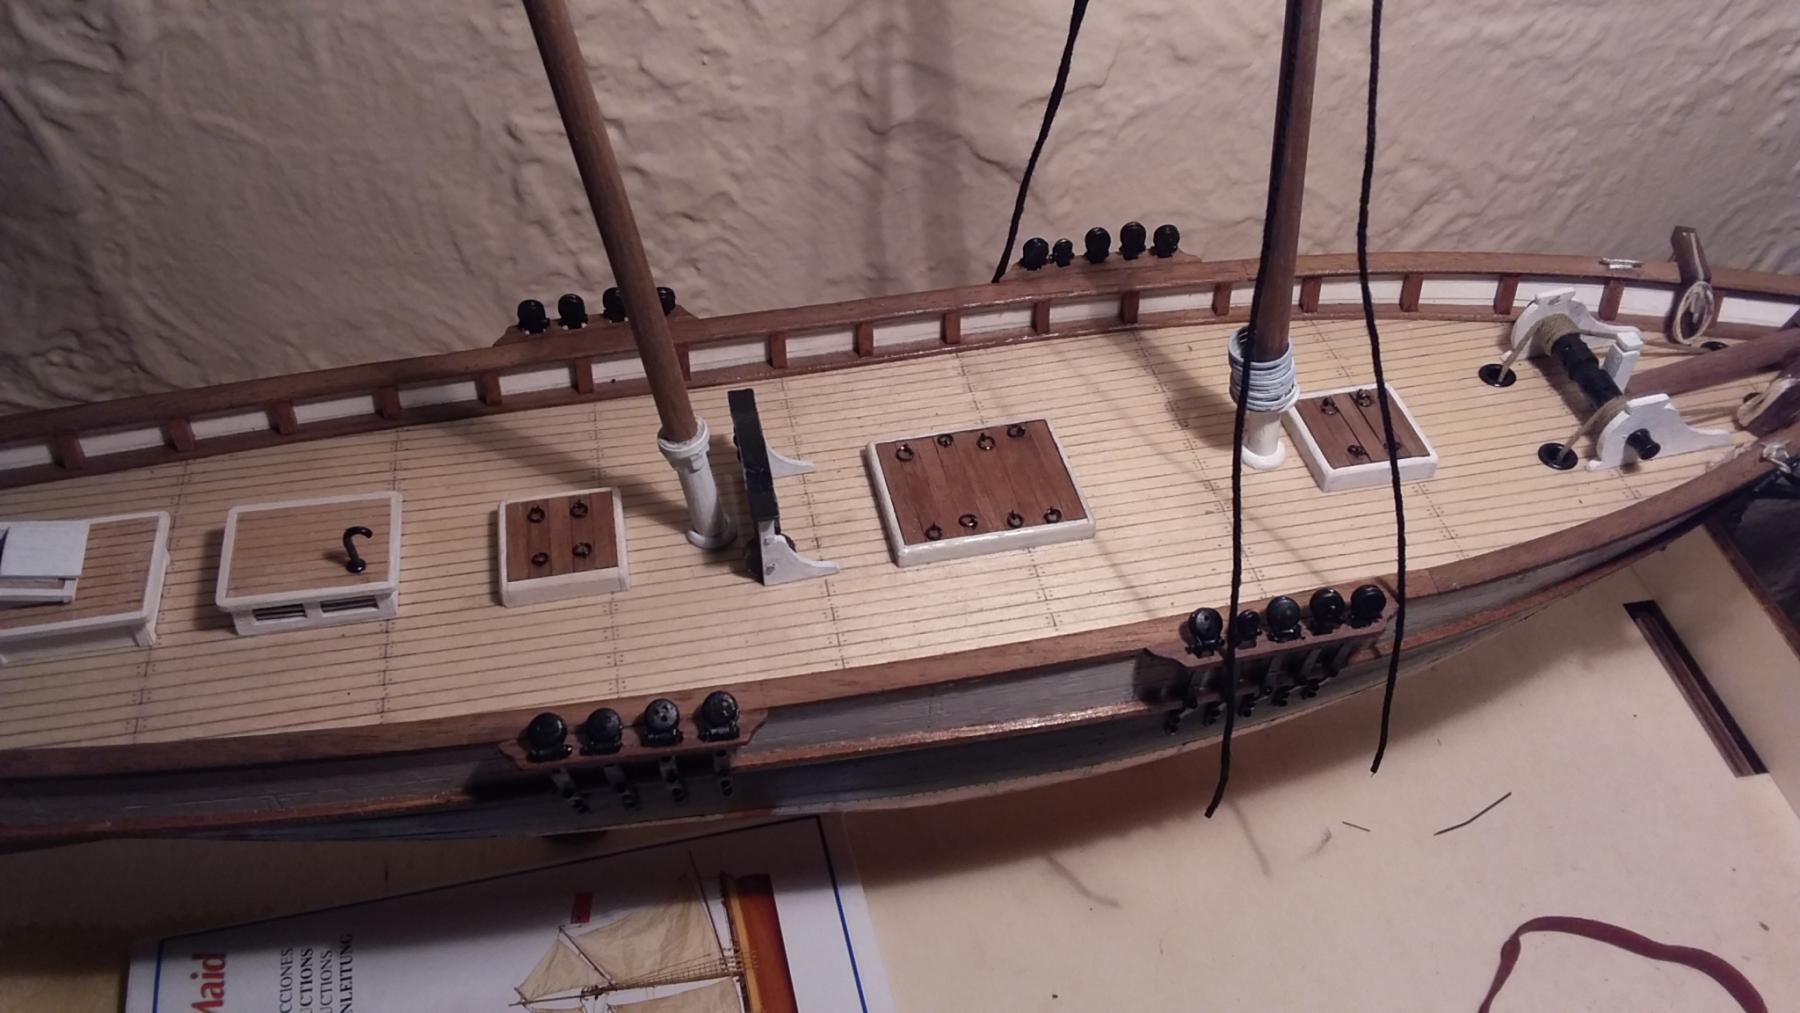
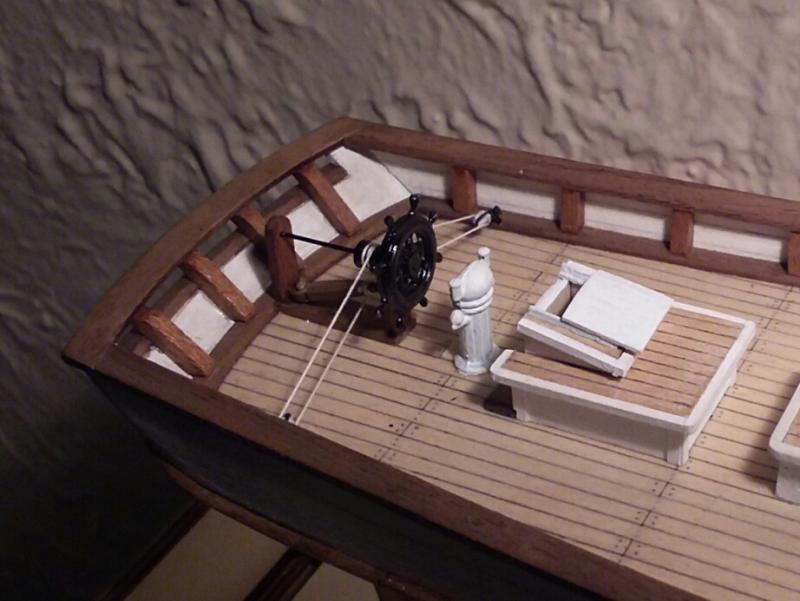
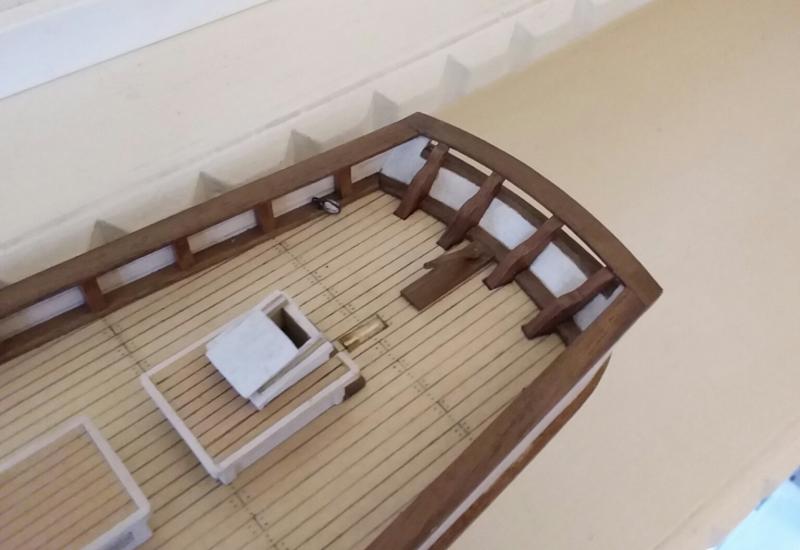
I have adjusted the stern of the model. The kit and plans show simple square frames, which I have adjusted to something more authentic. Photos explain. I made an error in splaying them to follow the curvature of the stern, which is a shame. Will know for next time. This is a simple upgrade made using wood from the kit.

- 115 replies
-
- 4
-
-
- Scottish Maid
- artesania latina
- (and 1 more)
-
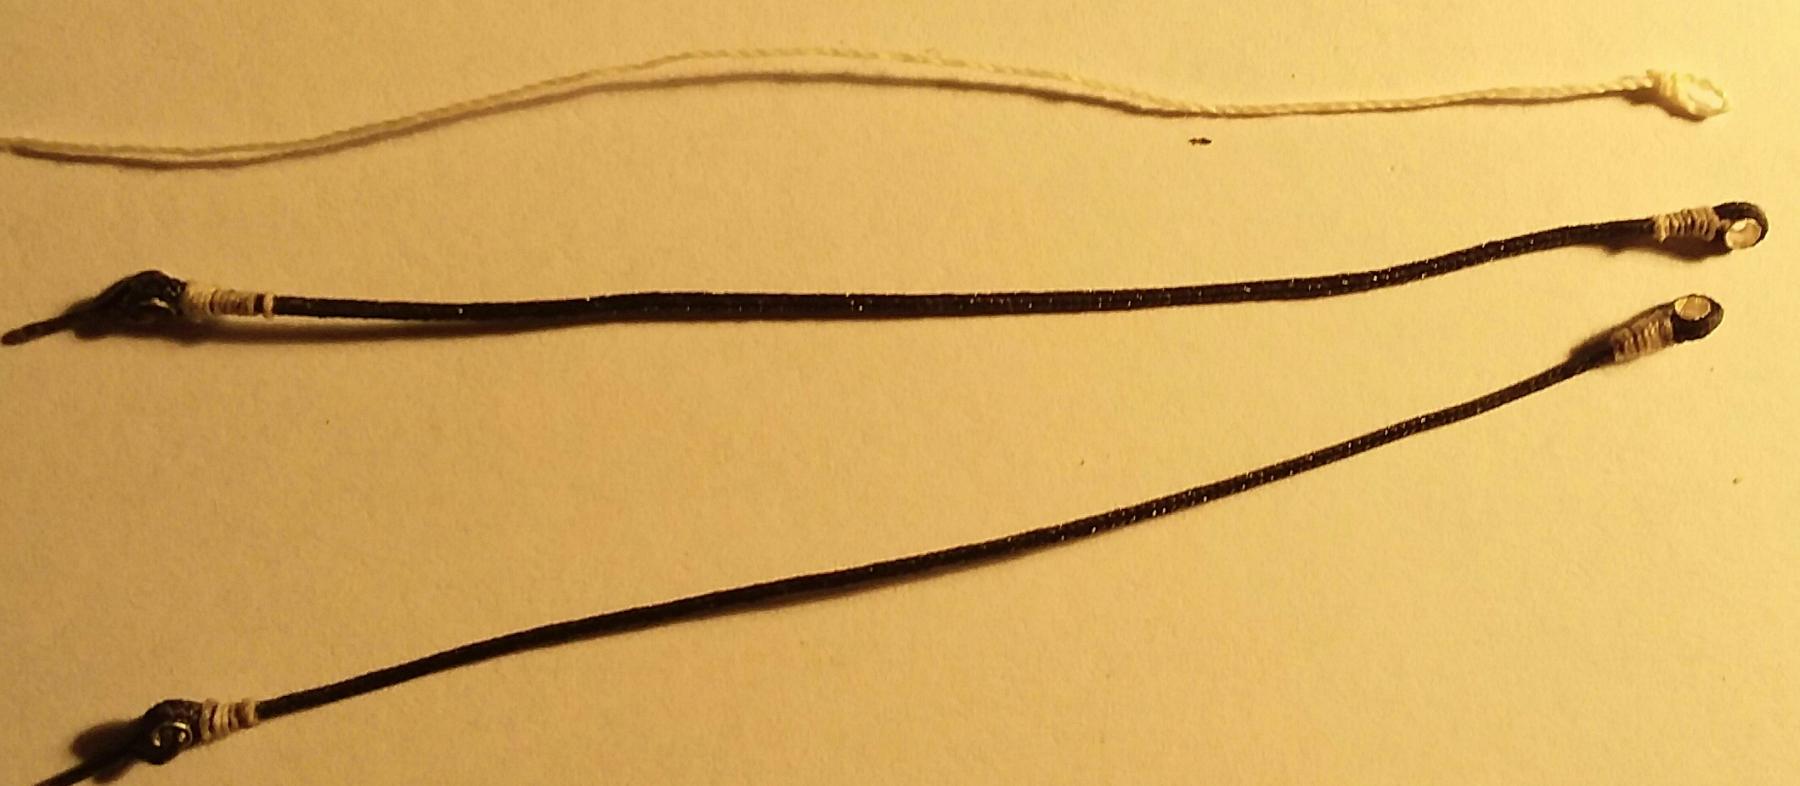
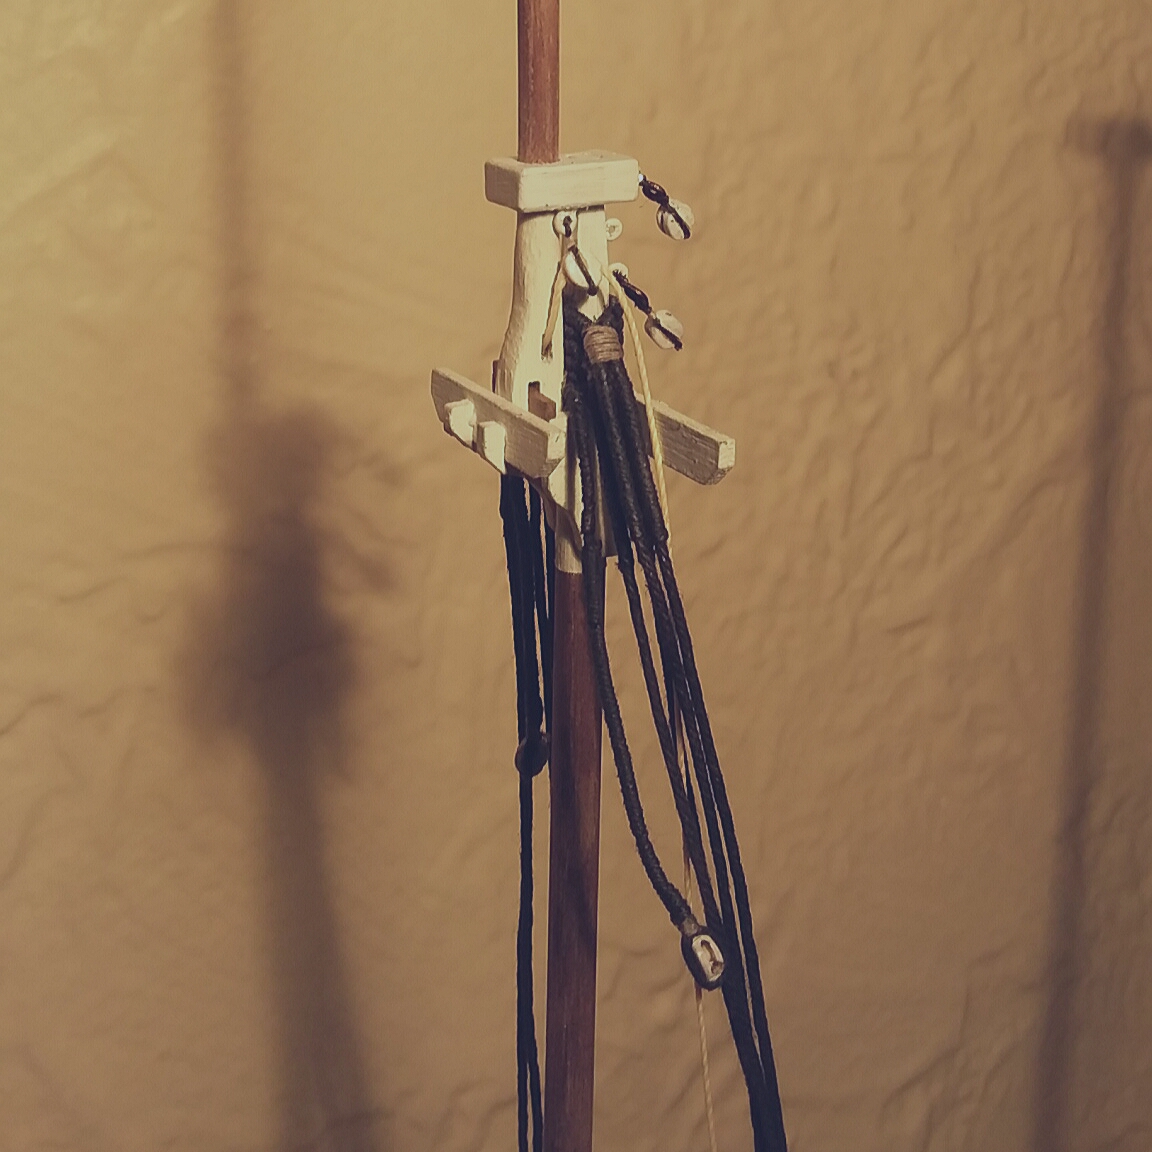
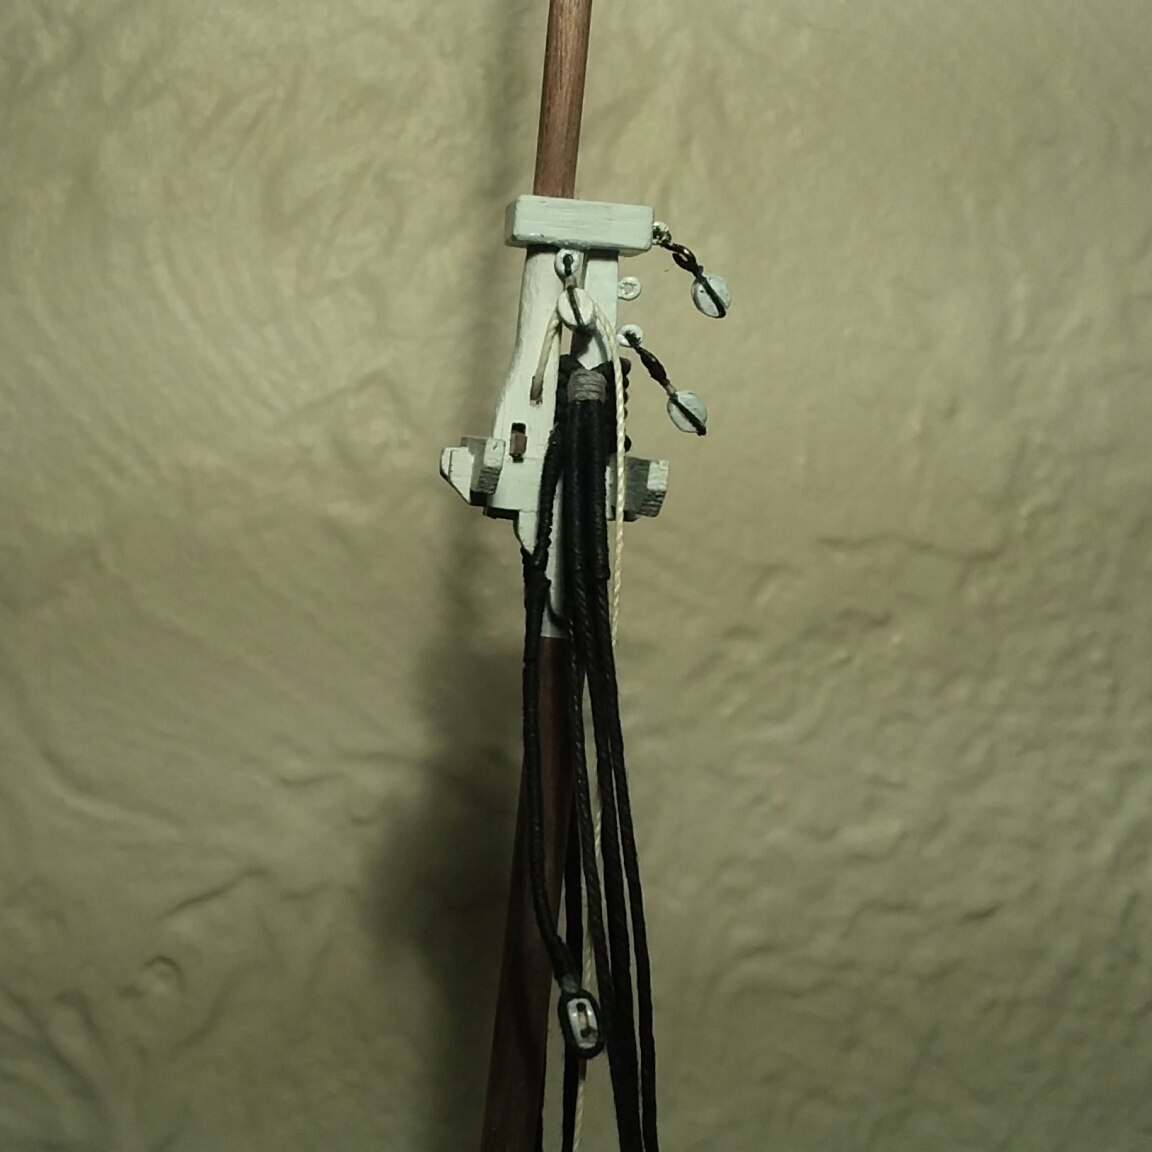
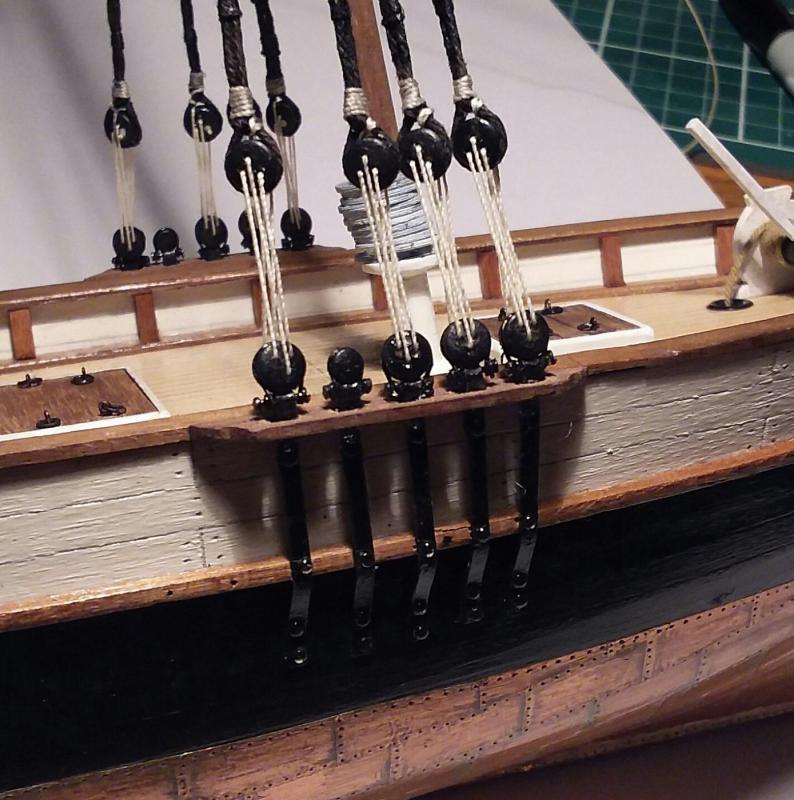
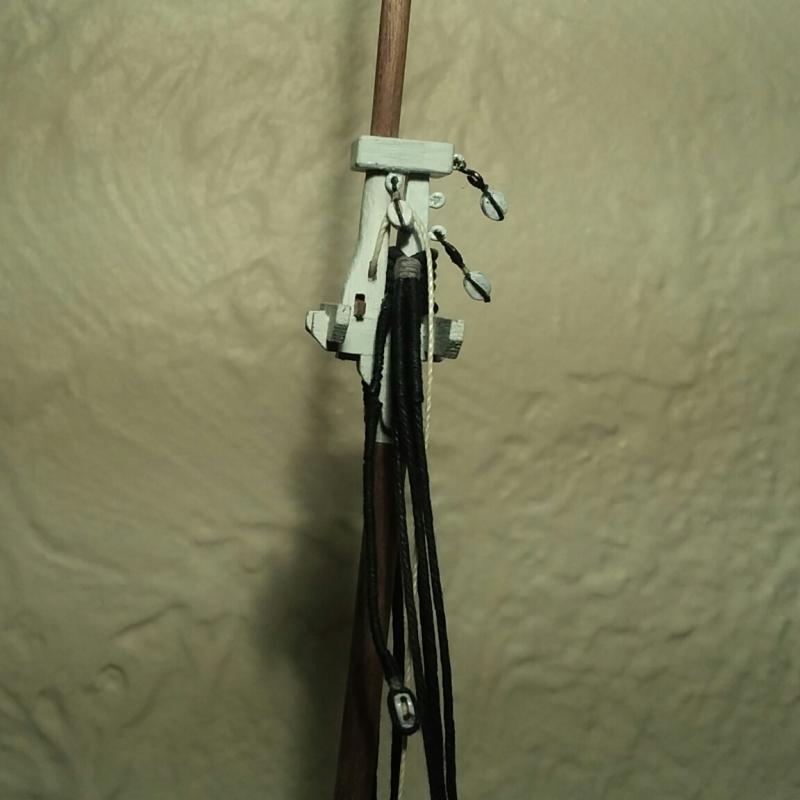
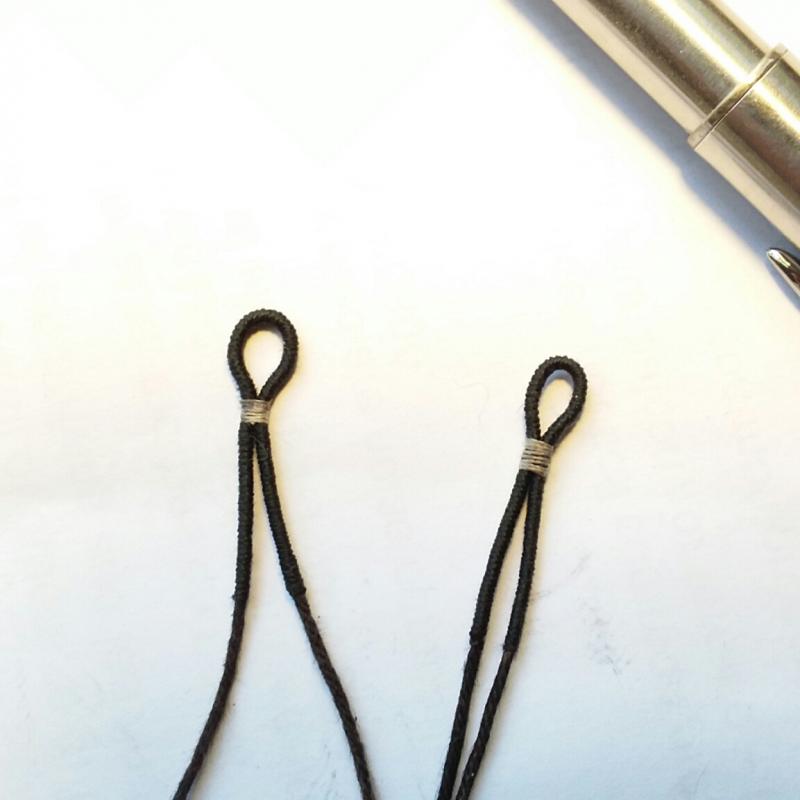
Have made a bit of progress on the standing rigging. Shrouds for foremast are in place. Also forestays, served and spliced in order to loop around foremast trees. Finally created the guys for the bowsprit. This was tricky. First had to create a collar with eyelets either side. Collar also needed the deadeye for the bobstay to be attached to it. Then made the the bowsprit guys themselves, which are then lashed to the collar. Both collar and guys have eyelets and thimbles. First go at this, but managed to get the hang of making little thimbles, by pushing a dremel head into some small sections of silver coated brass beads (from a bead store). This gives them a bit of shape. Then created a false splice around them. Finally make the little lashing and there we go. Its 2am, and I have a busy day with kids tomorrow. My wife is going to kill me... Bed time. Happy new year!


- 115 replies
-
- 5
-
-
- Scottish Maid
- artesania latina
- (and 1 more)
-
To date I have been painting hooks and eyes with oil based paint pens. However...it just scrapes off so easily. So resigned my self to purchasing proper brass blackener. Will be slower, but a much better result I hope.
-
Merci Jean Pierre. Could you explain what you mean a bit more? Also whats a #2 pencil? Is that a thickness or lead hardness? Tim
-
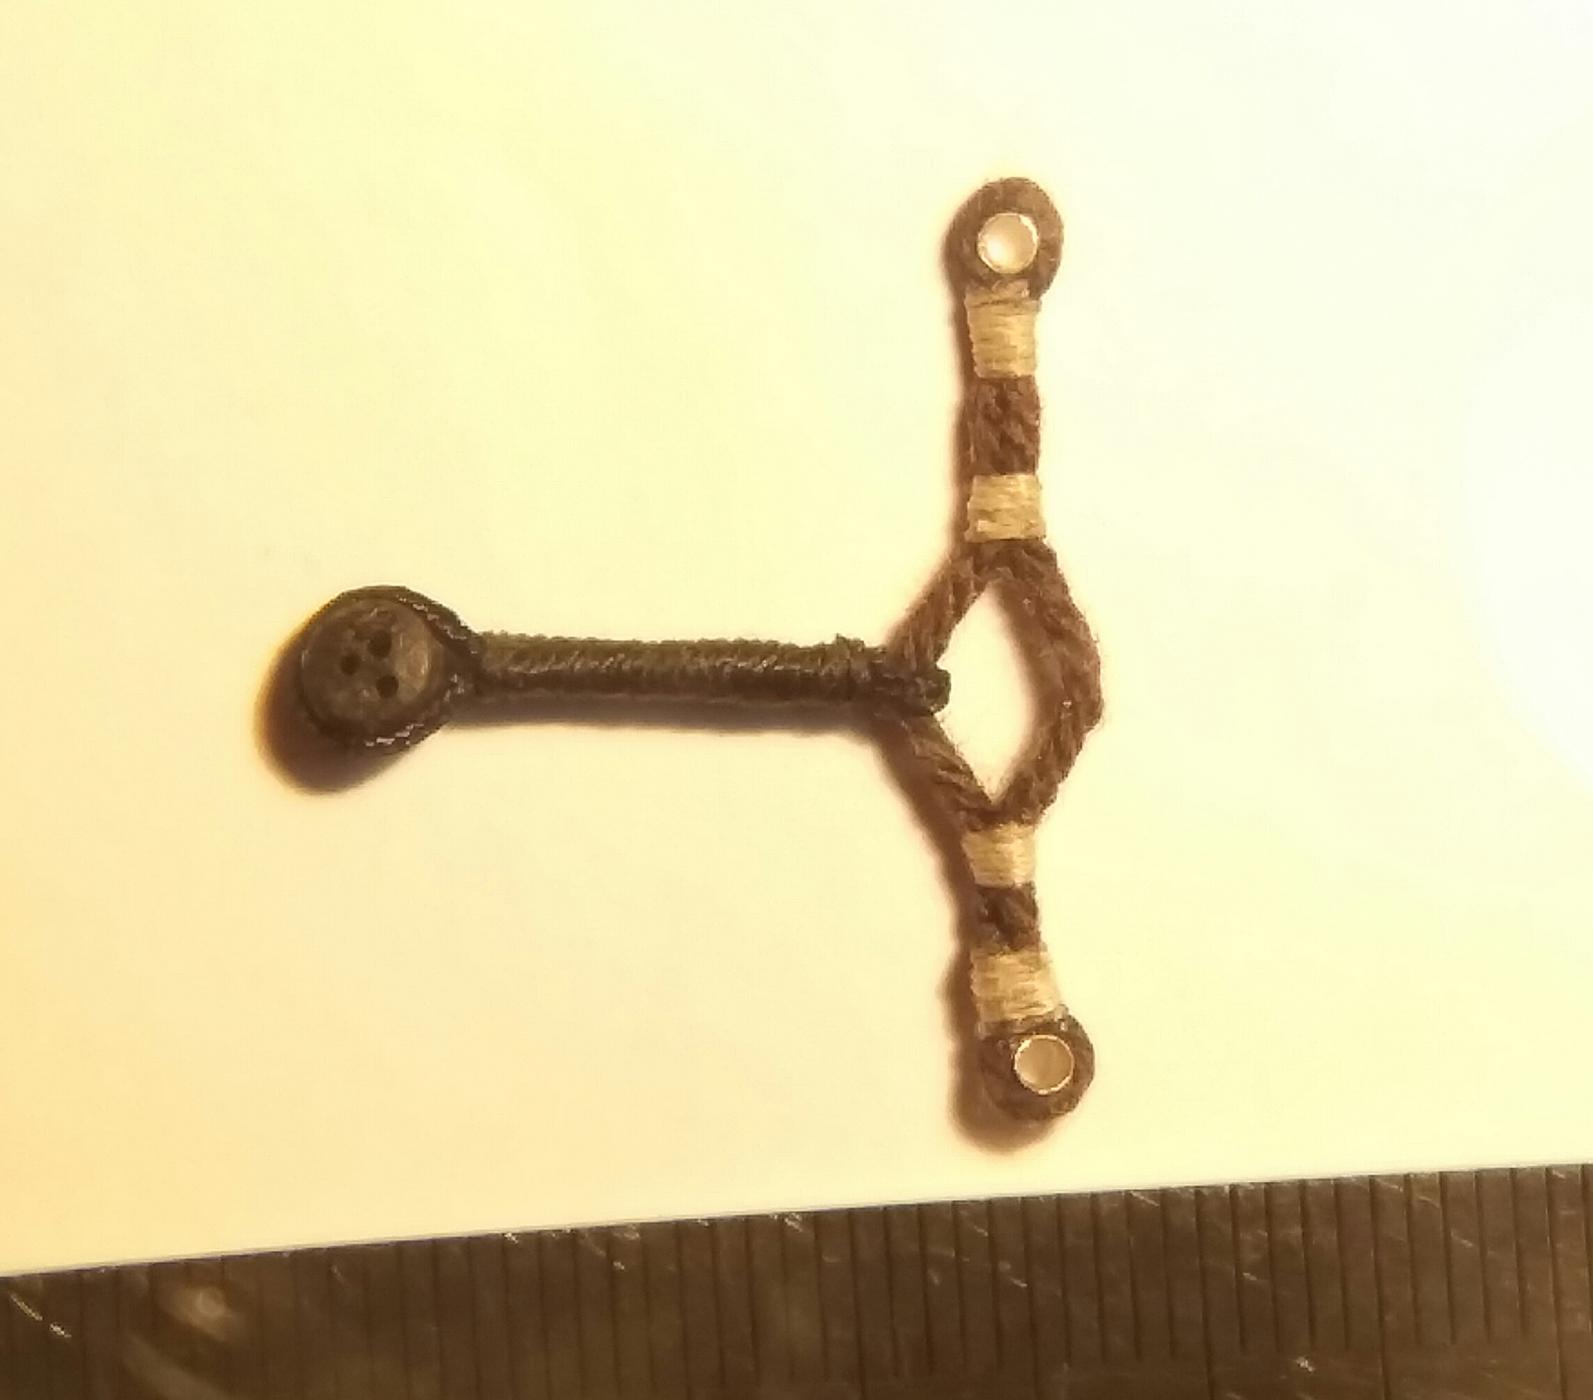
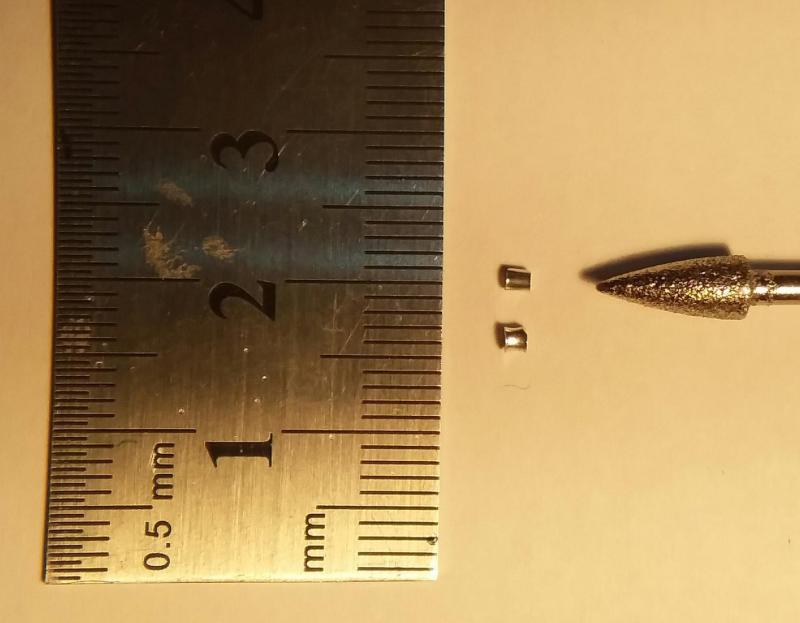
Thanks for the encouragement. I am currently trying to work out how to sort out my blocks. Have worked hard at stropping and am beginning to be satisfied after about 10 attempts. Also I am dropping a bit of brass into the loop or eye of the strop which is super fiddly with a 4mm block but does work, and gives authentic feel. See detail below.

- 115 replies
-
- 4
-
-
- Scottish Maid
- artesania latina
- (and 1 more)
-
Have done some work on the foremast trees, shrouds etc, and was able to dryfit the top mast. I also have fitted a toprope although not shown in the AL plans. Not sure if this correct. Having fun...slow progress.

- 115 replies
-
- 4
-
-
- Scottish Maid
- artesania latina
- (and 1 more)
-
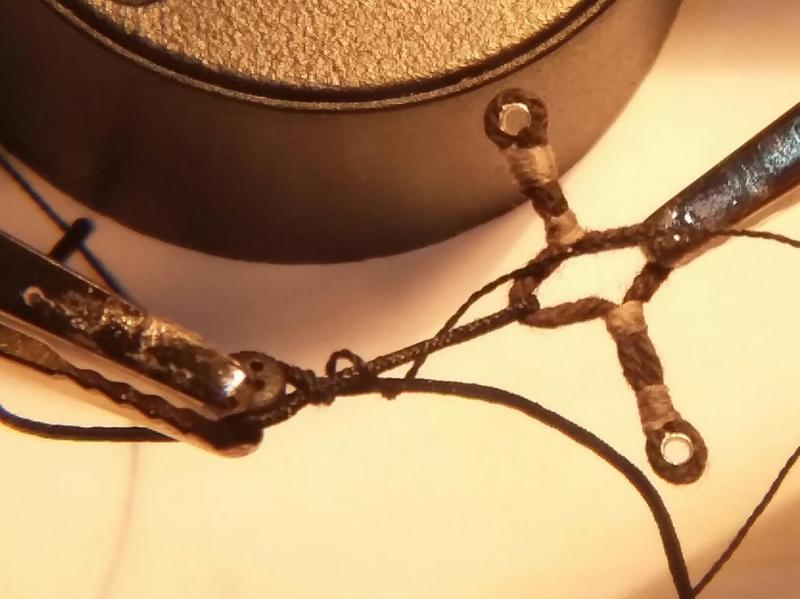
Thanks Chris. I am also trying to serve rope for the shrouds. Have not done this before and don't have Syren's wonderful Servomatic machine or equivalent. But managed to do these by hand.
- 115 replies
-
- 7
-
-
- Scottish Maid
- artesania latina
- (and 1 more)
-
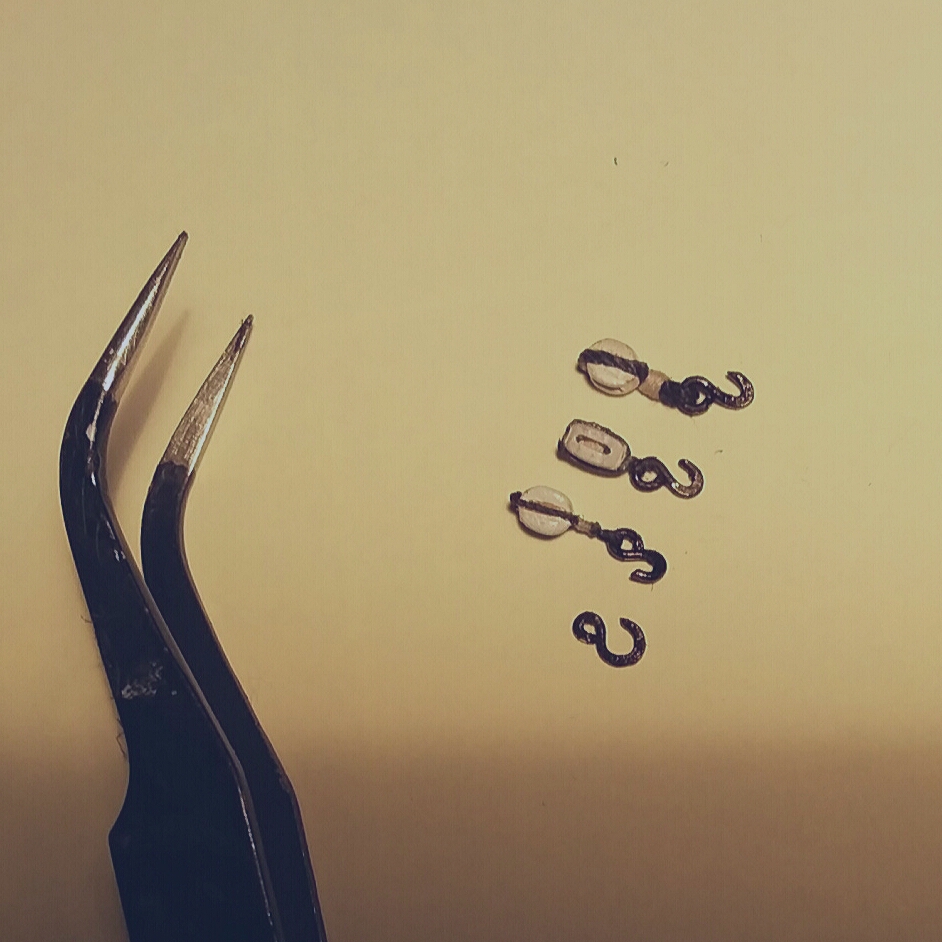
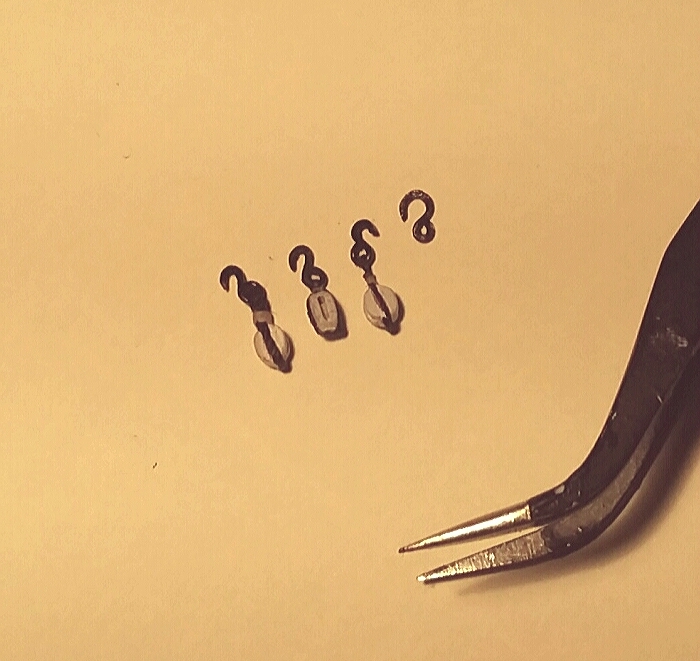
Mucking around with making hooks and blocks....here are the results.

- 115 replies
-
- 8
-
-
- Scottish Maid
- artesania latina
- (and 1 more)
-
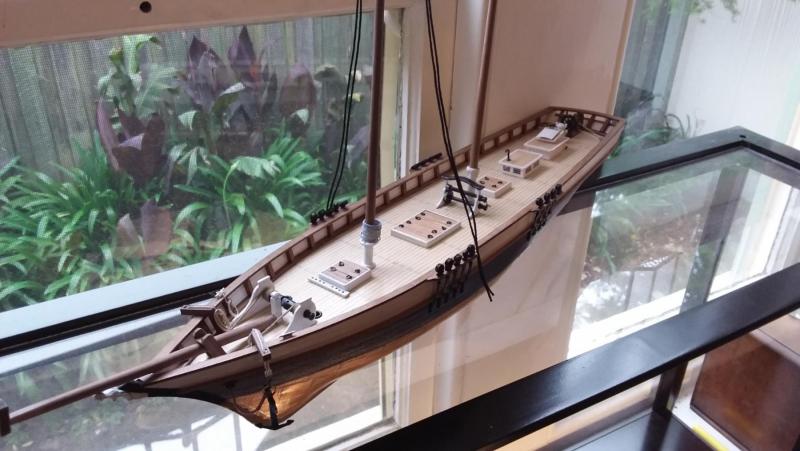
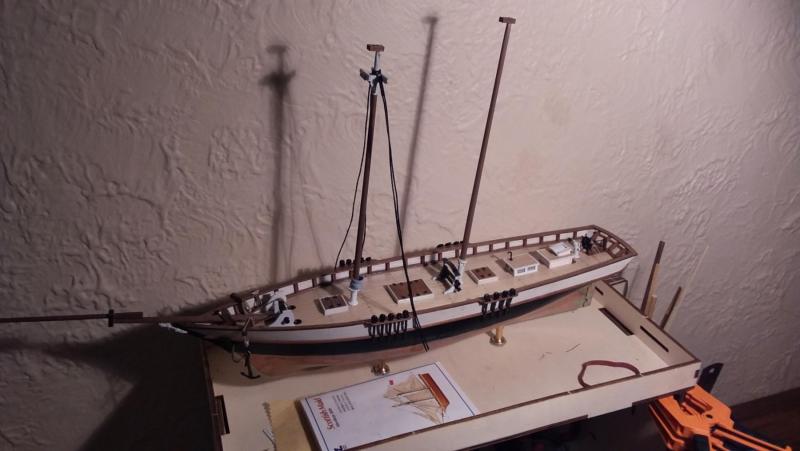
So here are a few pictures in better light.

- 115 replies
-
- 10
-
-
- Scottish Maid
- artesania latina
- (and 1 more)
-
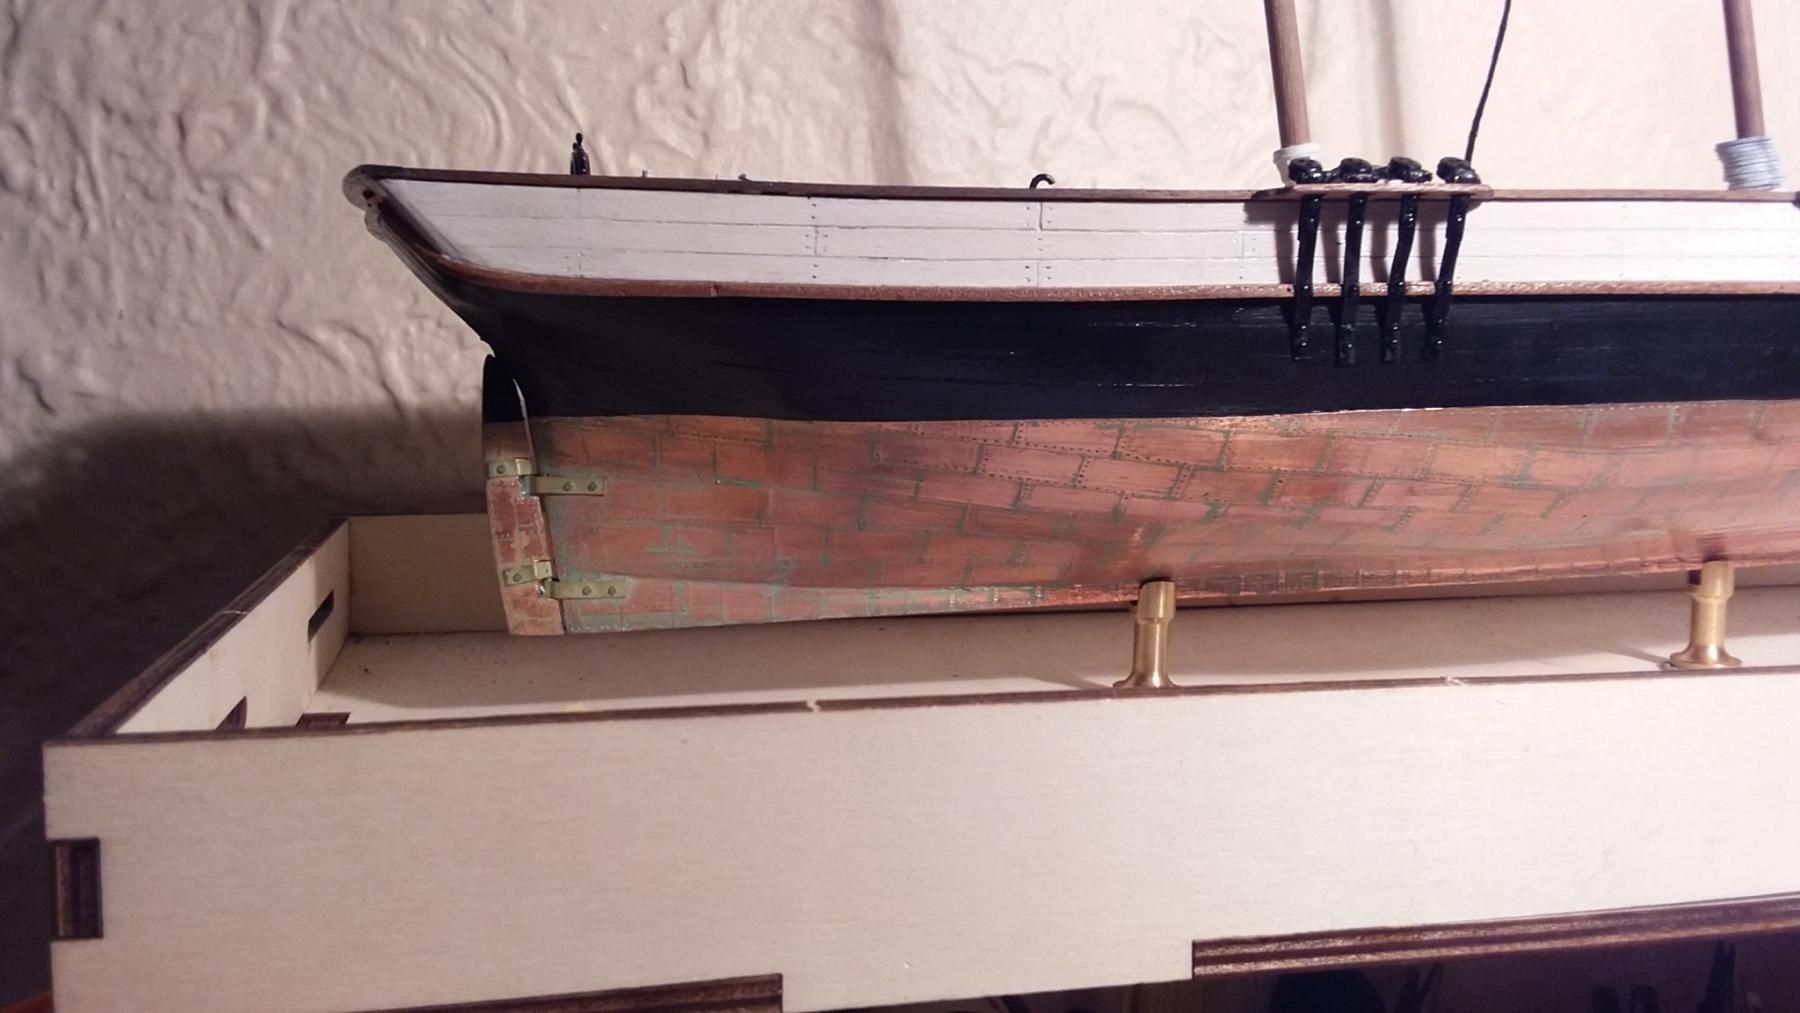
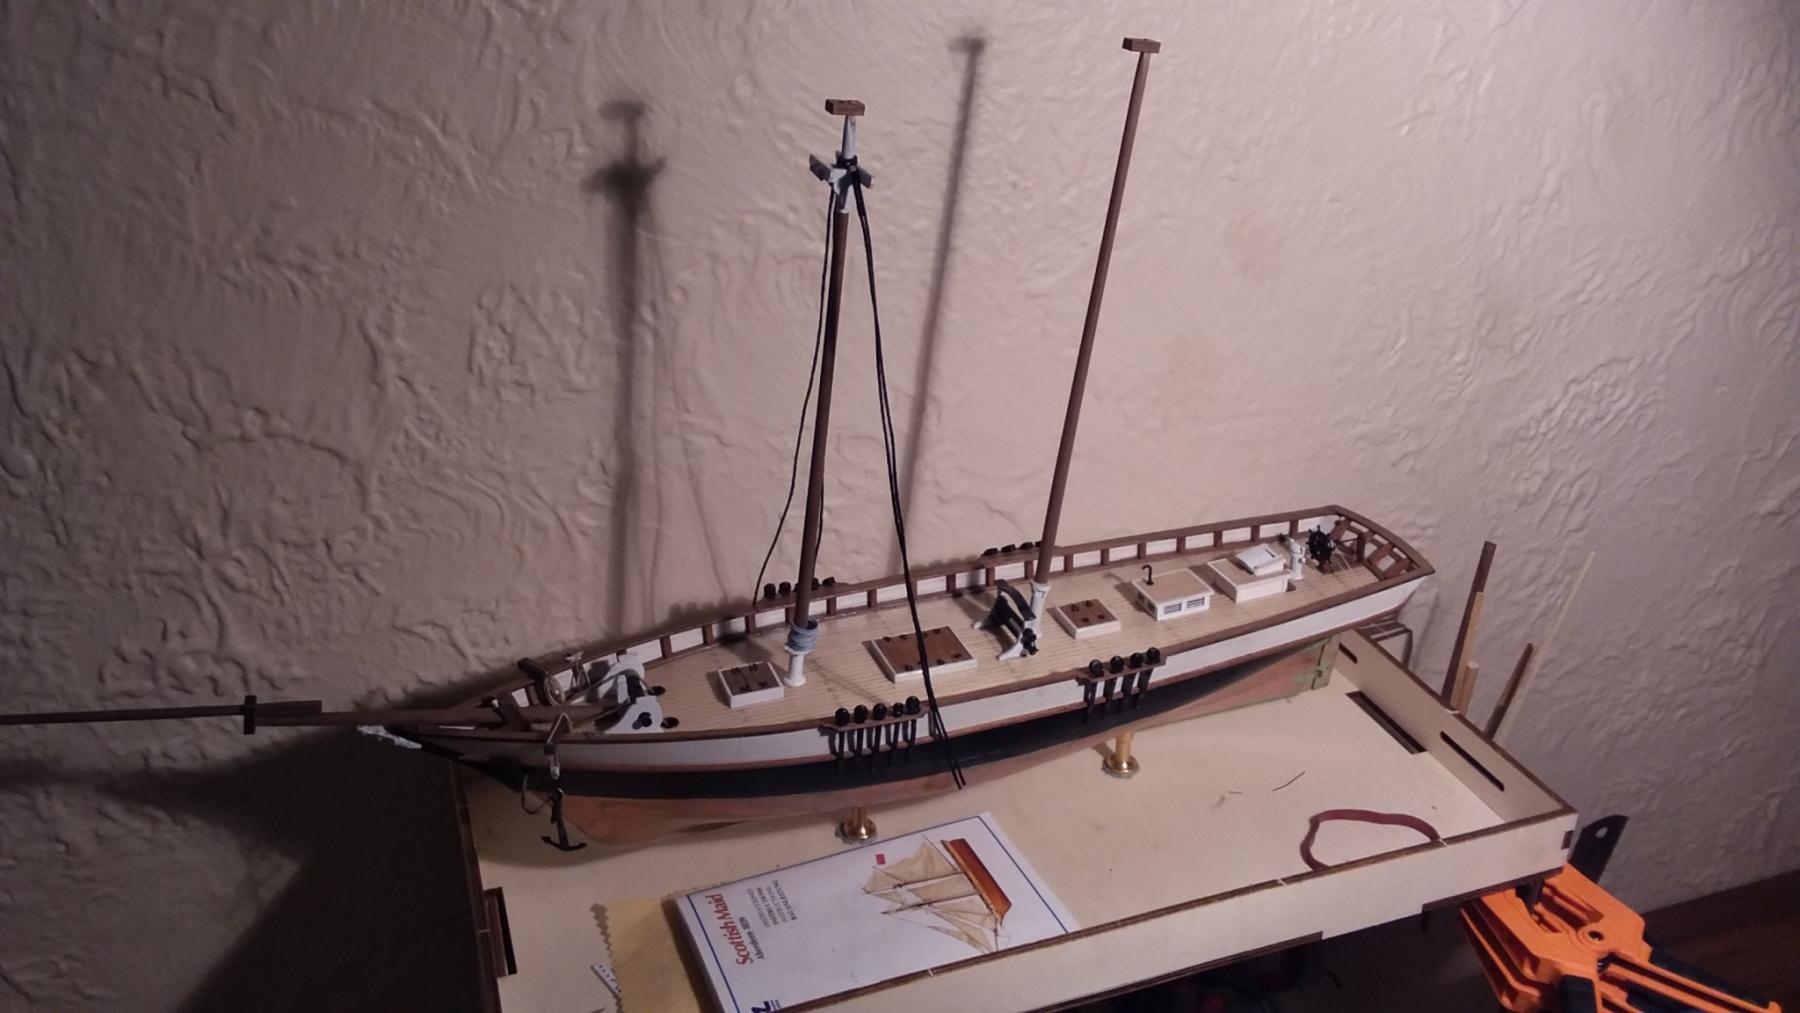
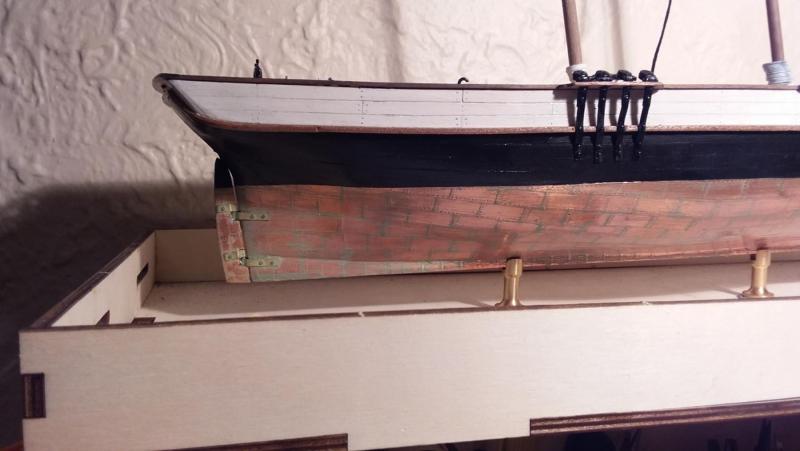
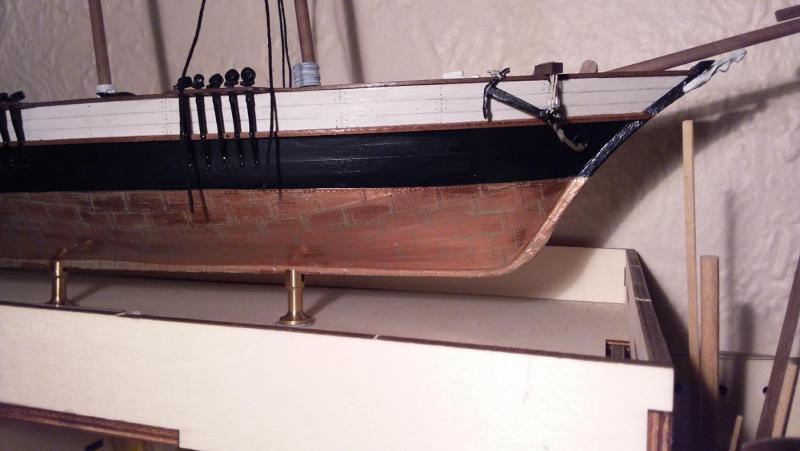
So here are a few pictures of where I am up to. Taken in very bad light.... As you can see, I am going with an unhistorical colour scheme, but I like it. I am pleased with the patina on the copper plates...used drybrush. I would welcome historical info about how to rig it more accurately than the AL instructions. I am using Petersson's book on Rigging Fore and Aft Period craft, but this uses an 1815 ship the Experiment as it's example. I am assuming the Maid would have used quite different rigging. Any ideas?


- 115 replies
-
- 7
-
-
- Scottish Maid
- artesania latina
- (and 1 more)
-
This is my second ever build so I am a learner. I am busy working hard and have three kids so build progress will also be slow. I chose the Maid because it seemed like a pretty simple cheap kit to cut my teeth on. I am going with a slightly unhistorical colour scheme, inspired by Clayton Osterling's Experiment (See here: http://www.shipmodel.com/models/experiment-full-hull-nav). I would welcome feedback, encouragement and advice. Thanks! But despite being new to this, I am totally hooked.
- 115 replies
-
- 6
-
-
- Scottish Maid
- artesania latina
- (and 1 more)