mtbediz
-
Posts
1,353 -
Joined
-
Last visited
Content Type
Profiles
Forums
Gallery
Events
Everything posted by mtbediz
-
 Now everything looks perfect!
 -
USS Constitution by mtbediz - 1:76
mtbediz replied to mtbediz's topic in - Build logs for subjects built 1751 - 1800
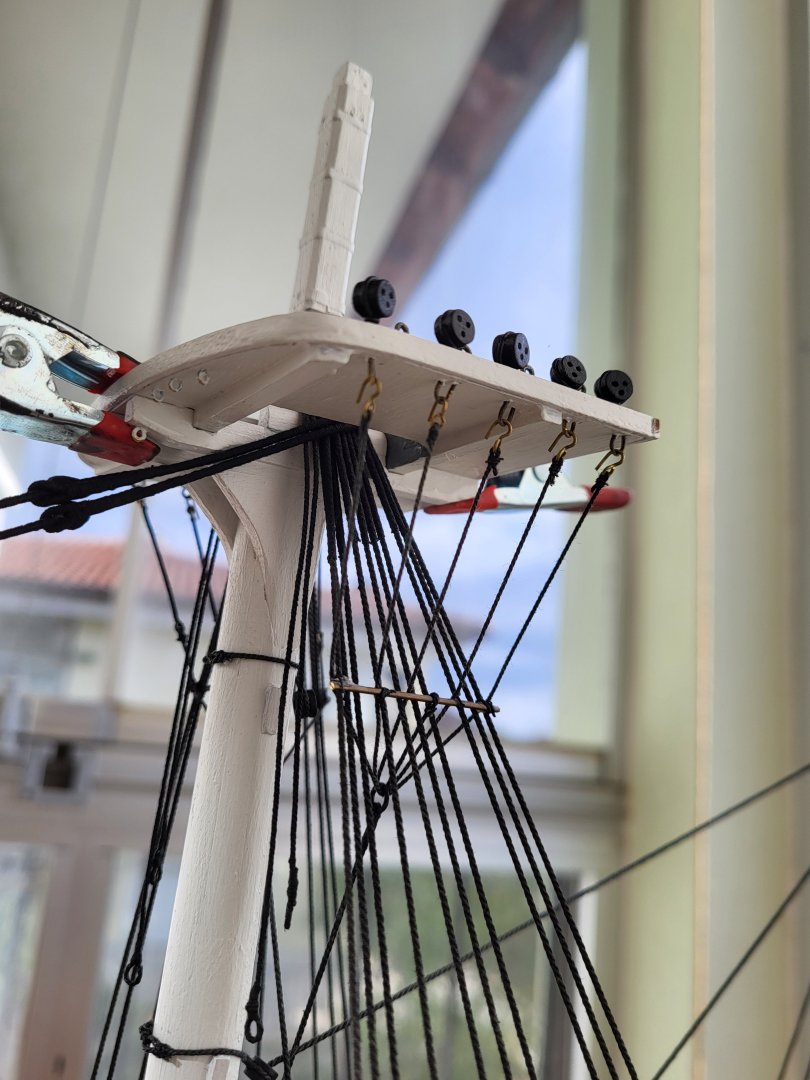
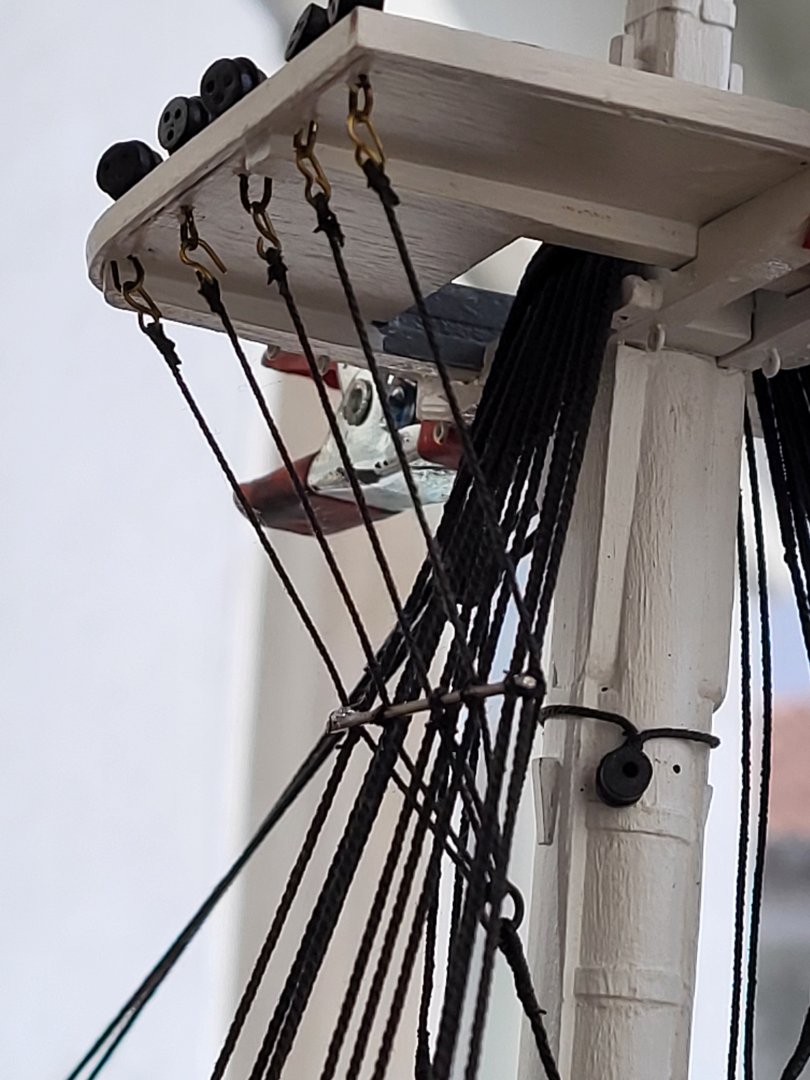
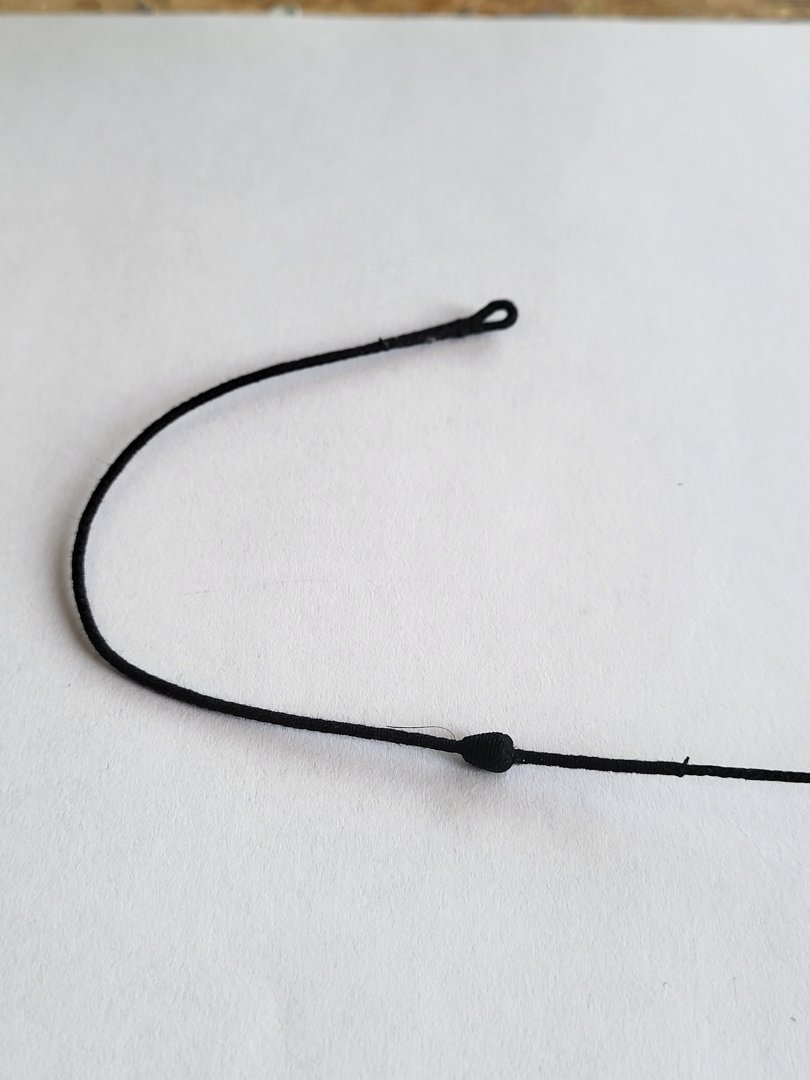
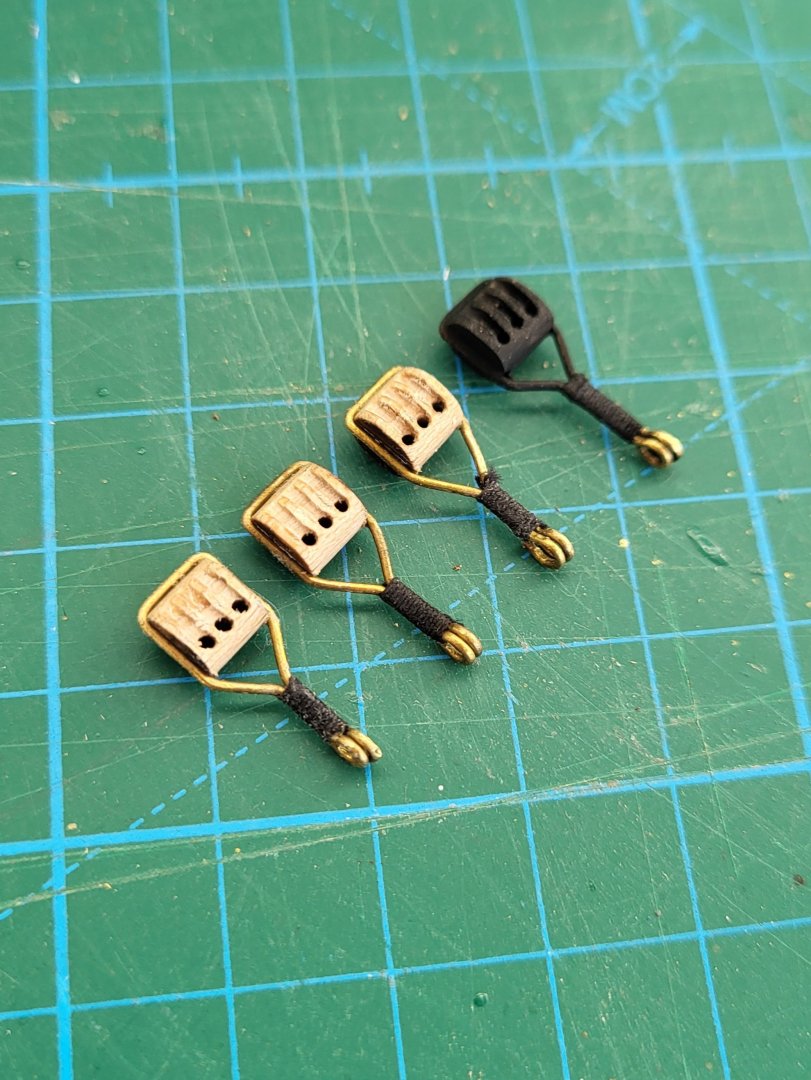
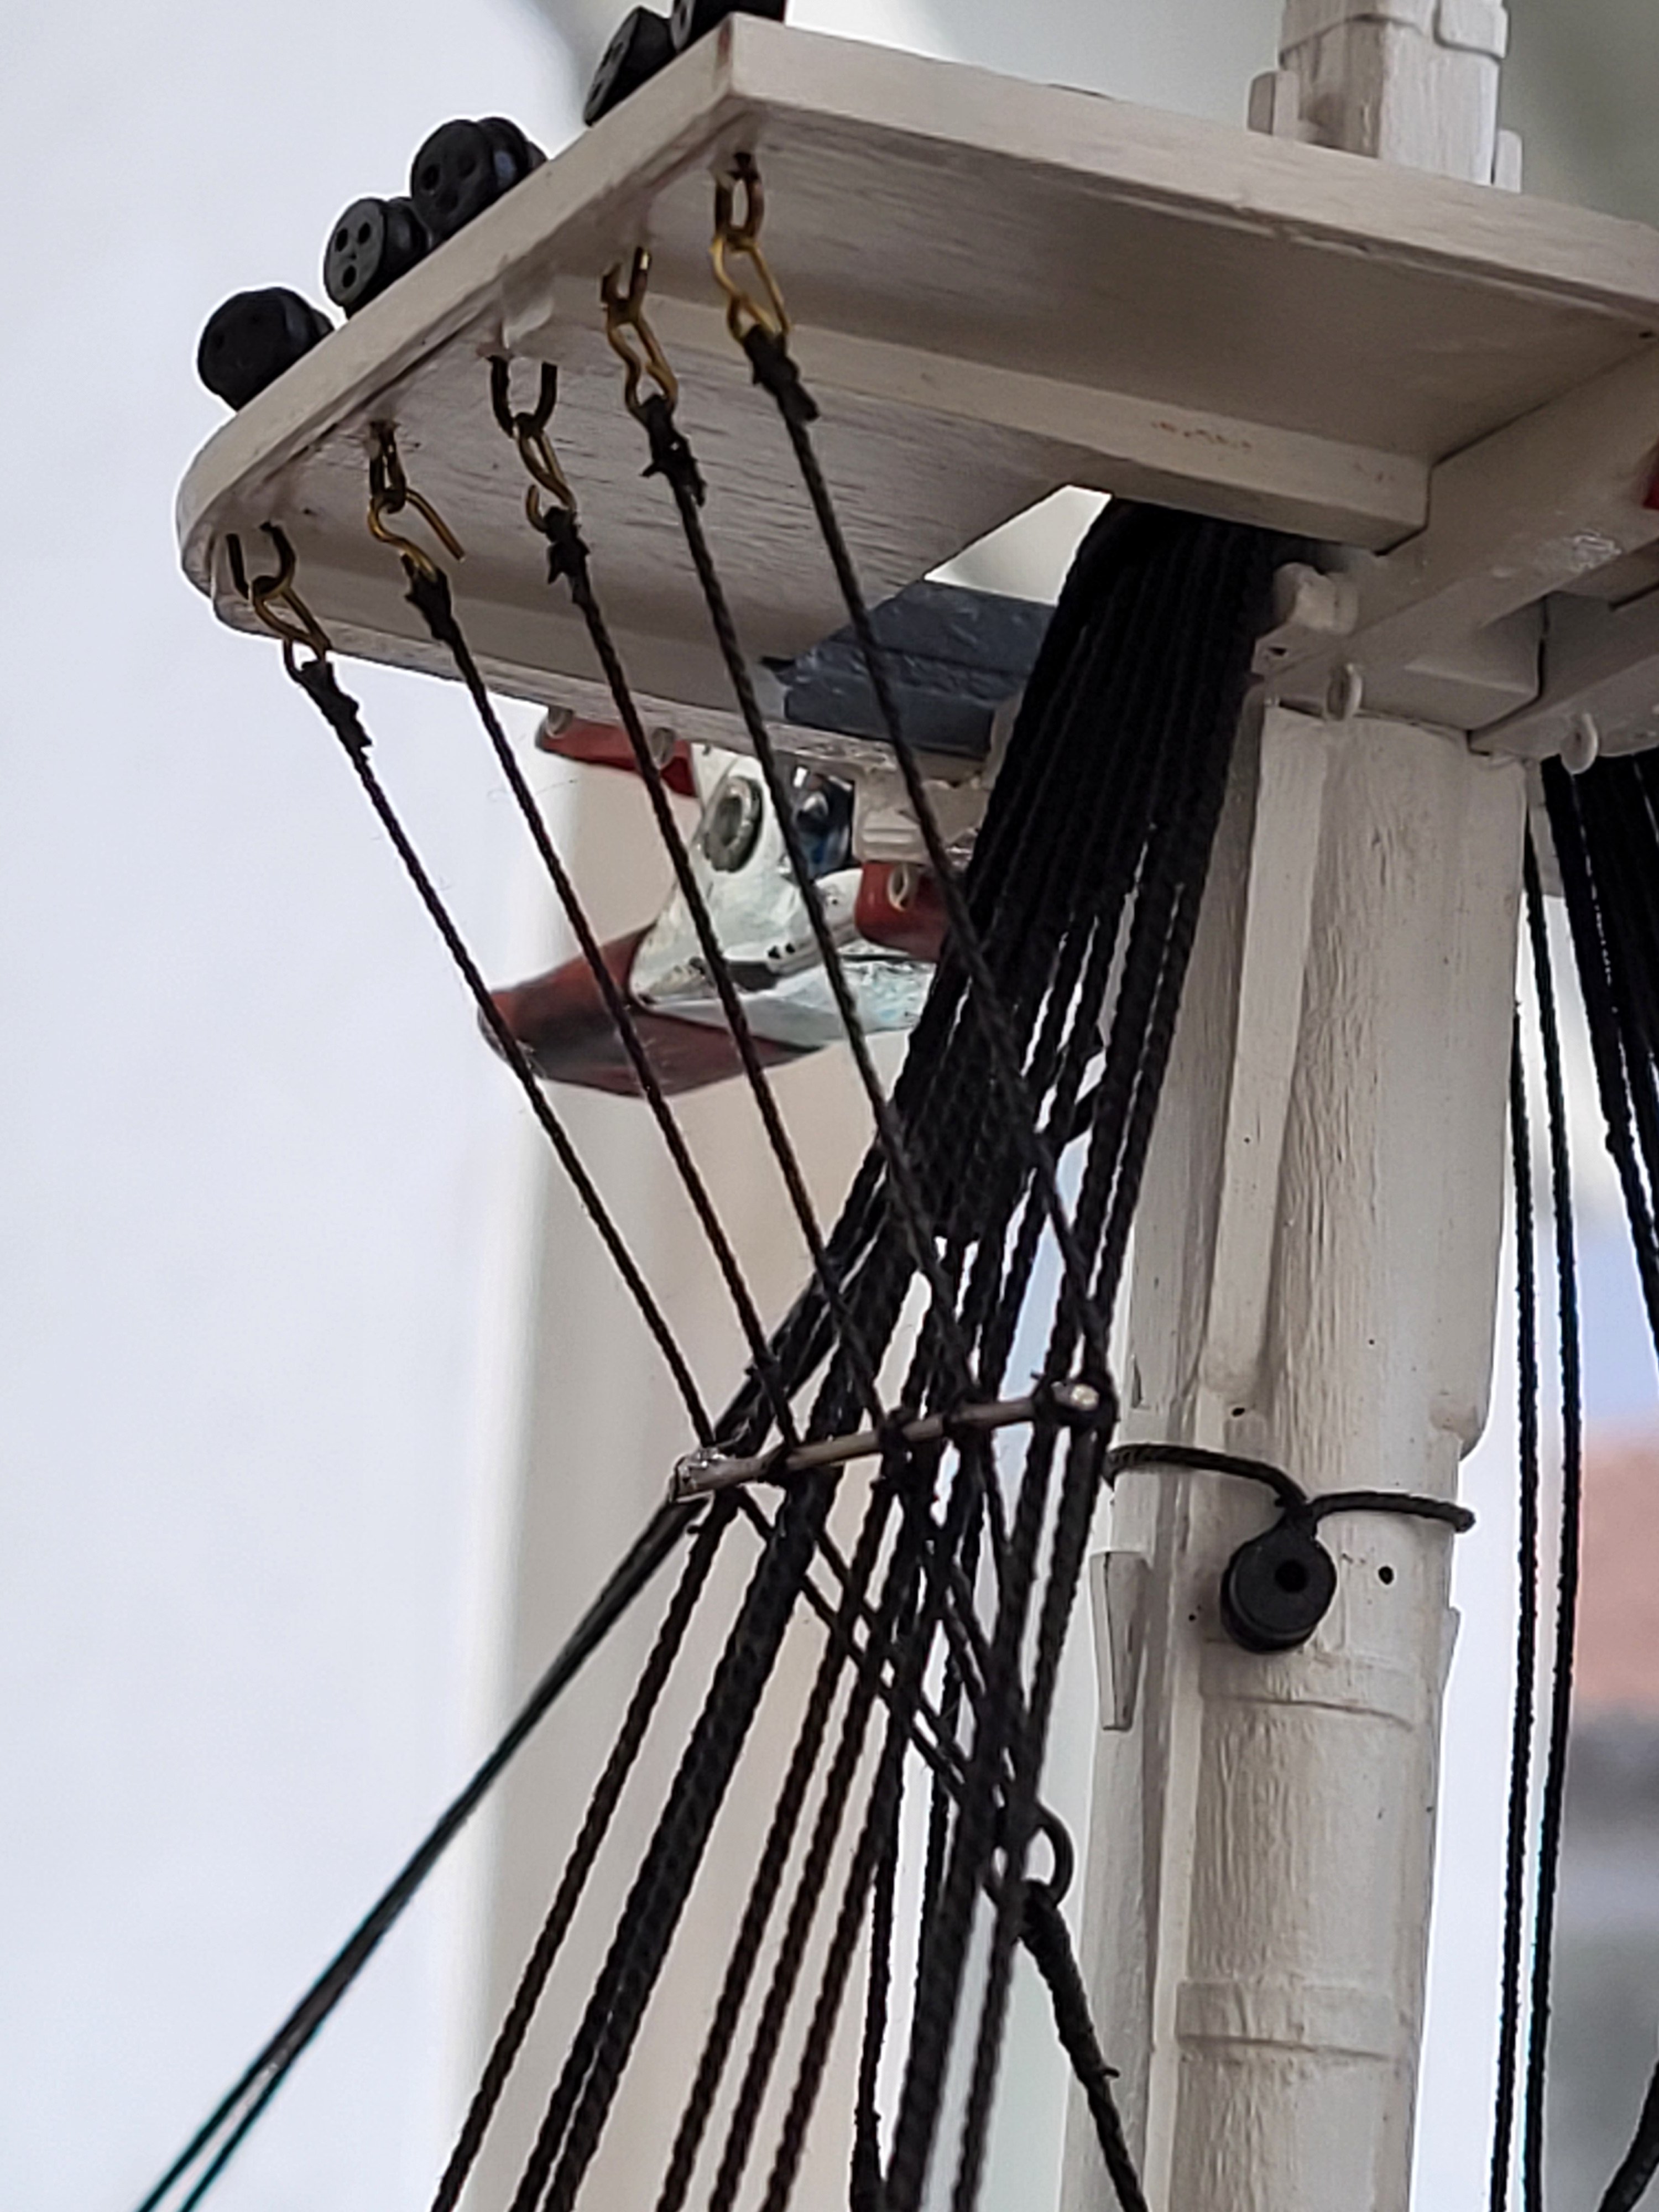
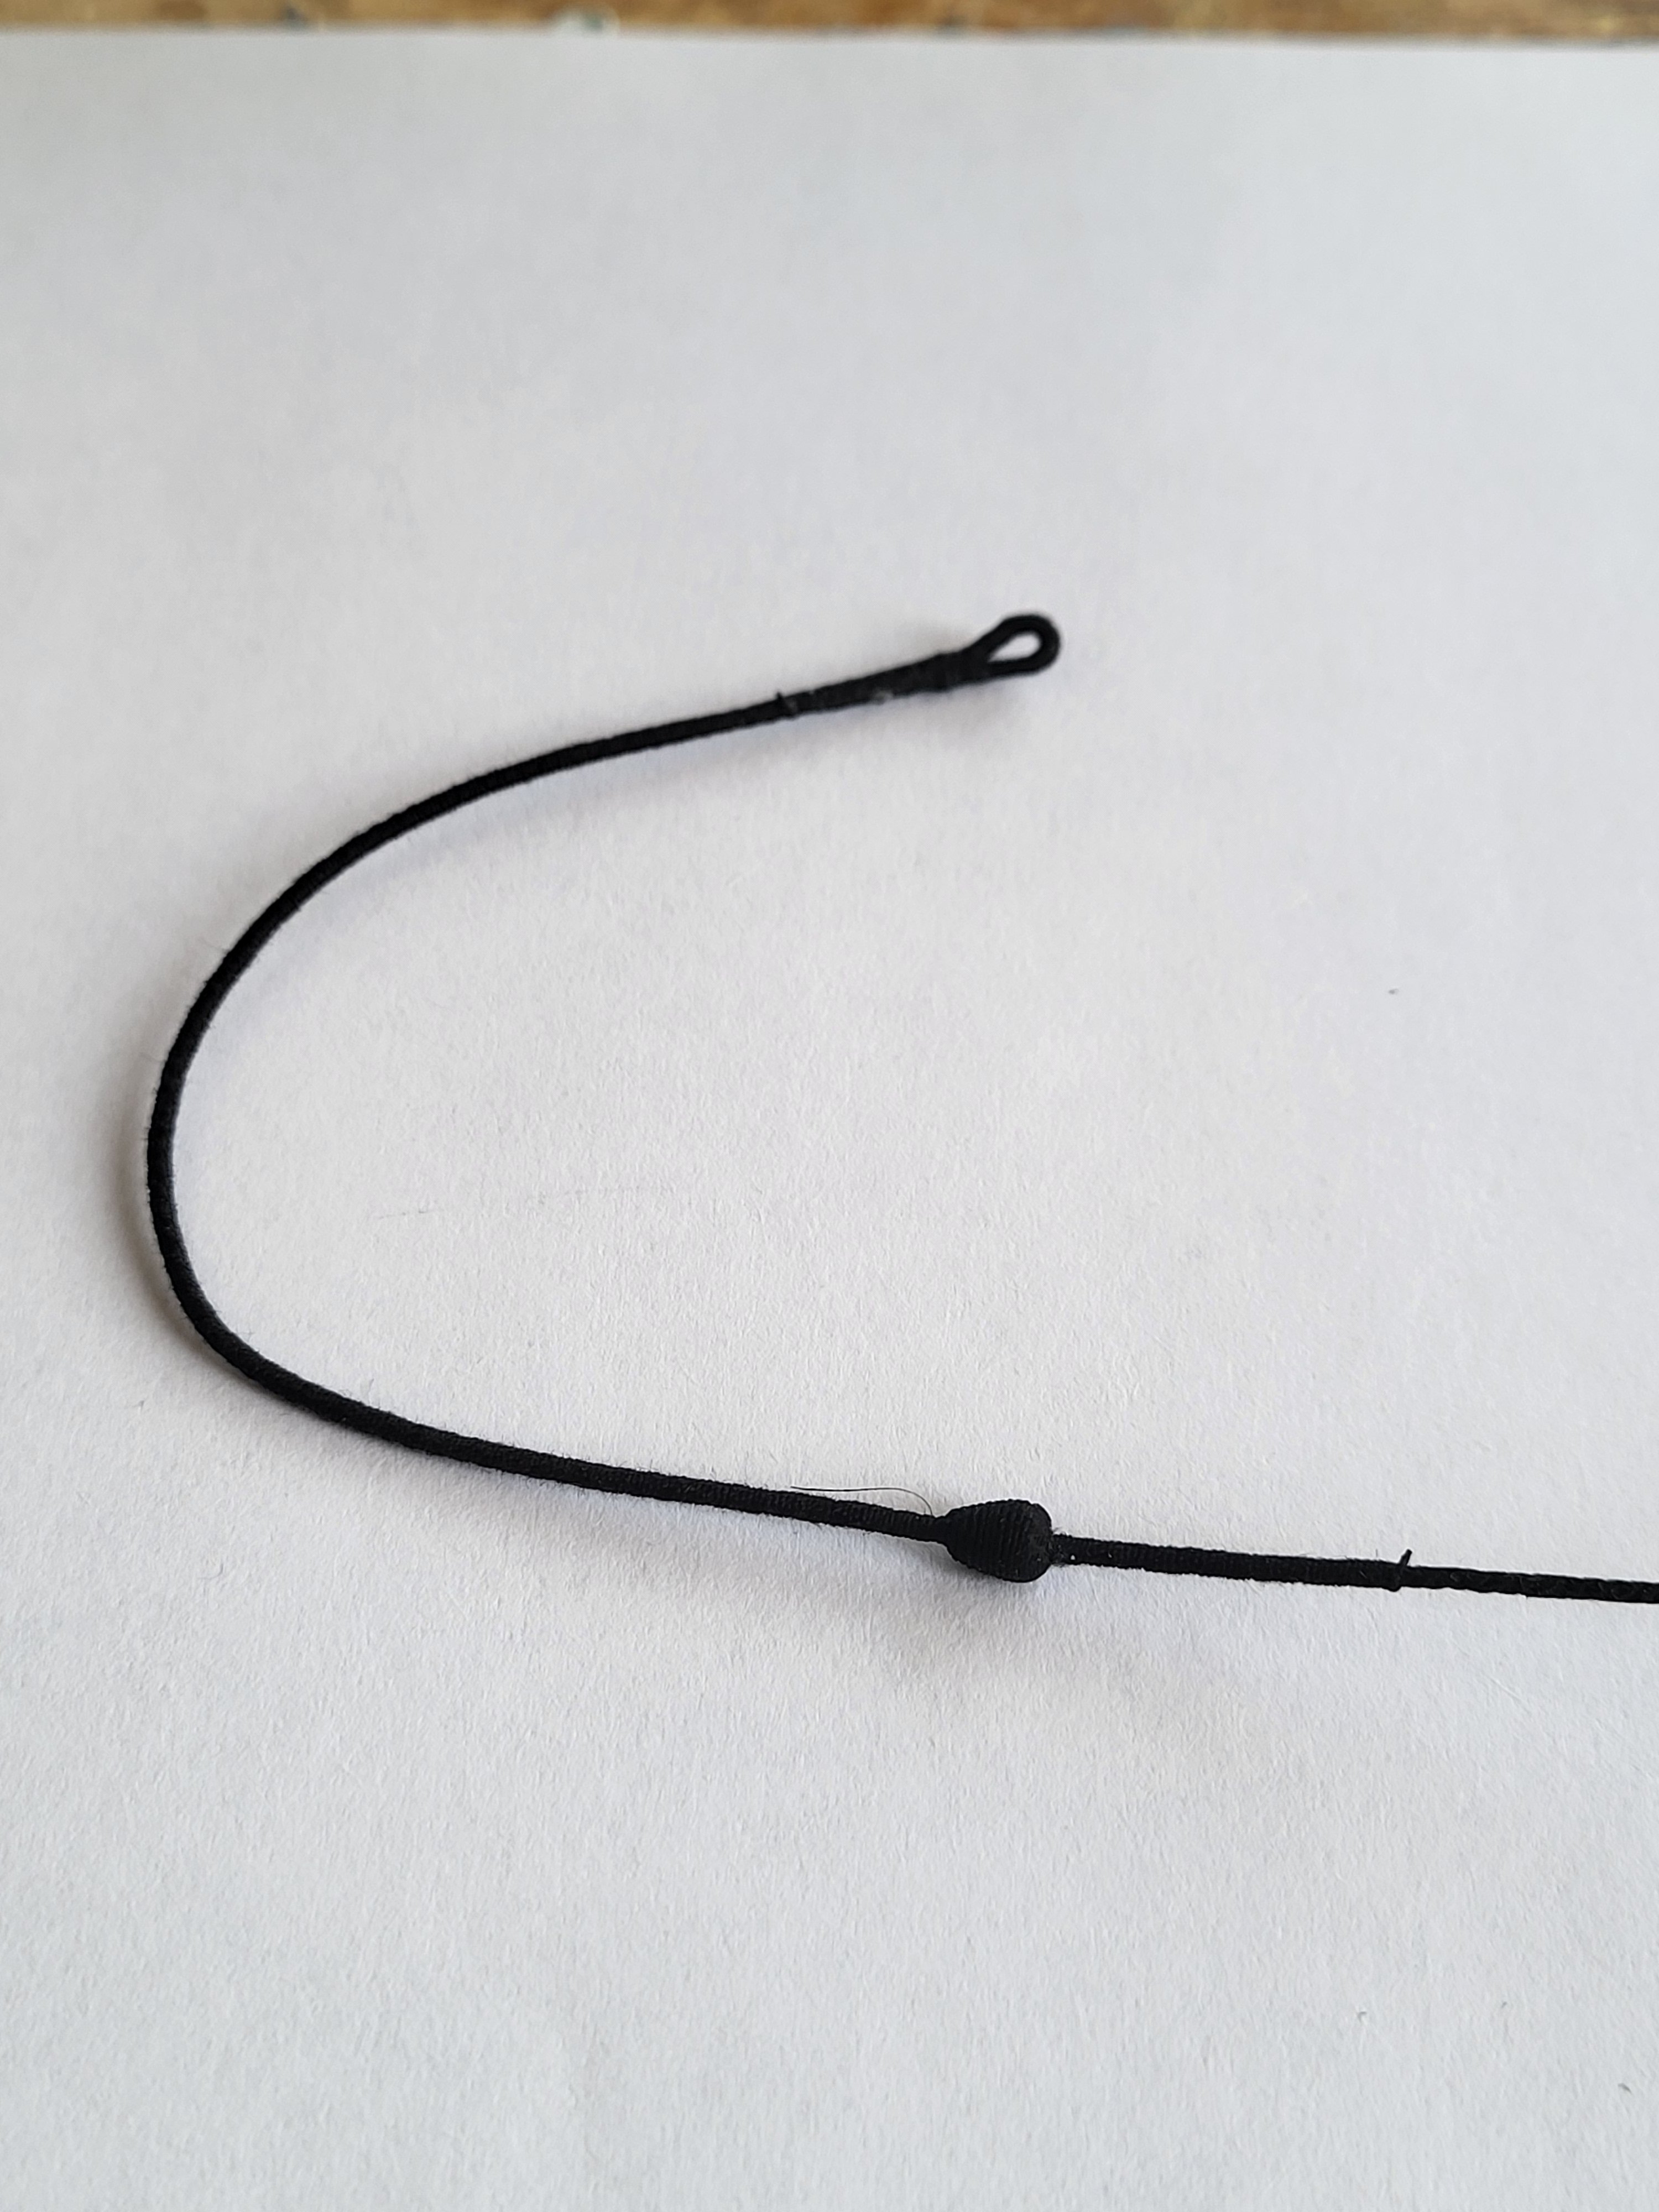
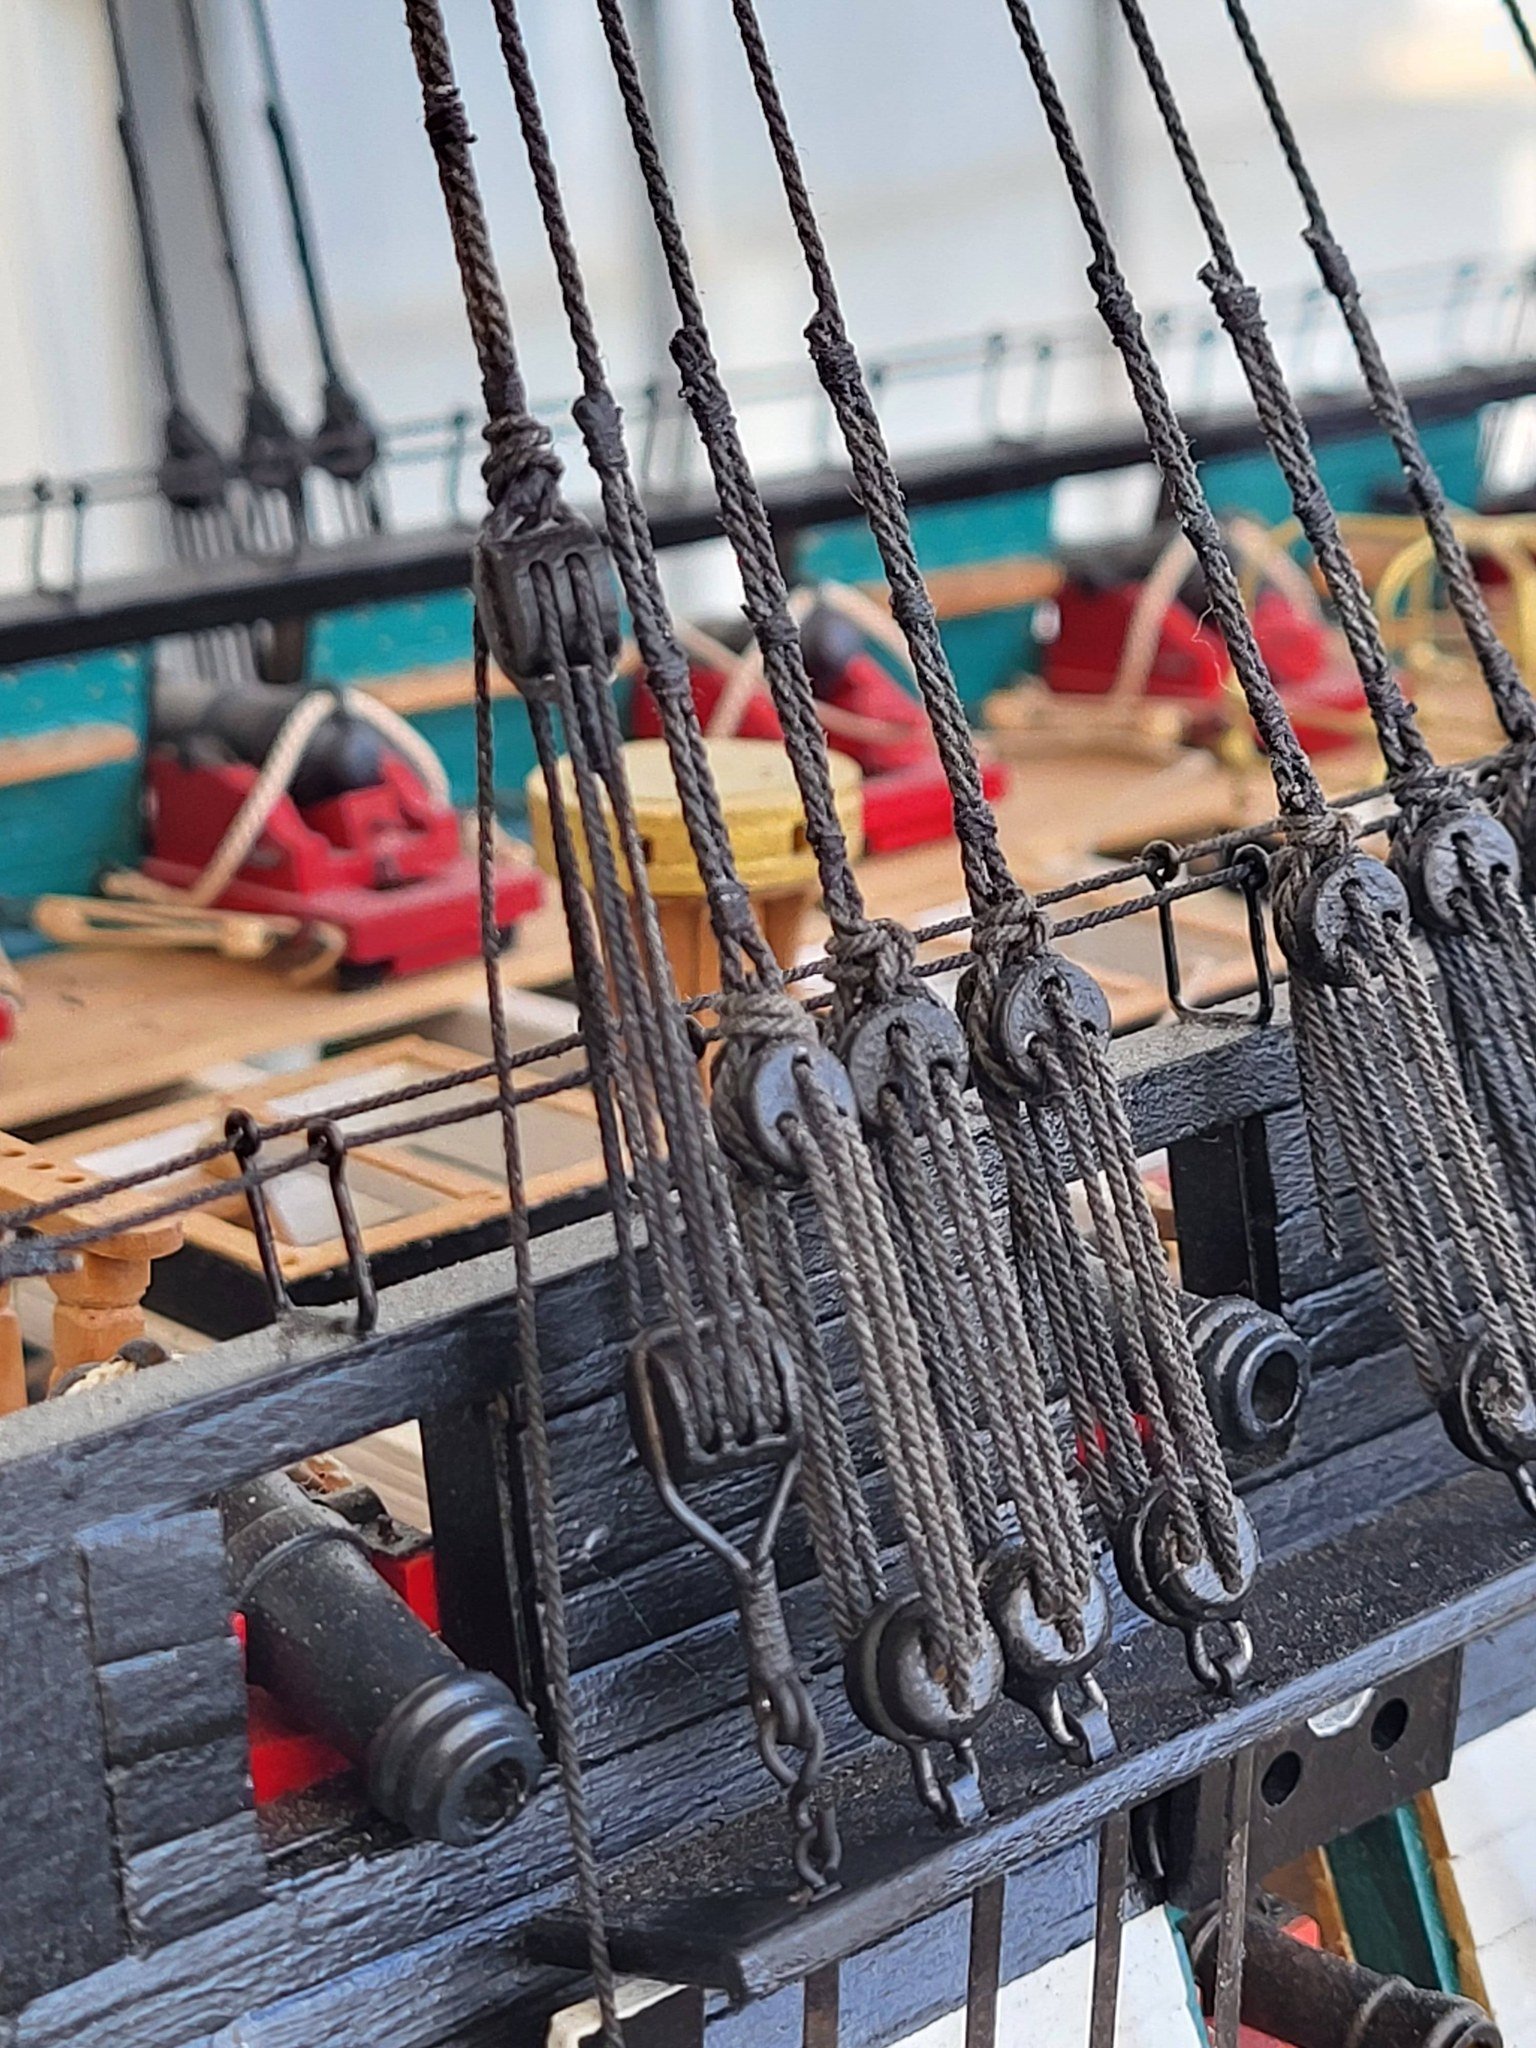
You might find an easier method, but I make the final hook connection as shown in the picture, then I cut the excess. This way, both my hands are free during the final knot.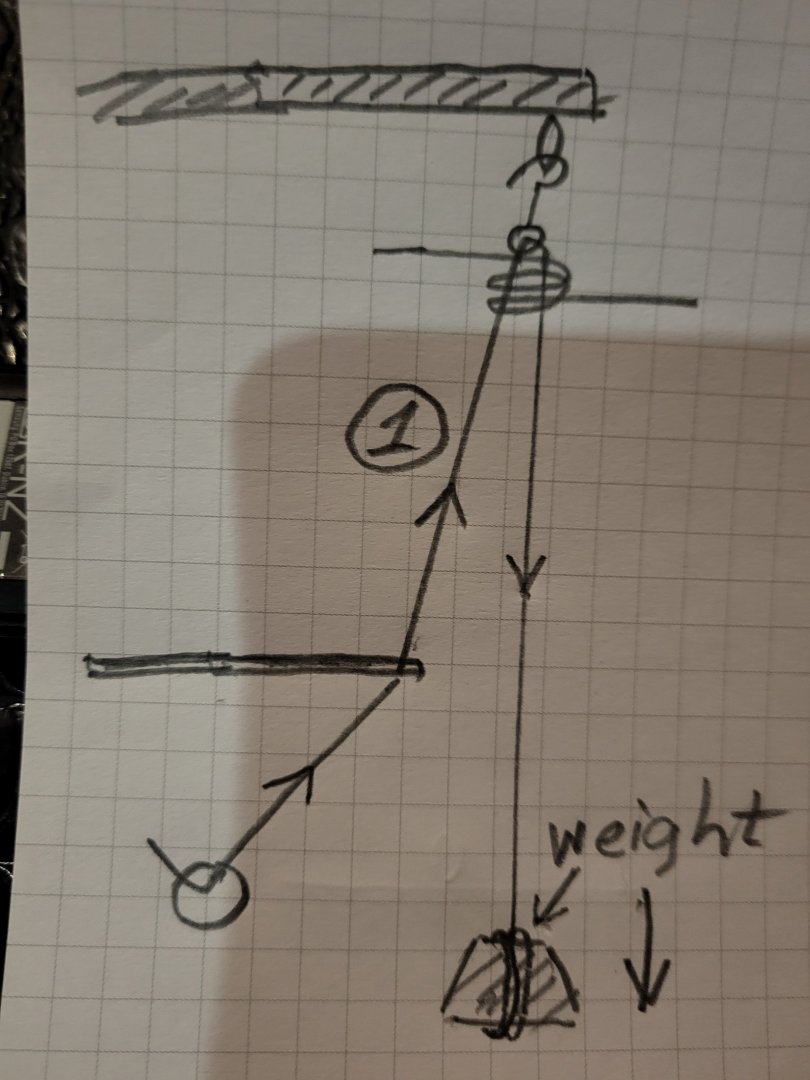
-
USS Constitution by mtbediz - 1:76
mtbediz replied to mtbediz's topic in - Build logs for subjects built 1751 - 1800
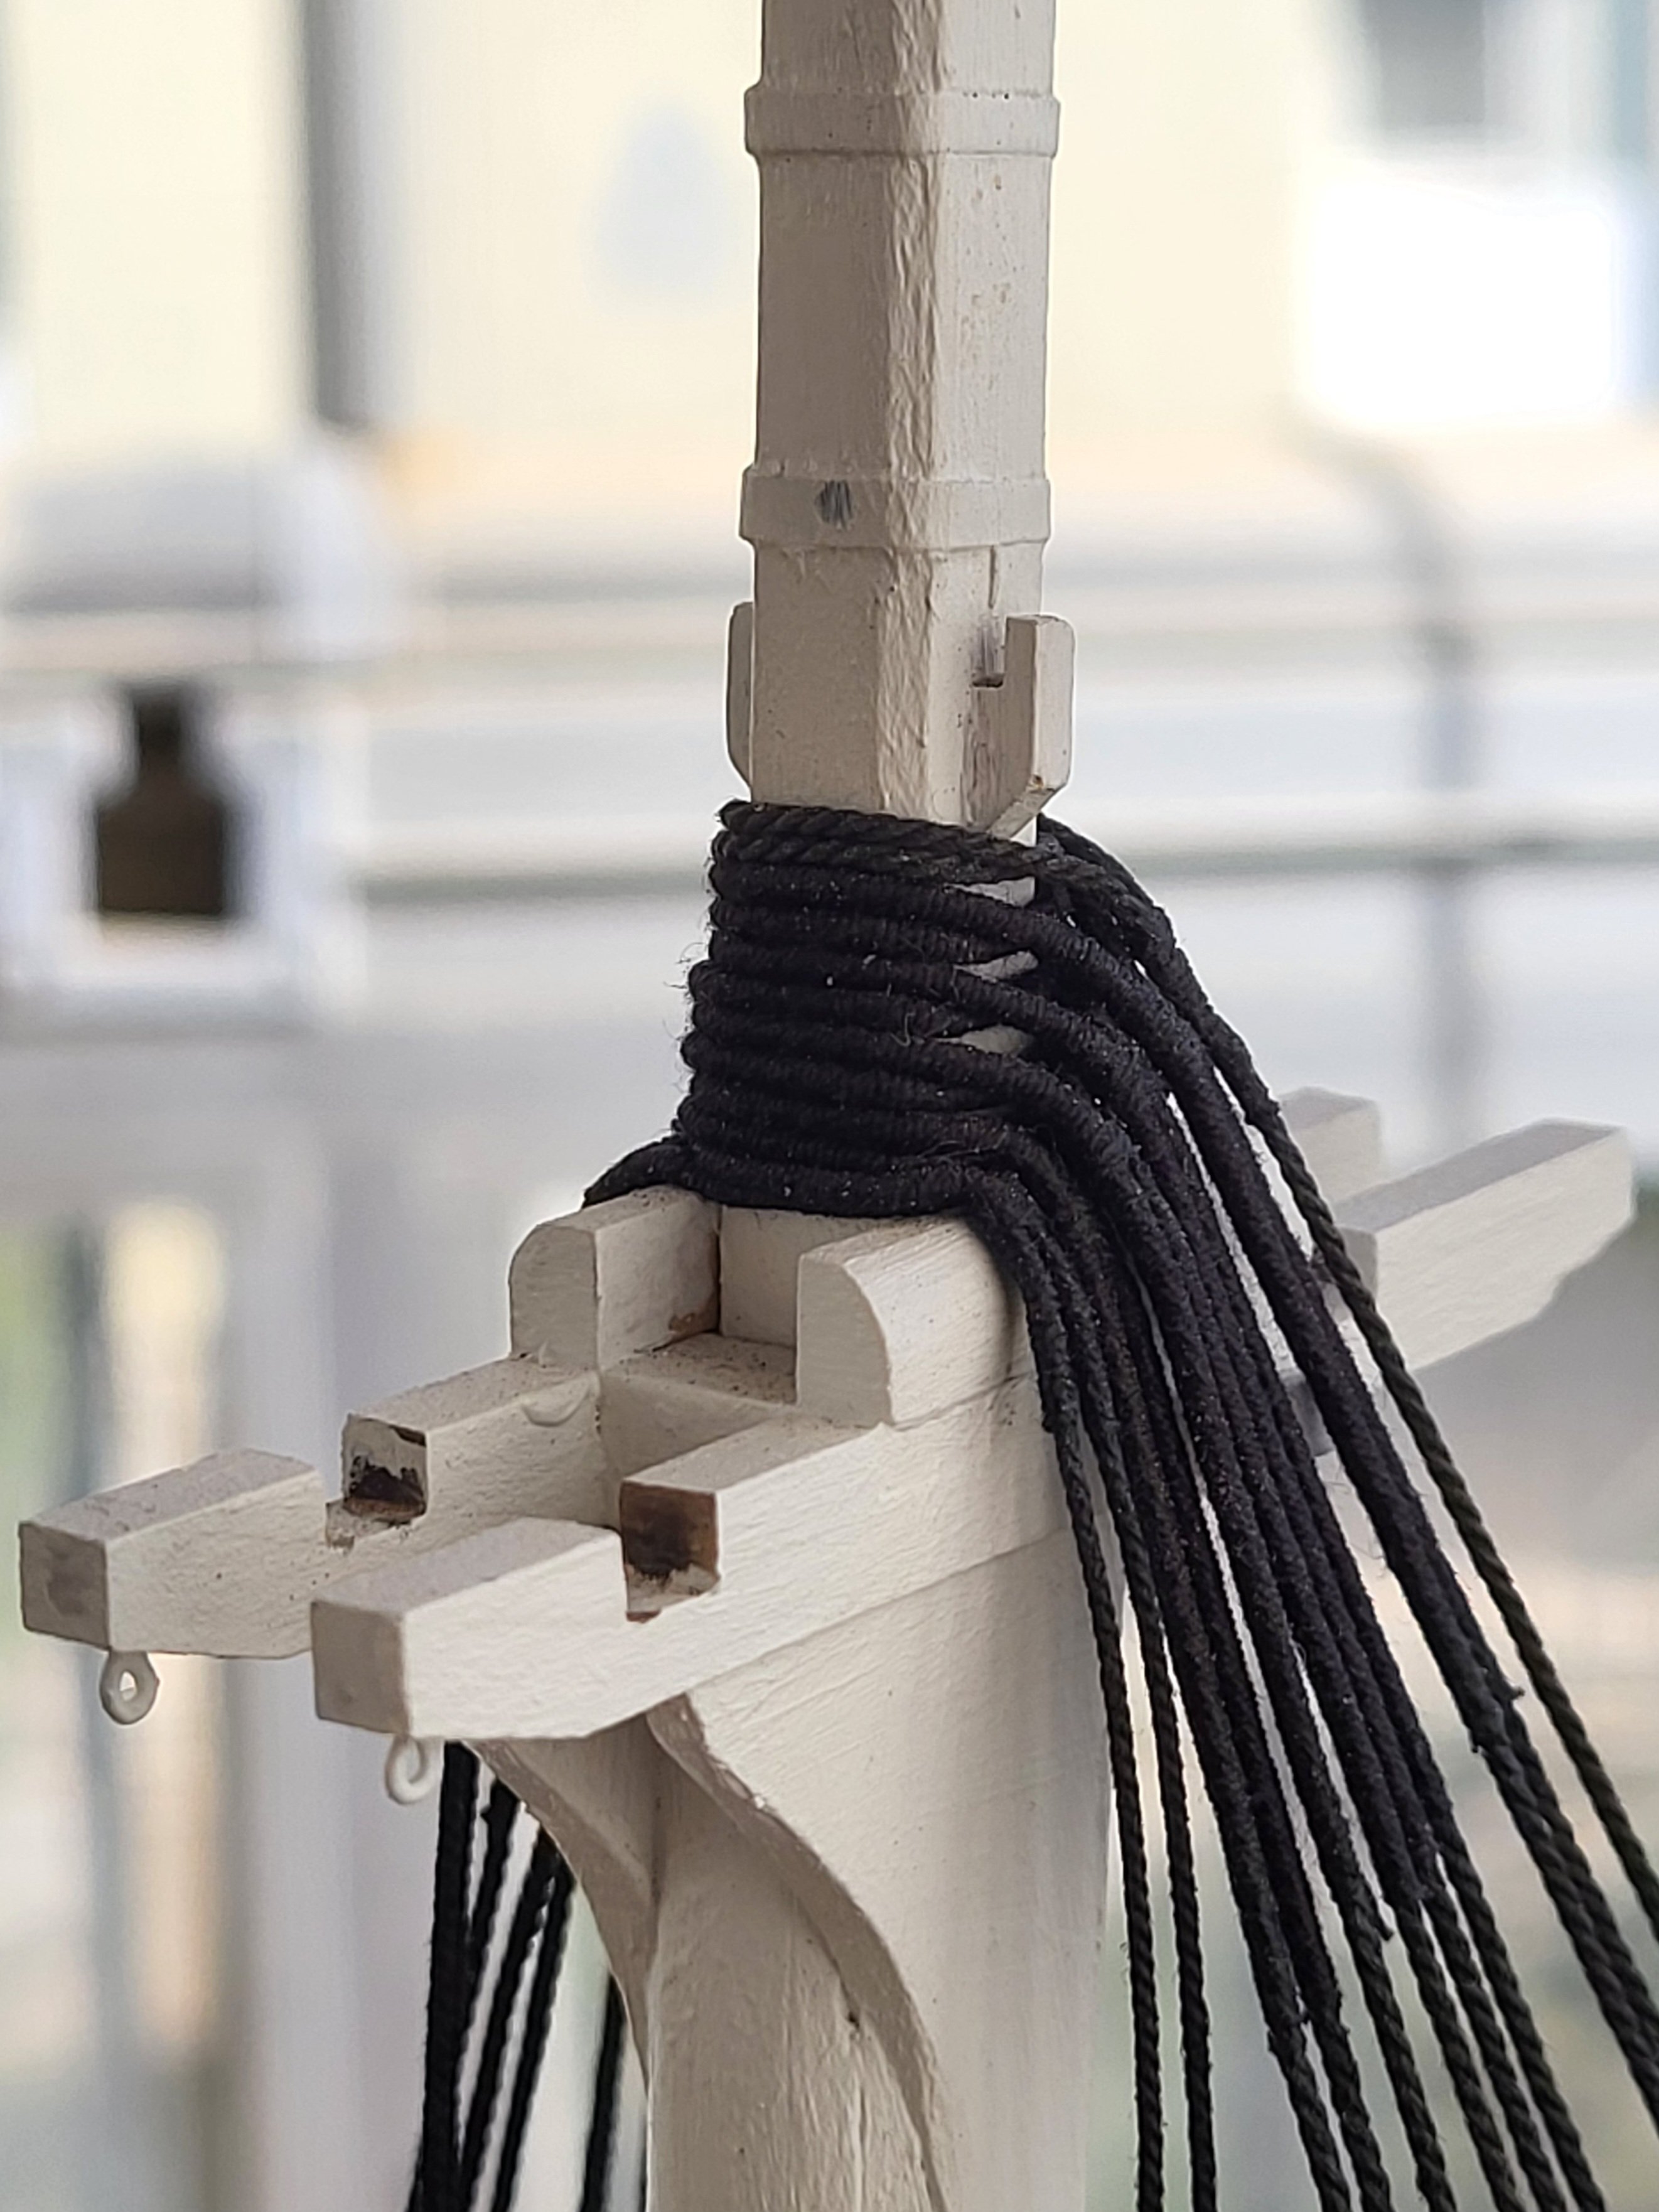
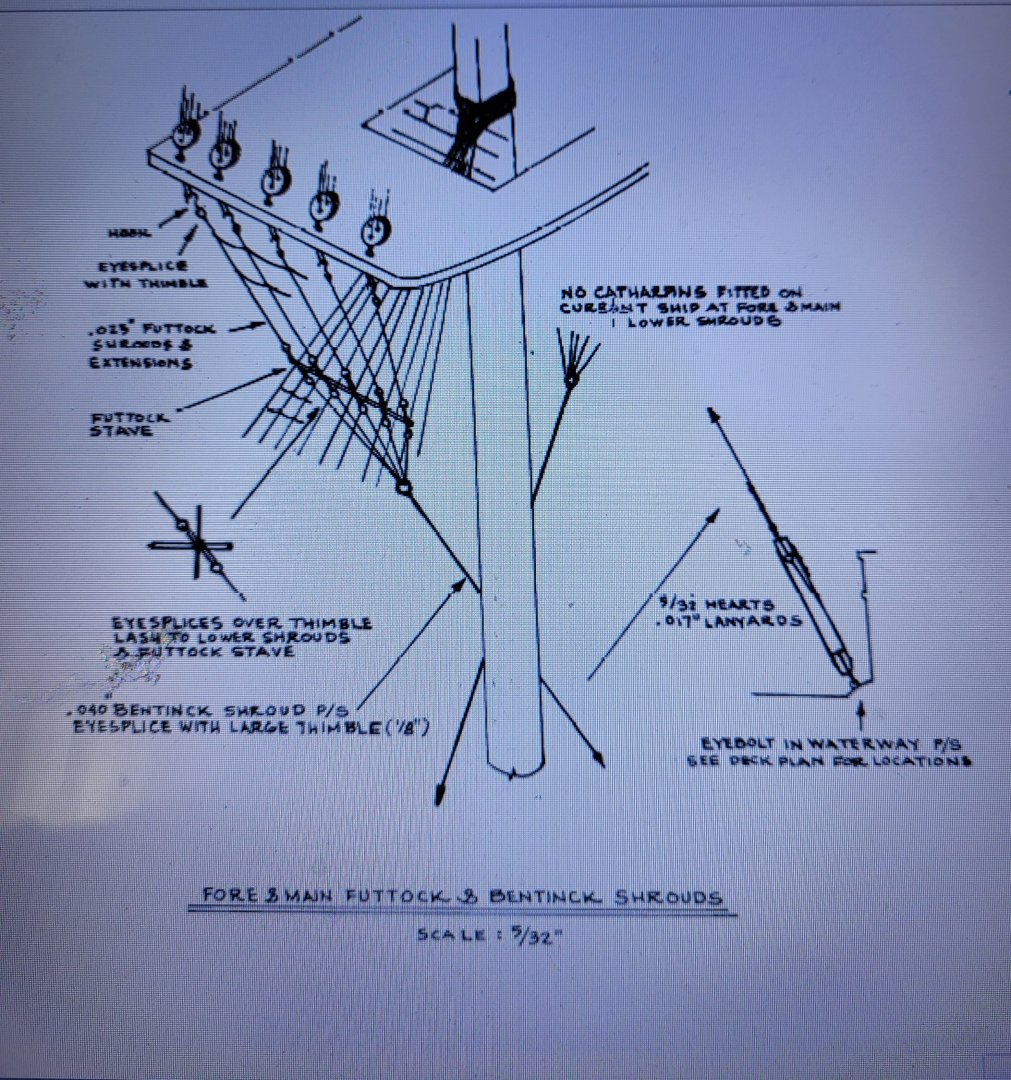
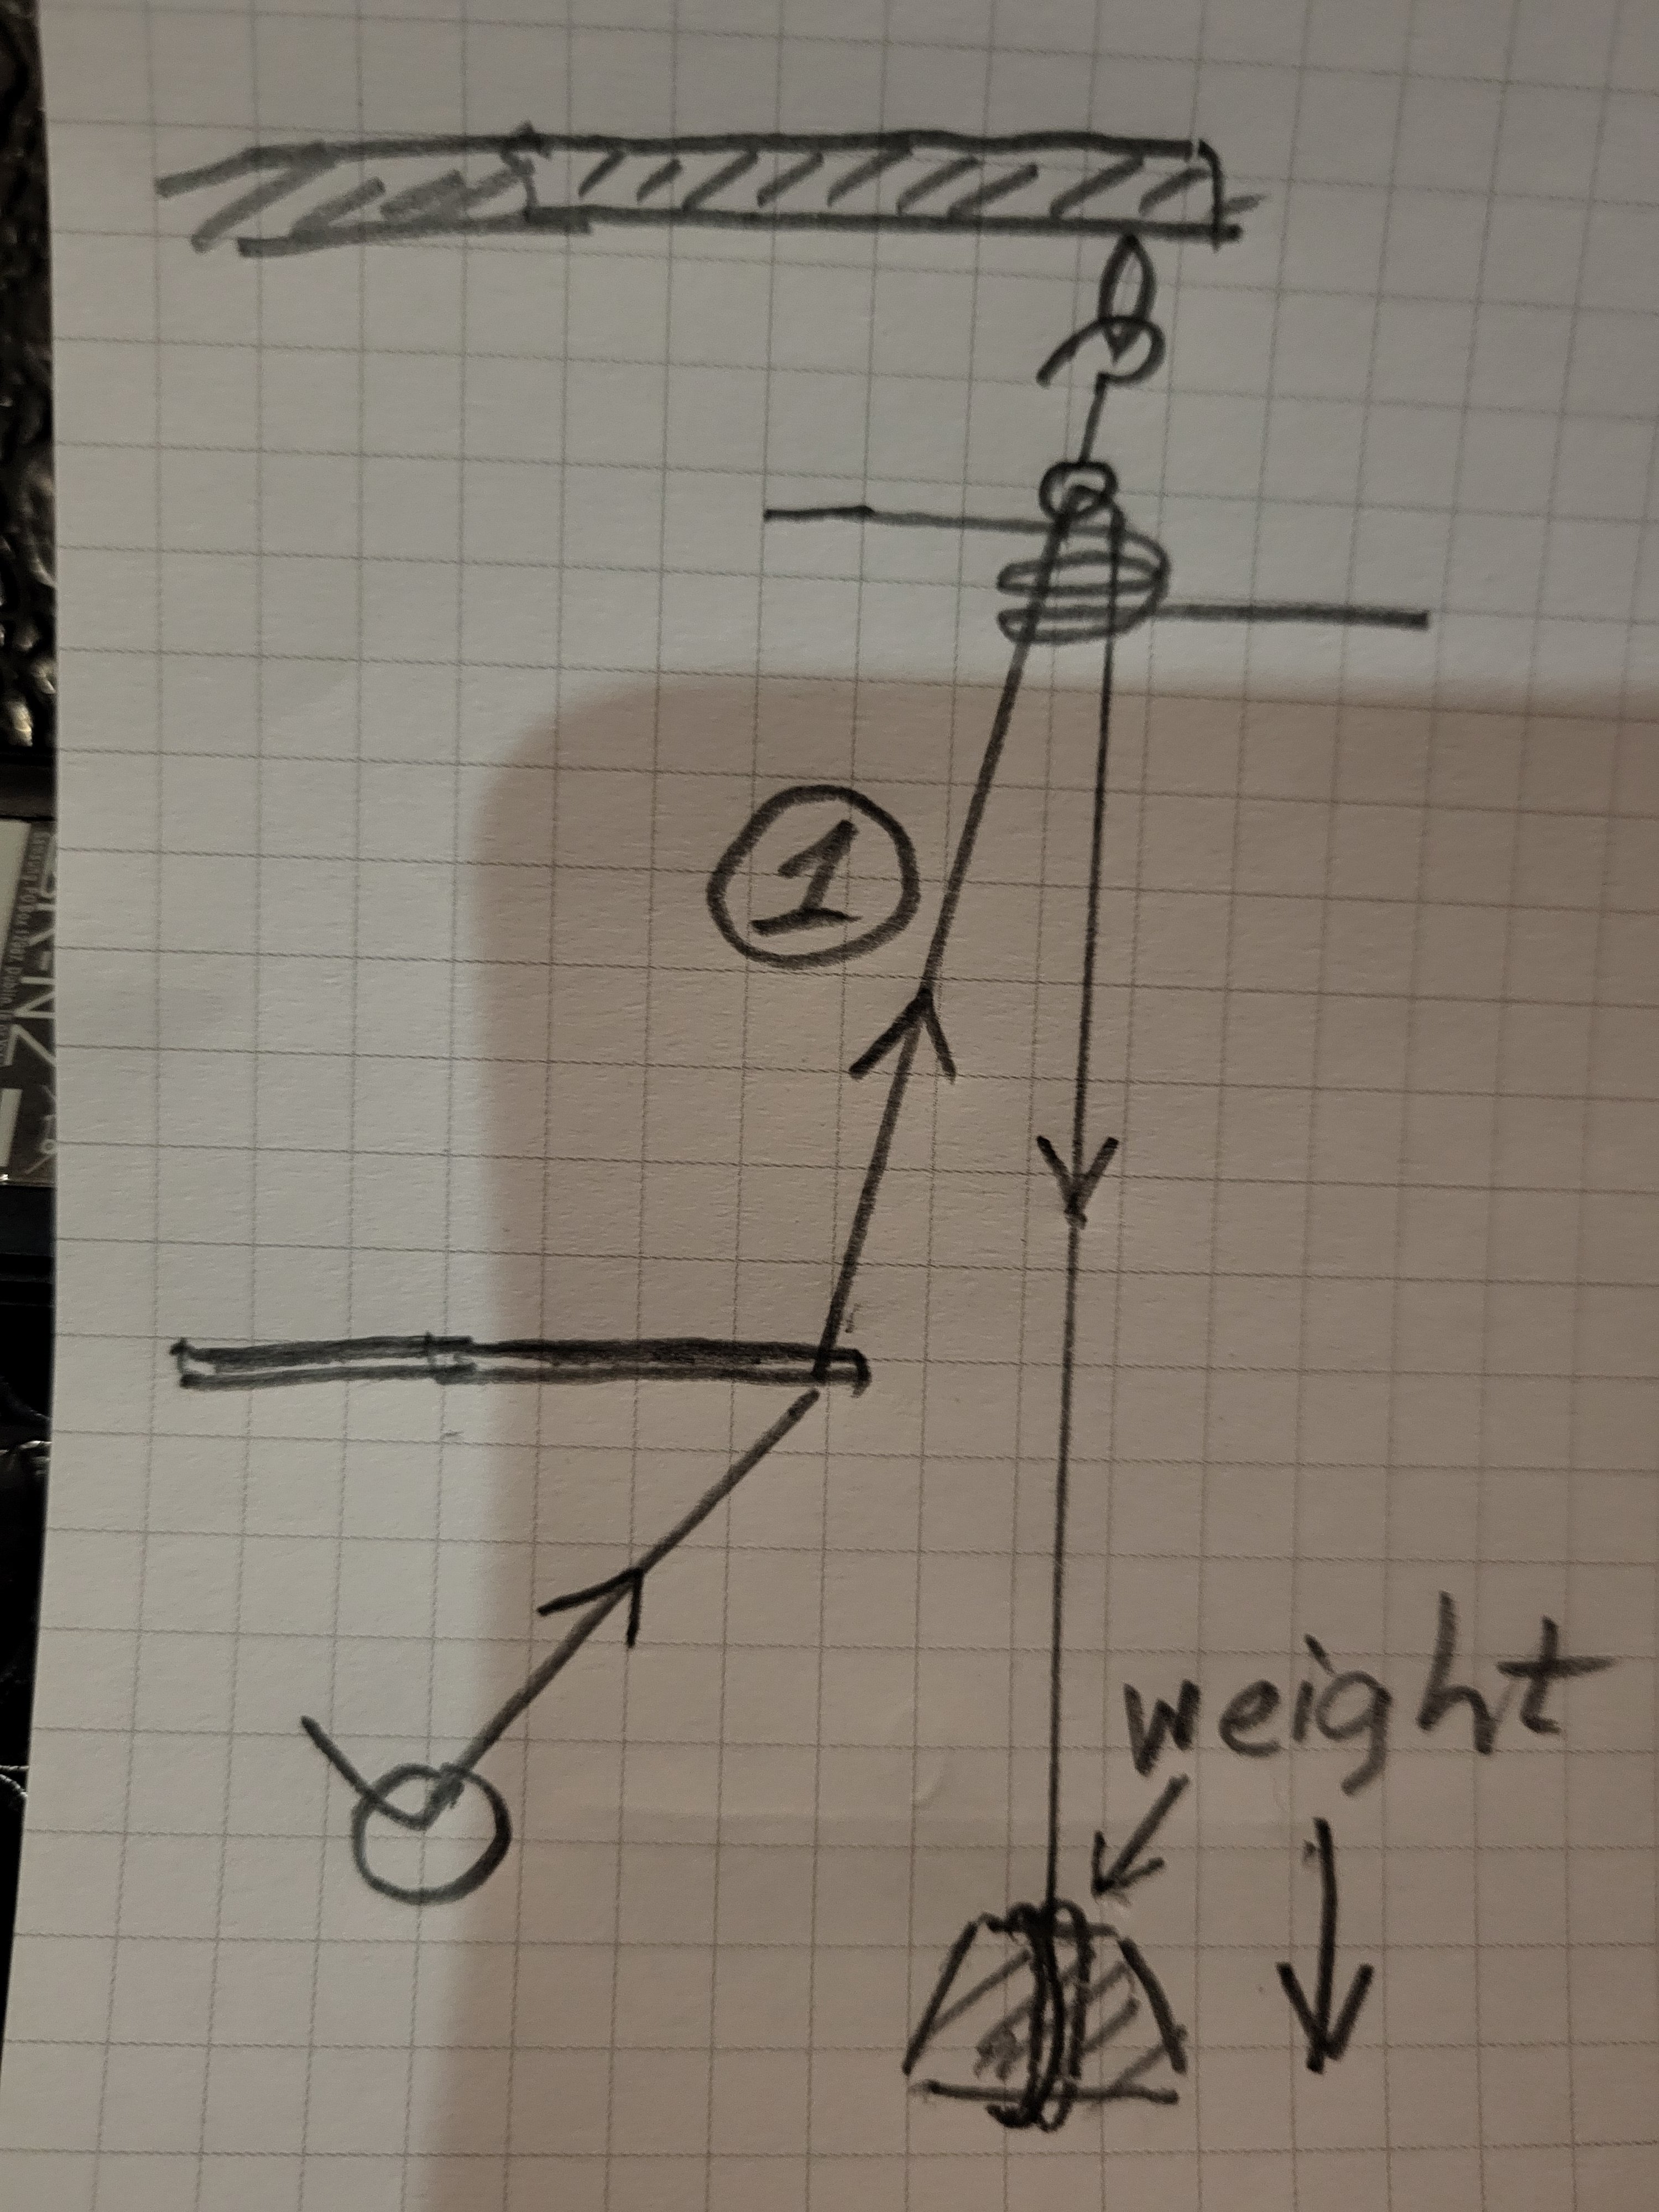
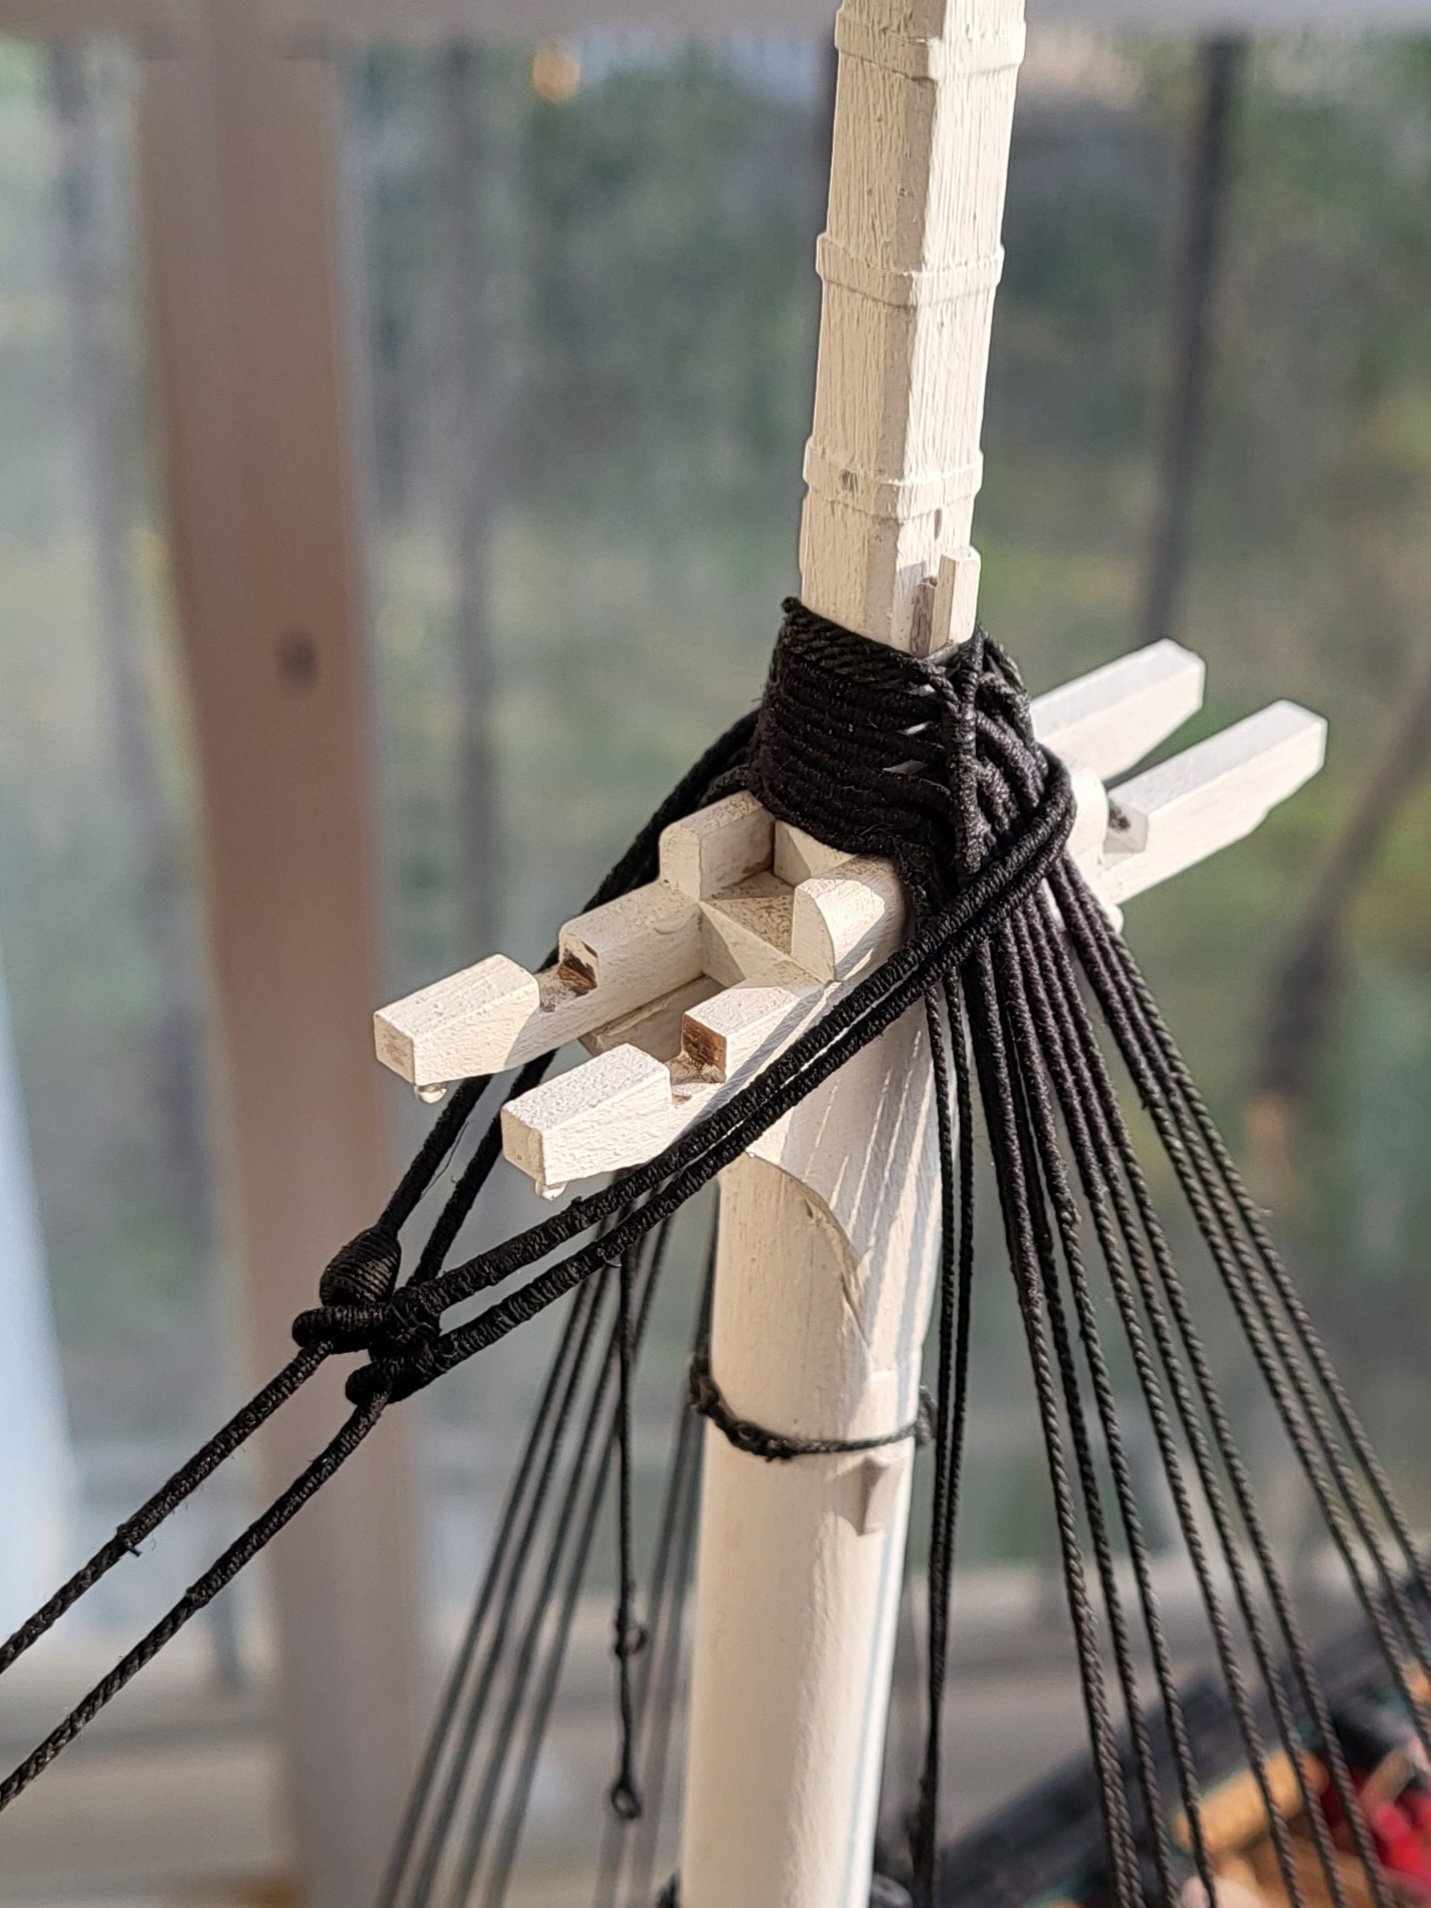
Thank you, Jon. I initially tried to make it with all the details, but since I didn’t like the final appearance, I decided to simplify it. Unfortunately, I didn’t photograph the sequence of steps, but I hope the drawing below explains how I did it. First, I secure rope no. 1 in its place with a hook. As indicated by the arrows, I first fix it to the futtock stave with CA glue, then pass it through the big ring, glue it again to the futtock stave with CA, and finally hang it back up to its position on the top using a hook. I repeat the same process for rope no. 2. For rope no. 3, unlike the others, I first secure it to the futtock stave, then pass it through the big ring and finally hang it in its position on the top using a hook.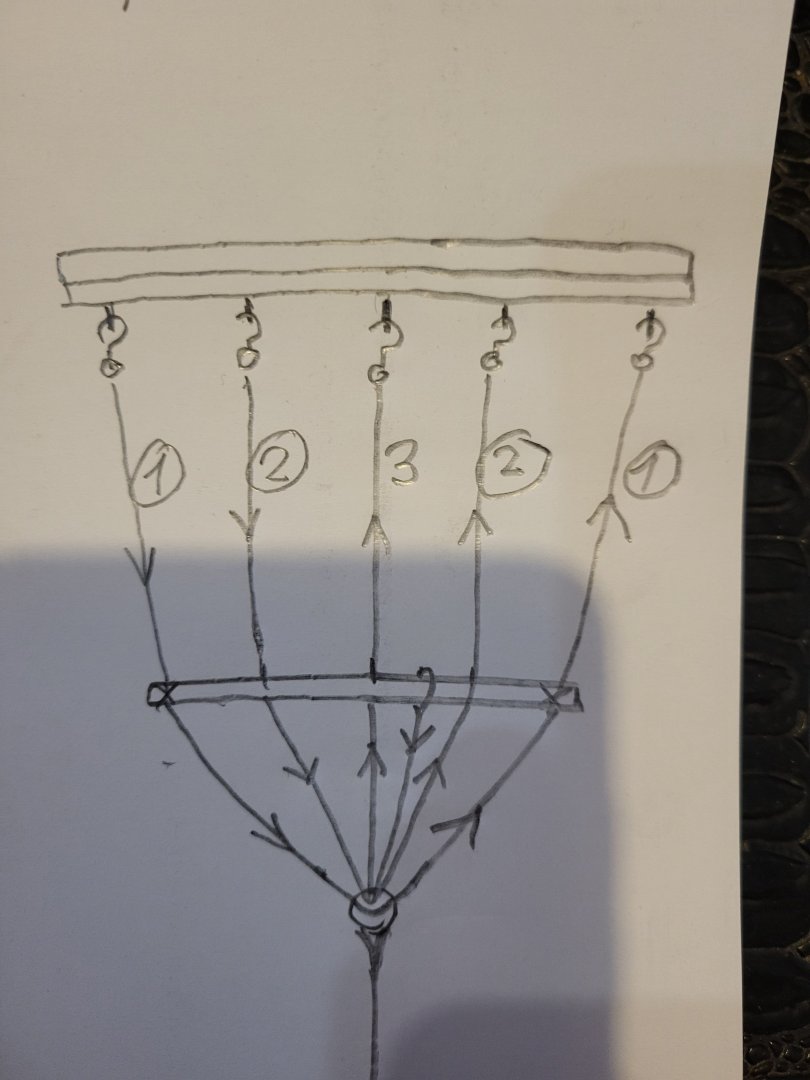
-
USS Constitution by mtbediz - 1:76
mtbediz replied to mtbediz's topic in - Build logs for subjects built 1751 - 1800
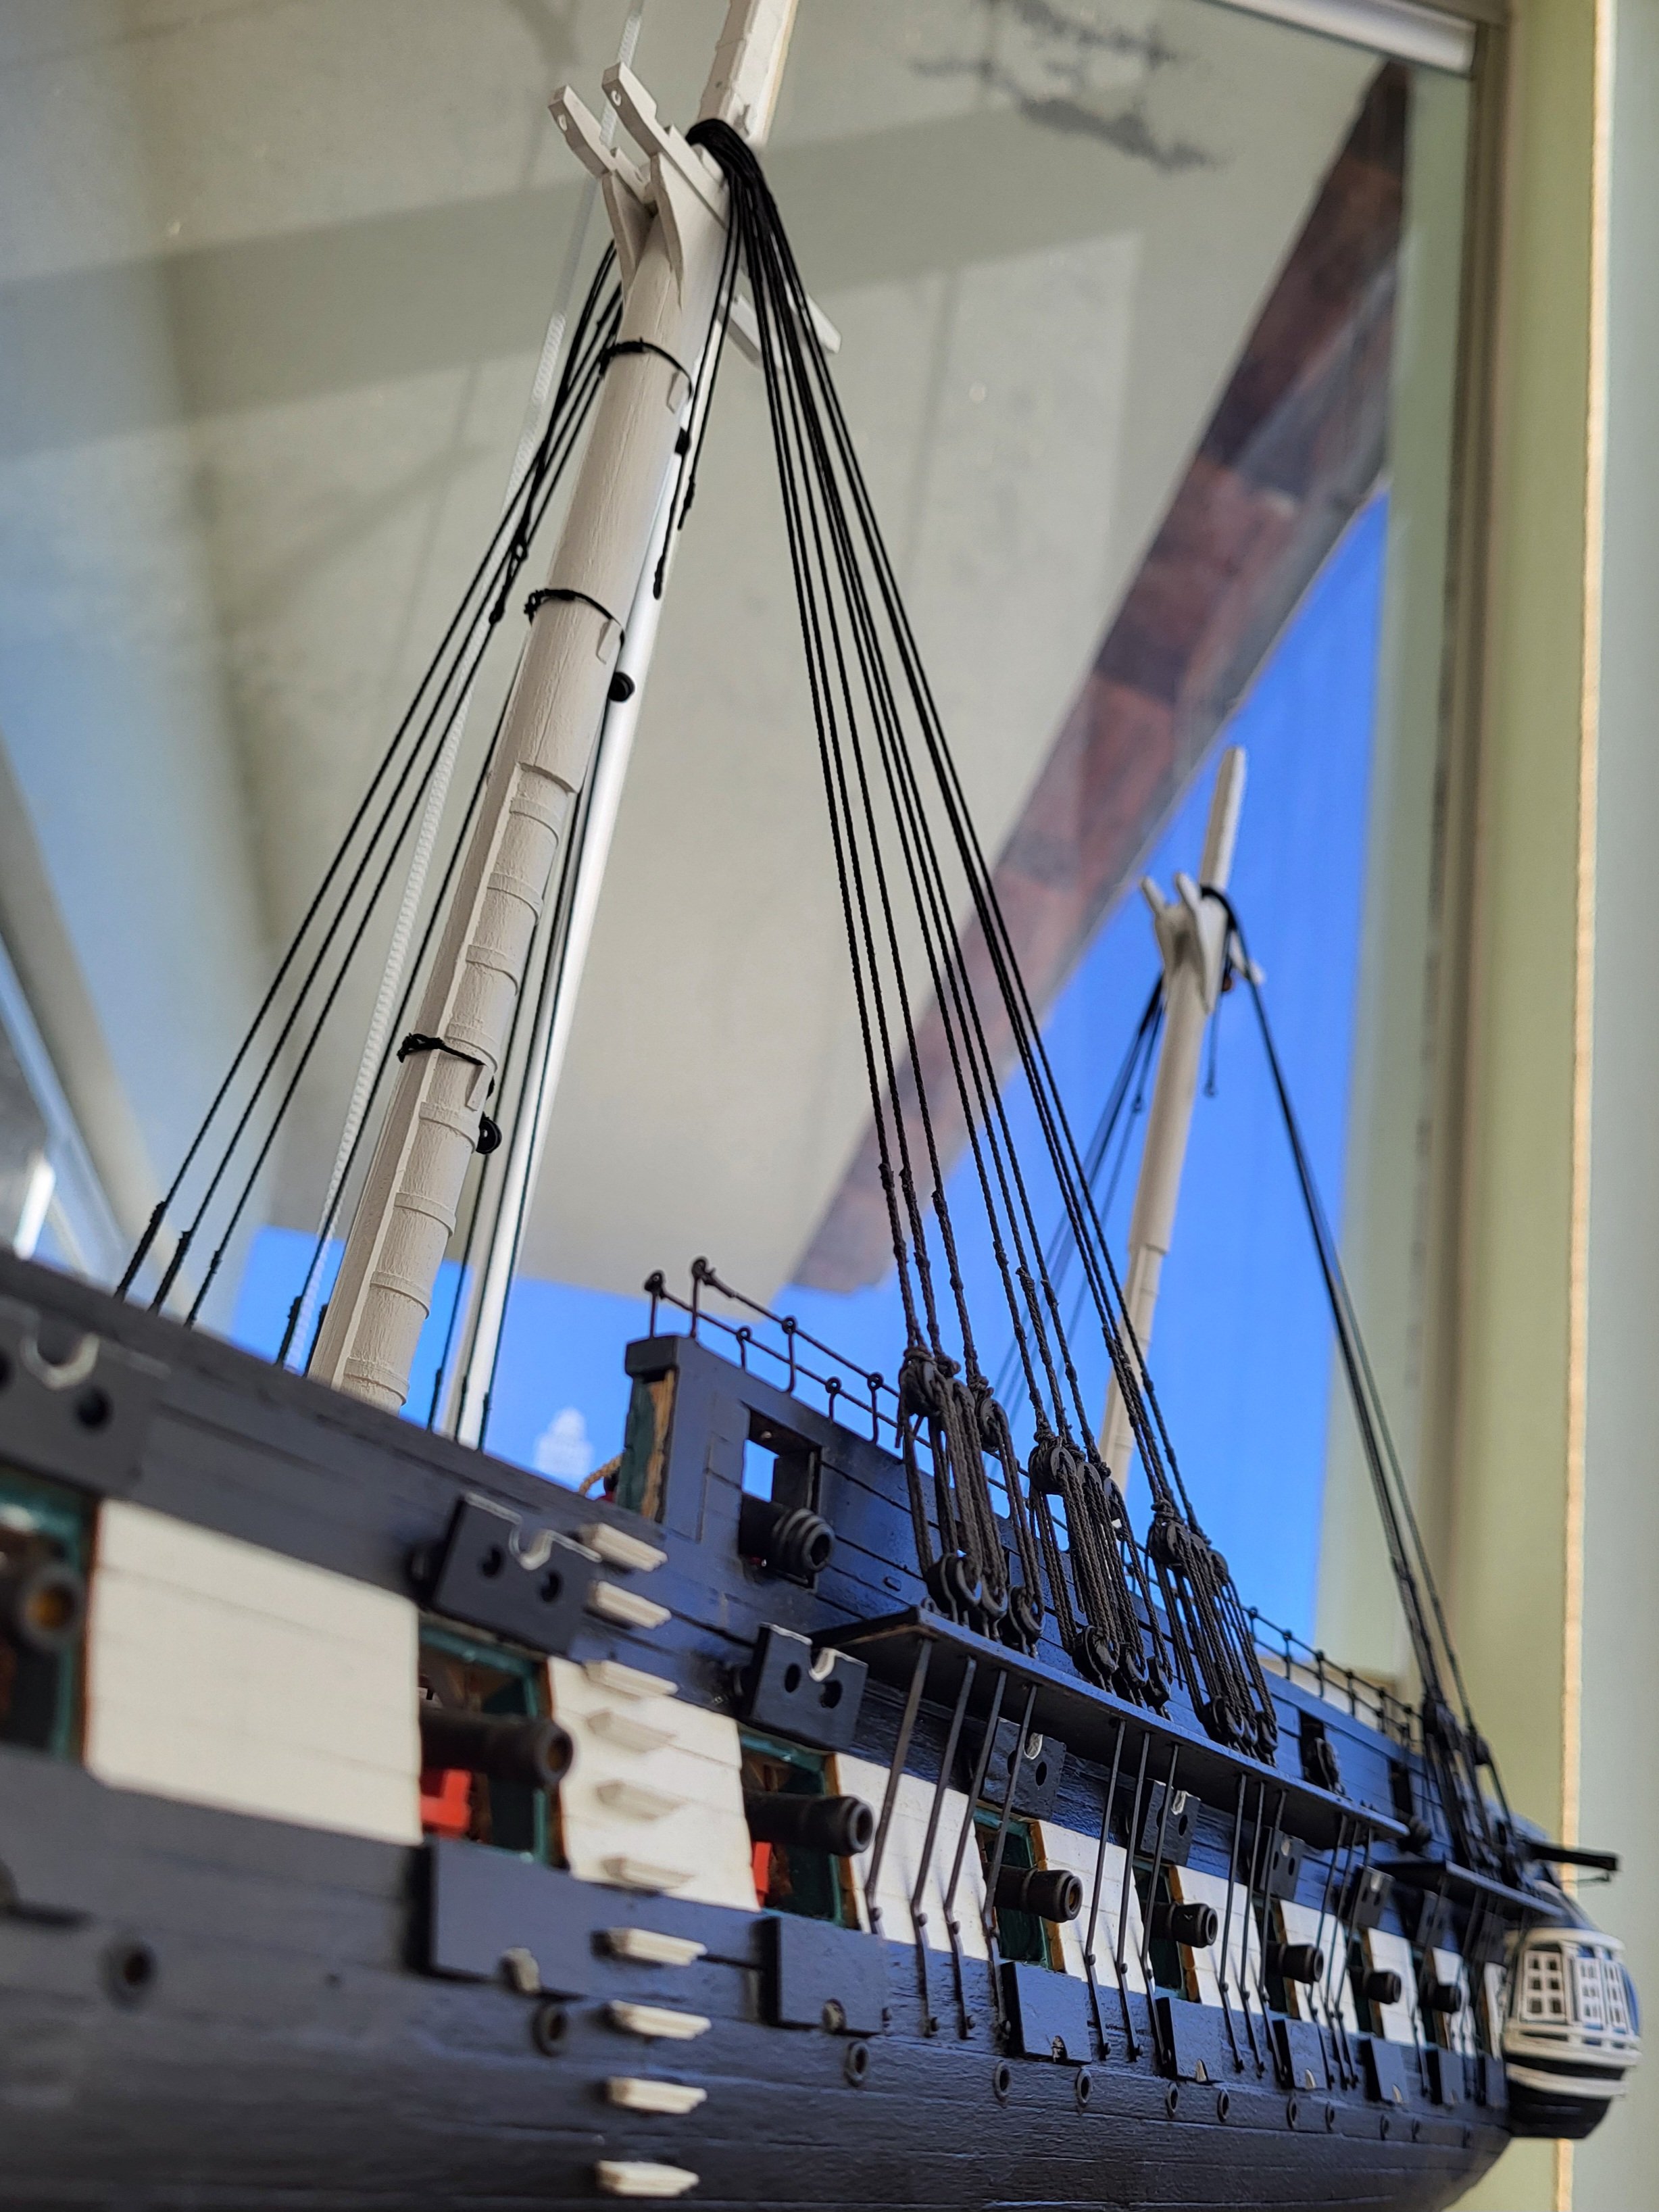
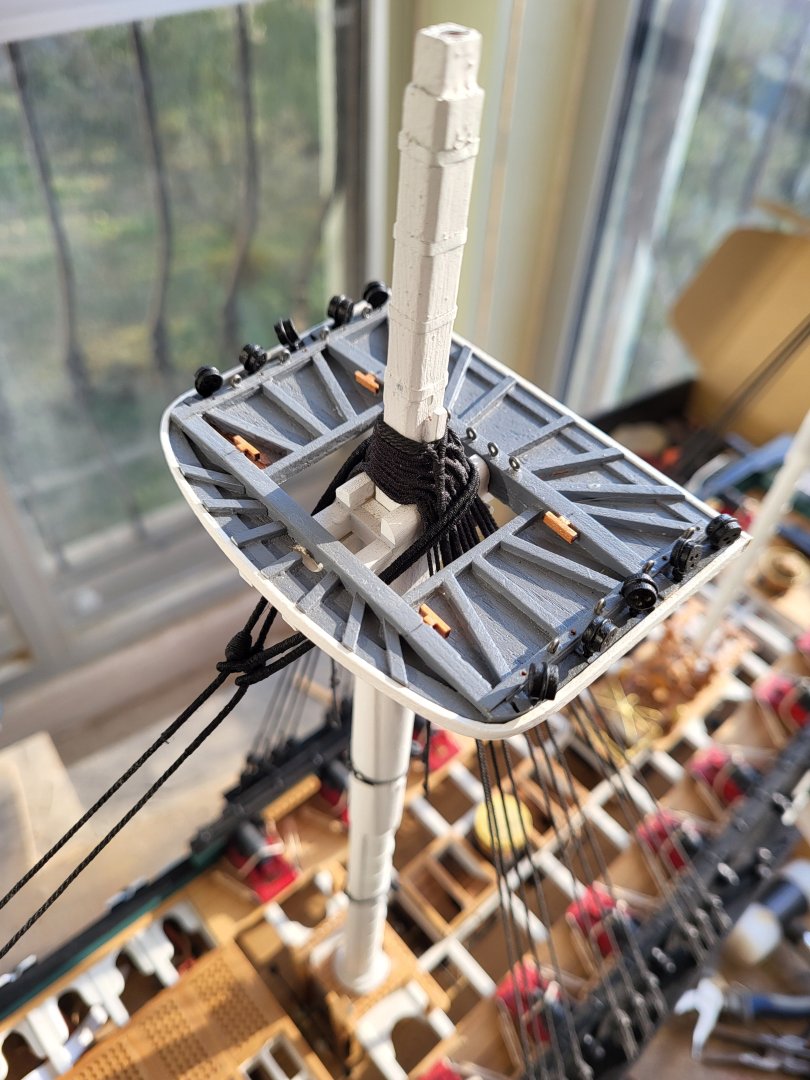
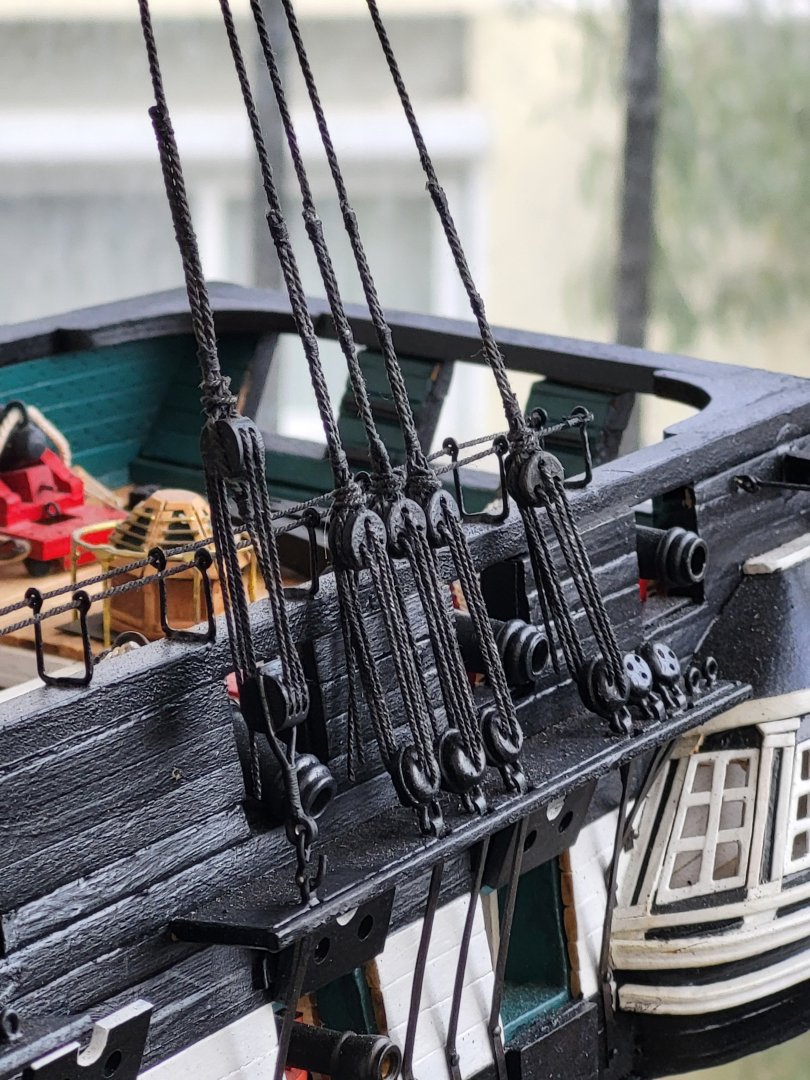
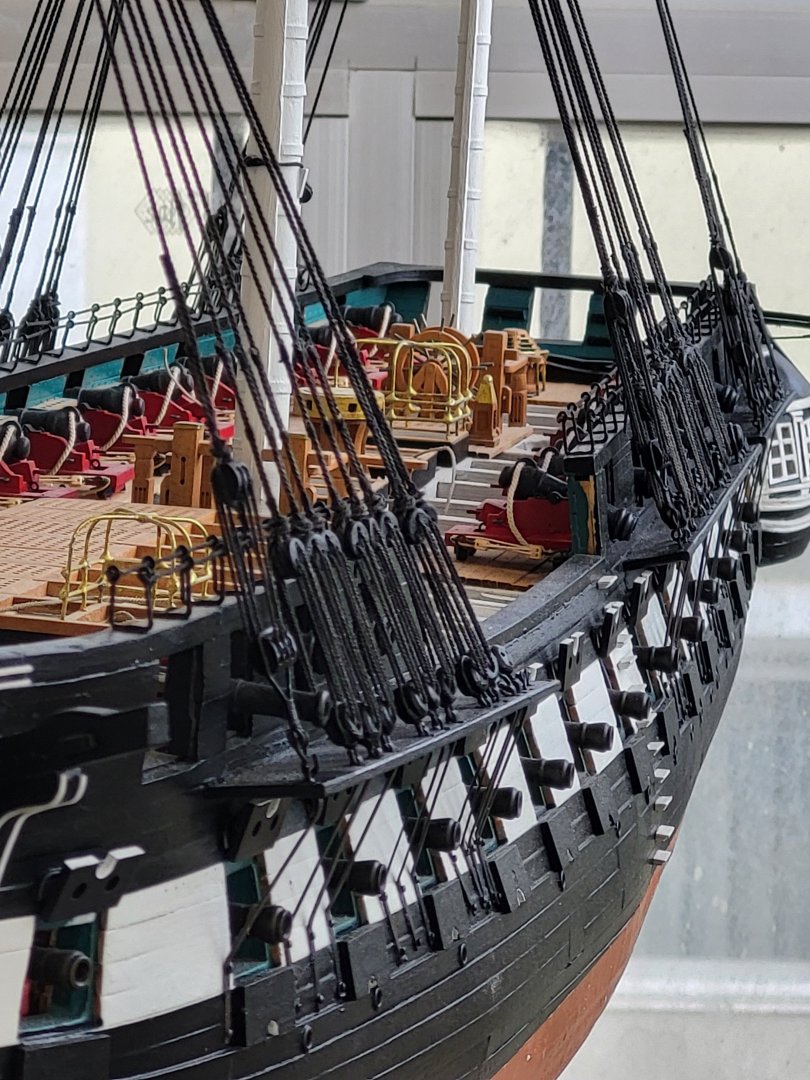
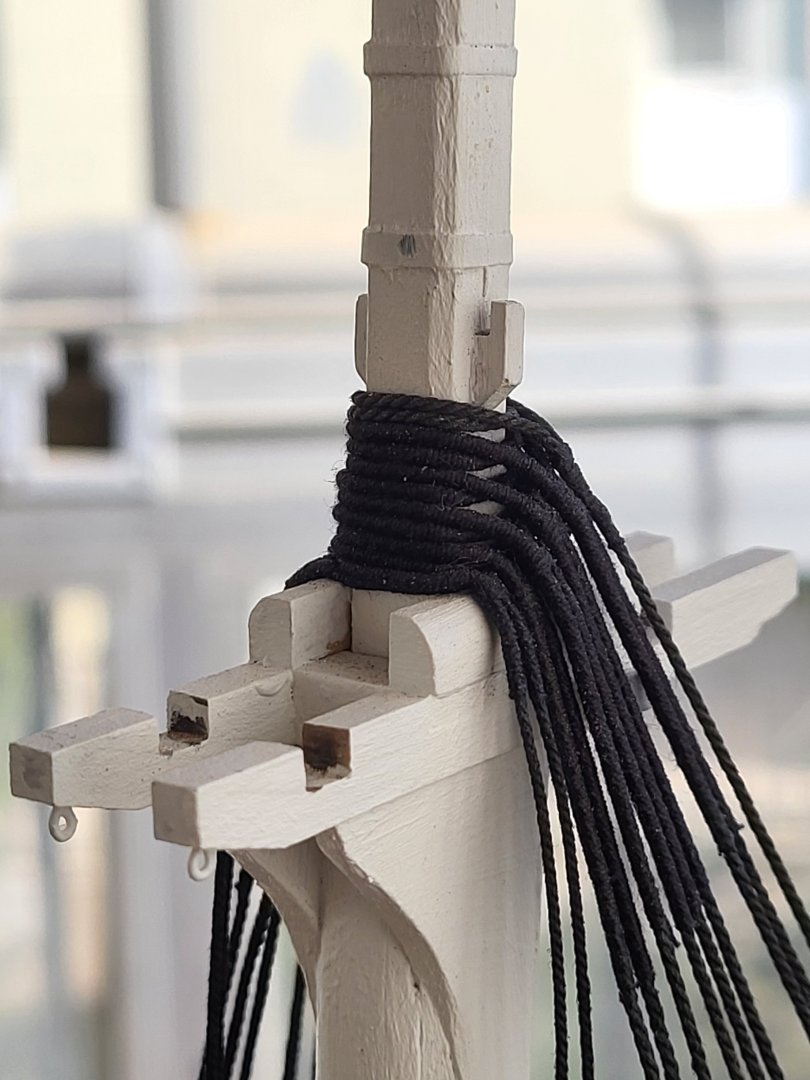
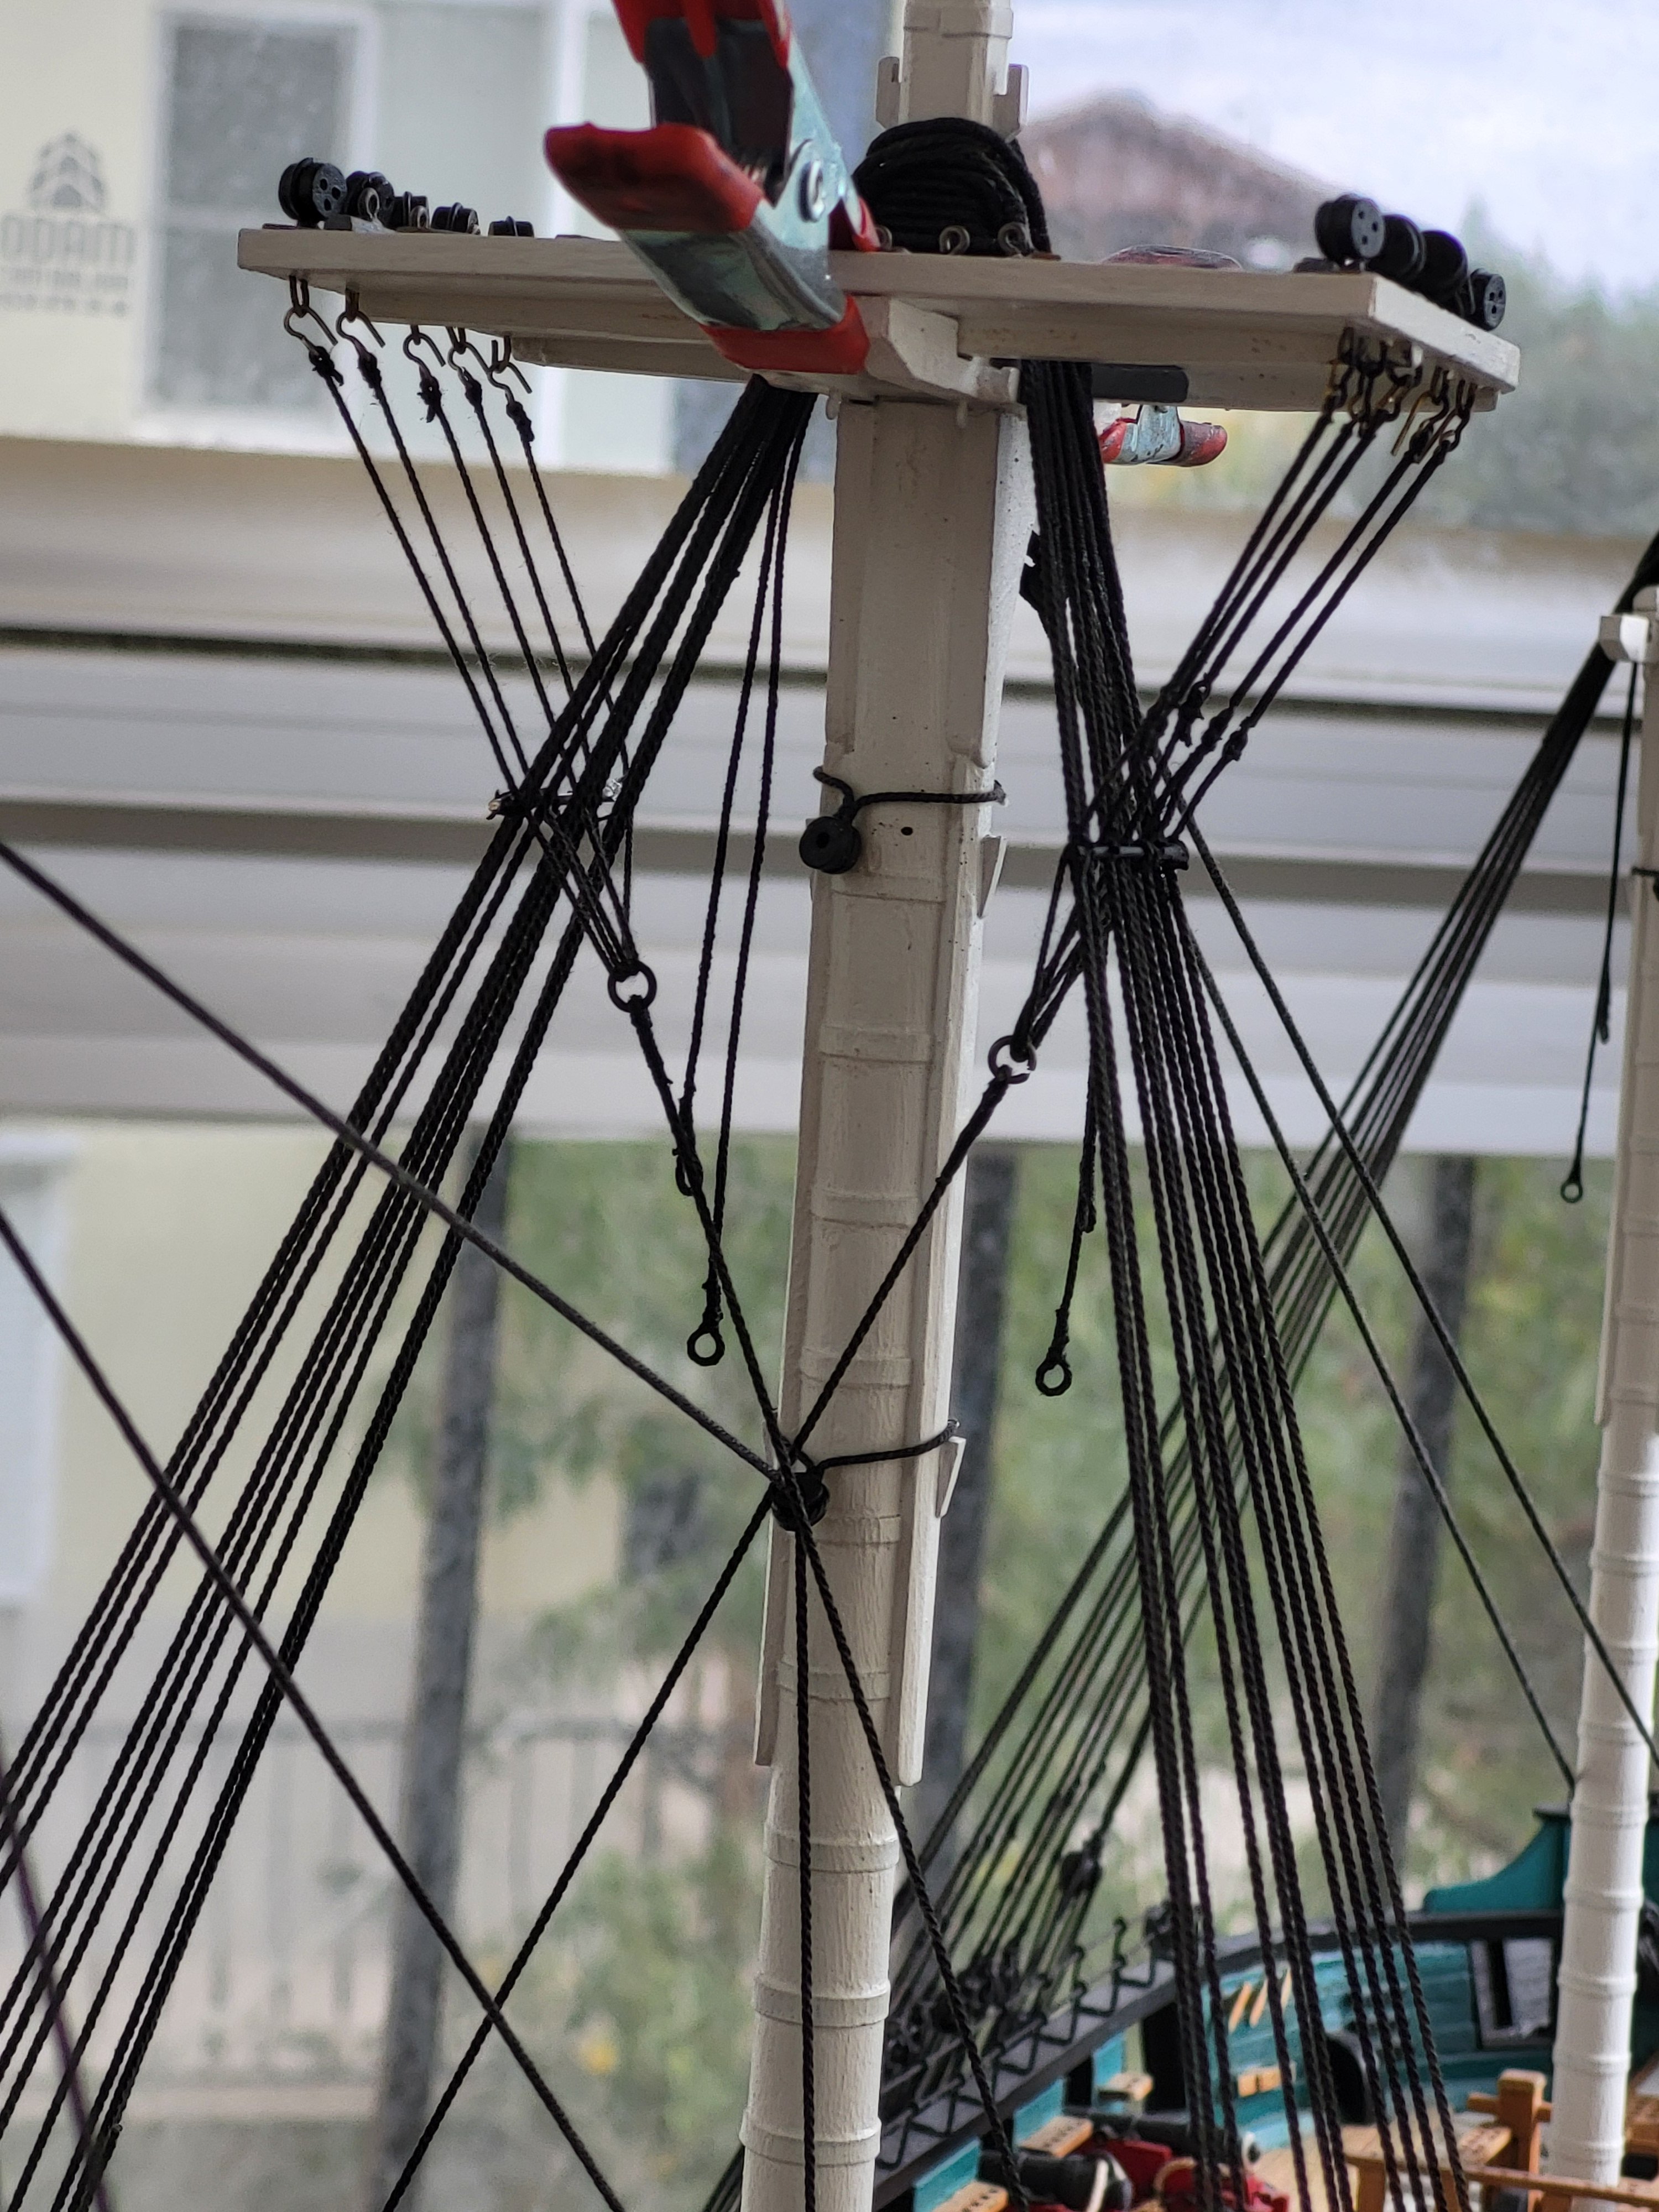
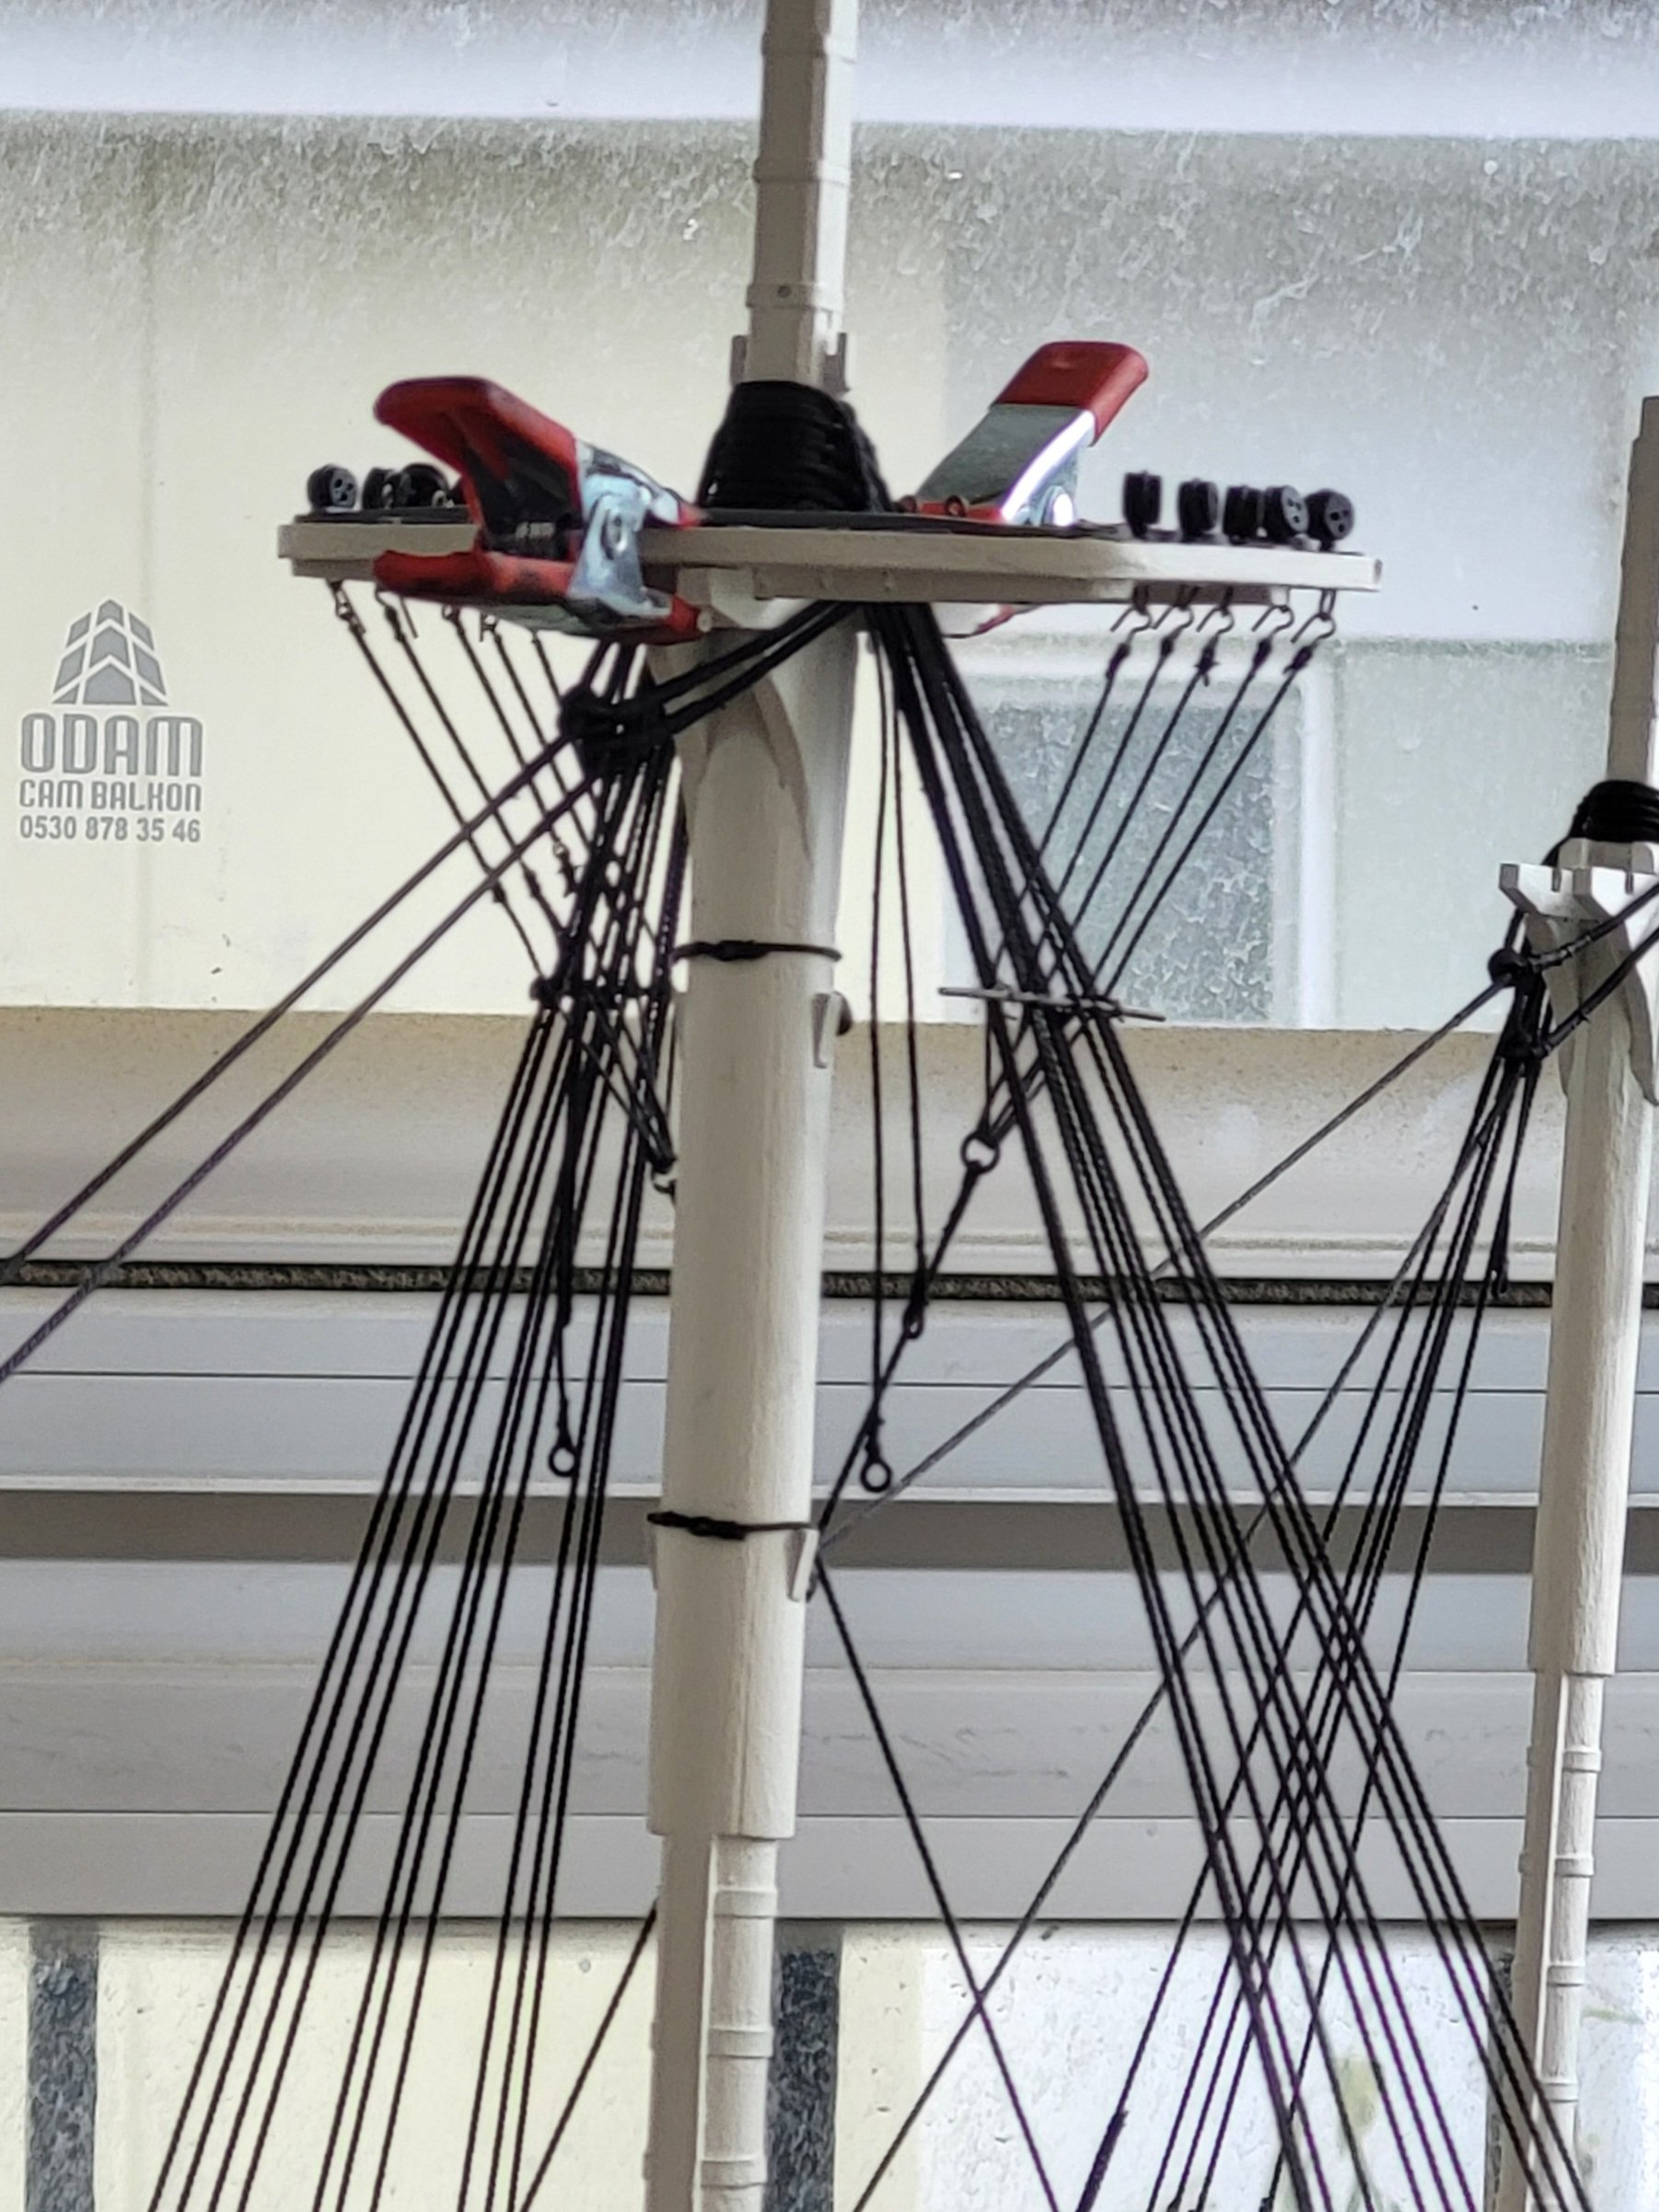
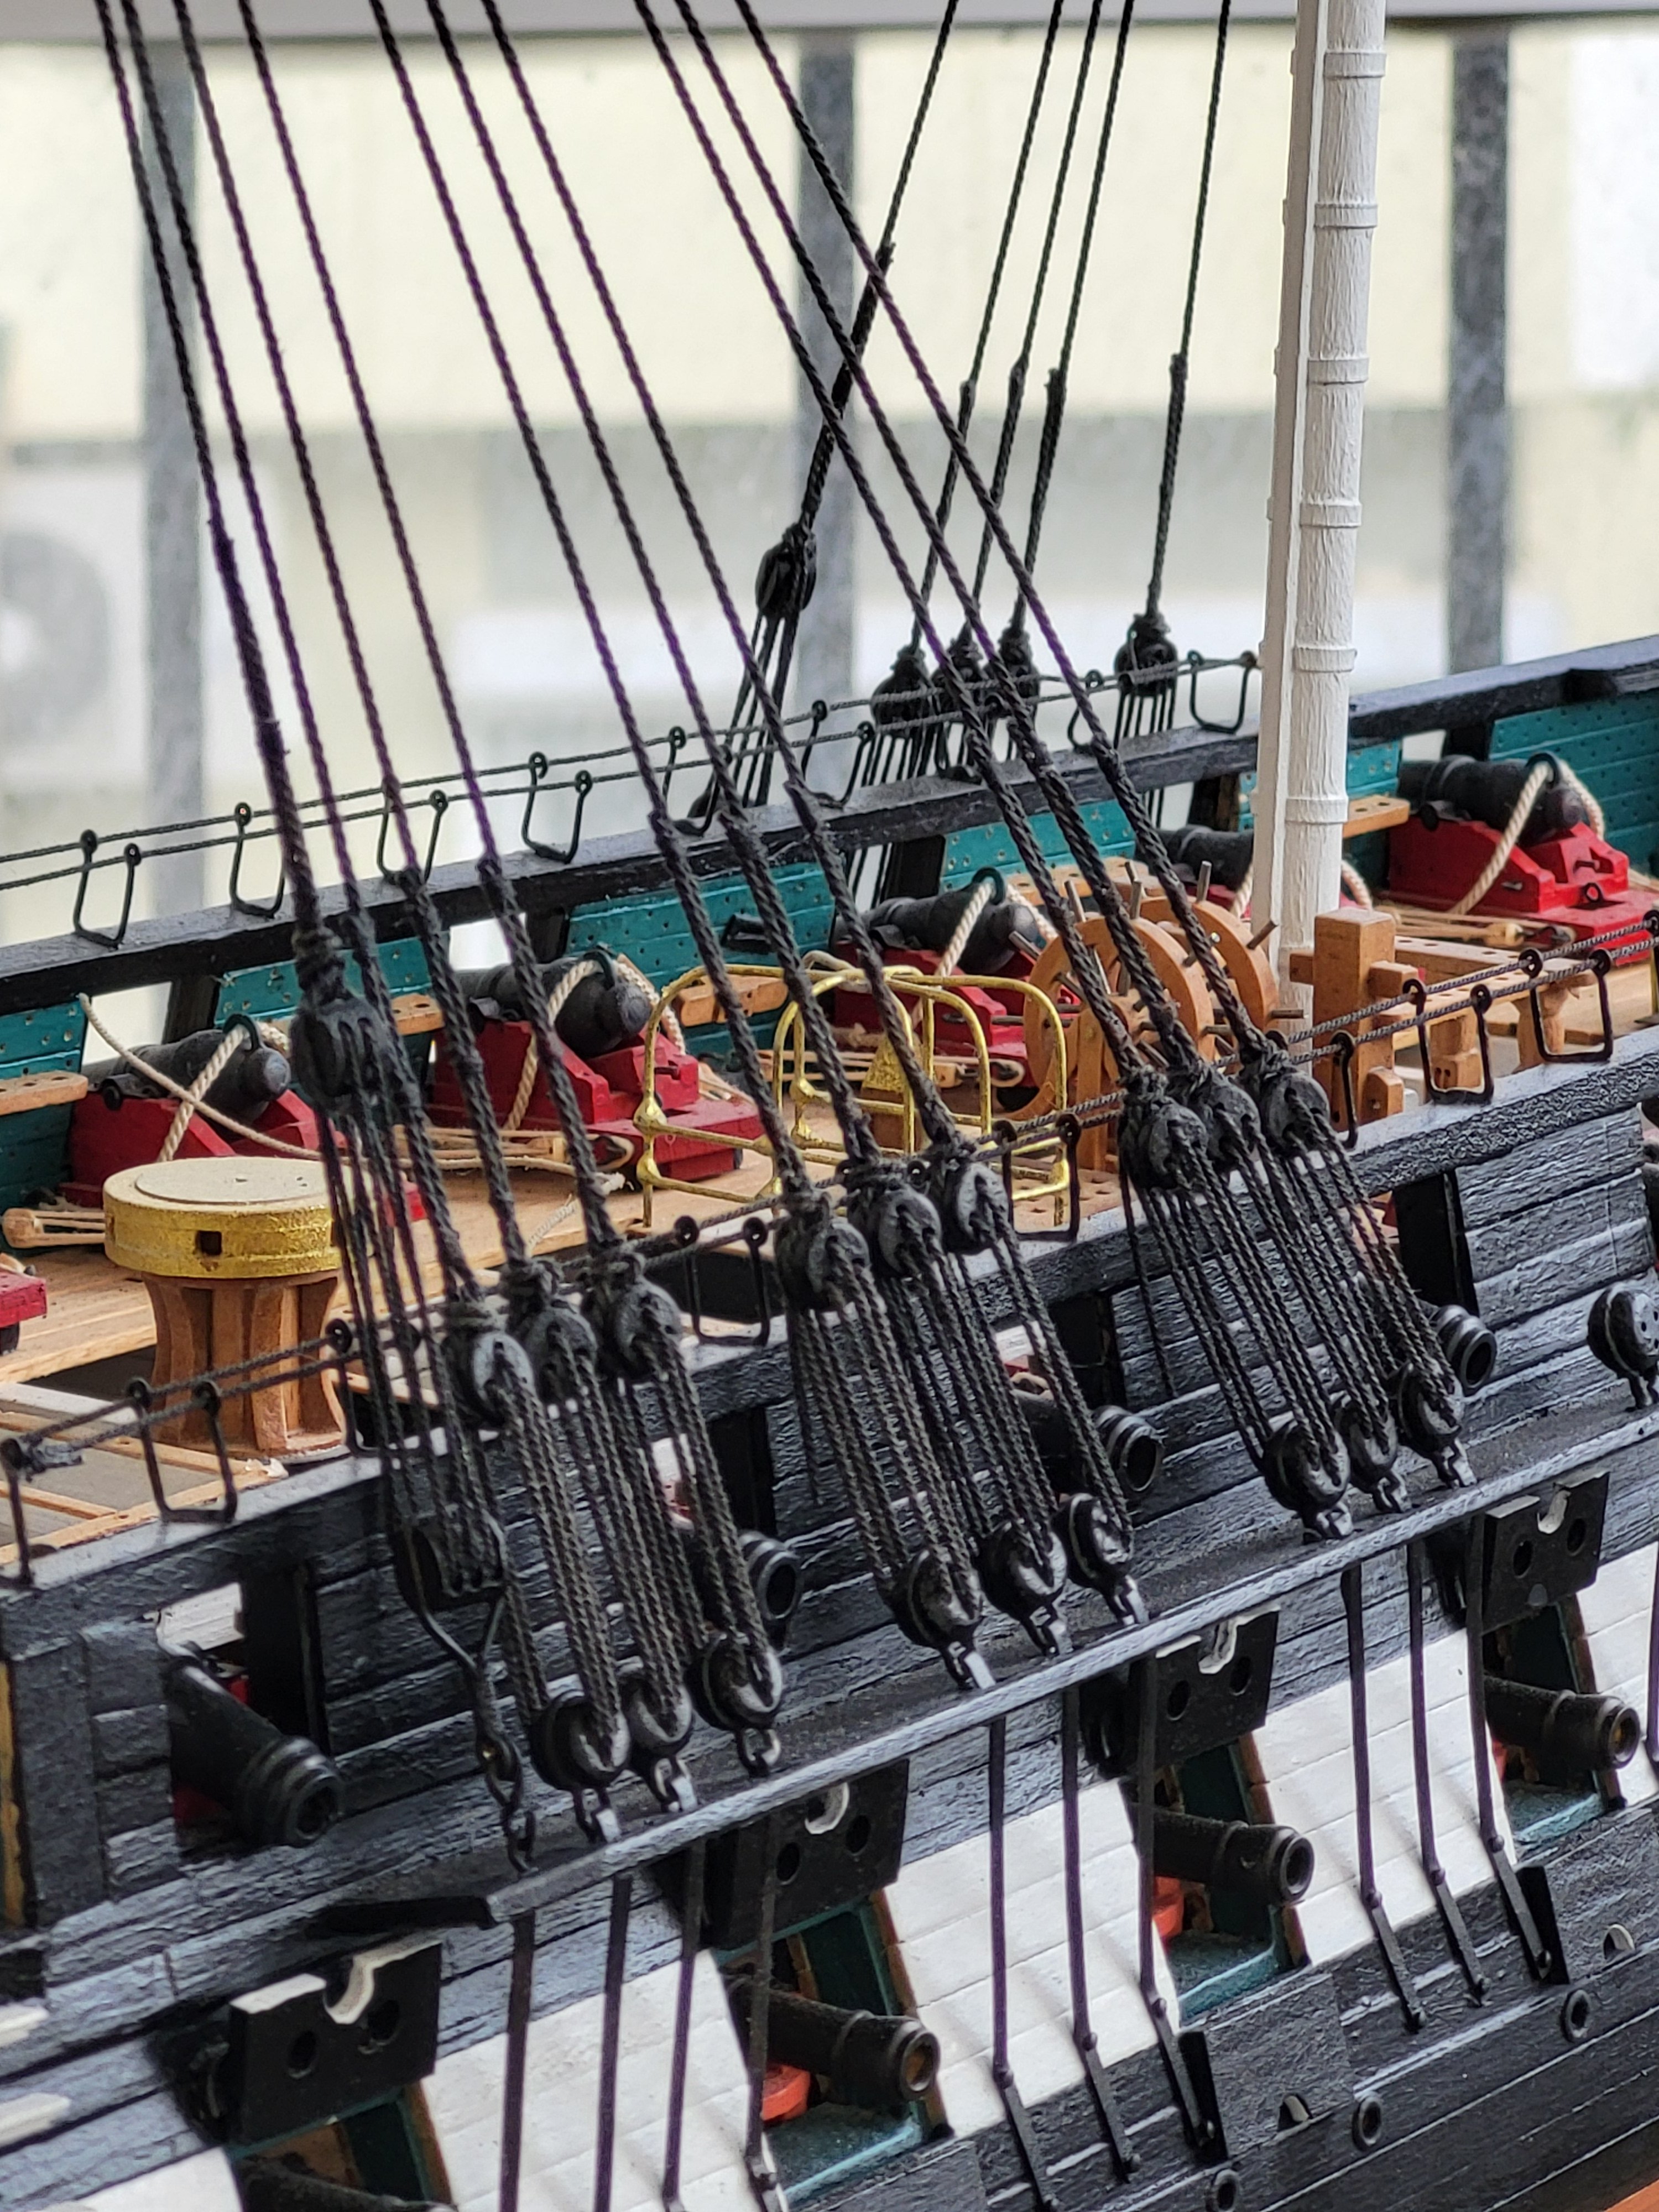
After completing the mizzen stays, I started making the futtock shrouds. I began with the main mast futtocks. I omitted some details for a cleaner look.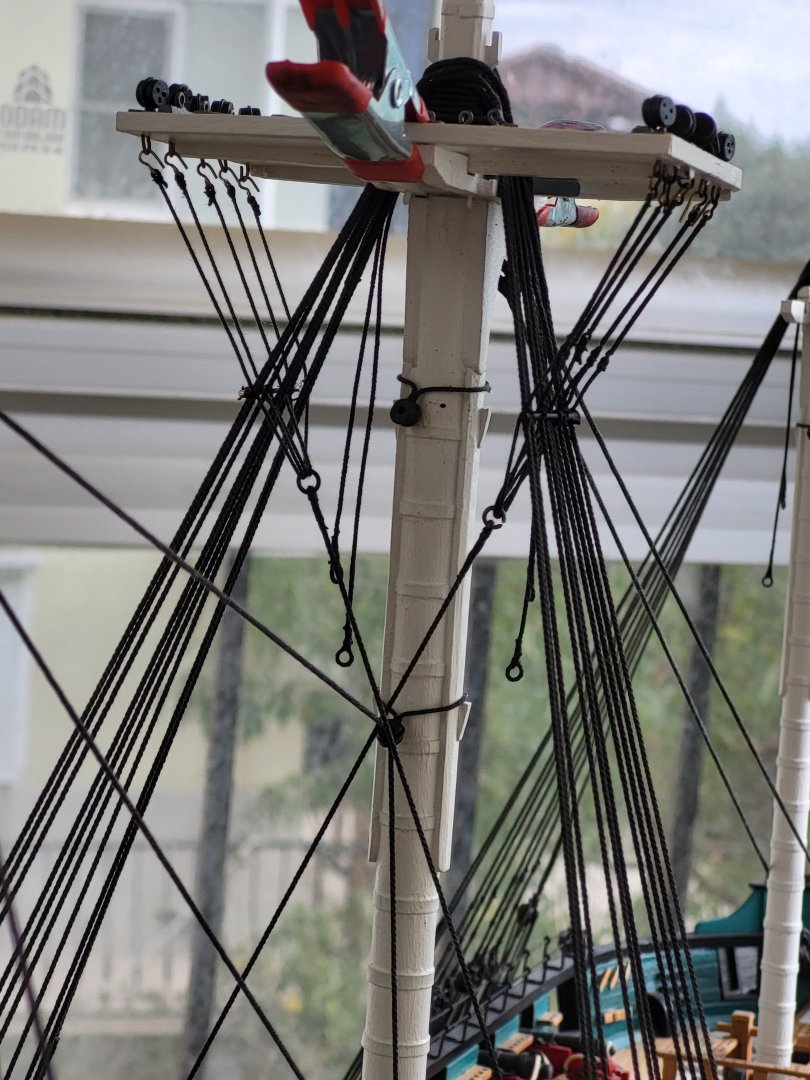


-
USS Constitution by mtbediz - 1:76
mtbediz replied to mtbediz's topic in - Build logs for subjects built 1751 - 1800
I’ll also shut down the shipyard in February because my daughter and her family will be visiting us for two weeks. -
Life becomes more beautiful and meaningful when such traditions are kept alive. Happy new year!
-
USS Constitution by mtbediz - 1:76
mtbediz replied to mtbediz's topic in - Build logs for subjects built 1751 - 1800
Thanks, Greg. I wish you and your family a healthy and happy new year! -
Of course, it's your model, and you have the right to build it however you feel happiest; I do the same. Looking at Mr. Hunt's model, his topgalant rail seems to go further than yours, blocking the cathead, so he must have passed the rope over it. I'd also like to point out that, although you didn't add it, there's normally hammock net on the topgalant rail, and it's impossible for the rope to pass over that. Again, I apologize, my intention isn't to bother you, I'm just trying to contribute to your model.
-
USS Constitution by mtbediz - 1:76
mtbediz replied to mtbediz's topic in - Build logs for subjects built 1751 - 1800
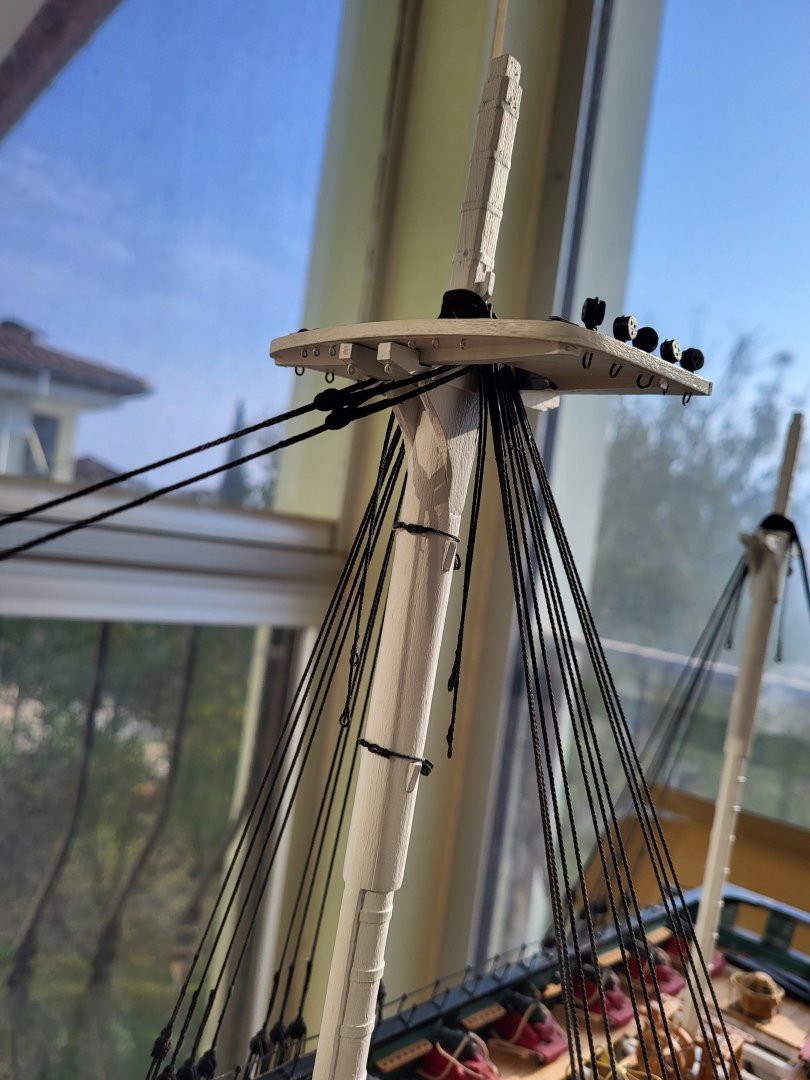
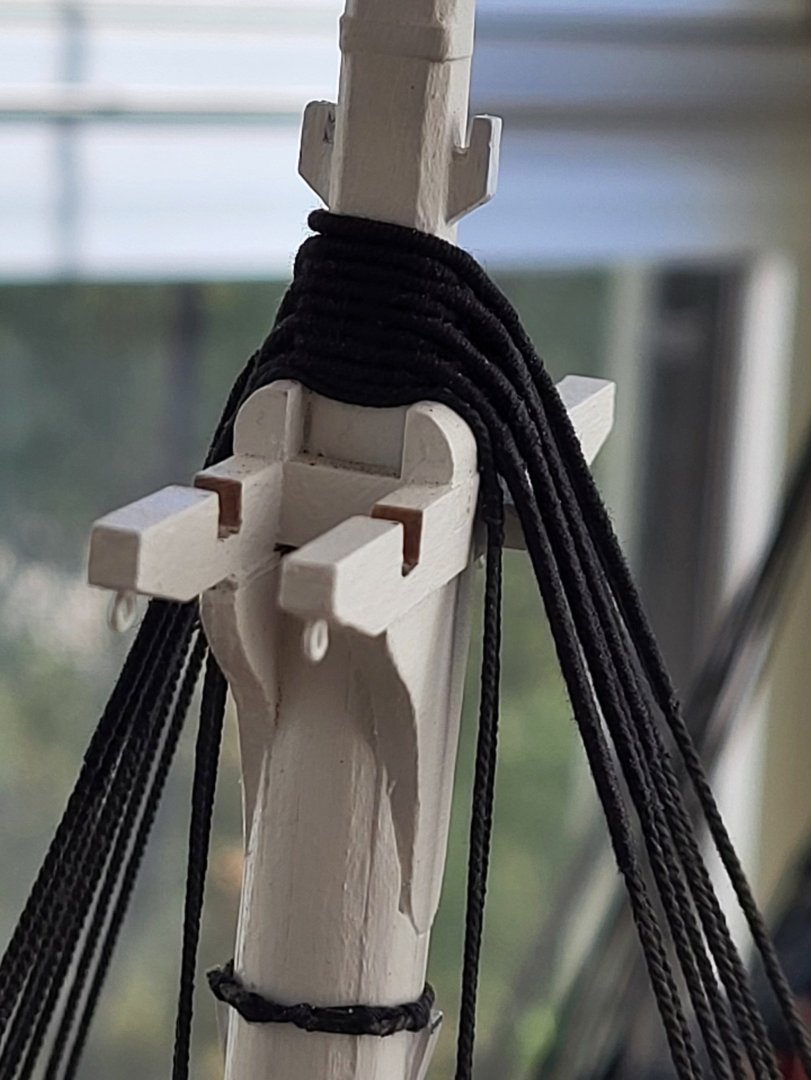
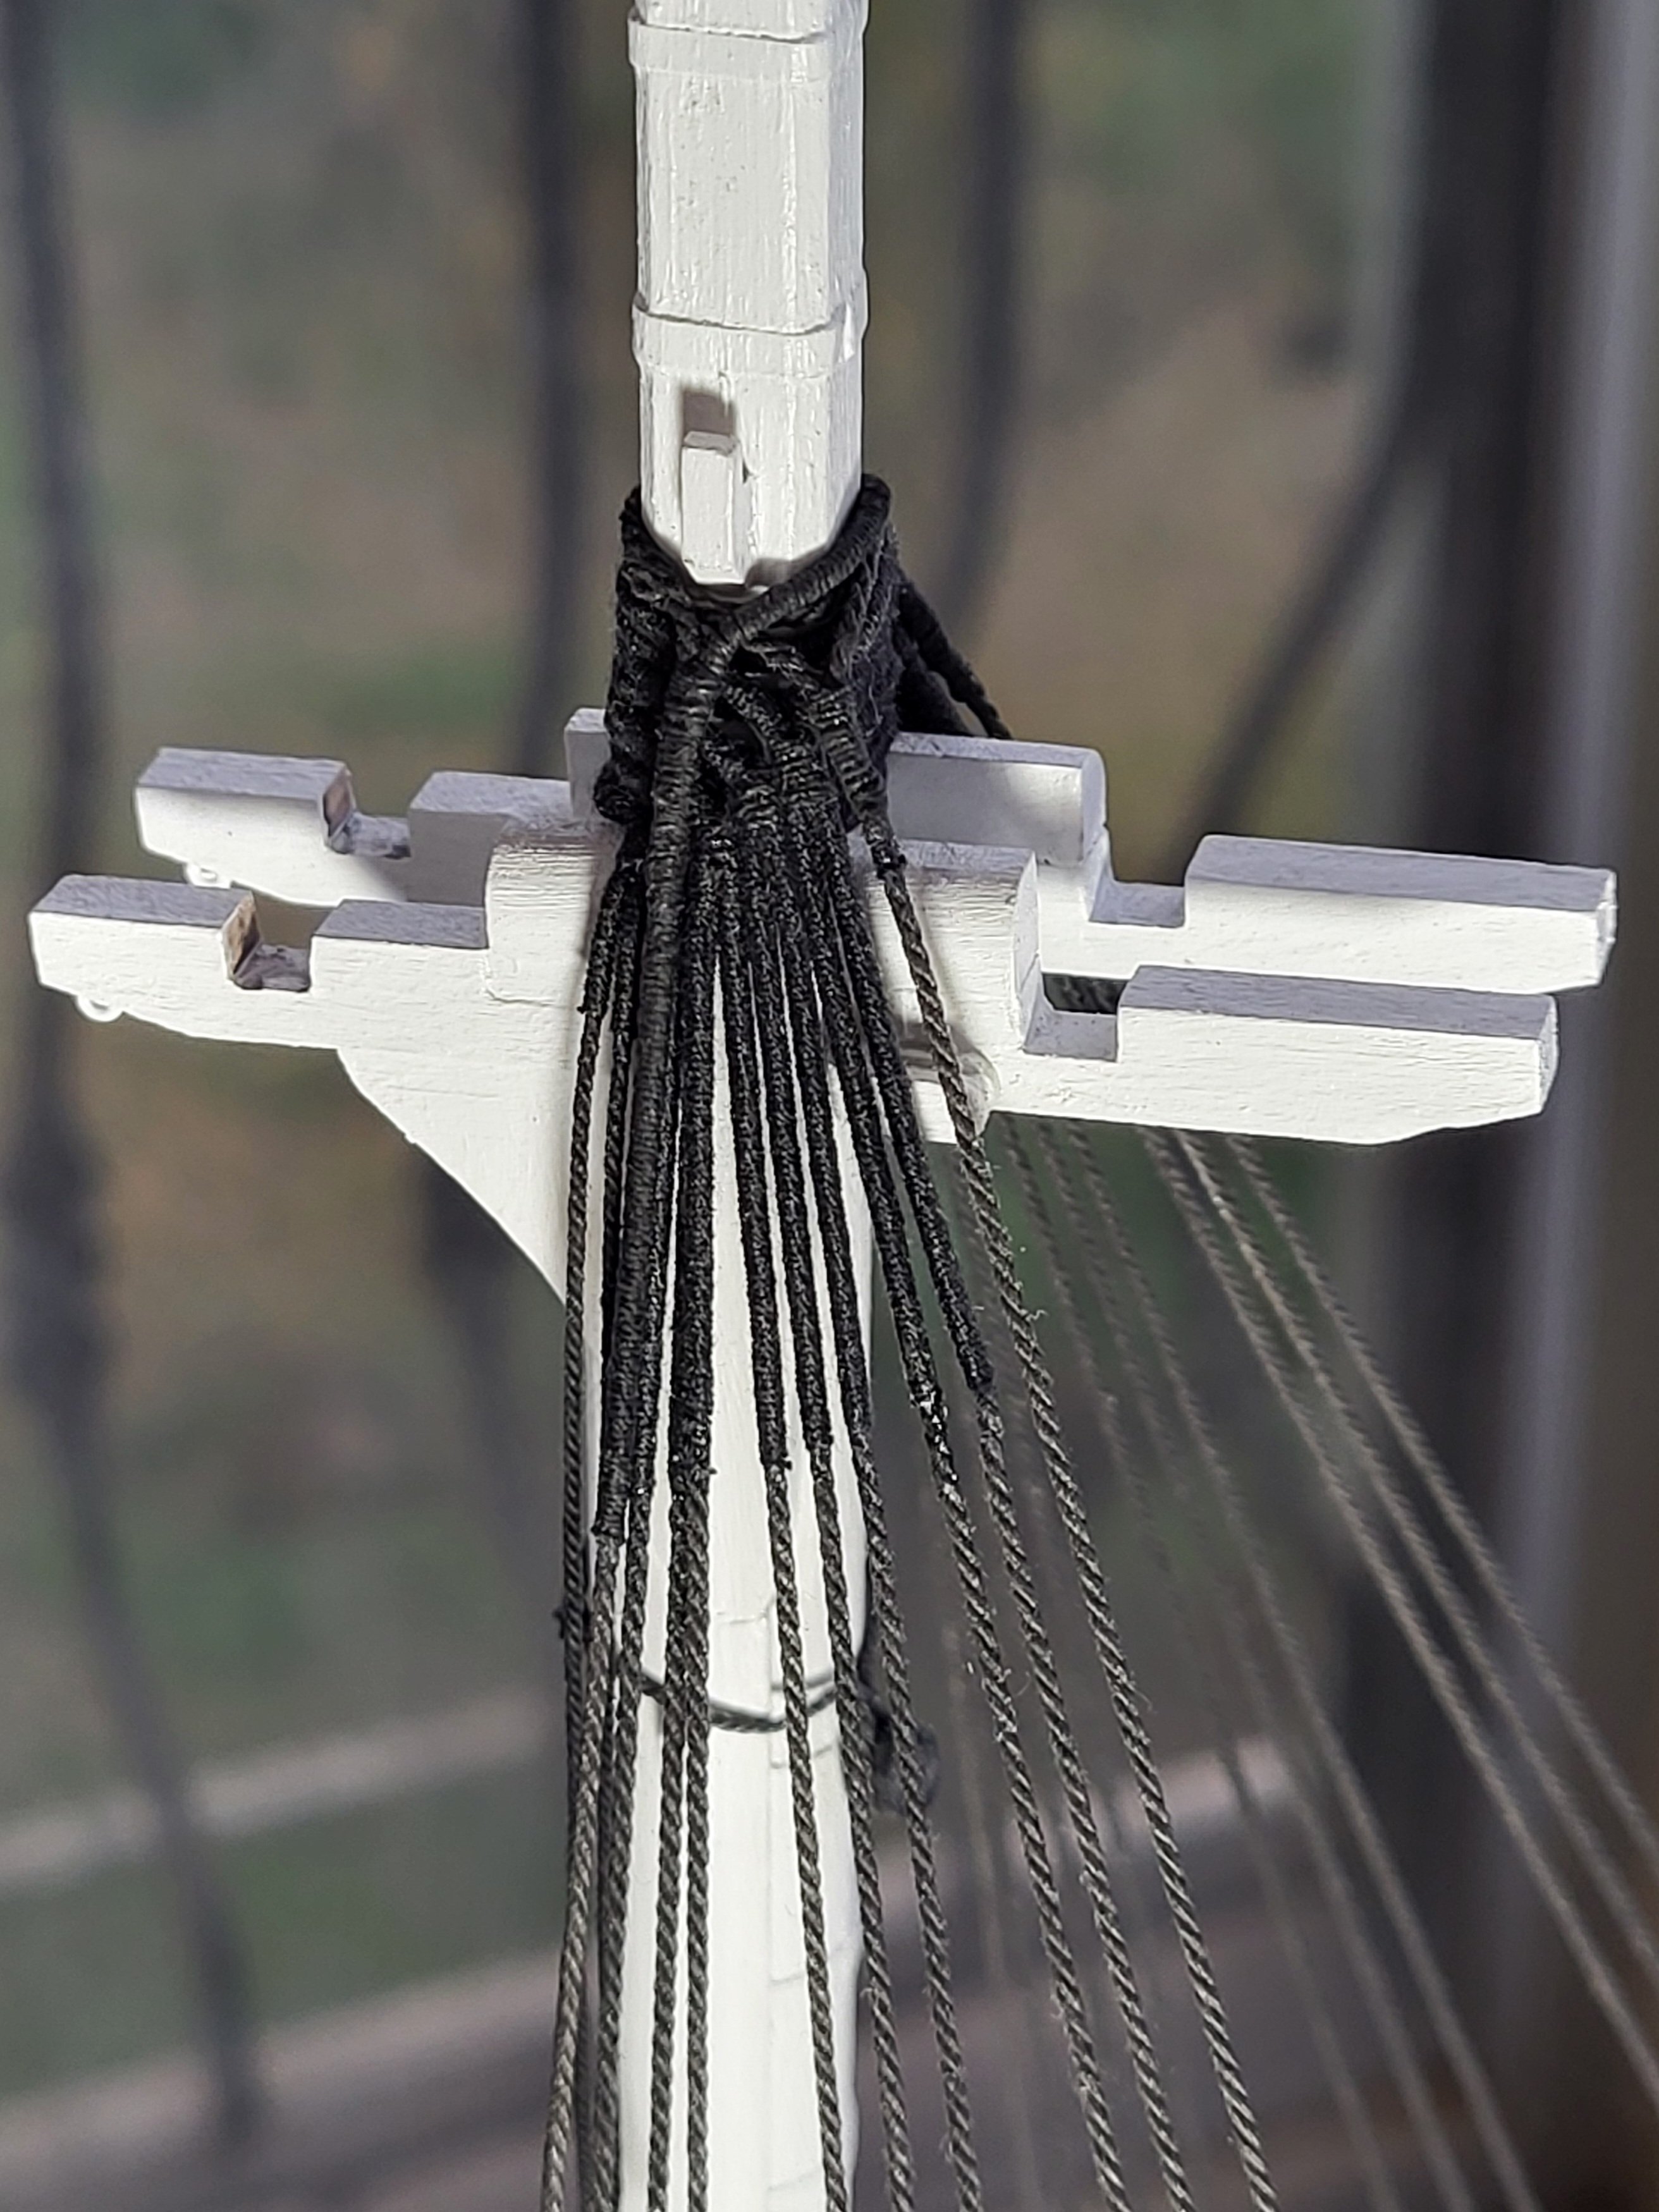
Main stays are complete.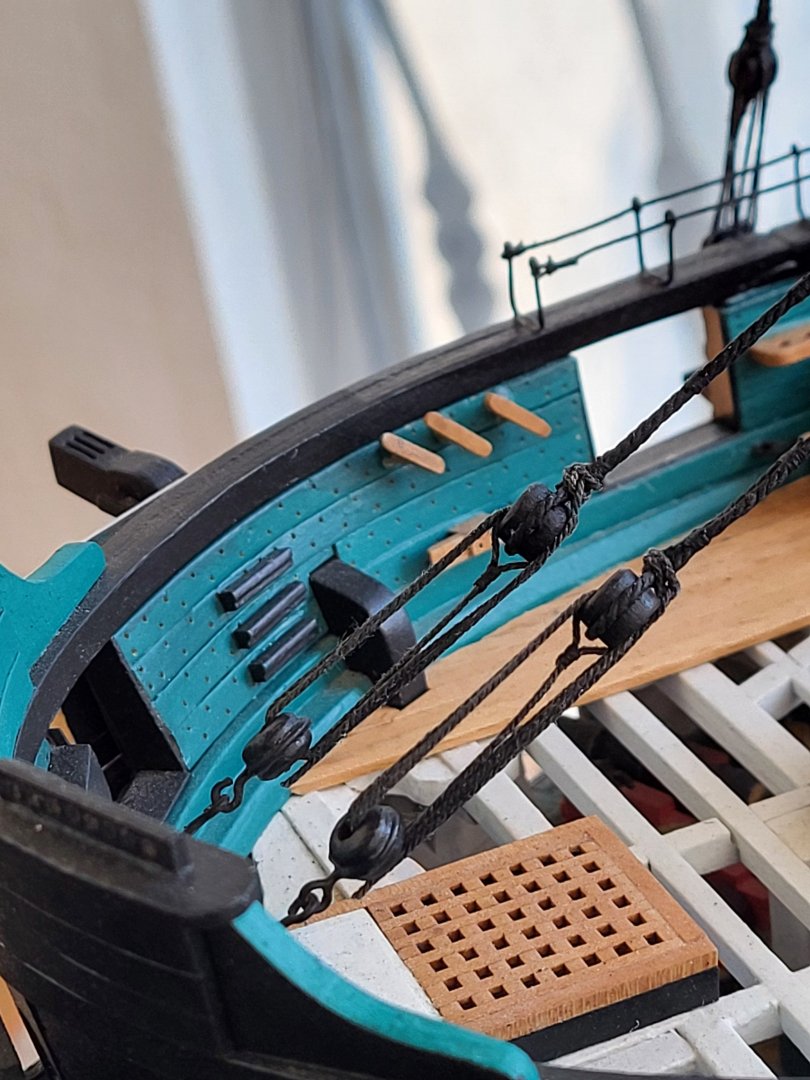


-
USS Constitution by mtbediz - 1:76
mtbediz replied to mtbediz's topic in - Build logs for subjects built 1751 - 1800
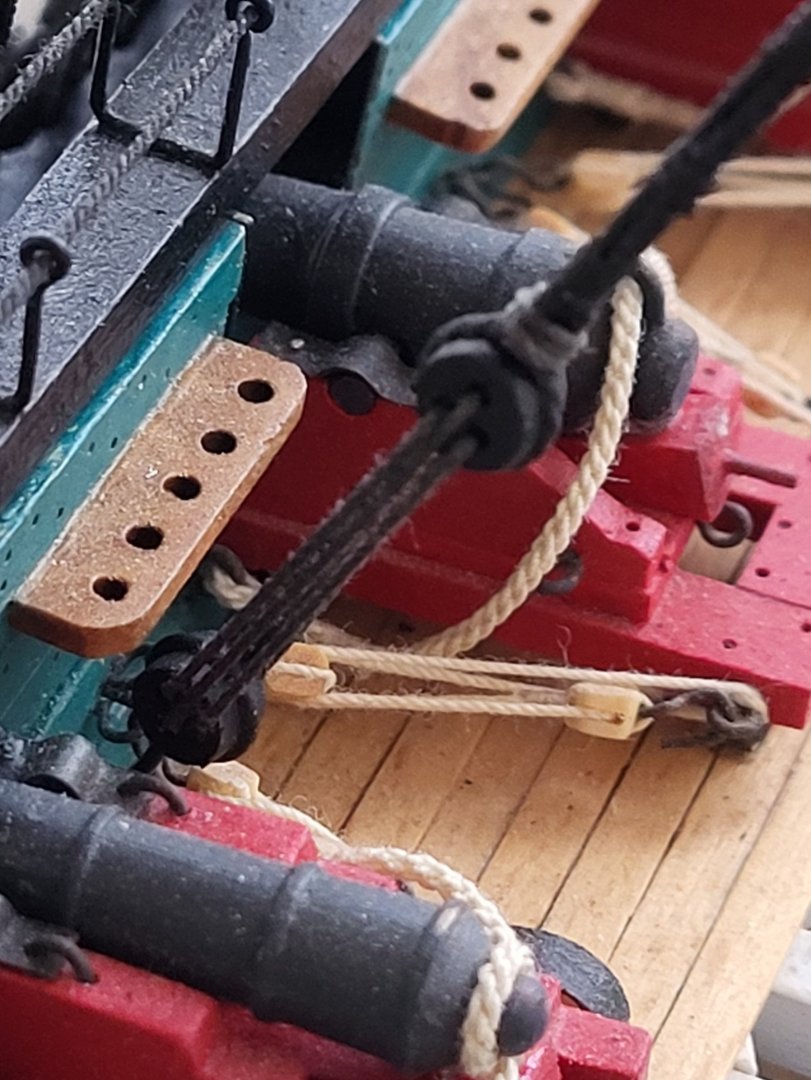
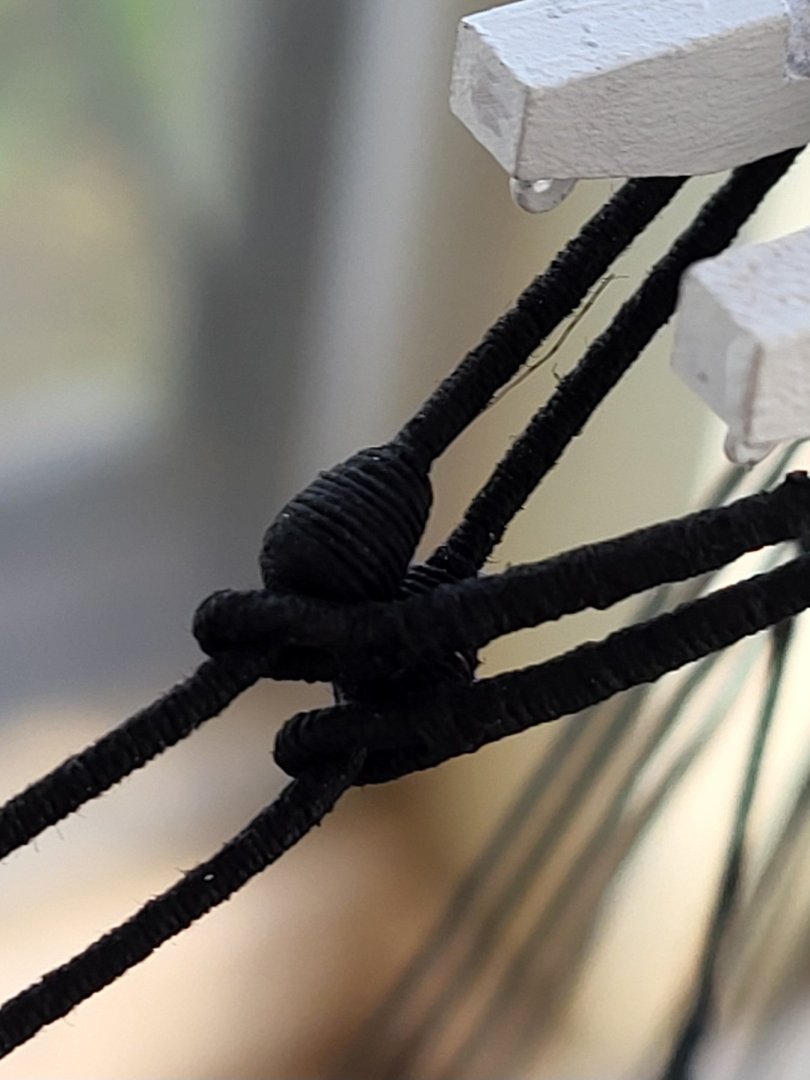
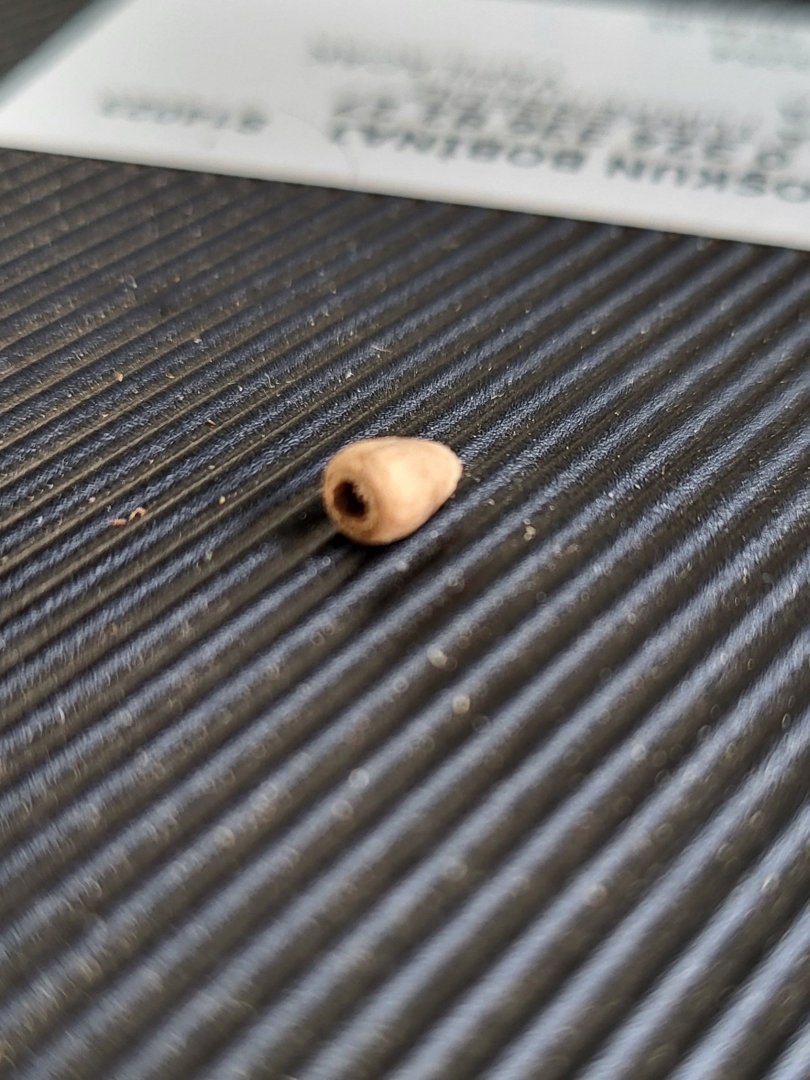
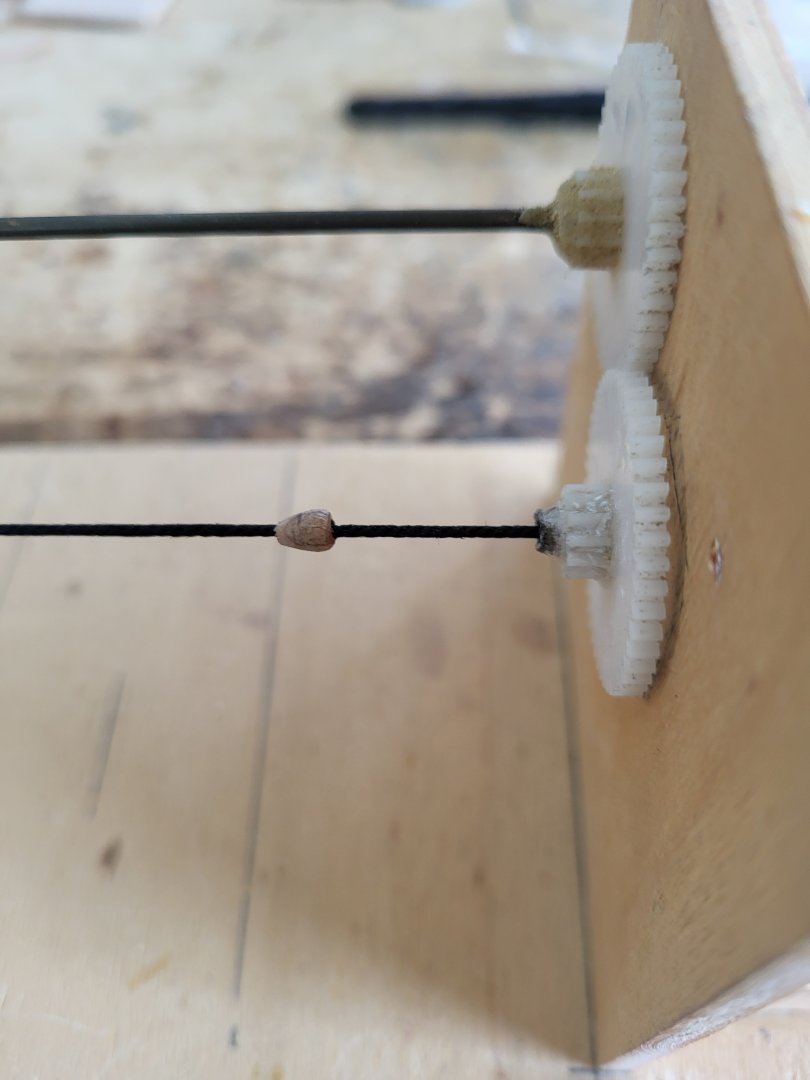
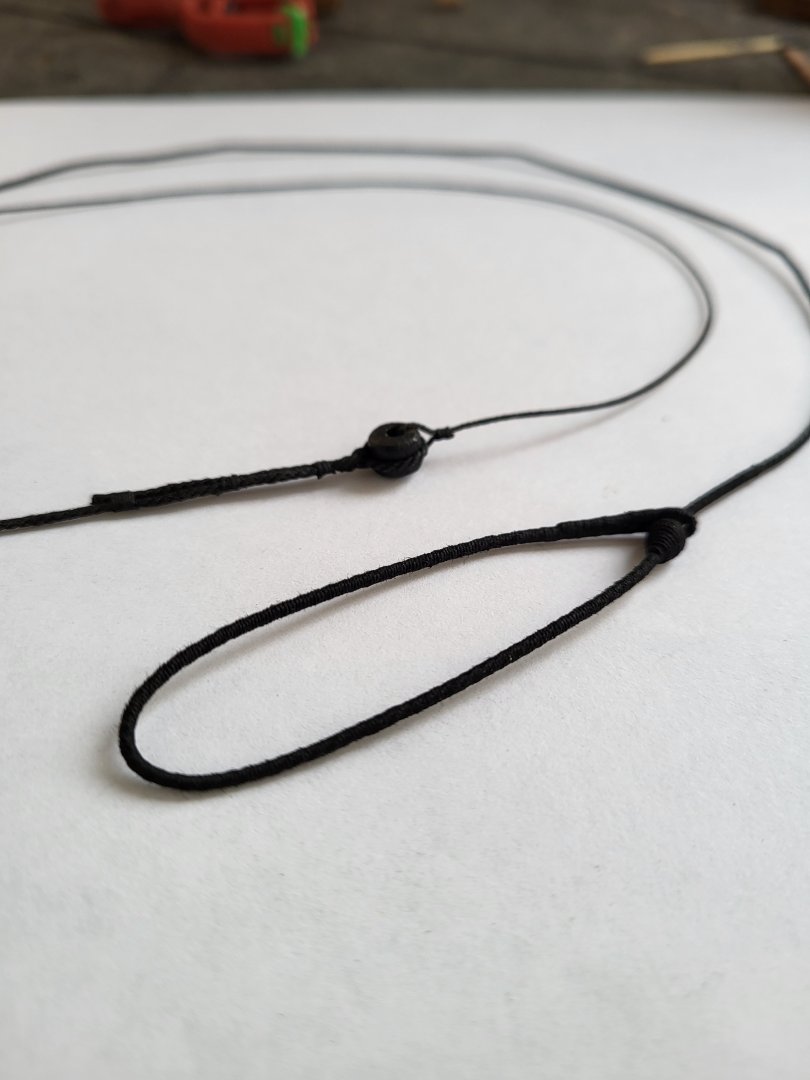
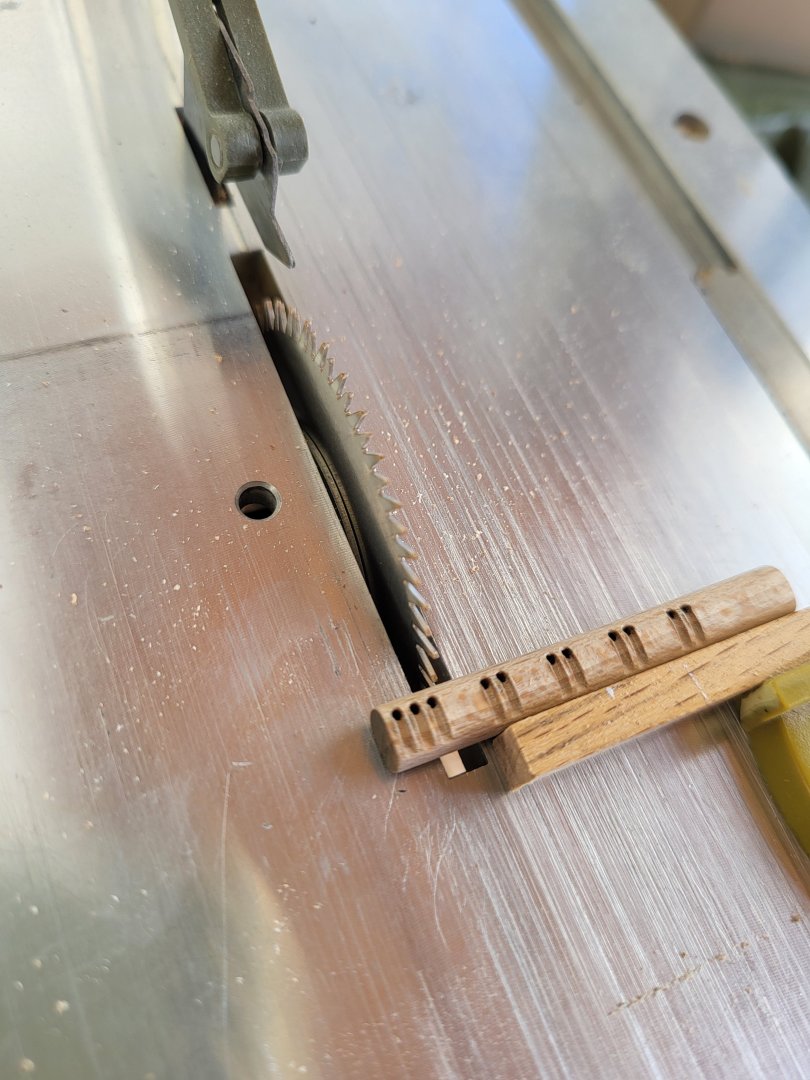
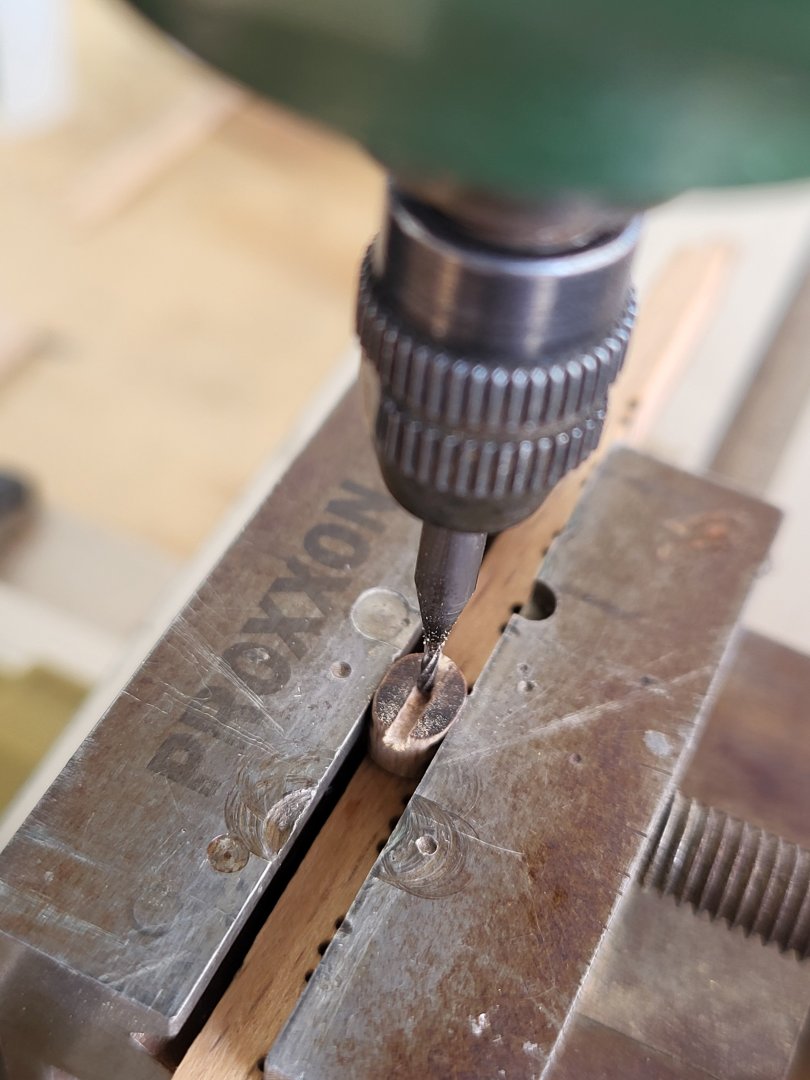
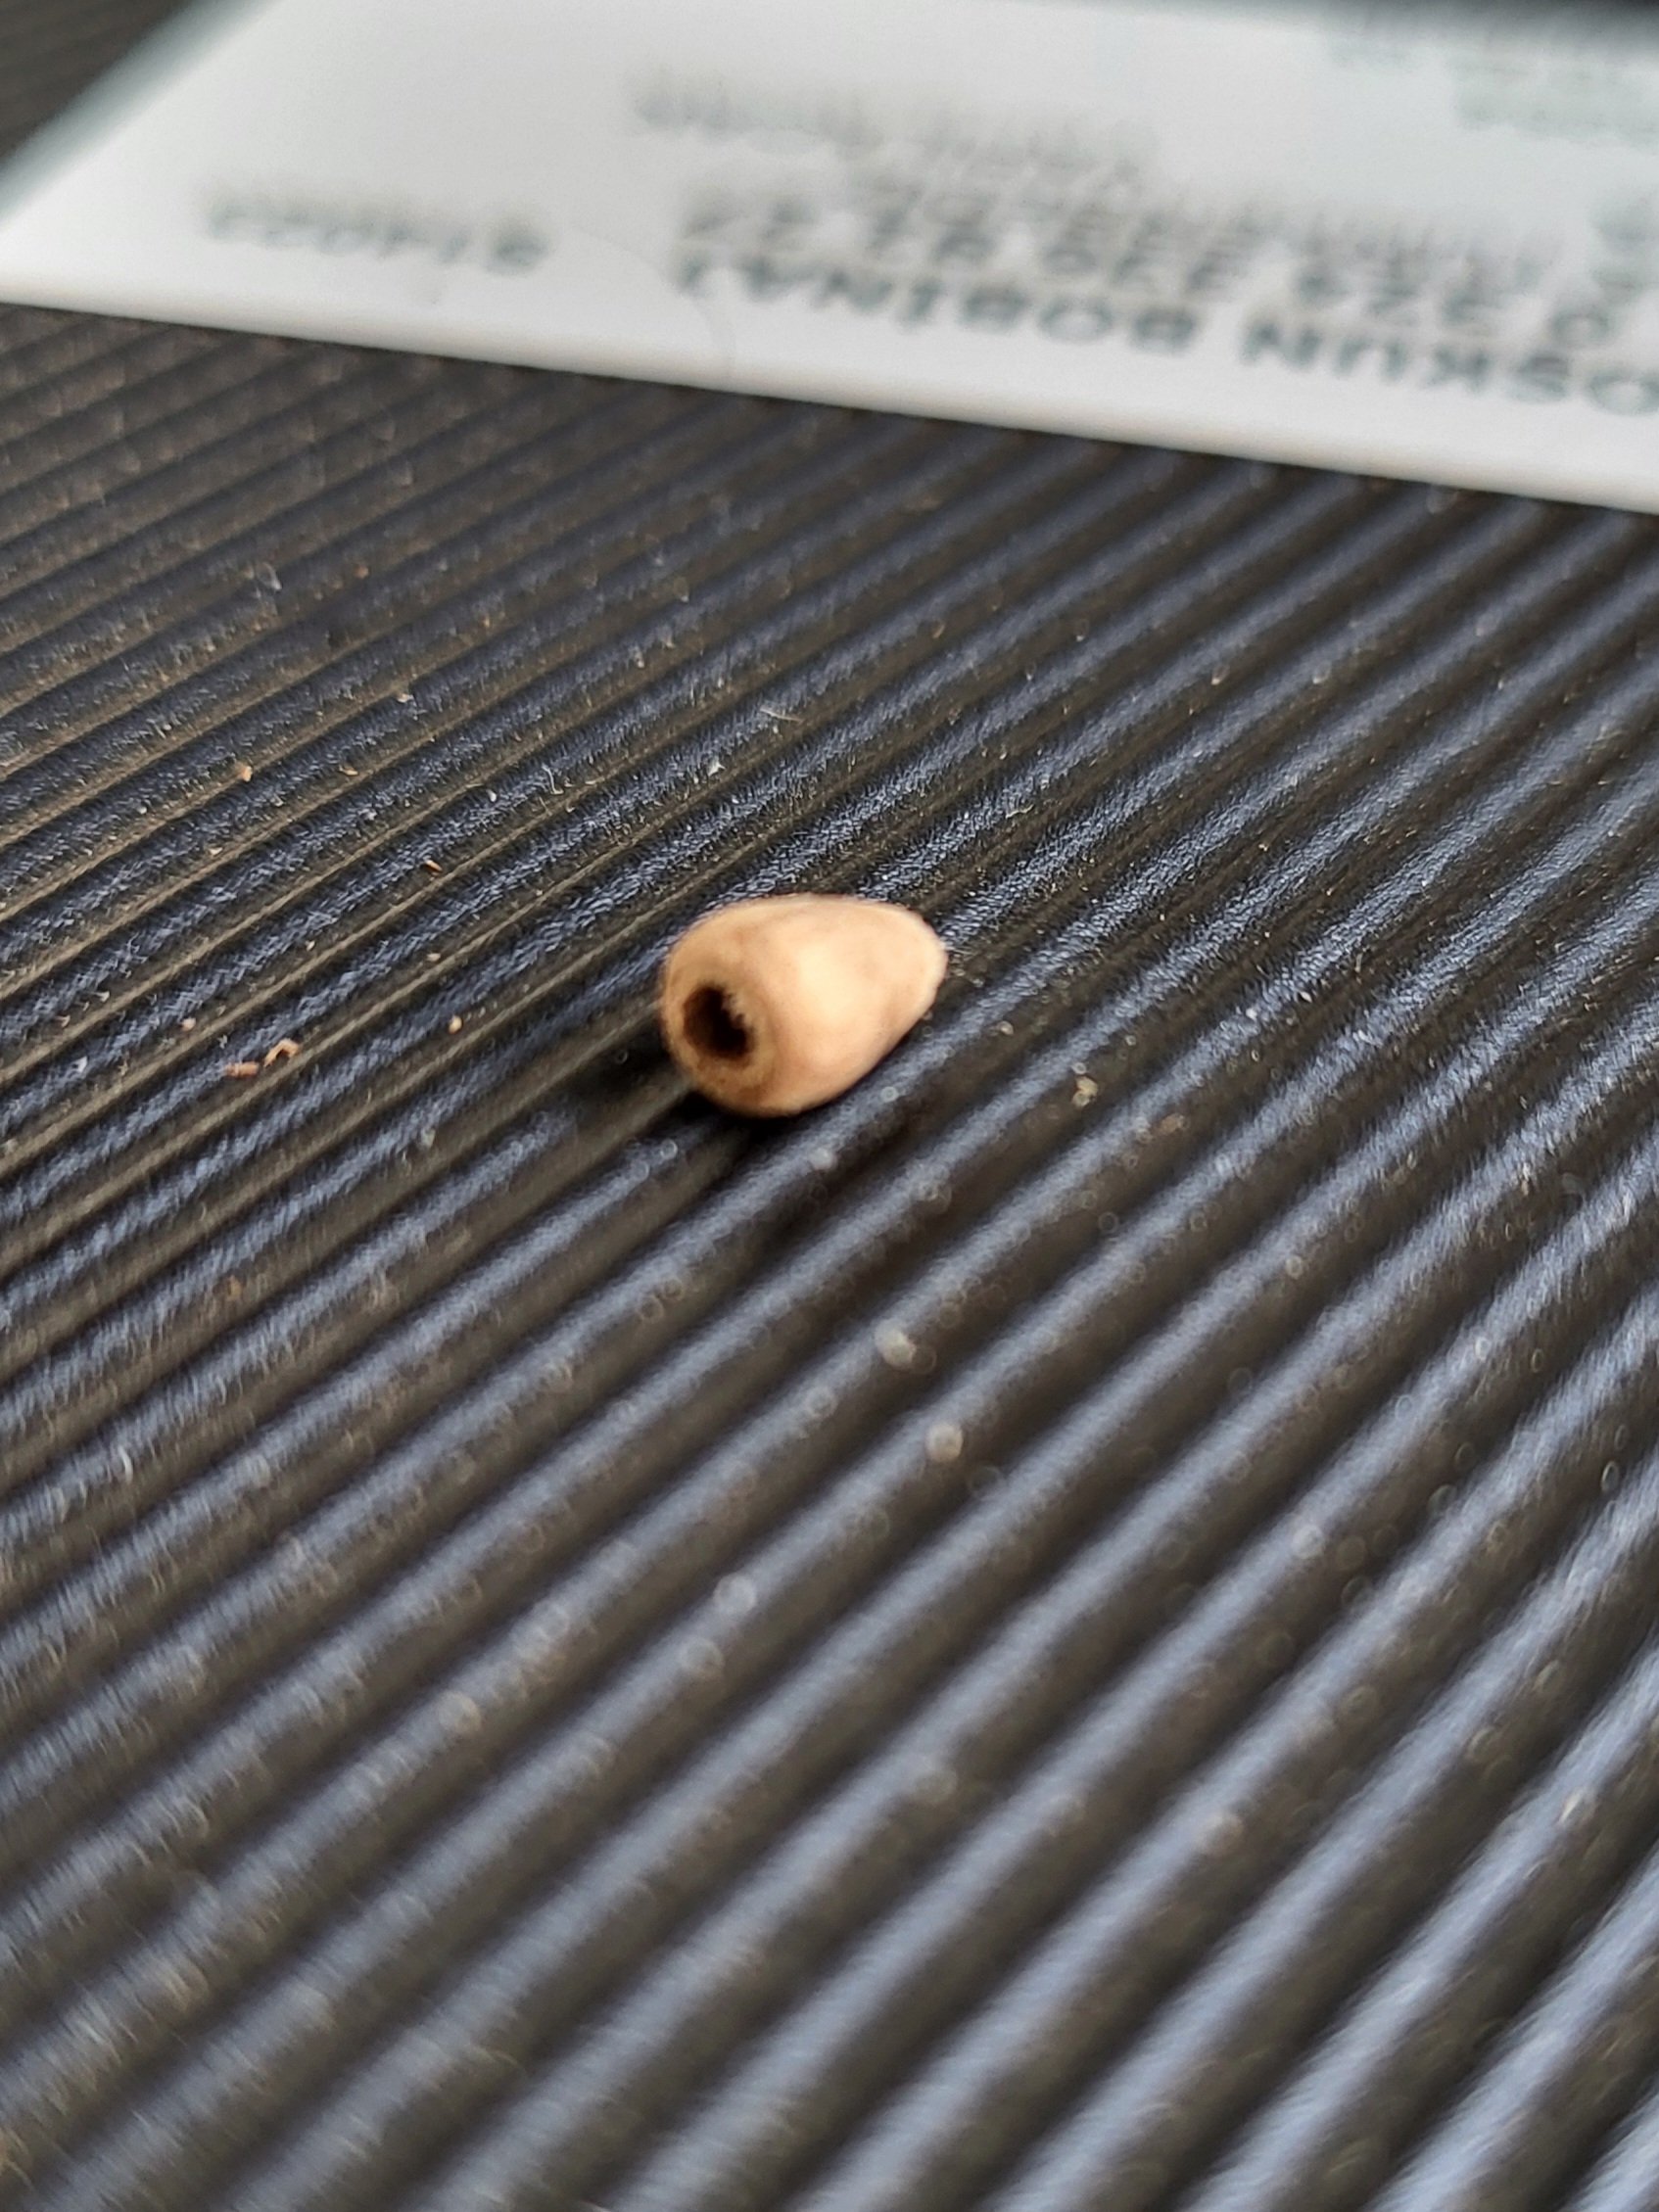
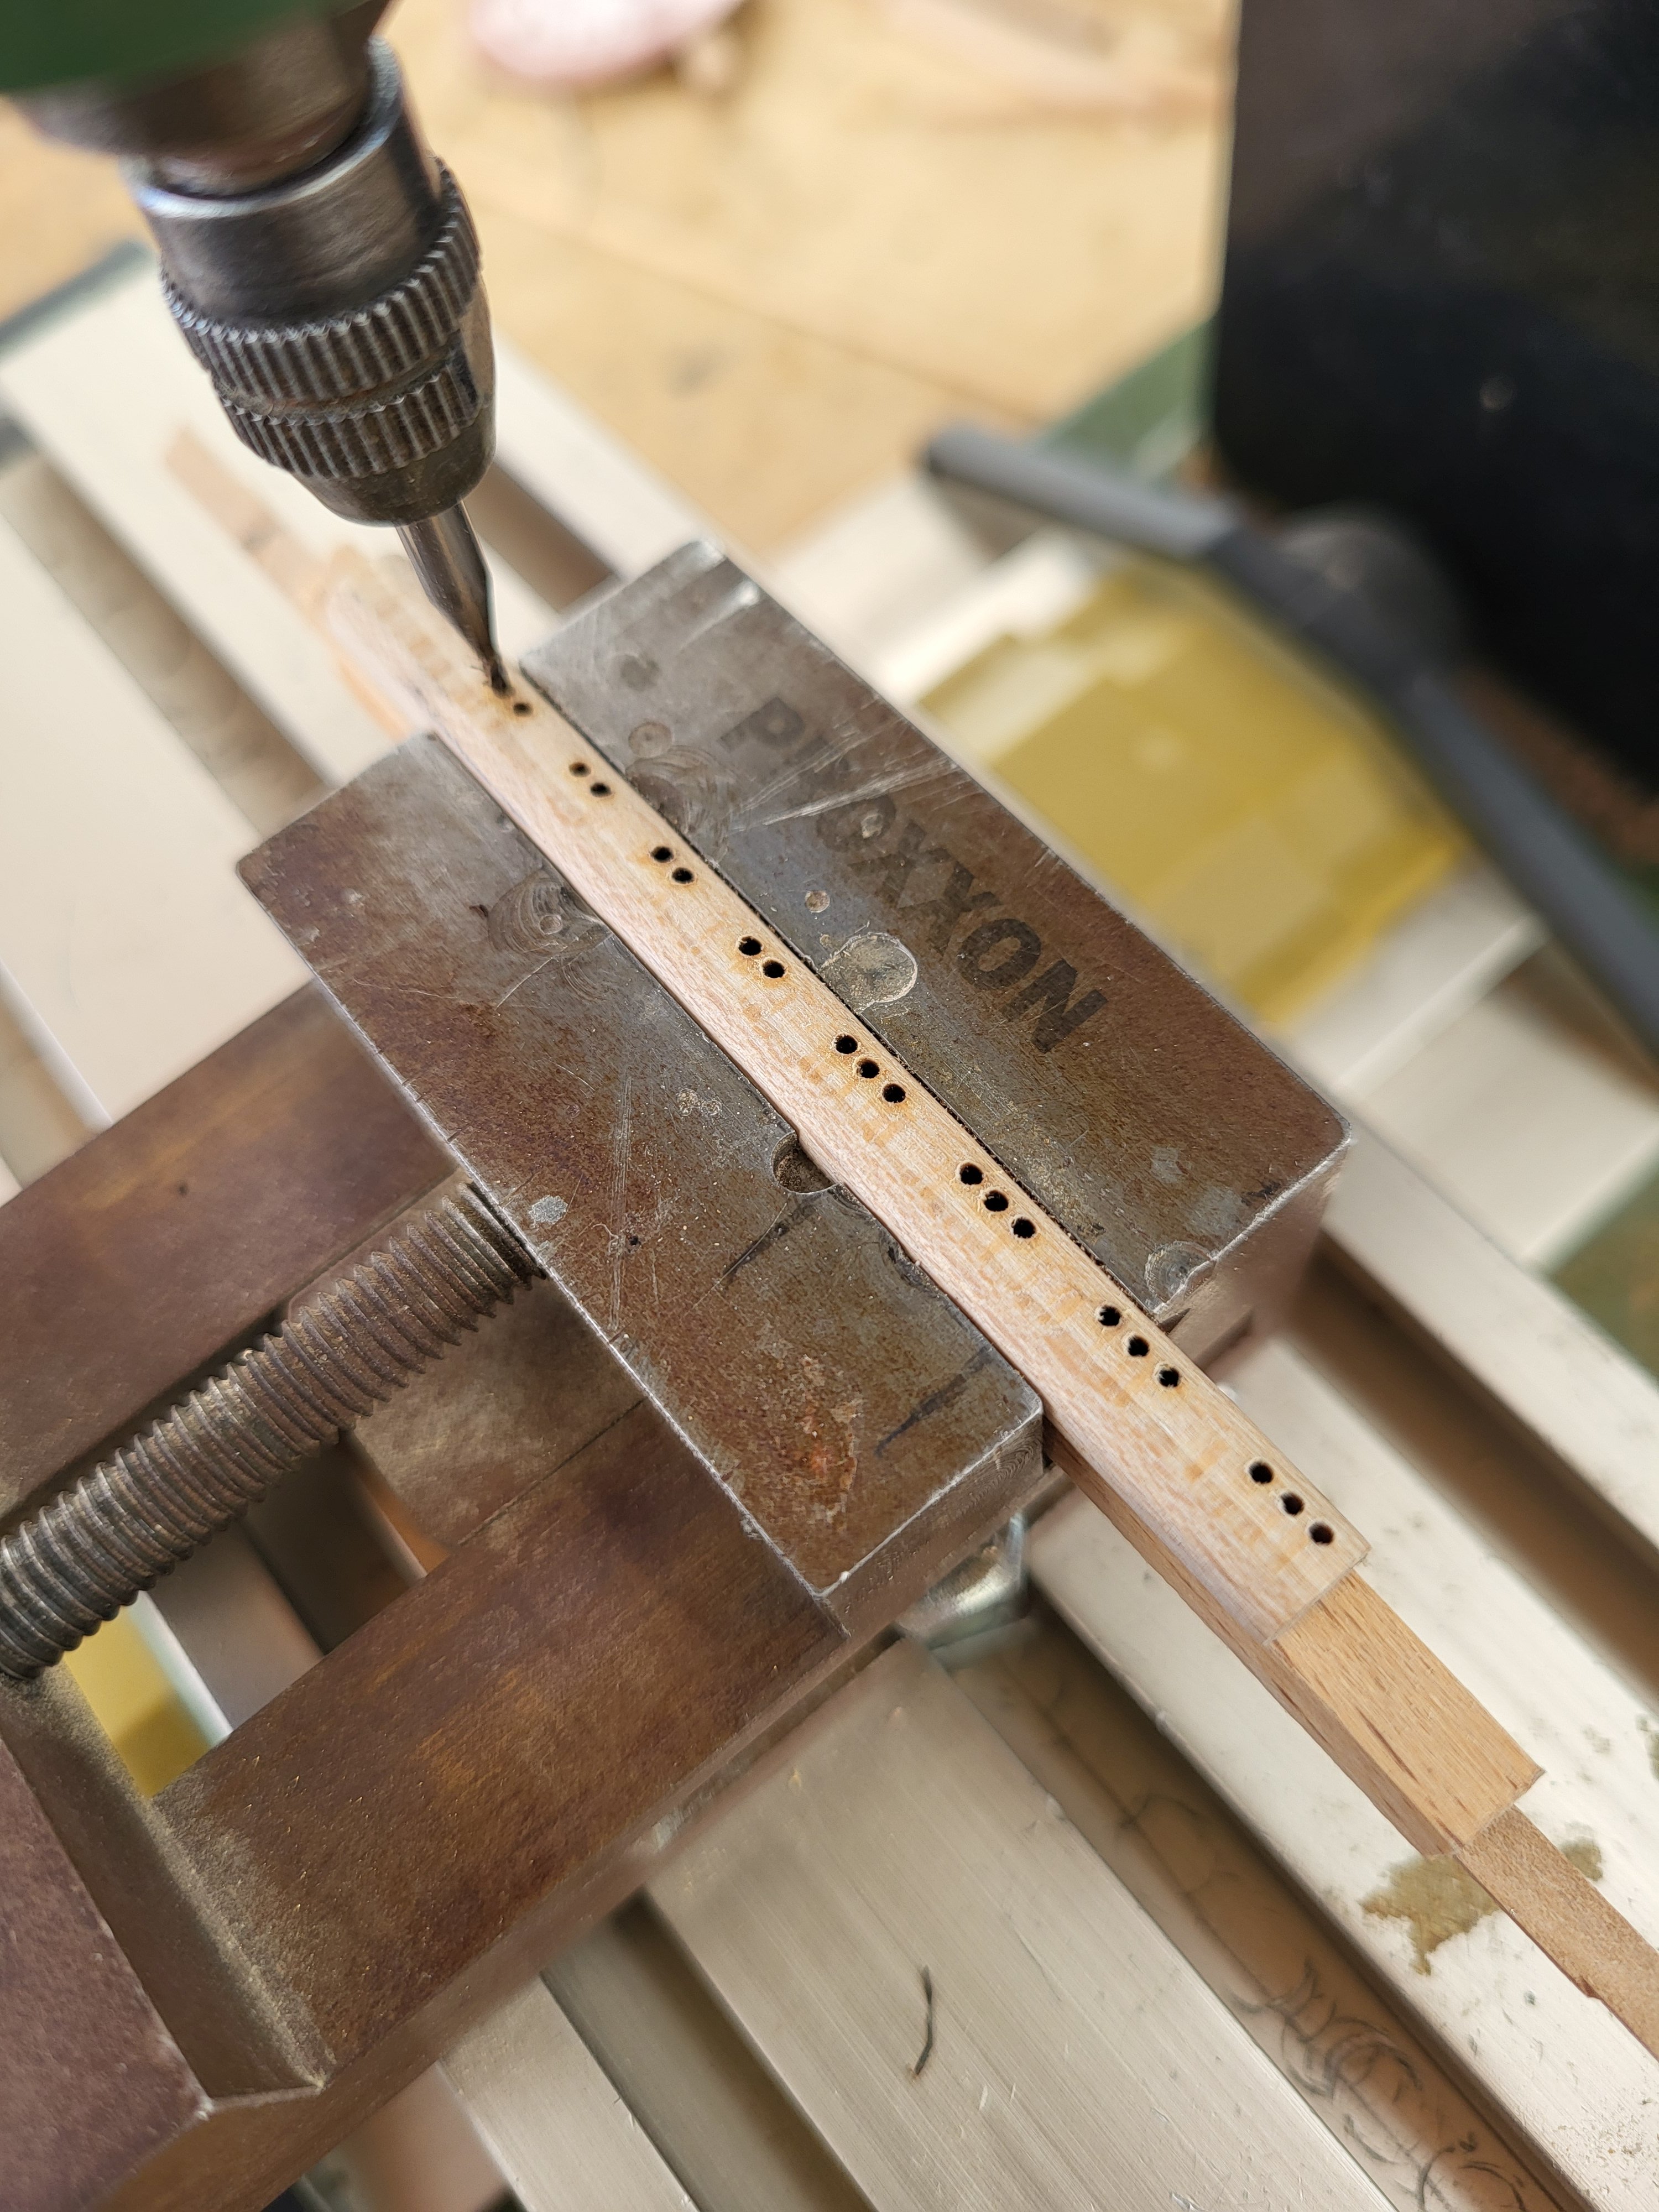
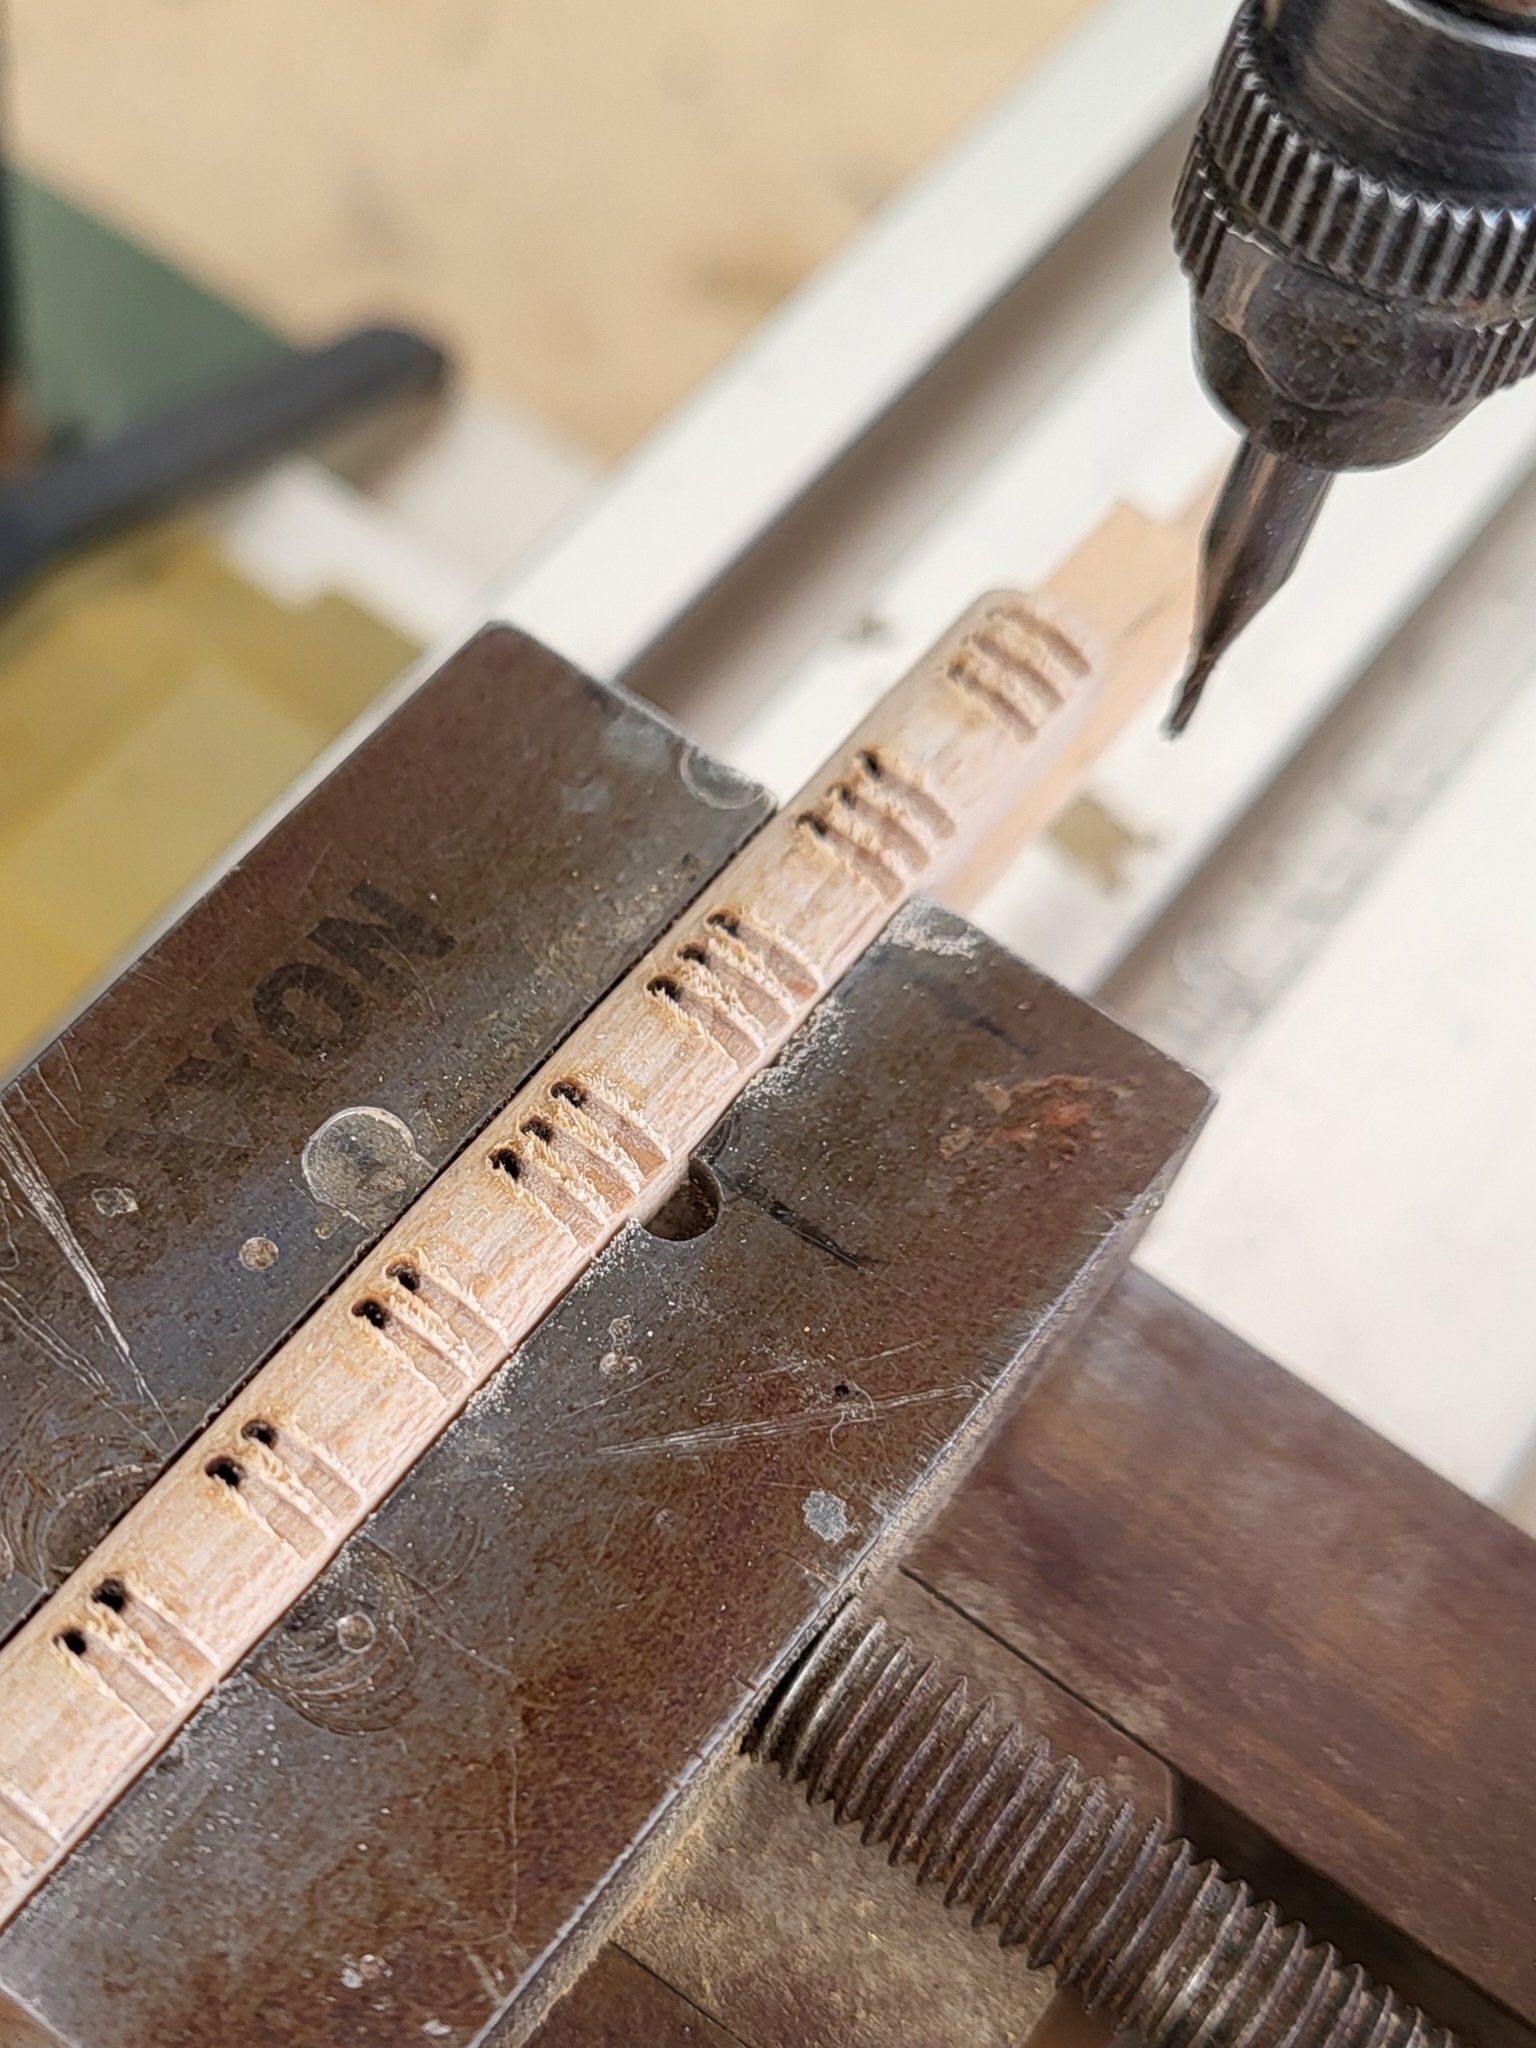
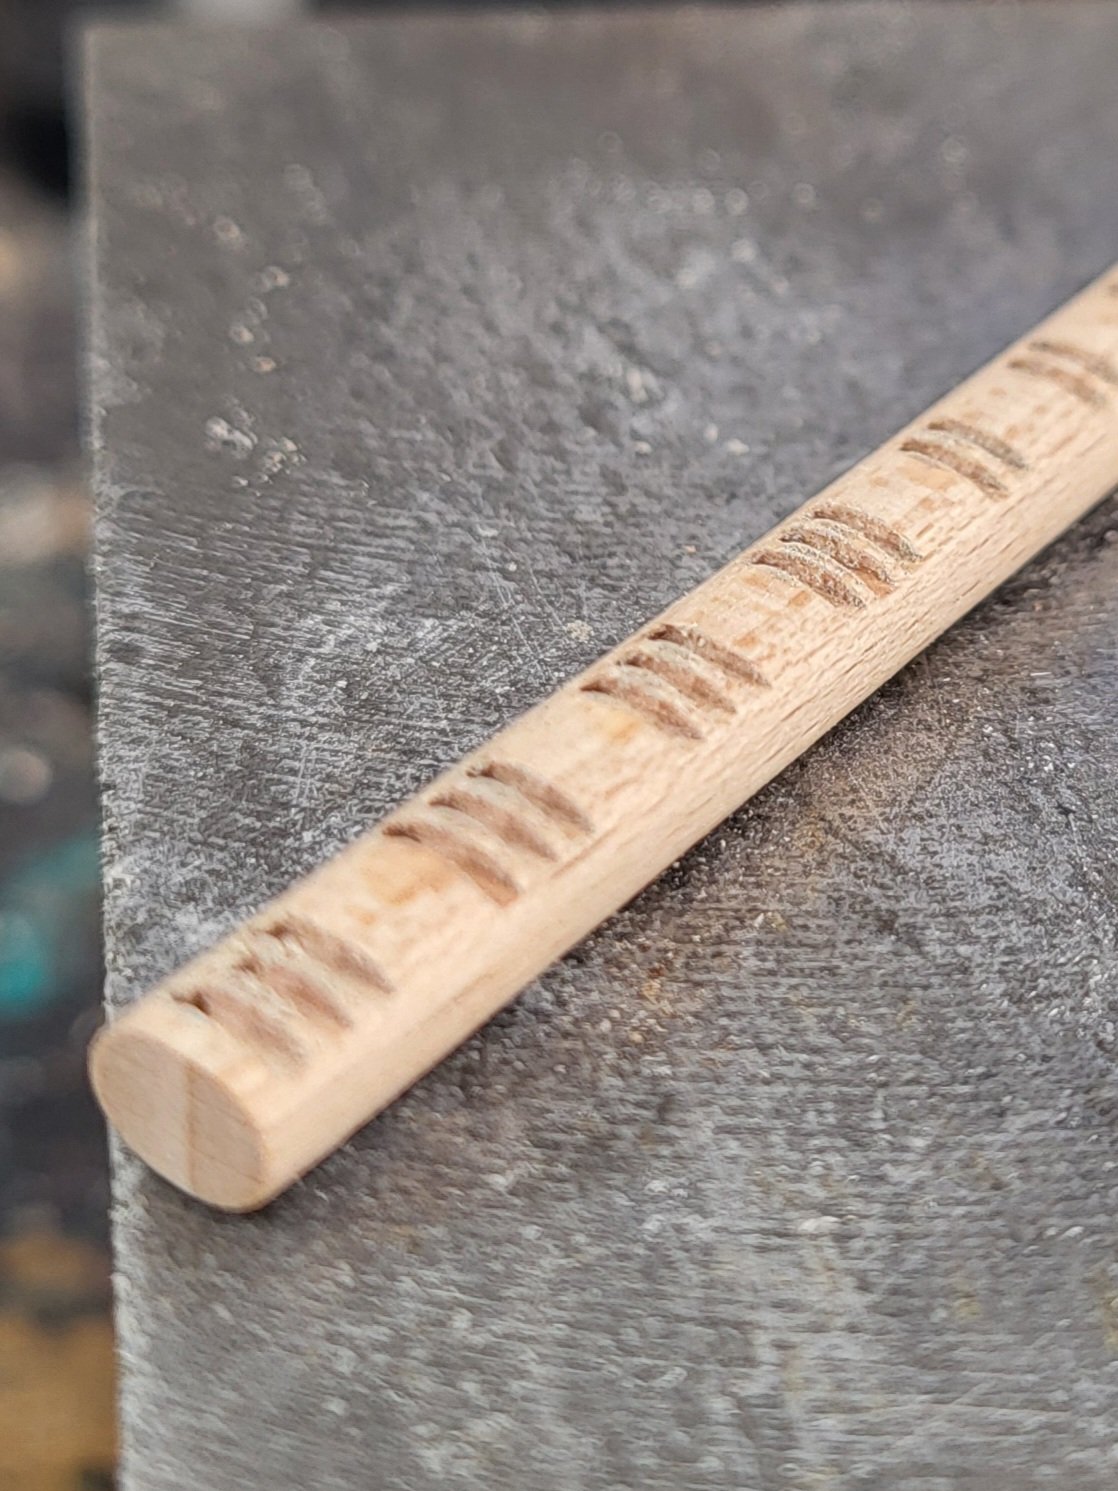
I prepared the main stays. To make the mice, I first drilled a 1.5 mm hole through the center of a 5 mm diameter dowel, then turned the dowel on my lathe. After that, I threaded a 1.2 mm rope through the hole in the mouse and seized it using my seizing machine. Next, I attached the 5mm bullseye I had made to the ends of the ropes and connected the lanyards to the bullseye.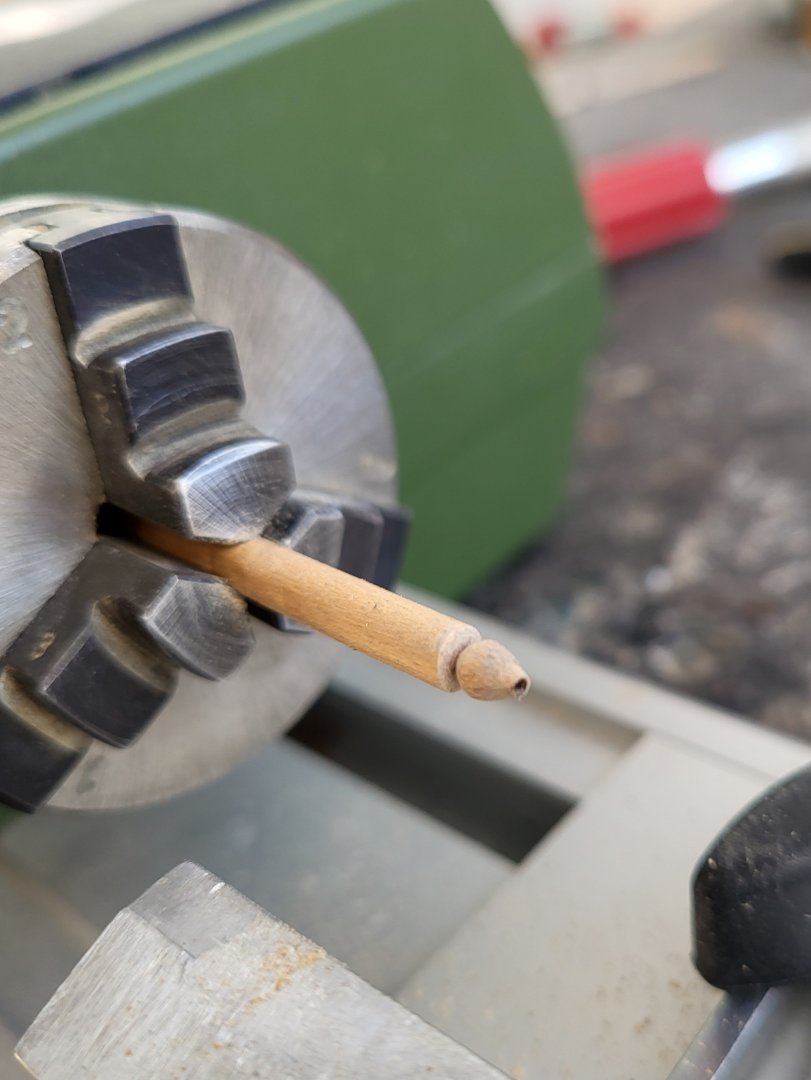


-
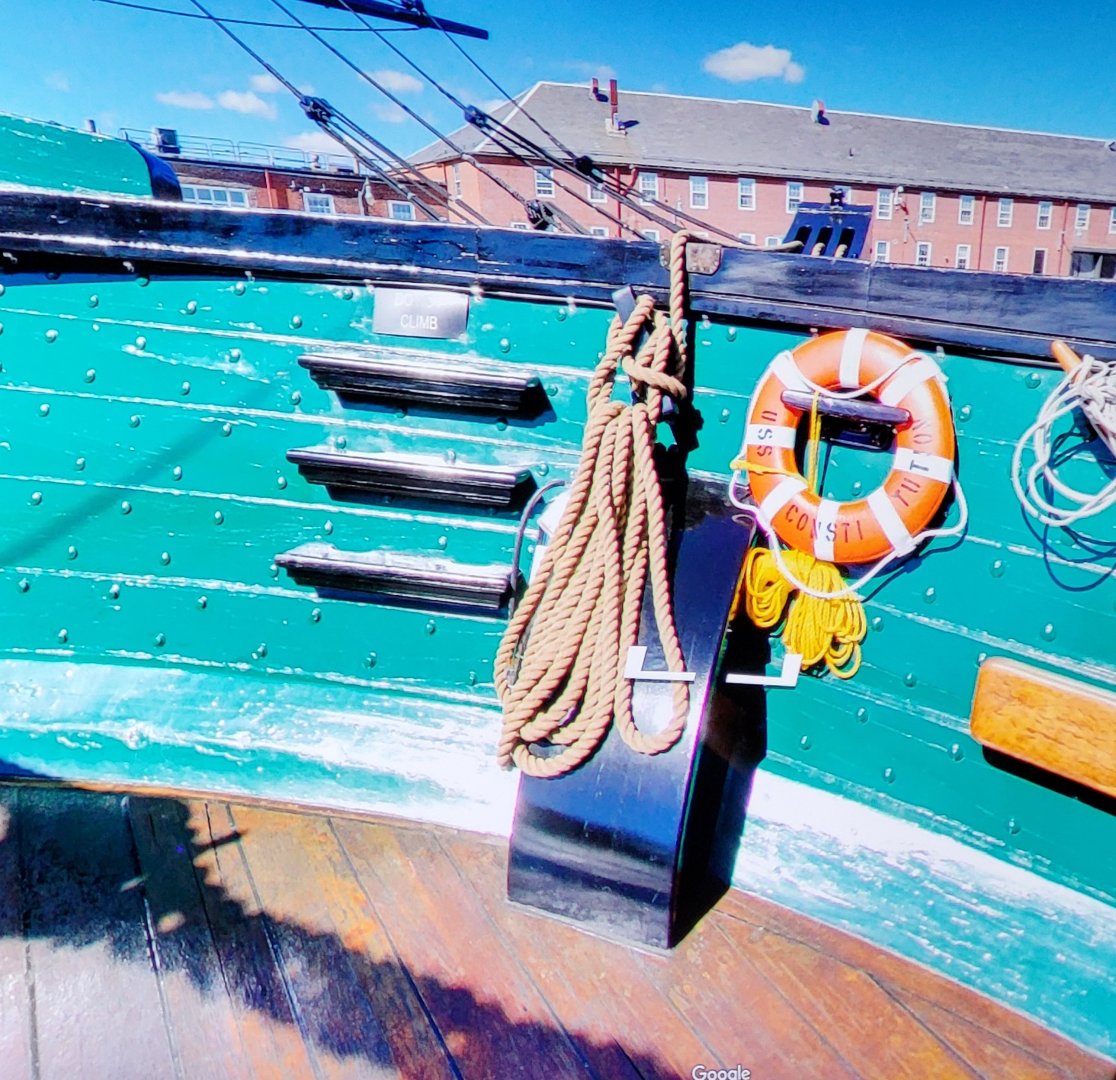
Merry Christmas to all my friends! Hi Peter, if I were you, I’d mount the cleat in line with the cathead, just as it appears on the actual ship in the reference photo, and secure the free end of the rope to that cleat. The idea of the rope passing over the top rail doesn’t seem very logical to me.
-
USS Constitution by mtbediz - 1:76
mtbediz replied to mtbediz's topic in - Build logs for subjects built 1751 - 1800
Thank you so much! -
USS Constitution by mtbediz - 1:76
mtbediz replied to mtbediz's topic in - Build logs for subjects built 1751 - 1800
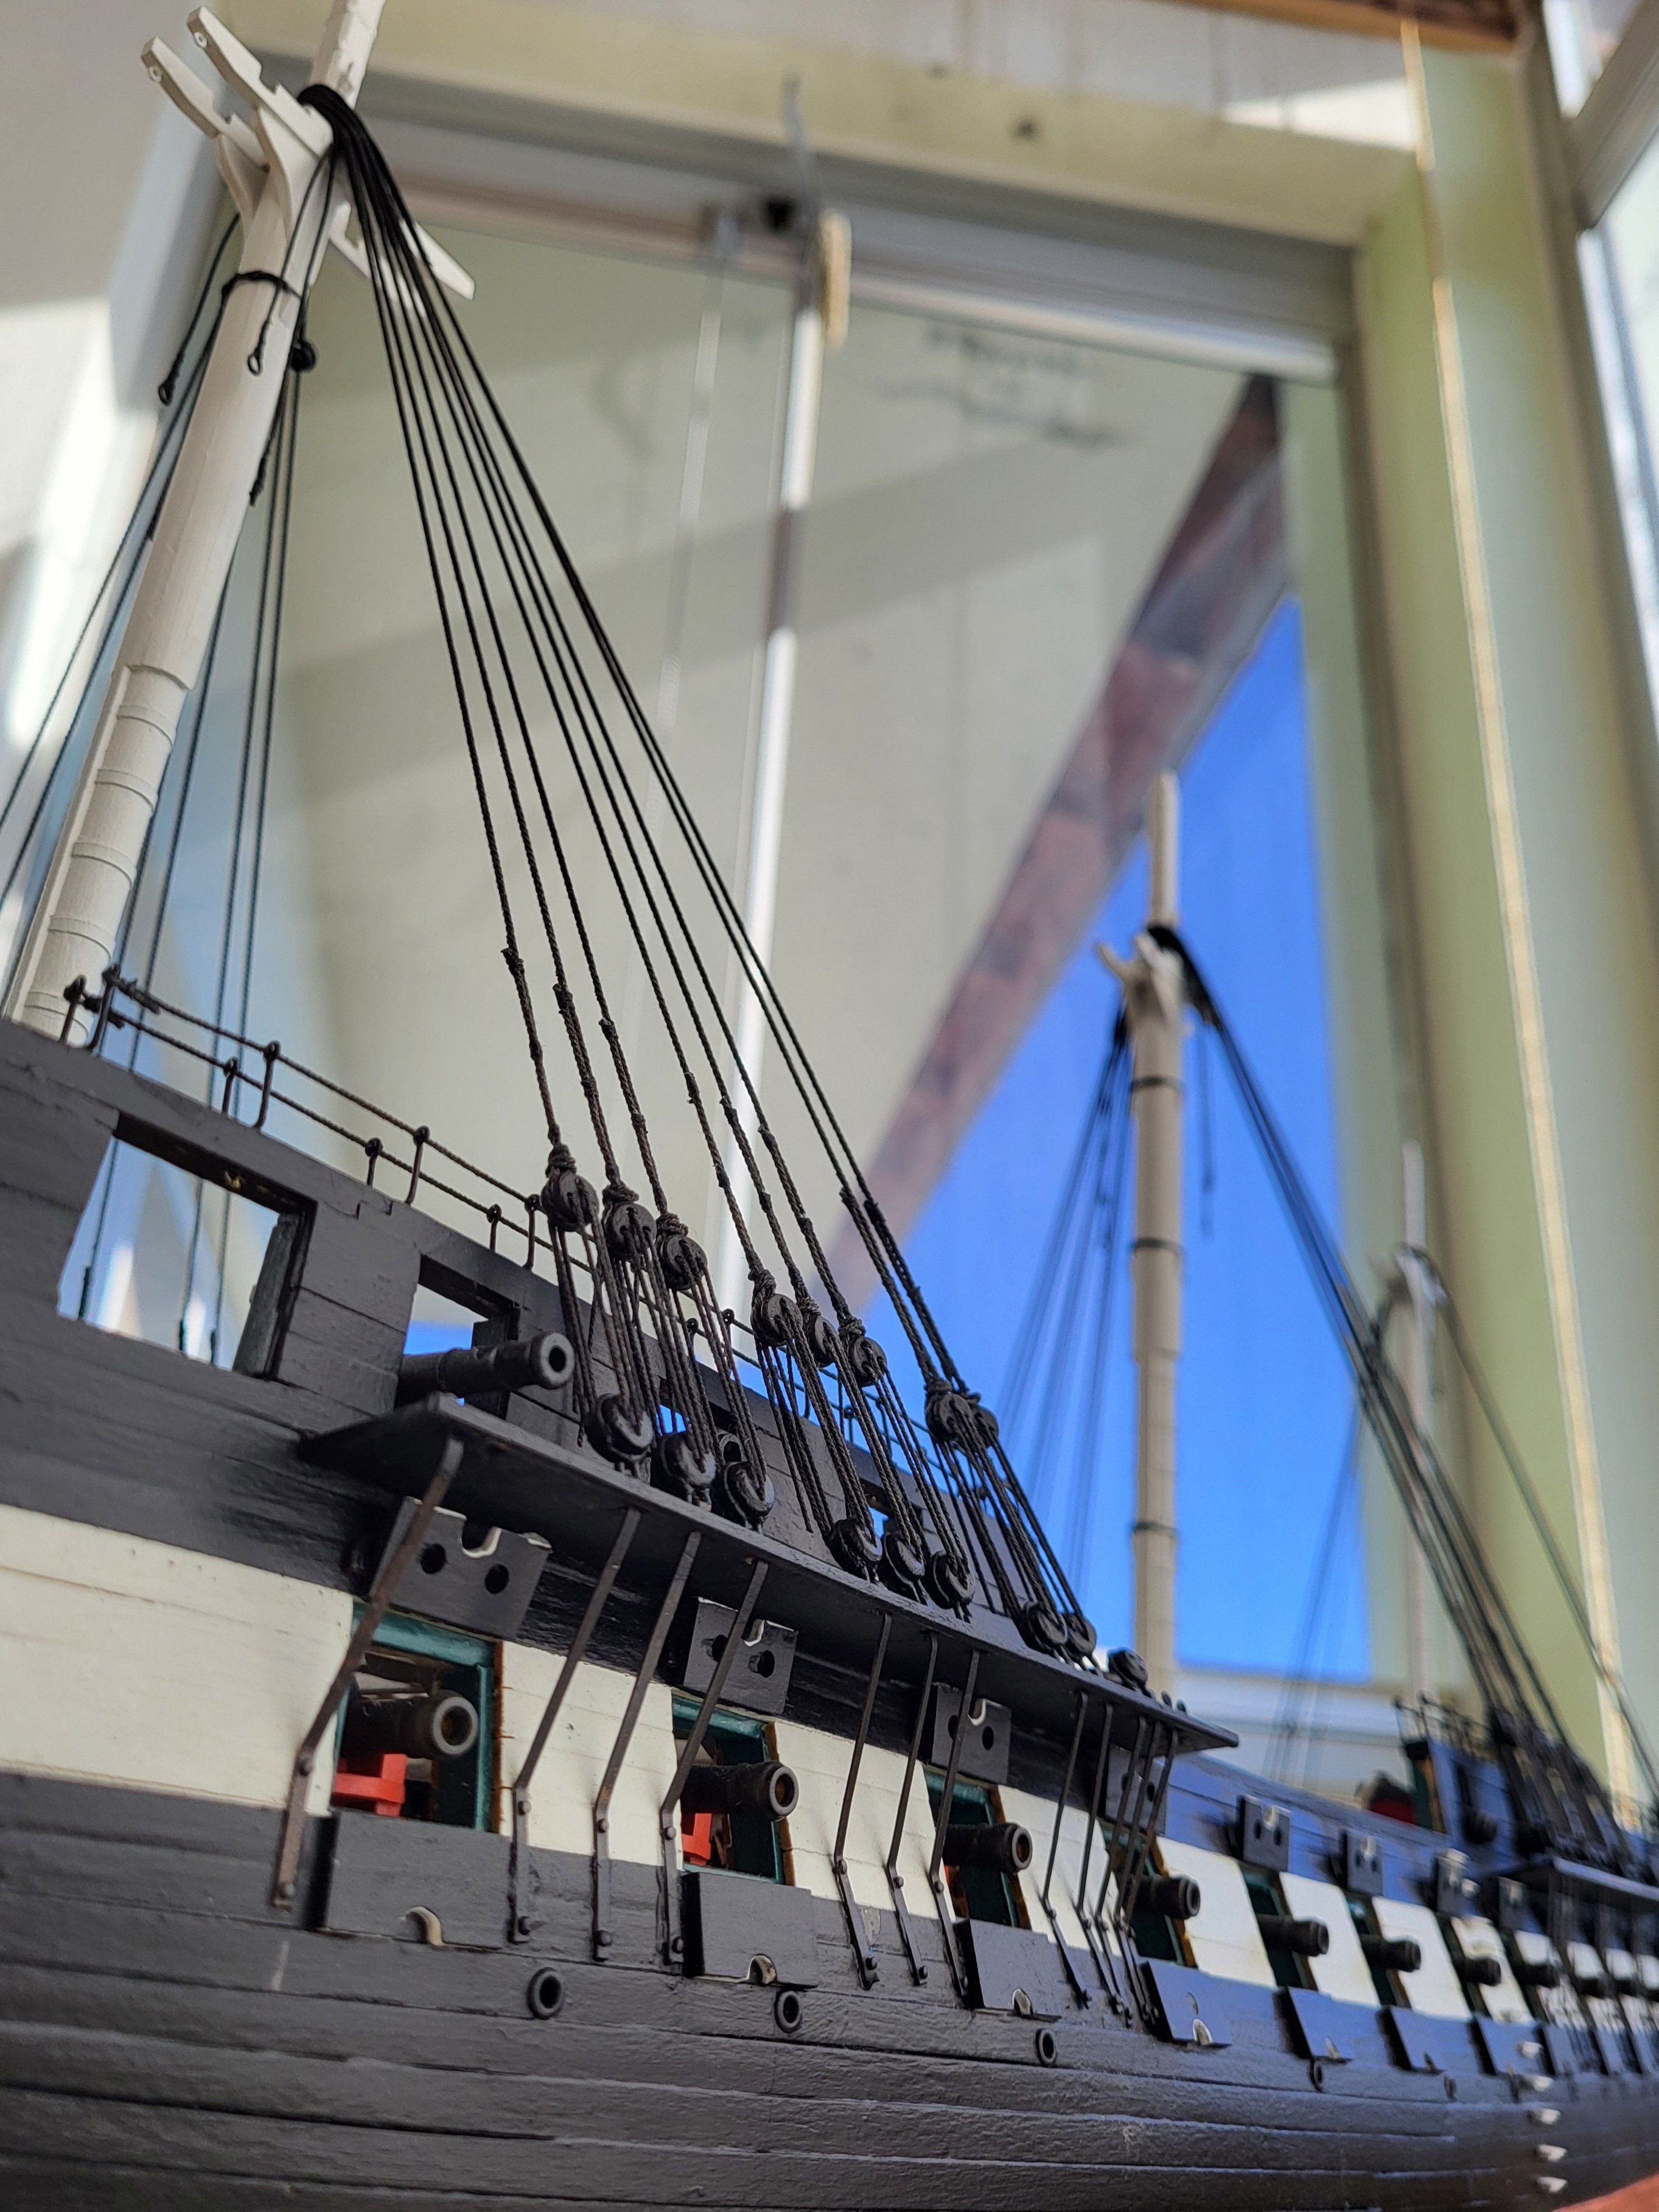
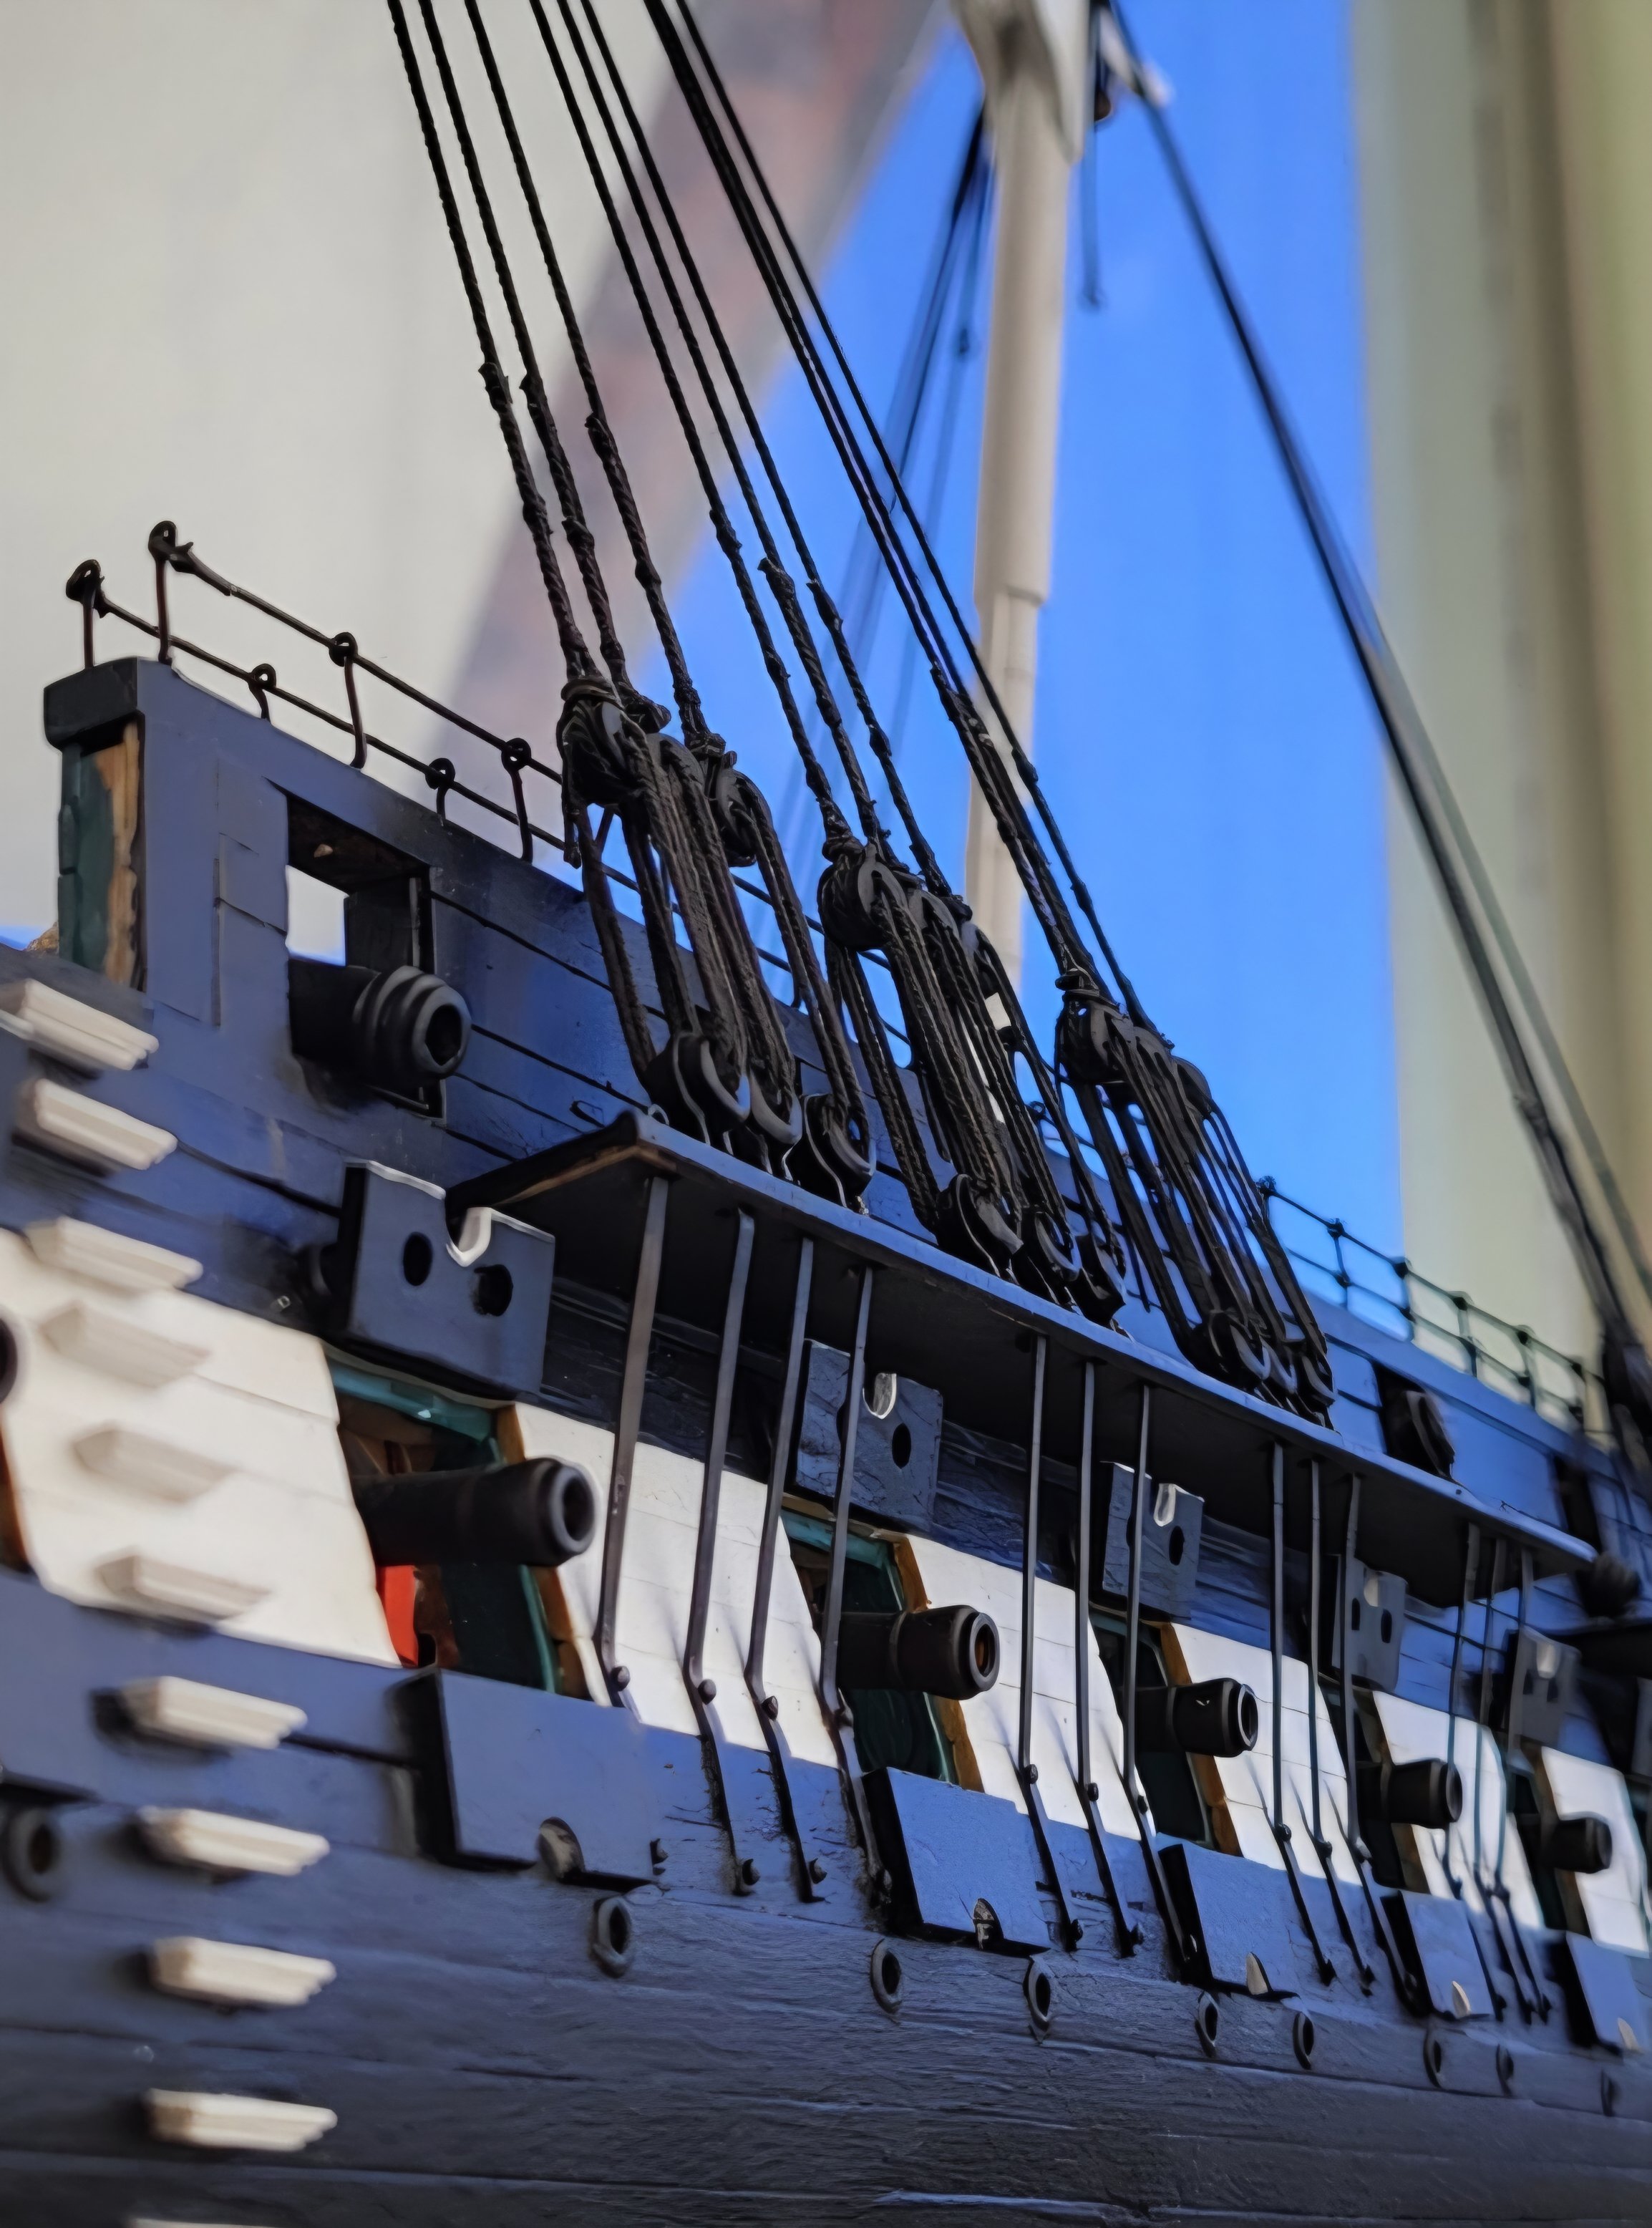
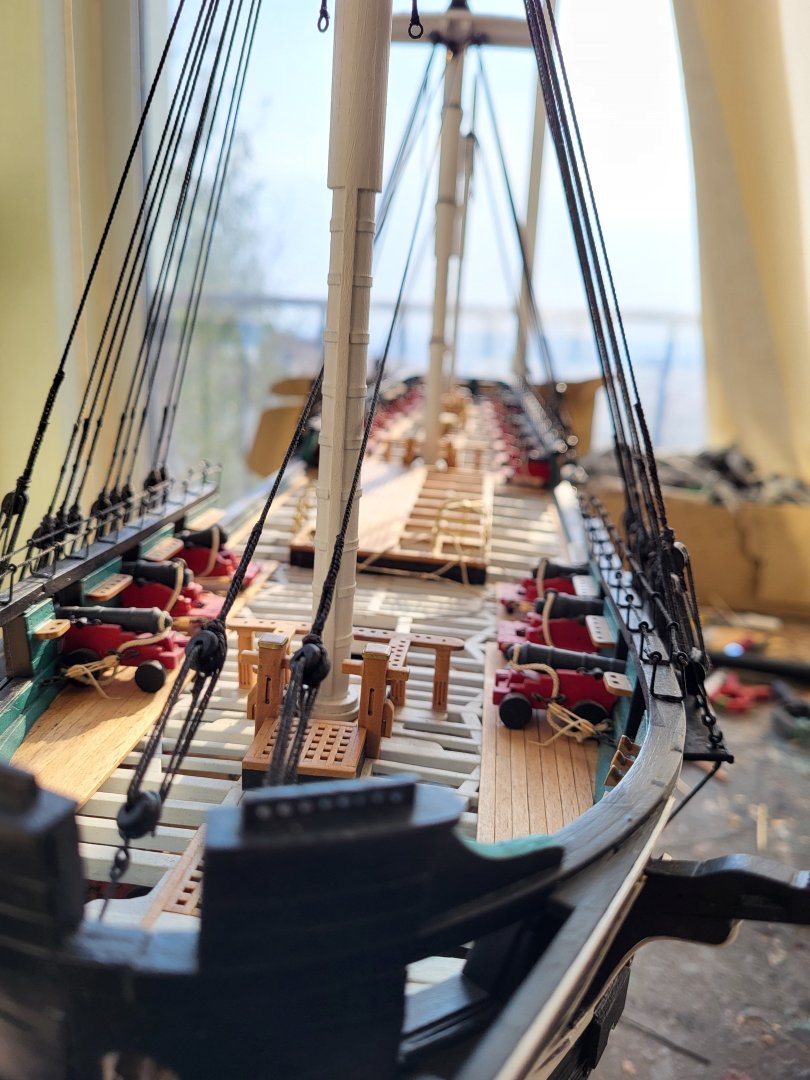
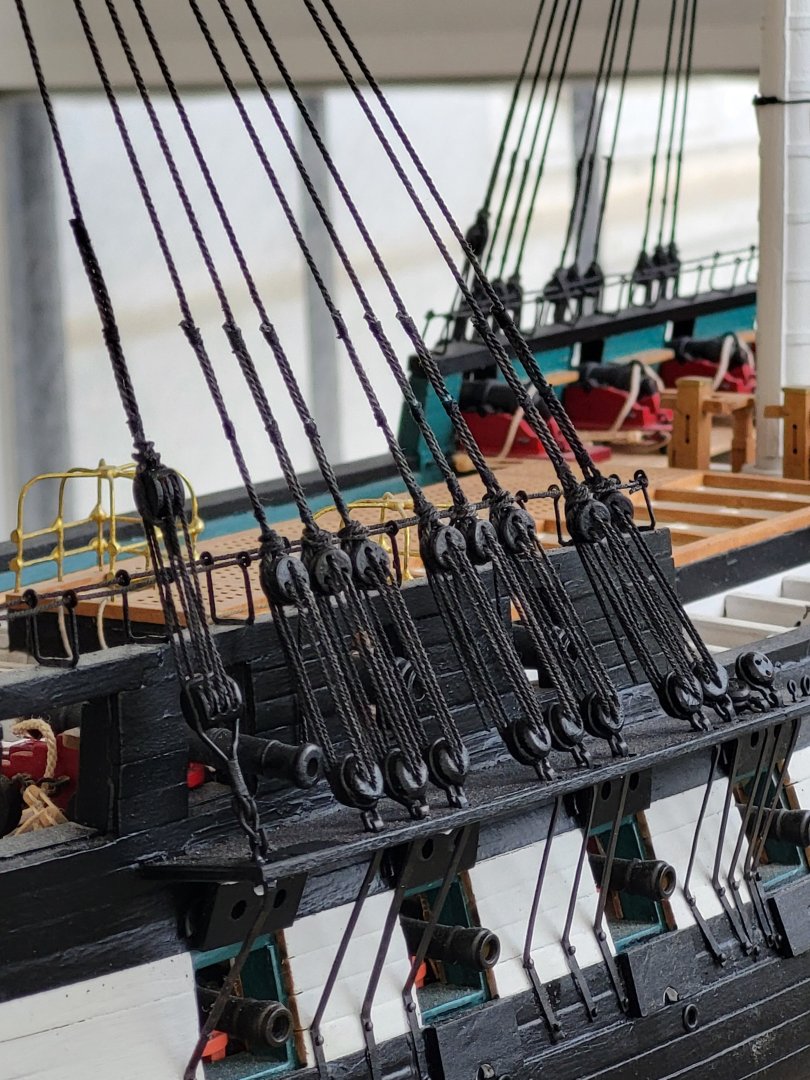
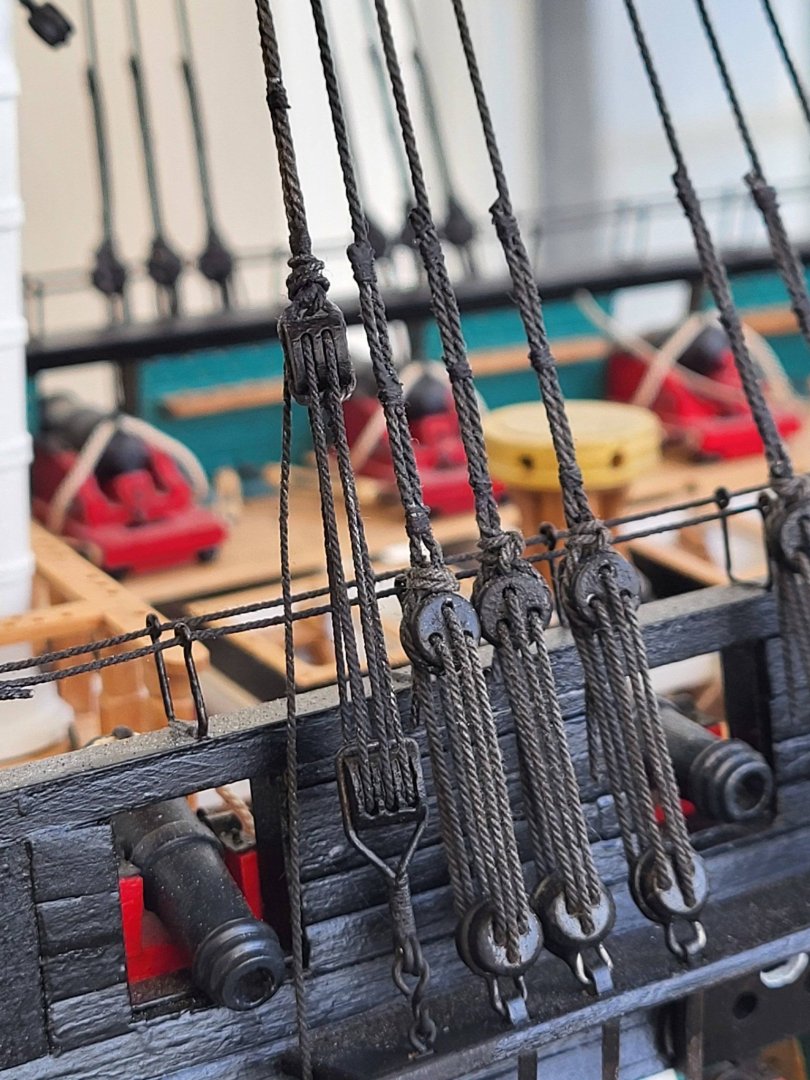
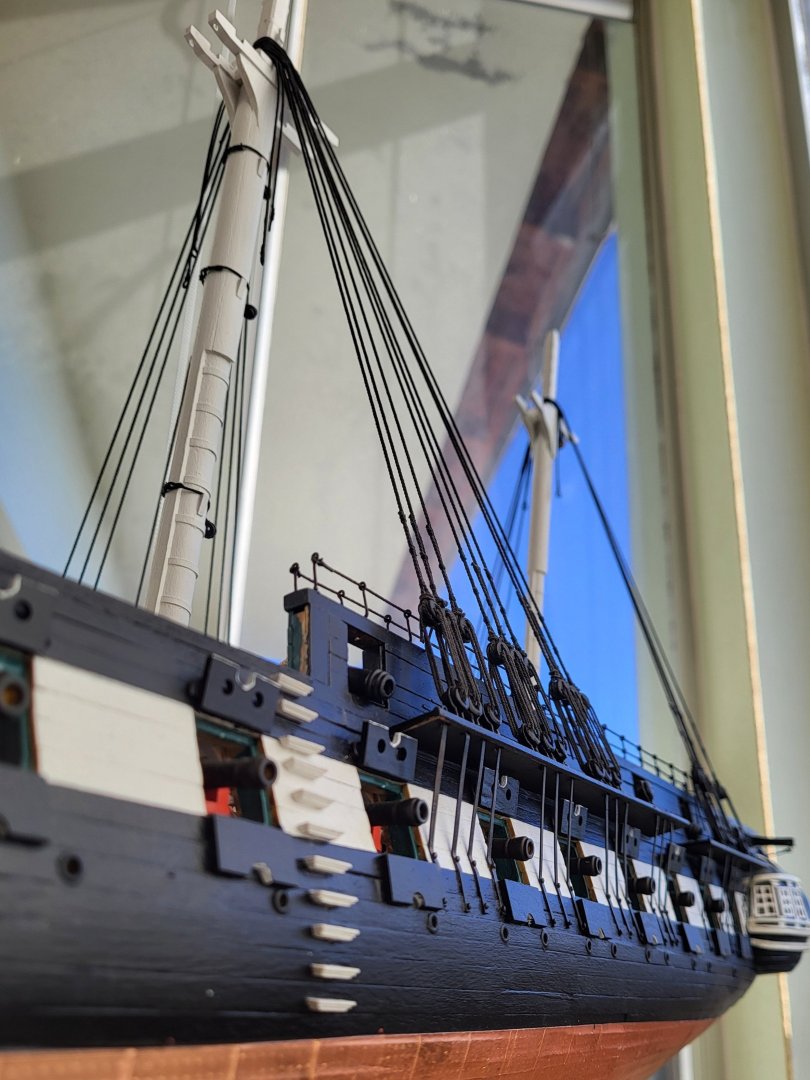
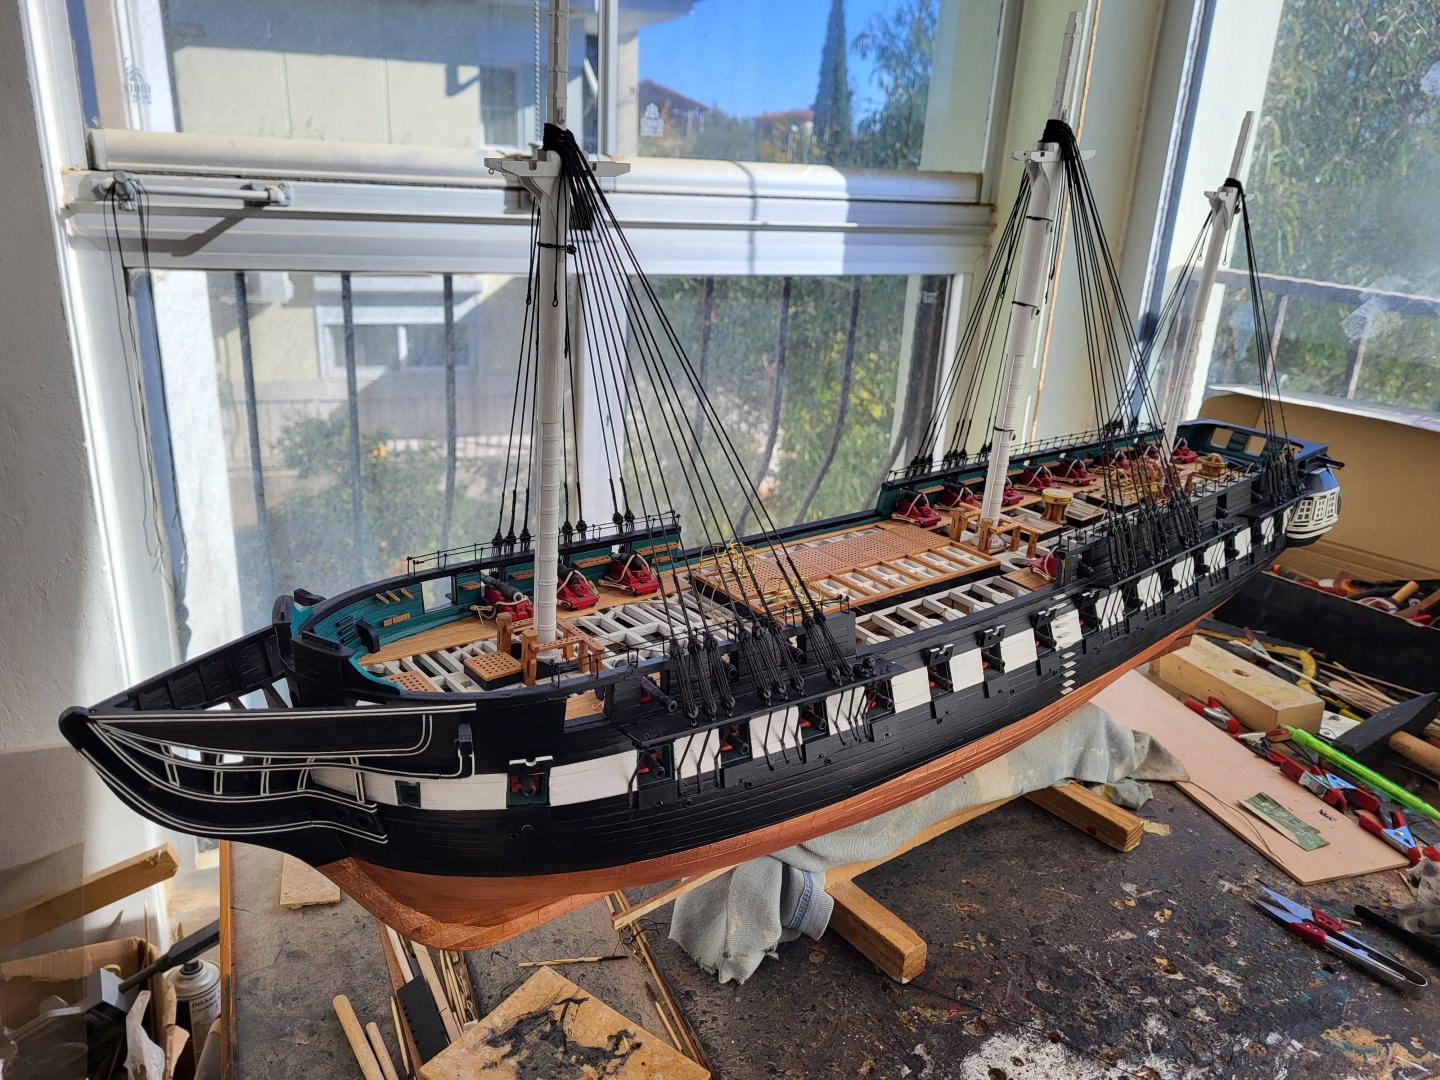
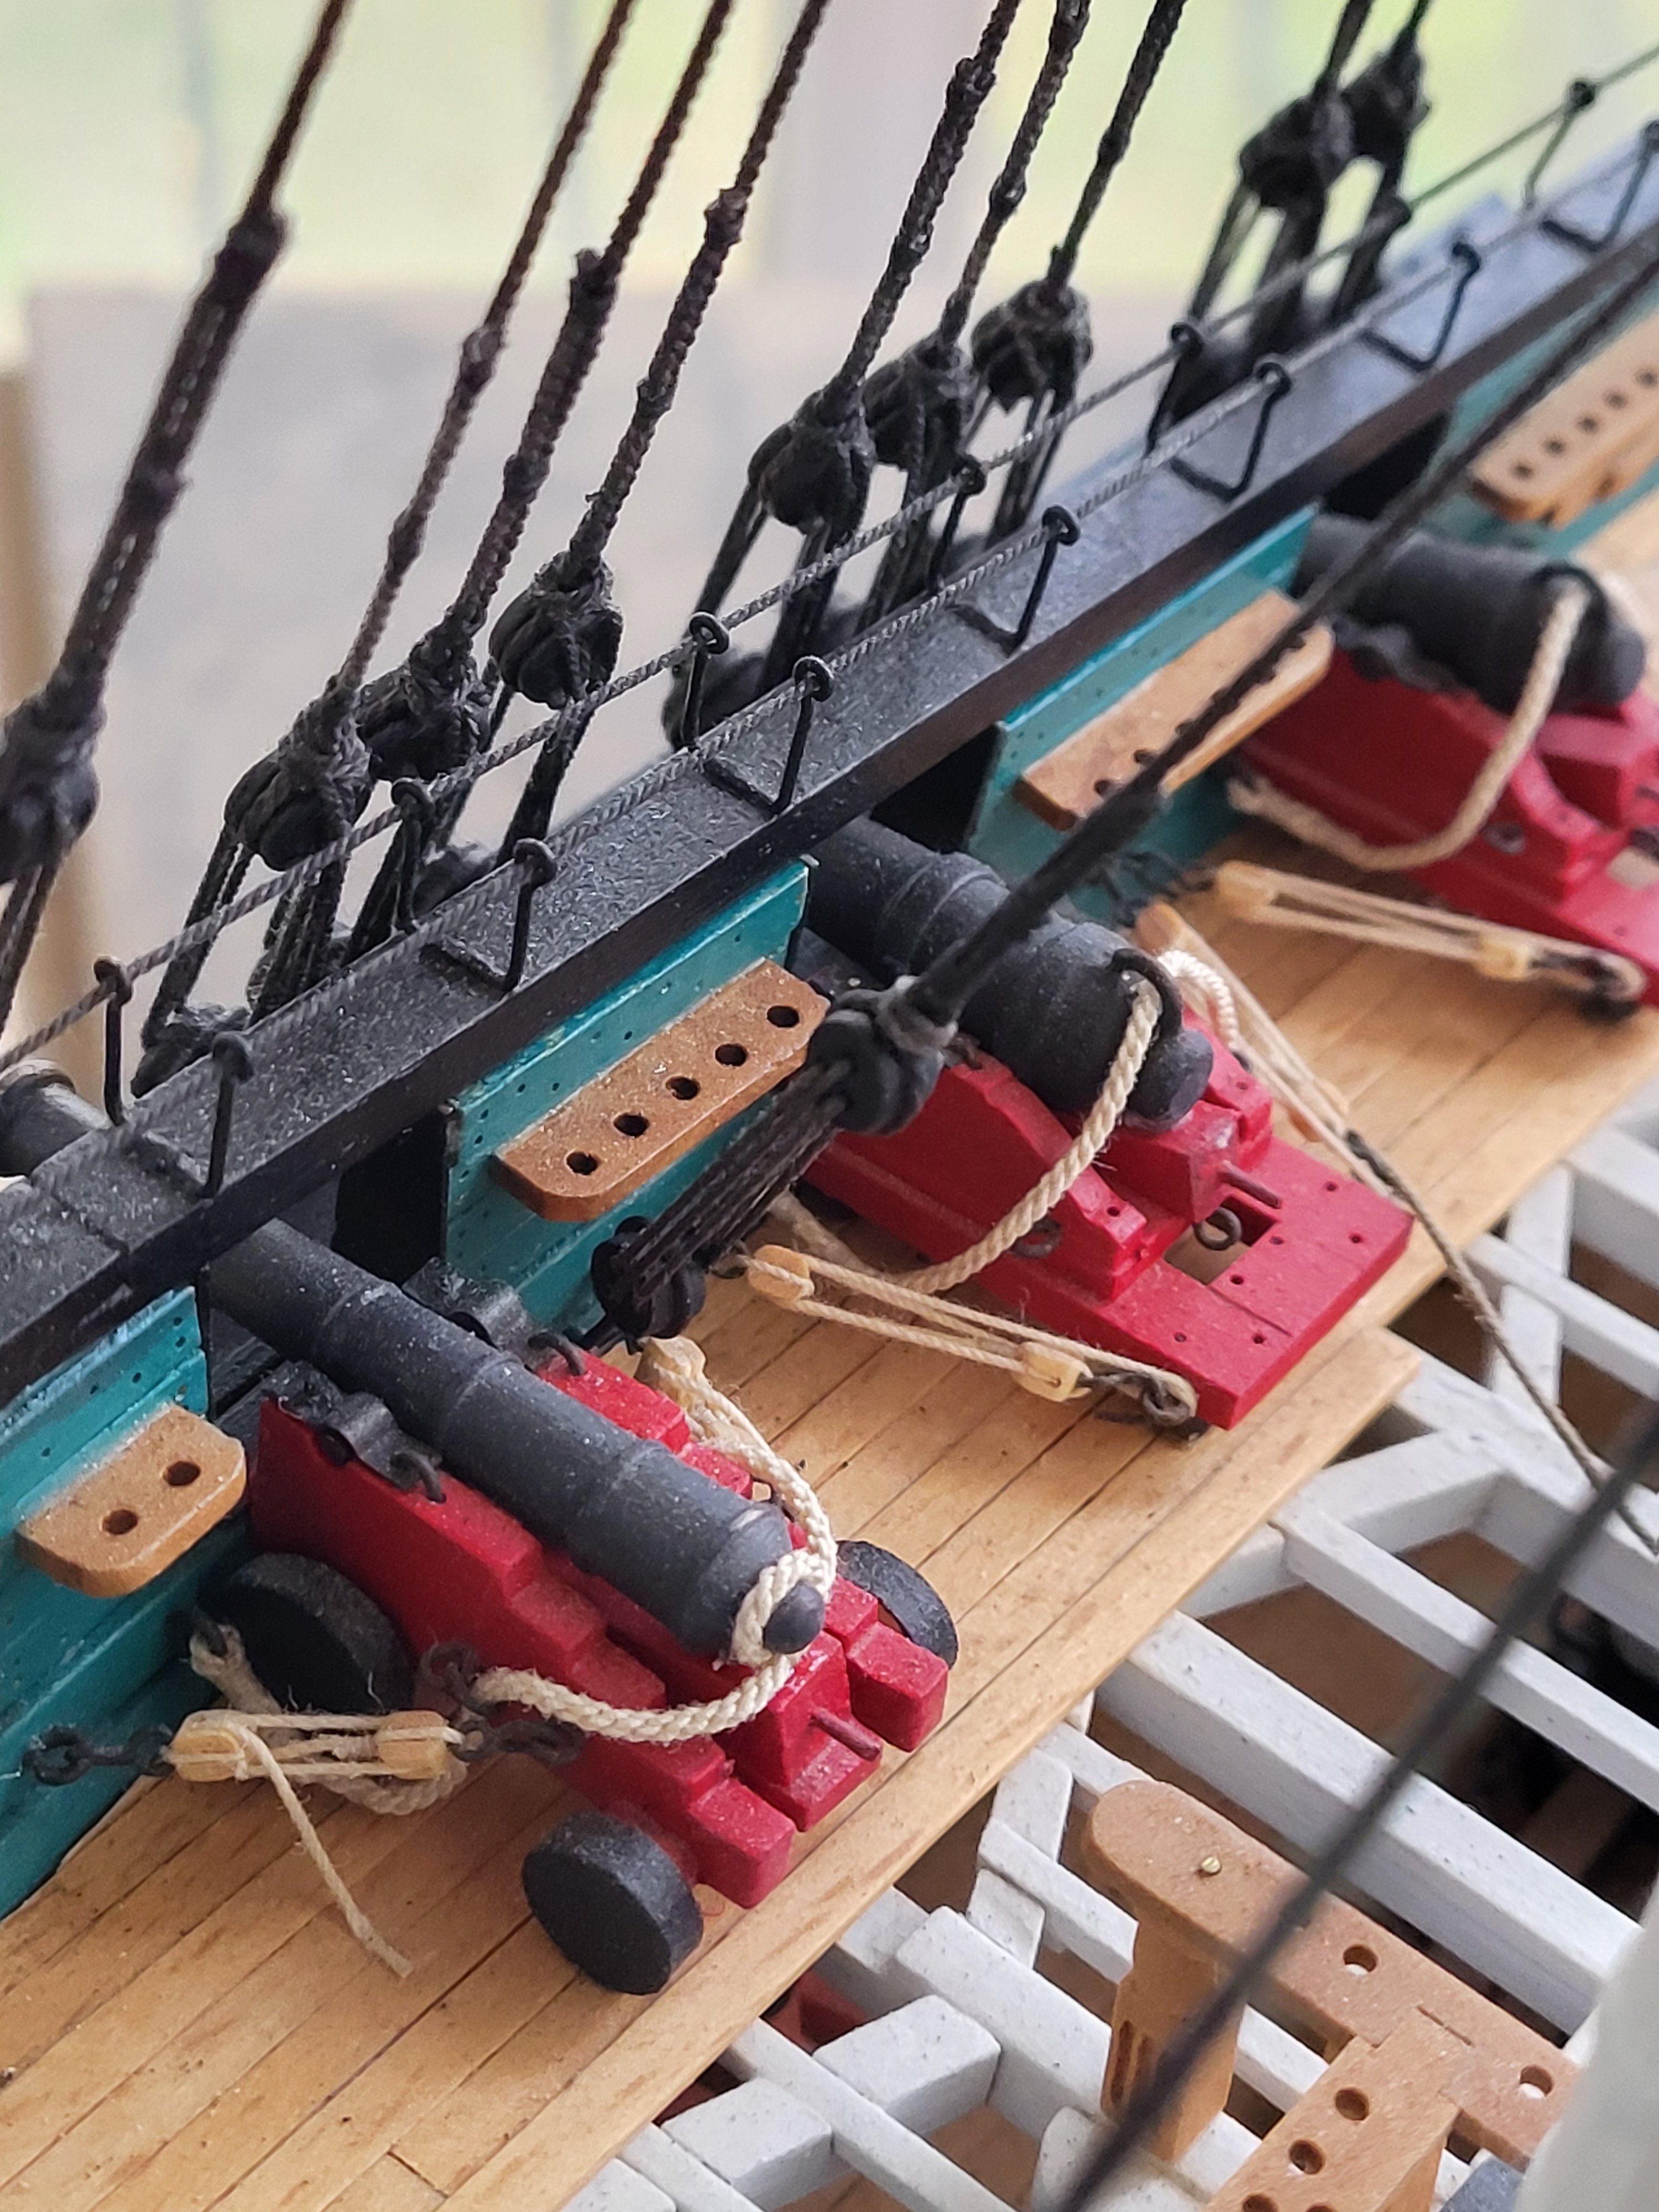
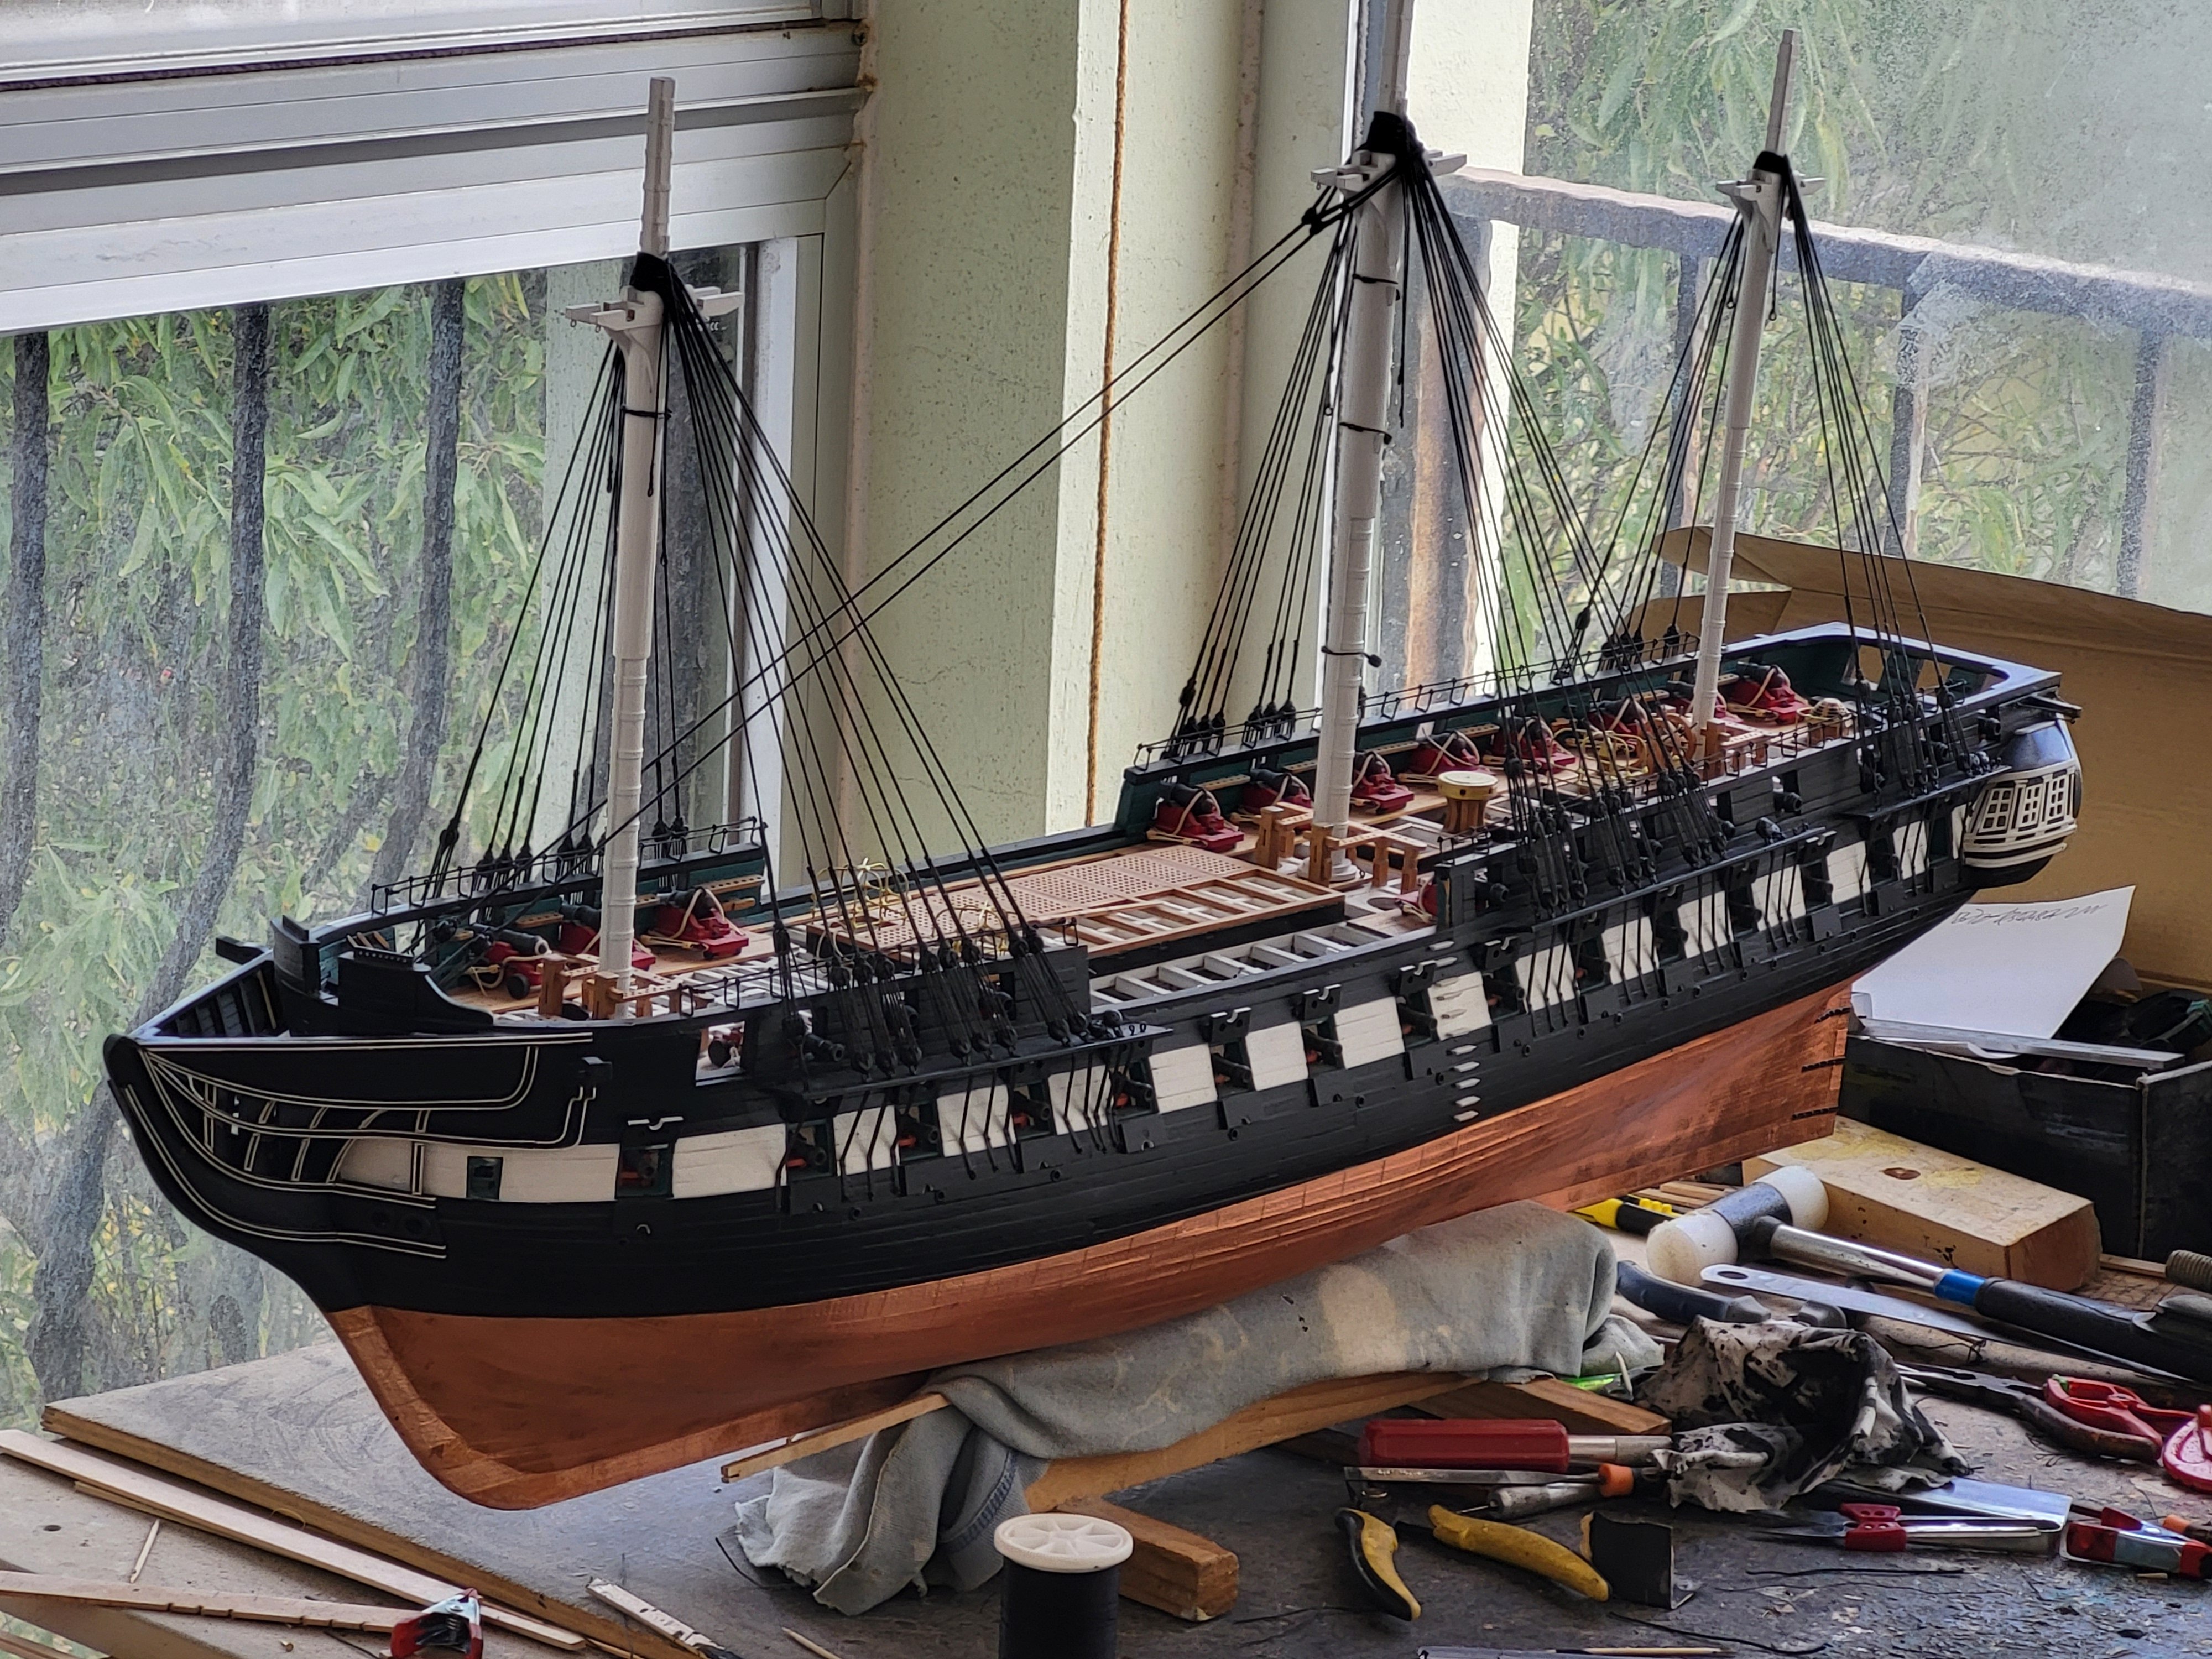
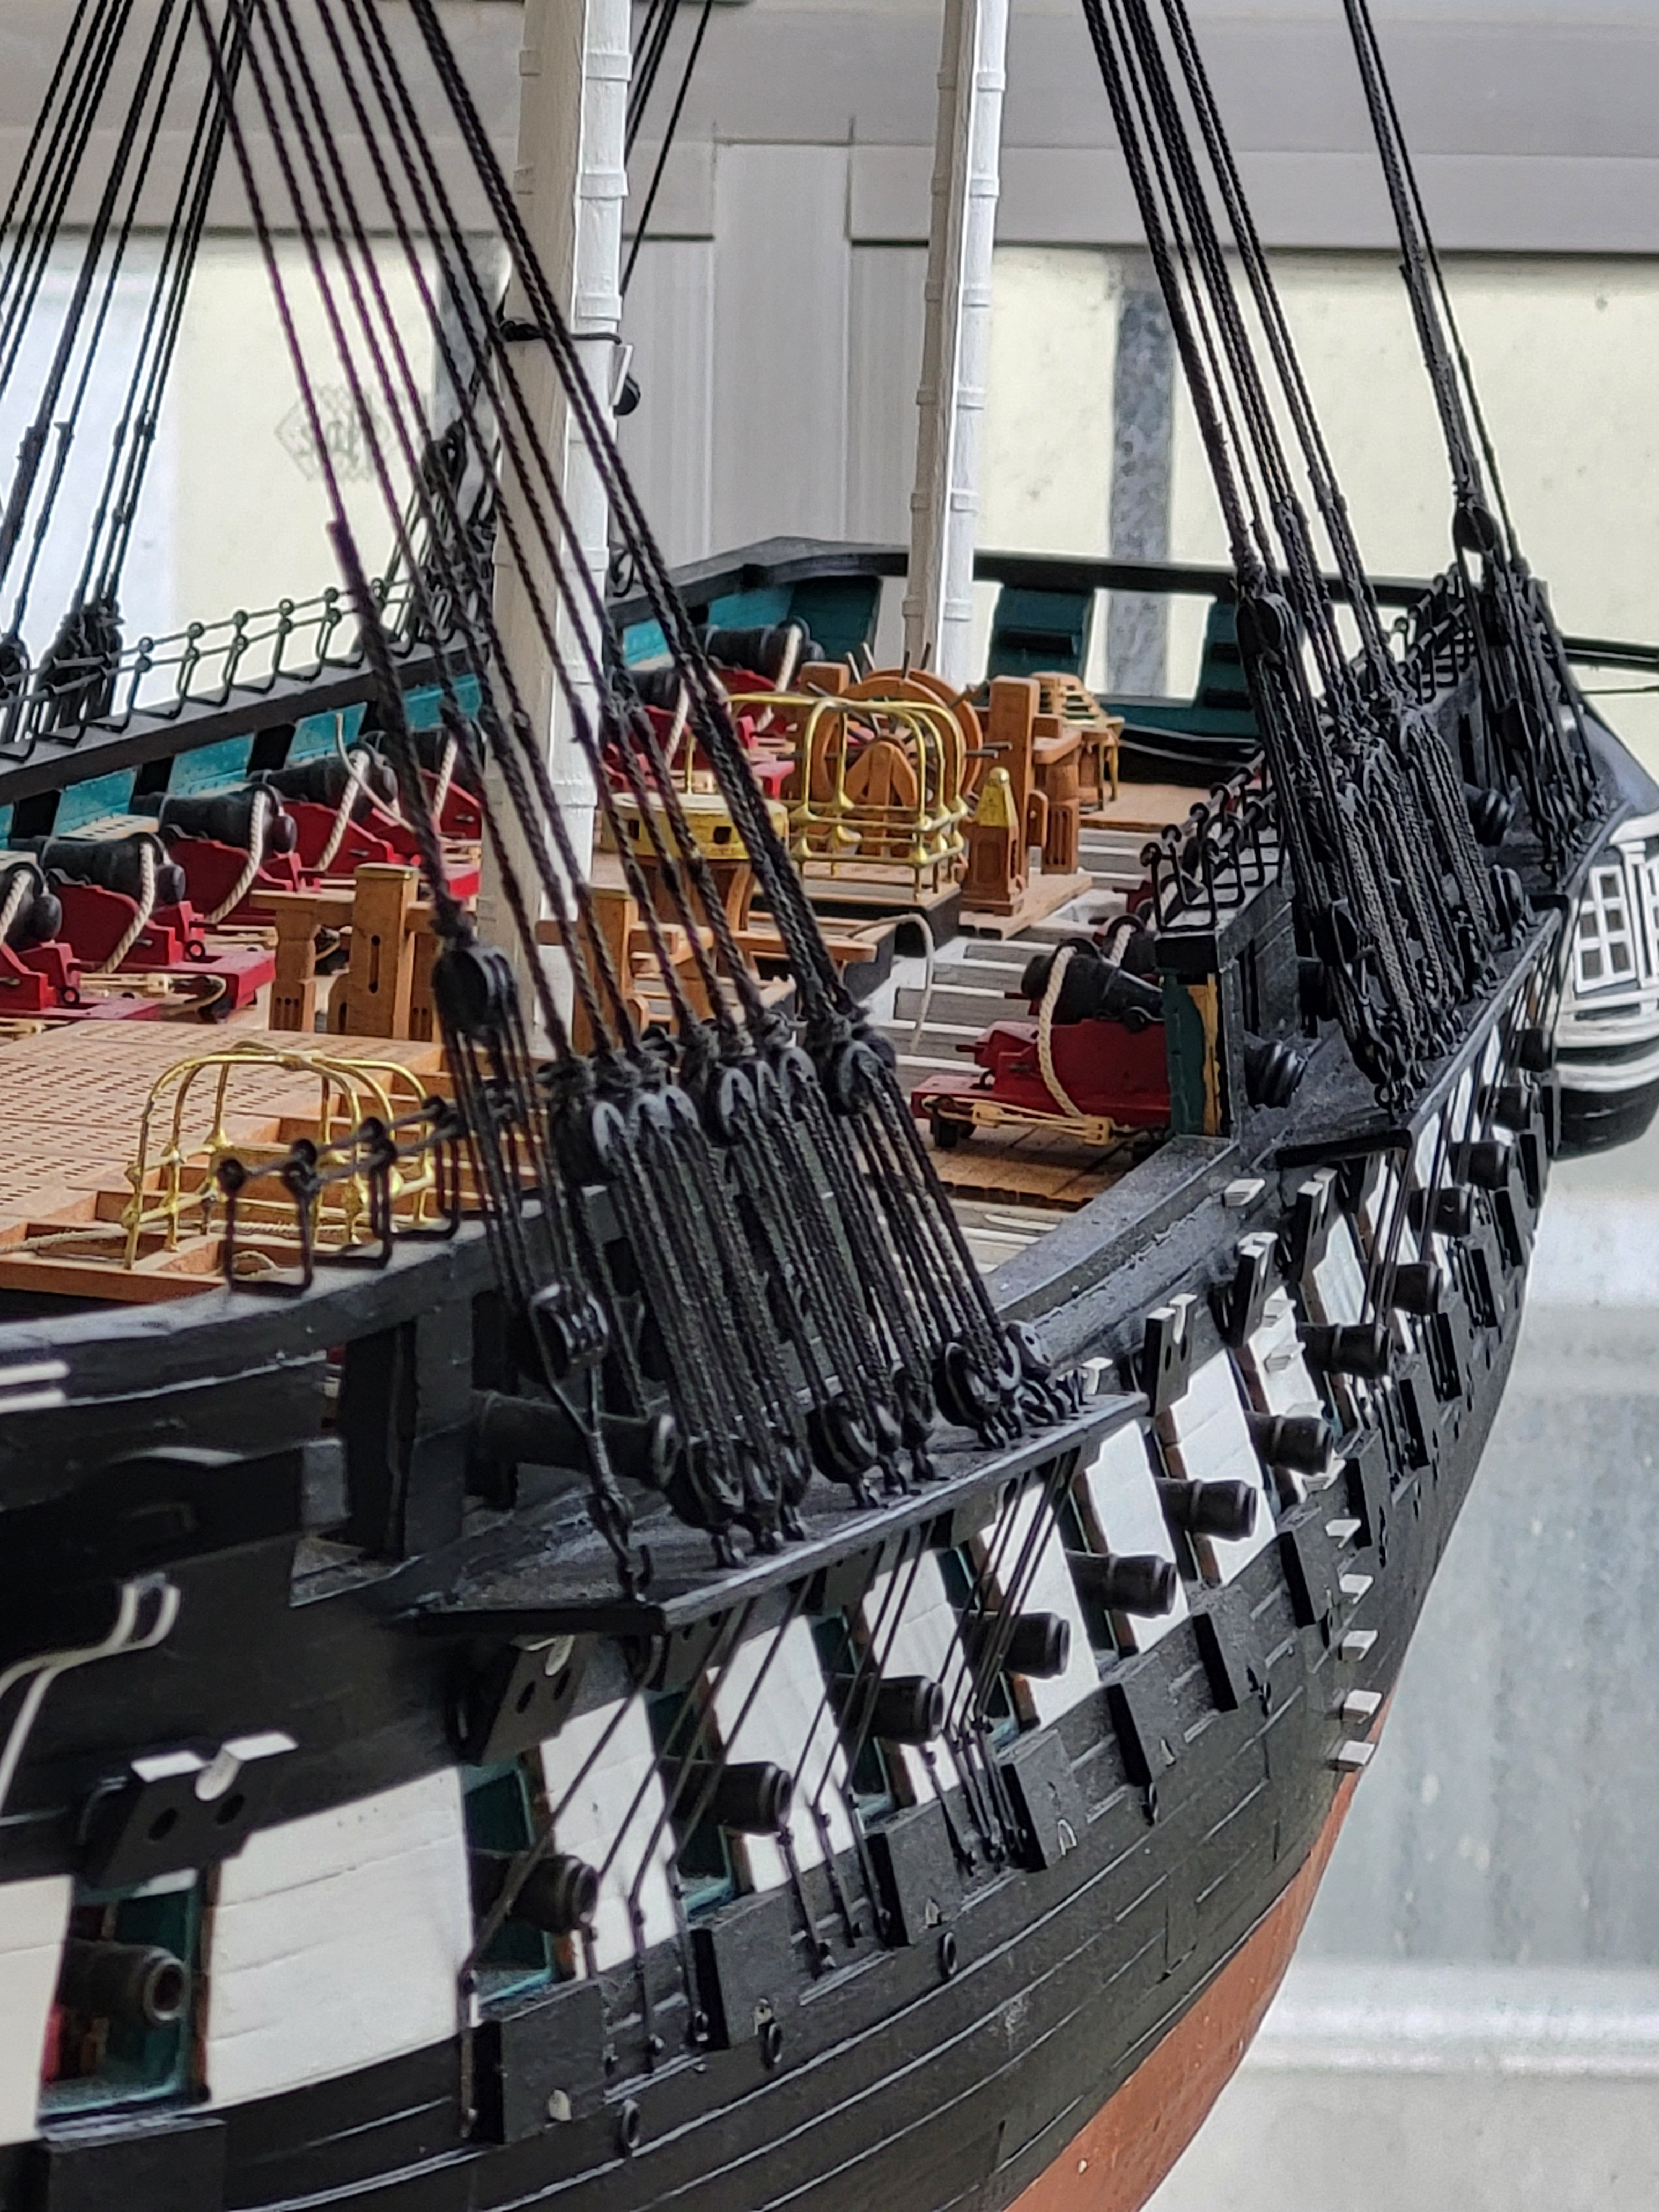
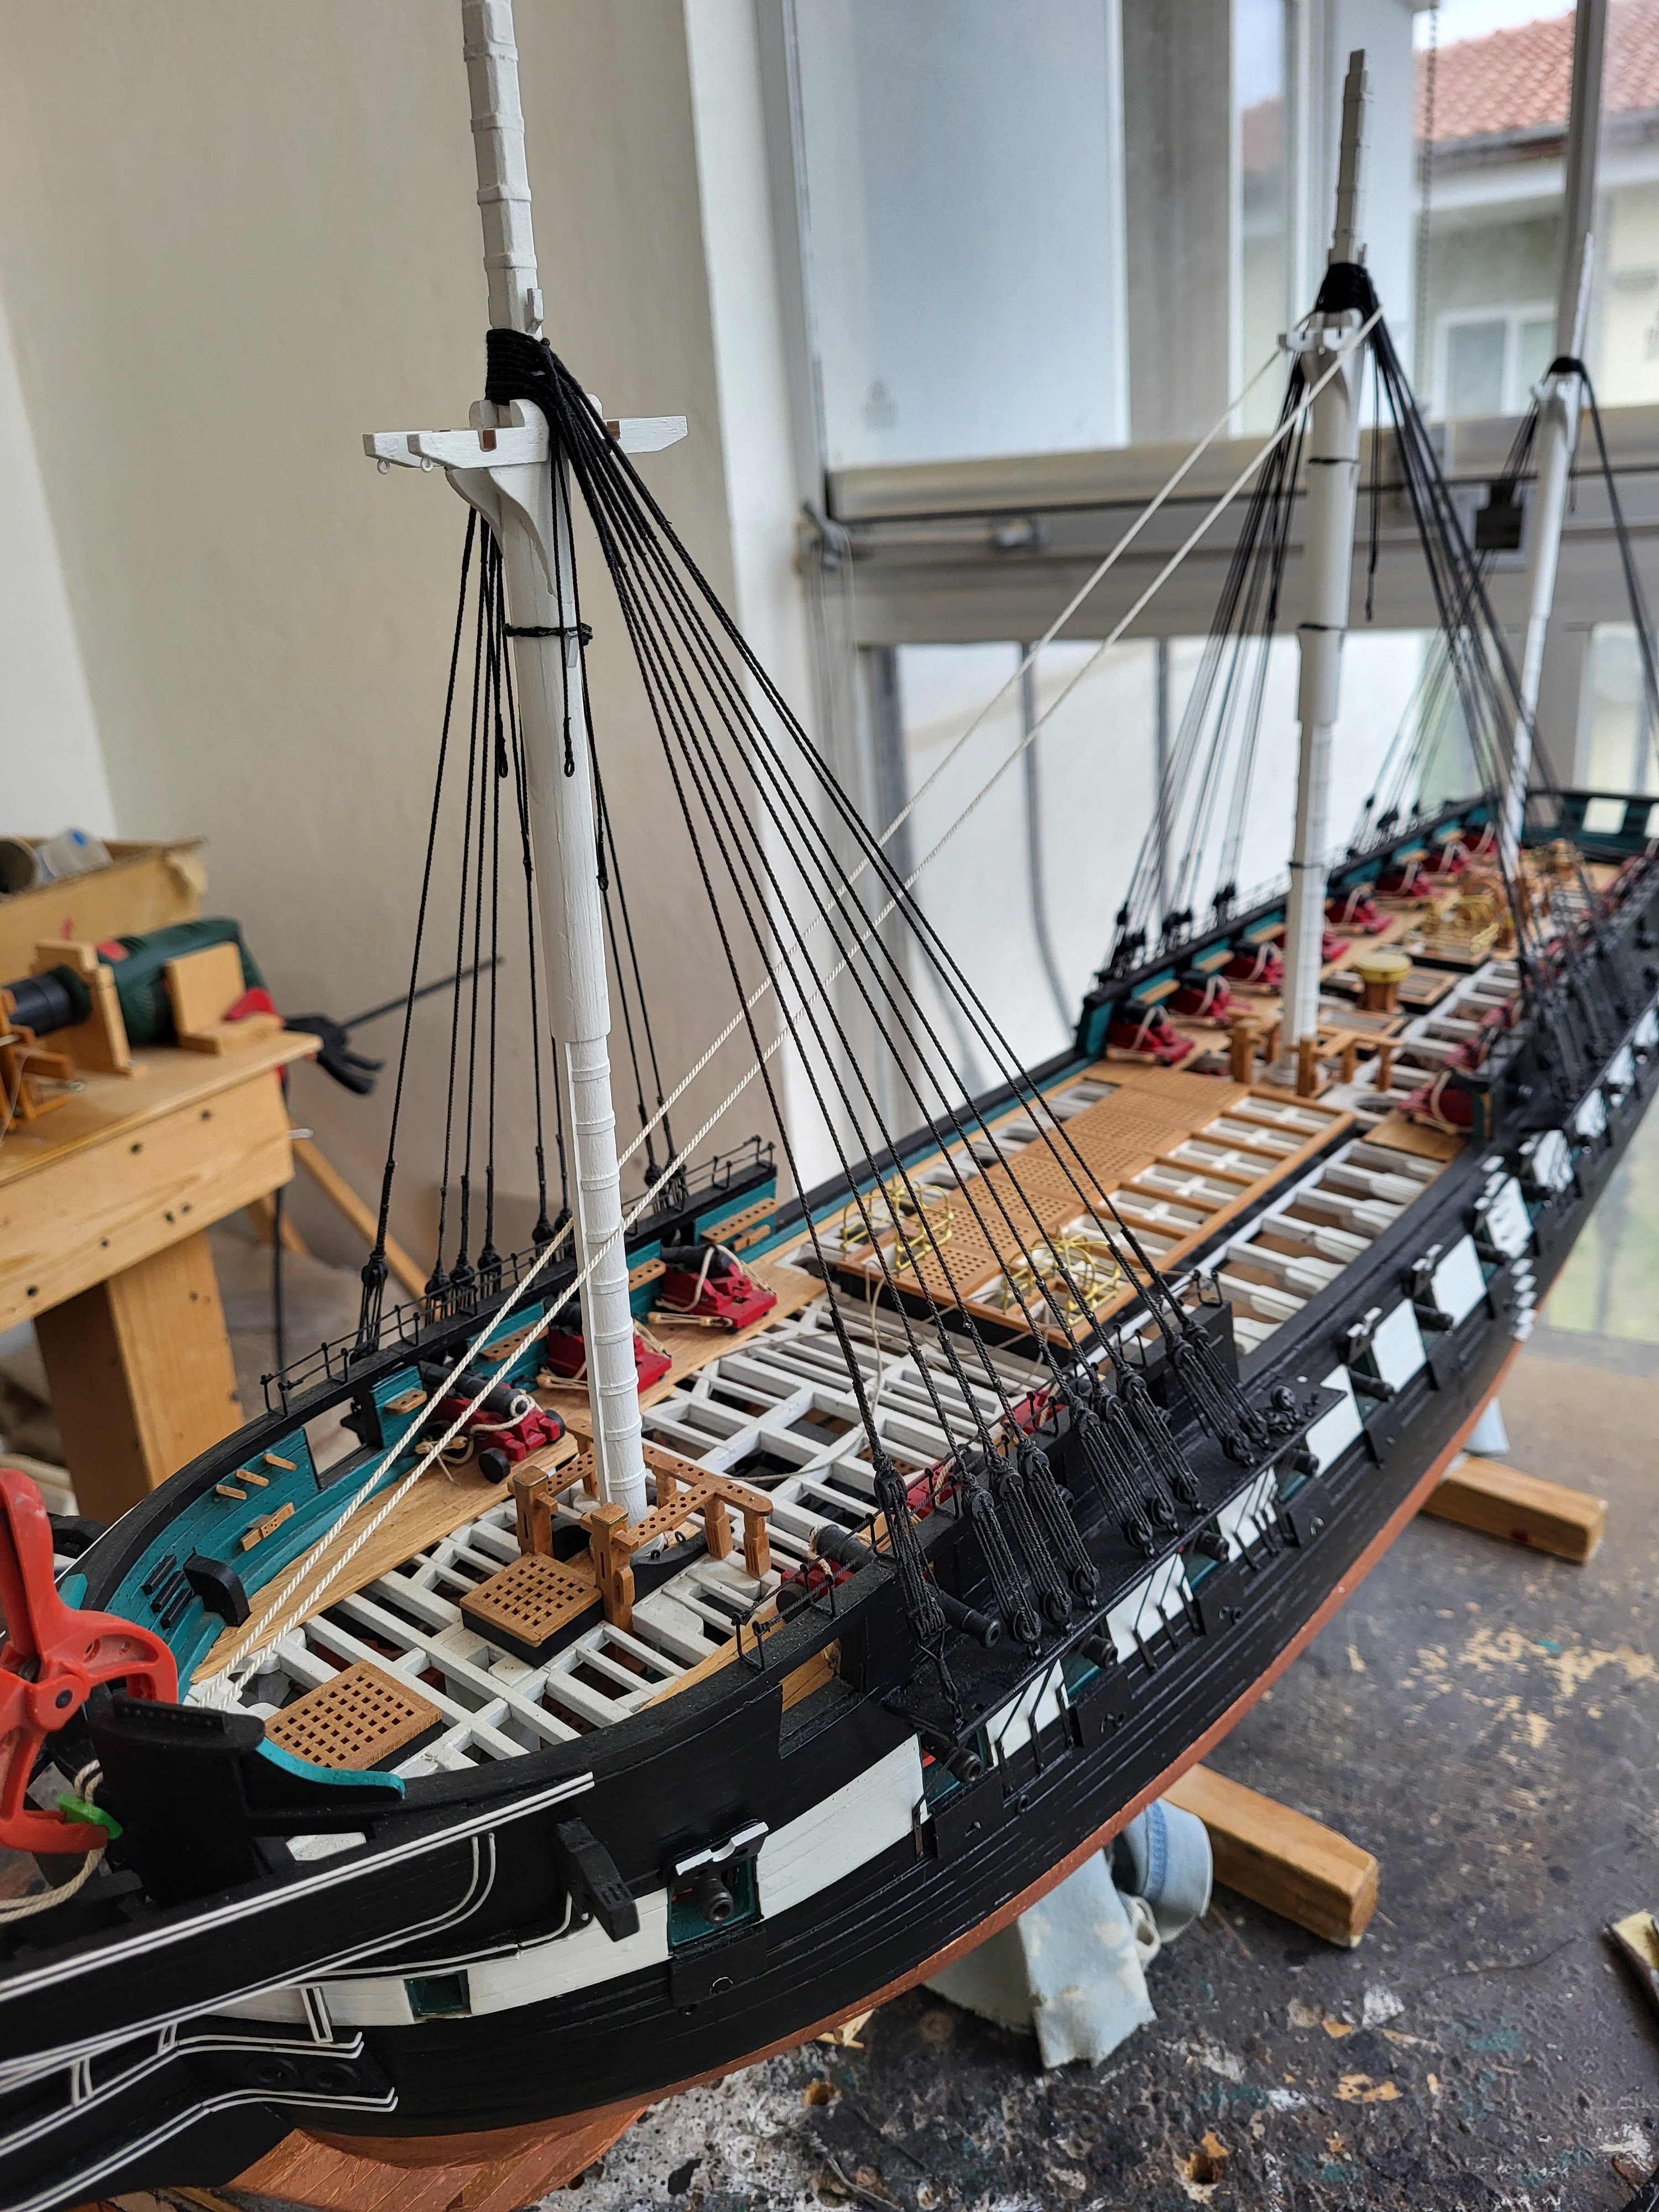
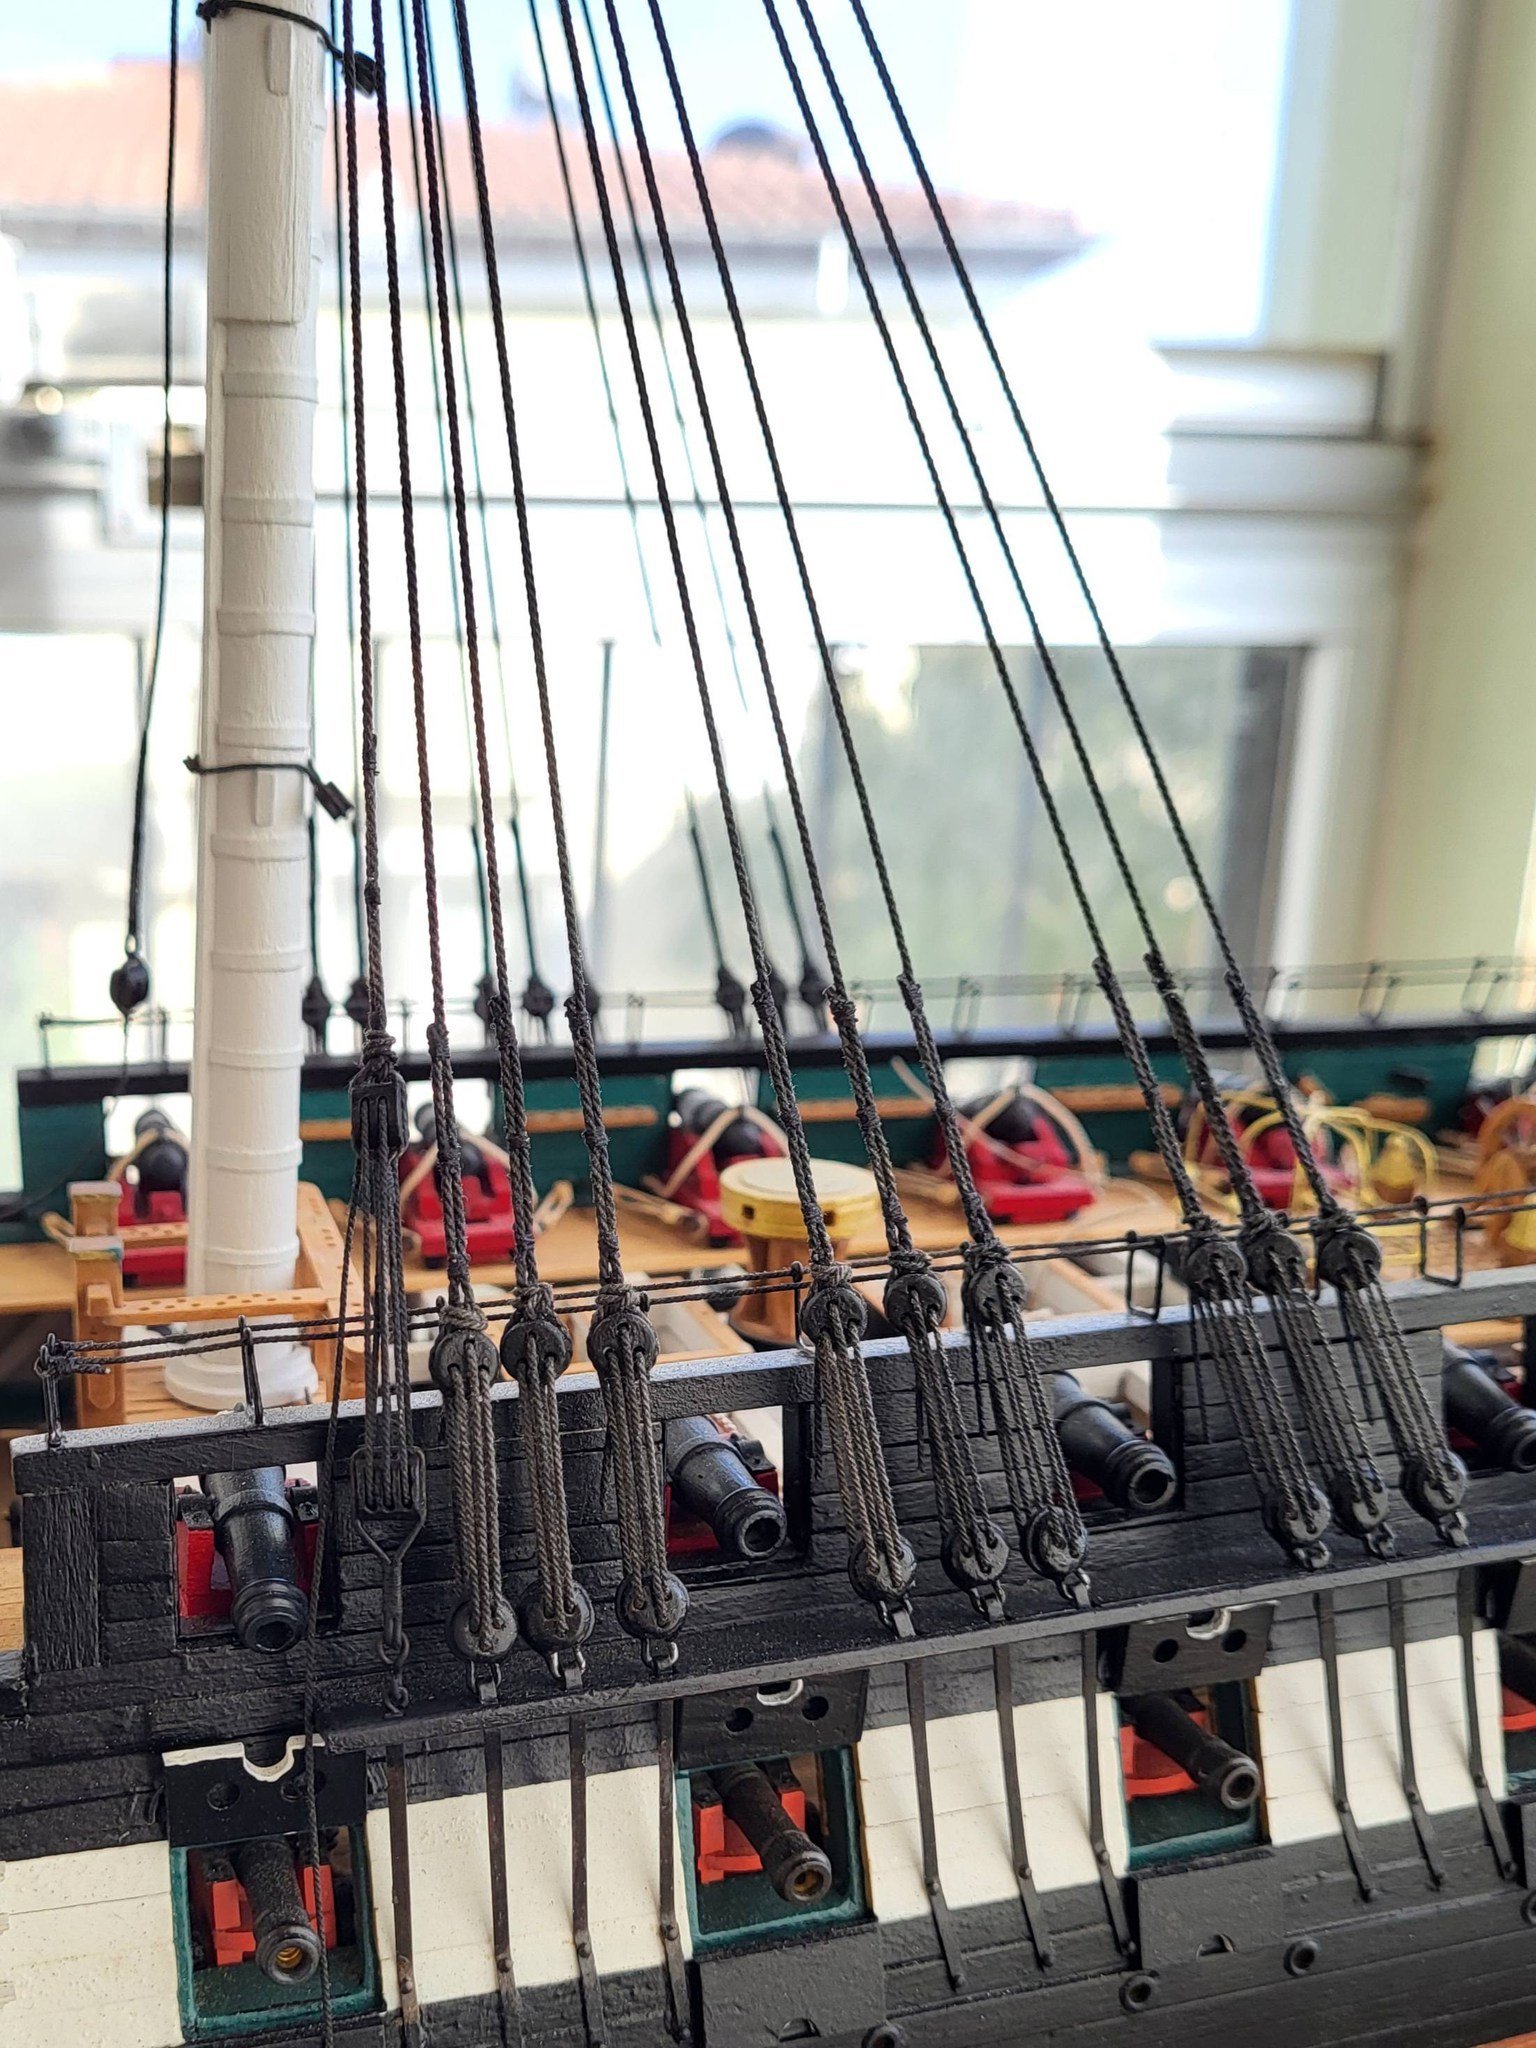
Dear friends, thanks for your nice comments and likes! All the lower mast shrouds and mast tackles are complete. I used 1mm rope for the shrouds and 0.3mm rope for the lanyards. The next task will be making the main stays.

-
USS Constitution by mtbediz - 1:76
mtbediz replied to mtbediz's topic in - Build logs for subjects built 1751 - 1800
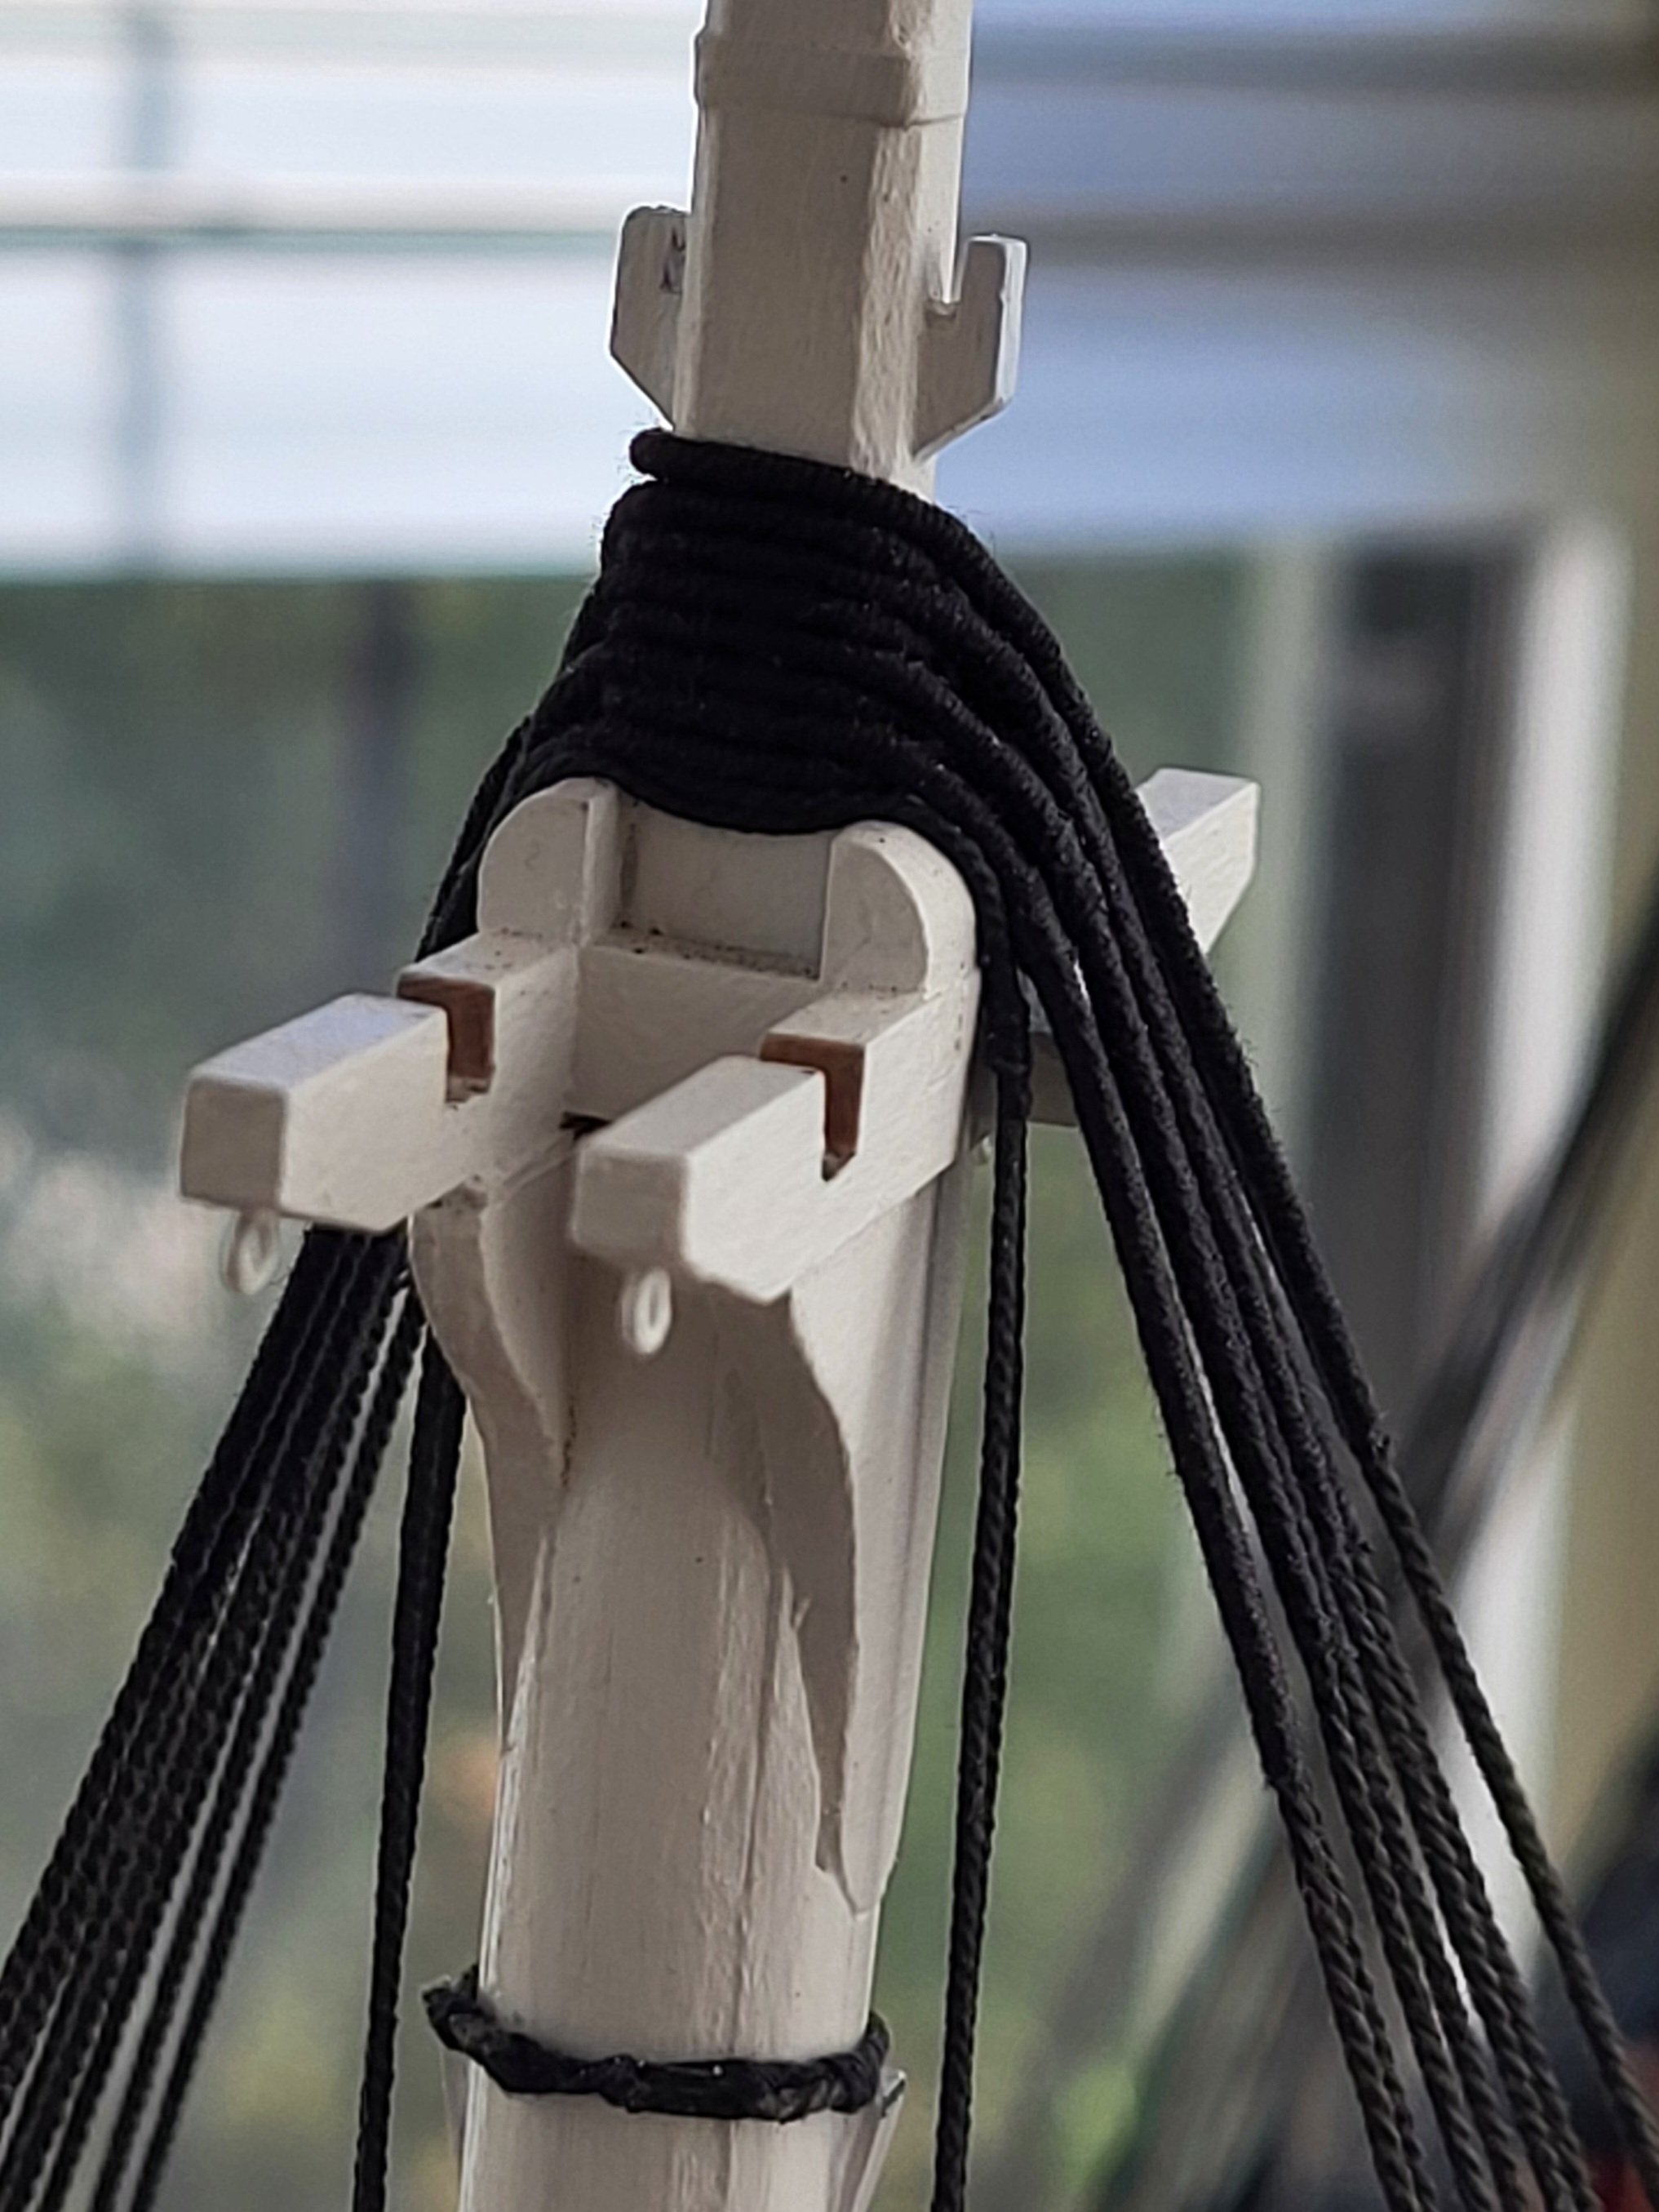
From what I understand, since this is on the lower masthead, we can say it's a mast tackle. Thanks for the information Phil. -
USS Constitution by mtbediz - 1:76
mtbediz replied to mtbediz's topic in - Build logs for subjects built 1751 - 1800
Thanks Greg. I can’t find what this is in the MS plans, maybe it doesn’t exist, or maybe I just missed it. That’s why I felt I had to point it out. If someone knows, perhaps they can inform us as well. -
USS Constitution by mtbediz - 1:76
mtbediz replied to mtbediz's topic in - Build logs for subjects built 1751 - 1800
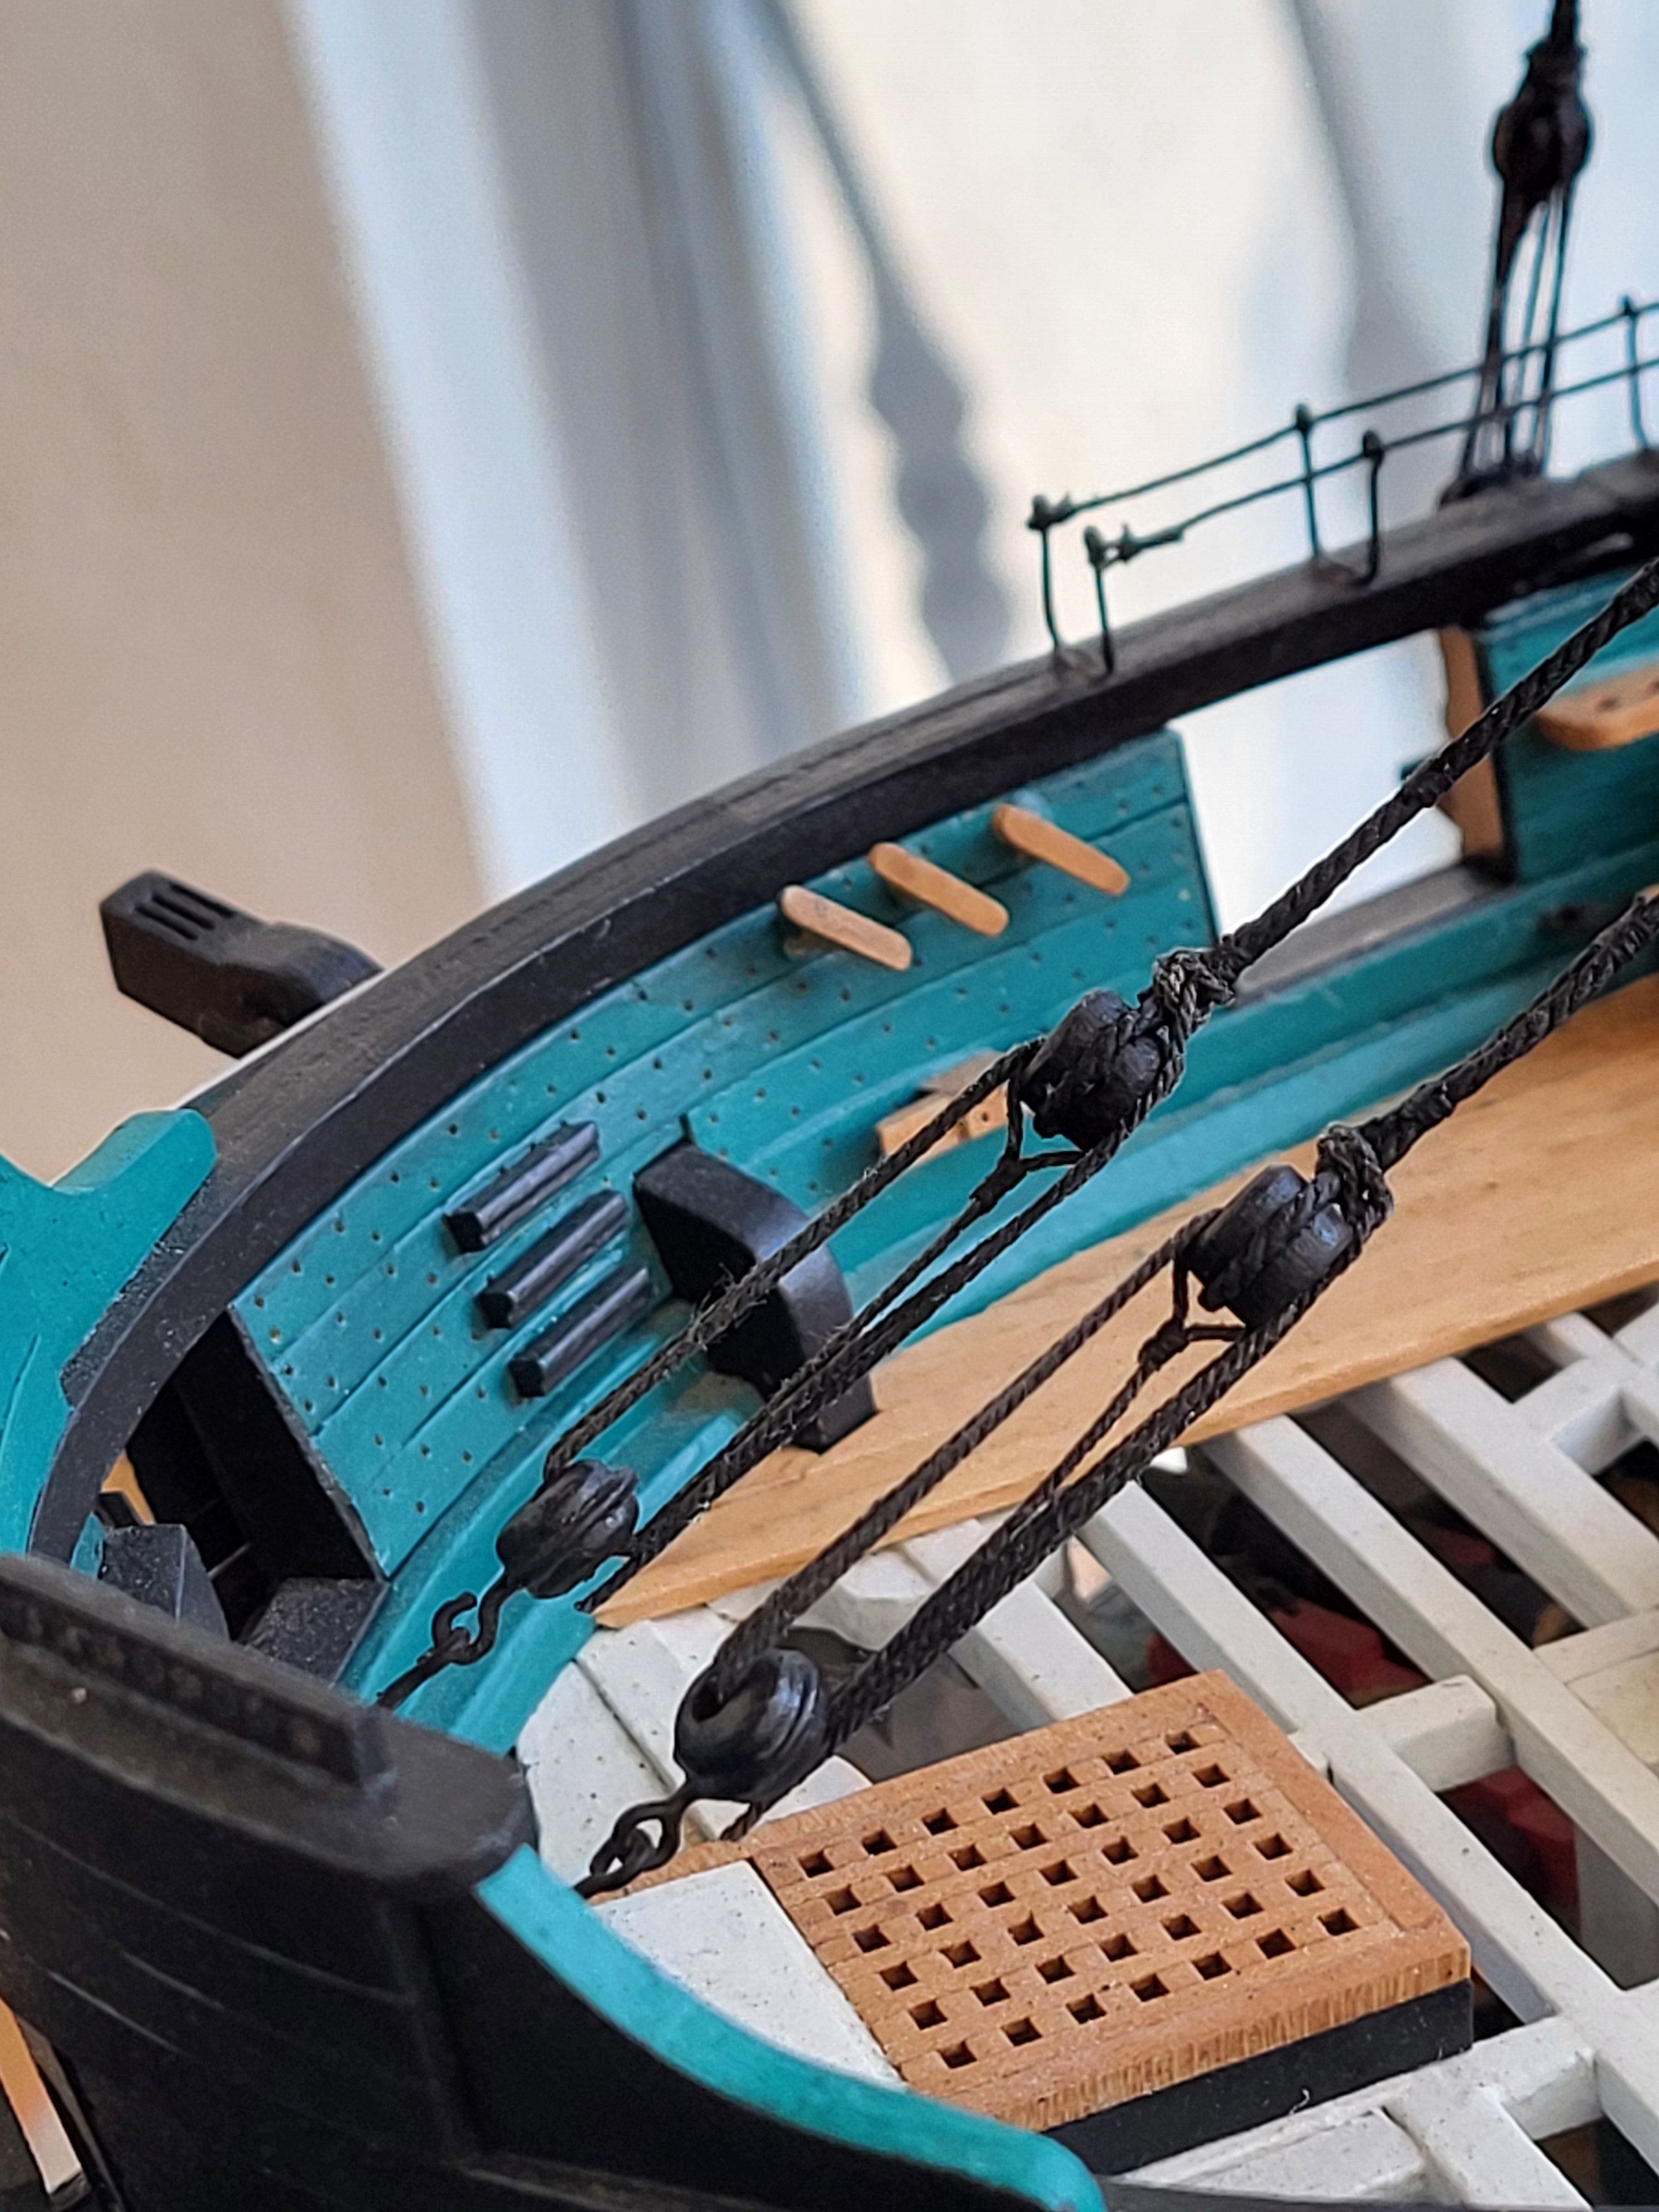
I mounted the tackle equipped stay on the port side of the main mast. By the way, I call this rope a stay, but I'm not sure if that's the correct name.


-
Yes Peter, I couldn't bear the thought of that beautiful craftsmanship being covered up with paint. Looking at the model's wonderful appearance today, it's clear I was right.
-
USS Constitution by mtbediz - 1:76
mtbediz replied to mtbediz's topic in - Build logs for subjects built 1751 - 1800
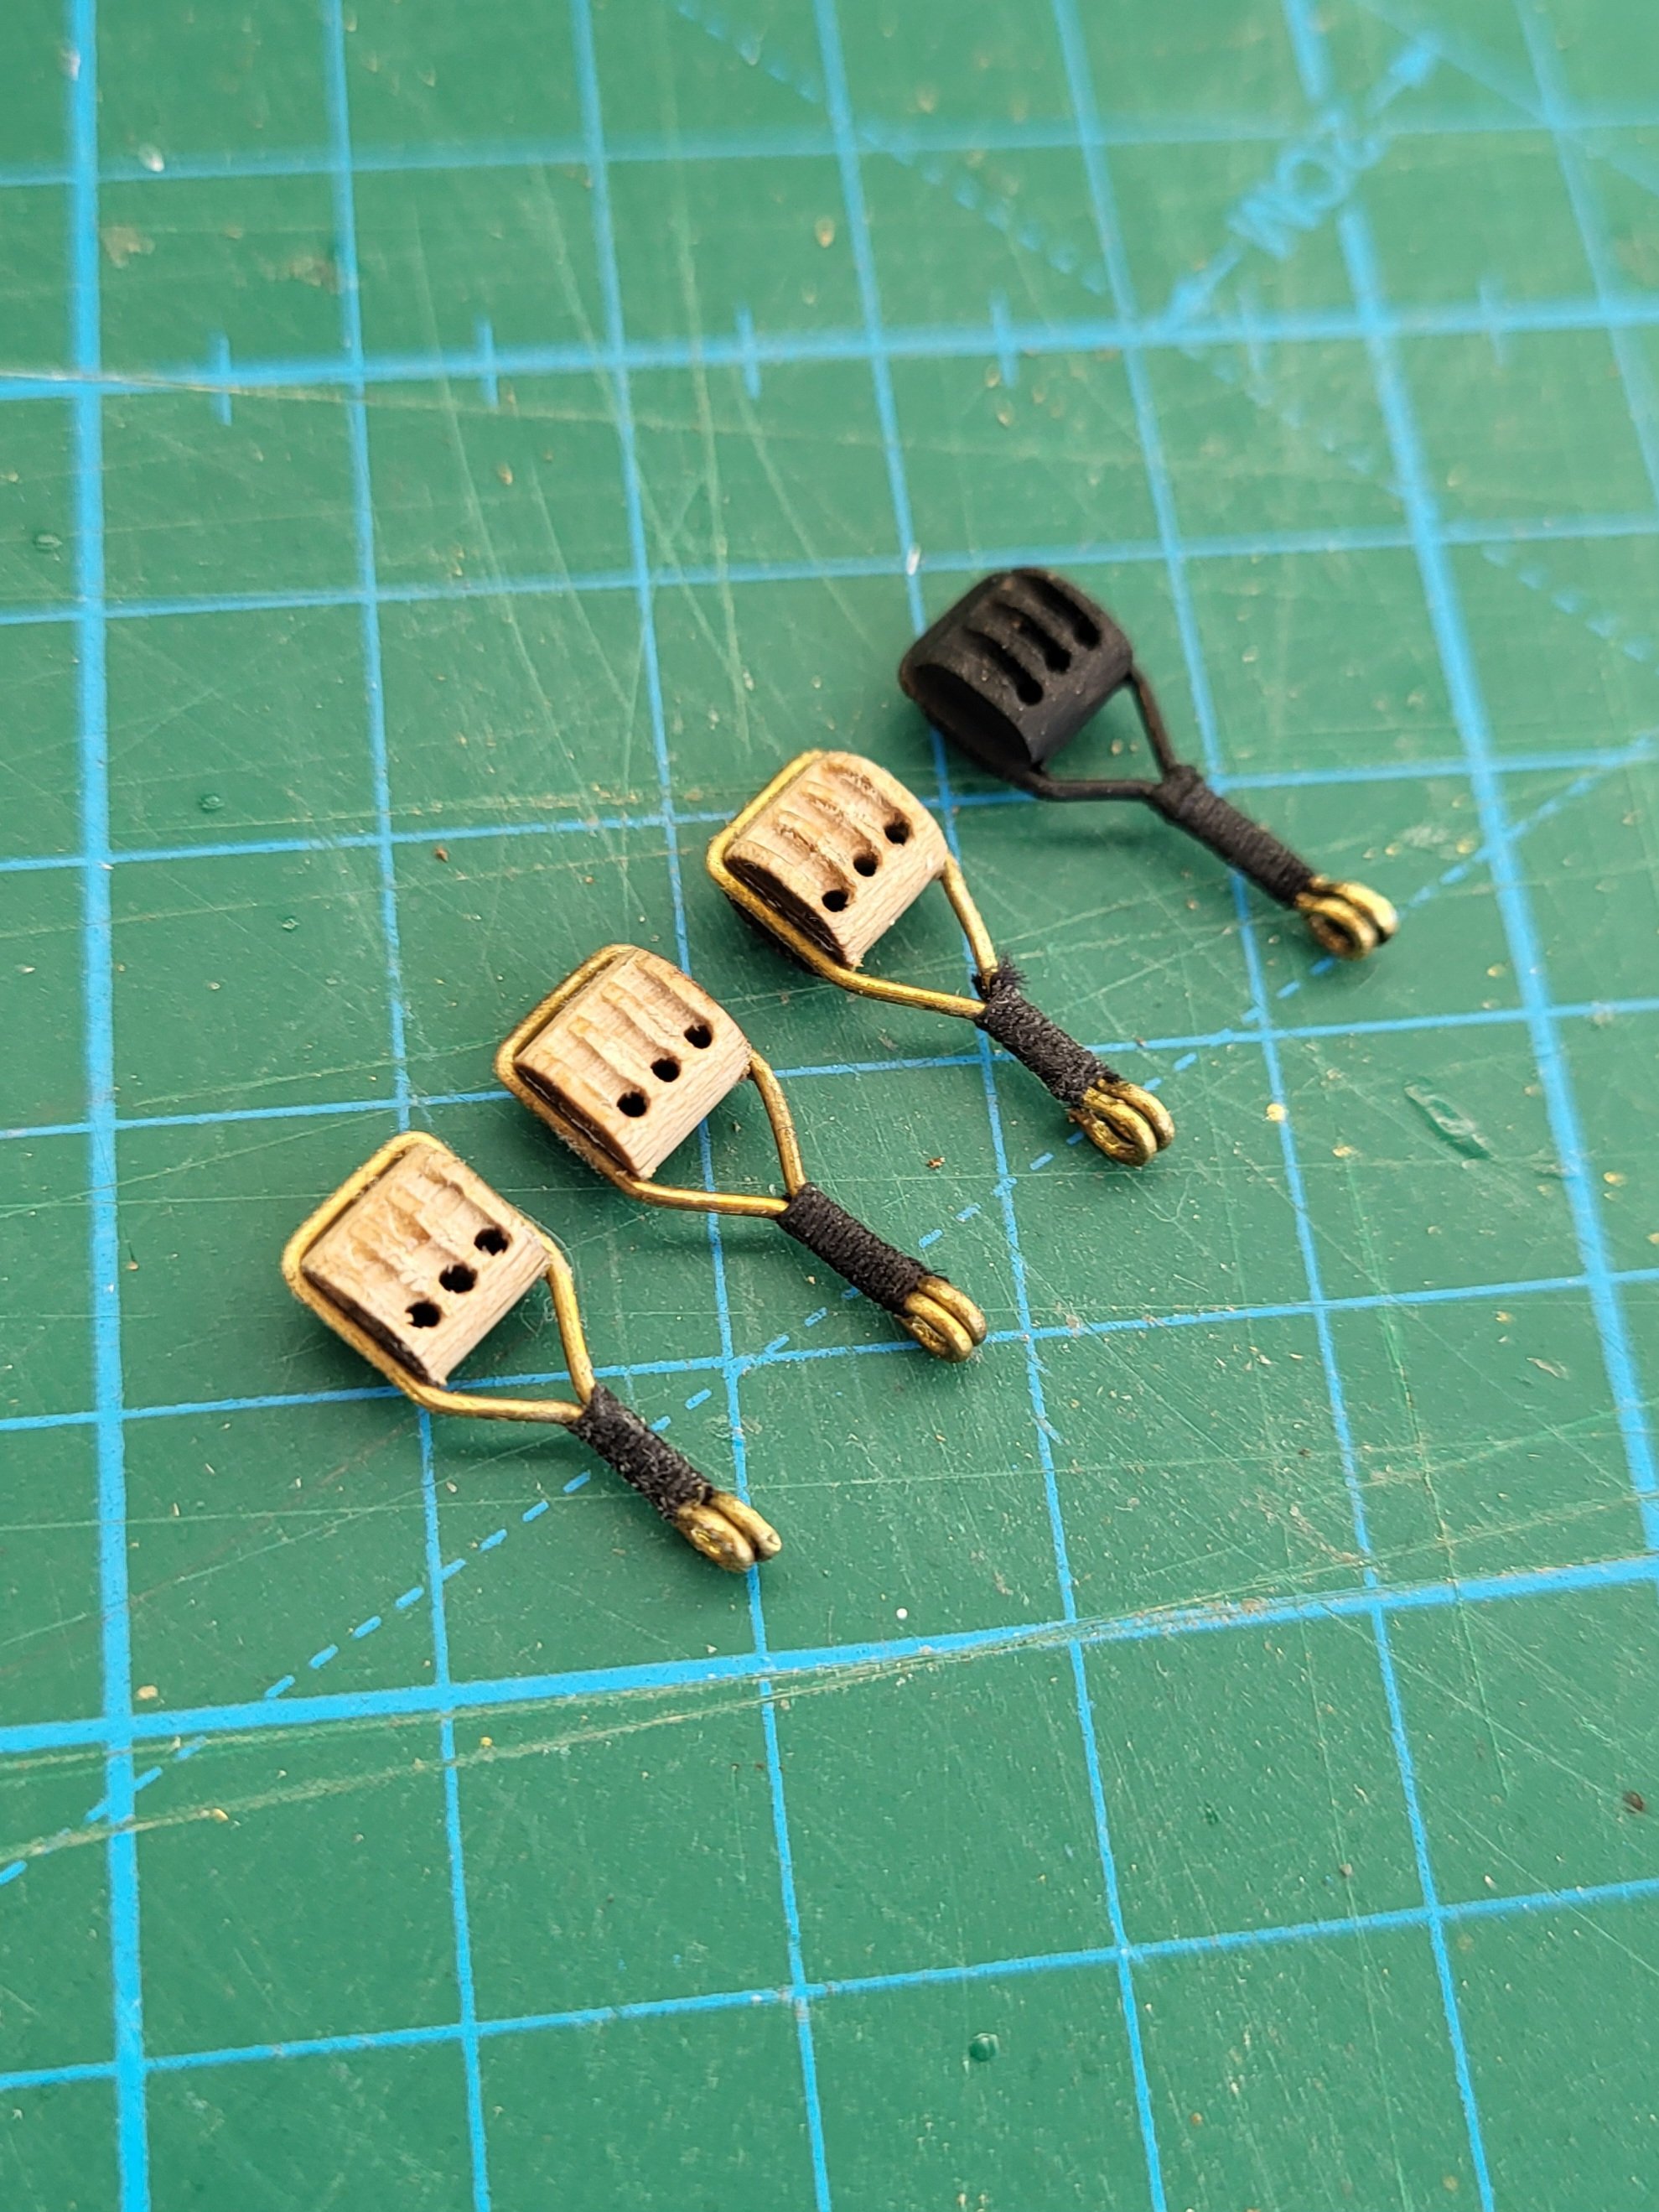
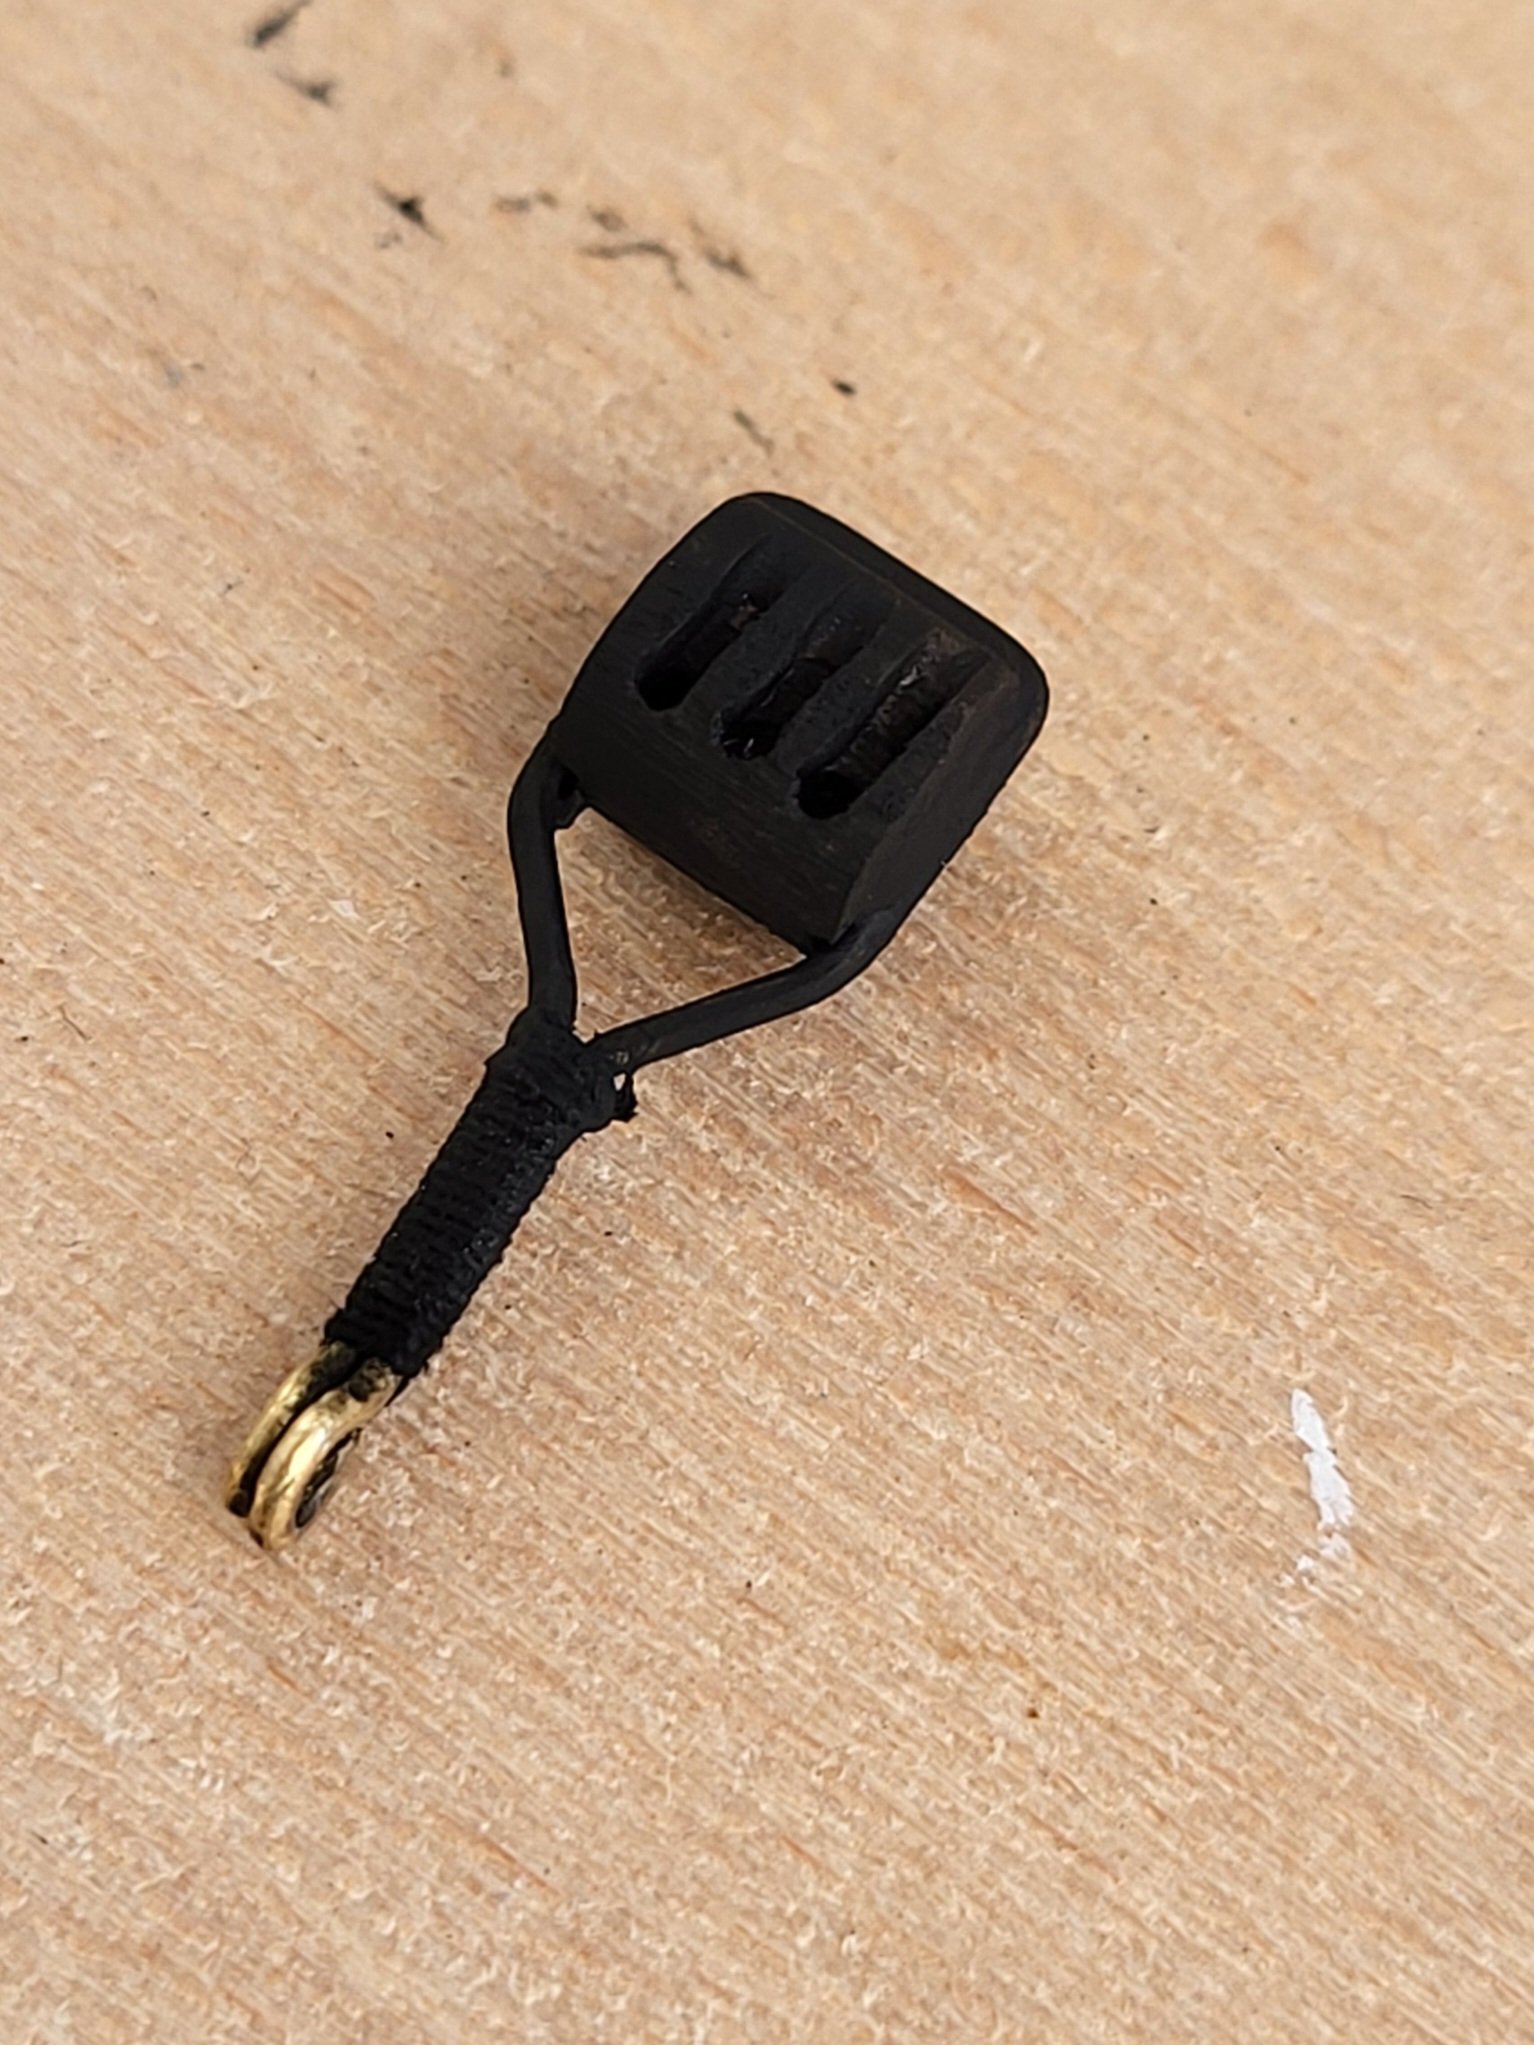
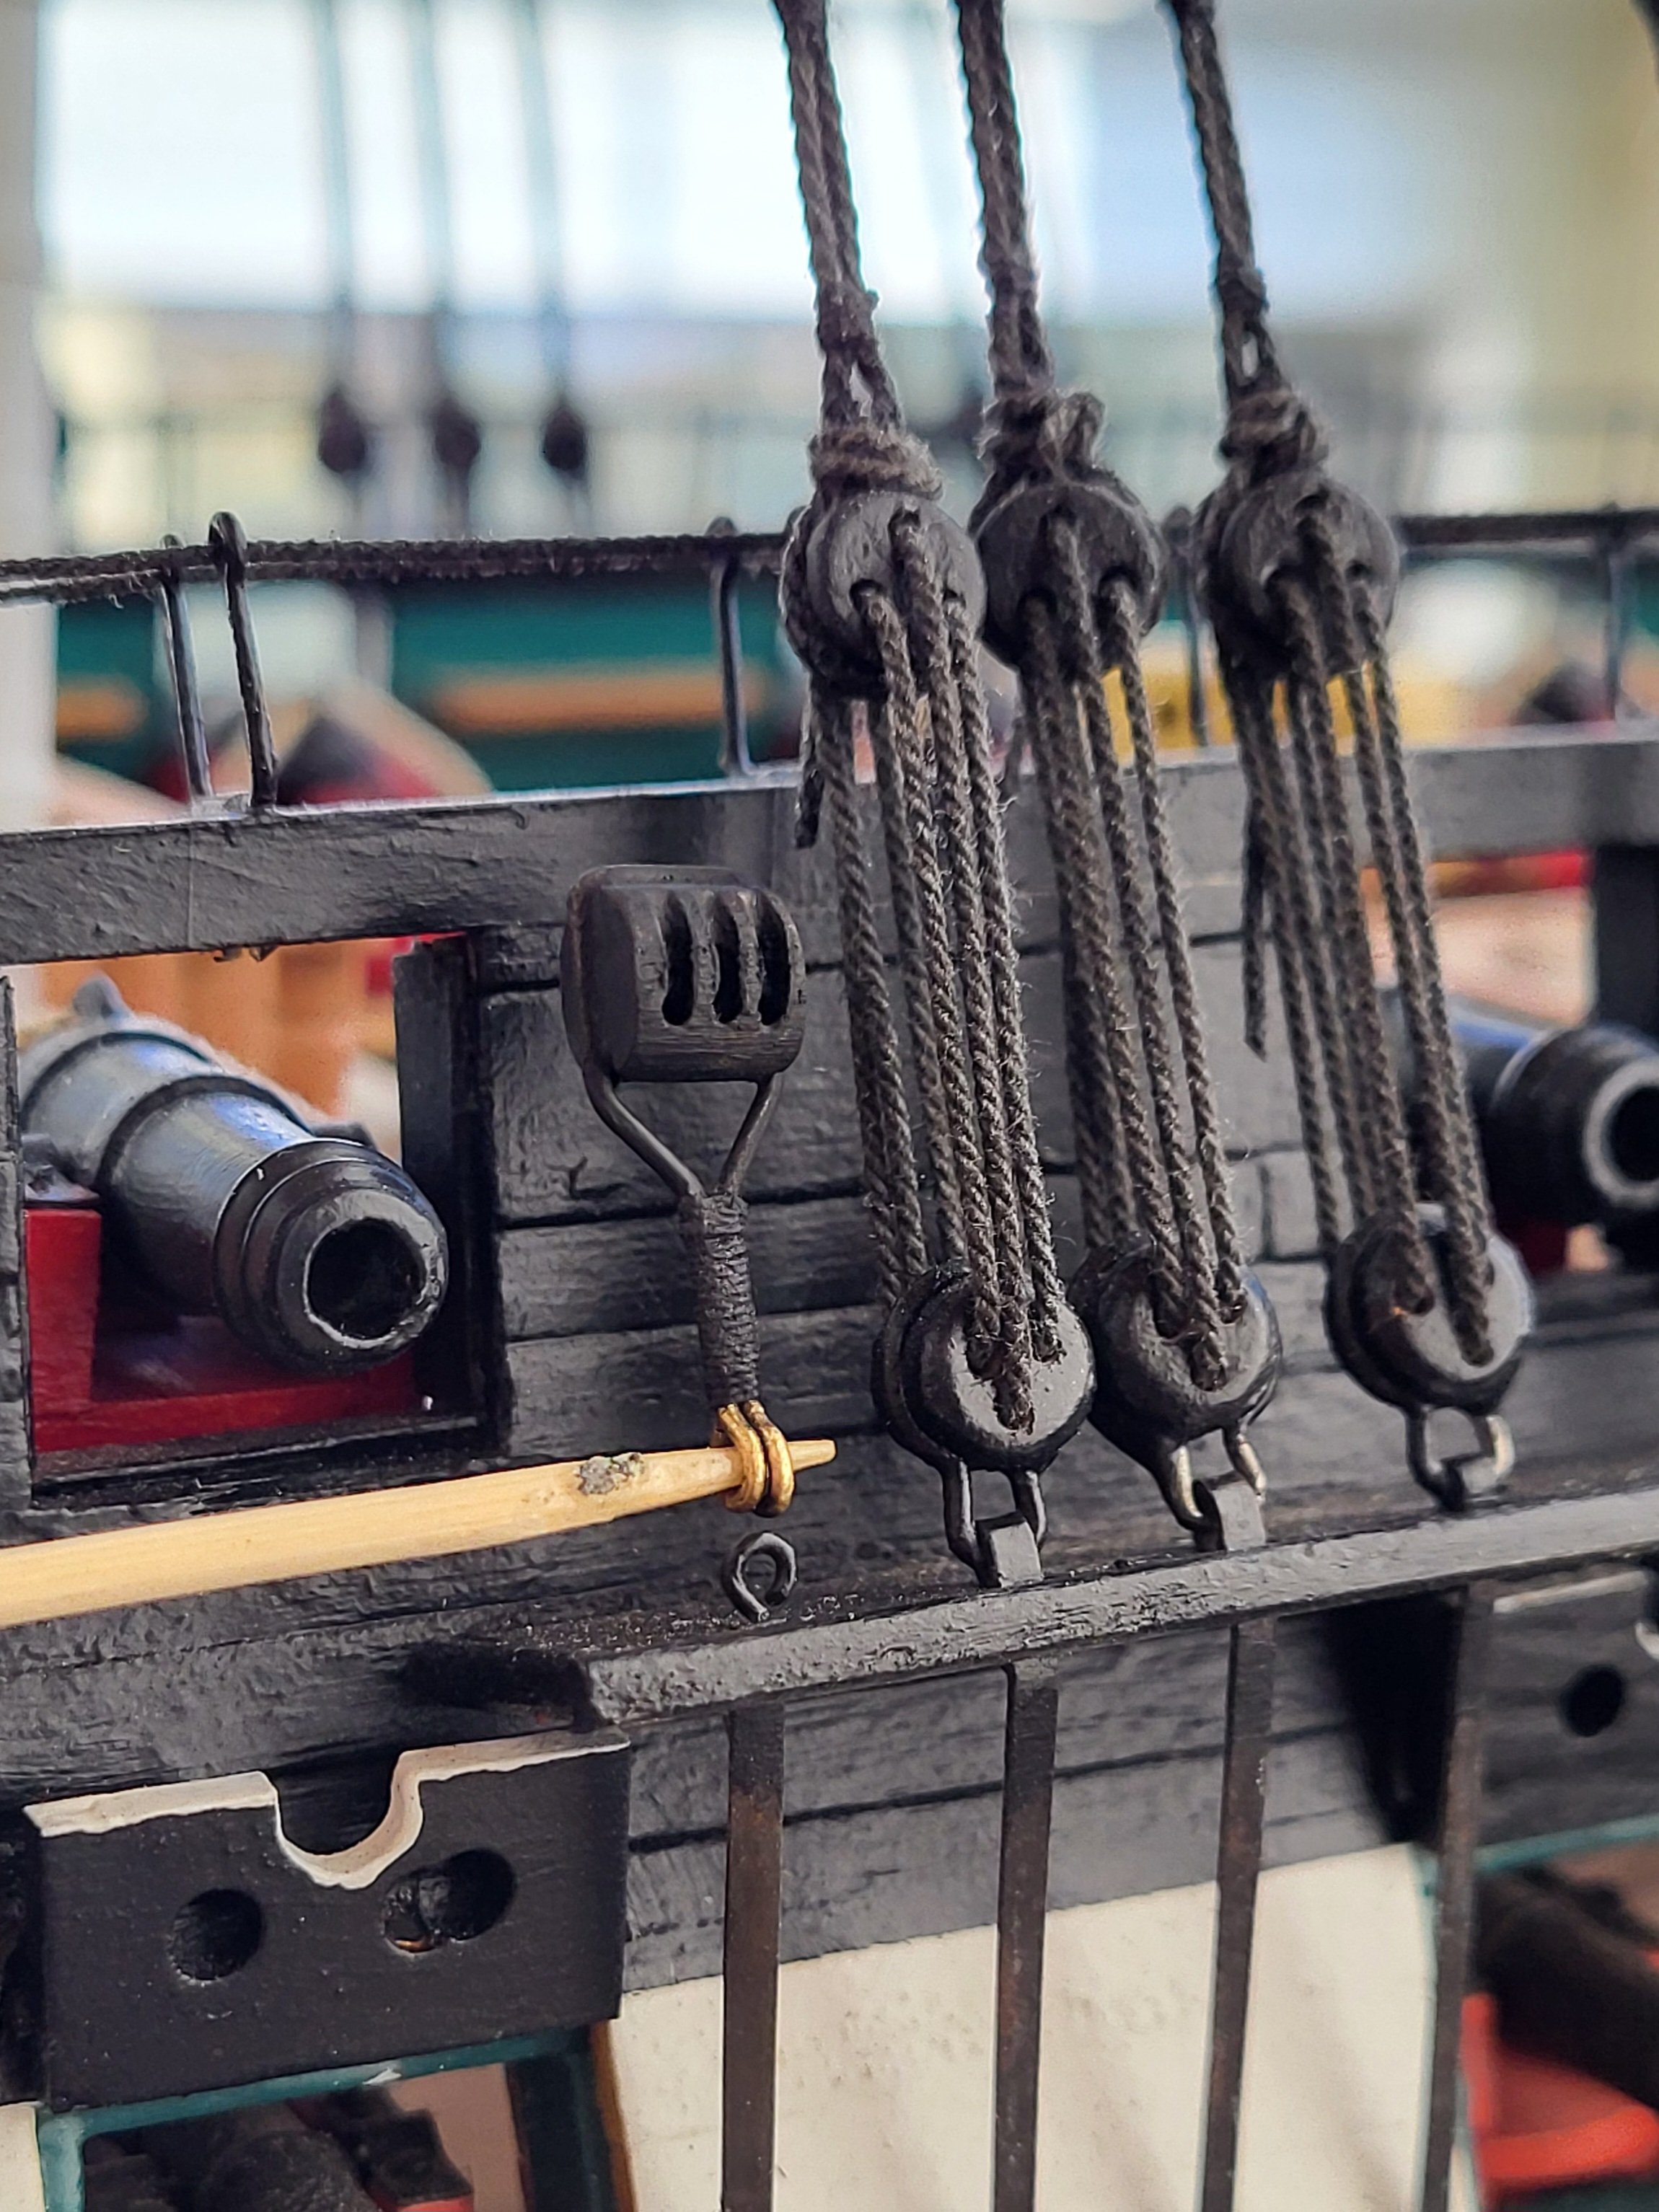
Jon, in the photos of the real ship, the triple block is connected to the eyebolt on the channel via a hook. I'll add a hook to the block as well. -
USS Constitution by mtbediz - 1:76
mtbediz replied to mtbediz's topic in - Build logs for subjects built 1751 - 1800
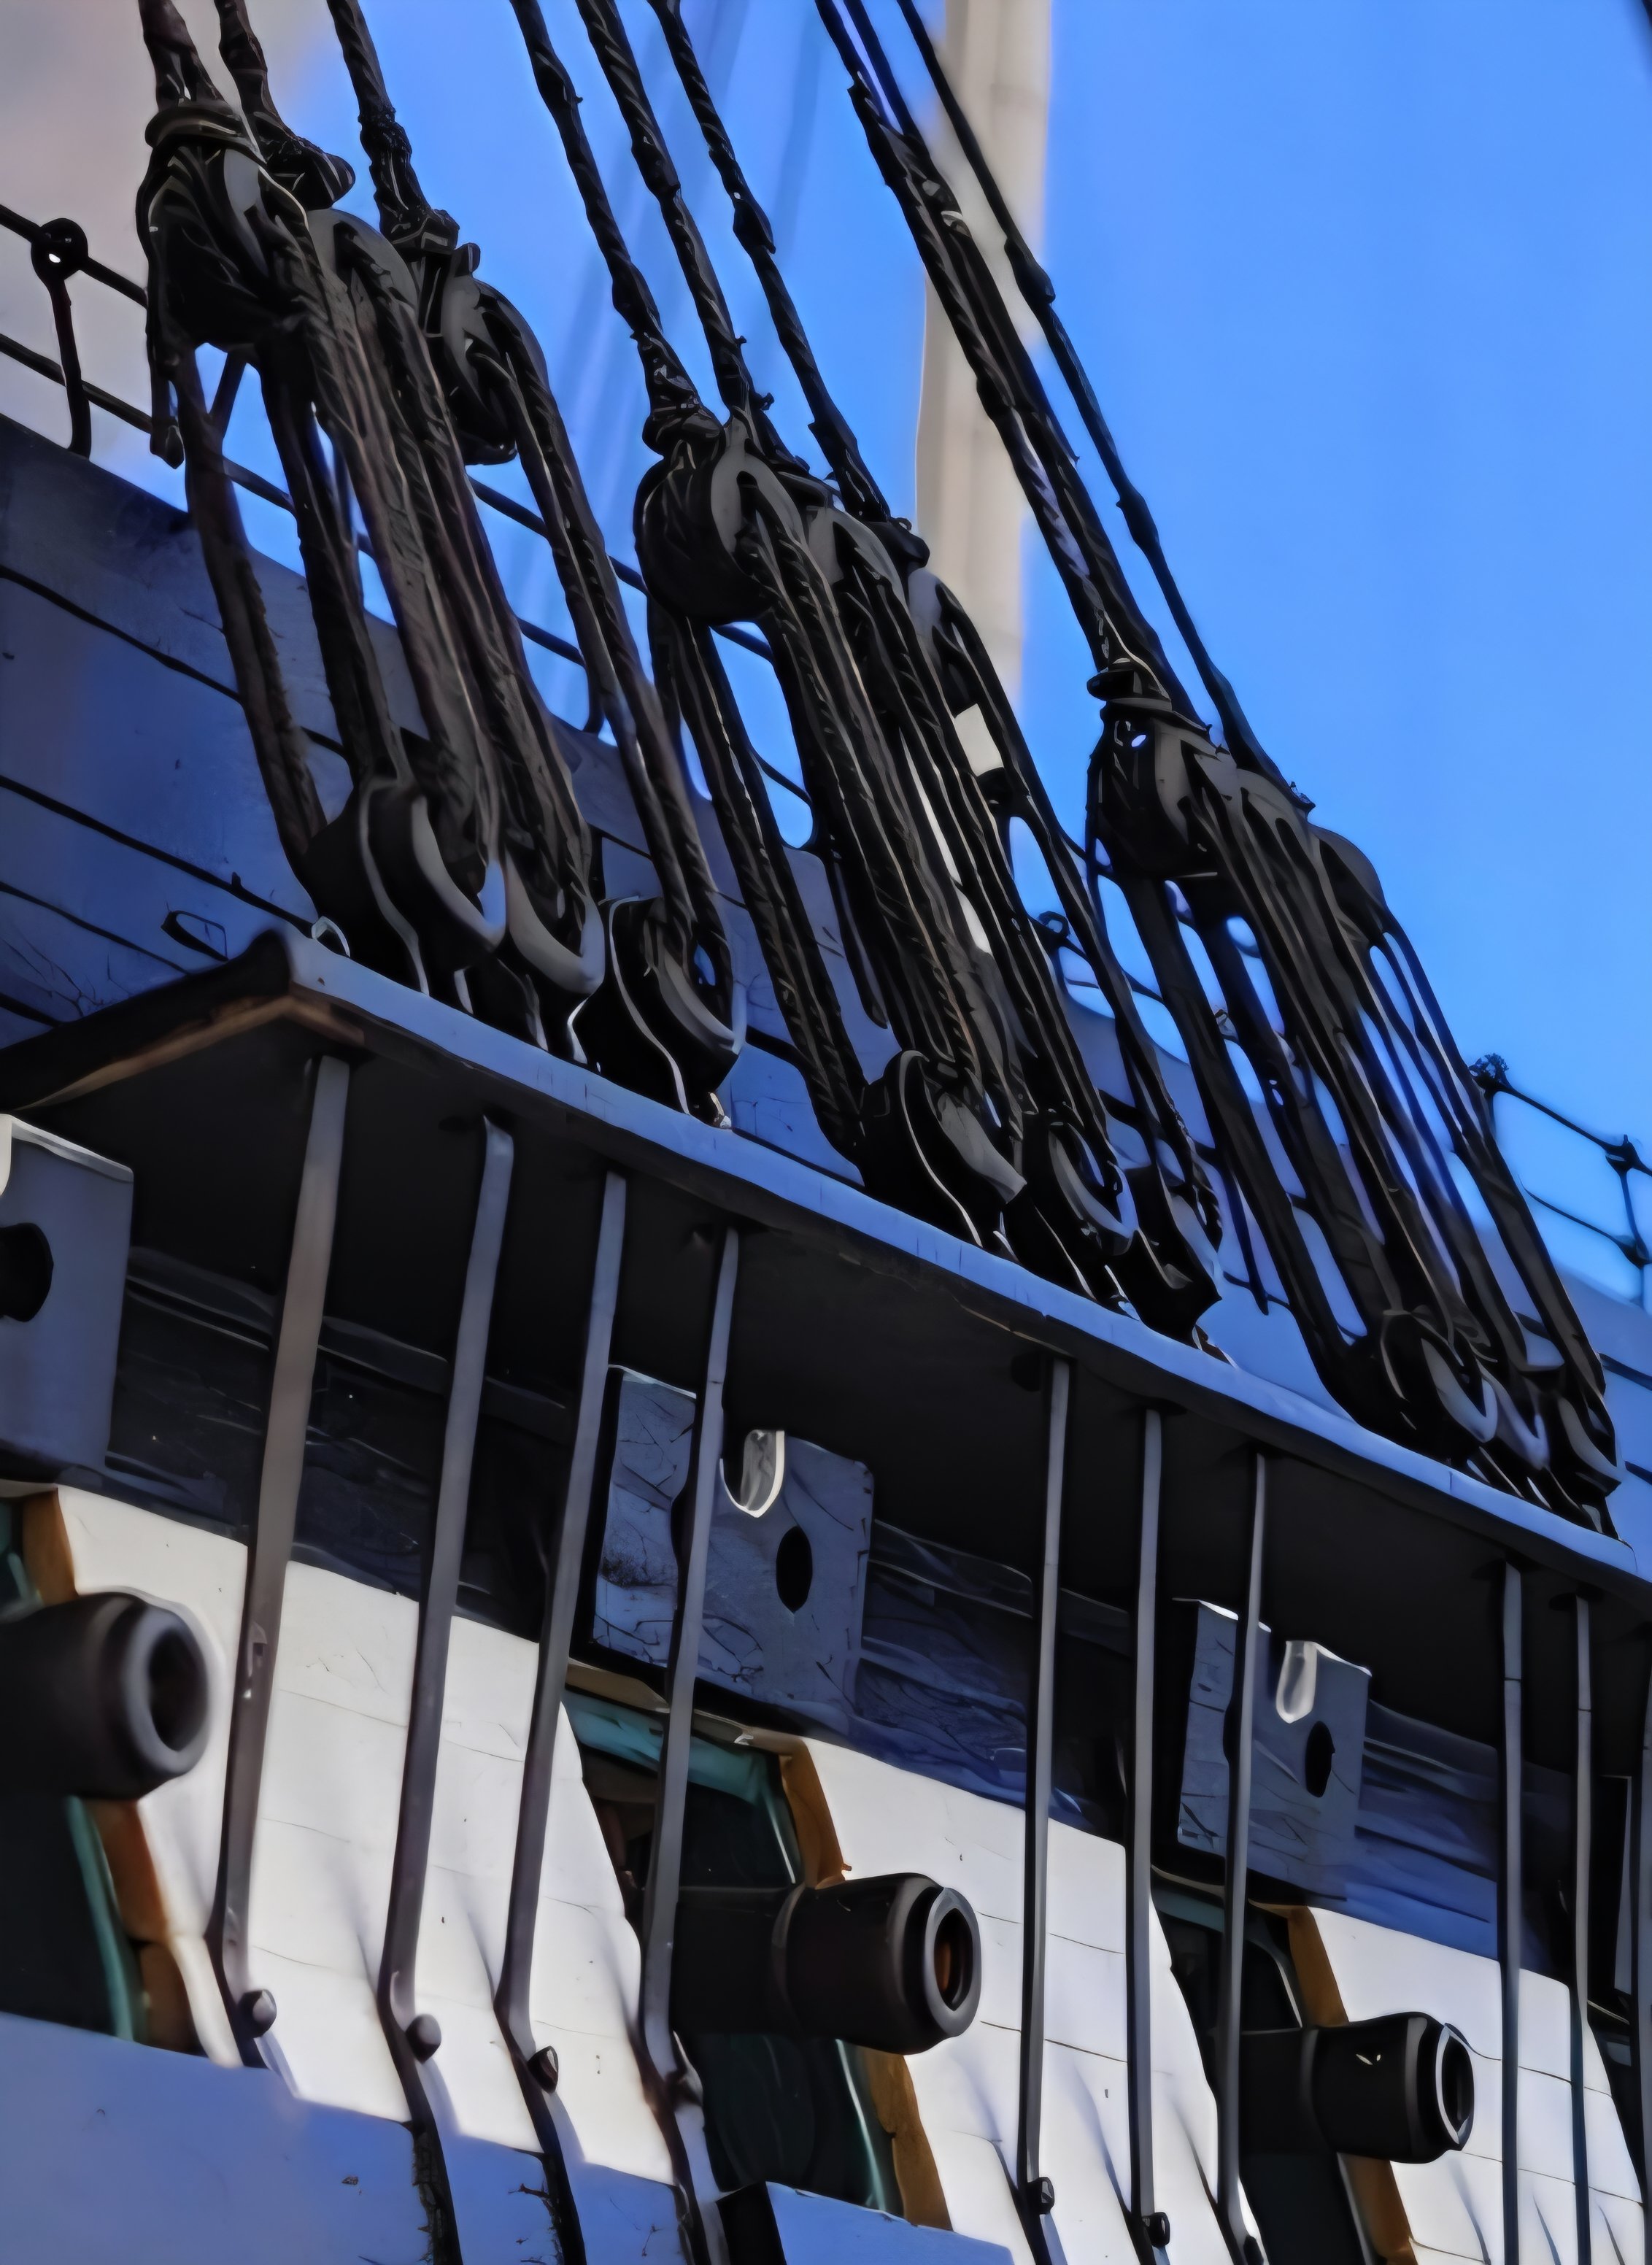
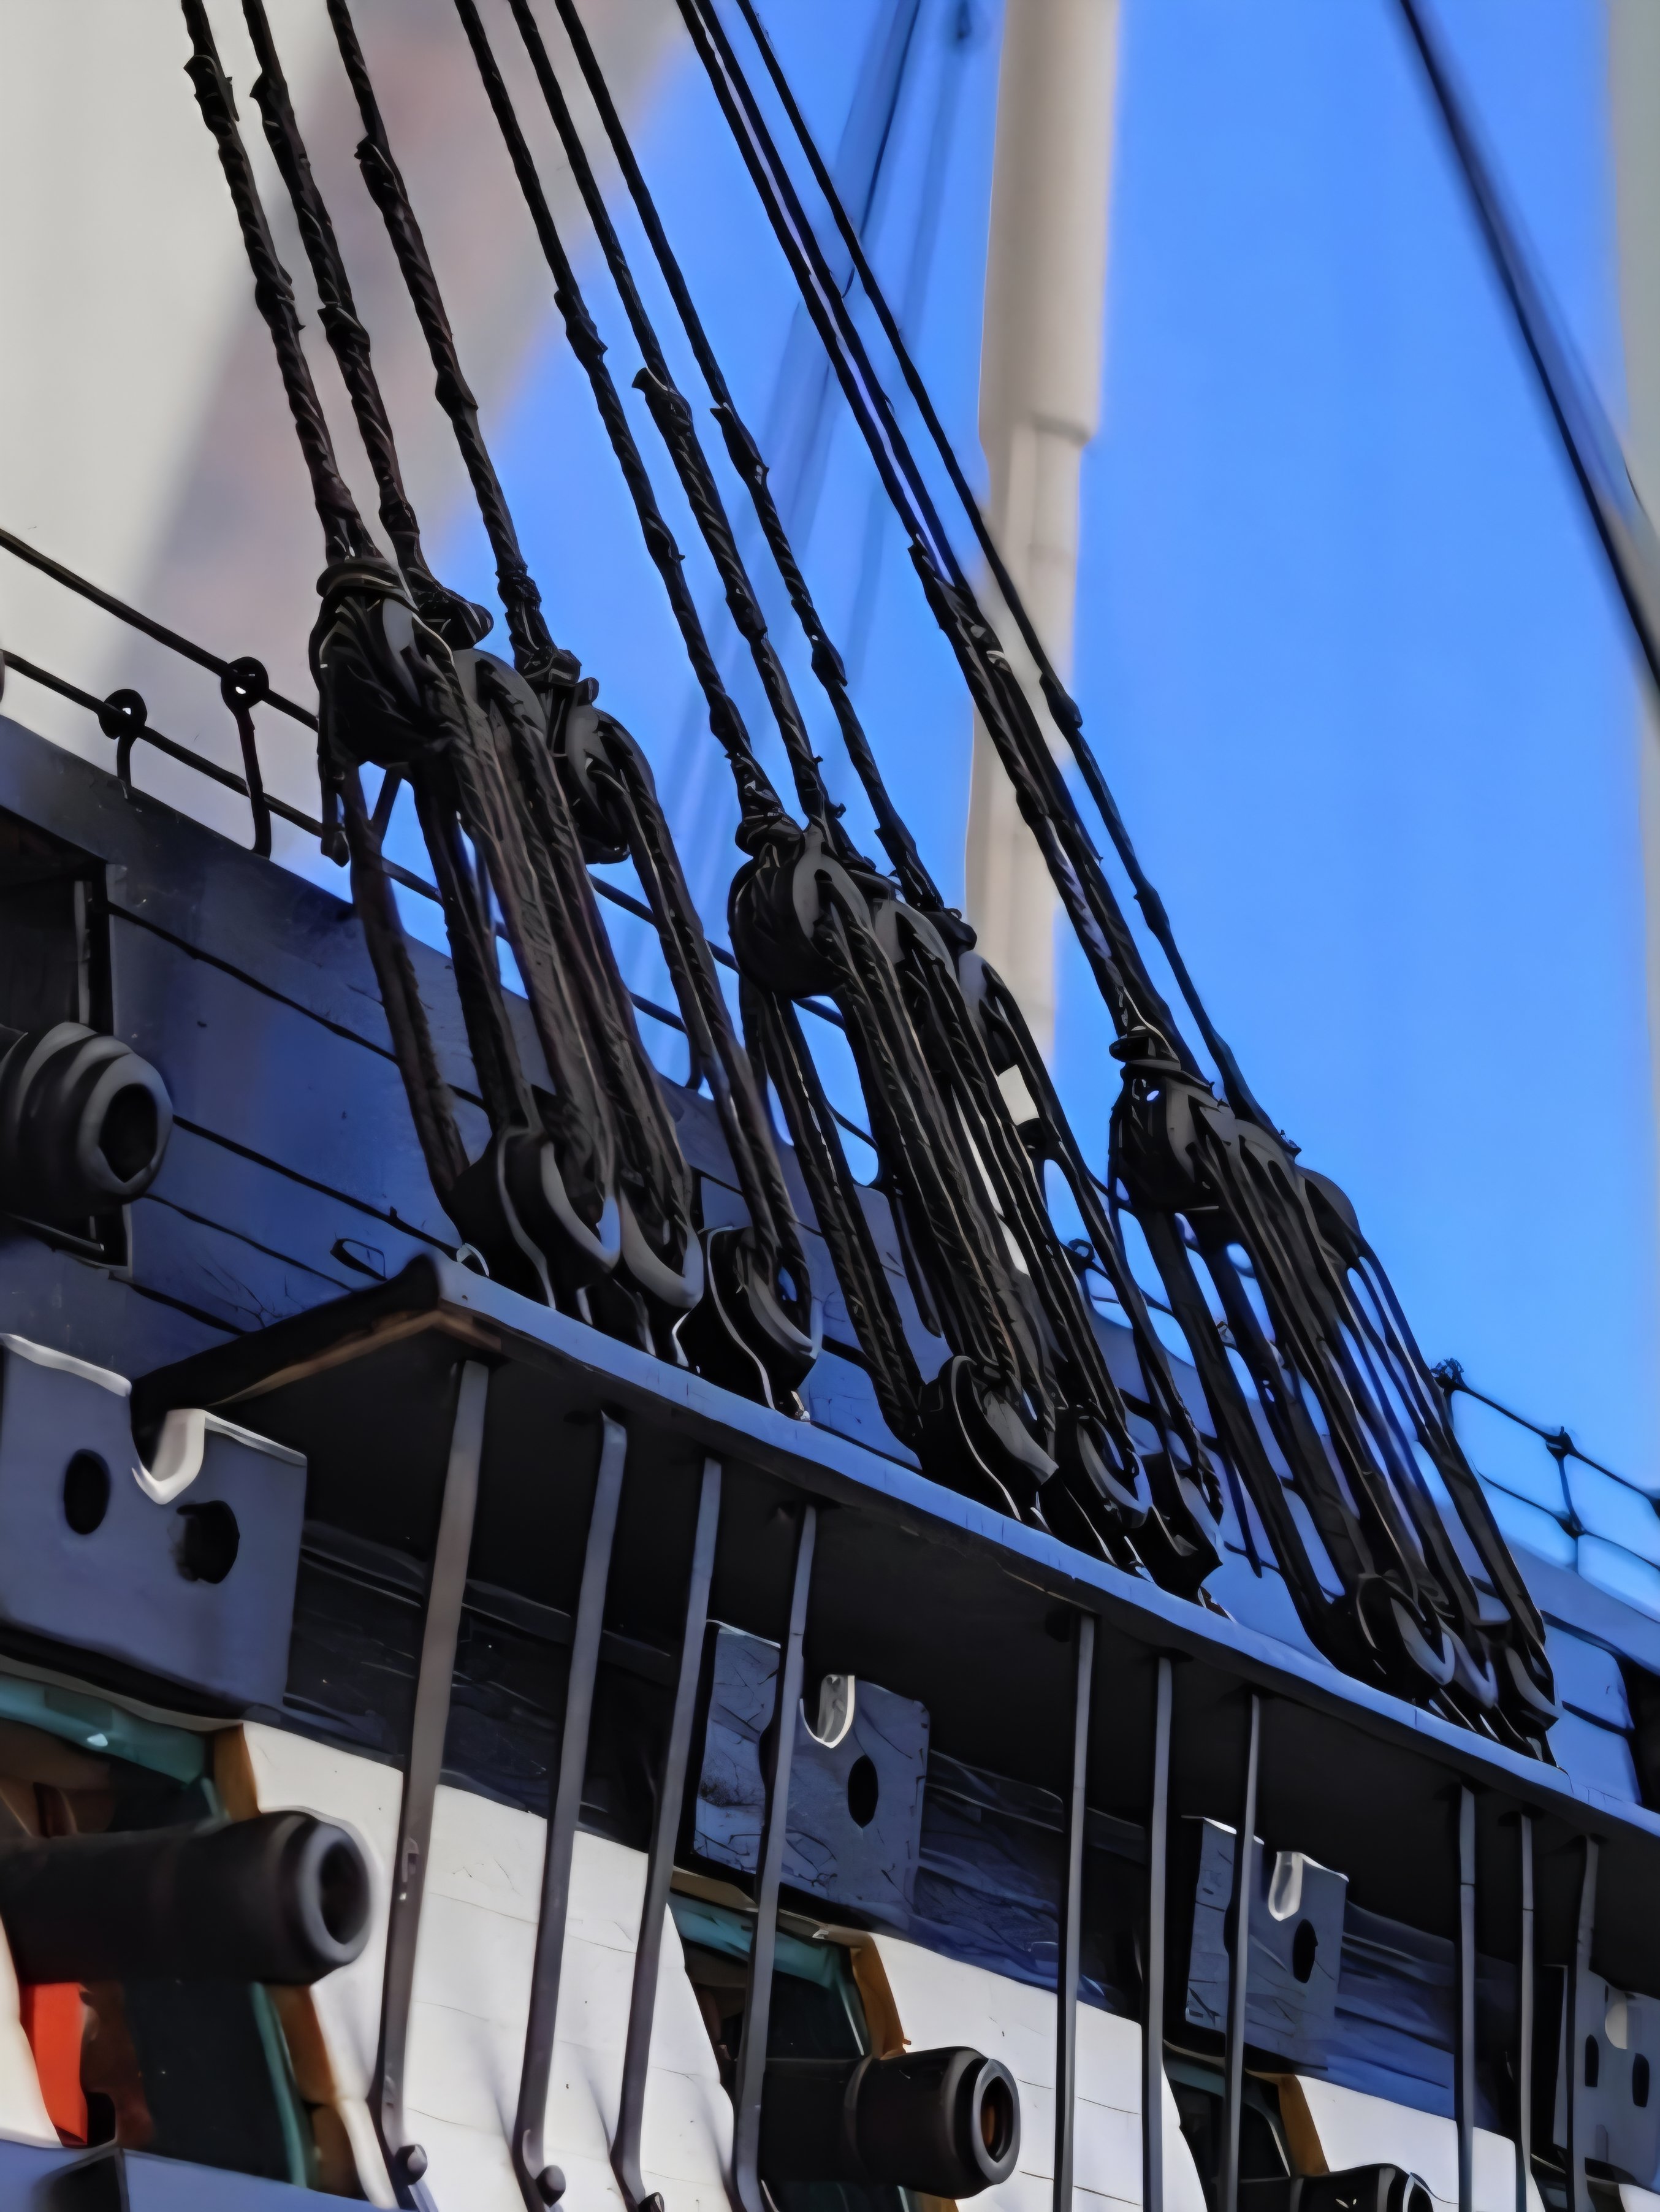
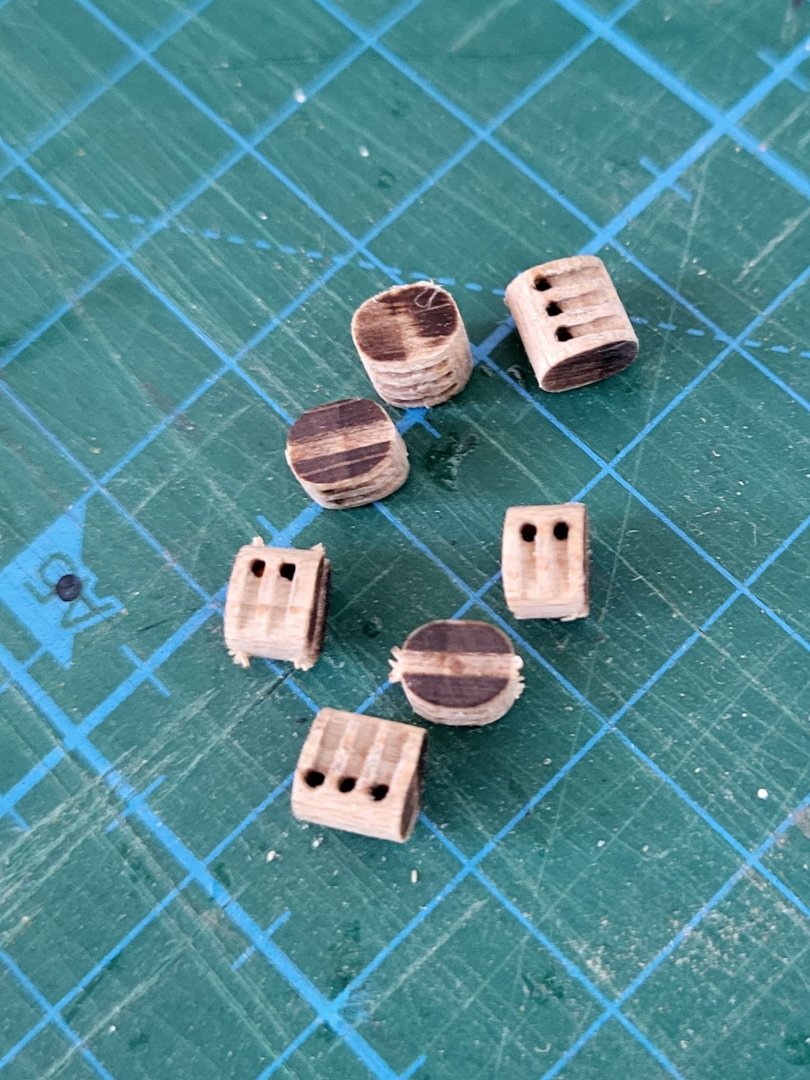
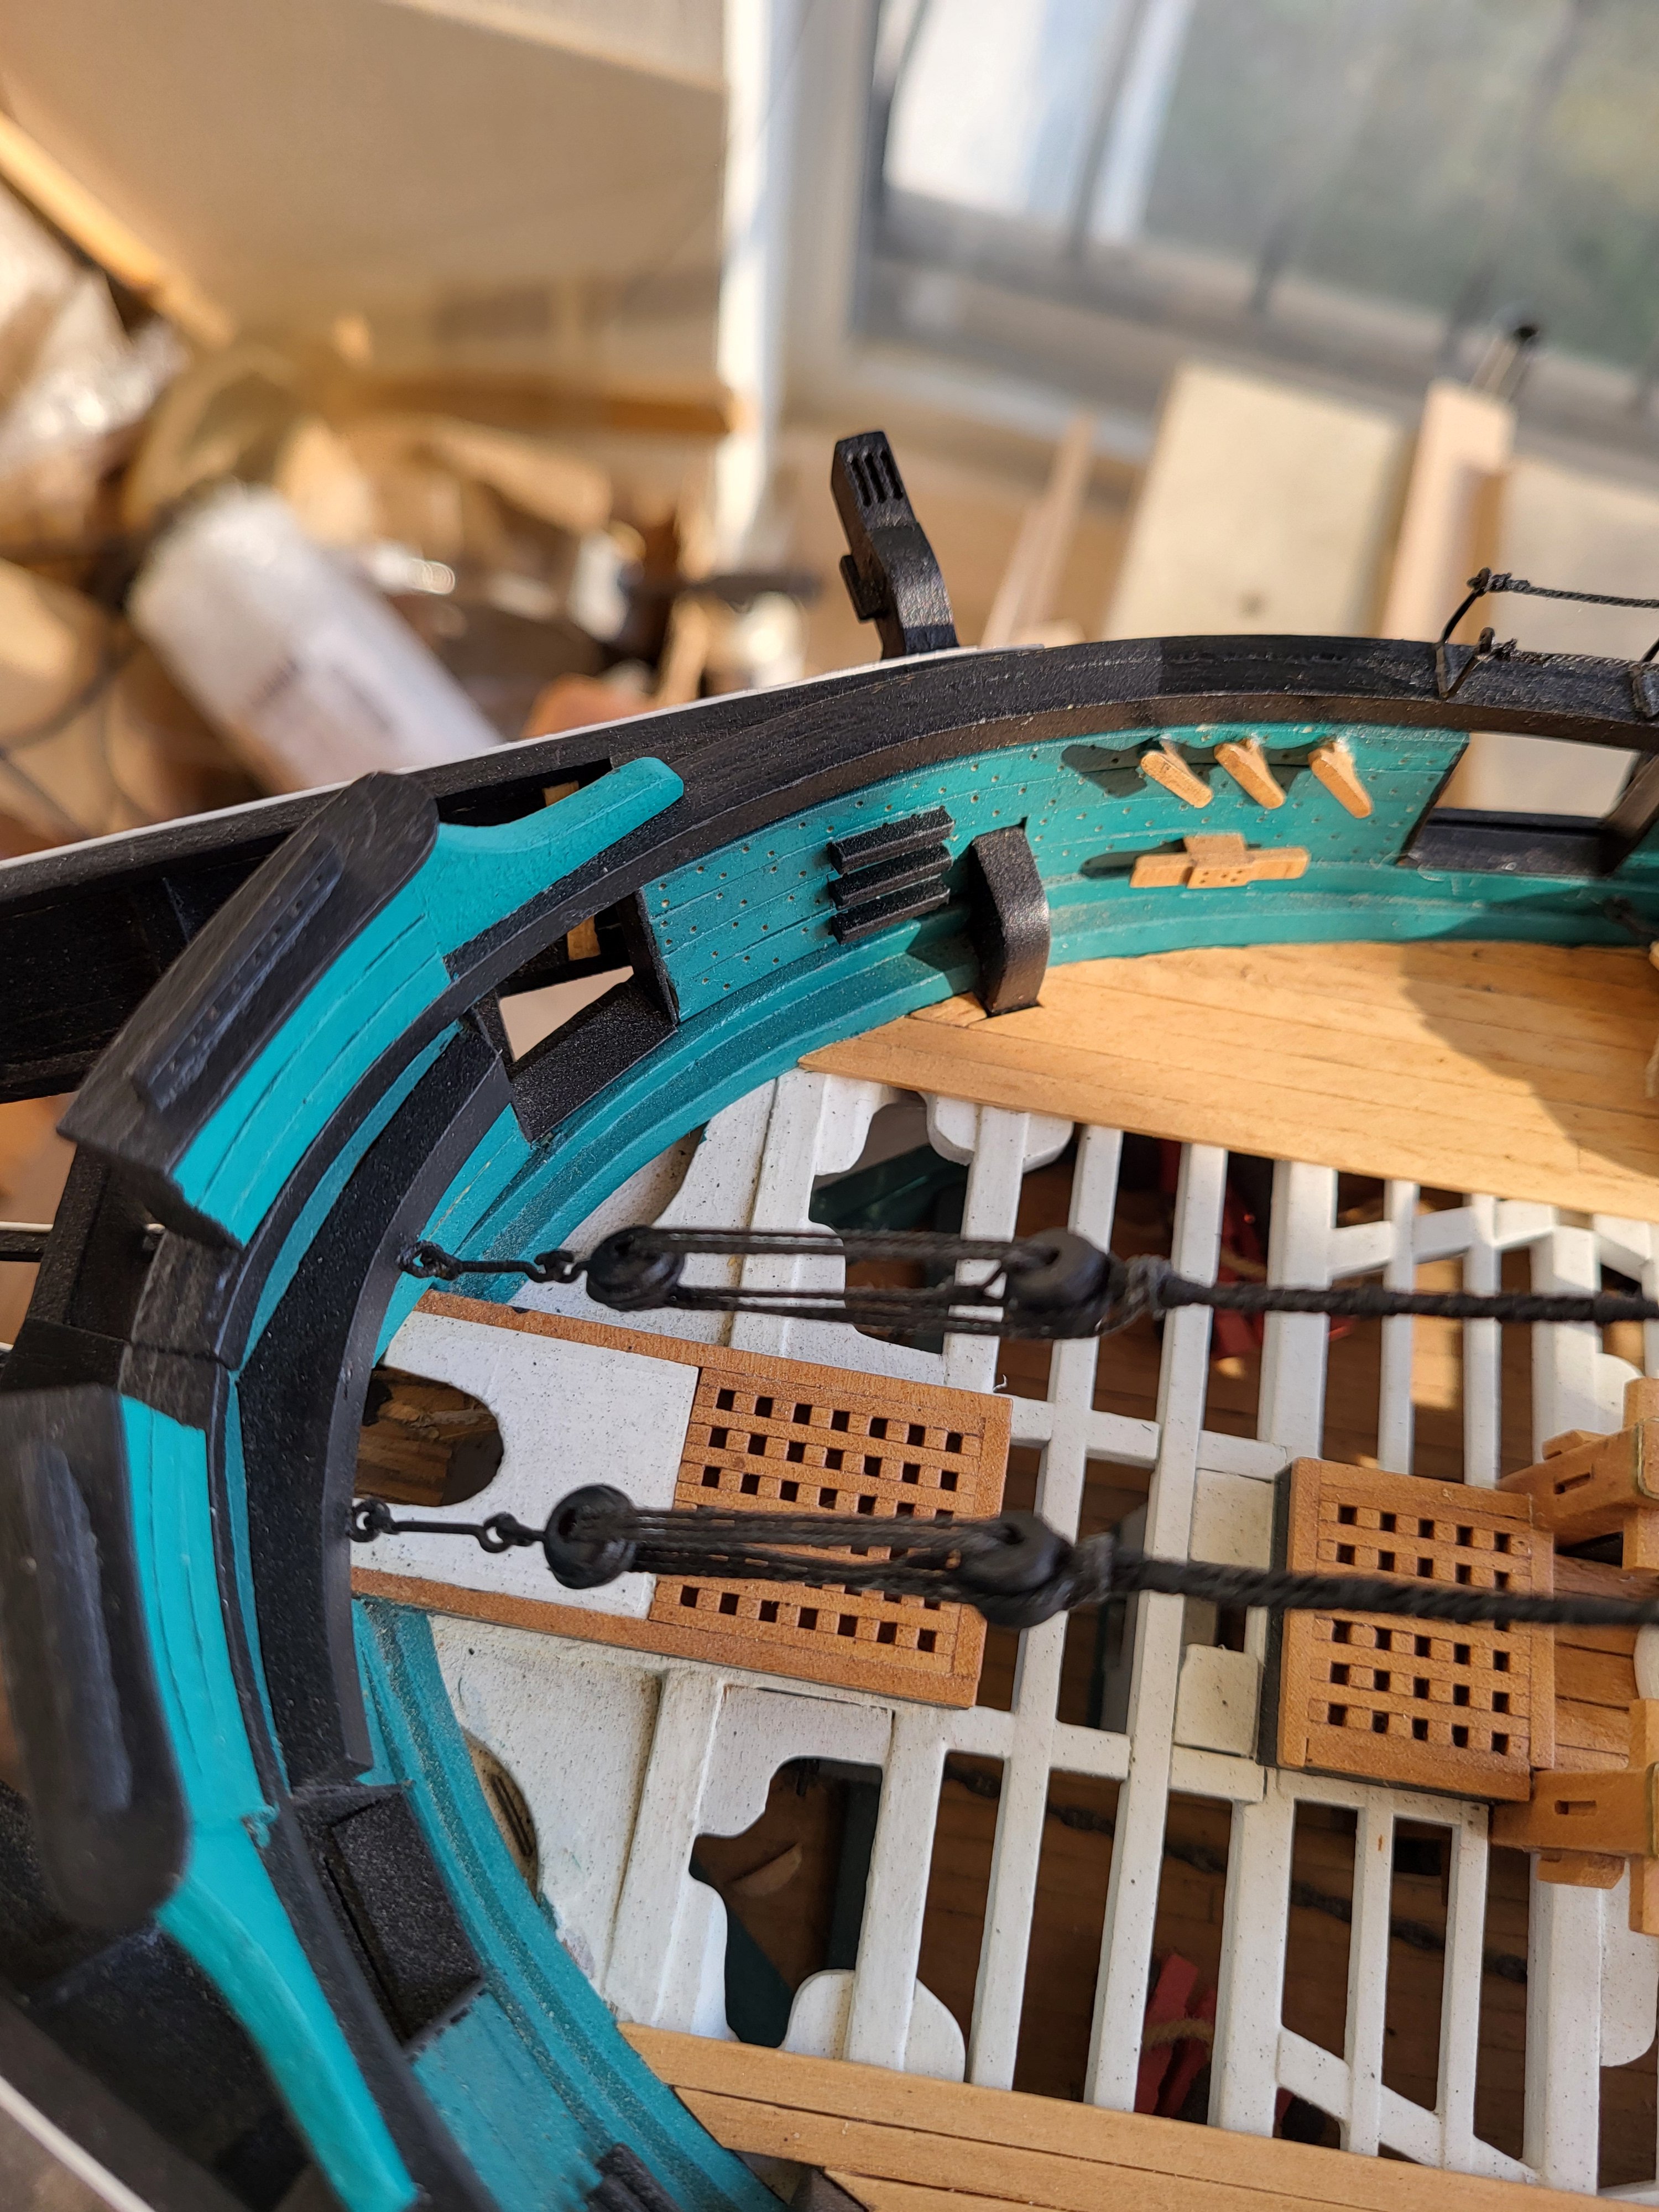
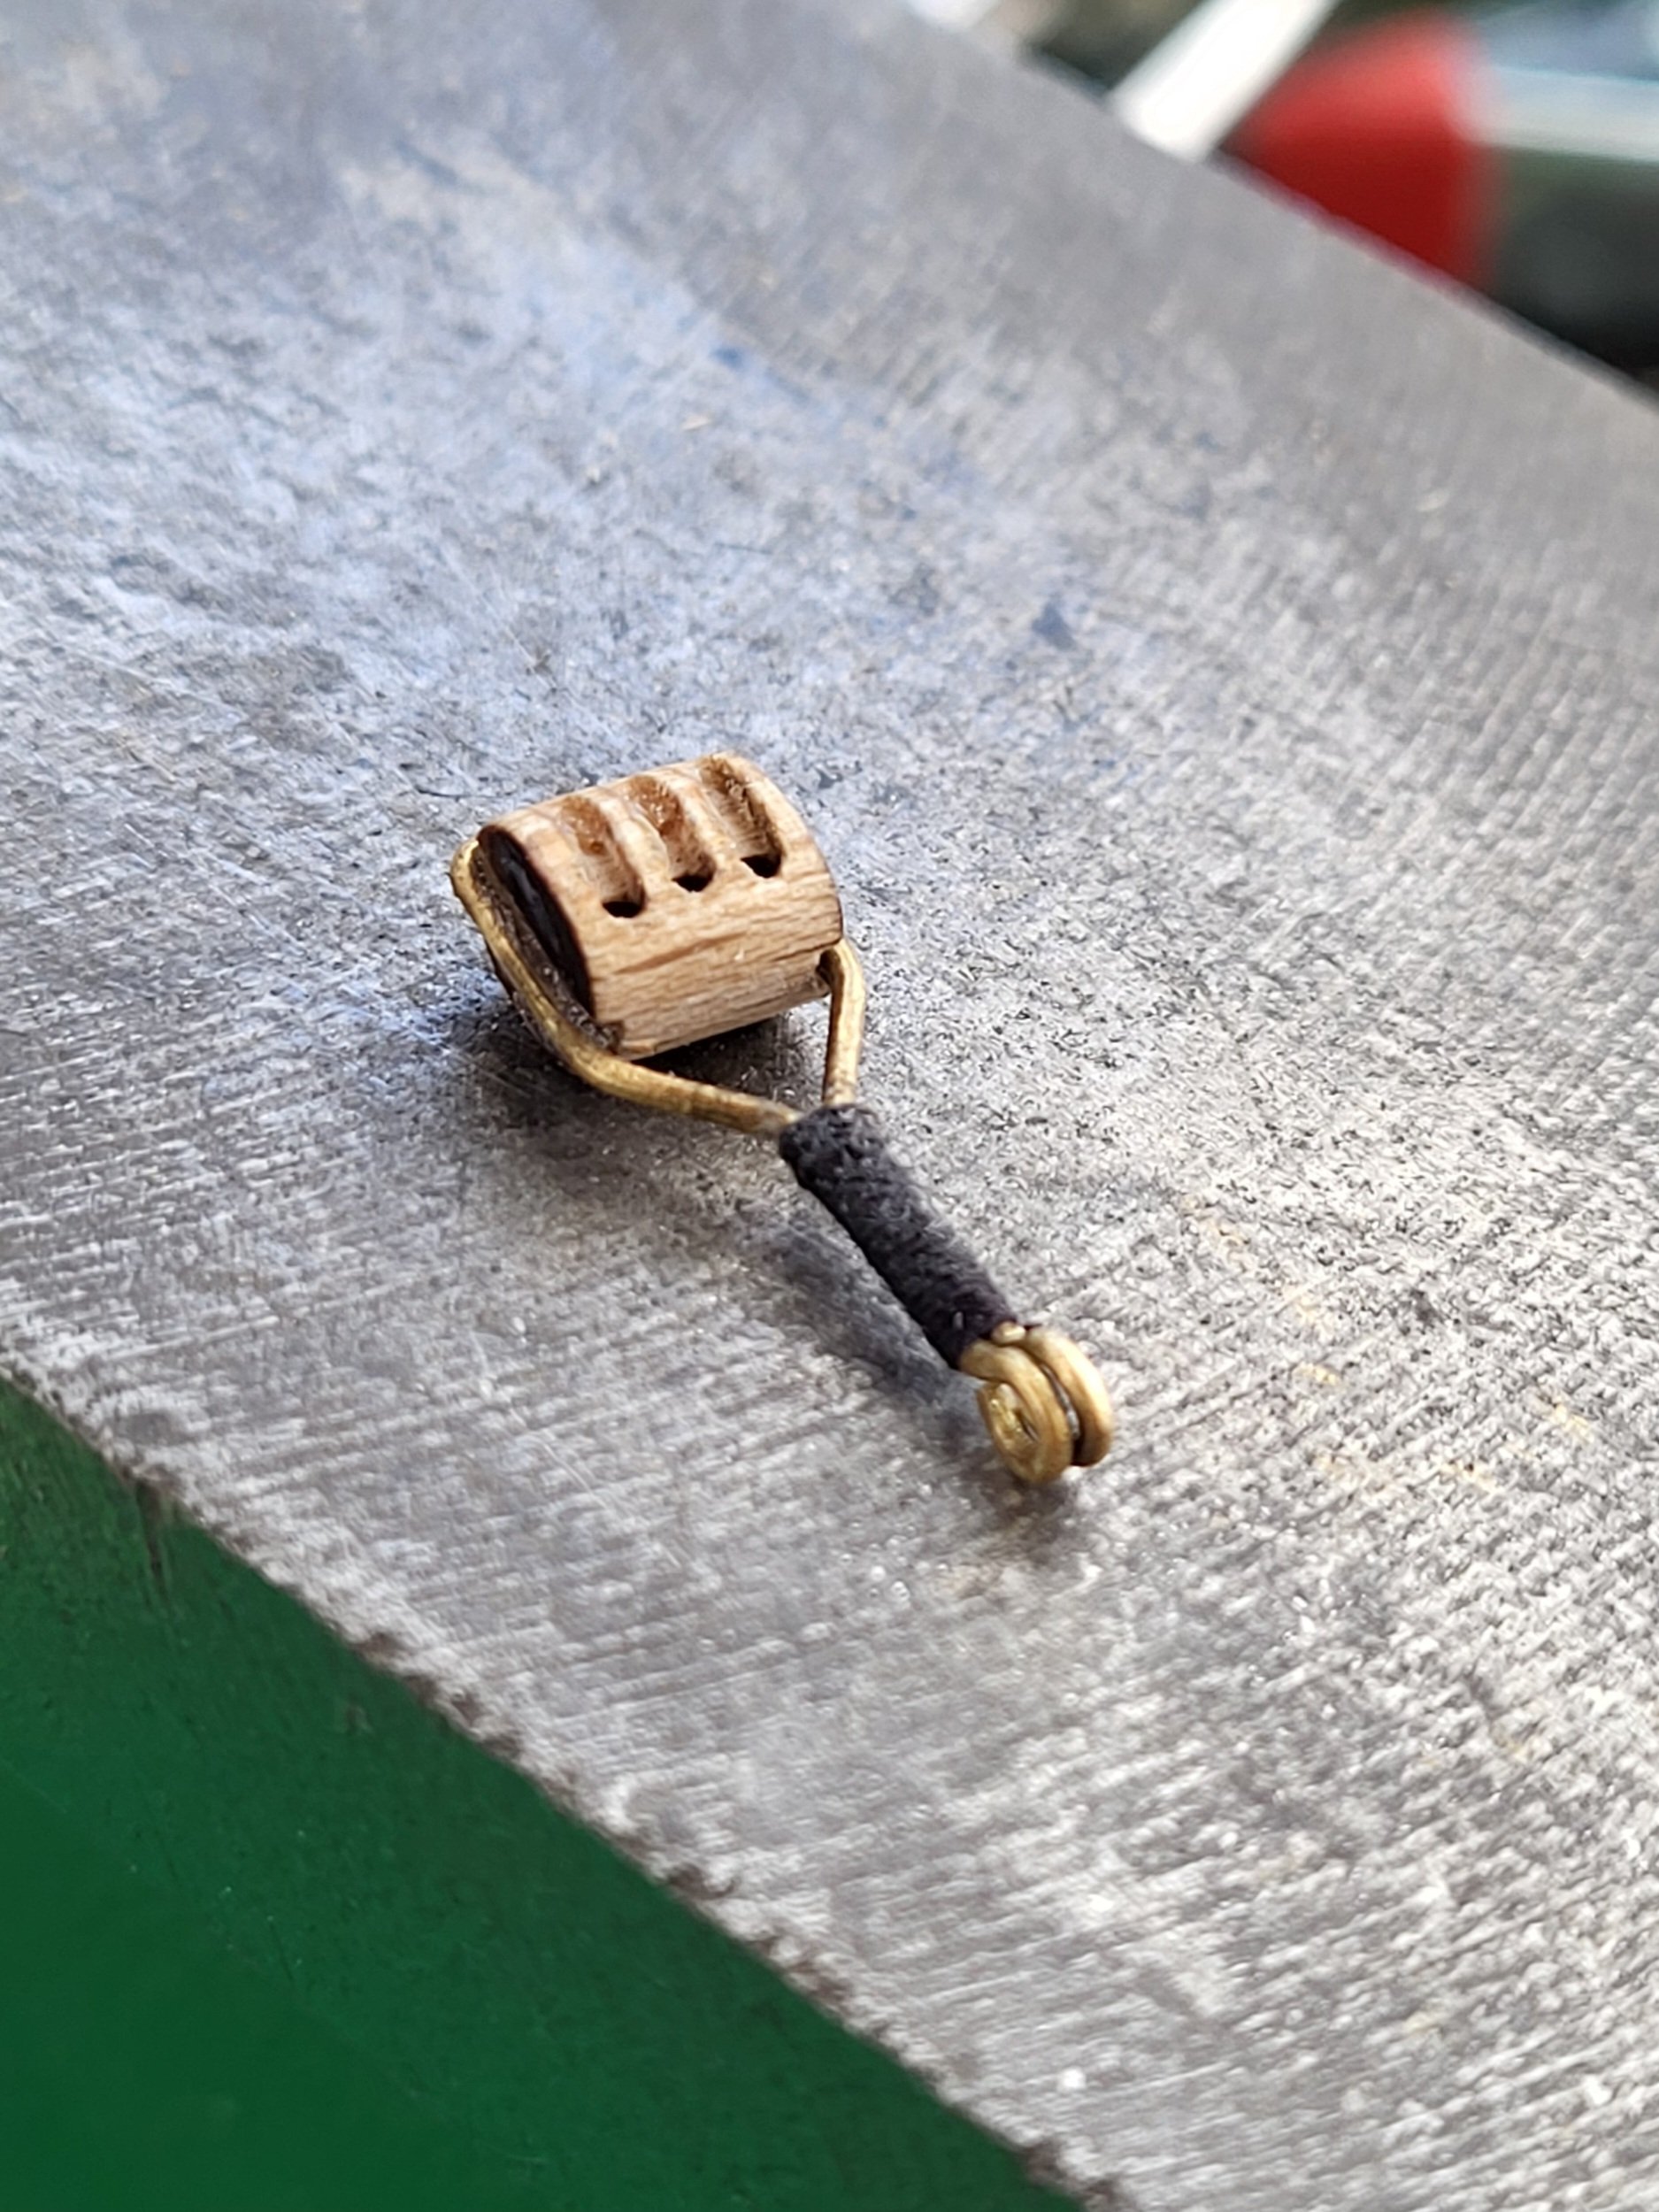
Dear friends, thank you so much for the nice commends and likes. I am fabricating the triple and double blocks for the stays with tackle.


.thumb.jpg.c9f501e412e6544351d7eb9f74e2454f.jpg)
-
USS Constitution by mtbediz - 1:76
mtbediz replied to mtbediz's topic in - Build logs for subjects built 1751 - 1800
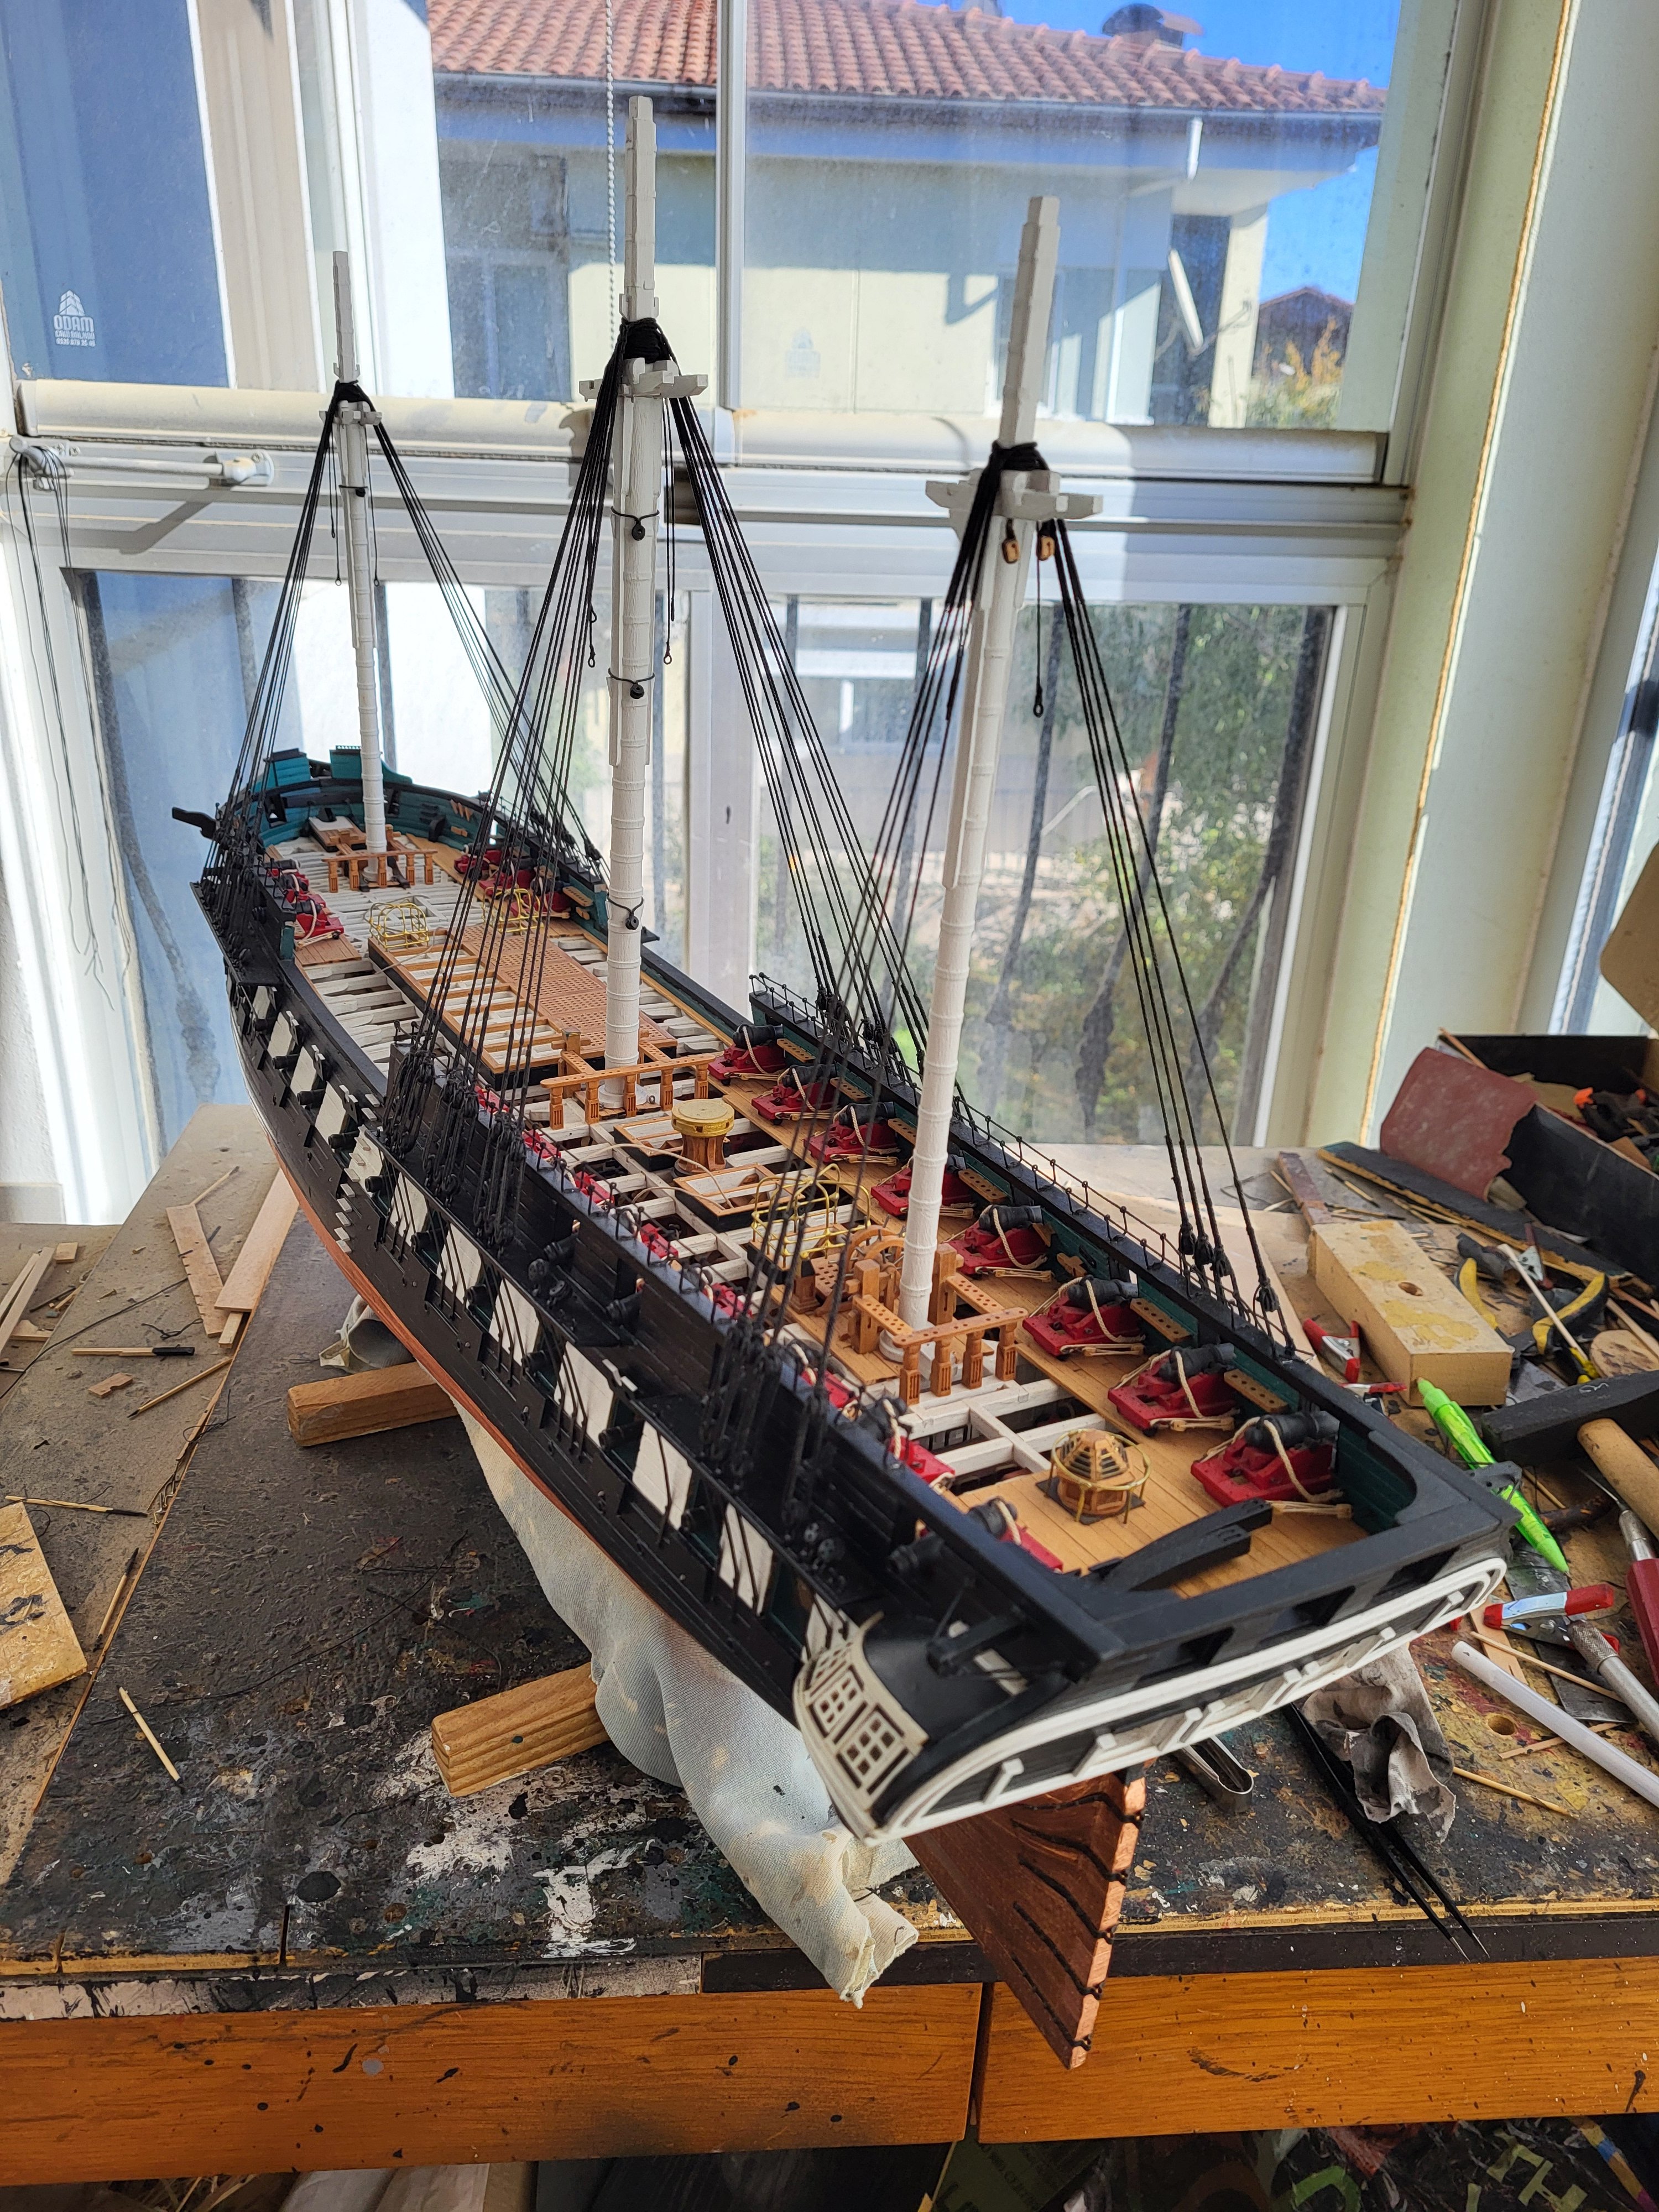
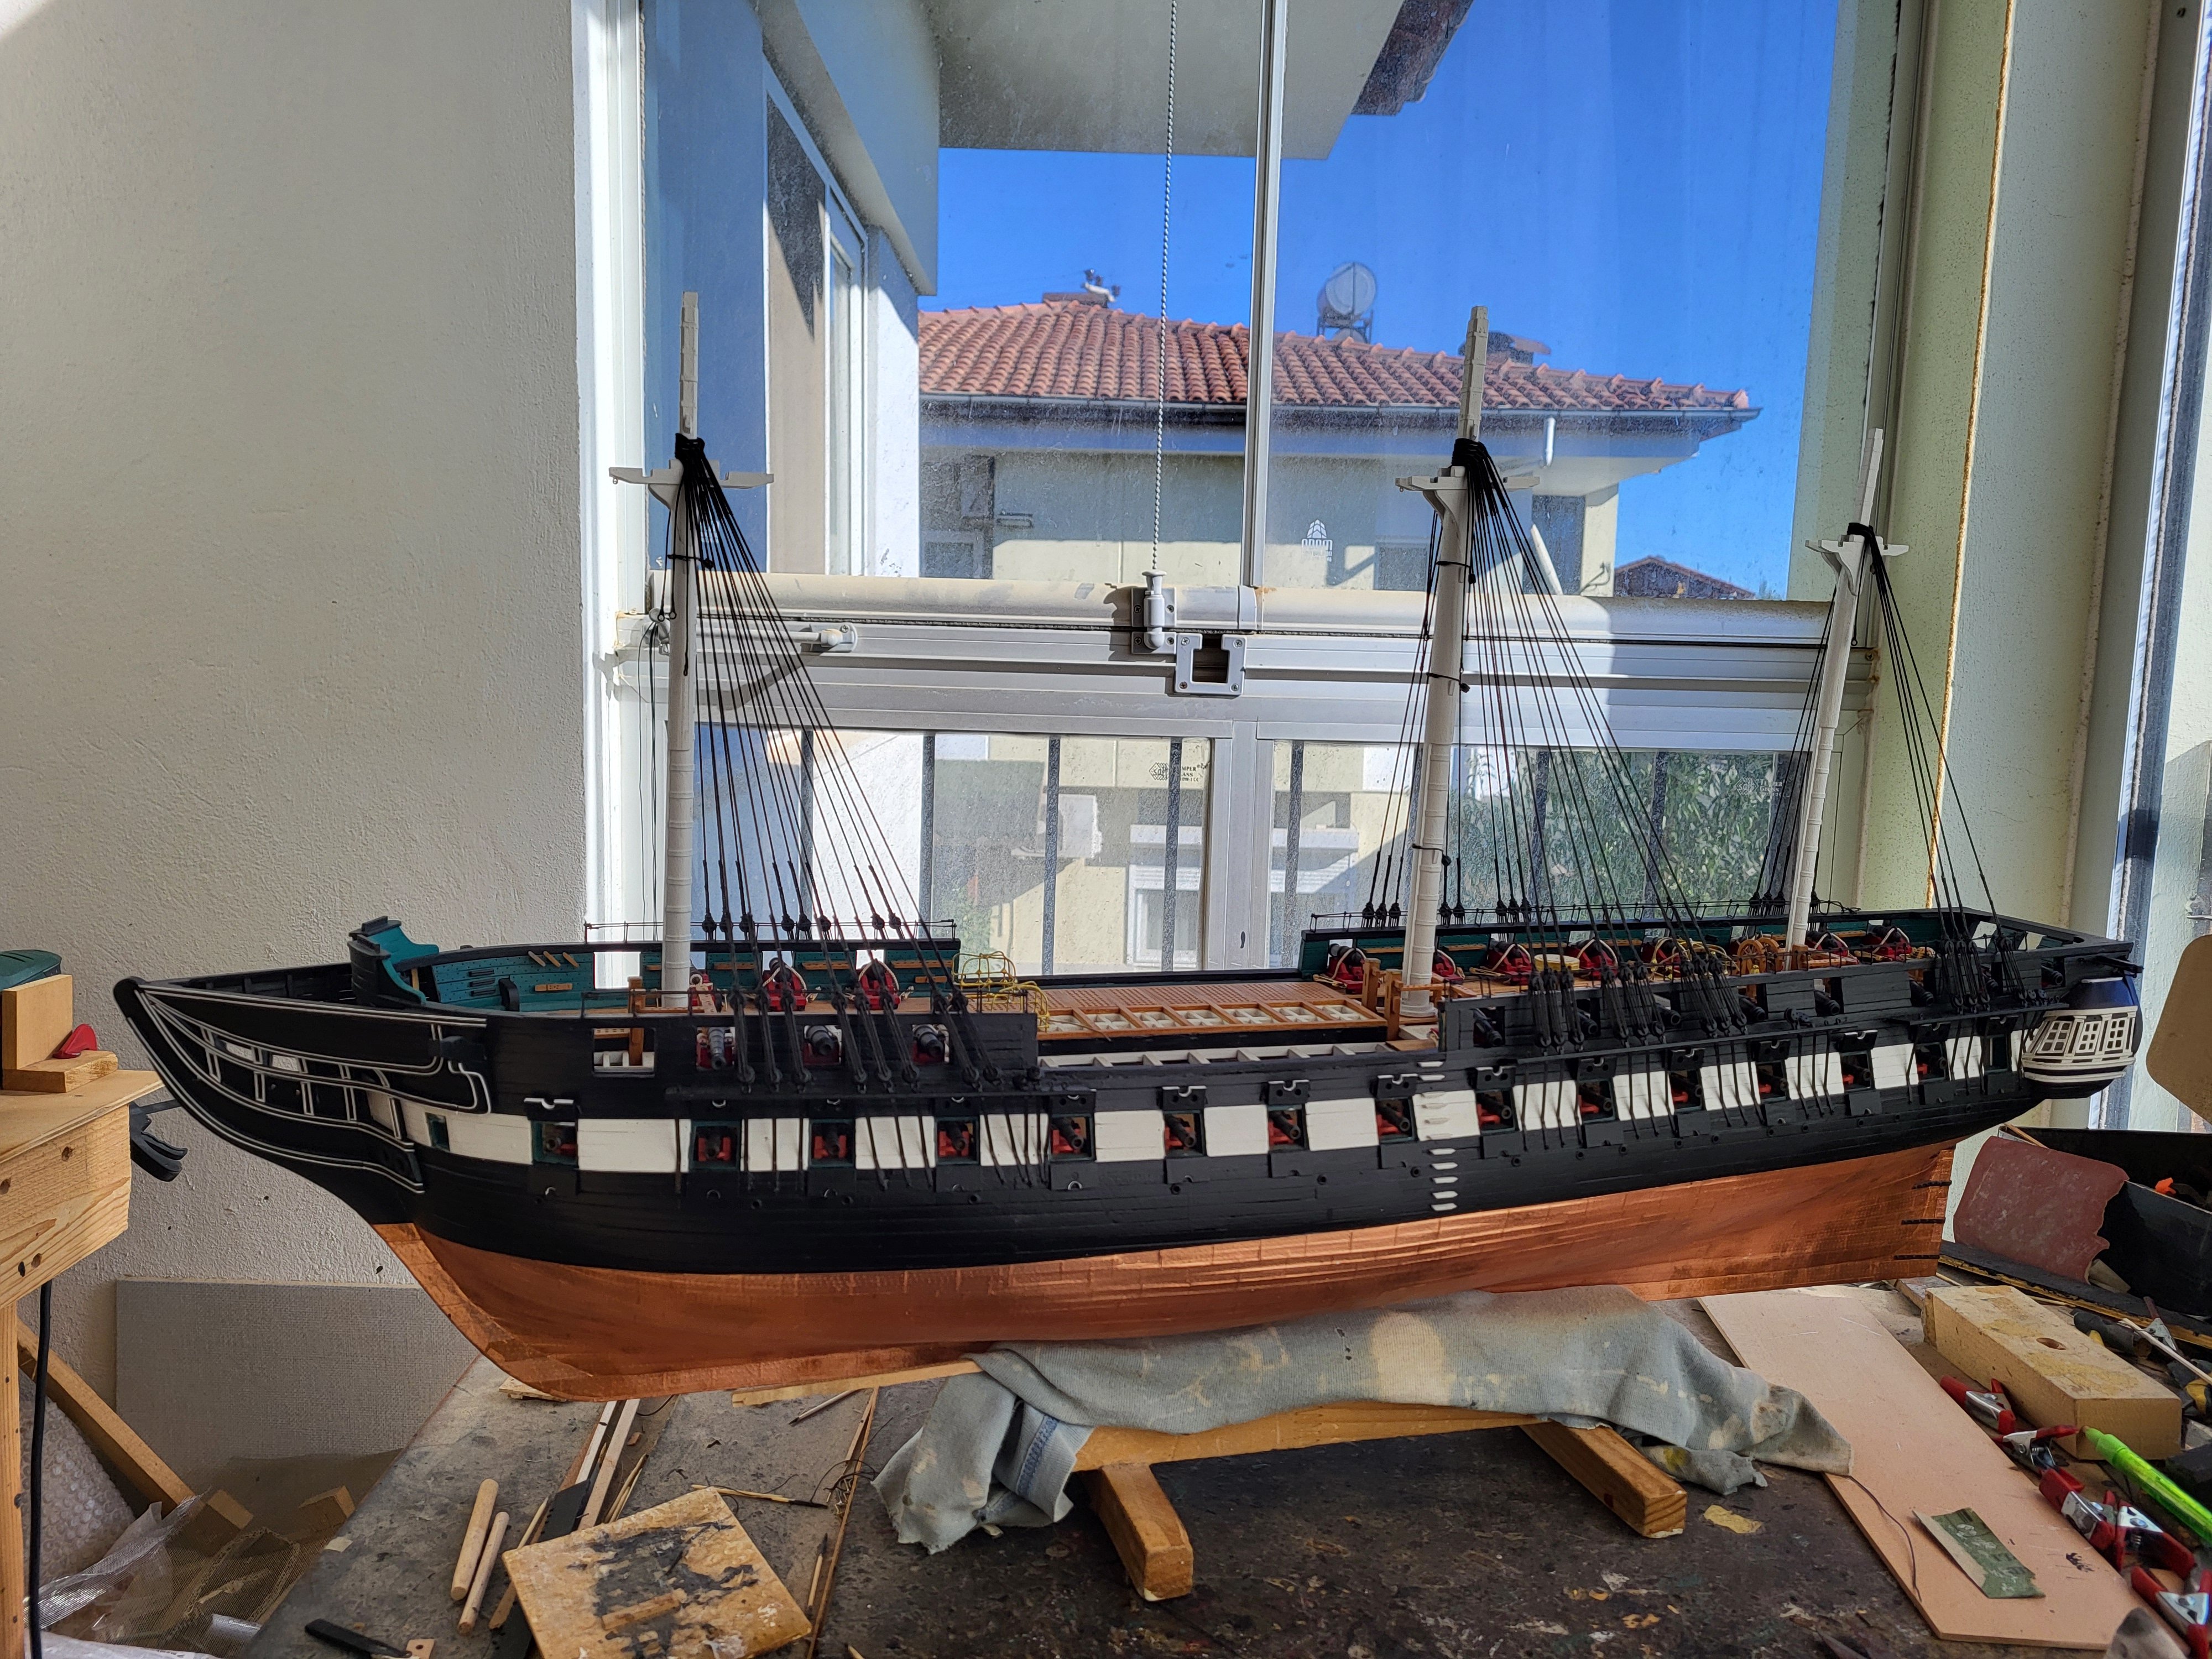
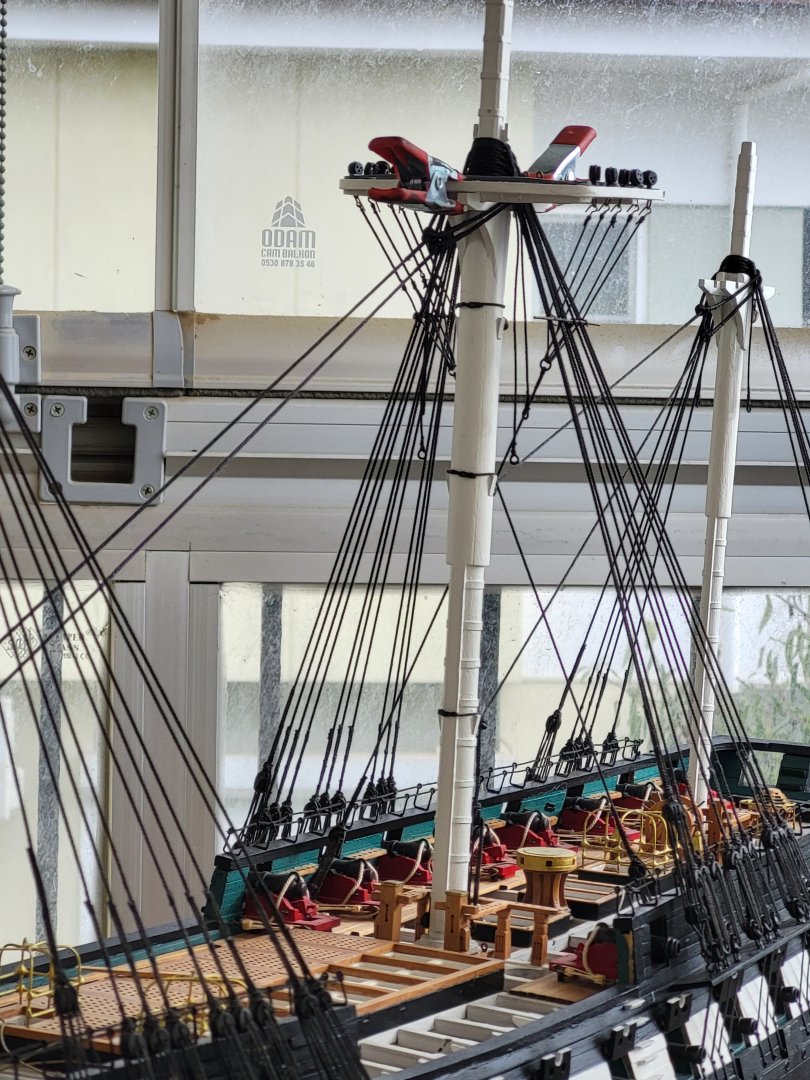
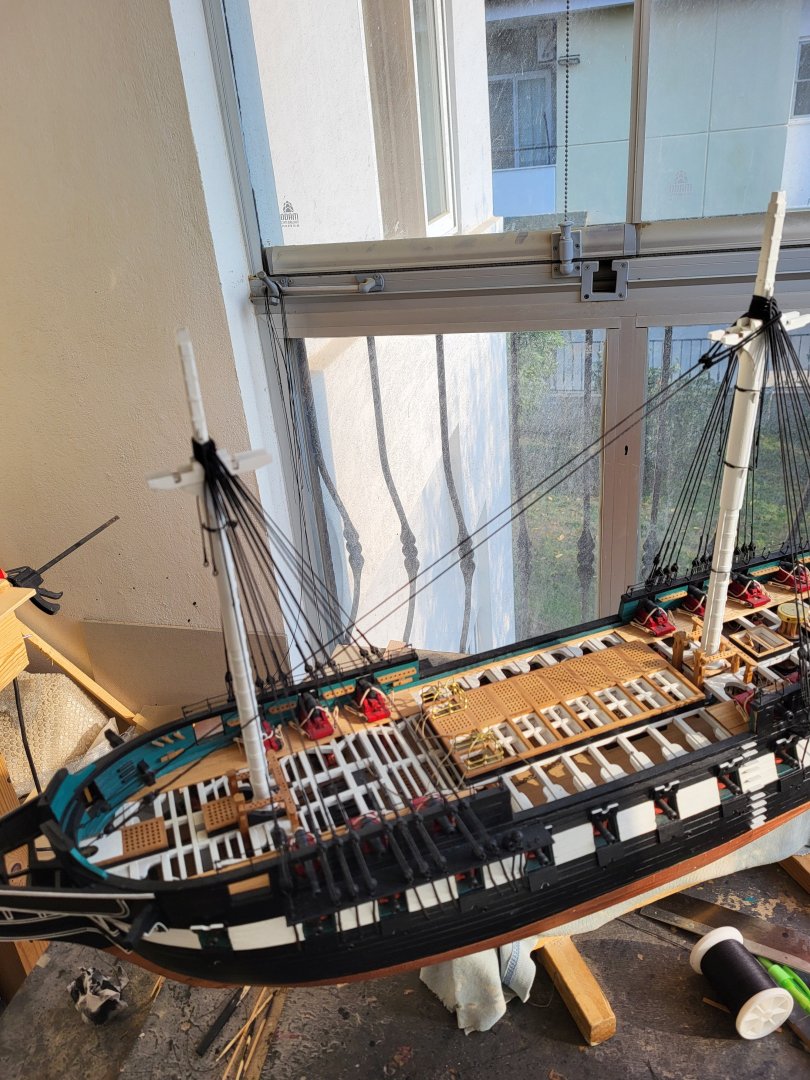
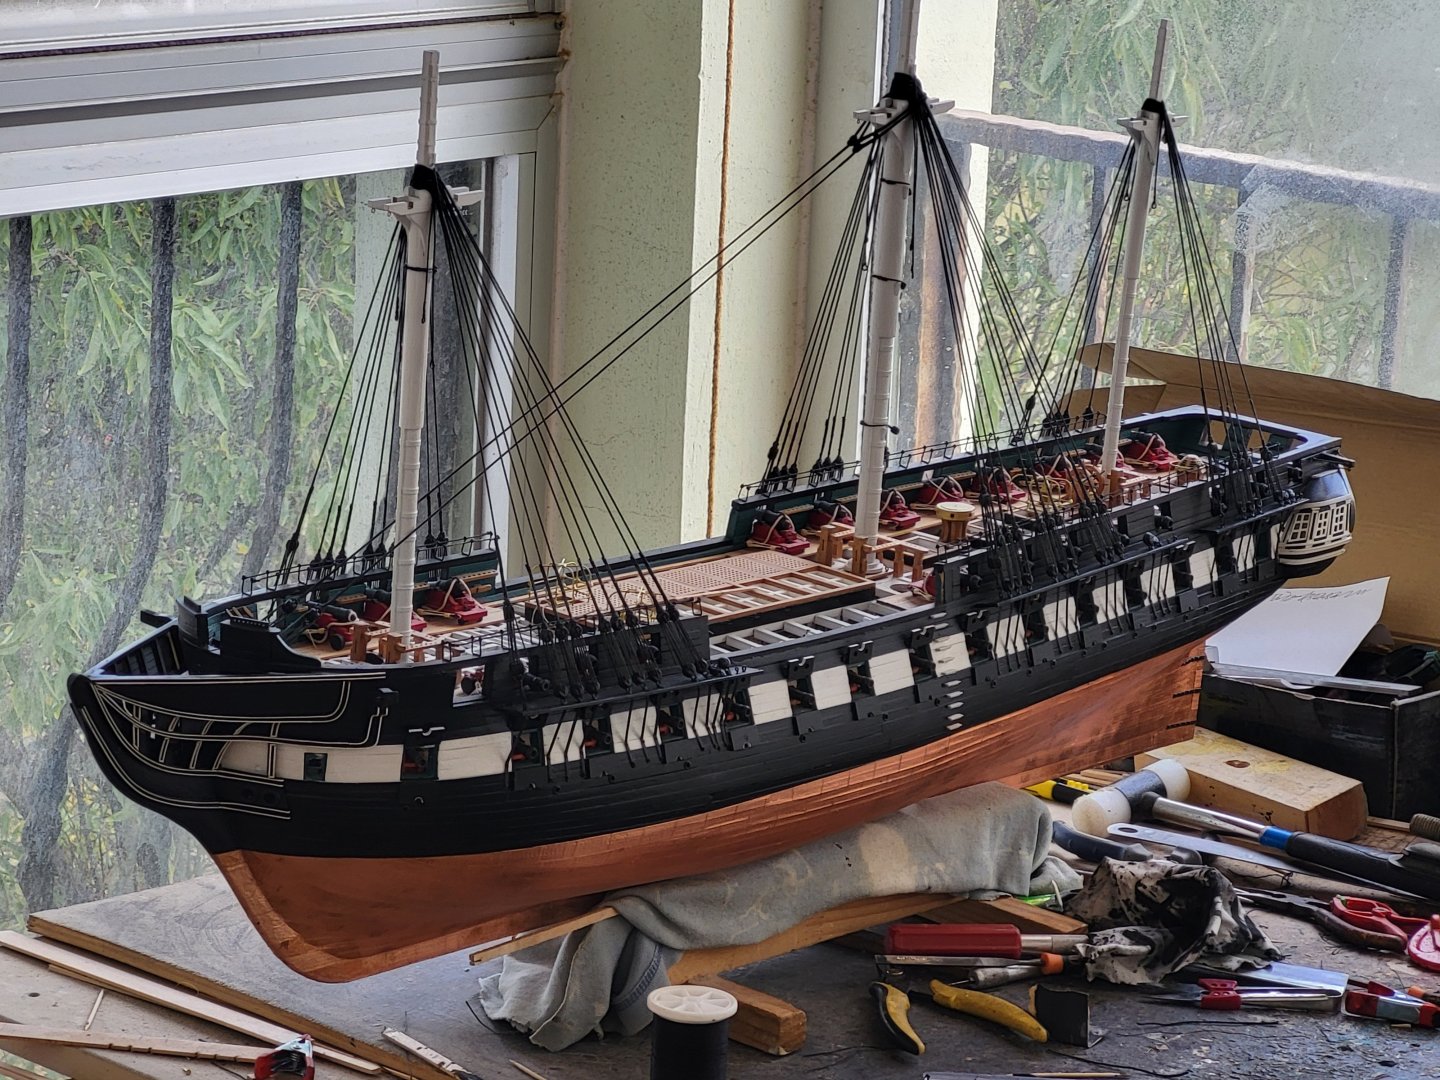
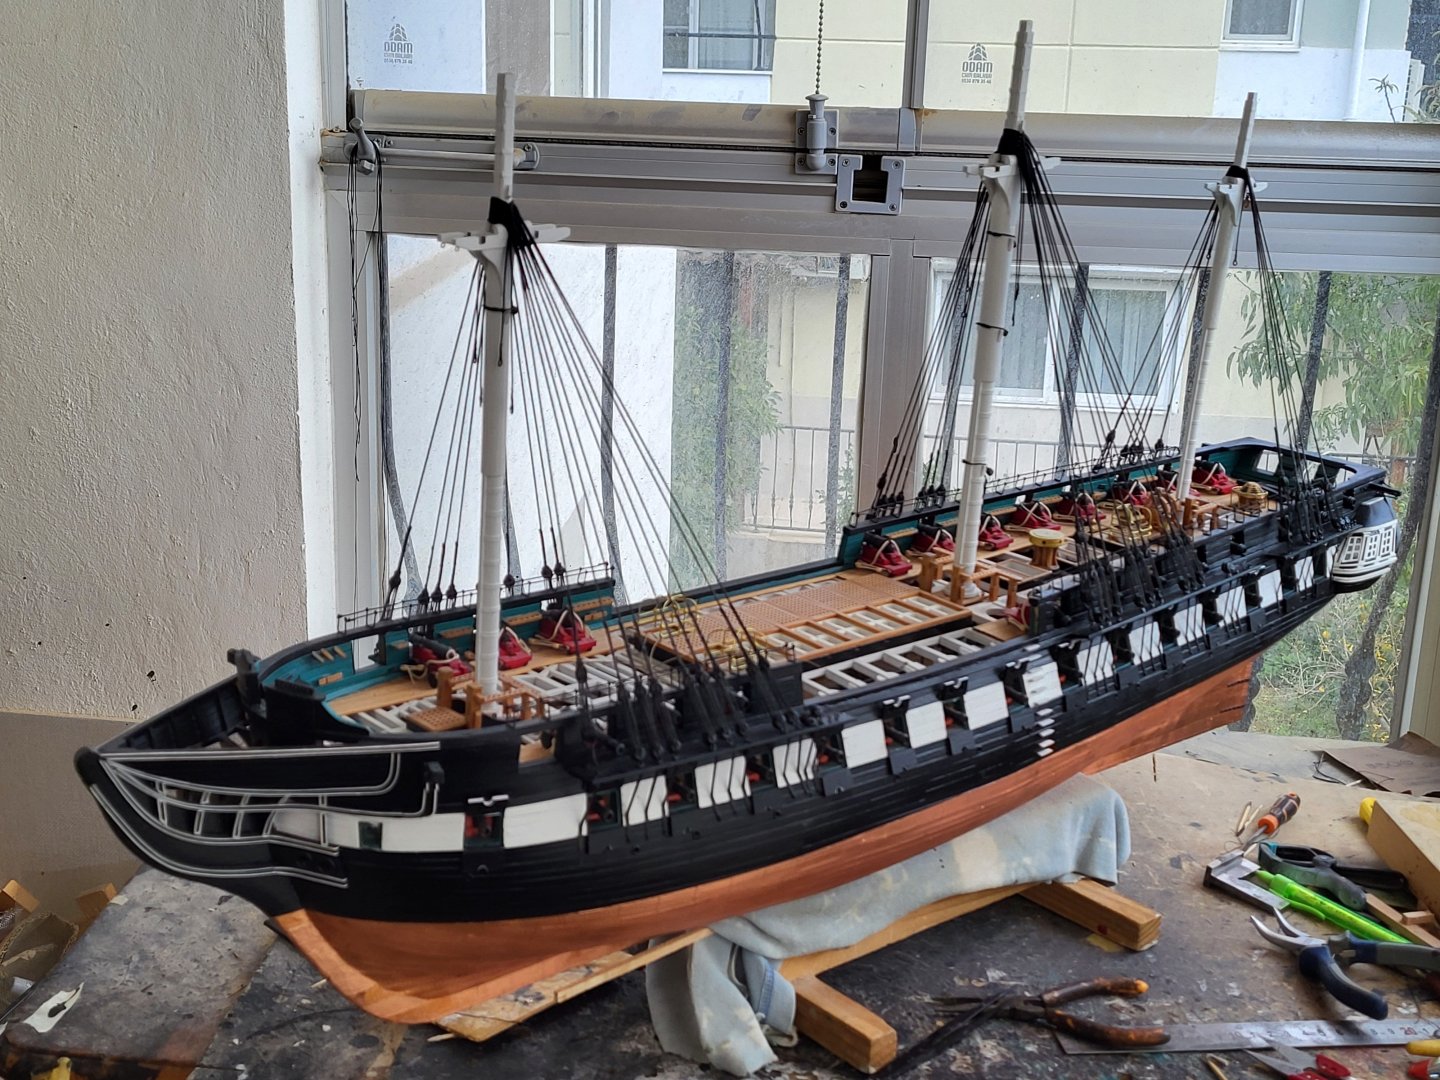
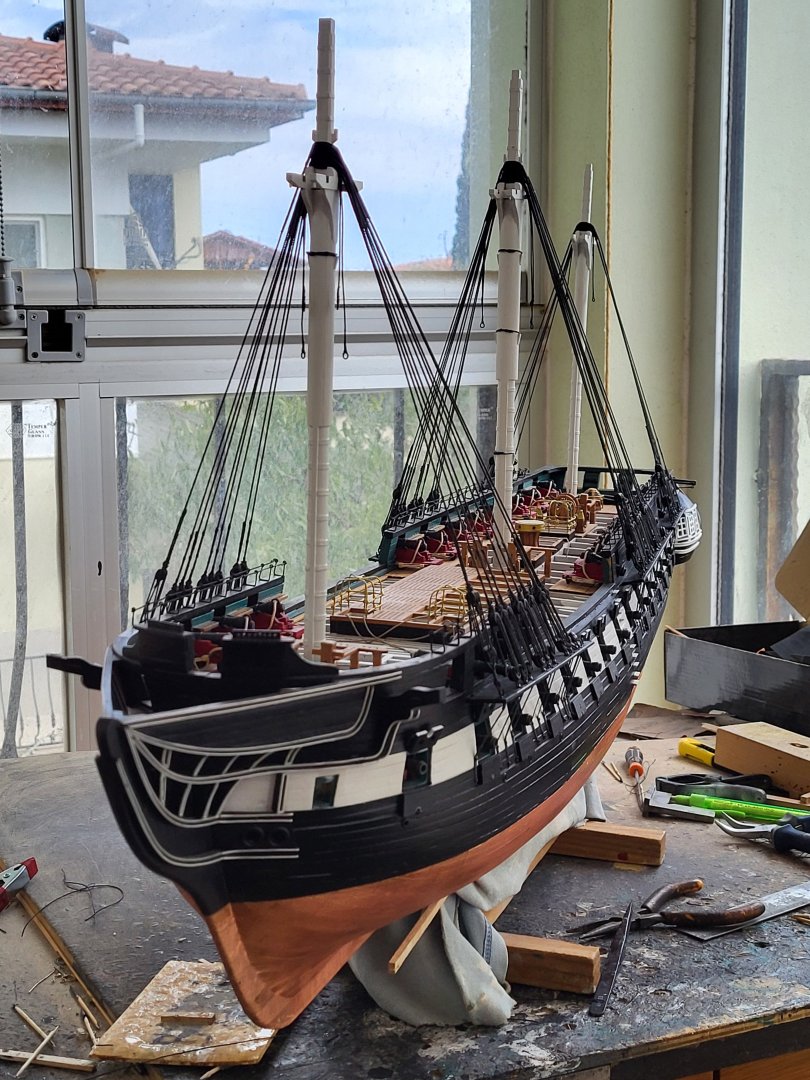
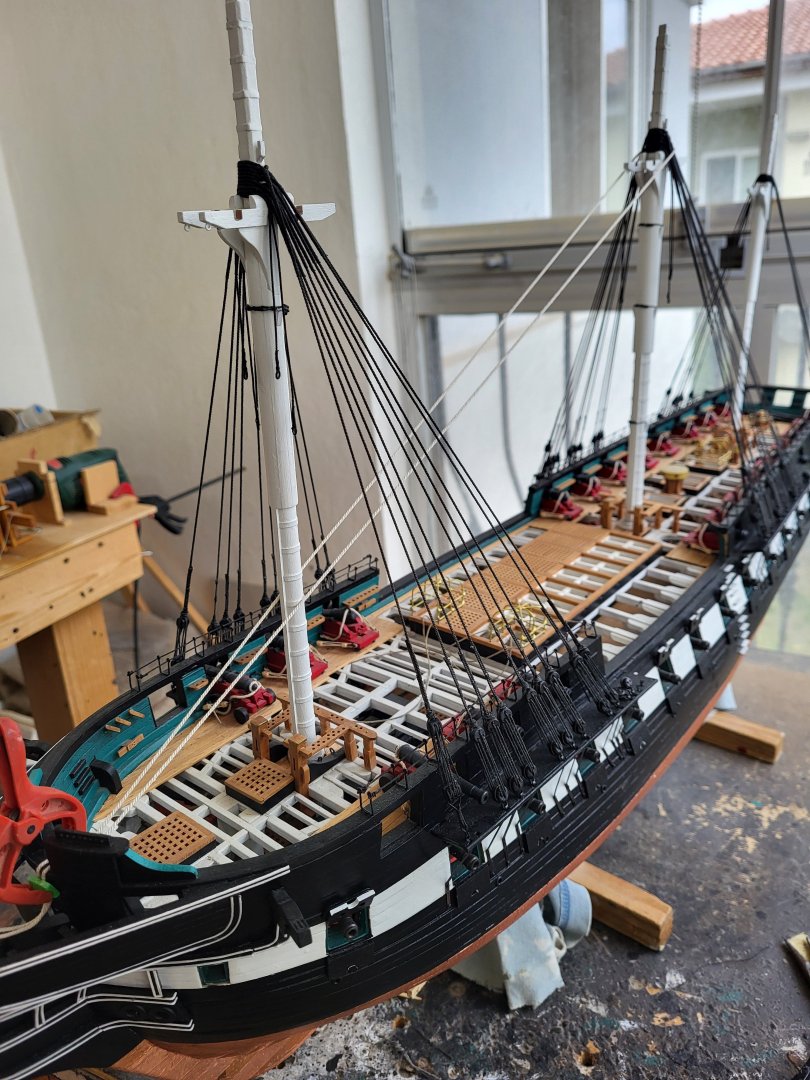
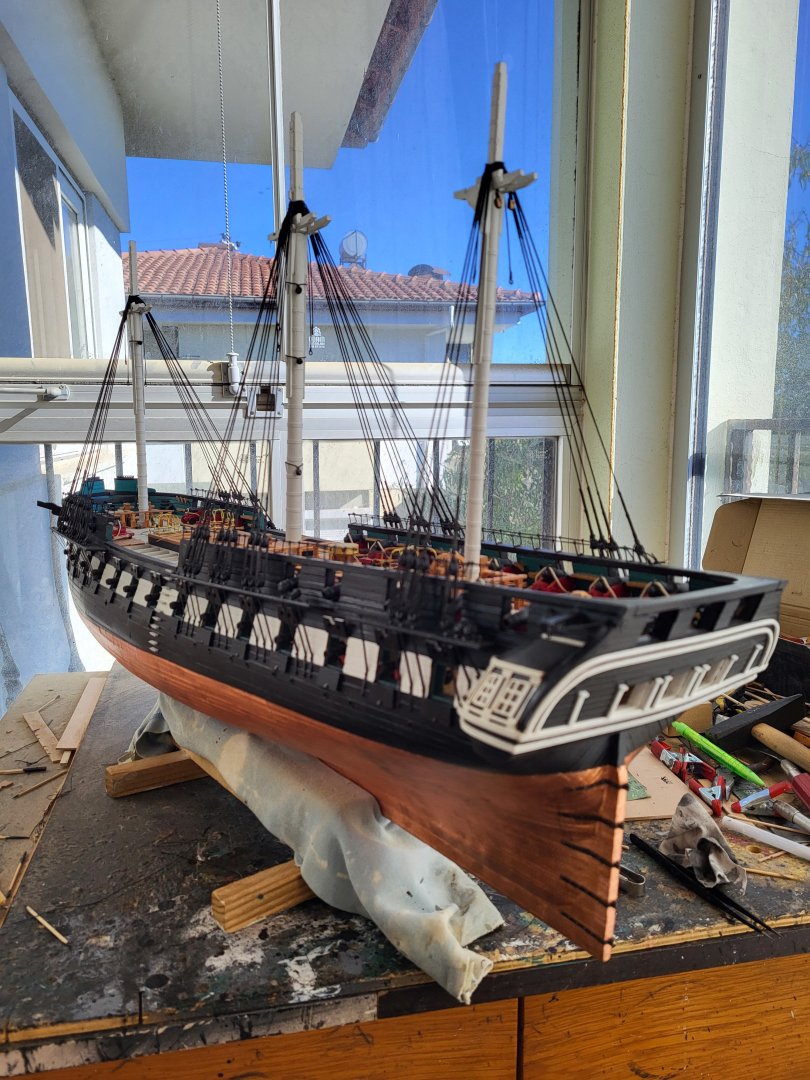
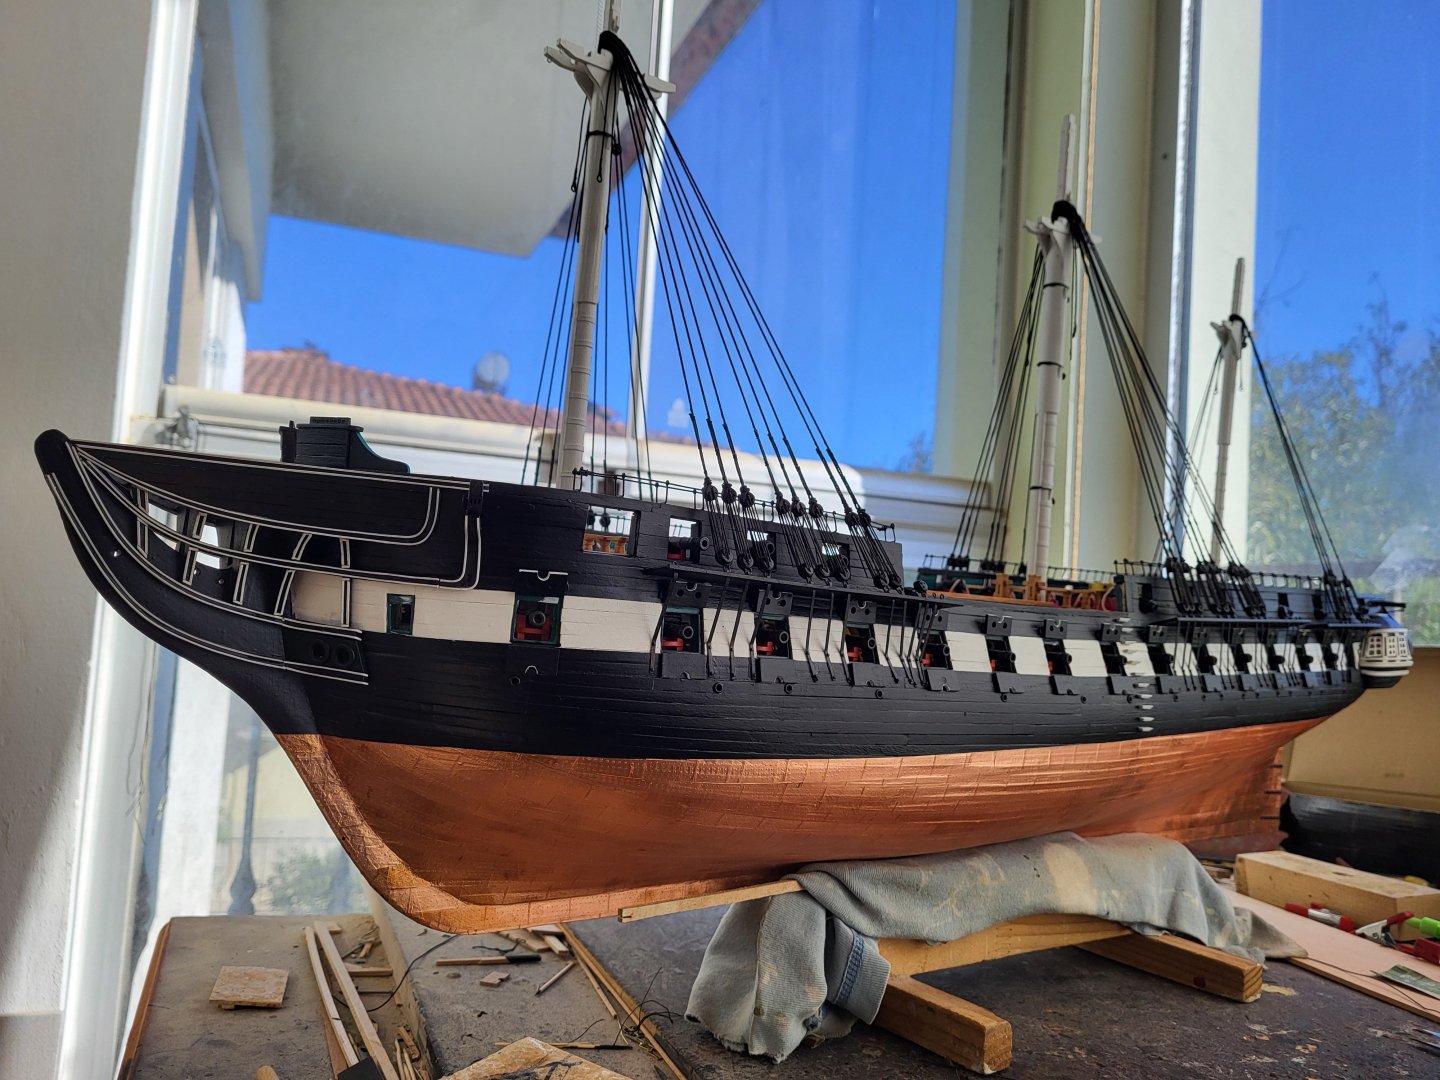
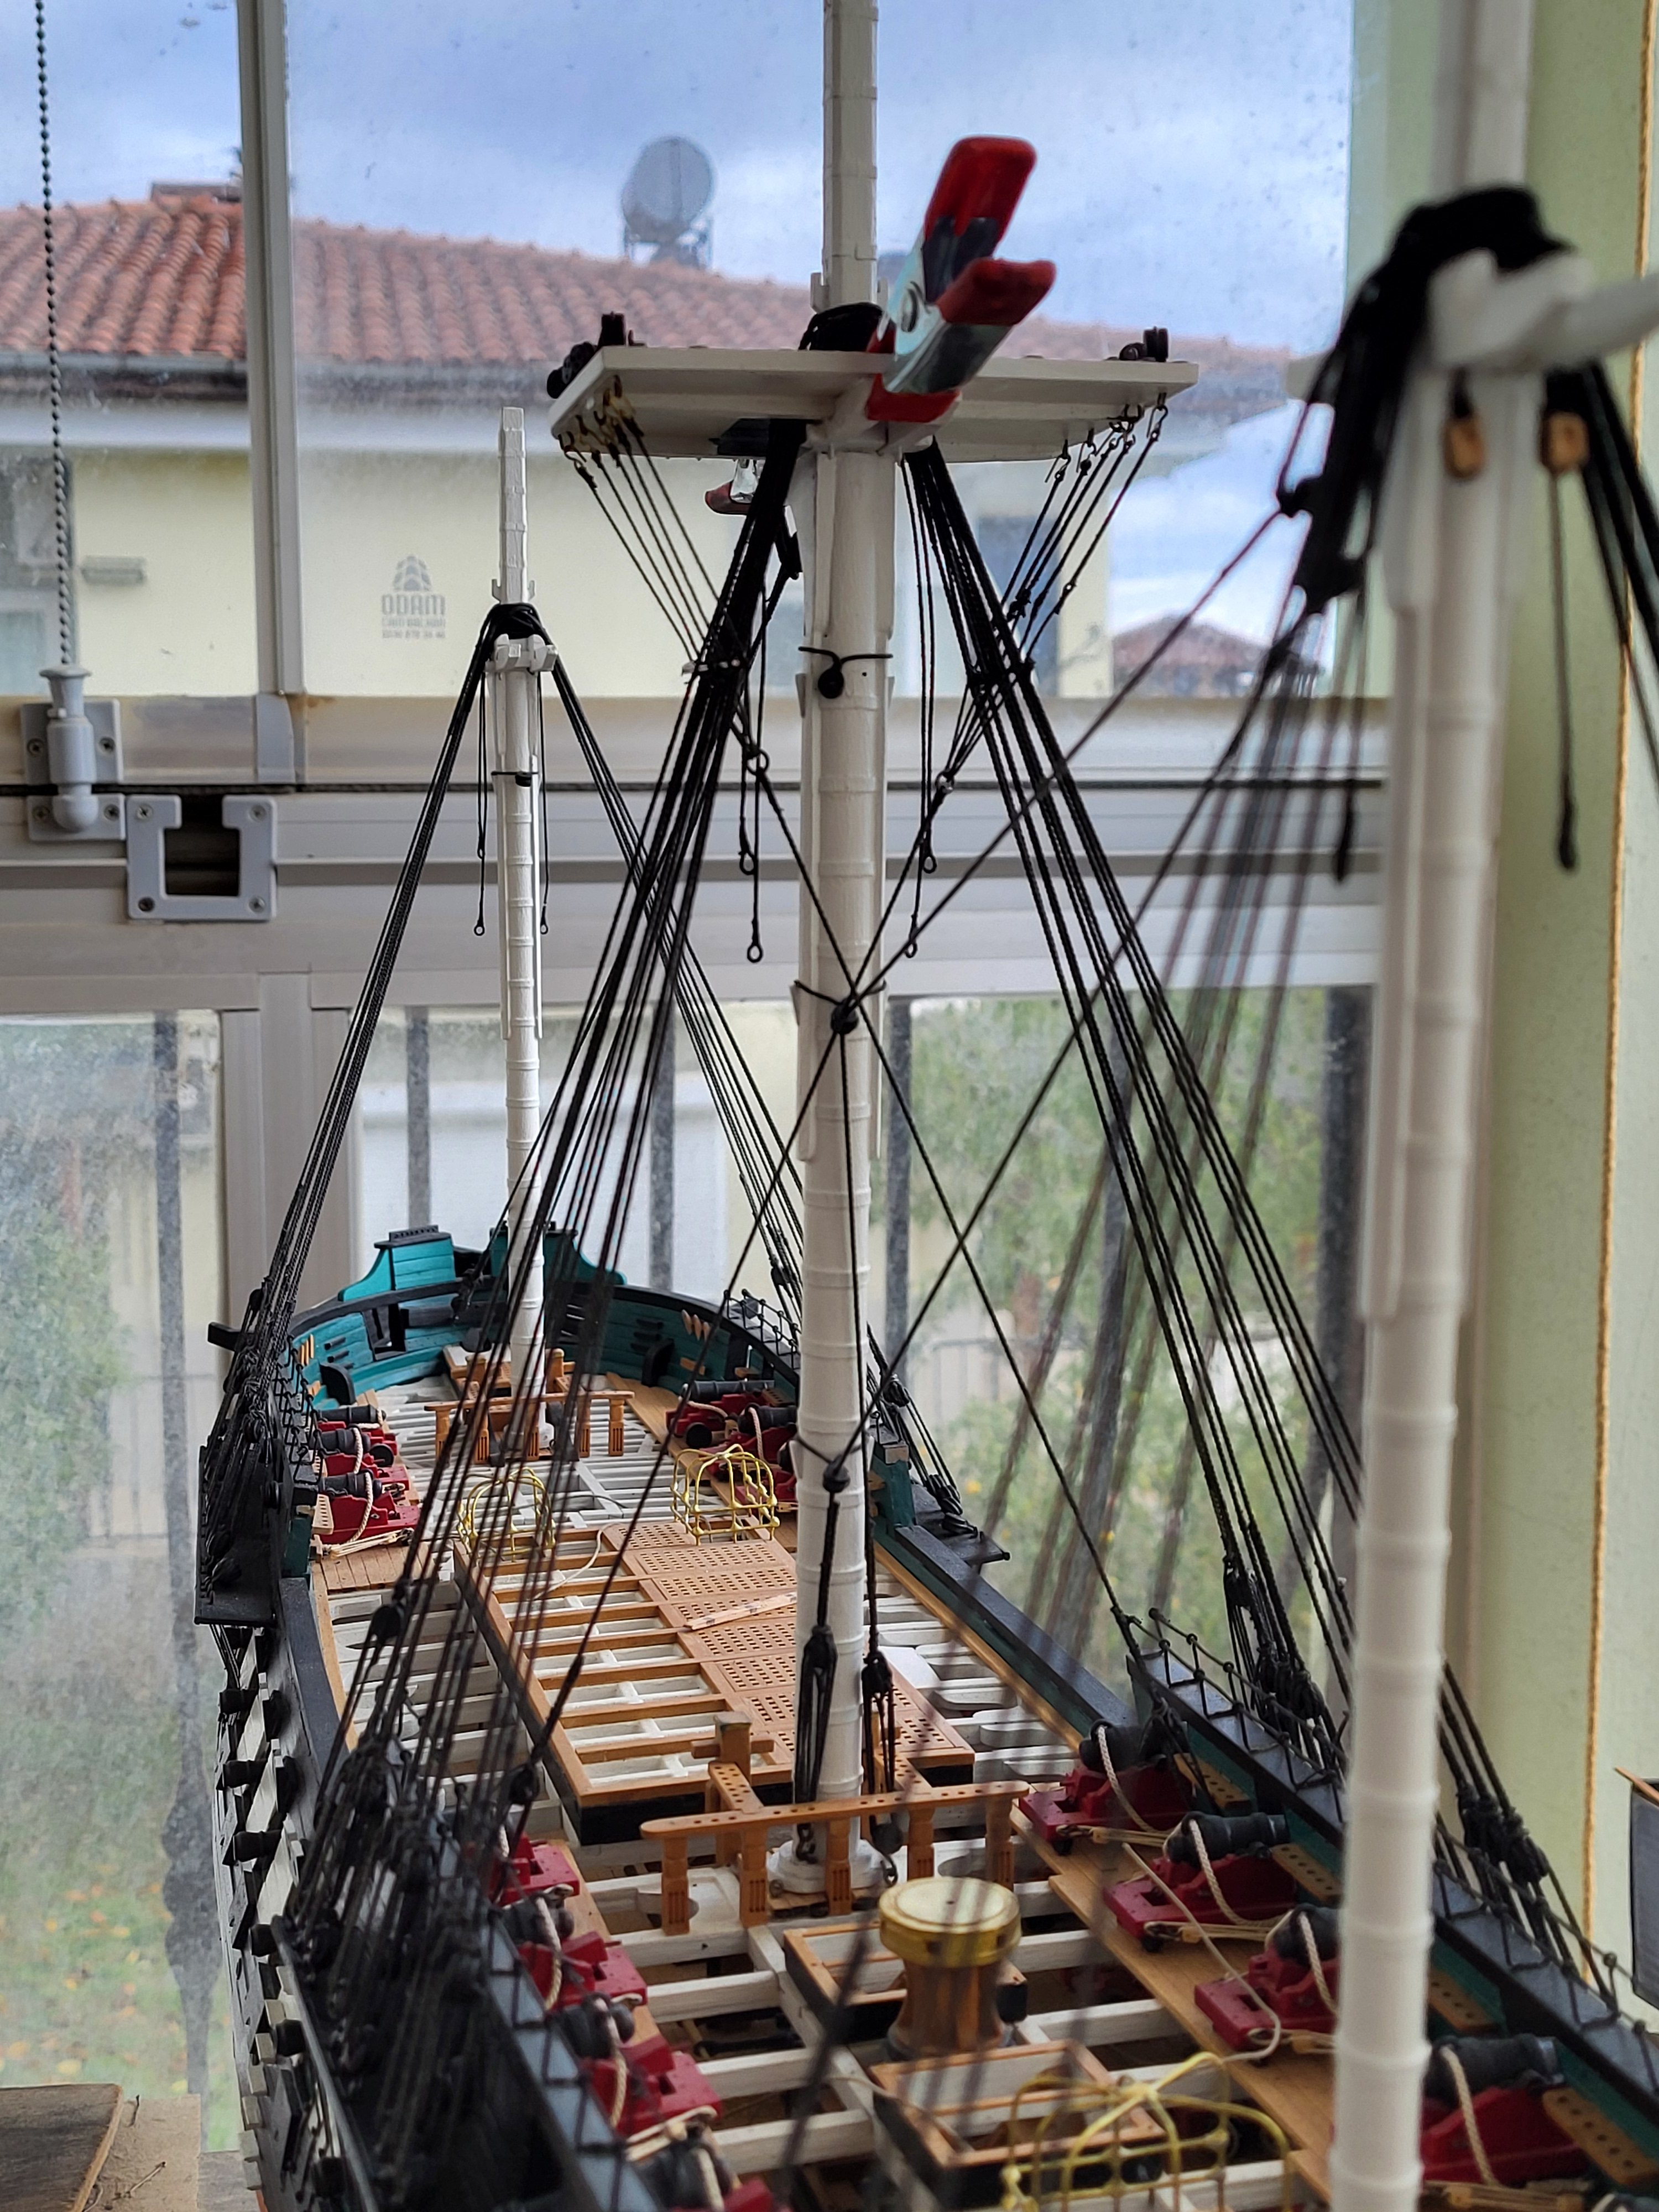
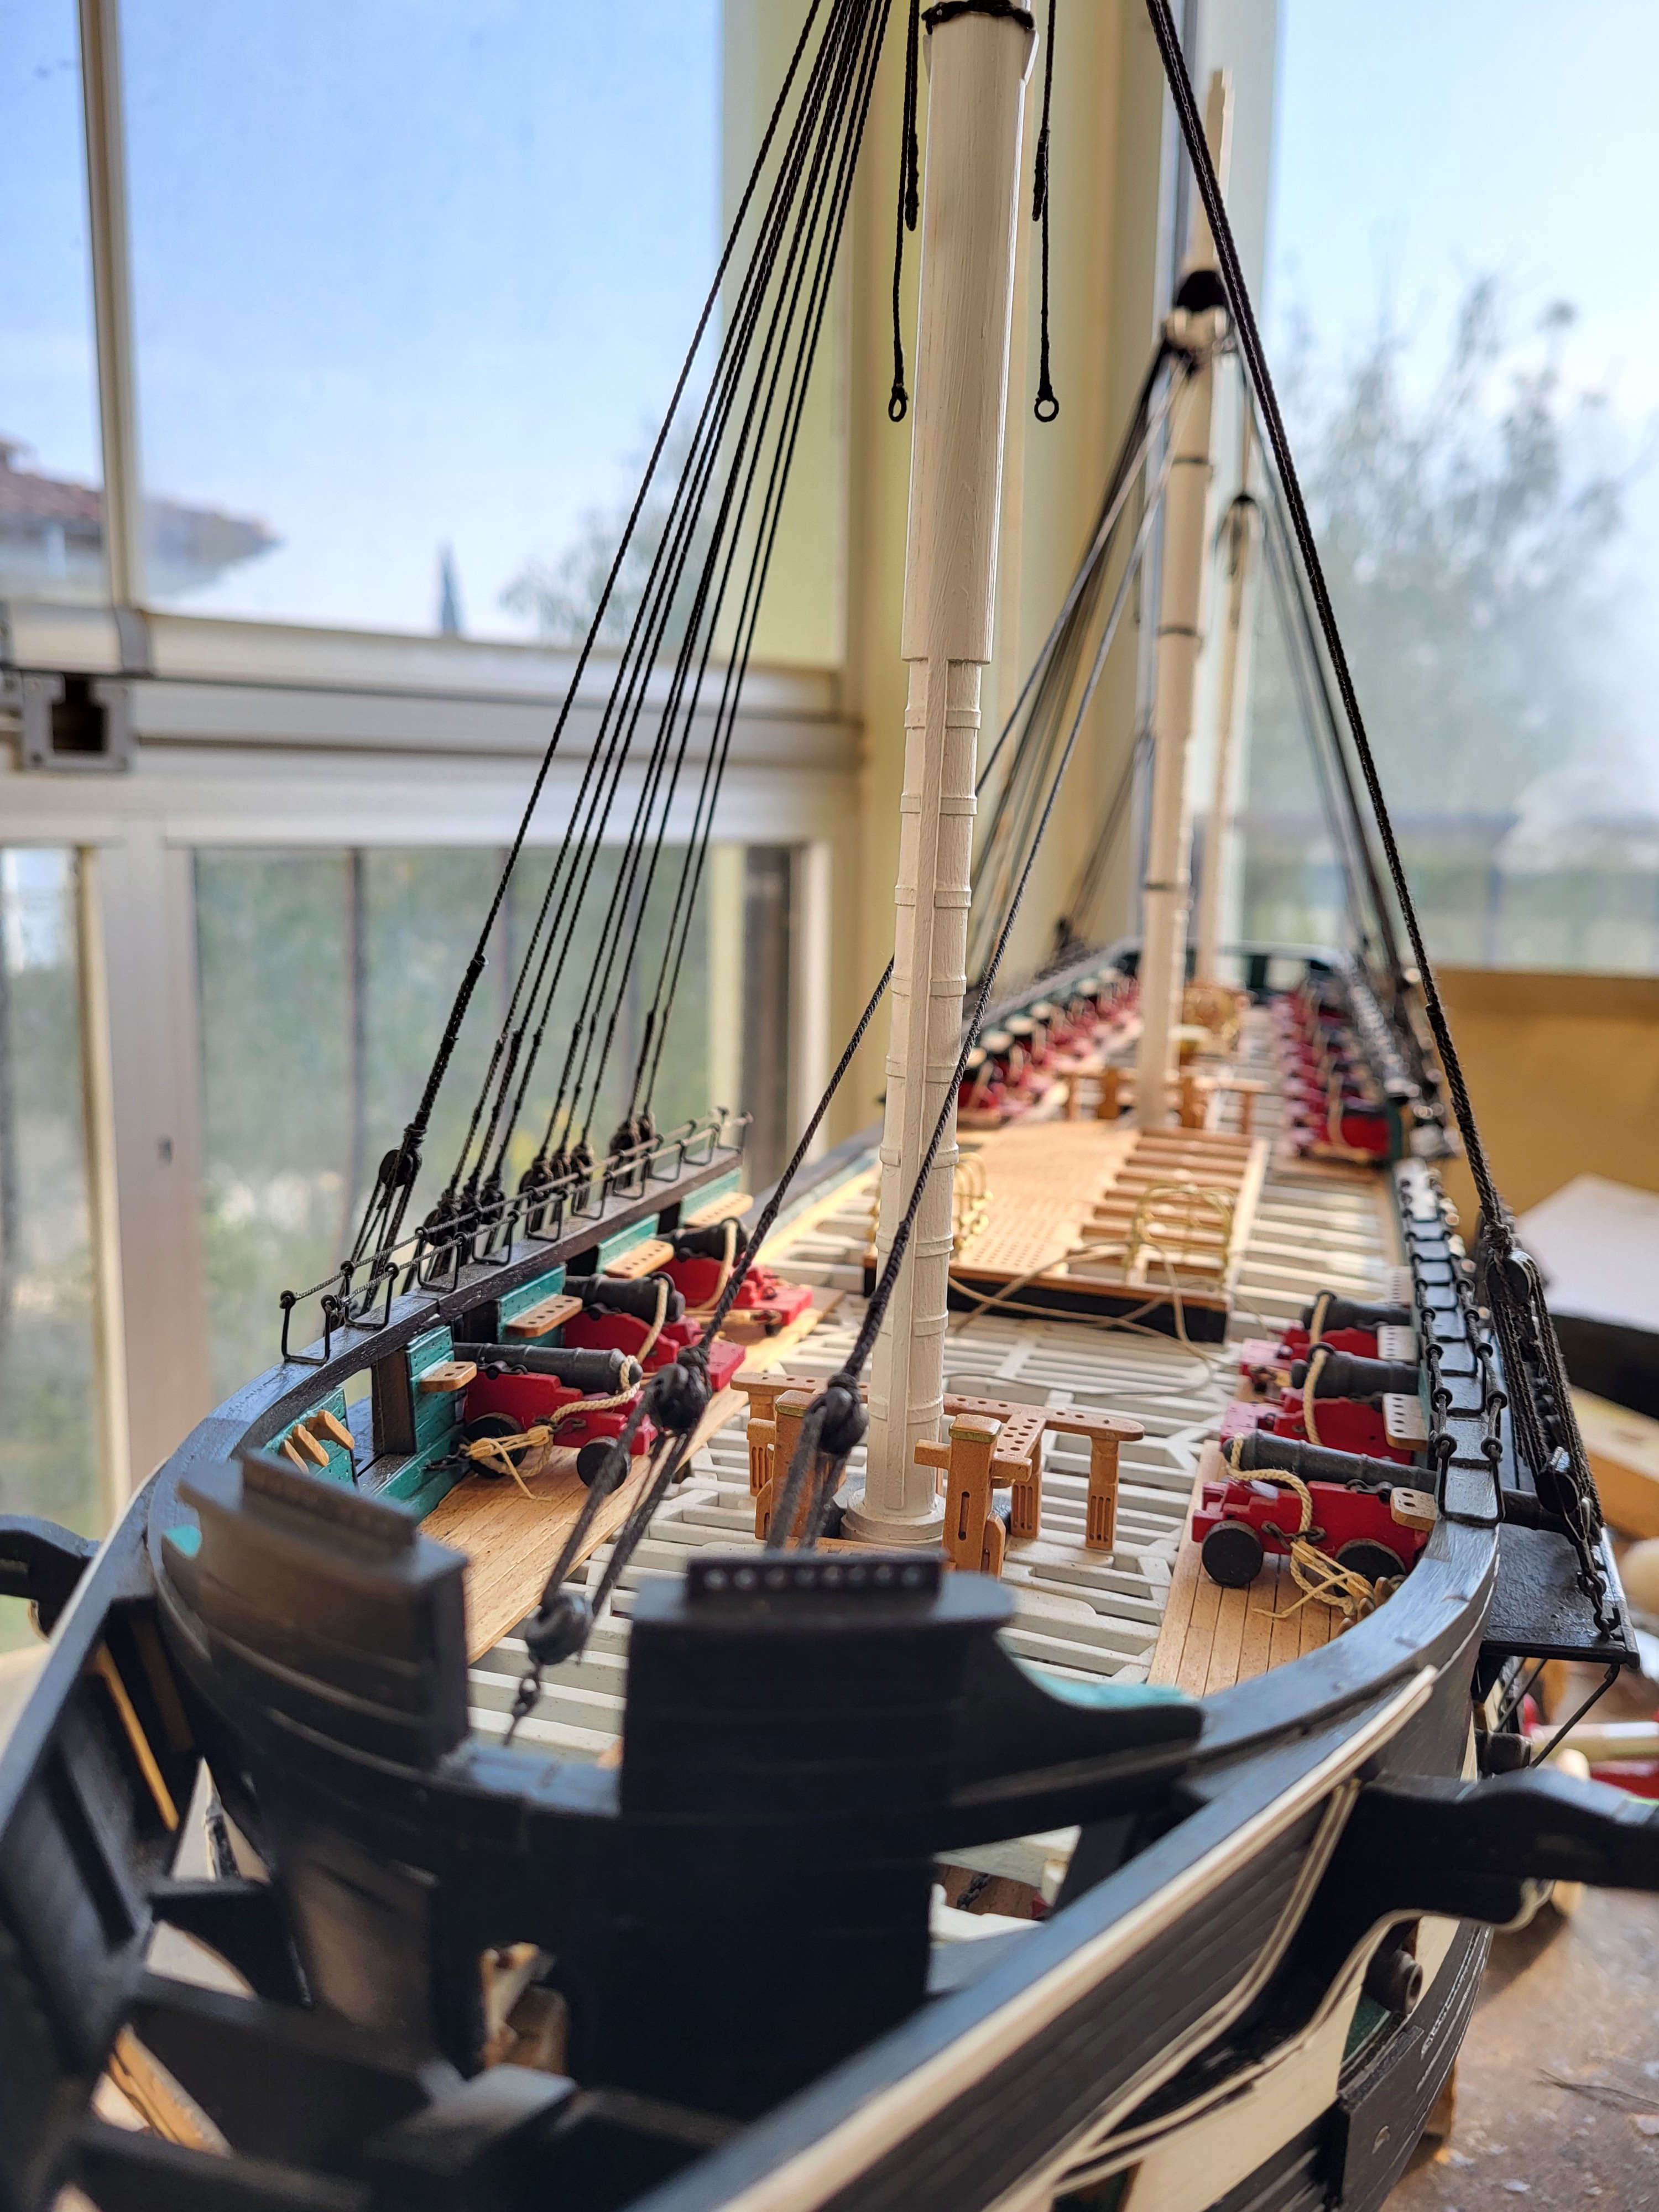
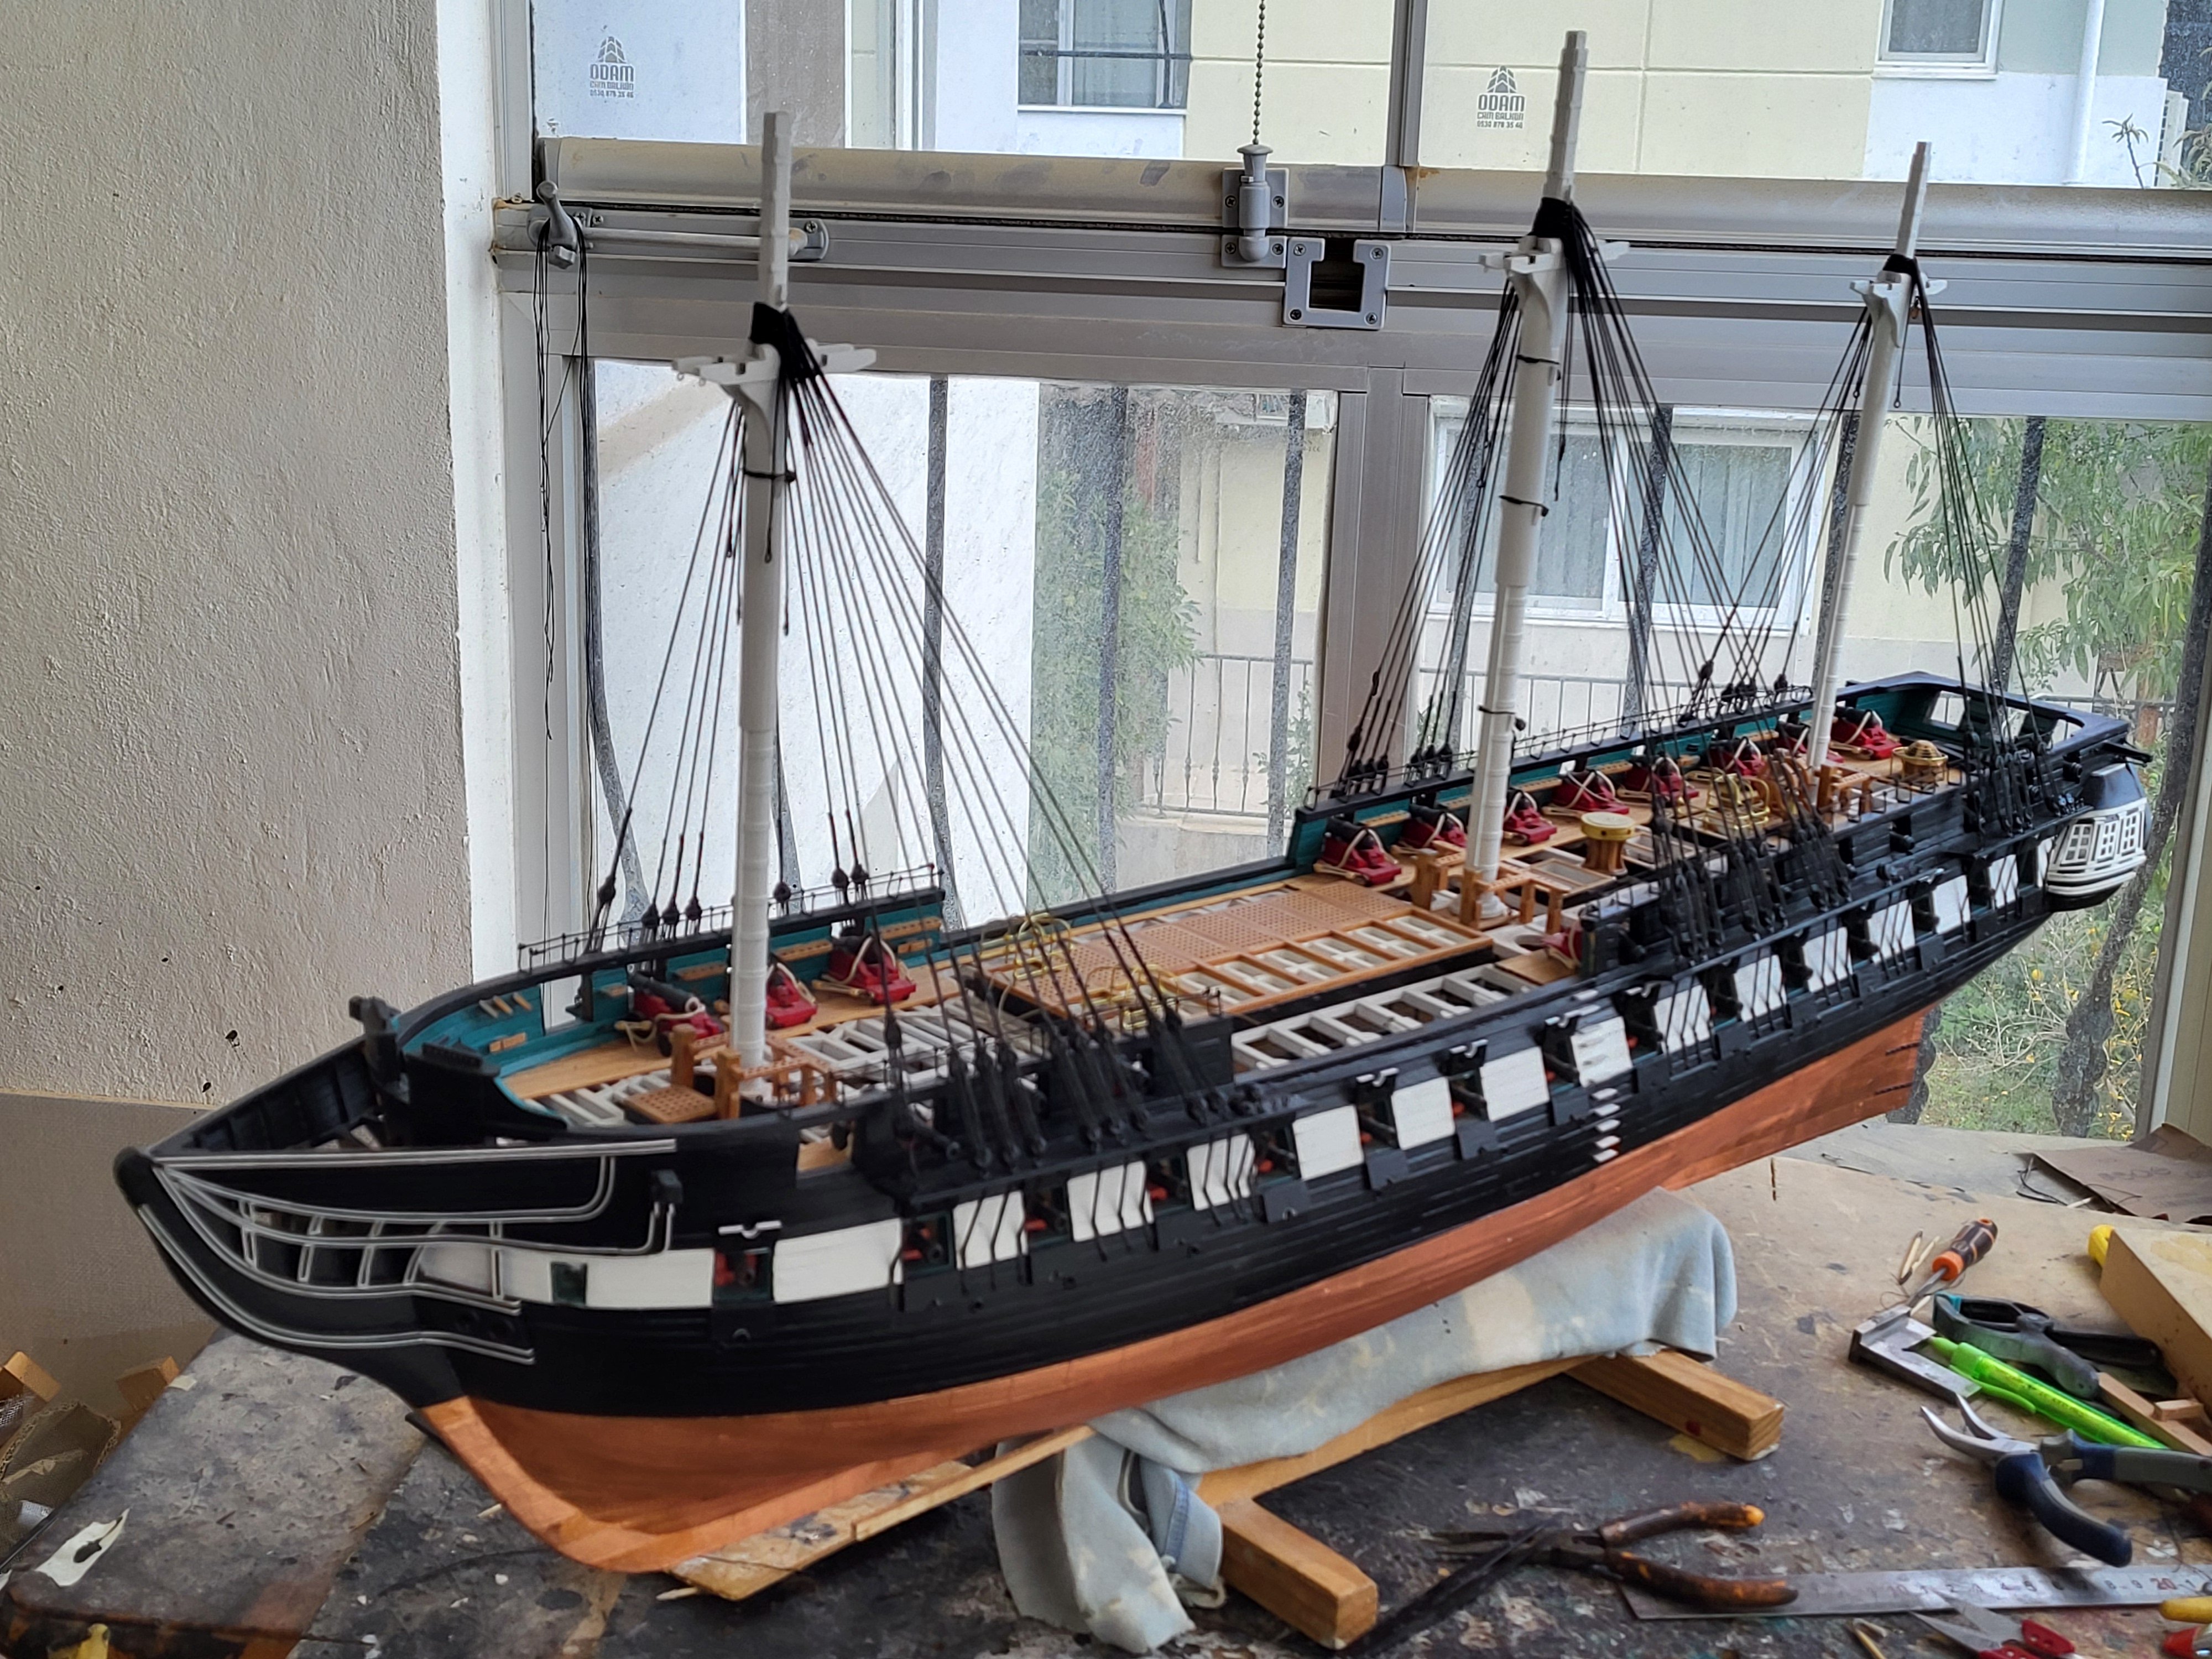
Is it just me, or is the ship starting to look like it belongs in Boston Harbor? With the rigging coming together, the overall silhouette is finally emerging. Little by little, she’s beginning to feel less like a pile of parts and more like a proper ship one that wouldn’t look out of place moored in Boston Harbor.


-
If you plan to add horizontal, vertical, and diagonal knees as I did, these stubs and even the spar deck waterways will seriously bother you and may even block your progress. I wish you had cut those stubs off completely at the start and avoided adding the spar deck waterways at this stage. Unfortunately, since there is quite a long gap between your updates, we see that you have already completed many steps, which leaves us without the chance to give timely advice.
-
Hi Greg. Are you planning to fully plank the spar deck, or will you leave it partially planked like Jon and I did, so that the gun deck remains visible? If the spar deck beams are going to stay exposed, let me remind you that if you intend to reattach the beams you cut back into their original positions, some of them will not align correctly with the hatchways on the spar deck. I recommend that you plan your approach in advance, because the spar deck beams must also be aligned with the hatchways and other details on the gun deck.
-
USS Constitution by mtbediz - 1:76
mtbediz replied to mtbediz's topic in - Build logs for subjects built 1751 - 1800
I hope we can follow the construction stages of your new project here. -
USS Constitution by mtbediz - 1:76
mtbediz replied to mtbediz's topic in - Build logs for subjects built 1751 - 1800
Thank you so much Geoff. -
USS Constitution by mtbediz - 1:76
mtbediz replied to mtbediz's topic in - Build logs for subjects built 1751 - 1800
Thank you, Henry. I used Model Shipways' kit plans to build the frames and false keel, and online images of the actual ship for other details. I also used publicly available plans from the USS Constitution Museum website. https://ussconstitutionmuseum.org/discover-learn/modeler-resources/


.jpg.ce07f135067c1ec93939e543ebf50000.jpg)