mtbediz
-
Posts
1,291 -
Joined
-
Last visited
Content Type
Profiles
Forums
Gallery
Events
Everything posted by mtbediz
-
 Good decision. To be honest, I'm not entirely satisfied with how the canopies I made look either. They're still in place for now, but the thought of removing them keeps crossing my mind. I might replace them with a basic rope guardrail.
 -
USS Constitution by mtbediz - 1:76
mtbediz replied to mtbediz's topic in - Build logs for subjects built 1751 - 1800
Looks like a great cutter, Peter. What's the maximum thickness of brass sheet metal it can cut? And if you don't mind me asking where you bought it? -
USS Constitution by mtbediz - 1:76
mtbediz replied to mtbediz's topic in - Build logs for subjects built 1751 - 1800
Here, anyone can ask anything Greg. We all learn. It's a wonderful thing. -
Great model, congratulations! Will you add the canopies on the hatchways?
-
USS Constitution by mtbediz - 1:76
mtbediz replied to mtbediz's topic in - Build logs for subjects built 1751 - 1800
I'd be very happy if you visited me, you're always welcome. As for the rings, I really don't have any idea about their purpose. -
USS Constitution by mtbediz - 1:76
mtbediz replied to mtbediz's topic in - Build logs for subjects built 1751 - 1800
Thanks for sharing these pictures, Jon. Yes, I knew that the chain plates are made in two parts, but I chose to make them as a single piece. If I were building this model for a competition, I would have followed the real-life design. But in the end, this model will just sit in a corner of my living room, waiting to be looked at and the people who’ll look at it will definitely not be experts in sailing warships anyway. -
USS Constitution by mtbediz - 1:76
mtbediz replied to mtbediz's topic in - Build logs for subjects built 1751 - 1800
Hi Thomas. First, I make a deep mark along the line I’m going to cut using a steel ruler and a sharp knife, and then I cut along that mark with sheet metal shears. This mark prevents the shears from slipping sideways. -
USS Constitution by mtbediz - 1:76
mtbediz replied to mtbediz's topic in - Build logs for subjects built 1751 - 1800
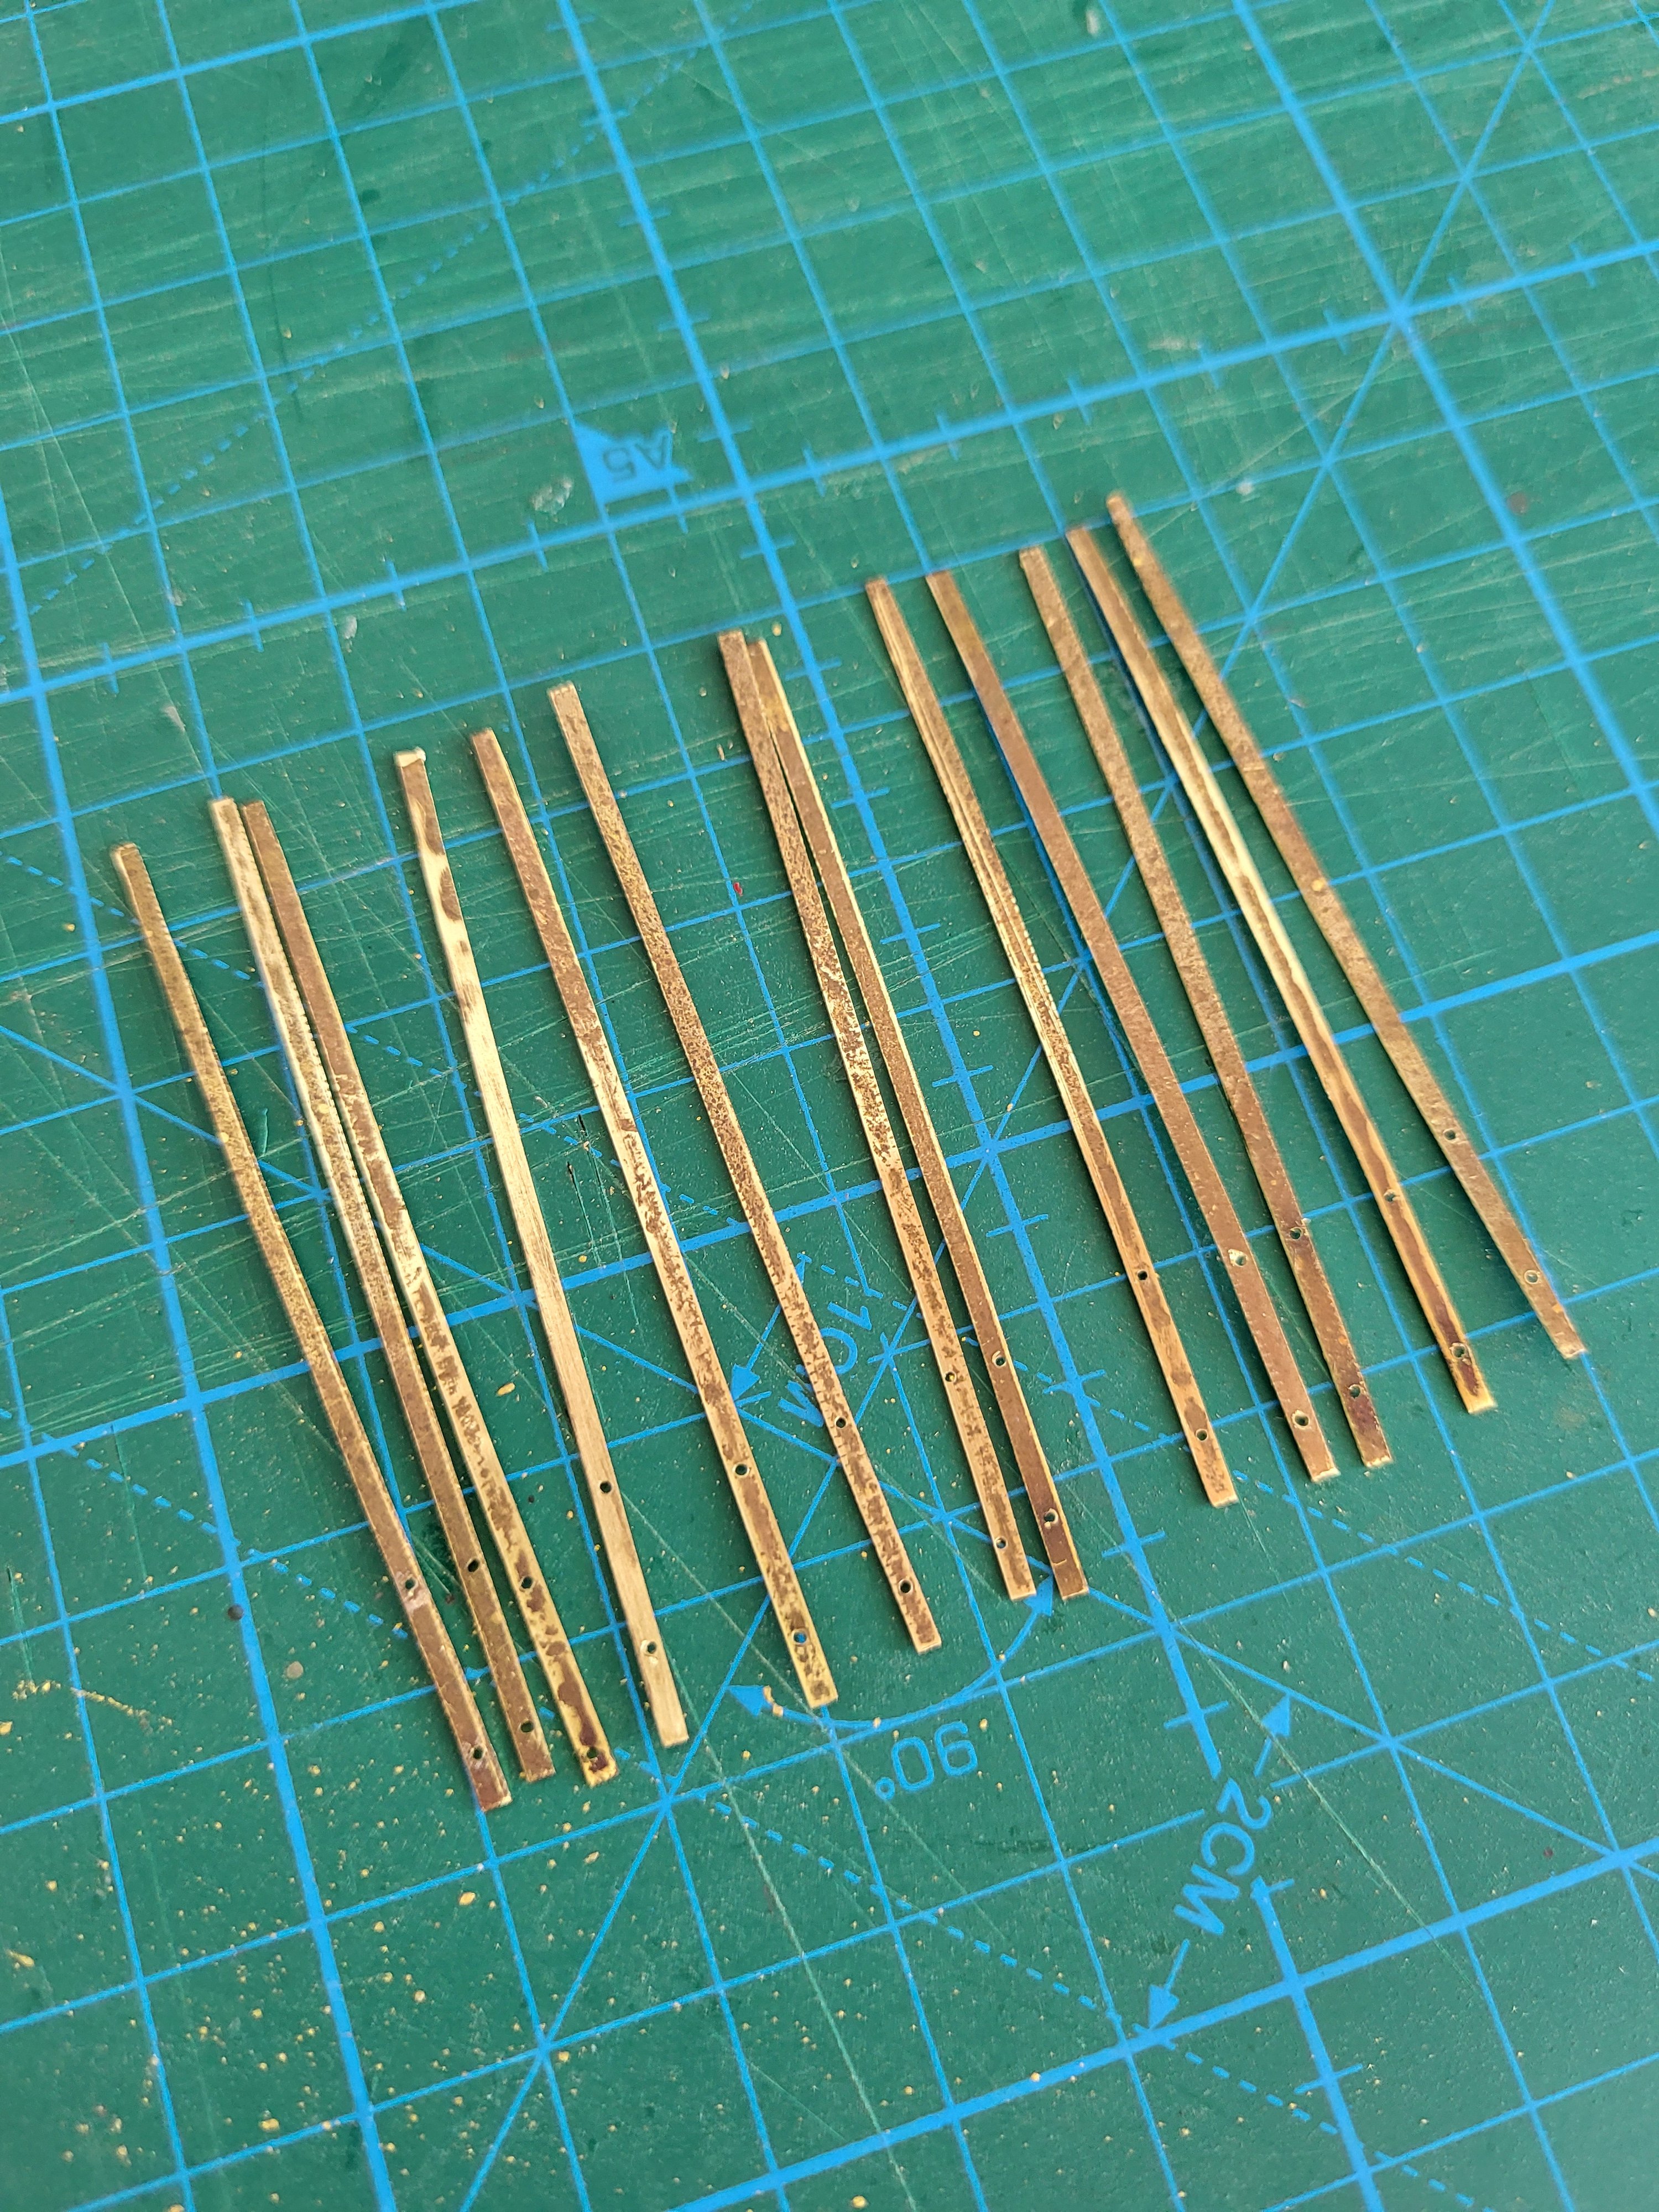
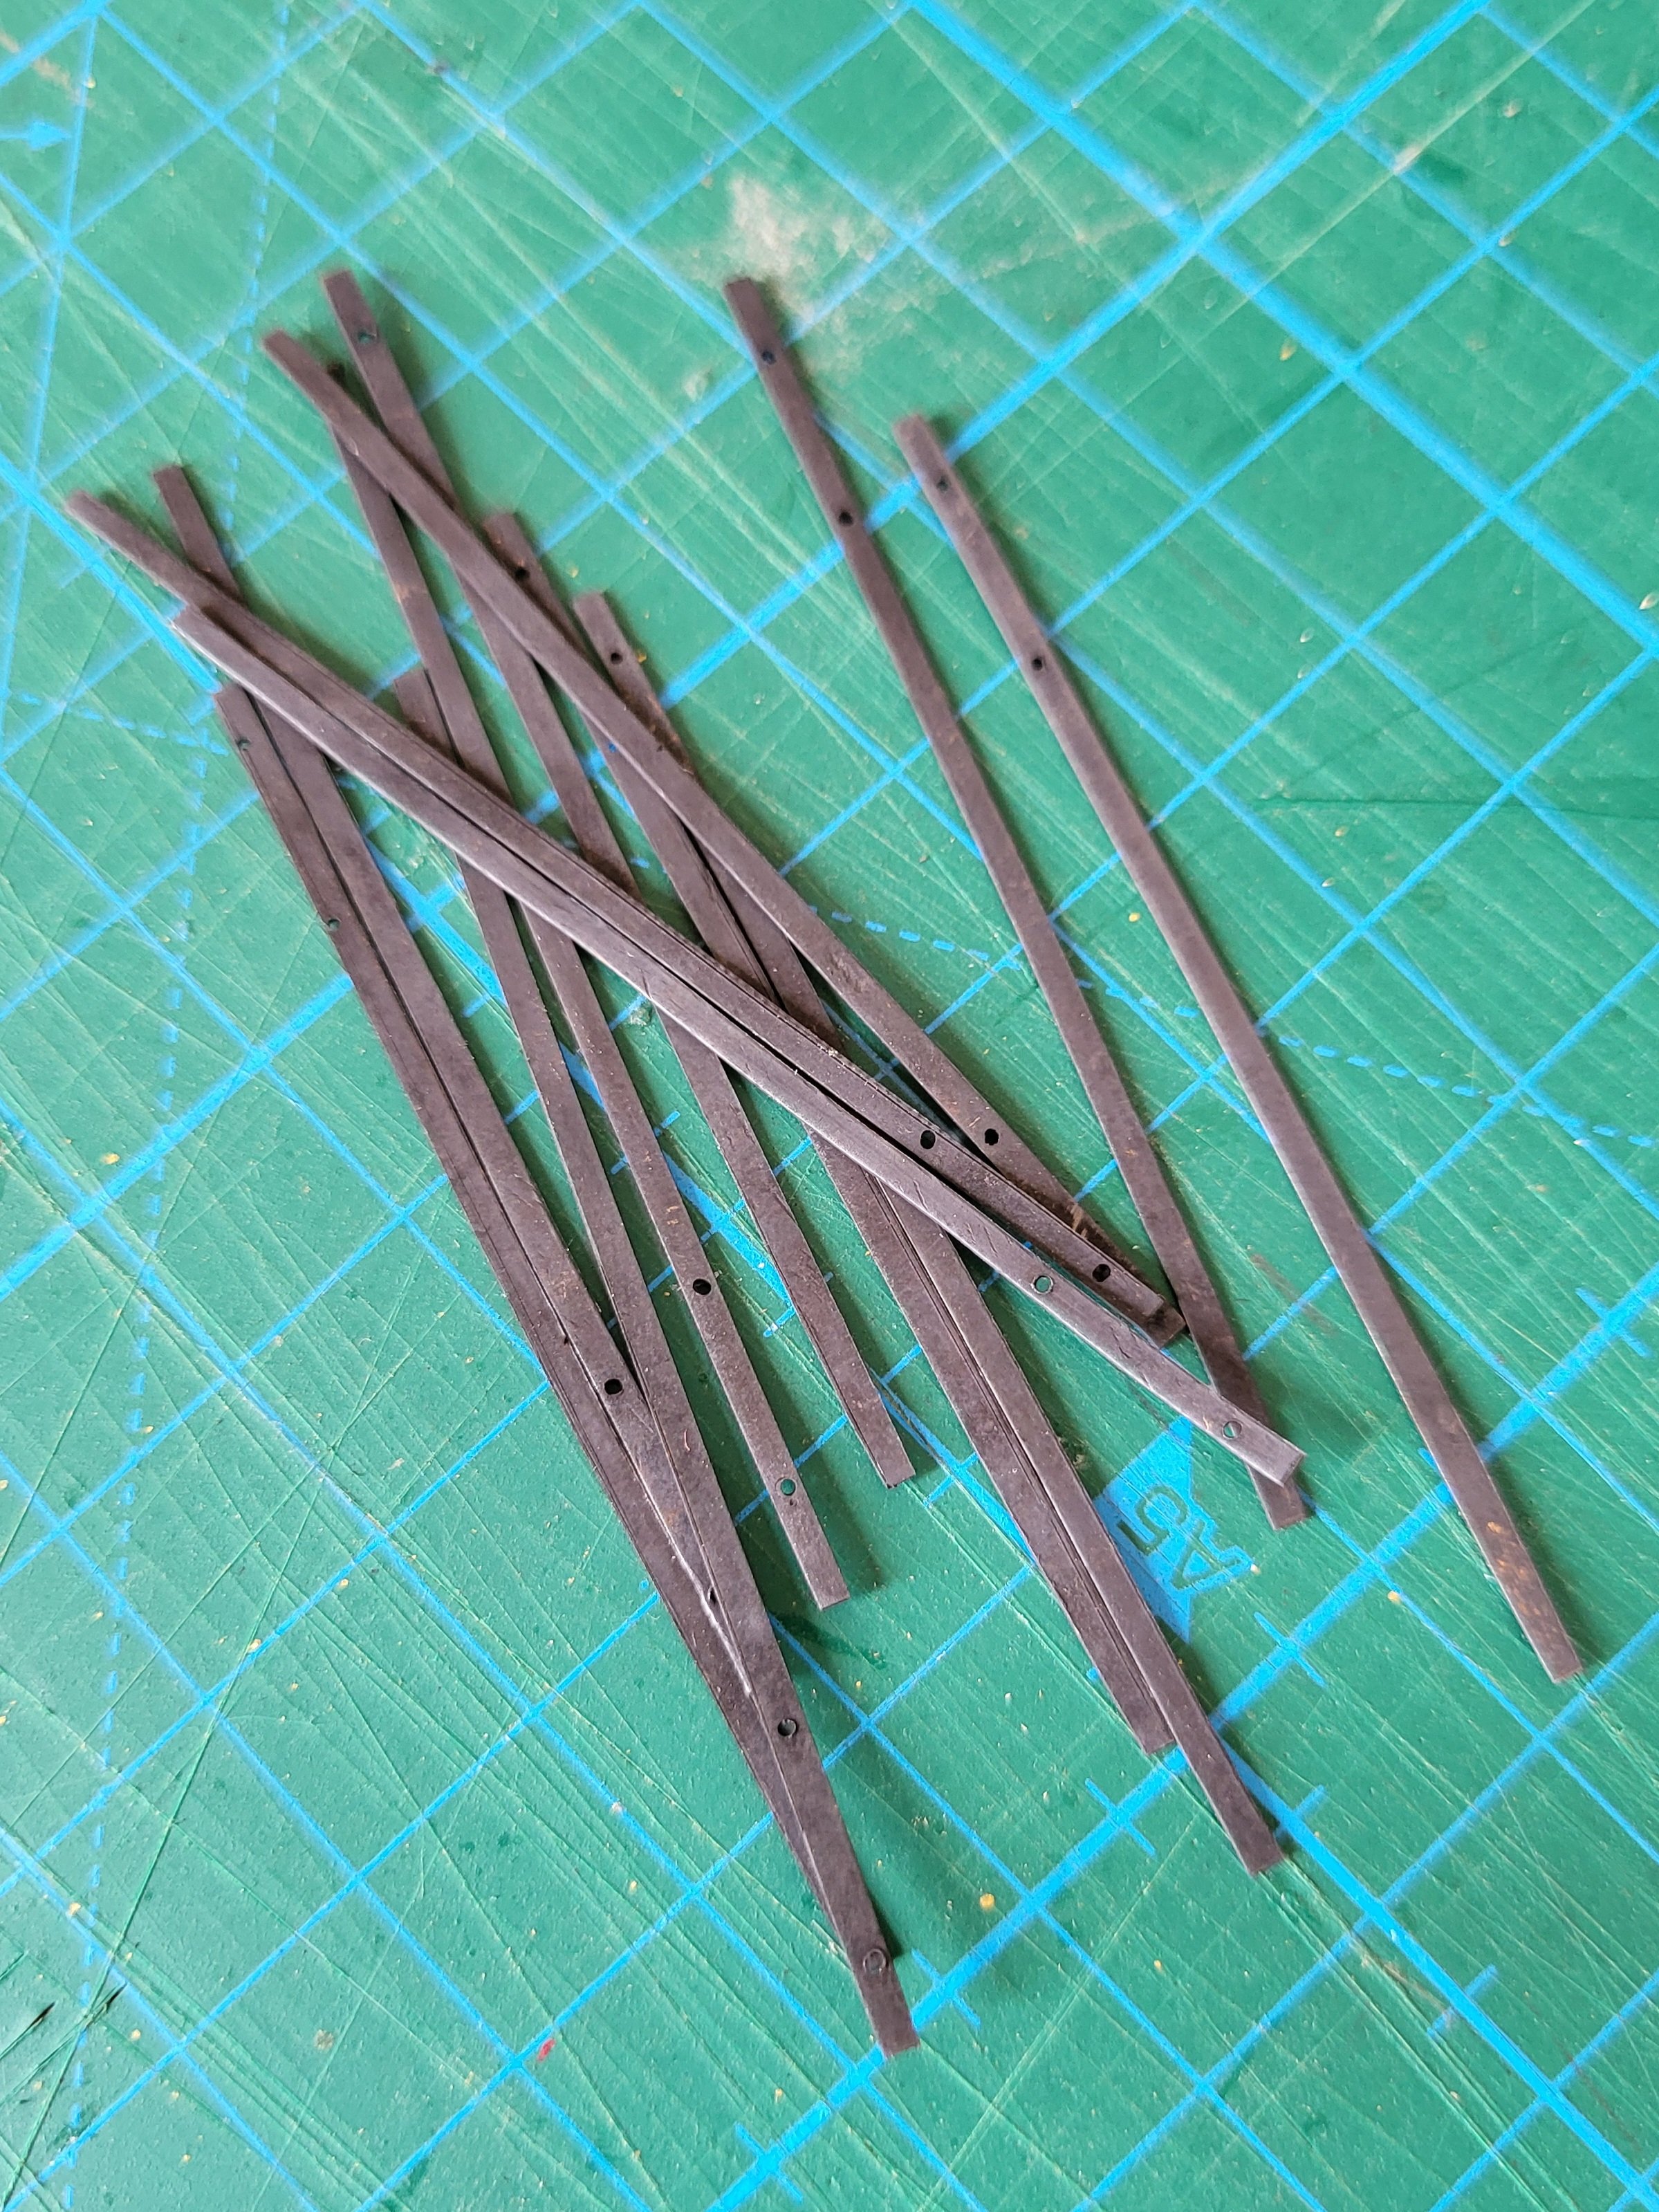
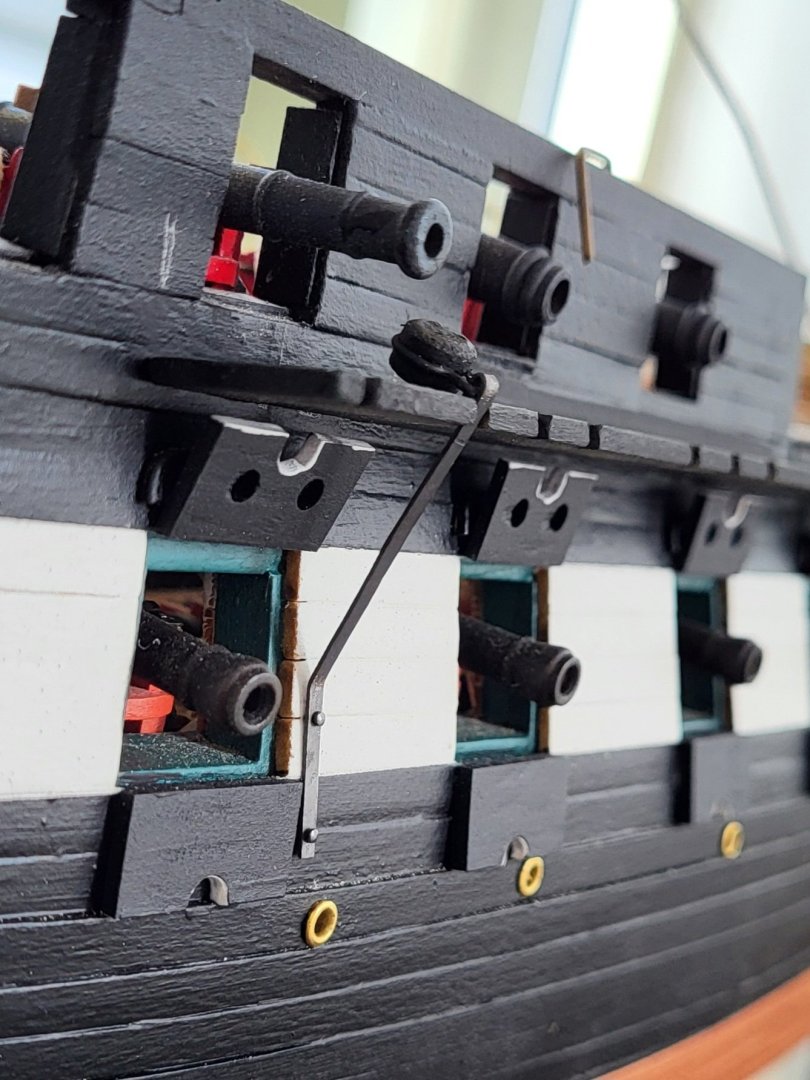
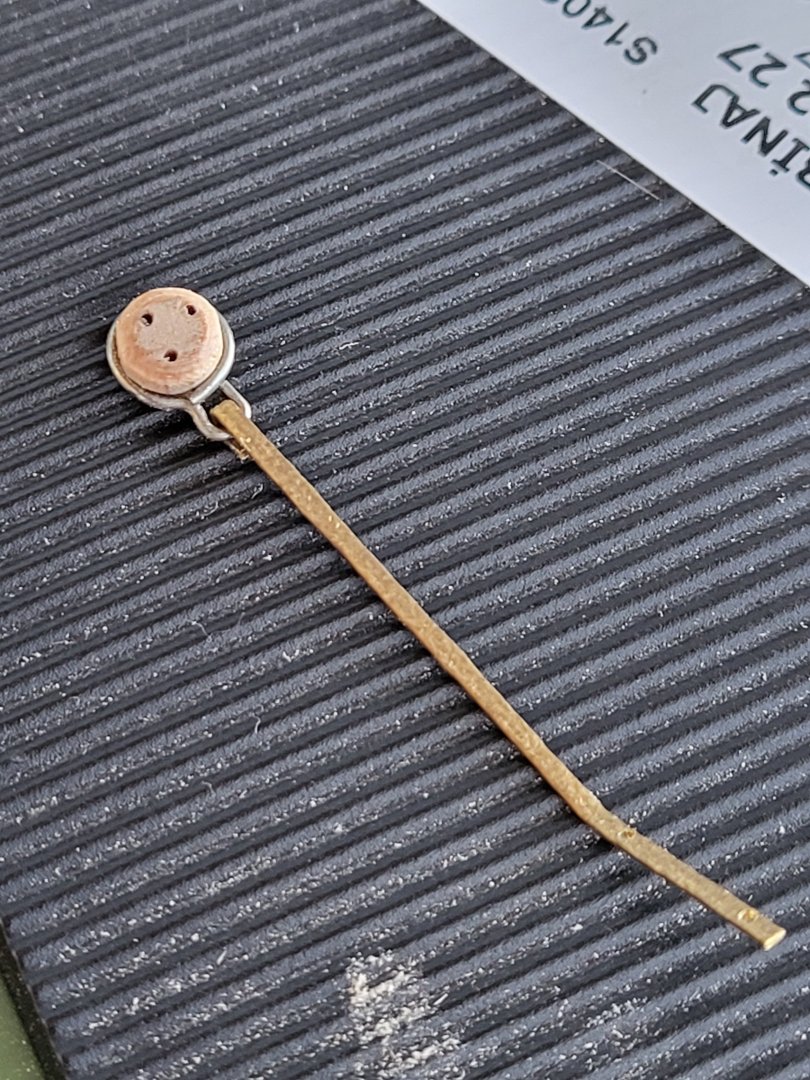
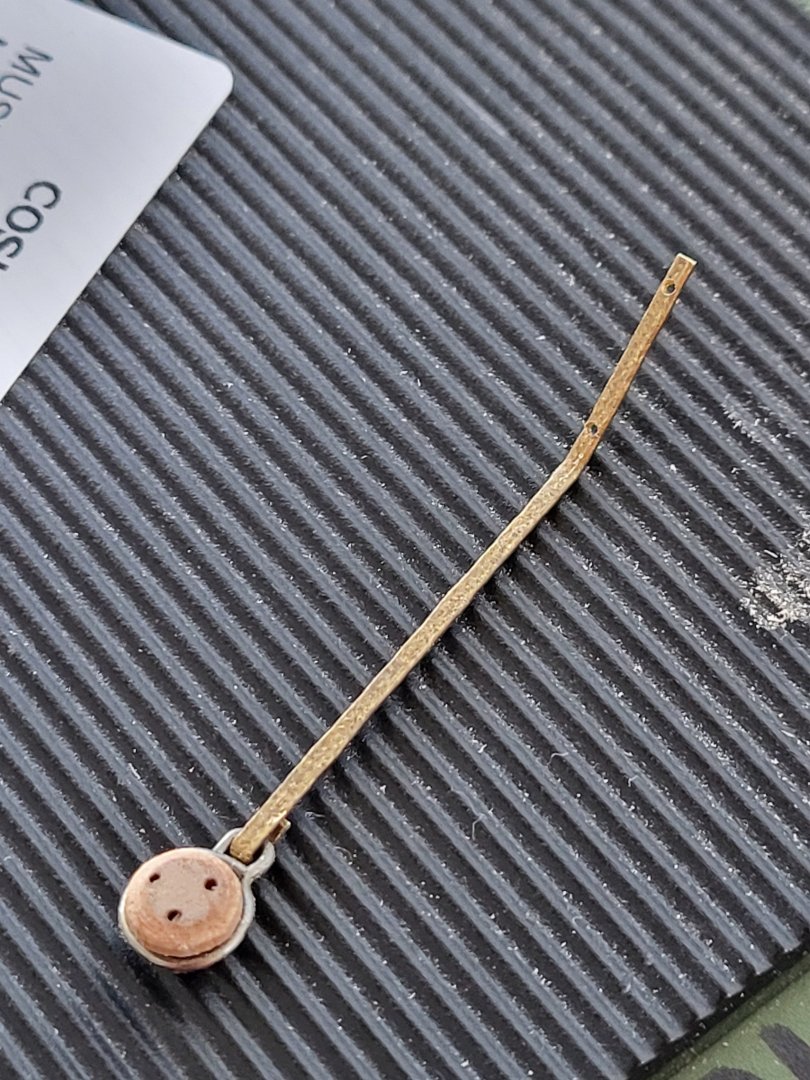
I gave up on making the chain plates from brass wire because I'm not very good at hammering 1mm thick brass wire into flat strips. The strips don't come out very smooth. Instead, I cut 1.5mm-wide strips from 0.4mm thick brass sheeting I had on hand. After cutting the strips and drilling the bolt holes, I chemically blackened them. I haven't decided yet whether to settle for blackening or paint them black as well. I mounted a deadeye onto the pre-made chain plate and mounted it in place as a test. I used some black 0.6mm diameter nails I had on hand. I haven't glued it in yet.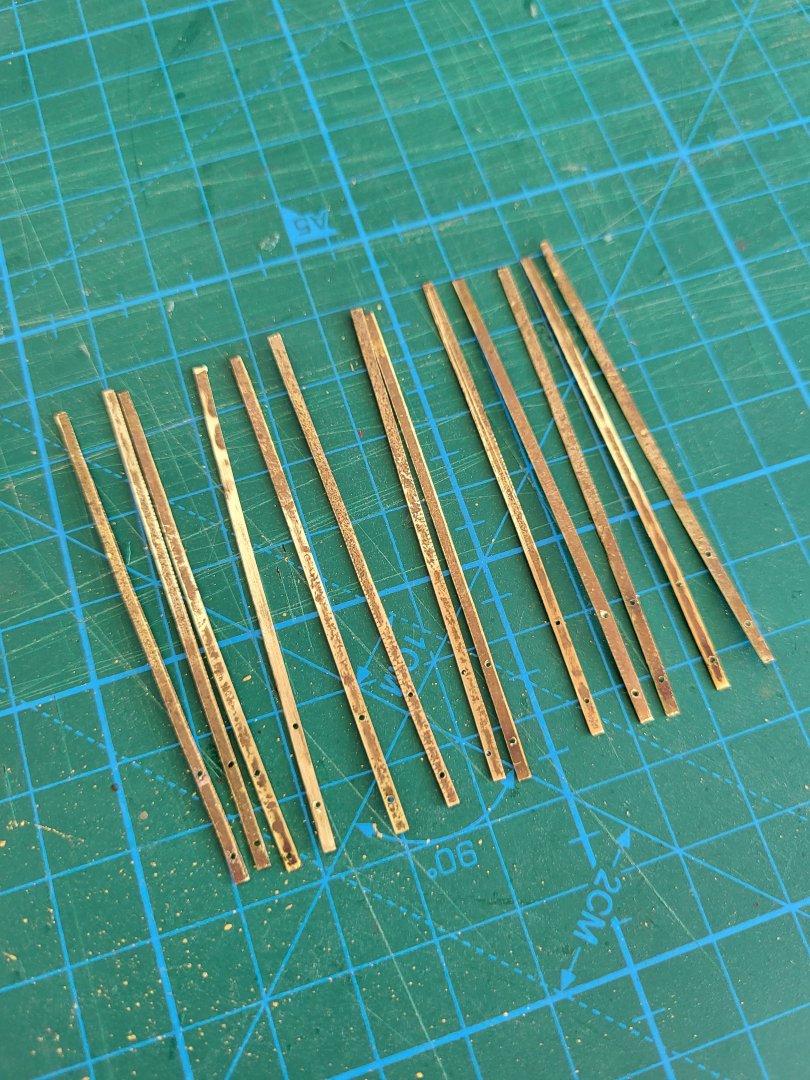

-
USS Constitution by mtbediz - 1:76
mtbediz replied to mtbediz's topic in - Build logs for subjects built 1751 - 1800
When I first got into ship modeling, my initial two builds were kit based. To be honest, I didn’t enjoy them much, and at one point, I even considered giving up the hobby altogether. But while browsing through the build logs on this forum, I stumbled upon some incredible scratch built models. That discovery changed everything for me. Inspired, I decided to try my hand at a relatively simple scratch build. I started by gathering the basic tools needed for scratch building and set out to see what I could create. To my surprise, I thoroughly enjoyed the process. Working from scratch gave me a sense of freedom I hadn’t felt with kits I wasn’t confined by pre made parts or instructions. As time went on, I gradually expanded my toolkit and began tackling more detailed projects. Of course, scratch building demands both time and patience, and having a dedicated workshop space is essential. But for me, the creative freedom and satisfaction it brings make it all worthwhile. -
USS Constitution by mtbediz - 1:76
mtbediz replied to mtbediz's topic in - Build logs for subjects built 1751 - 1800
Thank you Rick. -
USS Constitution by mtbediz - 1:76
mtbediz replied to mtbediz's topic in - Build logs for subjects built 1751 - 1800
When attaching the deadeyes to the chain plates, I'll use the same method I used on the Cutter Alert model, as this is the closest I can get to the appearance of the real ship. P.S. : I flatten the 1mm diameter brass wire by hammering it and use it in the production of chain plates and I drill two holes for the bolts with a 0.6 mm drill bit.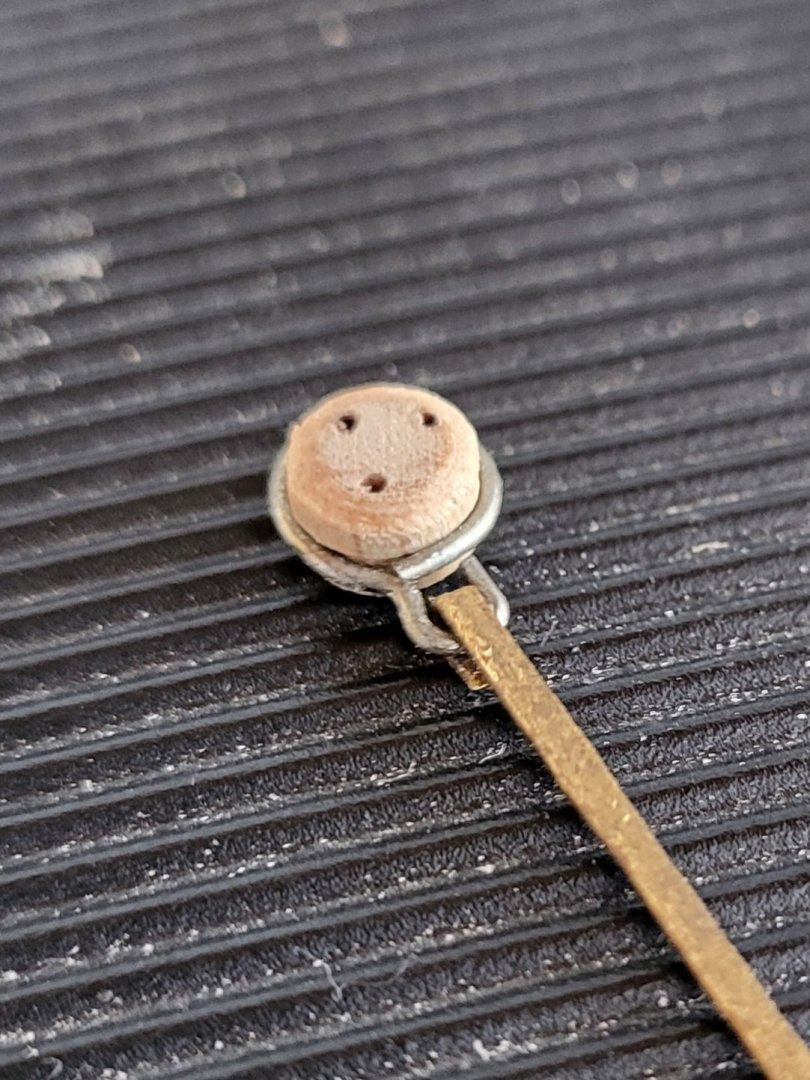
-
USS Constitution by mtbediz - 1:76
mtbediz replied to mtbediz's topic in - Build logs for subjects built 1751 - 1800
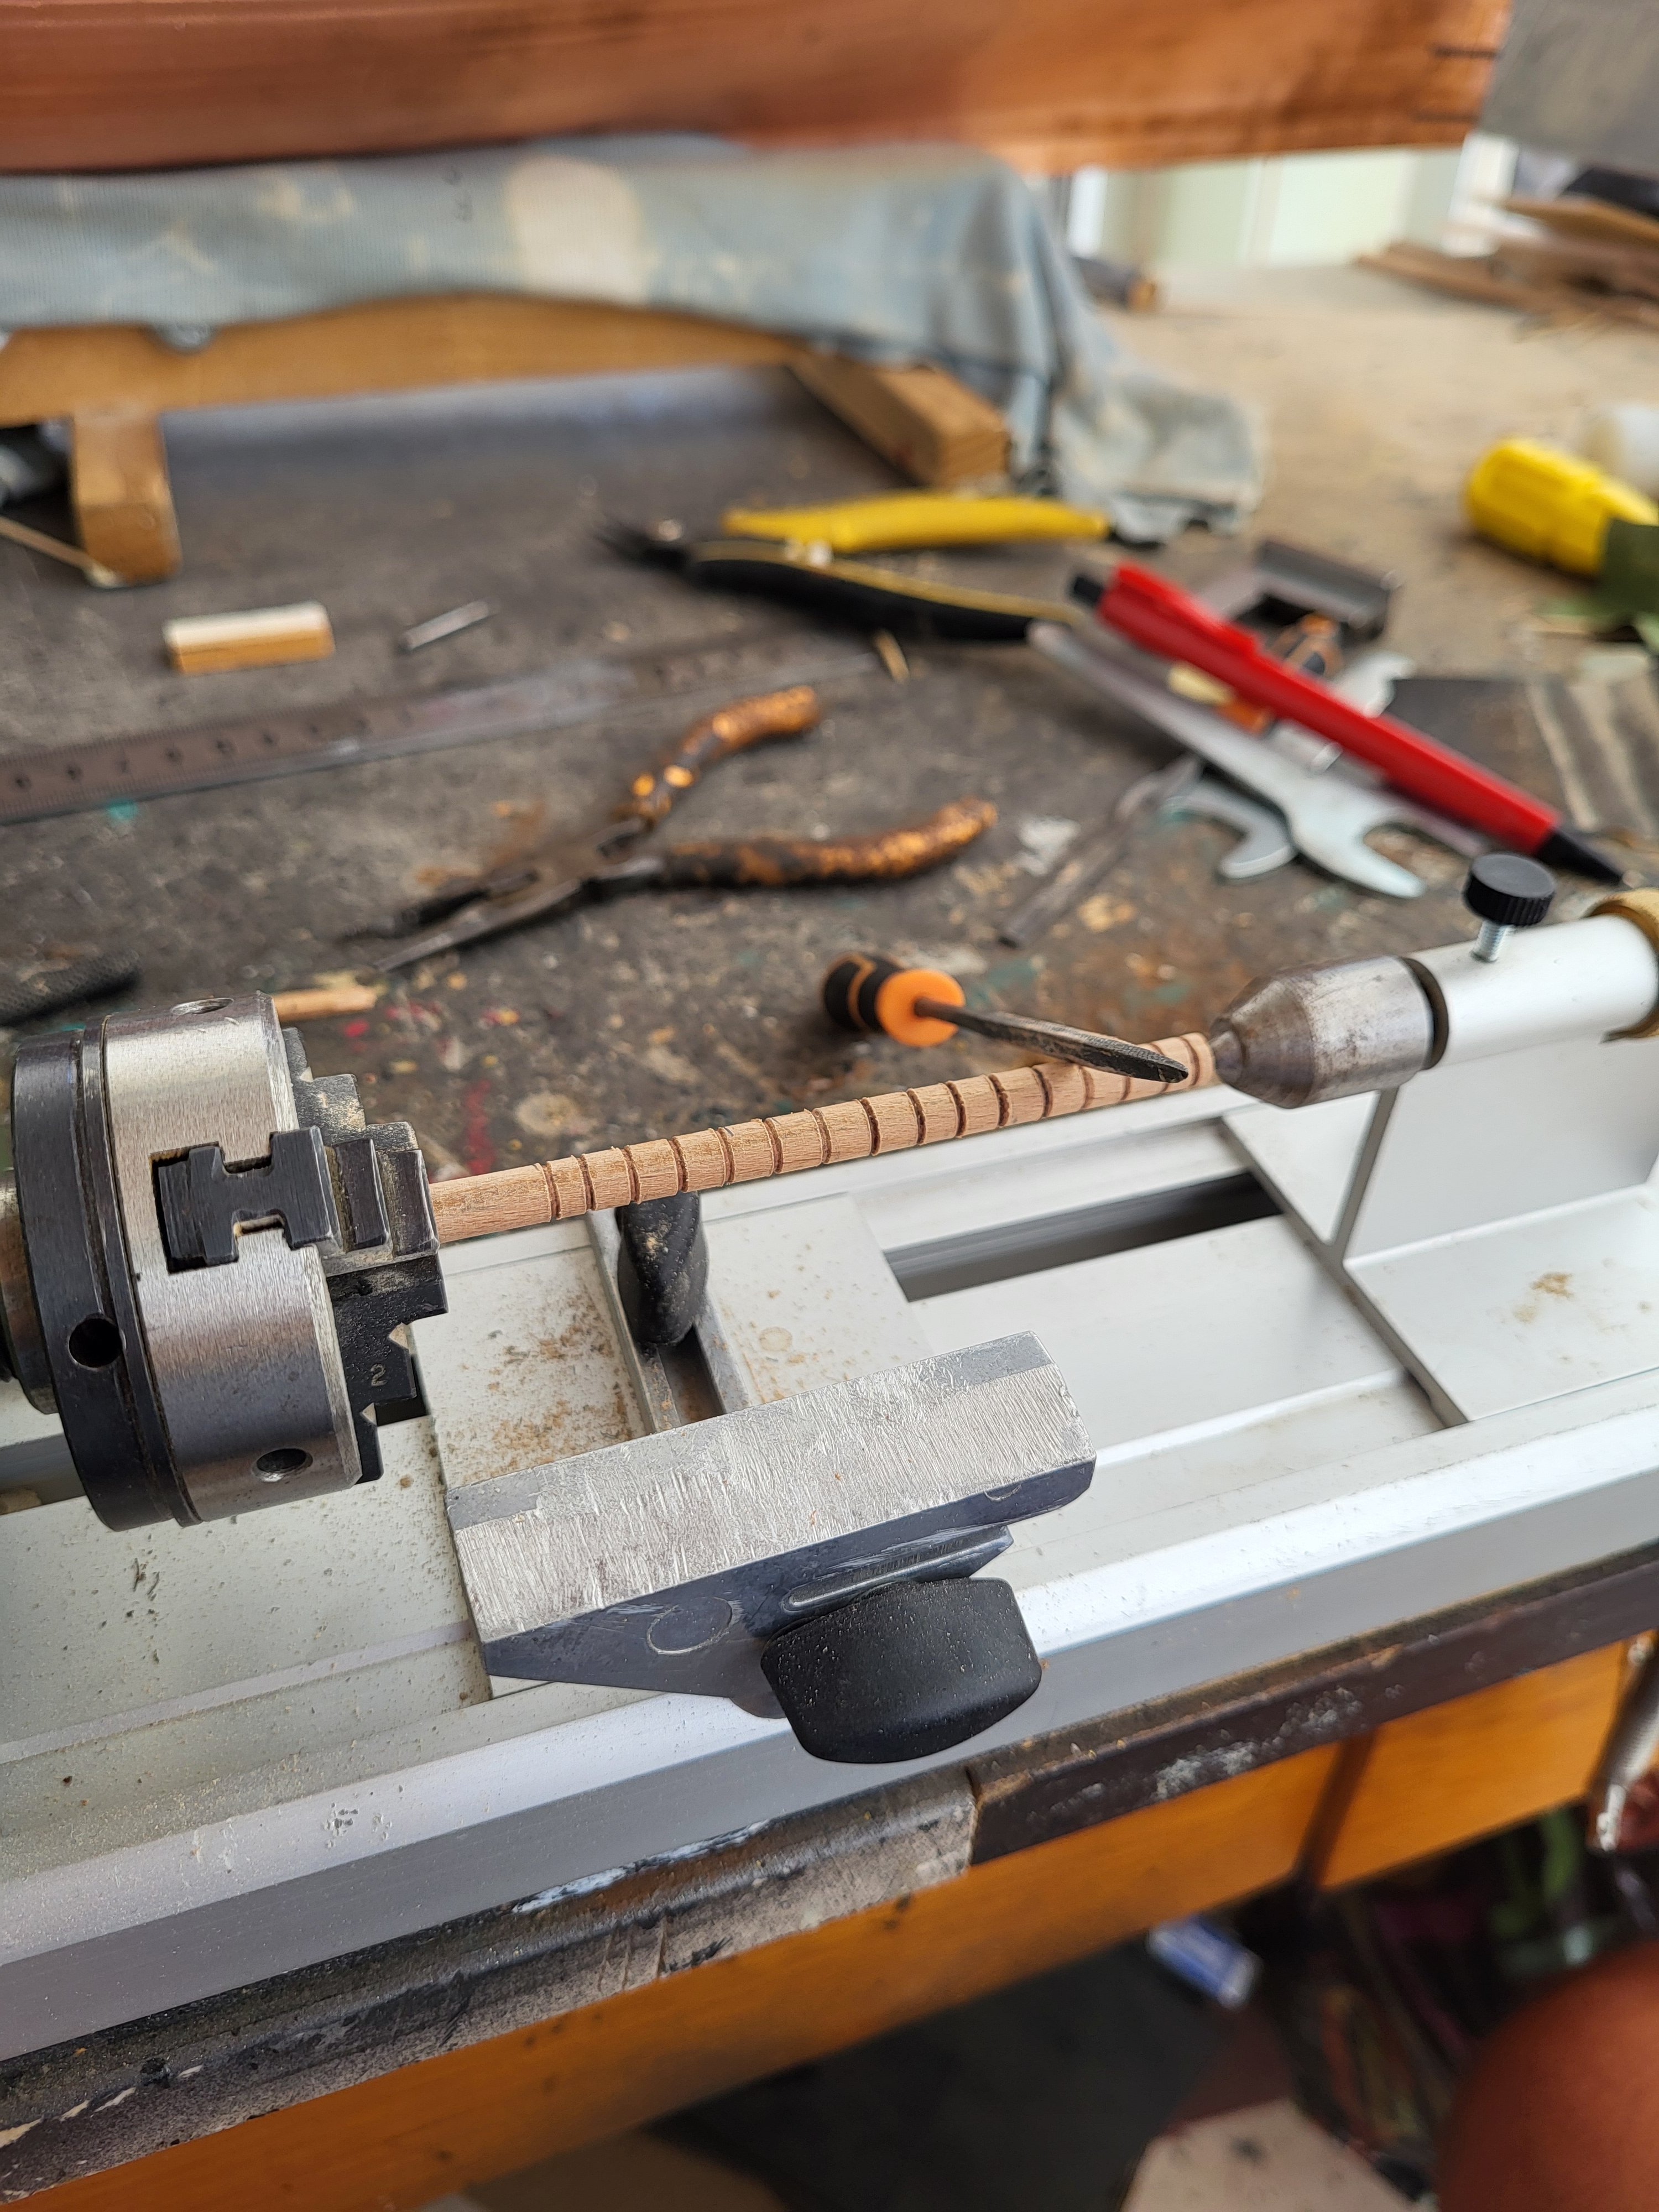
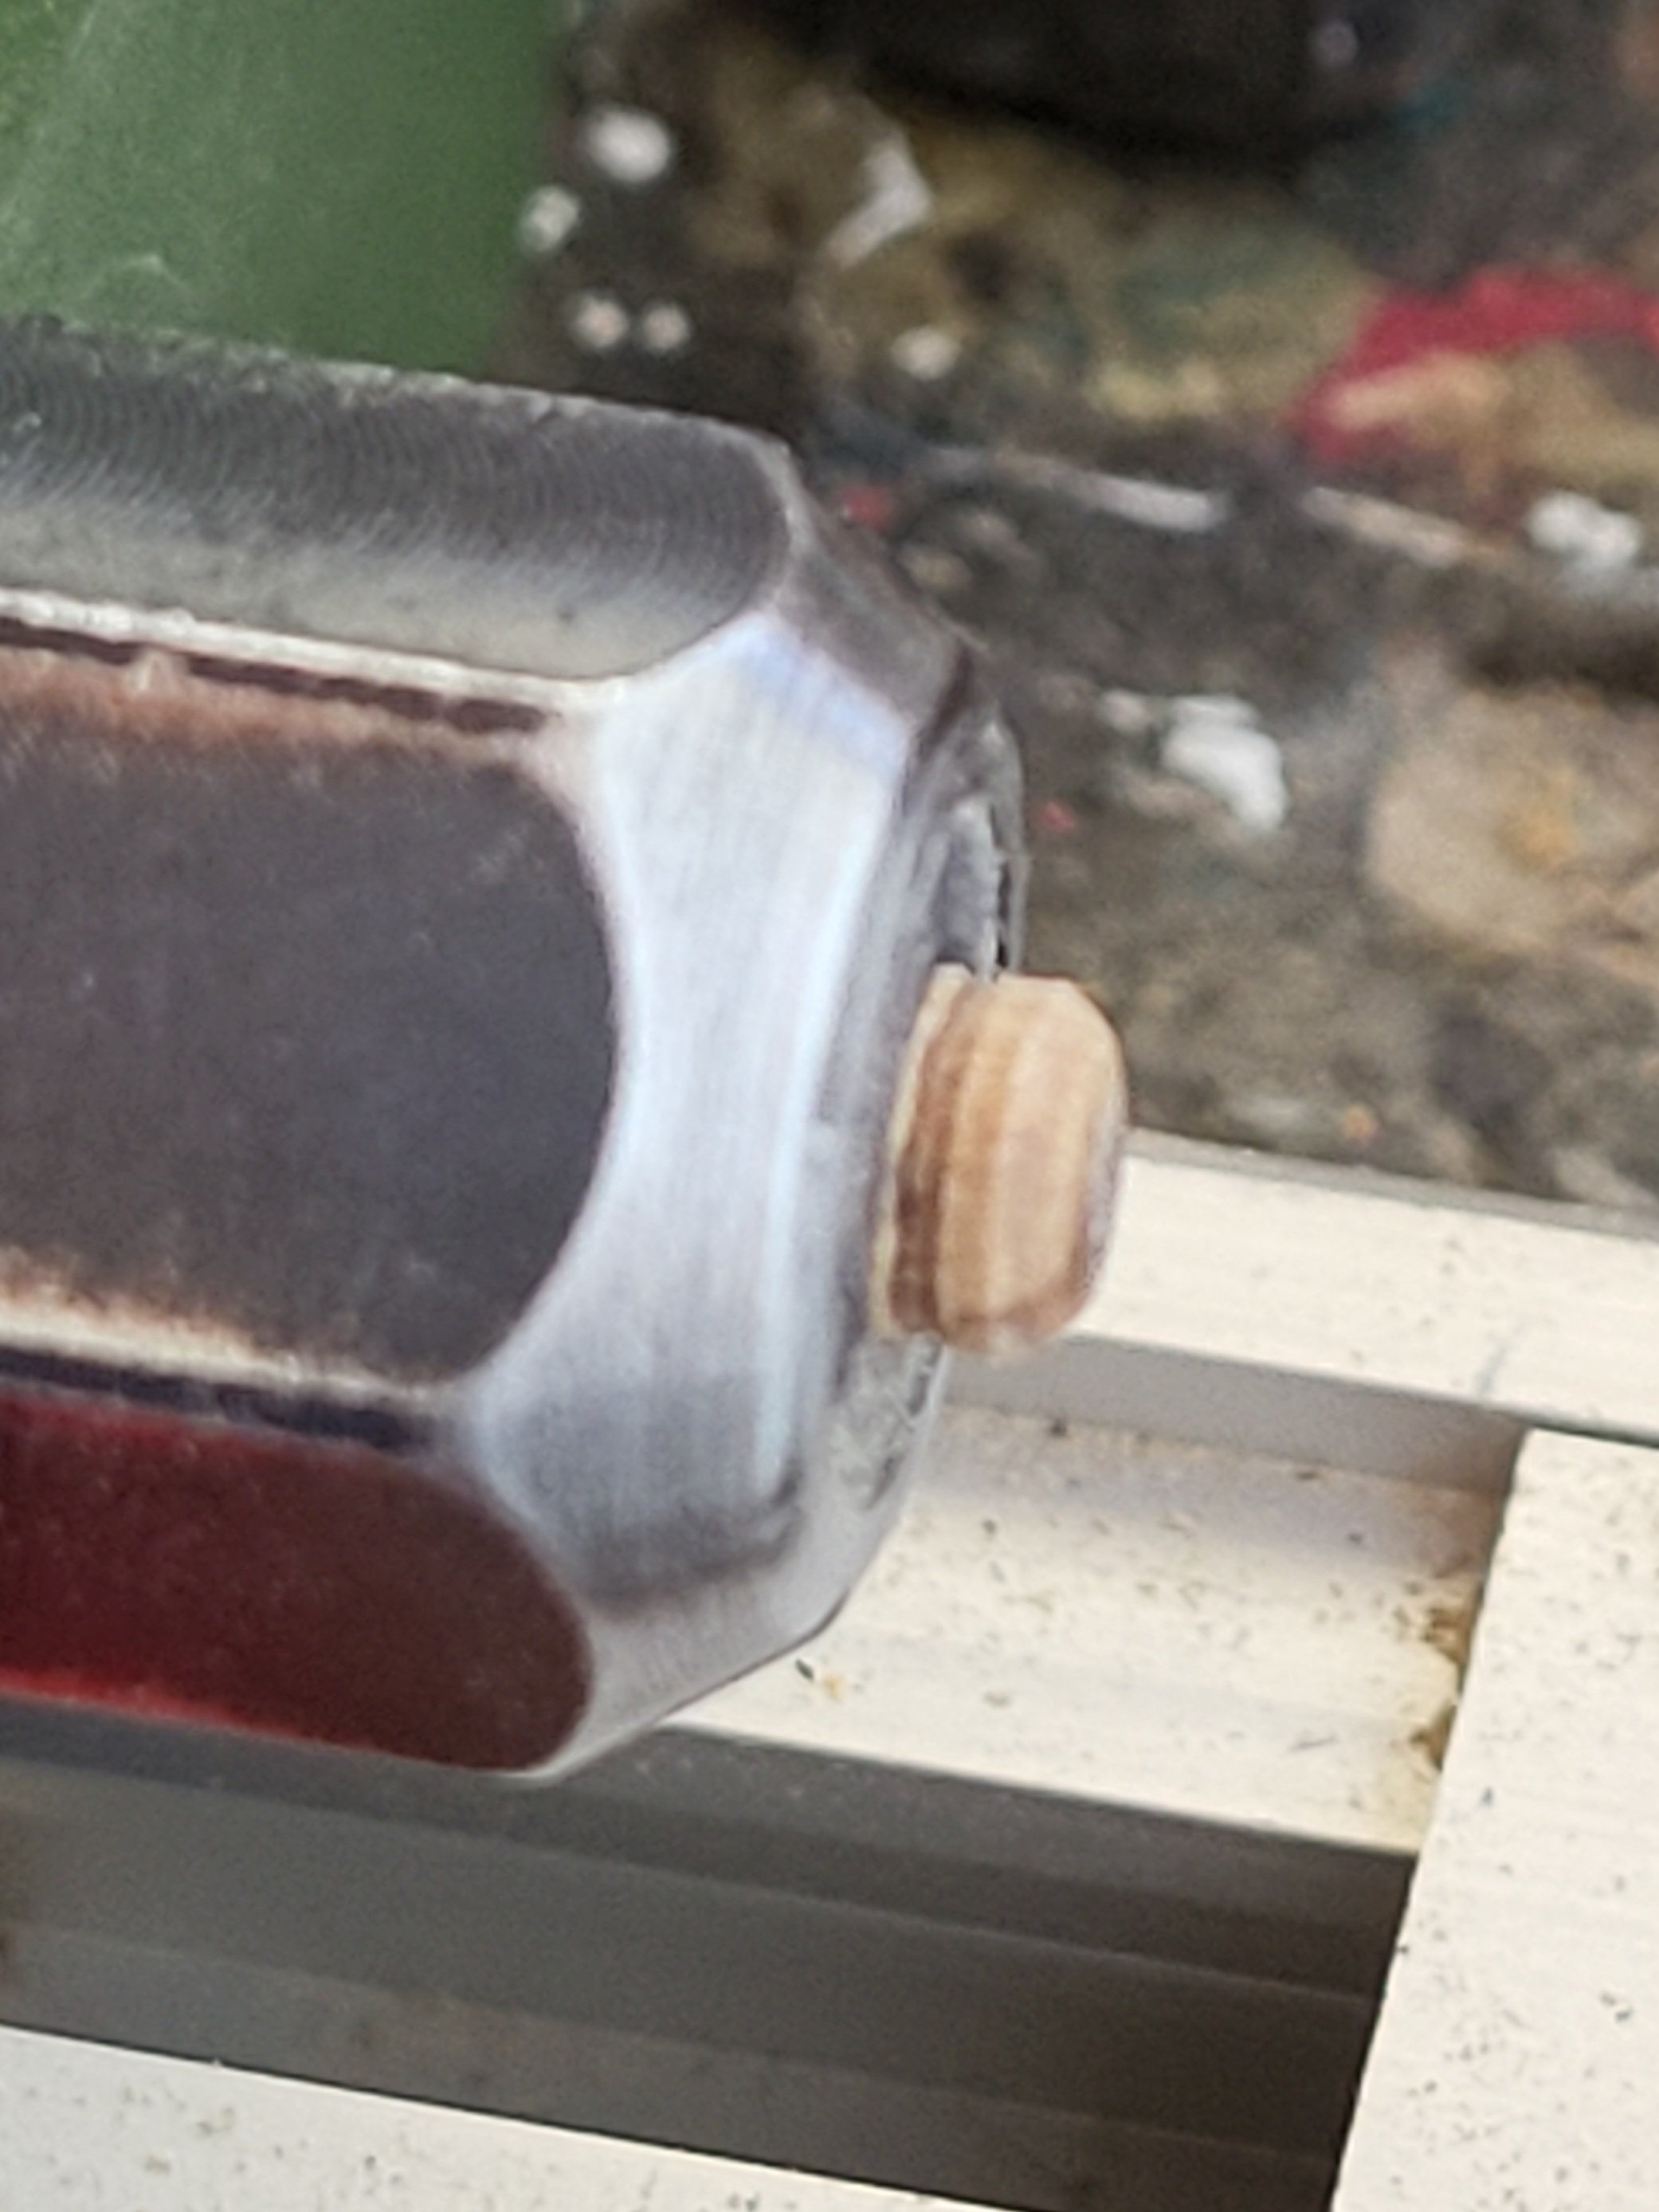
Yes you are right, I forgot to write it. Diameter of the dowel is 6 mm. -
USS Constitution by mtbediz - 1:76
mtbediz replied to mtbediz's topic in - Build logs for subjects built 1751 - 1800
I haven't sanded the deadeyes yet. I'll post photos of that later. I've used it before and it works well. -
USS Constitution by mtbediz - 1:76
mtbediz replied to mtbediz's topic in - Build logs for subjects built 1751 - 1800
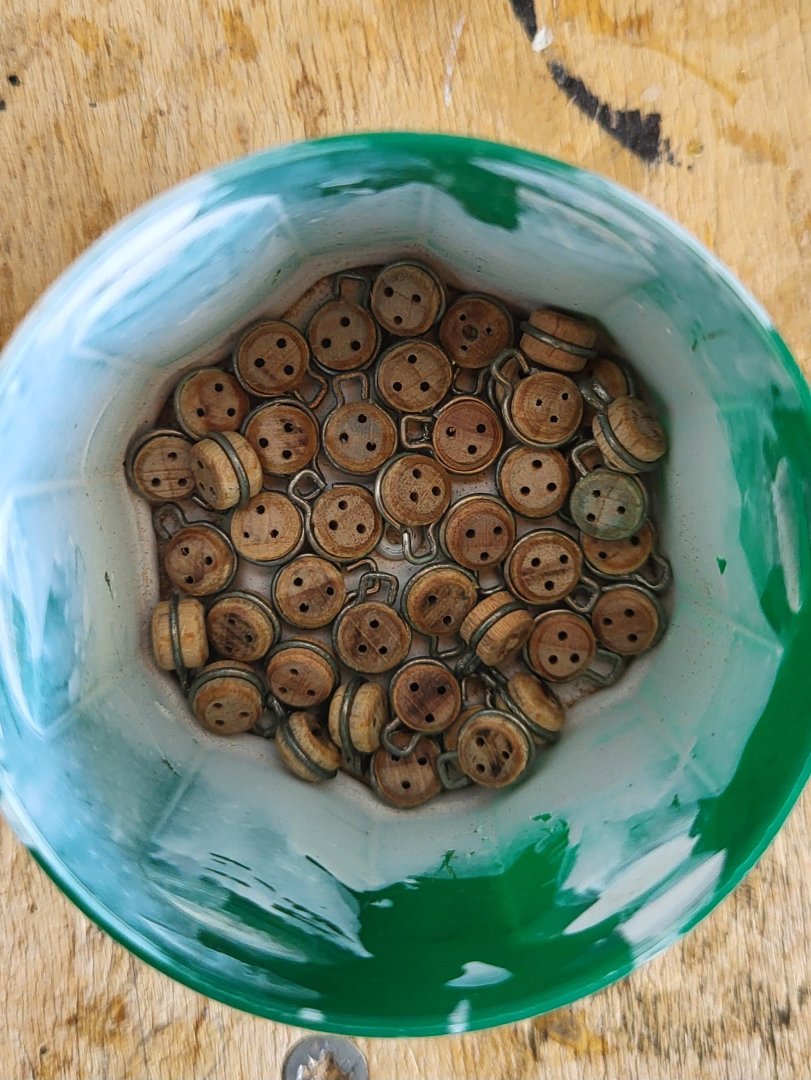
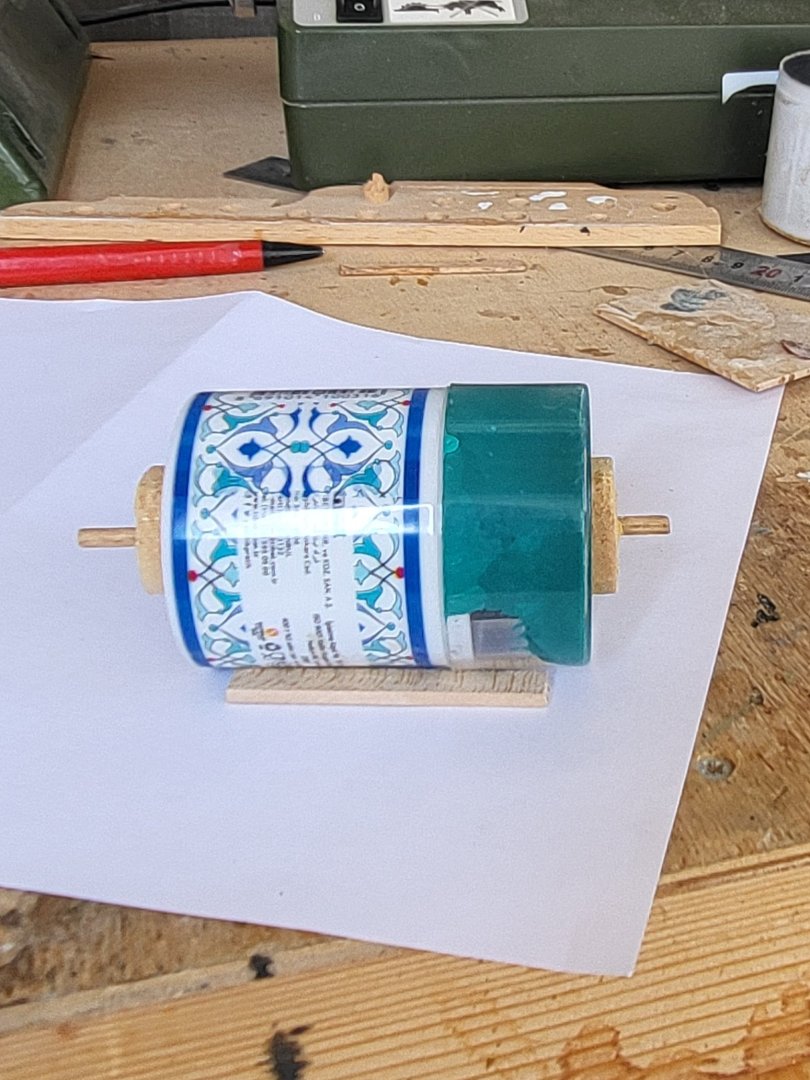
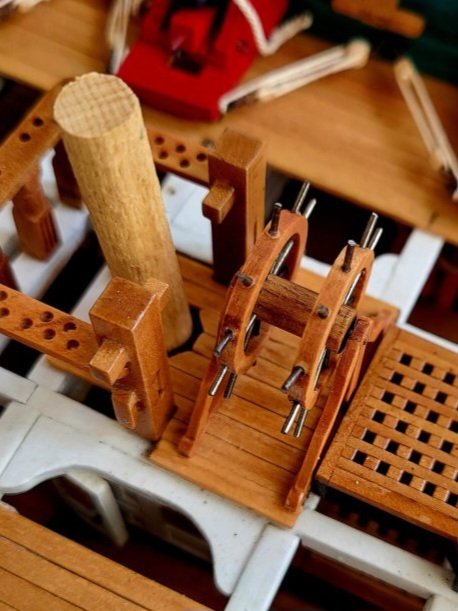
After this step, there are a lot of small parts like deadeyes and blocks that need to be sanded clean, so I made a simple sander to make the job easier. You just drop the parts in, turn the sander with a motor, and they come out clean and sanded.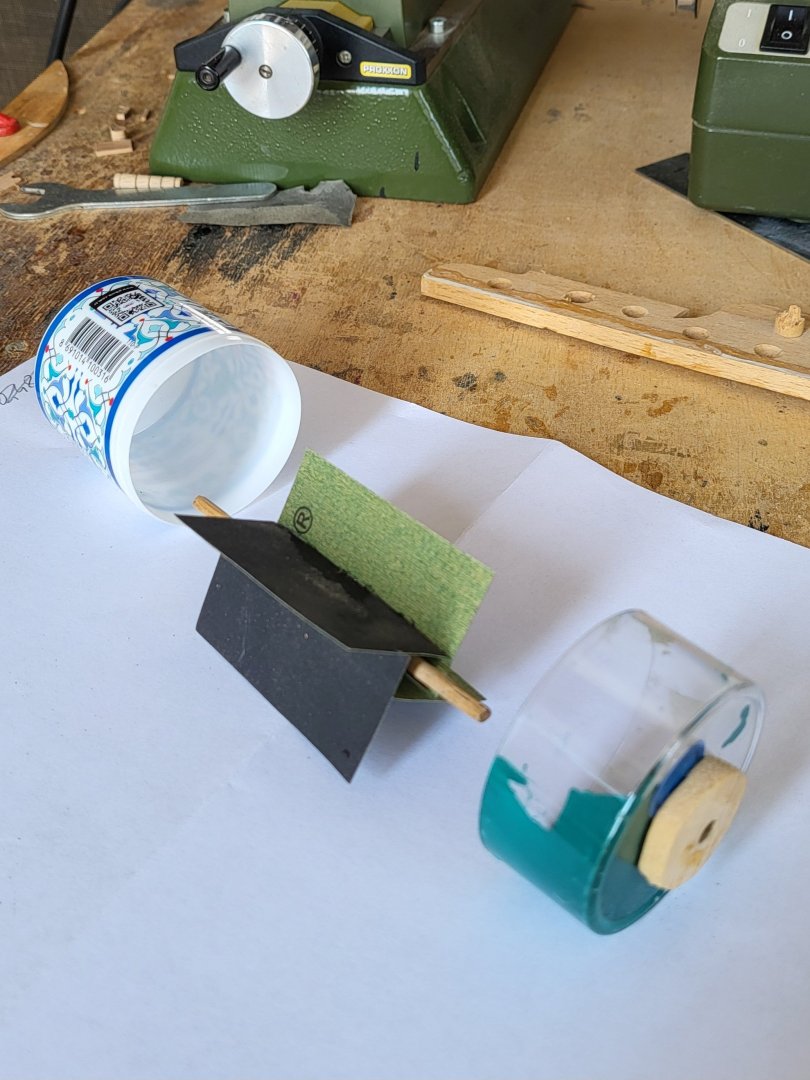

-
USS Constitution by mtbediz - 1:76
mtbediz replied to mtbediz's topic in - Build logs for subjects built 1751 - 1800
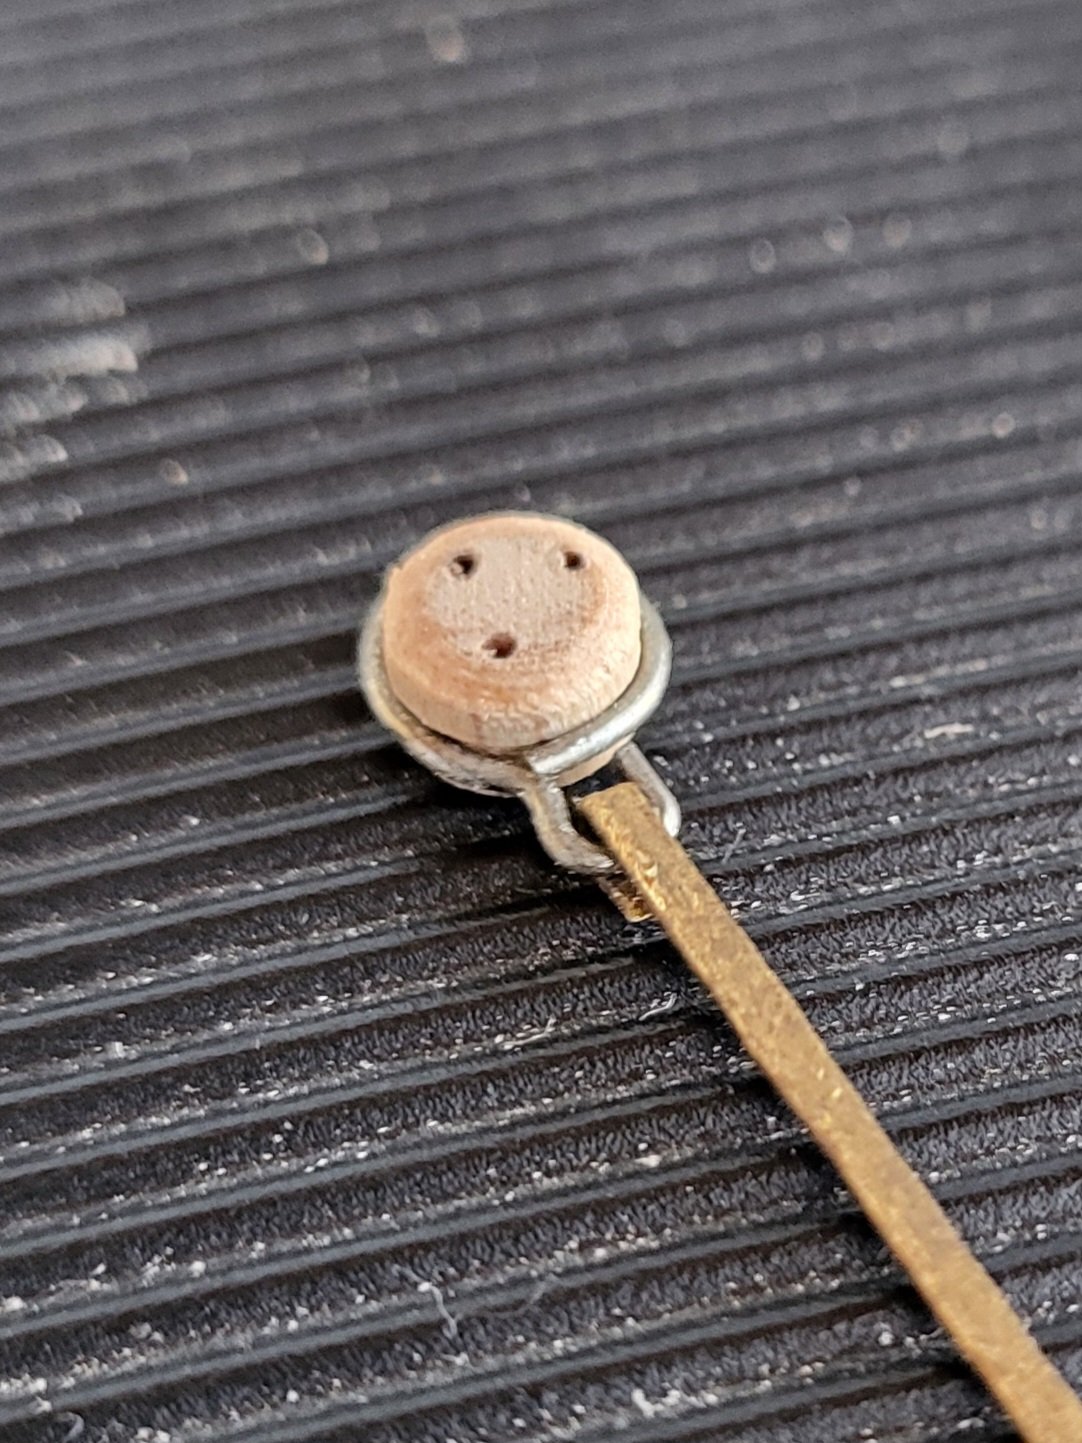
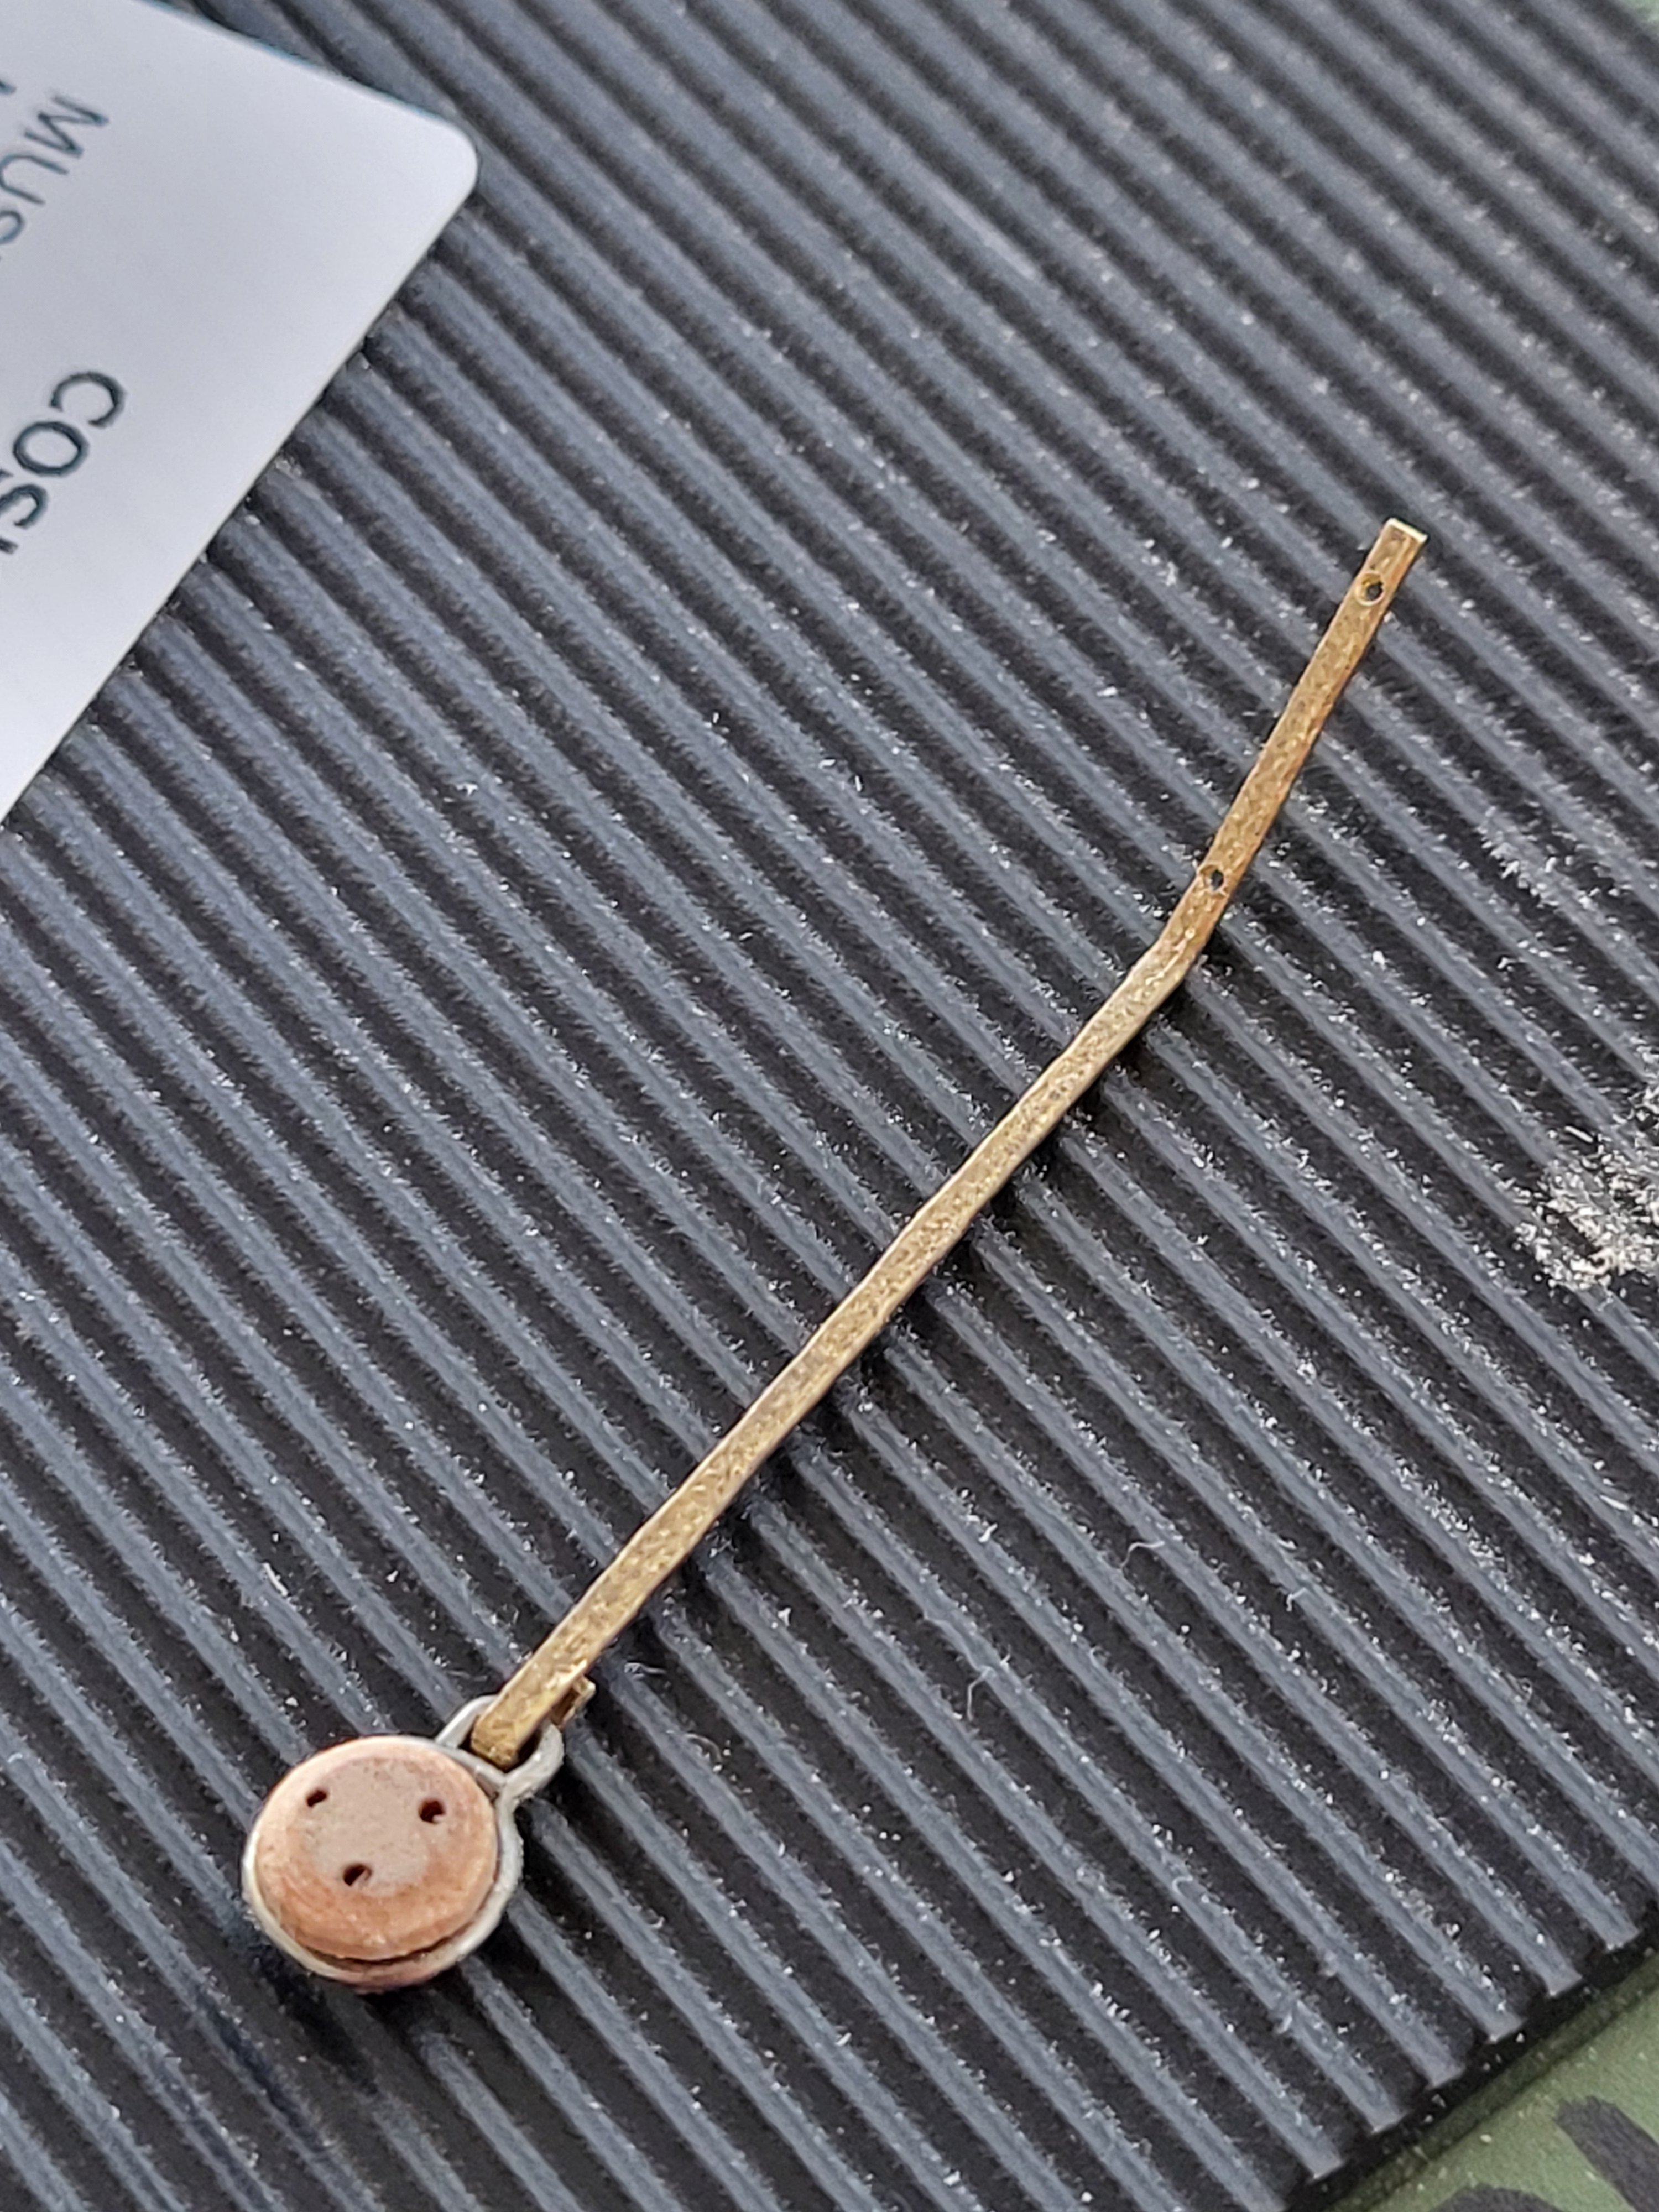
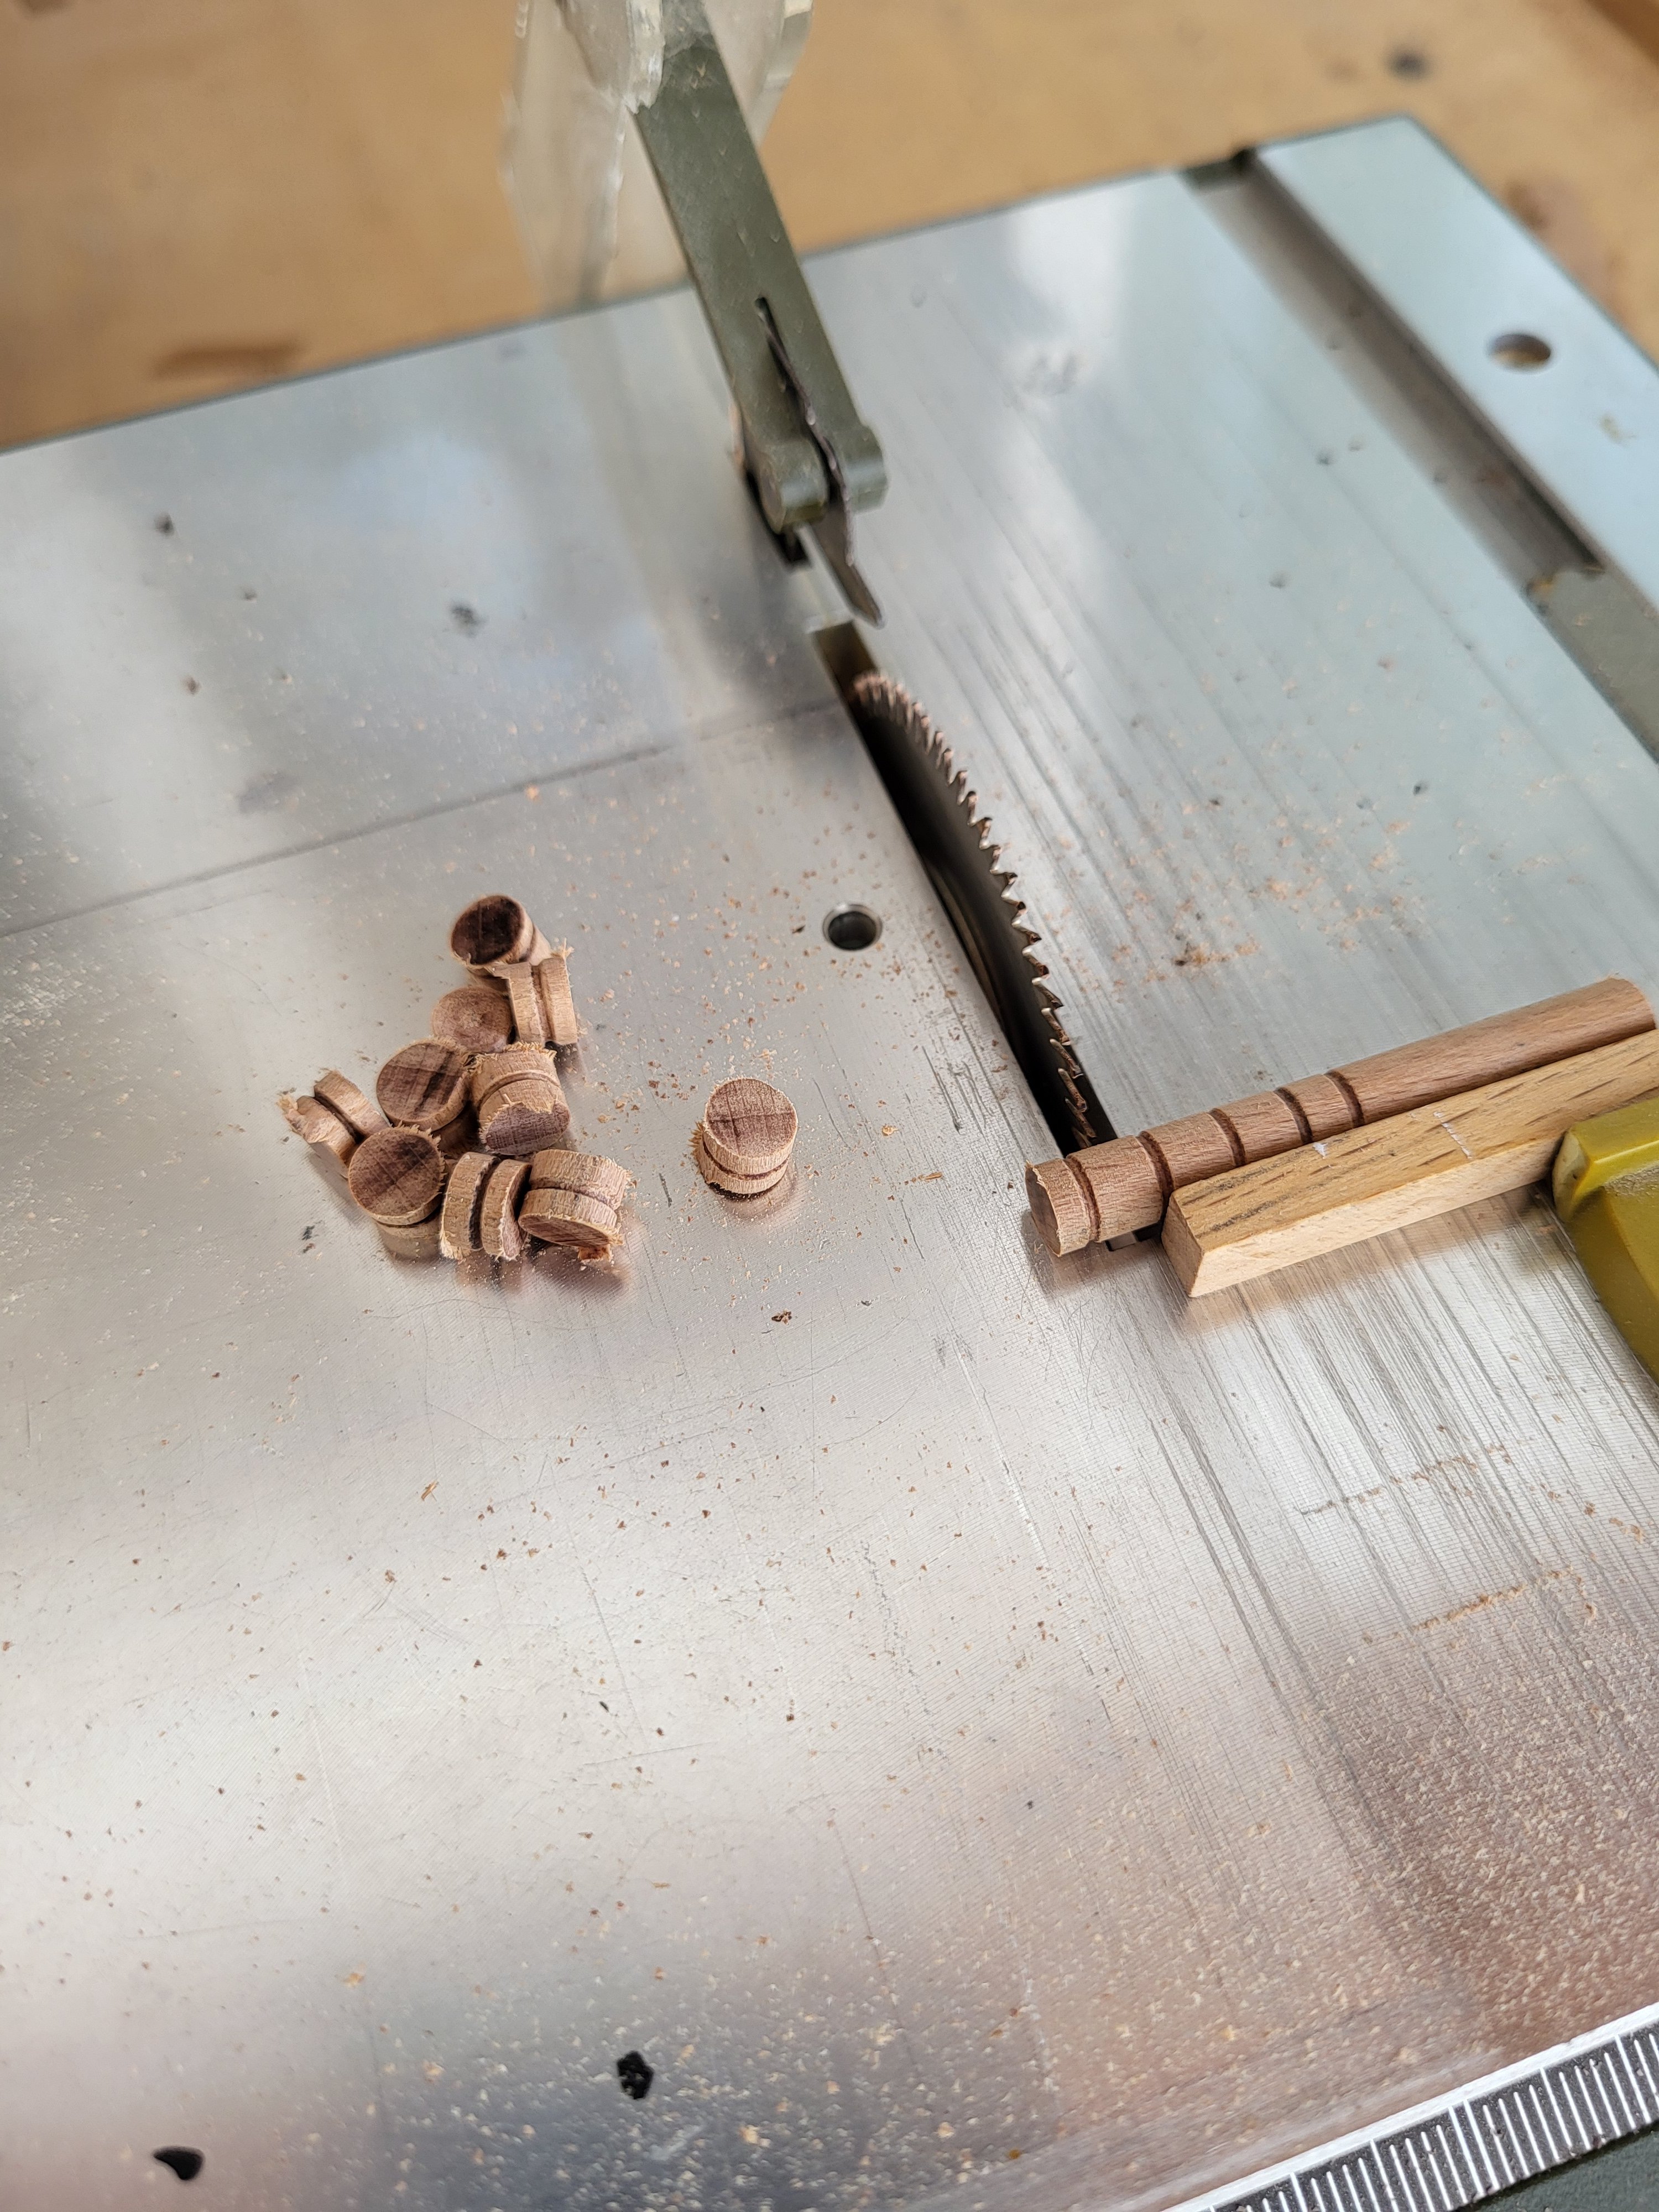
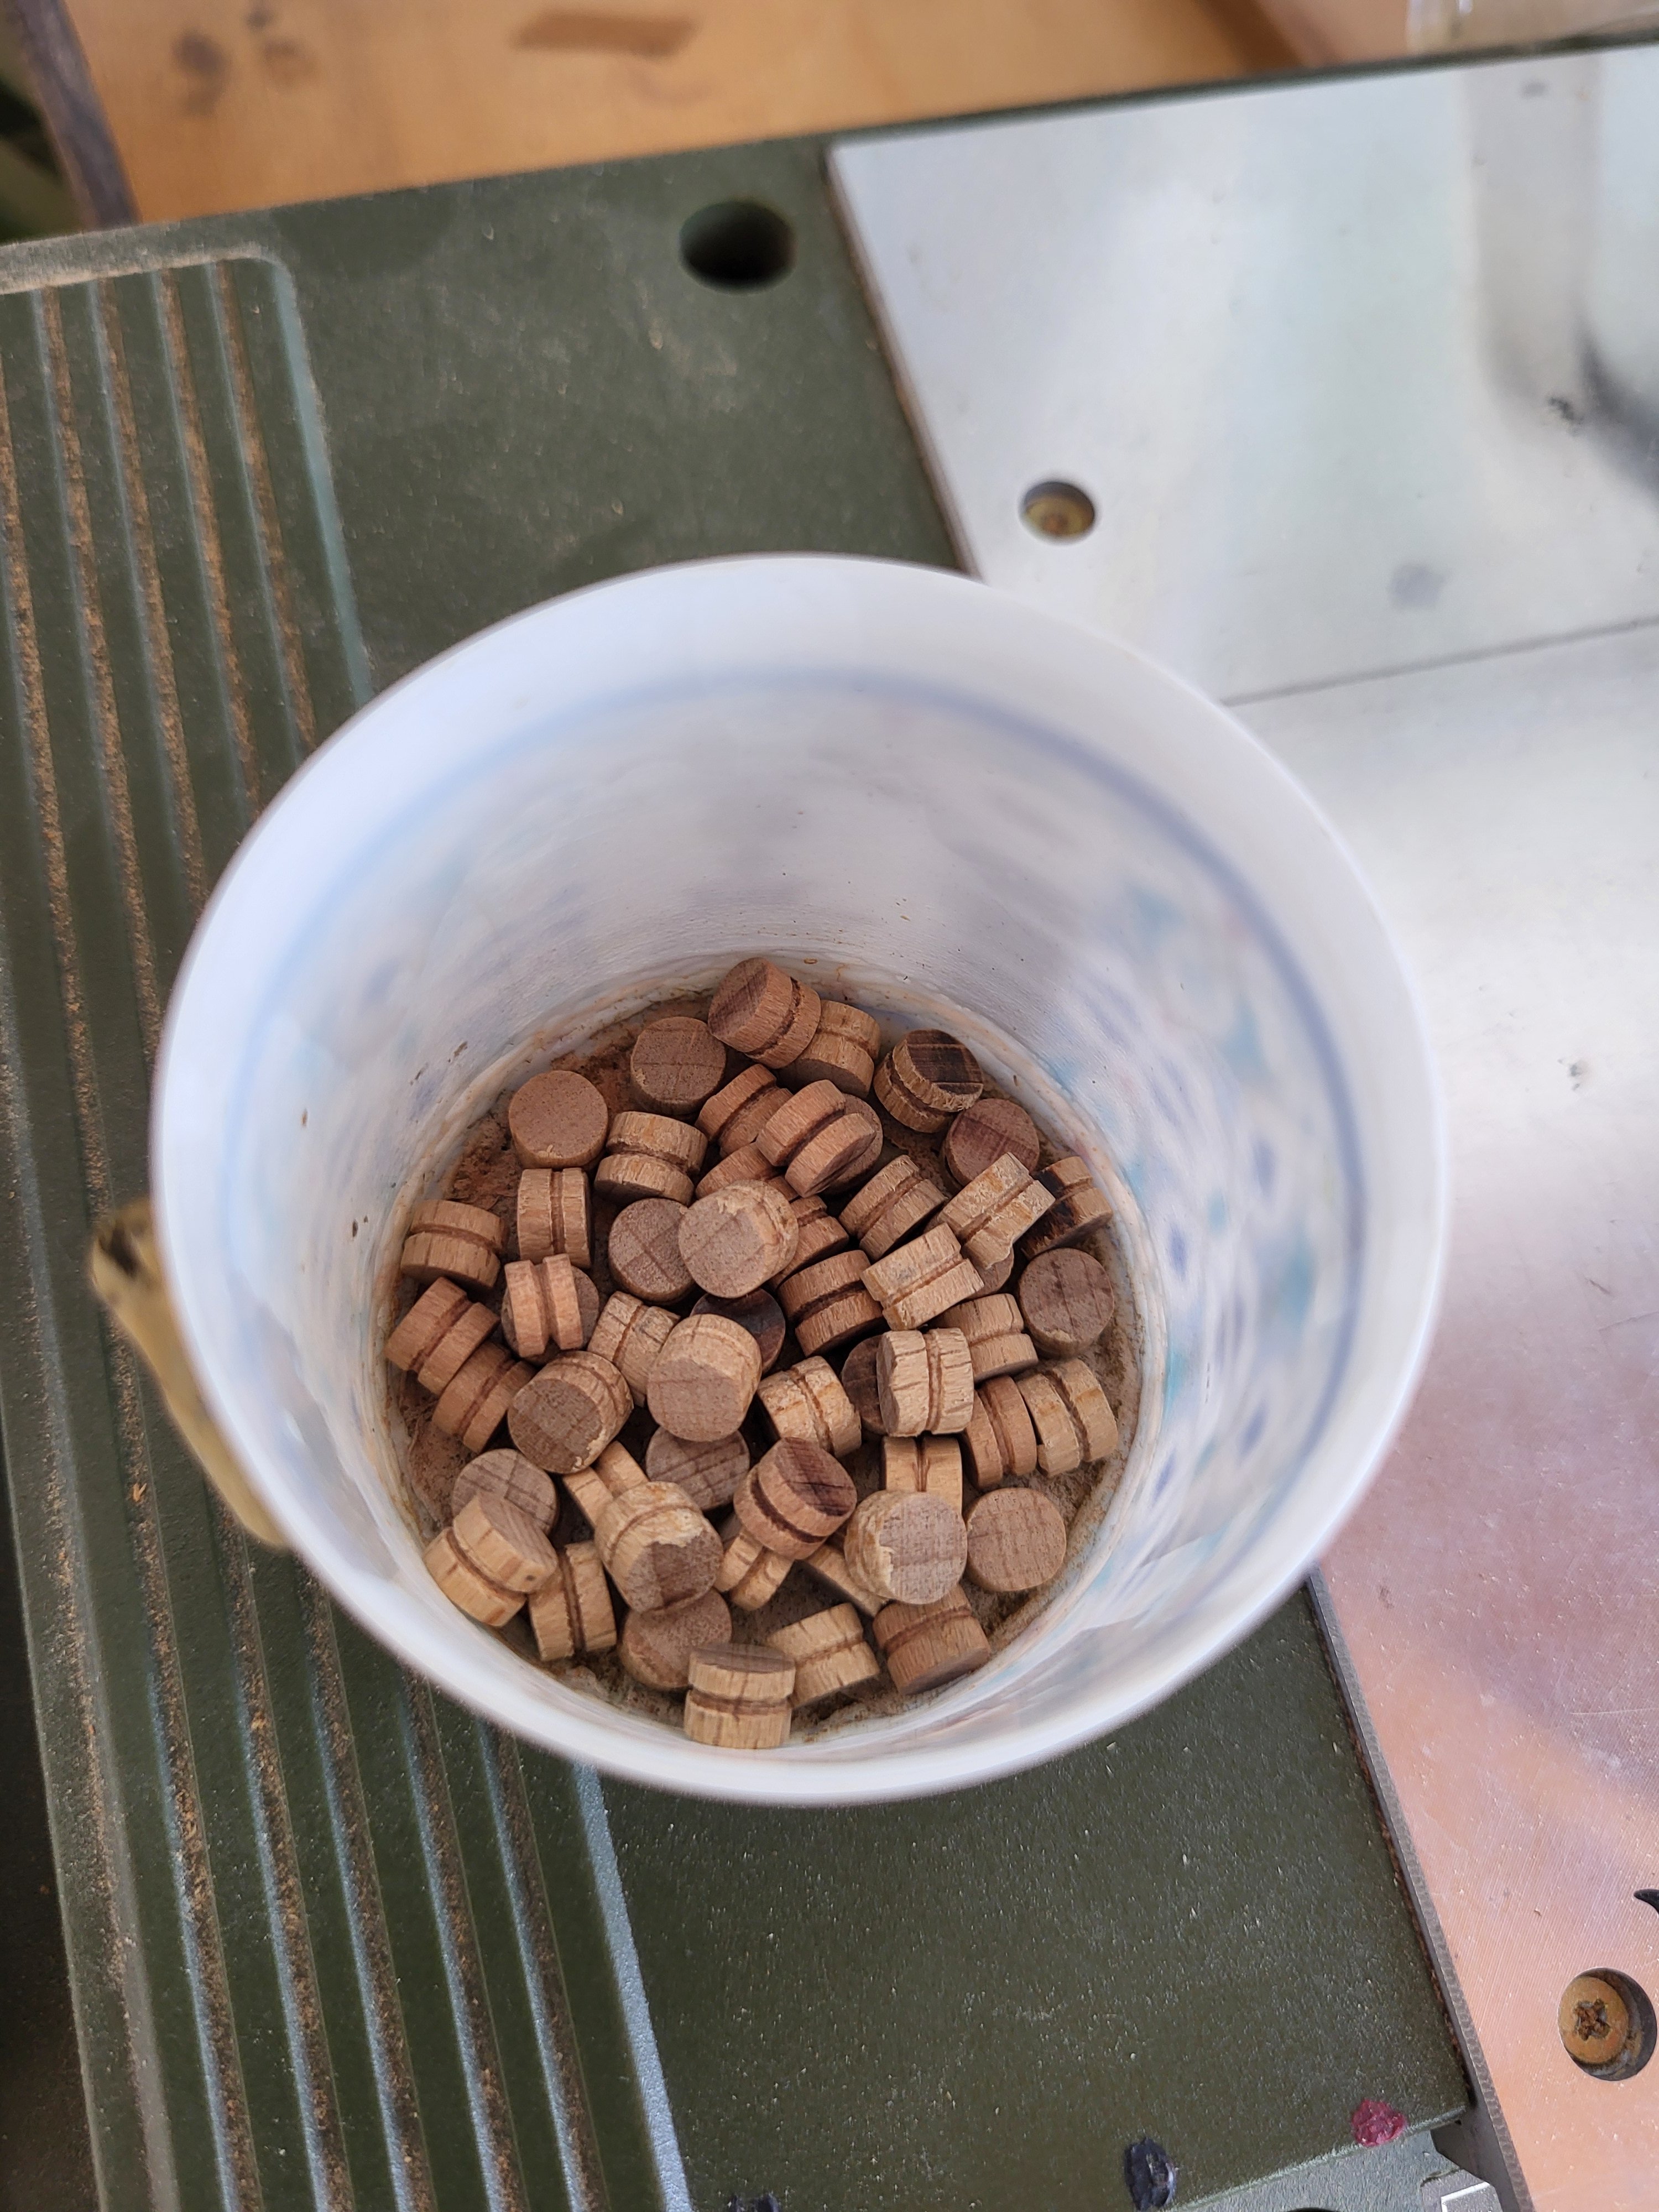
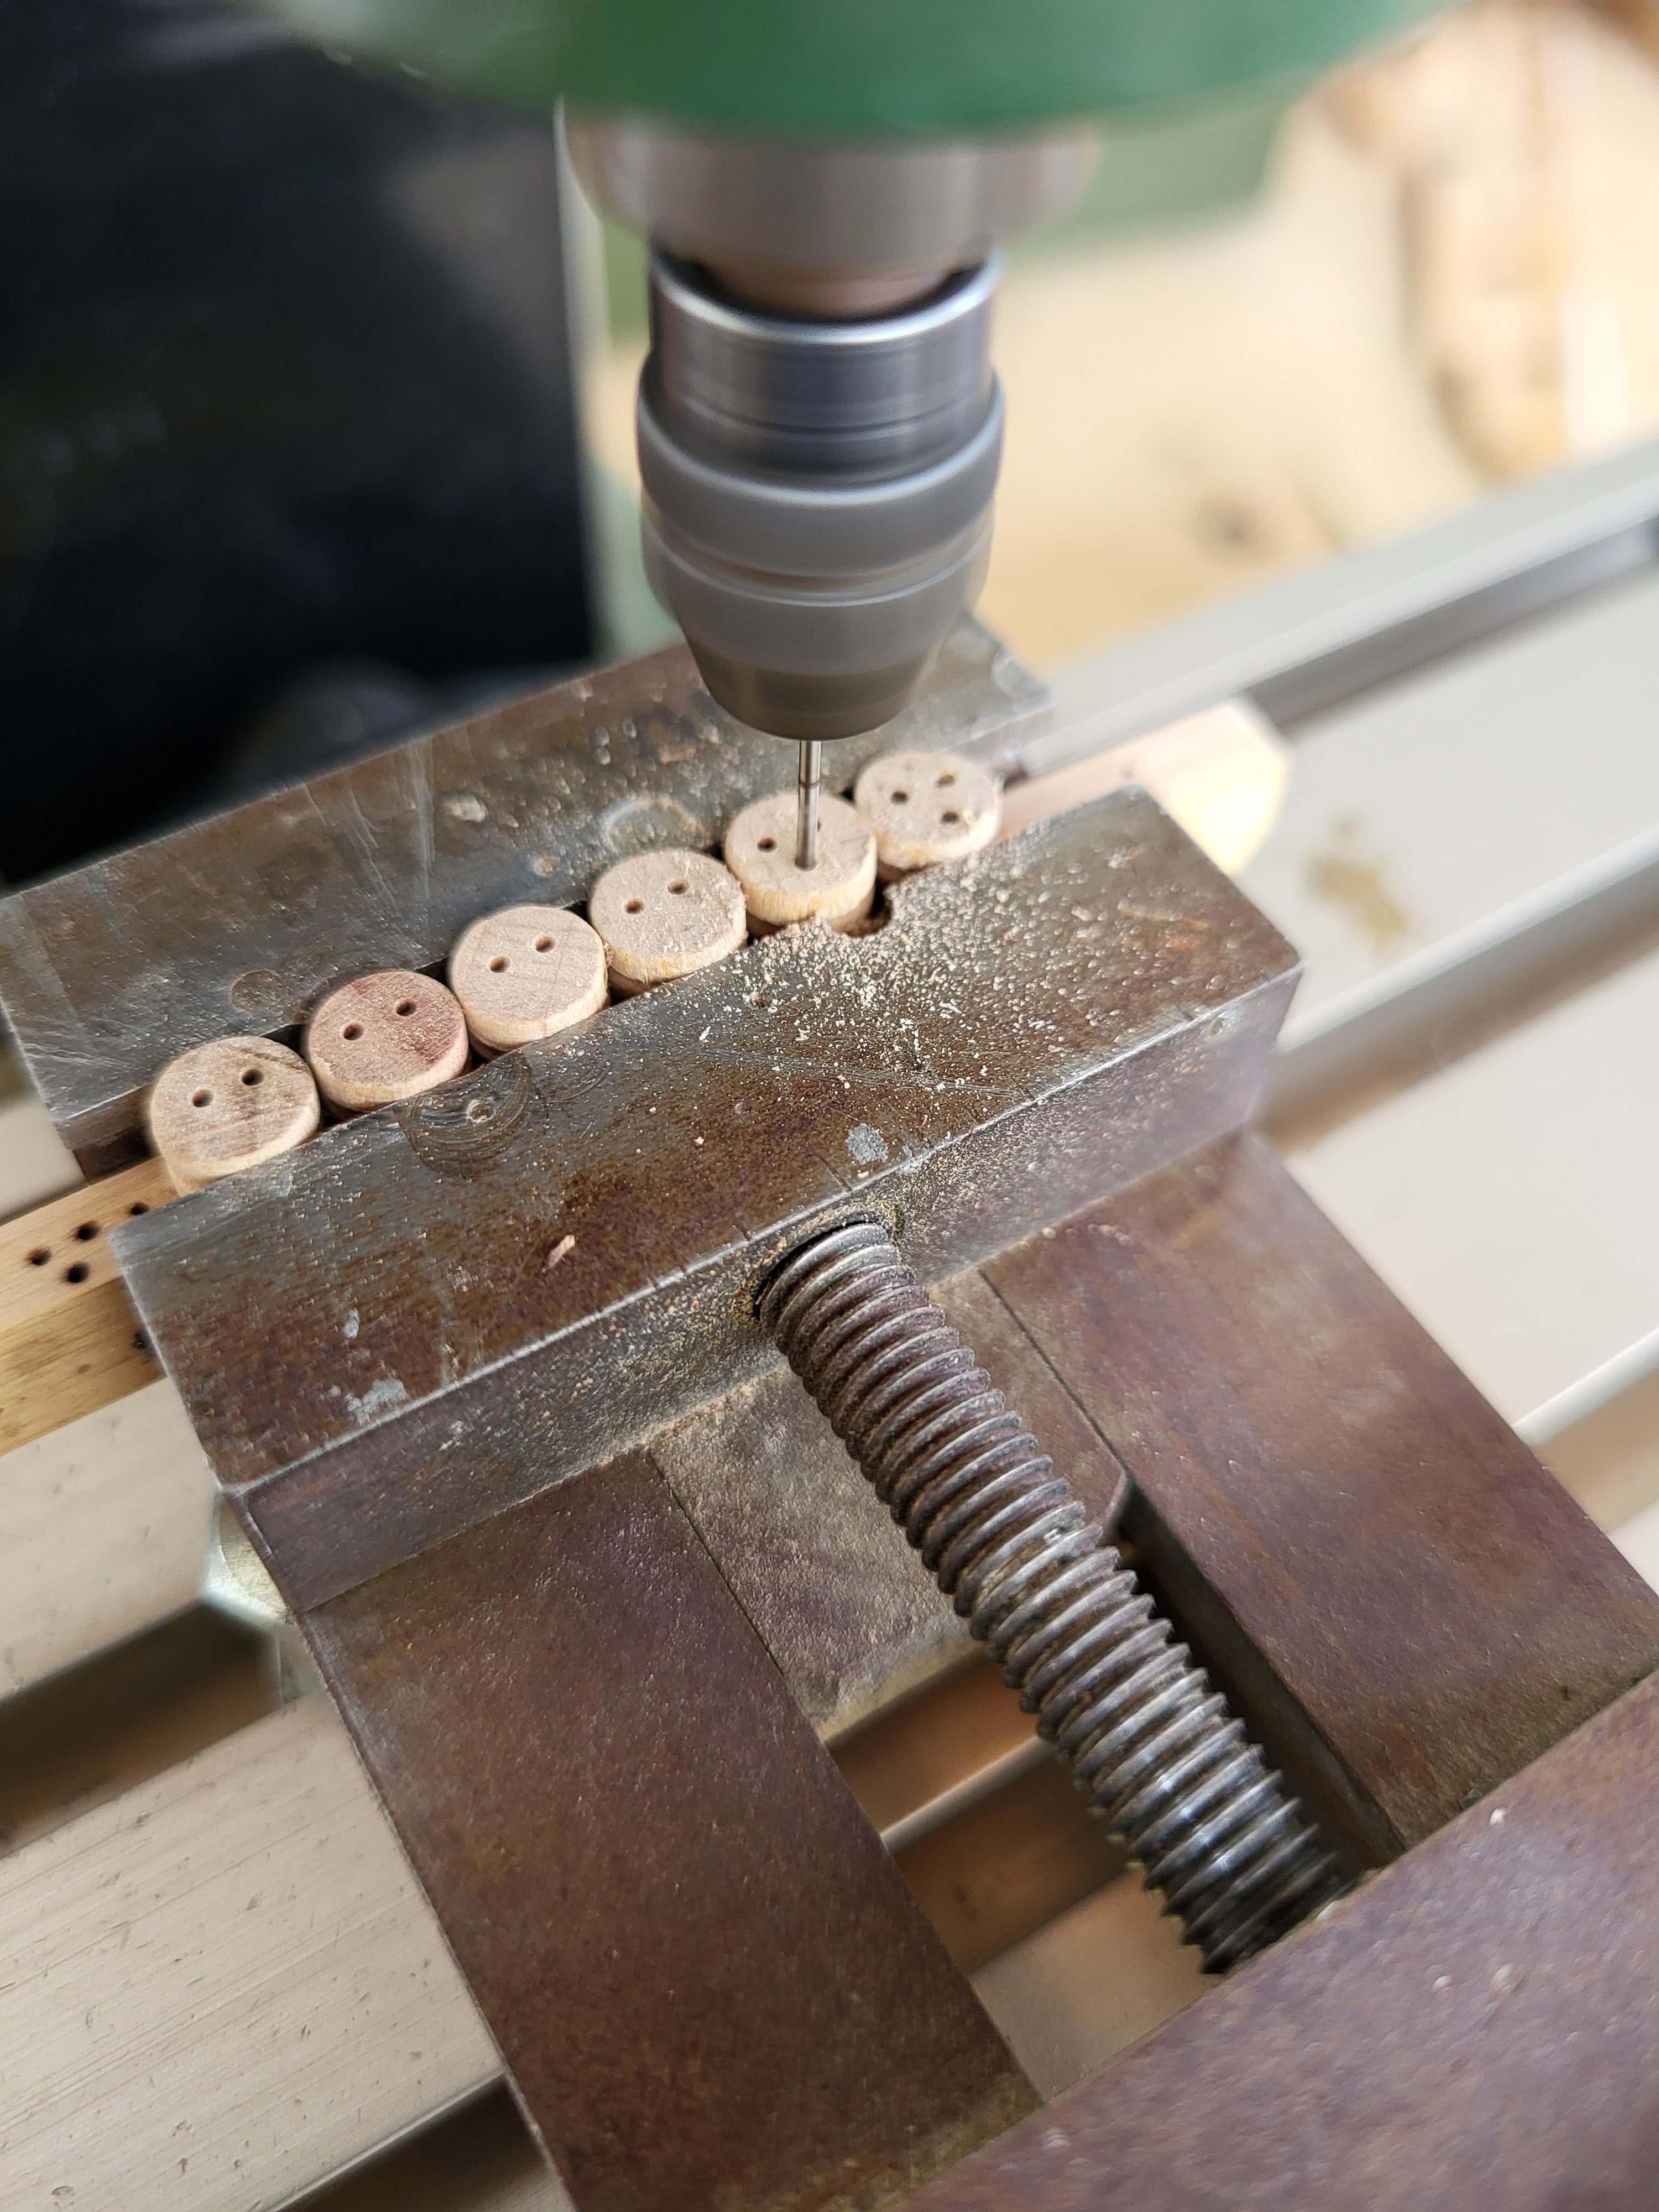
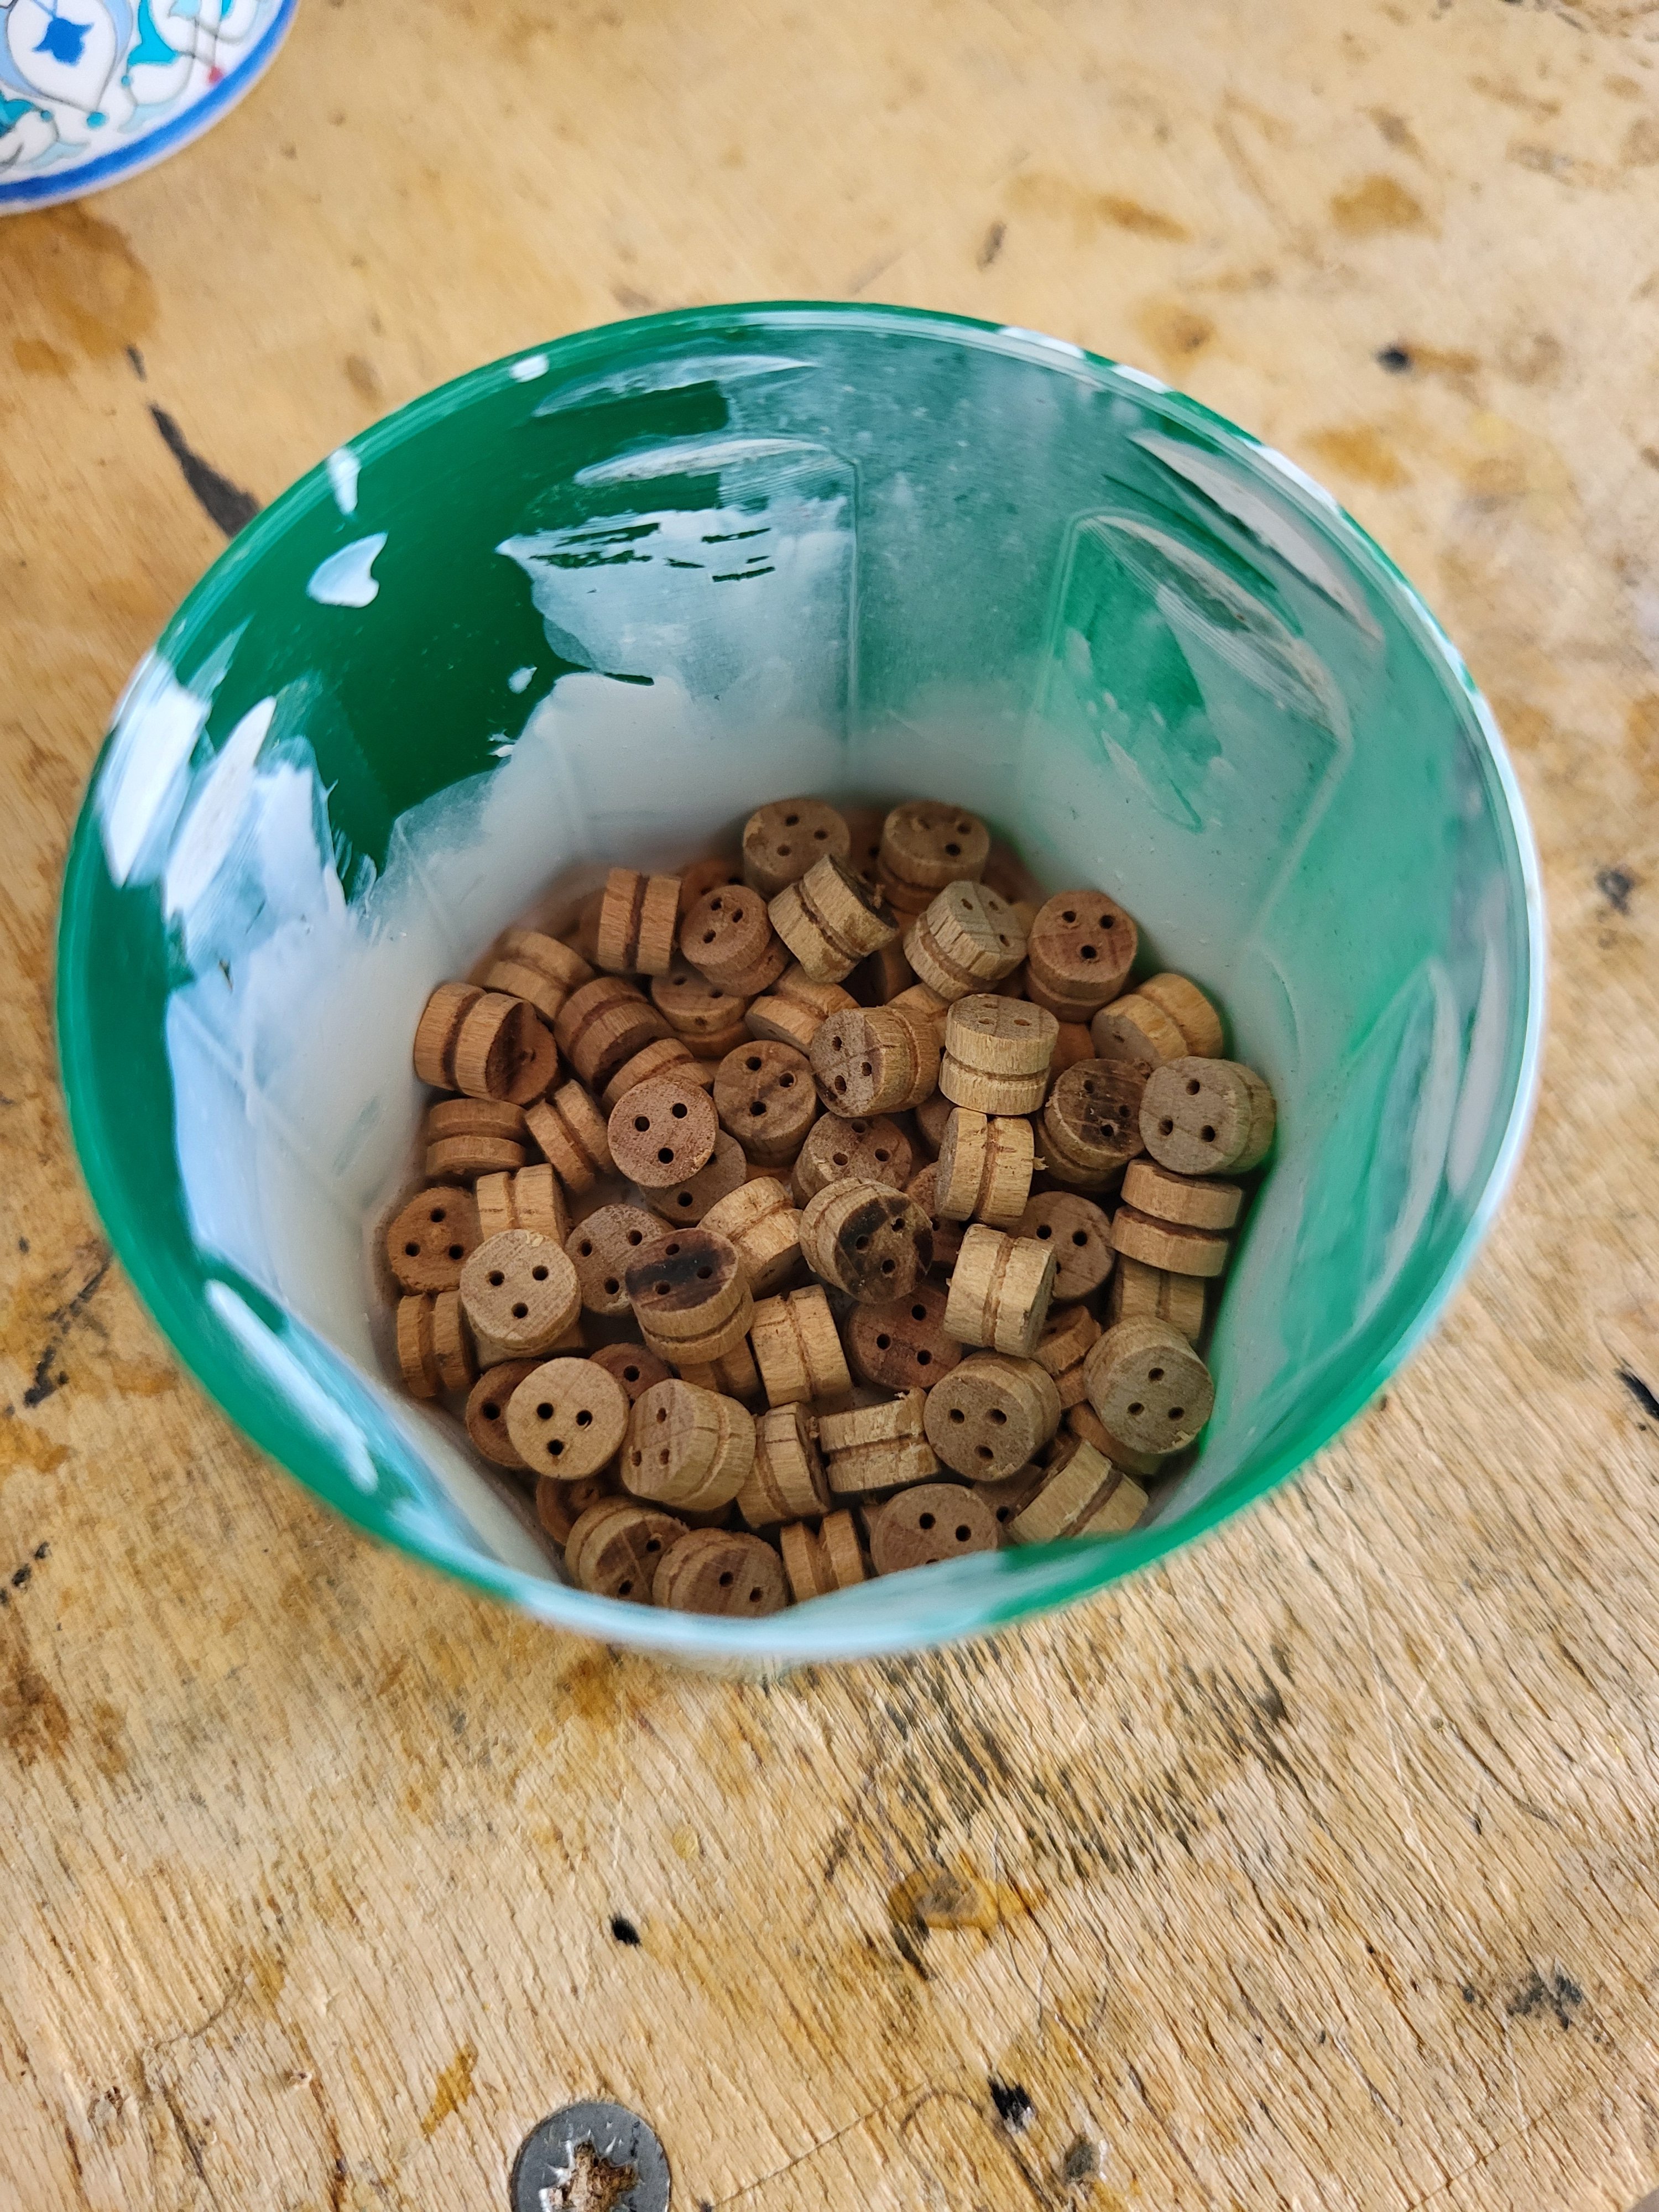
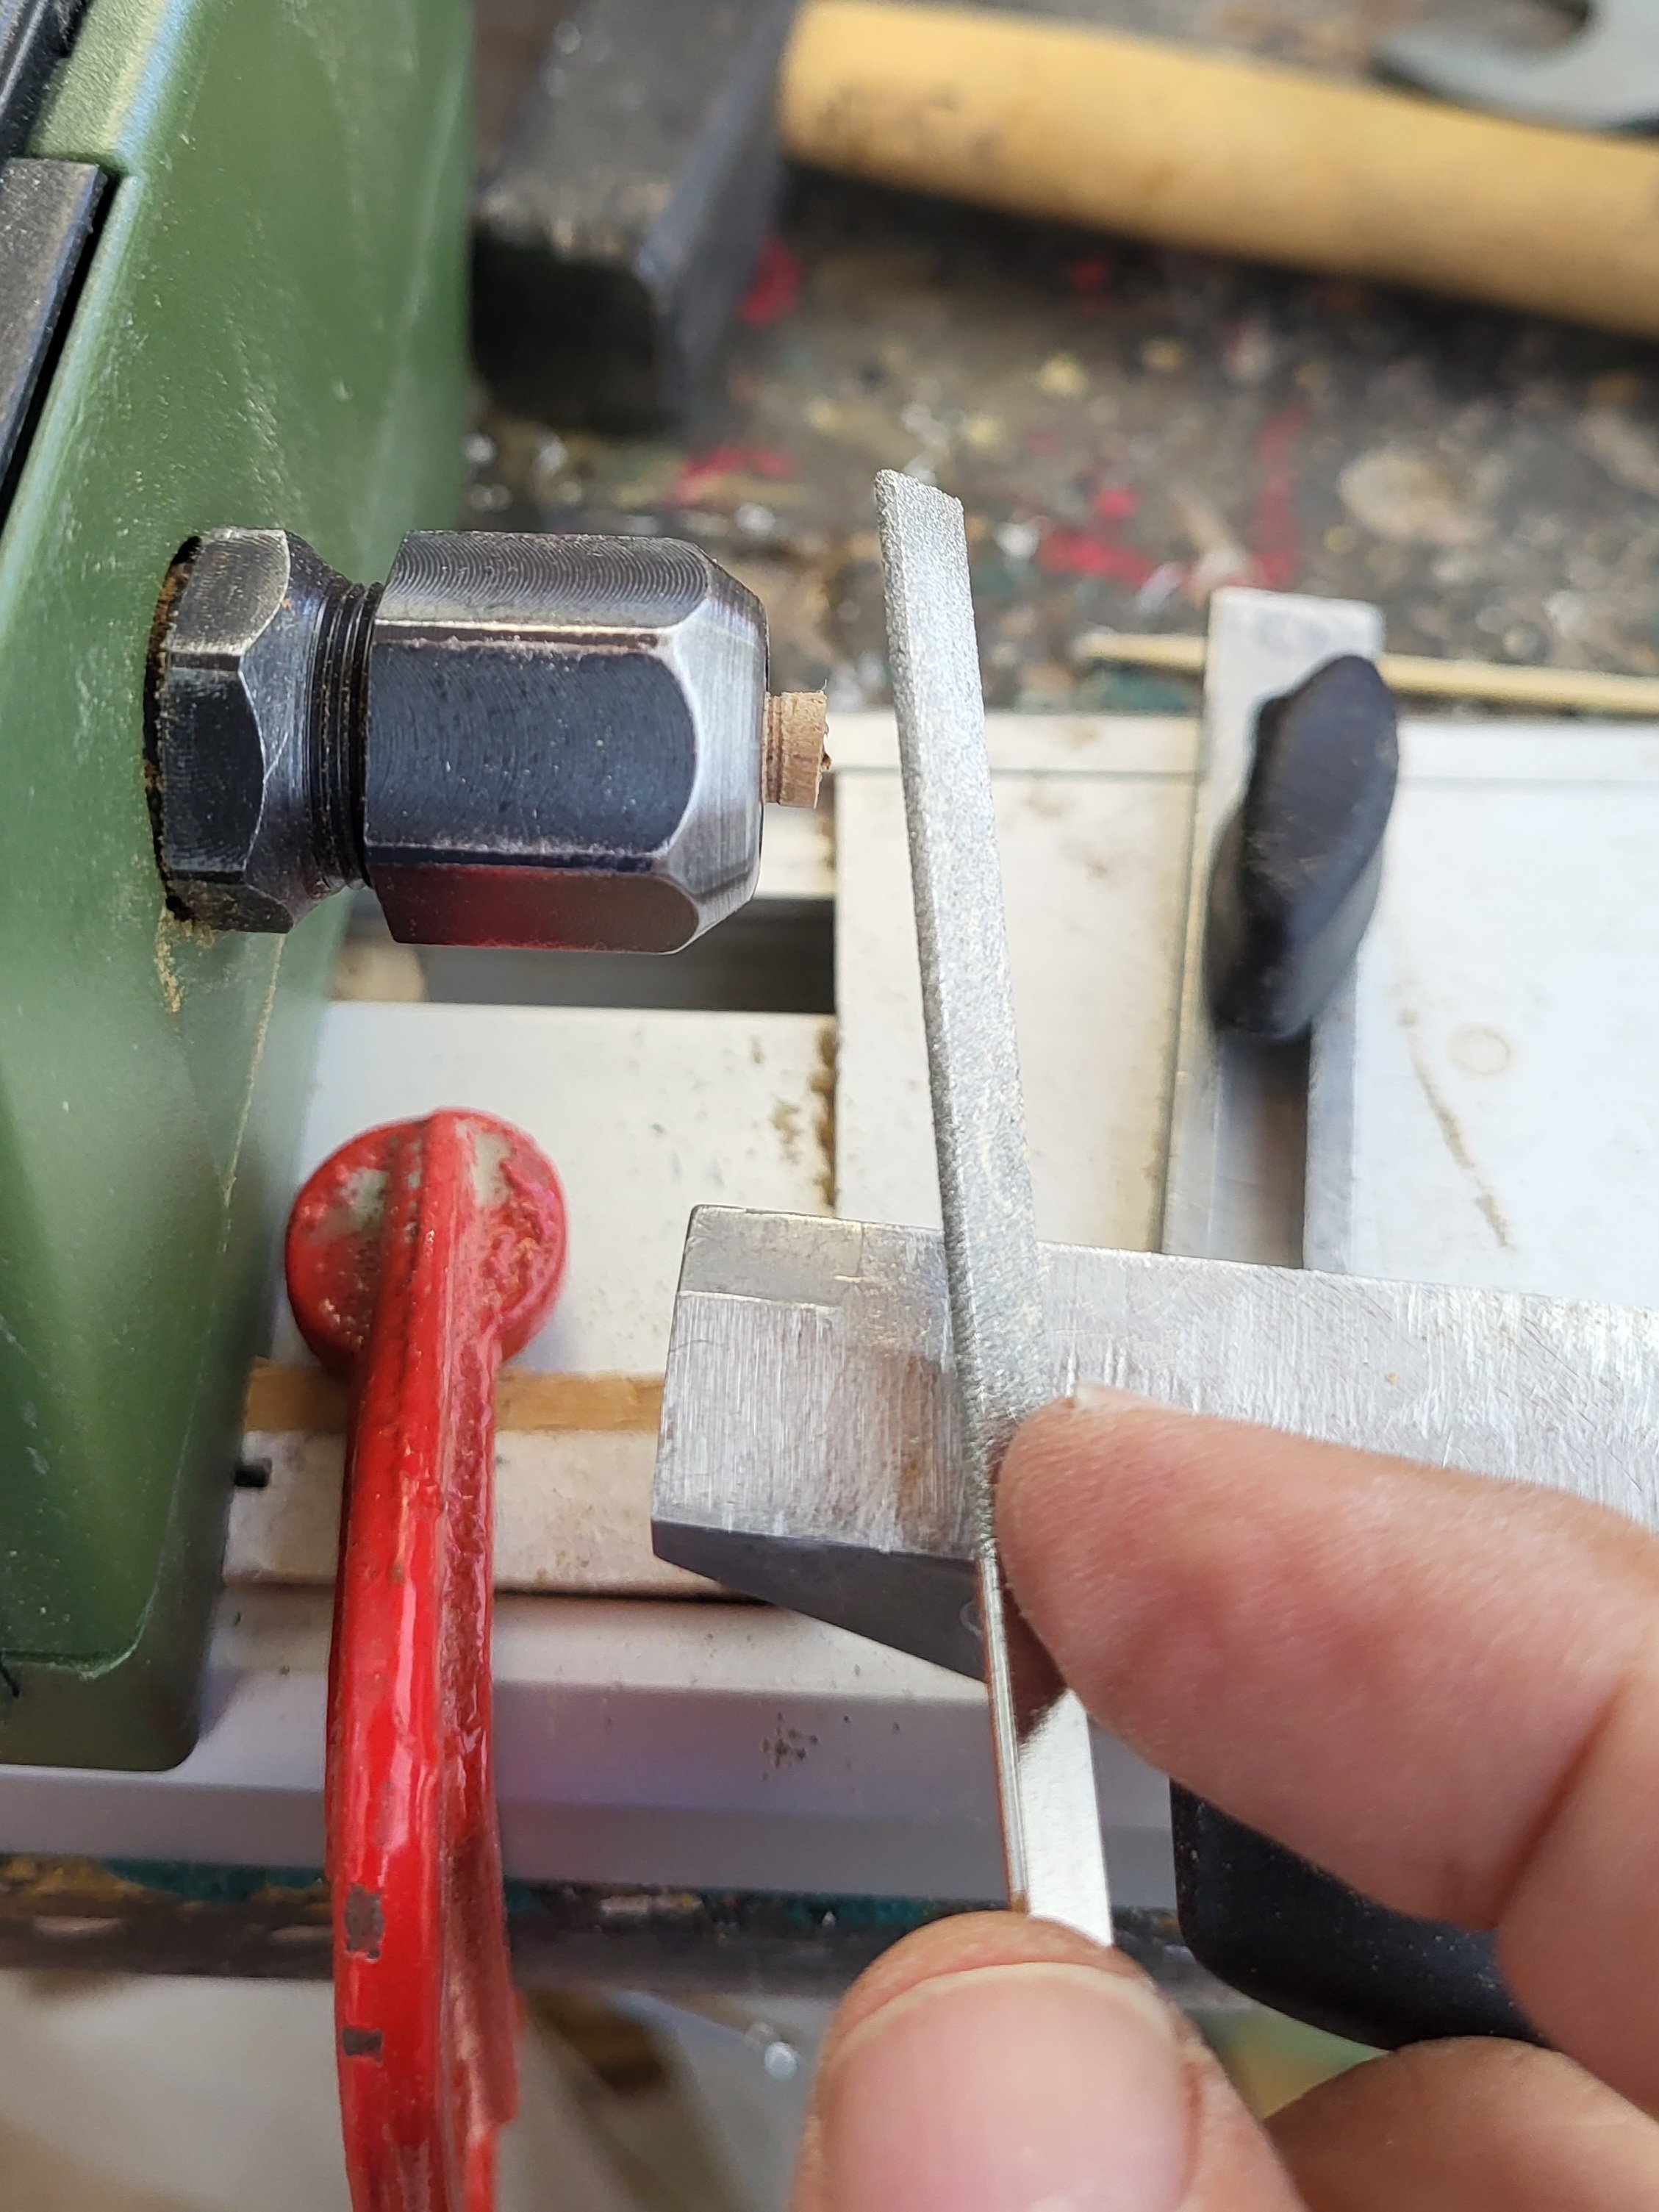
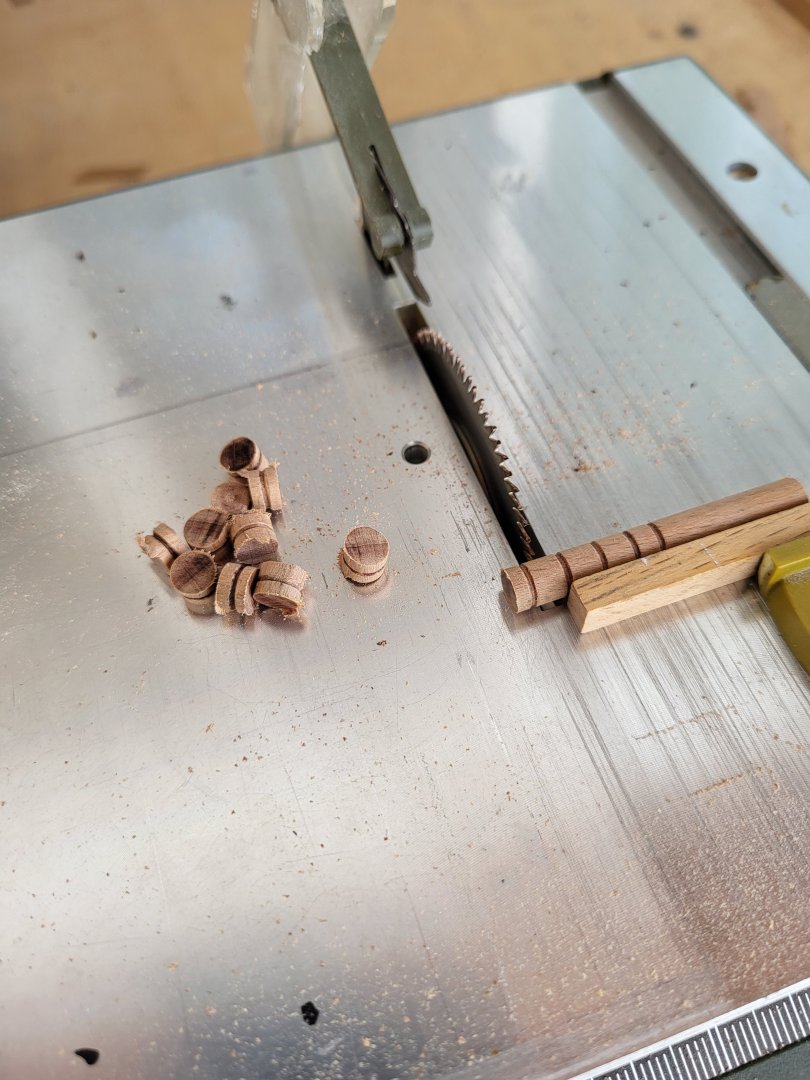
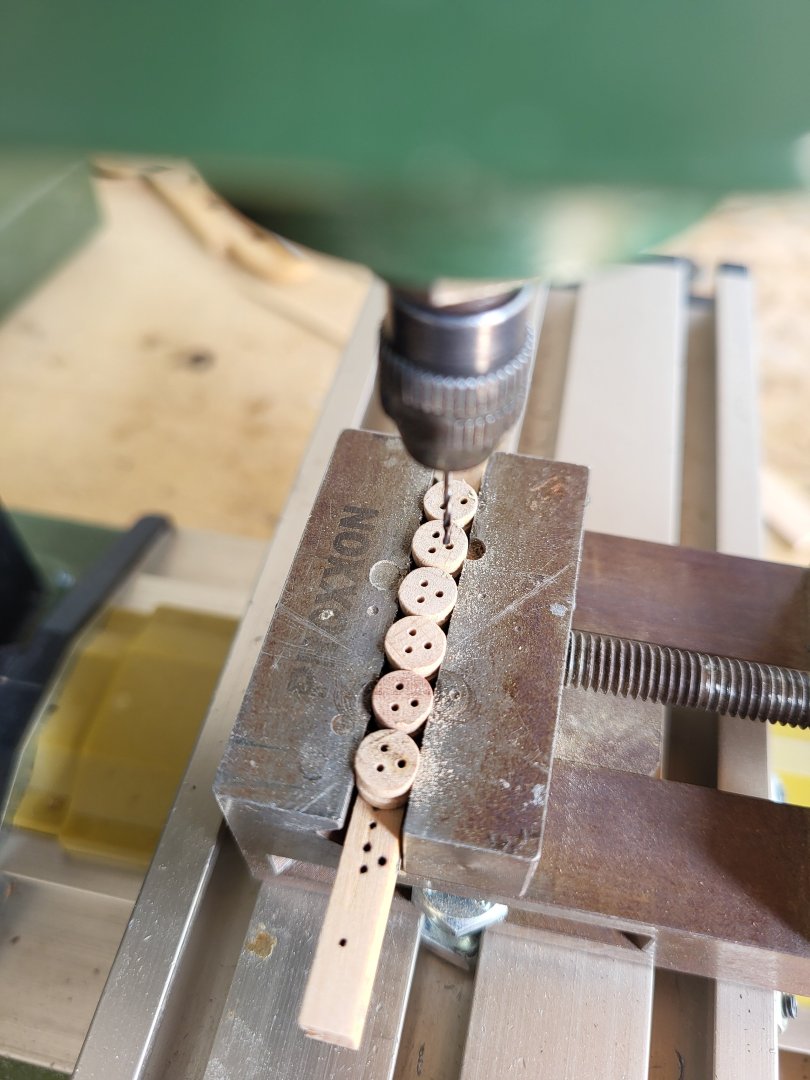
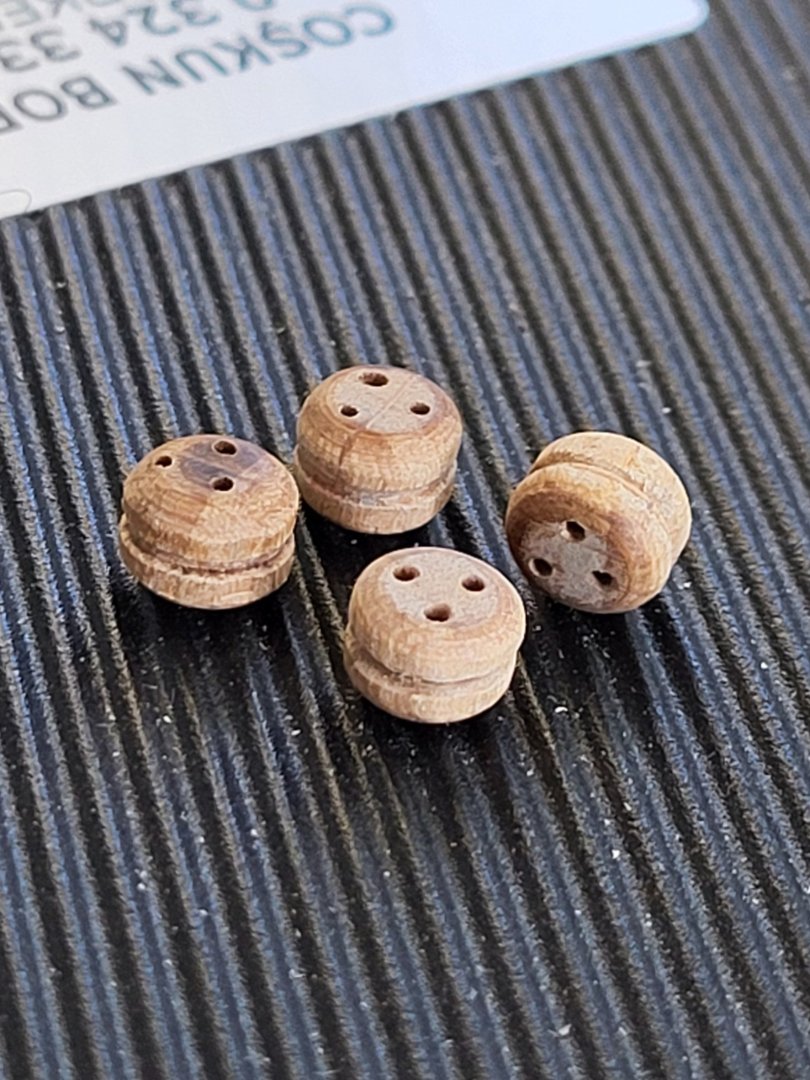
I have reached the point where I need to make deadeyes. At first, I considered buying ready made ones but I decided to fabricate them myself. I began by using a triangular file on the lathe to carve the classic grooves into the dowel. Next, I sliced the dowel into discs of the correct thickness using a circular saw, then drilled three evenly spaced holes in each disc using a 0.8 mm bit. After drilling, I remounted each piece on the lathe and gently chamfered the edges with a file. This final touch gave them a smooth, polished finish. The result: clean, functional, and completely handmade deadeyes.


-
I don't have any idea about rolling pins but the others look like truckles for the carronade carriages.
-
I have the same problem, but I have to leave it as is. Otherwise, I would have to remove the beams that the hatch sits on and many other things.
-
USS Constitution by mtbediz - 1:76
mtbediz replied to mtbediz's topic in - Build logs for subjects built 1751 - 1800
Yes my friend, I will do the rigging. -
USS Constitution by mtbediz - 1:76
mtbediz replied to mtbediz's topic in - Build logs for subjects built 1751 - 1800
Yes, due to the angle of the photos, the paths and stairs used to reach the monastery are not visible. Getting there is a bit challenging and tiring, but it is safe. -
You know how to take advantage of the dividing attachment's capabilities. I have one too, but I've realized I haven't been making the most of it yet.
-
Clean and precise work, as always. I absolutely agree with your opinion about the Proxxon mill. Every modeler should have it. I was wondering how you would made the square holes for the capstan bars, but I assume you're leaving them round, or will they be square?
-
USS Constitution by mtbediz - 1:76
mtbediz replied to mtbediz's topic in - Build logs for subjects built 1751 - 1800
Hi Peter. The outer diameter of the pipe on my grommet is 2.4 mm. I believe the 2 mm measurement on the grommet you found is the inner diameter of the hole, and the outer diameter is probably equal to mine. -
USS Constitution by mtbediz - 1:76
mtbediz replied to mtbediz's topic in - Build logs for subjects built 1751 - 1800
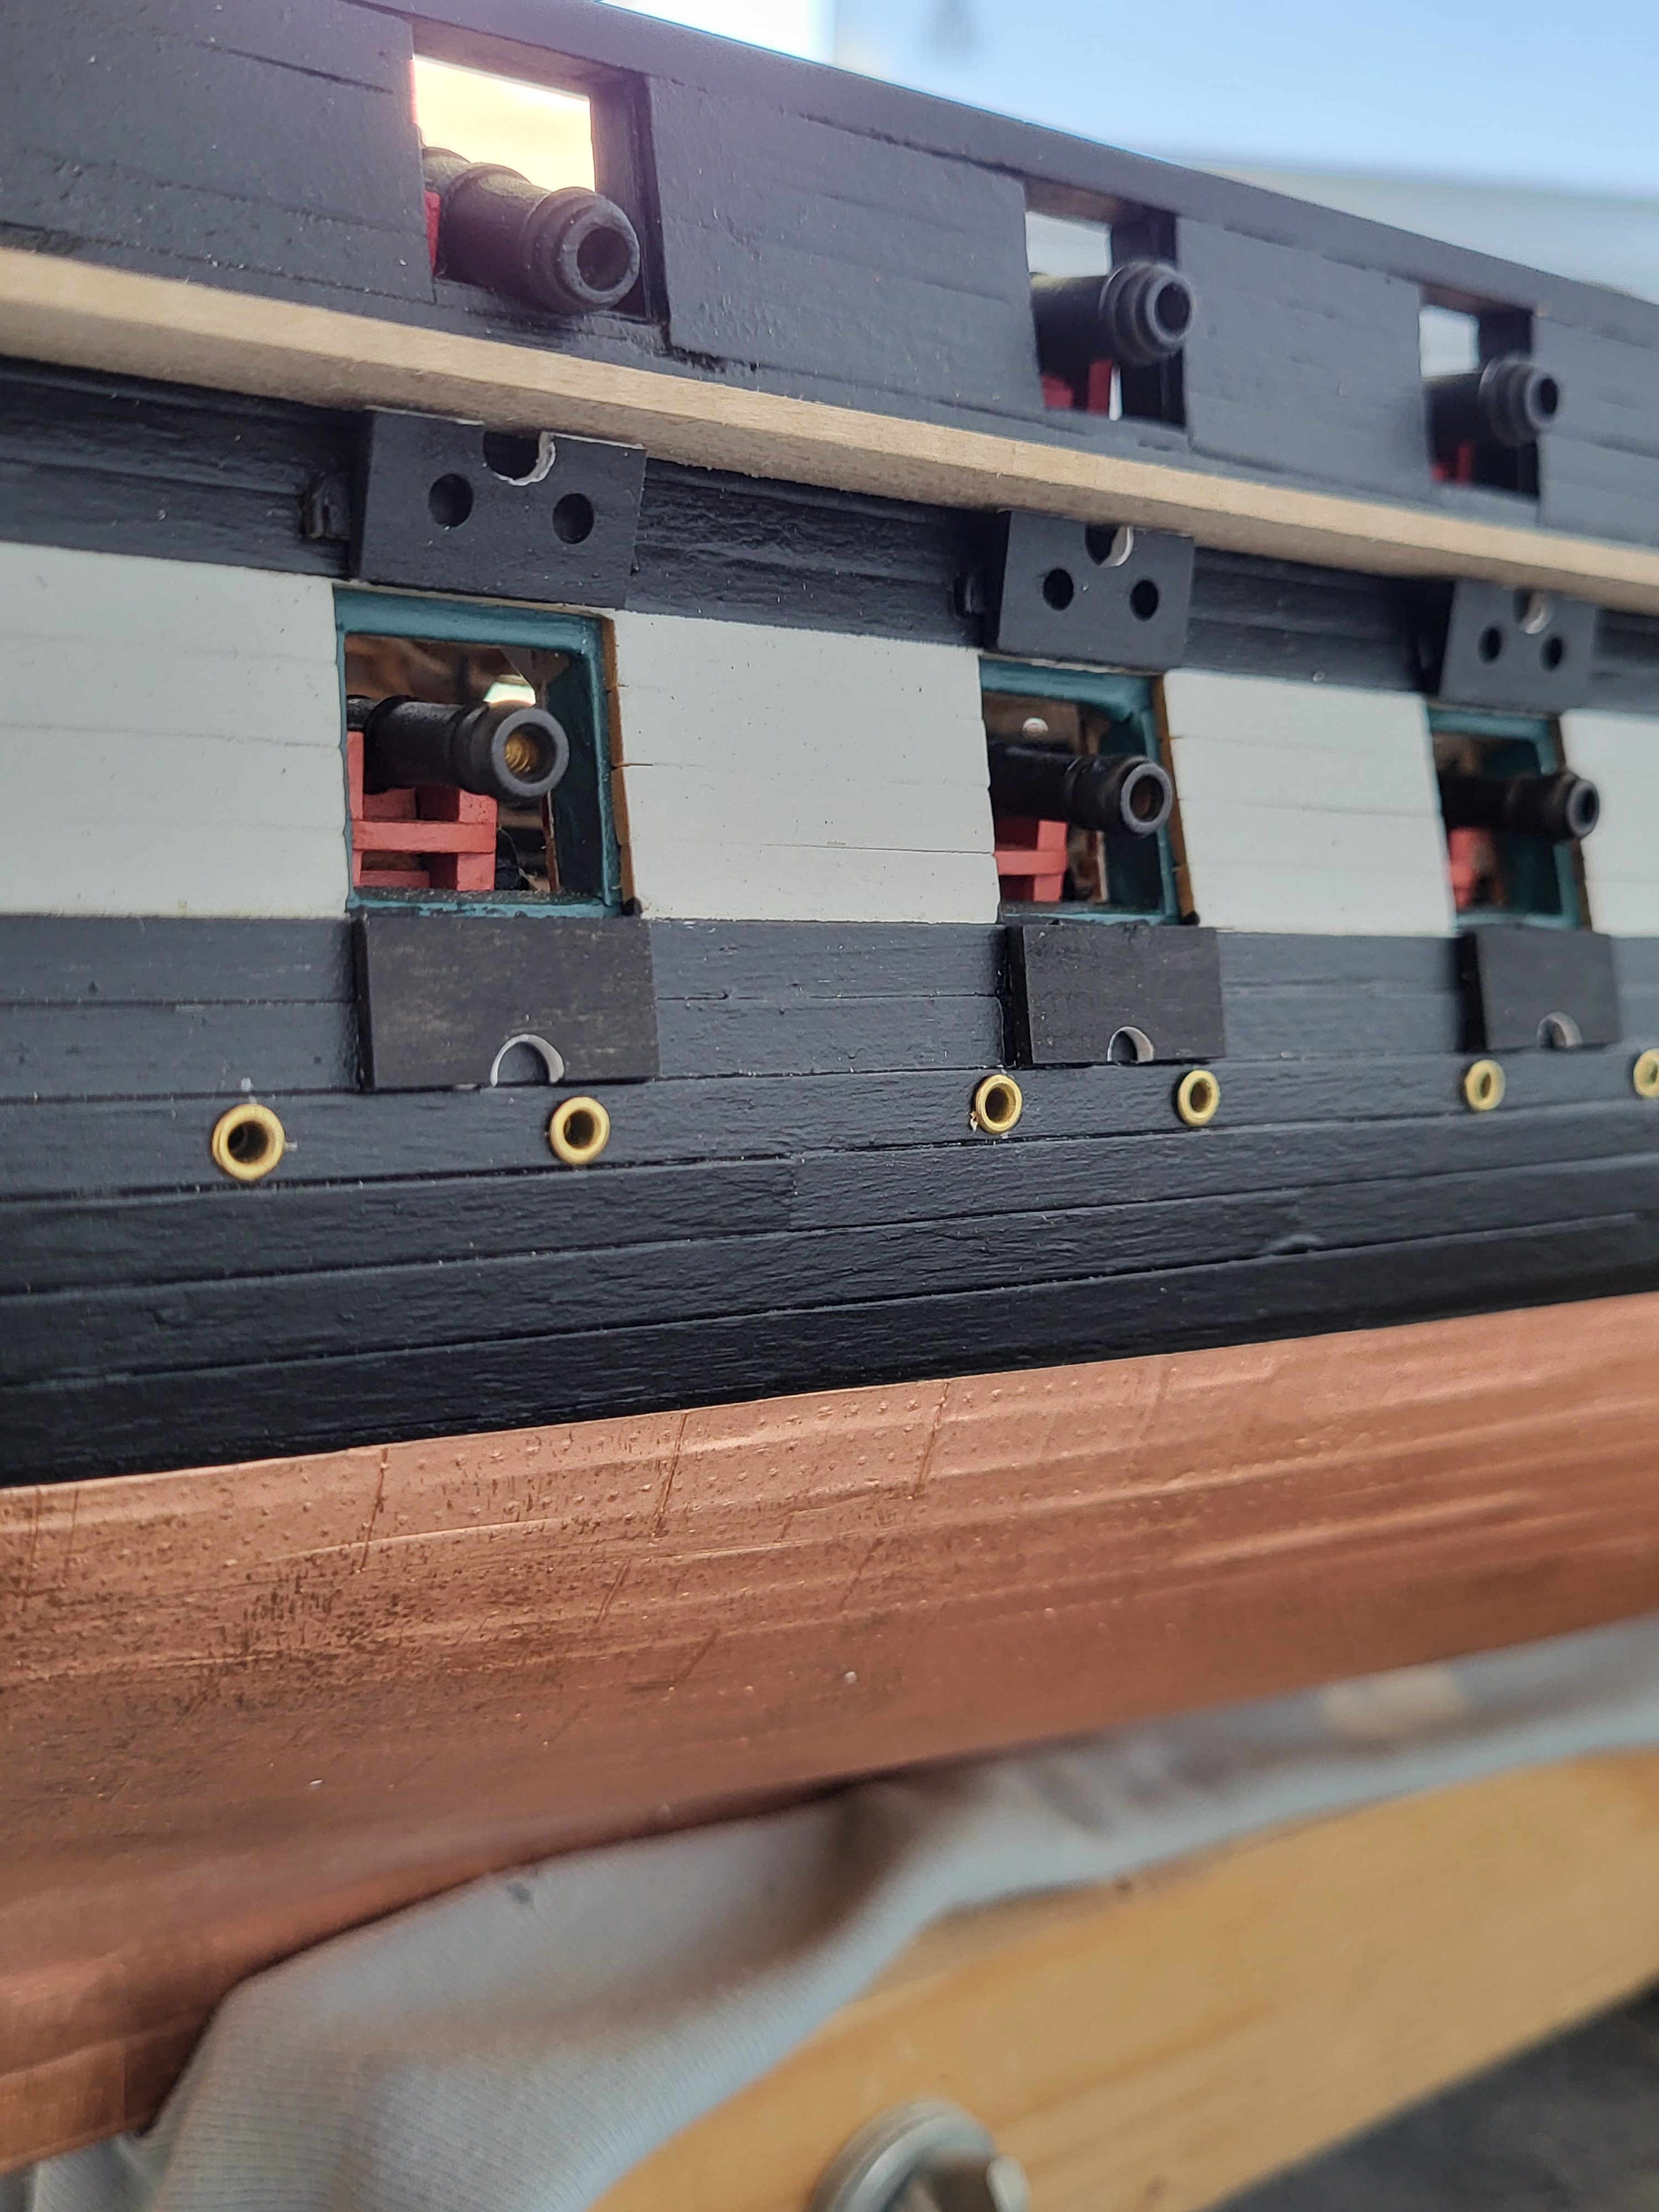
Hi Greg, no I didn't cut these from brass tubing. I bought them from a hobby store.The diameter of the flange is 3.6 mm and the outer diameter of the pipe is 2.4 mm. I first drilled 2.4 mm holes in the ship's hull and placed the portholes inside.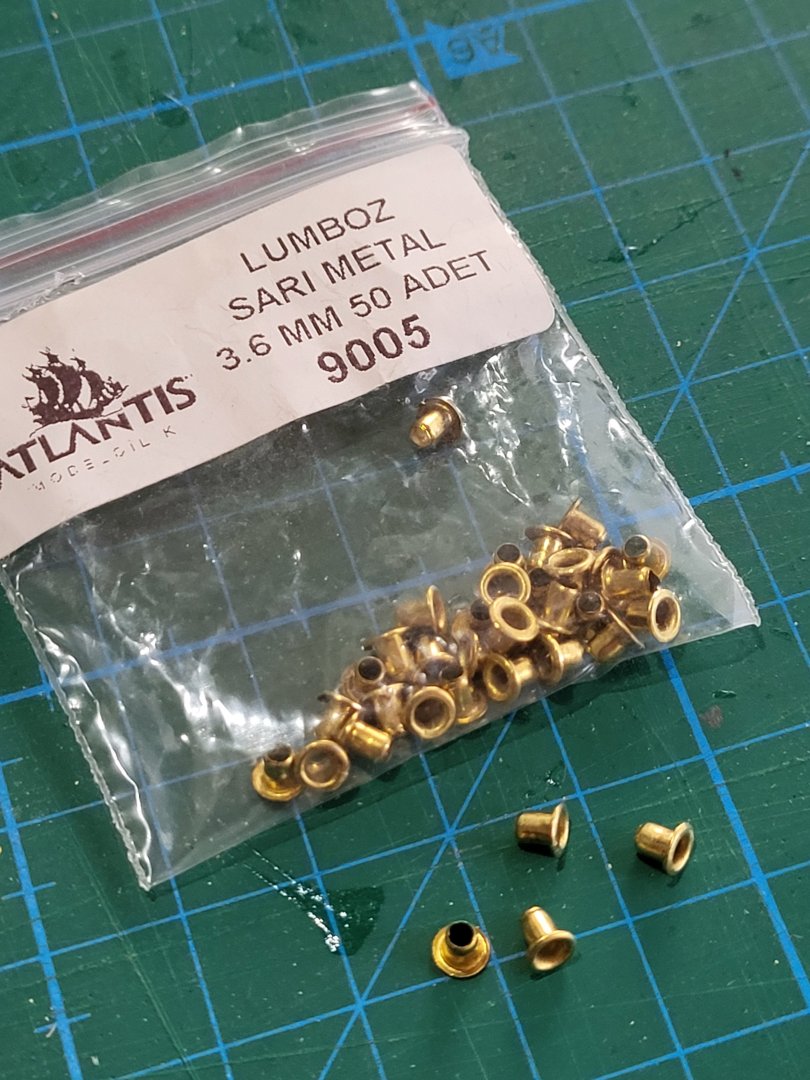
-
USS Constitution by mtbediz - 1:76
mtbediz replied to mtbediz's topic in - Build logs for subjects built 1751 - 1800
I am sorry I just noticed your message, Peter. I know it's too late for this, but I'll answer anyway. My curtains are 0,8 mm thick. -
USS Constitution by mtbediz - 1:76
mtbediz replied to mtbediz's topic in - Build logs for subjects built 1751 - 1800
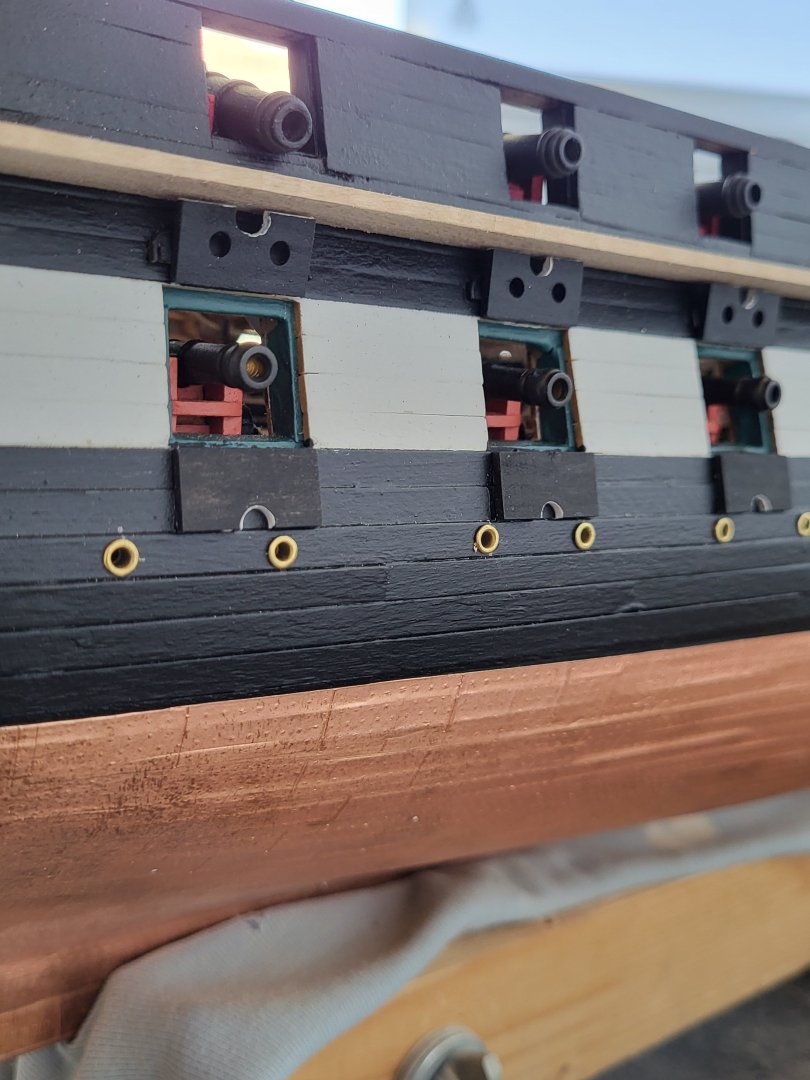
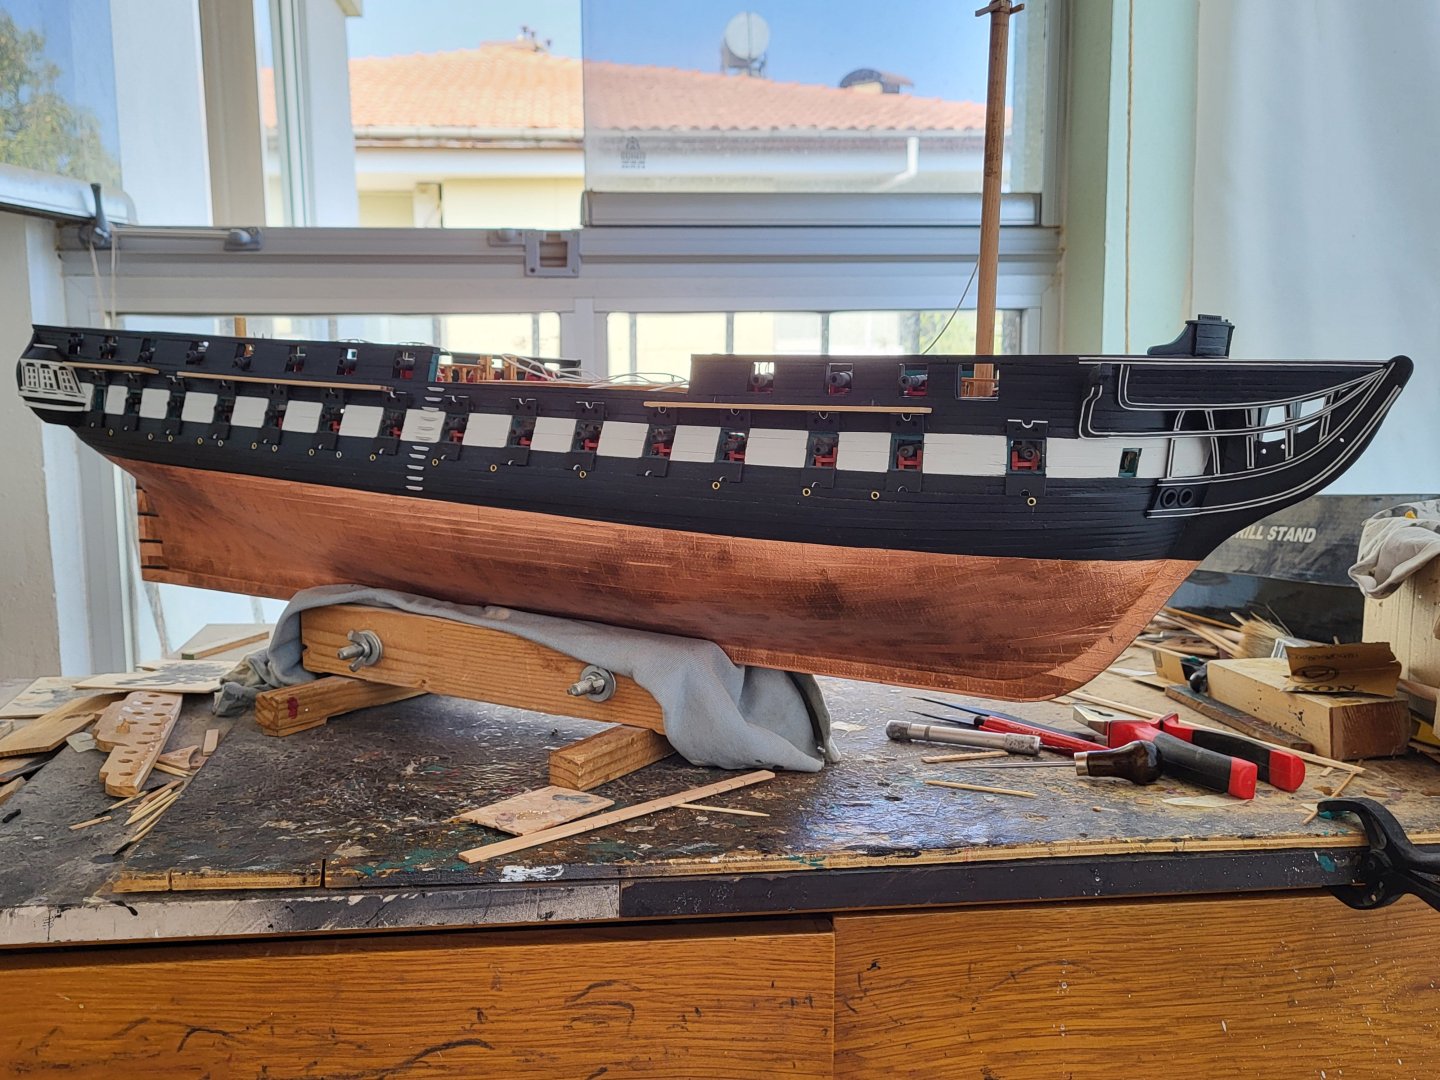
I'm back at my shipyard after a long break. At this stage, I've decided to add the berth deck portlights. I'll be making the channels and chain plates next. I've completed the installation of the starboard portlights. They will be painted black later.