mtbediz
-
Posts
1,353 -
Joined
-
Last visited
Content Type
Profiles
Forums
Gallery
Events
Everything posted by mtbediz
-

USS Constitution by mtbediz - 1:76
mtbediz replied to mtbediz's topic in - Build logs for subjects built 1751 - 1800
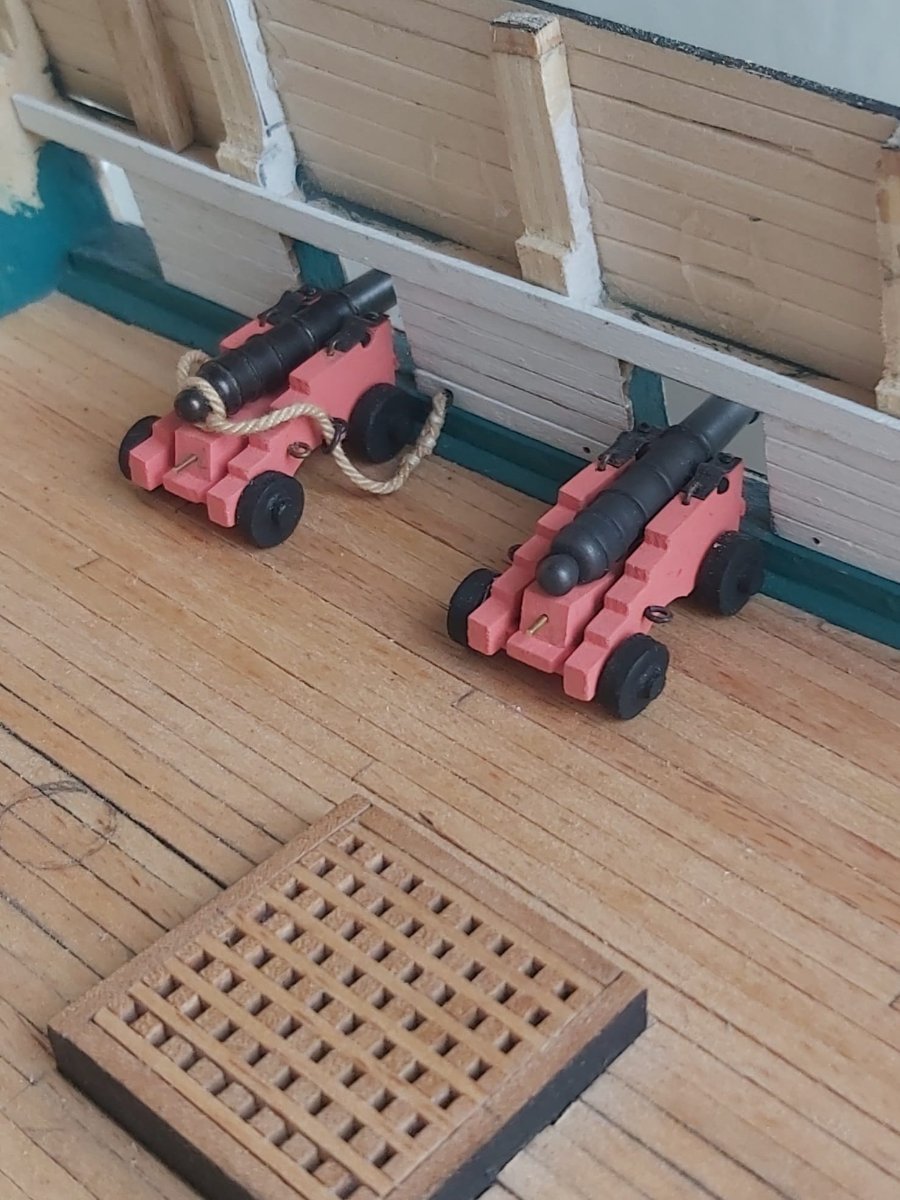
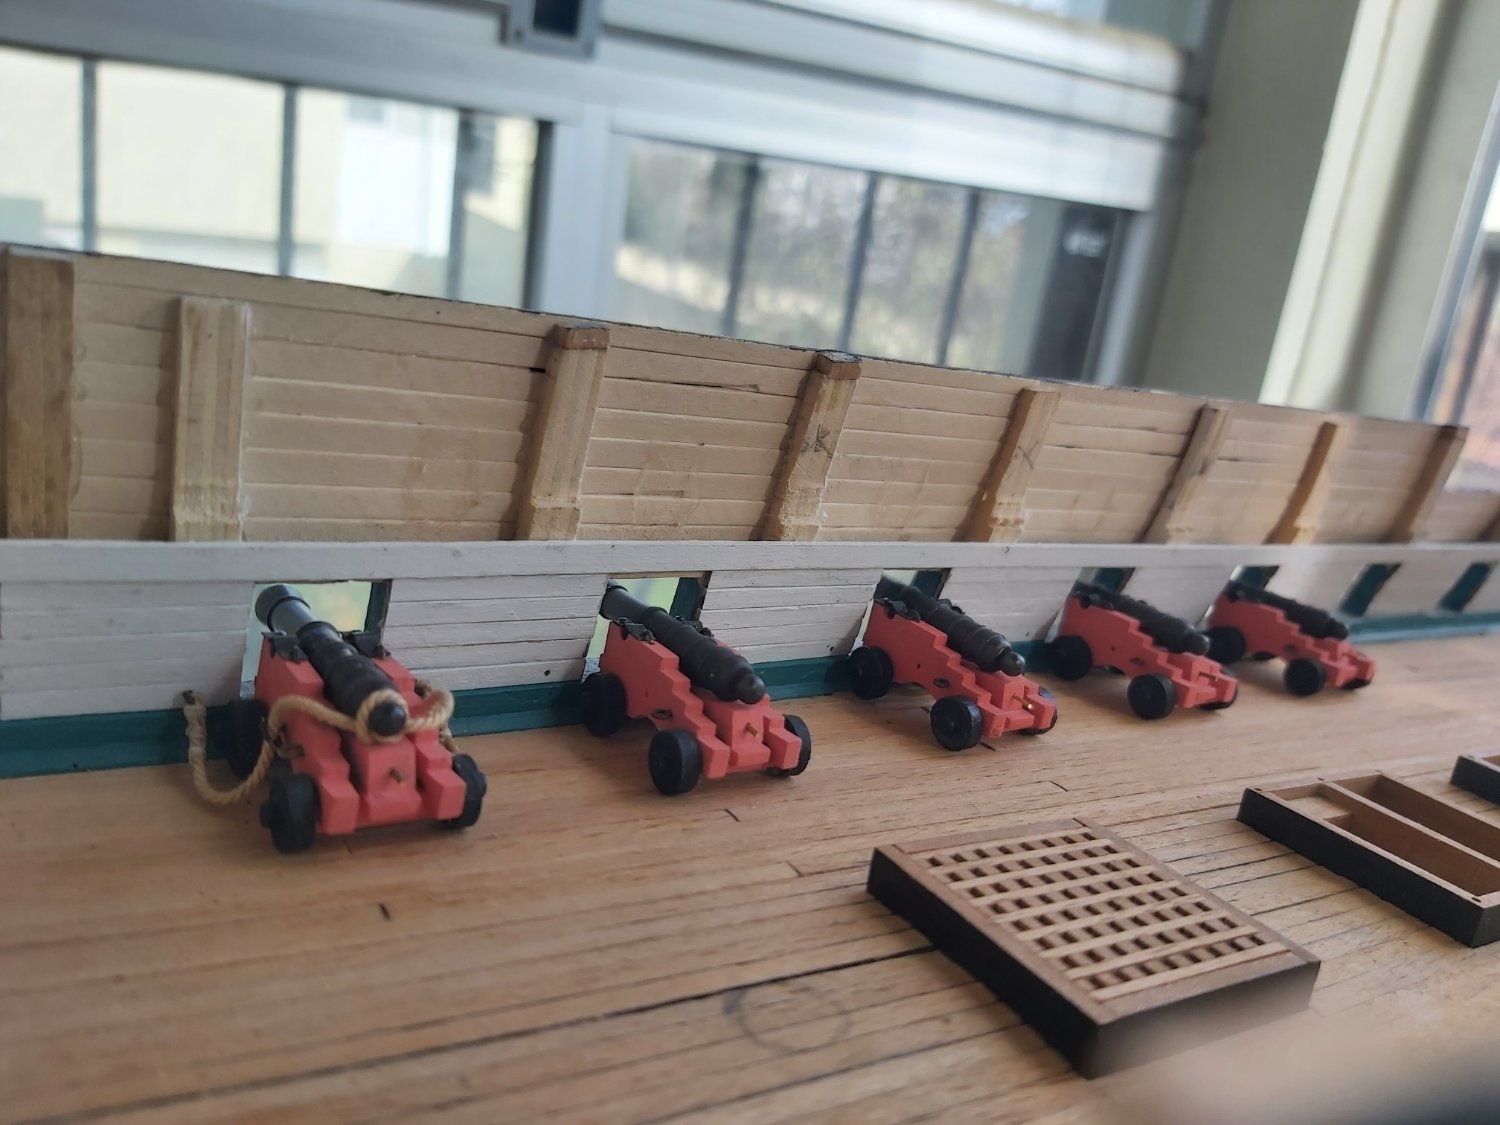
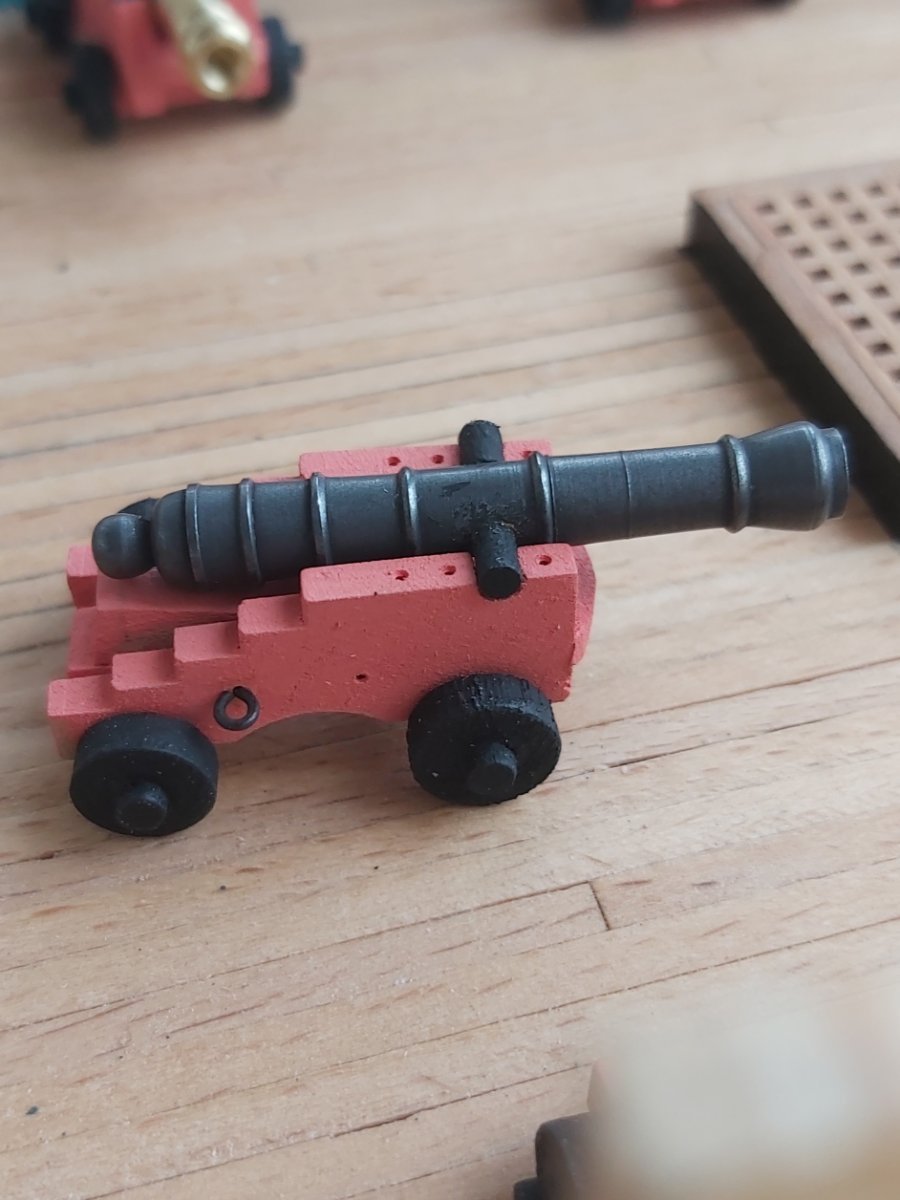
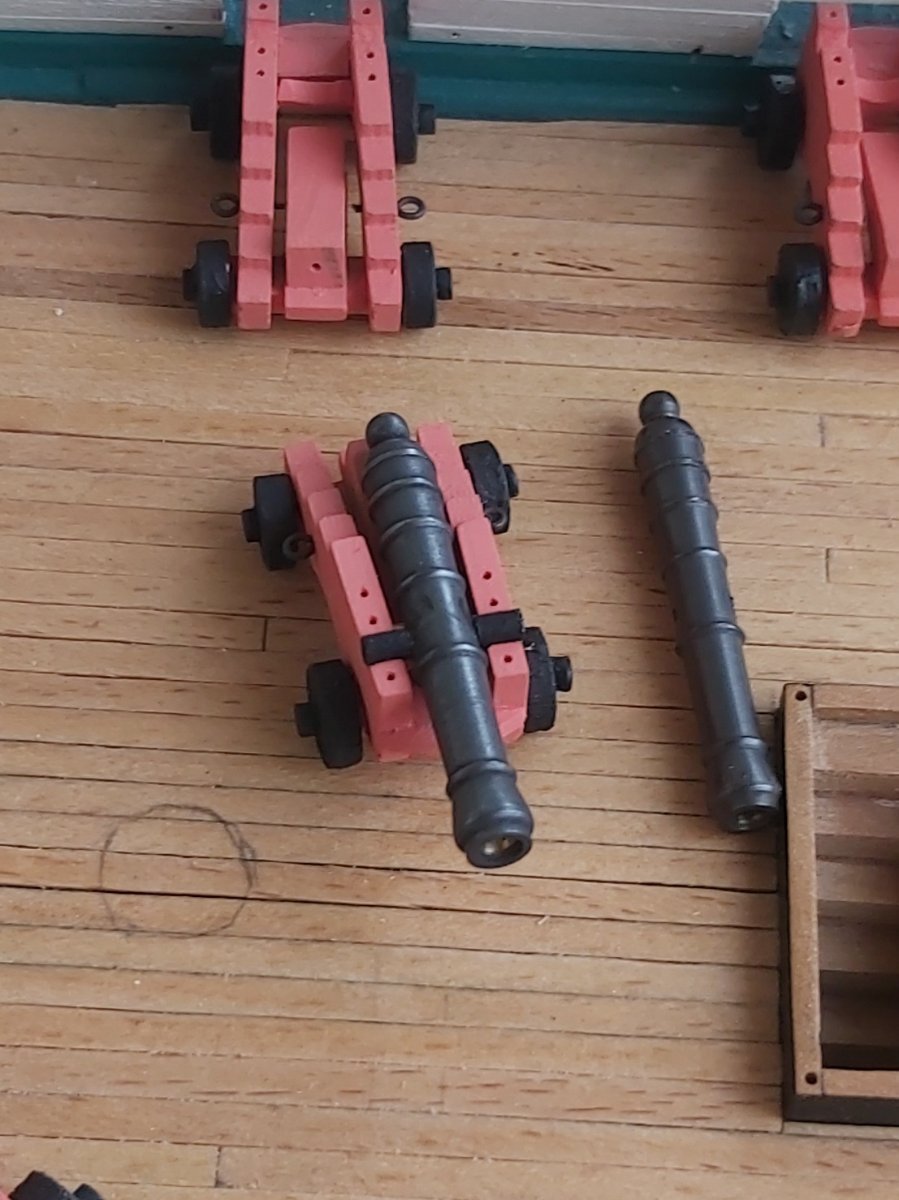
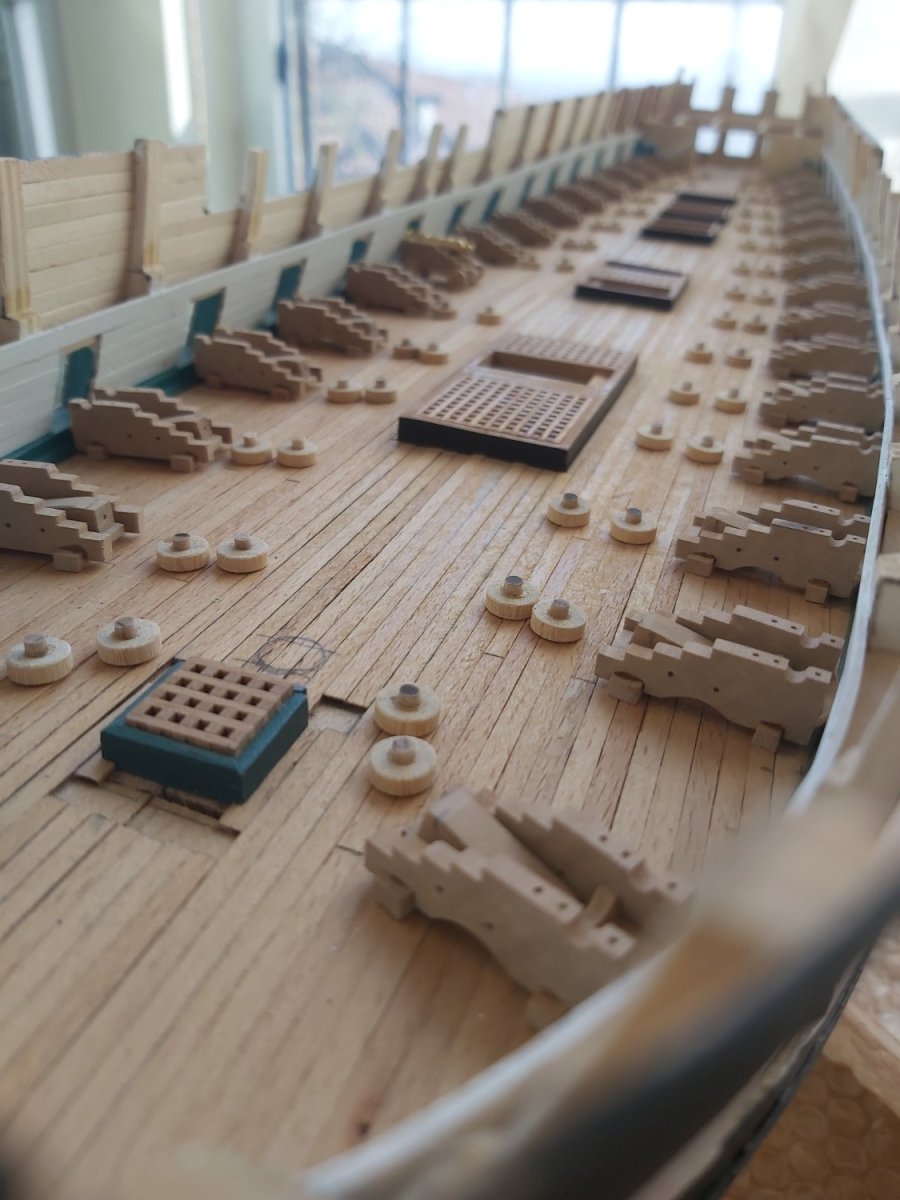
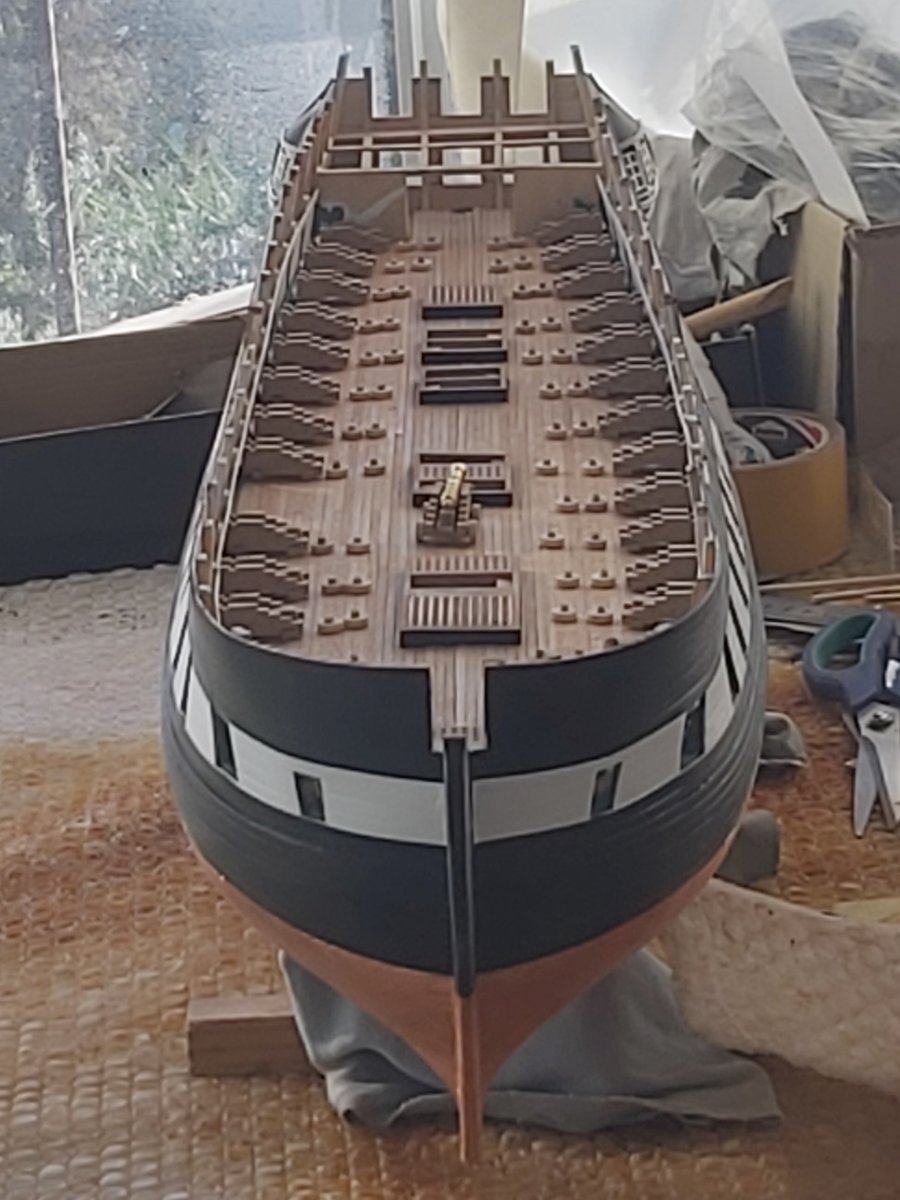
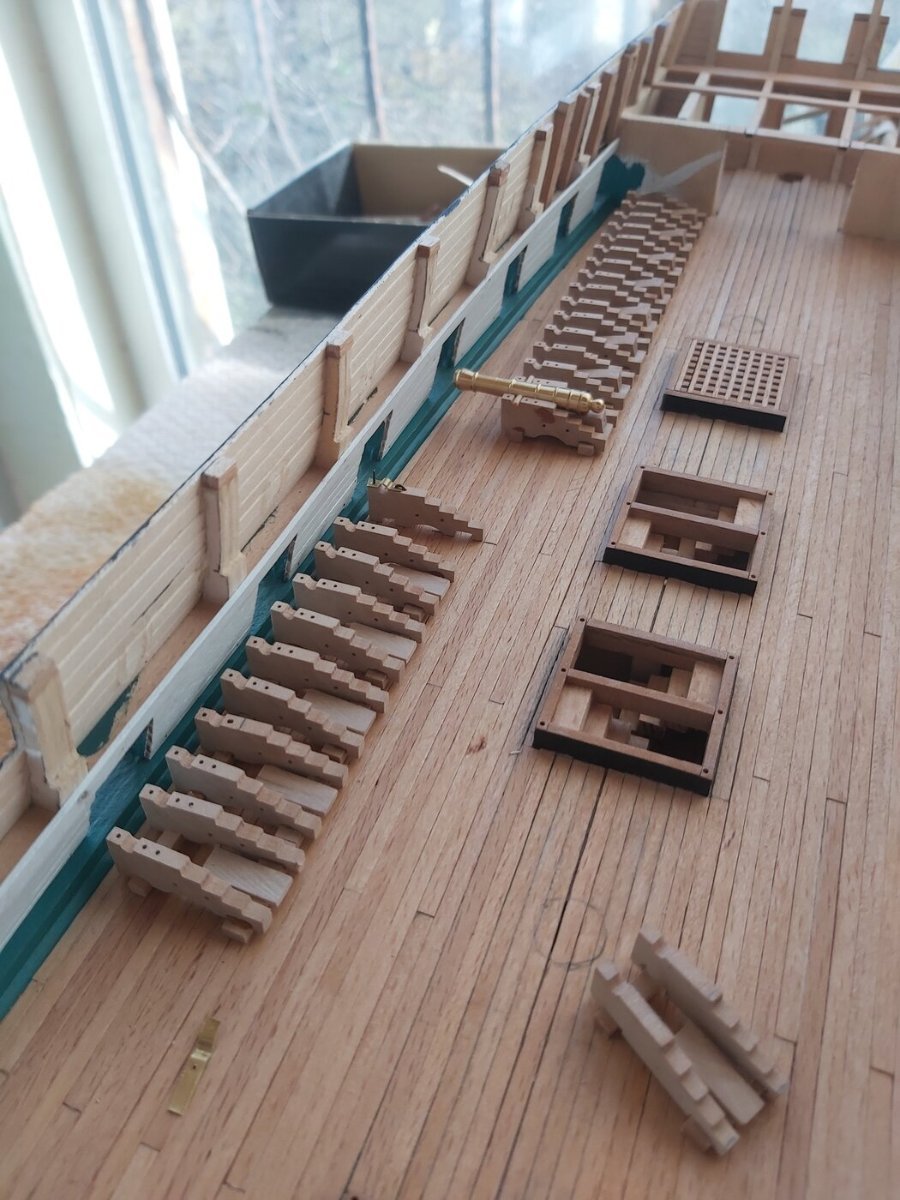
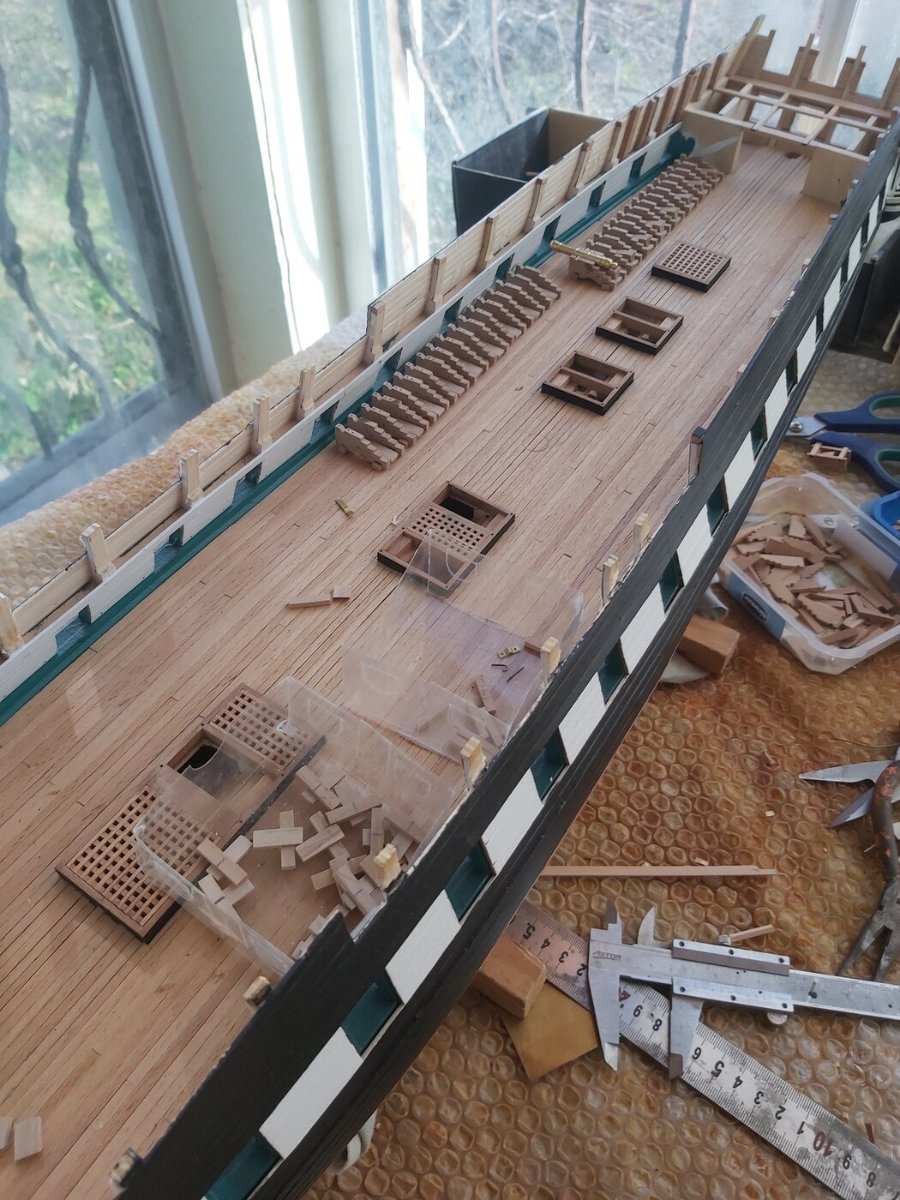
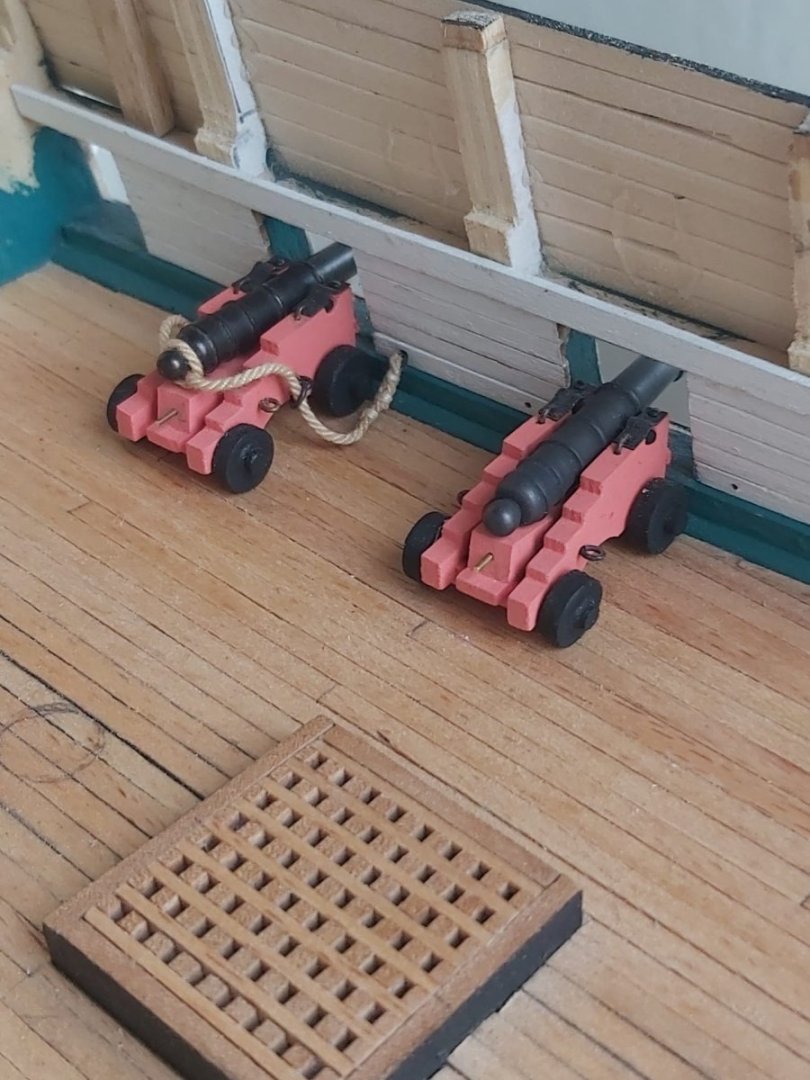
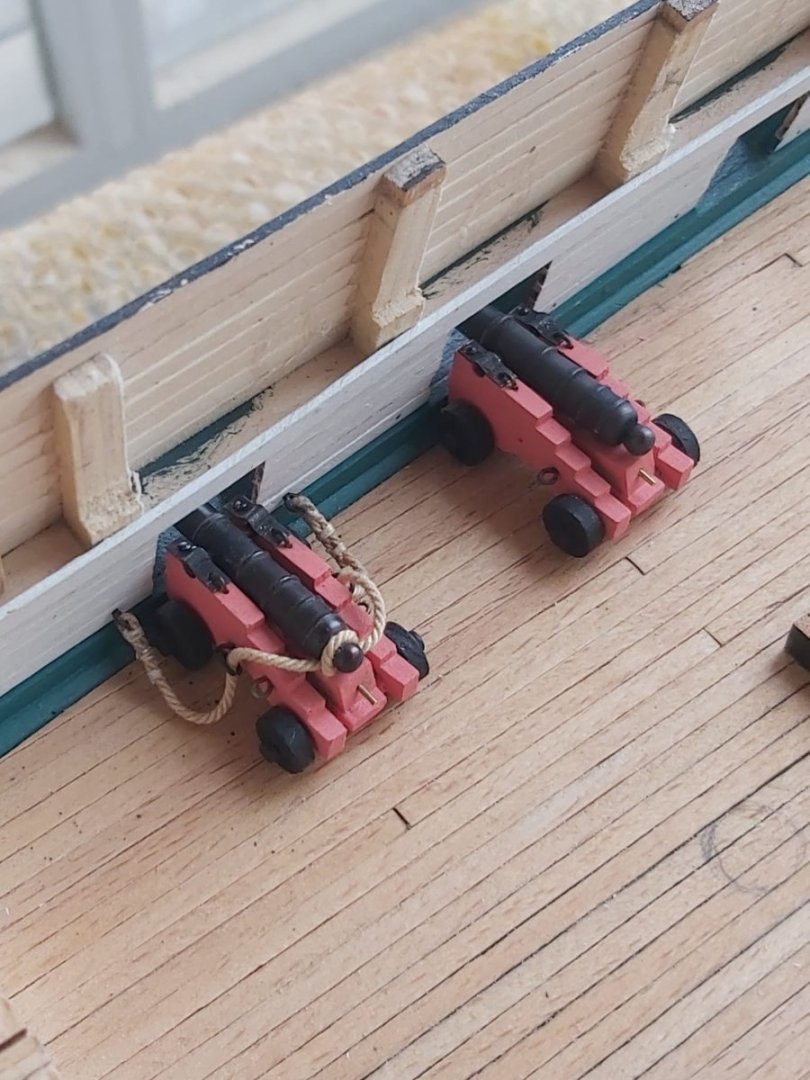
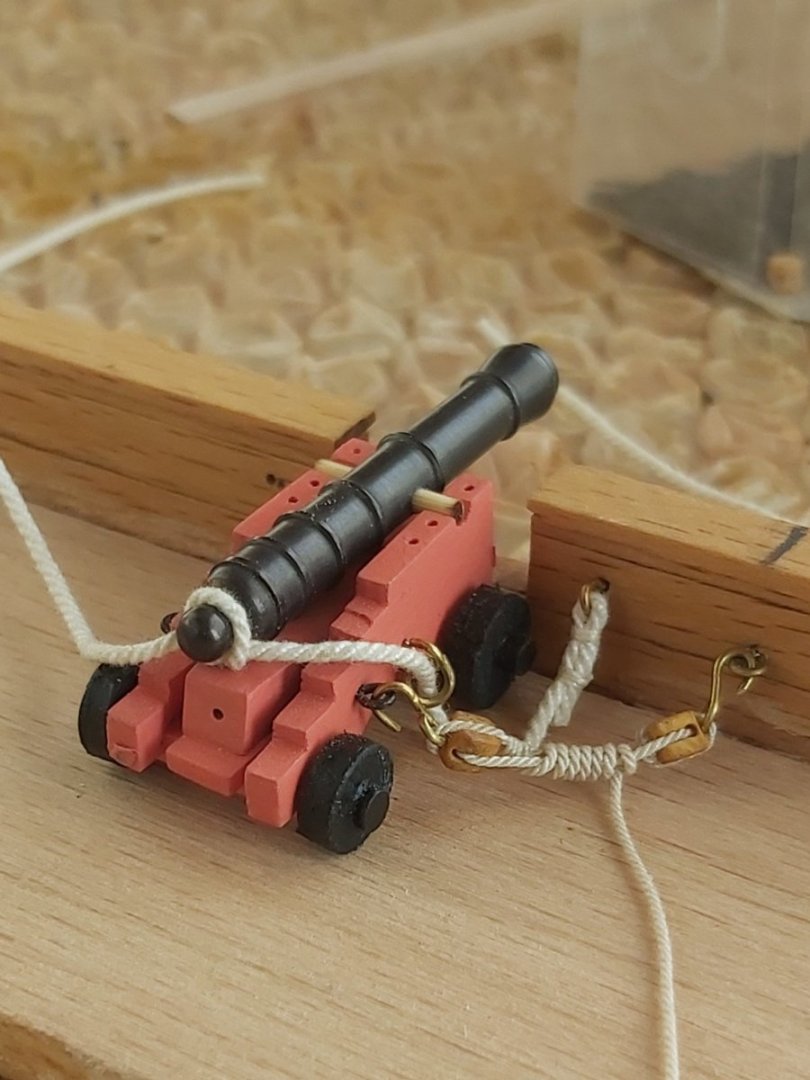
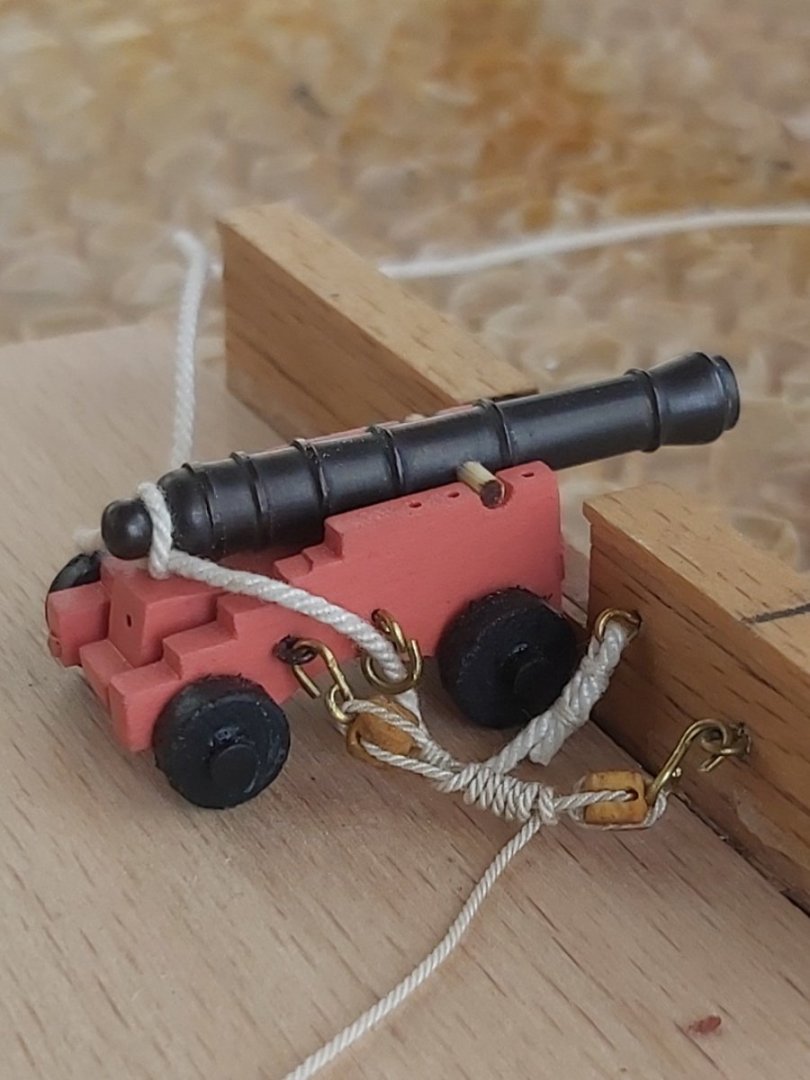
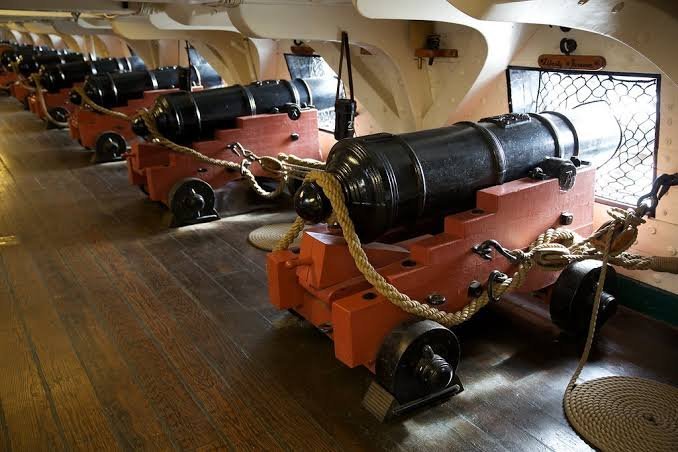
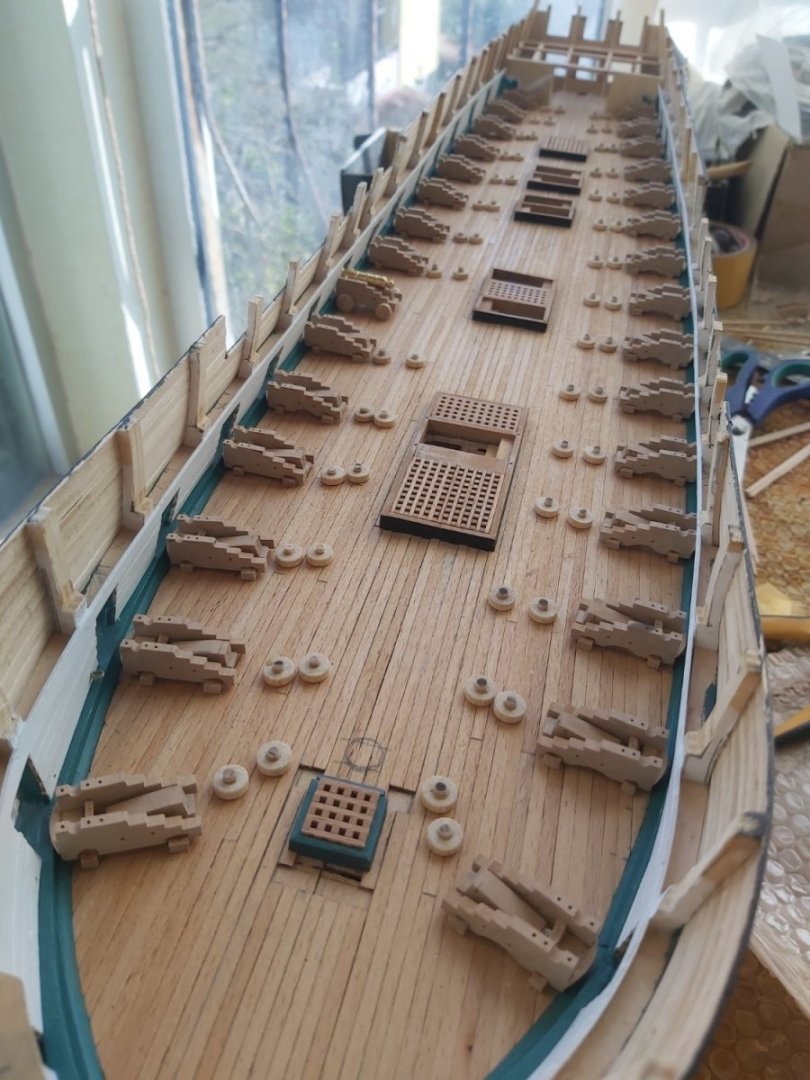
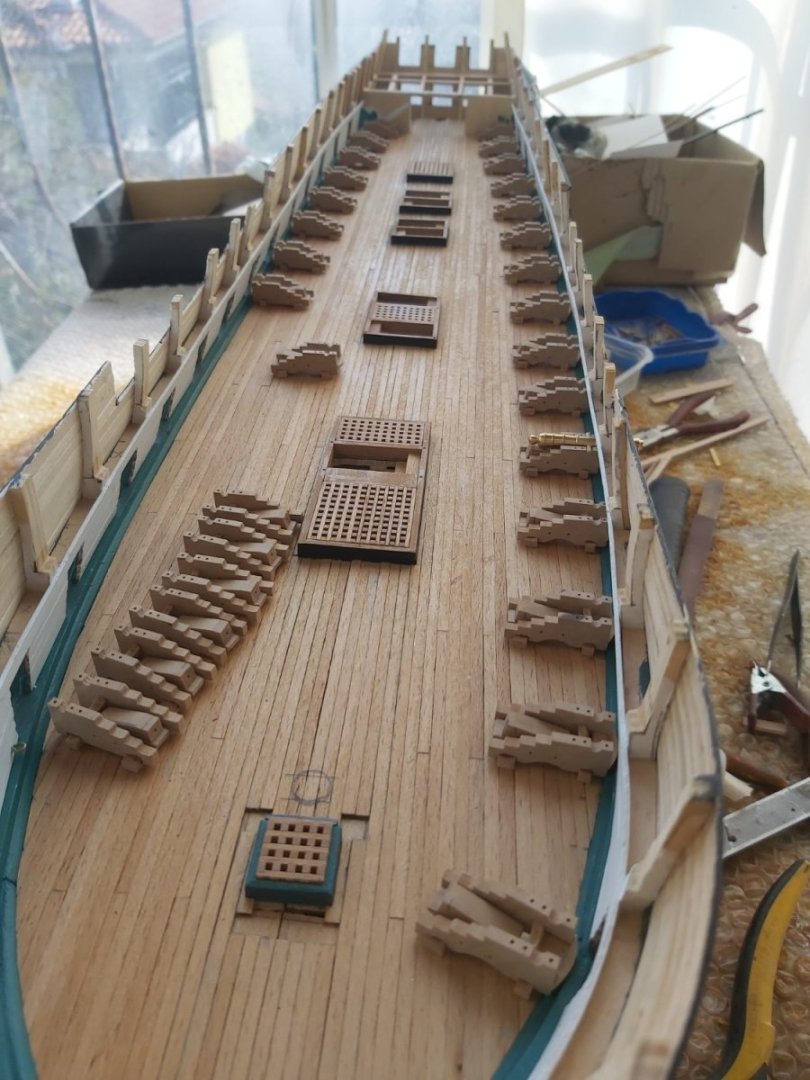
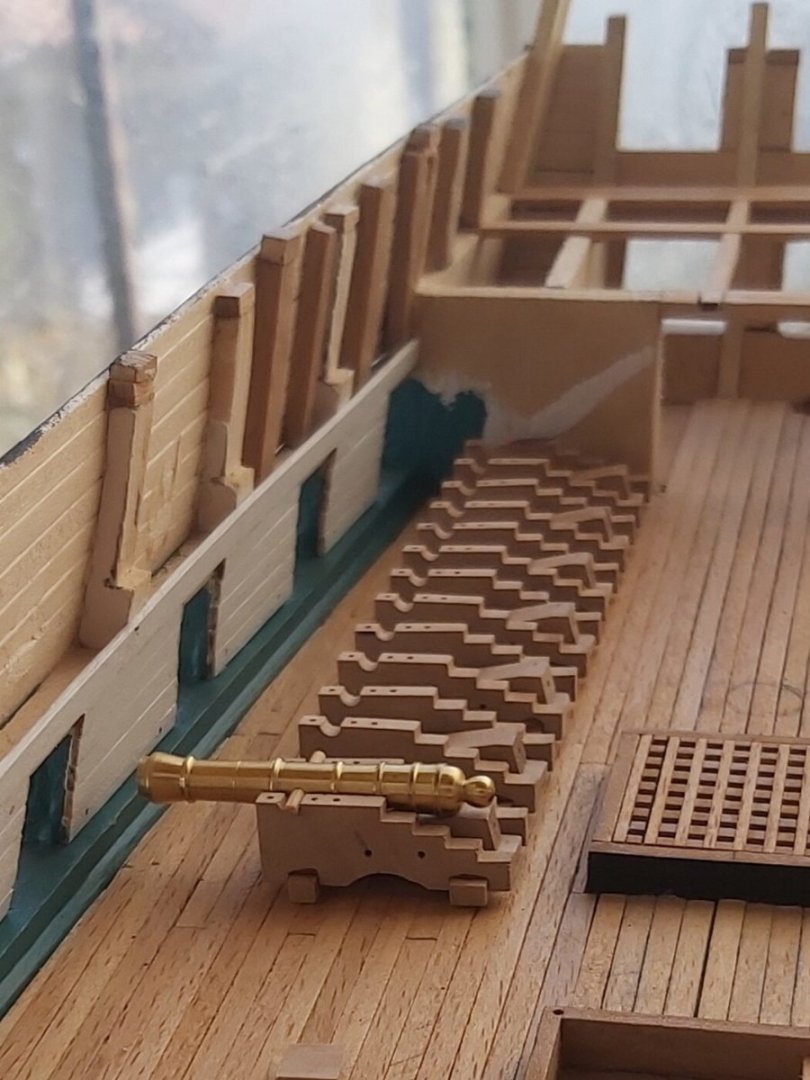
This is how the cannons on the gun deck will be seen in the end. Gun tackles will be added after the spar deck beam support knees are installed because gun tackle hooks will be attached to the eye bolts on the knees.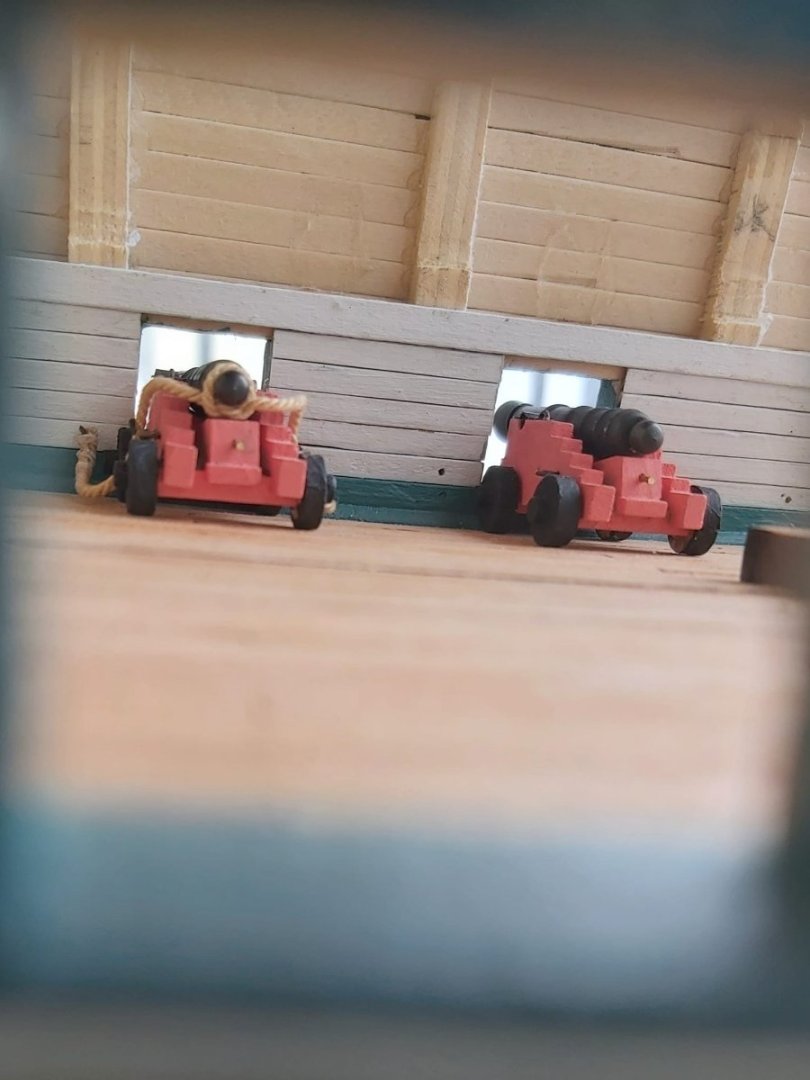


-
USS Constitution by mtbediz - 1:76
mtbediz replied to mtbediz's topic in - Build logs for subjects built 1751 - 1800
Thank you for your interest Geoff. -
USS Constitution by mtbediz - 1:76
mtbediz replied to mtbediz's topic in - Build logs for subjects built 1751 - 1800
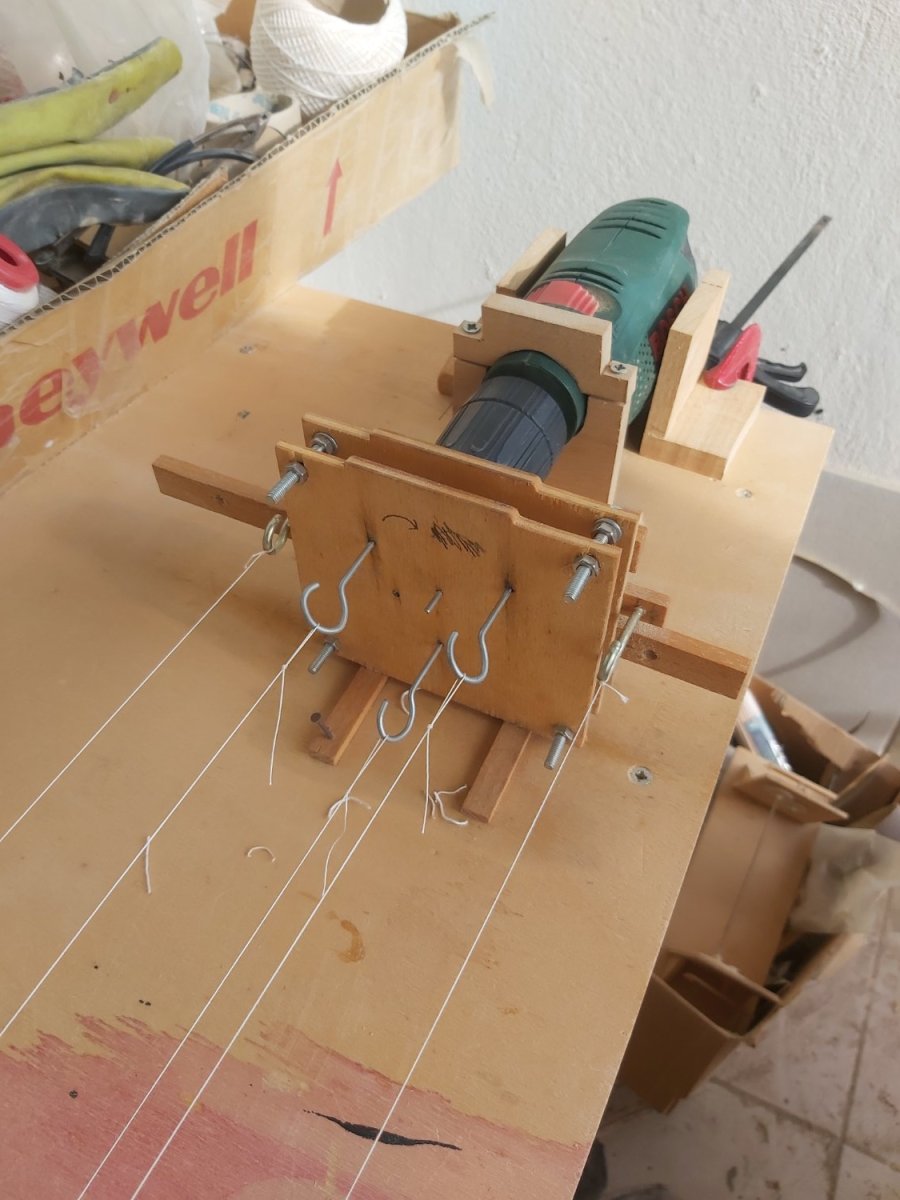
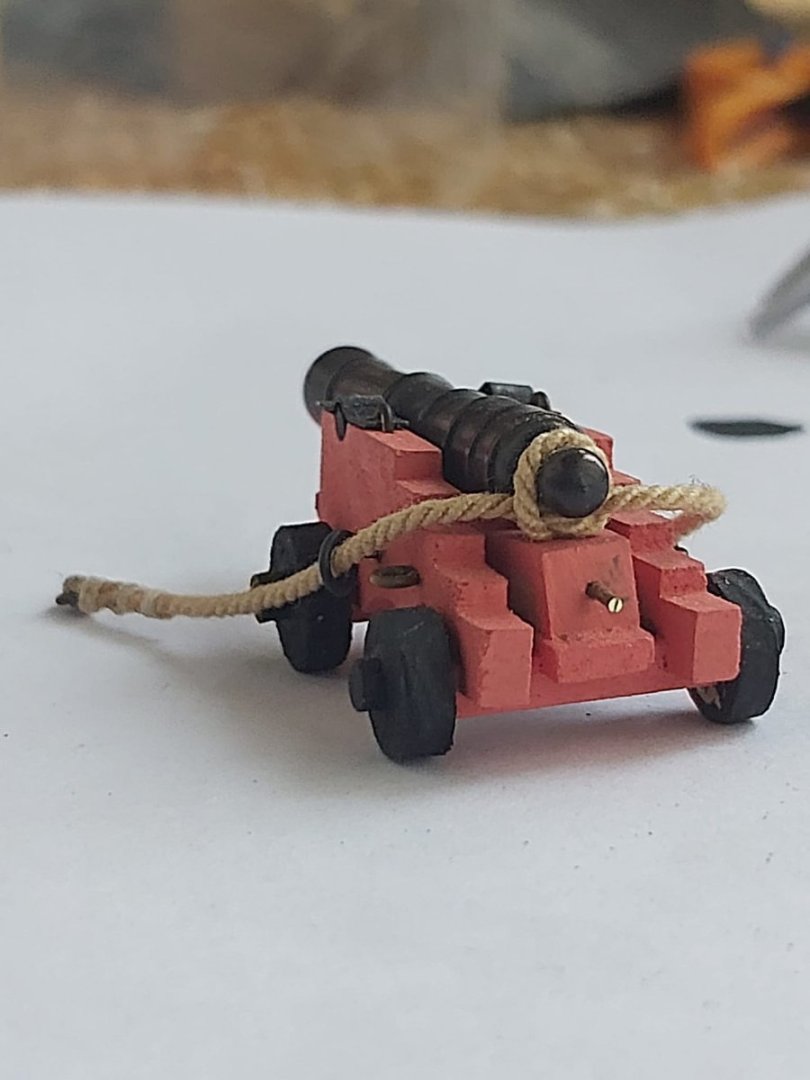
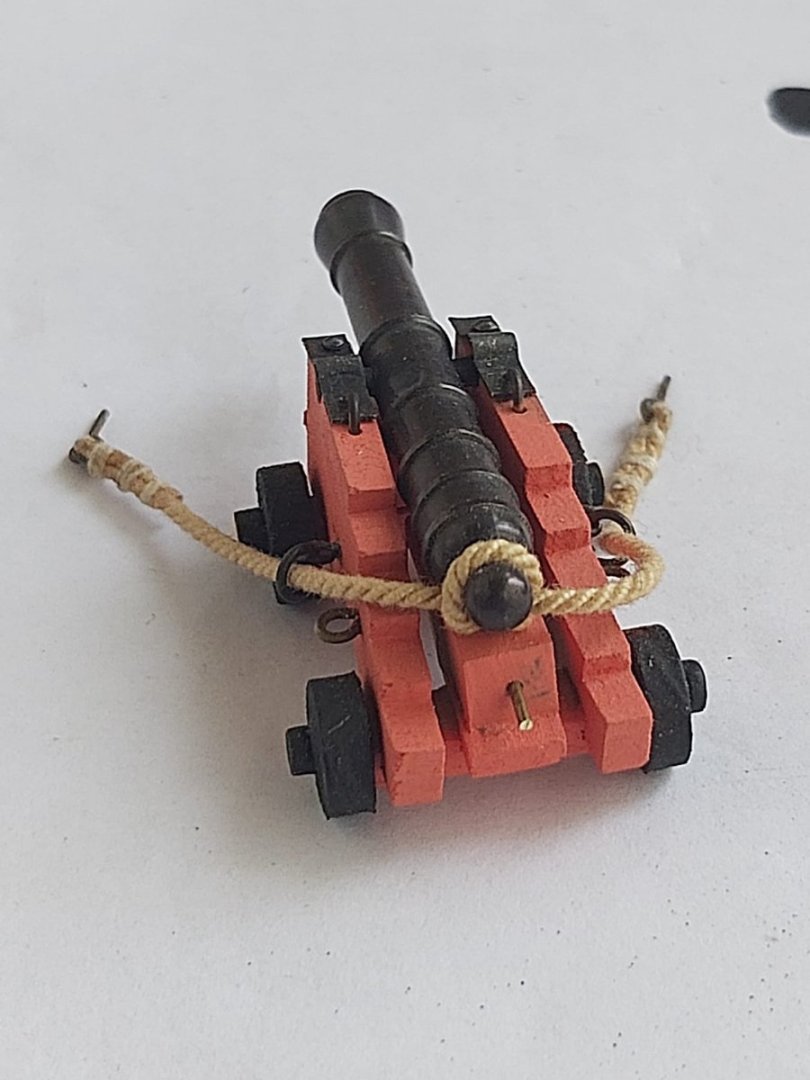
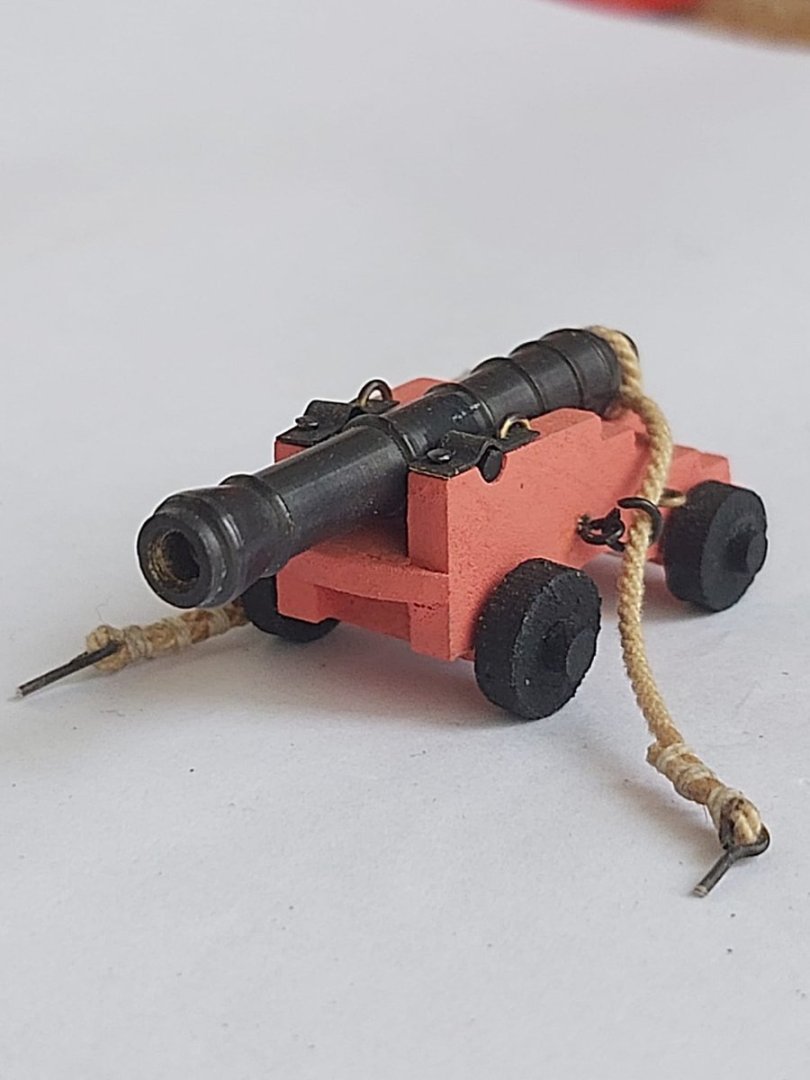
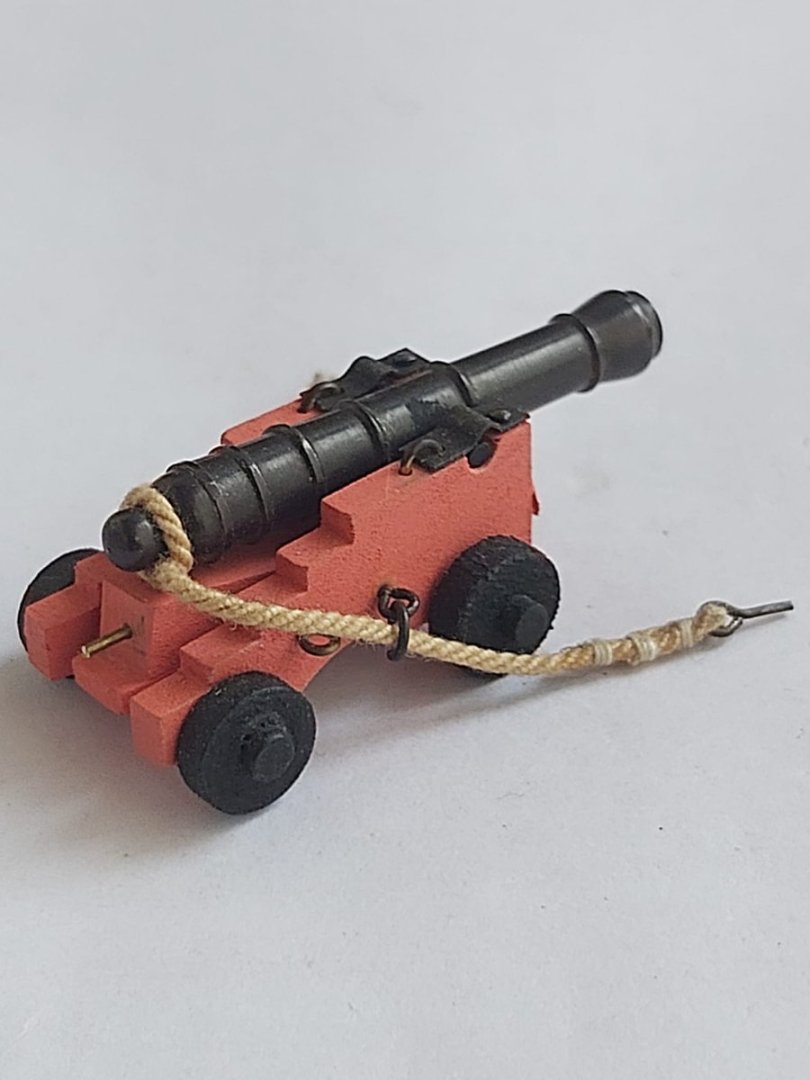
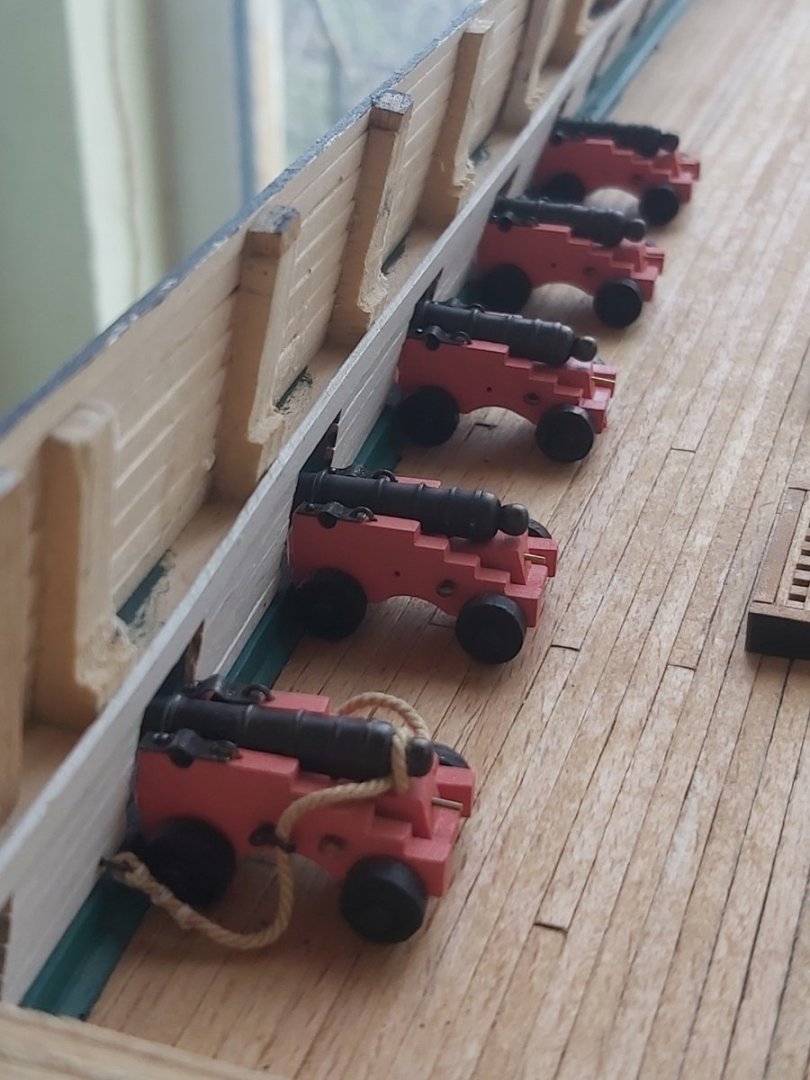
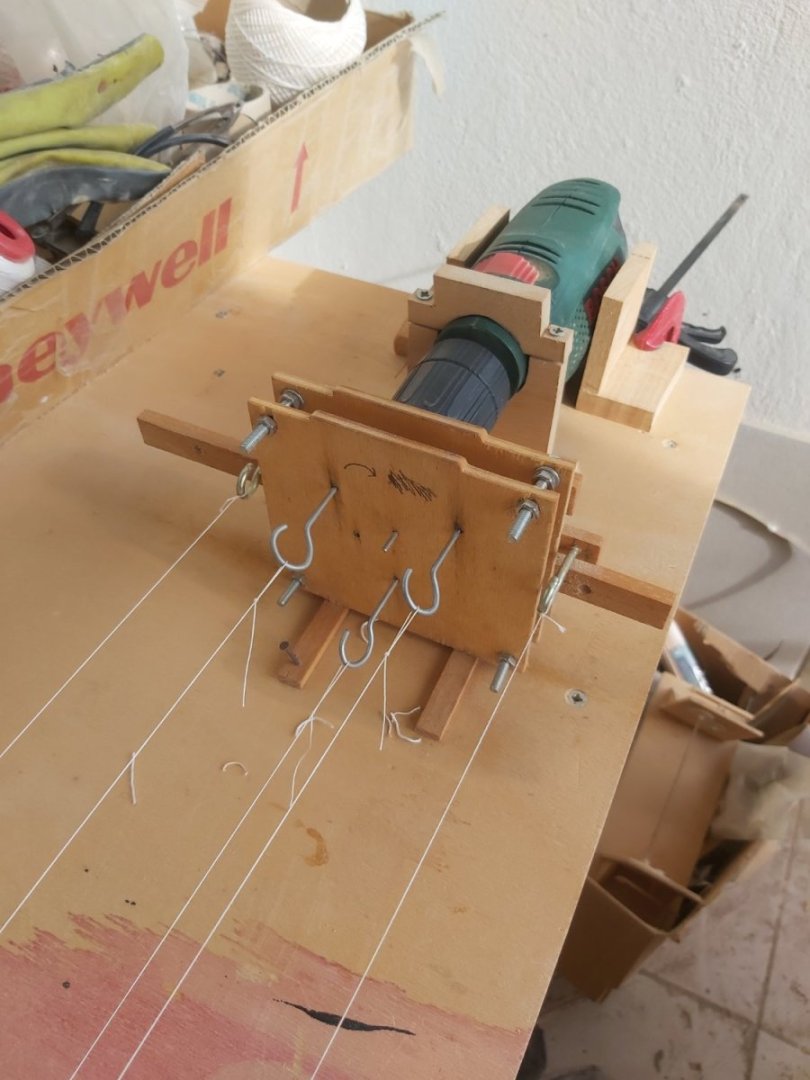
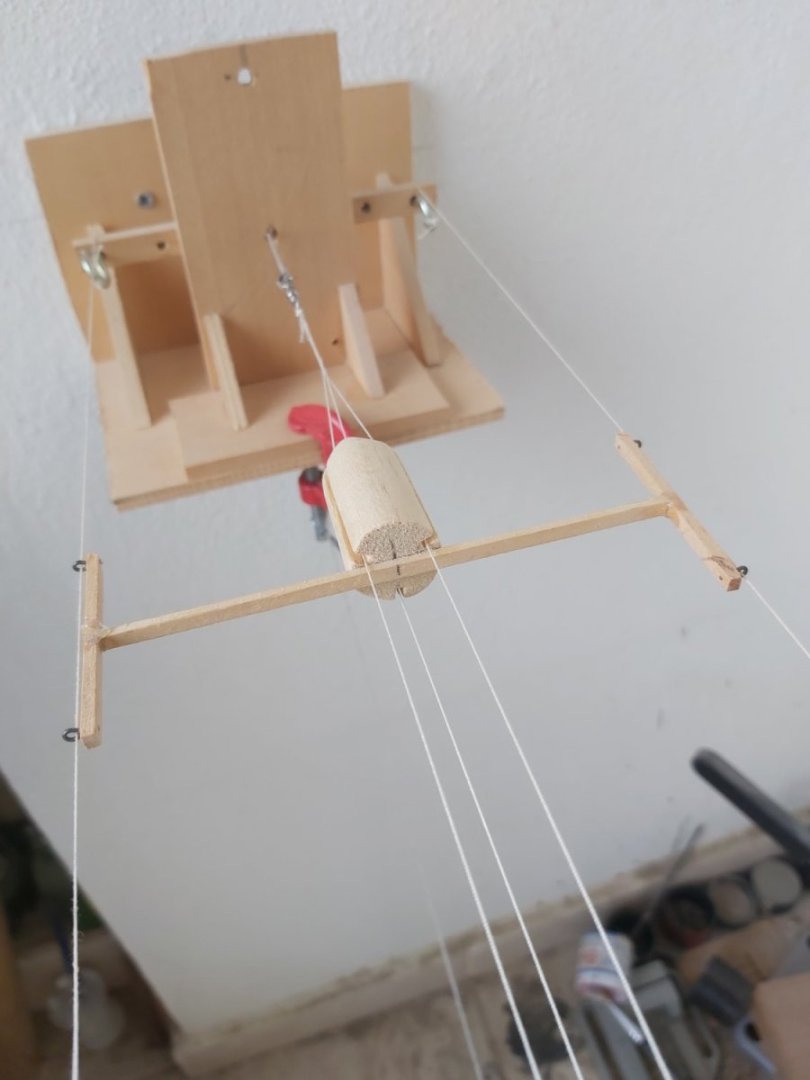
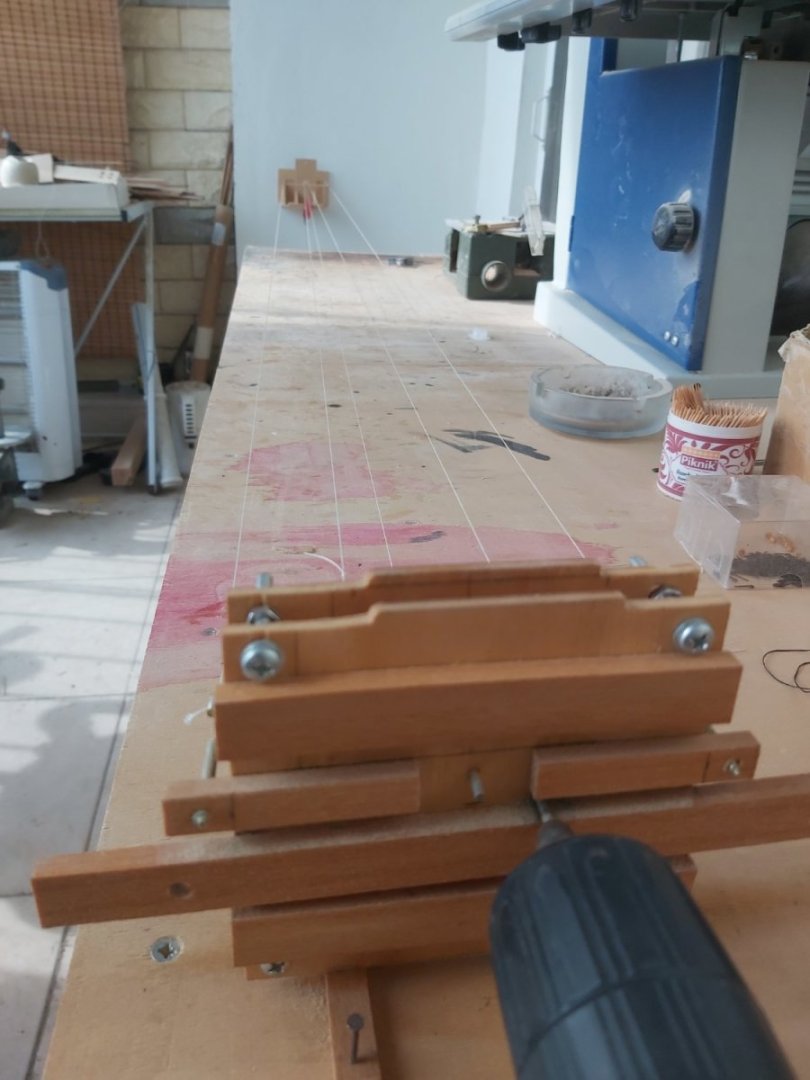
I made a jig to test the gun rigging. By the way I make my ropes with my homemade ropewalk.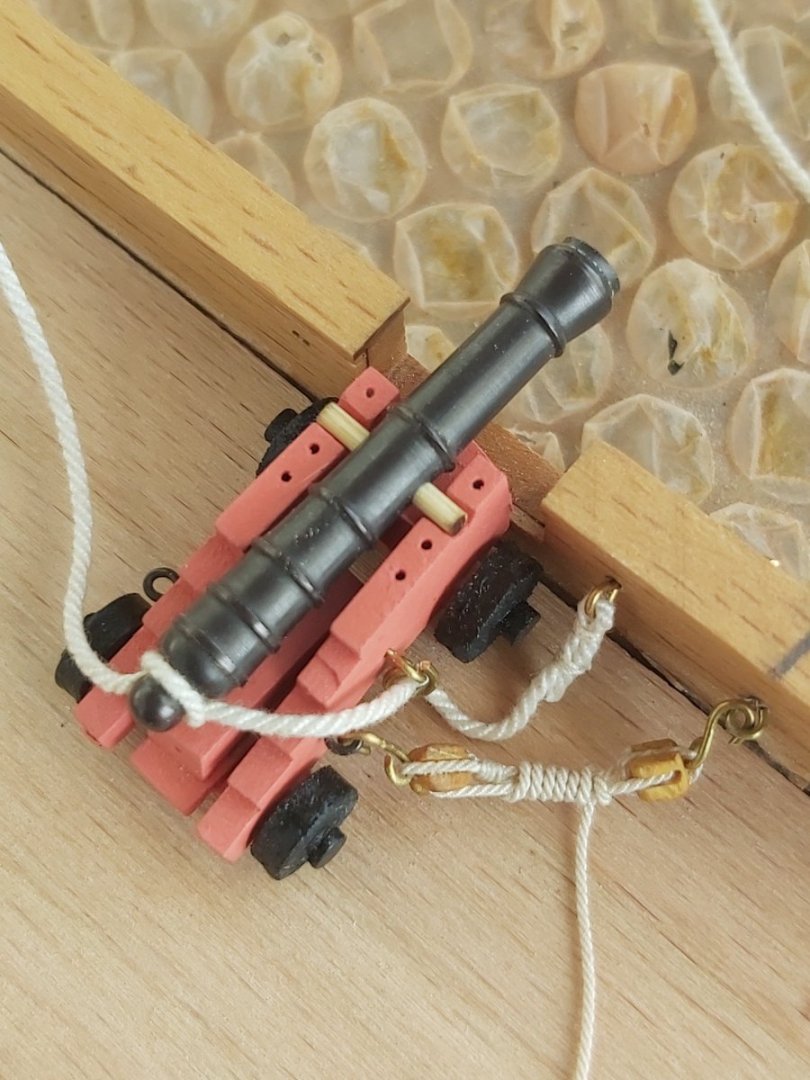
-
USF Essex by mtbediz - FINISHED - 1:50
mtbediz replied to mtbediz's topic in - Build logs for subjects built 1801 - 1850
Thank you so much. -
USS Constitution by mtbediz - 1:76
mtbediz replied to mtbediz's topic in - Build logs for subjects built 1751 - 1800
Thank you Jon. It means a lot to me that this is coming from you. -
USS Constitution by mtbediz - 1:76
mtbediz replied to mtbediz's topic in - Build logs for subjects built 1751 - 1800
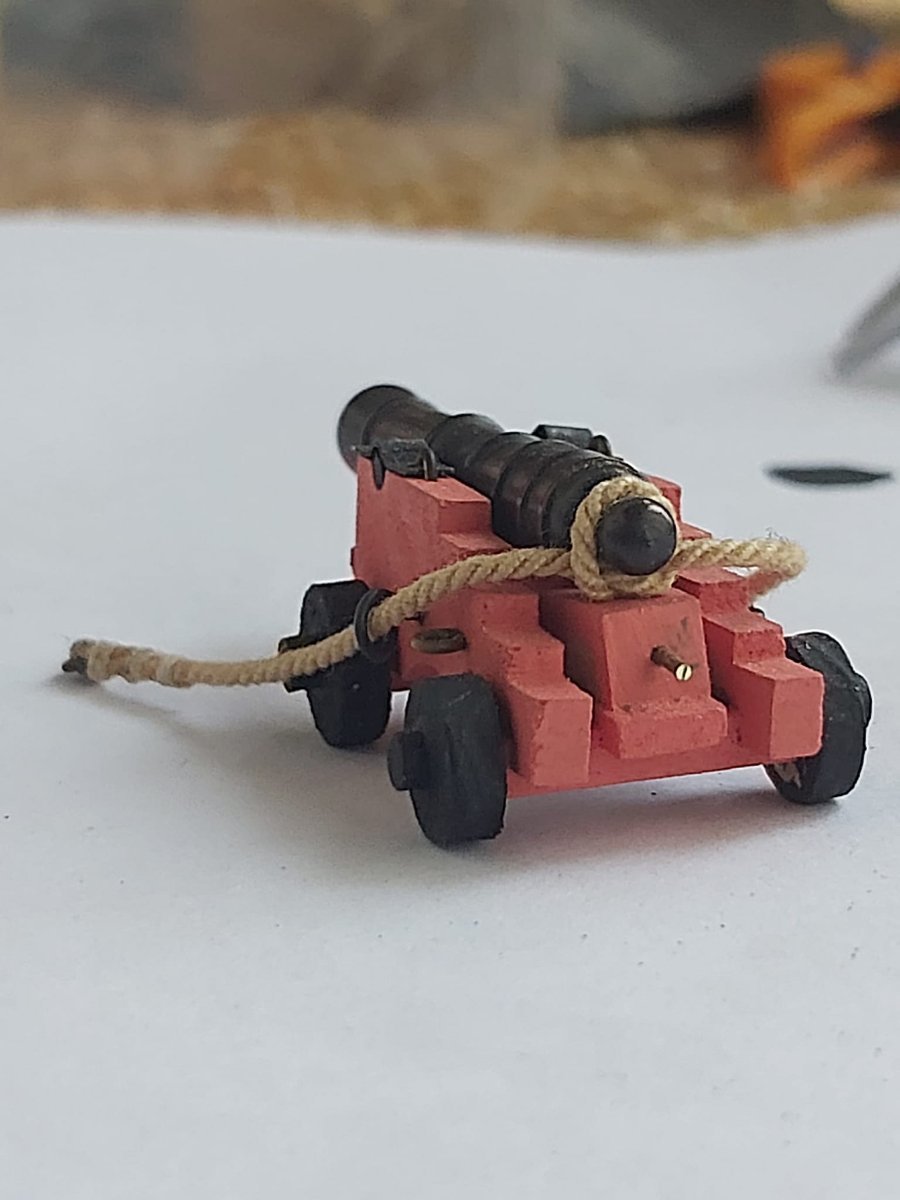
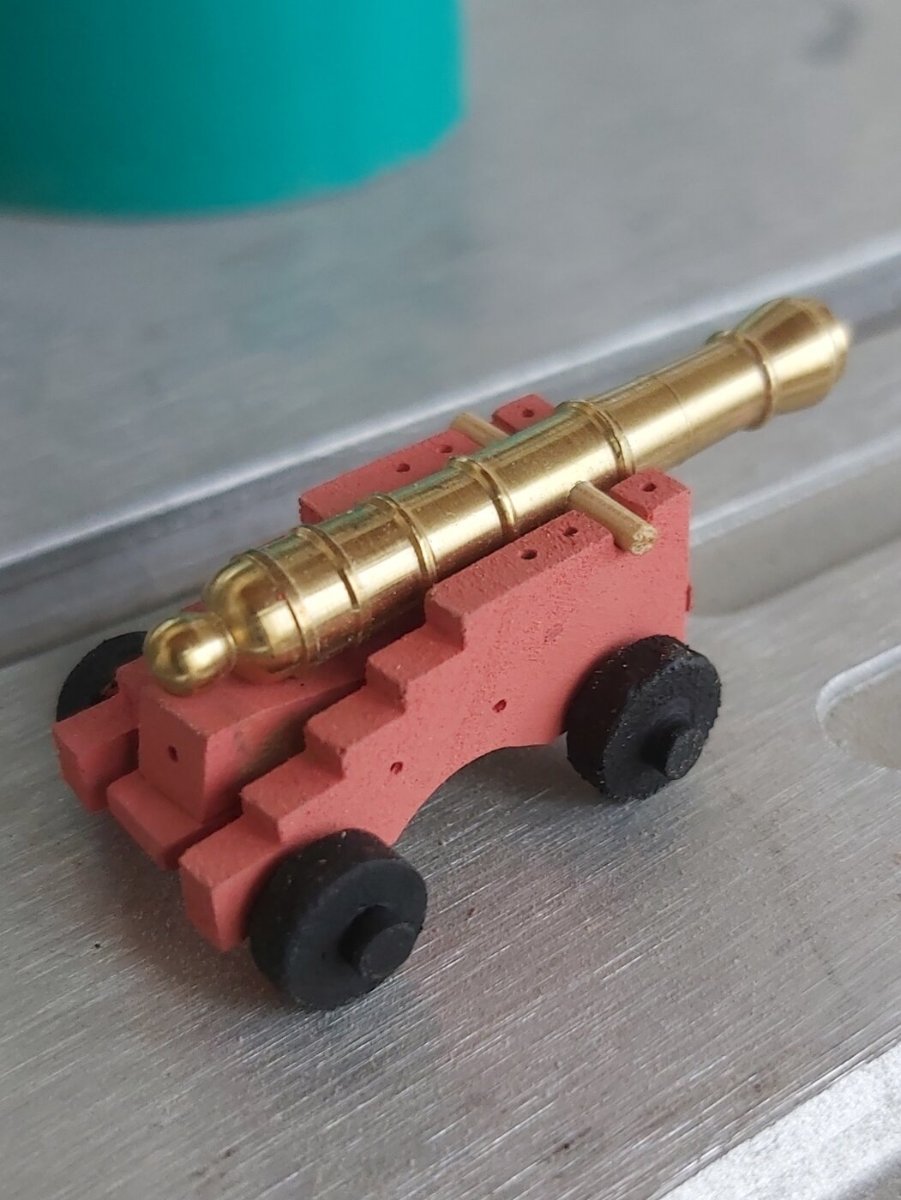
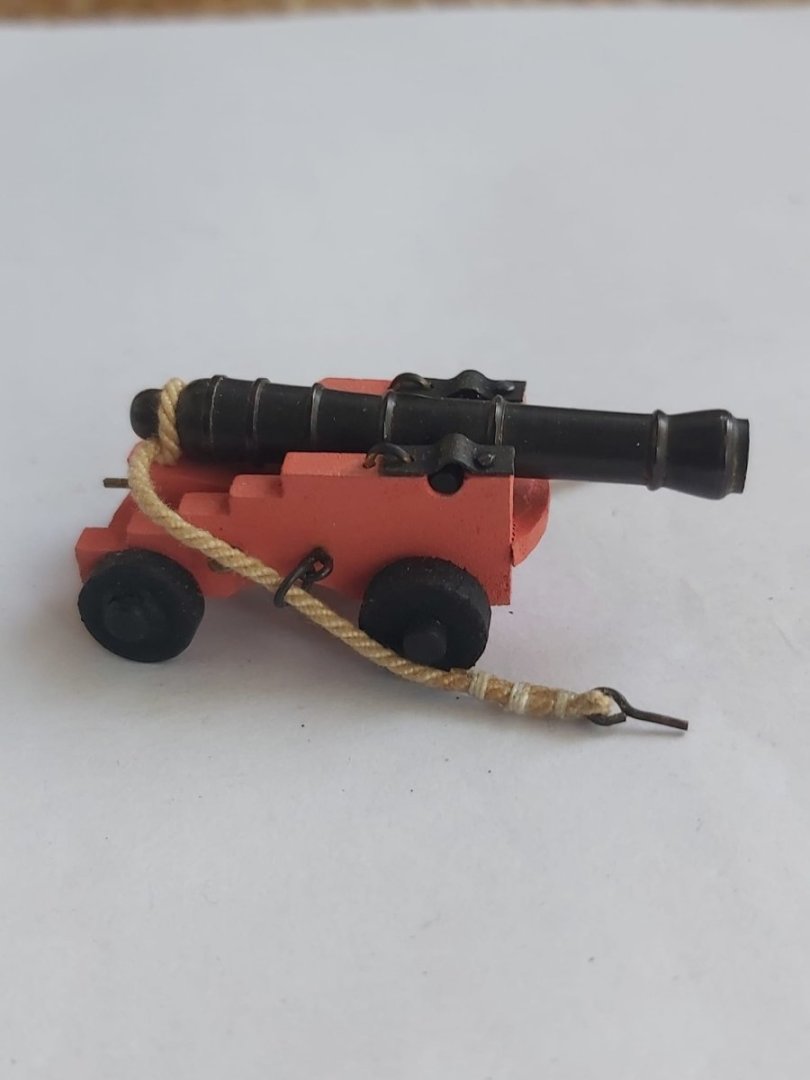
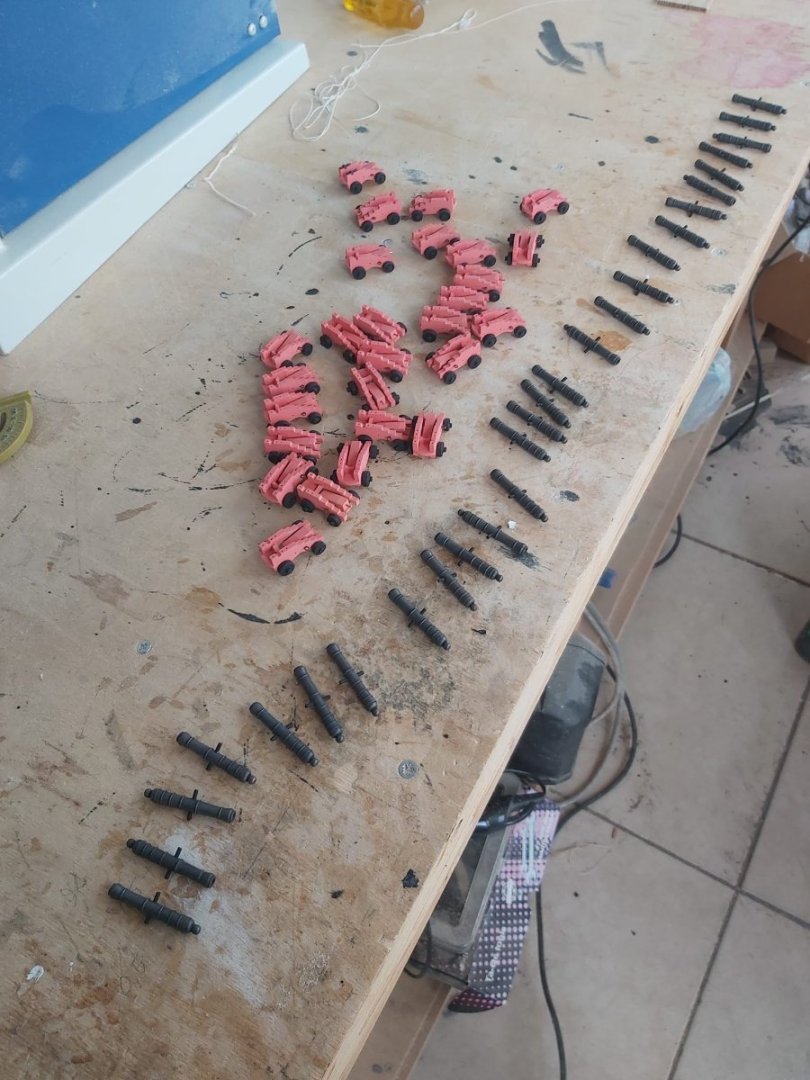
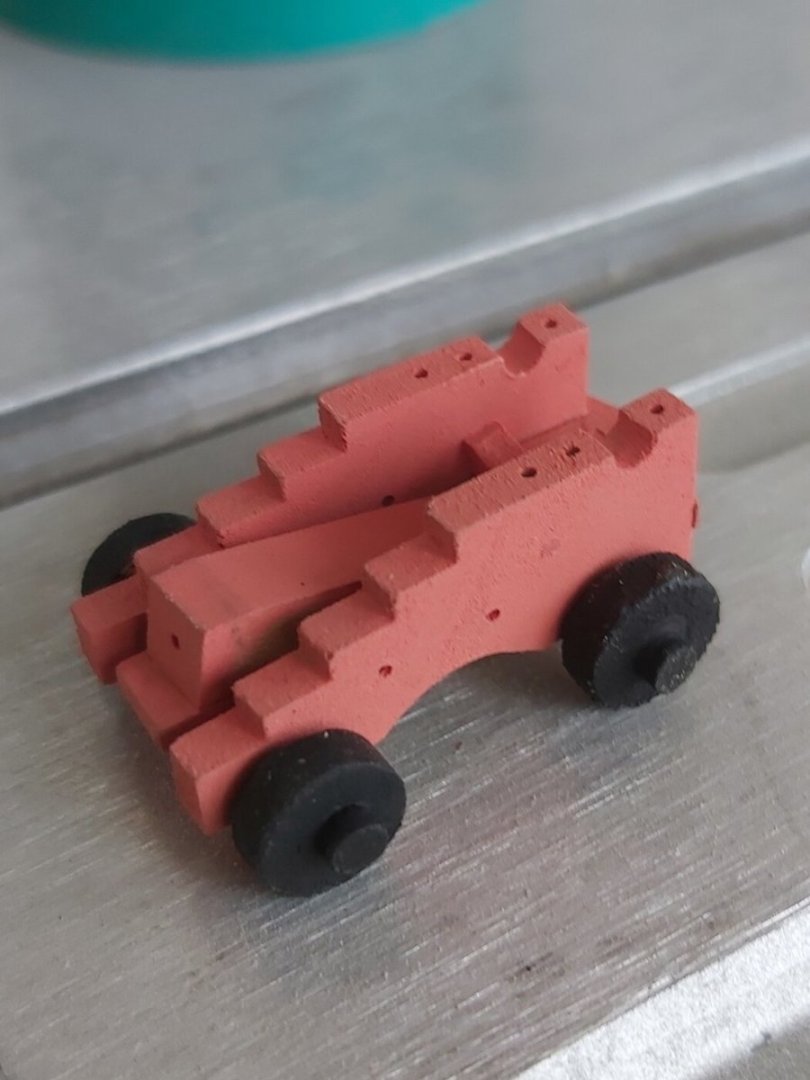
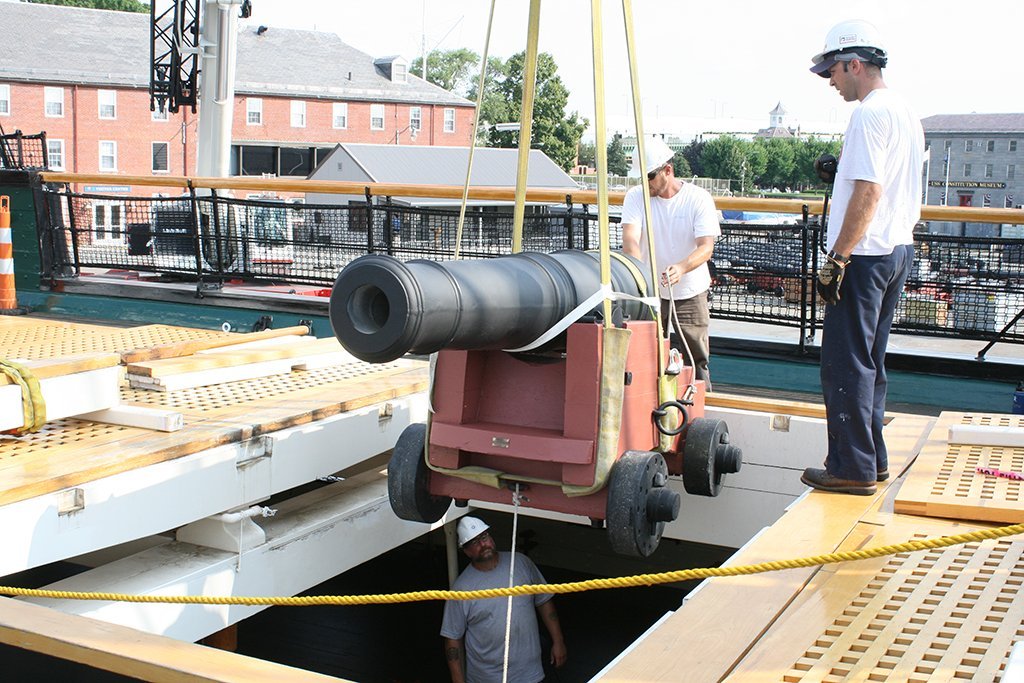
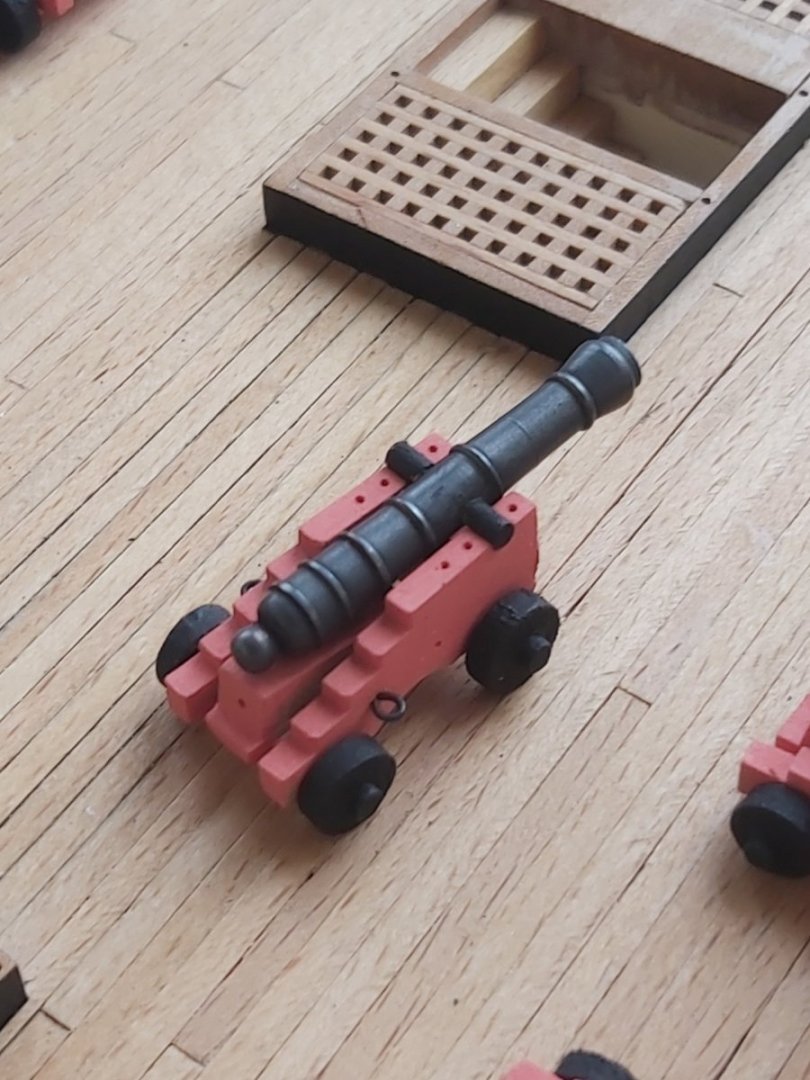
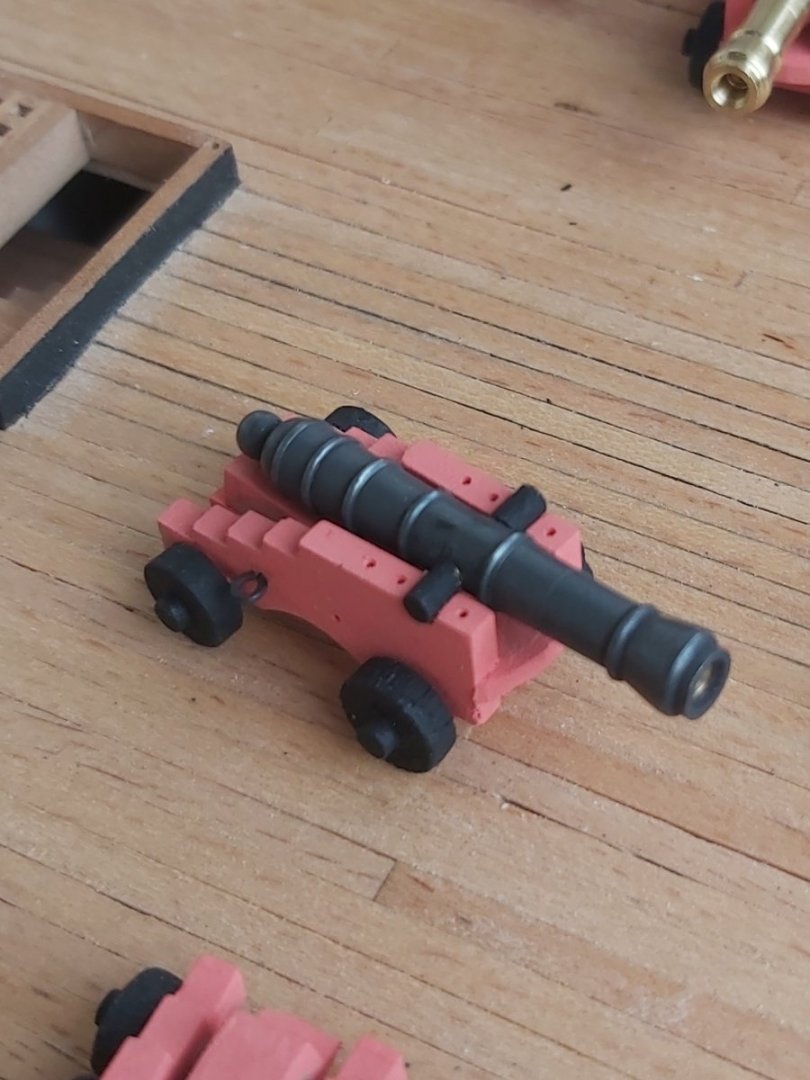
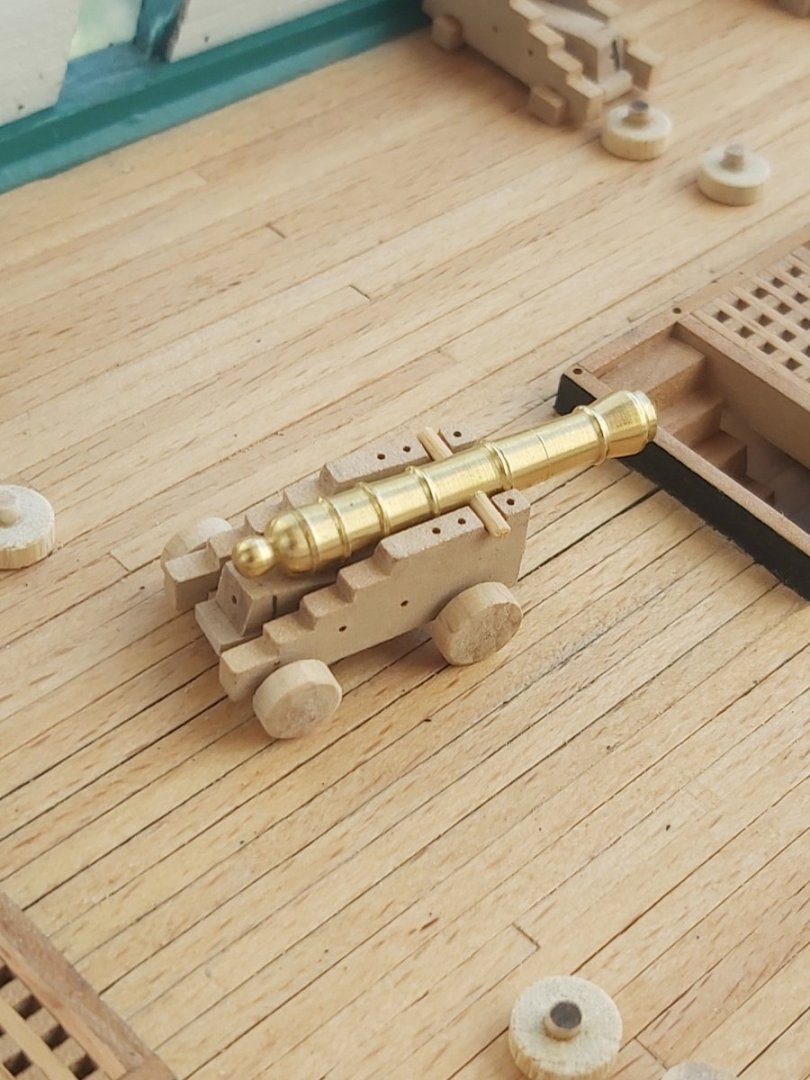
I have started painting of the gun carriages. I mixed red and yellow paints 50-50. Some friends may find the color of the carriages wrong (pinkish), but I tried to capture the color in the photos taken on the real ship. I think the paint on the carriages on the real ship has also faded over time or the photos taken may not reflect the real color. Despite everything, since these cannons will be under the spar deck anyway, the color will not stand out too much.


-
Excellent planking so far.
-
USS Constitution by mtbediz - 1:76
mtbediz replied to mtbediz's topic in - Build logs for subjects built 1751 - 1800
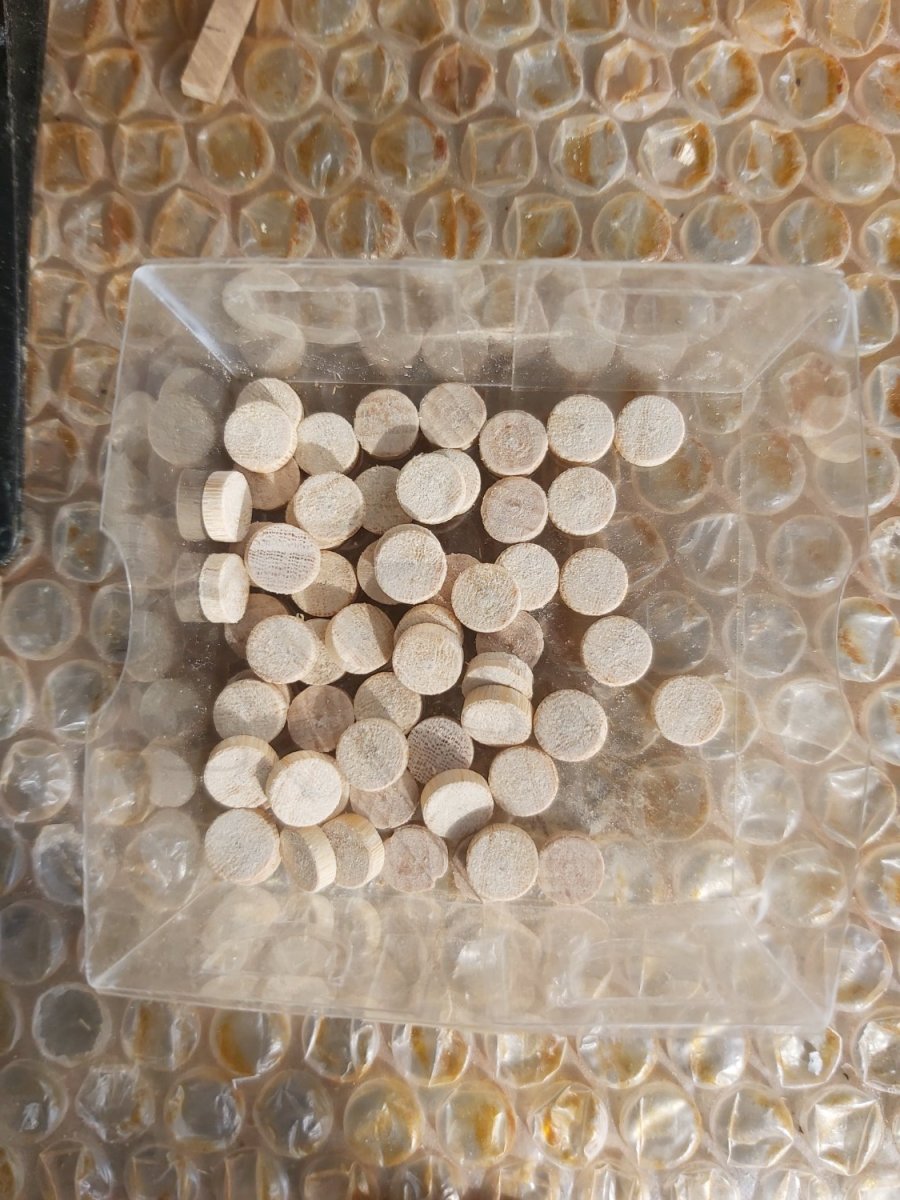
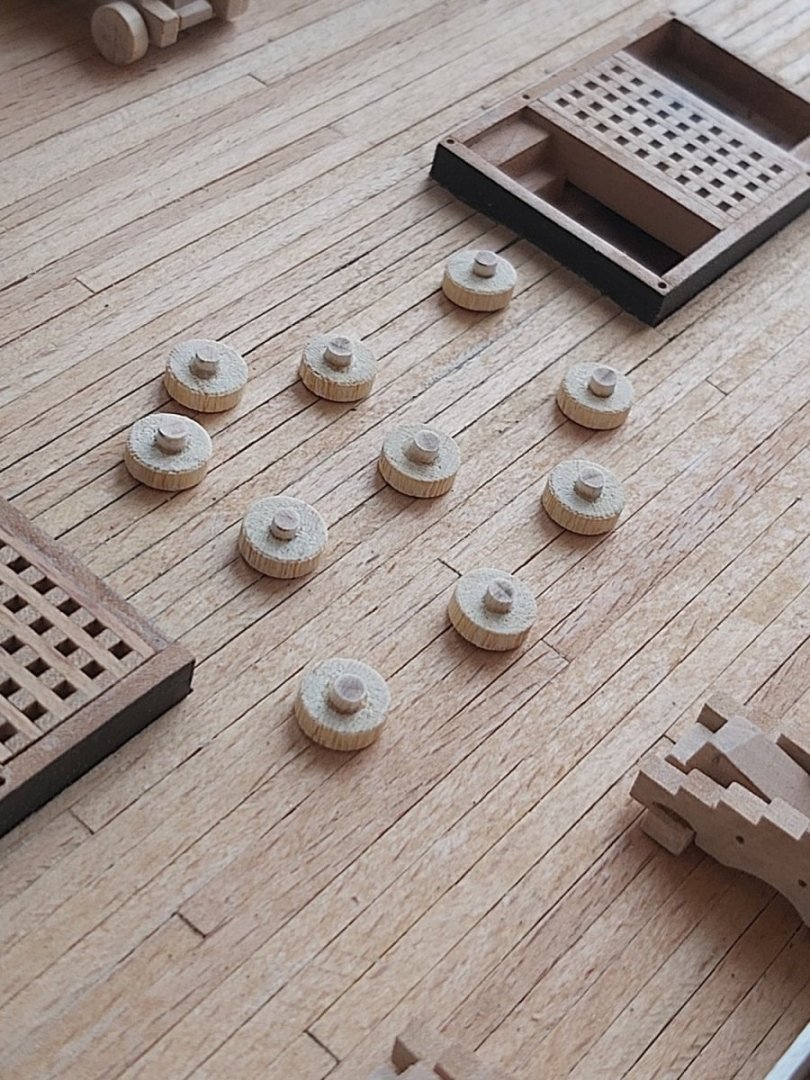
Thank you Greg. First, I cut the wheels from a dowel to the appropriate thickness with a table saw, then from a smaller dowel, I cut the pieces representing the axle extensions and glued them to the center of the wheels with CA. I glue these wheels I prepared to the carriage axles. Lazy job -
USS Constitution by mtbediz - 1:76
mtbediz replied to mtbediz's topic in - Build logs for subjects built 1751 - 1800
I have started making the wheels for gun carriages.


-
USS Constitution by mtbediz - 1:76
mtbediz replied to mtbediz's topic in - Build logs for subjects built 1751 - 1800
Hello Phil, thank you for sharing your technique. Good technique and nice result. -
USS Constitution by mtbediz - 1:76
mtbediz replied to mtbediz's topic in - Build logs for subjects built 1751 - 1800
Thanks Greg. The micro mill is a tool that every modeler should have. Thanks to it, I can do many tasks faster and more accurately. I am using Proxxon MF70. An excellent machine, I recommend it. -
USS Constitution by mtbediz - 1:76
mtbediz replied to mtbediz's topic in - Build logs for subjects built 1751 - 1800
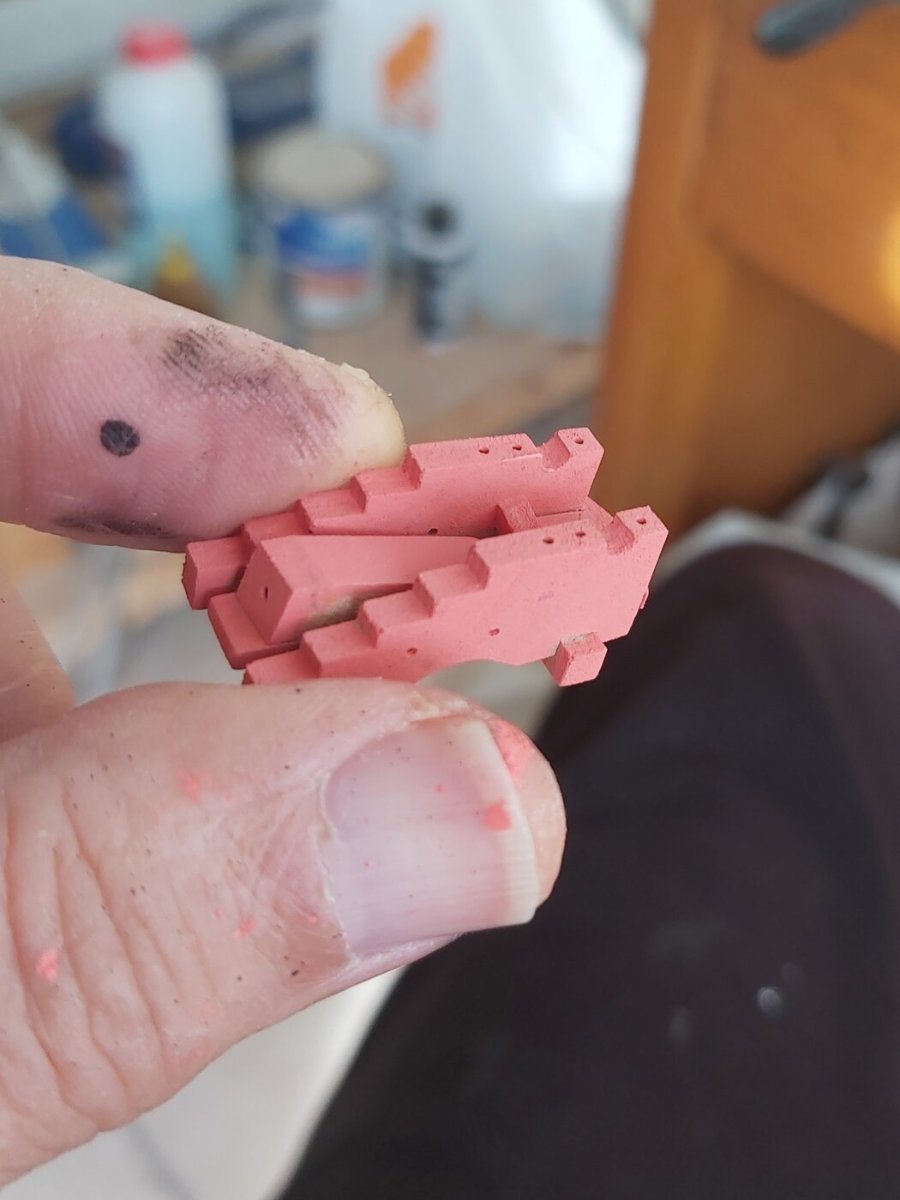
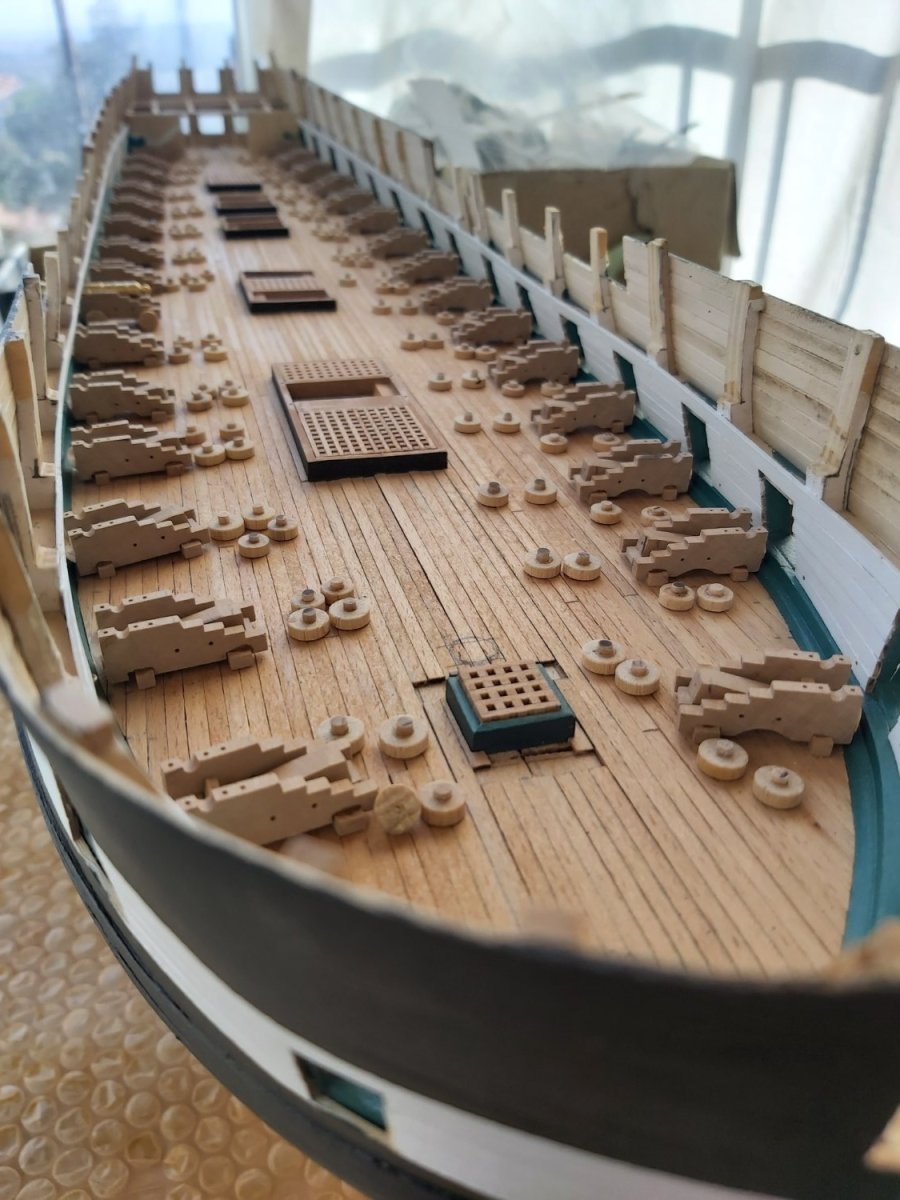
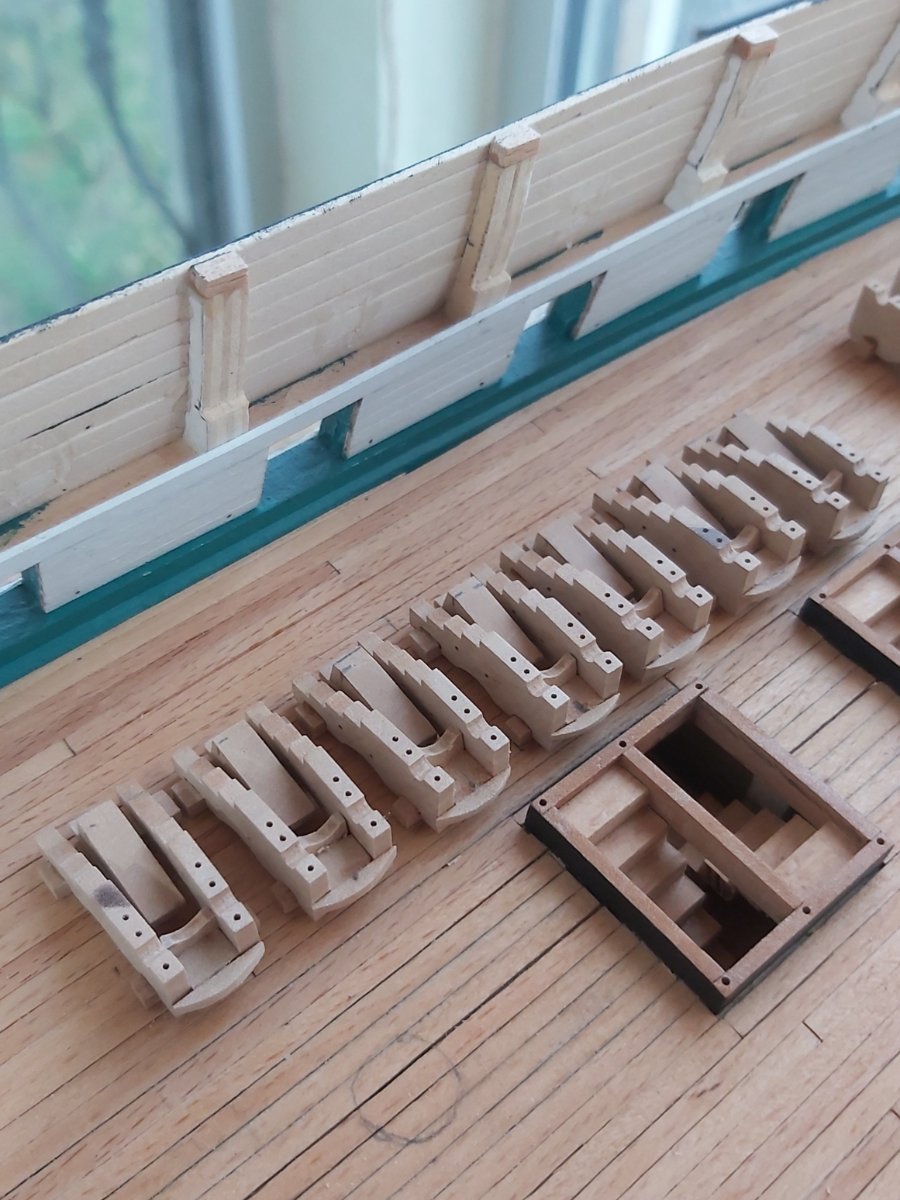
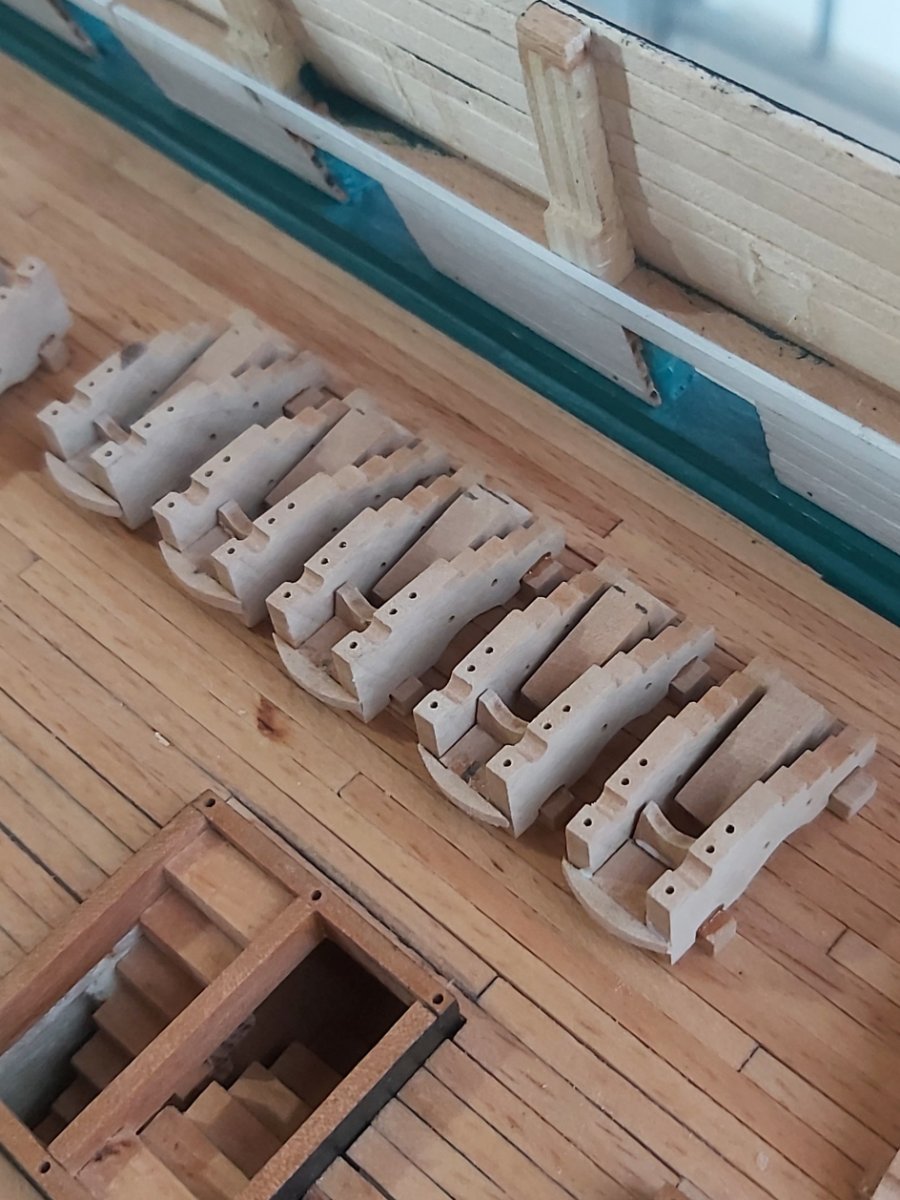
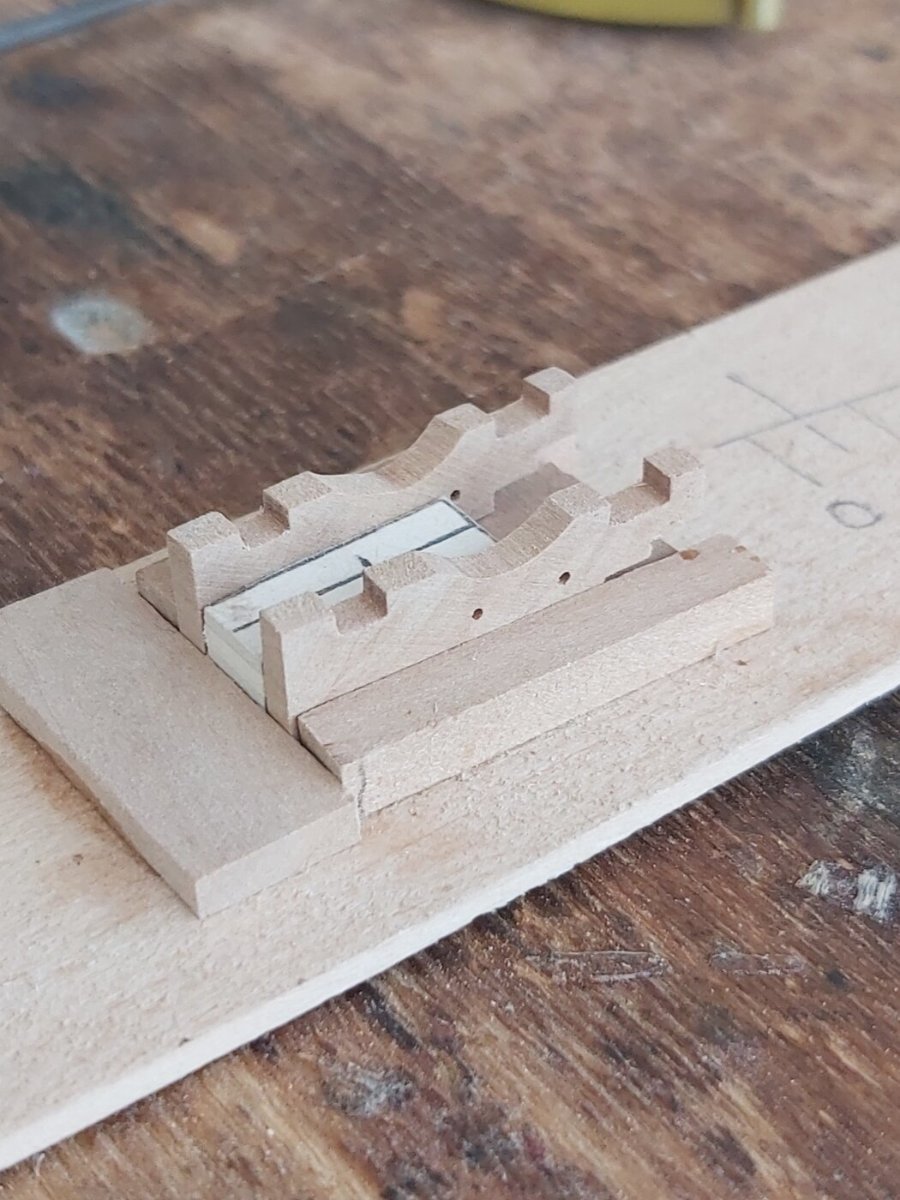
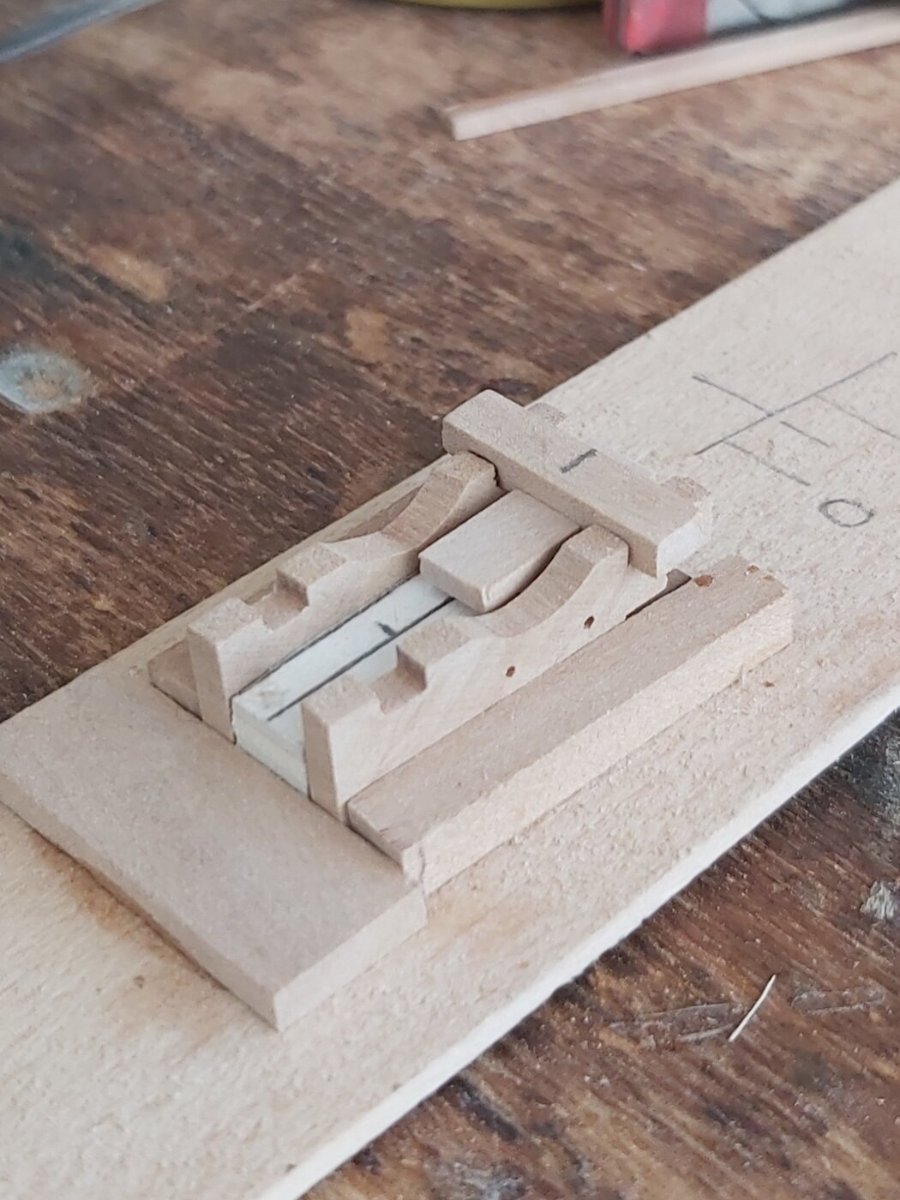
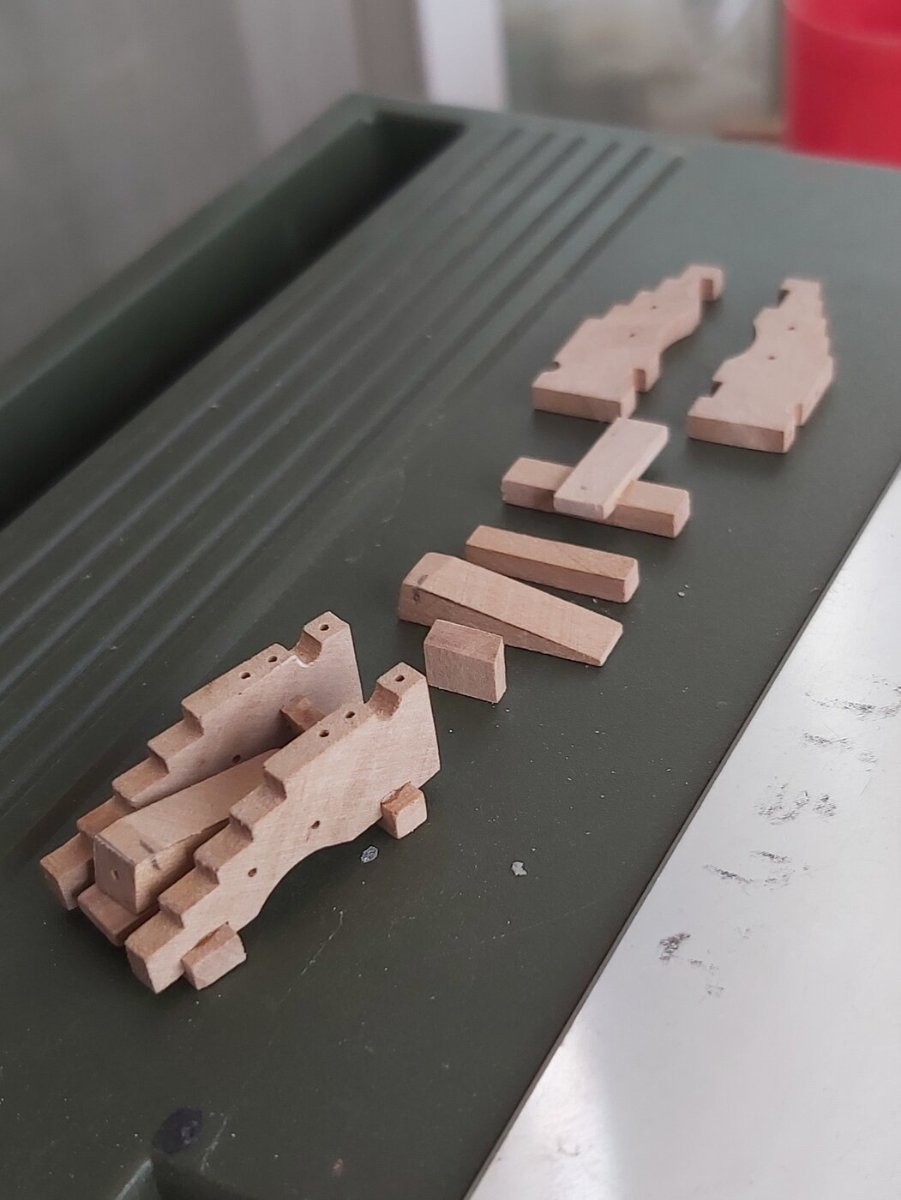
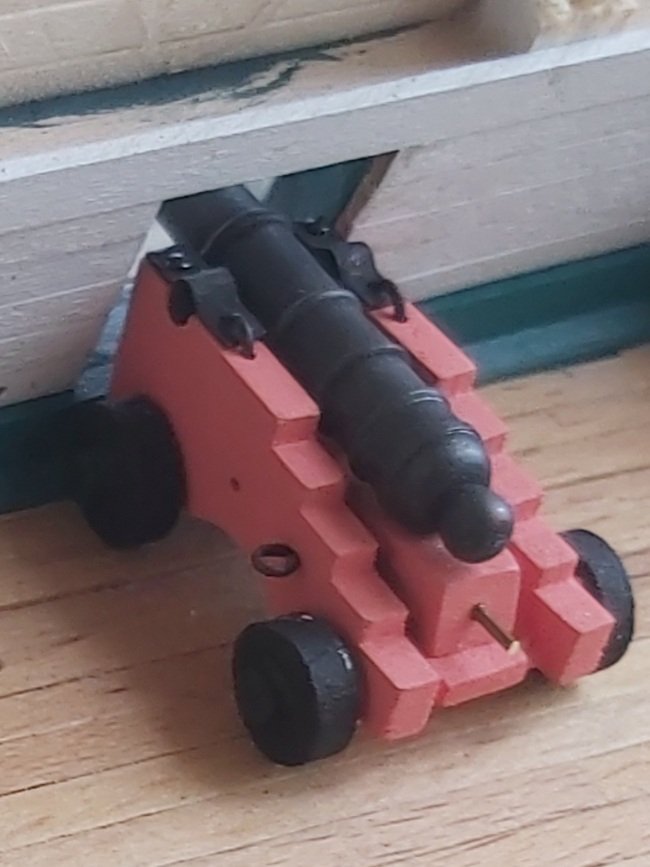
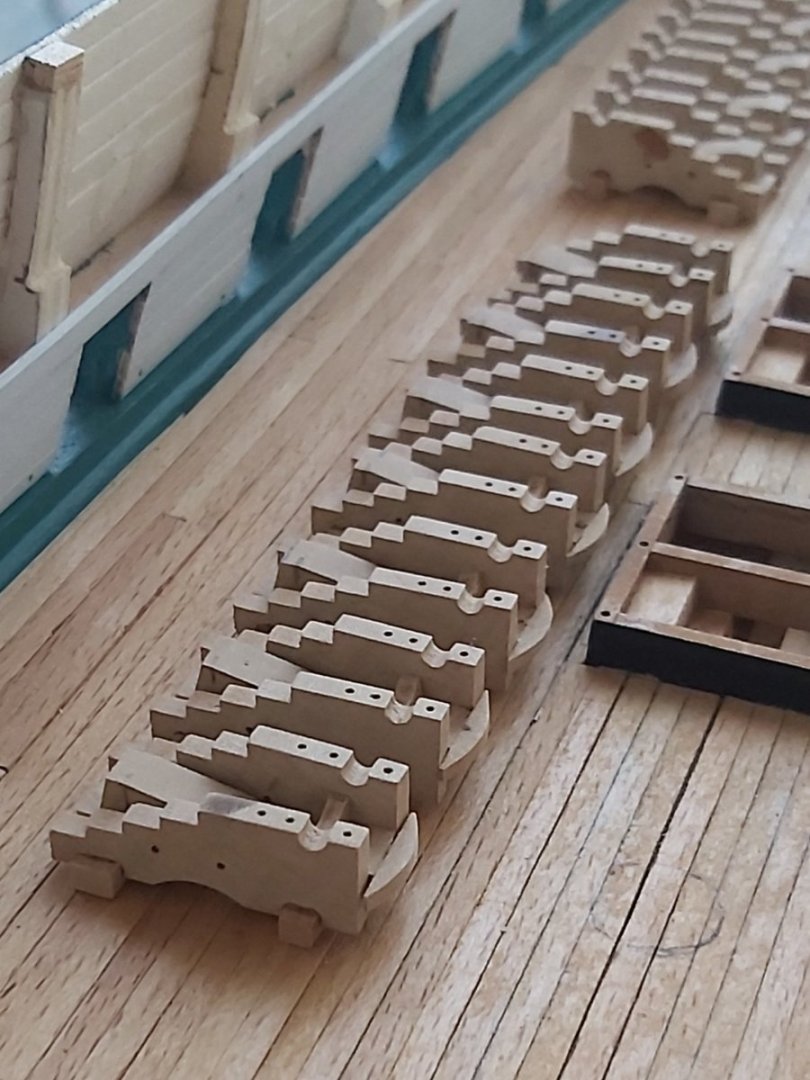
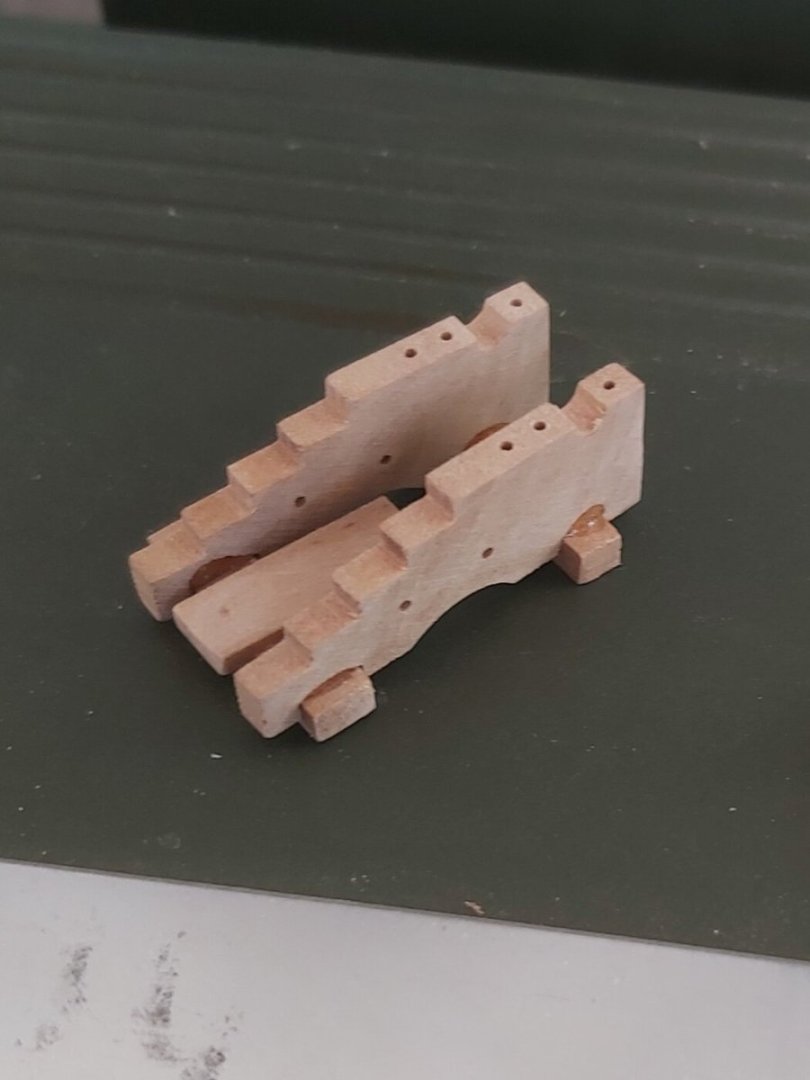
I am adding the cuoins, transoms and breast pieces of the carriages.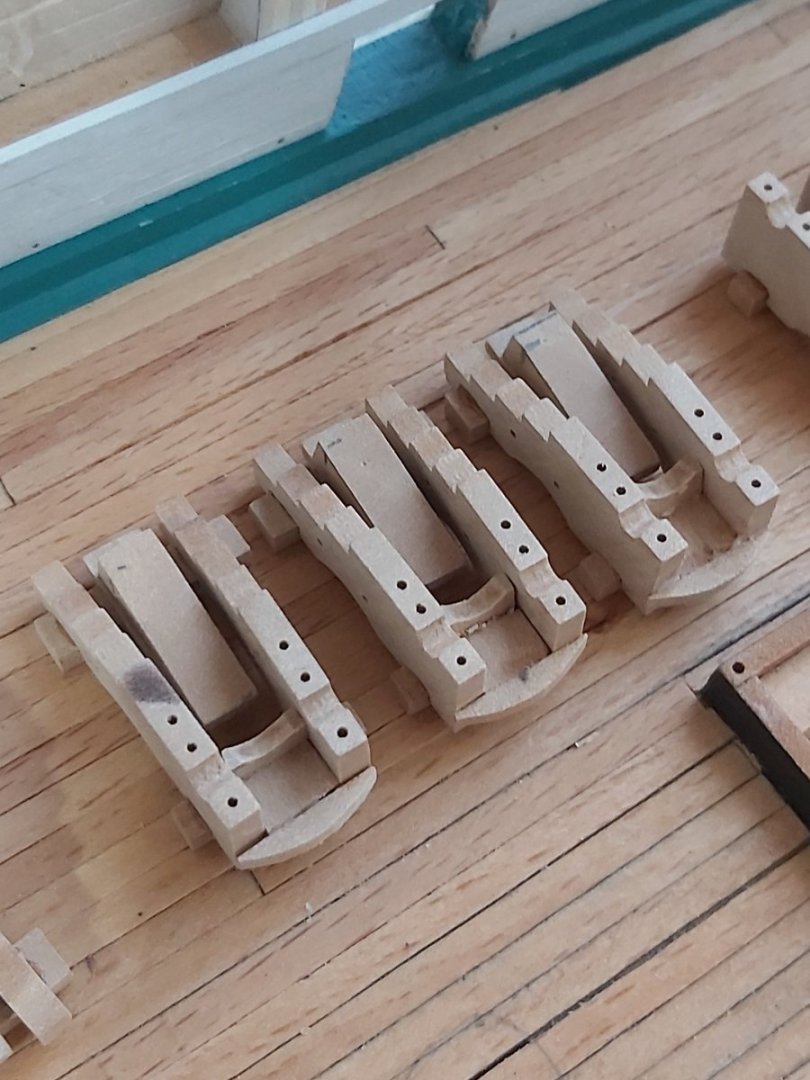


-
After seeing the last photos, I understood your problem, but the truth is that I had the same problem and, just as Jon said, I fixed the problem by increasing the width of the planks in that area when laying the next planks.
-
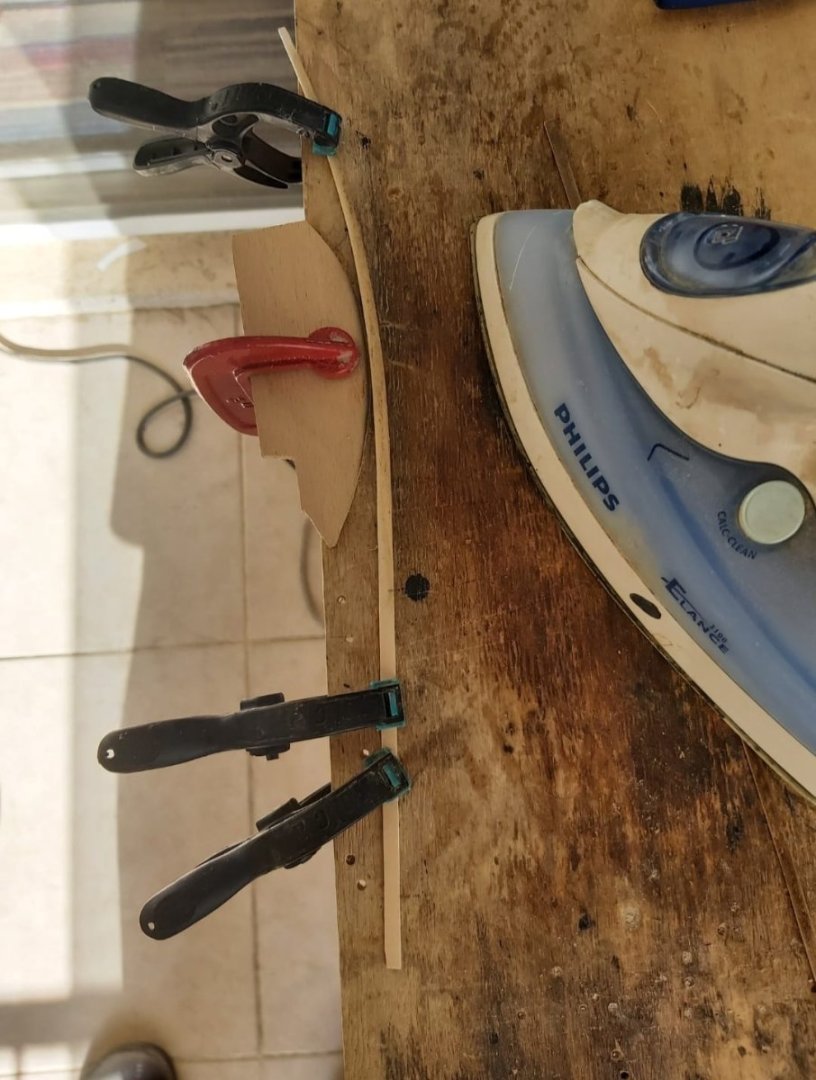
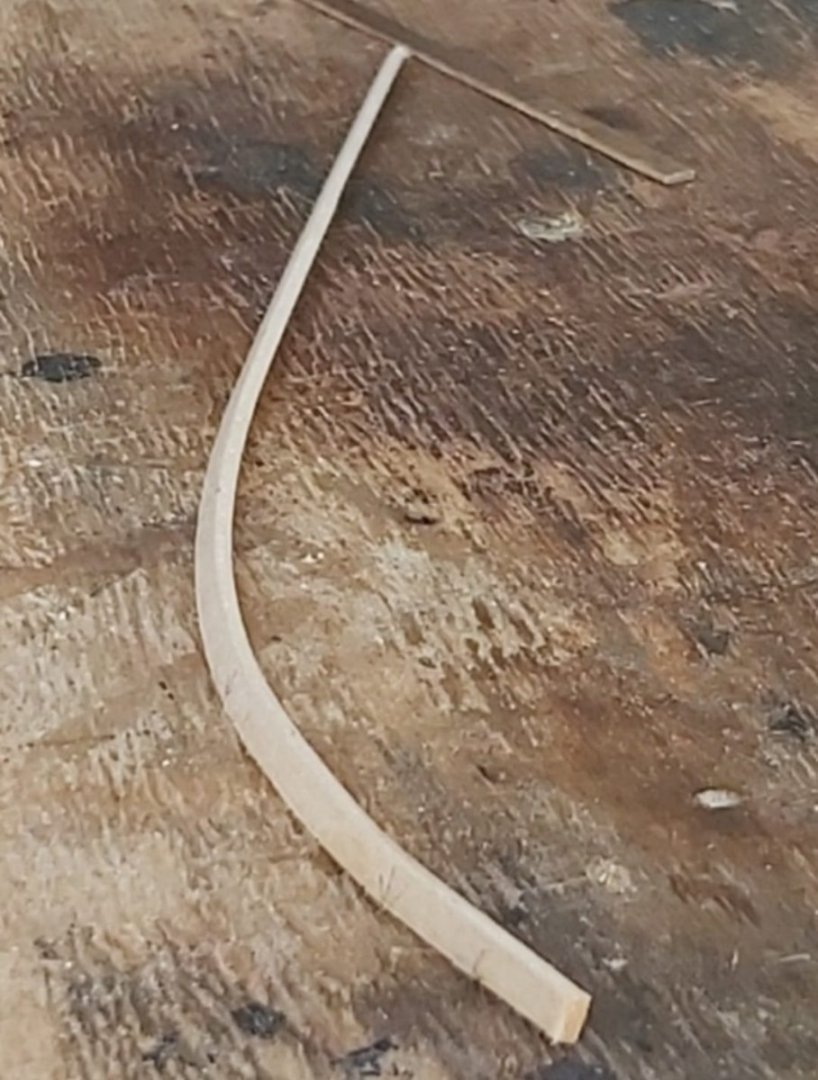
If you do the edge bending the planks in the bow section of the ship, you will see that the planks fit exactly onto the bulkheads and you will get a smoother surface. As you can see in the photo, I do the edge bending with the help of an iron. I wish you a Happy and healthy new year to you too.
-
USS Constitution by mtbediz - 1:76
mtbediz replied to mtbediz's topic in - Build logs for subjects built 1751 - 1800
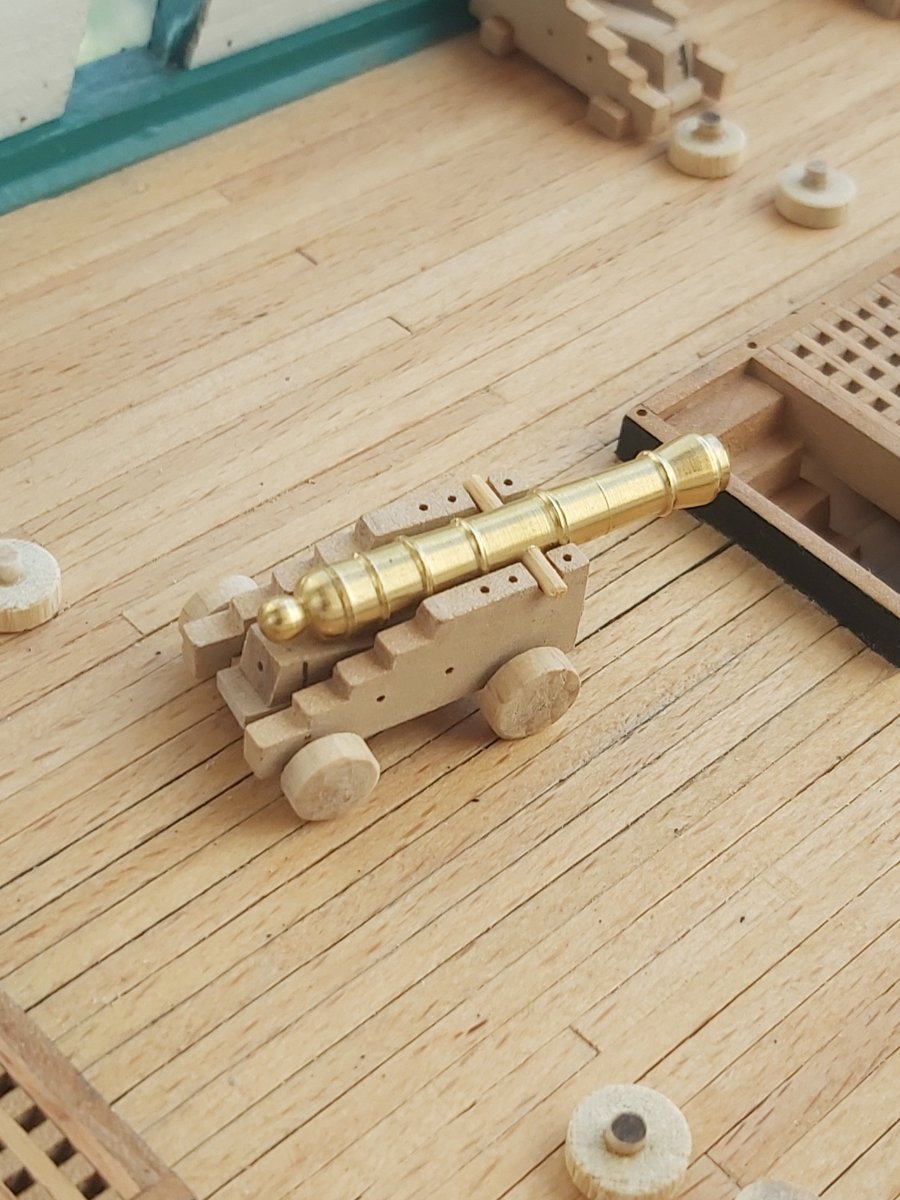
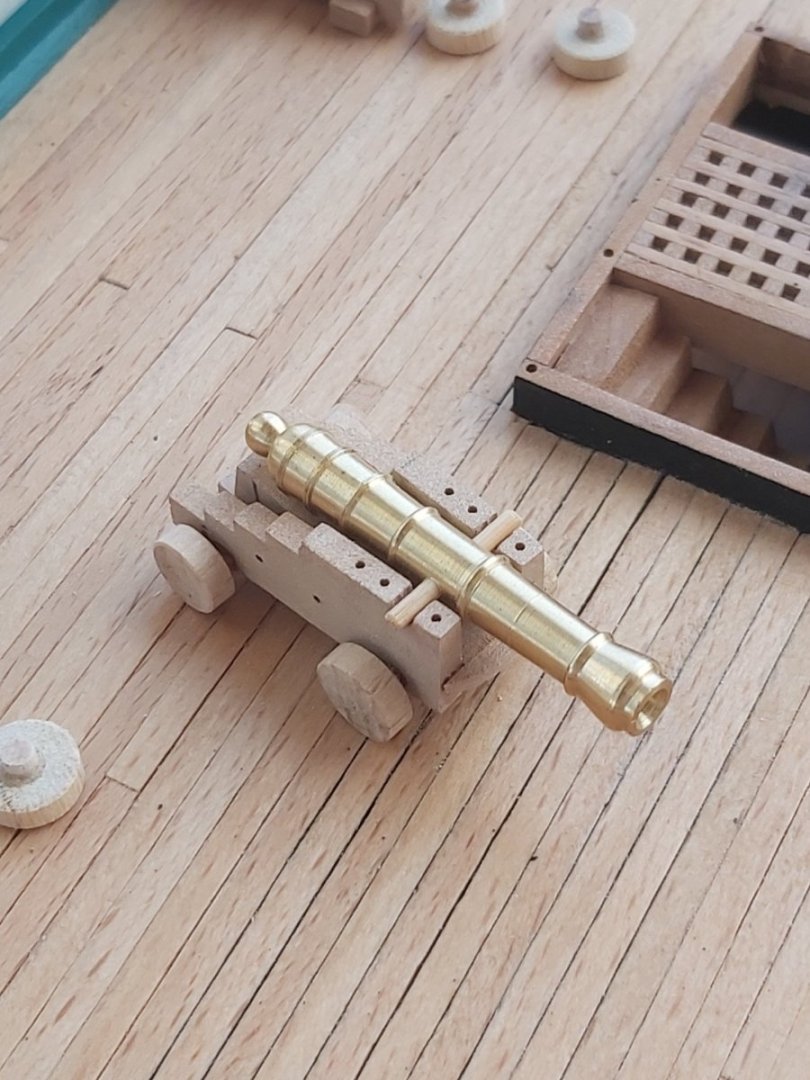
Thanks for the useful information Jon. I actually don't know the length of the original guns either. I just wanted the tip of the guns to be a little further out from the gun ports. Happy new year. -
USS Constitution by mtbediz - 1:76
mtbediz replied to mtbediz's topic in - Build logs for subjects built 1751 - 1800
The scale of my model is 1:76. Actually, I needed slightly larger cannons, but this is the closest cannon I could find in Turkey. It was possible to buy larger sizes abroad, but since it would cost me a lot, I decided to use them. The length of the cannon is 43 mm. -
La Palme by Tobias - 1:36 - POF
mtbediz replied to Tobias's topic in - Build logs for subjects built 1501 - 1750
Very nice nailing Tobias. Happy new year. -
Precision work. We will see a very good planking in the end.
-
USS Constitution by mtbediz - 1:76
mtbediz replied to mtbediz's topic in - Build logs for subjects built 1751 - 1800
Thank you Greg -
USS Constitution by mtbediz - 1:76
mtbediz replied to mtbediz's topic in - Build logs for subjects built 1751 - 1800
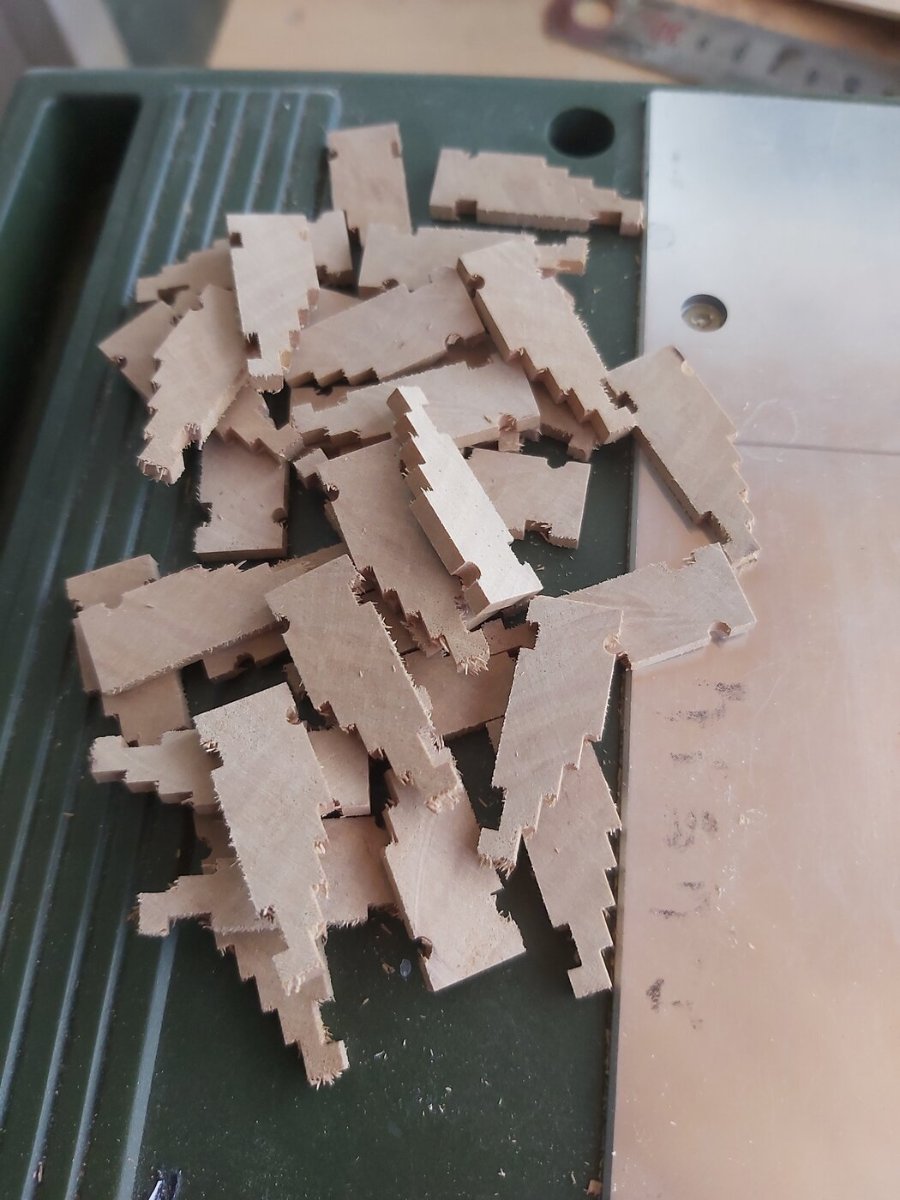
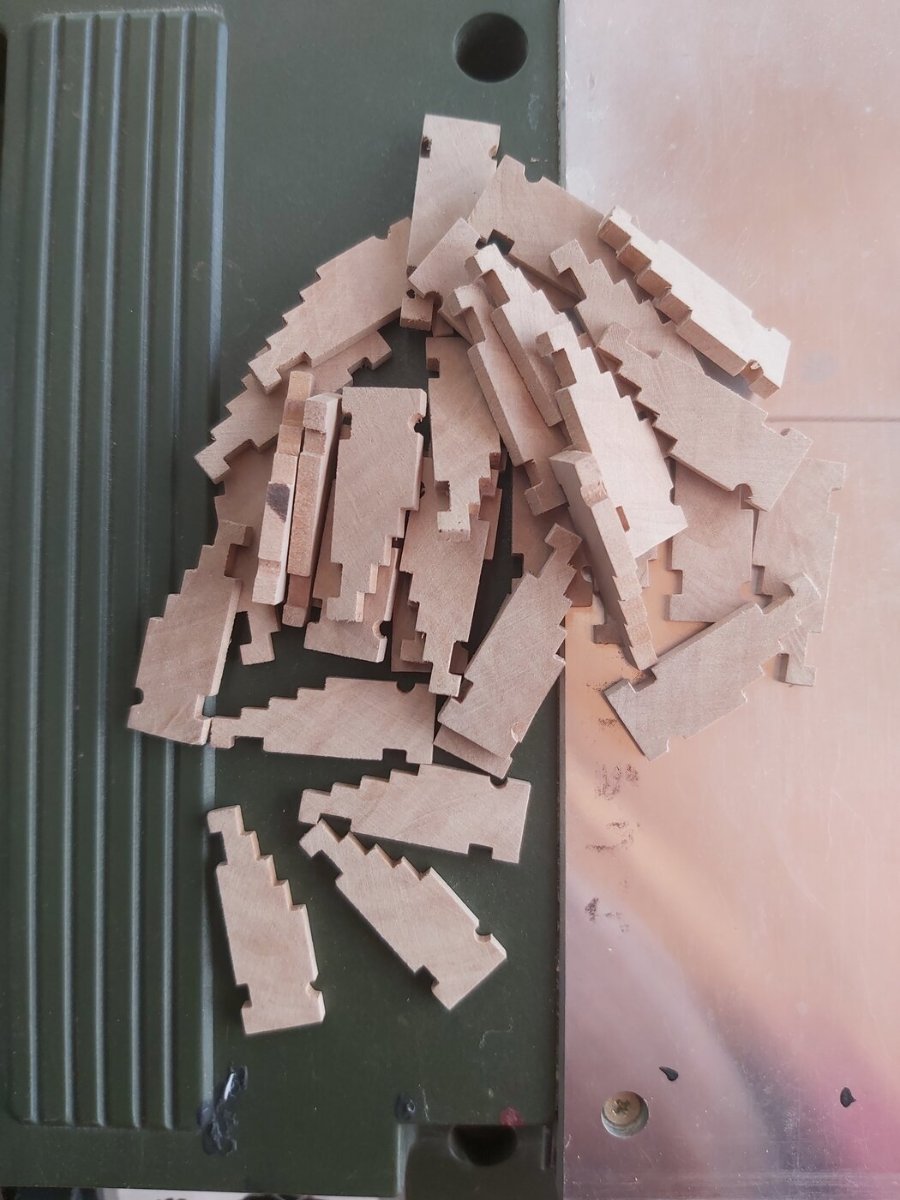
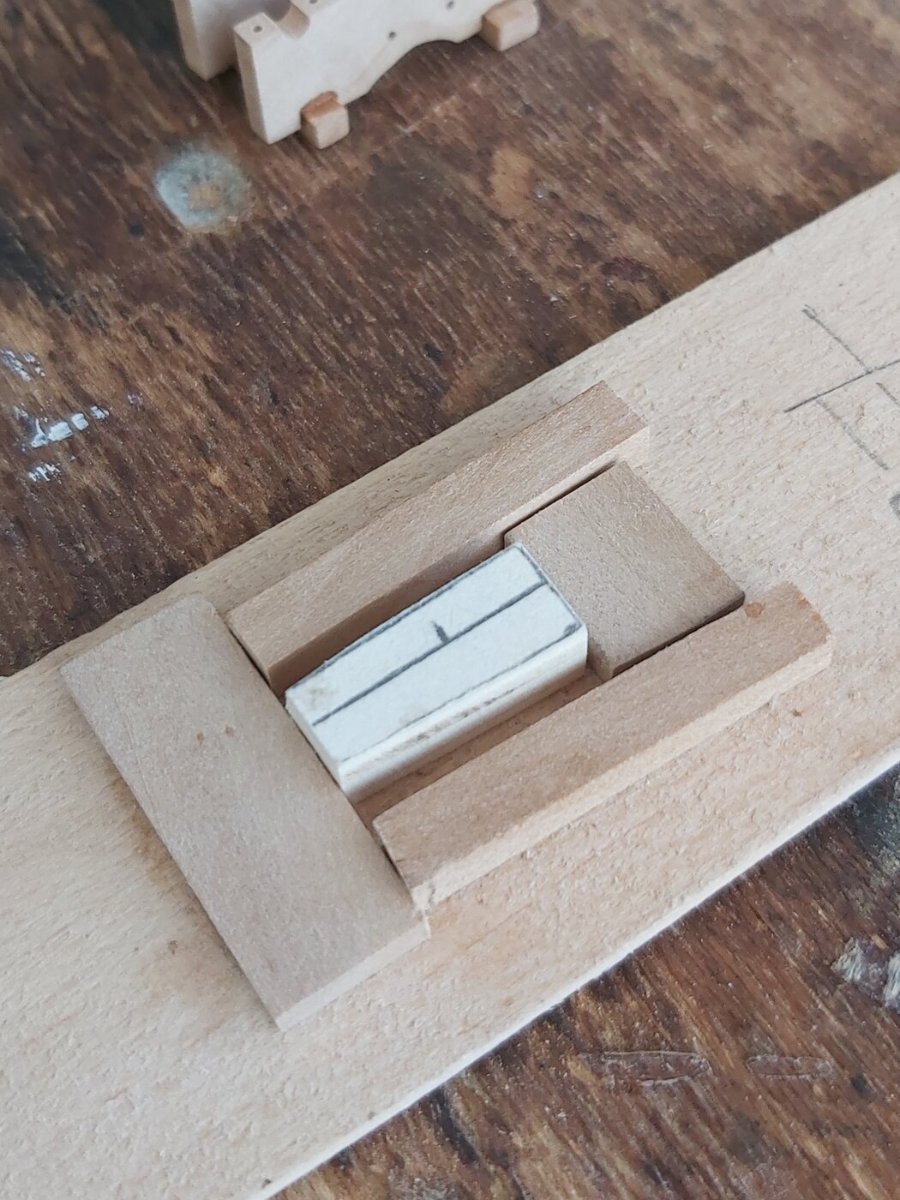
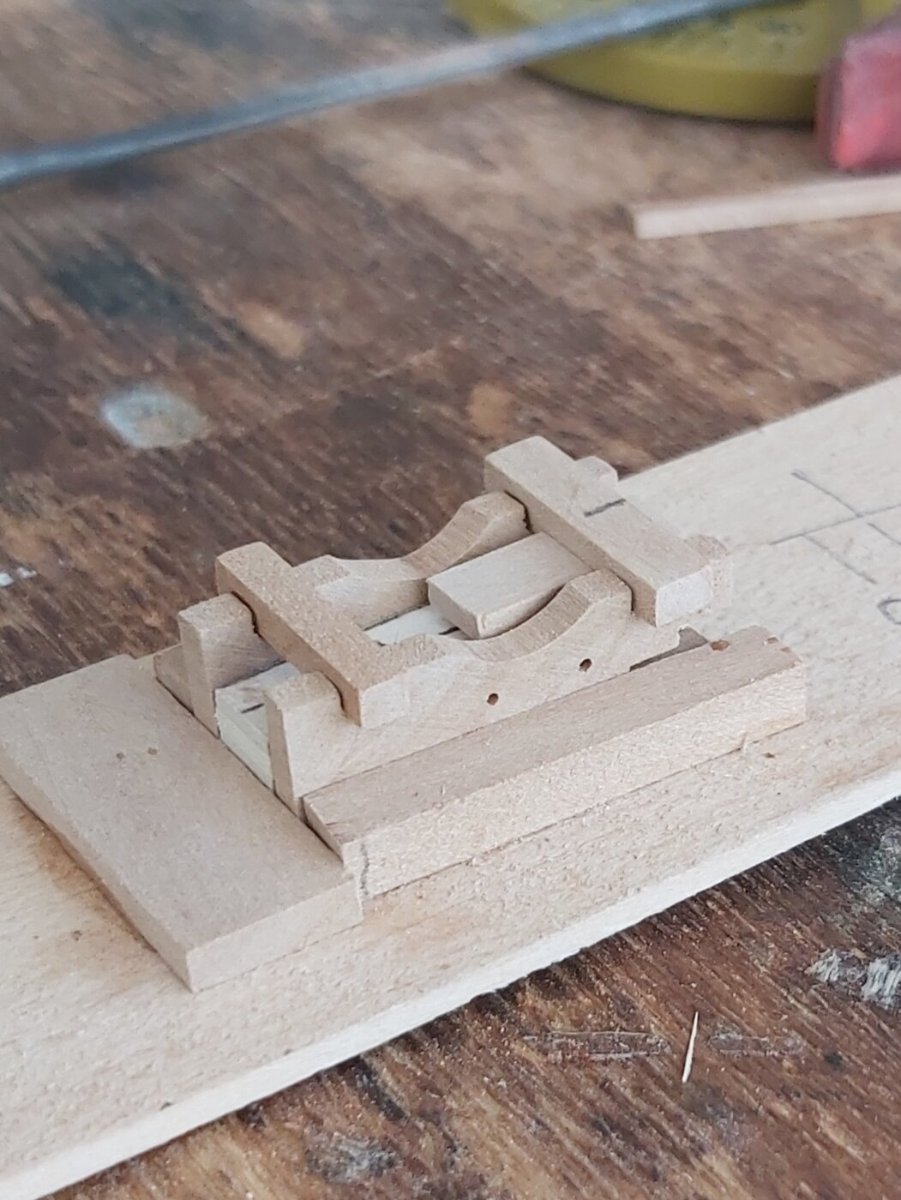
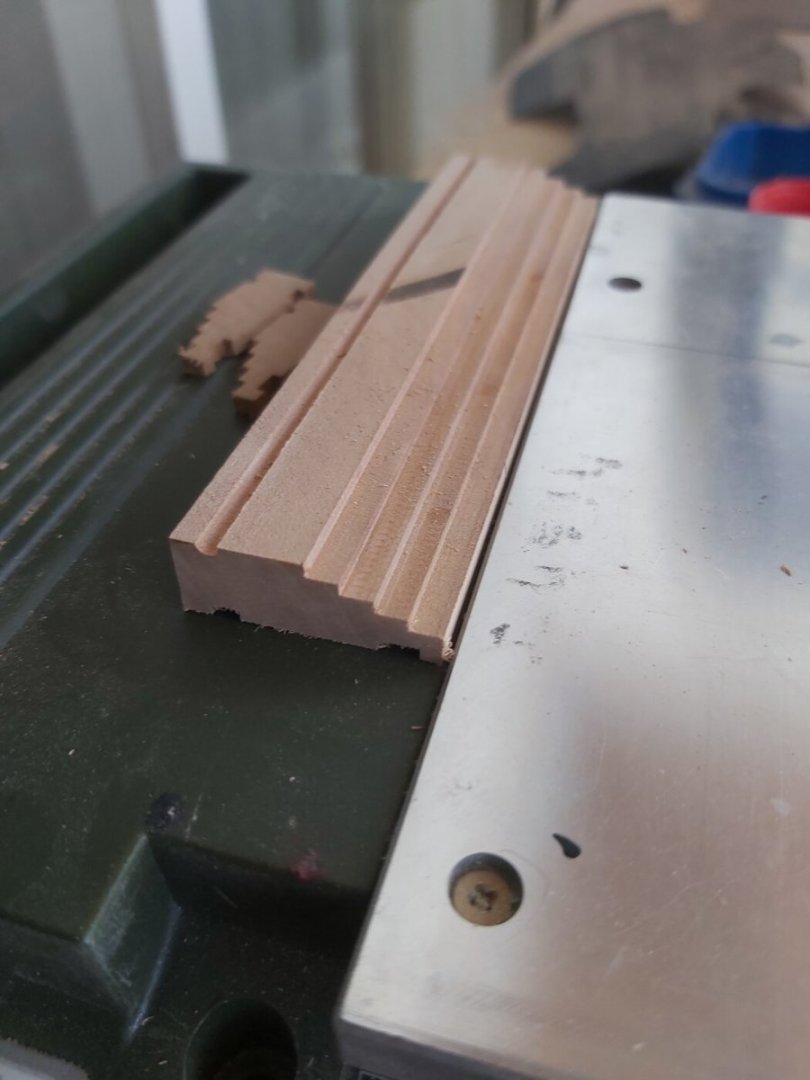
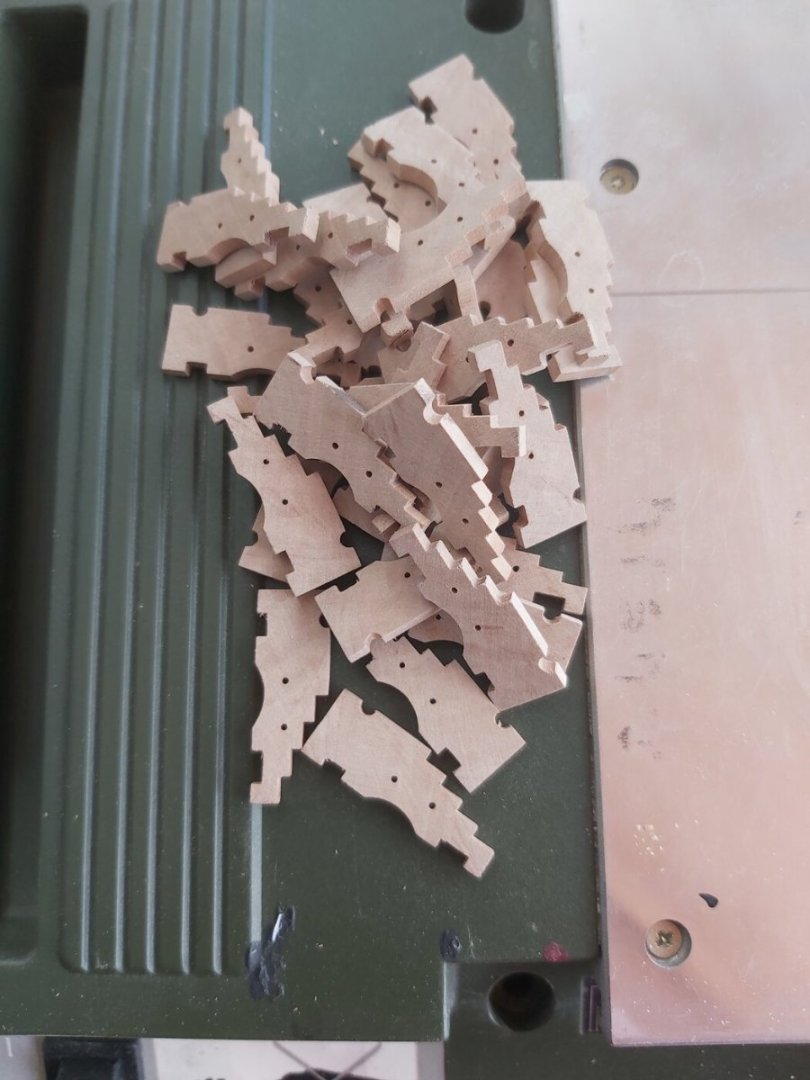
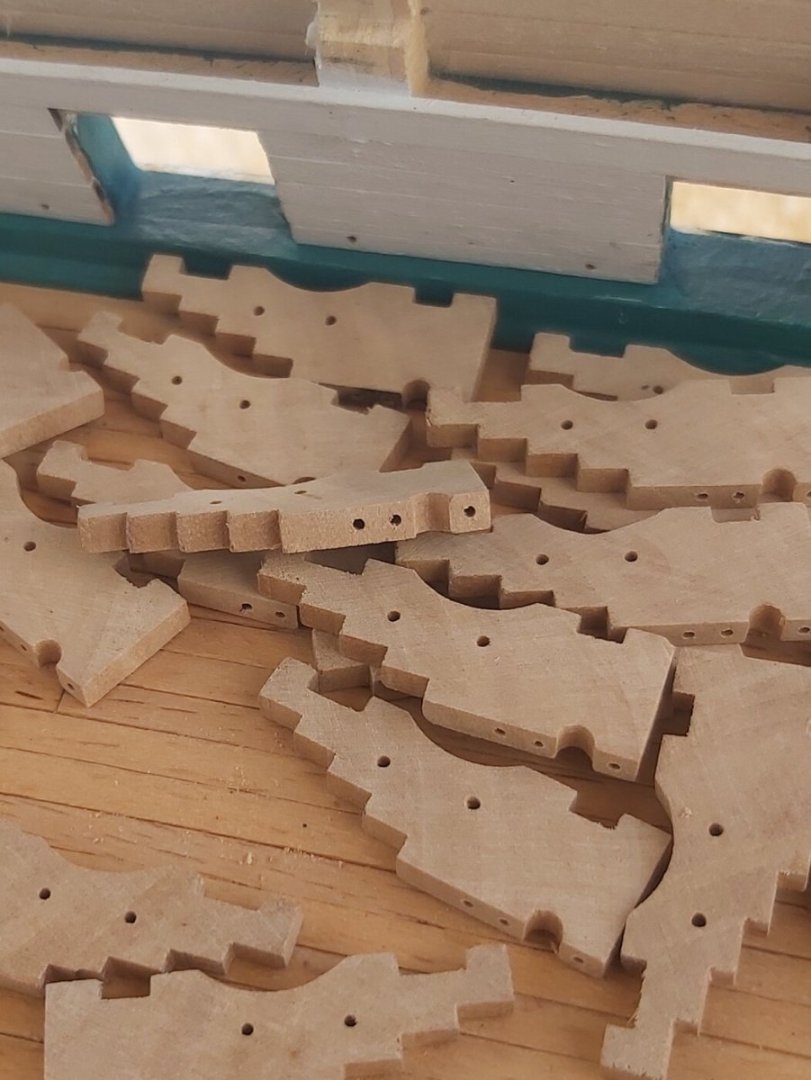
I have started the construction of gun deck cannon carriages. There will be 30 in total. I am making the cannon carriages from pear wood. First, I prepared a block that would form the side walls with a milling cutter, then I obtained the side walls by slicing the block with my table saw. After sanding and necessary drilling, I combined the front and rear wheel axles that I had prepared before with the side walls using the assembly jig I made.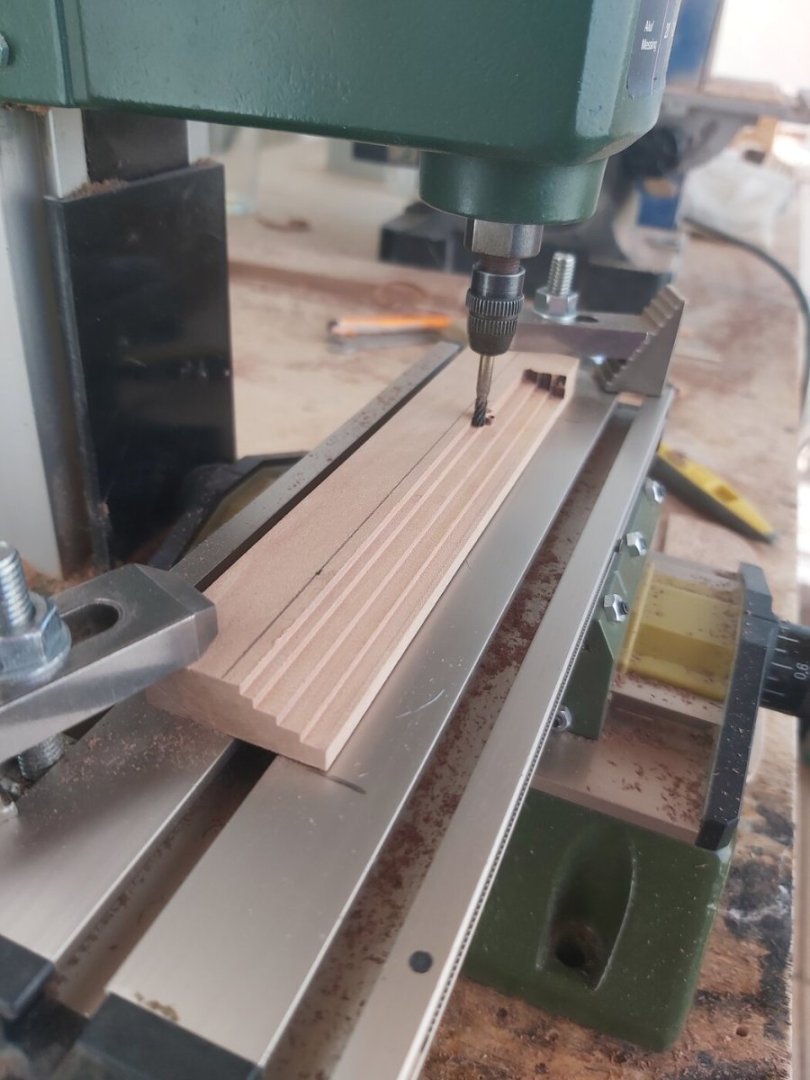


-
USS Constitution by mtbediz - 1:76
mtbediz replied to mtbediz's topic in - Build logs for subjects built 1751 - 1800
No problem. These types of discussions are instructive for everyone wherever they are held. -
USS Constitution by mtbediz - 1:76
mtbediz replied to mtbediz's topic in - Build logs for subjects built 1751 - 1800
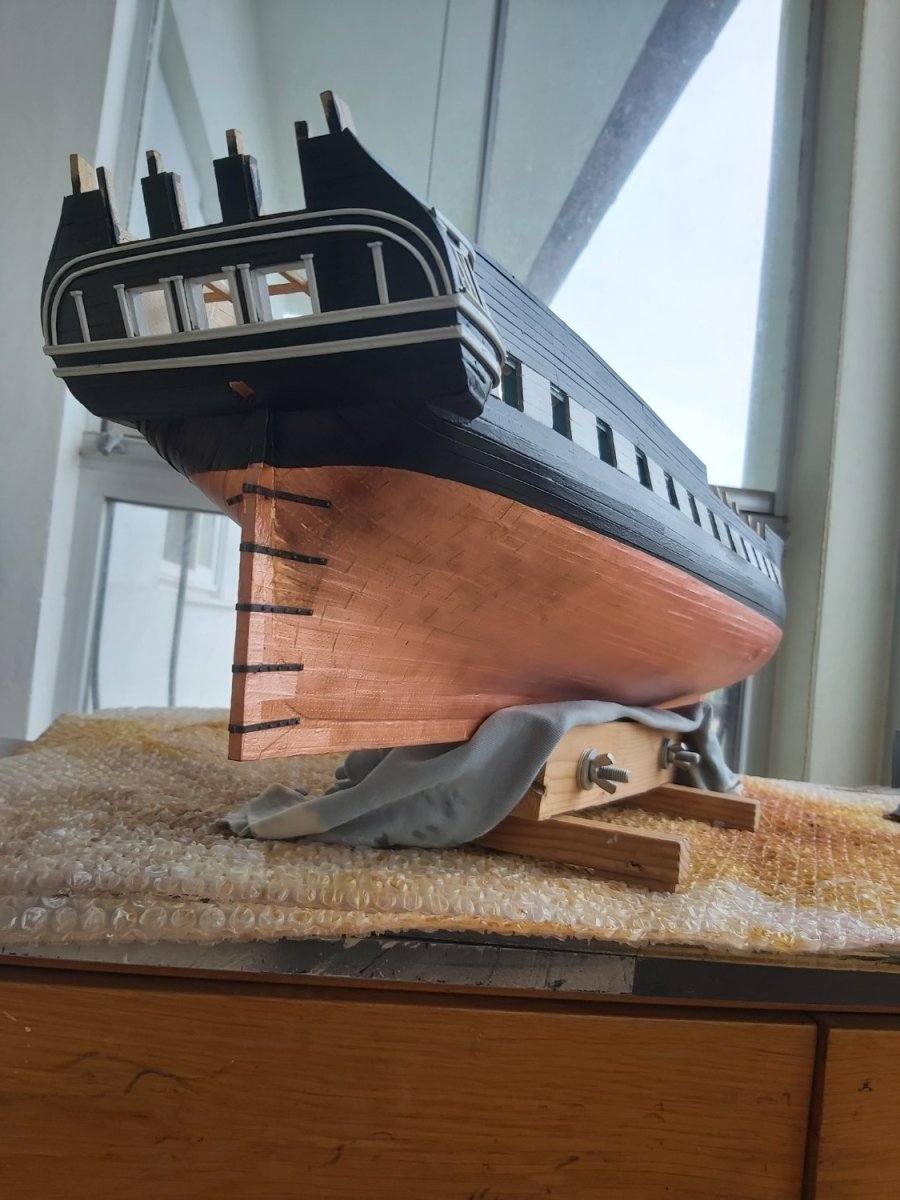
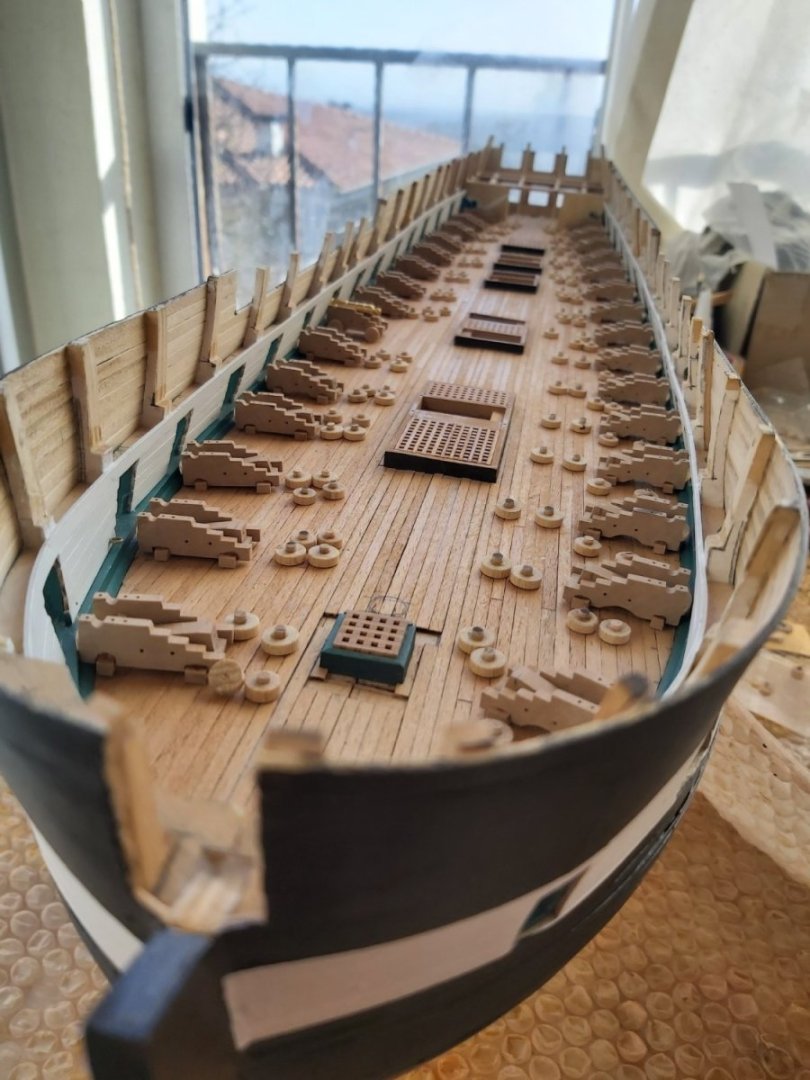
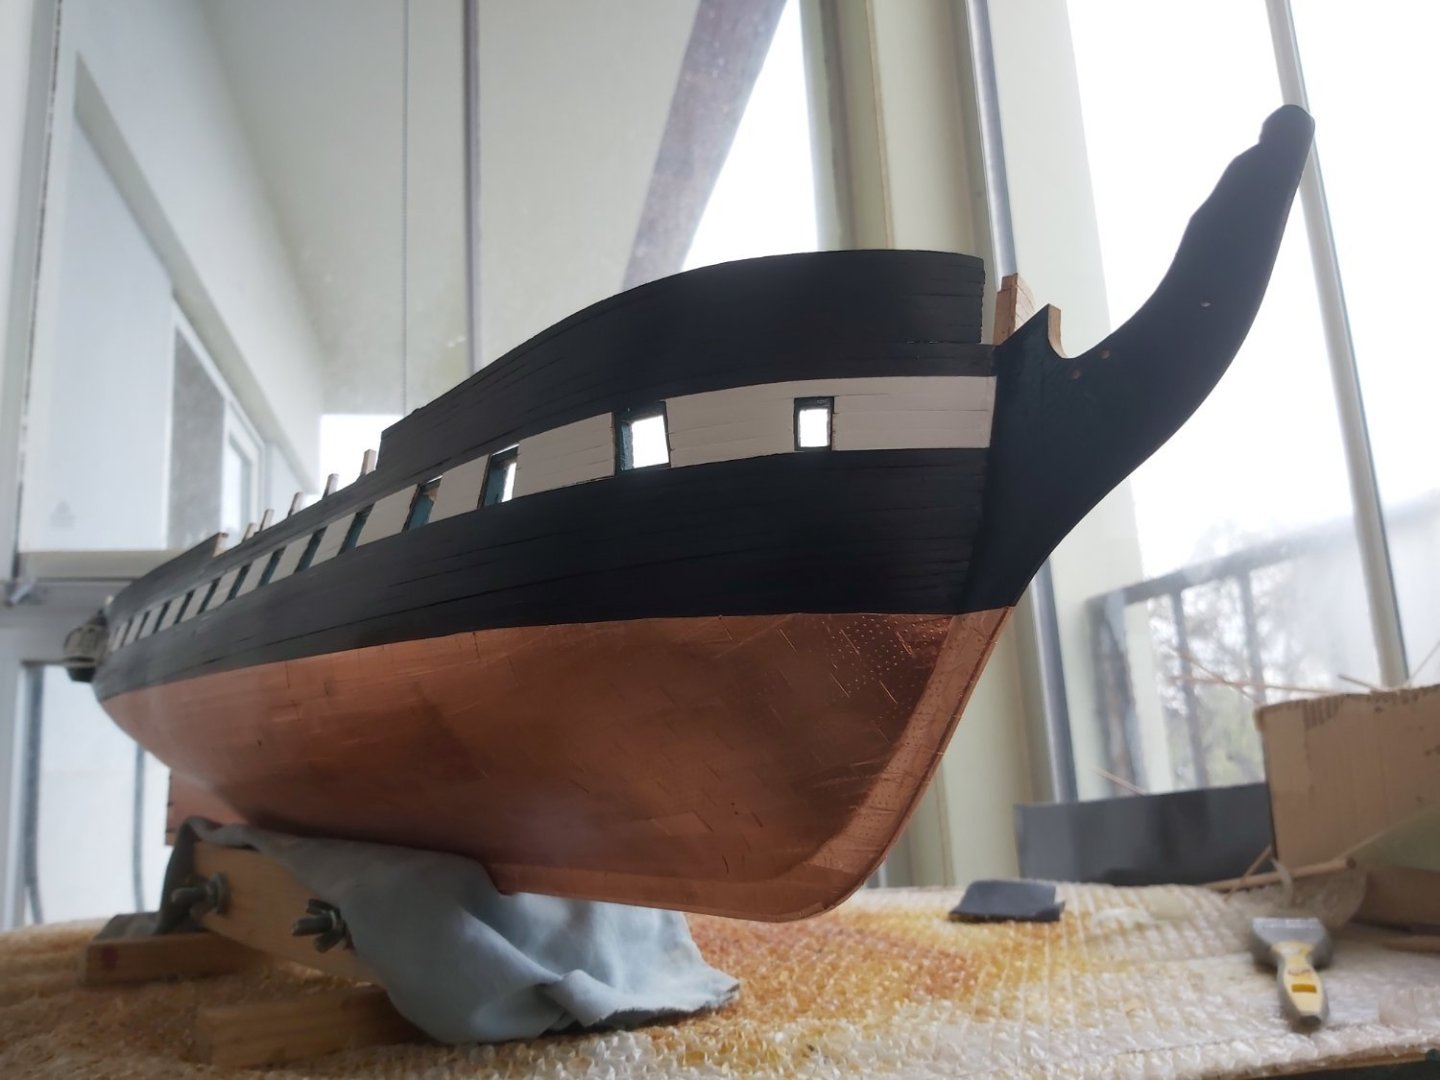
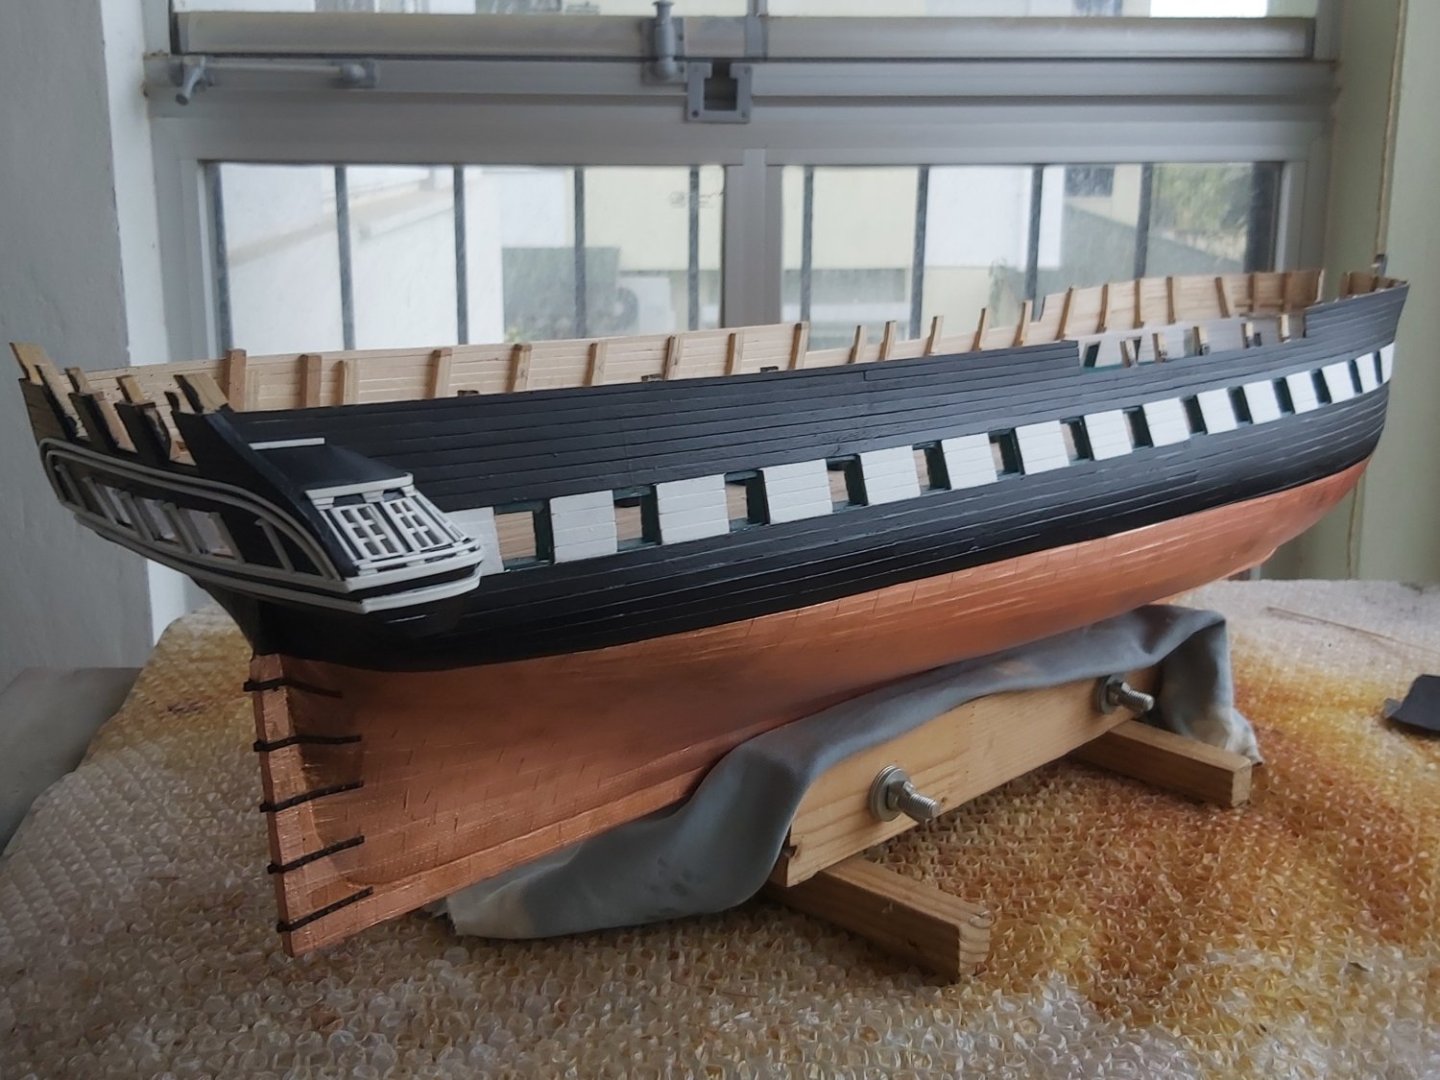
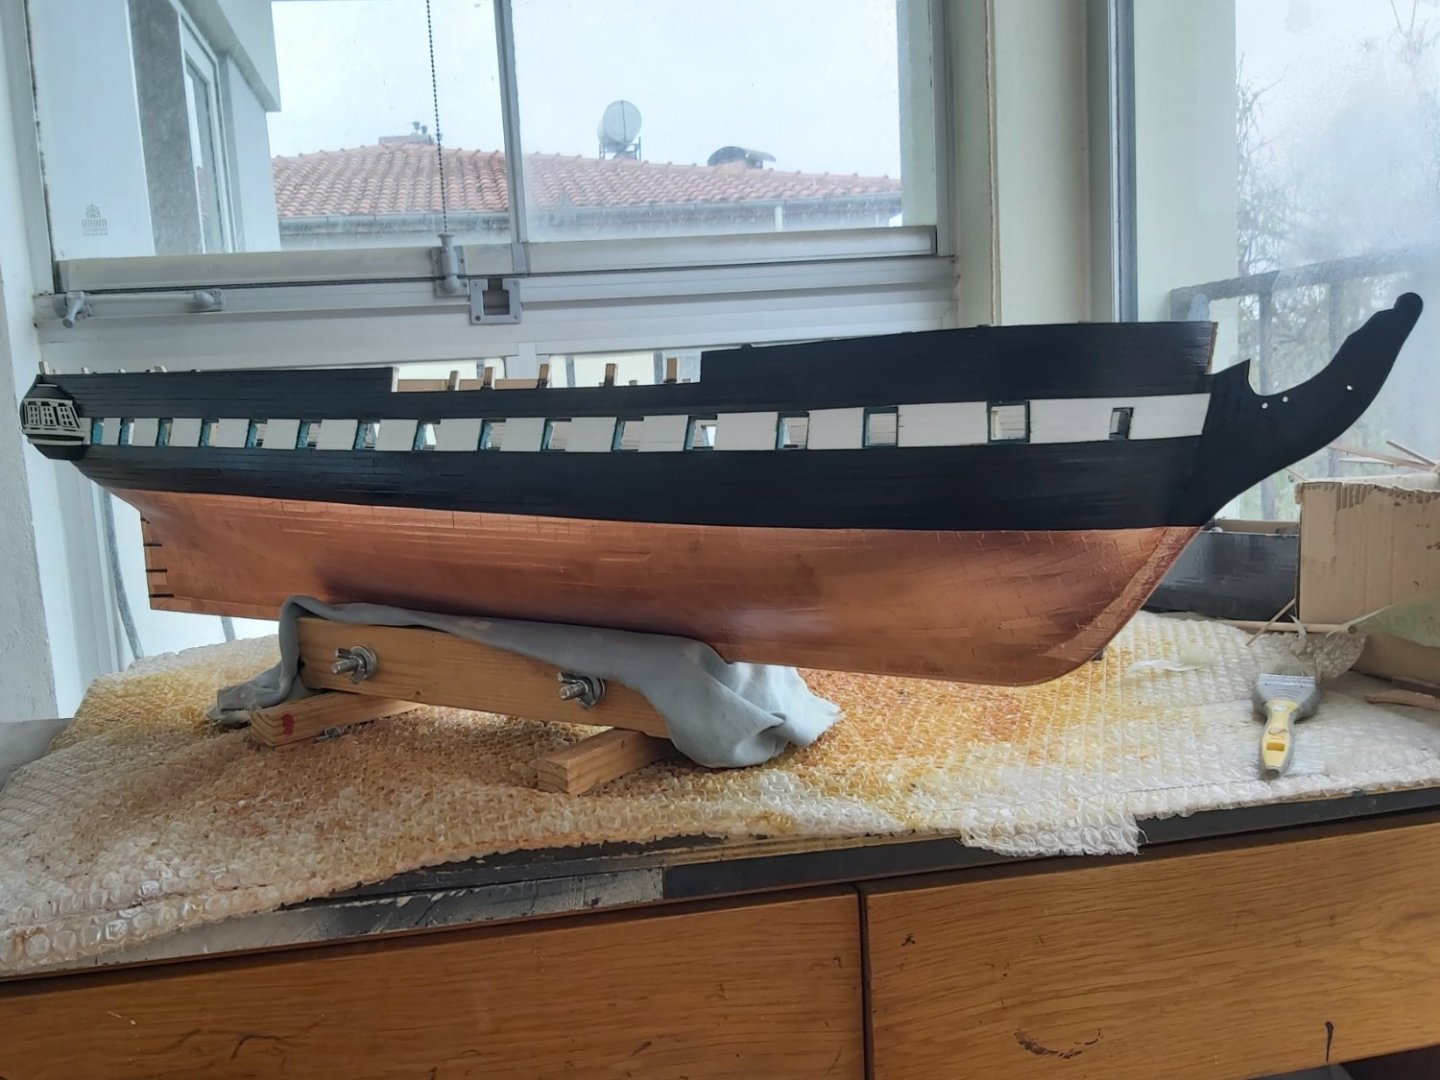
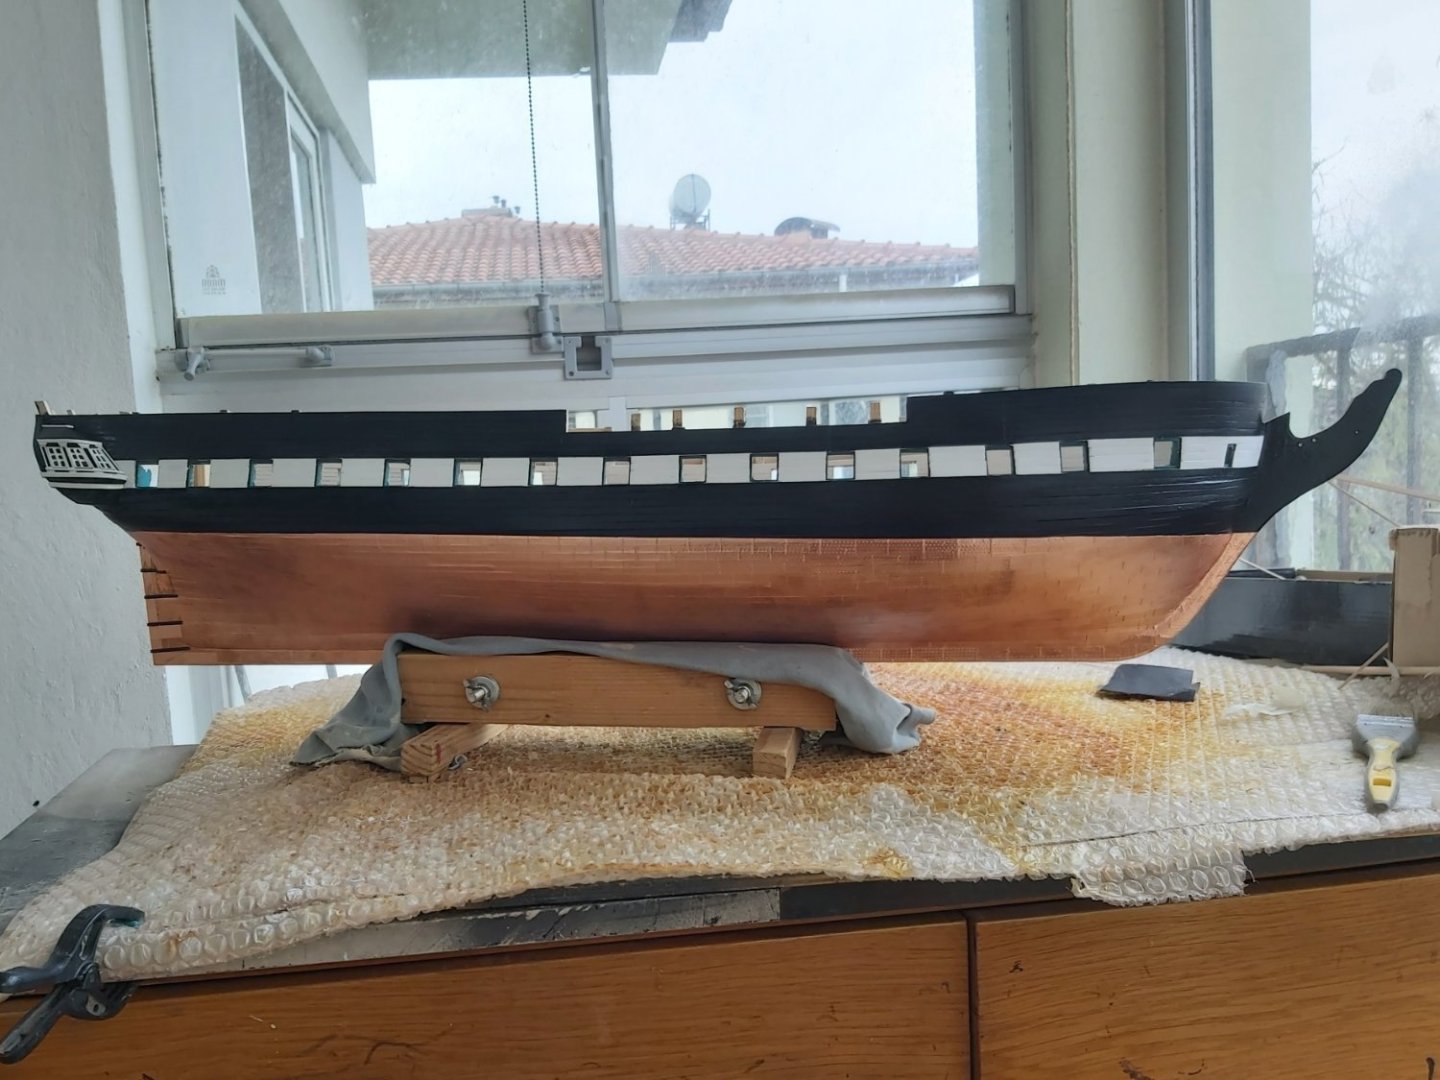
I have started painting the upper hull. The starboard side is complete.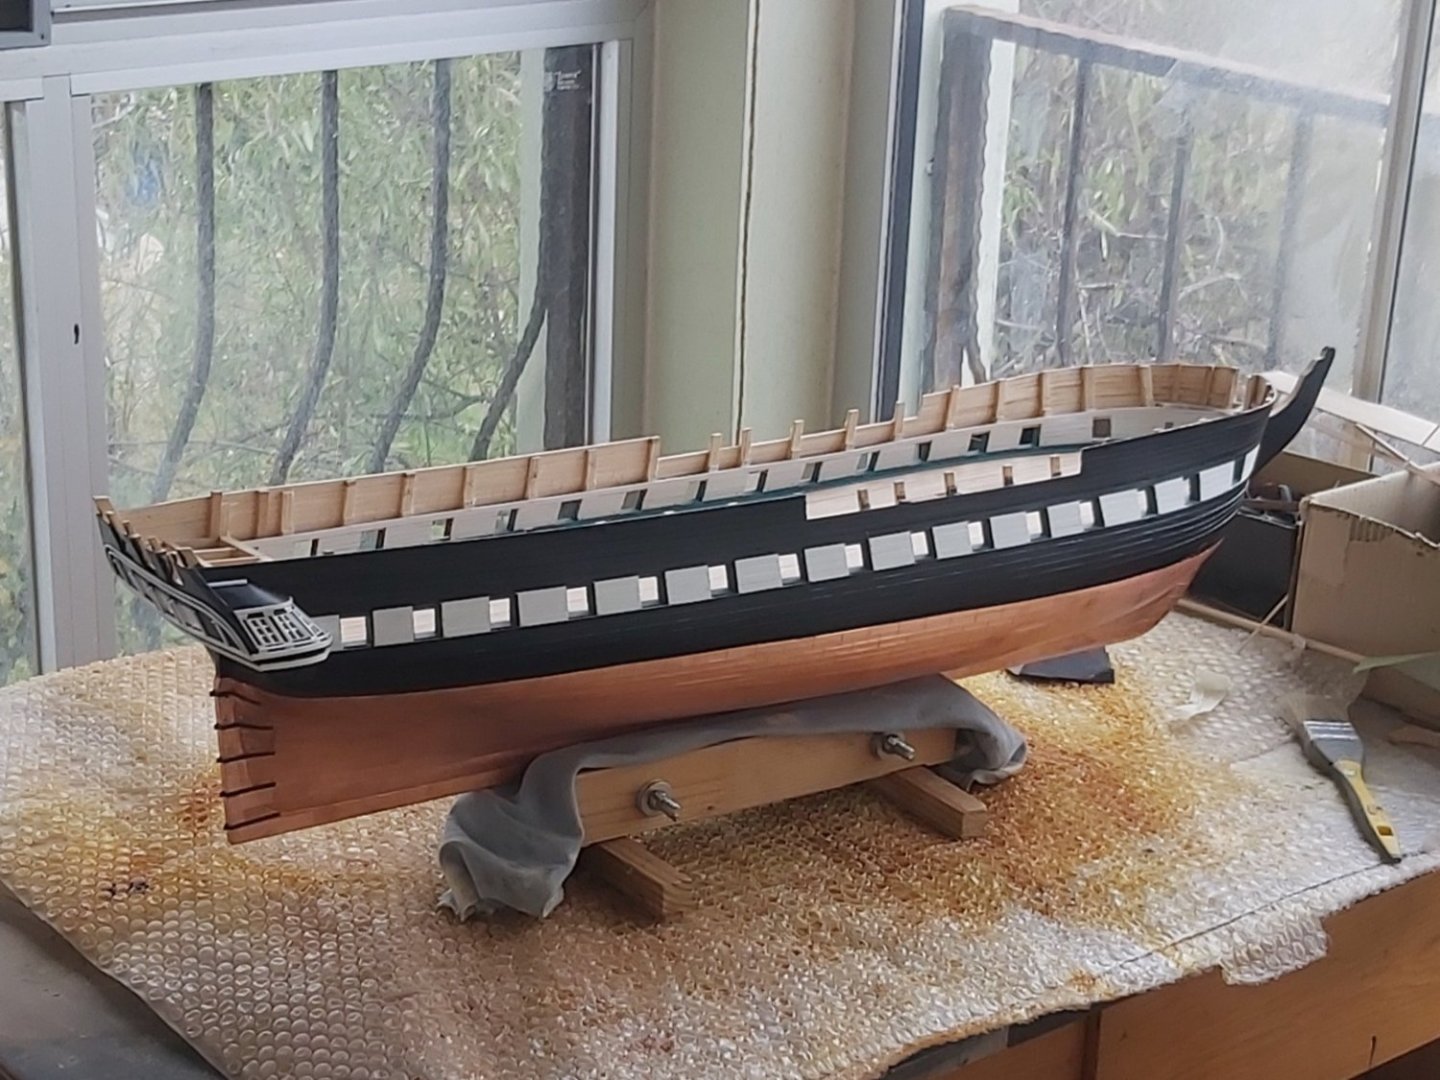


-
USS Constitution by mtbediz - 1:76
mtbediz replied to mtbediz's topic in - Build logs for subjects built 1751 - 1800
Thank you very much Jon. I agree with Greg, these are great information and pictures and helped me a lot. Now I have to decide whether to add window sashes or not -
USS Constitution by mtbediz - 1:76
mtbediz replied to mtbediz's topic in - Build logs for subjects built 1751 - 1800
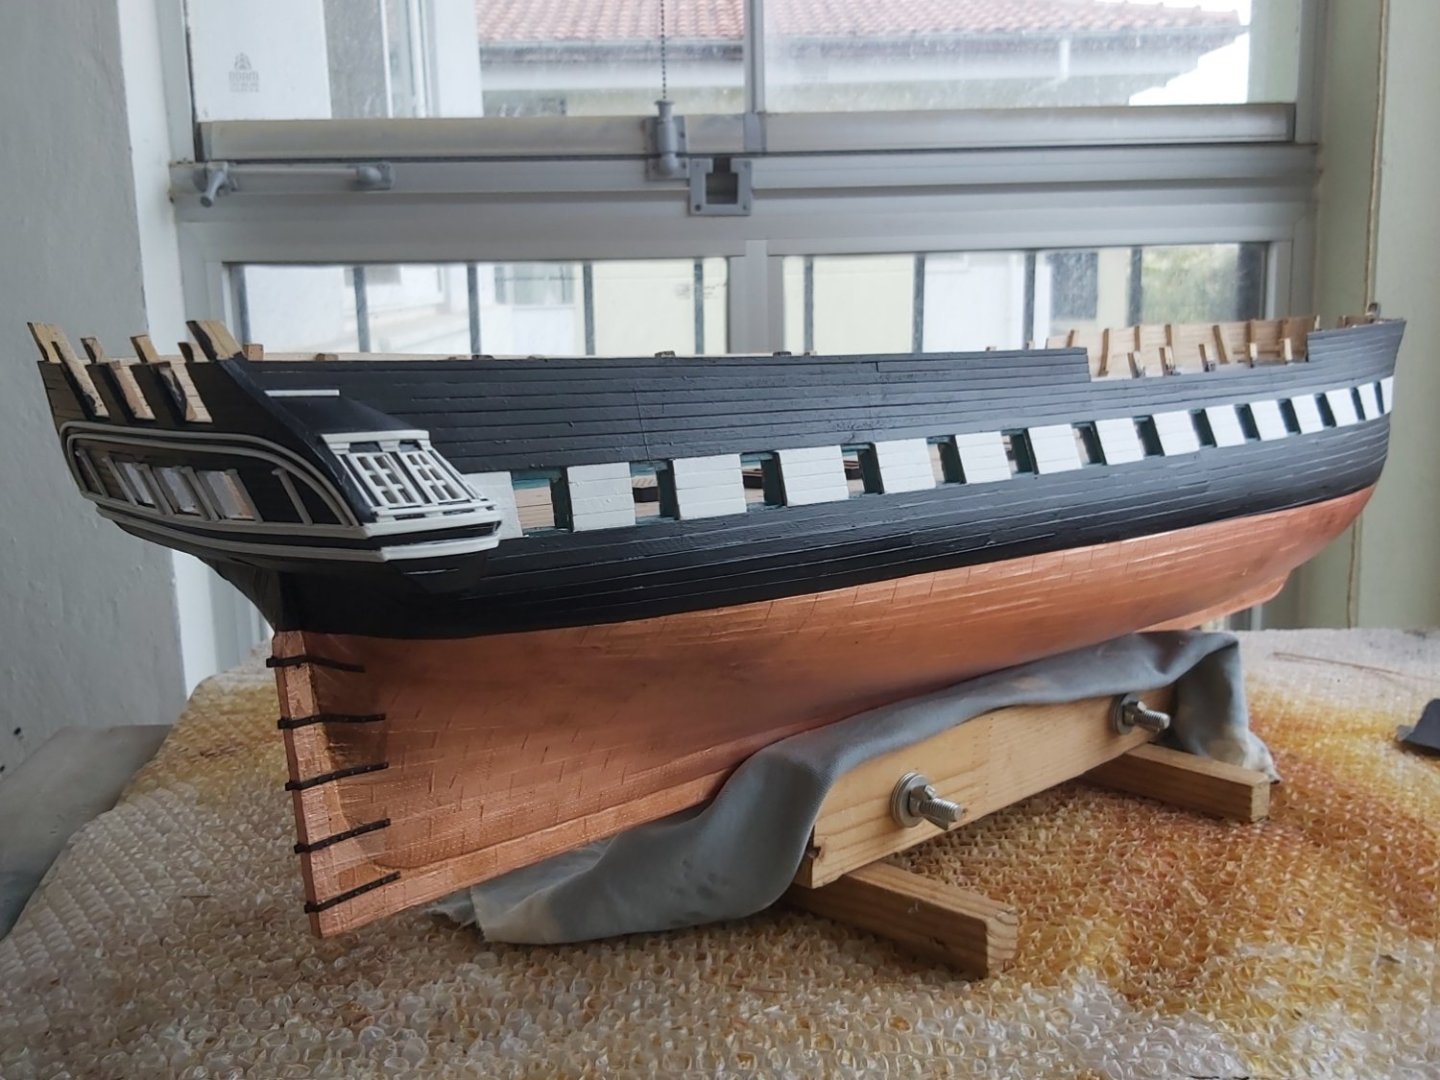
Dear friends I need a help in this stage. I would like to ask my friends who have knowledge. As far as I can see in the photographs, there are no frames in the stern windows of the ship today. Were there frames for glass in the windows in previous periods? If so, why did they remove these frames? Thanks. -
USS Constitution by mtbediz - 1:76
mtbediz replied to mtbediz's topic in - Build logs for subjects built 1751 - 1800
I agree with you on the issue regarding the wife.