HOLIDAY DONATION DRIVE - SUPPORT MSW - DO YOUR PART TO KEEP THIS GREAT FORUM GOING! (Only 68 donations so far out of 49,000 members - Can we at least get 100? C'mon guys!)
×


rwiederrich
-
Posts
5,518 -
Joined
-
Last visited
Content Type
Profiles
Forums
Gallery
Events
Everything posted by rwiederrich
-
I hate when I run out of supplies during a crucial build
-
Fantastic job Vlad. She is taking form. Now we’re cooking. You’ll be caught up to me before I get back from North D.
-
Super job Vlad getting the banding done was wonderful...did you use brass or copper...or something else? Love the topmast stay sheave too. Rob
-
Moving along nicely.....you know...you just gotta do what you gotta do. Great application without a lathe....good move. Rob
-
Rich..what you are describing is the topmast jib stay mounting. The stay comes down from the topmast to the bowsprit and goes through the topmast jib sheave(the bowsprit bees)....then back to the base of the bowsprit...where it terminates. What you are seeing is NOT an iron bar....but the stay itself...running along the underside of the bowsprit. Why..you ask? Because the jib stays are not mounted directly to the bowsprit and jibboom......but because of flexure and deflection they need to stretch and flex with the bowsprit and jibboom. A firm but flexible rigging. The royal and sky stays typically come down and go through sheaves in the jibboom and then back toward the martingale and then to adjustable bullnoses/reeving hearts fixed to the hull. Rob
- 3,560 replies
-
- 2
-

-

-
- clipper
- hull model
- (and 2 more)
-
Starboard and port.....my friend. Rob

-
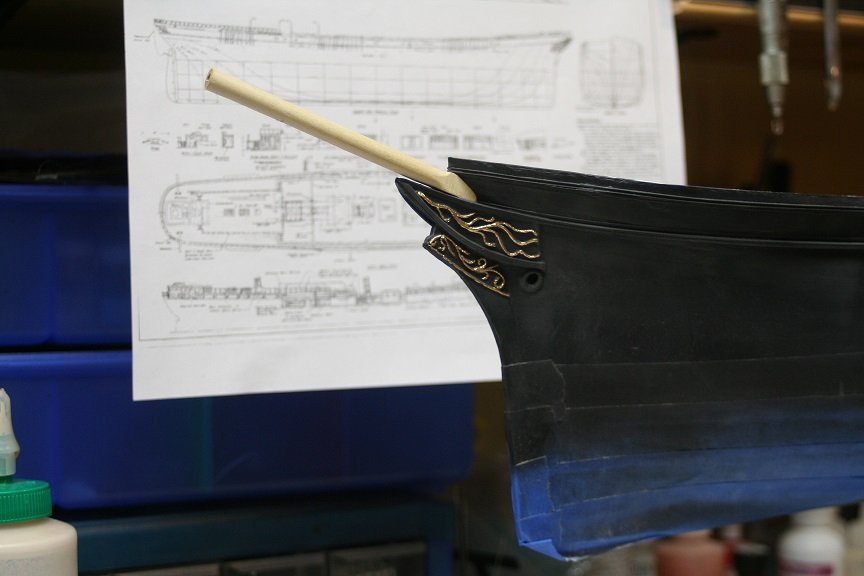
I'm not going to affix the bowsprit at this time...I just wanted to turn it down on the lathe and square up its base to the contour of the hull. And to make sure the banding was properly located and in scale. I will stop working on the monkey rail addition and such, and will resume after the muntz plates are installed. I will demonstrate how I make the embossed plate strips in my next installment. I have some left over from the Great Republic, but will need tons more. I devised a method that is quick and can be applied quickly. Sounds like my favorite song....*Quickly*. I'll be back to the shop next week..bringing more fun and mischief. Rob
- 3,560 replies
-
- 2
-
-
- clipper
- hull model
- (and 2 more)
-
The true issue was making sure the framing matched up with the port at the right location. You don't want a port on the outside that doesn't match with the space available between the correct two frames inside....... Much pre-thought went into the construction. Thanks for the fine compliments. Rob
- 3,560 replies
-
- 1
-
-
- clipper
- hull model
- (and 2 more)
-
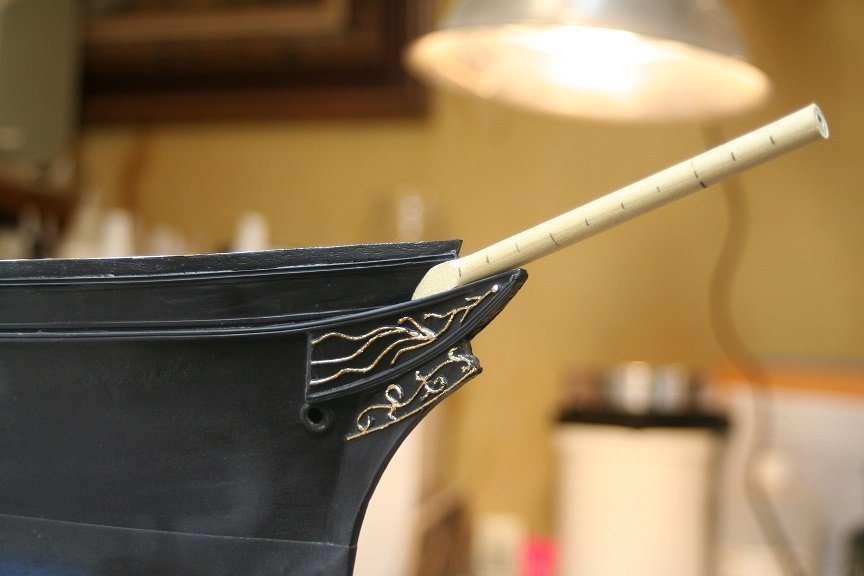
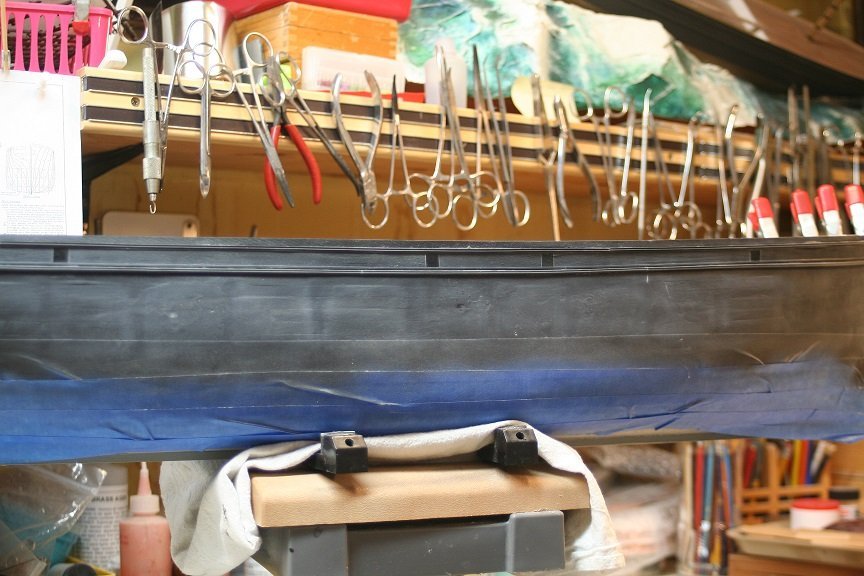
Dry fitting the bowsprit......lots of work still to do..but there needs to be a beginning.. Notice the correct spacing and locations marked out for the banding....... the bowsprit will be cut to proper length after fit is satisfactory.
- 3,560 replies
-
- 4
-
-
- clipper
- hull model
- (and 2 more)
-
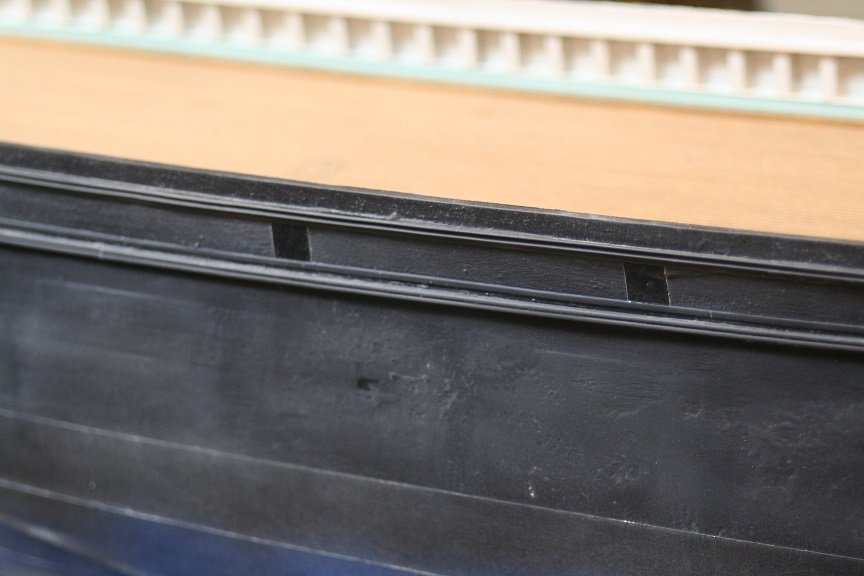
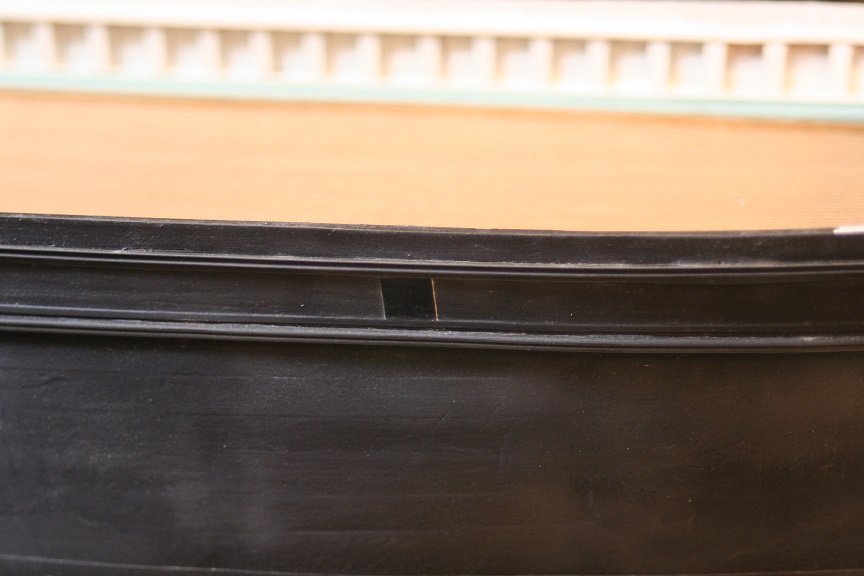
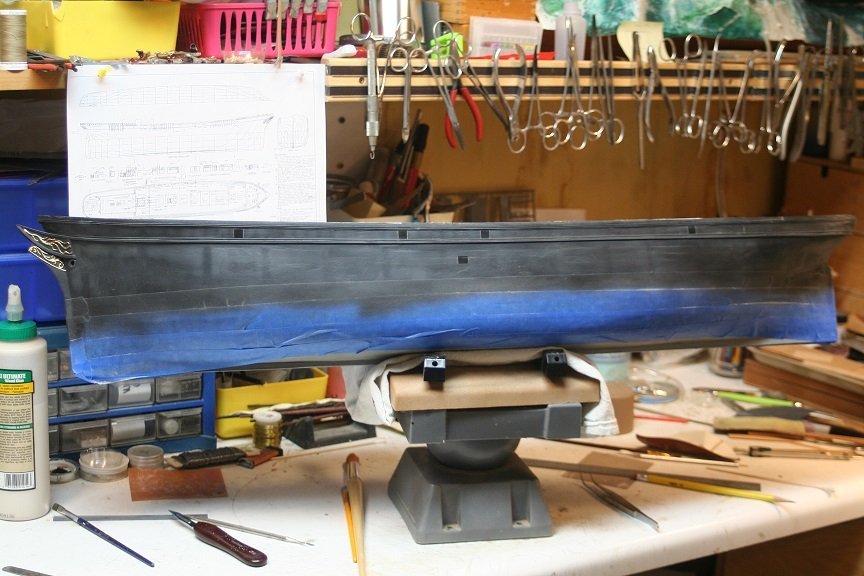
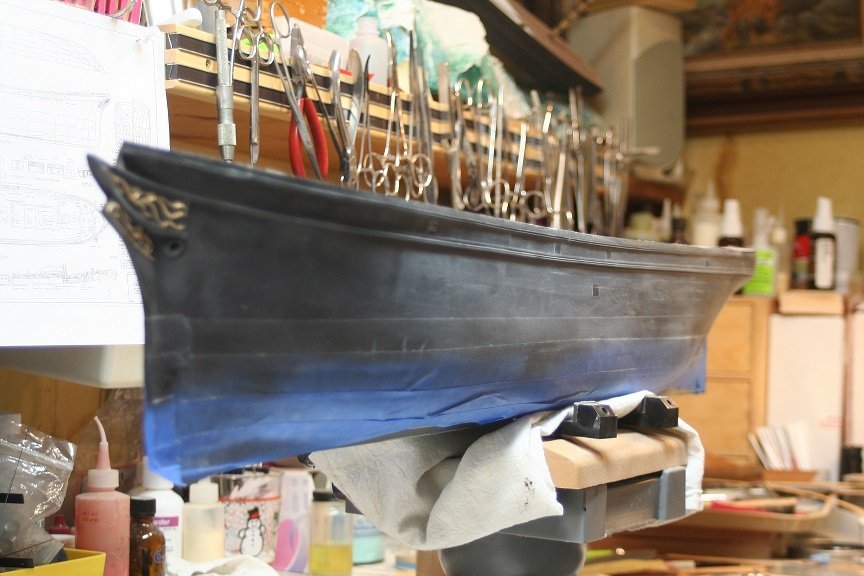
I went right into adding some hull details. I started with the spillways or flushing ports and then added the hull cargo ports. Once I finish the muntz plating(which is next) and painting them metalic...I will give the entire hull a dull coat...coat to protect the weathering and to protect the muntz. The dull coat also covers up any glossy or shinny errors or things I don't want shinny. Rob


- 3,560 replies
-
- 5
-
-
- clipper
- hull model
- (and 2 more)
-
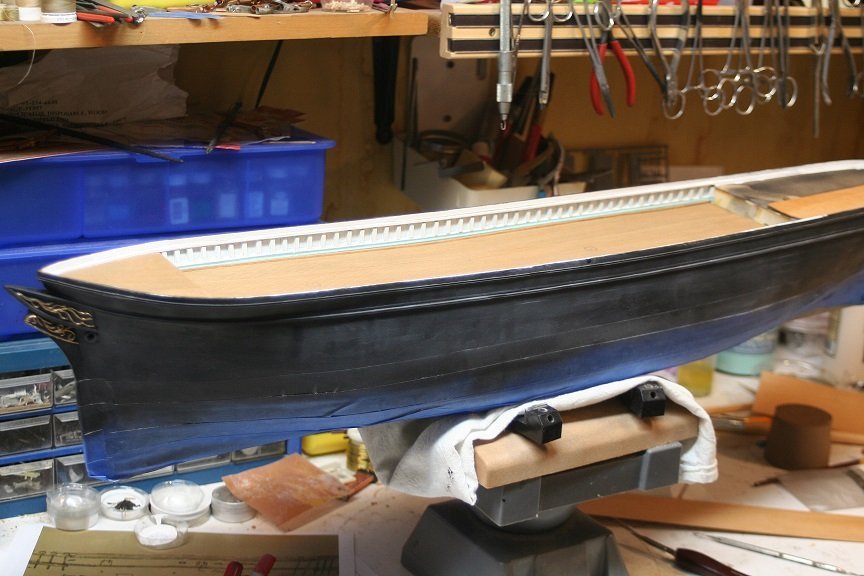
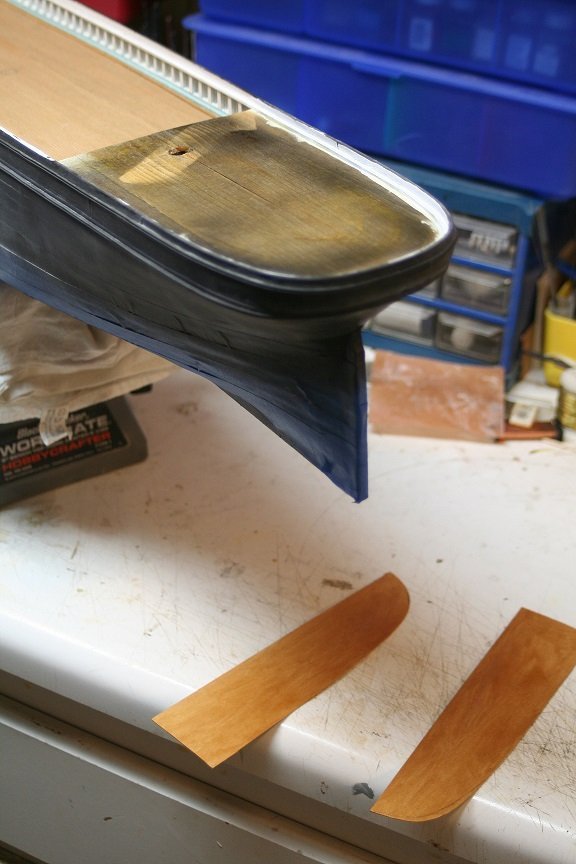
Well I was able to sneak in a couple while my wife cut some customers hair and went berry picking with friends.......mmmmmmmm. So I finished laying the deck.
- 3,560 replies
-
- 5
-
-
- clipper
- hull model
- (and 2 more)
-
THAT'S WHAT i CAME UP WITH..... I just needed confirmation...thanks. Rob
-
Scardies.....
-
What size was the cargo port…….Rich?
-
Well lets go then sir......now you know how far the bar is set....😎 He stares at me everyday.....I'm a nervous wreck.....🤪
- 3,560 replies
-
- 1
-

-
- clipper
- hull model
- (and 2 more)
-
Good news....Now I can fill the bowl with buttery popcorn and take a seat. Rob
- 3,560 replies
-
- 2
-
-
- clipper
- hull model
- (and 2 more)
-
I'm with you. Personally I tend not to set dates for myself. I tend to have long periods of silence then moments of sheer construction madness. I will be making composite lower masts for my version....I think that was a significant detail and I want to mimic that. I have identified so many more details that I will be incorporating in this version that I failed to do on my last version. I also plan to fully mast her and rig her....but probably without sails this time. We'll wait and see. Rob
- 3,560 replies
-
- 2
-
-
- clipper
- hull model
- (and 2 more)
-
Sweet approach....looking good Vlad. Can't wait for them strakes to get applied. Rob
-
I like that idea. My first build of her was as she was originally constructed by McKay.....but because she had sucha lengthy life and plenty of mods....any time frame of her will be accurate. I just want to choose the busier time frame...the one with the most mods. I still have my original for comparisons.... Rob
- 3,560 replies
-
- 1
-
-
- clipper
- hull model
- (and 2 more)
-
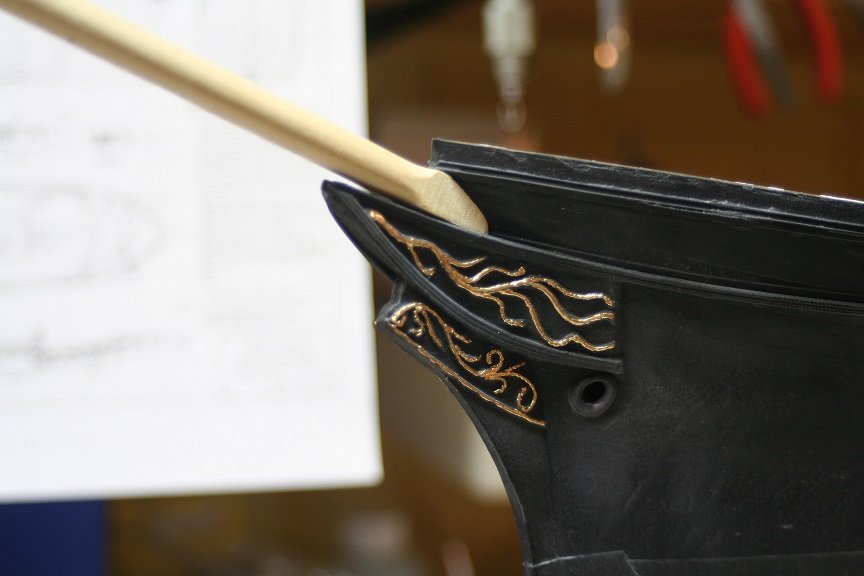
I muddled over this myself. Knowing that perception is everything...deciphering what, *painted pearl, relieved with white* means was a challenge. Modelers license permits me to actually paint as I see fit(with some direction...blue waterways). But as you describe....*what color of blue*? I've seen models with dark blue waterways and others with light blue(Mine included). IMV light blue transitions better to the pearl/white....hence my choice. All said and done....if one was to paint their model in a weathered fashion(such as I).....the paint would take on an entirely different character. Weathering actually releases you from the scrutiny of exactness....since the *HINT* of what it might have looked like is covered up with the natural grime and distortion of every day use. My coat of arms..... Rob
- 3,560 replies
-
- 1
-
-
- clipper
- hull model
- (and 2 more)
-
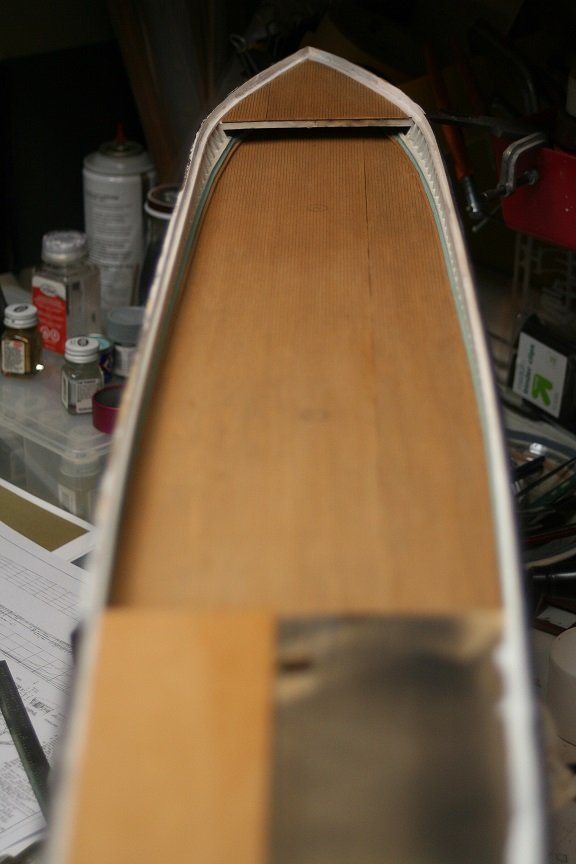
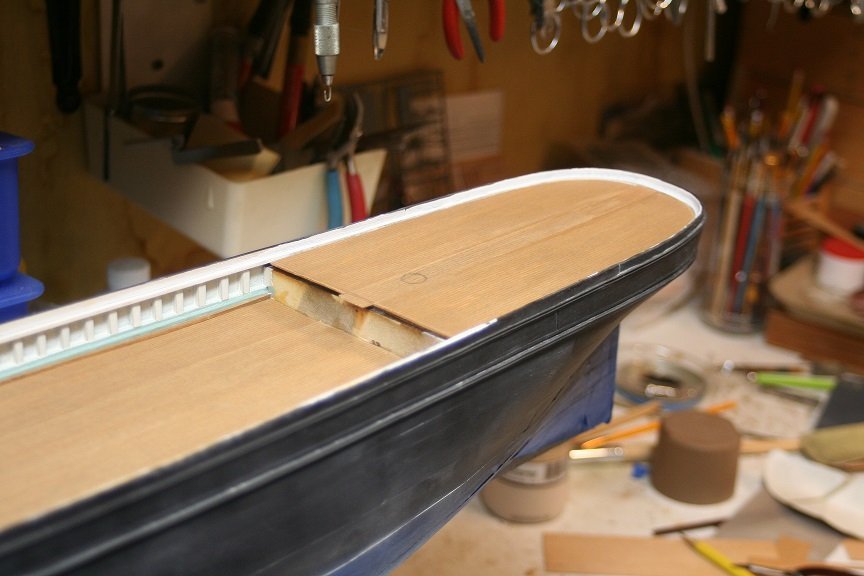
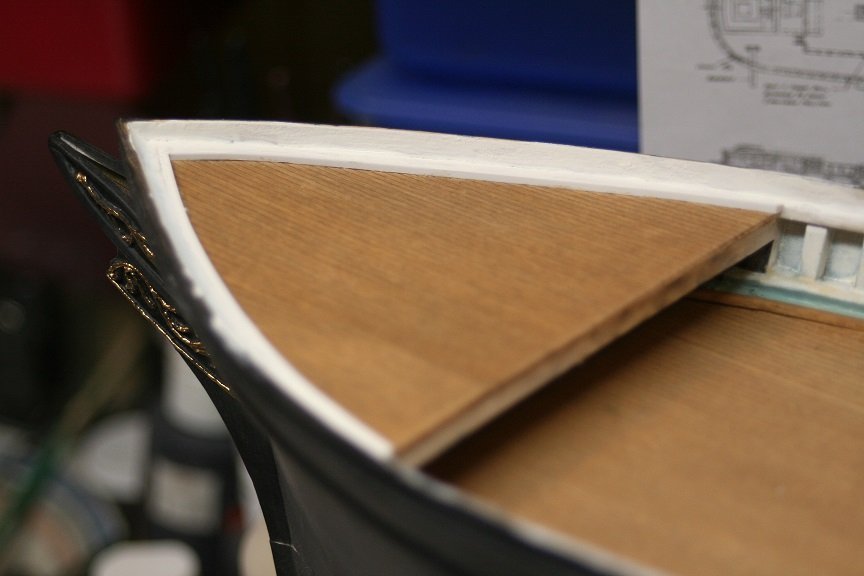
No that is OK....I actually don't leave till Wednesday....but I have far too many things to do till then, that model building is probably not one of them. If you ask my wife. My technique is simple and rather expeditious. After the deck piece is cut...I use contact cement to glue it down. It aint going no where. What the bracing is for is to hold the trim against the waterway snugly while it dries. They simply press against the opposite side and hold the beam in place nicely. When dry, just slip them away and when ready, reuse them for the other side. In this scale I use pre scribed sheet decking. It is to scale...clean, perfectly aligned and most importantly...FAST, when applied correctly. I laid decking for my Clipper Western Shore model using single planks and it took a while...plus sanding it, to make it smooth and even took skill...to prevent any damage to the bulwarks (what a pain). This technique allows me to paint and sand the deck off model, which permits a very clean result quickly. As you may have noticed...if you have followed any of my other builds, is that I am not interested in the atypical processes...it is the finished product that matters to me, NOT what material lies under the paint, or what slick trick was used to by-pass tedious work. Thanks for the fine comments. Rob
-
IMV...removing material is always easier then trying to add back what you just removed. Every thing is aligned and to scale. Thanks for peekin in. Rob
- 3,560 replies
-
- 1
-
-
- clipper
- hull model
- (and 2 more)