rwiederrich
-
Posts
5,520 -
Joined
-
Last visited
Content Type
Profiles
Forums
Gallery
Events
Everything posted by rwiederrich
-
Similar to this....
-
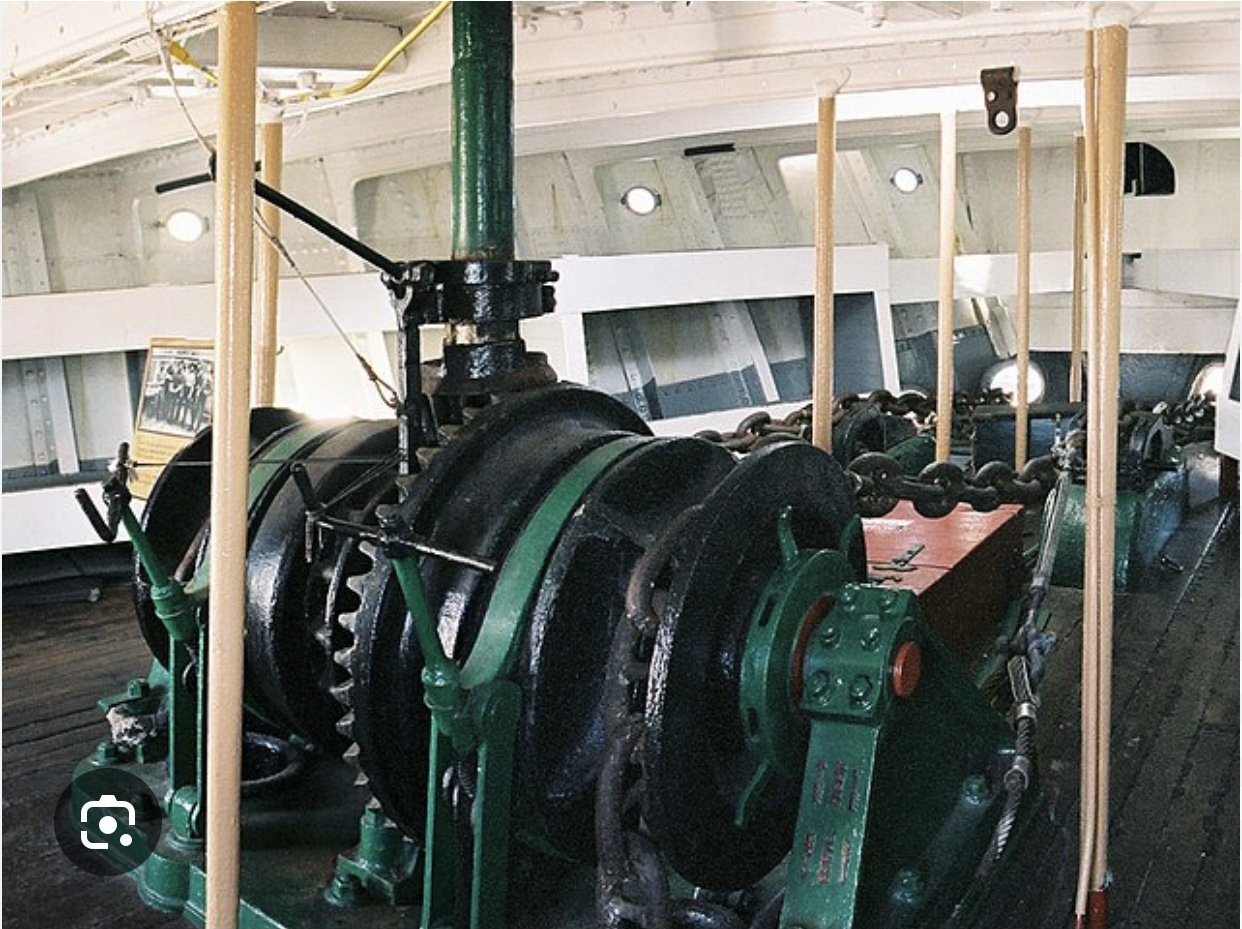
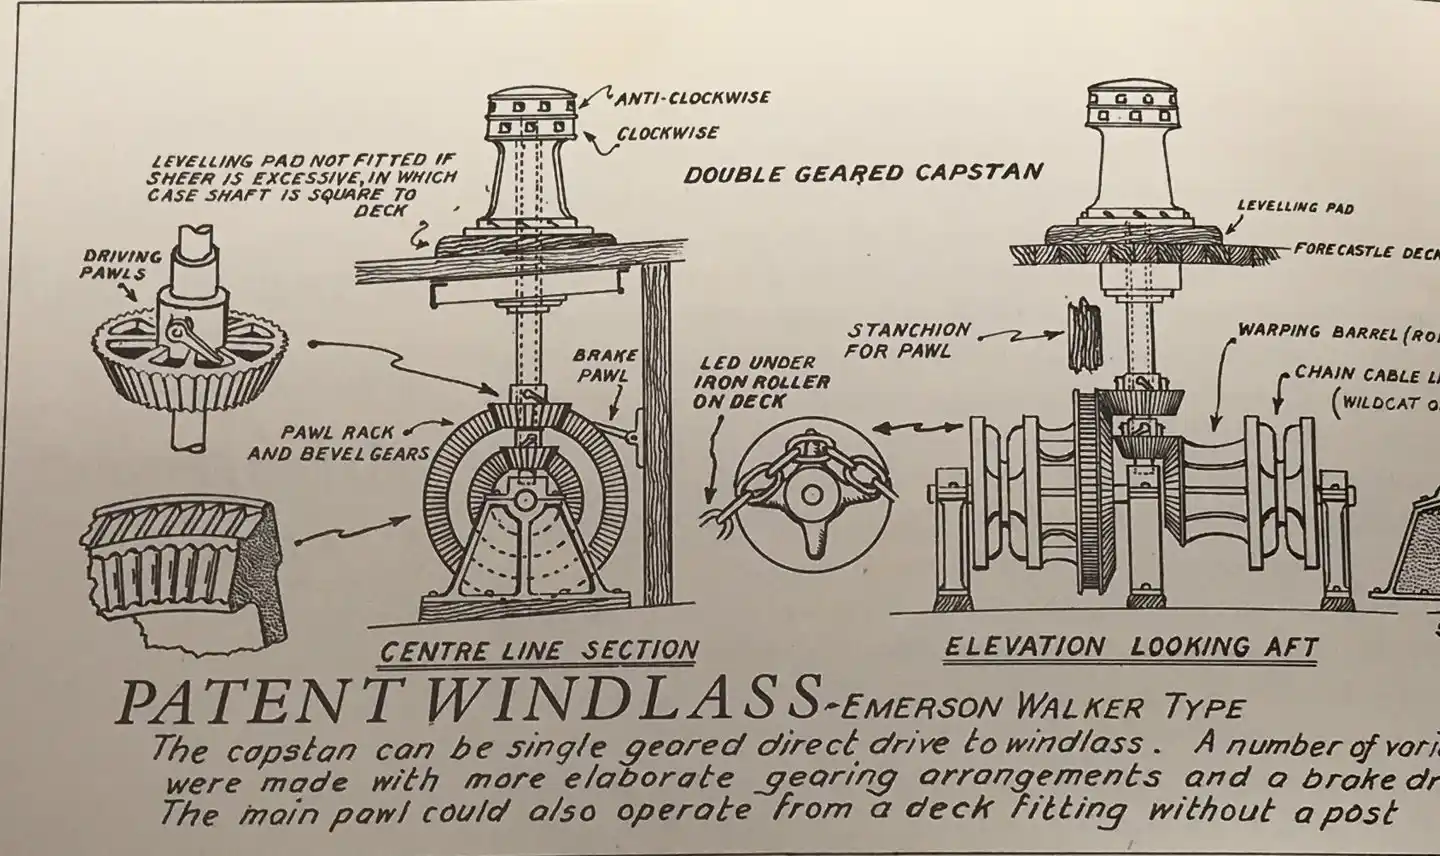
This is another issue Rich and I have with many drawings of Staghound , Flying Cloud, and Flying Fish. They were all fashioned the same in the topgallant forecastle. Most drawings show they were outfitted with the older wood capstans, mounted just under the edge of the forecastle deck.......HOWEVER. the descriptions of these vessels clearly indicates the forecastle crew space was recessed 3ft below the main deck...to make room, in a weather tight space for their patent windlesses.....that were driven by their patent double action capstans on the forecastle deck. this description is very clear concerning Staghound...and Flying Cloud was a near duplicate of Staghound, with minor differences. this patent windless had to be protected from the elements, so it was within the recessed forecastle cabin.
-
Here, again in her case.
-
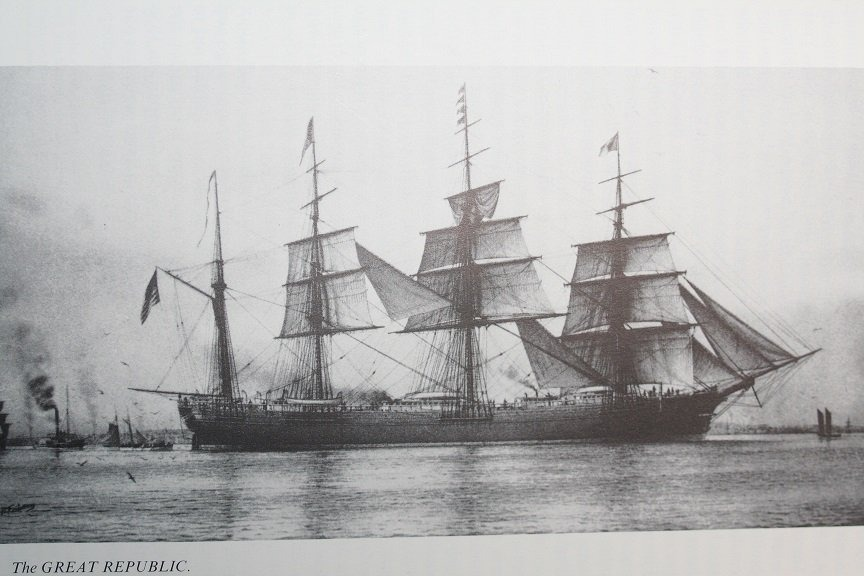
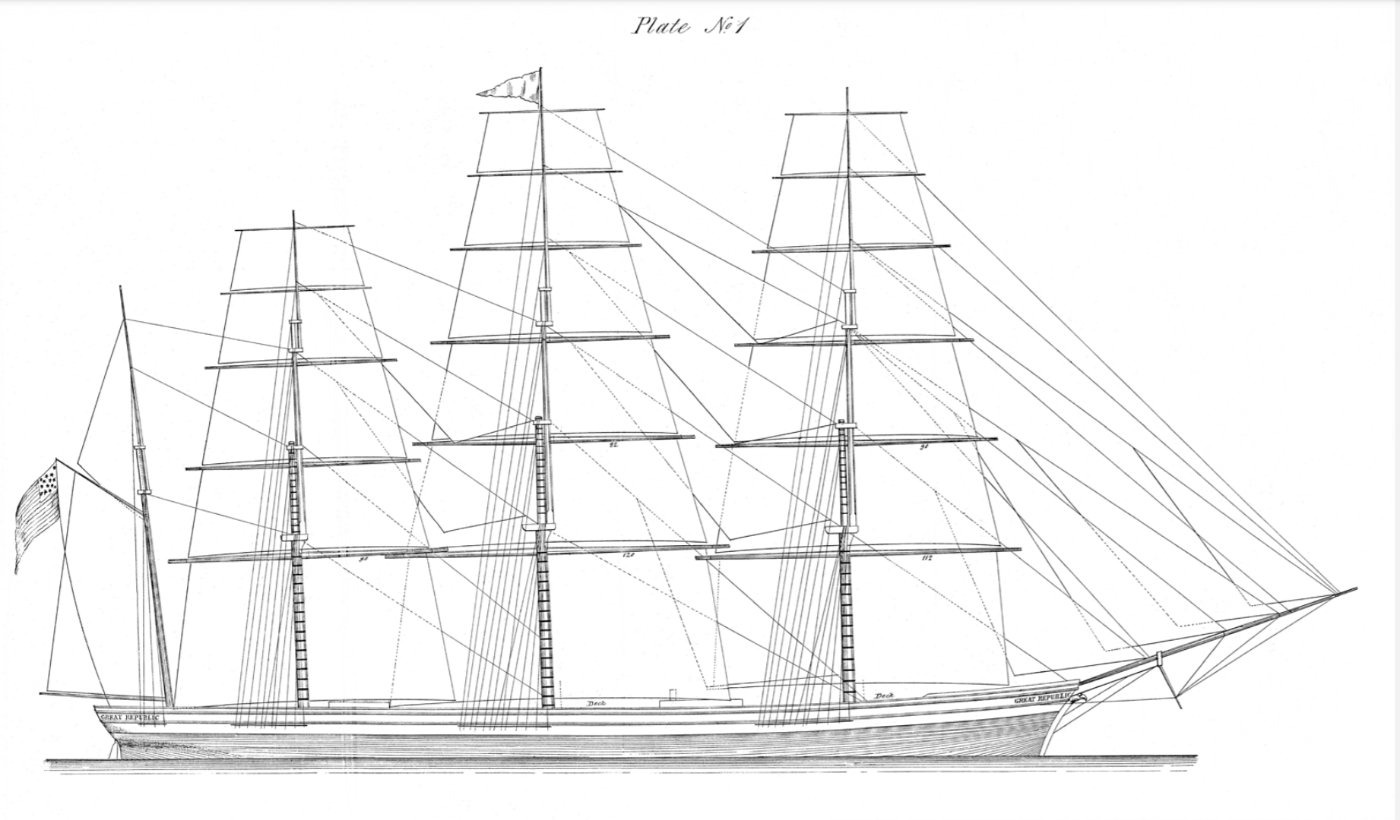
This rendering of her yard and sail plan is highly suspect and just inaccurate. This drawing shows her after her rebuild.....with flying skysails and bulwarks and splash rail. You can see them clearly. No complete stanchioned railing around the weather deck. Plus, when she was rebuilt...her eagle figurehead was replaced with a simple billet figurehead and gilded cheeks. With all these glaring errors....why would Duncan McLean..draw this? Why would he draw her with bulwarks...when he described her,.....he described her as she was first built.....he saw her in NY. This is what she most likely looked like at her arrival to NY....prior to her burning.
-
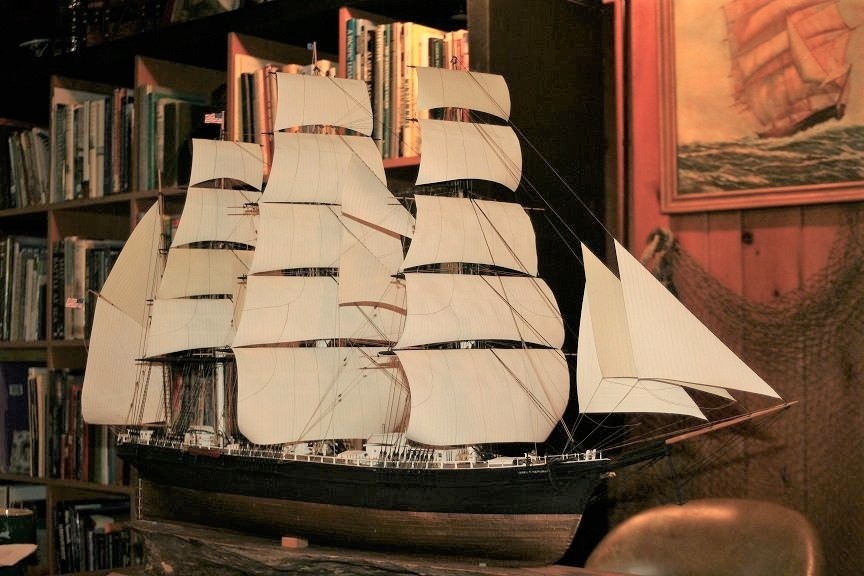
Yes.....thank you, I have that booklet. It was invaluable when I built my Great Republic.
-
Yes...she most likely had the same wood and brass capstans as Staghound on her main deck....but Staghound had a double action patent capstan for her forecastle....over her patent double action reversable windless in the topgallant forecastle. It is said that both Flying Cloud and the Staffordshire were fitted out the same as Staghound.....with the most modern machines and mechanics. These early models were well funded by McKay...so he spared no expense.
-
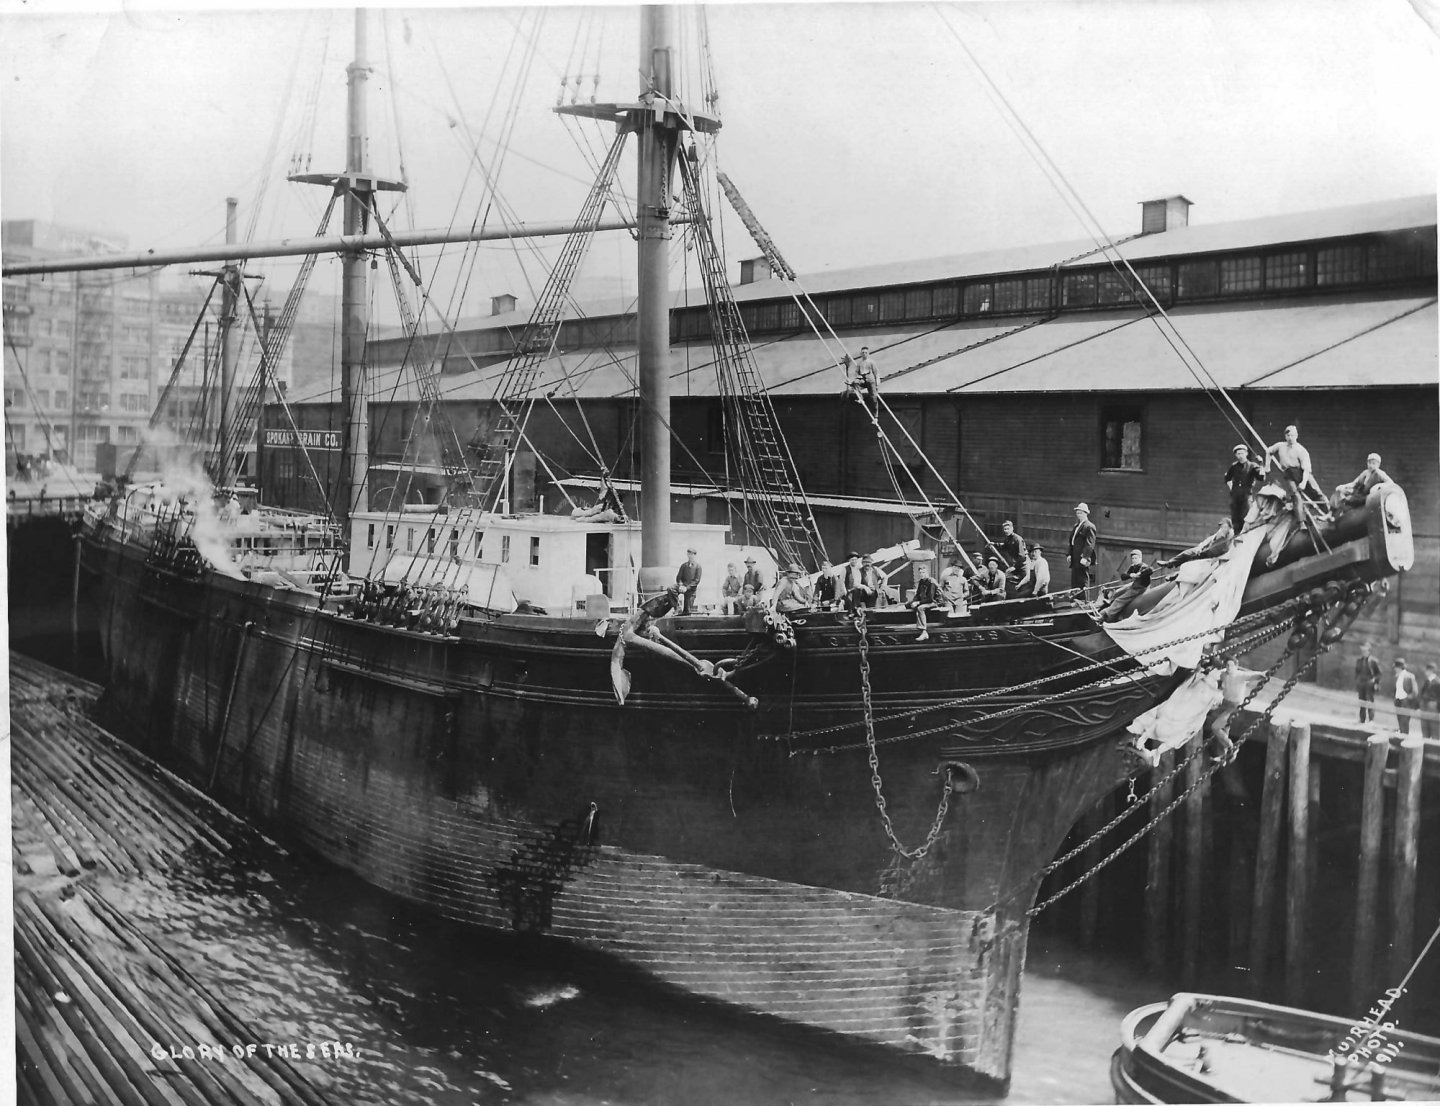
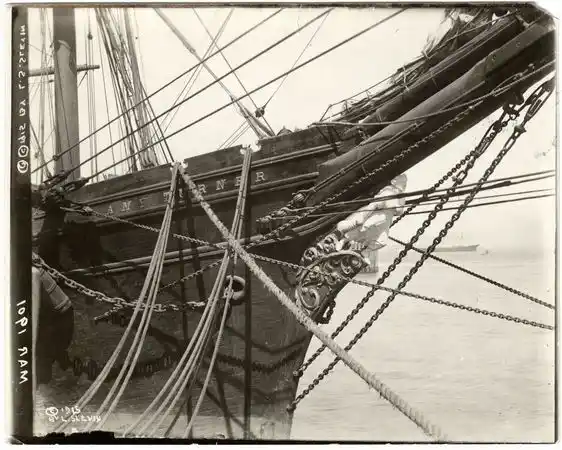
Further excerpts from Clipperfan: " Another detail that commercial models get wrong is placement of the anchor chain hawse hole. That's due to the fact that they've completely missed inclusion of the devices I just enumerated, and which can be clearly seen here. What simply blows my mind is that this unusual prow arrangement has been on every McKay clipper, save one, the Great Republic since Donald McKay debuted his inaugural extreme clipper Stag Hound December 1850! Correct placement of this hawse hole is immediately below the base of the naval hoods, as can be clearly seen in this remarkable image. I sincerely hope these factual insights will enable you to create your most accurate Flying Cloud model that you desire".

-
Another image of the clipper Amy Turned....showing no evidence of the famous, McKay *Hood*. Notice how the stem is utterly unprotected, and vulnerable?
-
Witty tongue and cheek....I suppose they could if that tactic was used for changing the subject. When one compiles all the facts.....one would wonder why then, when Duncan McLean says clearly that a patent windless was mounted under the forecastle, beneath her patented capstan.....that scale model drawers of her plans, always draw the standard wood windless at the edge of her forecastle deck....causing modelers to inaccurately model her forecastle and windless.......? Now THAT is the true act of piracy....IMV. Excerpt from Clipperfan: " Donald McKay jealously guarded his nautical design secrets. I believe he was so successful that one of his key components have been lost to Modeler's for centuries. Until now. Thanks to Michael Mjelde's generosity in sharing ultra rare Glory of the Seas photos, we now have incontrovertible proof of these rare structures. But you don't have to take my word for it. Here are excerpts from The Boston Daily Atlas write-up: "She has neither head nor trailboards, but forming the extreme, where the line of the planksheer and the carved work on the naval hoods terminate, she has the full figure of an angel on the wing, with a trumpet raised to her mouth "... Later in his description of this largest merchant ship in the world, McLean observes the ruggedness of this unique bow structure: "Her hood ends are bolted alternately from either side, through each other and the stem so that the loss of her cutwater would not affect her safety or cause a leak." (italics added by me to emphasize specific components) Here's a link to the entire article: http://www.bruzelius.info/Nautica/News/BDA/BDA(1851-04-25).html"
-
Which surely cannot mean anything to do with the Howes hole. If rightly understood the termination of the hood and planksheer simply indicates the point at to where the figurehead is located. Reference the photo I posted of Atheana on Glory of the Seas. She does NOT rest her feet at that point...then begin her extension forward.......No...she is in general marked out by the termination of these structures. She IS forward and, for structural purposes, bolted BELOW as well. Still, this is not in violation of McLeans description. If you refer to Glory as if she was Flying Cloud, in the description....it becomes very clear. Rob
-
However, it is interpreted....It appears that the structure is more then just *support beams* aiding to anchor cable/chain threading. Nearly all descriptions depict Carving and gilding on the Hoods. Now, since no other vessel retained these McKay *beaks*, and our full grasp of Duncan McLean's description can't be entirely realized. It is a proper thing to refer to the structure as a McKay *hood*. But regardless as to our agreement on its naming...it is undeniable these structures were the *secret* McKay reinforced his stems on his clippers with. Leading Rich Jones, to conclude, that every drawing and model of McKay clippers are represented inaccurately. Glory of the Seas is the Key, without the clear unpublished photographs, provided to me by my friend and historian and author, Michael Mjelde, I and Rich would have never had the proof/evidence, of Donald McKay's ingenious, McKay hood. Rob
-
So, just follow the line of the planksheer up that forms the top edge of the hood....there is where the figurehead is located. Look at the image of Glory of the Seas Atheana. she is under the hood and she is where the planksheer and hood leading edge terminate. the figurehaed must firmly be secured to the bottom of the hood is if is to survive....just like GotS. Rob
-
The difficulty with it NOT being...if it could be. would be the feet of the angel are the only things securing the figurehead to the stem...that and possible a bit of the aft of the wings. Atheana, the Indian goddess figurehead of Glory of the seas is secured from her back to the naval hood and her feet to the prow of the stem. Securing her very well. This is in part why we feel the hood was a very significant structure to the entire security of the stem and cutwater. Simply sticking the figurehead to the tip of the stem is hardly secure. Duncan McLean's very detailed descriptions of Flying Cloud and Stag Hounds structures is our source, in part. Rob

-
One of the difficulties we are having with this interpretation is that the bowsprit is flexible and to secure the figurehead to it, would surely mean you may lose the figurehead during bad weather...due to extreme flexure and sheer.
-
There is strong evidence the Naval Hood was on the Staghound....prior to Flying Cloud. We cannot be distracted by bias , blindly ignoring a practice that was clearly evident on his last clipper. Proof evident. And no other shipwright employed this unique structure. This is why Rich Jones and myself have dedicated over 18 years of our time to researching and re-imagining the secret structures of Donals McKay's fantastic clippers. Richard Jones (Clipperfan) is more of a zeolite then I am concerning this overlooked structure. Maybe he'll pipe in...... Rob
-
Even Mckay's own hand drawings of Star of Empire and Chariot of Fame...shows an extended stem far outside the typical reduced version seen on line drawings. It is unclear from this image...ut it can be devised it is a more pronounced and curved prow then on other protypical line drawings. Notice the extended *Beek* underneath the bowsprit? Rob

-
McKay left off all the bow details from his drawings......even from his half hull lofting models. here is a rendering made by Rich Jones....of Flying Clouds bow with the hood. Rob

-
Champion of the Seas 1854 definitely shows a structure above and behind the figurehead . Not super clear, but evidence the figurehead is not simply pressing up against the bowsprit. there is evidence of ornate cheeks as well.....similar to Glory of the Seas. Rob

-
The top trim of the Hood is the trim of the planksheer. Rob
-
Scott...all those drawing are not showing the location of the Naval hood in proximity to the stem of the cutwater. McKay never drew the hood on any of his drawings...probably to protect it). Here is our drawing of Glory of the Seas...you can see the large Hood under the bowsprit and above the cutwater. Below the hood (with its carved liefing's) is the ornate cheek that adorns the stem and is under the feet of the figurehead

-
Pat...Hi. Yes I have heard of these Howes *Hoods* that you are speeking of. However, as I mentioned to Scott...this term probably underwent a bit of transformation, since McKay's use, and Duncan McLeans description of it on McKay clipper bows. Photographic evidence proves, McKay clippers possessed this unique feature.....all else did not. It is also very reasonable to assume since McKay used this feature on his last clipper...he used it on all or most of his clippers....with the extreme exception example of his massive Great Republic. Rob
-
From Great extensive research Richard Jones (Clipperfan), and I have determined that the term (Post the clipper ship era), that time after Donald McKay built his clippers...the term evolved. The examples you have presented are of vessels, that post date 1869. McKay was adamant about his bow secrets on his clippers and his *Naval Hood* as we have described it is only found on McKay clippers. His unique application of this structure greatly strengthened the cutwater and stem of the bow. It is not unrealistic to assume, McKay would utilize this feature on all of his vessels....if he used it on his last. Clippers like the Great Admiral and the clipper frigate Admiral Webb were typical of the clipper bow of the time. NO McKay *Naval Hood*, supporting the stem. Damage from high seas regularly occurred, but with Mckay's designed *(Hood)*...such disaster was avoided. Not forgetting to mention, that the Hood also added greatly to the support of the figurehead. Edit: "The GREAT ADMIRAL was built in 1869 by Robert E. Jackson at East Boston for William F. Weld & Co., who at that time had the largest sailing fleet under the American flag. Her figurehead was a life-sized image of Admiral Farragut and still is preserved on the Weld estate near Boston."


-
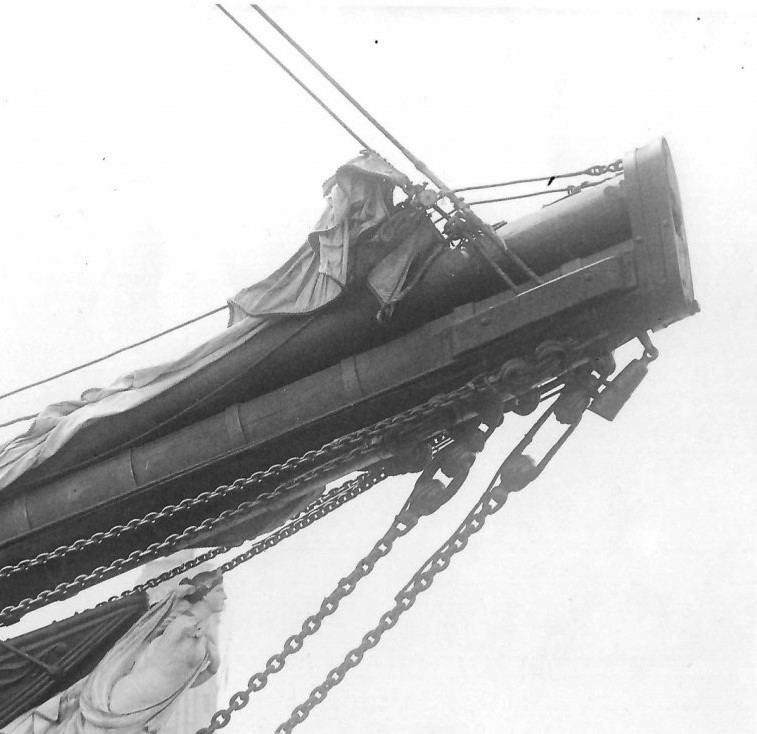
In later clippers(1869)...bulleyes were employed instead of deadeyes. Note the bobstays, head tackle.
-
I think some fudging will need to take place. My initial measurments.....made the premade fixtures appear too large...but Staghound was a much smaller and sharper vessel then was Glory of the Seas...which I still have rattling around my brain. Further evaluations will happen after I get the hull planked. Rob
-
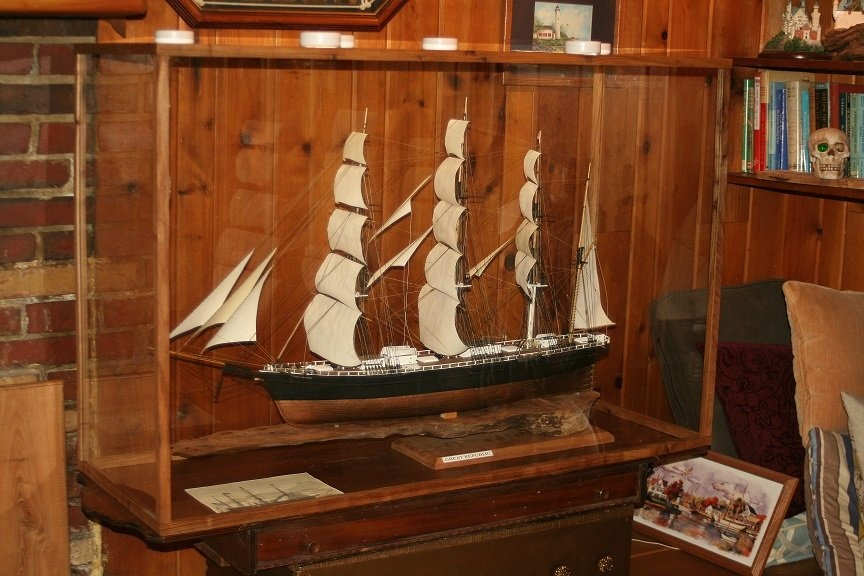
As with Glory of the Seas...I will be using an image to model my likeness....and I chose this painting. I plan on modeling her exactly as depicted in the painting, How fun. Rob