HOLIDAY DONATION DRIVE - SUPPORT MSW - DO YOUR PART TO KEEP THIS GREAT FORUM GOING! (Only 66 donations so far out of 49,000 members - Can we at least get100? C'mon guys!)
×


rwiederrich
-
Posts
5,518 -
Joined
-
Last visited
Content Type
Profiles
Forums
Gallery
Events
Everything posted by rwiederrich
-
Well done...clean and nice. Congrats. Rob
-
As far as rigging is concerned, all I have left to do is the starboard royal, top gallant braces and both starboard and port top masts and main braces and the main sails sheet and tack lines. Adding the house and Union Jack sails will top it off. Rob
- 3,560 replies
-
- 2
-

-
- clipper
- hull model
- (and 2 more)
-
There is no shame in recognizing the aspect of a daunting rigging project is more then you can successfully accomplish. You've built enough types of models to know where you find your greatest comfort and aptitude. Building a ship kit is not that unlike many other kinds of models (you've proven that)...the big shift comes with the rigging and all that it entails. It surely can be intimidating and then couple that with unsporting and weak structures(thin, brittle masts/yards)...you have a real challenge on your hands. Lastly....the learning curve to understand each parts function...so you can rig successfully and accurately. is a very steep one......sometimes so much so it is the nails in the coffin. I for one will miss your updates and contribution to these pages. I hope you don't give up entirely on ship building.....possibly a different model (Kind) of ship might suite you better? Good luck. Rob
- 481 replies
-
- 2
-
-
- Cutty Sark
- Revell
- (and 2 more)
-
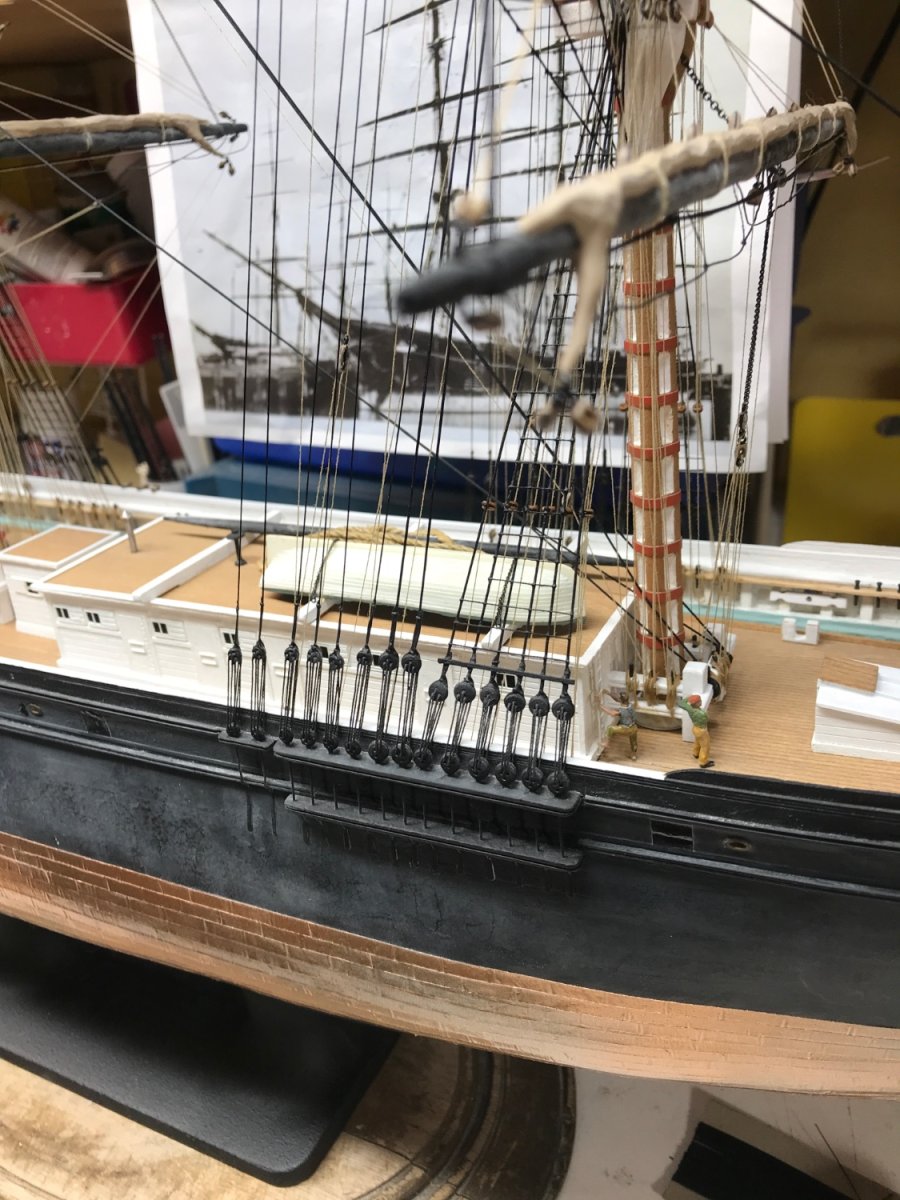
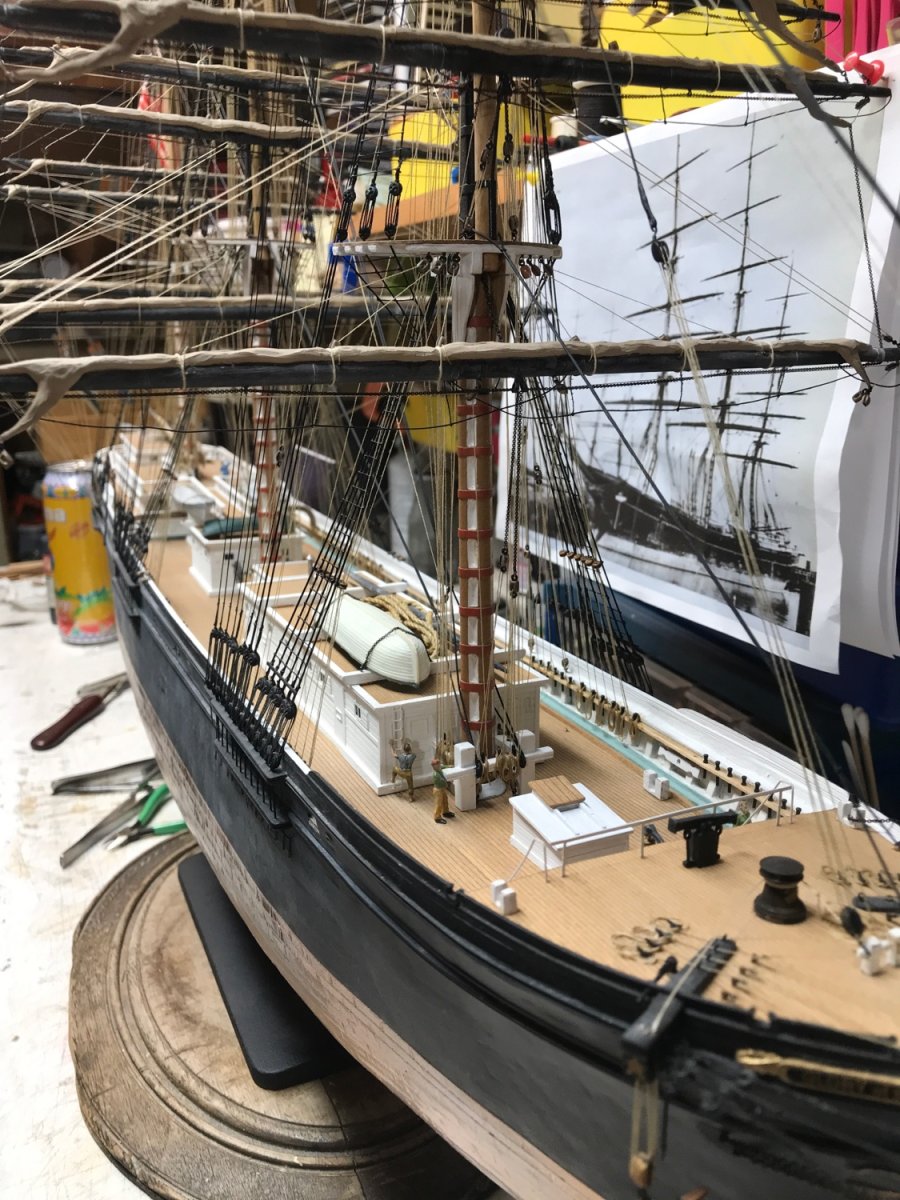
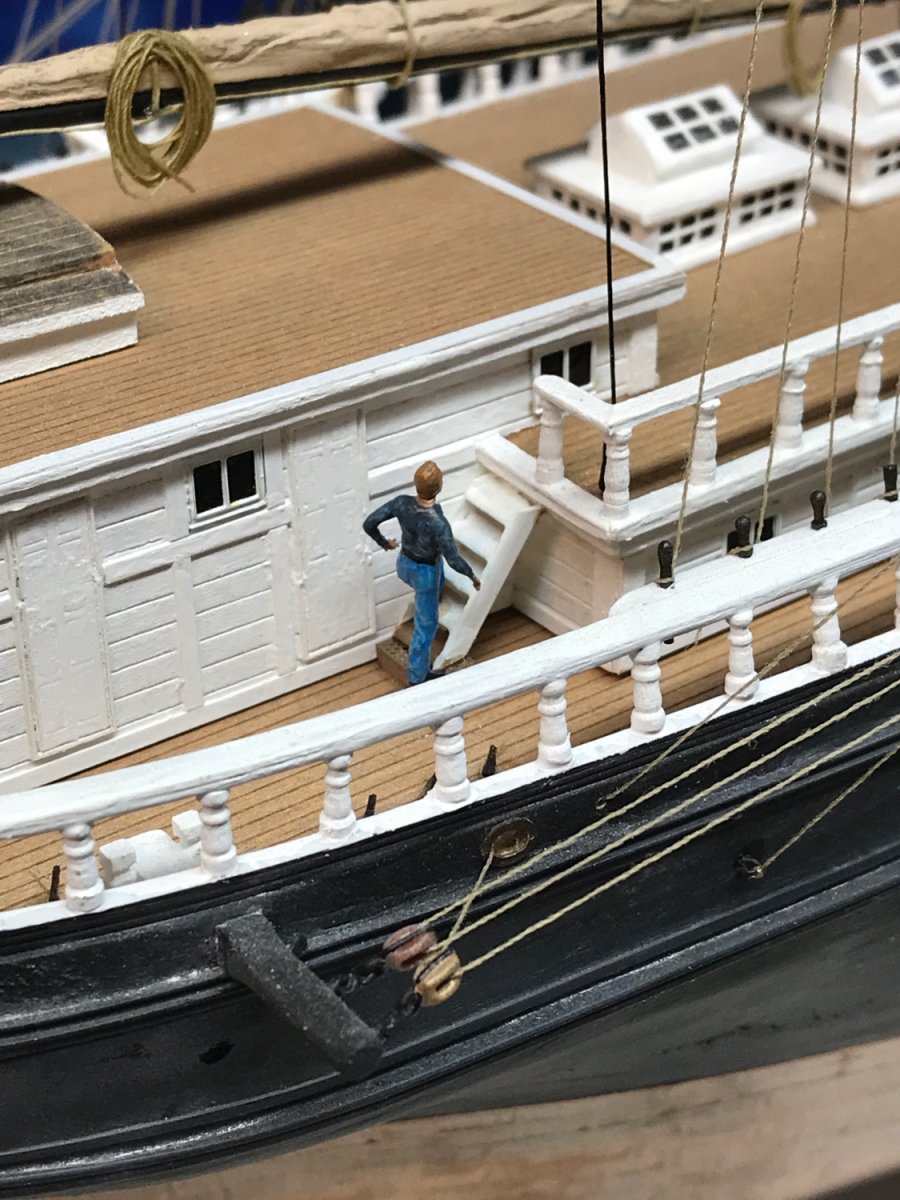
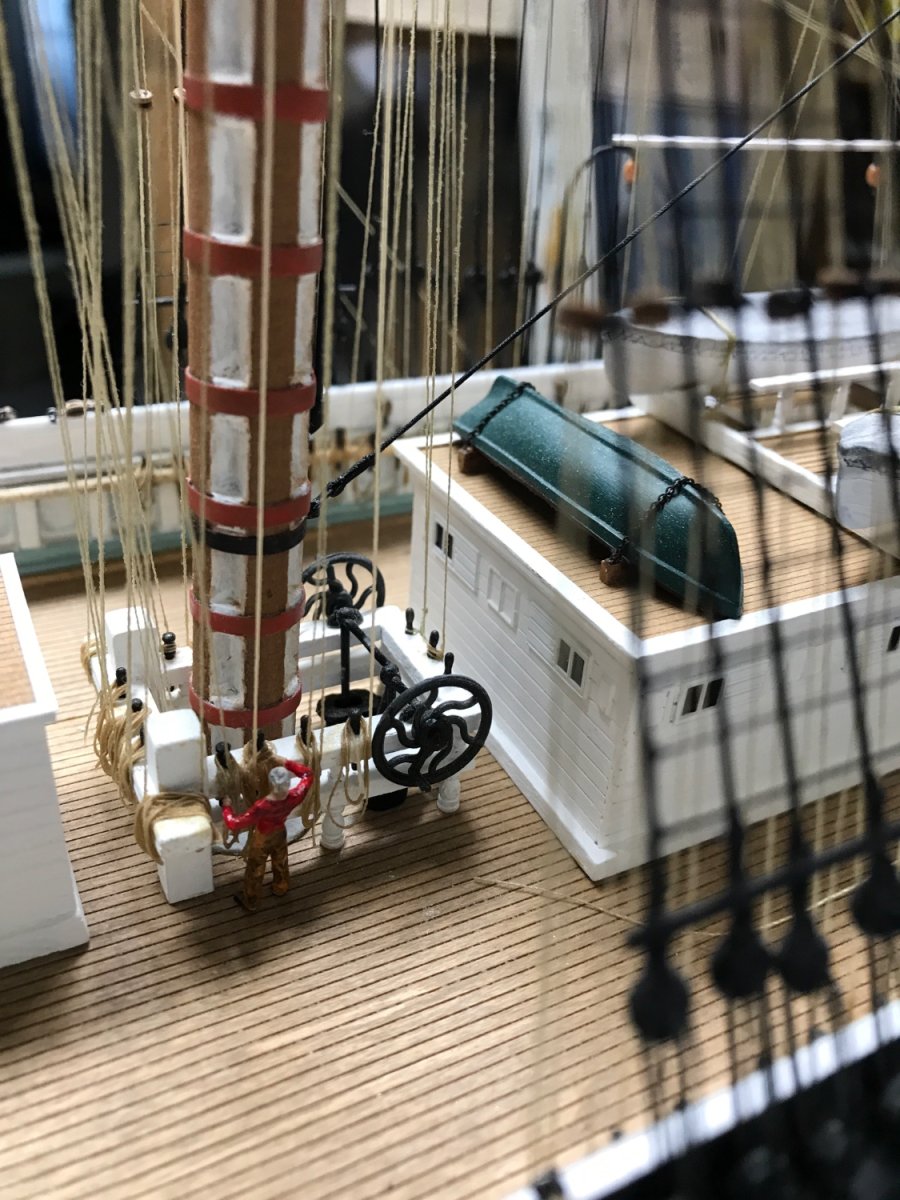
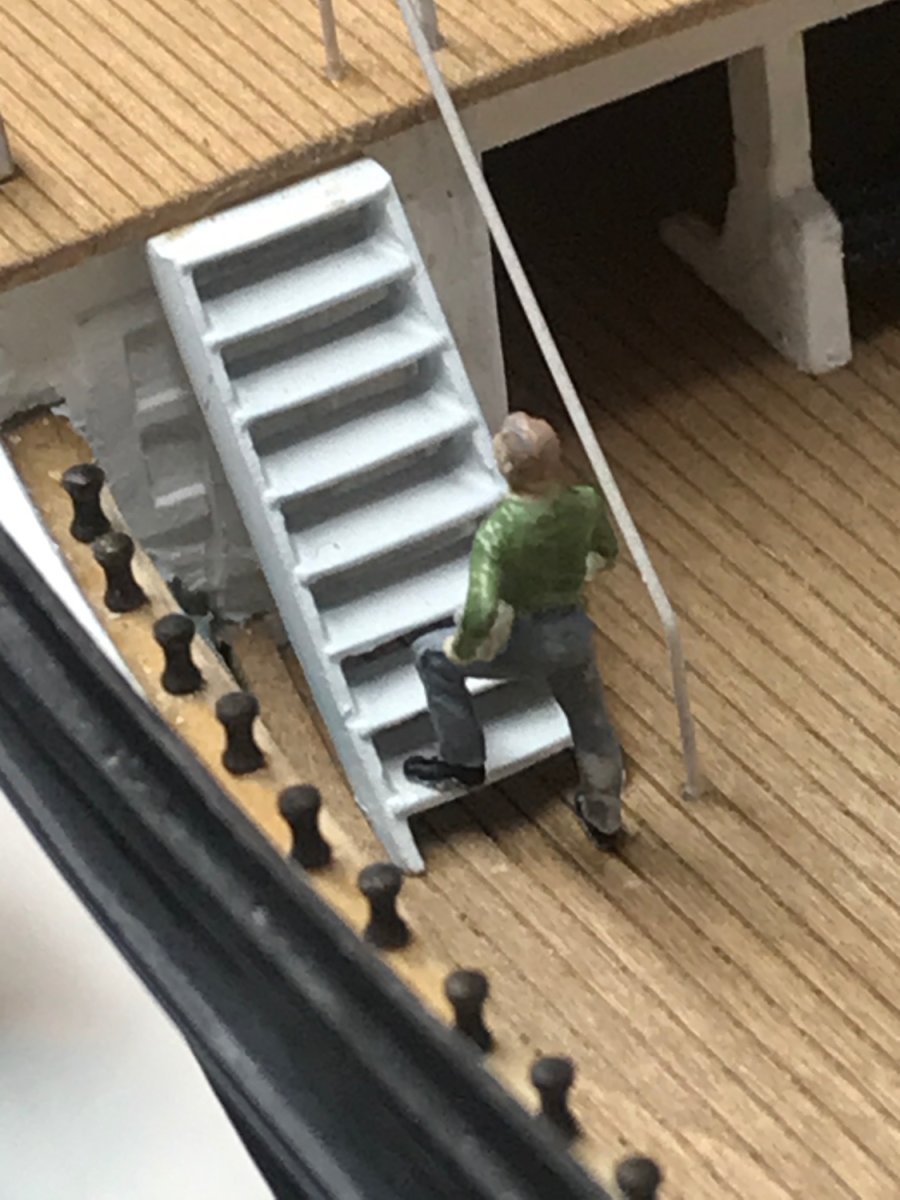
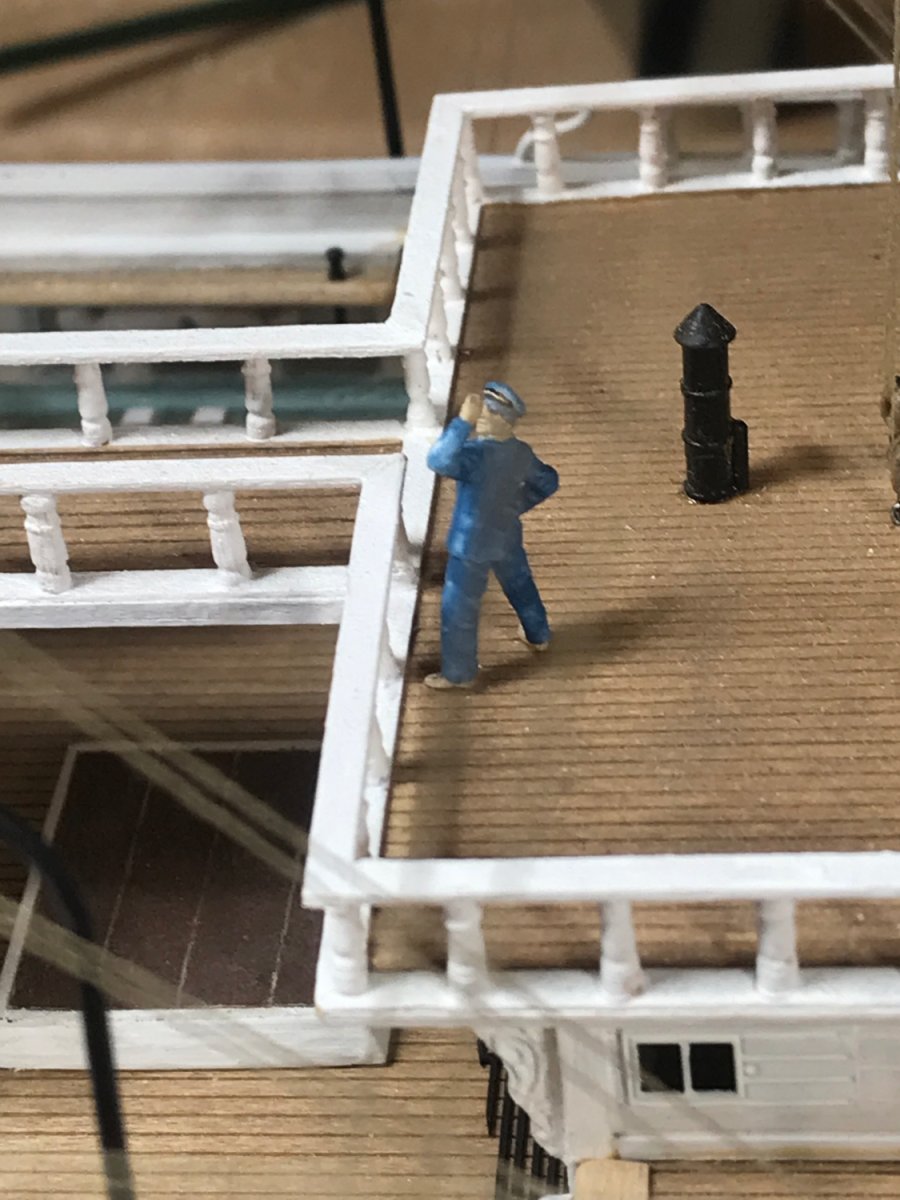
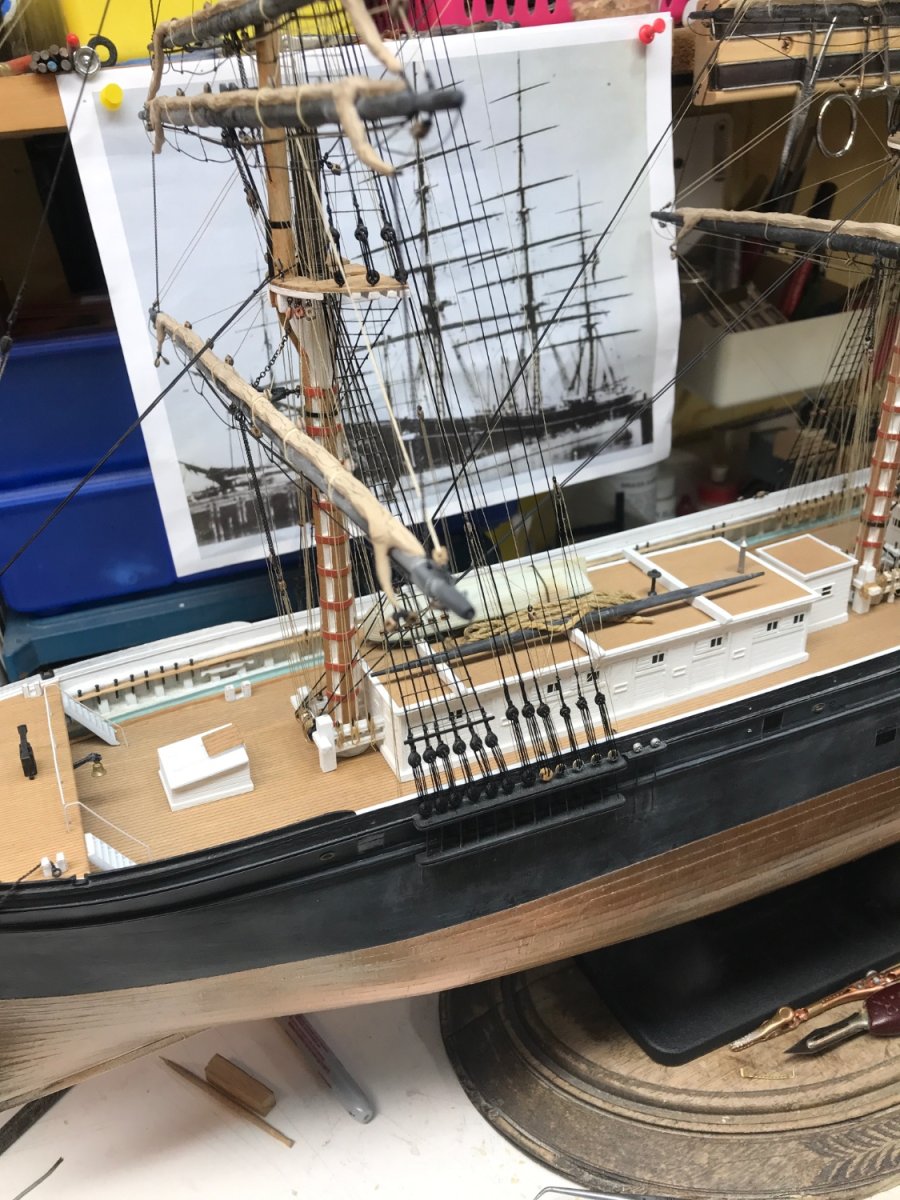
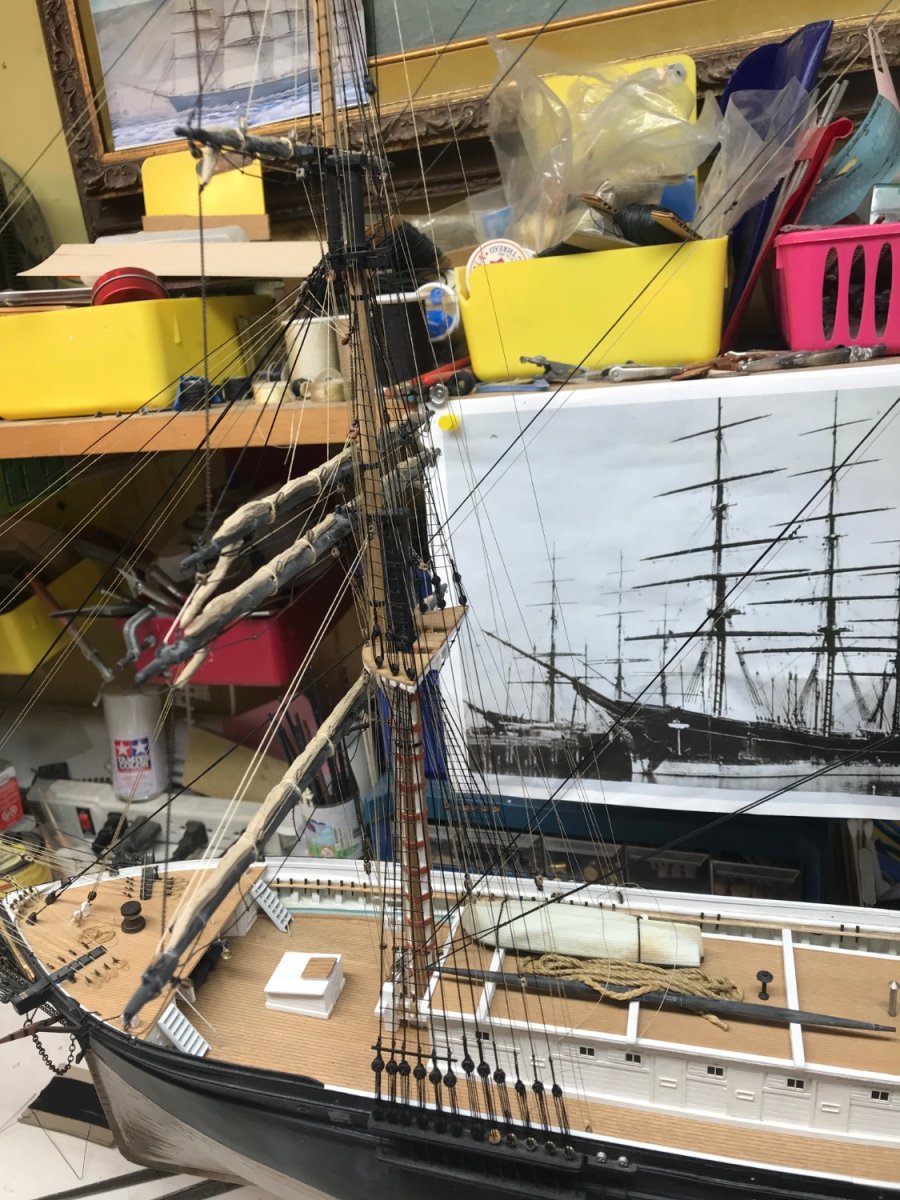
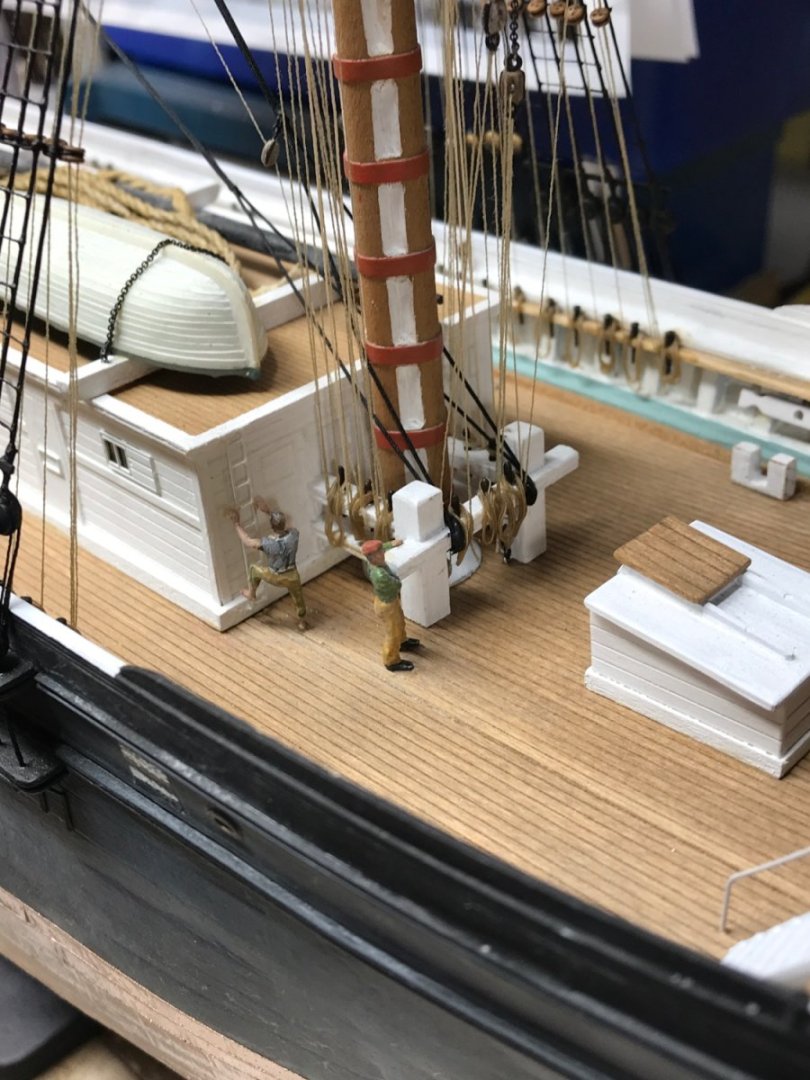
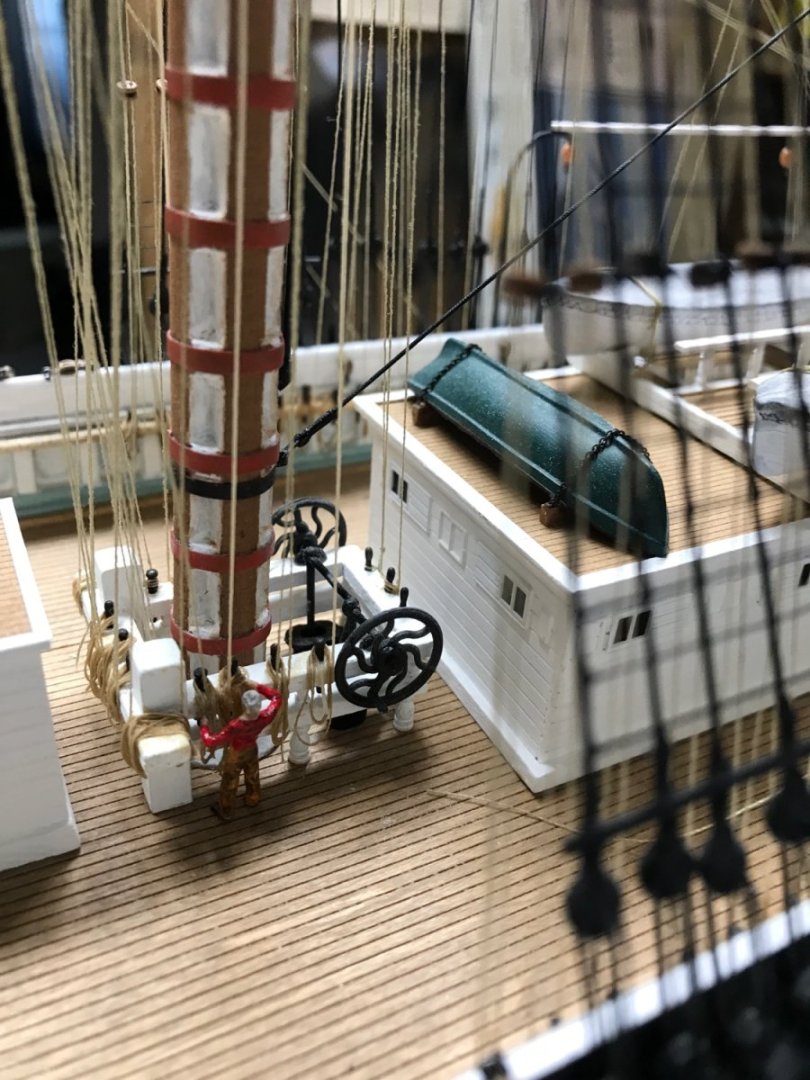
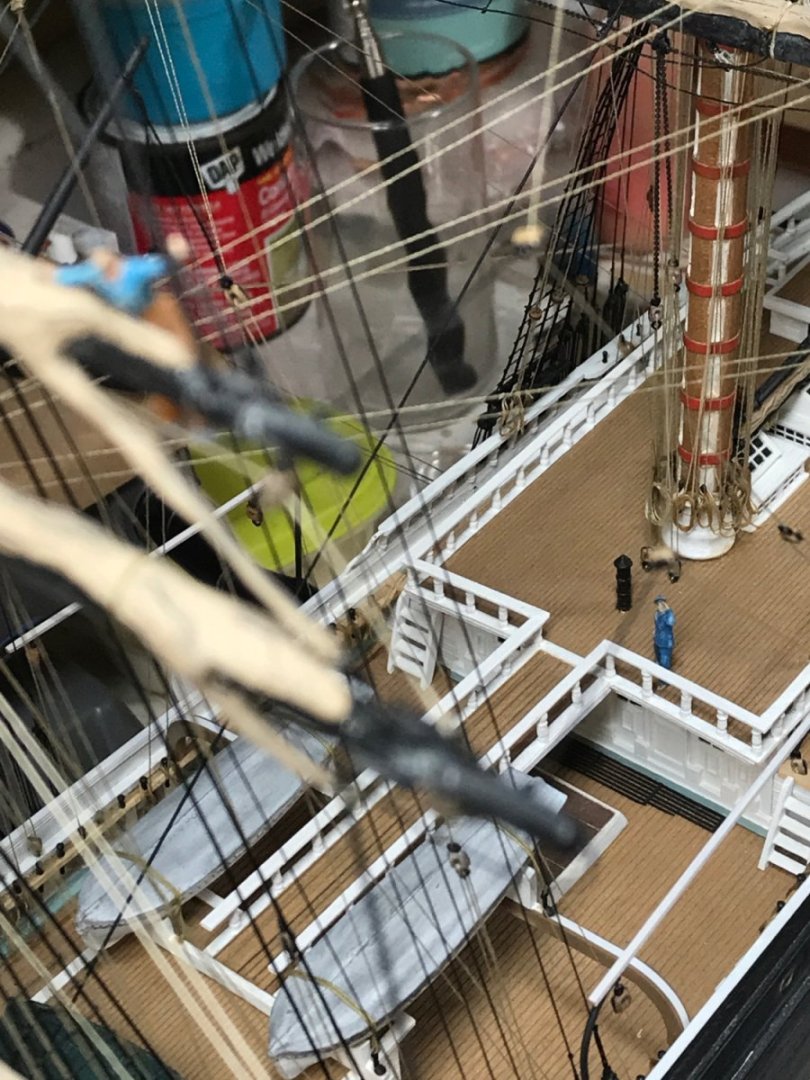
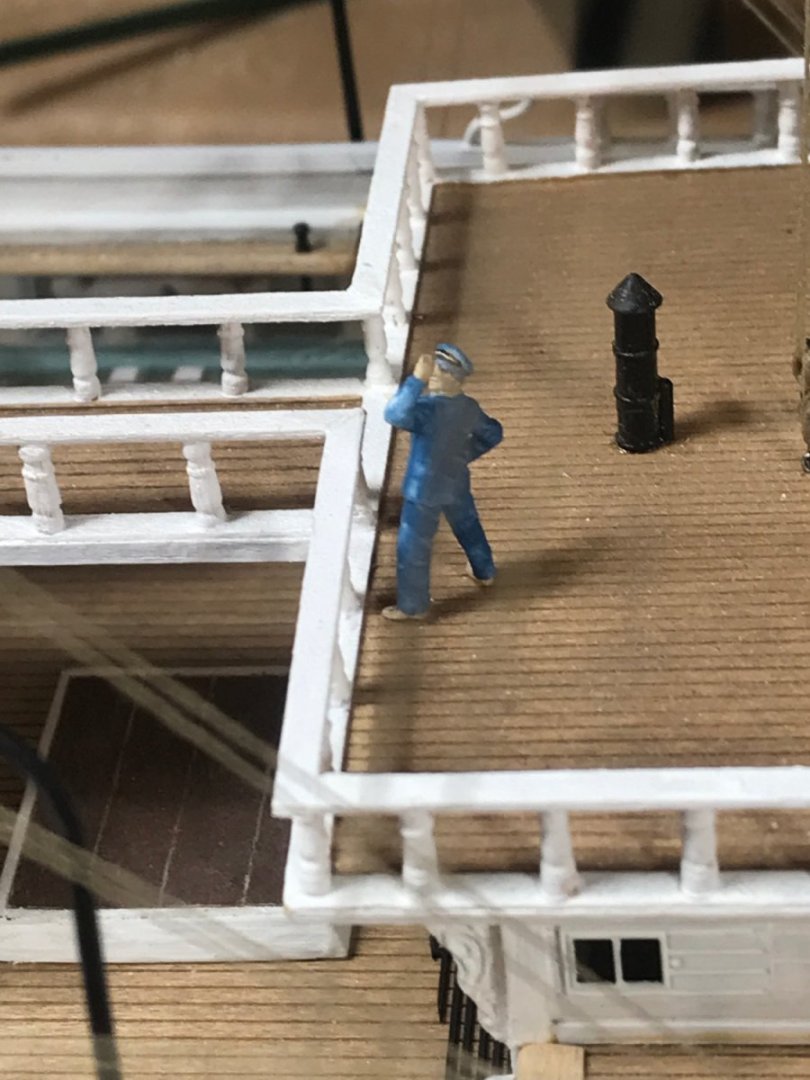
Taken on a few more crewmen , while Glory stays in port a bit longer. Some men by the foremast, one preparing to mount the main cabin roof. A mate ascending the aft stair. And a seaman sporting a red jacket tending to the main fife rail rope coils And lastly, a closeup of the first mate on the carriage cabin roof. Rob


- 3,560 replies
-
- 4
-
-
- clipper
- hull model
- (and 2 more)
-
Exactly……. By heating them, I can lengthen them as well. Rob
- 3,560 replies
-
- 2
-
-
- clipper
- hull model
- (and 2 more)
-
Some are And some are HO figures. I had to heat them up and reform them for my purposes. Rob
- 3,560 replies
-
- 1
-

-
- clipper
- hull model
- (and 2 more)
-
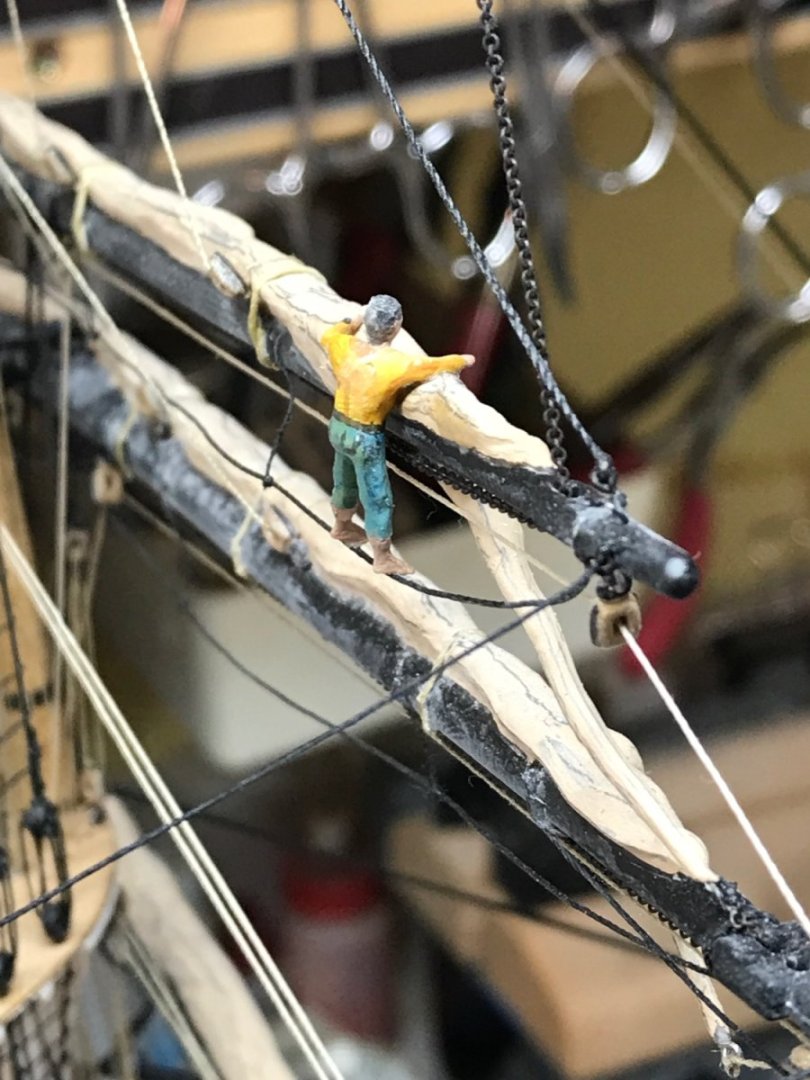
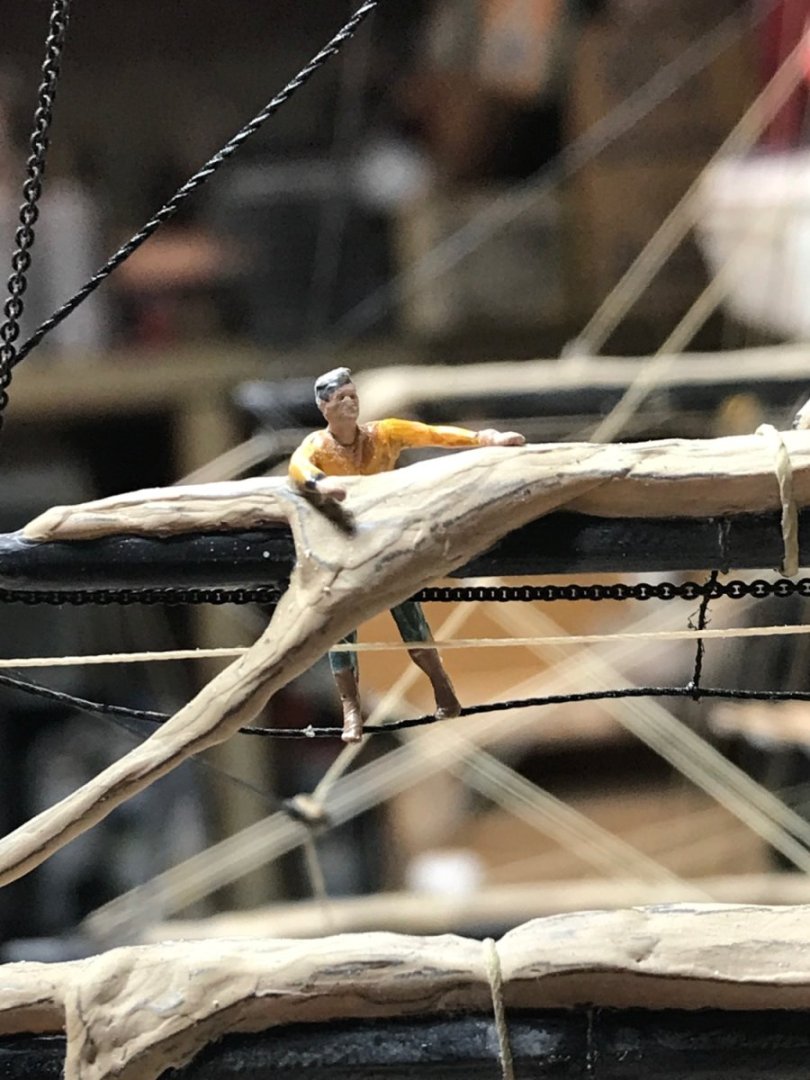
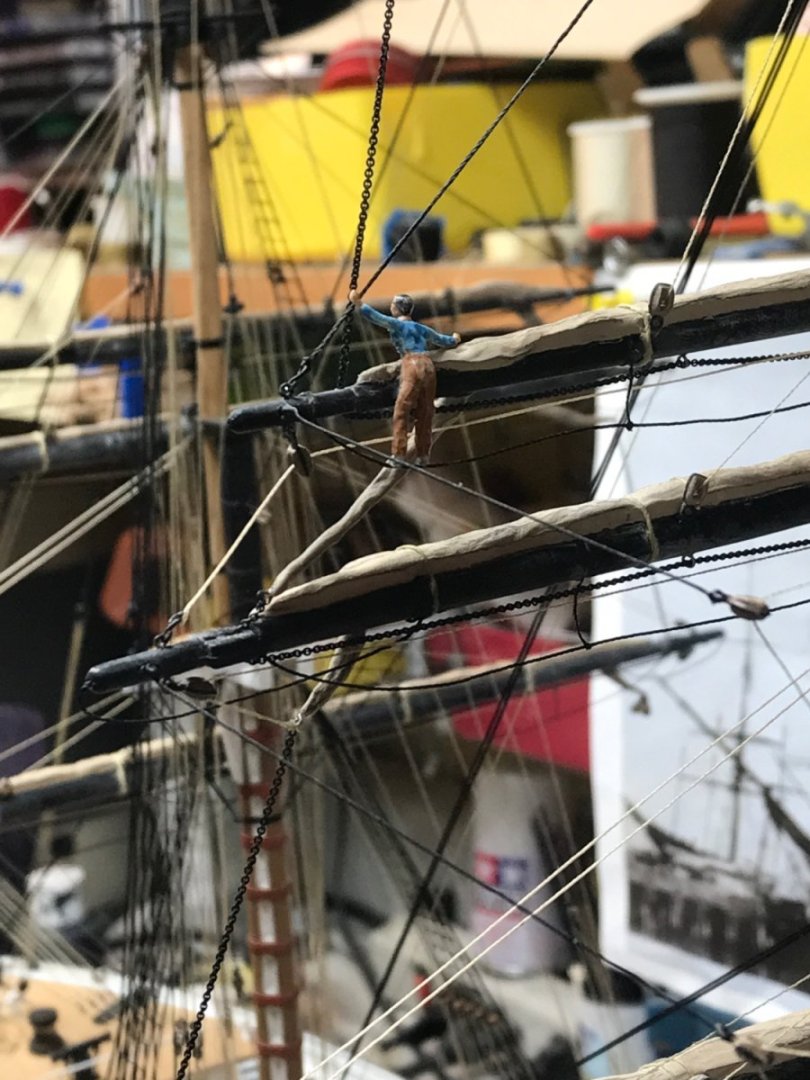
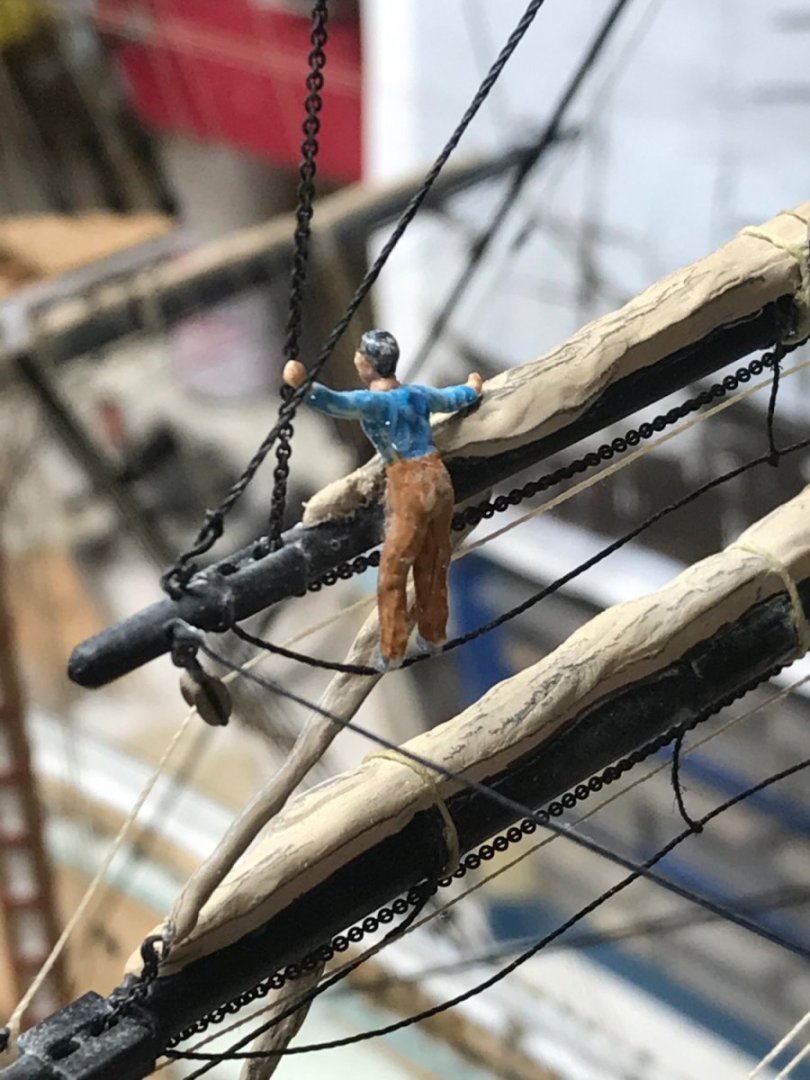
I added a sailor on the upper topsail foot rope. The first mate on deck is yellin up orders. Rob
- 3,560 replies
-
- 5
-
-
- clipper
- hull model
- (and 2 more)
-
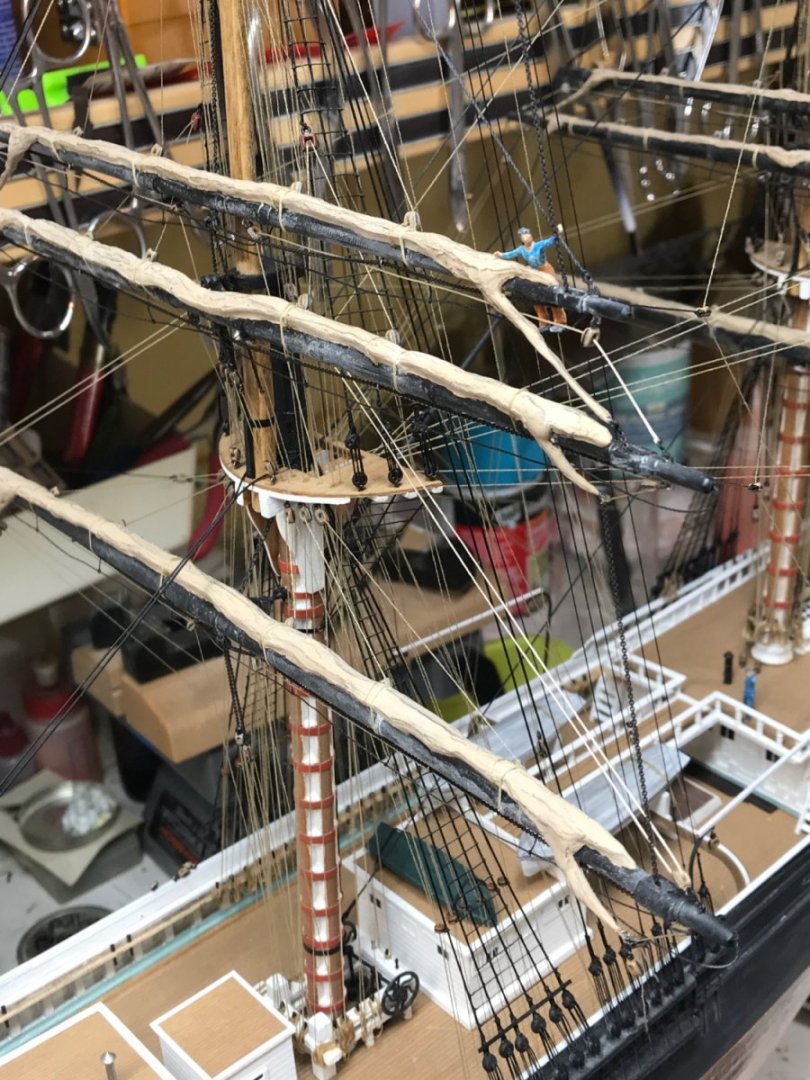
Rich….. you bring up a fantastic point……one that I had already settled on. However, I had intended to place an officer on the poop (which I have), yelling forward into the main mast rigging at a sailor doing work on a topsail yard. The addition of a boy on the boys cabin roof is a great idea too . I’m enjoying adding these captured moments and some fictitious ones too. Good observation, we are on the same page…….as usual. Rob
- 3,560 replies
-
- 2
-
-
- clipper
- hull model
- (and 2 more)
-
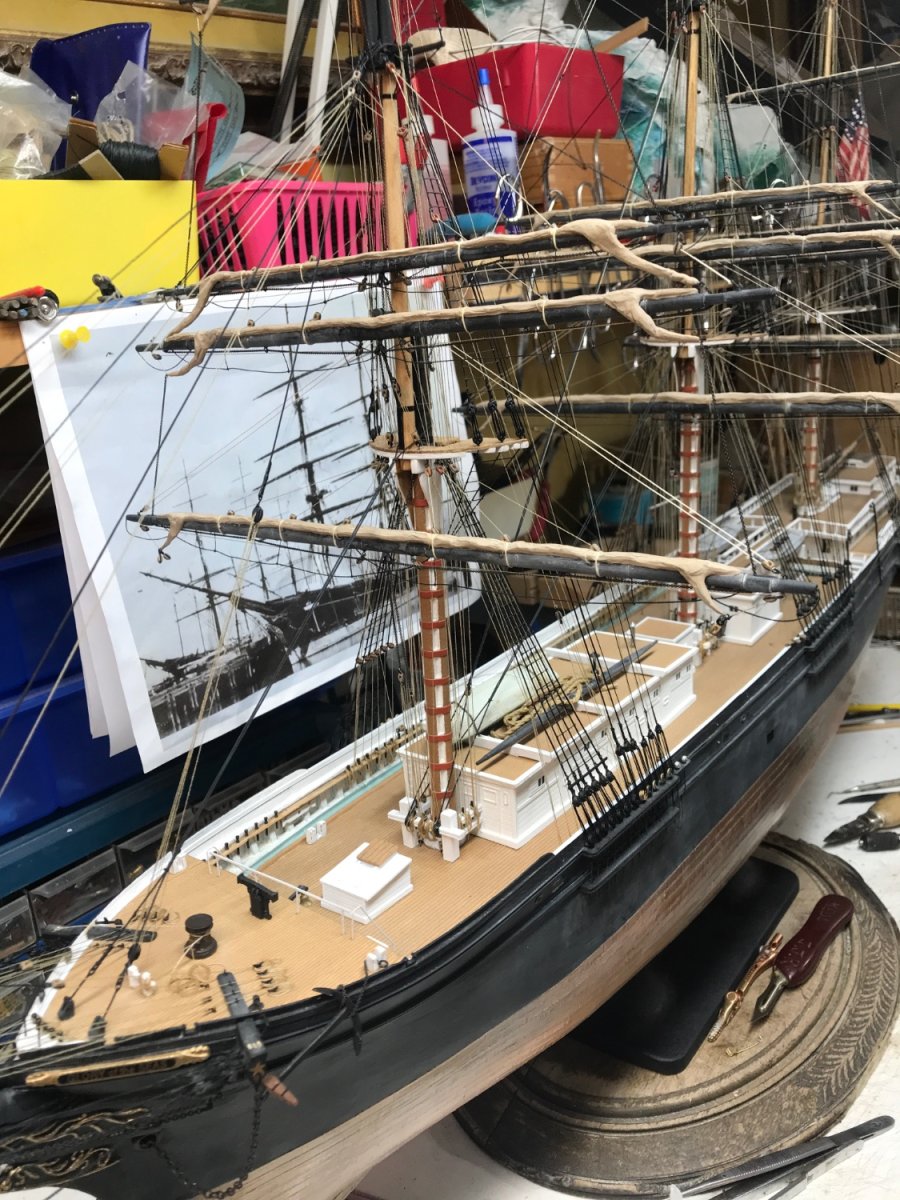
Looky there………there be crew afoot on board. Better pics from other angles will be taken later. Rob

- 3,560 replies
-
- 7
-
-
- clipper
- hull model
- (and 2 more)
-
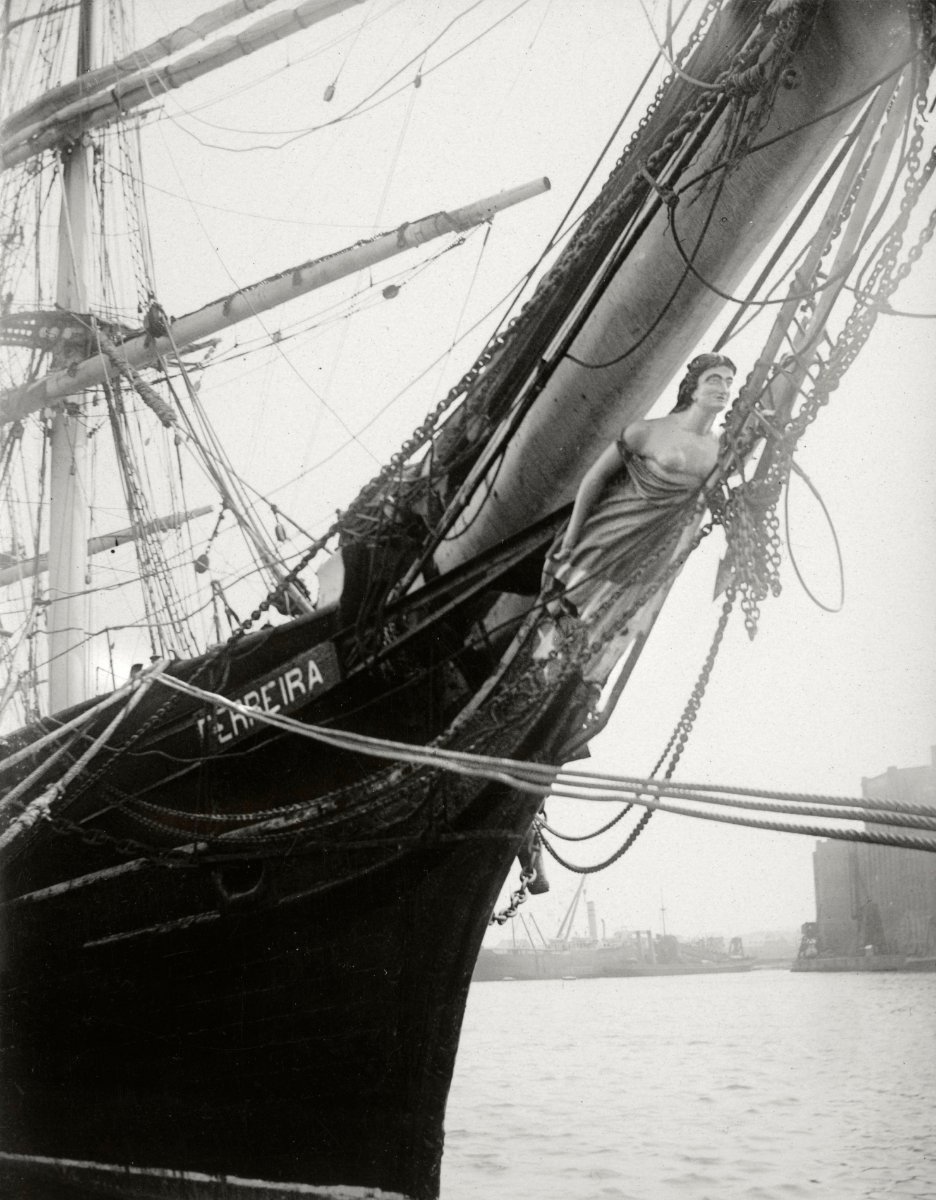
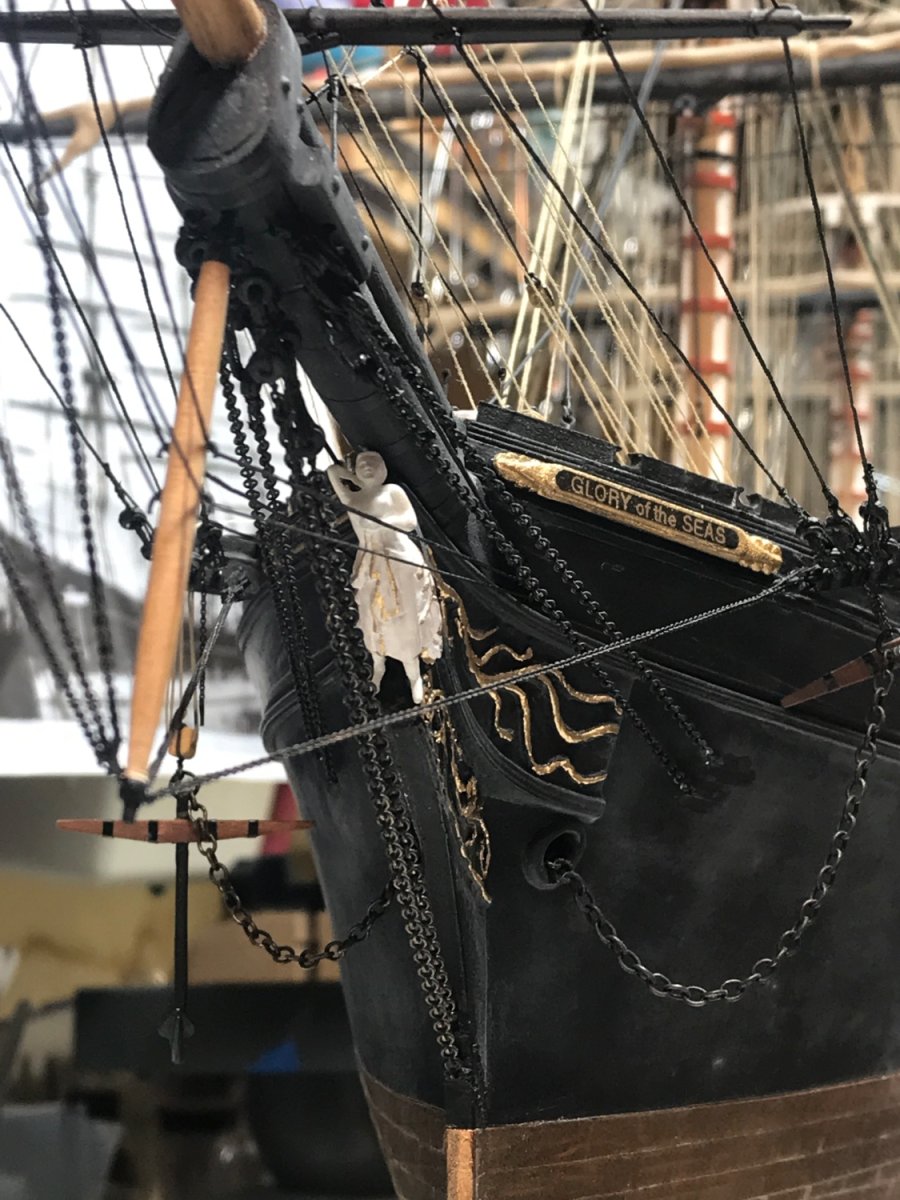
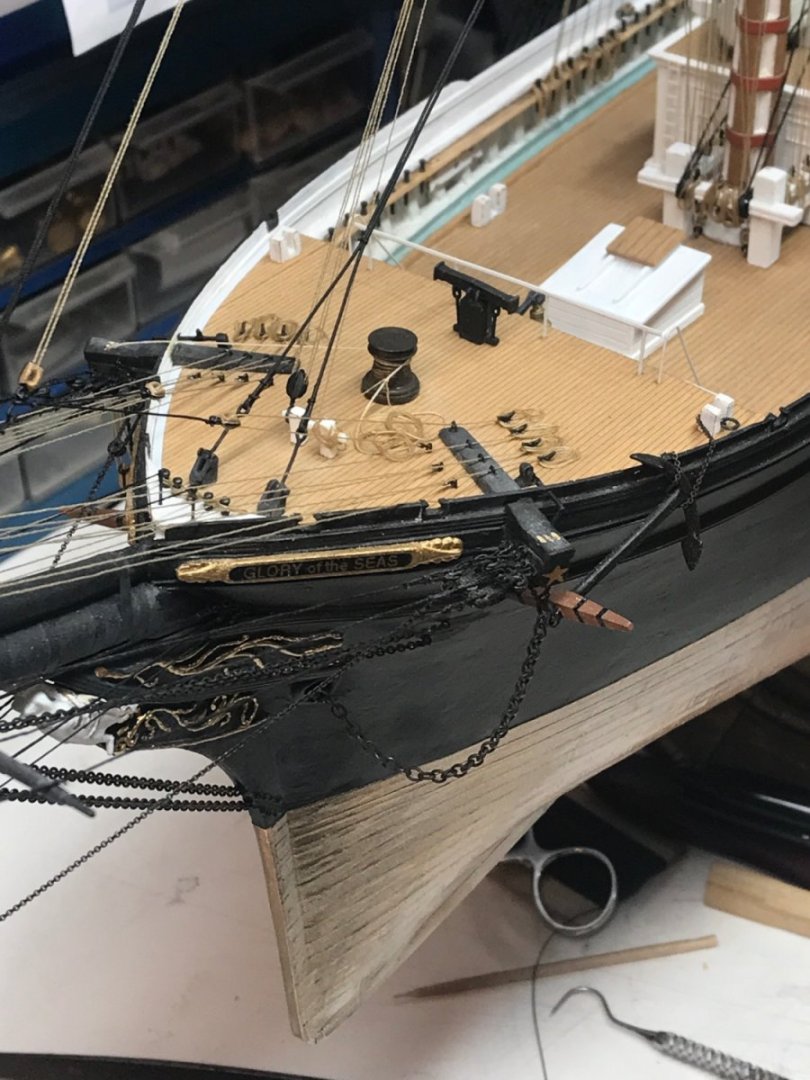
Here is a picture of a trail board....it is the top boards on this vessel. Cutty Sark/ aka Ferreira had trail boards that supported her nameboard.

- 34 replies
-
- 2
-
-
- Flying Fish
- Model Shipways
- (and 1 more)
-
Perfect example...astonishingly similar to the Amy Turned

- 34 replies
-
- 1
-
-
- Flying Fish
- Model Shipways
- (and 1 more)
-
Thanks Pat....I'm still relishing in the work left to do...getting all the lower yard pennants and brace purchases installed in their blocks. I've decided to add several scale men working at various locations...to help define her scale and add a bit more life inducing details. I've gone and removed the older (first attempt) model I built using a modified Cutty Sark hull from my displayed collection. The poor thing is so inaccurate....I can't display her as Glory of the Seas. I'm considering removing her name boards and fantail lettering....and creating a fictitious clipper. Making enough changes to her figurehead, rigging and other identifiable details...that she can be reconstituted as my new clipper....the *Vickie Jean*....after my best friend and wife. This will probably be my next build......or rebuild. Life is full of changes and adventures. Rob
- 3,560 replies
-
- 4
-
-
- clipper
- hull model
- (and 2 more)
-
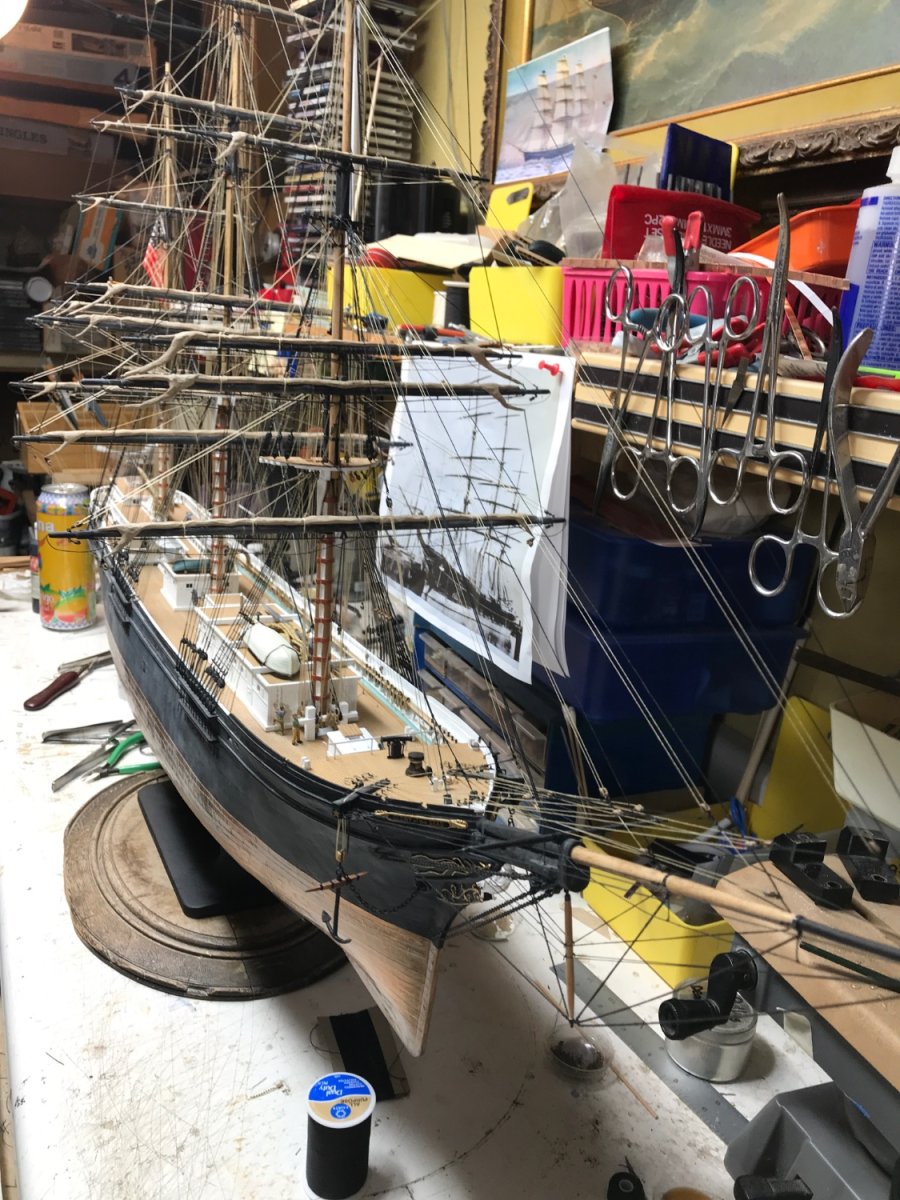
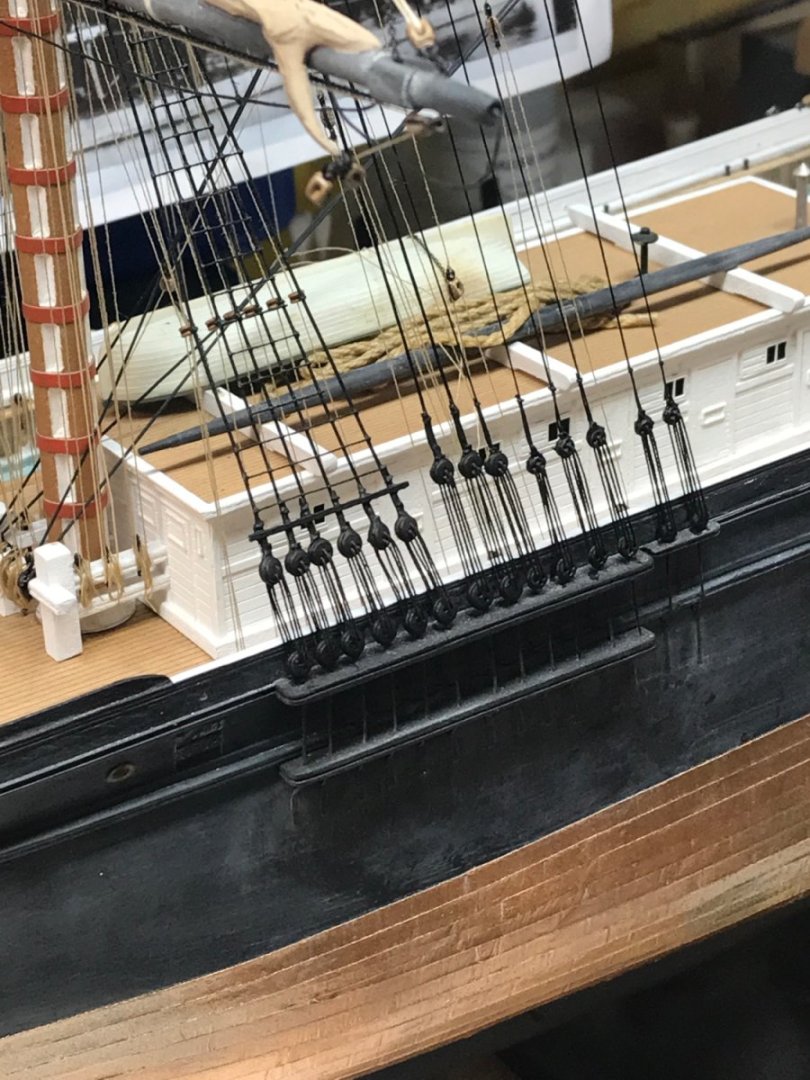
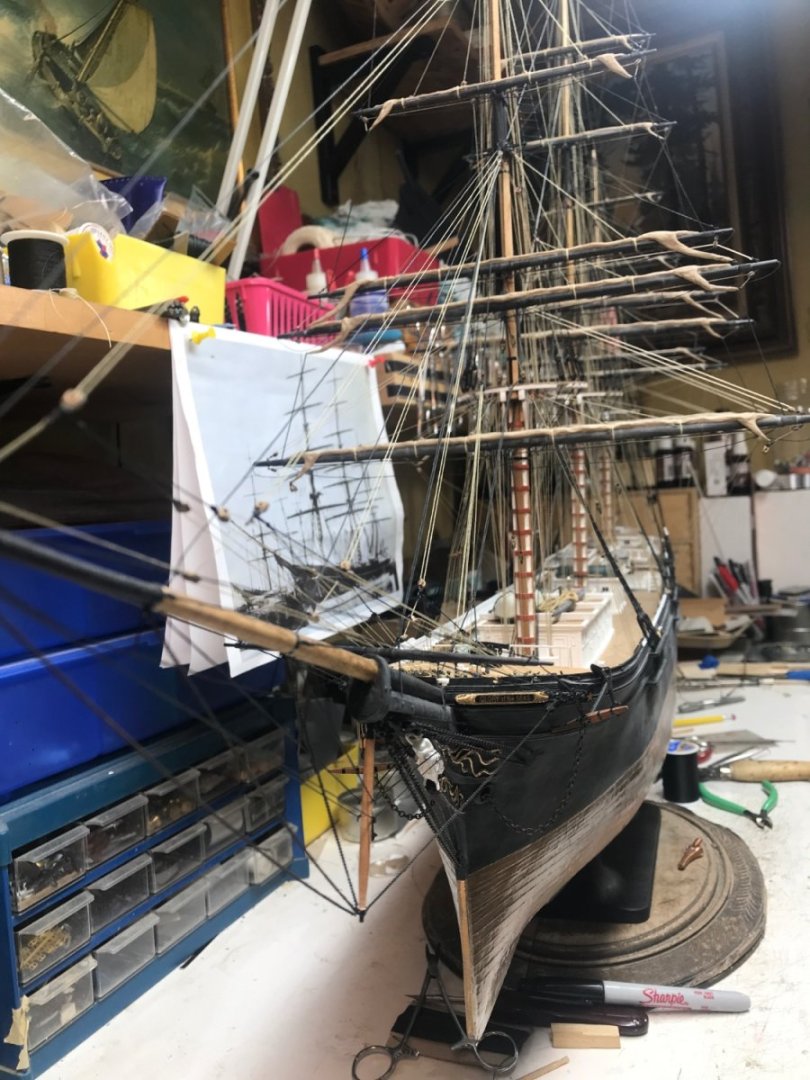
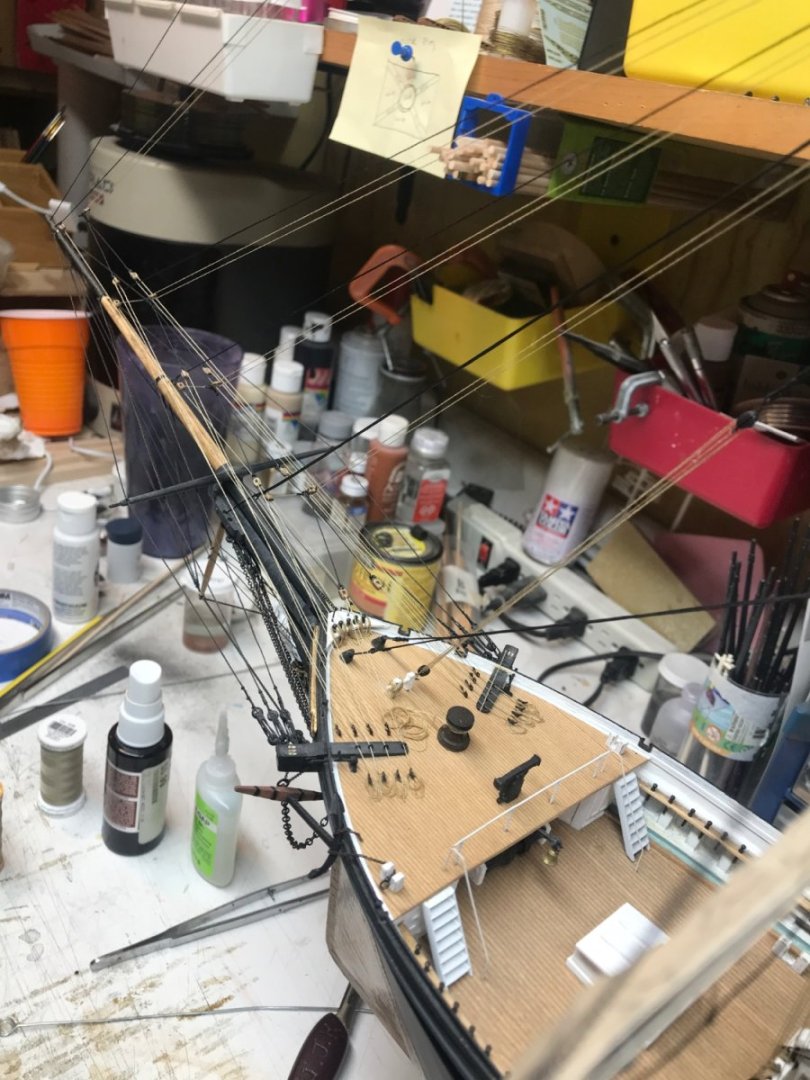
Finishing up the port backstays and I added the top yard braces too Rob

- 3,560 replies
-
- 4
-
-
- clipper
- hull model
- (and 2 more)
-
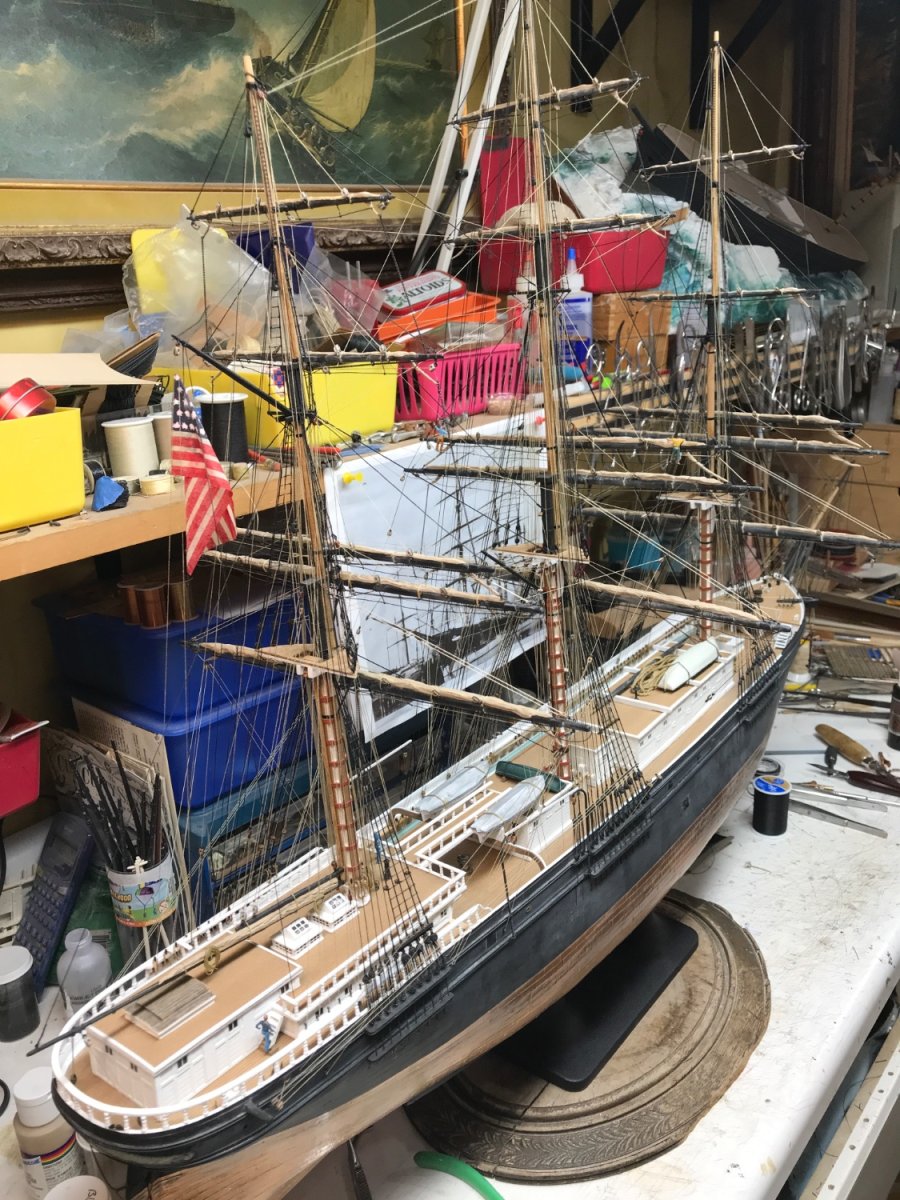
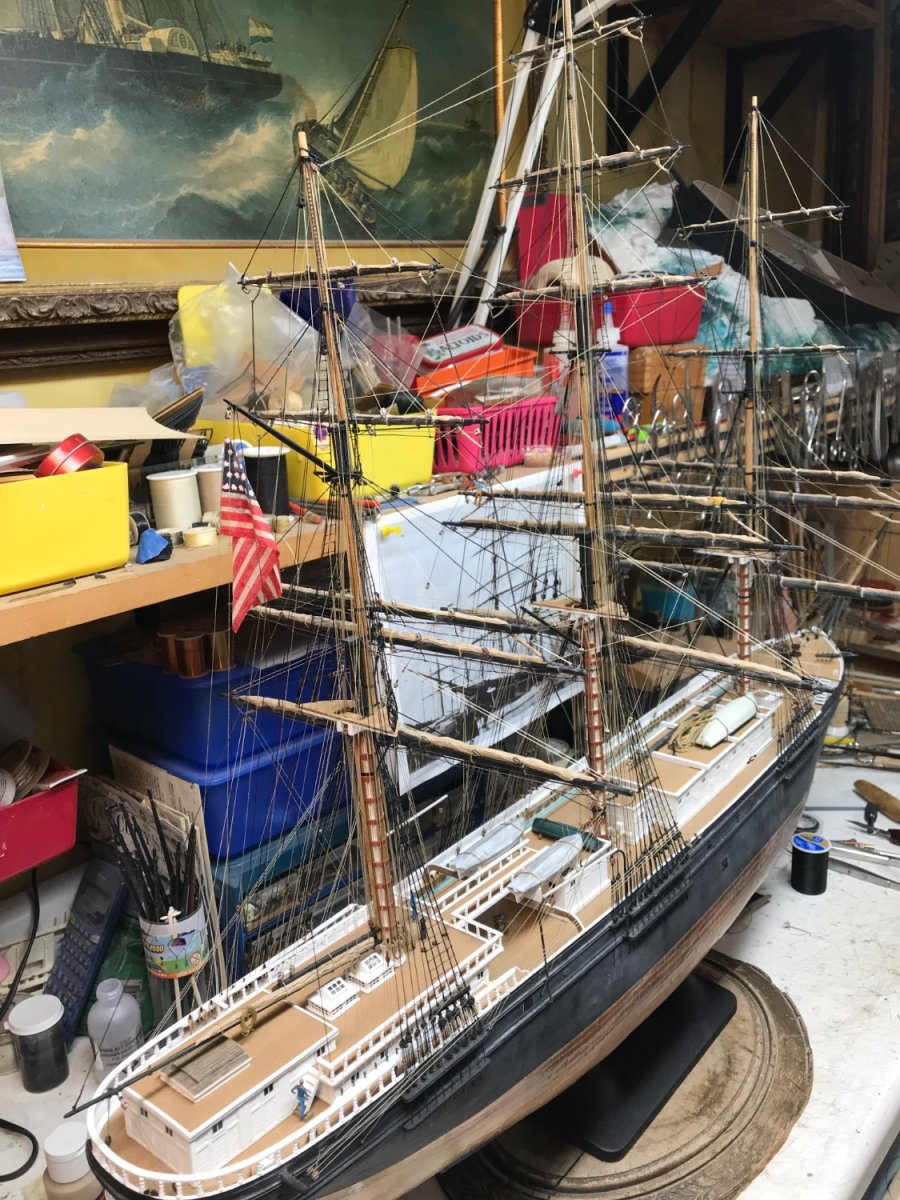
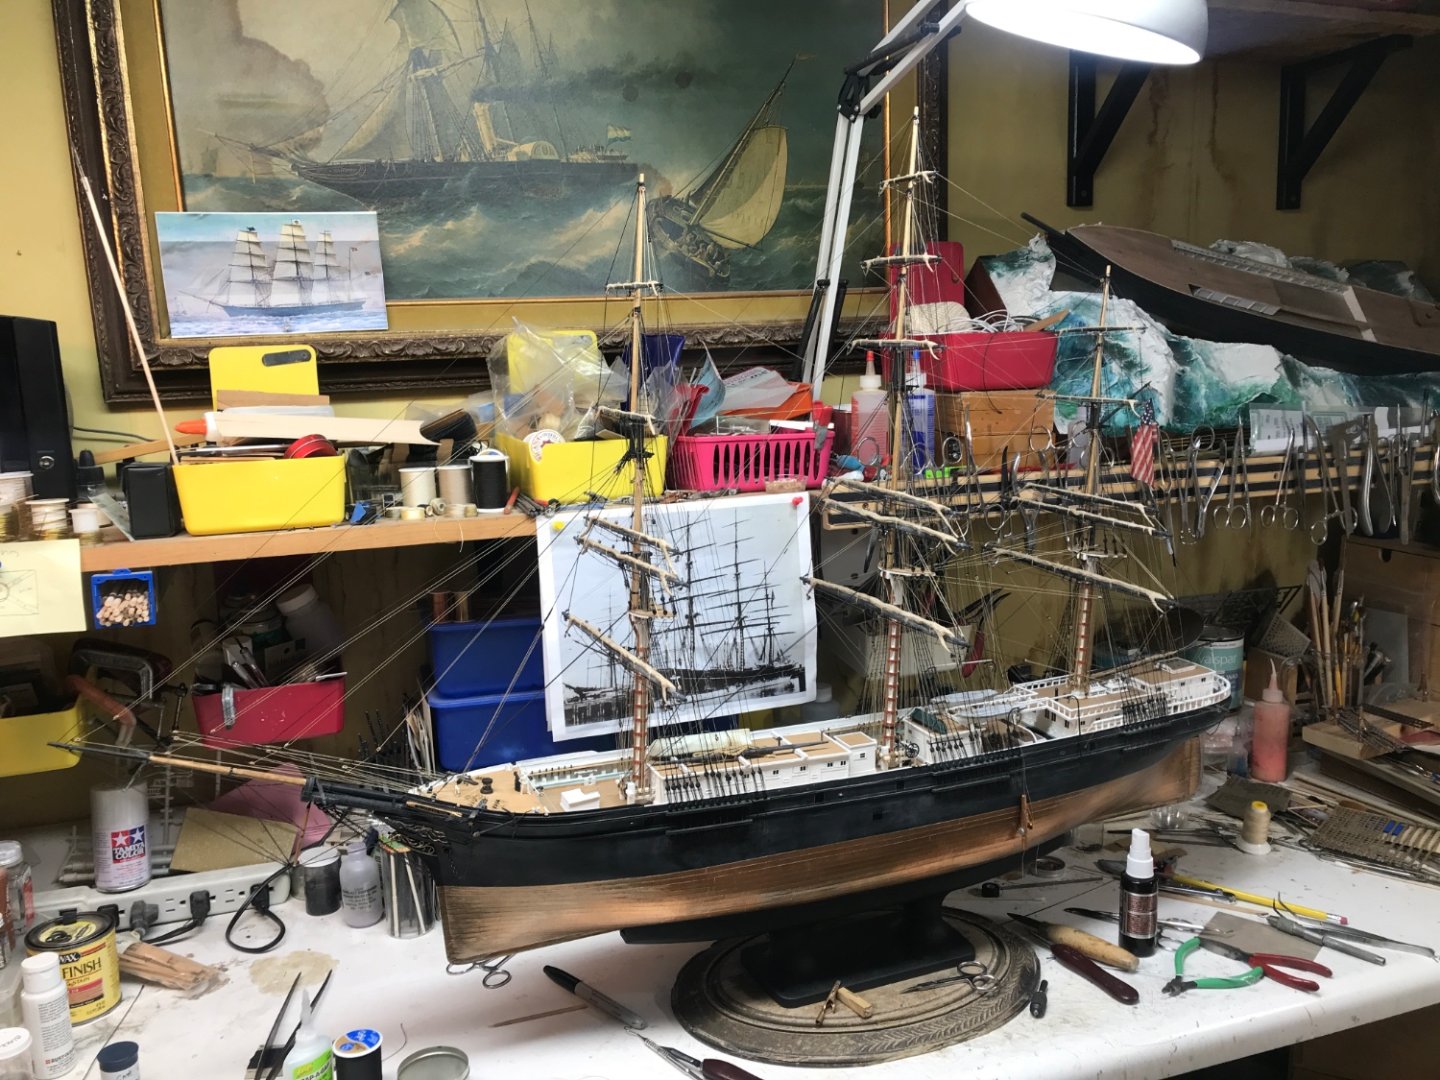
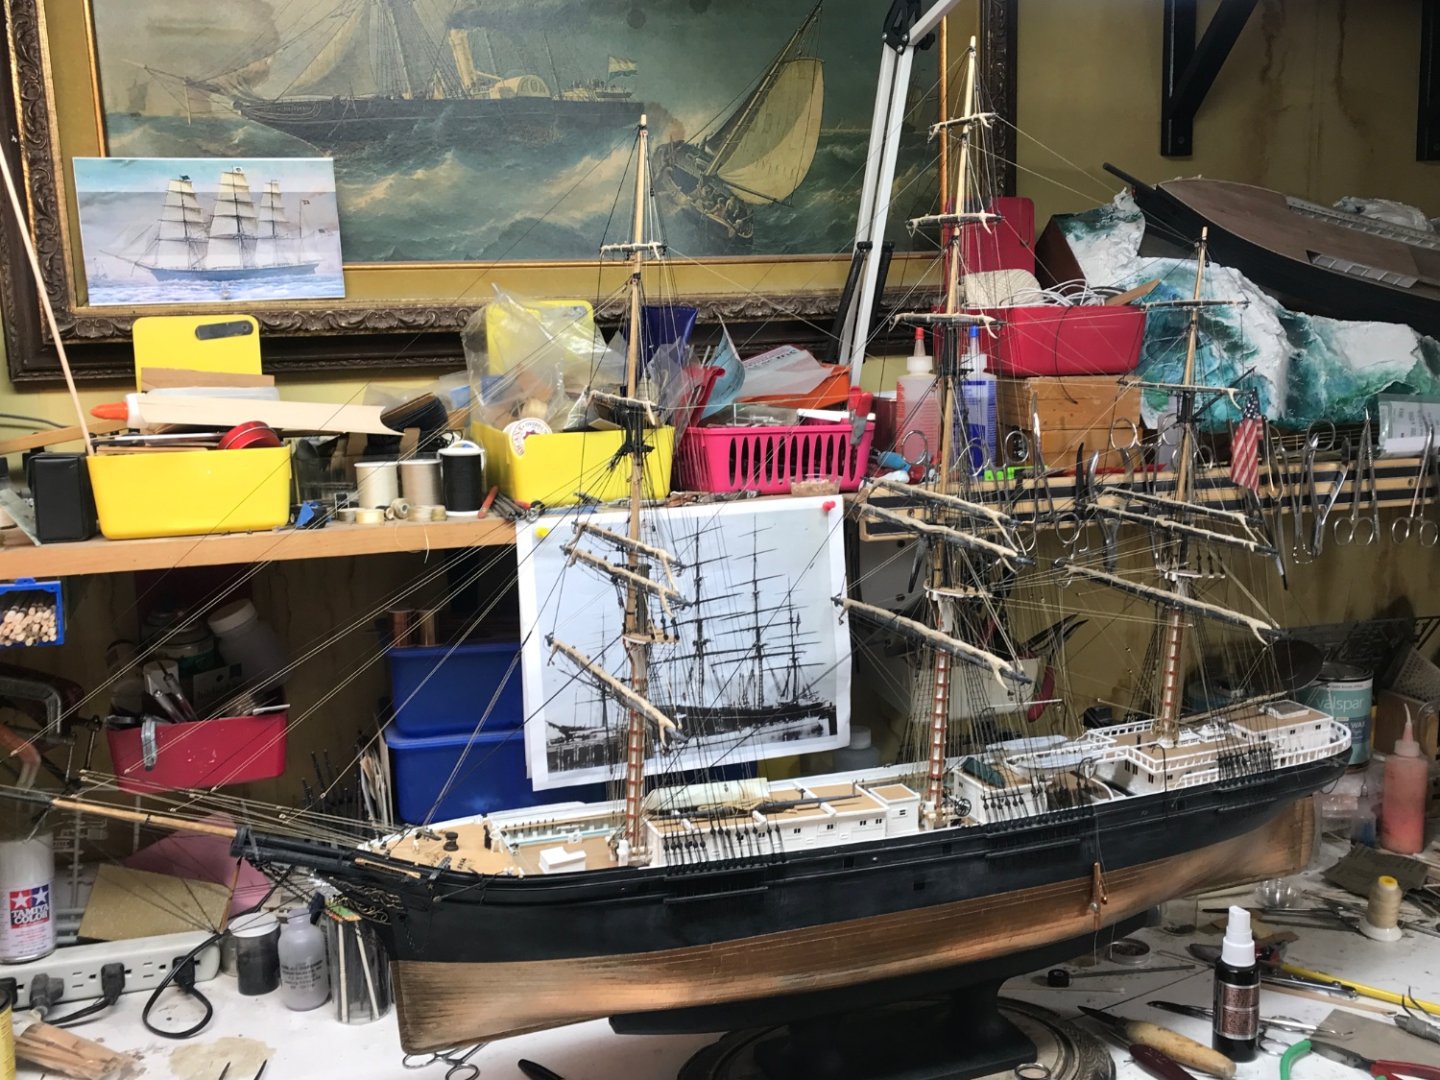
A year and 4 months this week I began construction on Glory's hull.....via the bulkheads I received from Vladimir. This time does not include the months of work I previously accomplished prior to the hull construction. Much could be done then and I availed myself of the time waiting. Total time accumulated for work on Glory has been 19 months. Even though Glory is a larger scale model then was my previous build Great Republic. Great republic took me 5 years to complete. Of course she was fully rigged with an entire suite of sails and all the rigging accompanying them.....so that lengthened the build time. Again, even though Glory is a larger scale, 1/96 compared to Great Republics 1/128......Great Republic was so much larger of a vessel...the two models are nearly the same length and height. In retrospect....I actually pumped out Glory in quite a record time, compared. Now I am rounding the corner and only have the finish up the port backstays and add the starboard and the yard braces....add a view more flags, redo a few minor items and I'm finished. I give her a couple weeks at best. Rob
- 3,560 replies
-
- 7
-

-
-
- clipper
- hull model
- (and 2 more)
-
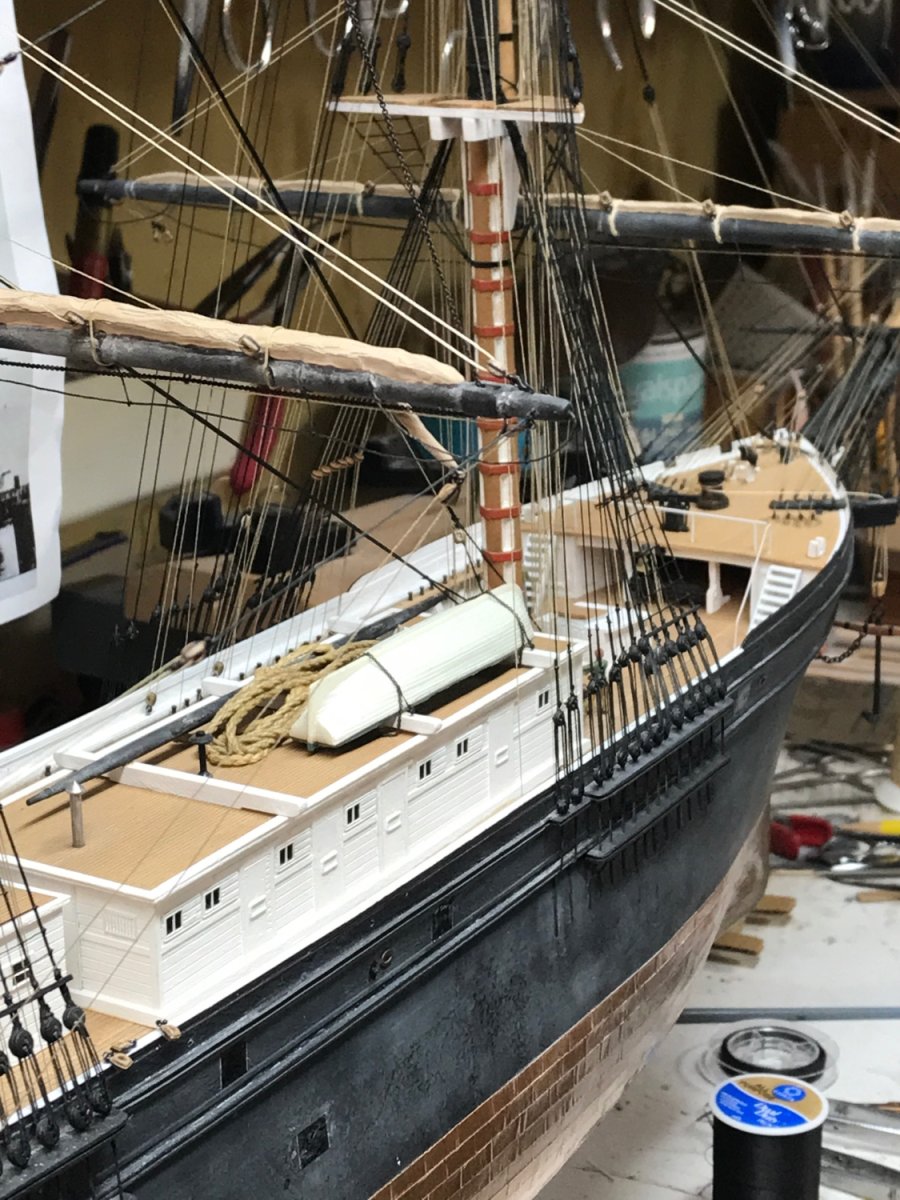
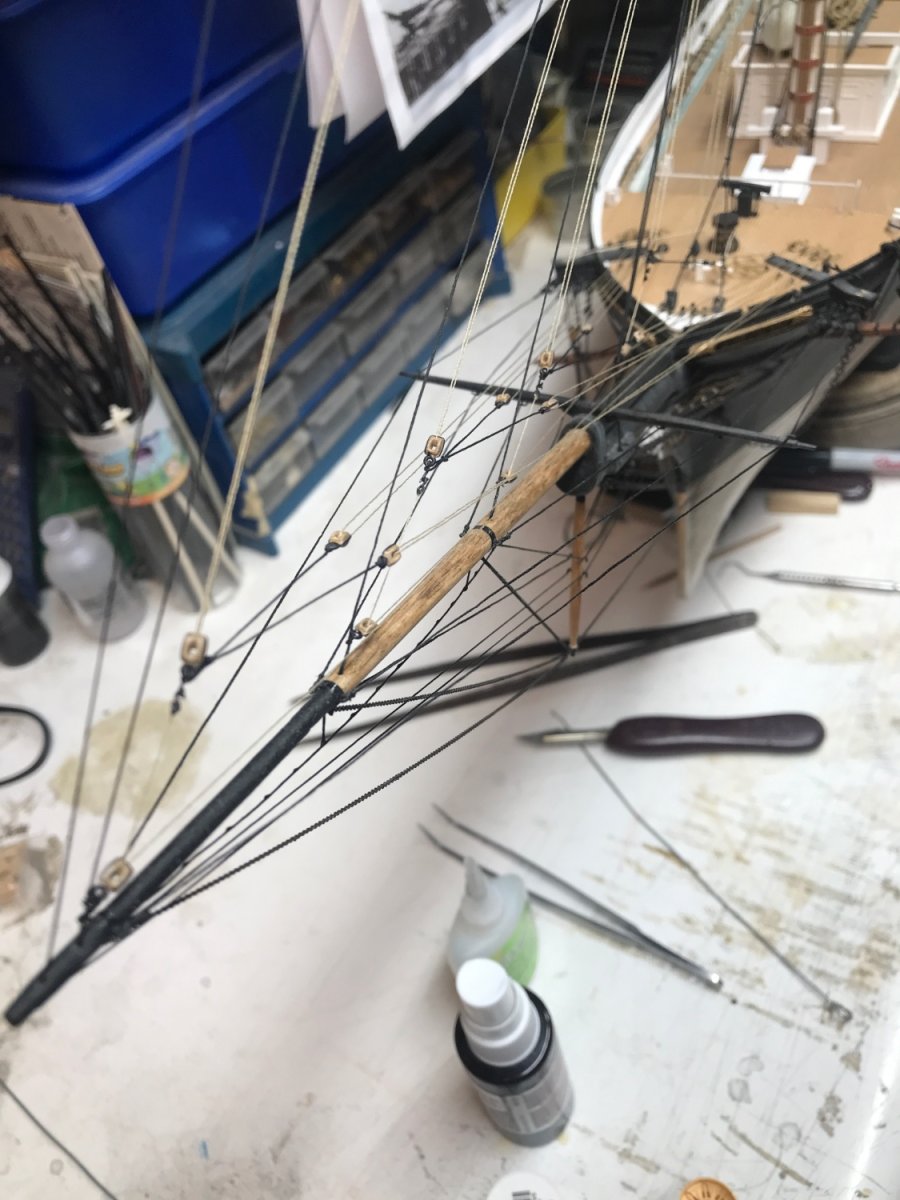
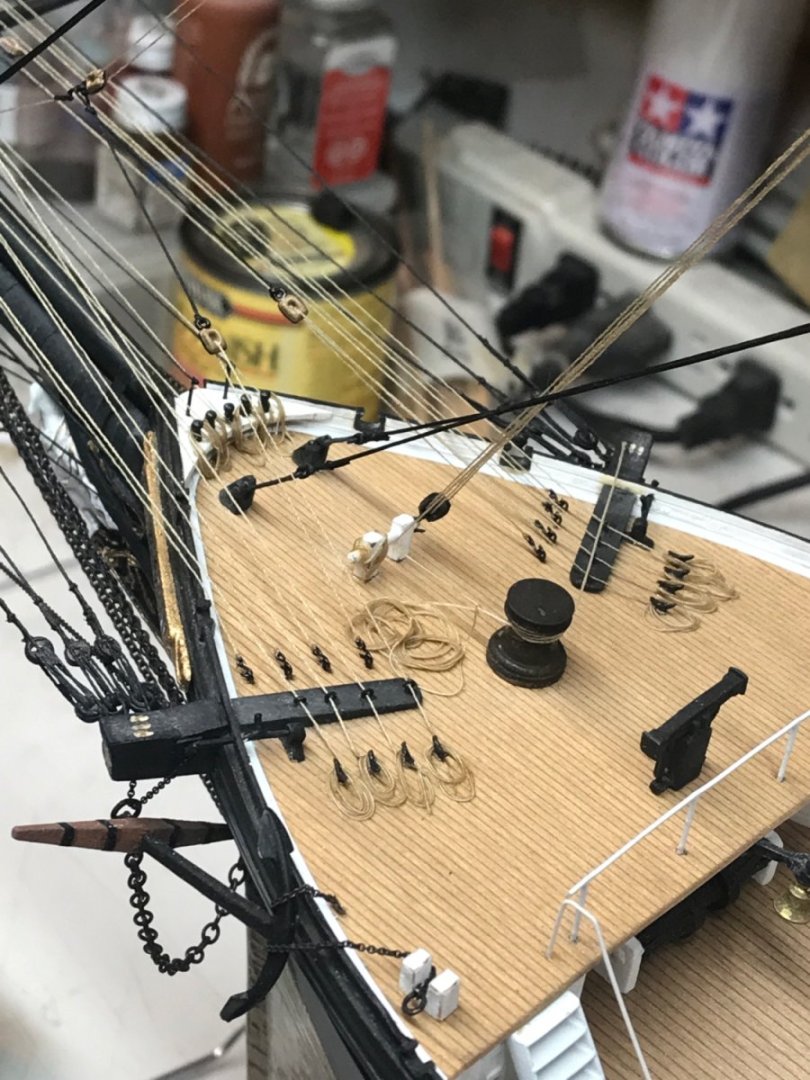
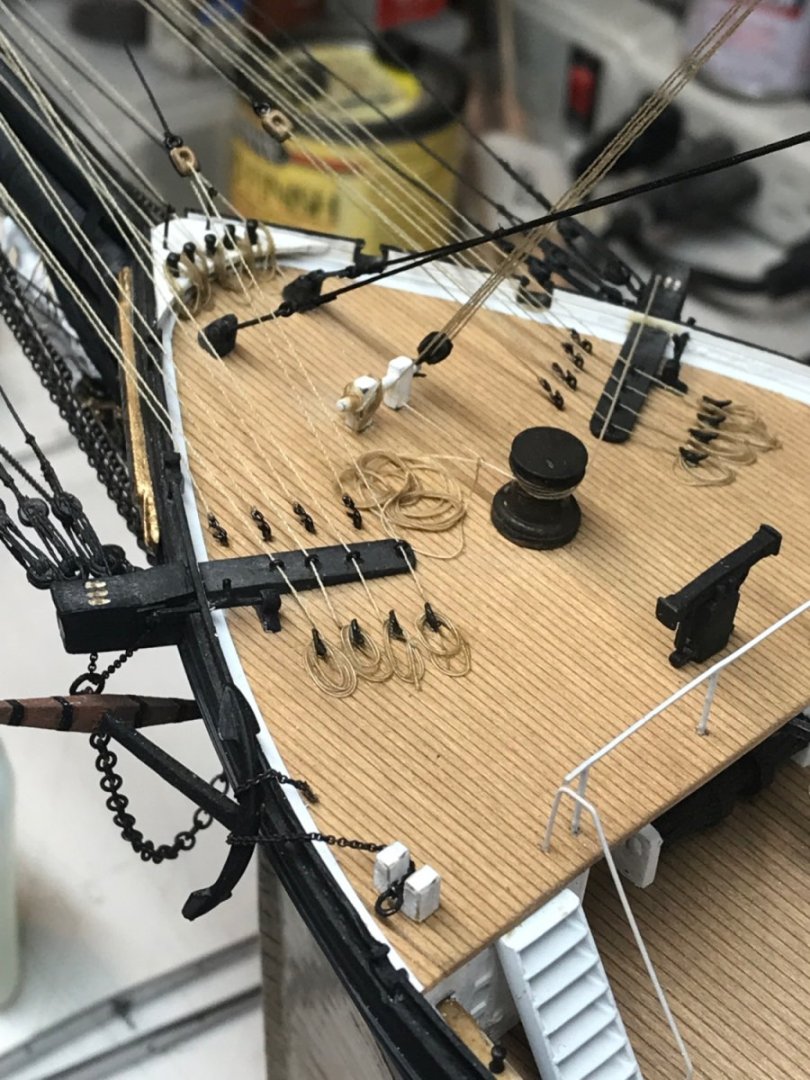
Finished up the jib pendants and sheets. Securing them via their eyebolts, fair leads and cleats, along with rope coils. Rob


- 3,560 replies
-
- 6
-
-
- clipper
- hull model
- (and 2 more)
-
Wonderful work indeed. Rob
-
Time flies by actually. I started my Glory of the Seas in March of 2021.....a year and a half ago. I'm finishing up her fore backstays...nearing completing her. It took me nearly 5 years to build my Great Republic. Man it take so long...building these clippers. Yours is coming along very nicely...you have worked very hard on her....great job. Rob
- 602 replies
-
- 1
-
-
- Flying Fish
- Model Shipways
- (and 2 more)
-
Wonderful rework....glad you are progressing. Following along closely. Rob
-
Philanthropy usually has self motivated implications attached to it. Things have unfolded as they have and we are left only with disillusioned speculation. We are fortunate that Glory lived as long as she did....so we can have ample photographic evidence of her transformation from magnificent clipper to a funeral pyre. I have several copies of the book, *Some Famous Sailing Ships and their Builder Donald McKay*, myself and it is a must have print for any clipper ship library. However, as I recall, I don't think there is much concerning Glory of the Seas...surprisingly enough. If, I'm not mistaken. The exhaustive works by Michael Mjelde on the subject...contain copious amounts of historical information.
- 3,560 replies
-
- 1
-
-
- clipper
- hull model
- (and 2 more)
-
What I find interesting is, why...if in fact, James Ferrell was such a fan of McKay's vessels and particularly Glory of the Seas, since his father was captain of her and he himself rounded the horn in her as a boy.....and if he was the President of a large steel firm...why just save Glory's figurehead.....why not save the entire vessel? She was only worth $4000 dollars at the time, and could have easily been purchased and restored by a man who actually had the means and supposedly the *Passion* for her. A simple captain purchased Cutty Sark and restored her for posterity....how is it beyond reason to think a steel mogul could not perform the same? I suggest...beyond *passion* and *Love of*....business wise, there was no money in it for him. It's one thing to appear humanitarian, *One who gives back to the people*...when it costs little of them......then it is, when a more monumental contribution, that would have ultimately greater consequences is not made because...it has little to no return value for them. MHVA Rob
- 3,560 replies
-
- 1
-
-
- clipper
- hull model
- (and 2 more)
-
Vlad....I use the smallest chain I can find, and that is 42 LPI. I got it at Cast your Anchor, but I think they are out of stock currently. Do a net search. Rob
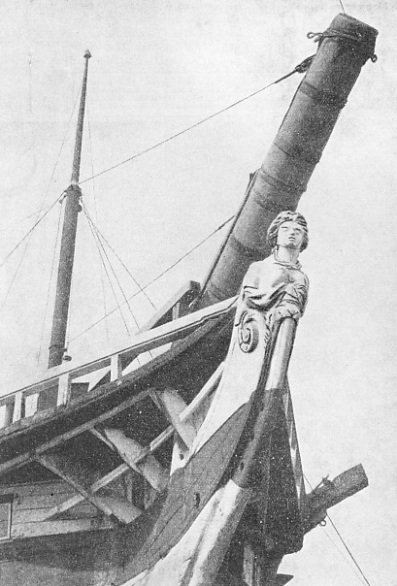
-
Good write up Jonny. One other note:….…. Her replaced left led and foot aren’t exactly a true representation either. Her original foot curved down as if standing on a curved rock…..but her replacement foot demonstrates that the ball of the foot is supporting the weight as the toes are bent as that of a runner in a starting gate position. The restoration craftsman had the freedom to exercise a bit of artistic license along with his (correction) of some apparent (unfinished) details. Rob