HOLIDAY DONATION DRIVE - SUPPORT MSW - DO YOUR PART TO KEEP THIS GREAT FORUM GOING! (Only 27 donations so far out of 49,000 members - C'mon guys!)
×


rwiederrich
-
Posts
5,518 -
Joined
-
Last visited
Content Type
Profiles
Forums
Gallery
Events
Everything posted by rwiederrich
-
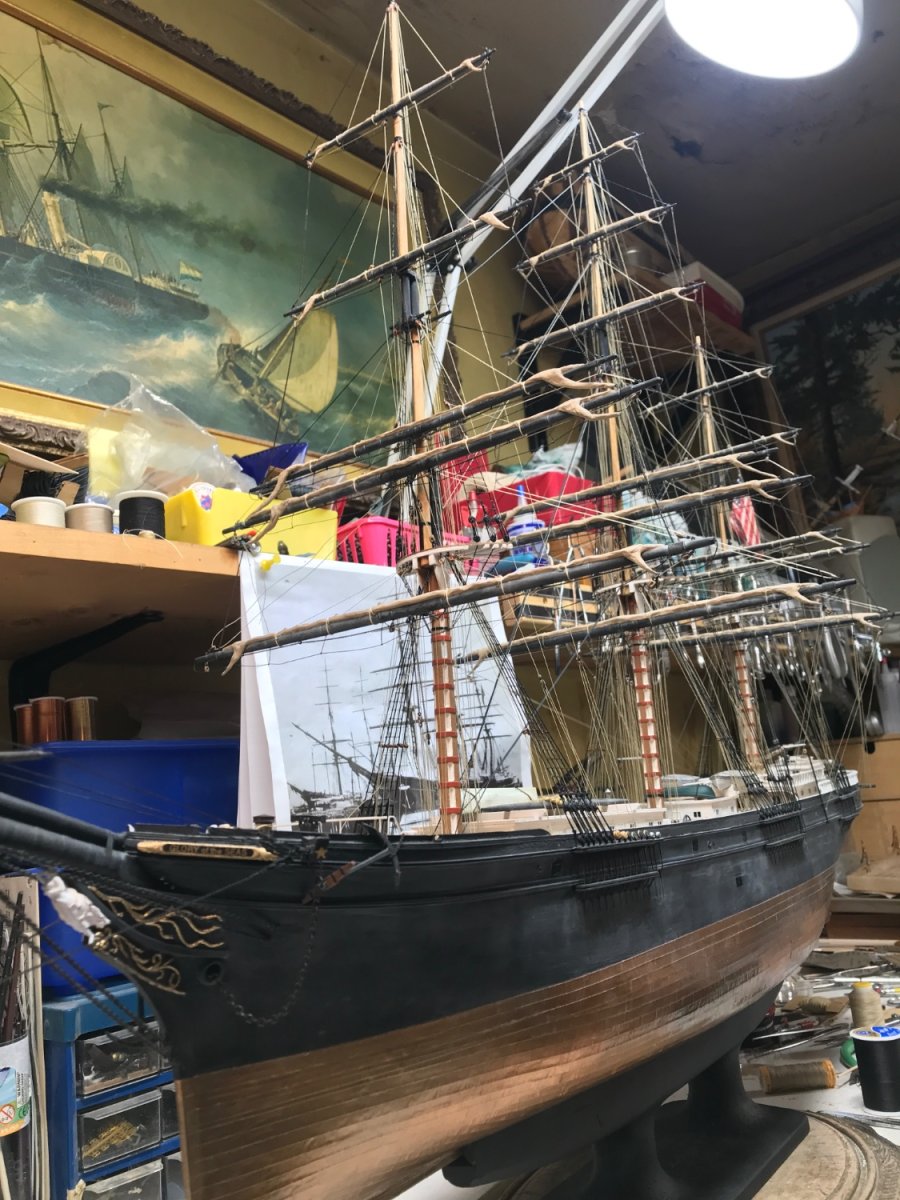
More stay work. I think I did enough for the day…….I put in just under 8 hours today. Rob

- 3,560 replies
-
- 4
-

-
- clipper
- hull model
- (and 2 more)
-
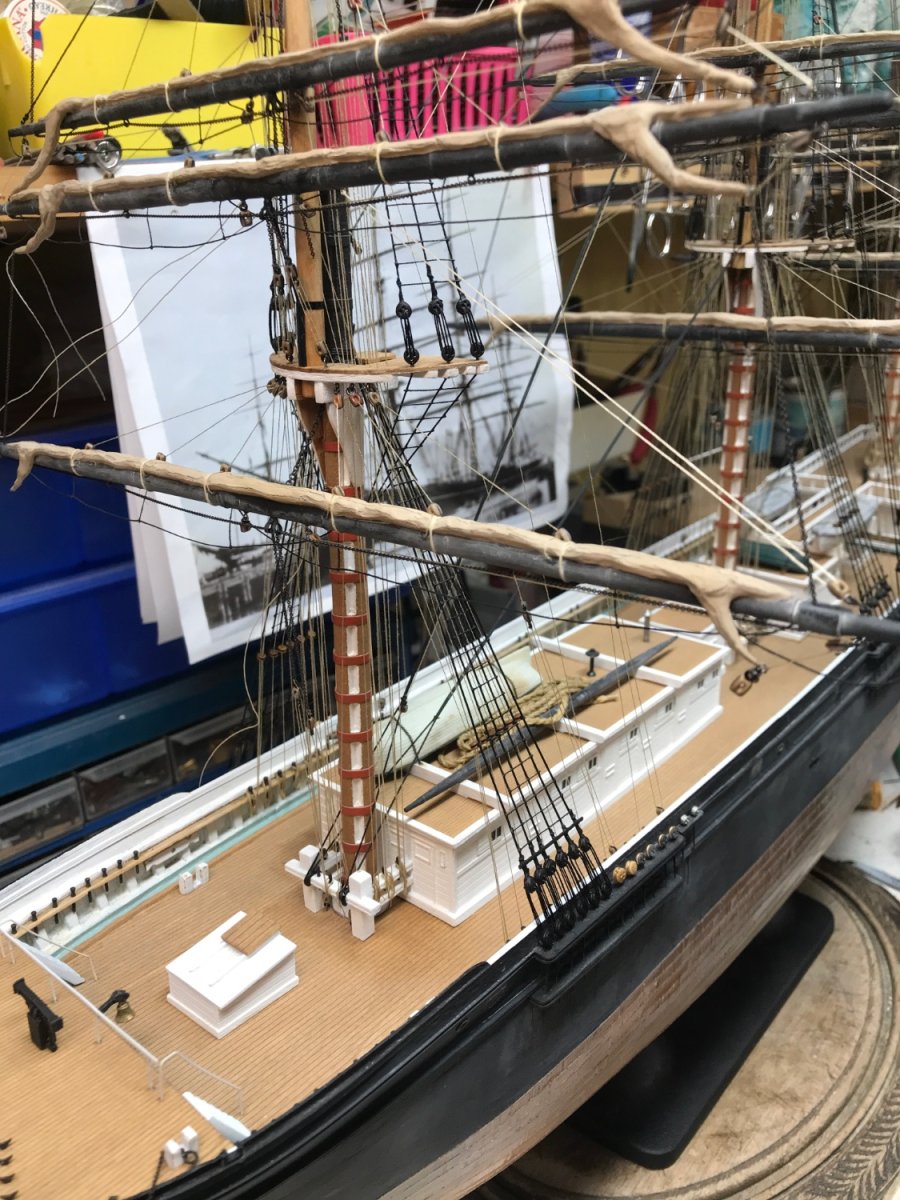
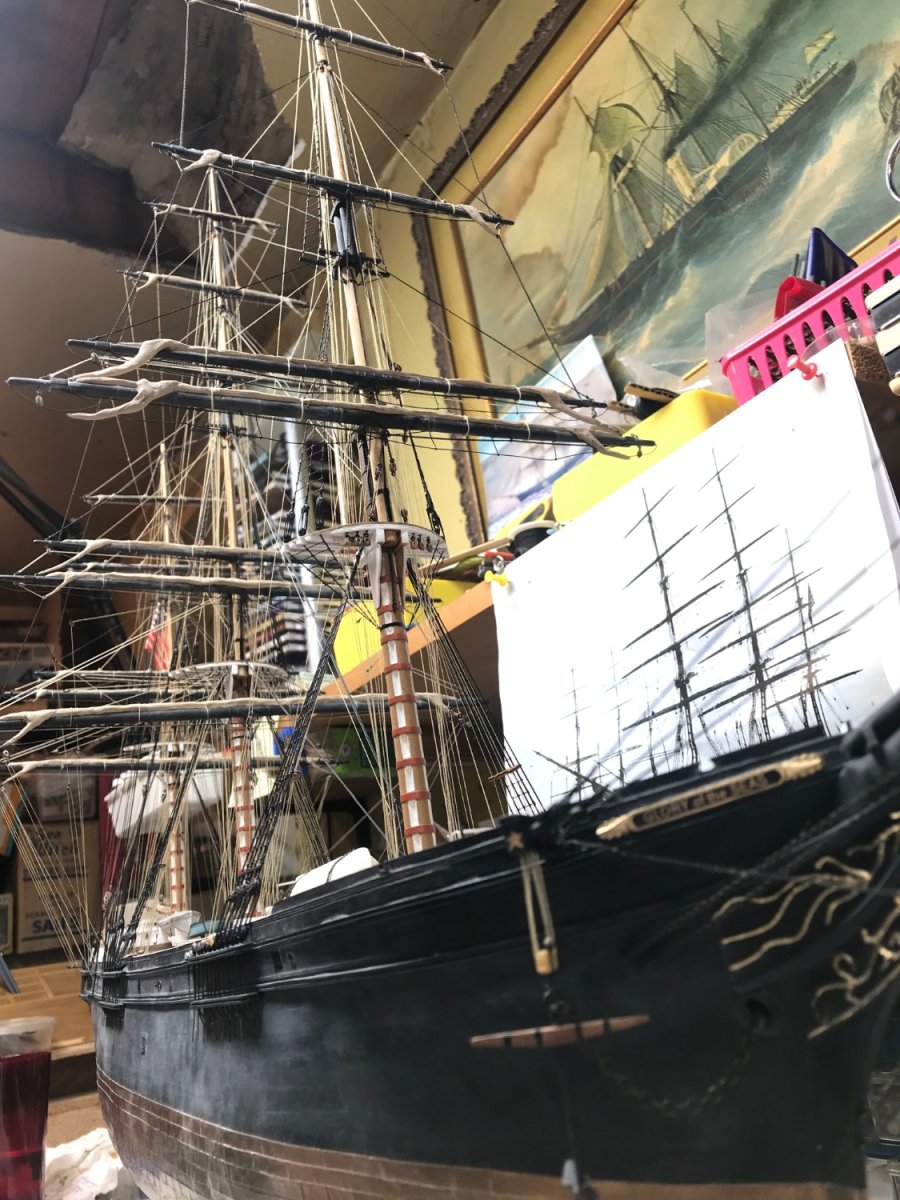
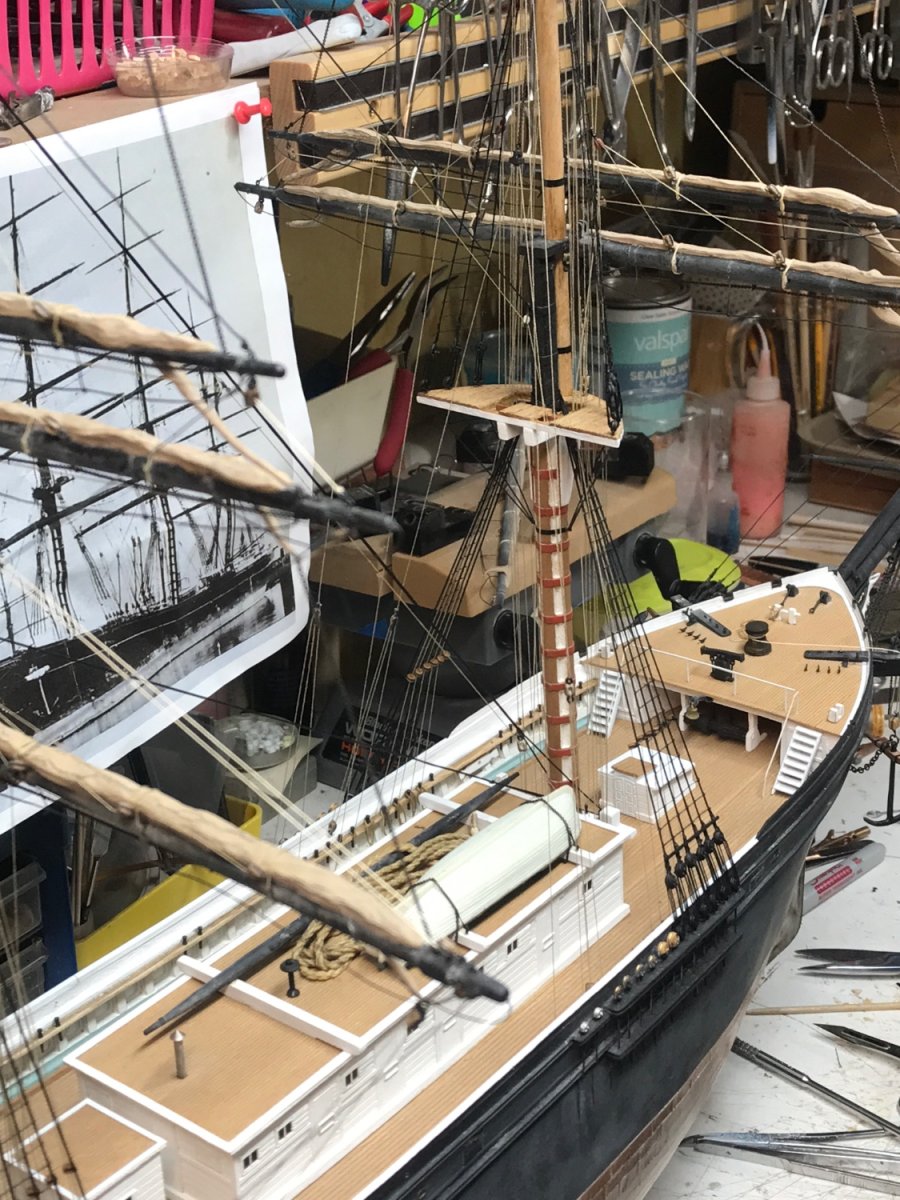
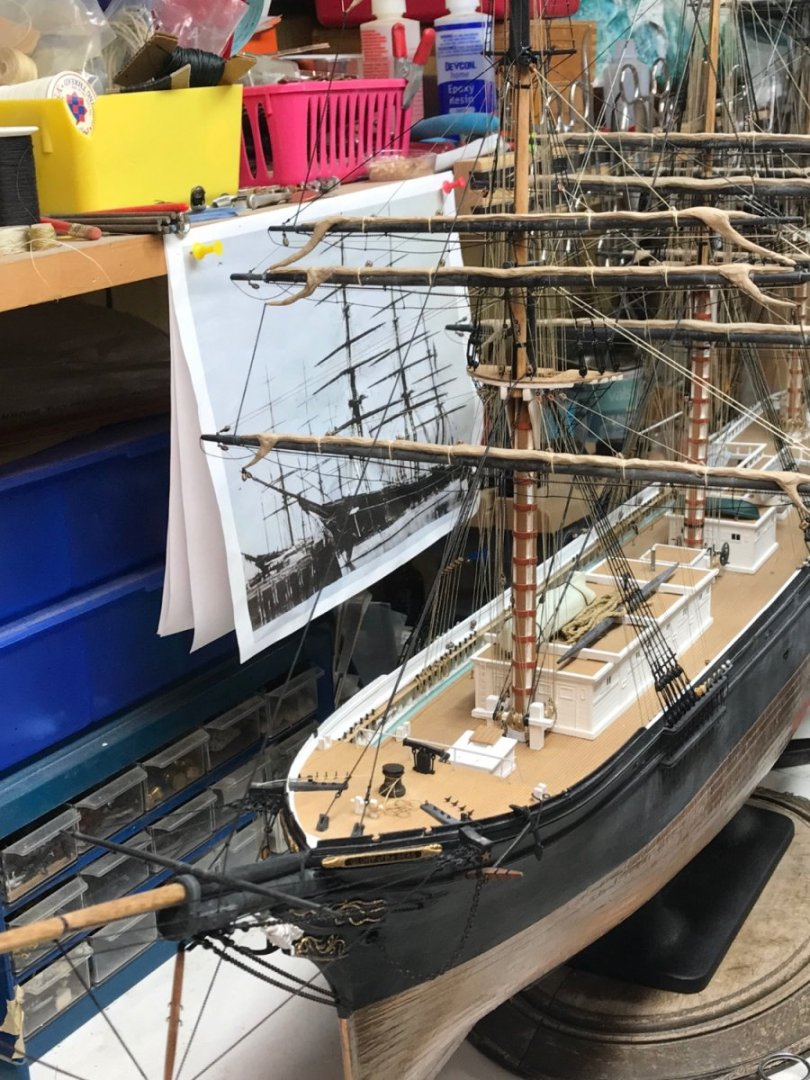
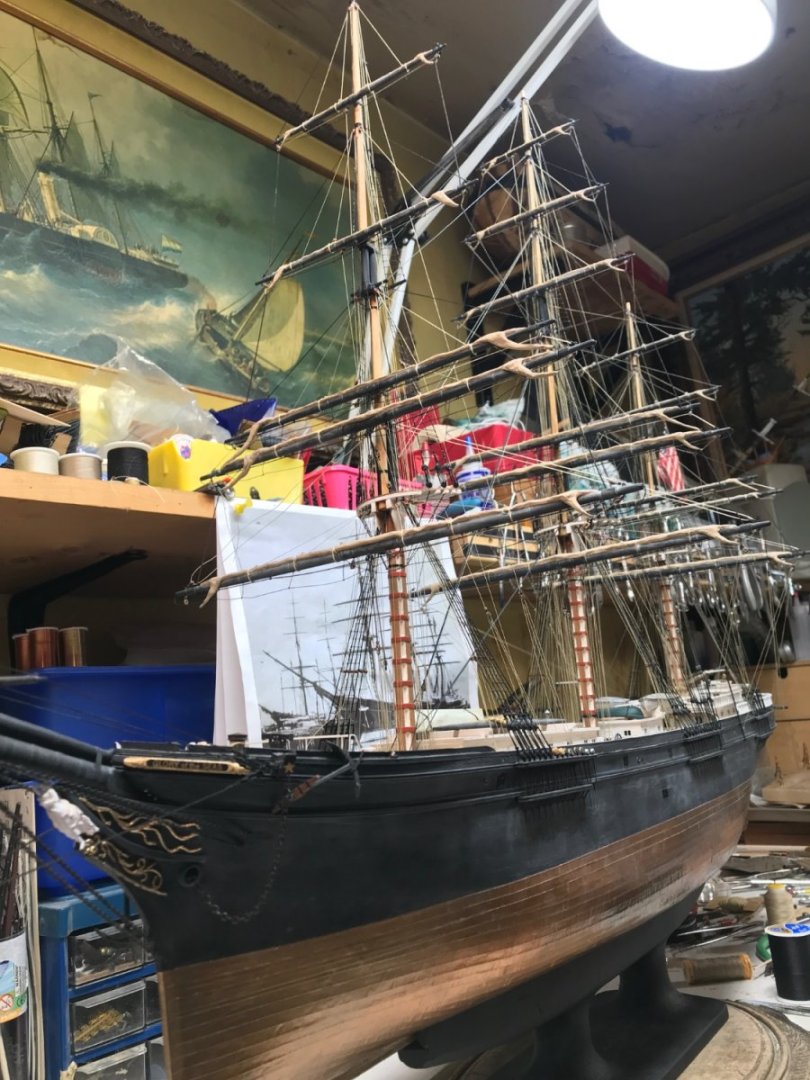
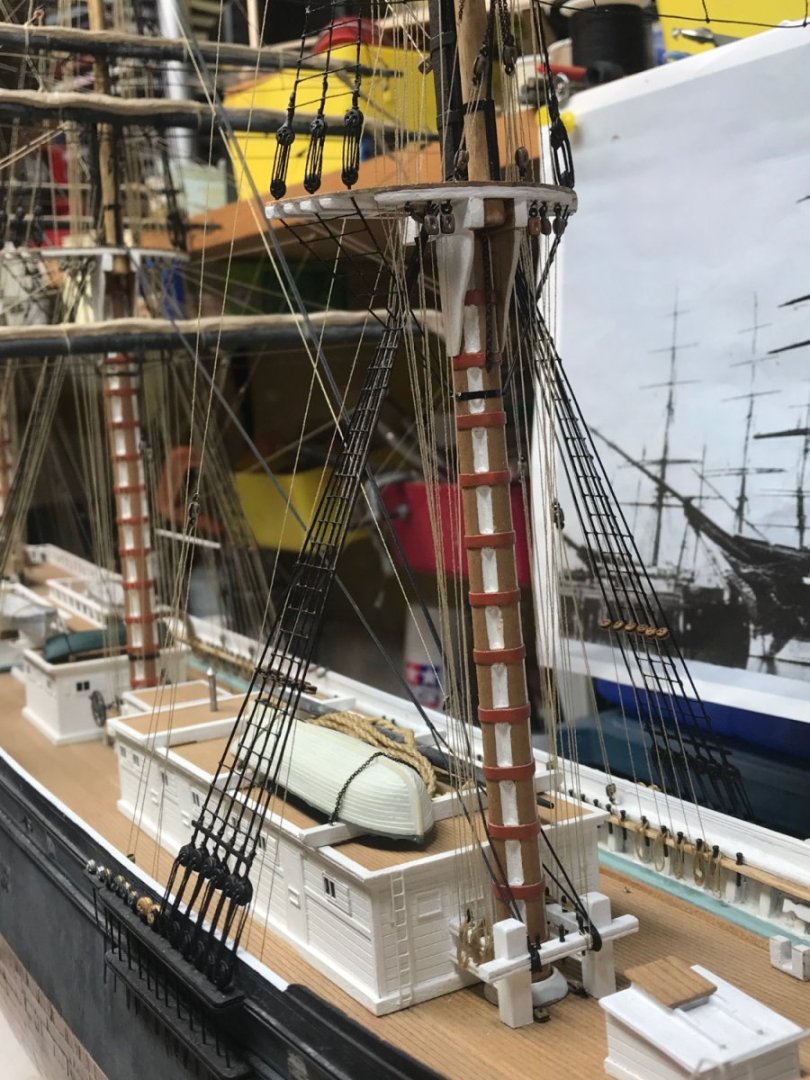
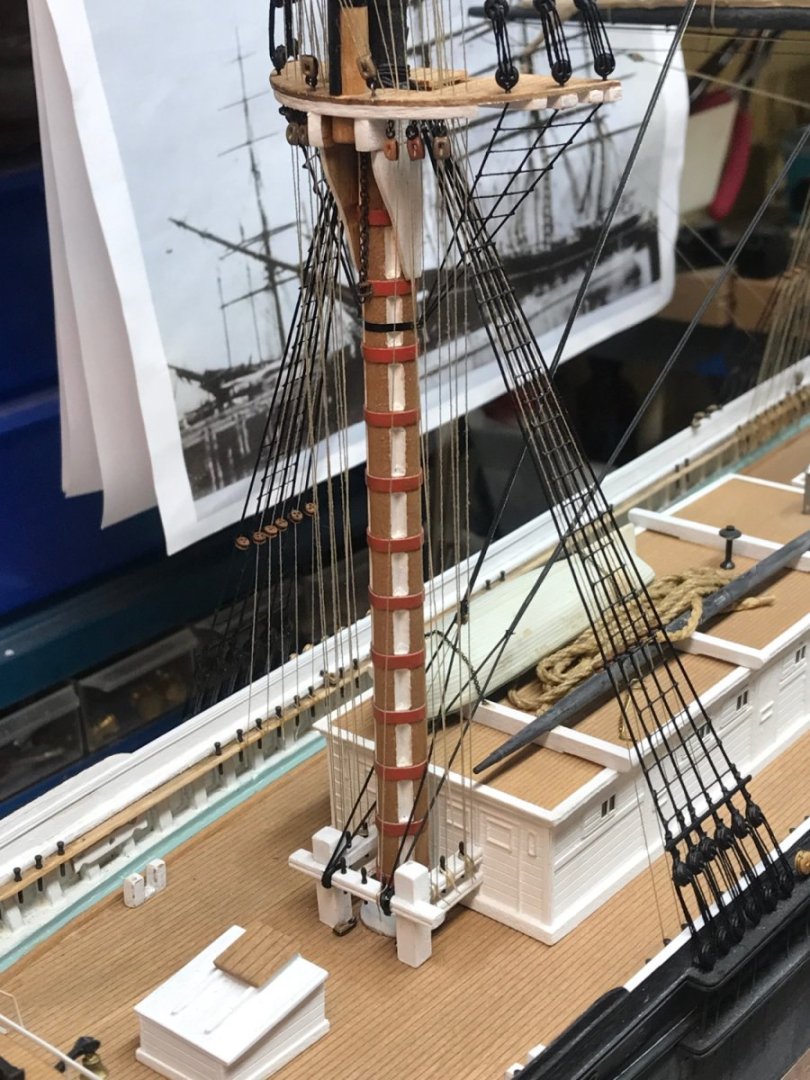
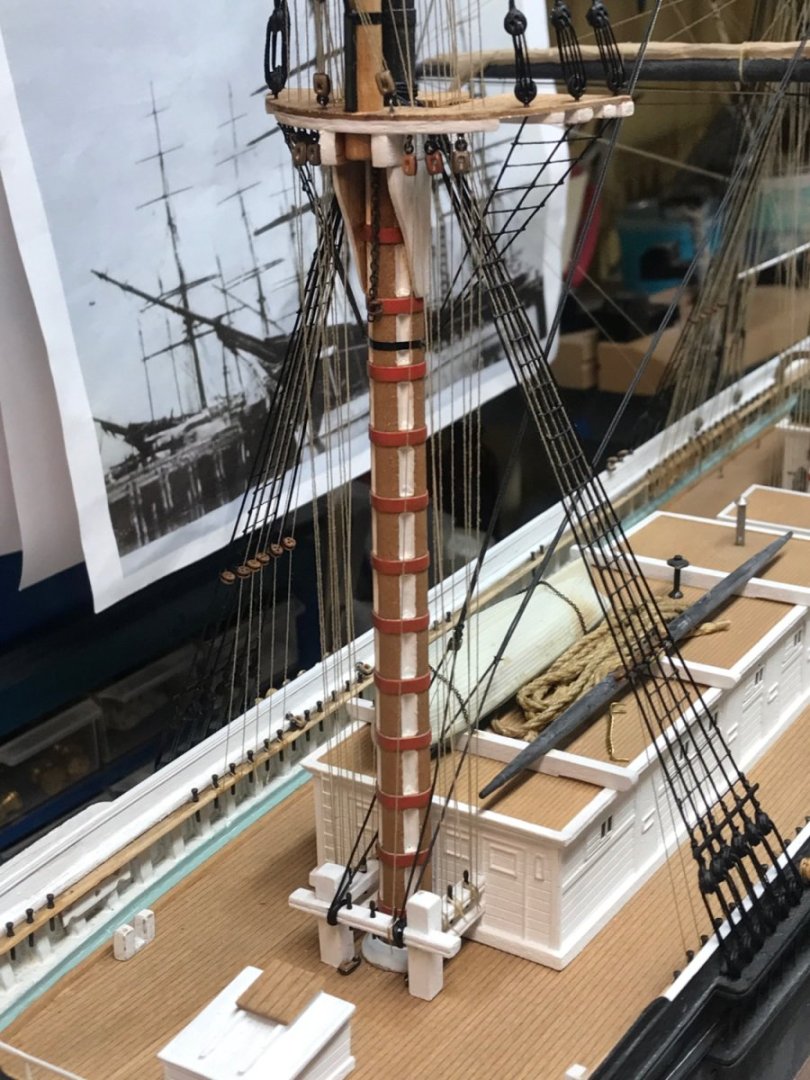
Adding the forstay. Now that the main yard for the foremast is hung and rigged, I can go ahead and add all the jib stays at this time…..because all of their halliards and downhauls need to belayed aft of the fore mast. No better time to act now then to wait till all the backstays are installed and in the way. Rob

- 3,560 replies
-
- 2
-
-
- clipper
- hull model
- (and 2 more)
-
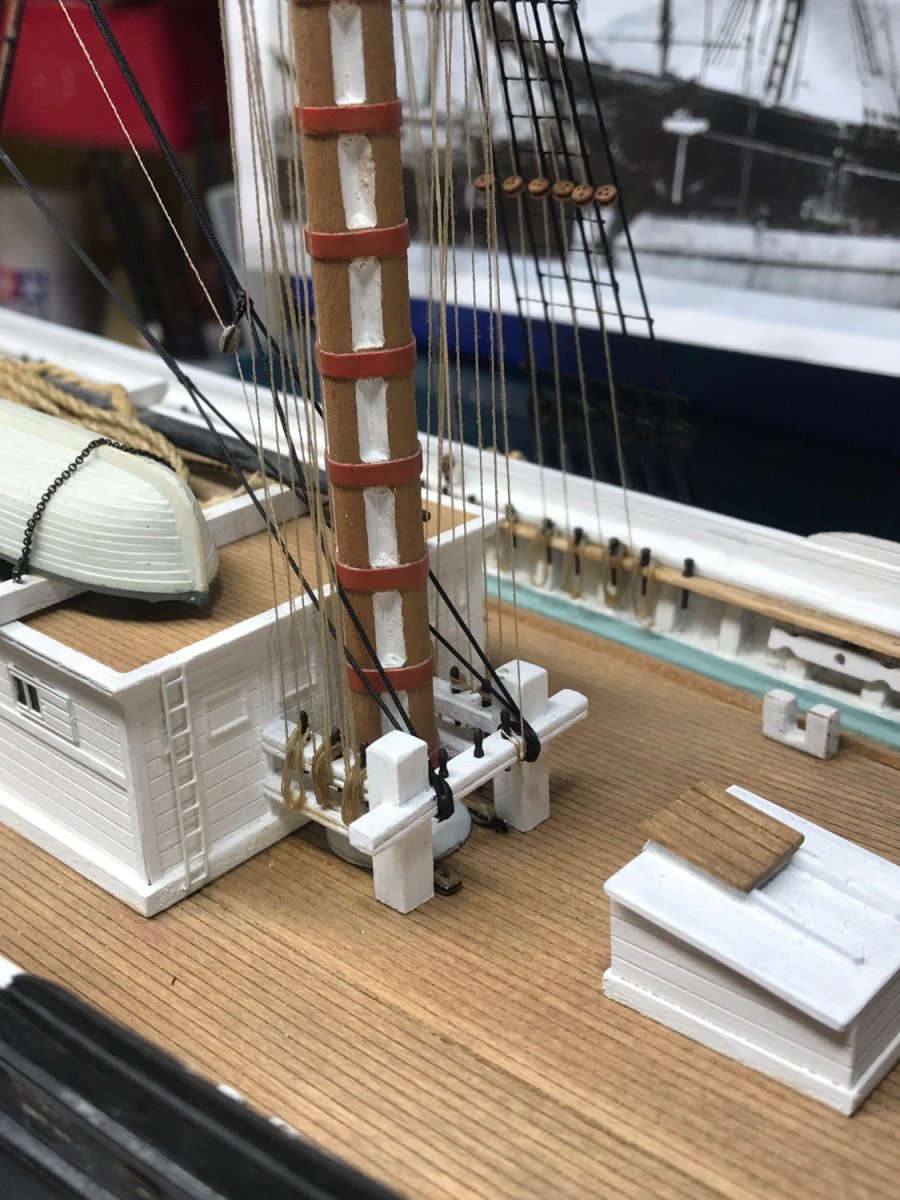
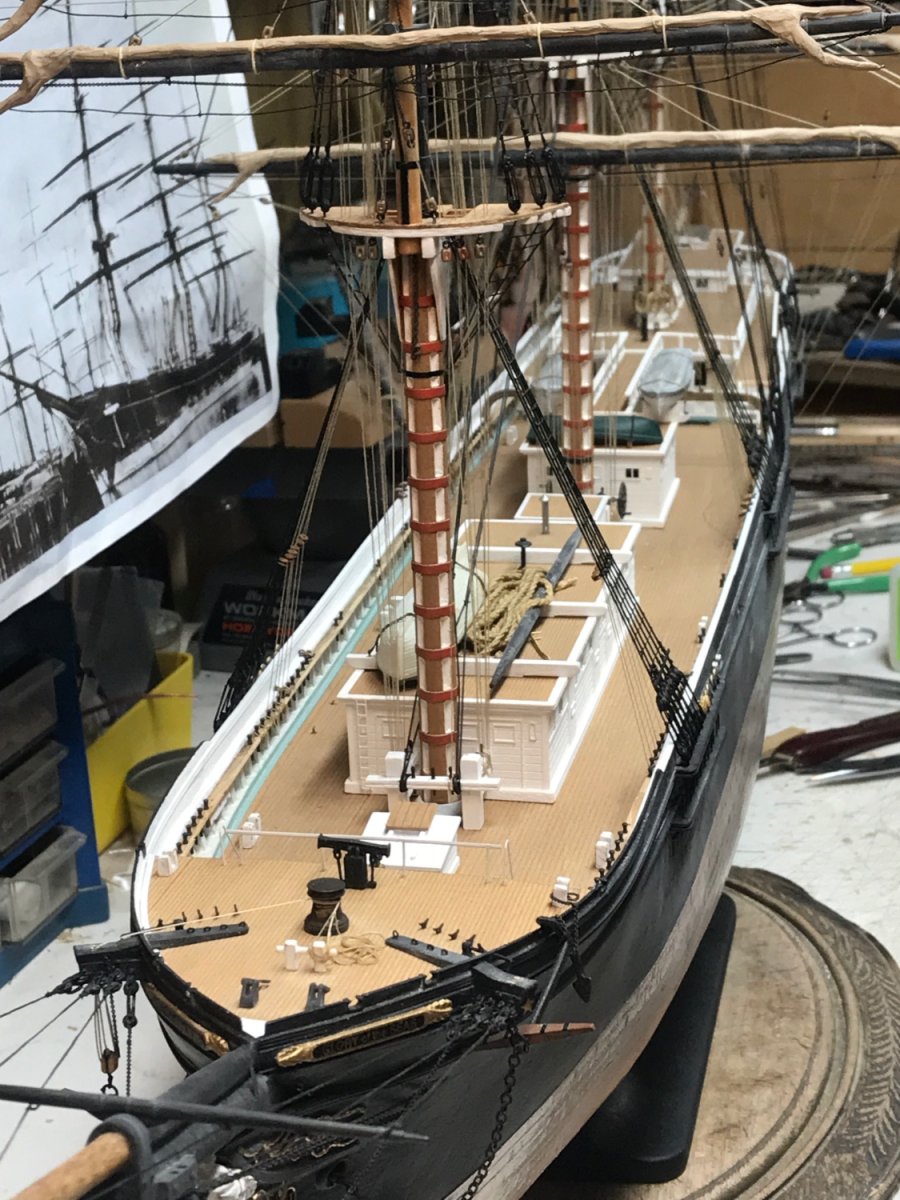
Now the real work comes….. adding the bunt lines, rigging and belaying them , along with all the other rigging. Need to finish the starboard lift and lower topsail sheet. Rob


- 3,560 replies
-
- 3
-
-
- clipper
- hull model
- (and 2 more)
-
Thanks Nic. That would have worked. I also recall EDT using tissue paper. I just didn’t like how the paper I used, crinkled as it folded around the hull, unlike your straight example on the stays. So I simply “opted out”. Rob
- 3,560 replies
-
- 1
-
-
- clipper
- hull model
- (and 2 more)
-
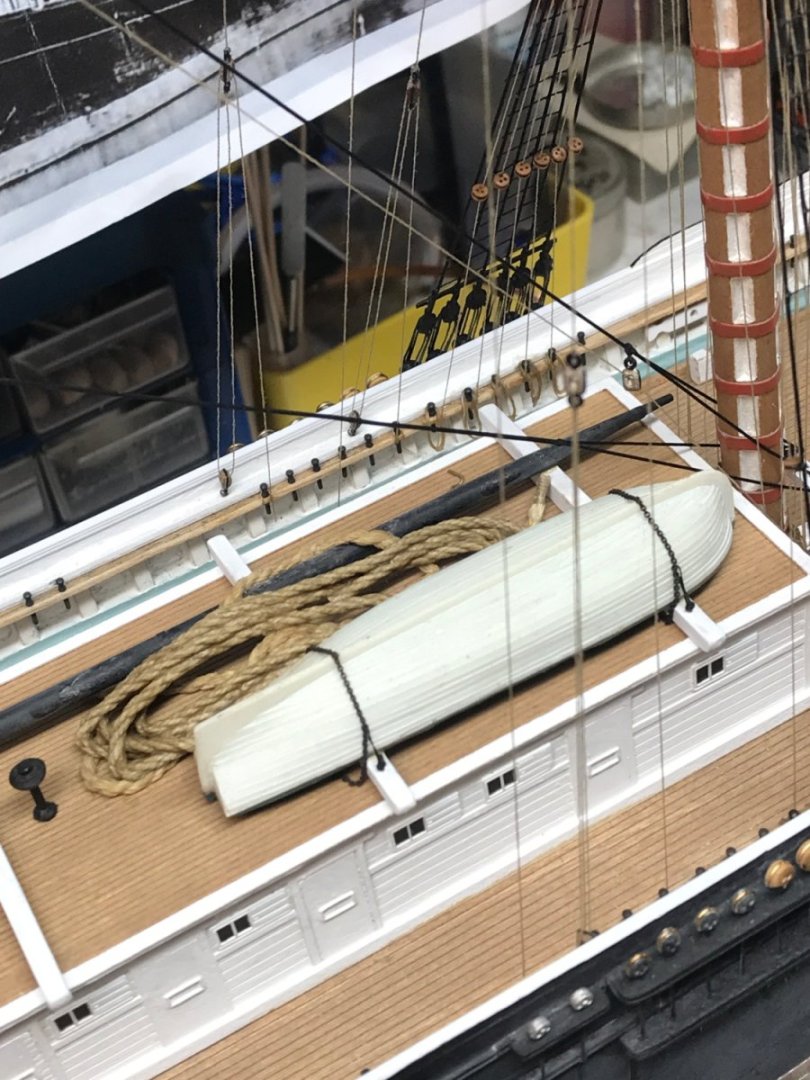
Pat , good observation. Those chains would most likely be encased in a canvas sleeve. I tried several attempts, but none were acceptable or truly convincing, so I opted to leave the chain virgin. Knowing the issue was an extremely minor one. Rob
- 3,560 replies
-
- 1
-
-
- clipper
- hull model
- (and 2 more)
-
That’s a good solid way….but if the eye bolt was horizontal, you could easily fit another next to it. With the eyebolt vertical the futtock shrouds will have to lay upon one another, creating a tight situation. Rob
- 481 replies
-
- 1
-
-
- Cutty Sark
- Revell
- (and 2 more)
-
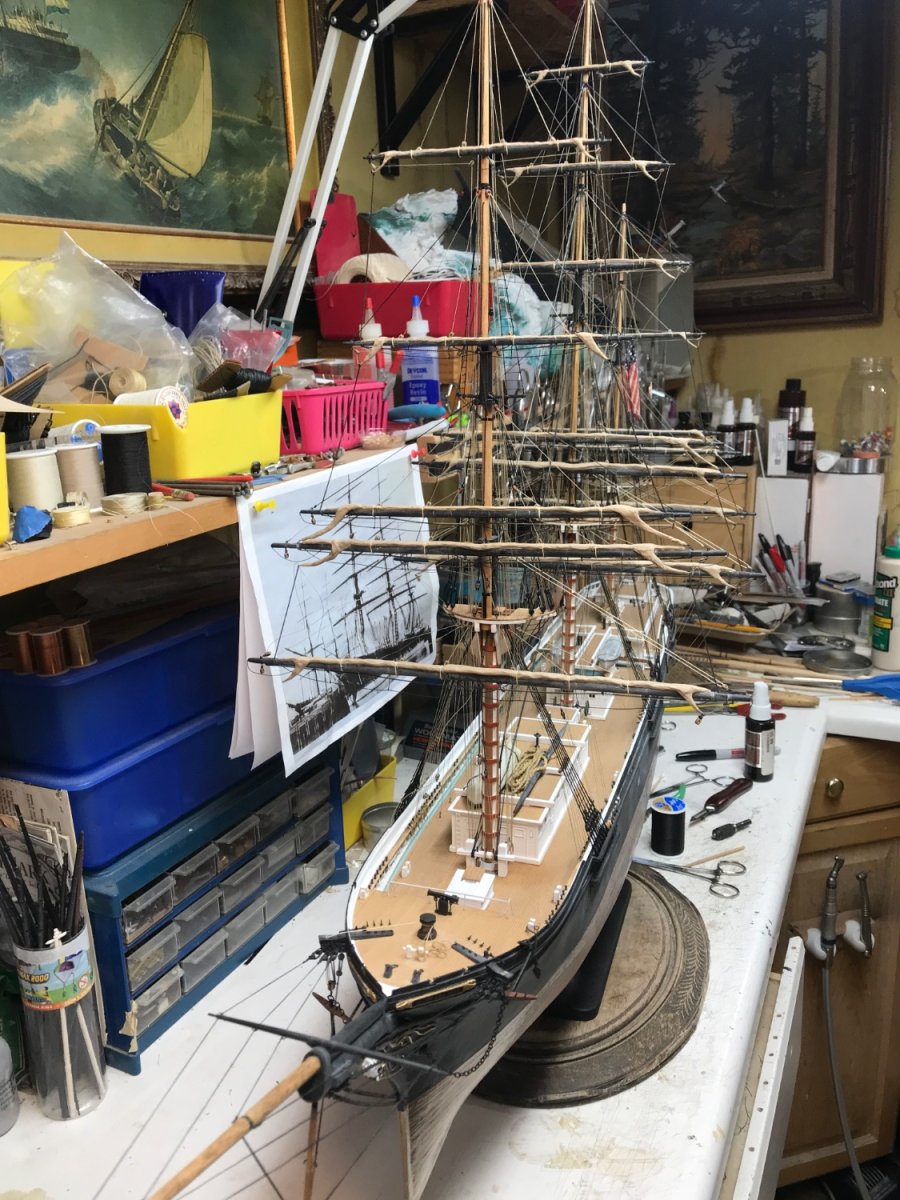
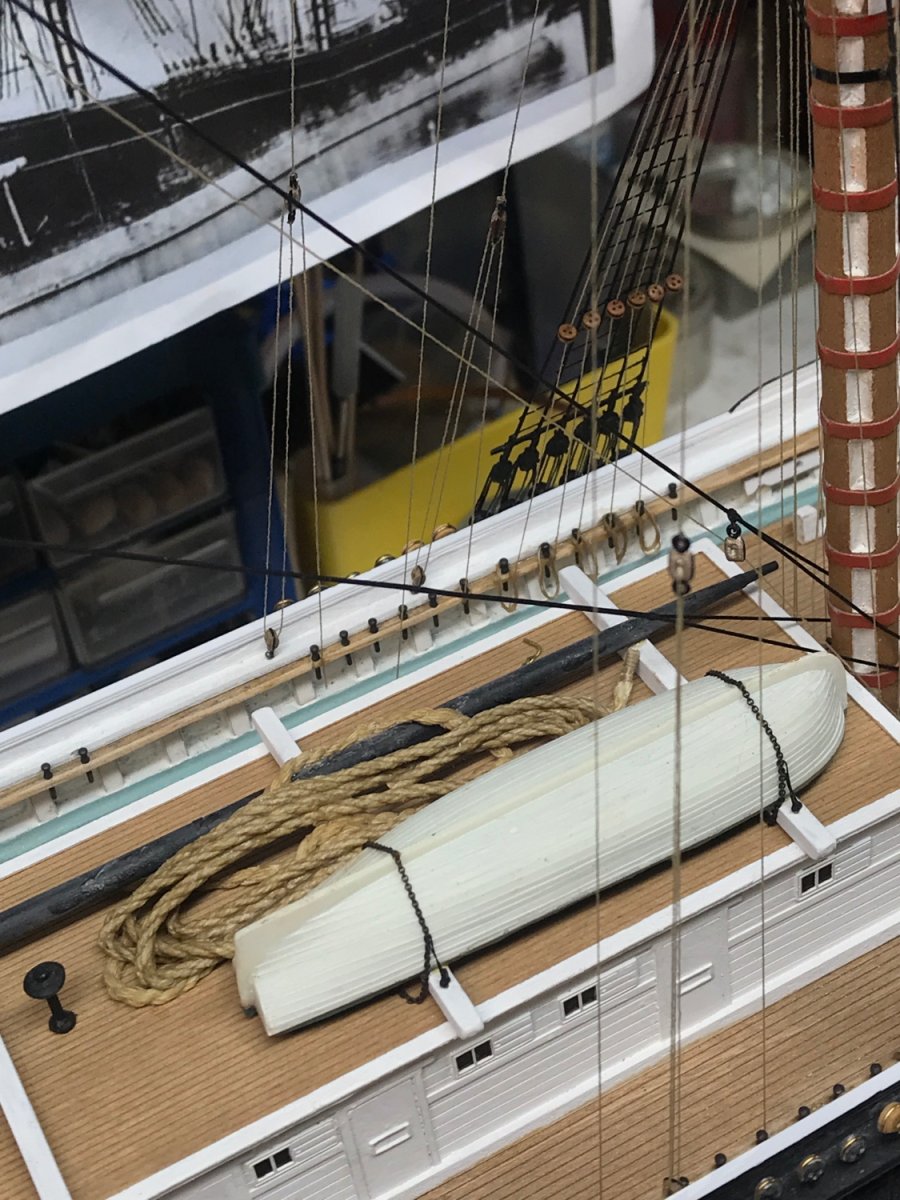
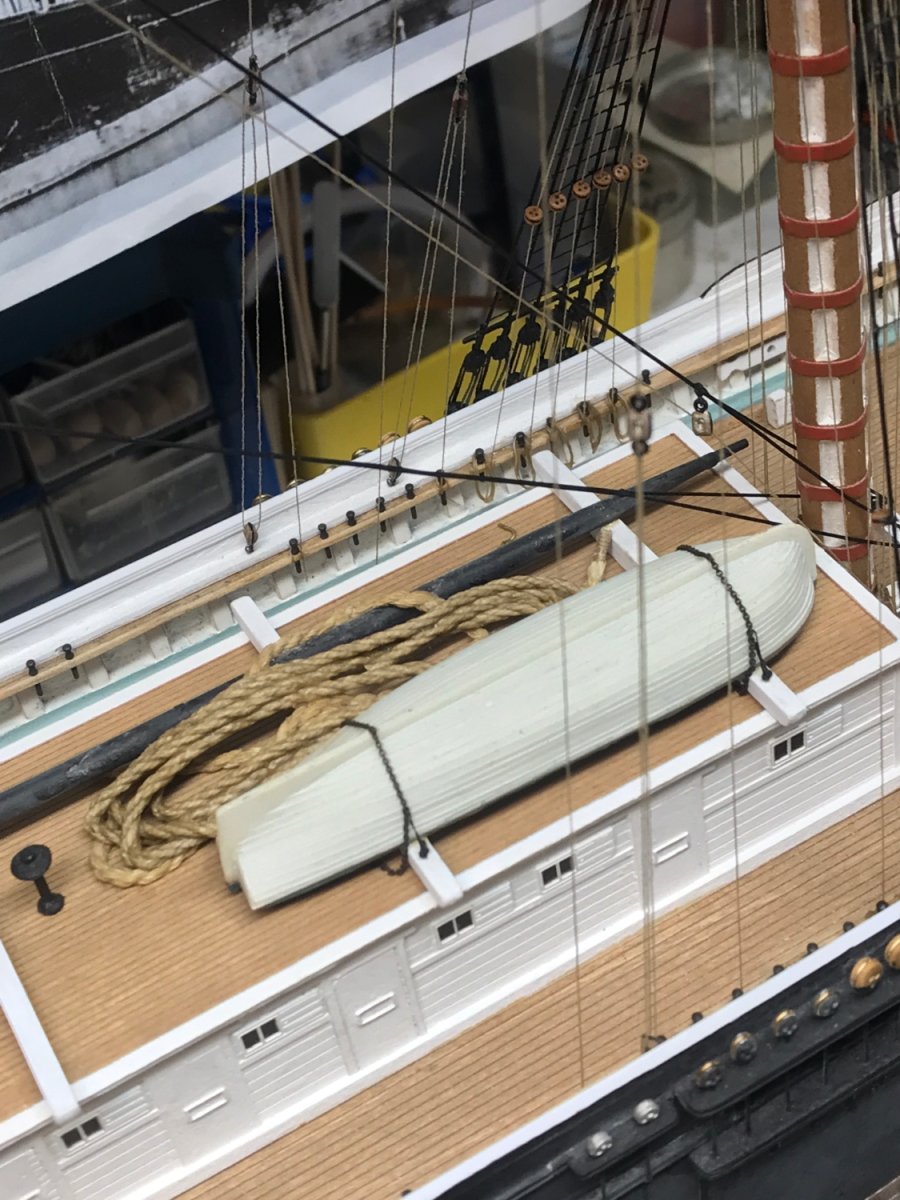
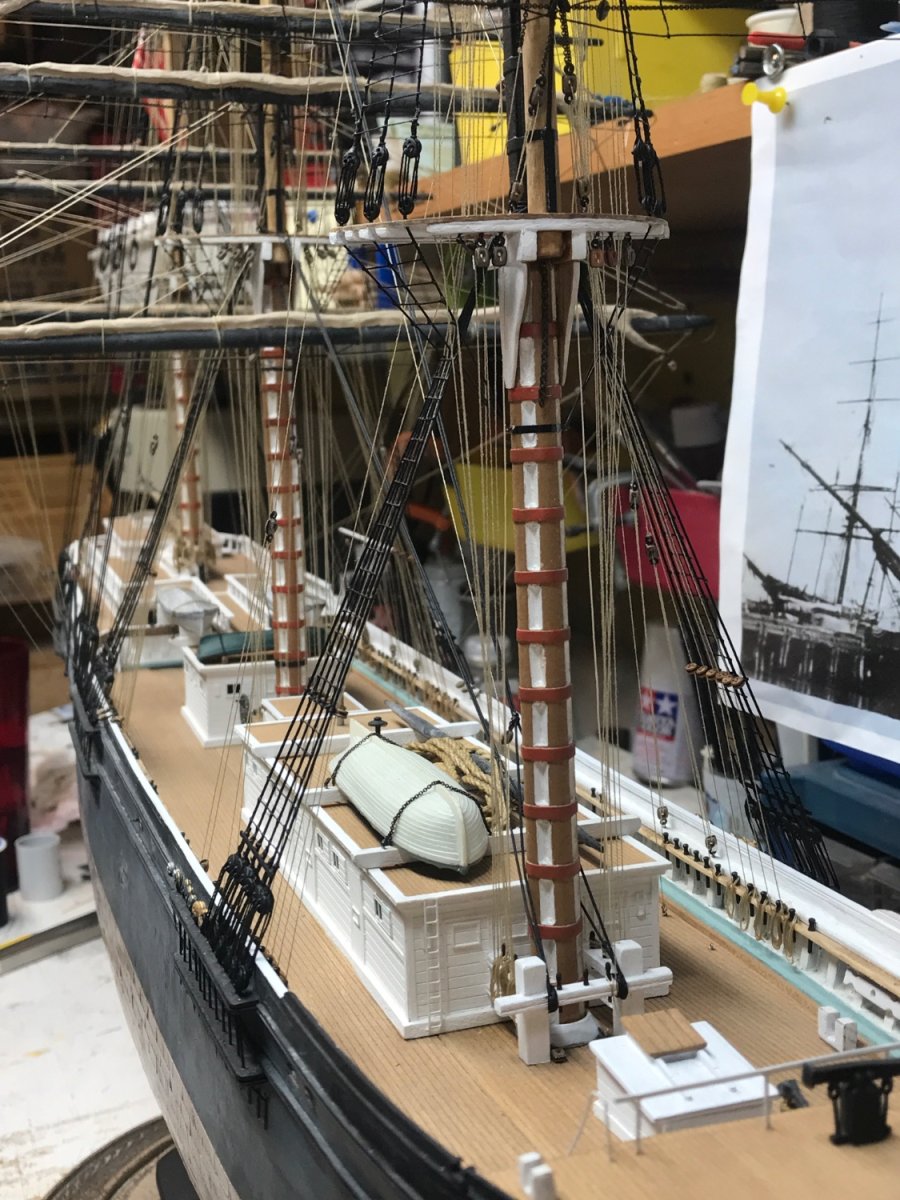
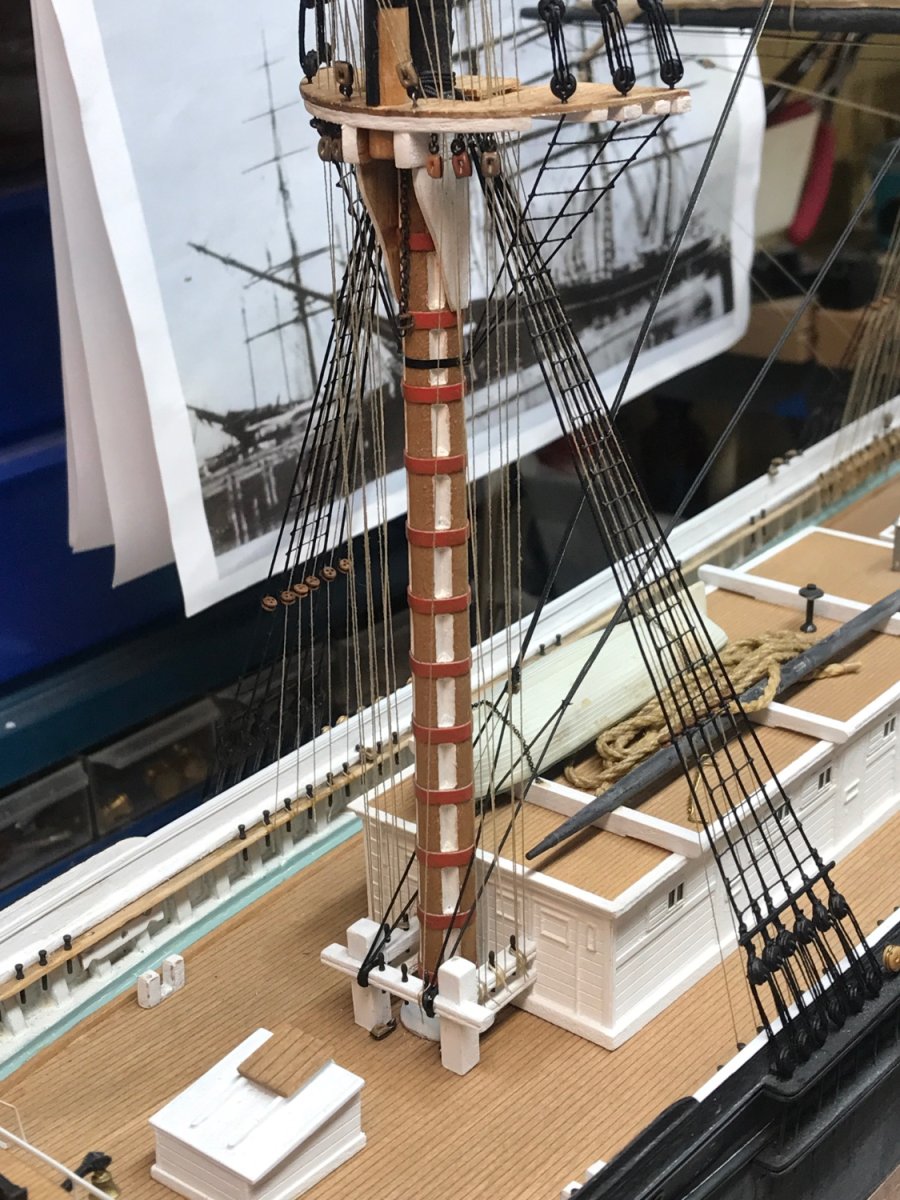
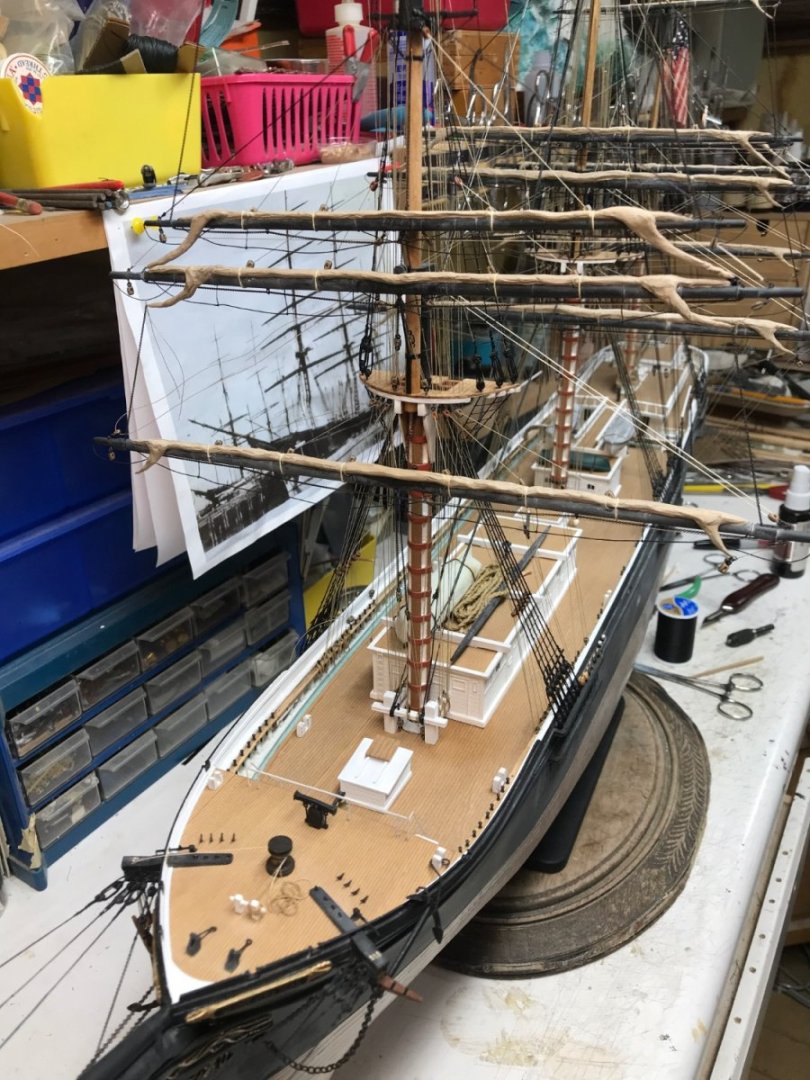
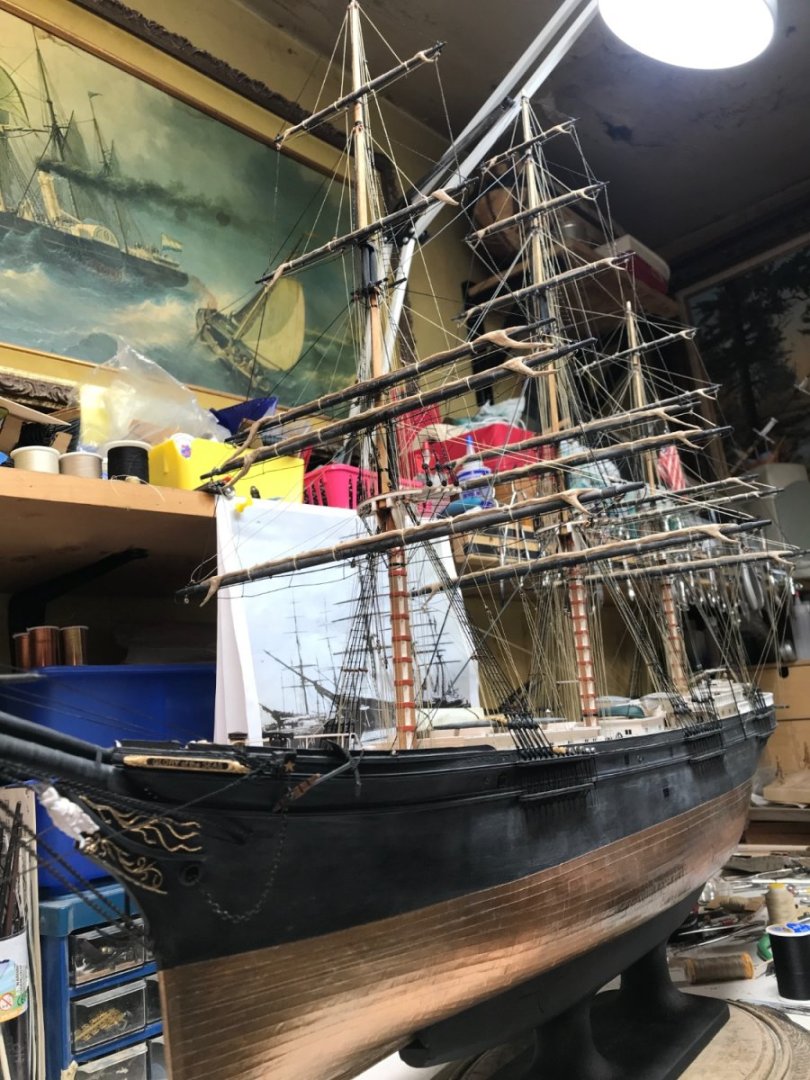
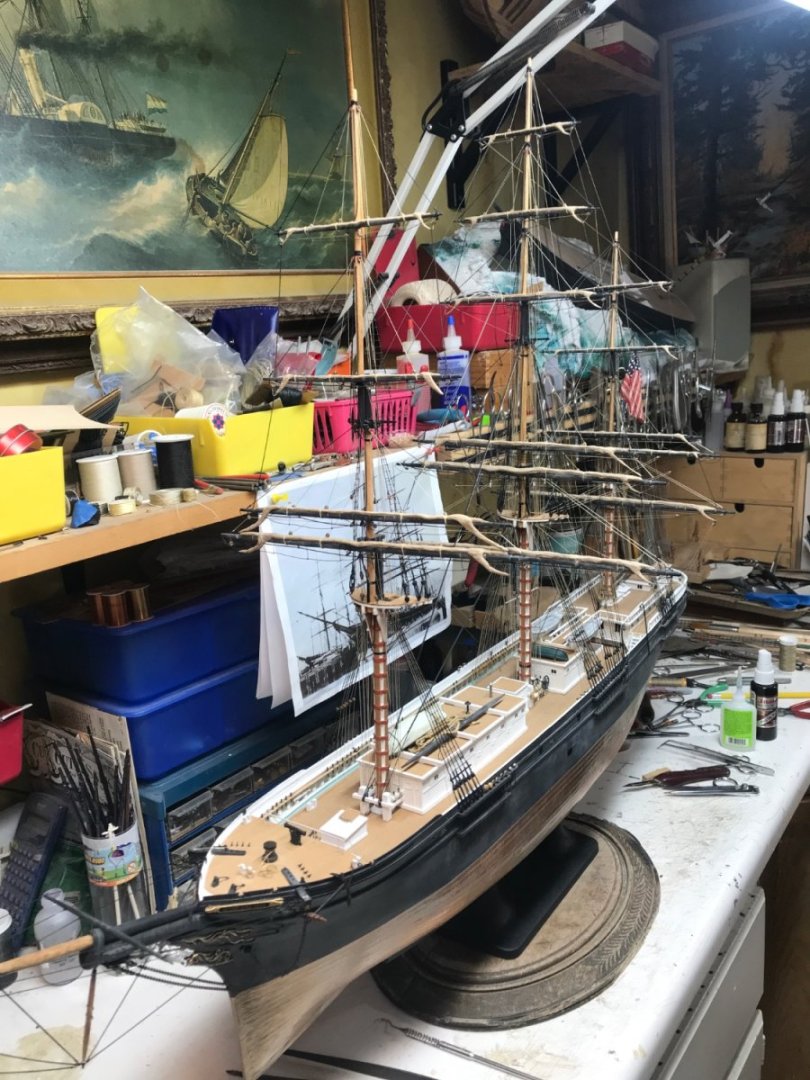
Finished rigging the halliards and their purchases. And added some rope coils. Things are getting pretty complex and busy. Rob


- 3,560 replies
-
- 4
-
-

-
- clipper
- hull model
- (and 2 more)
-
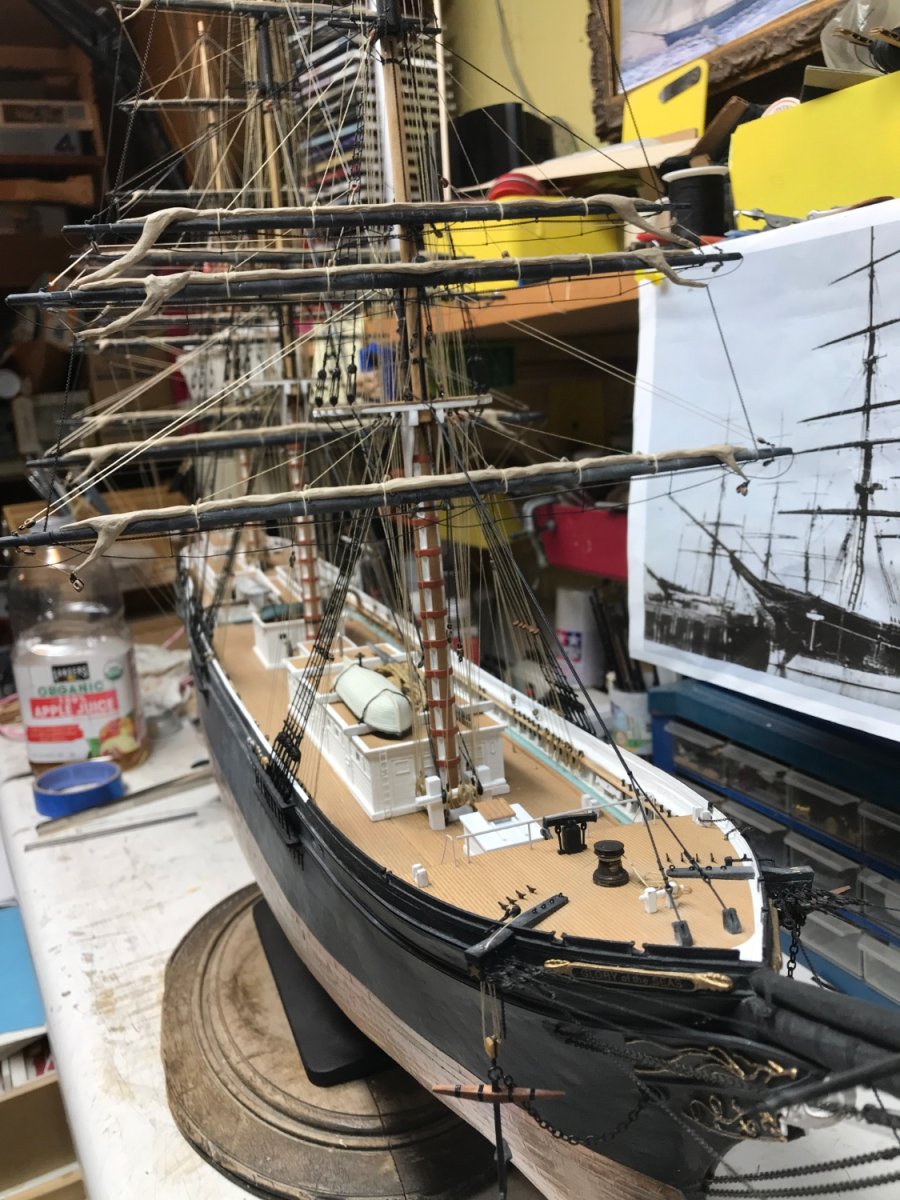
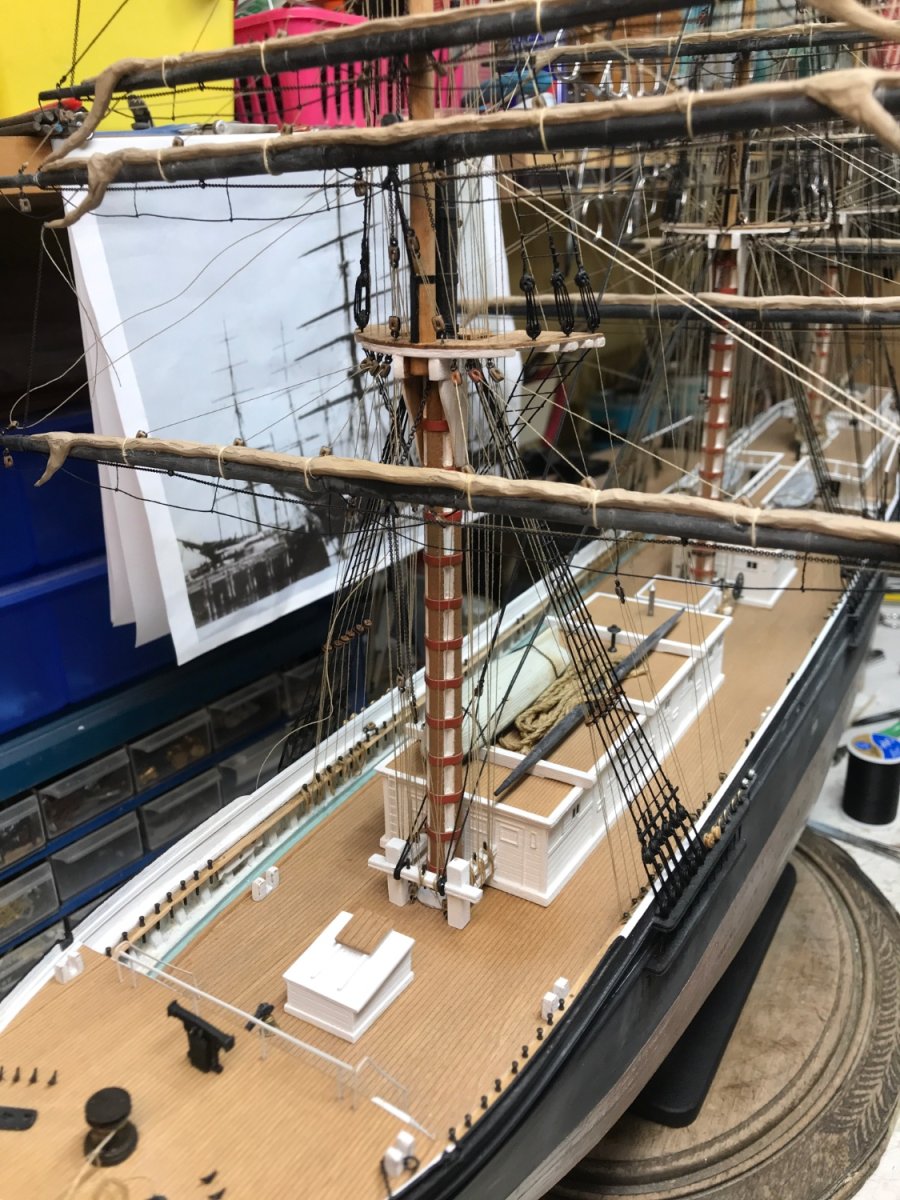
Worked on finishing up the starboard shrouds and ratlines. Then I rigged the bunt lines through their fair leads and to belay pins. Still need to add road coils. Next will be to rig the gin block lifts and their purchases…..before I begin the backstays. Rob

- 3,560 replies
-
- 2
-
-
- clipper
- hull model
- (and 2 more)
-
It appears many of us on these pages juggle many hobbies. I too work on my HO power and rolling stock....along with machining and building telescopes...and of course in the shipyard working on my clippers. Gardening and building miniature lighthouse dioramas rounds out the major hobby list. I need more hours in the day.....how to do that without giving up my 8 hours of sleepful bliss.....? More power to ya. Rob
- 481 replies
-
- 1
-
-
- Cutty Sark
- Revell
- (and 2 more)
-
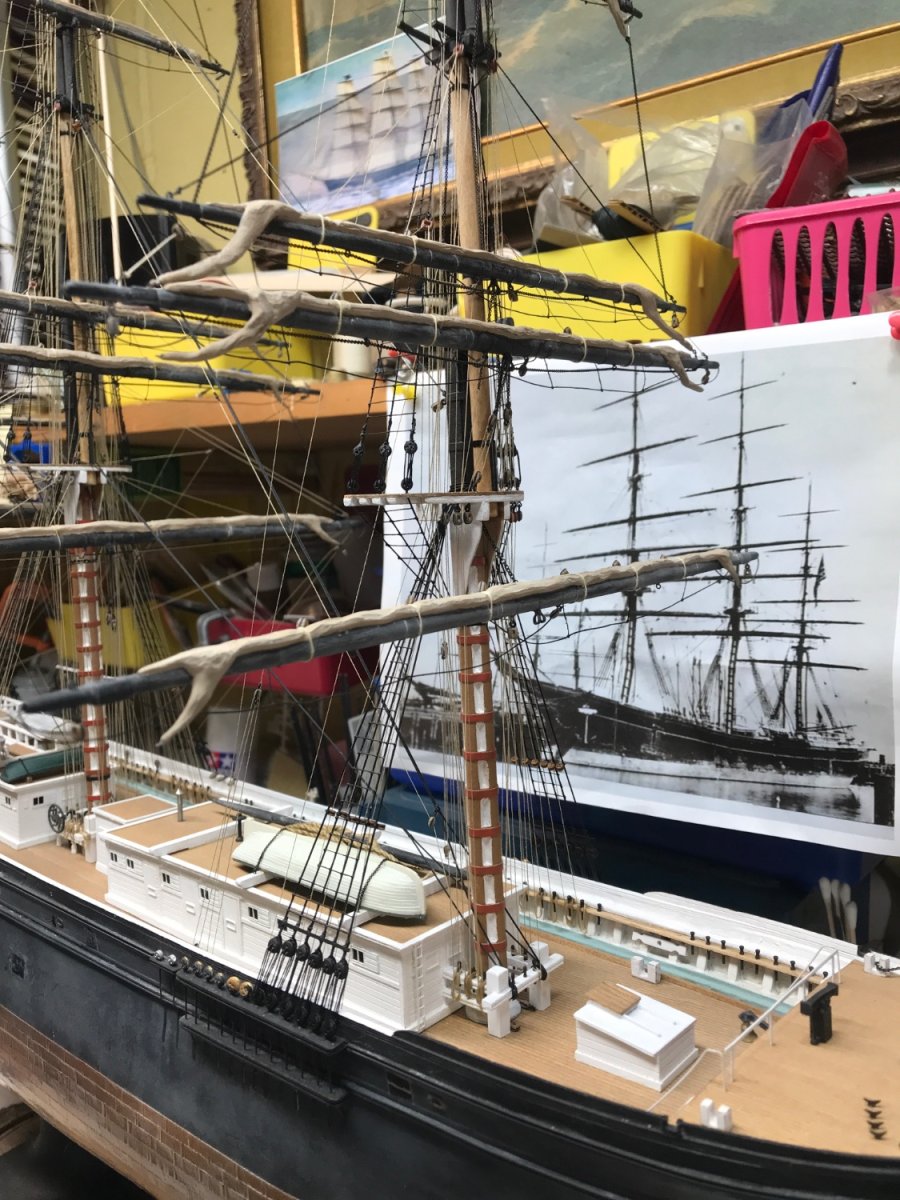
Its a wonderful carving and it took great skill.....I have nothing but respect for the carver....but.....(In all aspects), she's has a very disproportional body. I'm sorry to say. I posted updates last night, but somehow my post never materialized. I finished up the starboard shrouds/ratlines and added the fairleads and ran all the buntlines and belayed them. I'll repost those images when I get home. Rob
- 3,560 replies
-
- 2
-
-
- clipper
- hull model
- (and 2 more)
-
Doing your proper research is important if not more so, if you want an accurate model. I have 12 years of personal research coupled with that of my cohorts and a lifetime dedicated by my friend Michael Mjelde....before I tackled fully scratch building my Glory of the Seas. I have been building clippers for over 50 years and the Revell CS 4 times.......and I had to begin at a steep curve, such as yourself. Study pays off and it will for you. Understanding the function of each line, brings greater accuracy to your build and greater confidence in your own skill, not to mention how a sailing ship as complex as a clipper functioned. Good luck. And enjoy and apply what you learn. Rb
- 481 replies
-
- 2
-
-
- Cutty Sark
- Revell
- (and 2 more)
-
Great solution George. Once you realized there is no rotation issues...your options for construction just opened up. Super results. Rob
-
No problem Rich. I fully appreciate your research. I read that myself and wondered about it. I chose not to paint them, based on, I could not find any corroborating evidence myself. Plus it was after the time period, I am building my Glory. So there is enough speculation and uncertainty, to disregard conclusively, that red was it’s color during my time period. Rob
-
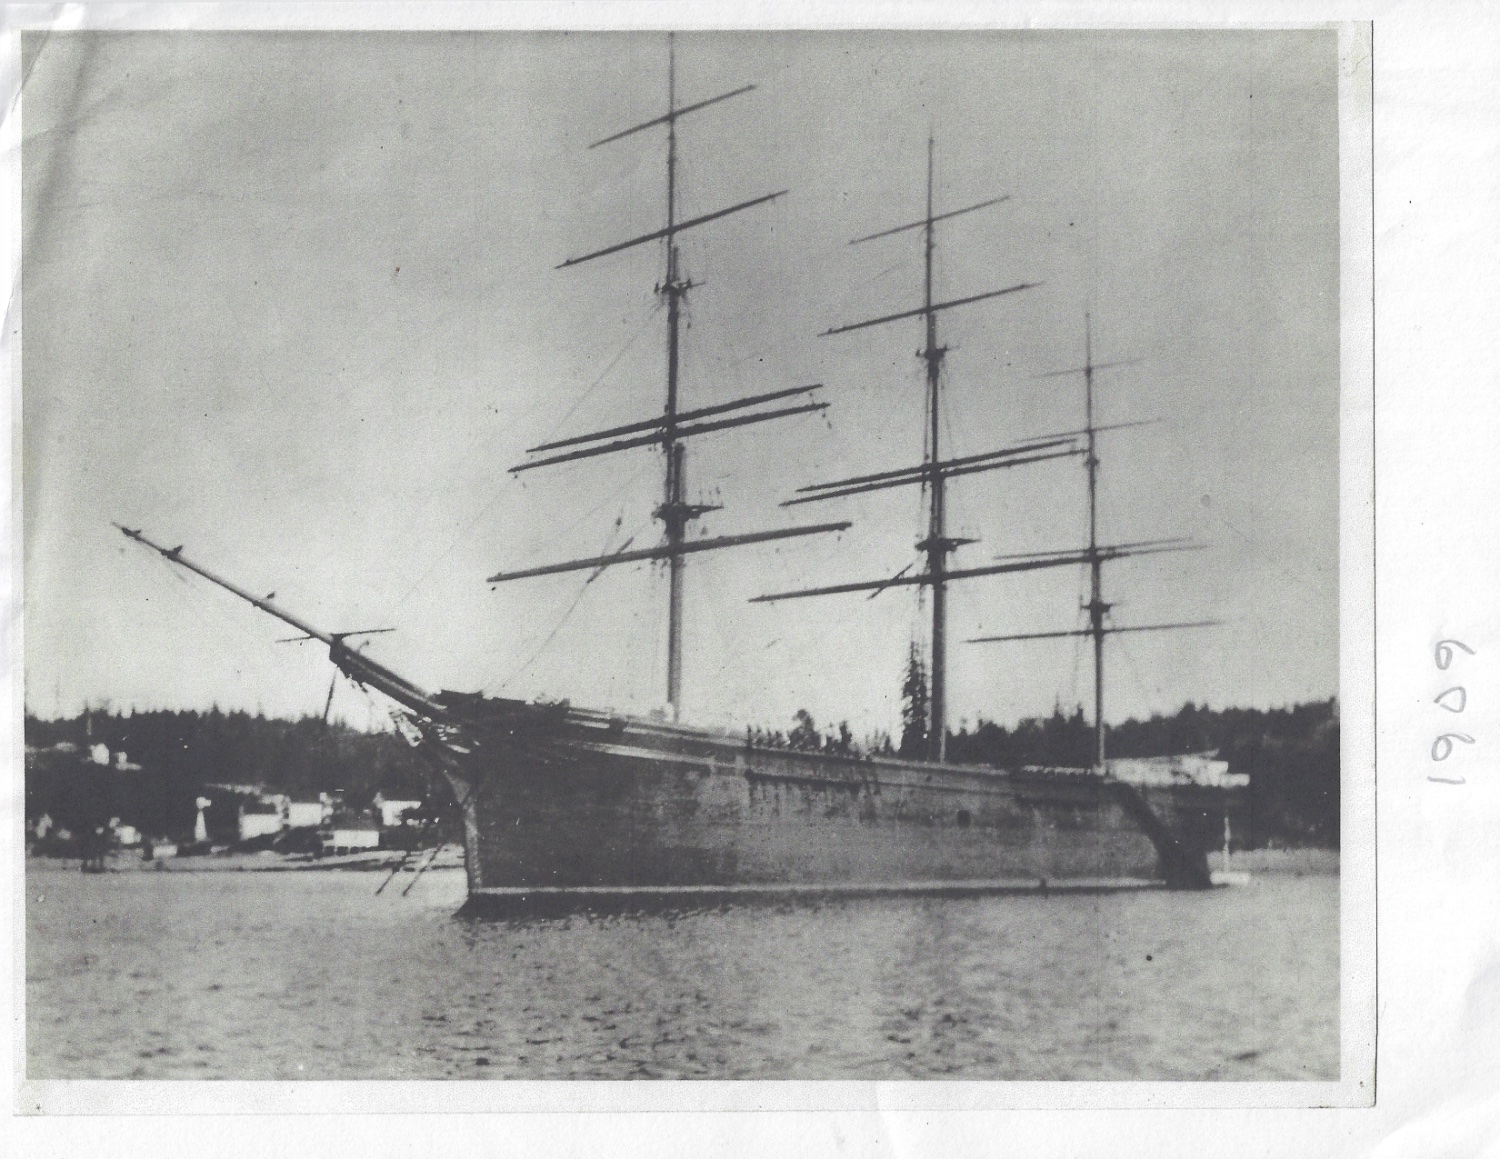
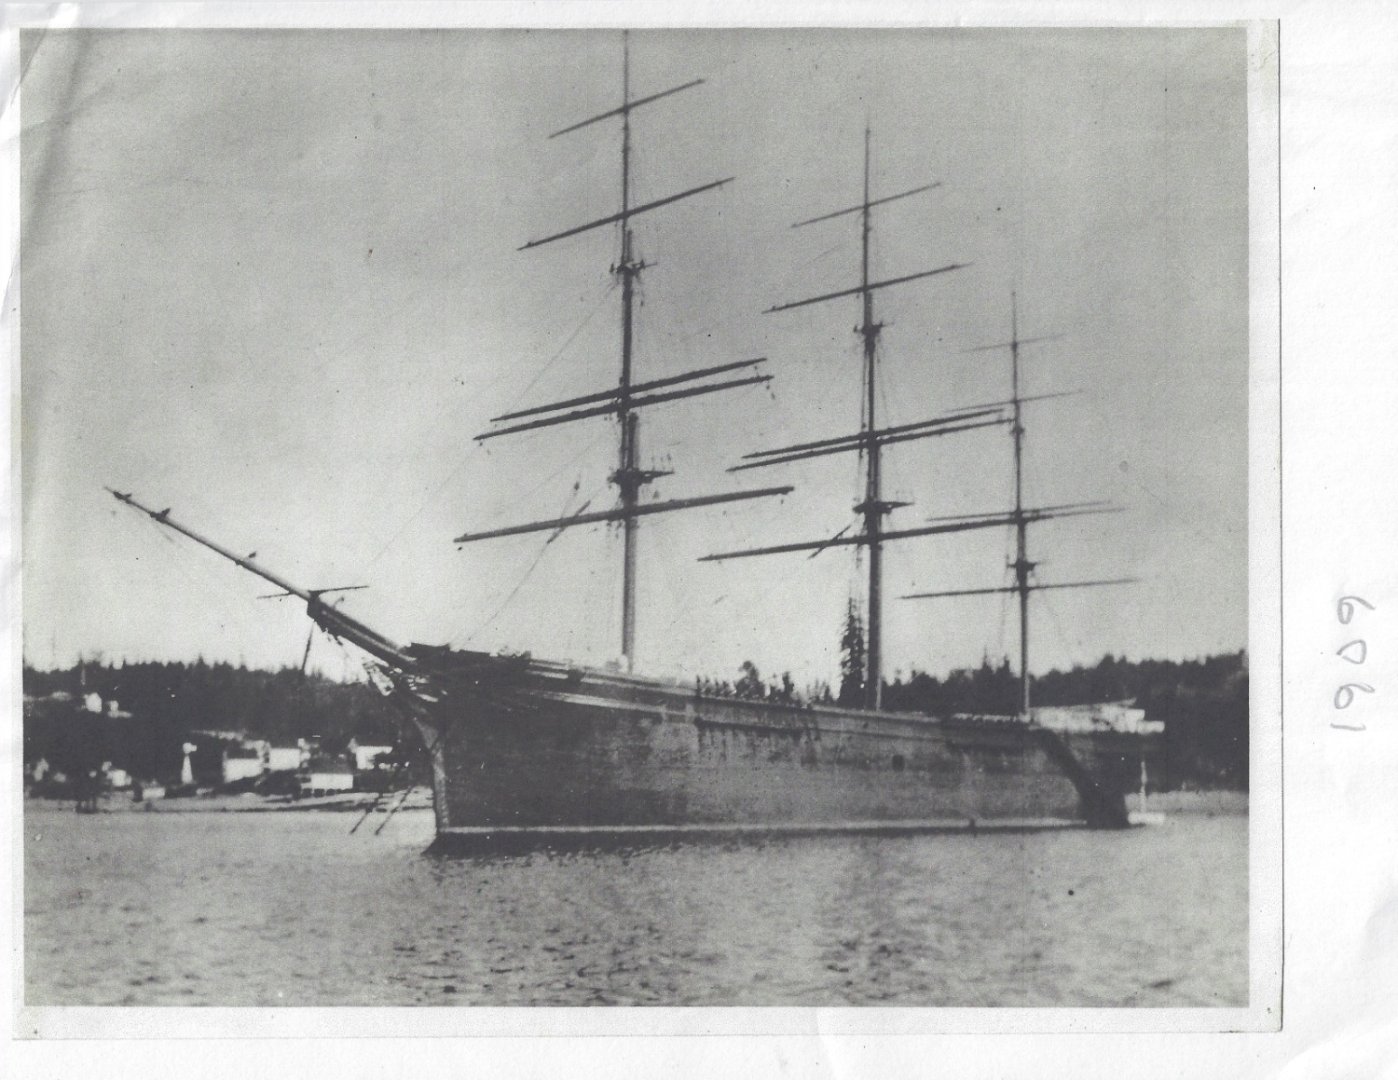
I think this is during the time she was brought back into service to serve as a troop transport. She surely is not as lofty as during the time period I’m modeling her. She’s riding high in the water too. Rob
-
A new image from Mike. Looks like this was Taken after her mast reduction.
- 3,560 replies
-
- 4
-
-
- clipper
- hull model
- (and 2 more)
-
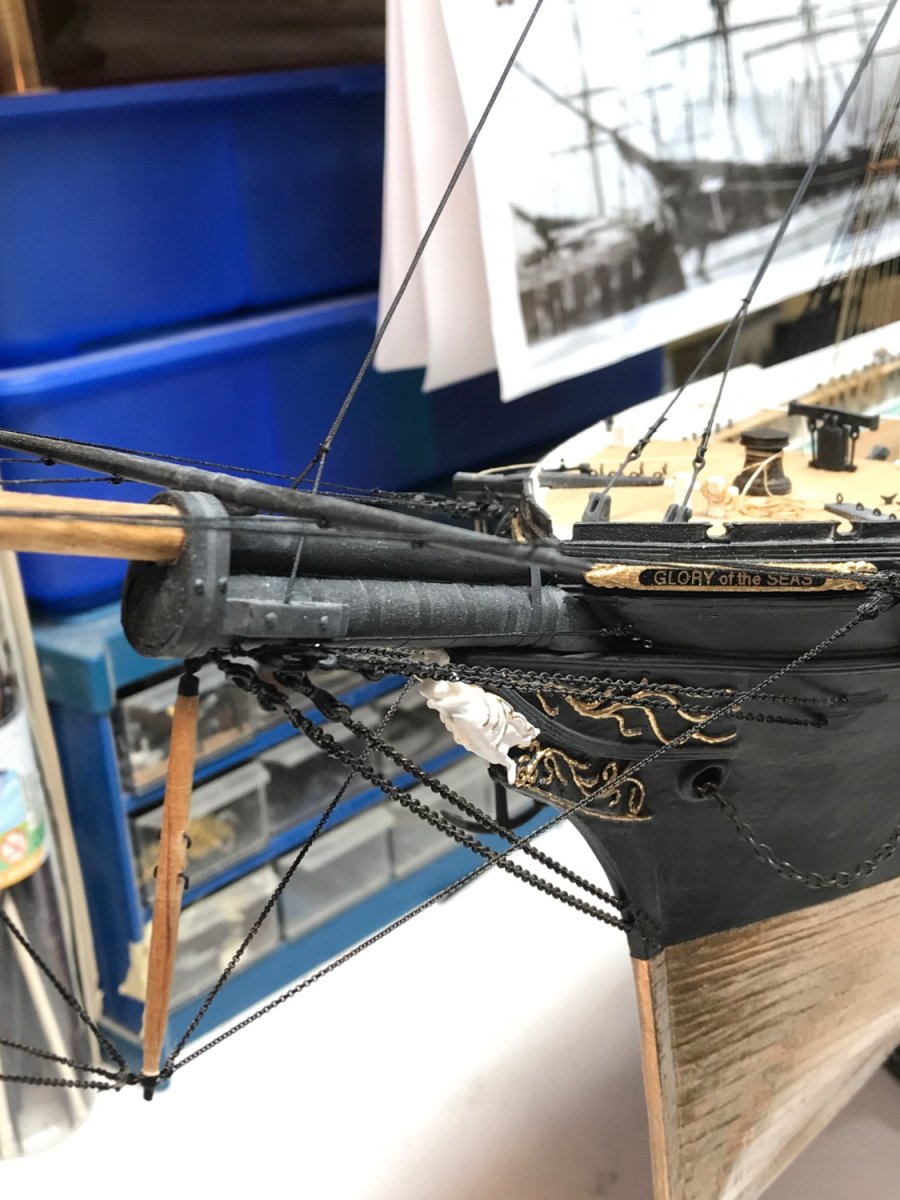
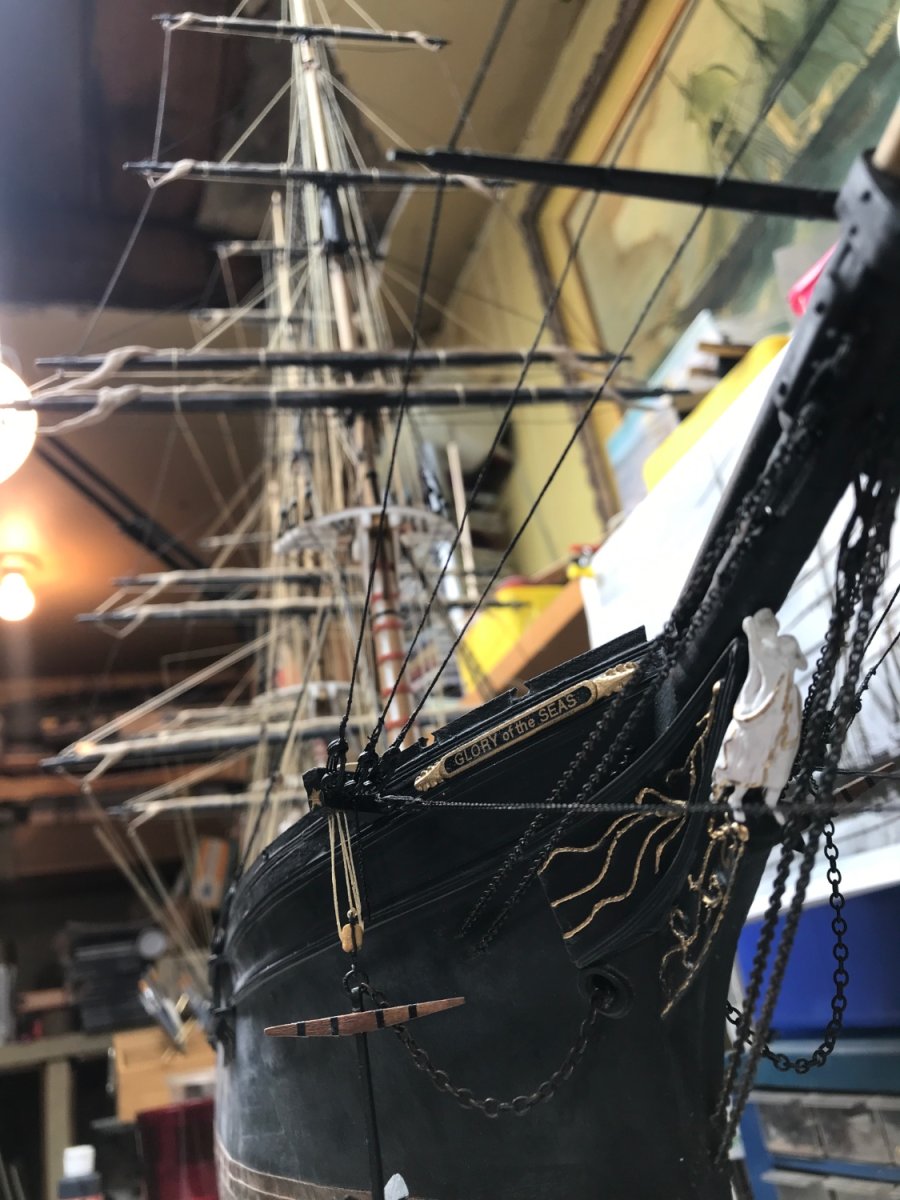
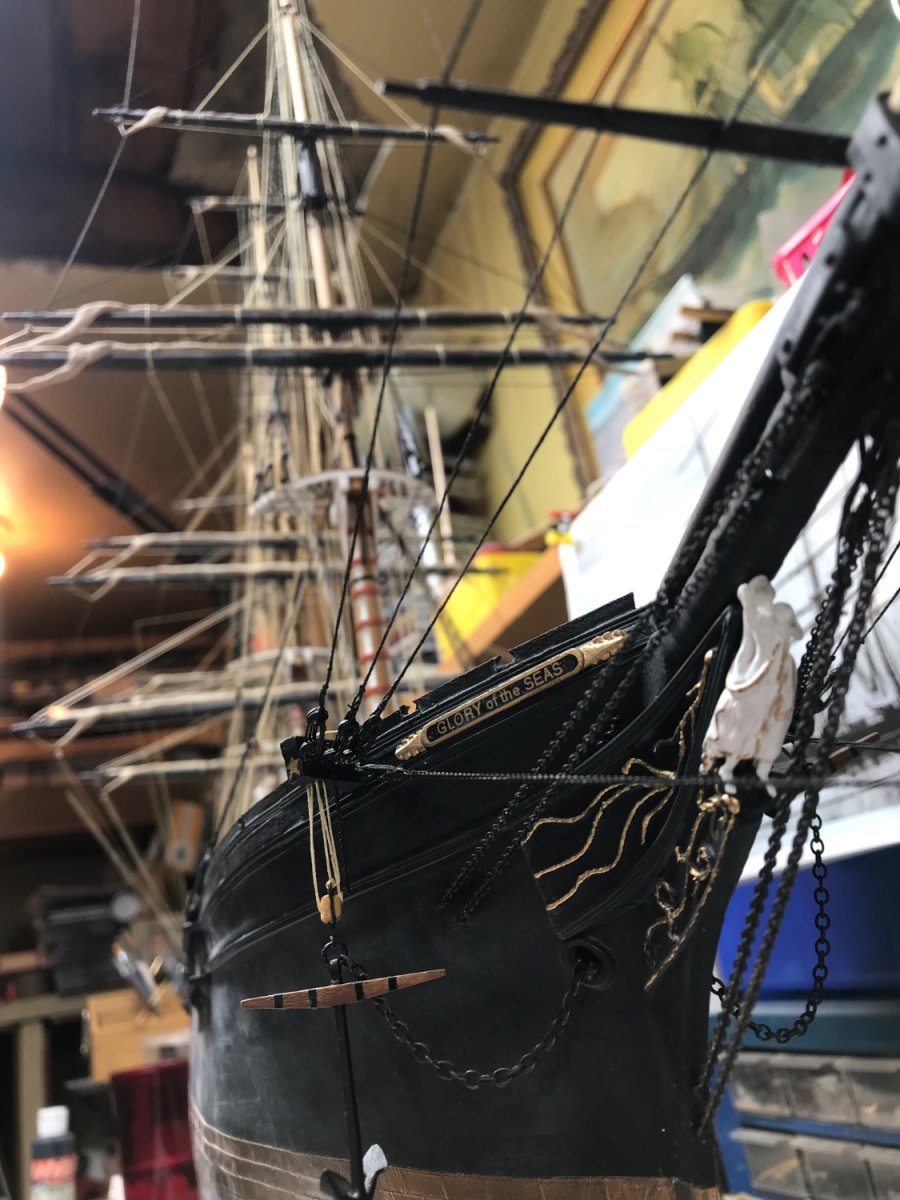
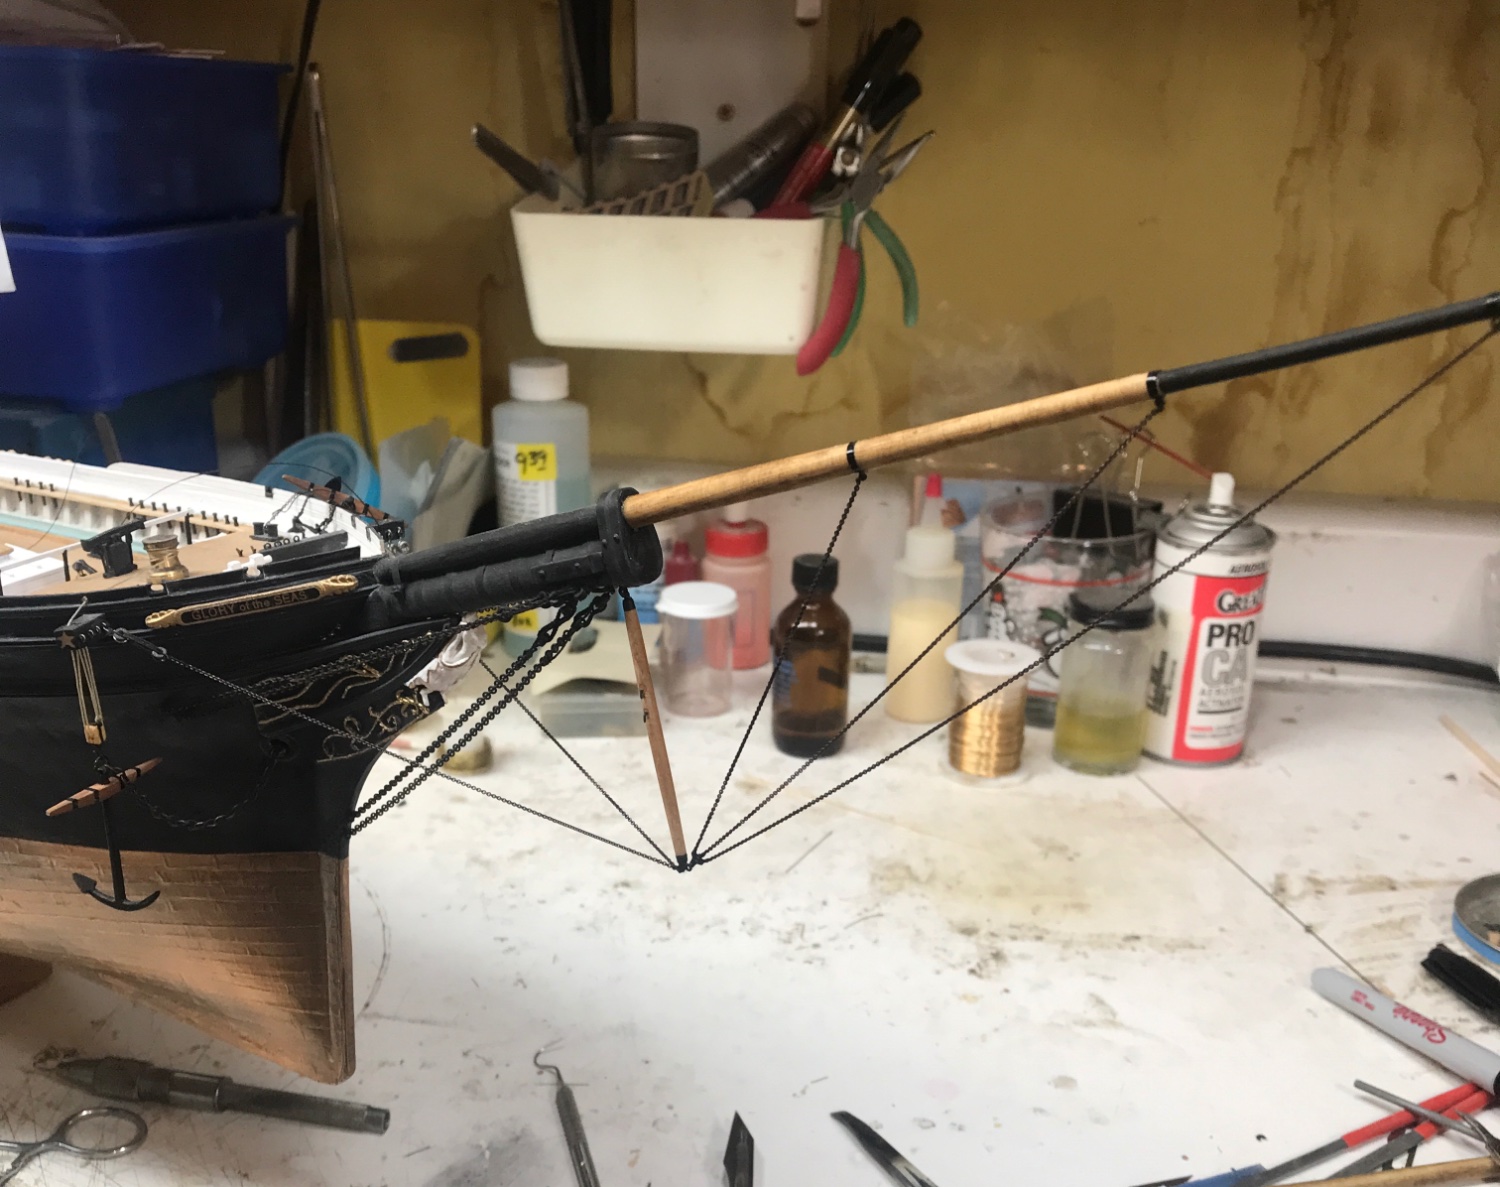
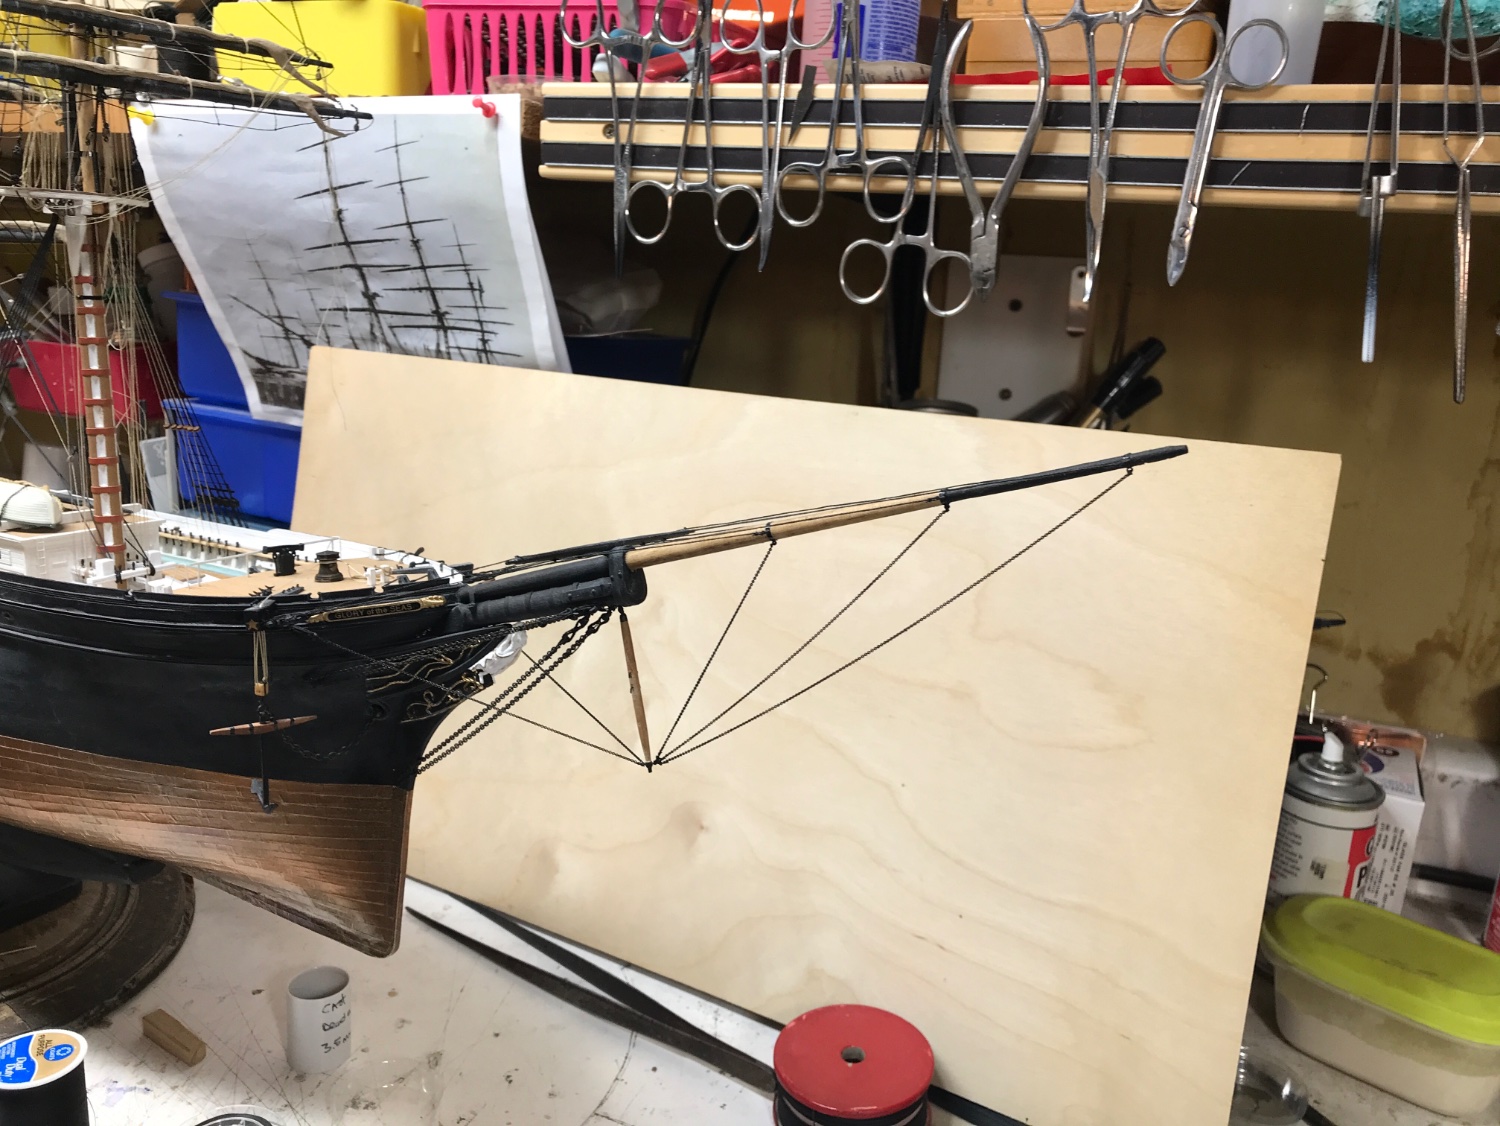
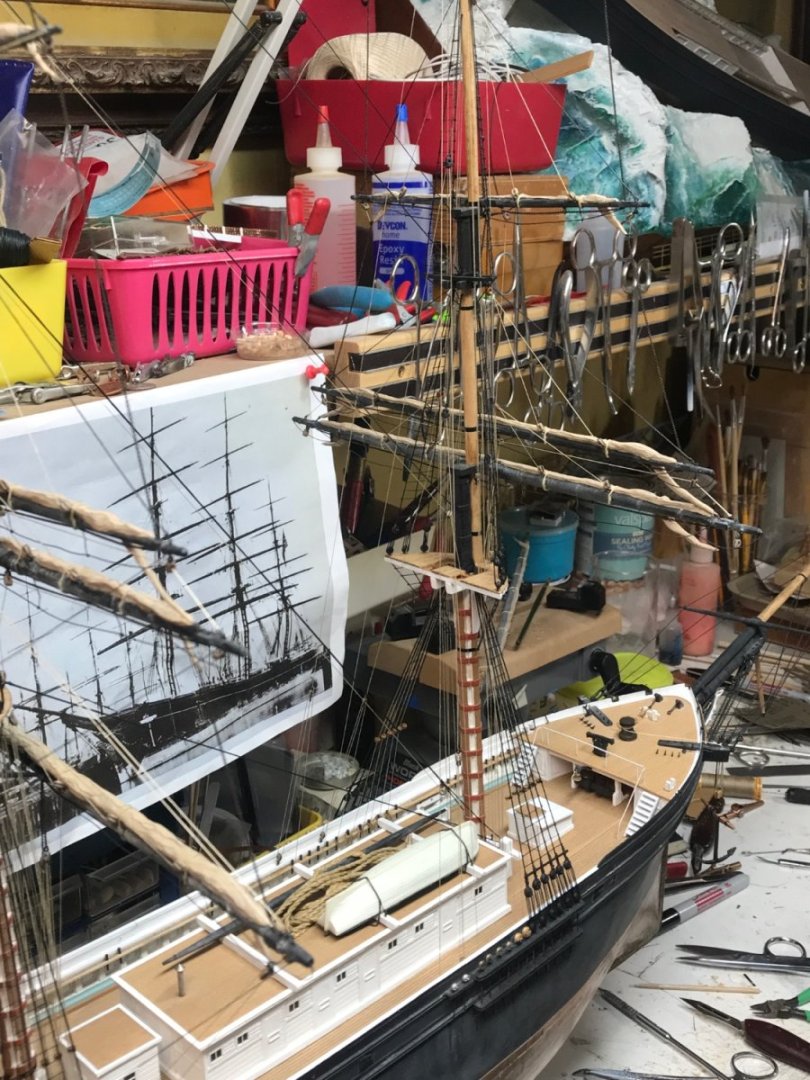
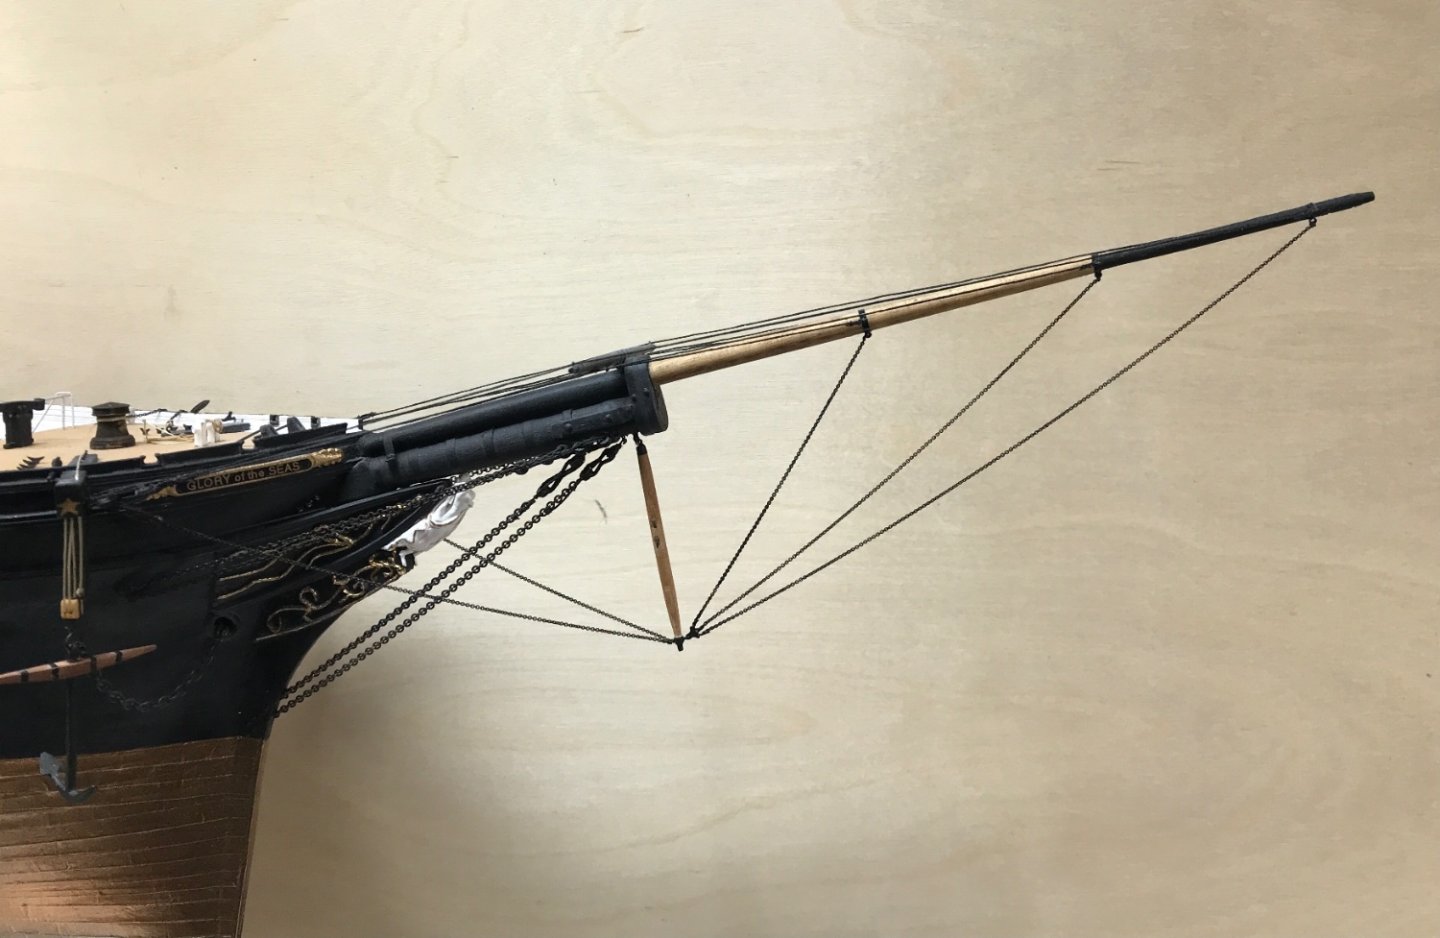
You didn’t think such a thing……😏…You, of all of my critics, would have pointed out the error as soon as you identified it. An act you proudly Commit, as you relish in keeping with preserving her accuracy. Dolphin striker my………. You wouldn’t let me intentionally inaccurately misrepresent anything on Glory. 🧐. You’re my official “fact checker”…..my authenticator……….the, *oh you messed that thing up*, got my back kinda guy. Short of one or two things I’m just too selfishly bullheaded over, that we’ve already discussed…….you’re my, *keep your nose to the grindstone*, and *keep it right* advisor. I know you secretly knew the martingale was outa proportion. Why you didn’t pistol whip me earlier is a mystery. Must be that kind heart residing in your chest. 🥰 NOW…….I can get back to the rat lines. Rob
- 3,560 replies
-
- 3
-

-
-
- clipper
- hull model
- (and 2 more)
-
I wrestled with the ‘that’l do’ monster……but I had to slay it. I feel so much better that I corrected the error. Two down. Rob
- 3,560 replies
-
- 3
-
-
- clipper
- hull model
- (and 2 more)
-
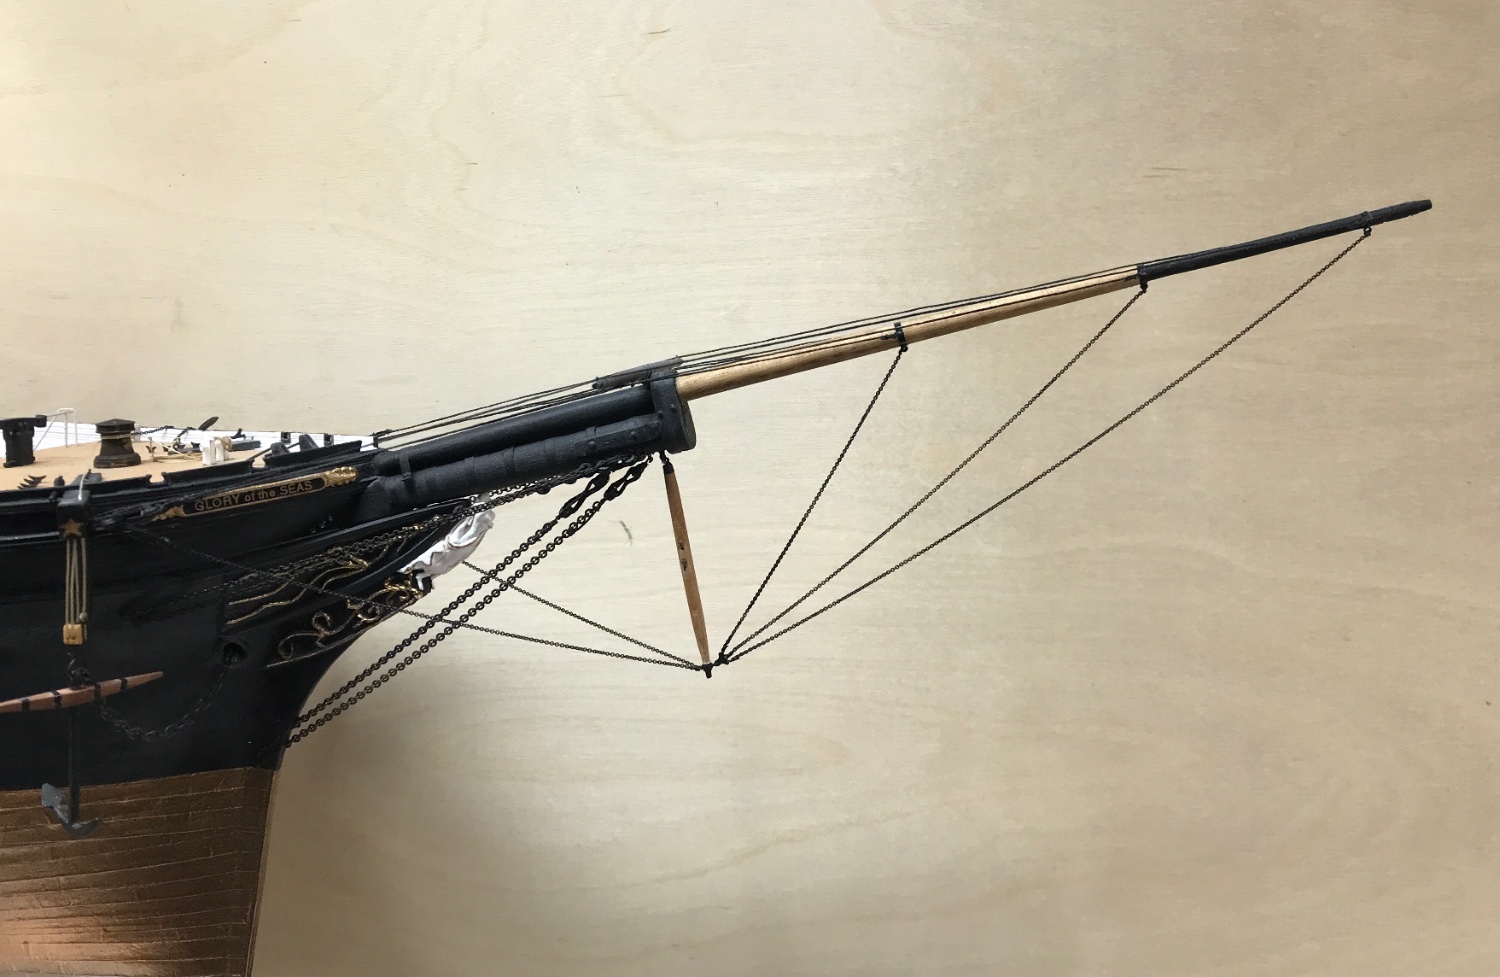
Oh well…….I couldn’t wait…….so I had to fix the martingale. Here it is cut down two ft. and re rigged. Only took about an hour and a half. I feel better. Rob

- 3,560 replies
-
- 5
-
-
- clipper
- hull model
- (and 2 more)
-
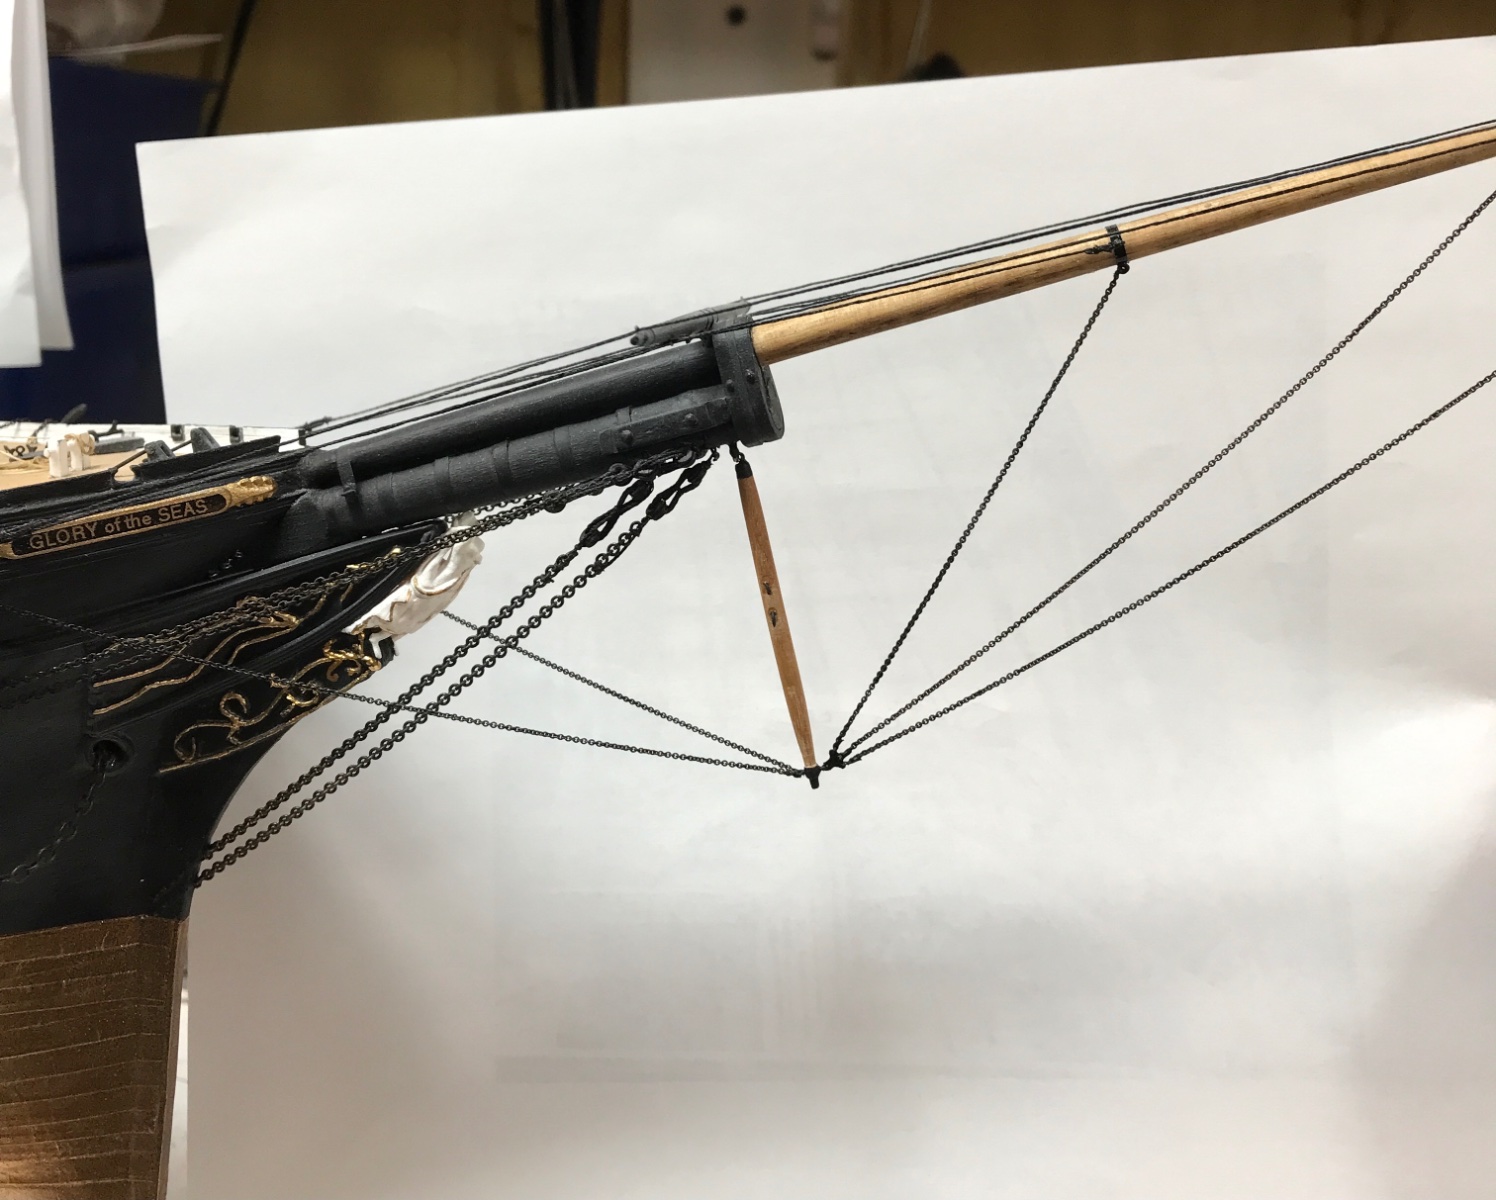
One NEW remodel update, I want to share. From almost the beginning of the install of the martingale....I've been disappointed with my results. Meaning: I made the martingale too long. This has bothered me, but I was too lazy to do anything about it...hoping I would get over it...or it would *blend* in. NO SUCH LUCK. After further remeasuring, I have determined that the martingale is nearly 2 scale ft. longer then its prototype. This is easily calculated by measuring the martingales length on any profile image of Glory, and then comparing that with any other known measurement. What I did was identify that the distance from the bottom of the bowsprit measuring down to the lower bobstay, is exactly the length of the martingale. When I tried to replicate this comparison method on my model, it was clearly obvious, that my martingale was too long. By...again...2 scale ft. NOT failing to mention that, it just *Looks* too long, when looking over the entire model. Soooooo. I will remove the chain stays from the martingale and where they attach to the jibboom.... Remove the martingale...cut it down to size, then reinstall the chain stays....making the appropriate adjustments to their lengths. This will be a relative simple modification, *And I know.......I hate re-doing stuff*, but in the end, it will be accurate.....and I won't hate myself for not making the correction when it was easiest to do so. Stay tuned for this fun and exciting redo. I'll finish the ratlines and fairleads on the shrouds first. Thanks for all those with discerning eyes, who noticed this and refrained from mentioning it to me.....so My wittle feewings wouldn't be hurt. I appreciate it. Rob
- 3,560 replies
-
- 3
-

-
-
- clipper
- hull model
- (and 2 more)
-
Every image I can muster up and extrapolate clearly of McKay vessels...definitely show some kind of a *Naval Hood* supporting the stem and cutwater. I know this kind of information can and probably will, set the history books on end...not to mention the correction for the modeling industry. *If they want to be accurate*. Rob
- 345 replies
-
- 1
-
-
- Flying Fish
- Model Shipways
- (and 1 more)