HOLIDAY DONATION DRIVE - SUPPORT MSW - DO YOUR PART TO KEEP THIS GREAT FORUM GOING! (Only 13 donations so far - C'mon guys!)
×


jfhealey
-
Posts
361 -
Joined
-
Last visited
Content Type
Profiles
Forums
Gallery
Events
Everything posted by jfhealey
-
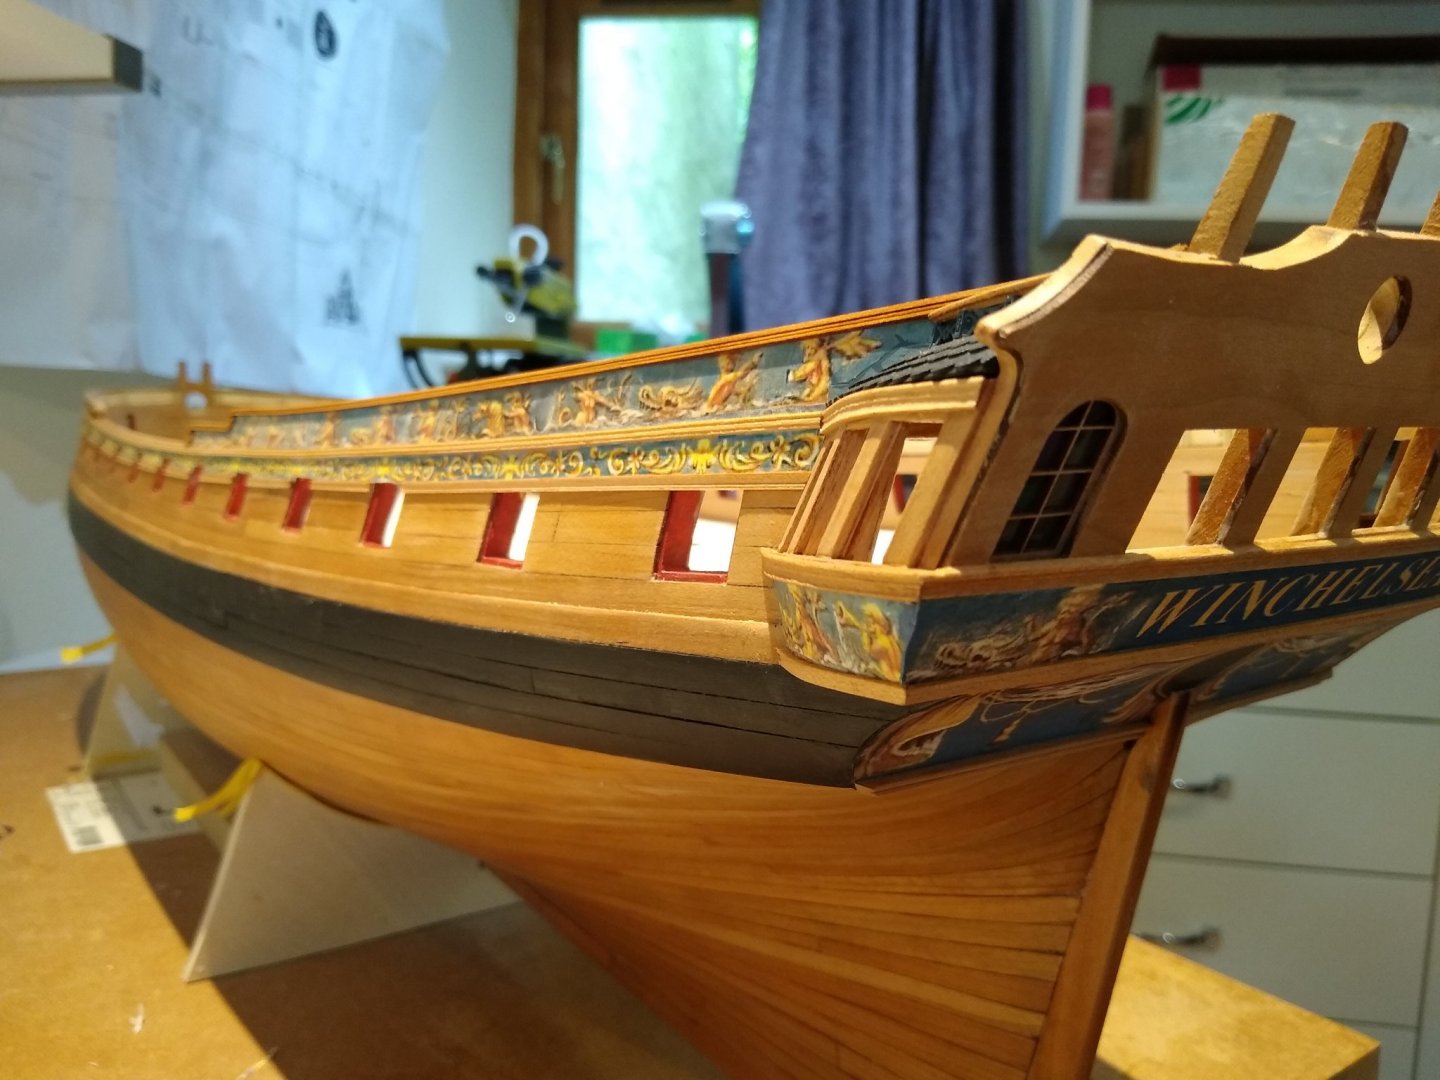
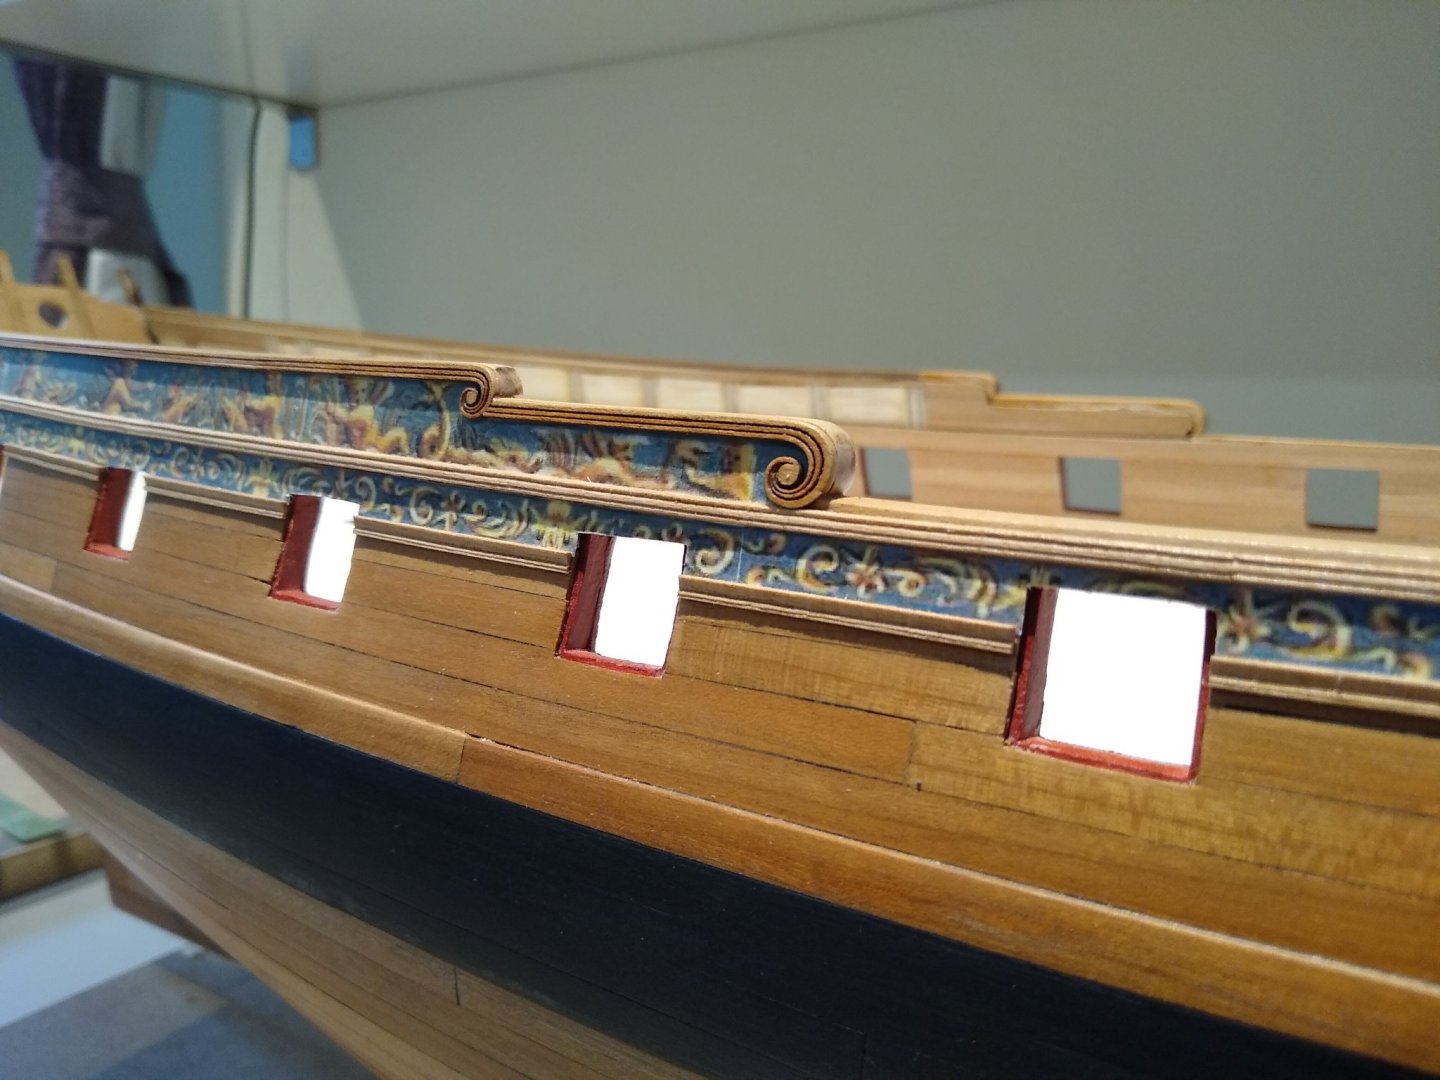
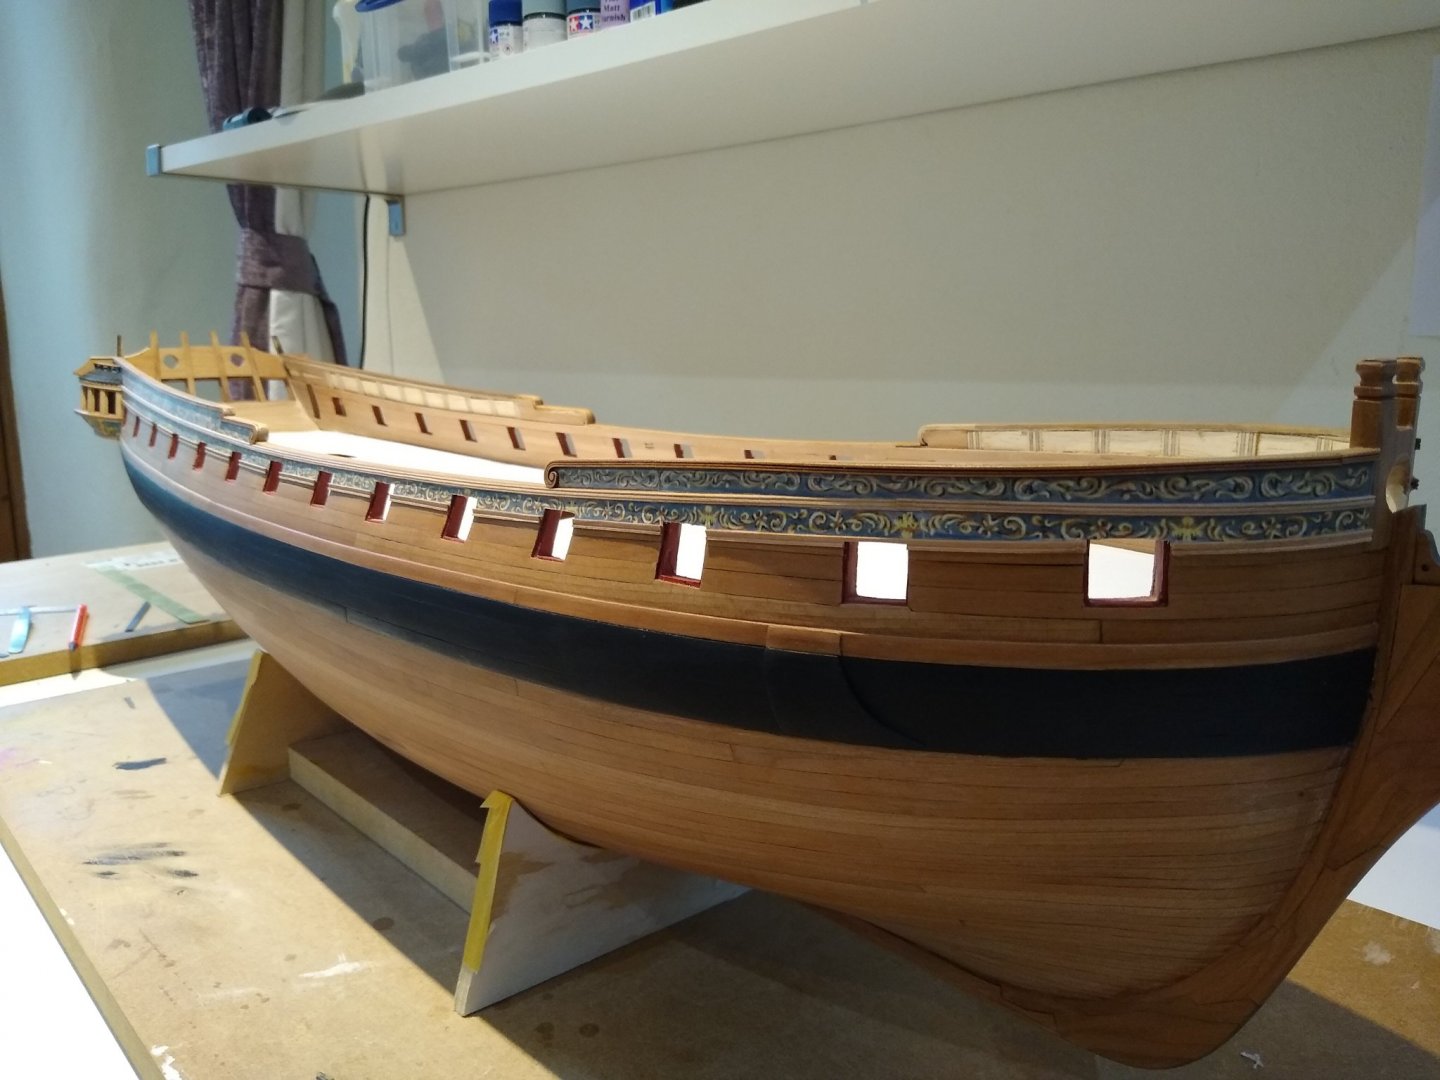
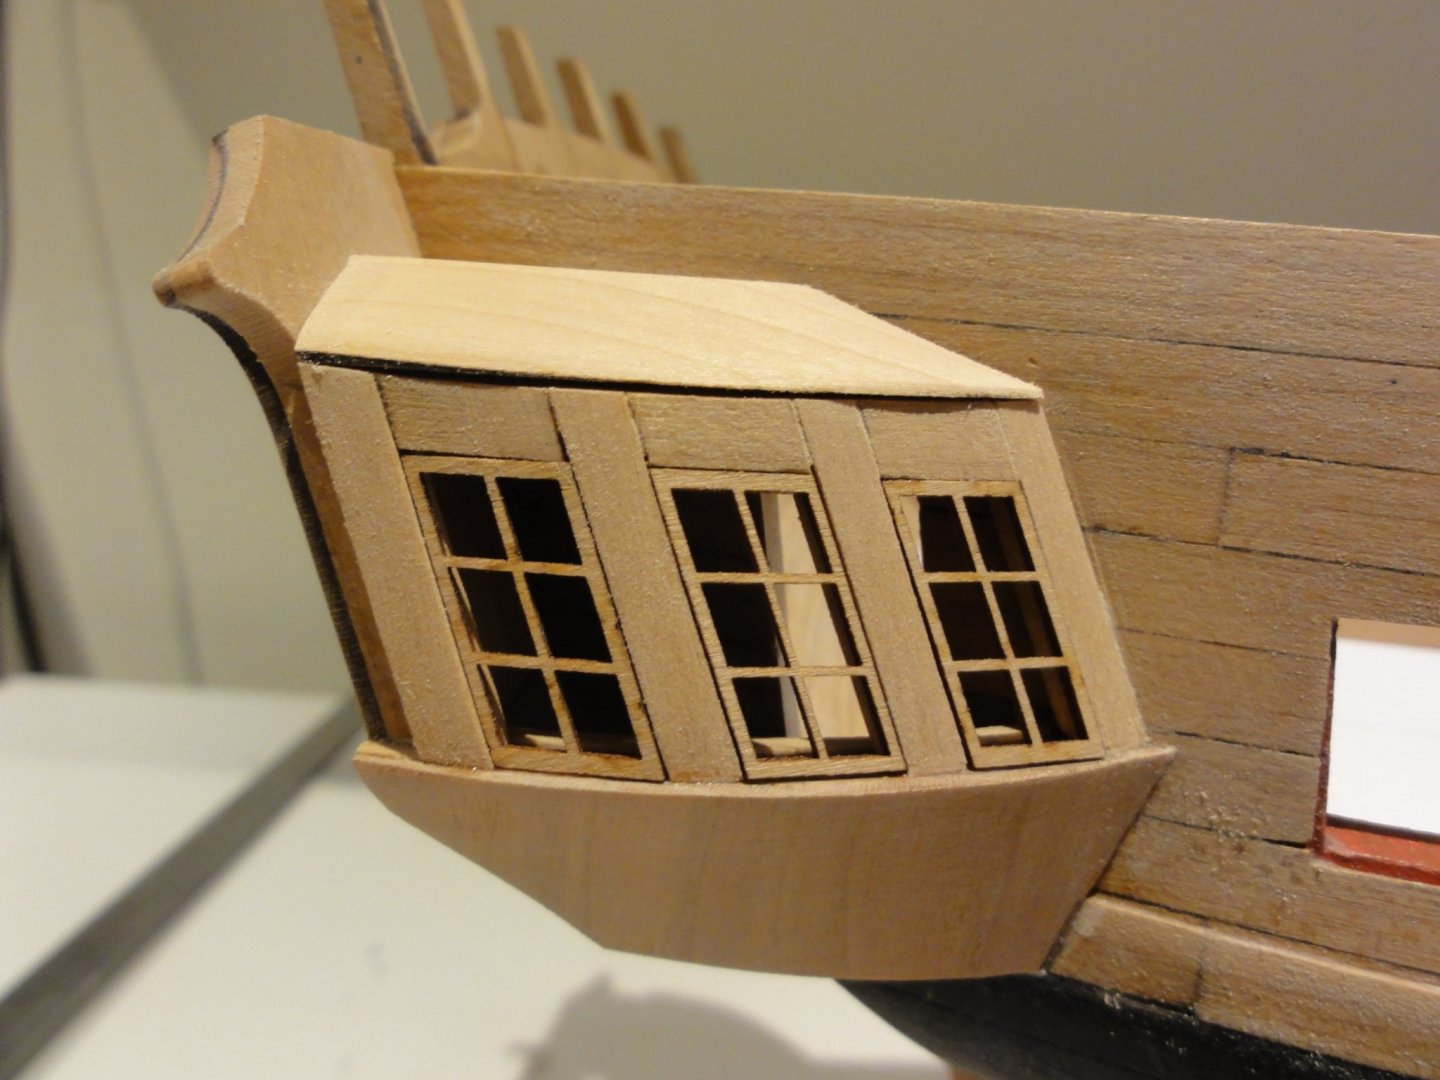
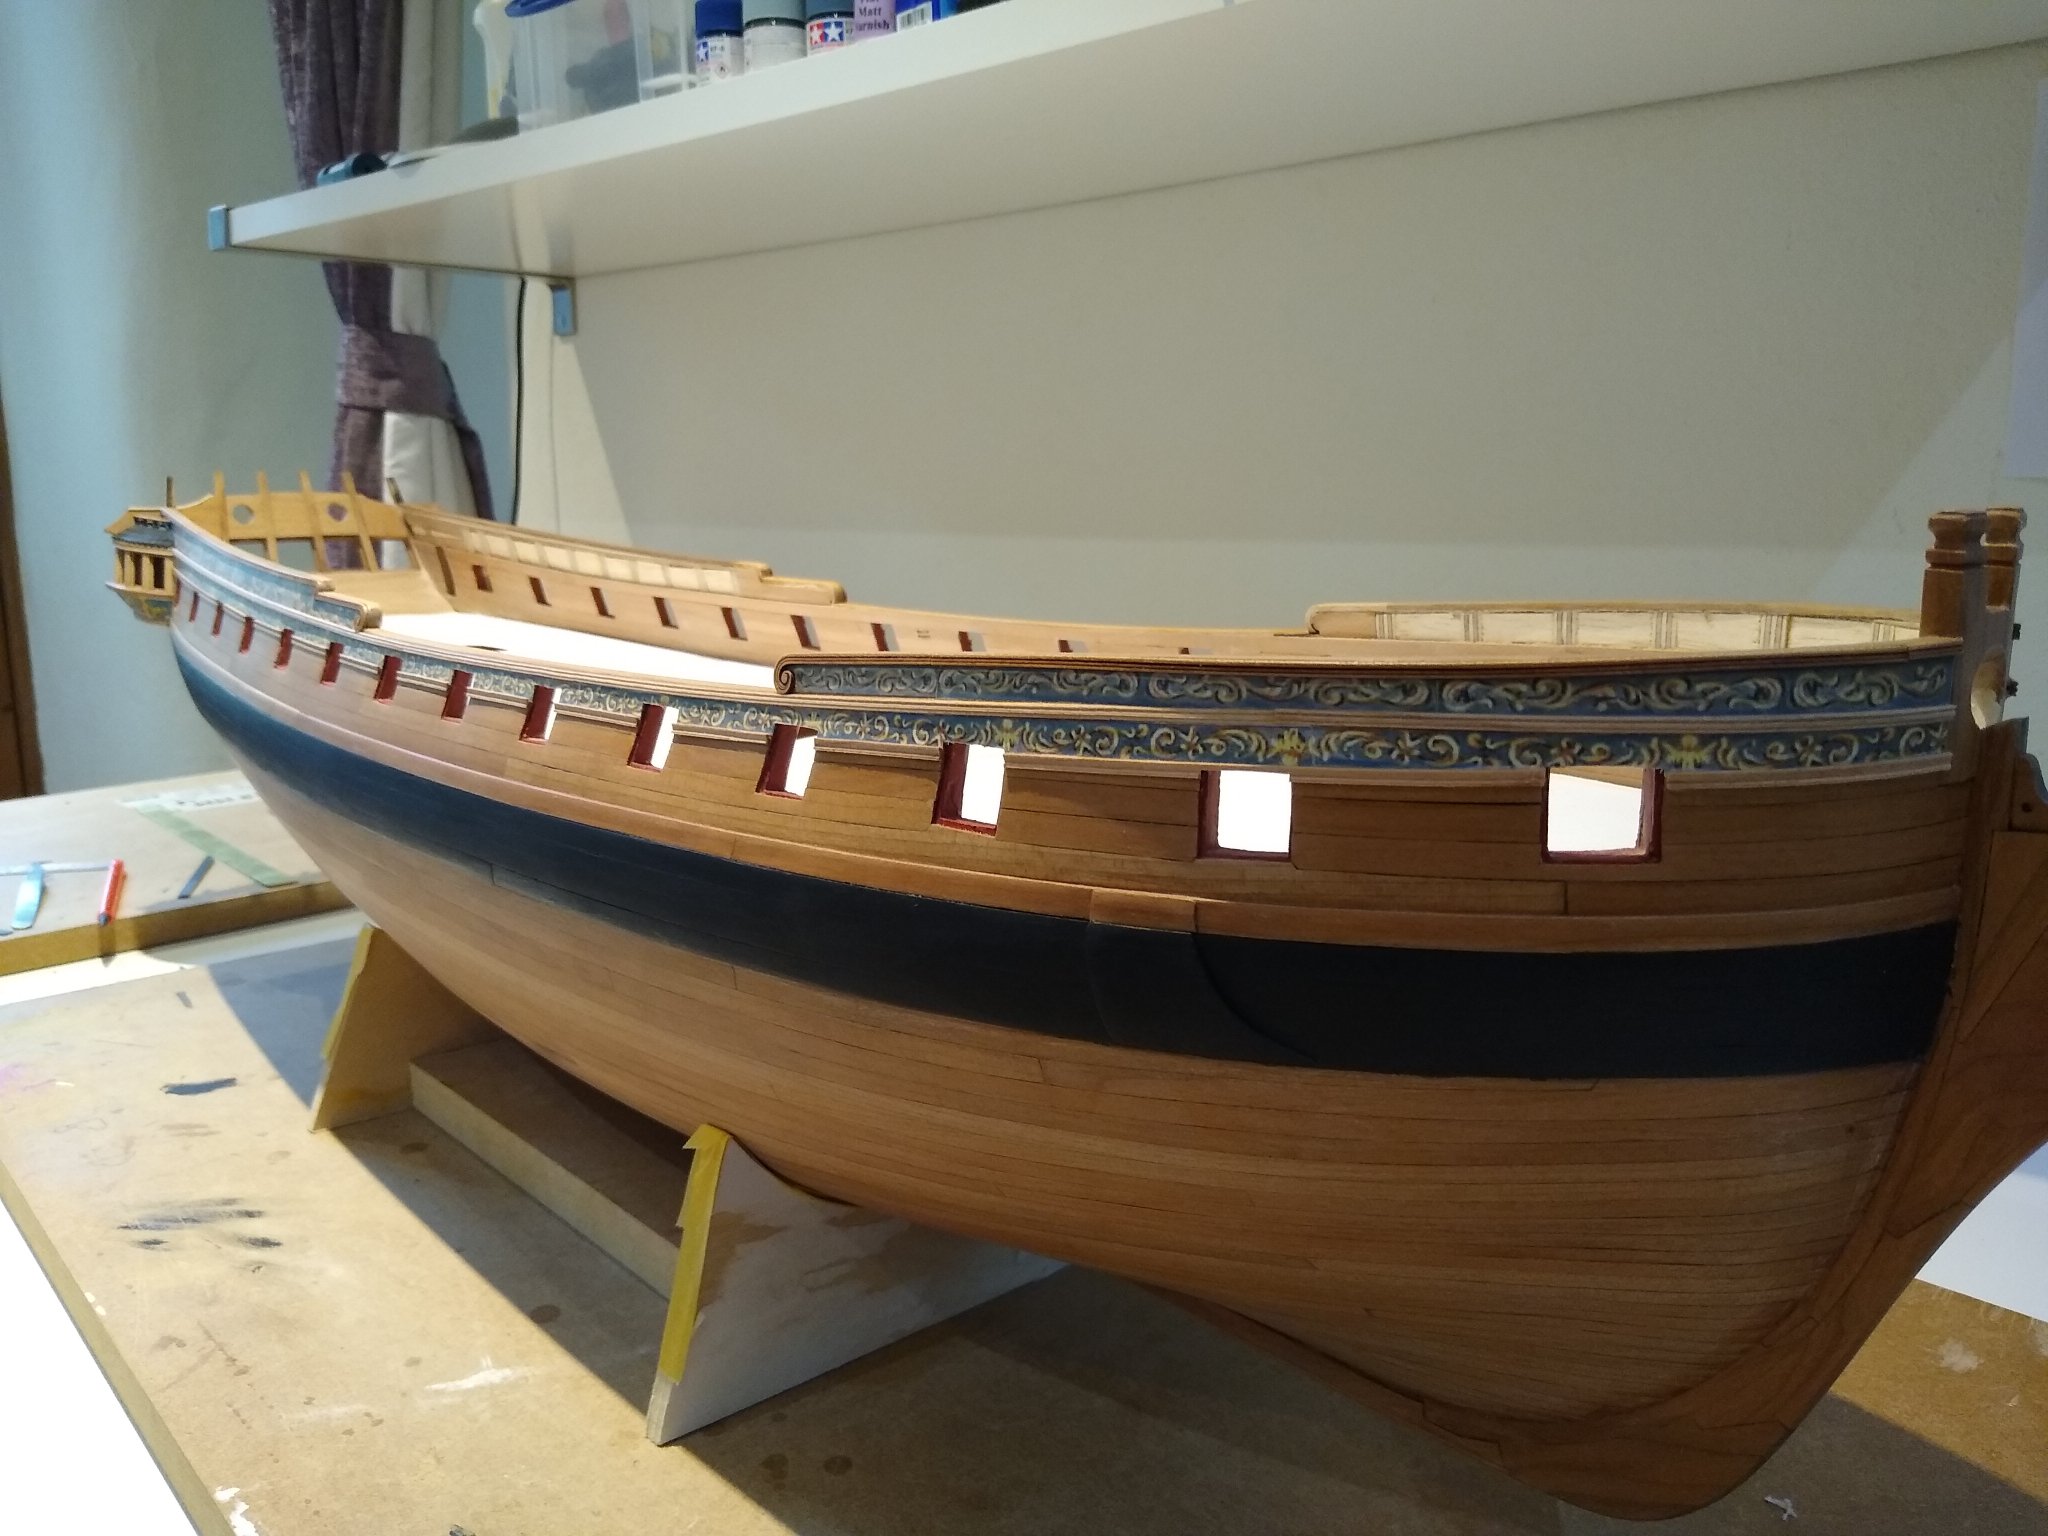
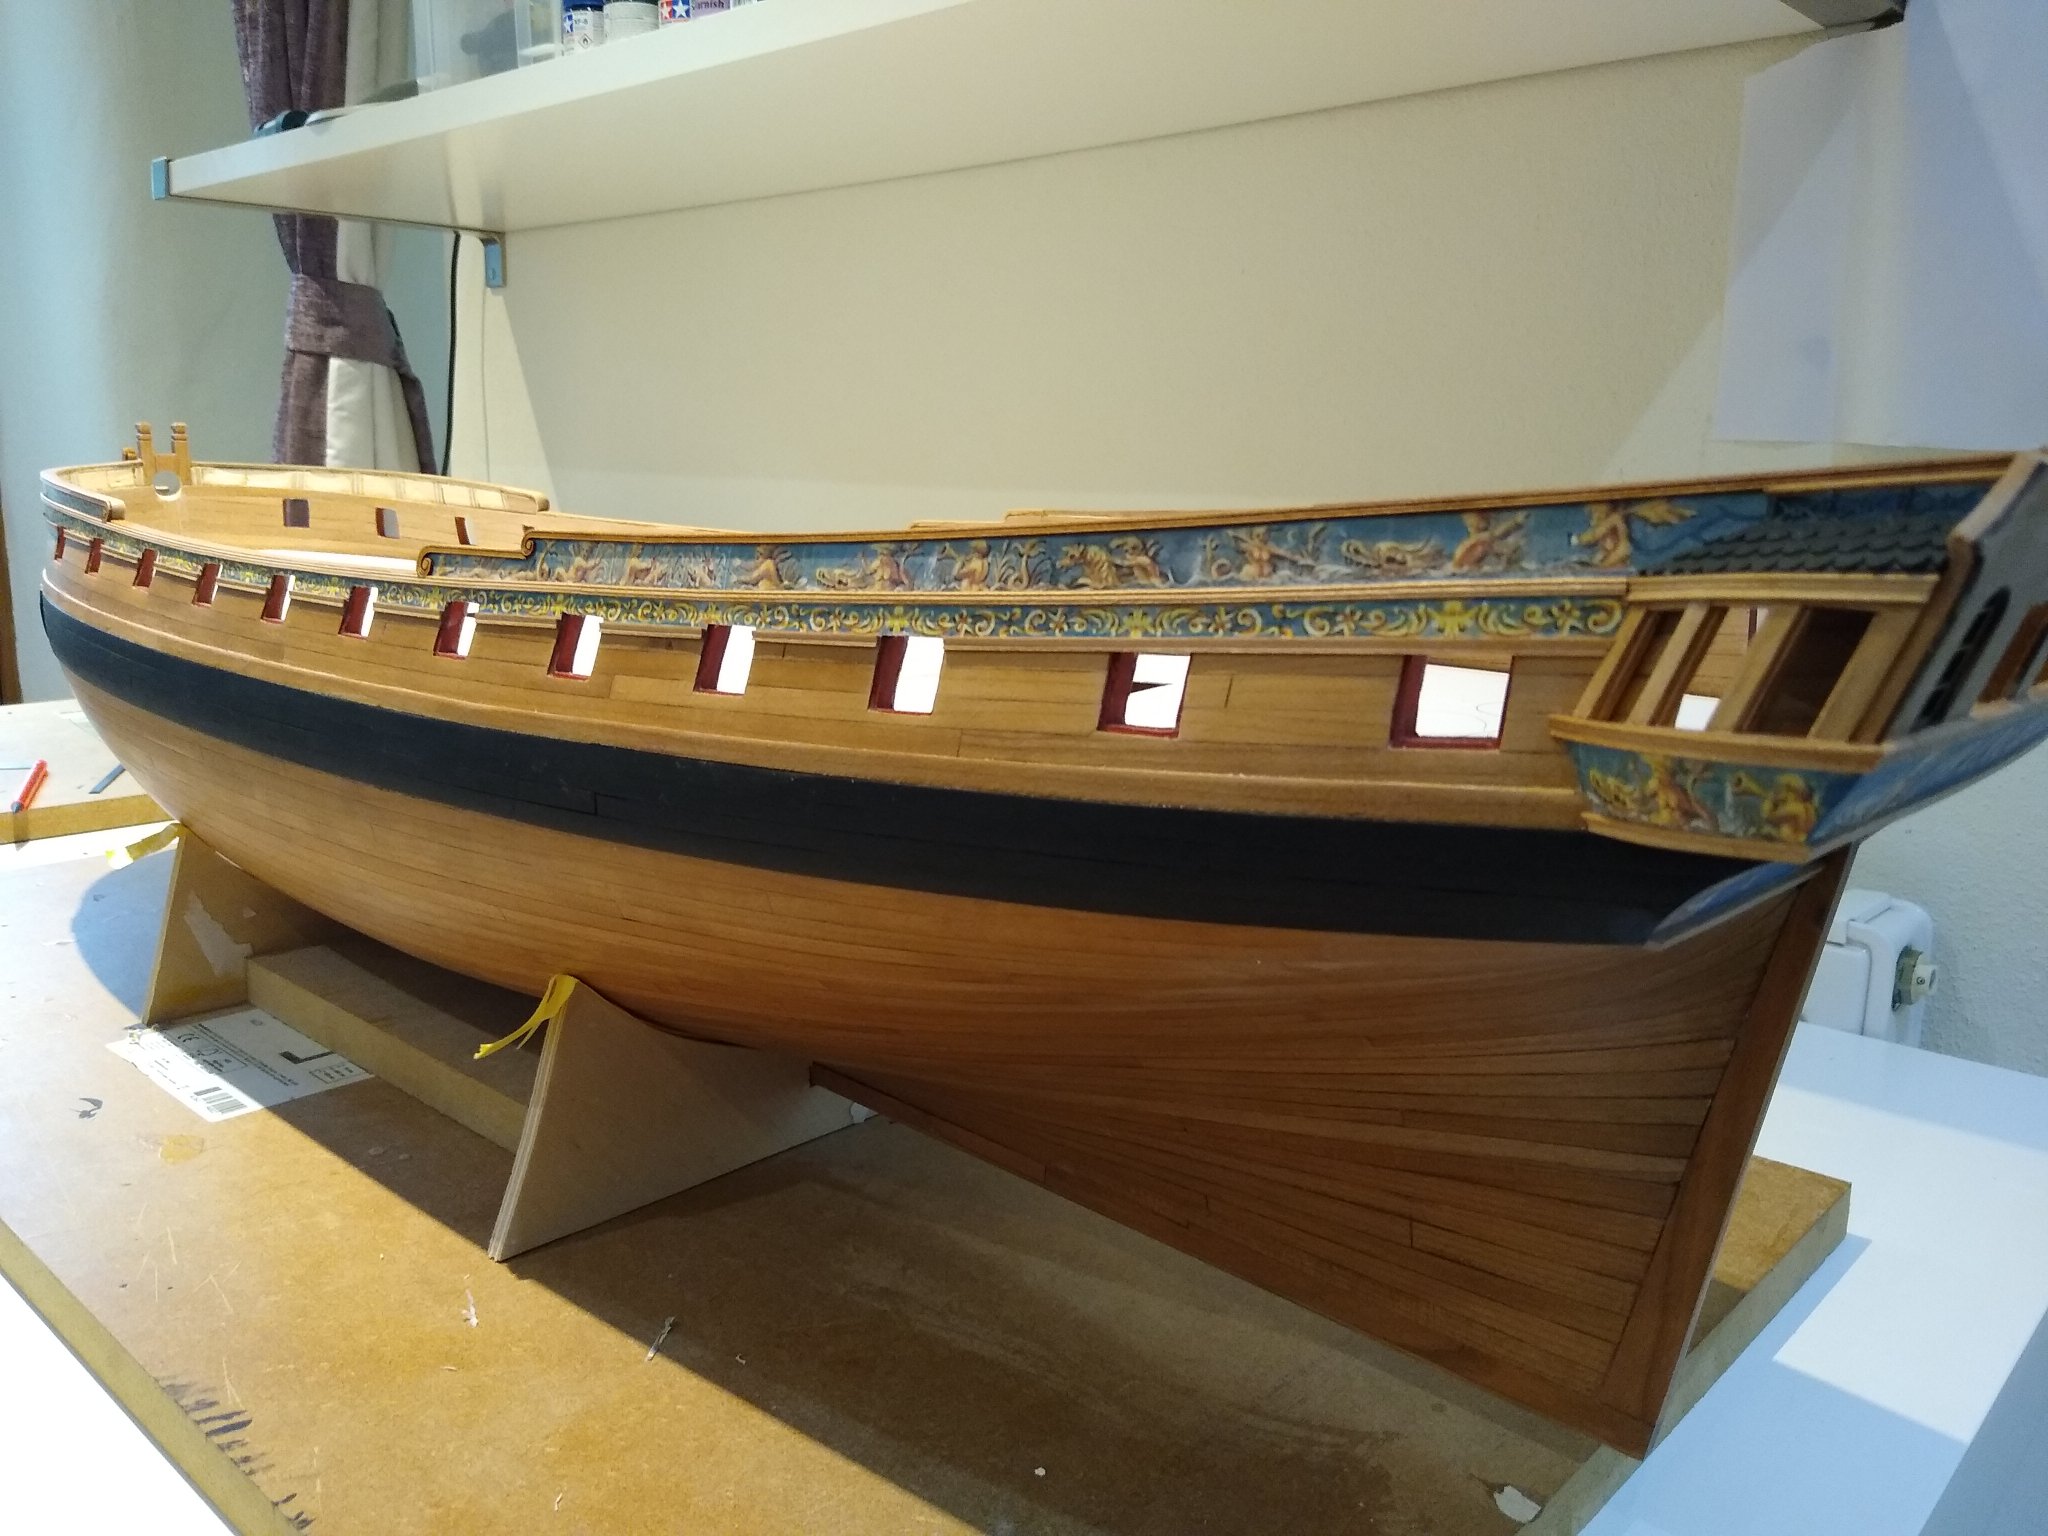
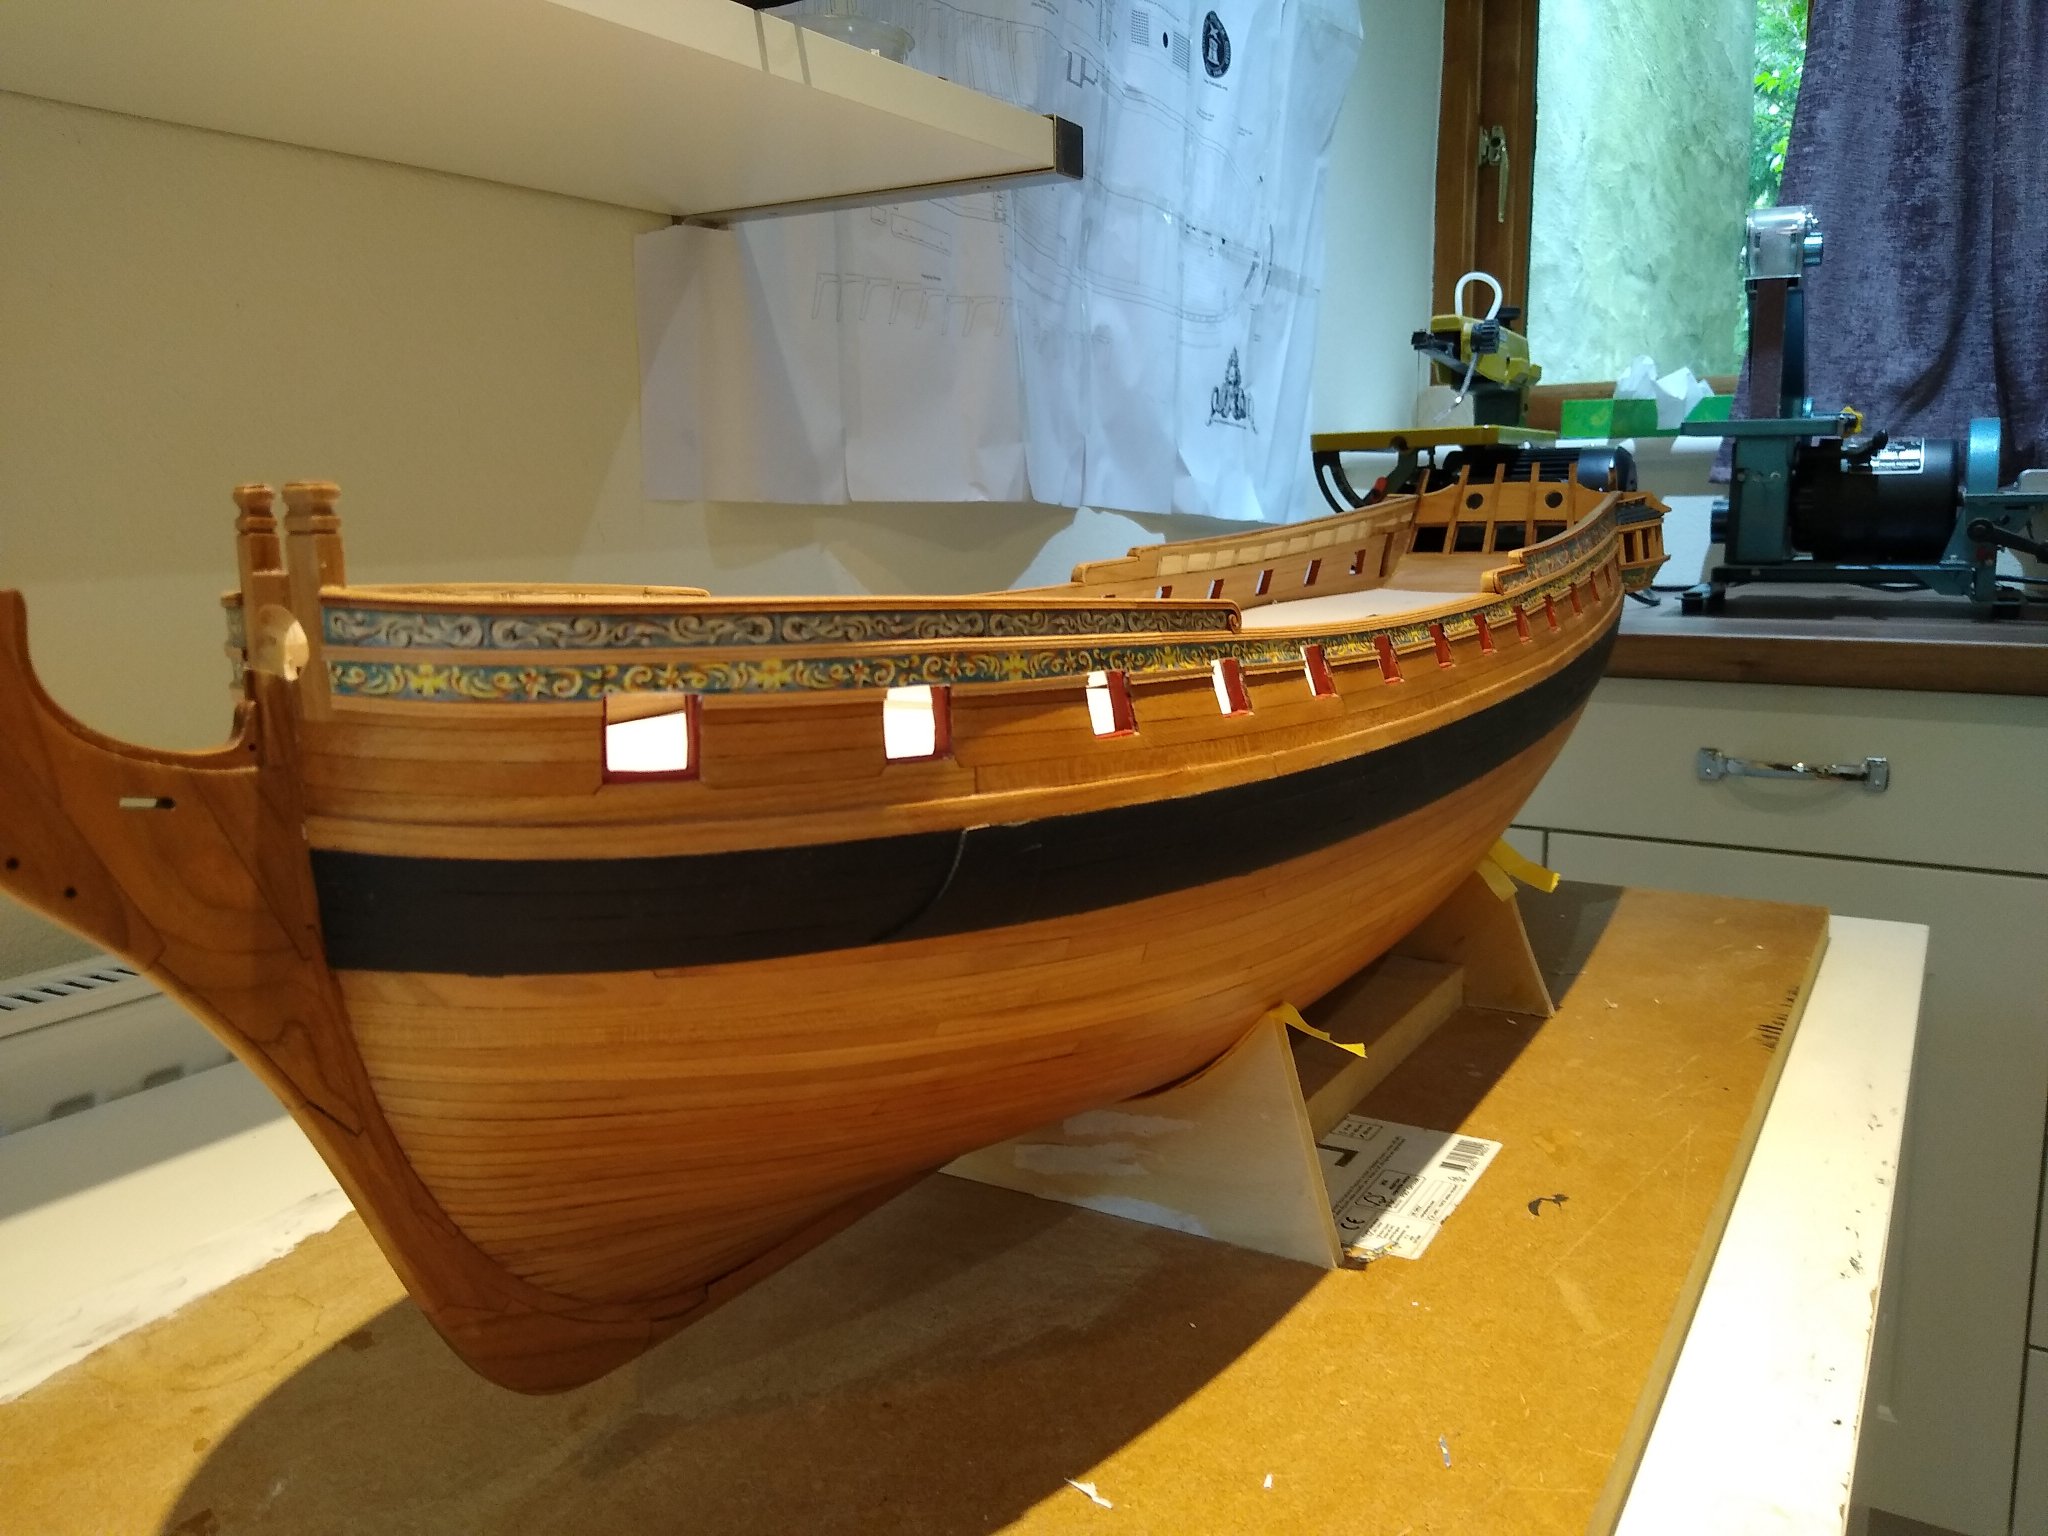
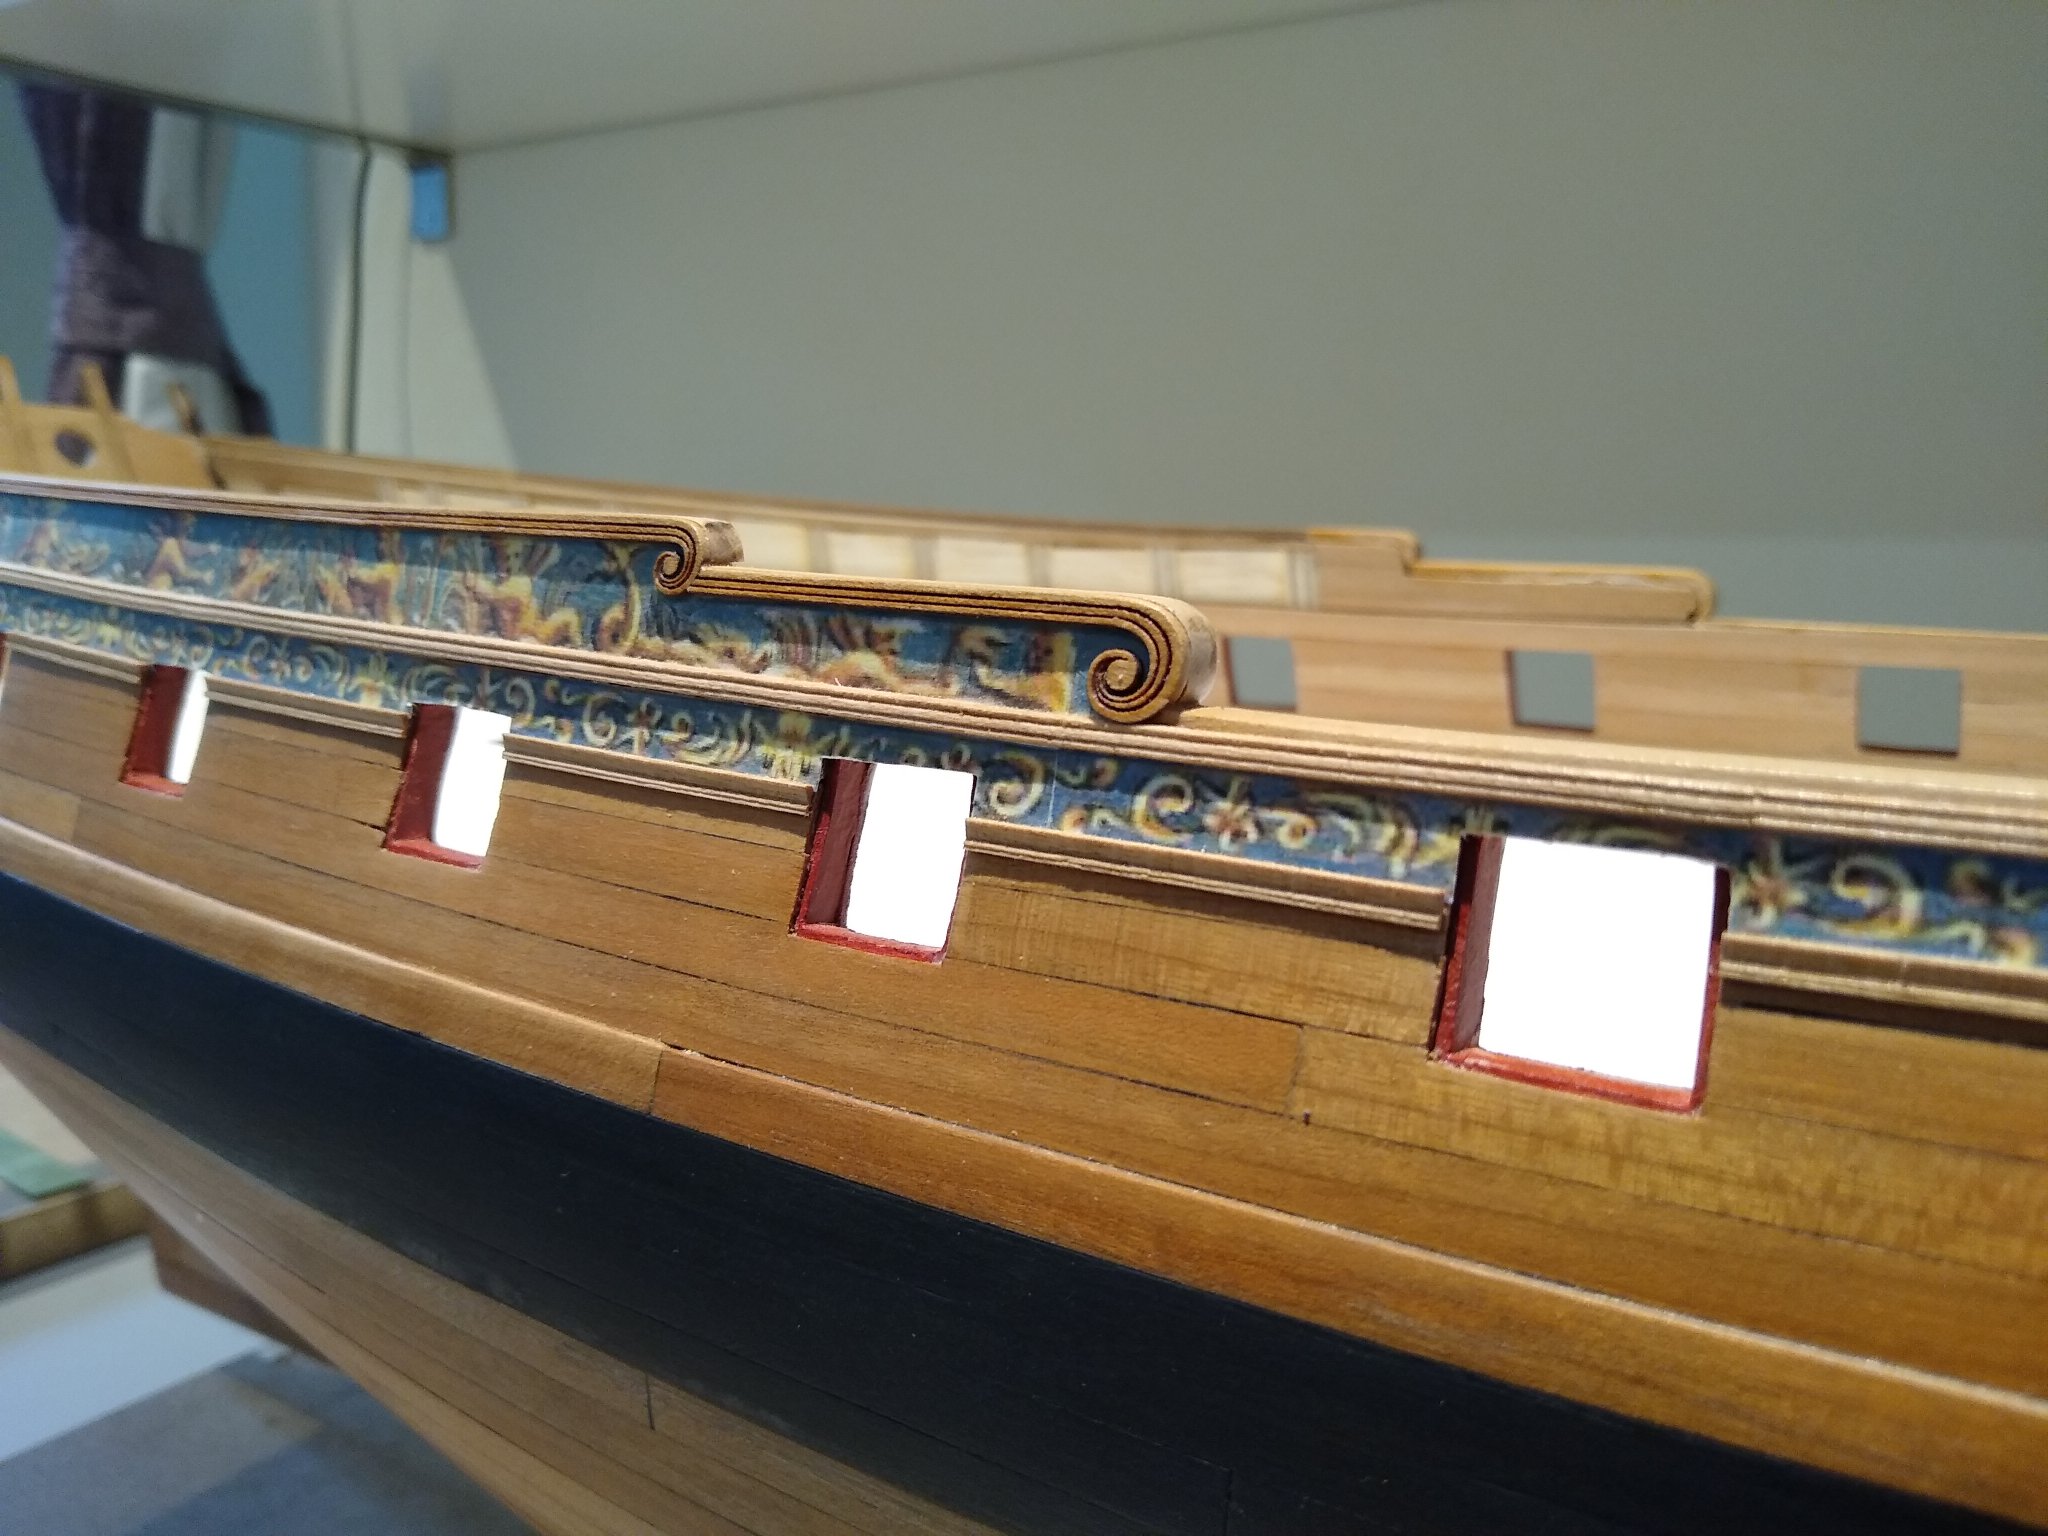
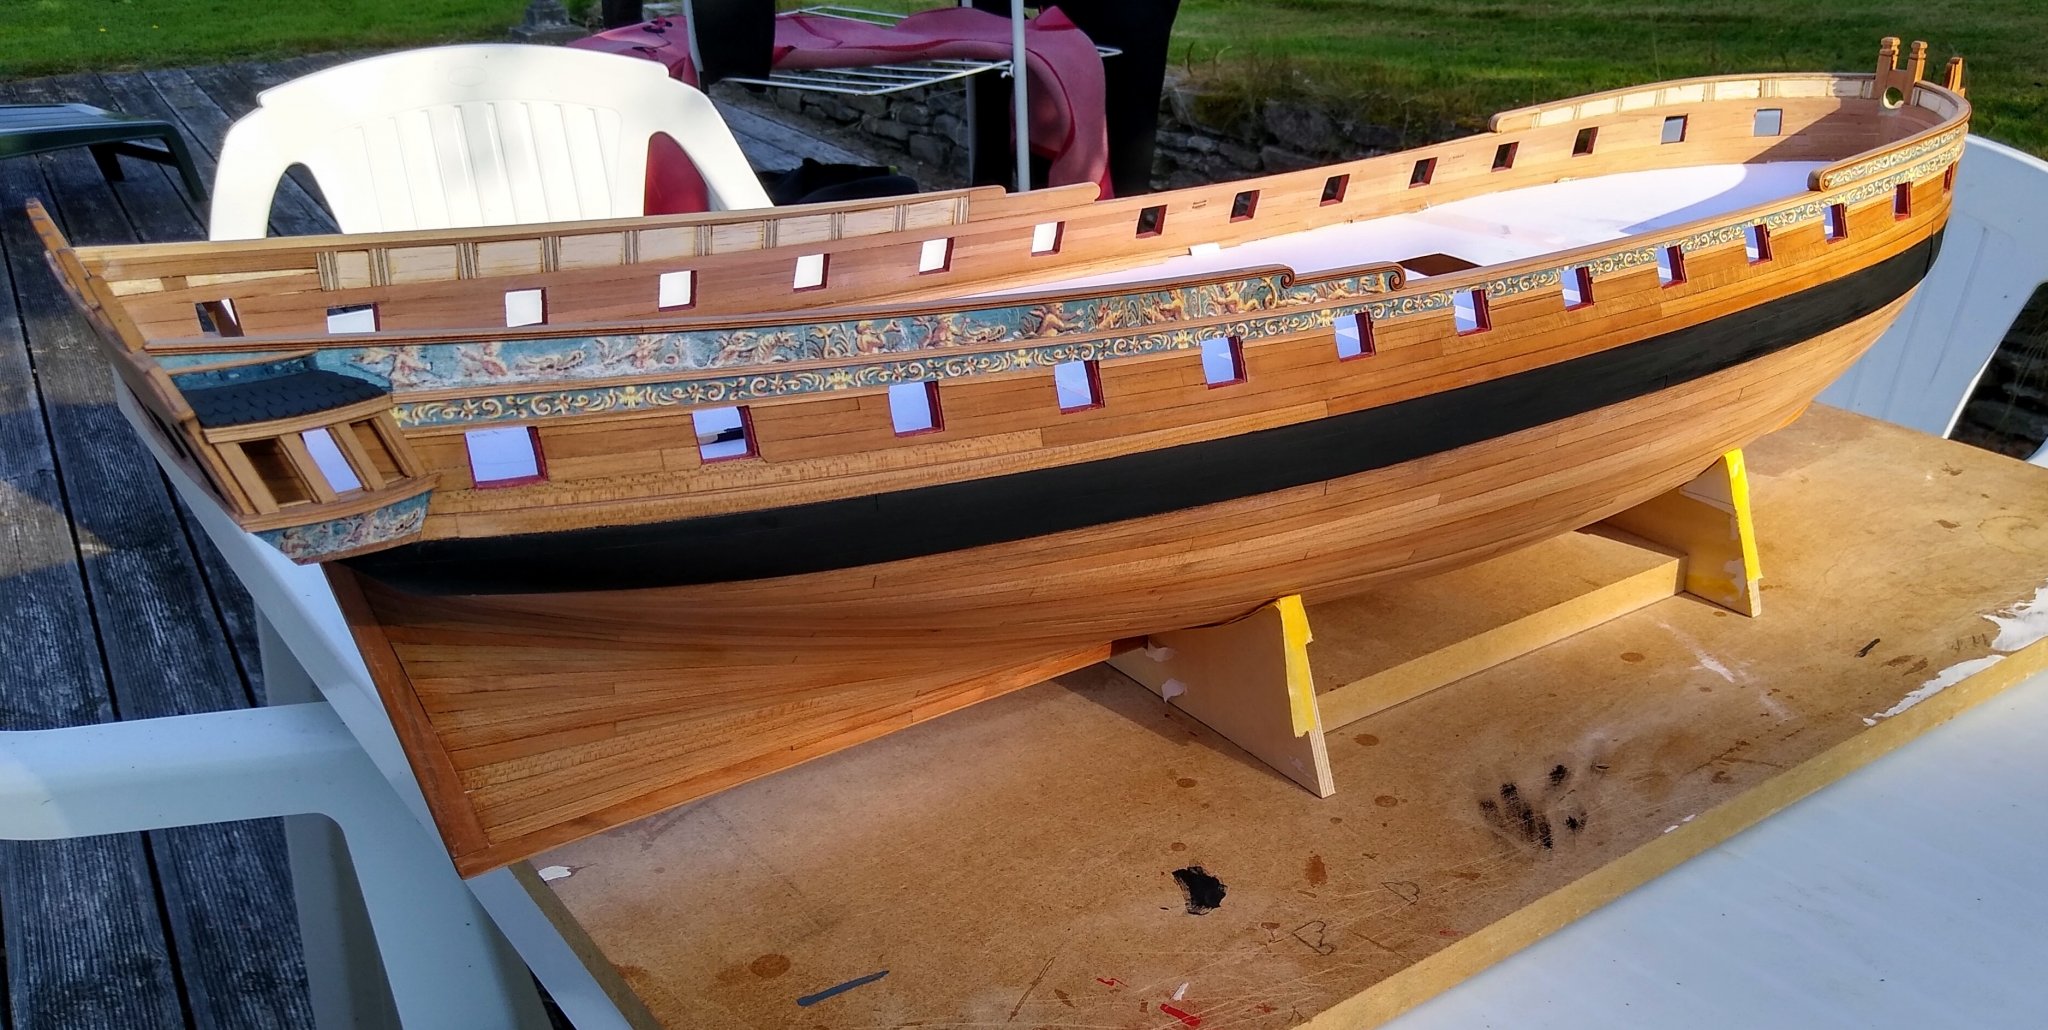
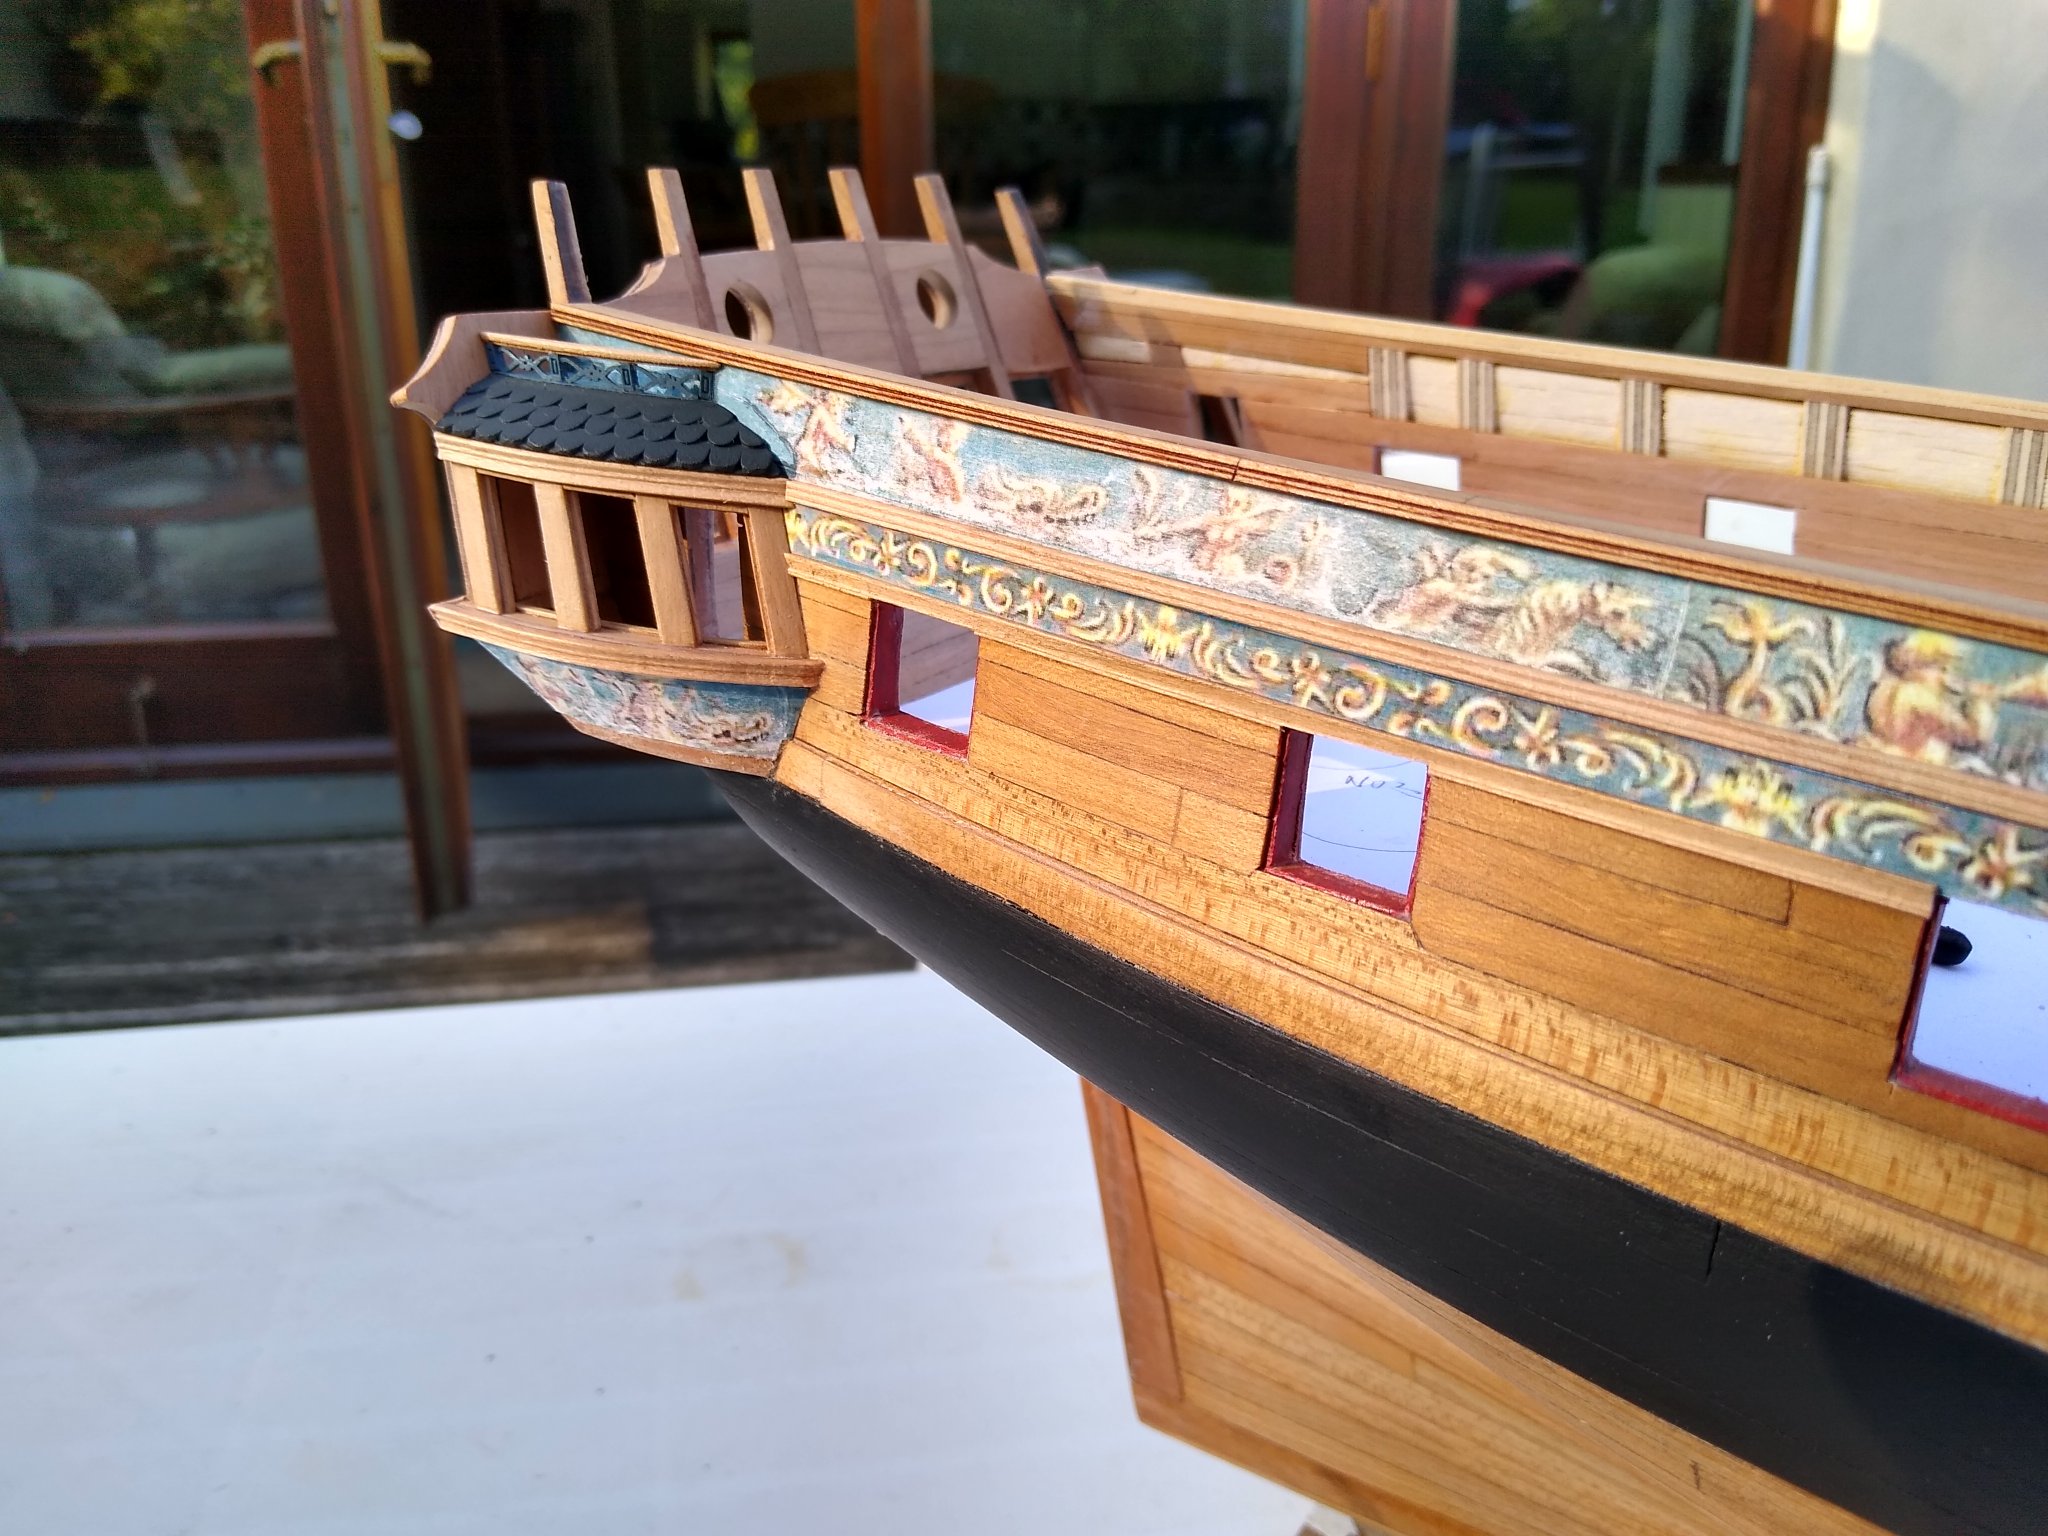
Thank you JJ. Here are some more pictures as I near the end of chapter3. Observations on chapter 3: The laser cut scrolls are superb and really look the part. I had real doubts about the paper freizes having never used anything like that before but they are straightforward to apply and with a coat of varnish look completely authentic. The QGs are not easy but well worth putting the time into. The QGs and the open great cabin beyond contain a level of detail I doubt can be seen on any other commercially available product. I cant wait for chapter 4! Things that have gone wrong: the winchelsea frieze didn't fit my inaccurately built stern. You can see where I've spliced in little bits and stippled sir paint over the joint. It looks fine to my eyes. I had to do the same with some of the other friezes. And the mouldings could have been a bit cleaner but for a first attempt I'm pretty happy with them.
-
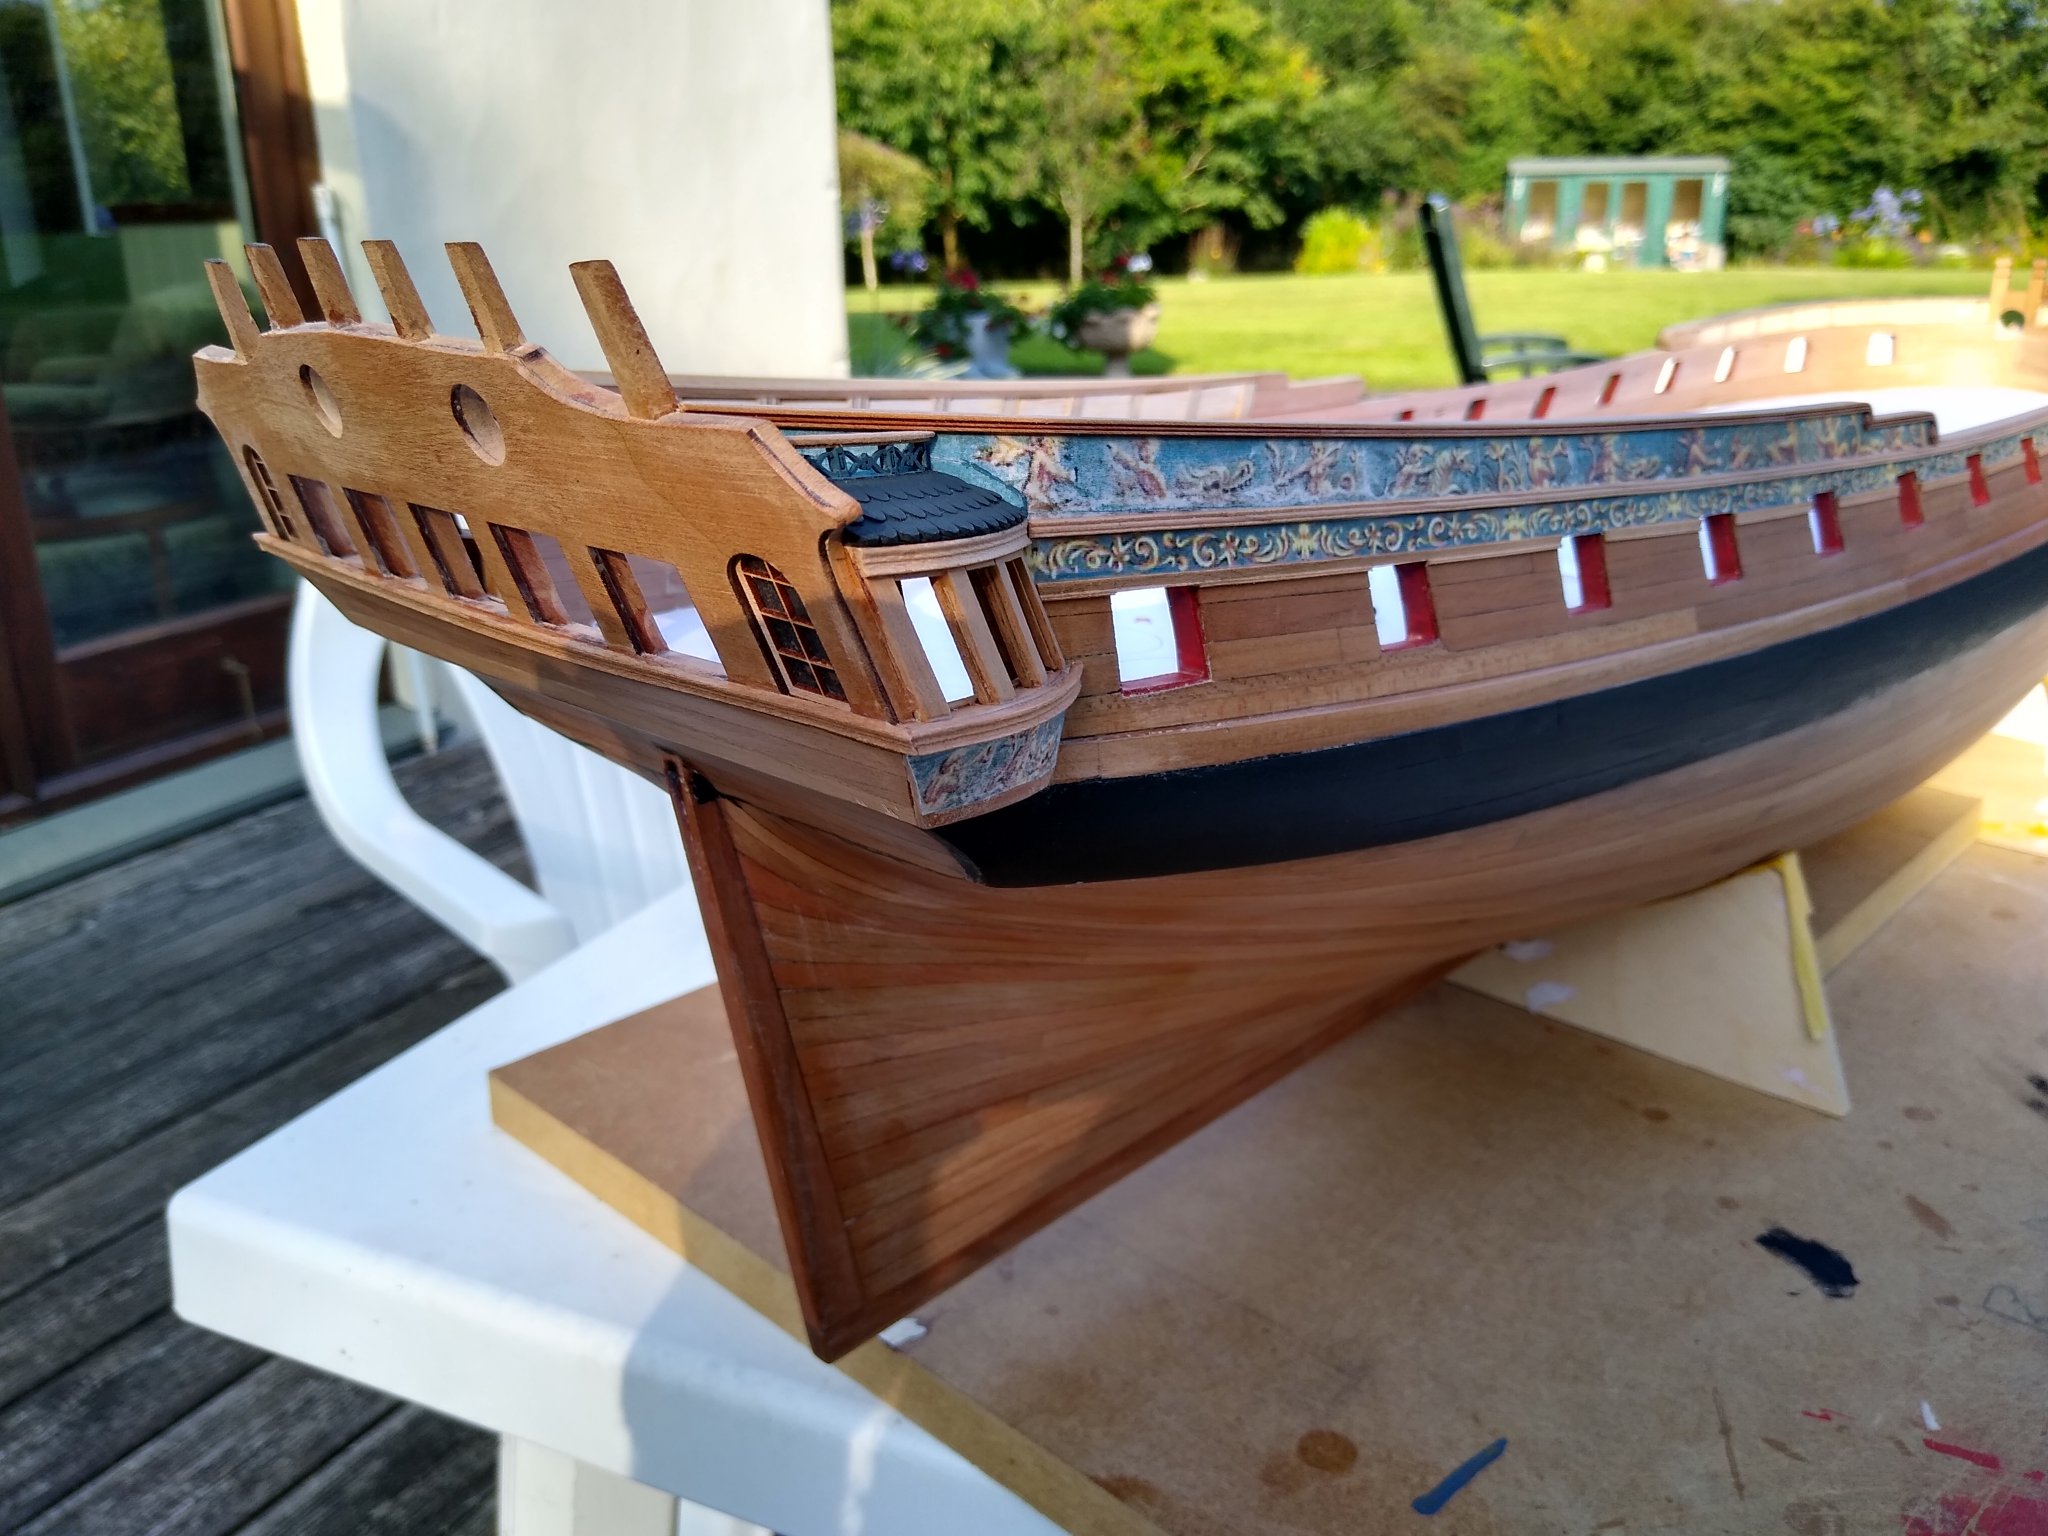
Thanks Bob and Matthias and for the likes. Matthias - I glued the friezes on with a prit-stick (which works well and allows for a tiny bit of sliding around) and, when dry, hand painted (with a brush) with Admirality Flat Matt varnish from Cornwall Model Boats. I think Admirality paints are connected to Caldercraft/Jokita. I have not used Admirality varnish before but it seems to me just about the perfect product. It goes on with no hint of brush marks. You can overcoat a small section of woodwork and not see the join with the adjacent not-overcoated section. Brushes wash out in water. We can not as far as I know get wipe on poly which all our American friends seem to swear by in the UK but I can not think its any better than this stuff. I've used only the flat matt but I like the satin appearance of the varnish before it dries on the friezes and mouldings. I may give those a coat of satin. All the best Fred
-
I love those mouldings around the QG. I am at that stage and finding them a right so-and -so Fred
-
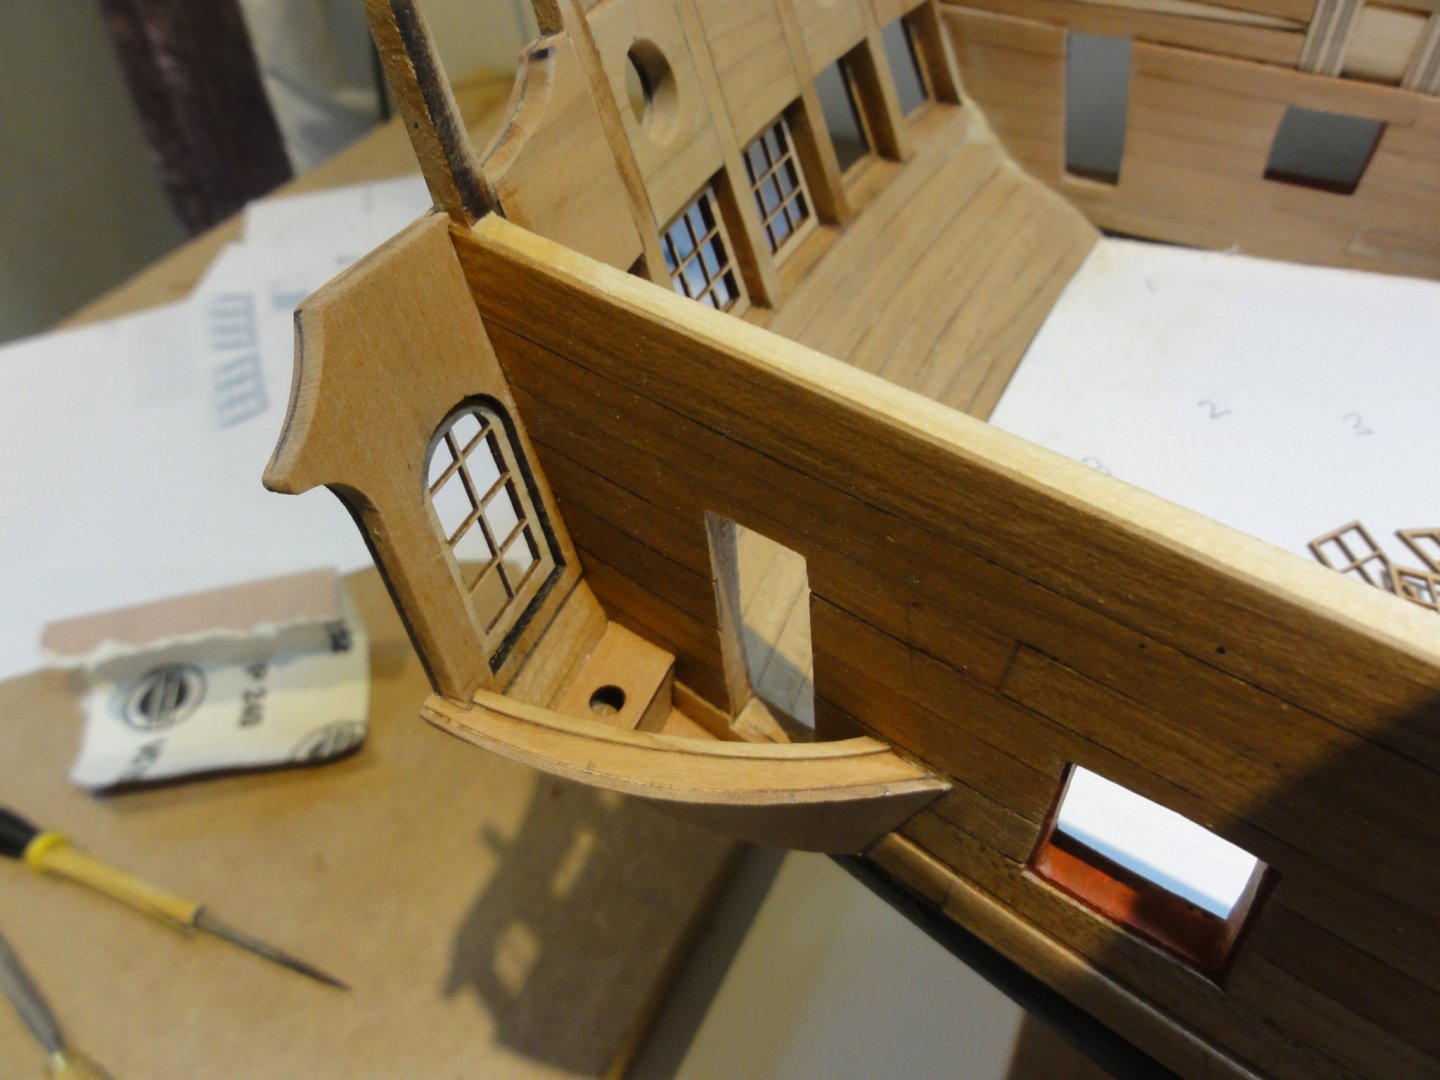
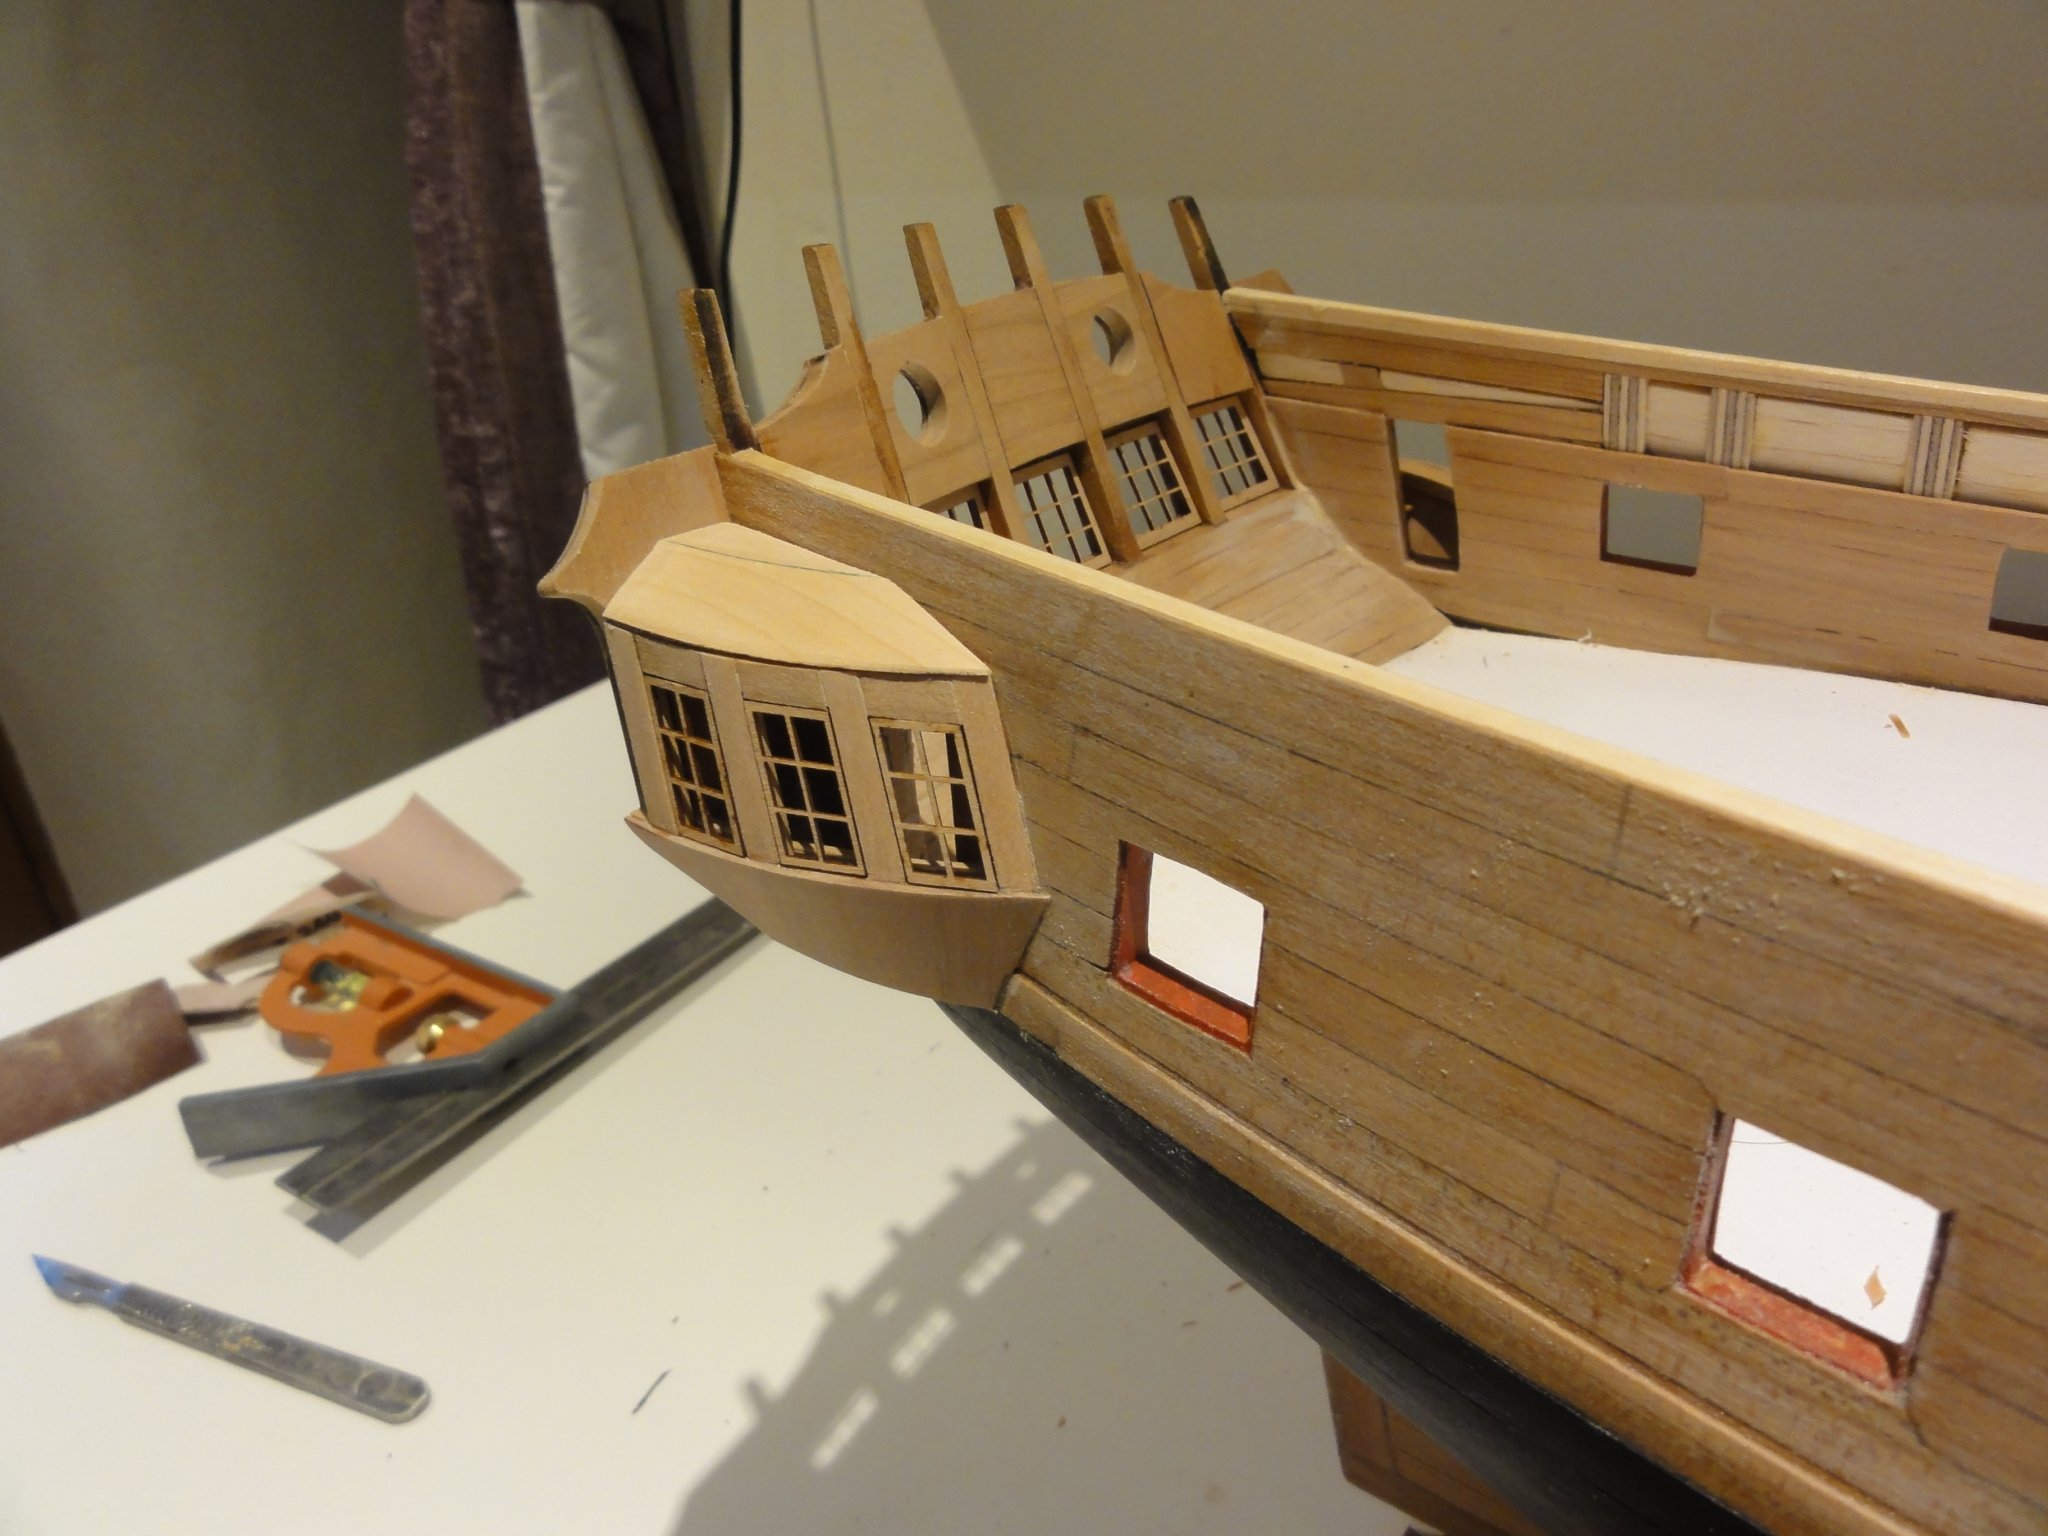
I think my QGs must be a little low or the sides of the ship too high or a combination of both. You can see on the close up of the QG that (a) I had to cut in a little bit more frieze and (b) the fancy rail on top of the QG fits under the laser cut fancy moulding whereas it should intersect it. Still, I quite like it that way though I suspect my multiple inaccuracies will lead to problems down the line.
-
The English have a saying - I expect every nation has a variant - "London buses - you wait for ever and two come along in two minutes". So it is that no one has posted for days and Bob and I post within minutes. I'm coming along reasonably well. I have found the mouldings on the lower part of the QG far and away the hardest pert of the build so far. They require edge bending, twisting along their length and plain old bending. After a number of goes I came up with something acceptable for the moulding immediately below the windows. I'm still working on the lower moulding.
-
Thank you Chuck
-
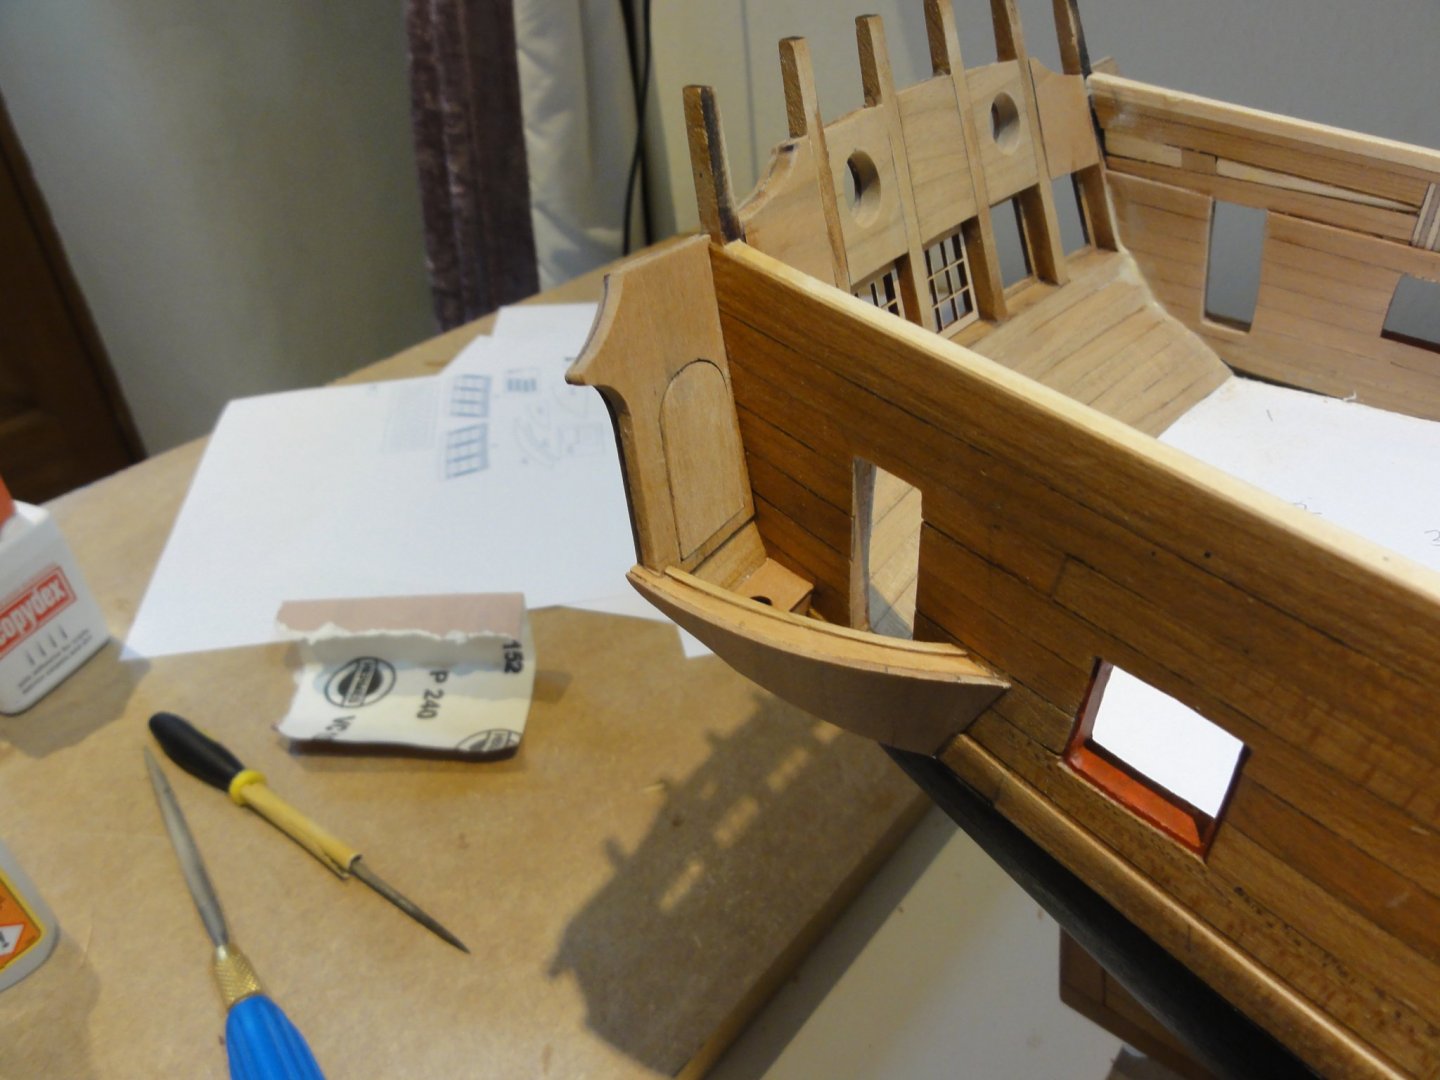
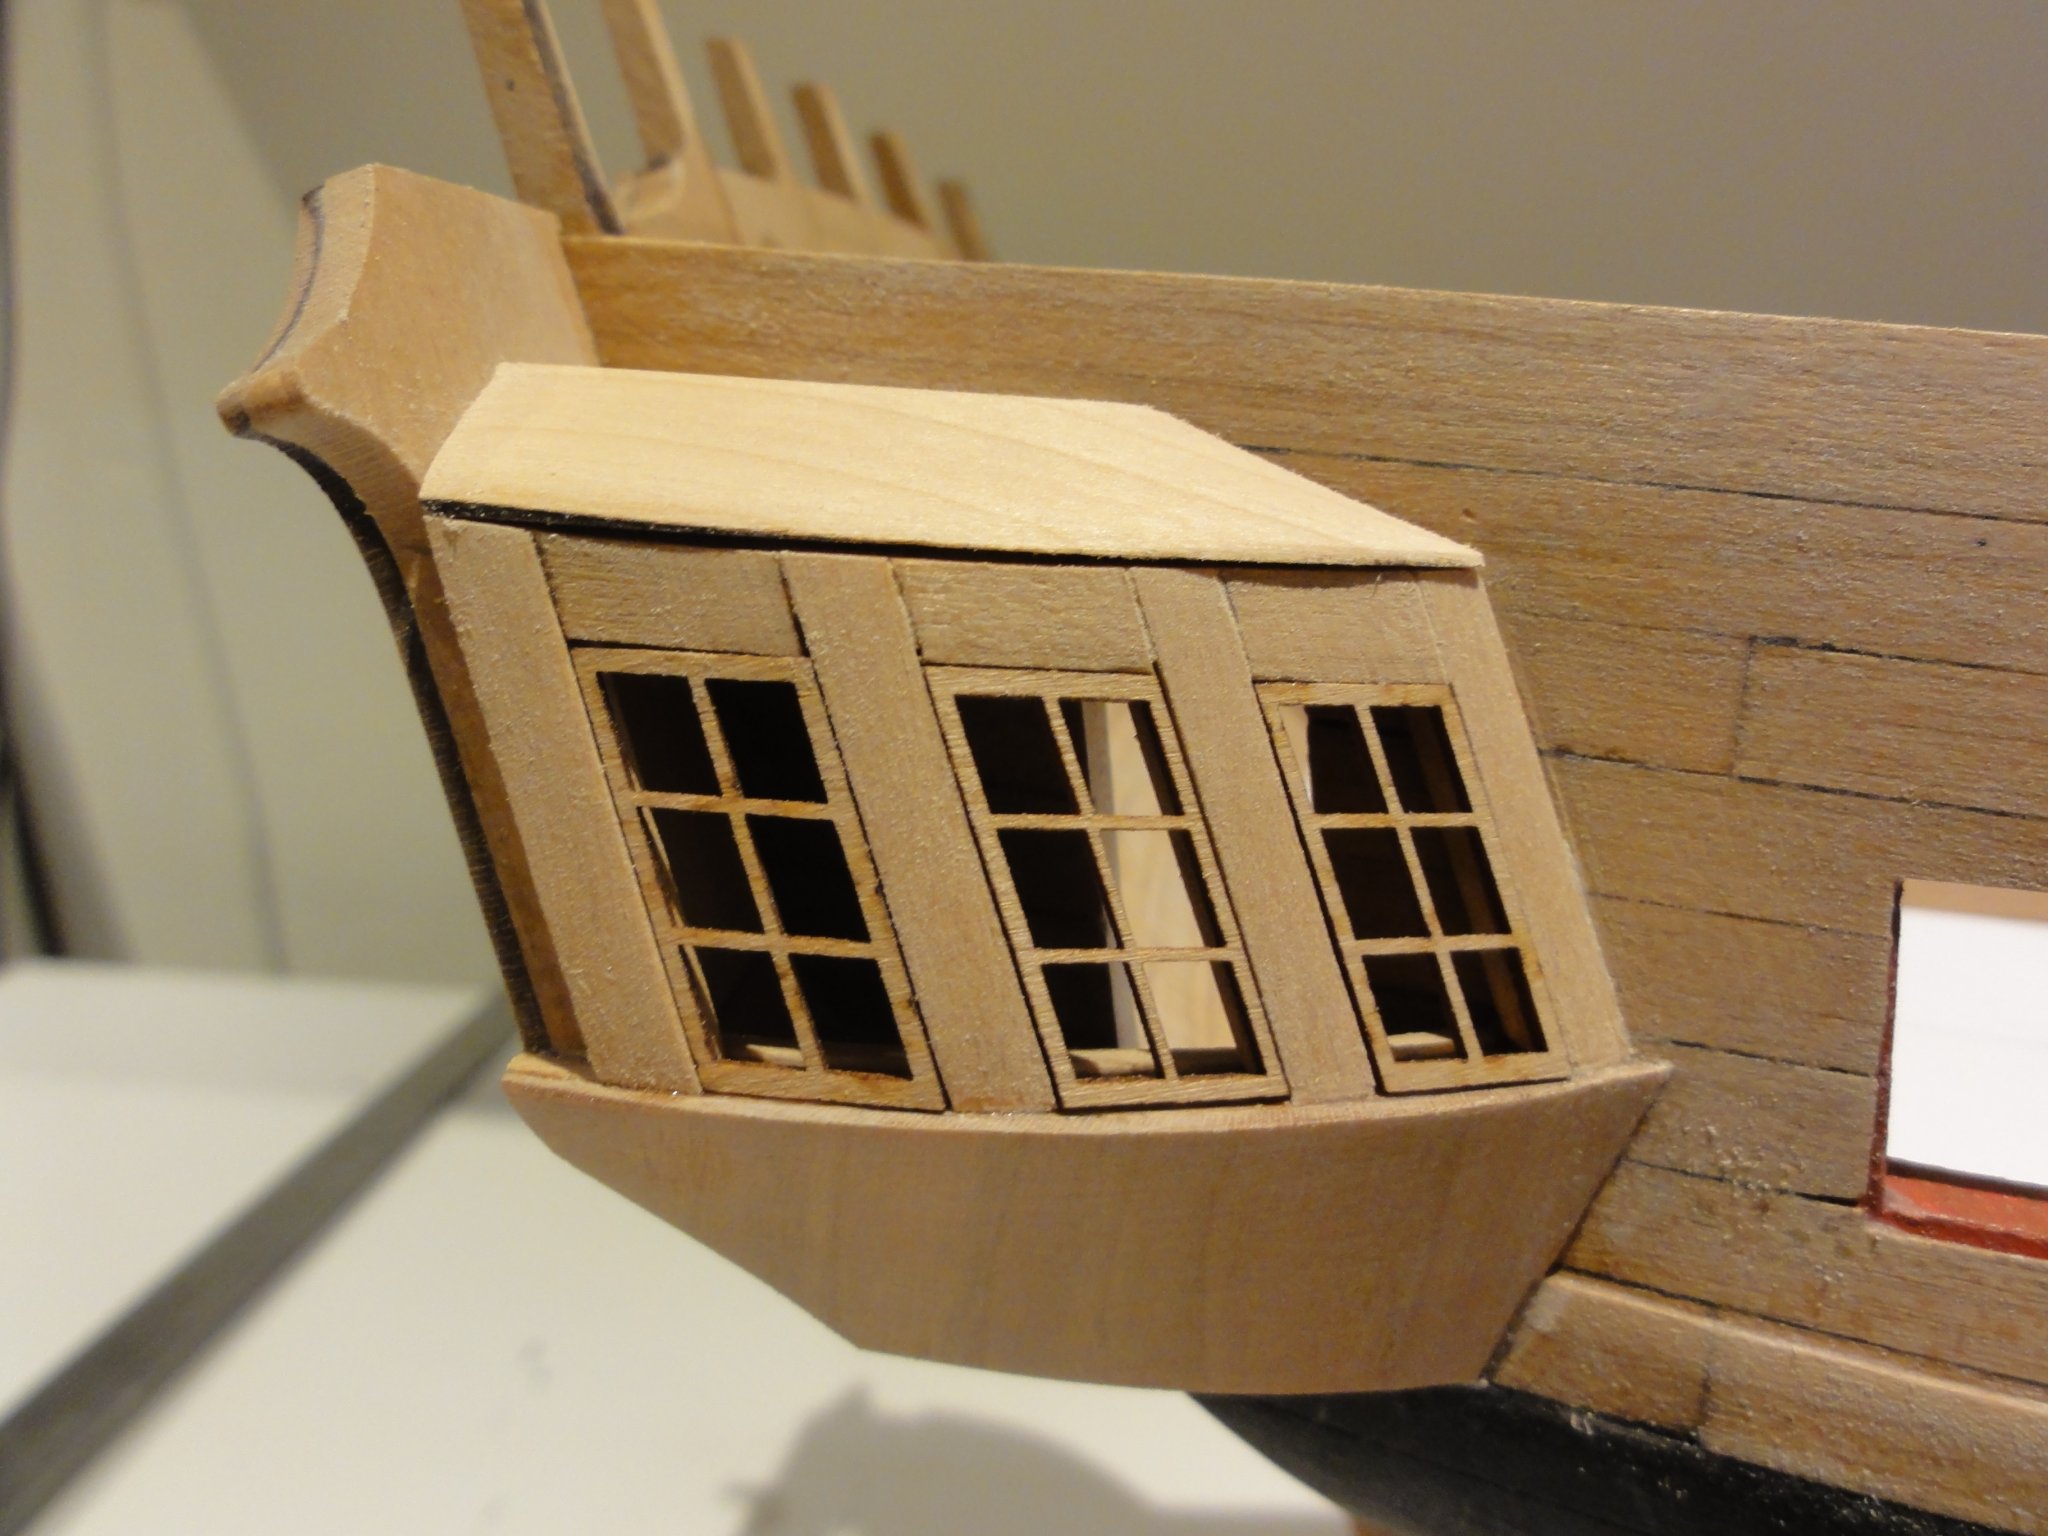
Thanks folks. JJ - your method is certainly better than mine and your Winnie is looking superb. Chuck - should the roof on the QGs be sanded flush to the outer wall of the QG as in the pictures below or do I need to add the fancy moulding and sand the roof to the ouyer edge of that? Fancy mouldings next. I've never tried that before. Fred

.thumb.JPG.1ee694194d3e81014105ce49572e932b.JPG)

-
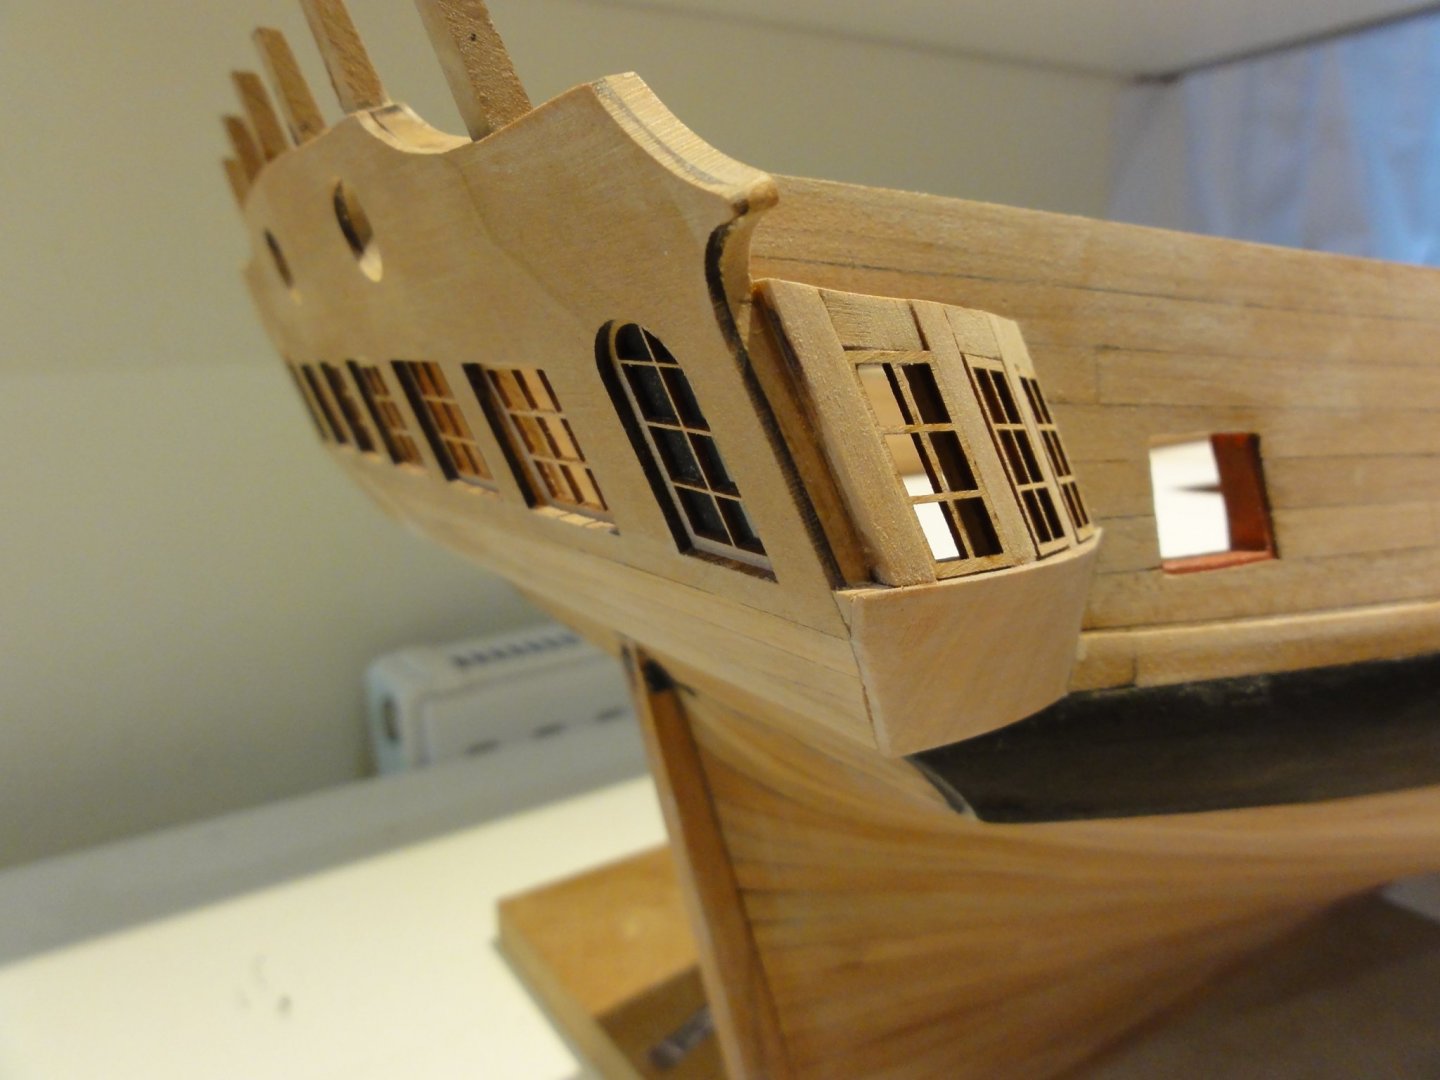
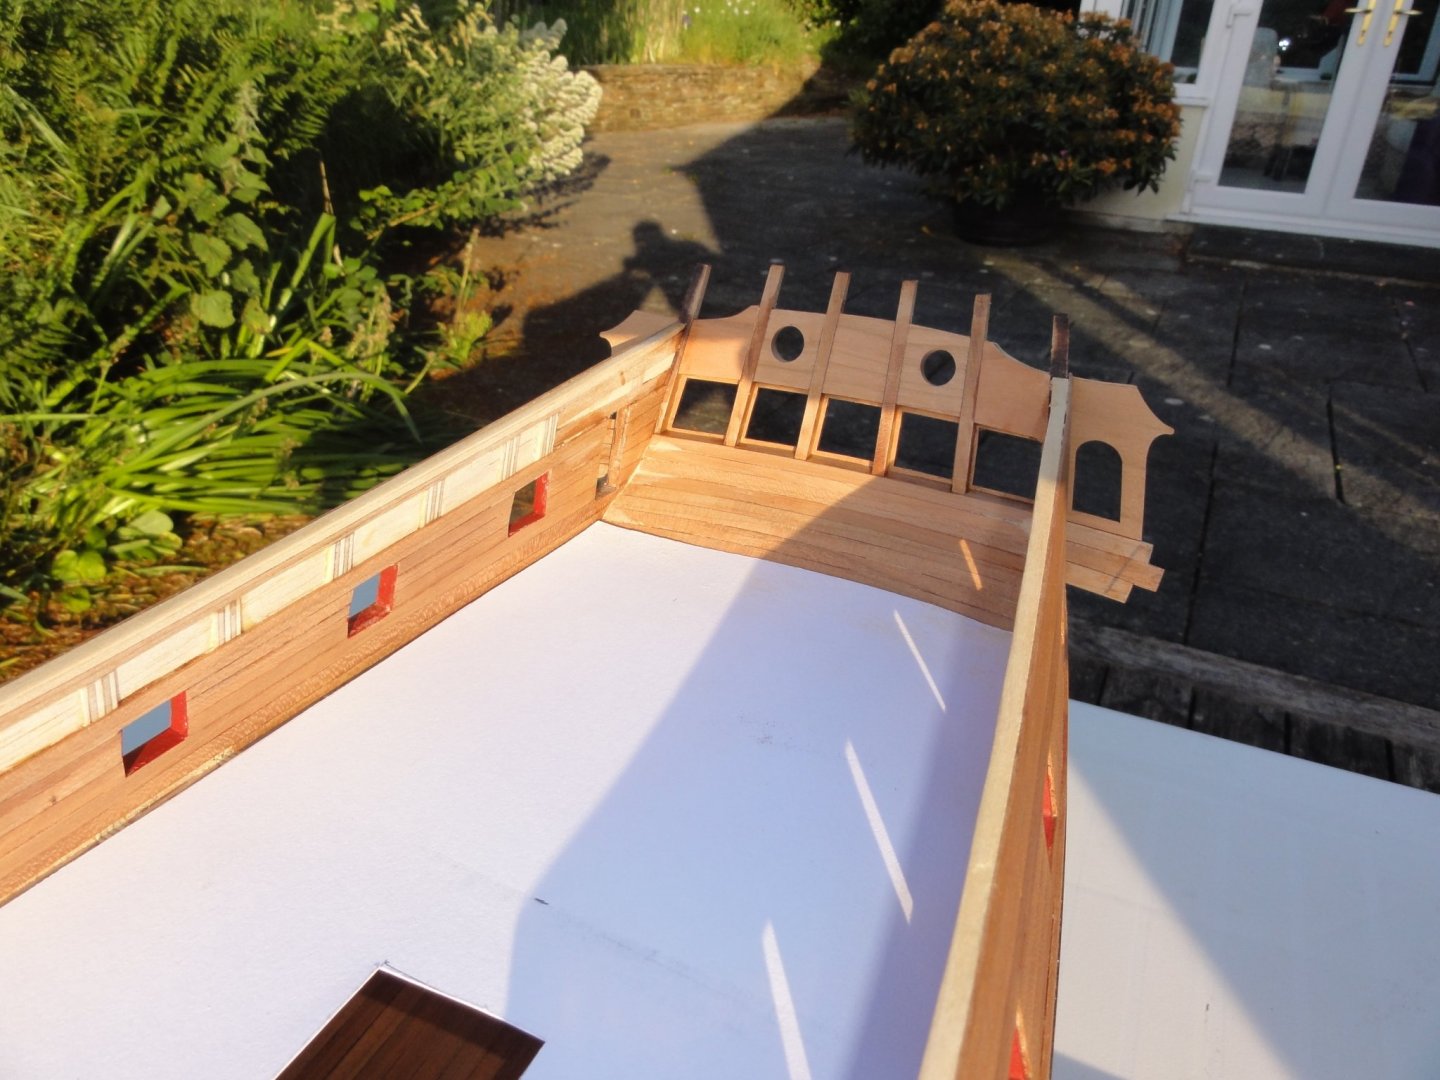
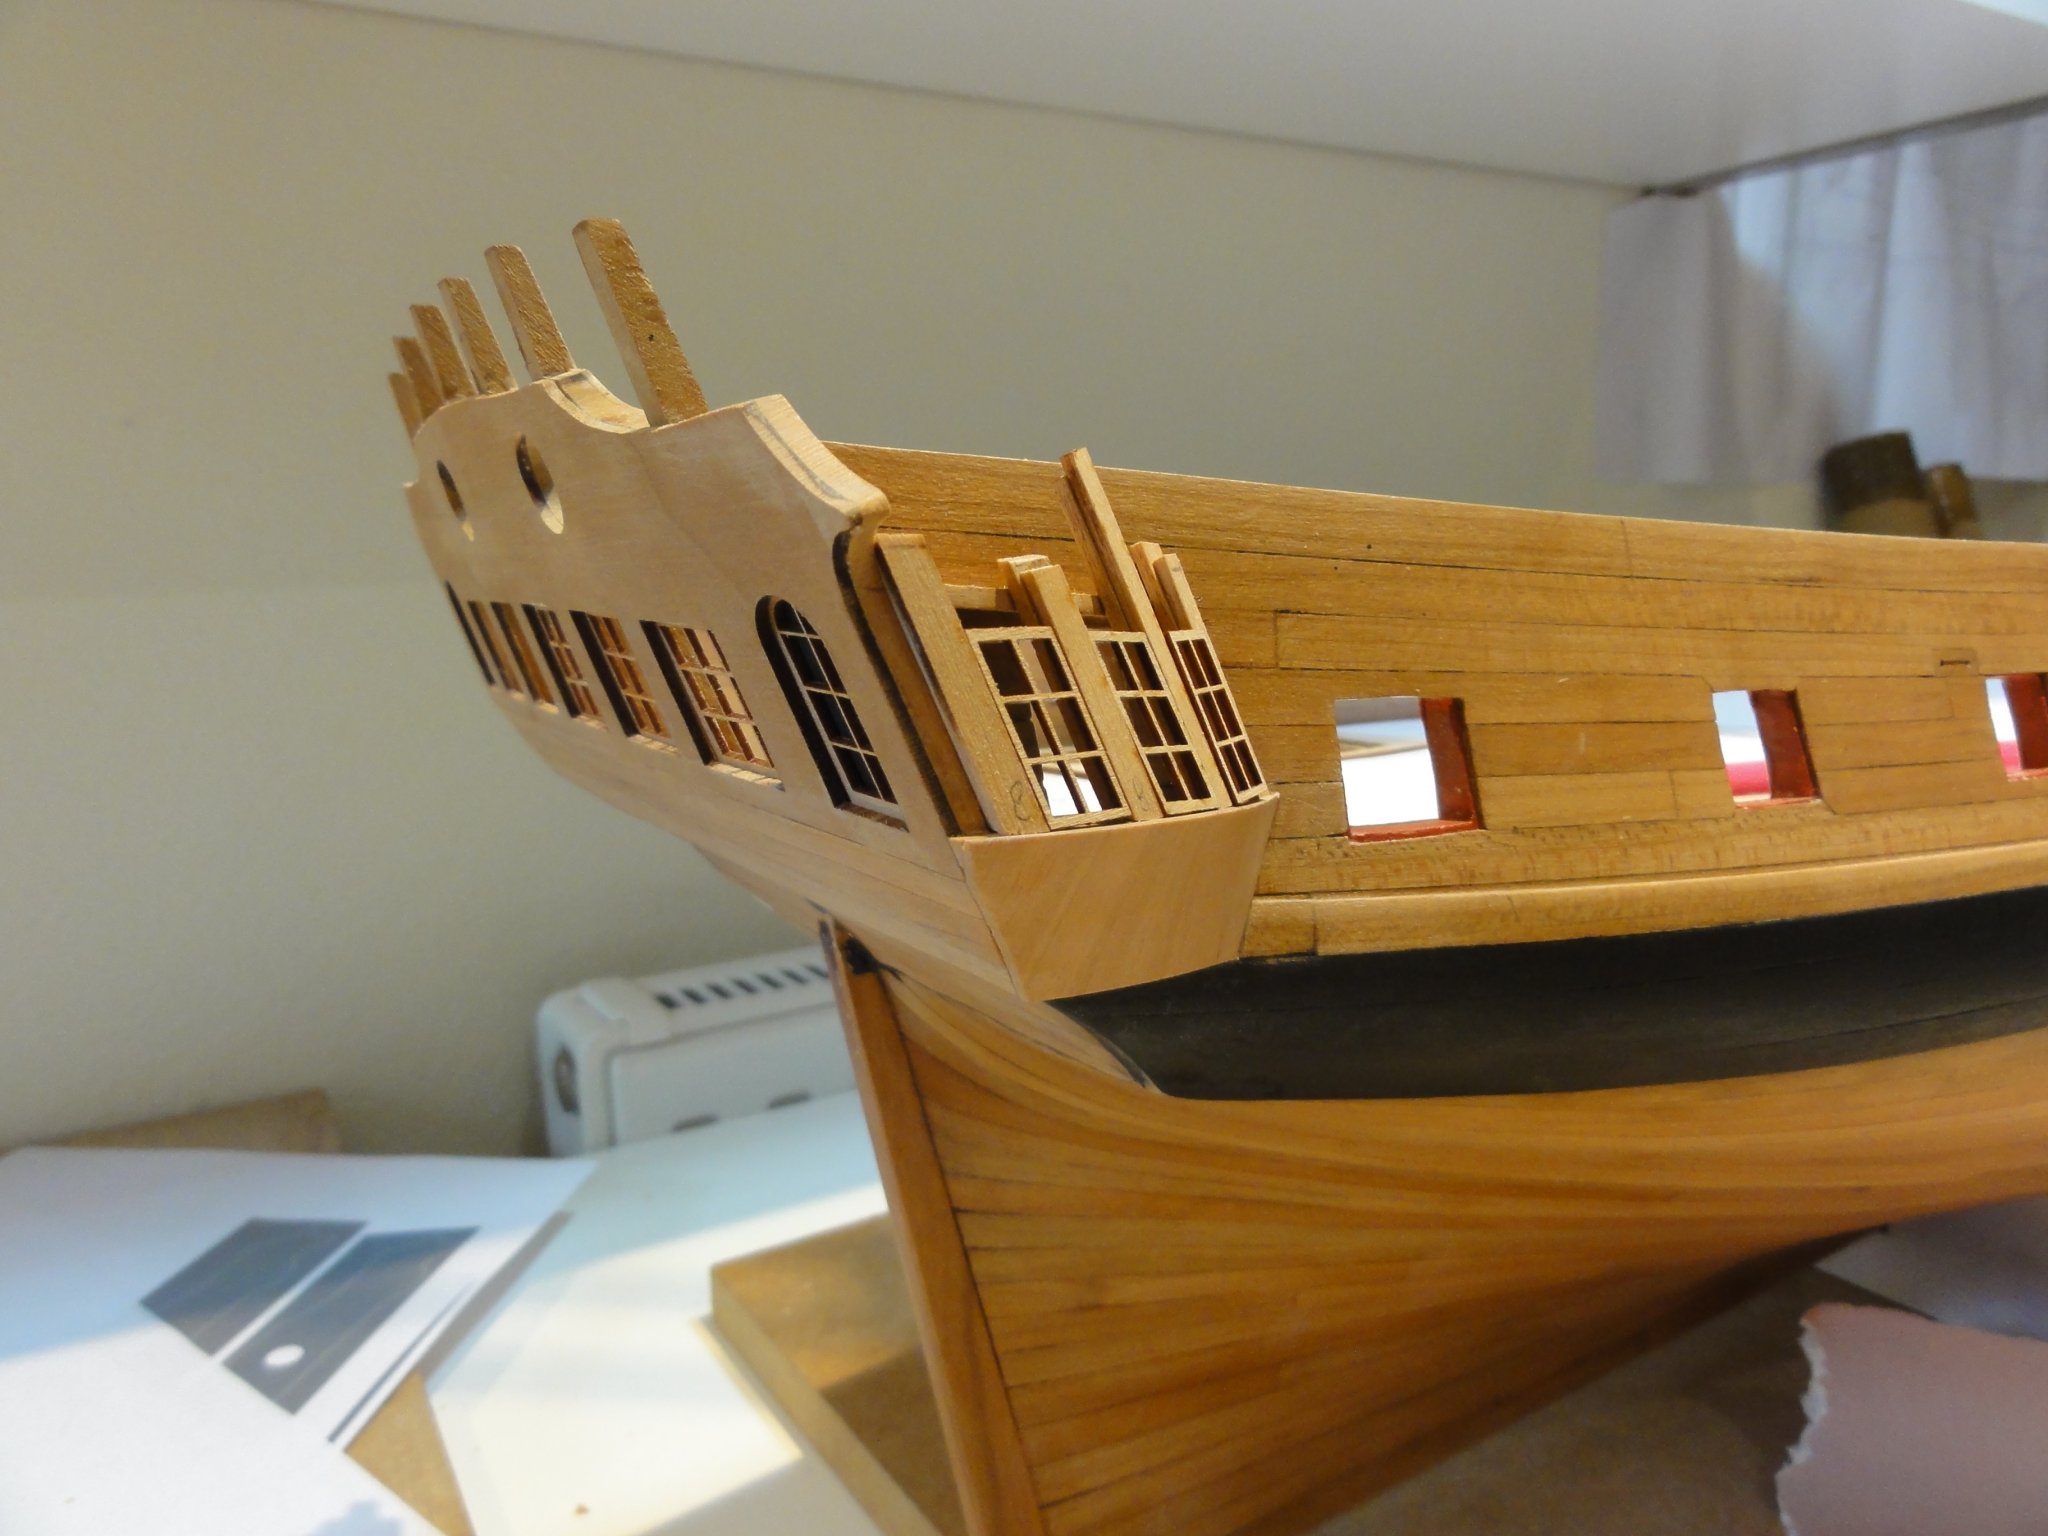
I forgot to mention – chuck supplies 14 window frames of various angles from which you can select the best 6 to suit your QG. In the photos above I have just taken the first three – just see what they look like. Here's a start on the other side.

-
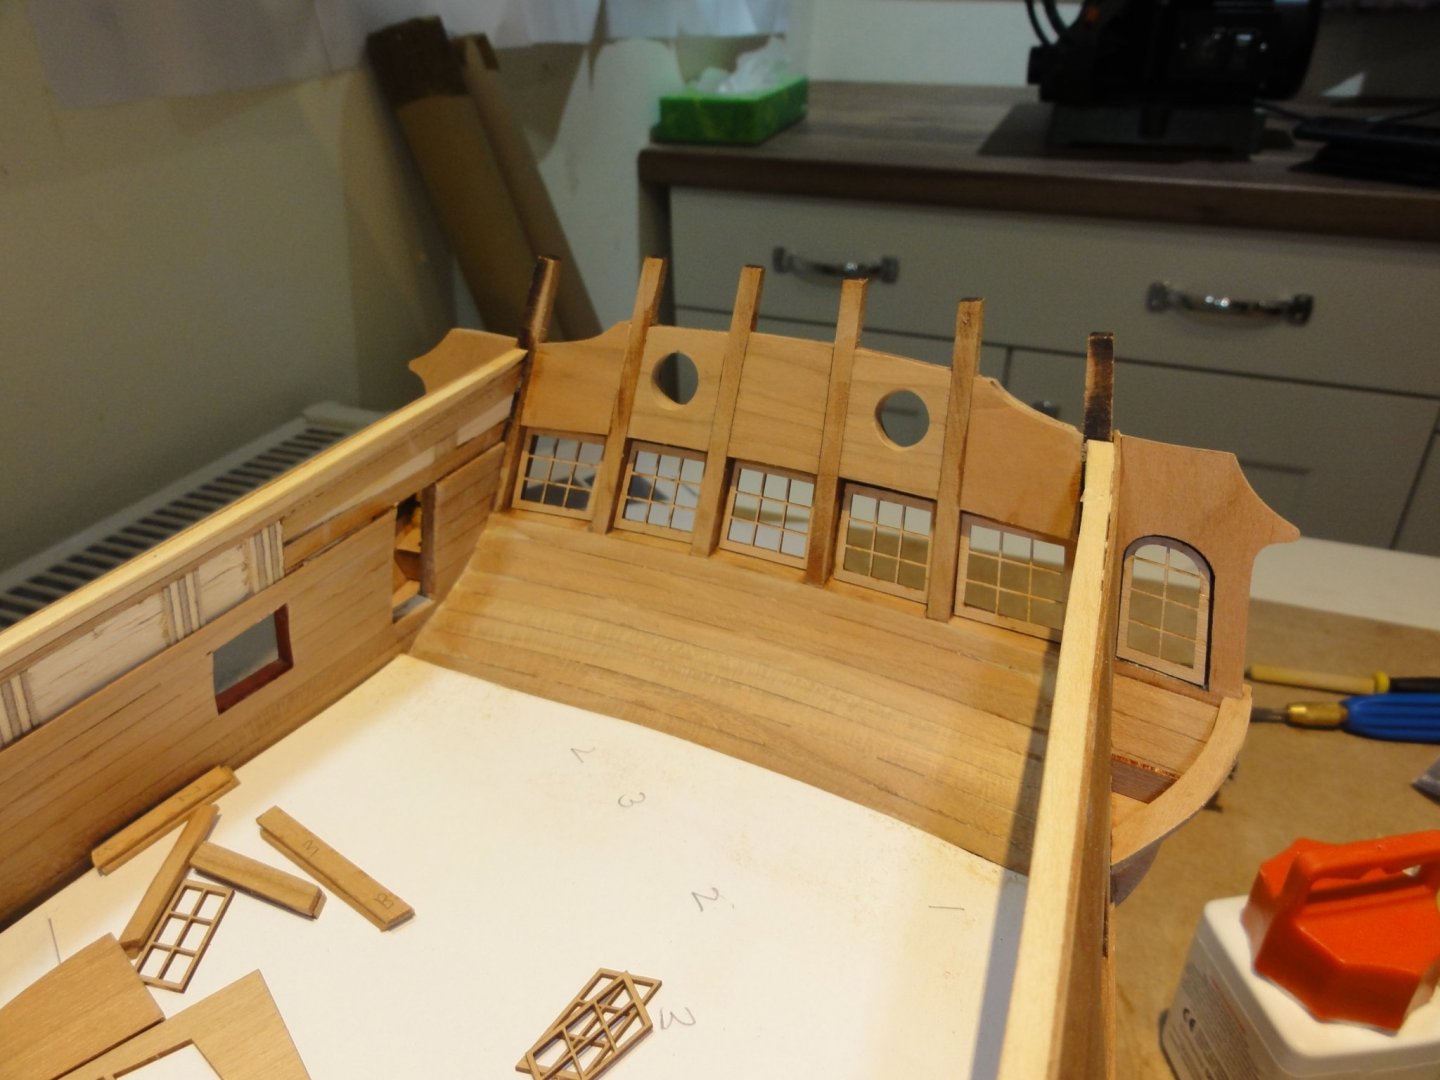
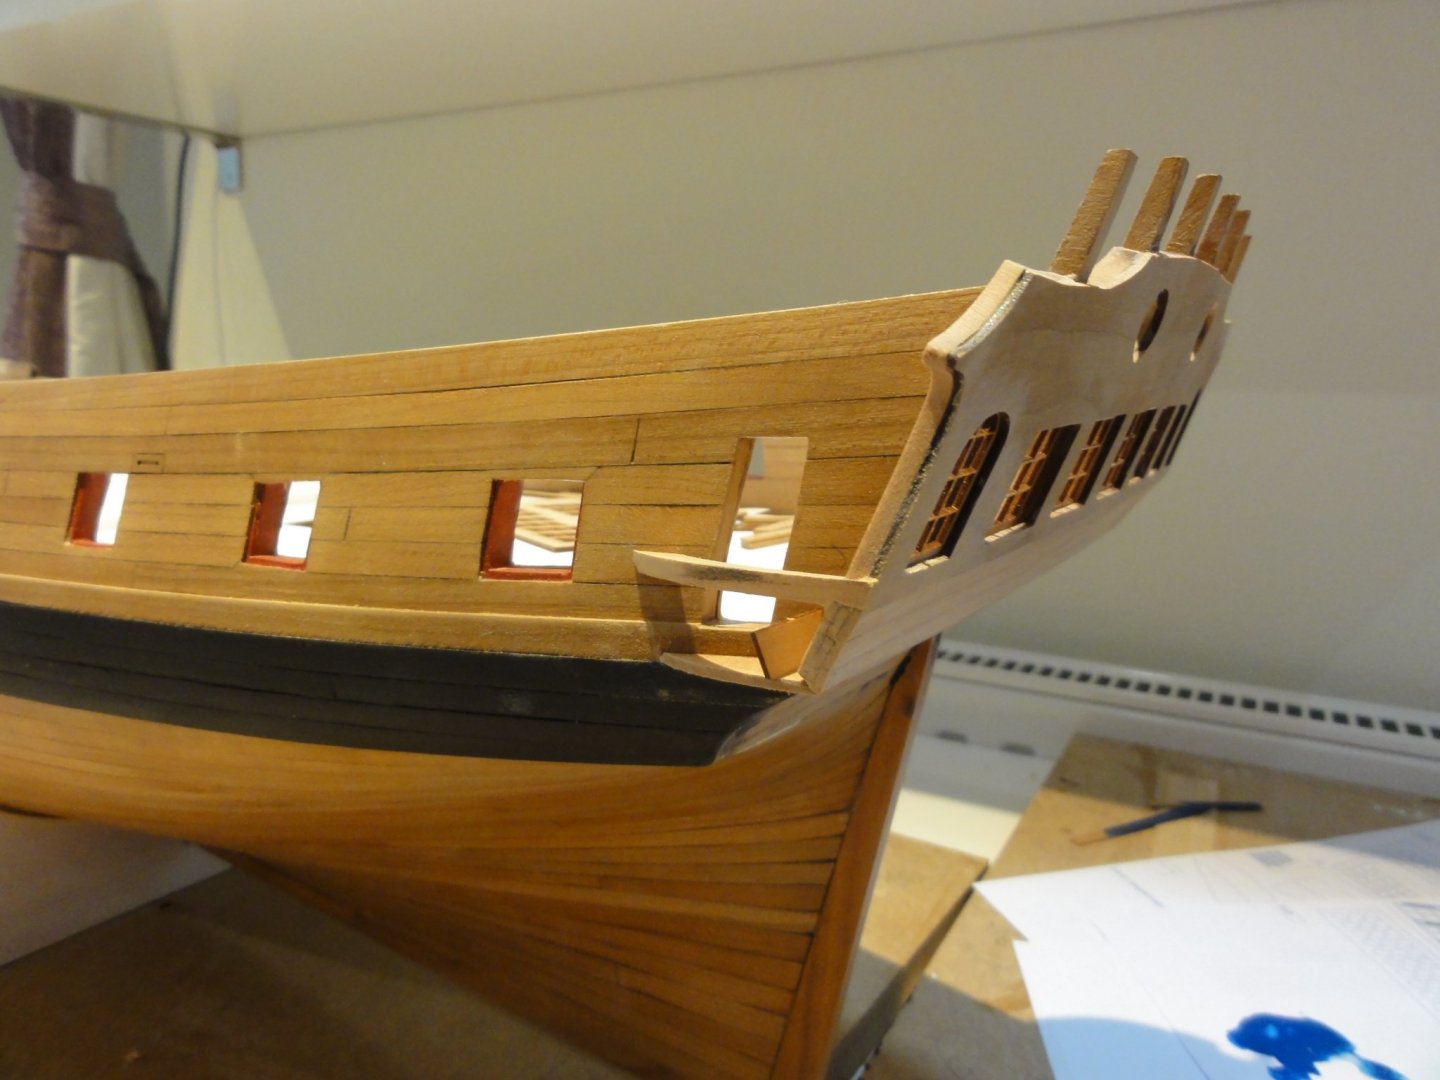
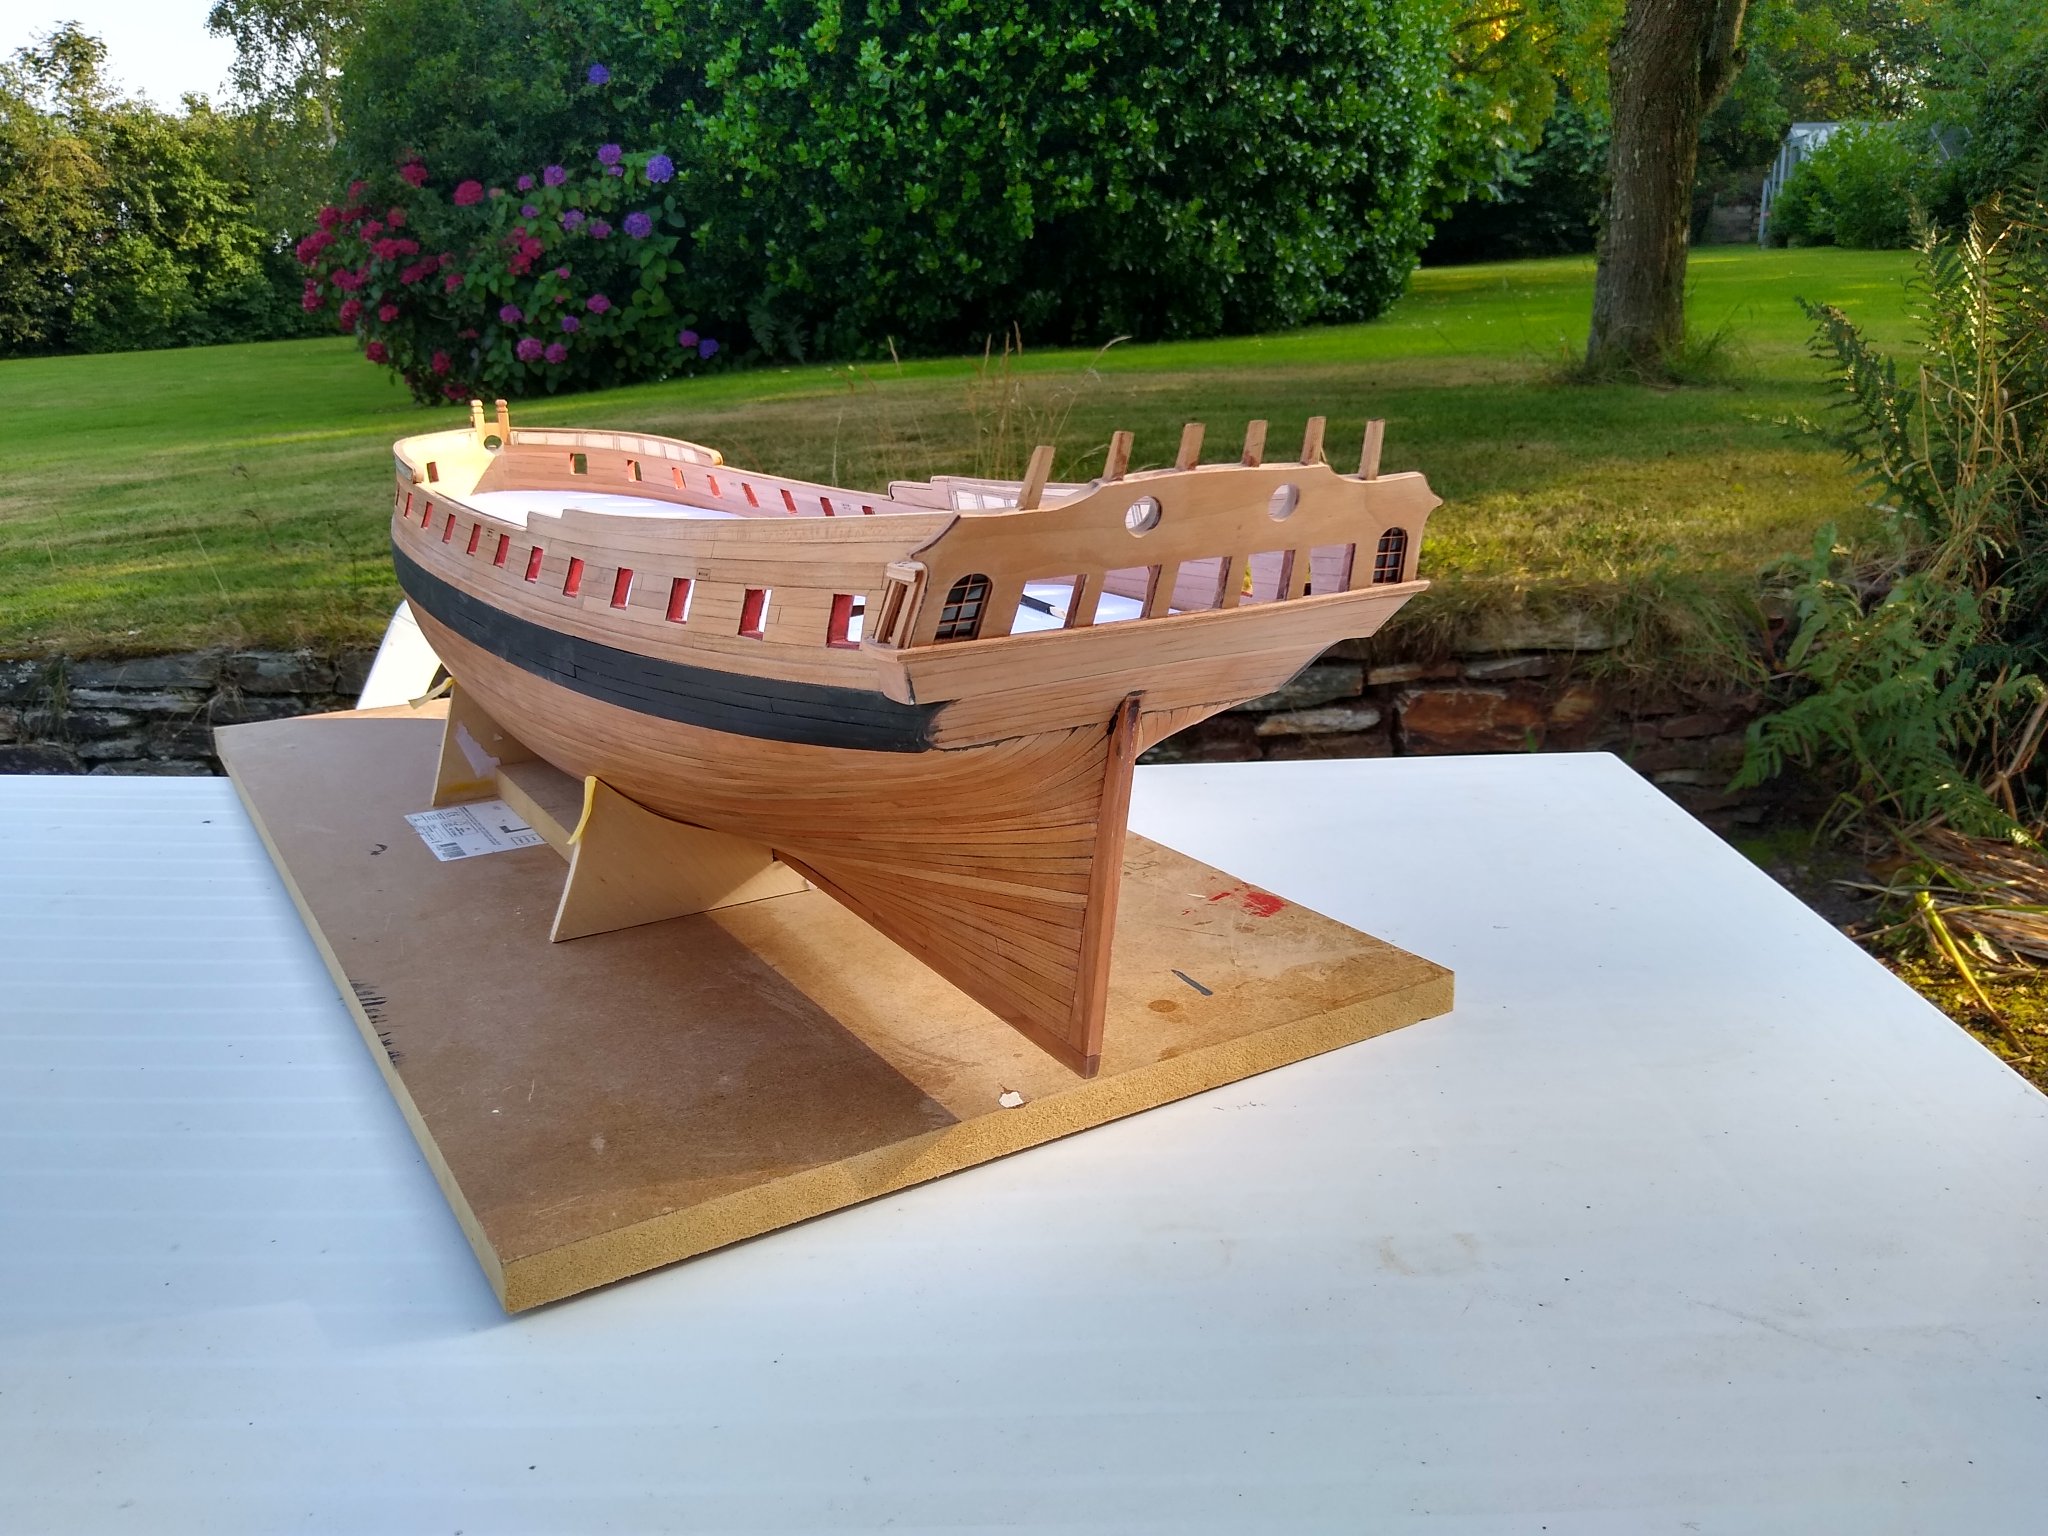
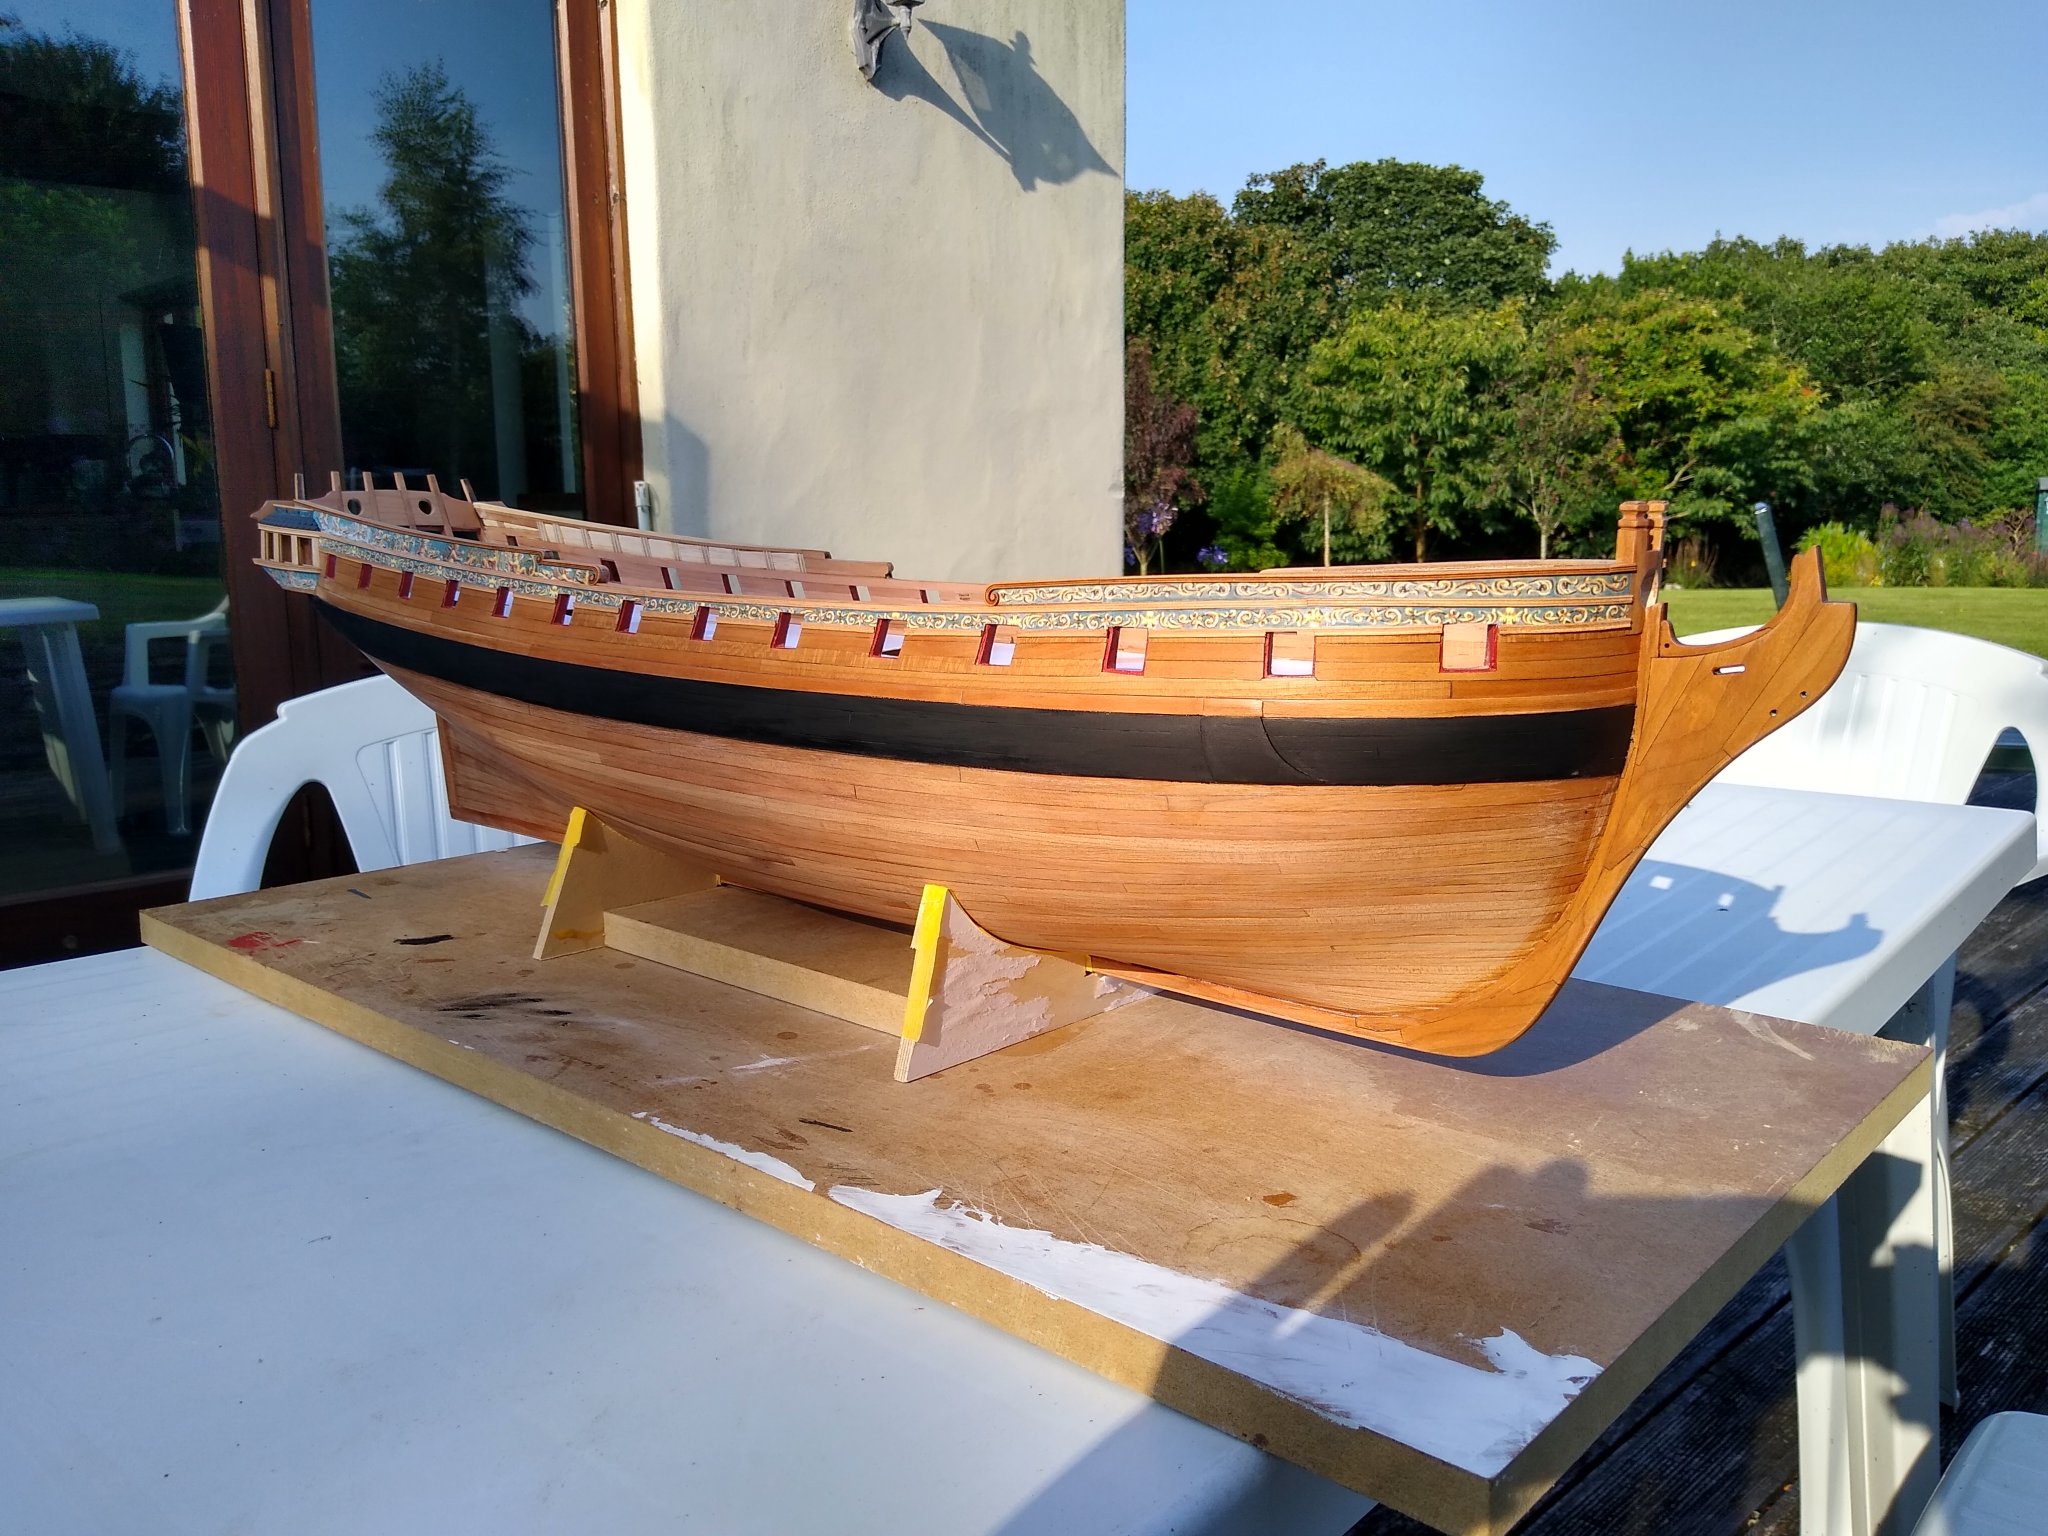
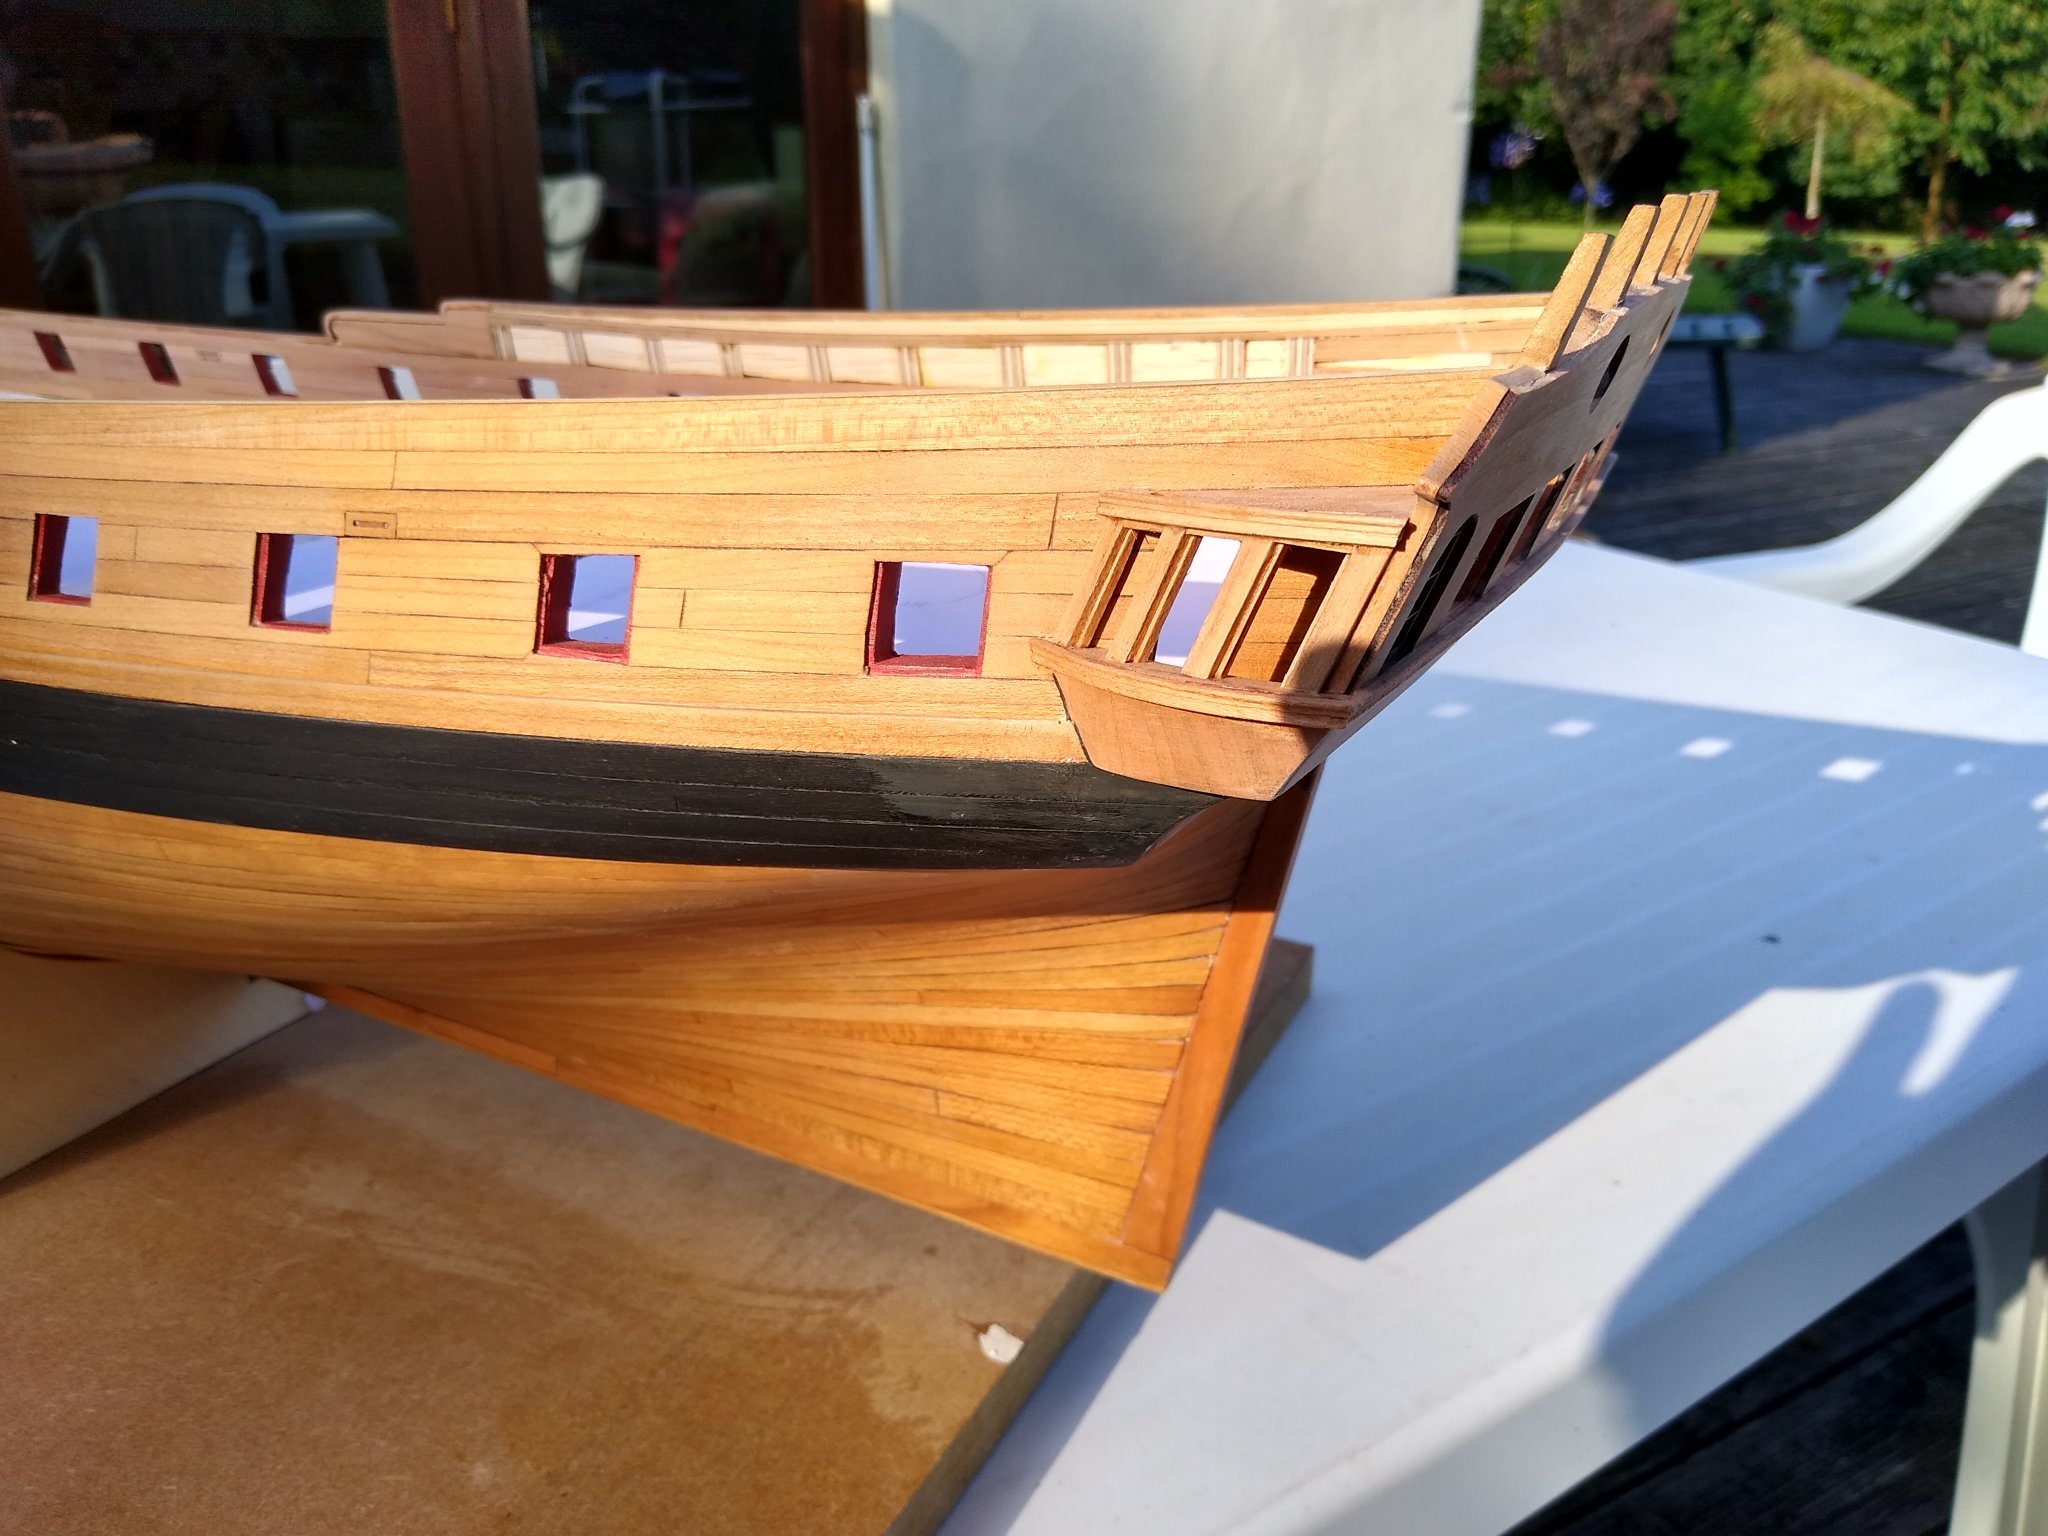
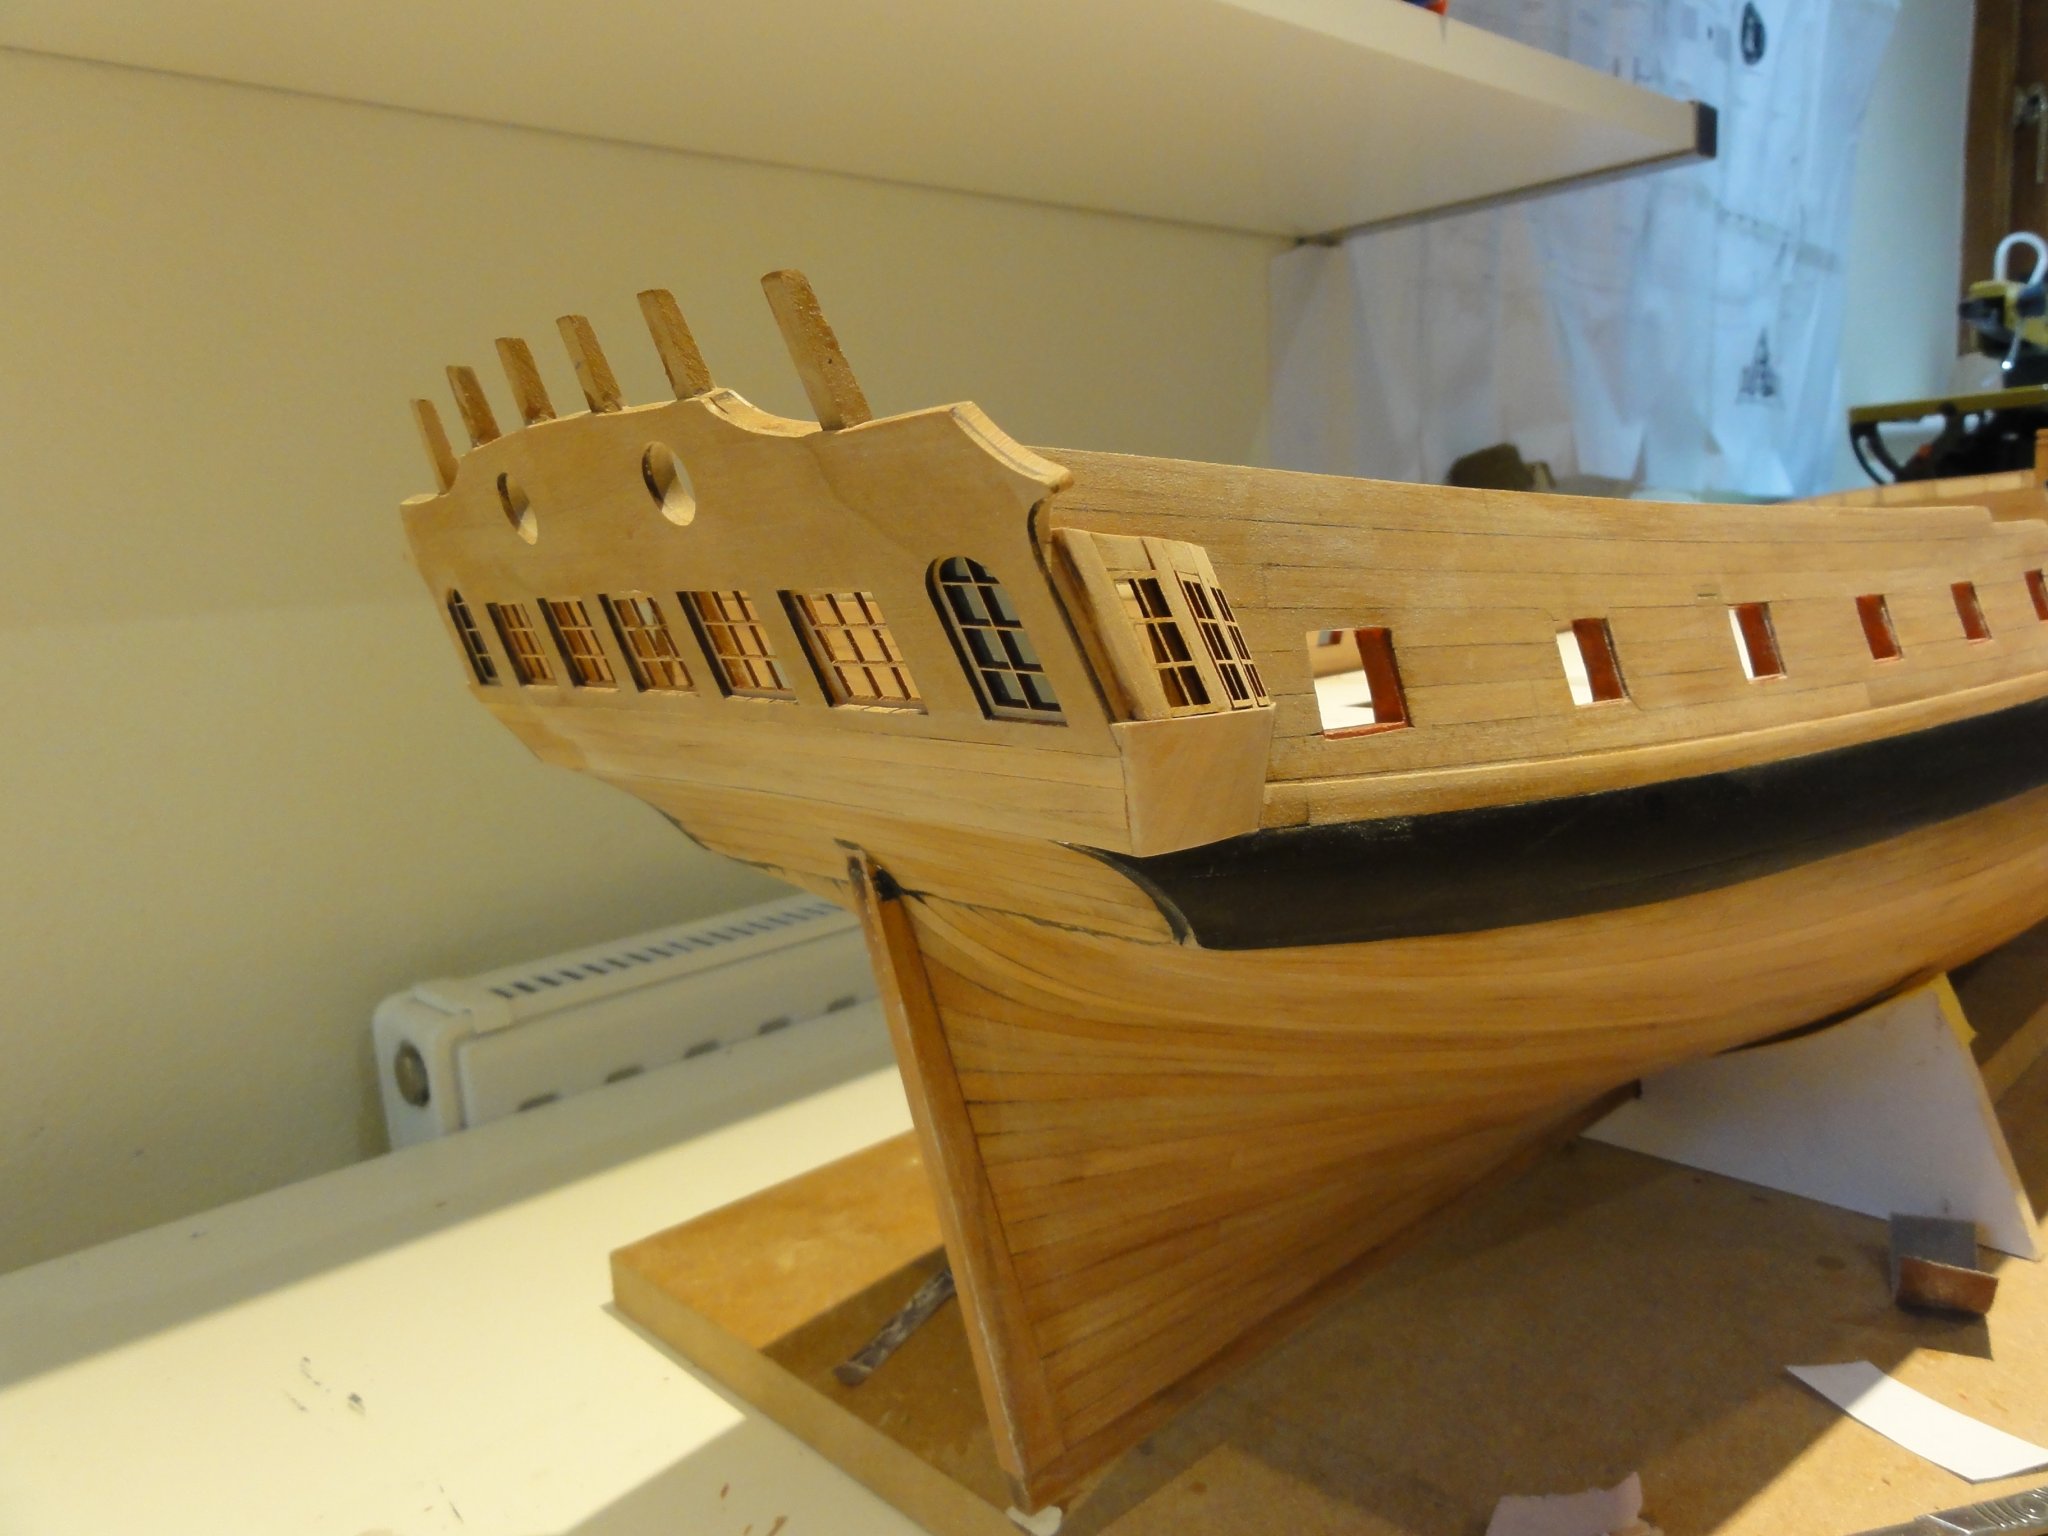
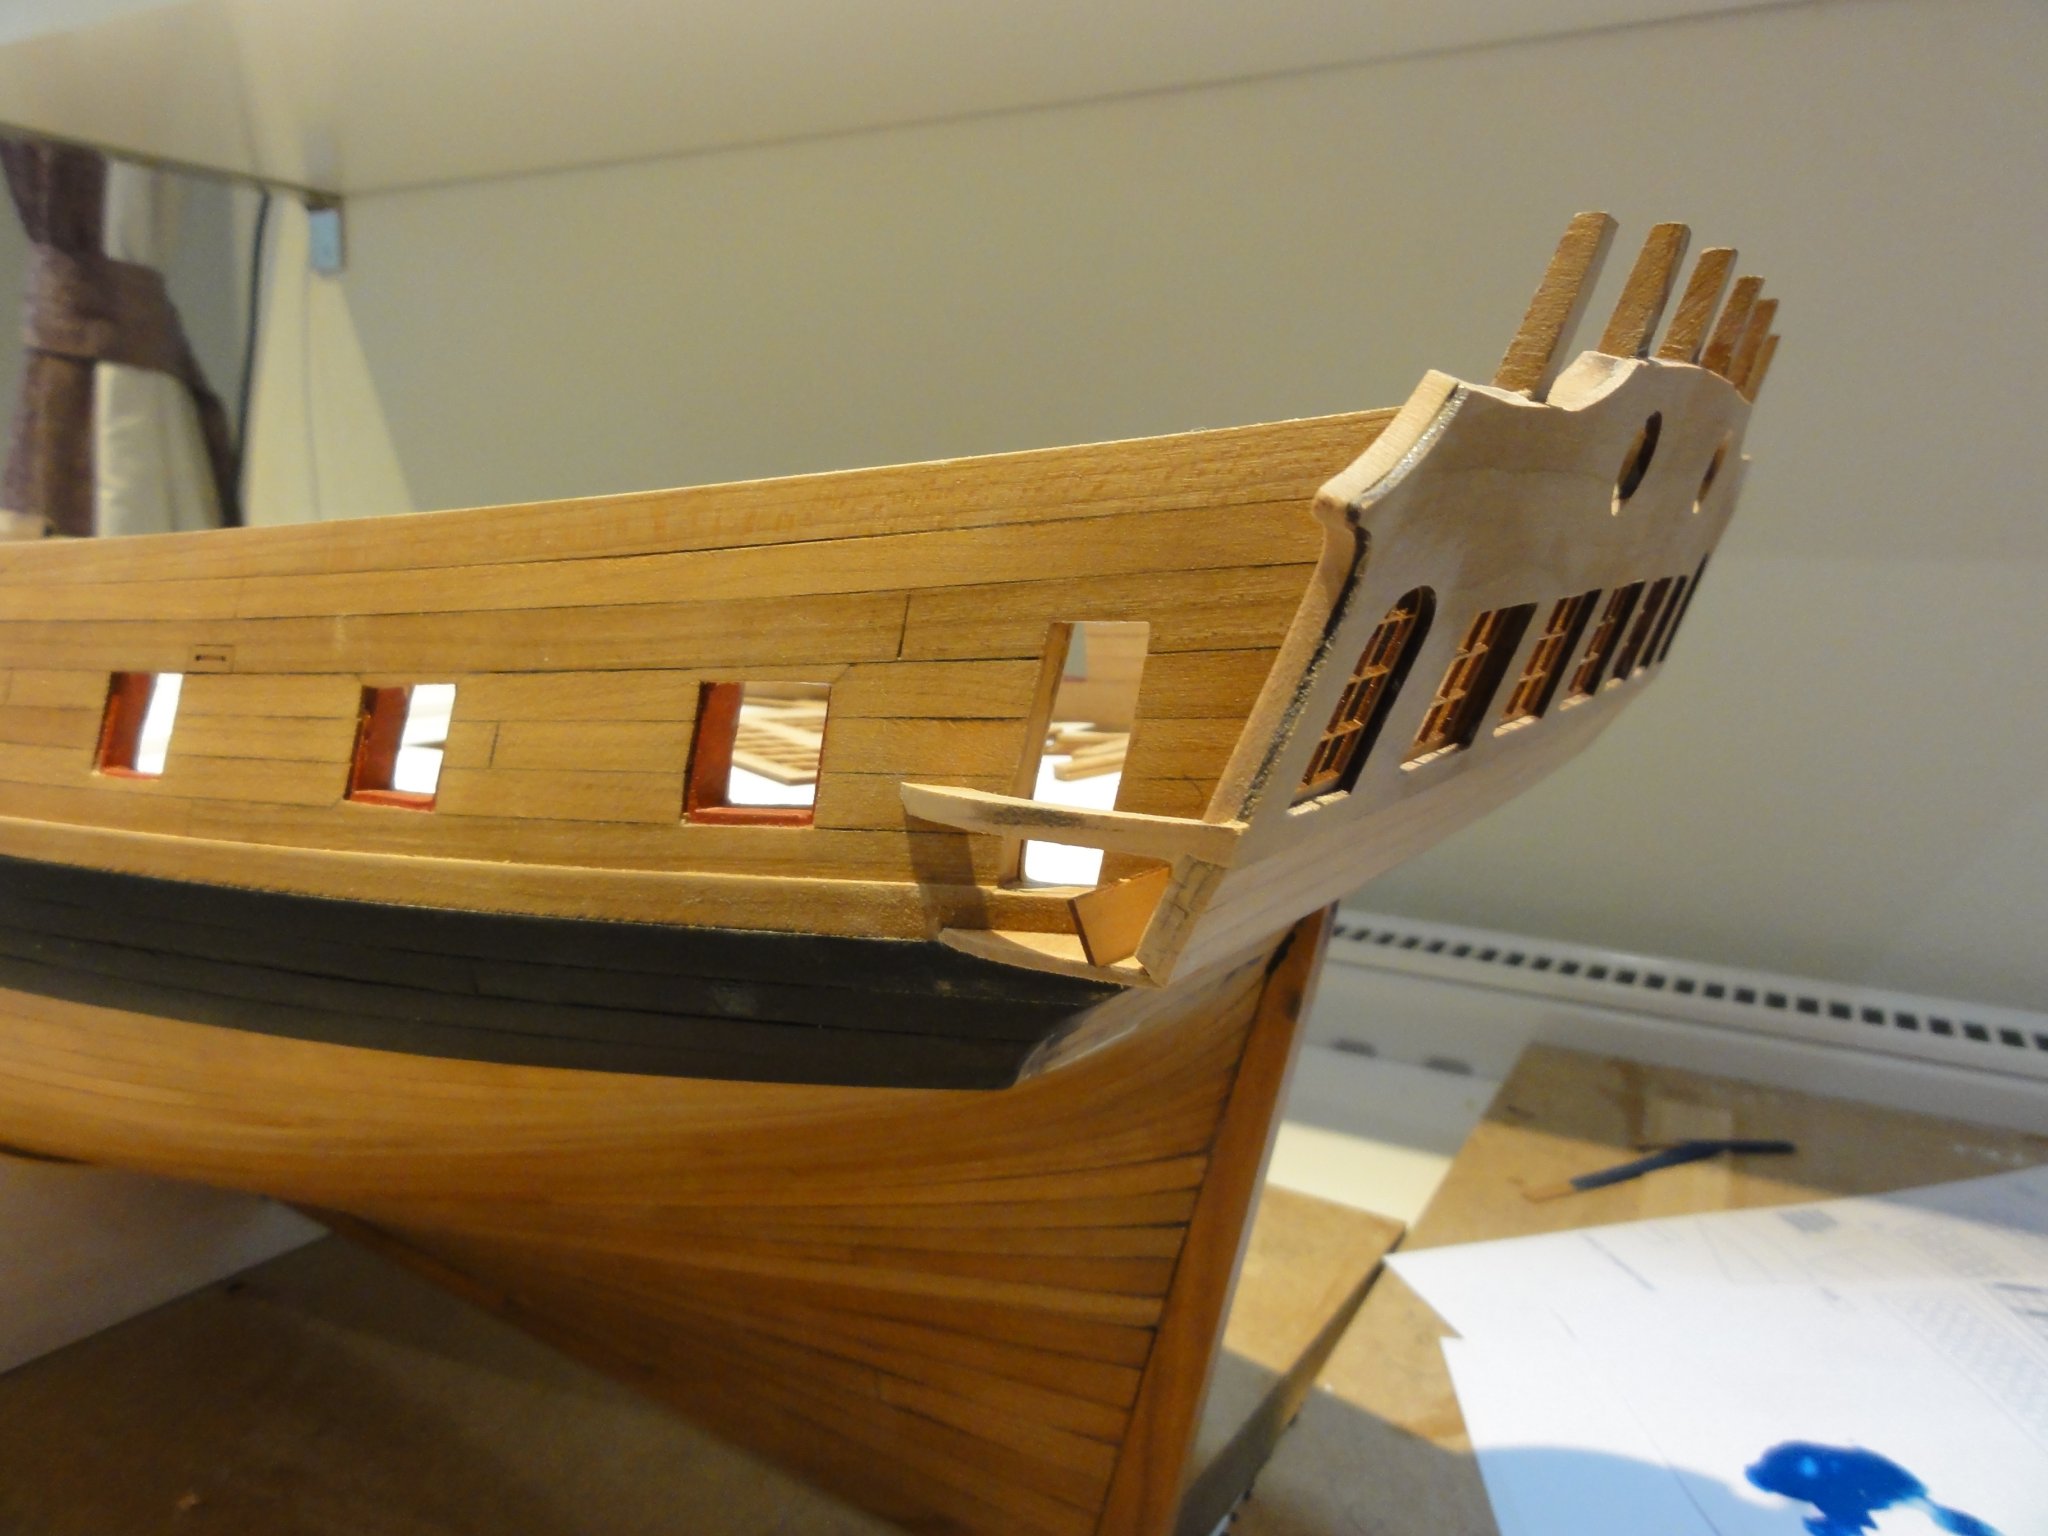
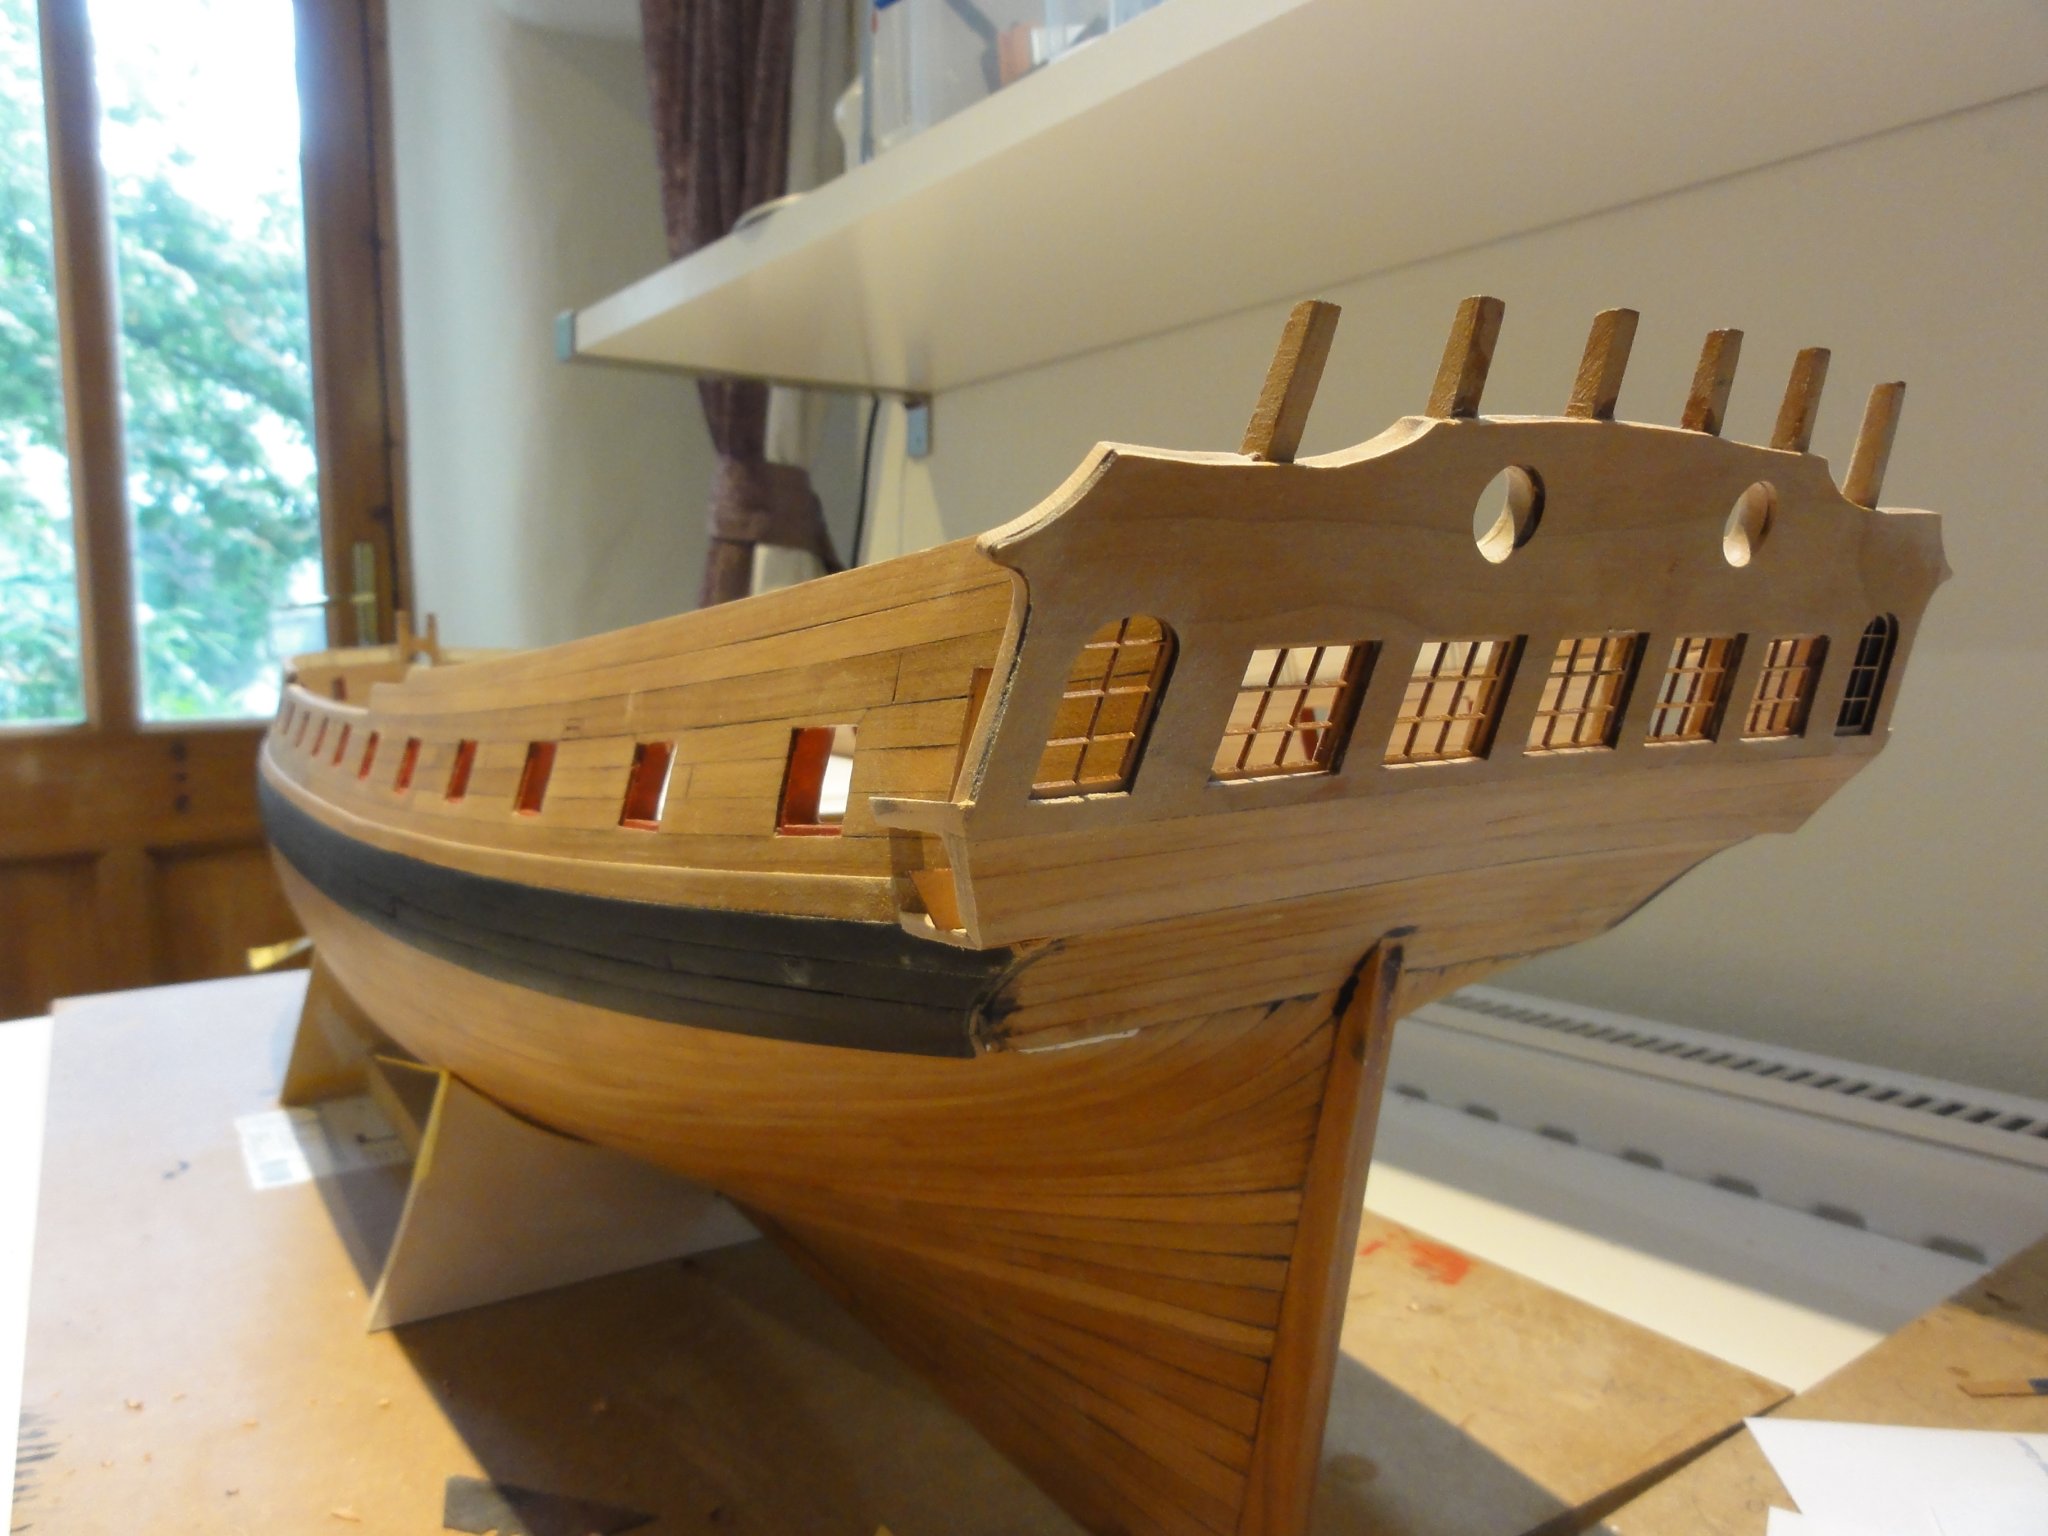
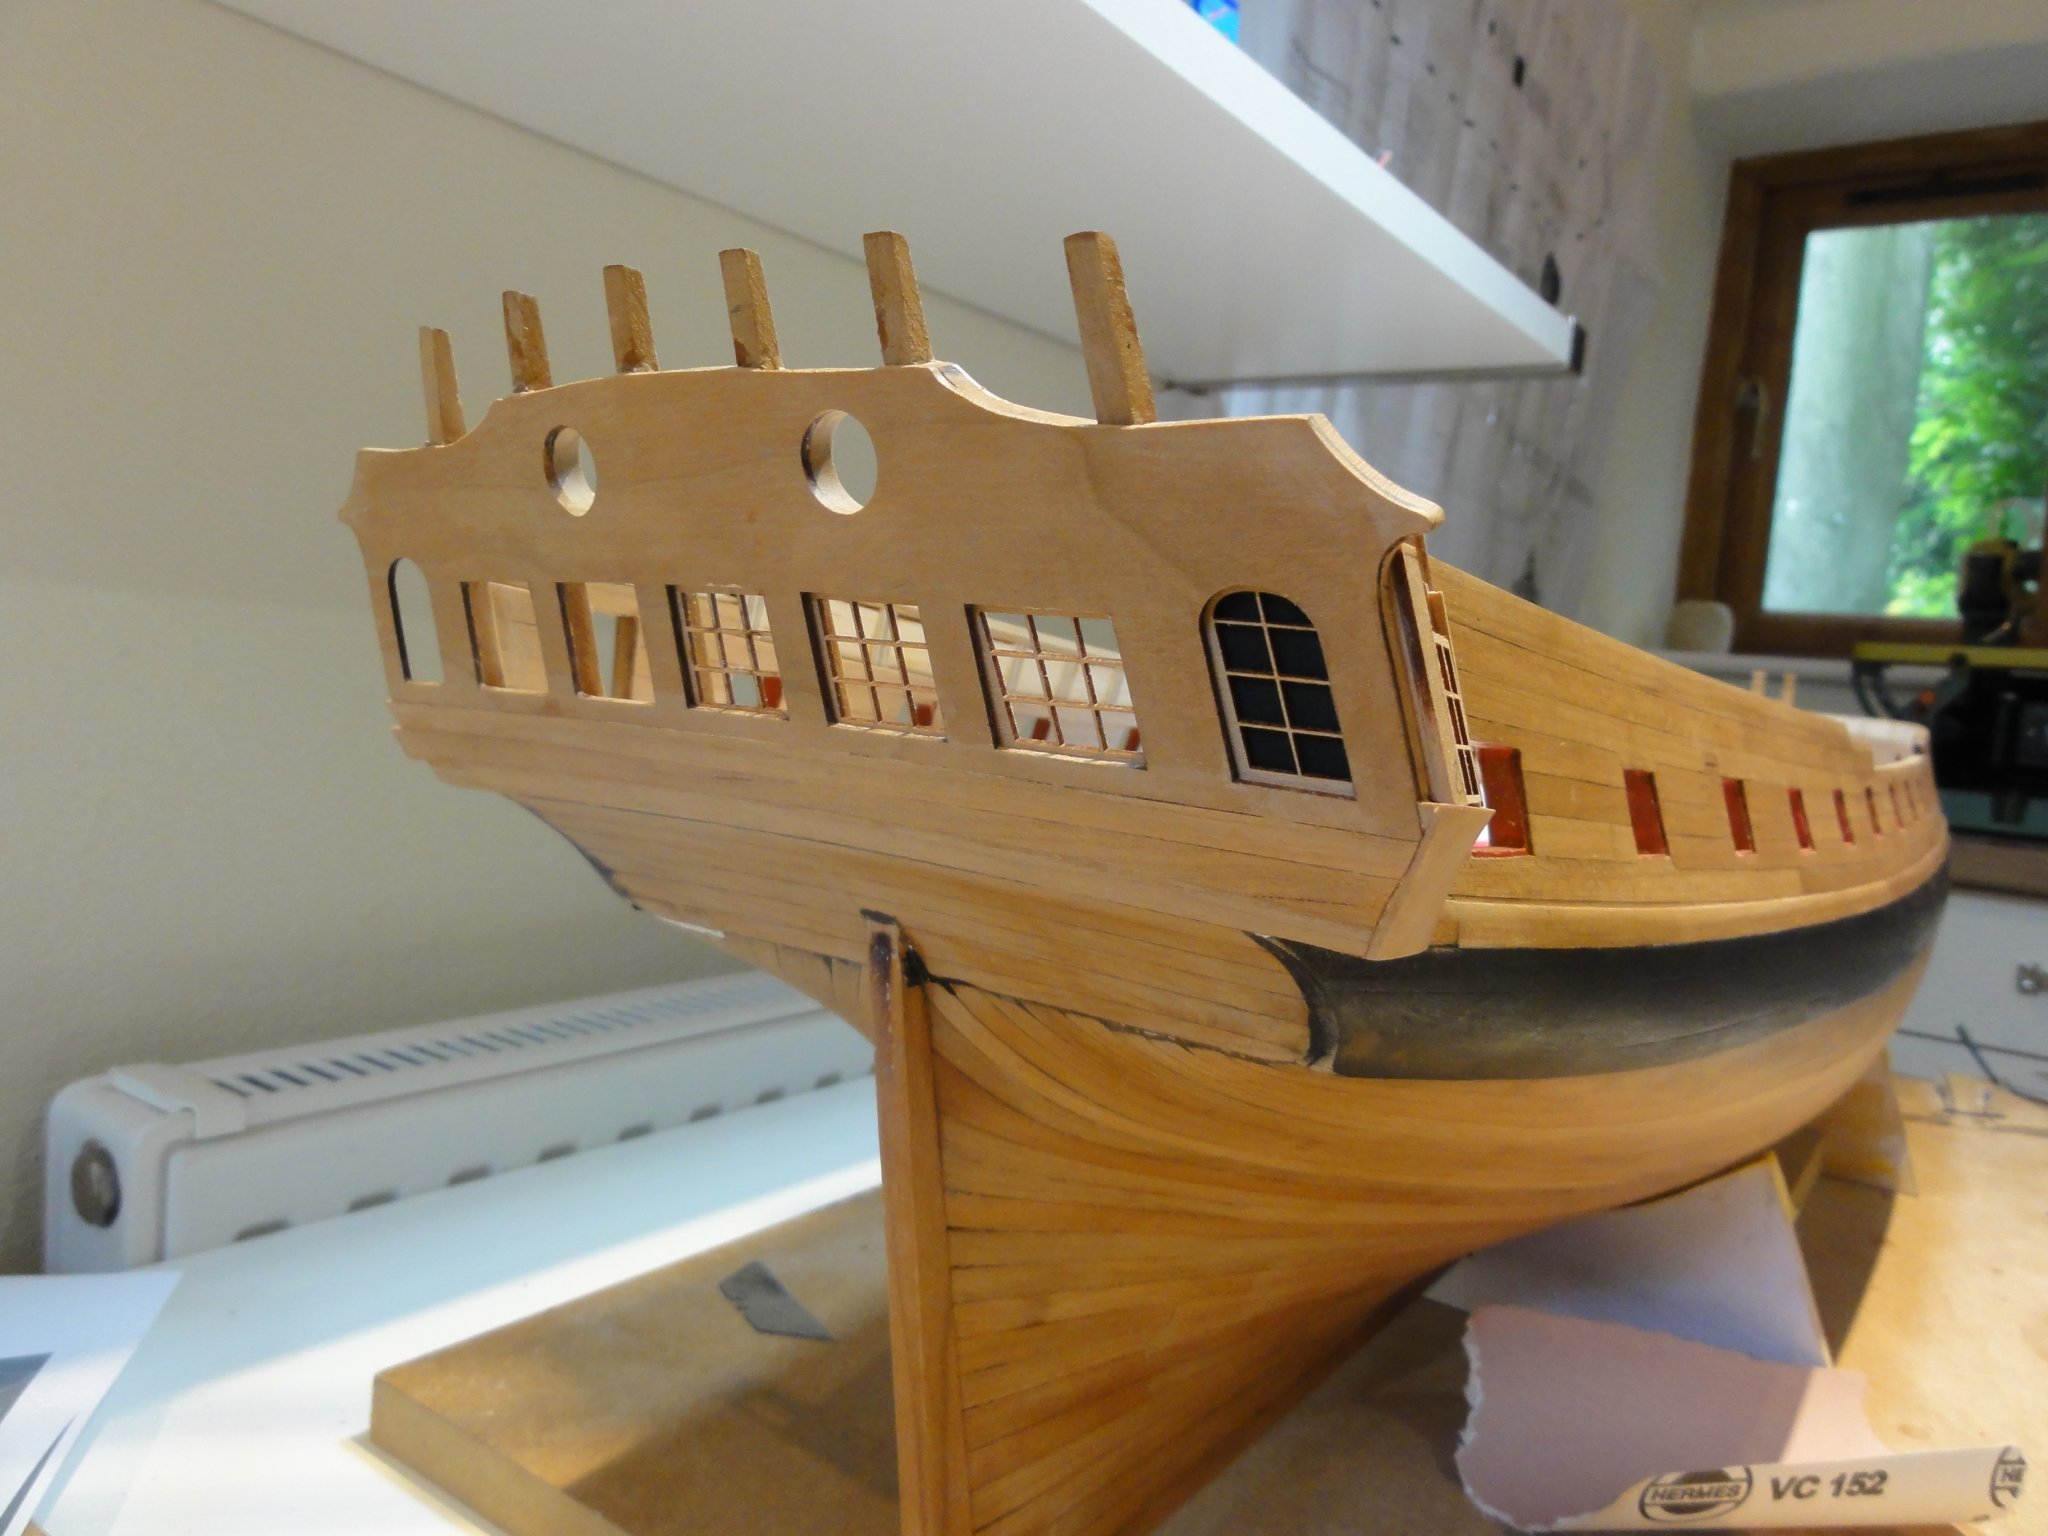
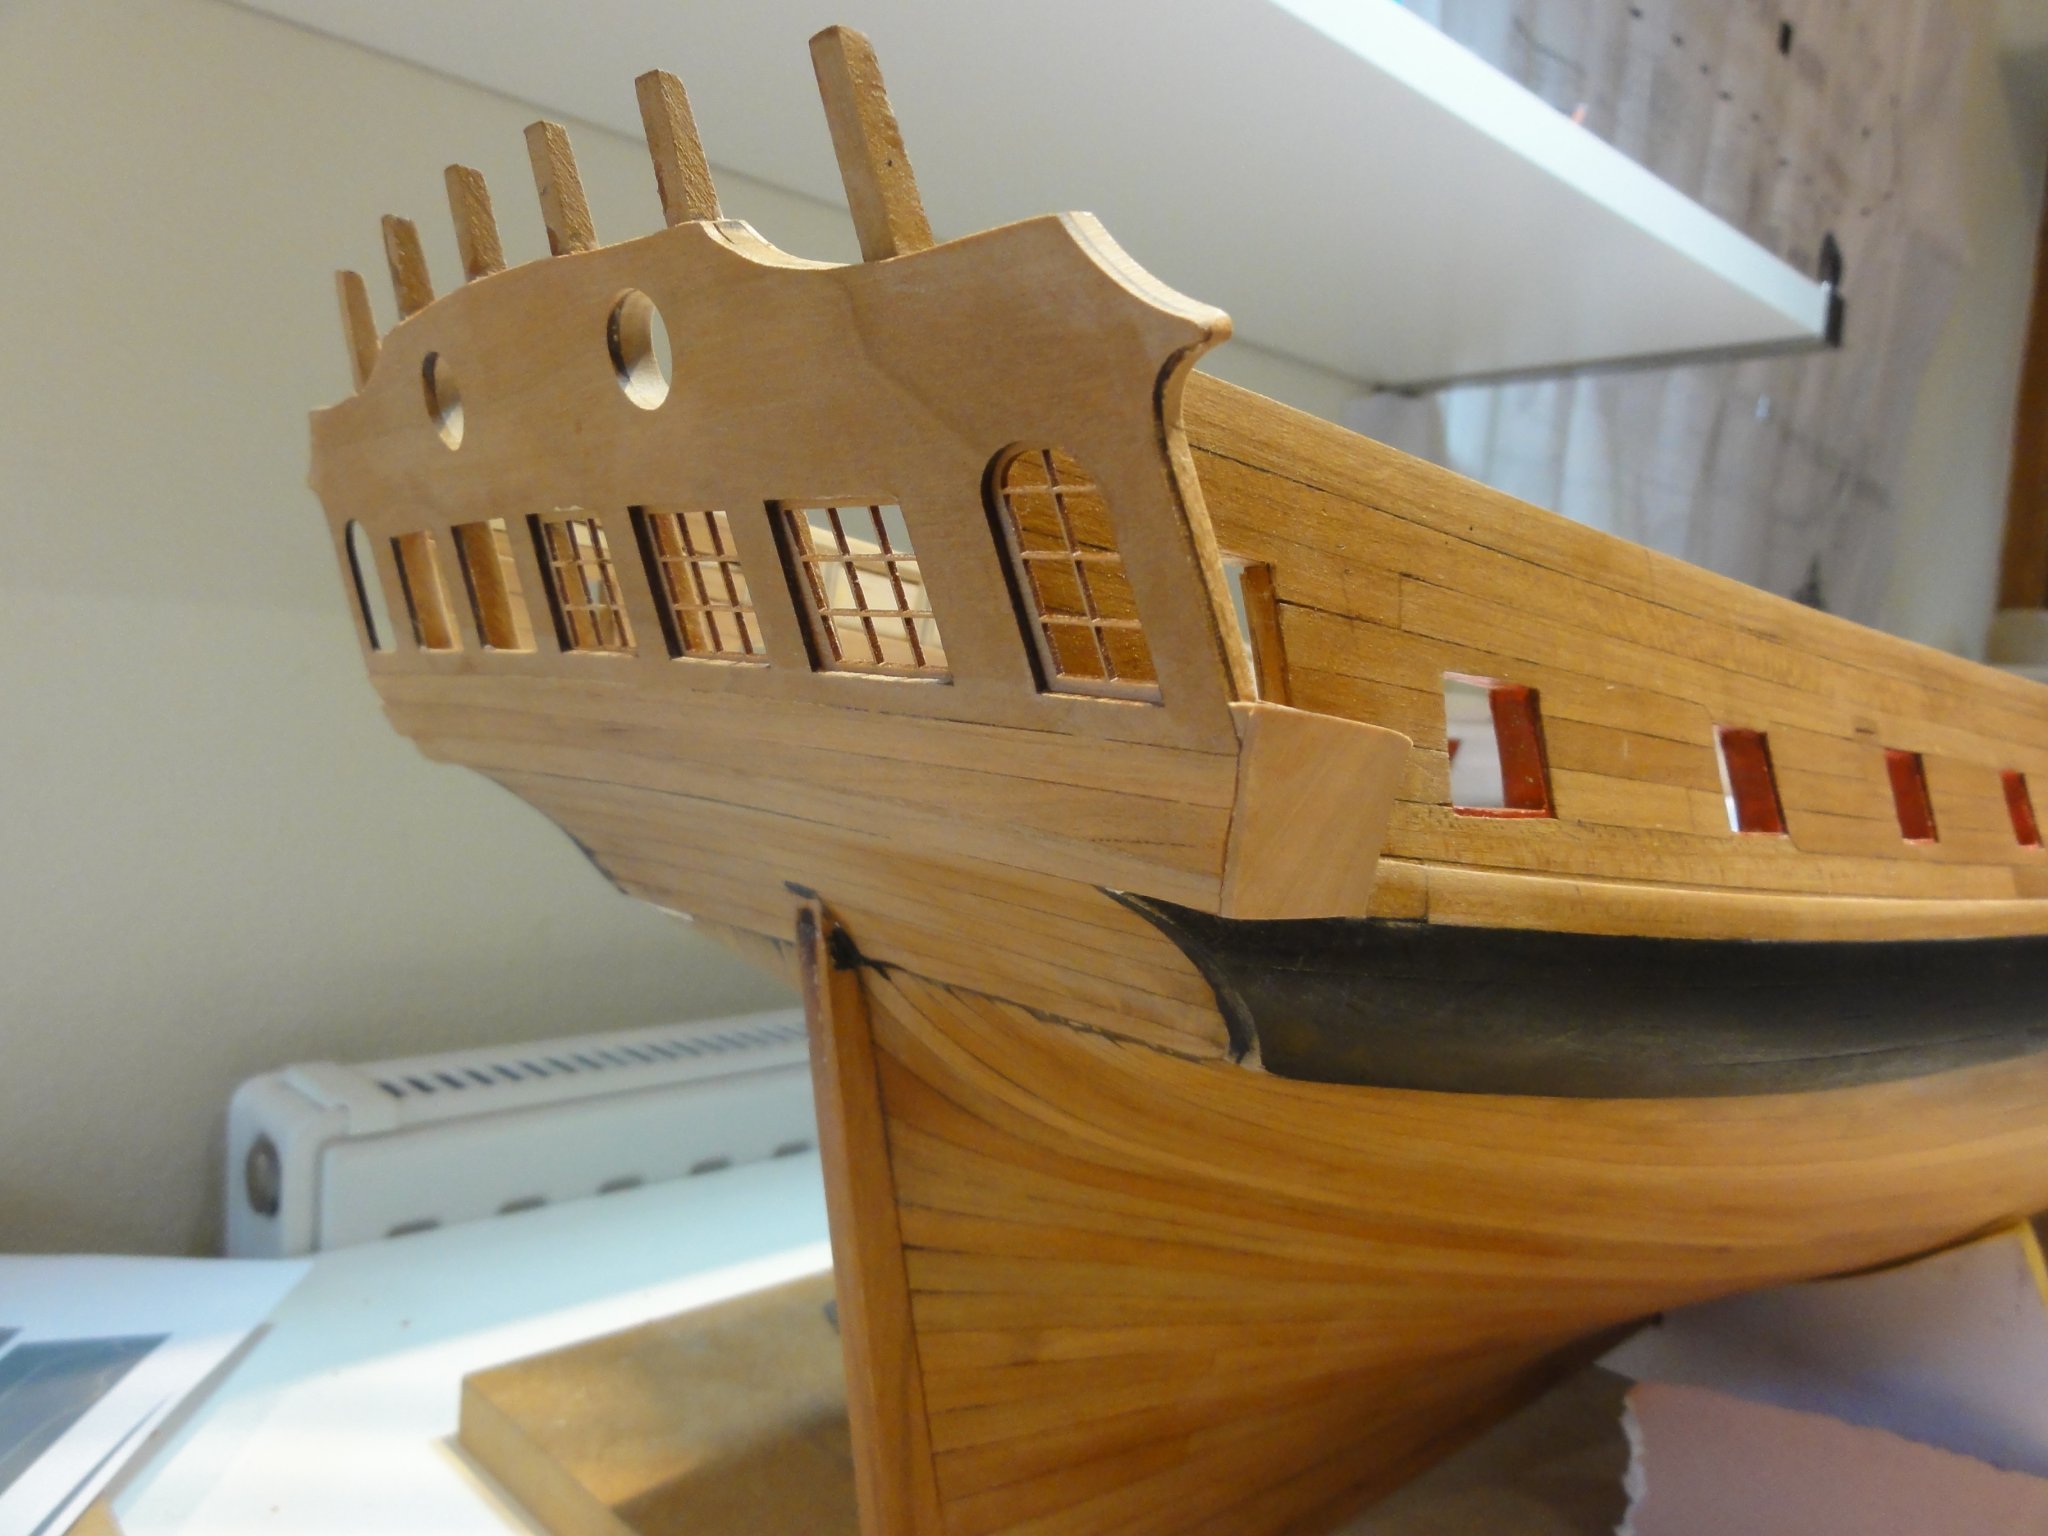
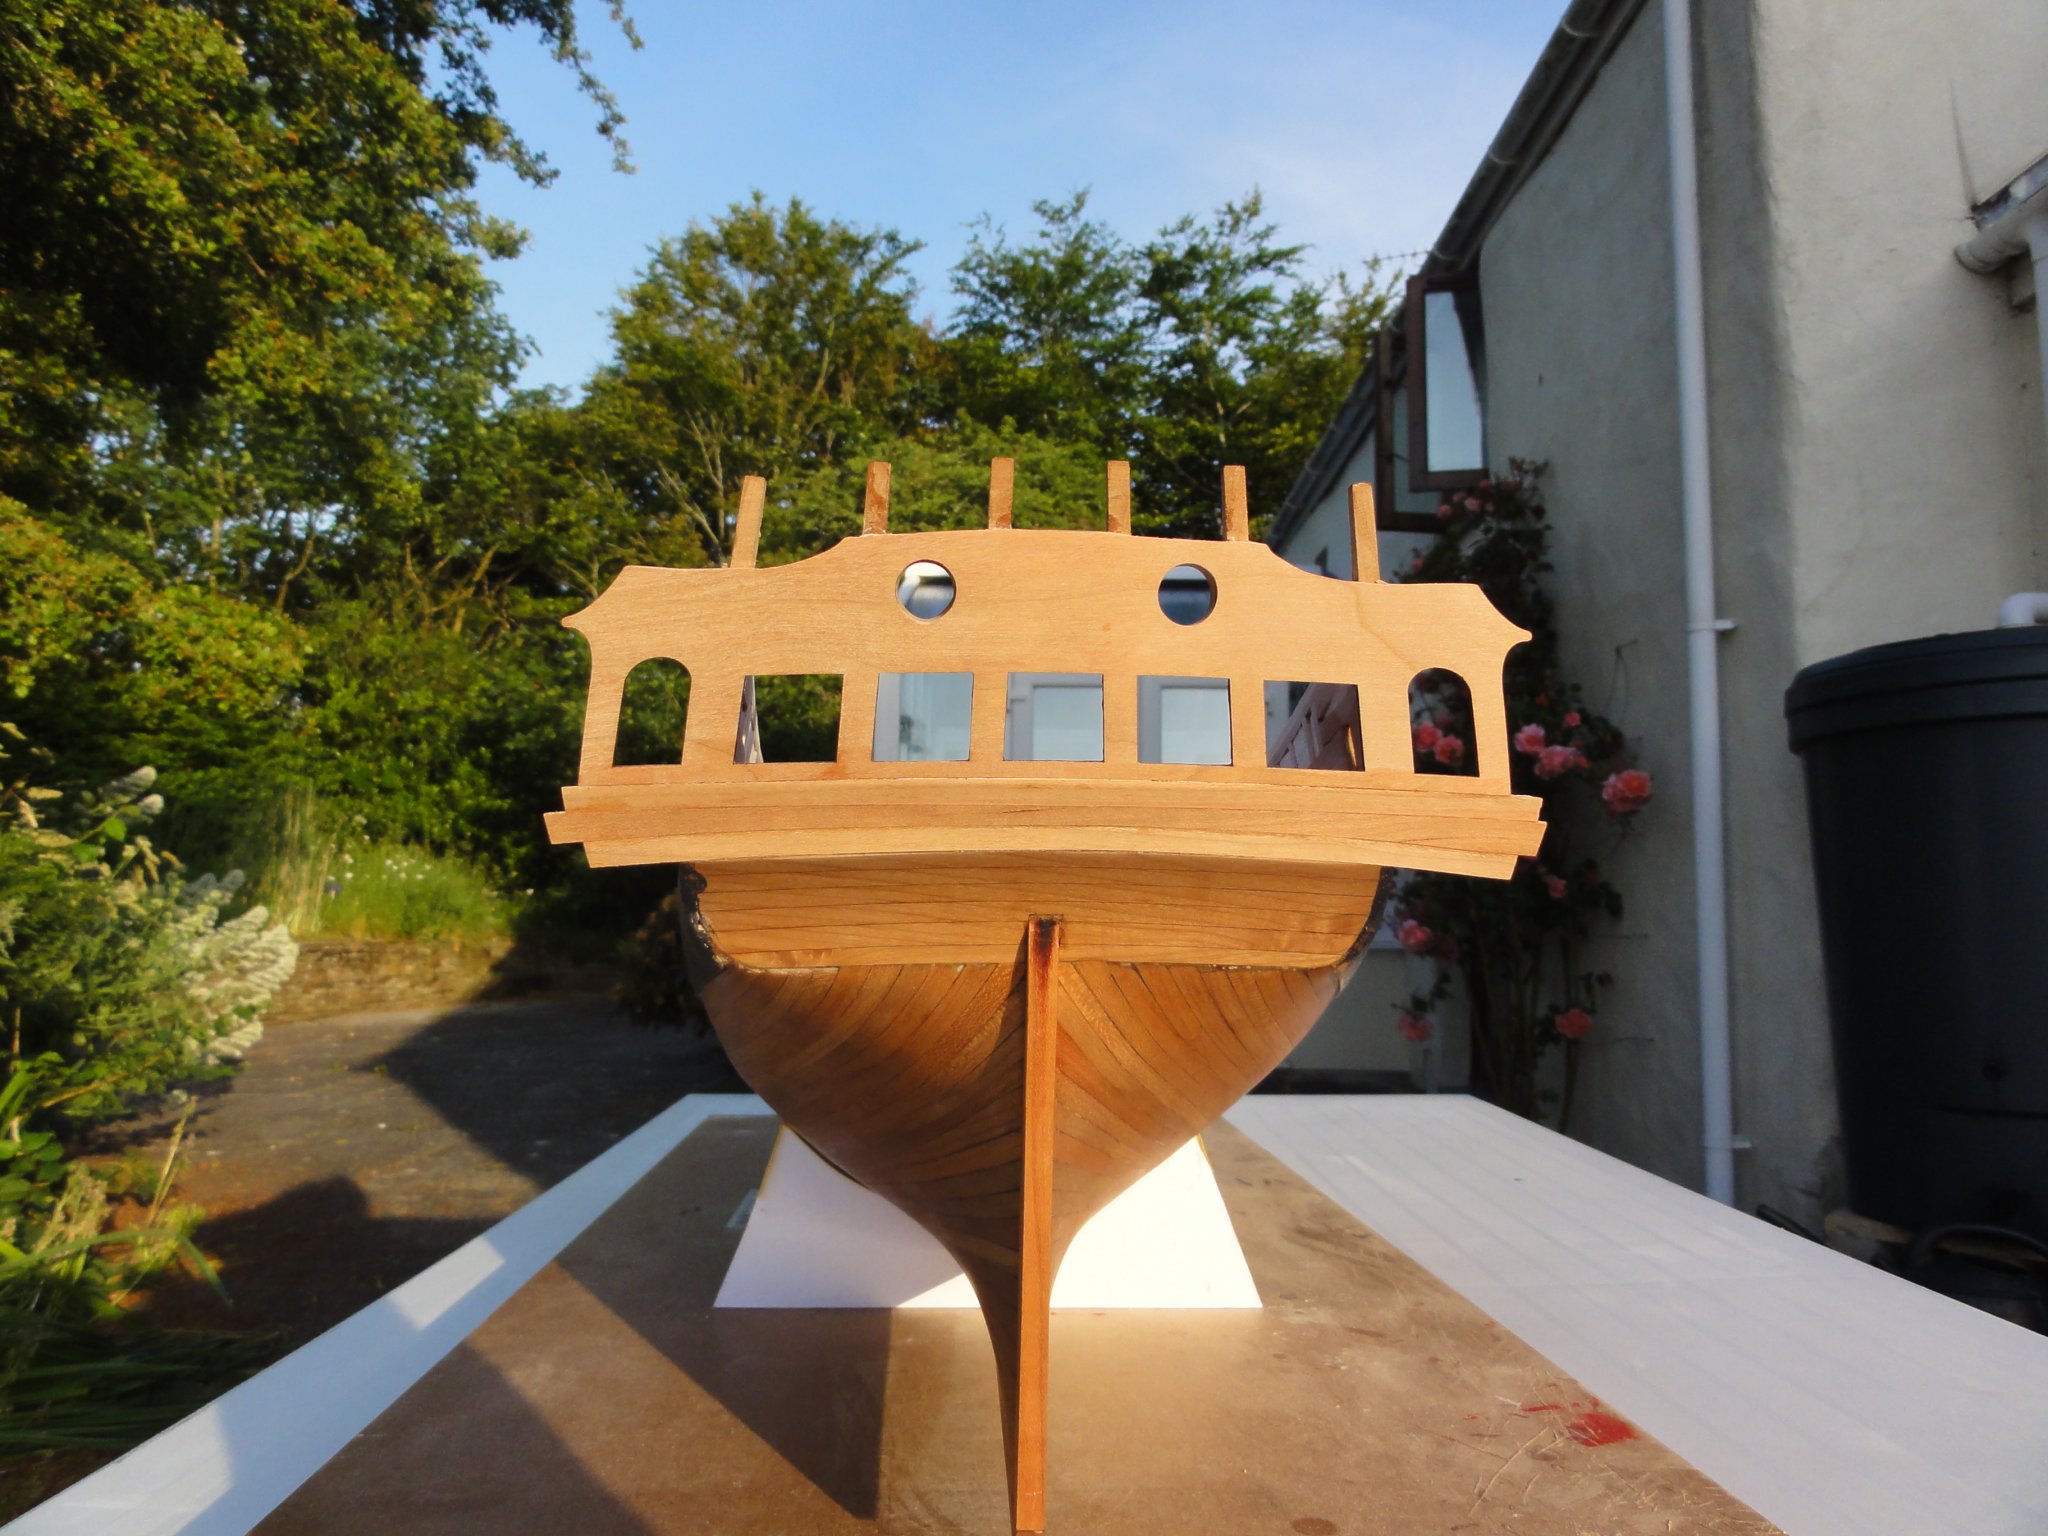
Good morning everyone from a (finally) sunny Cornwall. First, it has been two months since Bob G asked me to explain a little more where I had gone wrong with the stern counter. Please accept my apologies, Bob, for the delay in responding. This is how I see it. First, the stern counter needs to be sanded to the correct shape. Looking at the incoming planking there is quite a pronounced L shape as the sides of the how turn underneath the stern counter. Chuck's post at #337 is the one to look at. Stuntflyer Mike's post at #133 is another one to study. Of the more recent posts Guillermo Madico's stern counter looks good (post #41) though oddly he has left out the supporting block screwed to the underside of the stern frame's. Scubby J at #93 shows the roles those supporting blocks play in providing something to glue the incoming planking to. I sanded to the wrong shape. I sanded to a gentle curve rather than pronounced L. That's the first thing I got wrong. Secondly, those supporting blocks need to be sanded to allow the incoming planks butt up to the lower counter planking with the edges of each nicely bevelled. I didn't sand away sufficient of the supporting blocks so that my incoming planking "overthrew" the lower counter planking. When the incoming planking was sanding down it left gaps – see #43 above. Fortunately, I had access to the planking from the other side and was able to fill the area with glue and then filler so it is all perfectly sound albeit unsightly. There is, as Chuck has said, fancy profile to go along the junction so I hope to be able to hide some of the error, at least. Finally, the incoming planks turn quite sharply upwards in the last insurer so before they meet the lower counter planking – look at Scrubby J's #93 and you will see what I mean. That sharp upward turn really needs to be preformed with heat. Aside from turning up quite sharply the planks also need to be tapered, edge bent and twisted along the length. They are tricky. I did the tapering, edge bending and twisting first so that I had a pretty well fitting plank up to the point where it needed to be turned up quite sharply. I then tried to form the upward turn by holding the plank with pliers in the heat of a room blow heater. The cherry goes quite plastic once it reaches a certain temperature and it will take and hold bend quite well. The difficulty, as I found it, was controlling exactly where the bend formed. I think I would doing it again I put the bending fairly early stage of making the planking question and then, but only then, fettle the edge bending, tapering and bevelling. So, like I suspect most of these things, there is a combination of errors in play. I hope I will do better next time? On a much happier note, and after a journey of several thousand miles involving three transatlantic crossing is (New York – London / London – Miami and Miami – London) and the best part of a month my chapter 3 parts finally arrived – though not before I got clobbered for import duty. Winchelsea is only my third build (after Amati's Lady Nelson and AL's Bounty ) so I do not speak from a wealth of experience but the laser cutting quality of the chapter 3 parts (as with the earlier parts) is far, far better than anything I have seen before. I have started work on the QGs. I doubt if I have the angle of the transom correct. I certainly think I have set the stern windows to low in the frame's. I doubt if my hull planking follows the plans – unfortunately, all the balsa wood and body filler I added (see above) obscured Chuck's guidelines so I just eyeballed the run. All in all I am expecting to have to make a few compromises but here are some pictures showing the present state of play. The qg frames are just rested in place as our the frames in the great cabin.
.thumb.JPG.83c5057219542f3cd7b4fed406c05975.JPG)


.thumb.JPG.90758ffa86683620327cc286dd4d9a7d.JPG)

.thumb.JPG.fe3decc05a1e1d05d9d7ba09c1933194.JPG)

.thumb.JPG.650e6987a6d2aeb01e0da7bc8759218c.JPG)
.thumb.JPG.478c8a27b30310473521ca04b6765951.JPG)
-
Thanks Chuck. If there were no postal risk I'd order the carving set too but given there is a risk of things going astray I'd be jolly grateful if you could supply the chapter 3 parts. I'm quite happy to accept the risk. Can I just place the order through Syren in the usual way? I'm not sure what a PM is! Fred
-
Wow. You made a bit of progress between posts 39 and 41! Tell me ( because I'm thinking of treenailing my Winchelsea) did you drill all the holes with a hand drill or electric and if the latter did you use a big DIYers one (is there one with a chuck capable of holding such a small bit?) or a small modellers one? I ask because I can't find a small modellers drill with a soft start. I'm doubtful about treenailng because it seems to me that done well it's superb and done less well it looks awful. You clearly know what you are doing however. Fred
- 105 replies
-
- 1
-

-
- winchelsea
- Syren Ship Model Company
- (and 1 more)
-
This is looking fantastic. I'm not far behind you Rusty and following with keen interest. Fred
- 642 replies
-
- 1
-
-
- winchelsea
- Syren Ship Model Company
- (and 1 more)
-
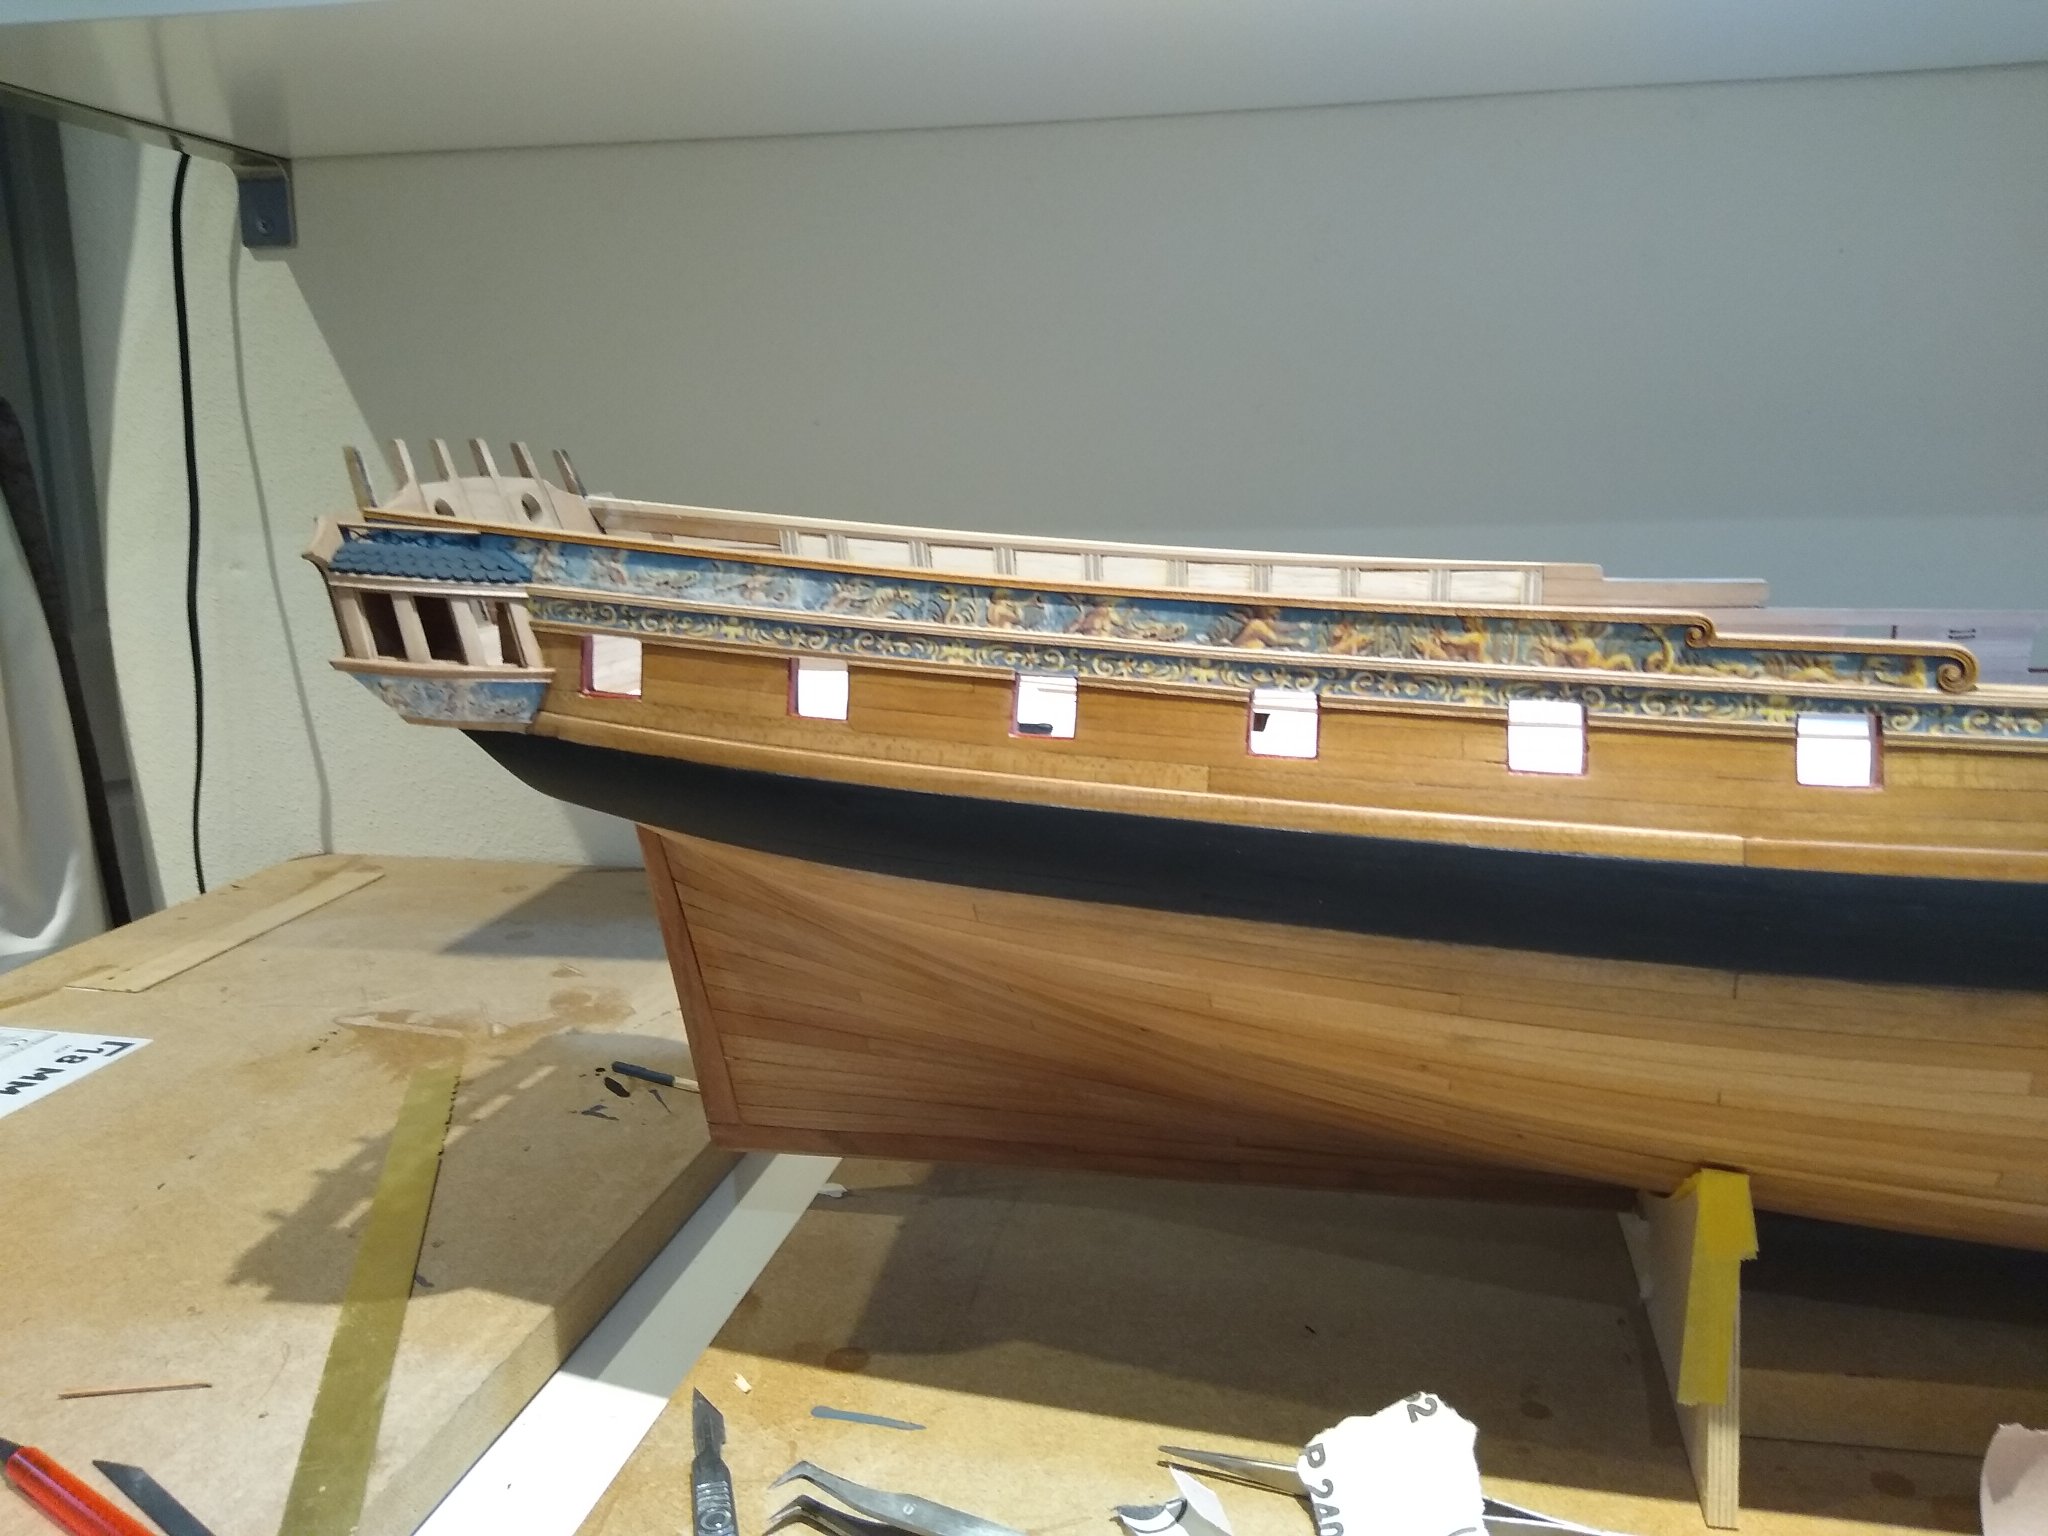
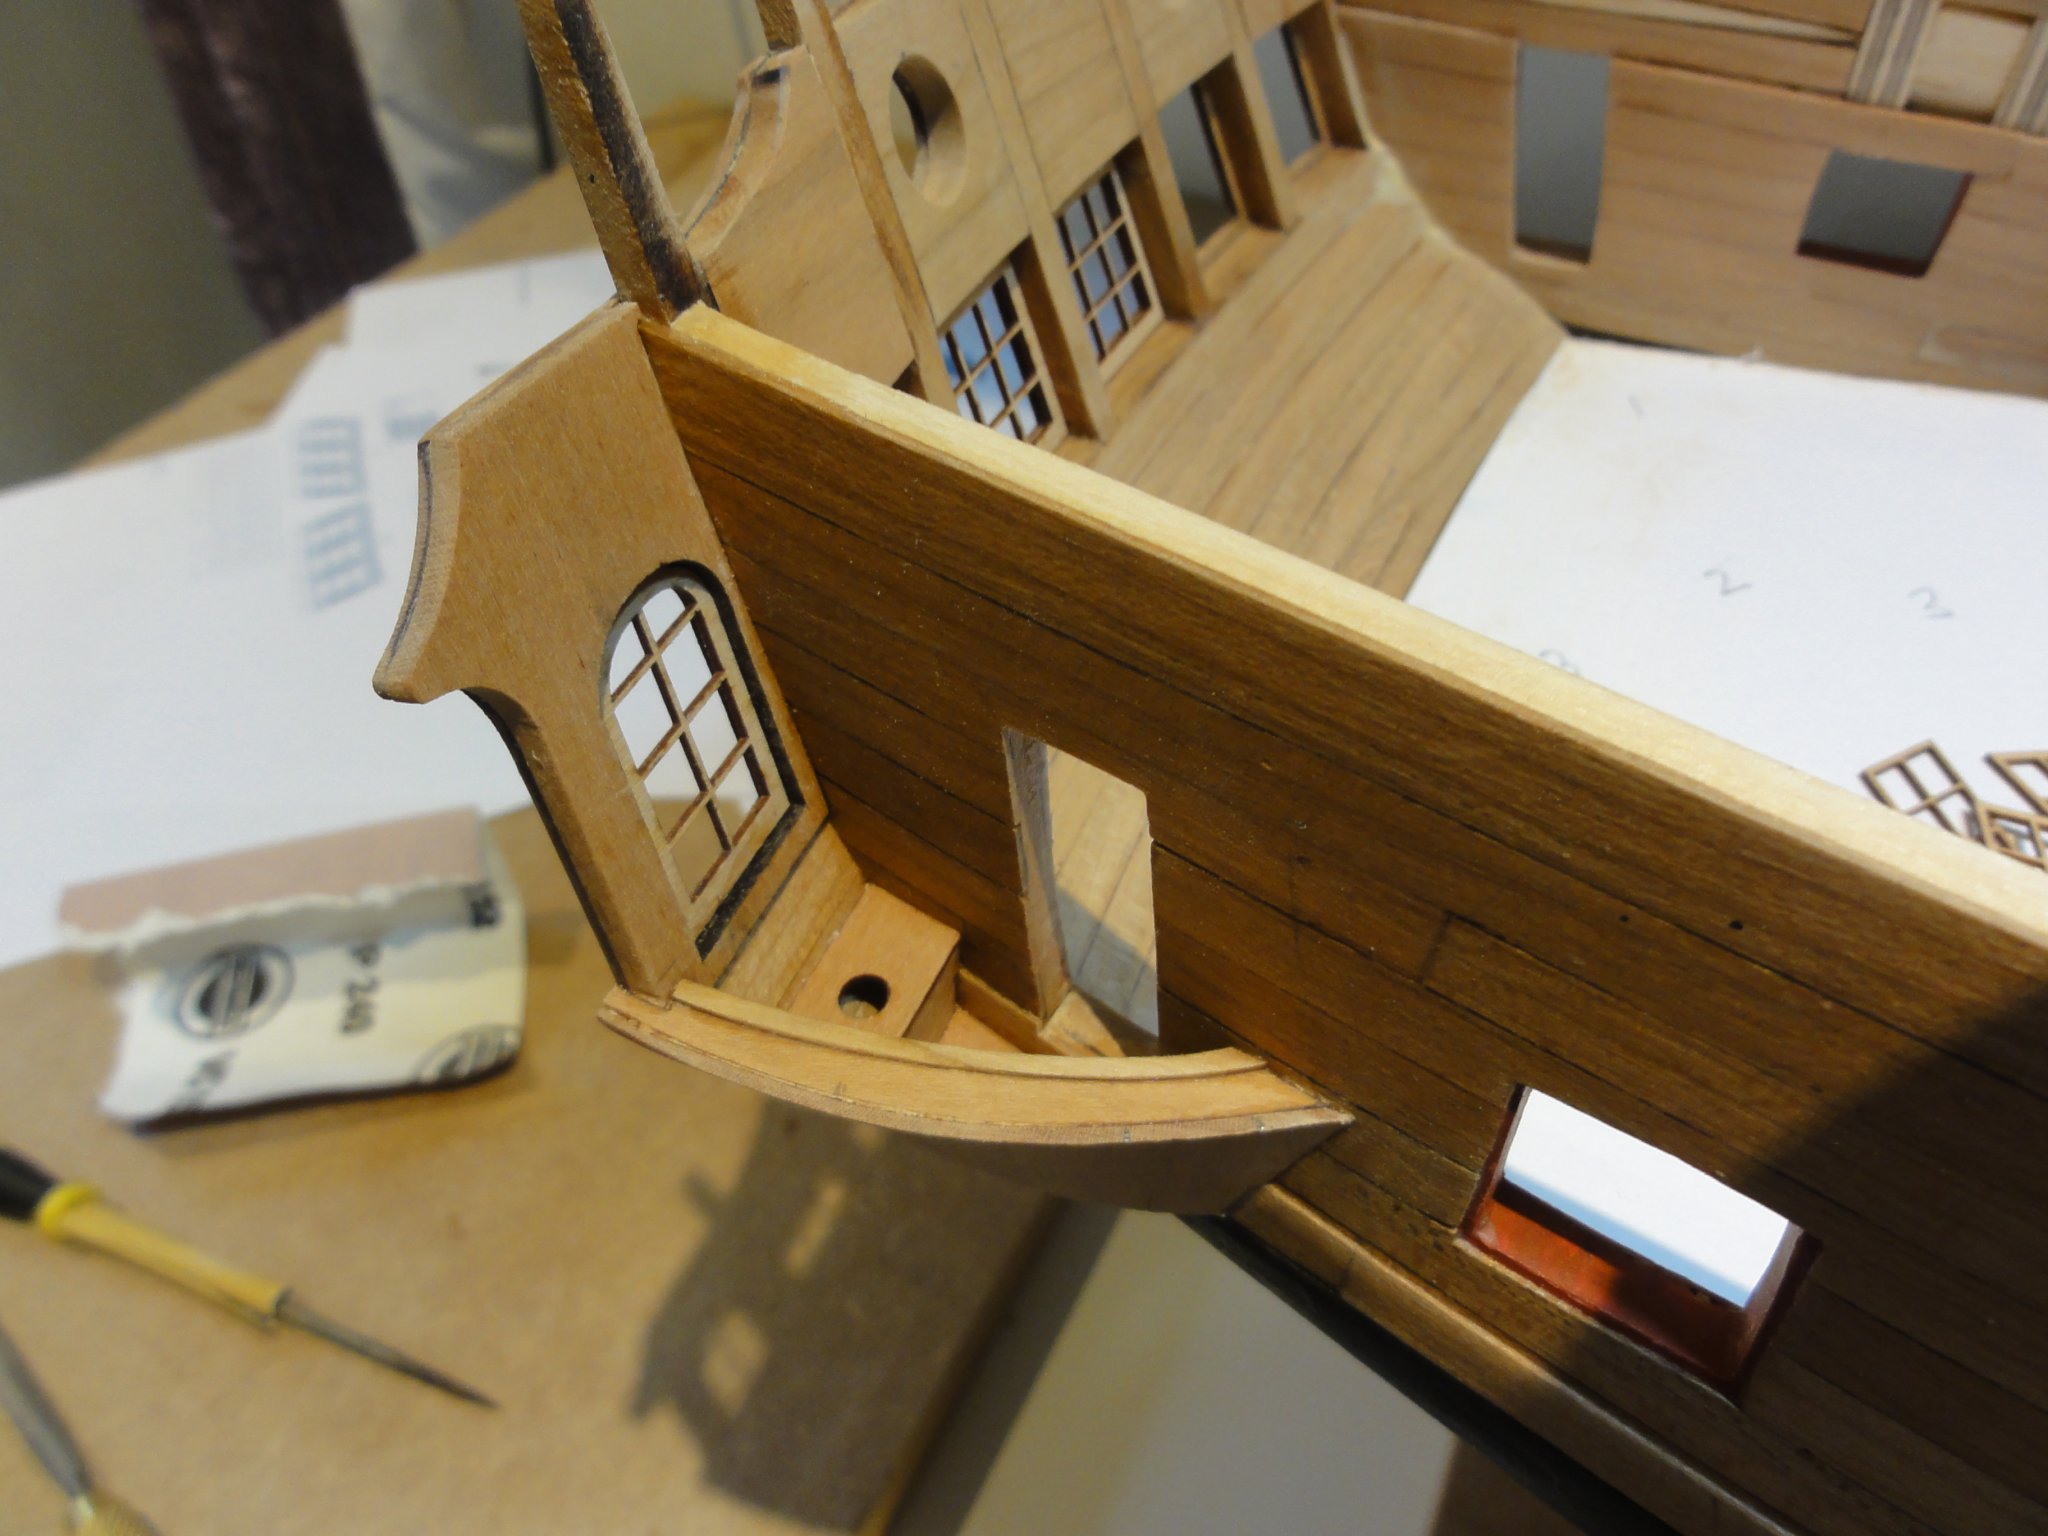
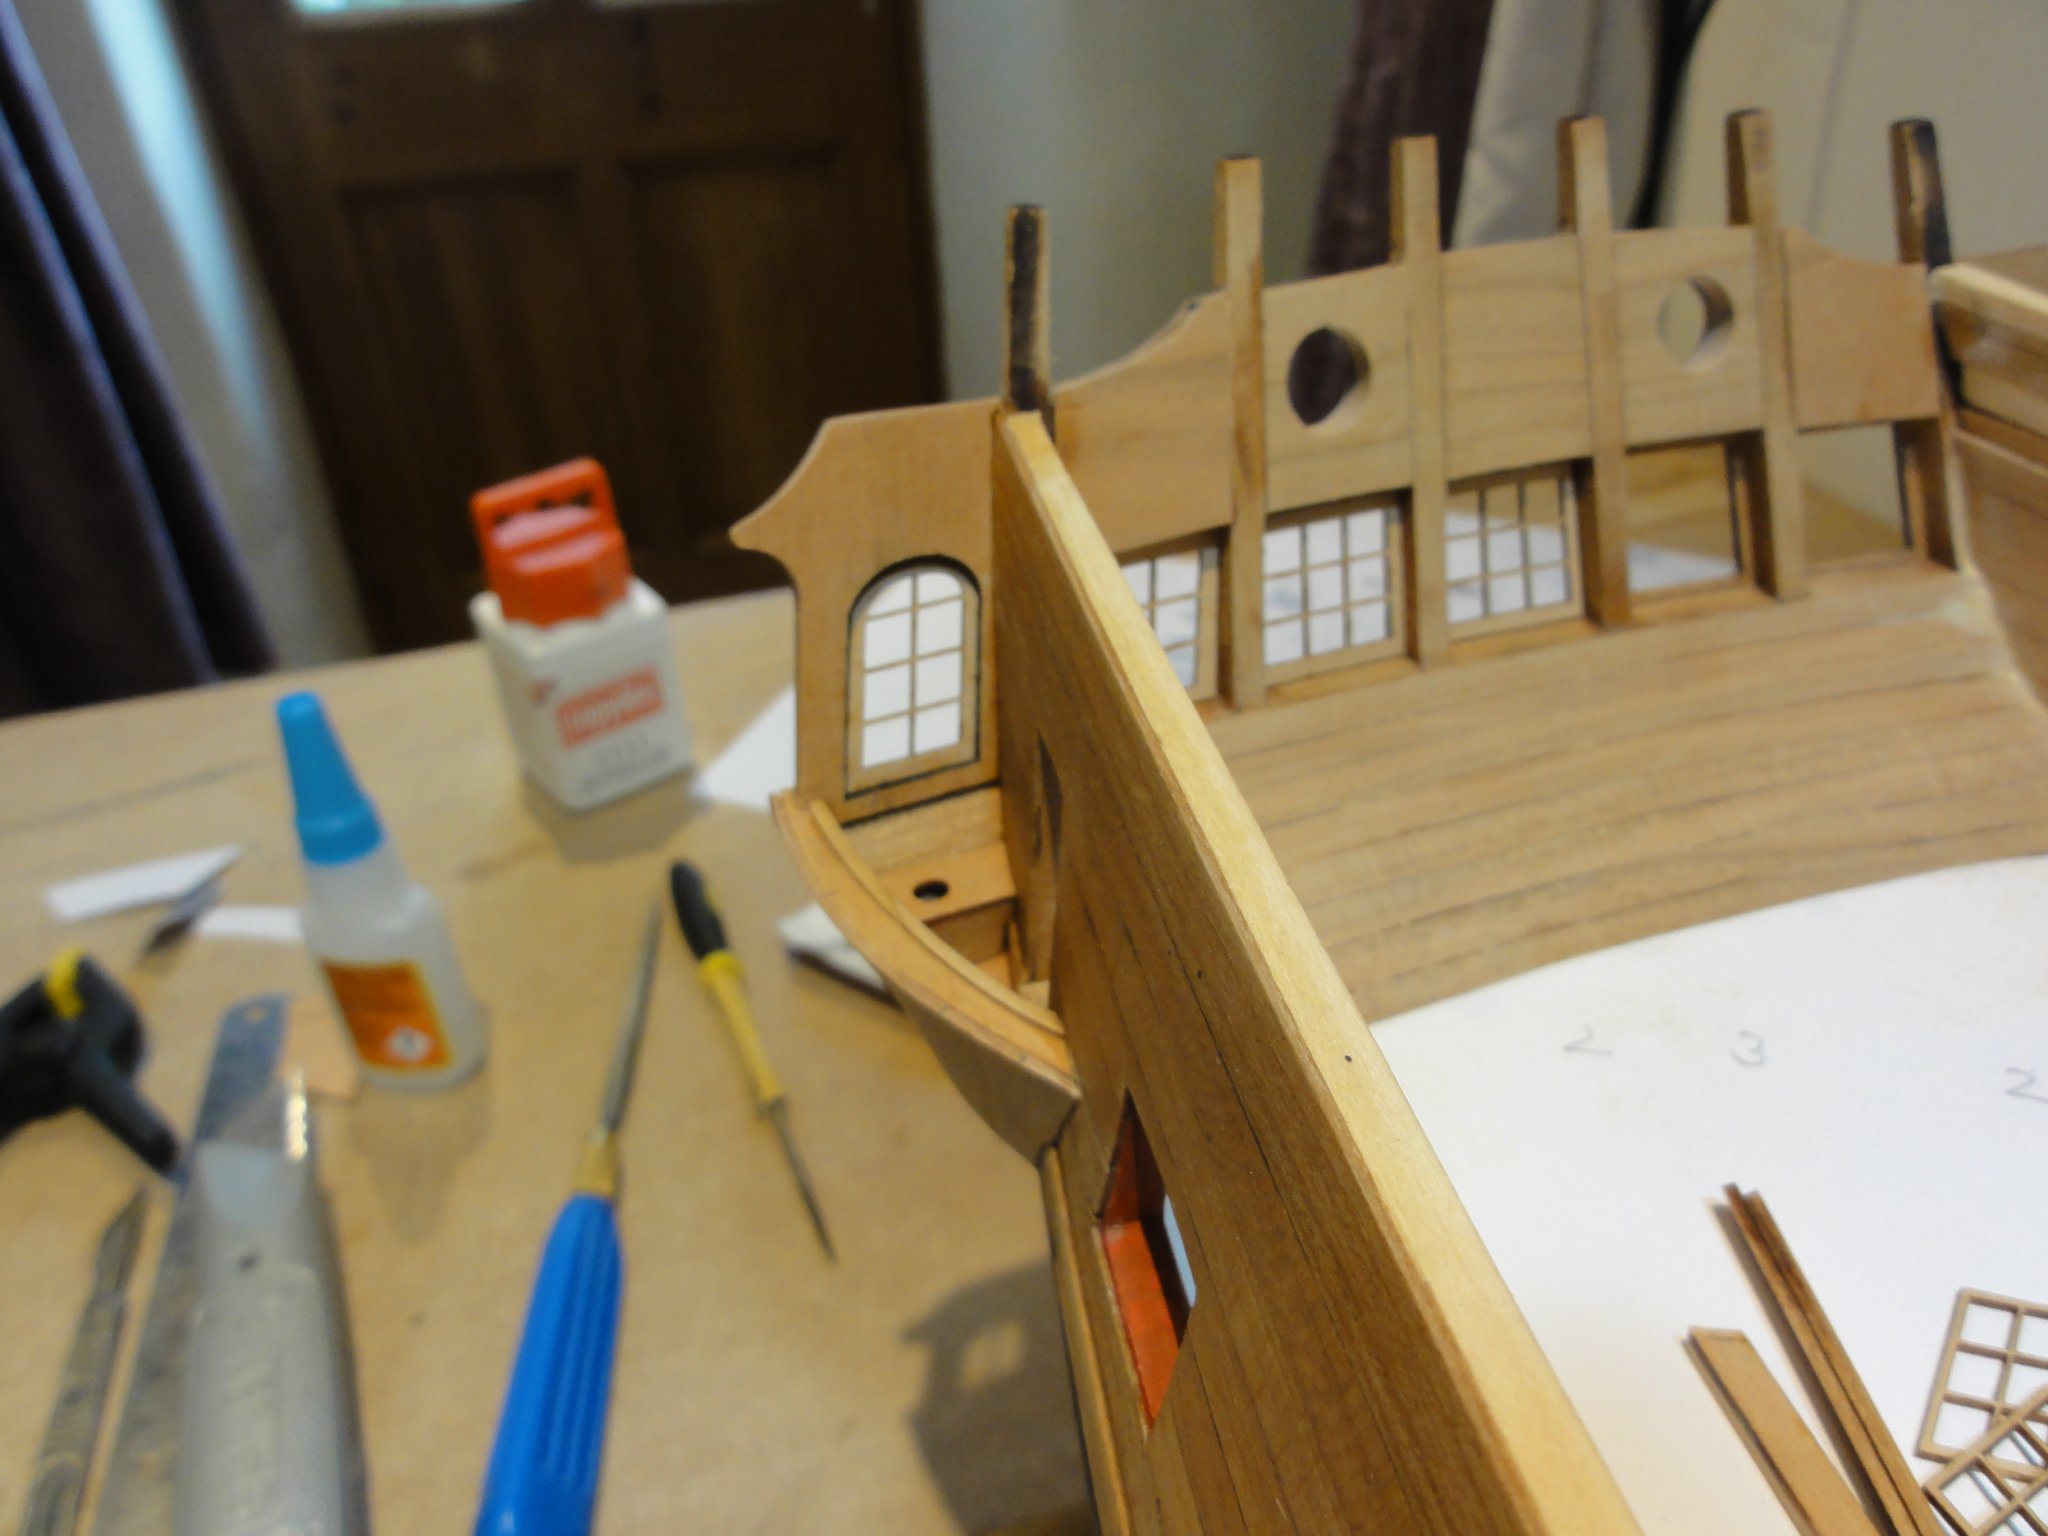
I can't work out how to interpose text between pictures. You can see that (with nothing else to do!) I've lined the inside of the bulwarks. That all went surprisingly well. I had a lot of cutting away of the QG framing in order to allow for the panelling without intruding into the window opening - the blue arrow on the last but one picture above. I've also lined the inside of the lower counter and plan to cut out the rudder trunk later. I got fed up looking at the mess I made of the lower counter inside as well as out. I plan to paint the panelling - duck egg blue or something like that - but to leave the non-panelled lining in wood. I know that's probably not correct but it looks really nice unpainted. Stay well everyone. Now to see if I can scan in my diagrams and explain where I think I went so badly wrong with the lower counter. All the best Fred
-
Thanks Chaps. Bob, Eamonn and Rusty: my sincere apologies for the tardiness of this response. Things have rather ground to a halt on the Winchelsea front with Chuck unable to ship internationally for the time being. Bob - I thought I had a clear grasp on where I went wrong with the lower counter but the more I think about it the less sure I am. I've done a couple of diagrams and I'll post them below if I can figure out how to do it. First though some pictures.
.thumb.JPG.e0cc2cef988a6531ca5220d57bcded3a.JPG)
.thumb.JPG.3548169c2125b2a22d65fc9d03e0d918.JPG)
.thumb.JPG.96b45904c08c7eb2a4b1a5b6eee0ef1c.JPG)
.thumb.JPG.0c6be21cebc338173afc7706da293352.JPG)

.thumb.JPG.4ab59be4859daedf9617be850a4913f7.JPG)

.thumb.JPG.8fd69cfa3ecc4ce071f852fbc14019bc.JPG)
_LI.thumb.jpg.56067cdaa1af05728e23aecda4b7bd22.jpg)
-
Eamonn - this is superb. I wholeheartedly recommend the Winchelsea as your next build. No way will you be batting too high up the order! Pour yourself a Guiness - you deserve one. All the best Fred
- 1,039 replies
-
- 1
-
-
- ballahoo
- caldercraft
- (and 2 more)
-
I've been thinking about the time in New York. I reckon, on reflection, it might be cup of tea time rather than 6:30am. Sorry!
-
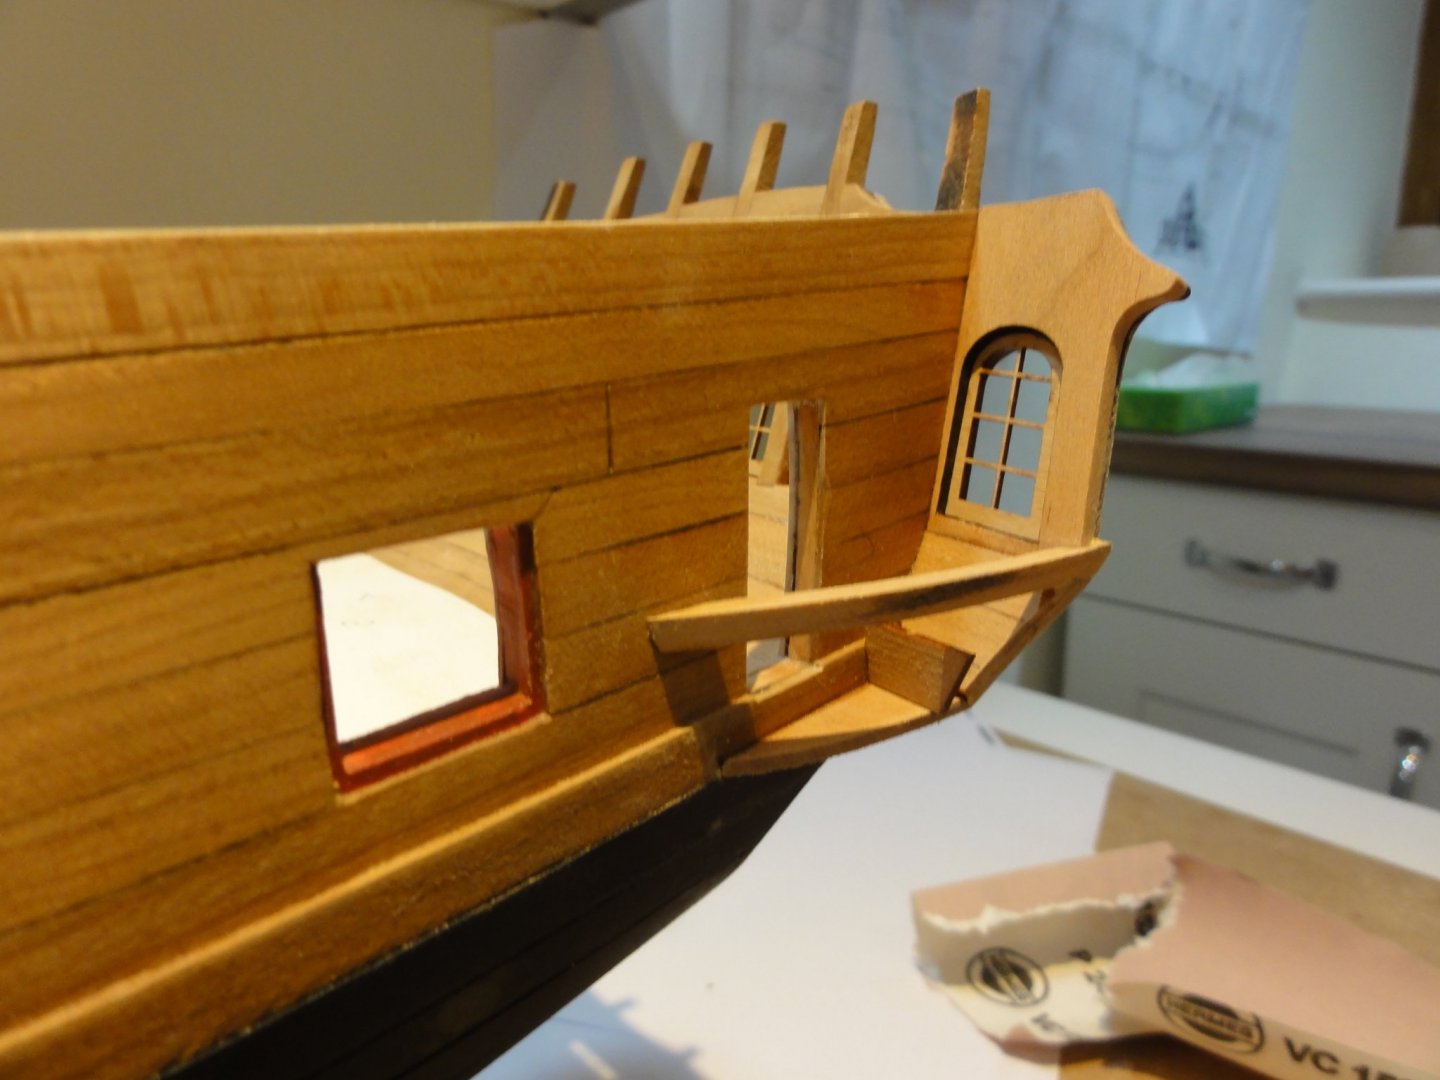
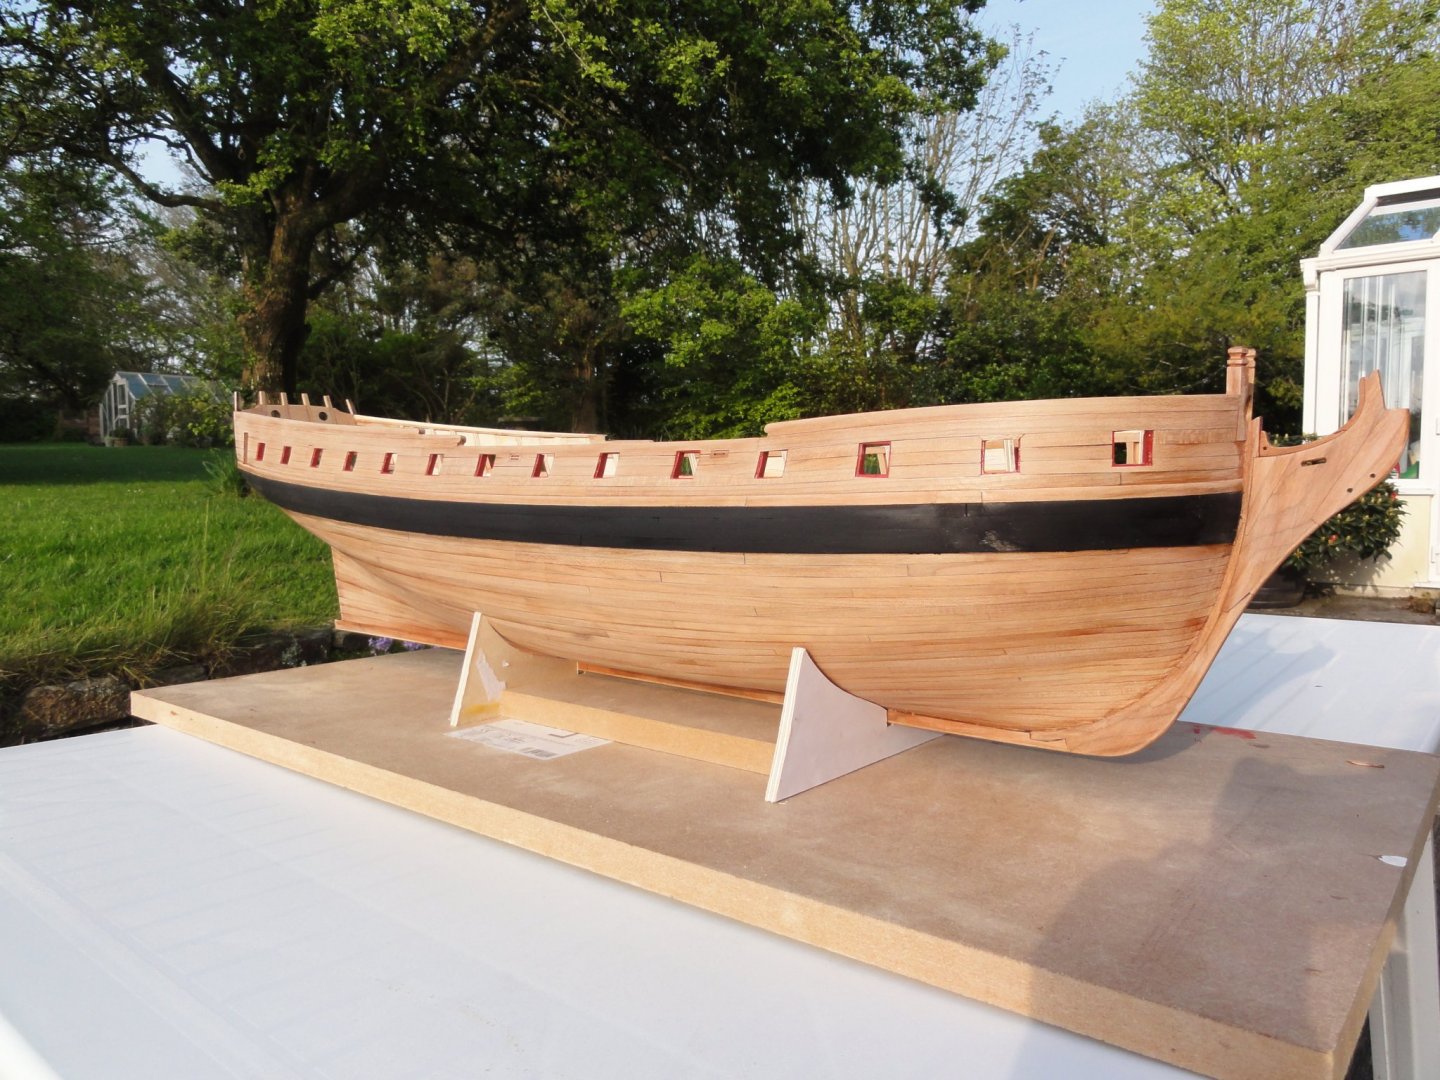
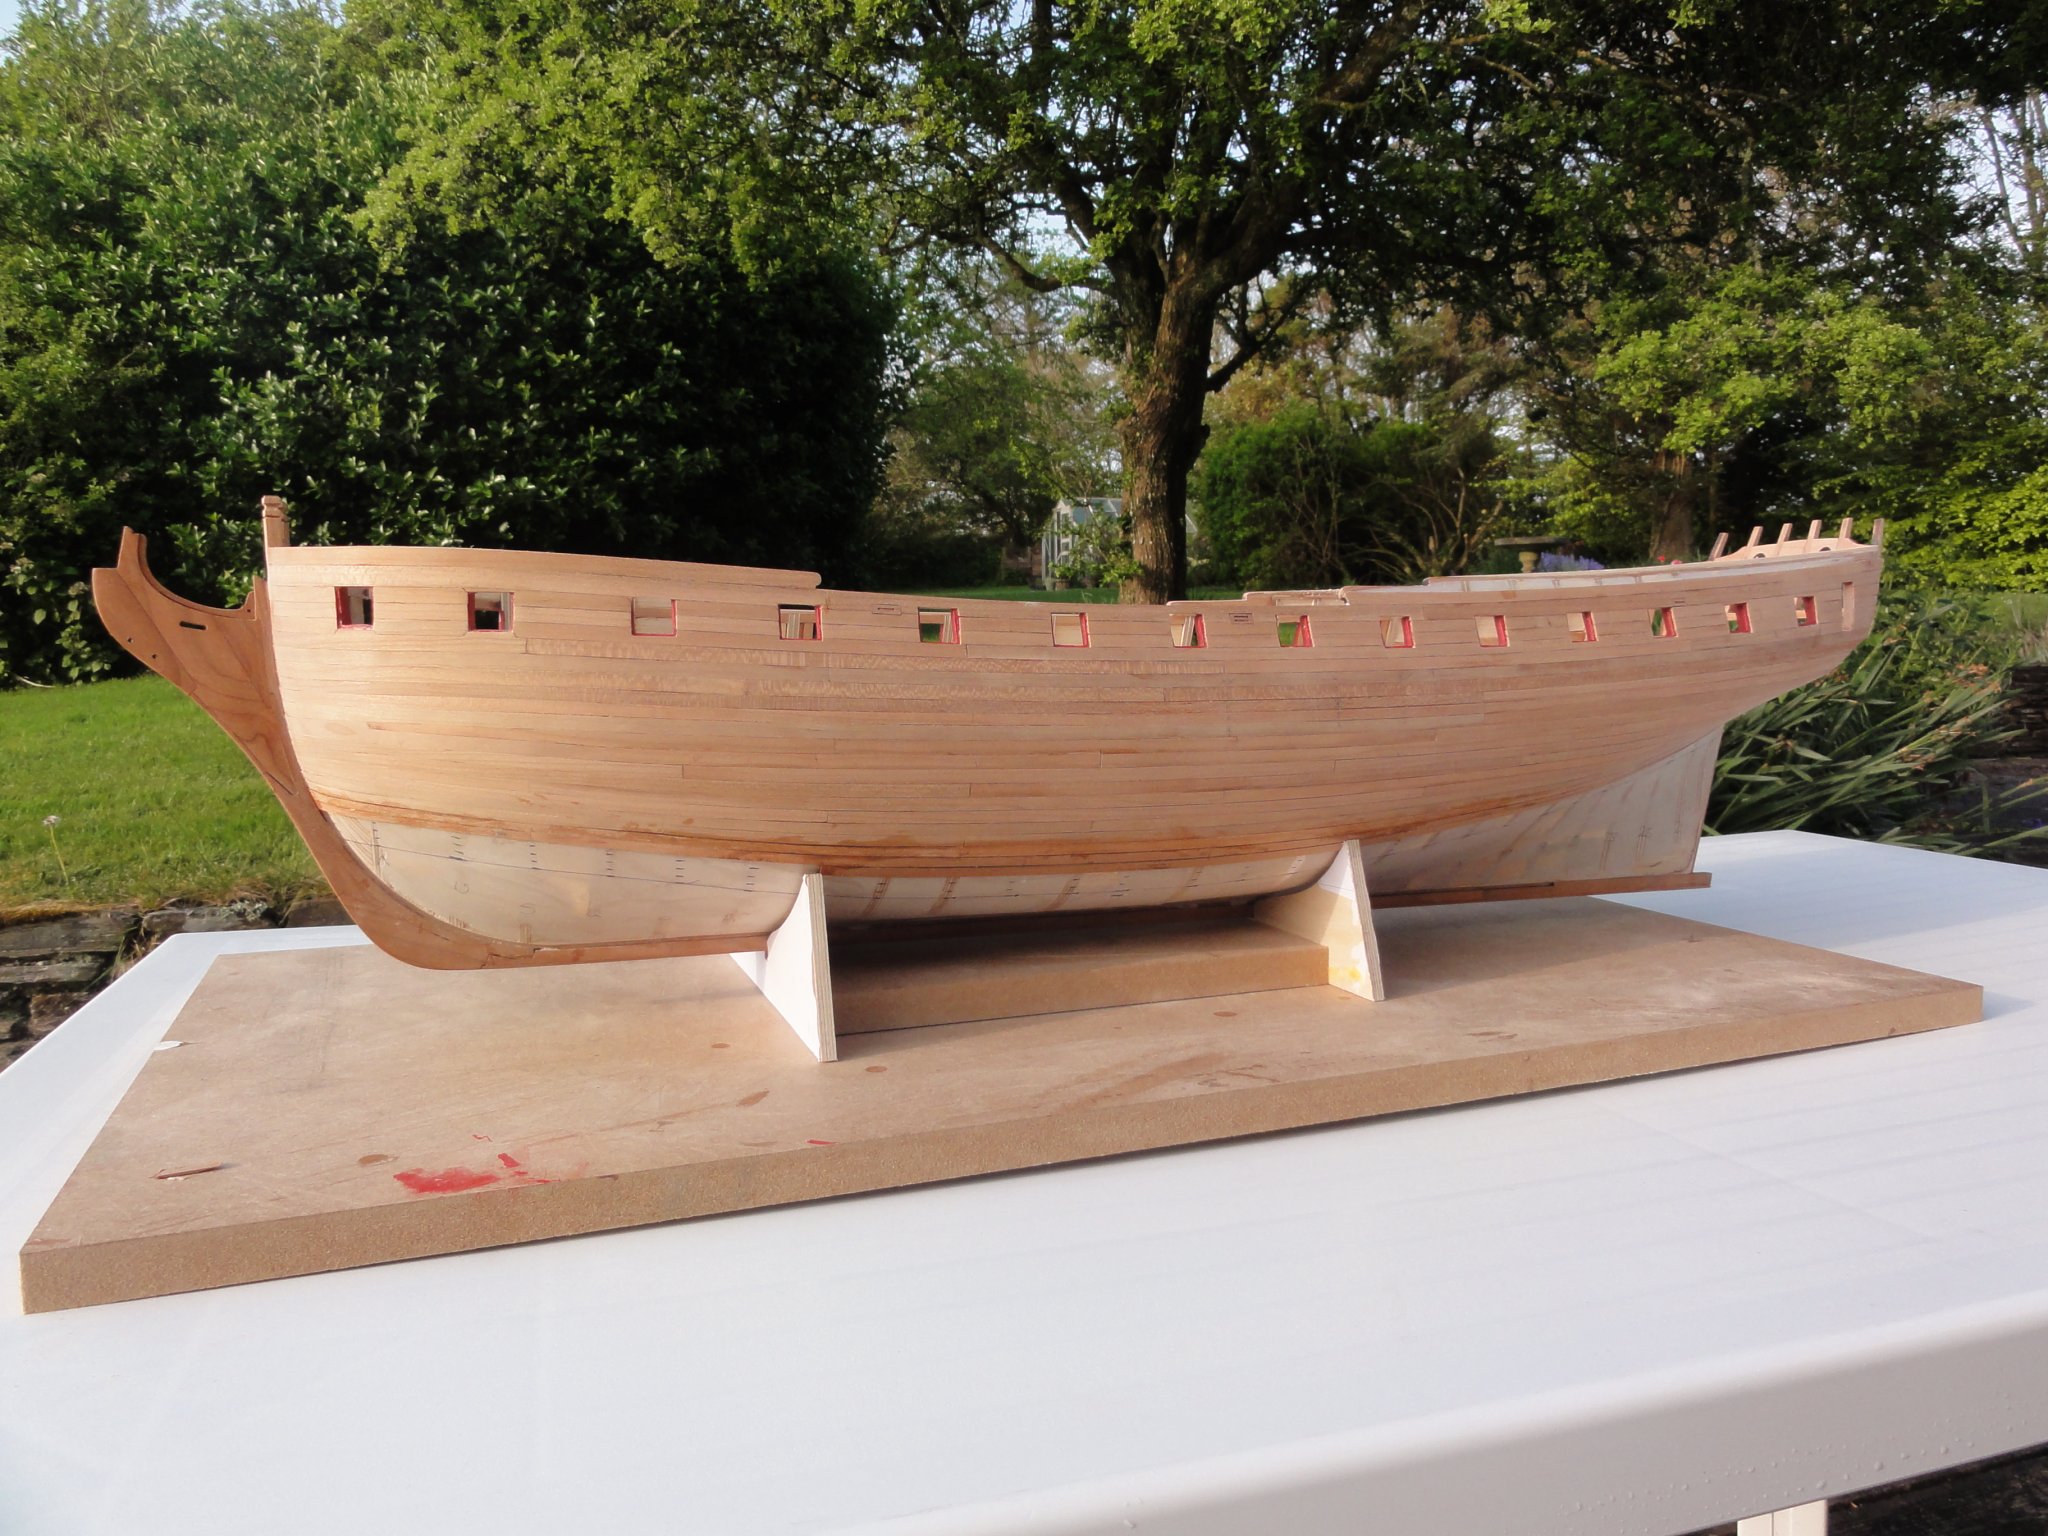
This is the other side. Not far to go and then its the q galleries. Even Stuntflyer Mike says there are tough bits there so what hope for me I wonder! Keep safe everyone Fred
-
Thank you Chuck. I reckon it must be about 6:30am over there. Don't you sleep well??
-
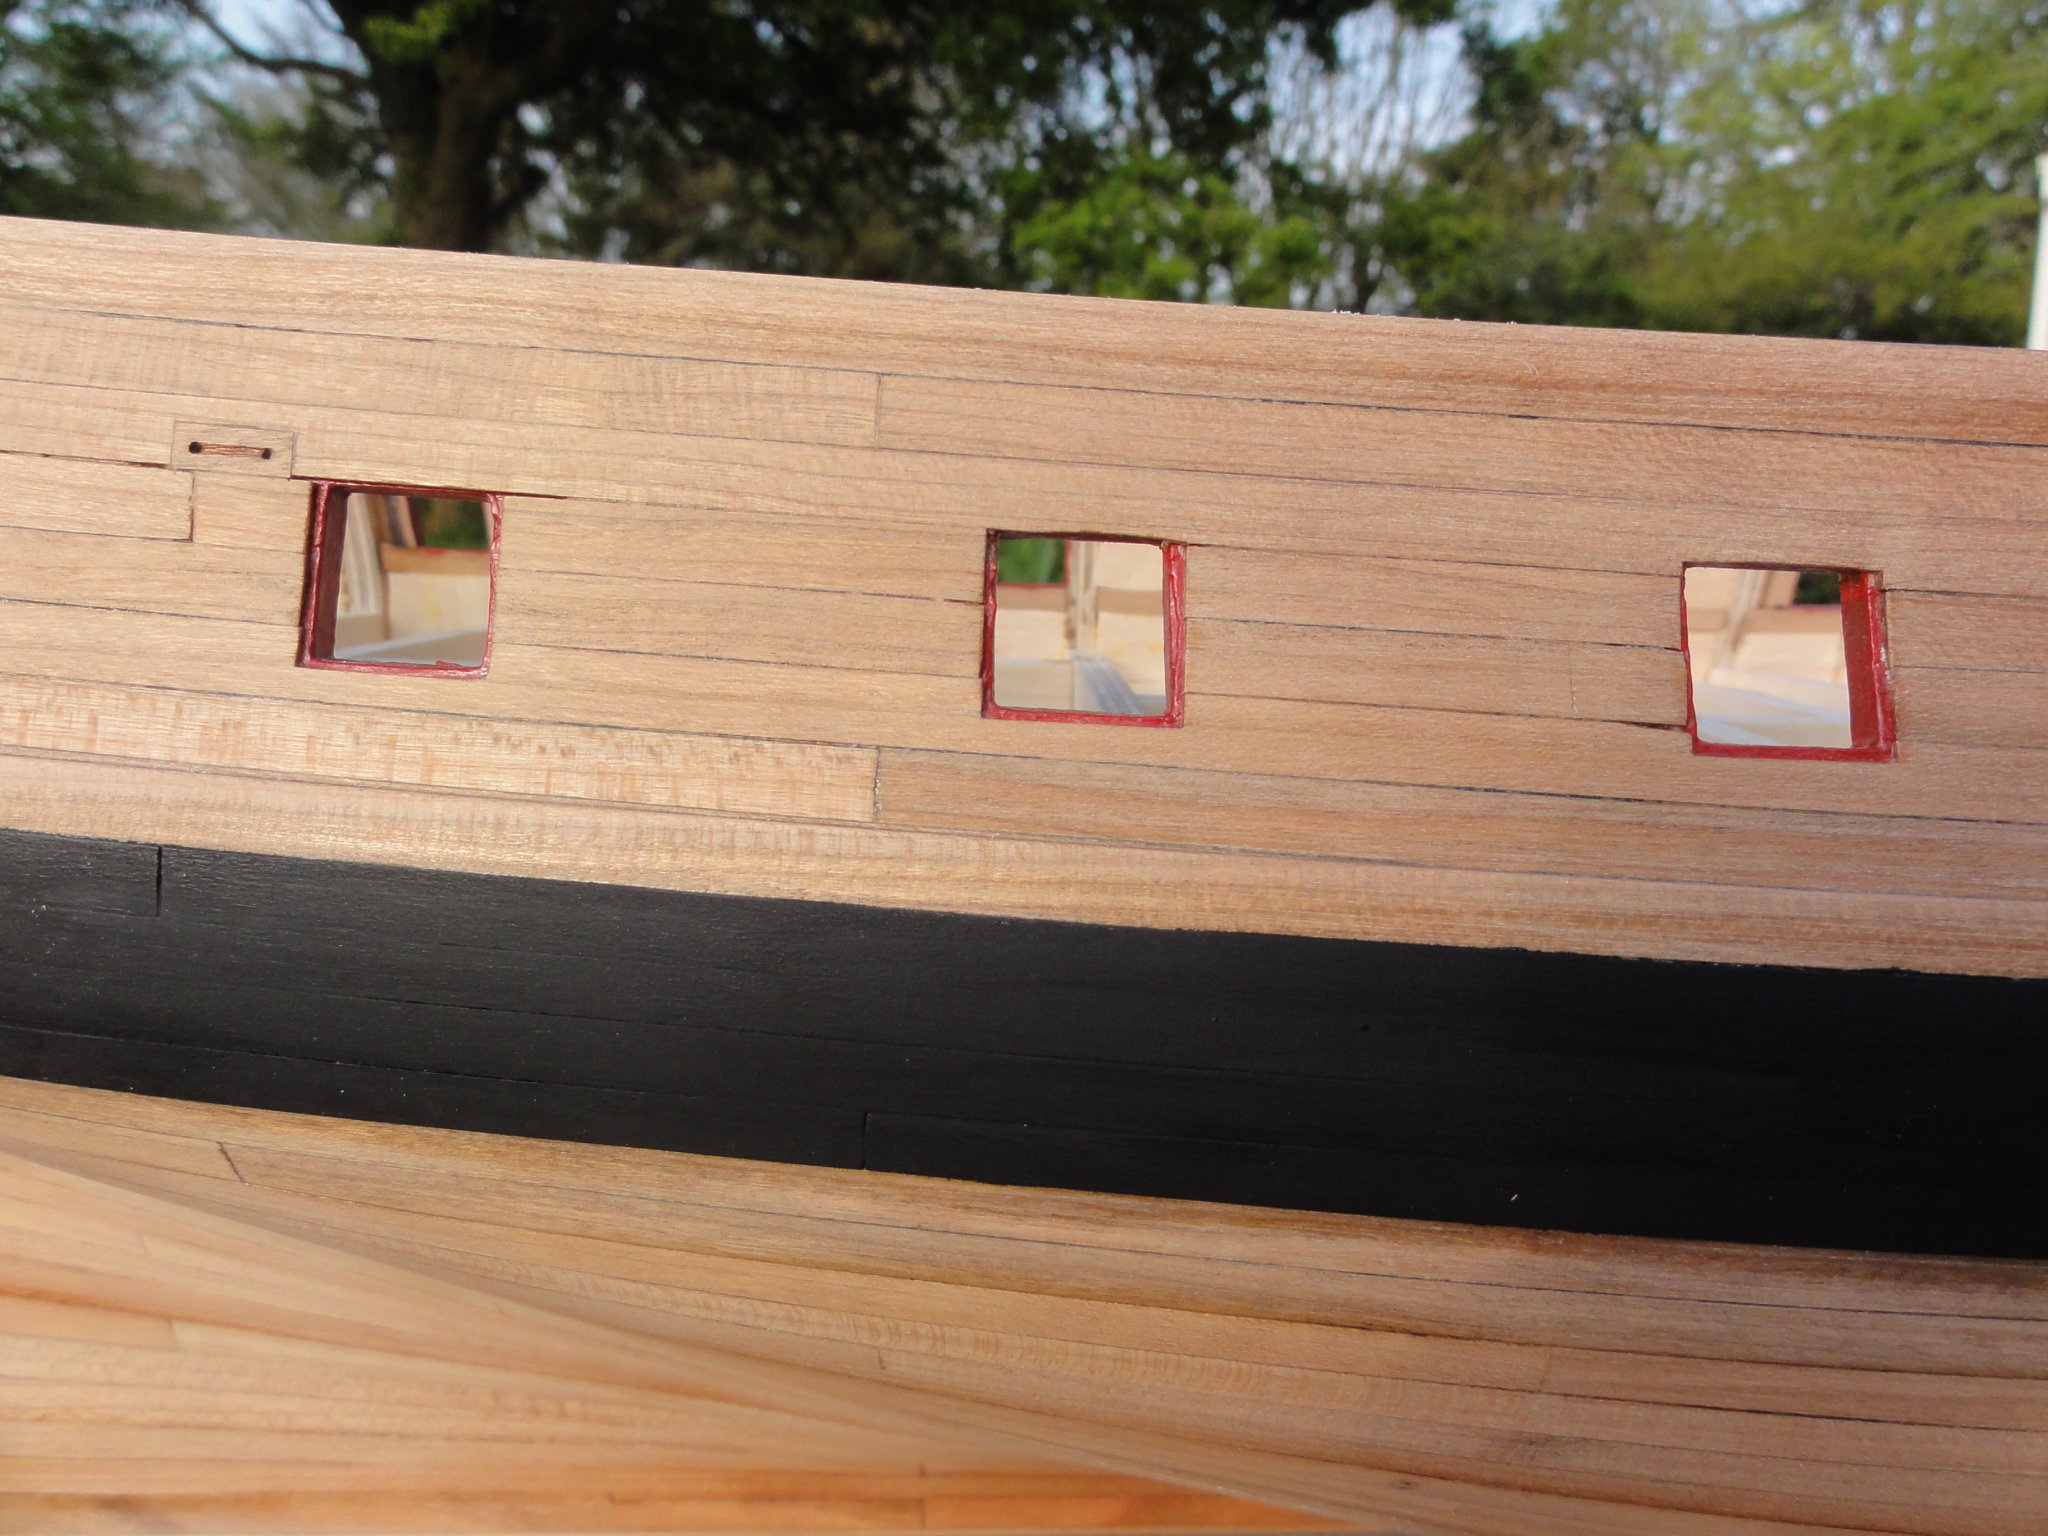
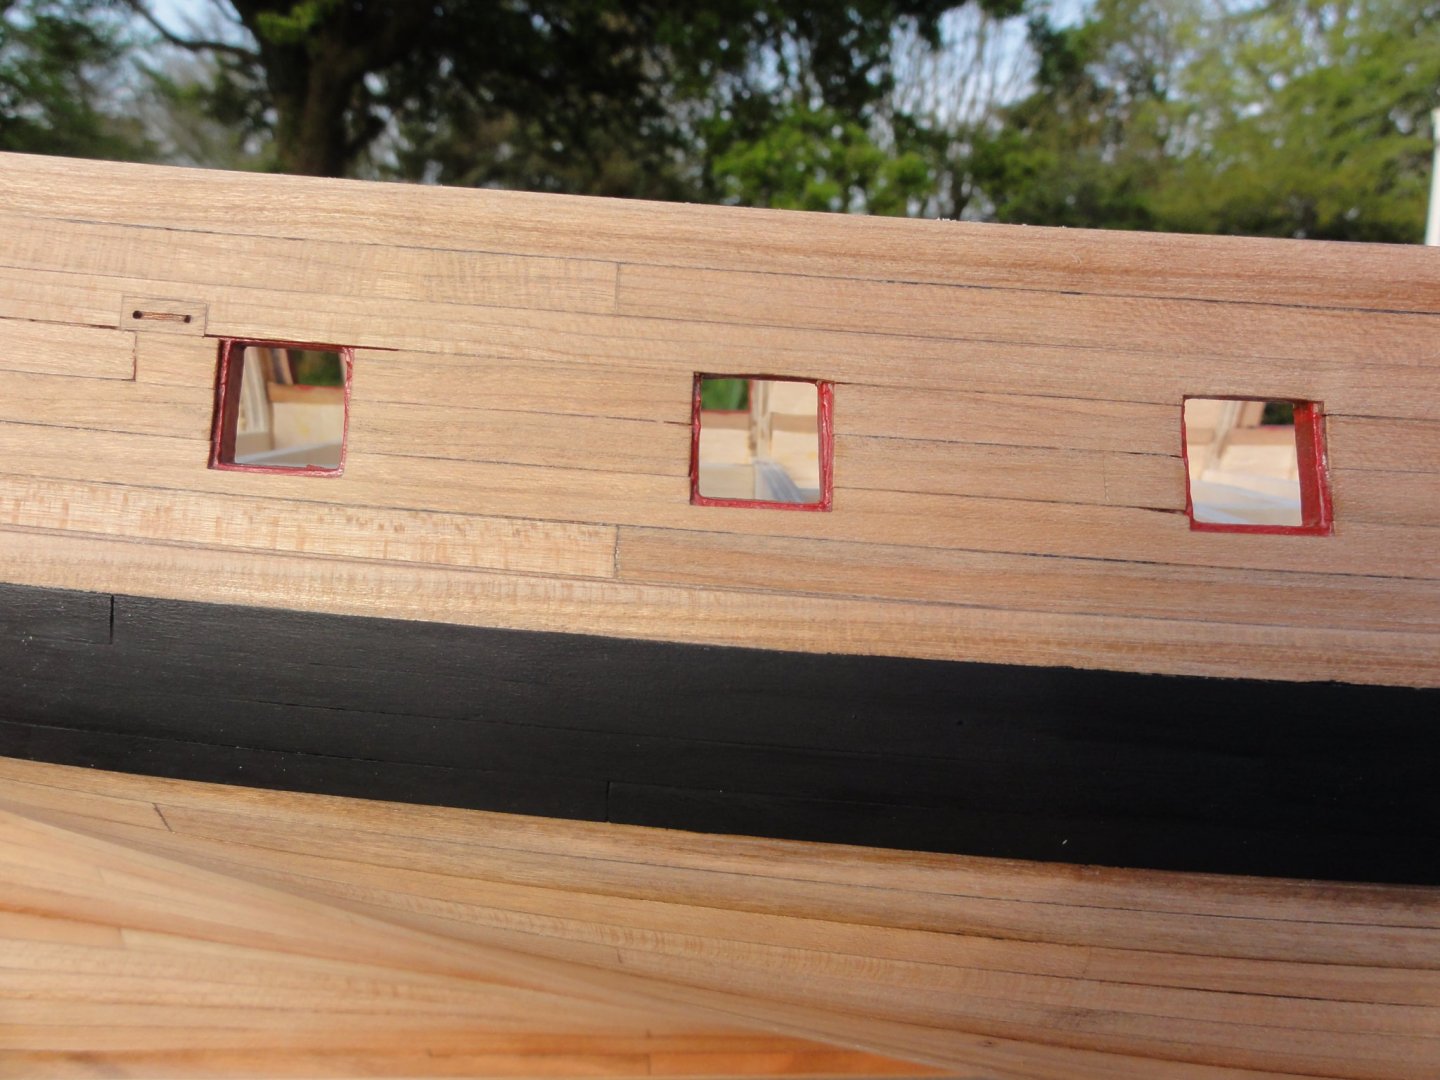
But don't get me wrong. I am loving this project. The Winchelsea is a beautiful ship. Chuck has clearly spent countless hours making the build accessible to even nincampoops like me. And I love to read of everyone else's triumphs and even to share the pain of things going wrong. I suspect my first skin of balsa wood and body filler is rather frowned upon - but I simply don't have the confidence to plank without. I wish I marked out the tic strips and followed them with greater precision. In the photo below I think every plank probably ends in a different width from its neighbour. But it's been a sharp learning curve and I suppose that's the point. I'm seriously thinking of regarding this Winchelsea as a dry run for another to be started next winter: I love this ship that much. Oh - and perhaps buying a new camera to replace my 15 year old point and shoot. And I forgot to own up to the awful joint in the keel. I got ratty with the sandpaper when I knew I should have walked away and had a beer.

-
There are sadly some right old howlers. This is a failure to understand the relationship between the lower counter, the incoming planking and, crucially, the substrate. I can see exactly what I did wrong. Its down to a lack of experience. I won't make the same mistake again.
.thumb.JPG.1dd43d5d5e73726ebcb36e4a21d6251a.JPG)
-
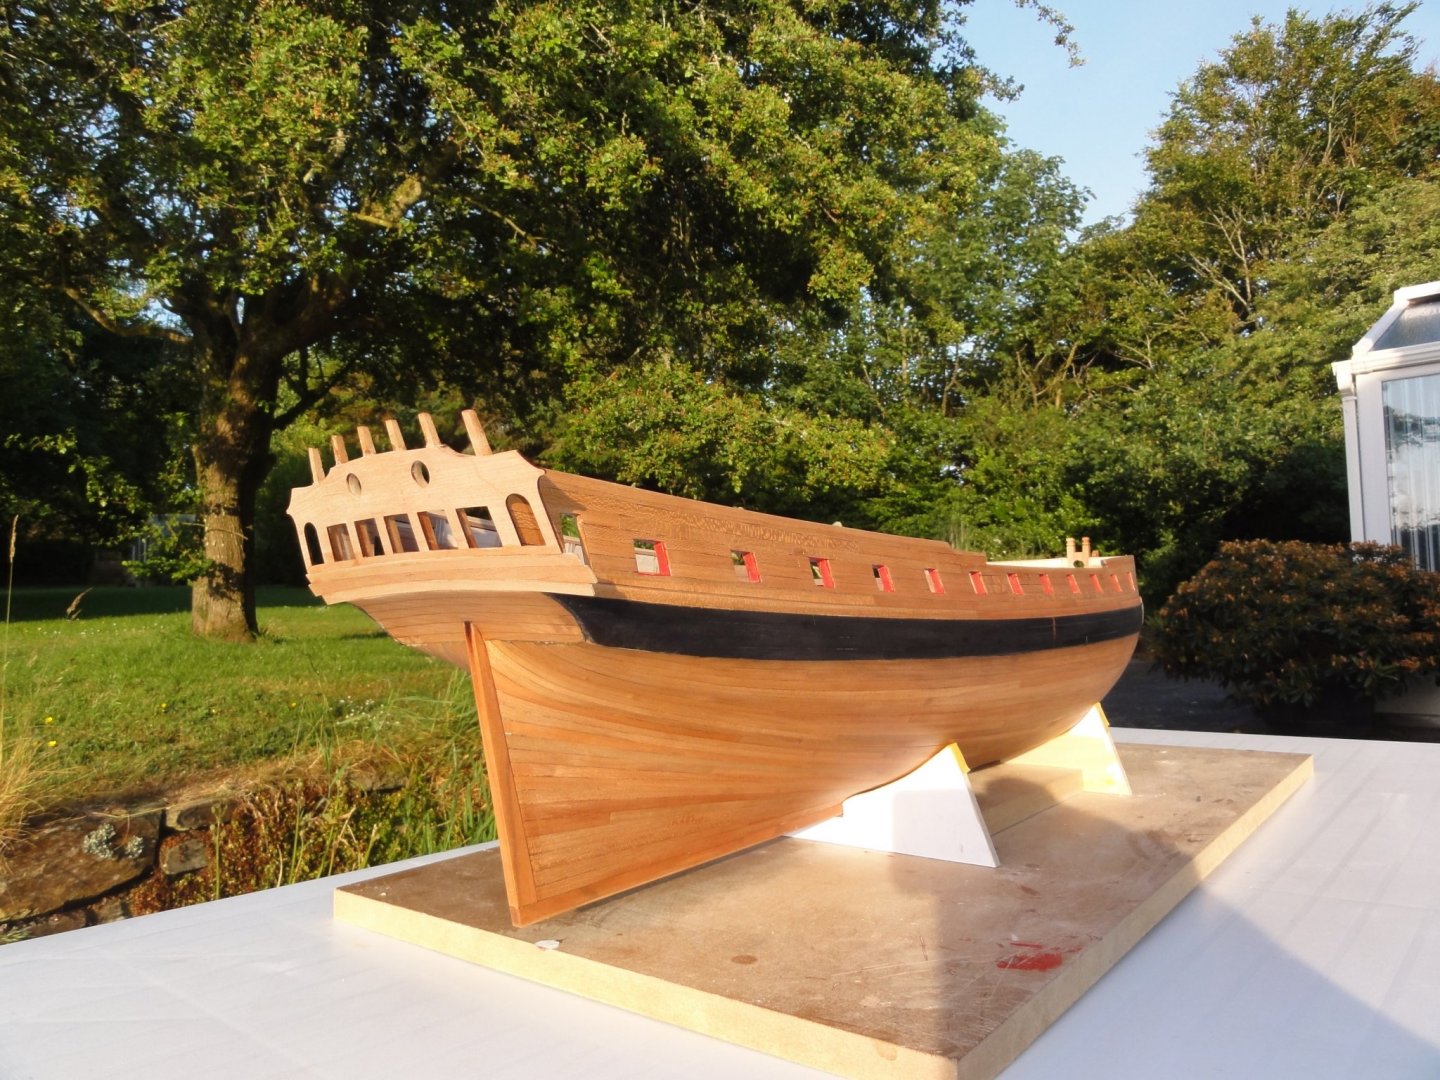
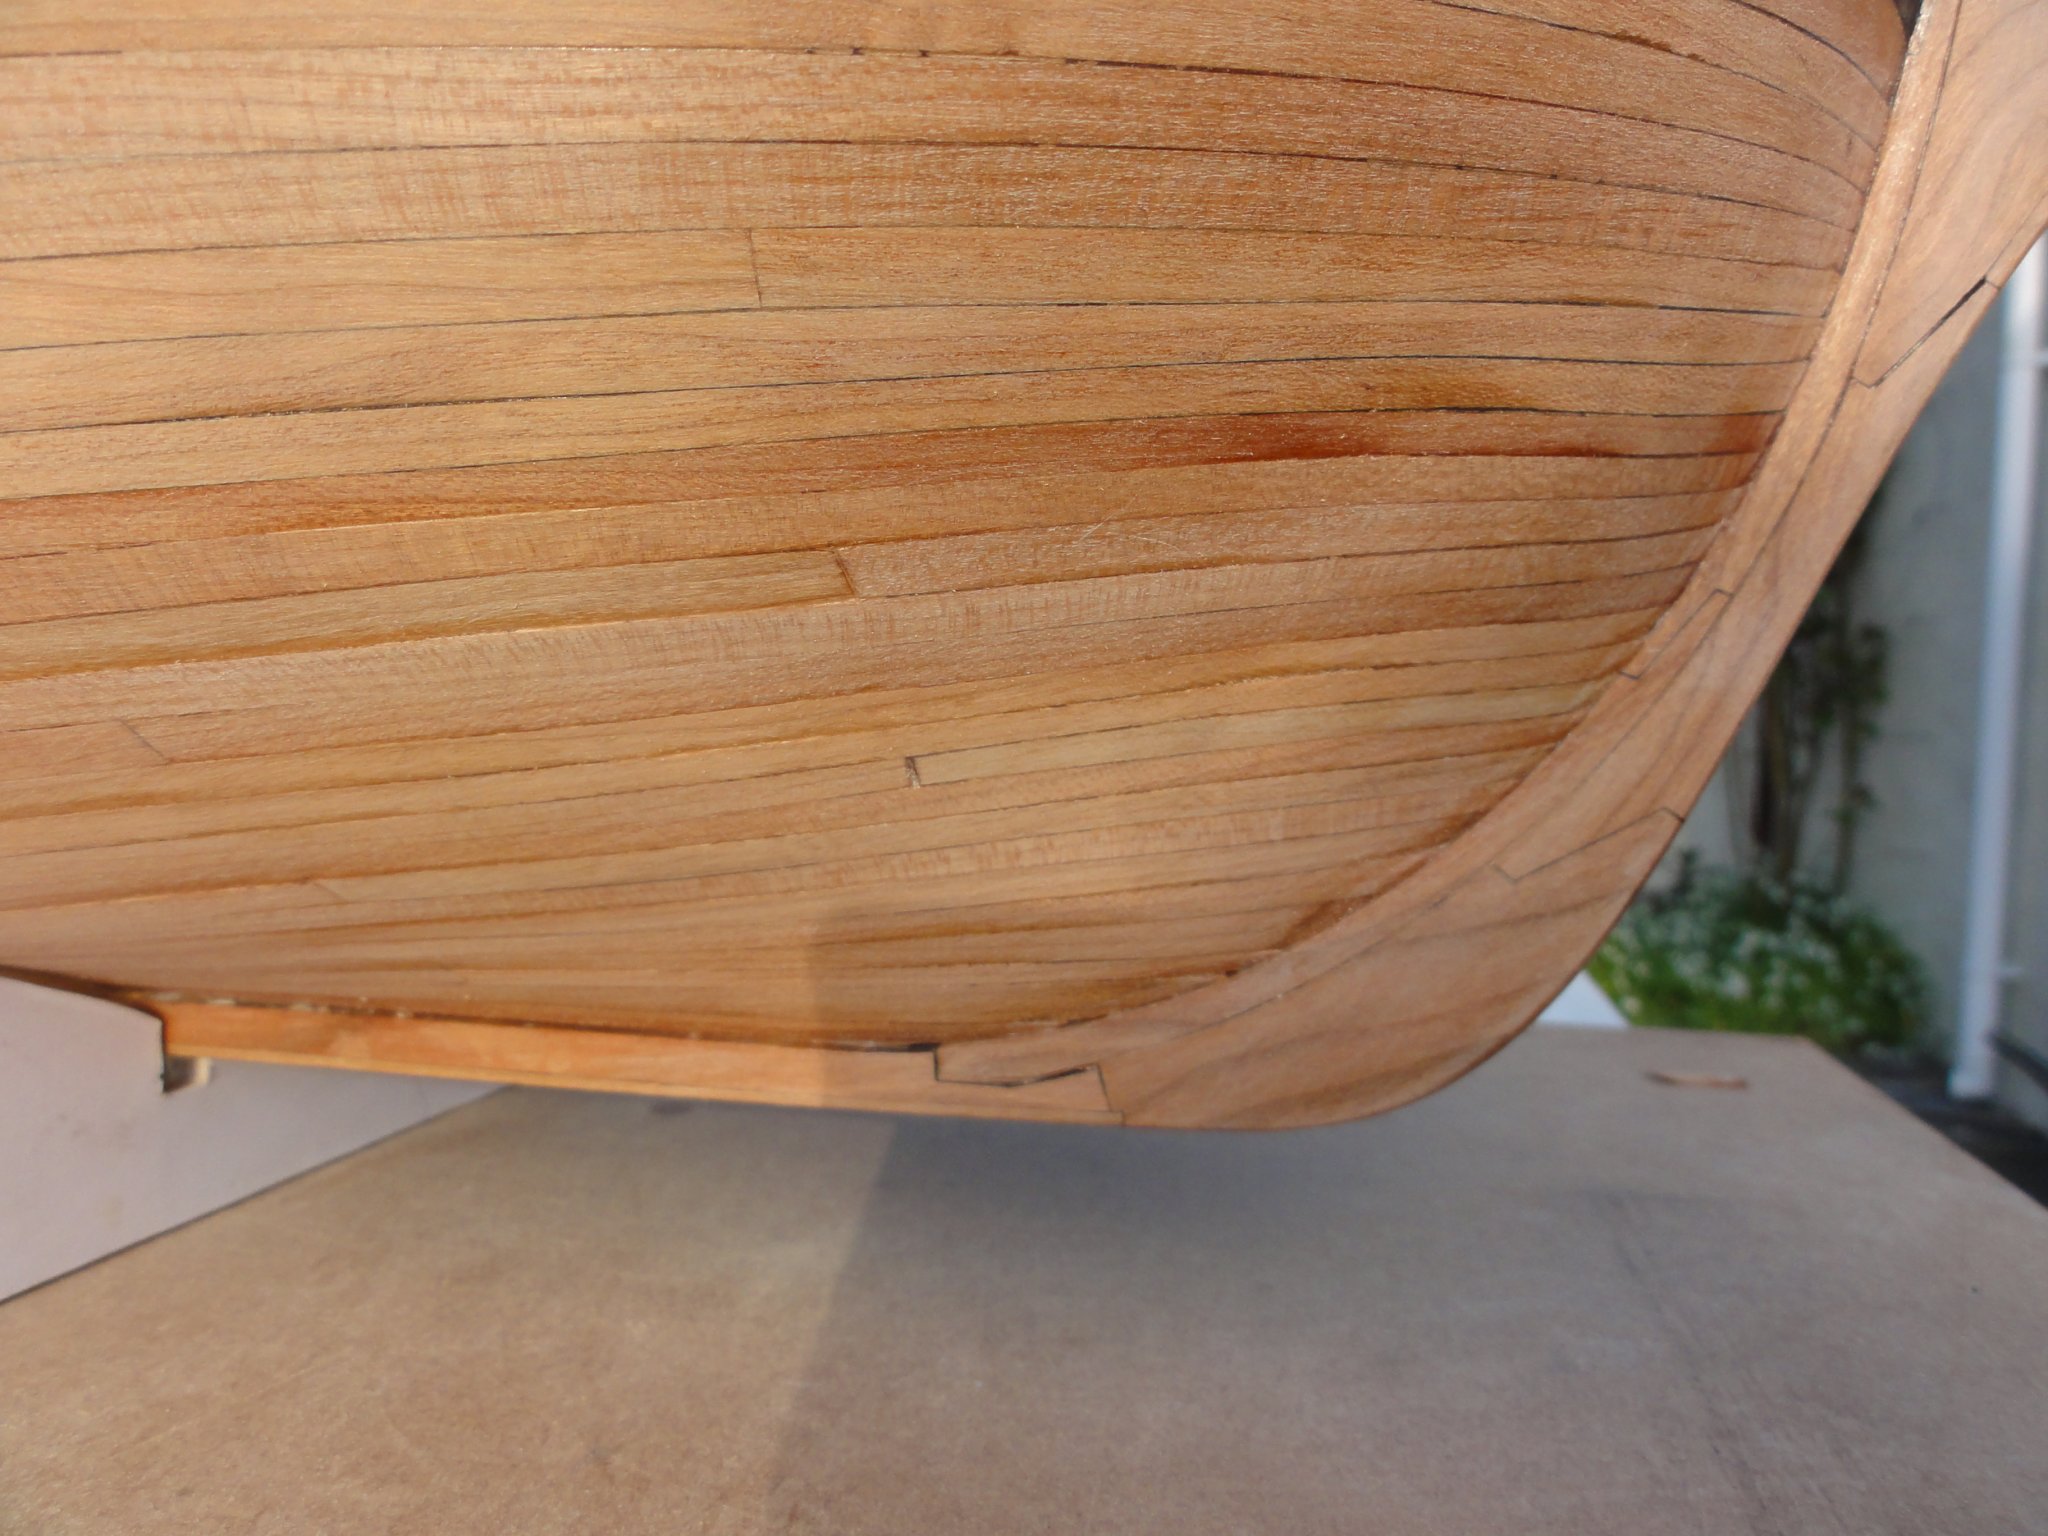
I can't work out how to add pictures and text in one go so this is all a bit disjointed. I don't have a Jim Byrnes or similar (is there anything similar to a Jim Byrnes?) so I bought pre cut planking and I have mixed feelings about it. There is a mixture of planks showing a fair face and planks showing an end grain face and it looks a bit disjointed and over complicated. Its OK if the finish is completely matt but any sheen brings out the problem.
-
Thank you Bob; and thank you too for the kind remarks about our garden. We had a spell of gorgeous weather even you lucky Californians would have been pleased to see. Thank you for the likes - every kind word and thumbs up lifts your spirits when things don't go according to plan. Which is quite often in my case. I've planked one side!


.JPG.92dc1238680cf0415e3aa2581abb14f6.JPG)


.JPG.98c78a7fdd86ad8b3950dc0149c4f34d.JPG)
.JPG.9e1595a06b654c6c226431a45237bcd5.JPG)
.JPG.2fdec1ec6978aaa33875e8b8dc036fe7.JPG)

.JPG.84ffd302c433d86159498c0f07ae1ae9.JPG)
.JPG.4fa3c4d13d1d9af3bd123a74abe10517.JPG)
.JPG.a6e170ae14d62e23f6c016420bb01e72.JPG)
.JPG.535ab2cee4e107f182a8720ac9a4251d.JPG)

.JPG.a09d46d8f455673038e68d127dbd6bad.JPG)
.JPG.20962321417cb3ababf1d99a436a9042.JPG)

.JPG.ff5ee56ed08f208d1cc793bae9b4f8ab.JPG)

.JPG.c9ea647898ce85e0a2bbc6d031c71e95.JPG)
_LI.jpg.8292ef0a123a6fe4c04458d0ea9ae7fa.jpg)
.JPG.fd606a47789f9427eeb0d148441f2cfd.JPG)