HOLIDAY DONATION DRIVE - SUPPORT MSW - DO YOUR PART TO KEEP THIS GREAT FORUM GOING! (Only 13 donations so far - C'mon guys!)
×


jfhealey
-
Posts
361 -
Joined
-
Last visited
Content Type
Profiles
Forums
Gallery
Events
Everything posted by jfhealey
-
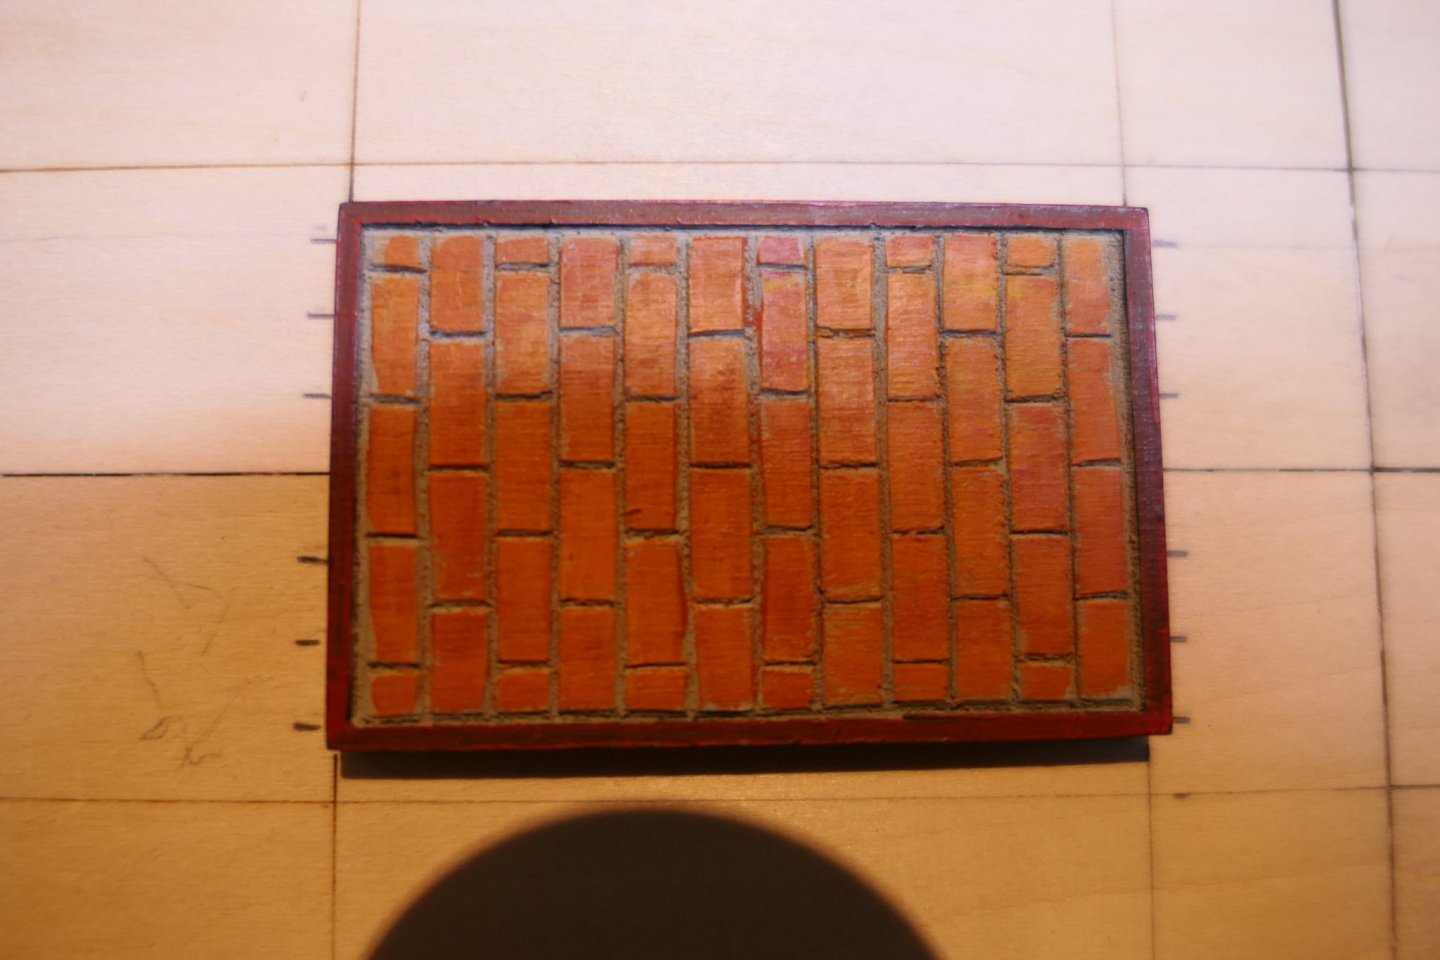
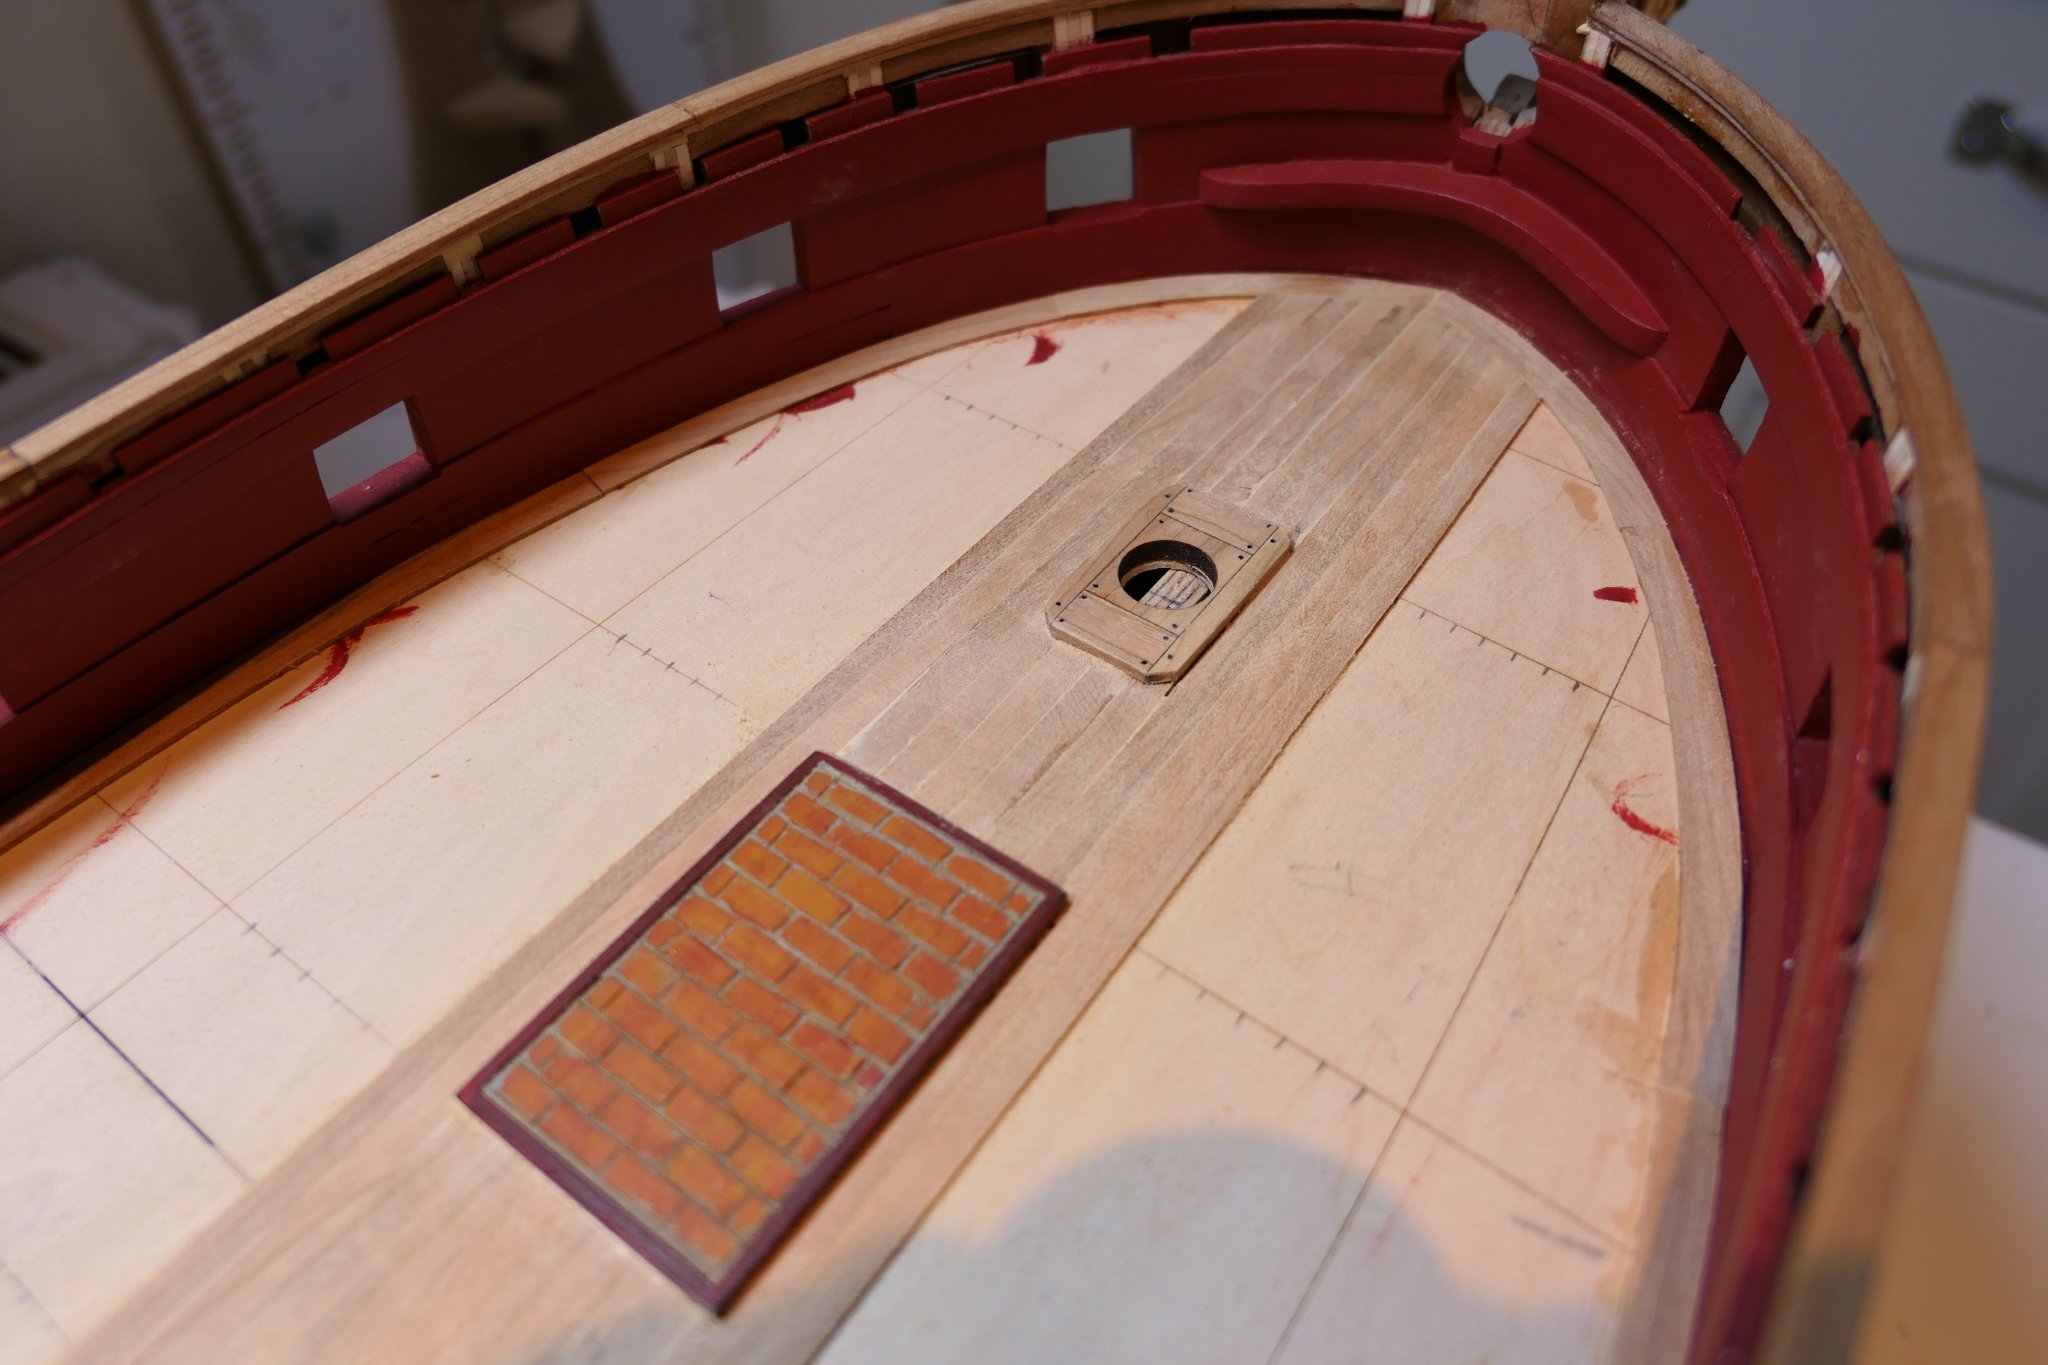
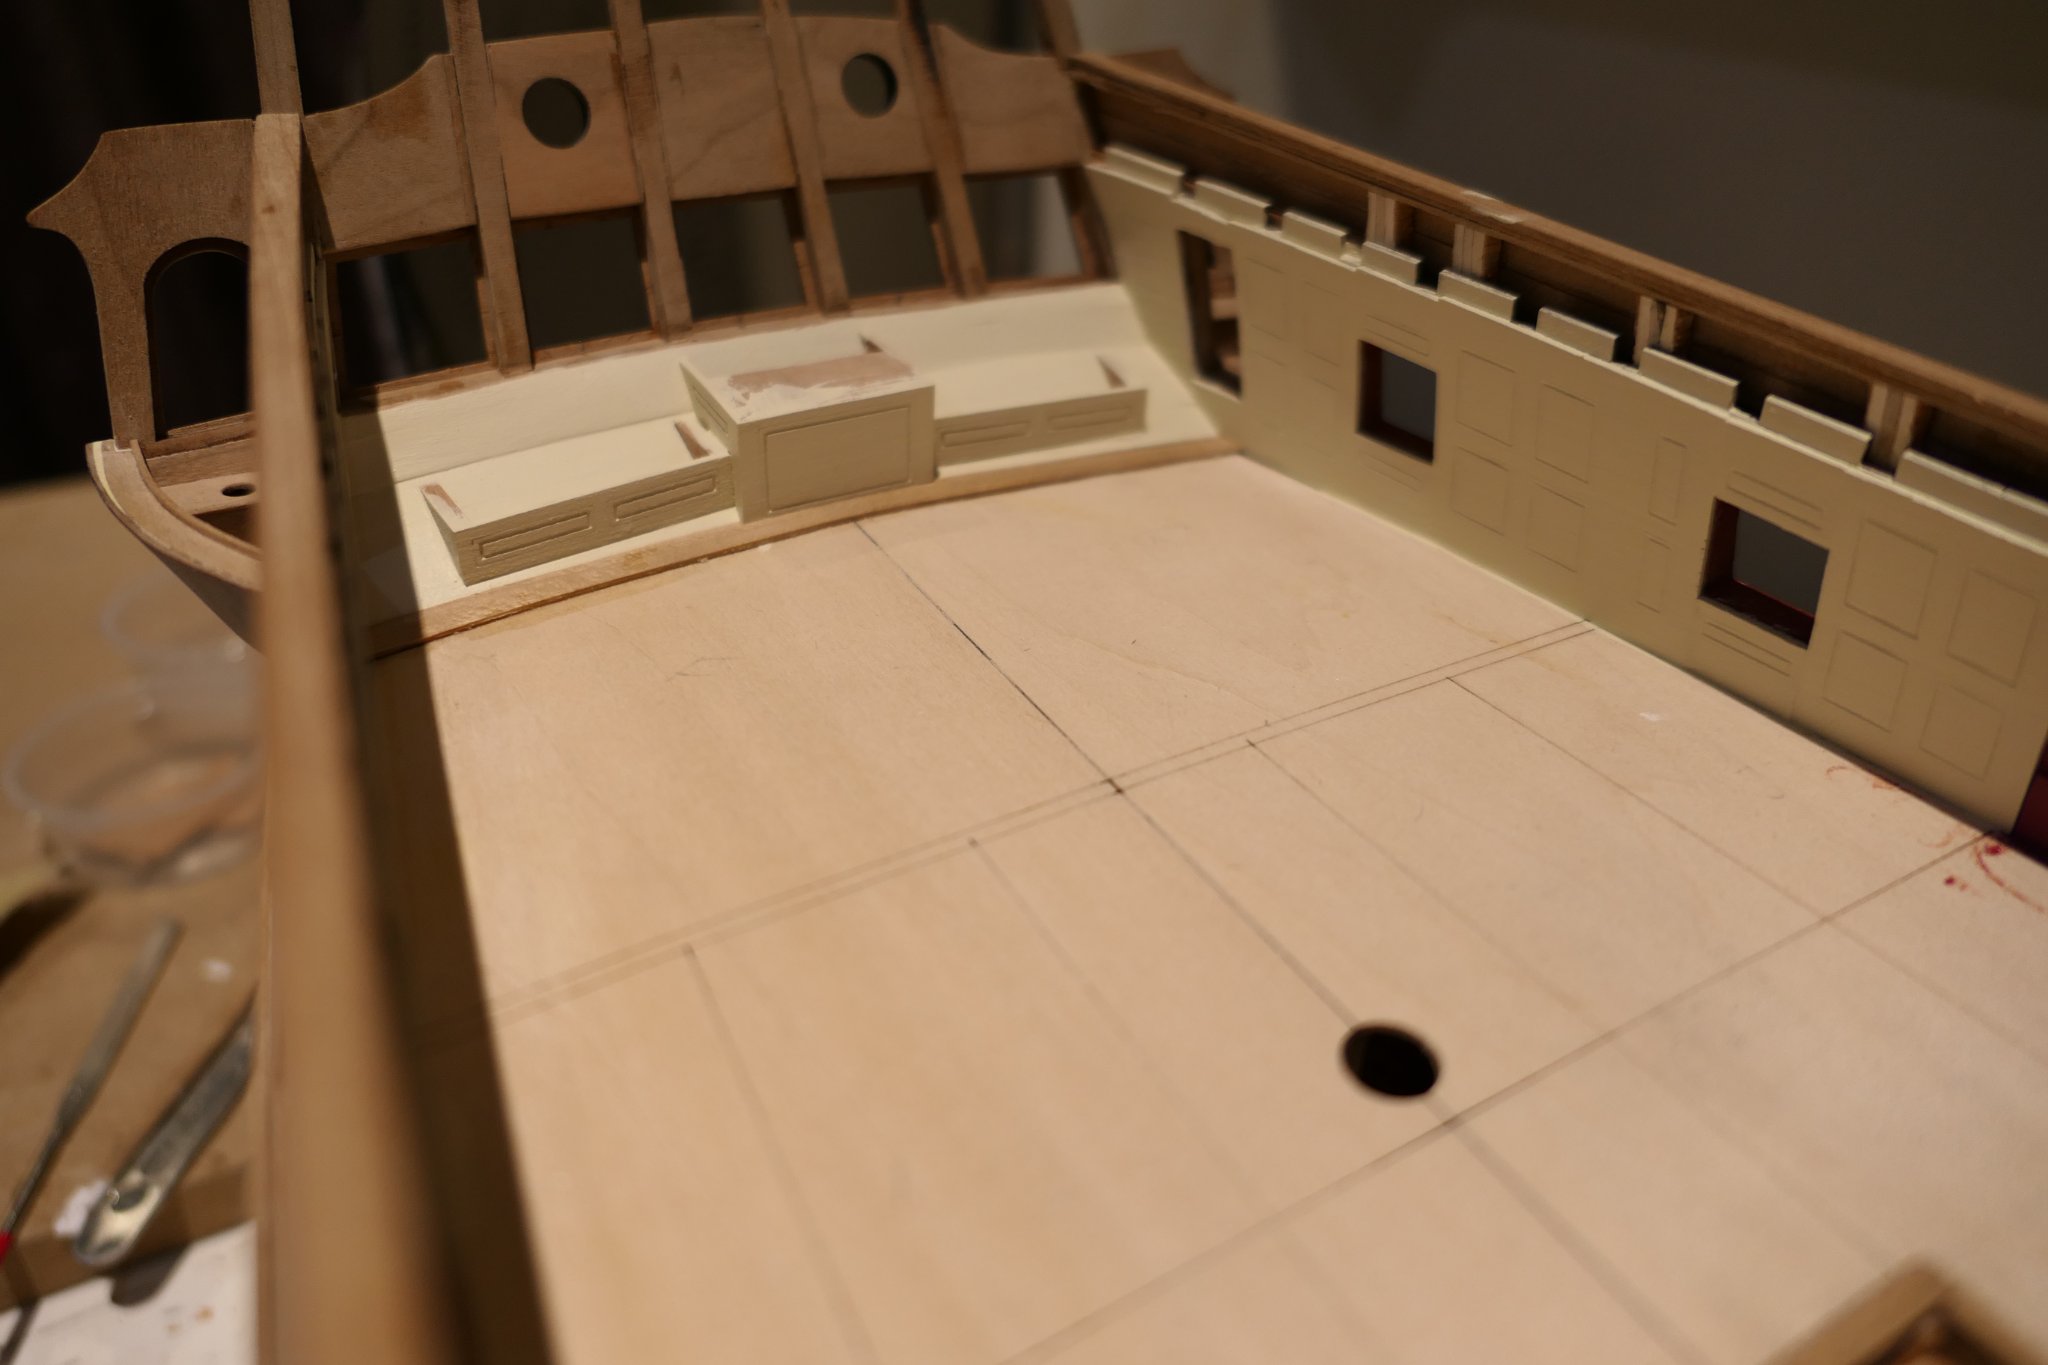
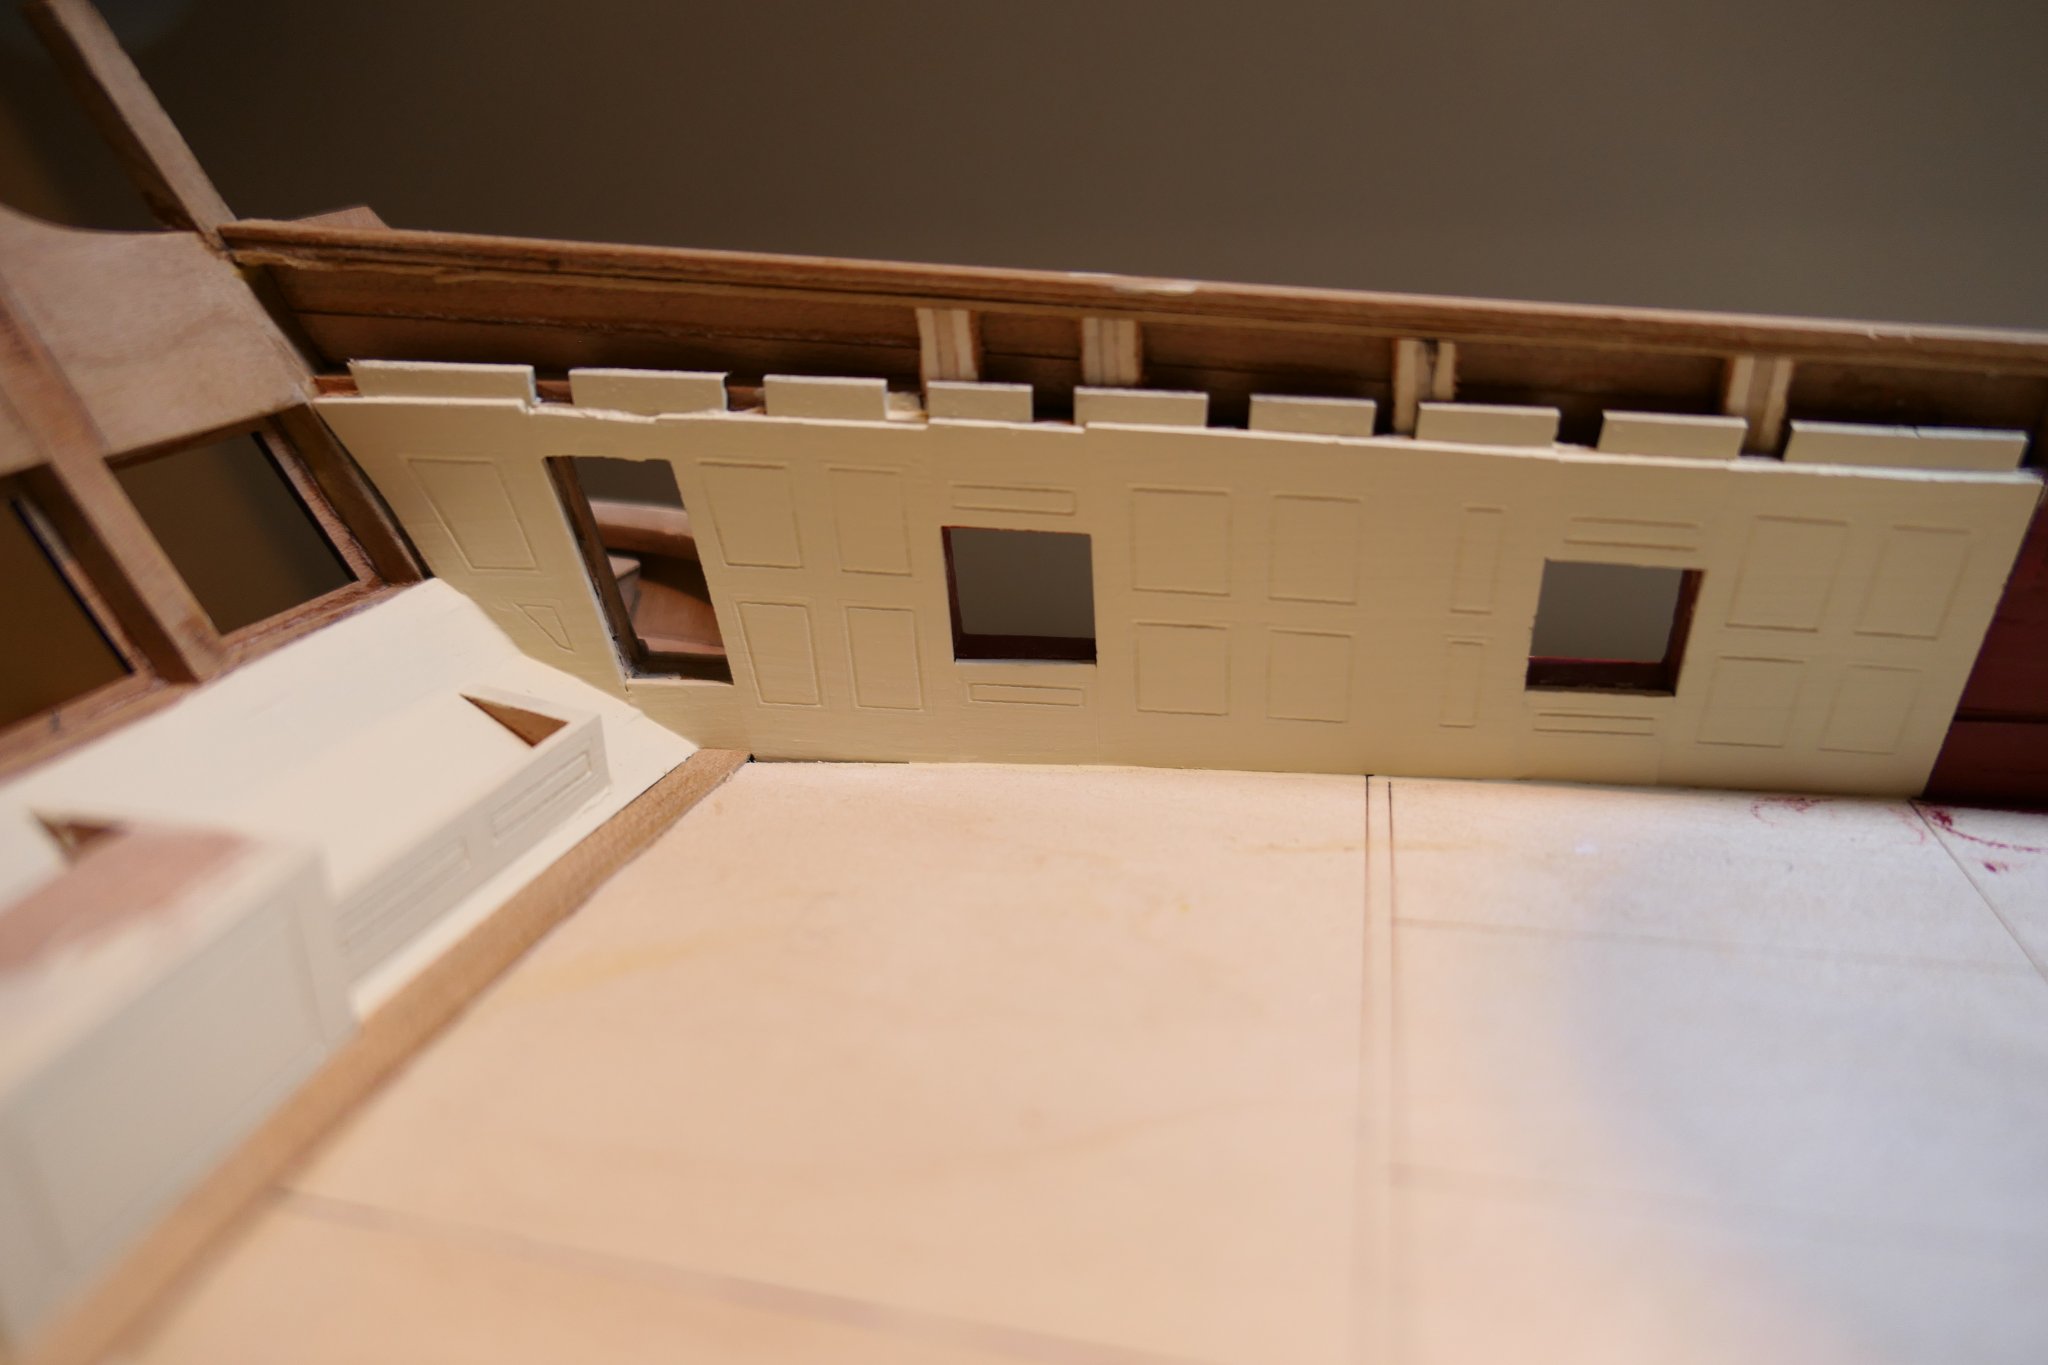
Thank you chaps. JJ - I'm so sorry I missed your question regarding the panelling. No - I didn't use any weathering powder or fancy paint techniques ( I don't know any) to emphasise the laser etched lines. They are plenty deep enough to take 4 or 5 coats of paint and still retain definition. As to the stove base I used a sharp blade at 45 degrees to soften, without being too precious about it, the very straight laser cut lines and then dry brushed on the brick colour after first painting the grey mortar colour. But I think I might paint them slate grey now - see Chuck's comments above.
-
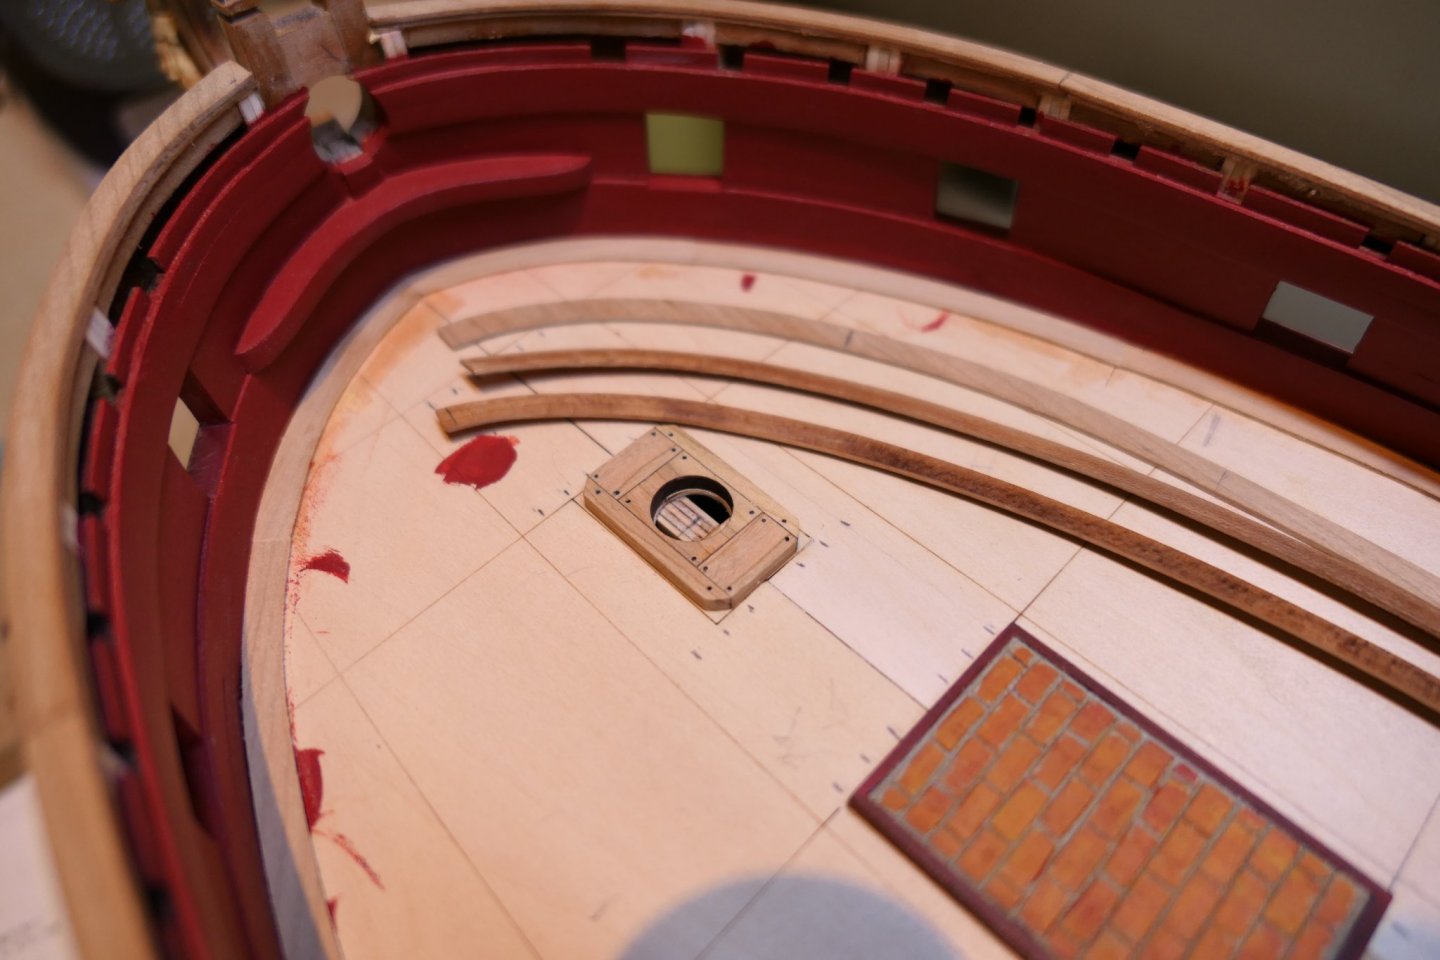
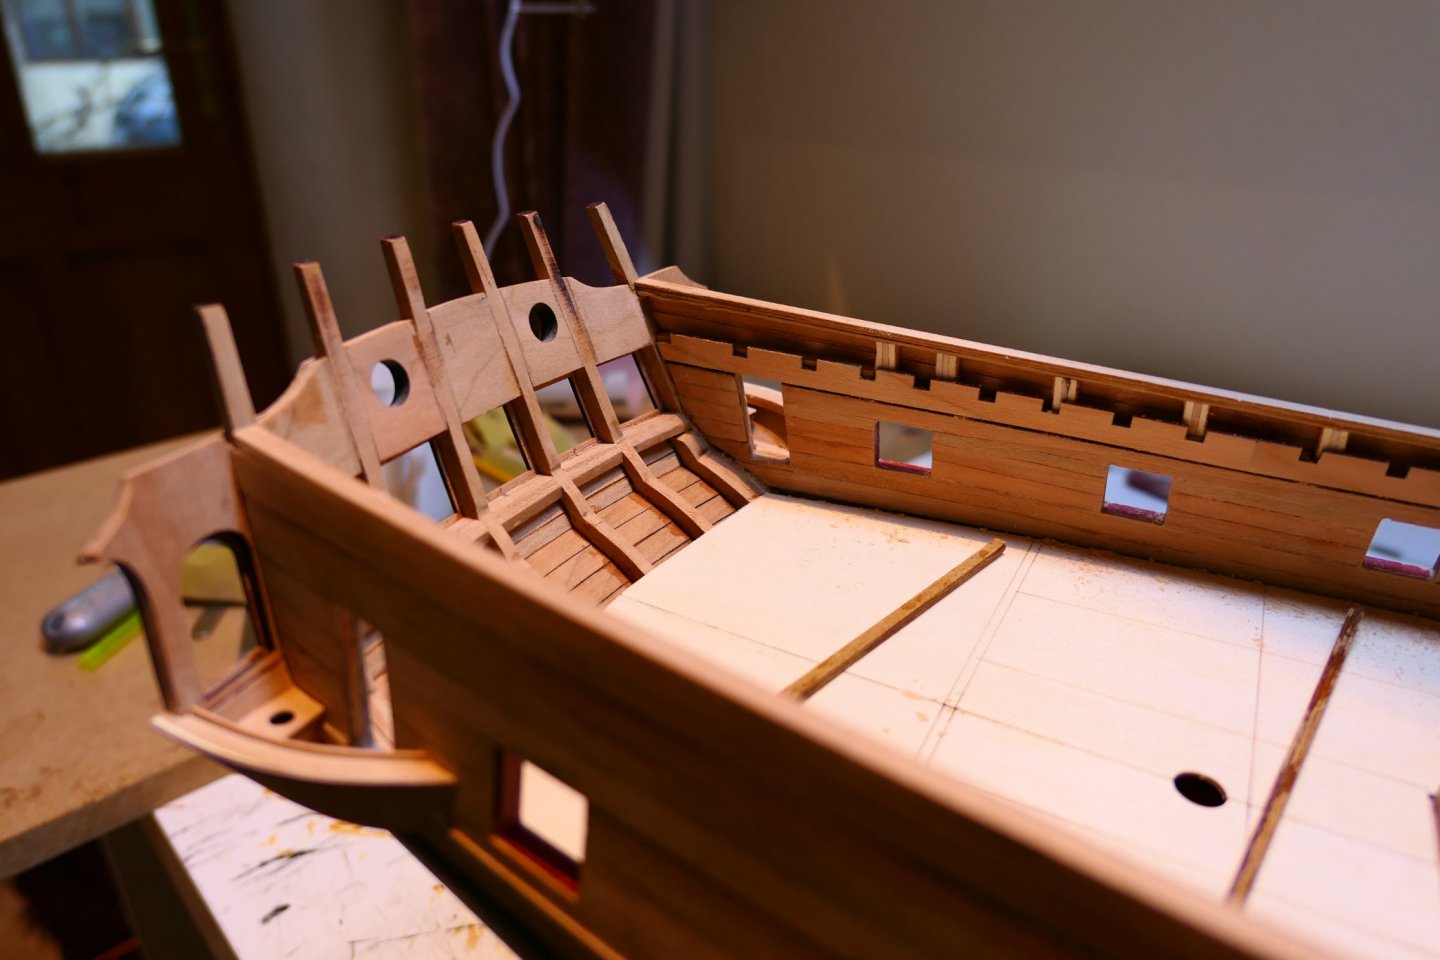
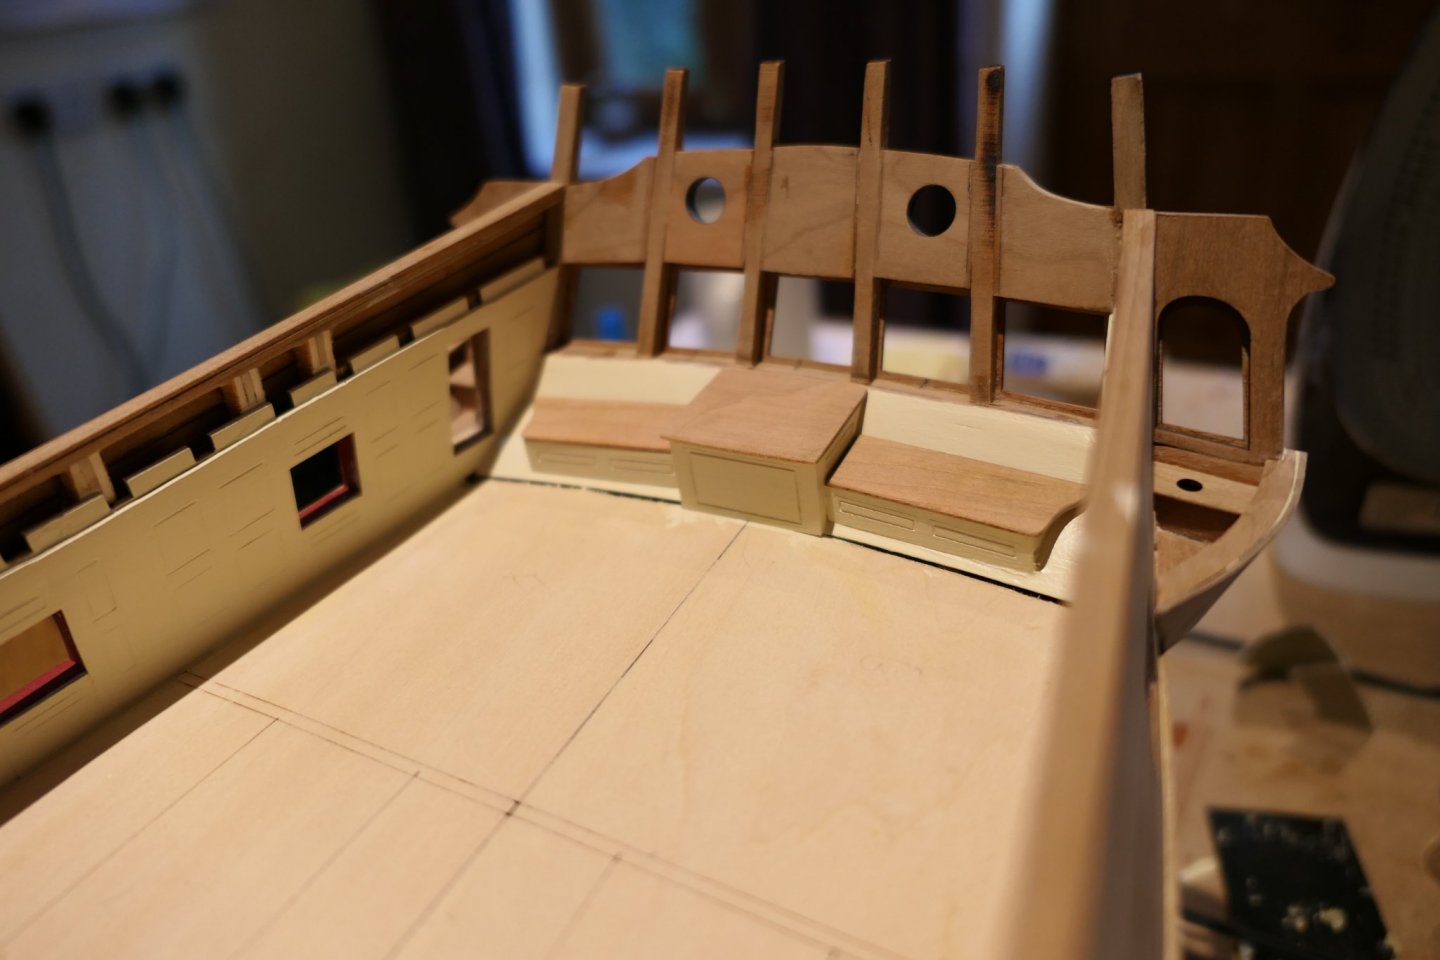
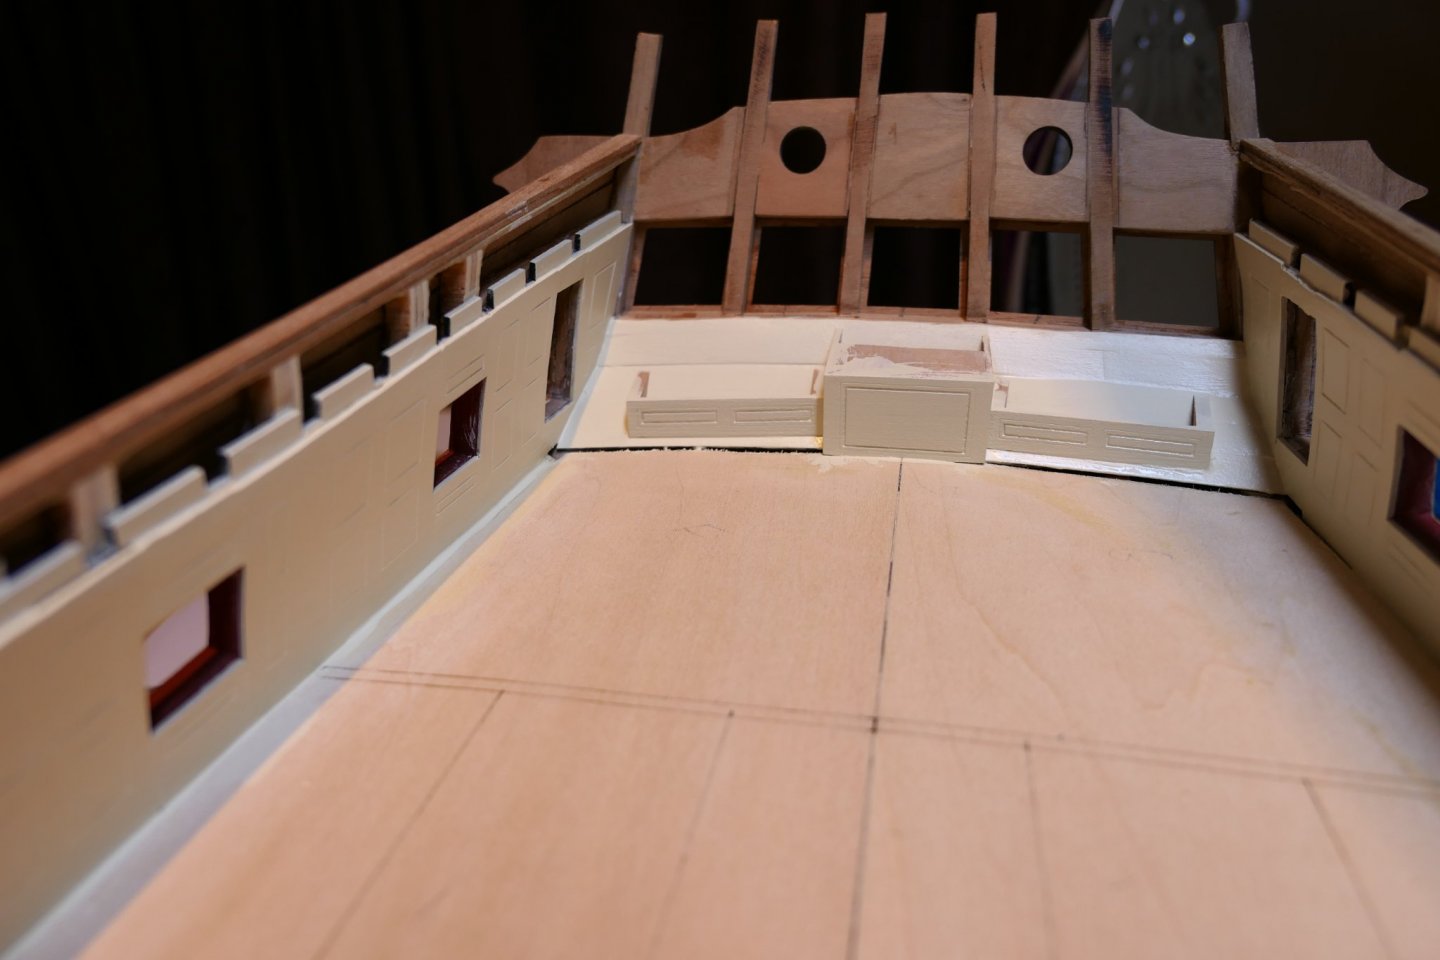
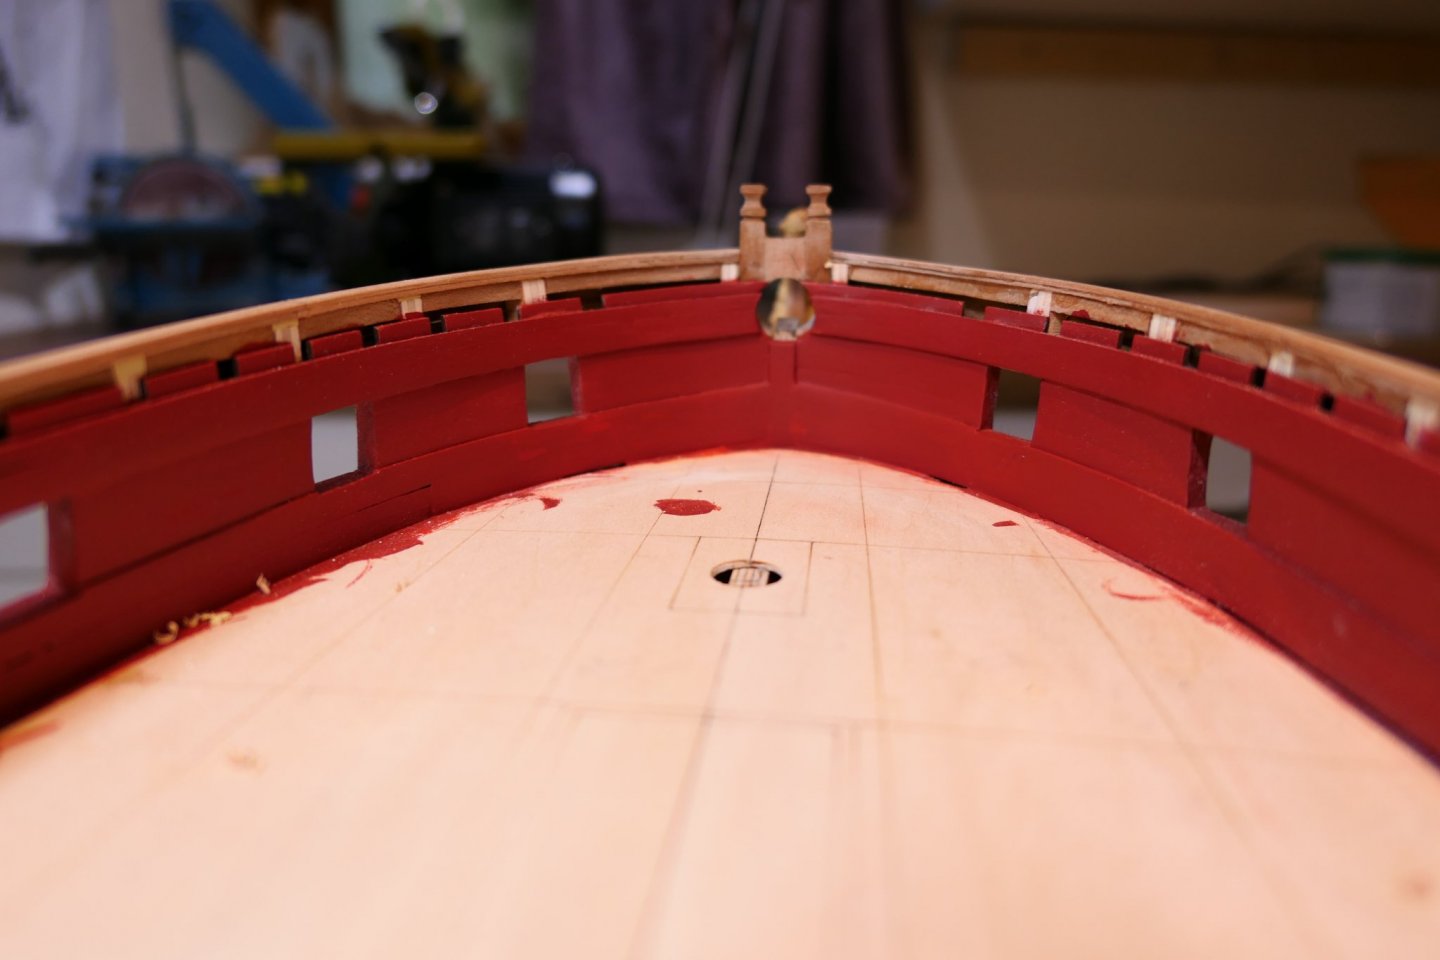
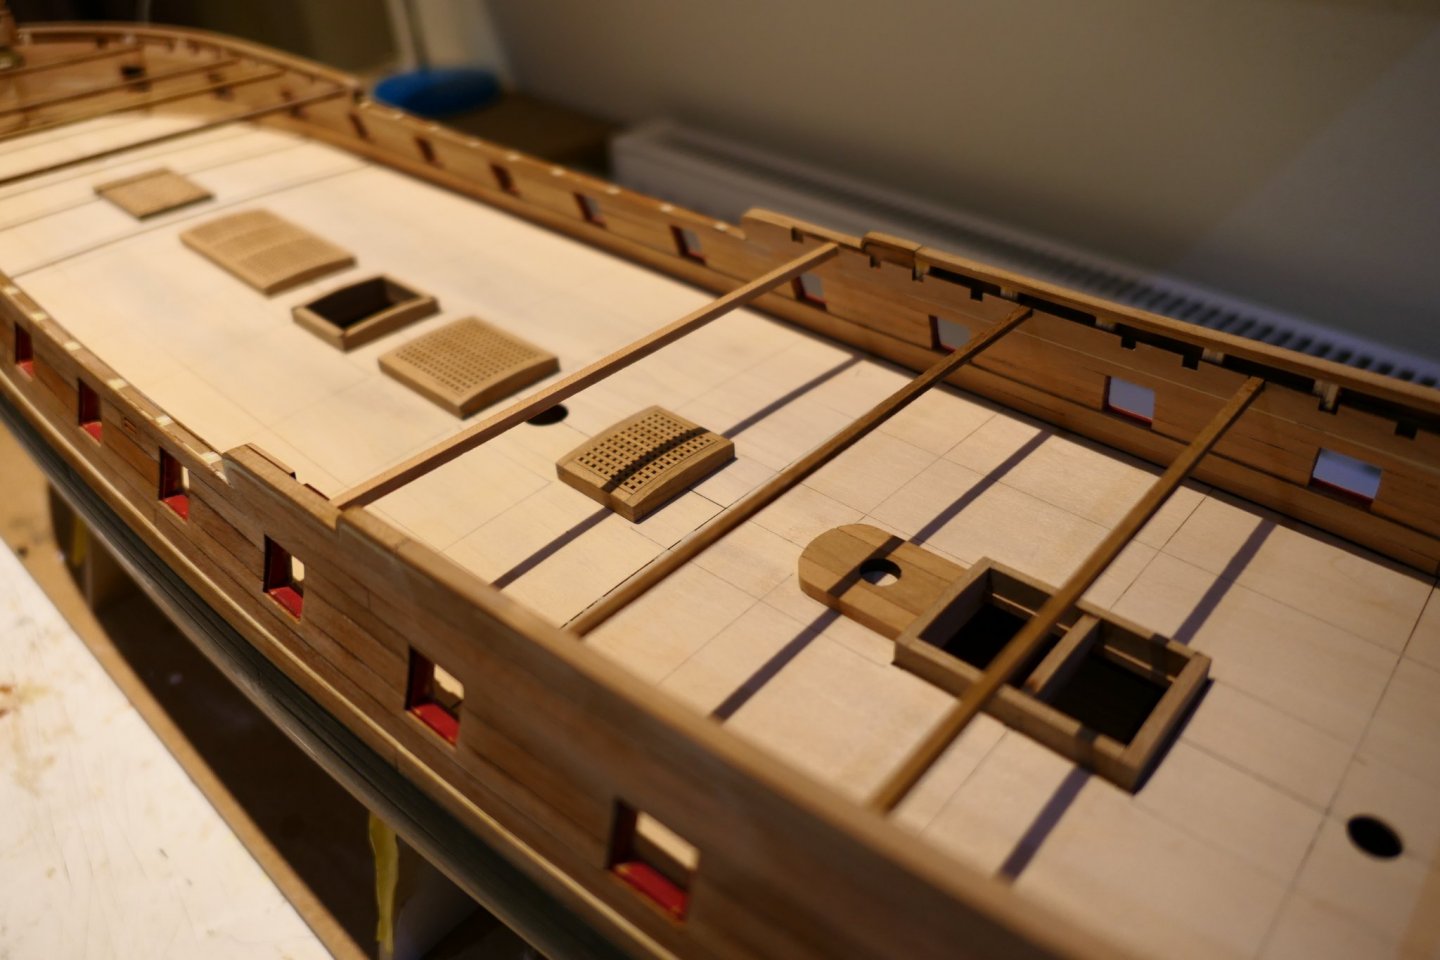
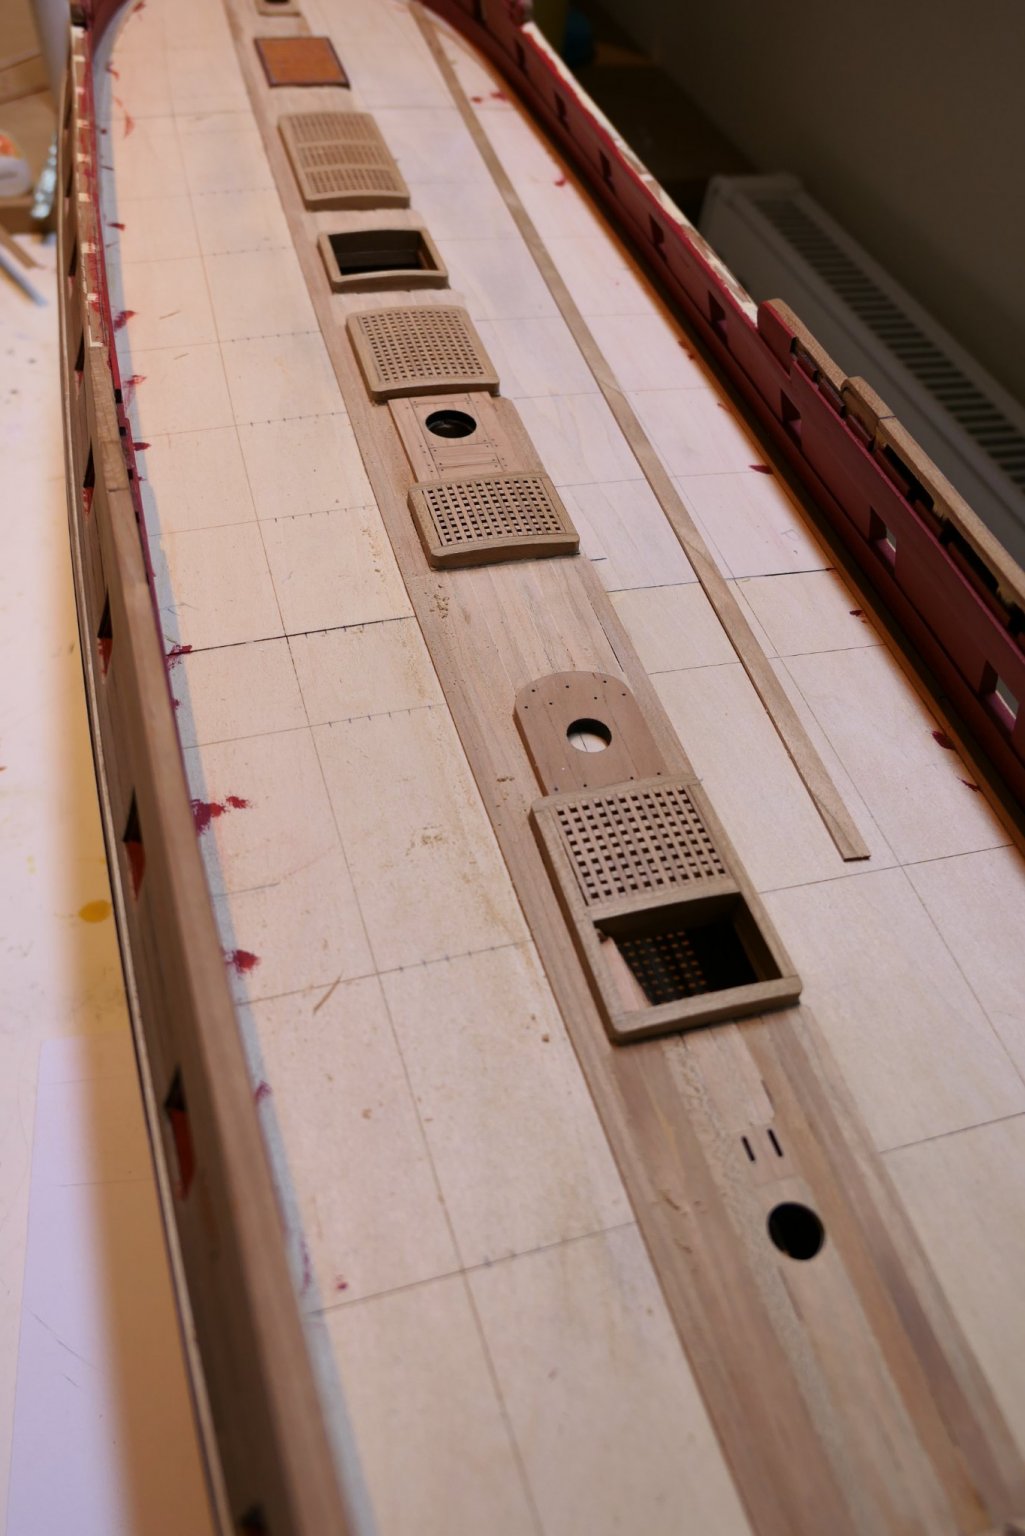
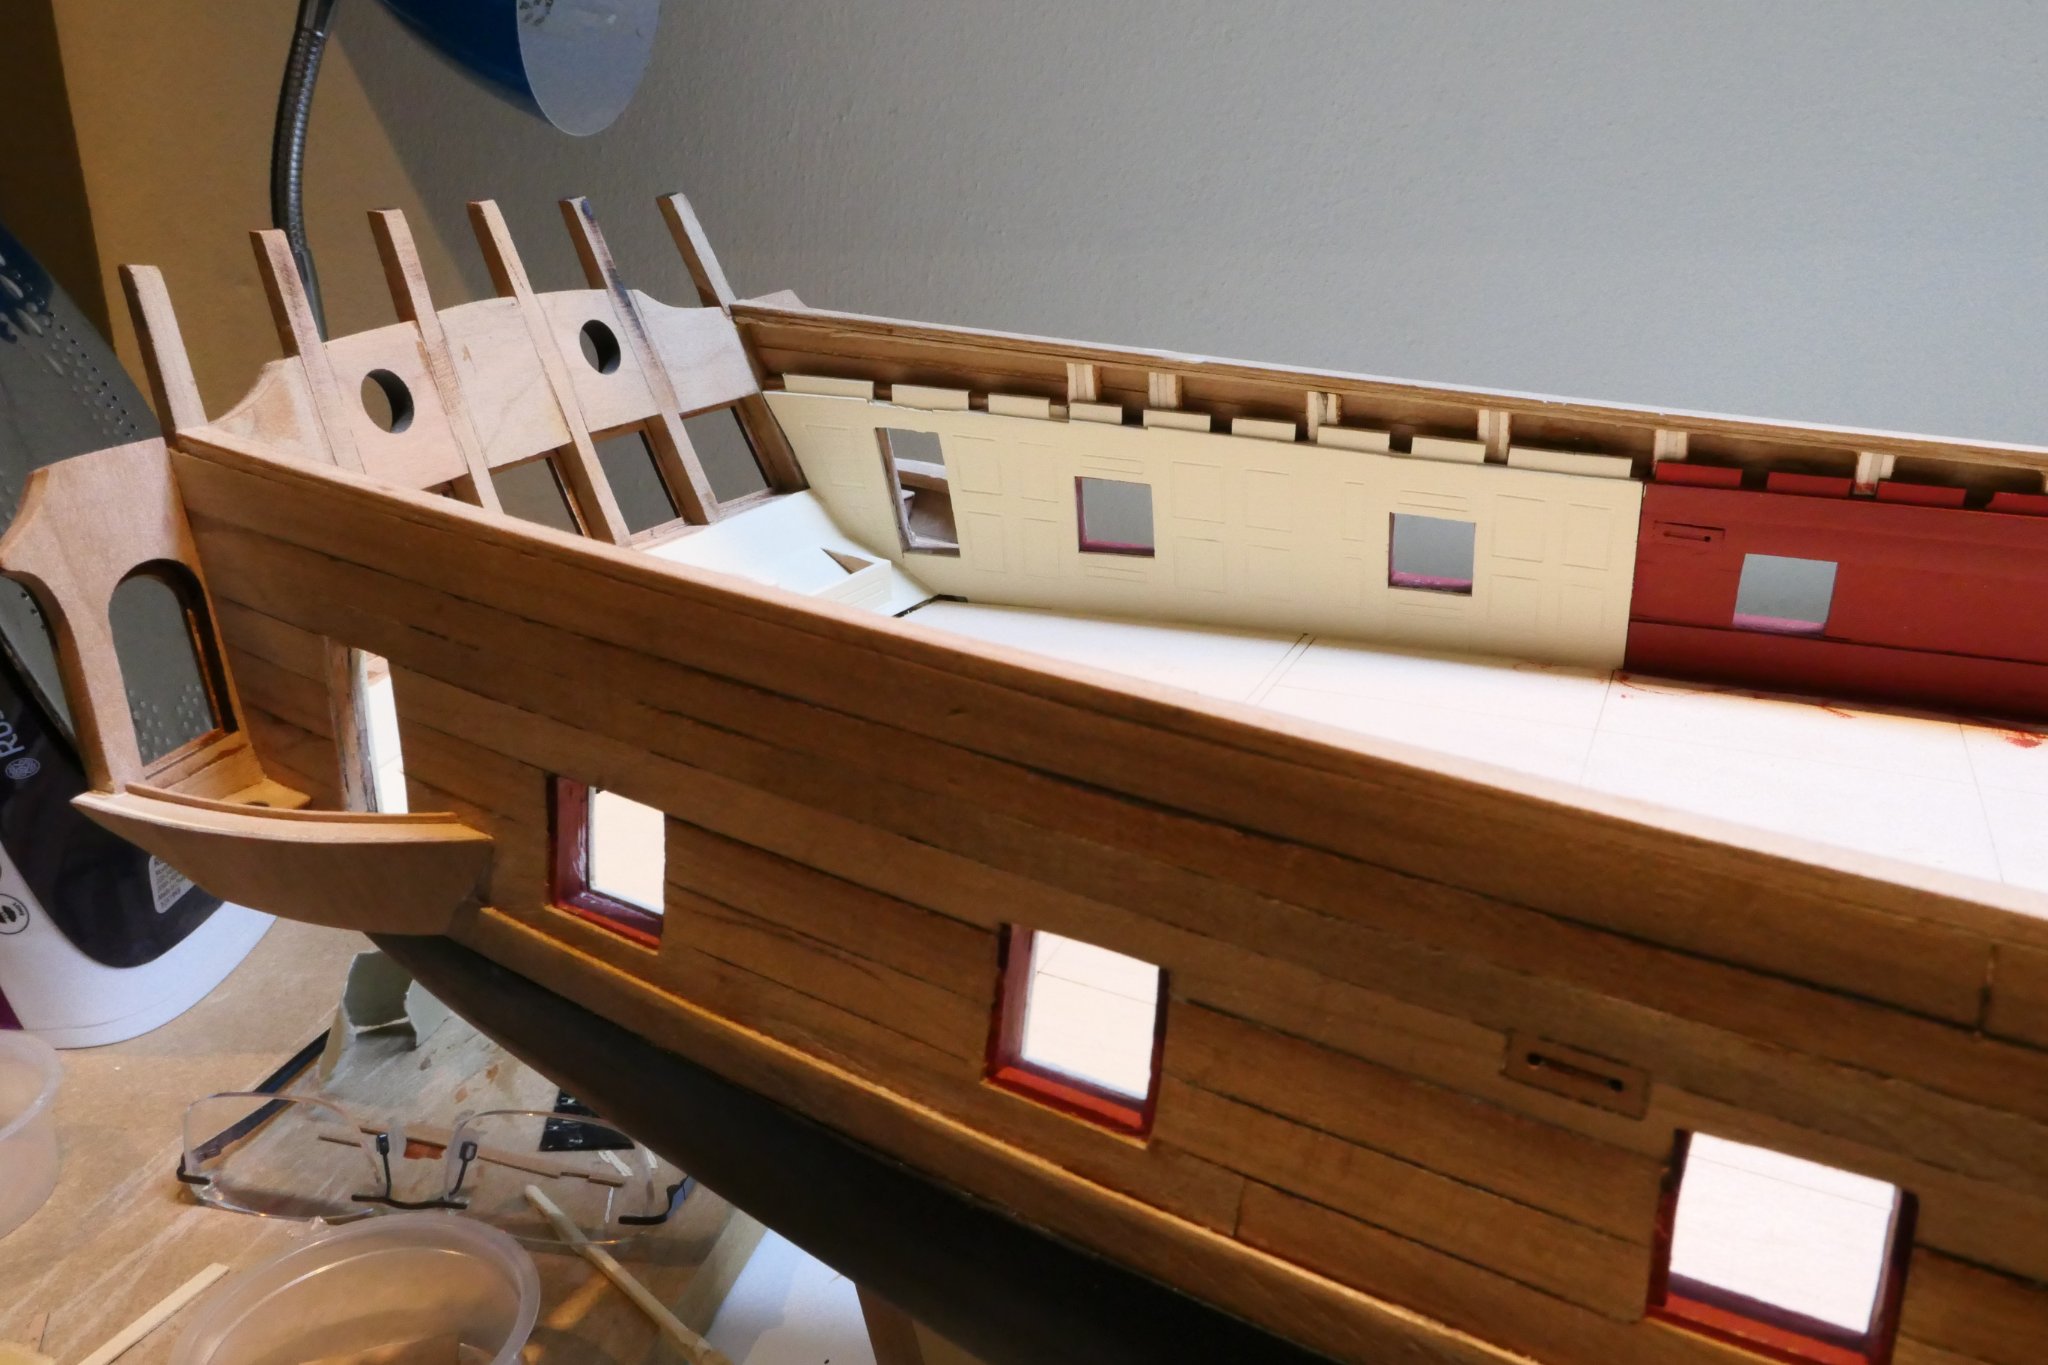
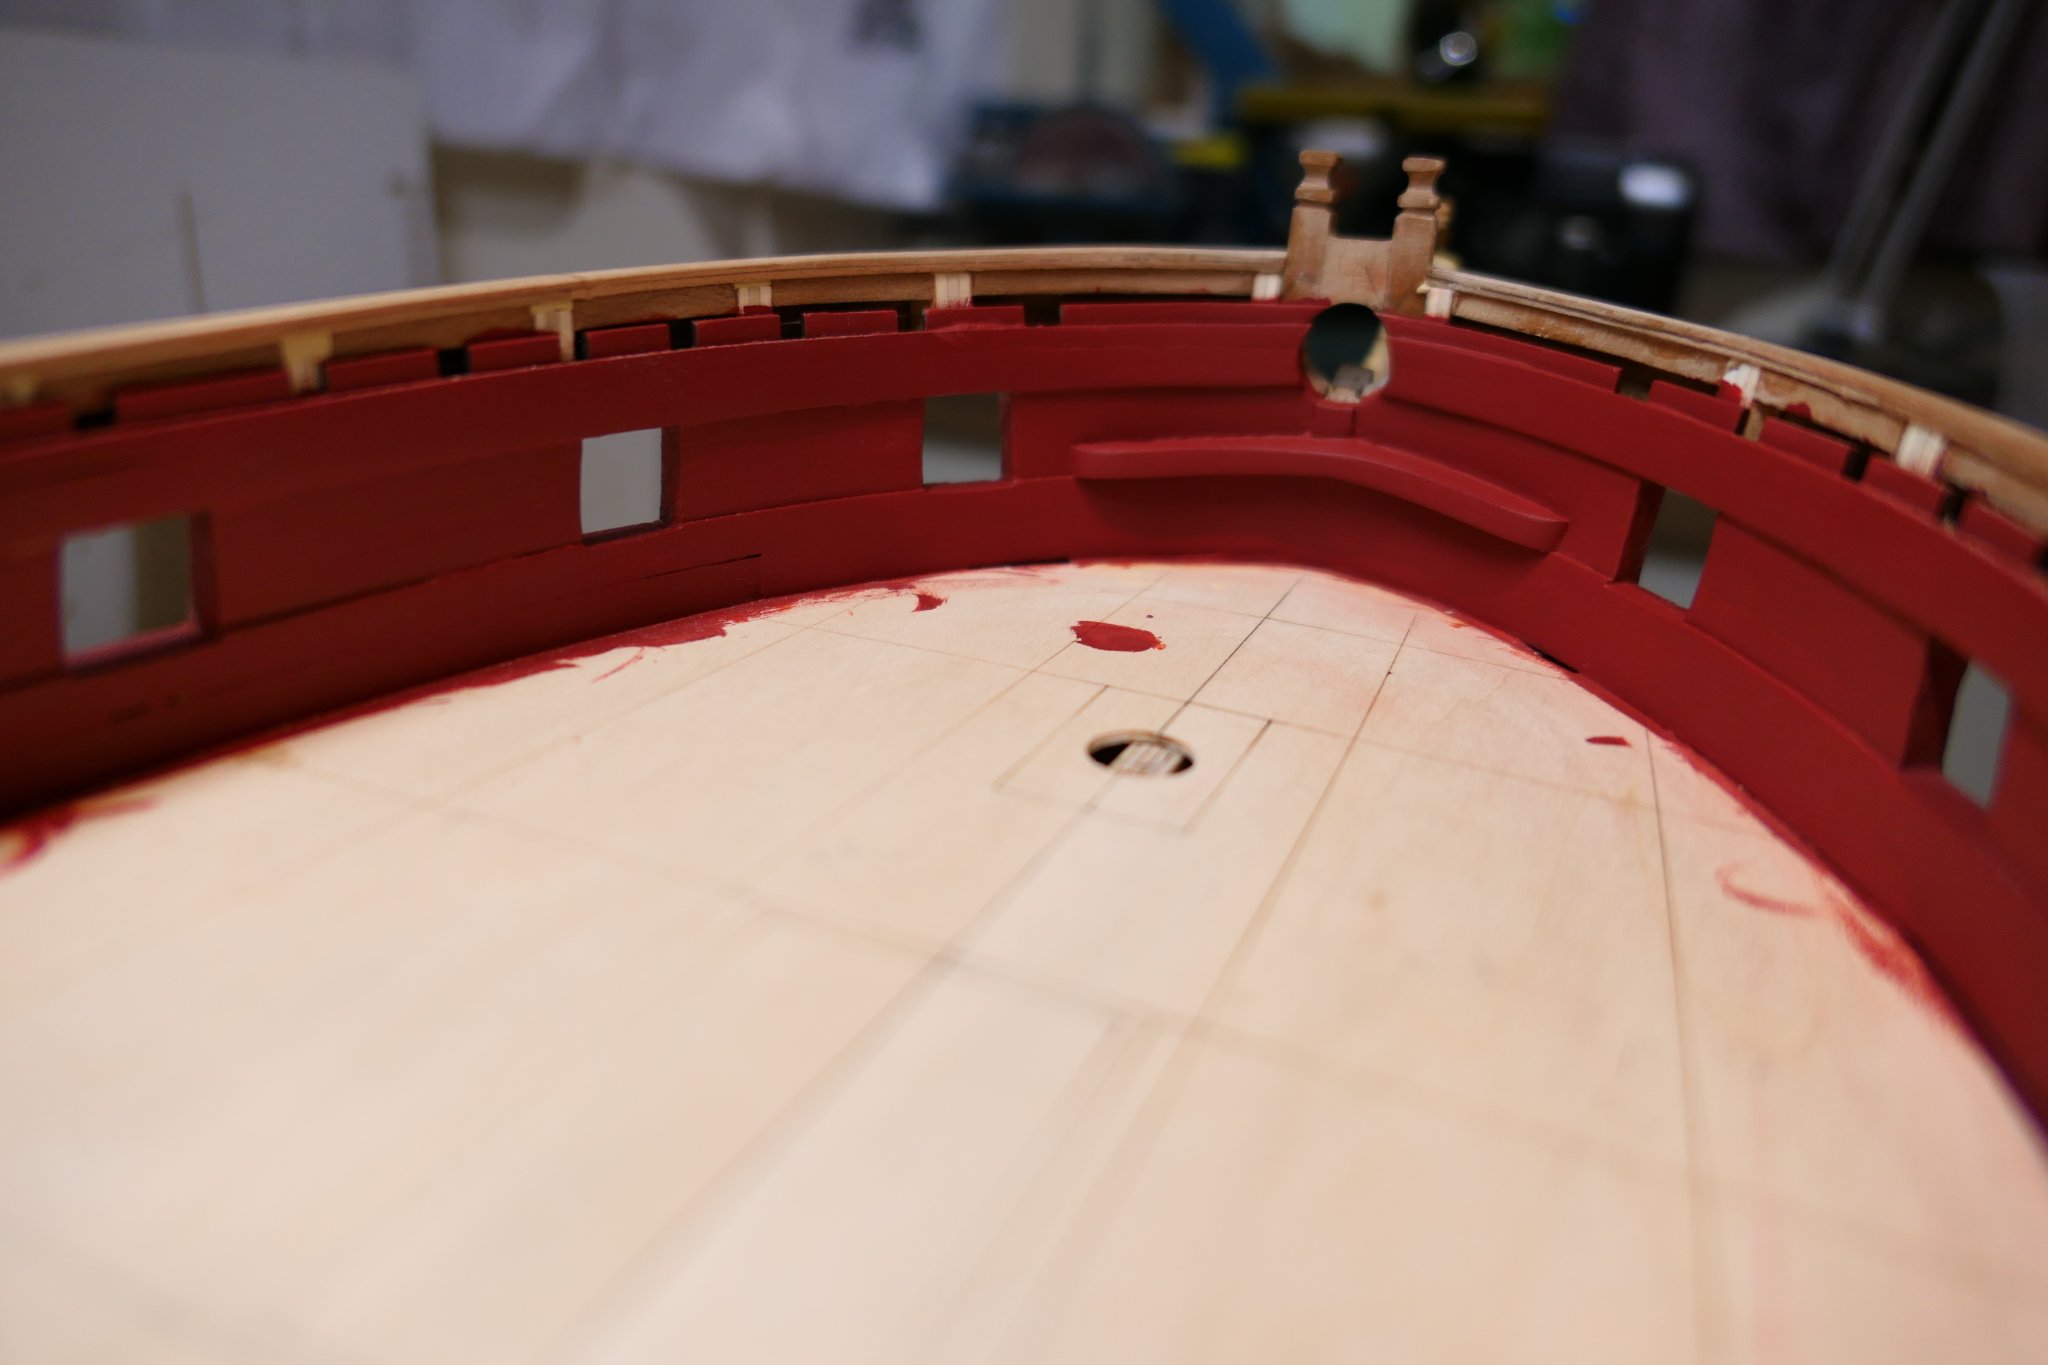
Good evening everyone. So many new builders starting off it's hard to keep up. It's a fantastic project. Good luck everyone! I went for a rustic brick finish on the base for the stove. I've started the deck planking. It feels like a really big step. When its done the majority of the "construction" bits - the plywood - that need to be concealed will be concealed. The "tabs" are tricky and nowhere near perfect but they are as good as I could have hoped for and I'm pleased. I can't make up my mind about painting the comings. On balance i think I prefer them natural (too late to change my mind now anyway) though it may not be historically accurate and it is undeniably a lot of bare wood. For the margin planks I tried edge bending (It's asking a bit much I found), cutting from a single piece and cutting three pieces to make up the curve - so as to follow the grain. I went with the last.


-
Good morning Chuck I understand that you may discontinue the production of rope in the not too distant future. I would like to rig the cannons on my Winchelsea but have little idea what I need in terms of rope – if available – and blocks (size or quantity). To that end would you consider putting together a shopping list necessary to complete chapter 6 or perhaps even a Winchelsea rigged cannons pack comprising cannons, carriages, rope and blocks? Fred
- 1,784 replies
-
- 2
-

-
- winchelsea
- Syren Ship Model Company
- (and 1 more)
-
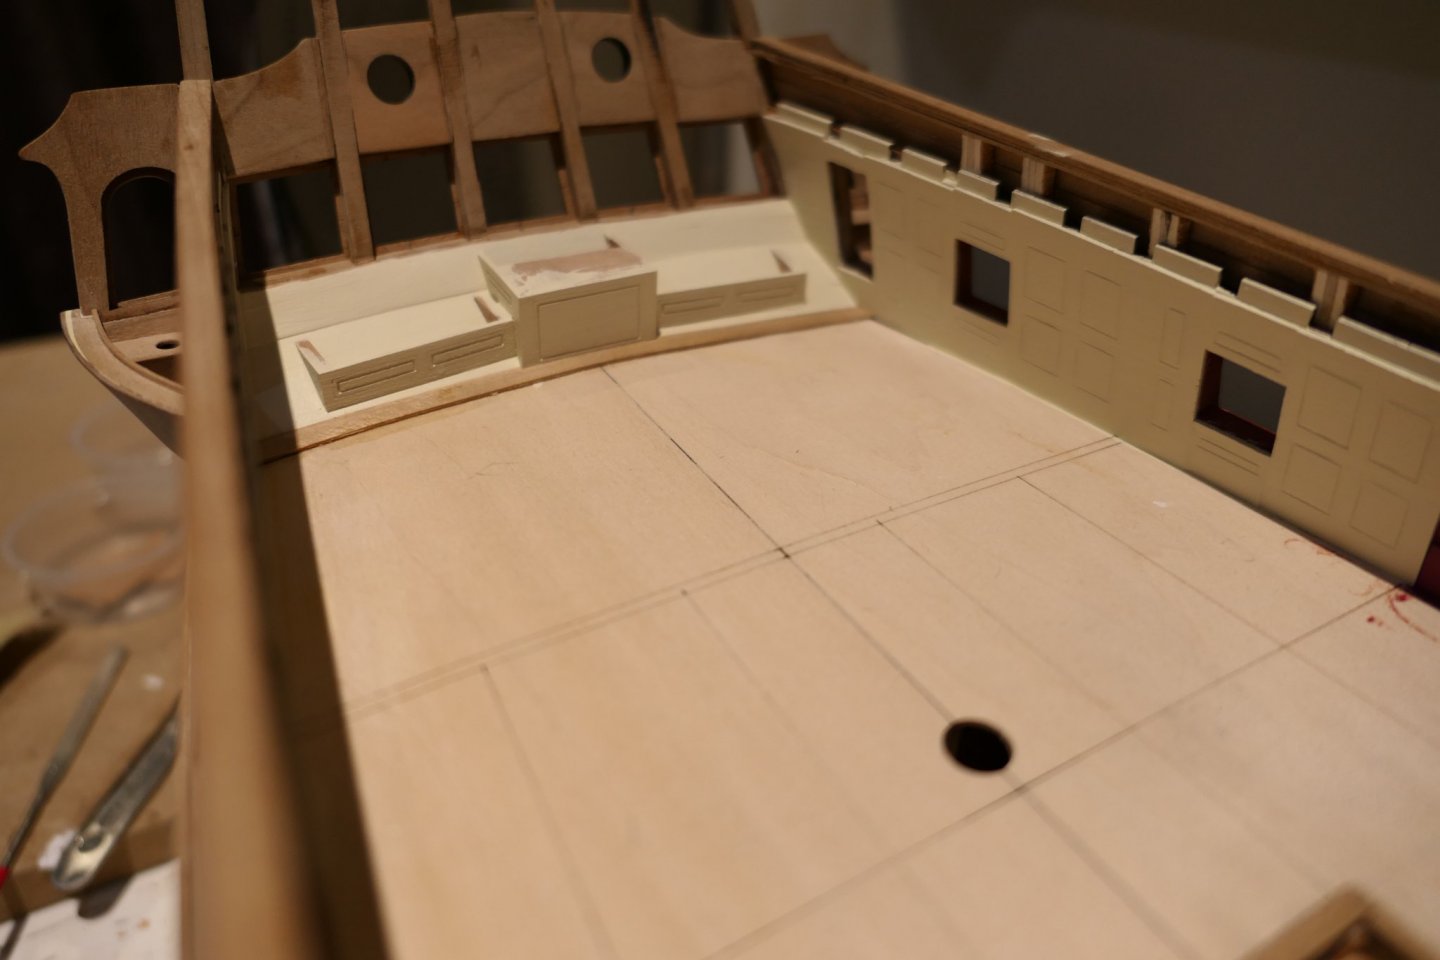
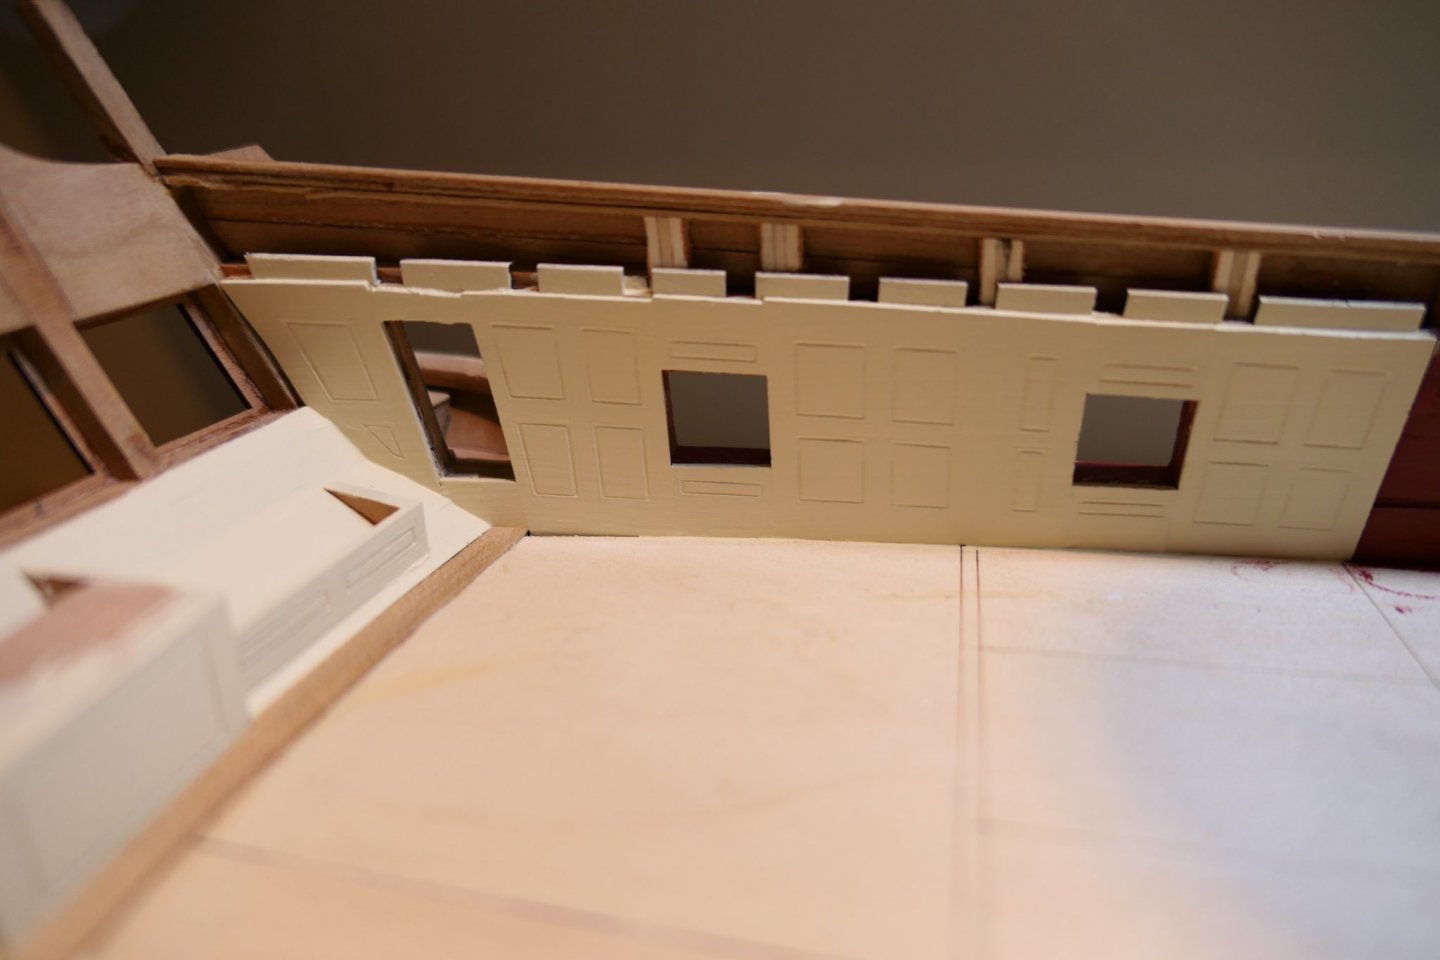
Thank you Tom. Model shipbuilding is a hobby I have taken up only comparatively recently and I am conscious, first, that I have so much to learn, and secondly, that if I do something twice generally turns out better second time. I'm not quite at the point of abandoning W2 and starting W3 but I do think about it from time to time. I'm determined to make the best possible job that I can of the Winchelsea. The trouble is (a) the more experience I gained, "making the best possible job" is a moving target and (b) I look at everyone else's logs and think "if only....". I am intrigued, incidentally, Tom by your unique approach to the Winchelsea build and I shall follow your blog with keen interest. In the meantime........... I'm not completely convinced by the painted panelling – but I cannot believe it would not have been painted. Surely there would is a modern fad?! One advantage, of course, of painting the panelling is that you can use a little bit of filler to make good the seams. And paint can cover a multitude of modelling sins. I do not like the unpainted bench seats and rudder trunk top. I'll paint those but I wonder if the bench seats should have hinged locker tops and whether the rudder trunk should also have an access hatch. Any thoughts, anyone? The inside planking is pretty much done. I made up one of the lovely Chapter 5 ladders. Here it is Decking next. All the best everyone Fred


-
Good evening Bob. Could I ask your thoughts about margin planks, in particular at the bow. I will shortly be starting work on the deck of my W2. I cut one pair of margin planks from a sheet of cherry with the scroll saw. I edge bent another pair from 8mm wide strips. It is pretty extreme edge bending and they buckled a little bit but not so much that I cannot glue them down flat. I could not edge bend to a perfect curve and had to sand down to an overall width of 6mm. They – the edge bent pair – would fit pretty satisfactorily. The pair I cut from a sheet of cherry fit well, too - but the grain, of course, does not follow the curve. I guess – and it is a complete guess – that the original shipwrights would have cut the margin plank from a bough of timber that was naturally curved. On balance I think I prefer the edge bent pair but I would have liked them a little wider than 6mm. What did you do? Your decking looks pretty good to me. All the best Fred
-
I reckon what with your slight regression - I hope you found a fix - and your lighting deviation (which looks fantastic - I'm looking forward to seeing that when you've got the quarter deck and foc'sle in place - I'm catching you up. My inner planking and spirketting are nearly in. I'll get the paint pot out this weekend. All the best Fred
-
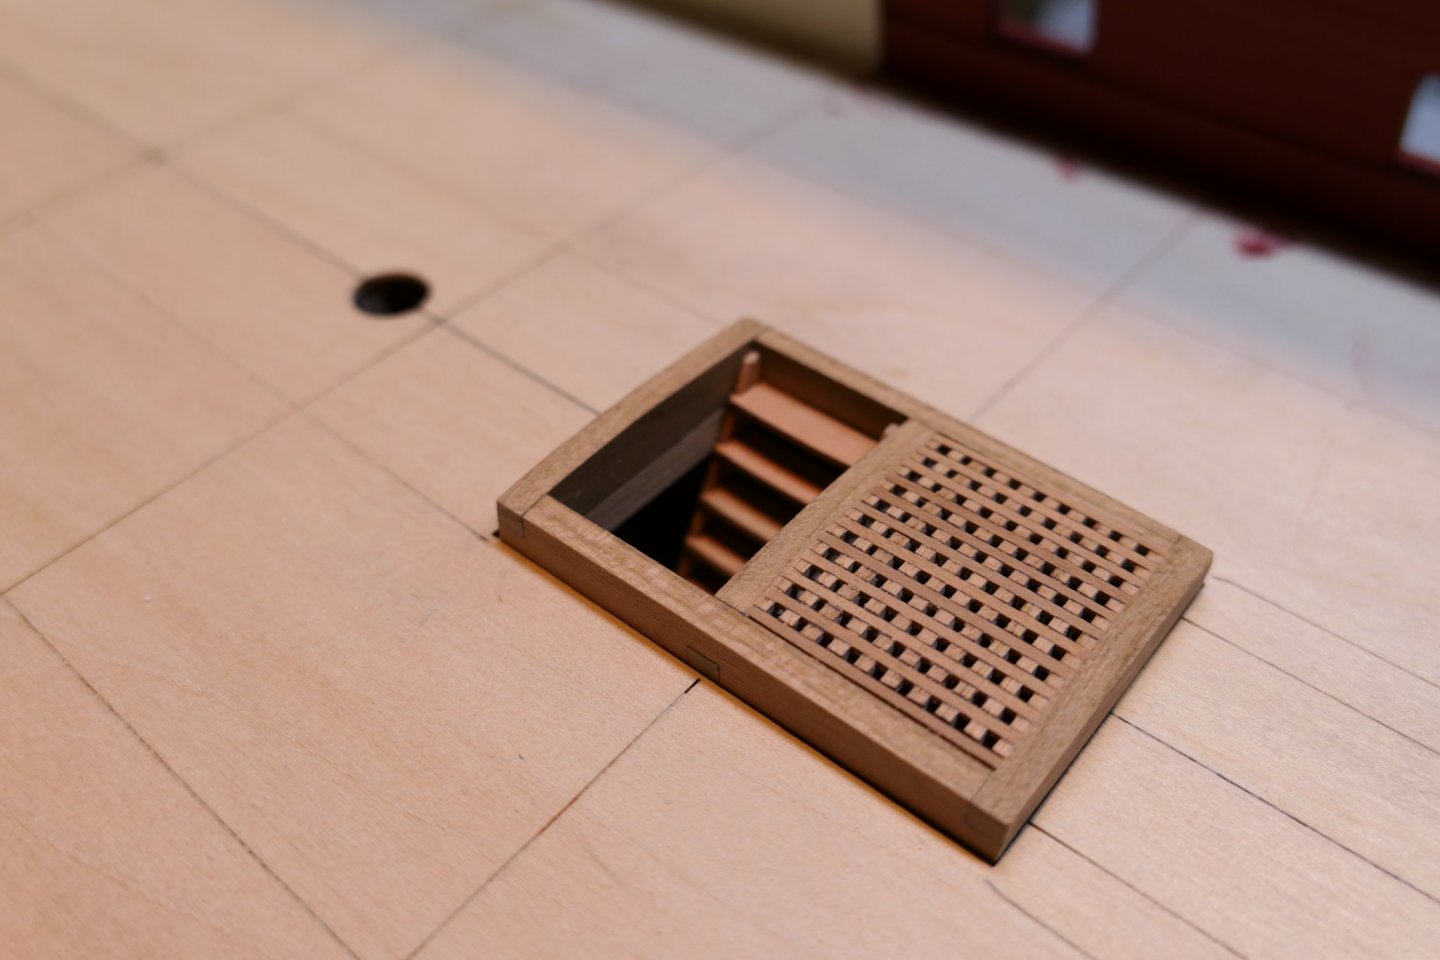
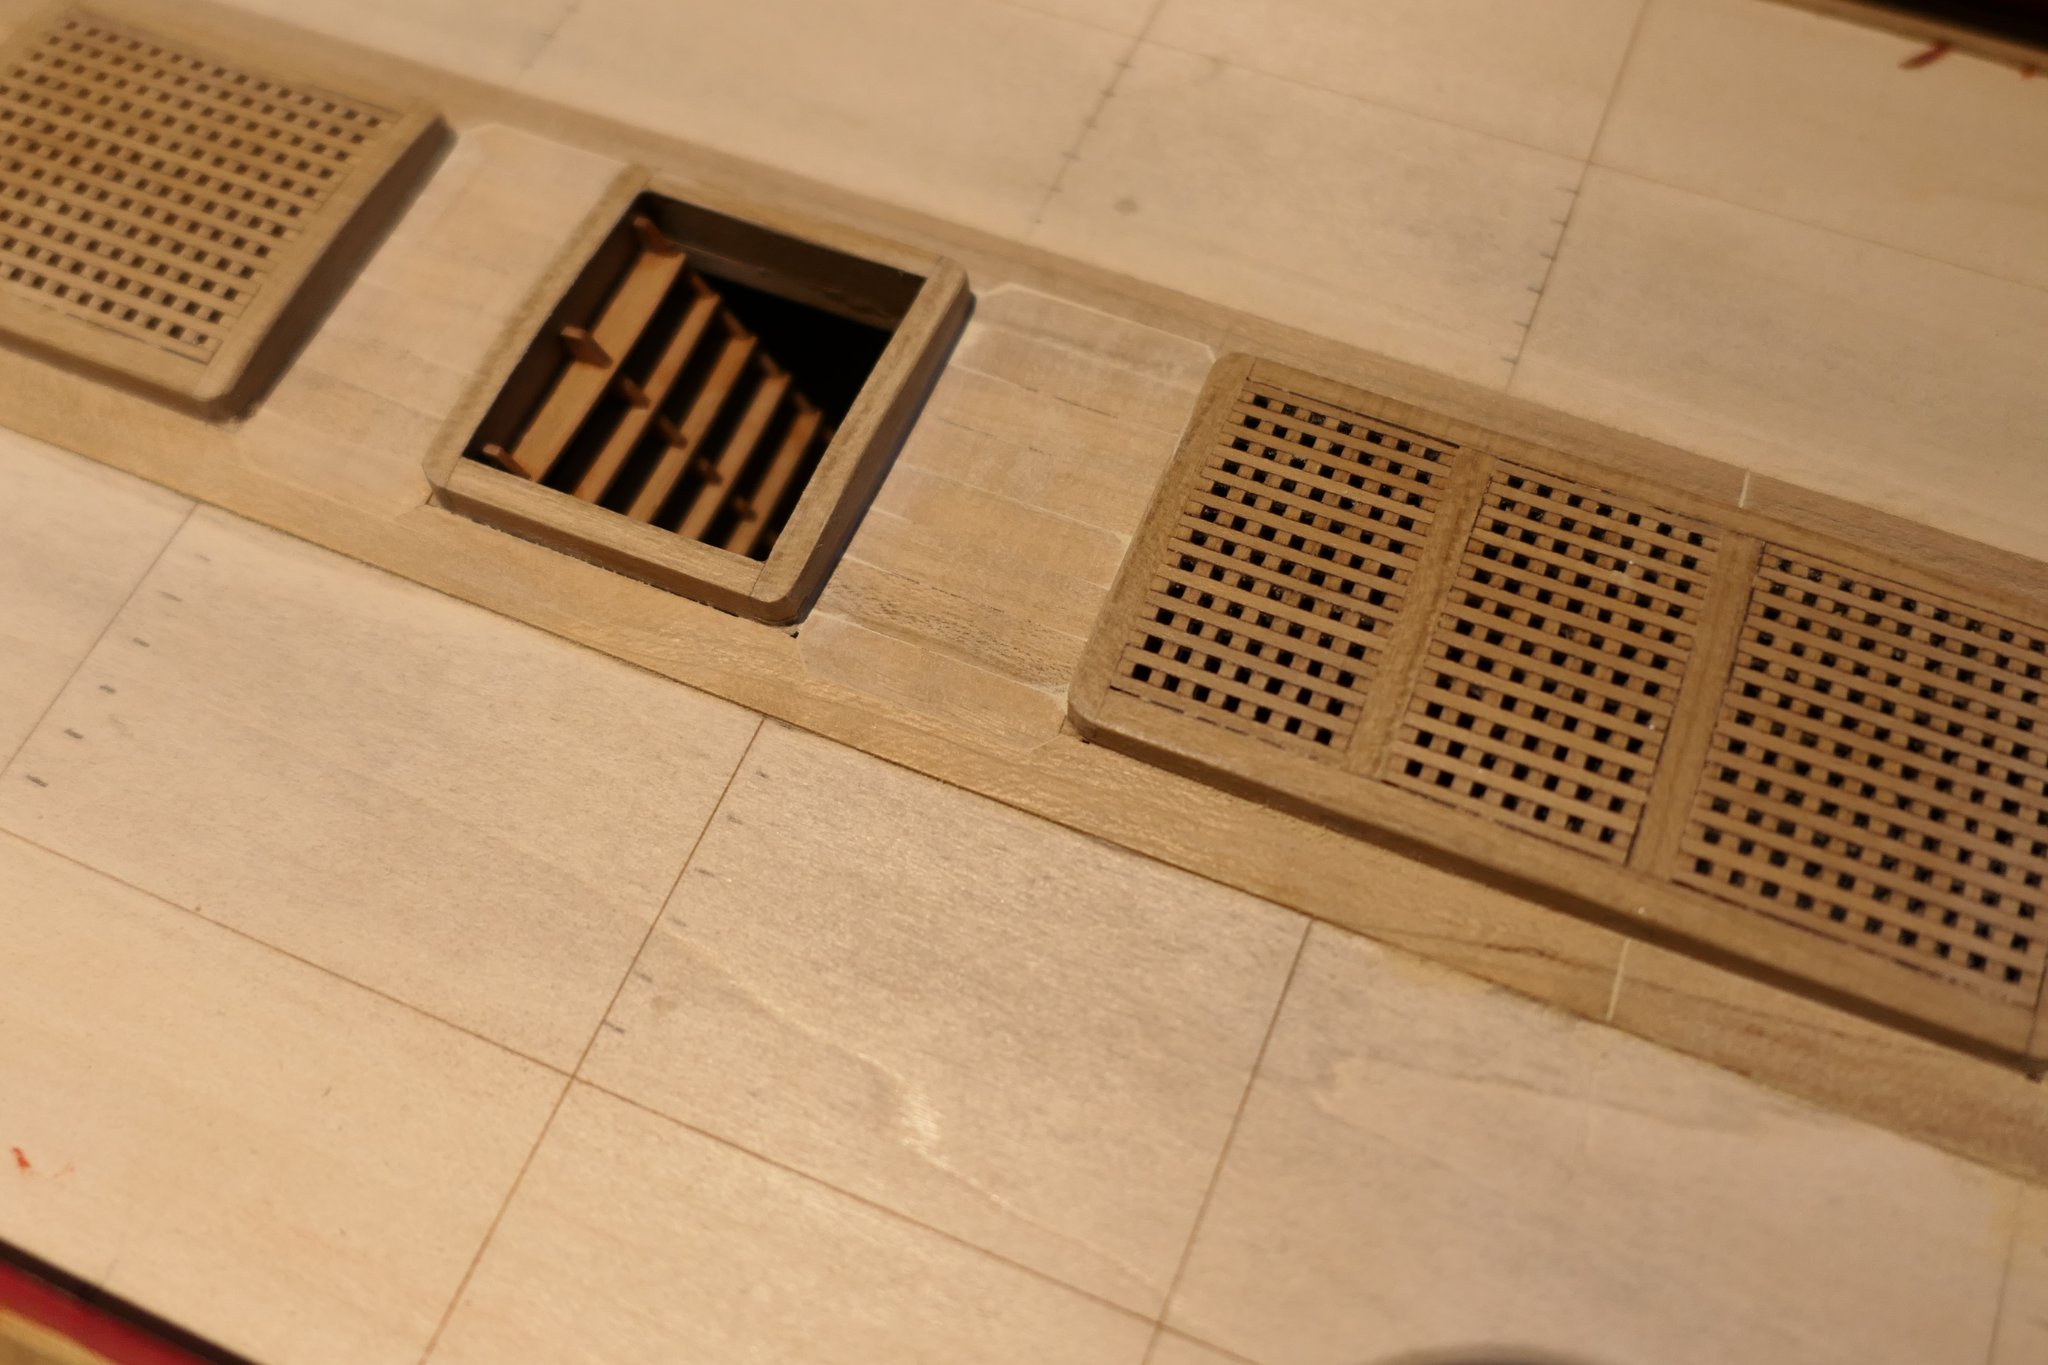
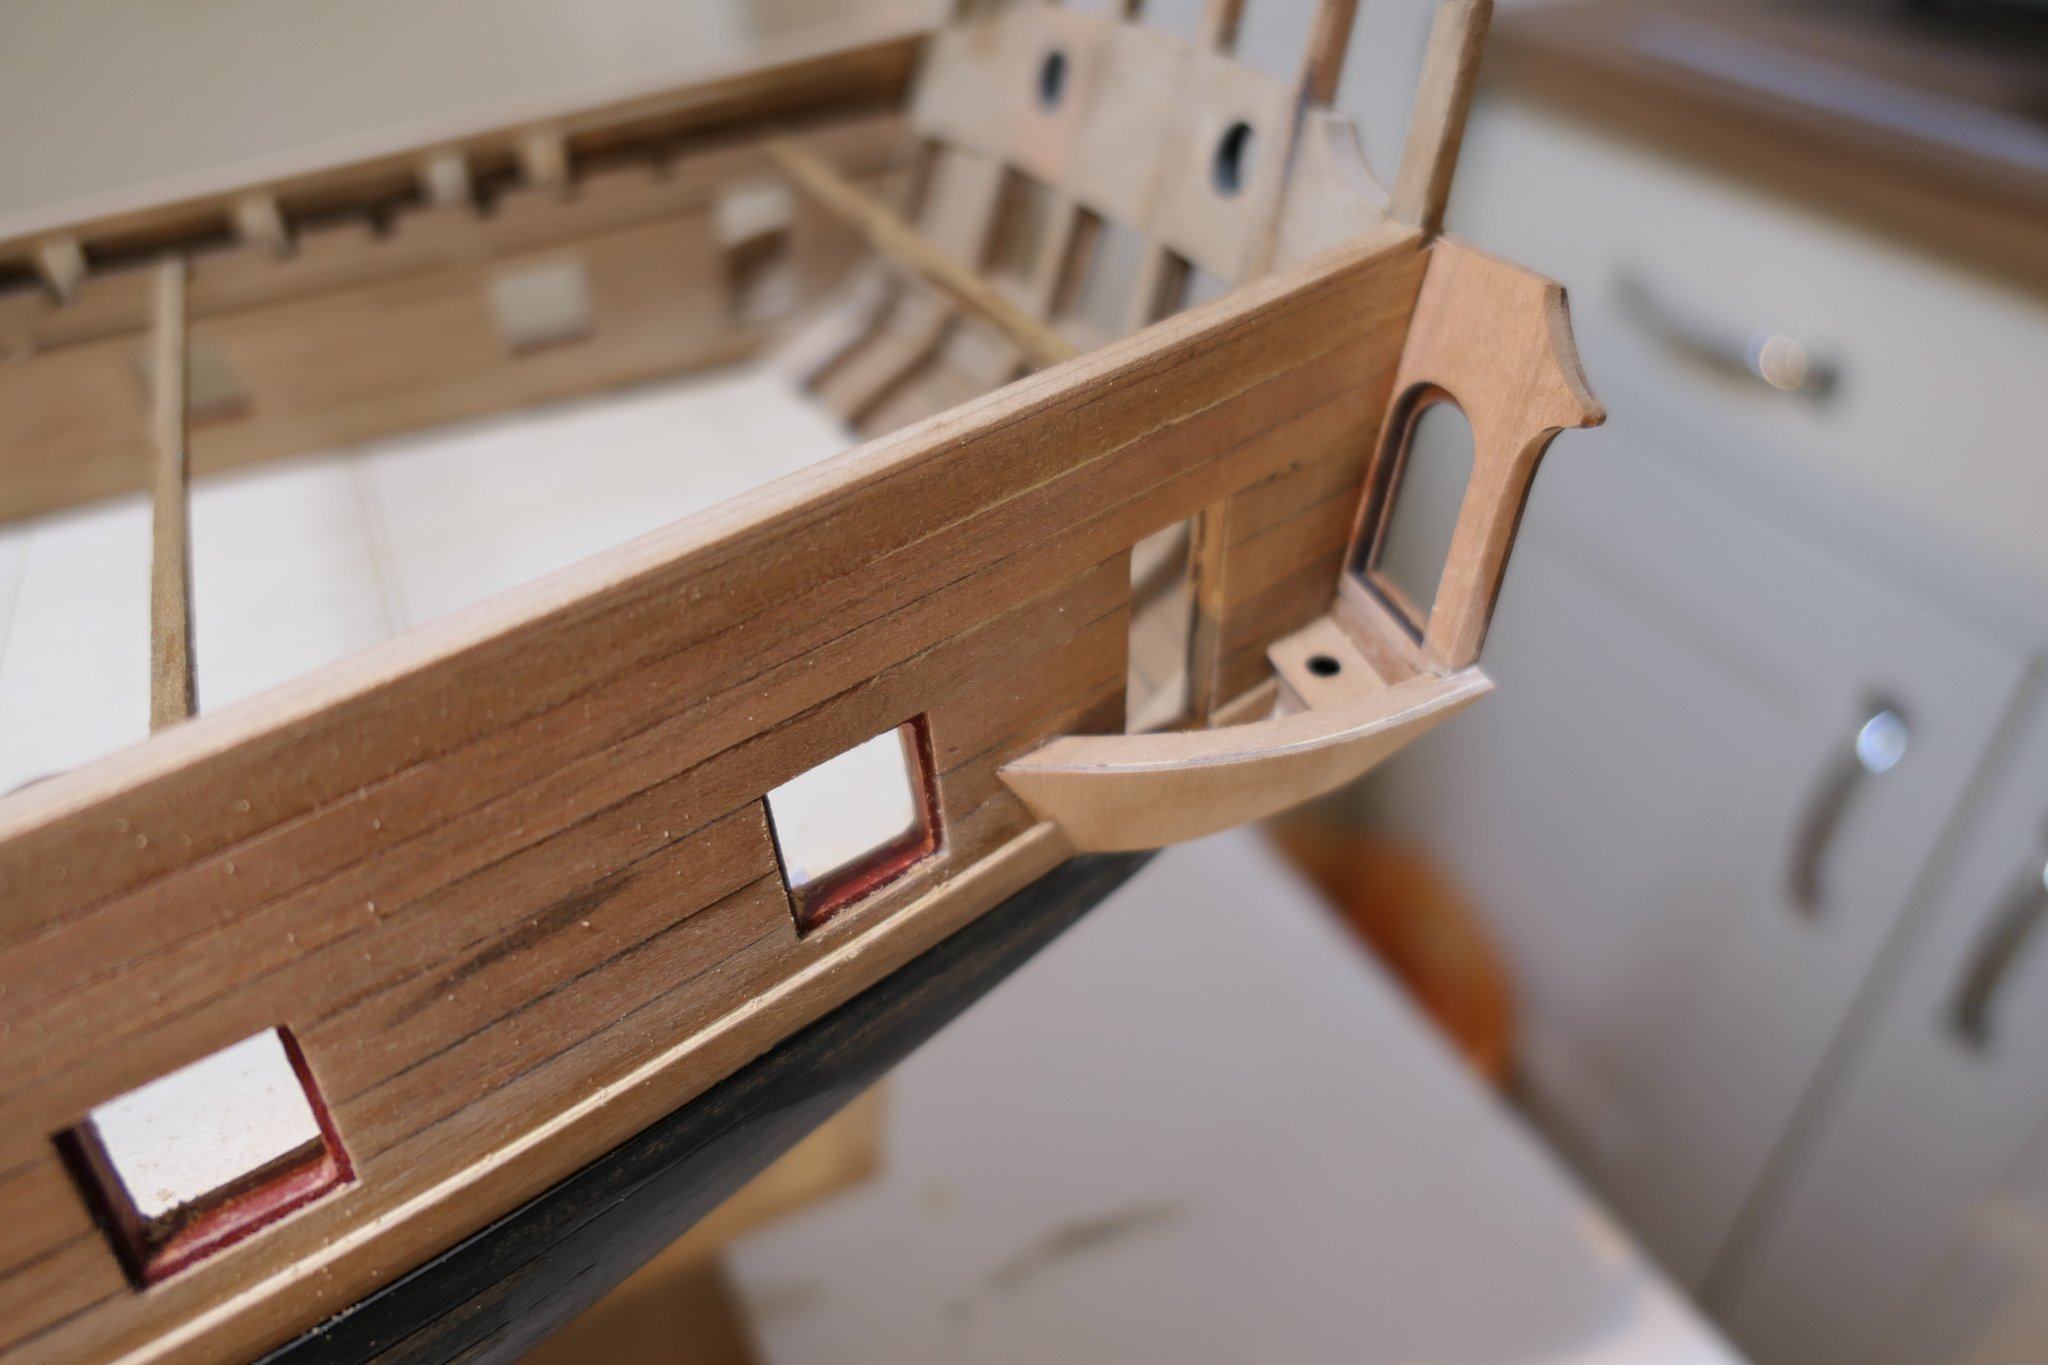
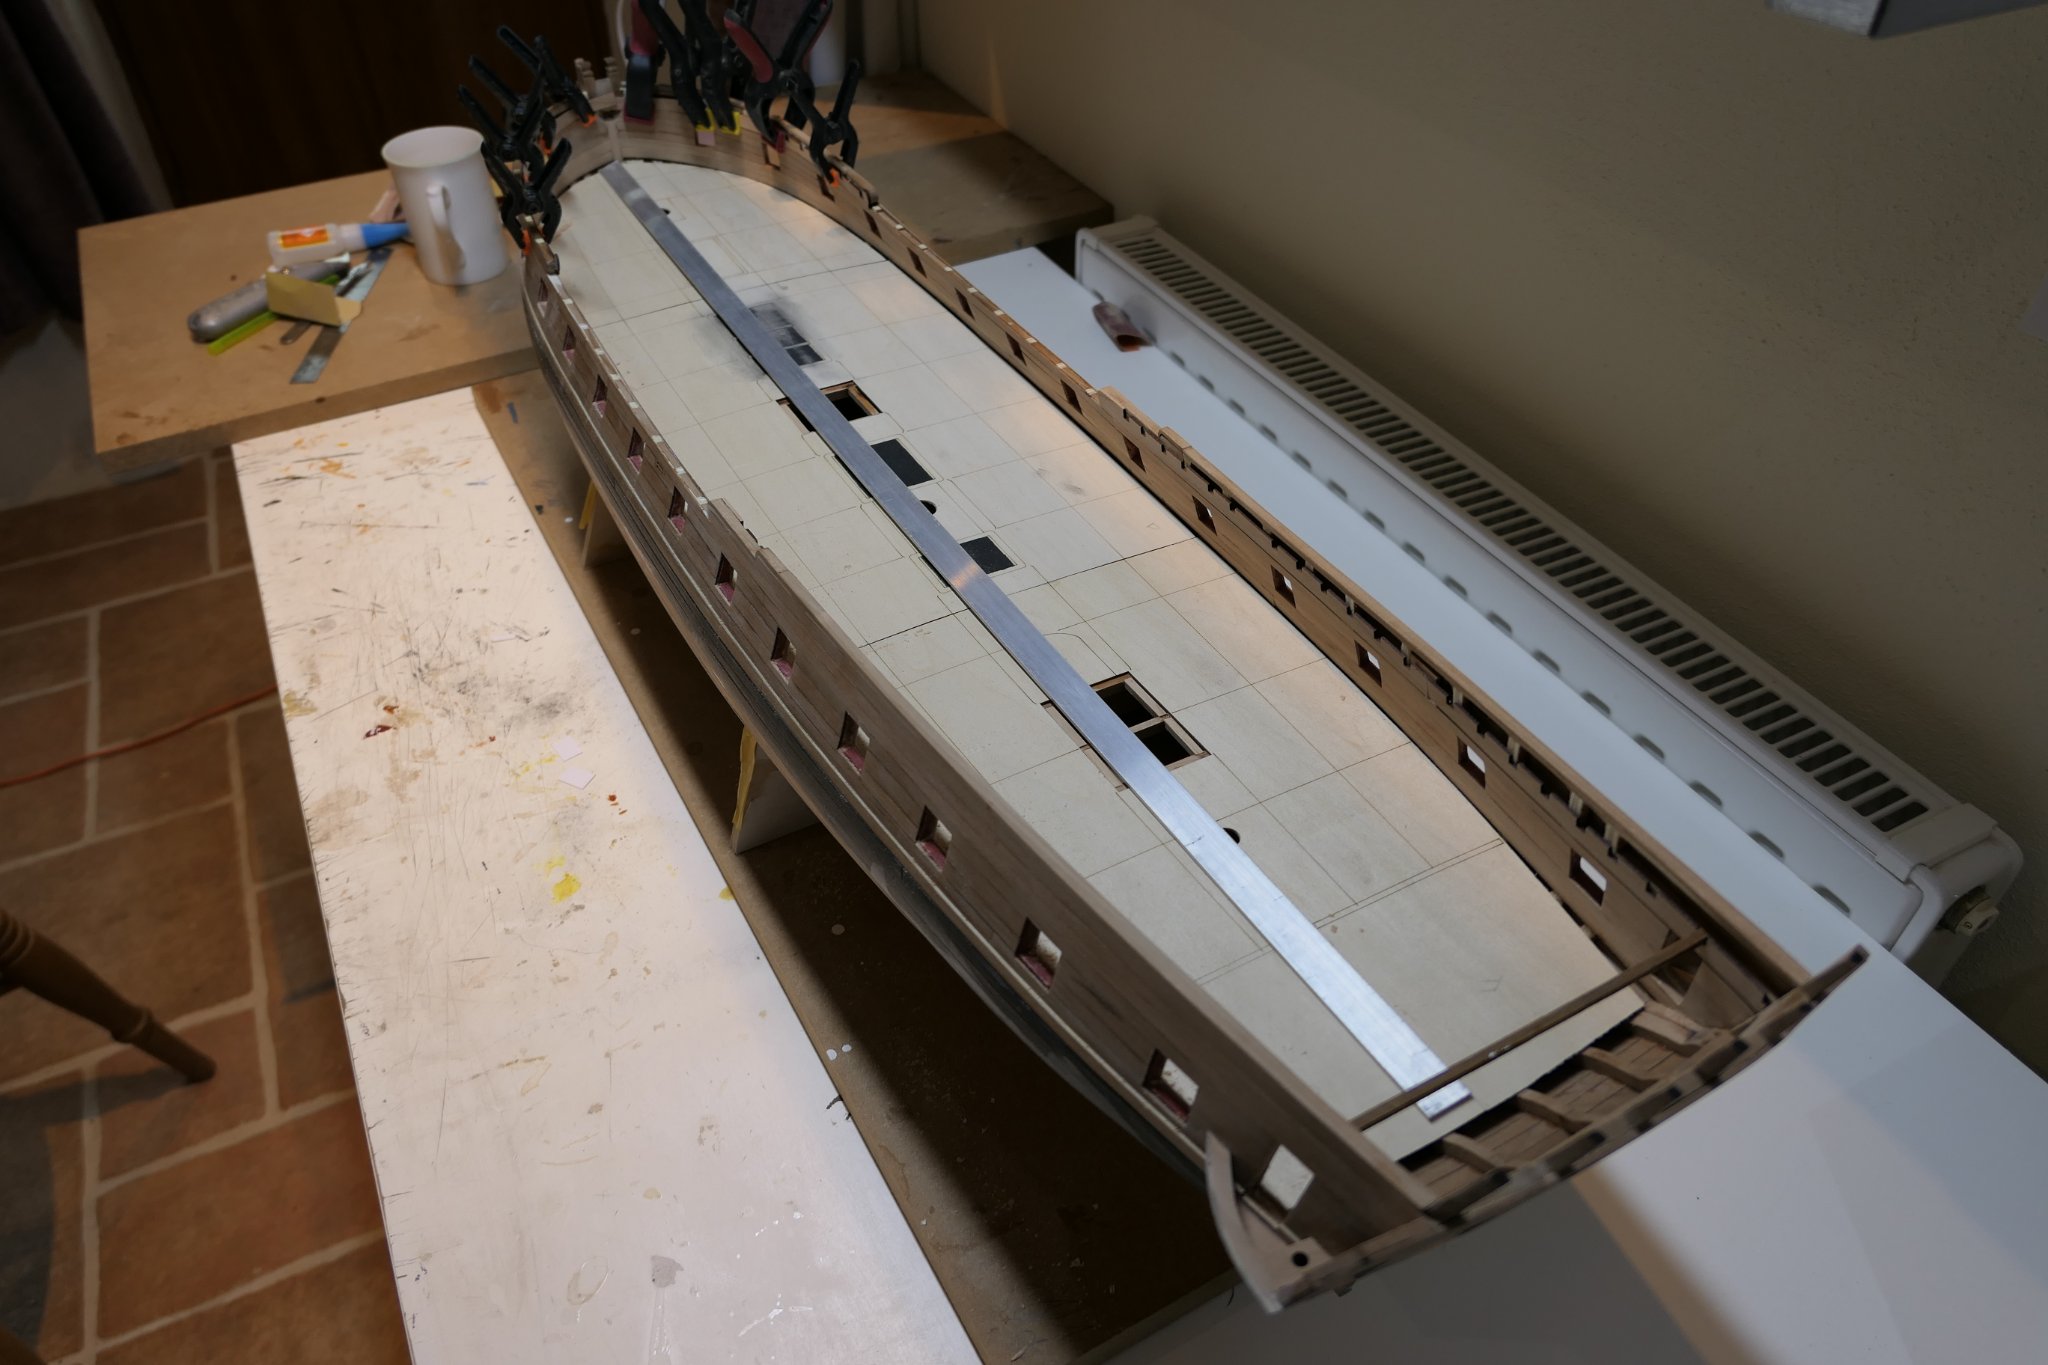
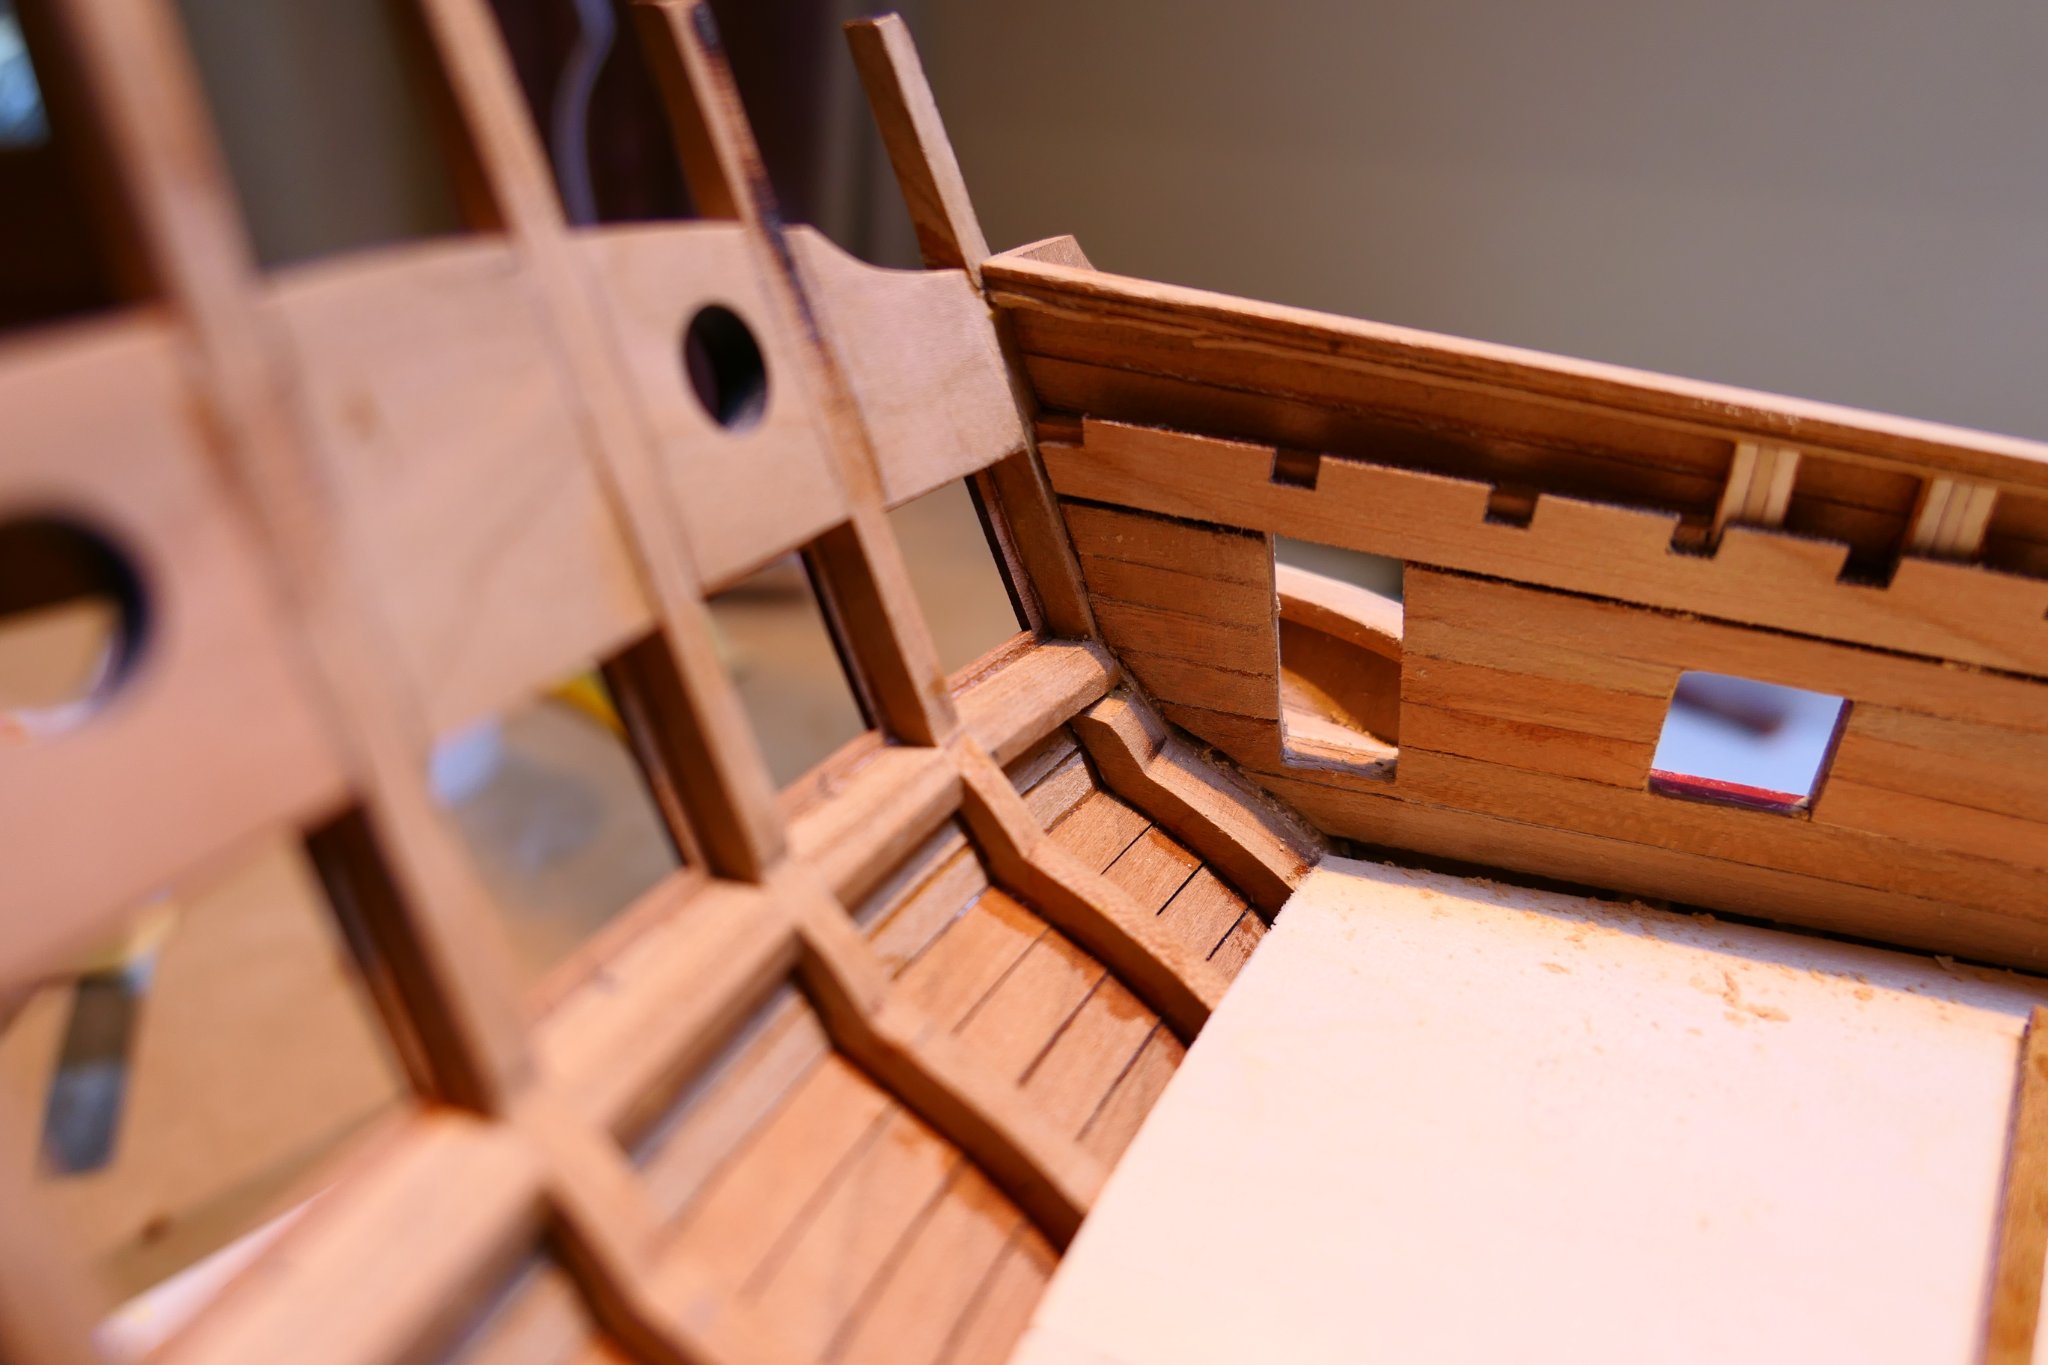
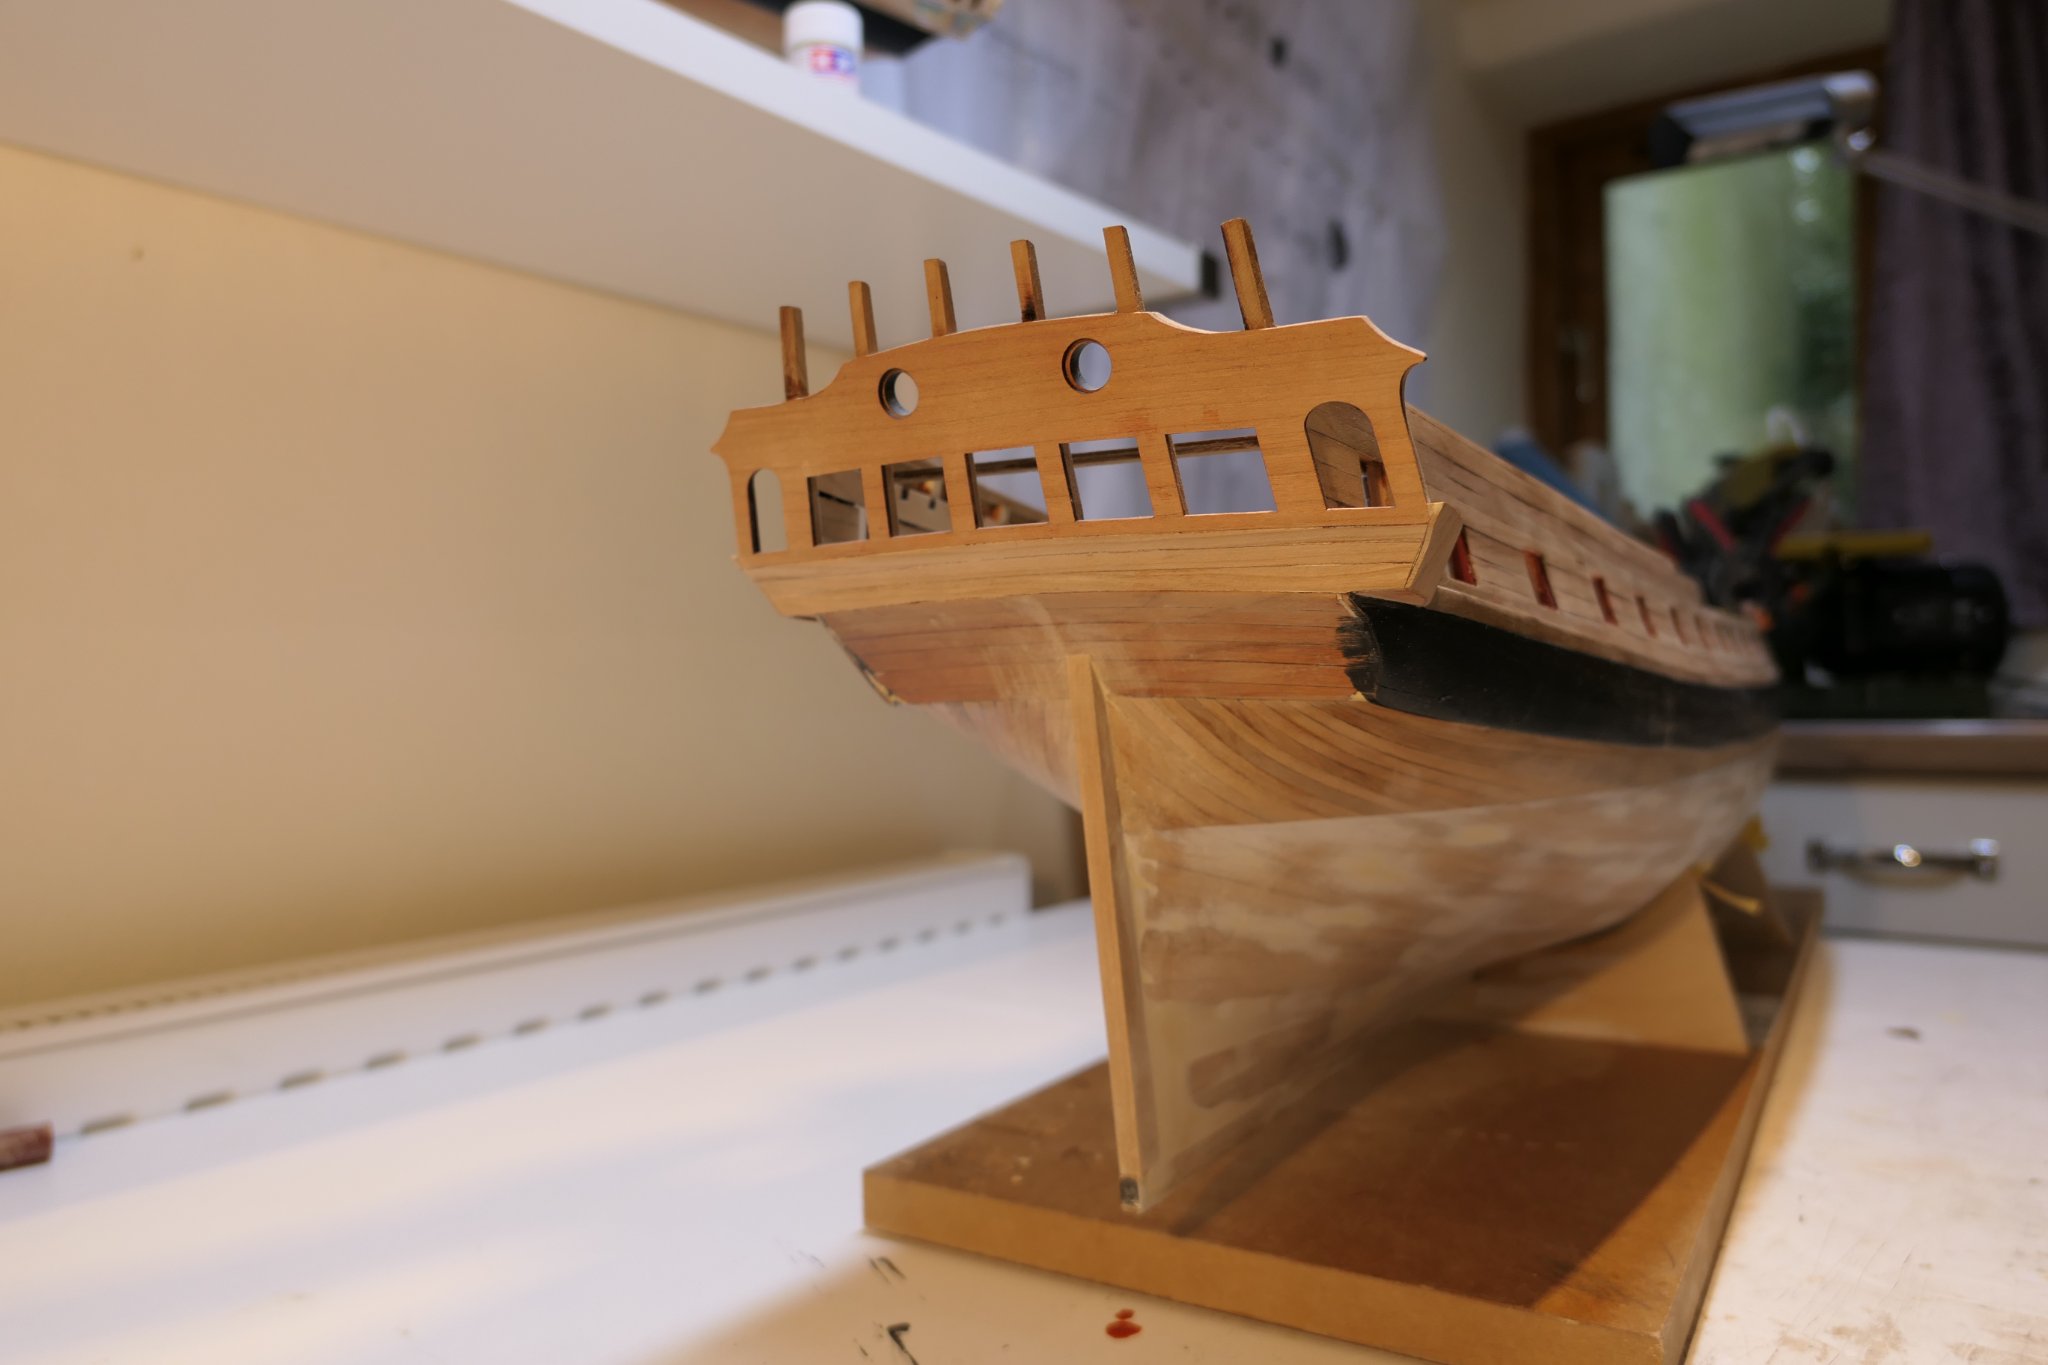
The shells of the quarter galleries went in uneventfully. I bought a length of aluminium bar from my local DIY store and clamped it down to the bulkheads to give me a really good straight edge centre line before fixing the false decks. The deck clamps end up where they are supposed to but only by leaving a small gap to the inner planking - no matter, that will be covered up with the panelling. I am not sure whether to paint the panelling. I suspect it should be painted – A pastel green or blue, perhaps, or ivory ( paint, that is, not the real thing like Matthias). I used some small sticks as temporary deck beams to make sure the deck clamps were level and square with their opposite number. I'm still undecided about the painted hull. I'm leaning towards following Chuck's advice to paint all the way up to the underside of the wales but it seems a shame to cover up wood. I'll leave it for a while. And here is one of those lovely Syren grating kits not yet glued nor the corners rounded off. I can't bring myself to paint these. This is looking scruffy but should clean up really nicely and is so much better than W1. And finally here is poor old W1 looking rather forlorn and abandoned (which it is).

.thumb.JPG.18360a3d5cedb78f7206ac42fbf98277.JPG)
.thumb.JPG.cdf20cb94662eb3dbc293e97888b0322.JPG)


.thumb.JPG.21508889147f6c10ea74e1383c0bc203.JPG)
.thumb.JPG.3e24578f7208b47c316c83fcd8346c82.JPG)

-
That is looking superb Matthias. Really well done. Fred
-
Thank you Chuck - will do Fred
-
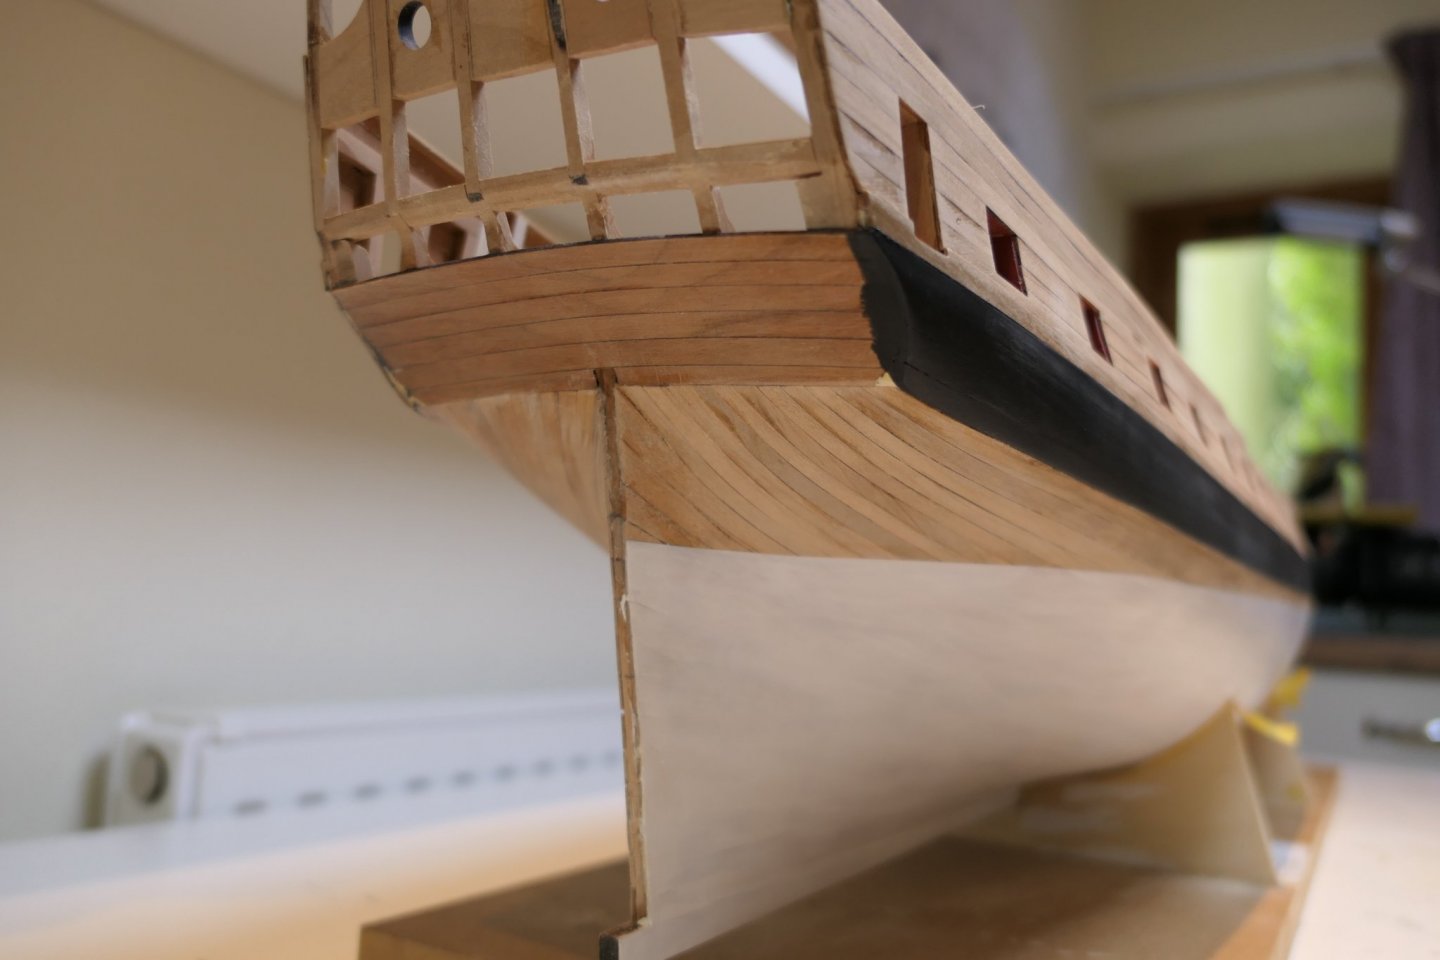
Thank you JJ. Start another Winnie - however good your first one is, and it looks great, they always come out better second time round. Chuck - Could you offer some advice on this point? Where the hull is painted white on the contemporary models was it the fashion to leave the underlying planking visible (in the sense that the lie of the planks could be seen) or to sand/fill the hull to a completely flat smooth surface?
-
Thank you Matt, JJ, Edward and Christian. I remain in two minds about W2. One day I look at it and think it's looking fine. Another day I look at it and I can see what is lurking under the white paint. I have placed my order for the chapter 3 and chapter 4 parts this morning so I guess I will build W2 up to that stage and decide where to go. I suspect it is going to take some time for Chuck to produce the parts for chapter 5 and however many chapters remain after that so I could probably start W3 and catch up. The thing is there really is no other model on the market I really want to build (apart from Syren's Cheerful) and I am determined to get the bloody thing right! Good luck all of you with your builds. I am following each with close interest and I share your trials and tribulations. All the best Fred
-
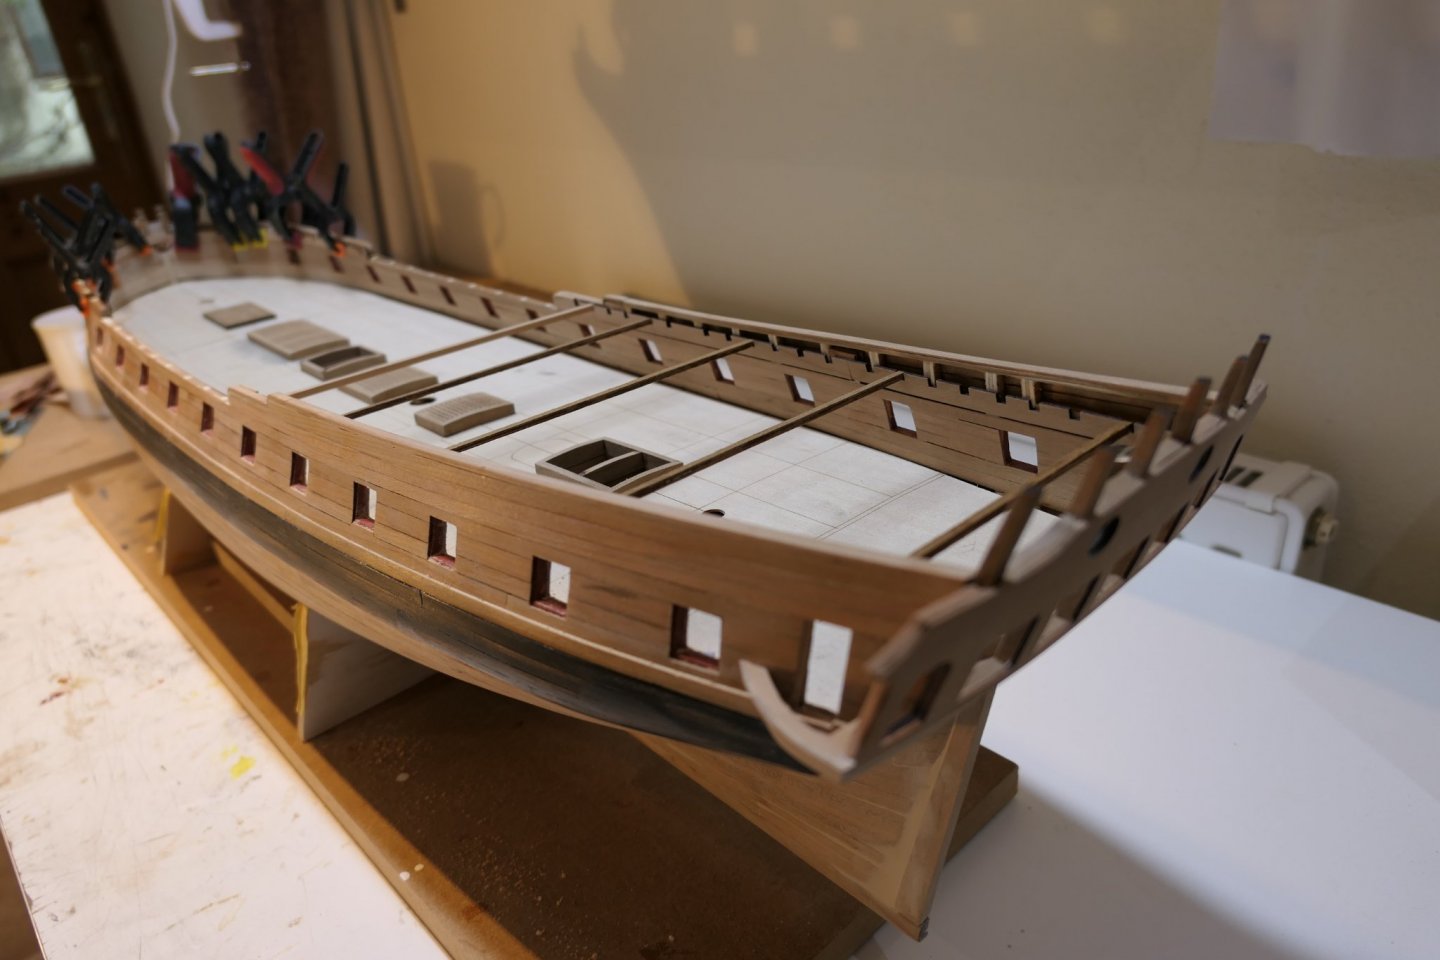
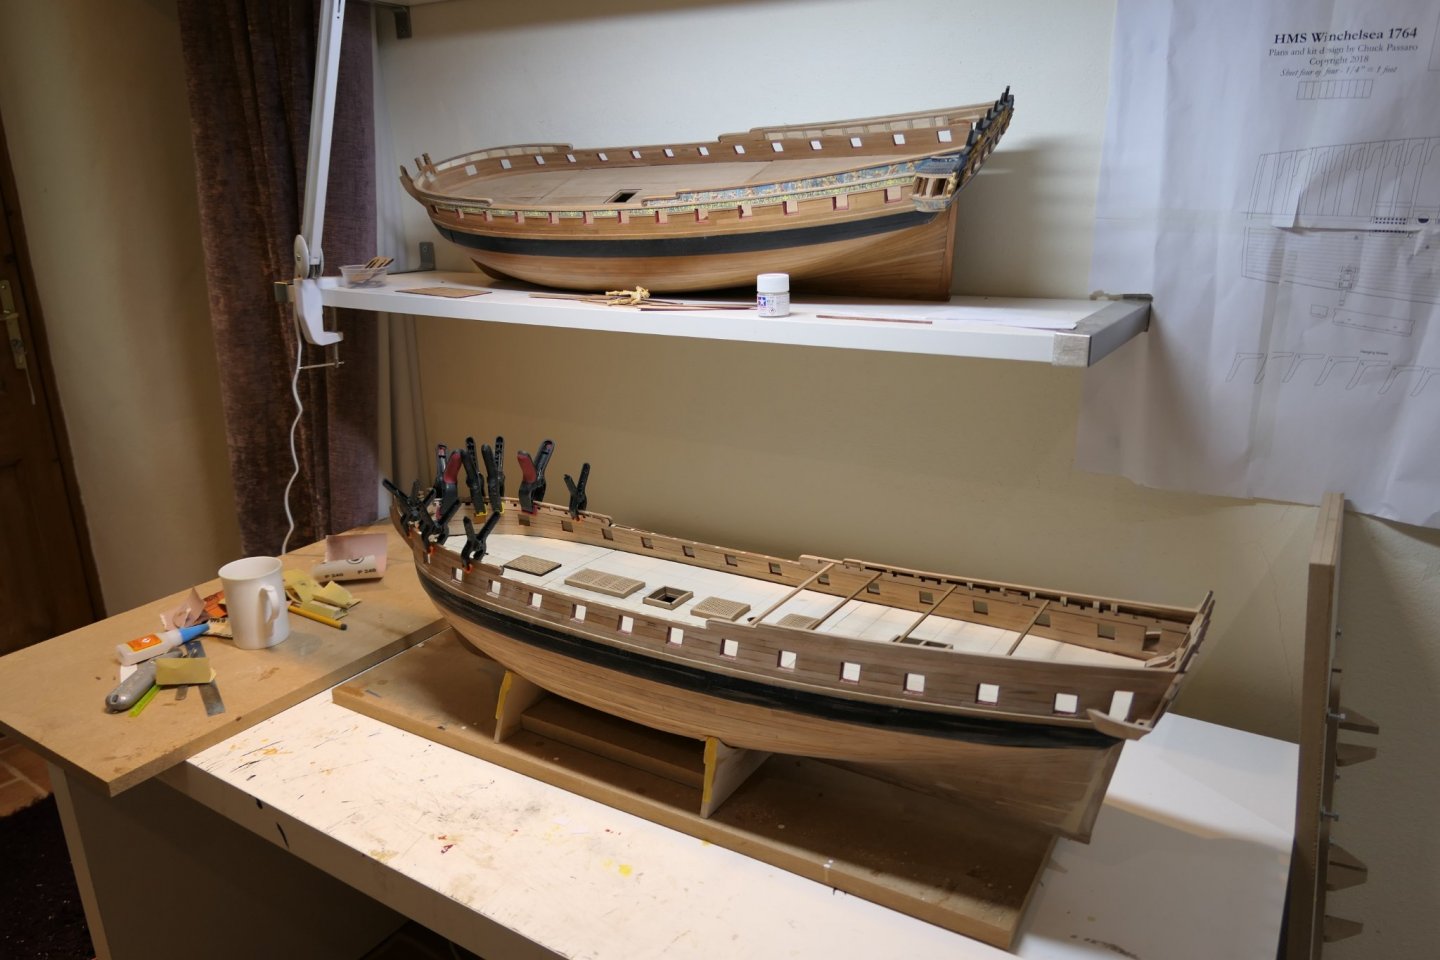
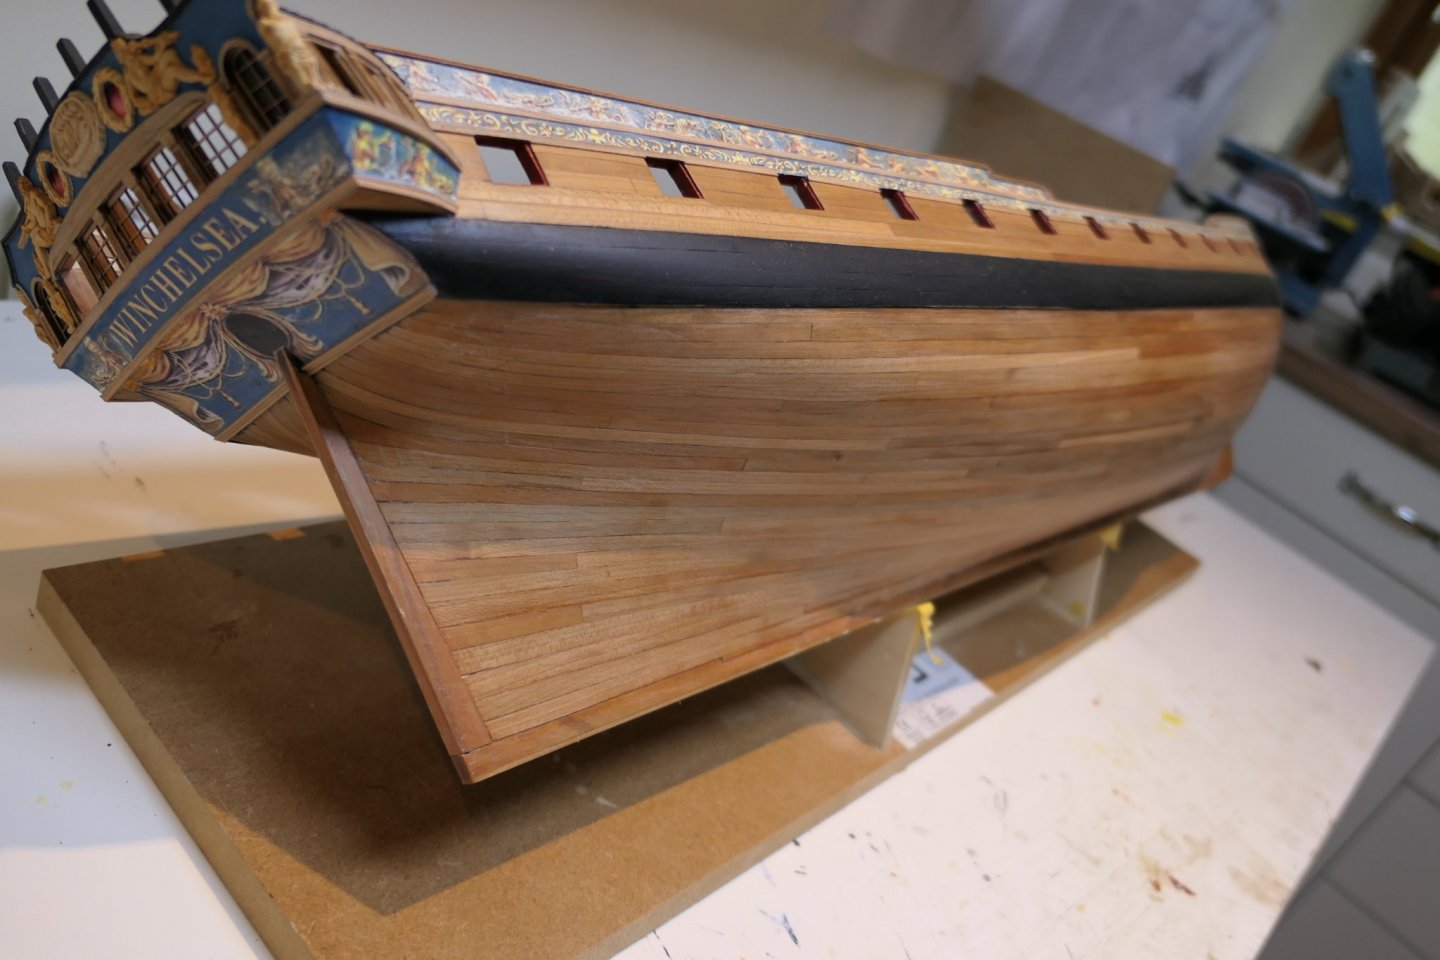
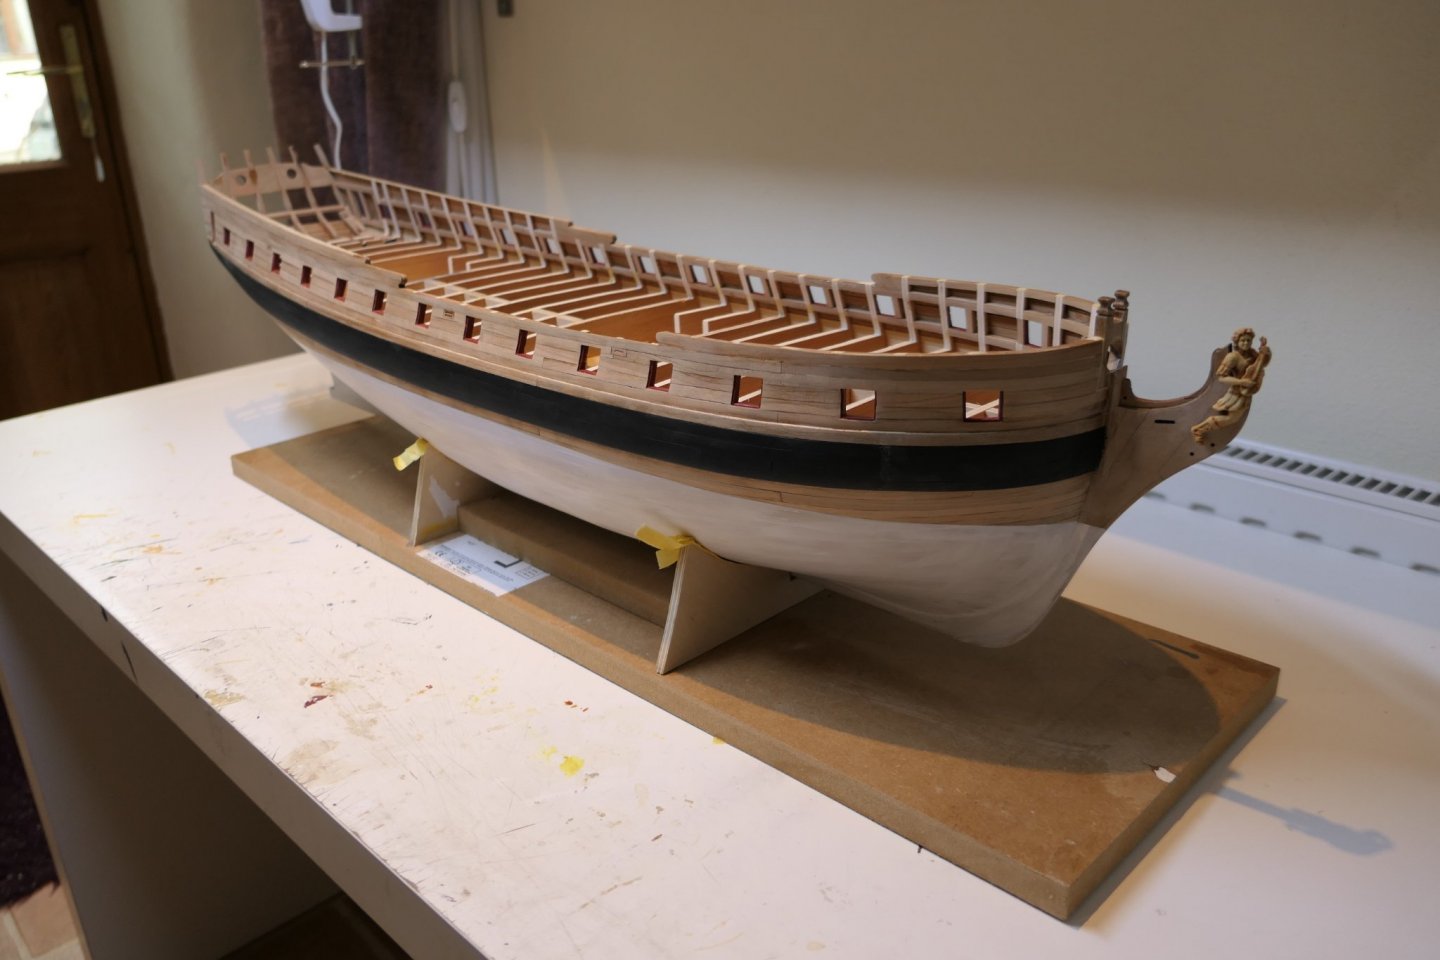
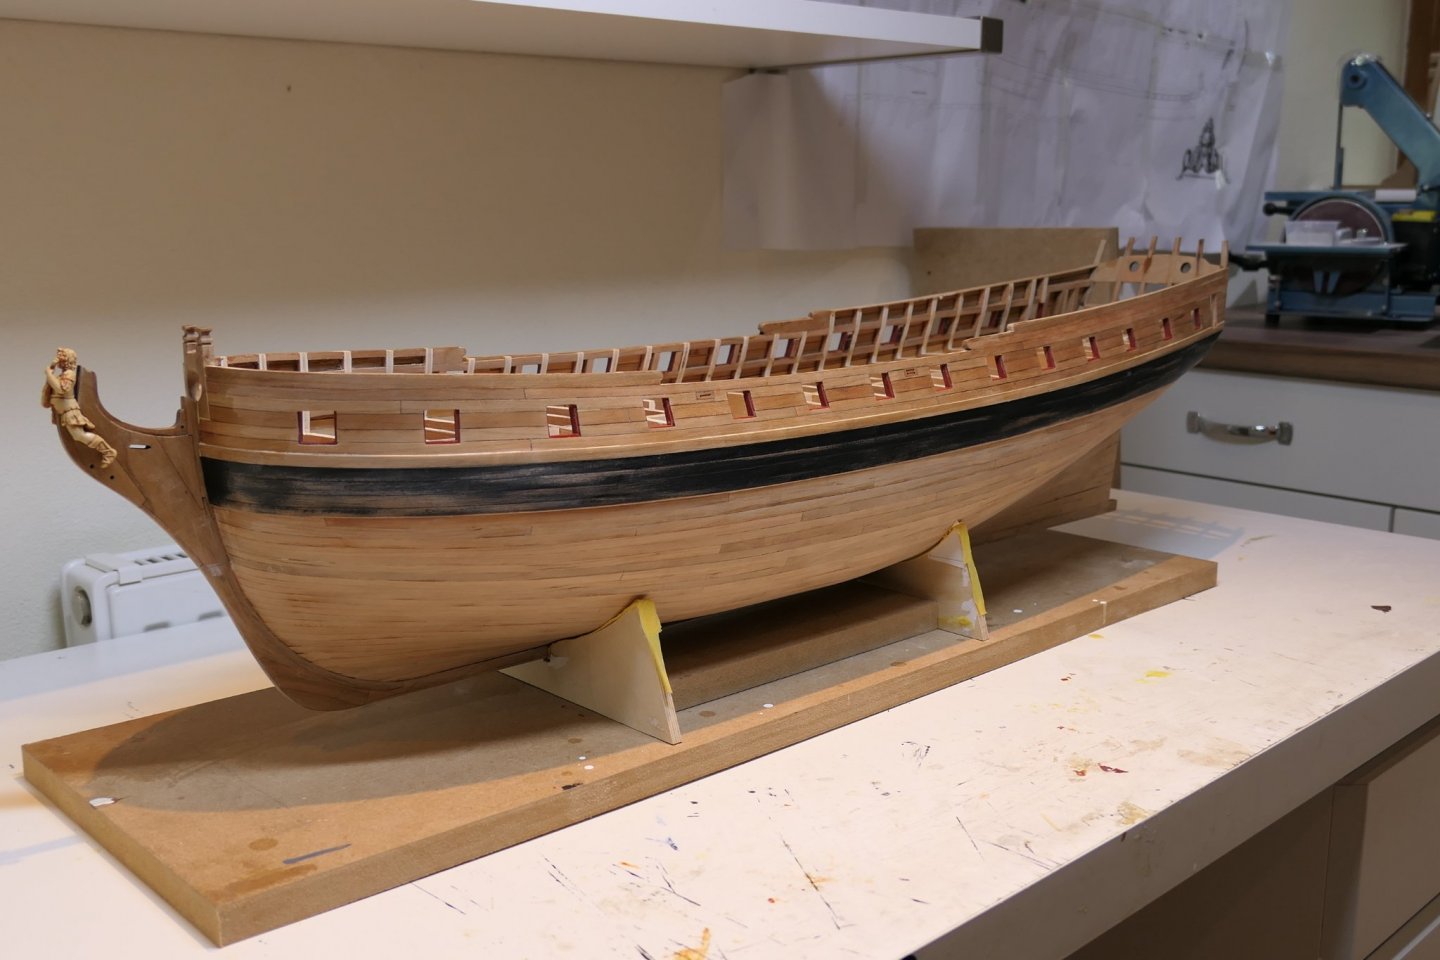
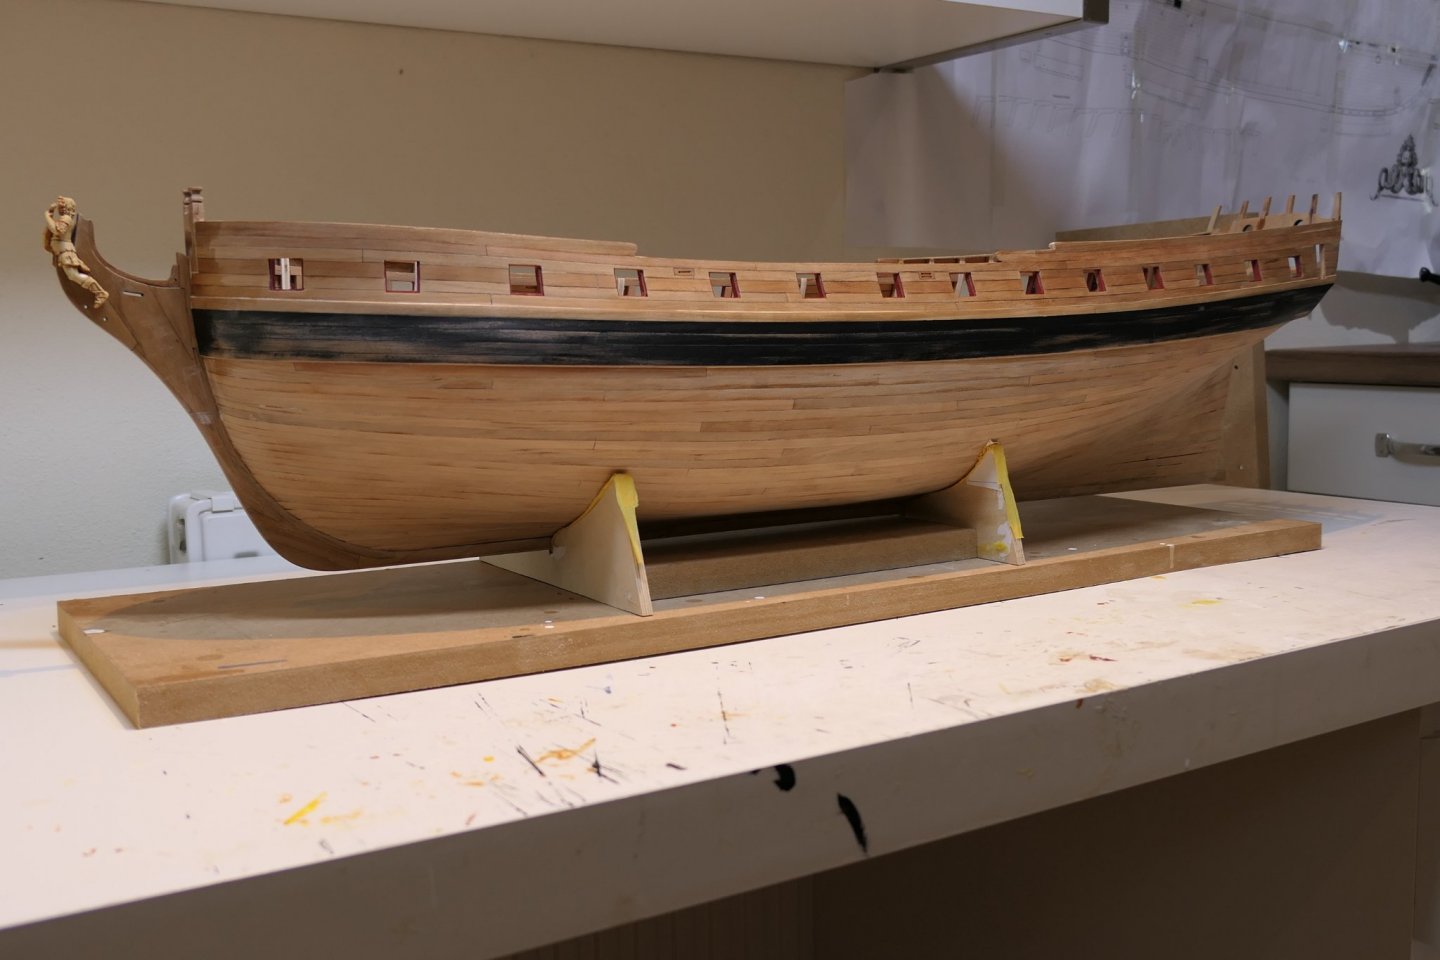
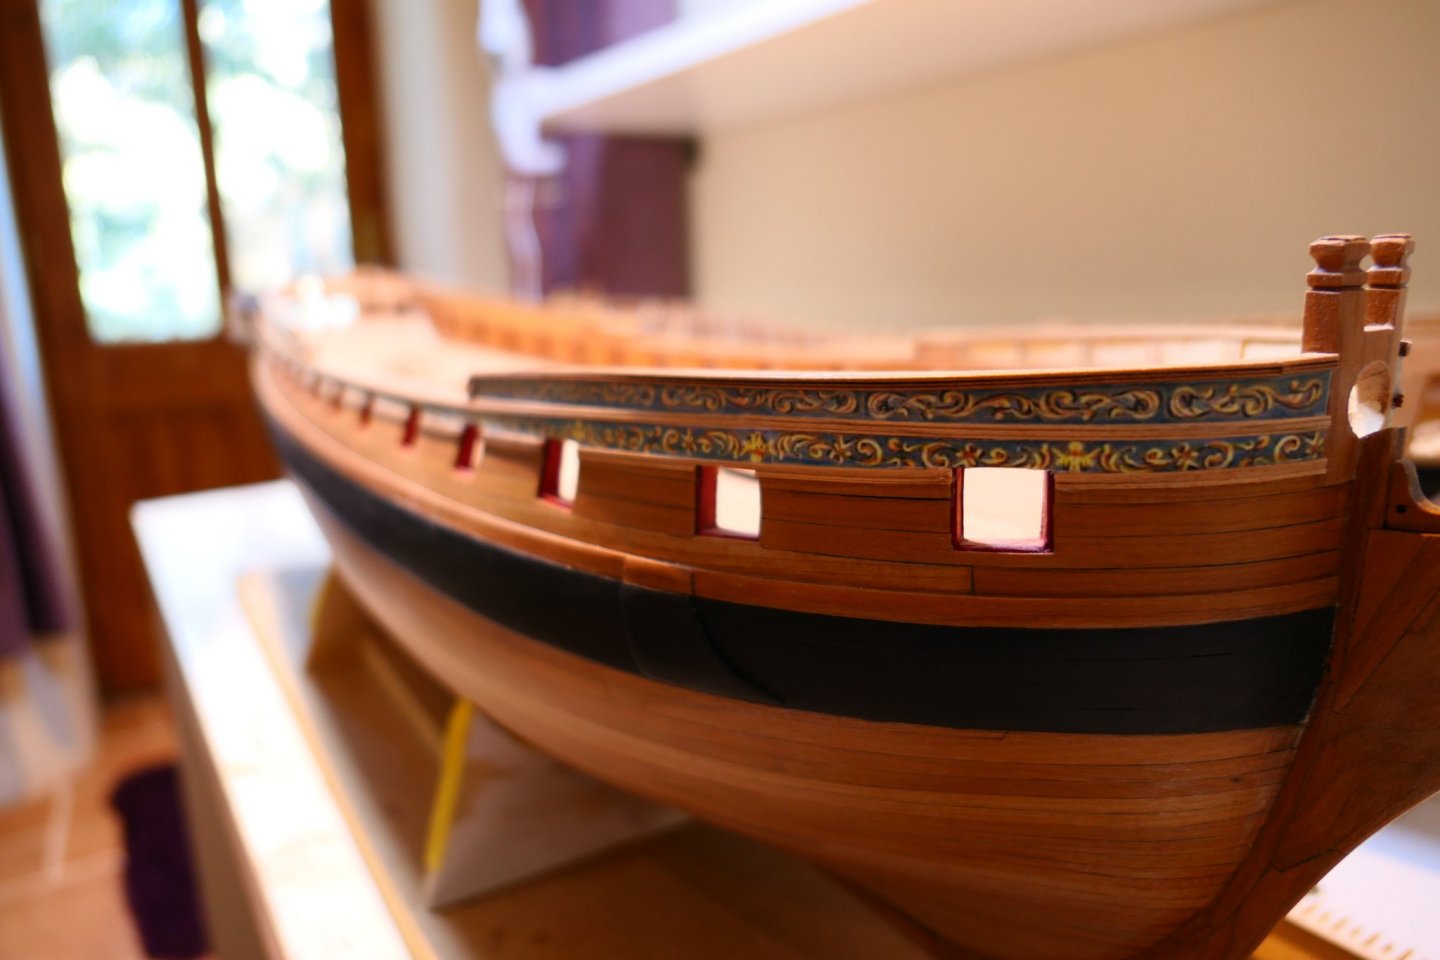
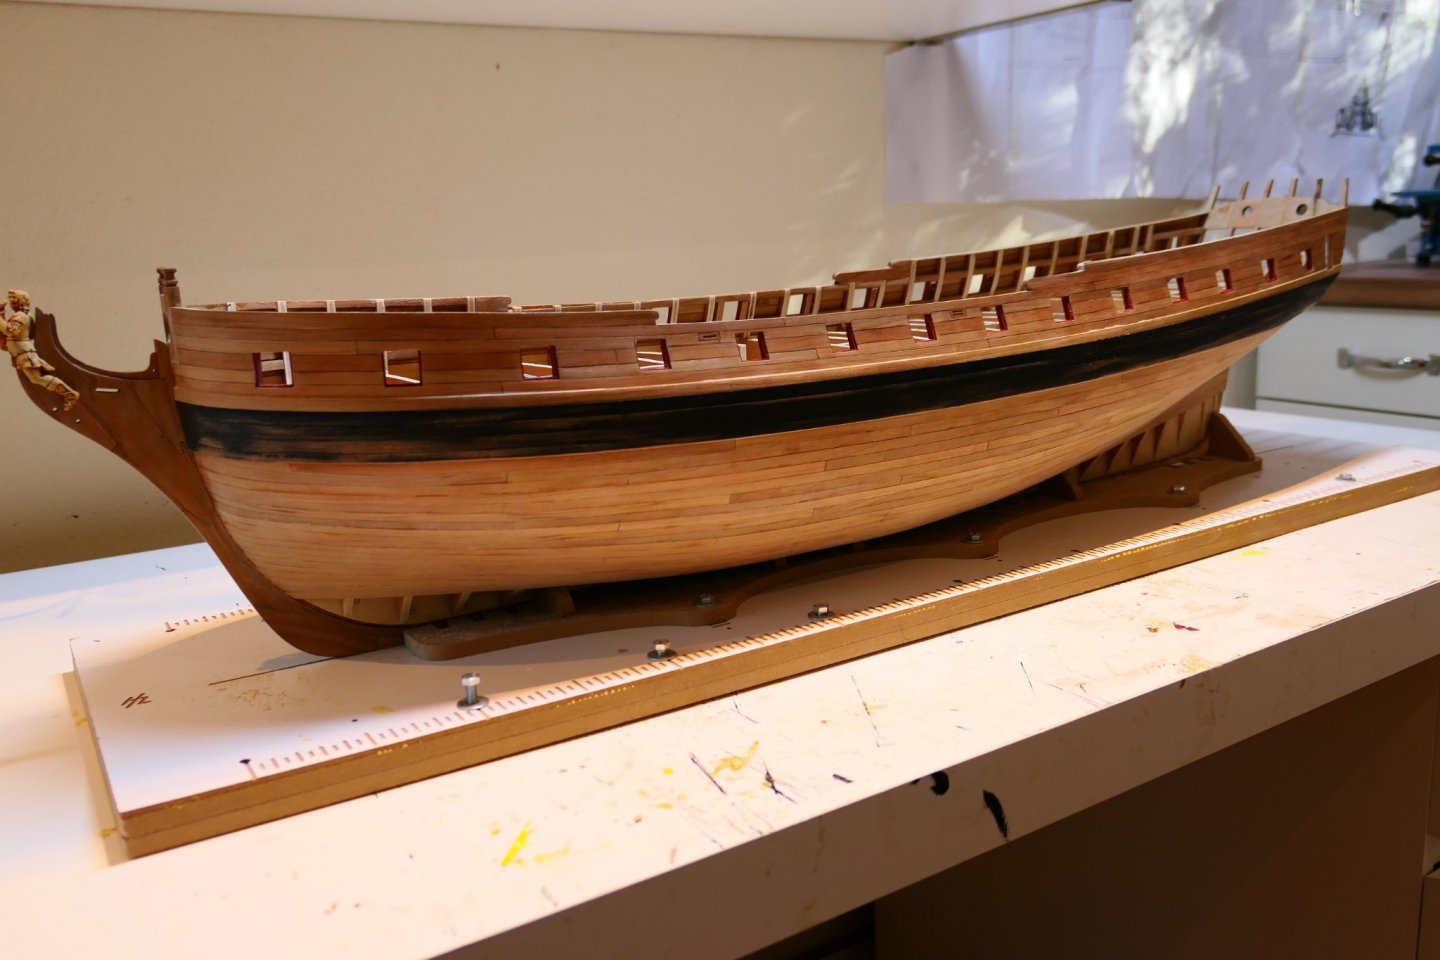
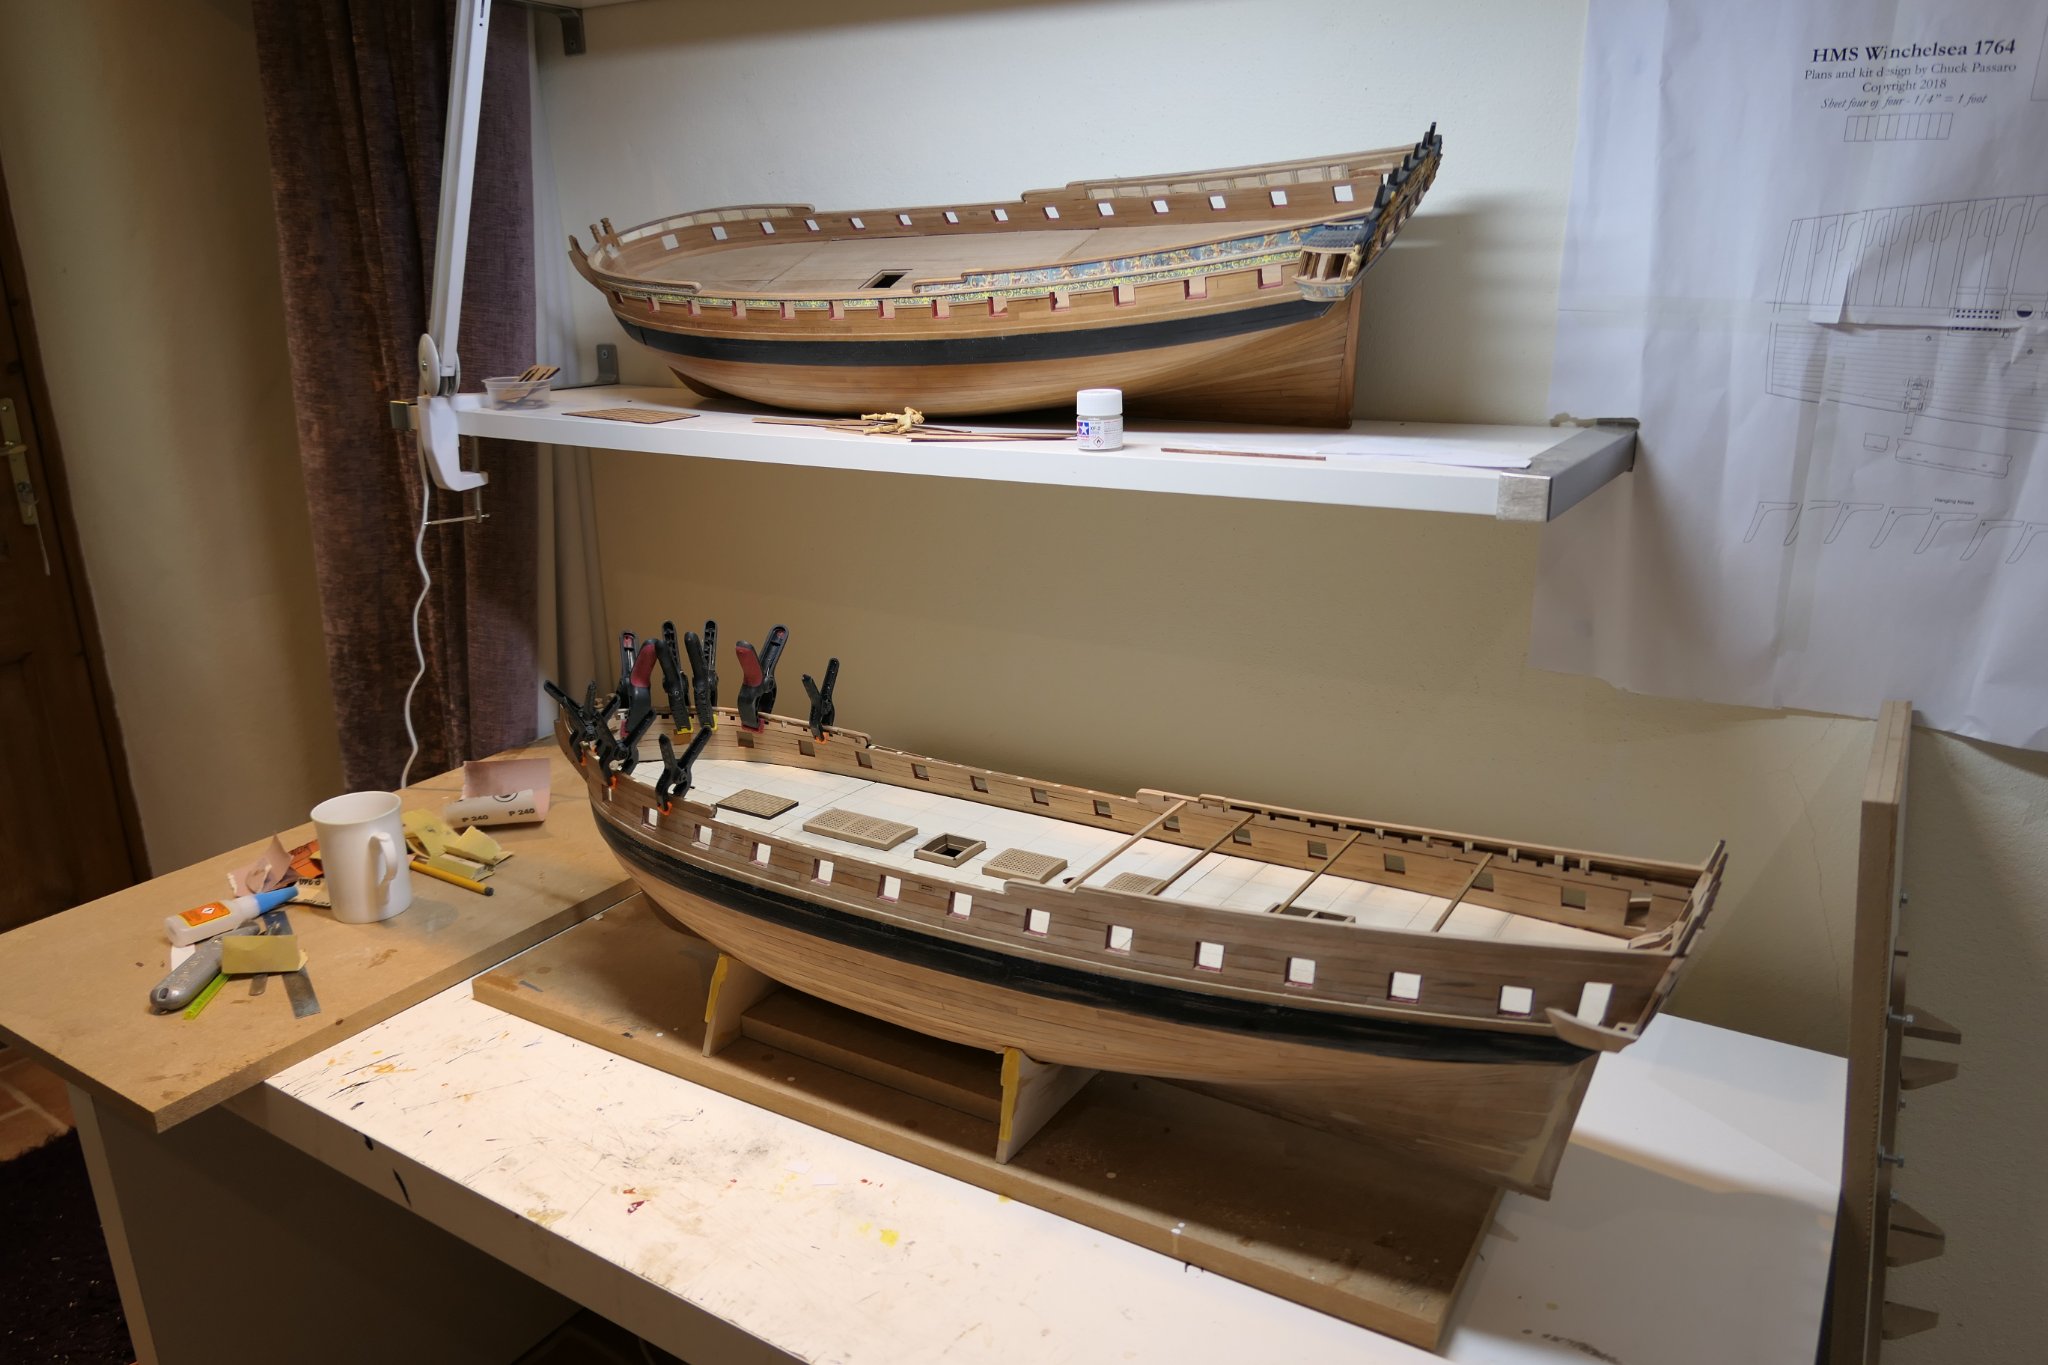
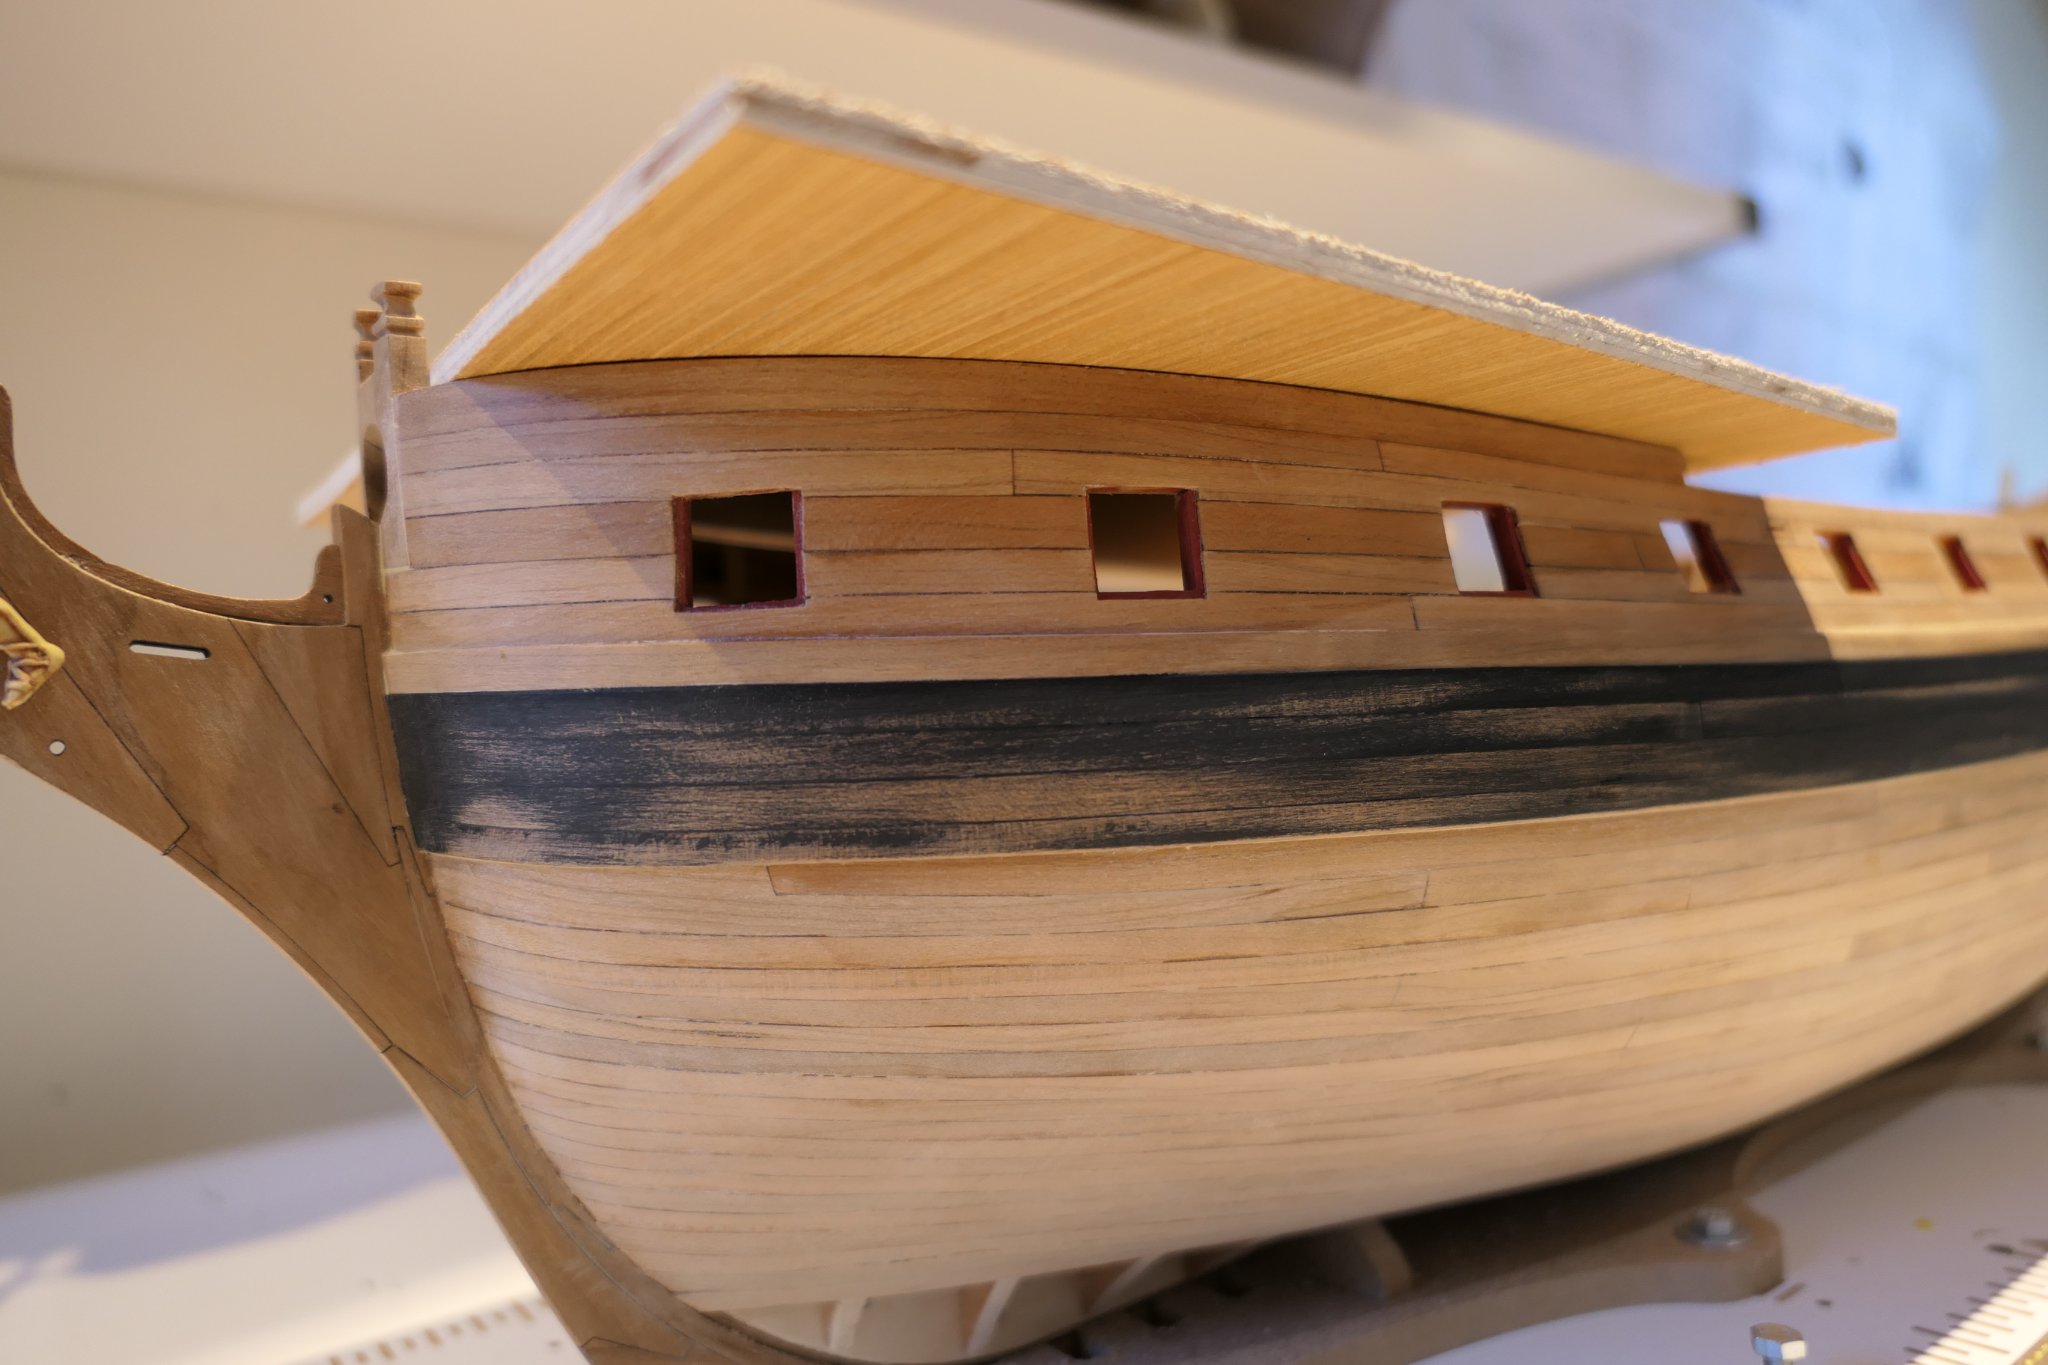
Thank you JJ and Rusty and for all the likes. I have finished planking the hull of W2 and it seems a good time to take stock. W2 is certainly a significant improvement on W1. That is mostly down to (a) much more accurate cutting and fitting of the bulkheads and frame (b) a better understanding of the way the model goes together and (c) more experience. But I am not completely happy. Here are my thoughts so far: 1.If I lived in the USA I would not hesitate to buy the Syren bulkhead set but the cost, here in the UK , with shipping, import duty, VAT and handling fees is prohibitive. It is clear that accurate cutting, especially of the slots in the bulkheads is vital. Any inaccuracy in the slots in the main frame results, I think, only in the bulkheads leaning either forward or back and that is easily picked up and corrected at the gluing up stage. Any inaccuracy in the slots in the bulkheads, either cutting or filing the slots to get a snug fit, results in leaning side to side that is much more difficult to spot and correct. 2.On W1 I filled the spaces between the bulkheads with balsa and then skimmed the entire hull with filler. In effect I double planked W1. It may look a bit amateurish but, the many faults with planking on W1 there are no dips or high spots. I single planked W2 and rather regret doing so. There are dips and high spots. No doubt if I were better (not more careful – I took a lot of care) at bevelling I would have achieved a better outcome. 3.If I were to build W3 - and I am seriously thinking about it – I would not only double plank it as I did W1 but also line it out (as Ben/Trussben has done). It looks like a lot of work but I am sure it is worth it. 4.I I am not convinced about the white painted hull on W2. I did it, frankly, because the planking was not up to scratch. So far it has only had two coats of paint. I will give it a good sanding and a few more coats and see what I think. I don't dislike it: the real problem is that I know why I did it: to hide my son calls one of those " only you know it is there, dad" problems but a real problem nevertheless 5. Everything needs a jolly good cleanup and some paint and varnish and then I will see what I think. Just at the moment I can't shrug off, when I look at the superb parts to come in chapter 5 and, no doubt, subsequent chapters, the feeling that if I brought together the best of W1 and W2 I would have a pretty good foundation for going forward. W3 is therefore quite tempting. The pictures below are W1. These are W2


.thumb.JPG.72b7fc782c712b12915bfabc31c69650.JPG)

-
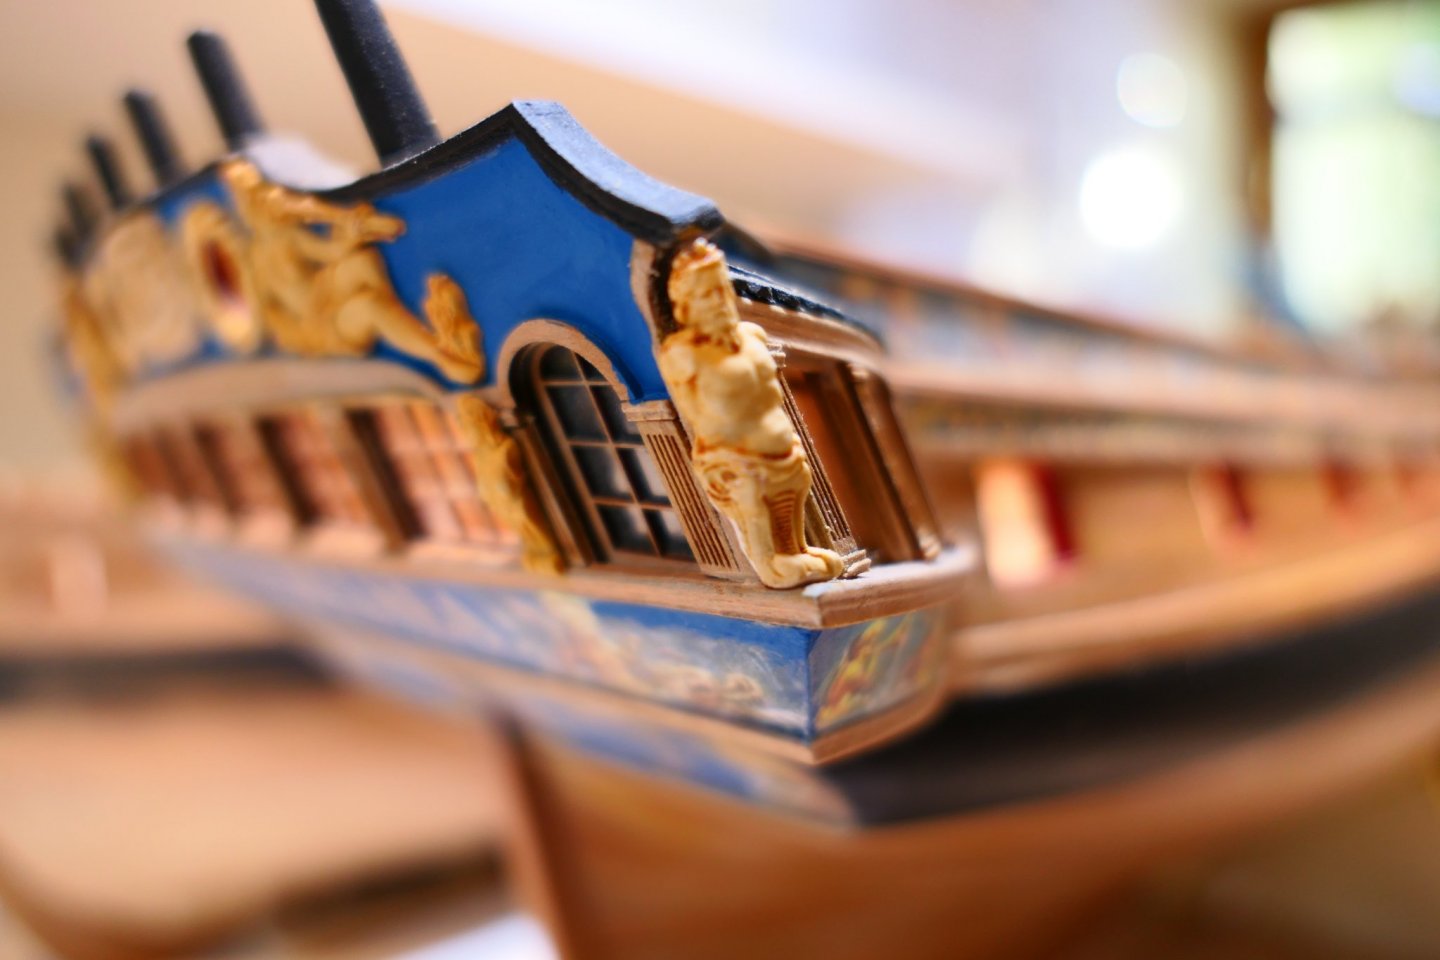
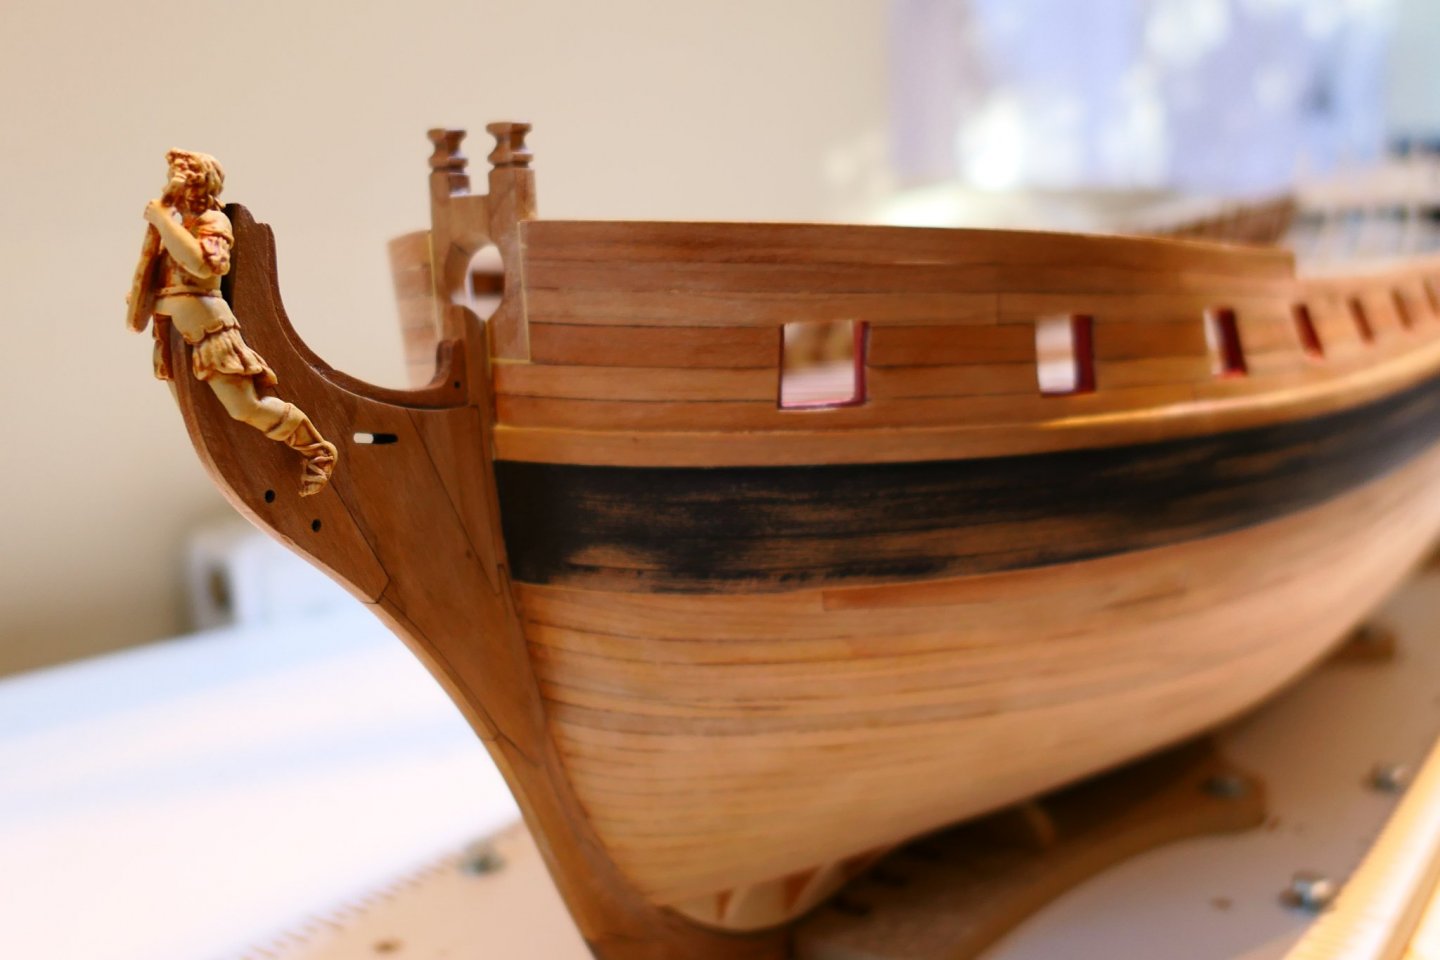
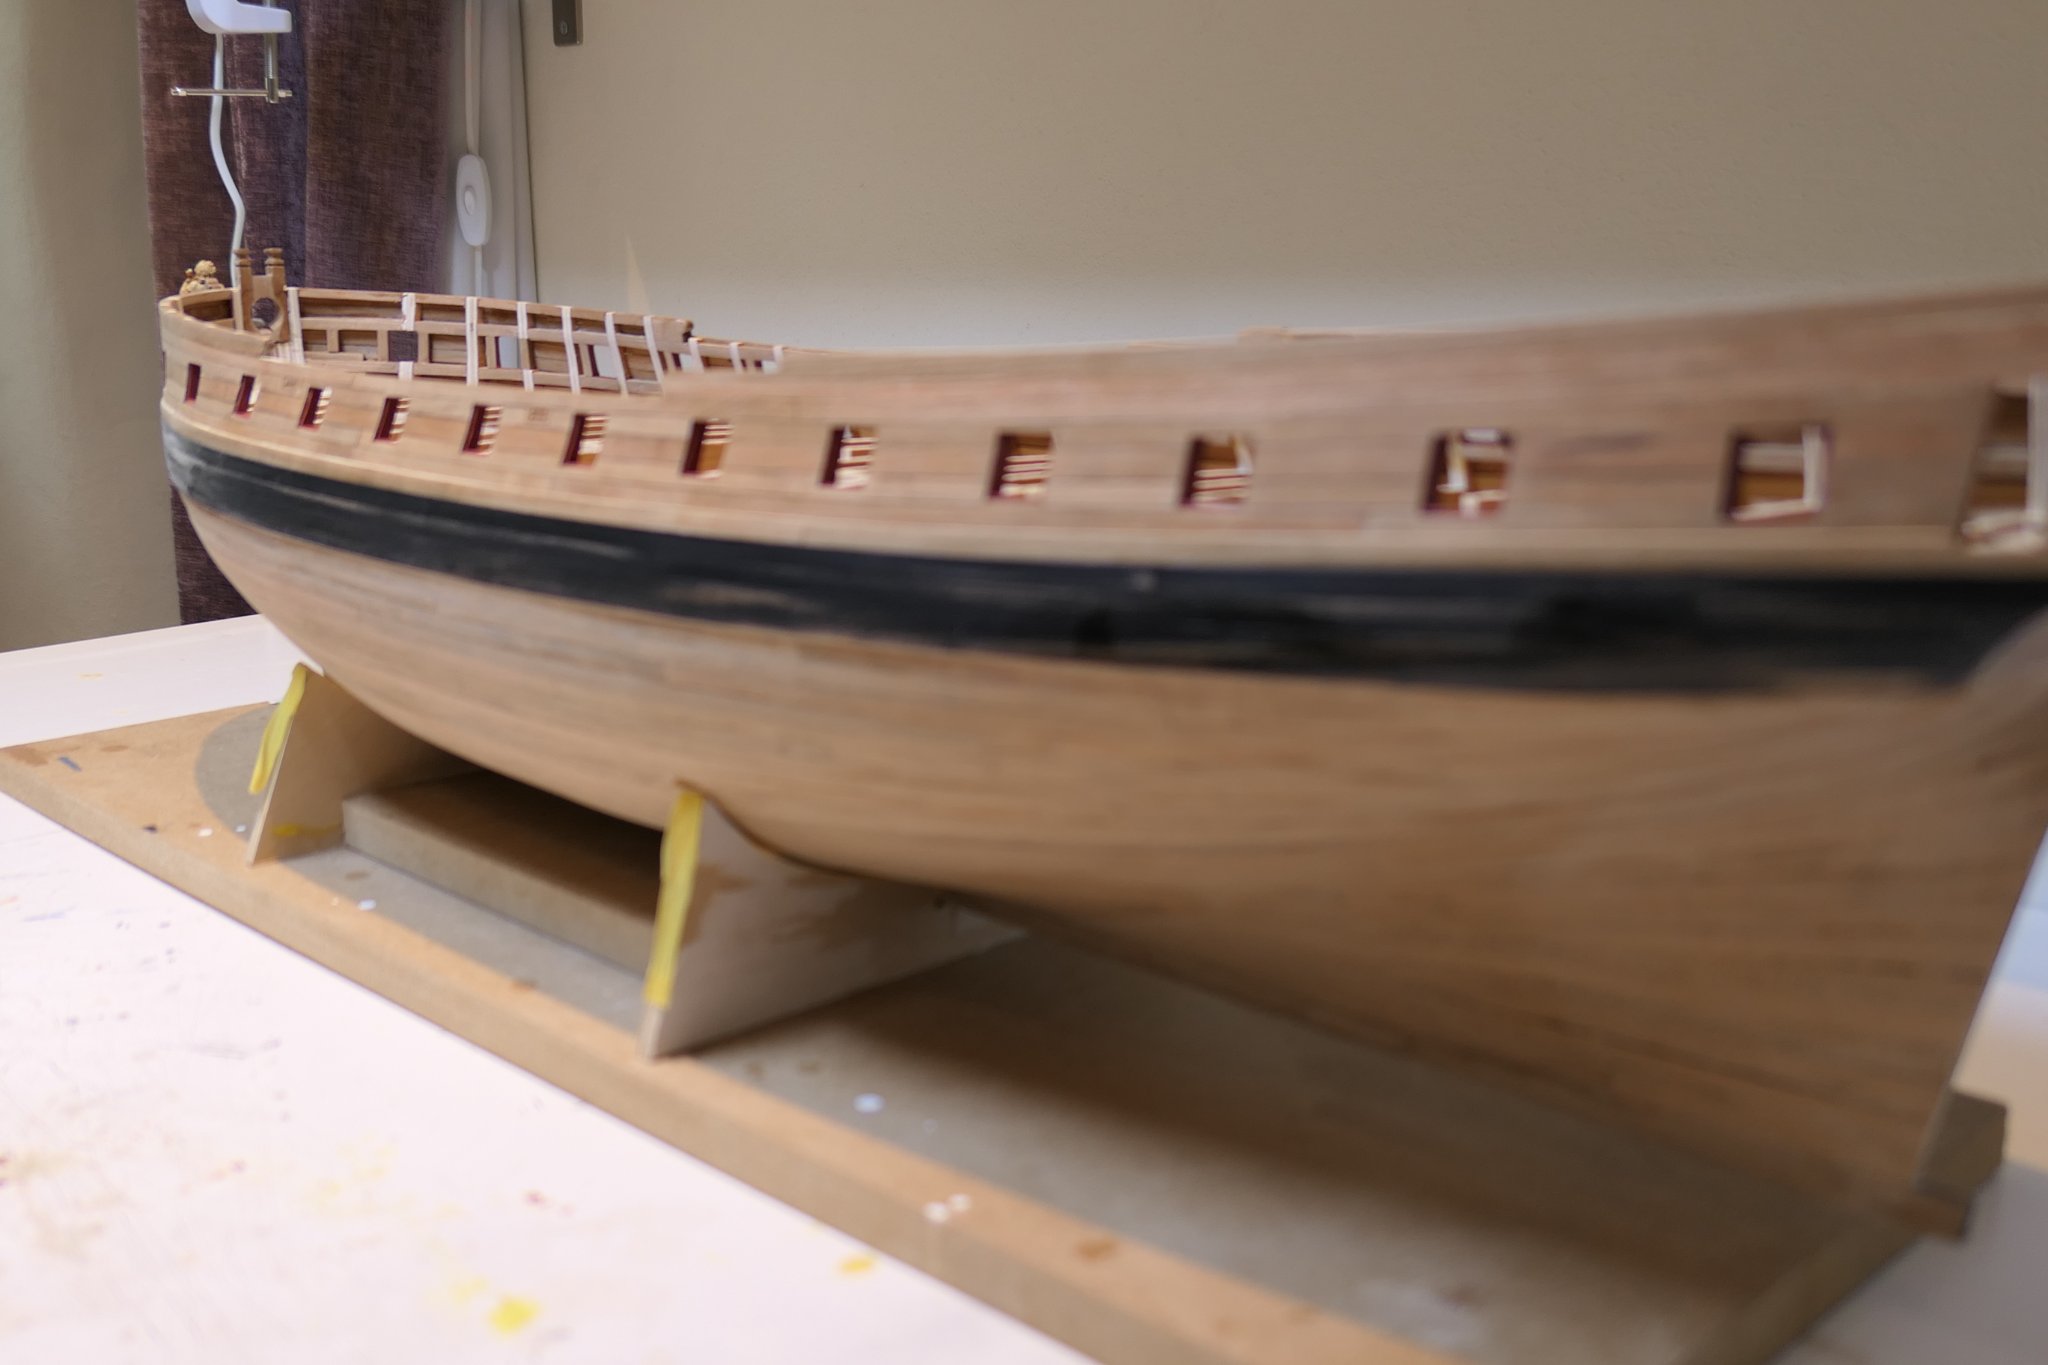
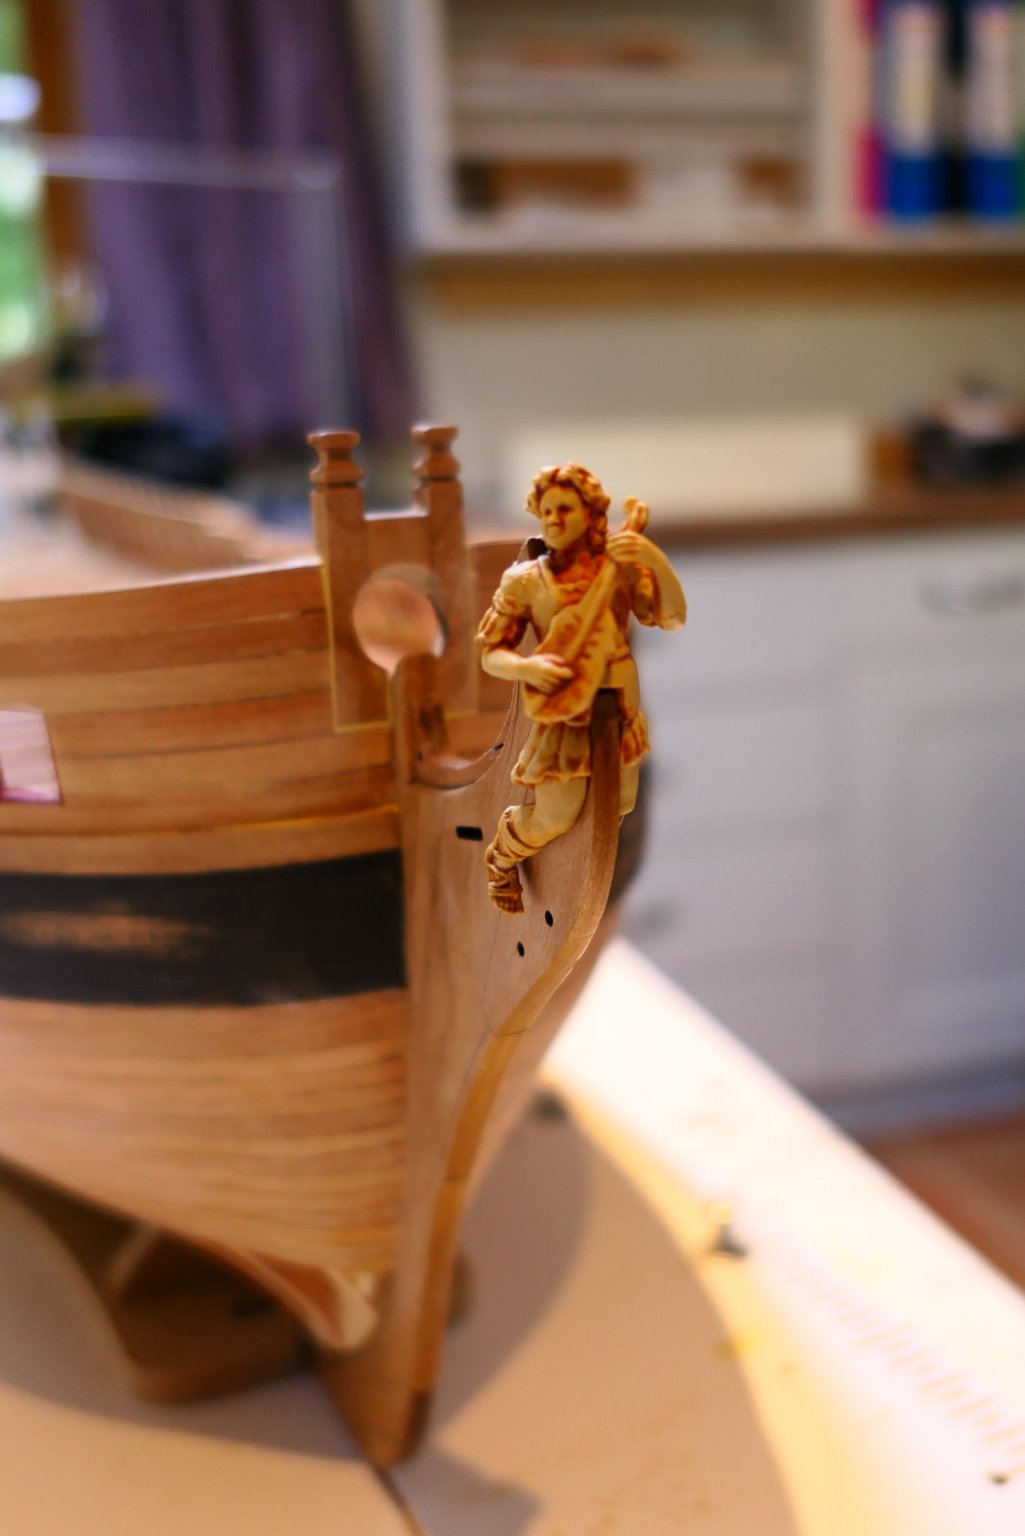
Here is W1. It is rather gathering dust and I do not suppose I will ever finish it now W2 is underway. I can see now that I was hopelessly optimistic taking on a model of this size and complexity as a third build – but I learned a lot! The resin figures were nearly a disaster. I thought if I painted them with fairly random mix of browns, whites and yellows well thinned the pigment would run into the low points and bring out the highlights. I hated the result so painted on another coat. That made things worse so I painted them gold. At that stage they looked awful so I gave them a bath in nail varnish remover with acetone and they actually ended up looking quite good. I have never used weathering powder but I might try a bit of that. Here is the figurehead dividing his time between W1 and W2. P1000056 (1).MP4
.thumb.JPG.e1b191b25cbcbe241af2a13d0d39bc2d.JPG)


-
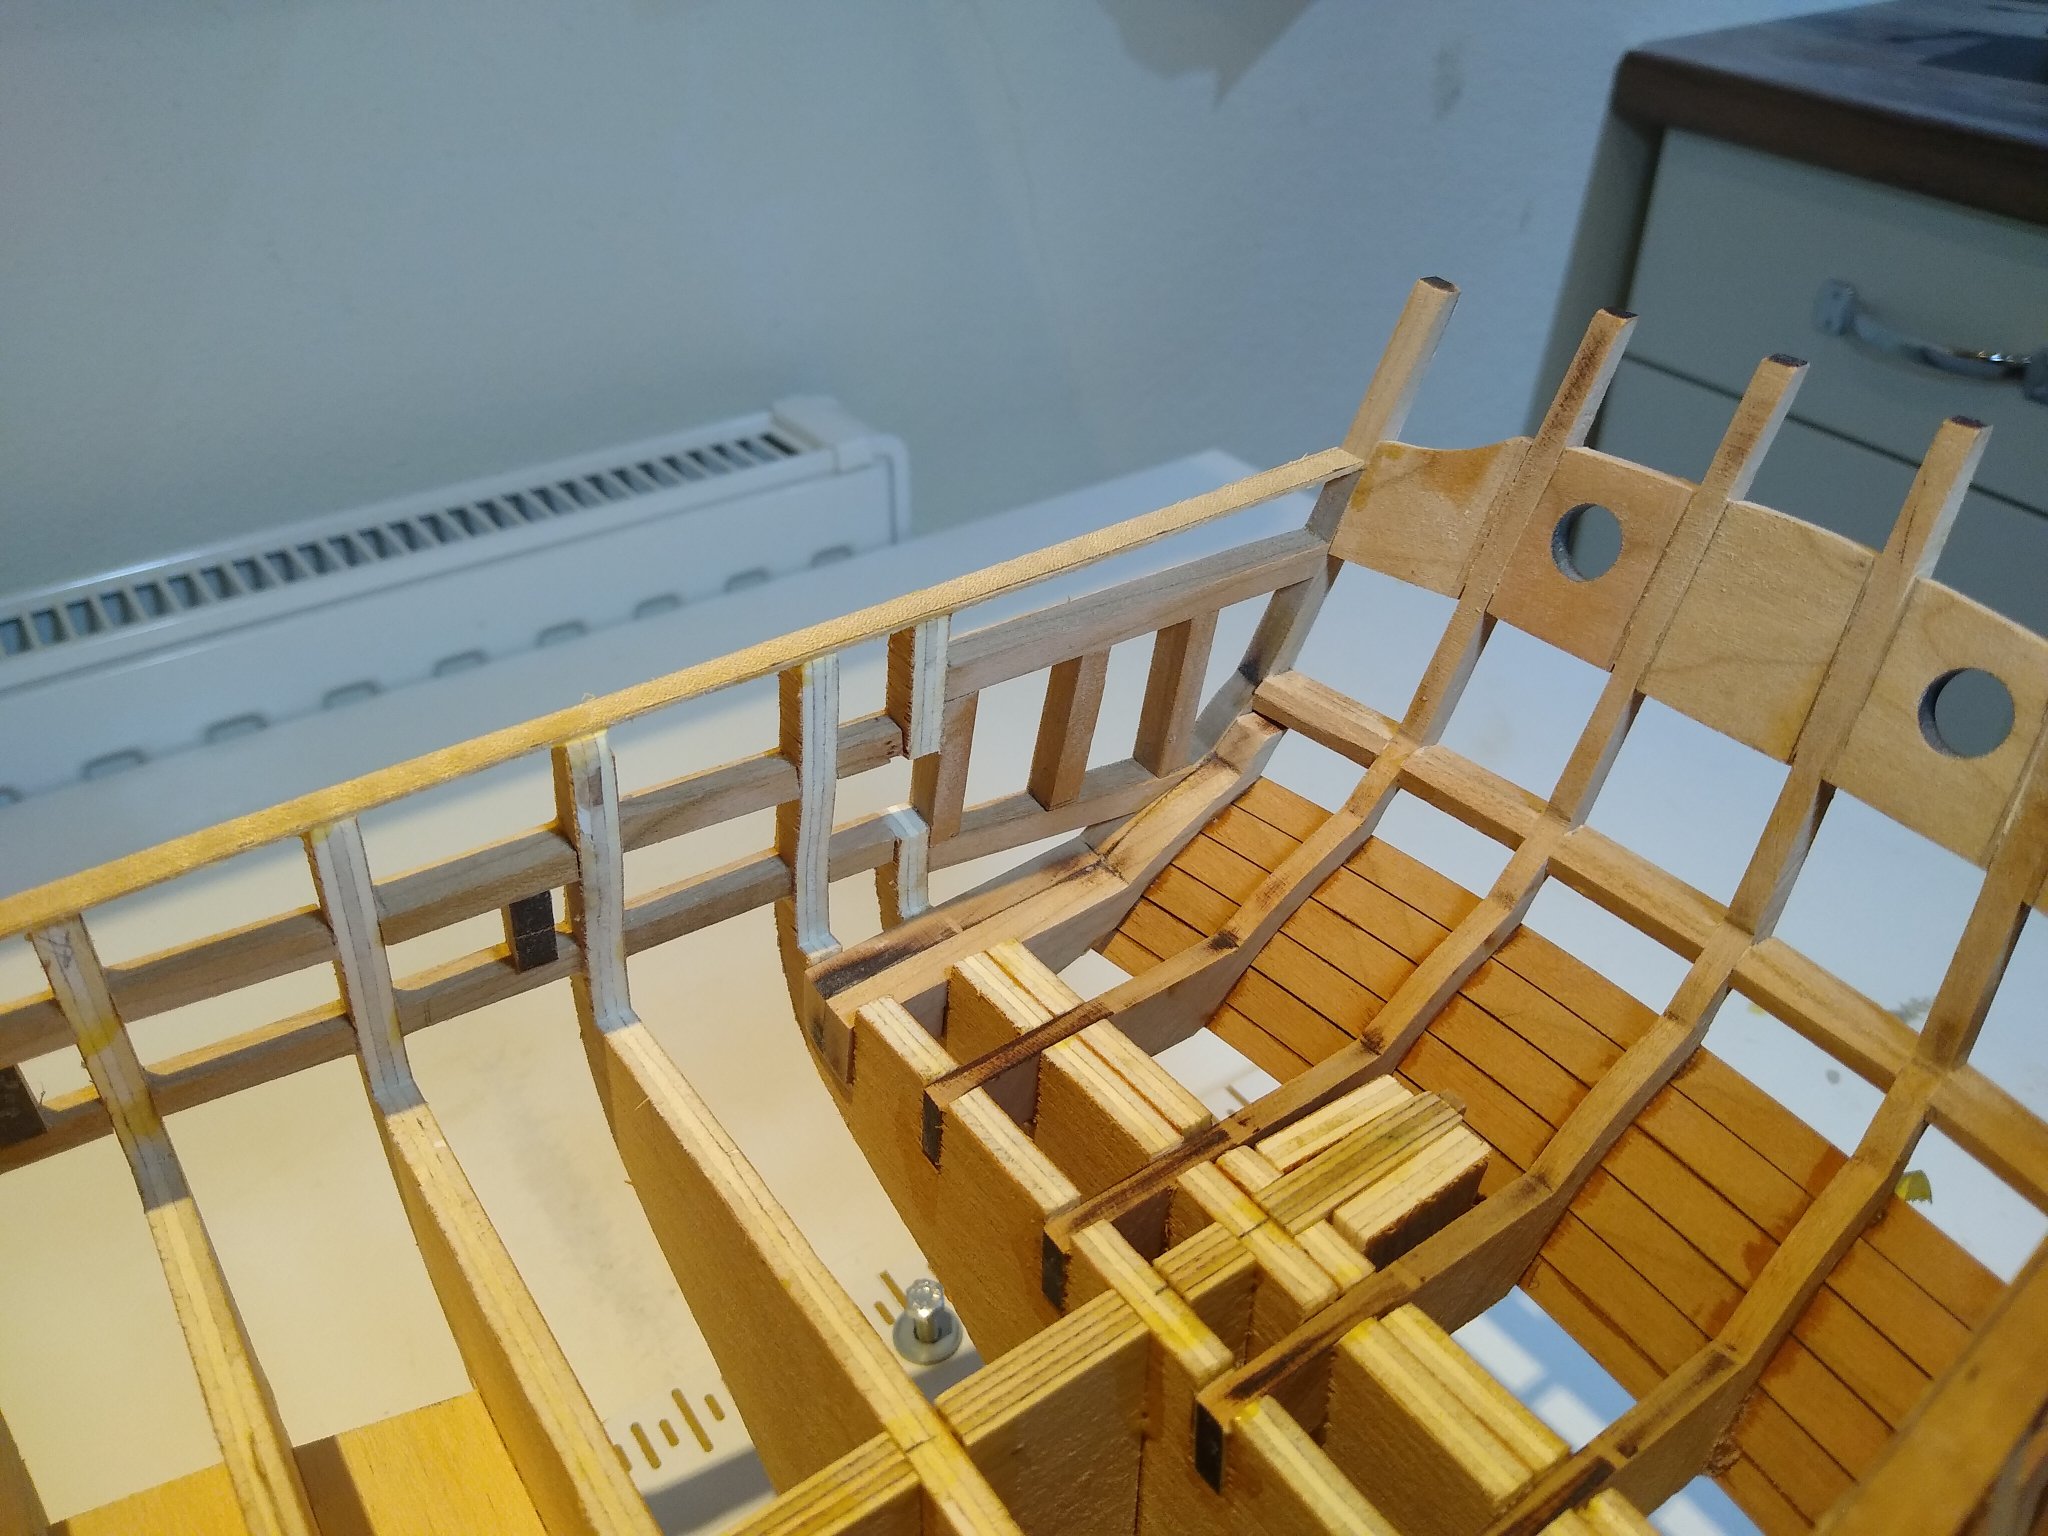
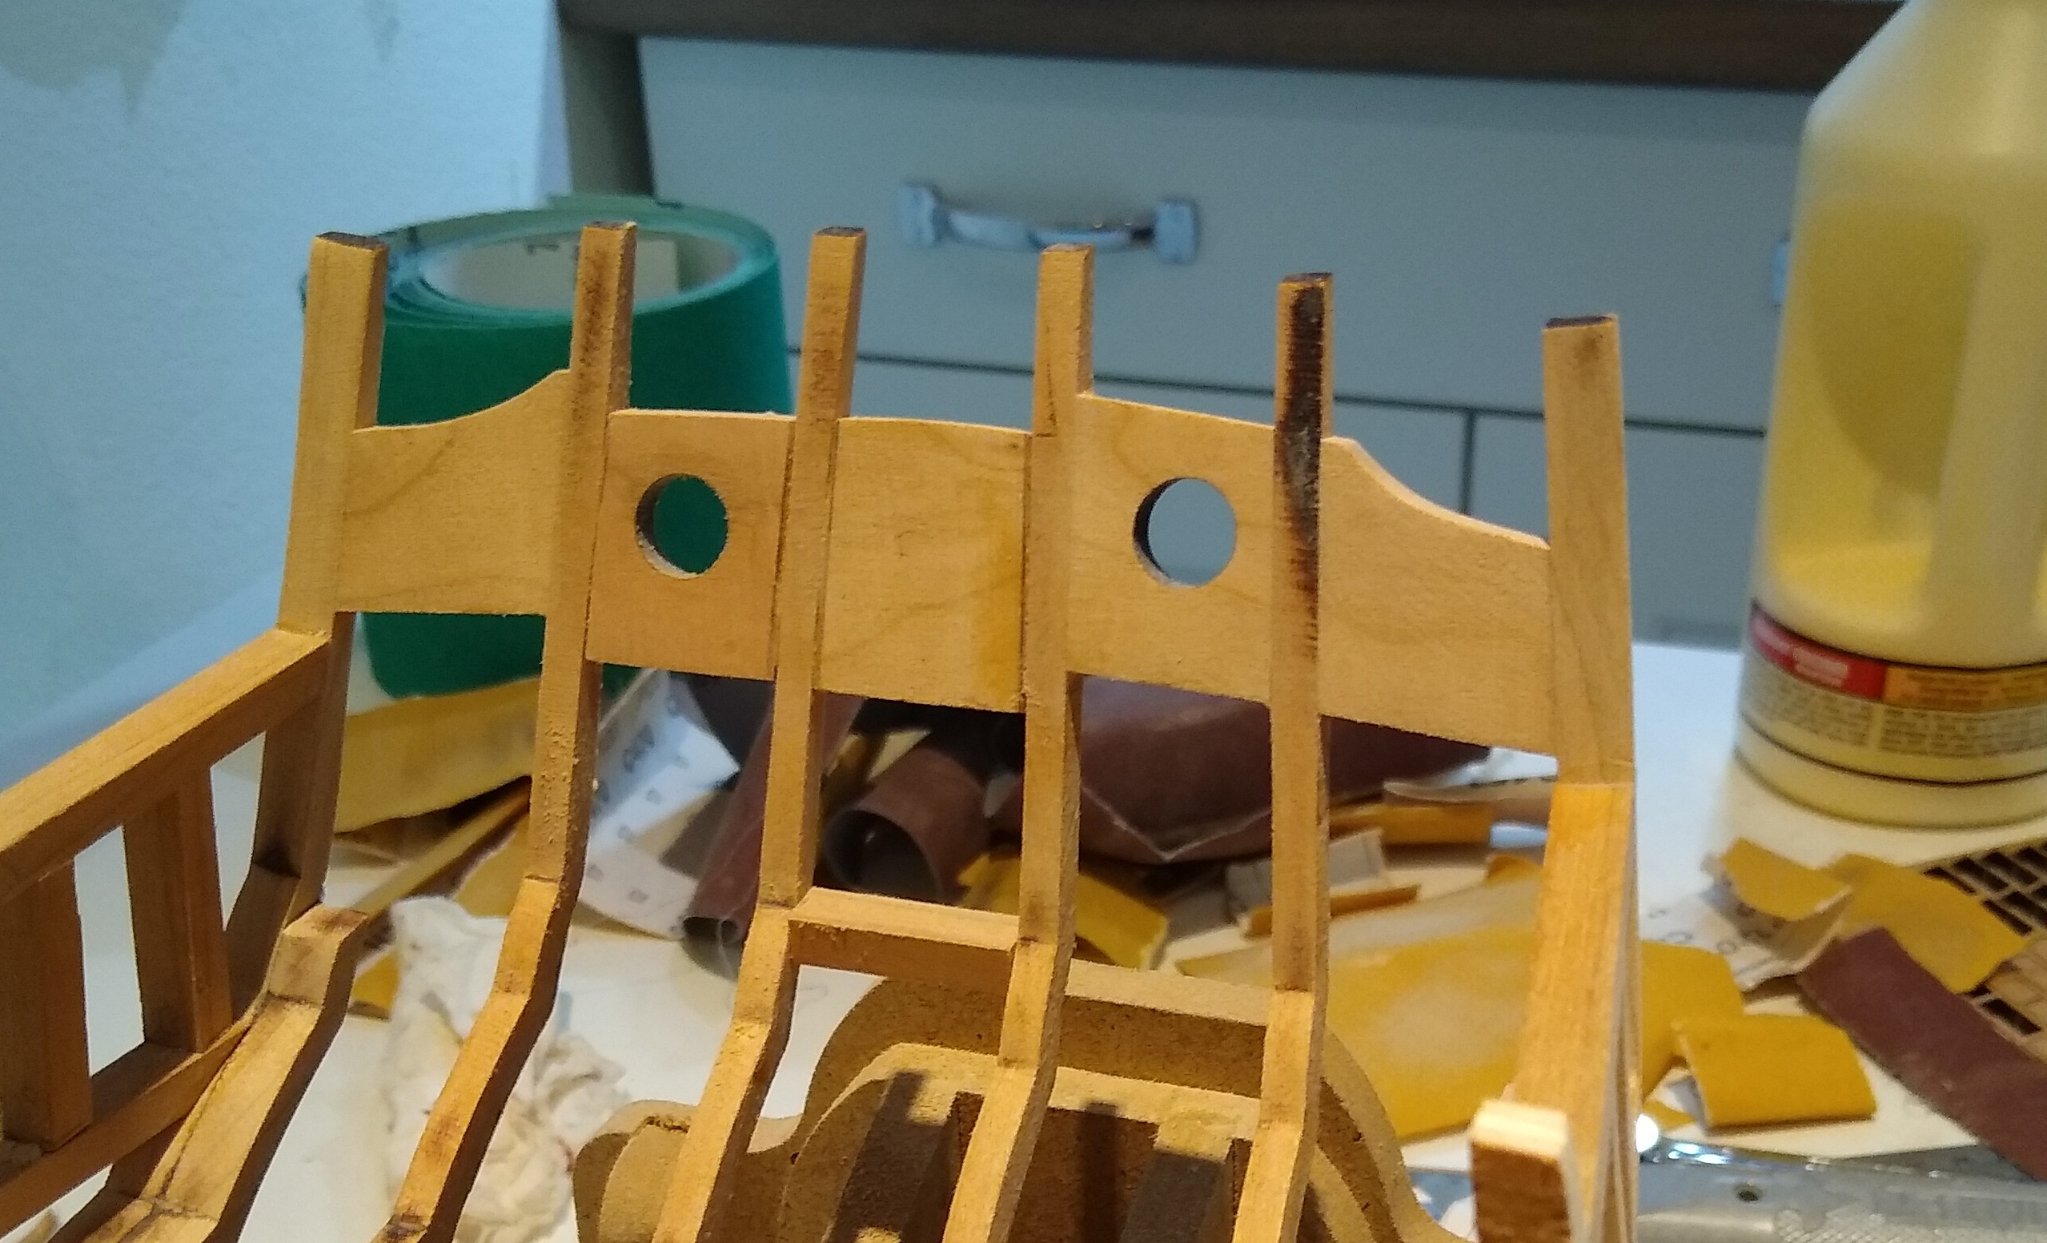
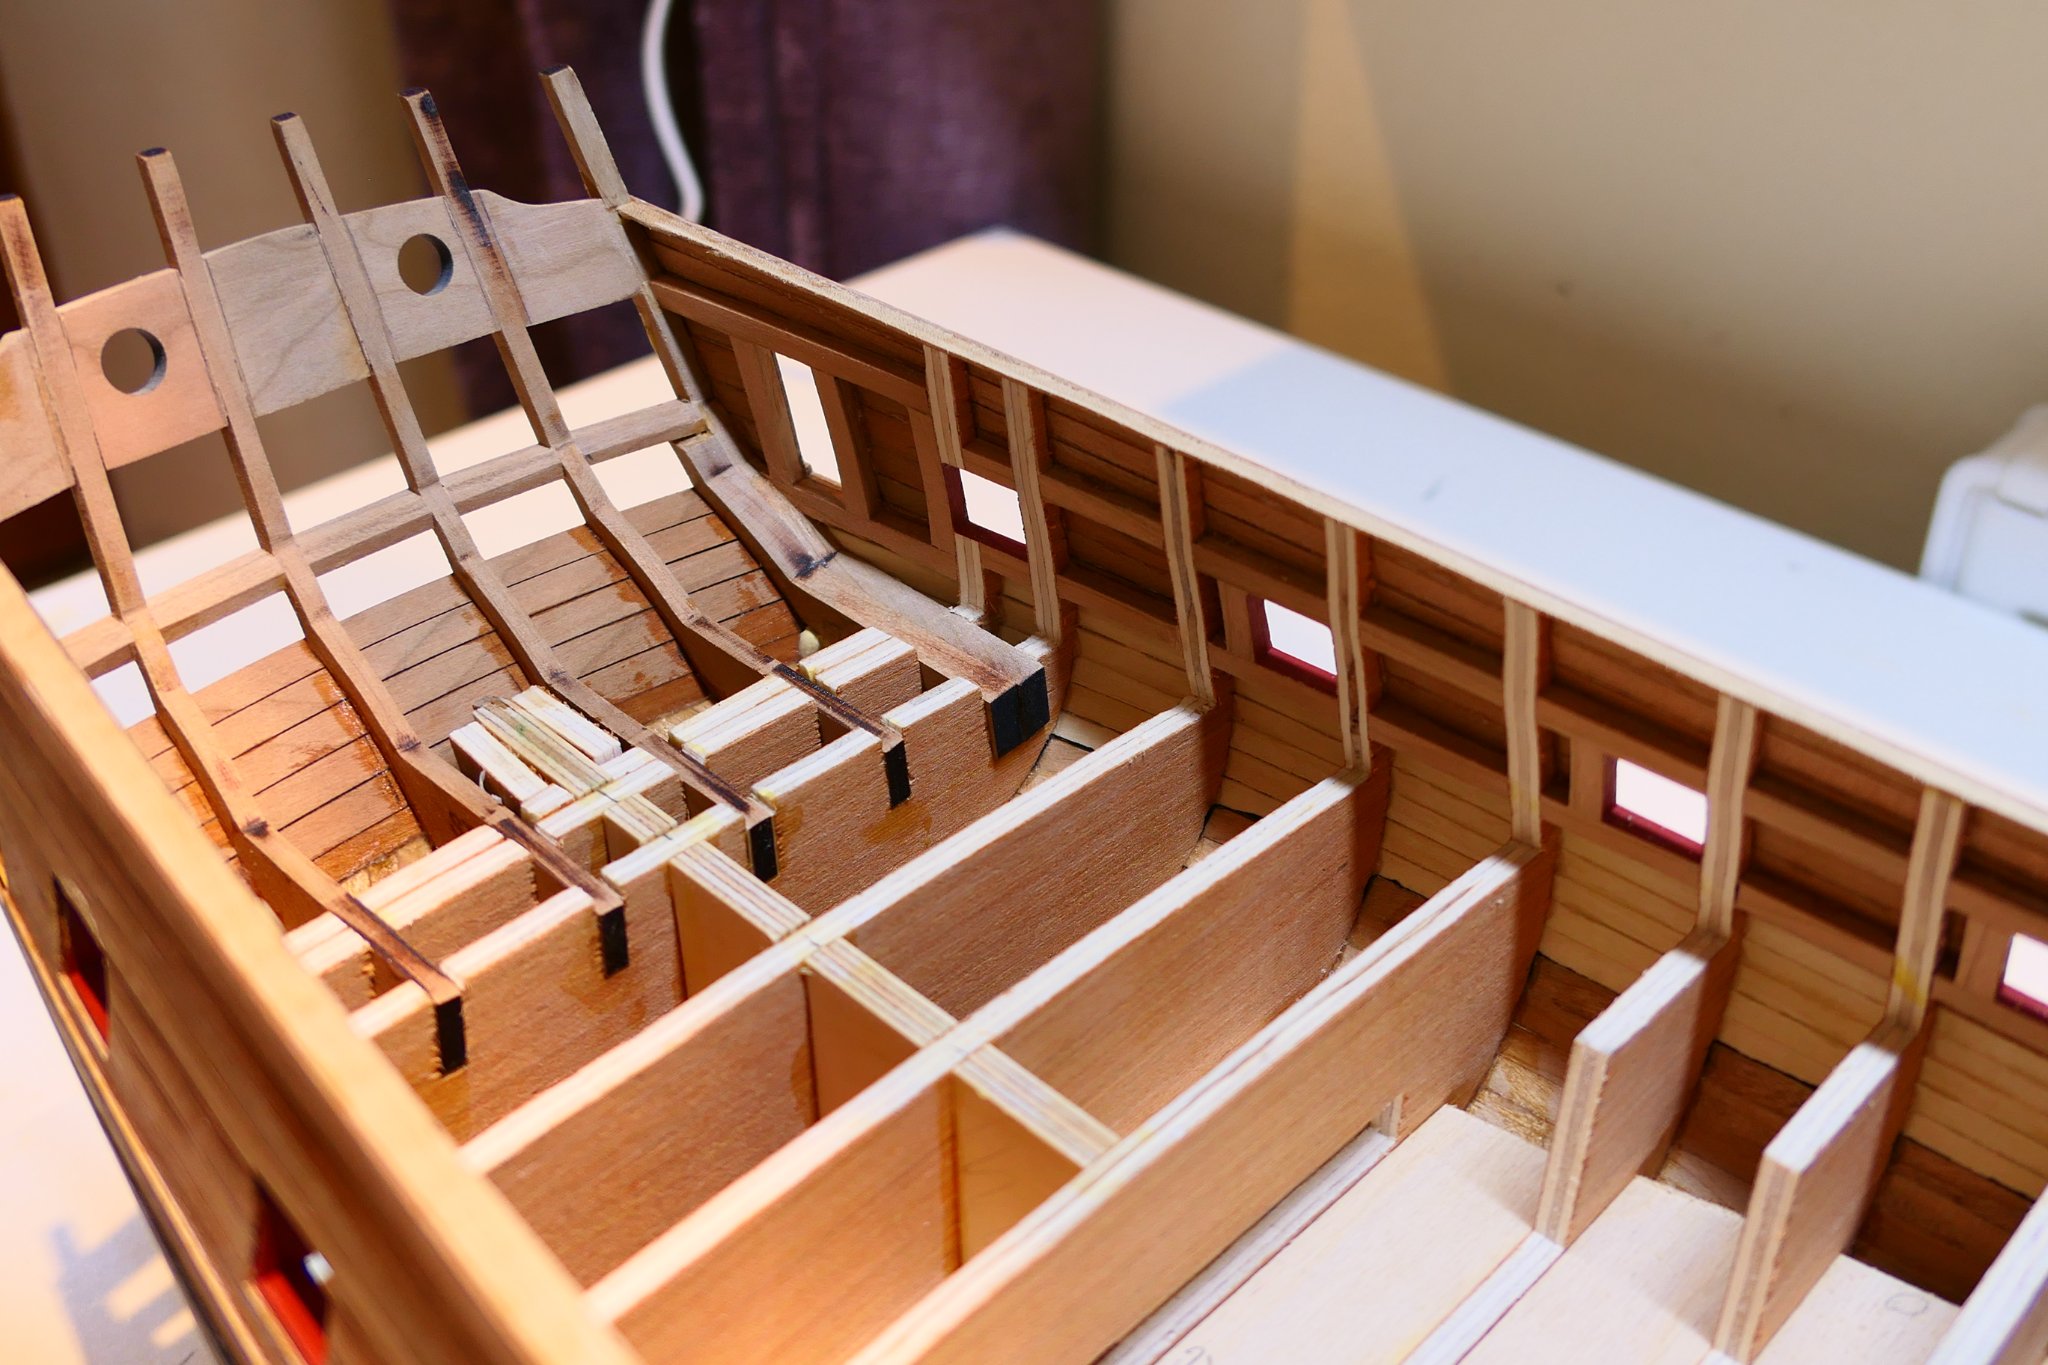
I am quite well on with sanding the inside of the bulkheads. It is certainly a great deal easier with plywood lite than it was with the Baltic birch plywood I used on W1.
.thumb.JPG.60cc2d5415ba7009610d5efcbe46a5fe.JPG)
.thumb.JPG.f62f45c2a62fbfdfea6cd5e76c3f2da2.JPG)

.thumb.JPG.ba5c1d0235bc3ed82436817b92f582d2.JPG)
-
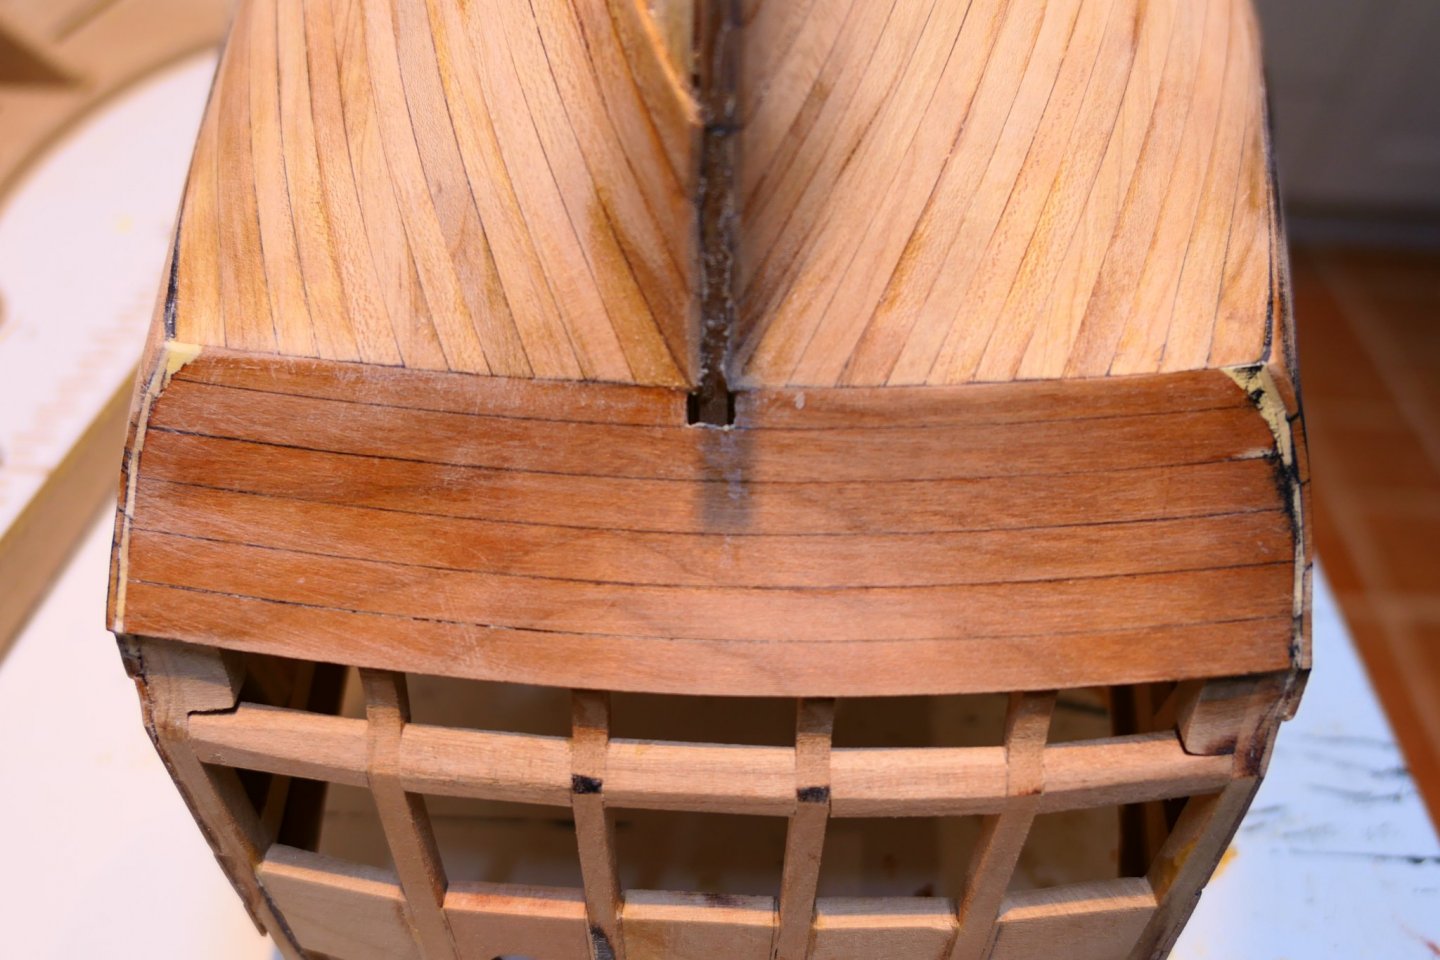
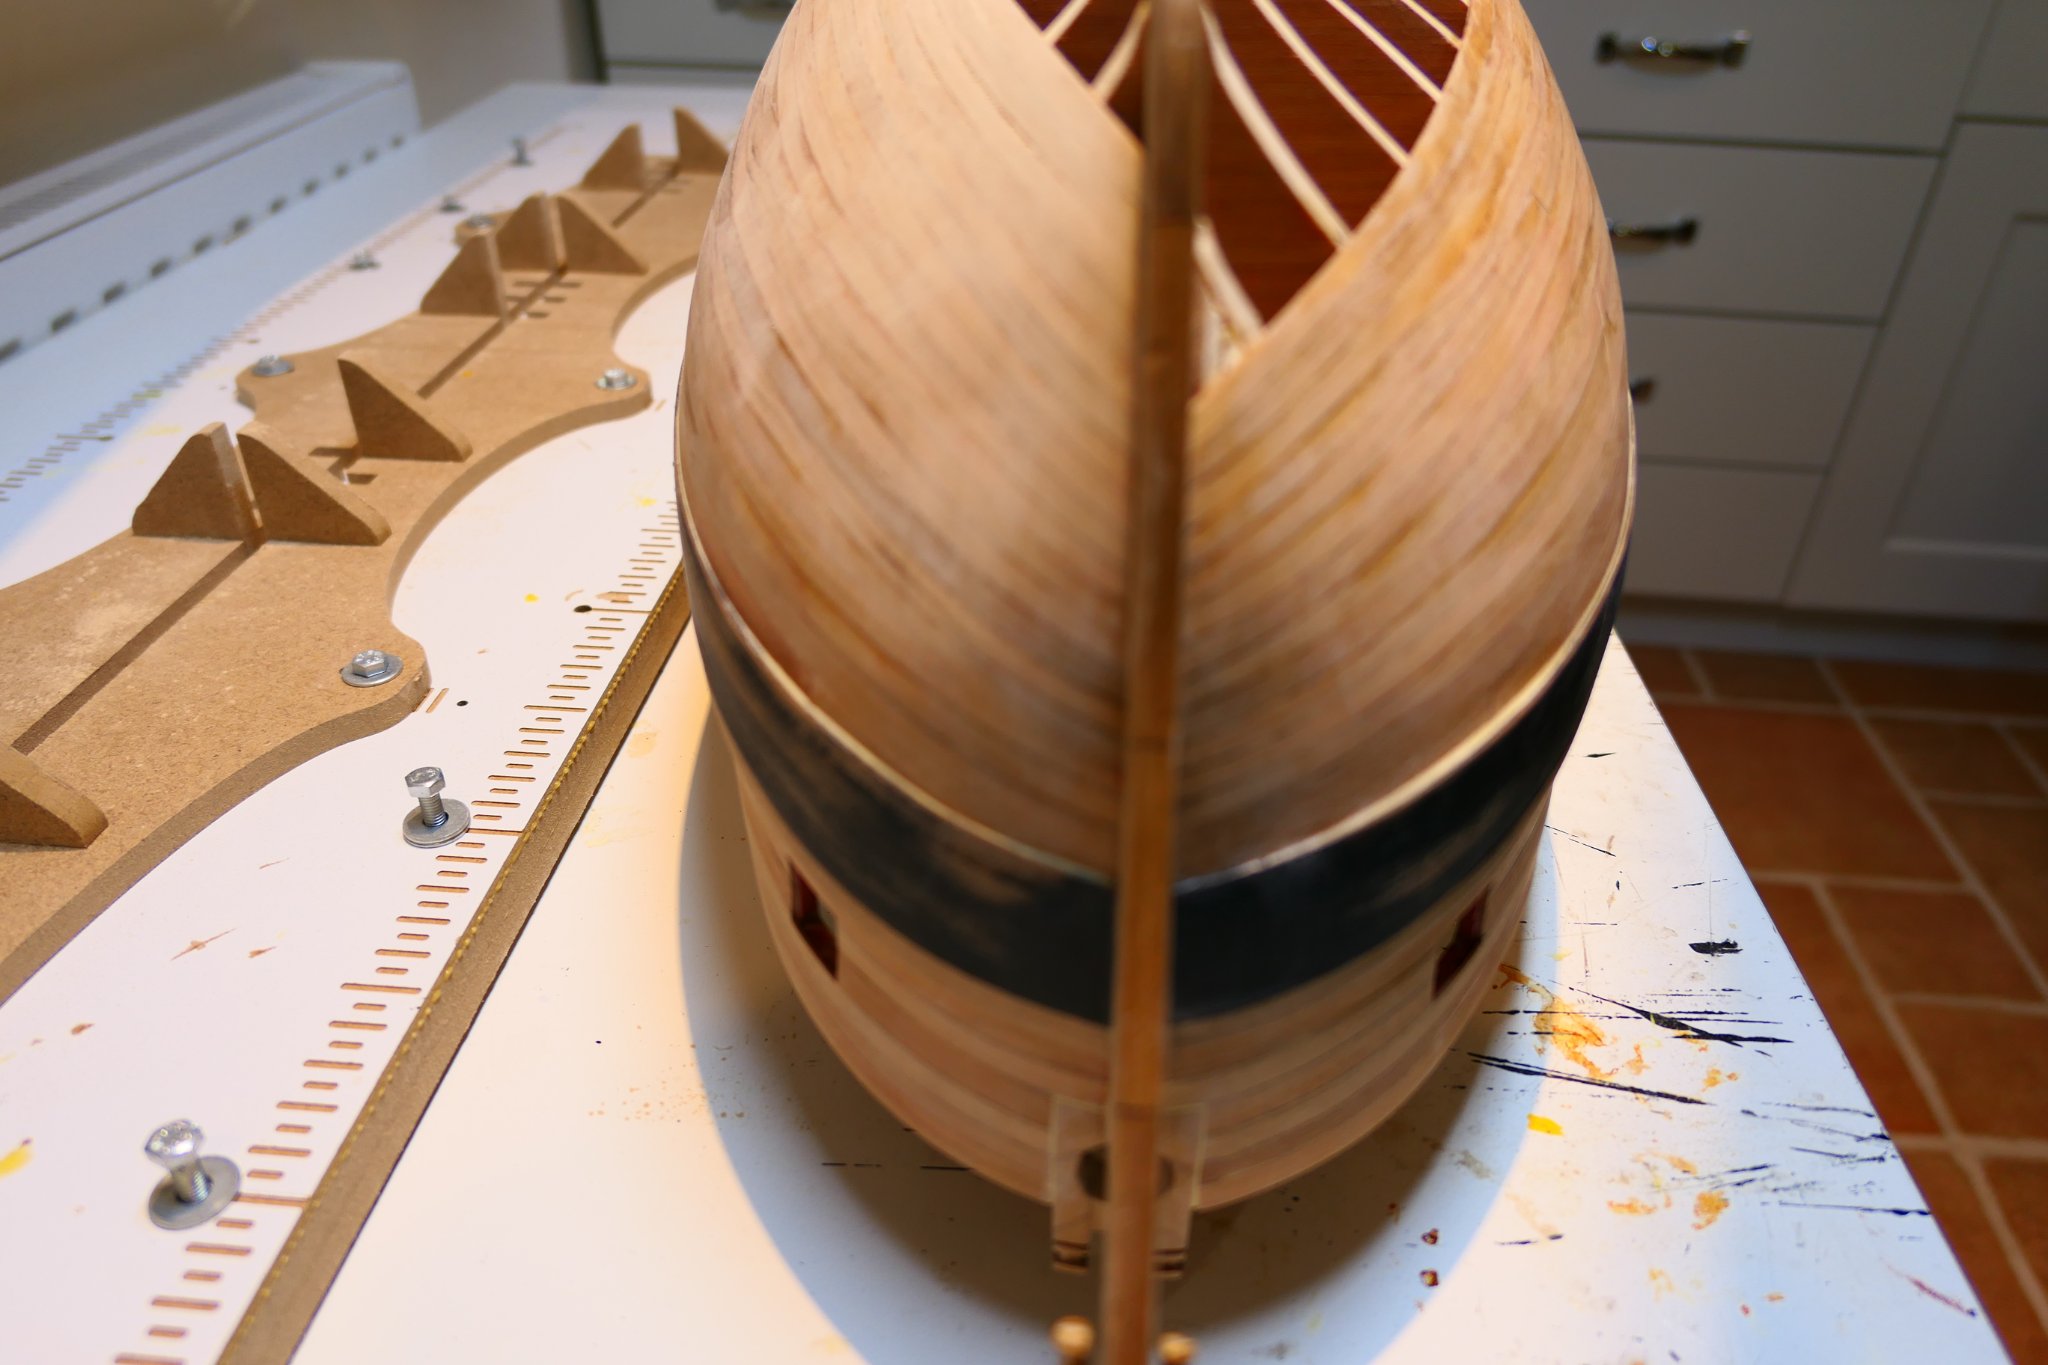
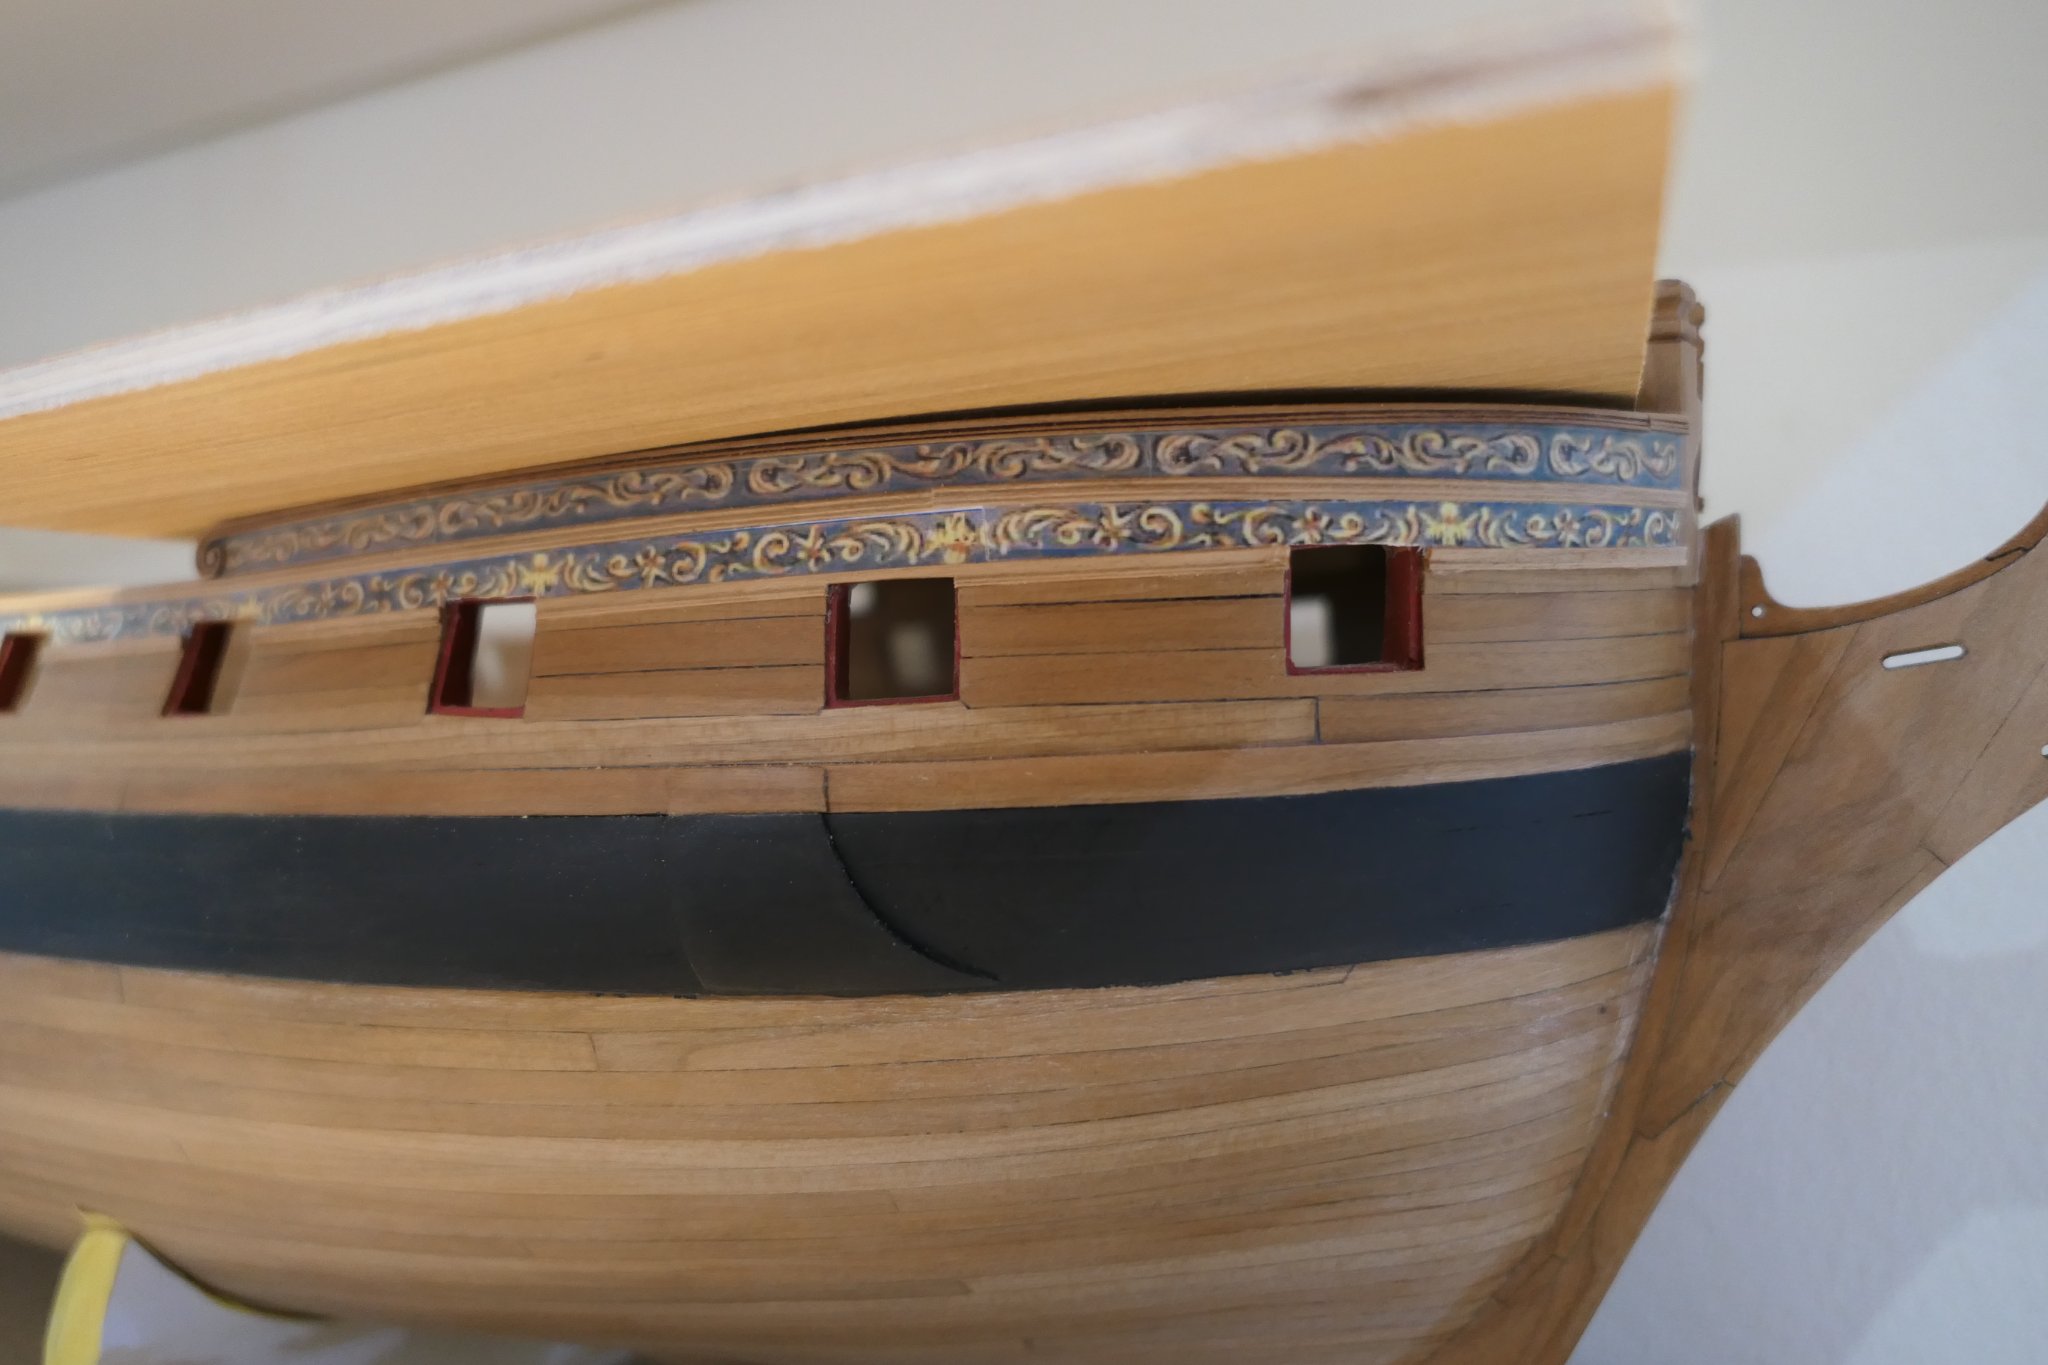
This was a disaster area on W1. It has come out much better on W2 You can see I sanded the profile of the lowest plank of the lower counter incorrectly and had to make good with a little wood filler – but that will be covered by the frieze in due course. Thank you JJ for your thoughts about how to tackle this tricky area. I did not put in the piece that attaches to the bottom of the stern frames and provides a glueing surface for the planks. I found it easier to heat bend the corkscrew curve into the planks so that they fitted without any pressure and then just cut a bevel before gluing to the lower counter. On W1 this area cost me several layers of skin off my fingertips struggling to get pieces to stay where I wanted them to go while the CA did its best.
.thumb.JPG.3871ad389a50b66216074f9c8ae4478e.JPG)


.thumb.JPG.1c8edbae03c4401014f35897e389bfa5.JPG)
-
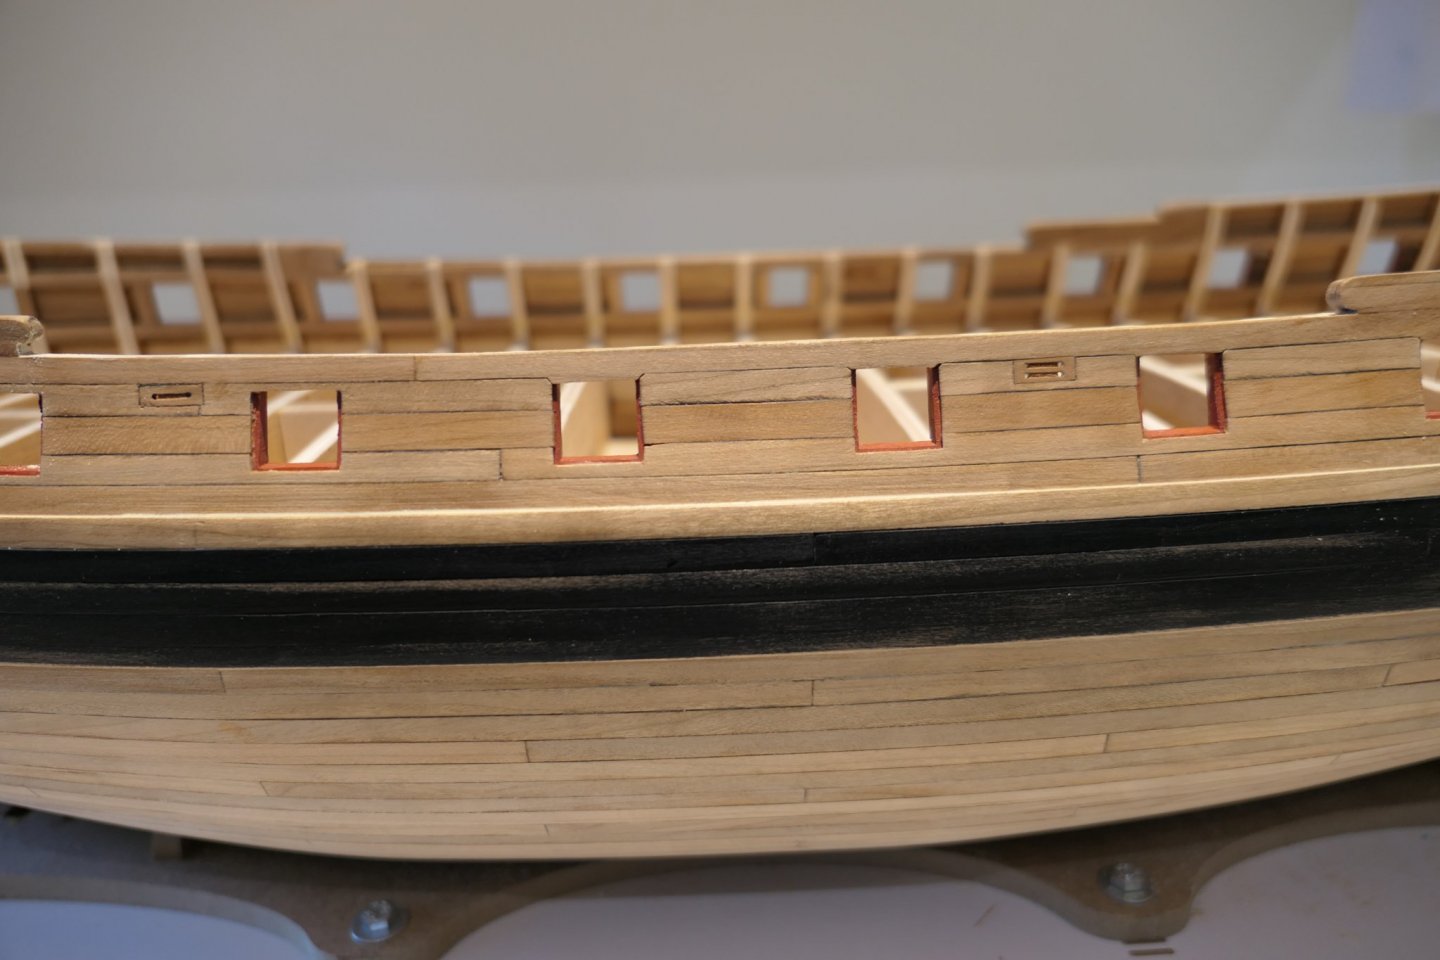
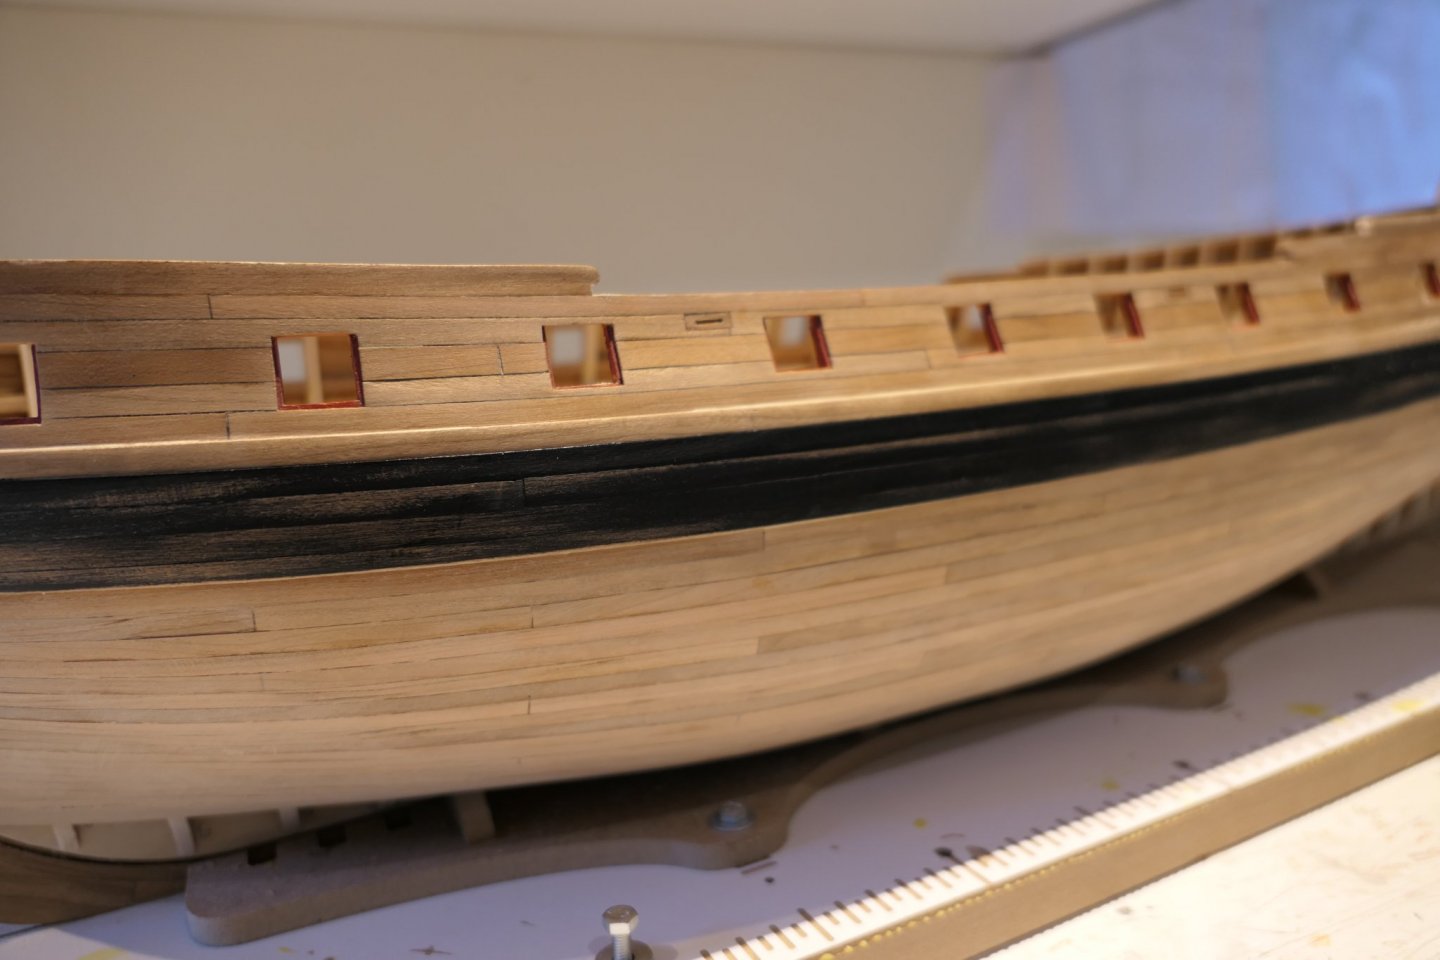
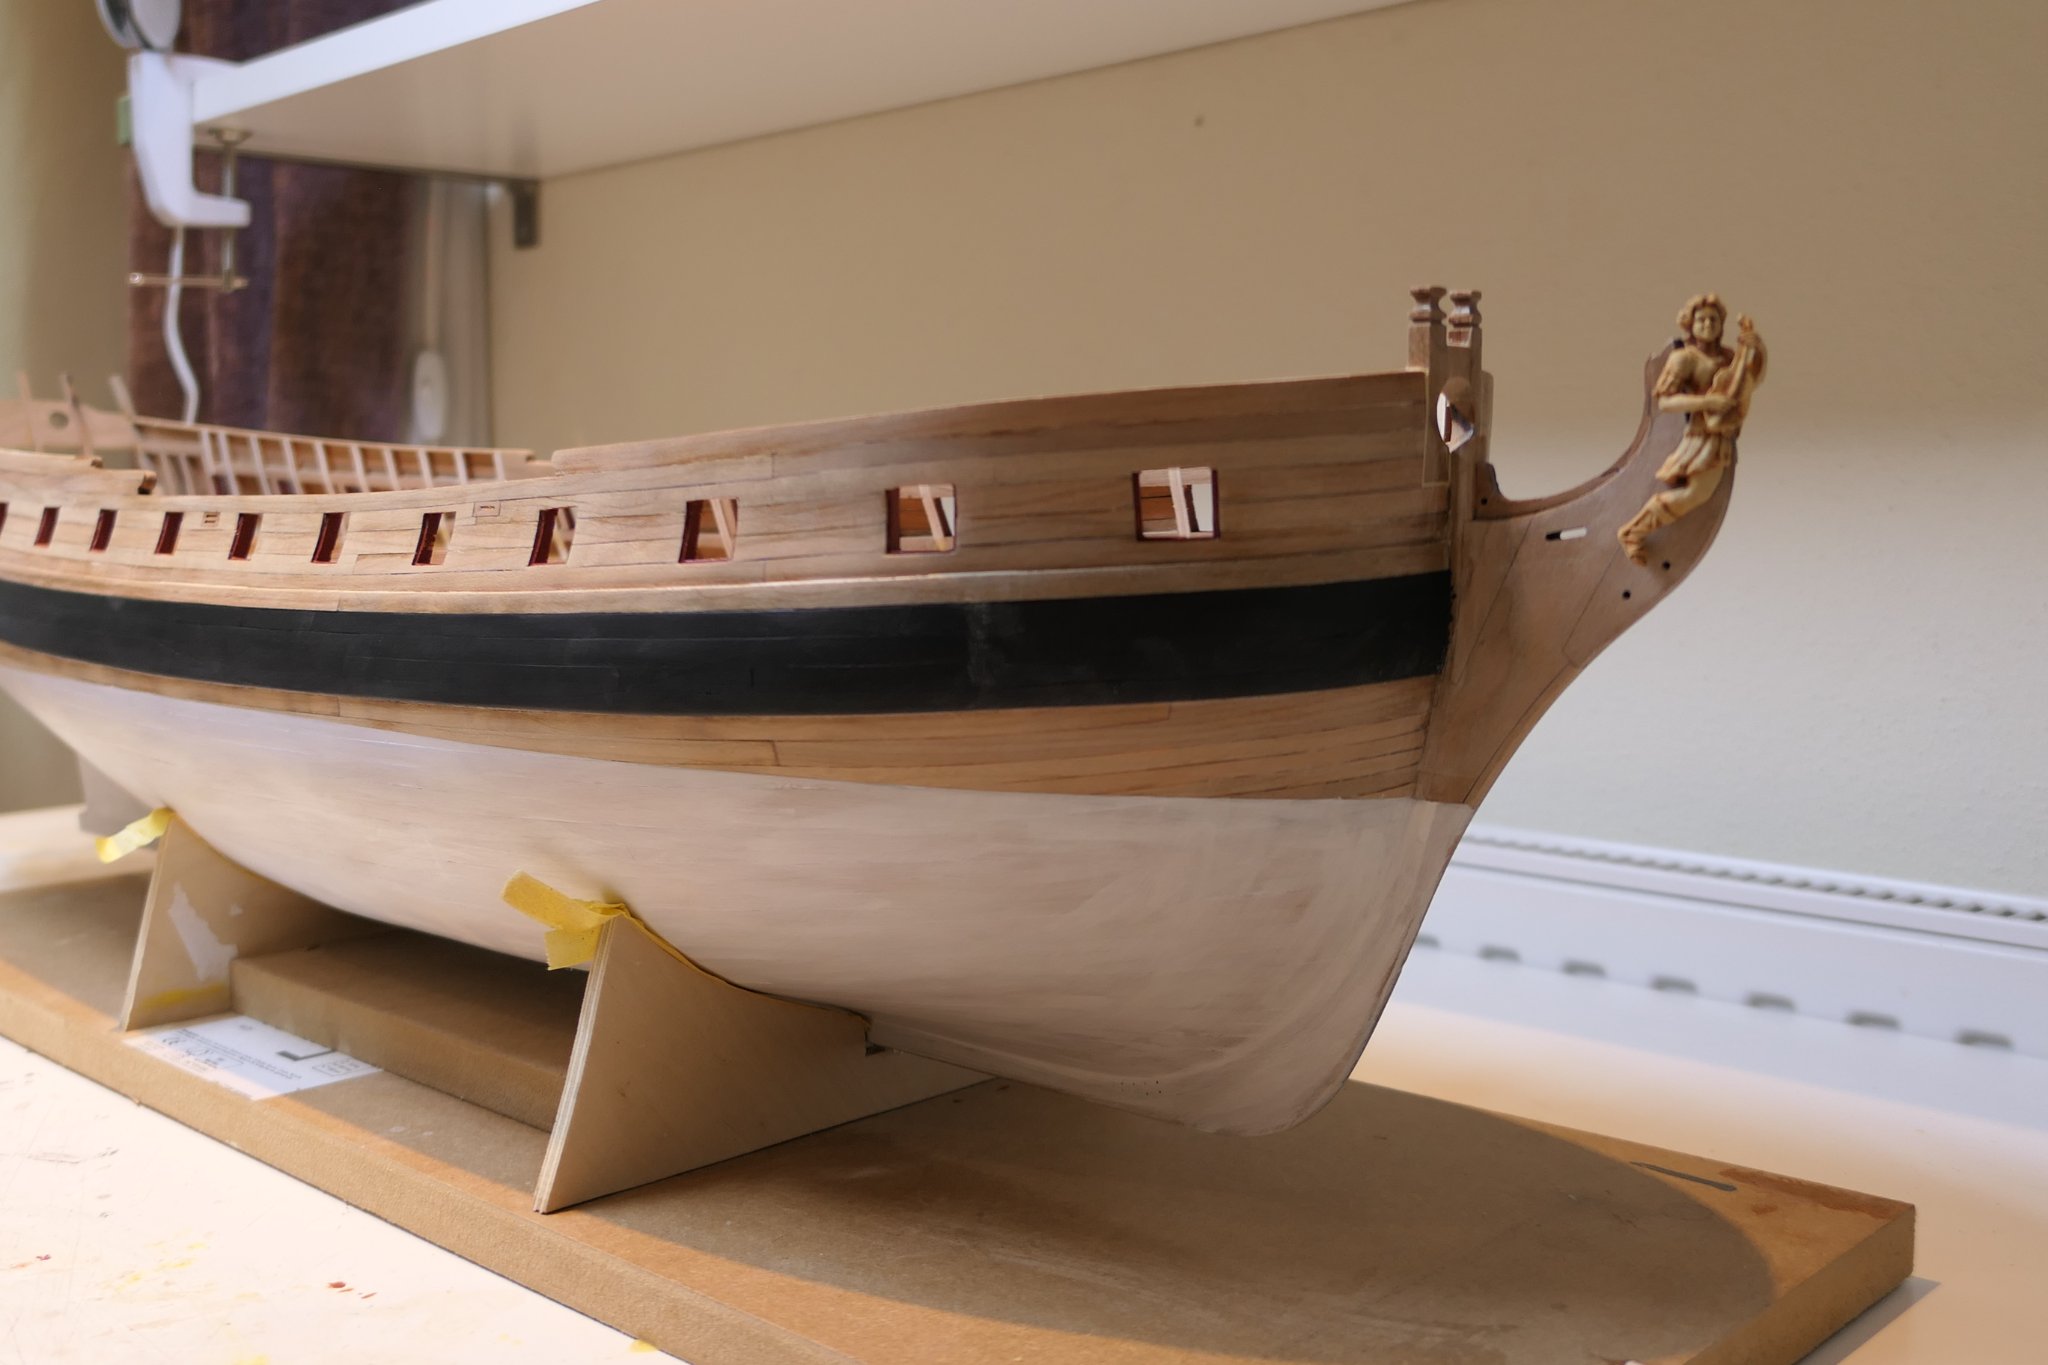
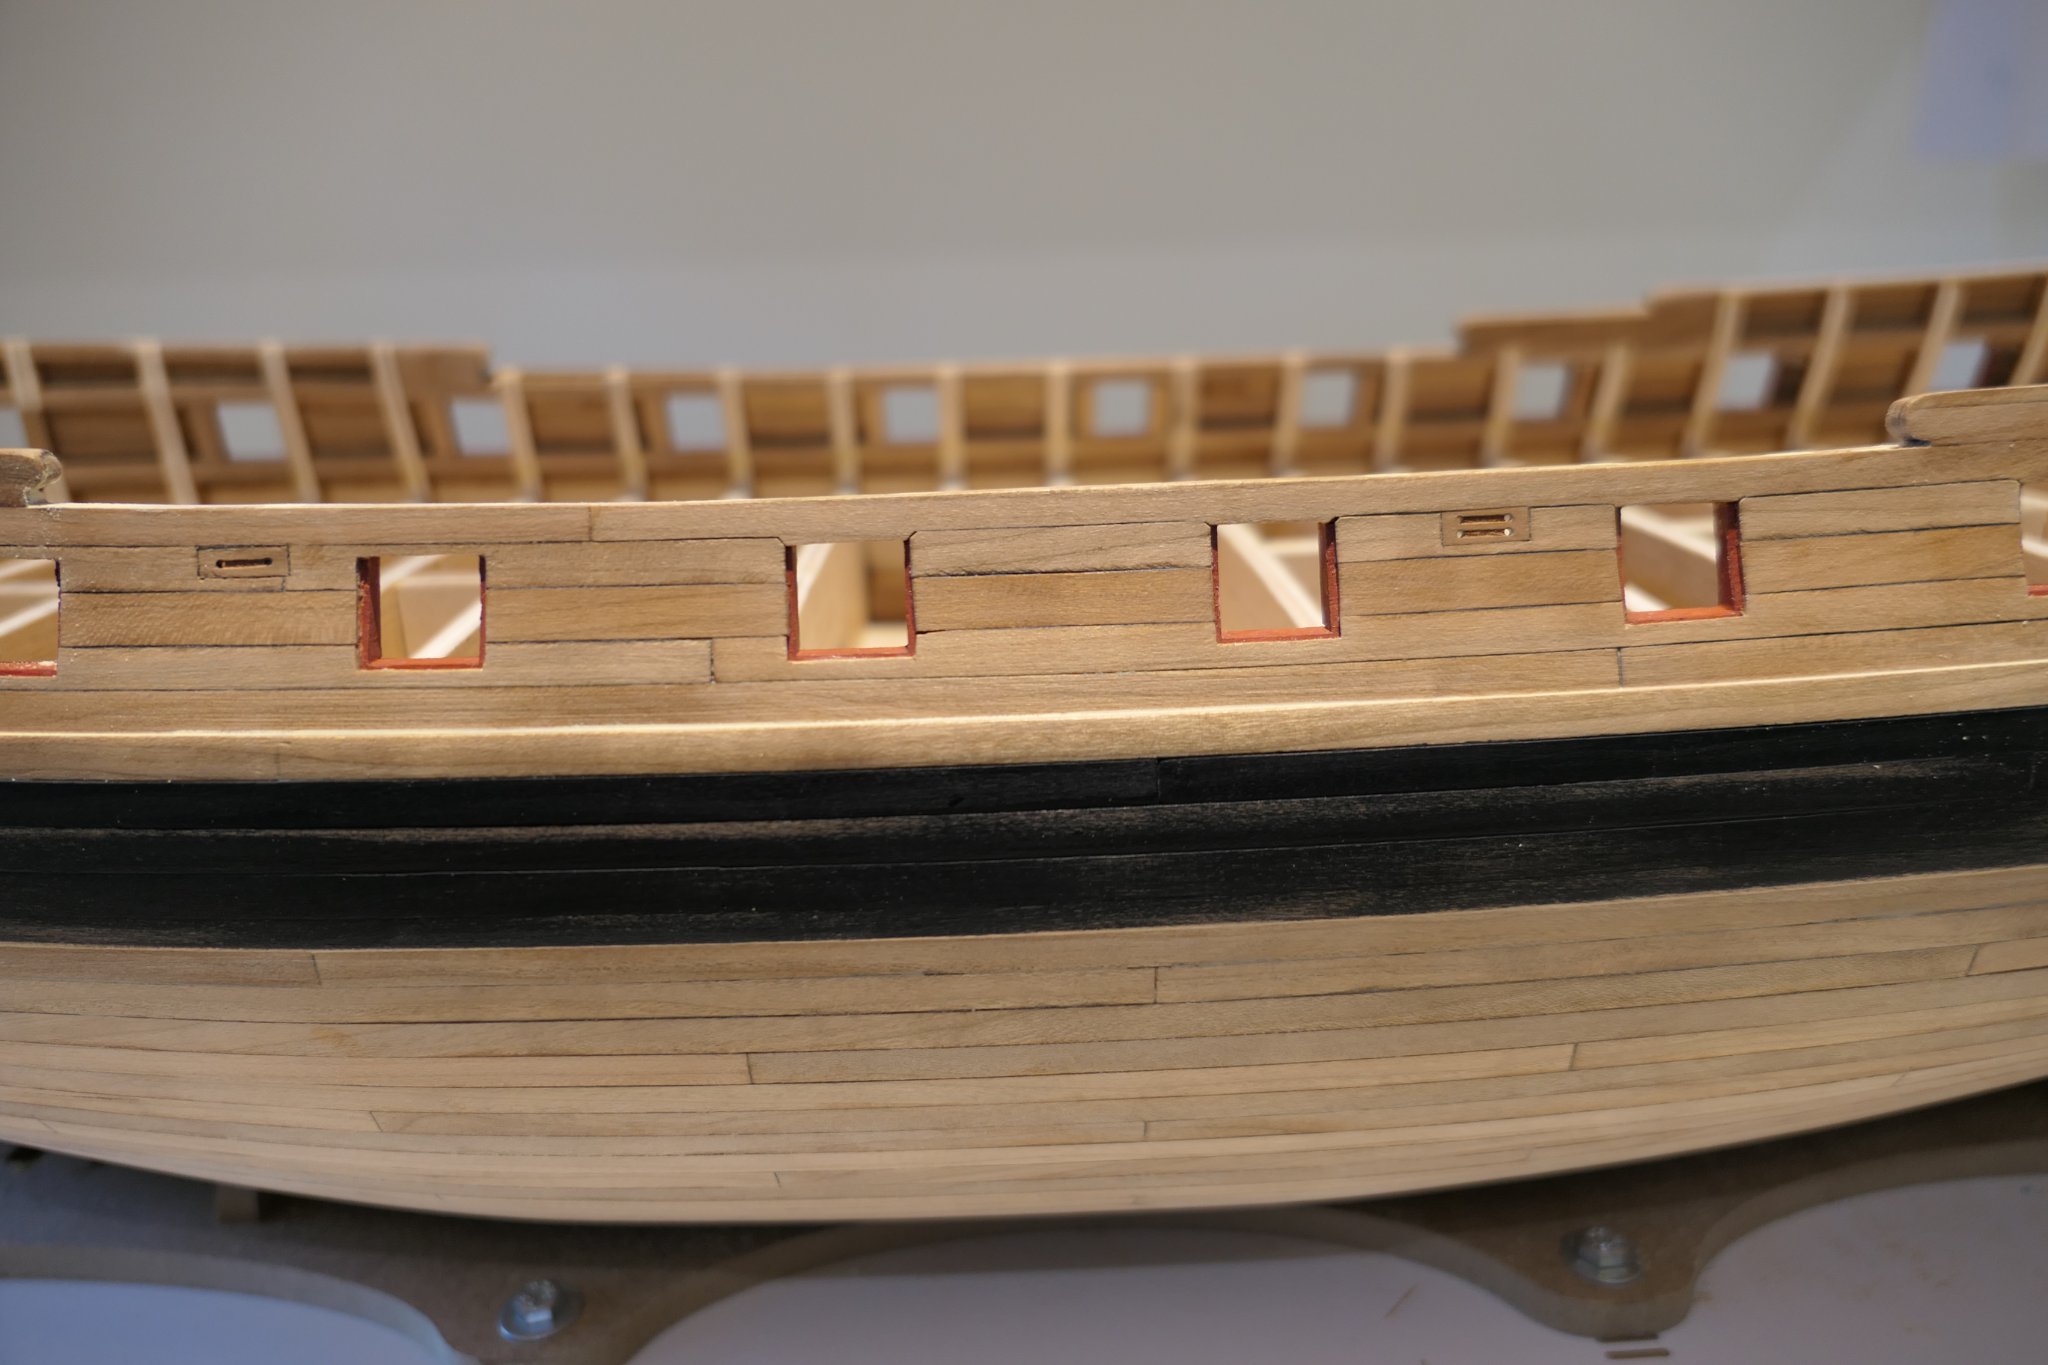
I am not convinced by the run off the planking. I wish I had lined the hull just as Ben (Trussben) has done. It looks okay on the side viewed head-on the planks curve upwards uattractively. I took a lot of care with the gunports which were untidy on W1 but I am sure there is a far better way of doing it than working by eye. Still, they are not too bad. Here are W1 and W2 together

.thumb.JPG.6a934f837f77c11dc7eeccdc54b92bef.JPG)
.thumb.JPG.eac41be34cbd9923b5083477ae4fc7f9.JPG)
-
Ben – I wish I had lined out the hull for planking just as you did. It clearly gives you the very best chance of a really good outcome. Best wishes Fred
- 399 replies
-
- 2
-
-
- winchelsea
- Syren Ship Model Company
- (and 1 more)
-
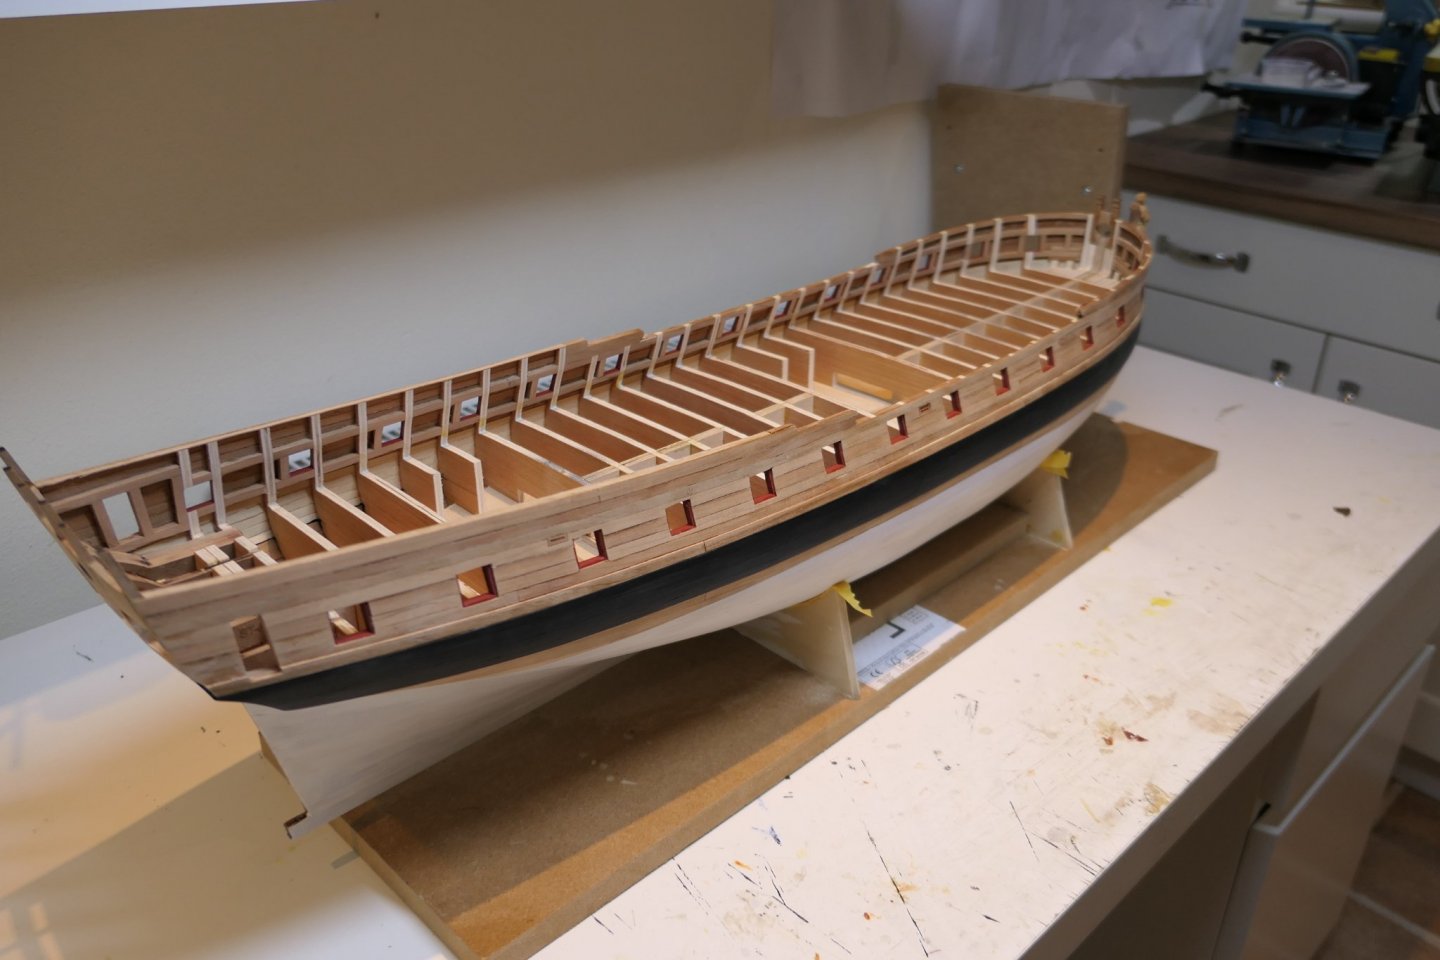
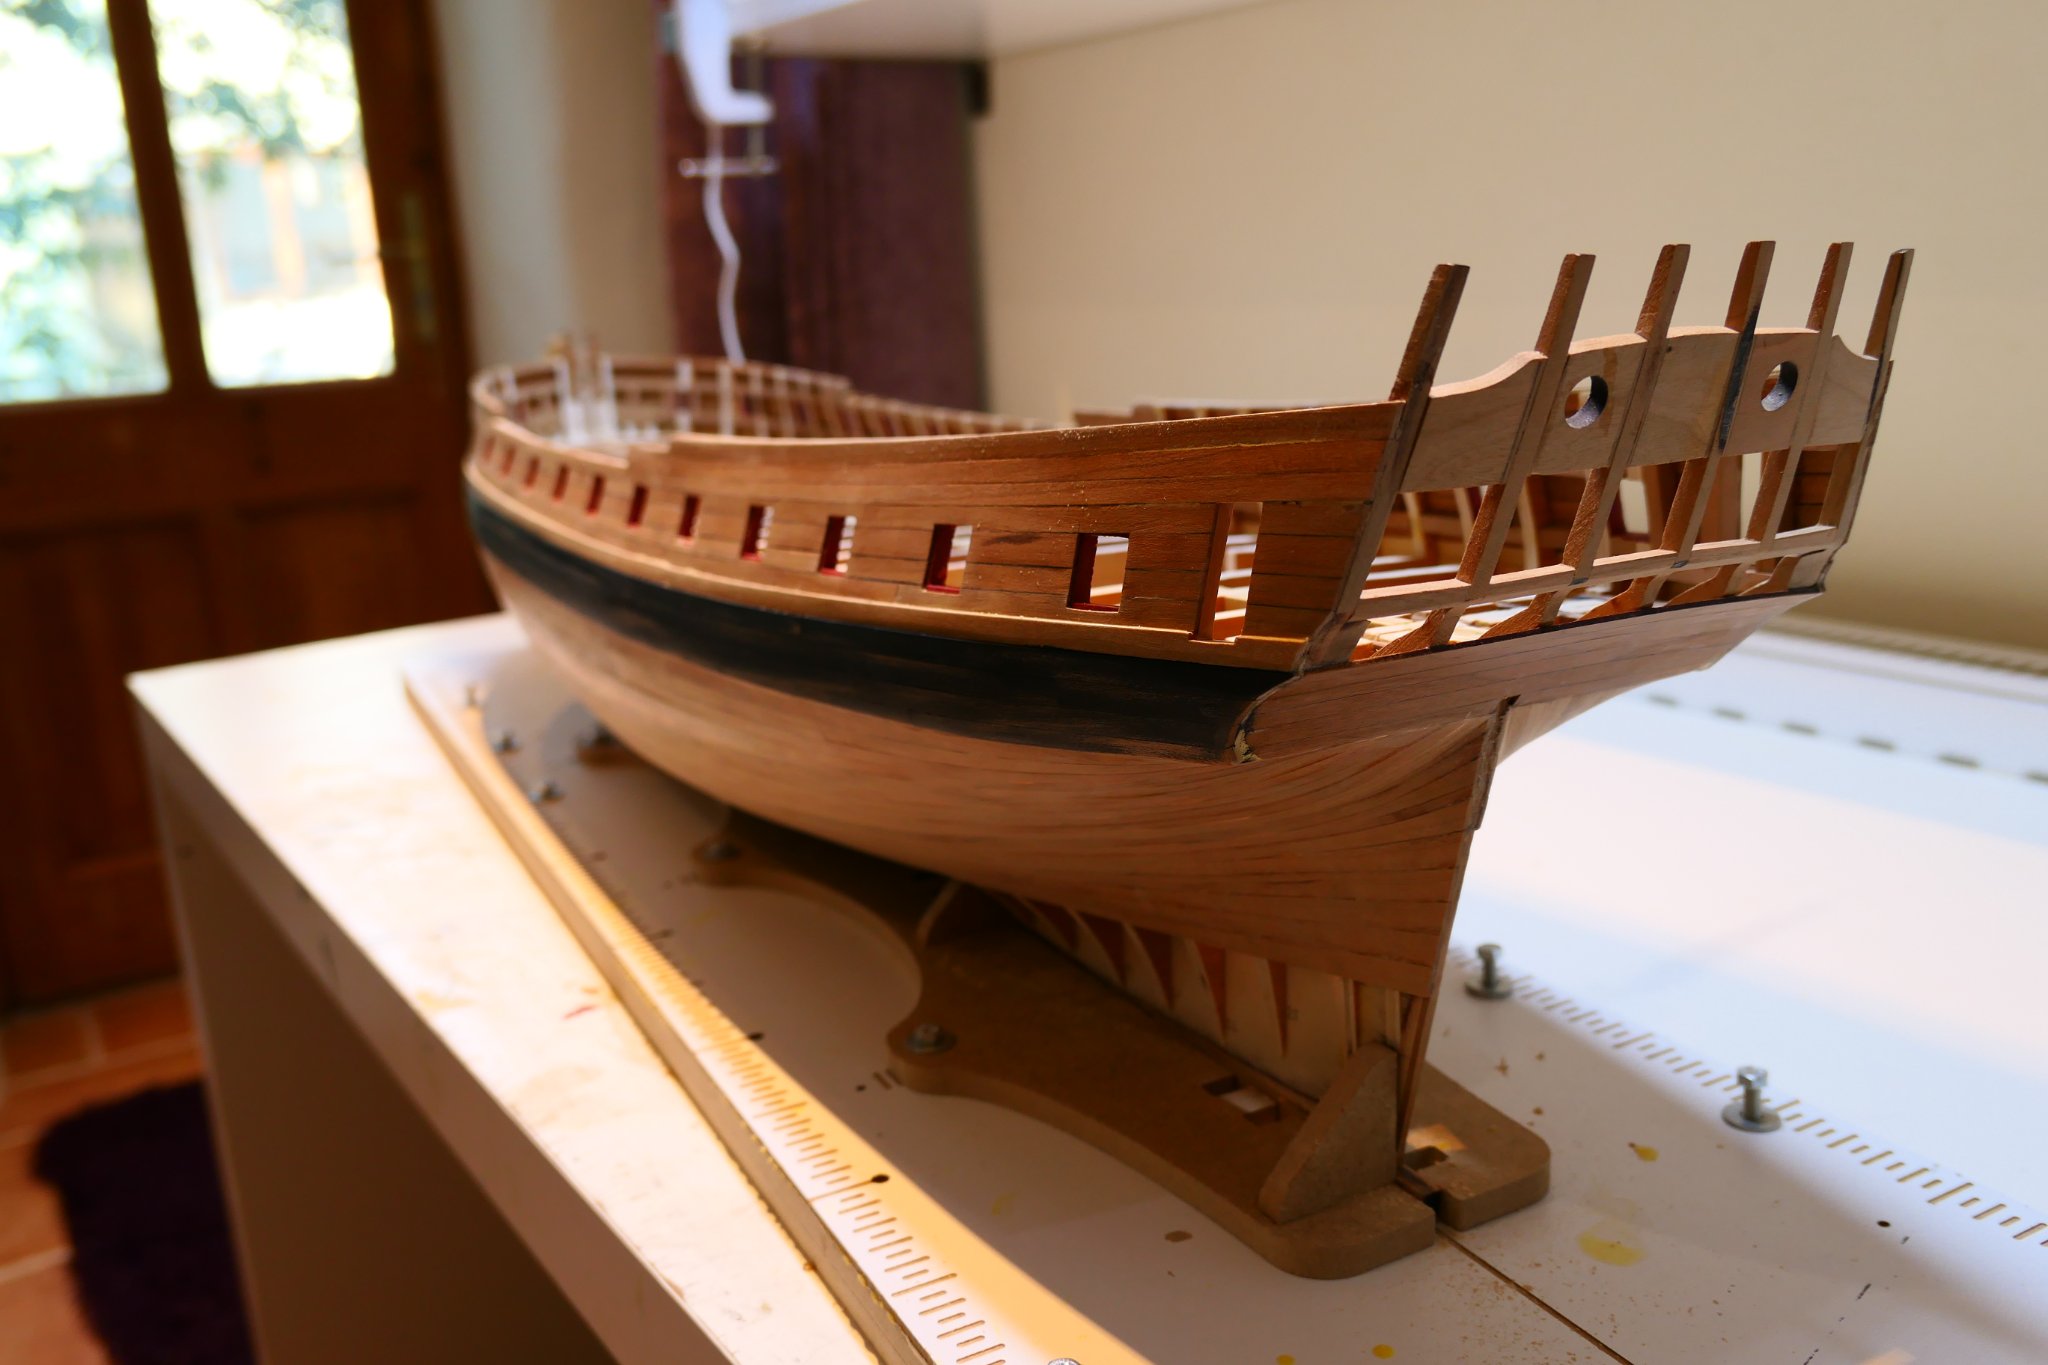
The sheer on W1 didn't turn out well at all. I guess I miscut the bulkheads. I ended up with an unacceptable bulge just in front of the hance piece. The pictures above are W1. It looks worse in reality than in the photo and was a significant factor in my decision to begin W2. The picture below is W2. The sheer is absolutely flat – which is much better than W1 but not correct. The plans show a slight upward curve towards the bollard timbers. I had not twigged the relationship between the sheer and the wales. I think if I were to build W3 (aaargh!....... see below) I would put a temporary capping piece along the sheer and crosscheck the run of the wales before fixing anything.


-
W2 is coming along. For the most part I'm very pleased: it's certainly a big improvement on W1. And I can finally mix text and pictures. Thank you Greg and Meddo. The planking is about half done on the starboard side and 2/3 done on the port.
.thumb.JPG.8851824bc81208d9de06f081666e39b2.JPG)

.thumb.JPG.073649dbfd84f4ff17a85c48056ca7aa.JPG)
-
A lightbox to check the fit of your joints. Crikey! That's levels of precision I've never thought about let alone attempted to achieve. Superb work. Fred
- 607 replies
-
- 2
-
-
- winchelsea
- Syren Ship Model Company
- (and 1 more)
-
Thanks chaps. I hope to finish planking the wales this weekend and then I will try inserting photos in text again.
-
Finally can someone please tell me how, having uploaded a picture, you can continue text. I can't figure it out. All the best everyone. Fred
-
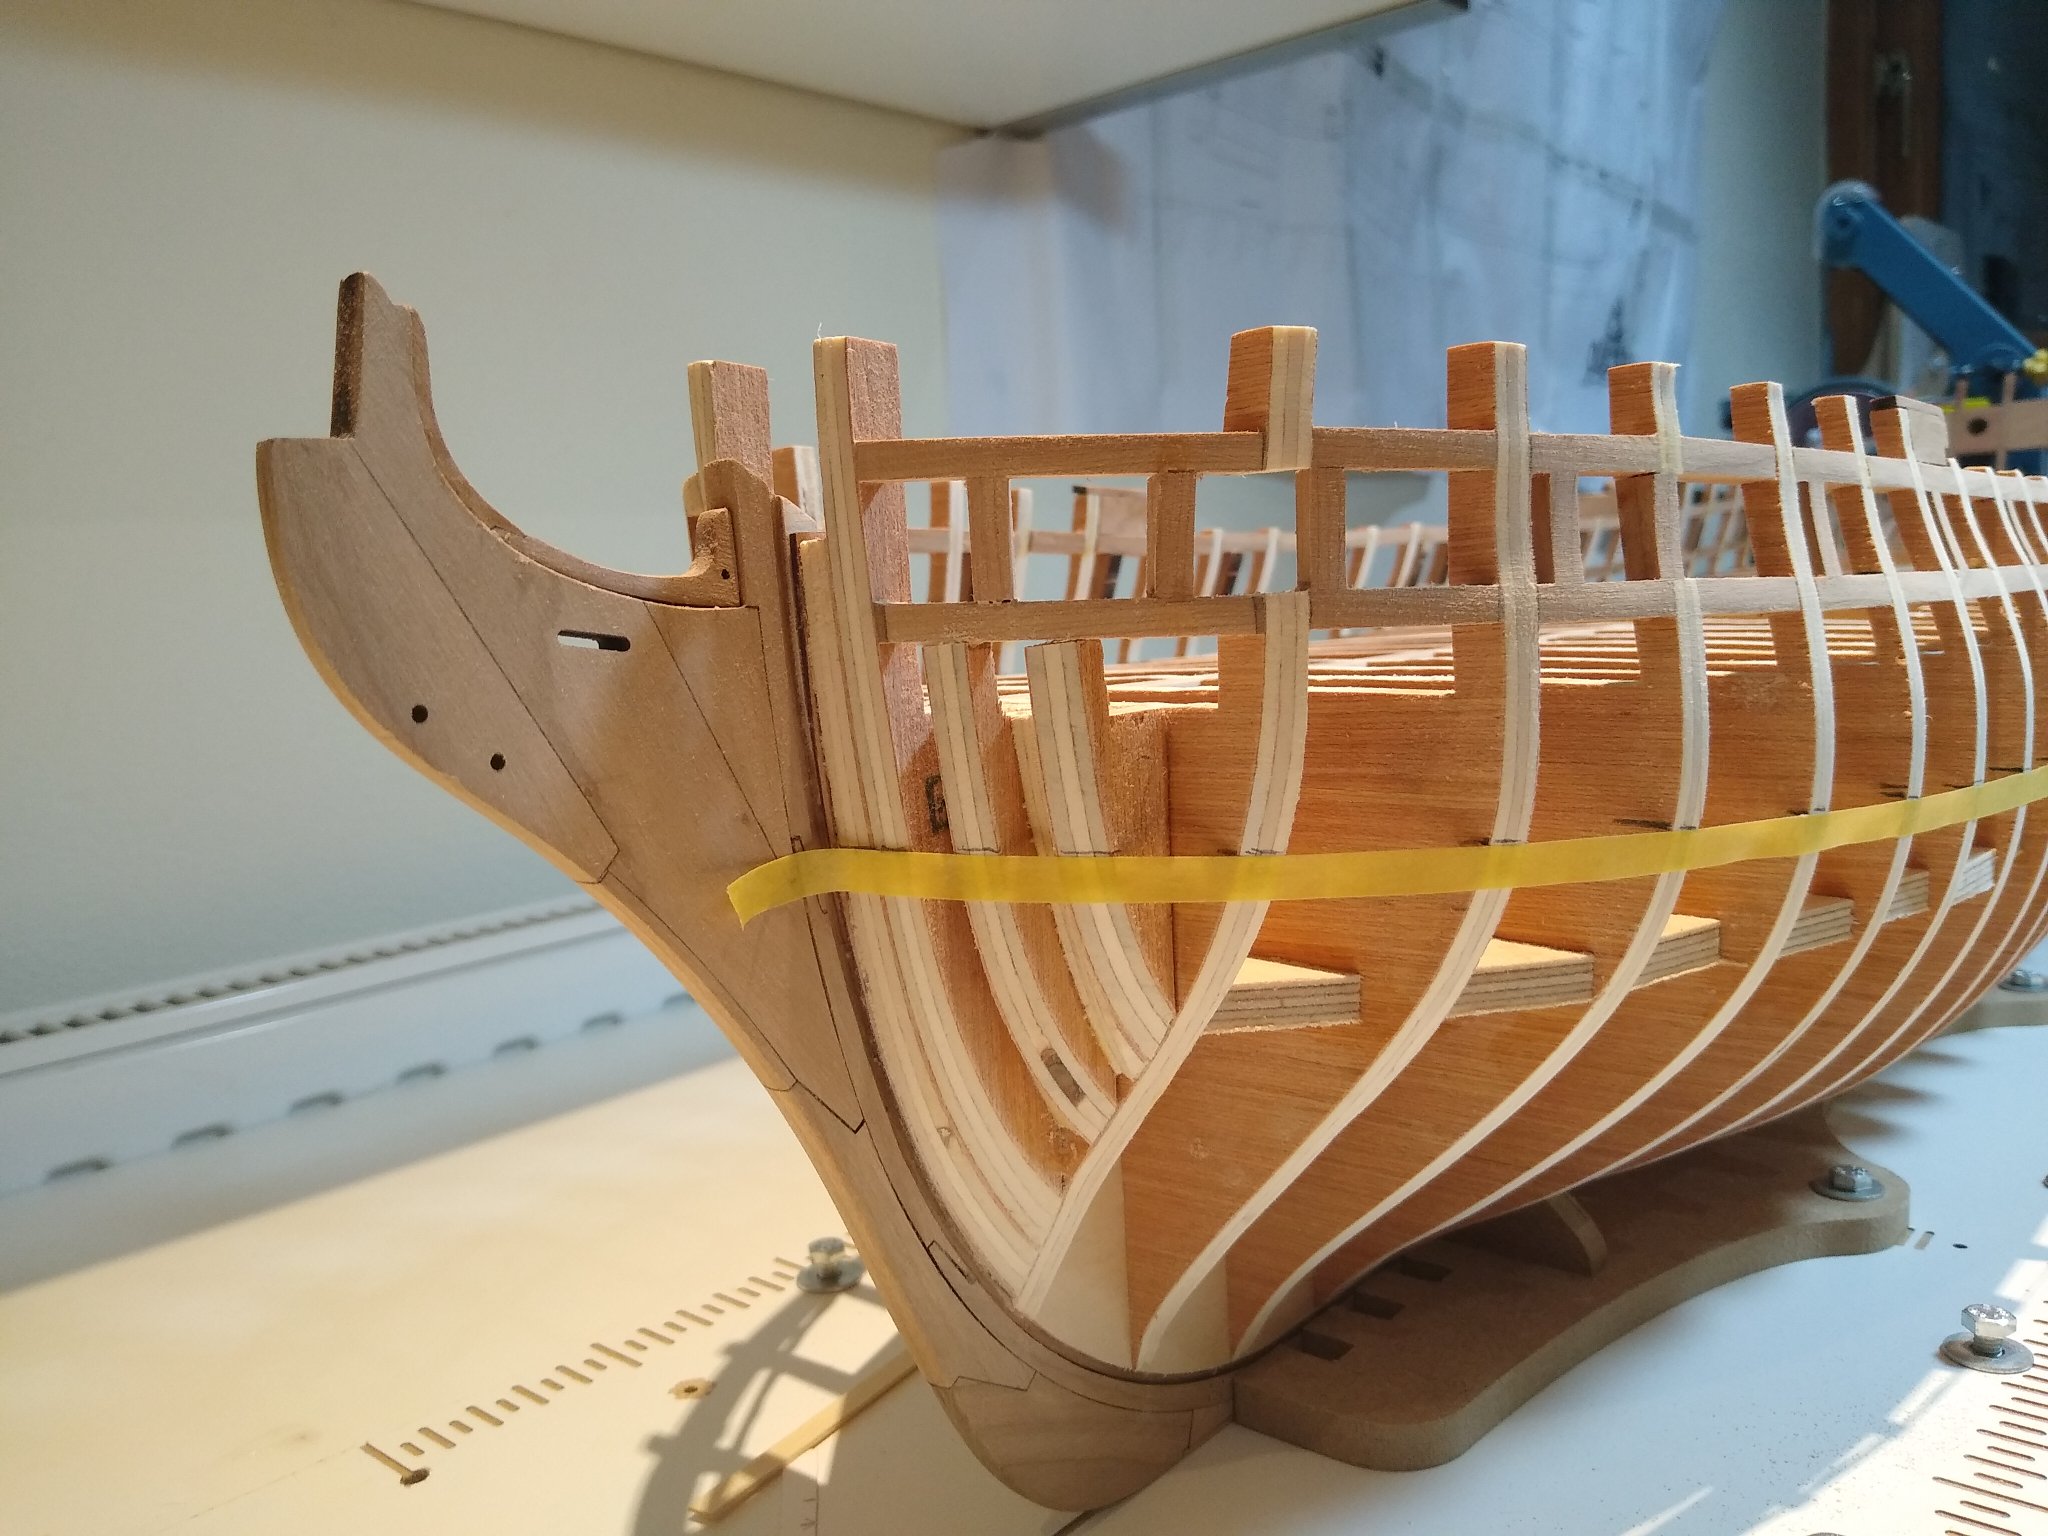
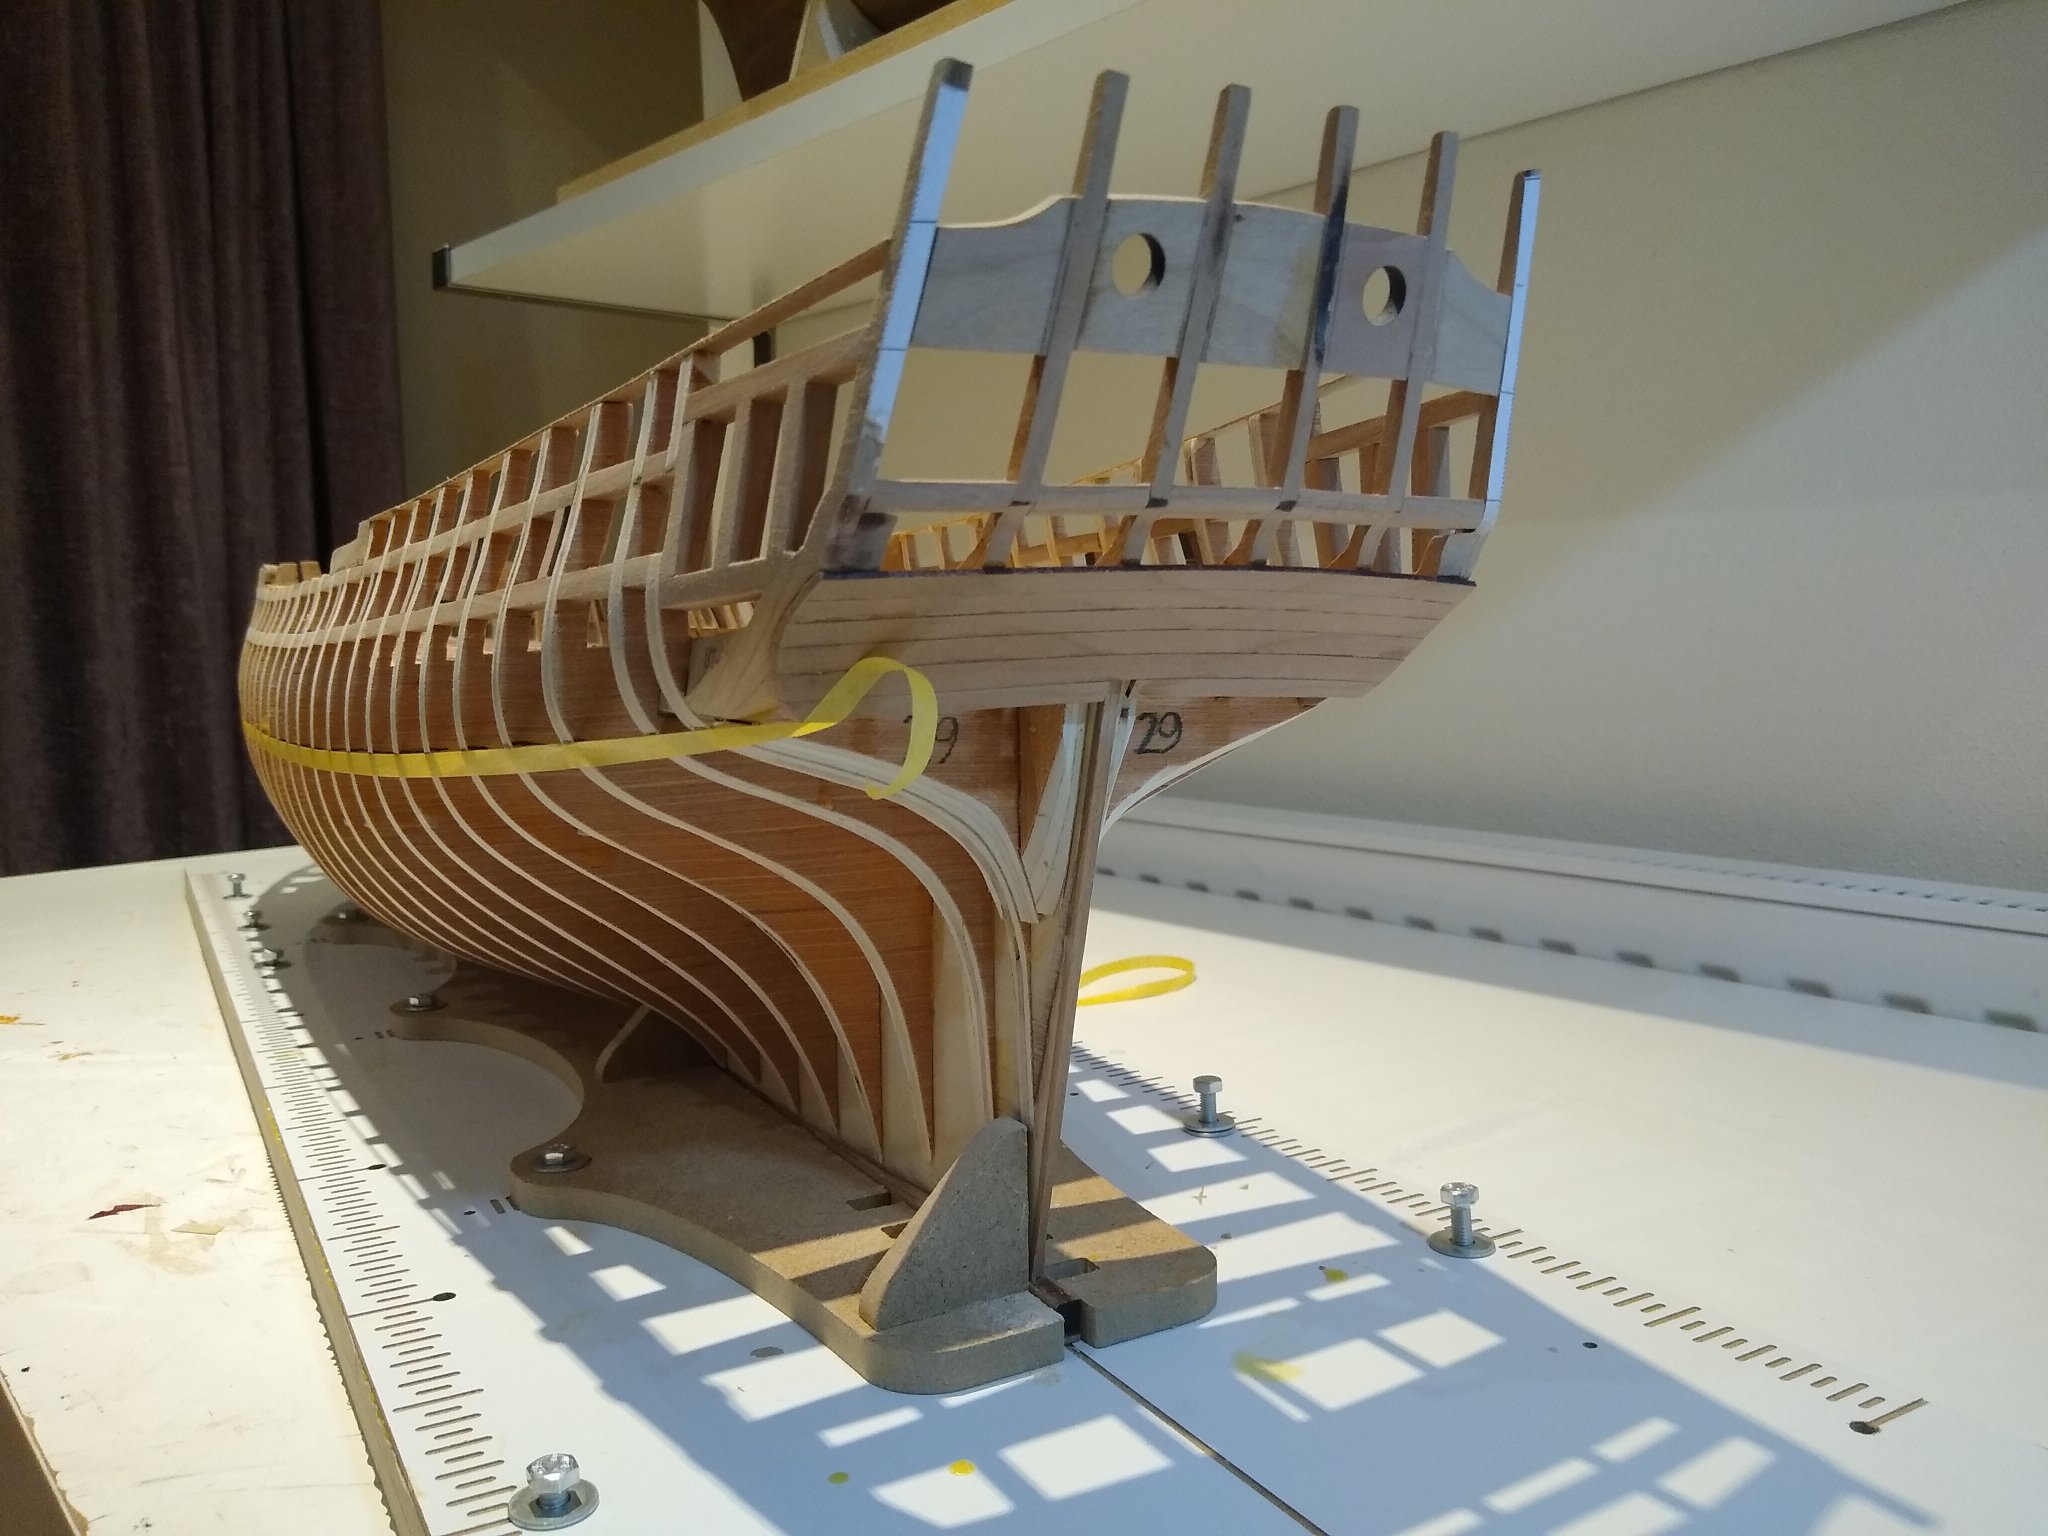
On W1 the frames were out side to side and I used a bucket full of of car body filler to get things straight. I can see now,looking at all the other super logs, that that's for chumps. This is looking much better. I've added frames bf3 and bf4 however. The yellow tape follows the marks on the plan exactly and looks pretty good without any tweaking.


-
W2 was supposed to eliminate the errors I made on W1 not introduce new ones I didn't make first time round. Still, the repair was pretty straightforward. I cut out the fillers with the razor saw, glued a 1mm strip on either side to replace the saw cut and glued them back in. They have not come out badly at all. Here two are done.


.JPG.26c1956e364c3d8a53a7c4b3cc163bb7.JPG)
.JPG.c6a362ed687ae238c76ab737c38b9221.JPG)


.JPG.c4b26c544681f3ea32d97c2a3390e51e.JPG)
.JPG.c893d809d462fe1cd160216d2a1ded90.JPG)


.JPG.258b833c0cc176ac4e31f72e163c70e5.JPG)


.JPG.734778ff03b56c4c6c7467d73929d7f7.JPG)

.JPG.6a3c152401772f2f5a612a7a1ad242fc.JPG)
.JPG.4f4a6774137b42391e44f102fa794683.JPG)
.JPG.b5826af547fe6c71df9793ece781c616.JPG)
.JPG.bda0738741d5ff1901b66a1098139195.JPG)


.JPG.cf4758c6251200f443ff595abff73aa3.JPG)
.JPG.2b570b8cf0b37f46b5c7364be3a2ee24.JPG)

.JPG.8d405af342bbd065cbf2a6117184d730.JPG)


.JPG.83f7df0bc8a470db0572d81543d7e7c5.JPG)

.JPG.69a0bd0ec7e36846e88b19ed1c1eedd4.JPG)