HOLIDAY DONATION DRIVE - SUPPORT MSW - DO YOUR PART TO KEEP THIS GREAT FORUM GOING! (Only 24 donations so far out of 49,000 members - C'mon guys!)
×


king derelict
-
Posts
3,273 -
Joined
-
Last visited
Content Type
Profiles
Forums
Gallery
Events
Everything posted by king derelict
-
Progress but slowly. I seem to spend more time on the web looking for information on this one than I usually do. Possibly because it should be possible to find more information than for some of the WW2 boats. So trying to find good clear photos showing where hand rails are on some of the side decks. A lot of the photos are not really clear enough and neither PE sets provide any railings expect the WE has the main deck railings. I worked on the hanger adding some delicate PE (for me anyway). I used the Trumpeter PE throughout on this assembly. It was actually more comprehensive than the WE set and the yardarms were a folded single piece whereas the WE had three pieces to each yardarm which would have required some very accurate and tidy gluing to get the same result. The hanger door is a temporary installation to prevent overspray. tomorrow My discovery for cutting primered PE from the fret was to change to a clear piece of acrylic sheet and put a white card underneath it. The fret attachments then show up so much better. Sorry if its obvious but I was quite impressed. One disadvantage is the fret casts a shadow onto the card and i found myself cutting the "ghost" attachment point. A piece of white acrylic would be a better solution but I don't have any. I started working up some of the details. The RIBs, main gun and the Harpoon launchers. The kit provides plastic launchers and the WE PE has the launcher frames and nothing to put in them. I made up barrels with plastic rod and put them in the PE frame. I'm leaning towards the PW framed ones but will see how they look after painting. Thanks for looking Alan
.jpg.3f4395212a4c3f799dc60dc02daa1680.jpg)
.jpg.44a9f16d97f881de0d28ad0eb6a2dd71.jpg)
.jpg.ad03aebe4ae8a19eb9adeb34d18a5a9a.jpg)

-
Its looking great OC. Lots of action already. The detail being so good really makes it a gem Alan
-
Thanks Mark There is definitely as much black art as science in this I think. Alan
- 460 replies
-
- 7
-

-

-
- Finished
- Flower-class
- (and 1 more)
-
Hi Mr Gray I used two and a half cans for the hull and stocked up on a few more ready for the decks and superstructure. I probably could have managed with less but the first coat showed up more areas needing attention than I thought. It worked out at nearly a can (12 oz) per coat. Alan
- 460 replies
-
- 4
-
-

-
- Finished
- Flower-class
- (and 1 more)
-
Thanks for the info Roger I have the Lifecolor set and like the paints so I will definitely be using them. I think I have the Tamiya options too. I think I will be a bit behind everyone with the Hood. I want to get some progress in assembling the basic structure of the corvette before starting another big project and based on what I learnt with Geisenau it will be quite an adventure for me making a good job of either POW or Hood. For me they are too big and complex to try to work them in parallel with something else. I lose my place in the flow of building. Thanks for the reminder about the wooden decks. I did get them for the Prince of Wales but I have forgotten them for the Hood. I'll get them ordered tomorrow. Thanks for the note Alan
-
Thank you OC; the support from everyone has been a great help. Now its starting to feel like fun. Have a great weekend Alan
- 460 replies
-
- 5
-
-
- Finished
- Flower-class
- (and 1 more)
-
Thank you OC. I've used the seller before and he has always done well but this time we were six days away from the end of his stated delivery window. I was glad to see the package today and no mistake especially as it was the right shape, After your experience I have been imagining it wandering around the world gradually leaking small plastic pieces. On the other hand I just sent a package to my dad in the UK and it arrived in five days. Alan
-
A bit of a muddled update here. I think I'm incapable of working multiple projects at the same time. I keep forgetting where I am on this one so I think there may be some backtracking. The foremast PE was built up. I used the WE PE as i thought it looked nicer than the Trumpeter stuff. I also modified the top of the bridge structure to take the WE PE bridge wings. WE even provide stays for the yardarms which were an exercise in breath control The major elements were primered and the dark grey deck was air brushed where needed. The hanger has some nice interior detail (and a door to glue over it when its done) that I have started to work on with dark grey for the shadows and light grey and some dry brushed white for the highlights. The light grey has been painted on the main structures. The indifferent lighting does not show the deck colour as darker but it is in real life. So now I need to backtrack and work on the hull and start the main mast. There is some detail in the mouldings for the quarter deck but I don't think it will really be visible once assembled so I have done some basic basic painting in that area before putting teh roof on. So far the PE is going quite well even though it is fiddly. Trying to read two sets of instructions from Trumpeter and WE keeps things interesting especially as the WE parts are really for one of their own models. Thanks for looking and have a great weekend Alan
.thumb.jpg.0d206267232eb432b23997d896ea4ca8.jpg)
.thumb.jpg.5d9218c40481f5d99bc3ba3c8a062509.jpg)
.jpg.03ddc2b17fb19771ab0b27b8cd9909e5.jpg)
.jpg.ac5e37a14e76377fd279966869f1b29c.jpg)
.jpg.3df84ec6b714374a50c9b3c6797ffff9.jpg)
.thumb.jpg.c34b423cf804fdb1737a05e871d8d6ed.jpg)
-
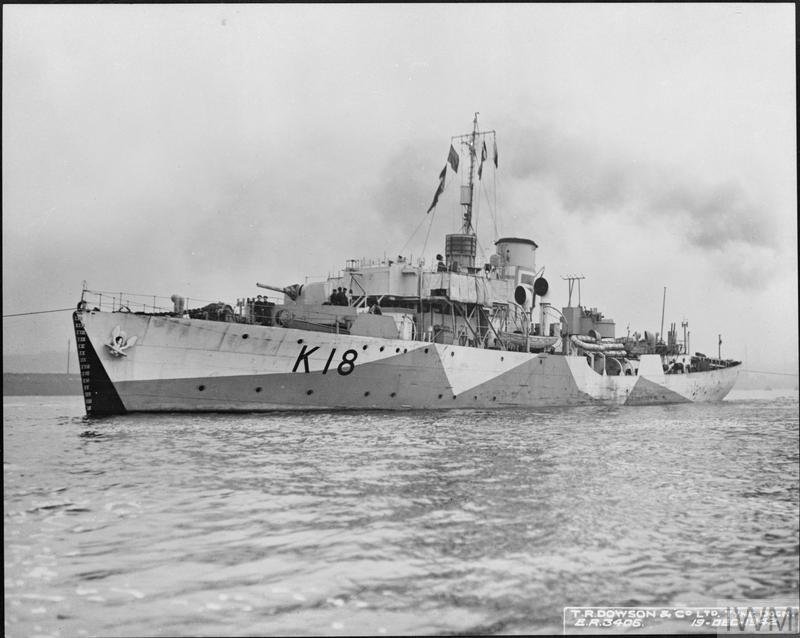
A minor end of week update. The printer is churning out parts without needing any adjustment. I completed the large bridge piece without issues. I'm still nervous about talking about this too loudly though. I'm convinced there is some voodoo in there somewhere. I'm still using a combination of brims and corner brims and so far no warping In between the thunder showers I got the final primer coat on the hull and sanded down. The finish has come out quite well and i think I like the slightly subdued panel lines My local Ace Hardware is now out of Automotive primer After wandering around the web and buying another corvette book I have decided to go with HMS Campanula as the subject. The paint scheme is the better defined of the two choices (HMS Poppy was the other) and she was an early Flower but had sufficient refits to justify any artistic license with the wooden decks, engine room skylights etc. I found a view of Poppy showing the foredeck wooden section but teh paint schemes are hard to nail down especially as I don't want to build the minesweeping gear. Campanula is the nearest I'm going to get to Compass Rose so I'm happy with the choice. Accordingly I put an order into Sprue Brothers for supplies and now realise I forgot the dark grey deck. I'll have to put another order into Freetime Hobbies to spread the load around; it gives the chance for a few other things to fall into the shopping cart. Thanks for looking and have a great weekend. Alan
.jpg.84e7ee1a75d6487356b9697d519b13b7.jpg)
.jpg.a08dd9be18219728adb45f6d32aa32d3.jpg)
.jpg.4a5bc838f5fa93a99520510a9d463a63.jpg)
- 460 replies
-
- 8
-
-
- Finished
- Flower-class
- (and 1 more)
-
Thanks Steven Its good to see a whole hull after the initial rocky road. I was regretting getting into this project for a while😄 Alan
- 460 replies
-
- 2
-
-
- Finished
- Flower-class
- (and 1 more)
-
Yesterday marked the 56th day since my Hood package was shipped and still no sign of delivery. I checked Trackingmore.com and there was an entry for Wednesday suggesting that the package was still wandering around China. I checked Freetime Hobbies and they show HMS Hood out of stock but still had Prince of Wales Then our nice post lady knocked on the door this afternoon with this Both arrived safely at last. Both look impressive but daunting. So much for thinking I would beat the on=shore stores with the delivery. Alan
.jpg.79209d03e2147446151d7ce4e23d4b81.jpg)
.jpg.527031a47d3f4d7033e07194b48f6895.jpg)
-
Whenever I drop mine they always land points down - in my leg or on the tile floor. I think the points are getting beyond filing and straightening so these might be a good option. Thanks Alan
- 174 replies
-
- 7
-
-
- prinz eugen
- trumpeter
- (and 2 more)
-
Printing process remains steady. The mouse ear brims continue to stop the corners warping and I seem to have hit a working combination of variables. I've printed about twenty parts without needing to do anything more than wipe the build plate down with alcohol between prints. A major change for the better if you compare with the first page of the log. Hopefully I haven't jinxed myself. The hull has been sanded and primed again. It needs a last coat but its been a rainy day today so that's on hold. I've been spending a lot of time researching options for the actual ship to be the subject of the build. Given the nasty nature of the PLA plastic when it comes to cutting and sanding I don't want to stray too far from the kit of 3D parts being generated. So the subject has to be a long forecastle and mast behind the bridge configuration. The John Lambert book I am using also shows the wooden deck arrangement and the number of ports in the engine room skylights as other obvious differences. I suspect that there are many others but just these four variables make it interesting enough. It is hard to confirm all the details given the limited number of photos of many of the corvettes. I have it down to two choices that I favour. HMS Campanula and HMS Poppy. Campanula is the better documented and is also the model for Monserrat's Three Corvettes ship. It has a nice WA blue, black and white camouflage but it may have the wrong engine room skylights. There are a couple of nice photos showing the wooden decks on Campanula. Poppy seems to have the right skylight configuration and has photos showing a 507a / 507b grey camouflage scheme as well as a WA scheme that is hard to see clearly. Poppy looks like she was carrying minesweeping gear when she had the WA scheme. The wooden deck layout is not shown in anything I have found. I suspect that either direction is going to have in consistencies with the real ship but given that this is a first dip into 3D printing as a model medium and the limited reference material I think there will have to be some license. I did look at getting the book Warship Perspectives for the Flower Class Corvettes but at $118 for 96 pages secondhand I decided that was a bit steep, especially as it may not show anything new. I'll decide which appeals most and get some paint ordered and some plastic strip for shimming the decks - the next part of teh build. Thanks for looking Alan
- 460 replies
-
- 10
-
-
- Finished
- Flower-class
- (and 1 more)
-
I broadly follow Craig. I paint railings, ships boats and rafts, and gun turrets off the model. I suspect other than these which are fairly fixed in my process I think it depends on the model, the access when installed and the ability to paint without getting overspray where you don't want it. Alan
- 174 replies
-
- 5
-
-
- prinz eugen
- trumpeter
- (and 2 more)
-
Yep, no second chances of you find you bent the part in the wrong direction. Just straightening it is often enough to break it. Likewise I've had parts break in the fret. Alan
- 174 replies
-
- 6
-
-

-
- prinz eugen
- trumpeter
- (and 2 more)
-
Thank you Mike, That is a really great photograph. It will be really useful both from a weathering aspect and also for the detail layout. The Trumpeter instructions are a bit vague and in some cases incorrect. The Trumpeter instructions shows the longer yard arms on teh fore mast being on the forward side. The WEM instructions for the PE shows them on the aft side. Your photograph confirms this so thank you very much. The dark grey decks look pretty grubby. Do you know how long she had been at sea at that point. Thanks again Alan
-
OC, your photos already saved the day. The instructions are very vague and I had the 1006 Navigation Radar platform installed wrongly. It's now where it should be. Many Thanks Alan
-
Those are great photos OC. Excellent quality. Thank you so much; they will be very useful Alan
-
Thanks OC I hope I can make a nice job of it. It looks a nice kit with the PE added. I have a few pictures of Monmouth not very good for detail but this one might be handy for weathering. Alan
-
Thanks Yves. Yes the logistics for this one are quite an issue. A lot different from using tiny amounts of paint on a five inch long ship. I got the second coat on this morning and I think I may need a third. Its a whole different aproach from 1/700 where a couple of ounces of paint will last for several ships. Alan
- 460 replies
-
- 8
-
-
- Finished
- Flower-class
- (and 1 more)
-
The individuality of the faces still amazes me. Well done OC Alan
-
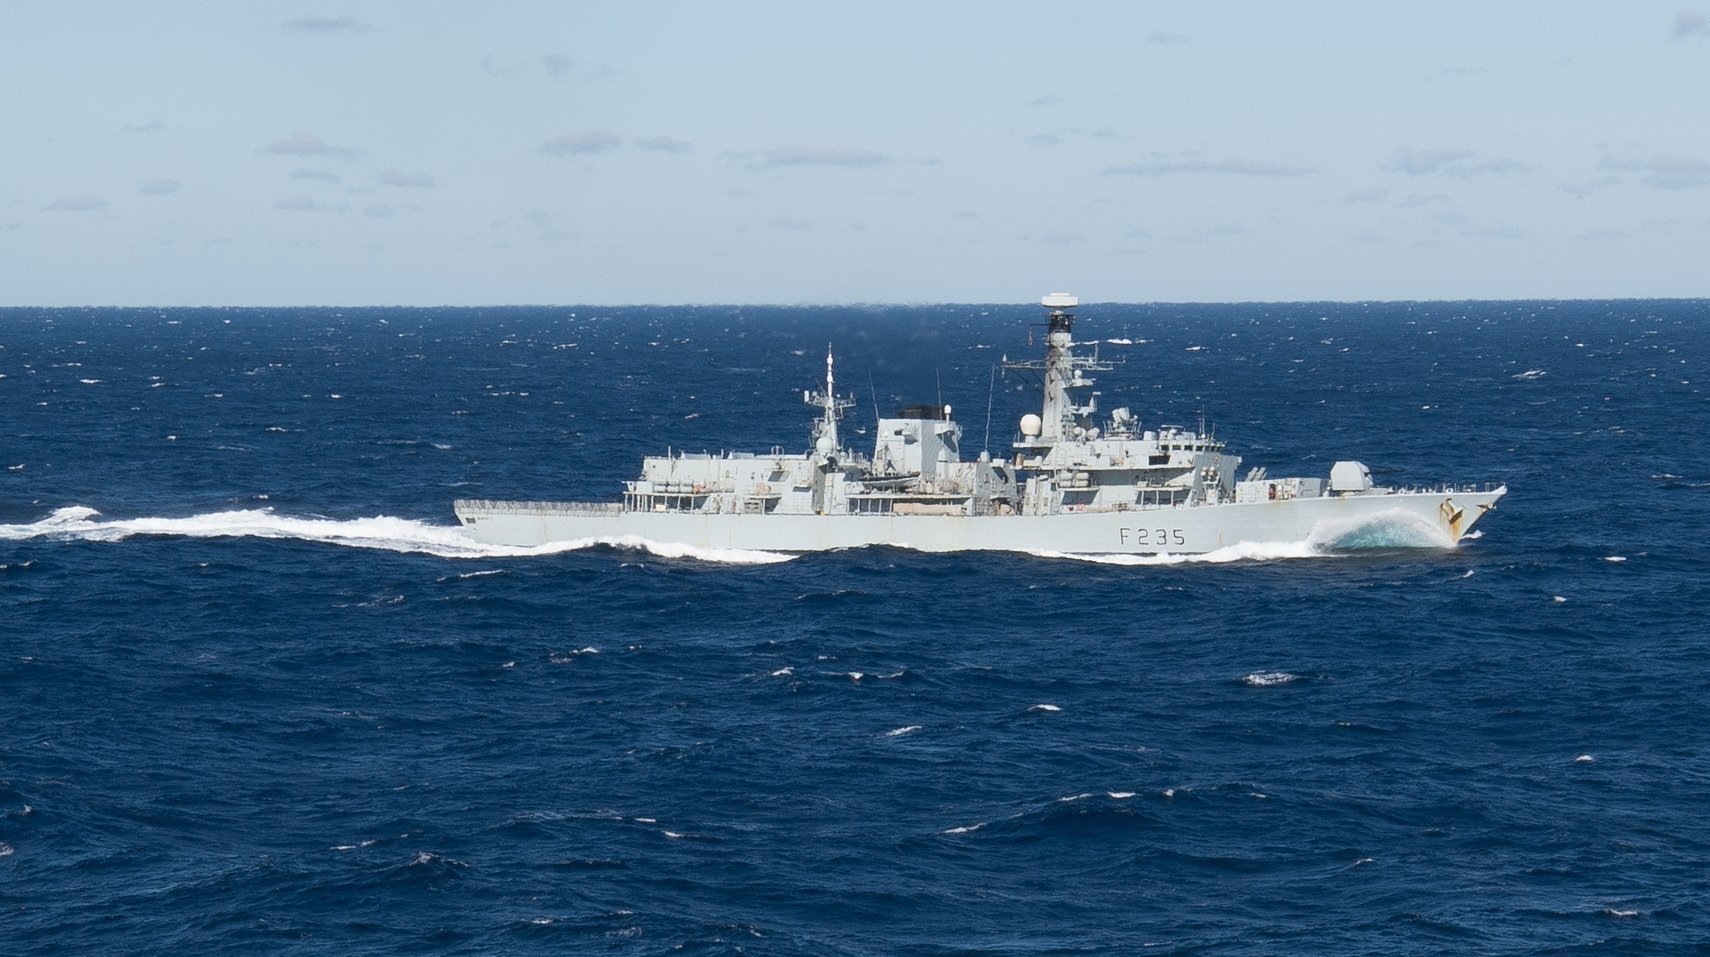
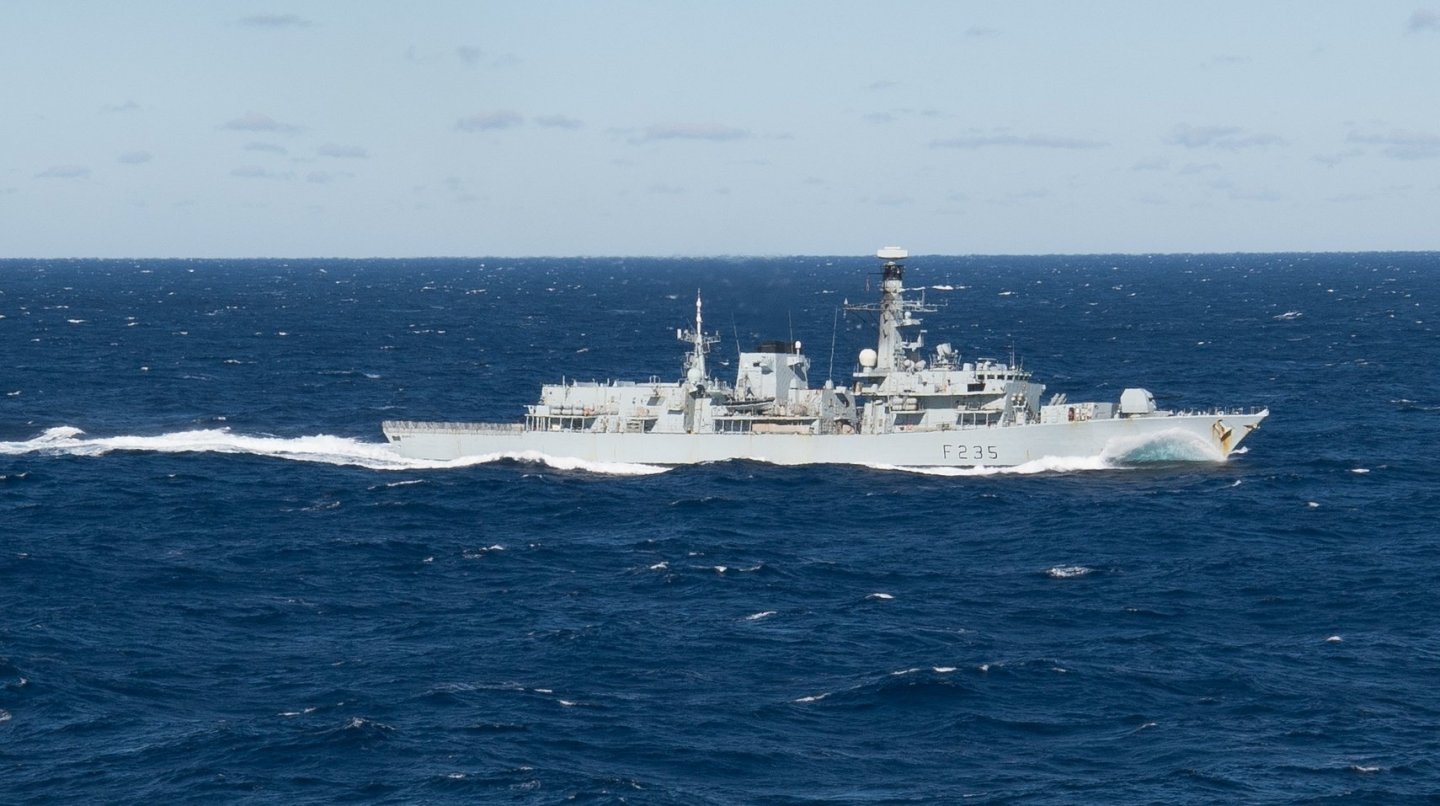
Ahhh - back to the security of tiny world and 1/700 scale ships. While the parts are printing for the corvette and I play with the layout and order bits i decided to start a 1/700 scale ship as a break from the almost industrial scale project that is the Flower Class Corvette I have the Trumpeter kit of HMS Montrose, a type 23 frigate and I bought the White Ensign PE kit to add details. It turns out the Trumpeter kit has quite a decent set of PE anyway but it doesn't have ladders and importantly, no railings. The first curiosity came when thinking about fitting the WE helicopter deck and finding it is considerably wider than the aft deck on the plastic model. As far as I can determine its not supposed to overhang at least in any of the photos I have found. The WE PE is really aimed at their resin model and I suppose its possible that their 1/700 is different to Trumpeters. The safety railings around the helicopter pad fit with their deck so will need to be altered. The WE PE deck is going to be put aside; it doesn't bring much to the detail in that area and would add a step to the deck. I started the bridge structure with the first bits of glitter going on from both sources. The WE PE is finer (hand railings are really thin) but the fret is noticeable thinner than the Trumpeter or Flyhawk sheets so its going to require careful handling. The bending tool is very helpful as usual in forming the parts. This is my first full hull model. I'm thinking about setting it in a modelled sea rather than on a stand so rudders and props may not be used. My initial thought was to finish the ship as "The Black Duke" HMS Monmouth but that will depend on finding decals. As far as i can see the ships are identical in equipment so just the pennant number and name needs changing Thanks for looking and have a great weekend Alan
.jpg.42cf83714591bd0bc92dd67027fd34b8.jpg)
.jpg.7b699dbac31877694f2d4f50a1277d02.jpg)
.jpg.8b4a8aee024e2762be2c075131b89121.jpg)
.jpg.ad923f1cf9b33e41b9fa5c5442736ae9.jpg)
.jpg.5a1211b722c32b98d805ca71b515751f.jpg)
-
After a bit more putty and an overall sanding down I put the first coat of primer on yesterday evening and this morning rubbed it down. It is going to need more primer coats but it looks quite good already and its hard to pick the section join lines from the printed weld lines. One coat used an entire 12 ounce can of primer! I bought two more cans tonight. In parallel I have been printing the sections for the chartroom. The mouse ear brims seem to have been working well and I set up and ran each print without any issues. Either that or the Gods of Modelling have found someone else to torment. I plan to pause updates for a few days while I print more of the chartroom, bridge and engine room and get a sense of how the deck and its superstructure are going to assemble. I need to sort out plastic shims and how to set the decks to the correct levels, find some wood strips etc. That's probably going to require some on-line shopping but I need to work out shim thicknesses first. I also need to decide on a ship and get the paints for the appropriate scheme. None of this is going to be terribly exciting unless the printer really gets out of hand so i won't trouble you with the daily progress until we start moving into the next step Have a great weekend and thanks for looking in I'll be back with the next installment soon Alan
.jpg.378a52f57245fc1e21761be9832f46dd.jpg)
.jpg.73b8454f468876b13f1010d3903da51e.jpg)
.jpg.8c64f3ec8d3b2e2cbaa3e2bbda1149f8.jpg)
.jpg.4b66356a9cb8938cf9b359f7c2fa3b7a.jpg)
- 460 replies
-
- 14
-
-
-
- Finished
- Flower-class
- (and 1 more)

.jpg.9d239f5f8008189a8c550779801fc890.jpg)
.jpg.a660a3bb51e7eb4d71fad797aa4cfe5e.jpg)
.jpg.4eb619fe9efaecbc587ea99c28ef5a7d.jpg)