HOLIDAY DONATION DRIVE - SUPPORT MSW - DO YOUR PART TO KEEP THIS GREAT FORUM GOING! (Only 69 donations so far out of 49,000 members - Can we at least get 100? C'mon guys!)
×

Zarkon
-
Posts
295 -
Joined
-
Last visited
Content Type
Profiles
Forums
Gallery
Events
Everything posted by Zarkon
-
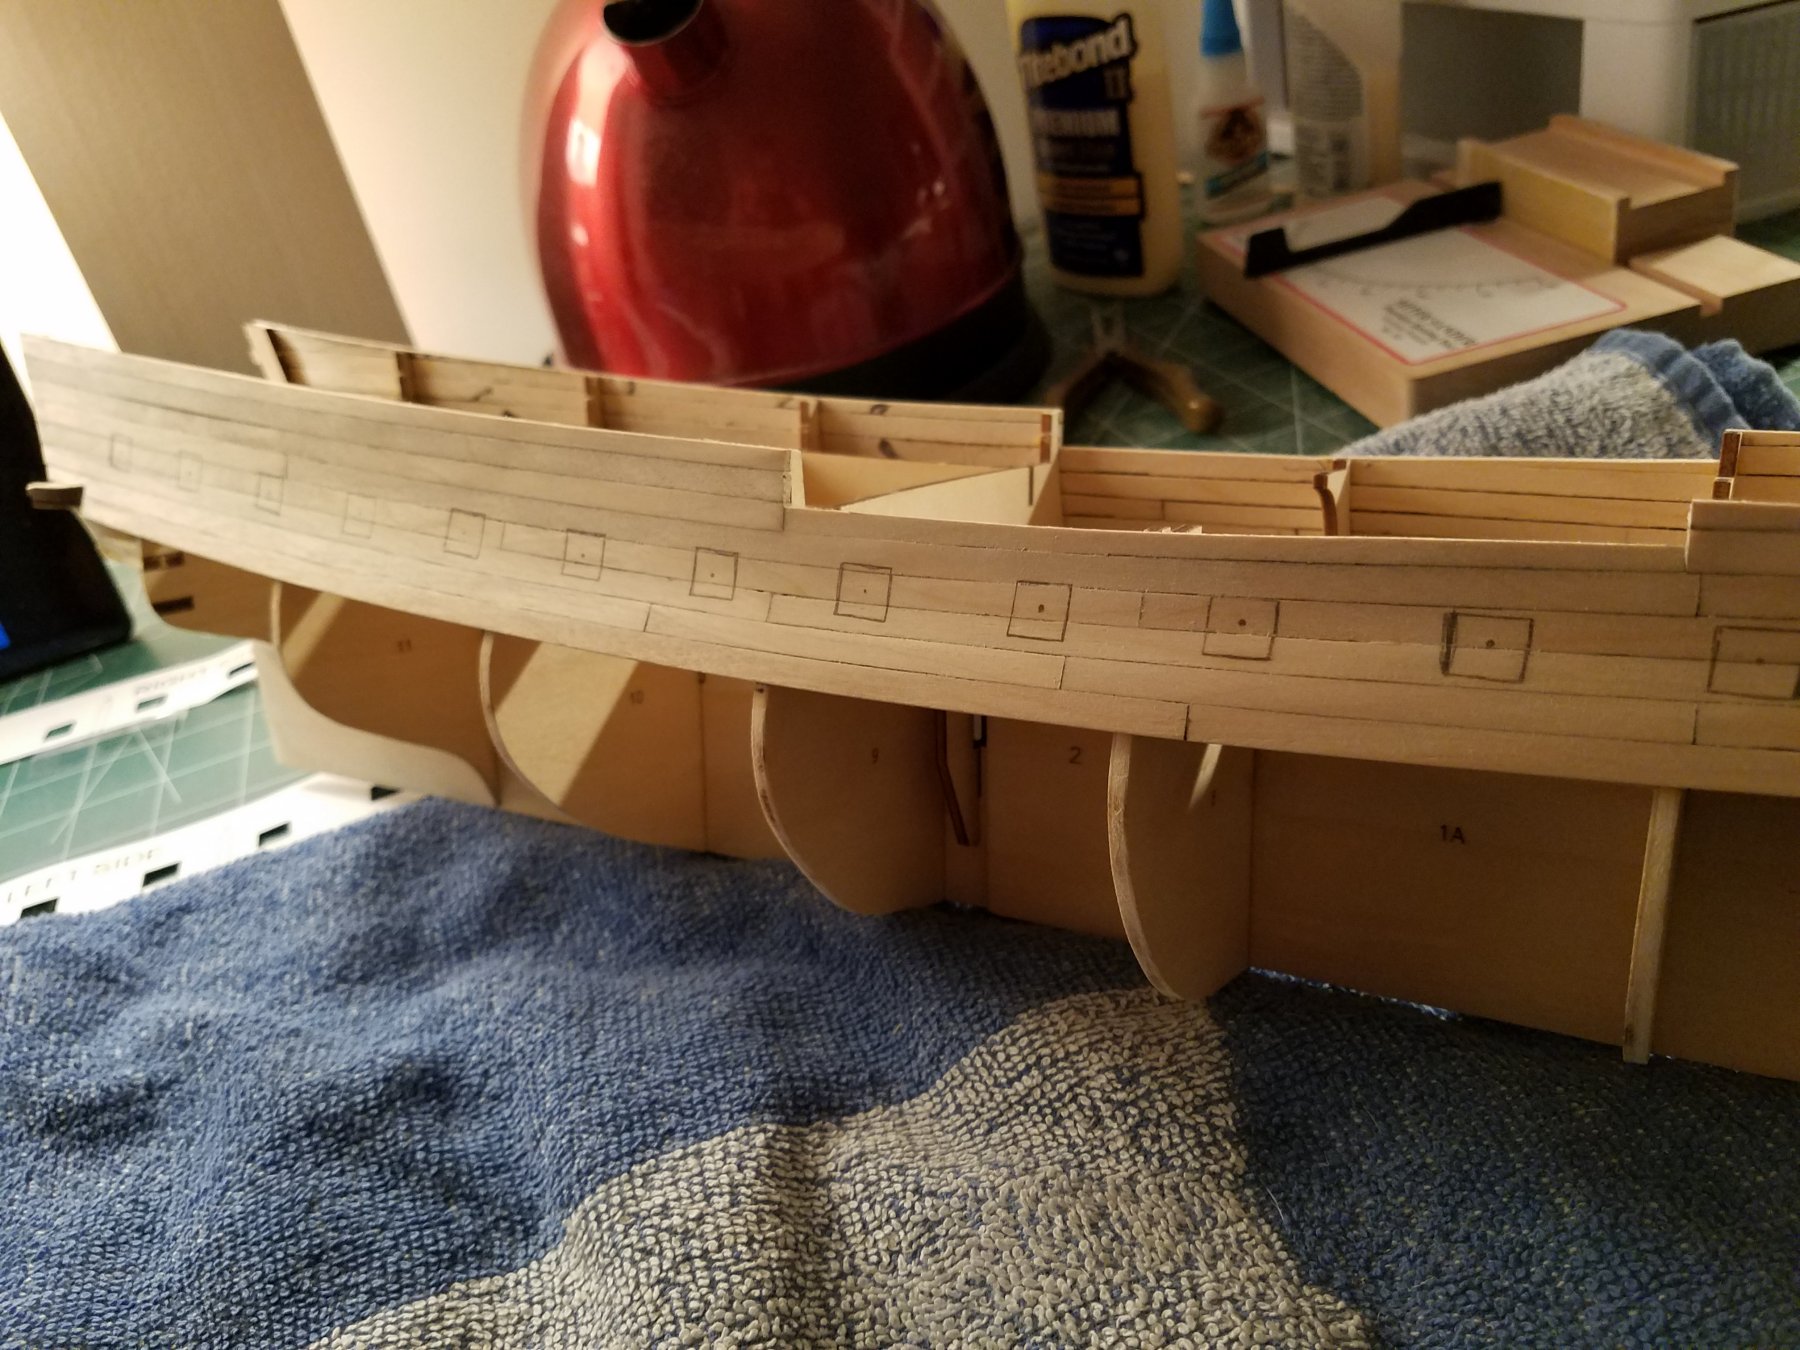
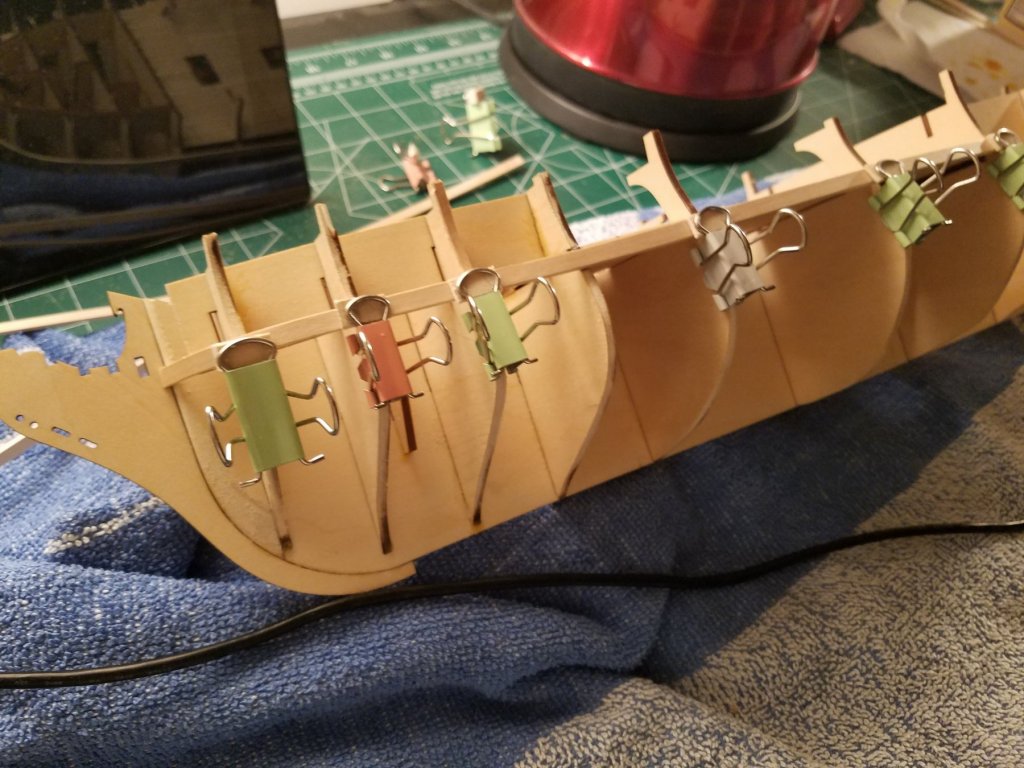
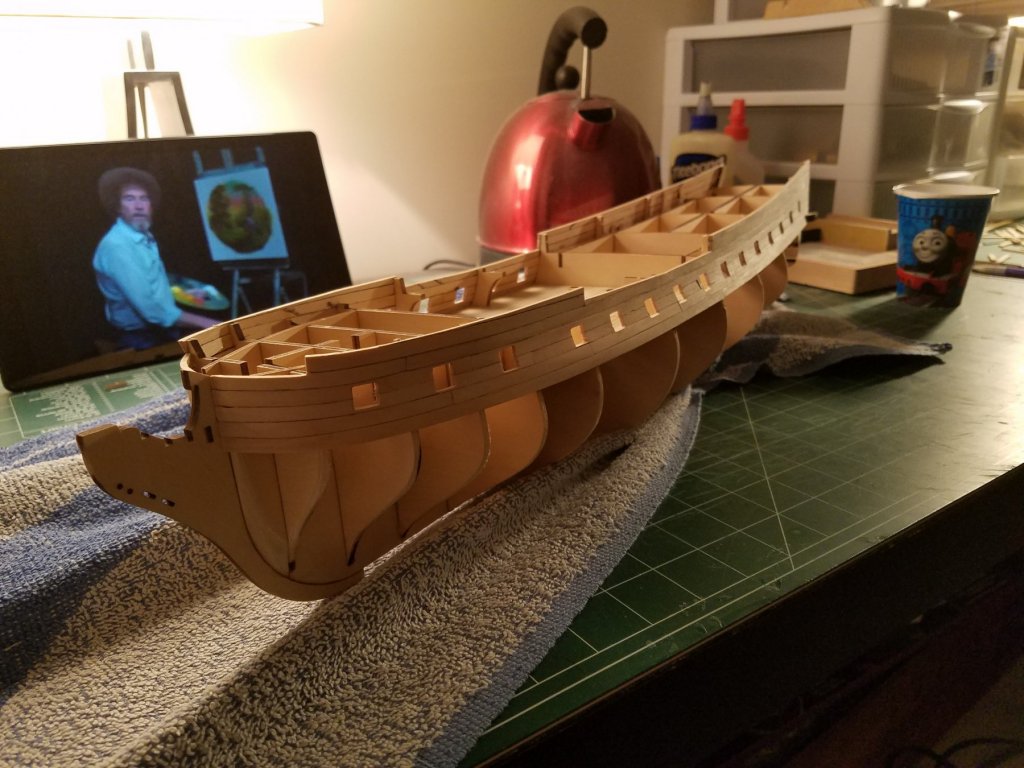
Thank you for your comment Jim! After reading over 3 planking guides here on the forums, I realized I have a lot to learn and experiment with to get the planking correct. Here is a small update to my planking That bottom plank took me 30 minutes to get into the correct shape. This row of planks will be the last of the upper planking. So I will be using the guides to help me plank the hull below the wales. Jeff
-
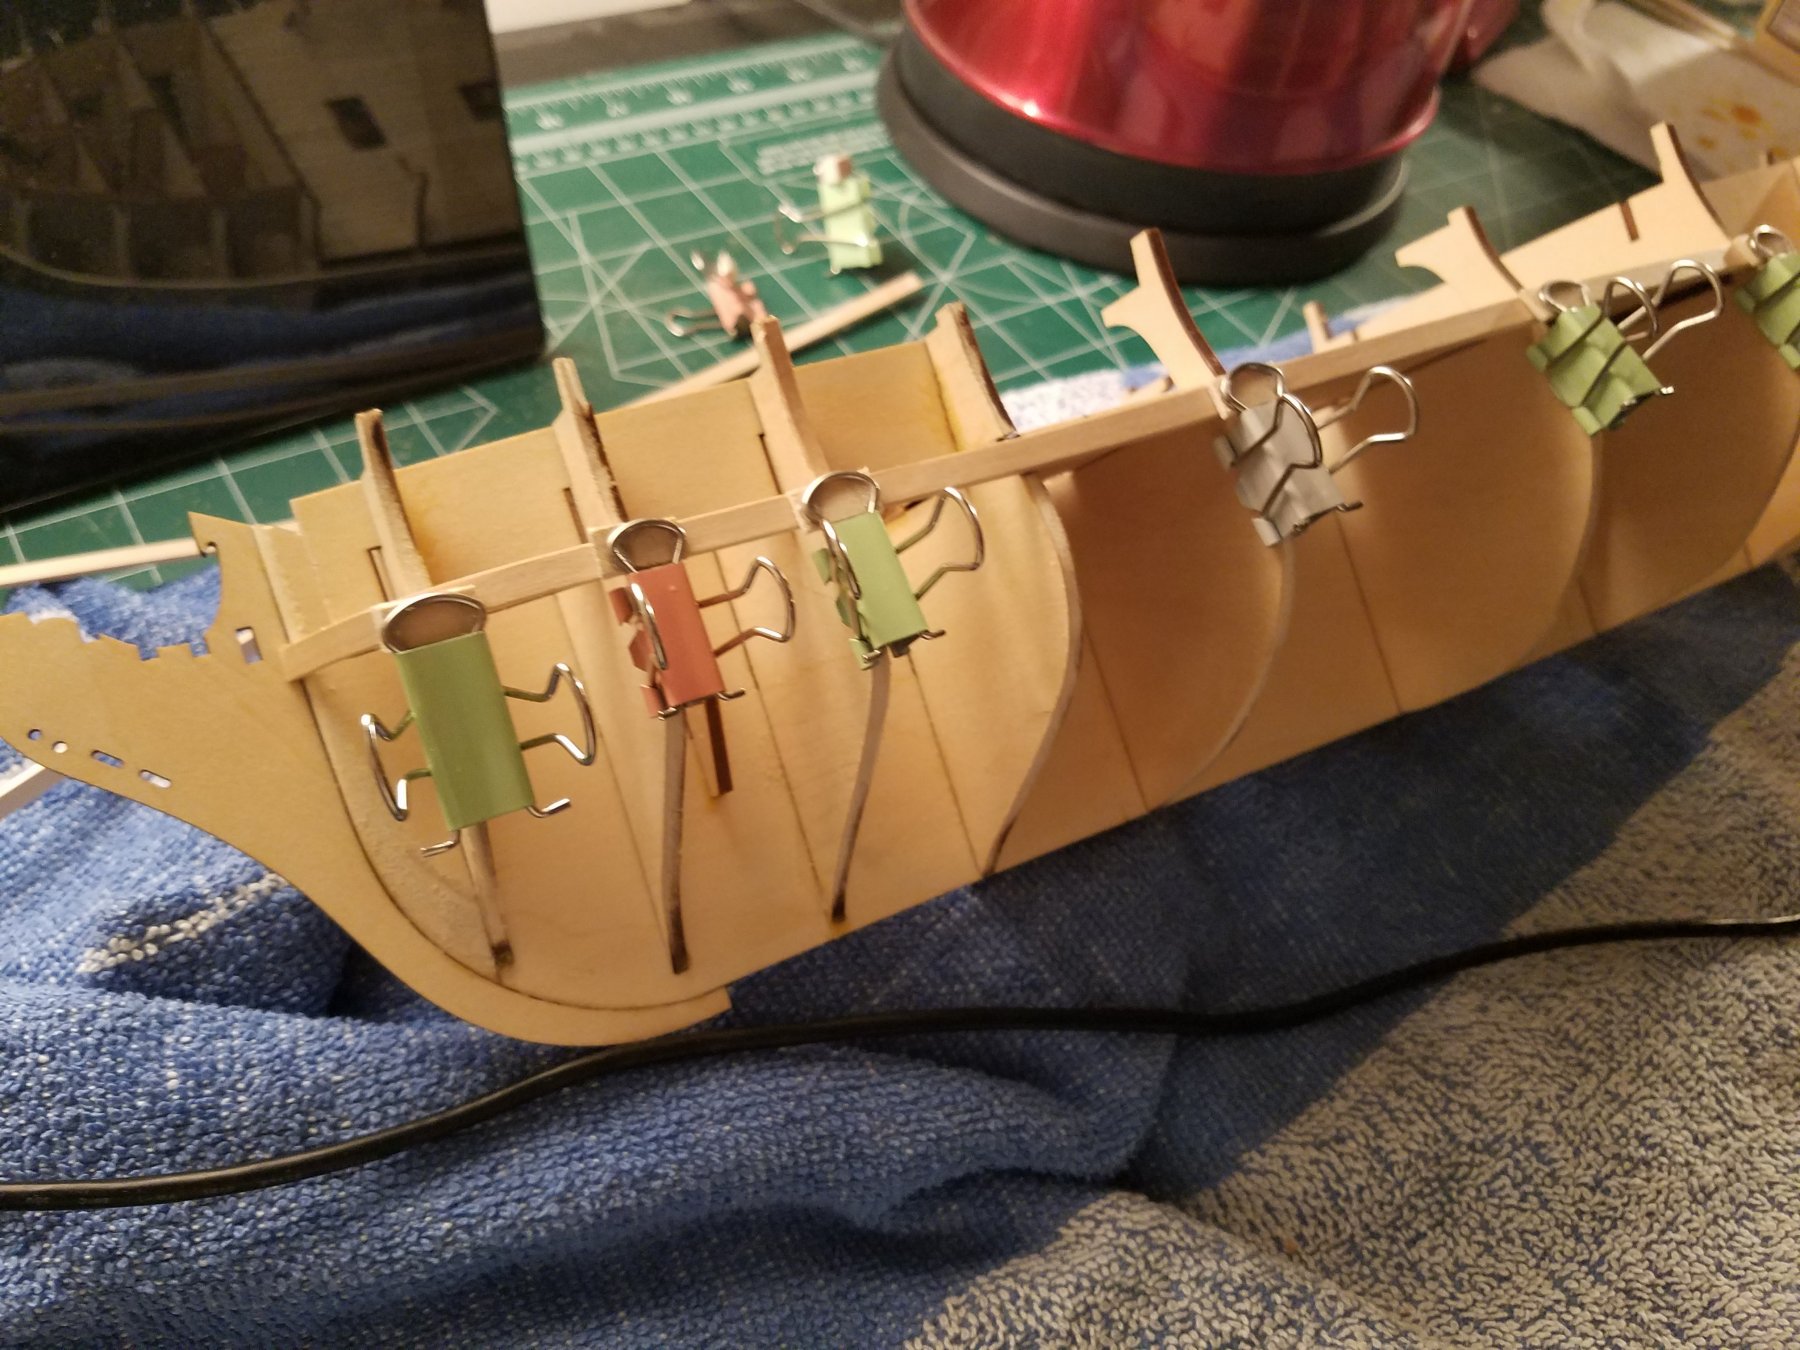
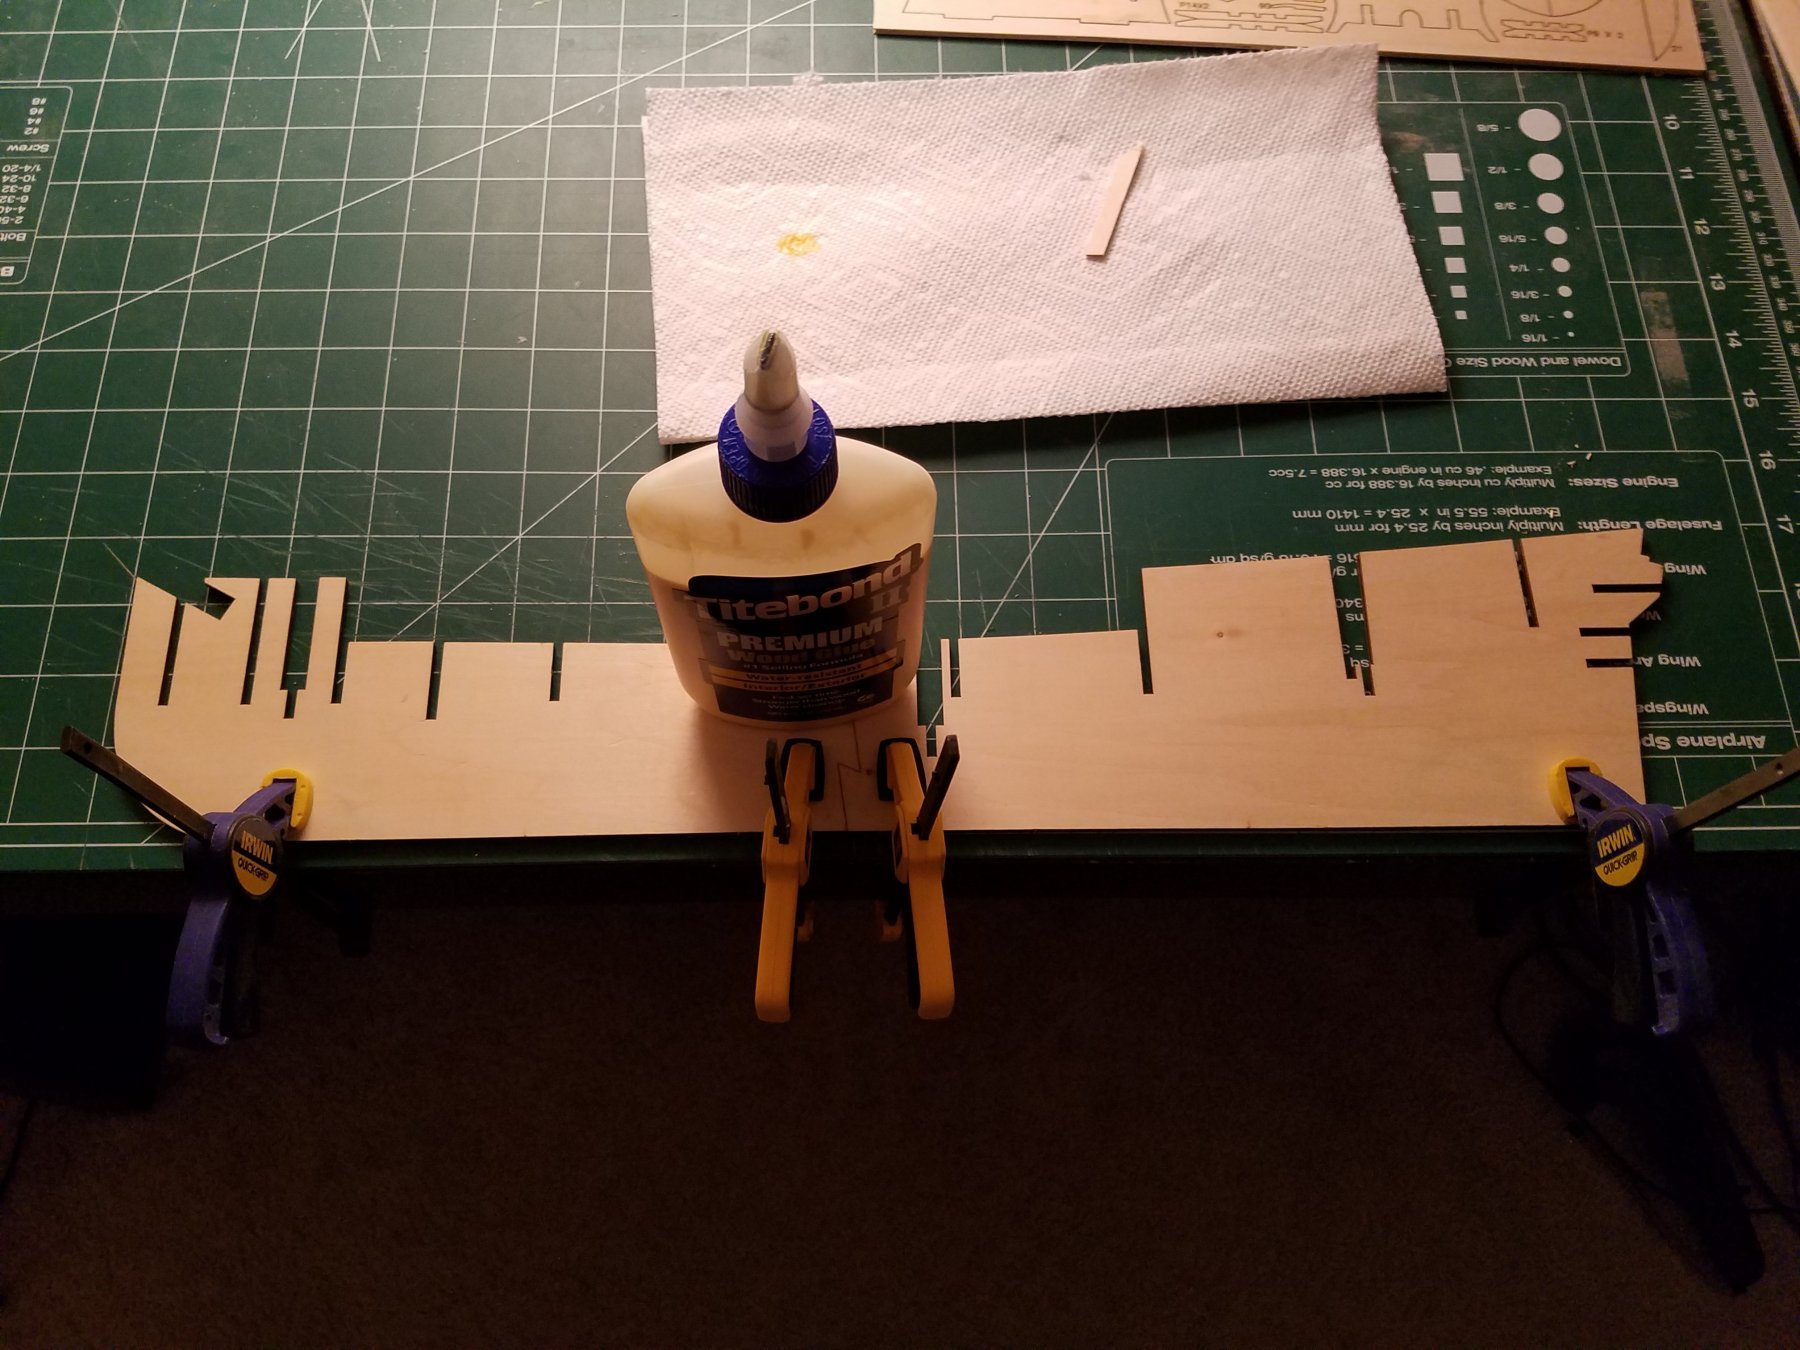
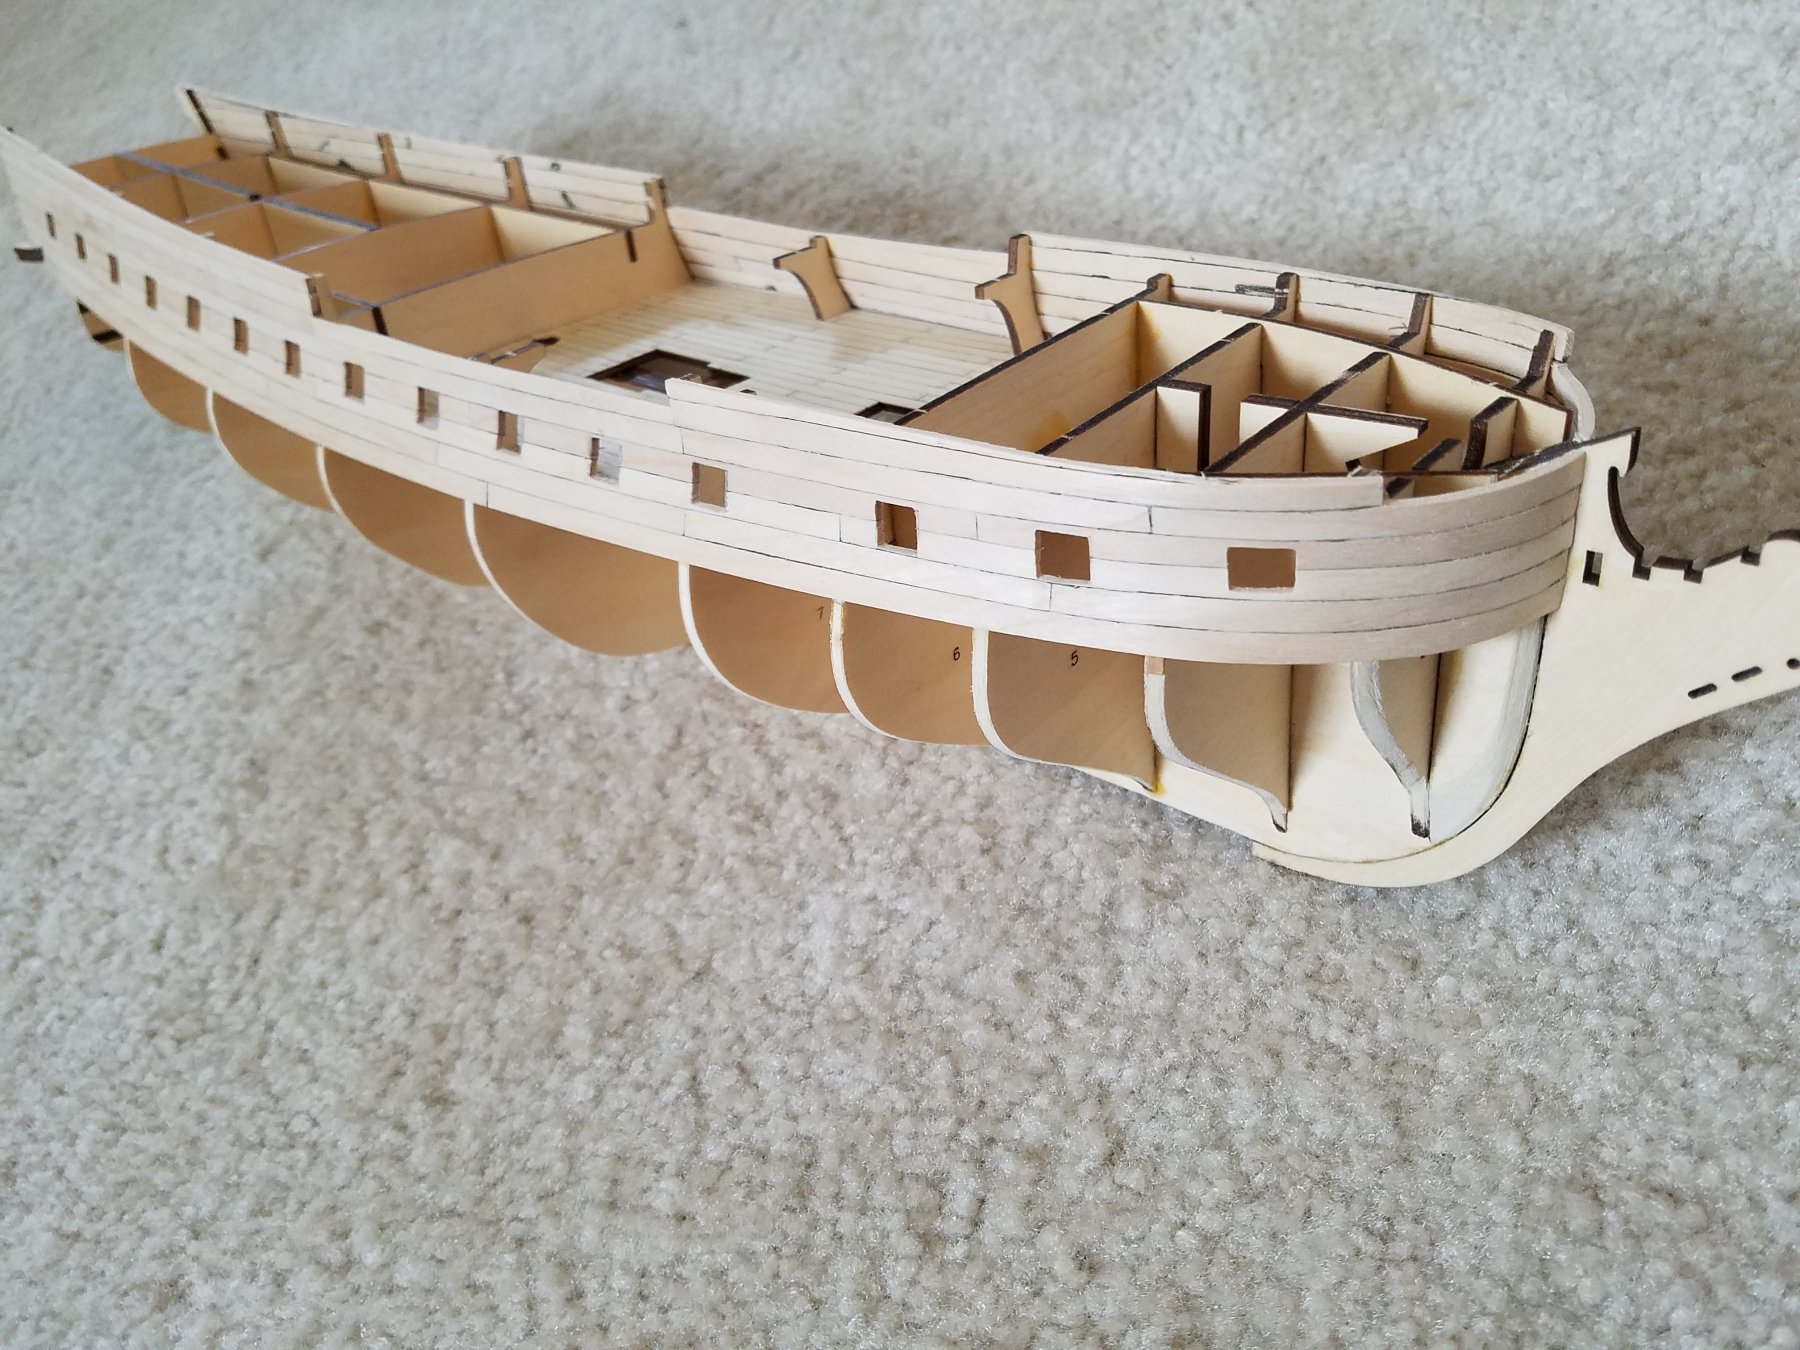
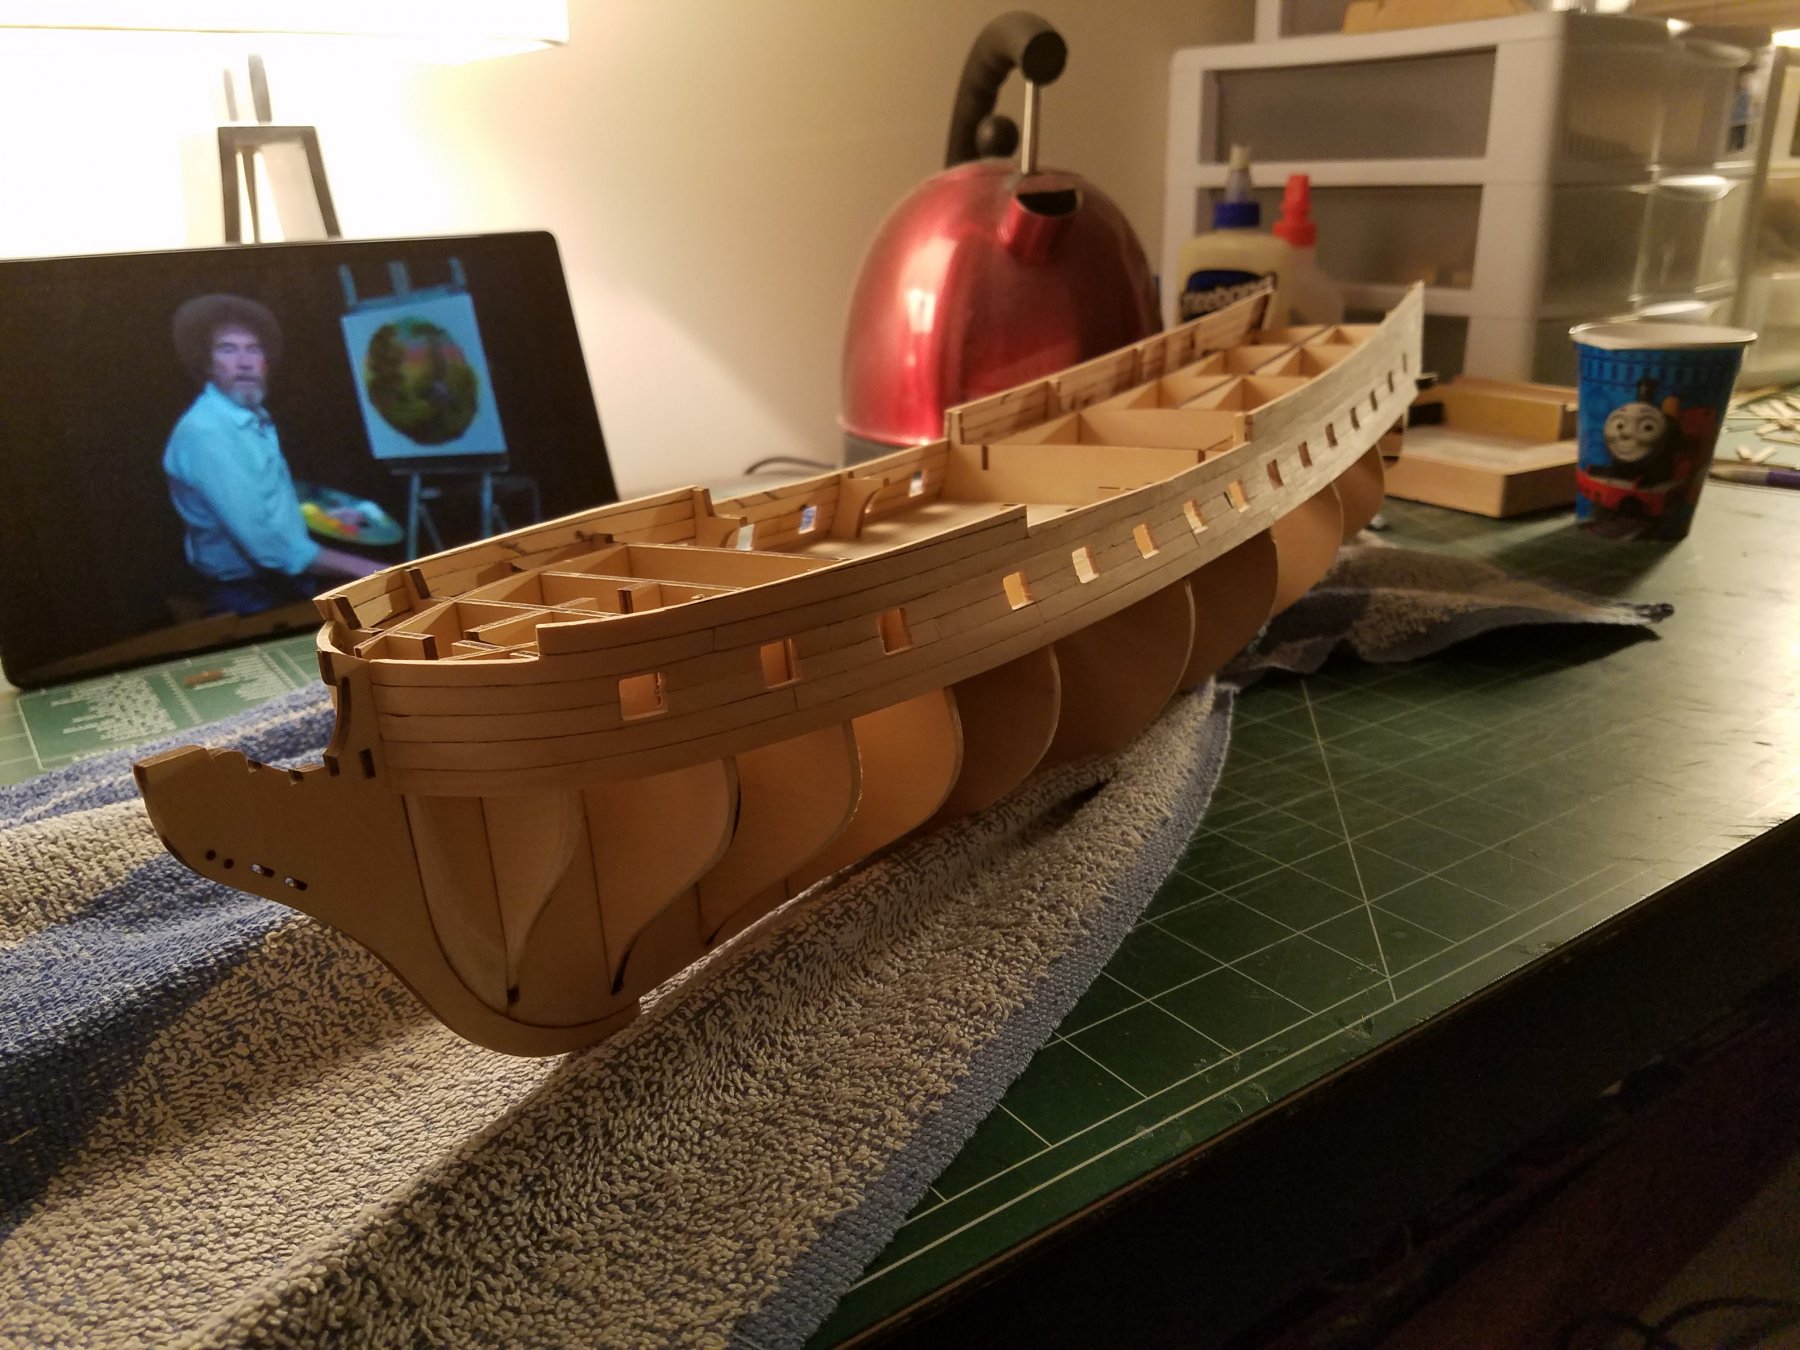
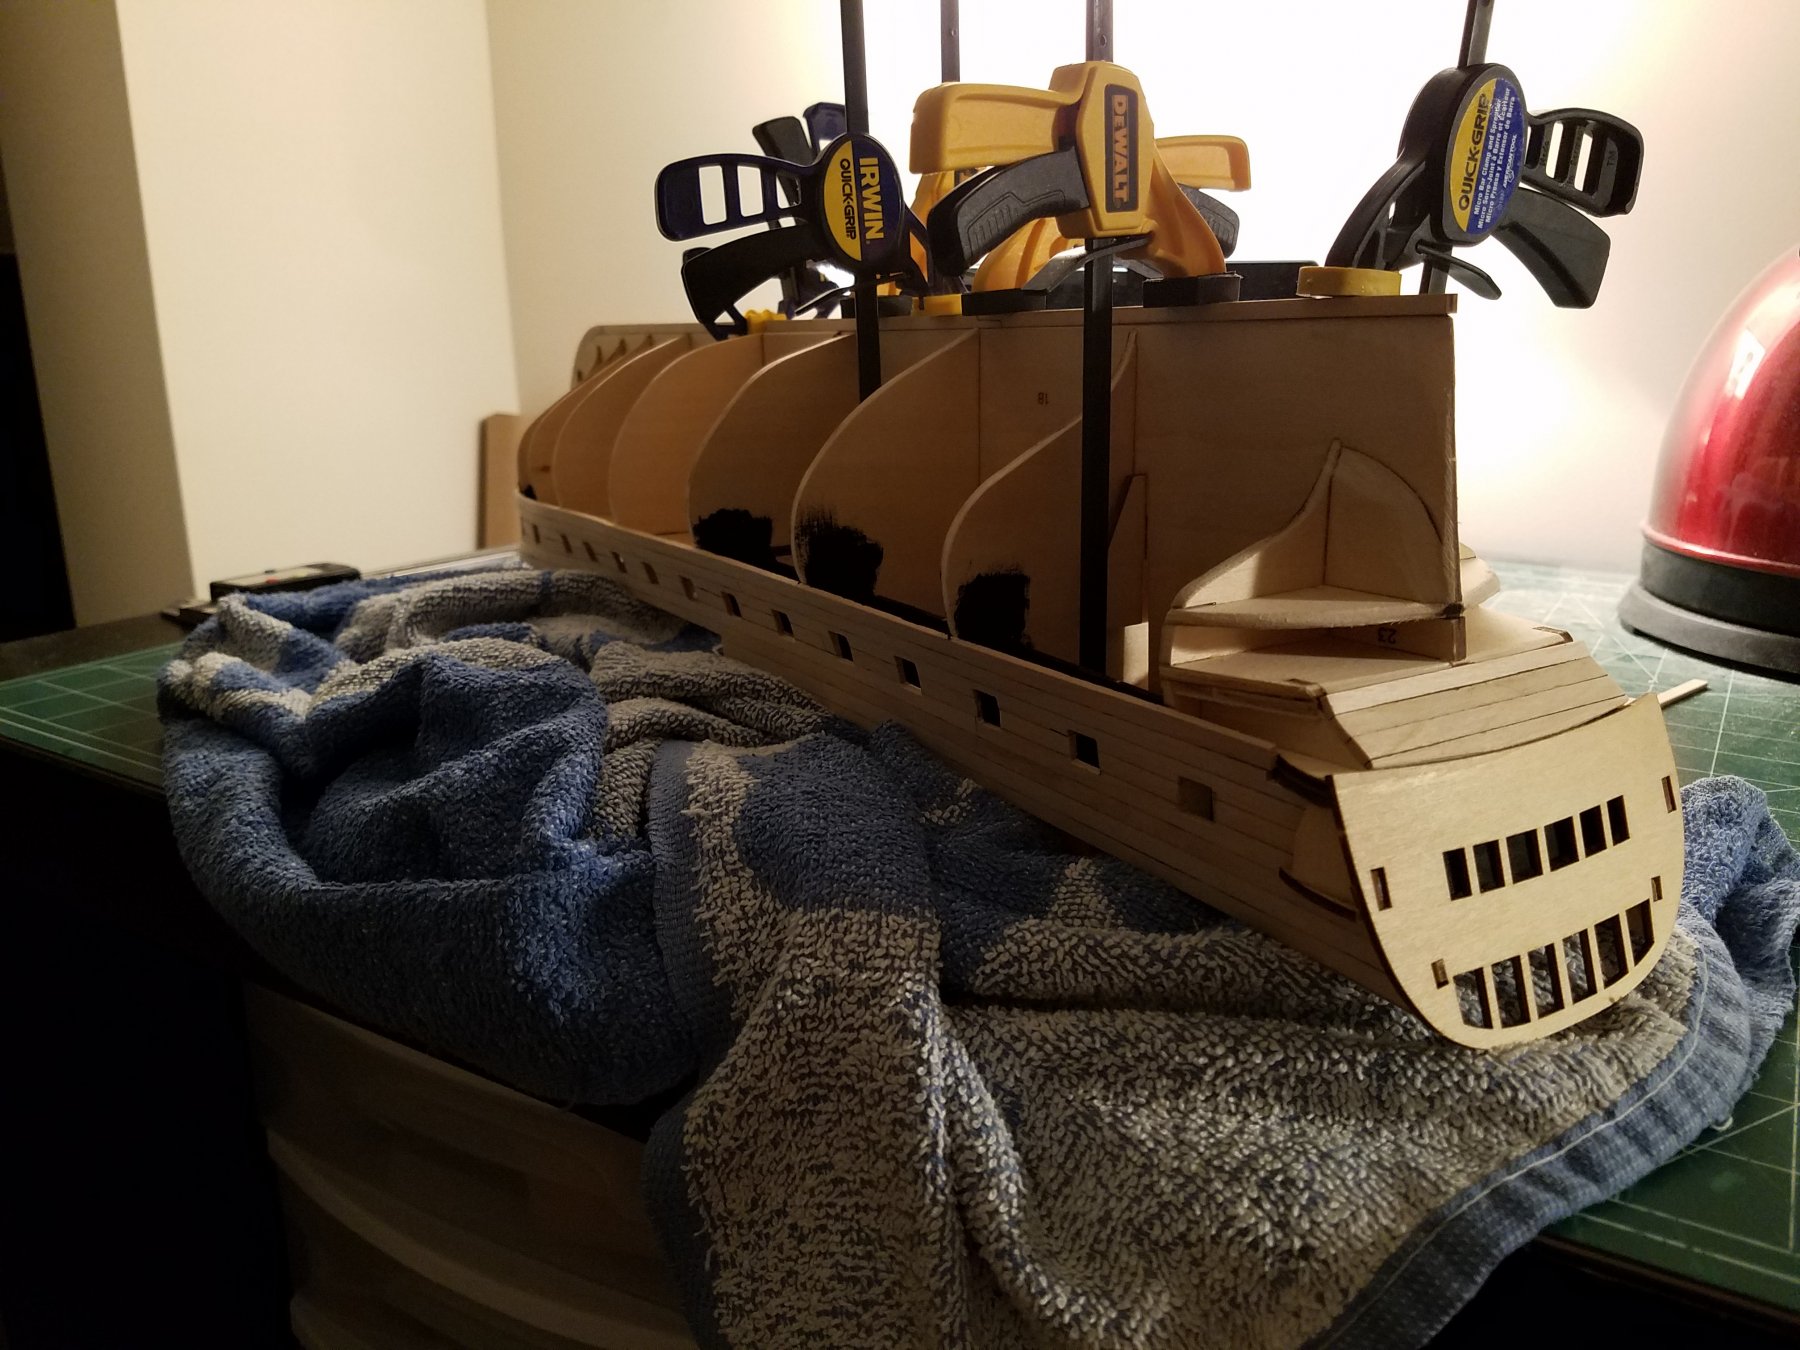
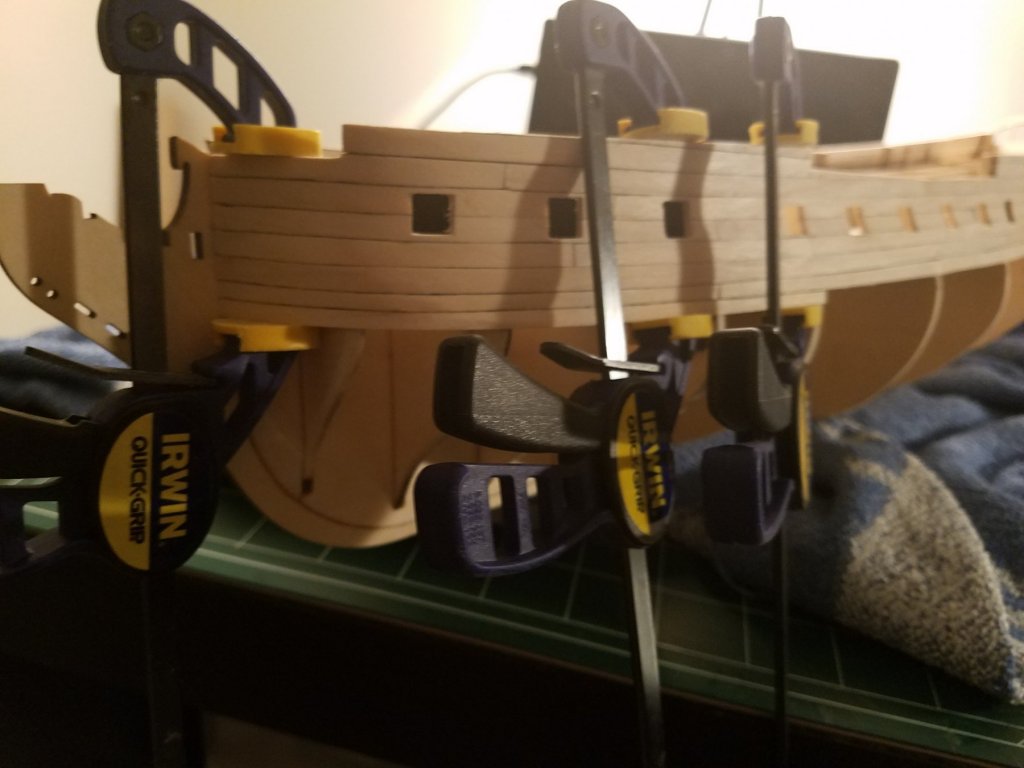
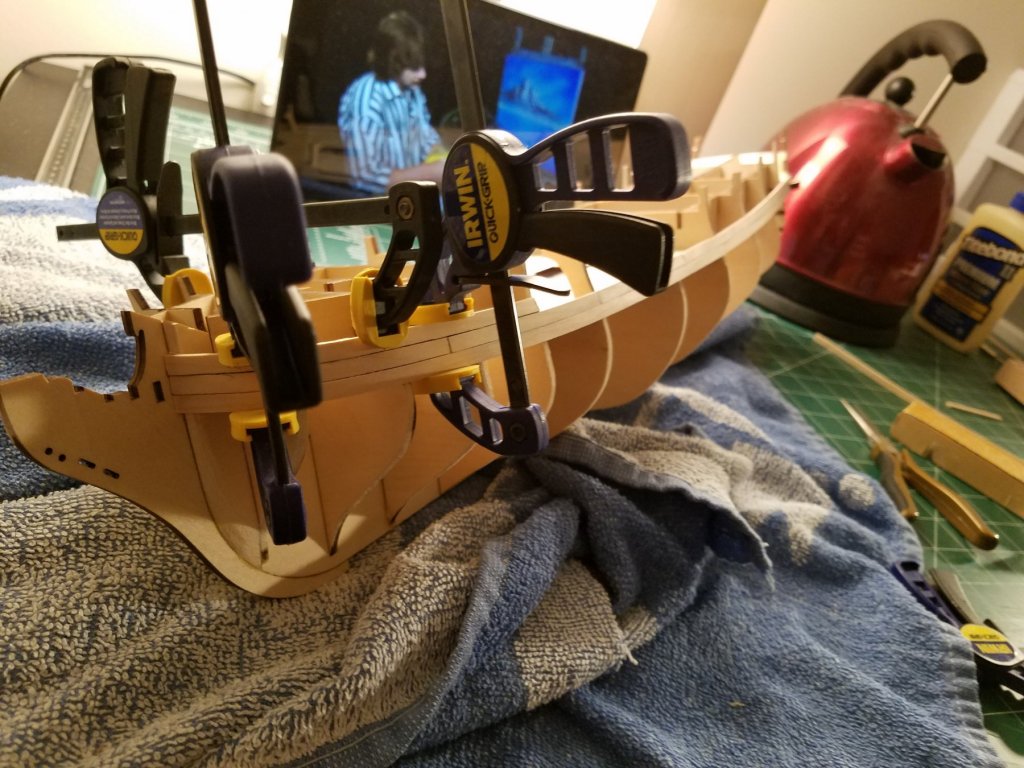
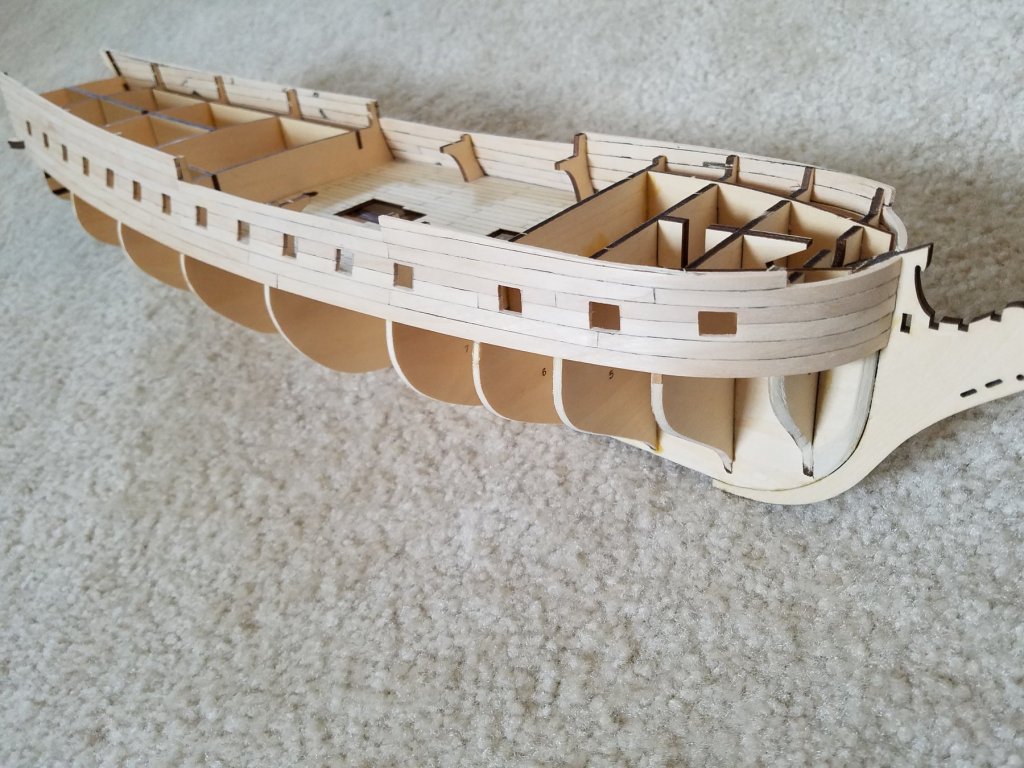
First off, I have glued the keel together since it came in 2 pieces. The oveall false keel is straight, exept the tops between the frames are bent. I was able to get around that though. This is where I decided to do the instructions out of order. I glued on the stem at this point instead way later at step 12. I then planked the second deck and glued it onto the ship. The first hull plank! The red thing in the back is my electric kettle which the steam really helps to bend the wood easily. next, I marked out and cut the gunports. I then glued on the stern transom and the hull planks underneath. I had an issue glueing the stern transom on. I thought I had bent it enough, so I glued and clamped it and left for work. When I came back home, it looked like this. So I removed the glue and put that non glued side under the steam for a minute. I then re glued that side and this is the outcome. MUCH BETTER! It made me feel a lot better after I was able to fix it. Finally, I have skipped yet another step and glued on the rest of the stern. I am now suppose to plank the rest of the hull. I am reading through the hull planking guides here, and they are very useful! I will be referencing to them a lot during this process. I am not that happy with how the instructions want me to plank the hull. Adding a lot of plank strips that end in a point. I want to get better at planking, so I will be following the guides and go slow so I can see my mistakes and learn from them. Jeff


-
Thank you Dilbert55! I totally agree. I have already done a few things out of sequence to the instructions. Like, for example, I glued on the stem to the keel before I did anything else. The instructions say to do that on step 12 after the hull has been fully planked. But it seemed to me it would be much easier to do it early in the build. Jeff
-
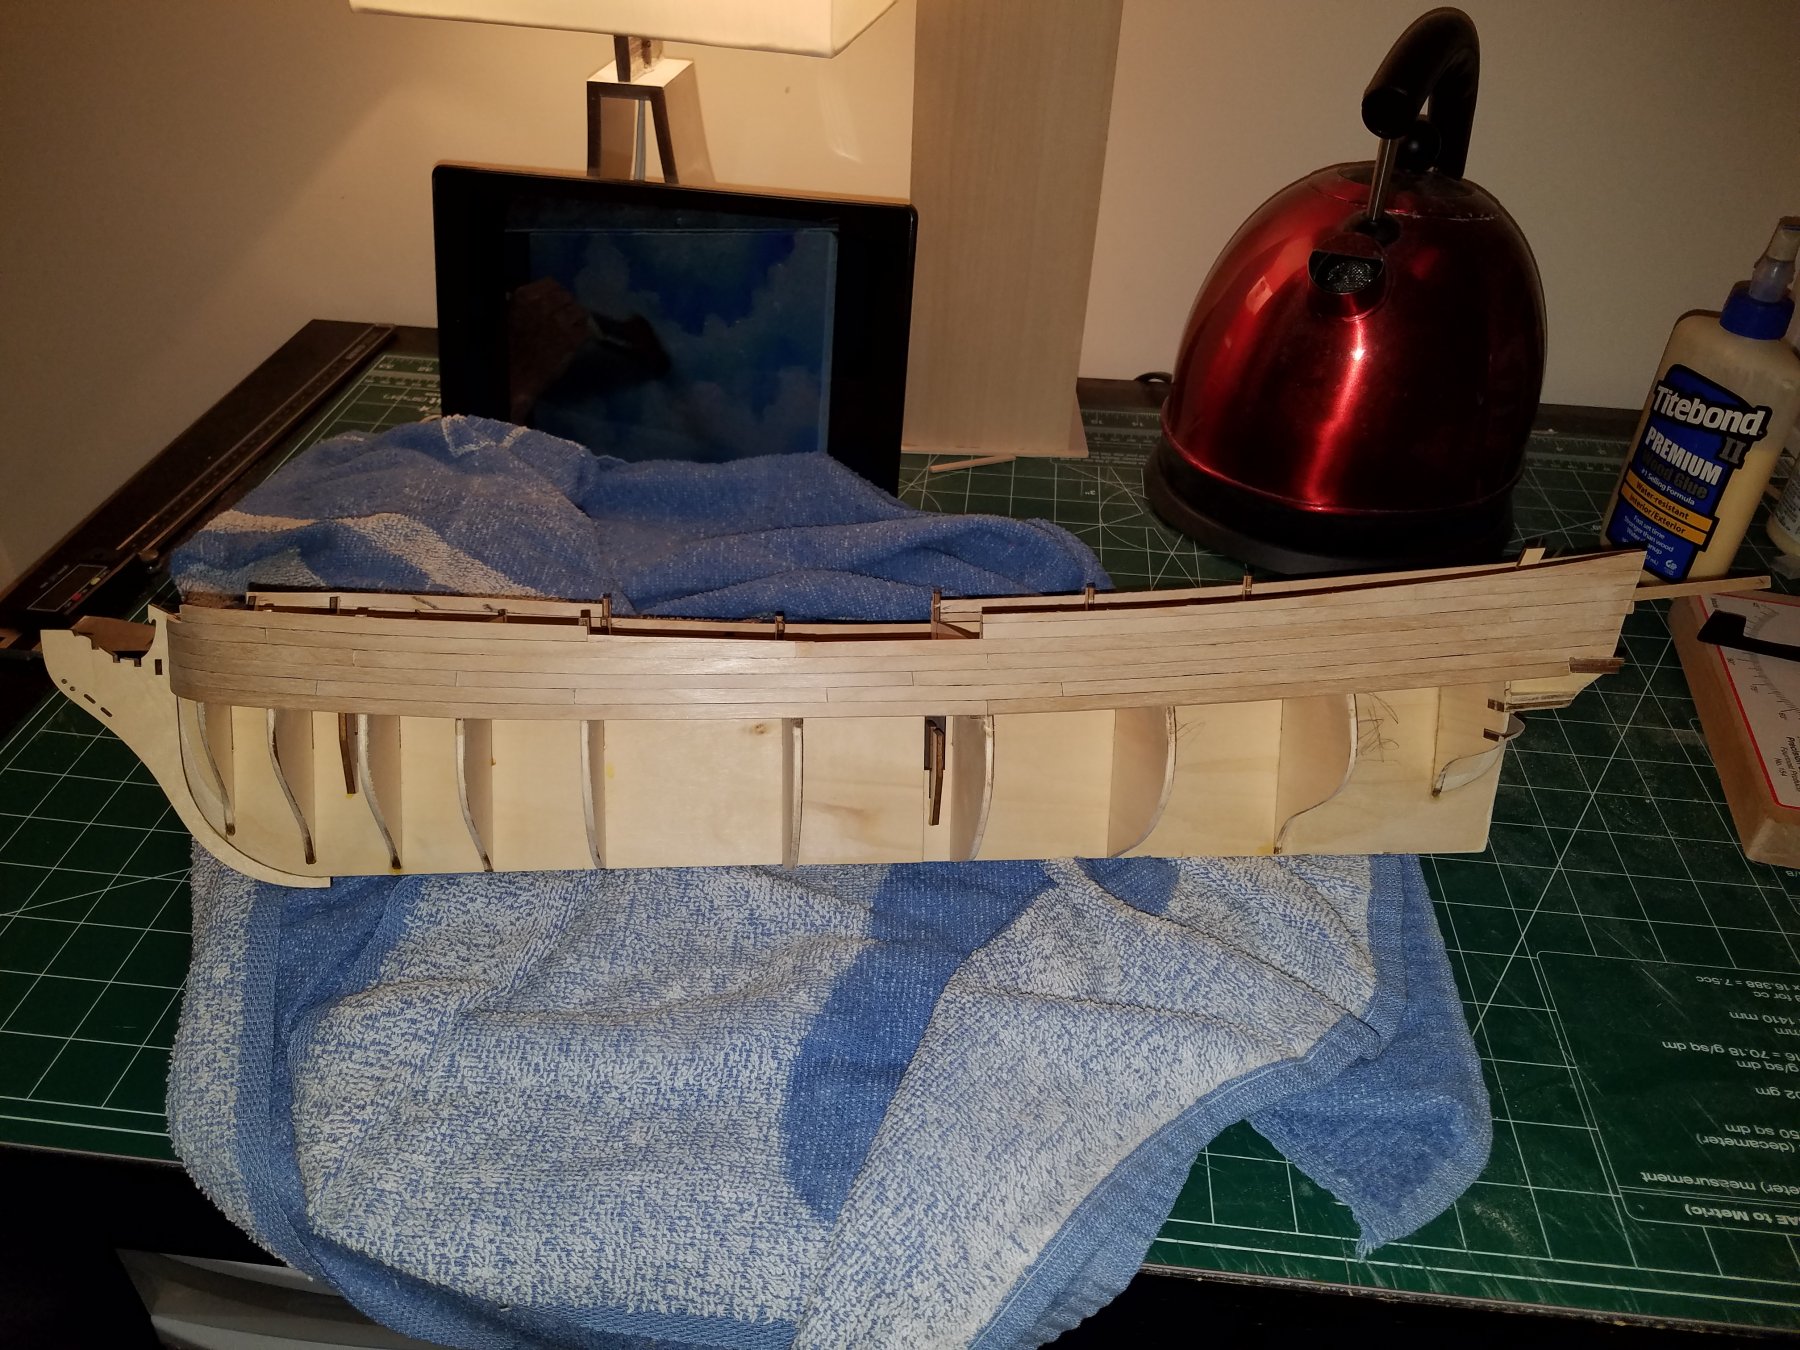
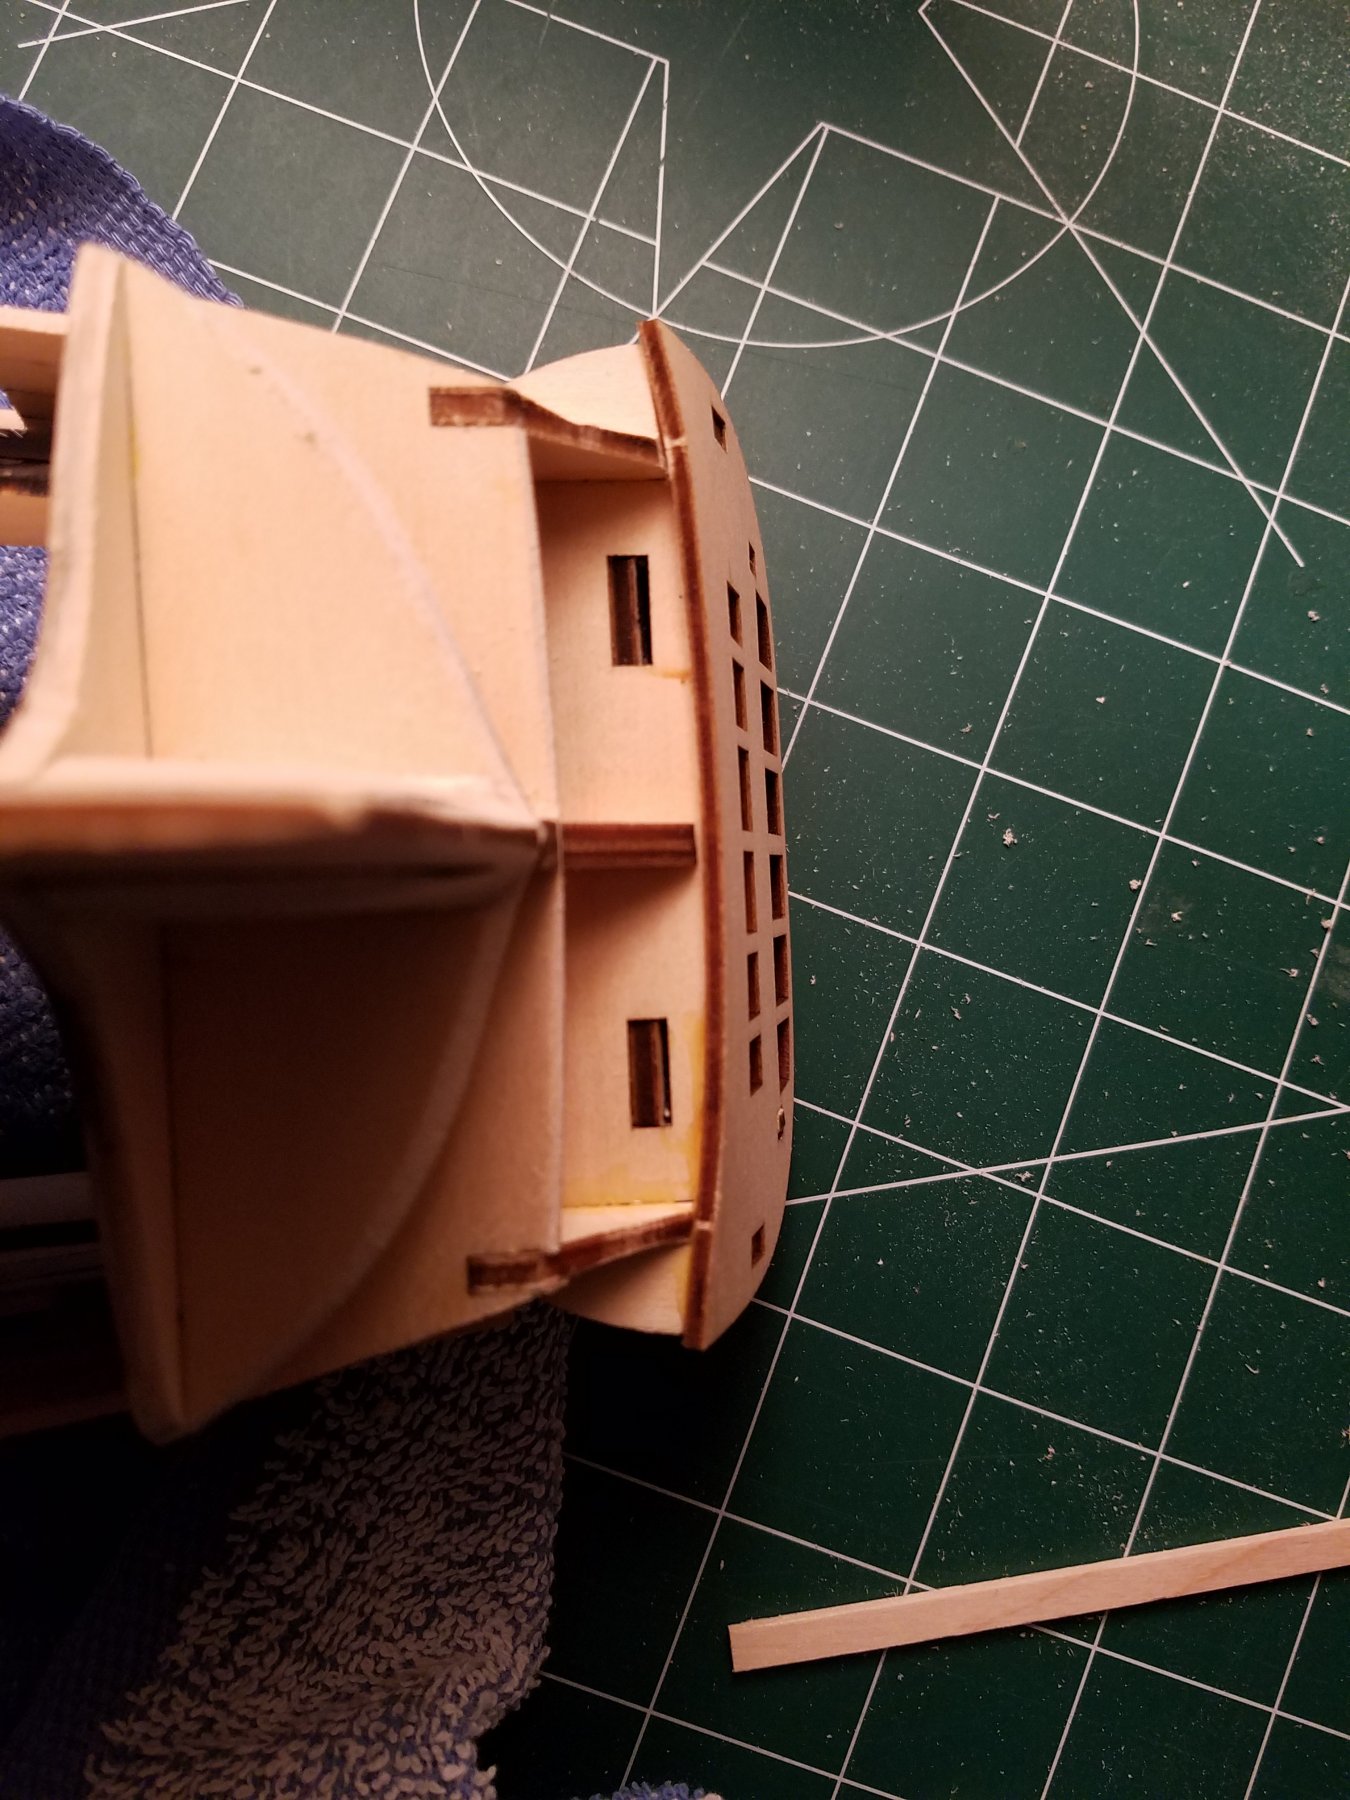
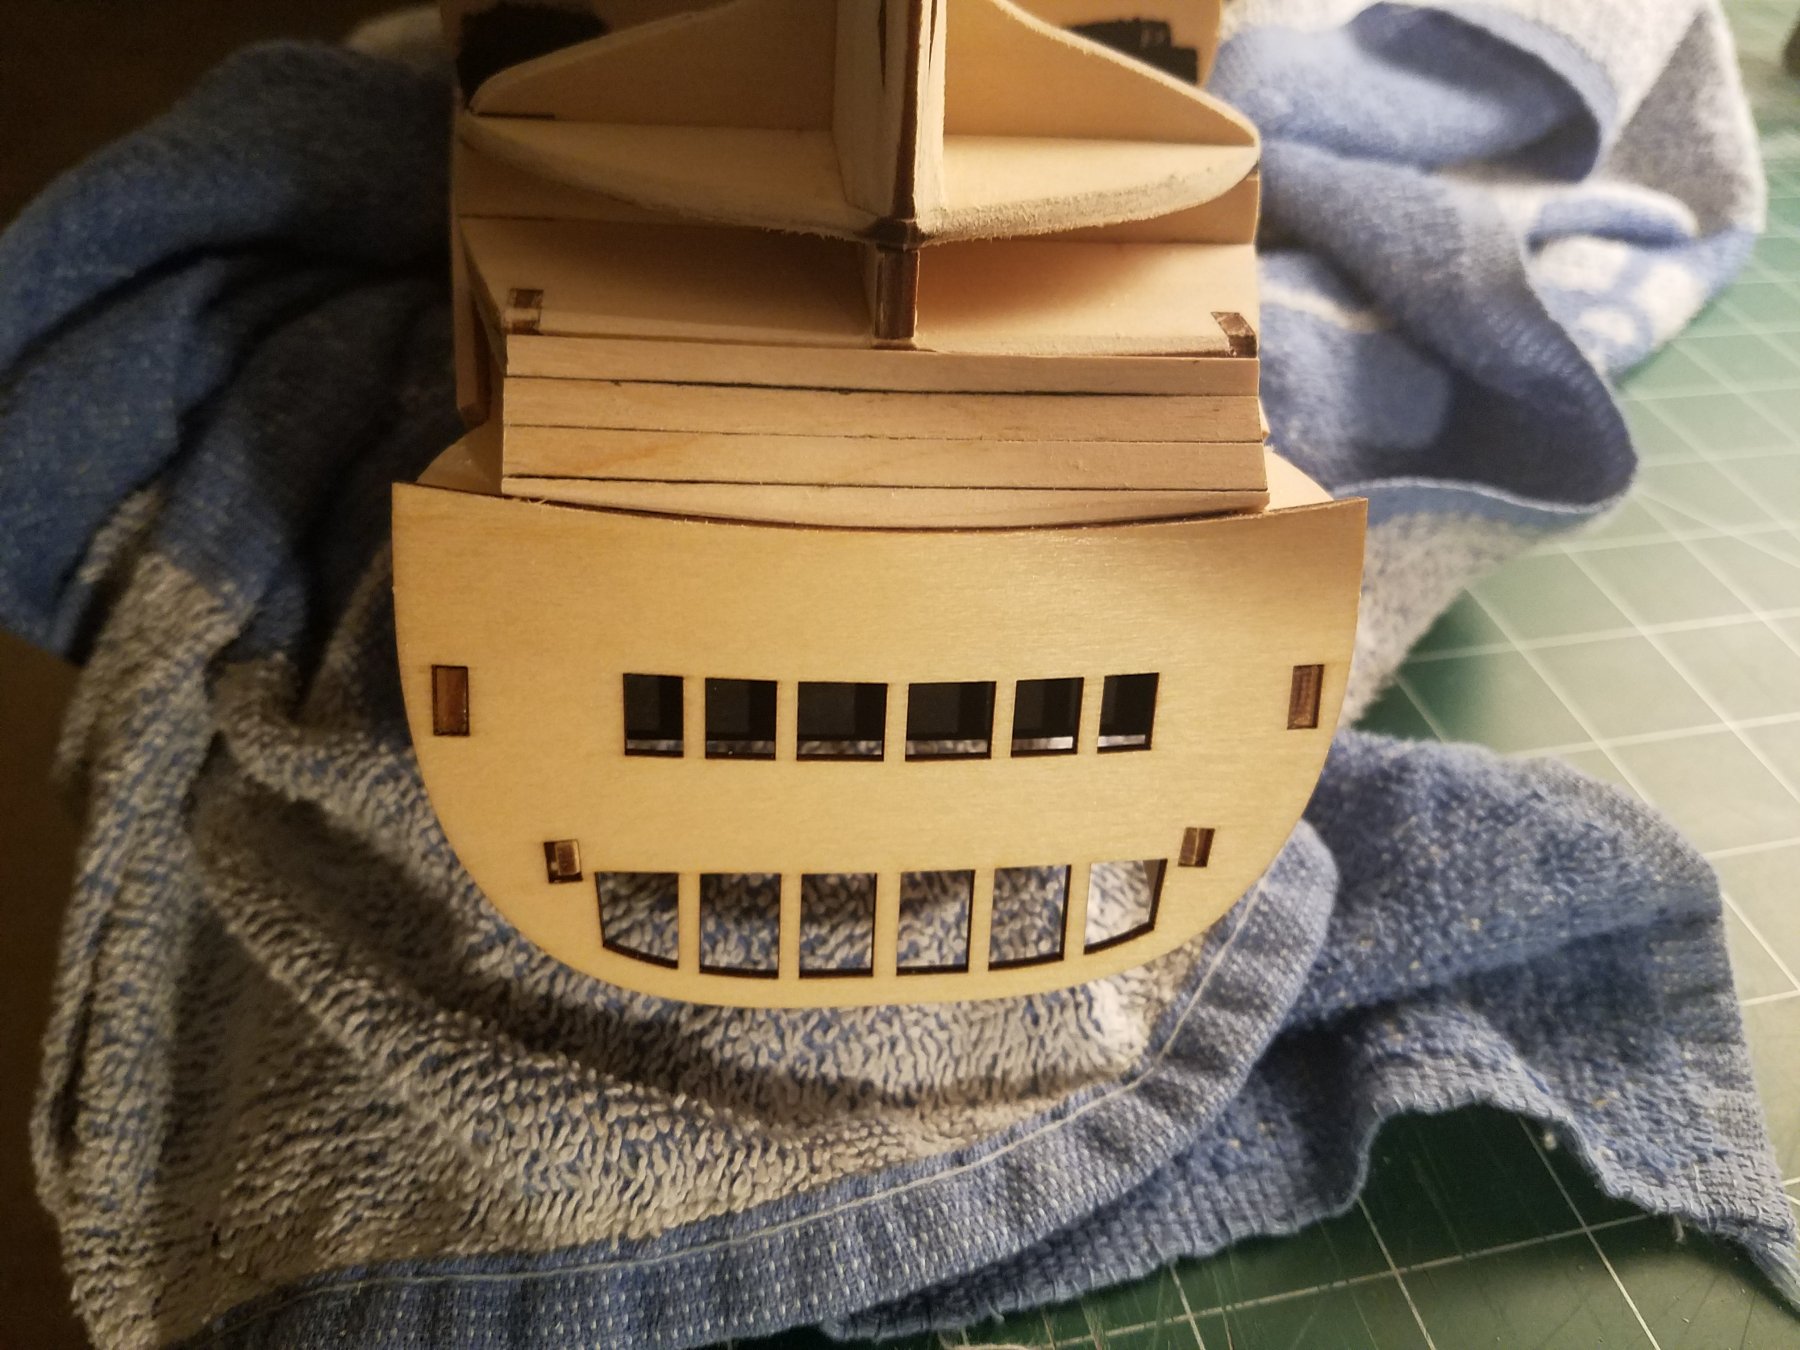
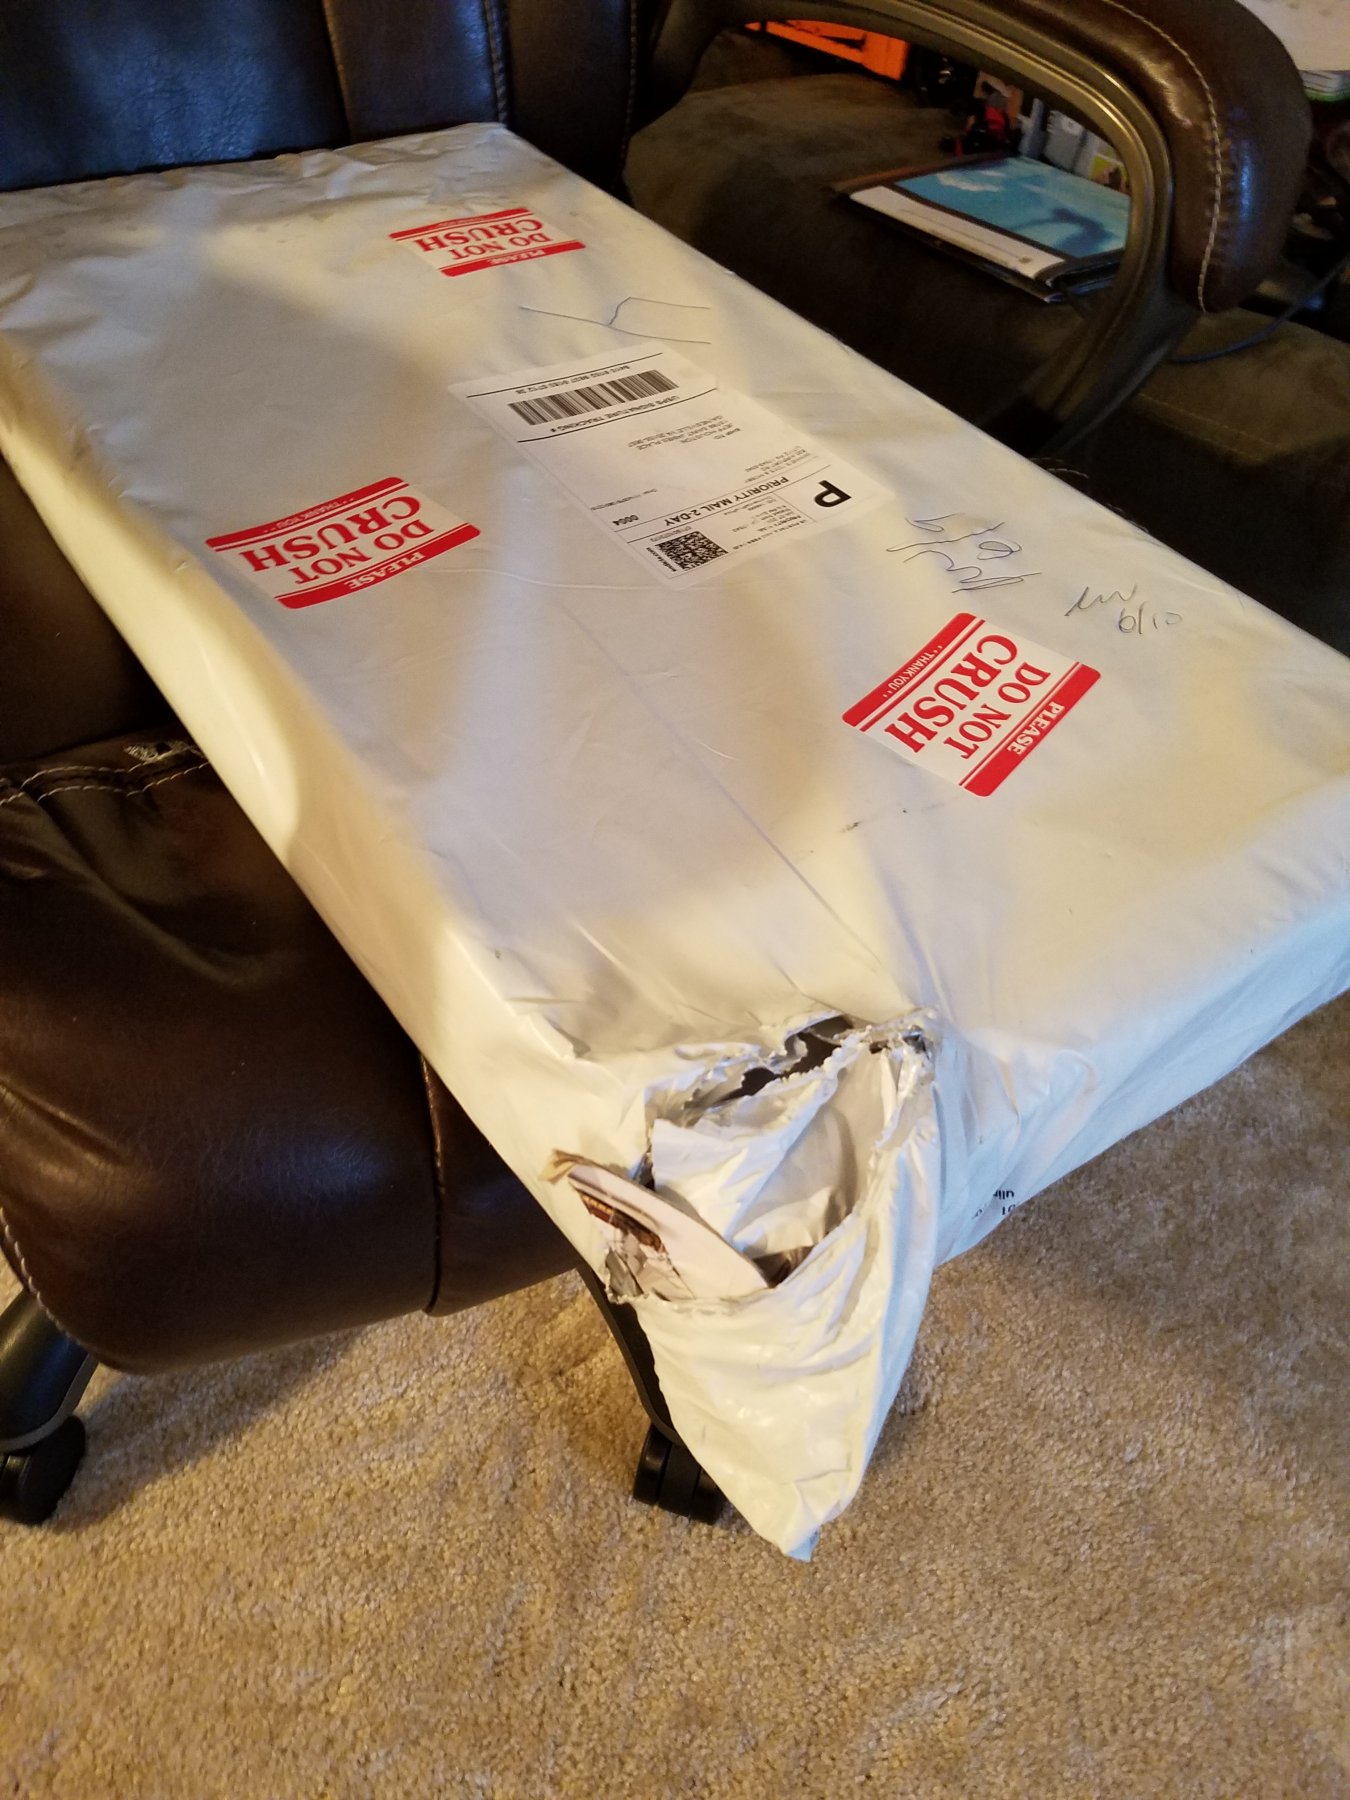
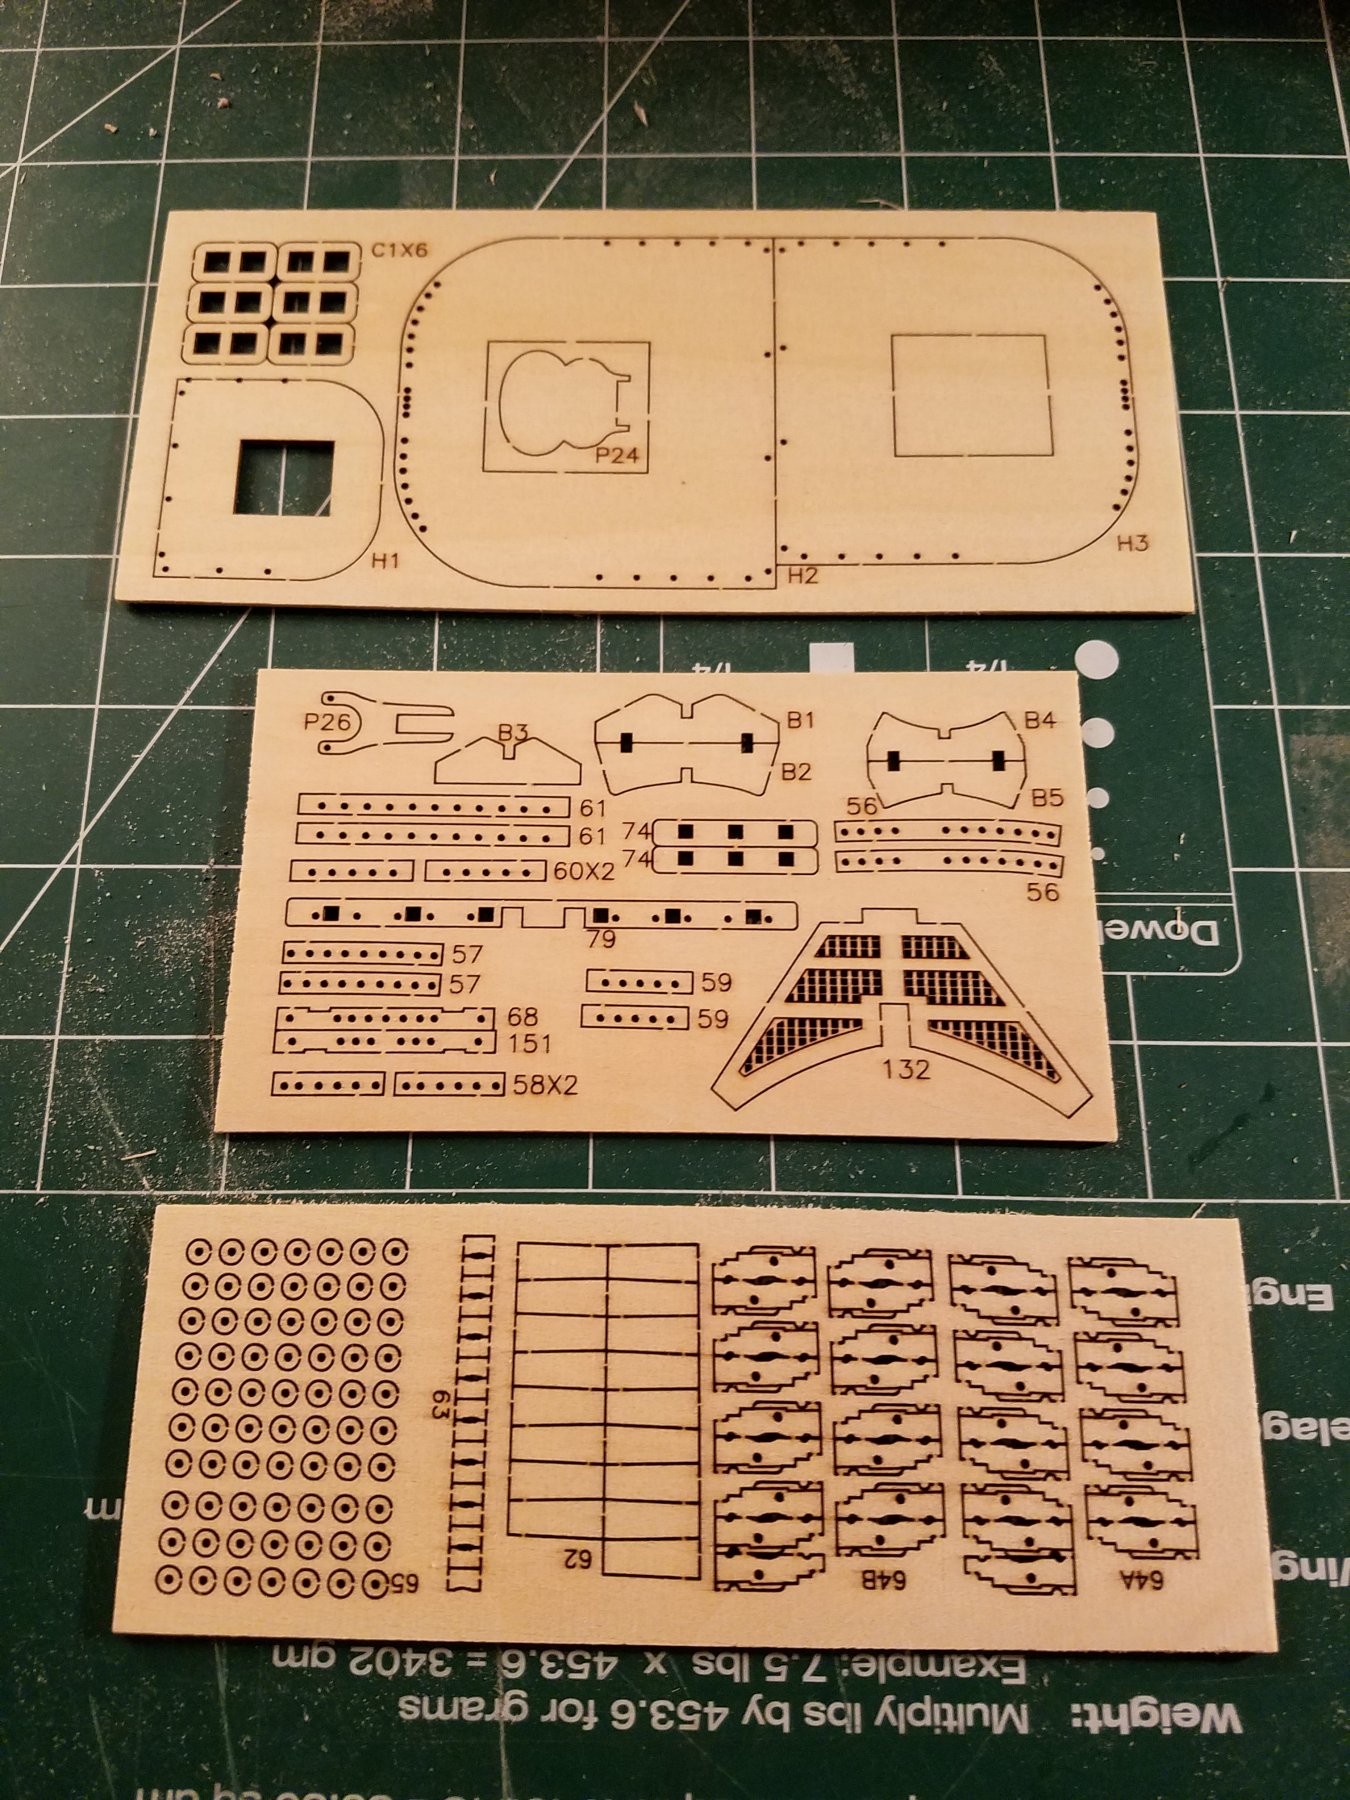
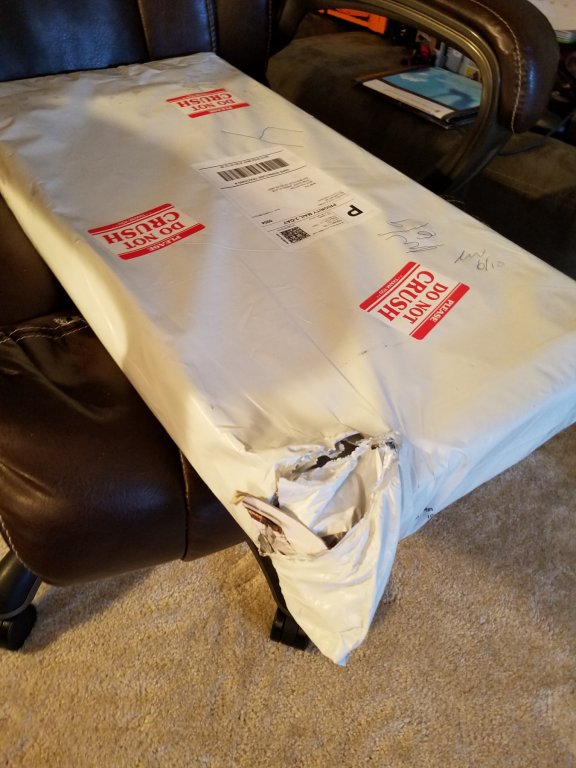
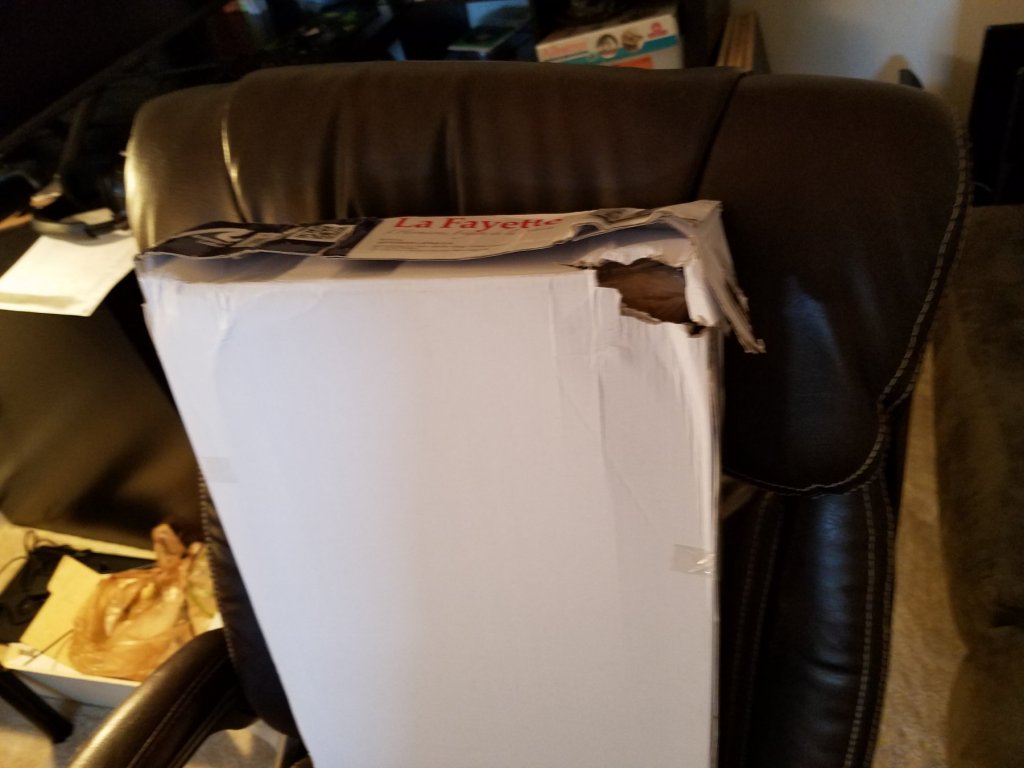
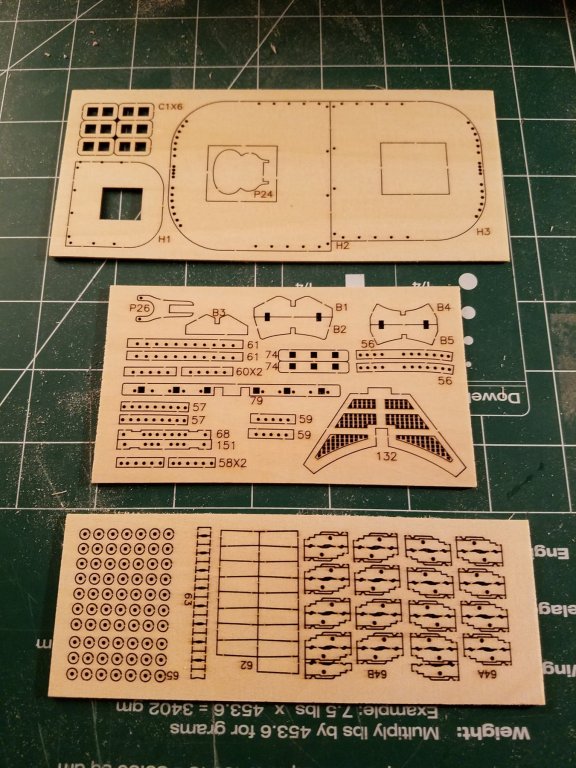
Hello all, Since my Victory is on hold, I decided to start something smaller and easier to fit in my busy schedule and my skill level better. I don't have much time to work on this model, (between 0 - 1 hour a day if I am lucky), so I thought the Hermione would be much better choice. First off, here is how the kit arrived Its funny how it has a big red sticker on it, and it was crushed! UH OH! As you can see, I was a little hesitant to open it. I closed my eyes and opened the box and luckily no pieces were damaged! That was a relief! I was trying to find the instructions to no avail. Then I realized that they were all in pdf and jpg format on the included cd! That isnt too bad cause at least I can zoom into the photos if I need a close up. I do like how there are MANY photos to help me understand what the instructions are trying to say. I noticed that the pictures help more than the English text does! I guess a picture is worth more than a paragraph of words! Next comes the plans. It included 1 sheet of plans which just had different views of the conpleted model. I was a little disappointed that it didn't come with plans that showed any cross sections of anything. Bummer. Pretty much all the parts are basswood and ply. The few pieces that were not basswood were the deck planks. I think the reason they didnt include much other wood was to: 1) save money on making the kit 2) pretty much all parts will be painted ,except the deck planking, so why include high quality wood if it will just be painted later? The laser cut parts are very detailed with very little burn marks. I was impressed with the amount of detail they could put into those small laser cut pieces. Here are a few of them The only pieces I have some gripe with are the basswood strips. Most of them do not have good edges like so I would say a good 30% of the strips have bad edges on all sides. I think this will make planking a little more challenging, but I will have to wait and see. I will be posting later tonight on my progress but wanted to describe the kit first. I'm already farther on this model than my Victory! So far, this is turning out to be a much better choice! Jeff

-
Hello all, Since my Victory is on hold, I decided to start something smaller and easier to fit in my busy schedule and my skill level better. I don't have much time to work on this model, (between 0 - 1 hour a day if I am lucky), so I thought the Hermione would be much better choice. First off, here is how the kit arrived Its funny how it has a big red sticker on it, and it was crushed! UH OH! As you can see, I was a little hesitant to open it. I closed my eyes and opened the box and luckily no pieces were damaged! That was a relief! I was trying to find the instructions to no avail. Then I realized that they were all in pdf and jpg format on the included cd! That isnt too bad cause at least I can zoom into the photos if I need a close up. I do like how there are MANY photos to help me understand what the instructions are trying to say. I noticed that the pictures help more than the English text does! I guess a picture is worth more than a paragraph of words! Next comes the plans. It included 1 sheet of plans which just had different views of the conpleted model. I was a little disappointed that it didn't come with plans that showed any cross sections of anything. Bummer. Pretty much all the parts are basswood and ply. The few pieces that were not basswood were the deck planks. I think the reason they didnt include much other wood was to: 1) save money on making the kit 2) pretty much all parts will be painted ,except the deck planking, so why include high quality wood if it will just be painted later? The laser cut parts are very detailed with very little burn marks. I was impressed with the amount of detail they could put into those small laser cut pieces. Here are a few of them The only pieces I have some gripe with are the basswood strips. Most of them do not have good edges like so I would say a good 30% of the strips have bad edges on all sides. I think this will make planking a little more challenging, but I will have to wait and see. I will be posting later tonight on my progress but wanted to describe the kit first. I'm already farther on this model than my Victory! So far, this is turning out to be a much better choice! Jeff
-
Thanks Dan. You have really made me feel better about my decision. I have decided to start L' Hermione La Fayette from Artesania Latina. I like all the pictures of the instruction manuals (which are PDF and I can display them on my tablet which is nice too). I already feel that I am progressing much better (I wouldn't say "faster" because it's more about feeling that I accomplished a part of the ship rather than how fast I can complete it) and it's more satisfying to build. I'm thinking of posting my progress so far. This ship is much more "doable" with the time I can dedicate to it per week and with my current skill level. Jeff
-
Hello All, I haven't posted in a while and that is because of a few factors: 1) No time to work on it (work, family etc) 2) A little stumped on a certain part of the build (but not enough time to be able to dedicate to figure out a way forward) 3) I feel, like some posted early on, that my skills are not quite up to the task of what I want to do with the model With that said and with a heavy heart, I have decided to take a break from this model for a while. I will come back to it, but I feel that I need to take a step back. I feel I was doing a lot of work for very little gain, or not being happy with what I did and having to rip it all up and start over (multiple times even!). Unfortunately, it was feeling more like an up hill battle than a relaxing/fun hobby. It saddens me to have to post this, but I have to be truthful with myself and give myself the opportunity to gain more experience with the hobby before continuing with this build. I have learned a LOT from all of you and through my pitfalls which is a great thing. I think for my skill level, I need to start with a smaller kit. I think this will be a much better fit for me and how much time I can currently dedicate to the hobby. I am thinking of posting that build with the intention of keeping with the kit instructions with no added details to help me get a better foundation to the skills of the hobby. I WANT to get better and make wonderful ships. Thanks for listening! Jeff
-
Well boo. I'm not happy with the inner walls so far. I have completed 3 rows on each side, and I feel it doesn't look very good. 1) the planks are NOT even in height: 2) the planks do NOT sit flush against the deck and other planks (small example): 3) The door frames are also out of alignment by 1mm which will affect the positioning of the gun ports: It's hard to tell by the photo, but I re measured 3 times to validate. 4) I also measured where the gun ports that go on the other decks, and realized that the ports go through the frames. Boo. So... I'm thinking of ripping off the inside walls on both sides and doing it again; and also maybe moving the top parts of the frames I made so they don't hit any gun ports. Feels like 3 steps forward, 2 steps back. My issue is, I need a good way to accurately sand off the sides of the wall strips to angle them correctly against the frames and to sit flush against the deck, the frames, and the other planks. I have tried to sand the planks manually, but there is no way I can get the angle even over the full length of the plank. Any suggestions on hoe to accurately sand planks to angle them slightly? Jeff
-
Thank you for the advice! I have started to build up the inside walls according the the plans in the book. I also built one gun carrage to test fit to make sure the guns will fit properly (inside and having the gun protrude enough out of the ship). I will post more of the walls once I have the time. I also will utilize your advice and add some strengtheners between the frames. I'm also adding a few nail markings like I did on the deck floor once I use the sealer, they will be a little more noticeable. Thanks! Jeff

-
Congrats Bob! Fantastoc job! I can only dream of having skills like yours! I'm looking forward to your next build! Jeff
- 682 replies
-
- 2
-

-
- halifax
- lumberyard
- (and 1 more)
-
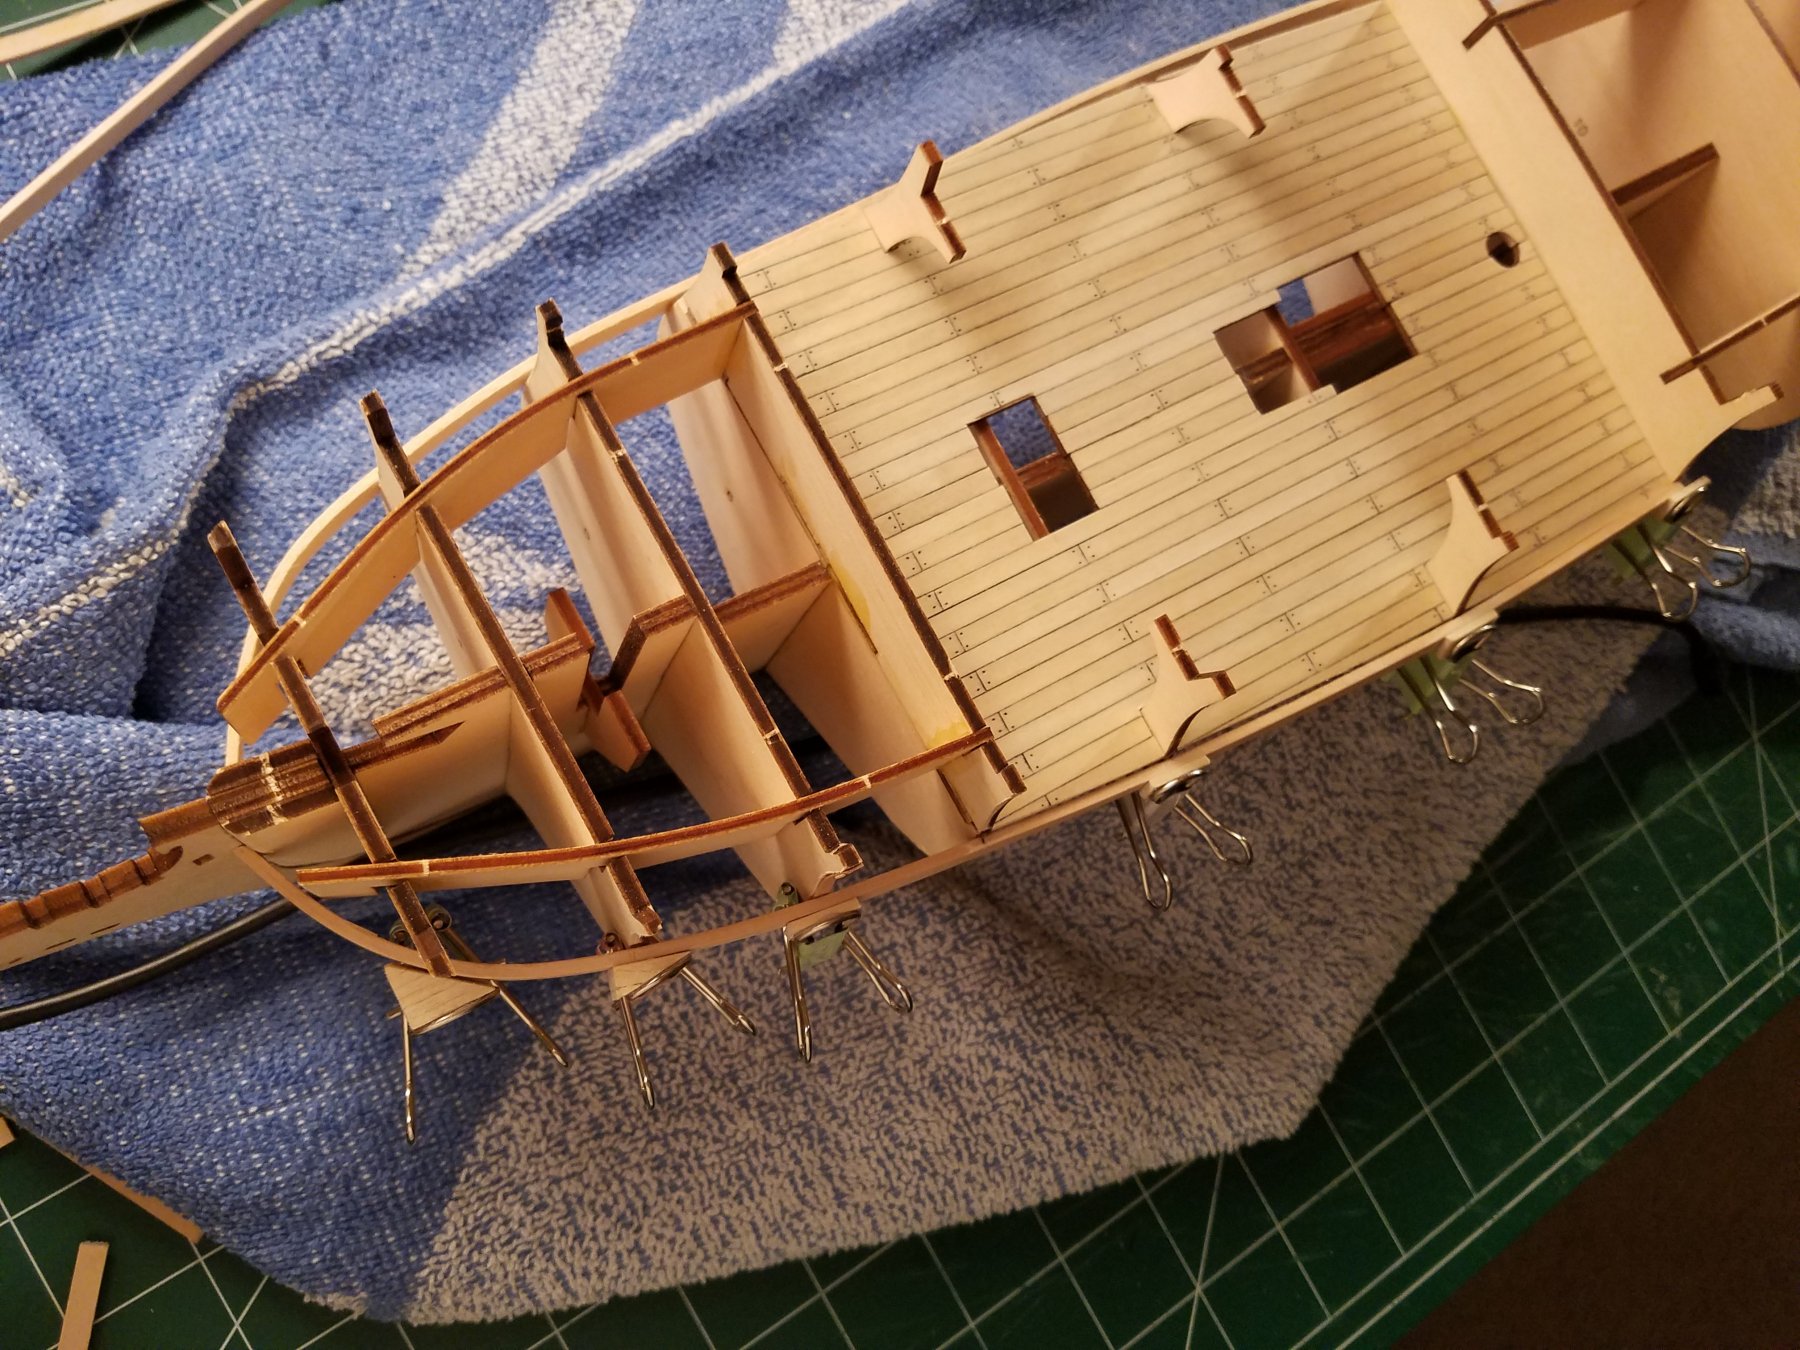
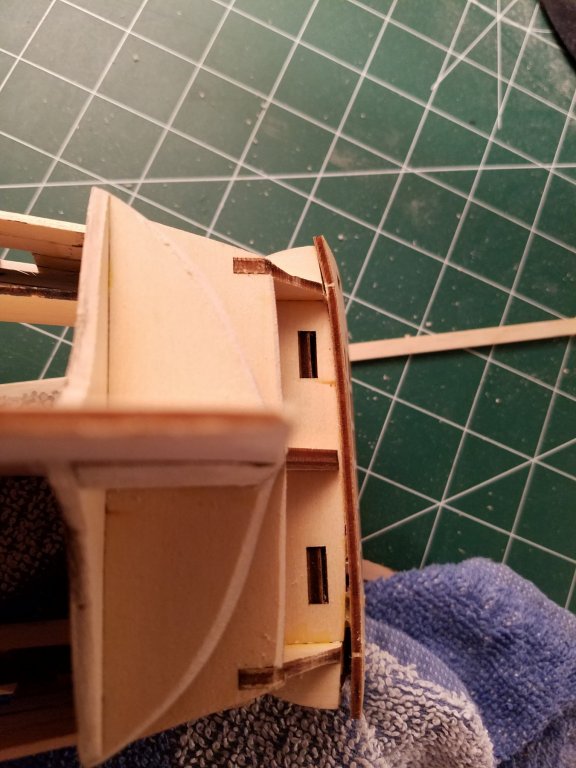
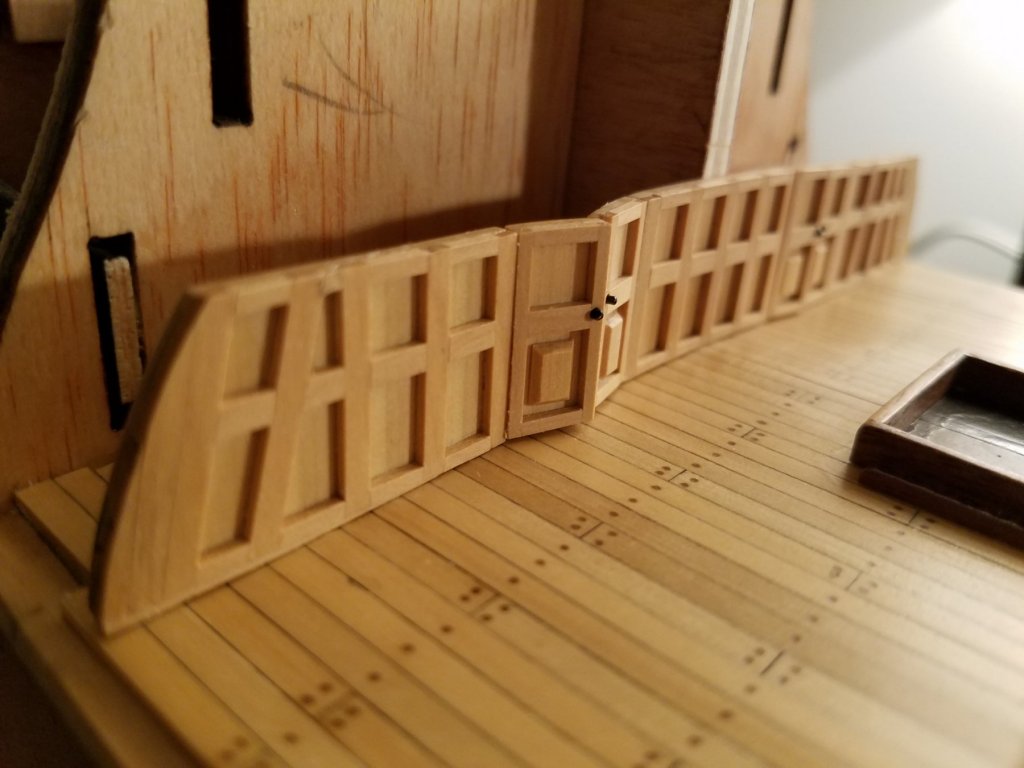
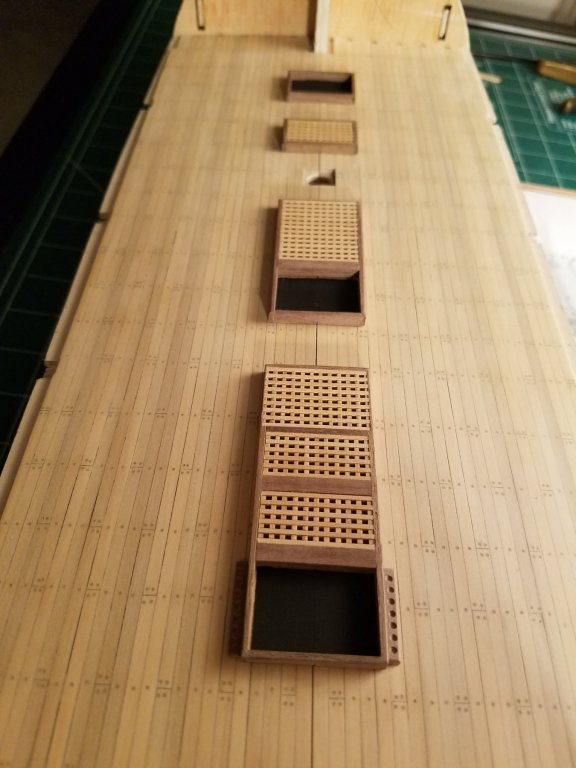
I finished the other wall! I didn't realize that it would take 139 pieces to make... Not sure what to make next. Should I build the inside walls first of the middle deck? So I can make the gun ports on the inside first? Or complete all the measurements and plank the hull next? Or plank the front part of the ship where the bowsprit sits on the deck? I can't follow the instructions for the next step because it wants me to make the upper deck and then plank the quarter deck. I can't do that until the middle deck is fully finished with guns and things. I will be not planking the upper deck so you can look down into the middle deck. Here is what it fully looks like right now. Any advice would be great! Jeff

-
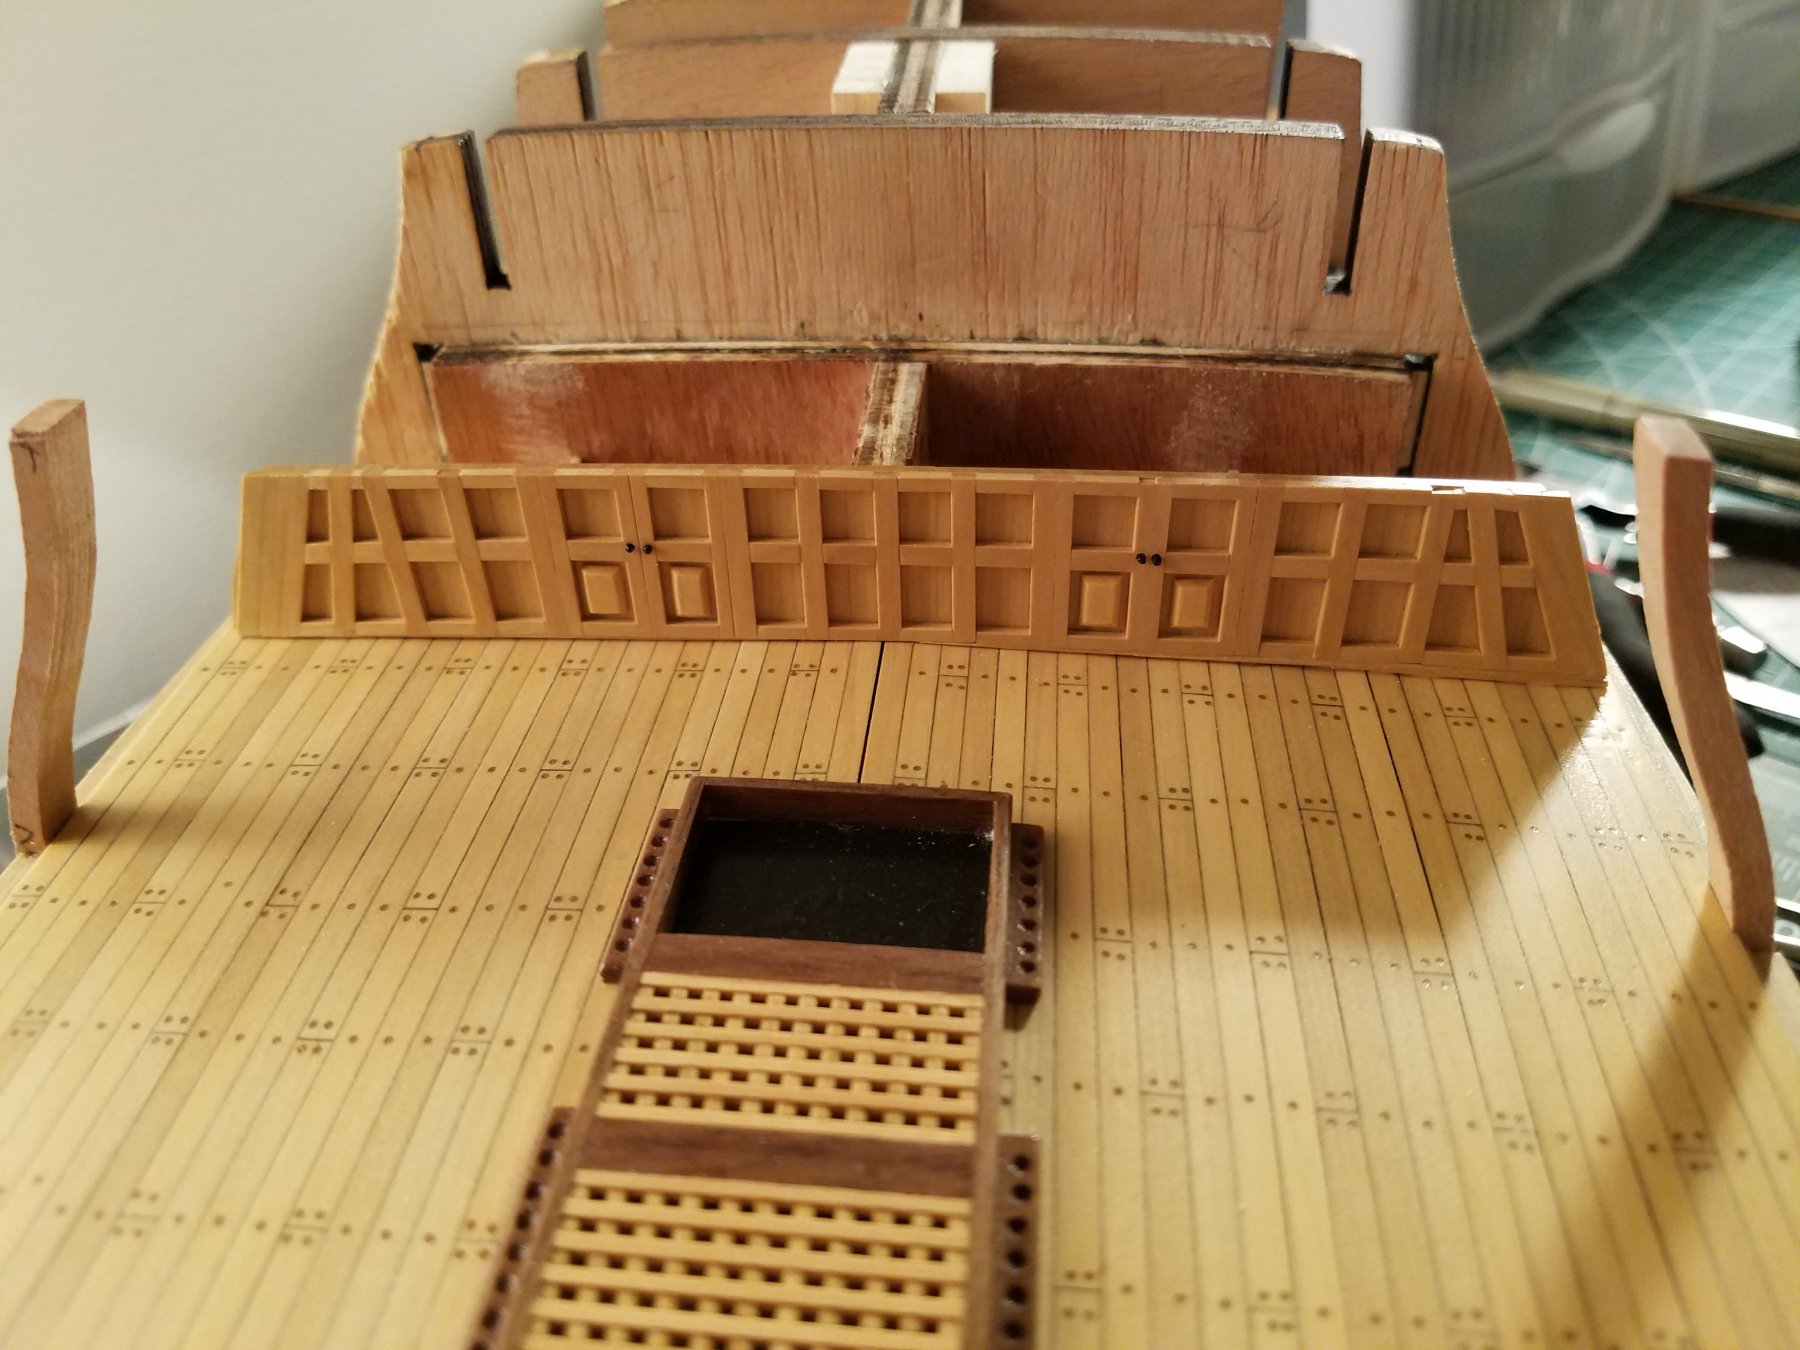
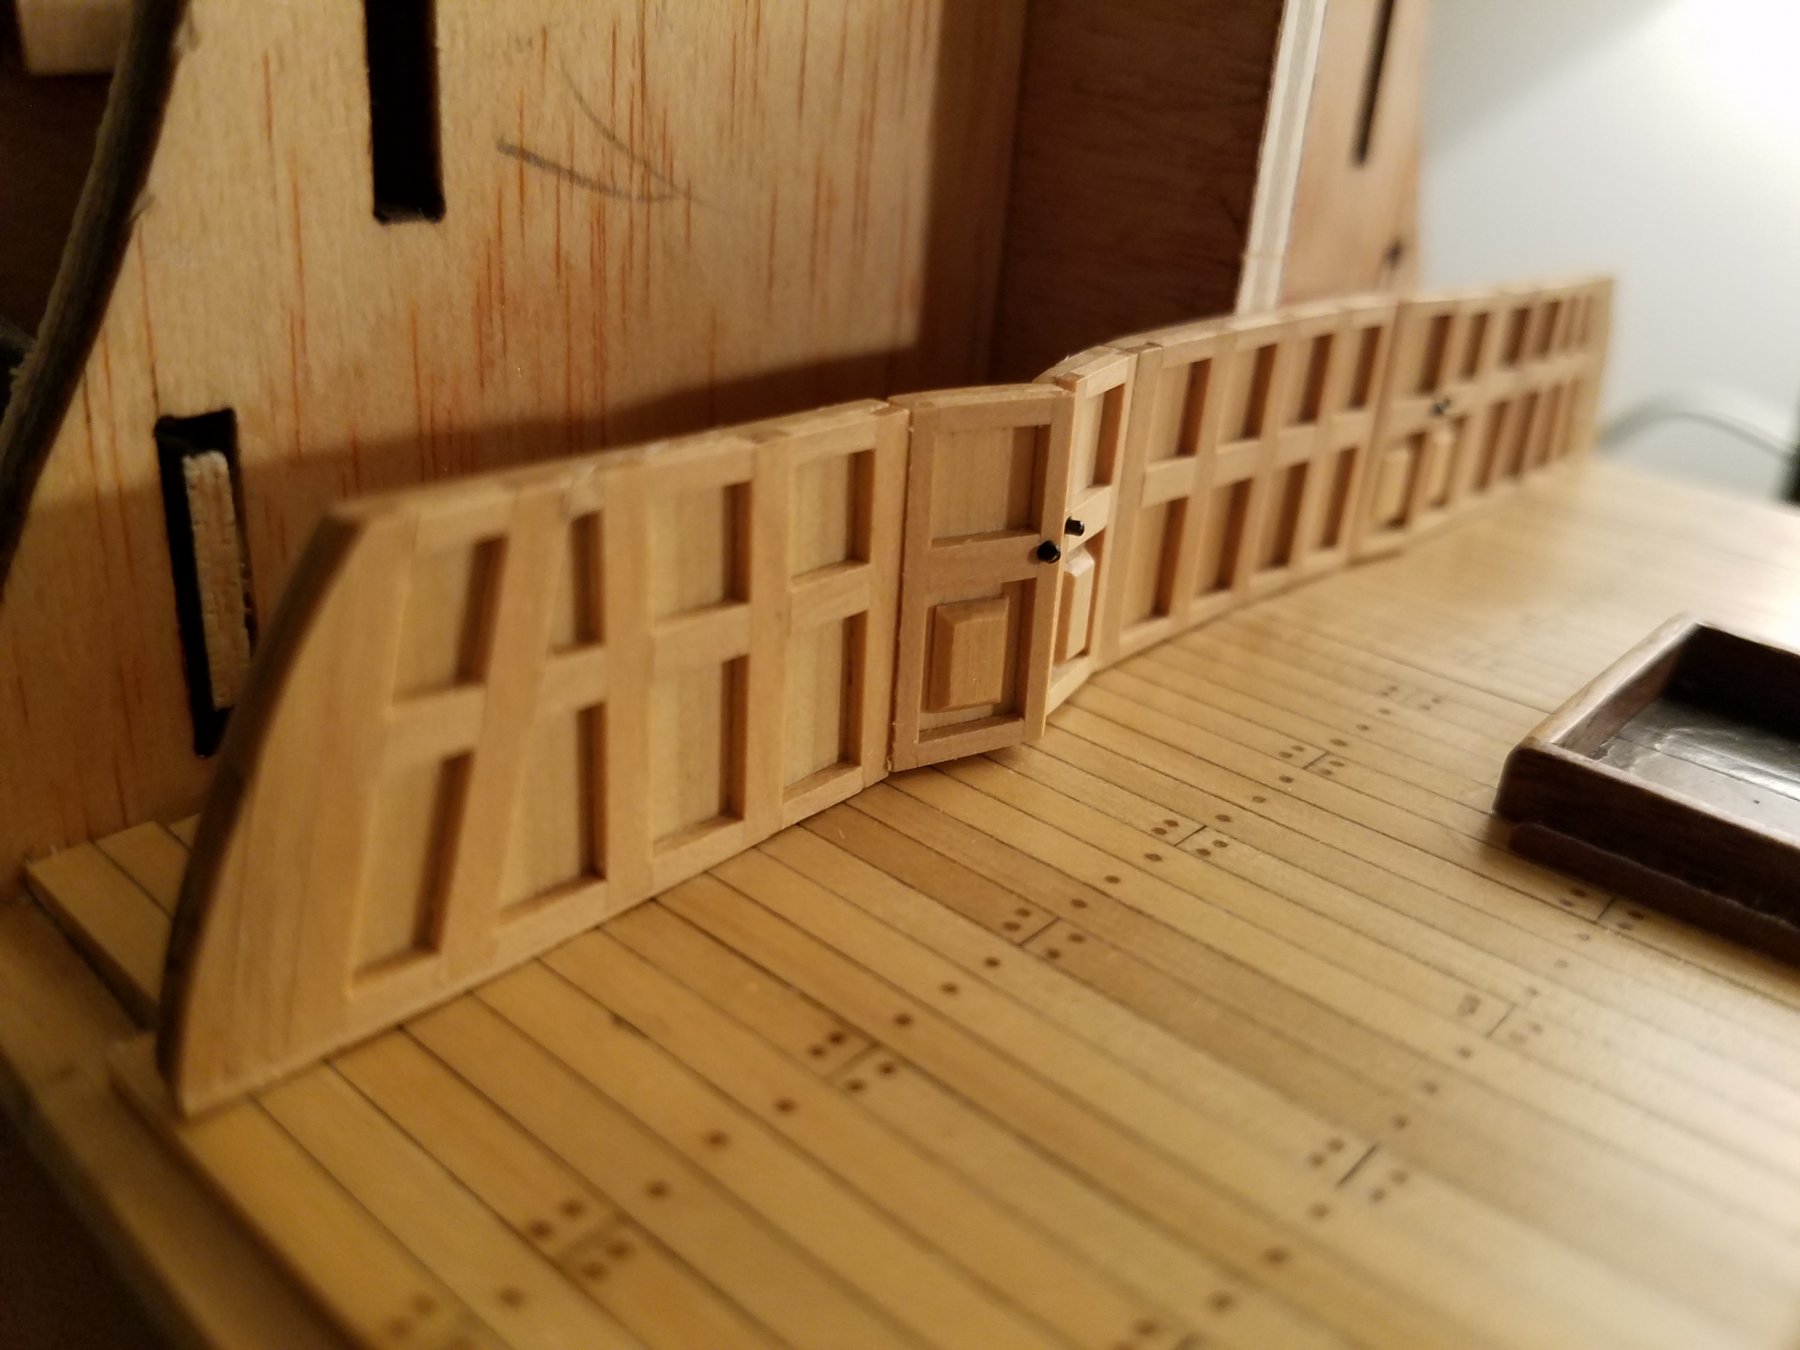
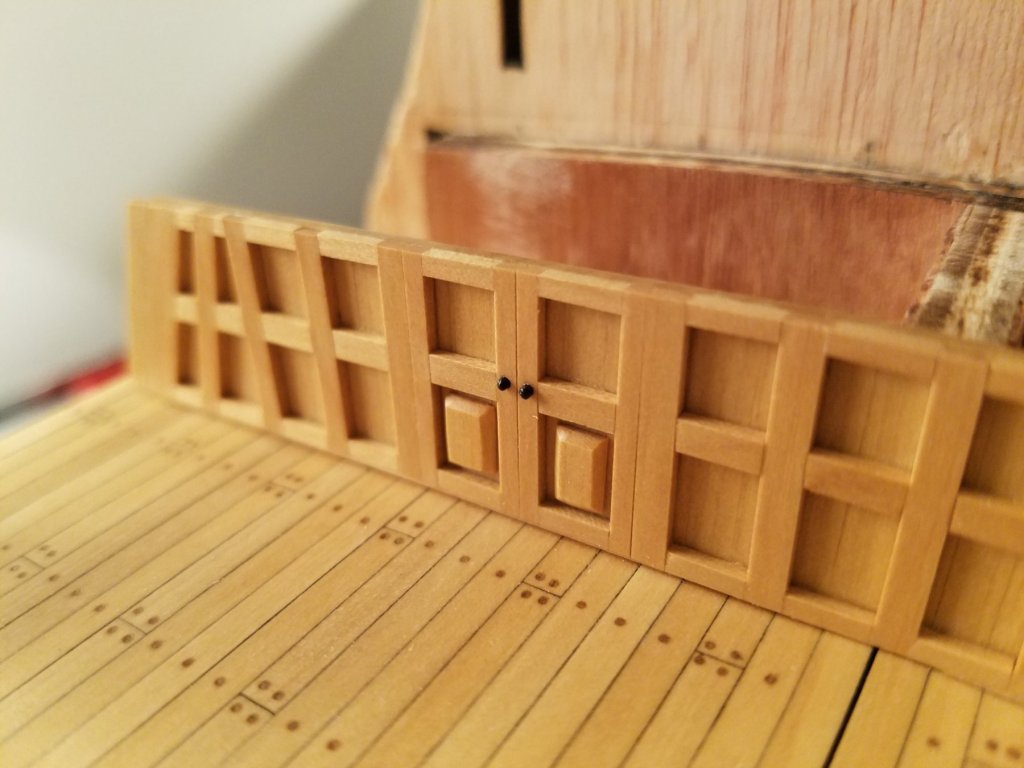
I finally finished one of the walls on the middle deck! Whew! I also made some small doors too. I know that this wall is not actuate, nor is it in the right place. But I'm not making the full middle deck and I just needed something to cover up the bare frames. I am currently working on the other wall for the other side of the ship. I positioned the doors so they are slightly open. Thanks! Jeff
-
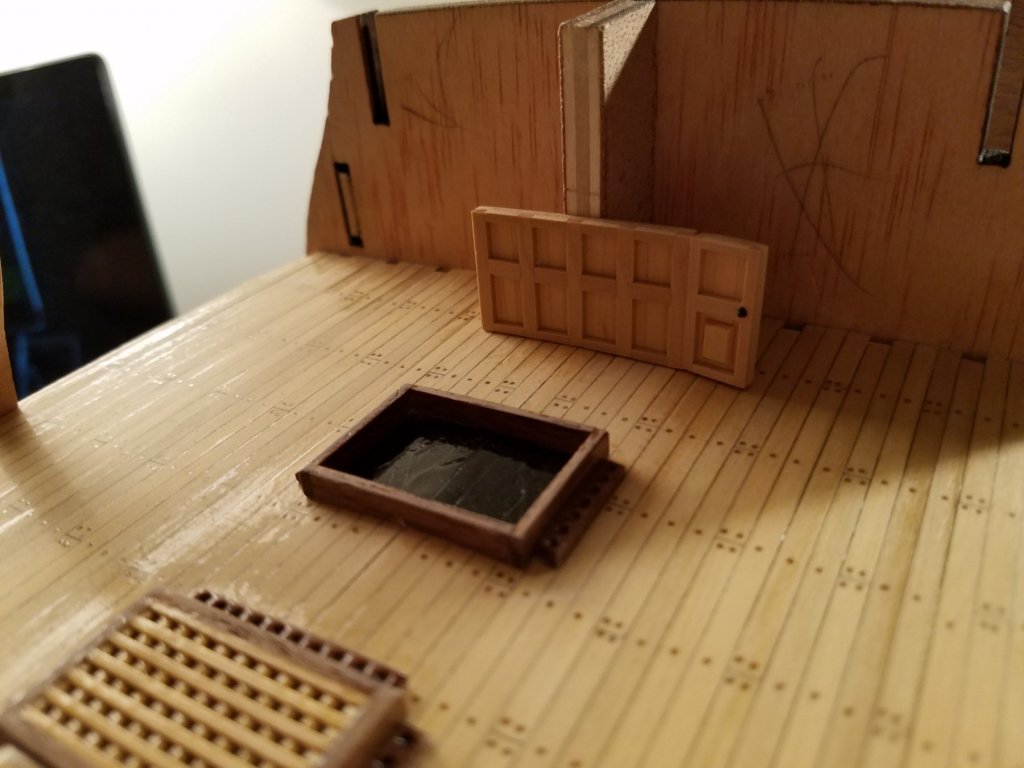
Thank you everyone for all your likes! I finally finished cutting out the tops of the frames and glued them on the ship. That took a while and a few attempts using the scroll saw. I am currently working on the walls and doors that I will be placing on the deck. This is the first section and door. I know that the position of this wall and the doors aren't correct compaired to the real ship, but I'm good with that. I wanted to keep the frames from view. I hope to be able to build more of the doors and walls soon. Jeff

-
That is a good idea! I will have to try that next time. Thanks for thr advice John! I had already purchased the sanding sealer and this is the outcome: I like it a lot better than the varnish as its really clear and brings out the wood really well! The nails are more pronounced but not too overwhelming. I need to dust off the black pained haha! I am happy with the result. I will get better at applying it the more I use it. Jeff
-
About varnishing, I have noticed that some varnish leaves a yellowish hew on what I am varnishing. I don't like that too much. What varnish would you guys recommend? Jeff
-
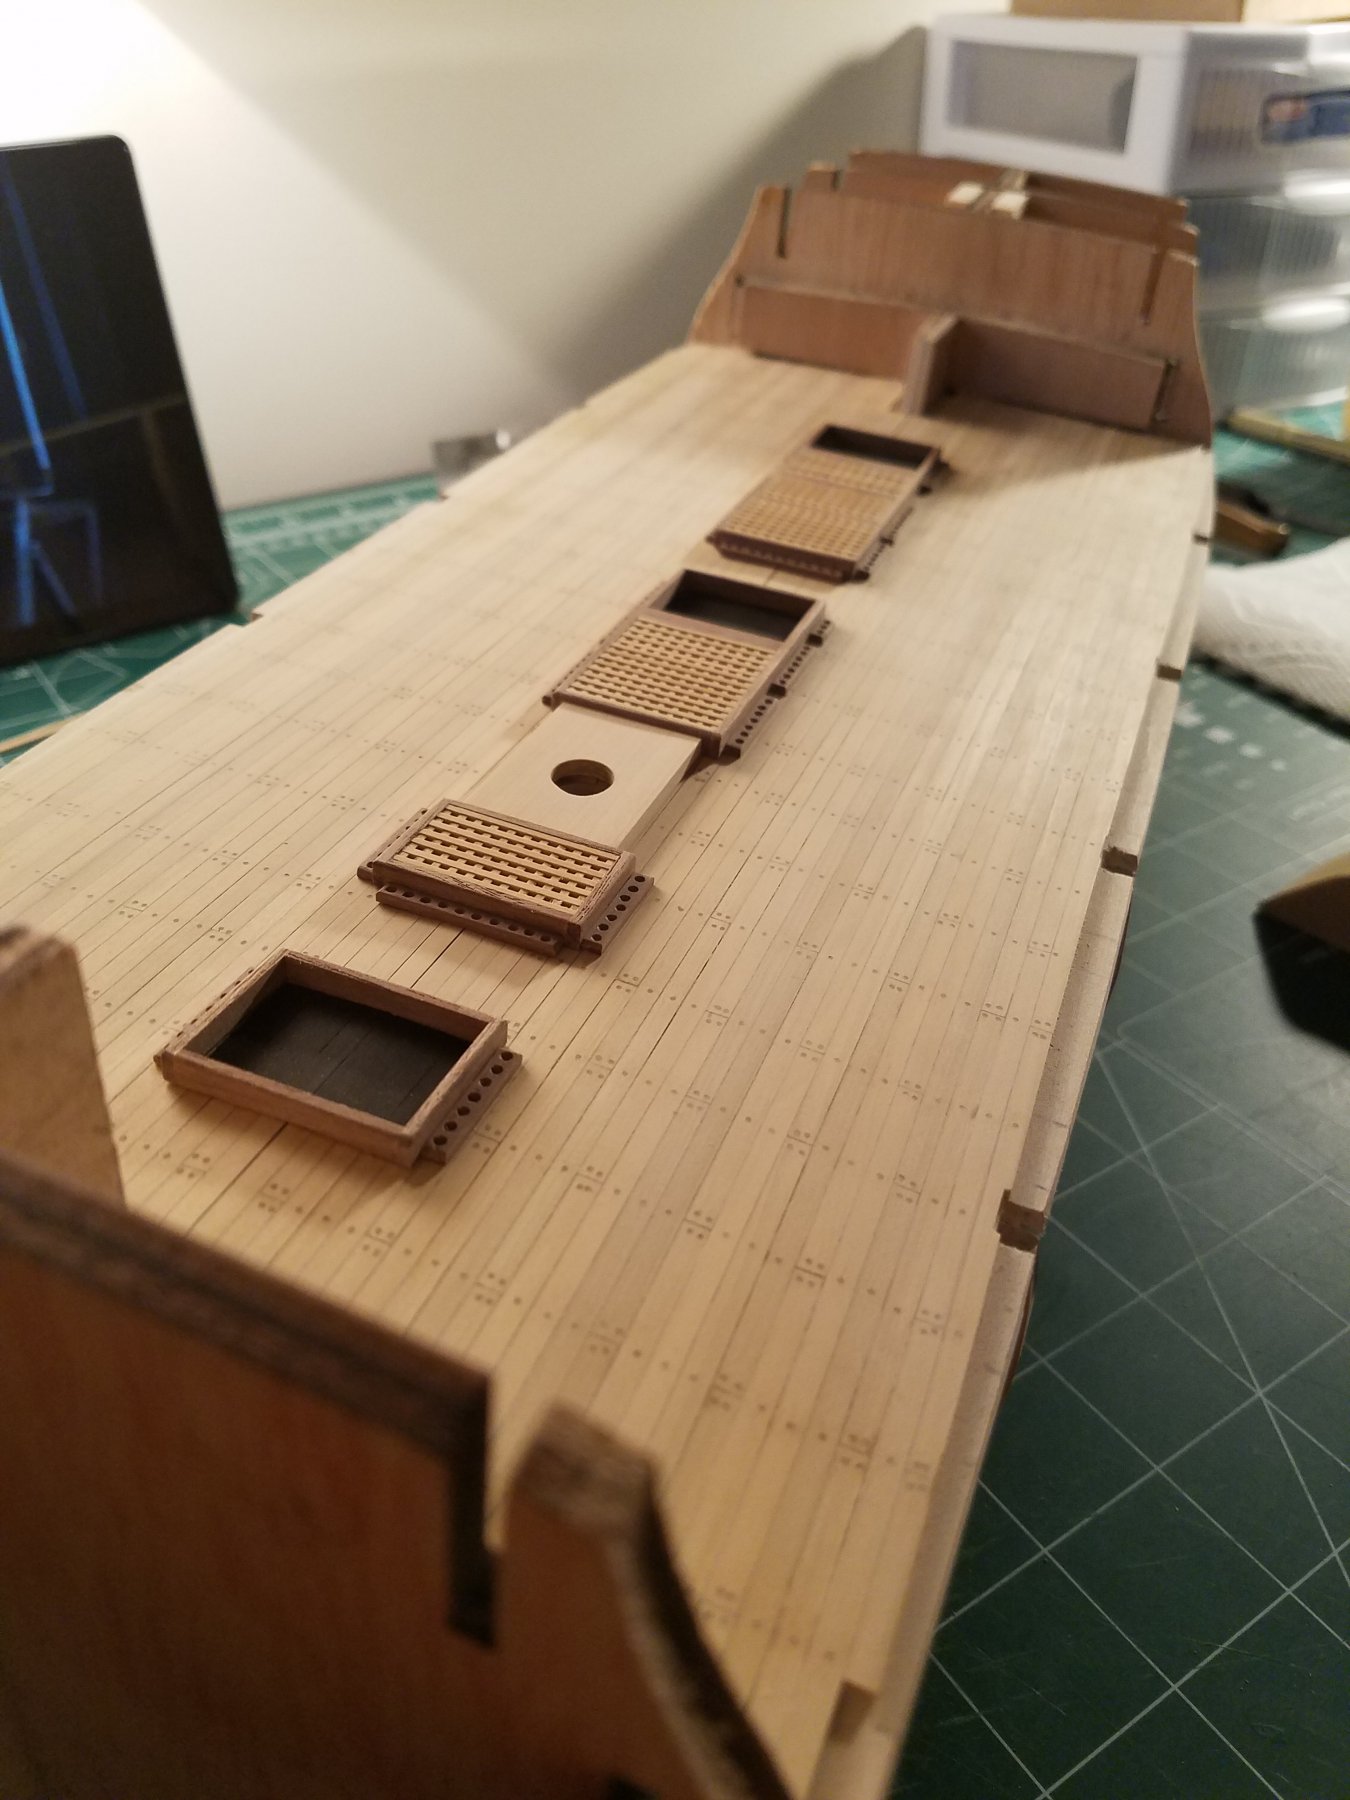
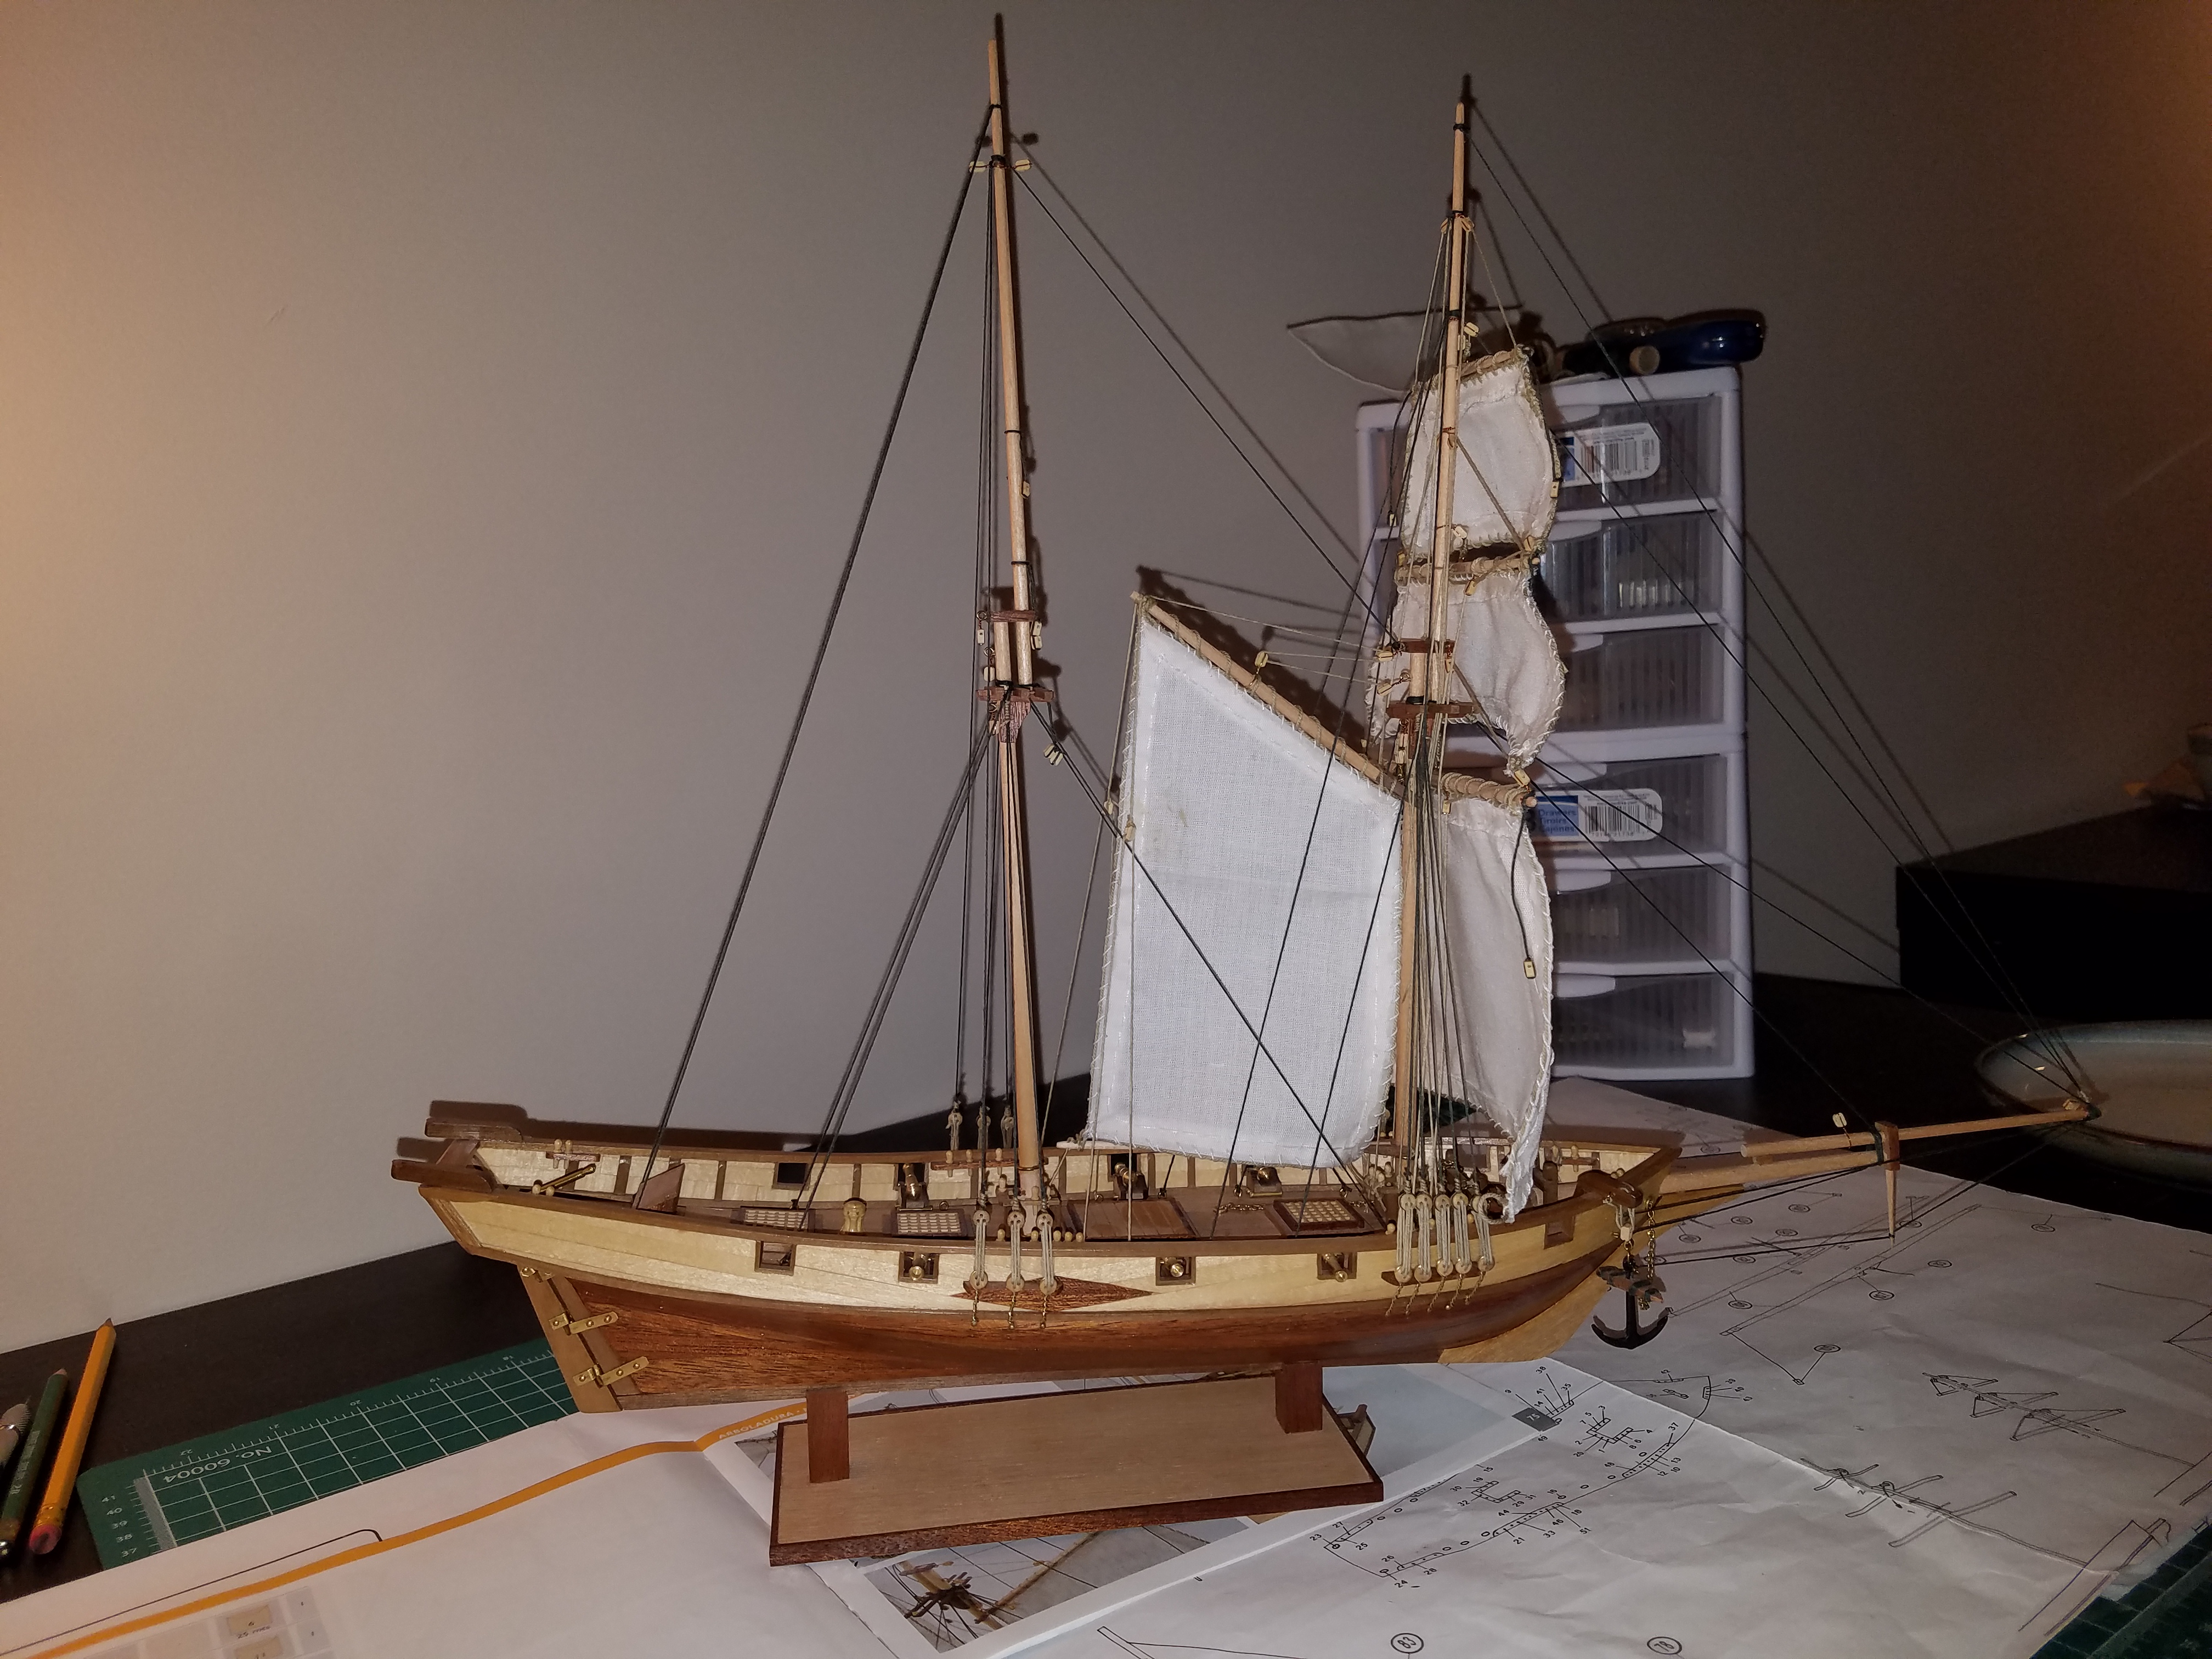
Thanks for the advice Dan! I will be doing just that on the next deck. I feel that I am finally back to where I was before the accident! I finished putting on the shot garlands! Compairing it to what I had before, I think this is much better. What I didn't realize was that the space between the shot garlands were actually roughly in the middle of where the corresponding gun would go. I already had marked where the guns should be on the model and figured out that I had marked out everything correctly! That was a huge relief and 0 work had to be redone. That means the gun placement as well as the hatch placements are correct. Next, I am thinking of varnishing the deck, then remaking the bulkhead sides I removed and gluing them in place. I am not that happy with the ones I already made and think I can make them better. Thanks! Jeff


-
Antony, thank you and everyone for the likes! As for making the gratings curved, I plan on doing just that as both you and Dan have pointed out. I will be progressively curving them based on the book plans. Thanks!! Jeff
-
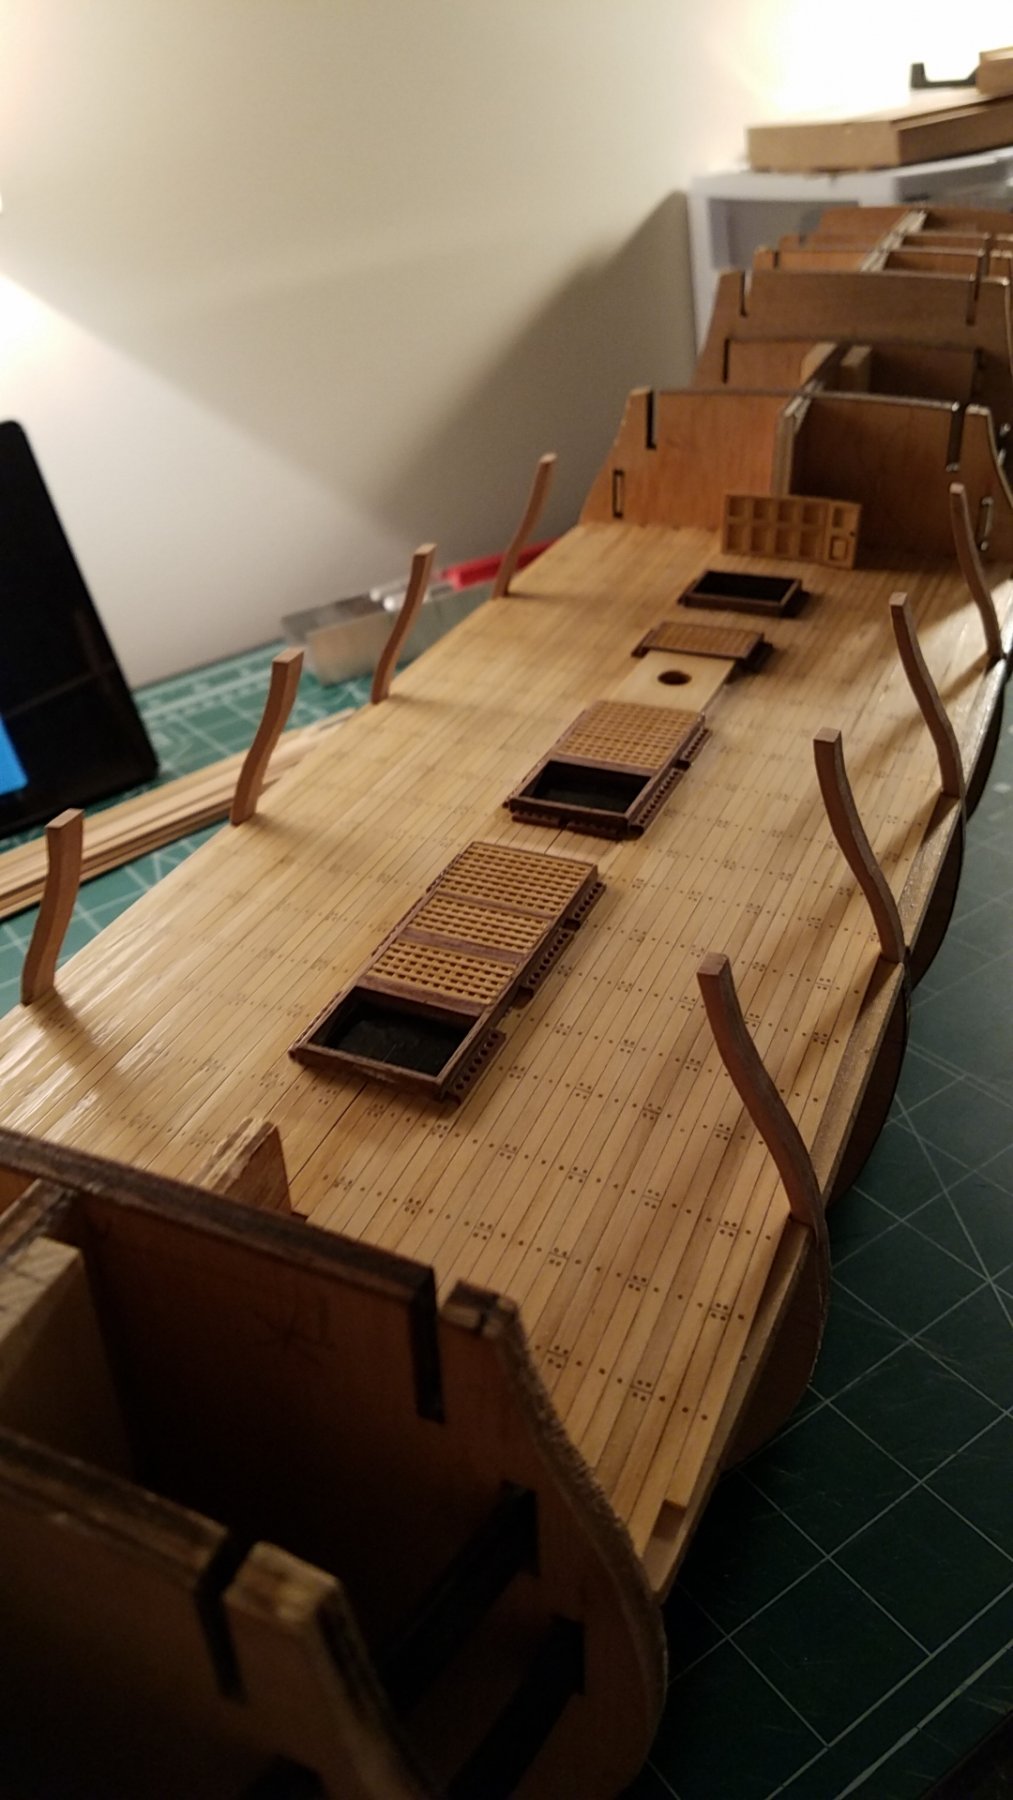
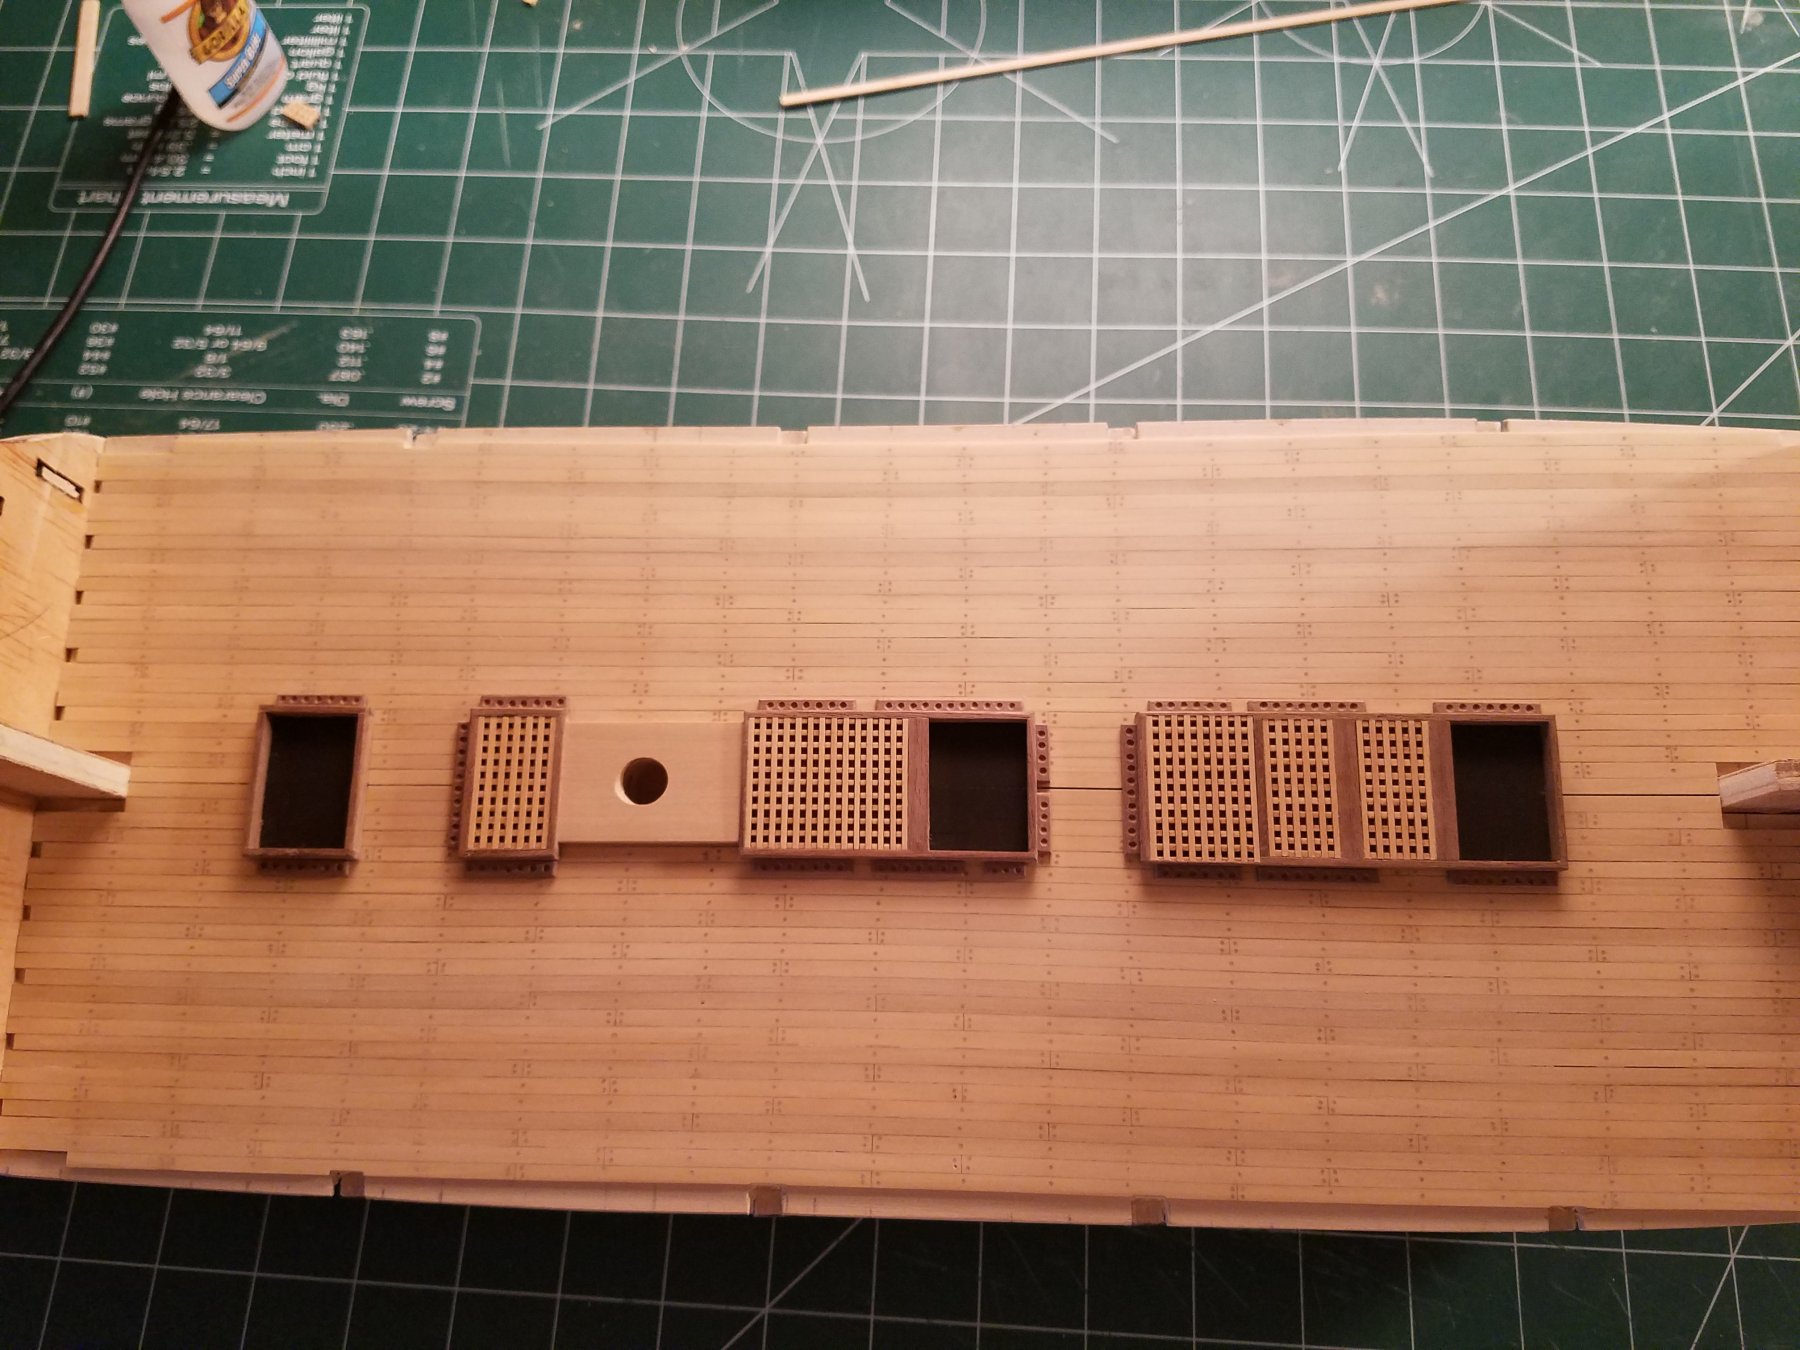
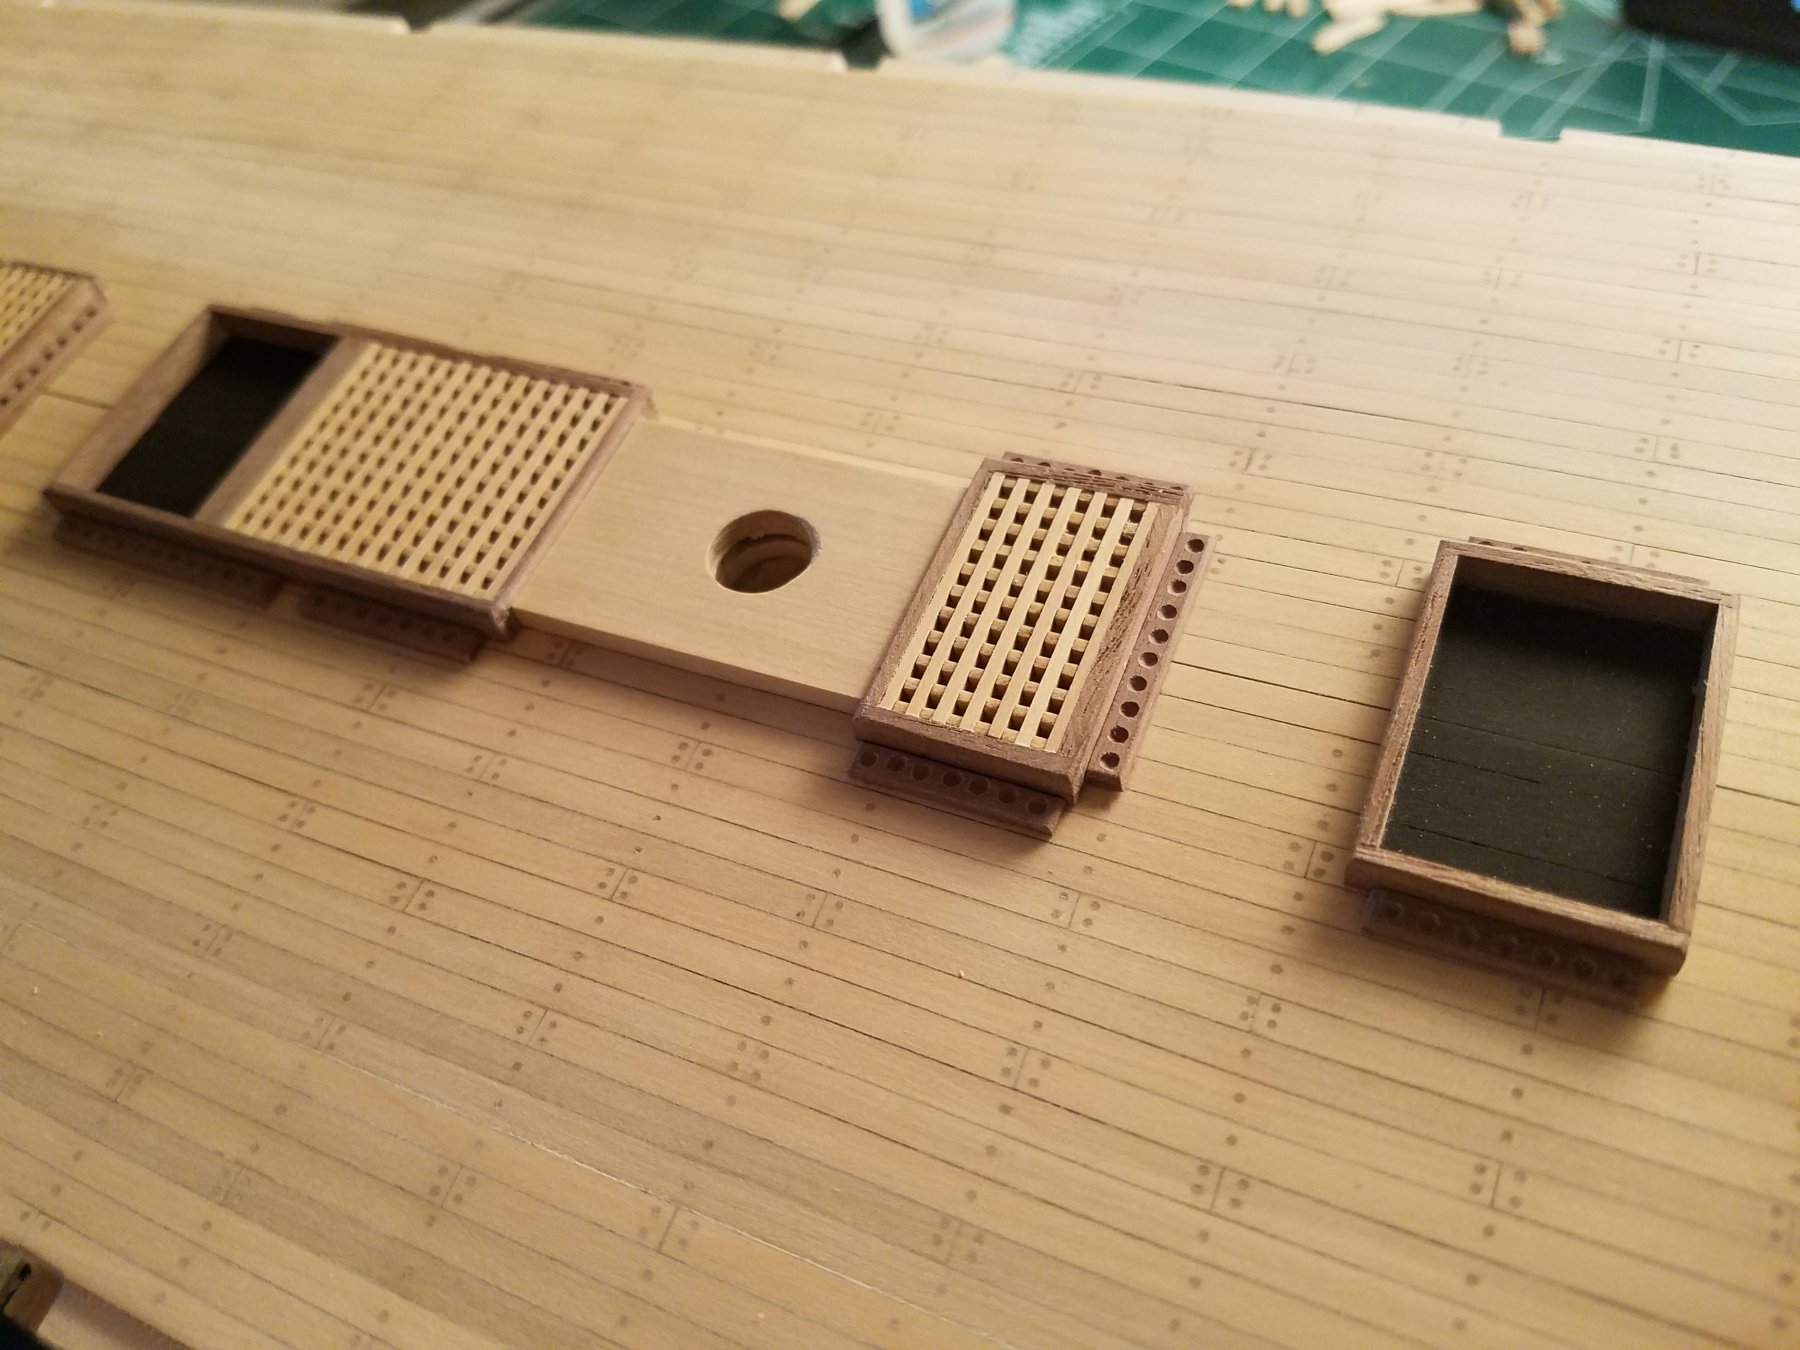
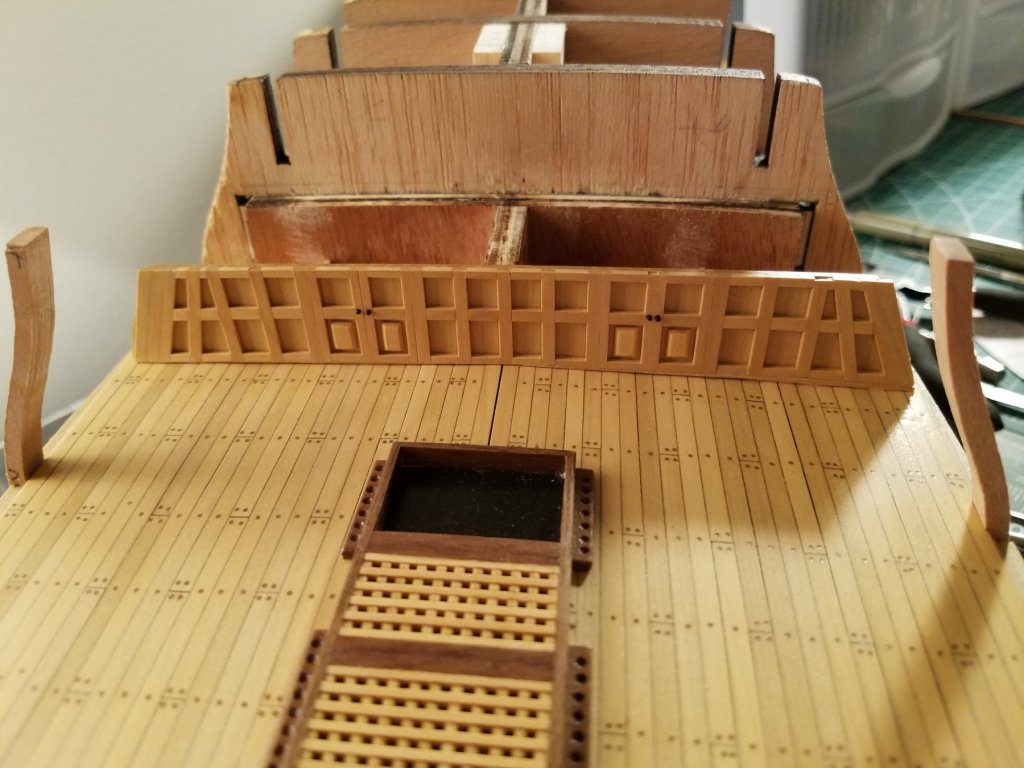
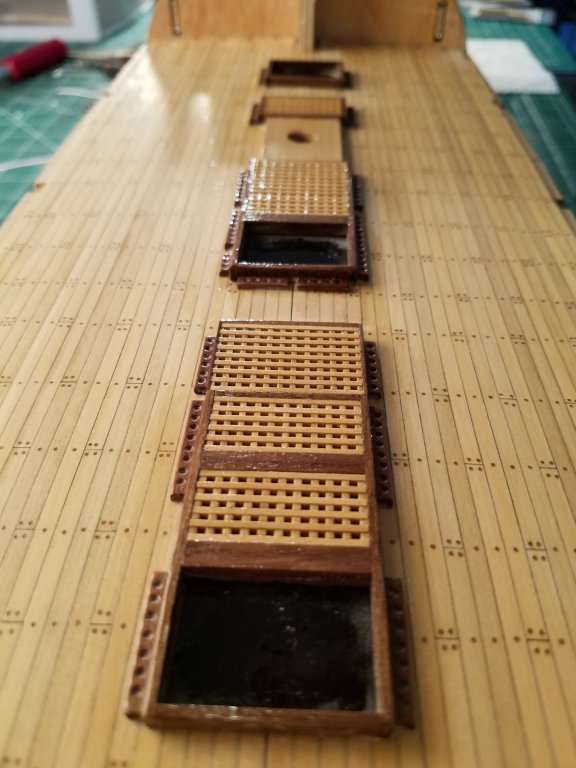
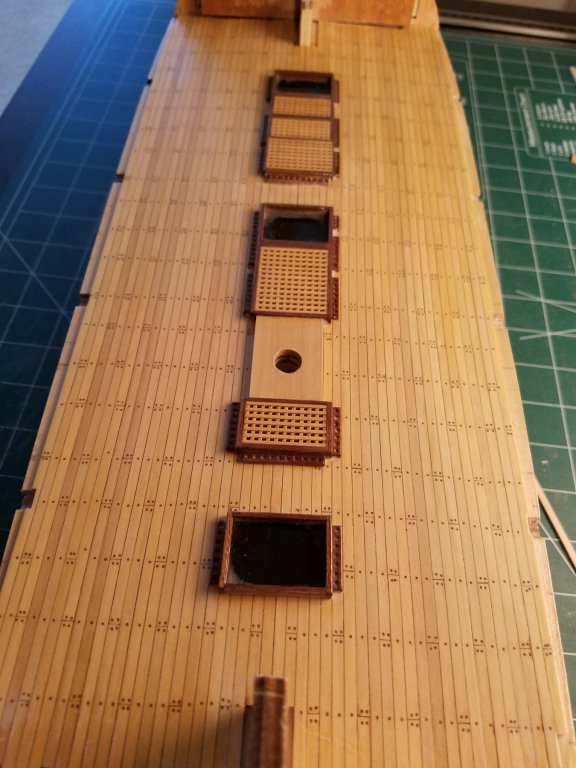
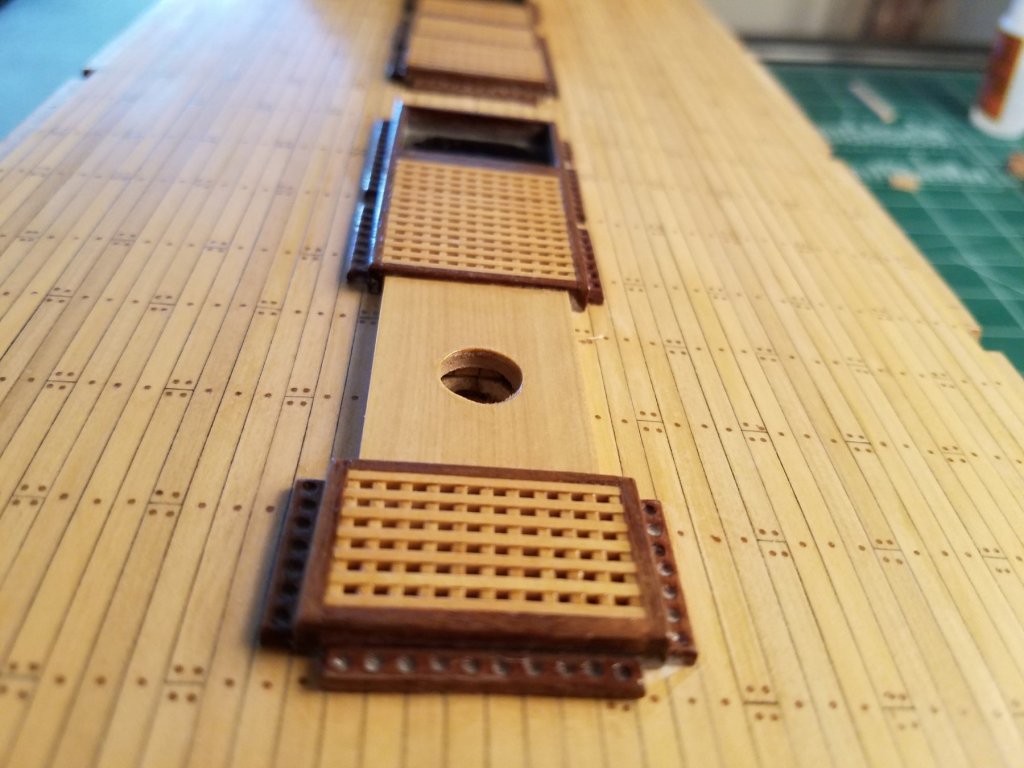
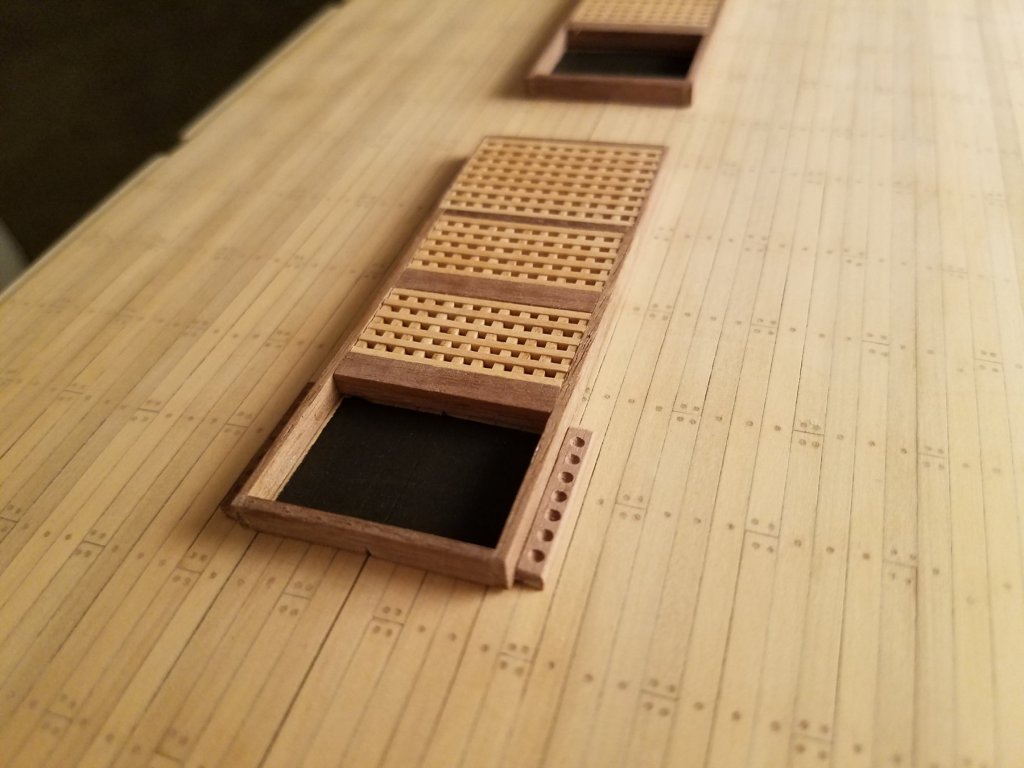
I finally feel like I have made some progress! I am close to getting back to before the falling disaster. But this time making the middle deck instead. I have put on the hatches as well as started to make the shot garlands. According to the book, there should be nine cannon balls held on the shot garlands I have made. But the wood supplied in the kit kept chipping off because of how close each cannon ball is to the next. So instead, I put seven instead of nine and that fixed the problem. ( And no, not meaning to make that a Star trek reference!) The companionways are all painted black because I am not making the lower deck nor cutting out holes to look deeper into the ship. Thanks!! Jeff
-
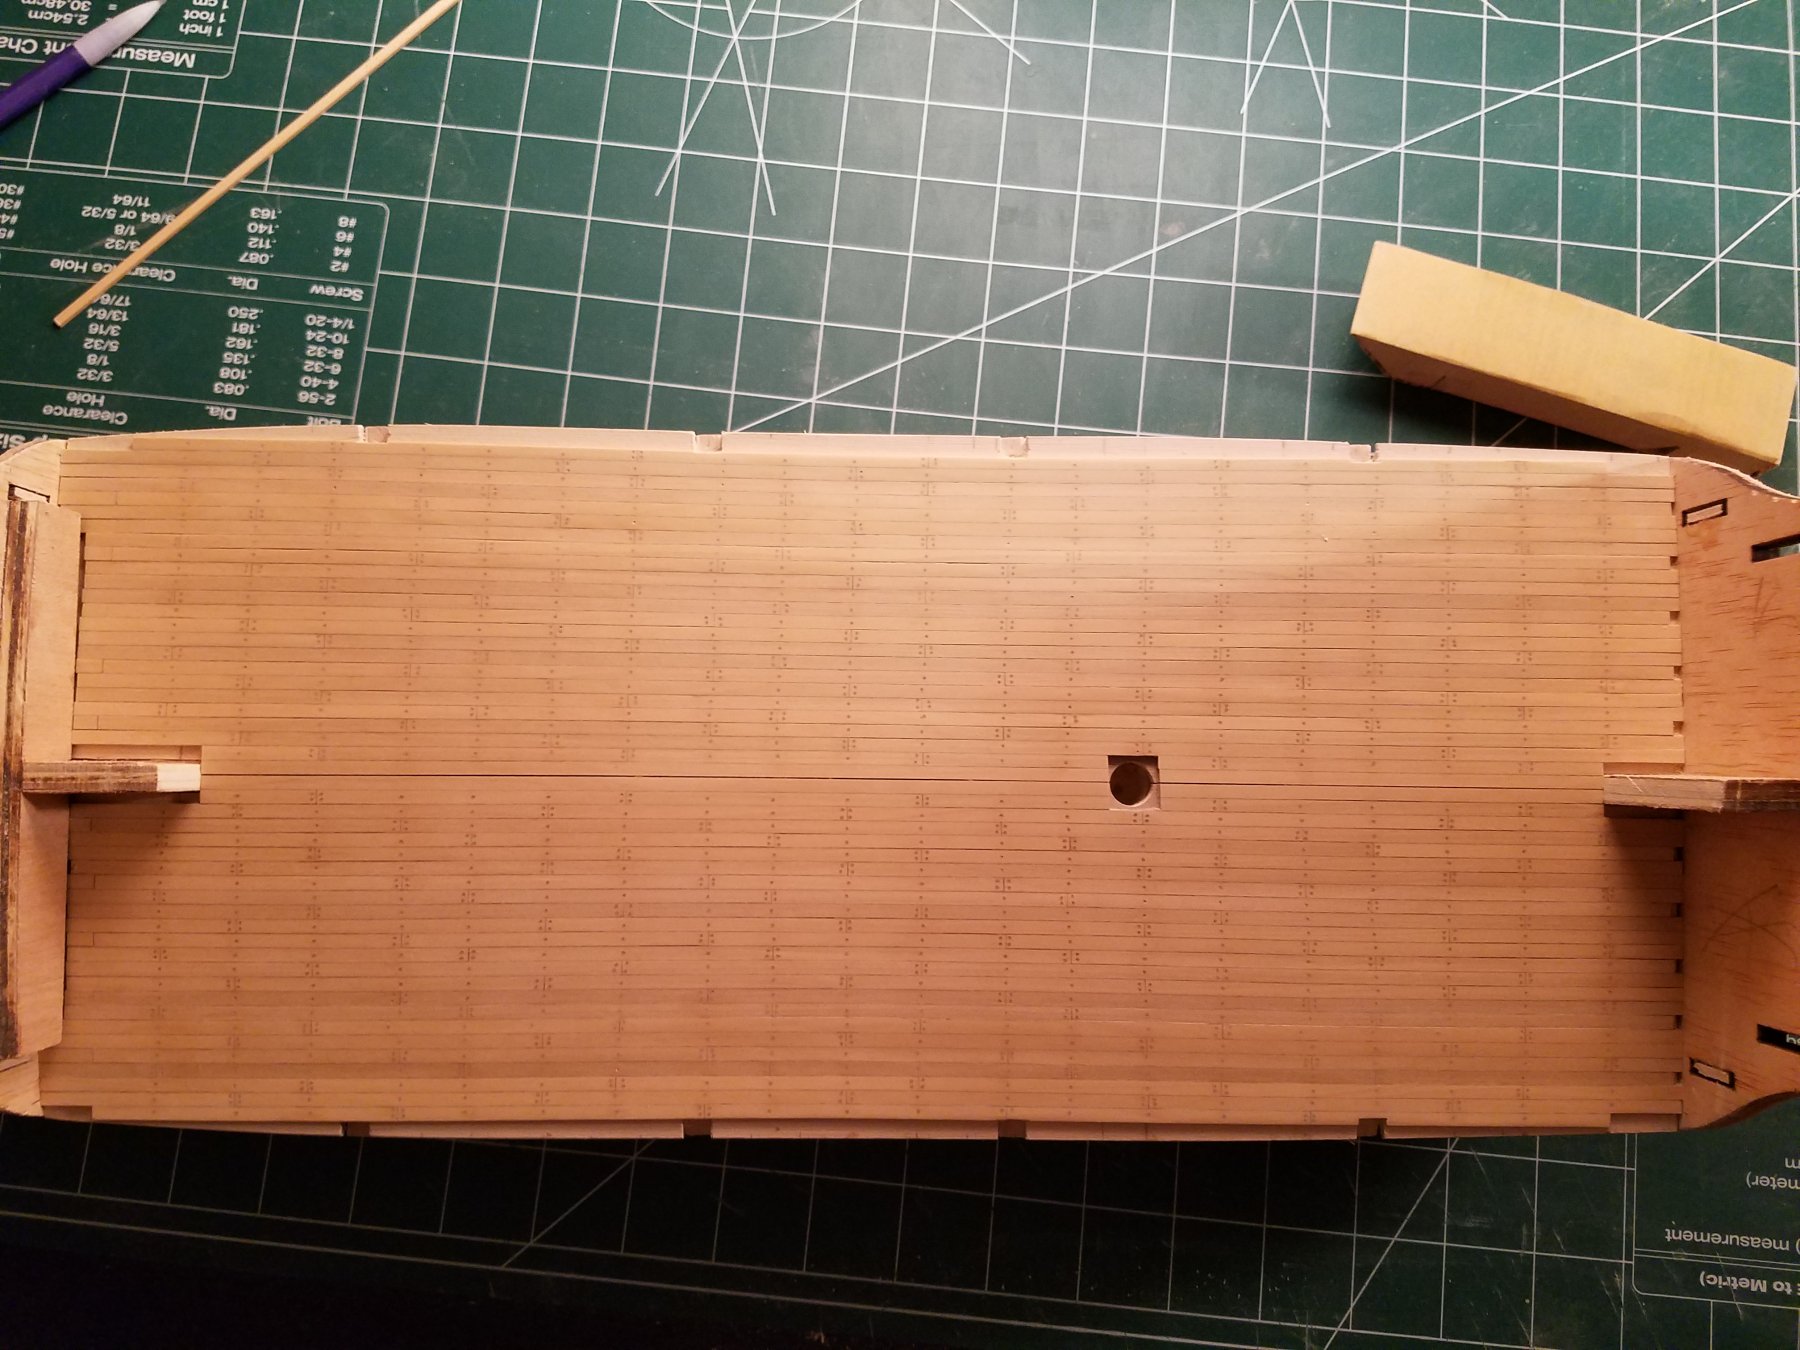
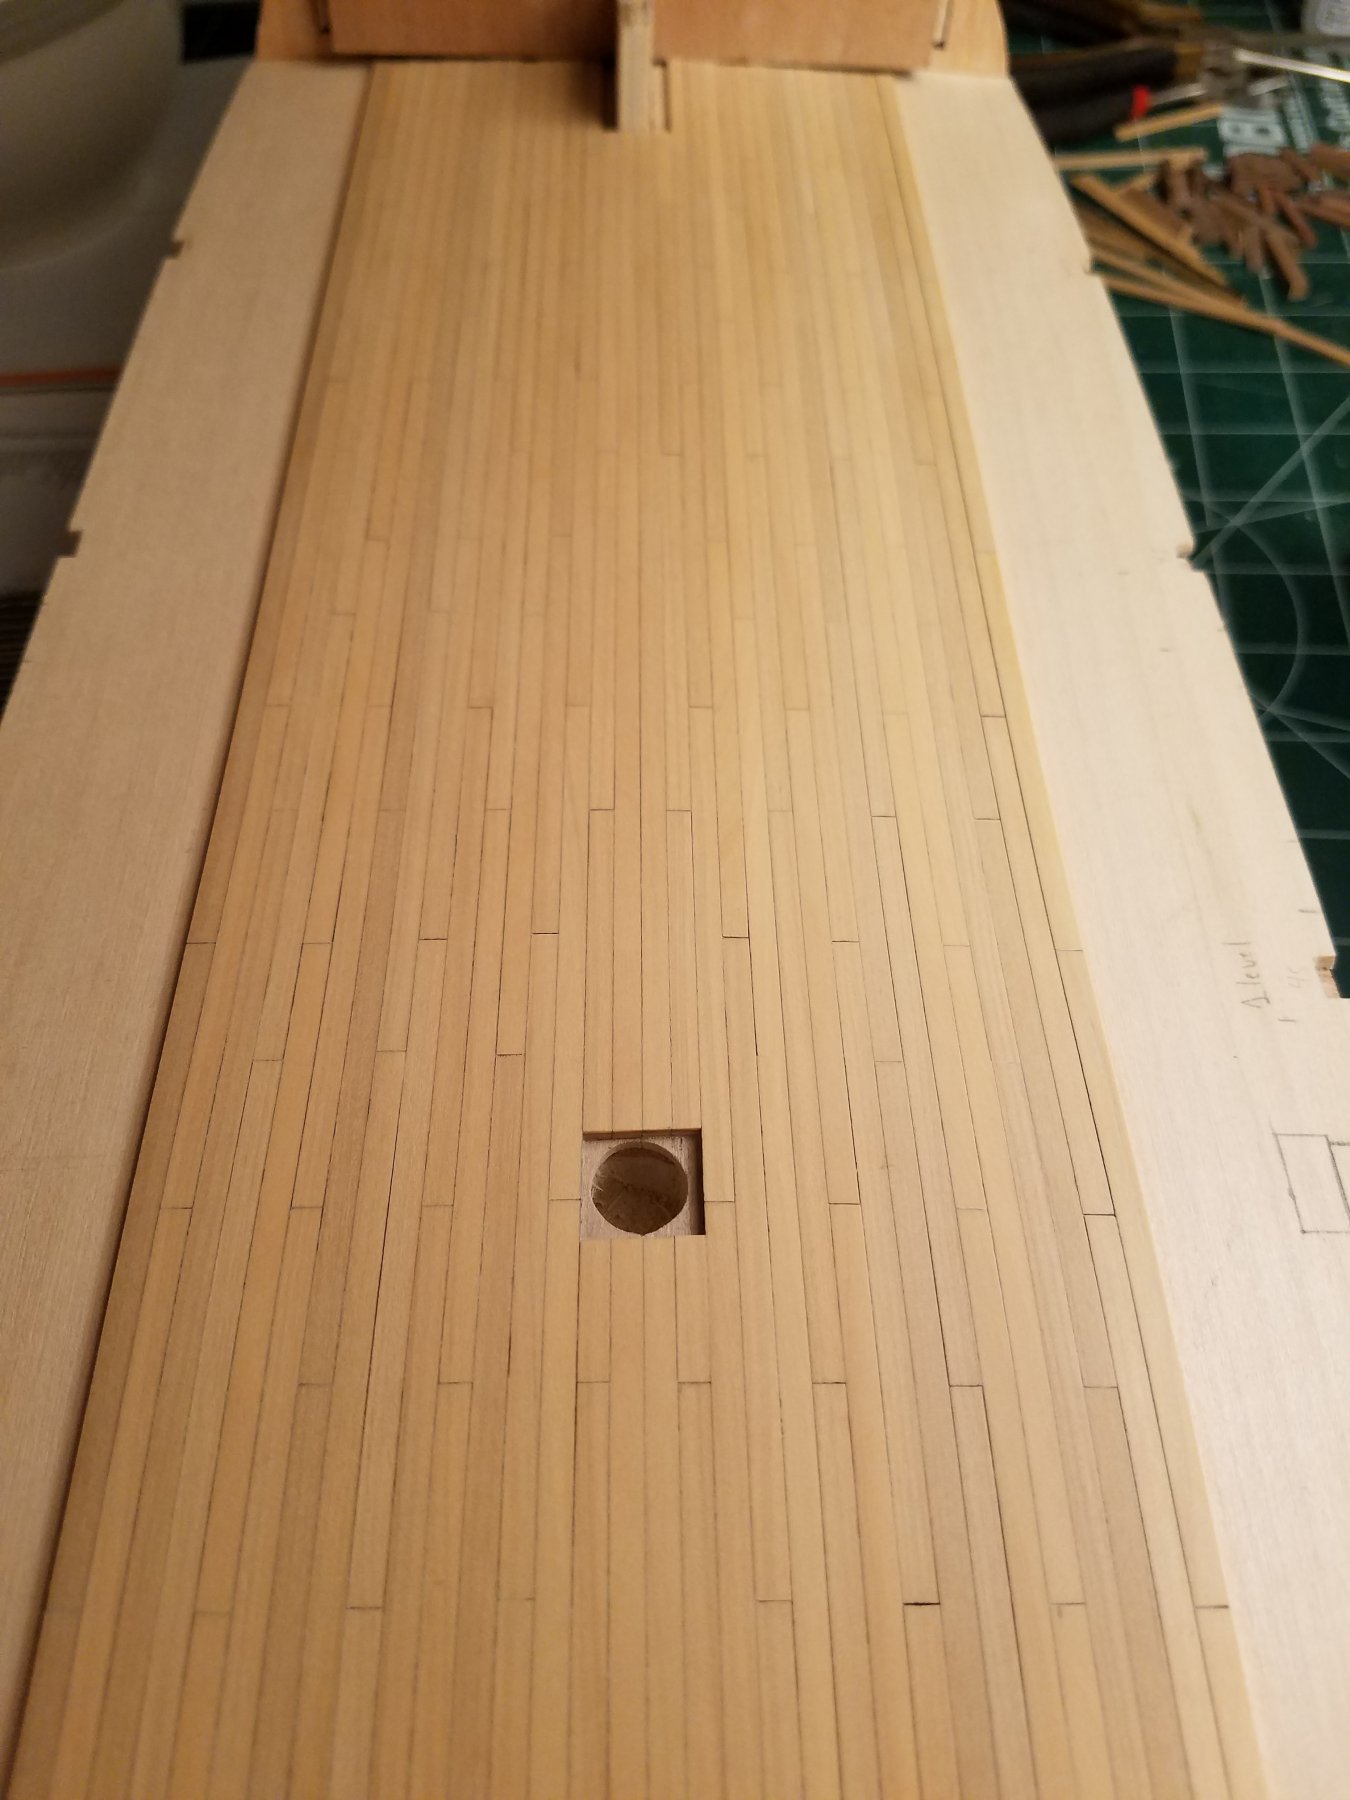
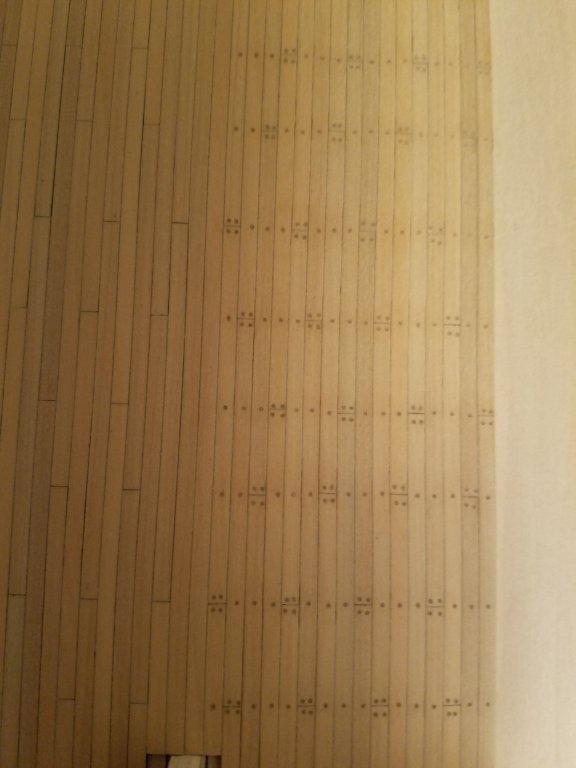
It sure has been a while since I have posted. Things have been crazy around here! I finally finished planking the middle deck!!! It took a long while to do, but its done! The last part is to varnish it. It is definetly not perfect, but I have learned a lot so the next deck I plank will be a lot better. I hope I can continue at a little faster pace. I get about 30 min per day to work on it. Usually I am too tired so I don't get to work on it as much as I want. Happy holidays and new years! Jeff

-
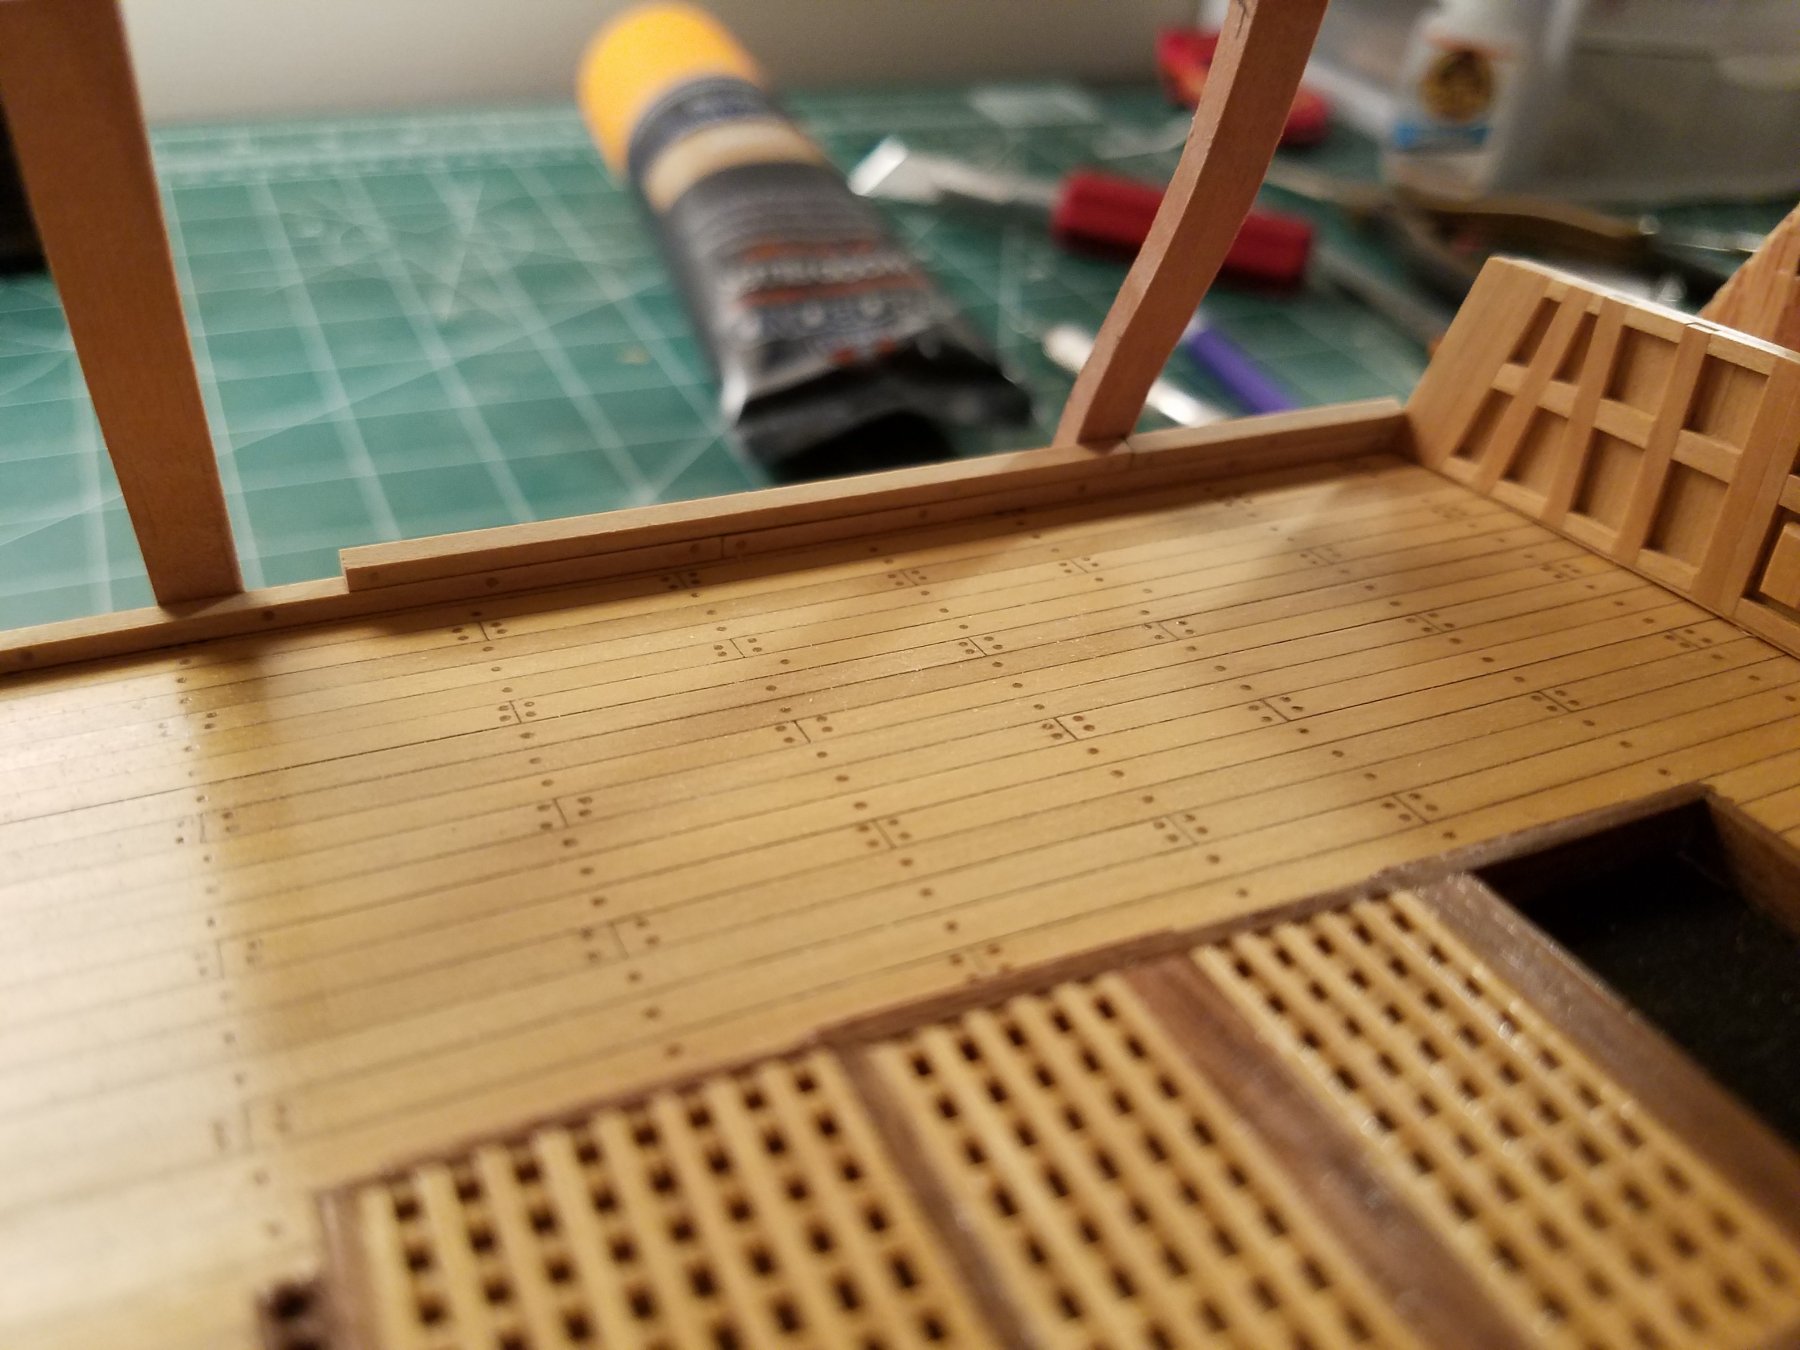
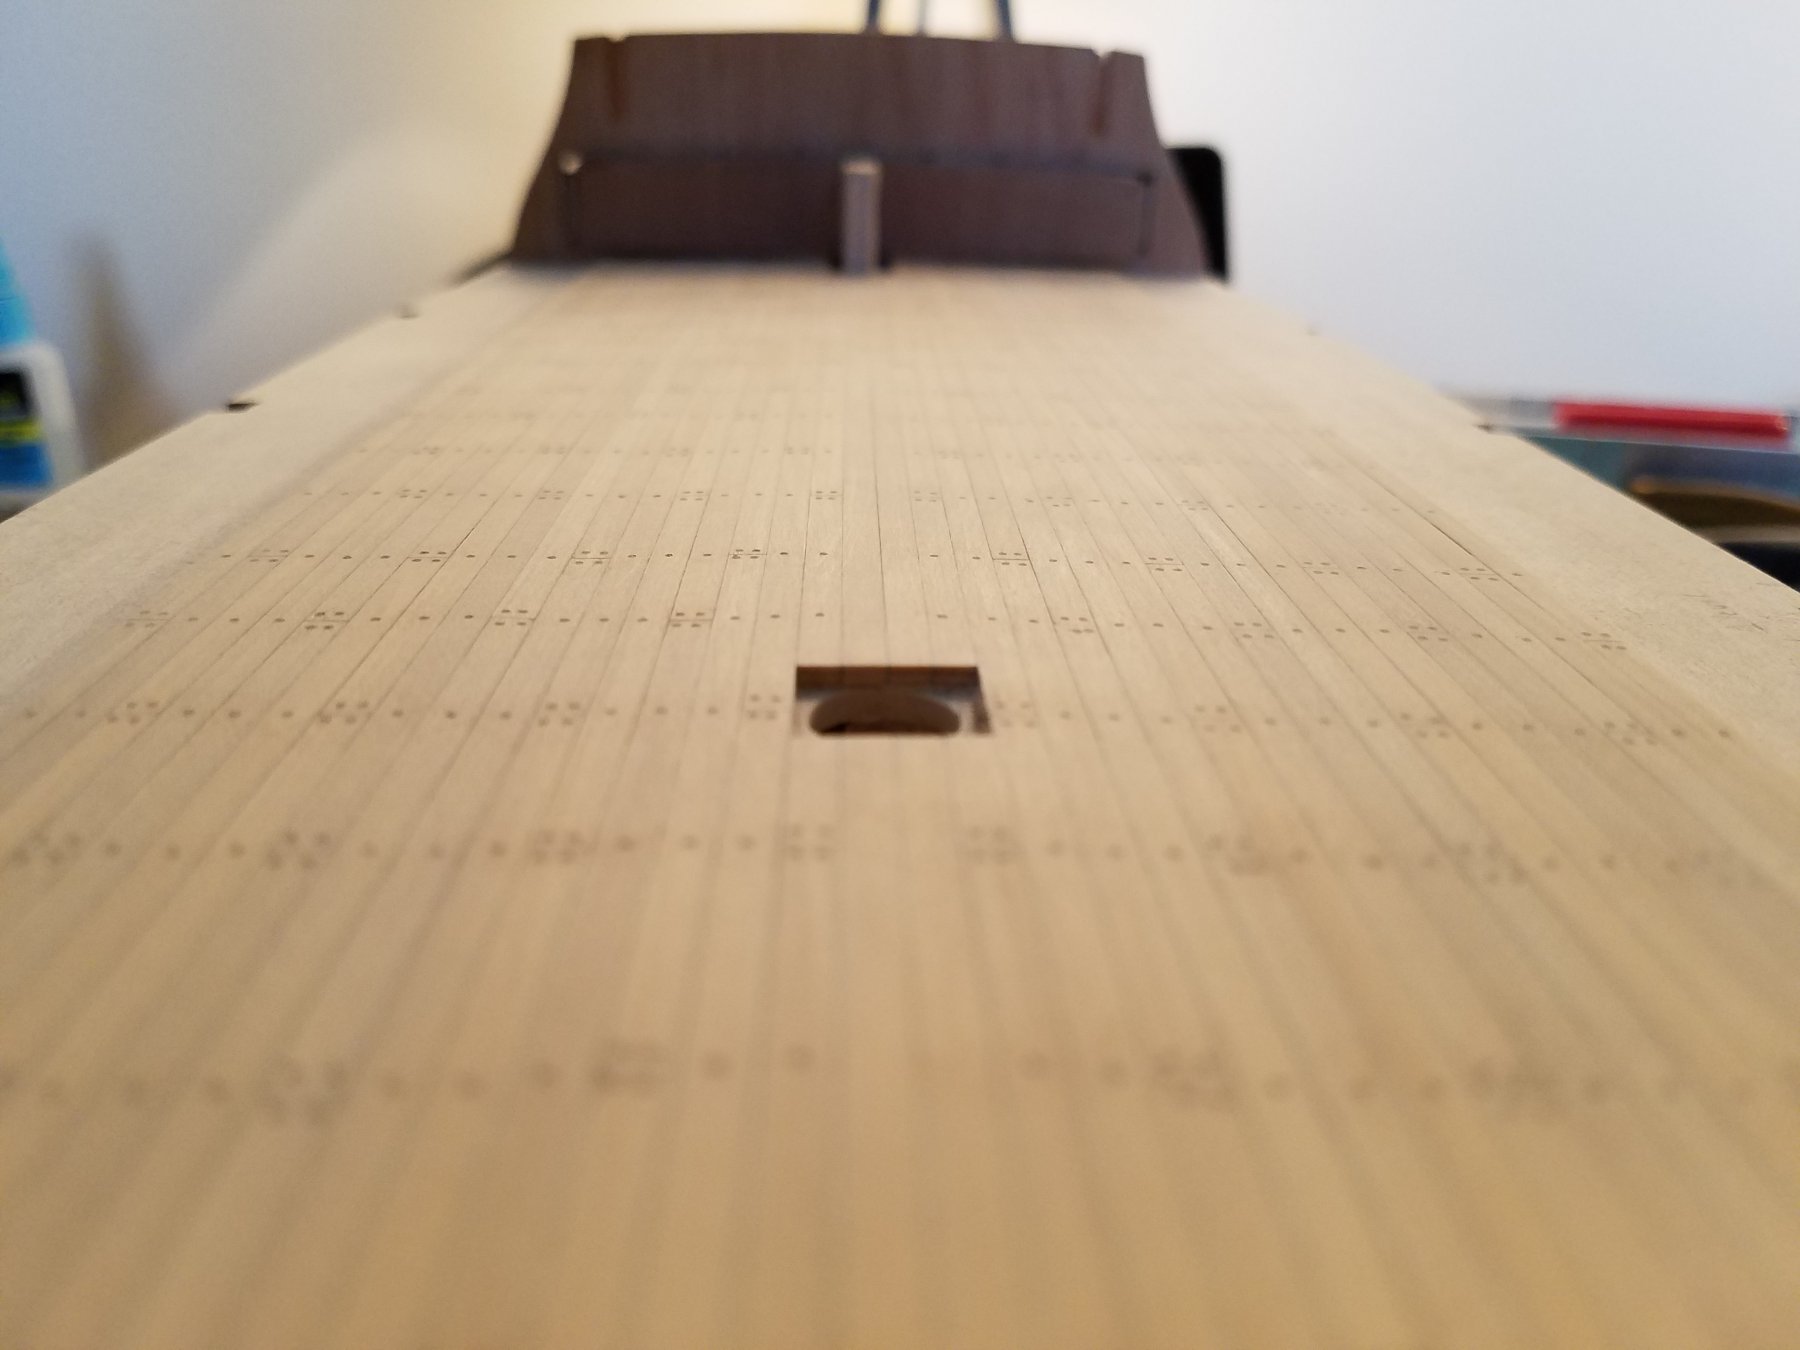
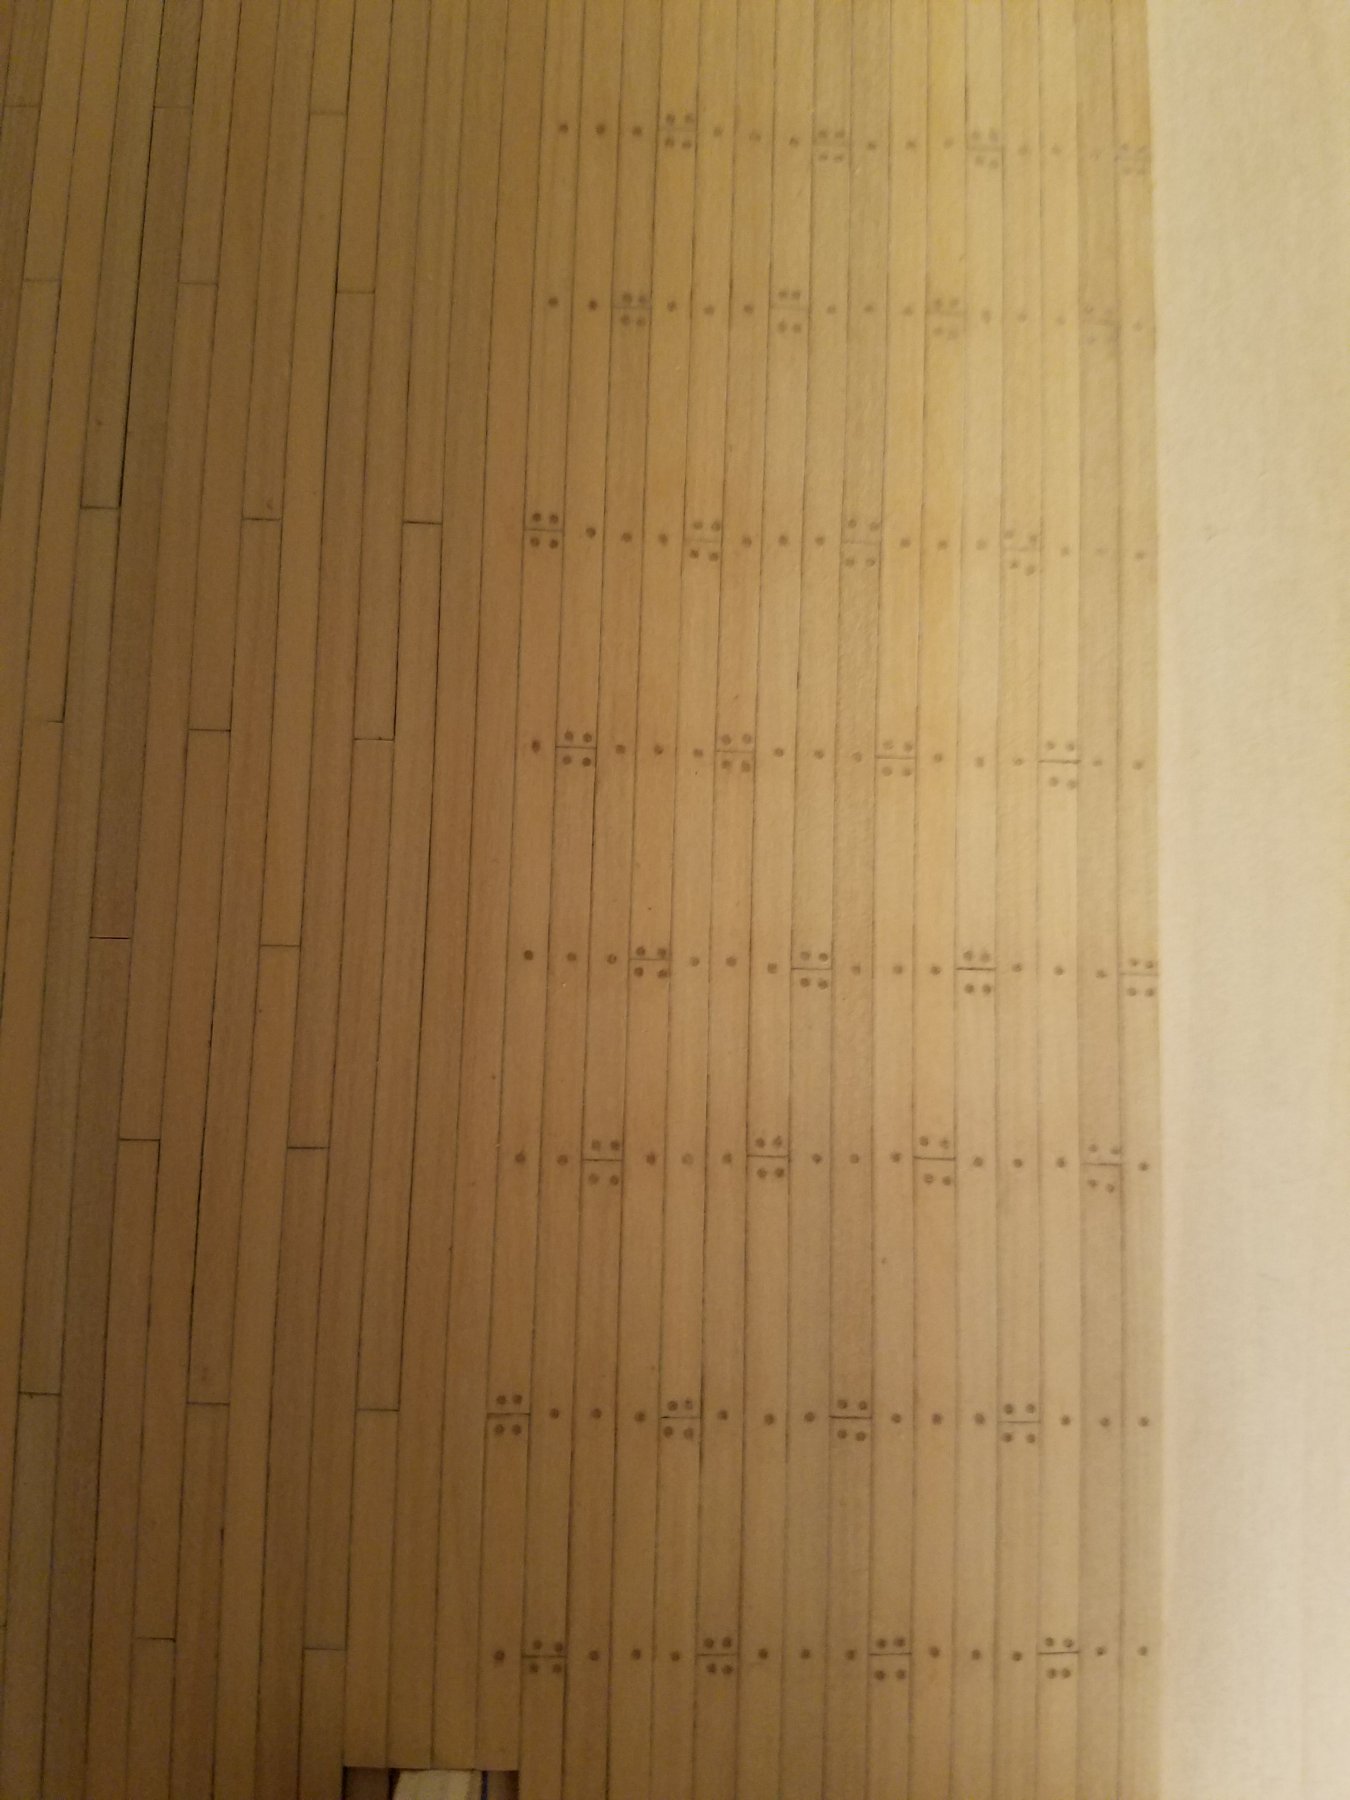
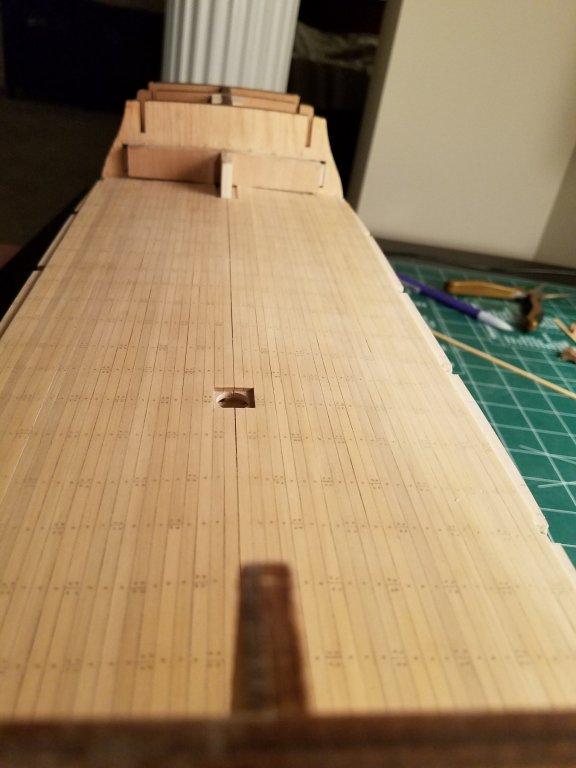
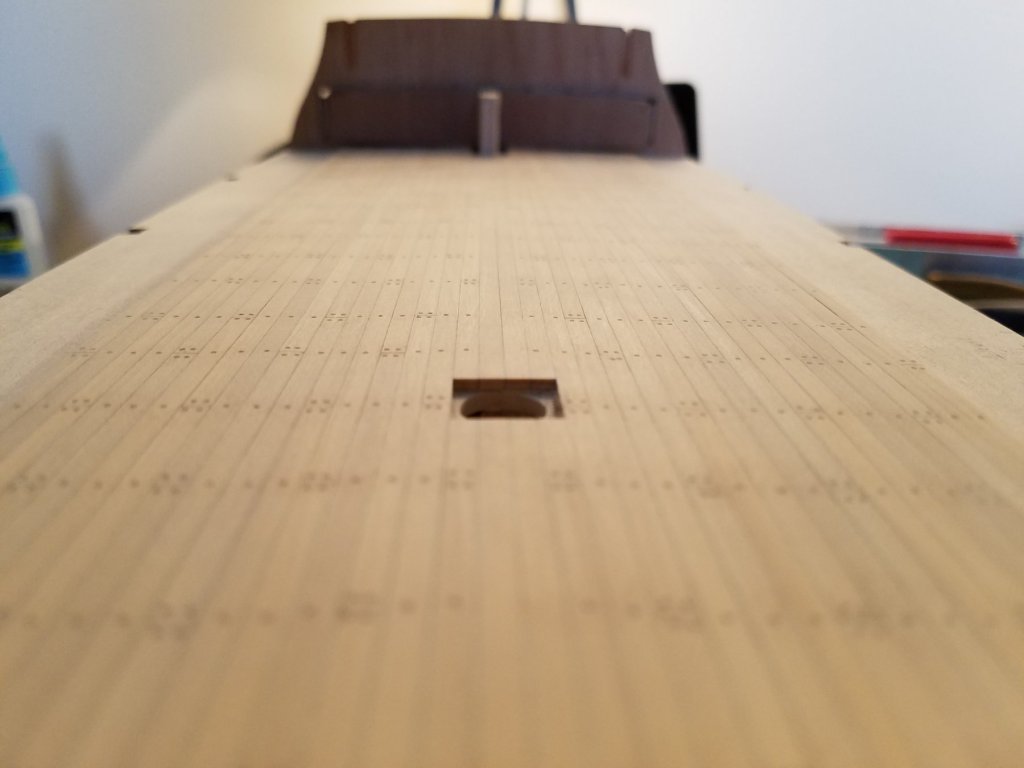
Thanks for the explanation Dan! I will be sure to use the correct terminology from now on. Luckily for me, I had today off so I was able to complete the deck nailing on the planks already placed. I think it turned out better than I thought! I tried to use a pen and a pencil, but I kept adding small lines whenever I tried to pick it up of the decking. Instead, I drilled 1064 holes. I then filled them up with cherry wood filler and sanded it smooth. I also started to make the frames I removed. Using thr scroll saw, I made these. I made the other side too but not sized yet. I haven't glued them in because i want to finish sanding/shaping them, and it will make it easier to add the last of the deckk planks.


-
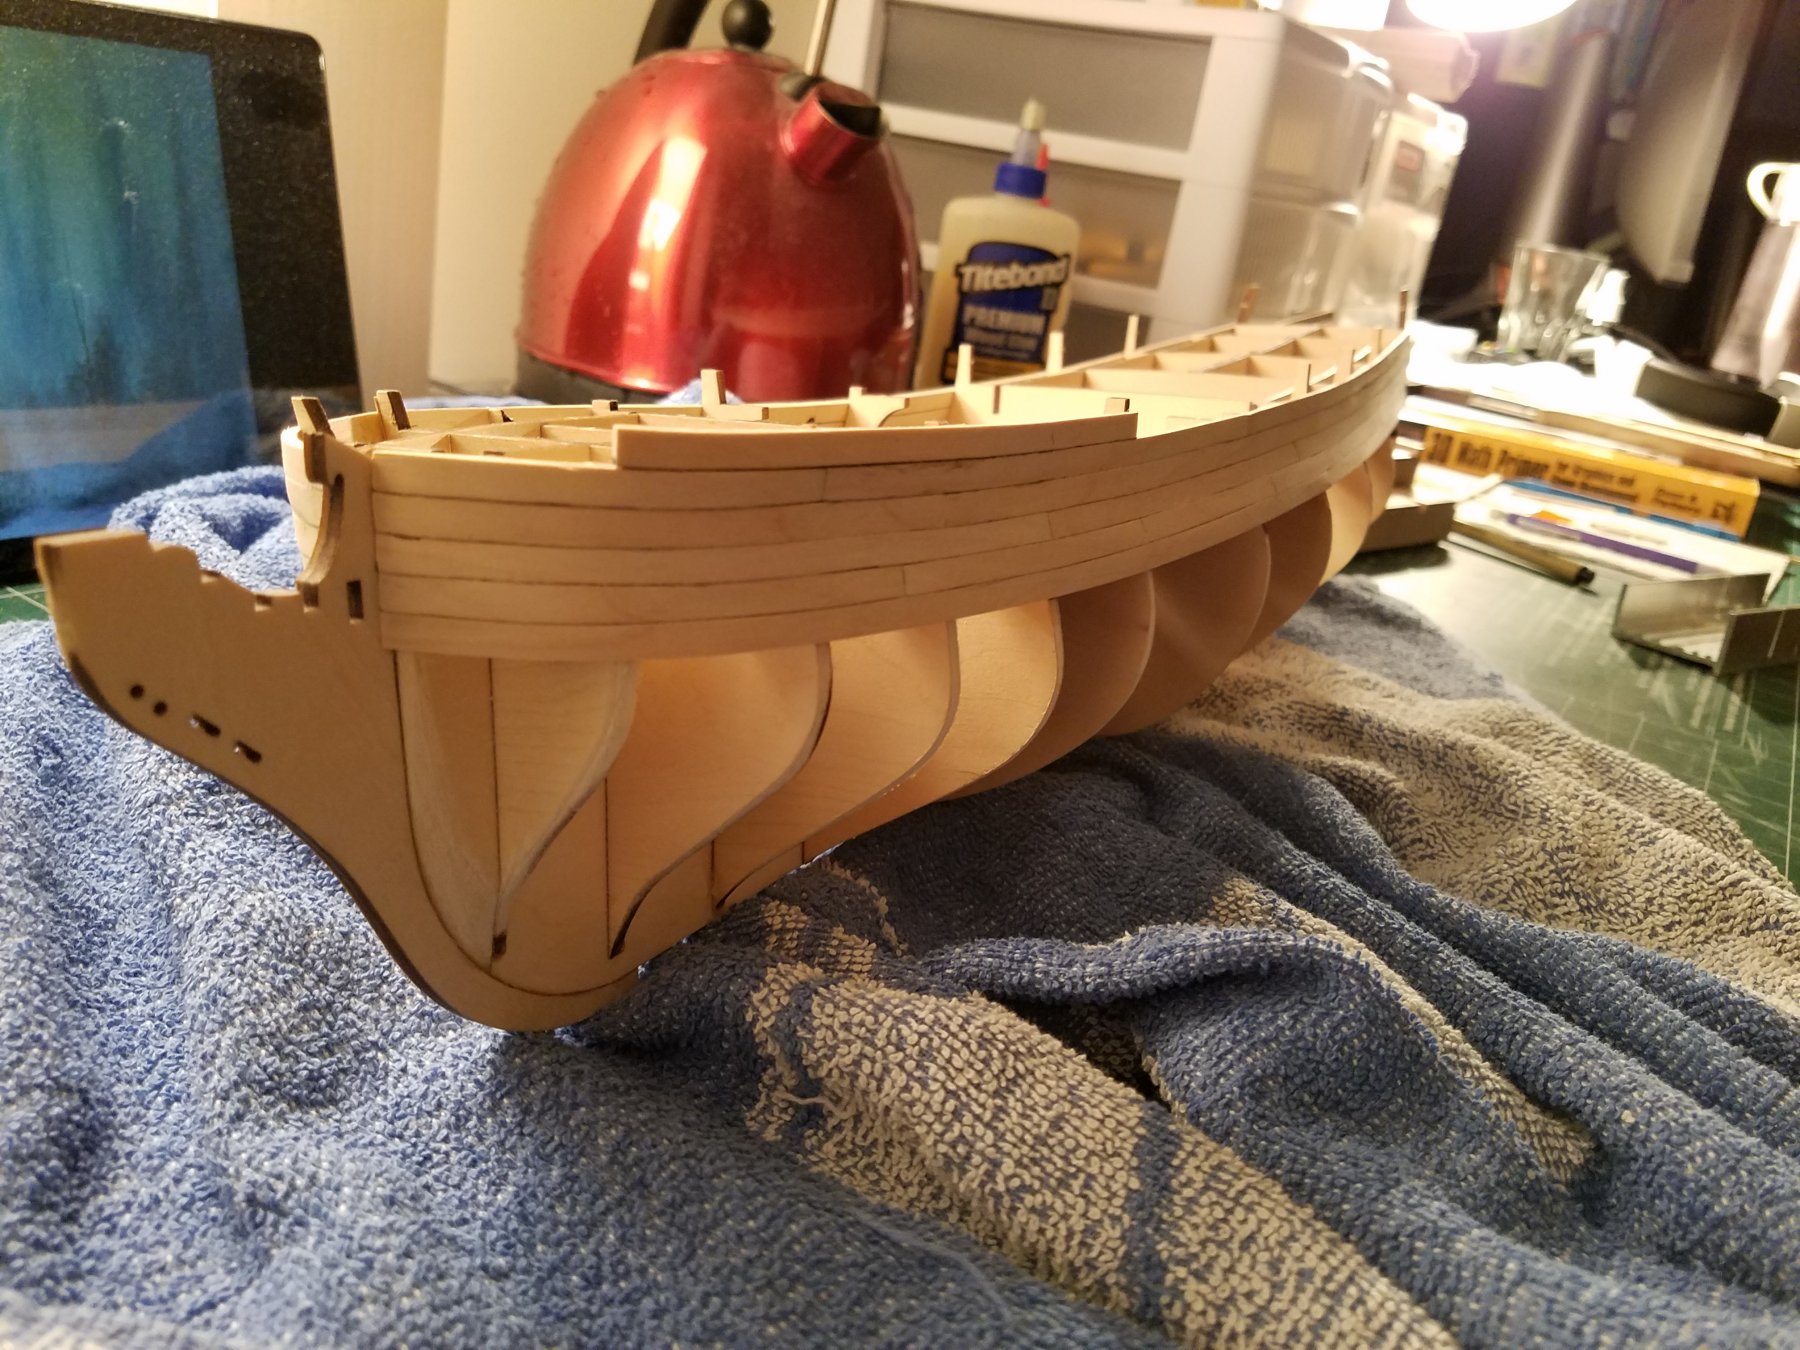
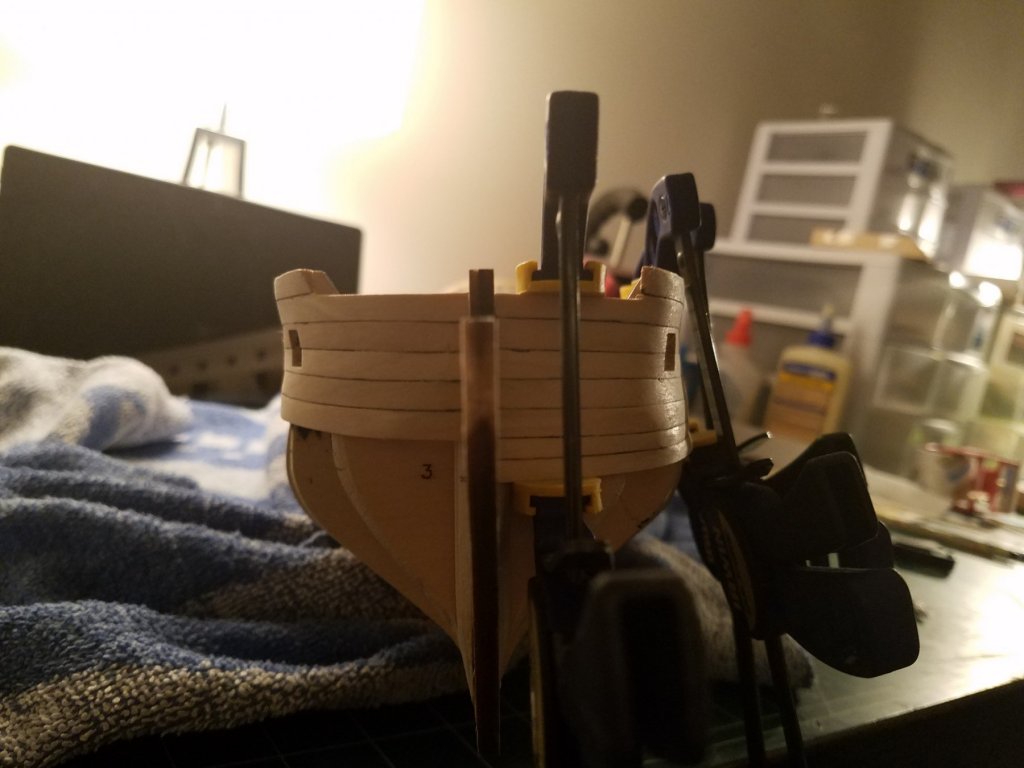
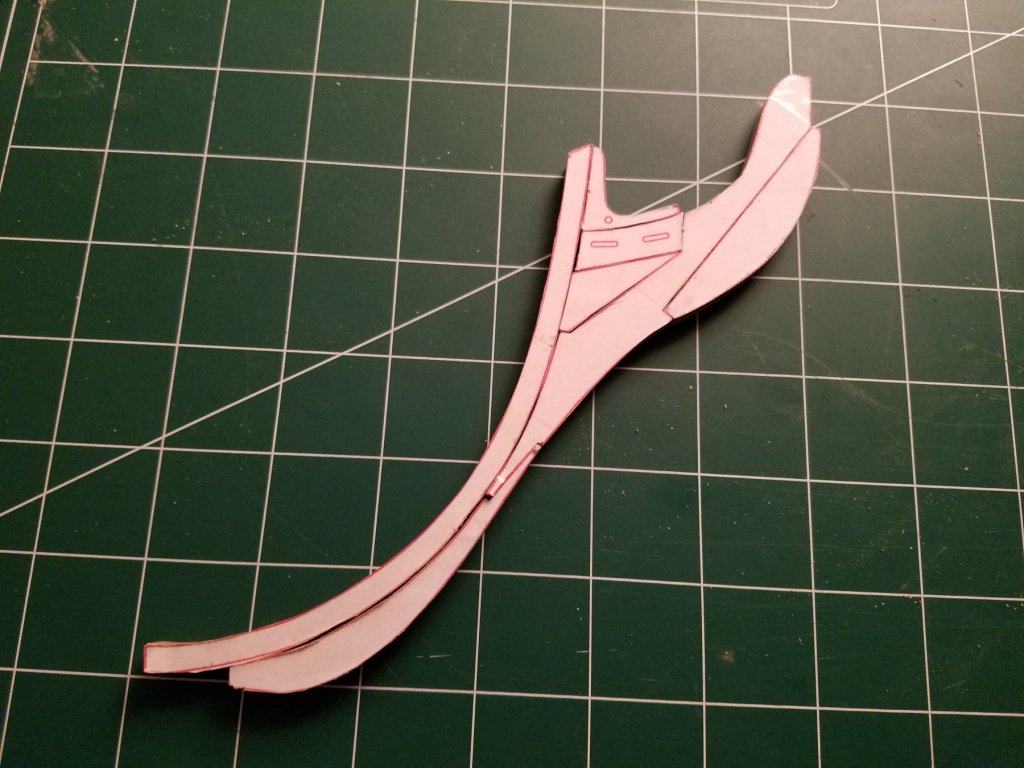
So finally my scroll saw came on Friday! I was excited to try it out, so I used it to make the piecses of the cutwater. I think thats what its called. After watching a few YouTube videos, went went off to work! I think I will remake 1 or 2 pieces, but overall I think it went pretty well! I used the book plans for this and it actually fits much better on the hull than the prefab kit part did. I also got a dremal and the drill press attachment thing and used it as a sander to help dand the curves of the pieces. While I was waiting for the saw, I also put some nails into the middle deck planks to try it out. I now need to finish the cutwater and cut out the parts of the frames I removed ealier. Thanks! Jeff
-
Thanks Dan! A scroll saw looks to be exactly what I will need! Just did some prive checking and the hardware stores around me sell them from $81 - $150 dollars. Thats not bad at all! I will have to ask my wife though, before picking one up! Jeff
-
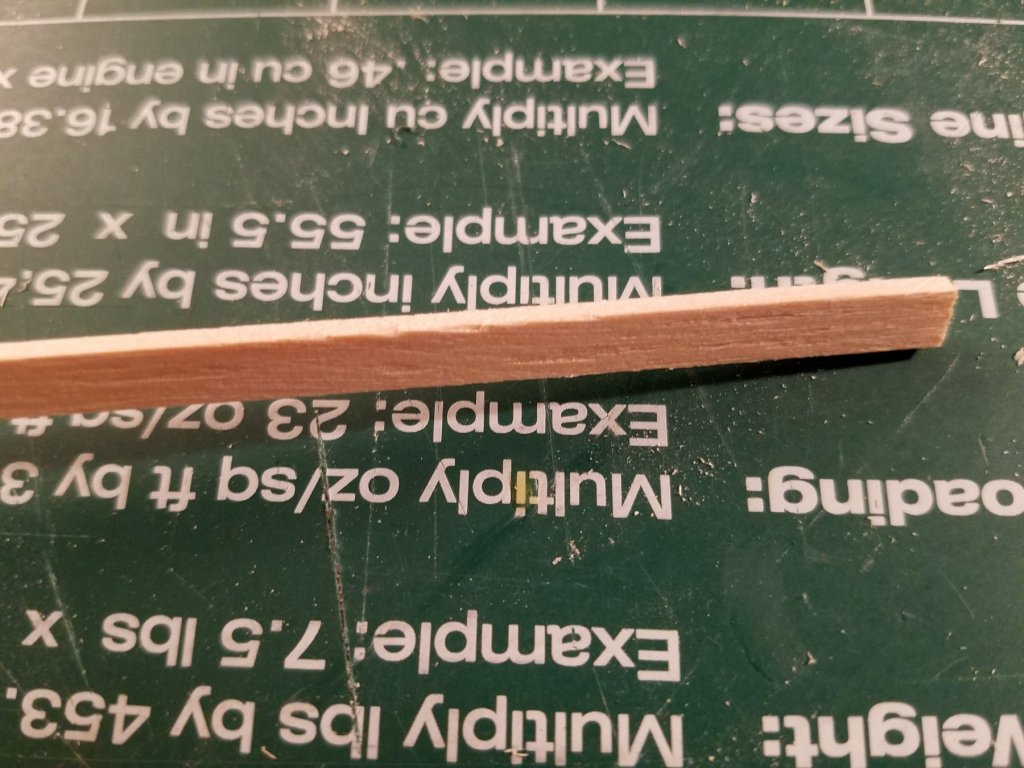
Hmm it didn't seem to remove that last pic when I edited the post. Oh well! Forgot to ask you guy's opinion about hull planking. I noticed that the supplied wood is about double the width of the actual hull planks shown in the book. My question is, should I use the supplied wood, or get new hull planks that more accuratly replicate the plank size? I know it would be more work, but what would look better for the end result? It's not a matter of time, I just want it to look nice. Especially since I am using deck planks that much more closely match the actual width, would it look strange to use wider planks on the hull with the thinner deck planks? I do not intend on painting the hull since I really like the natural wood look. If I do decide to get new hull strips, what type of wood would work well? Thanks a LOT for the help! Jeff
-
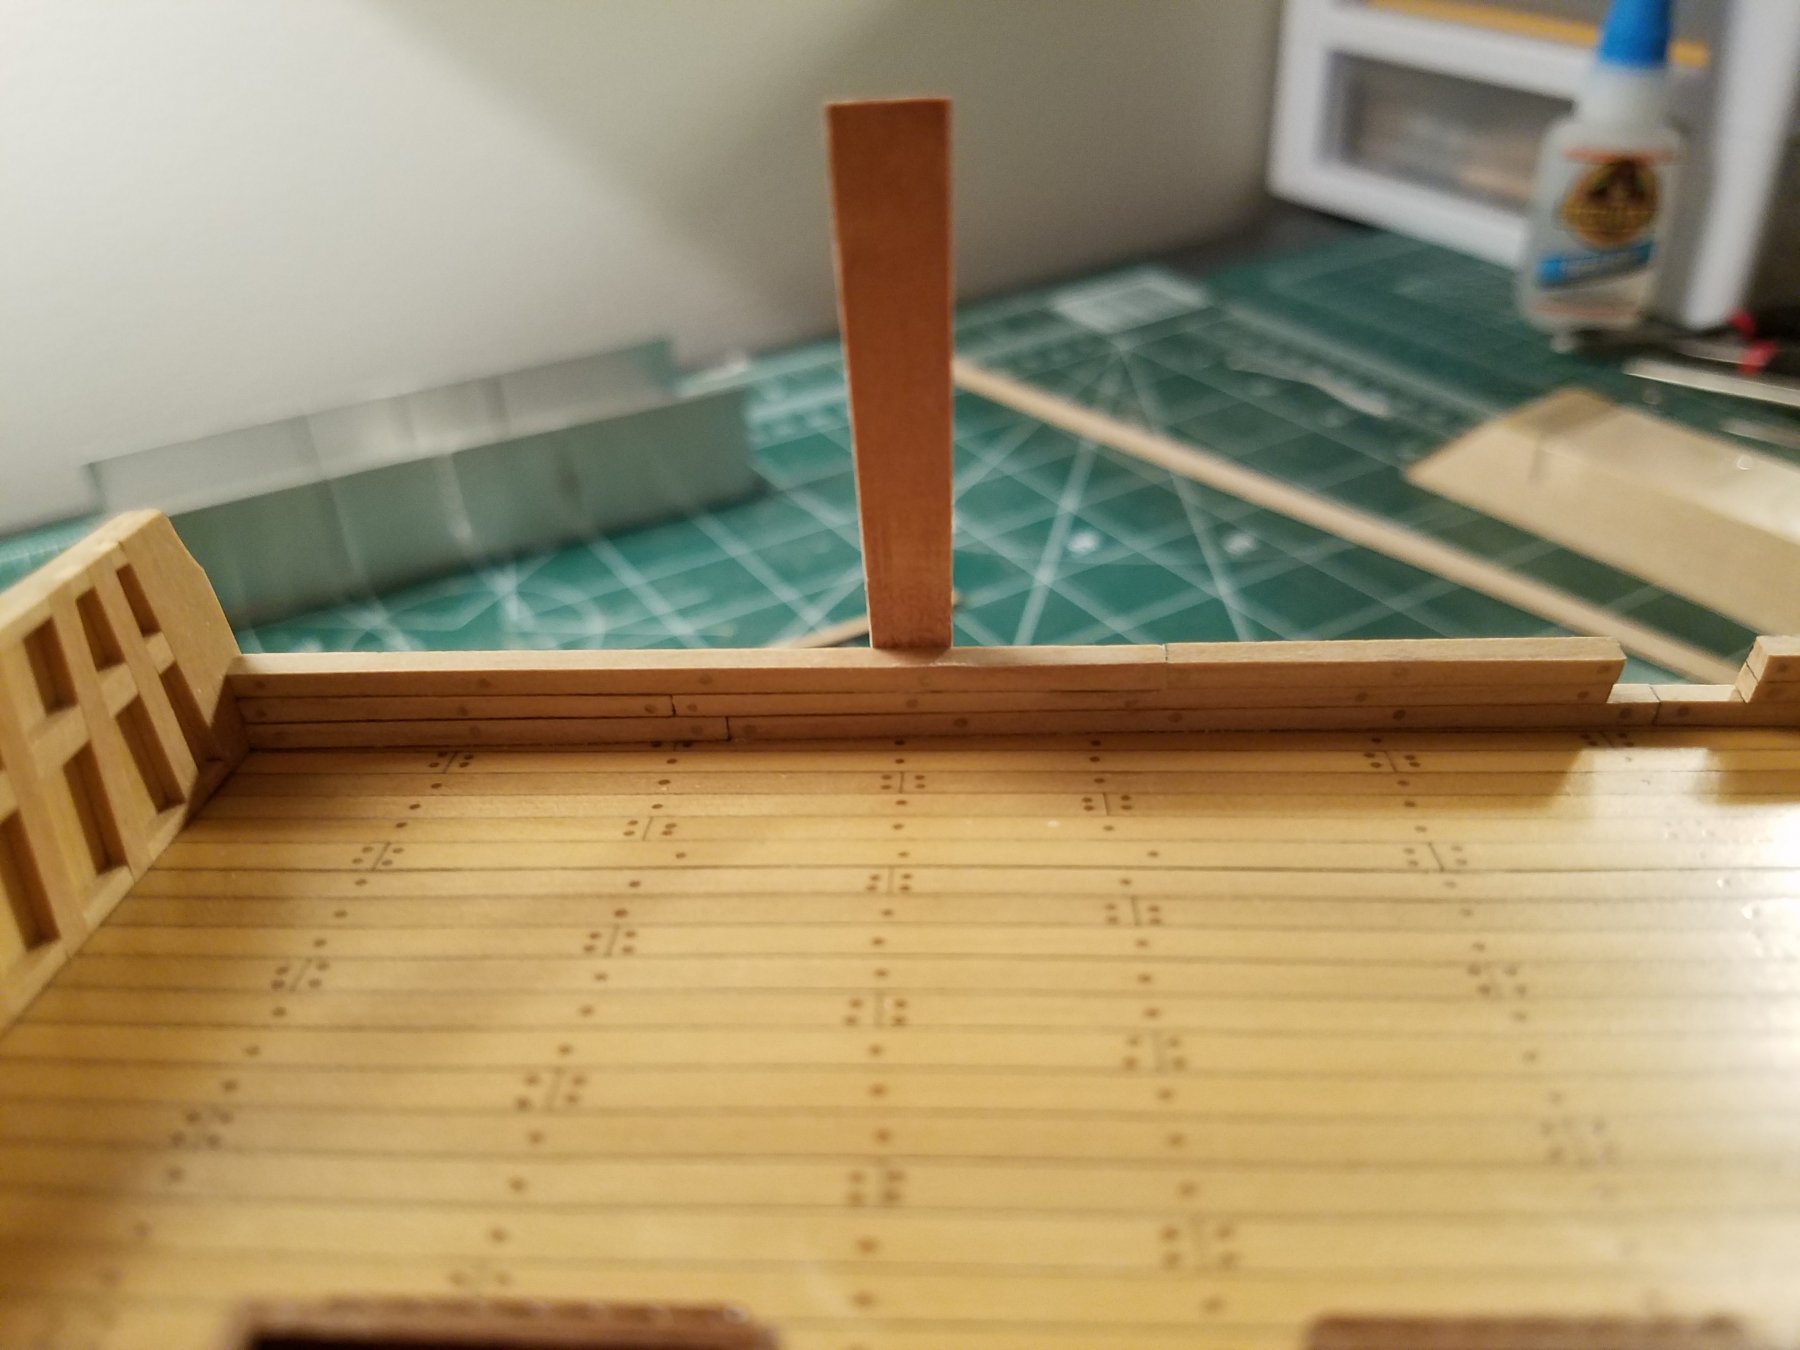
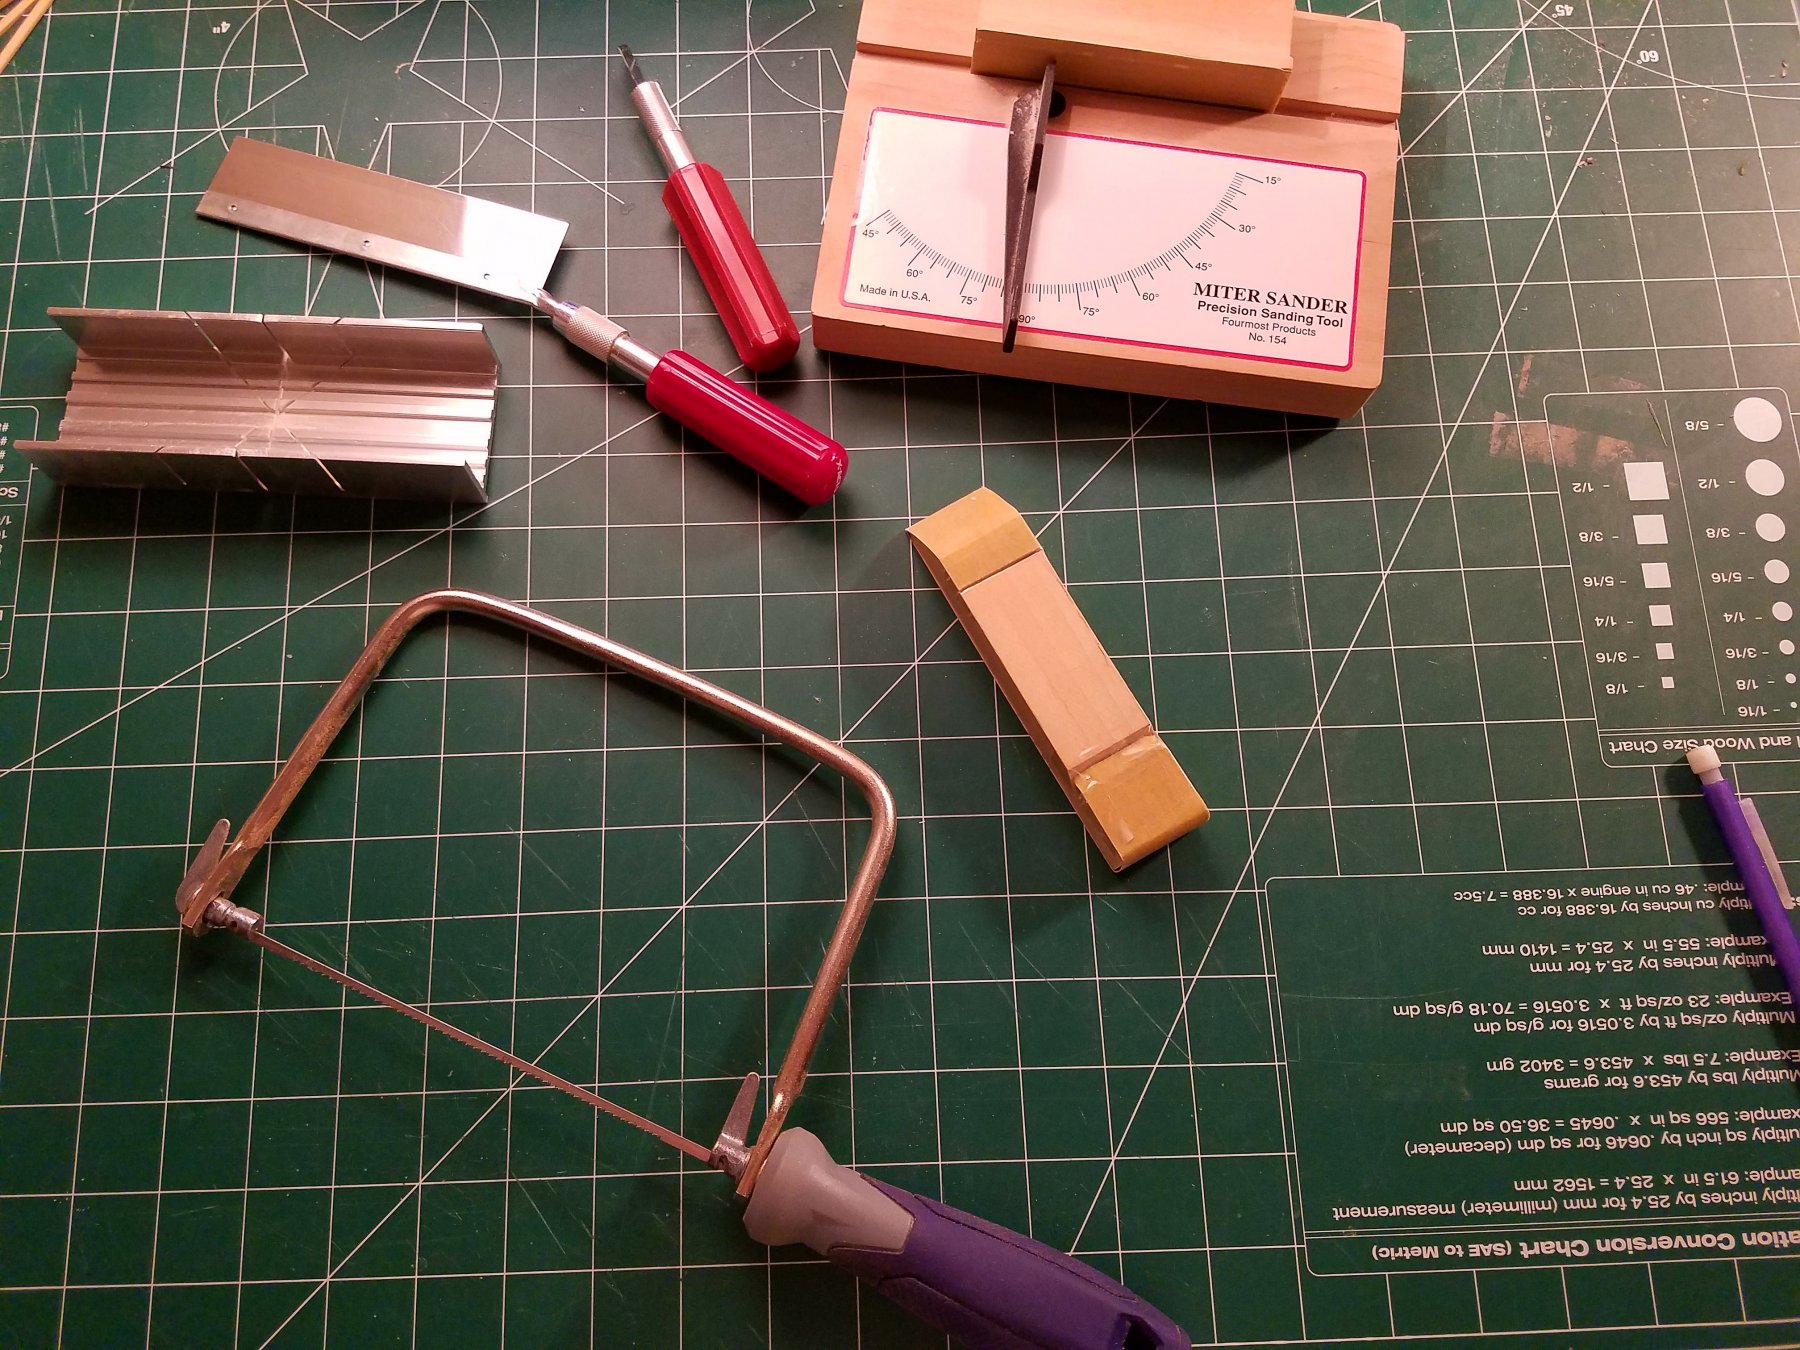
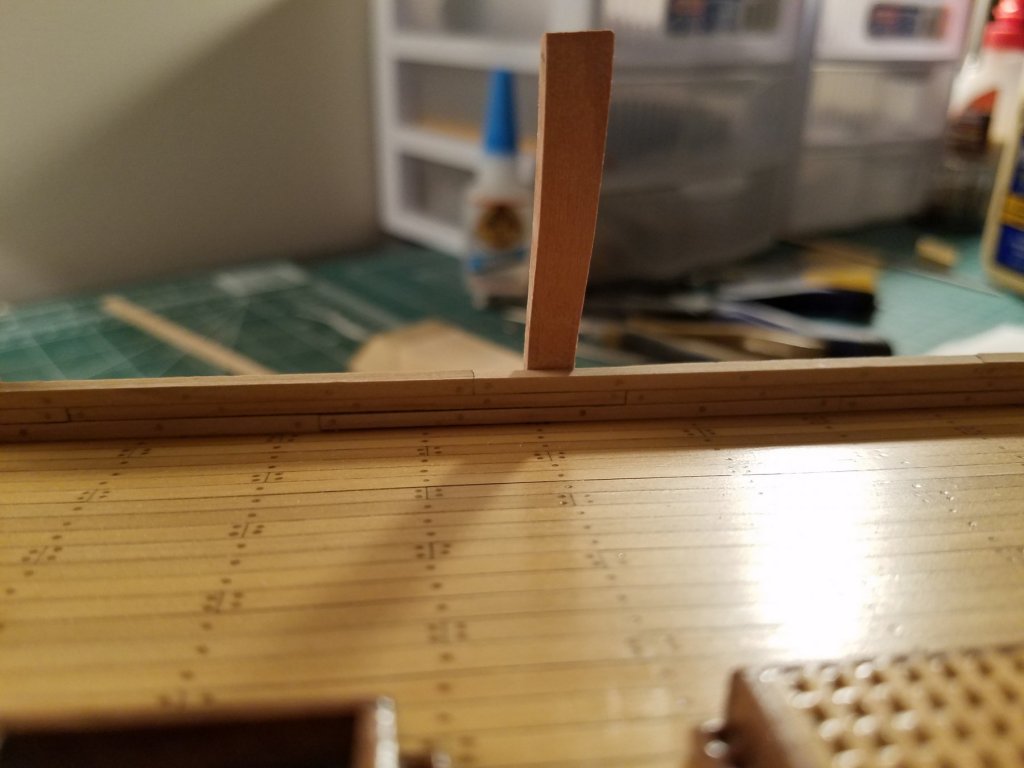
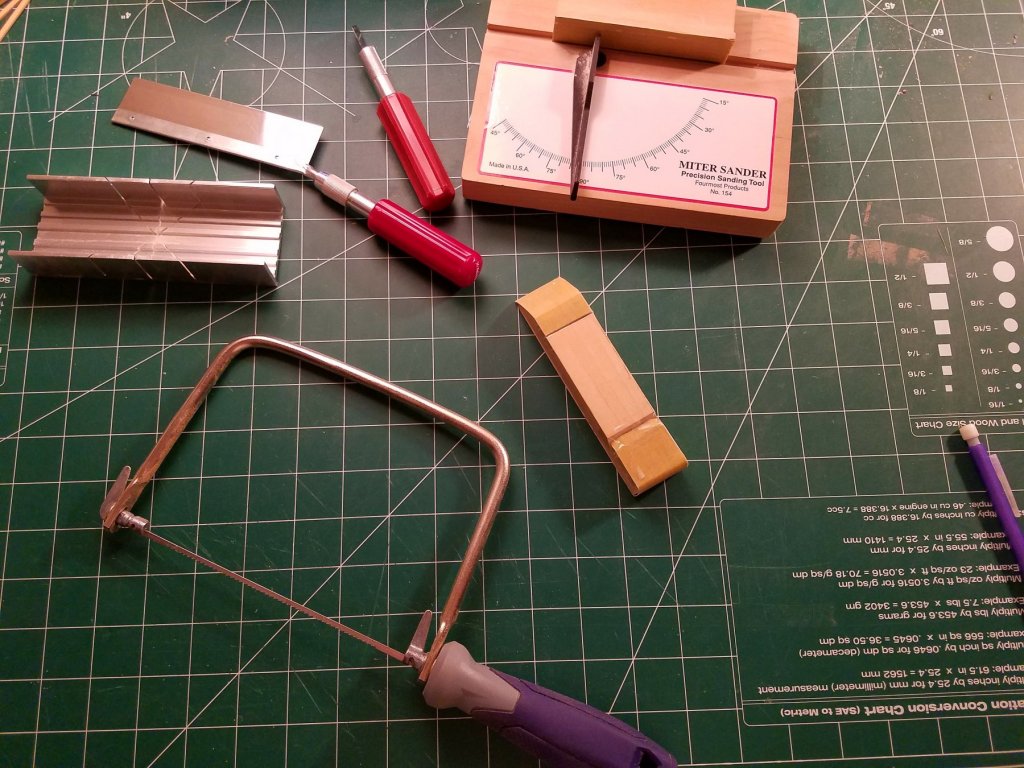
Thats a good idea! I tried that out on some scrap wood with very nice results. I will use that technique! I haven't put the tree nails in yet, but I have been making slow progress on the deck I've been leaning along the way how to make it flat since the strips are 1.5mm thick. I really like working with this wood! It's a lot nicer than the kit supplied wood. It's not sanded yet so it does look a little rough. Since I am getting closer to the edges of the ship, I am starting to think about making the frames that I removed. I have the correct shapes, thanks to the book and the ply sheet that I saved that held the pre-cut frames. The frames need to go from the middle deck to the quarterdeck. I need to make these very precise so the hull planking will be correct. I need some help with that because I am not sure of the best way to make it, nor what wood I should use for it. I'm thinking ply would be fine since it won't be seen. I don't have any power tools to help create them. This is all the tools I have right now: I might (?) need some other tools to help make those frames but not sure what would be best. Also, I think I will need some tools to help make the athwarthship carlings, knees, shaped half beams, etc. Any advice would be great as to what tools really help make these custom pieces that I will add to the upper deck. Like I said before, I'm not going to plank the upper deck so you can see into the middle deck. I'm thinking of using swiss pearl for the beams, carlings, knees, etc. I've seen that wood used on other projects here and it looks like it might contrast well with the costello boxwood I am using for the deck planks. Jeff


-
Thanks Dan! By caulking, do you mean rubbing the side of each plank with the artist pen? Thats what I have been doing for these planks. I would like to know of an easy way to tree nail. I have read a lot of threads here about different ways to do it. But at my scale, 1:94, I'm not sure what would be the best approach. Thanks again for the advice! Jeff