HOLIDAY DONATION DRIVE - SUPPORT MSW - DO YOUR PART TO KEEP THIS GREAT FORUM GOING! (Only 24 donations so far out of 49,000 members - C'mon guys!)
×
Tom E
-
Posts
469 -
Joined
-
Last visited
Content Type
Profiles
Forums
Gallery
Events
Everything posted by Tom E
-
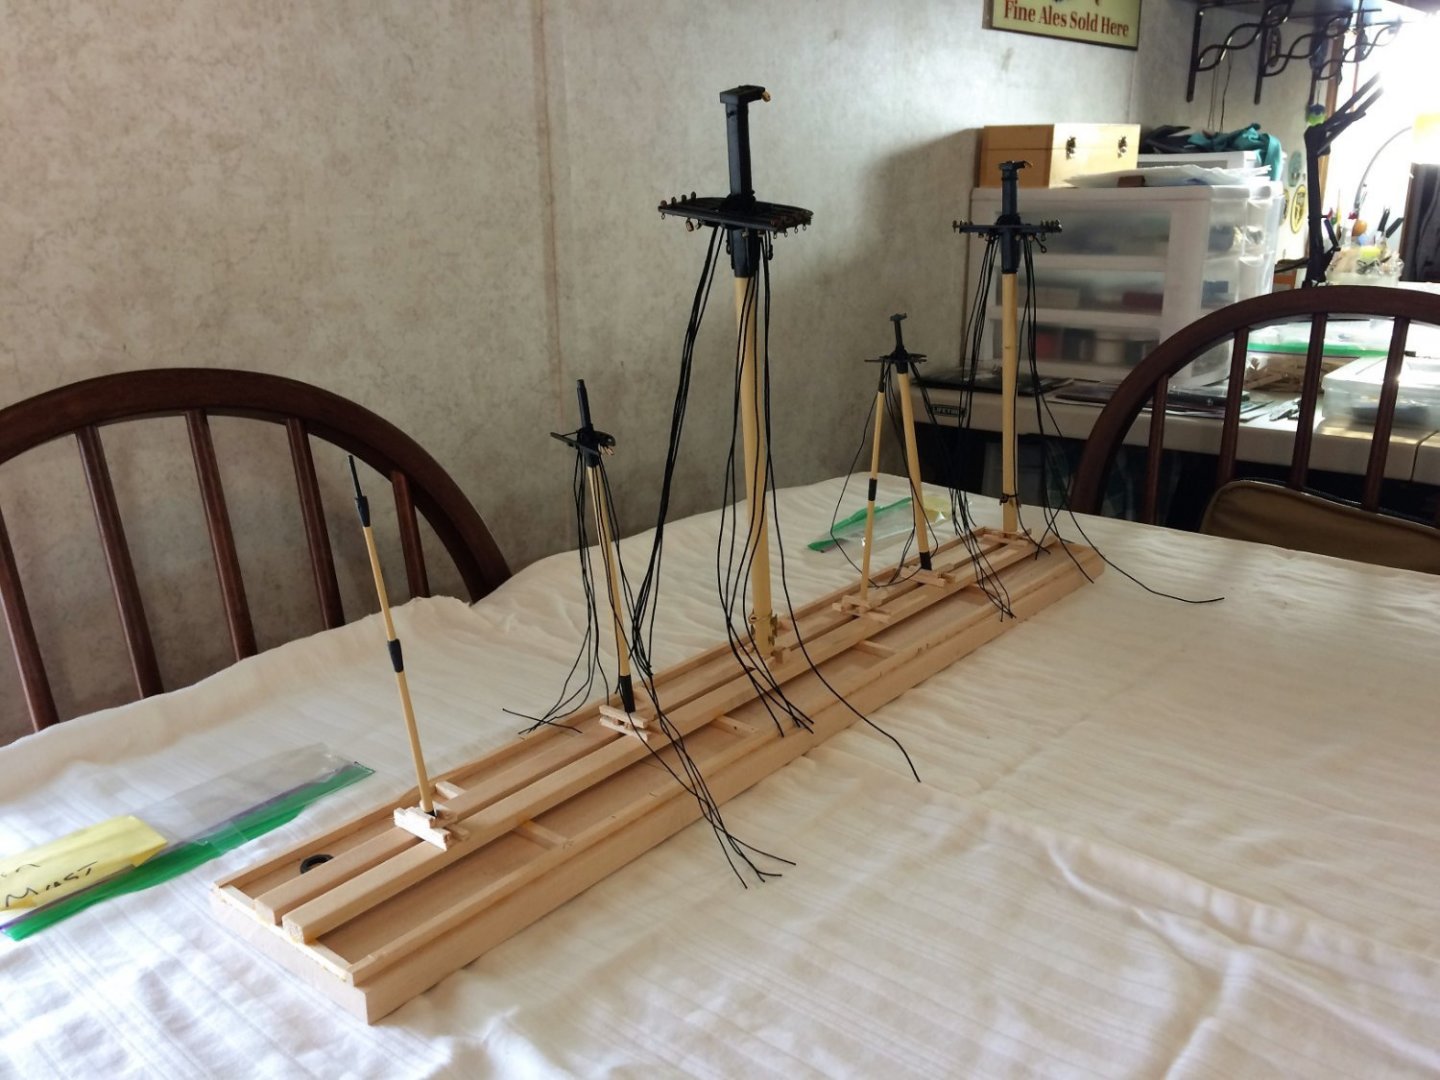
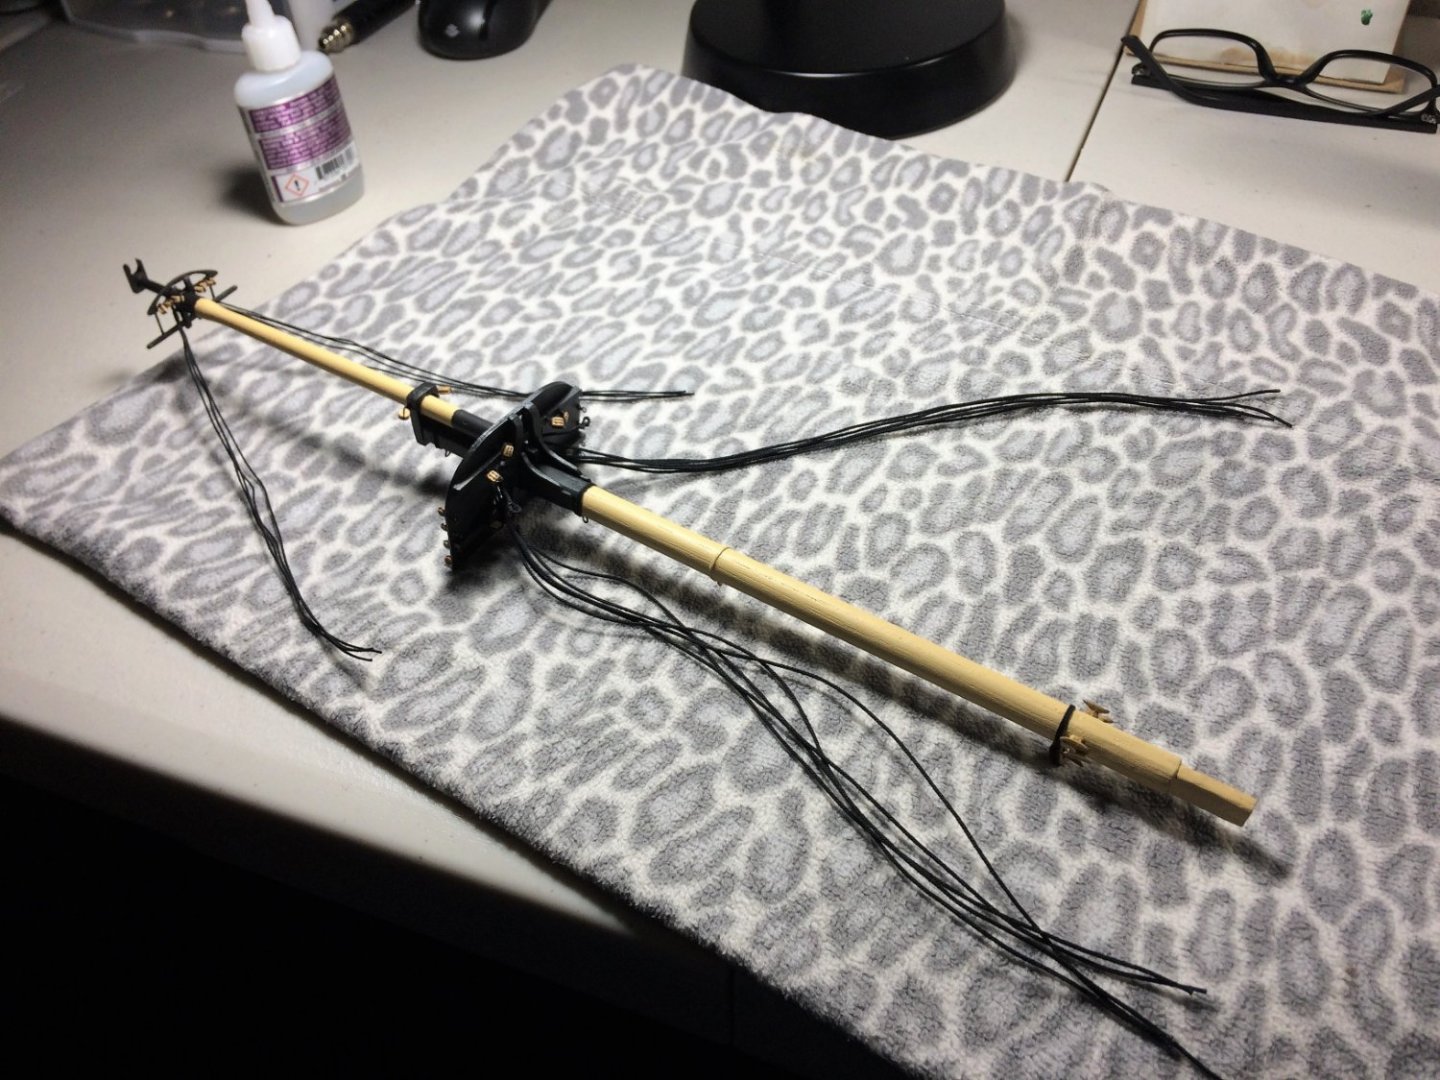
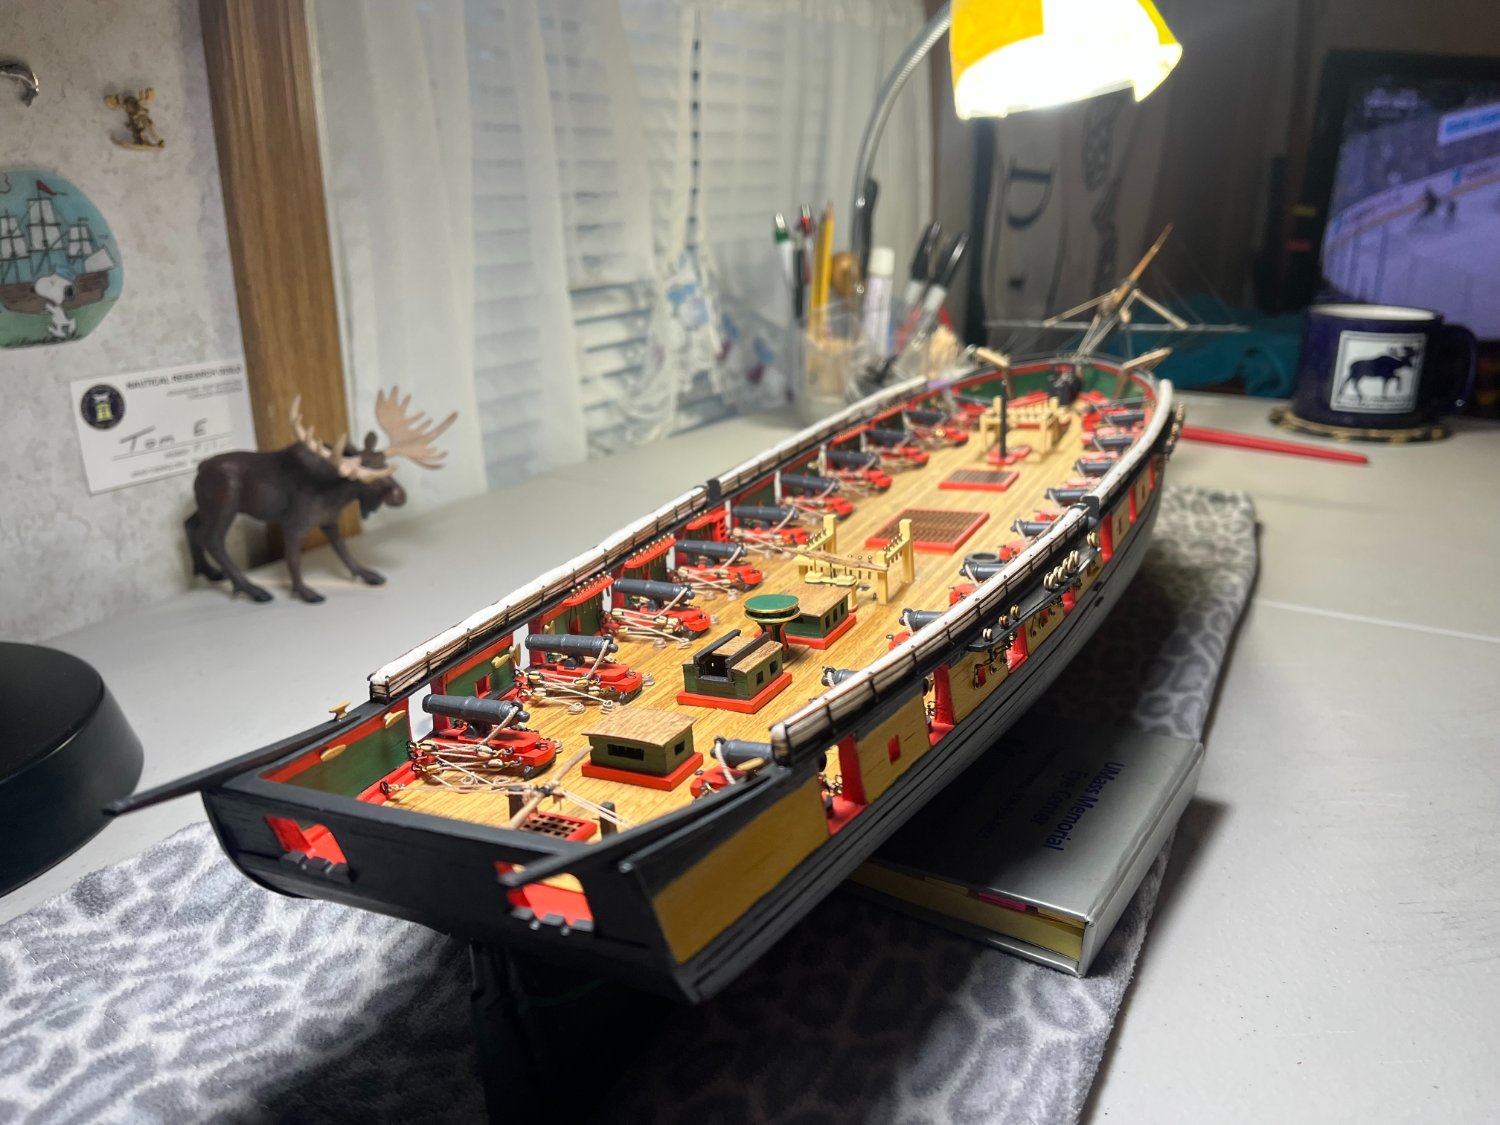
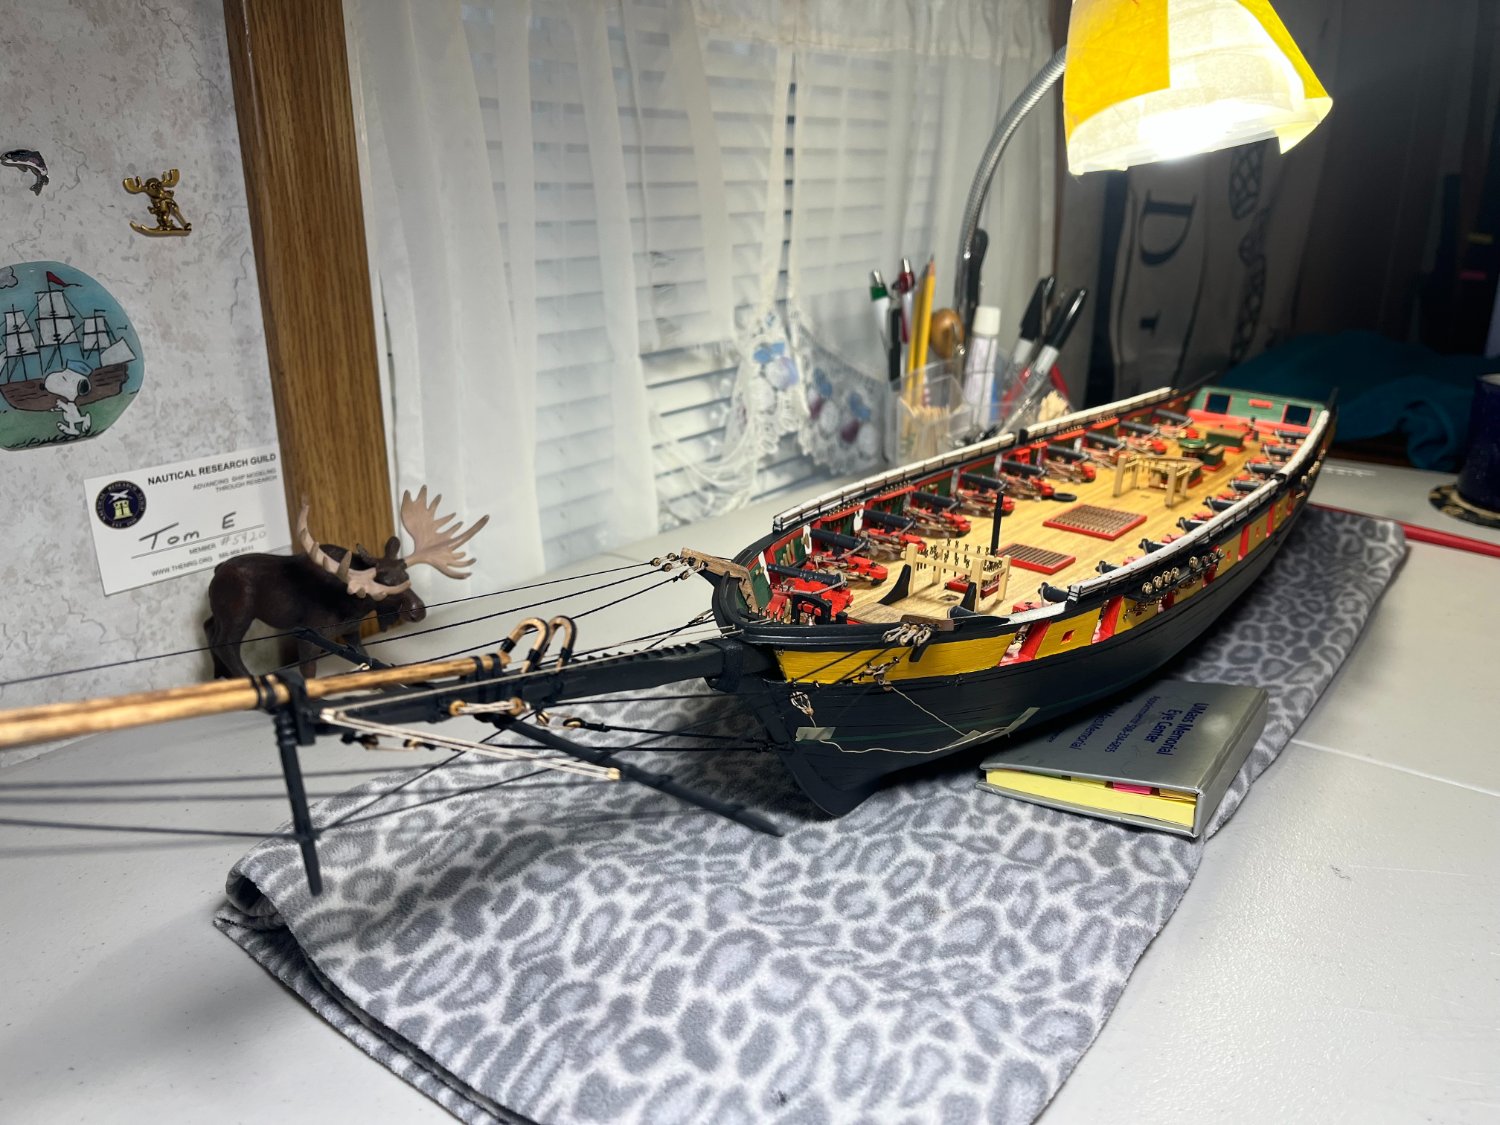
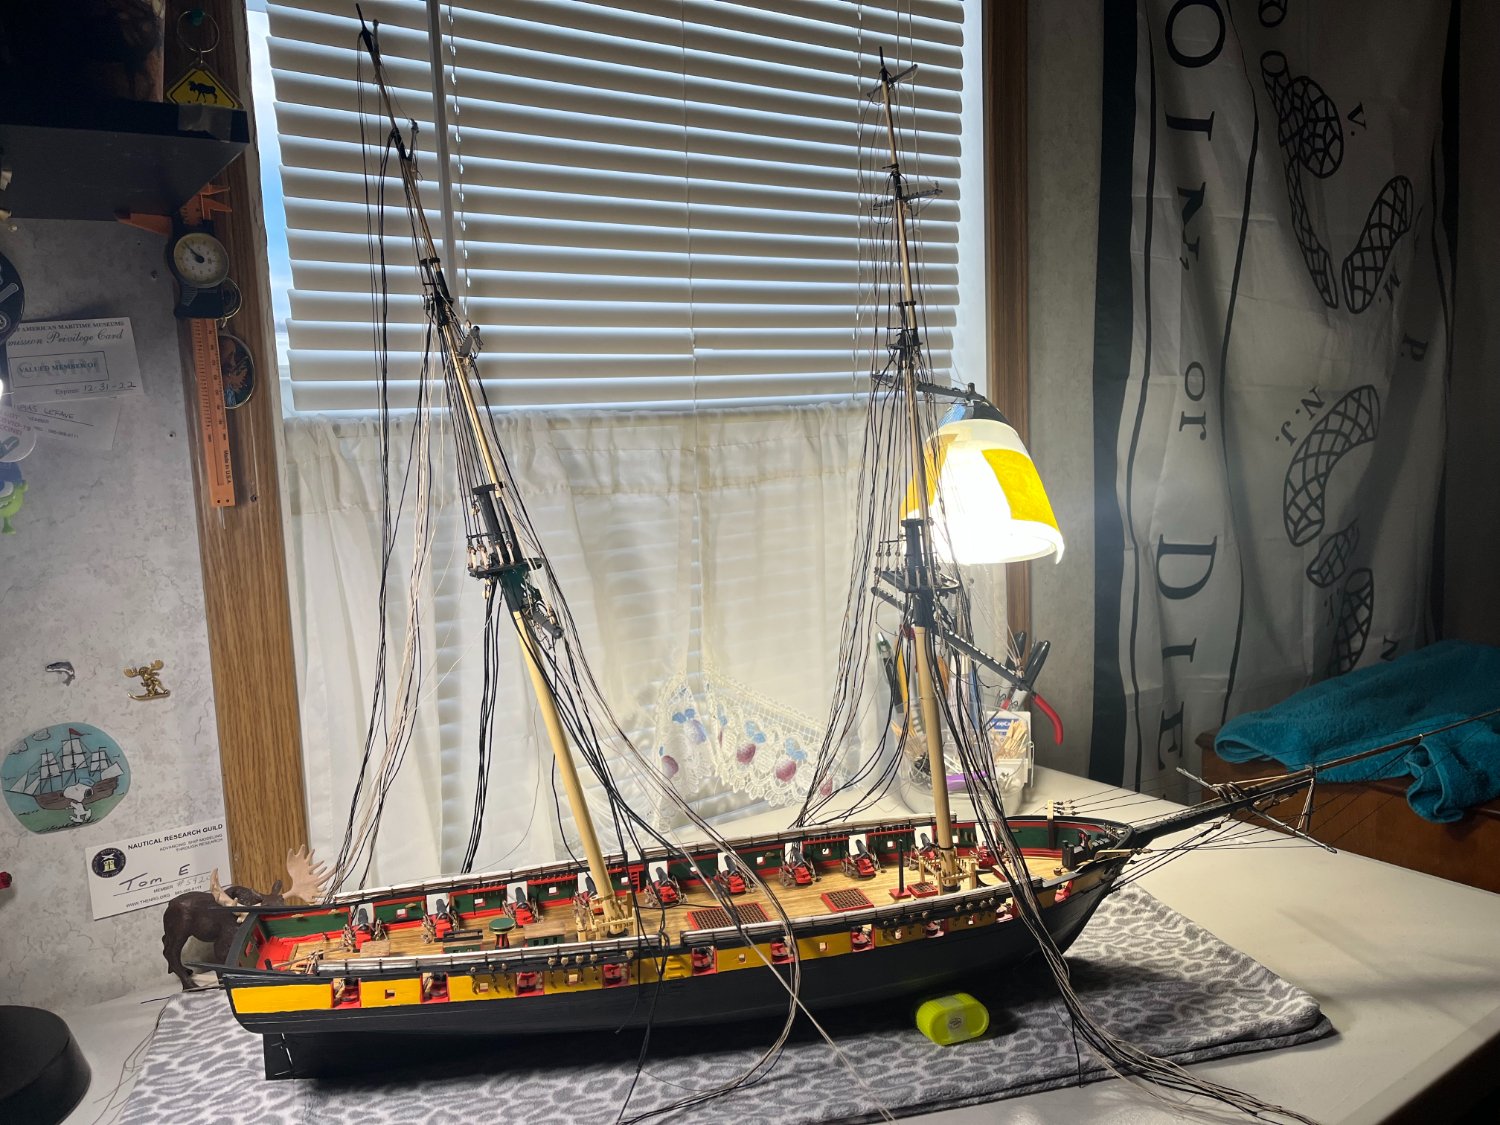
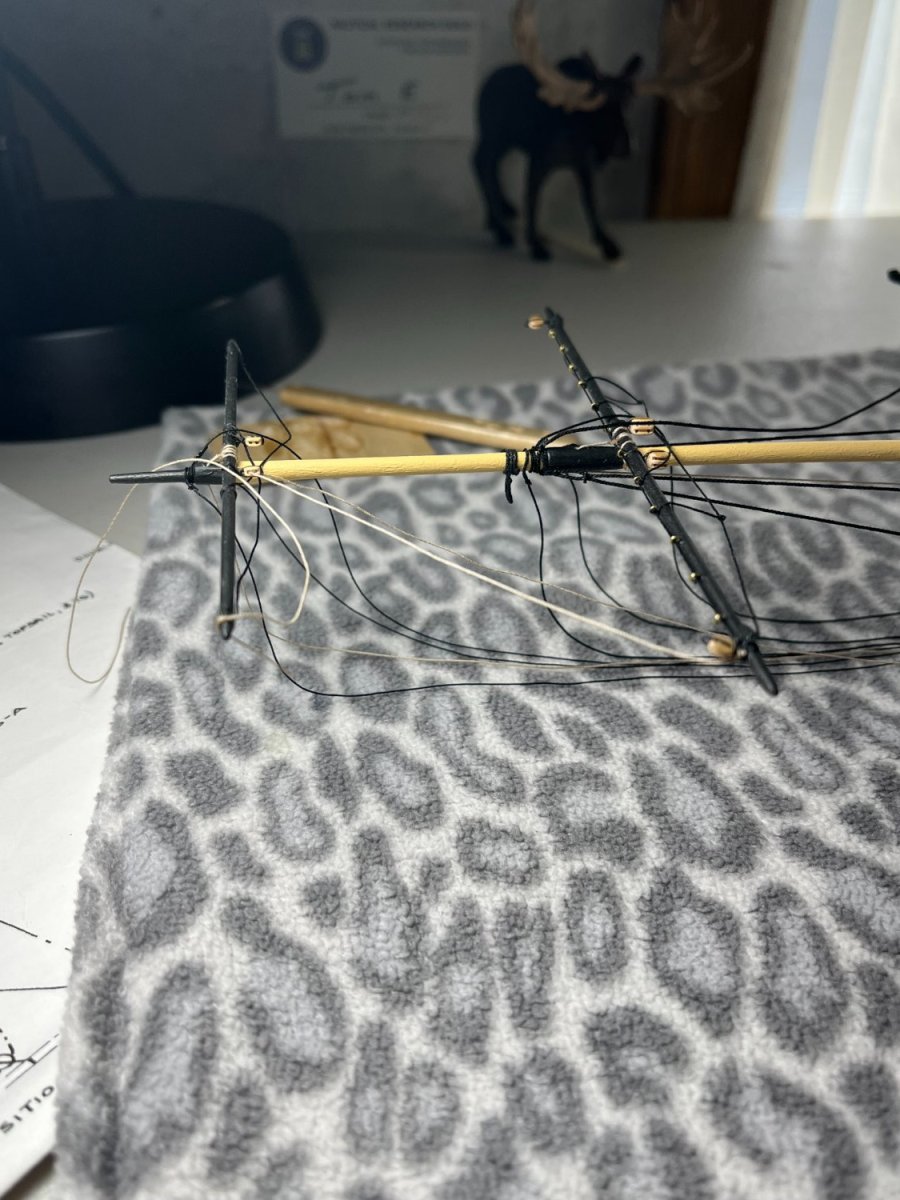
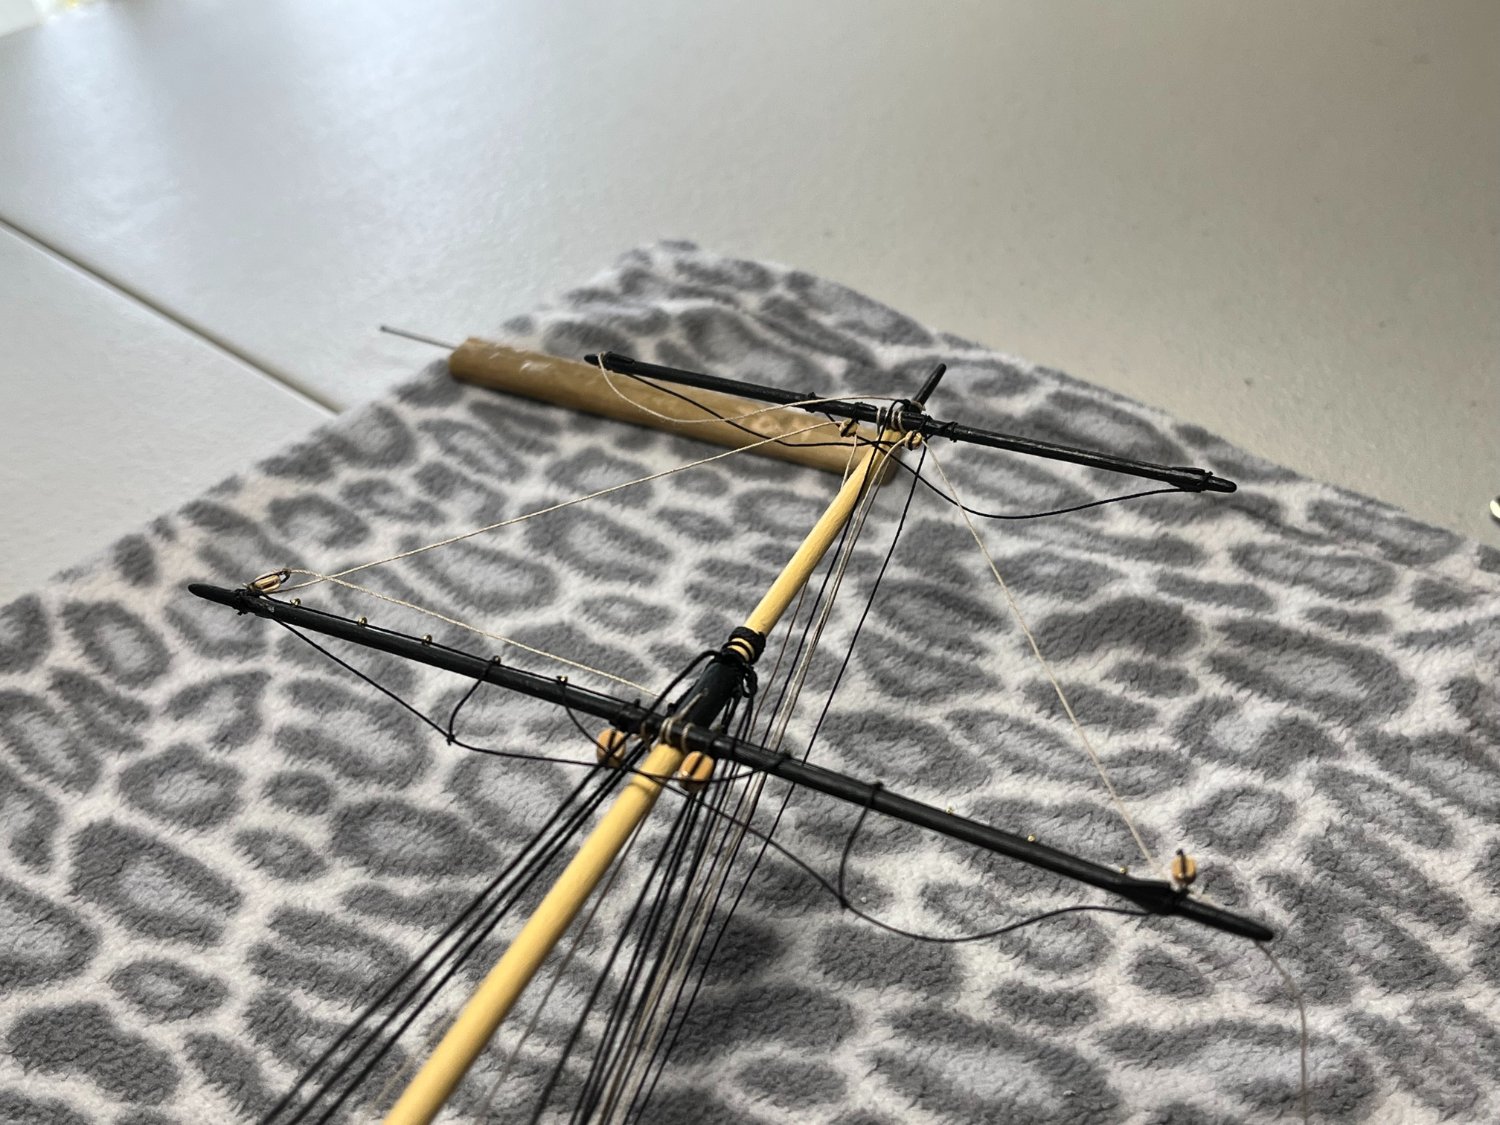
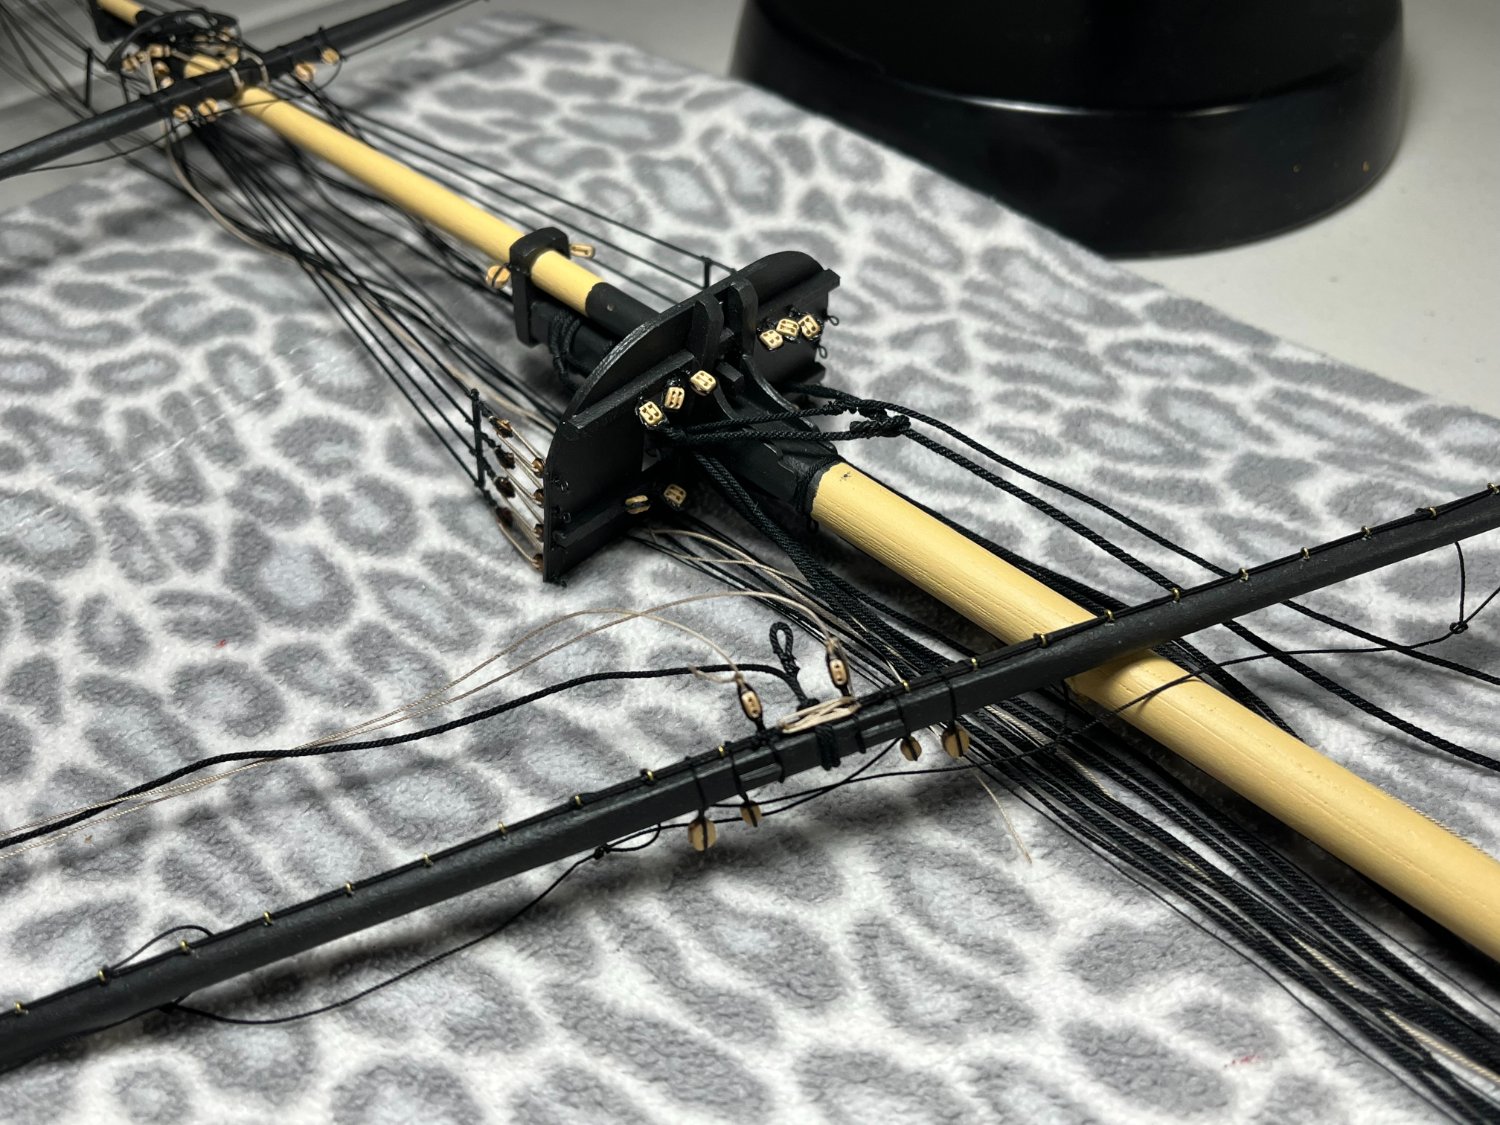
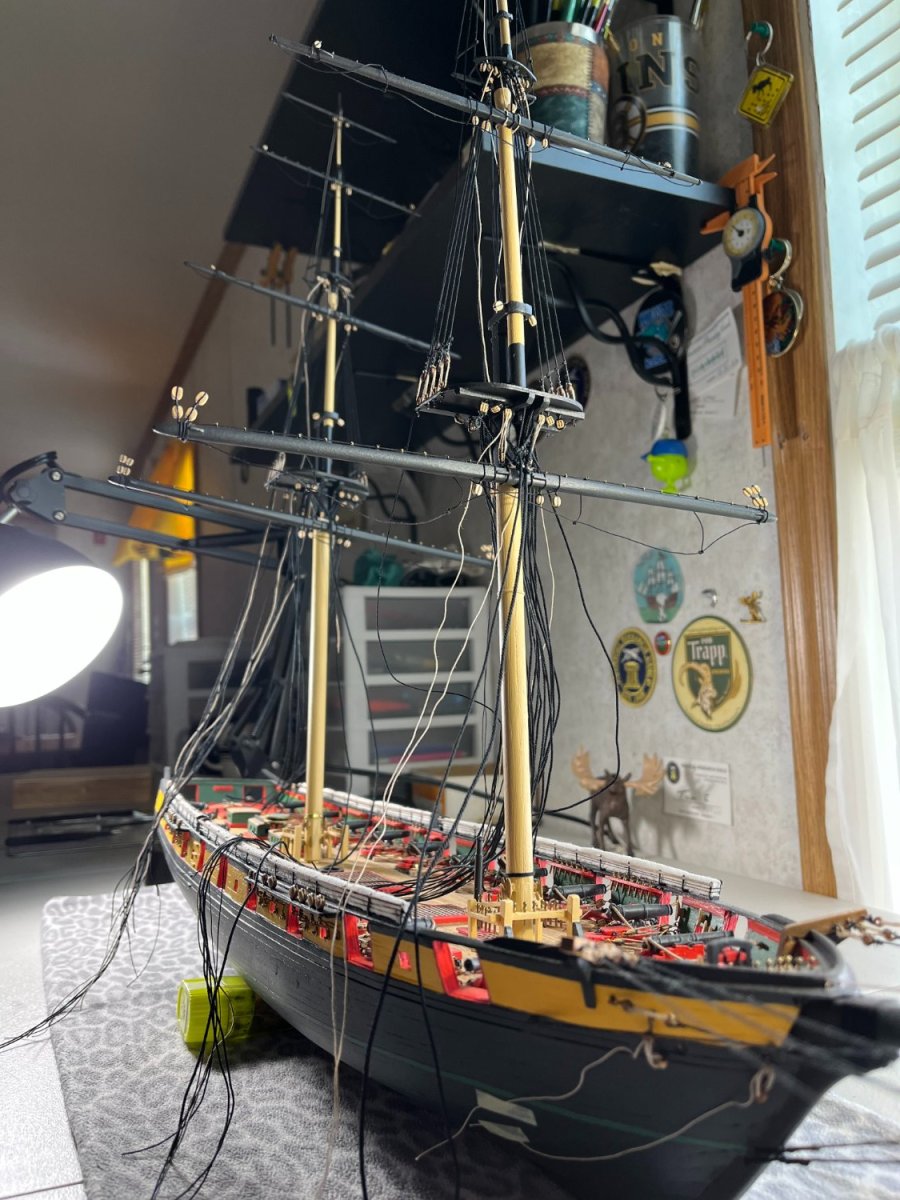
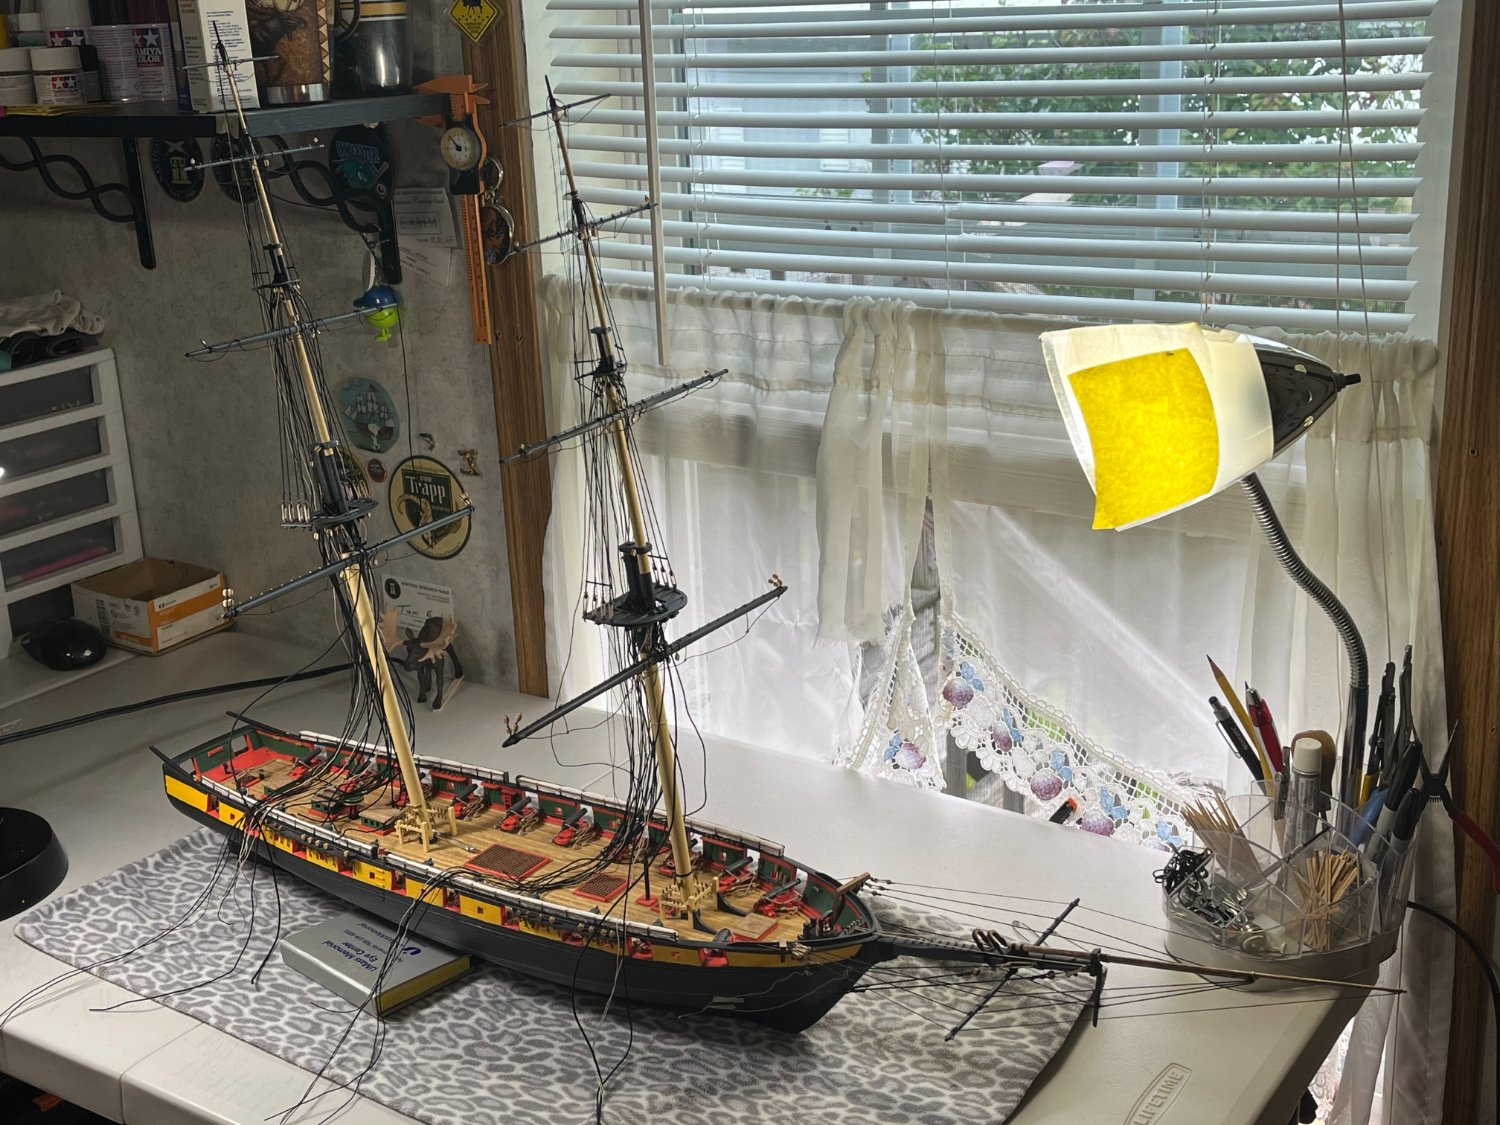
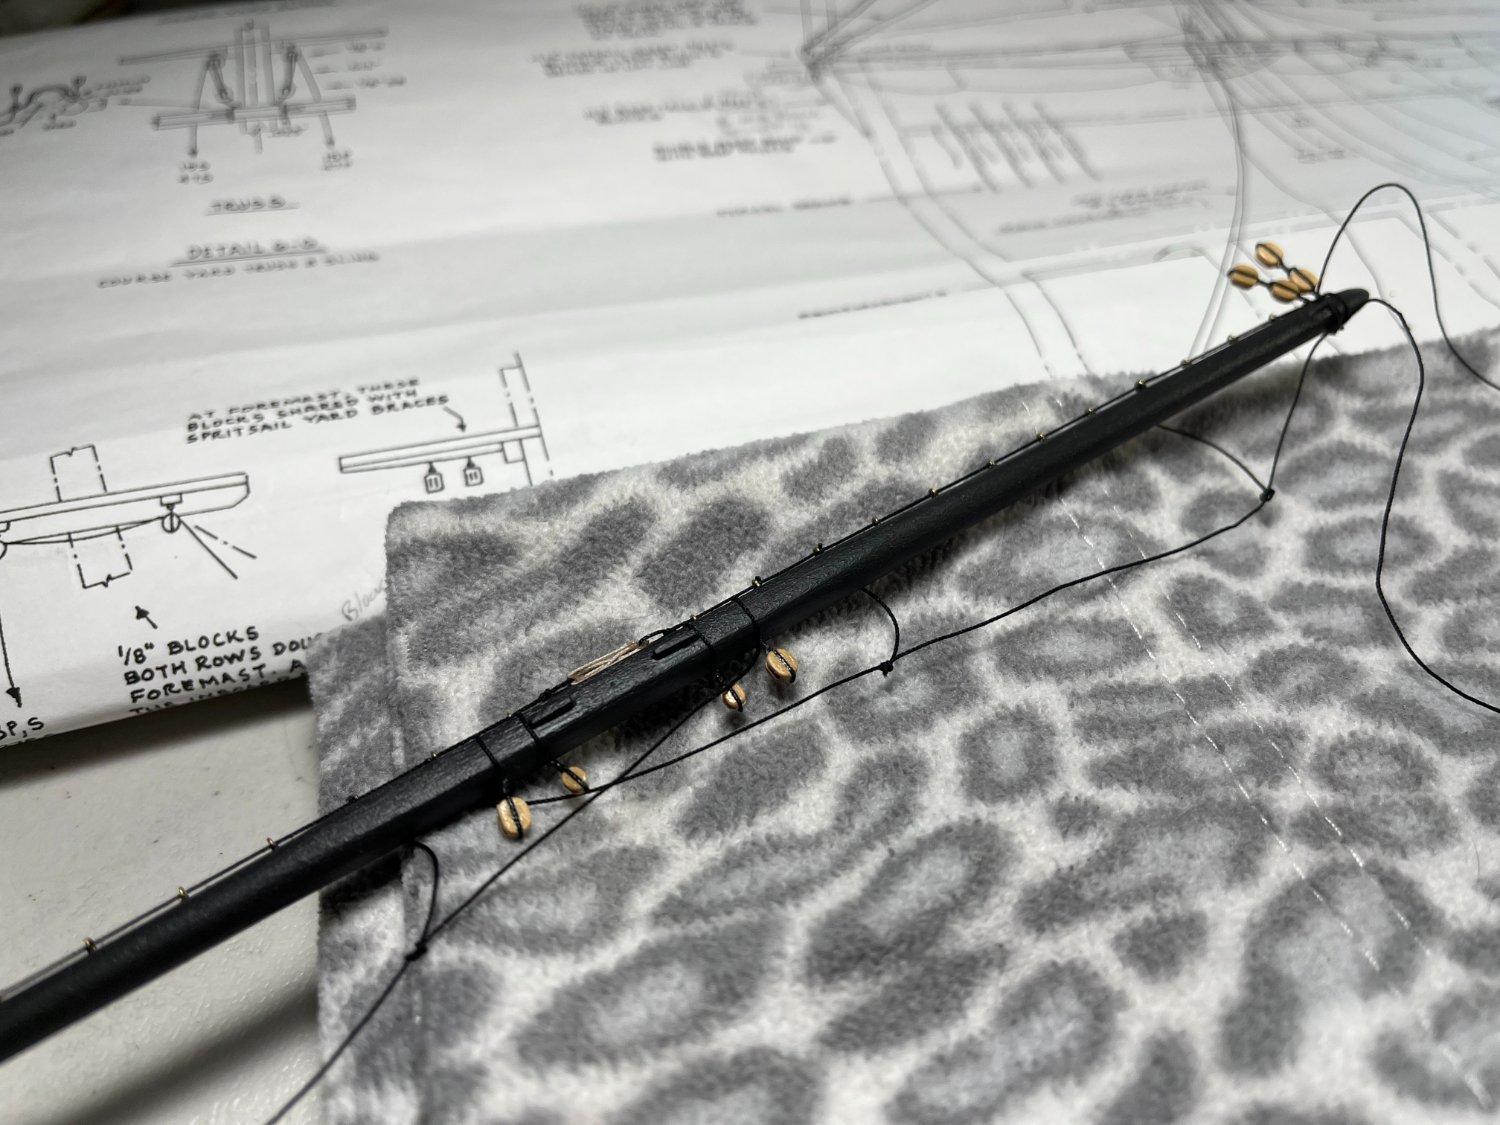
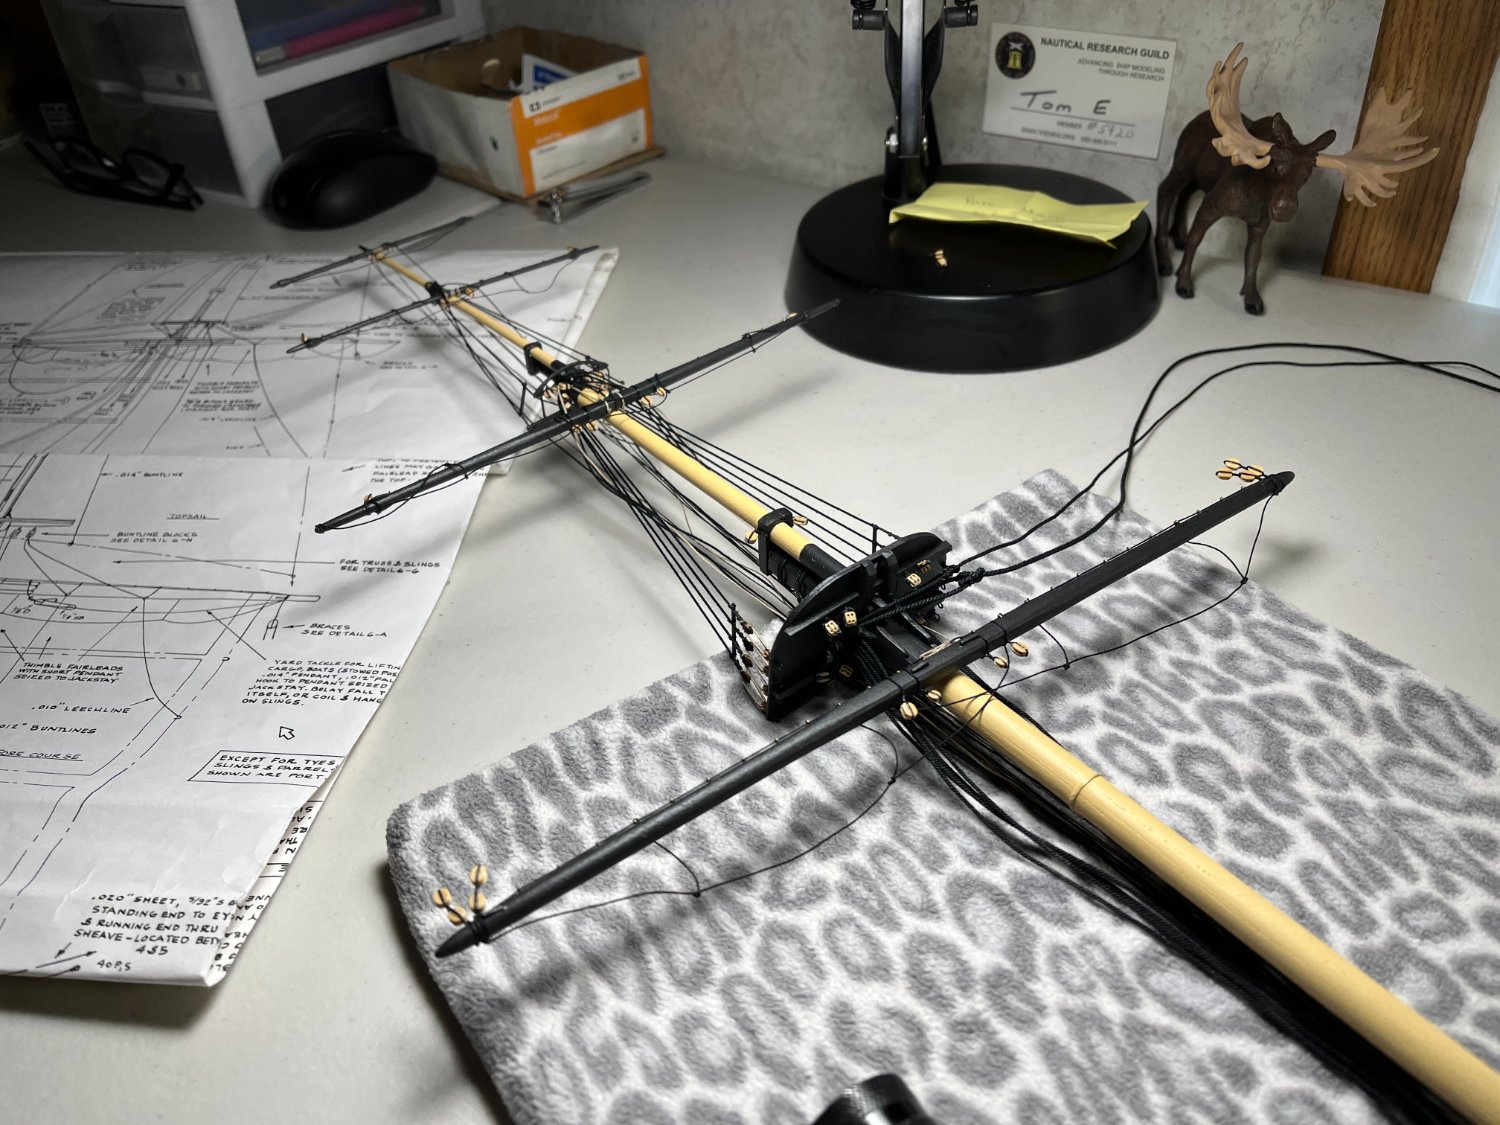
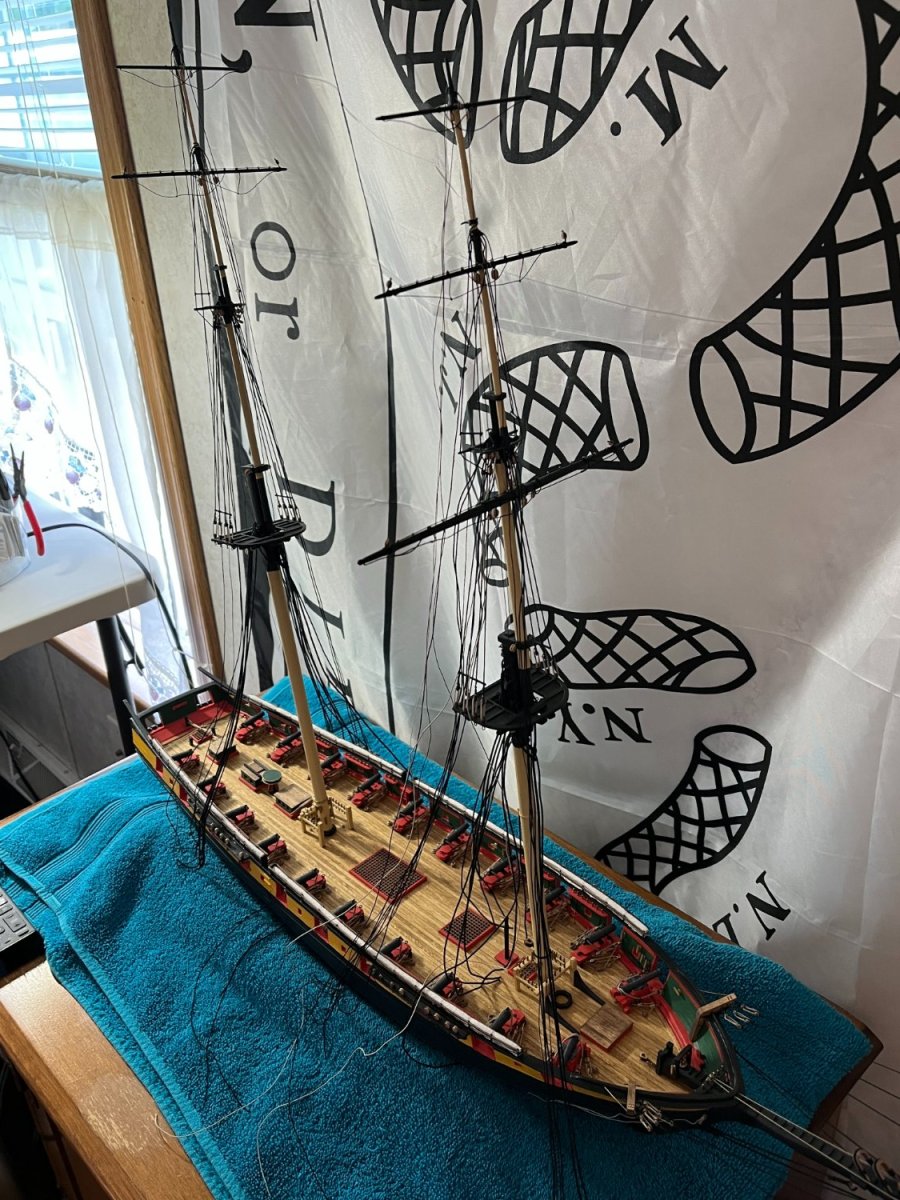
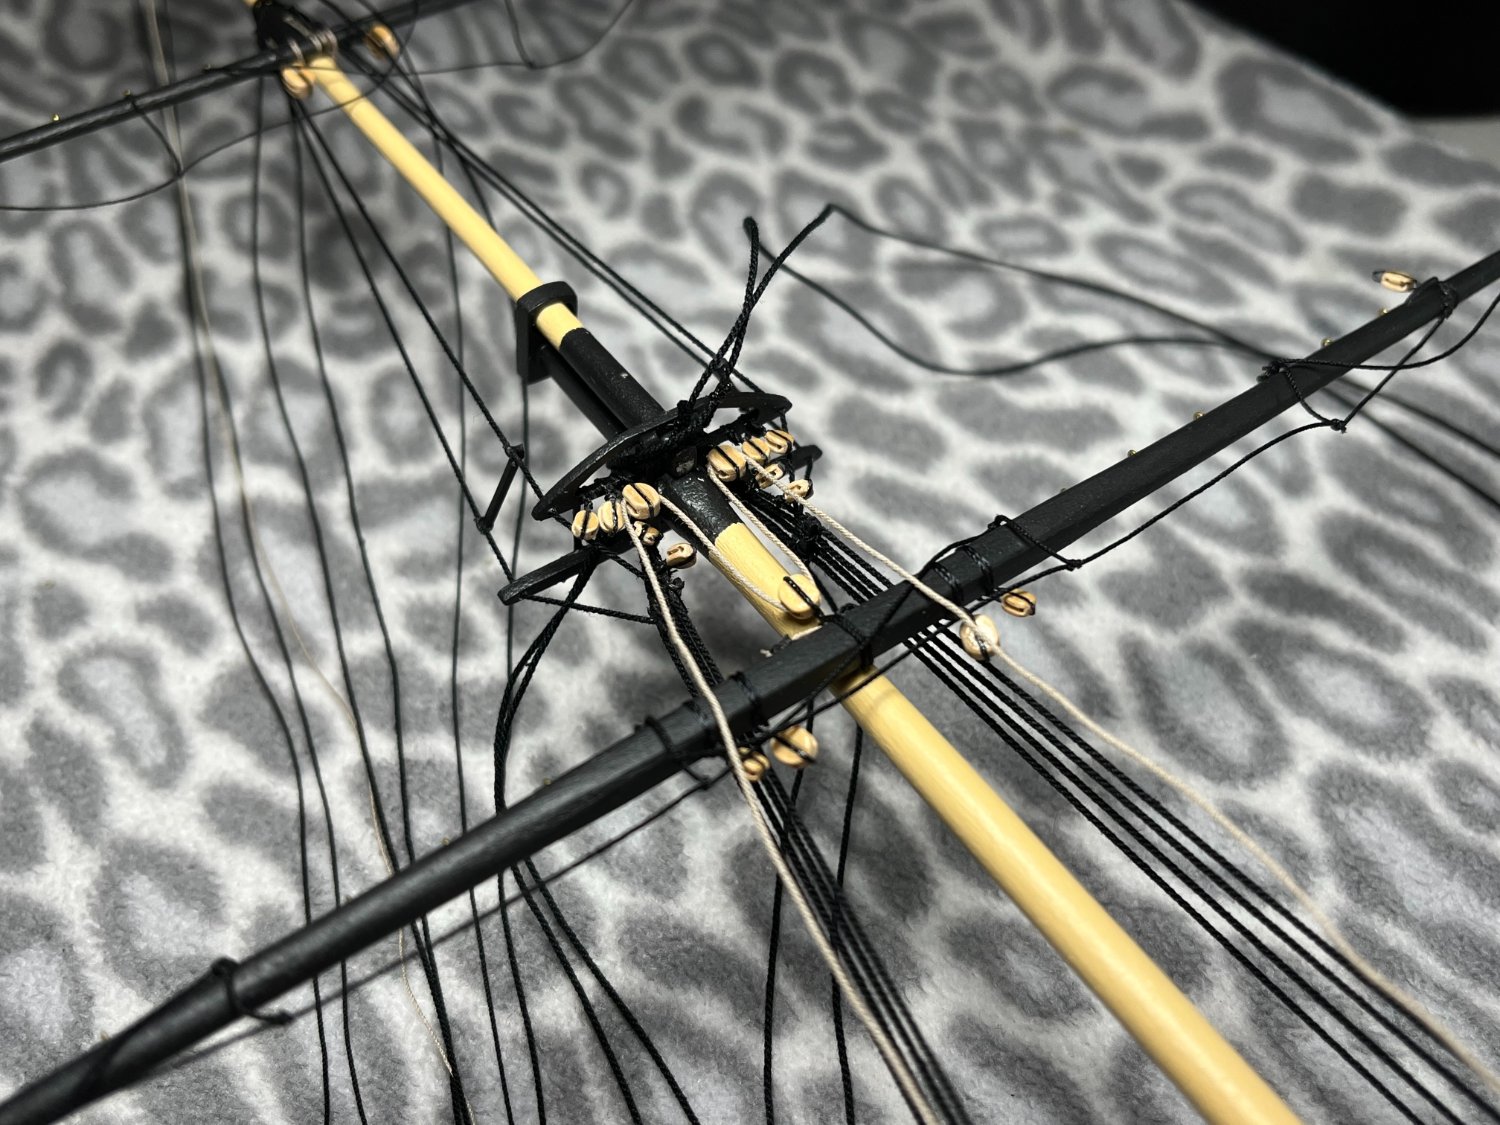
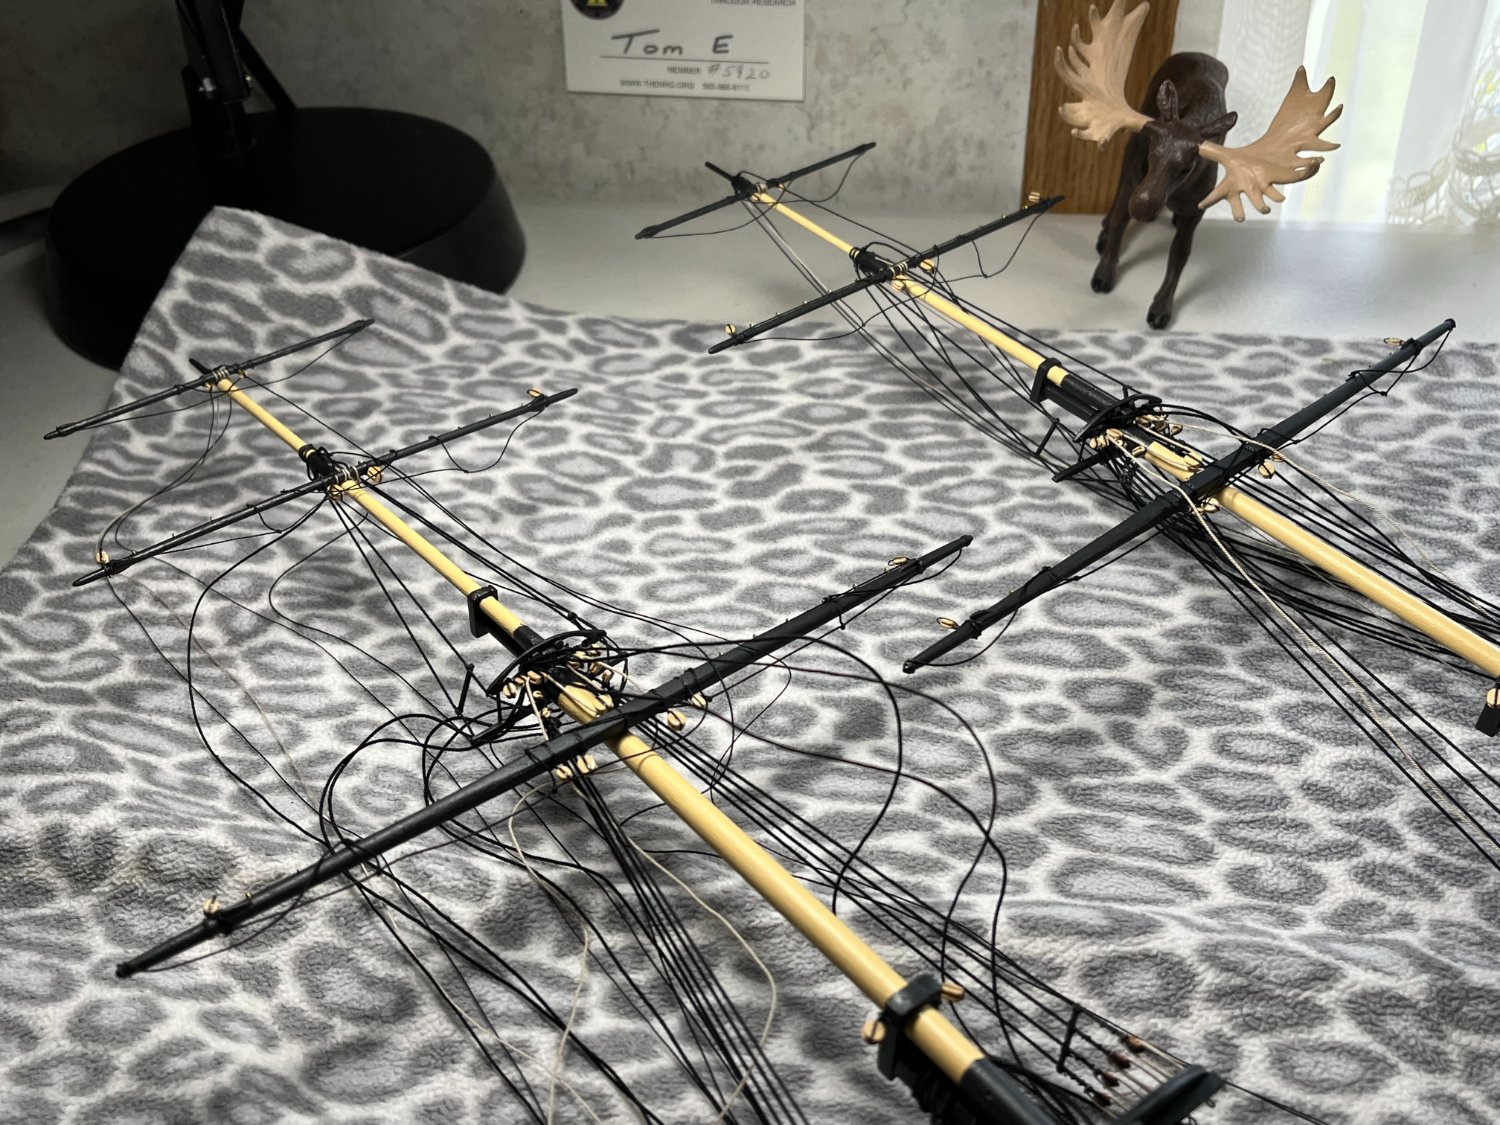
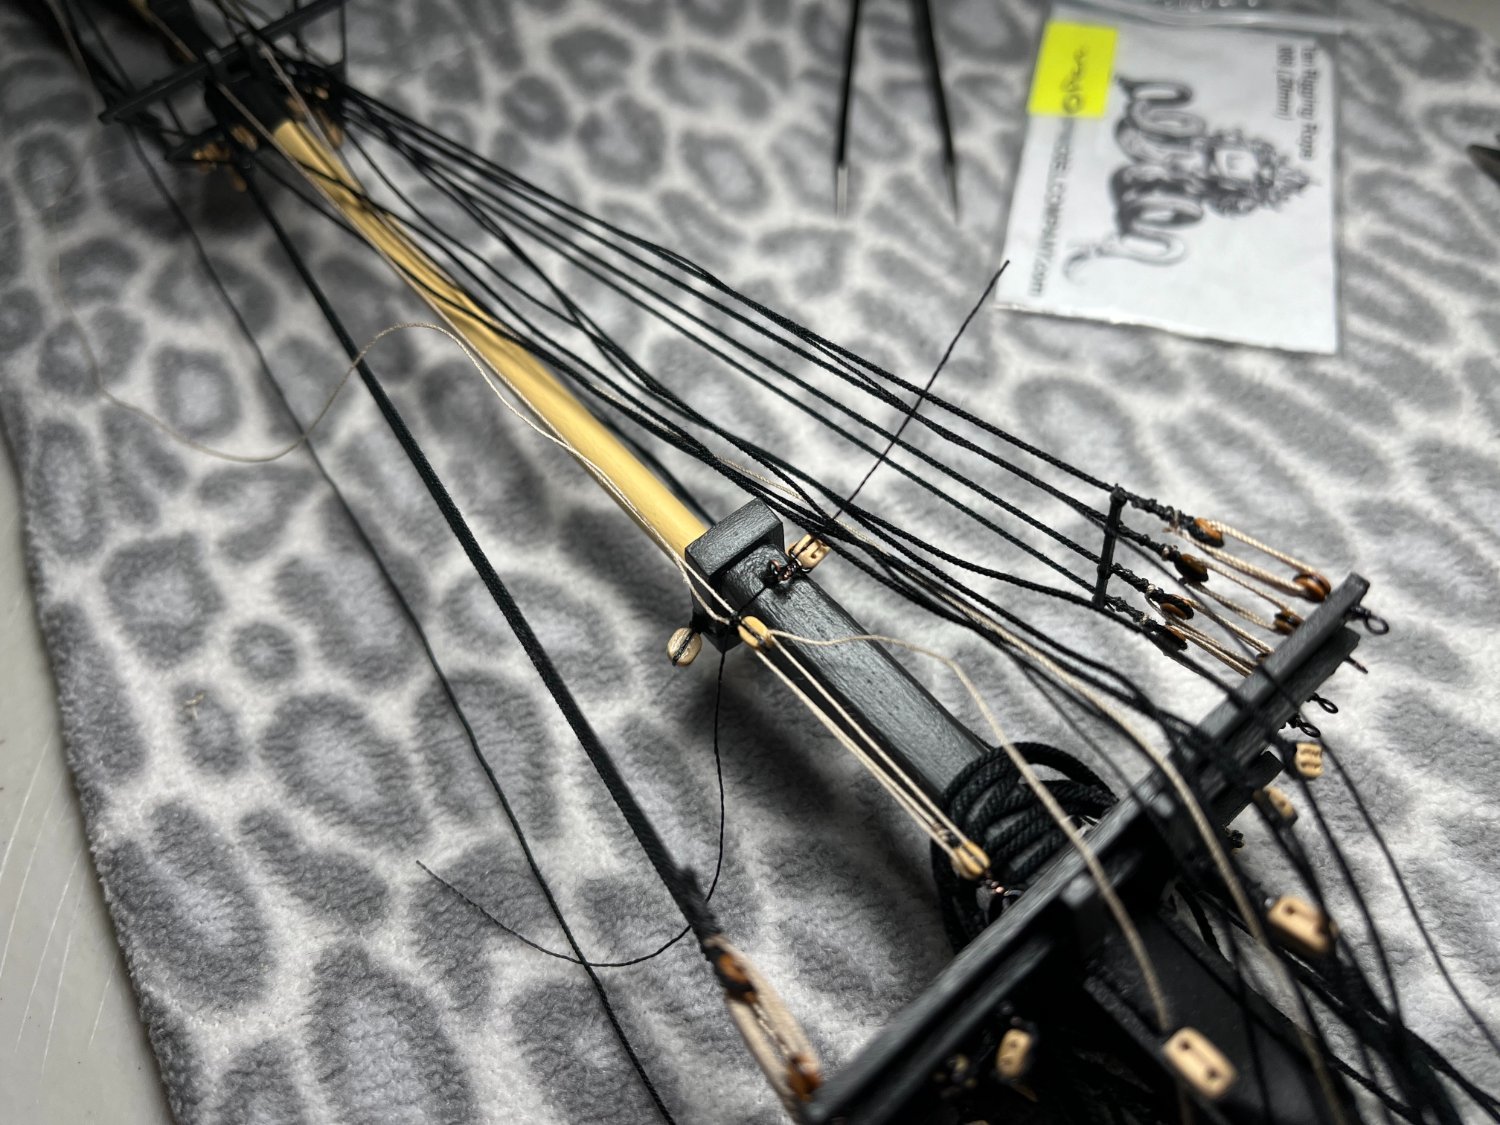
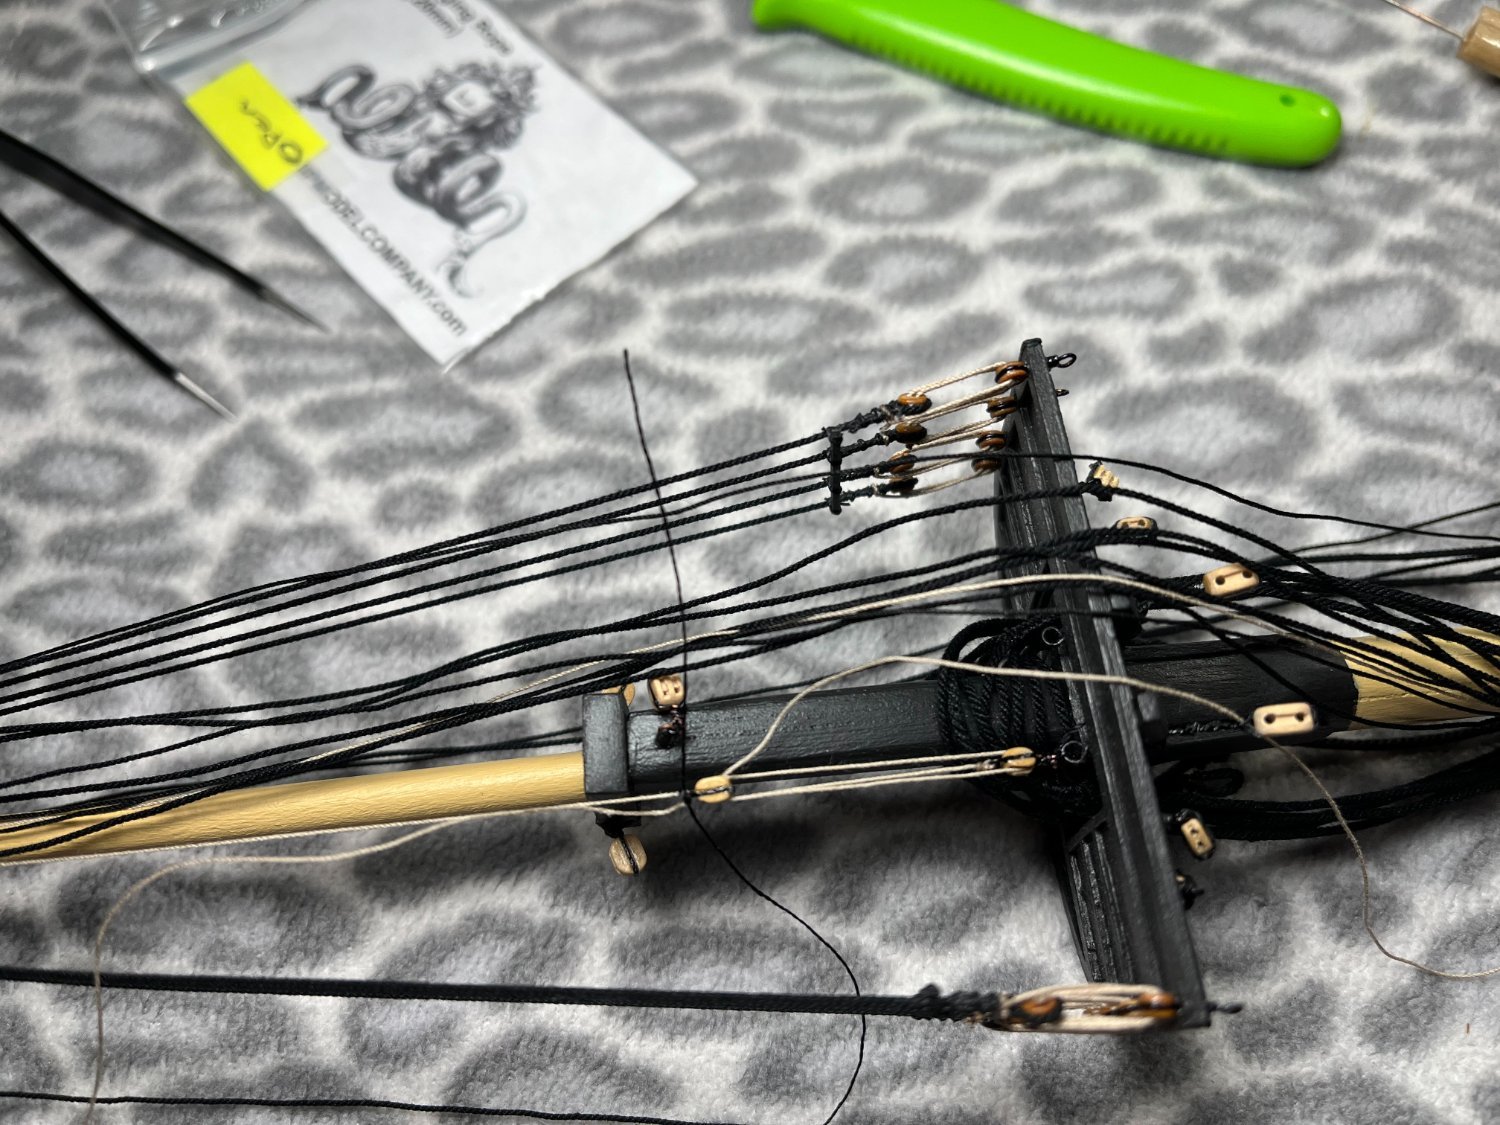
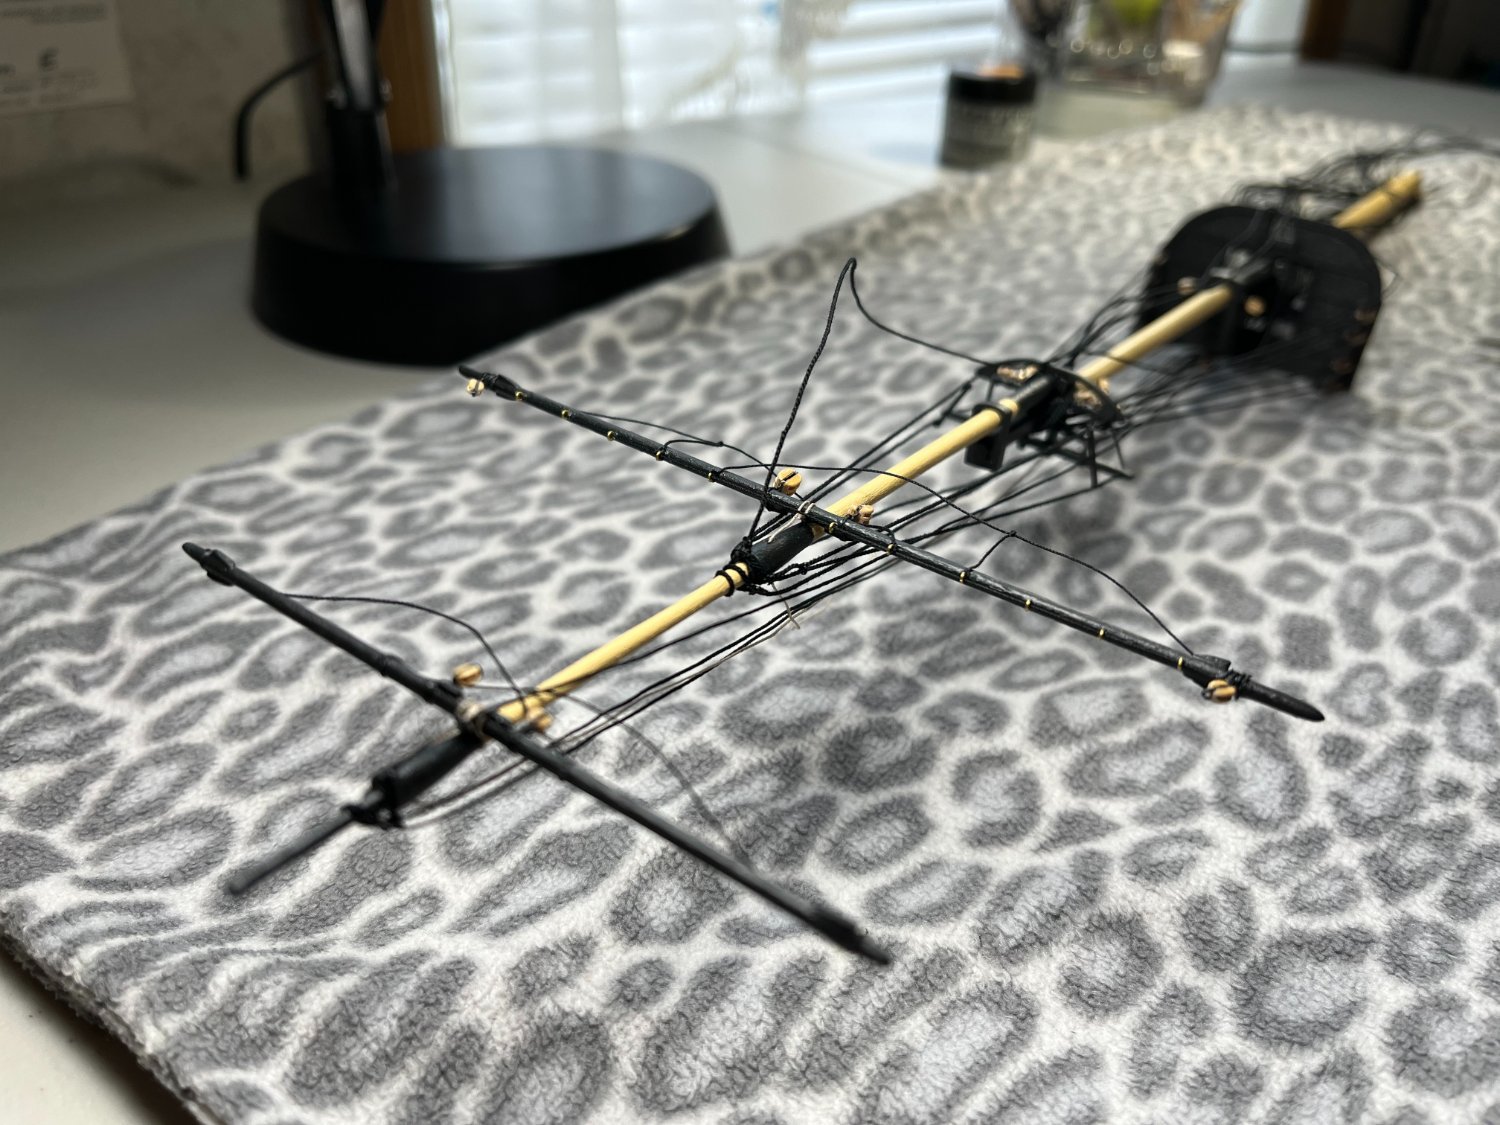
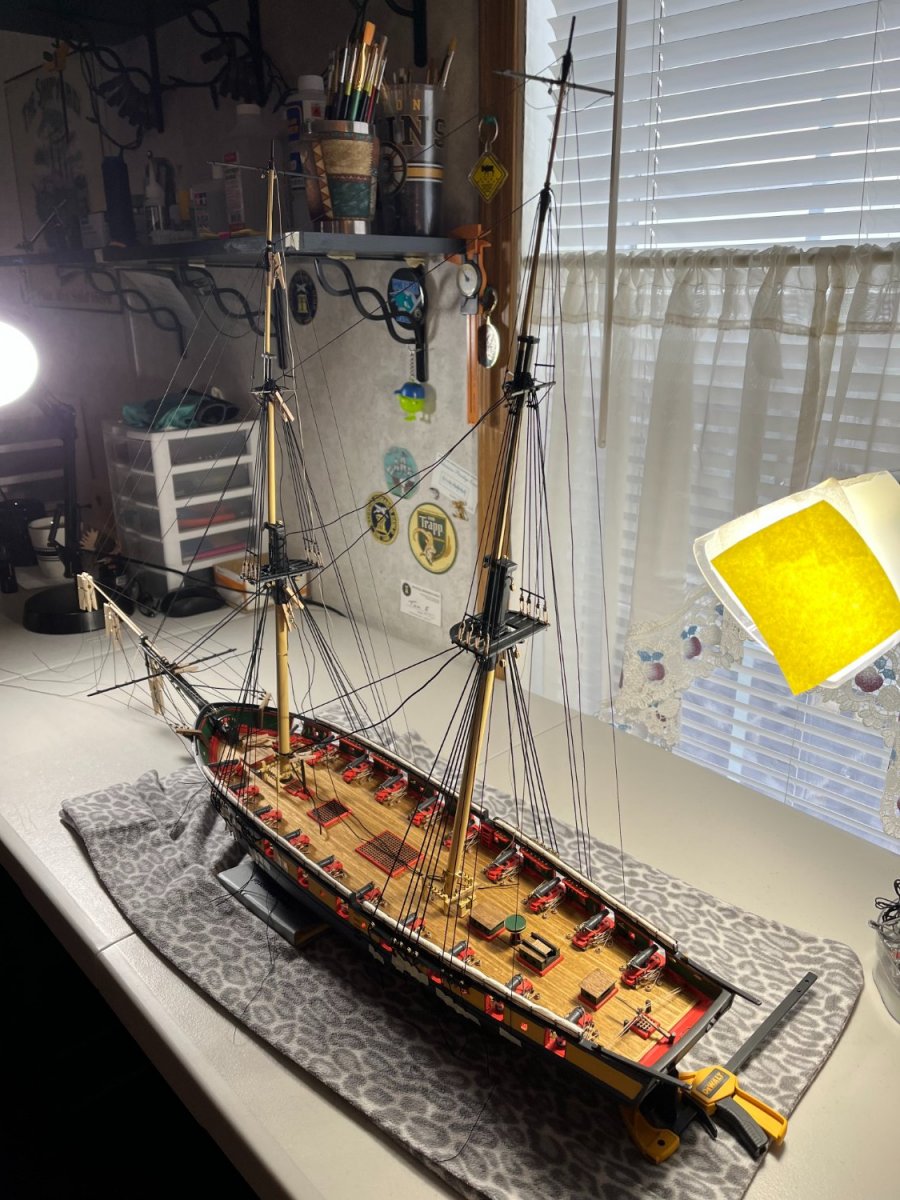
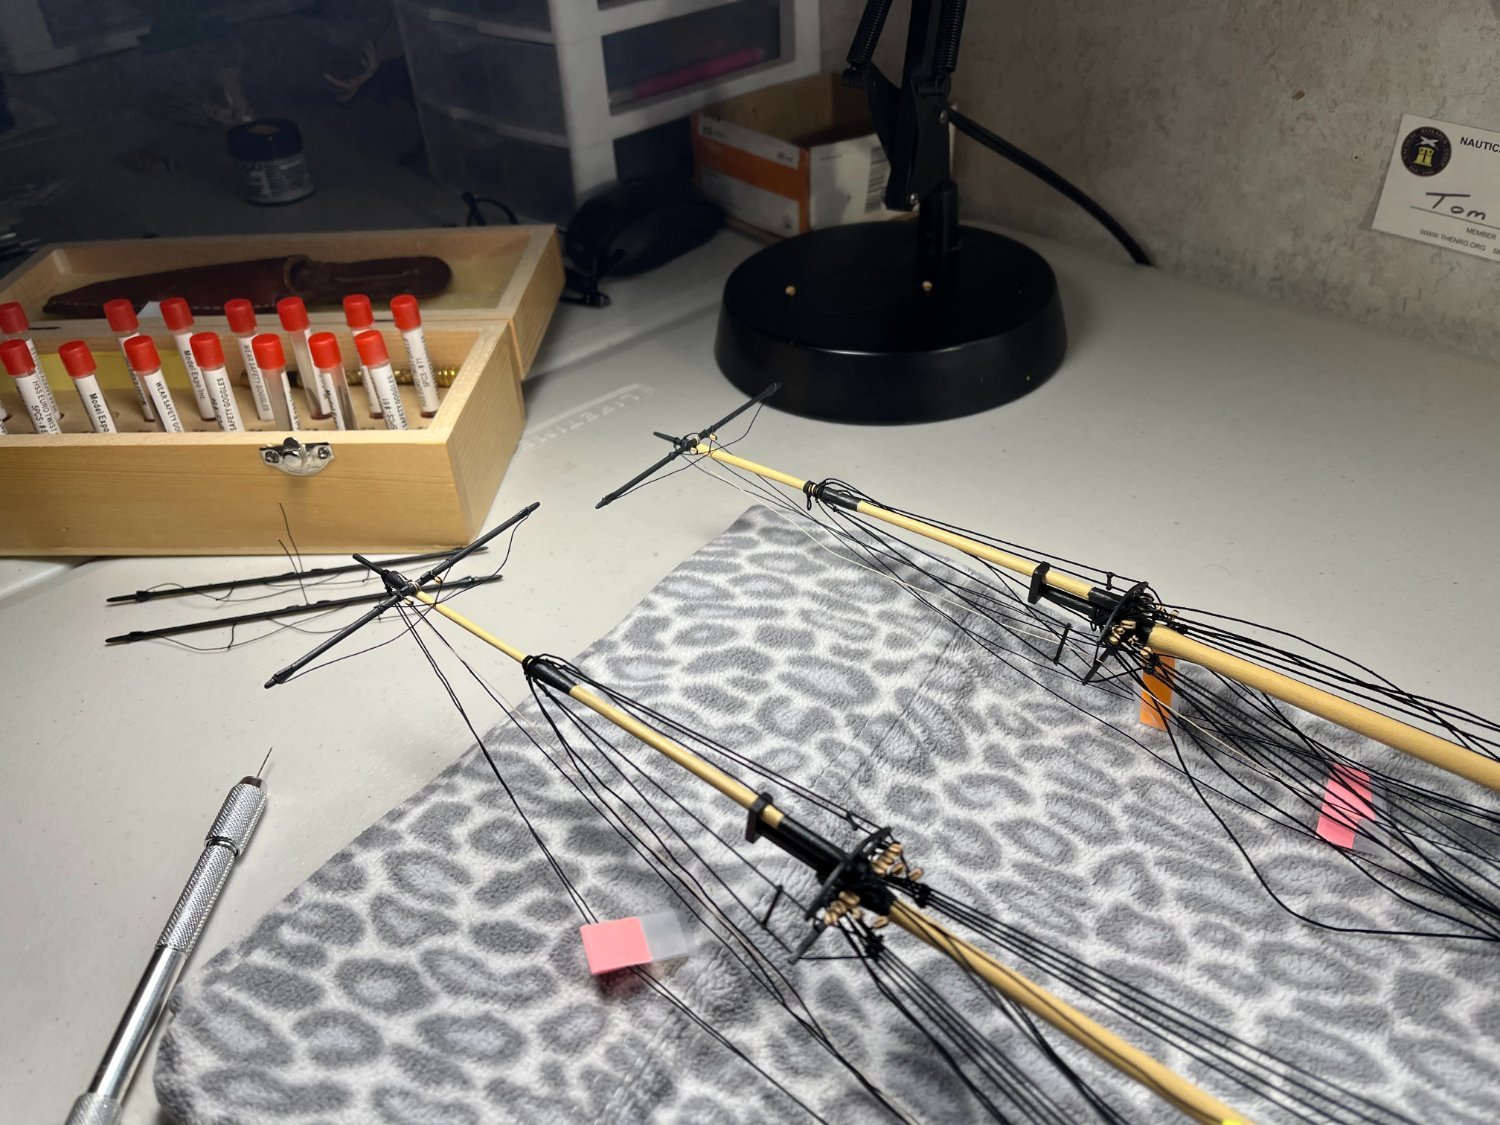
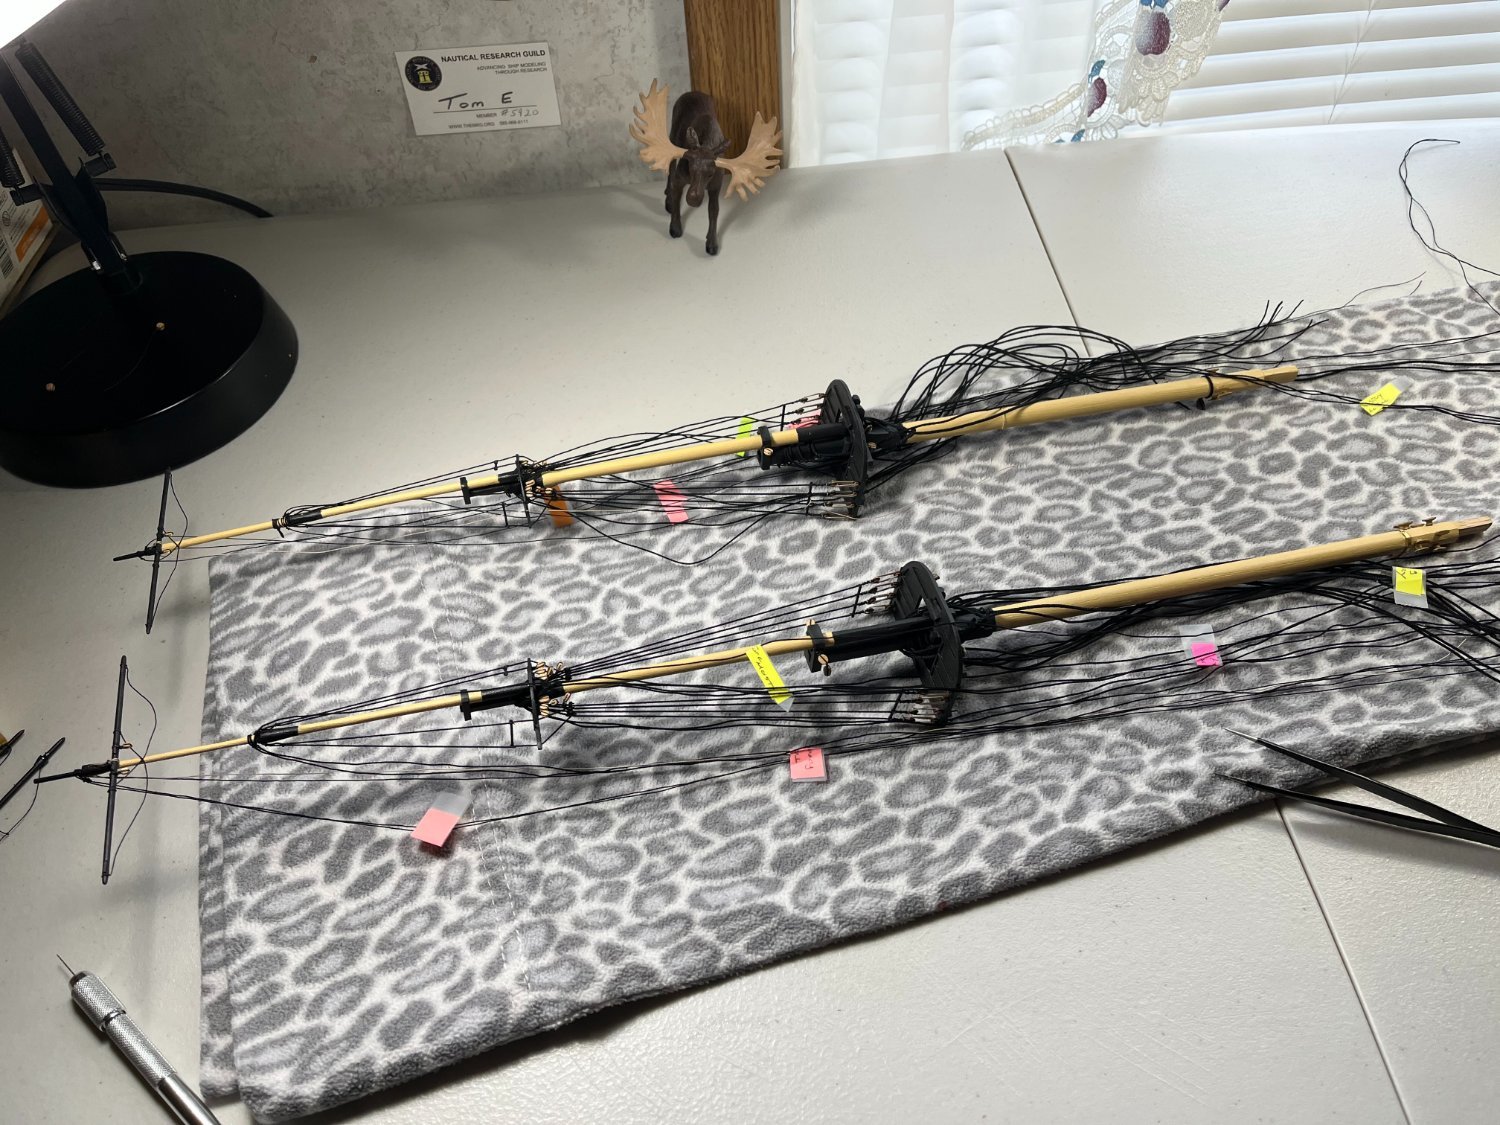
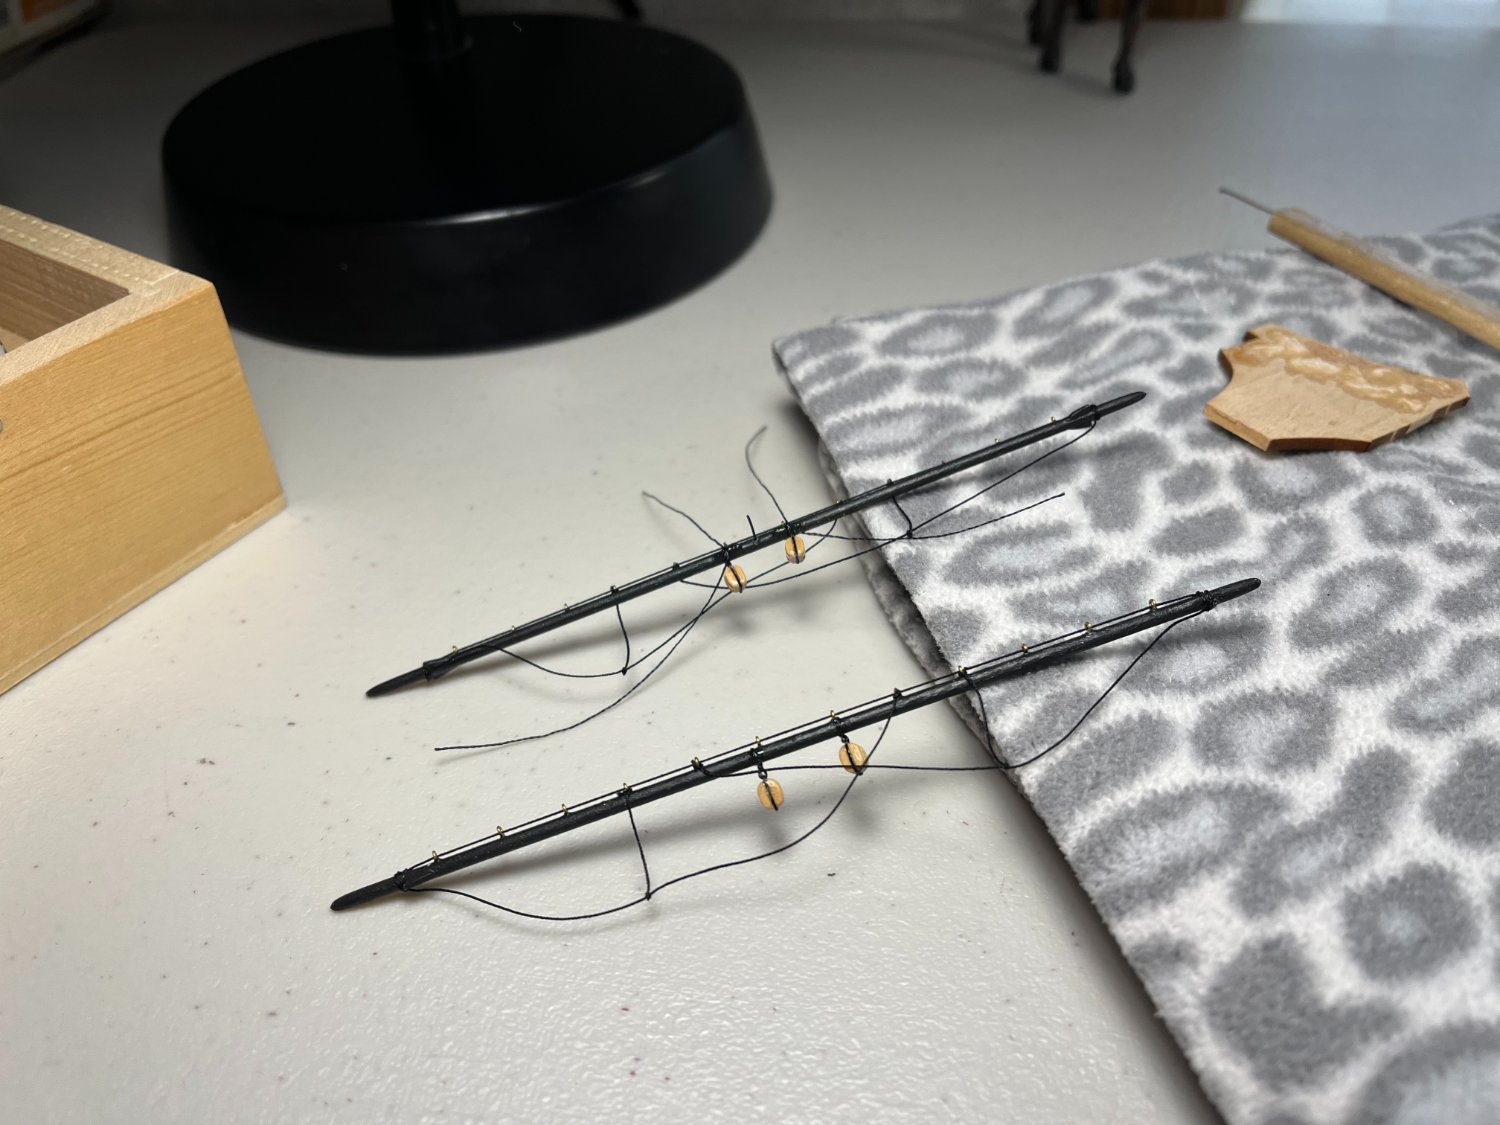
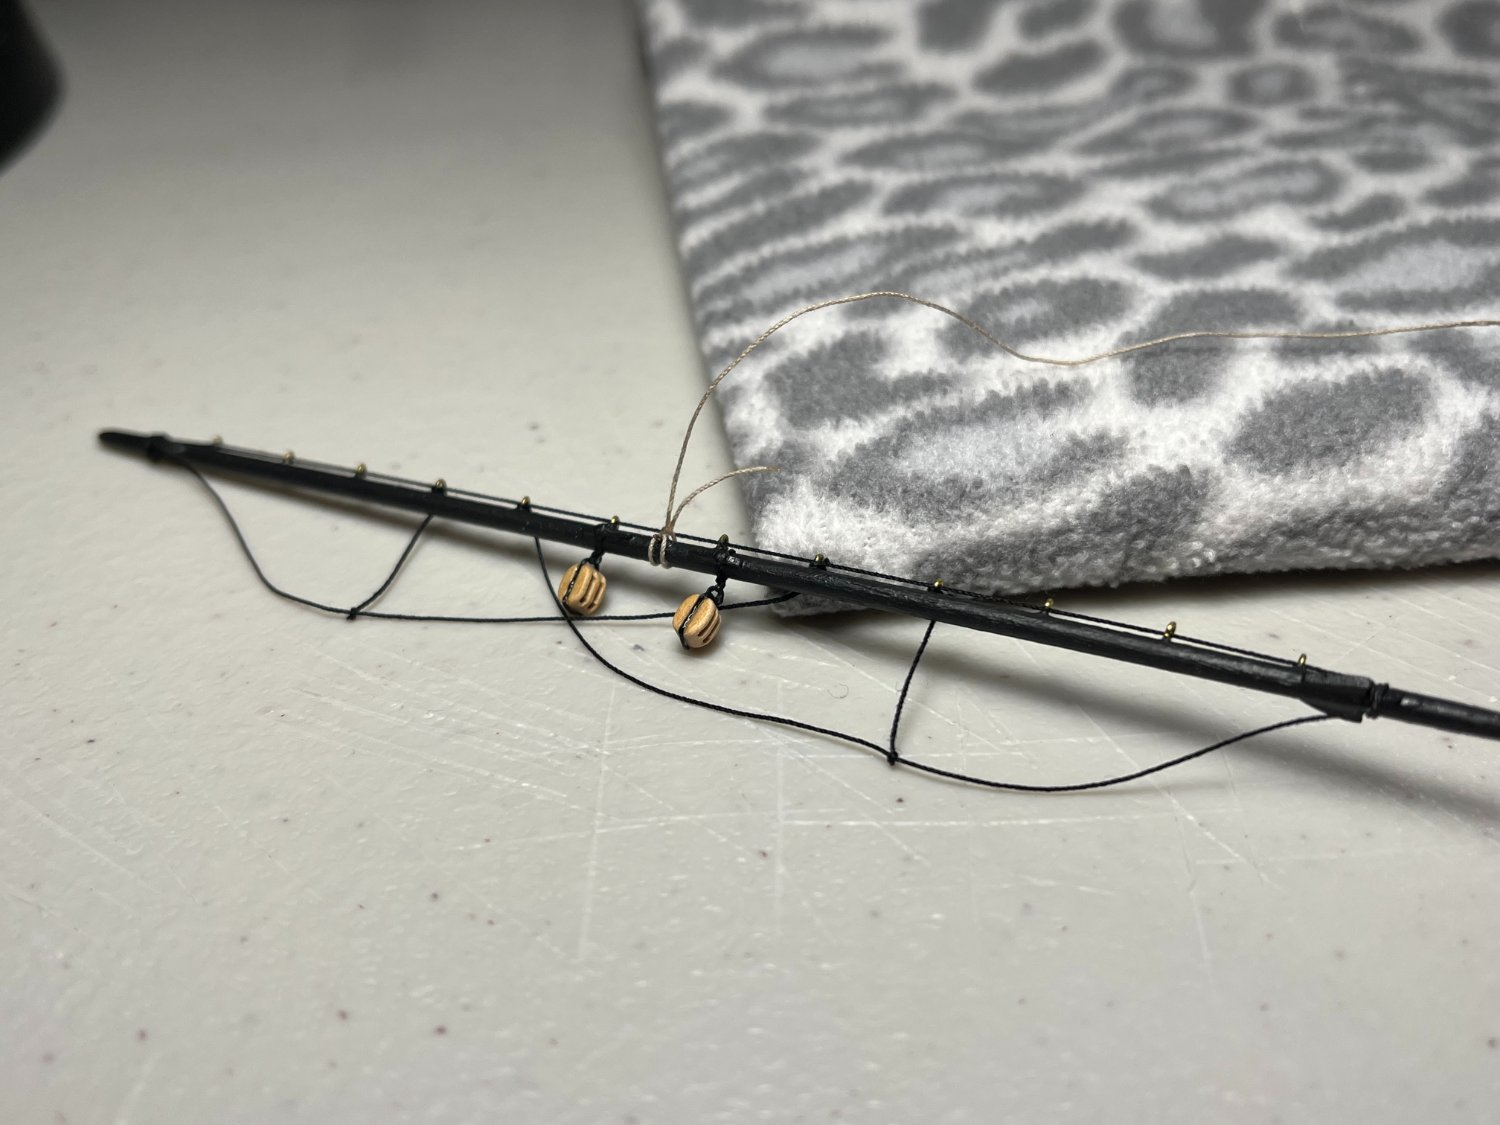
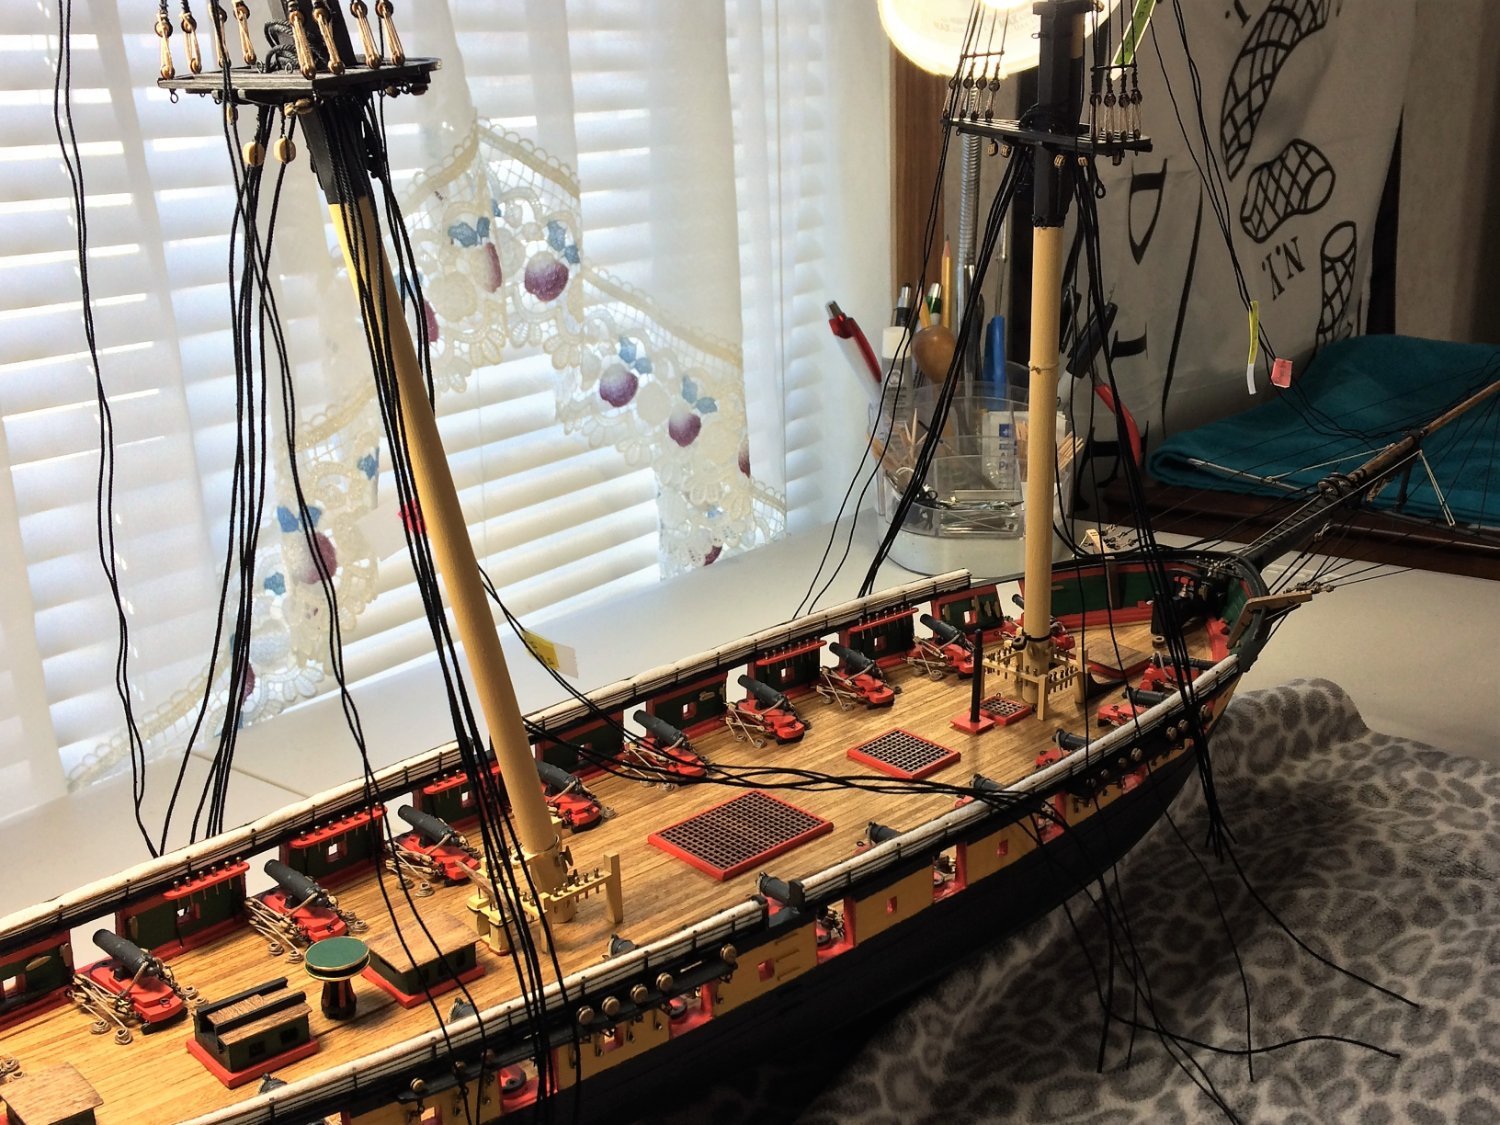
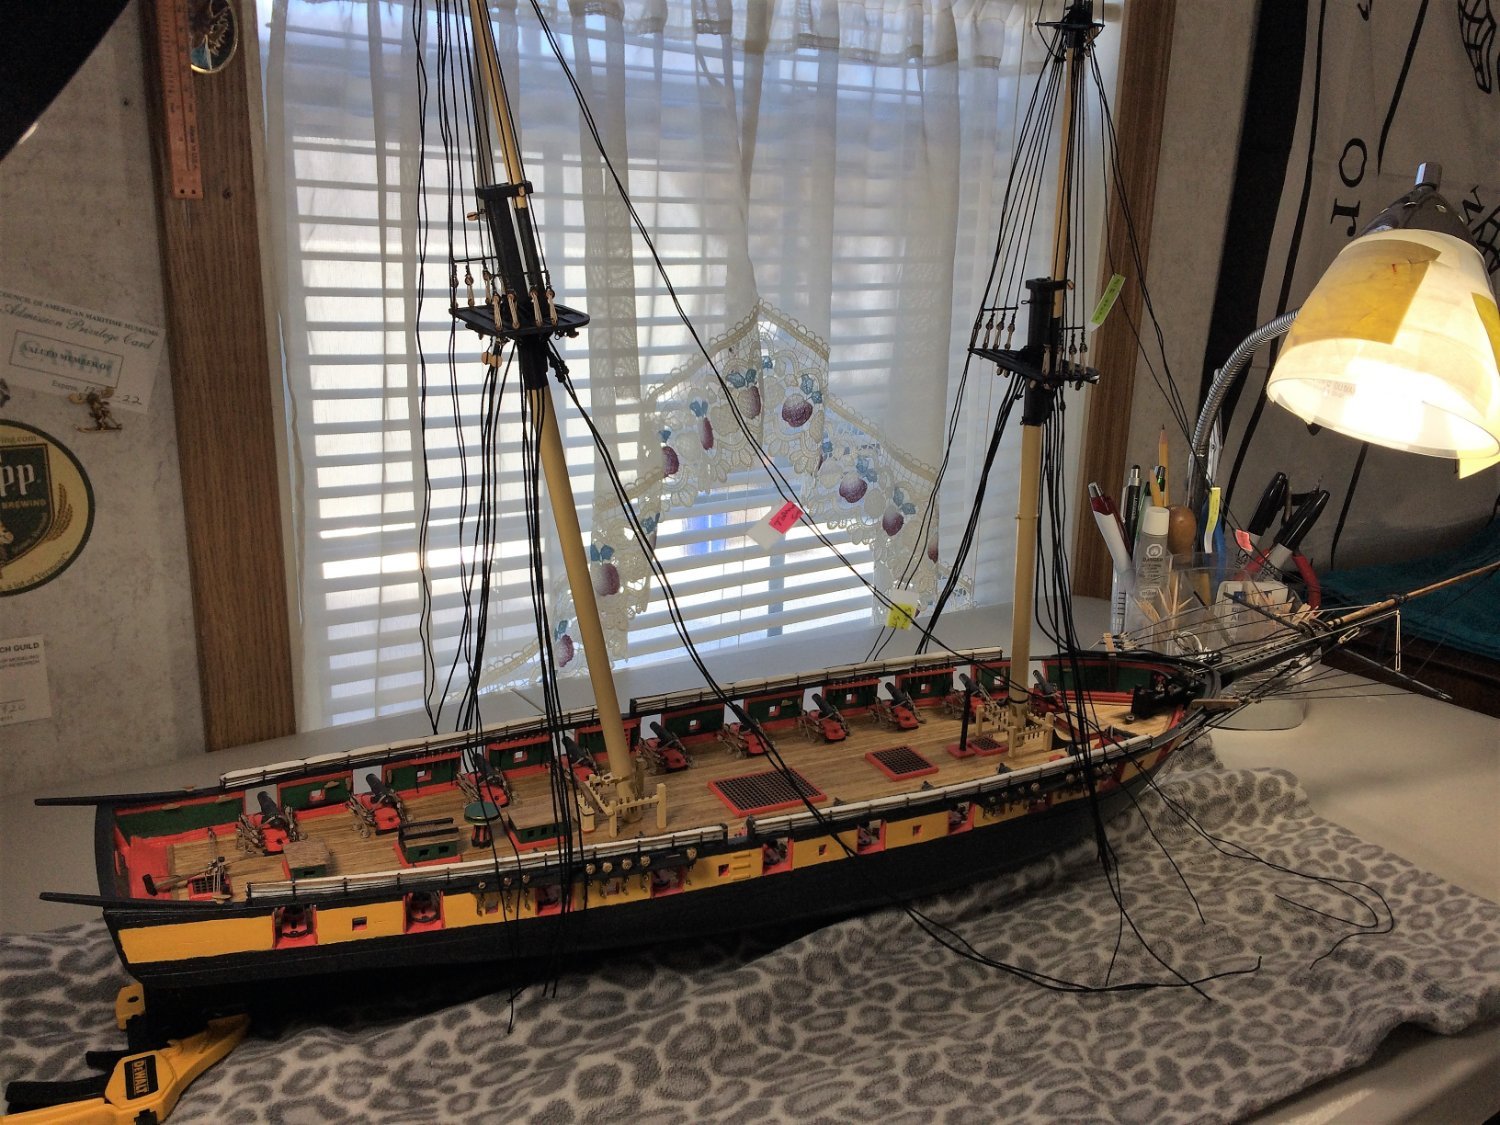
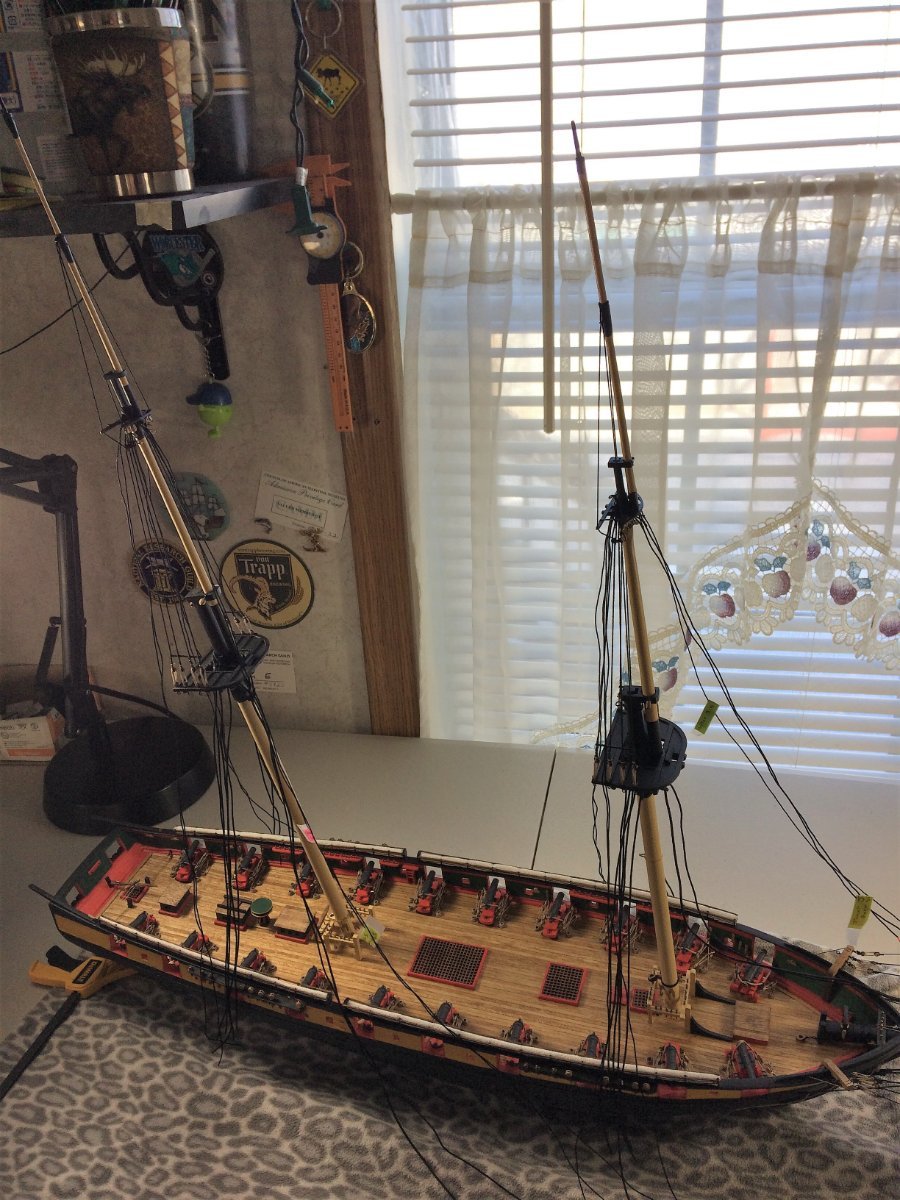
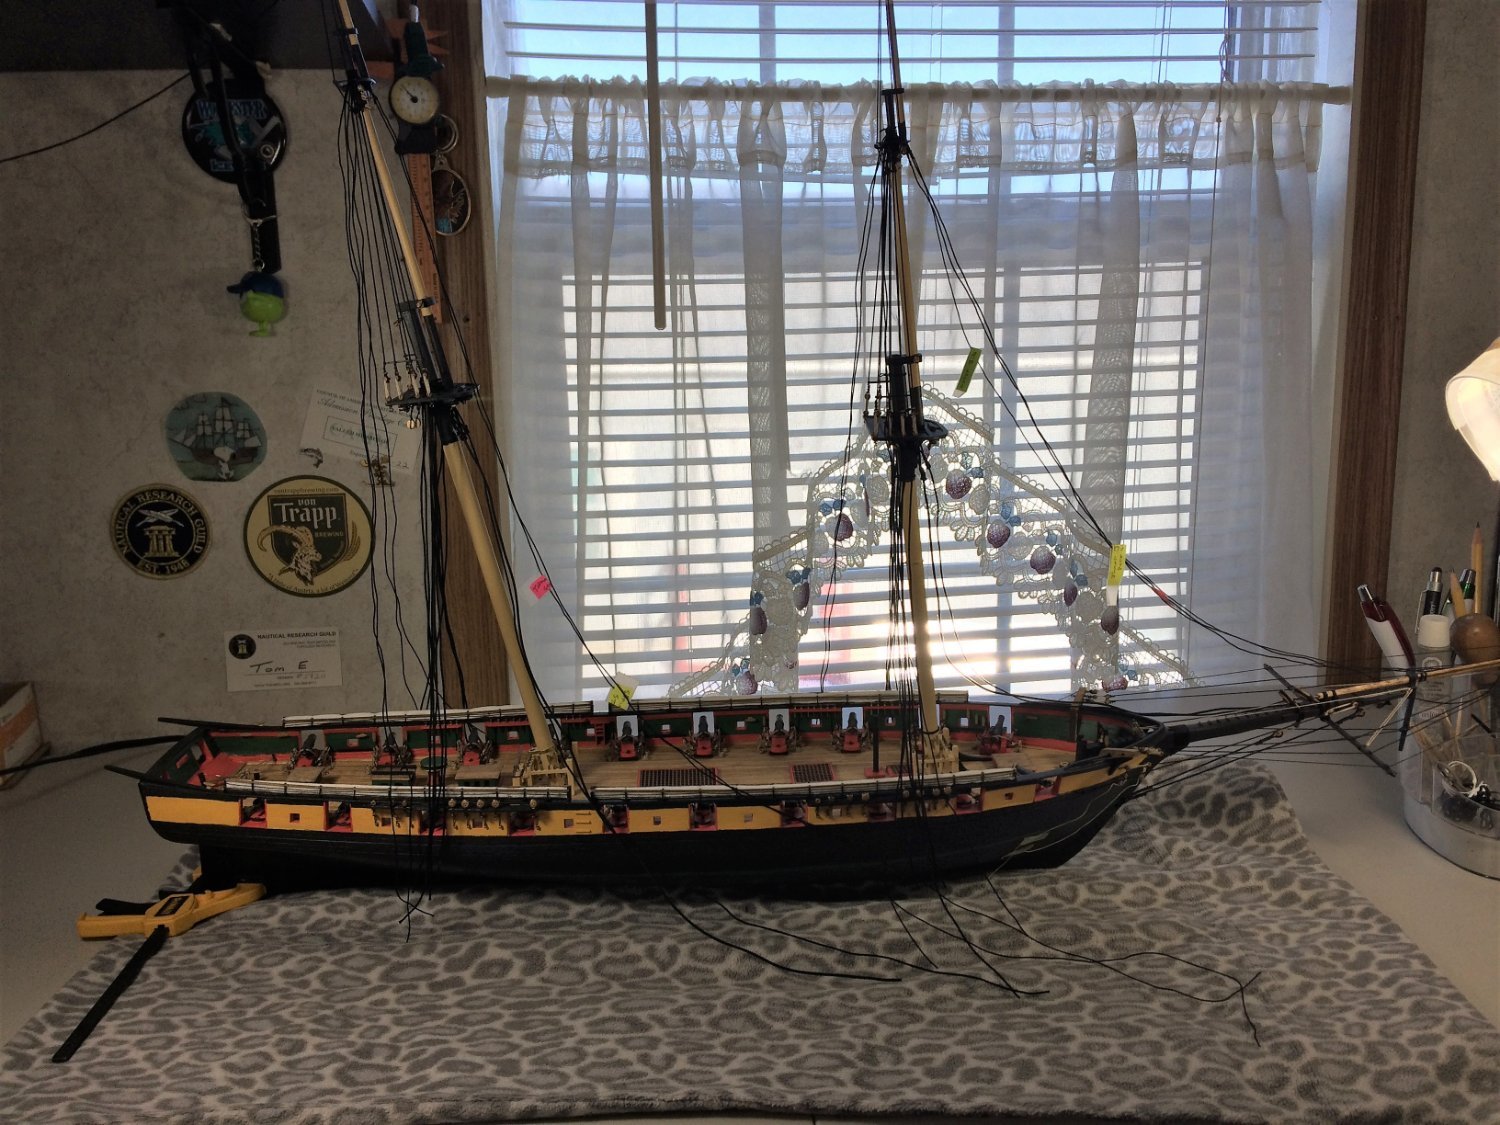
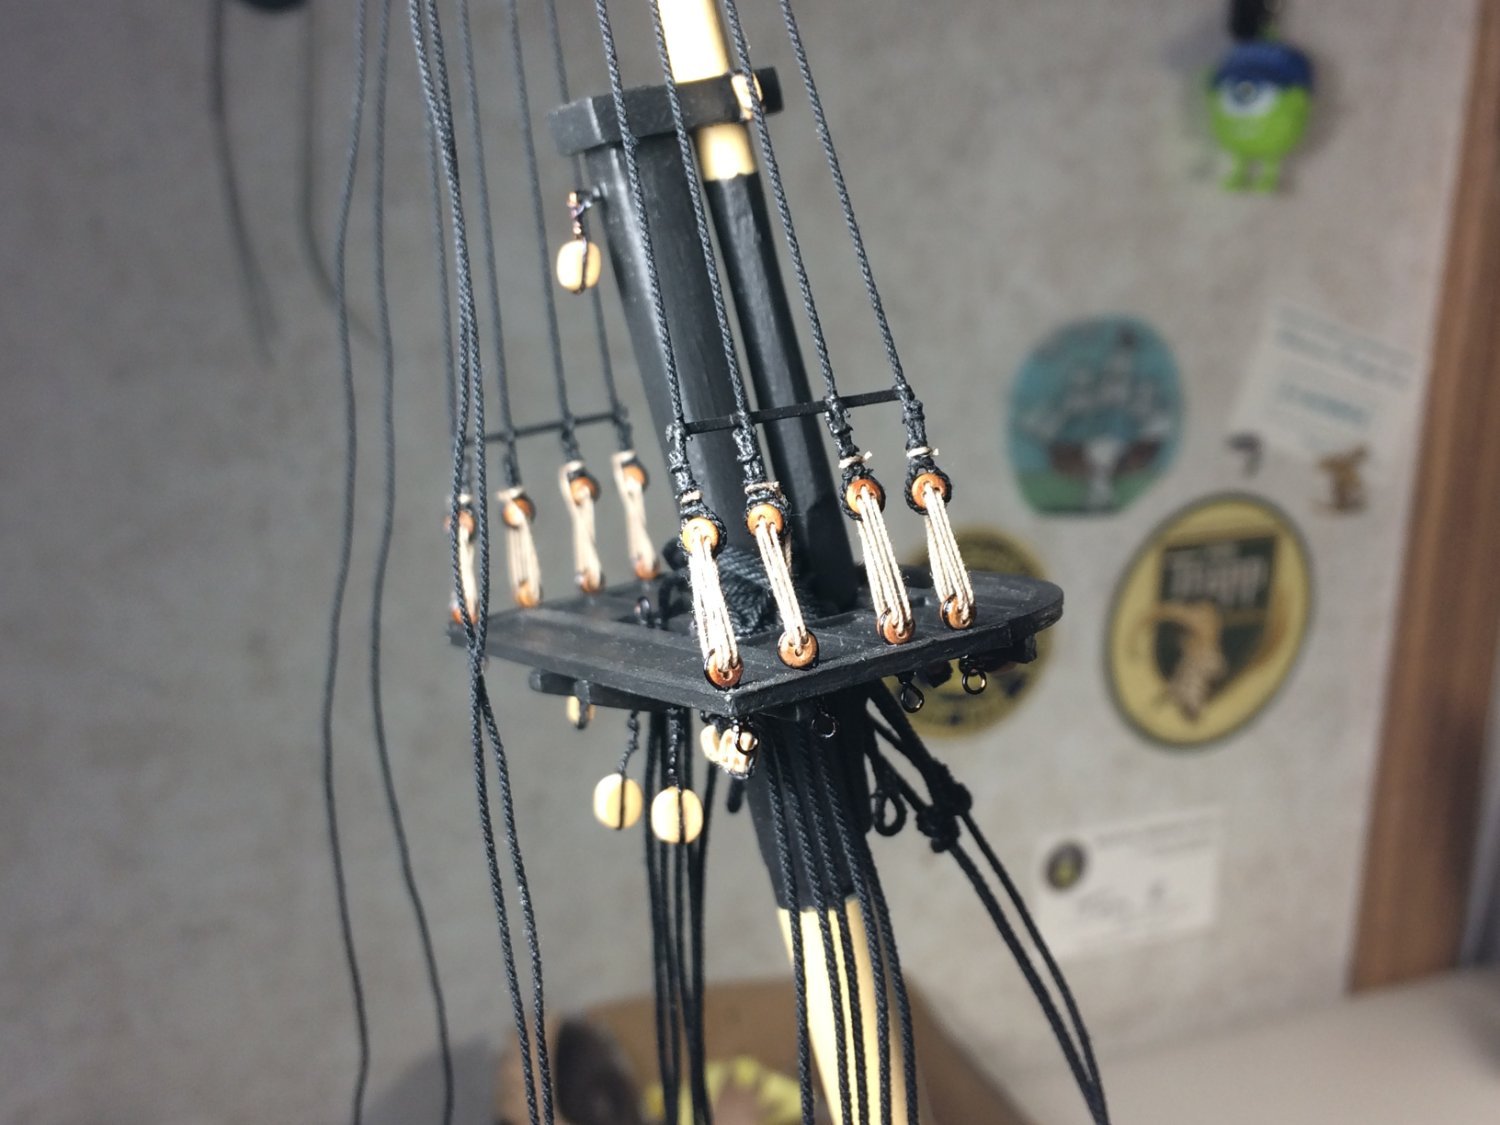
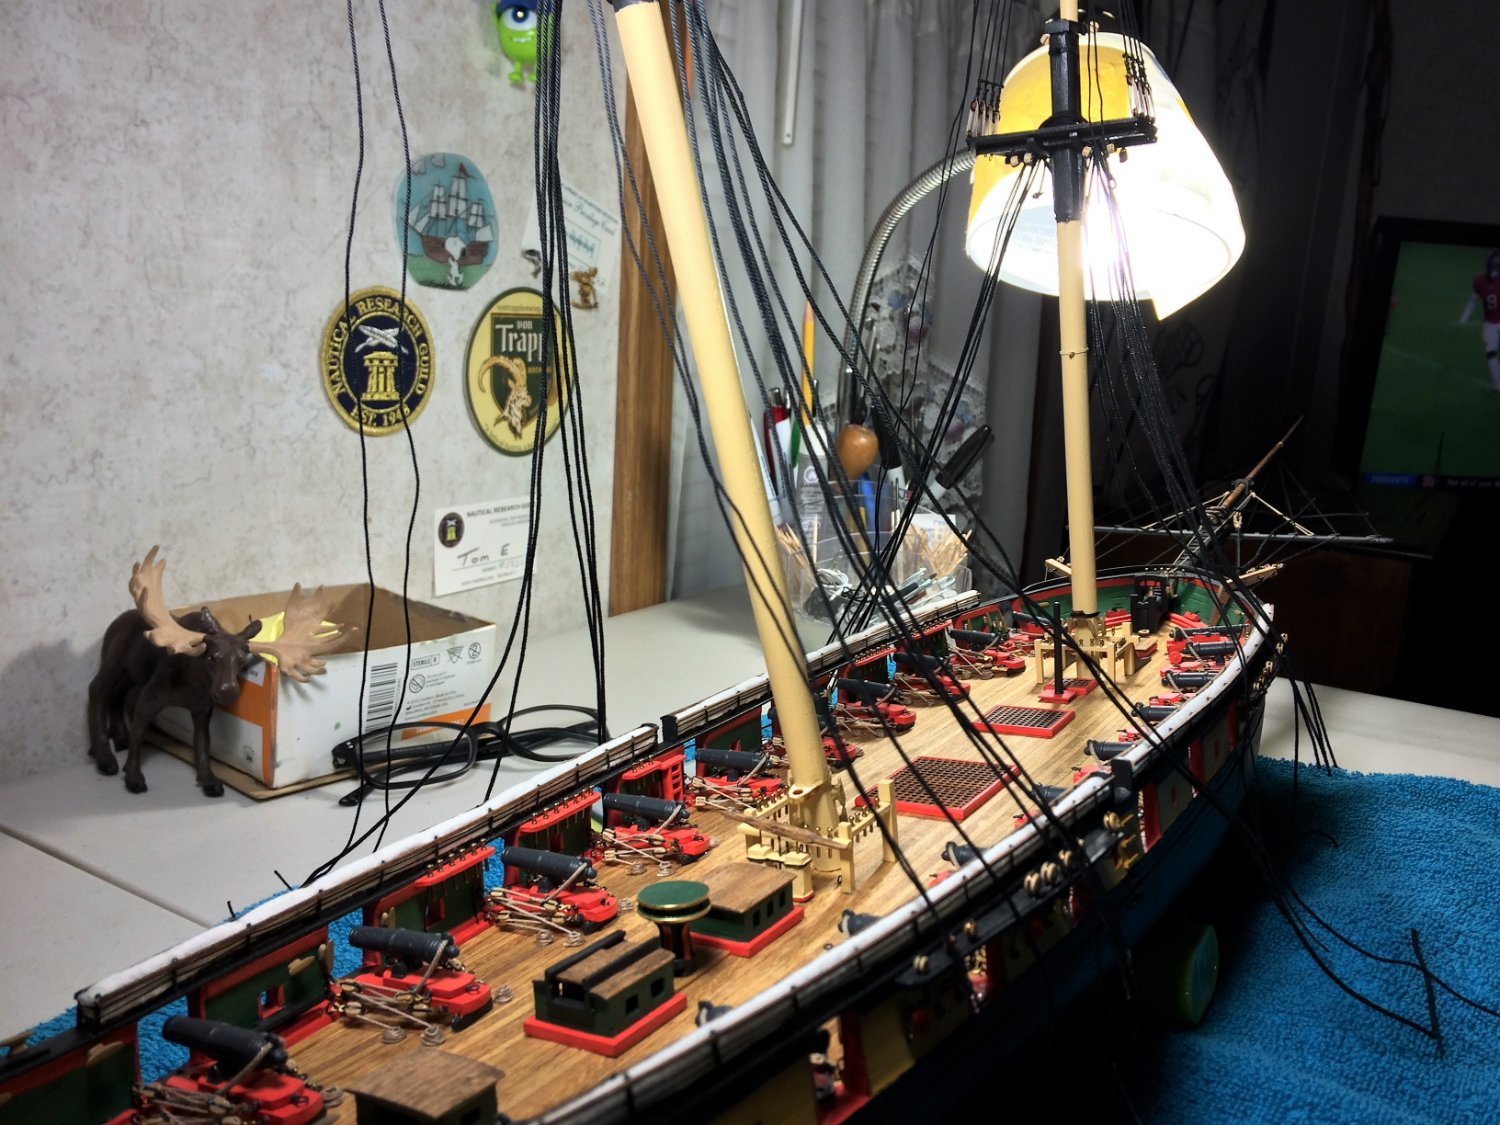
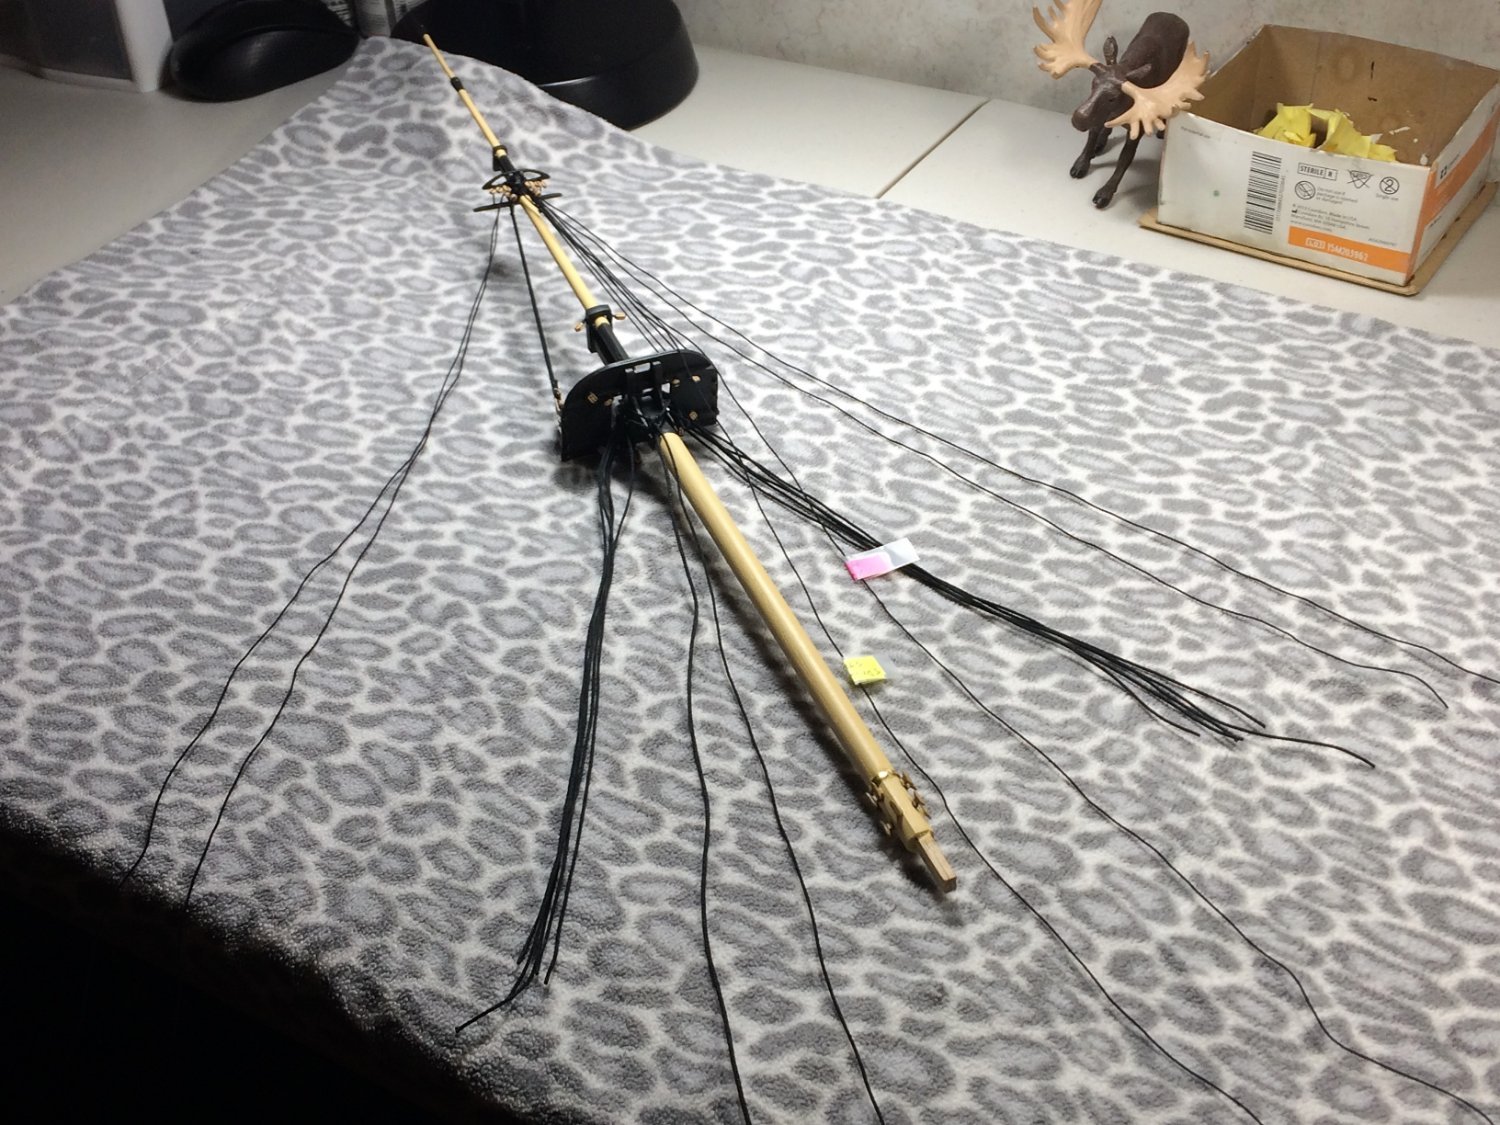
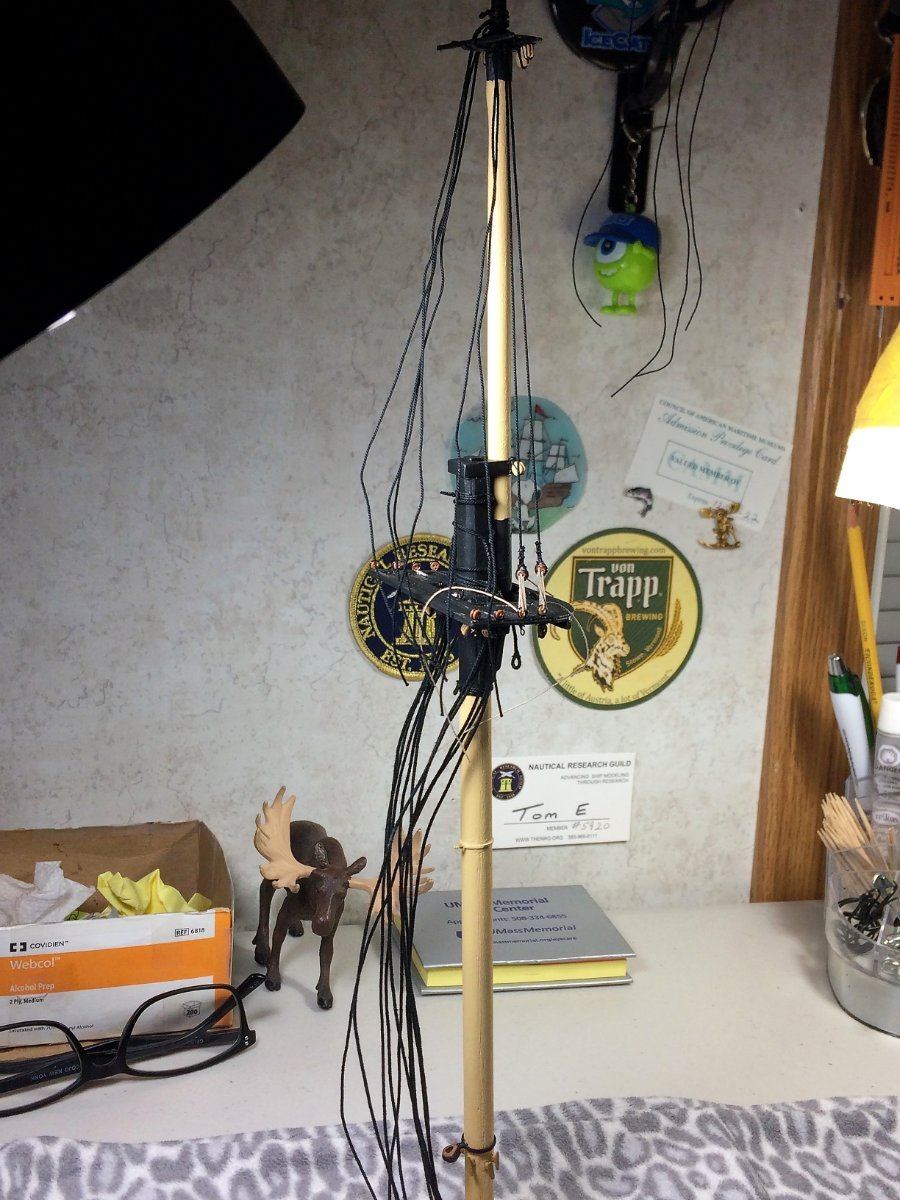
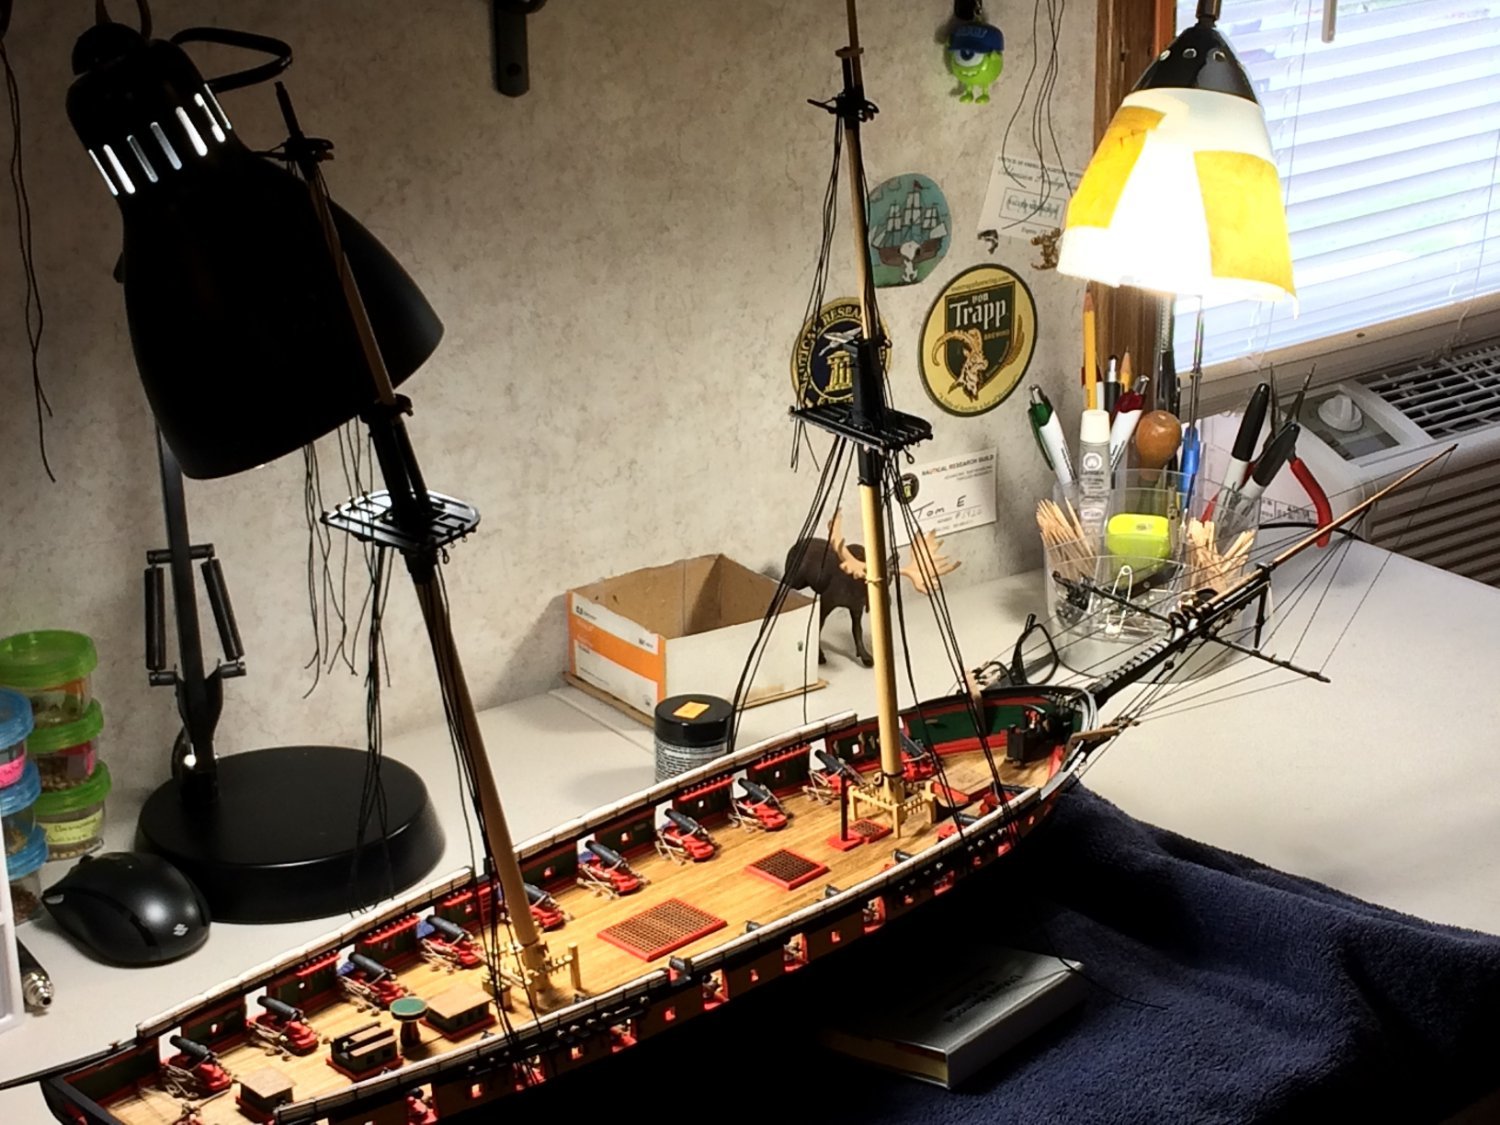
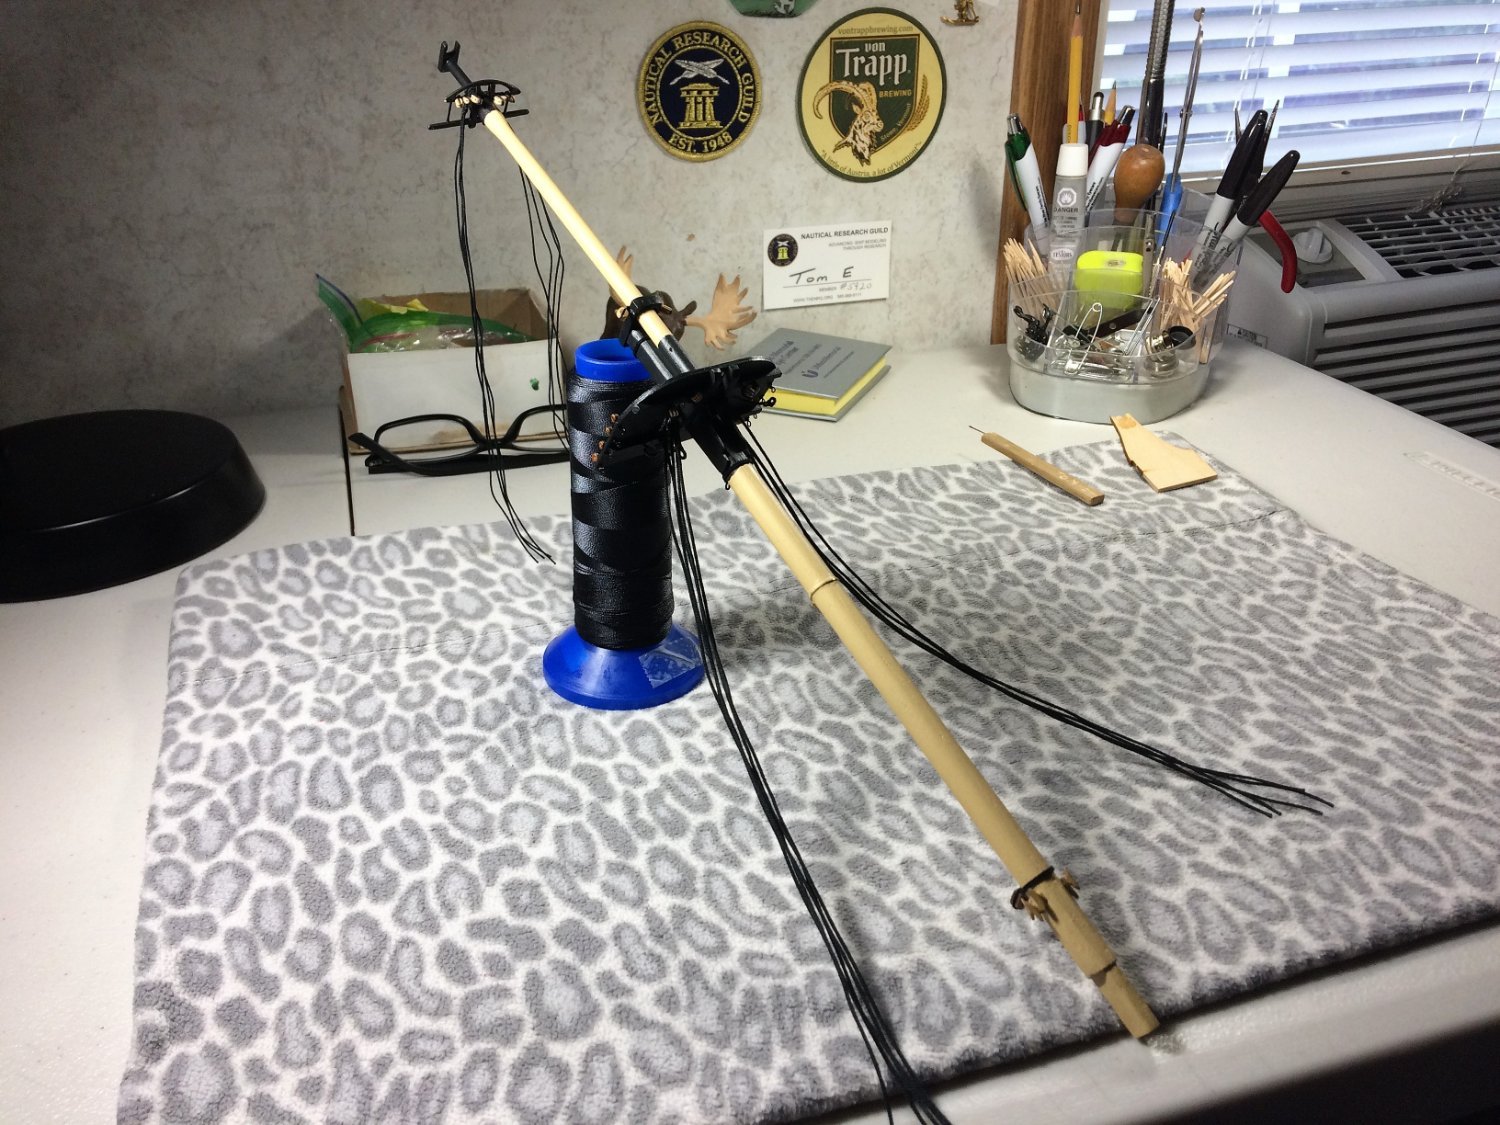
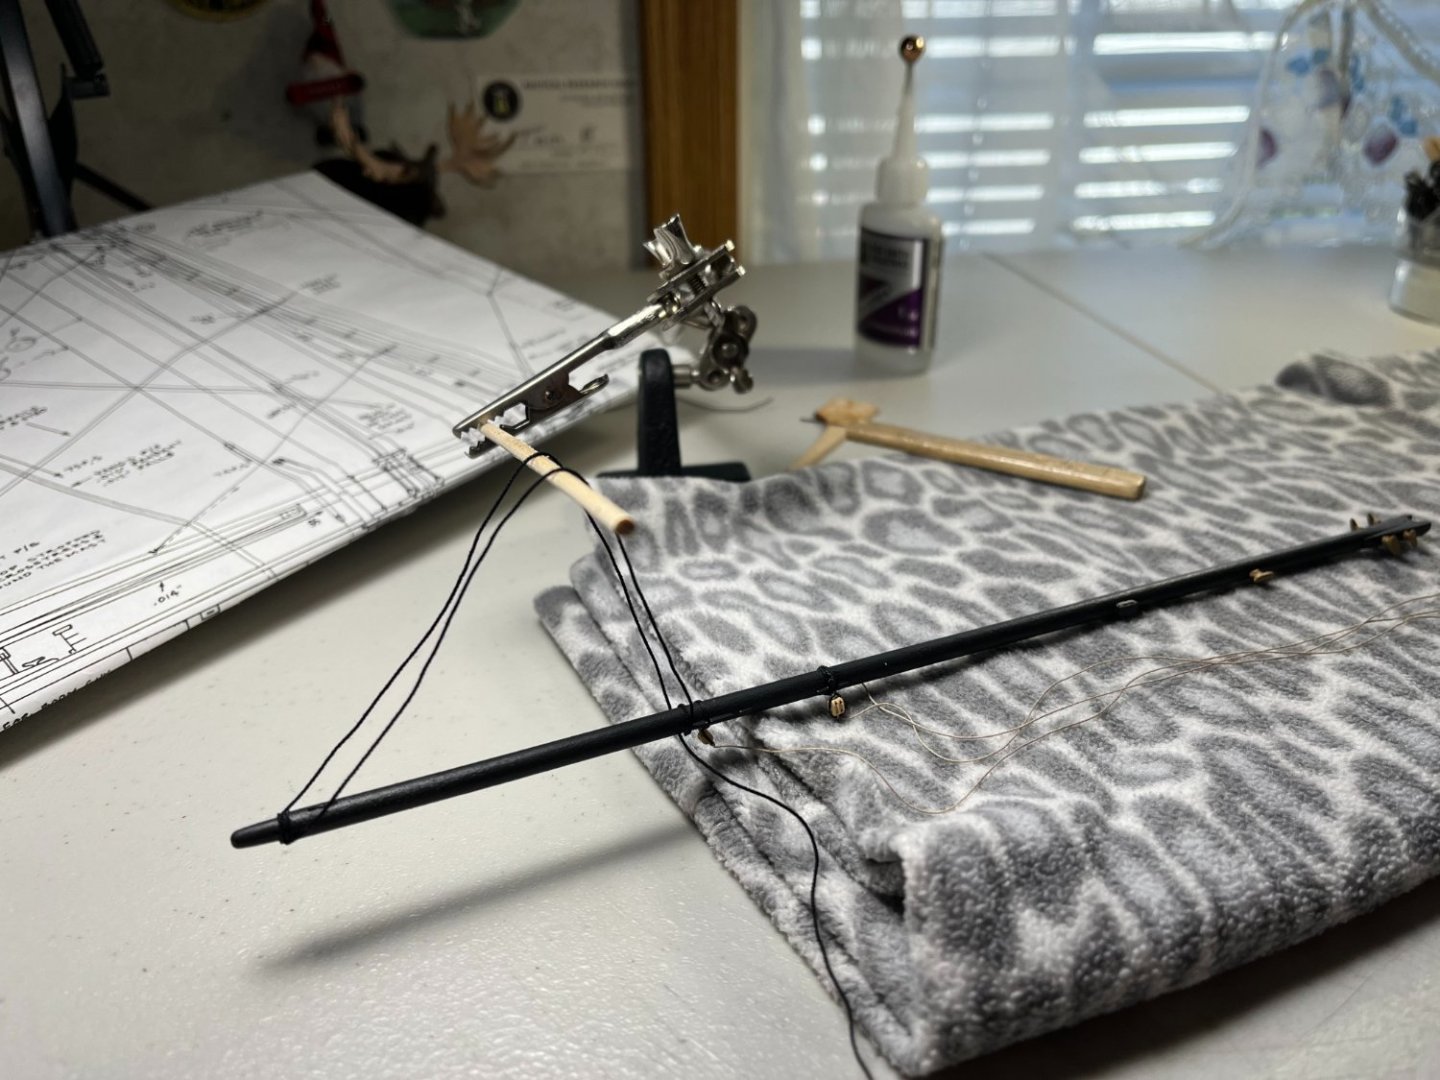
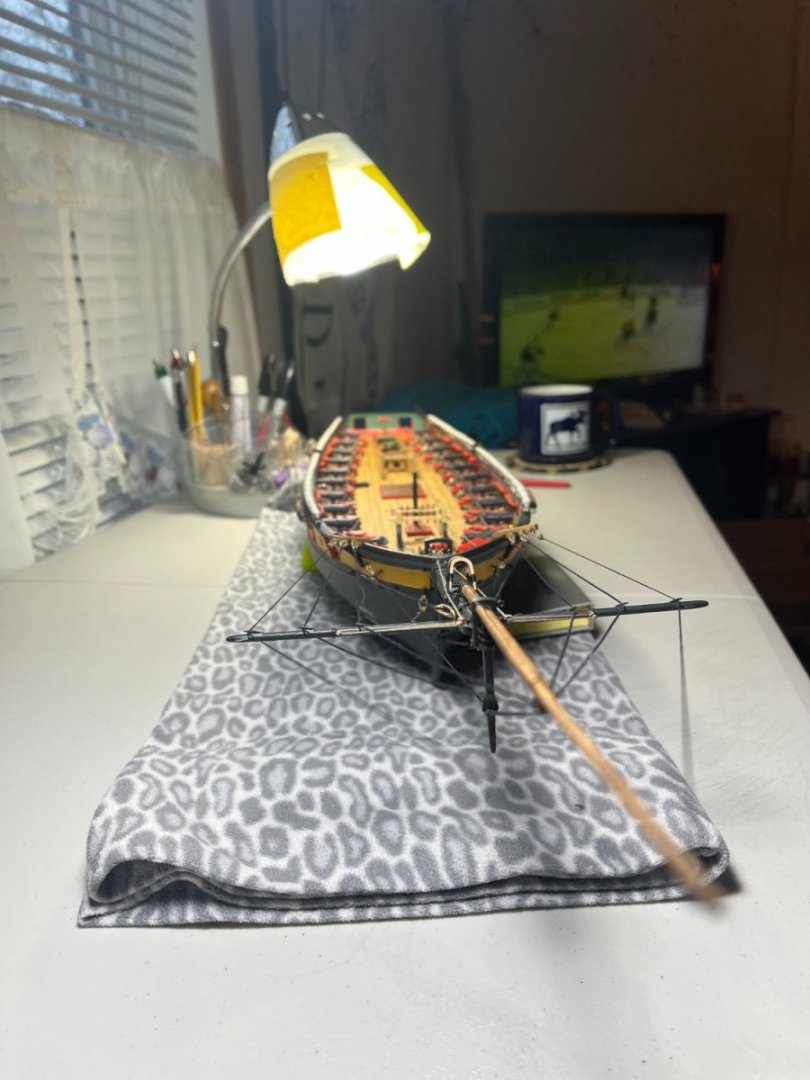
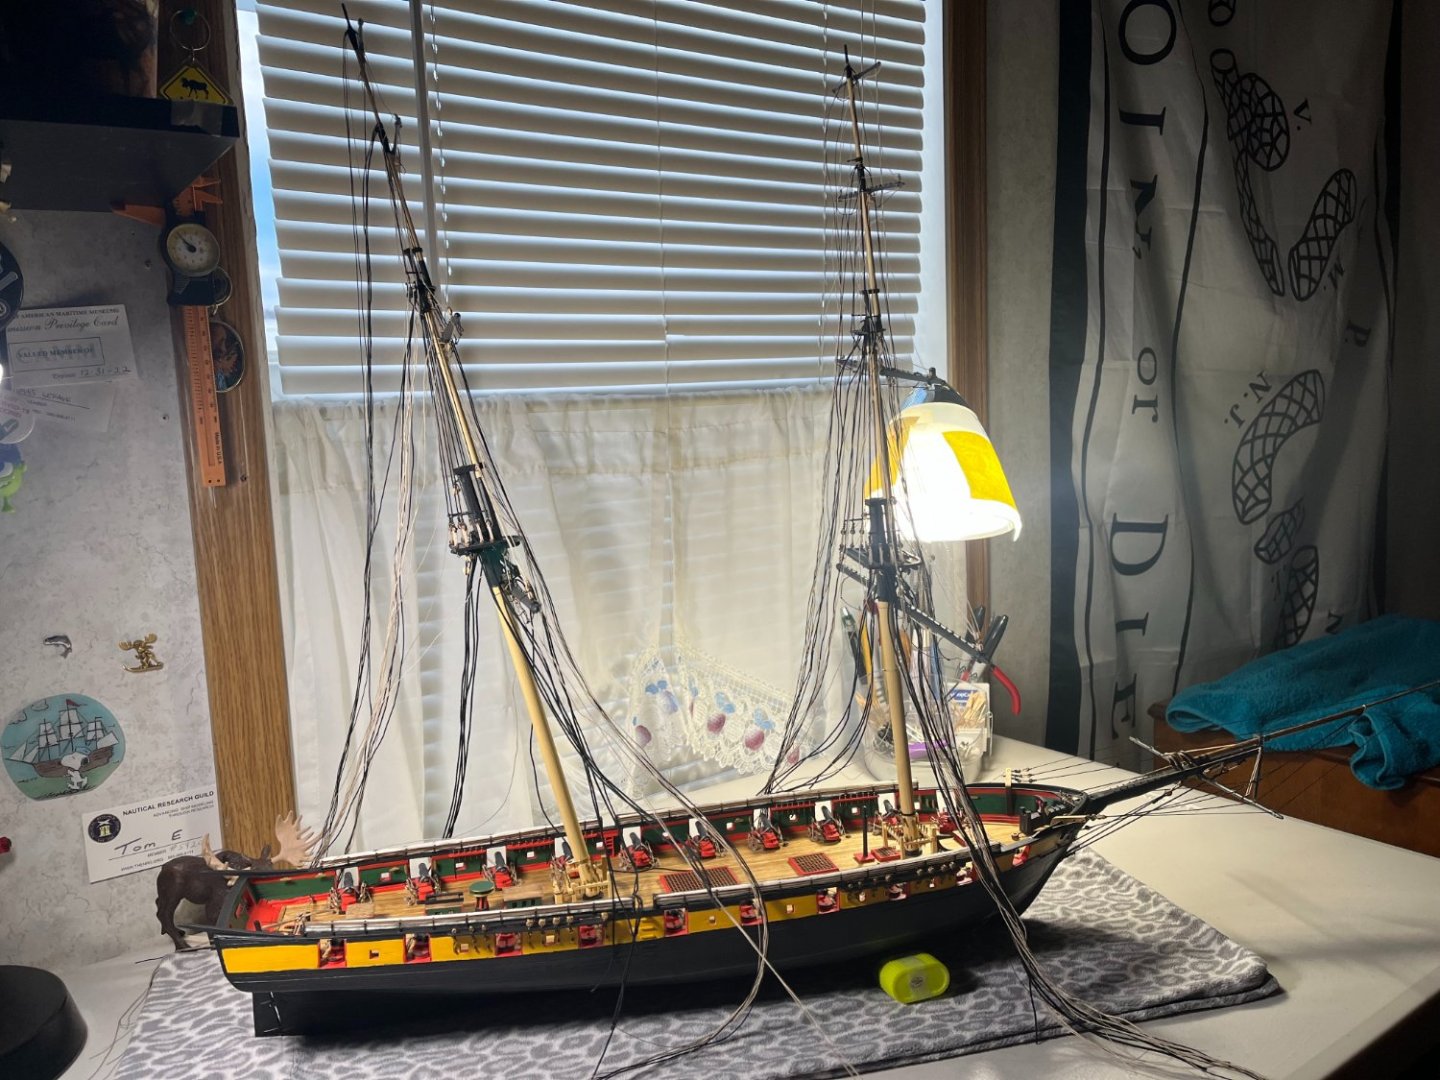
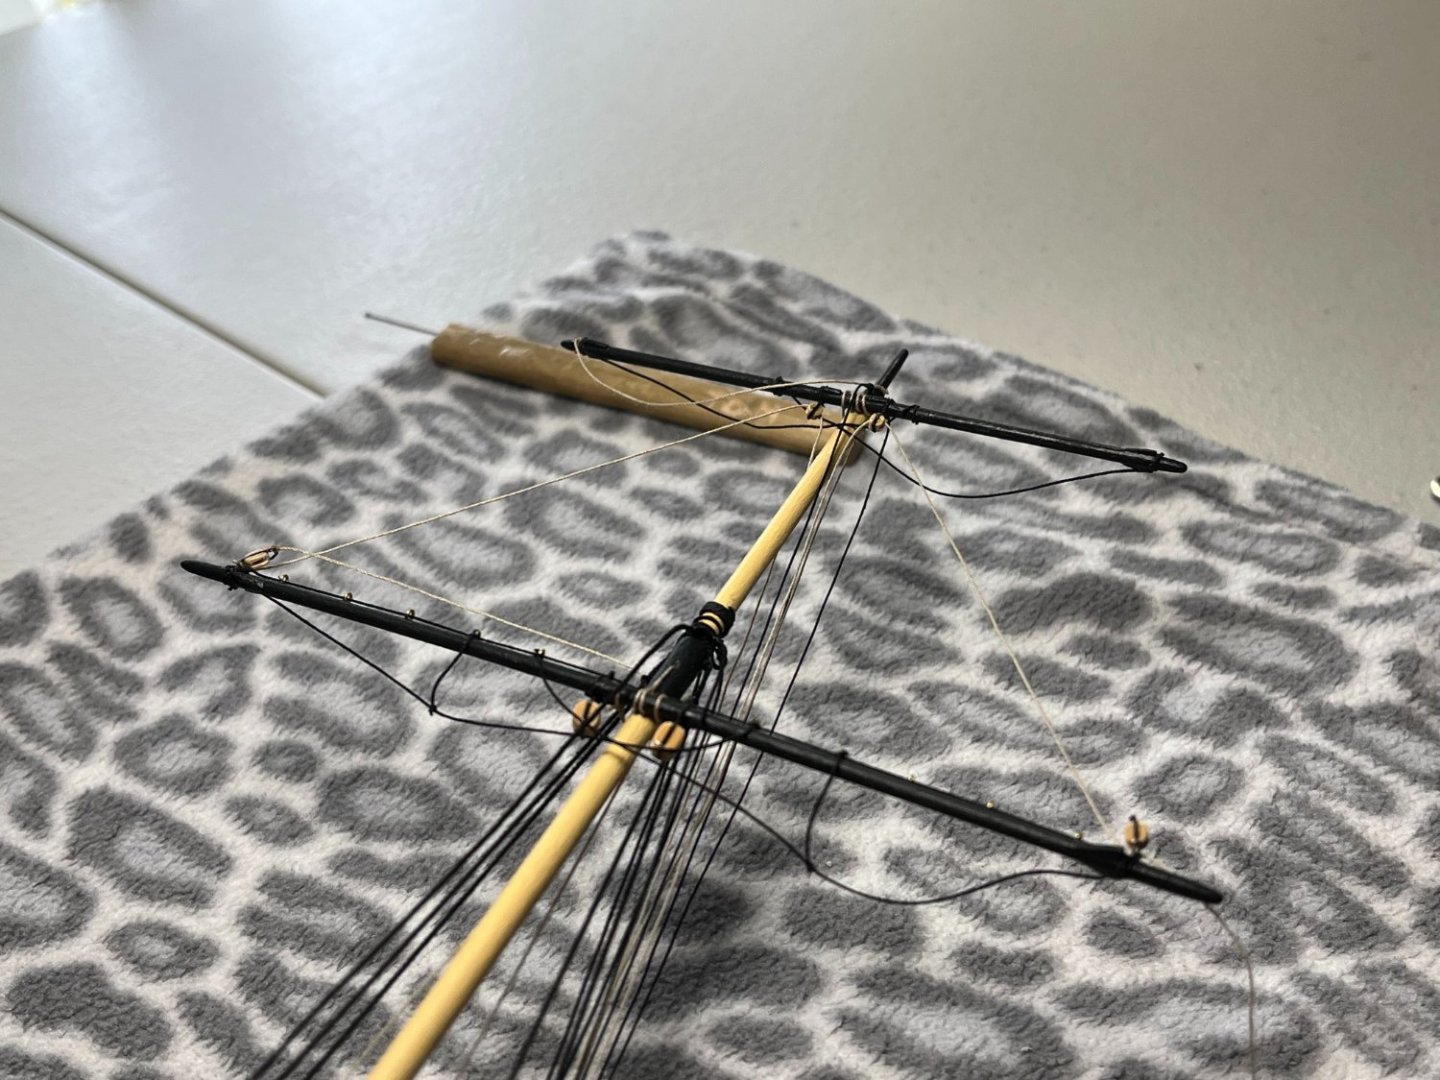
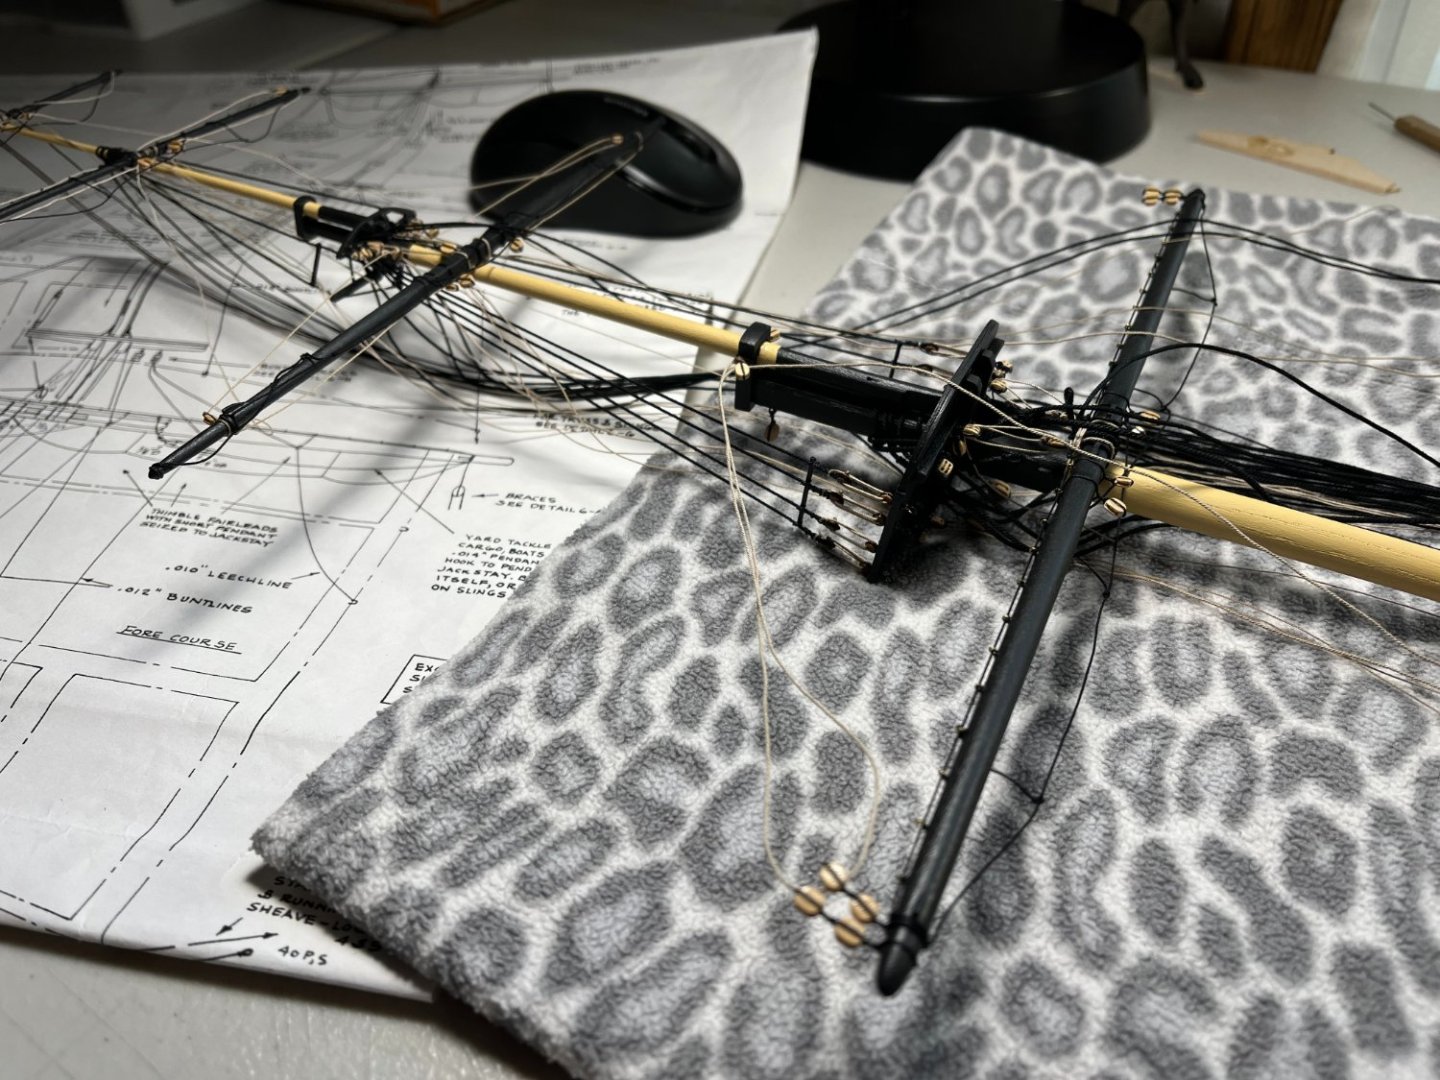
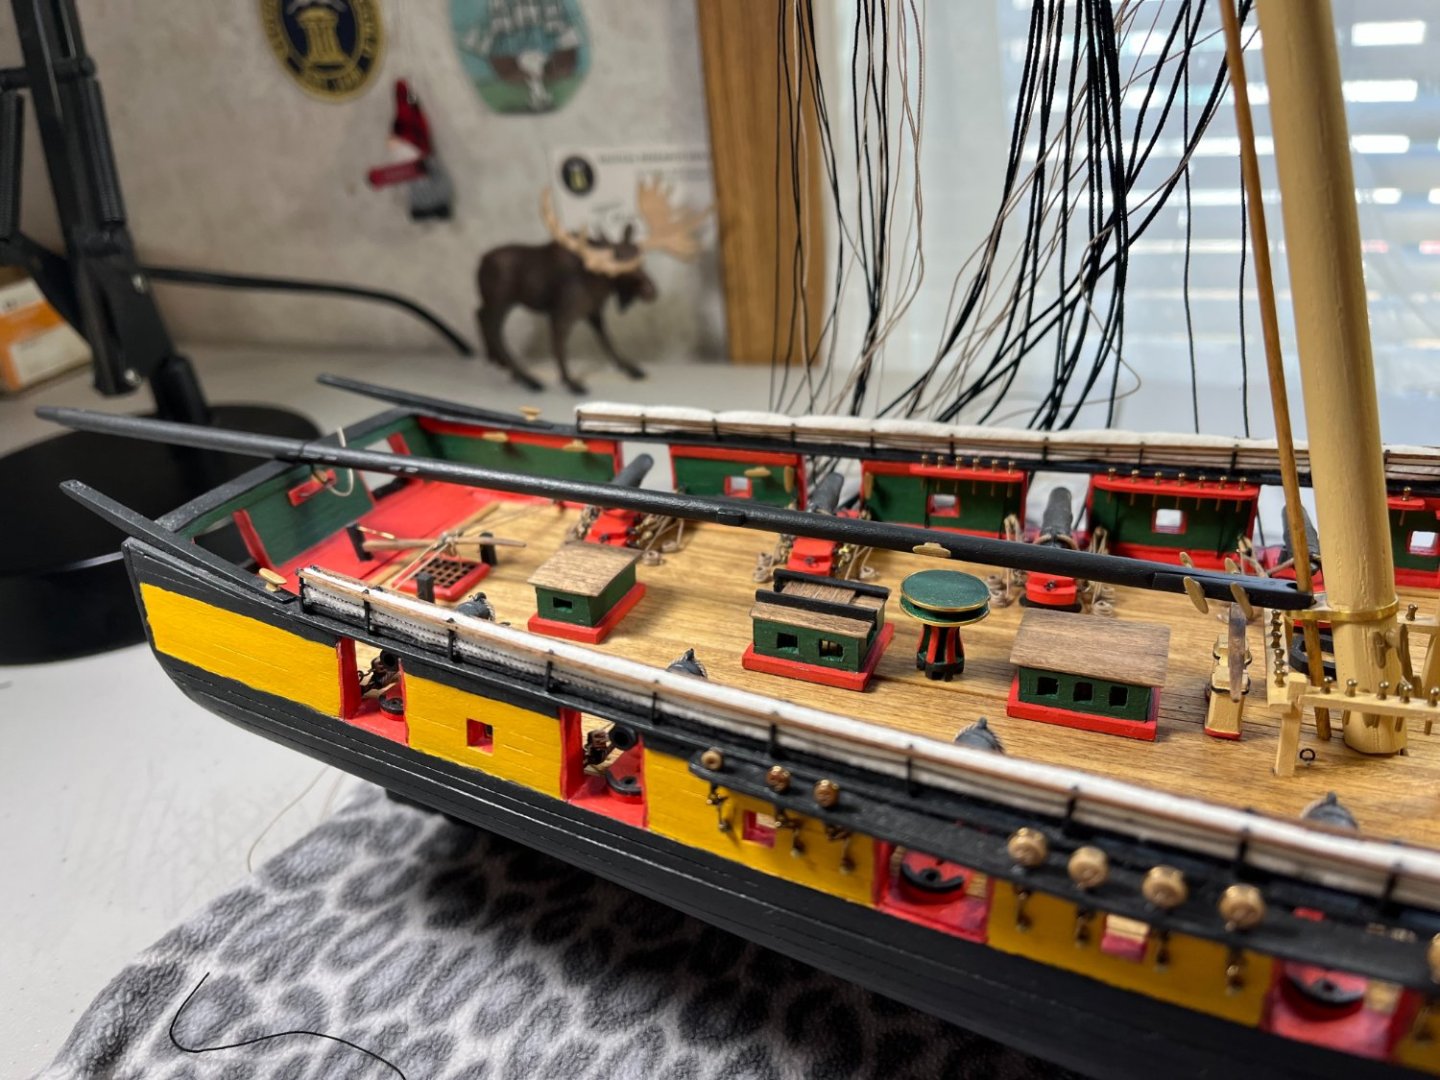
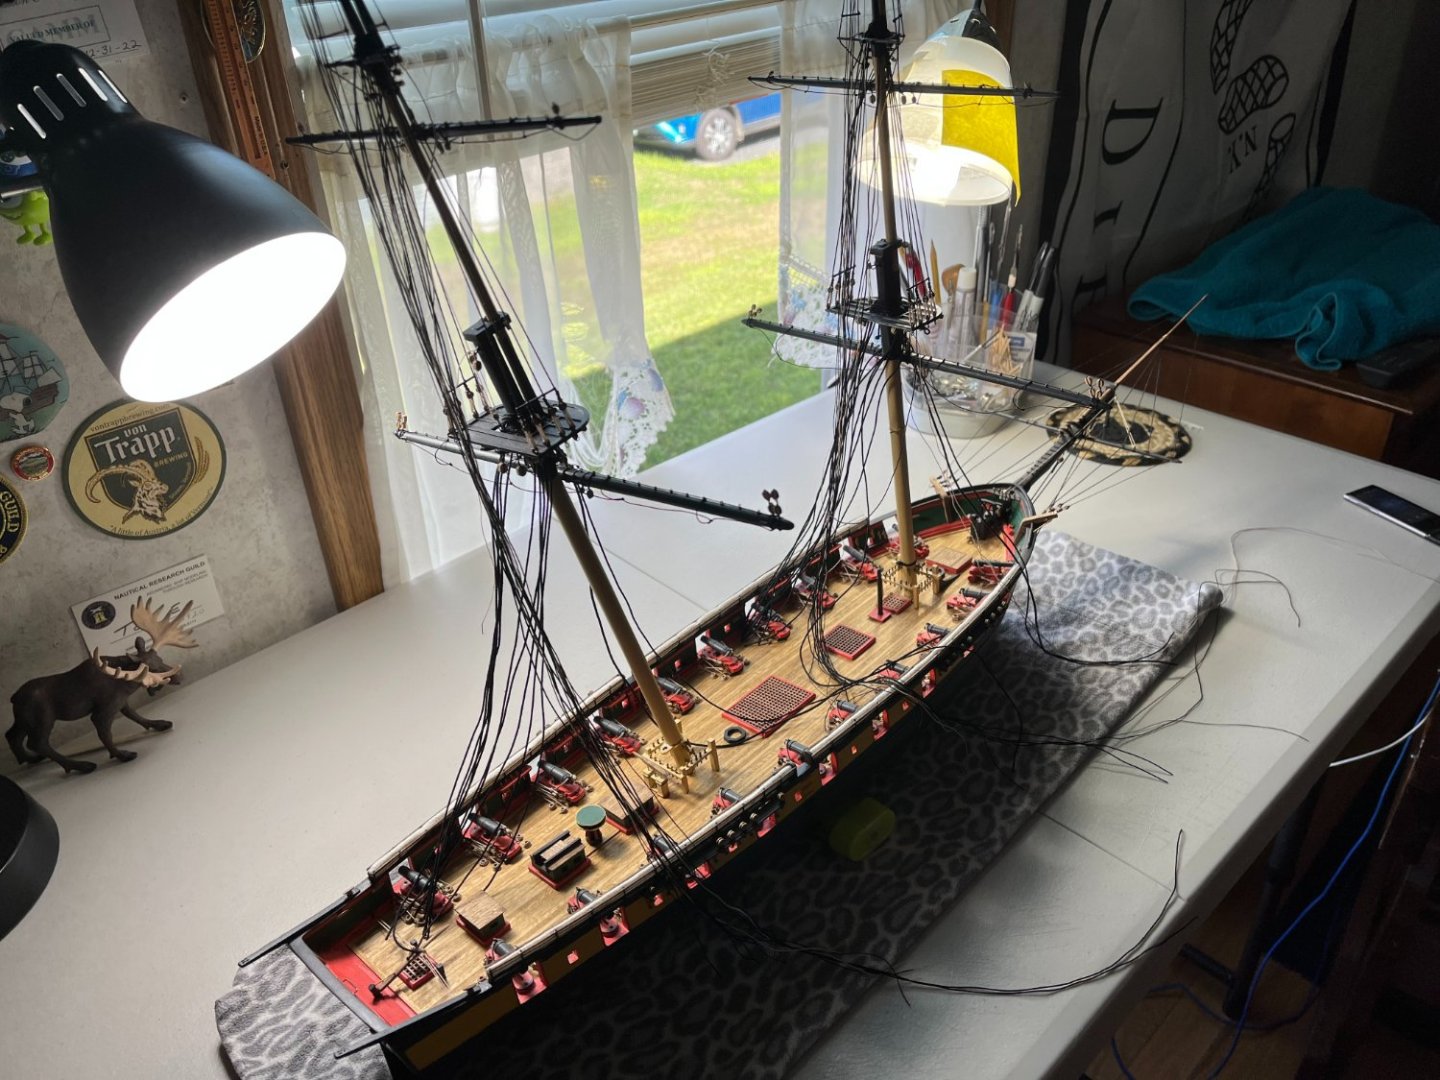
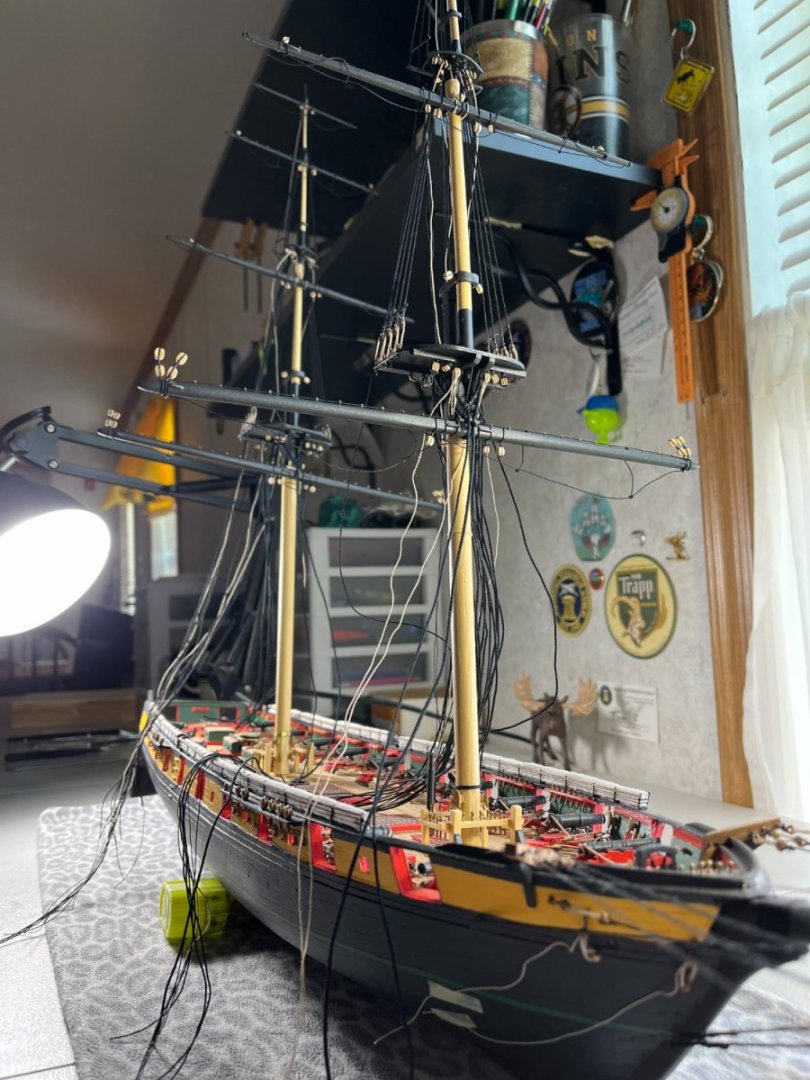
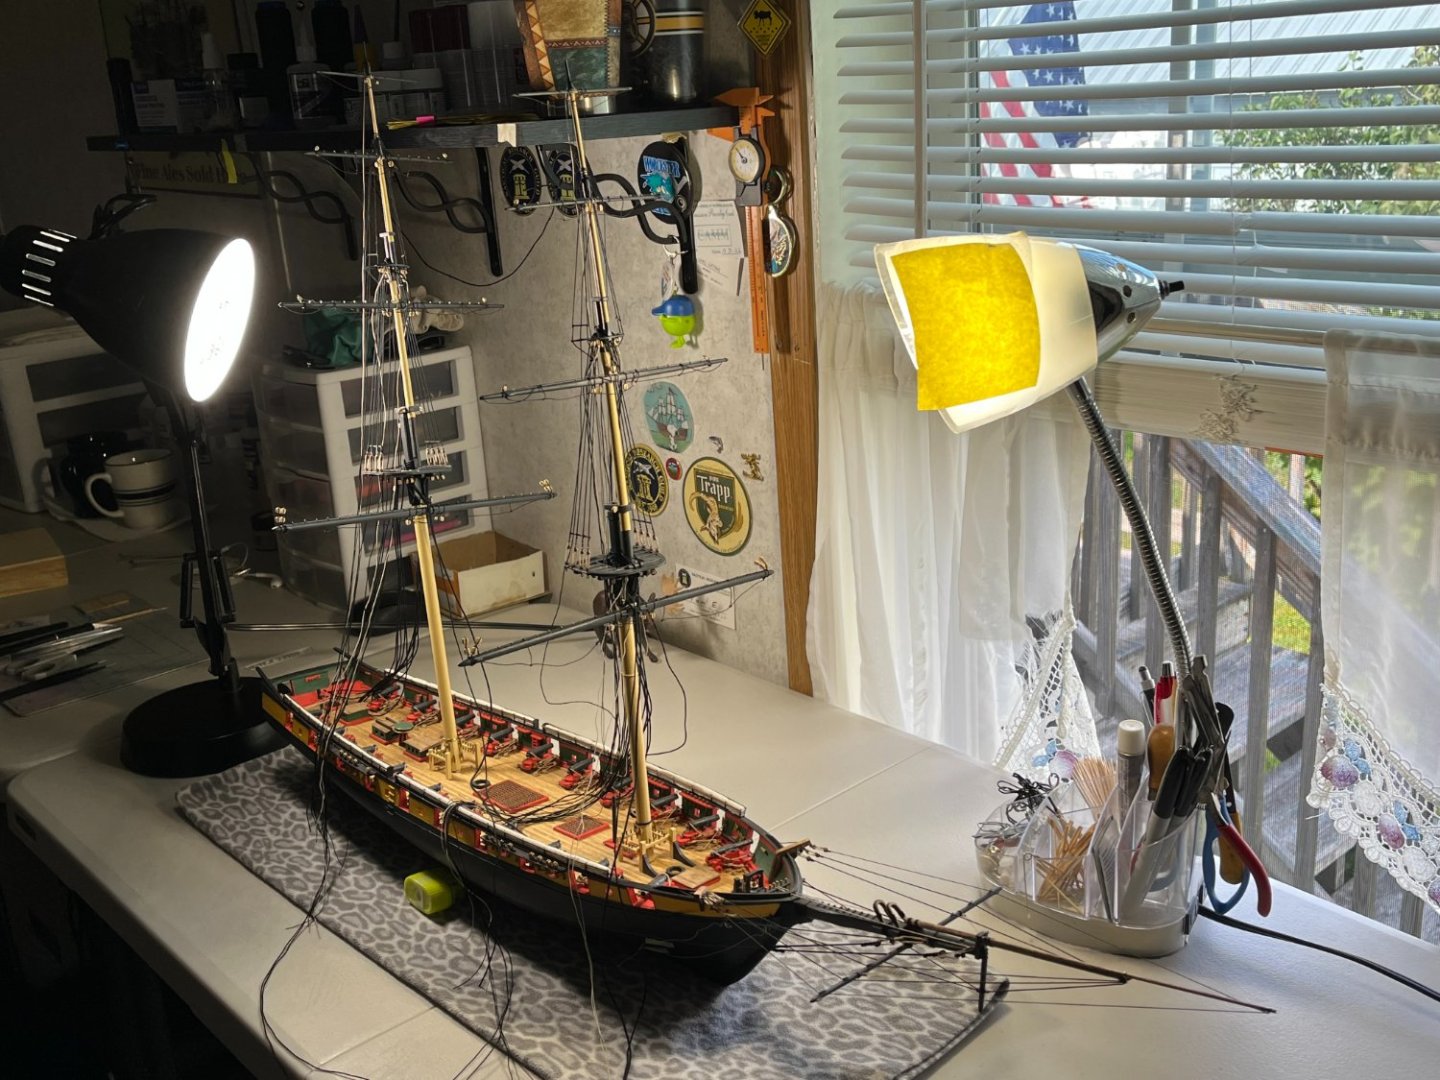
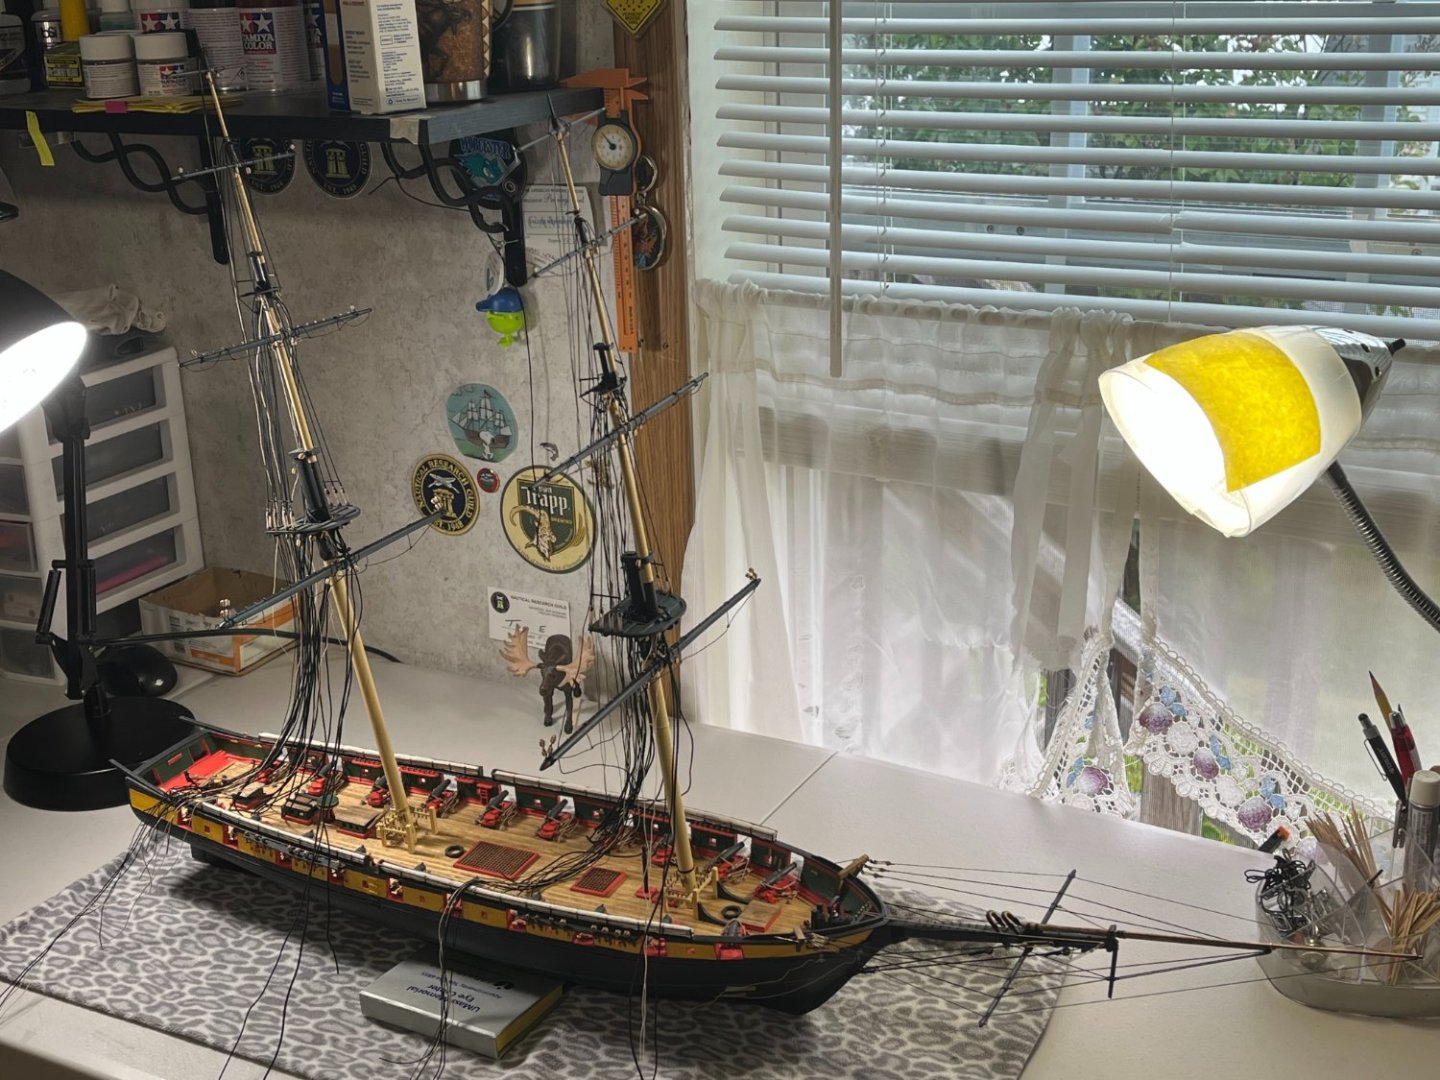
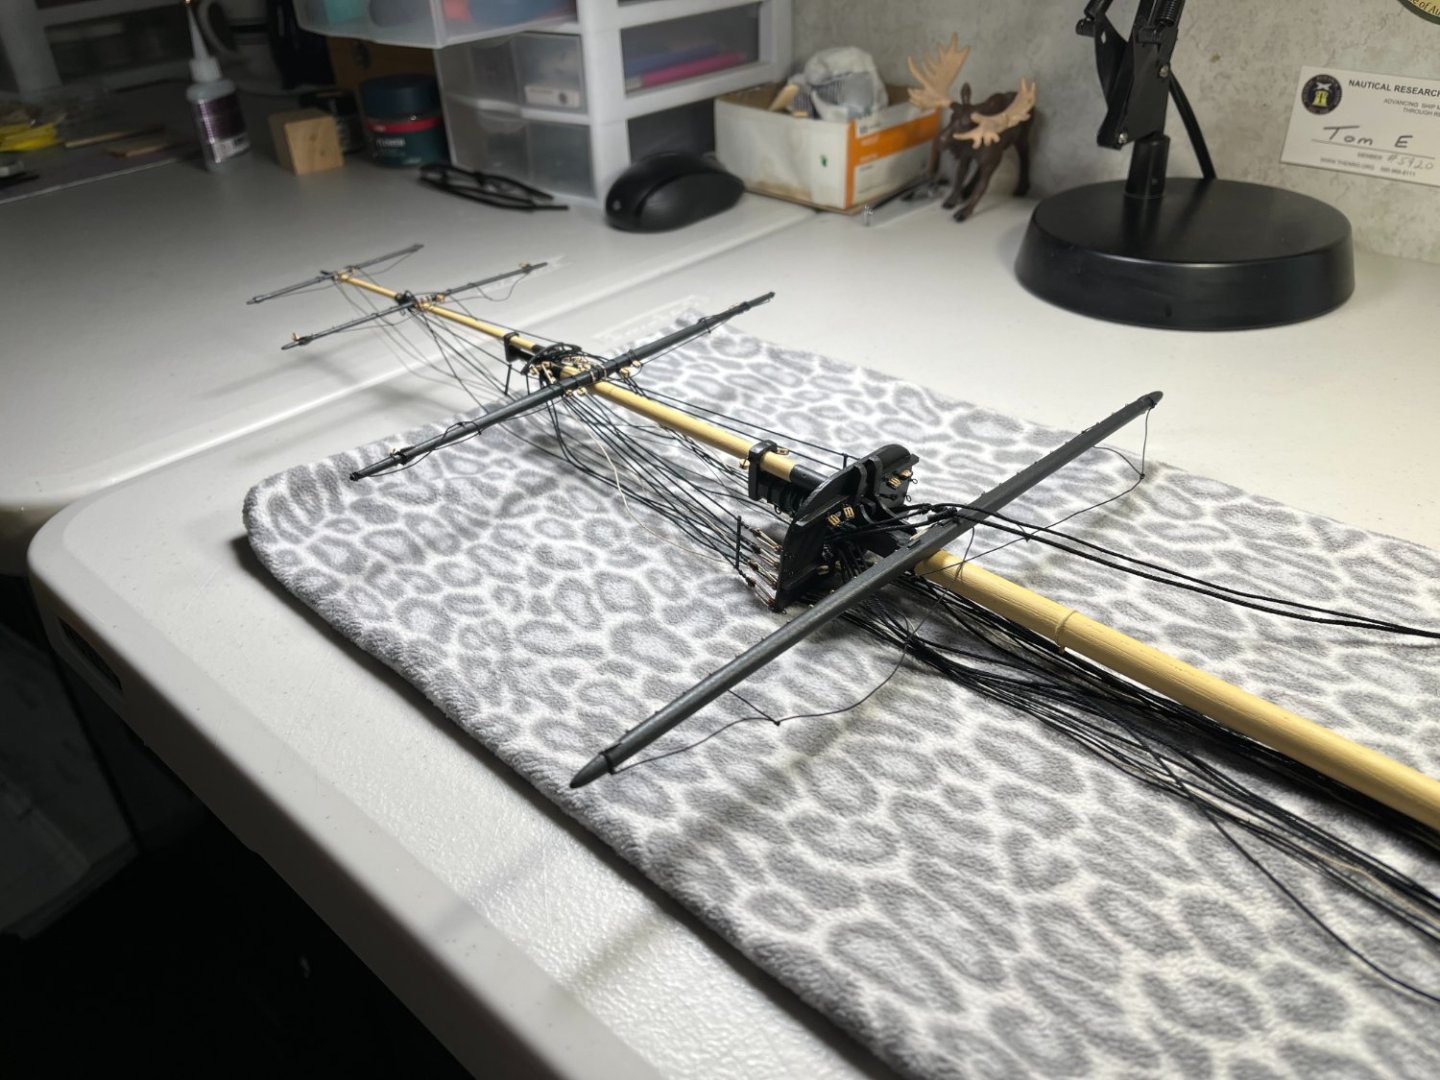
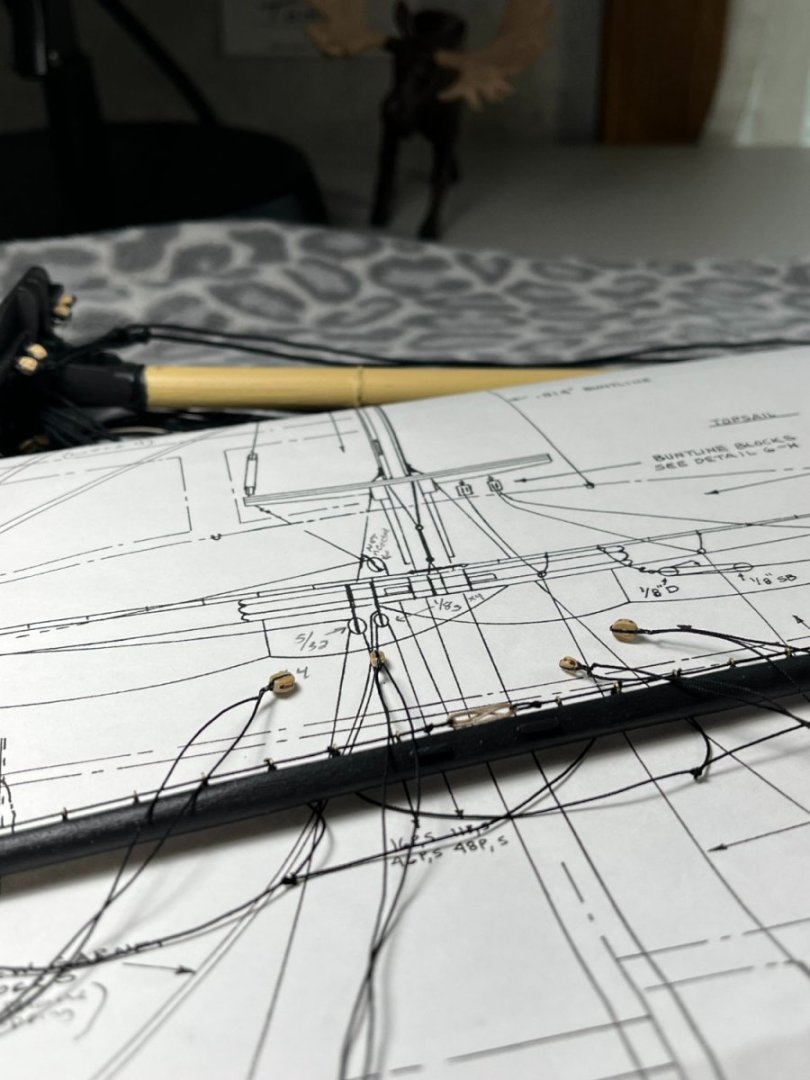
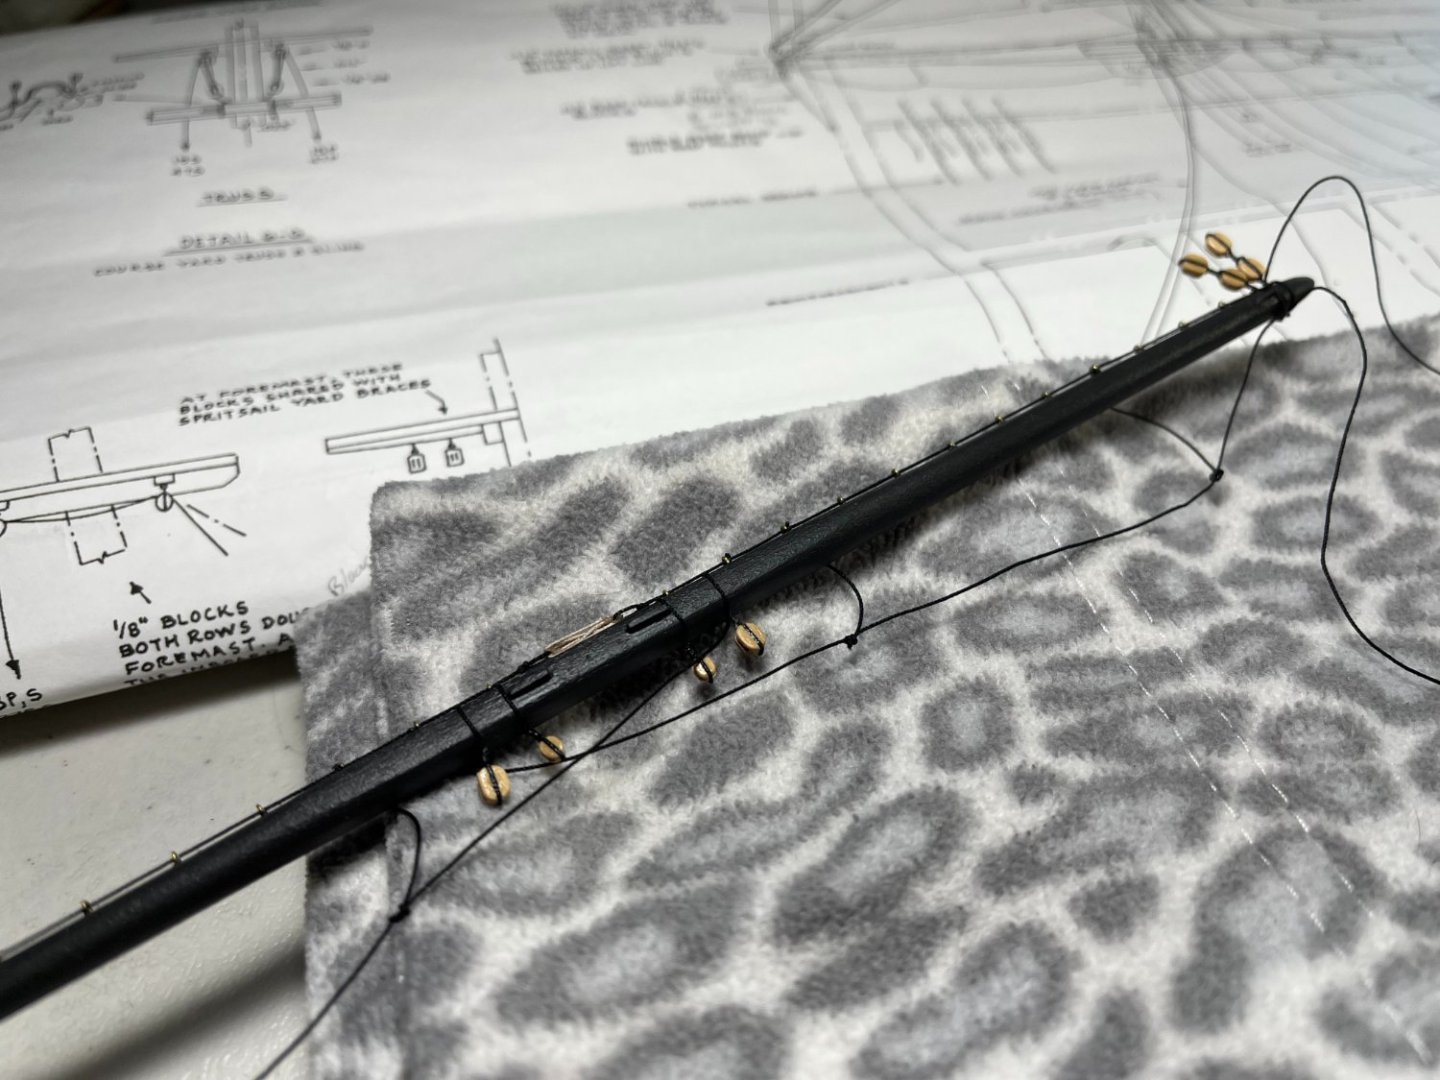
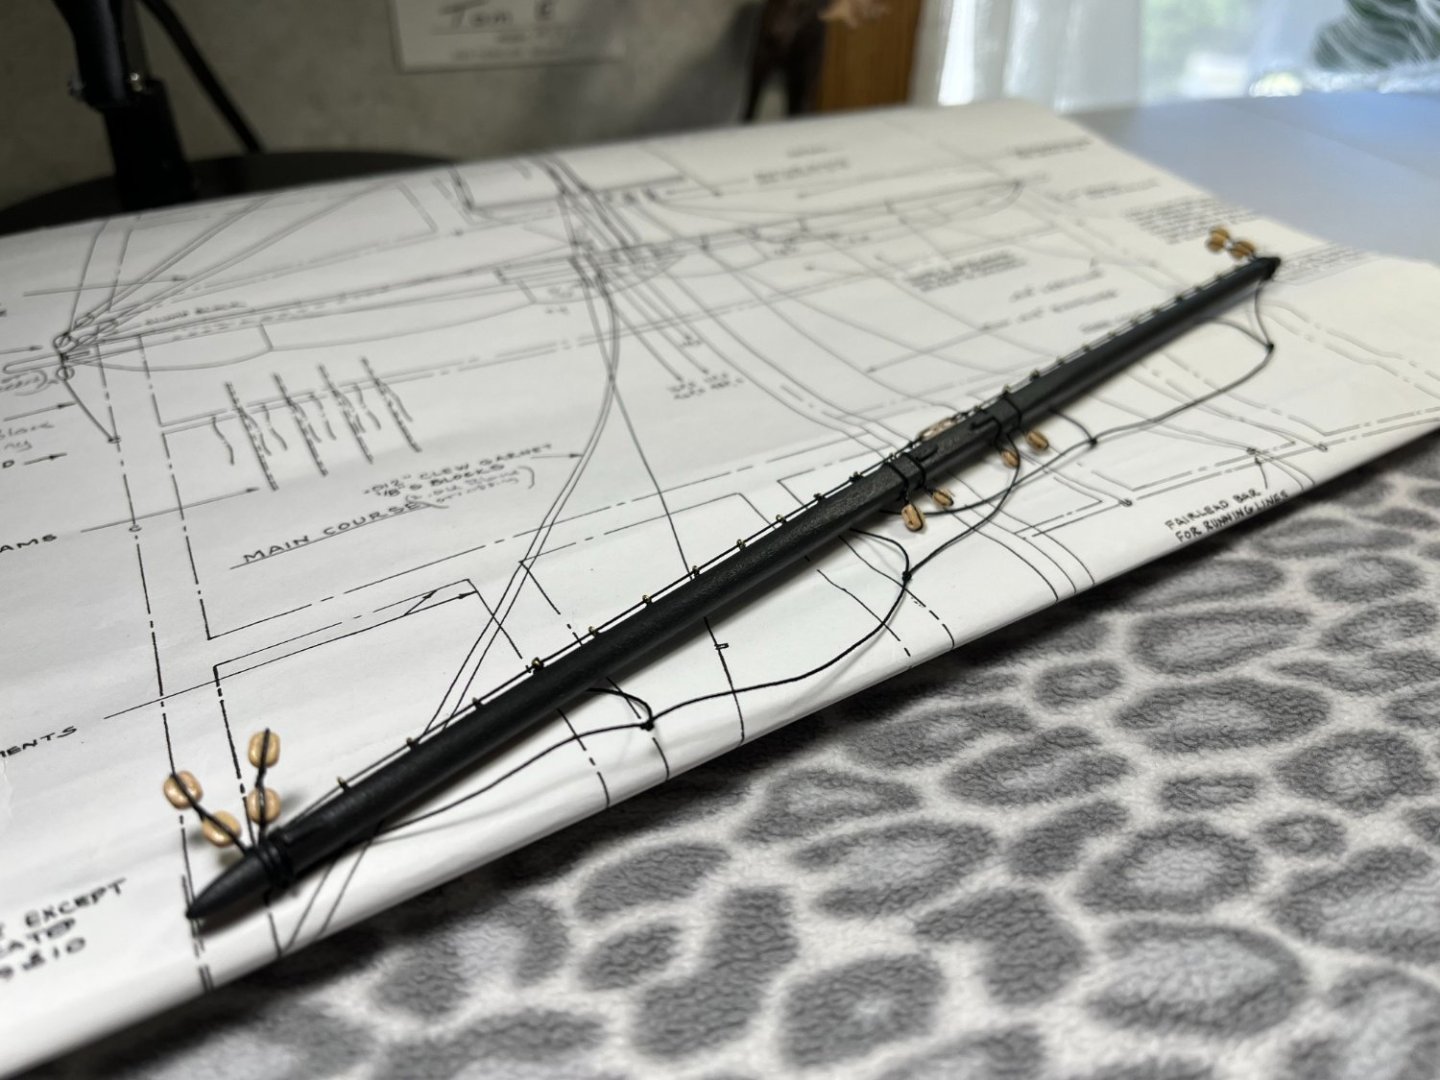
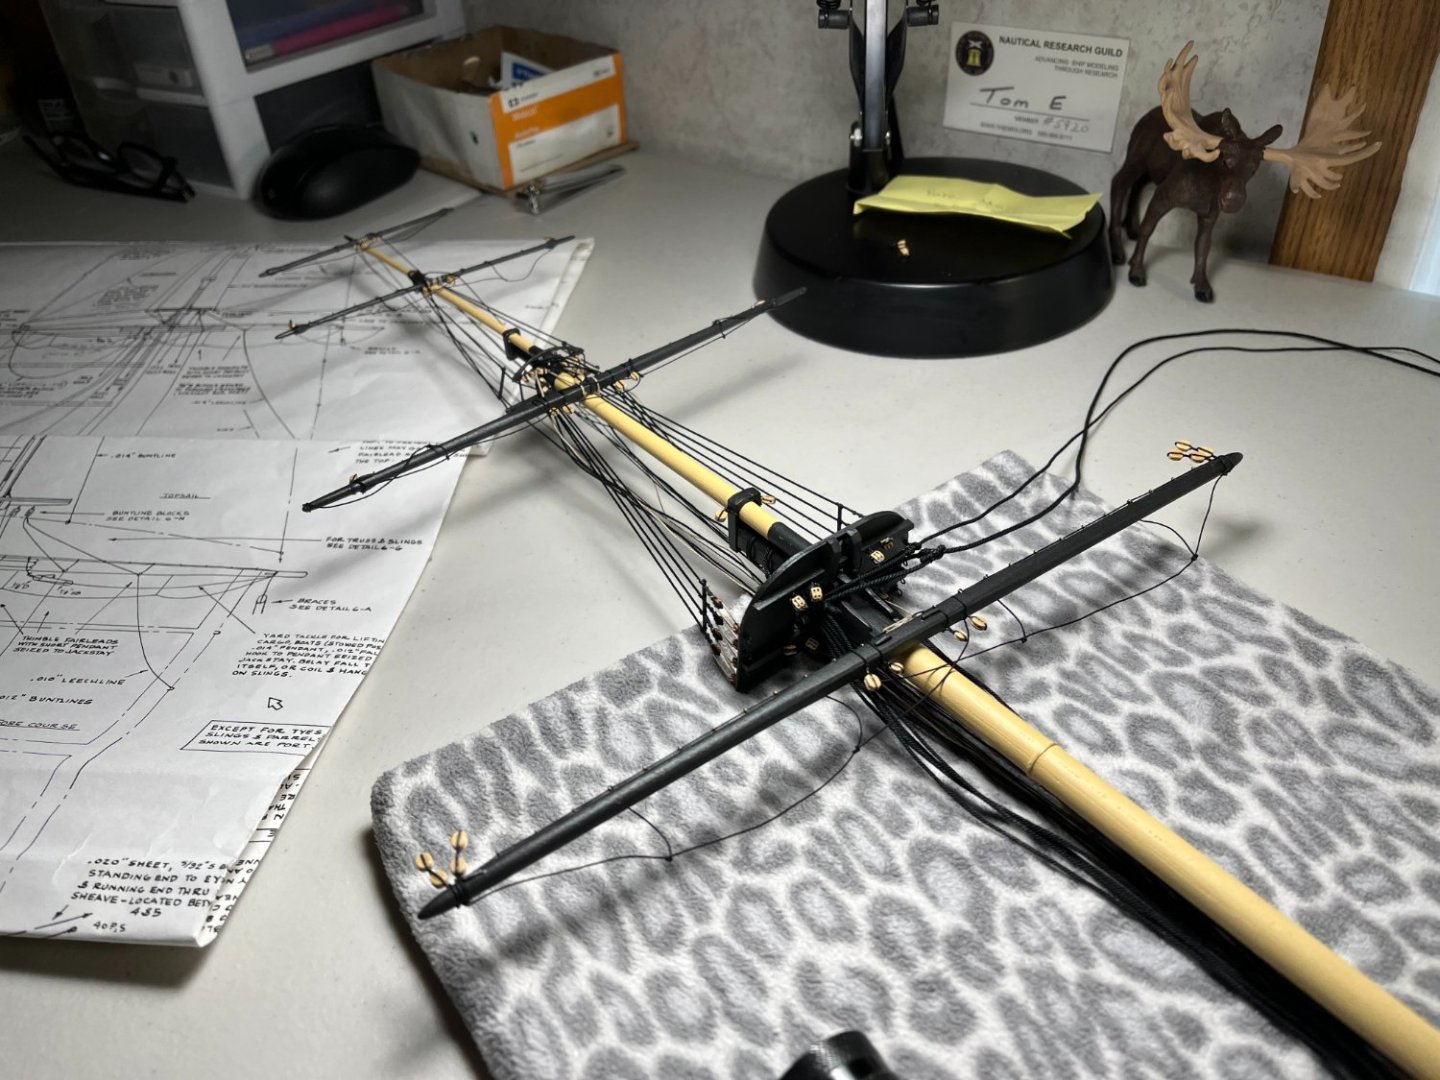
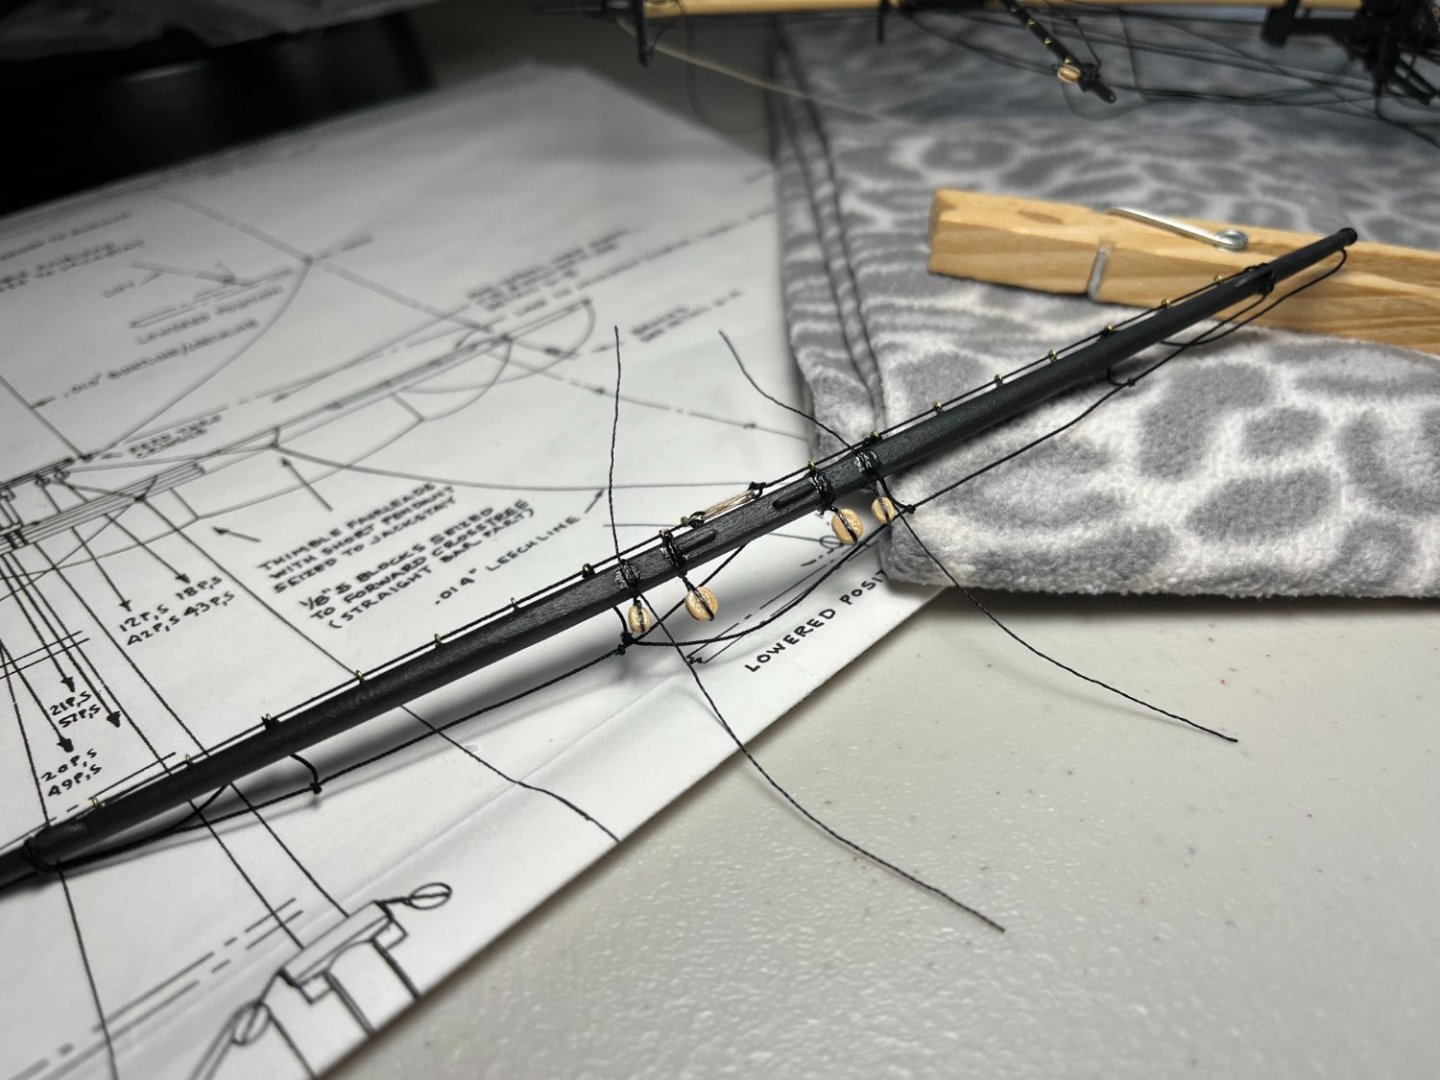
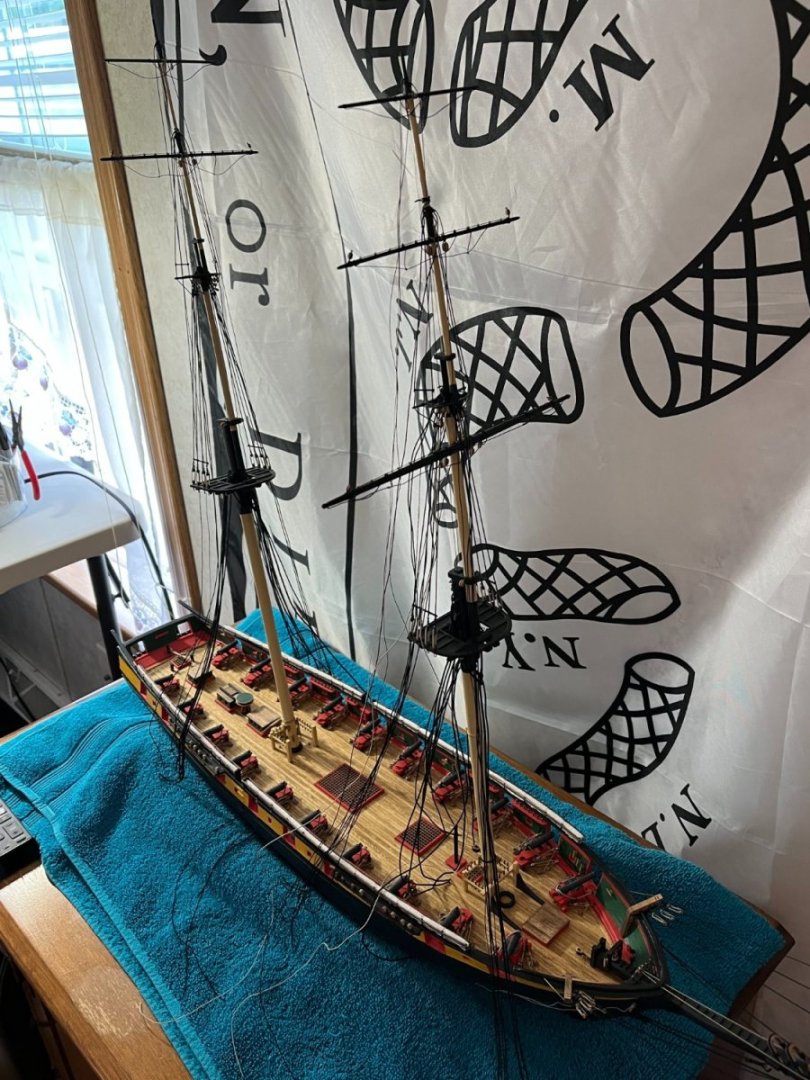
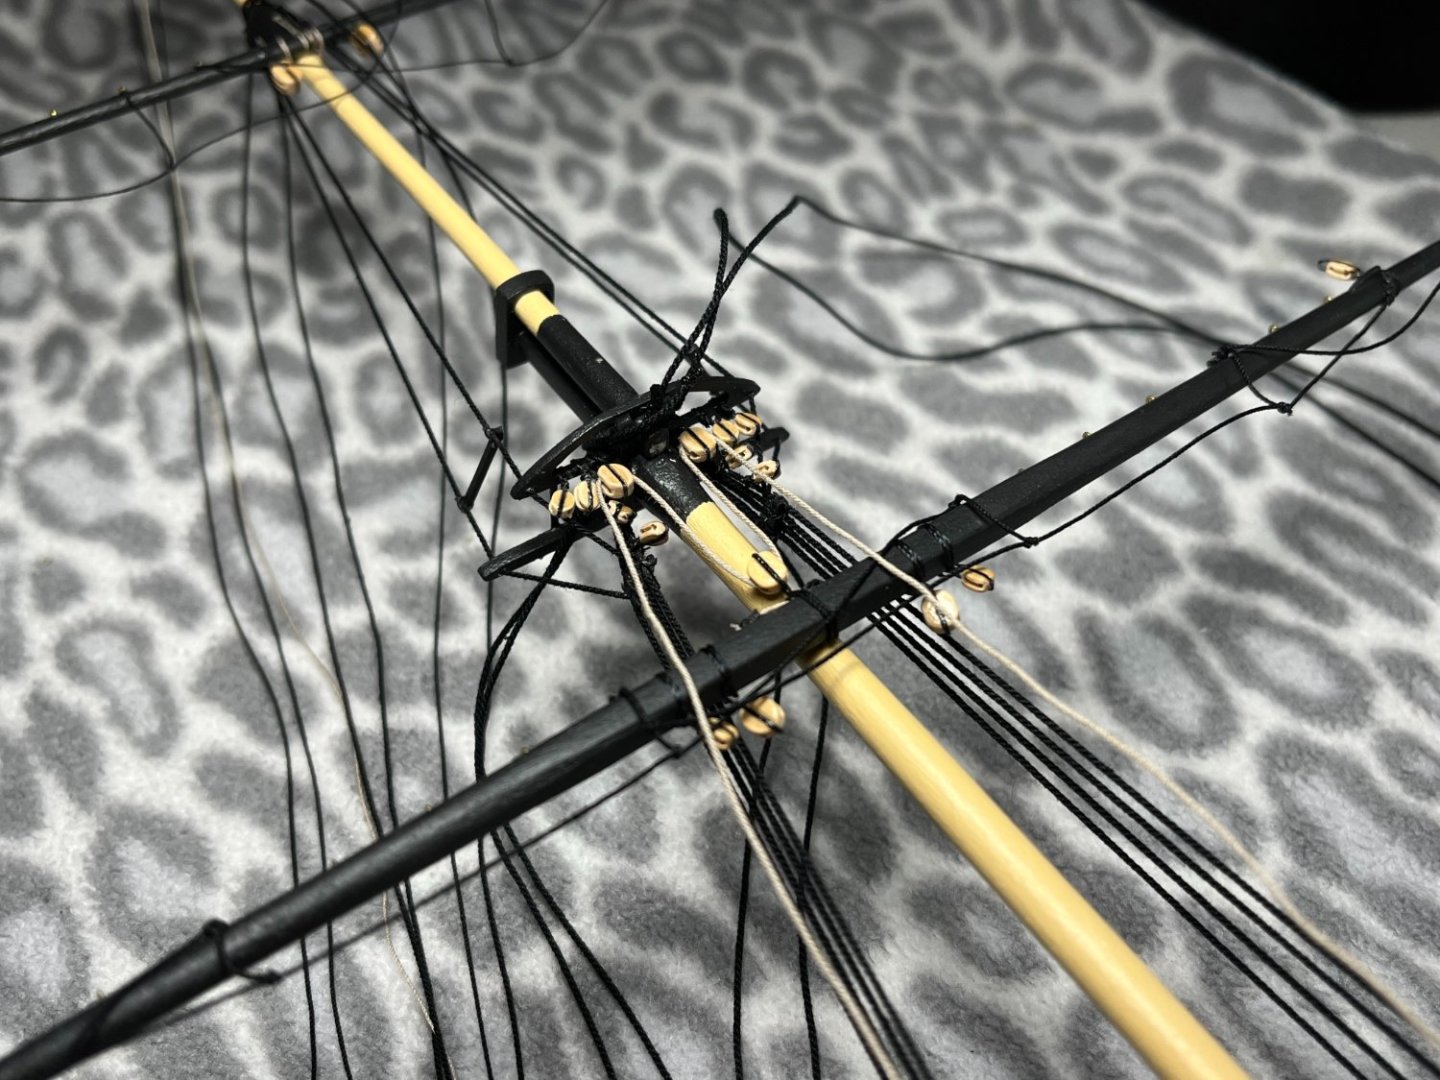
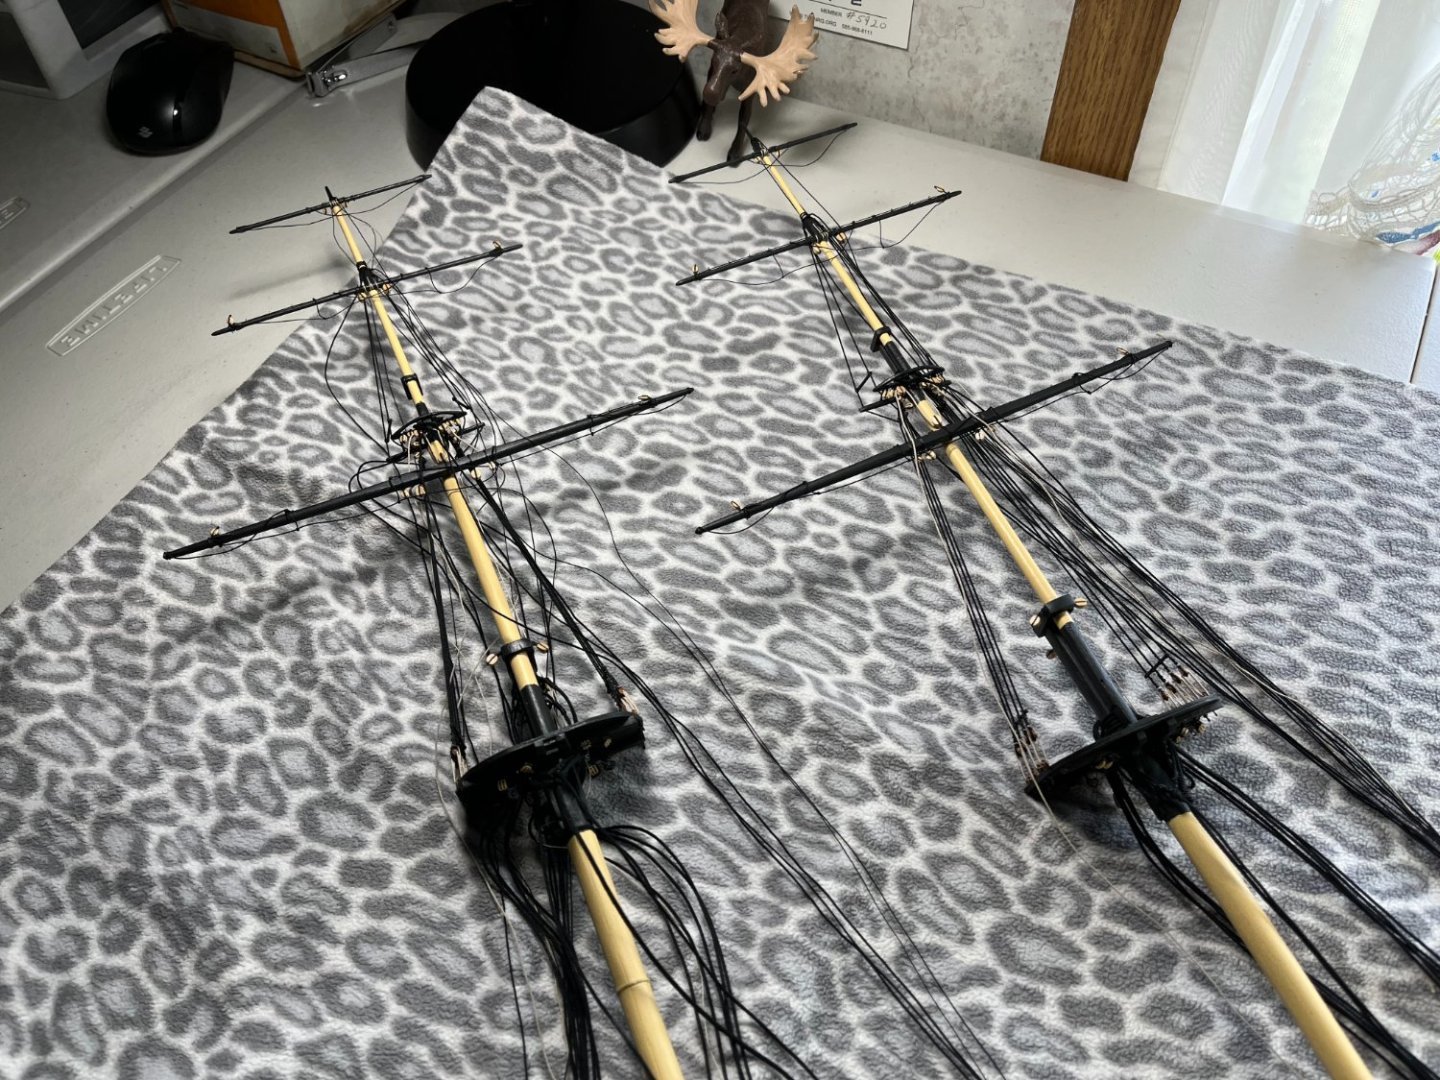
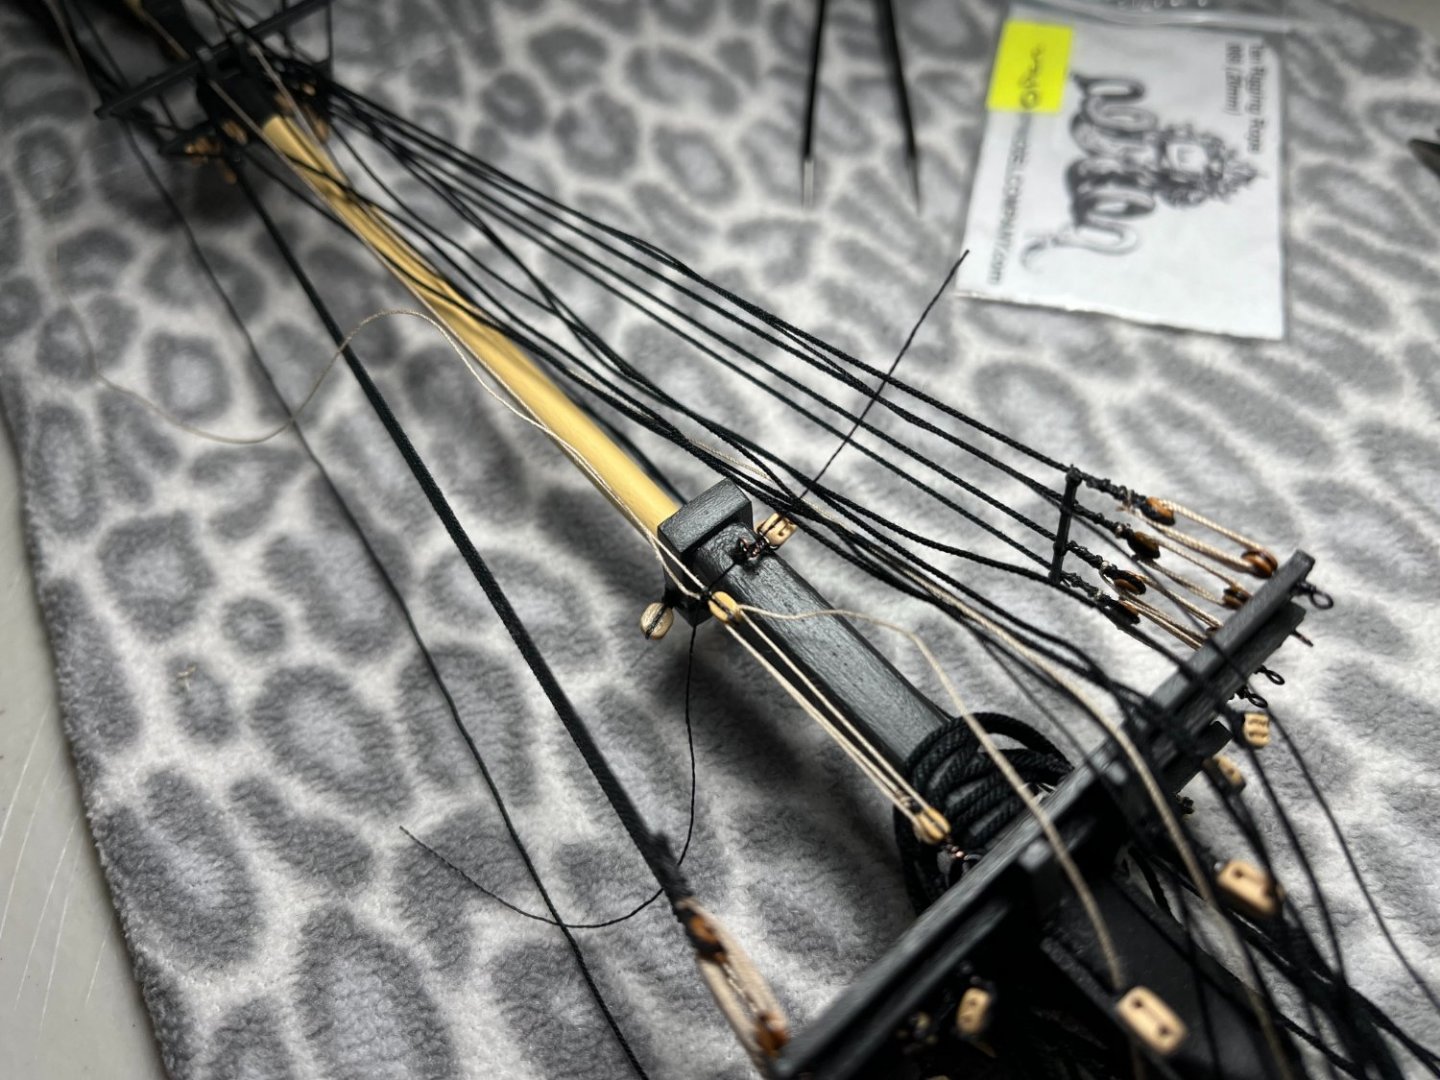
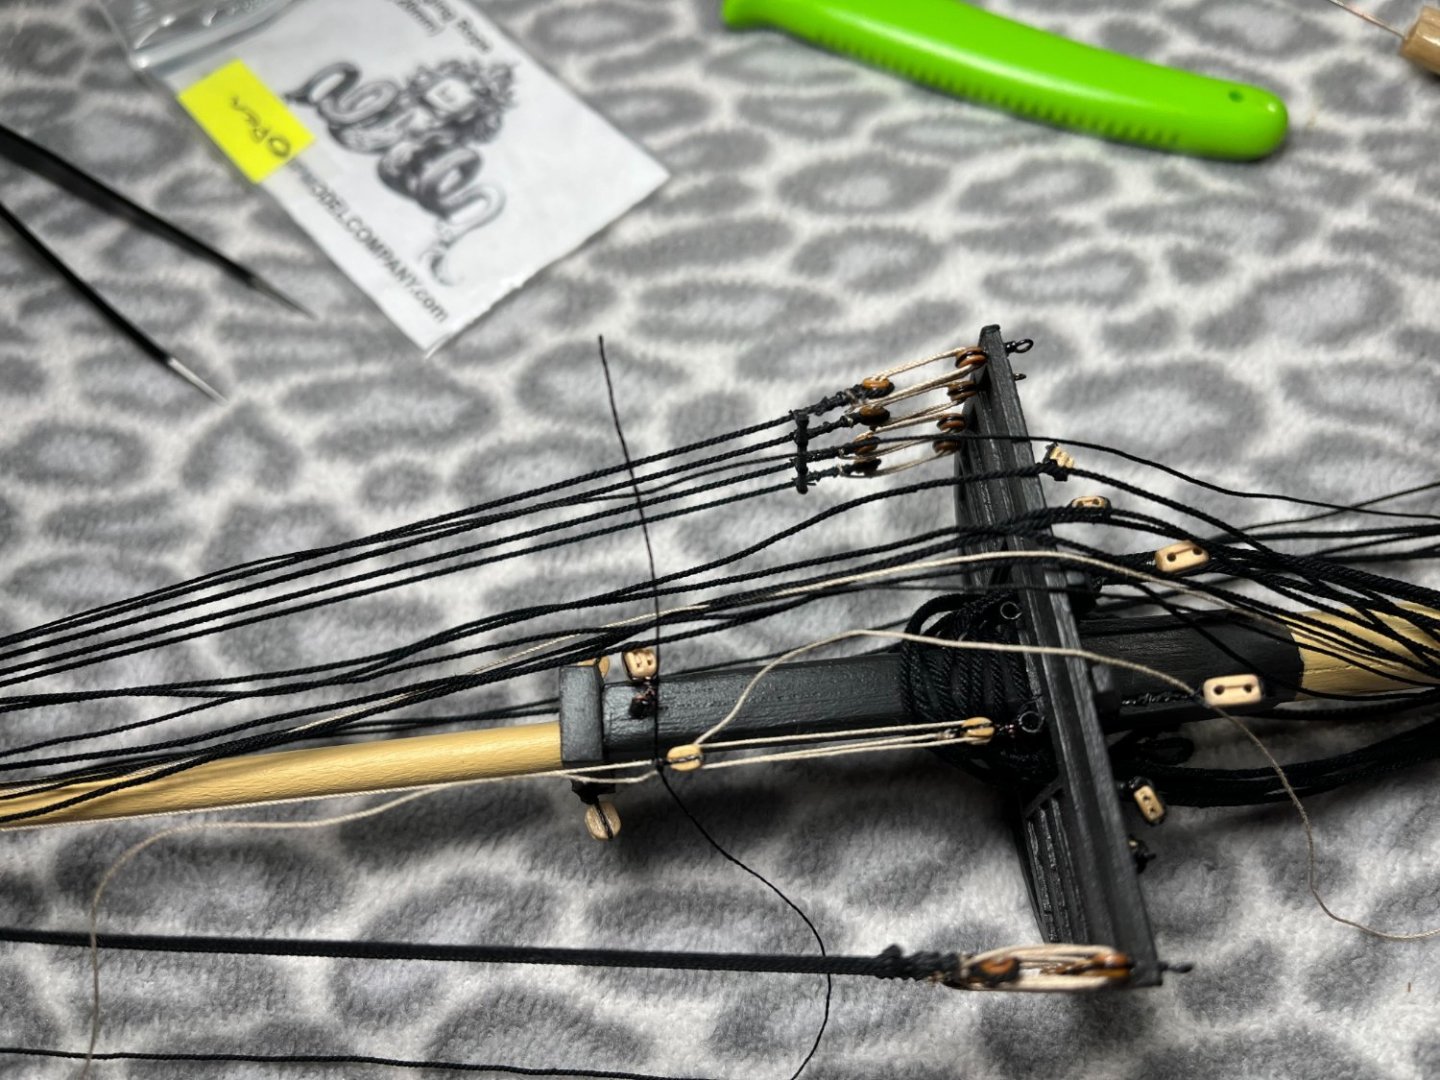
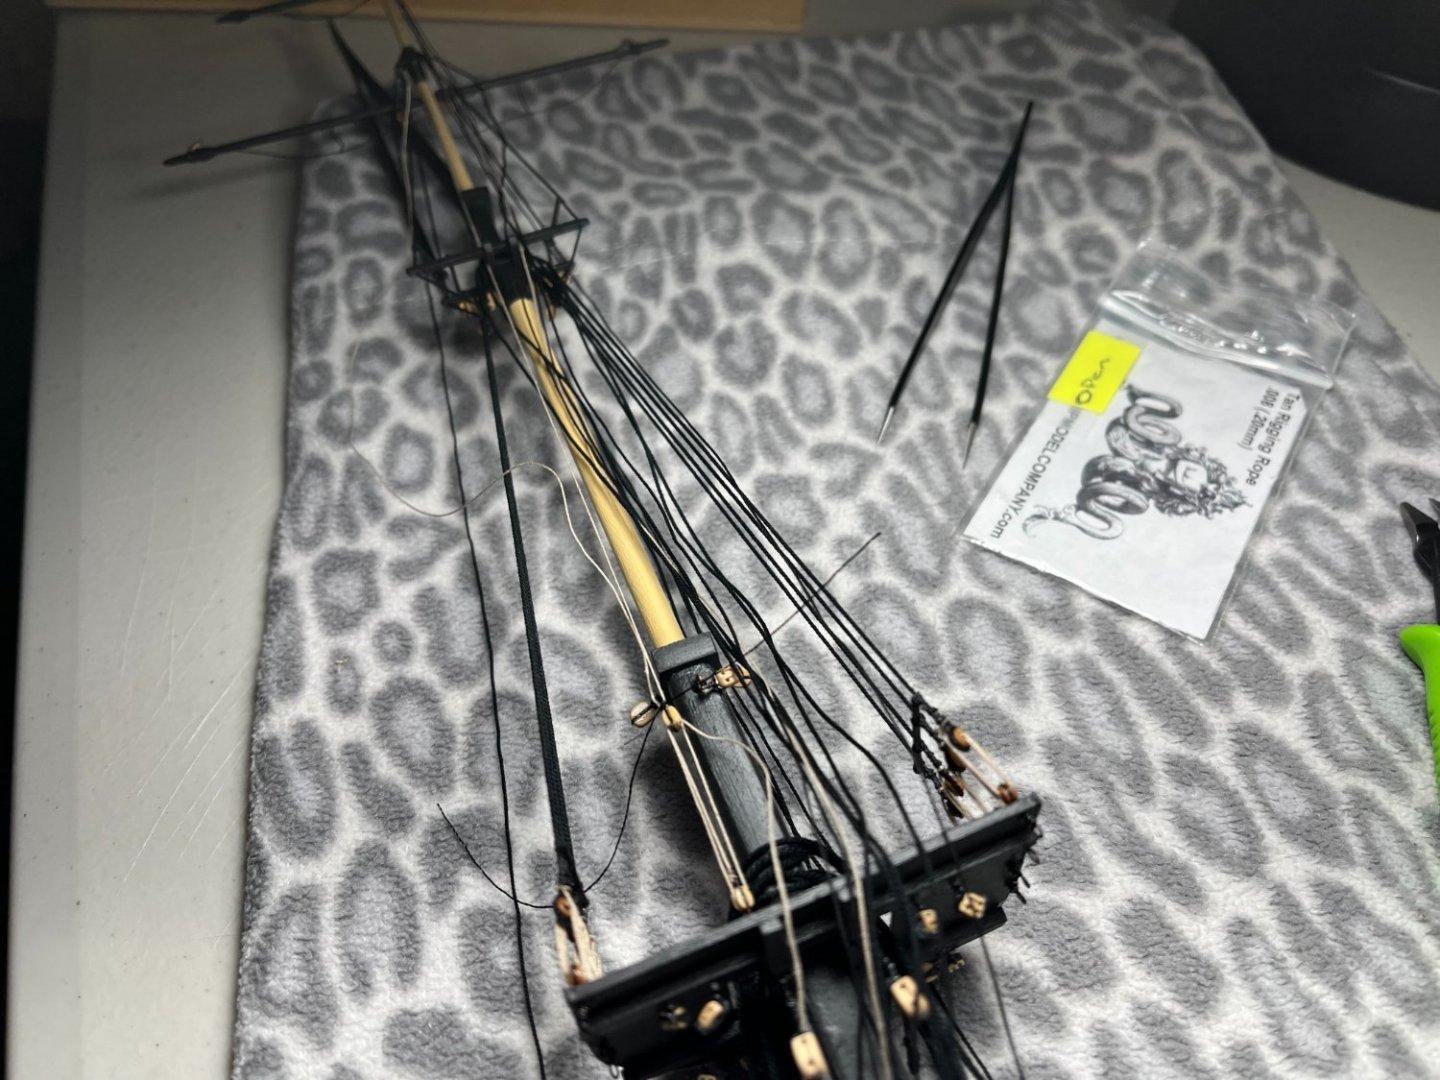
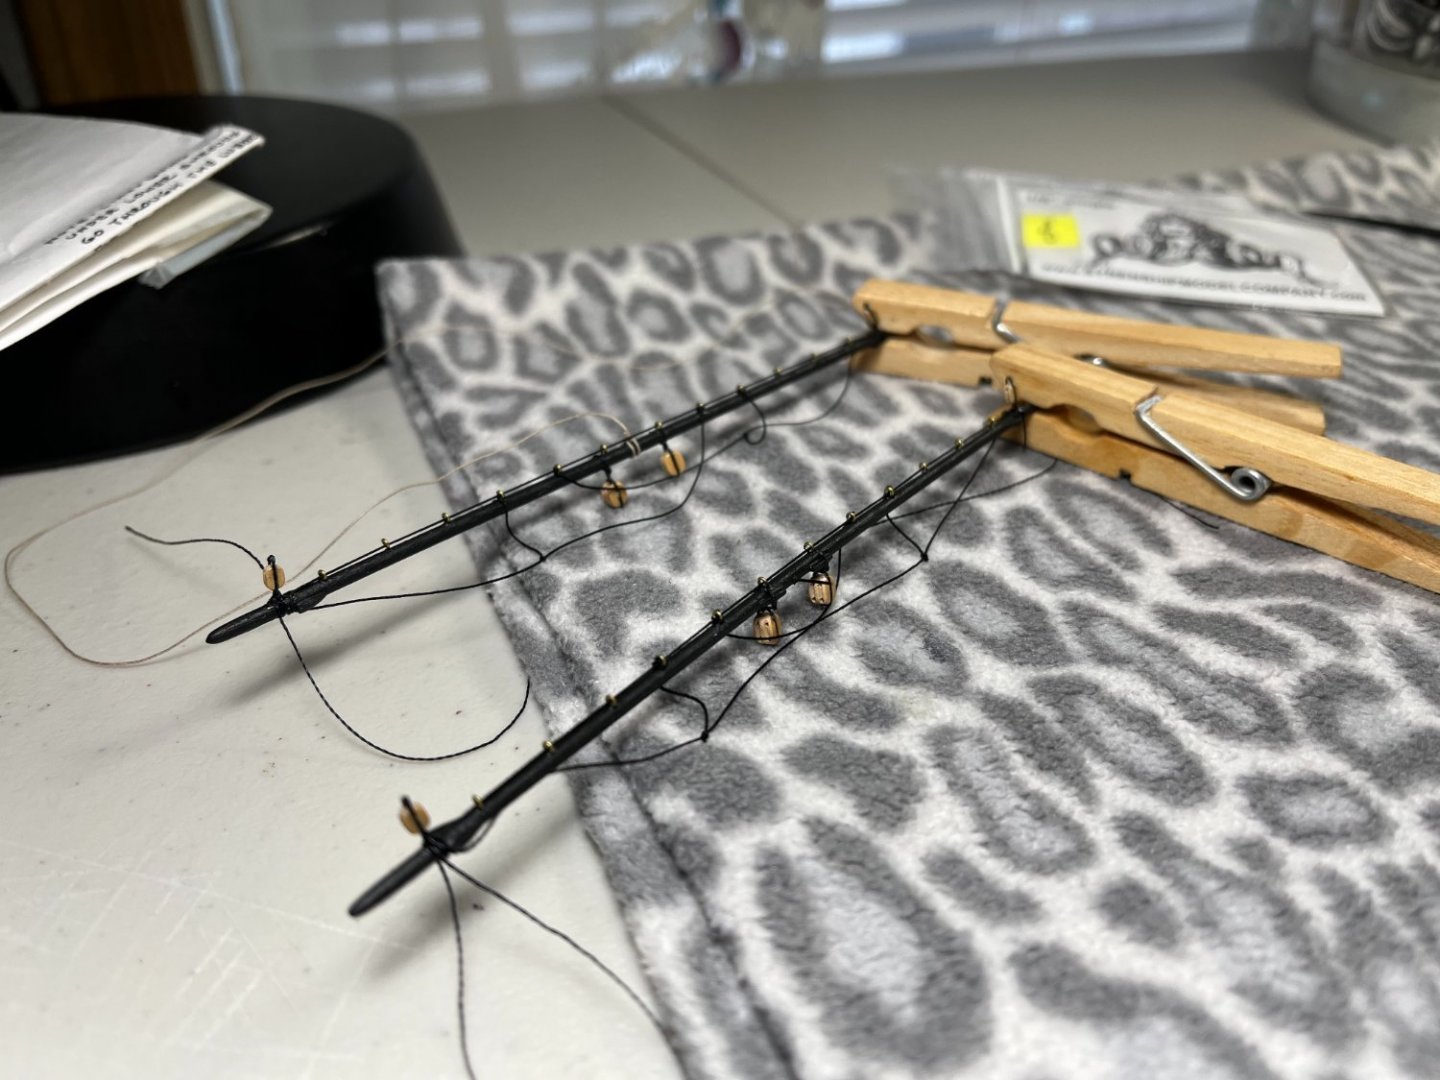
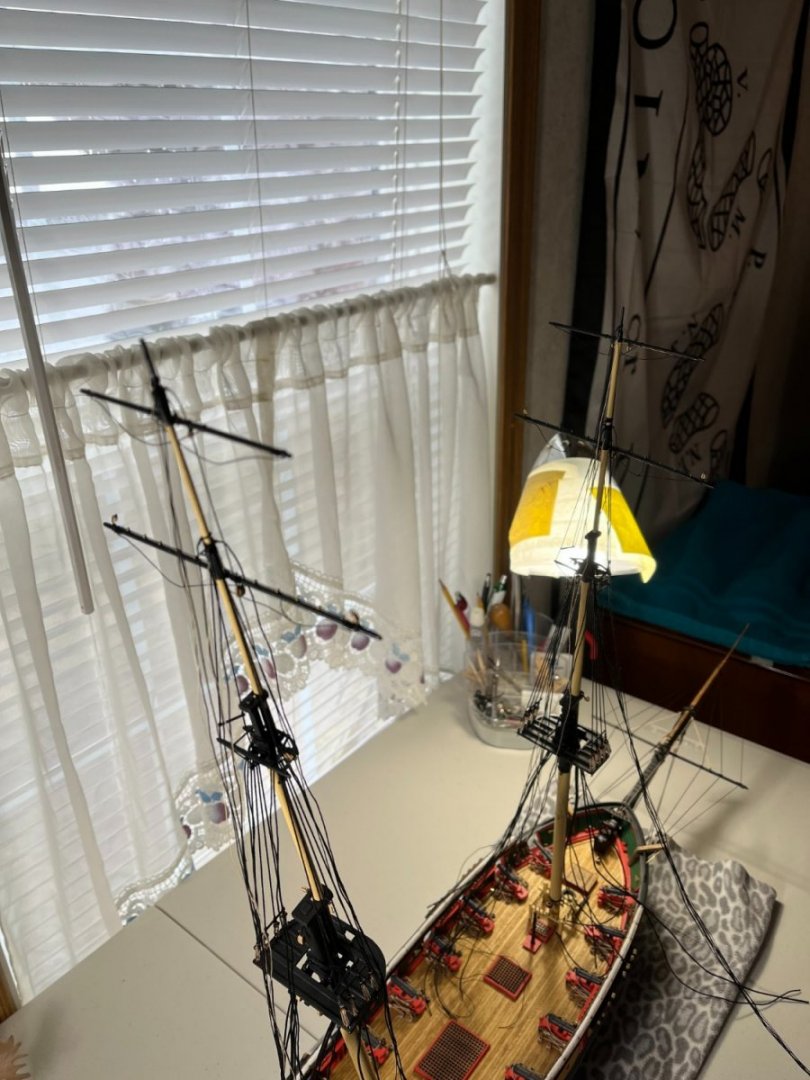
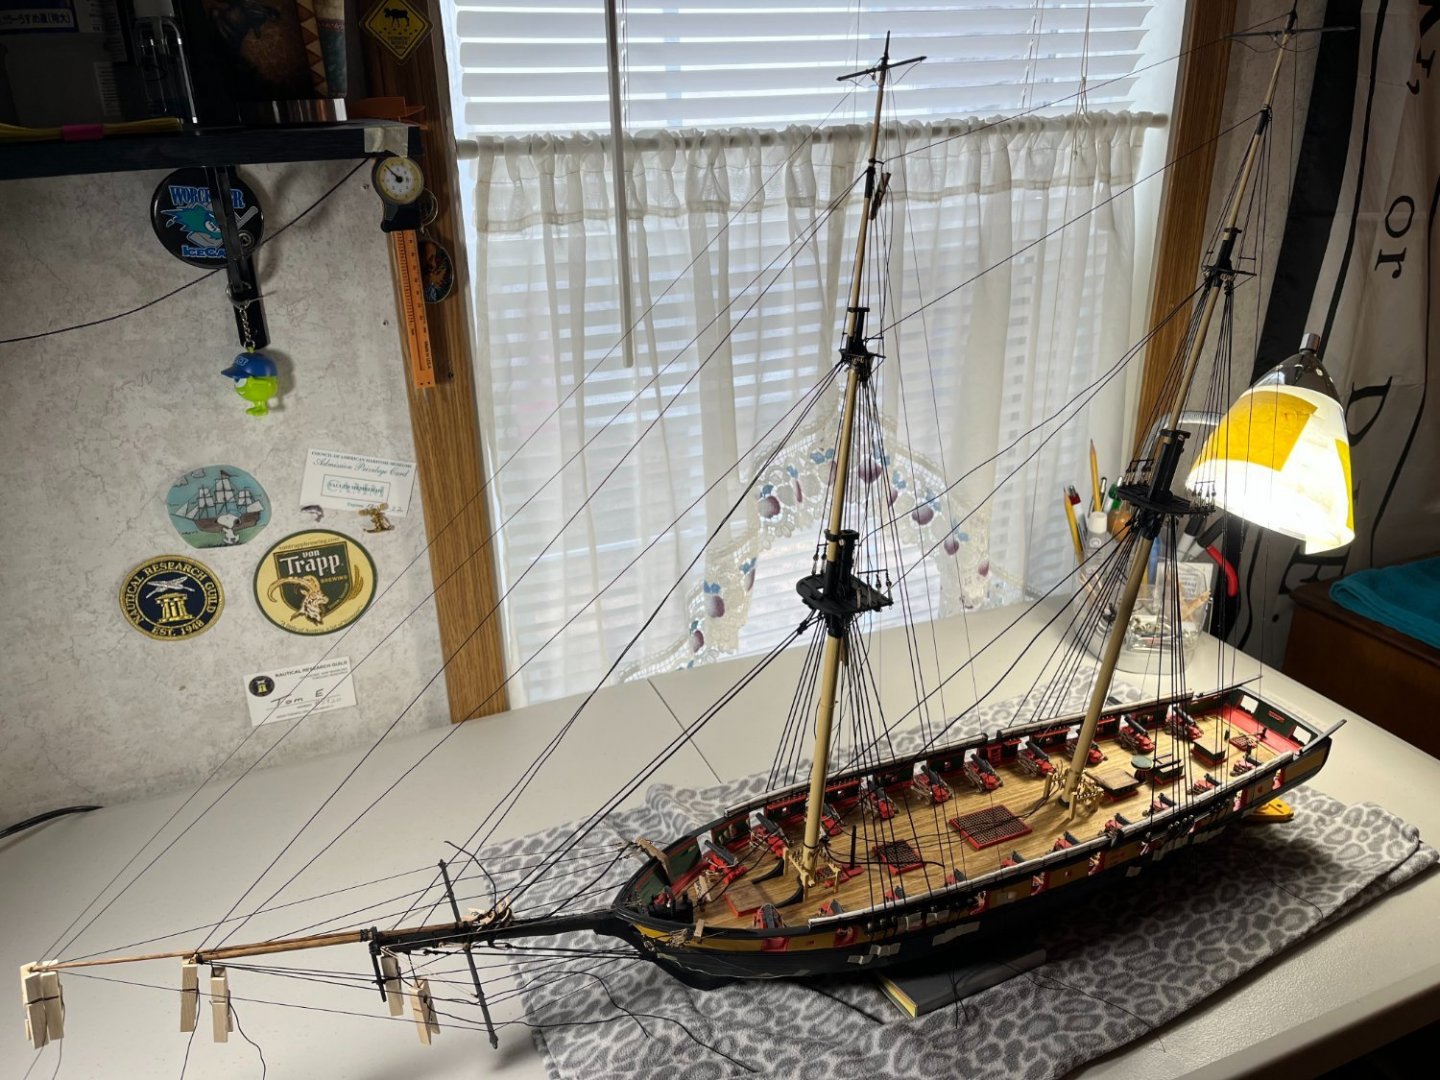
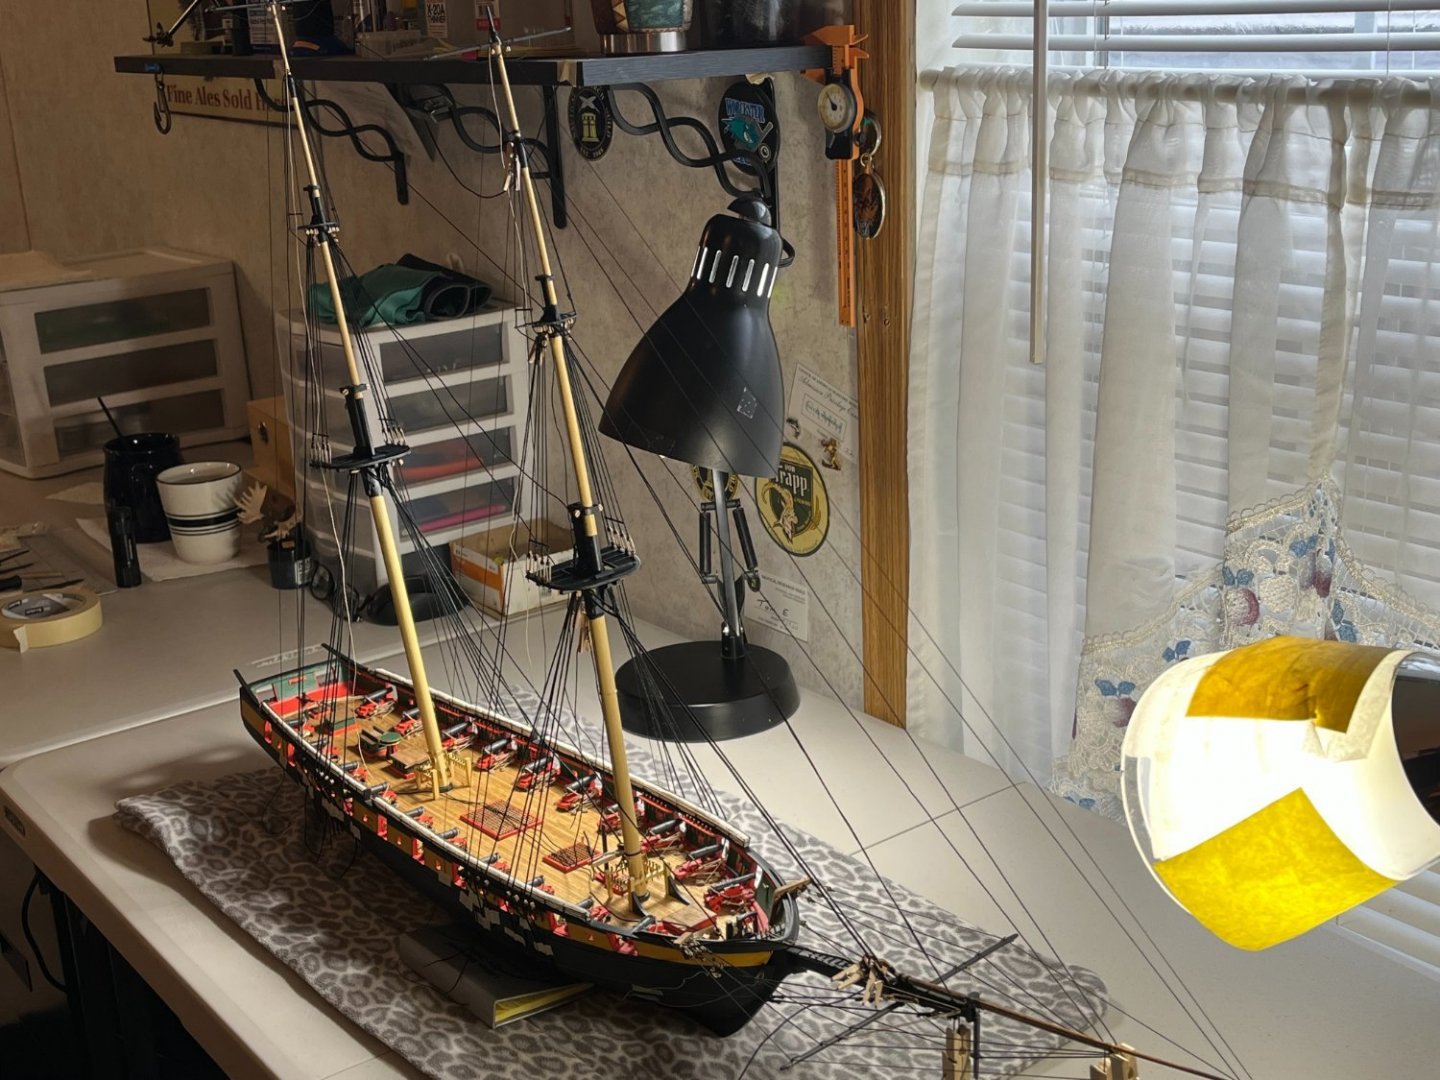
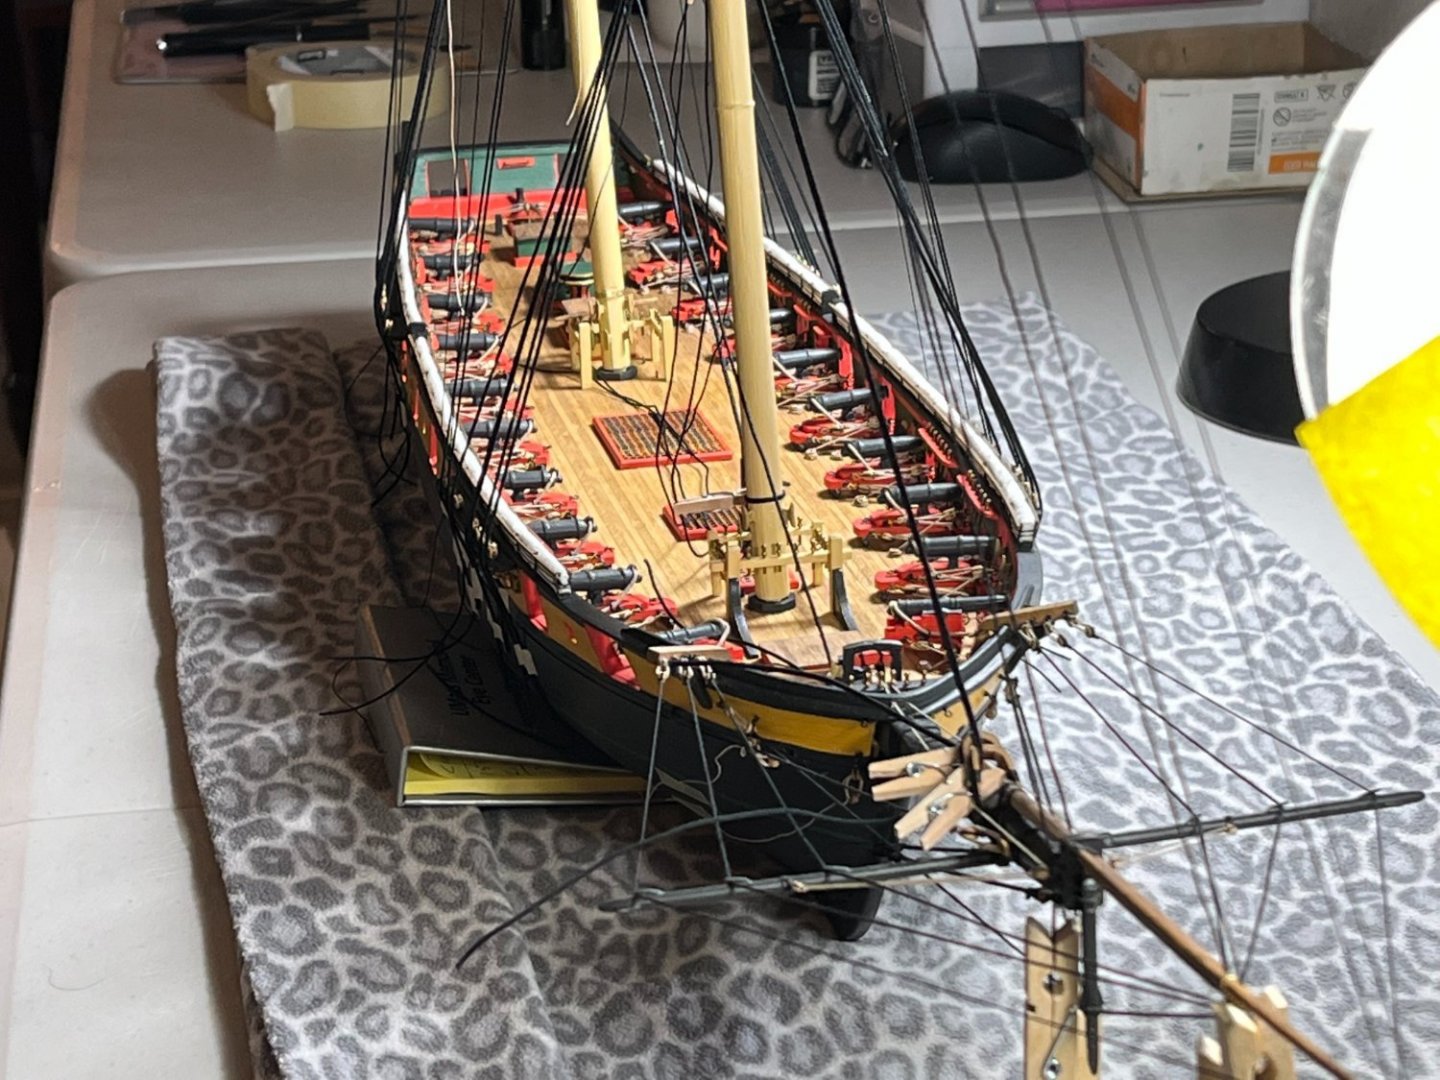
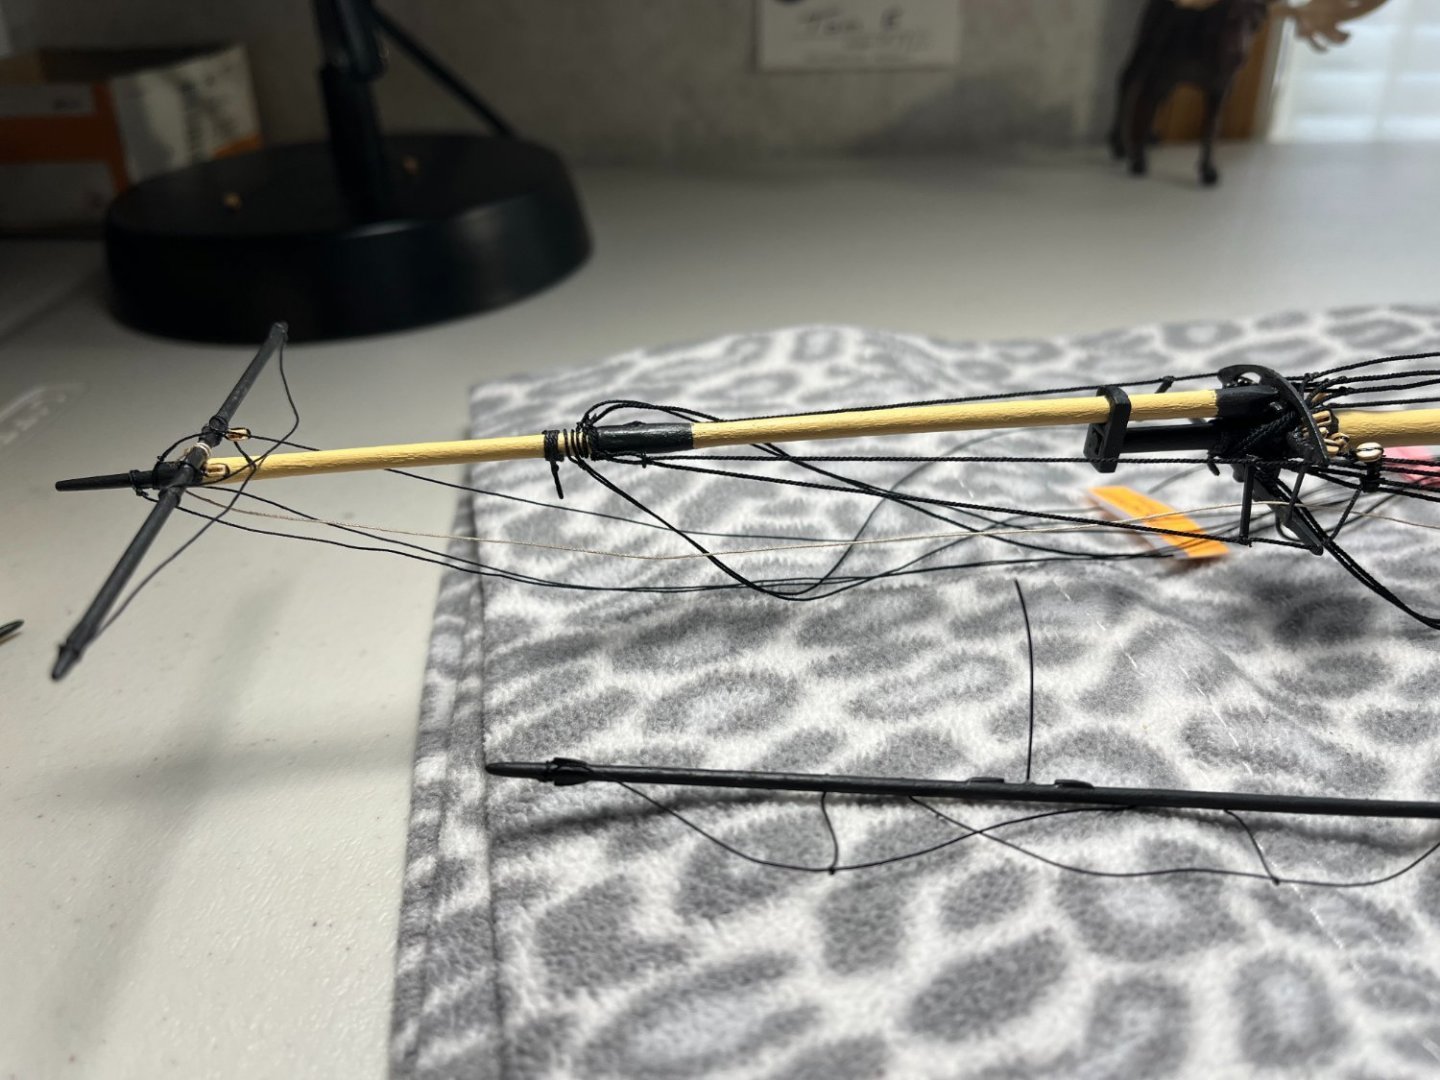
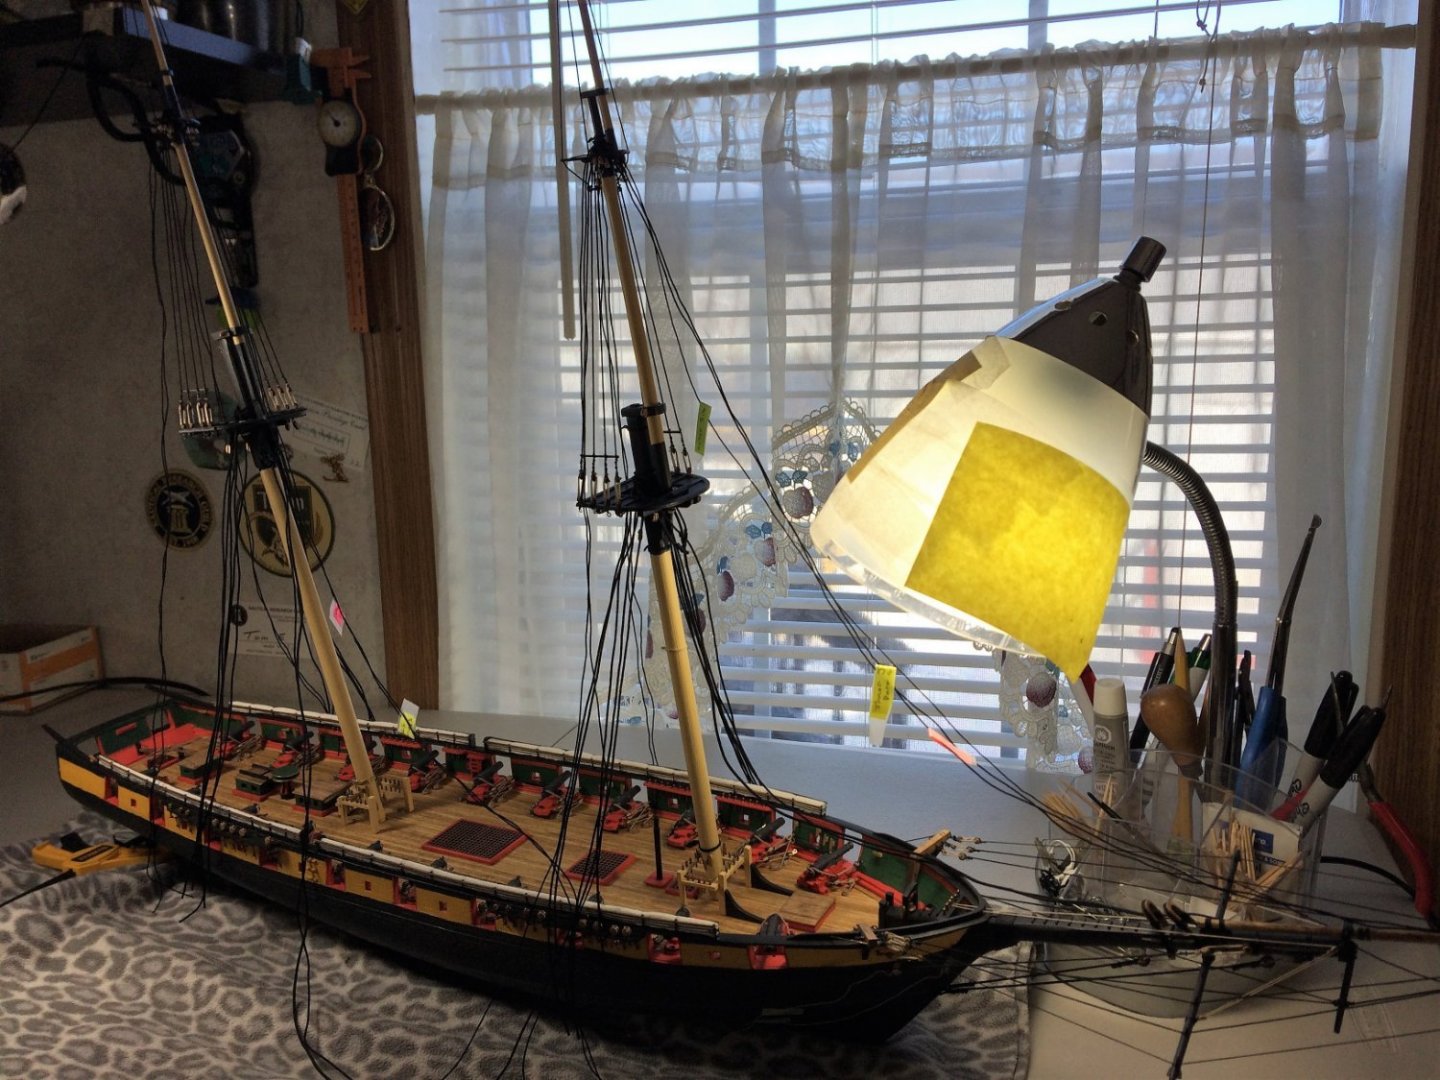
 Evening, Somewhat chilly night in New Hampshire, a wet snow falling tonight. Home from work, warm house, takeout pizza in the belly, can't ask for much more! Niagara could use in update. Work continues on the Spanker boom. Just trying to pre rig as much as possible. The good thing about rigging off model. Technically, I can only work on one mast at a time. The other is safely away from sweatshirt sleeves and elbows.... learned the hard way! A simple jig for keeping the Topping lifts as symmetrical as this rook can get. With the masts mostly done. I focused some attention to the overall deck area on more time. Check connections, general dusting. catch all the wayward bits of rope and shavings. Overall, I feel like I've been able to keep everything as lined up as possible. There's some wayward bends and curves. Always learning. The Bow area is ready to accept all the forward stays off the Fore mast. Starting to formulate a "rigging schedule". So far, I'm thinking, work from the inside out. Start with the most internal ropes first once the masts are stepped in. Lifts, clew lines, Fide rail fodder. Then, work from front to back with standing rigging. We'll see how I do! Well here she is in all her glory. Minus a few left-over lift and clew lines, which I should have pics in the next update, the masts are ready to be installed. Just wanna go over the plans one, two, twenty more times before I firm things in. Stay warm, Tom E


-
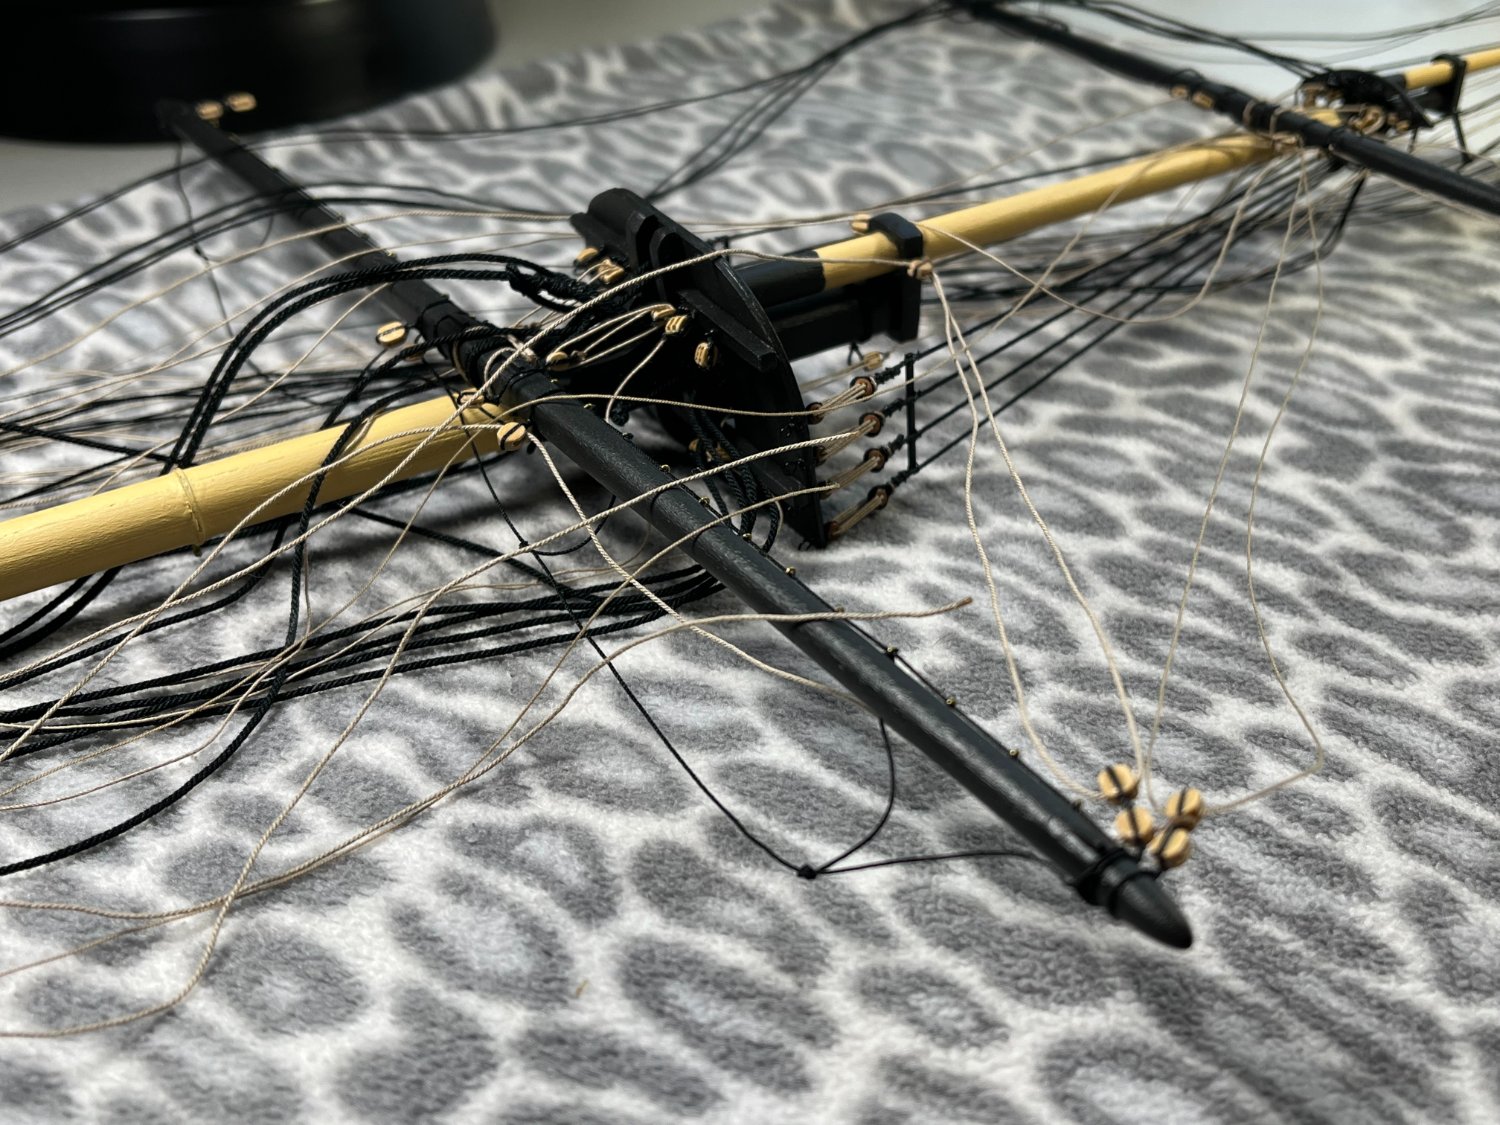
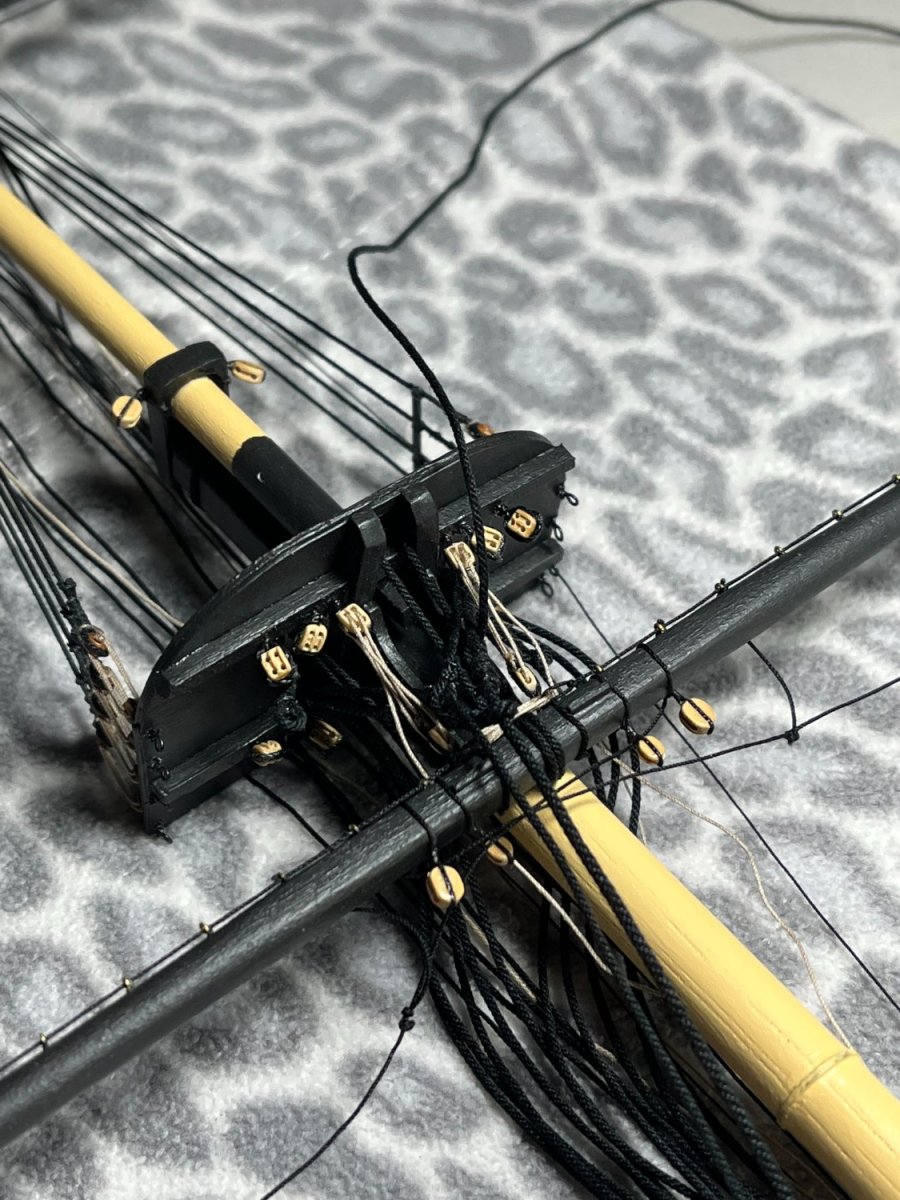
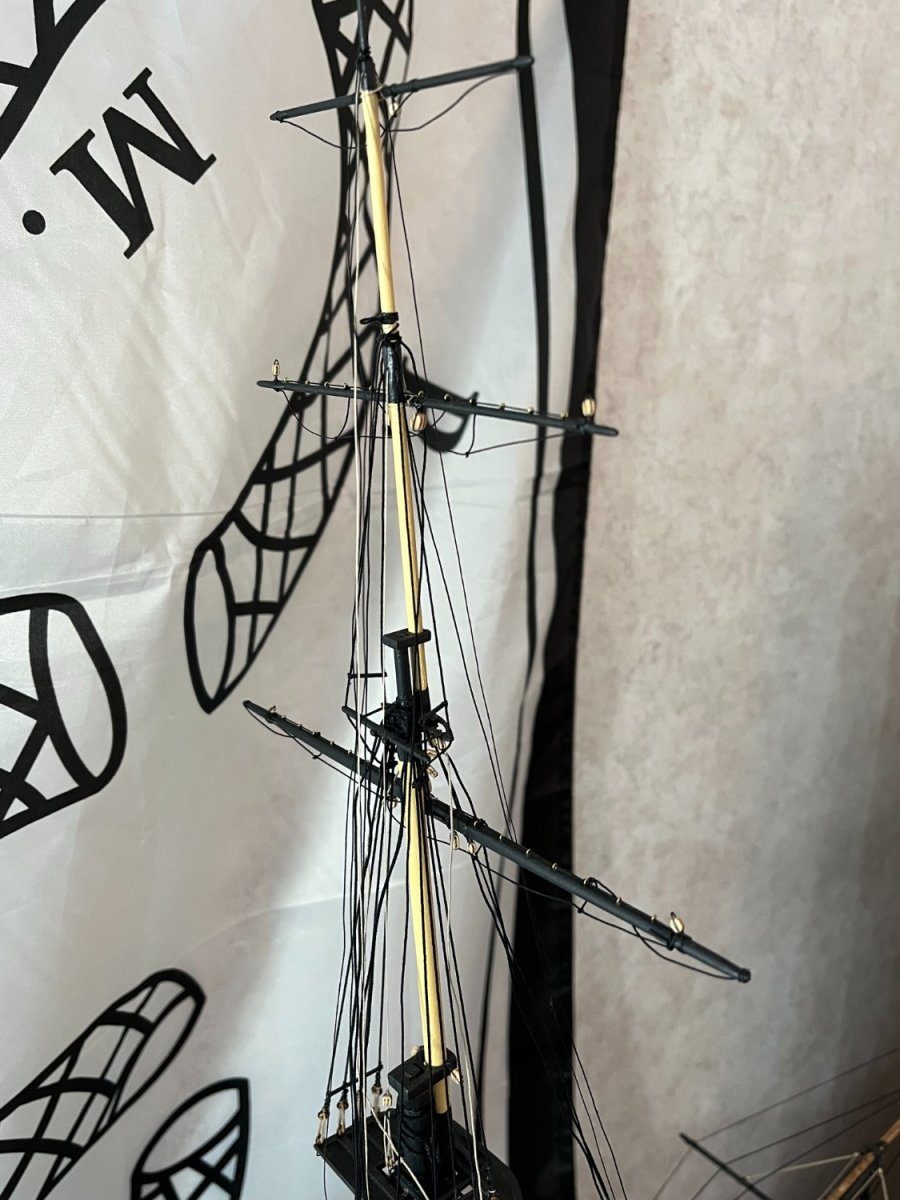
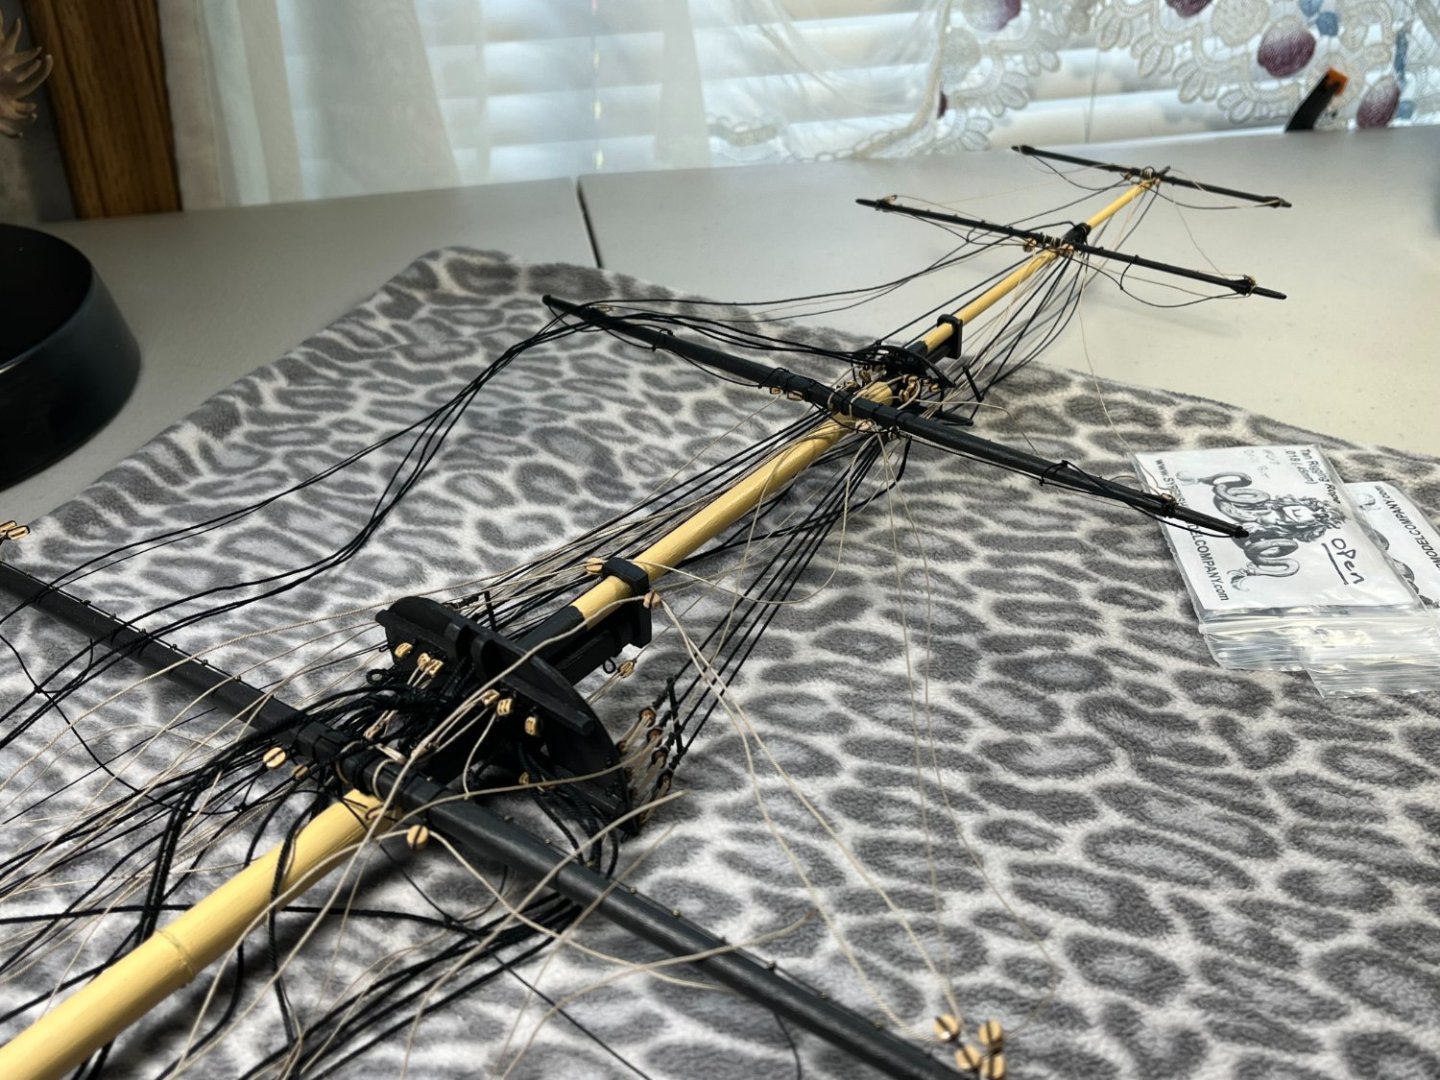
Evening, Chores are done, dinner in the belly, football game on the tv. Niagara needs an update! Before I step the masts, I want to install the yard lifts and some Clew lines. Anything and almost everything before I step. Starting from the Royal yard and work my way down the mast. Absolutely out of control with loose ropes. But I can see the finish line as towards what lines I plan on installing. Both Fore and Main mast are being done at the same time. Learn on one, then repeat. I've started sorting out the Spanker Mast, boom, gaff and throat halliards. Identify blocks, placement then start stropping. Again, just try and pre-rig as much as possible or feasible. Be good, Tom E


-
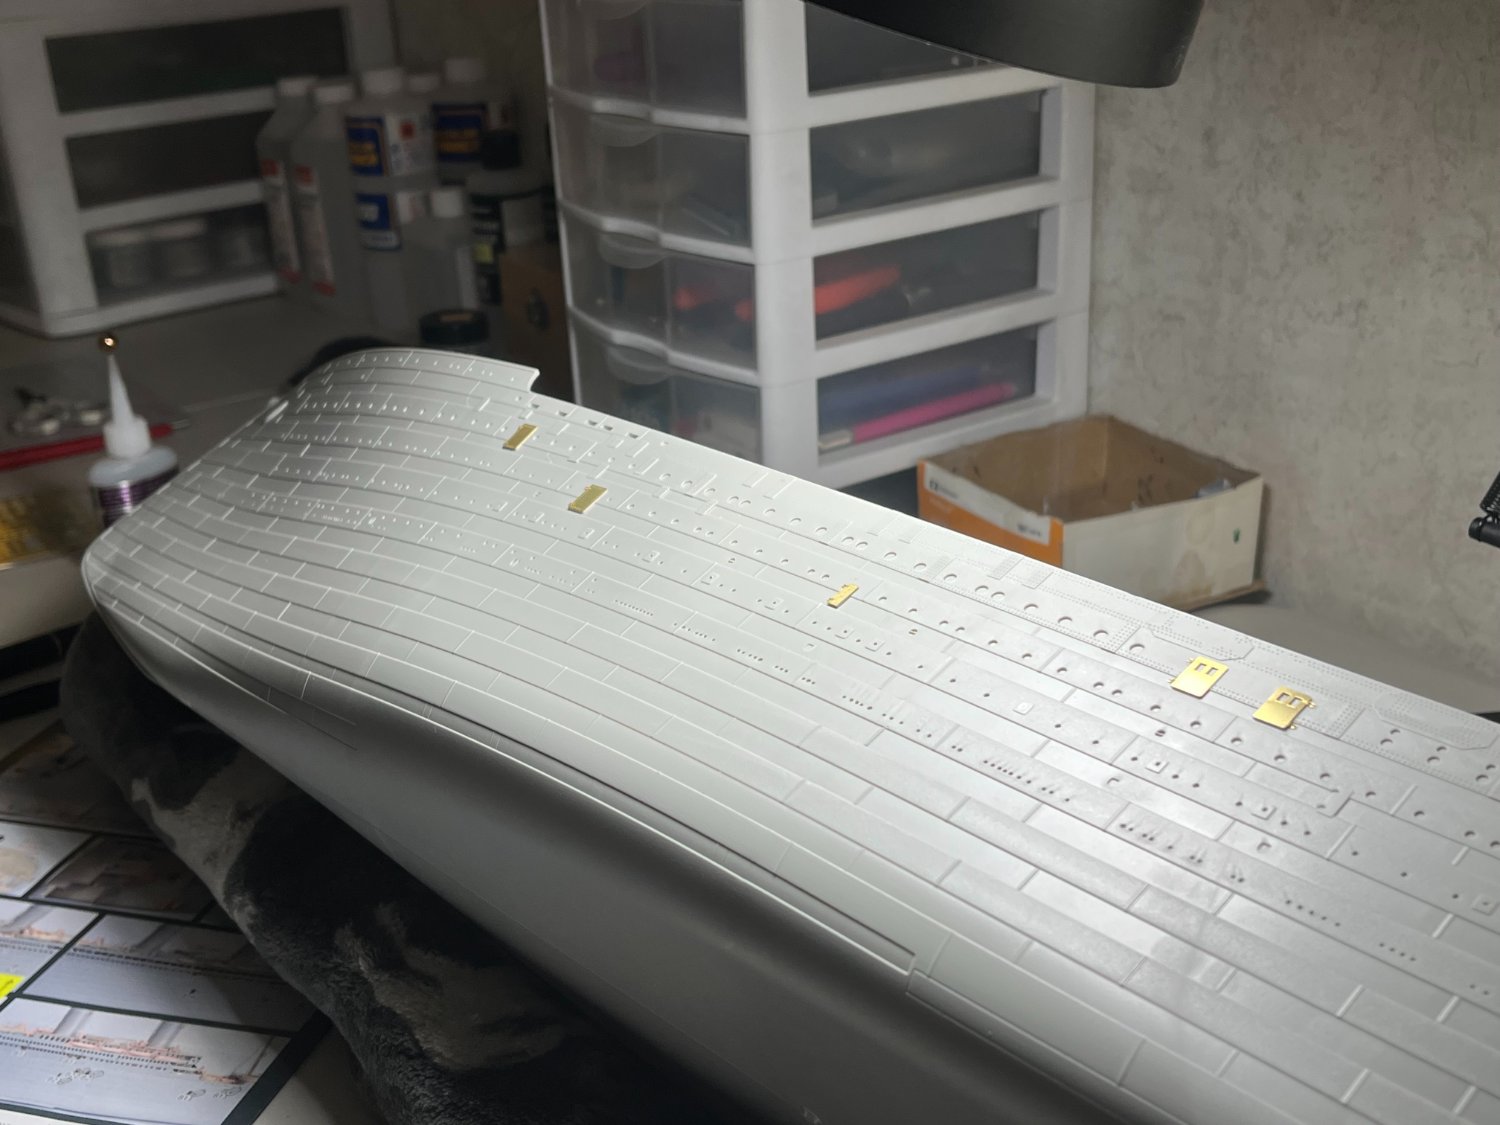
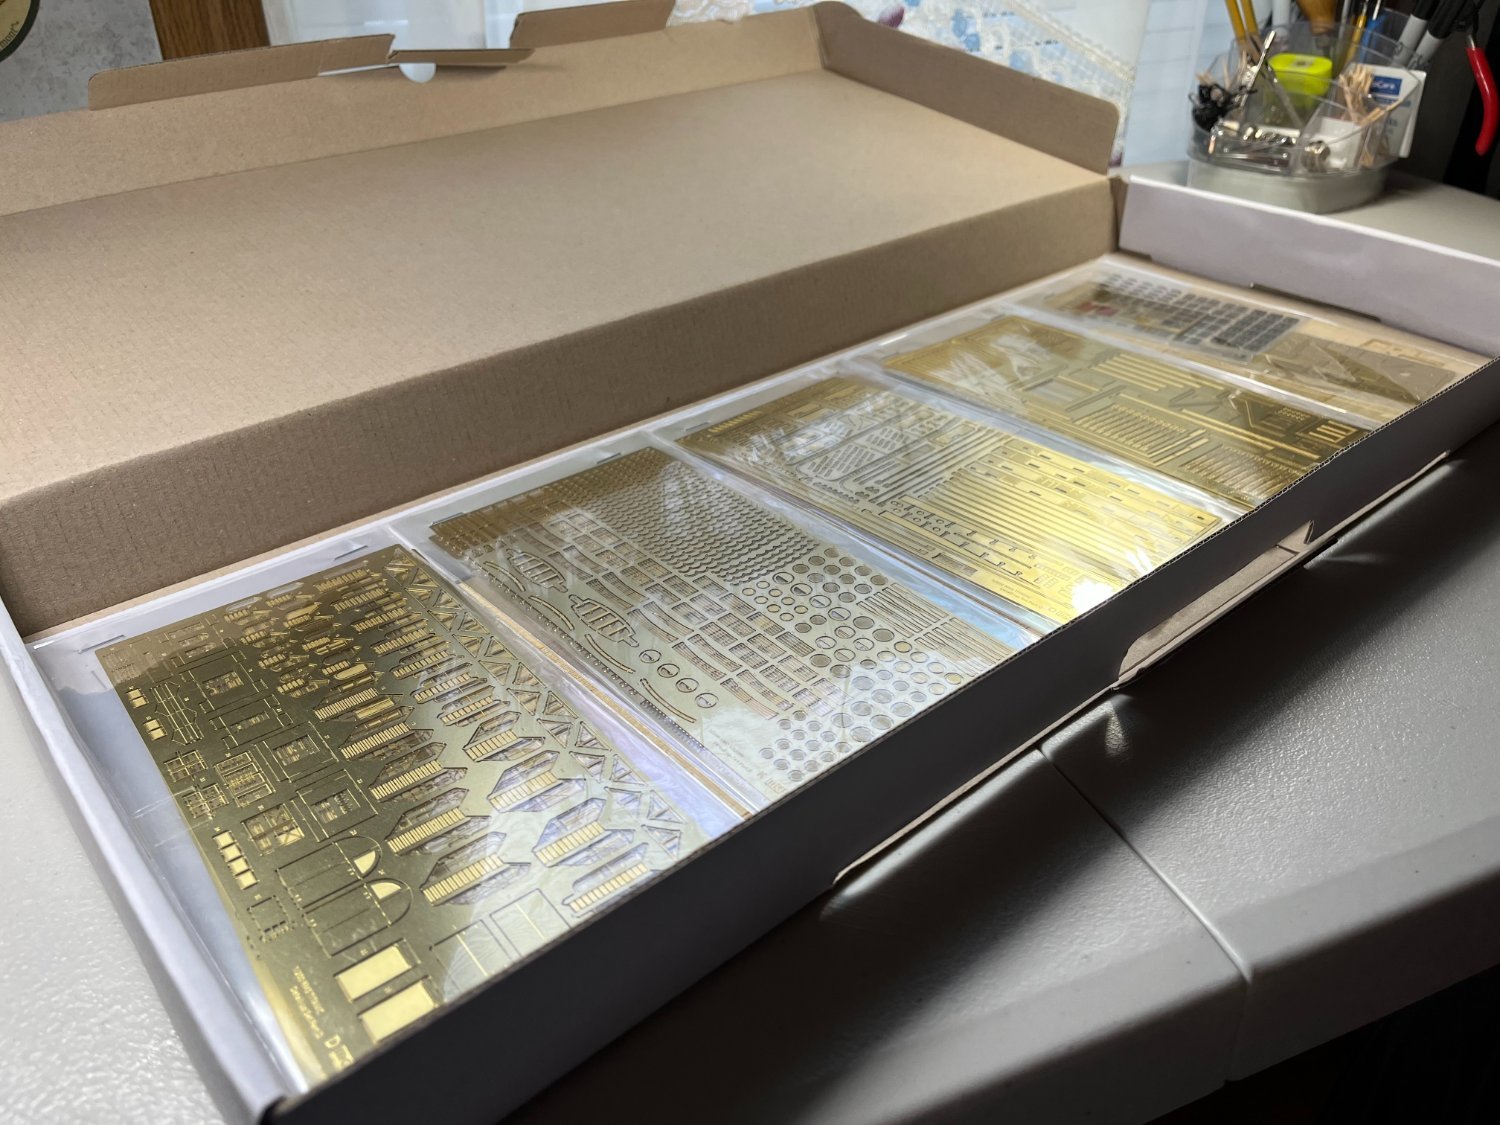
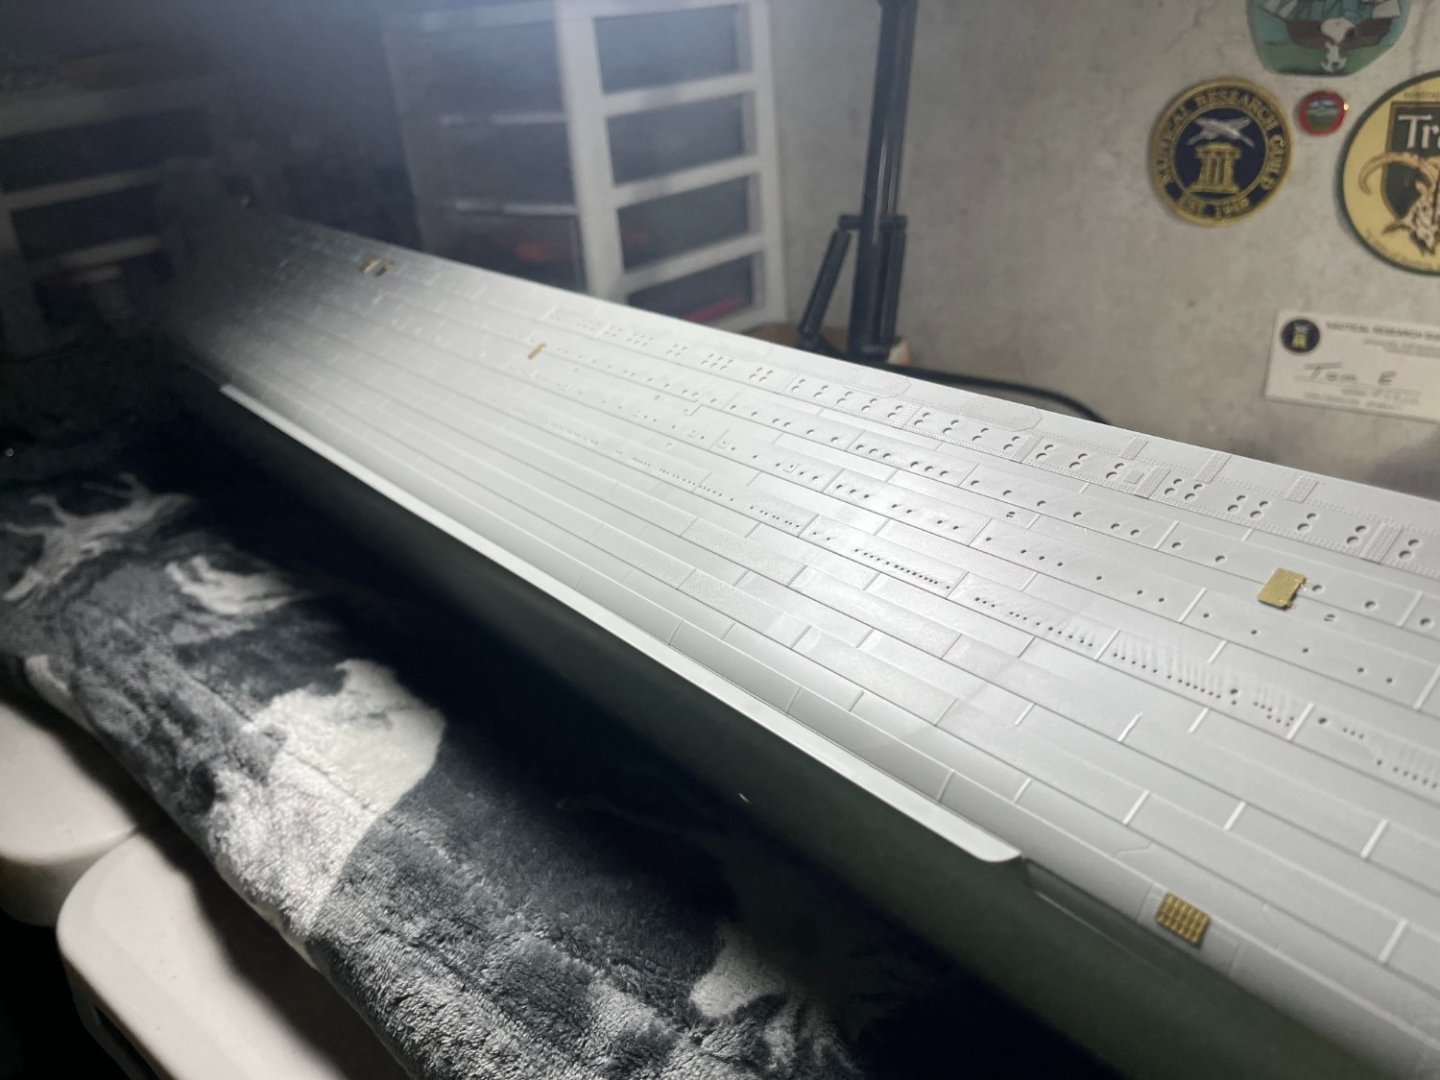
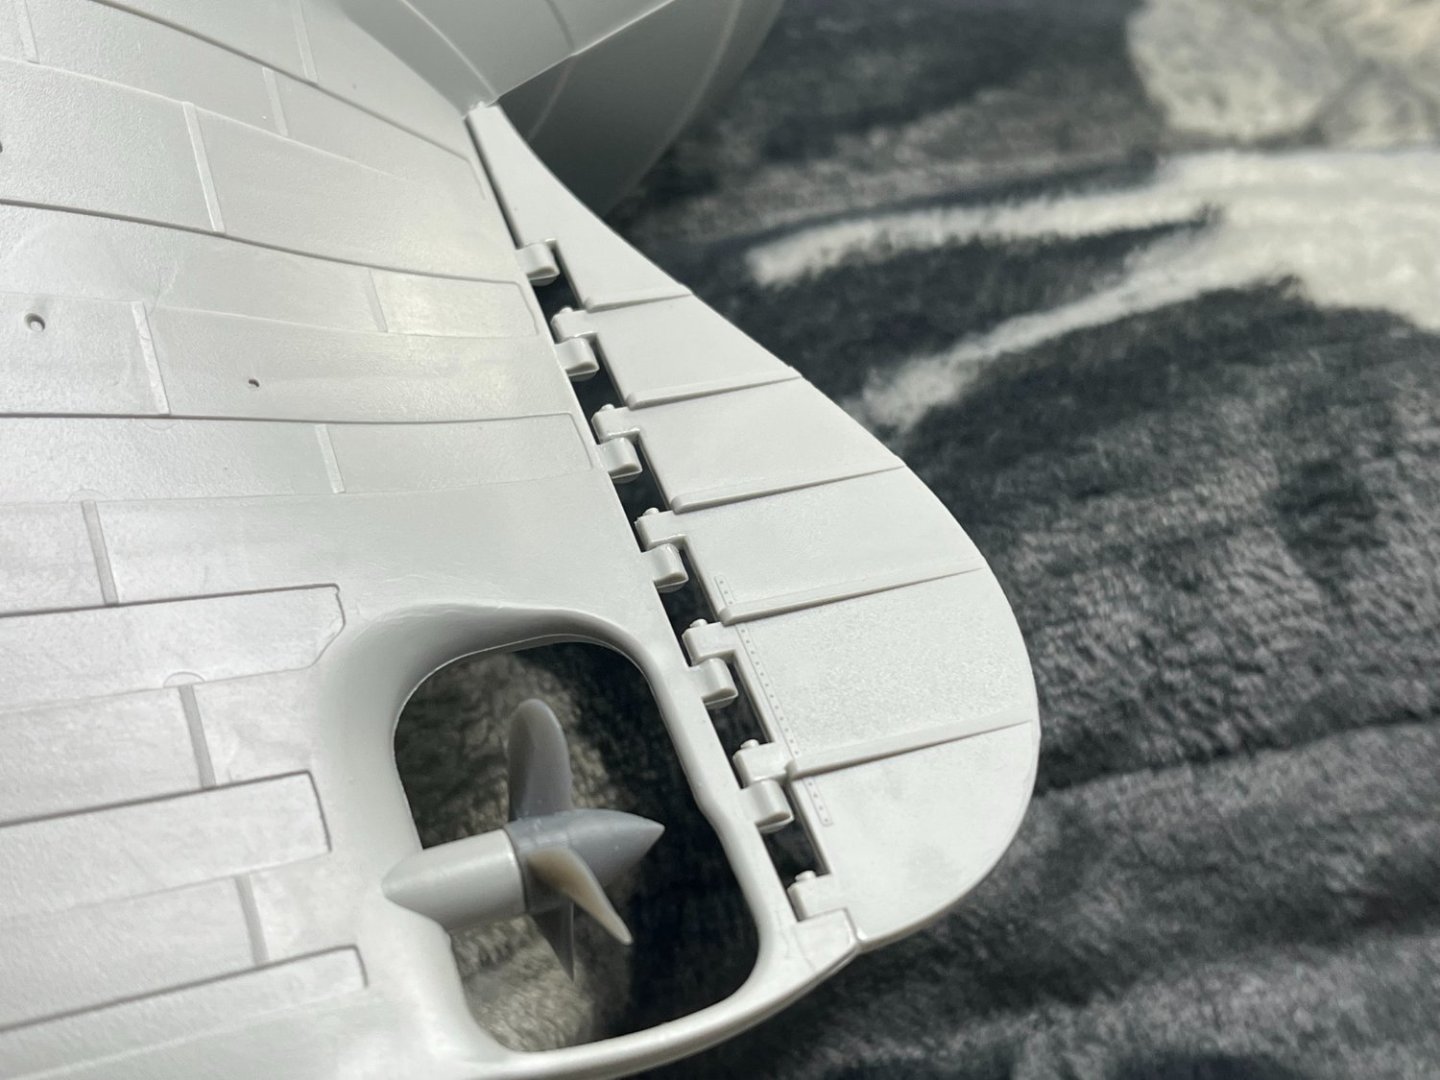
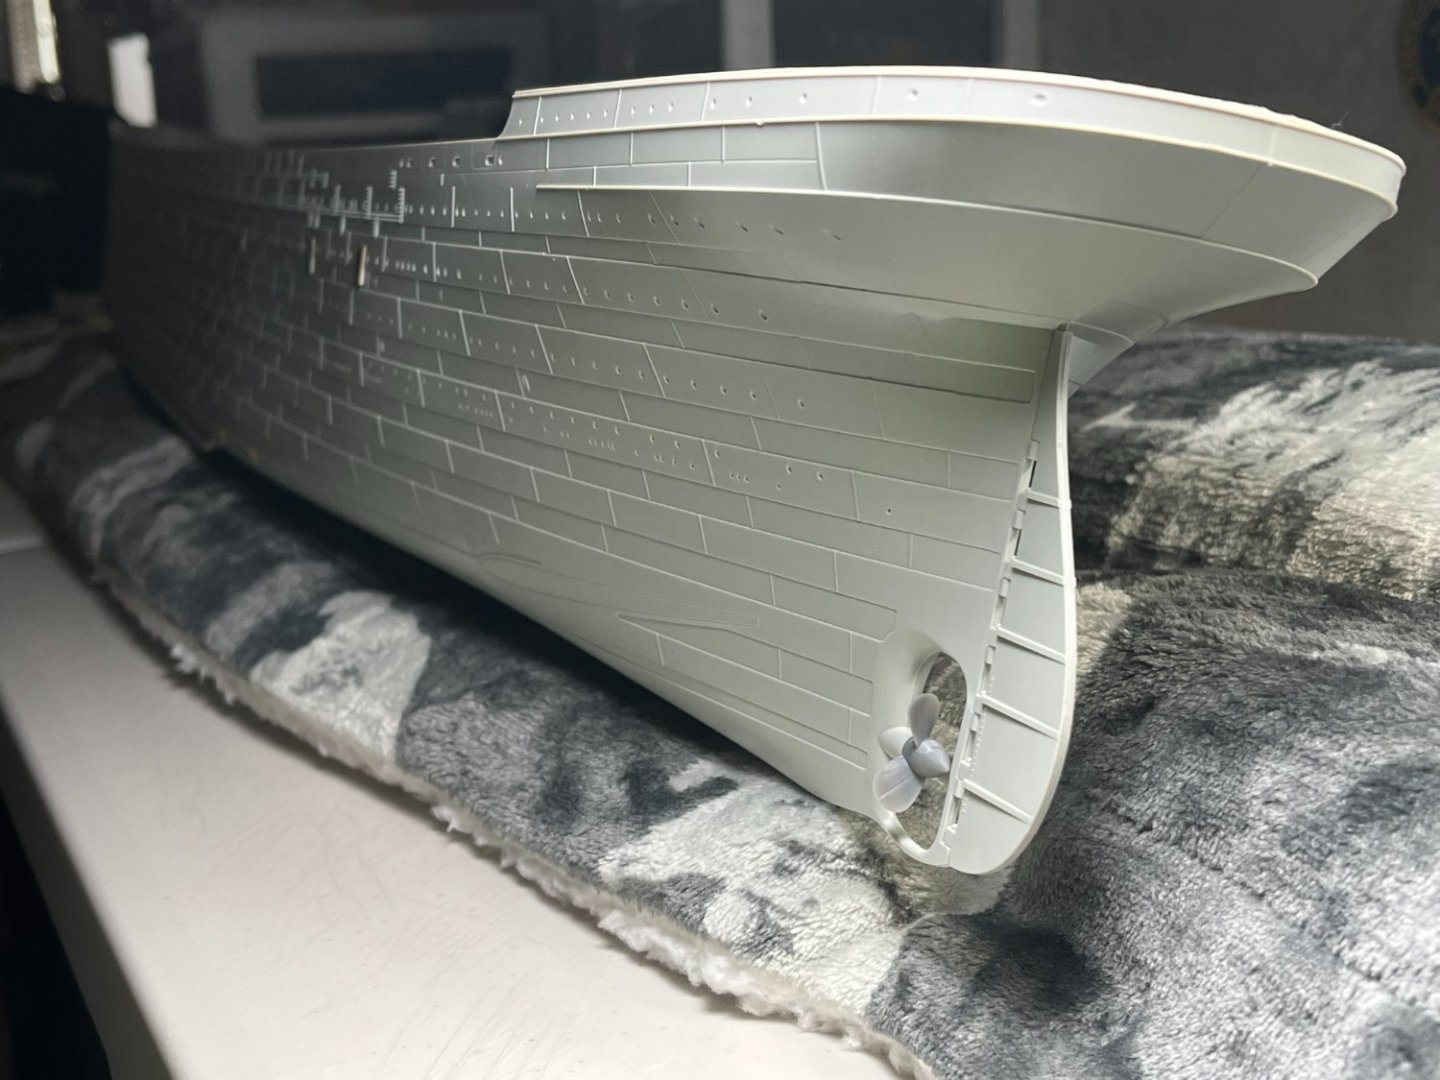
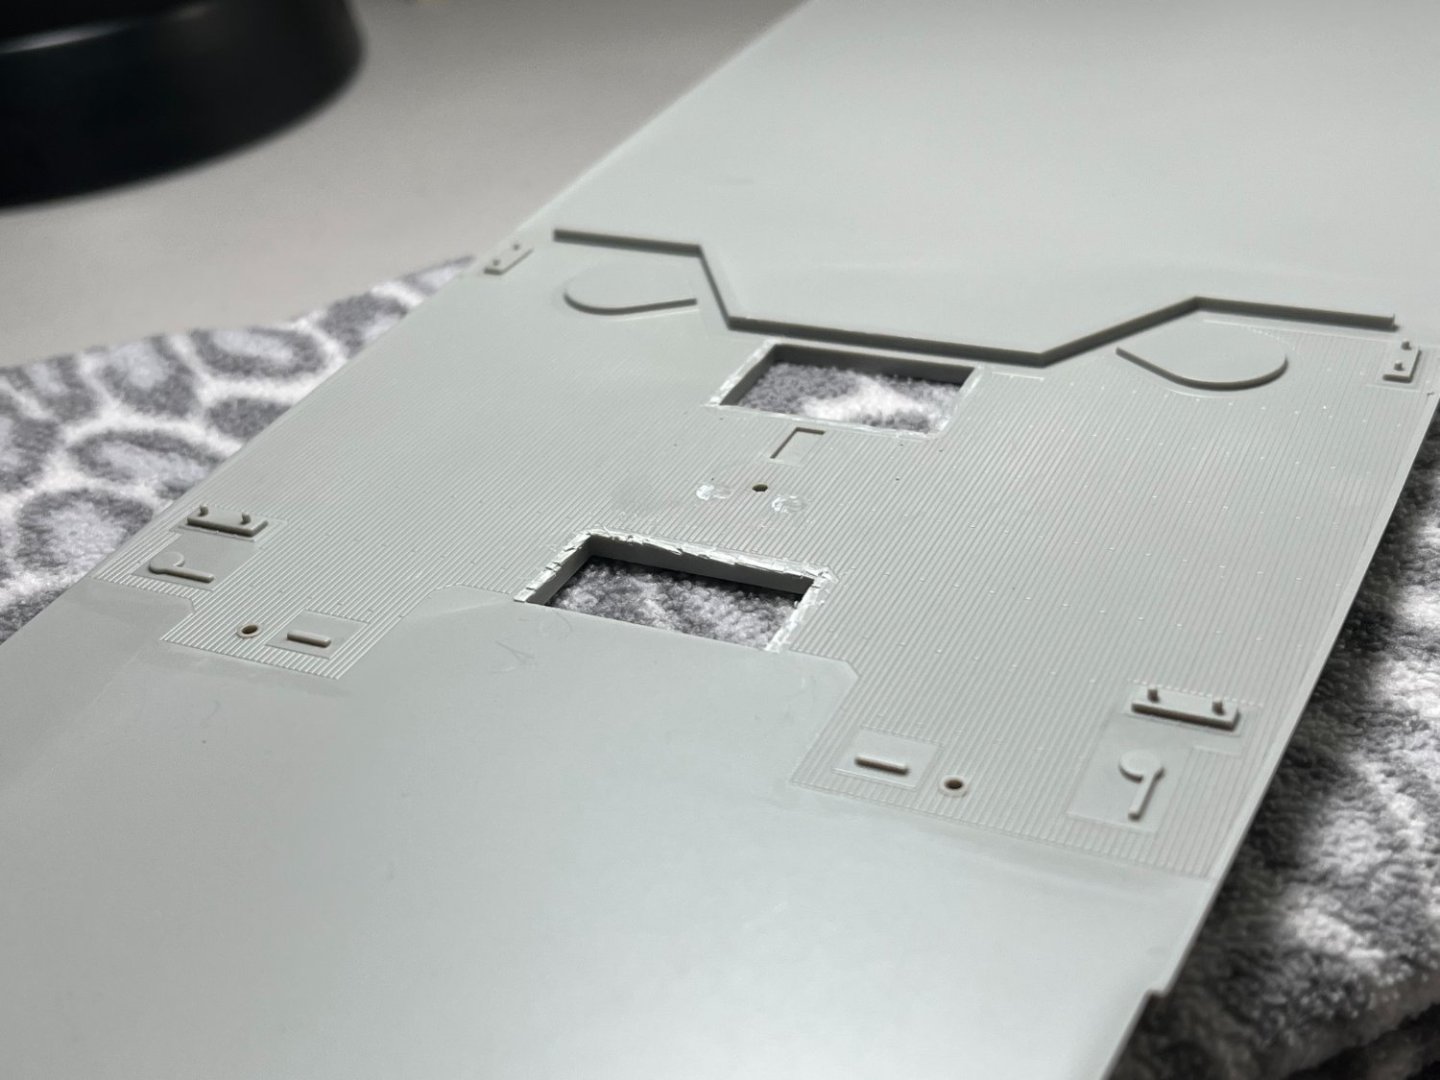
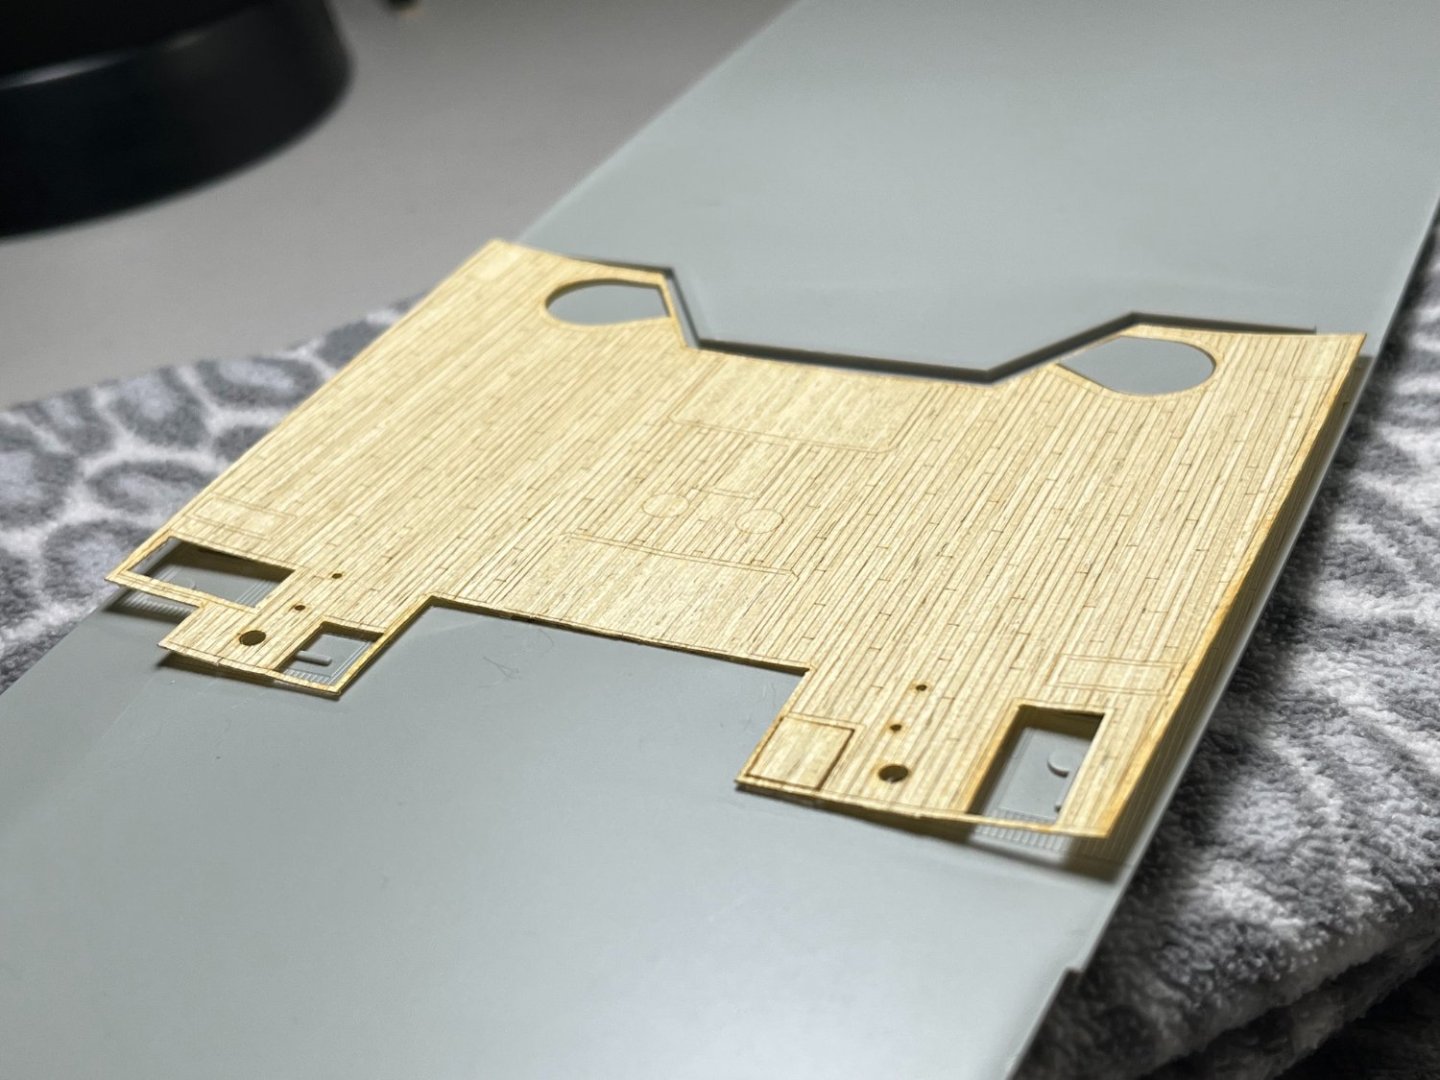
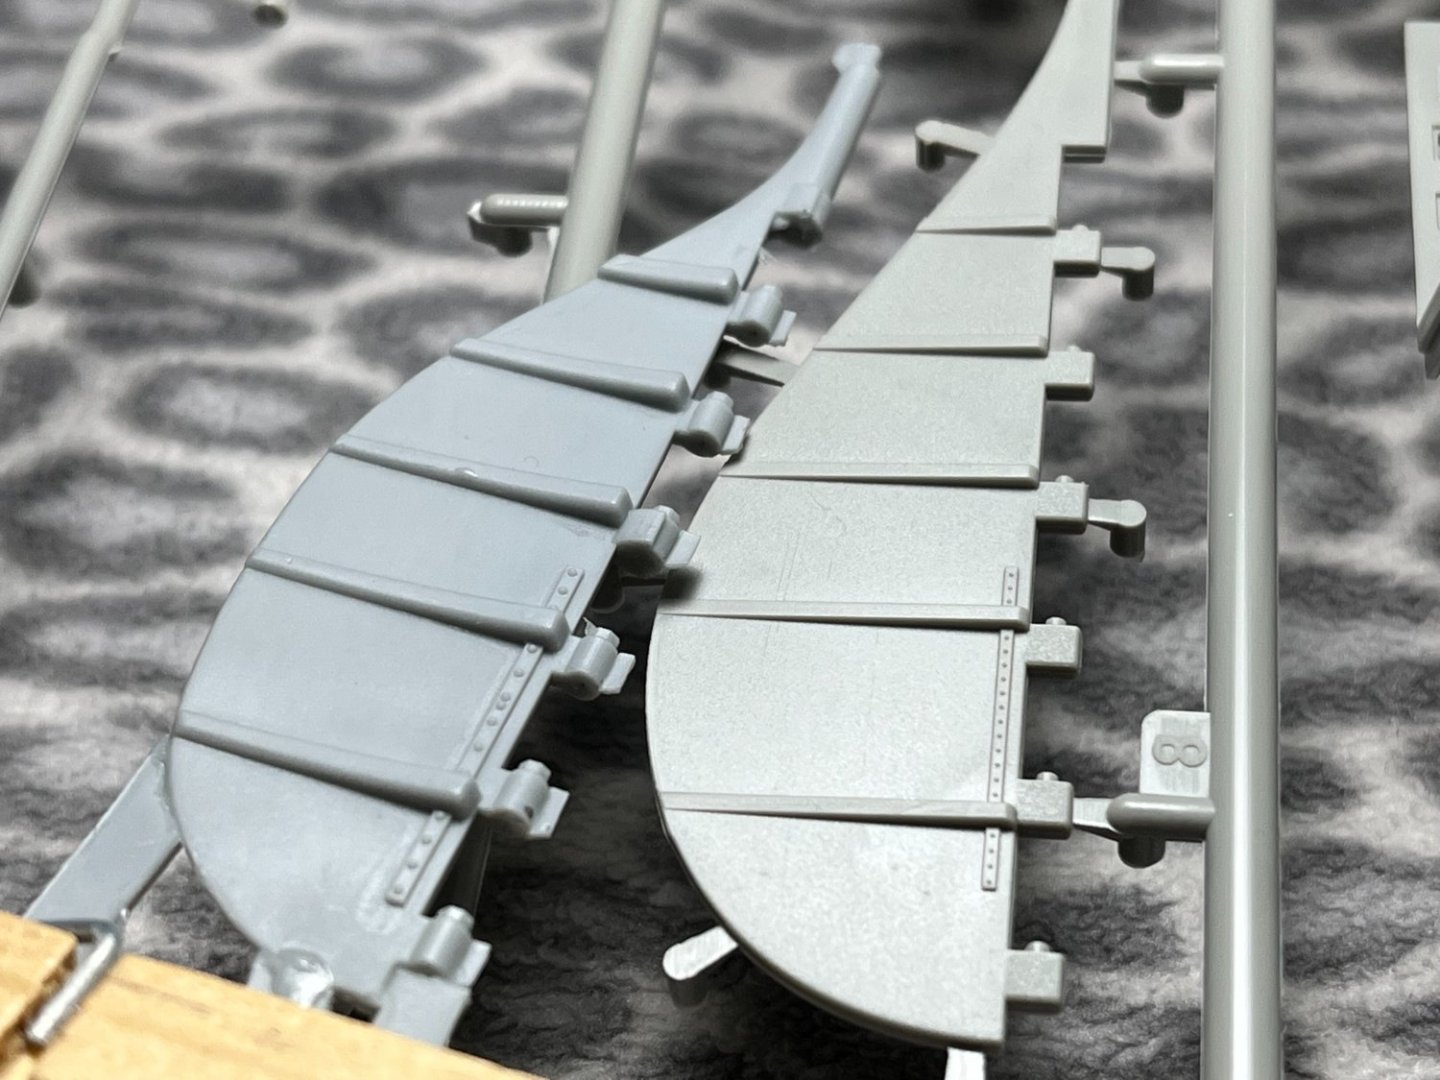
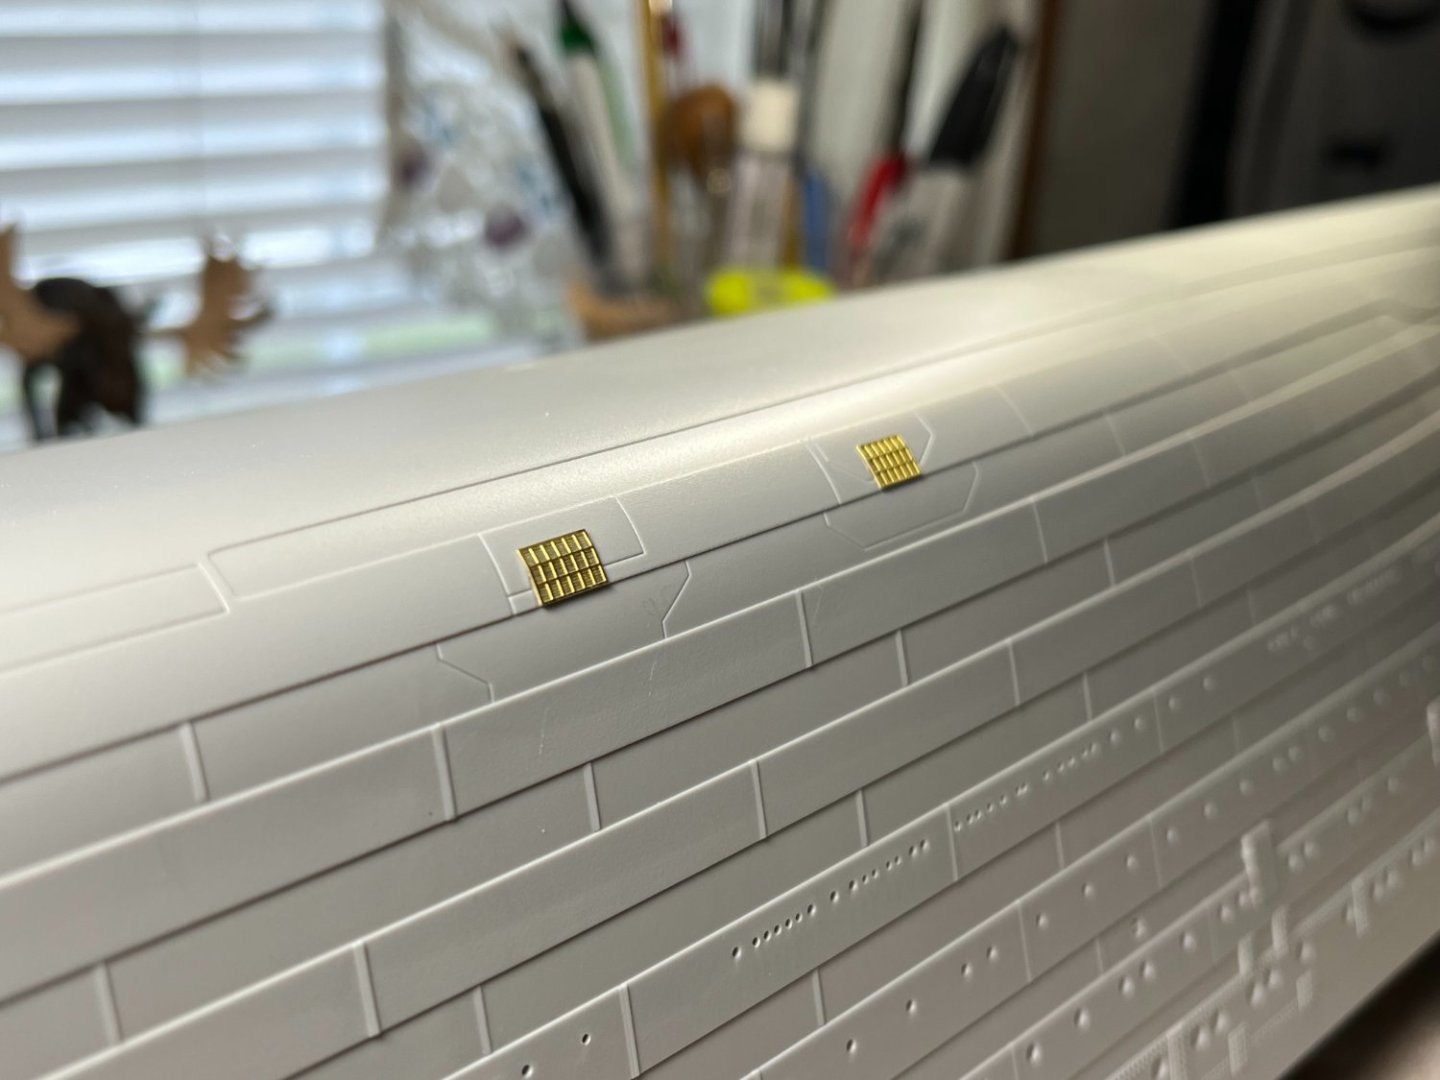
Thanks Greg, welcome aboard. In regard to the aftermarket stuff. With what comes with the kit itself and what's included in the MK1 set, seems like plenty. I know some will say there's never enough PE, but I'm comfortable with what's here. Don't get me wrong, I could go crazy with aftermarket stuff. But all in moderation. Once all the flat PE pieces for the hull were installed, the stabilizer fins are next. I want to get as much installed on the hull itself, then paint. Earlier in the build I was having trouble with the MK1 rudder. I was way too small, didn't fit right in the model and looked out of sorts. In the end I stayed with the kit supplied rudder. The central propellor is from MK1. It won't be affixed to the hull until after its painted. Same with the two side propellors. With PE pieces, fins and rudder attached. It's ready for paint. The hull will get a coat of Fine grey primer from Tamiya. With the hull under way and ready for paint. Time to start carving some decks to receive the wooden decks. Probably the main reason I bought the MK1 upgrade was for the wooden decks. These look awesome. Really adds an extra dimension to the model. Be good Tom E
-
Well said. Enjoy the journey and don't sweat the small stuff. Tom E
- 34 replies
-
- 1
-

-
- Grand Banks Dory
- Model Shipways
- (and 1 more)
-
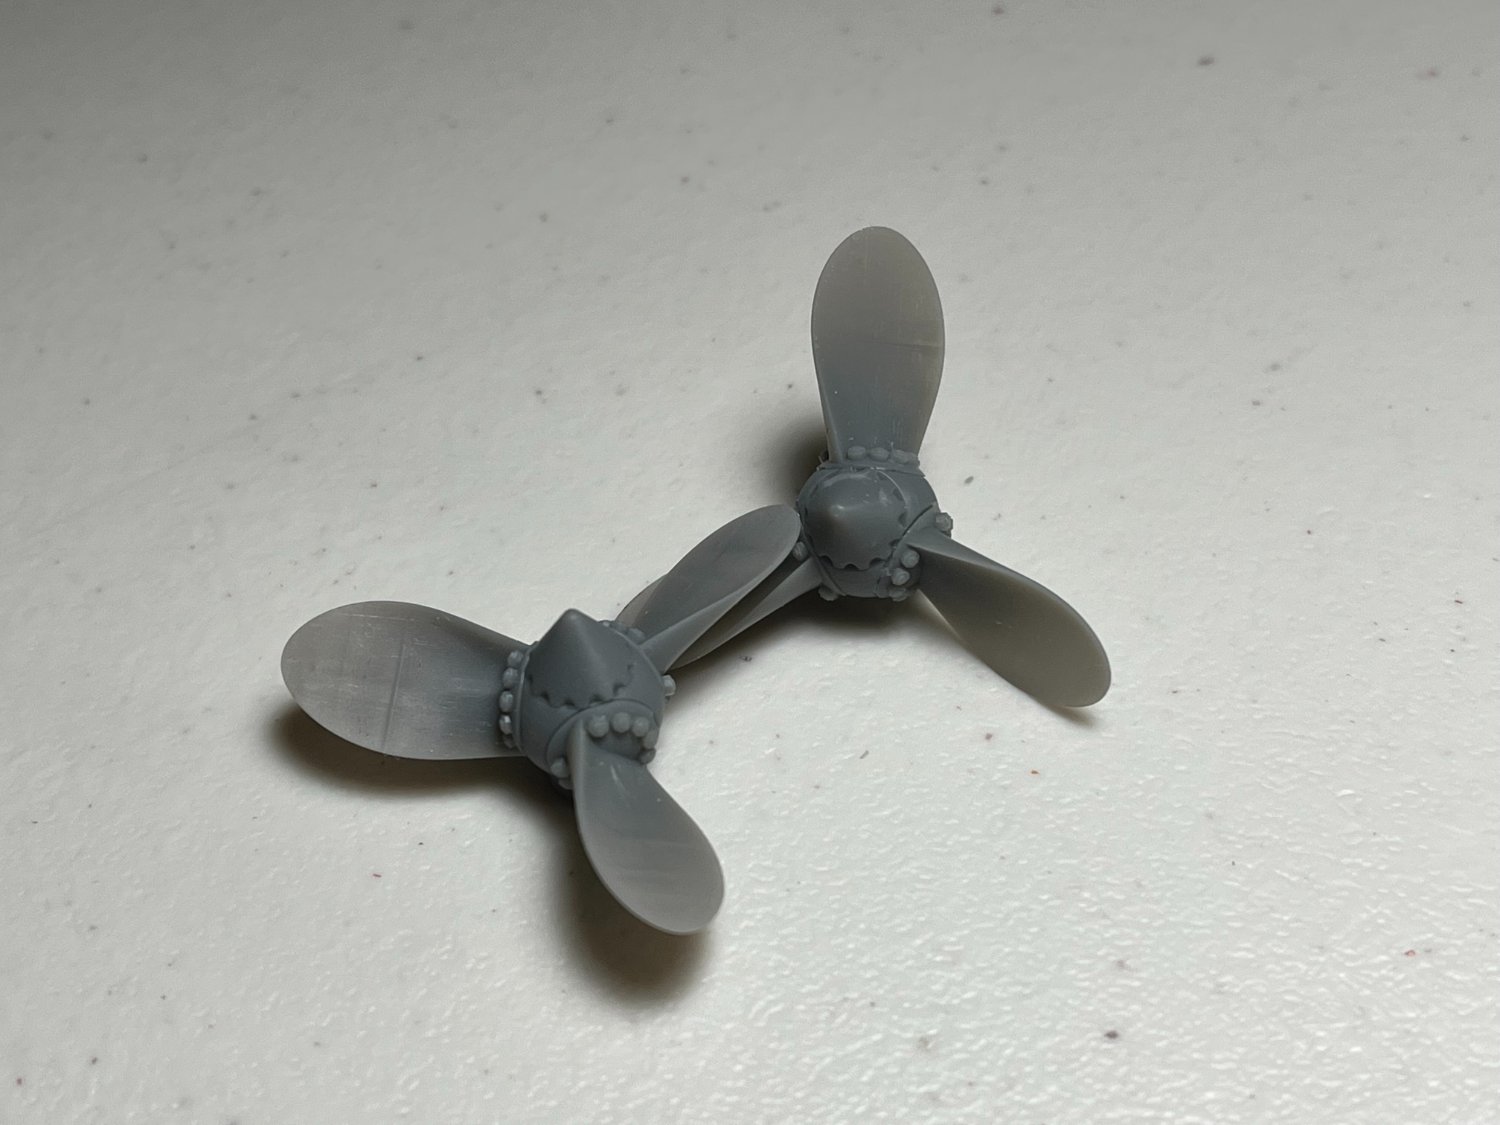
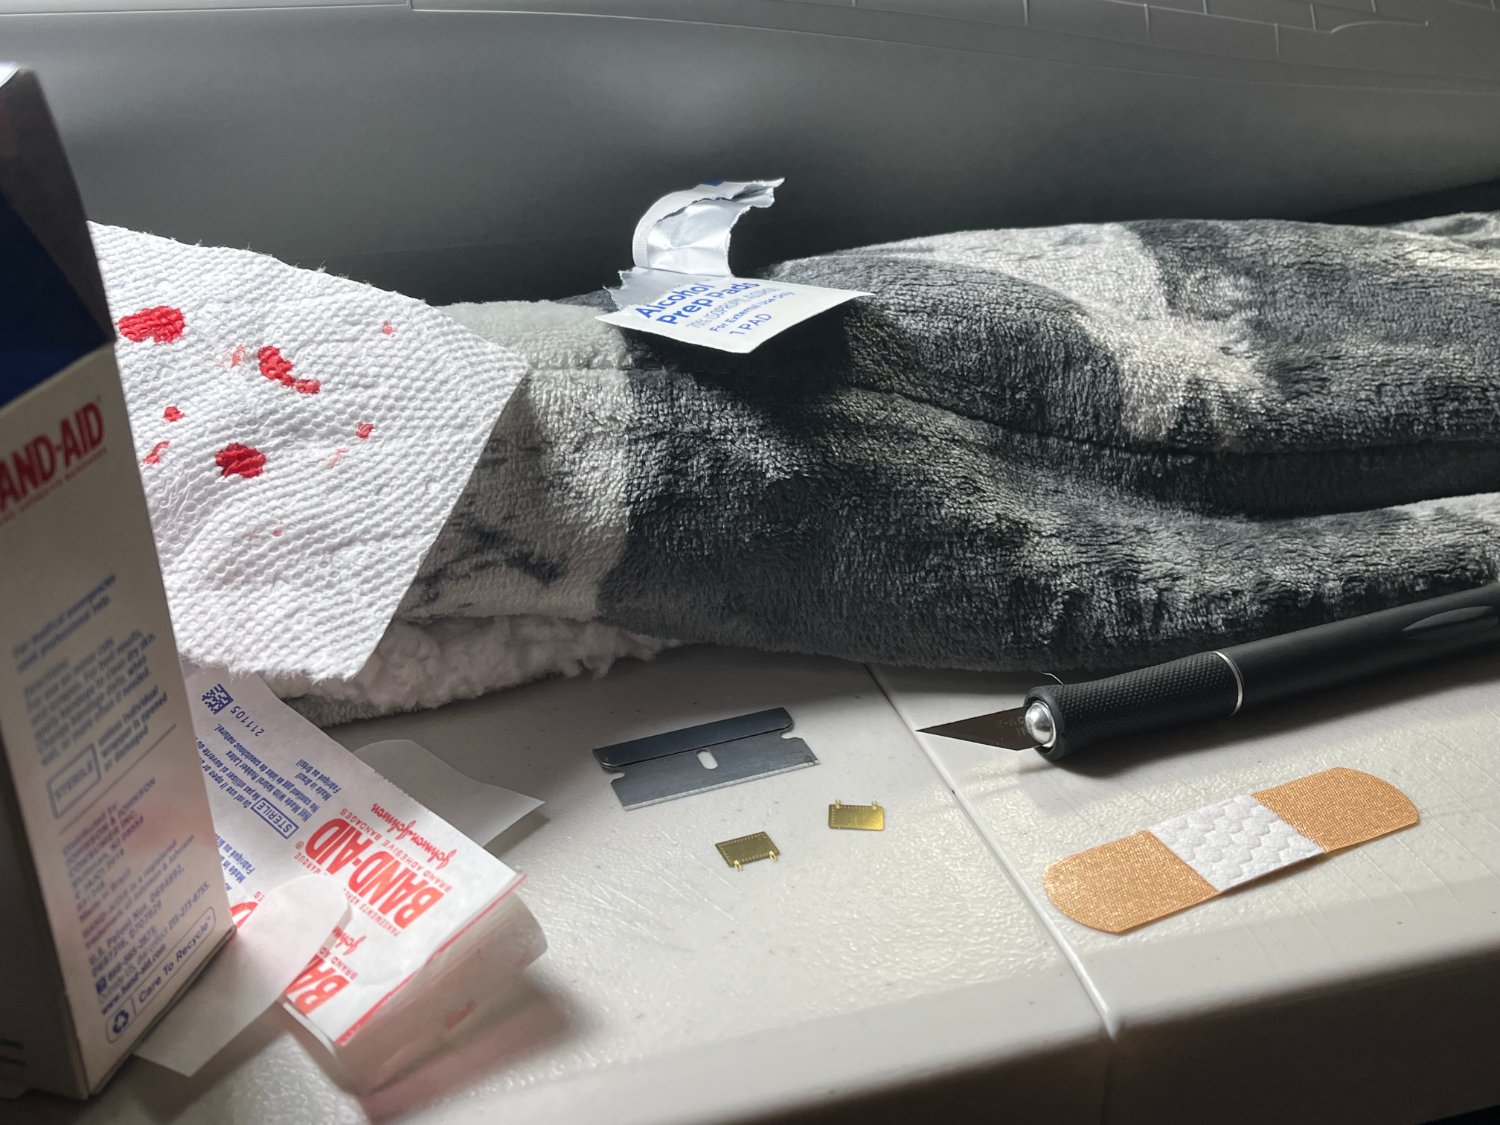
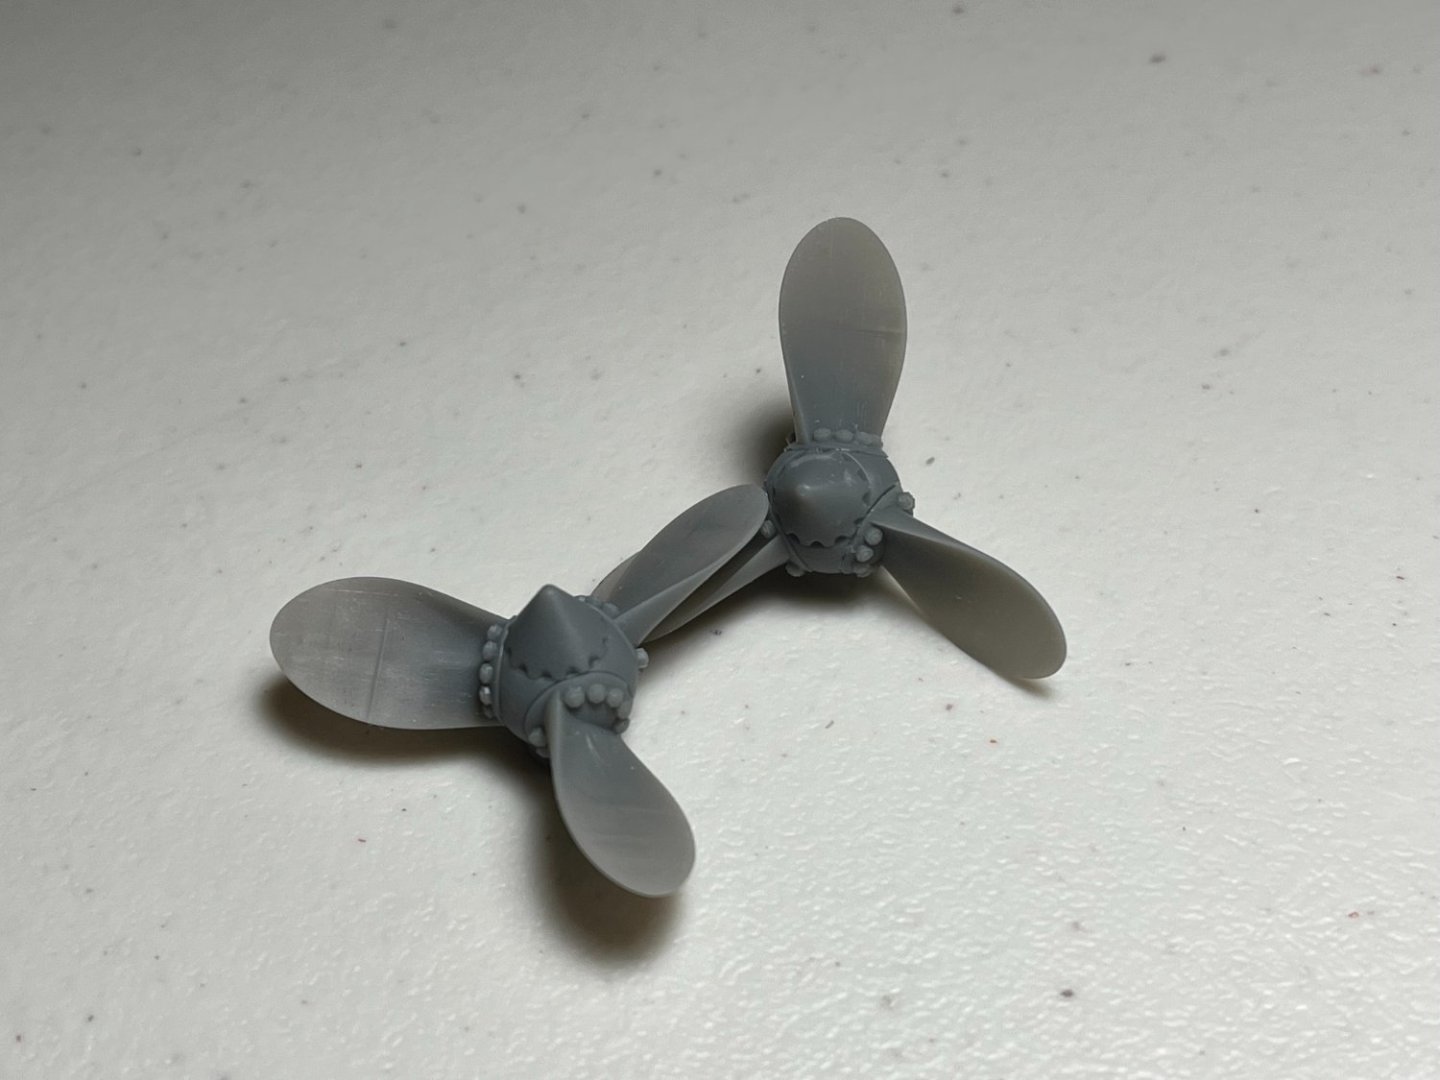
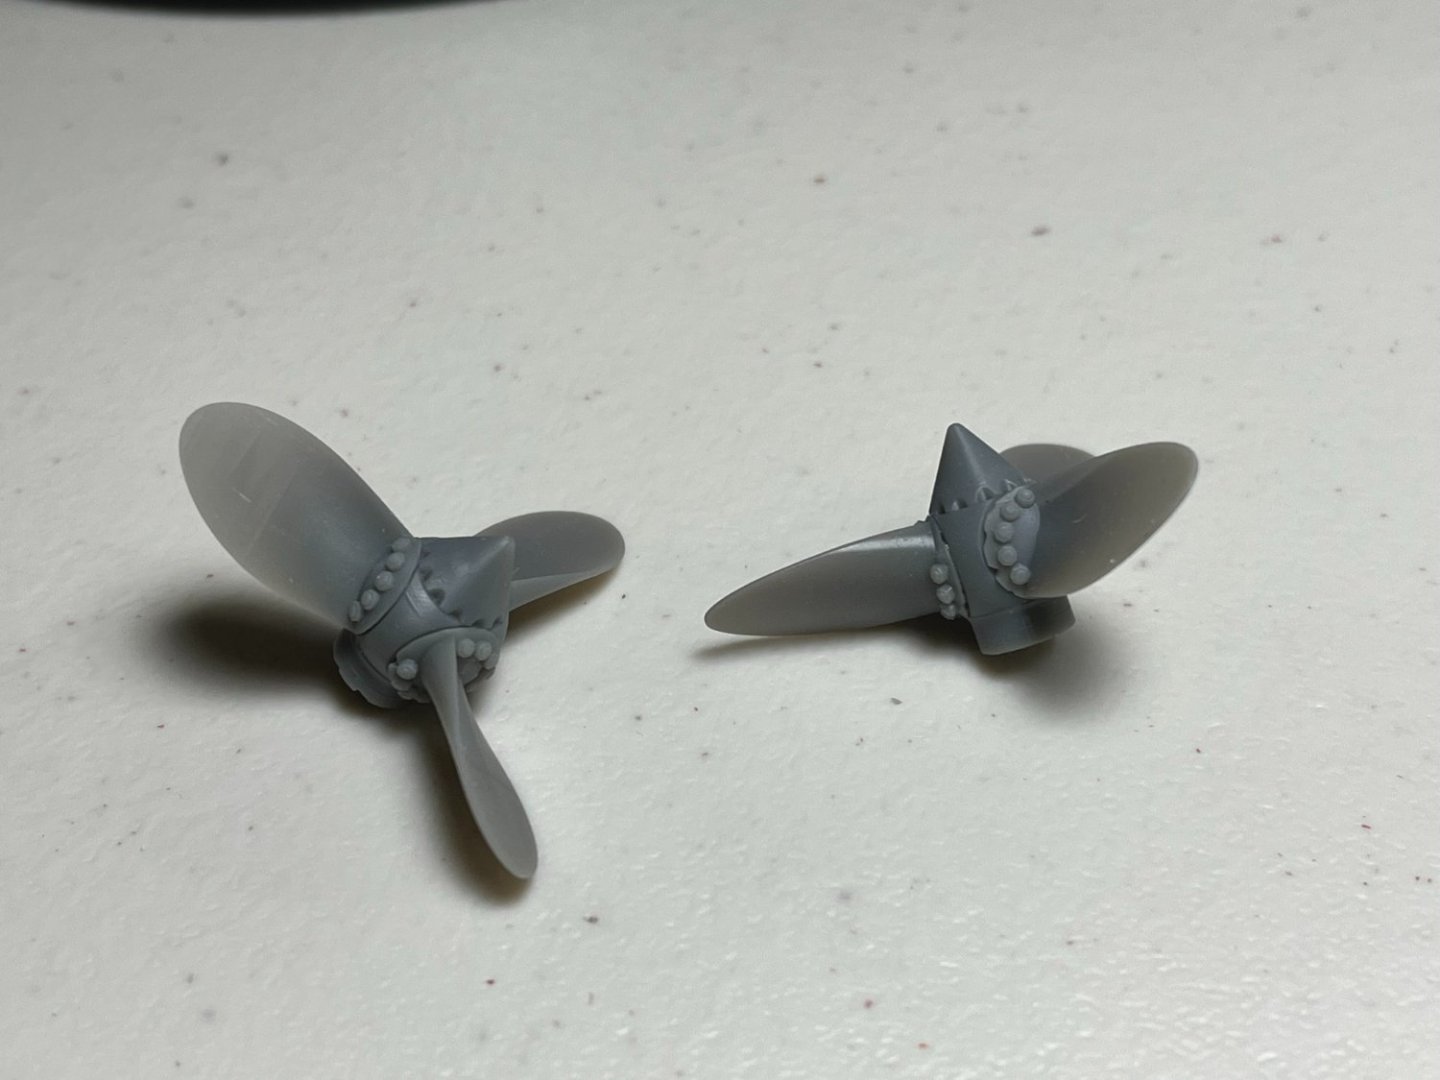
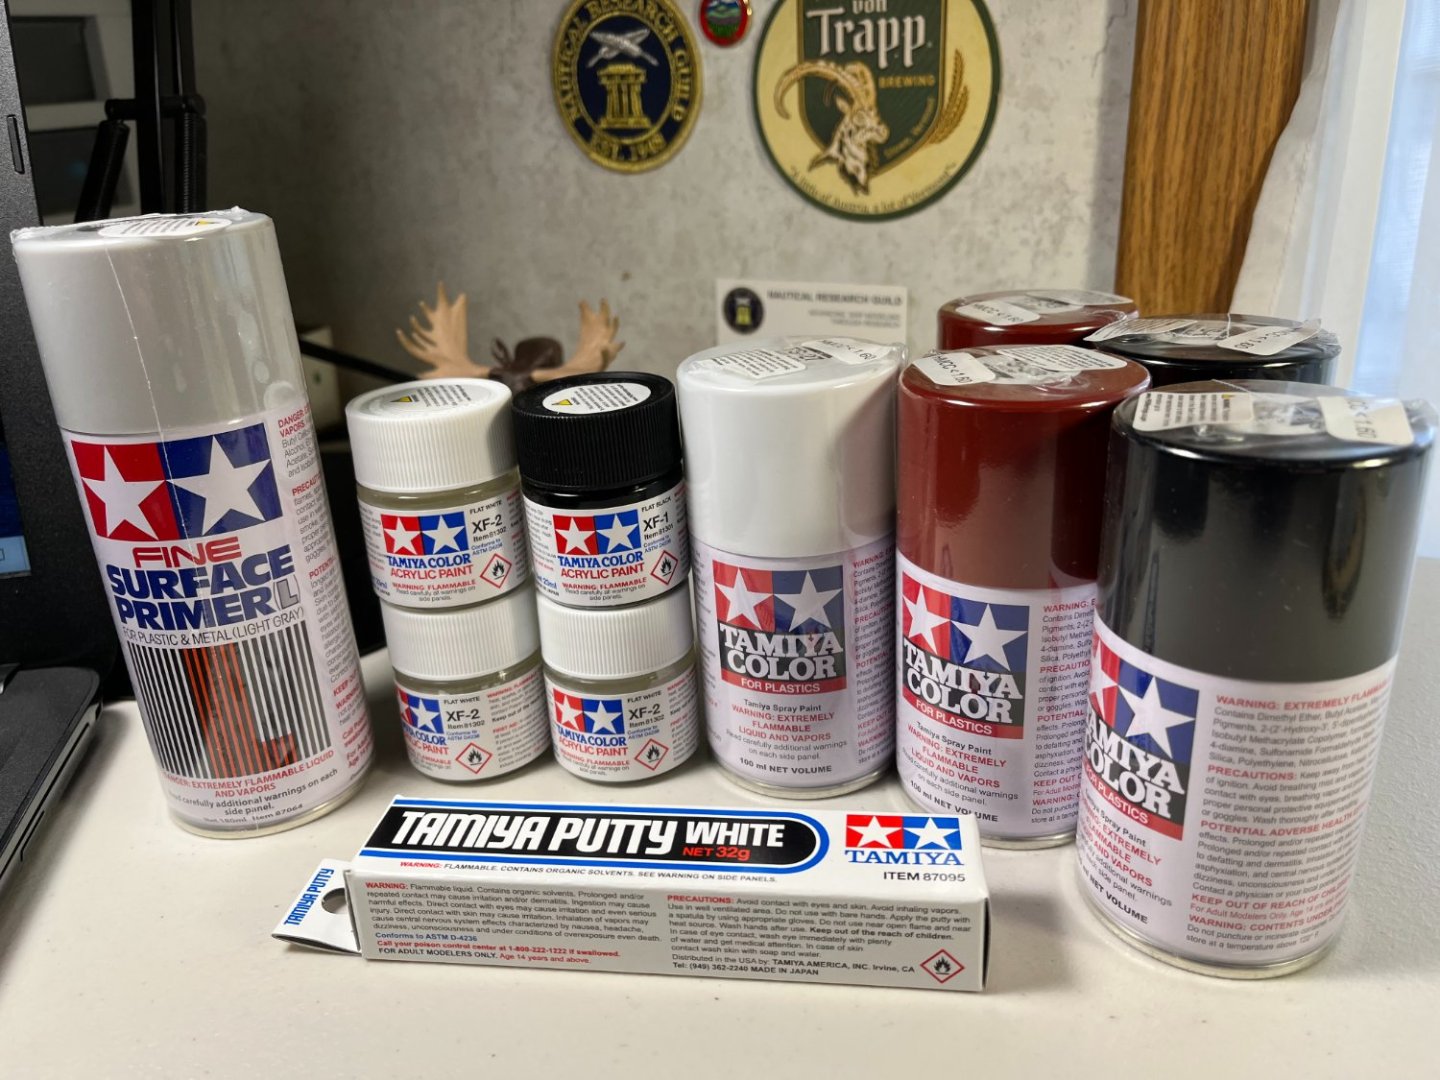
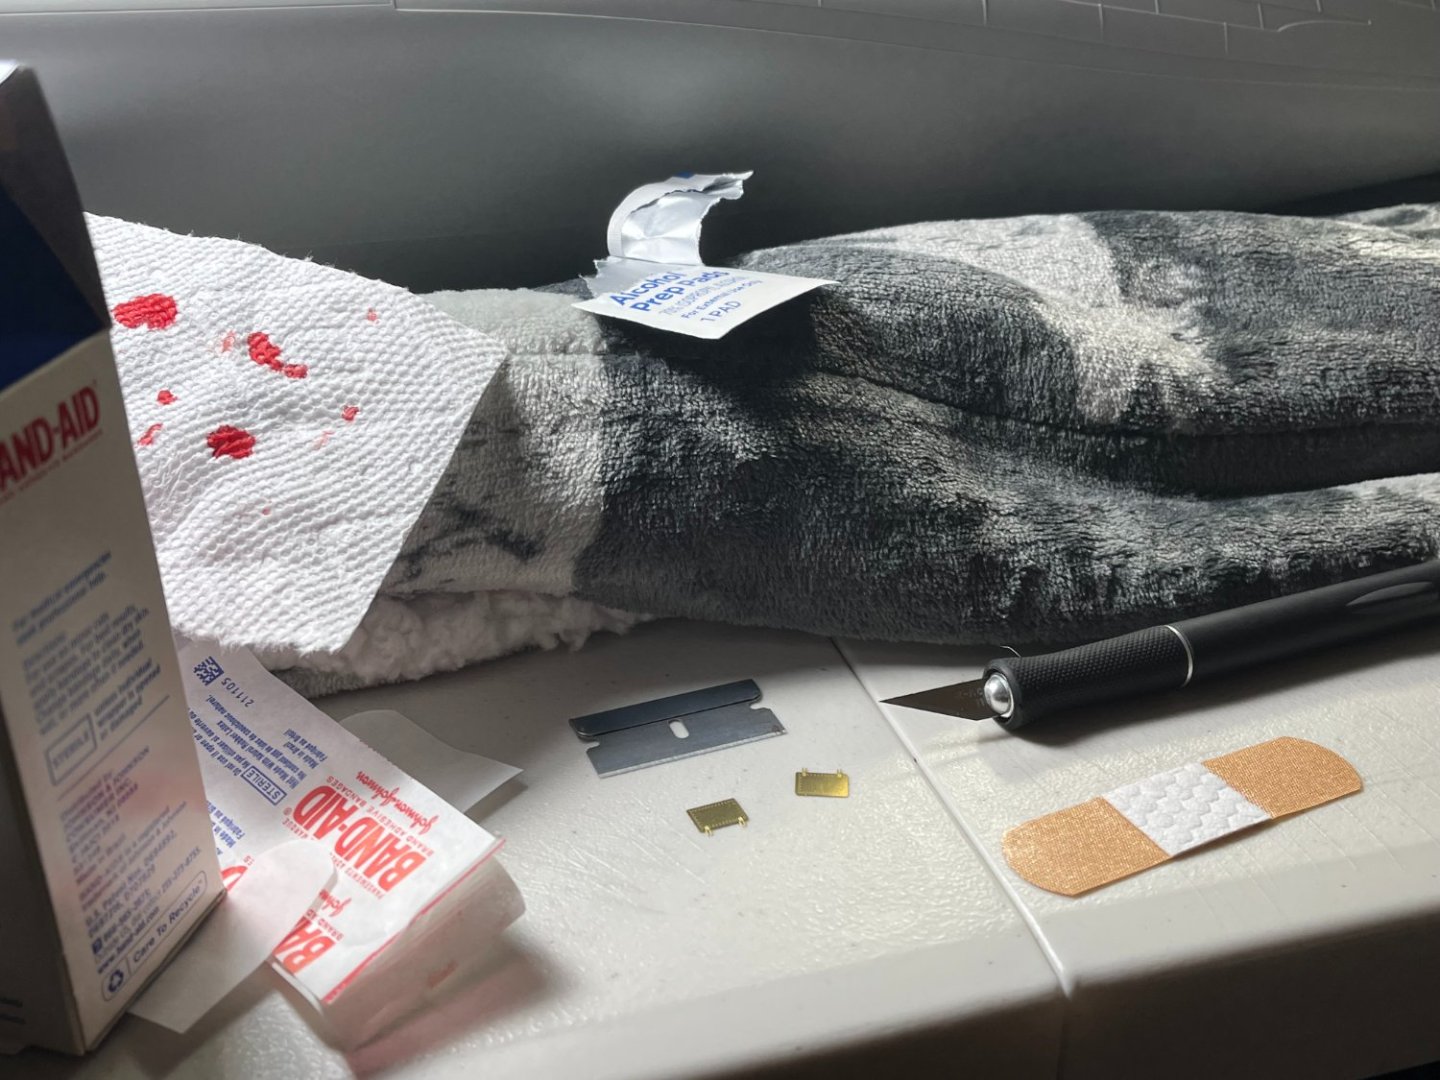
Evening, Hope everyone is well. The holidays were busy, but some building was done. Titanic needs an update! I made up the propellors. Below are the two side props from the MK1 upgrade. Quite the detail. These will look nice. According to the paint guide these are all a copper color. I will do the same. For the vast majority of the ship, I'll be using Tamiya rattle cans for the larger items such as the hull. The smaller/finer stuff will be thru the airbrush. I'm familiar with the Tamiya paints and feel comfortable working with them. I looked at other paints but went with what I know. I will work in some Mr. Color paints for the more unique colors. I feel equally as comfortable with their line of paints as well. From the MK1 upgrade, I've started attaching some flat PE pieces. Look like doors and hatches and the like. These run along both sides of the hull. Pretty straight forward stuff. Some gentle flattening/scraping of the hull and they set in nicely. It's official. This project has drawn blood. Now I have to finish it!!!!!!! Keep building! Tom E


-
Evening, Hope all is well. Safe and happy holidays for all was my Christmas wish. Sitting down after work, the movie Gladiator is on and I'm eating crab Rangoon. Time for a way overdue update! I can't believe it been almost 4 months since I last updated. The holidays are behind us, the dog days of winter are here. Should mean more quiet weekends in the shop. I was building though over the holidays. The Royal, Topgallant and Topsail yards are all set in place. The course yards are next. The truss and sling are preplaced, as much as possible, on the yard and mast before setting into its final placement. Couple of dirty words later, some CA glue and it "fell" into place. It may look messy, but it sorts out nicely when attached to the mast. Both Main and Fore masts and yards are done. It may look a bit wonky, but the masts aren't stepped in yet and they wobble a bit. When I do attach them, I may use some simple white glue to give them a little grip. But that's a few steps away. She's dripping with rope. All rope is from Syren. I had some older Syren rope to use up and have now started to incorporate some of the newer Ultra rope. Beautiful stuff. Wish I could have used it from the beginning, but I had some older stock that I wanted to use first. Waste not, want not. Be good, Tom E


-
Bob, I'm humbled, and honored, that I can play a small part in your build. You are not wrong about the plans and directions!!!! But.....If I can do it, you can do it! Tom E
-
Wonderful progress! Looking back, I wish I did my rudder with the Oak stain. Really pops out and grabs the eyes. Tom E
-
Good afternoon, I appreciate all the likes and look in's, thank you! Taking a break from the Saturday afternoon chores, Red Sox are playing the Yankees on TV, will Aaron Judge hit #61?........ Back in the day, Pedro Martinez would have just drilled him in his backside....old school. Fresh cup of coffee in hand, Niagara could use an update. On to the Fore and Main Course yards. They look naked compared to the other yards without its blocks yet. As I've done with all the yards, I start with a small pin in the back and a corresponding hole in the mast. Helps with grip/stability...maybe.......in my head kinda stuff.....my goblins. All ropes and blocks are fitted after I've established that contact point. All essential blocks are stropped. Think I've become a master in the art of CA glue. Not perfect by no means but serves its purpose. These do get a light brushing of black paint once attached to the yard to try and hide any glue shine. Don't get me wrong, not using gobs of the stuff. Just feels like I'm cheating, hide my shame. Easy enough, following the plans as towards placement. All blocks and rope are from Syren. Below are my attempts at making a cluster block. I wrestled with these. I really focused on keeping these lined up with each other. Keep them straight with each other and the yard itself. It took a "one step at a time" approach and took most of a weekend to make the eight sets needed. These get brush with black paint as well once attached. Looking ahead. Once the course yards are done, I'm looking at stepping the masts. Never thought I'd say that!!!!!! But before that, I want to look over the super structure one more time. There are a few things I want to get done before I start attaching ropes. Anchors, davits...the like. We're getting there. Be good Tom E

-
Evening, Dinner is done, Red Sox are playing the Yankees on TV. Figured Niagara could use an update. Some building was done over the summer. Moving on to the Topsail yards. Just following the plans as for block placement. Constantly checking for alignment with the mast. The glue shine below is strategically on the back side of the mast and painted over as well. Hides it well. She's dripping with ropes, yet only halfway thru rigging in the yards. Below was a tricky area. I hacked it together. It's ok. As in Algebra, as you do to one side, do to the other. I'm following the plans as towards which side of the yard points outward. Starting to get a feeling my foot ropes are on the wrong sides. Hmmmmmmm...........I have to look into this. The Main course yards are next and are already being fixed with blocks. Be good Tom E


-
You're a better man than me Roger. My mind went right to........"the #1 and #2 have to go somewhere". There located near the bottom of the hull rear of the stabilizer fins port and starboard. I doubt there were any types of "environmental" concerns back then and into the ocean it went. Tom E
-
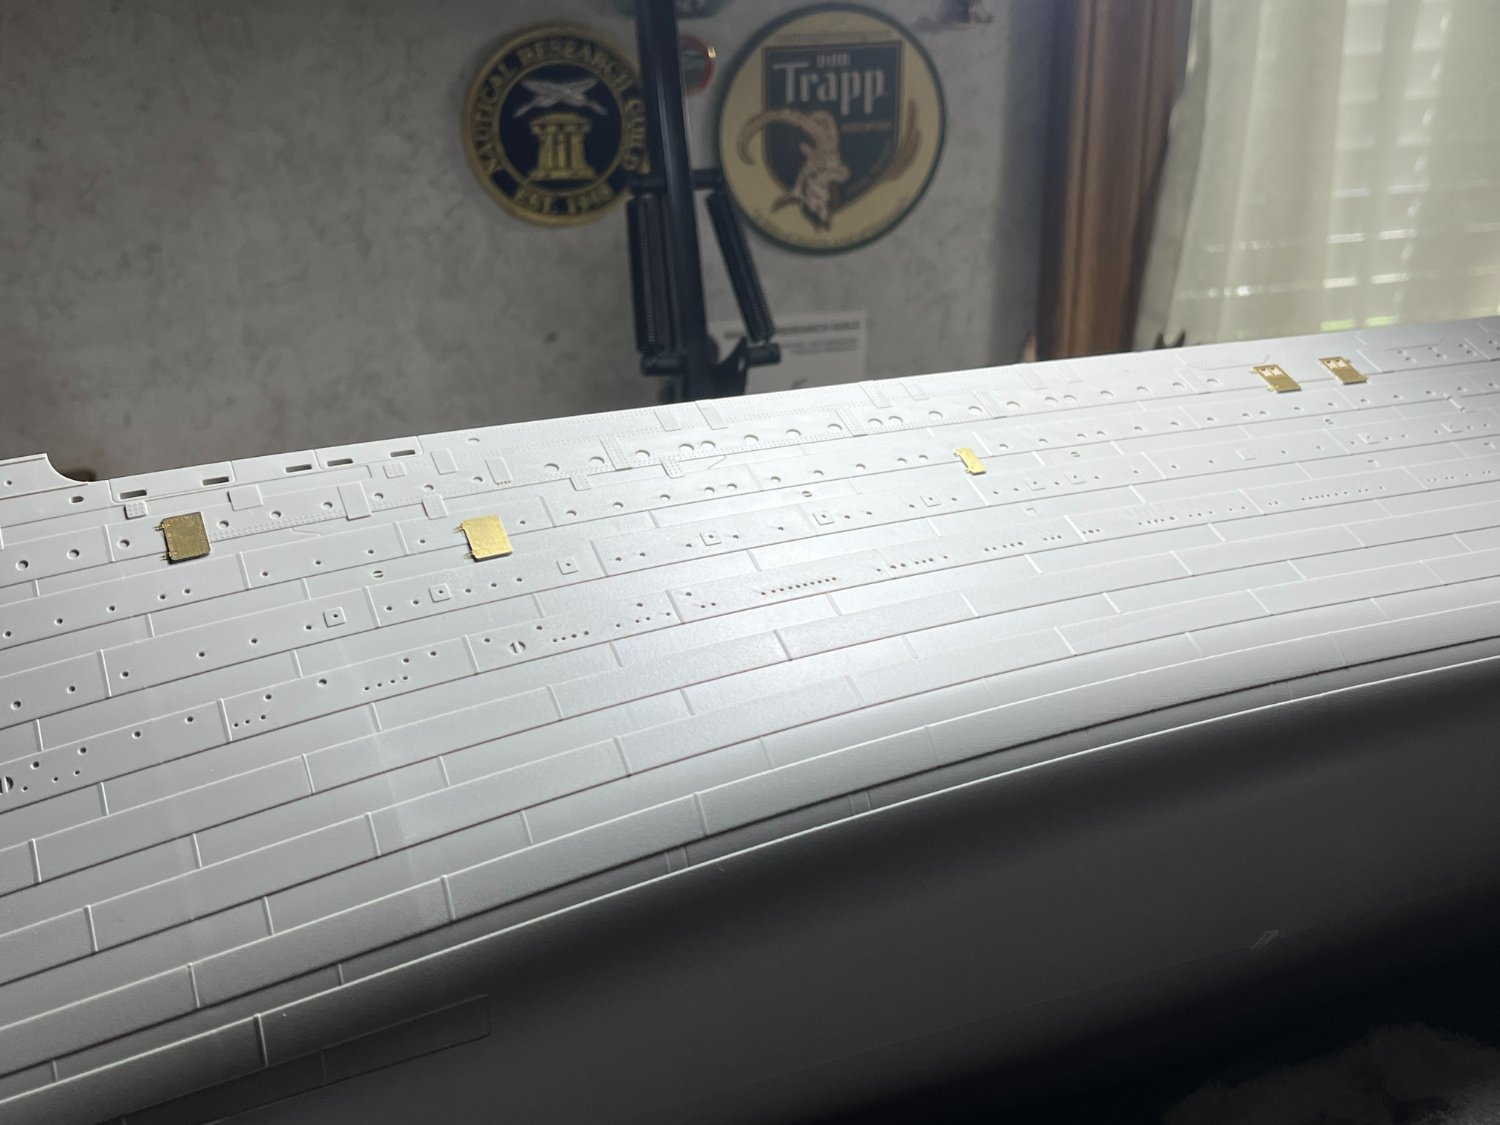
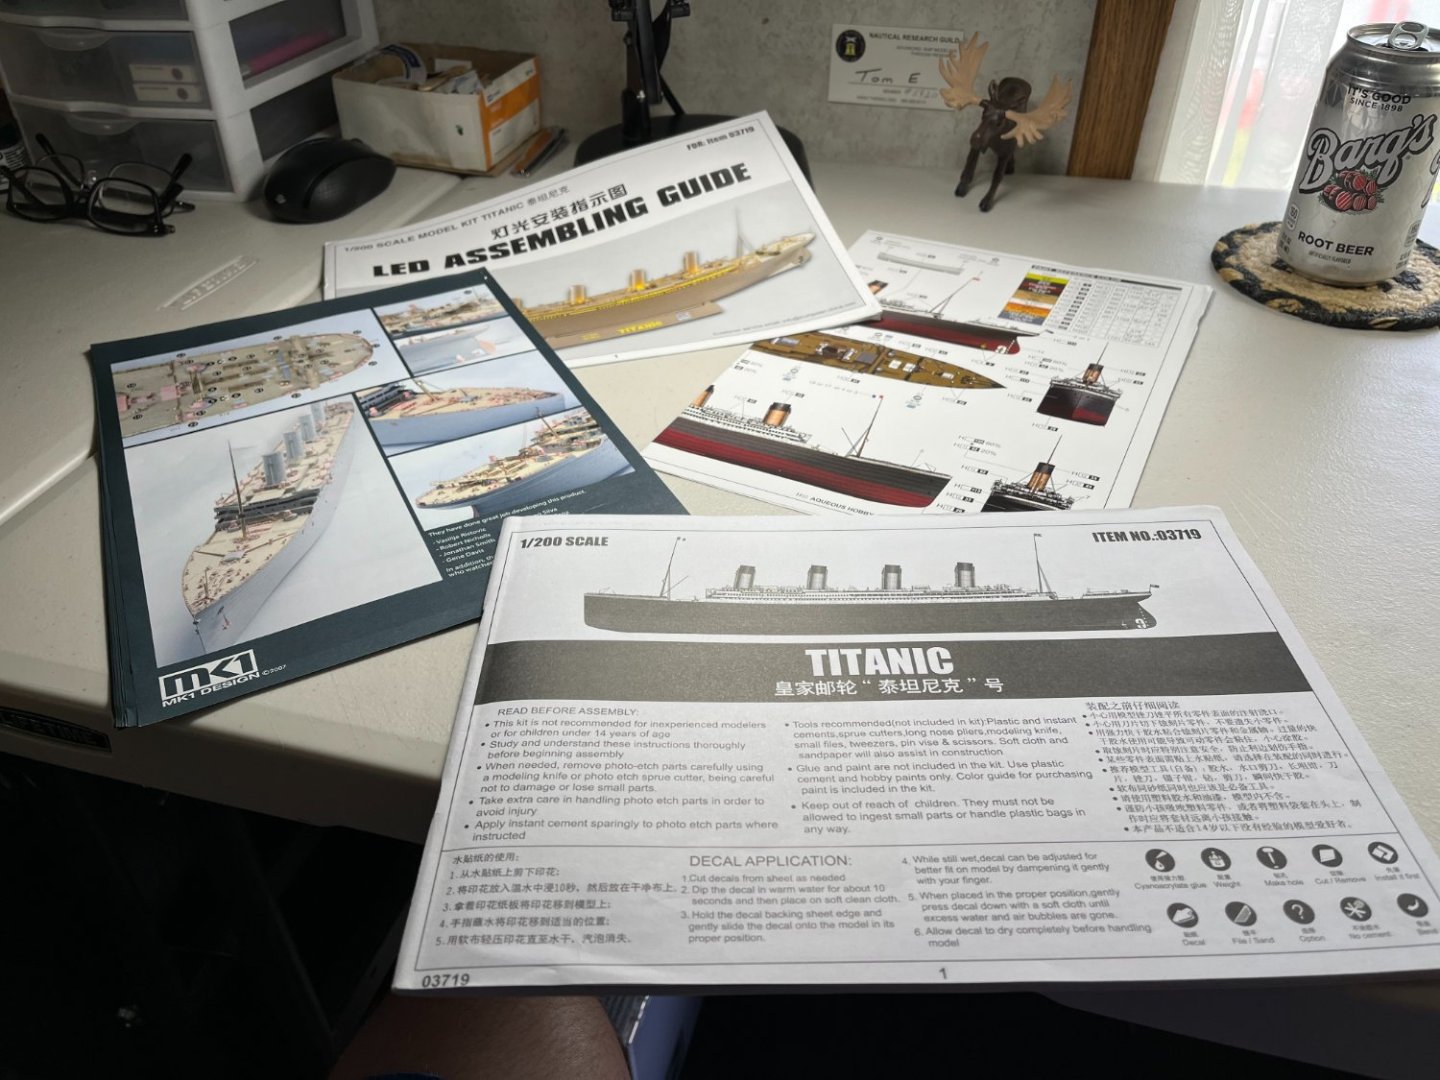
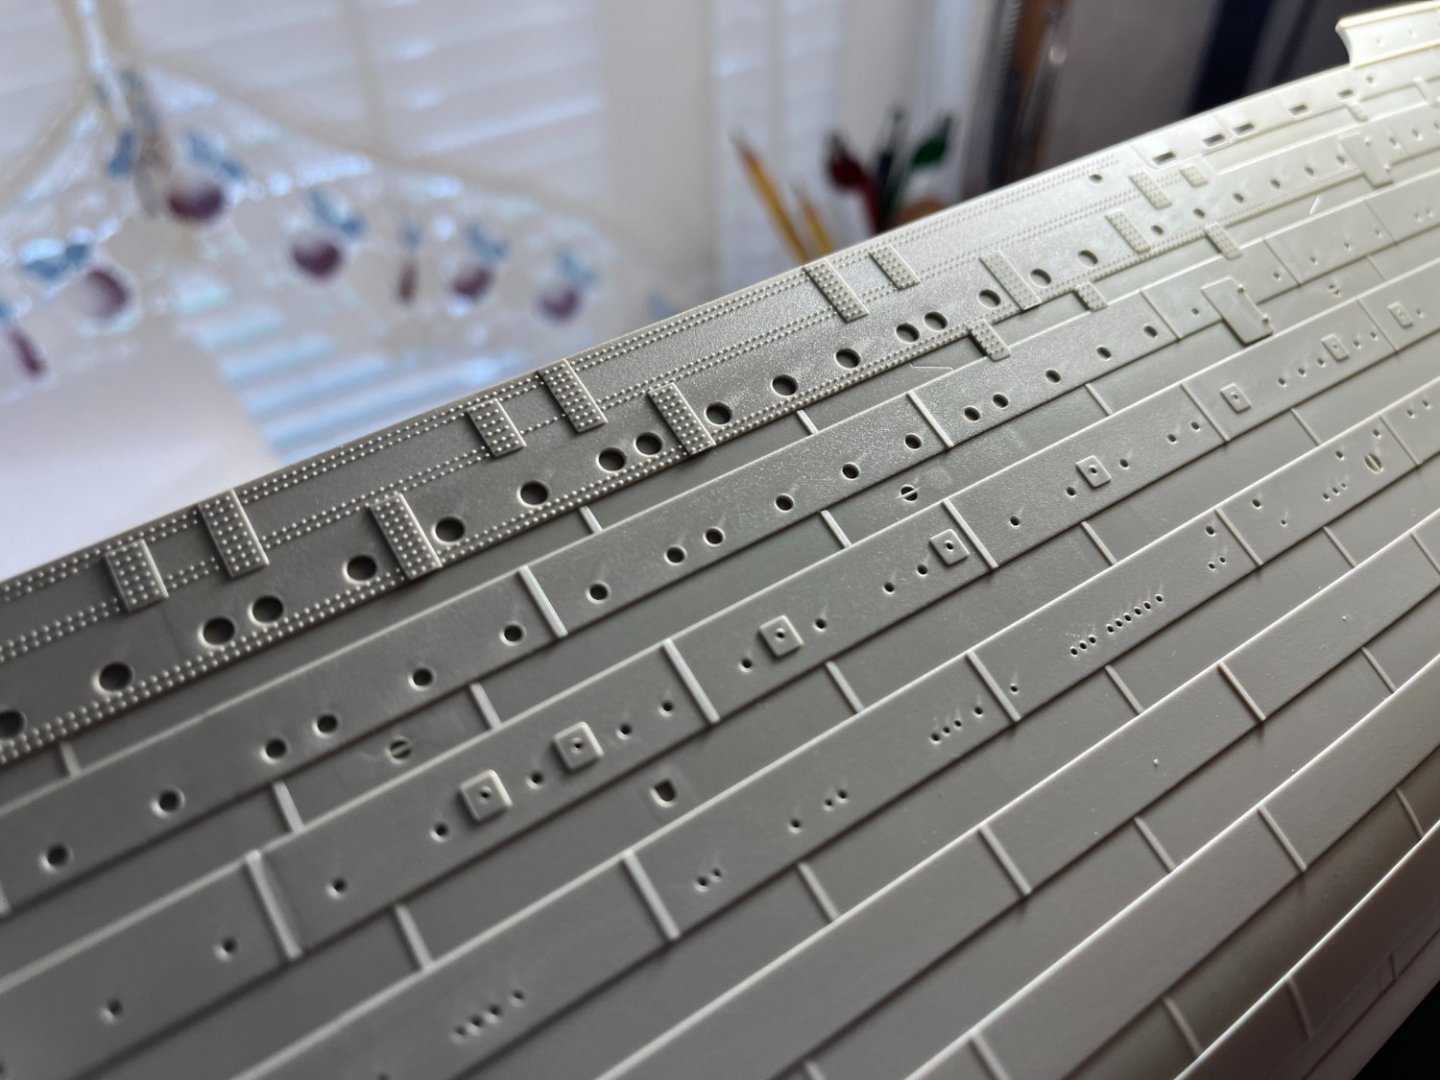
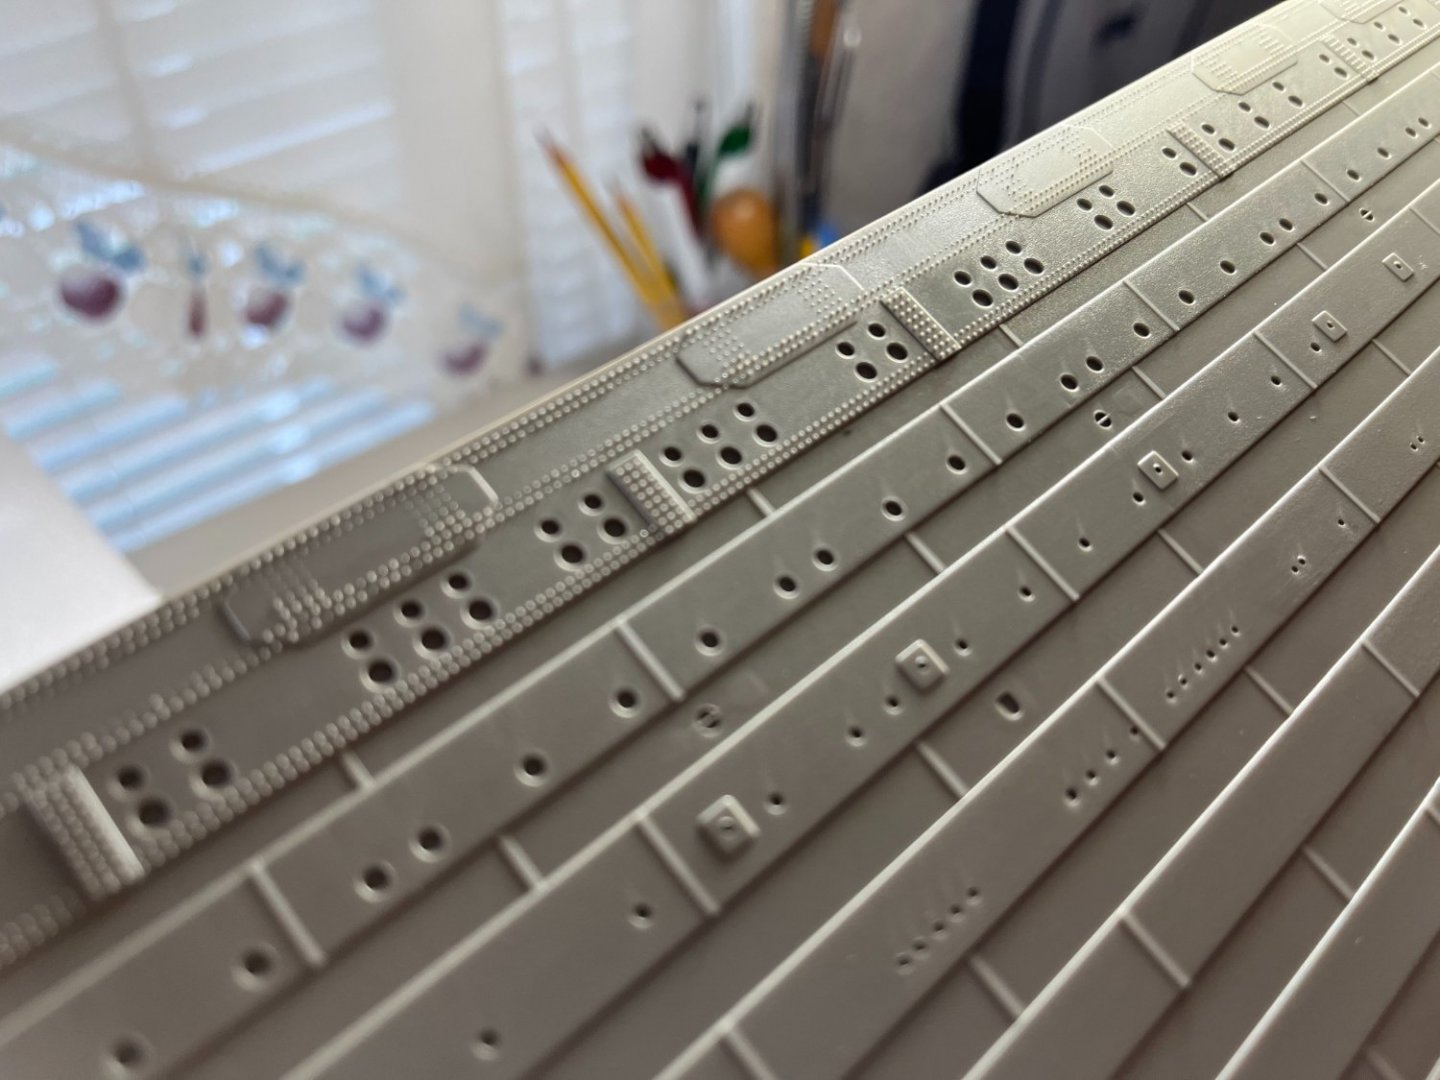
Evening, I do believe Titanic needs an update. As promised on one of my original posts, this will be a bit of a sporadic build while I finish my Niagara. But some building has been done none the less!!! The instructions are extensive and should serve their purpose well. But the "instructions" for the upgrade set seem more like suggestions. With some study, I think I've found my path thru this build. I'm going to skip to section 4 of the instructions as a start and prep the hull. I started with the propeller hubs. I'll be using the propellers from the upgrade set. Test fitting these on the hull and they fit quite well. Looking towards the rudder, I've noticed some problems with the upgrade rudder. It doesn't fit quite well on the ship, seems to short. The "neck" of the rudder leading into the bottom of the ship doesn't quite reach. The kit supplied rudder fits well and will stick with that for now but that could change. I've also started fitting PE pieces to the hull. Below is kit supplied PE, there are a few other pieces from the upgrade set that I'm working on now. Mostly doors and hatches. No portholes. Be good Tom E
-
Hi Steve, There's no rush on these models in my eyes. Take your time. I've been working on my Niagara for just short of 5 years. But I'm generally a slow builder anyways. If I was retired, sure I would have more time and probably work quicker. Slow and steady will produce a fine ship. I really liked your idea with the card stock for the metal piece on the front of the carronade sleds. Wish I knew that trick! I only painted mine on. As towards the "authenticity" of Niagara, that's a loaded question. Some builders are all about hardcore historical authenticity; I just want to produce a good looking model. I know for a fact that my version of Niagara is not all the way "historically" correct. Doubt I could even do that, I'm not that good of a builder! I look forward to your updates. Tom E
-
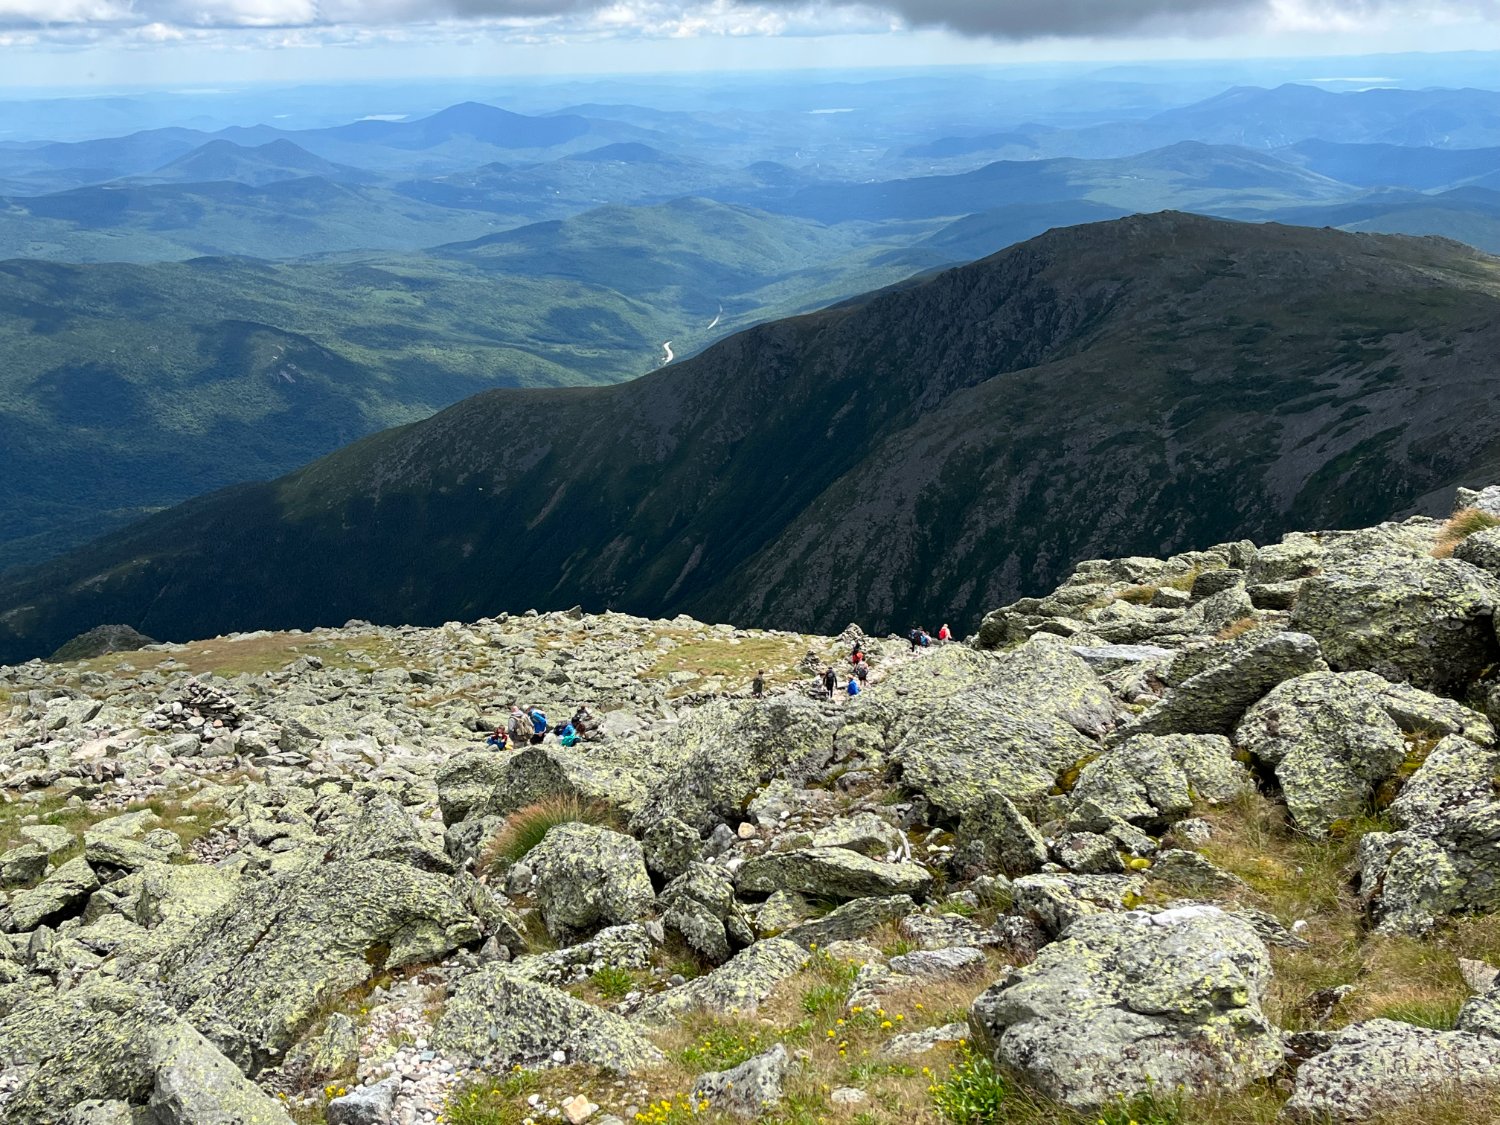
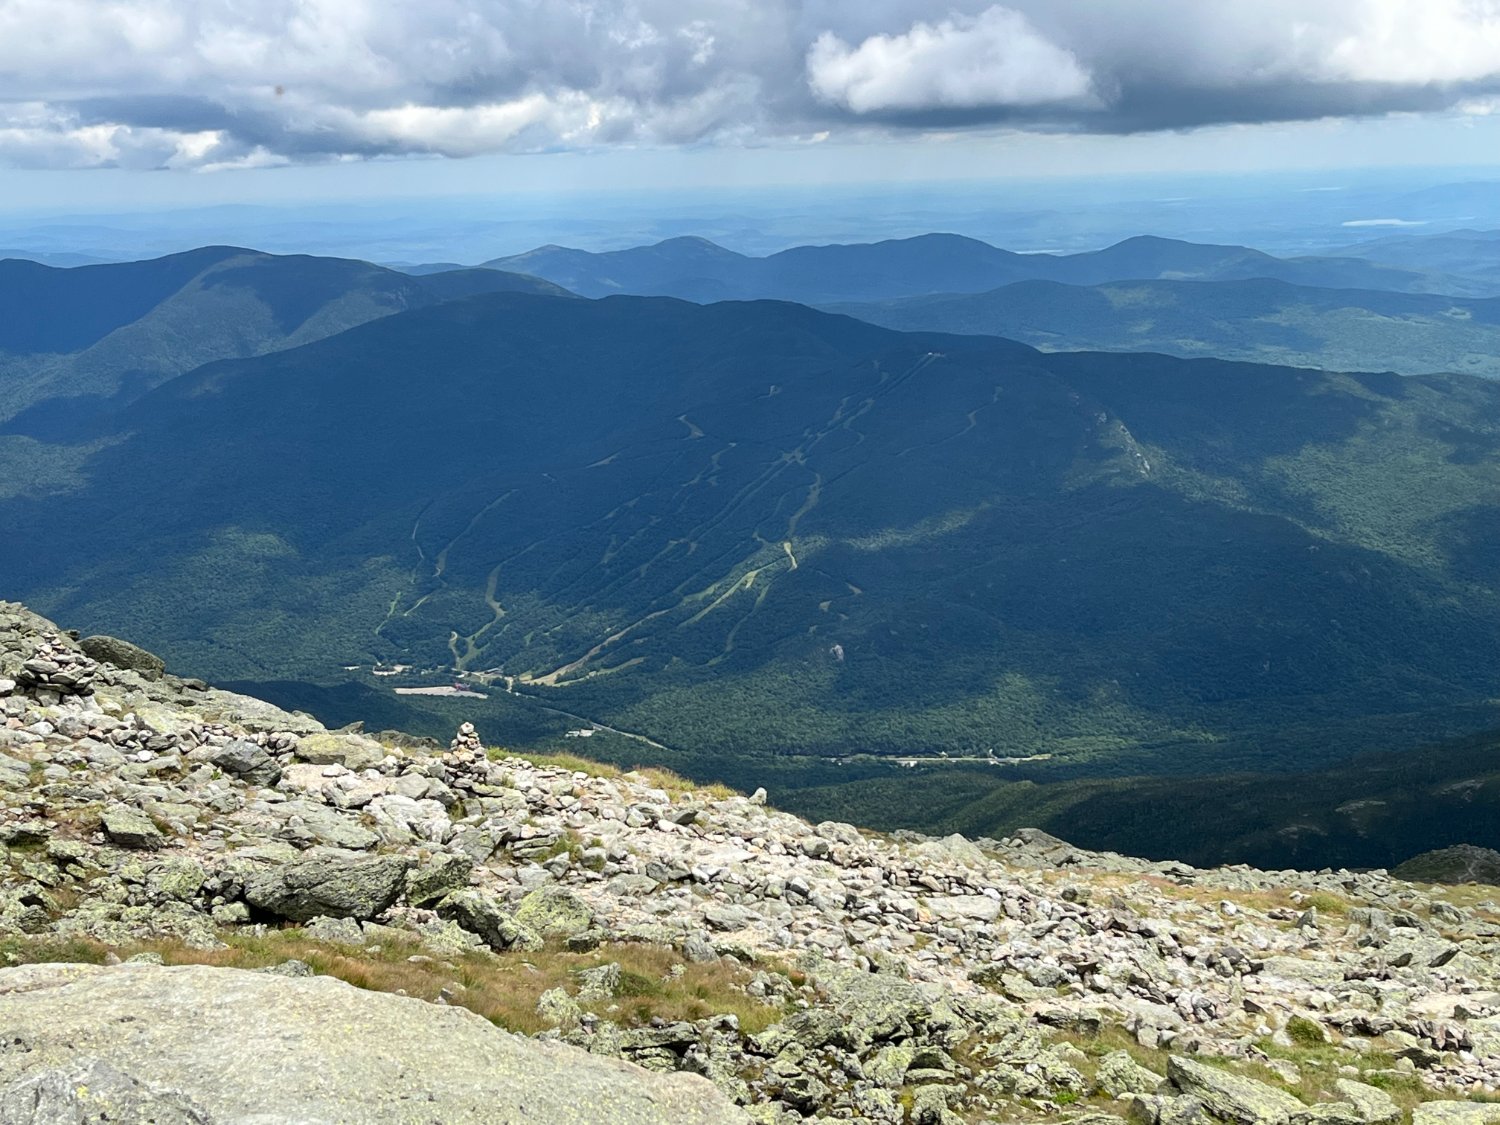
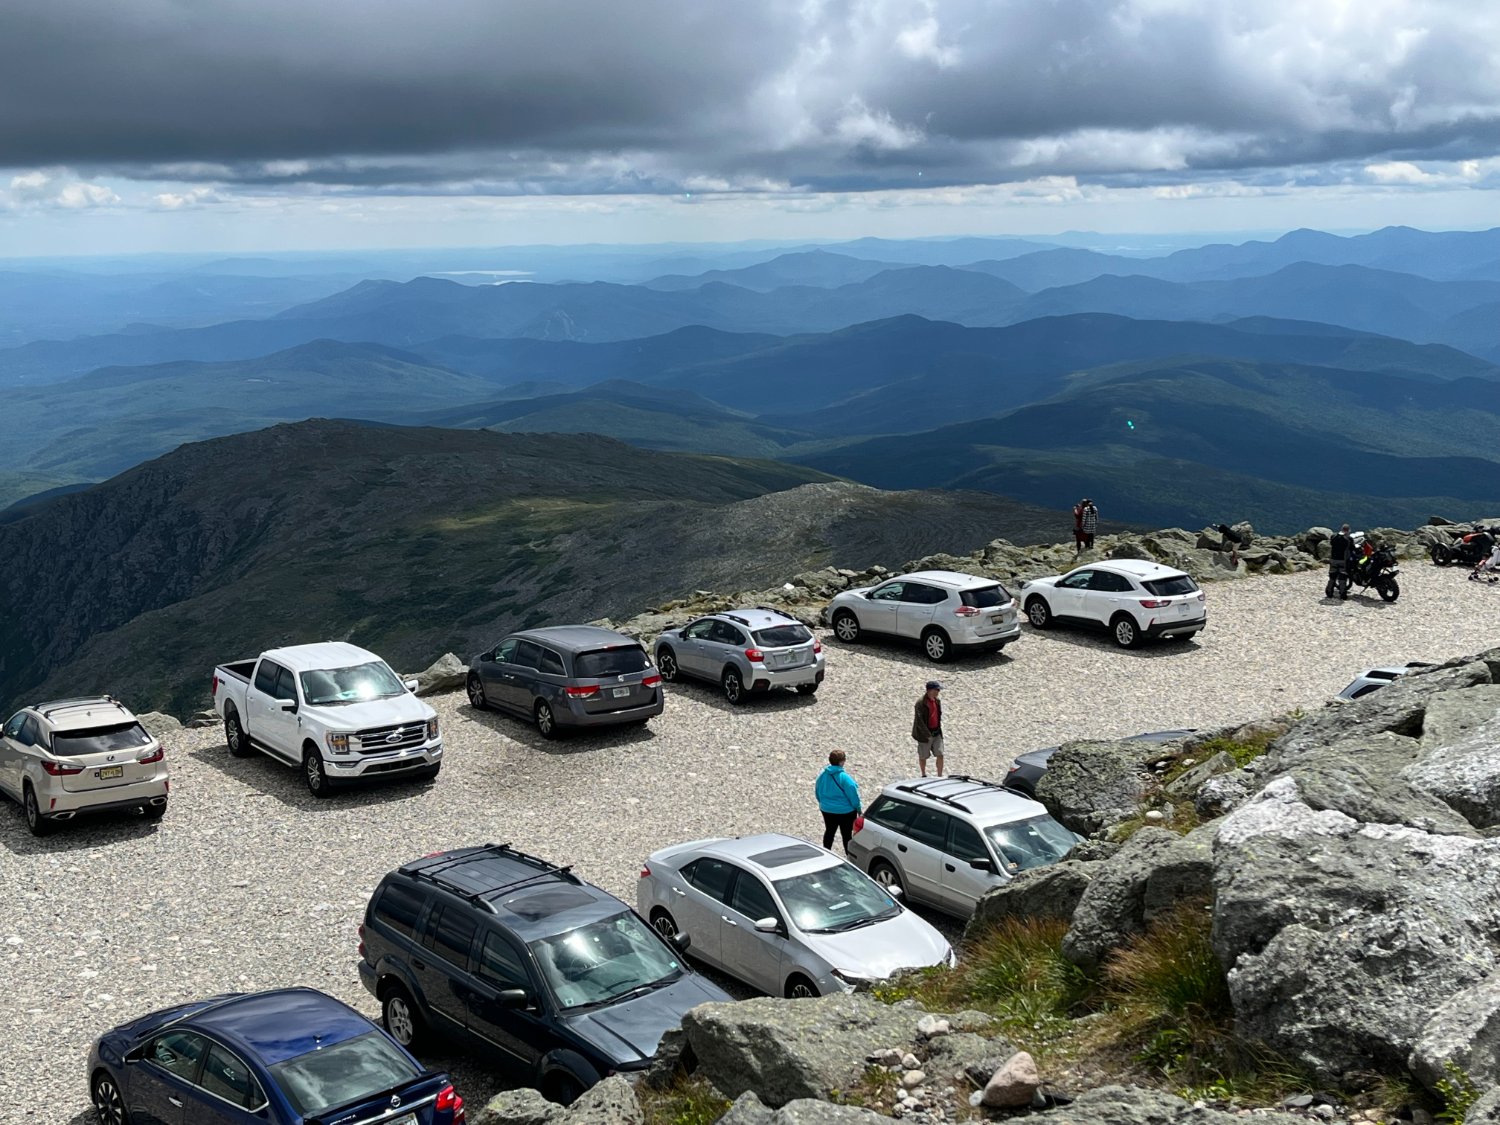
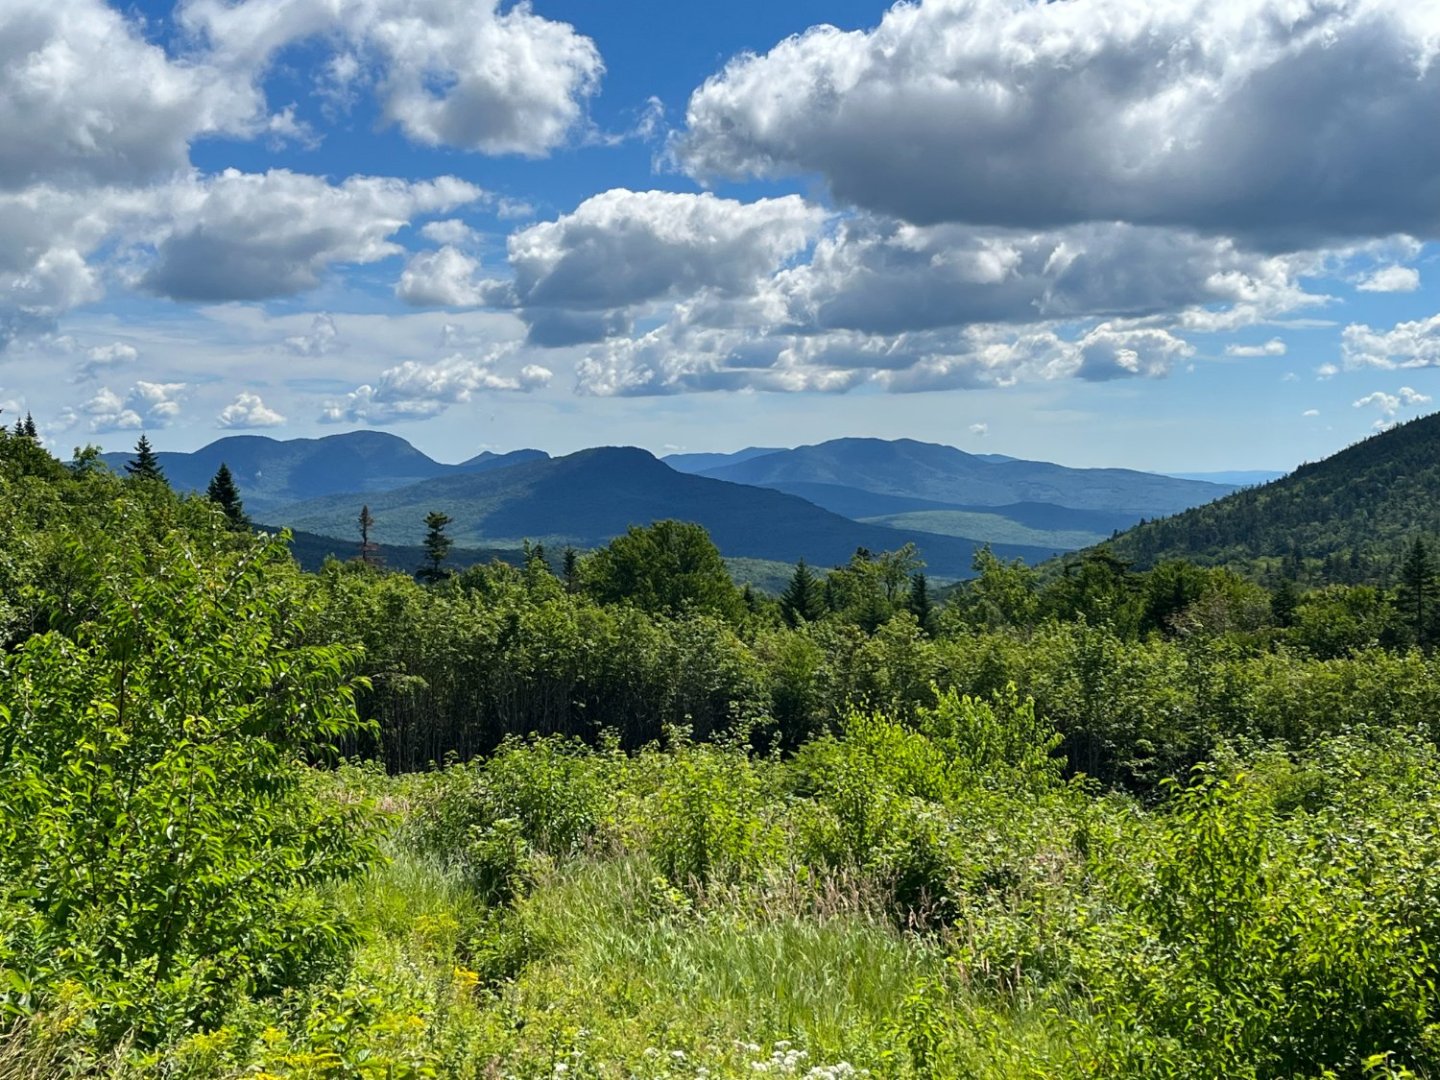
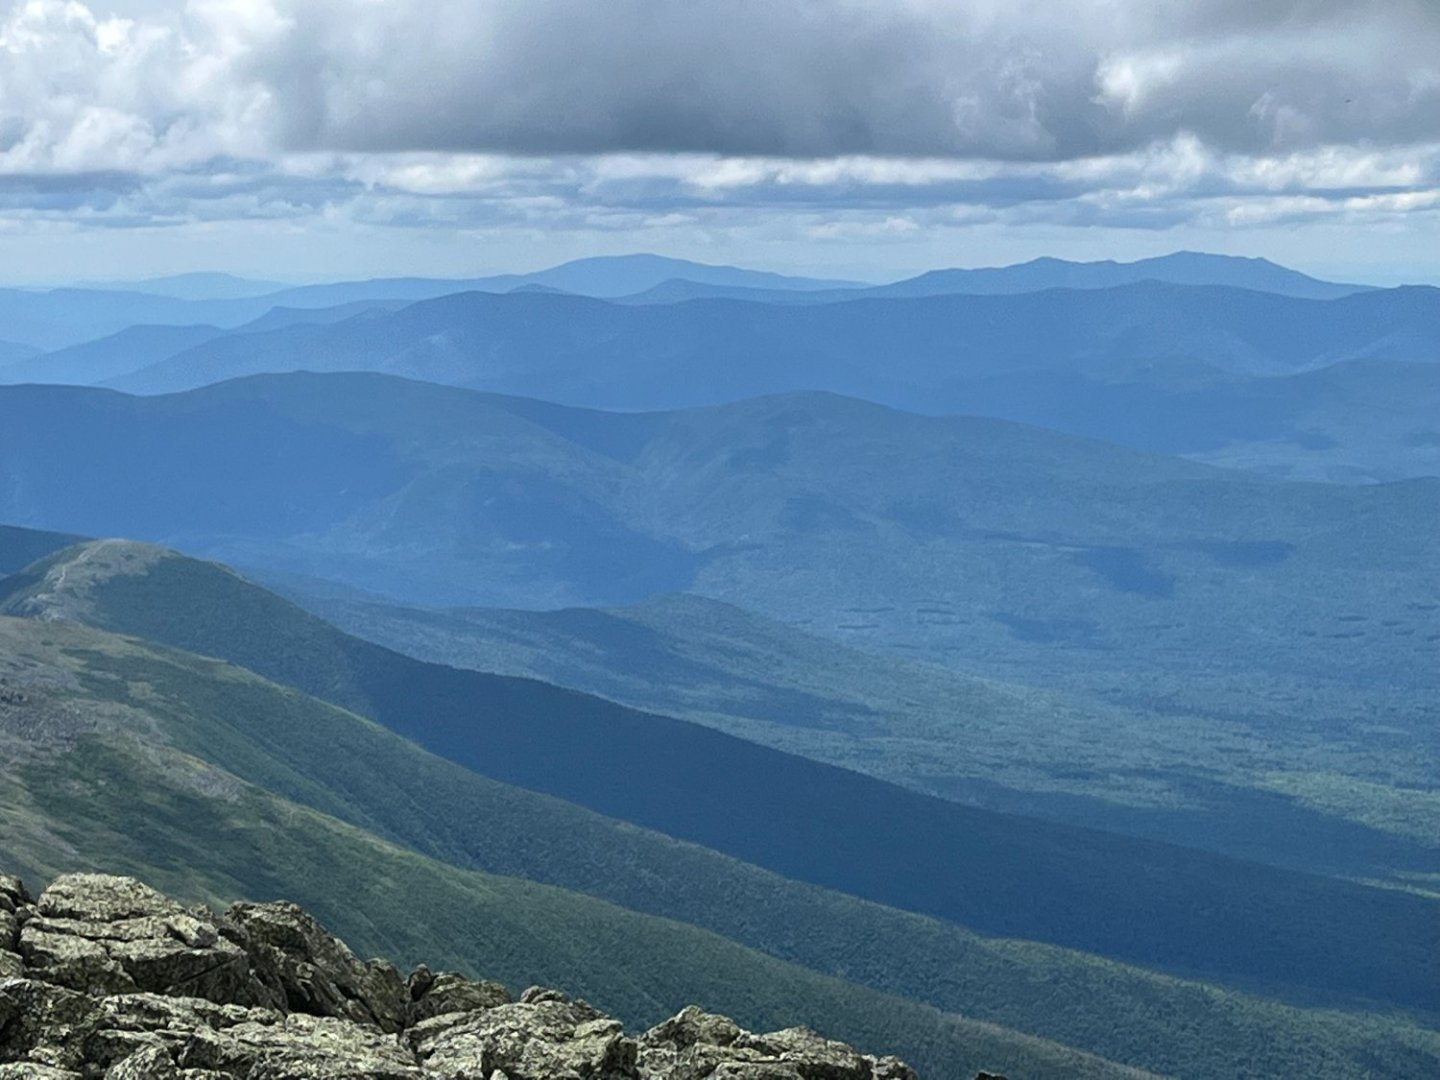
Wow!!!! I can't believe it's been since June that I updated my build. Wow! Shame on me! I have been building but limited during the summer. Too much summertime fun to be had! One trip was to the top of Mt Washington in New Hampshire. Sad to say, as a true Northeast boy, I had never been to the top. We remedied that. Wonderful day, awesome views. Below is what's called Tuckermans Ravine. People ski down this thing in the winter!!!! No lift service, so they have to hike up, then ski down. Extreme skiing. Below is Wildcat Mt. I've skied there before. The views in winter are incredible! Even the parking lot has great views!!! Thats my little Subaru in the center pointing out. With the cool fall winds, football on TV, Red Sox out of the playoffs.... It's my favorite time to build! Should have an update on Niagara soon. Tom E


-
Evening, Sitting down to dinner, thought Niagara could use a small update. I ended up just setting in the blocks for the Topgallant halliard. In my mind, anything that sets up that close to the mast would be a beast to rig later down the road. It's a static line. Once set, it's done. I've left it loose for now. The Main mast is done as well. I've also started prepping the Topsail yards with blocks. Wash your hands! Tom E

-
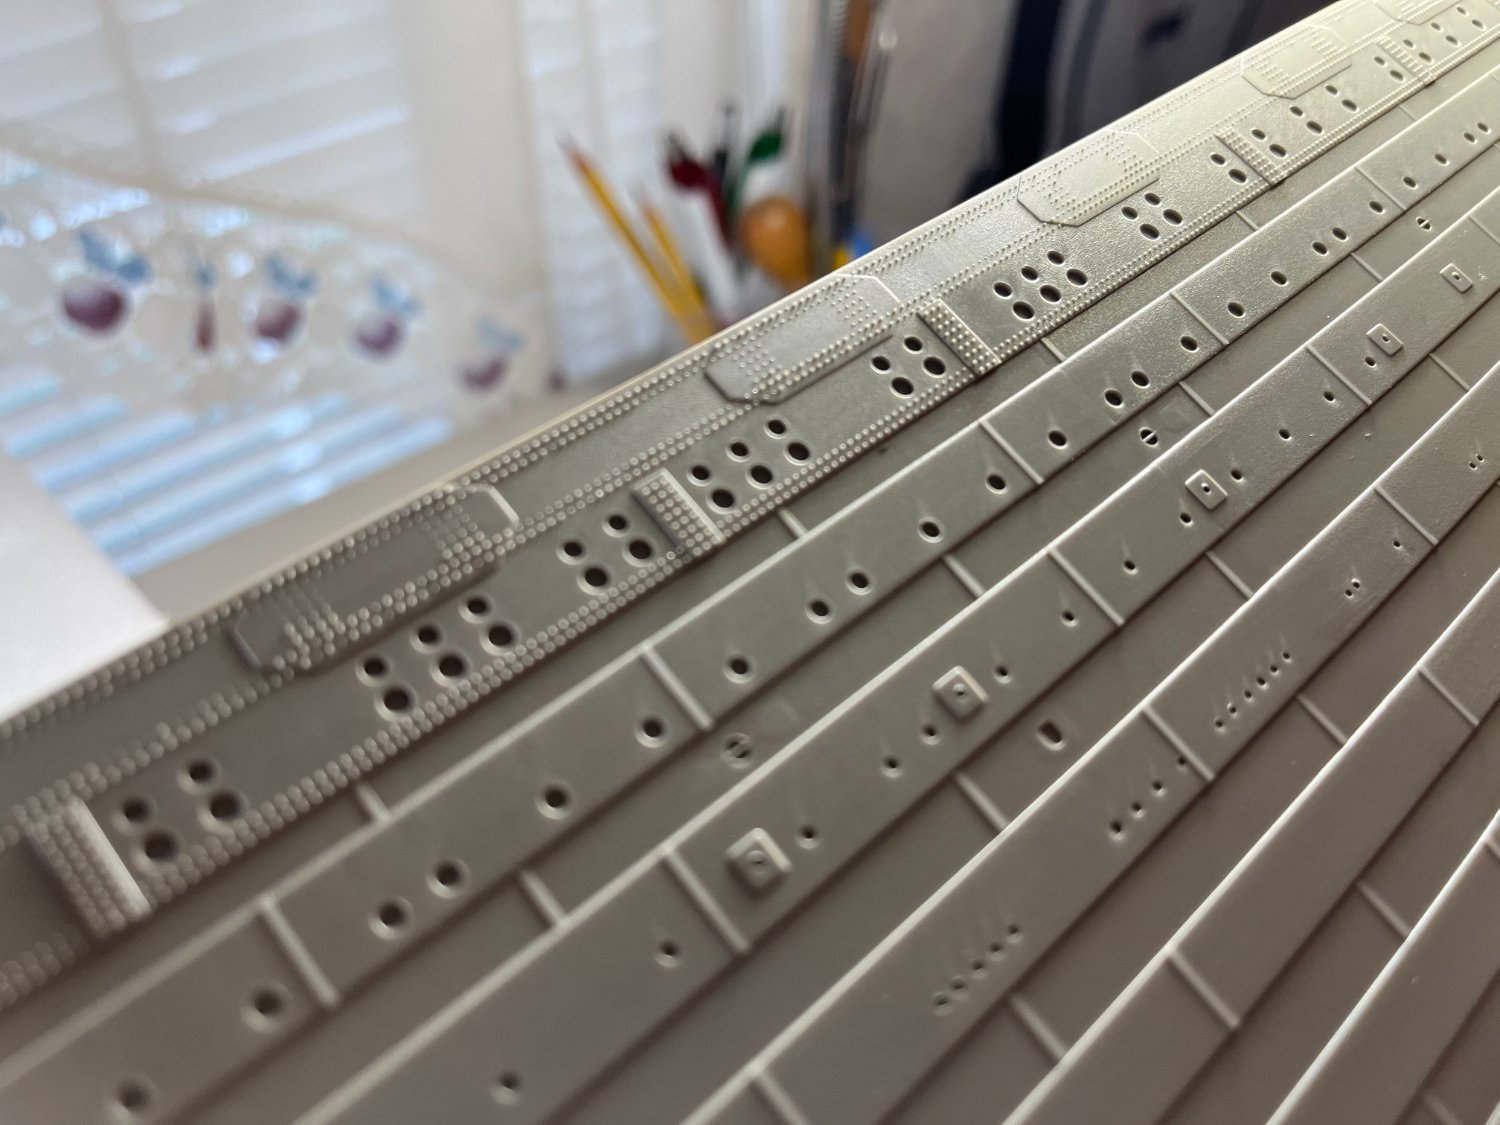
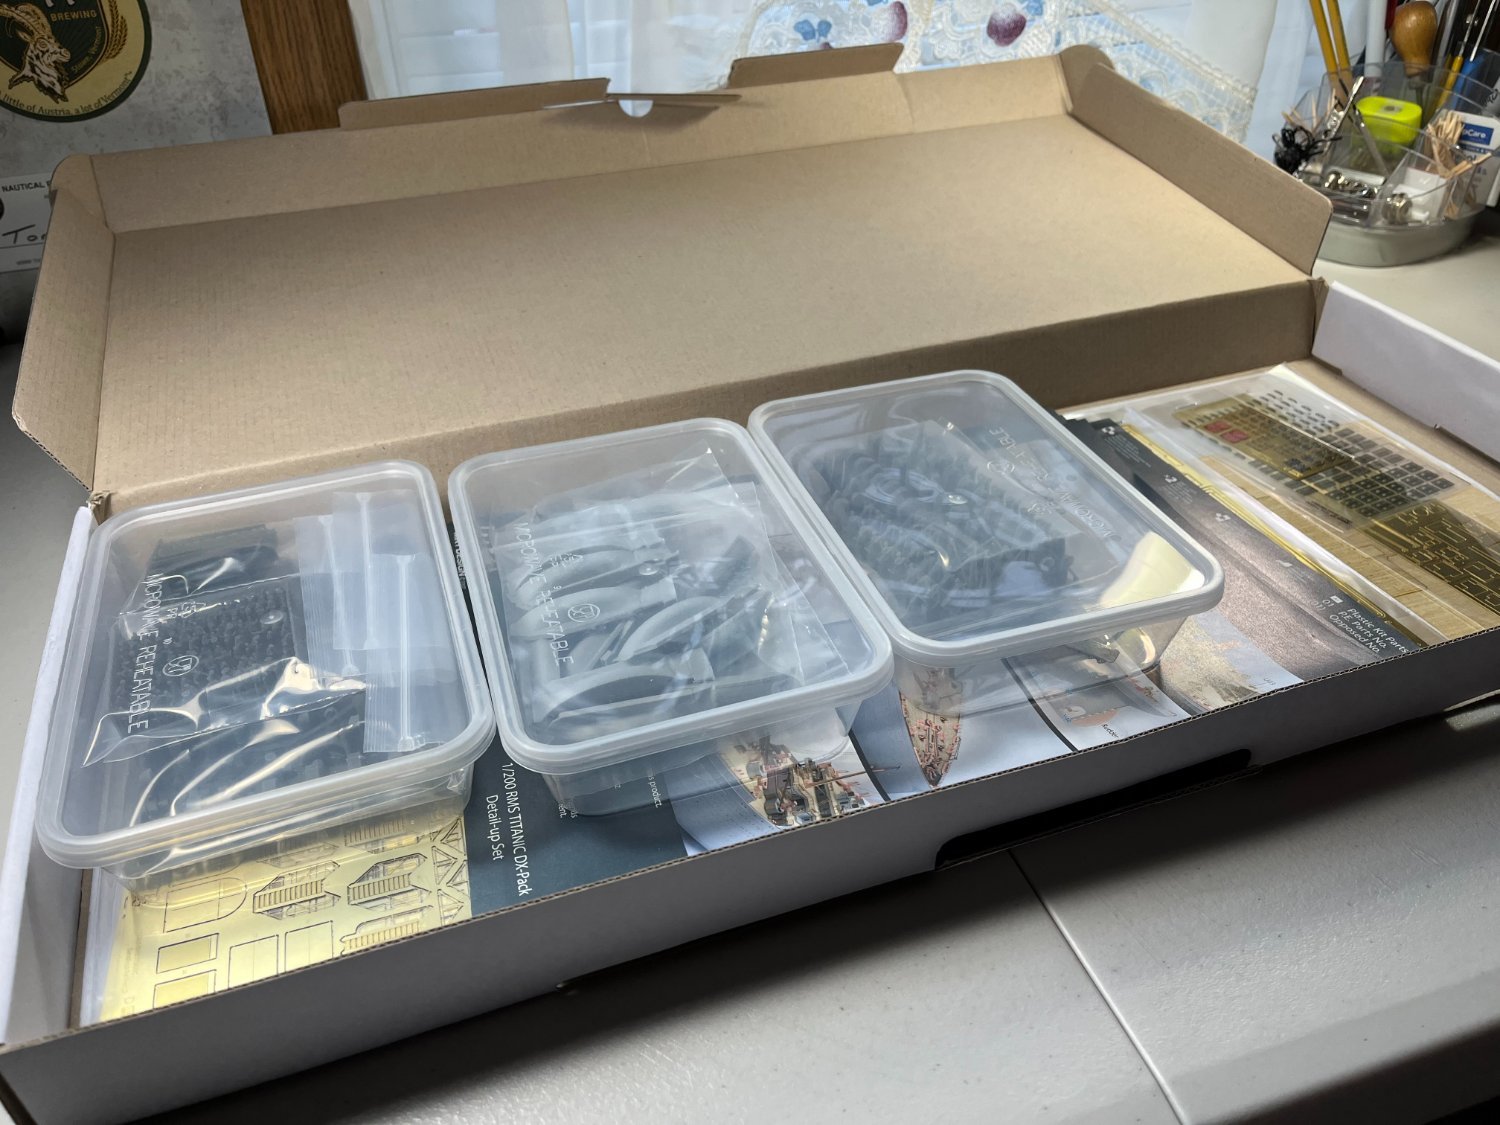
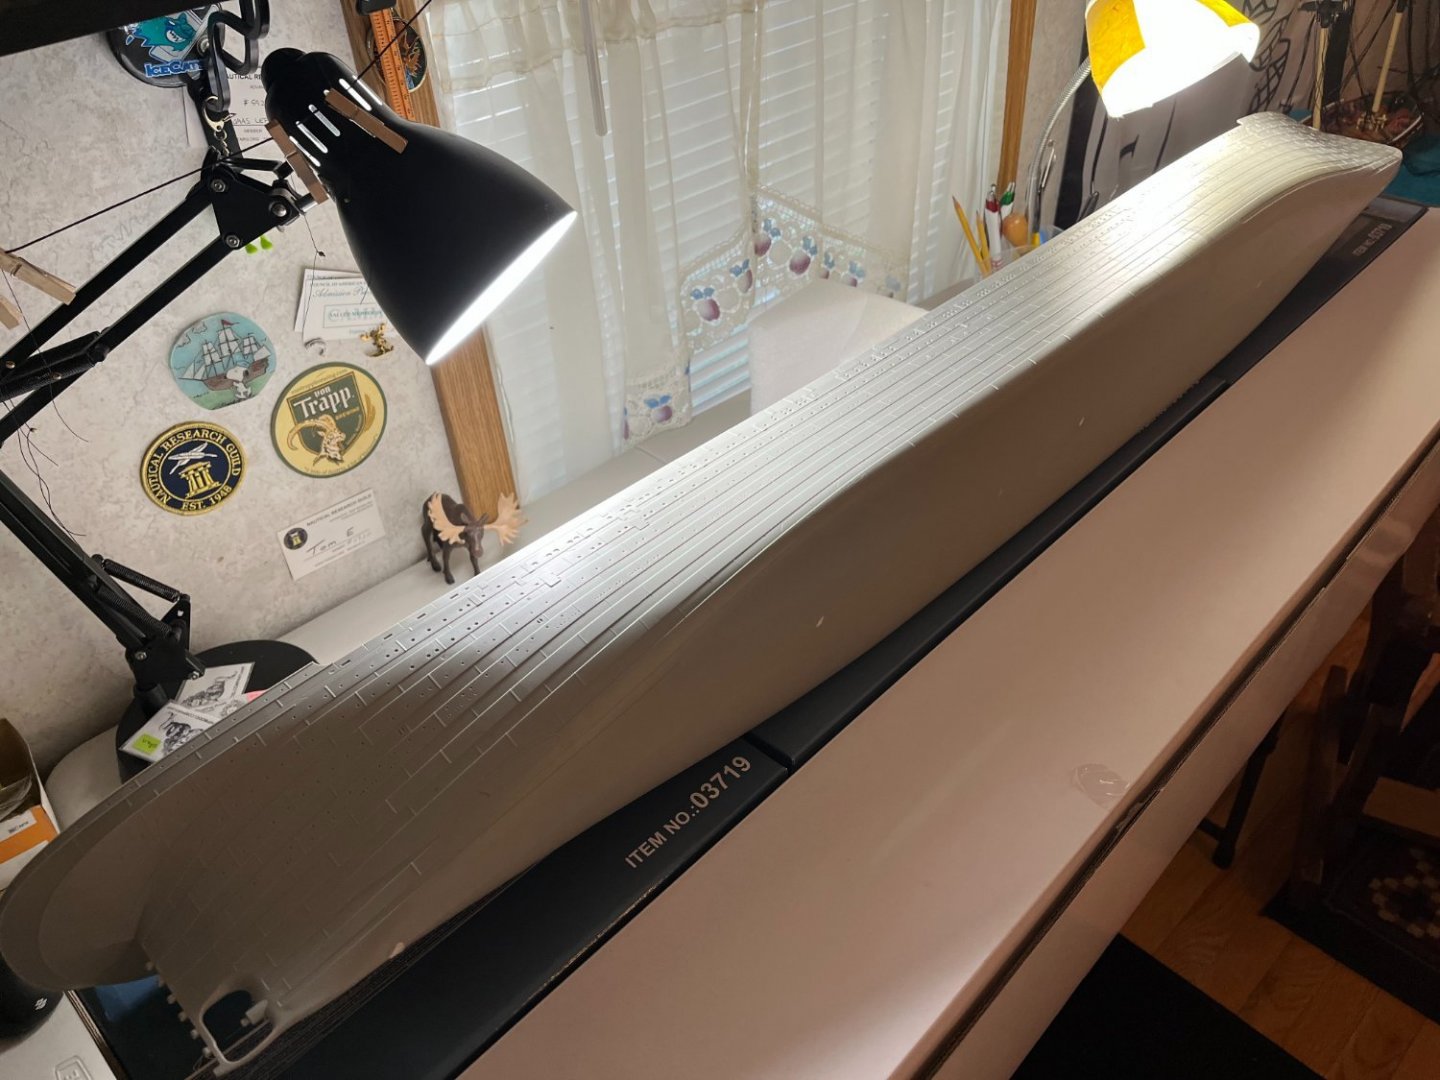
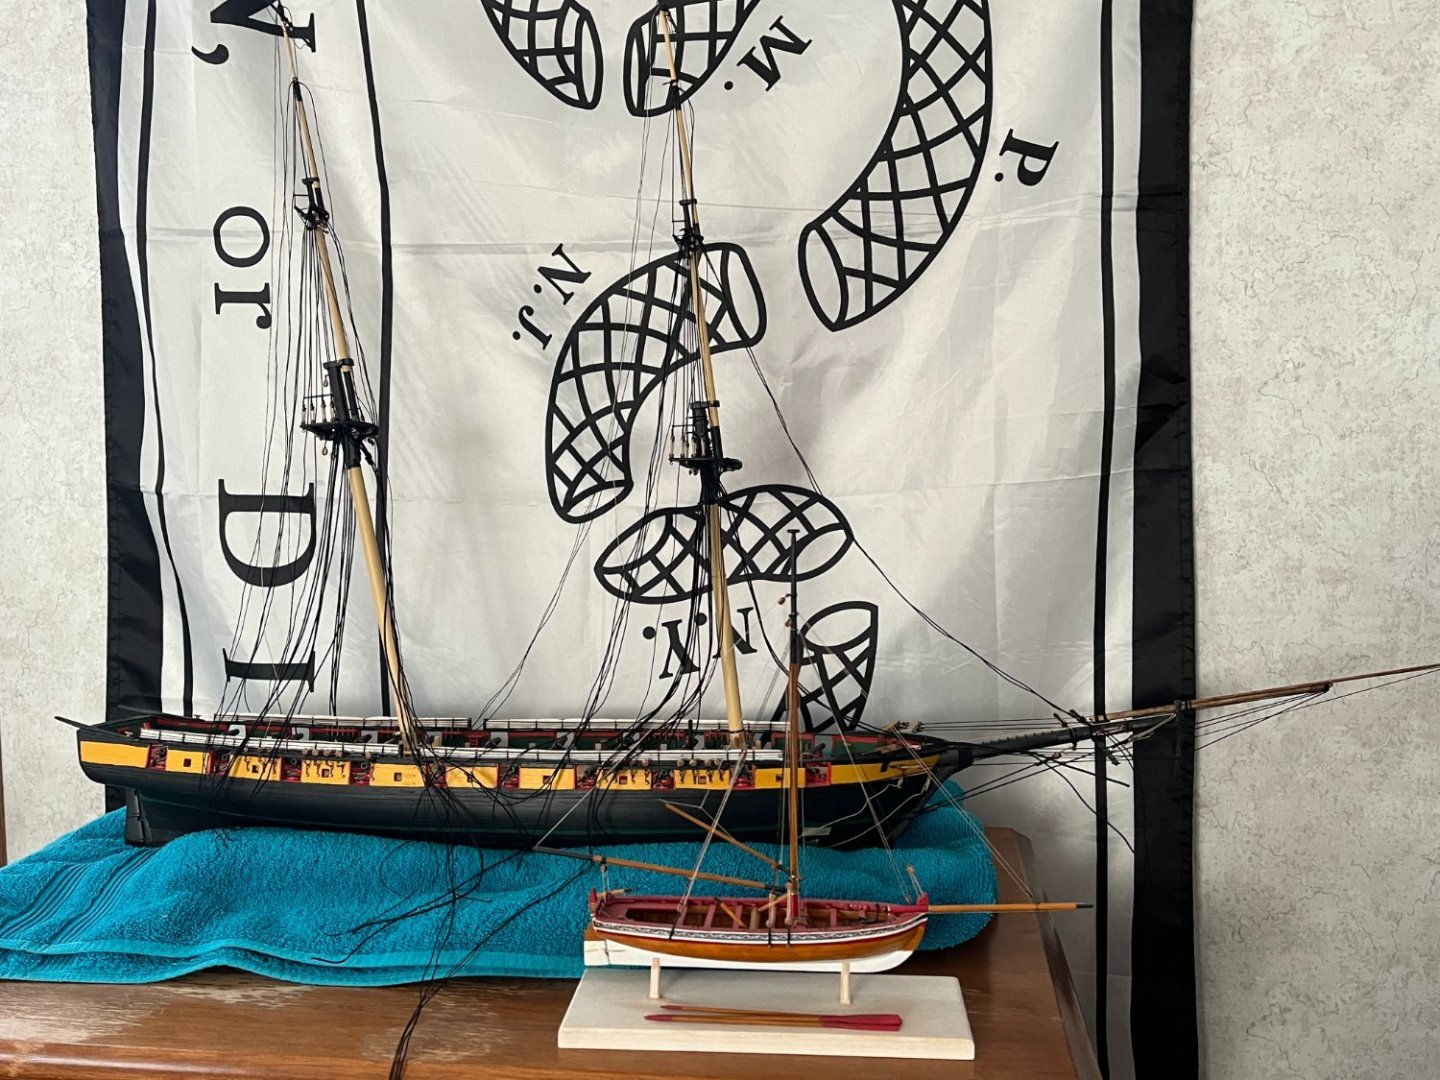
Evening, Welcome aboard everybody!!! The looks and likes are appreciated! Allan, I agree with you about the wooden ships. They are my first love and always will be. I will always have a wooden model going. Once I finish my Niagara, I plan to start the Bowdoin from Bluejacket. Just had to try this model that I've read and seen a lot about. Heck......why not!!! I have a small update. It's been a busy work week, should be able to spend more time with Titanic this weekend. A model this large, I'll start by just exploring the kit, and familiarize myself with everything. There's quite a bit to go thru. I've already started pouring over the manuals!! Everything seems to be packed very well. It's a single piece hull. Wow, what a beauty. Quite the detail in the hull itself. I see a lot of portholes to clean out. The plating and riveting is pretty cool. Be good!!! Go Celtics!!!!!! Tom E
- 40 replies
-
- 15
-
-

-
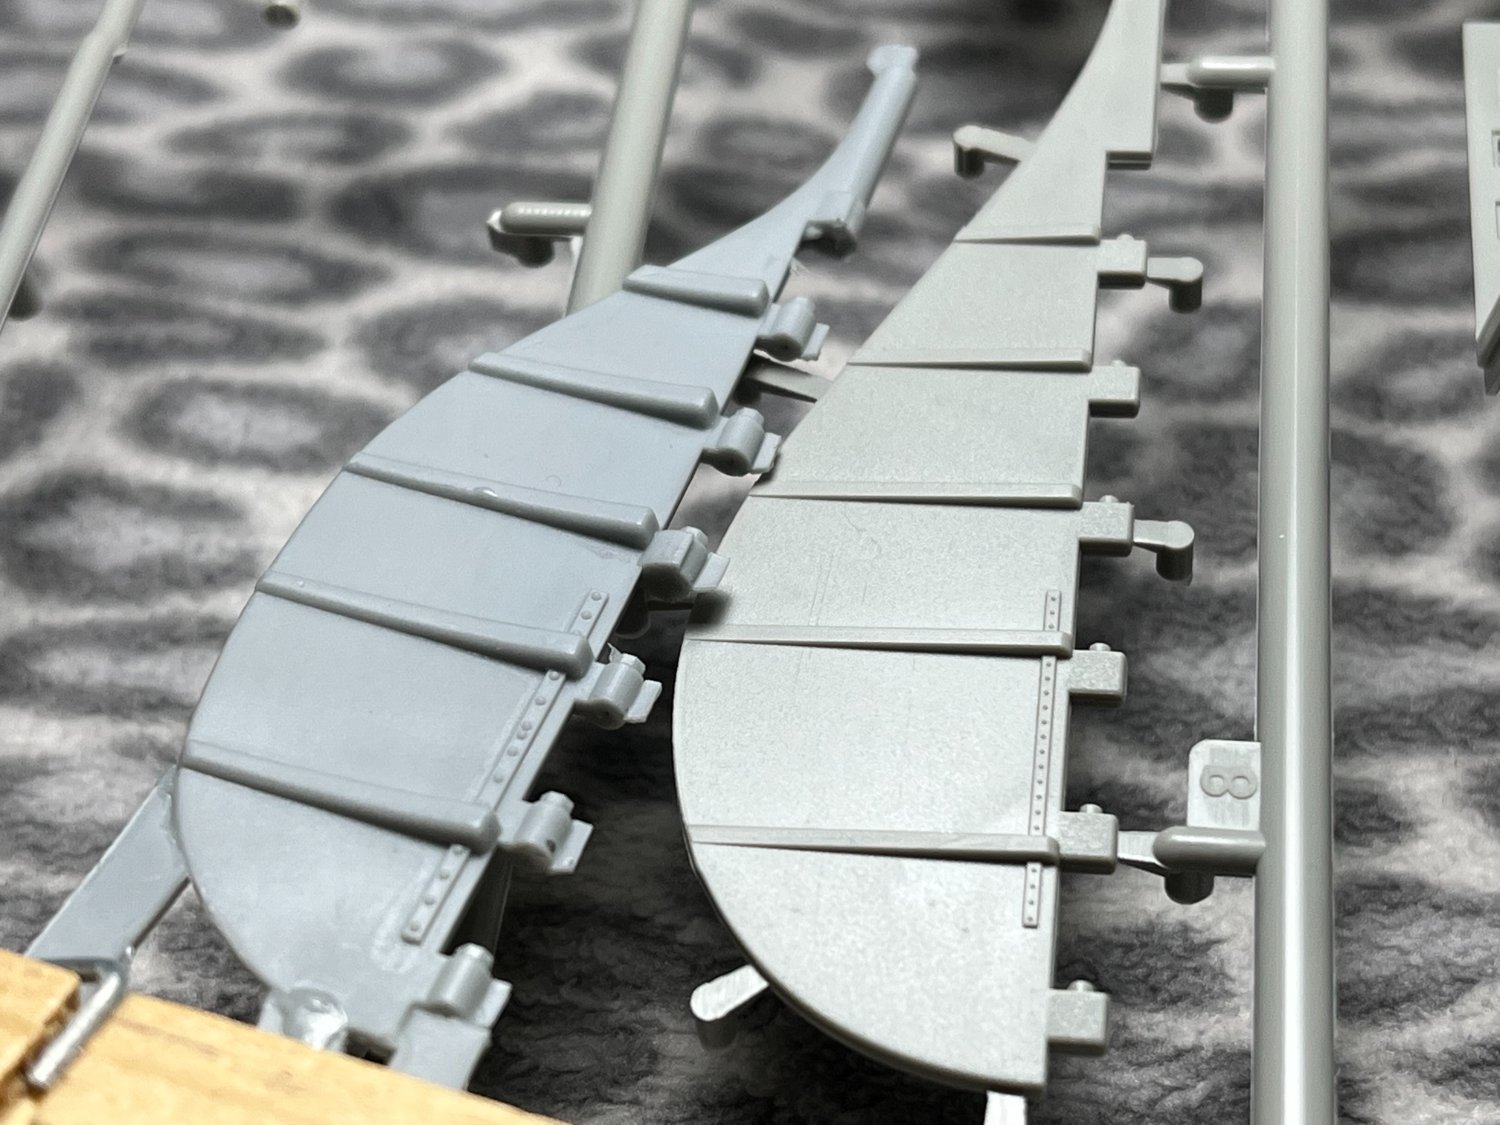
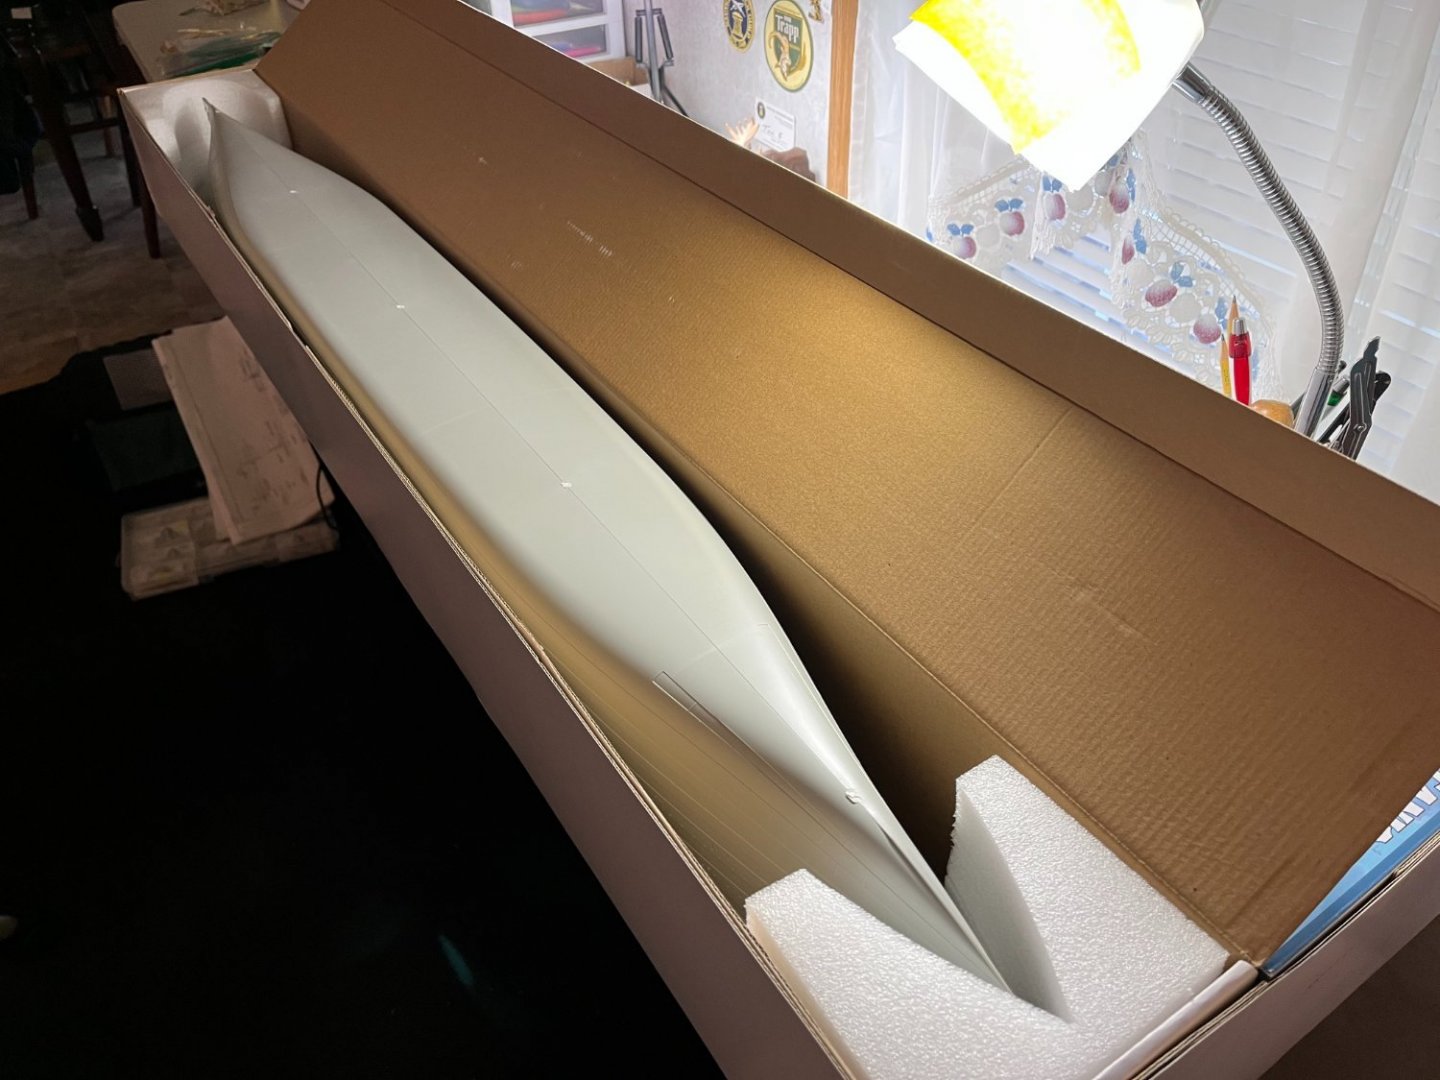
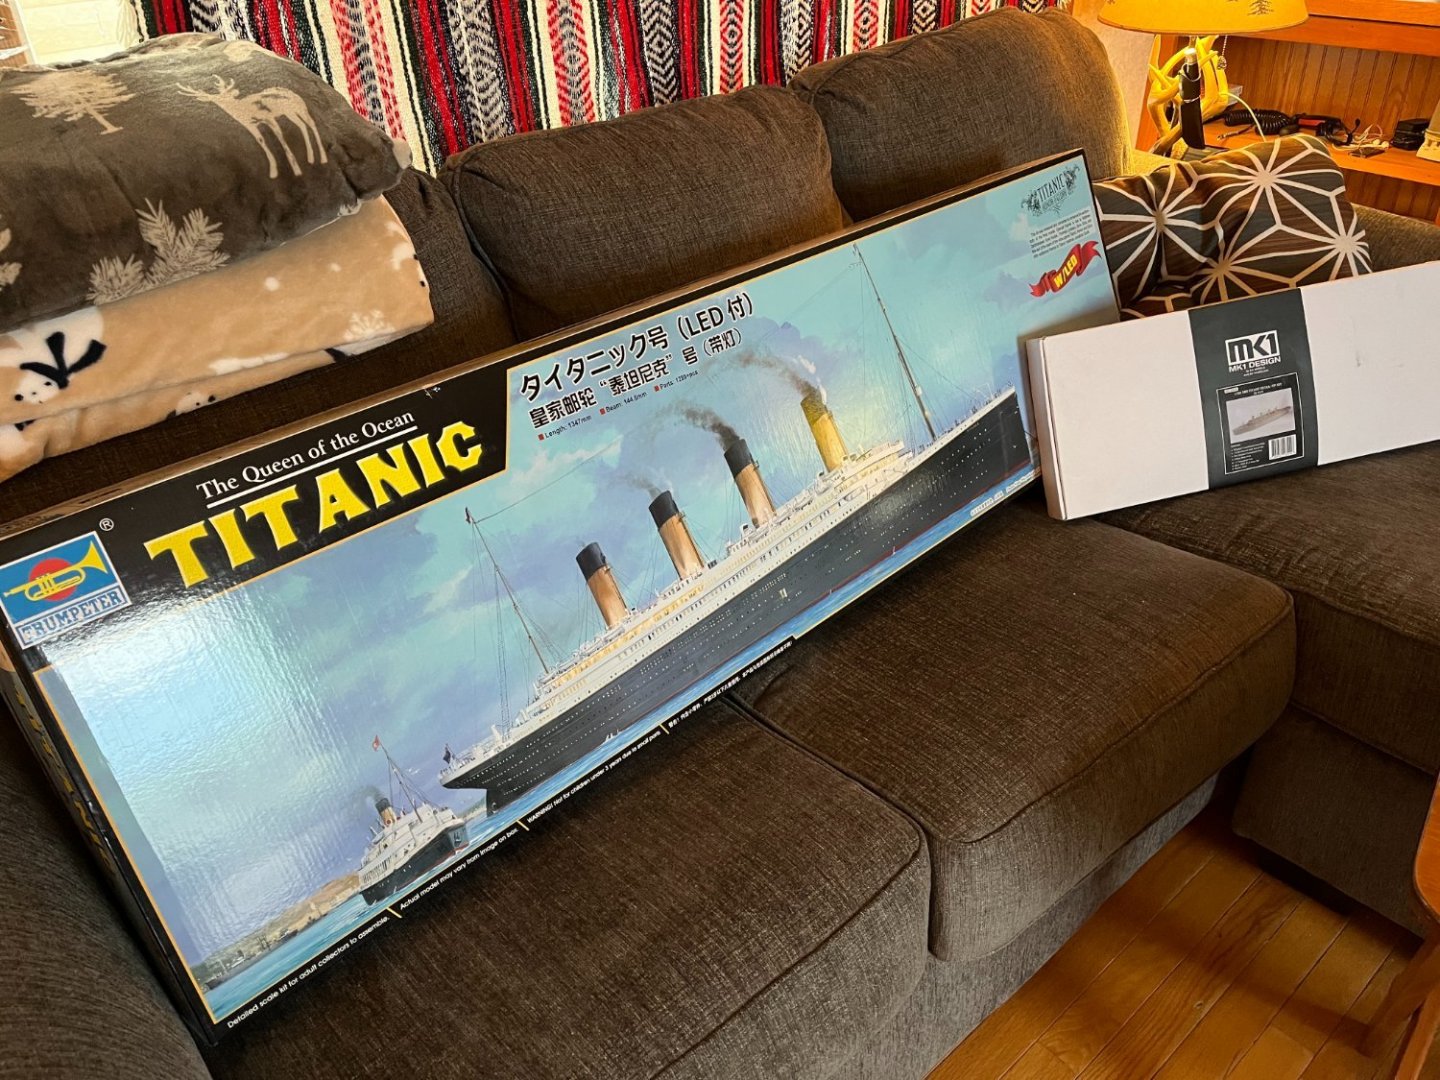
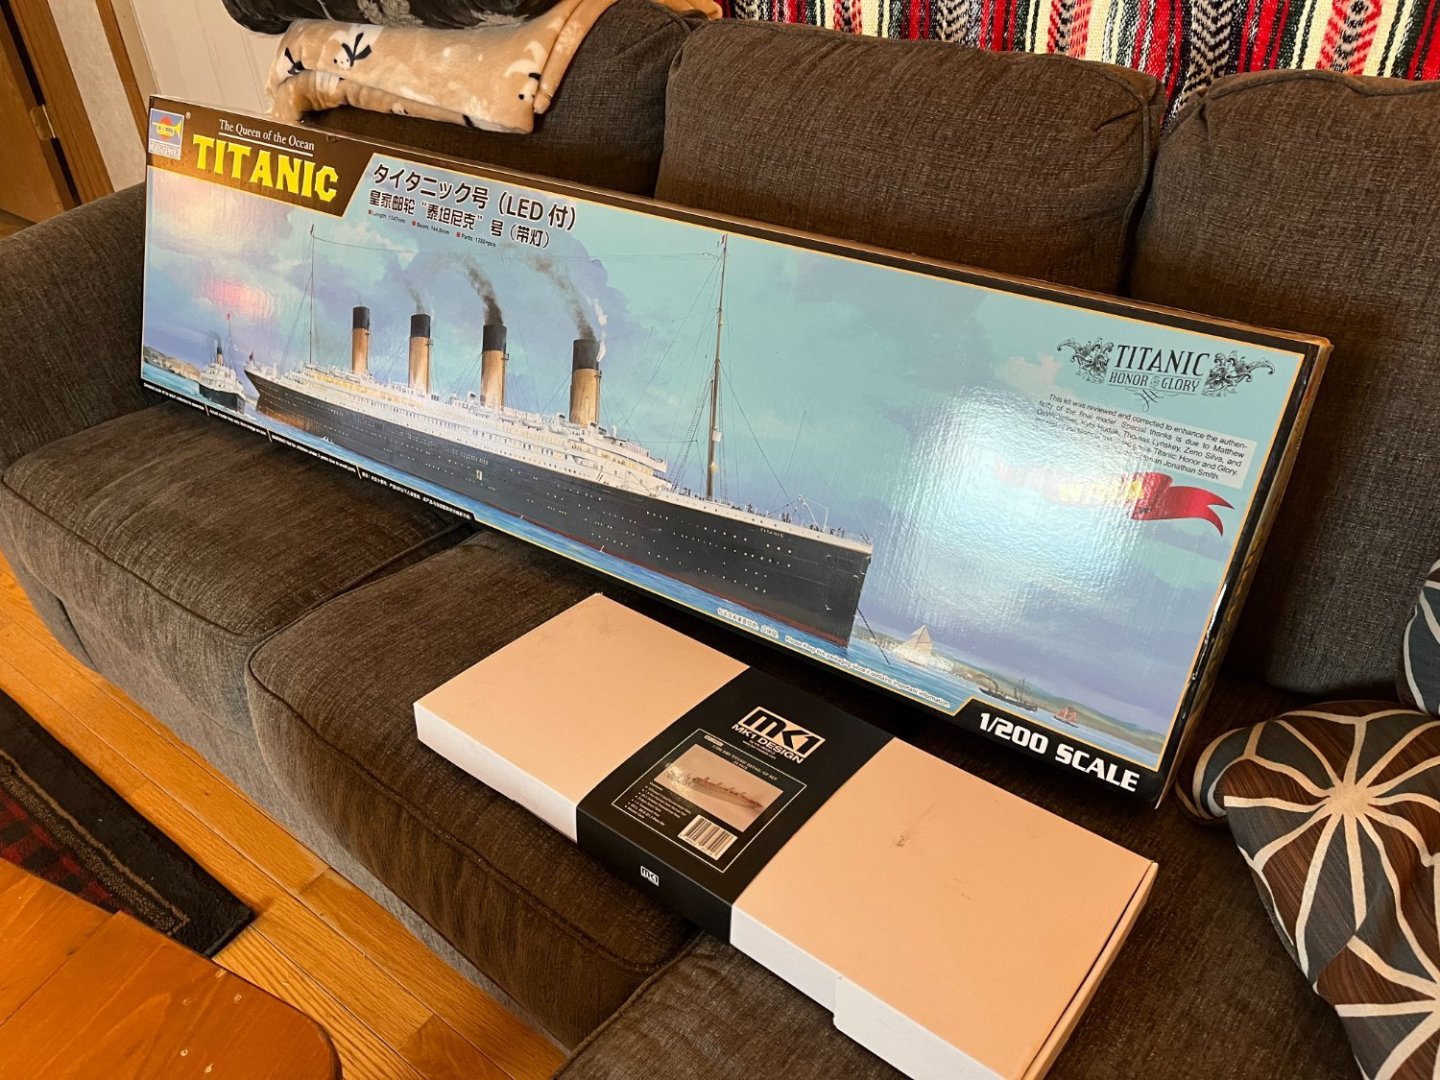
Evening, Thought I would get this build up and going. I rarely have two projects going, but I just couldn't keep from buying the kit and upgrade set. With my Niagara nearing completion, now is as good as any. Initially, this build will be a little sporadic. I need to study the instruction booklets. Figure out an approach to the build. Probably start by painting the hull. I will be installing the LED's. That should look awesome!!! The kit is almost as big as my couch. I've only just started to crawl around the kit and upgrade set. I should have some good pics as I go thru the contents. I'm no expert on PE, but it sure does look good. The wooden decks are pretty cool. Some damage to the very outside edge of the sheet of wood, but no damage to the particular piece. This should be fun! Tom E


- 40 replies
-
- 18
-
-
Evening, Hope everyone is well. Been a little slow in the shipyard, summertime fun can put a dent in the build! But, some progress has been made. I have been working on the Topgallant yards. Simply following the plans for block placement. All blocks, and rope, are from Syren. Constantly checking alignment with the mast. Don't want those blocks too far in or out. Eventually installed on the masts. The Halliard hangs out the back of the mast thru a sheave. I'm chewing on the idea of just installing the halliard to the lower top sooner rather than later. It looks like it would be a beast to install later. I had to insert the below pic. Sense of scale, Niagara is a big girl!! Be good, Go Celtics!!!!!!! Tom E


-
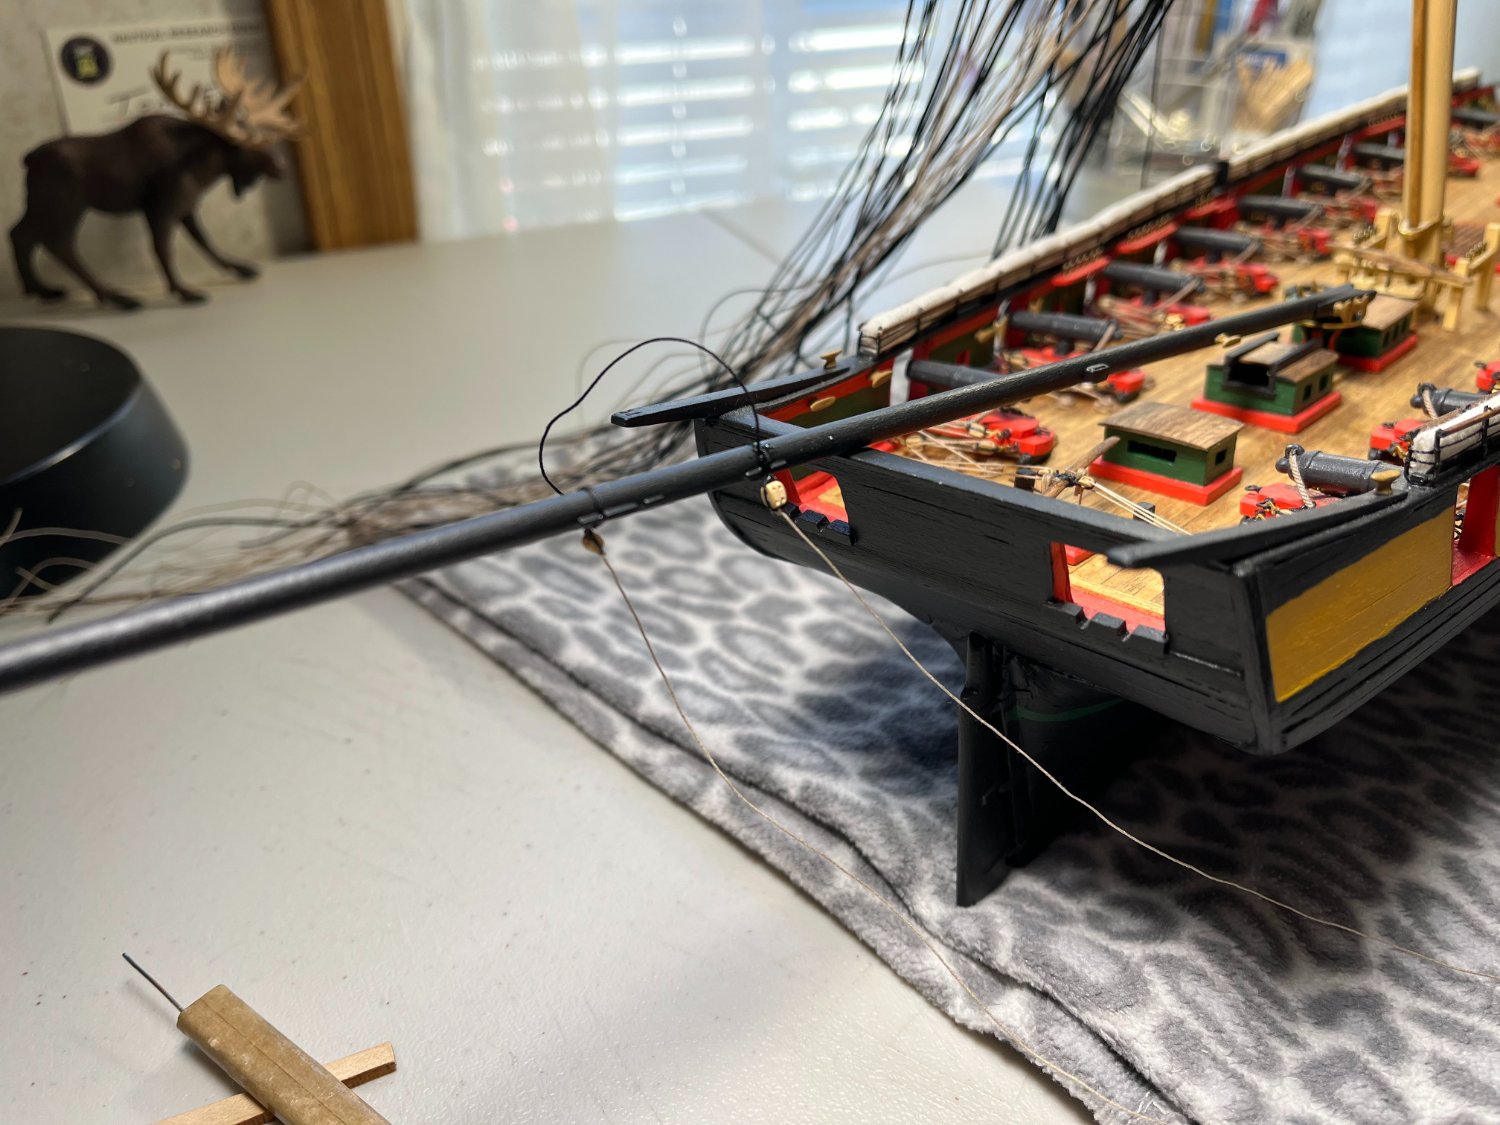
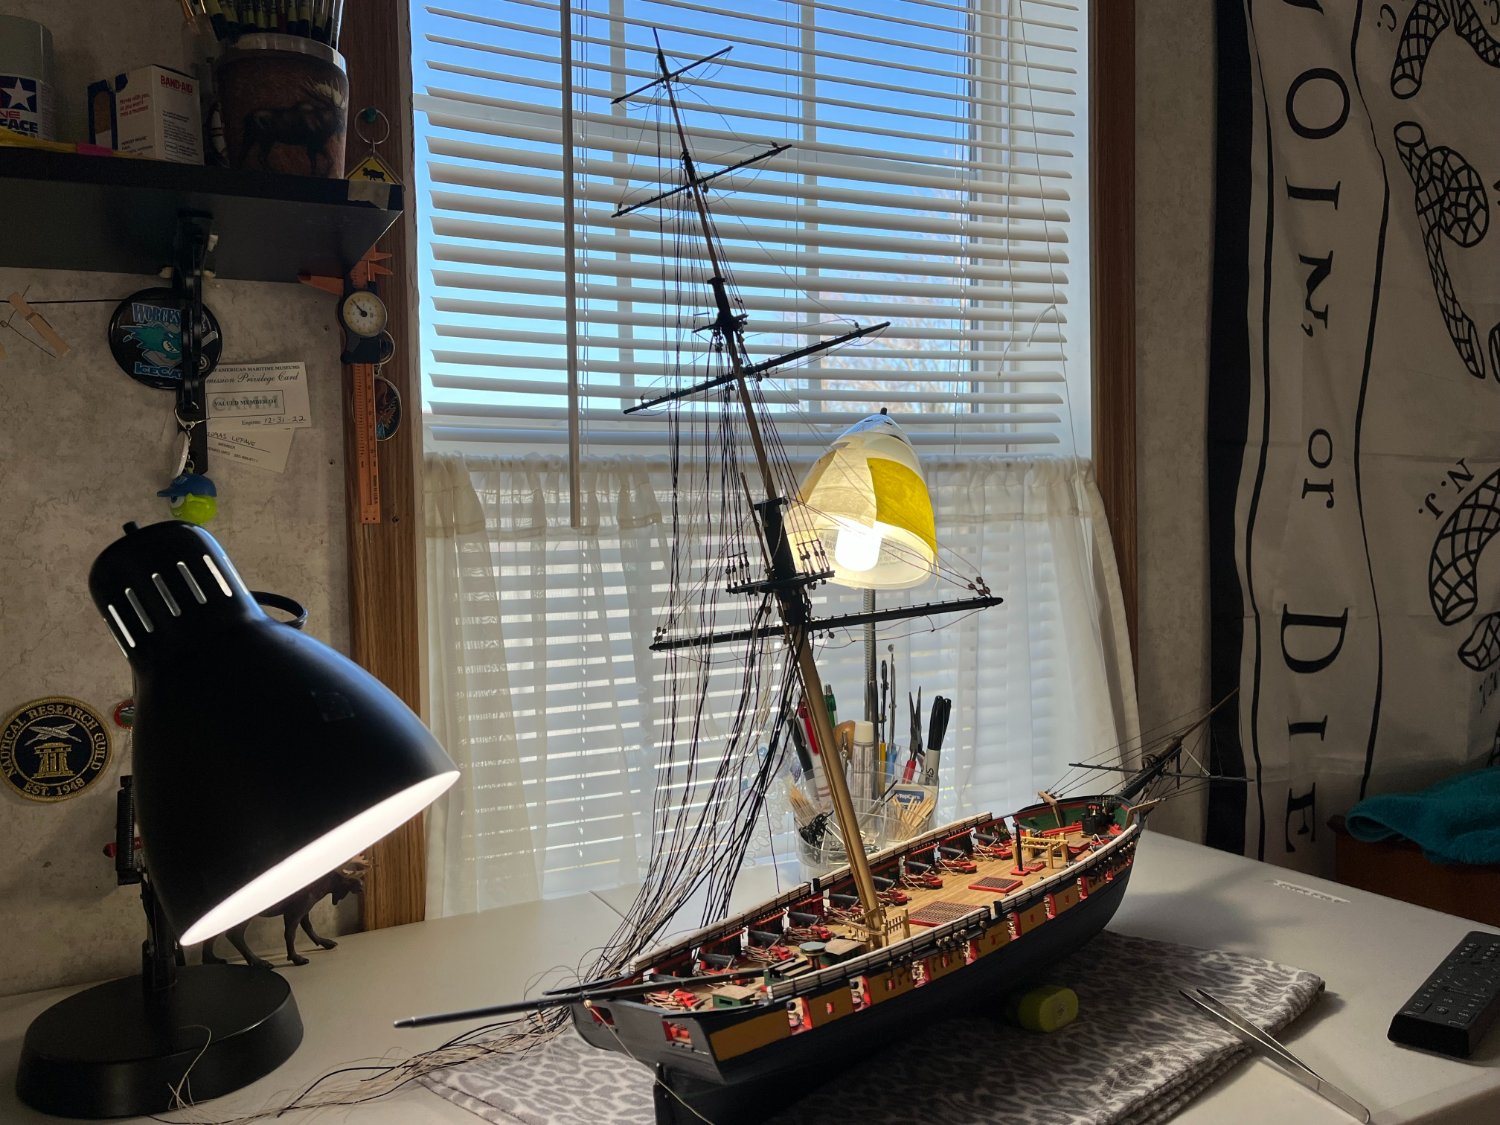
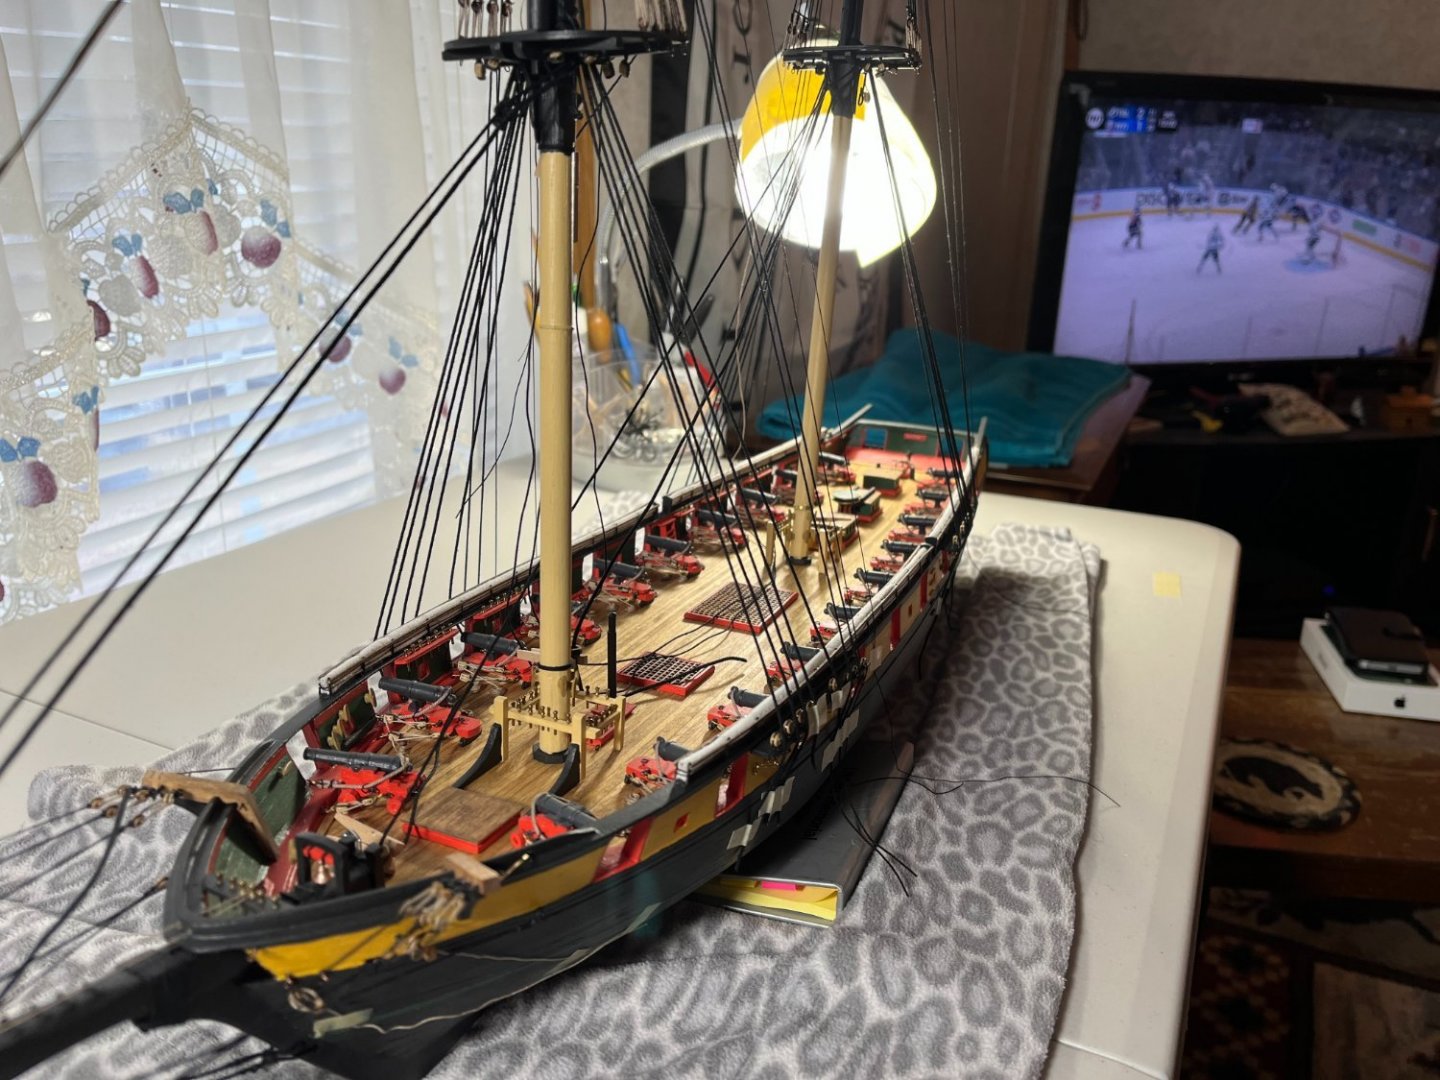
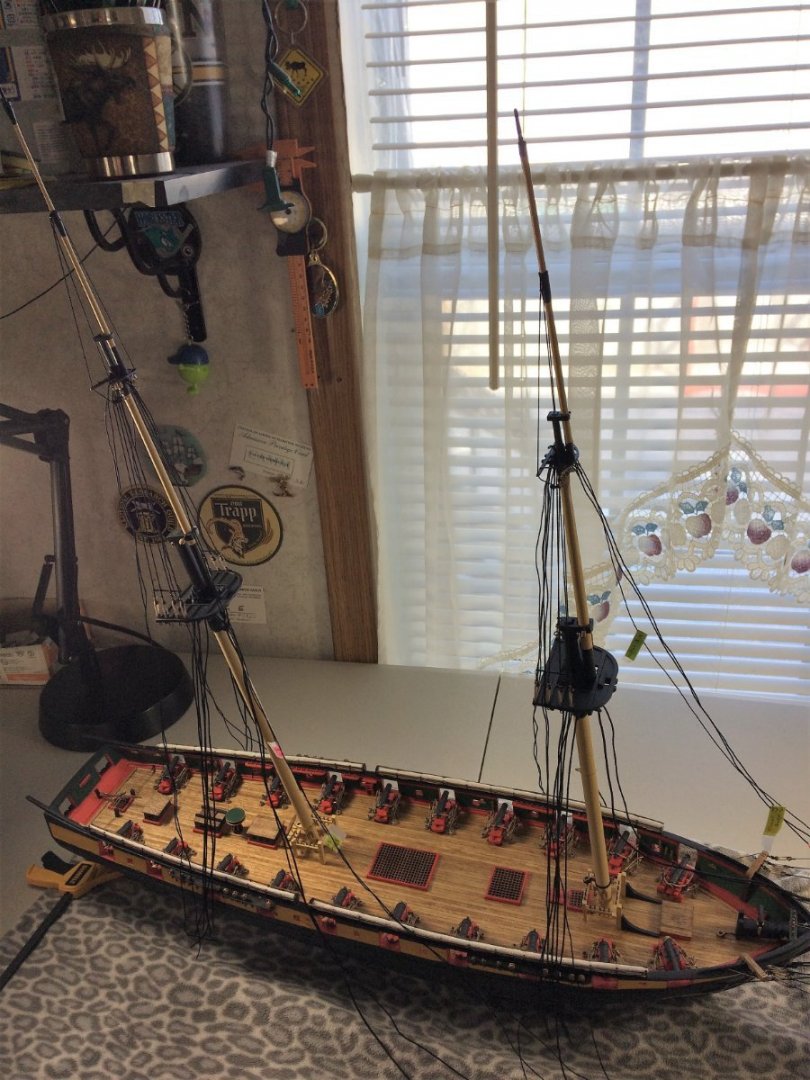
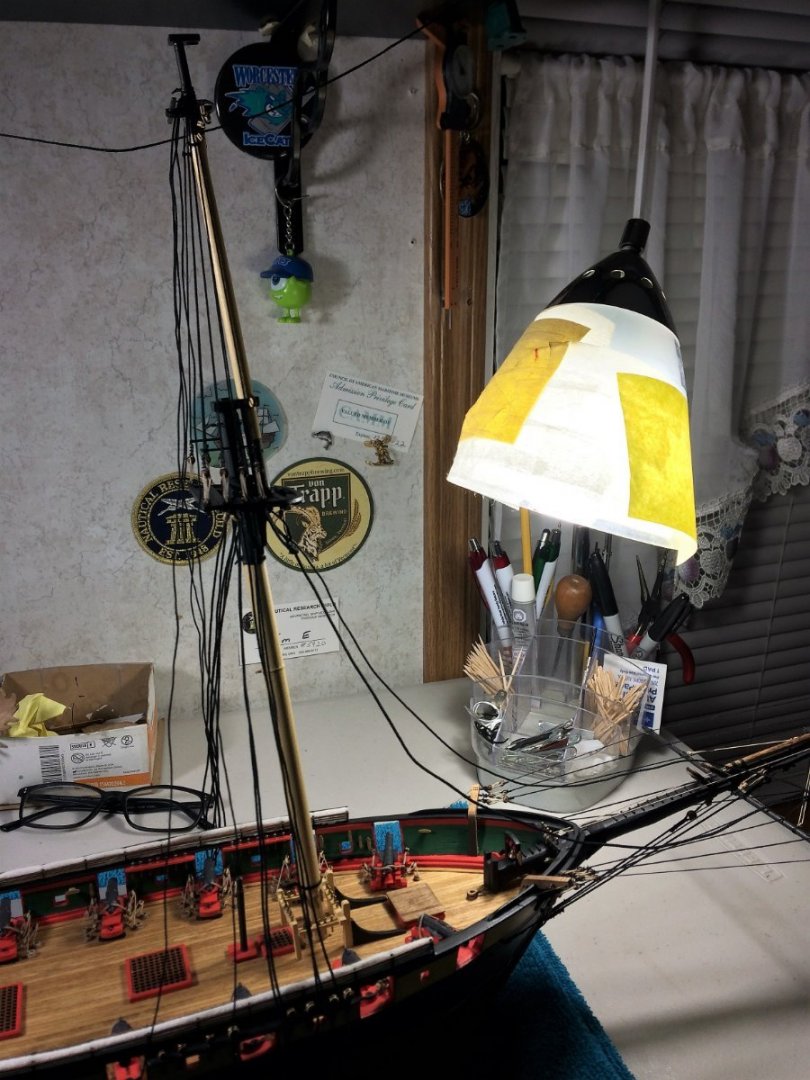
Evening, Waiting for the Celtics game to start, thought I would give Niagara a quick update. Both Royal yards are attached. For unknown reasons, I decided to go ahead and "attach" all the rigging so far and see how she looks. I haven't done this in a while. I've noticed I have a slight curve to starboard side on the Foremast. I should be able to straighten out most of that when I permanently attach the rigging. Shrouds clear the hammock stanchions at the Main rail. There is some twist in the stays leading to the Bowsprit. Those will be gone once firmly attached. It's all being held on with Tamiya masking tape or clips. Ship is getting busy! Never did I think I would get this far. I'm not the fastest builder, probably spent more time at study than building. Persistence and a dash of patience does pay off. Should have pics of the Topgallant yards soon. Then on to the Topsail yards. Be good, Tom E


-
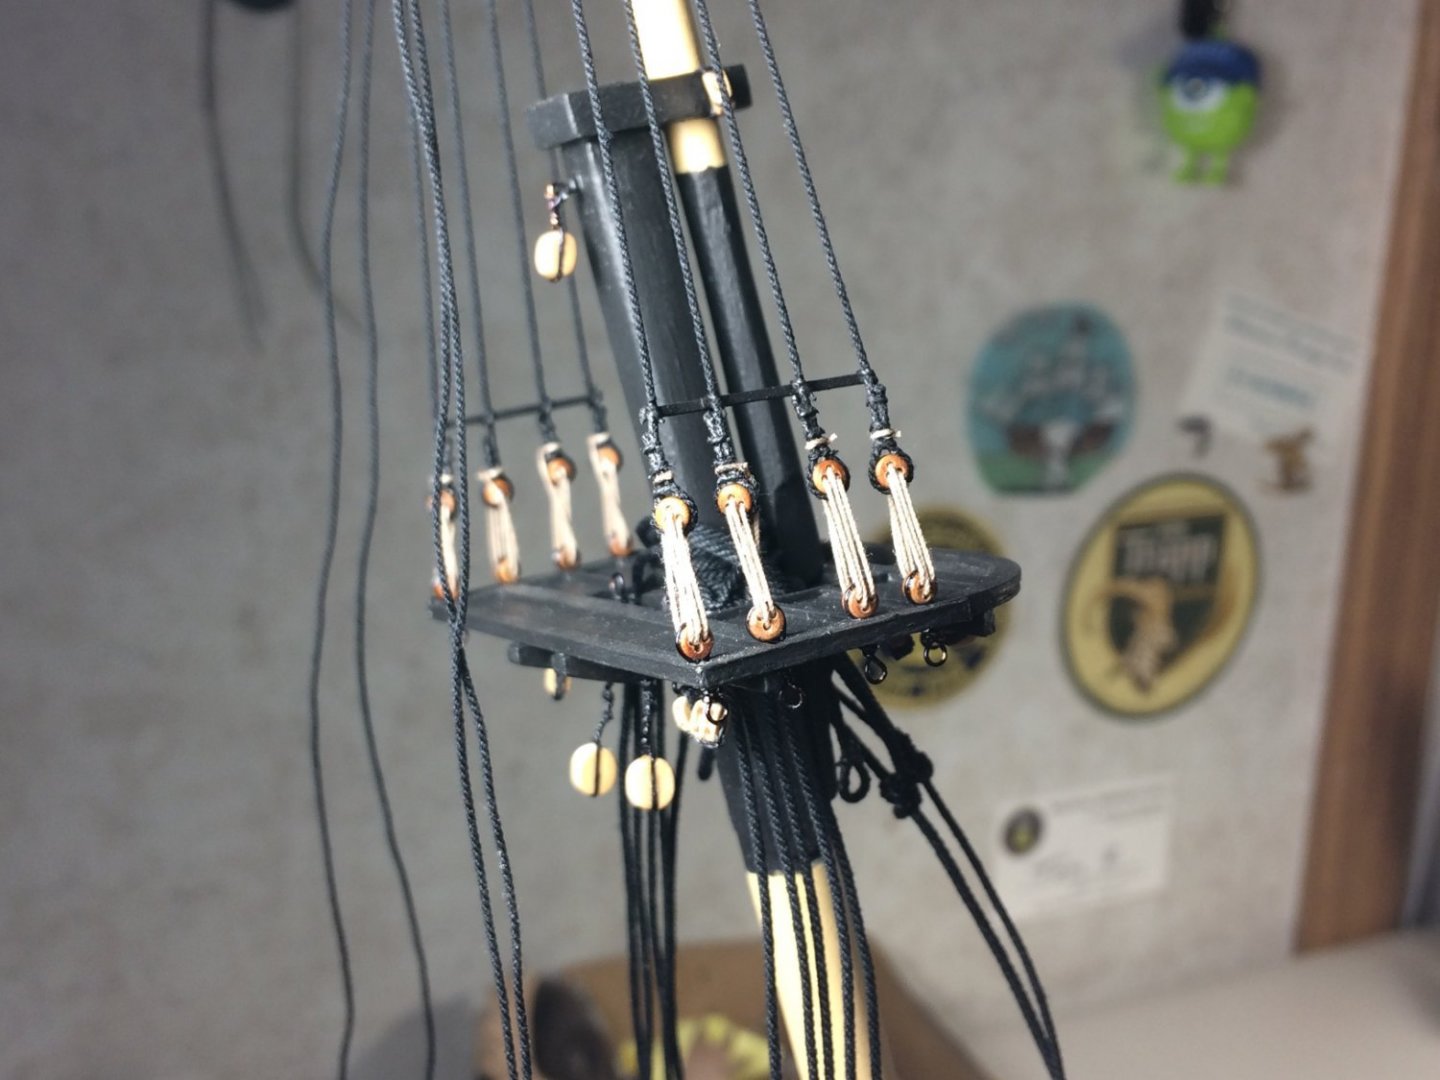
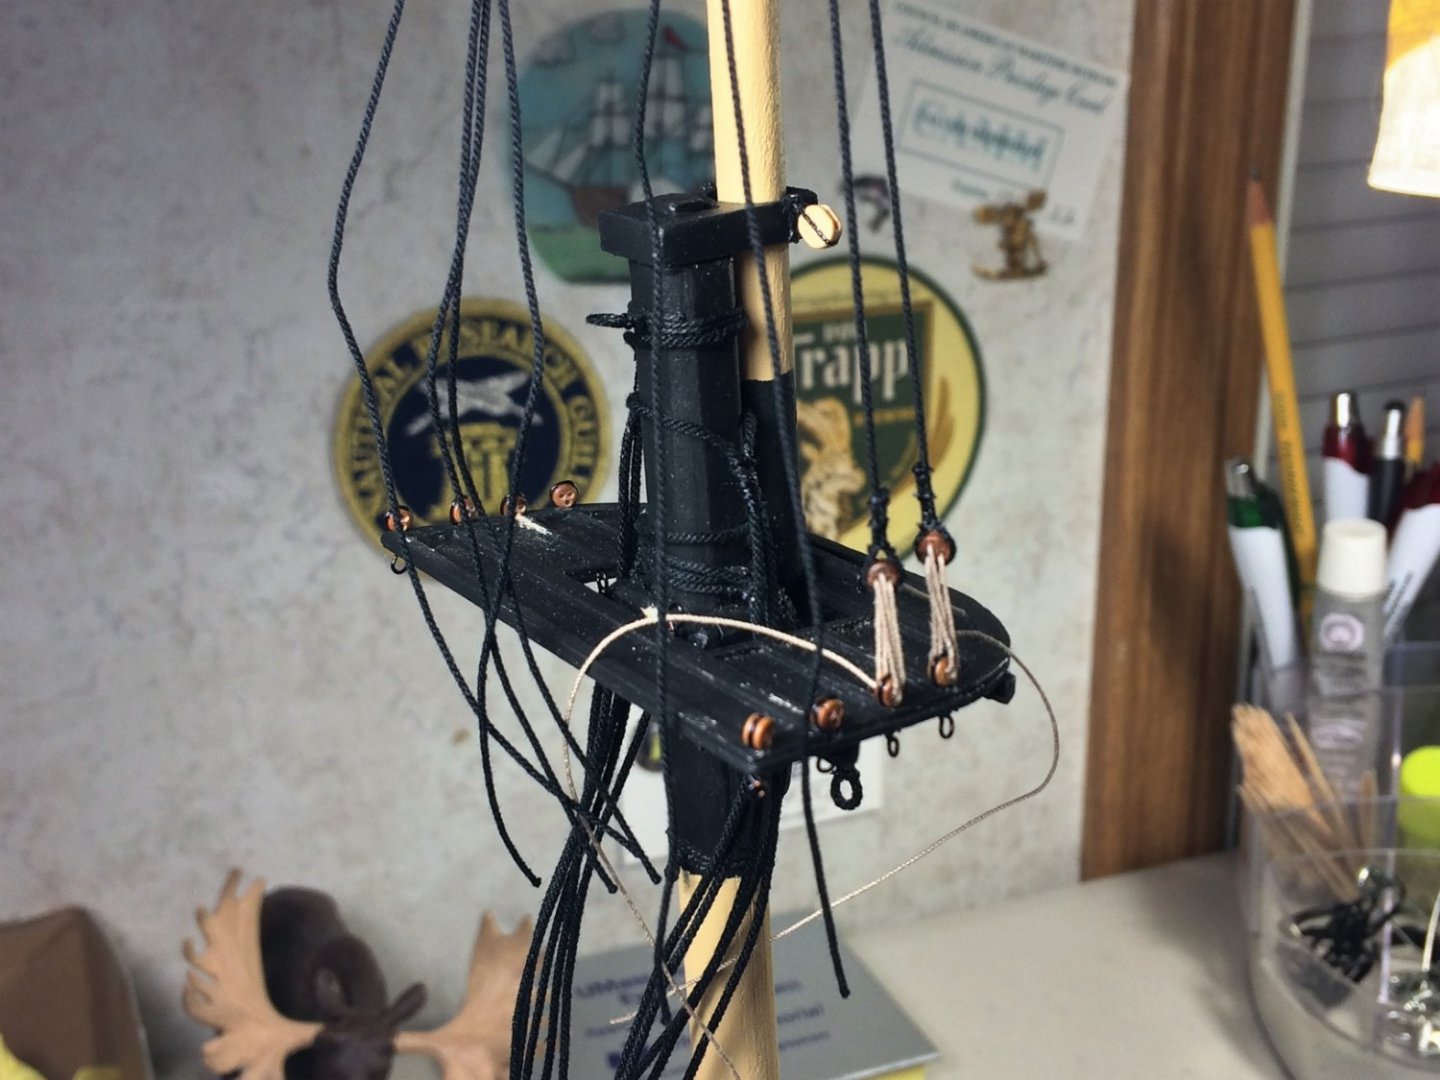
Evening, I think an update is in order. Admittedly, we have moved quite a way forward. All the standing rigging is attached and hanging from the masts. I had to upgrade my phone, it was an old iPhone 5 and was really showing its age and having problems with it. I have since gotten an iPhone 13 and have restarted taking a lot of pics. Anywho..... The Topgallant and Topmast shrouds are all in place and rigged in. Since I was moving up the masts installing the standing rigging and such. I'm just going to work my way down the masts installing yards. I started with the Royal yards. All the standing rigging is in there. I've been able to keep it from getting tangled up, for the most part, but nothing too bad. Weaving the Royal yard onto the mast, I'm always mindful of its surrounding ropes. I'm cheating a bit and anchoring the yards onto the masts with some thin wire for stability and grip. Dressed with appropriate blocks. The fore and main royal yards are being done at the same time. I don't have my notes directly in front of me, but if I remember, I used .008 Syren tan rope for the halliard. Fed thru sheaves built into the masts and will anchor at the sheerpole on the Topmast. There is a fixed lift of the same size that I can install a bit later. Again, harder in my head than in reality. The Topgallant yards are being prepped and will be next. Be good Tom E


-
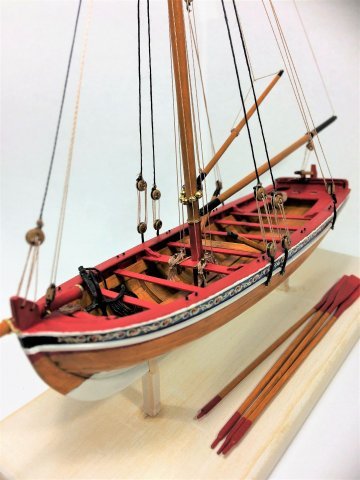
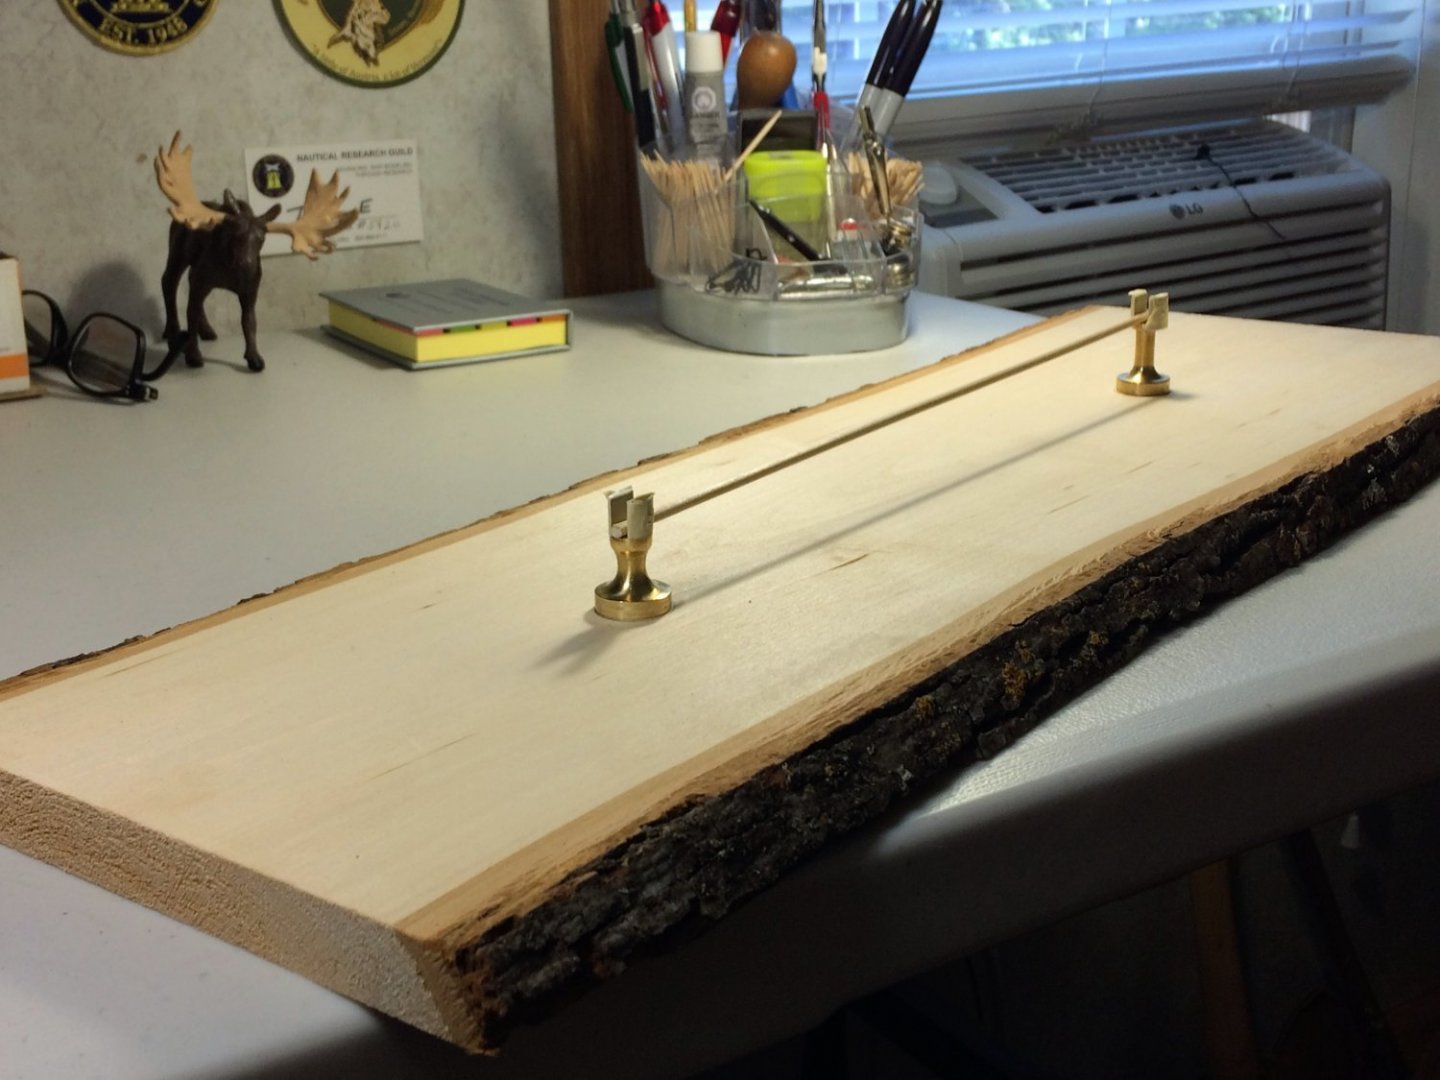
Hi Cisco, I appreciate the kind words, thank you! As towards a stand. Honestly, since I started building Niagara it was in my mind, but I never put any serious thought to it. Never really thought I would get this far. I did come up with the pic below, a few months back. If I remember correctly, the wood is just a slab from Michaels and brass pedestals from Model Expo. I have no kids, cats or dogs, so I'm not entirely worried about it getting chewed up while at work. I do want a case around it to protect from dust and the like, that I'm sure of. But I haven't even wrapped my head around that one yet!!!! Tom E
-
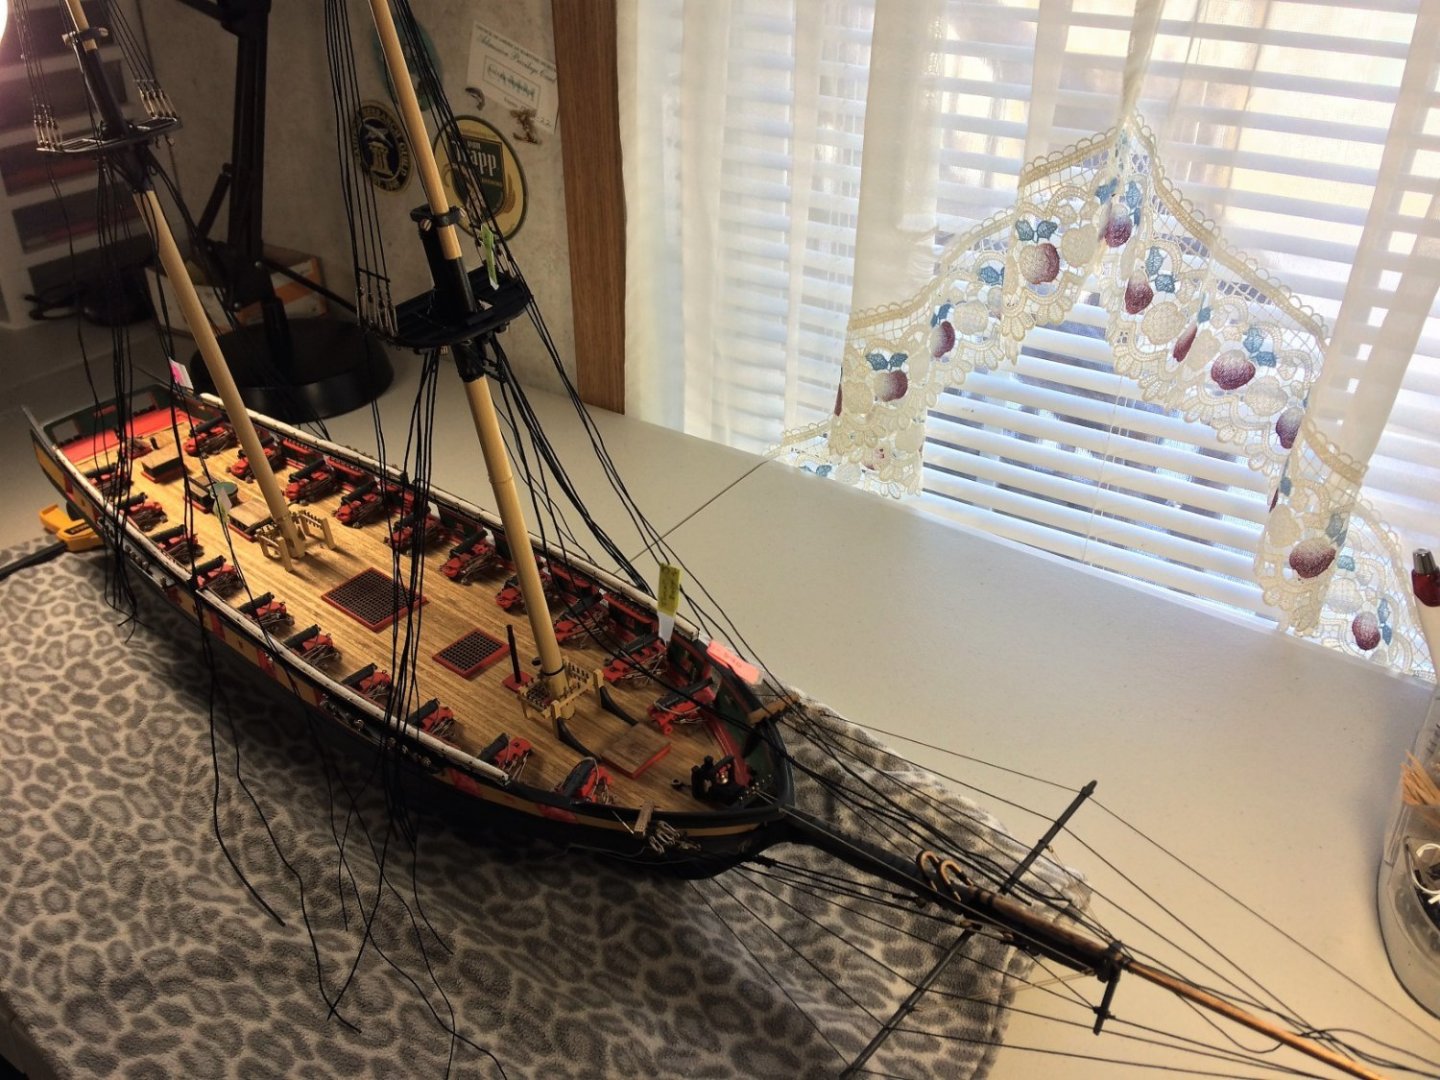
Evening, Richard, Steve, Thanks! Appreciate the look in, and all the "likes". The rigging continues. The Main stay and Preventer are hung. Nothing is attached to the boat itself. Purely just hung from the mast, with plenty of extra rope to work with. Still on the Main mast, I'm working my way up. The Topmast stay and Spring stay are hung. The Foremast has its Topmast stay and Inner and outer Jib stays as well. Once the Fore and Main Topmast were dressed out with rope. Felt like a good time to glue in the TG/Royal Masts. Sheer poles have been attached to the TG/Royal masts......just not in the below pic! I got ropes laying all over the place. Really have to be careful with the Foremast ropes getting tangled in the Bowsprit! Winter has to be one of the better times of the year to build, I think. I've gotten a lot done this season. Well, a lot in my book! With the TG/Royal masts in place, there next to get its standing rigging hung. Once all that is in, I'll work my way down installing yards. Going from the Royal yard down. Installing as much in place as possible. I can see me stepping the masts in a few weeks. Then start attaching all the rigging to the boat itself. Be good Tom E


-
Morning, An unusual Monday to start the work week! Nothing serious, just a little under the weather, so I took the day off. The internal plumbing seems to disagree with something I ate yesterday. I just wrote myself a prescription for a full day of boat building!!! Settling into the Shipyard, hot cup of tea and honey, and just found the movie Alien (the original from 1979) on TV. Before I start building, figured Niagara could use an update. The Topmast shrouds, both Fore and Main are done. Peak and Throat Halyard blocks are in place on the Main mast. The Lanyards seem to have been "whitewashed" in the pics. Not that bright in person, it's Syren tan rope. I next moved on to hanging the Forestay and Preventer stay. Purely just measuring these out and hanging from the mast. Nothing will be permanently attached until well down the line. The ability to remove the masts off the boat seems priceless to this builder. The Topmast Backstays are hung as well. Keeping with my "inside out" mentality of rigging, the Main stay and its Preventer stay are next. The Masts are getting busy!!! Stay safe Tom E


-
Evening, Hope everyone is well. Really missing baseball right now. It's late February and I should be seeing sports reports from Red Sox spring training. Sigh.......... Oh well, Niagara continues. As I mentioned before, I started the Topmast shrouds. I want these in place and tied down before starting other rigging. Some things seem easier to install if these are already done. Just no rat lines yet. In theory these seem easy enough....in theory I made a "spacer" like tool from spare brass wire to keep the distance between within reason. Twist in the deadeyes is a pain in the back side!!!! I'm hoping once a stave is installed it'll help with any leftover twist. On a broader scheme. My overall plan is to work my way up the masts, then work back down installing yards, finishing with the course yards. I'm absolutely amazed that I'm talking about fixing yards! Never did I think I would get so far! Be good and model on Tom E


-
Evening, A weekend completely spent at home during a classic New England snowstorm. Couldn't have asked for a better weekend.... minus the shoveling. Plenty of food, football and boat building. Niagara continues. With the lower shrouds done, time to set up the topmast shrouds. Simple enough process with lots of extra rope. Having something like the board below to hold the masts has been perfect. I want to have these measured out and fully installed with lanyards and deadeyes before moving forward with anything else. In my head, and plenty of time in front of the plans, so many other things do key off these being in place. When I do move to the upper shrouds, they tie off at the top of the topmast shrouds, things like that. We'll see how this thinking works. Things are moving along! Be good Tom E