
modelshipwright
-
Posts
299 -
Joined
-
Last visited
Content Type
Profiles
Forums
Gallery
Events
Everything posted by modelshipwright
-
 Thanks for your comments BH. They are really appreciated coming from a skilled kit basher like you. Regards, Bill
- 382 replies
-
- 1
-

-
- sovereign of the seas
- carving
- (and 1 more)
-
Thank you Tony for visiting my build and for your comments. There are indeed many very skilled modelers on this forum and we are lucky to be amongst them. With their participation, we can all gain inspiration to help improve our skills. Regards, Bill
-
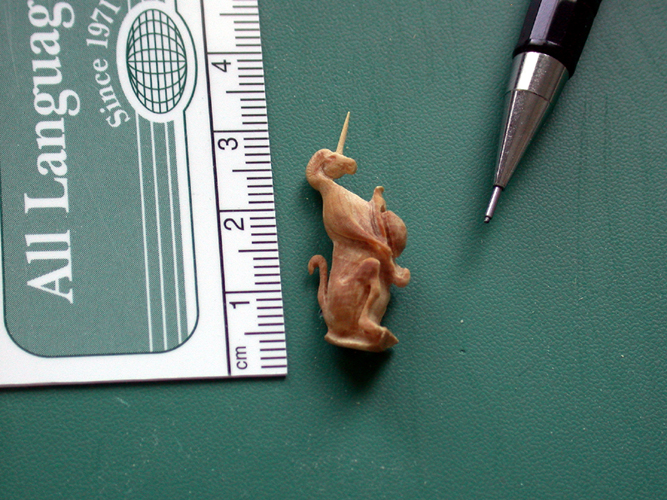
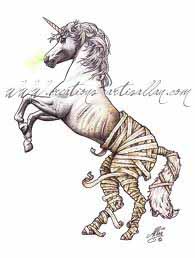
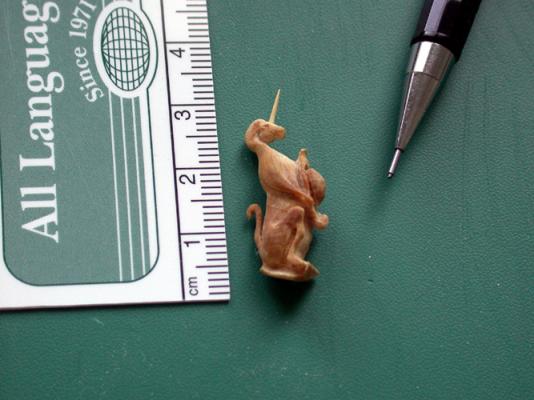
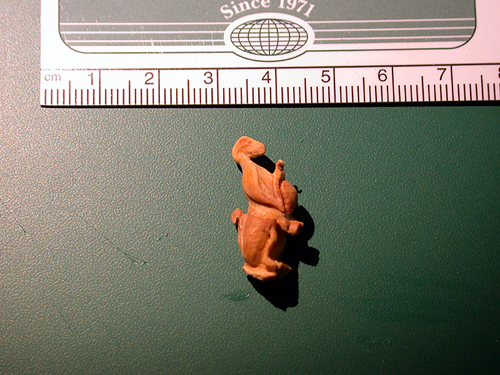
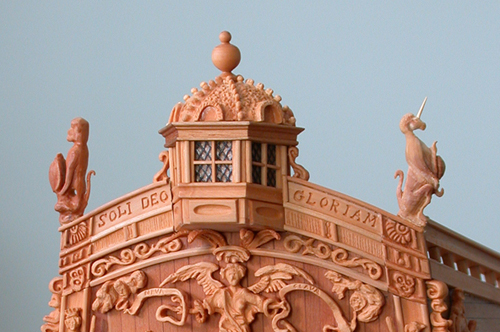
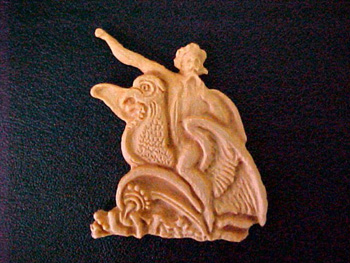
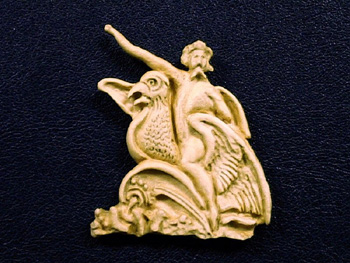
The Unicorn that sits on the stern rail at the starboard side was the next carving in the round to be done. The next photo shows the beginning of the carving against the section of the stern from the Lely portrait. I used several aids as guides to how the unicorn would look besides the Lely portrait. Here is an image obained from Google pictures. The Unicorn underway.......... A little more refined........ The finished Unicorn mounted on the stern of my model. The horn was made by inserting a piece of boxwood in my rotary tool and using a diamond file to create the shape. It was then cut off and mounted on the carving. More to follow................................ Bill
- 382 replies
-
- 2
-
-
- sovereign of the seas
- carving
- (and 1 more)
-
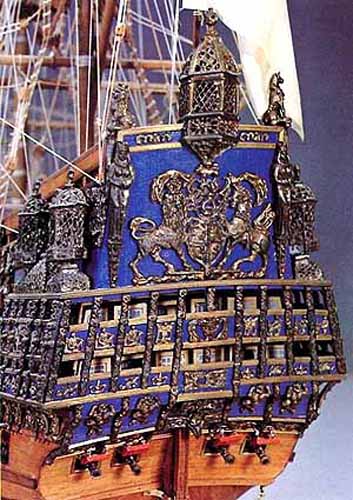
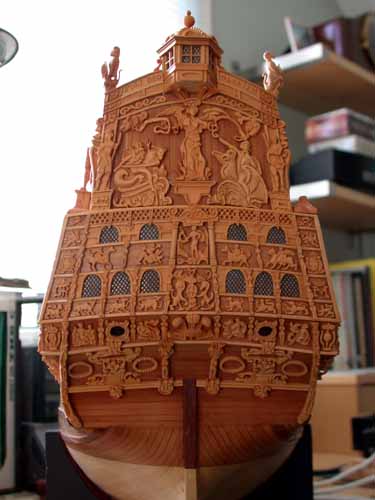
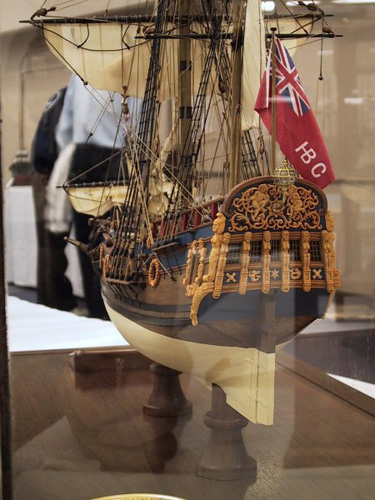
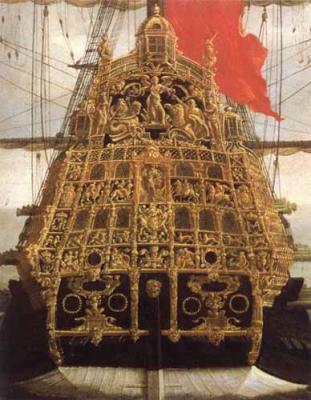
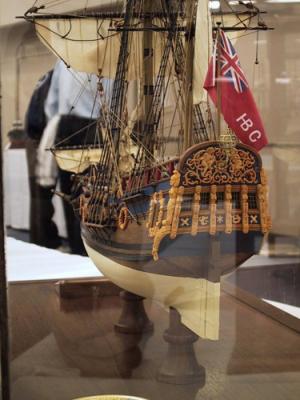
It might be interesting to see the comparisons of the Mantua - Sergal stern, The Sir Peter Lely stern in his painting and my stern The following pictures show the differences. The Mantua stern The Sir Peter Lely Portrait, and my stern side by side. It appears that Mantua copied the stern from the model in Greenwich at the National Maritime Museum. More to follow......... Bill .


- 382 replies
-
- 4
-
-
- sovereign of the seas
- carving
- (and 1 more)
-
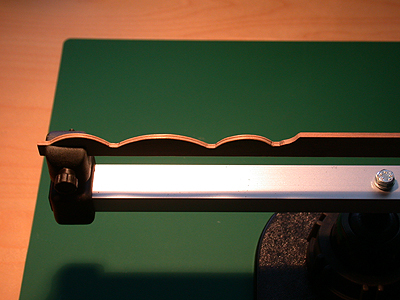
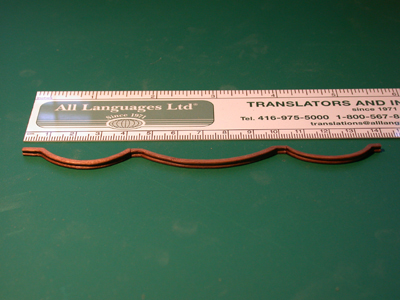
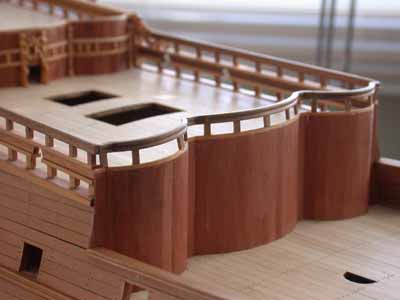
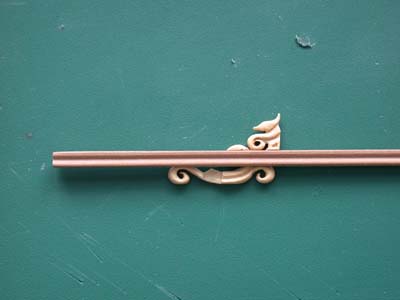
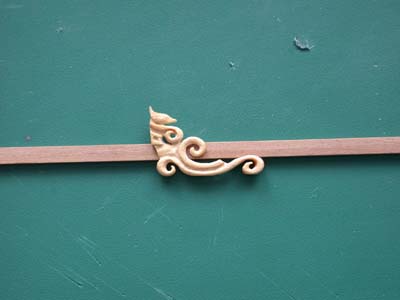
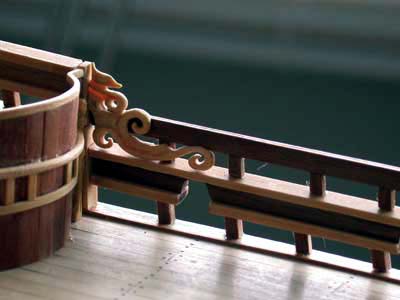
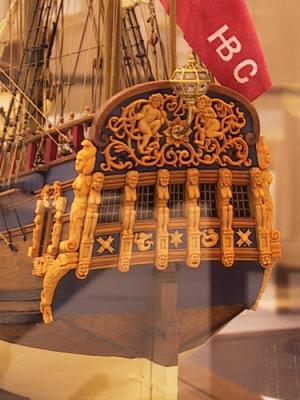
After planking the bulkhead between the upper and lower gun decks, I needed to fashion a curved rail with a profile cut into the leading edge of the rail. As the rail has three distinctive and rather tight curves along its length, I decided to make it from a solid piece of Mansonia and cut out the curves. with the jigsaw and other tools. The first photo shows the piece with the curves on the front side of the rail cut out. It is mounted in my keel clamp with the profile scraped into the leading edge with a straight edge razor blade. As the rail does not follow a straight line from port to starboard, I cut it in three sections as shown. I used a rotary tool with a drum sander attachment to remove the wood from the rear side of the curves. All theee pieces are now complete and ready for mounting on the model. The railing mounted on the top of the bulkhead. More to follow......... Bill


- 382 replies
-
- 2
-
-
- sovereign of the seas
- carving
- (and 1 more)
-
Hi Janos, The Tagua nuts are native to Central and South America and grow on palm trees. The carving in my post was done some years ago and is still the same colour as the day I cut the nut open. Regards, Bill
-
Even my wife thinks I am nuts Maury............. Regards, Bill
-
From you, Doris, that means a lot to me as I have followed your incredible Sovereign build on MSW1 and your beautiful Royal Caroline build on MSW2, and have great respect for your artistic talent in carving sculptures and building exquisite models. Thank you for stopping by my build. Regards, Bill
- 382 replies
-
- 1
-
-
- sovereign of the seas
- carving
- (and 1 more)
-
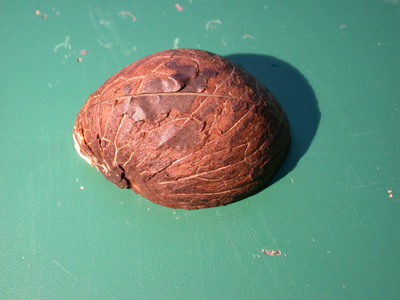
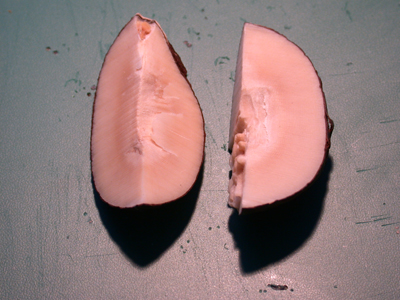
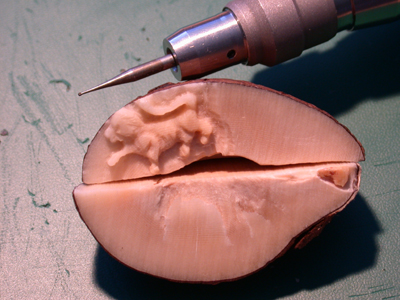
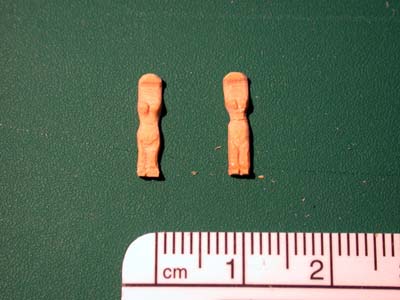
There are other materials to carve with and one of those that is very close to Ivory is Tagua Nut. It is a Brown coloured nut and when cut in pieces and the centre removed, the remaining part of the nut us very hard and Ivory coloured. The Tagua Nut from the outside. Cut in quarters with the centre removed... A carving of a lion in the flesh of the nut. The nut is very hard and hold an edge well for carving. Ceertainly another viable material to use for sculptures. More to follow....................... Bill
- 382 replies
-
- 2
-
-
- sovereign of the seas
- carving
- (and 1 more)
-
Thank you WackoWolf, Amfiibius and Michael for your comments. The build may not contain all the details that were on MSW1 but the main parts are shown here. I never anticipated that it would be lost and I would have to rewrite it, so I hope it flows along well. As for age Amfibius, I am just approaching 70 years young. Hands are still steady for now. As for the details Michael, I guess I just like to do it as well as I can with the information available. Regards, Bill
-
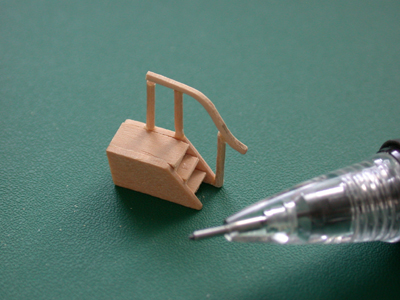
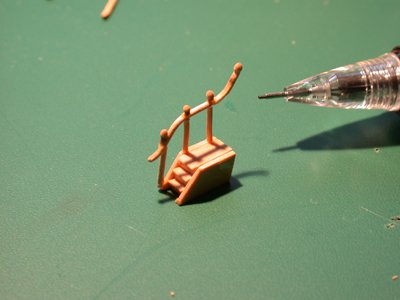
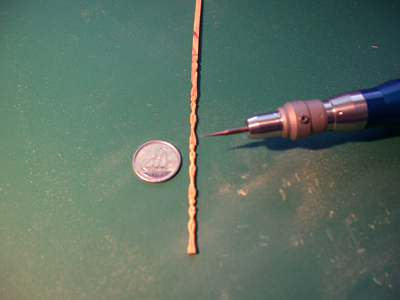
The staircases shown on the Van de Velde sketch were next and I used boxwood for the construction. The following picture shows a portion of the Van de Velde sketch with the staircases between the upper gun deck and the poop deck. The starboard staircase in construction beside the tip of my mechanical pencil. The port staircase showing handrail with tiny balls installed. The staircases installed on the deck.
- 382 replies
-
- 1
-
-
- sovereign of the seas
- carving
- (and 1 more)
-
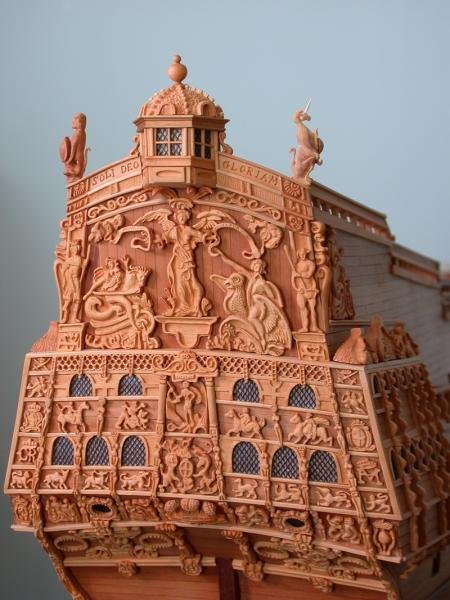
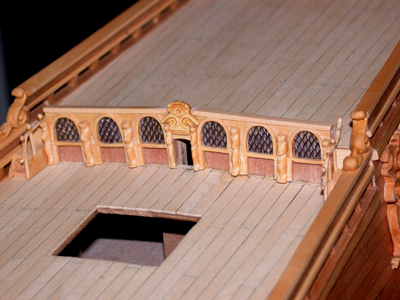
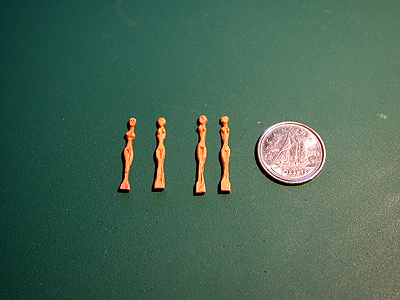
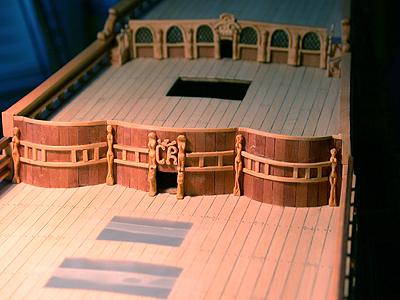
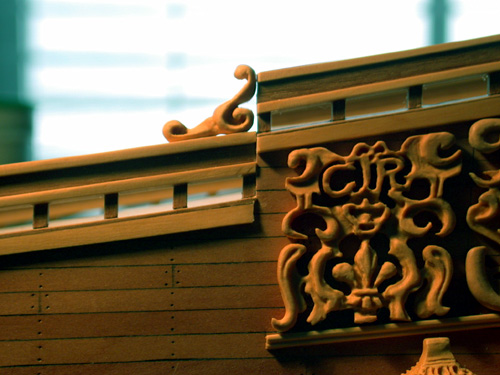
I now began to fill in the bulkhead between the Poop and upper gundecks. After planking it in Swiss Pear and capping the rail with boxwood, the ornamentation was to follow. Caryatids for the bulkhead. Assembling and gluing boxwood trim pieces. Carving large caryatids on a strip of boxwood The caryatids separated from the strip. Caryatids mounted on the bulkhead. More to follow........ Bill

- 382 replies
-
- 1
-
-
- sovereign of the seas
- carving
- (and 1 more)
-
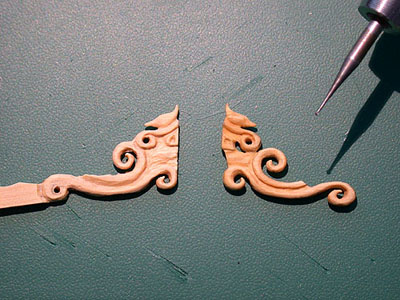
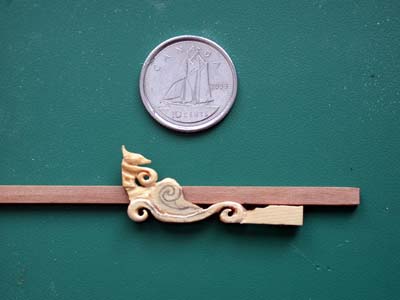
The starboard mirror image of the imbedded hance carving was next. The next photo shows the carving underway. With the port carving and to show the scale of the carvings....... More progress......... The finished carving installed on the railing between the decks. More to follow............. Bill
- 382 replies
-
- 1
-
-
- sovereign of the seas
- carving
- (and 1 more)
-
Thanks for your comments Erik, Regards, Bill
-
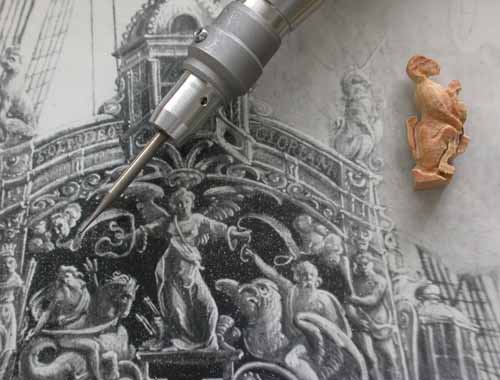
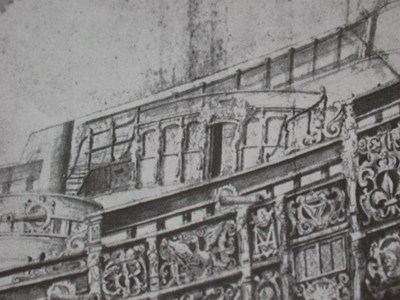
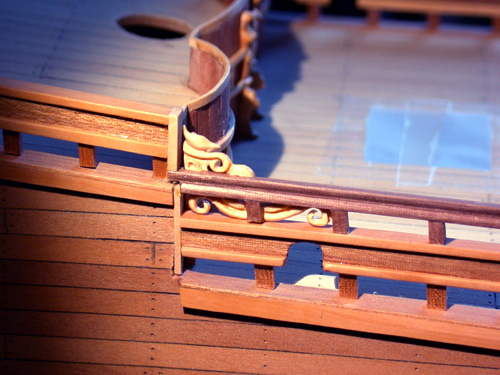
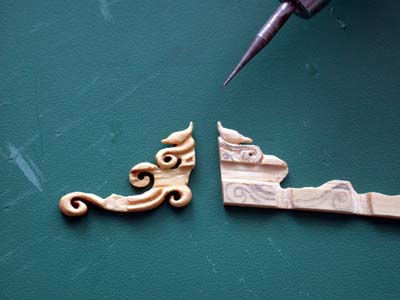
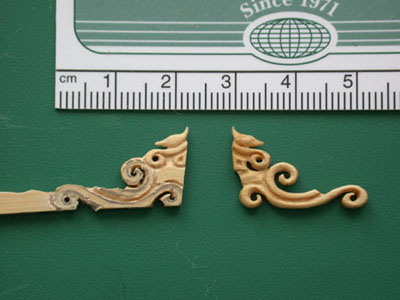
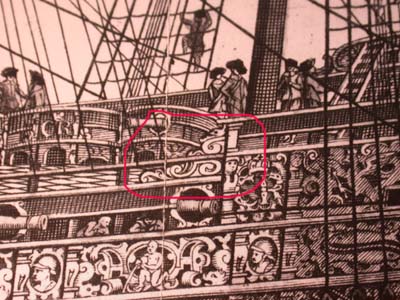
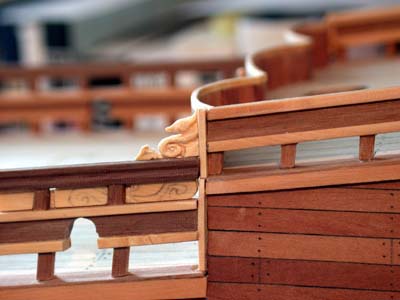
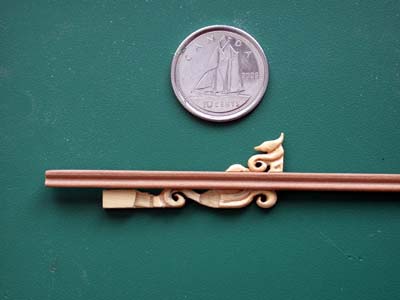
The hance of the waste at the next deck level required a carving that not only transitioned the two decks, but was imbedded in the rail. The following is a section of the Payne engraving showing this carving. The next series of photos show the carving in progress and finally mounted. This was a tricky fit and now I had to carve the mirror image for the starboard side. Note the dolphin at the top of the carving. More to follow.......................... Bill
- 382 replies
-
- 3
-
-

-
- sovereign of the seas
- carving
- (and 1 more)
-
The transition between the rear decks, the hance, has a small sculpture on it which I chose to carve next. The two hance pieces for the transition to the poop deck. One under way with the handle still attached and the other completed. The hance transition complete and mounted on the port side. More to follow....................... Bill

- 382 replies
-
- 1
-
-
- sovereign of the seas
- carving
- (and 1 more)
-
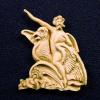
As you have realized by now, the reposting of my build is a time compression of the build that has taken place over a number of years. It is sometimes hard for me to follow the exact progression but for the most part I think it is close to what actually happened. Over those years, I traveled to model shows and conferences and sought out people who I could learn from and who might also critique my carvings. One example of this which stands out in my mind was a visit to the SMA Ship Modeling Conference in Los Angeles. I met a modeler, Jean Eckert from Los Altos California who was exhibiting a beautiful model of The Nonsuch. Jean won the gold medal at the 2000 Mariner's Museum Ship Modeling Conference in Newport News Virginia for her beautiful model. The boxwood carvings on this model were simply exquisite! Jean's beautiful Nonsuch model photographed through a glass case at the SMA Conference. Jean was kind enough to sit down with me over a coffee and look at carvings that I had taken to LA. She was most kind and considerate in her criticism. She advised me to pay more attention to undercutting aspects of the sculpture to create depth with shadows. When I returned to Canada, I reworked the Aeolus carving adding undercutting and want to show you what a difference this technique can make on a carving. The following two photos show the before and after results. Before undercutting After undercutting I am sure that despite the different colour of the wood due to lighting conditions when photographed, you can clearly see the difference the undercuts made in shadows cast by the light. The carving changed dramatically. I am indebted to Jean Eckert and many others that have assisted me over the years in improving my skills as a modeler. More to follow...................... Regards, Bill
- 382 replies
-
- 1
-
-
- sovereign of the seas
- carving
- (and 1 more)
-
Thanks for looking in on my build Borge. Regards, Bill
-
Lovely to see all that very fine detail work in your build Gary. Always a pleasure to view. Regards, Bill
-
Thanks Bill for your kind comments. Regards, Bill
-
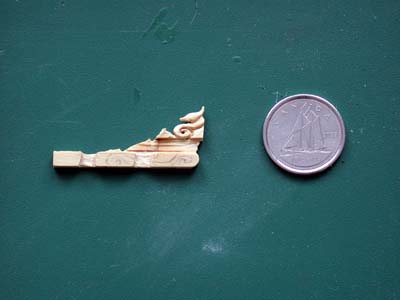
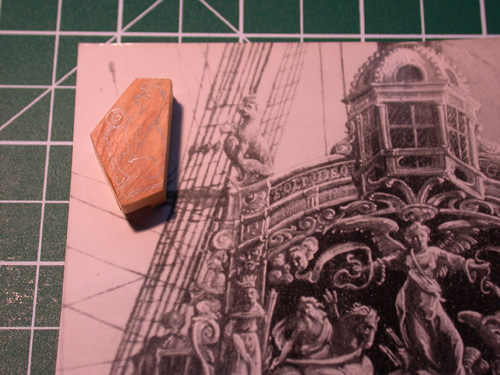
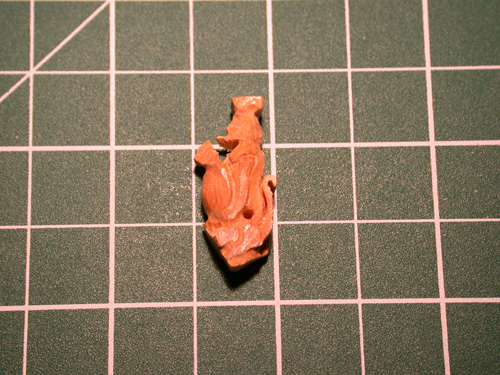
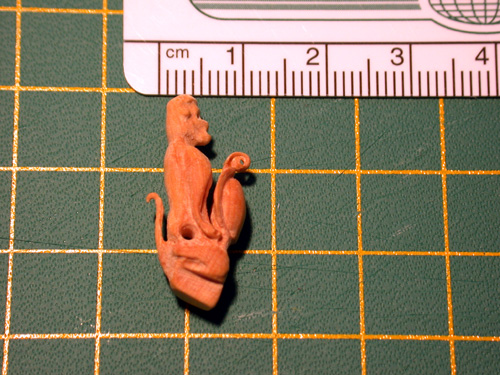
The next carving was of a lion with a shield that sits on the edge of the rail on the port side of the stern. This photo shows the rough outline of this carving in the round shown against the Lely portrait version. The start of the carving........ A more refined carving is taking shape........ The finished carving mounted on the stern rail. In order to carve the tiny detail of the less than 1 mm thick tail, I used a pair of dental loupes shown in the next photo. They are at 2.5X magnification and allow me to work at about 13" from the work. More to follow........ Regards, Bill

- 382 replies
-
- 3
-
-
- sovereign of the seas
- carving
- (and 1 more)
-
Thanks for your comments John, Regards, Bill