modelshipwright
-
Posts
299 -
Joined
-
Last visited
Content Type
Profiles
Forums
Gallery
Events
Everything posted by modelshipwright
-
 The small deck extension is now being planked in Holly with a new front trim glued in place. More to follow..........
- 382 replies
-
- 4
-

-
- sovereign of the seas
- carving
- (and 1 more)
-
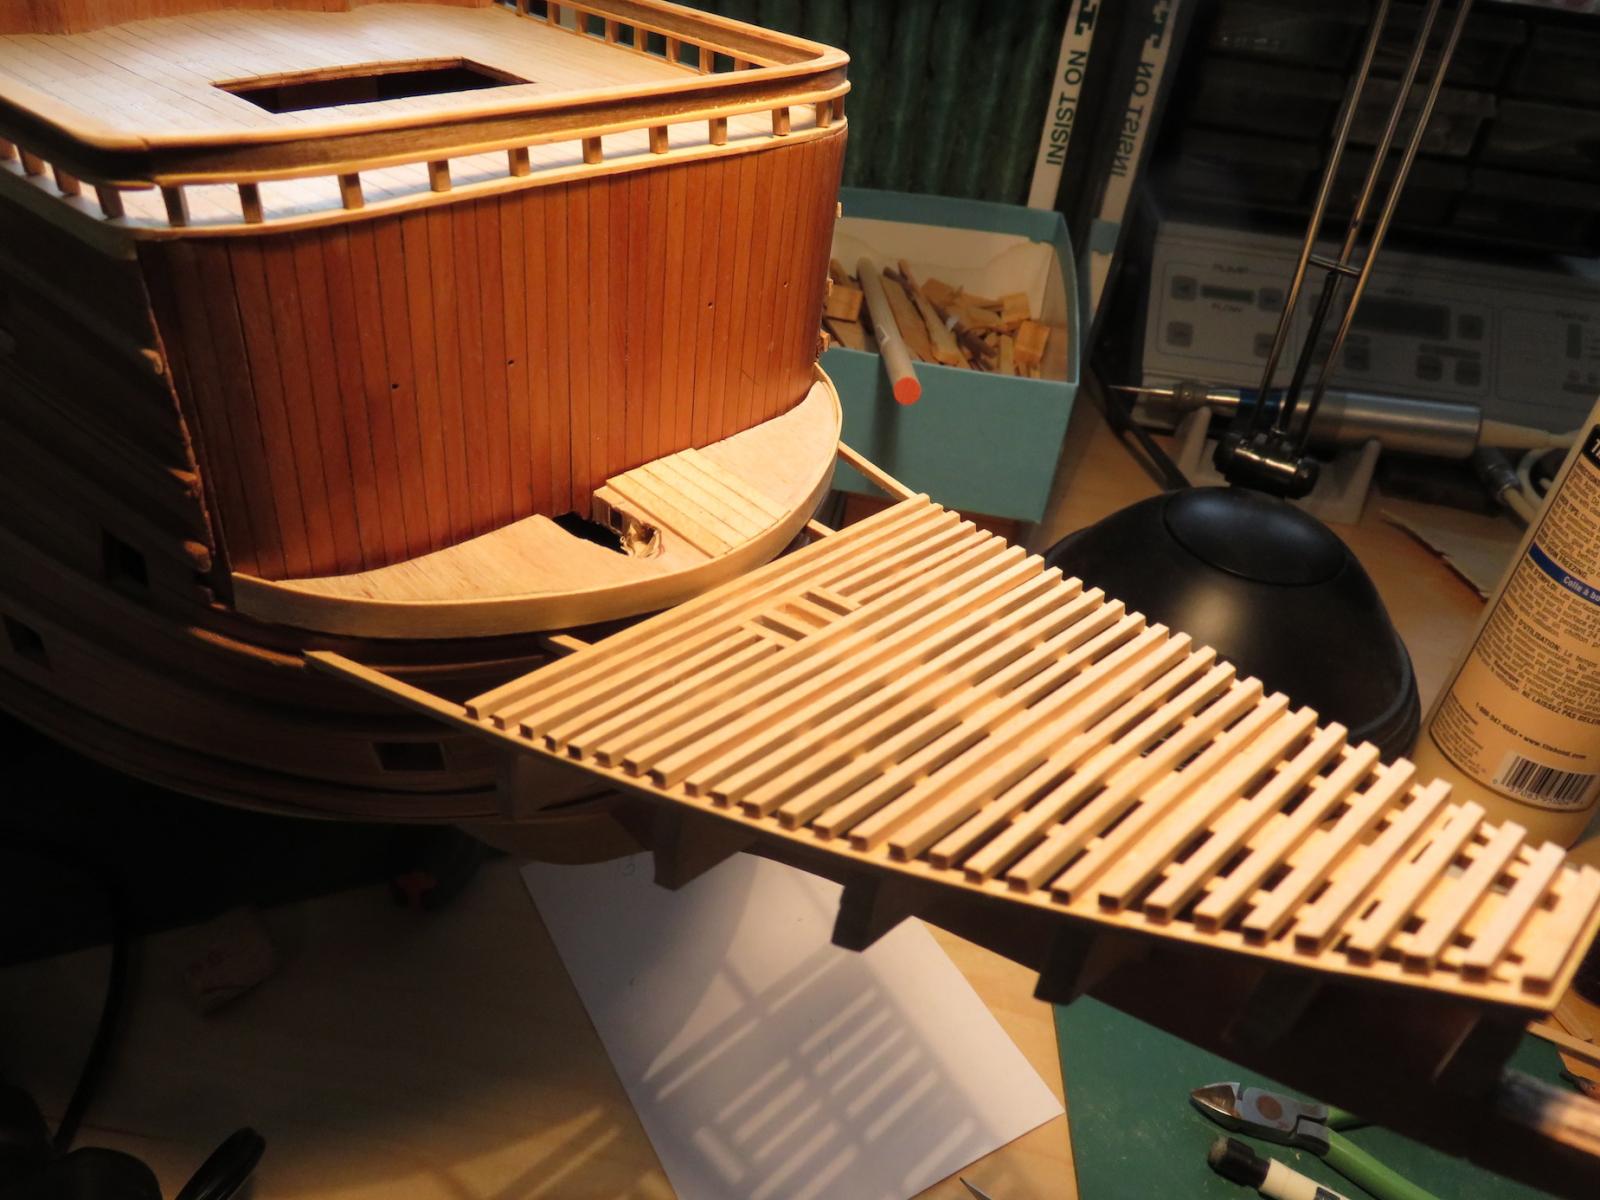
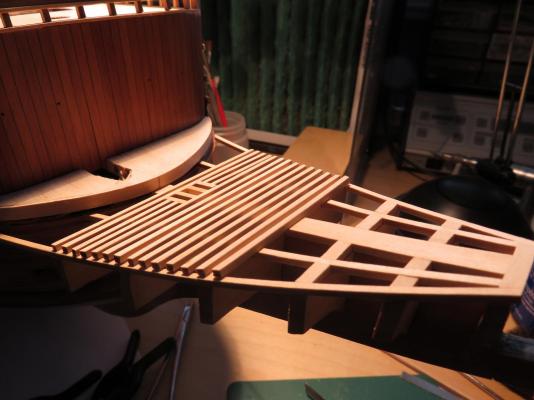
Thanks Nigel. I am leaning towards leaving the grating as it is now. It does somewhat look similar to the construction of the beakhead on the Vasa of 1628. As there are no clear contemporary representations of this area available to me, I am thinking this will be acceptable. Regards, Bill
- 382 replies
-
- 1
-
-
- sovereign of the seas
- carving
- (and 1 more)
-
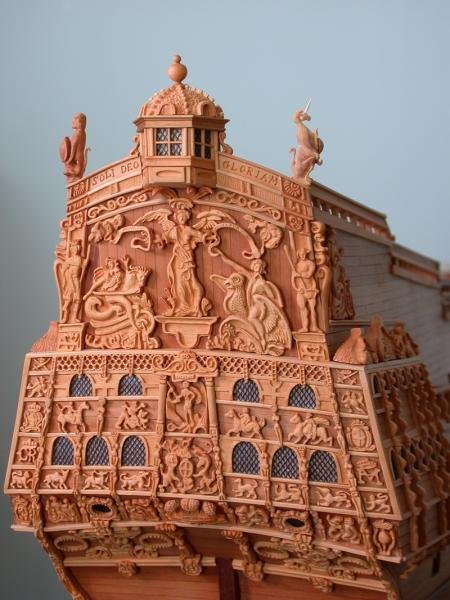
The next photo shows the beak in a more completed fashion. Next begins the work where the beak encounters the hull of the ship. More to follow...........

- 382 replies
-
- 9
-
-
- sovereign of the seas
- carving
- (and 1 more)
-
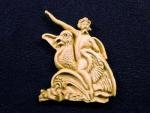
Sometimes the ability to zoom a photo spoils the effect of the subject, specifically when these are miniature carvings. Just like a fine painting, they were not met to be viewed at super close range but rather from a distance as the artist has created this image for that purpose. Some of my carvings look fine from a distance of say 2-3 feet, but close up they change. Regards, Bill
- 382 replies
-
- 2
-
-
- sovereign of the seas
- carving
- (and 1 more)
-
Thanks Mark, I really appreciate the comment. Bill
-
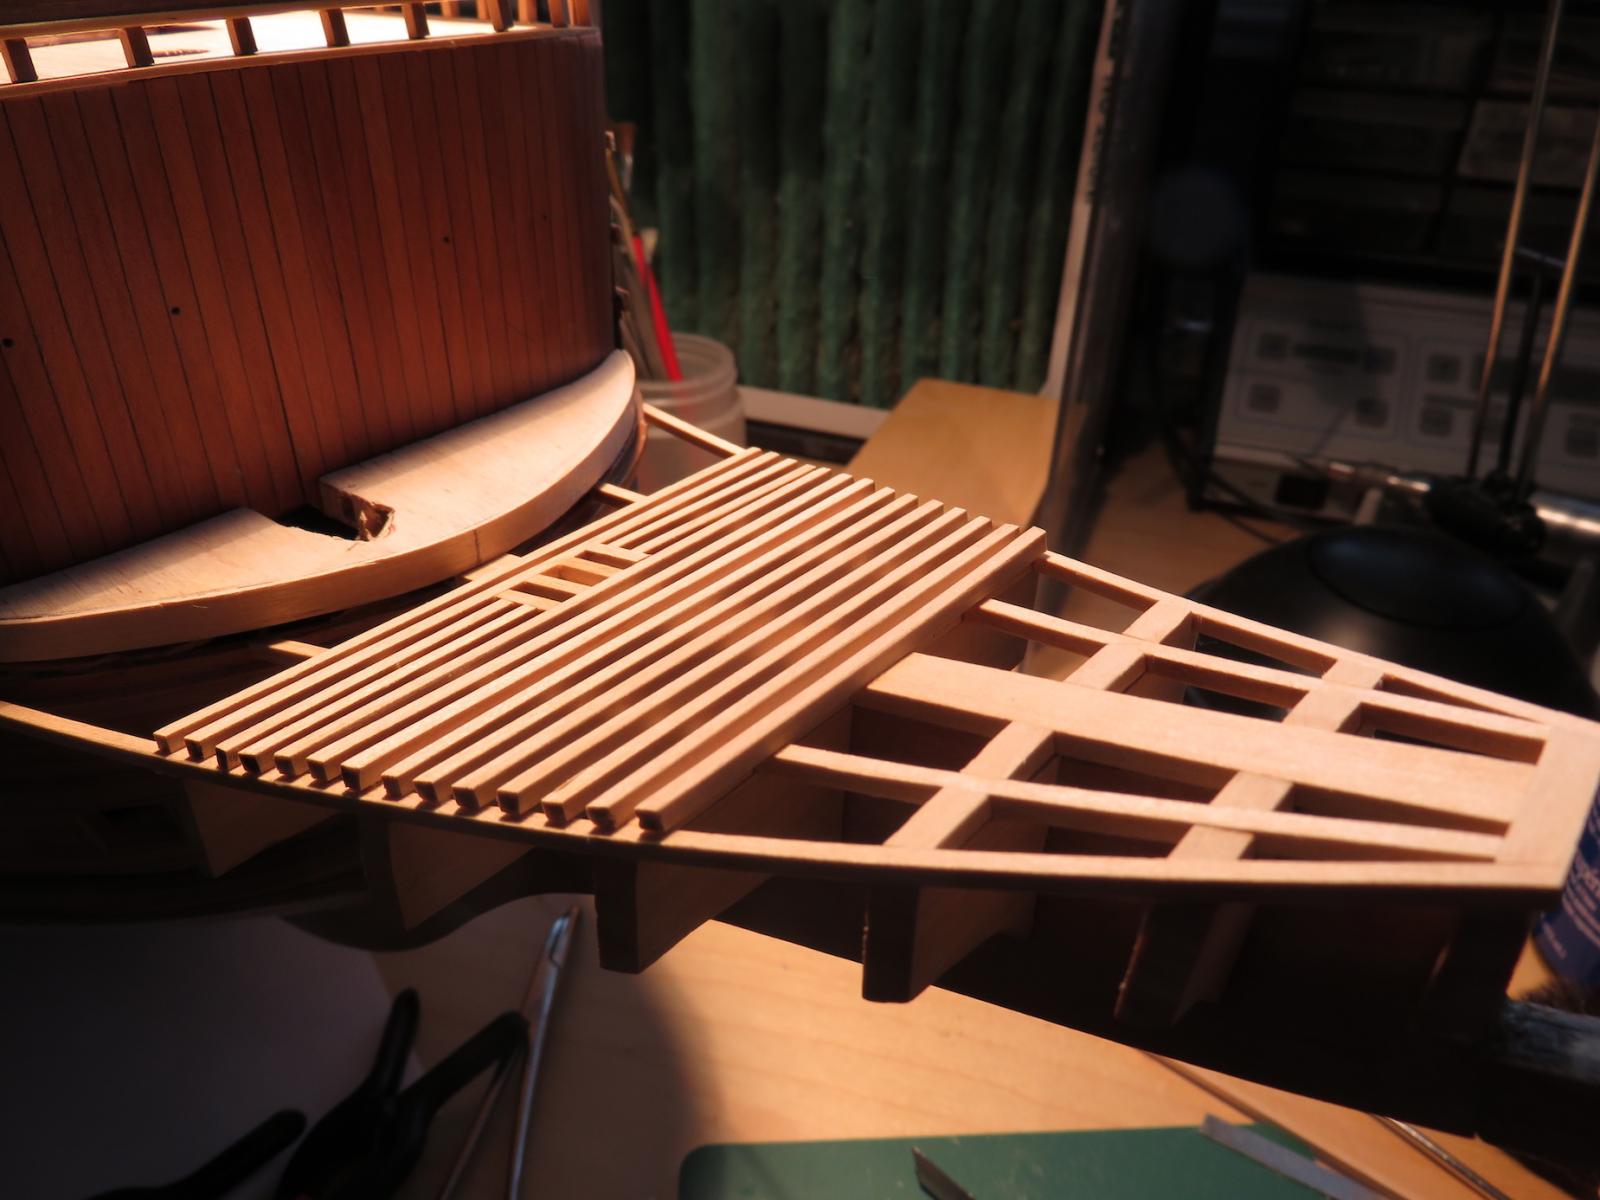
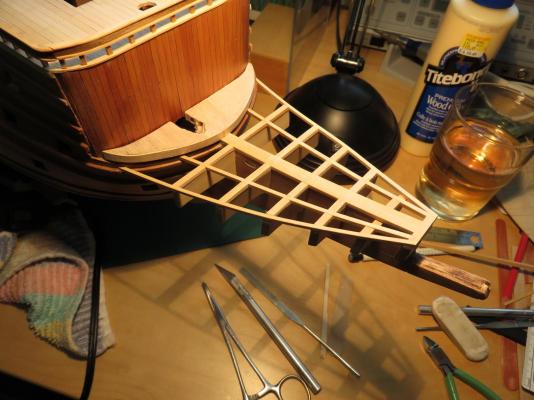
The construction of the beak is progressing. Provision has been made for the gammoning that will secure the bowsprit. The view from above. More to follow...............
- 382 replies
-
- 15
-
-
- sovereign of the seas
- carving
- (and 1 more)
-
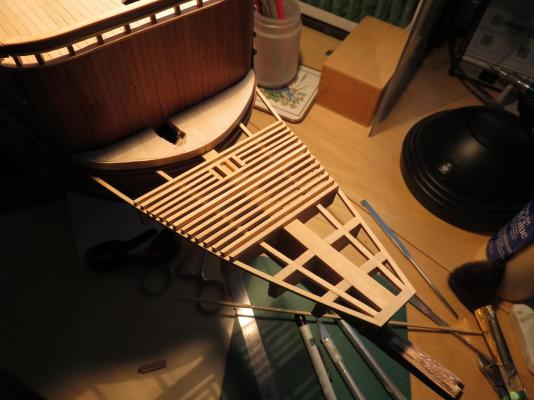
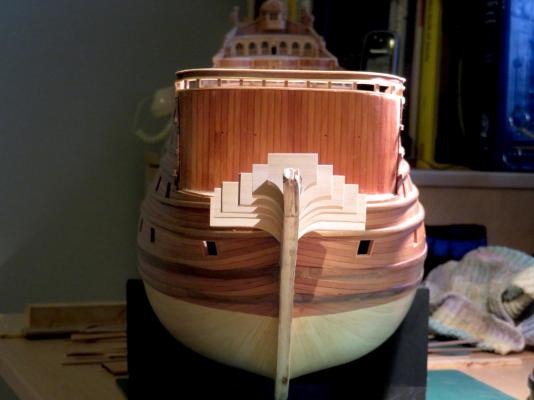
This shot shows the progress to date of the beak construction. All timbers are Pau Marfin. More to follow...............
- 382 replies
-
- 10
-
-
- sovereign of the seas
- carving
- (and 1 more)
-
You could be right but no matter how you look at it, the beak needed to be changed. Regards, Bill
- 382 replies
-
- 1
-
-
- sovereign of the seas
- carving
- (and 1 more)
-
Hey Dave, The new lantern is looking great. It is more in proportion to the rest of the stern than the first one. Nice work. Regards, Bill
- 962 replies
-
- 8
-
-
- sovereign of the seas
- ship of the line
- (and 1 more)
-
Yup, that pretty much sums it up. Therefore, I have a scrap box filled with boxwood pieces that didn't make it on the model. Bill
- 382 replies
-
- 3
-
-
- sovereign of the seas
- carving
- (and 1 more)
-
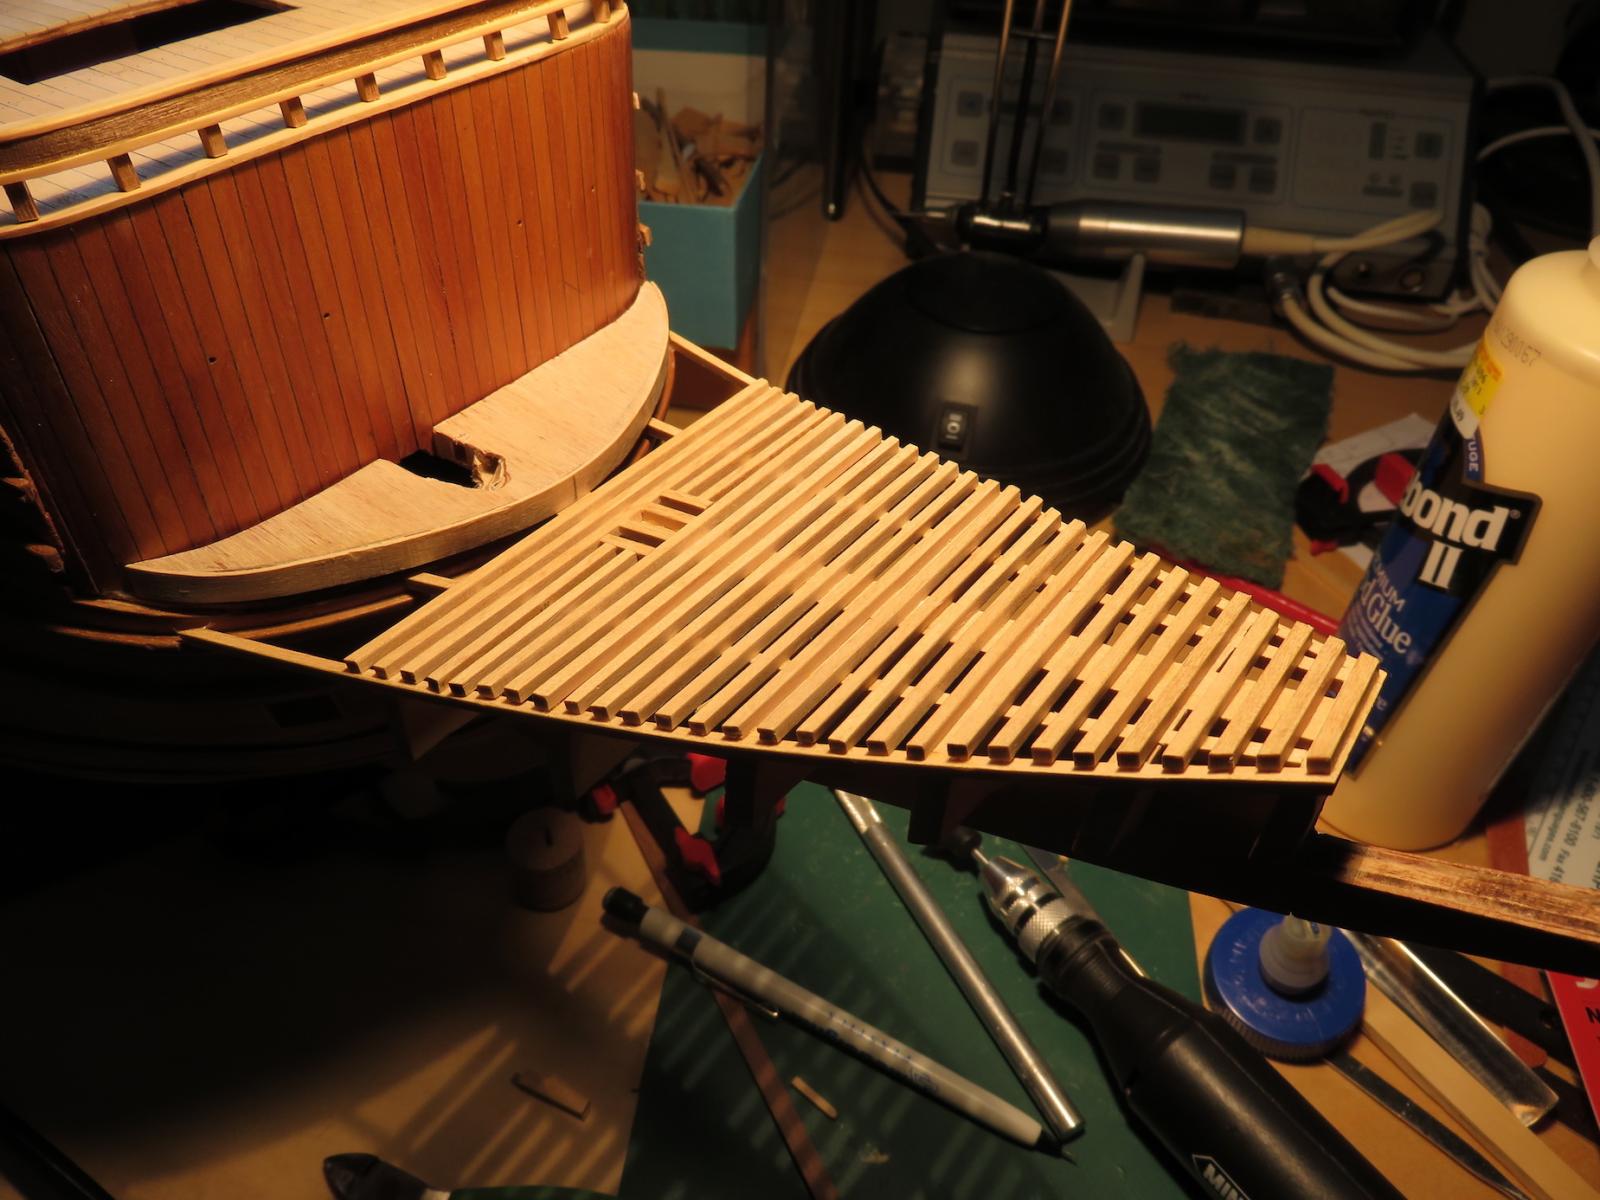
After some due consideration of my attempt to replicate the beak I came to the conclusion that it would not satisfy my vision of drainage grates and would not accurately reflect building methods of the day so I removed the decking and have started milling and building a new version of this area. The following picture shows the beginning of the fabrication. More to follow...........
- 382 replies
-
- 10
-
-
- sovereign of the seas
- carving
- (and 1 more)
-
That was my error and I have now deleted it. My apologies to Philip.
- 65 replies
-
- 1
-
-
- artesania latina
- king of the mississippi
- (and 1 more)
-
The lantern looks good Dave. Great job. Bill
- 962 replies
-
- 8
-
-
- sovereign of the seas
- ship of the line
- (and 1 more)
-
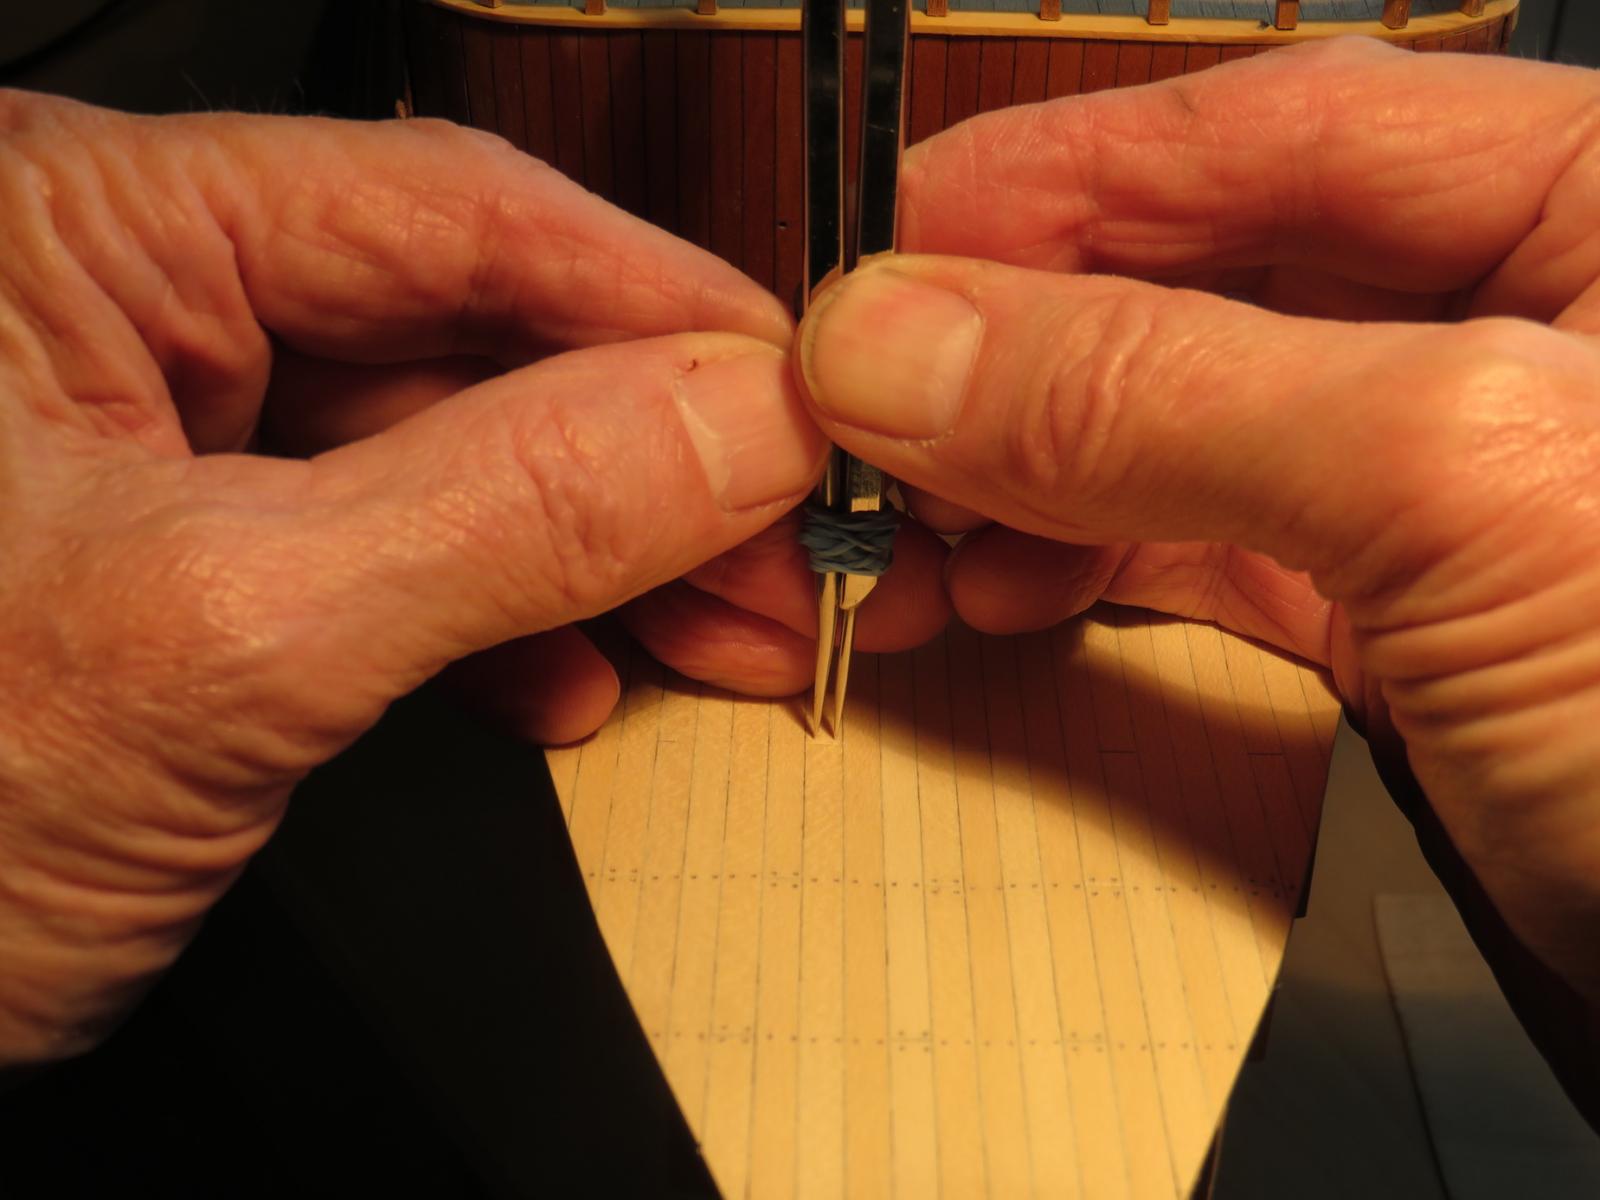
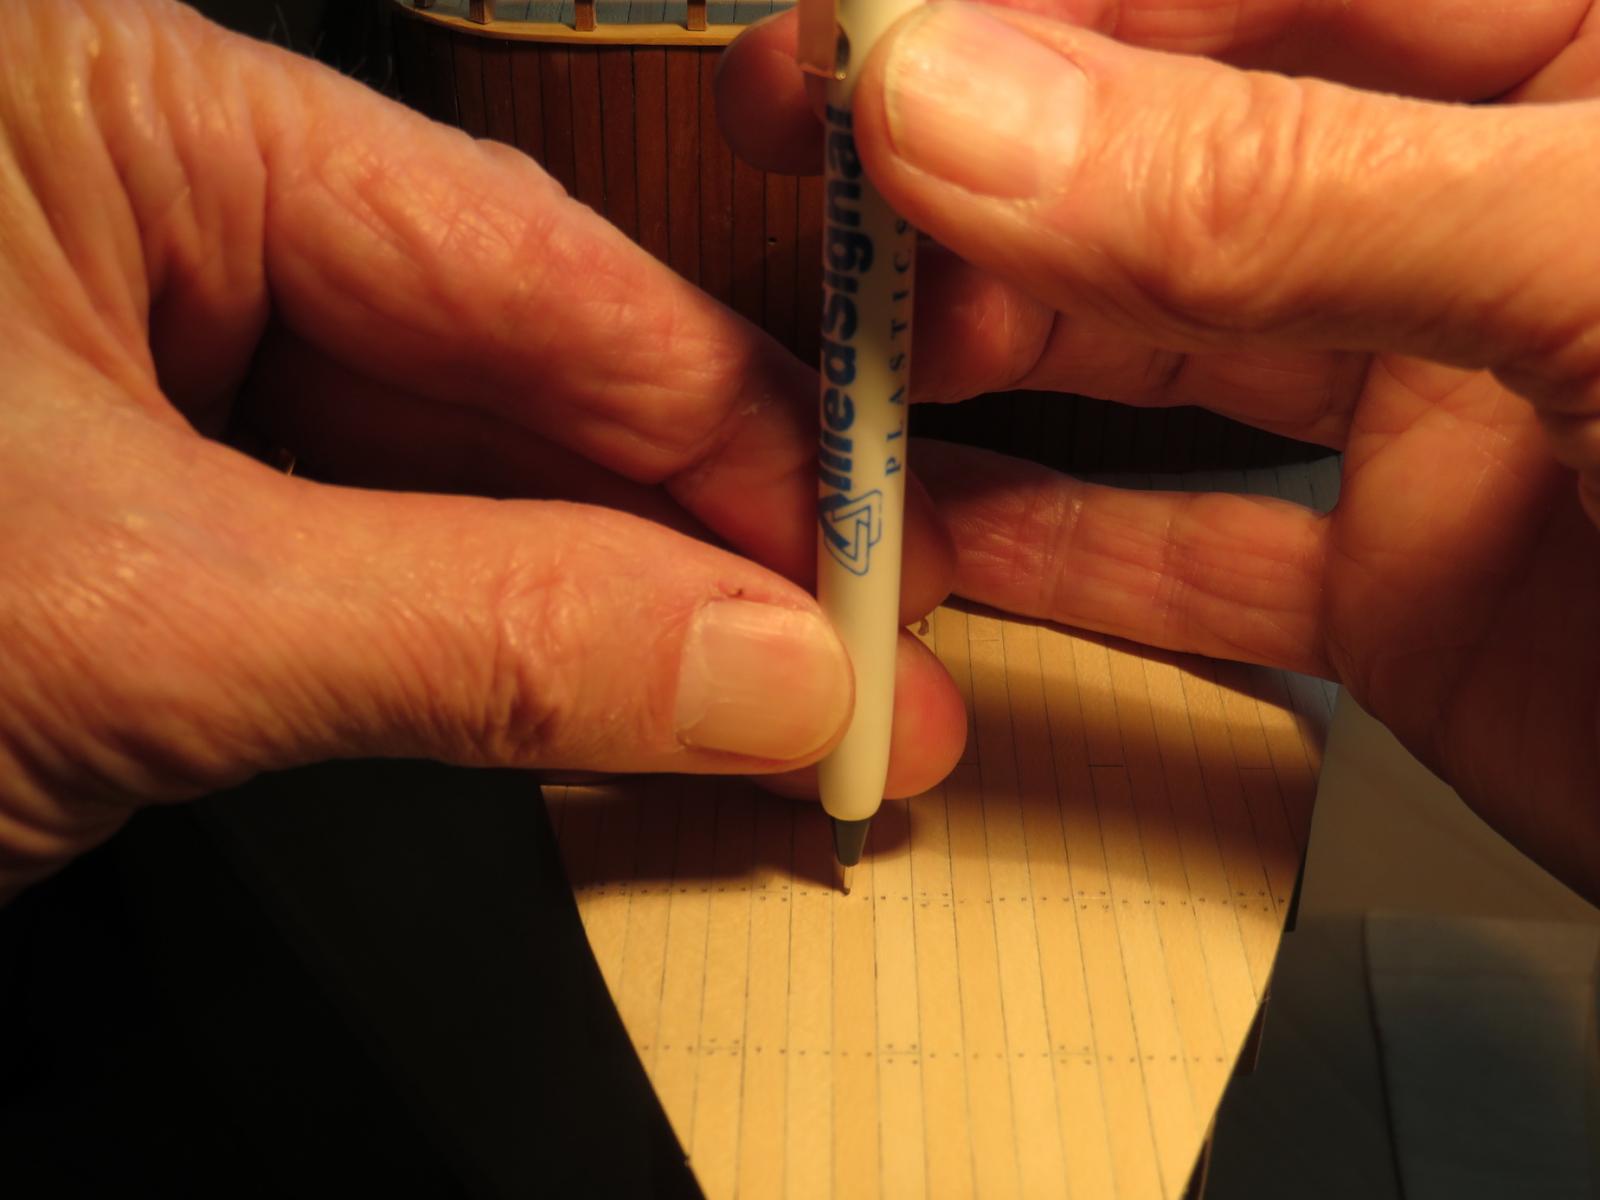
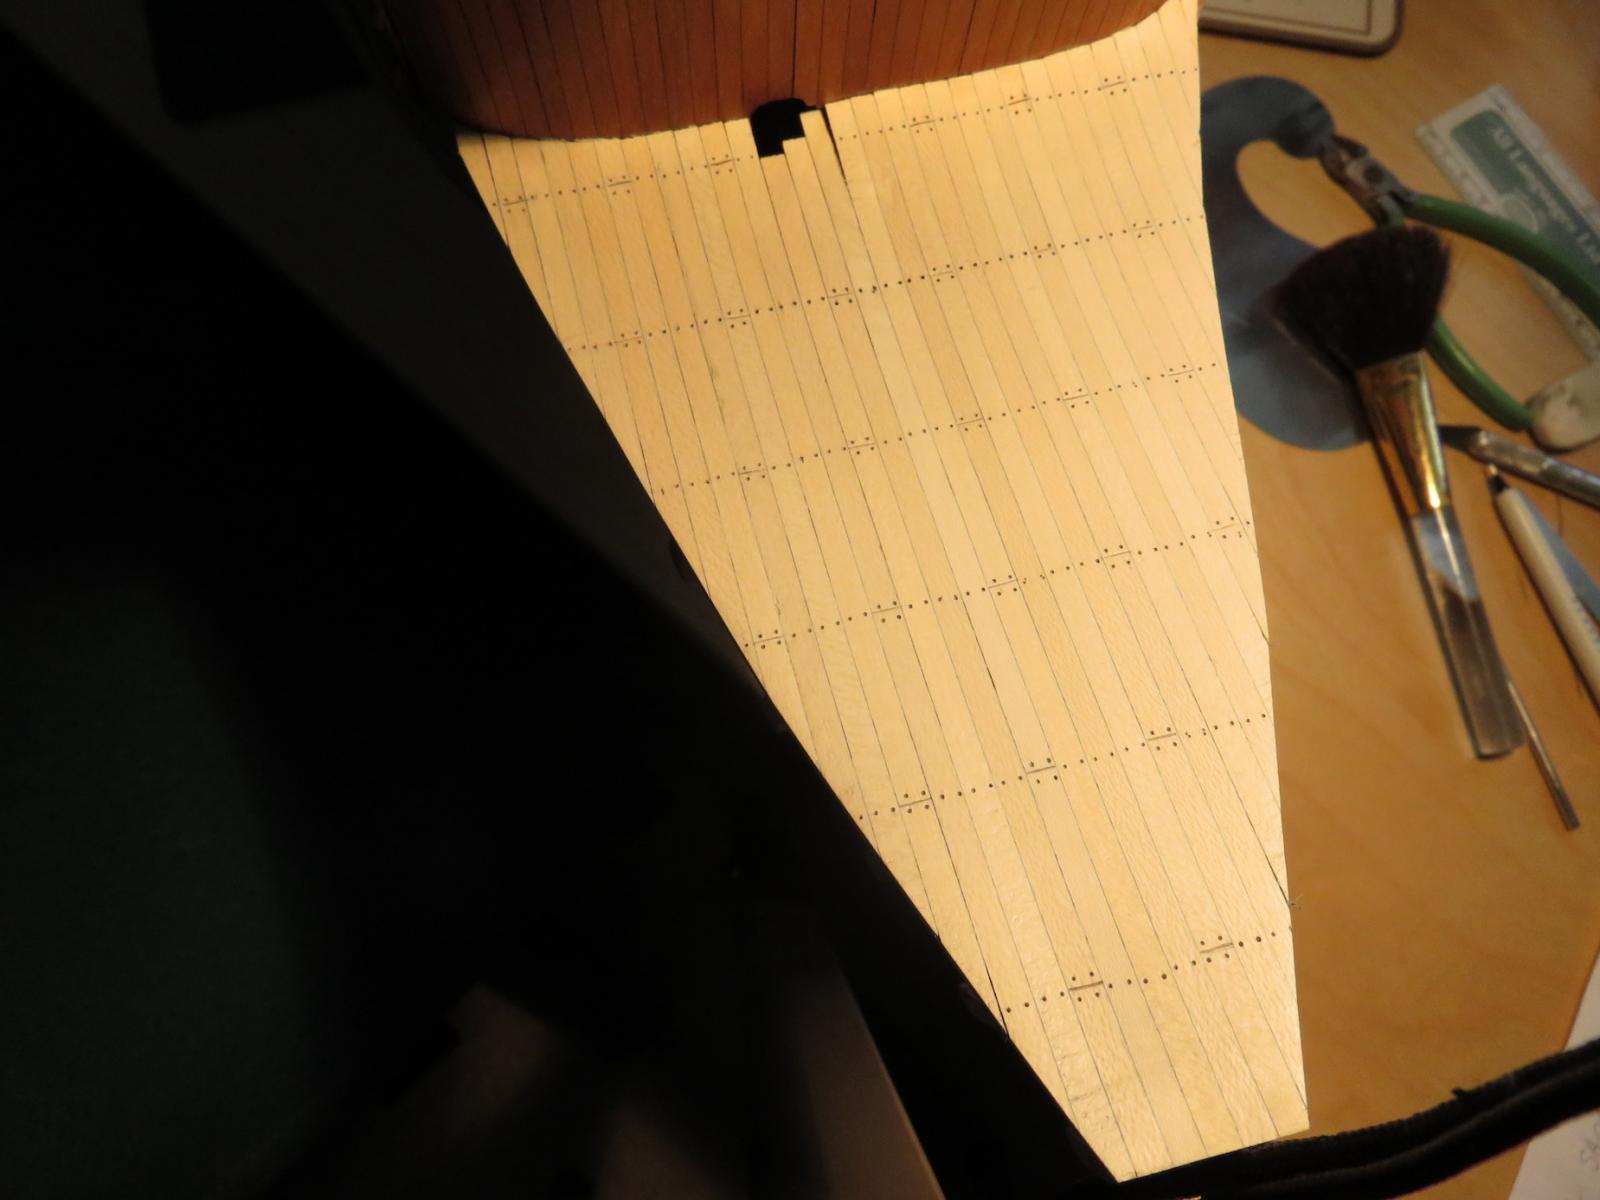
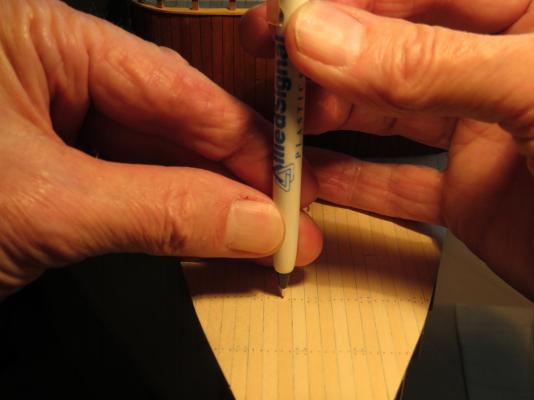
The following series of photos shows my method of representing treenails at this scale without drilling holes and making very thin wooden treenails. First I create the holes with a drafting divider. Then I rotate a 5H pencil lead in the holes to create the illusion of wooden treenails. Finally after sanding to remove any surface pencil marks, you can see the result. More to follow................


- 382 replies
-
- 11
-
-
- sovereign of the seas
- carving
- (and 1 more)
-
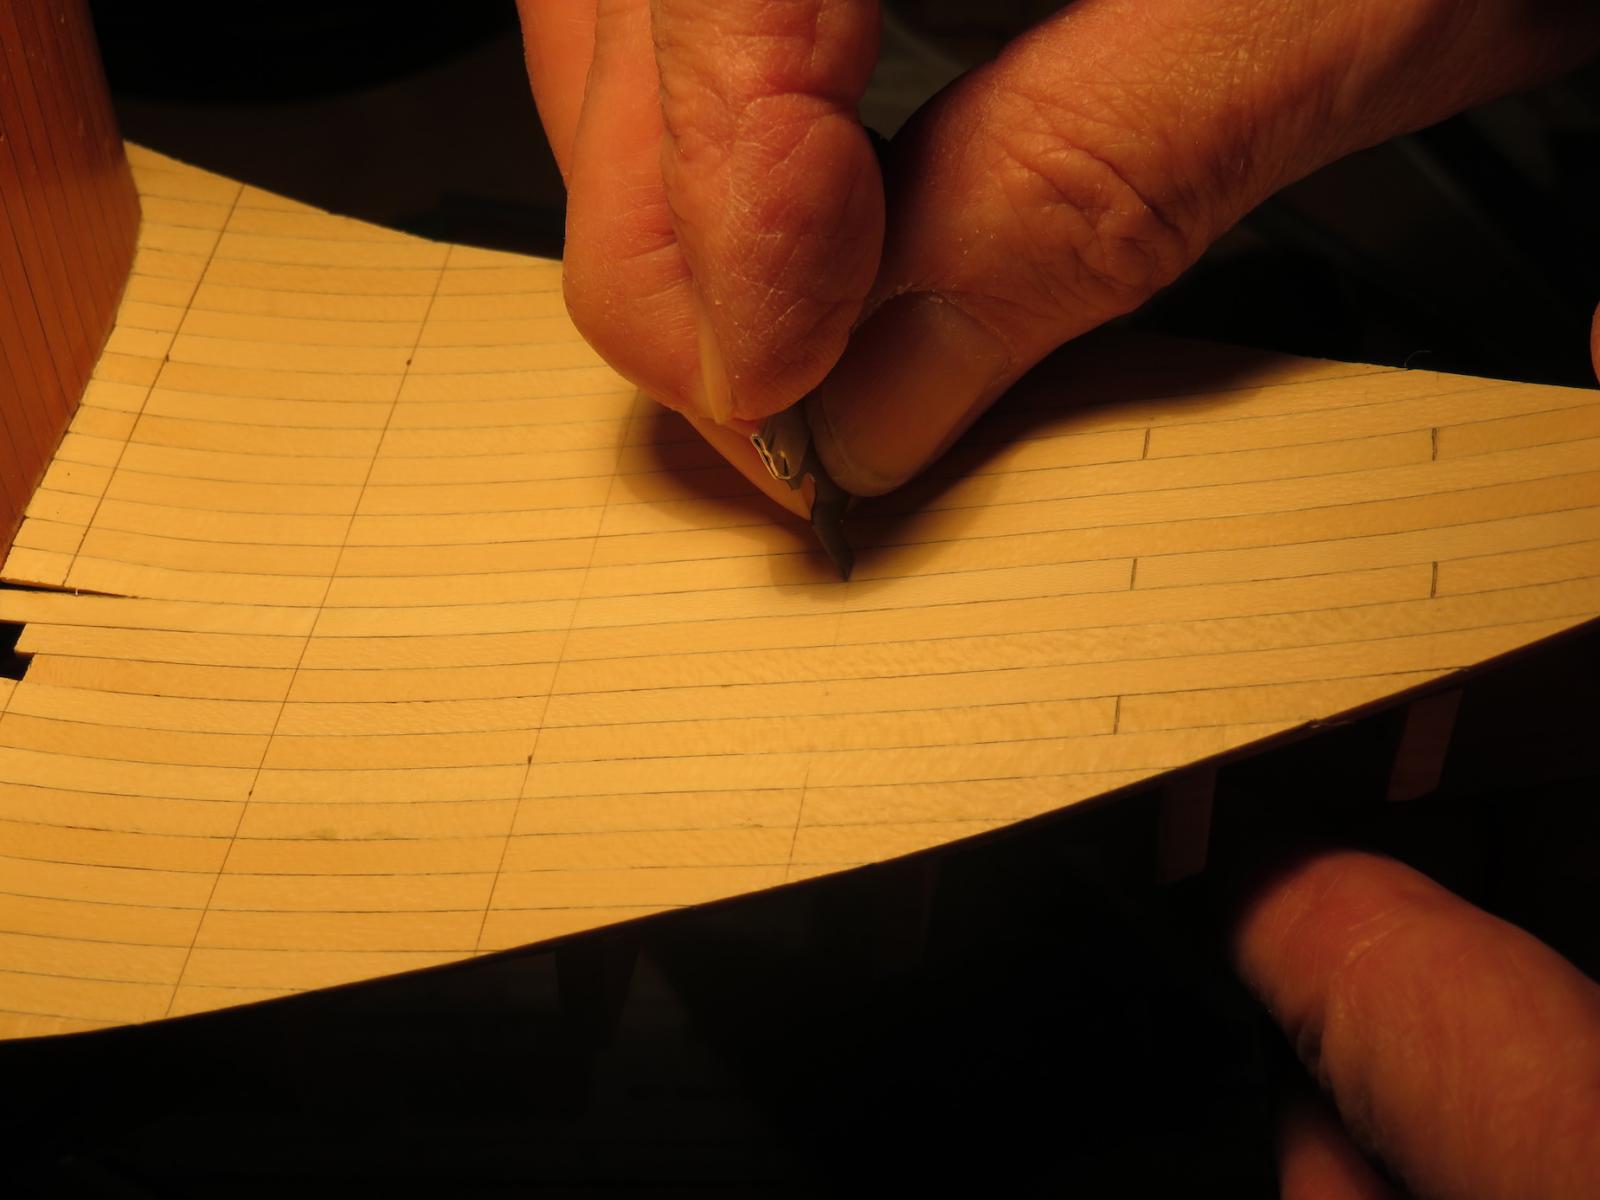
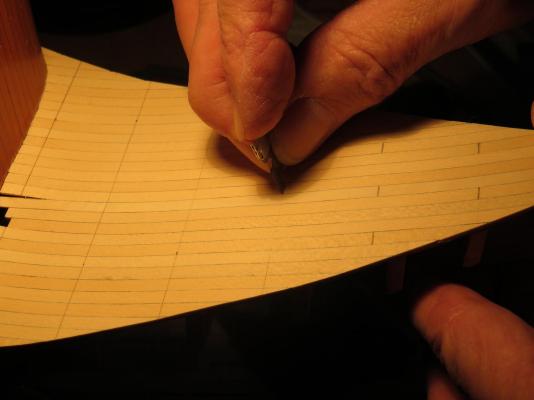
In this picture I am simulating plank endings using a modified straight razor blade to press cut the lines at the end of the planks. This shot shows the completed simulated plank ends after removal of the reference lines. Next step is to simulate treenails. More to follow...............

- 382 replies
-
- 7
-
-
- sovereign of the seas
- carving
- (and 1 more)
-
On second thought Dave, I may have misinterpreted what you meant. Do you mean another deck level on the beak? Bill
- 382 replies
-
- 1
-
-
- sovereign of the seas
- carving
- (and 1 more)
-
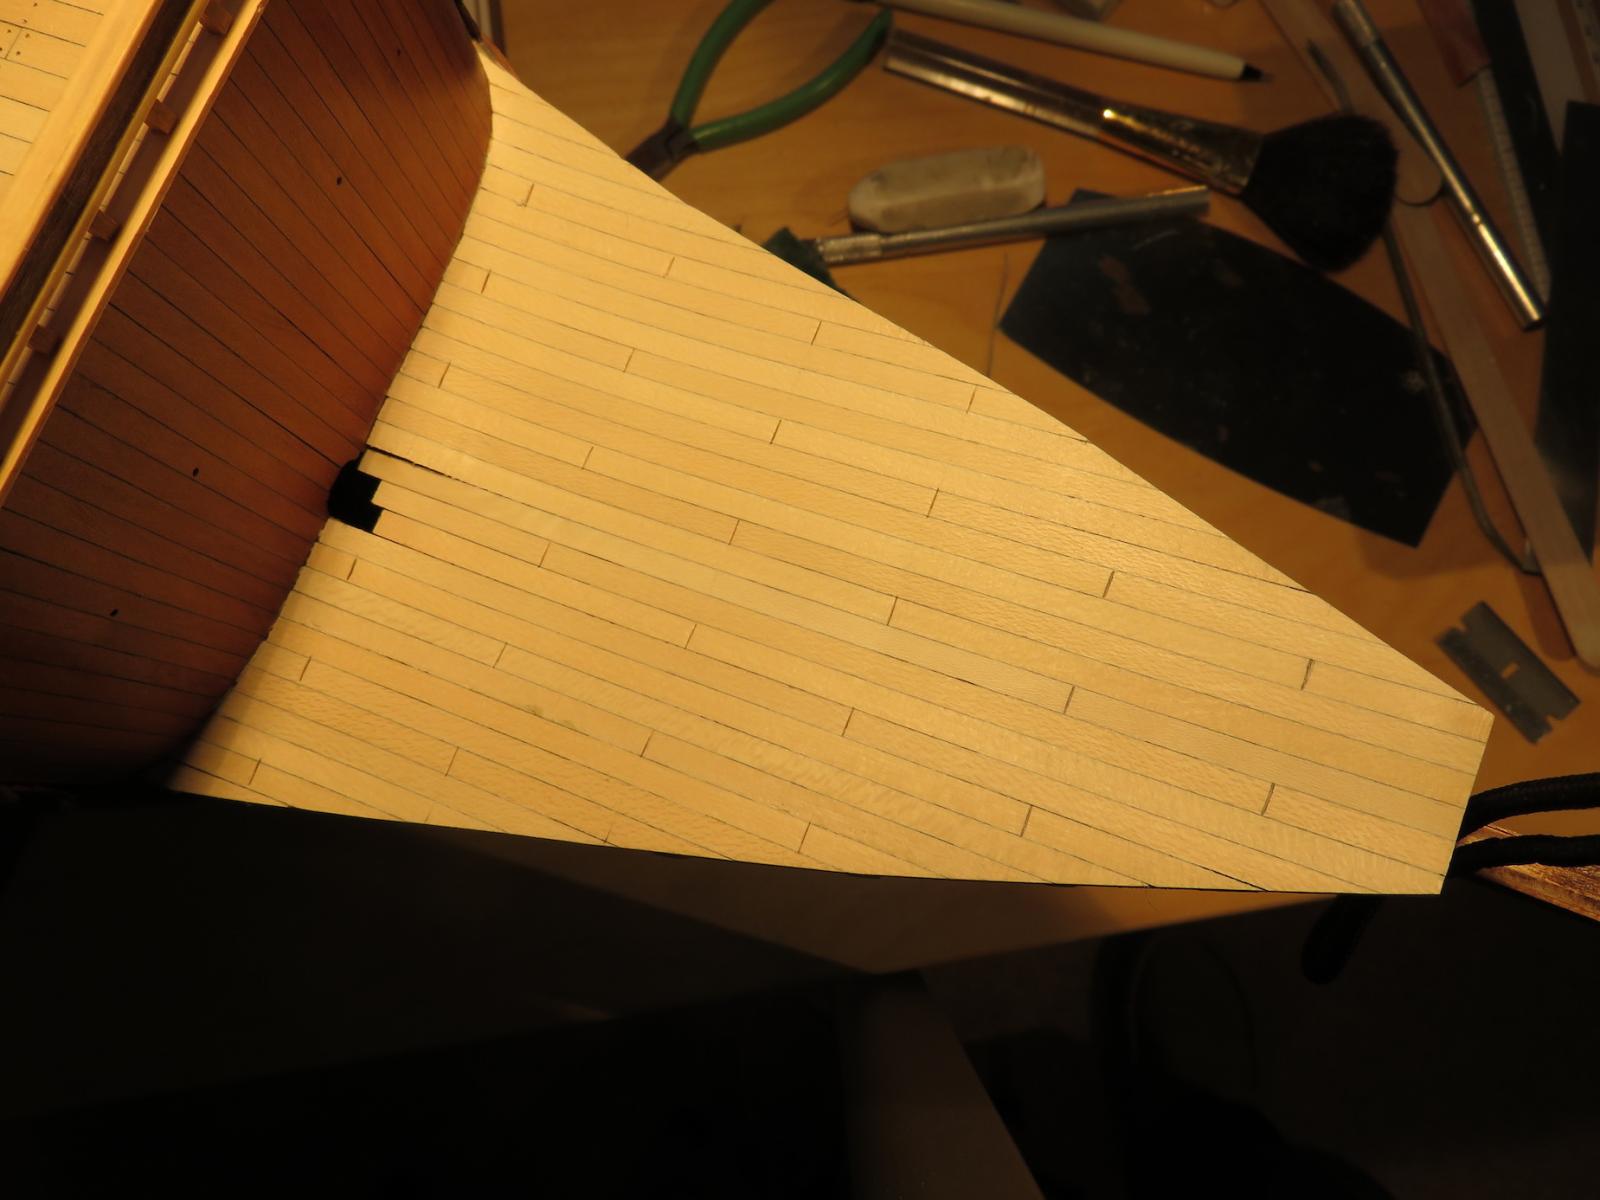
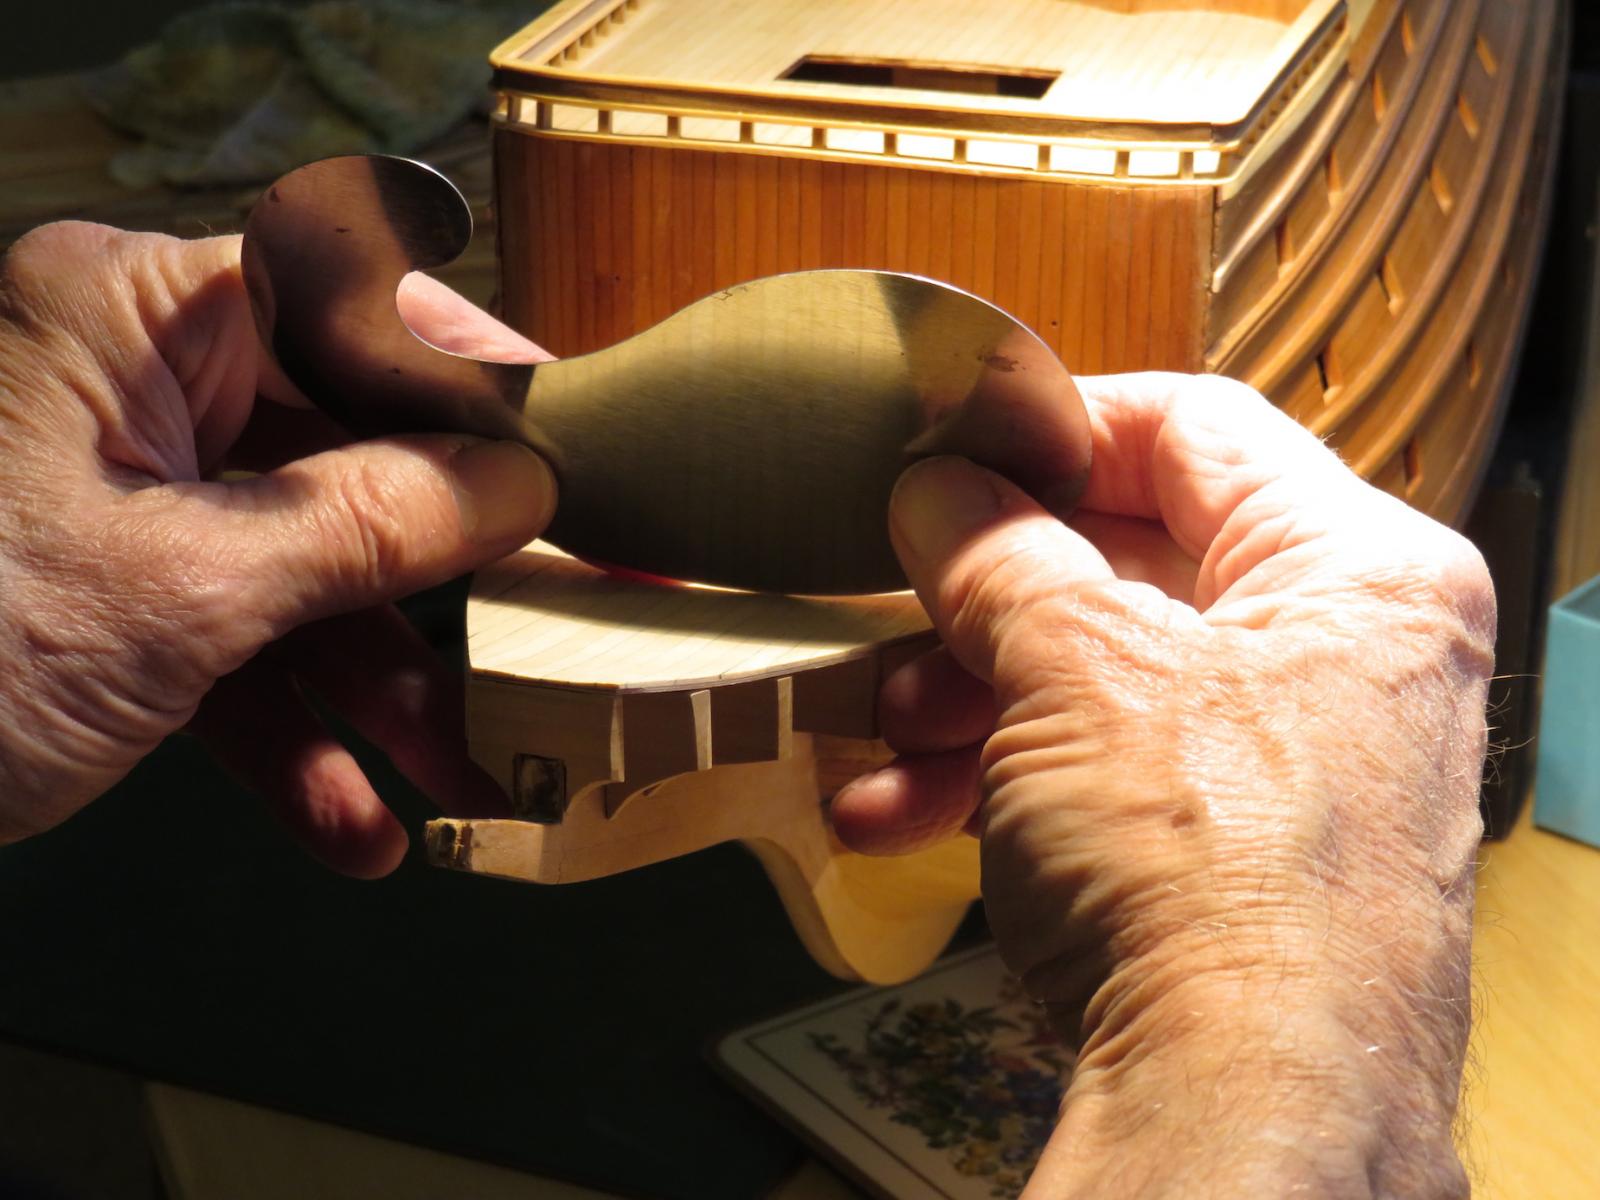
The following picture shows scraping the Holly deck planks with a furniture scraper to remove inconsistencies in the plank thicknesses and any excess glue. The next step will be to treenail the deck. More to follow.........

- 382 replies
-
- 6
-
-
- sovereign of the seas
- carving
- (and 1 more)
-
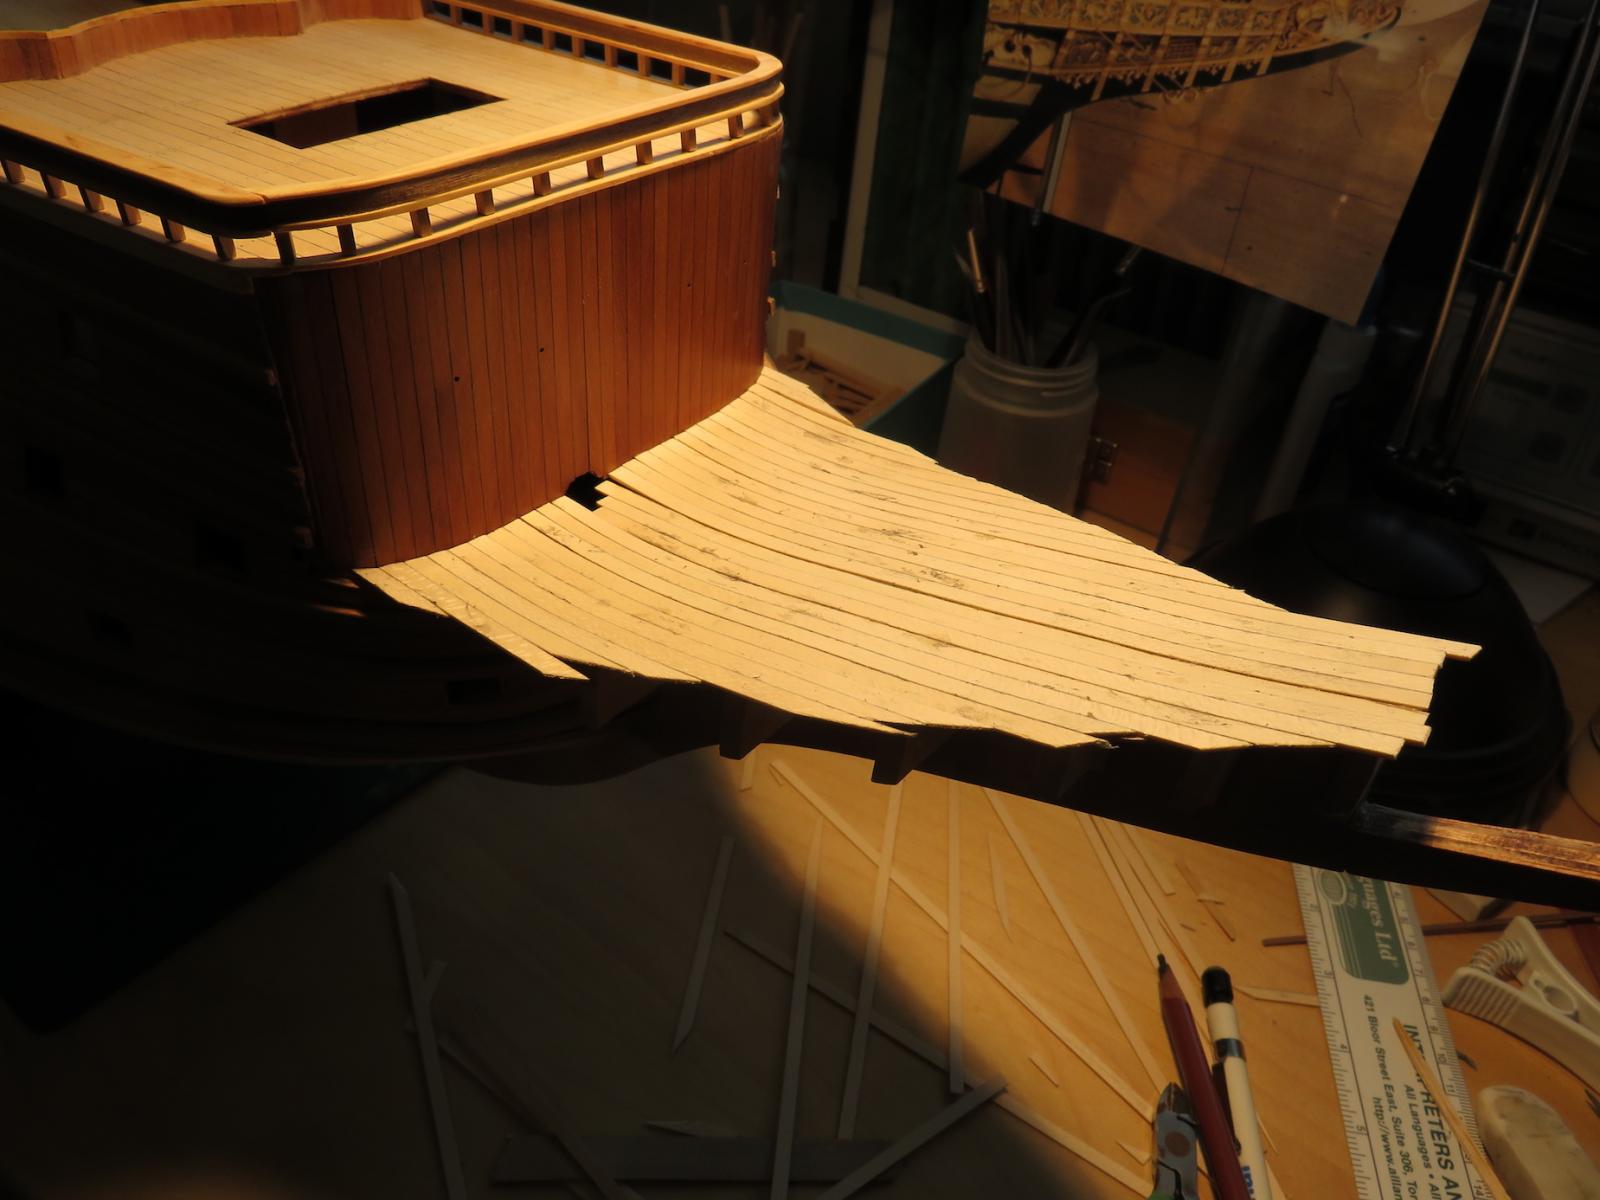
The beak deck is now rough planked with Holly planks ready for scraping and final finishing. More to follow.............

- 382 replies
-
- 6
-
-
- sovereign of the seas
- carving
- (and 1 more)
-
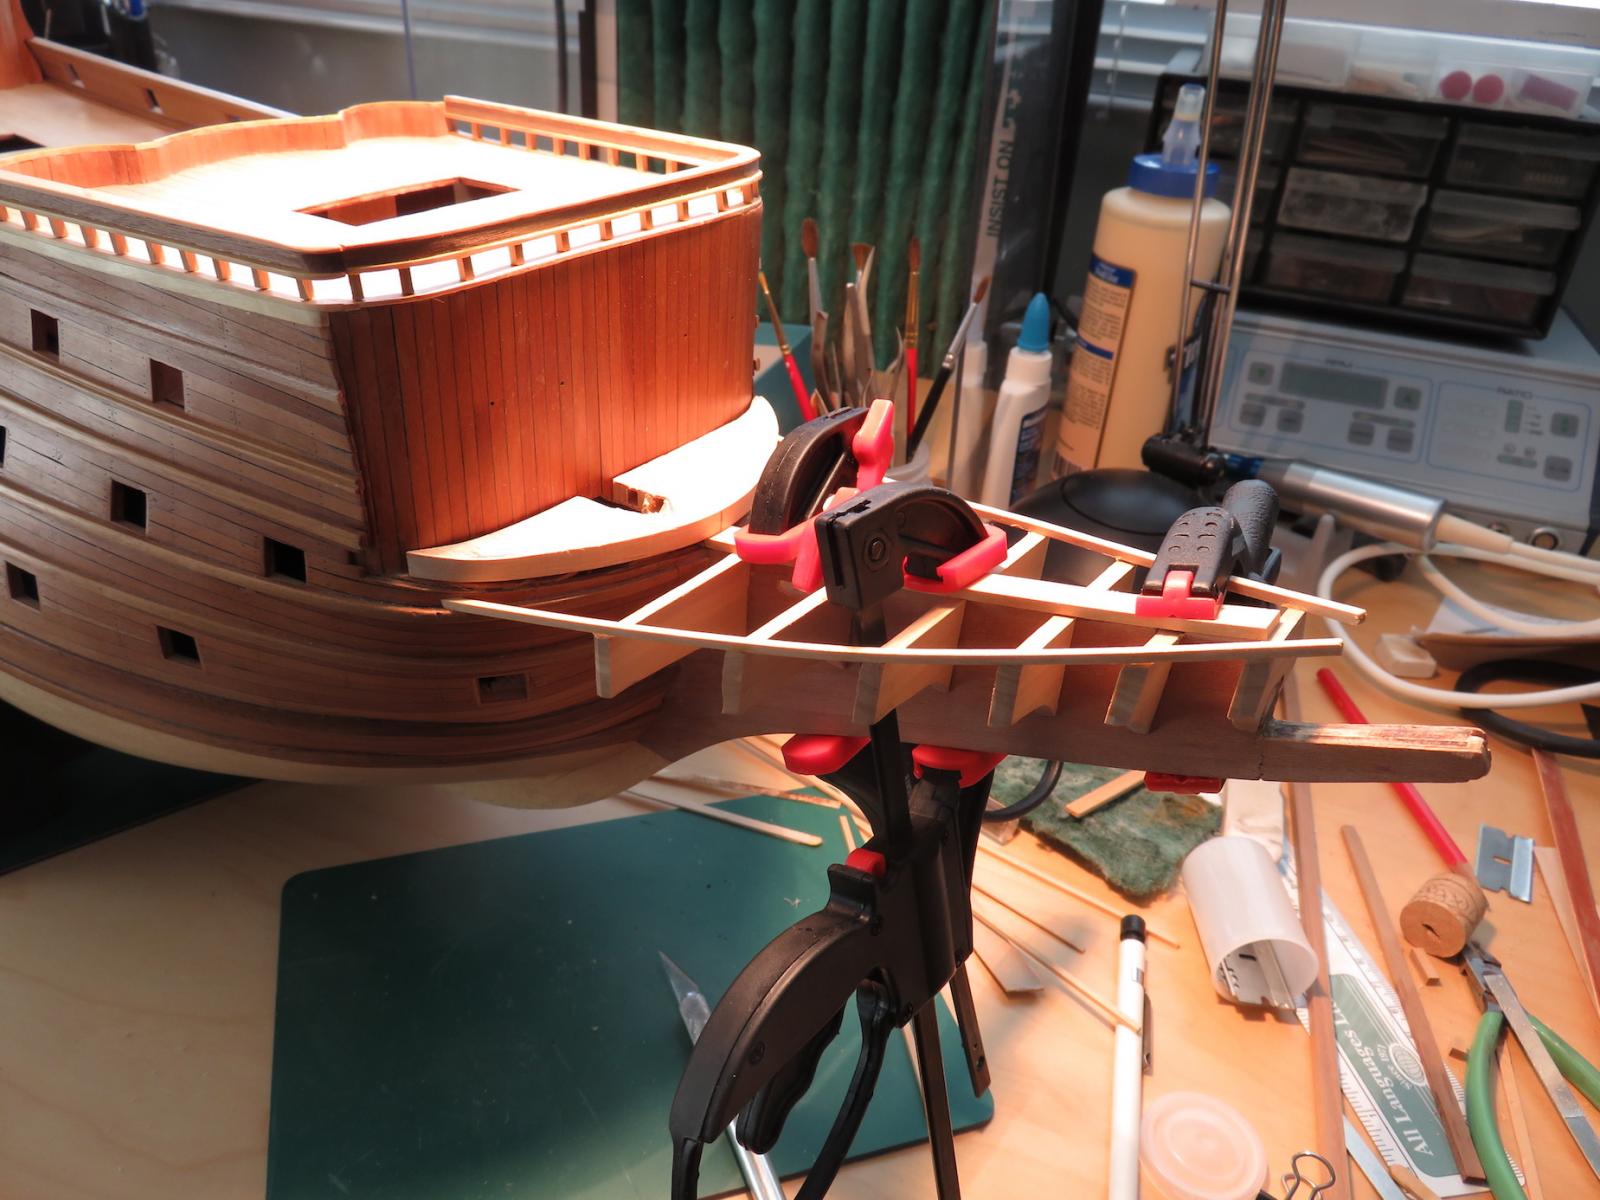
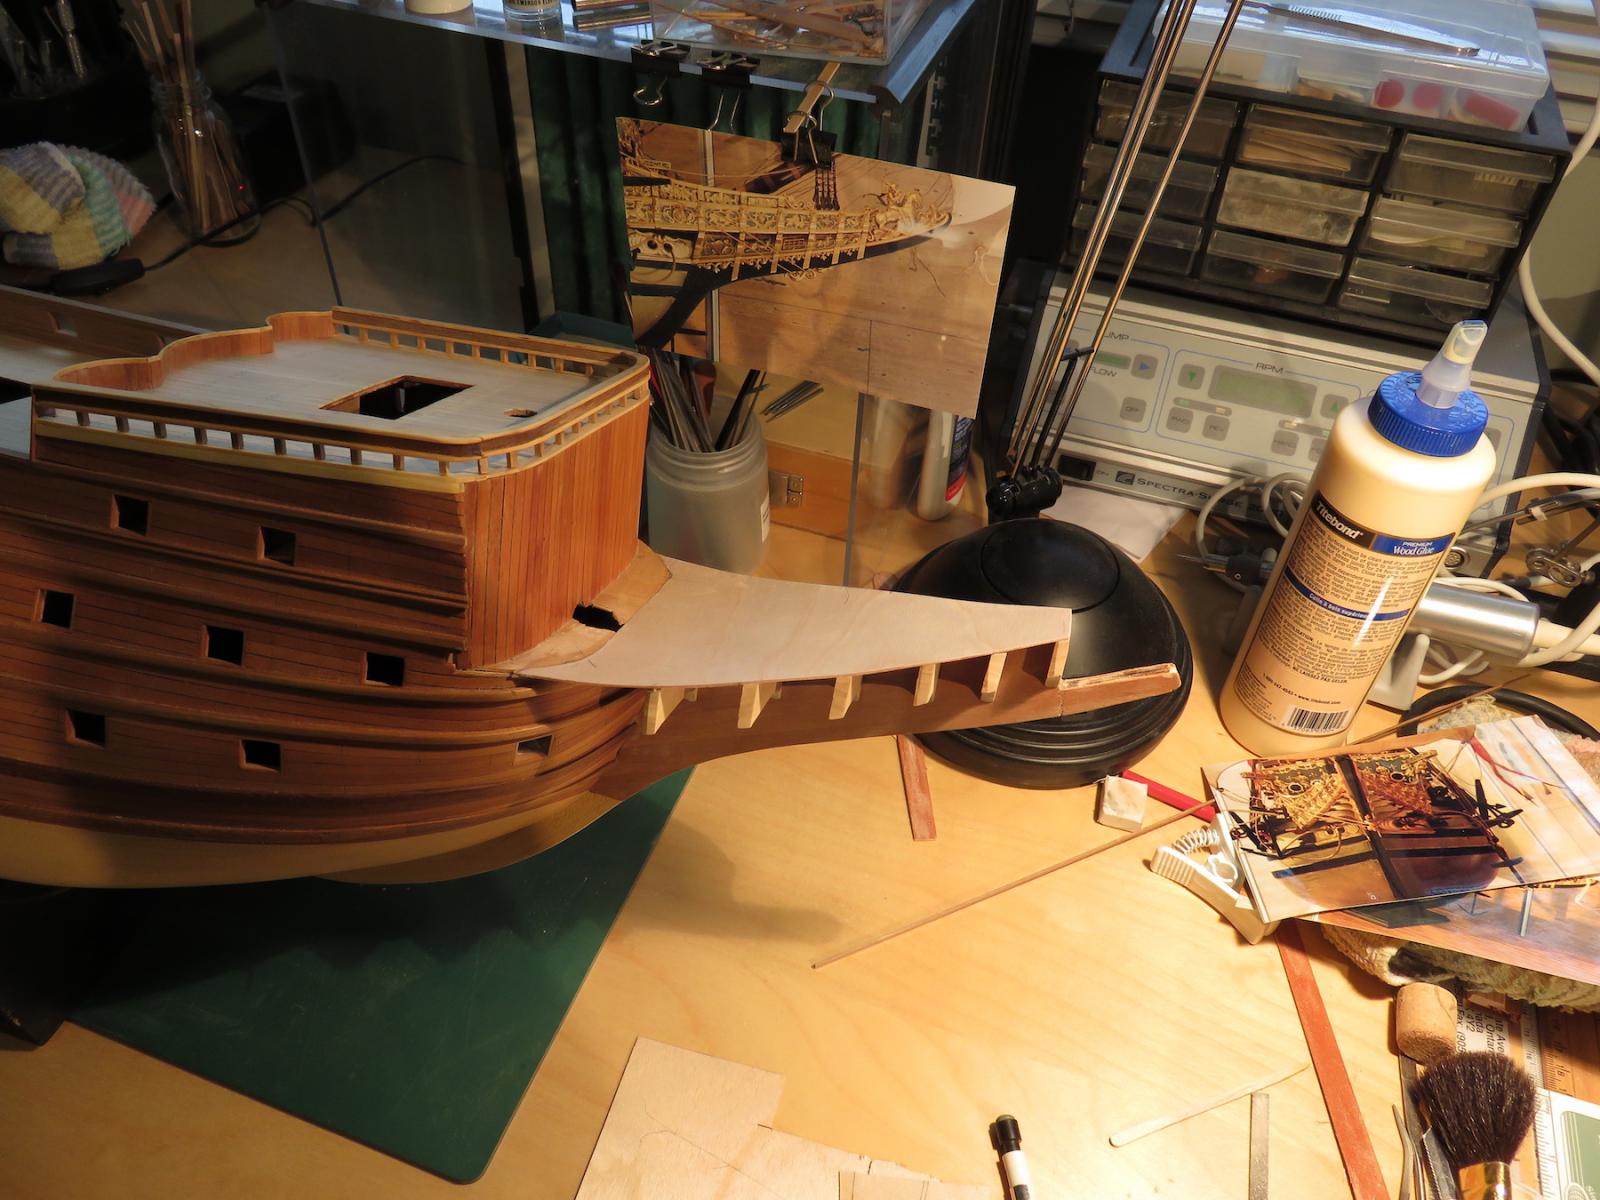
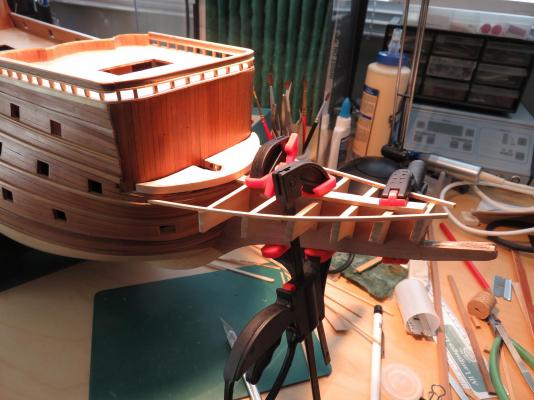
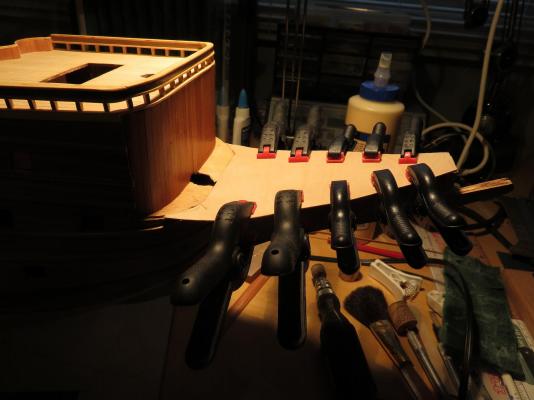
Using Scandinavian Birch plywood, I have rough formed the decl substructure of the beak and glued it in place. After the glue dried, I trimmed the excess from the edges and re-assessed the shaping of the beak head supports to give a pleasing transition from the hull to the beak. Every syupport received a reshaping to achieve this. Scratch building these components to fit the vision in my mind and at the same time to conform to what is essentially the base of a Sergal kit can sometimes be challenging. In the end, it is my eye that takes over and adjustments are made to get close to the overall look I am trying to achieve. This takes more time but it is well worth it. More to follow...............

- 382 replies
-
- 6
-
-
- sovereign of the seas
- carving
- (and 1 more)
-
Nice work Dave. What is the overall size of the window? Bill
- 962 replies
-
- 6
-
-
- sovereign of the seas
- ship of the line
- (and 1 more)
-
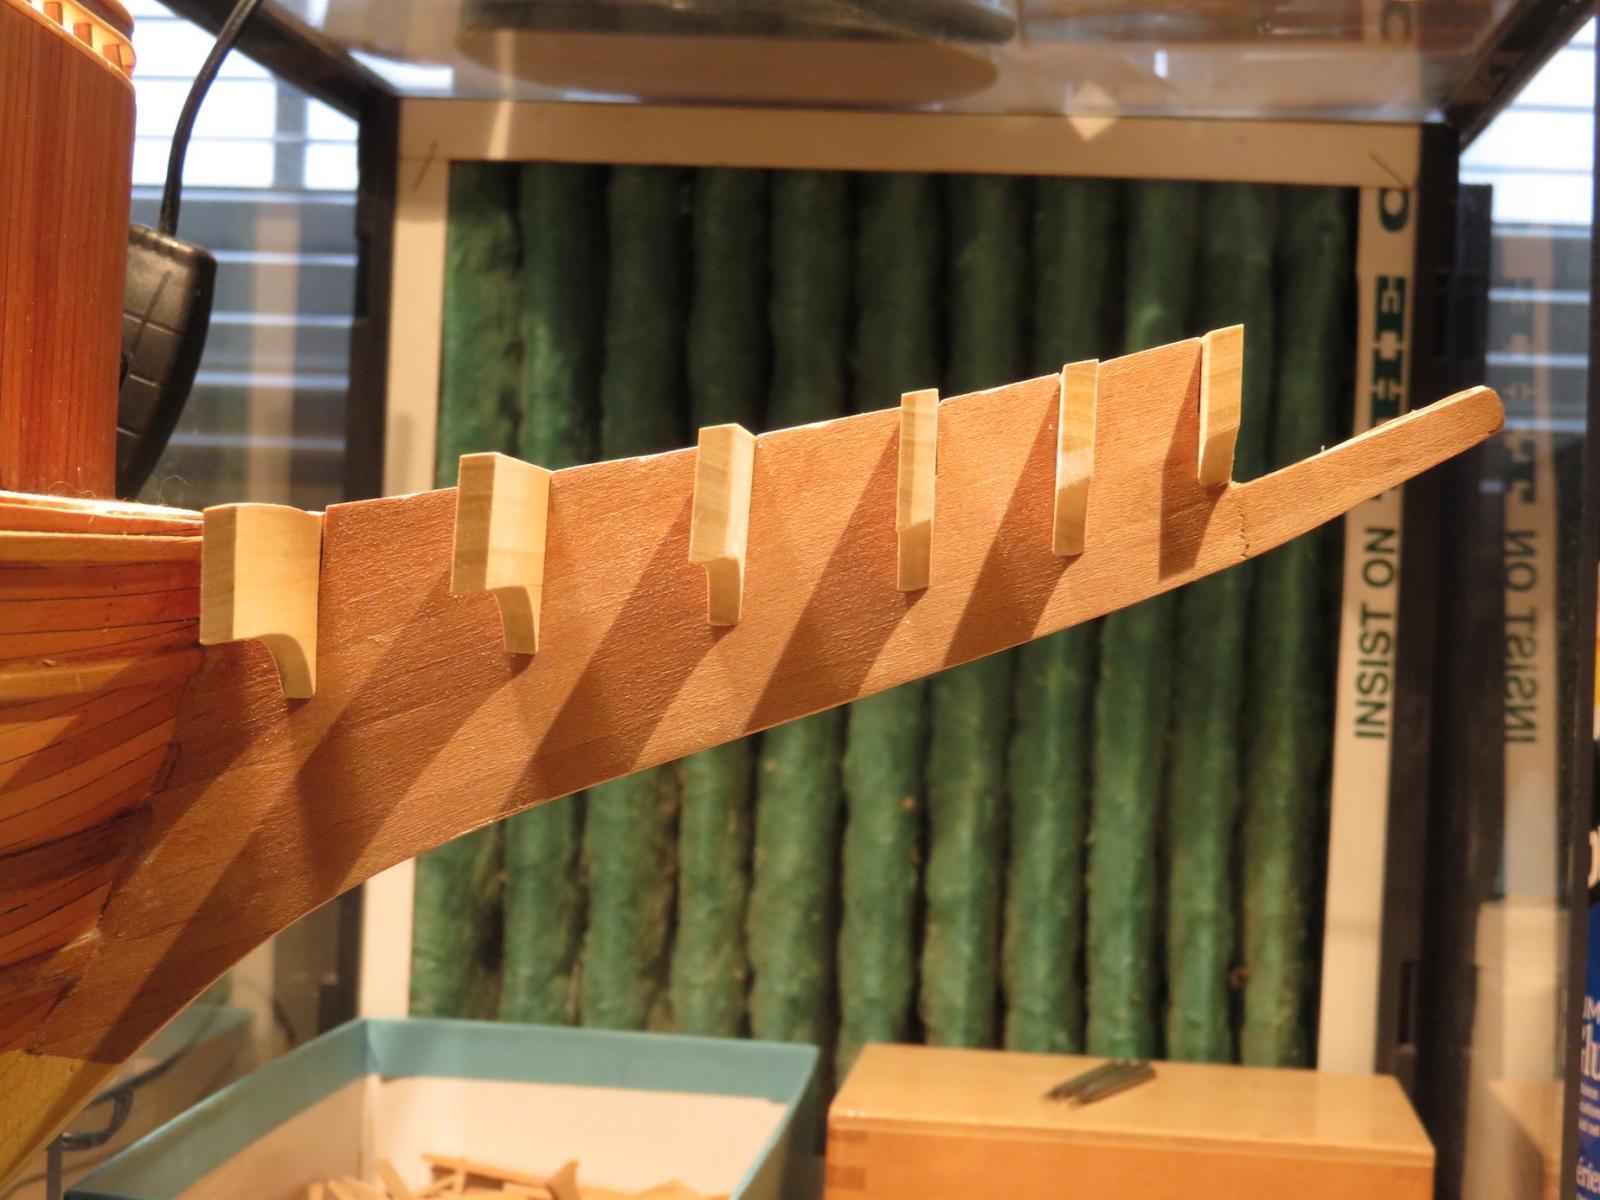
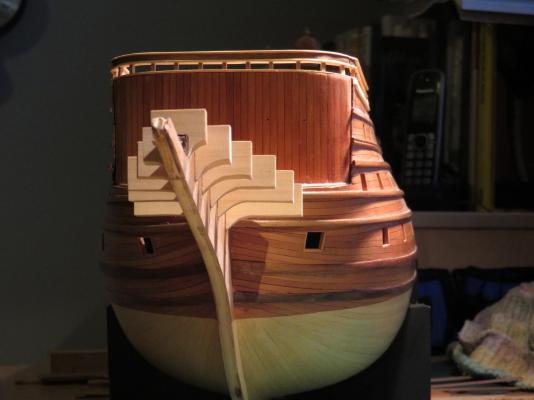
The bulk head supports are now modified to include the height of the side decorative panel and are now gently curving towards the beak where joined. The forward edges of the supports are now being beveled to reflect the line of future planking and structural woodwork that will support the sculptures. Side view. More to follow................

- 382 replies
-
- 7
-
-
- sovereign of the seas
- carving
- (and 1 more)