modelshipwright
-
Posts
299 -
Joined
-
Last visited
Content Type
Profiles
Forums
Gallery
Events
Everything posted by modelshipwright
-
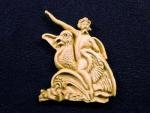
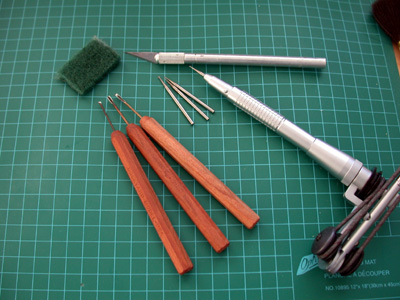
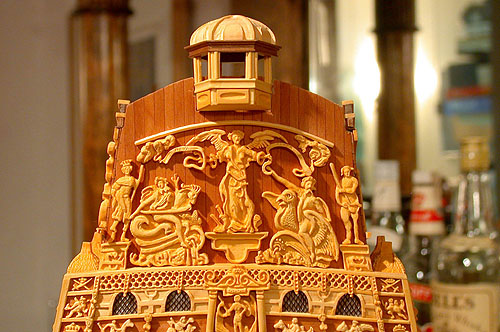
 The first carving above the cupolas is a lady in a robe with a shield at her feet. The carving in the rough.... Further progress on the robed lady.... The shield area nearing completion..... Tools used to carve the lady included the dental drill and several ball end burs, small chisels and carving tools, a #10 xacto blade and a green Scotch-brite pad. More to folow....................
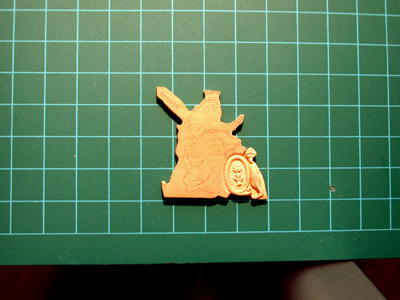
- 382 replies
-
- 3
-

-
- sovereign of the seas
- carving
- (and 1 more)
-
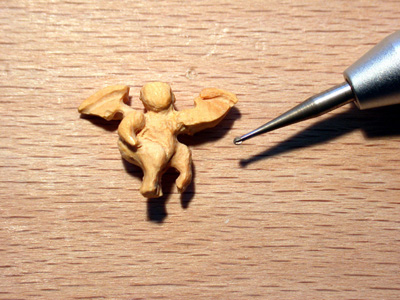
The next carving was a small cherub that was to stand in between the cupolas. A carving in the round that involved a pair of wings as well. The Cherub in progress.......... The cherub in place between the cupolas..... It might be interesting to add that at the time MSW1 crashed, the poll numbers reversed to 60% against changing the starboard side to 40% in favour. By then I had taken the leap and there was no turning back. More to follow................. Bill
- 382 replies
-
- 1
-
-
- sovereign of the seas
- carving
- (and 1 more)
-
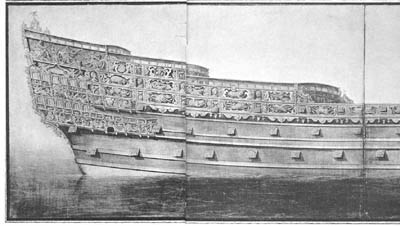
The discovery of the starboard view of the Sovereign stopped me in my tracks. It was an opportunity to either continue to duplicate the port side sculptures on the starboard side or to scrap the starboard carvings and start afresh with a view to representing the starboard side "as presented to Charles I by Peter Pett". On the old MSW site, I started a poll of the members to see what they thought and after a couple of weeks the verdict was 60% to build it "as presented" and 40% for "as built". This rather confirmed what I was strongly leaning towards and I decided to scrap the carvings and start over on the port side. The first area I tackled were the cupolas. I thought there might be a chance of modifying them to suit and so I started the process. A reminder of what the cupolas were hopefully going to look like. The first small cupola under revision.... The same cupola further along in the process.. The middle cupola under way....... Two of the three modified..... Two of them in place on the gallery....... More to folow...............

- 382 replies
-
- 1
-
-
- sovereign of the seas
- carving
- (and 1 more)
-
Thanks Theo. I guess I have always had an appreciation for the arts and have tried to draw ever since I was a young boy. When I decided to build the Sovereign to contemporary standards and abandoned the Mantua-Sergal kit it thrust me into the world of drawing and carving. It was a challenge and I rather enjoyed that part of it. When you think about it, I am actually copying the details from the contemporary paintings and drawings, or rather it is "minds eye modeling" for want of a better description. I basically am trying to use proportion to realize the correct size of things and my minds eye to try and duplicate what these amazing artists left behind for us to see. As I have no plans to follow, it is the only way left for me to create sculptures and decorations for my model. My model is a representation of what looks right to me when I view it. Regards, Bill
-
Thanks Vince and Wackowolf. I appreciate your comments and support. Regards, Bill
-
Nice work on your build Anja, and good luck with the interview. Regards, Bill
-
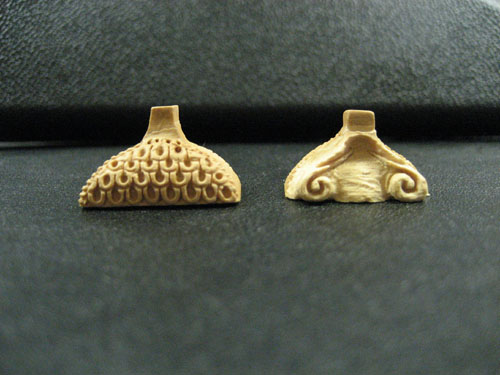
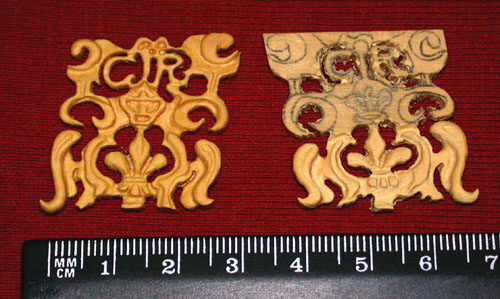
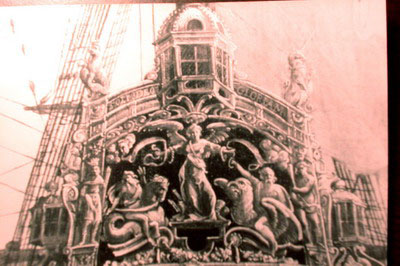
Not to neglect the starboard side, I was also carving reverse image carvings of the CR and HM carvings for that area. The two reverse image carvings side by side. The first CR carving in place on the starboard gallery. The starboard side HM carving in progress. It was right about then that Greg Herbert contacted me and made me aware of a booklet that he had come across called Ship Models which was essentially a guide to the ship model exhibition in the Museum of Fine Arts Boston. In that booklet was a photo of a painting of the Soveraigne, England 1737, painting on vellum by Peter Pett; ca, 1637 signed by Sir Phineas Pett, and built by his son, Peter, at Woolich in 1637. The sculptures shown on this depiction of The Sovereign were entirely different than the Payne engraving and the Van de Velde sketch. A dilemma indeed. After consulting with Lars Bruzelius at the University of Upsala, he noted that there was a reference in States Papers where indeed, Peter Pett had presented a painting to King Charles I for approval and Charles had asked for changes to the ornamentation on the gallery area, those changes which are reflected in the Payne and Van de Velde drawings. ************************************************************* States Papers Domestic Vol. 350, No 70 [PRO] "Alsoe the three figures in the upper strakes to be altered into a badge of Carved worke answerable to the other strake that runneth faire with it, and to be guilt answerable to the rest." ************************************************************* It can then perhaps be said that this representation of the Starboard side was "as presented" to Charles I for approval by Peter Pett, and the Payne engraving and the Van de Velde sketch were "as built". Now I had a big decision to make as I was tempted to change the starboard side and follow the painting on vellum attributed to Peter Pett. The Peter Pett painting at the Museum of Fine Arts Boston. The gallery section up close showing remarkably different Cupolas. More to folllow................................... Bill


- 382 replies
-
- 1
-
-
- sovereign of the seas
- carving
- (and 1 more)
-
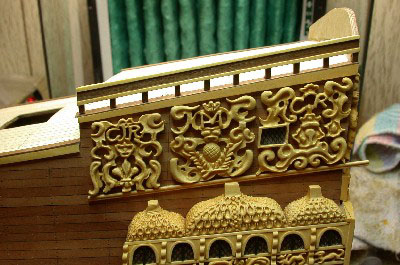
Next I took a break from carving and constructed the poop deck rail on the port side out of Boxwood and Swiss Pear. Another shot showing the railing and the Coat of Arms carving finished and in place on the model. More to follow.................. Bill

- 382 replies
-
- 1
-
-
- sovereign of the seas
- carving
- (and 1 more)
-
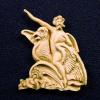
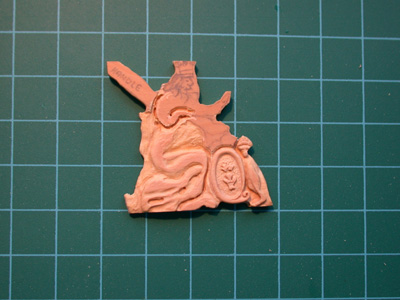
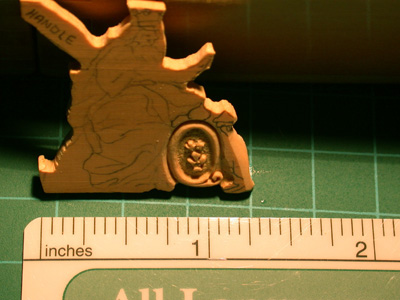
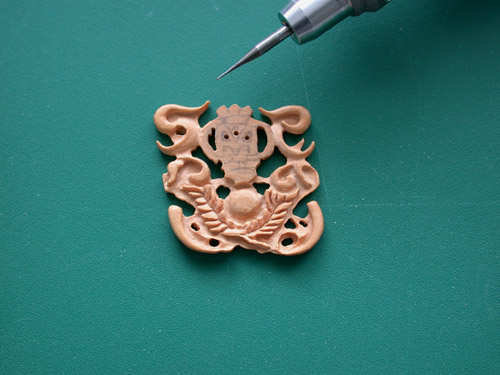
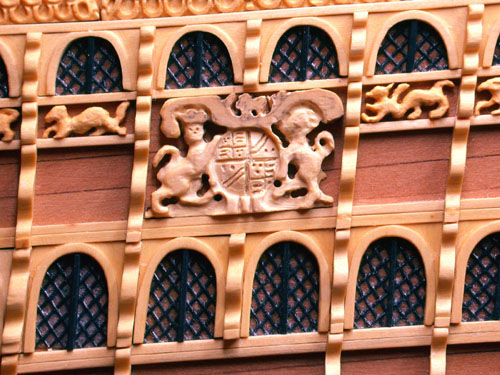
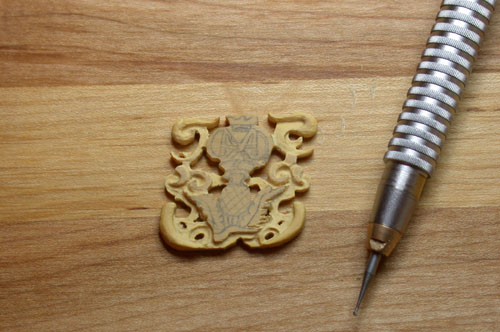
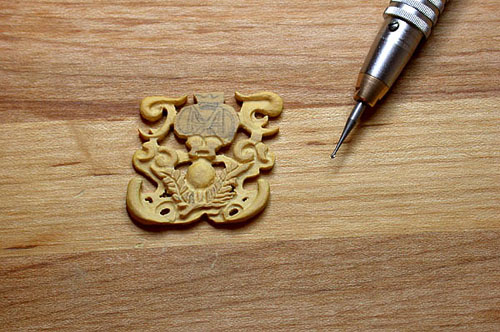
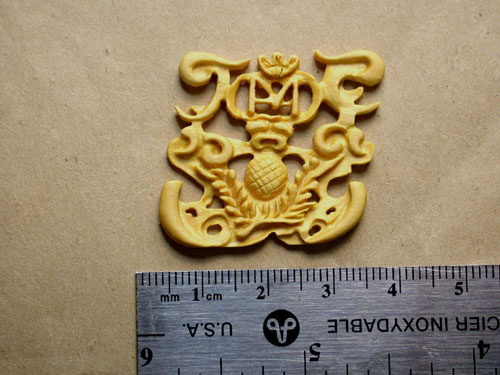
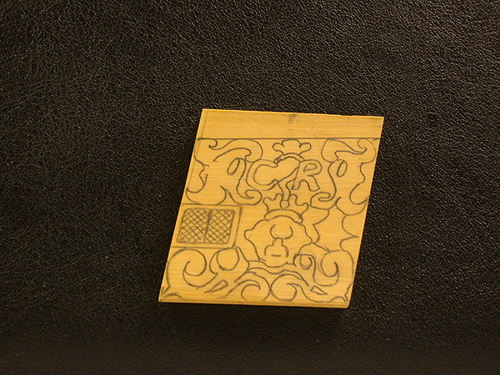
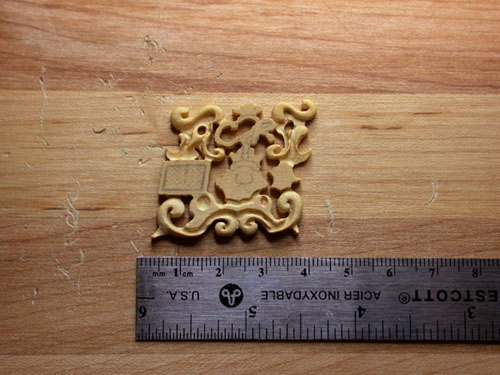
The next carving was a Coat of Arms that is situated on the gallery amongst mythical creatures. A delicate little carving indeed. The Coat of arms in progress and temporarily mounted on the gallery. The finished Coat of Arms. More to follow....................... Bill

- 382 replies
-
- 1
-
-
- sovereign of the seas
- carving
- (and 1 more)
-
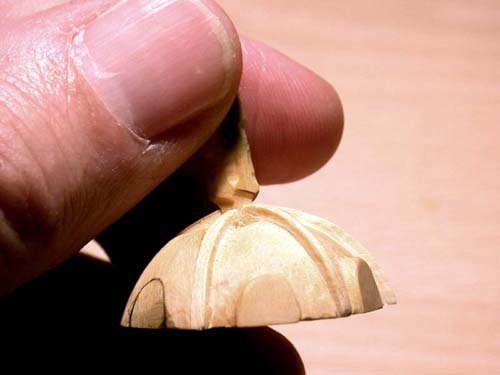
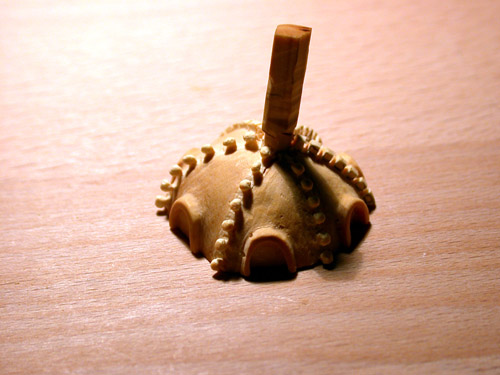
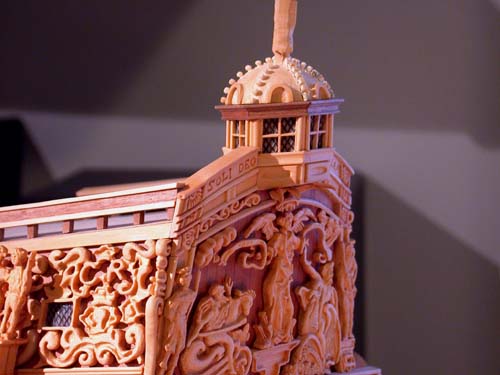
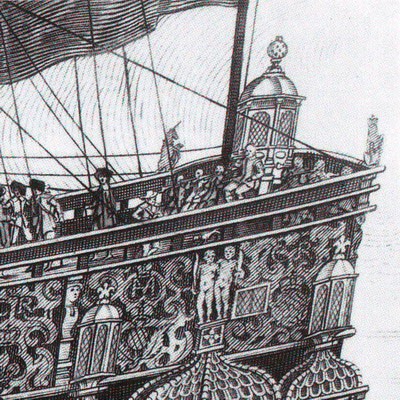
I will now return to the final stages of the stern lantern showing the progress of carving the cupola. The cupola in progress... Tiny balls carved from the solid in rows with the beginnings of the arched window frames.. The 'in progress' carving mounted on top of the lantern. The finished state of the stern at this point in the build with the lantern finally in place. The lantern as seen on the Payne engraving. The Lantern on the Lely portrait. More to follow.................... Bill

- 382 replies
-
- 2
-
-
- sovereign of the seas
- carving
- (and 1 more)
-
The middle carving on the port side was just as ornate and contained the initials HM for Henrietta Maria, the Queen of Spain who was Charles I wife. The HM are on top of each other . Carving in progress in the next three photos. And mounted on the ship with the other two. The ornamentation on the port gallery as seen on the Payne engraving. More to follow.................... Bill


- 382 replies
-
- 2
-
-
- sovereign of the seas
- carving
- (and 1 more)
-
Hi Greg, The scrap box spilleth over as they say. If any of the smaller parts broke off, I glued them back together. There are several examples of this on the ship. All of this build to date was done some years ago and I have to pinch myself to remember all the details as I repost it. Regards, Bill
-
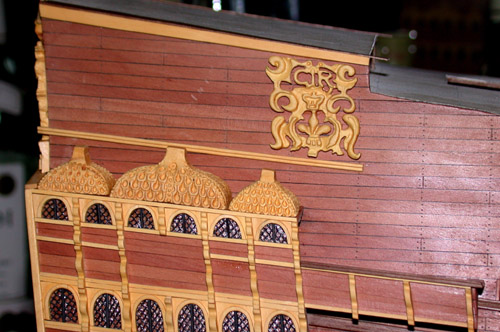
The end carving above the cupolas was similar to the first carving with CR on it with the addition of a window frame. The next photo shows the blank piece of boxwood with the drawing on it ready to carve. The carving in progress.... And the finished carving. More to follow........................ Bill

- 382 replies
-
- 1
-
-
- sovereign of the seas
- carving
- (and 1 more)
-
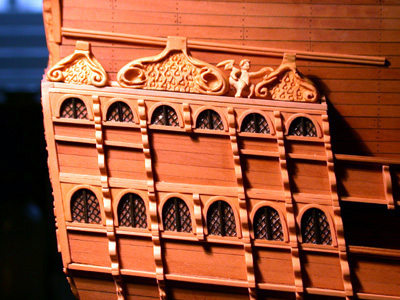
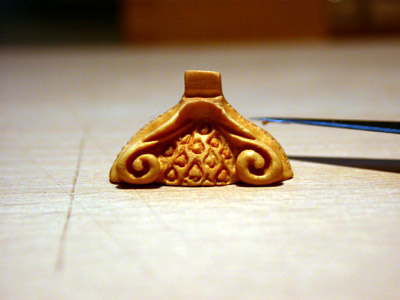
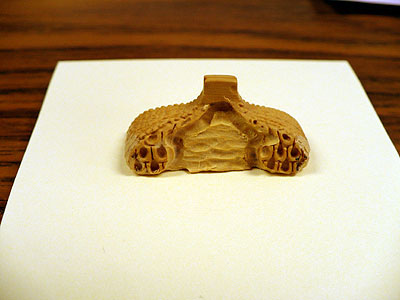
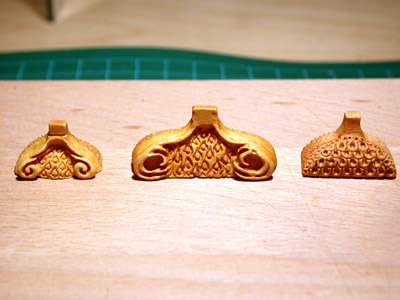
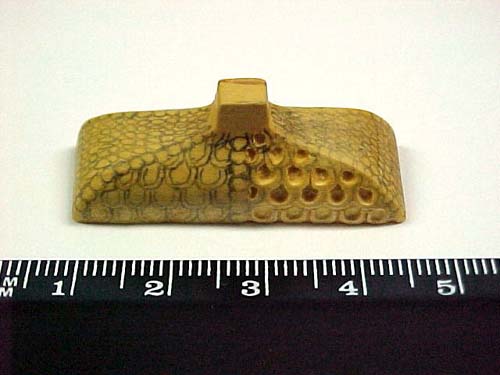
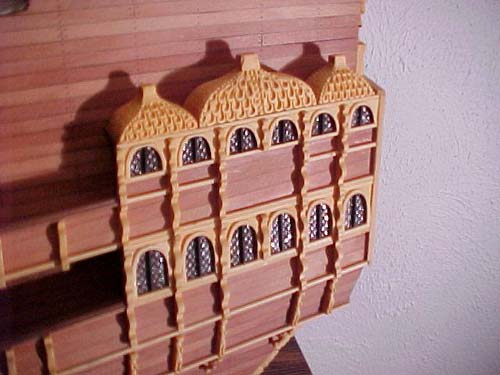
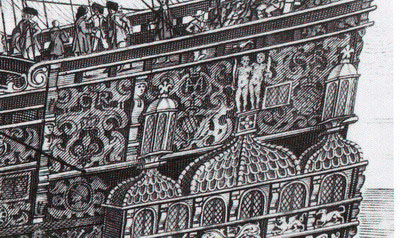
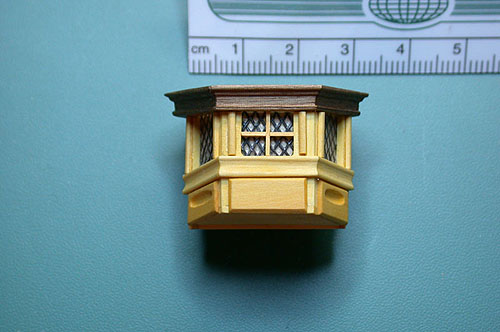
Next was the building of the cupolas over the stern galleries. After some due consideration, I decided to cut out the general shape of the cupolas from boxwood and carve the details on these pieces. The piece of boxwood with the shapes ready for the jig saw. The following photo shows the middle cupola with the pattern drawn on it and the initial carving started. The shapes were tear drop in form similar to the grating on the stern.. Four of the cupolas carved and ready to mount. Cupolas mounted on the port side. The Van de Velde sketch cupolas...... The Payne engraving cupolas............. At some time in the future lanterns will be mounted on the end cupolas and a sculpture on the top of the middle one. More to follow...................... Bill


- 382 replies
-
- 1
-
-
- sovereign of the seas
- carving
- (and 1 more)
-
It was at this point in my build that I was urged by my modeling friends and peers on the Web to write down my experience with carving in the form of a book and share it with other modelers. As there were limited resources available to instruct a modeler on carving sculptures, I considered the request and decided that it would be a way to give back to the hobby that had assisted me so much. My aim was to create a book that would be a tutorial on both 'in the round' and 'bas relief' carving utilizing rotary carving tools with dental burs. It had to be heavily illustrated with step by step photos. With a poll taken of potential buyers it was determined that it could produce sales of about 100 copies. It took 6 months to produce and get into print and the 100 copies sold immediately. It went through several reprints and a translation to French before it went digital. Thankfully over the years, it has been popular with modelers in over 20 countries and is still selling in digital PDF form on the internet. I sincerely hope that it provided the incentuive for others to attempt carving as there are so many beautiful ships adorned with sculptures that we can build if we have carving knowledge. For those interested, the web site is: http://carvingbook.weebly.com/ Thanks to Chuck and the site Moderators for allowing me to post this. Regards, Bill
-
Thanks Nat. Don't underestimate yourself. Scratch building components, even carvings, amounts to taking baby steps and having a clear goal with each step. As you will see, the carvings that will follow as I post this build will improve as I became more comfortable and learned from previous attempts. It is all about exploring ones potential and acting upon it. Regards, Bill
-
Thanks Geoff. It has been a bit of a challenge as the photos had to be dug out and reformatted and commentary added. It has brought back many fine memories of the build. Regards, Bill
-
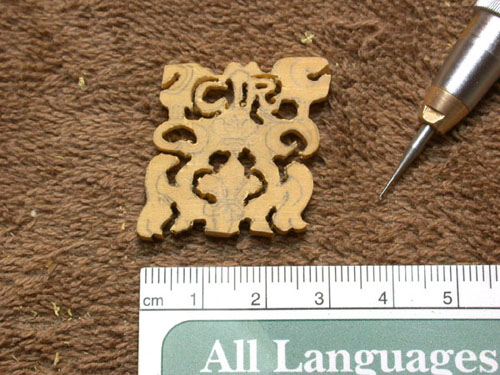
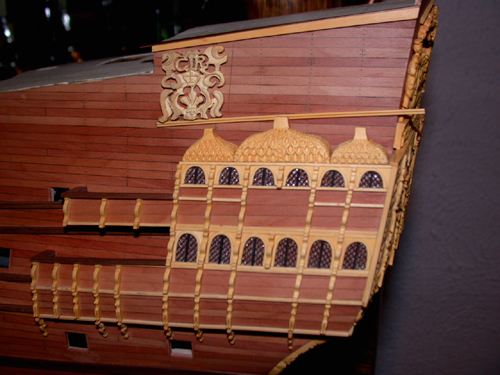
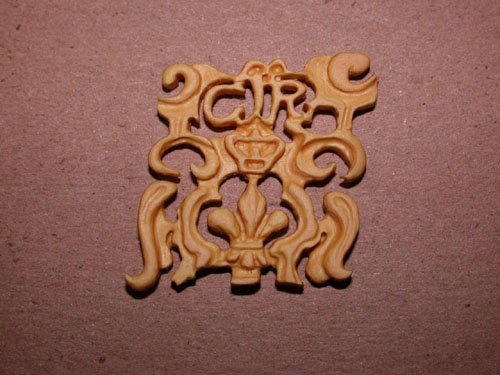
Now I went forward to the first of three rather ornate and complicated carvings that adorn the top of the port side gallery area. It is a crest like carving with the initials "CR" in it. CR is Carolus Rex or Charles King. In the next photo, the carving has been roughed out to eliminate wood not required. Showing the carving partially completed on the gallery area. The completed carving ready to mount. More to follow..................... Bill
- 382 replies
-
- 2
-
-
- sovereign of the seas
- carving
- (and 1 more)
-
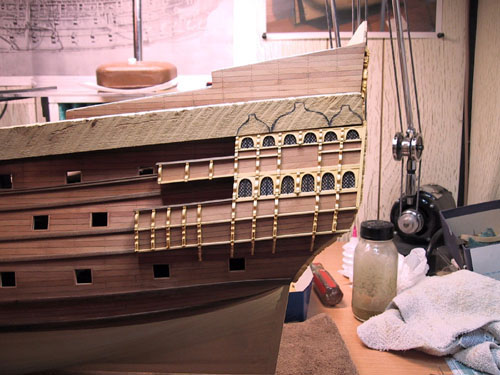
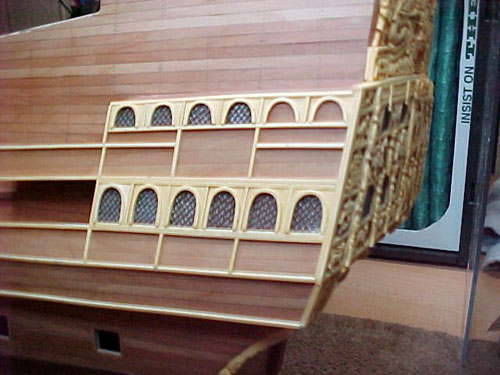
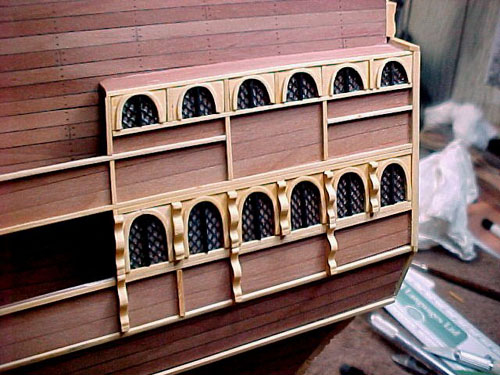
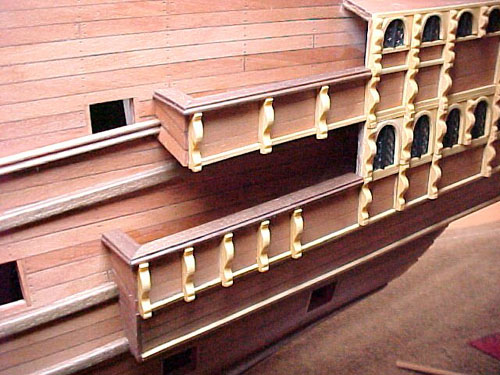
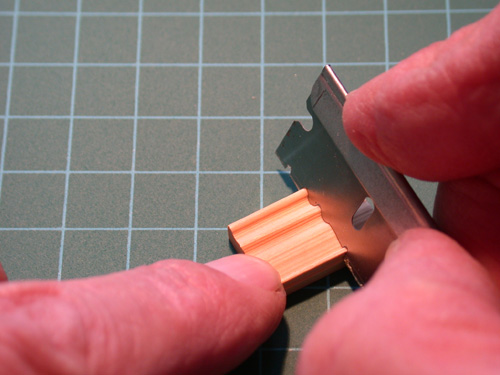
The next are I addressed was the port side stern gallery. The Payne engraving and the Van de Velde sketch of the port side show that the gallery was deeper than is depicted on the Mantua model. There was an additional section at the bottom of the gallery which I determined I should add to my model. After adding this section, the whole gallery needed to be framed in boxwood strips to create areas for the many carvings needed. Windoes were added as was done on the stern which involved carving individual arches for each window and of course, the leaded glass window itself. In between the windows, caryatids were required in duplicate. In order to create these on mass, I used a straight edge razor blade with the profile cut into it and scraped a section of boxwood with the blade to create a strip of about 4" in length with the profile in it. It remained to cut the individual caryatids on my Preac. In this shot I added the rails covers at the end of the gallery. More to follow................. Bill
- 382 replies
-
- 1
-
-
- sovereign of the seas
- carving
- (and 1 more)
-
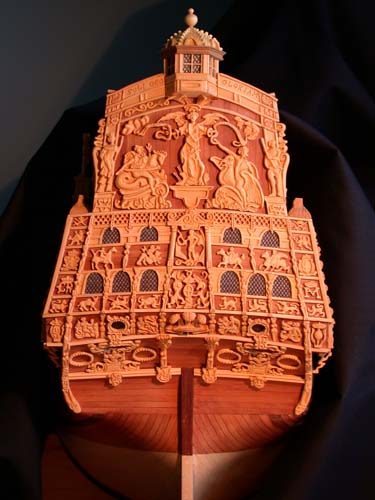
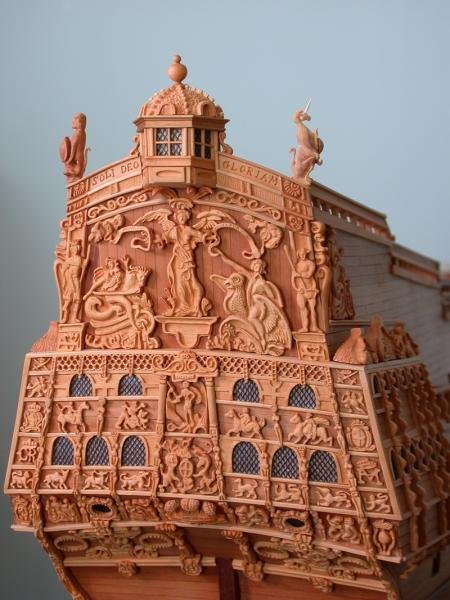
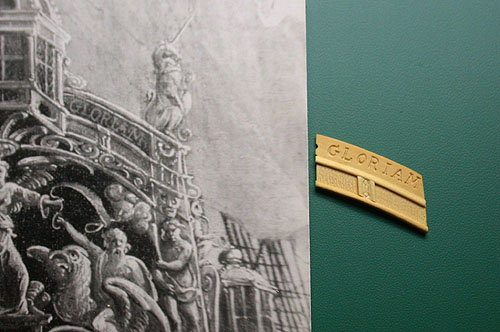
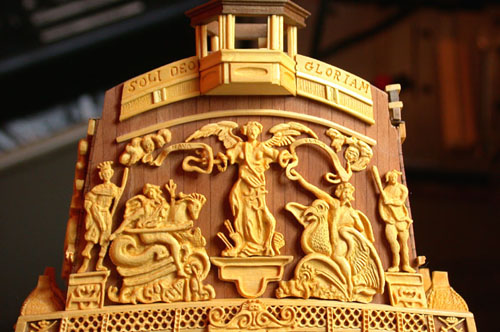
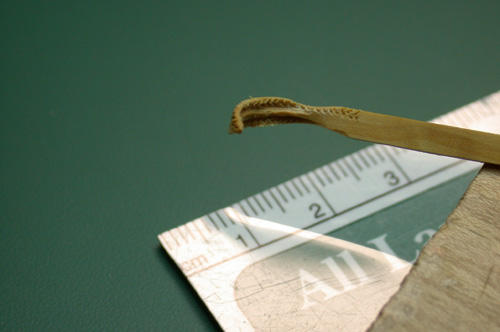
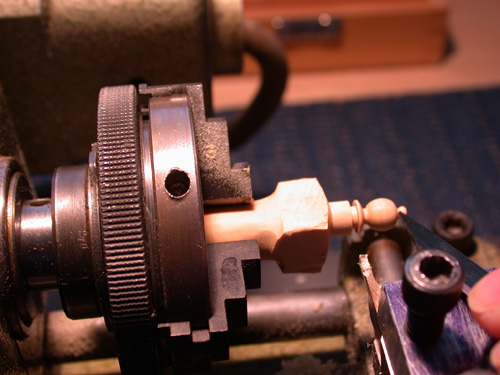
On either side of the stern lantern there were decorative panels engraved with " Soli Deo Gloriam" in Latin. It means 'to the sole glory of God' as the ship was dedicated to God. I carved these shapes and engraved them as the following photos show. Just above Victory's head were a crown of feathers. I carved these in Boxwood that had been heated and bent in a curve as the following photo shows. The ball for the top of the lantern being made on my Unimat lathe. The stern with the feathers in place and the stern lantern mounted and completed. More to follow................. Bill

- 382 replies
-
- 3
-
-
- sovereign of the seas
- carving
- (and 1 more)
-
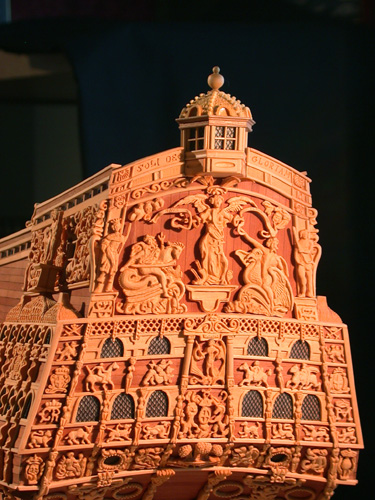
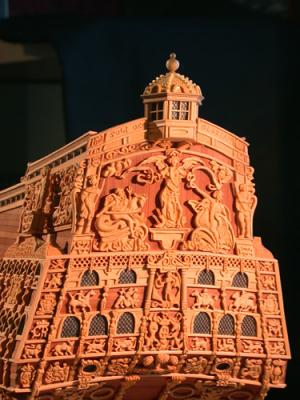
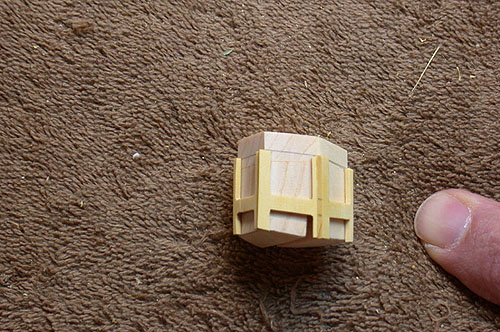
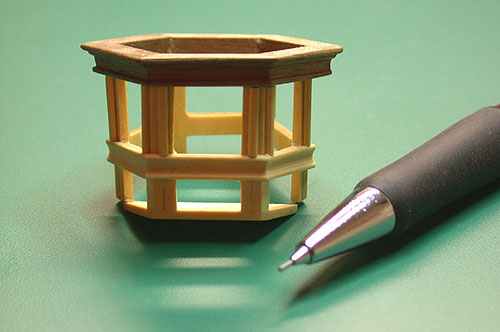
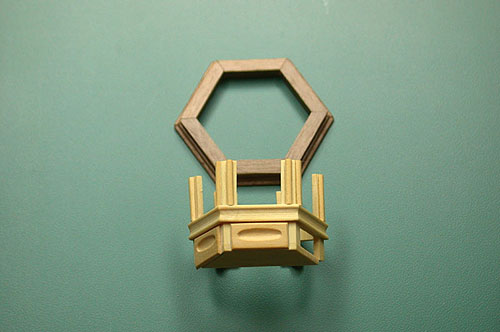
The next stage in the build was to create a representation of the stern lantern. I wanted to use the Lely Portrait as my guide and decided to build it using a 'plug' form to form the superstructure. The plug in place on the stern for alignment purposes. The next shot shows the framework of the lantern in progress. As the lantern progressed, I needed to create a large domw carving and the next shot shows the rough piece of boxwood in place on the lantern. Another fitting on the stern to chech for alignment etc. You will note that the carving has started on the dome. The next shot shows the partial completion of the windows. I used the same technique as on the stern windows with plastic window screen to create the diamond leaded glass. More to folllow.................. Bill


- 382 replies
-
- 3
-
-
- sovereign of the seas
- carving
- (and 1 more)
-
Thank you for your comments Johann. Regards, Bill
-
USF Confederacy by Rustyj - FINISHED
modelshipwright replied to Rustyj's topic in - Build logs for subjects built 1751 - 1800
Very nice work Rusty. Lovely and clean with beautiful sculptures. Bill -
Wonderful sculptures Doris. An inspiration to me! Regards, Bill
- 883 replies
-
- 2
-
-
- royal caroline
- ship of the line
- (and 1 more)