modelshipwright
-
Posts
299 -
Joined
-
Last visited
Content Type
Profiles
Forums
Gallery
Events
Everything posted by modelshipwright
-
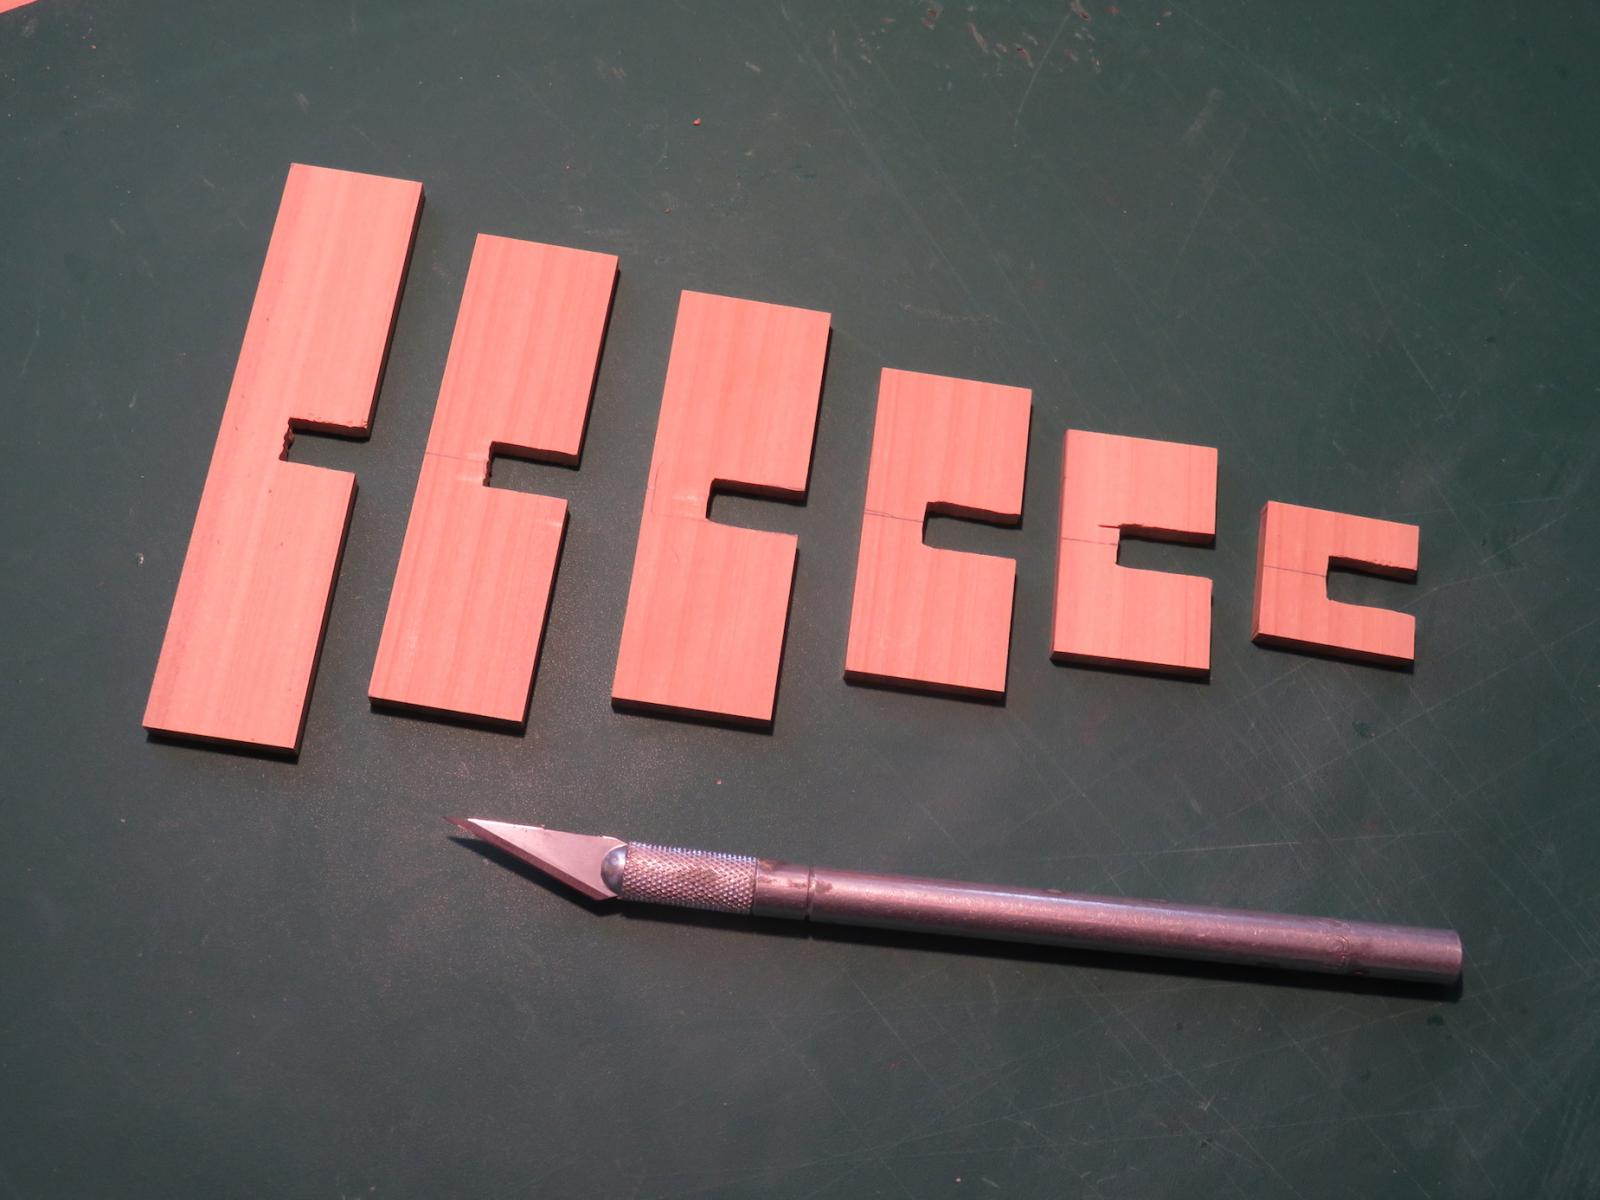
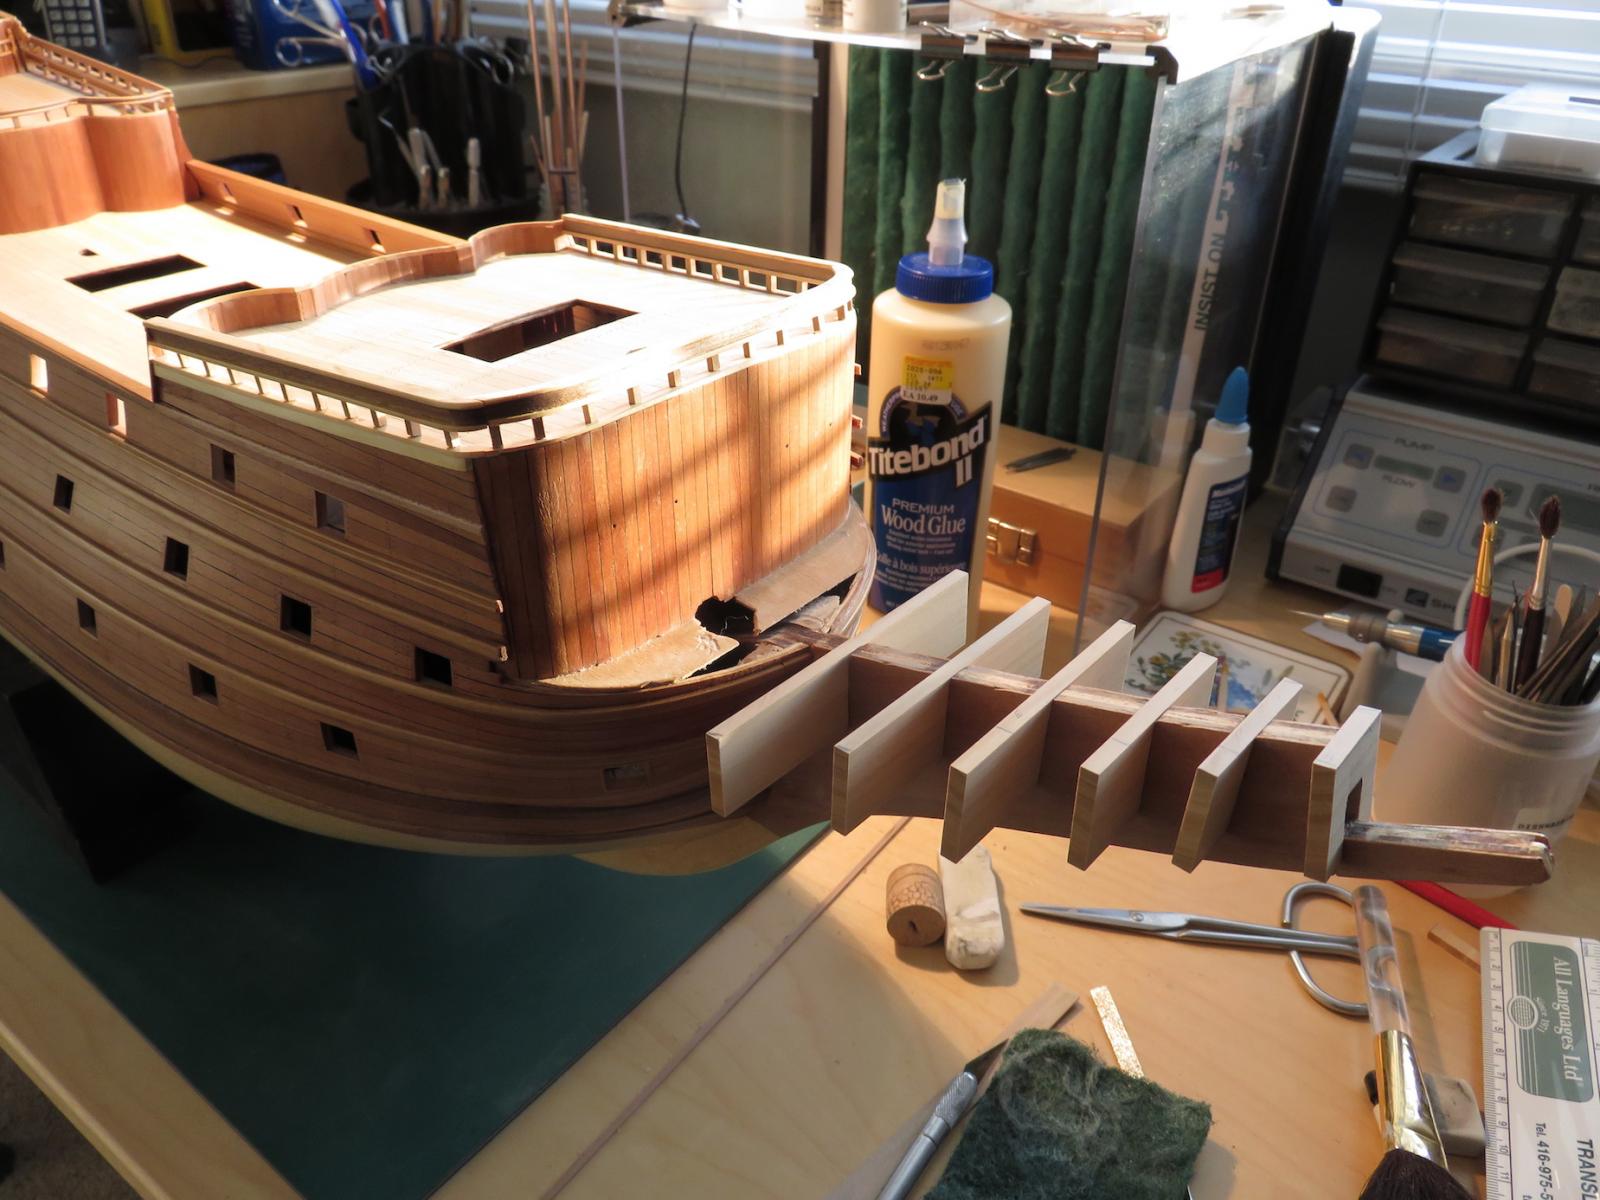
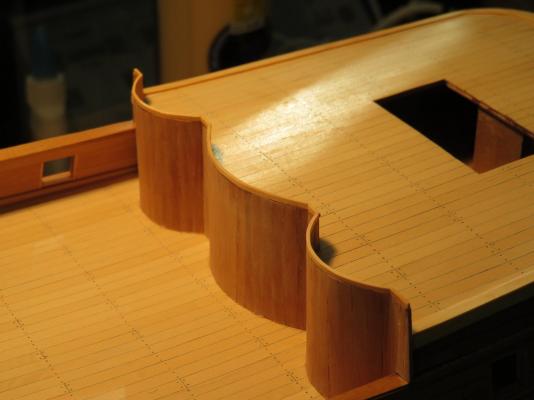
 The work now begins on fabricating the beak-head supports. I am using contemporary paintings and sketches as well as some beautiful models of the Sovereign that I have seen in my travels as guides to how I will represent the beak-head. One such model is located at the US Naval Academy in Preble Hall, Annapolis MD. Built in 1921 by Henry B Culver. Another was built by Ed Marples and is located in the Ventura County Maritime Museum in Oxnard CA. I have viewed both of these fine models and have many photos to refer to. The following picture shows the blanks cut out in Costello Boxwood. Now begins the process of forming the shapes that best support the sculptures they will be fitted with. This photo shows the blanks test mounted on the beak. More to follow.............

- 382 replies
-
- 7
-

-
- sovereign of the seas
- carving
- (and 1 more)
-
Great work on the carvings for the stern. It is really taking shape nicely. Regards, Bill
- 962 replies
-
- 8
-
-
- sovereign of the seas
- ship of the line
- (and 1 more)
-
Thanks Nigel. I hope to see you back at your SOS soon. Regards, Bill
- 382 replies
-
- 2
-
-
- sovereign of the seas
- carving
- (and 1 more)
-
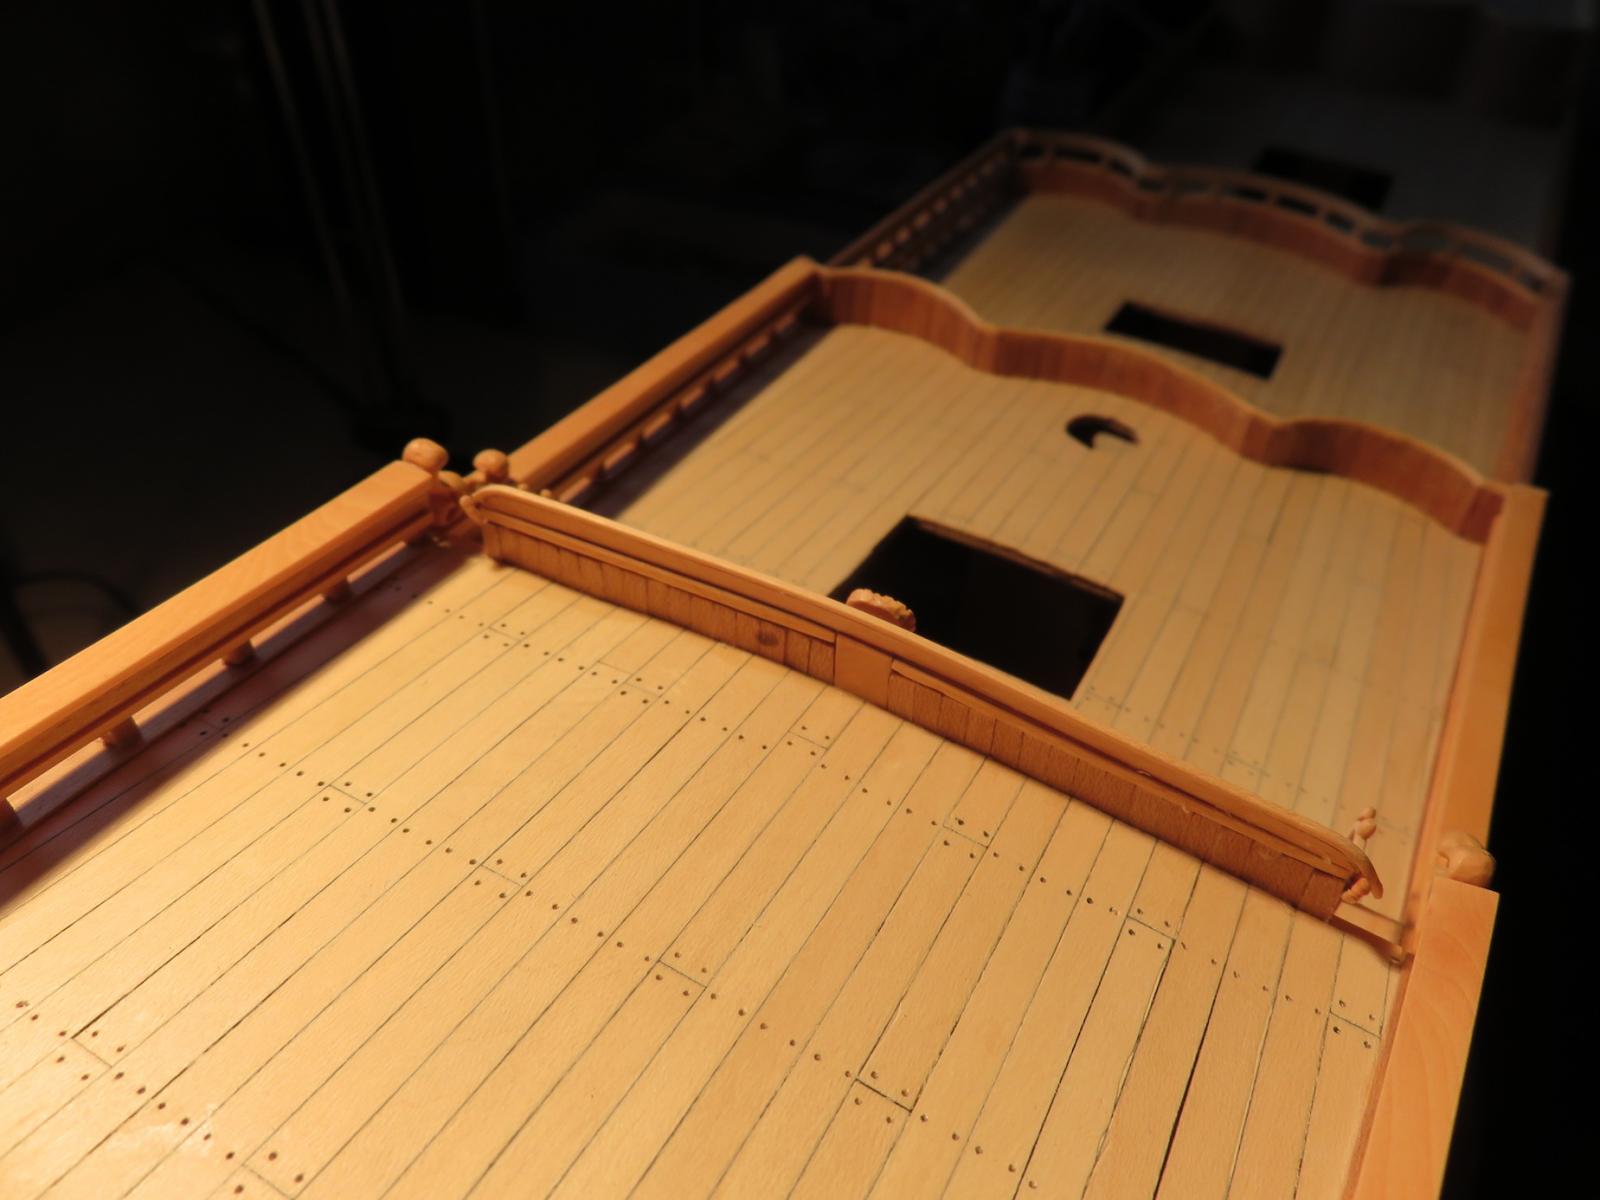
The following photo shows the assembly of the fore deck rails. They now have to be final fitted in place so that the joins are smooth and flowing from front to side rails. More to follow.......
- 382 replies
-
- 5
-
-
- sovereign of the seas
- carving
- (and 1 more)
-
You hit upon something that is very important to my build. It has been a 'visual' build from the very start for me and at every step, I think about what the paintings show with the beautiful curvature of all aspects of the ship and have tried to duplicate that in my build. I build it to what pleases my eye rather than to specific dimensions and scale, keeping in mind that it must be in proportion to the scale of the model for the most part. Regards, Bill
- 382 replies
-
- 5
-
-
- sovereign of the seas
- carving
- (and 1 more)
-
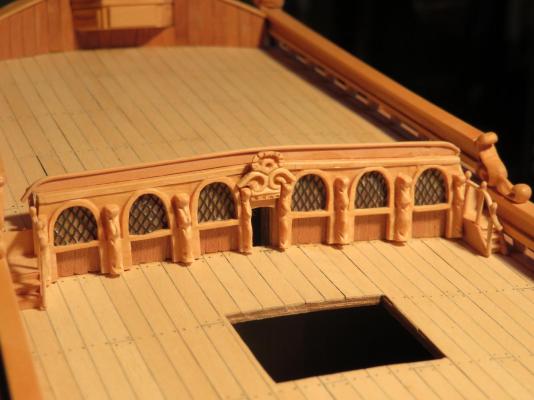
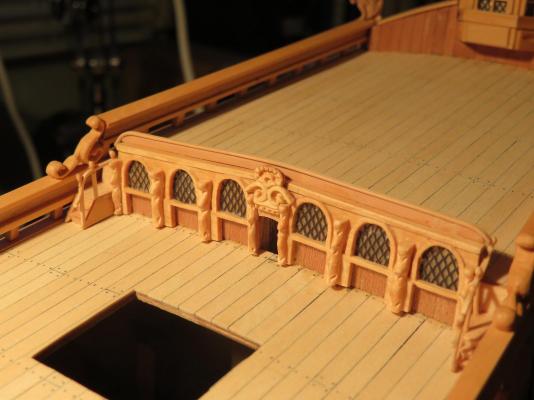
Hey Dave, You have found me out on this issue. When I adjusted the base construction of SOS to accommodate the many changes I wanted to make, I overlooked the poop deck height and it is the same as yours. What I did to compensate was to make an illusion that the deck was higher by finishing the fore side of the bulkhead with windows that are higher than the height of the deck. If viewed from the aft side, this rail is plain with no windows as if they are below the deck level. It was the only way I could think of to correct my error. Regards, Bill
- 382 replies
-
- 6
-
-
- sovereign of the seas
- carving
- (and 1 more)
-
Thanks Greg. I assume this was meant for another thread for someone called Vince. Regards, Bill
- 382 replies
-
- 2
-
-
- sovereign of the seas
- carving
- (and 1 more)
-
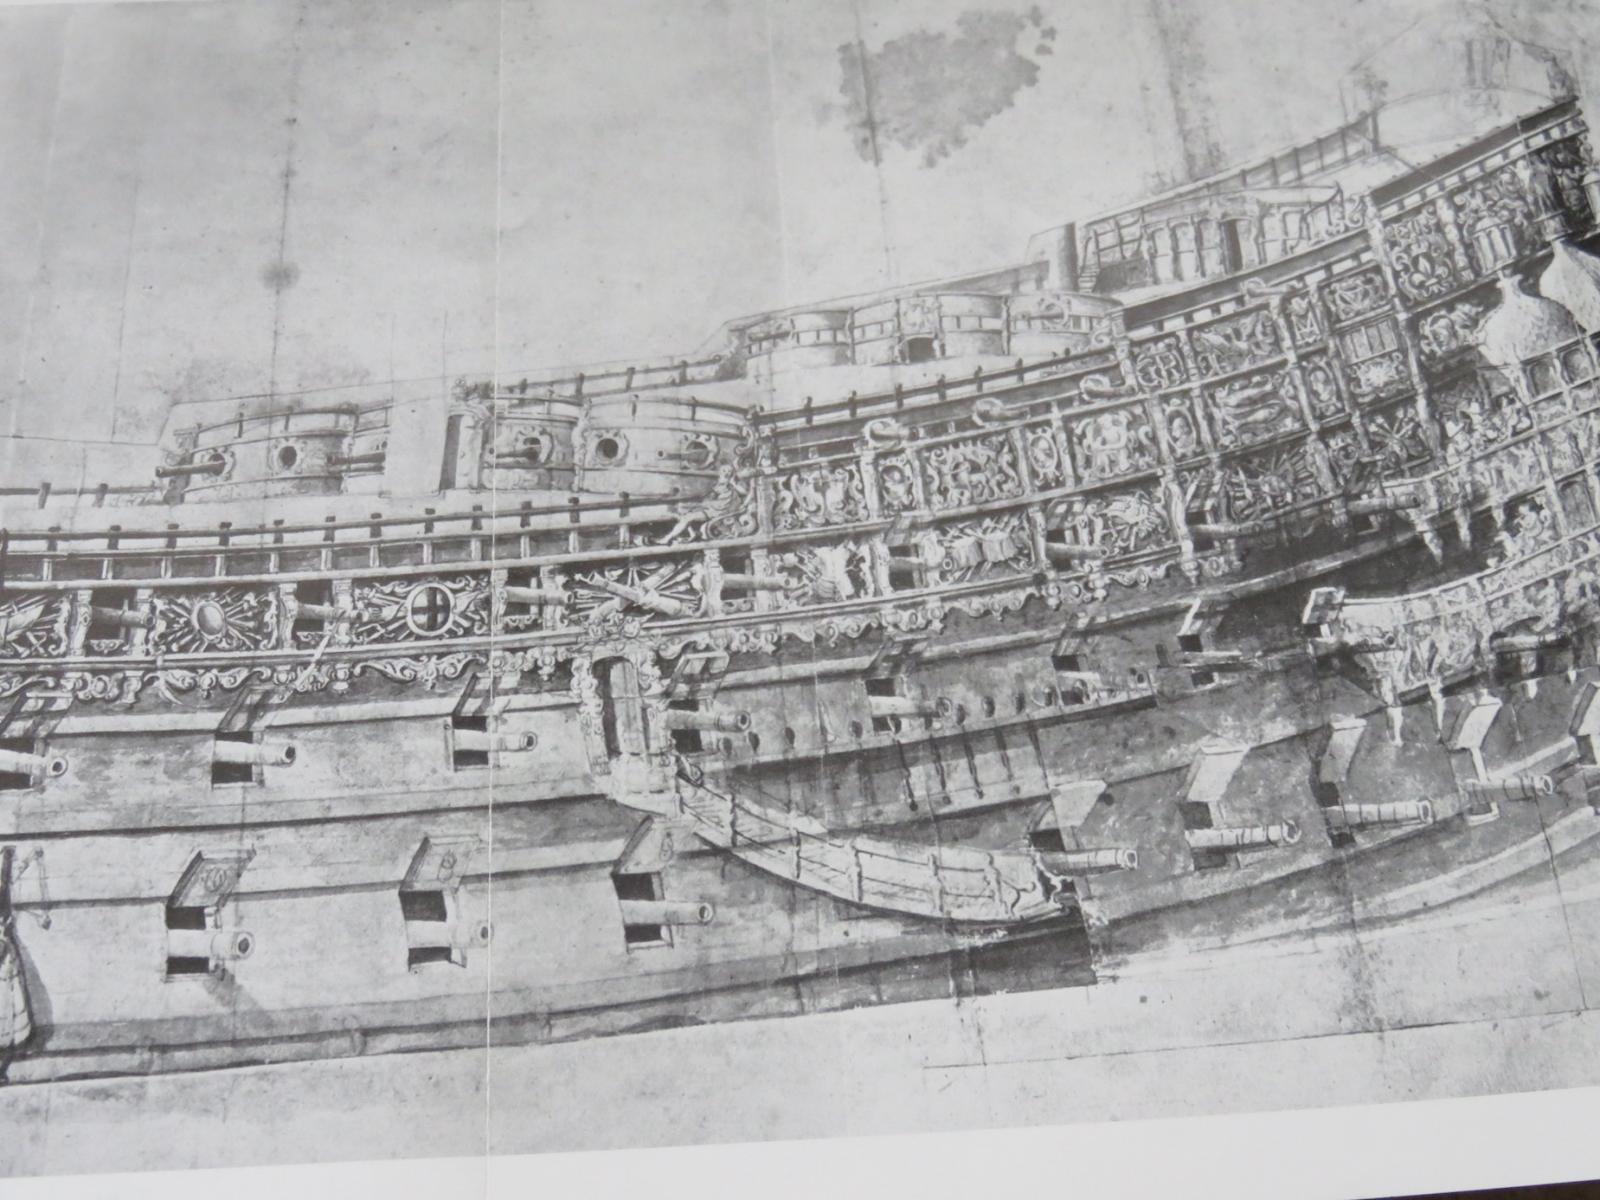
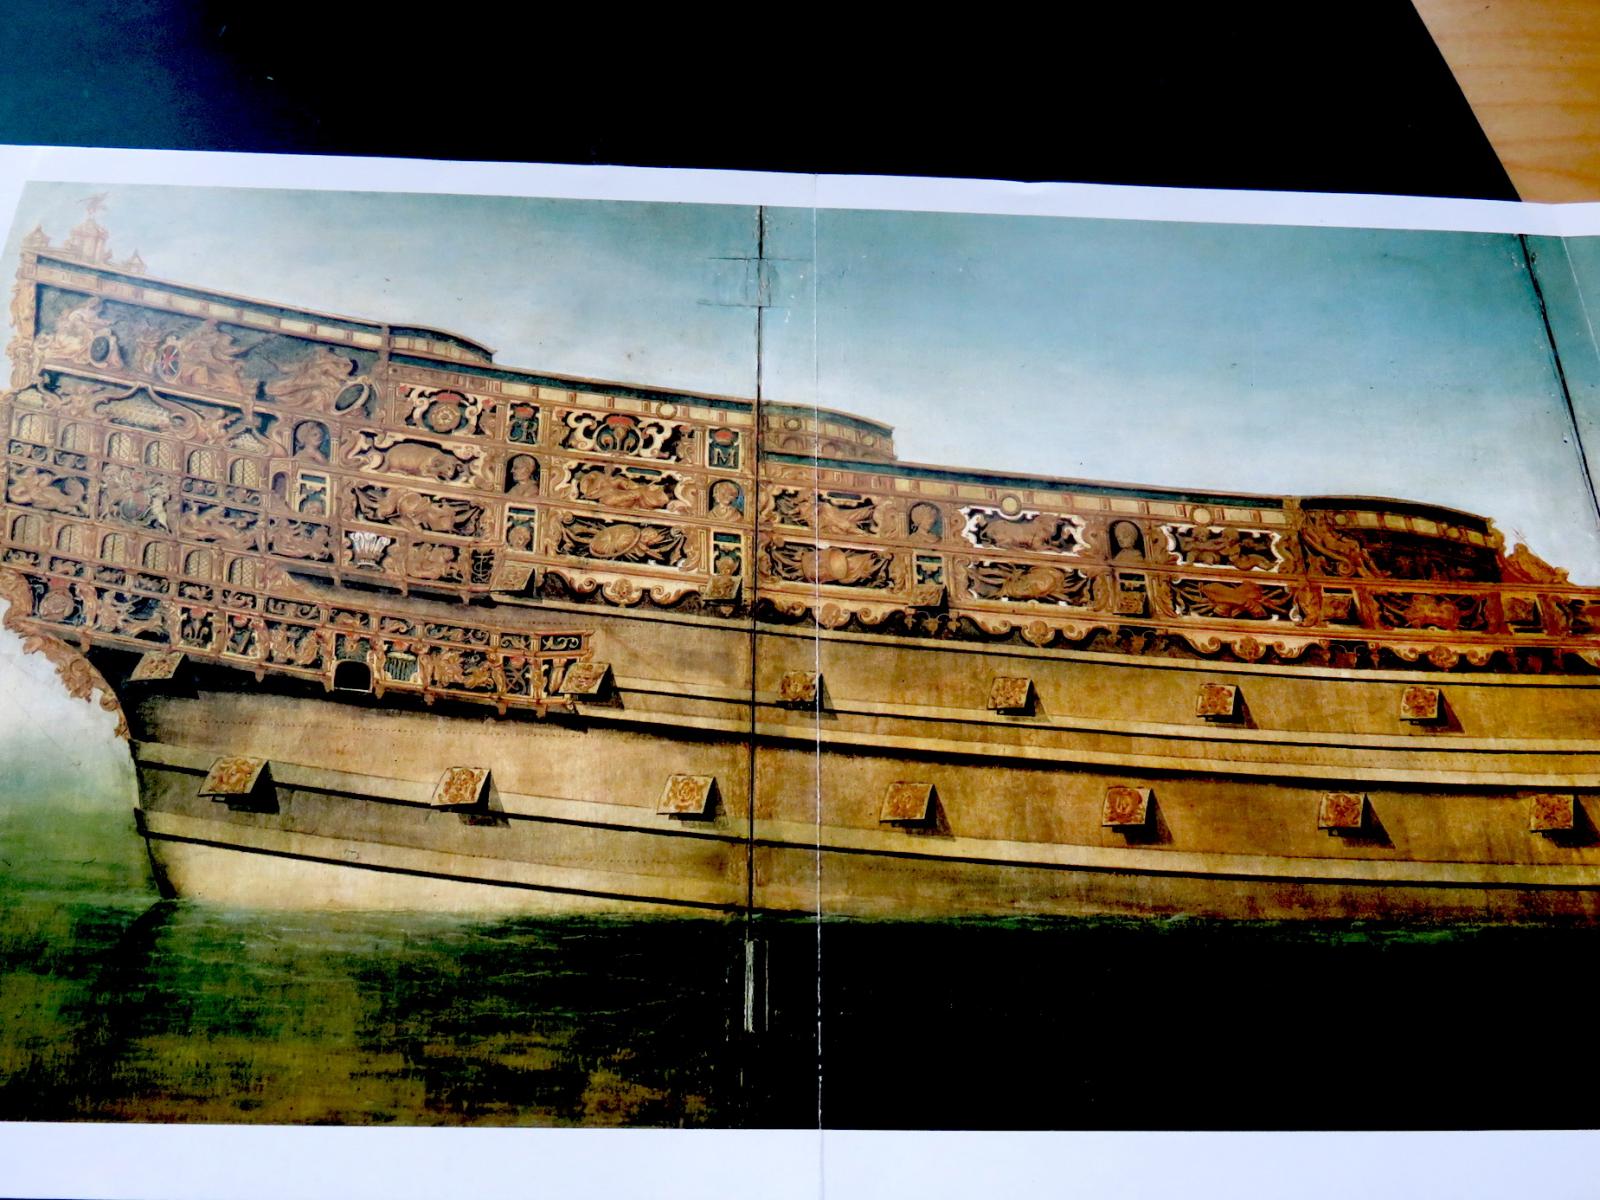
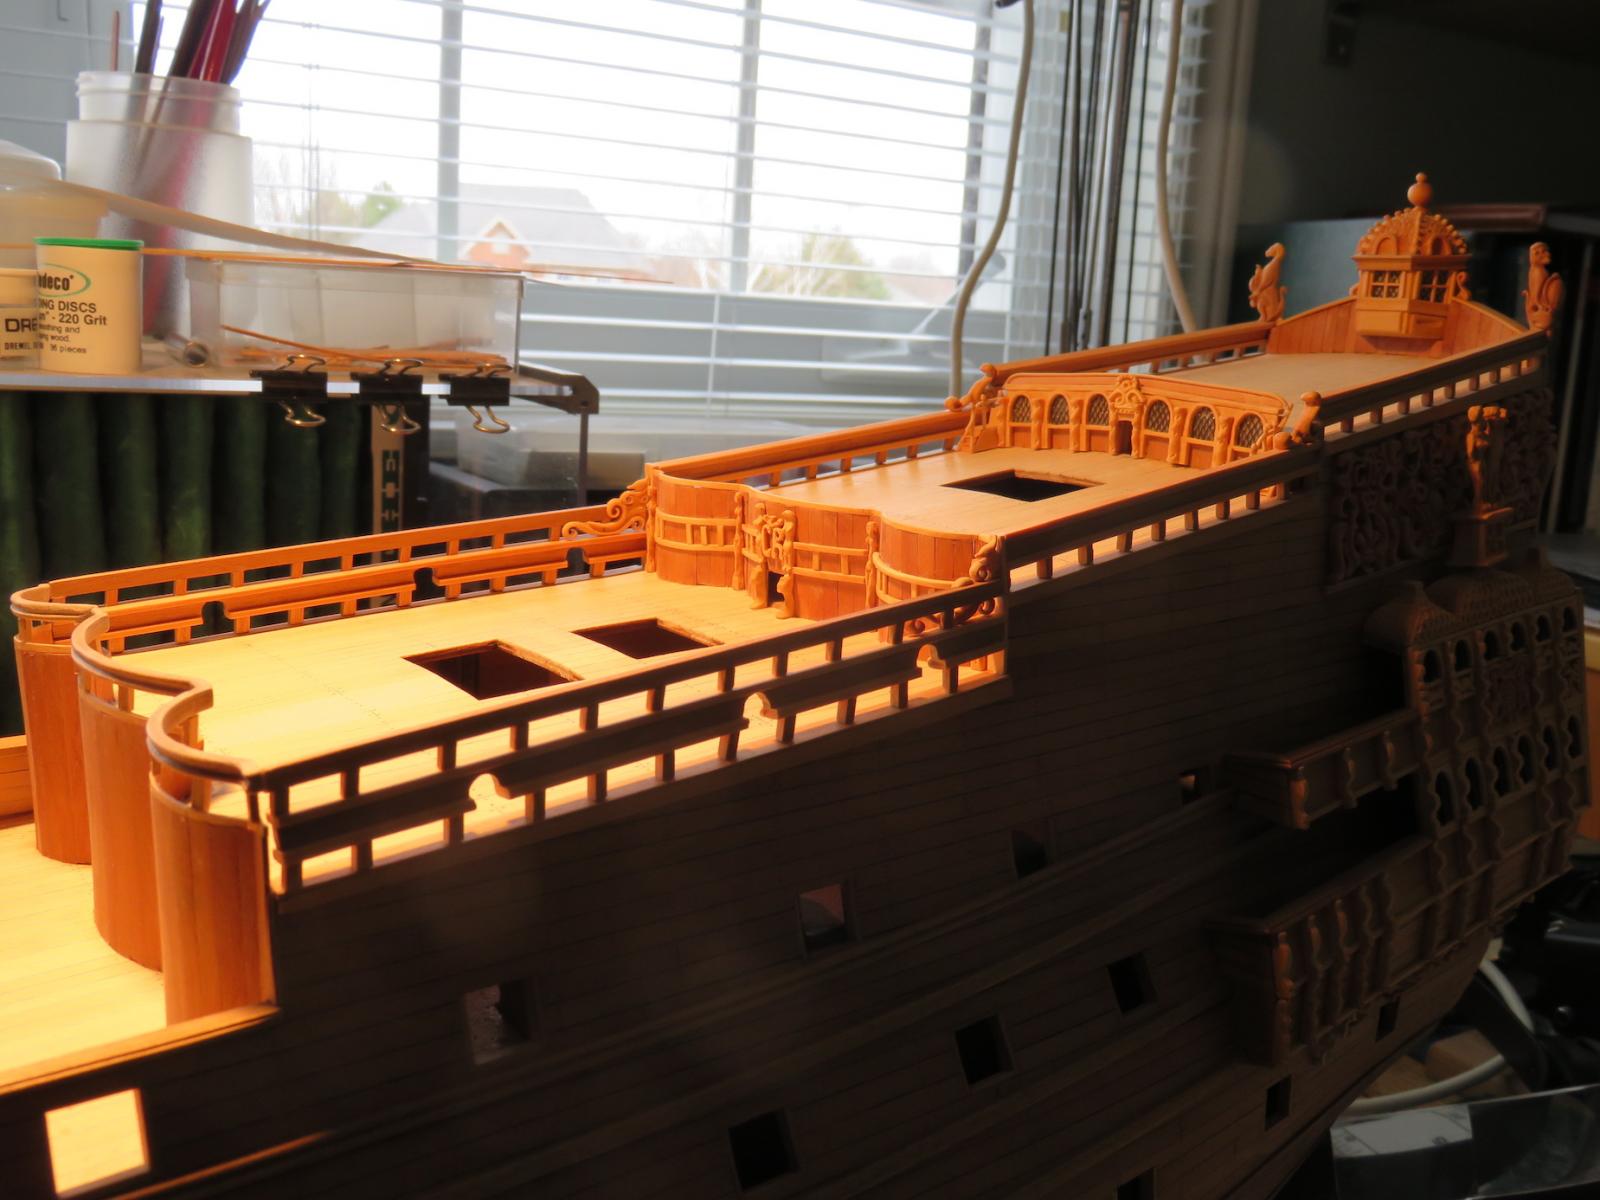
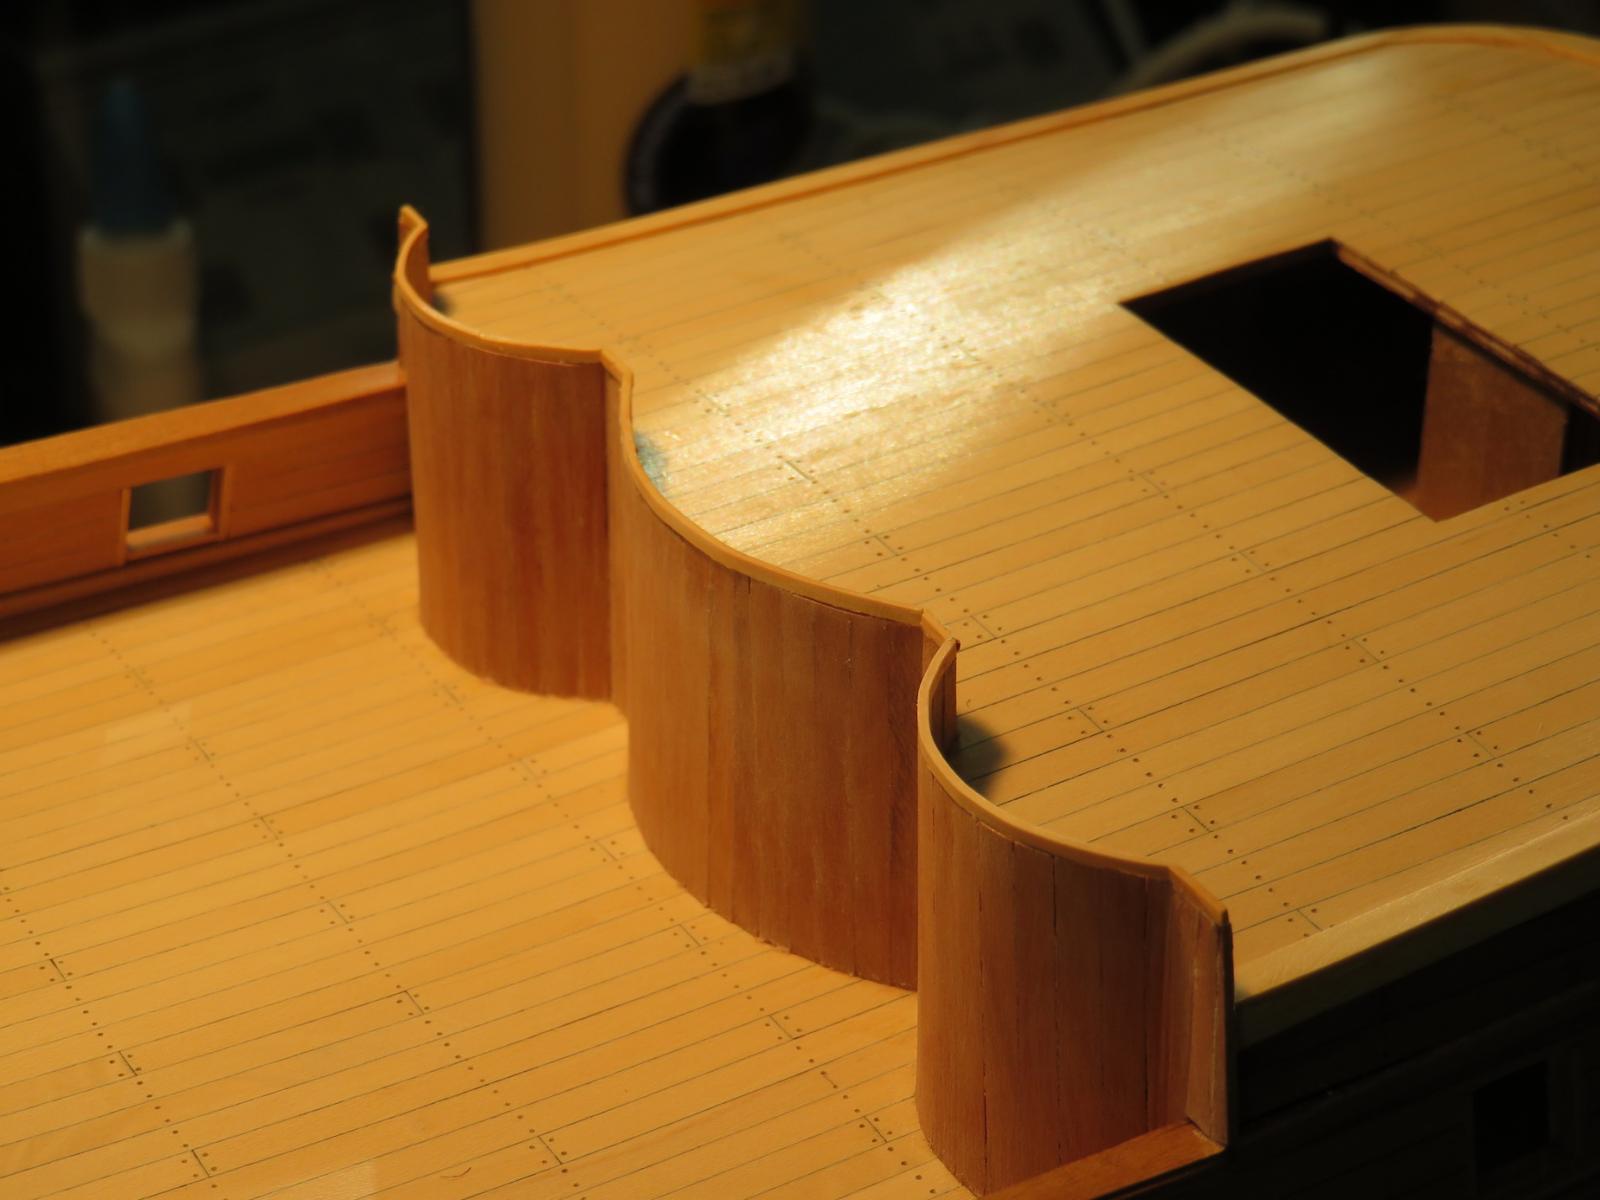
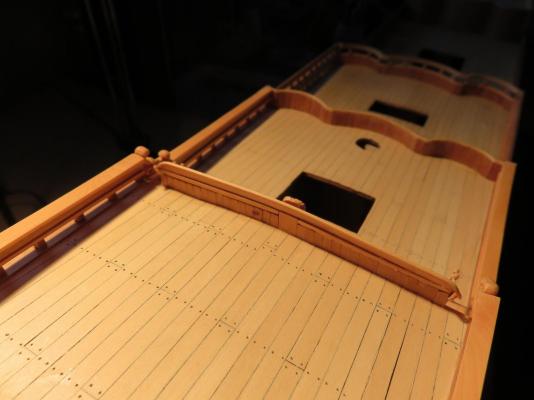
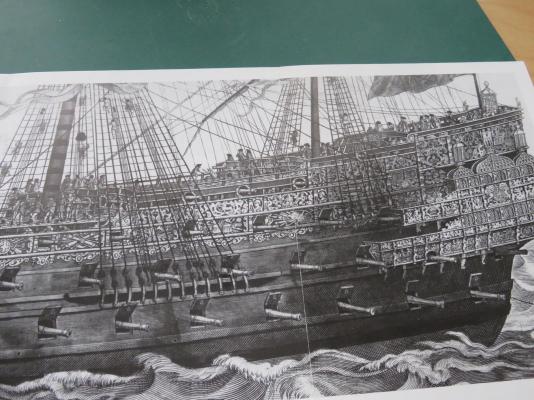
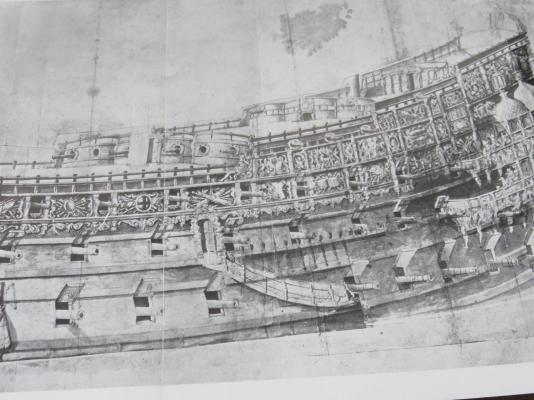
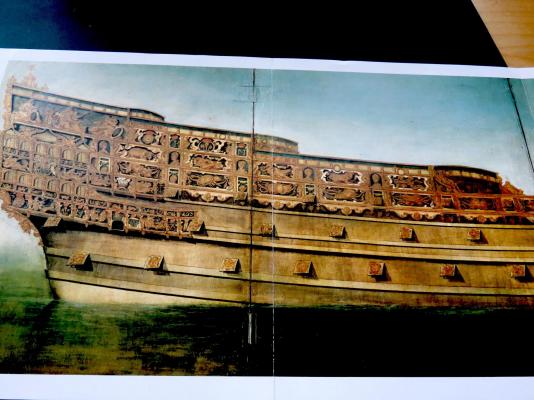
Hi Dave, To explain it better I have included partial pics of the three main references I am using to build my model. First the Payne Engraving. It shows the deck bulkheads from fore to aft and I think the poop deck bulkhead is rather straight with just a gentle curve. The rest of the bulkheads have the three rounded portions in each. Next is the Van de Velde sketch showing a rather similar view. This also shows the poop deck with a gentle curve and the rest with three curved sections. The last is the starboard side depiction credited to Peter Pett and it shows the configuration as presented to King Charles I. The decks all appear to be slightly curved with none of the triple dimple affects. Finally, here is a shot of my model from a similar angle showing the decks in question. My model is a conglomeration of all these paintings and in the case of the bulkheads, I have followed The Payne and Van de Velde depictions. My assumption is the the Pett painting was presented to Charles and he ordered changes which resulted in the depictions of Payne and Van de Velde which were done when the ship was near completion or completed. As I have previously noted in this thread, there are no plans for this ship and all we have to go on is the paintings sketches and engravings of the time for reference. This means that we are depending on the eye of the artist and what he saw when he created the depiction. I hope that explains it. Regards, Bill

- 382 replies
-
- 5
-
-
- sovereign of the seas
- carving
- (and 1 more)
-
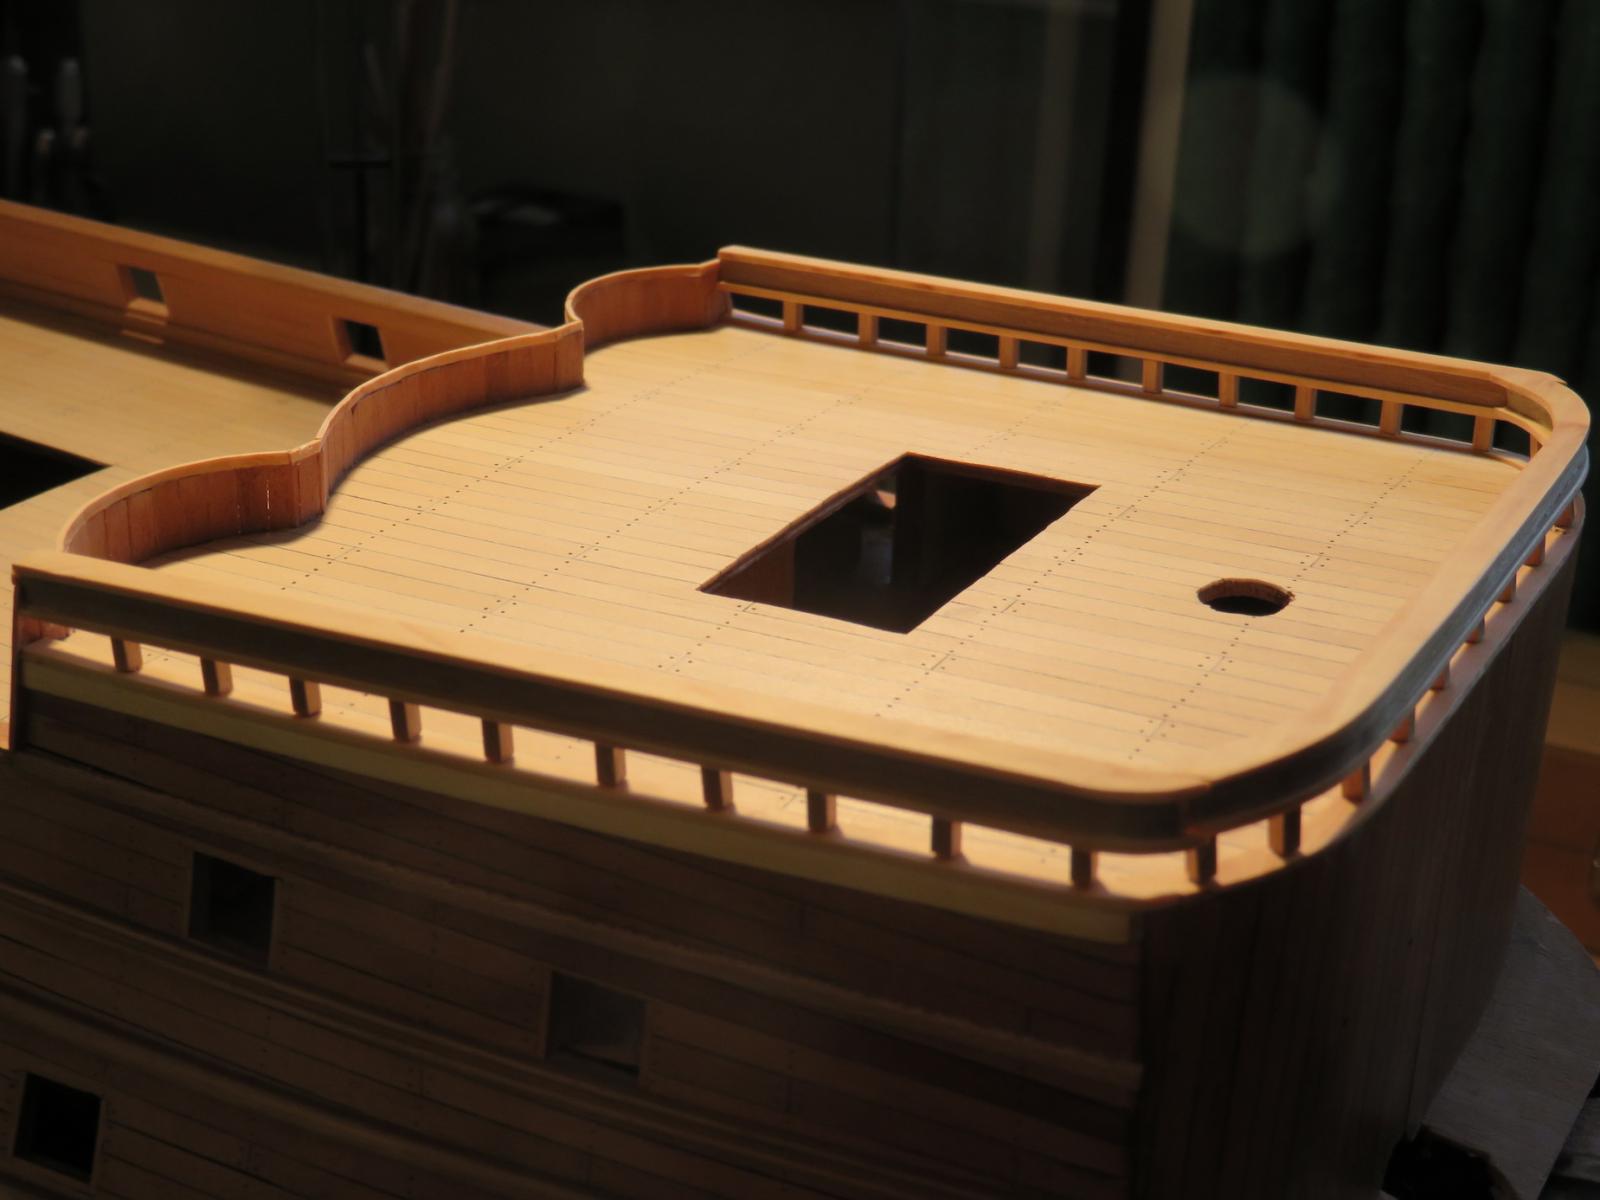
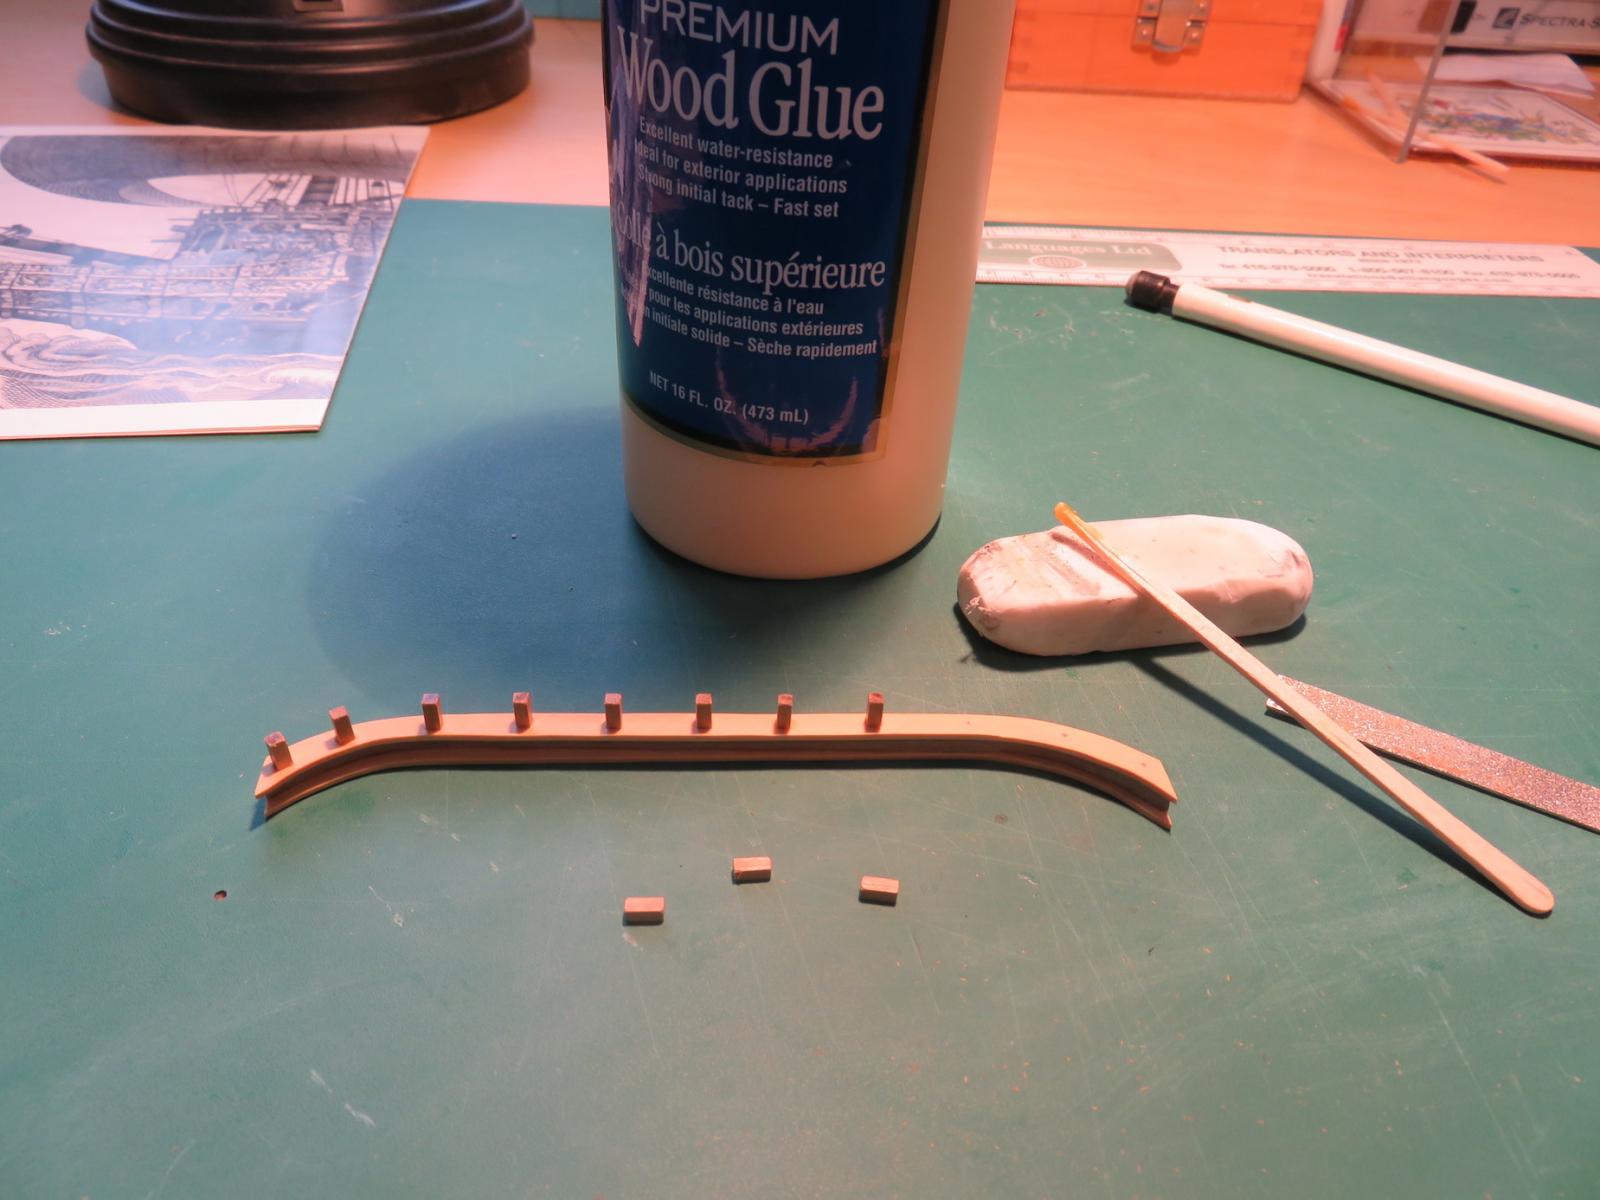
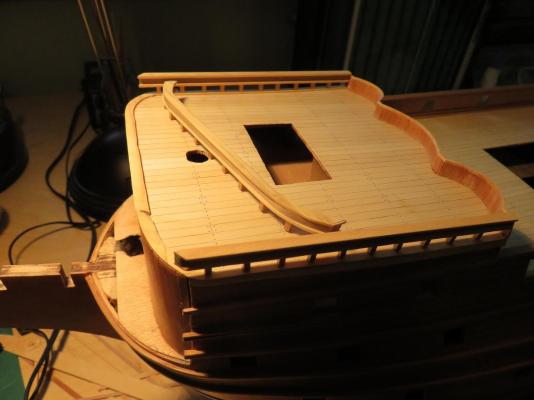
I had been meaning to cap the railing to the poop deck a long time ago and finally made the capping rail piece from boxwood and assembled it. it is about 1 mm wide and 0.5 mm thick. It was shaped using my soldering iron fitted with a brass tip I made specially for bending wood strips. The cap adds a nice finishing touch and blends nice with the stairway railings. More to follow............
- 382 replies
-
- 6
-
-
- sovereign of the seas
- carving
- (and 1 more)
-
Thanks for your comments. They are really appreciated.
- 382 replies
-
- 1
-
-
- sovereign of the seas
- carving
- (and 1 more)
-
The port and starboard fore deck rails are mounted and the next step is to fit and mount the front rail seen sitting loosely on the deck surface. More to follow..............
- 382 replies
-
- 6
-
-
- sovereign of the seas
- carving
- (and 1 more)
-
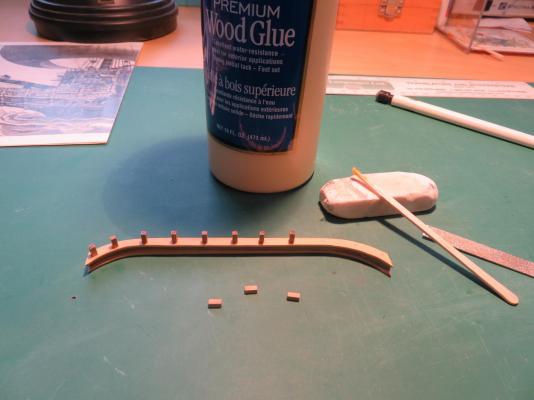
This photo shows the assembly of the stanchions to the front part of the fore deck rail. More to follow.............
- 382 replies
-
- 4
-
-
- sovereign of the seas
- carving
- (and 1 more)
-
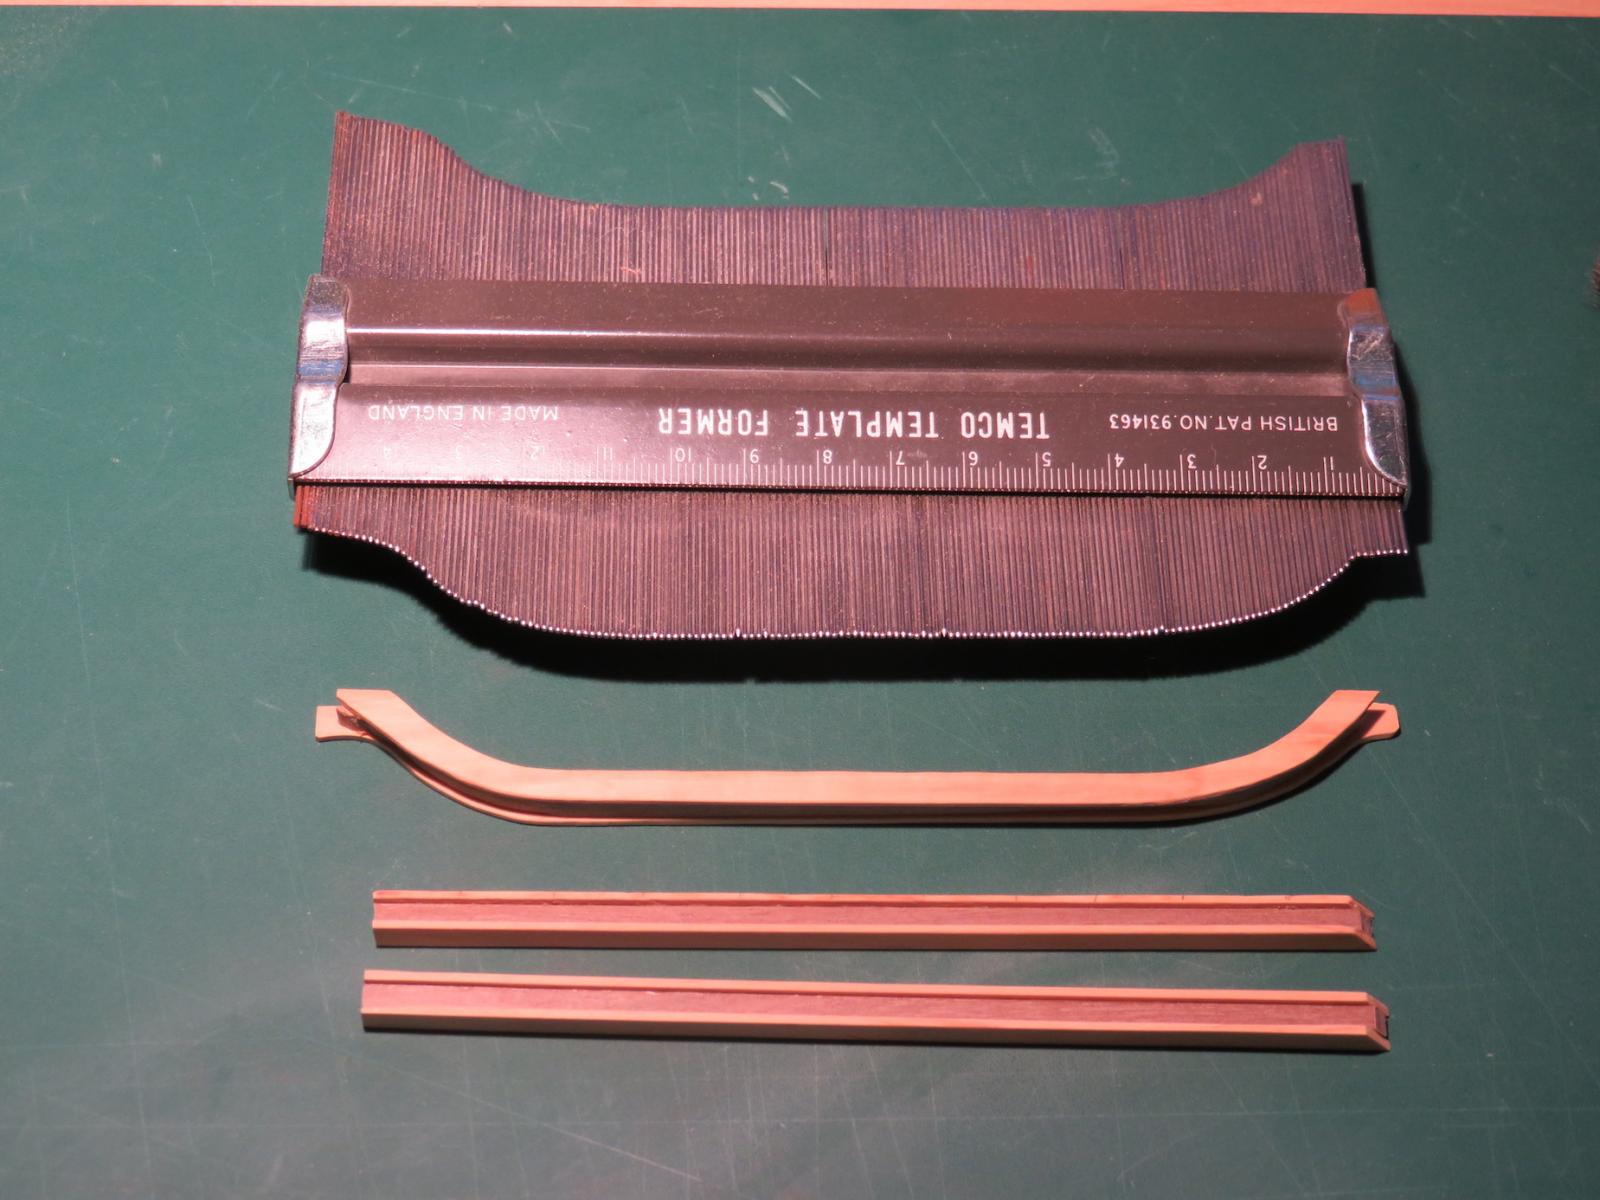
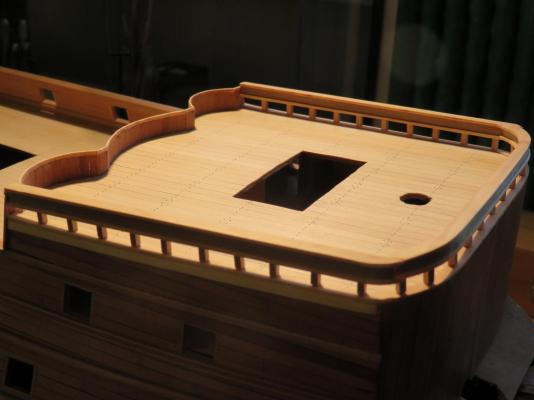
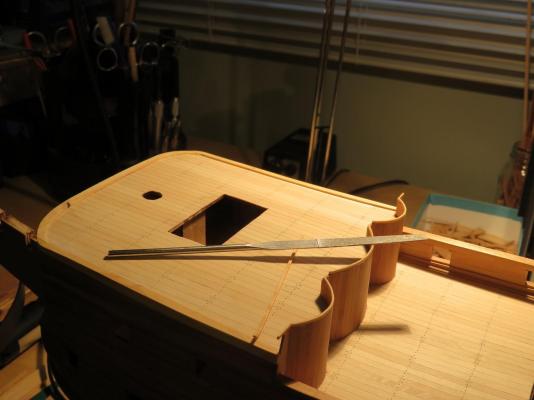
The following photos look at preparation of the fore deck and the bulkhead against that deck for the placement of rails. At the top of the bulkhead a capping trim was formed and glued in place. The next few photos show of the progress of rails that will surround the fore deck. Also shown is the Temco Template former used to copy the profile of the shape of the front of the fore deck. More to follow..................

- 382 replies
-
- 10
-
-
- sovereign of the seas
- carving
- (and 1 more)
-
Thanks to everyone for the kind remarks. Regards, Bill
-
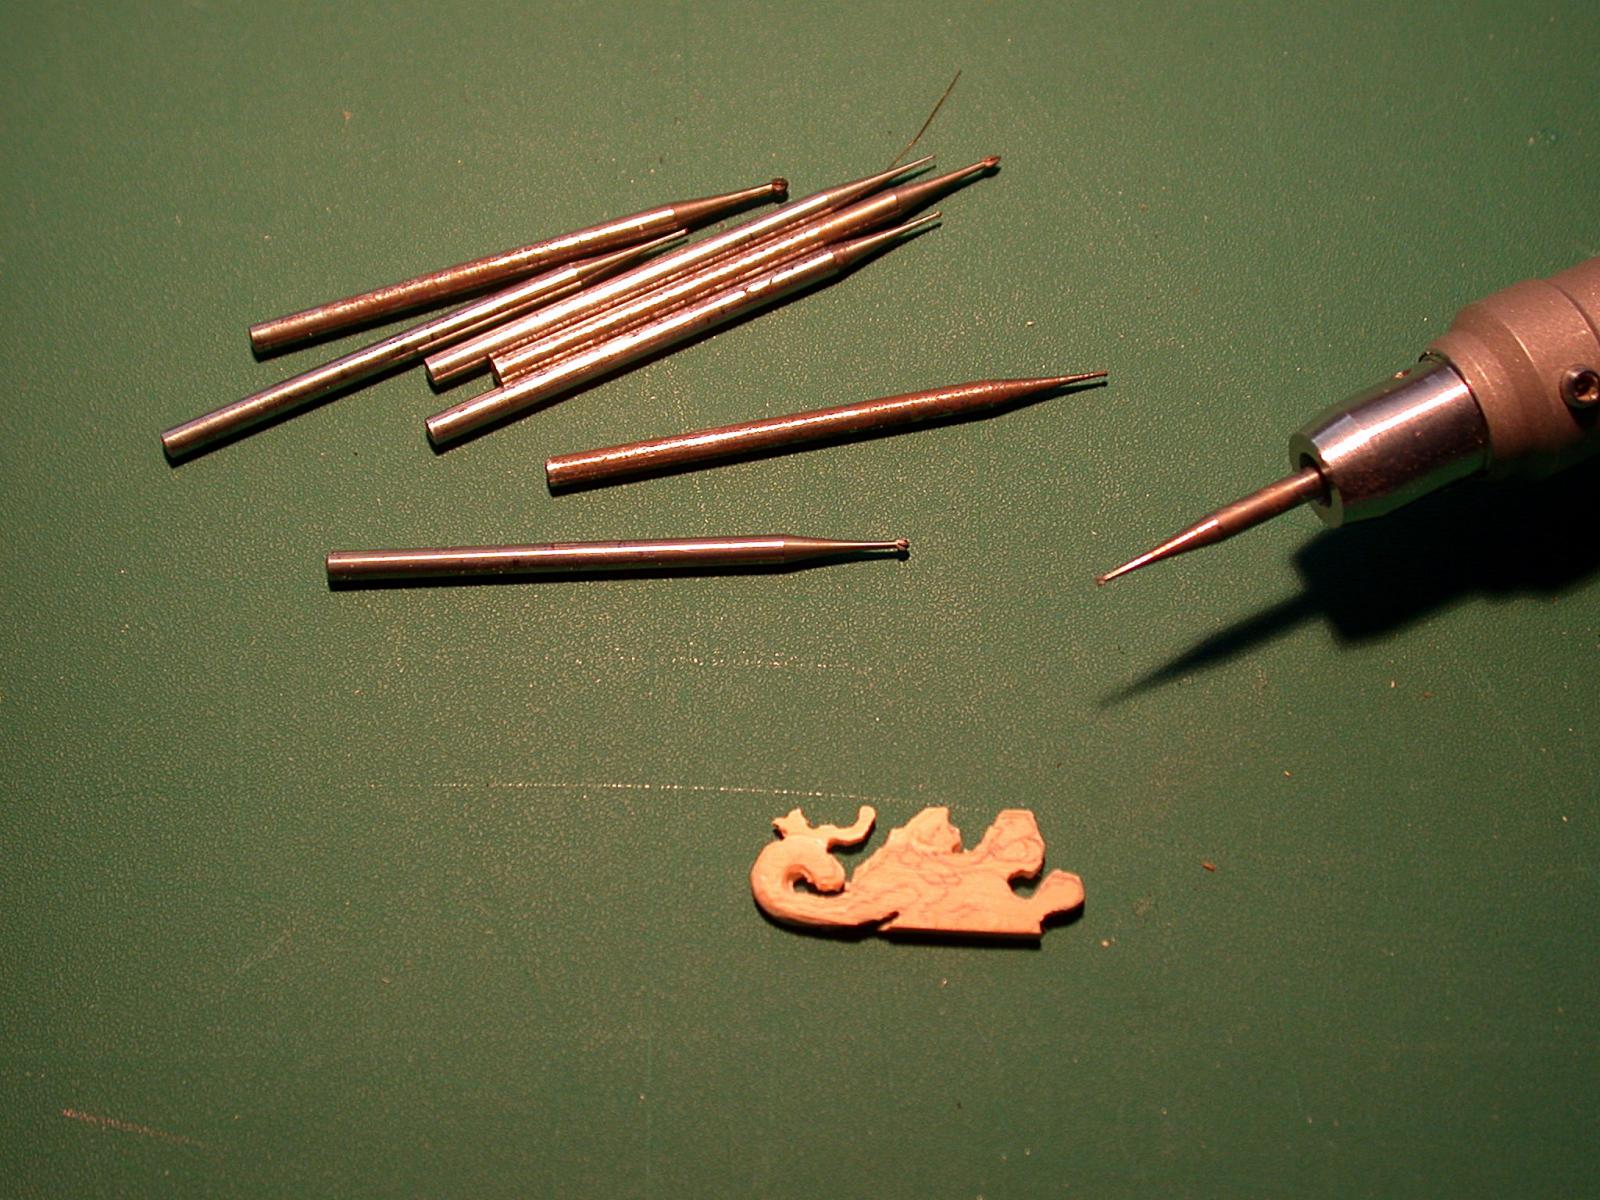
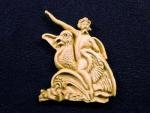
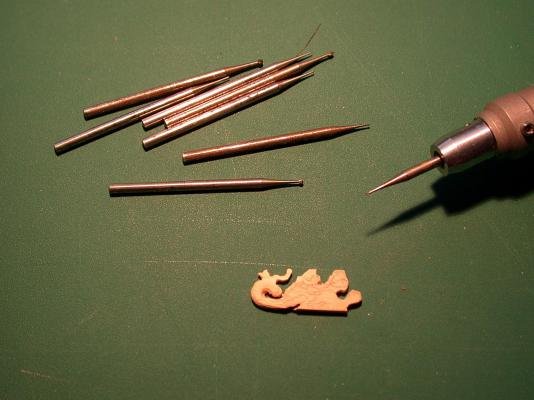
The beginnings of the carving for the right side of the coat of arms. Still looking quite rough.
- 382 replies
-
- 8
-
-
- sovereign of the seas
- carving
- (and 1 more)
-
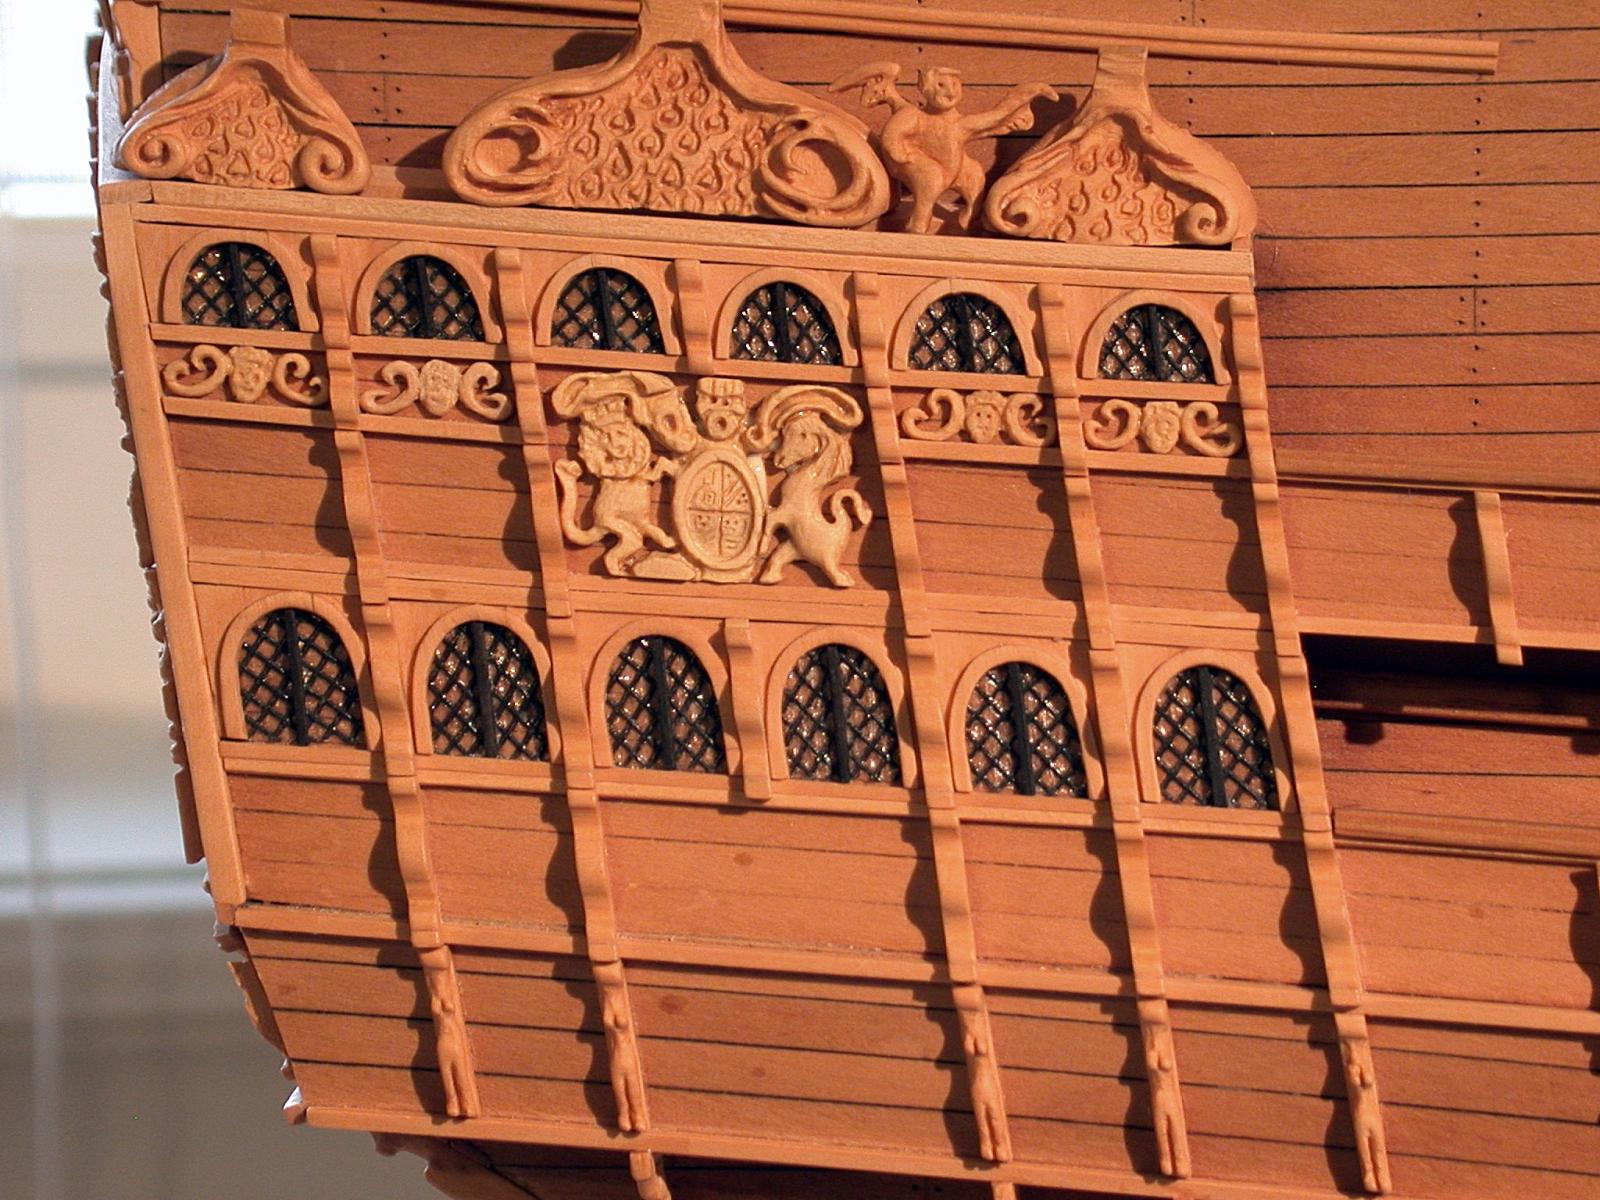
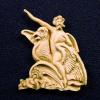
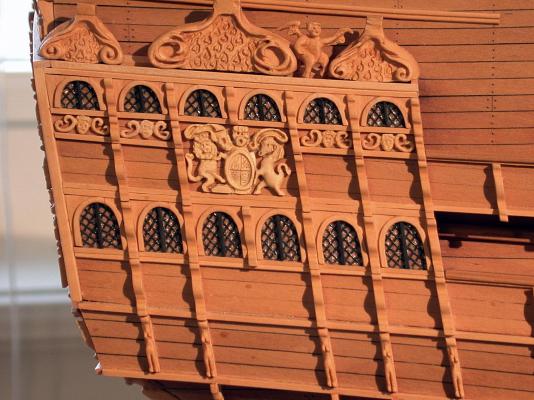
The four spaces adjacent to the coat of arms should be two wide spaces so I removed the dividers in the middle of each space. I then carve another mythical creature with a rider on his back to fill the left hand space. Regards, Bill
- 382 replies
-
- 13
-
-
- sovereign of the seas
- carving
- (and 1 more)
-
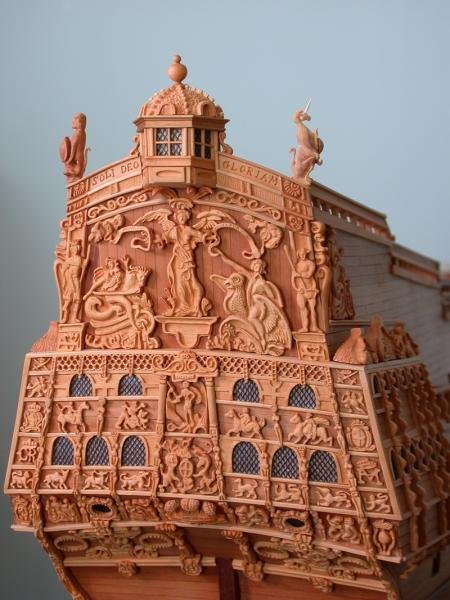
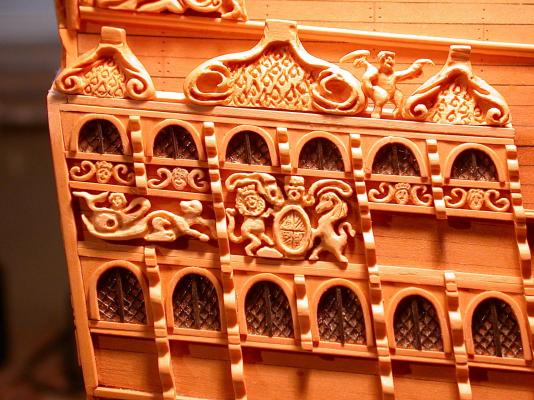
The Coat of arms is now complete and the additional small faces on each side have been added. Regards, Bill
- 382 replies
-
- 12
-
-
- sovereign of the seas
- carving
- (and 1 more)
-
Thanks for your comments Greg. It is a bit of an on again - off again process with me and what you see is basically where the model stands at this point. Regards, Bill
-
Thanks Nigel. Good luck with your build. Regards, Bill
-
Thanks Michael for your kind comments. Good luck with your carving. Regards, Bill
-
Hi Martin, Thanks for dropping by and posting your comments. Hopefully, the book has helped others as well in getting a start on carving. I am pleased you took the plunge and tried it. Regards, Bill
-
Thanks Janos. Coming from you, that is special. Regards, Bill
-
Hi Anja, Thanks for dropping by. The tagua nut is not in the book, but rather I included it in this log to show that there are other materials available for carving. Regards, Bill