flyenrw
-
Posts
43 -
Joined
-
Last visited
Content Type
Profiles
Forums
Gallery
Events
Everything posted by flyenrw
-
 Hi Dan, the windlass turned out well, for sure! I appreciate your methods and simplicity to achieve a fantastic, clean, end result.
- 87 replies
-
- 2
-

-

-
- Lady Nelson
- Amati
- (and 1 more)
-
As you March ahead, looking great, Ship Shape and Bristol Fashion! I'm still trying to figure out where I put my saddle.
- 87 replies
-
- 1
-
-
- Lady Nelson
- Amati
- (and 1 more)
-
Ahh; another Lady to follow....Very nice detail work Vossiewolf and the variations you have chosen really turn your Lady into a one of a kind! Best Regards, Roger
- 714 replies
-
- 1
-
-
- lady nelson
- victory models
- (and 1 more)
-
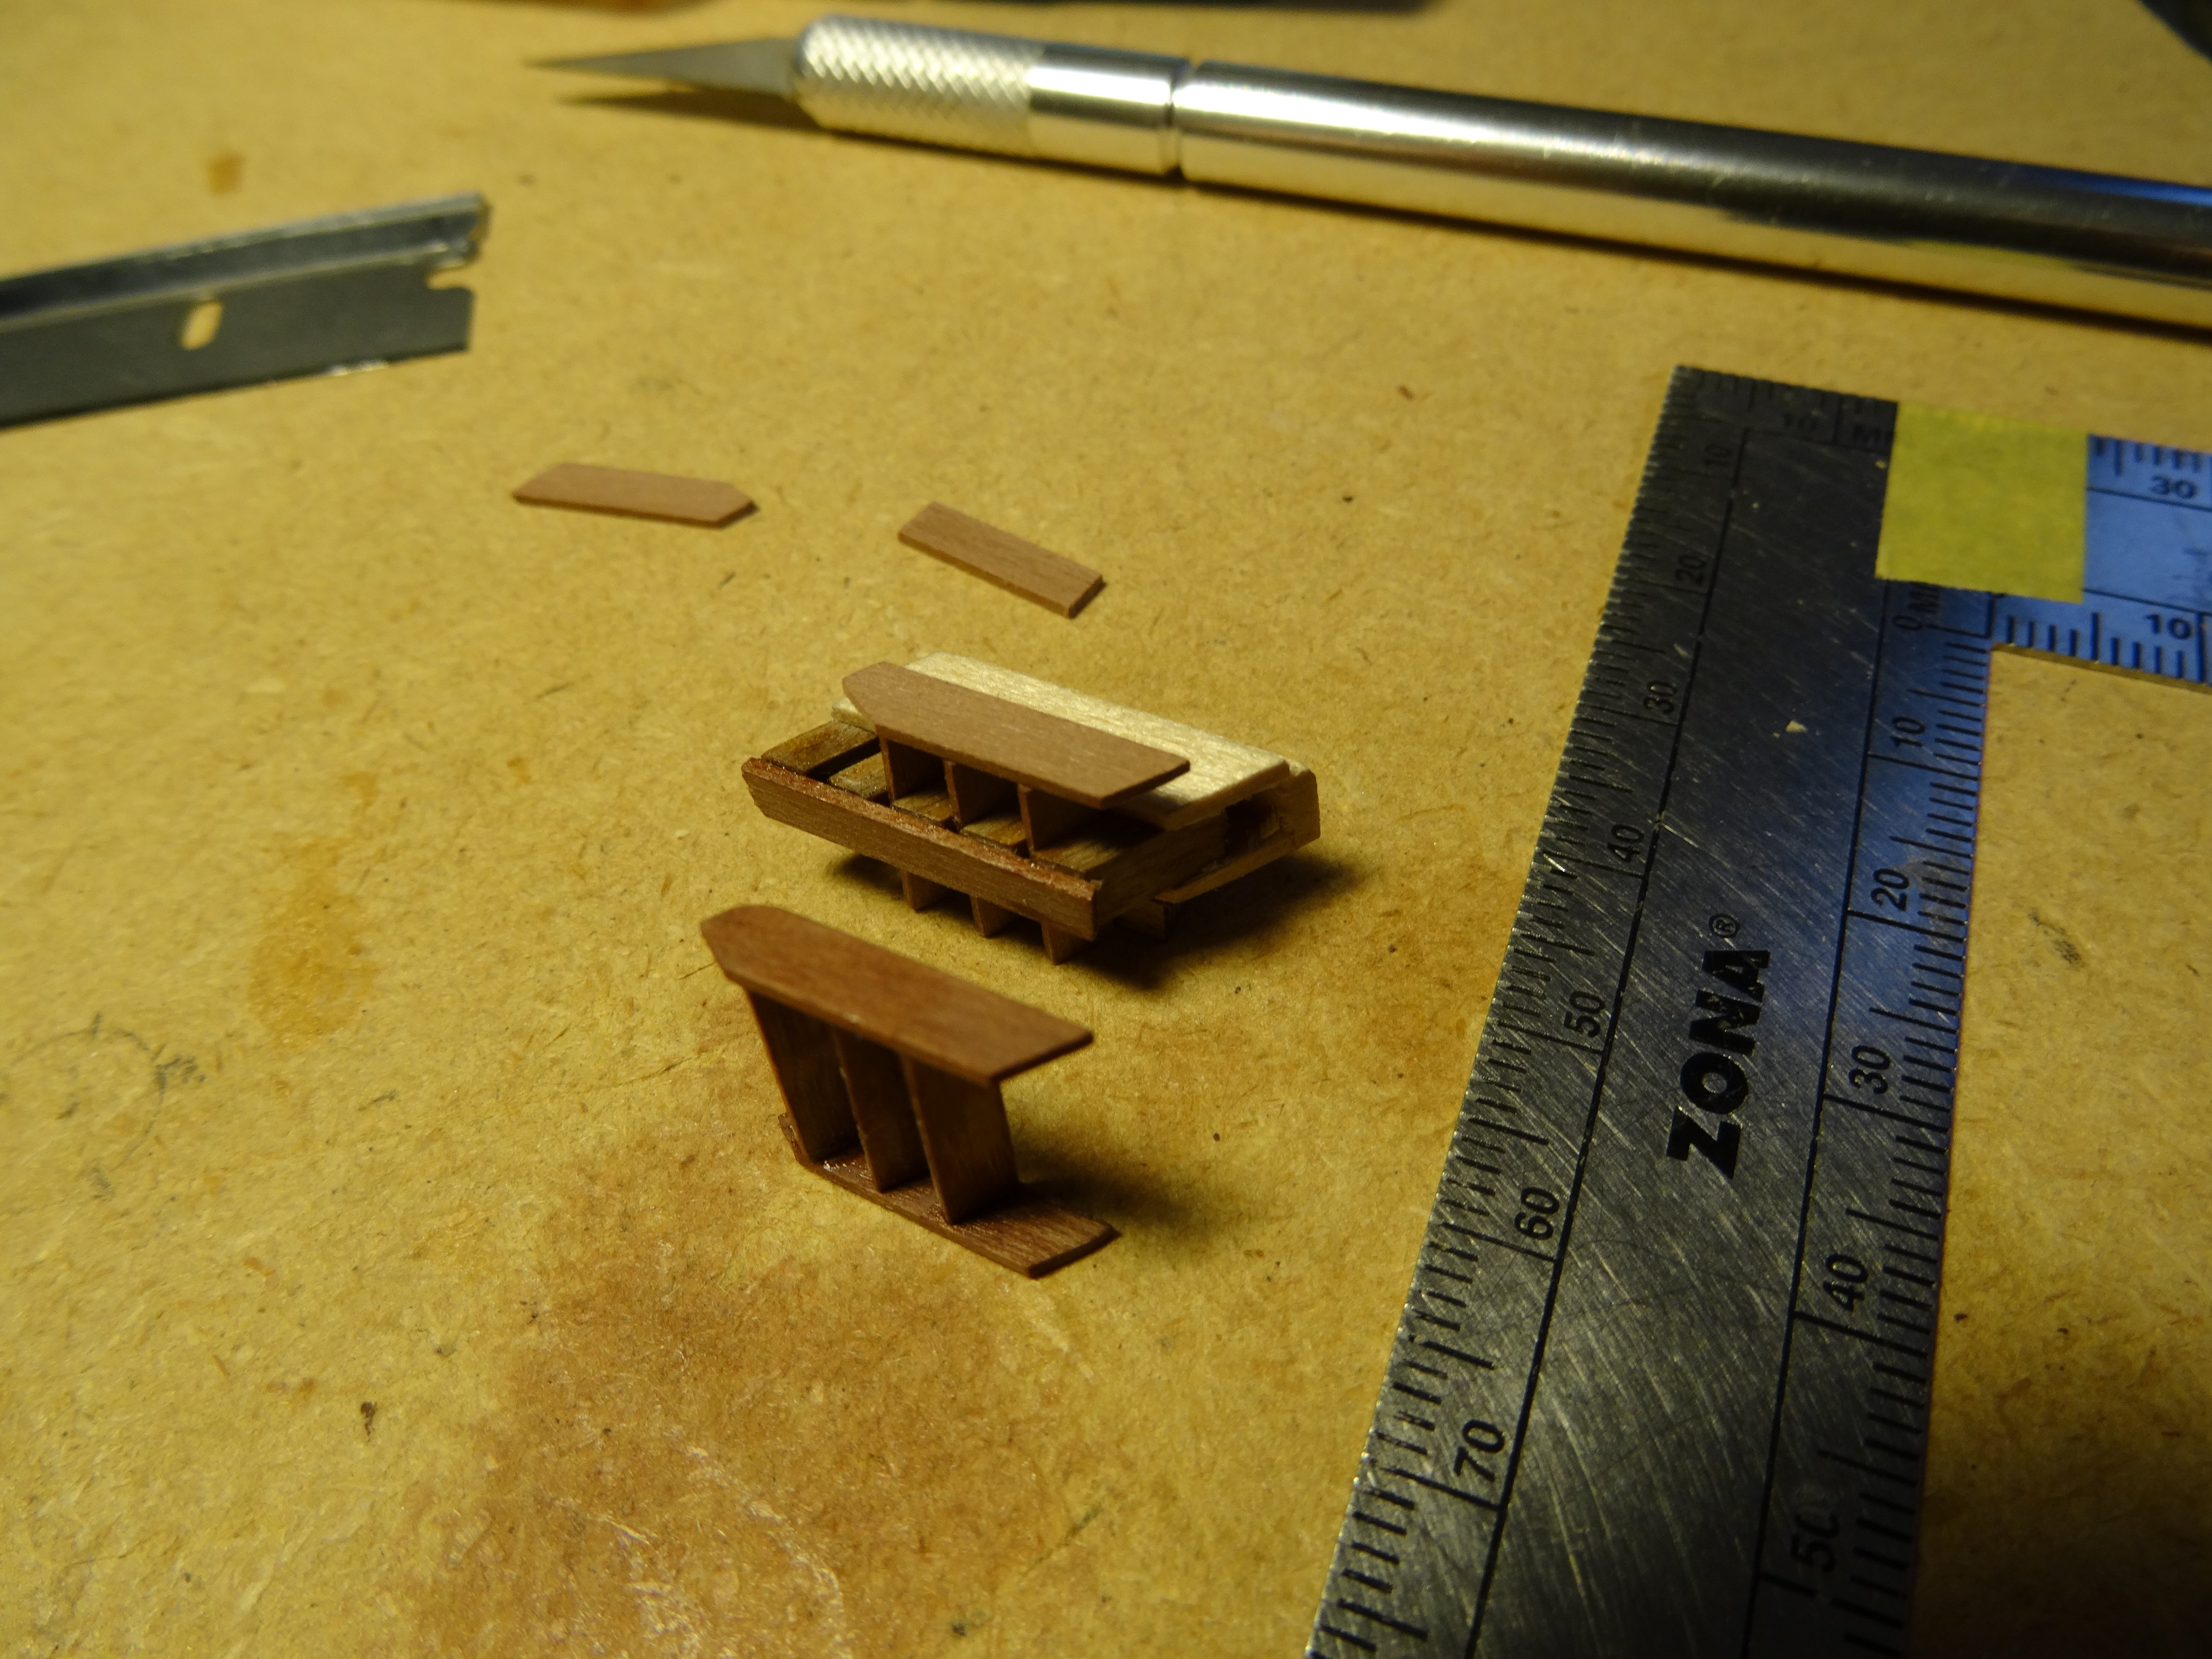
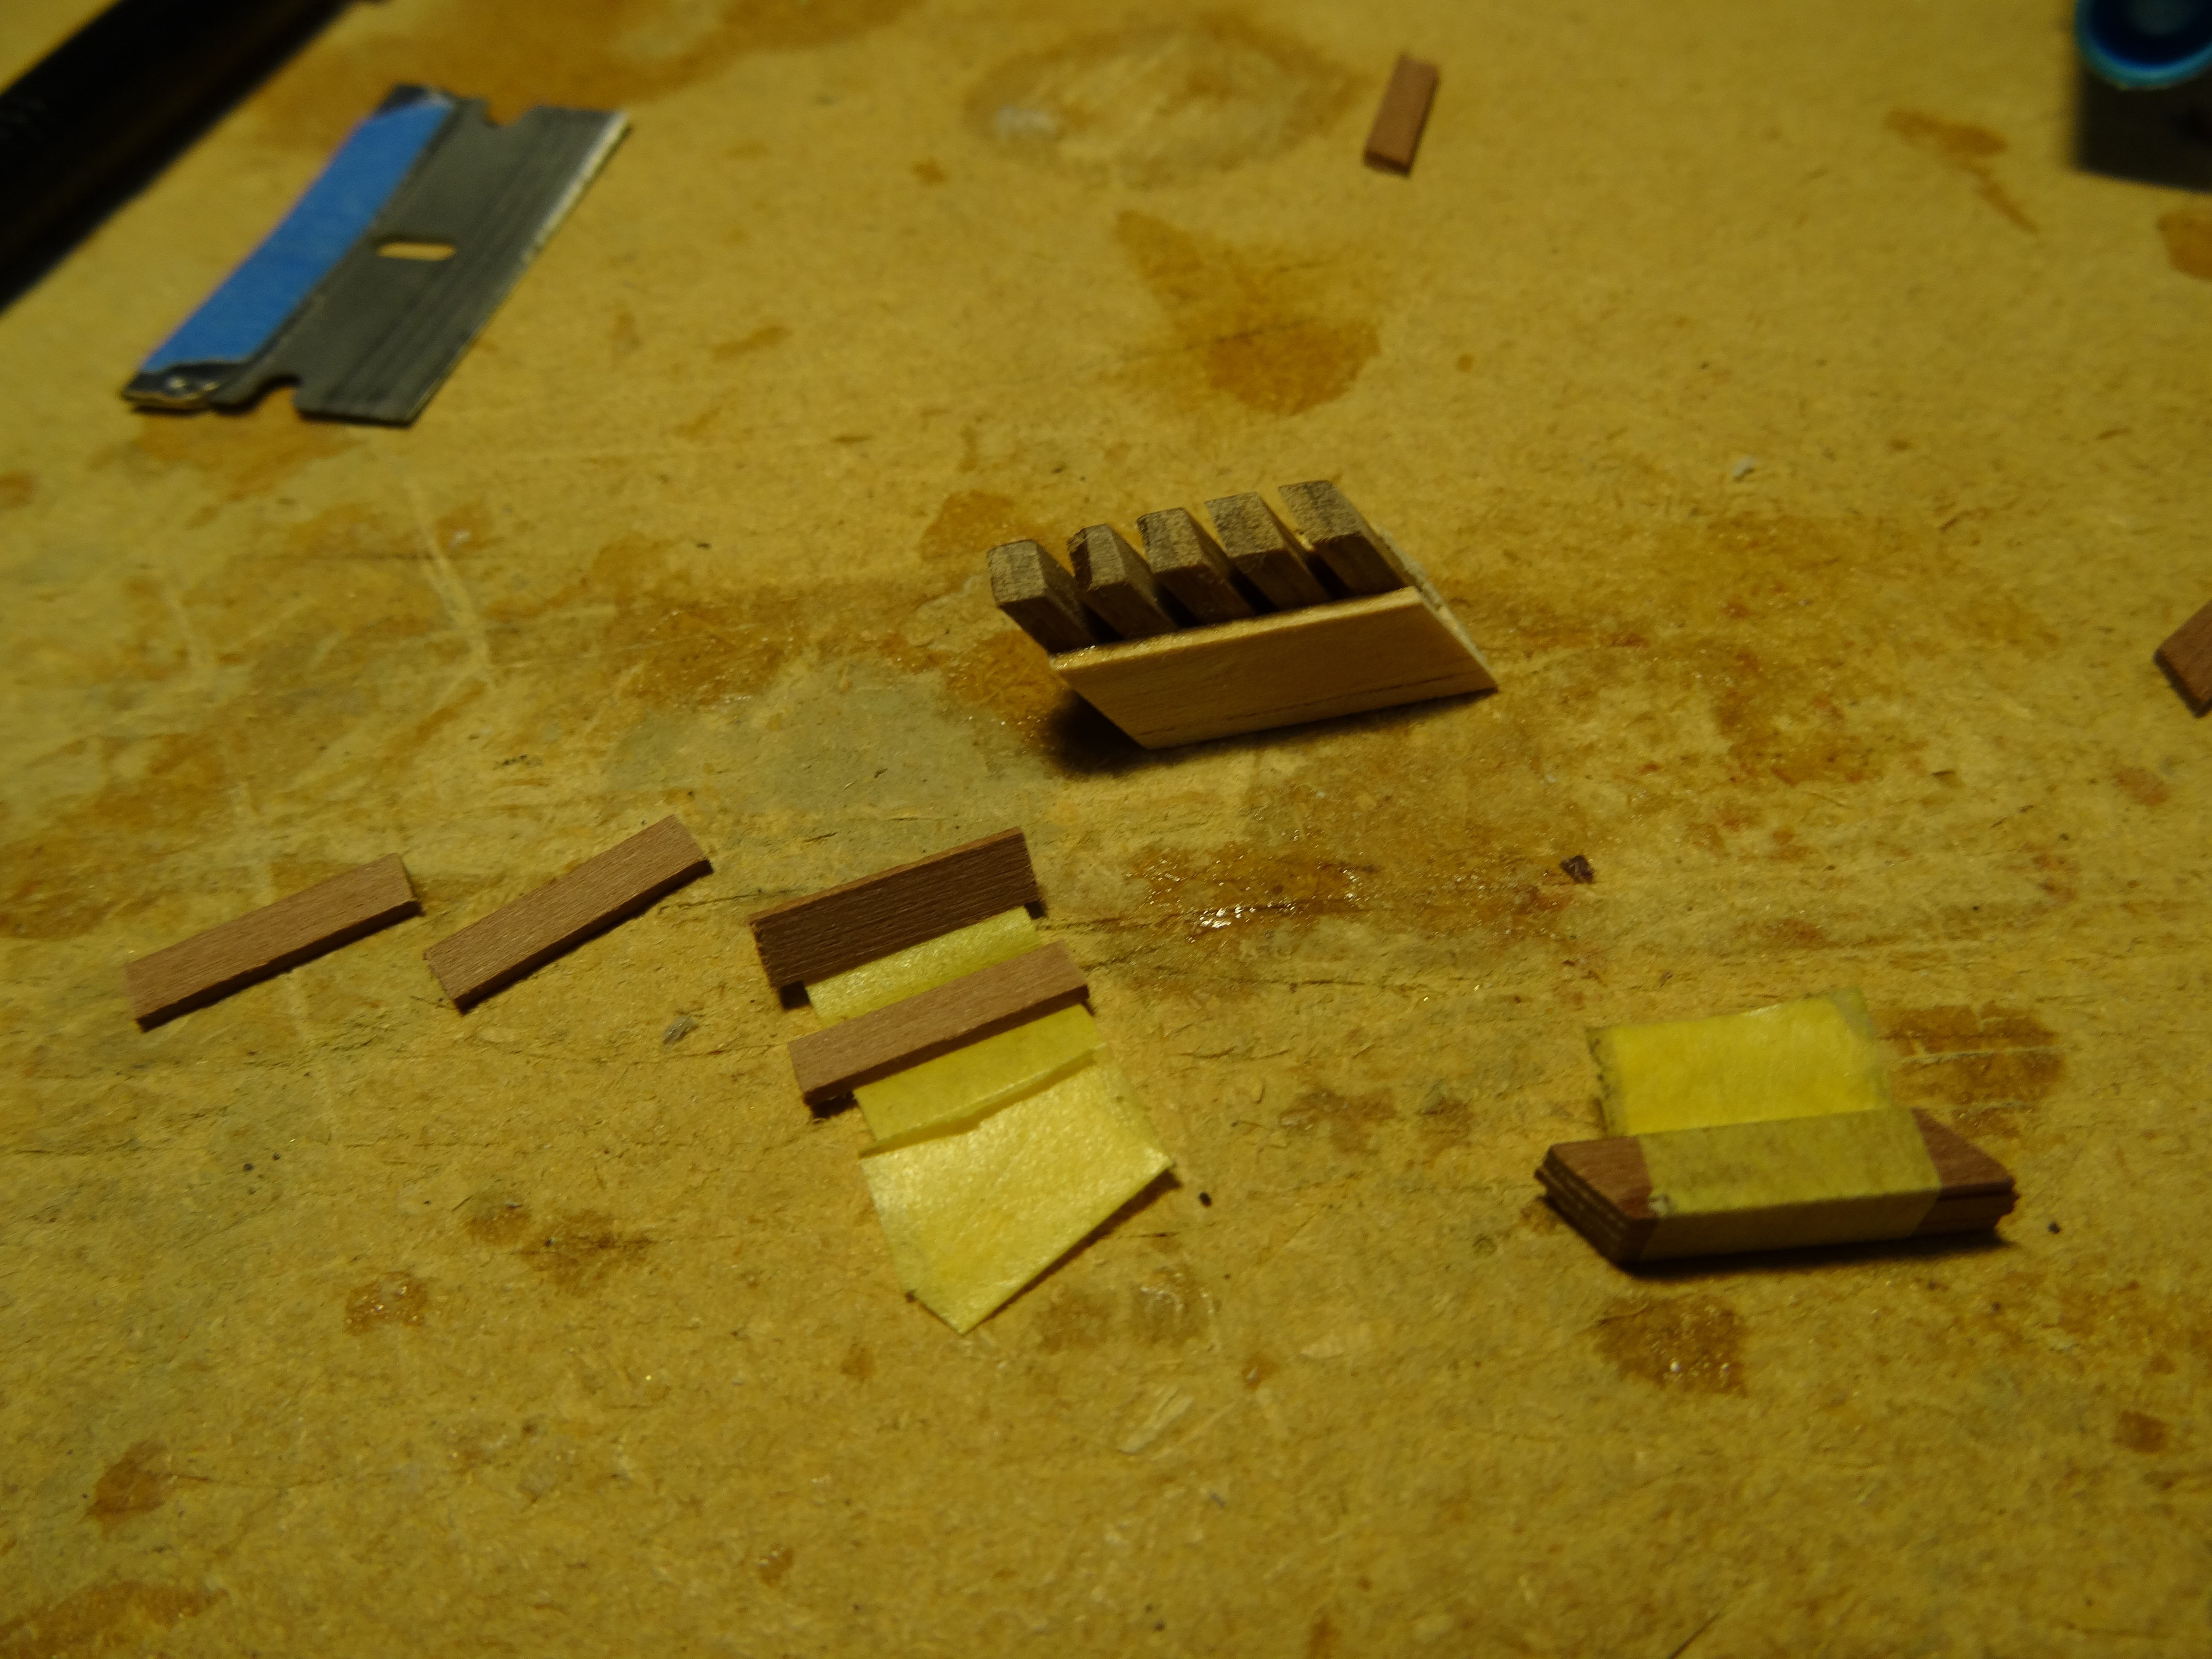
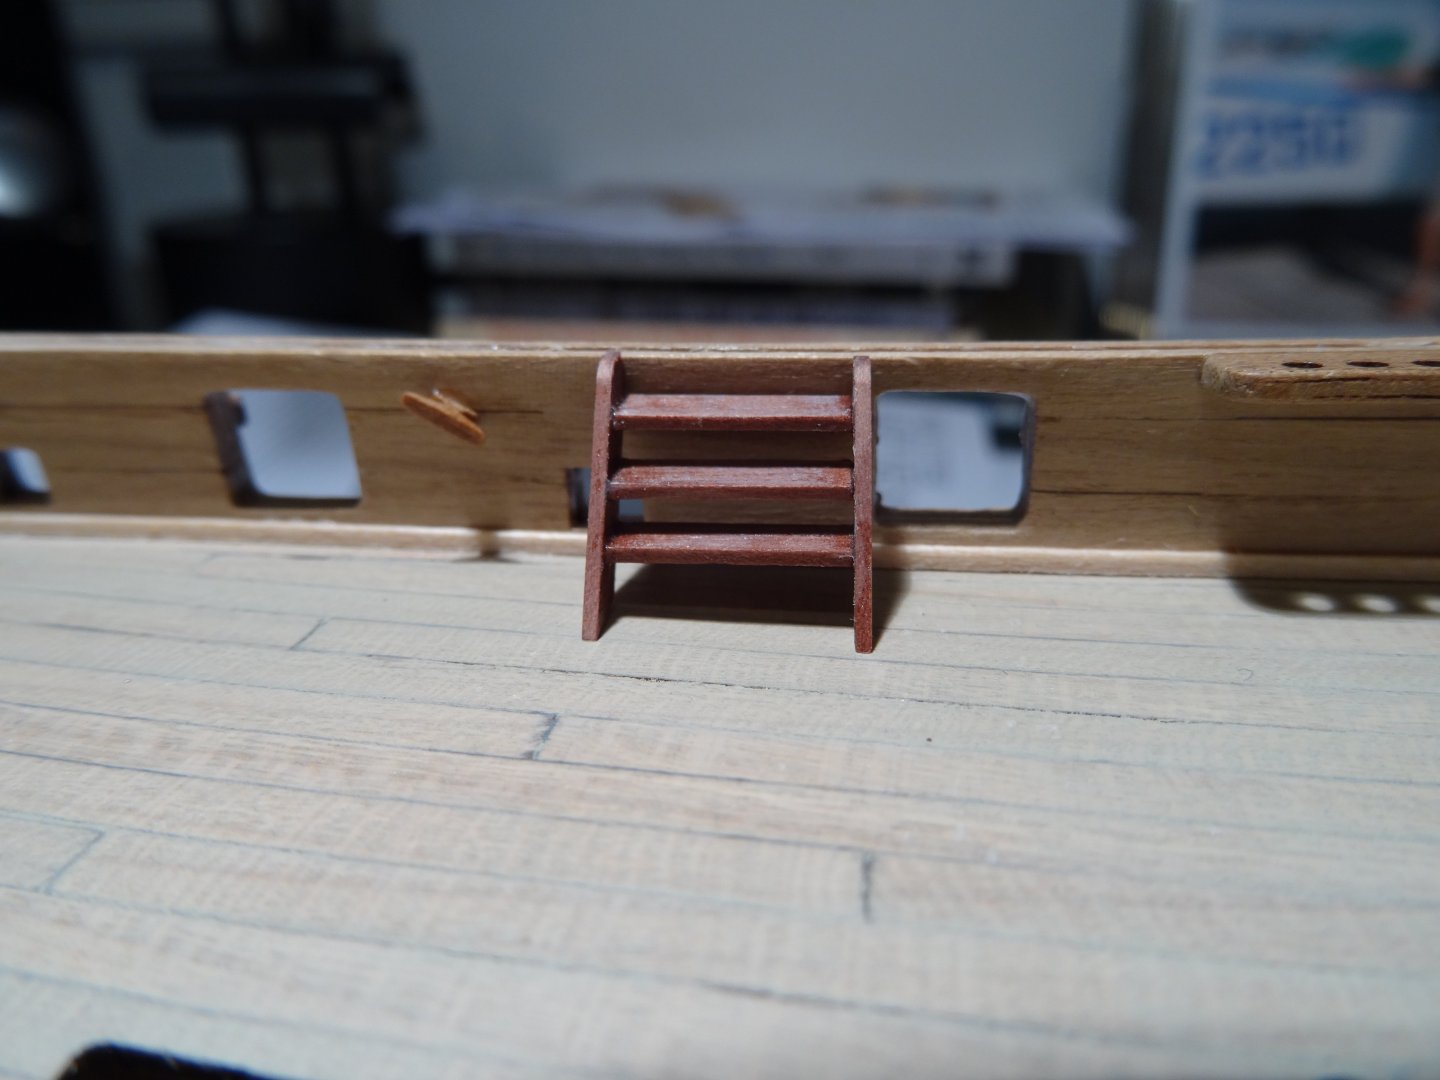
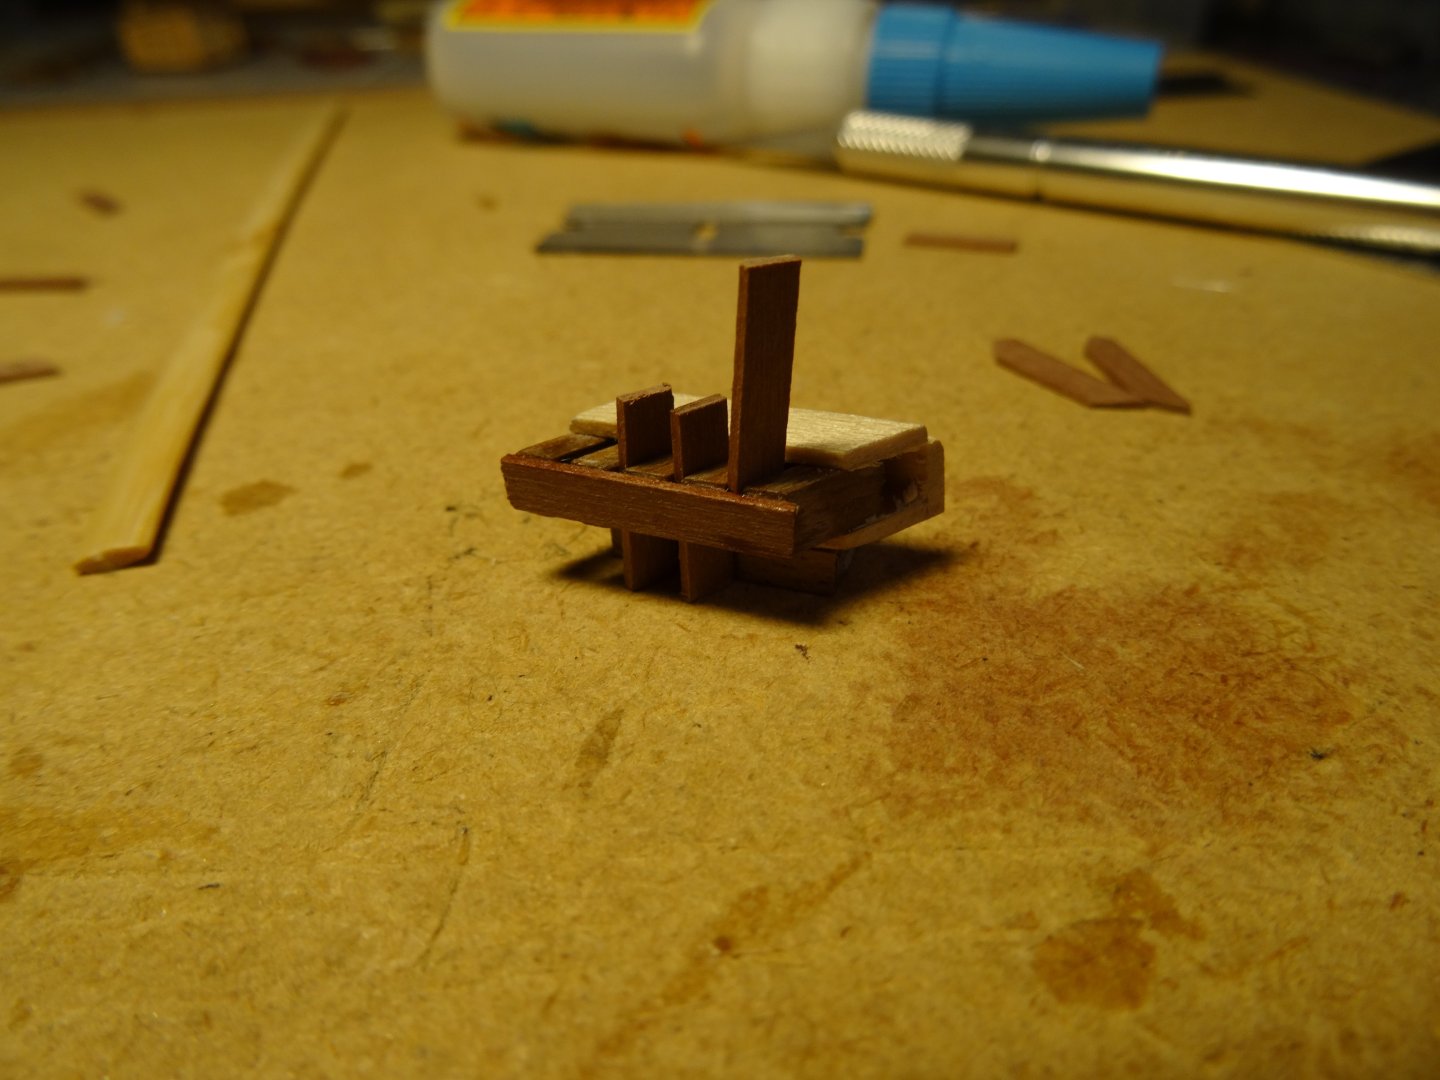
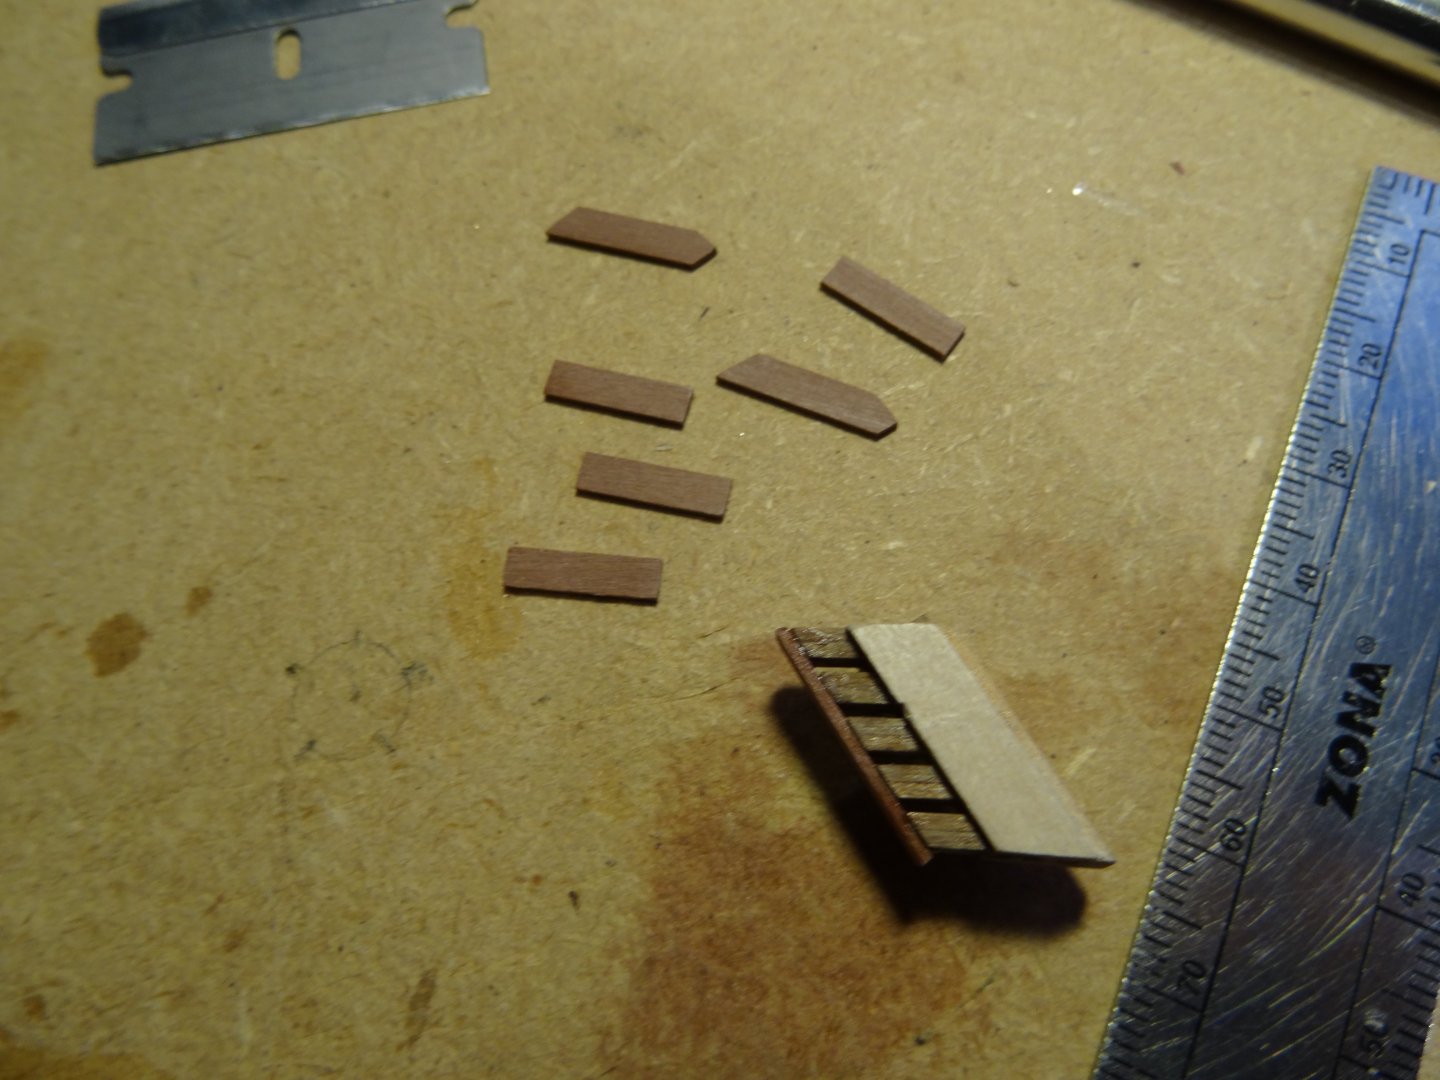
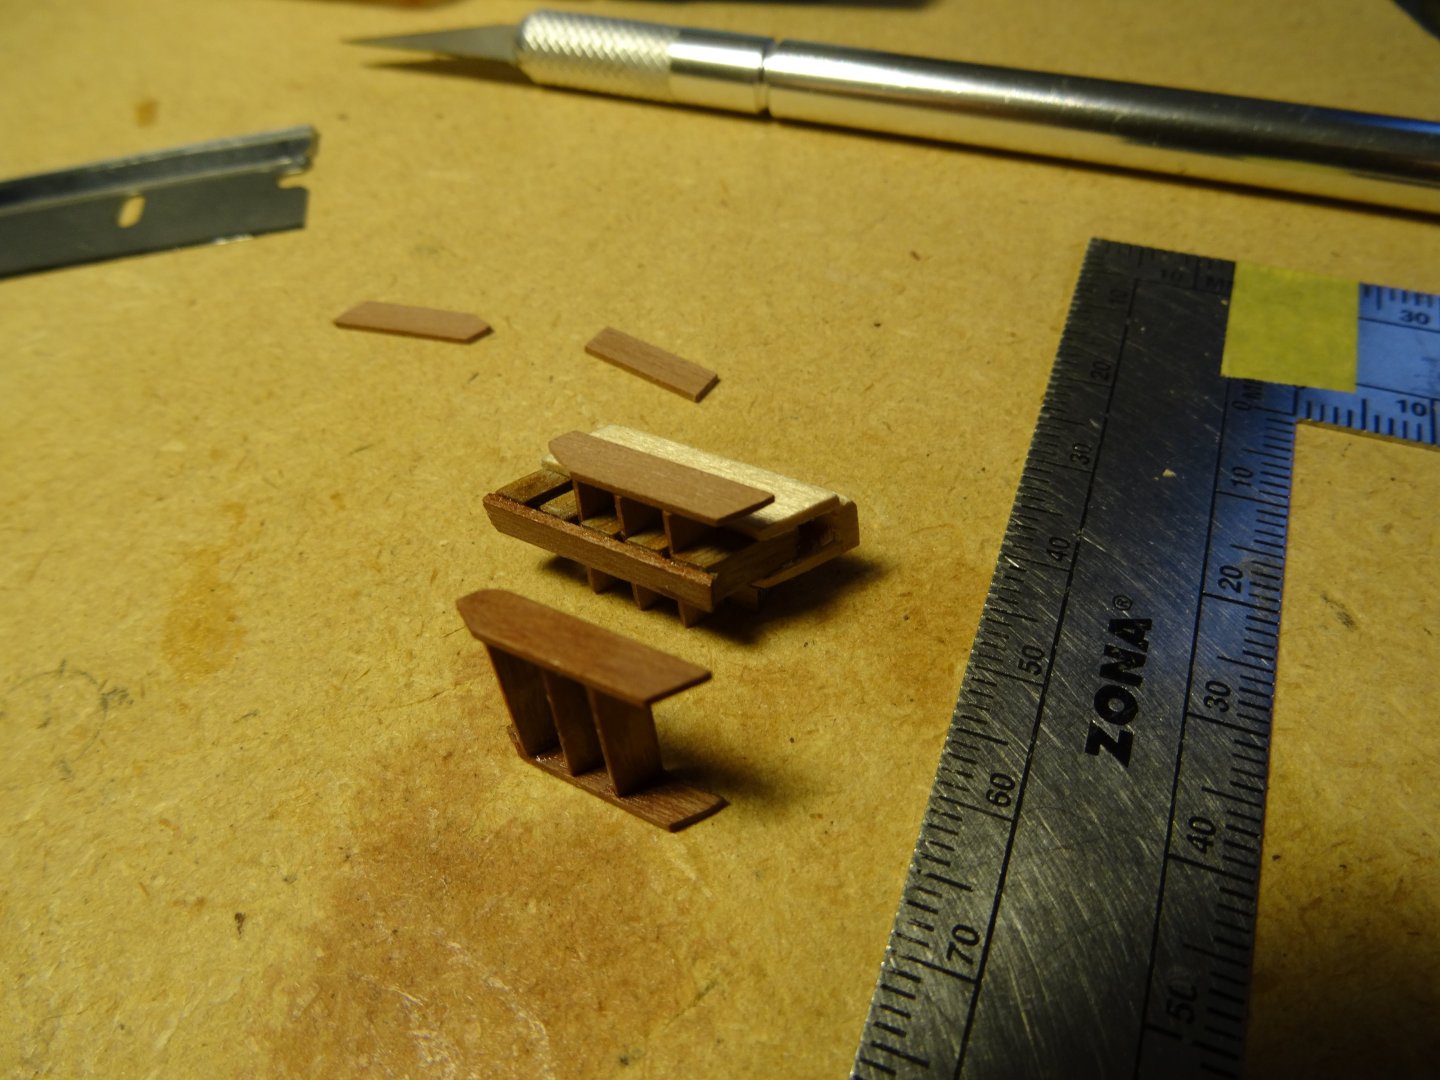
I realized that after dinner I hadn't included the pictures of the deck ladder jig and basic assembly. This was a hogg-pogg of different ideas I had come across, while researching how others had made ladders. So in a nut shell, after establishing the ladder rung spacing of 2mm , I made the rungs and stiles from 1 x 3mm strip. To make the jig, I glued small blocks of 2 x3mm to a footing at an angle of the ladder resting against the Bulwark for the rungs to be horizontal. After they were glued in place, I then sanded the height of the wood blocks to insert of the steps snugly against a strip of wood glued across the top of the blocks, capturing each rung snugly at the proper angle. I blocked up the bottom so that when the rungs were inserted, they would vertically rest even across one edge, so that the other side would be ready to glue it's stile in place. When one side stile had dried properly, I removed the half ladder, to finish and glue the other stile to complete the ladder framing. Finish was sealed with thin CA, sanded smooth with 400 grit, ready for painting.
- 39 replies
-
- 3
-
-
- Amati
- Victory Models
- (and 1 more)
-
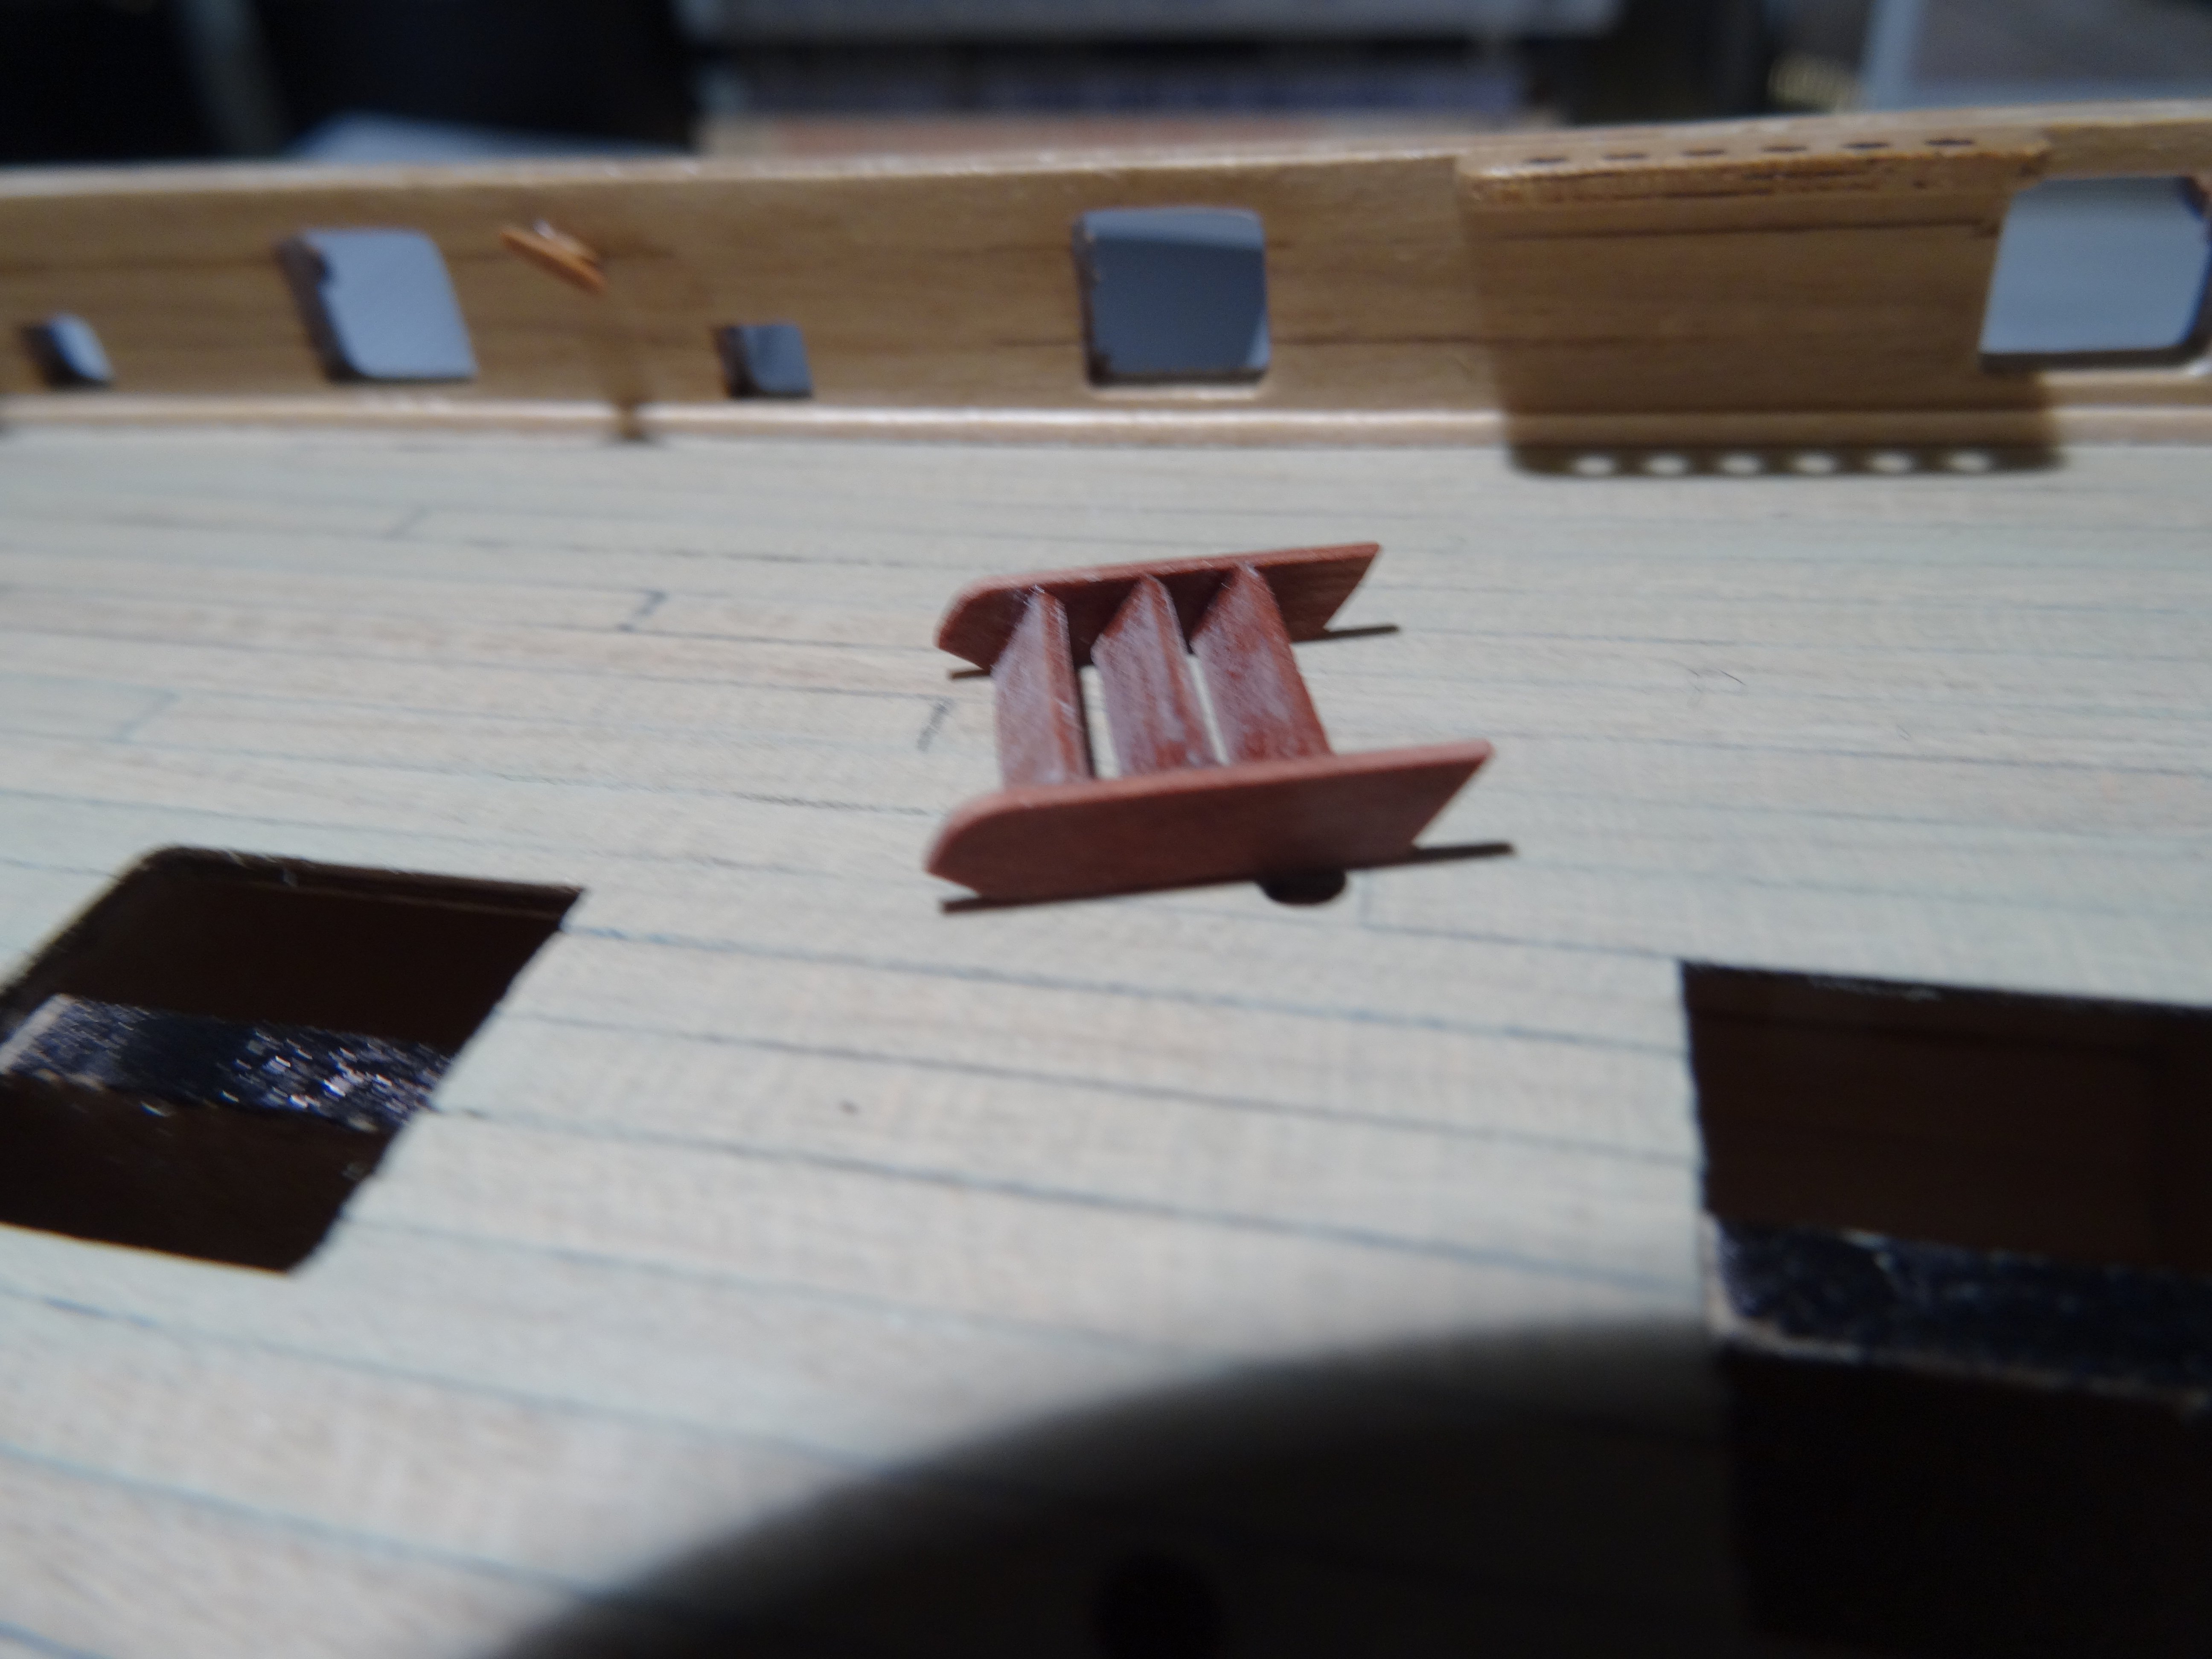
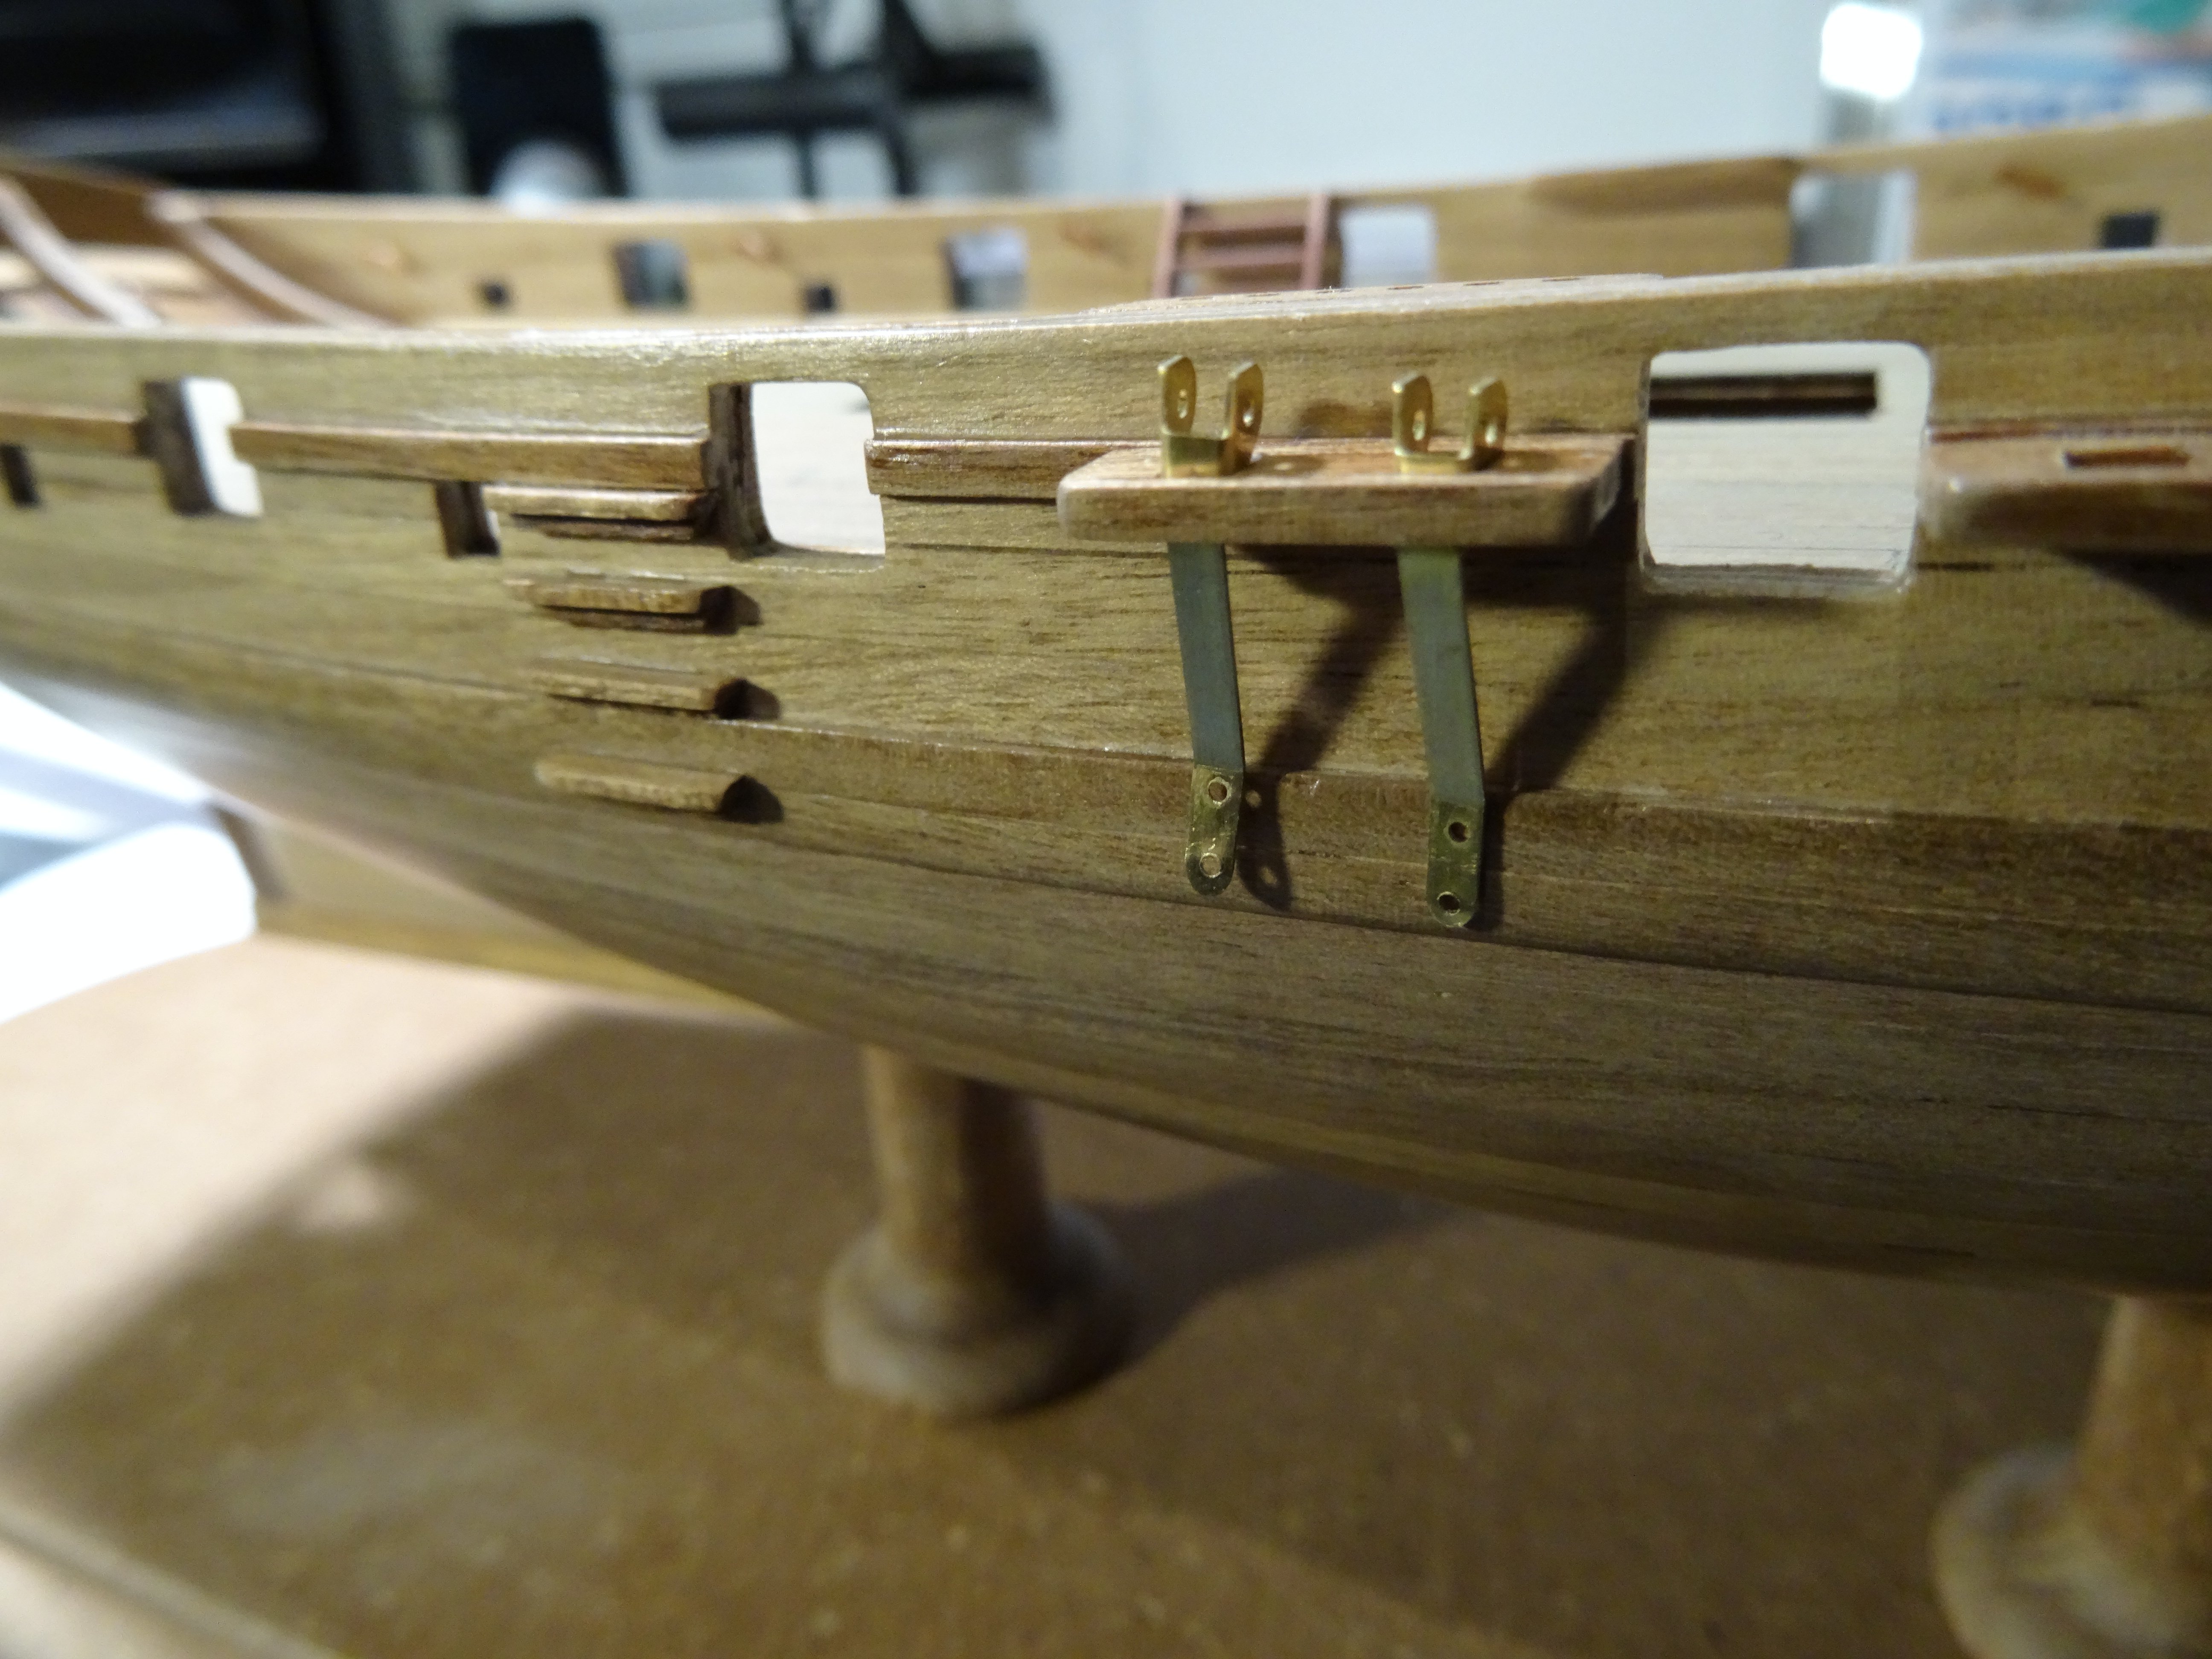
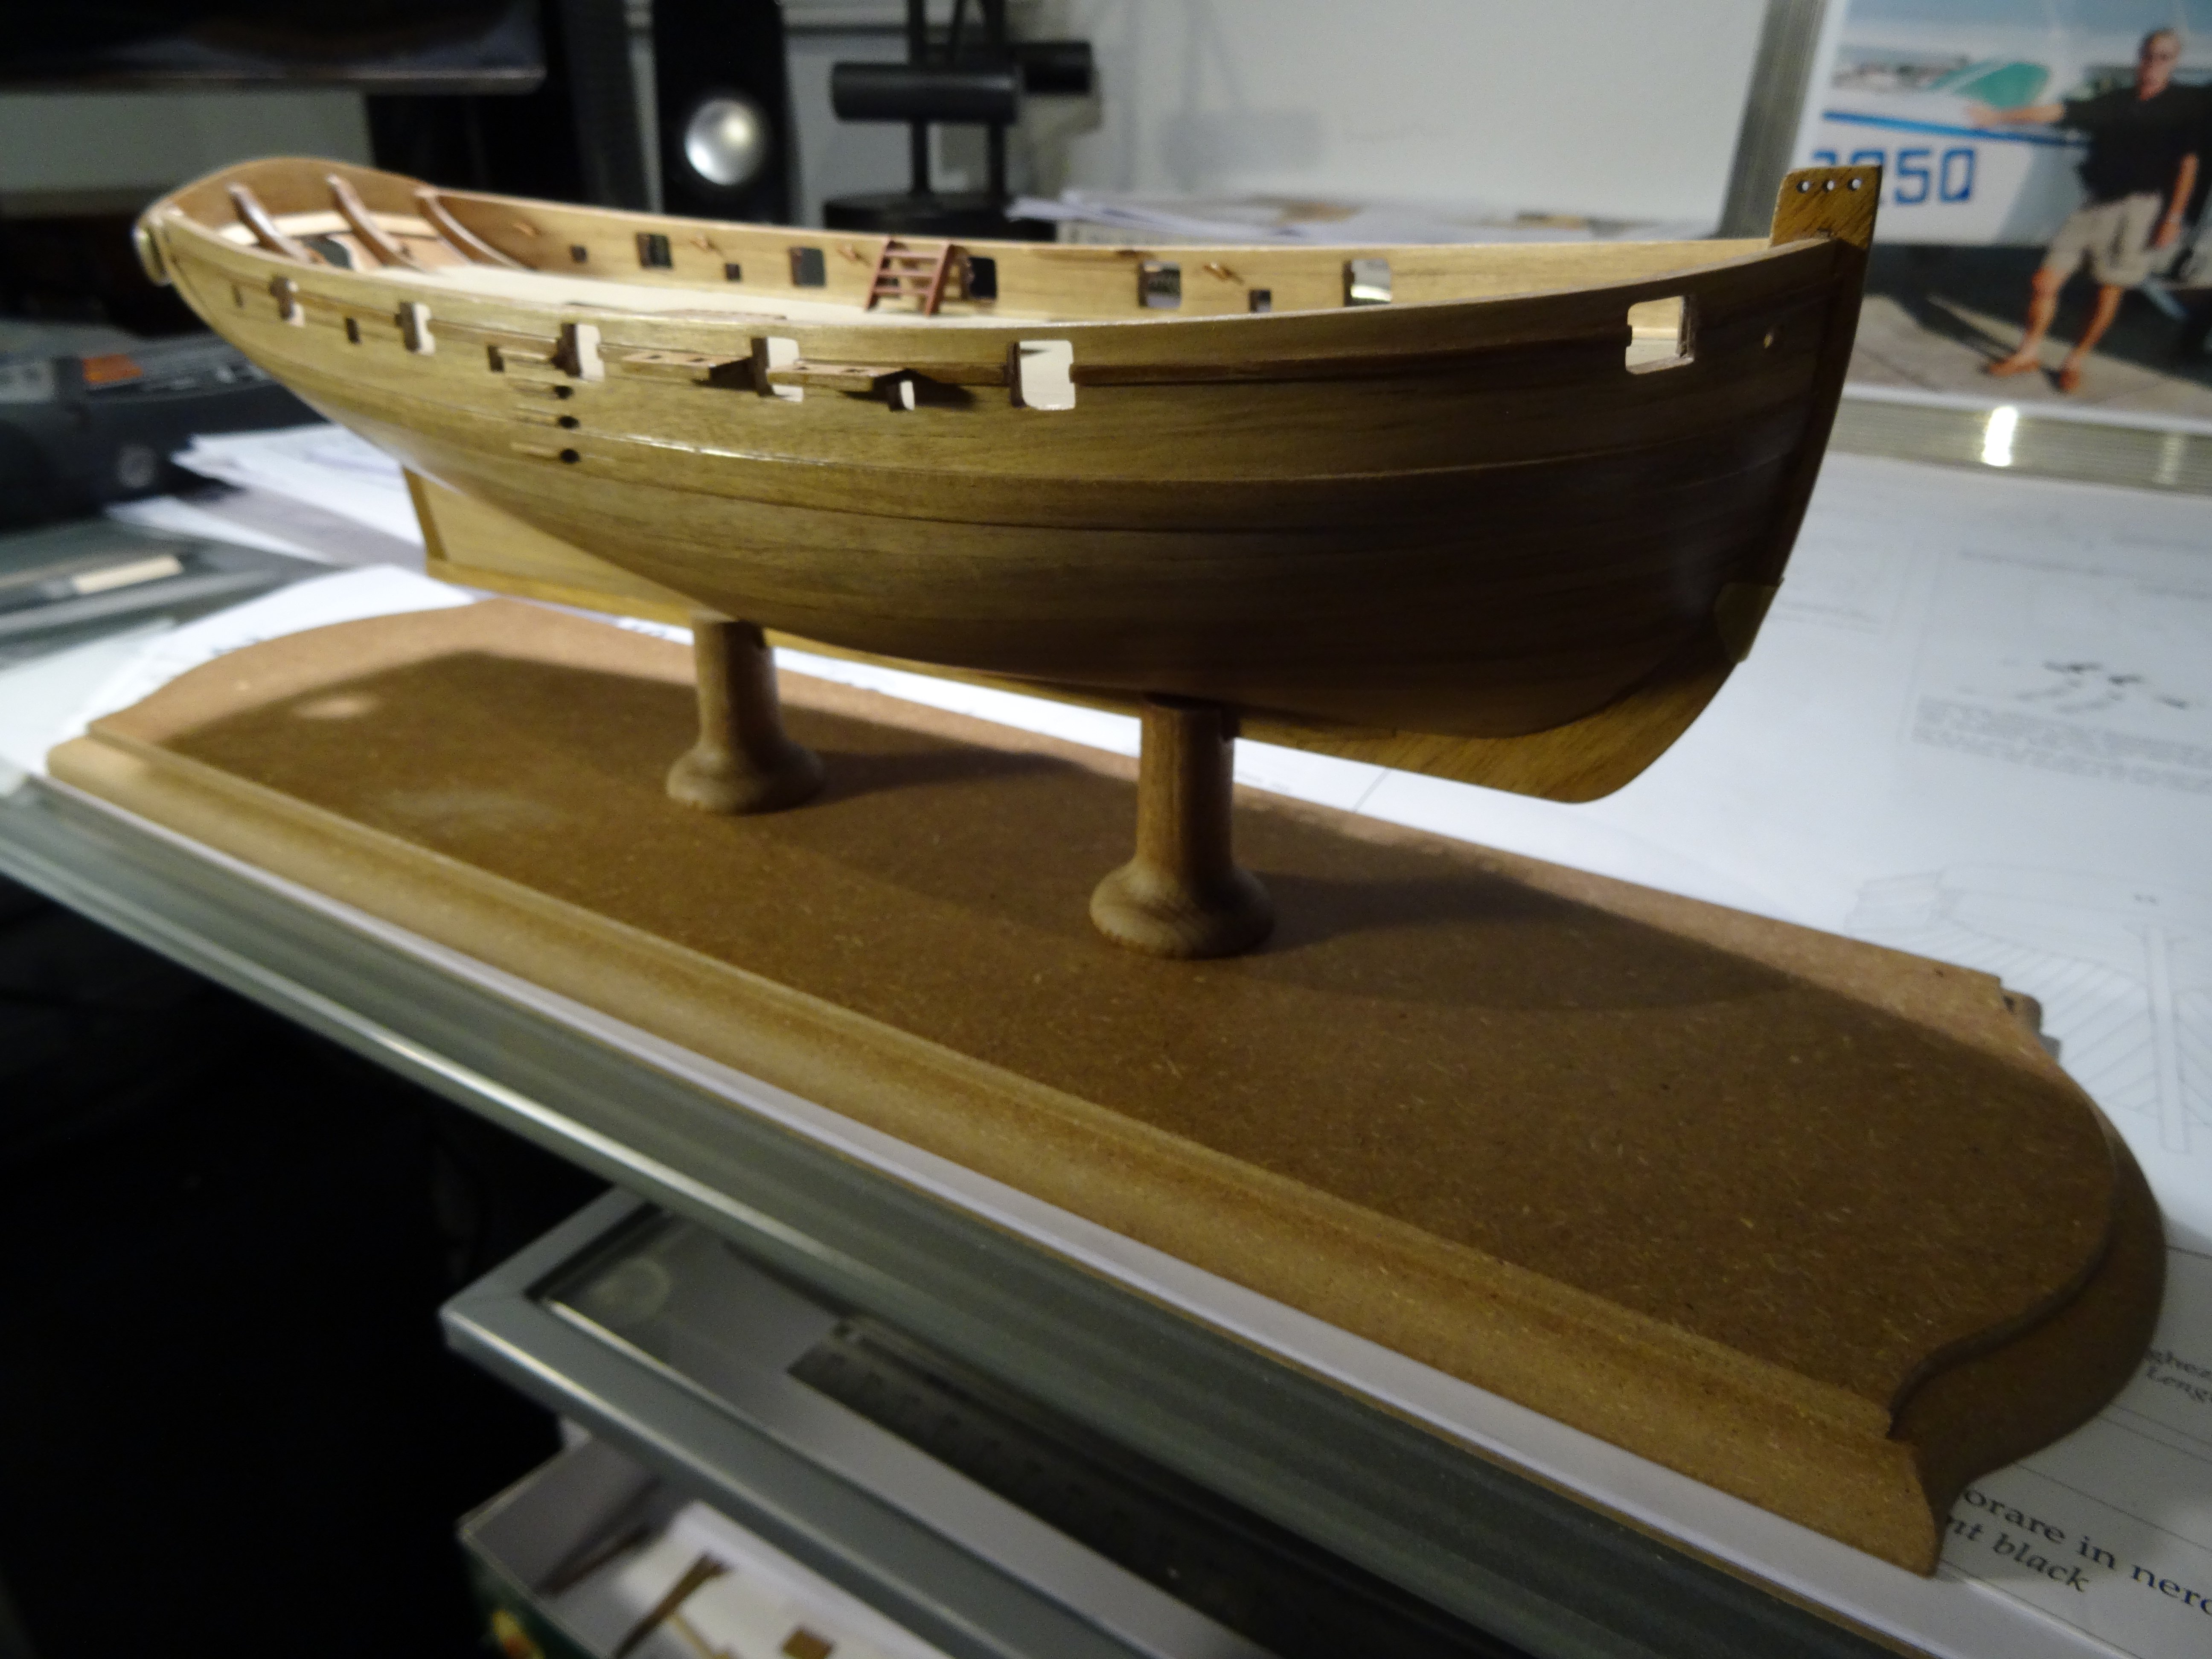
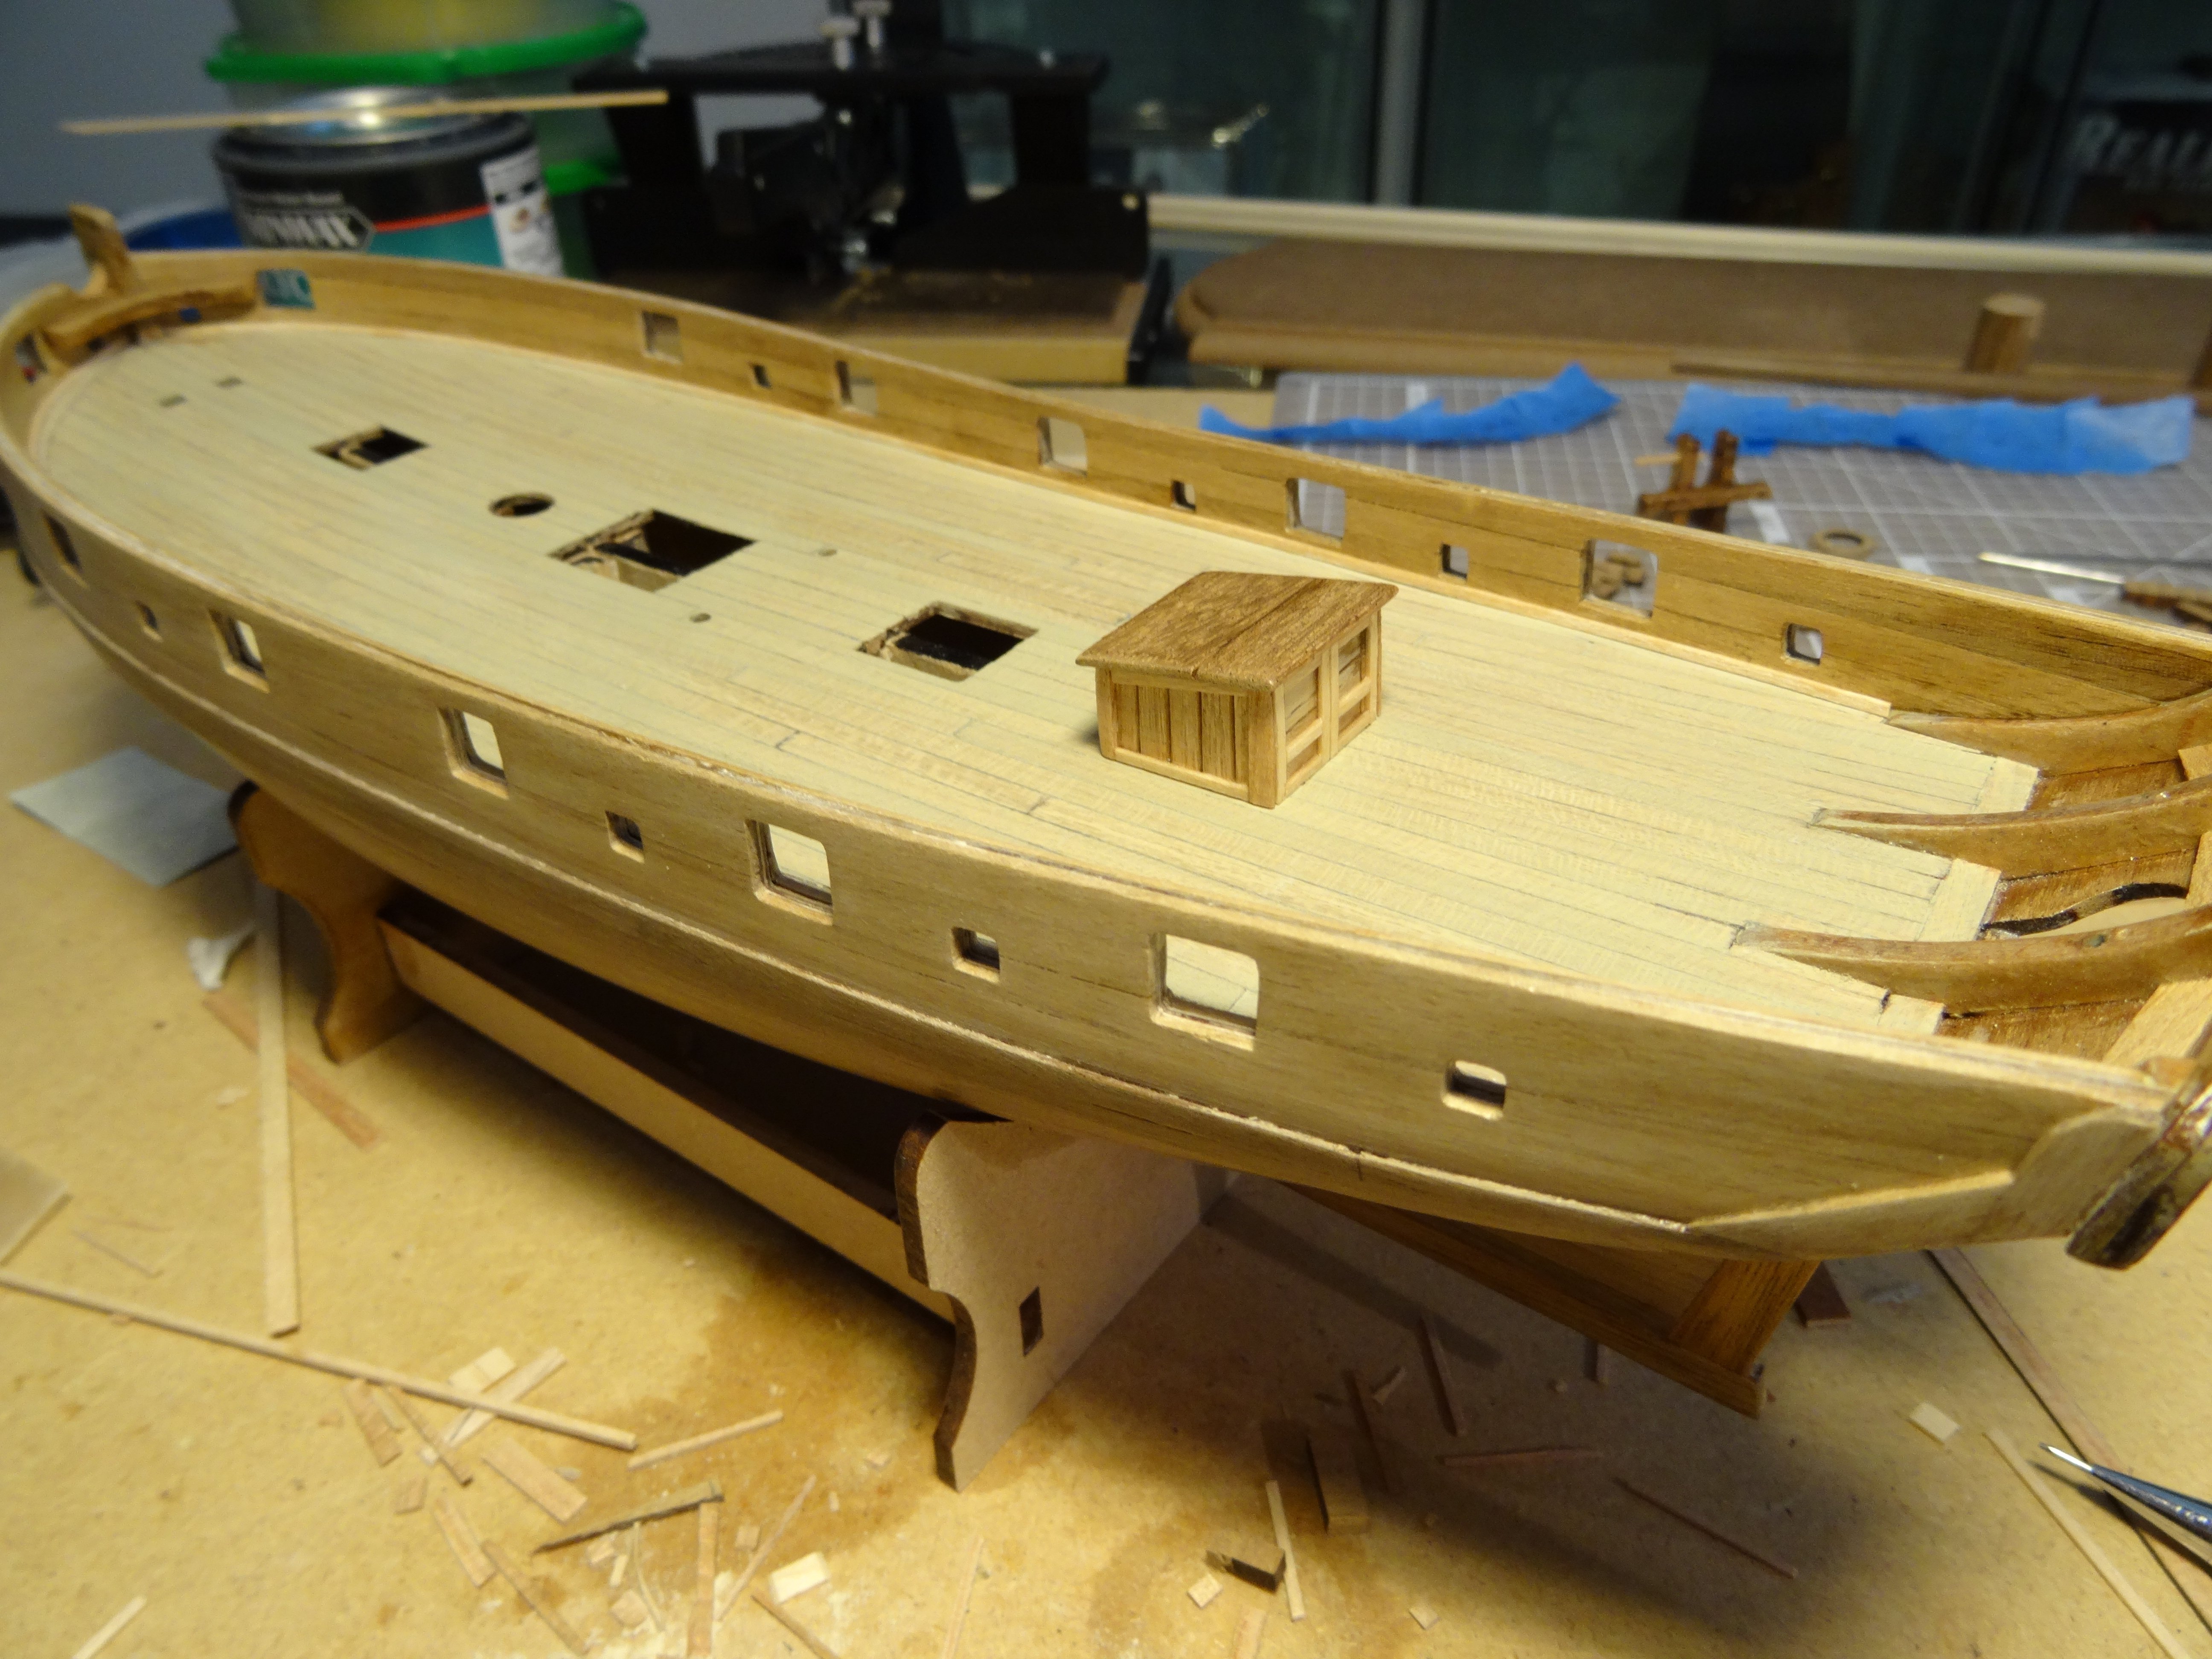
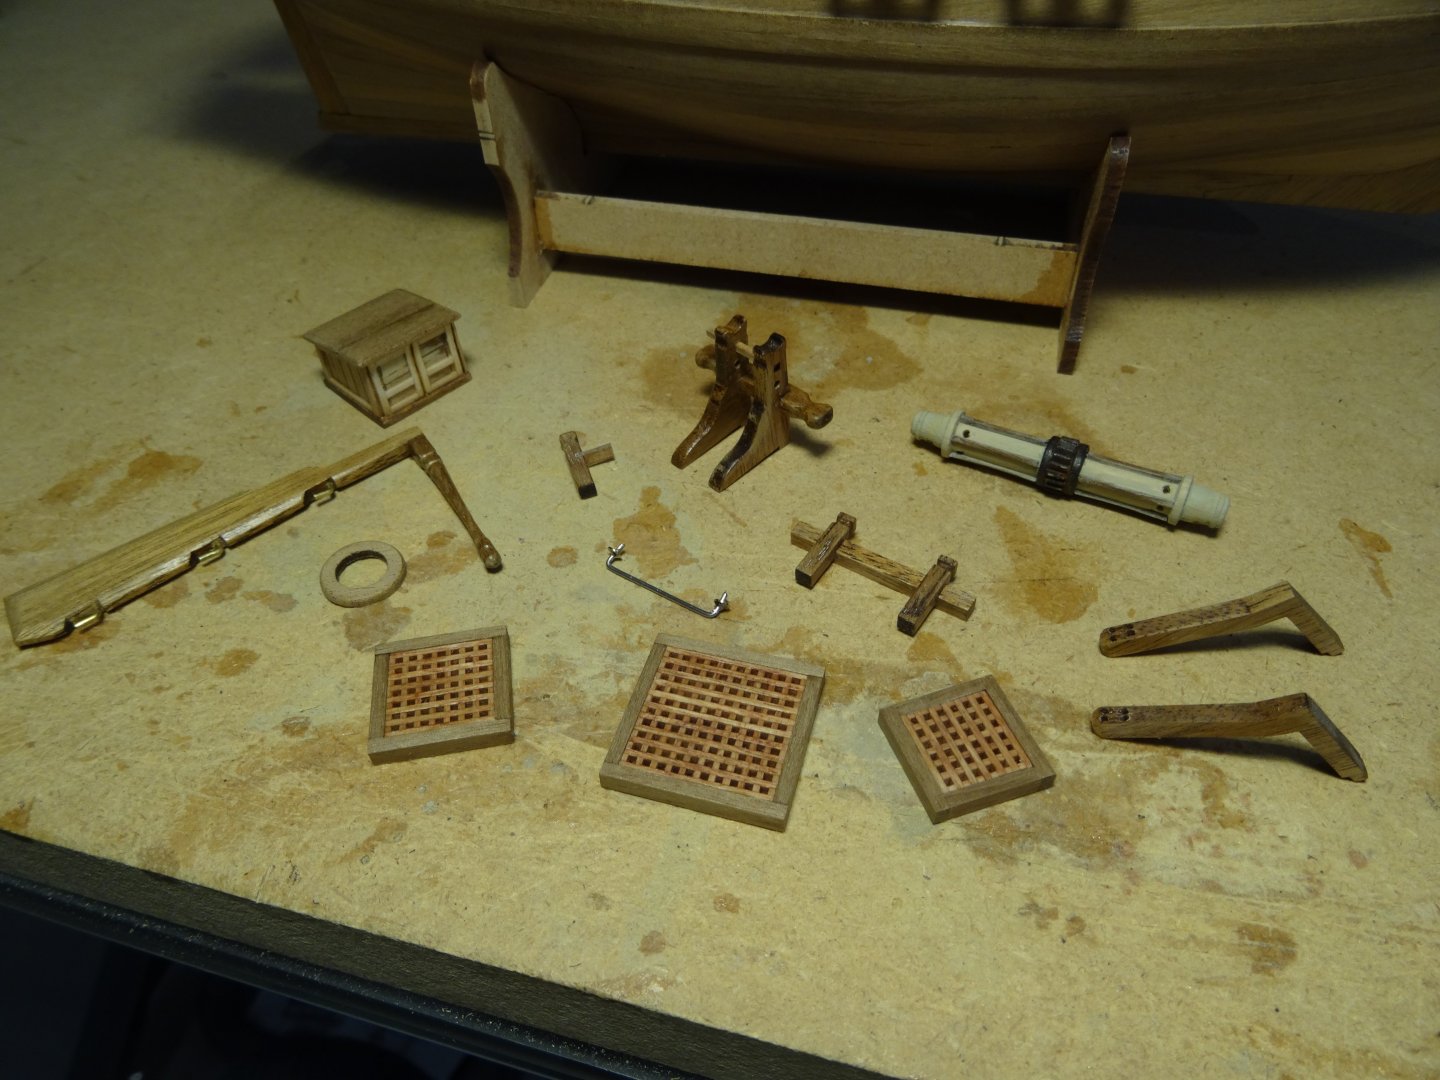
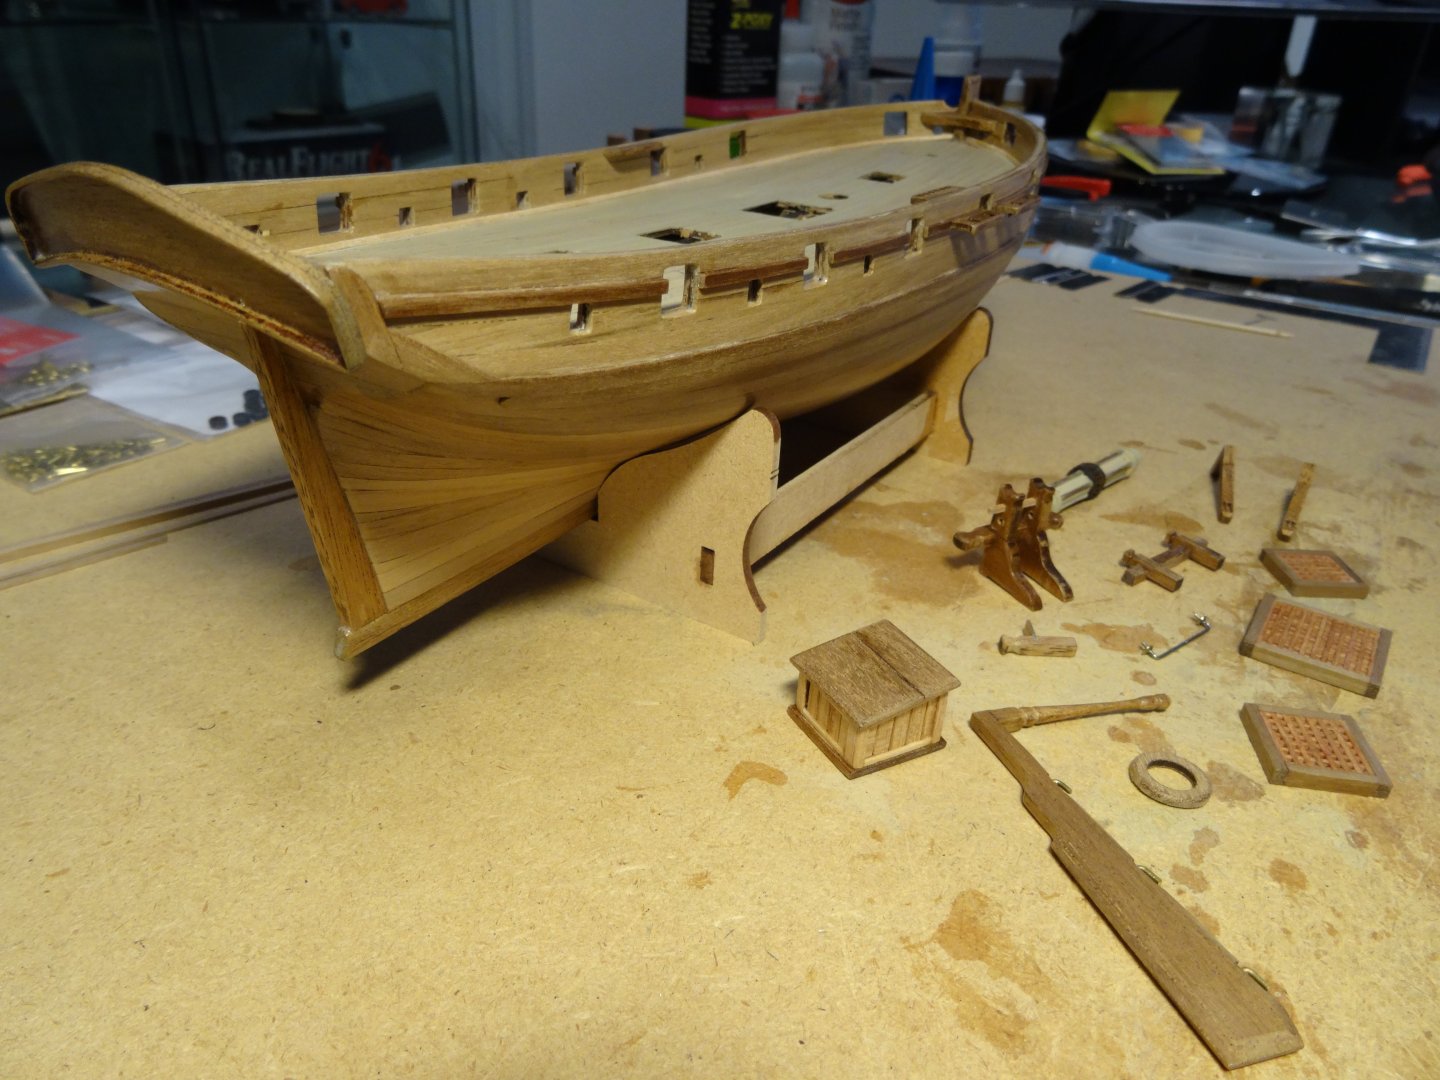
I've now started on the deck furniture as we ship lovers call it and need to formulate a game plan for putting all these bits and pieces in their place after having the paint finished in some areas first! I'm not one of those that has a dozen pictures on the wall and clutter piled up in the corner, but I do enjoy detail, so after having a look around at similar Cutters, I found a few features I have decided to add to my build. Some shown below and a few yet to be made! Having started with the anchor winch, I decided to add some external boarding steps and on deck steps to the bulwark. I've looked at some ready made stanchions, but I will give a hand drill assist turning of a brass rod a try first!, in order to make the boarding hand holds used a top the cap rail. There is paint to be applied, pieces to be glued in place and lots of detail taping yet to be done In the mean time, I wanted to share what I felt was an easy detail to add to the out board and inboard side of the ship, which are the steps. Outboard steps were made from scrap wood, 1 x 2mm for the tread and a 1x1 mm under the tread for extra detail, then adding a couple of angle cuts, face on and top down. The 1x1mm under the tread suffices to add a little more depth and detail. The inside ladder is a little more fiddly, using 1 x 3mm, but once the jig pictured is made it aligns the treads for the side rails, which then can be attached. A close look to the chain plates, is a modification of an Amati chain plate cut to size and drilled , ready to be Blackened and mounted. I modified the wood surround to accommodate these beefier pieces!


- 39 replies
-
- 4
-
-
- Amati
- Victory Models
- (and 1 more)
-
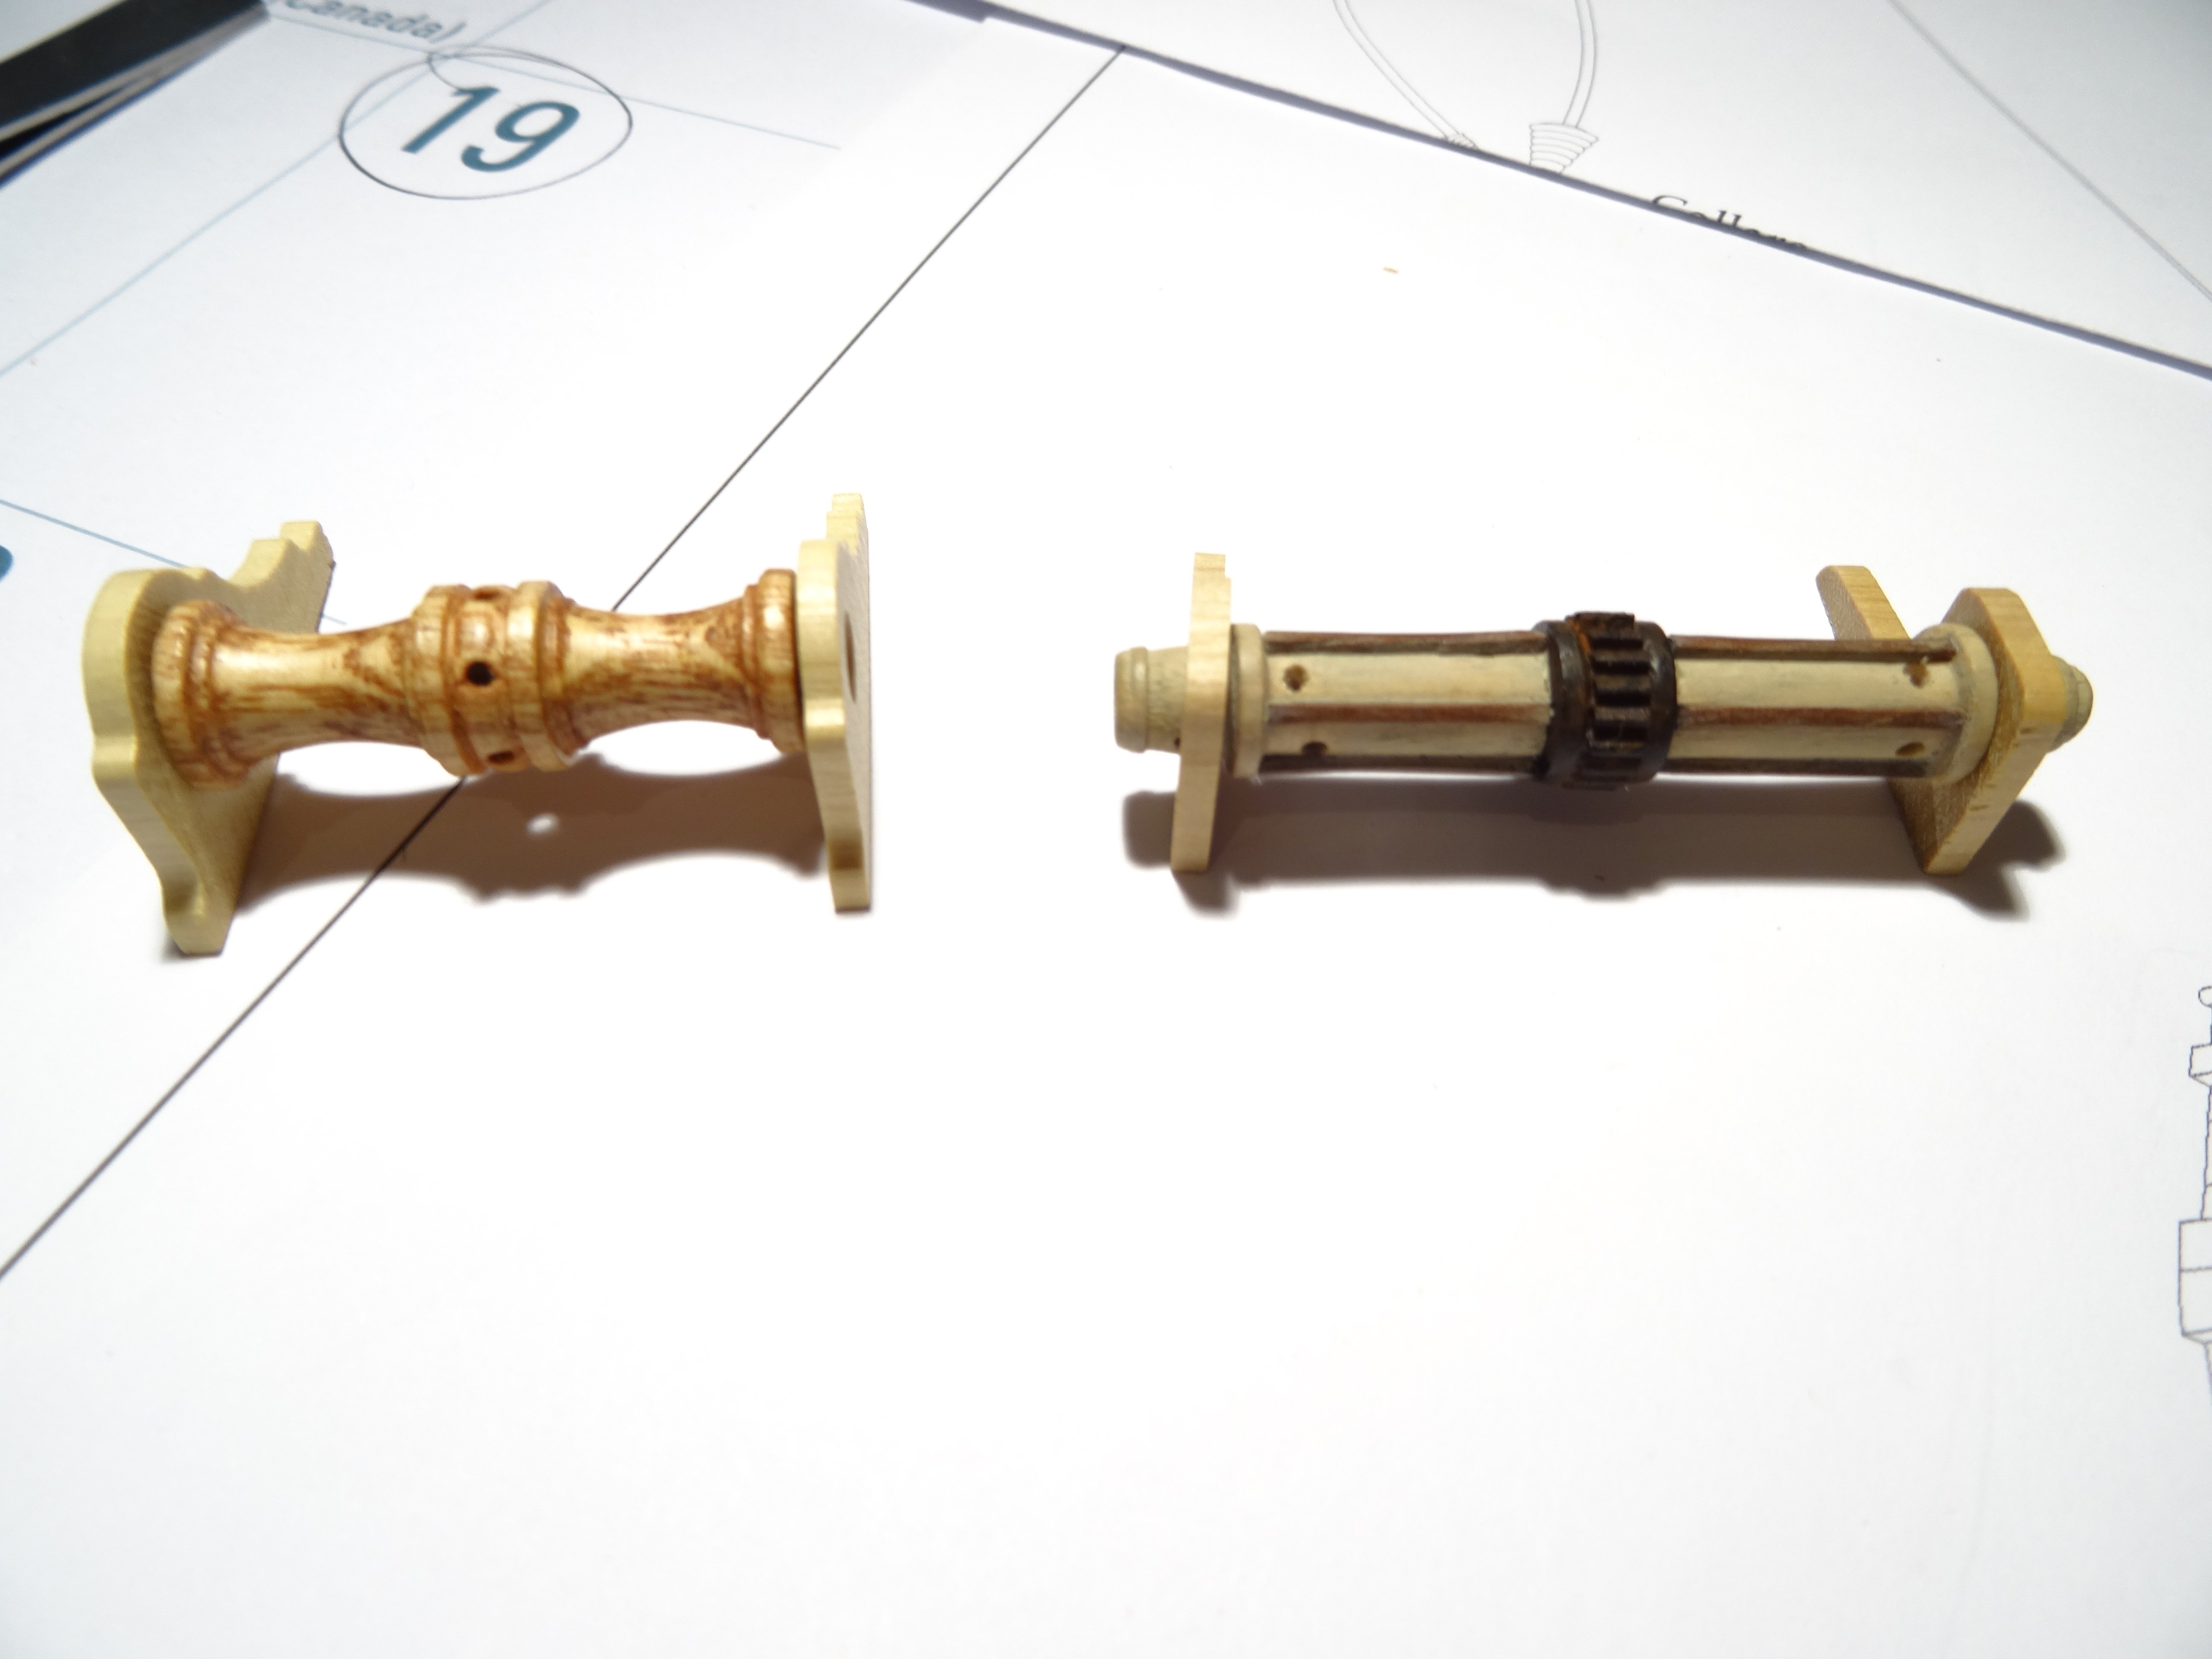
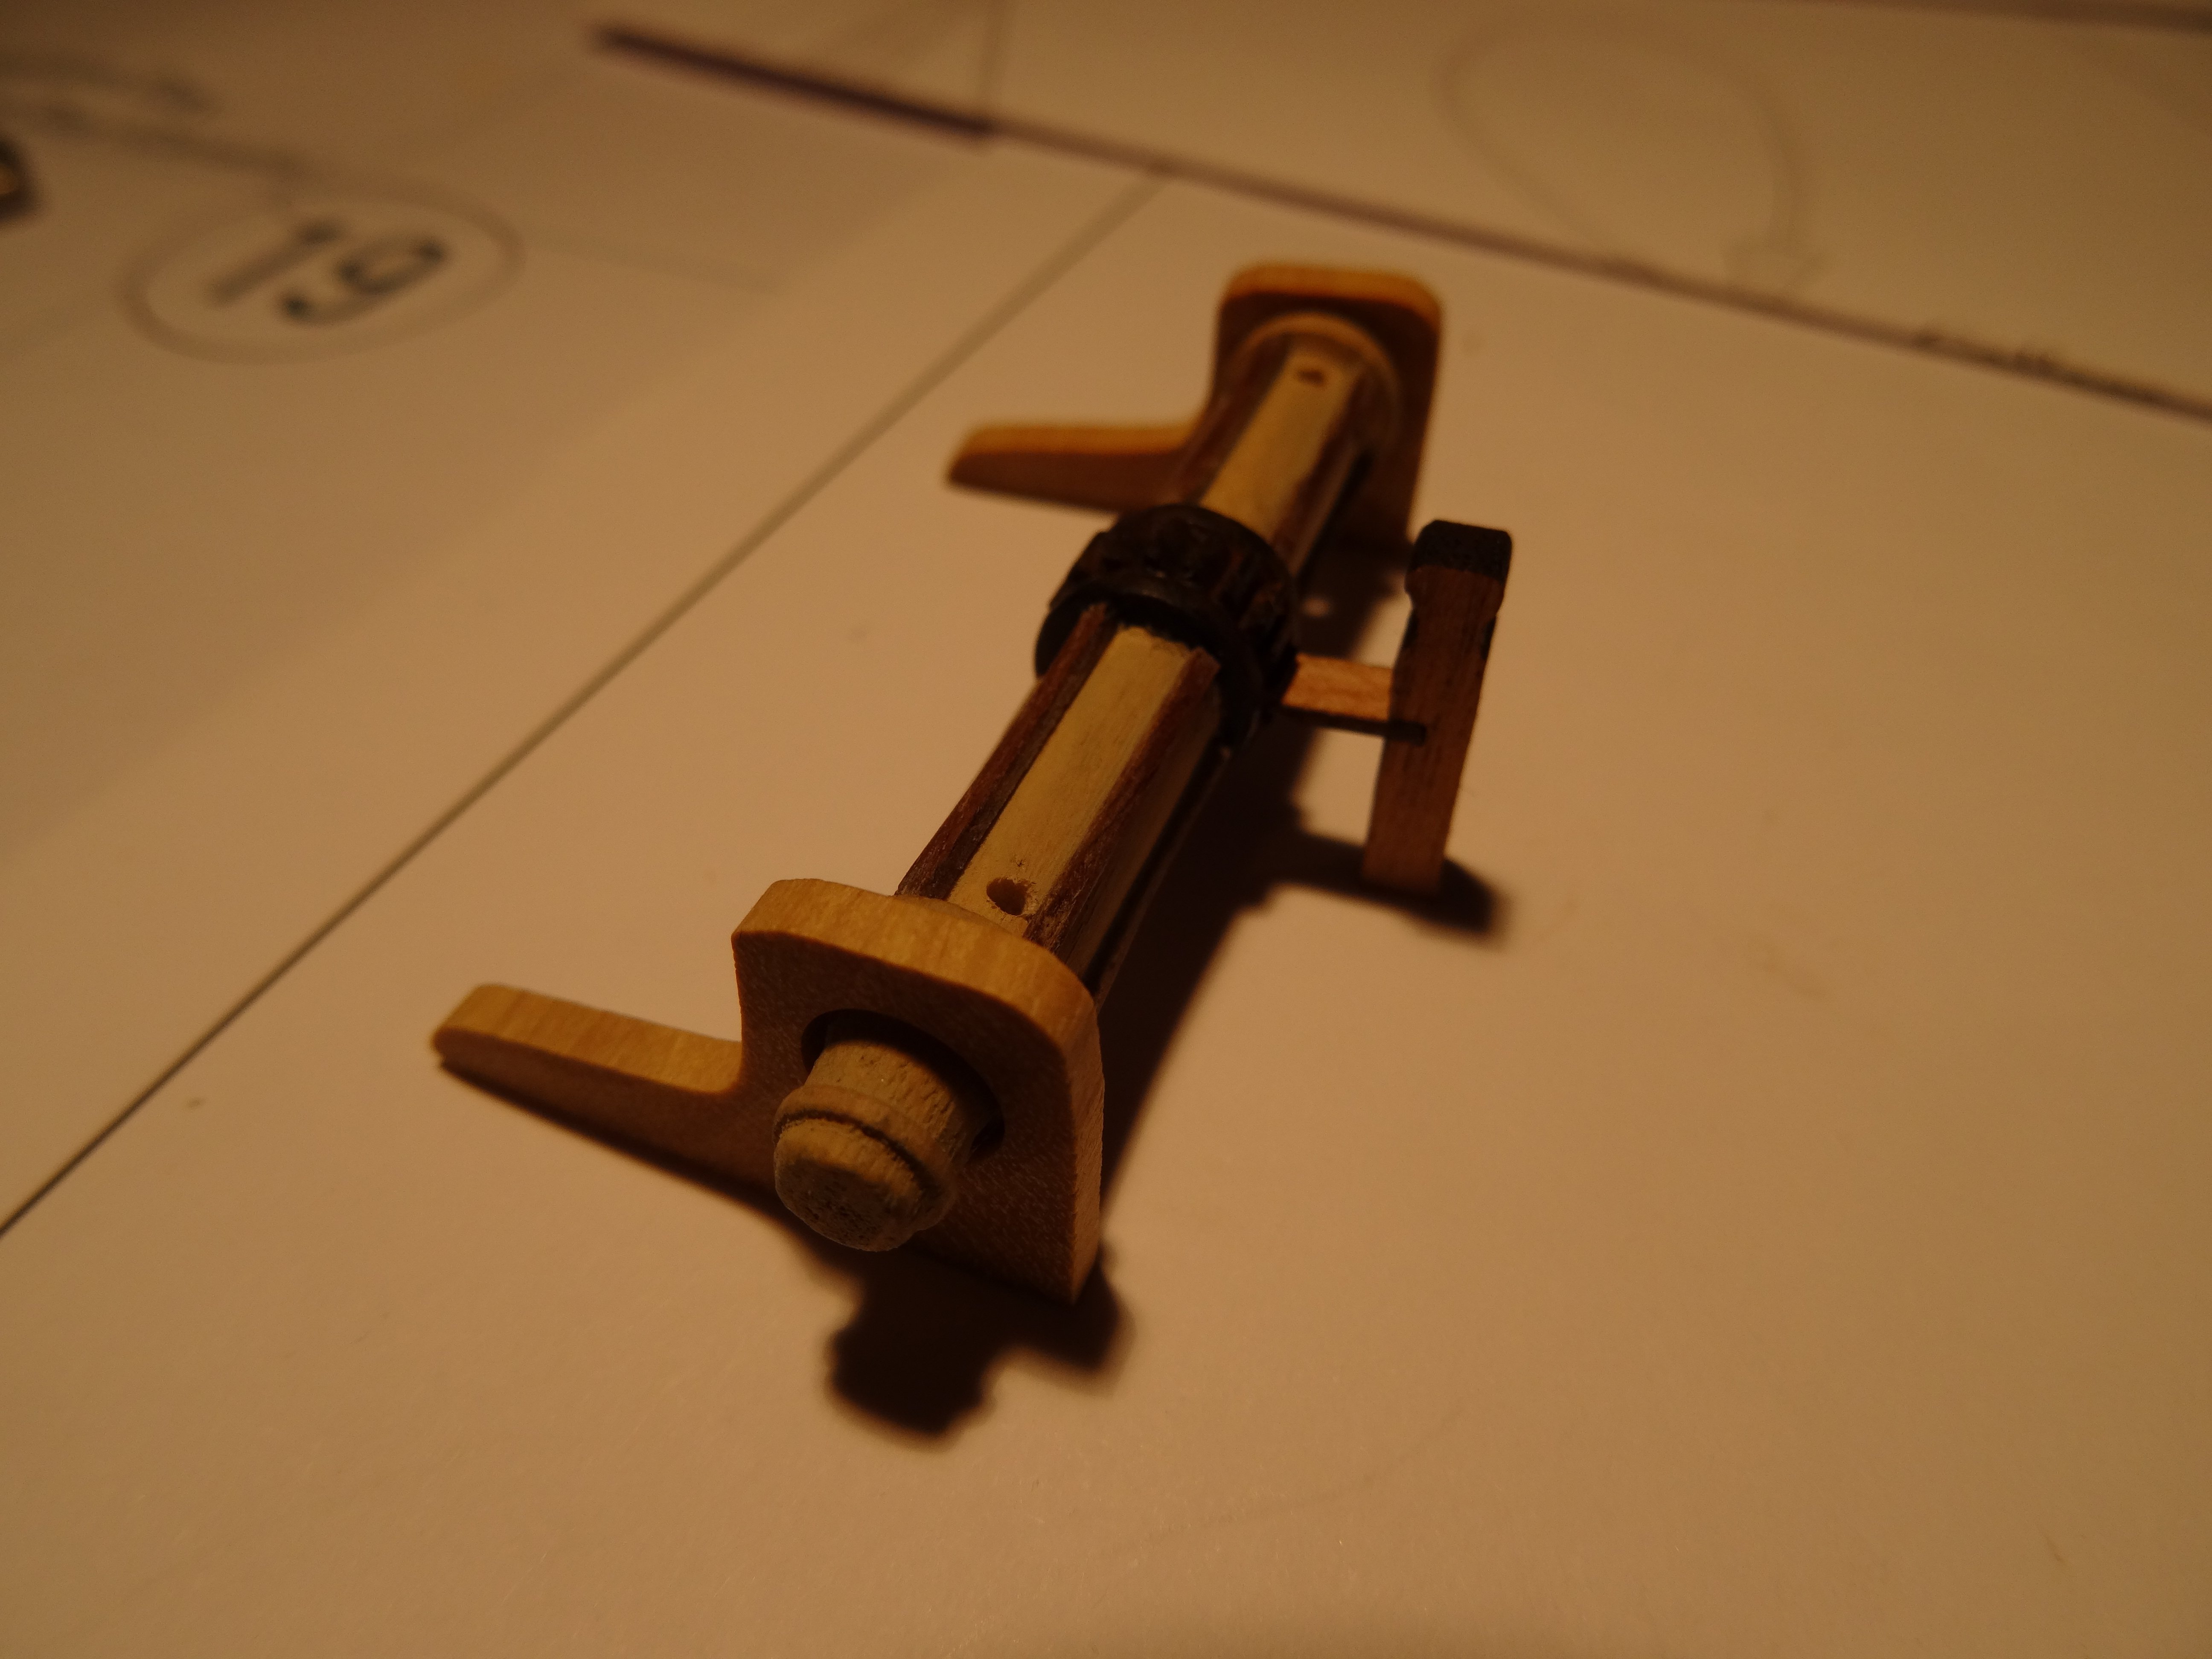
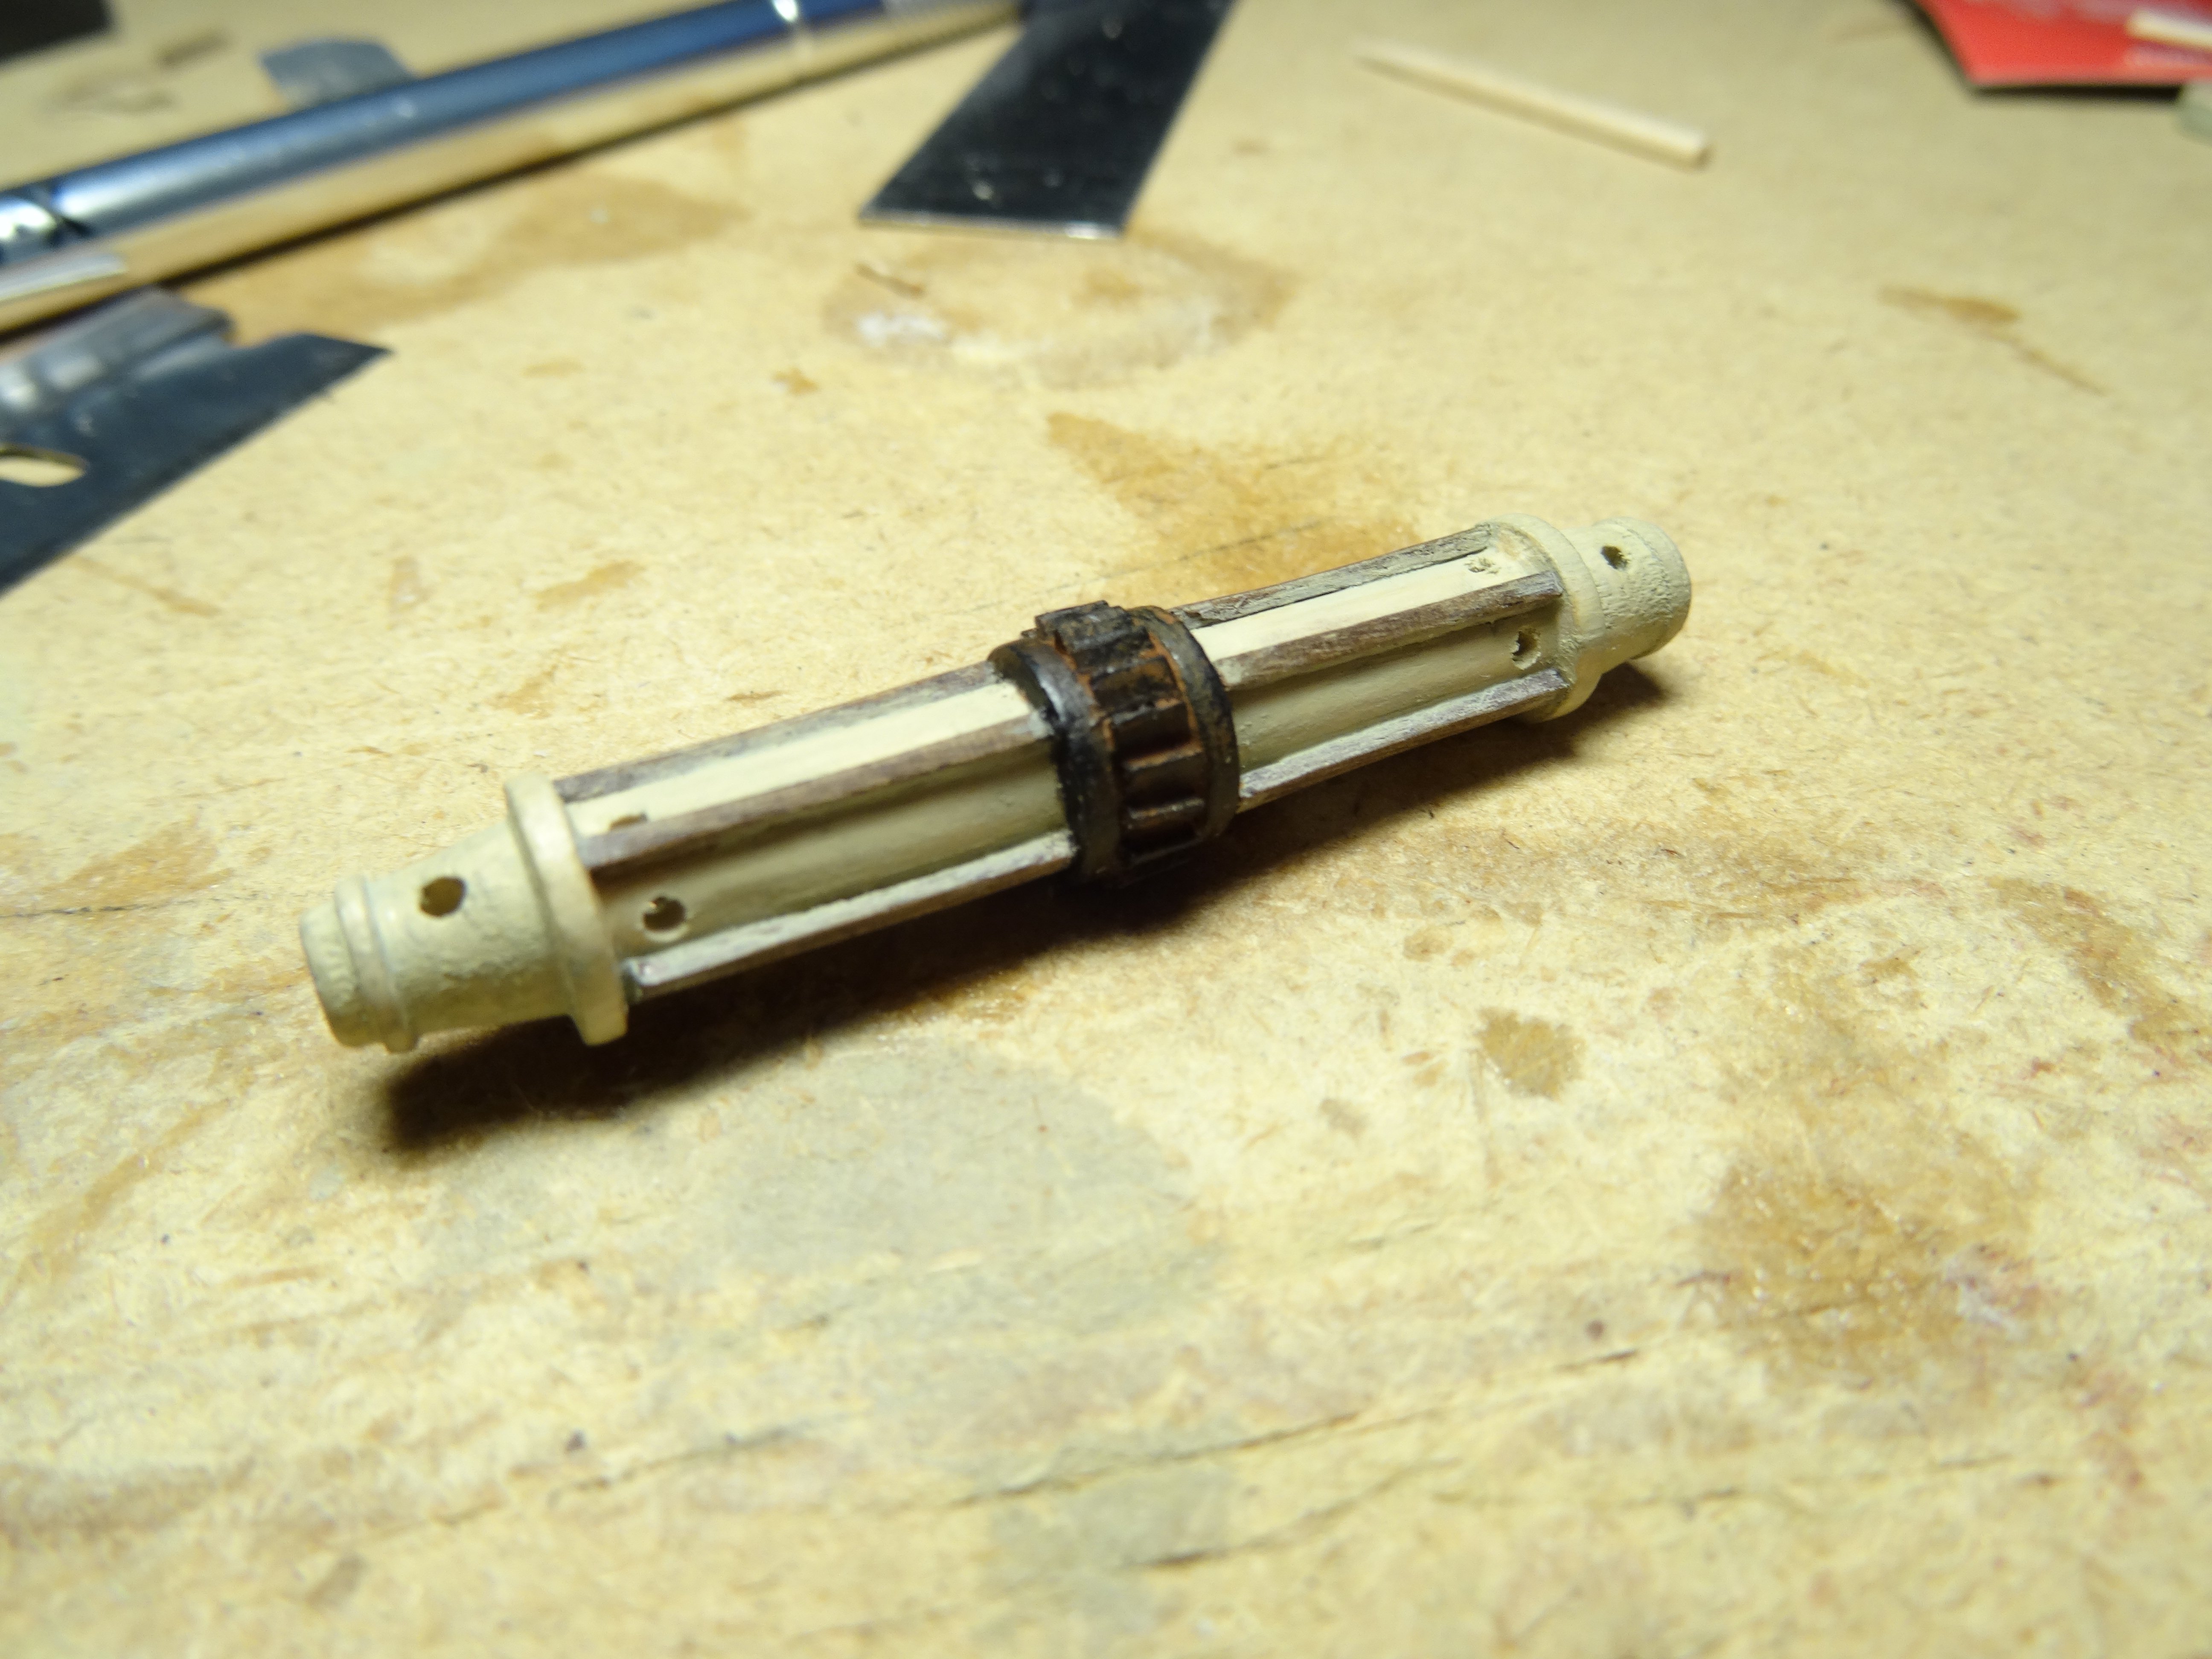
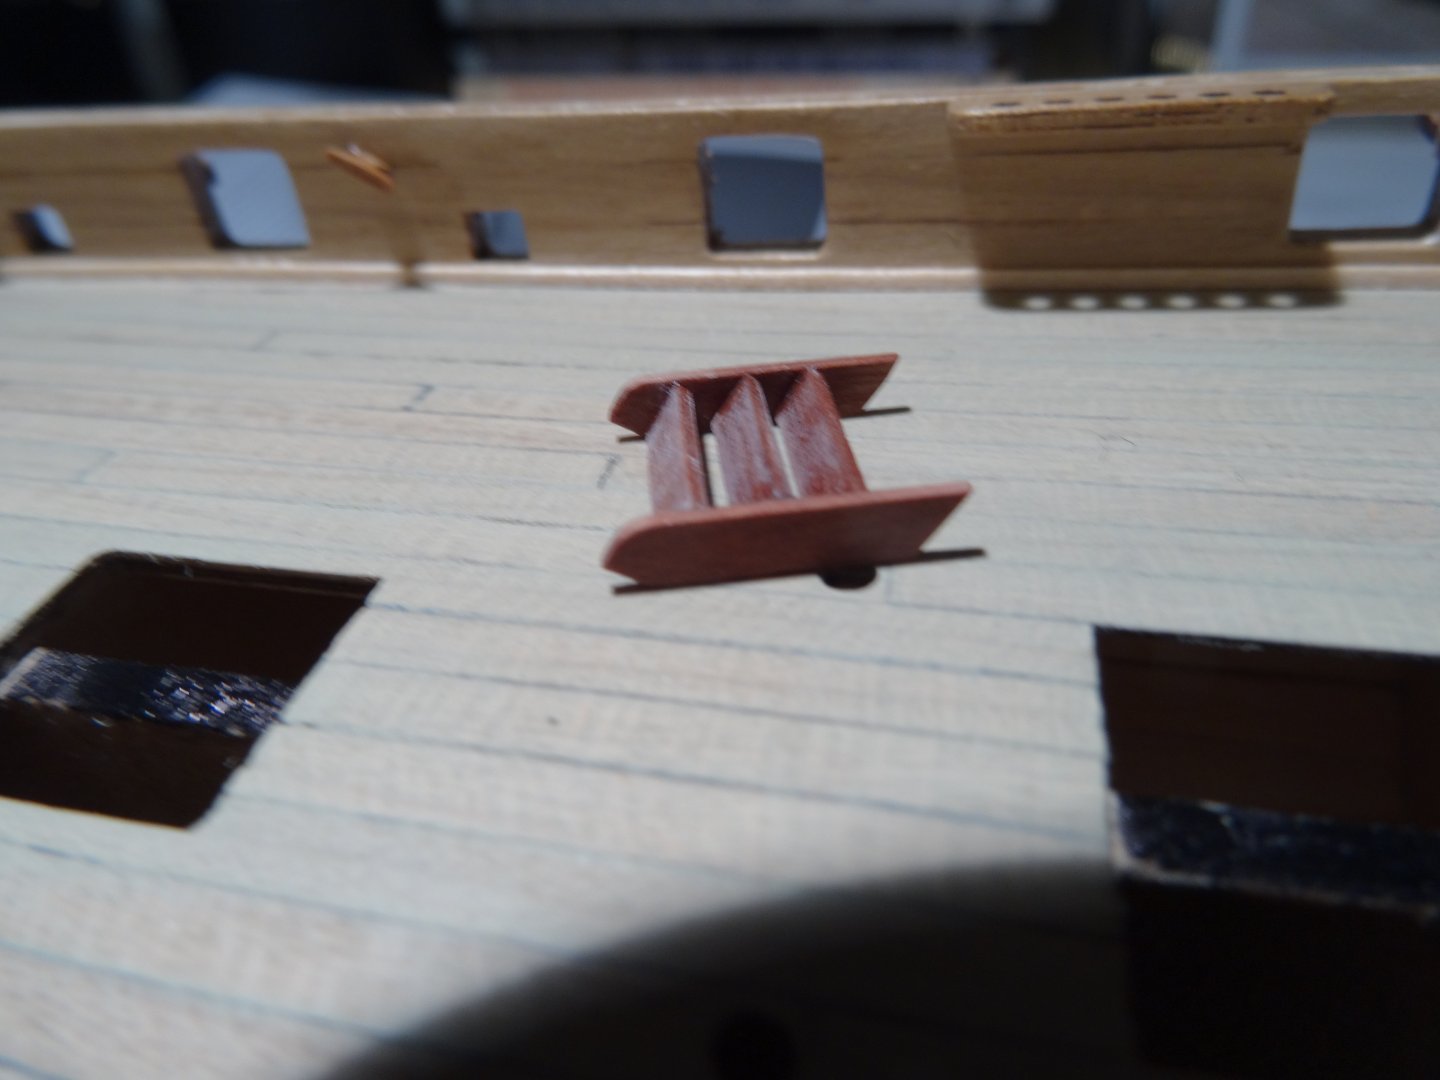
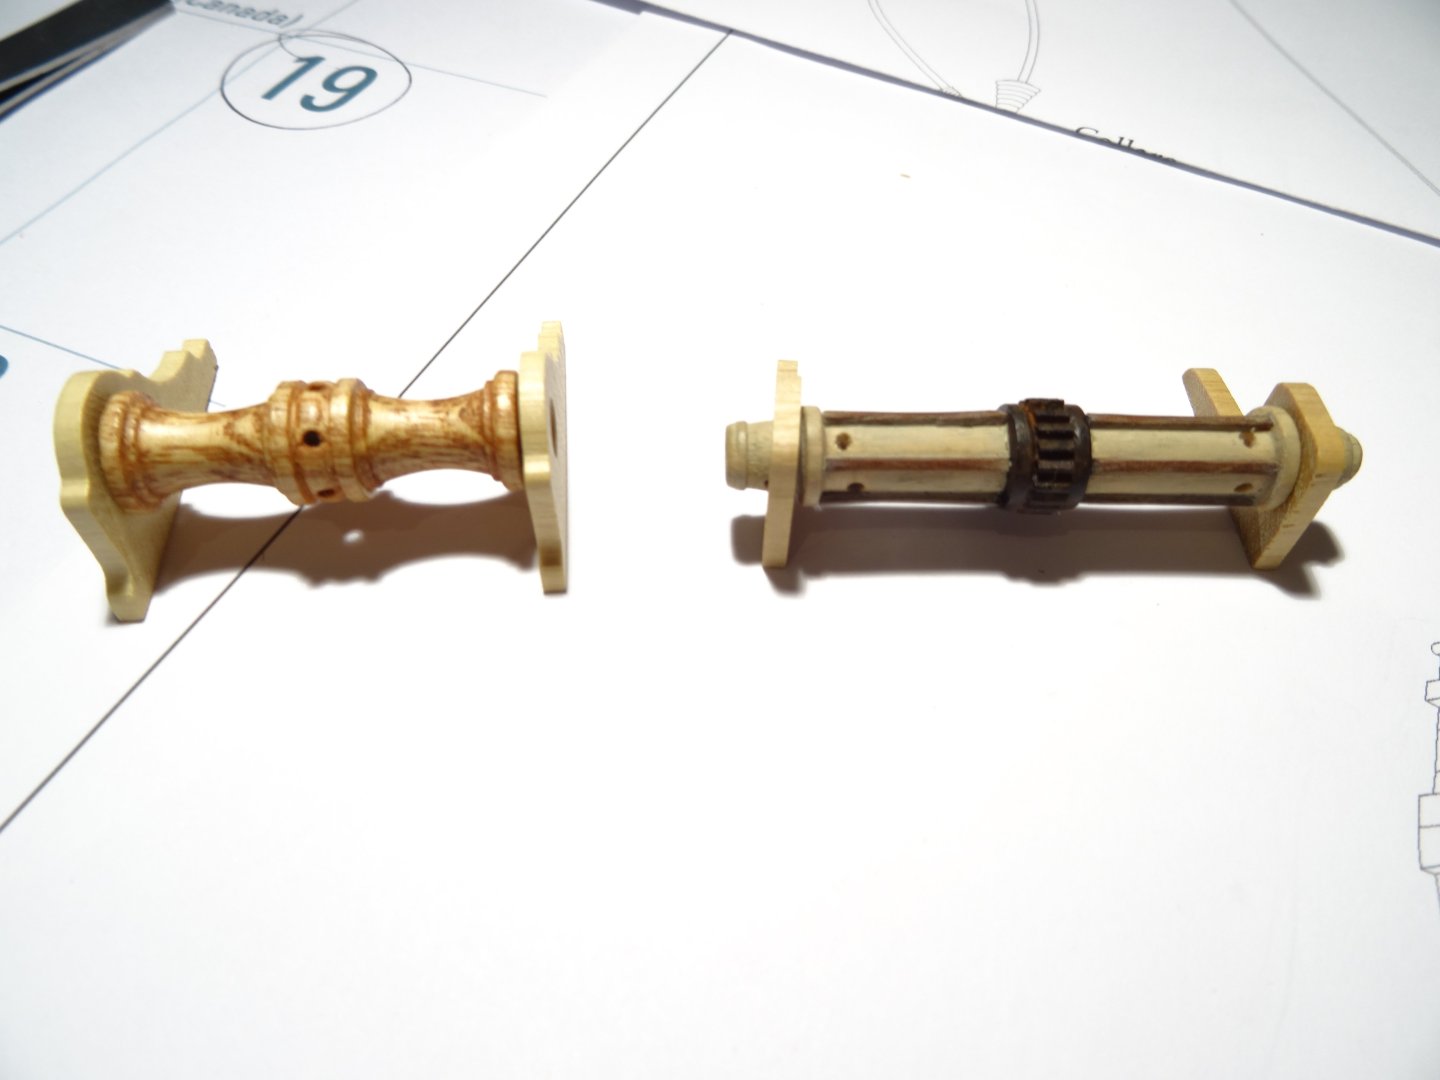
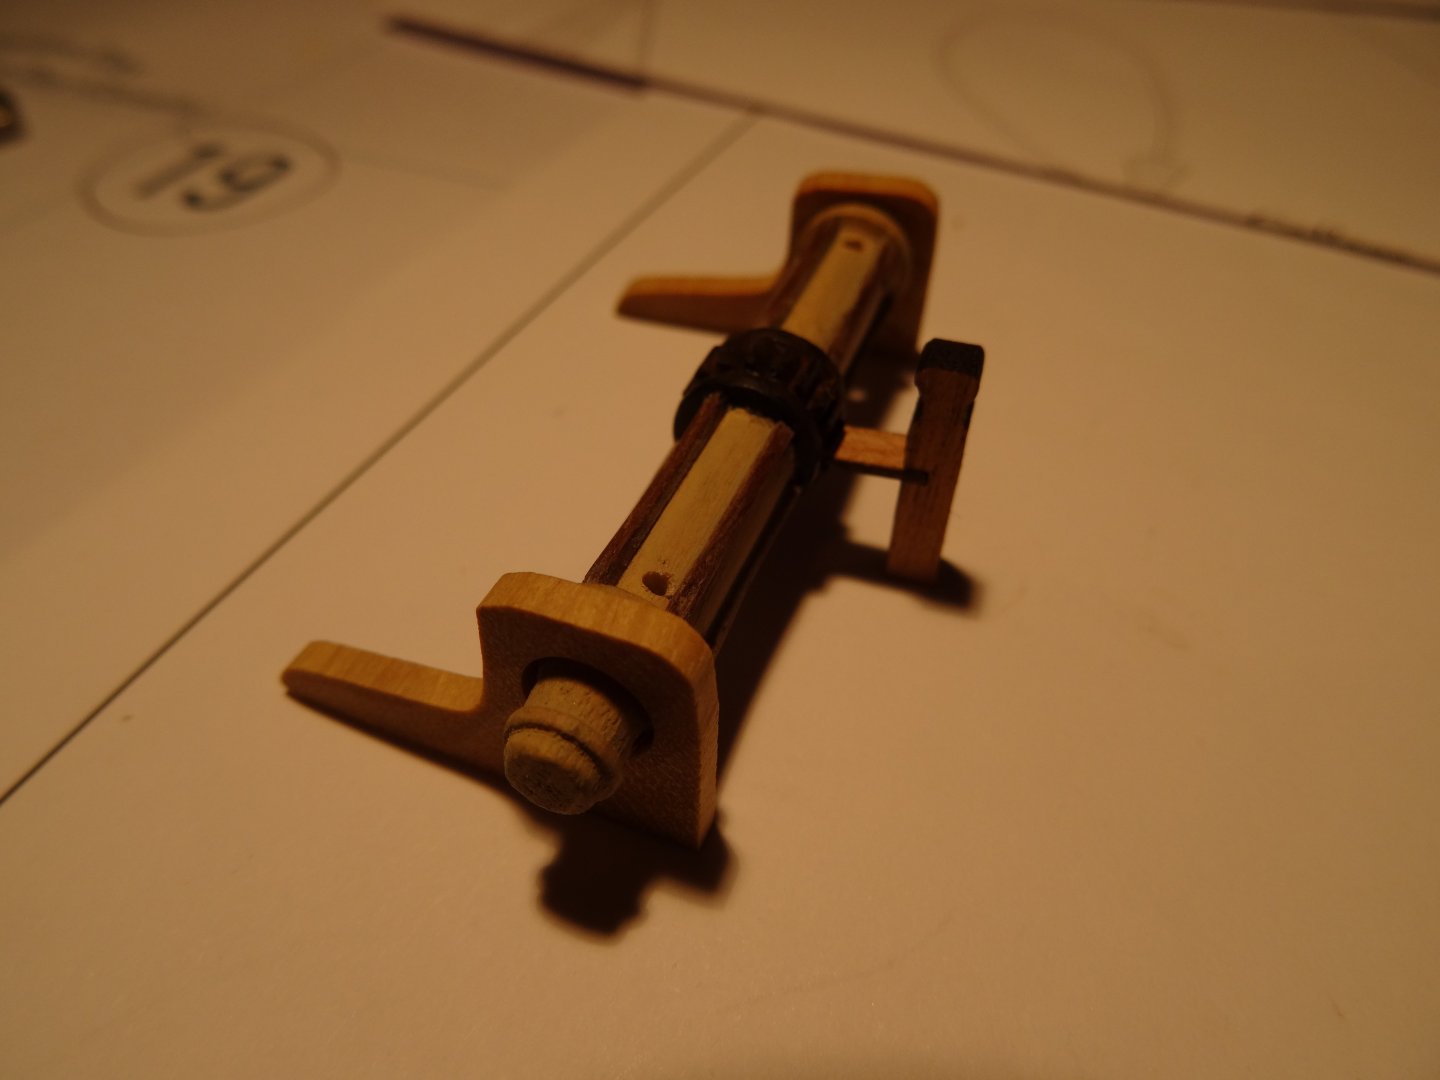
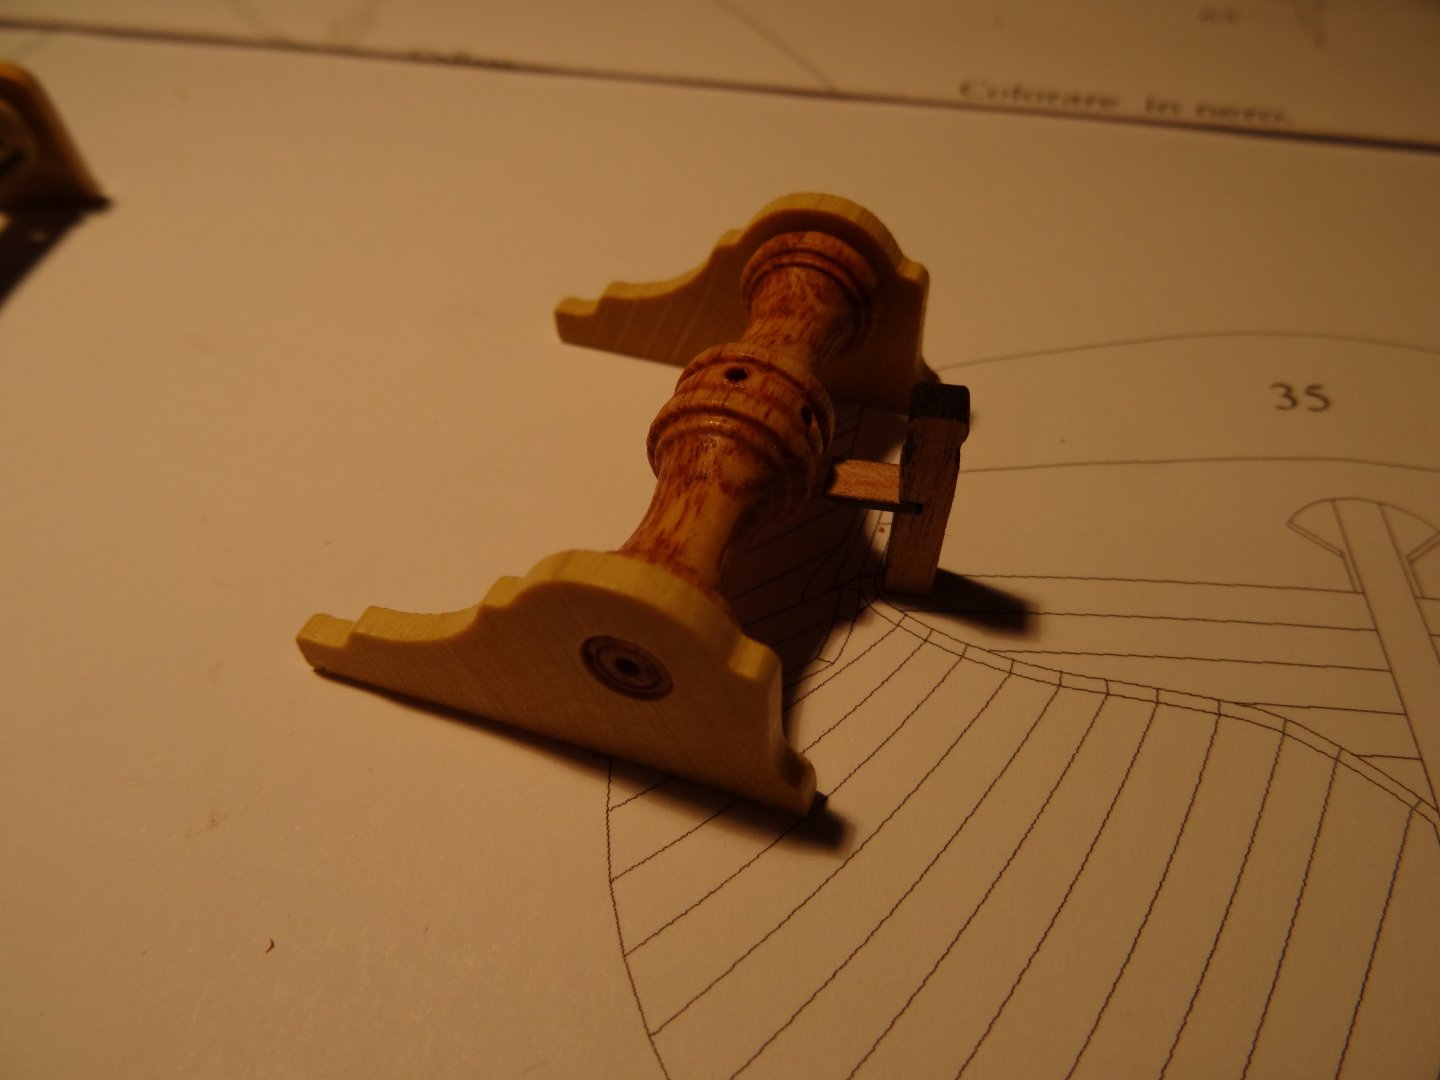
Things that make you go Hum! I couldn't find how the ( Pawl ) would actually work , using the kit supplied anchor winch. Any feedback or guidance would be welcome! I understand the holes being used as an insert for a pole to leverage rotation, but what and how is the Pawl part of this particular winch with holes? As I researched how winches were built, I see a ratchet gear with a PAWL, as the design I kind of followed. So I abandoned the idea of using the kit supplied winch and happened to find this Amati brand Winch used and modified for using the PAWL and ratchet. I wanted to show how the PAWL actually engaged into a ratchet. Making this piece was a all out Toboggan ride! I got into it and before I knew it, dinner was ready! I didn't stop until the ideas I had, came together as you see it pictured. So I didn't take a second to offer step by step pictures, but a brief description will describe how simple it really was to make. I took a 1/16 square stock basswood strip and fashioned it into a triangle, sanding it in half. The teeth of the ratchet are made from that triangle and were cut 2mm wide and fitted between the center rings. All you need here is a ton of patience and a very steady hand. I have the patience, but not a steady hand! The wood strips that the anchor line will rap around, are made from walnut 1 x 1mm Strips. The Amati little kit gives you short strip of wood. I wanted the full width of the opening where they are glued to the winch spindle, so I discarded the wood and replaced it with a custom size. The finishes are: the same deck wash for the spindle as my decking , a dull black paint for the gear with a small wash of rust to soften the black further. When the frame to hold the spindle is ready for install, it will be painted red , as the inside Bulwark.

- 39 replies
-
- 4
-
-
- Amati
- Victory Models
- (and 1 more)
-
Hi Dan, The hinge detail is a nice touch. Certainly looks more like a gudgeon and pintal.
- 87 replies
-
- 1
-
-
- Lady Nelson
- Amati
- (and 1 more)
-
Yup, that's pretty small!, But I feel, its really worth the effort to add the additional detail. At first glance, its really apparent, the quality in the line, which if to do that right, is just what you need. A breach line only is rather spartan. Looking forward to how you progress.
-
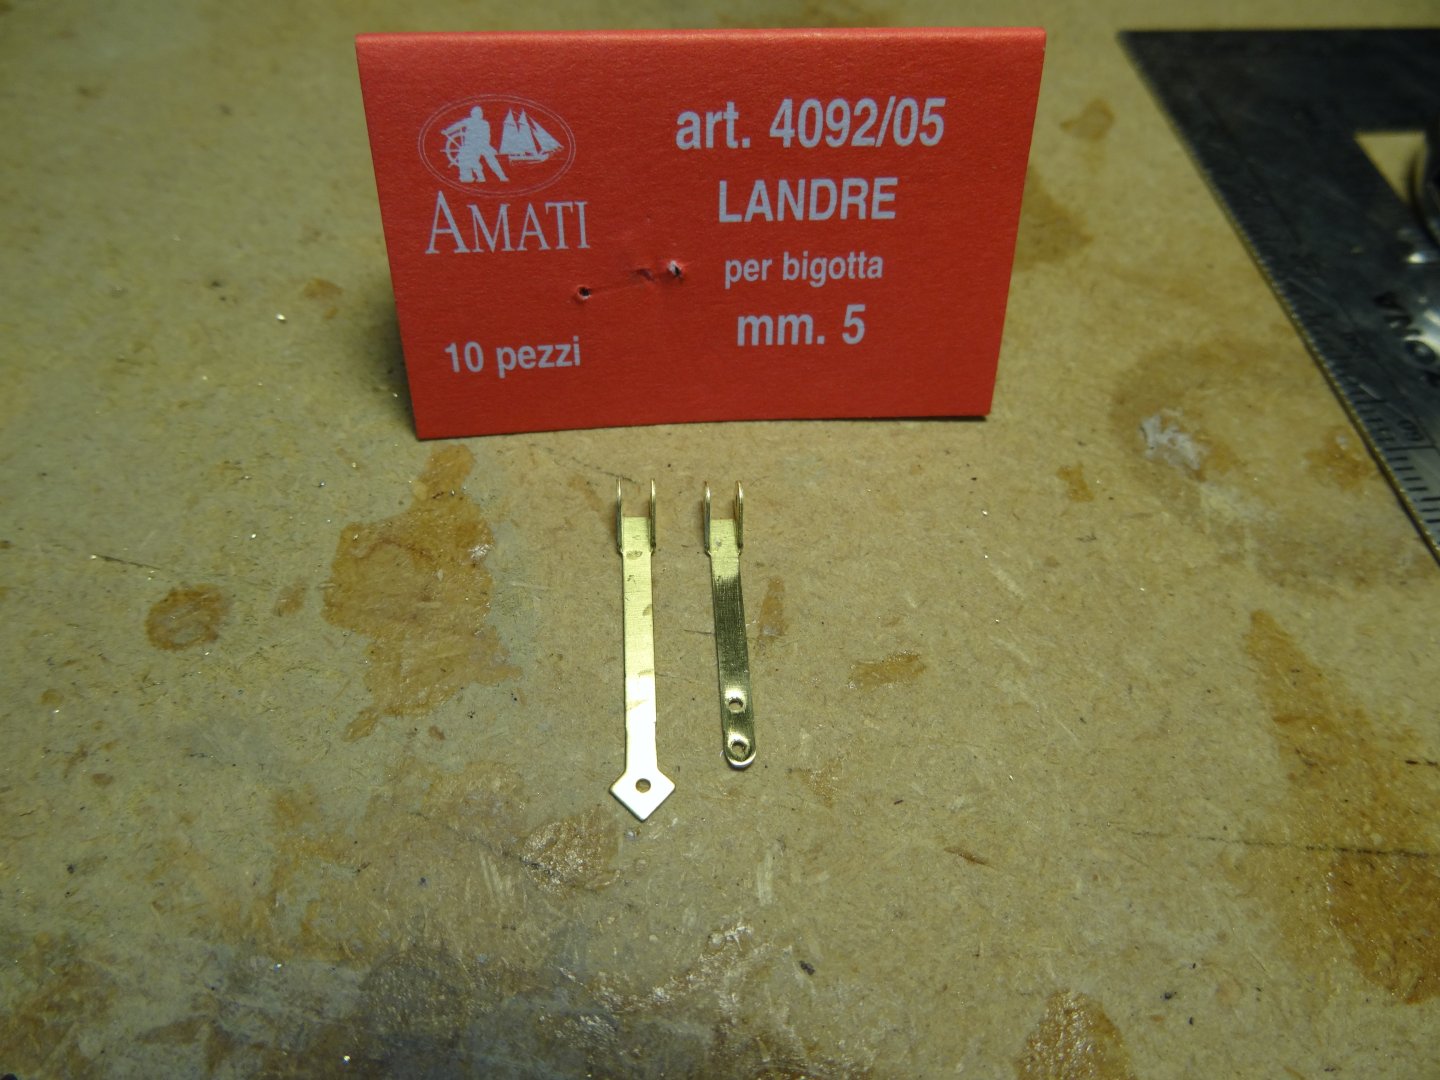
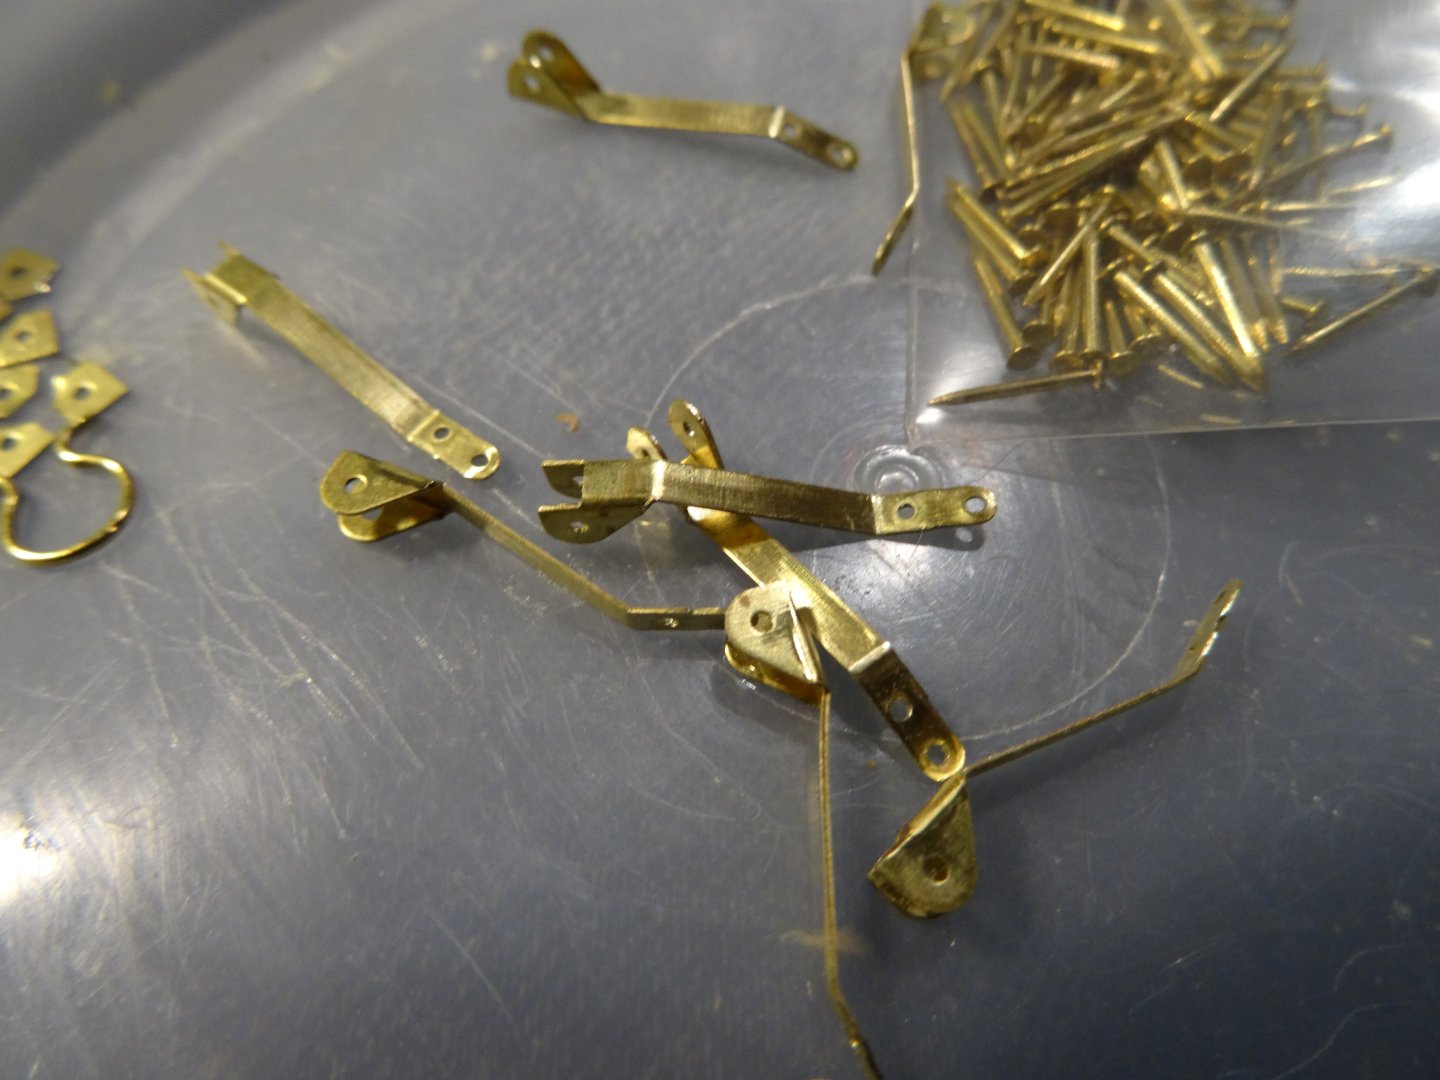
Hi Johnathon, I think you're right on target with the wire, if to make them from scratch. I have read of a few challenges with the kit supplied strops and chain plates breaking at the bend and because of that, decided to order the beefier, Amati version shown in the plans , but not supplied in the kit! The laser cut are a bit frail. Your cannons look nice. I have considered them as well. I'm a sucker for punishment, with lots of little details that they have! OMG another intense building session! It makes such a difference over the cast product when finished. You can find 2 mm blocks on Syren Models Web site, that won't be too out of scale. Just Depends on How deep in the rabbit hole do you want to go? Your Lady is coming along and looking good!
-
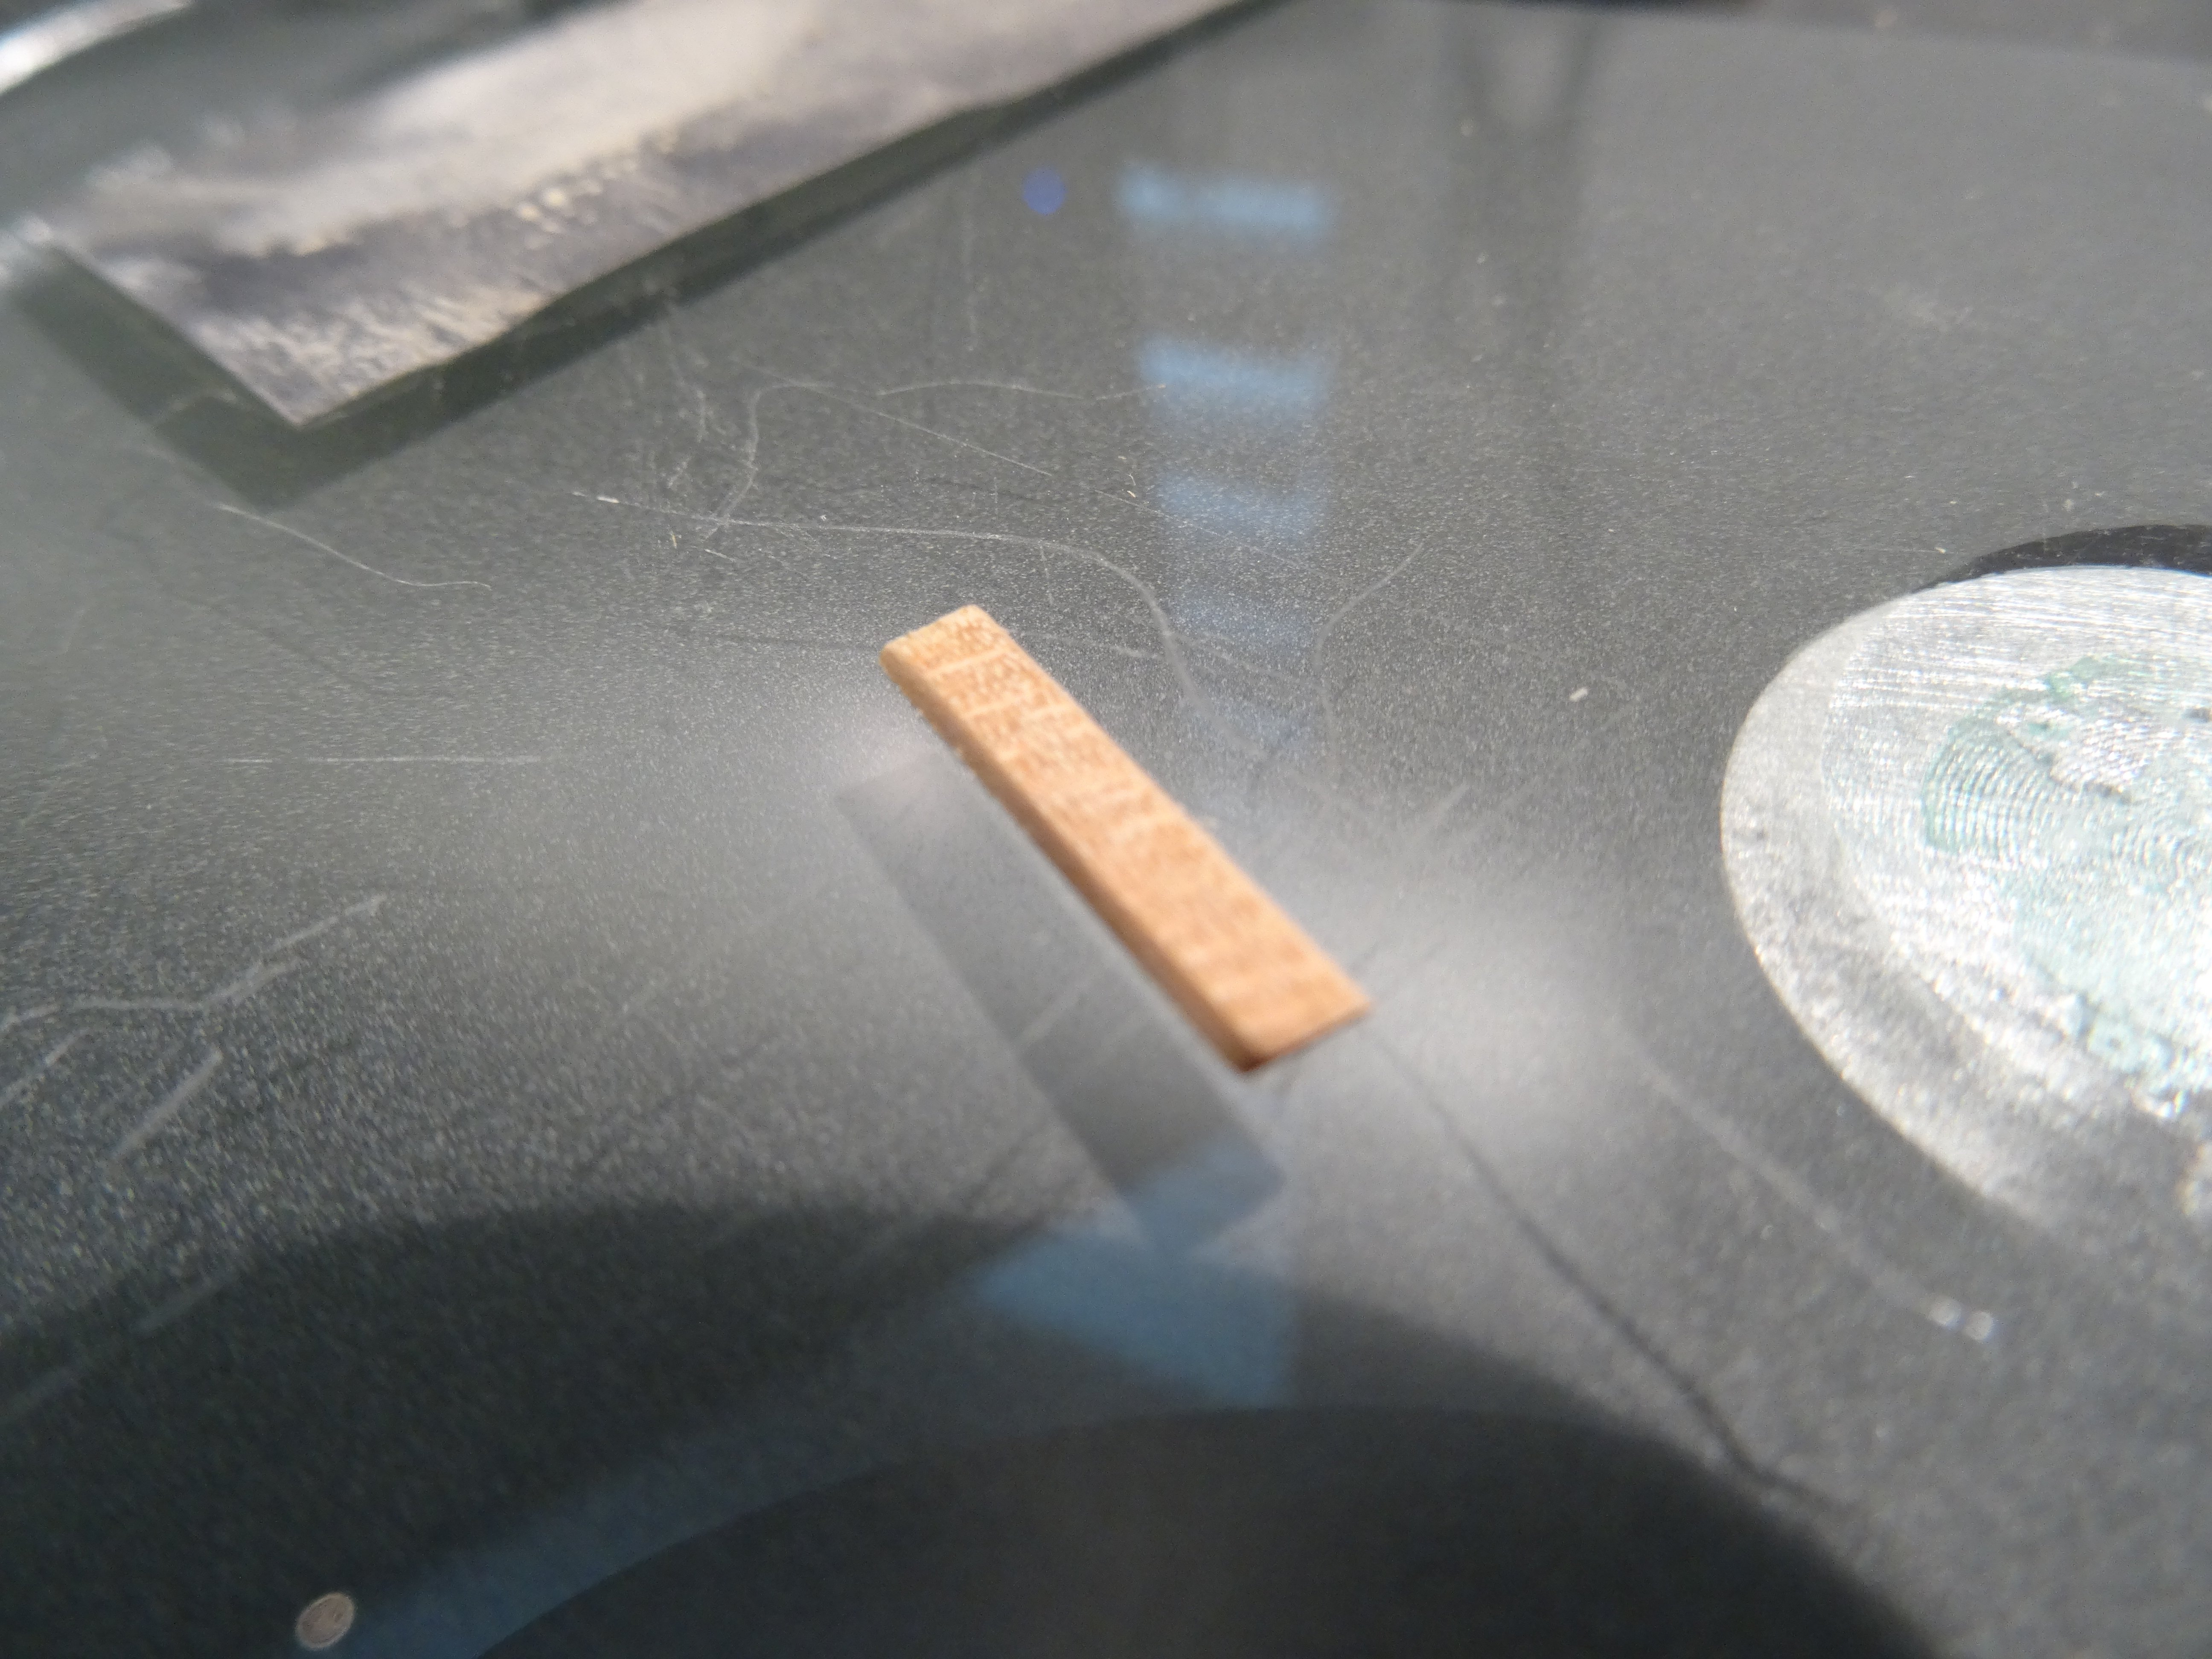
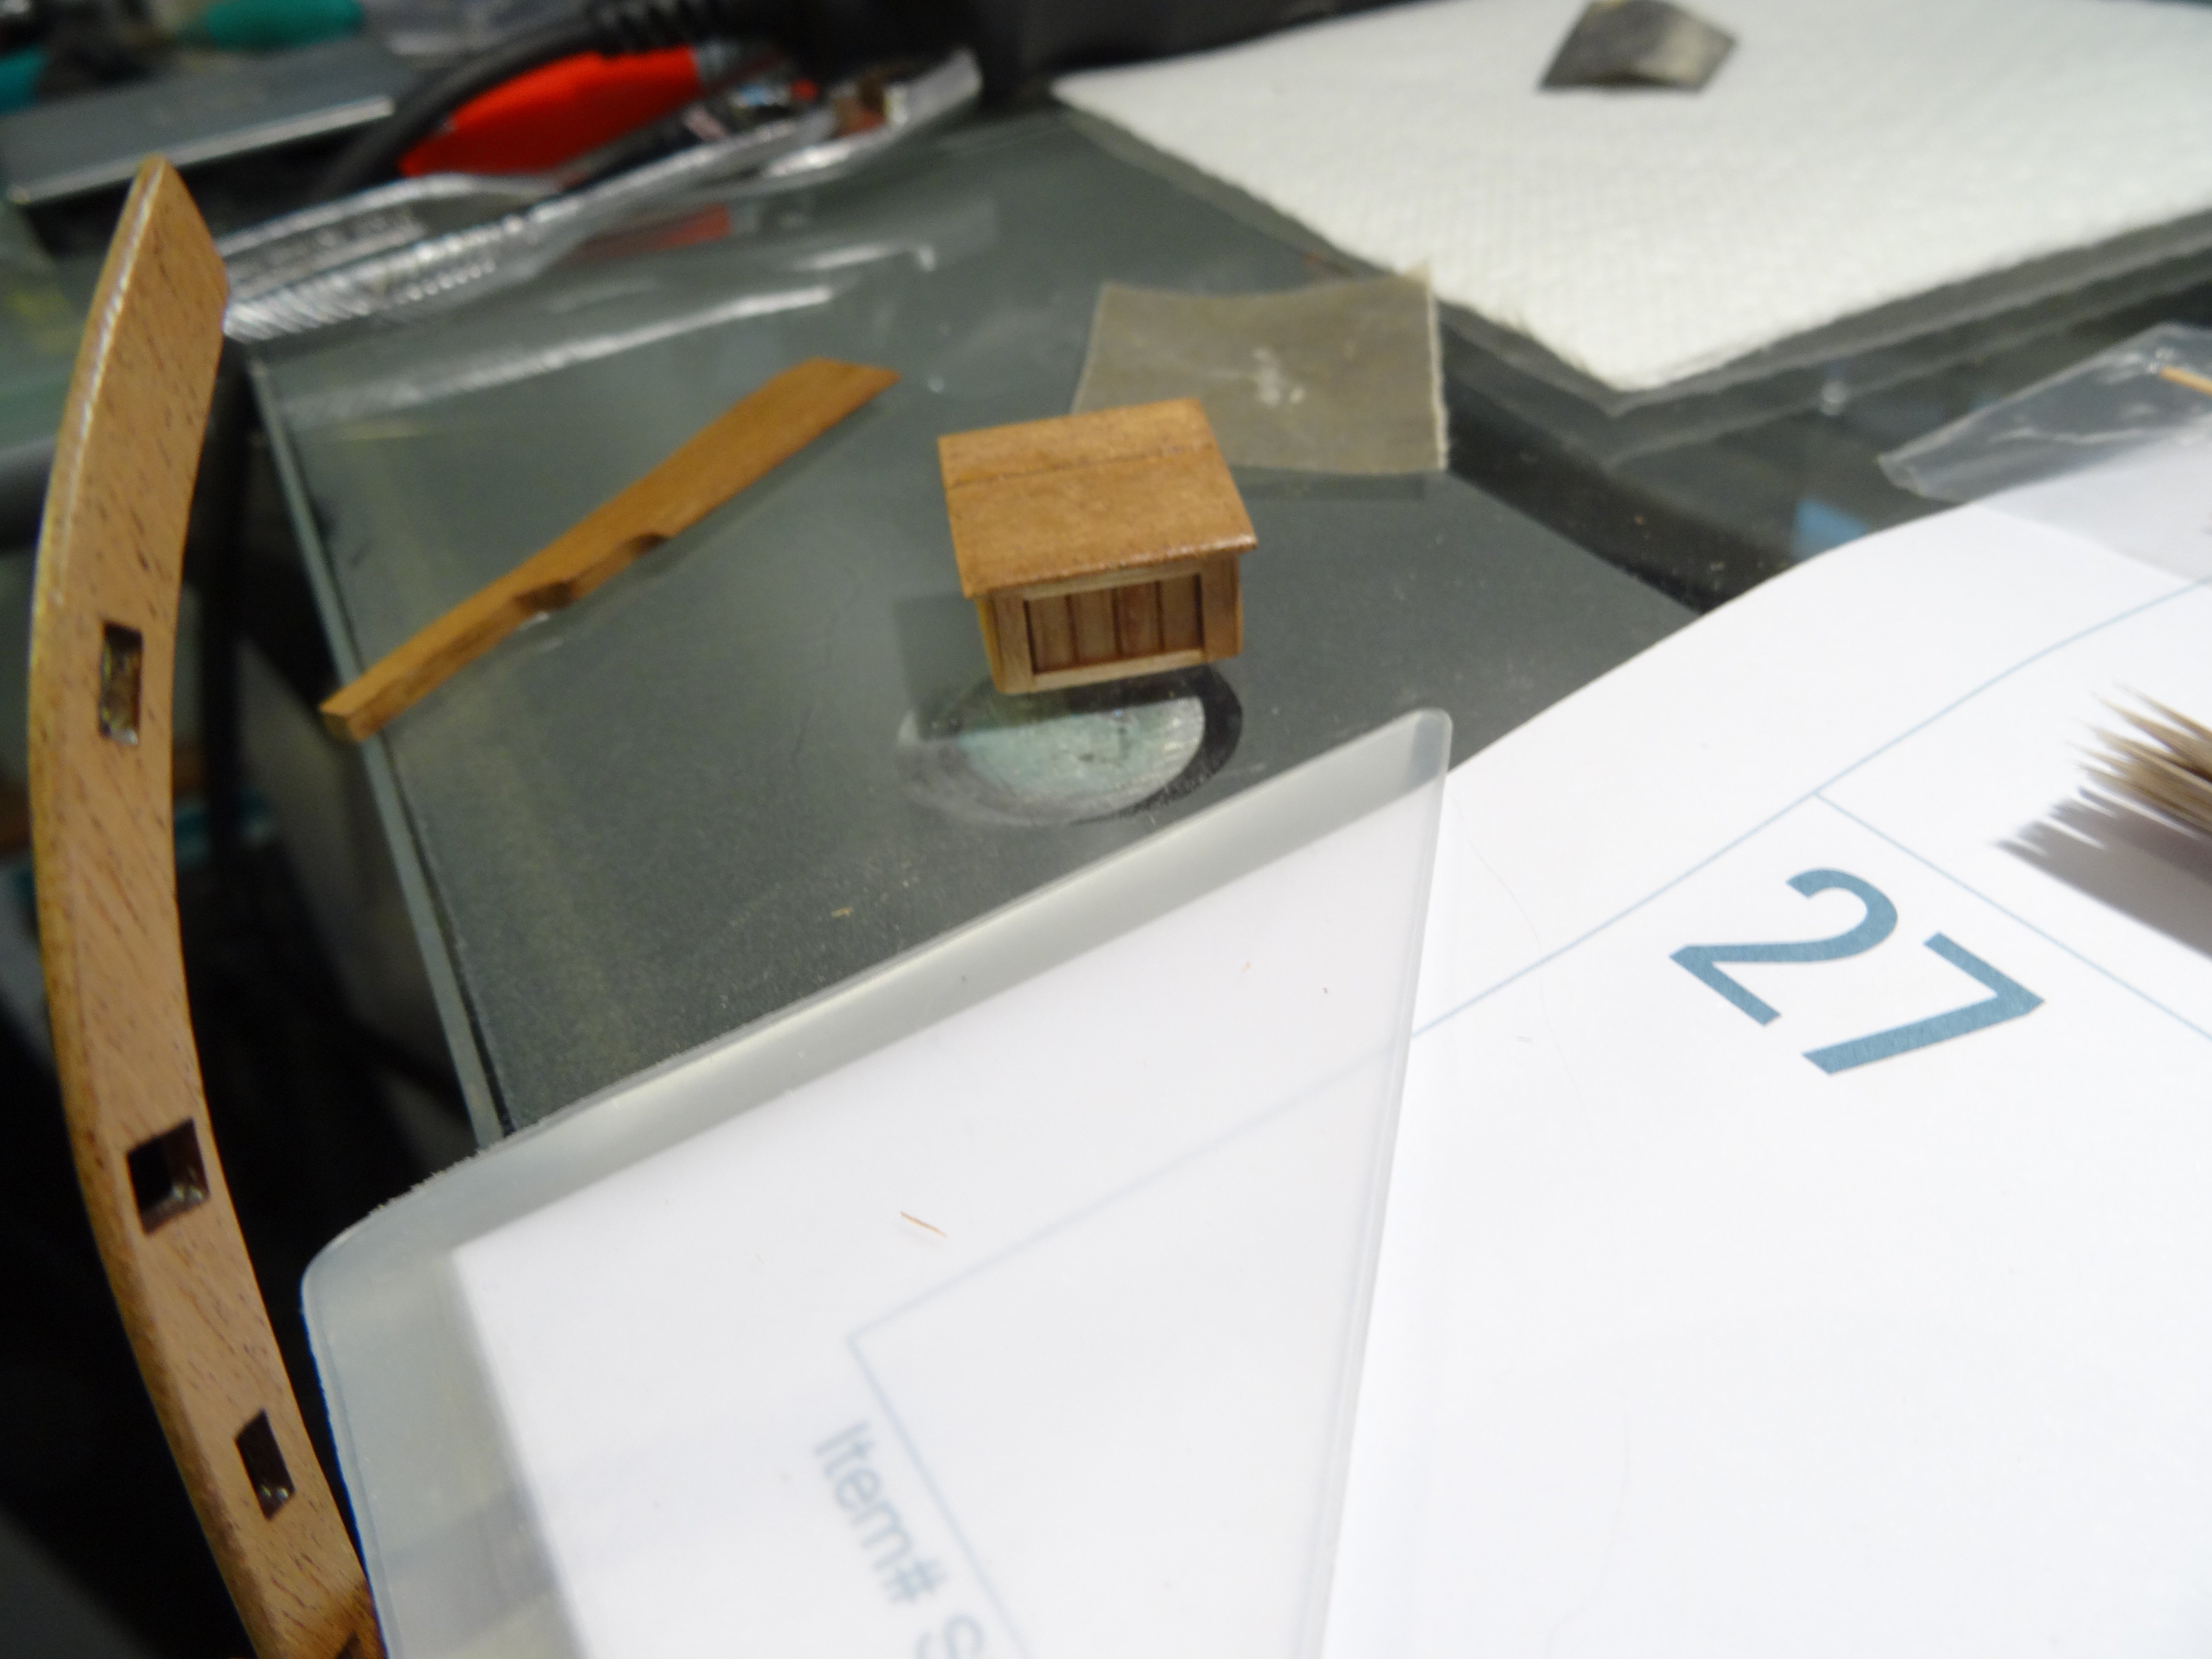
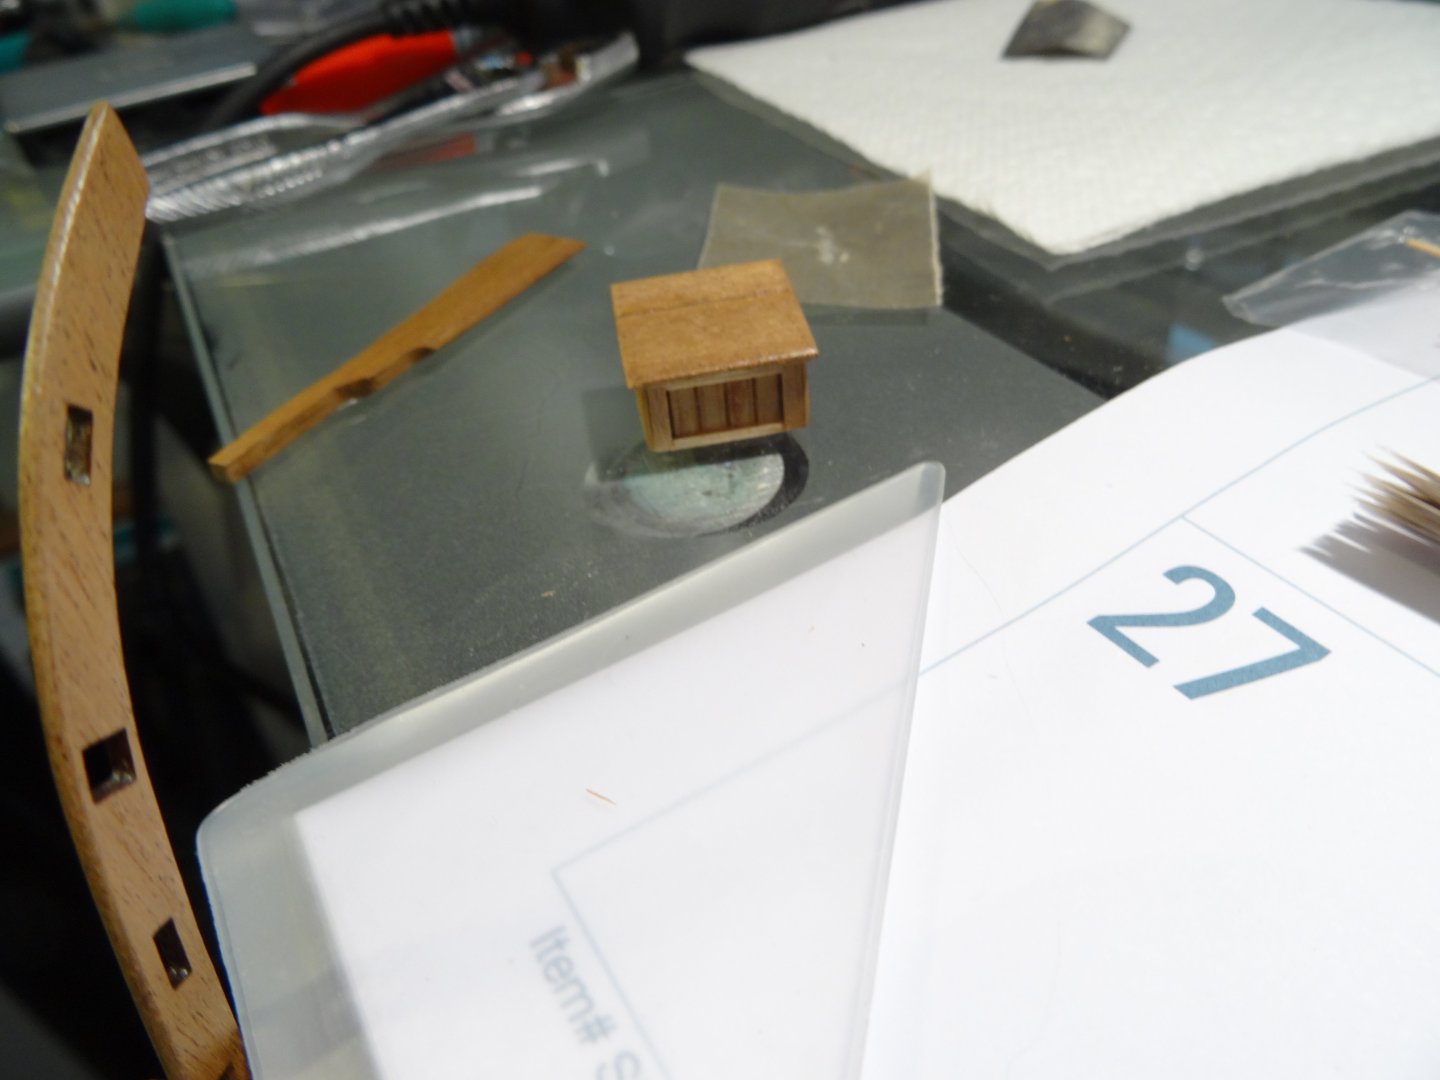
Well, I thought I would take a break from the build , per se! The inner shipwright kept knocking, until I answered with, well, OK...I'll do it! While prepping bulwark and cap rail wood pieces for painting and a sundry part exploration, I gave a shot at artistic license and decided to bling my companionway. With painting, hinges and door pulls yet to finish, I envisioned a little more external detail for this thing and donned my Squirrel suit and went flying. It was all of 3-4 hours, a couple mistakes, words that can't be mentioned, a complete re-do's of the front and doors and the finished product materialized! I have a few more chosen victims such as this, that I have planned to be changing, but this is what makes a hobby for me. In brief, the four sided shell was built and then, simply laminated with the wooden strips. For the vertical boards, I beveled the four edges, with 400 grit paper, to provide for a little detail and visual space. Because of the increased widths of the sides , I cut a new top, to include an overlap. I used wood, from left over kit wood, to cover and complete the companionway.

- 39 replies
-
- 4
-
-
- Amati
- Victory Models
- (and 1 more)
-
Hello Ralph, When Dan asked about the frieze details and how it was achieved, " Your reply ", I couldn't help but think, " how clever " in your approach. I really like the simplicity and effectiveness...! I'm glad to know the damage was not too bad and easily repaired.
-
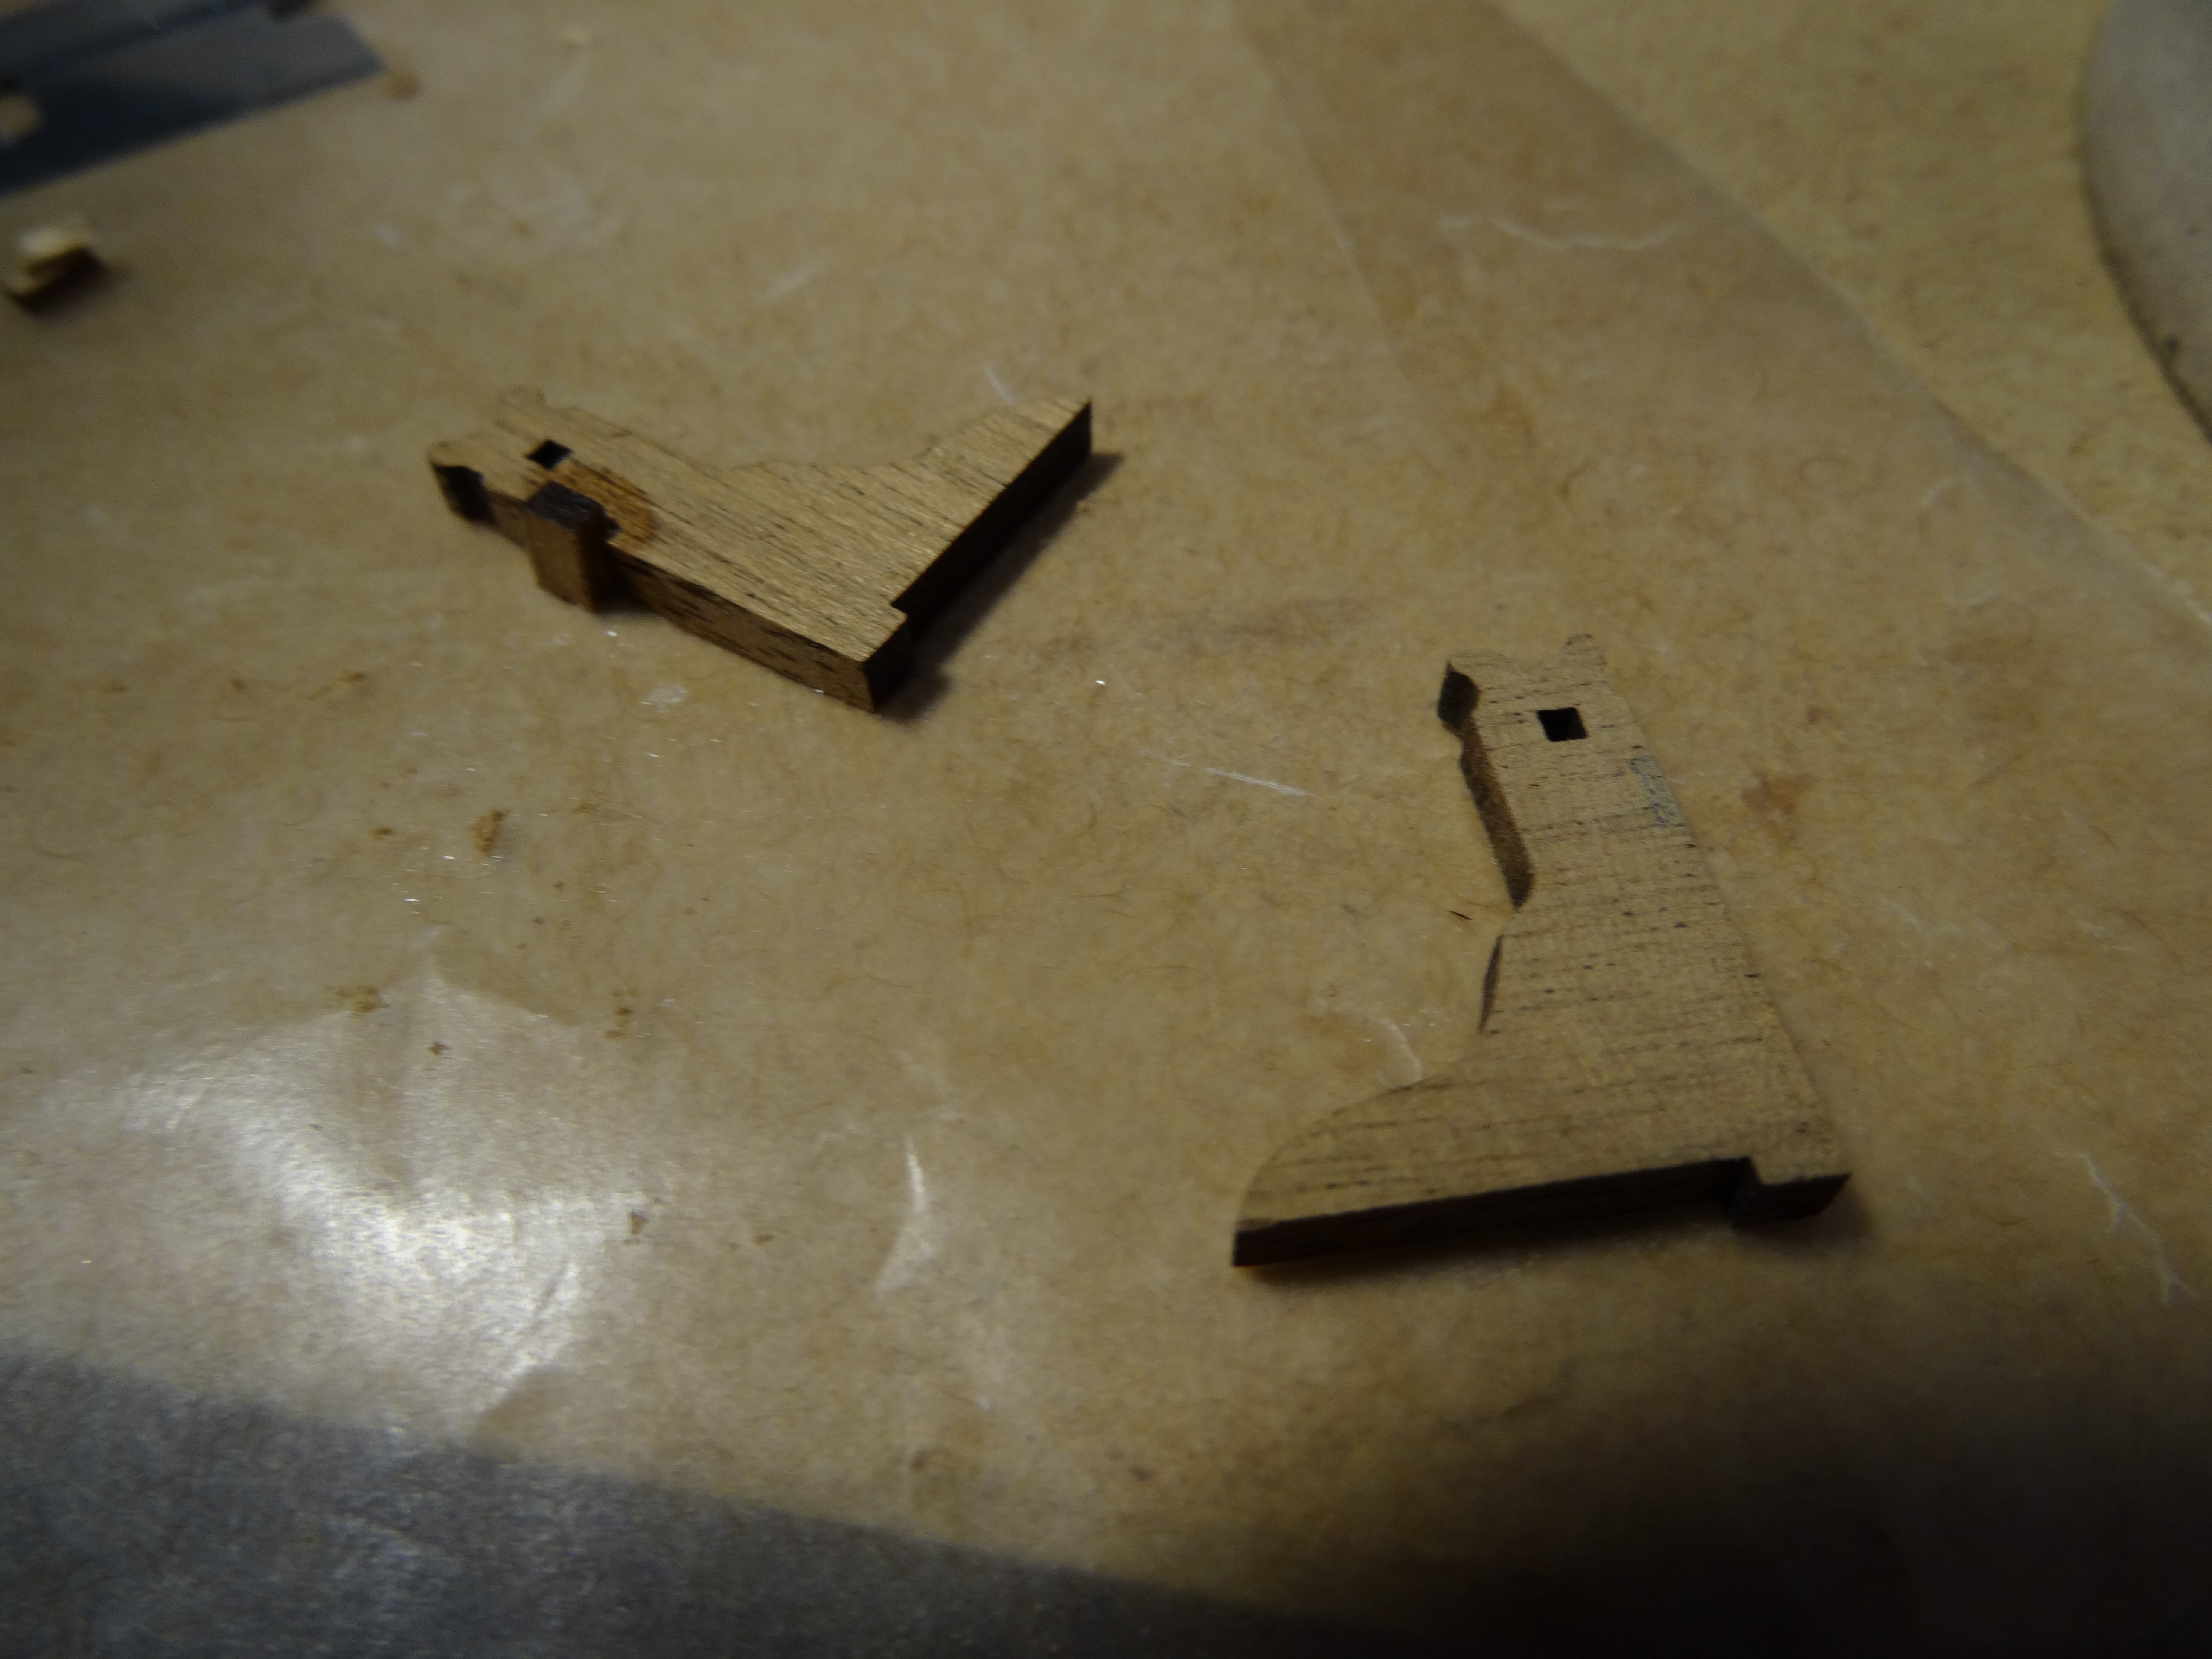
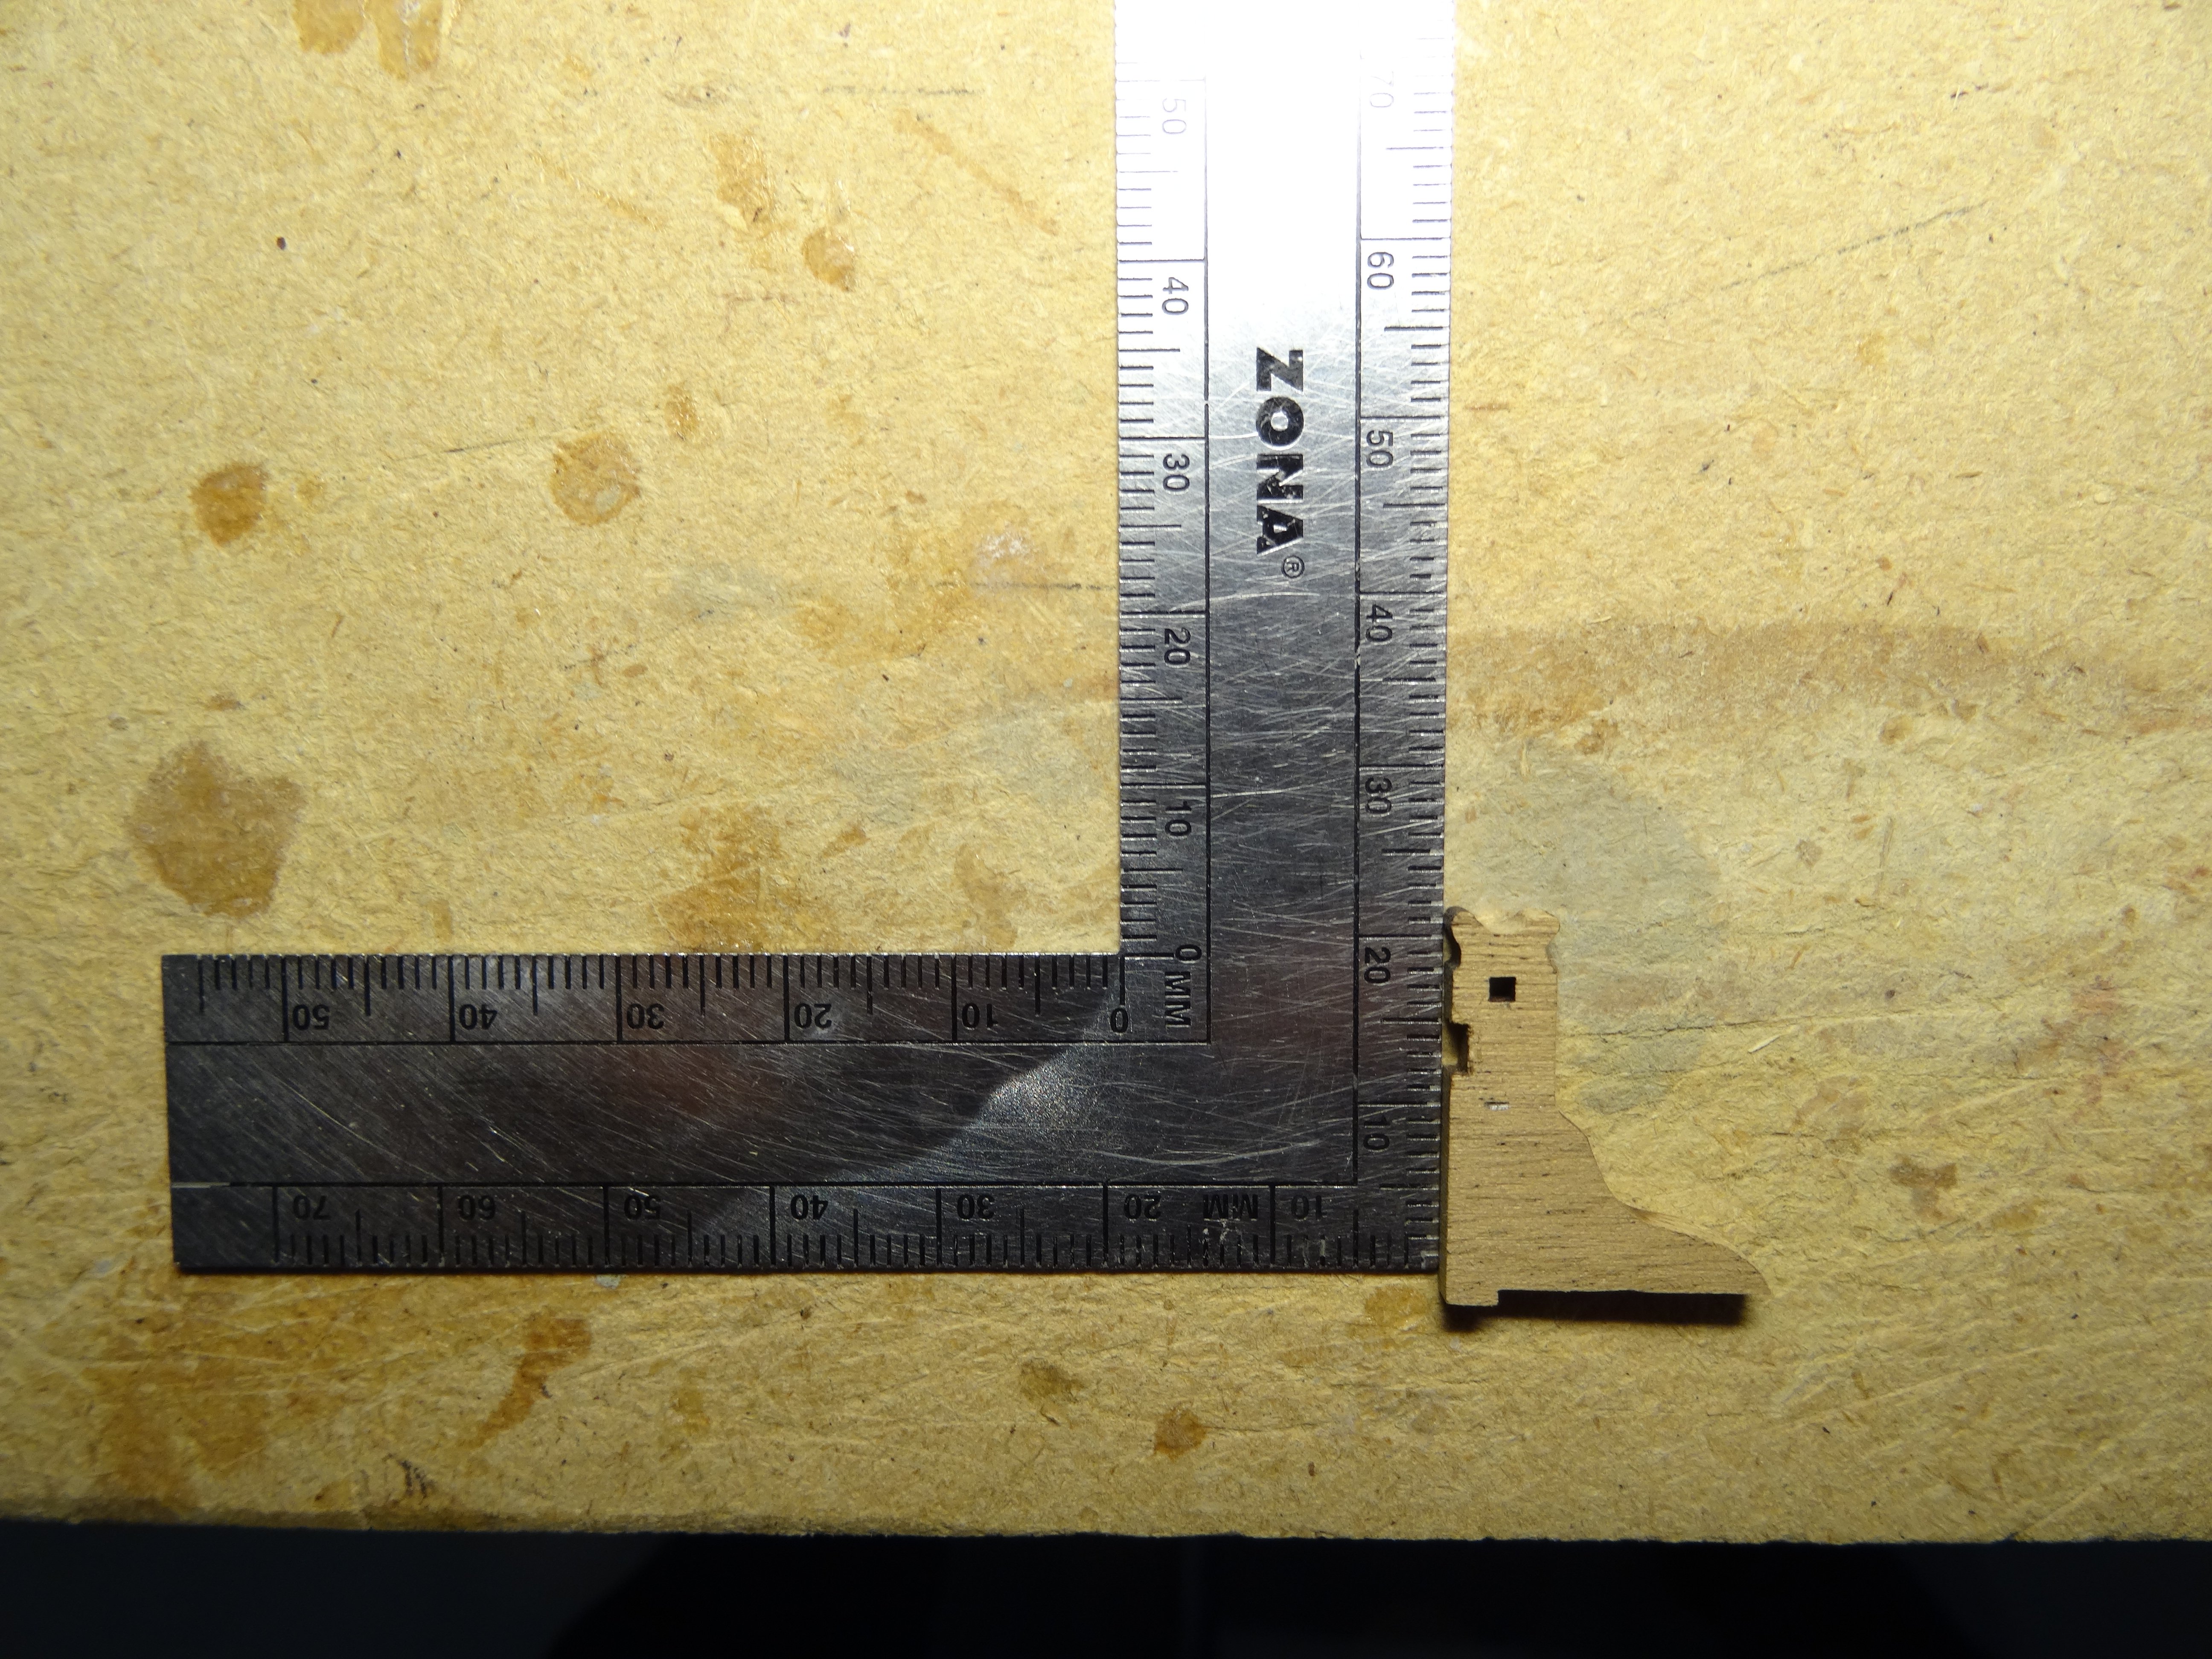
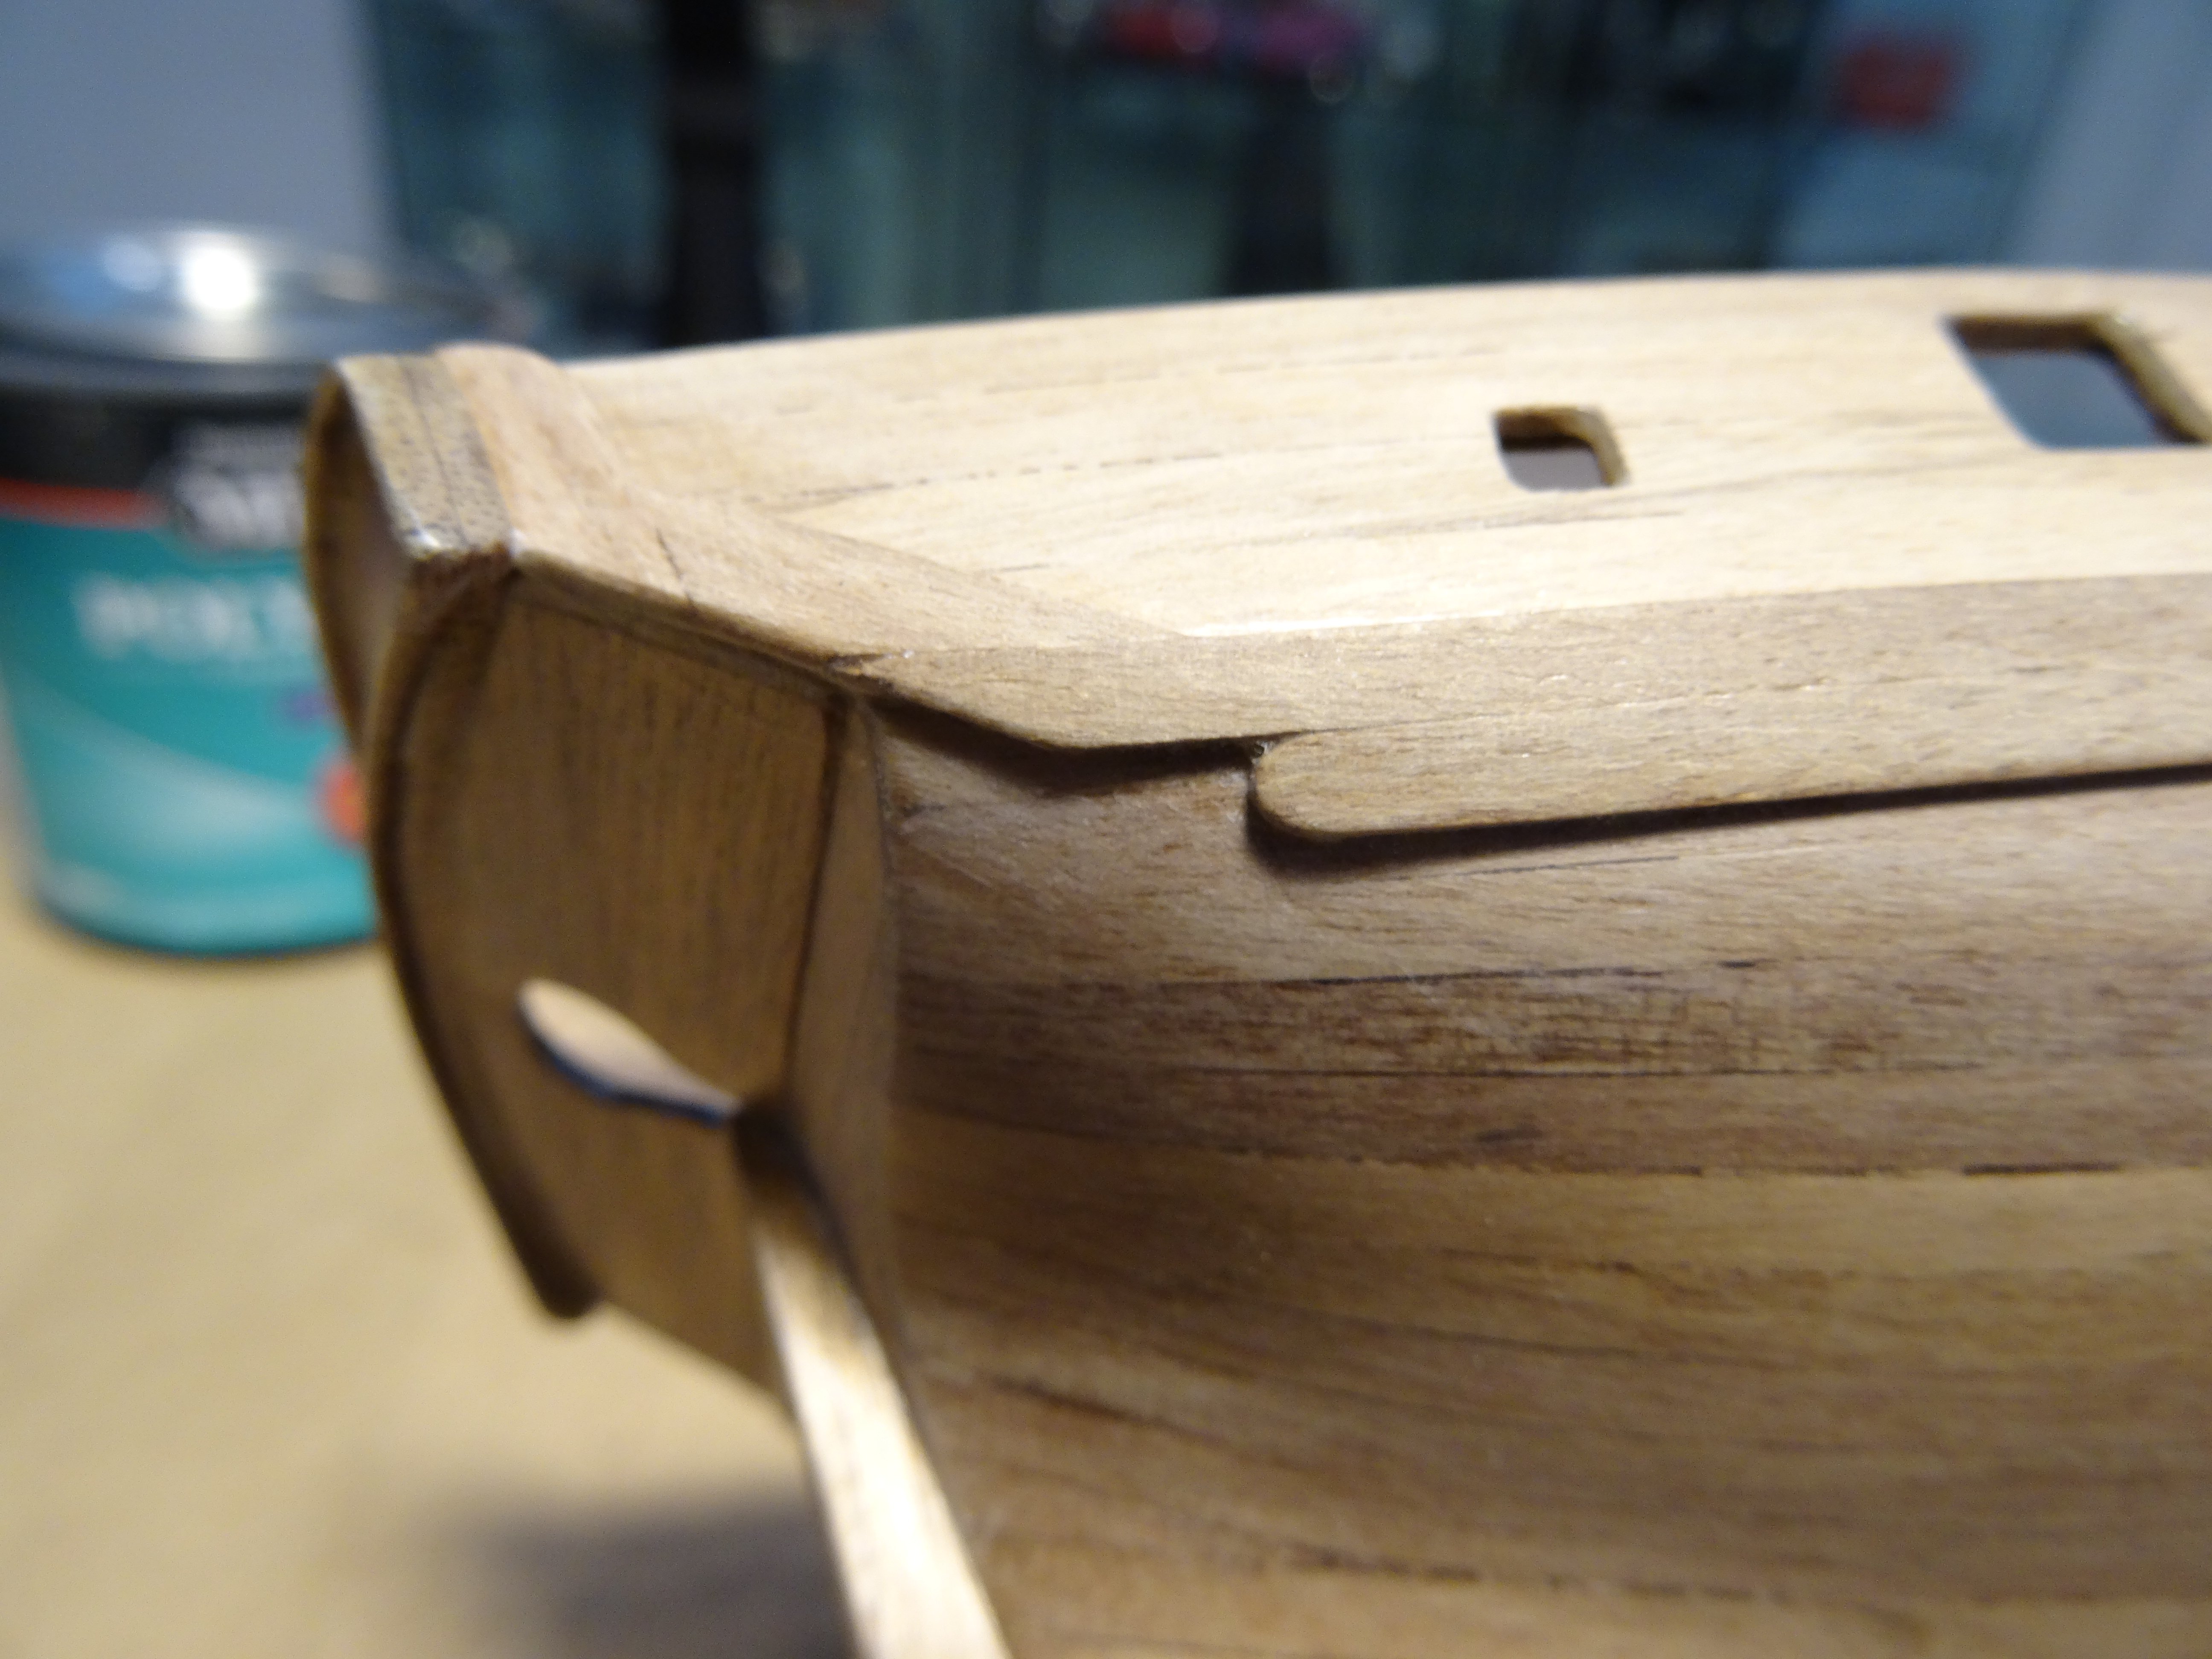
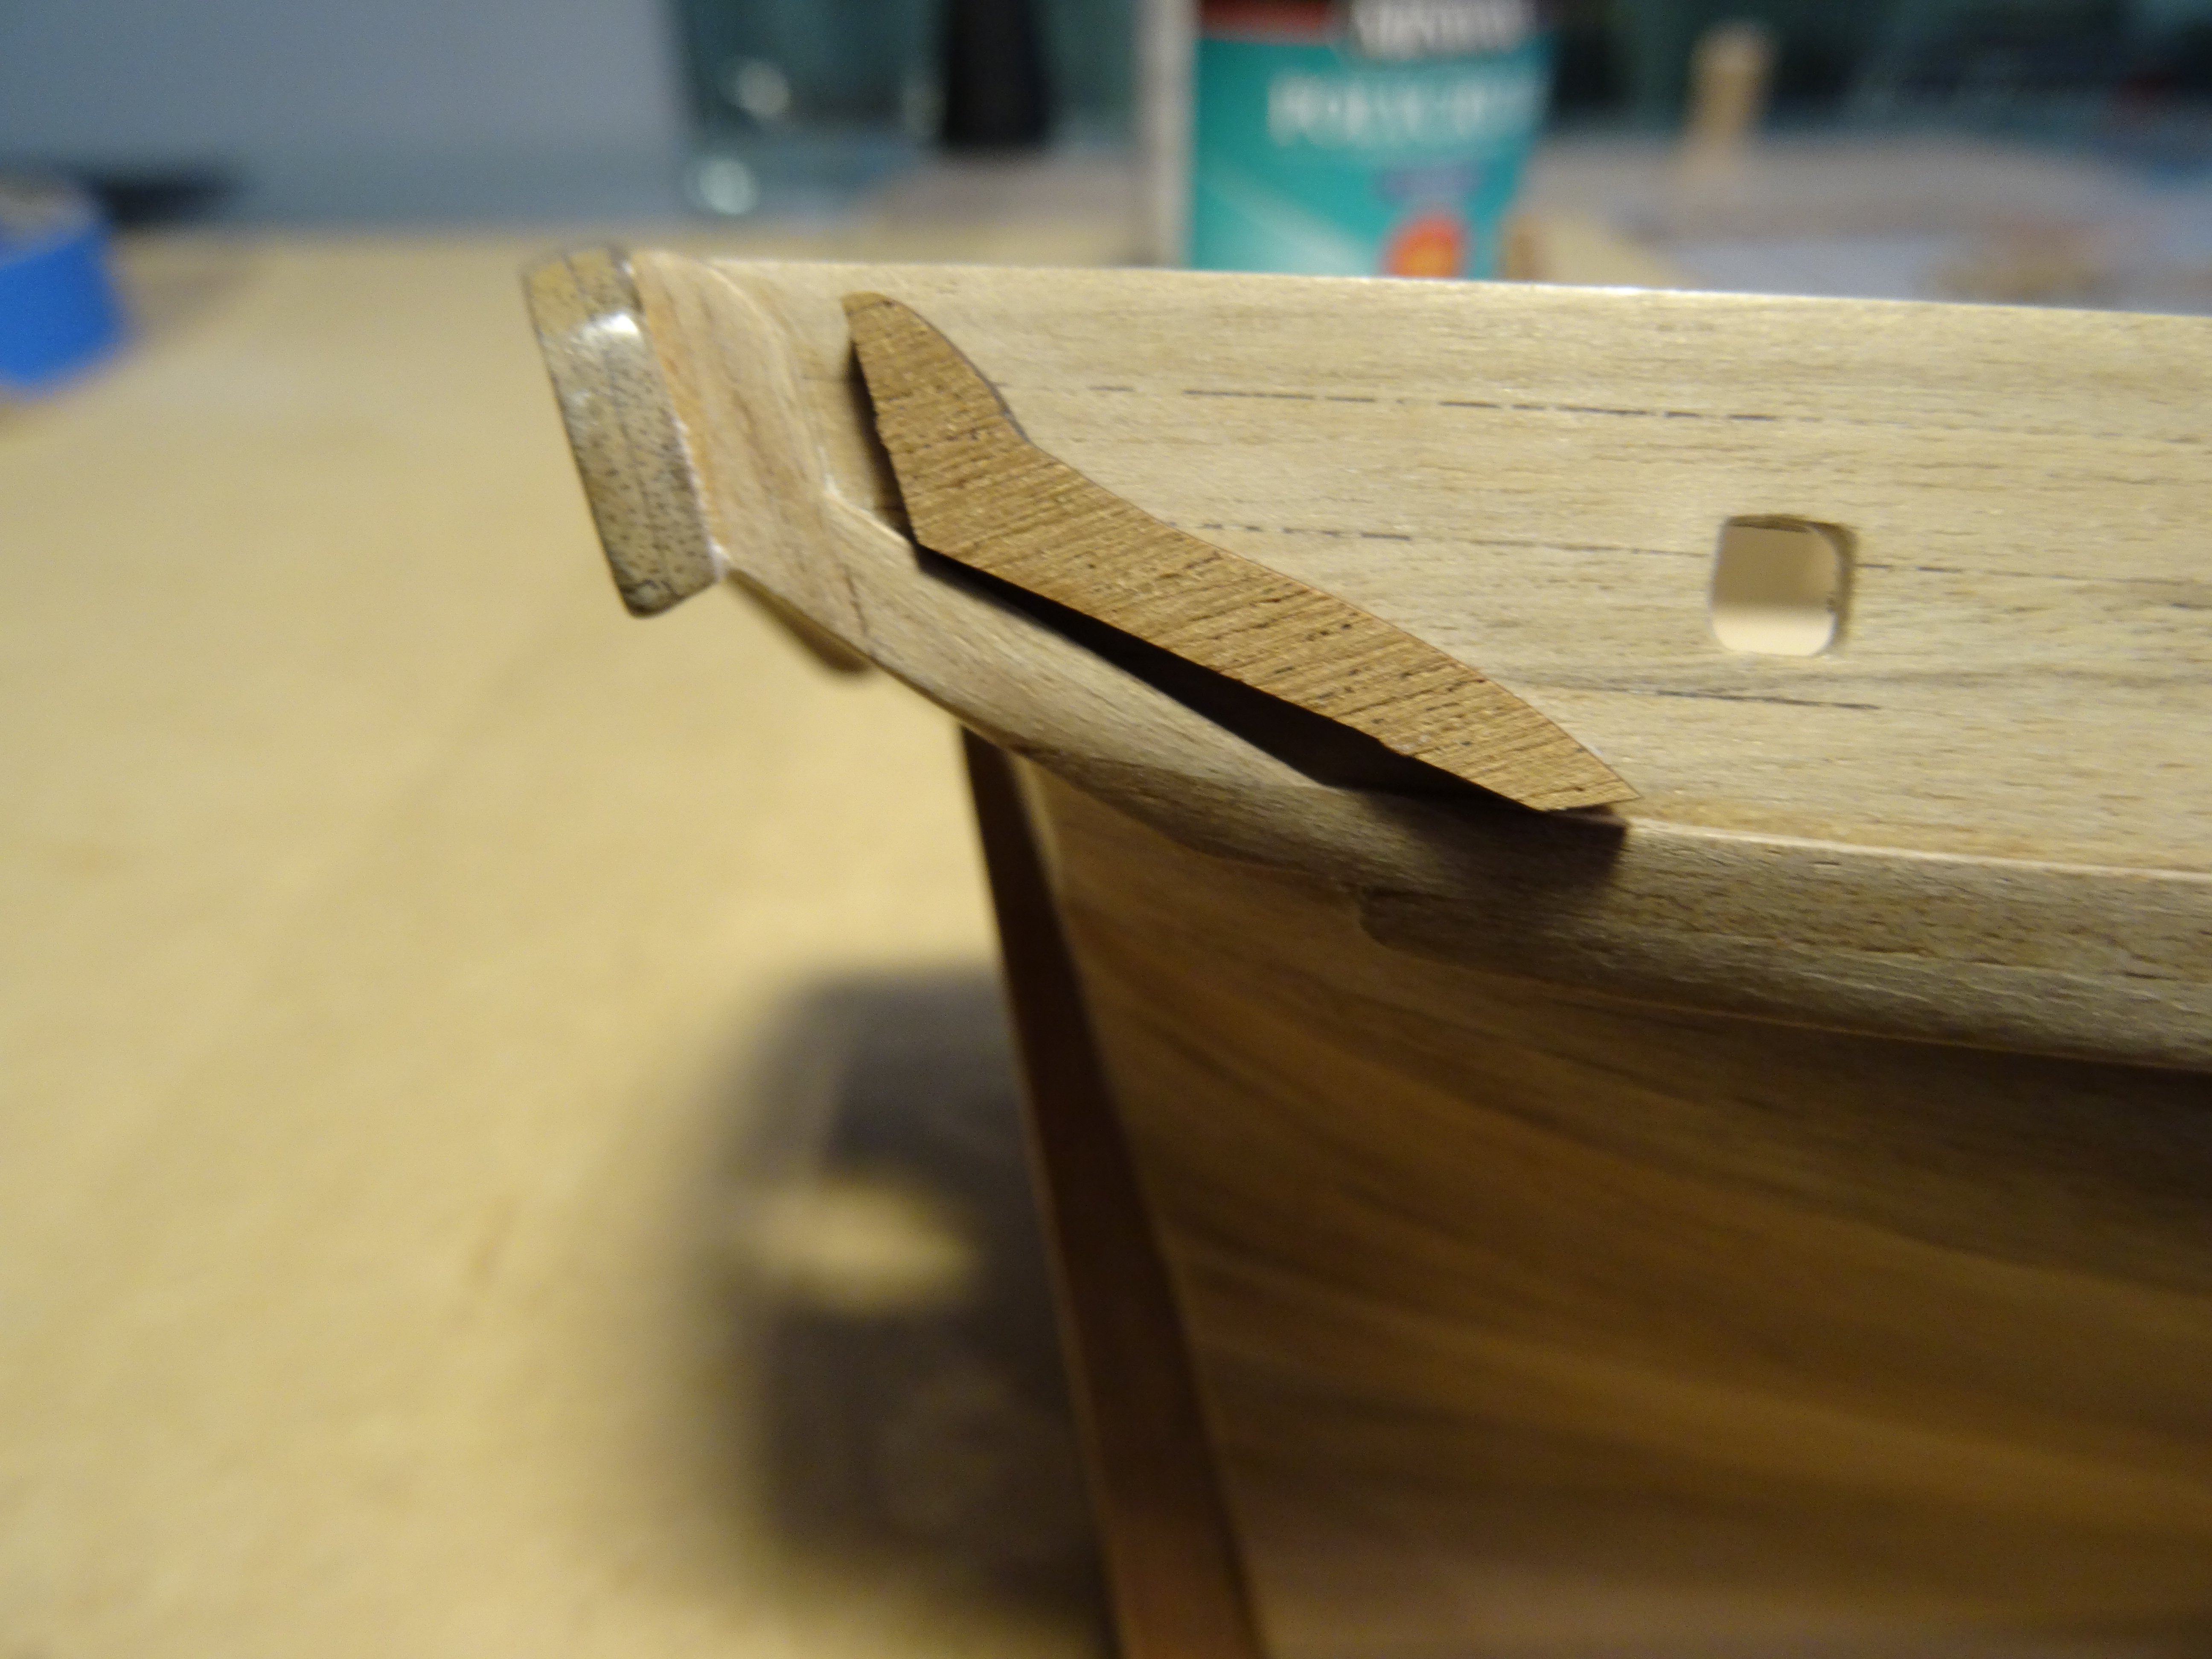
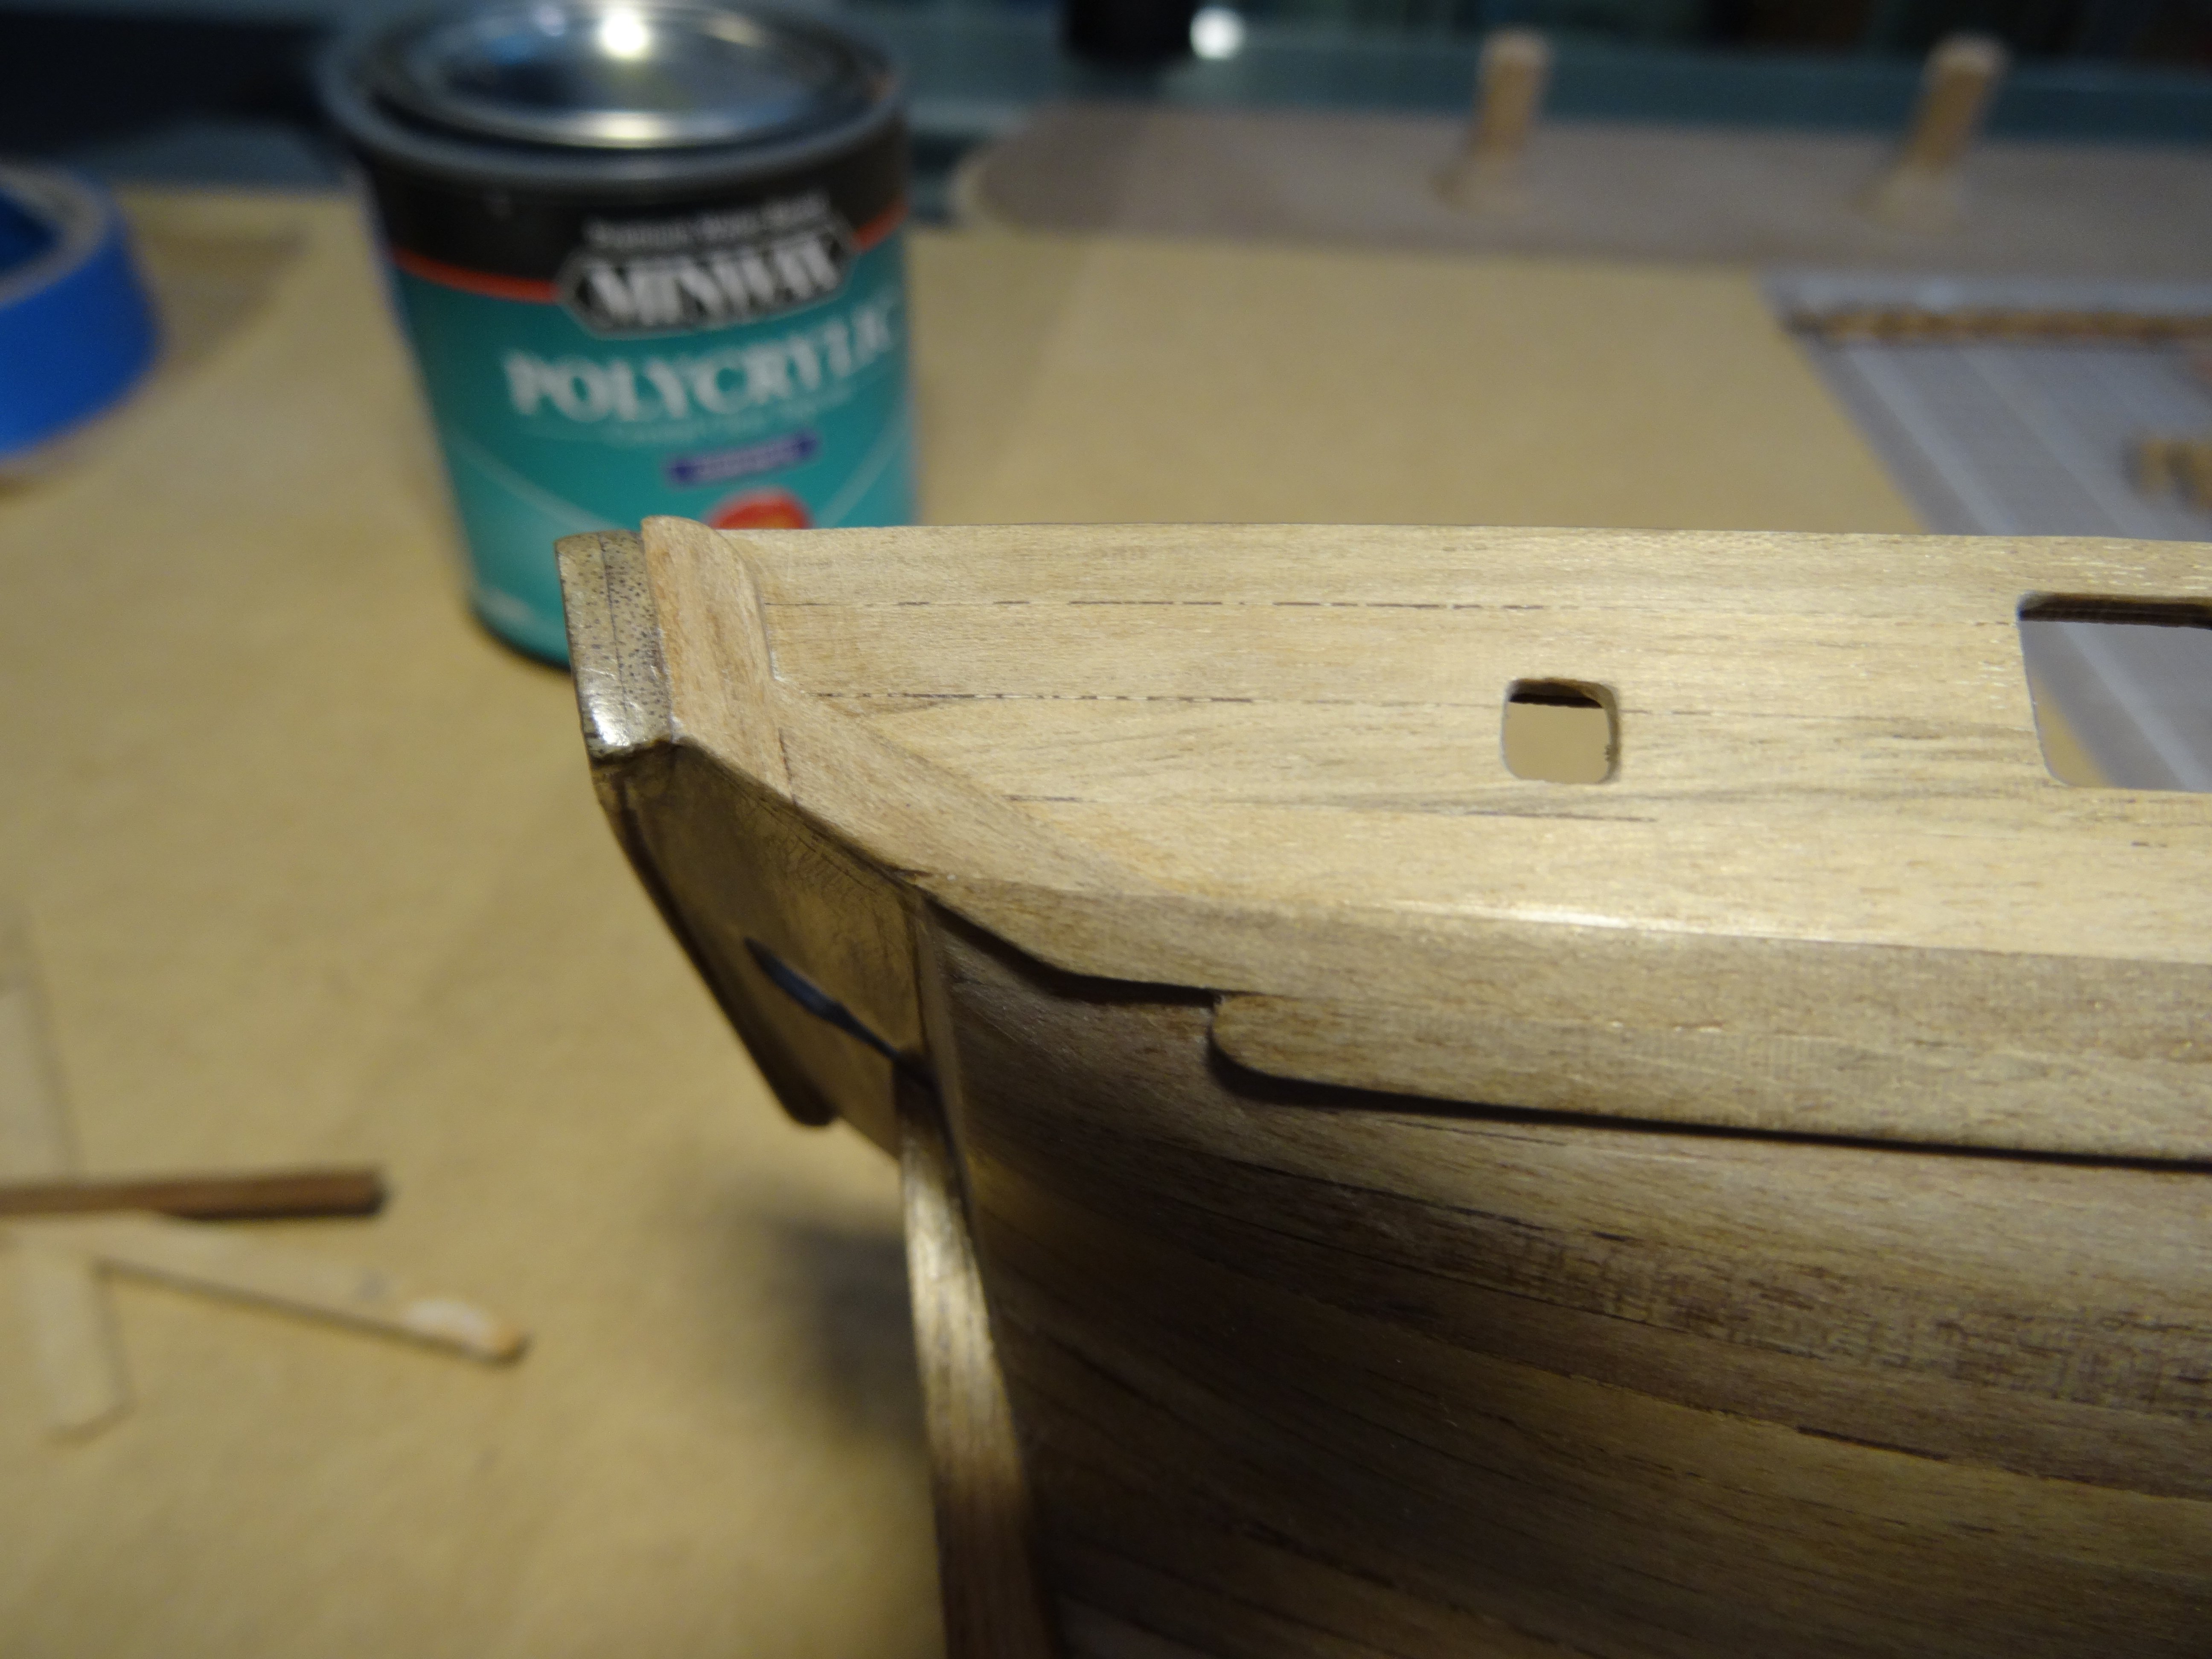
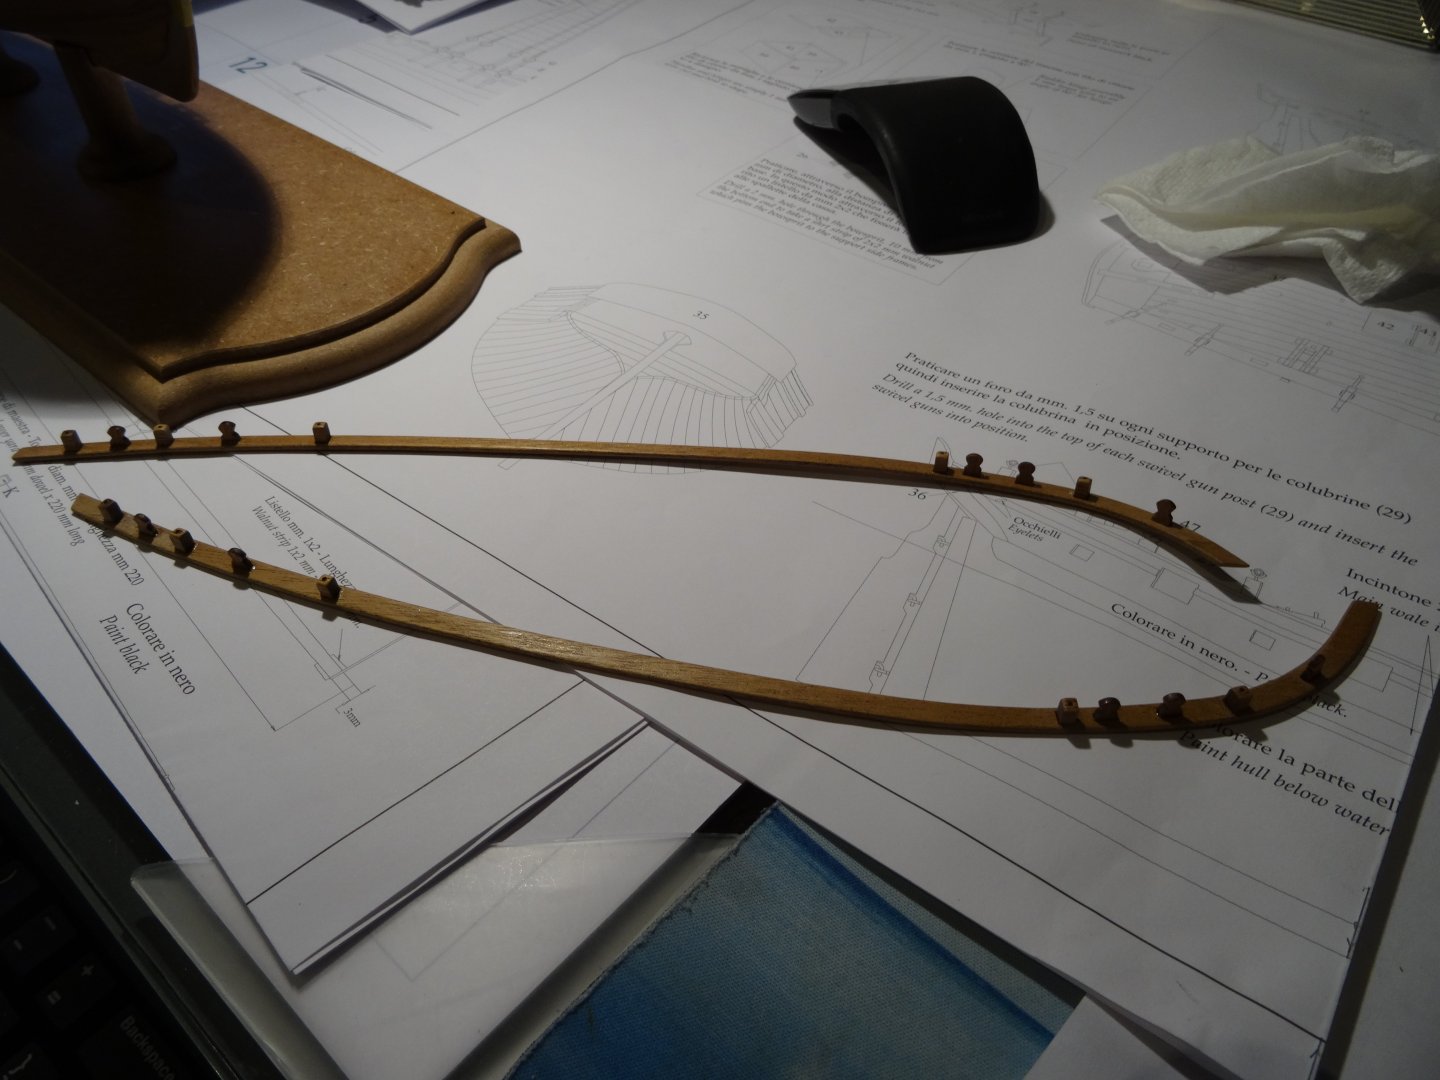
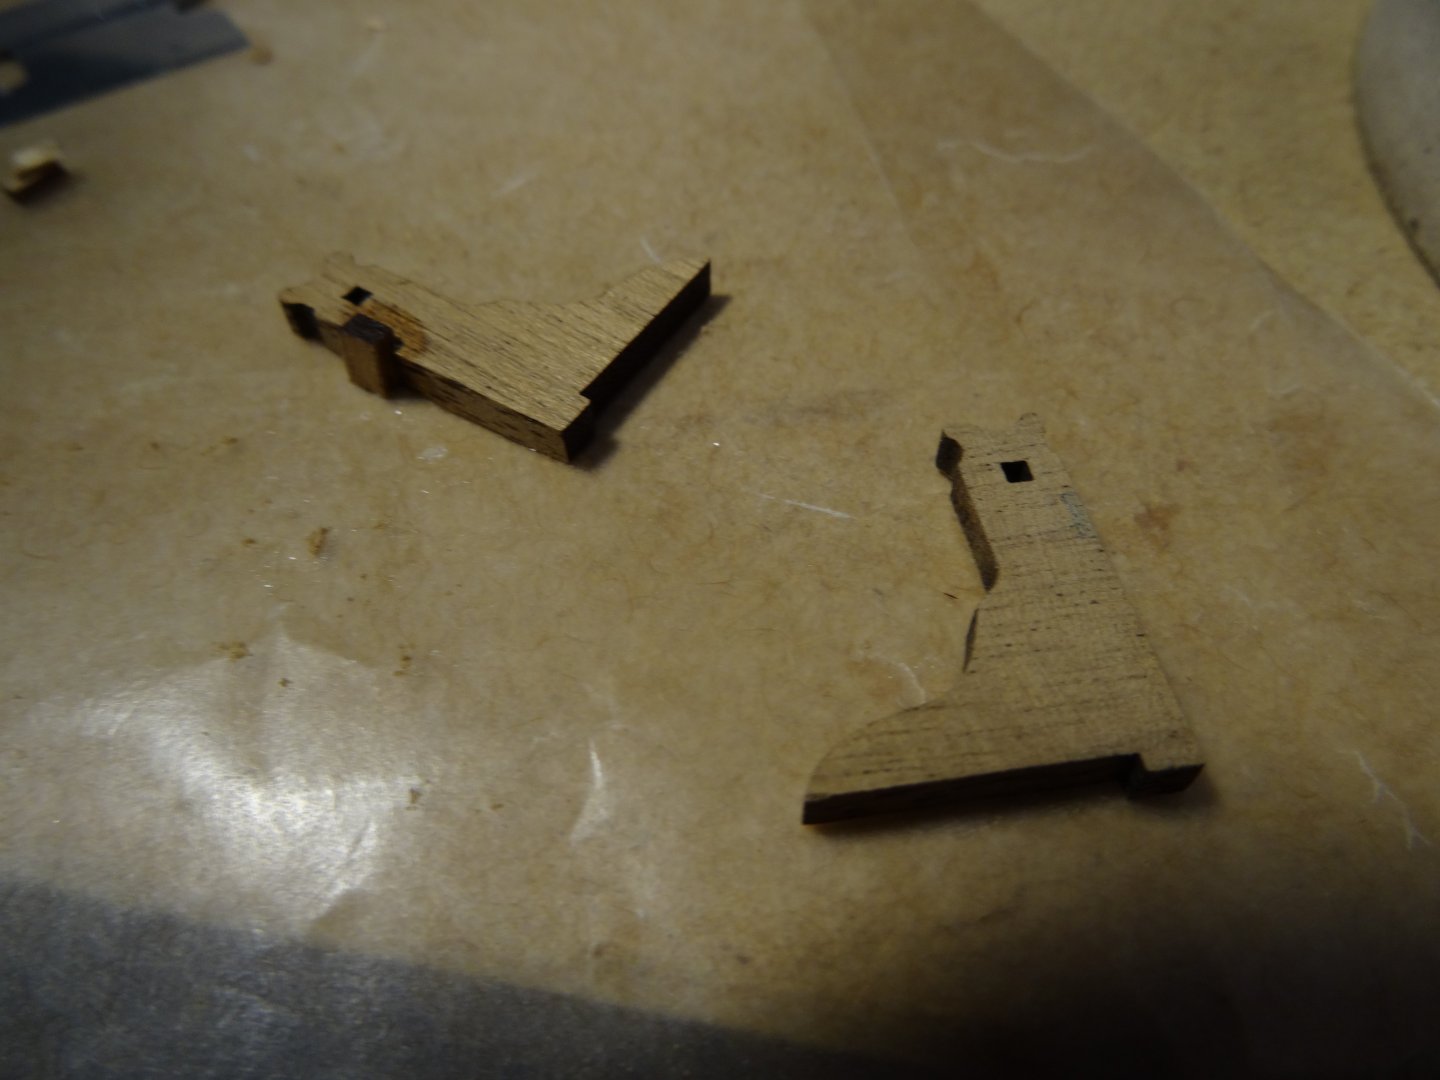
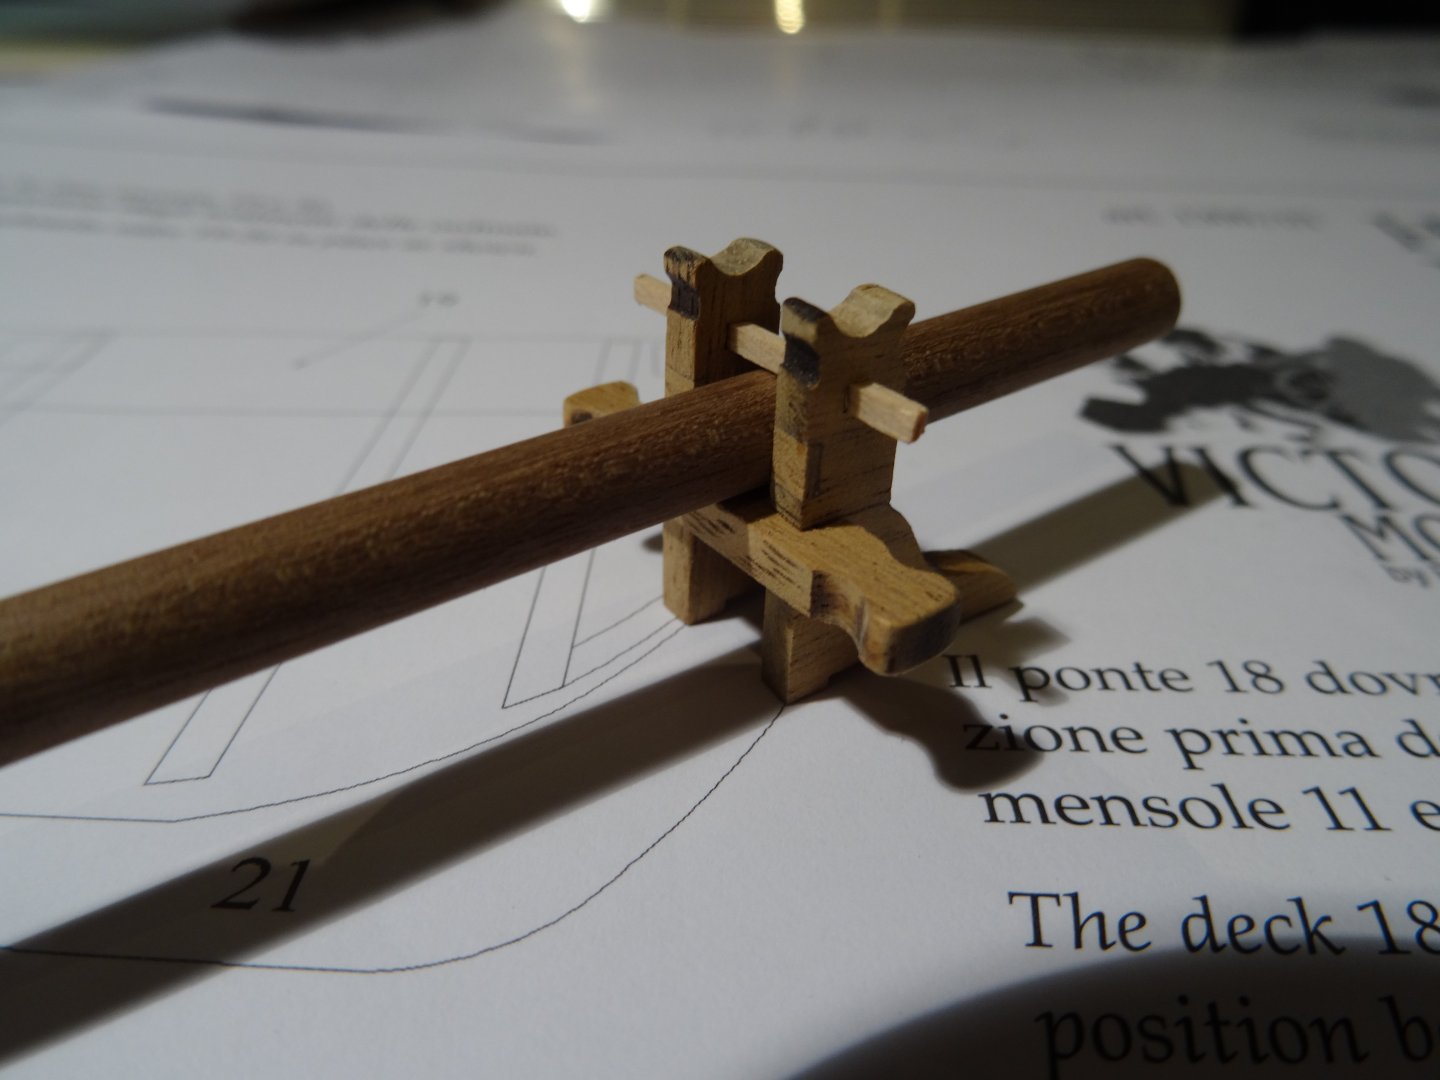
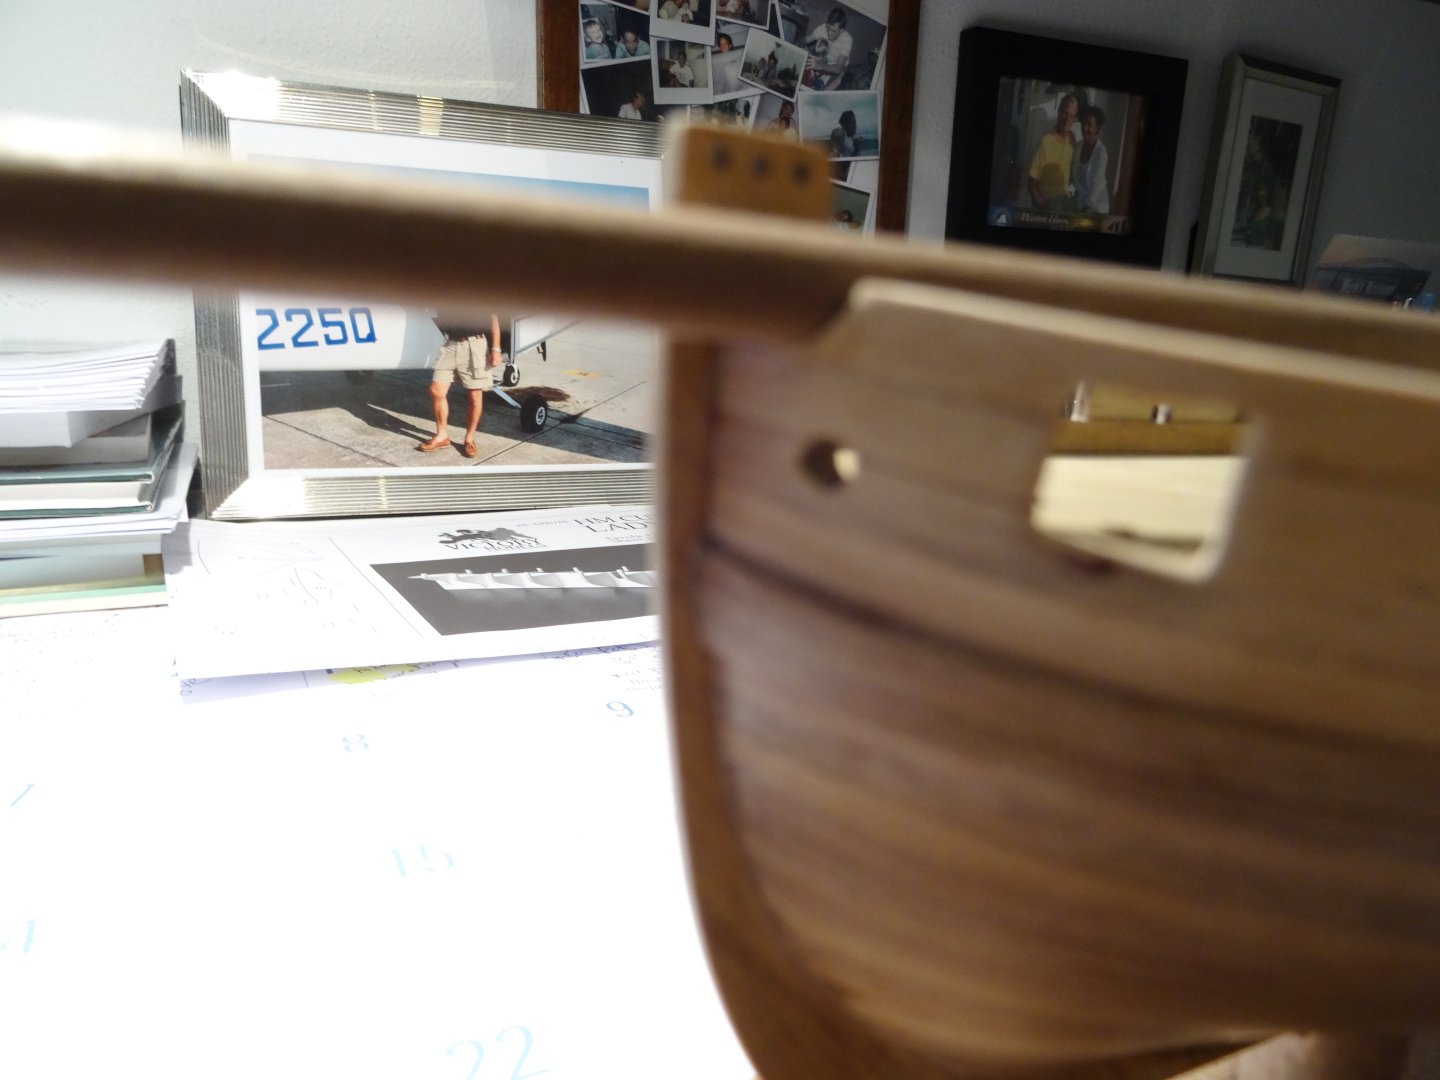
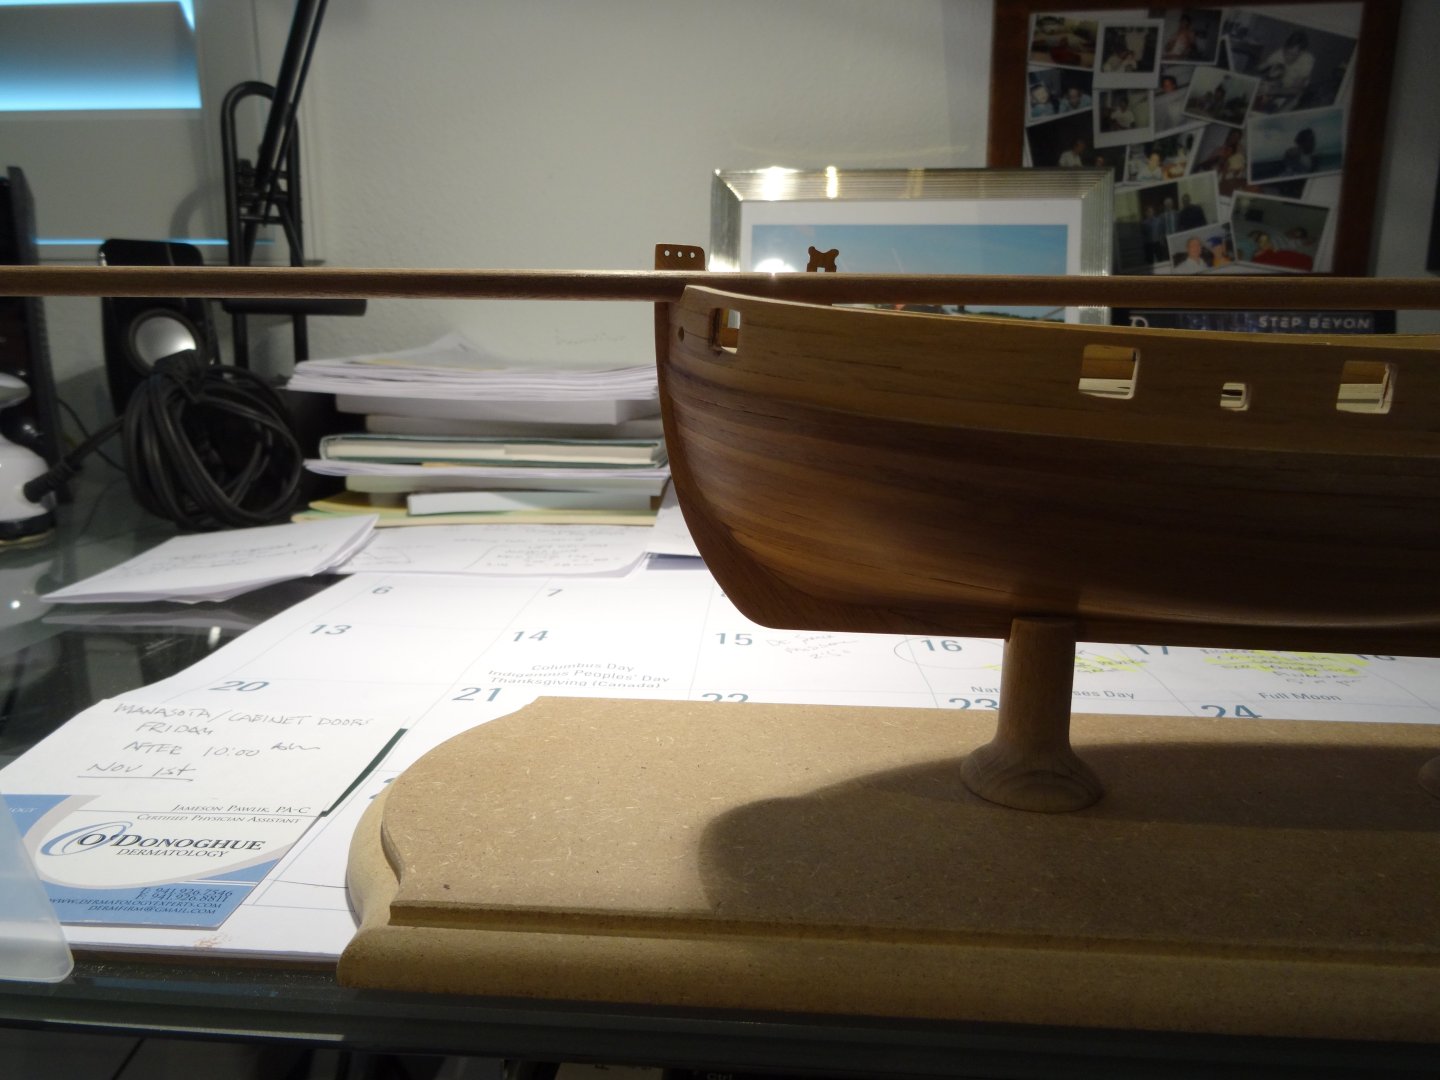
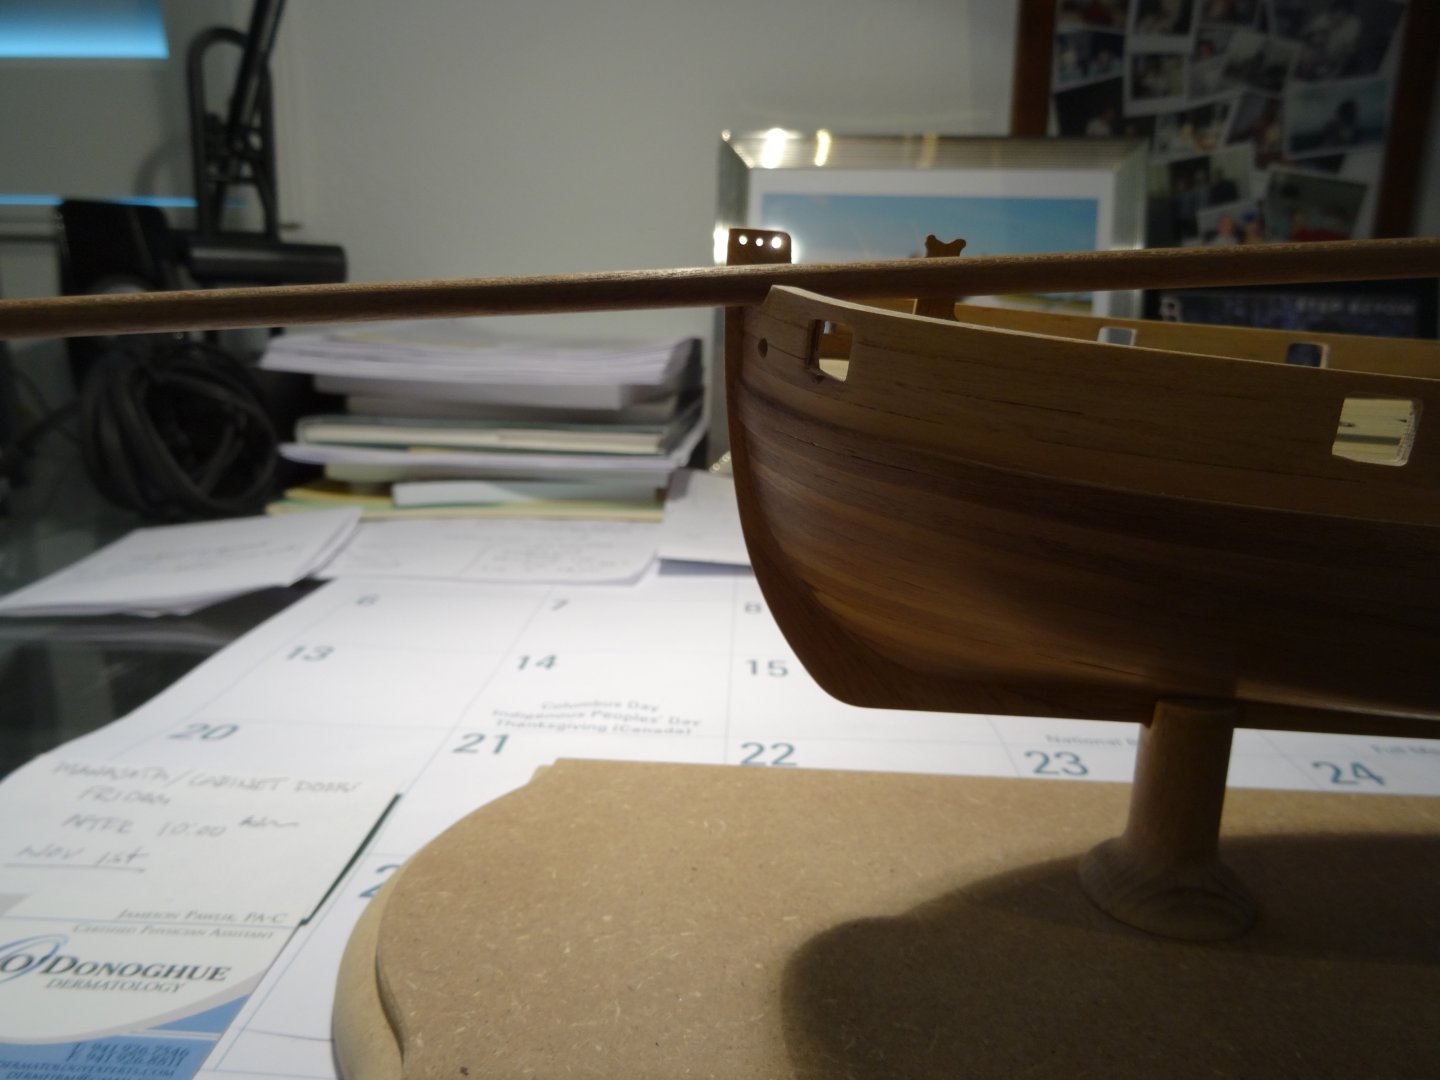
Thar she blows! An Easy mod to the Bowsprit support! By lowering the horizontal support, measuring from the bottom, 9mm up to the bottom first cut of new notches , ( included in that dimension, is the tab that fits into the deck ), I filled the original notches with the same wood from the laser cut sheet and cut the two new notches. Leaving the original Square hole to provide a top of the Bowsprit support. I had noticed in my searches for bowsprit supports, that a top support as such shown, wasn't uncommon, so it made no sense to remove it, also by leaving it, it adds an additional detail. Yet to be done will be to cut the taper into the dowel and drill a cross hole to pin the Bowsprit to the support frame. Shown temporarily assembled for illustration and now ready for glue. I'll drill the cross holes for a Bowsprit pin, thru the frame sides and Bowsprit, using a tooth pick dowel to secure it in place. By this simple mod, the original pieces could be retained, and achieve the proper angle for the bowsprit to follow.
- 39 replies
-
- 6
-
-
- Amati
- Victory Models
- (and 1 more)
-
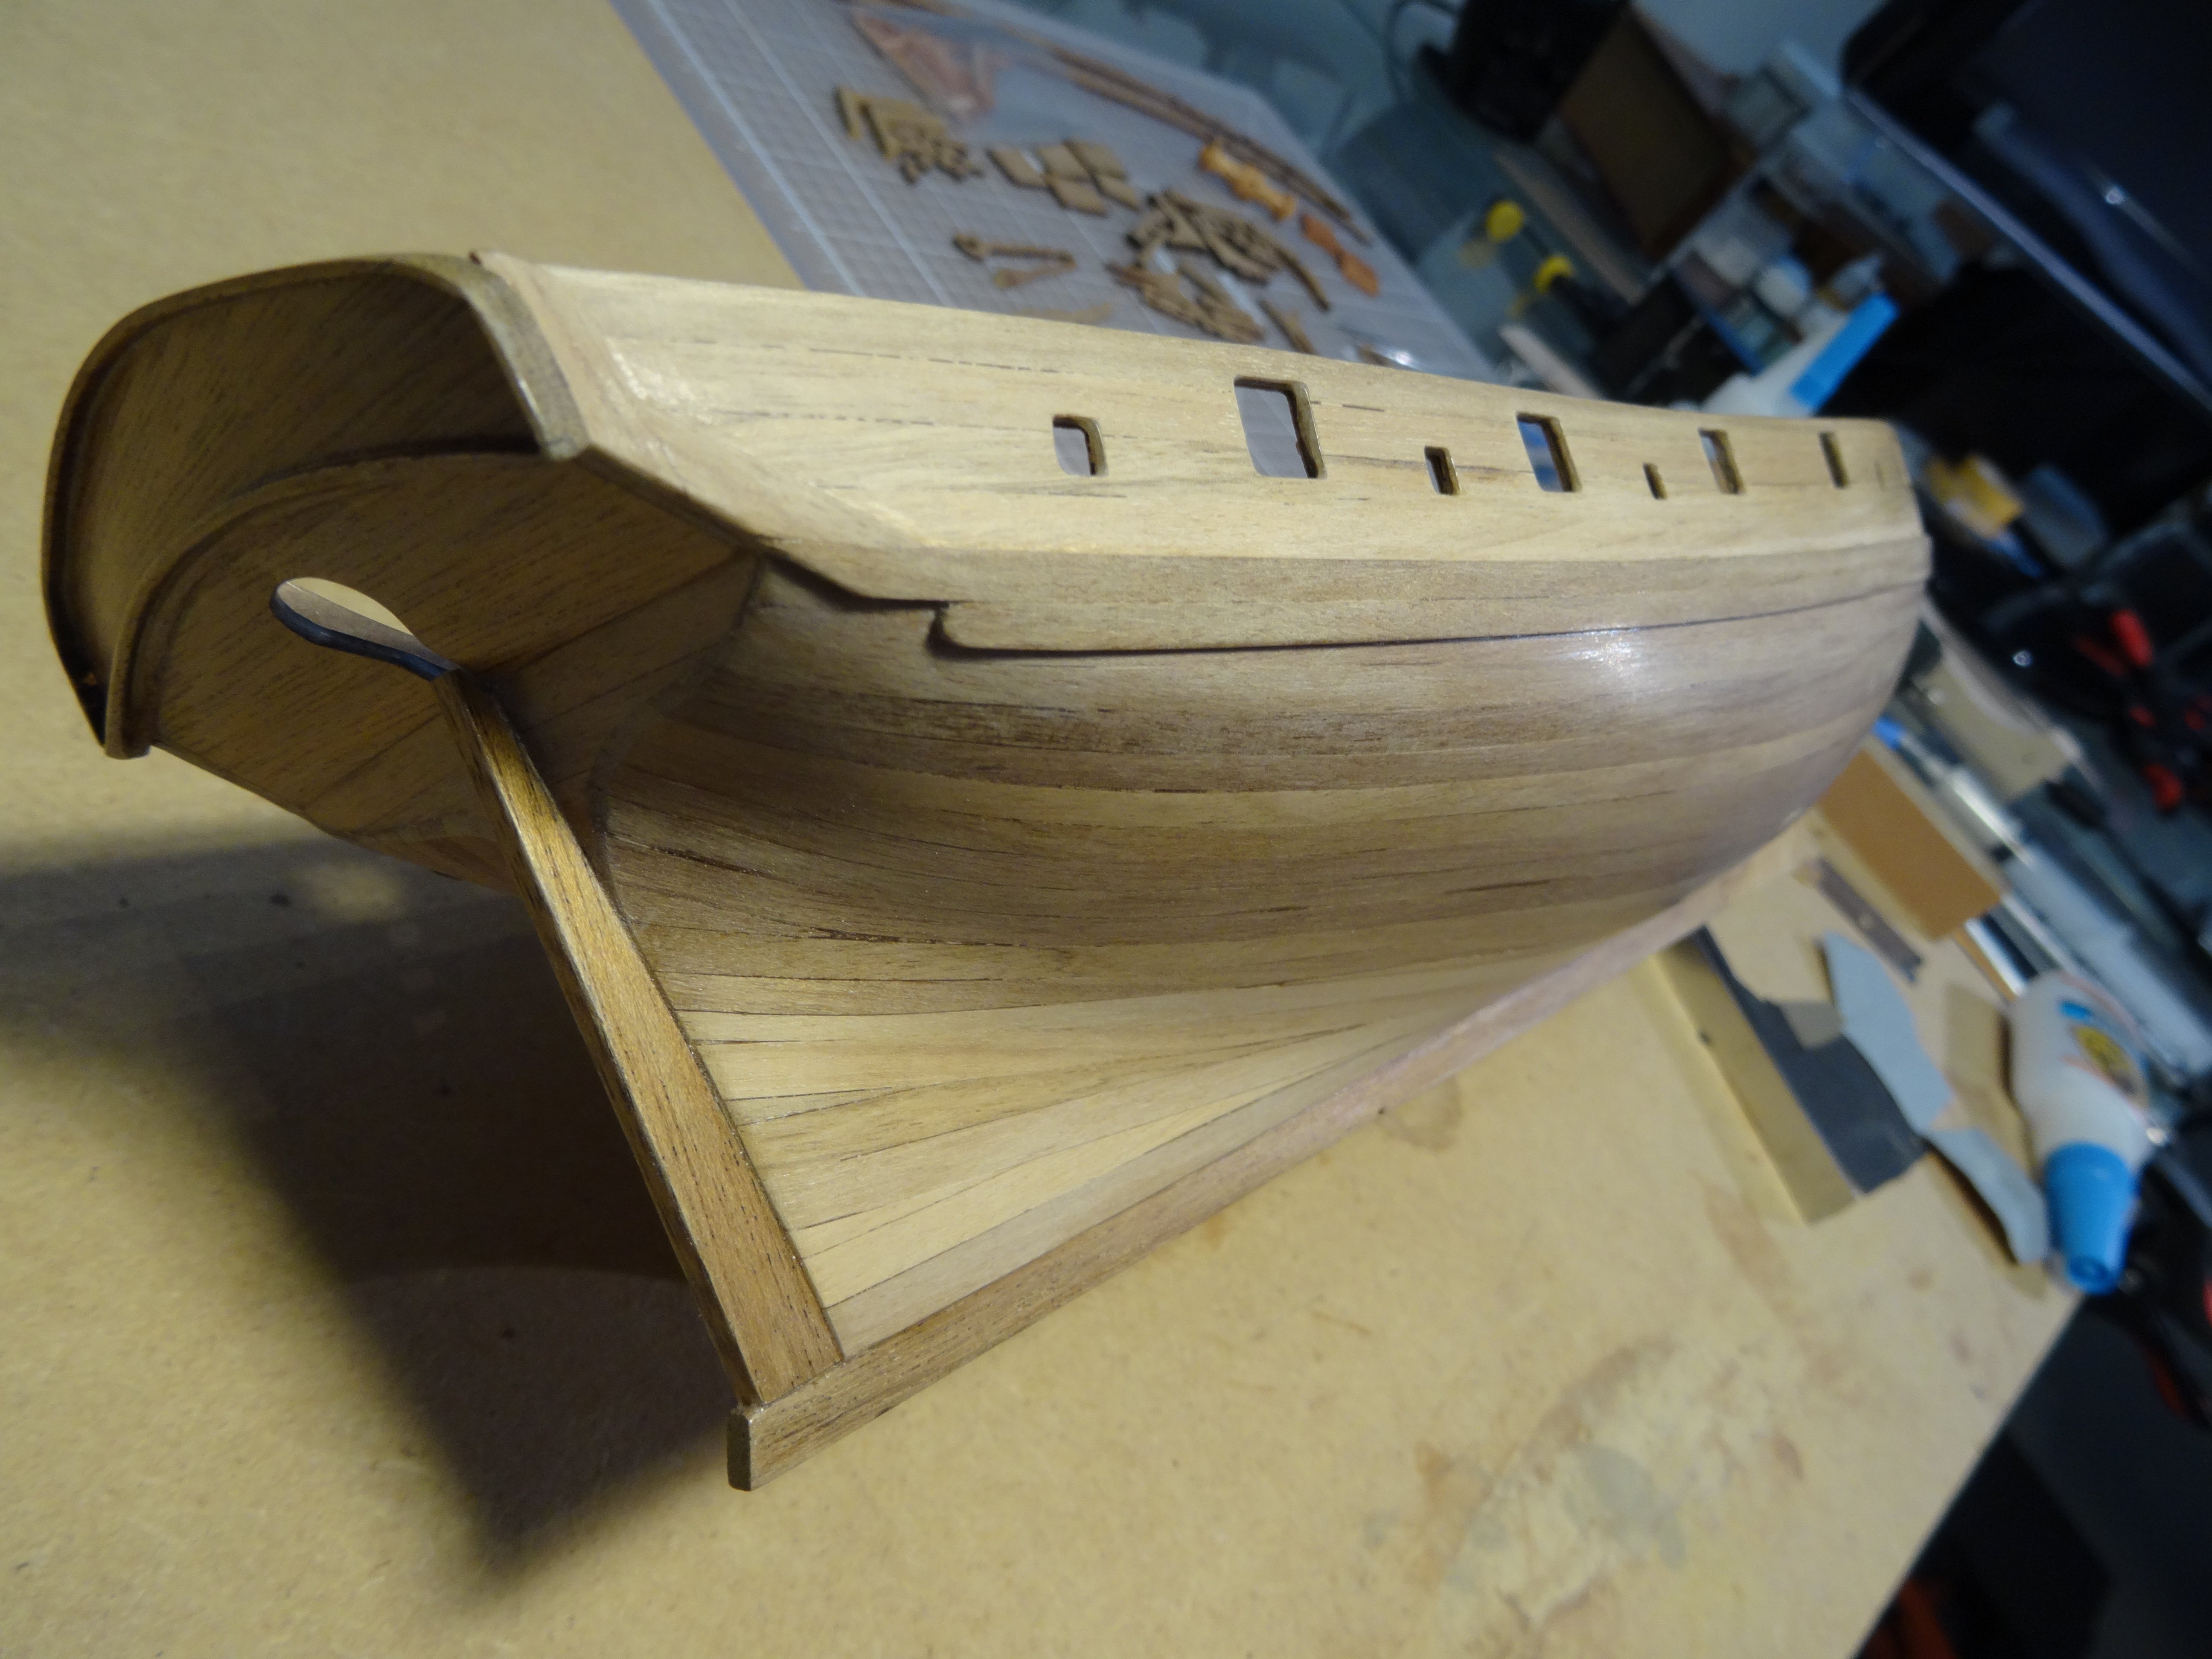
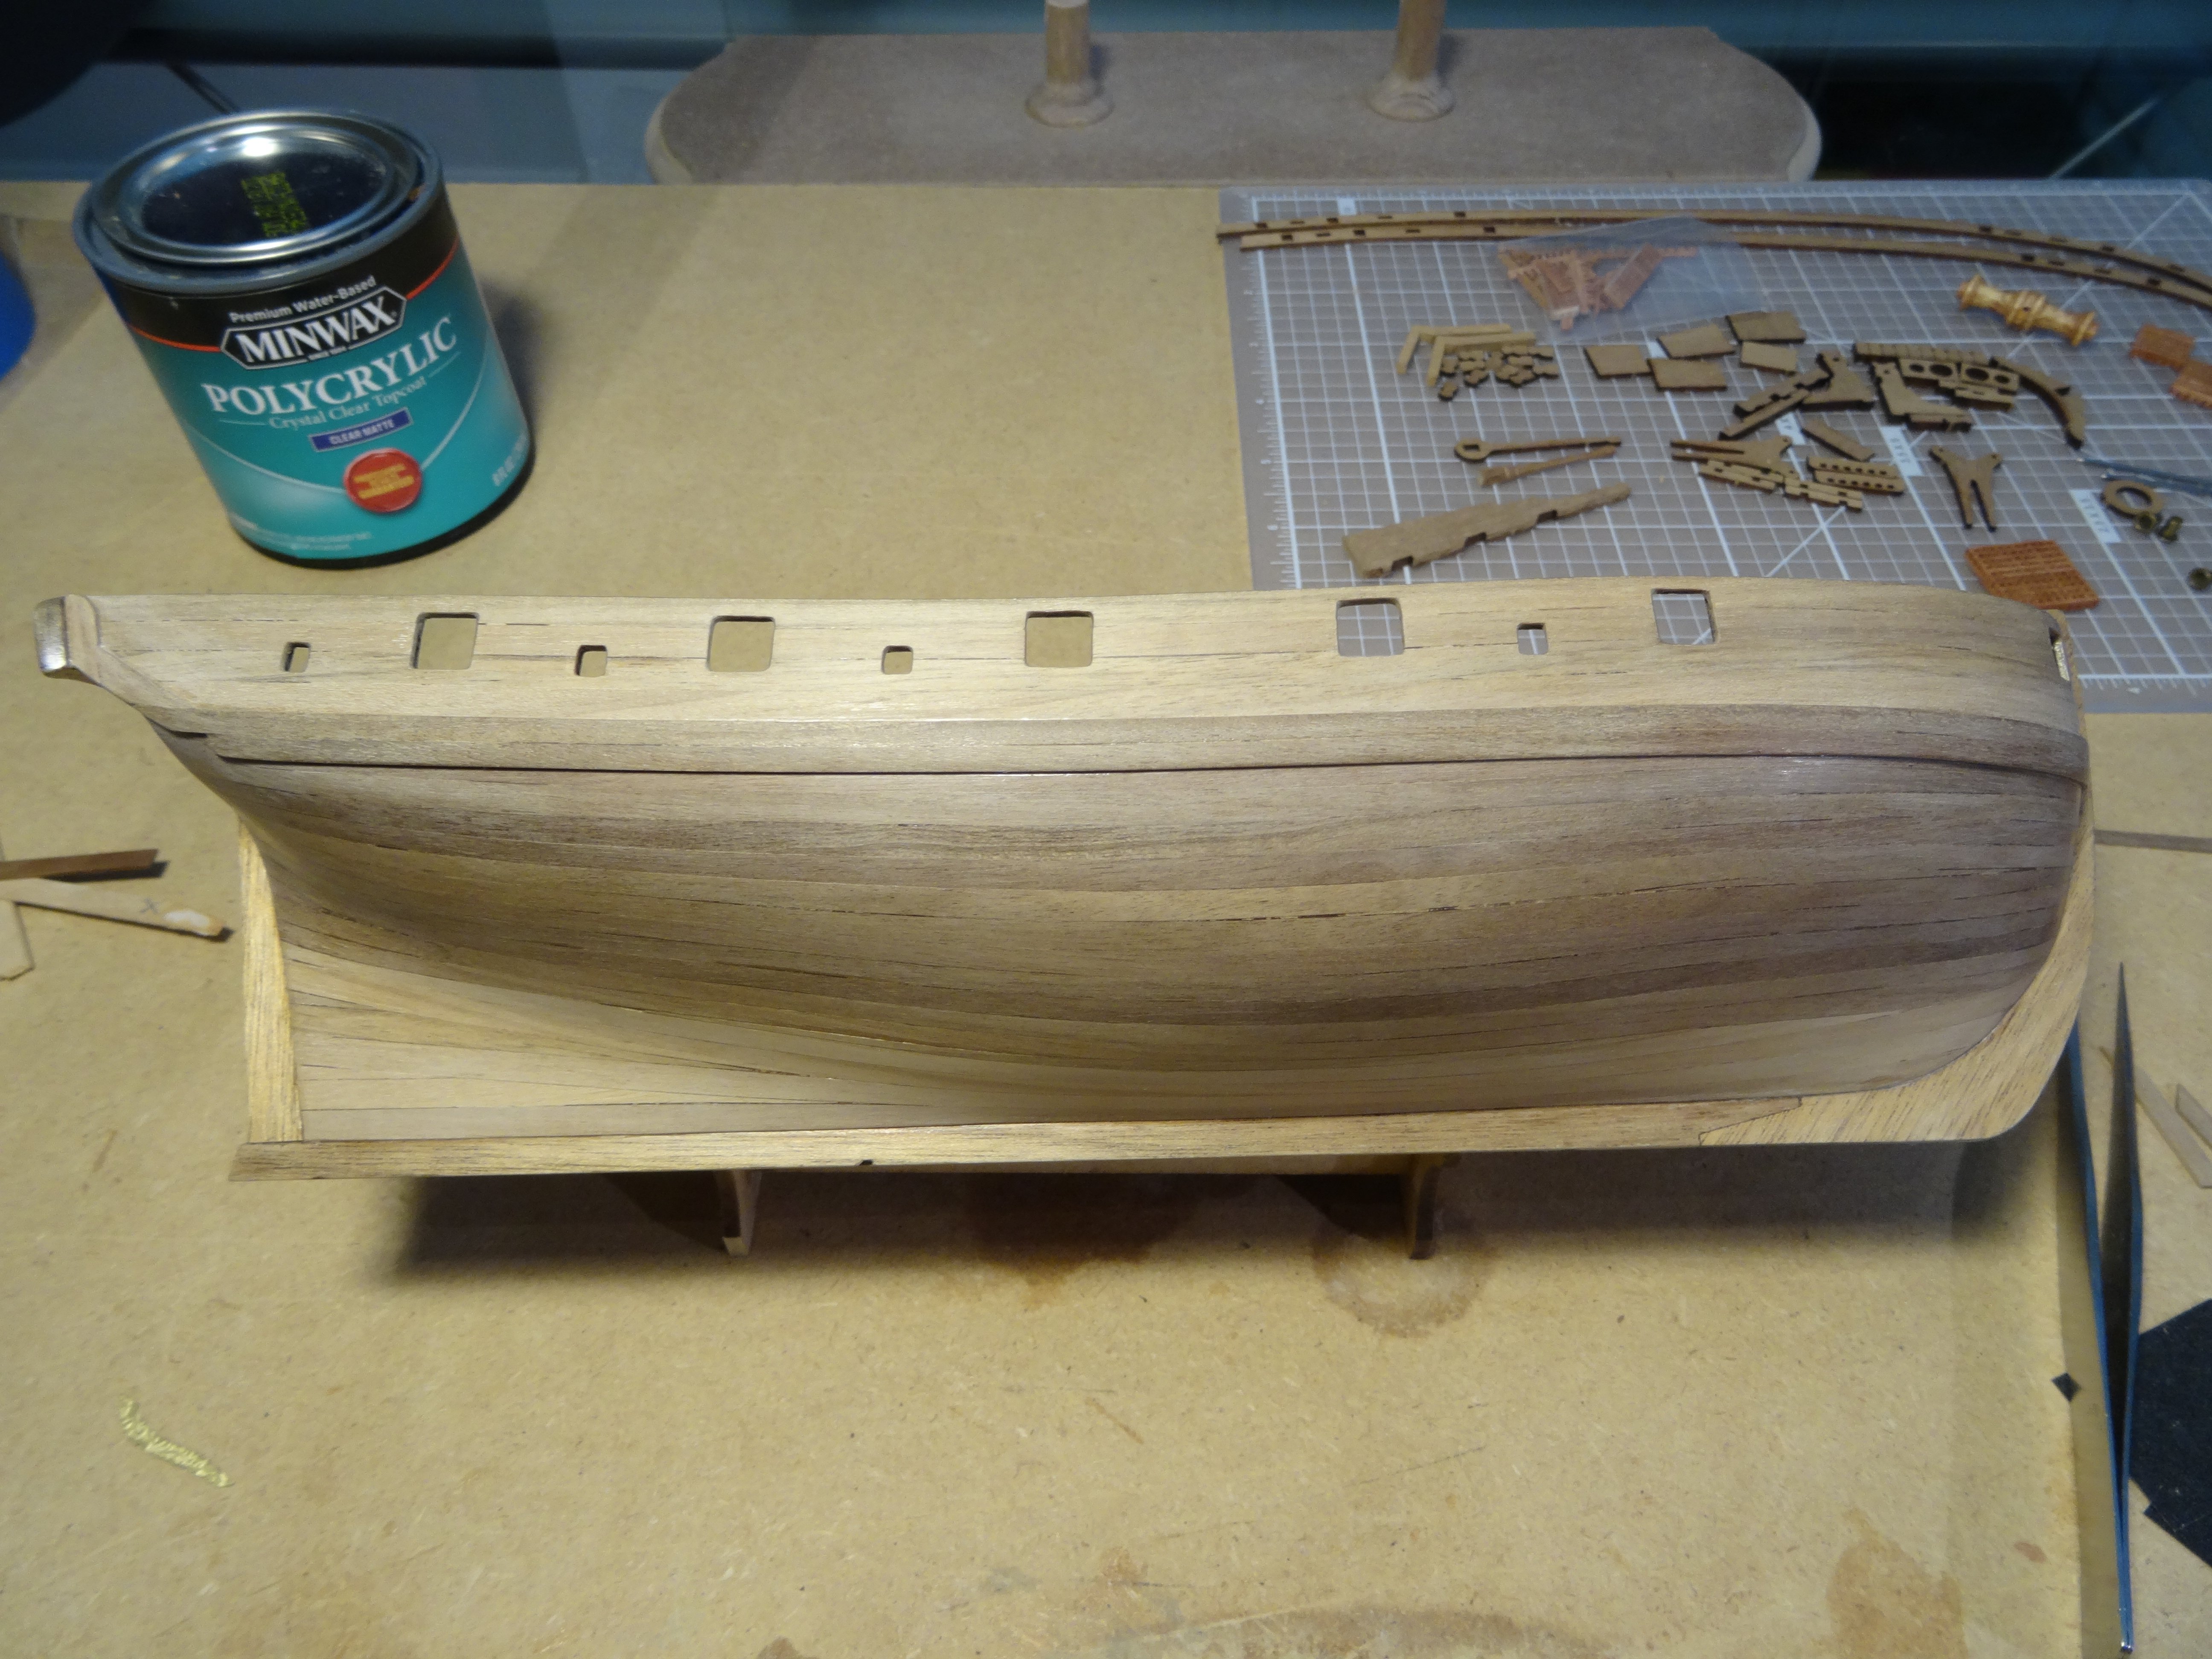
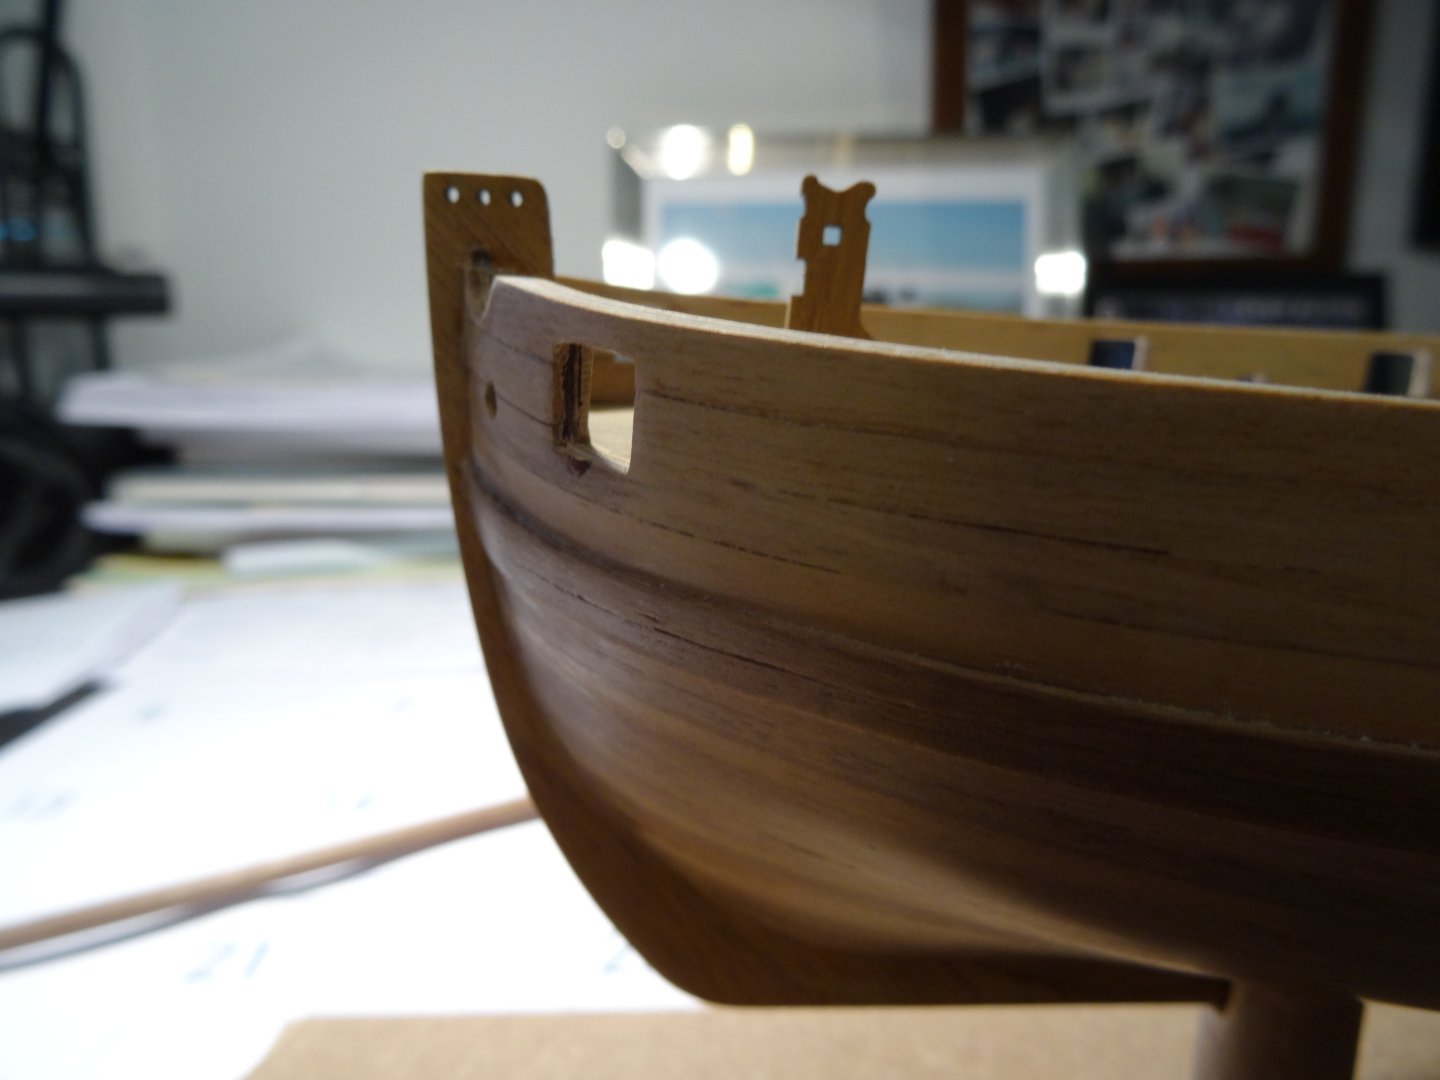
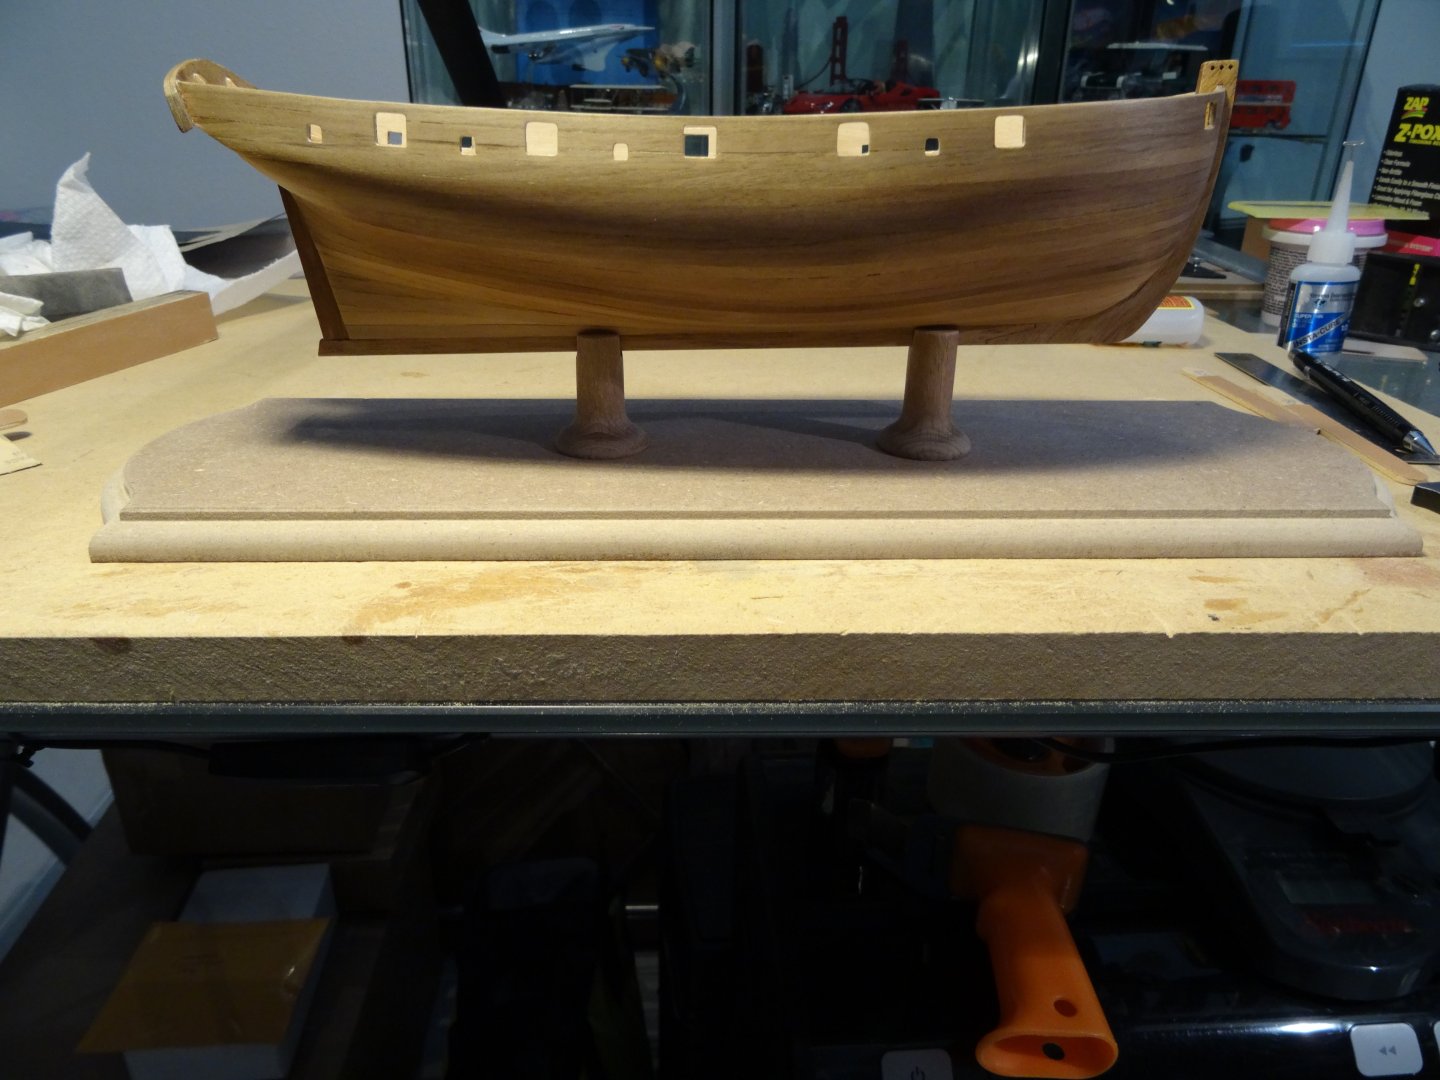
So, the first picture shows how high the bowsprit support post is to the Bulwark: but in addition to this is the square hole for a Square dowel to be inserted. If to use these stock part dimensions, the last picture is the result with the height pointing the bowsprit down. Now , I did file the recessed groove next to the bow stem, for the bowsprit, intentionally deeper than the MFG laser cut slot which exacerbates this bowsprit angle downward! I felt the bowsprit looked like it sat on top of the rail, like a TOP HAT!, so I made it deeper and had even considered deep enough to cover it with a re-mastered Breast Hook, that has to be made as the tapering to the breast hook received in the kit is much sharper than the Bluff Bow formed. My fault possible?, but I followed the bending to the T. So I believe it to be another error. I haven't done my mod yet, but I will share what I plan to do as I work it all out. Since this will be a painted piece on deck, it won't matter that Frankenstein lives underneath the paint. It will be like Bondo fixing a dented car! I am going to cut the posts, to align the holes with the proper angle to the bowsprit resting on the horizontal bracket that lies underneath. The pre-cut notches in the up-right posts, will be filled with wood and sanded smooth to surface heights and the new notches will be cut further down. Since the Square hole does not match any wood in the kit, I'll work my magic to fabricate a piece to fit. In my opinion, this area of assembly is a necessary total redo. Will post these changes as soon as they have been made.

- 39 replies
-
- 4
-
-
- Amati
- Victory Models
- (and 1 more)
-
Good day, y'all....just wanting to bring attention to a problem with the bowsprit brackets and breast hook of the Lady. The in board end of the bowsprit mounts to posts with a sq. wood pin thru the bowsprit into the support brackets. These brackets are too long and out of scale and the hole too high. This forces the bowsprit to point downwards rather than with a subtle few degree incline. Adjustments are needed before this part of the build is completed....more to follow!
- 39 replies
-
- 1
-
-
- Amati
- Victory Models
- (and 1 more)
-
Hi Dan, I just tried to share a posting with pictures of the bowsprit error and I have received an error from the web site and now unable to post anything! So I have to sort thru that! Caution, With the bowsprit deck bracket used, the bow sprit will point downwards...there needs to be a lot of adjustments. I would suggest I'd it is not too late , to hold off glueing the breast hook in place, as it may need to be cut to accept the bottom edge of the bowsprit.... I have half a foot out the door, but wanted to share this problem with you. Roger
- 87 replies
-
- 3
-
-
-
- Lady Nelson
- Amati
- (and 1 more)
-
Hi Dan, richening the deck color with coffee looks good. The color variations really draw the attention to the meticulous work....I'm sure by now, you have spotted a discrepancy of height difference, to support the butt end of the bow sprit to the rail. I'm modifying the provided parts to adjust it's height so that it projects the bow sprit at the proper angle to the water line. Relatively simple fix if to catch ahead of time.
- 87 replies
-
- 2
-
-
-
- Lady Nelson
- Amati
- (and 1 more)
-
Andrew; Really challenging work well done! After my first pill, I can really appreciate how well you've done the planking. Those curves are like hair pin curves, my God, what an effort to turn out so well! Best Regards, Roger
- 35 replies
-
- 1
-
-
- vanguard models
- Adder
- (and 2 more)
-
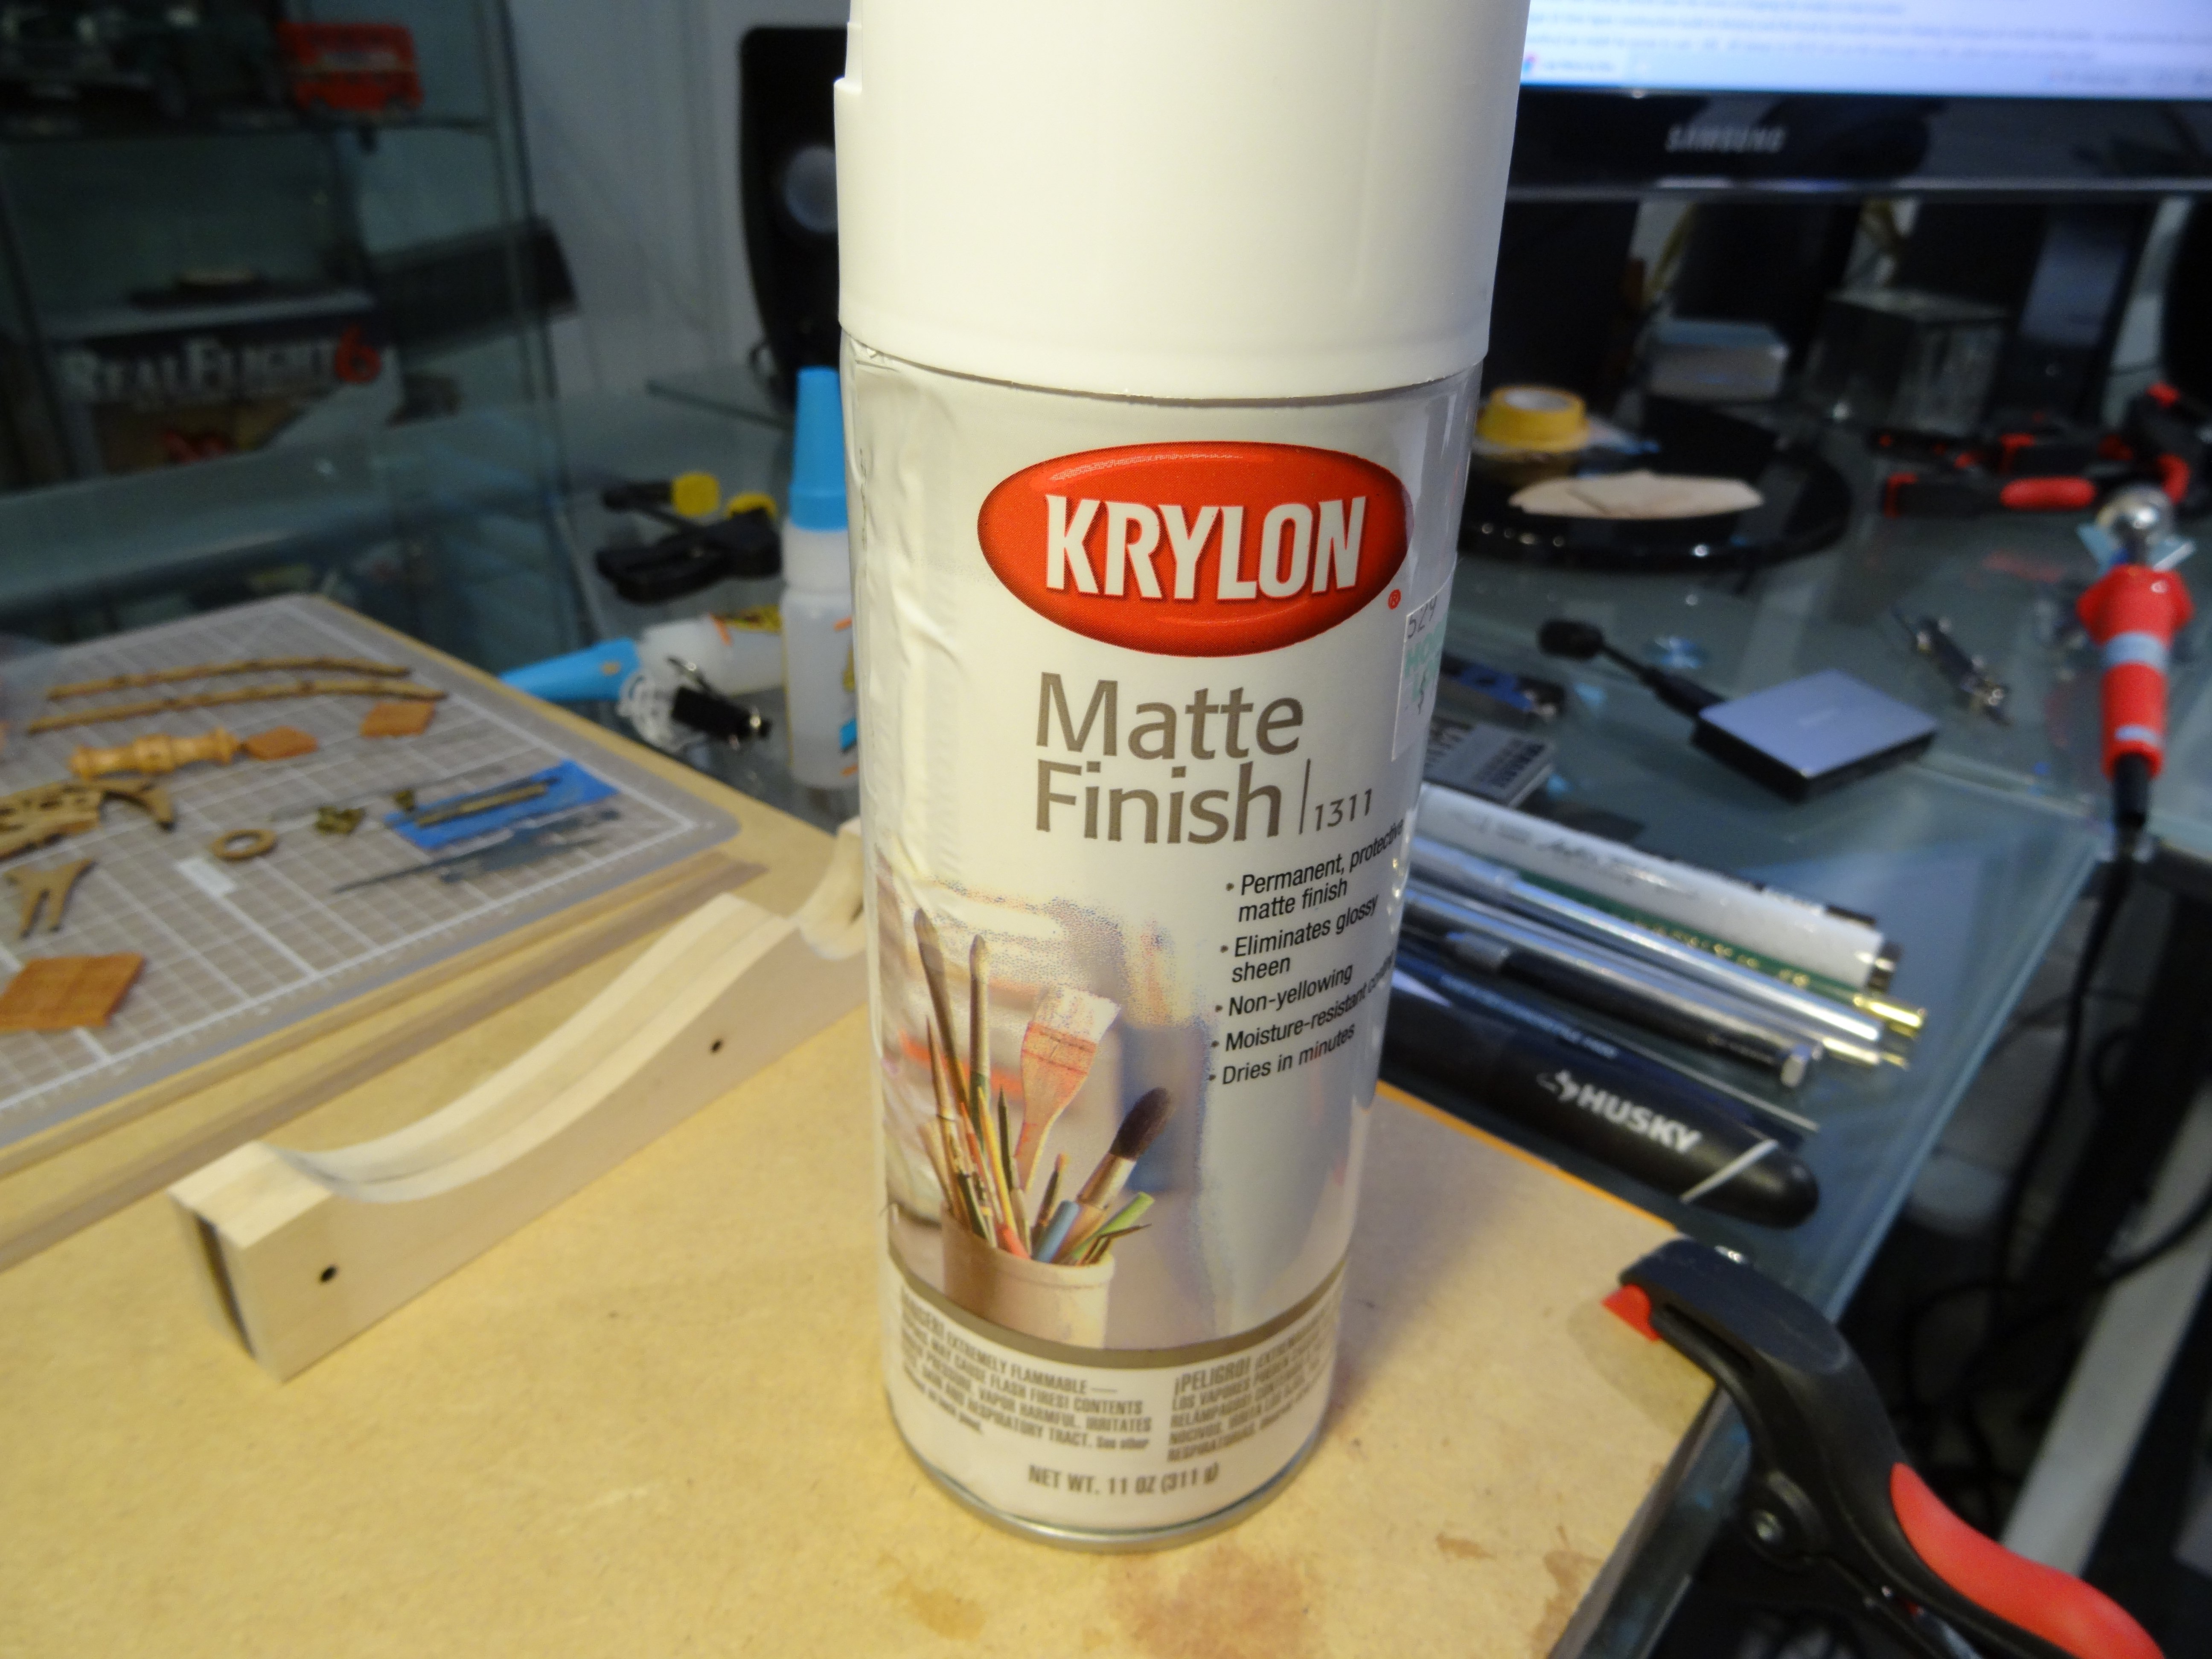
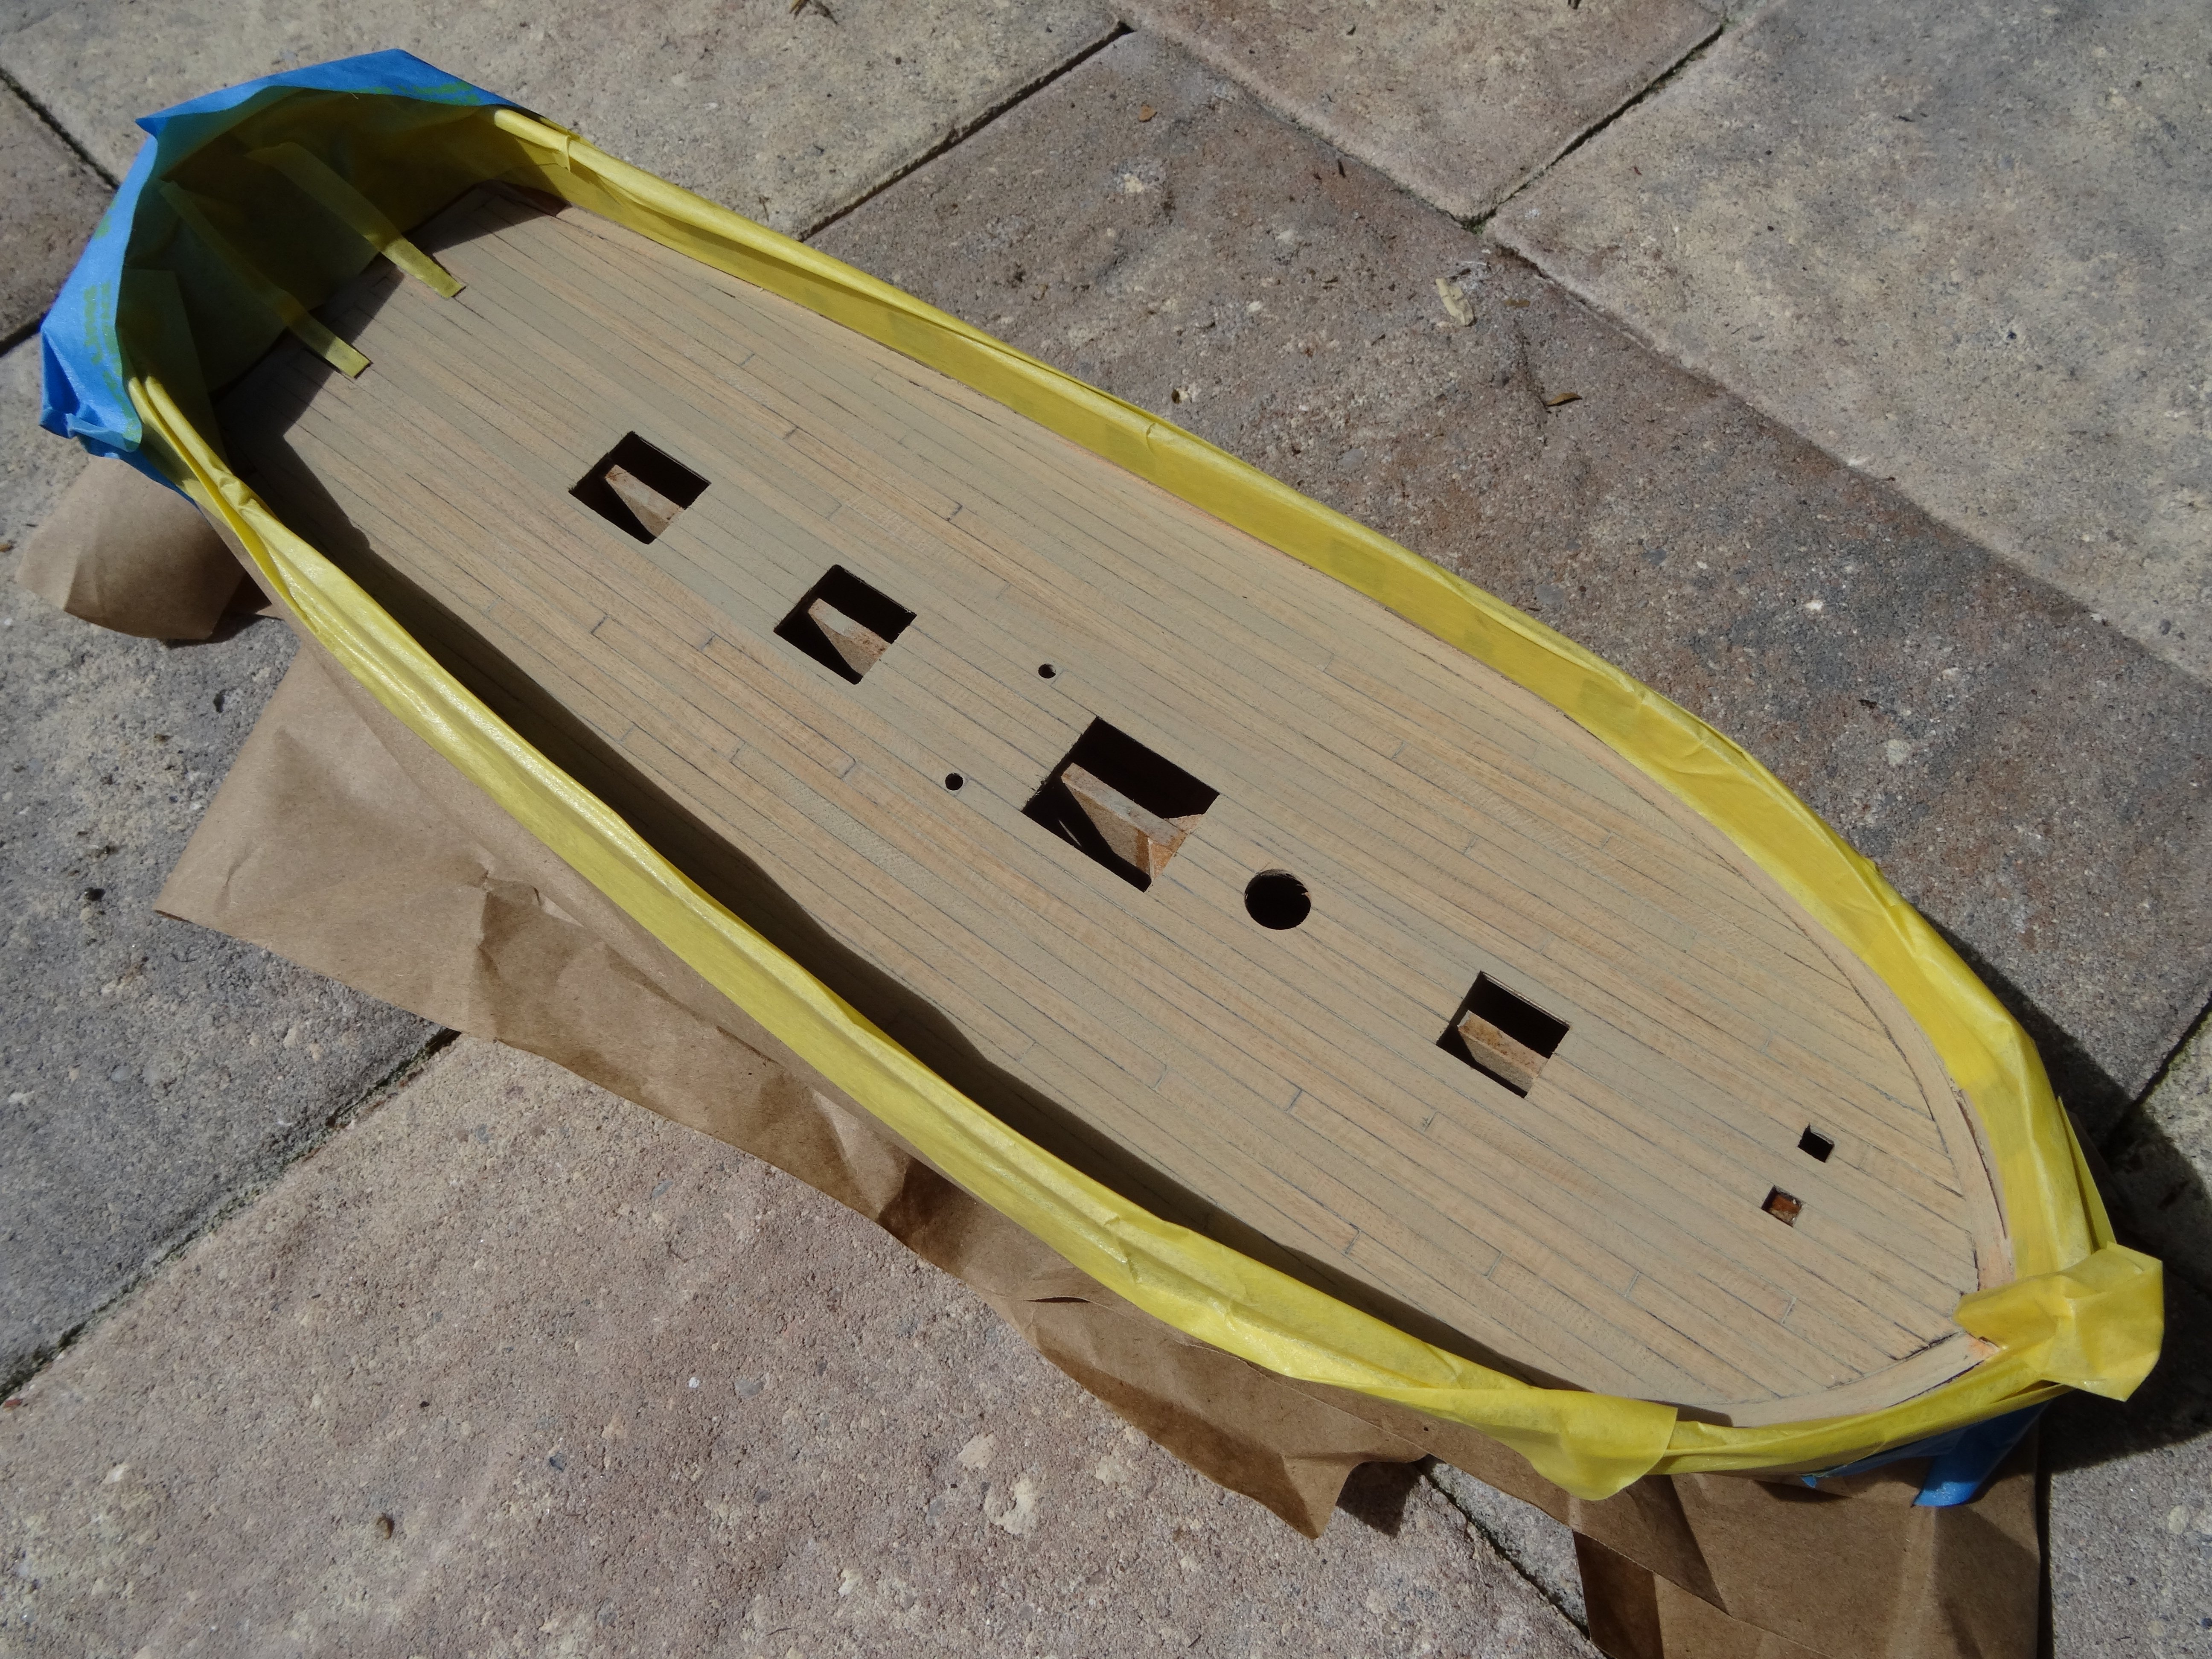
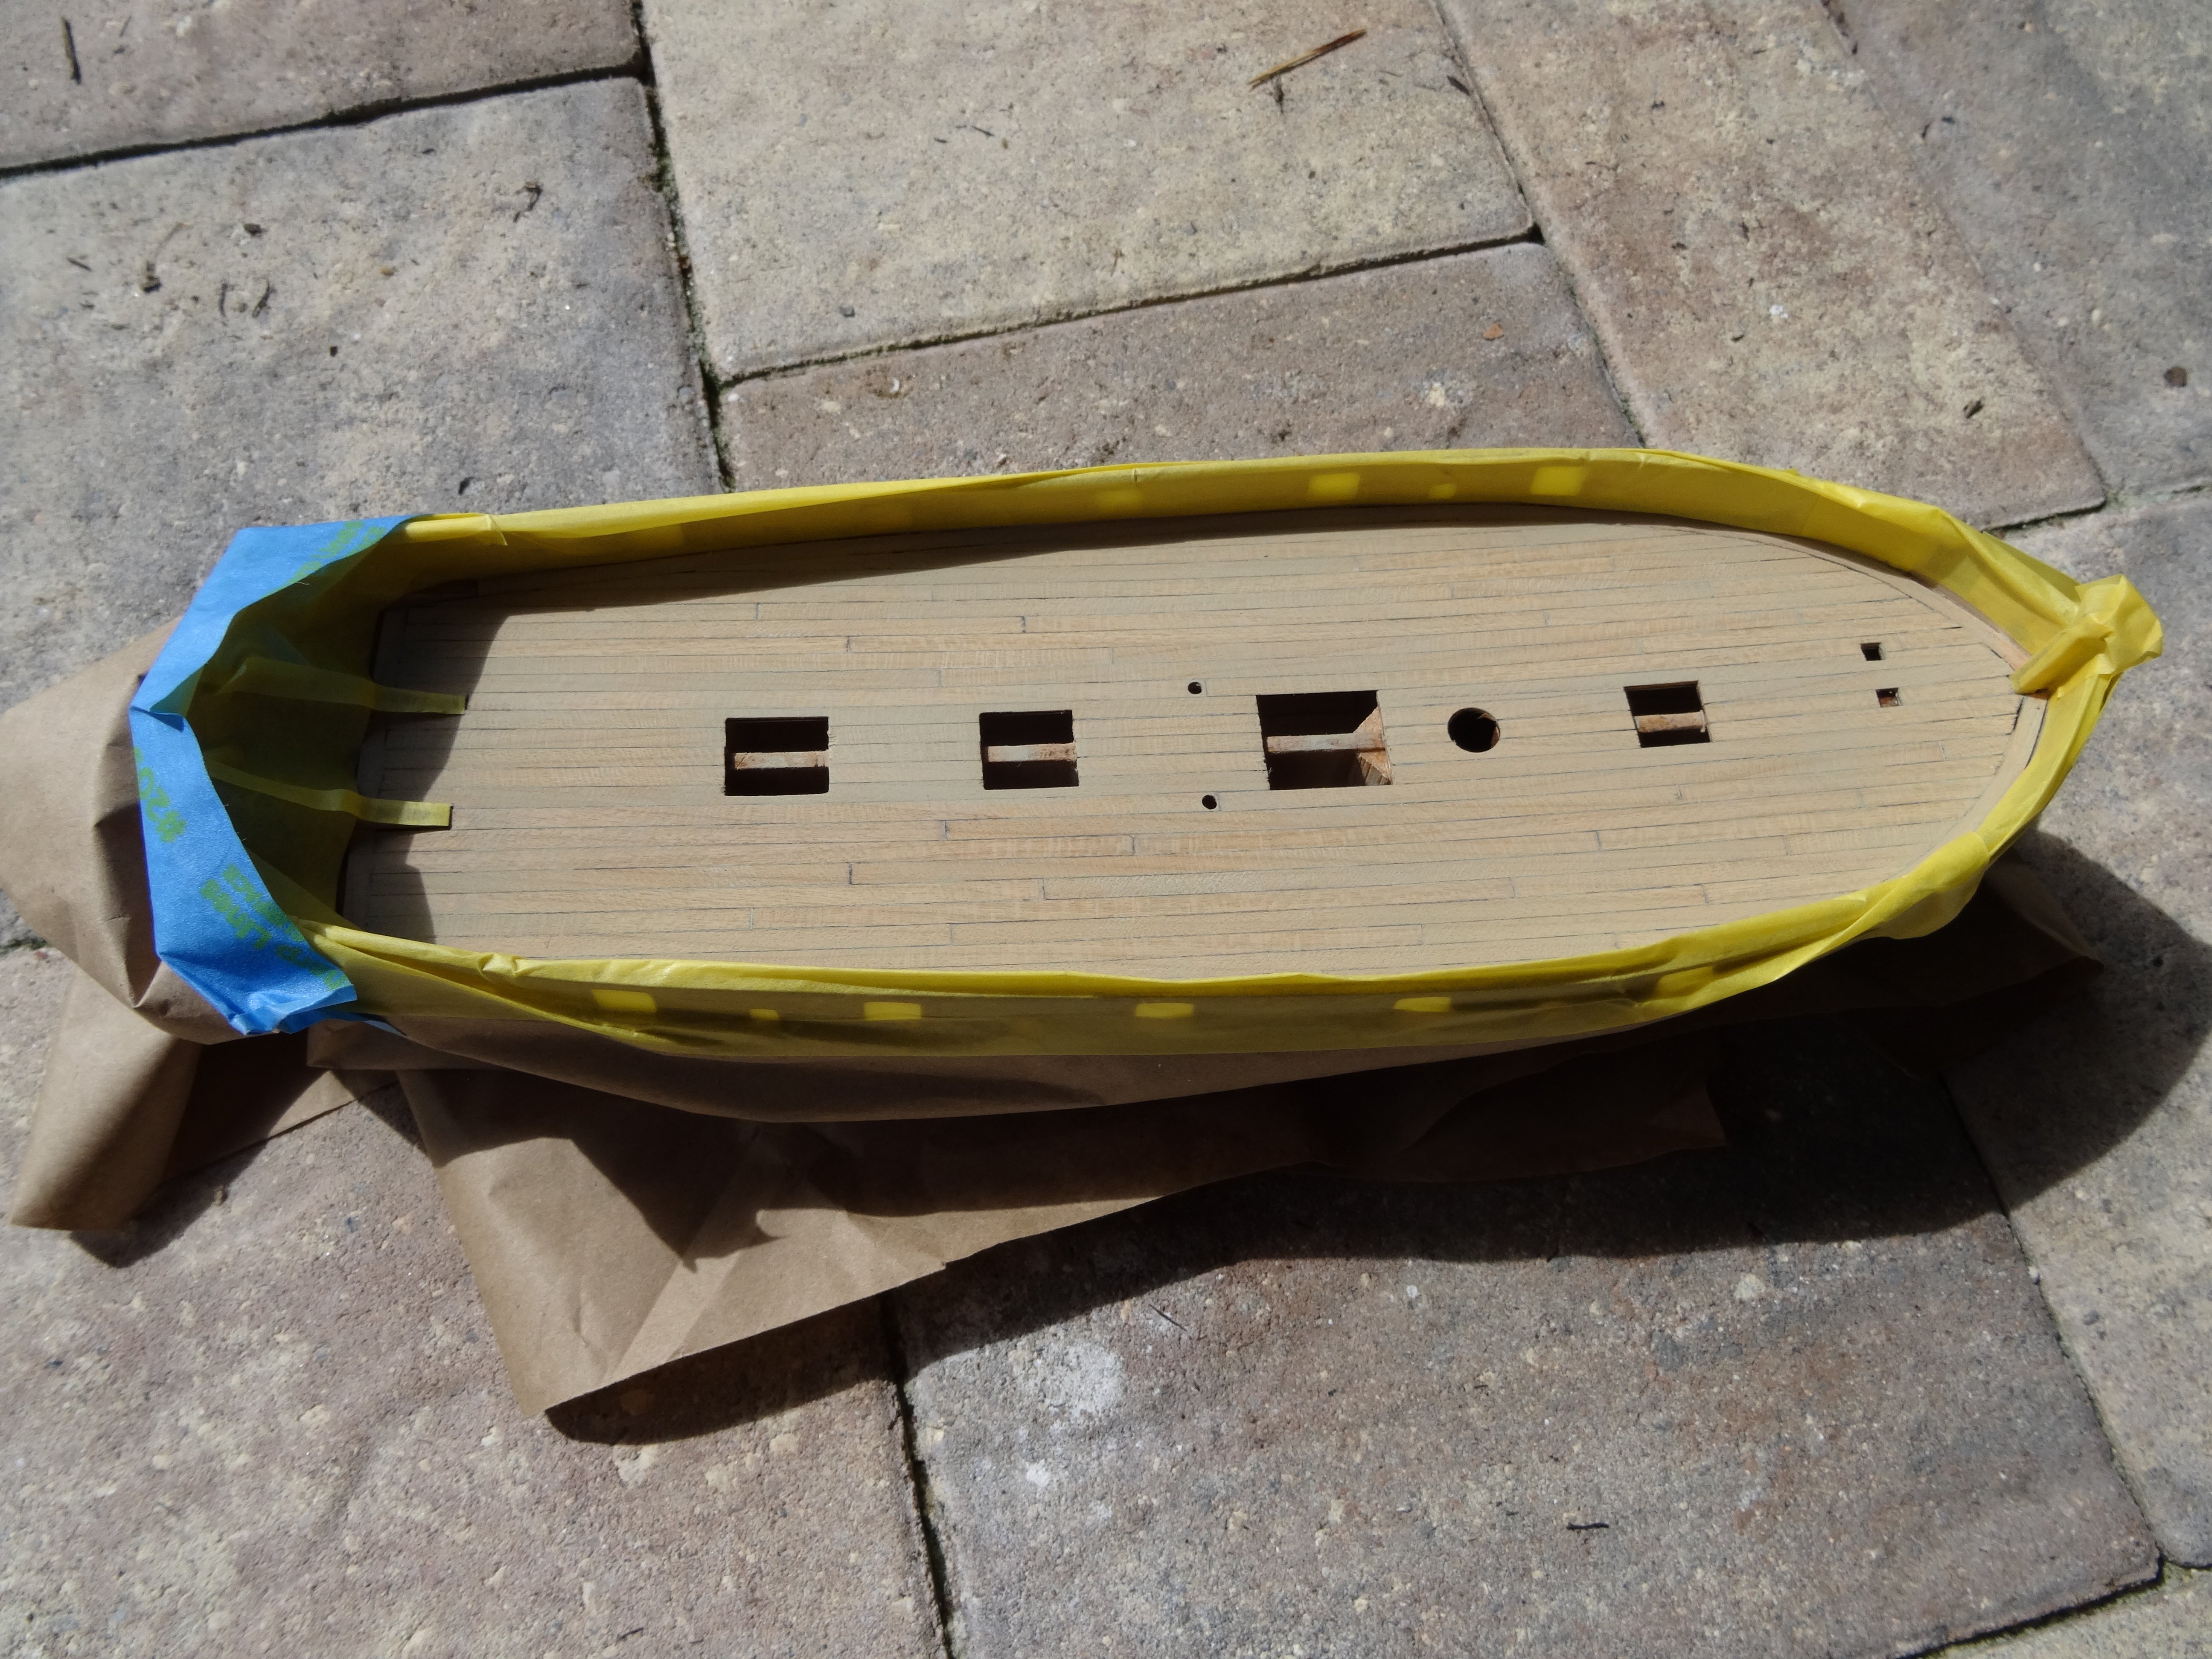
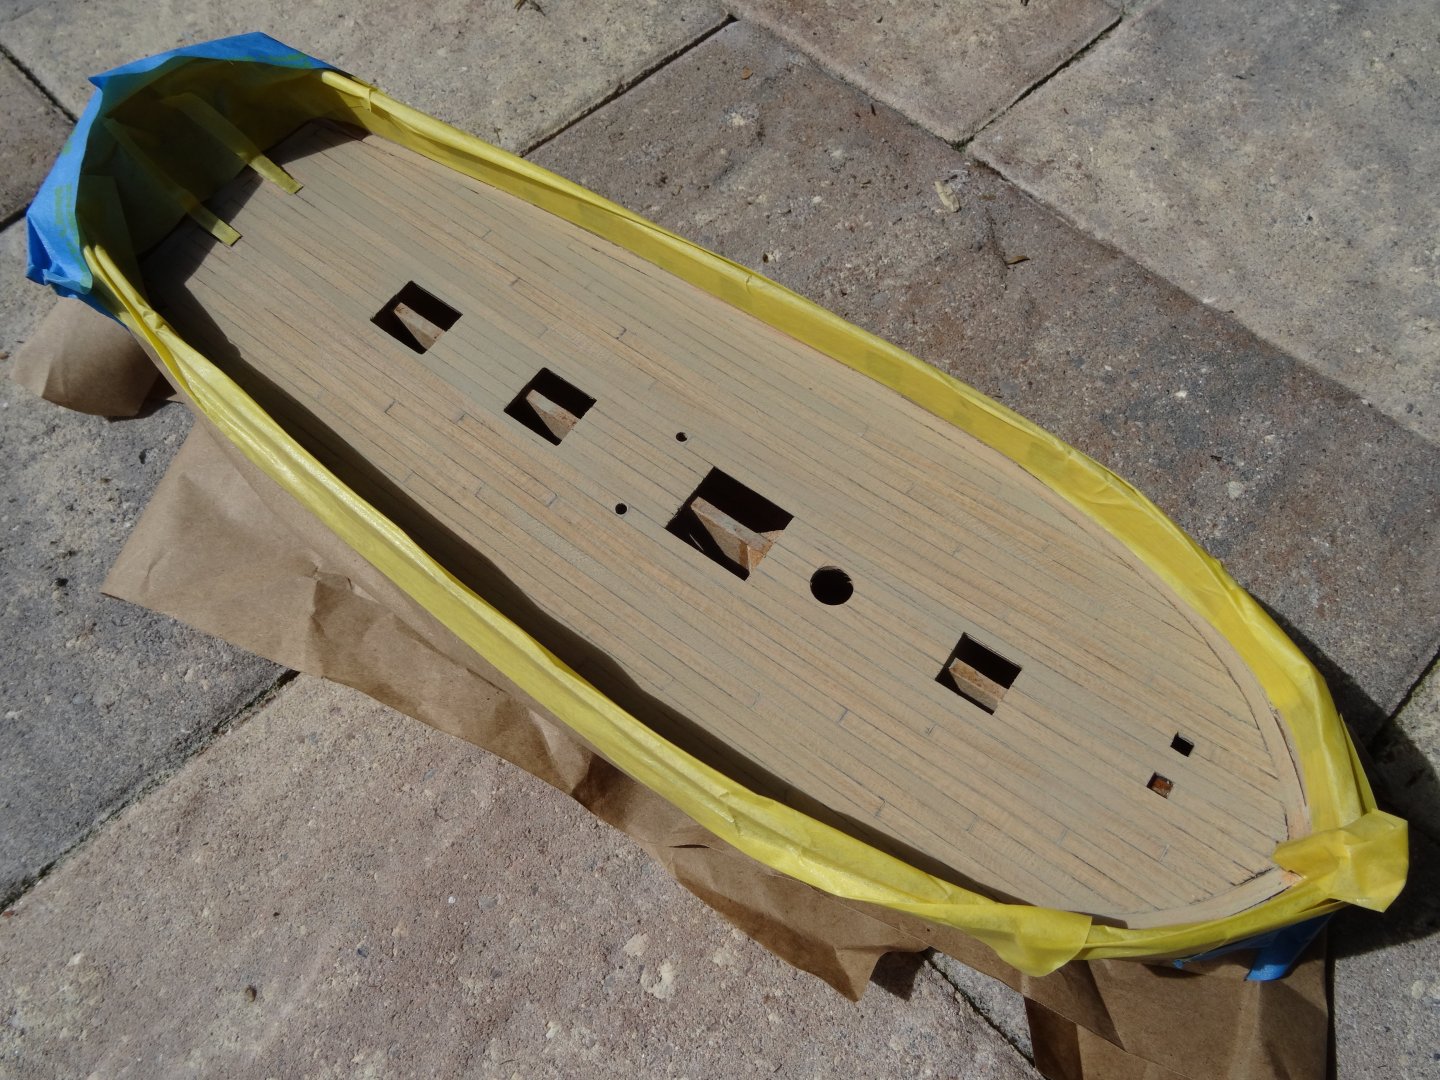
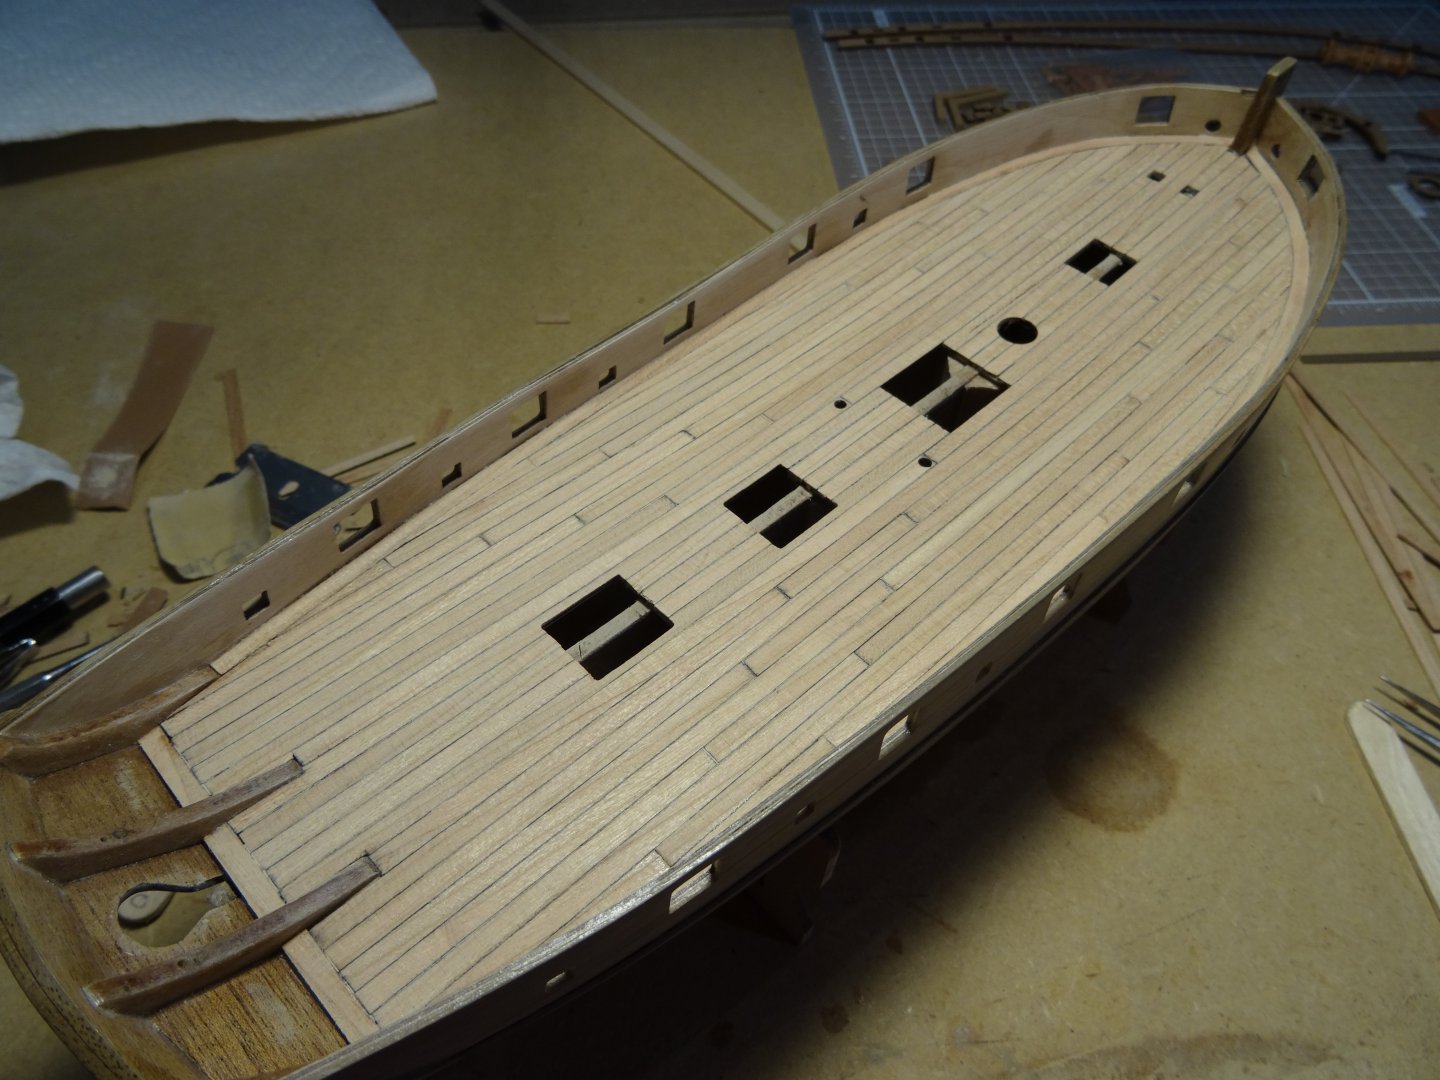
Well' its mid day here in Florida and I just sprayed the deck with a Non-yellowing, Krylon Brand, Matt Finish. Having used this product before, I like that it does not change the color or raw finish in any way! Dries in minutes! Todays picture is outside, under natural daylight, rather than incandescent and LED influence that I have in my office as earlier posted.. Even in the light of day, color is influenced, but I wanted to share what my eye sees outside in natural light. Computer monitor screens and settings will have a little less influence on what is perceived as the real way this wash has turned out. Thanks to all who have given their thumbs up and positive feedback, it is so much appreciated, while experimenting on new skills! Best Regards, Roger


- 39 replies
-
- 3
-
-
- Amati
- Victory Models
- (and 1 more)
-
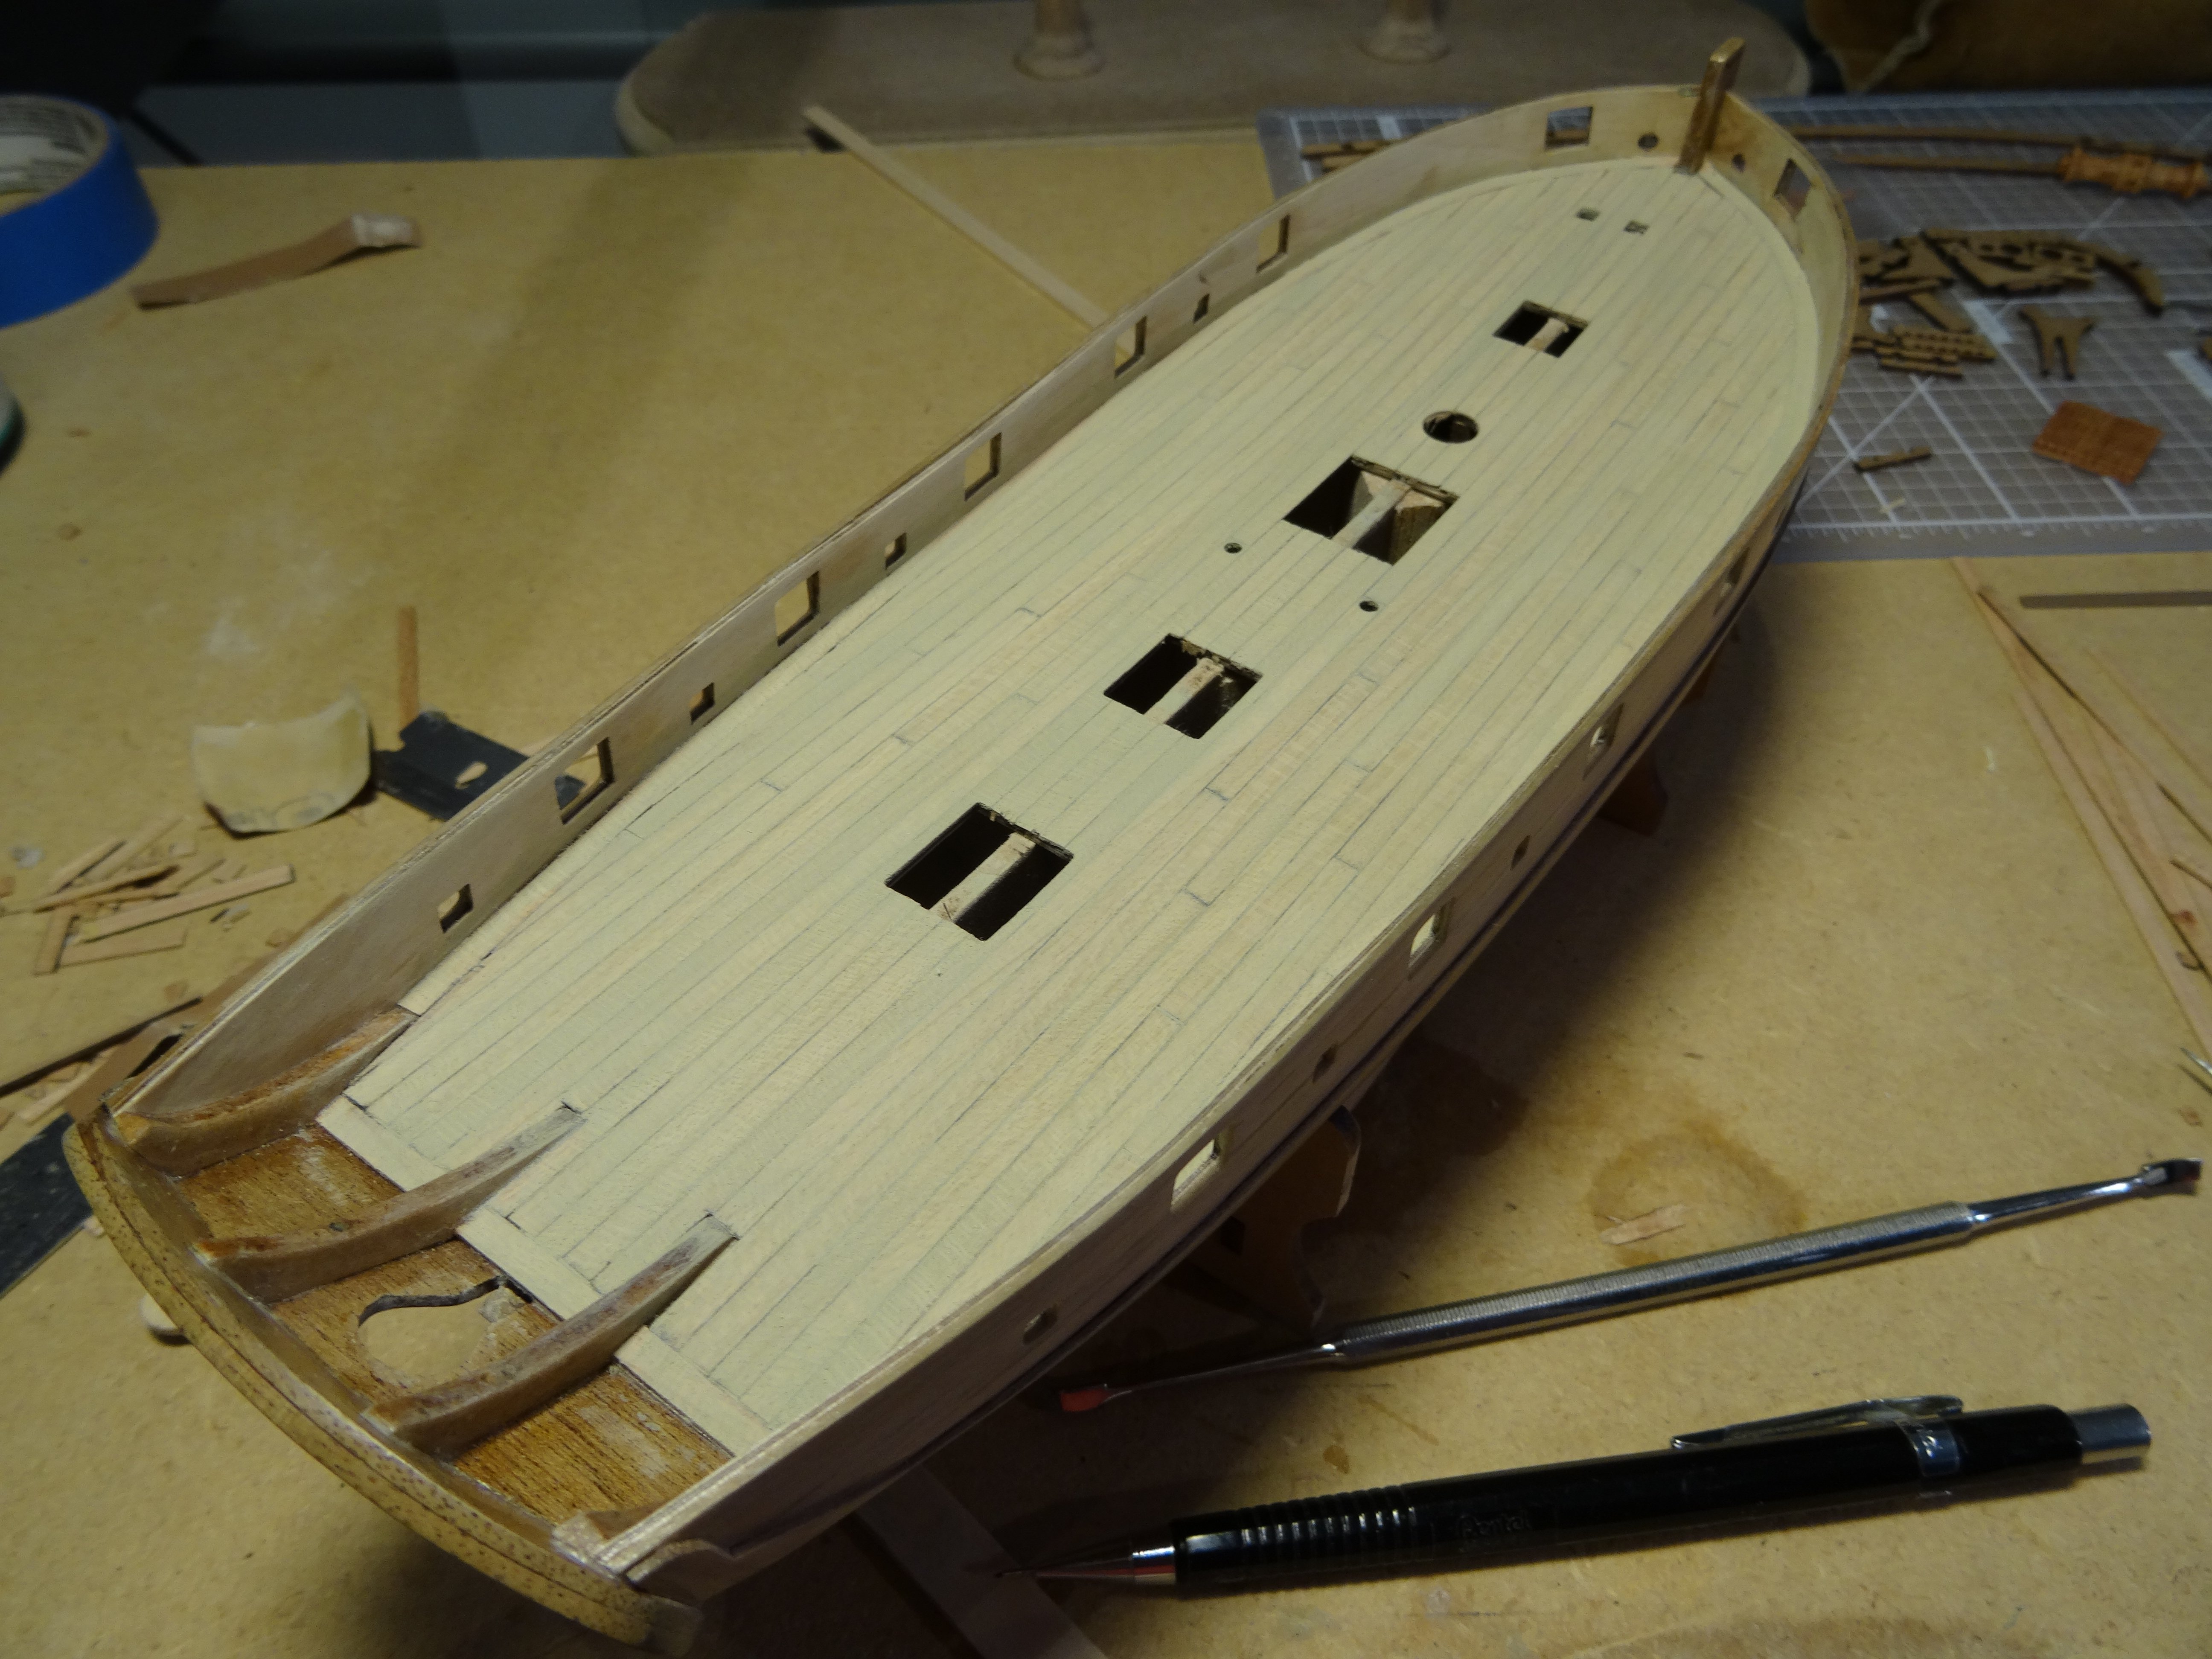
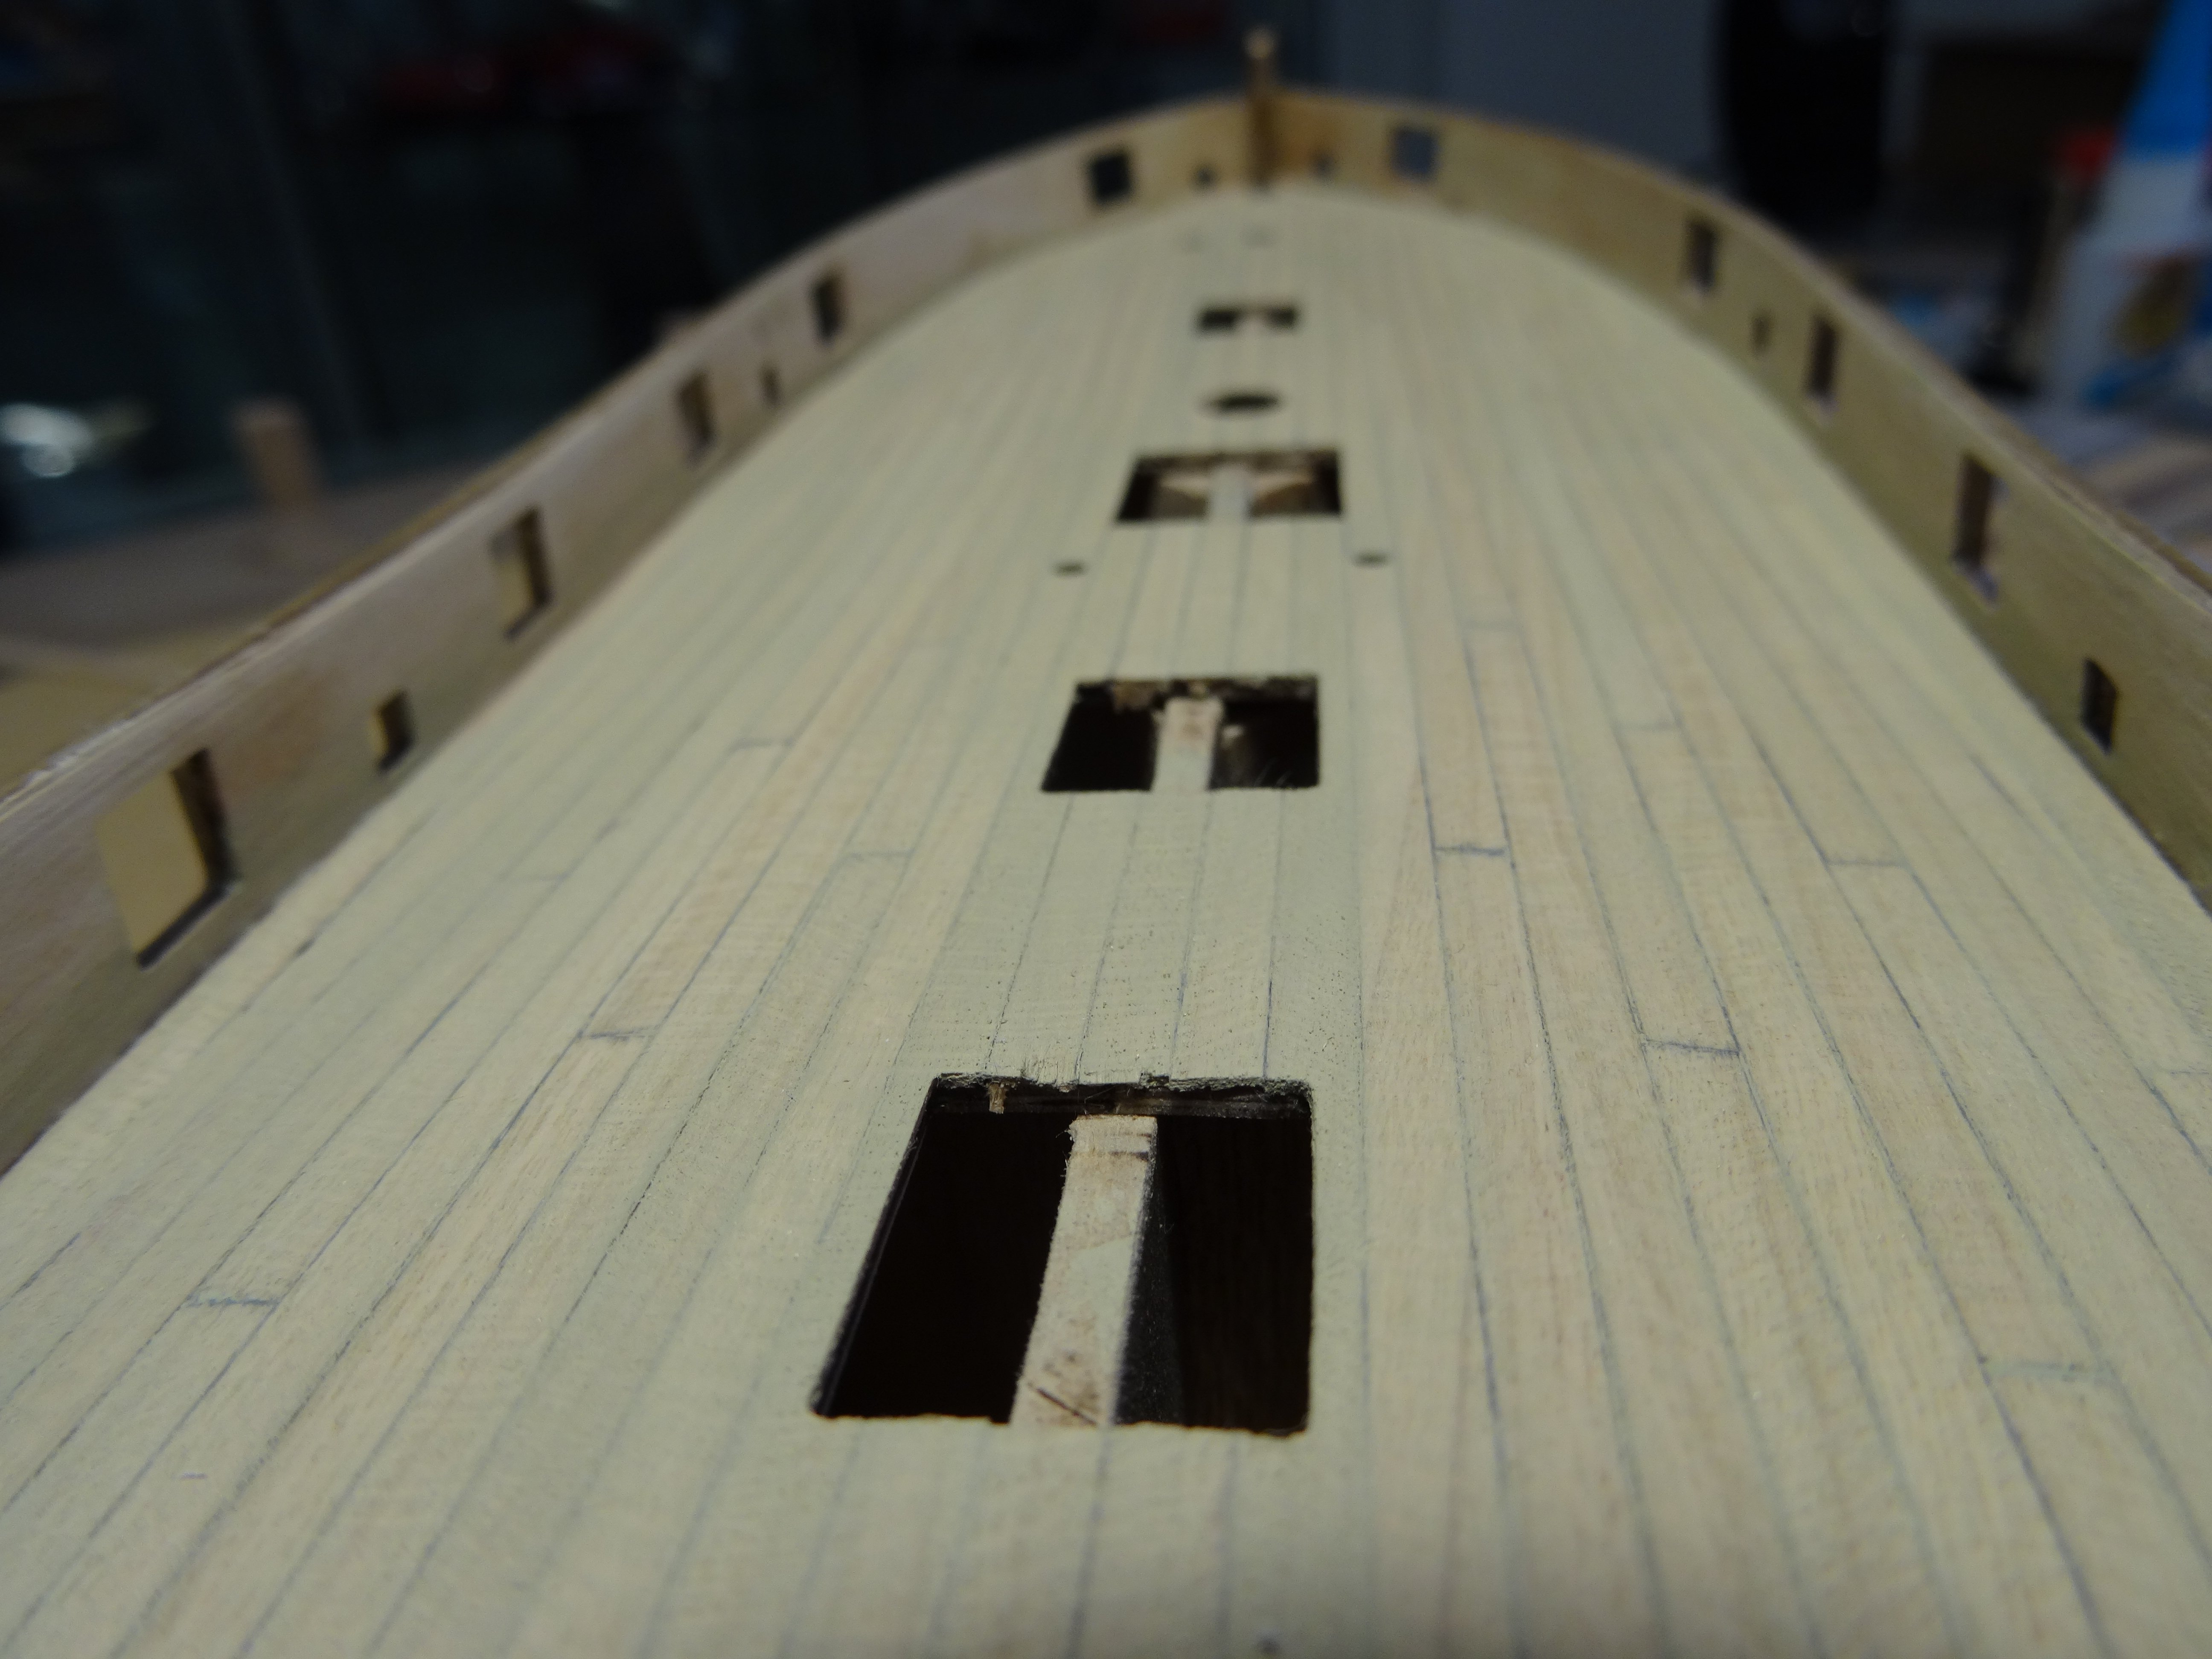
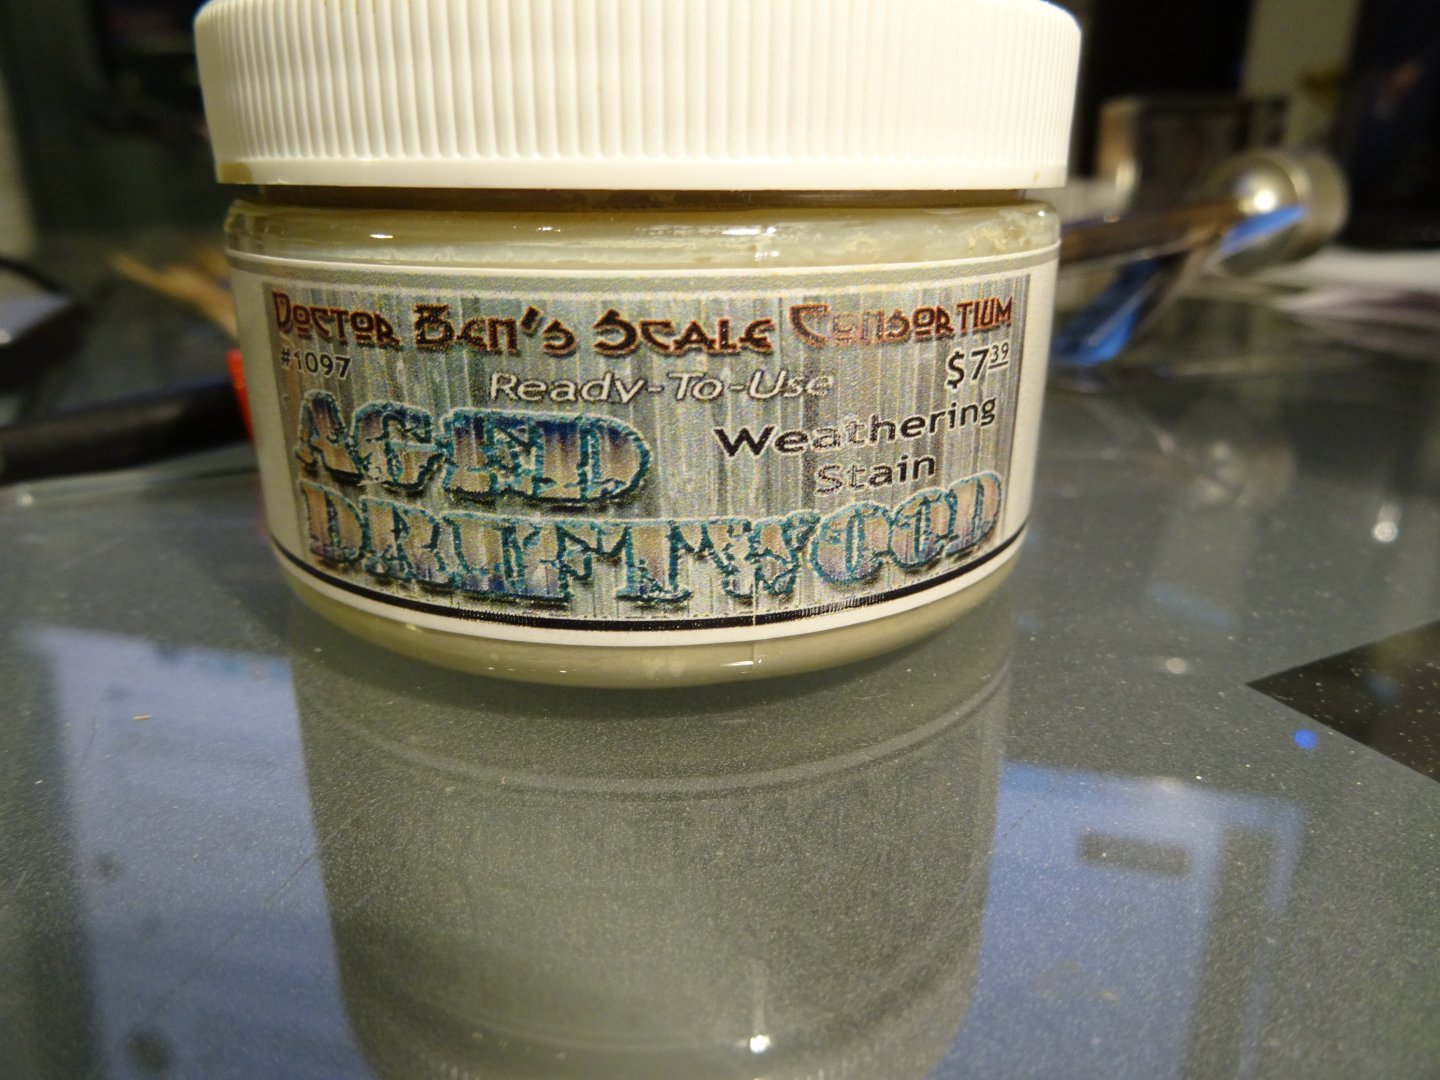
Well, I finally got there and the decking is done! Hu Raah! It was a lot easier to do than I had put in my mind it would become, partly because I was really thinking beyond simplicity and overwhelming my first time project with possible detail. I just decided I wouldn't do it. At this scale, Just too small to fuss with, besides, I feel, there'll be plenty of eye candy when all is said and done and my skill level just isn't there yet! I have been thinking to add a weathered look to the deck of my Lady. and used DR. Bens Weathering stain, to achieve the look pictured. Basically one and one half coats. It is a water based stain WASH not a stain! The color I used is called AGED DRIFTWOOD. I'm going to seal this final finish with a Matt Finish KRYLON rattle can spray paint, found in the art stores, like Hobby Lobby. Dr. Ben's is a product You'll find Model Railroader's use in the Diorama, to include buildings, barns, signs and fence about the track layout. Pretty easy to control the effects! I used a very fine camel hair 1" paint brush to apply it. If I felt too much was applied, I simply wiped it off, or applied it again, for the look I was going for and did a lot of control of color depth with a water dampened cloth and re- application if wanted. For a first time use, I'm very pleased with the product and for the look I had hoped to achieve. By the time I finish the deck furniture, rugs carpet, place matts and lighting : ) Oh and the cannons! I look forward to it's variation and completed decking effect.


- 39 replies
-
- 11
-
-

-
- Amati
- Victory Models
- (and 1 more)
-
Hi Dan, The framed Gun Ports is a nice ad on, Looks good with a sharp corner! I may have to copy that! Do you charge royalties?
-
Crisp! So very nicely done! Best Regards, Roger
-
Good Morning Dan, Well, there is no reason to think anything other than, how well she looks! Great Job! Just a thought on the Wale terminating at the stern: When I changed mine, it was a pre- conceived plan to alter and adjust, but now with yours in place, you could layer the end, closest to the stern, with a simple design, open relief design of wood, to equal the heights, if to use the kit provided shaped wood. Gosh, You'll soon be placing your deck furniture!
- 87 replies
-
- 1
-
-
- Lady Nelson
- Amati
- (and 1 more)
-
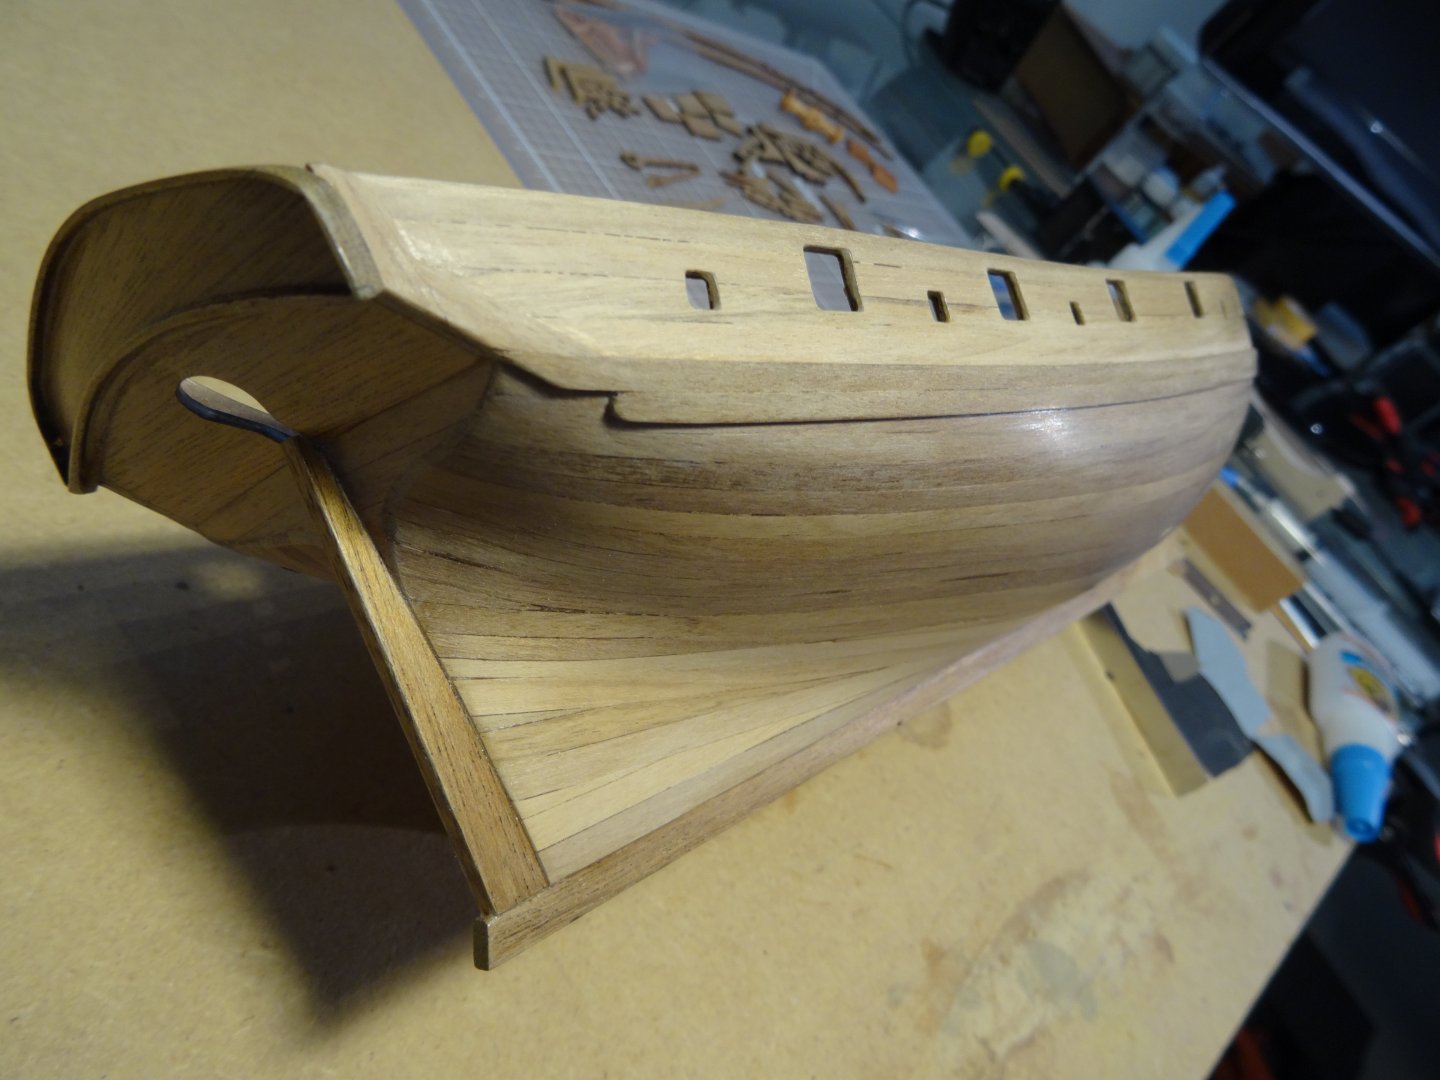
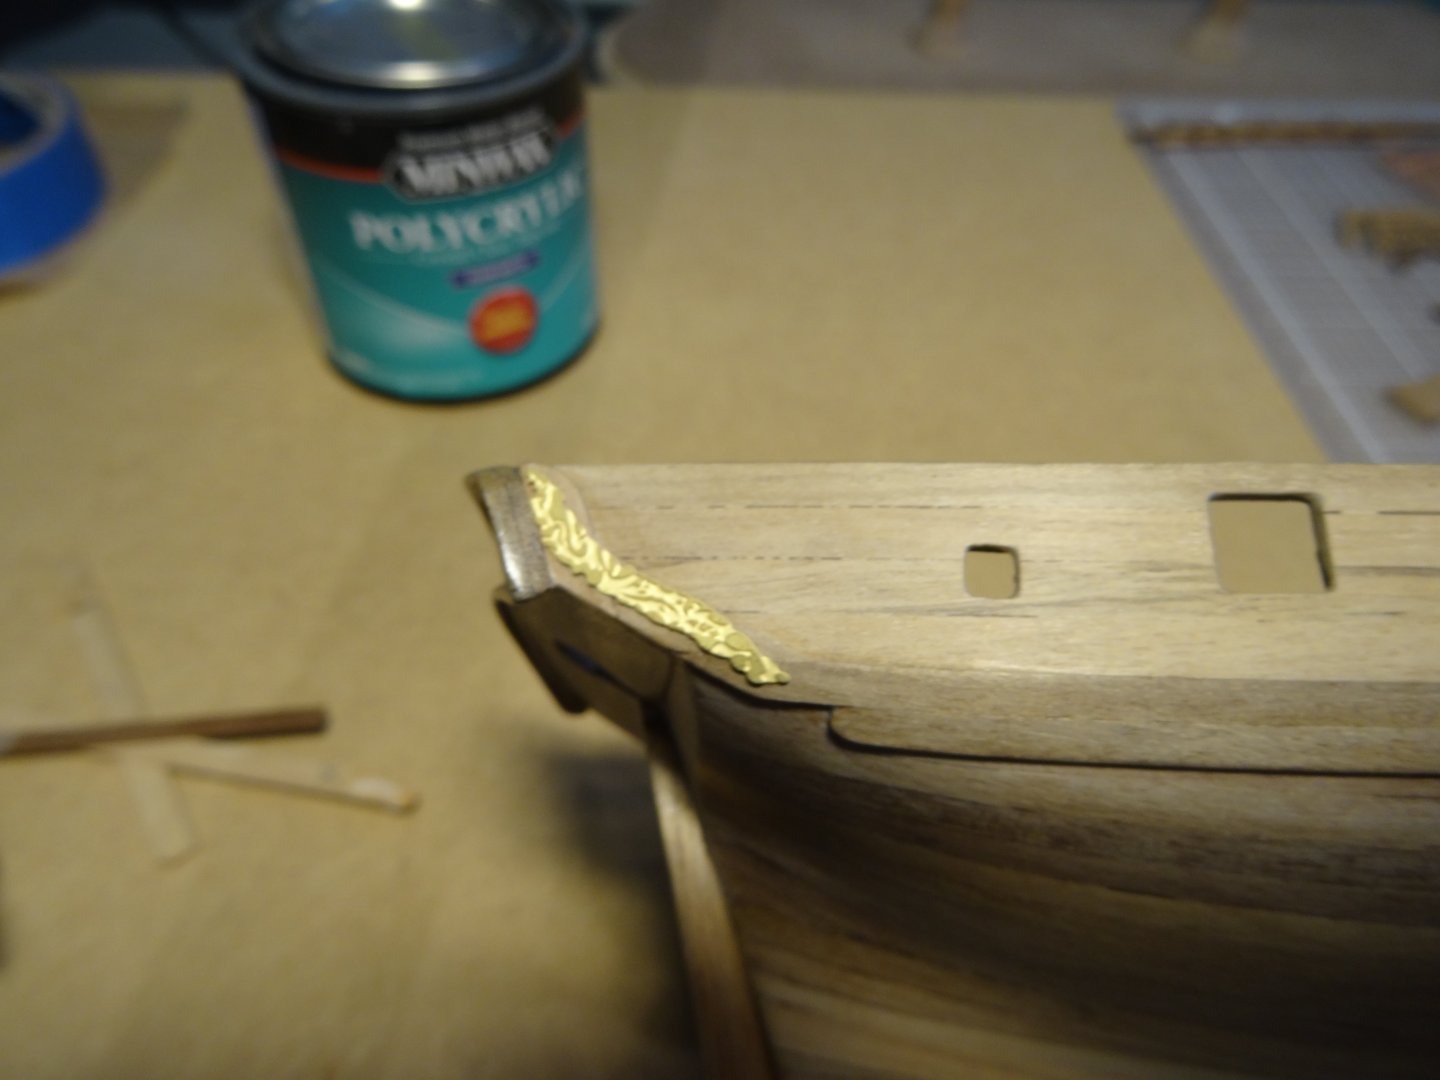
Bringing out additional details, I applied the Wales to the Ship sides. Using the kit supplied 1 X 3 mm Walnut wood, I ran into trouble with it breaking! Well, a couple times you could hear the Pittsburg Steal Mill Whistle Blowing, as the wood fractured and in some cases Broke in two! Very brittle wood, even having been soaked before bending. Thank goodness for extra thin CA! Much to my surprise, the wood took a lateral bend with less trouble, but when it came to a natural curve....snap, crackle, pop! My advise, be very careful, patient, and be sure the wood is well moistened! To have it sit well, use a gig to bend it laterally with heat and it's natural curve into the BOW. I found that the kit supplied Mahogany wood trim, for the brass filigree used at the stern and placed against the transom, to be too thick and overhanging the turn of the bilge, causing it to break as it cracked upon attempt to bend it to shape of the hull. The turn of the hull becomes notable at the stern, leaving a large enough gap to prevent the wood from taking shape. My remedy, was to slightly re- design the abutting transom side detail. I used left over, 1 X 4mm hull planking walnut, just wide enough to capture the brass filigree. Also a subtle design change to the stern Wale, as the curve under the hull produced an awkward lay of the wood. The 1 X 4mm Walnut, worked out , without issue, at all! I must have miss sharpened the curve too much, trying to achieve a graceful curve. For me, one area of the hull shape I struggled with in the initial build! I am happy I was able to save my wood for the Wales, after three fractures and two breaks!


- 39 replies
-
- 9
-
-
- Amati
- Victory Models
- (and 1 more)
-
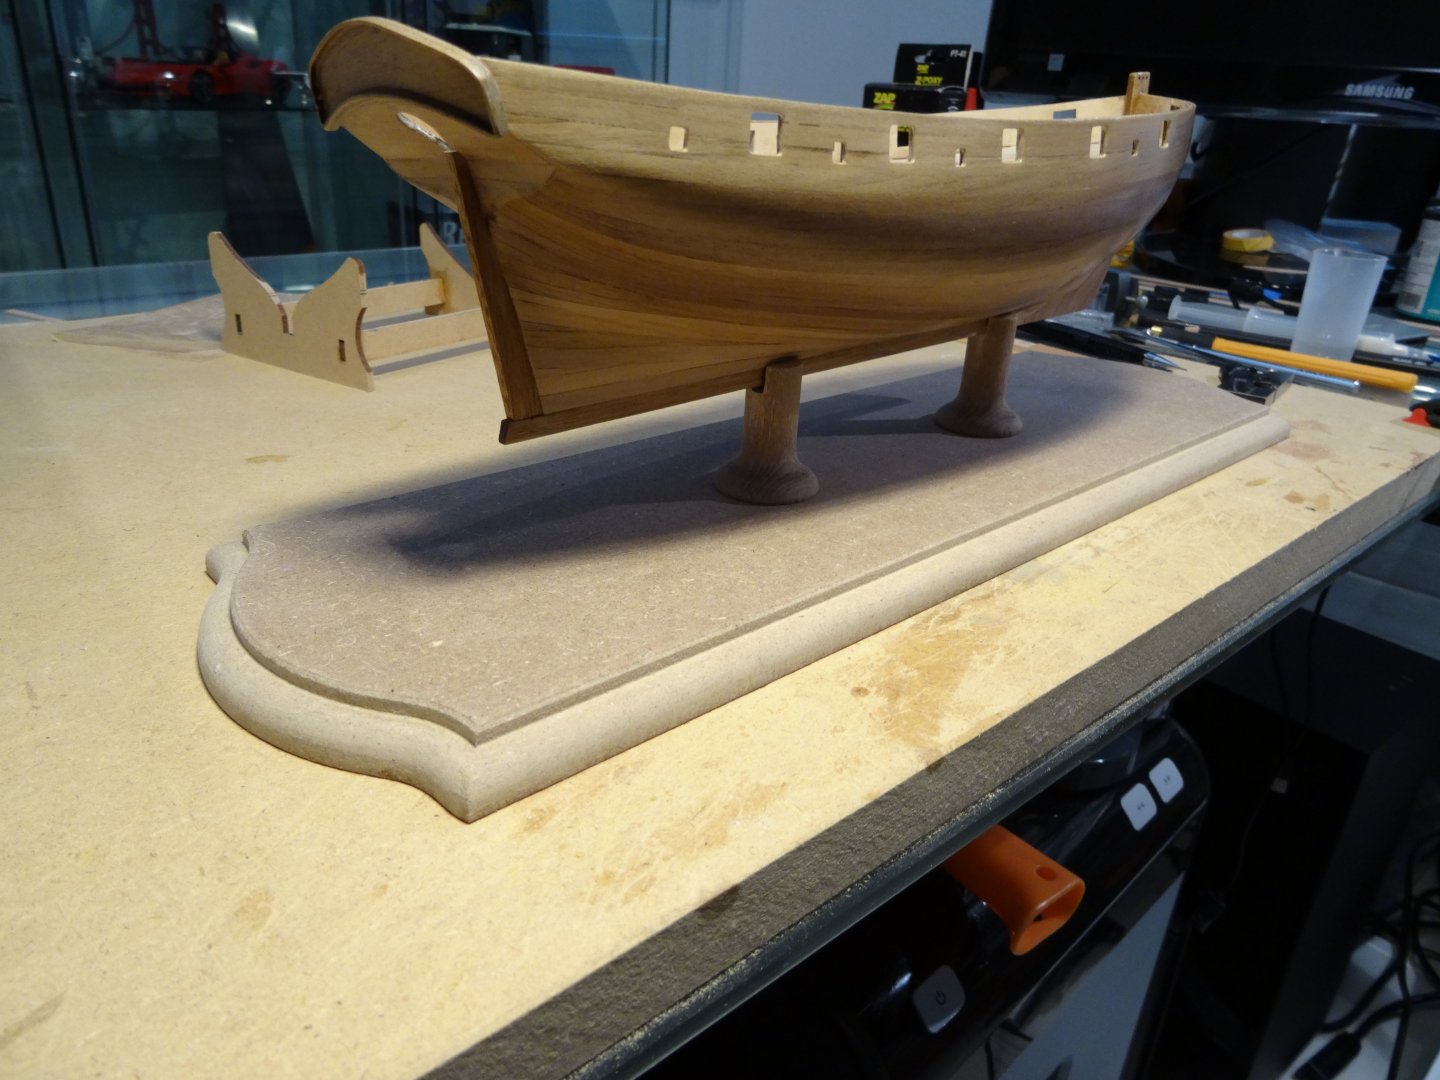
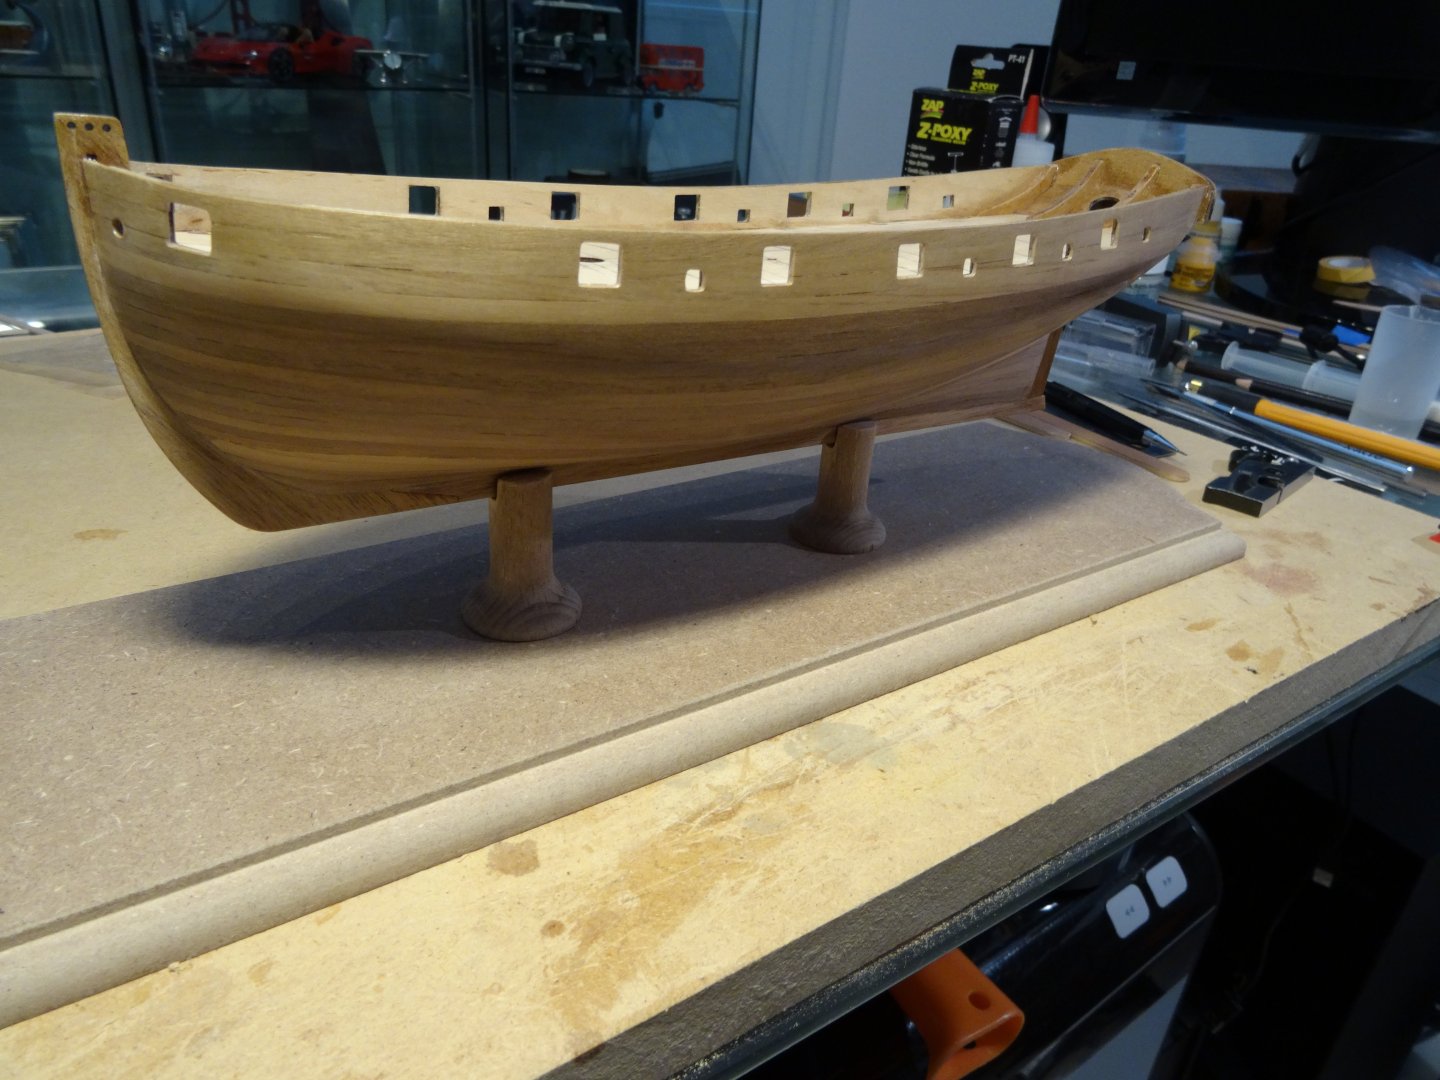
One and one half months later the real sense of what I have been building is actually on it's way to looking like a Ship! To have told me then, when starting,..... I couldn't see this far into the project, as all I had, was motivation to guide me here. All the great assistance to those on MSW thru articles, accounts of construction projects, techniques and conversations have been invaluable. A terrific forum to have come across! The hull planking is complete,...... good thing for bottom paint to hide my errors! Next is the decking.
- 39 replies
-
- 10
-
-
- Amati
- Victory Models
- (and 1 more)
-
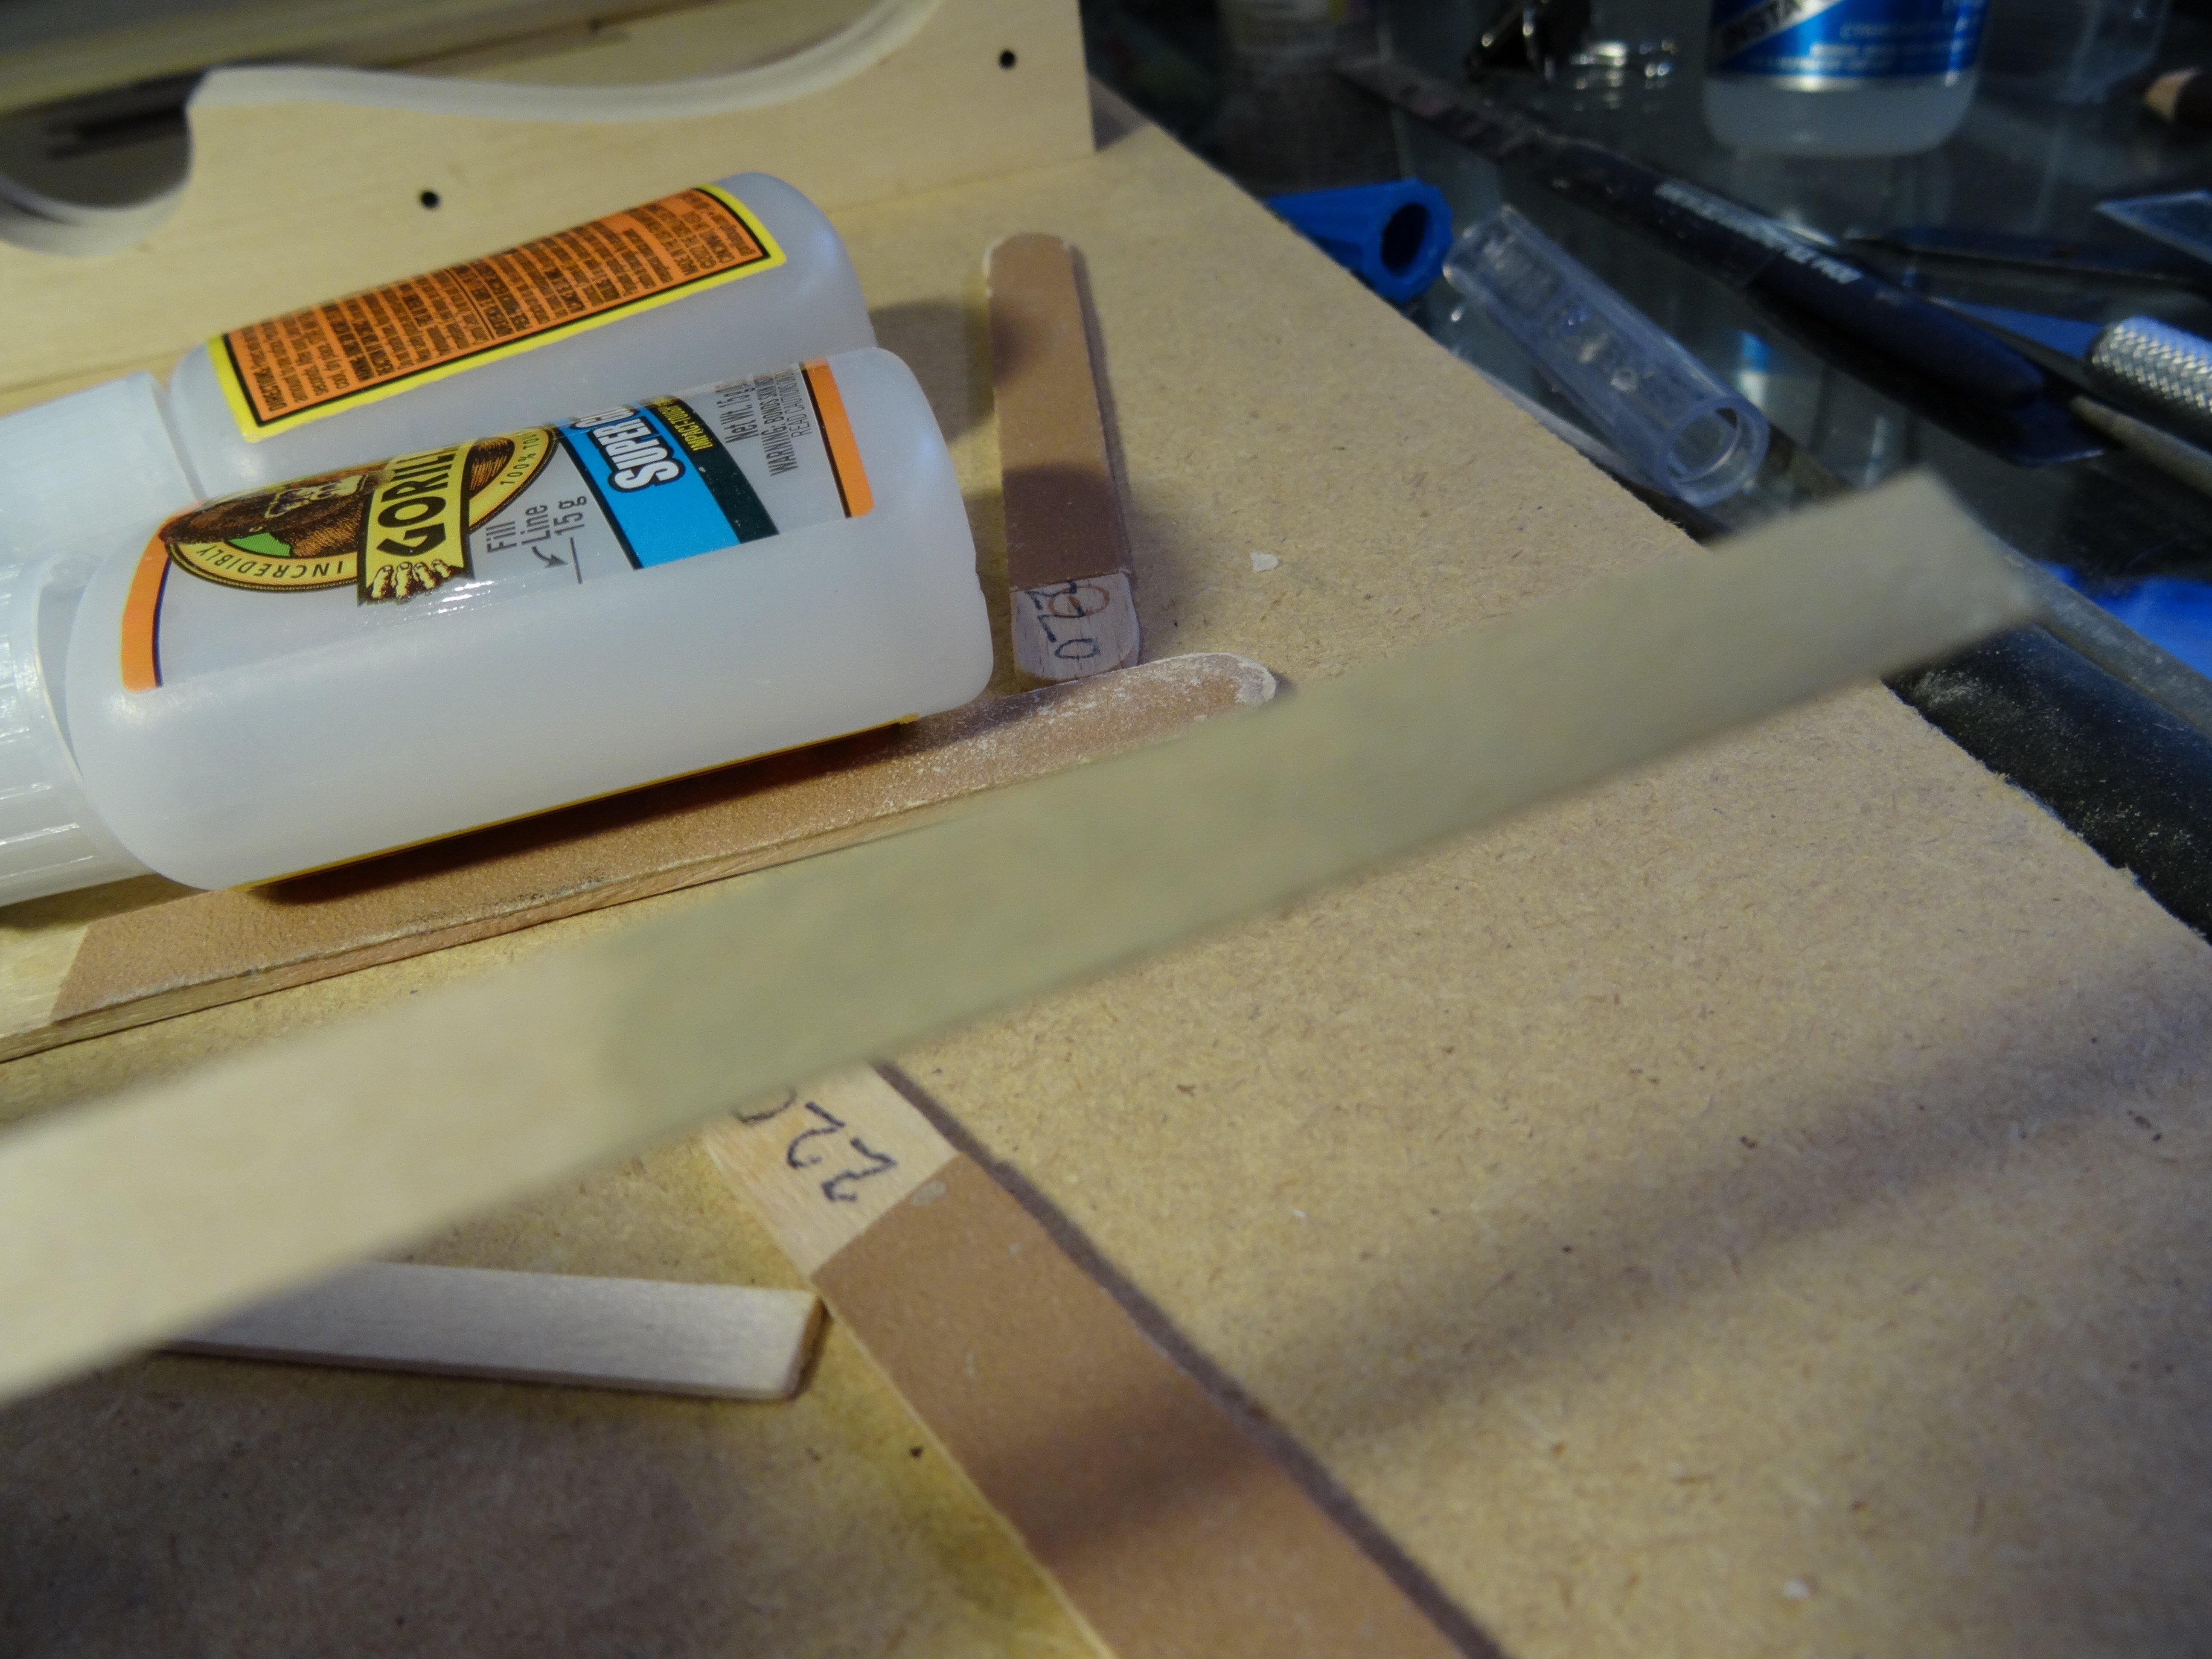
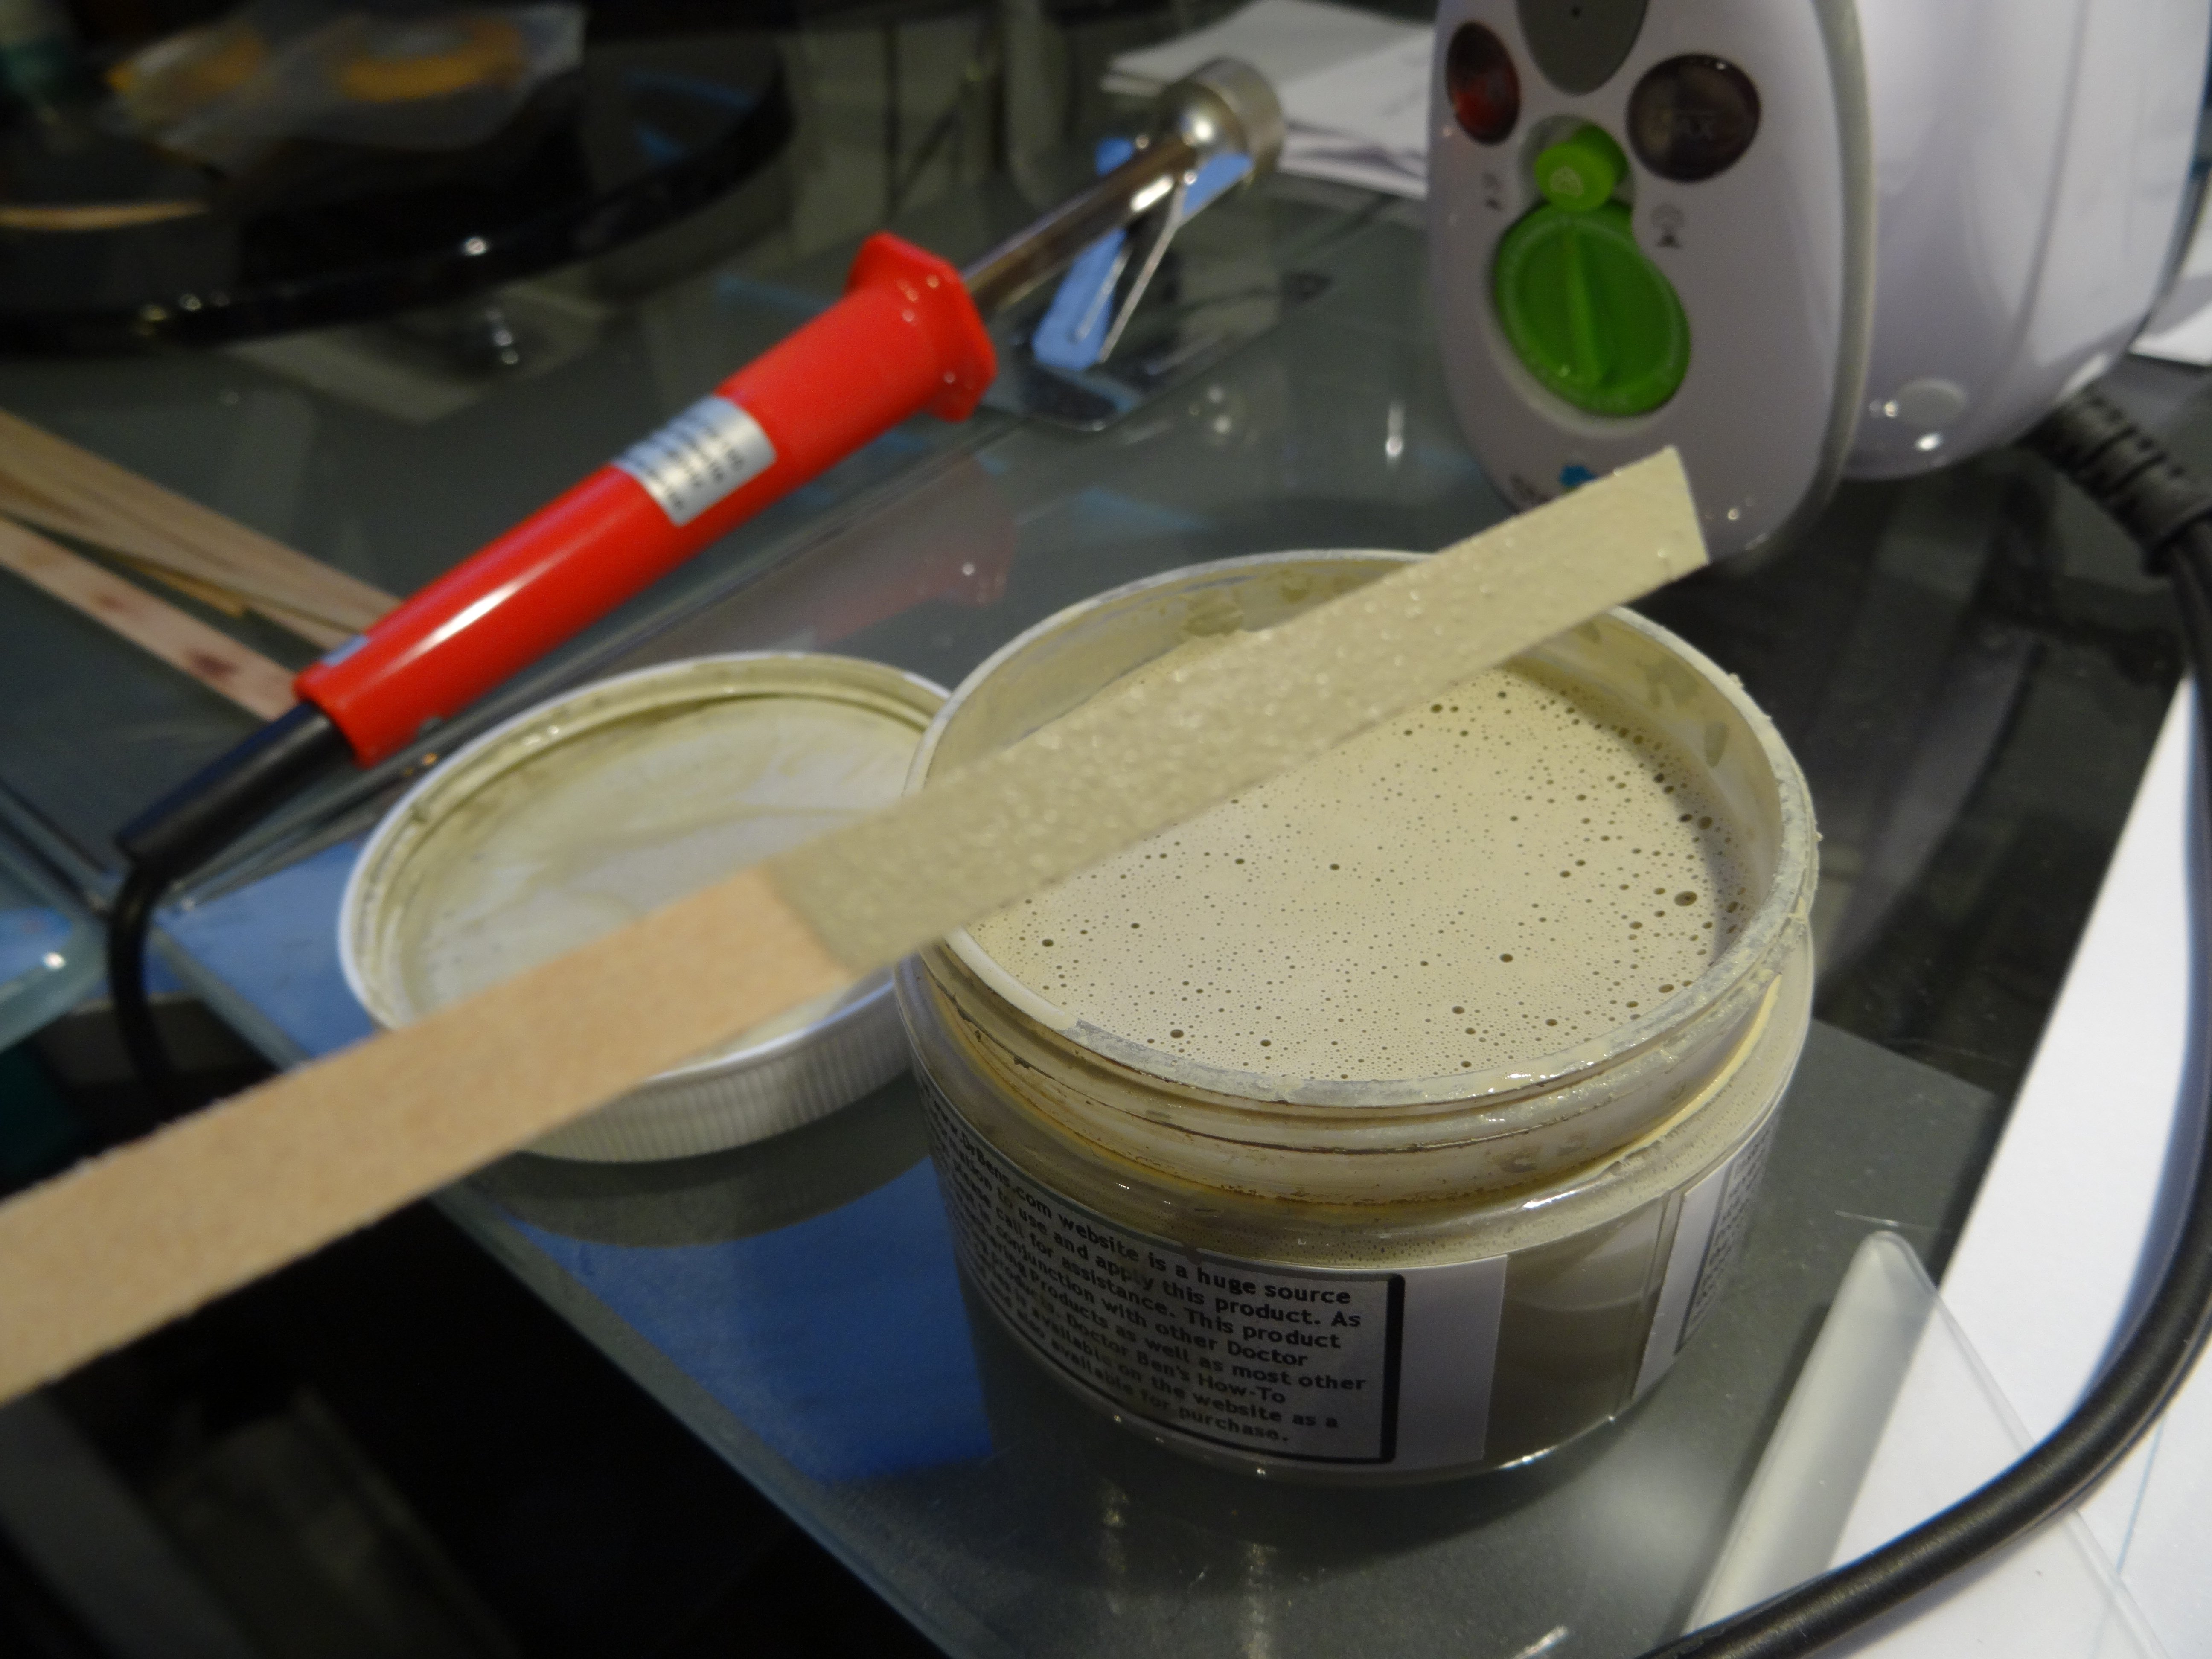
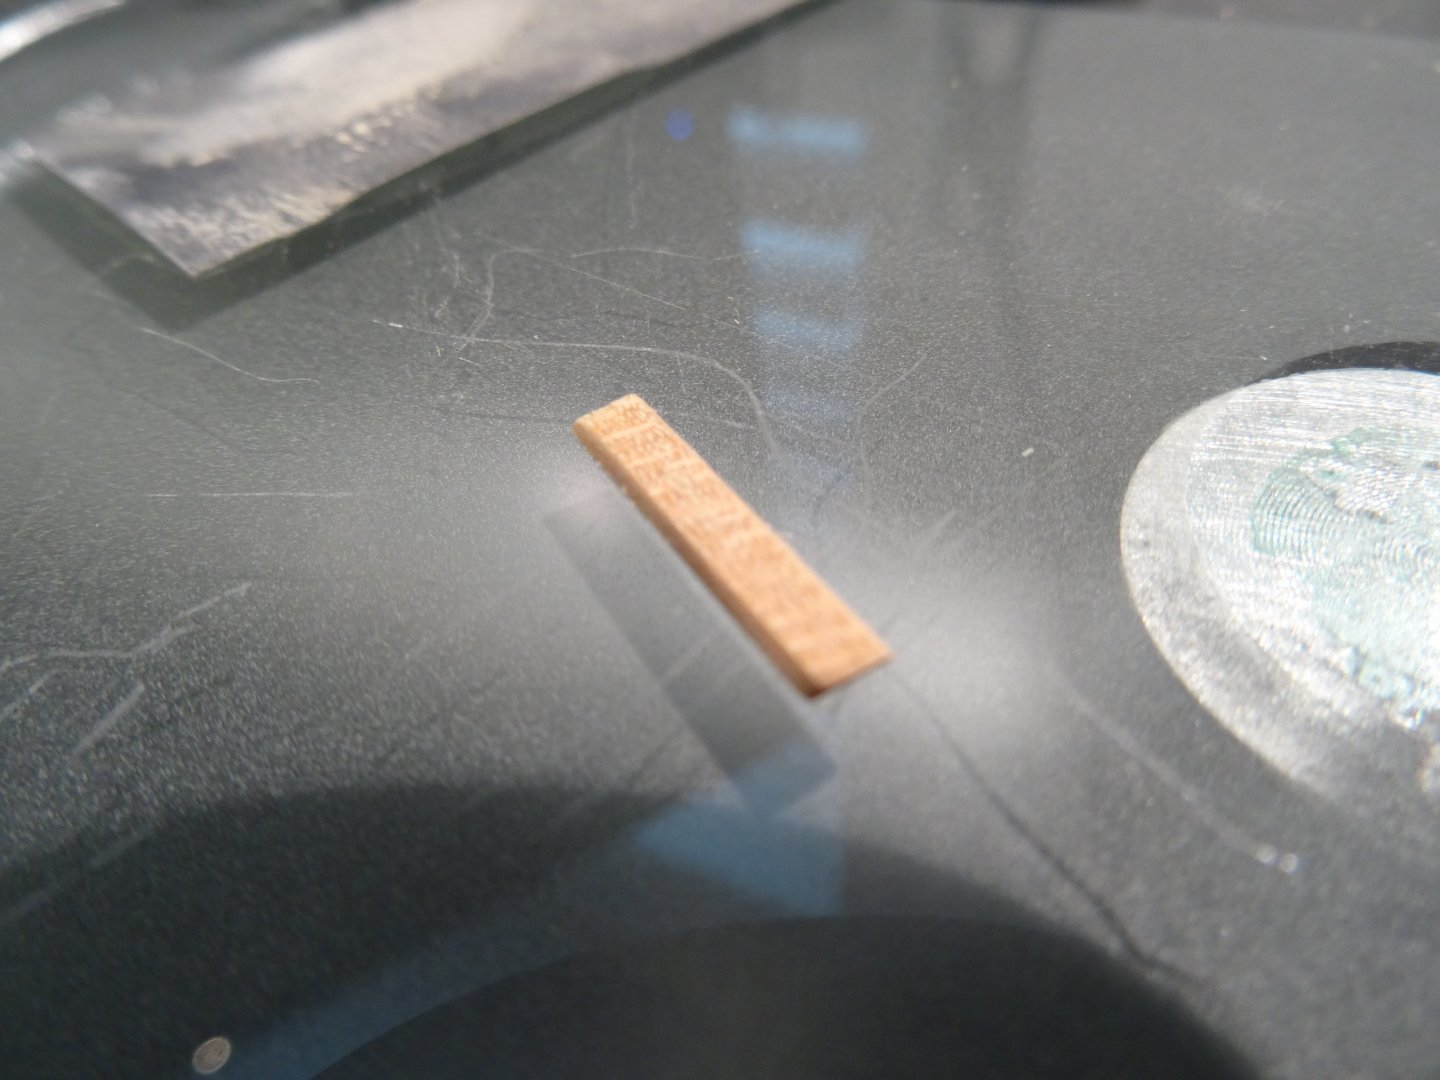
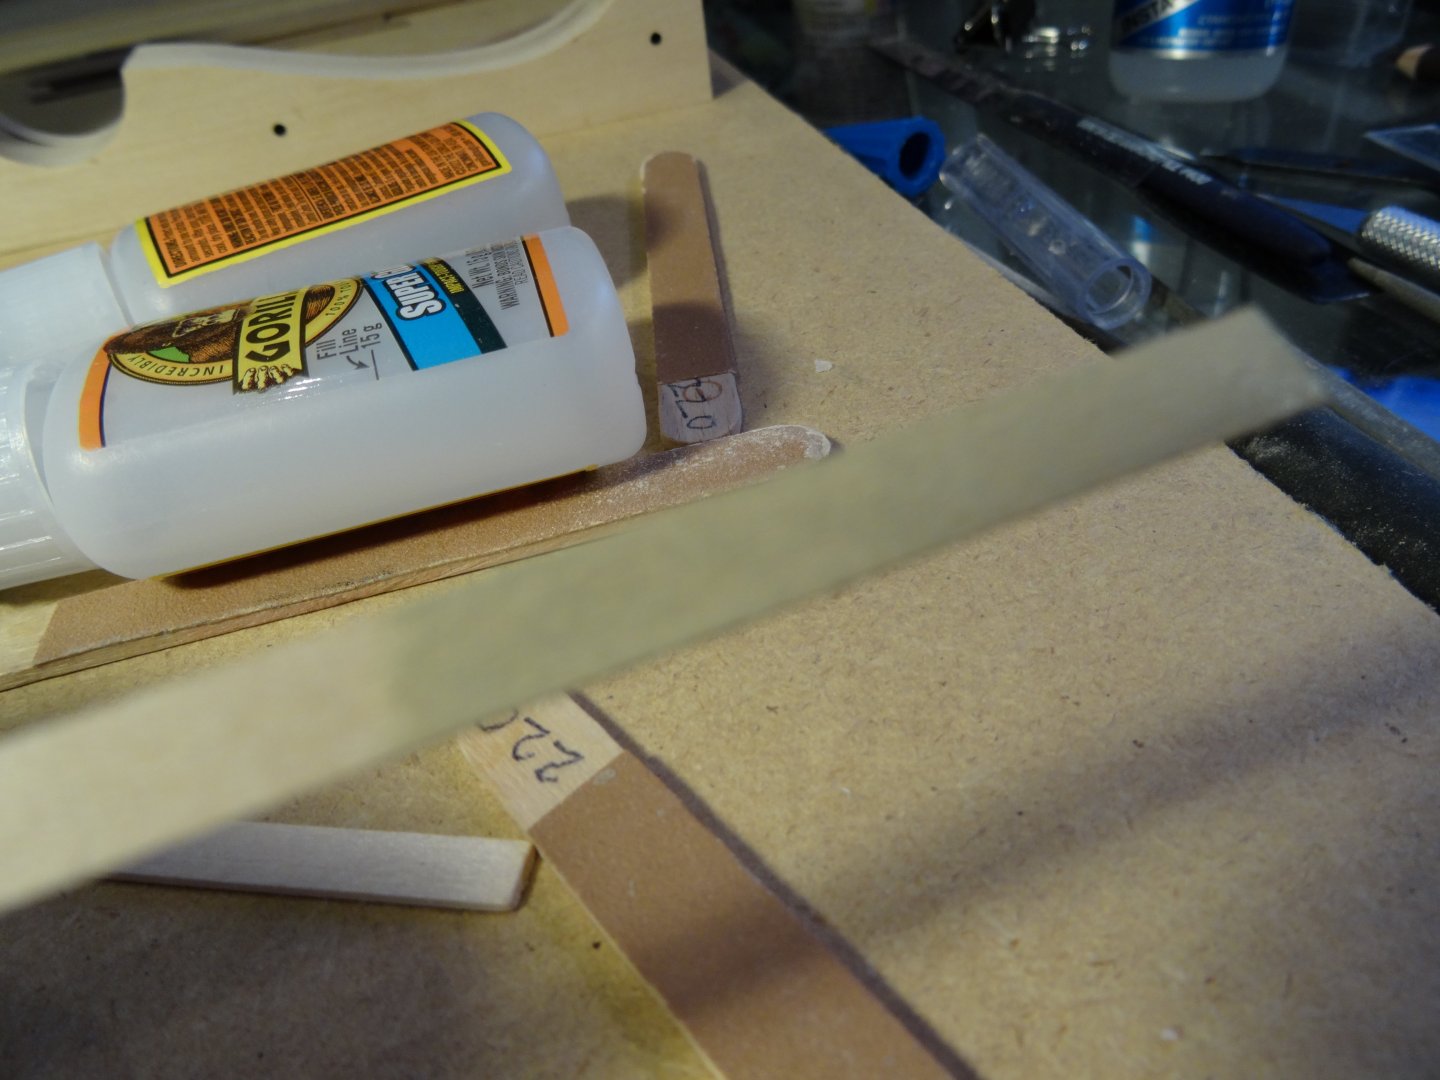
Hi Dan, You've got my vote! I feel it turned out great! I seriously doubt that any shipwright building a work vessel would take the time to organize heavy decking lumber for matching colors! Now yachts are a much different story! Given the deck furniture, cannons and a sundry fittings , line etc., I am drawn to the natural order of things, and find it very appealing! In fact as the above discussion covered, the mention of washing the deck in a hue, is something I have intended to do with my decking. If it is of interest, Model railroading has many products to capture a realistic look, which seems , is the main theme of most model railroad layouts. Weathering details are also very prevalent in most plastic model building. I came across the product pictured, that quickly drew me in, as I was in search of a more natural washed look to my deck. I found the product of all places, on ETSY, " DR. Bens " The second picture is of a stick of clear limewood, quickly stirred into the wash. The last picture is a second coat on the same stick. Keep in mind, Limewood is soft and porous. Depending on the woods hardness, obviously will determine the intensity of the color. From my experience with paints and stains, in order to have a lighter suggestion of color with over the counter stains, one would need to reduce with adding a thinner. Dr. Bens is a Water based stain, already thinned with the intensions of using it as a wash, to hint of color. If to go the route of adding color to the deck, possibly you would like the effect of this product.

- 87 replies
-
- 3
-
-
-
- Lady Nelson
- Amati
- (and 1 more)