HOLIDAY DONATION DRIVE - SUPPORT MSW - DO YOUR PART TO KEEP THIS GREAT FORUM GOING! (Only 13 donations so far - C'mon guys!)
×


Matt H
-
Posts
181 -
Joined
-
Last visited
Content Type
Profiles
Forums
Gallery
Events
Everything posted by Matt H
-
Very good looking work, welcome.
-
Hello and welcome.
-
Greetings from North Yorkshire, England
Matt H replied to Niallmhor's topic in New member Introductions
Good looking builds, welcome. -
Welcome
-
Good looking boat, welcome.
-
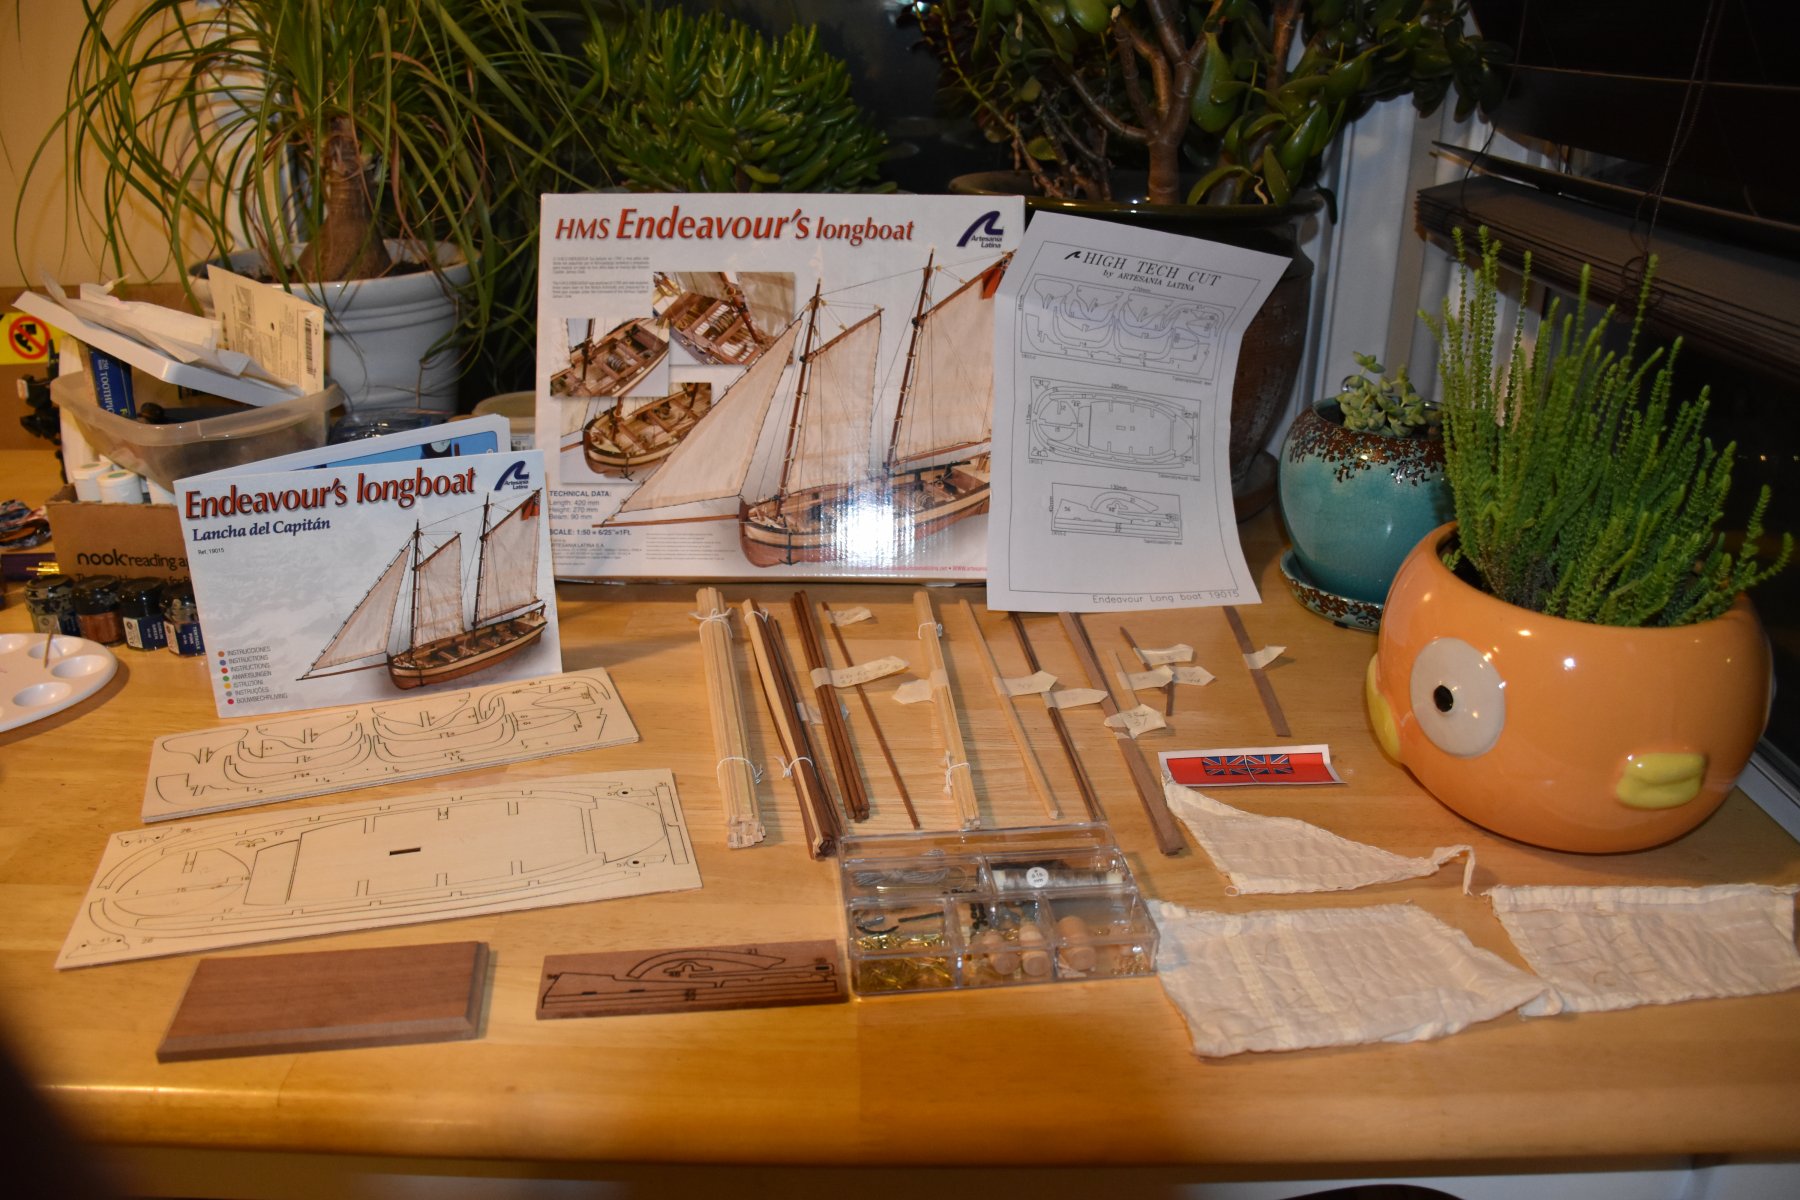
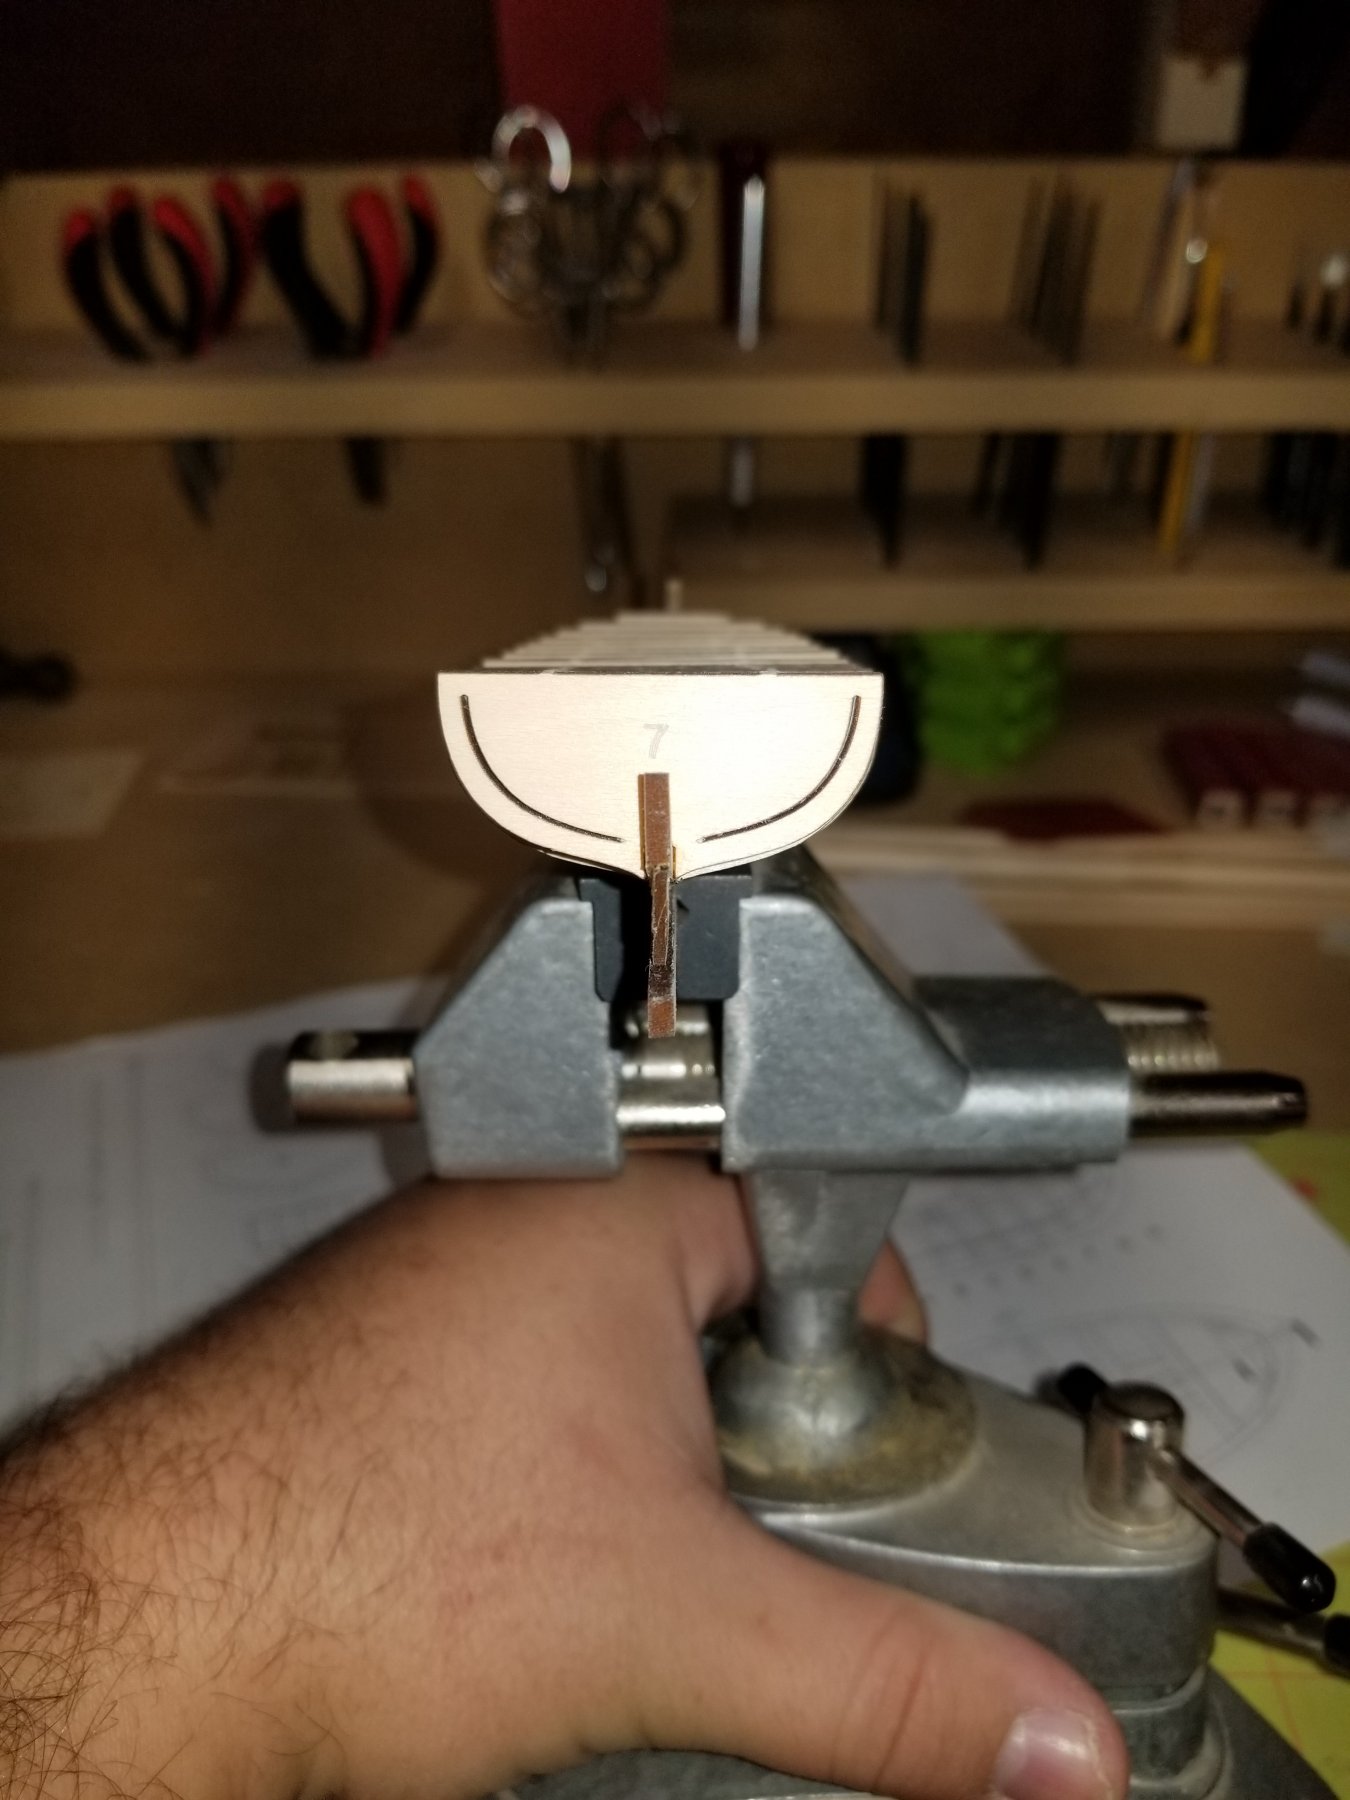
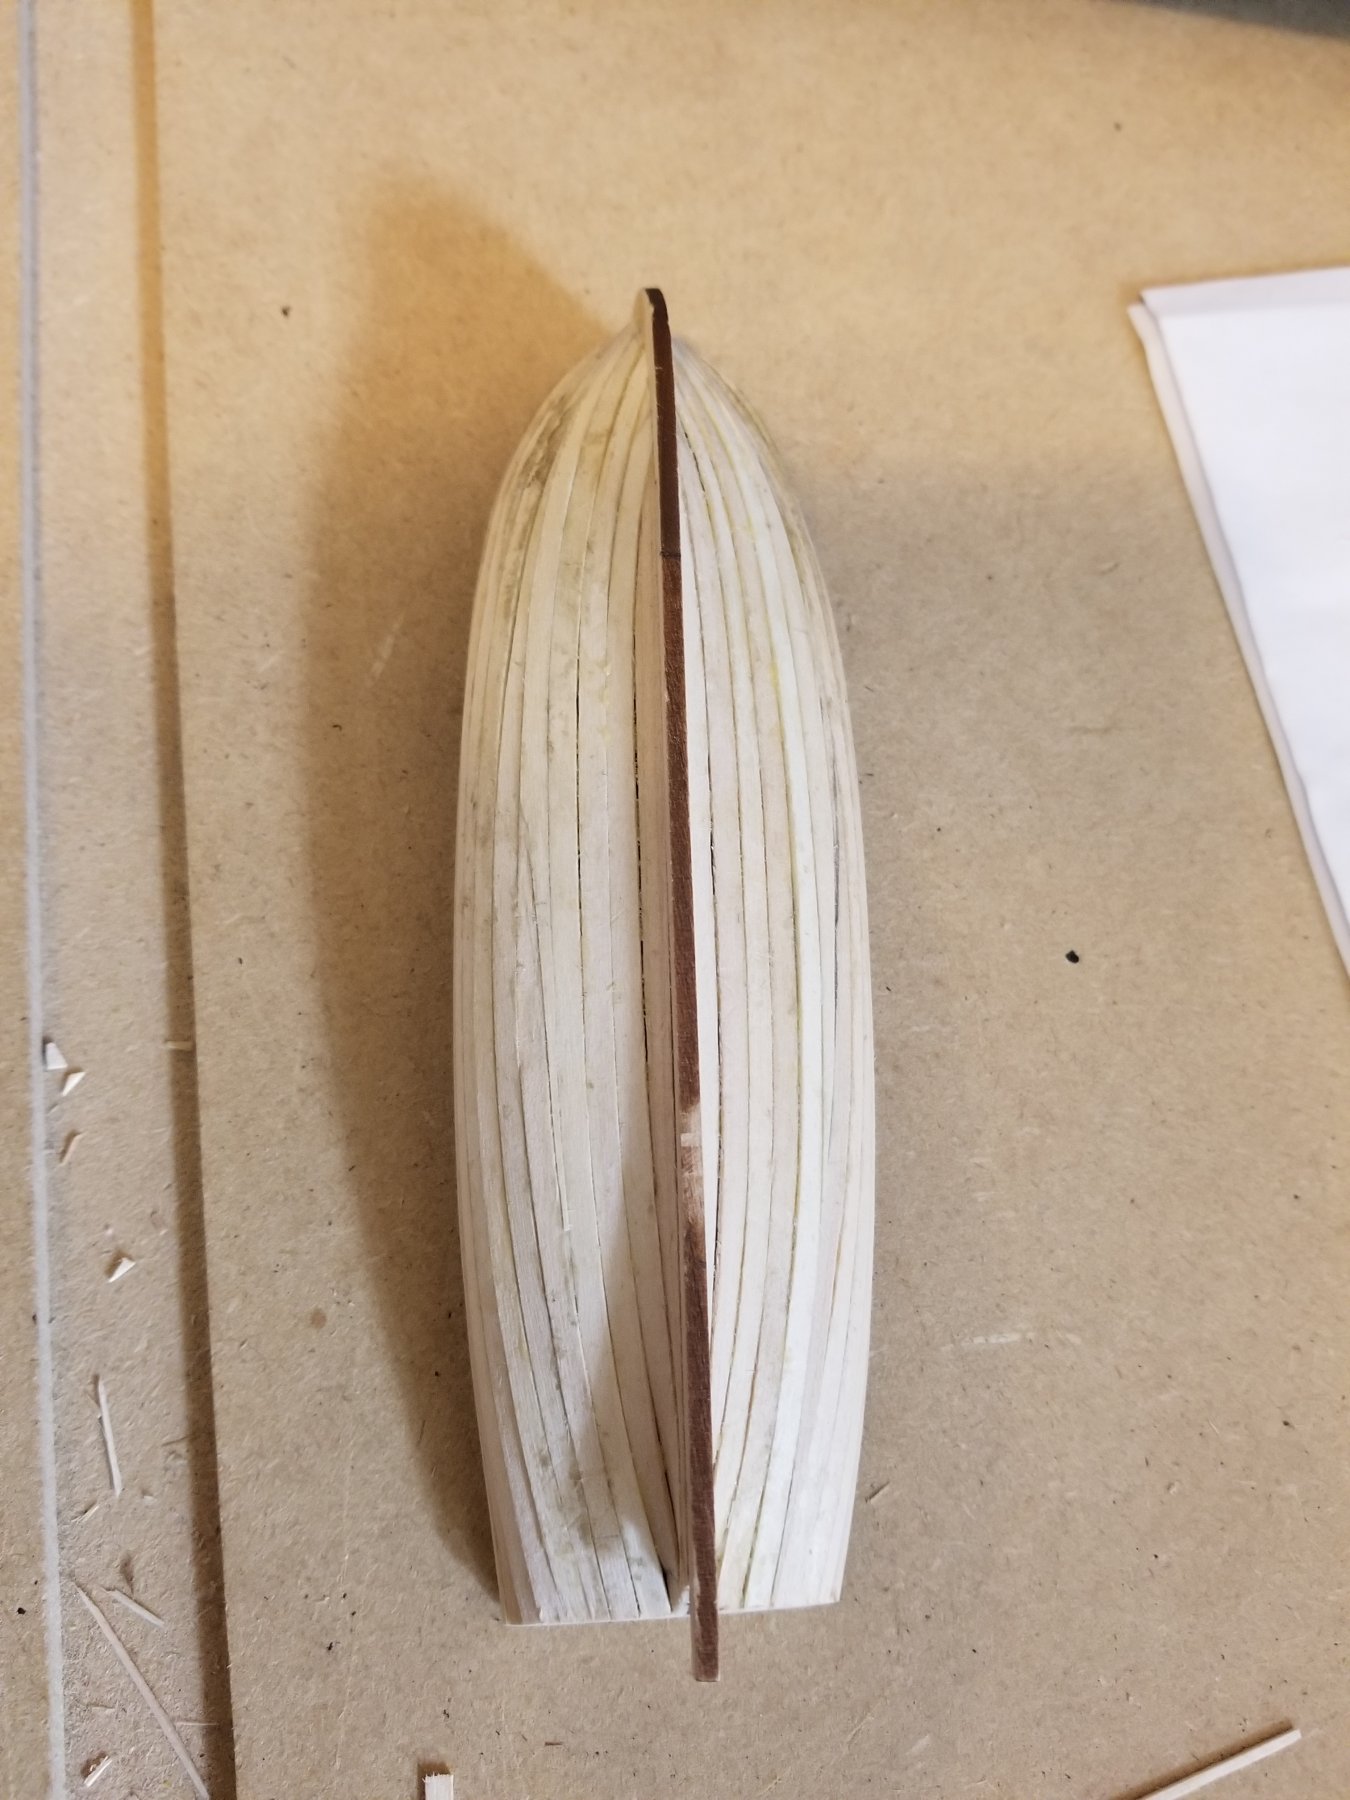
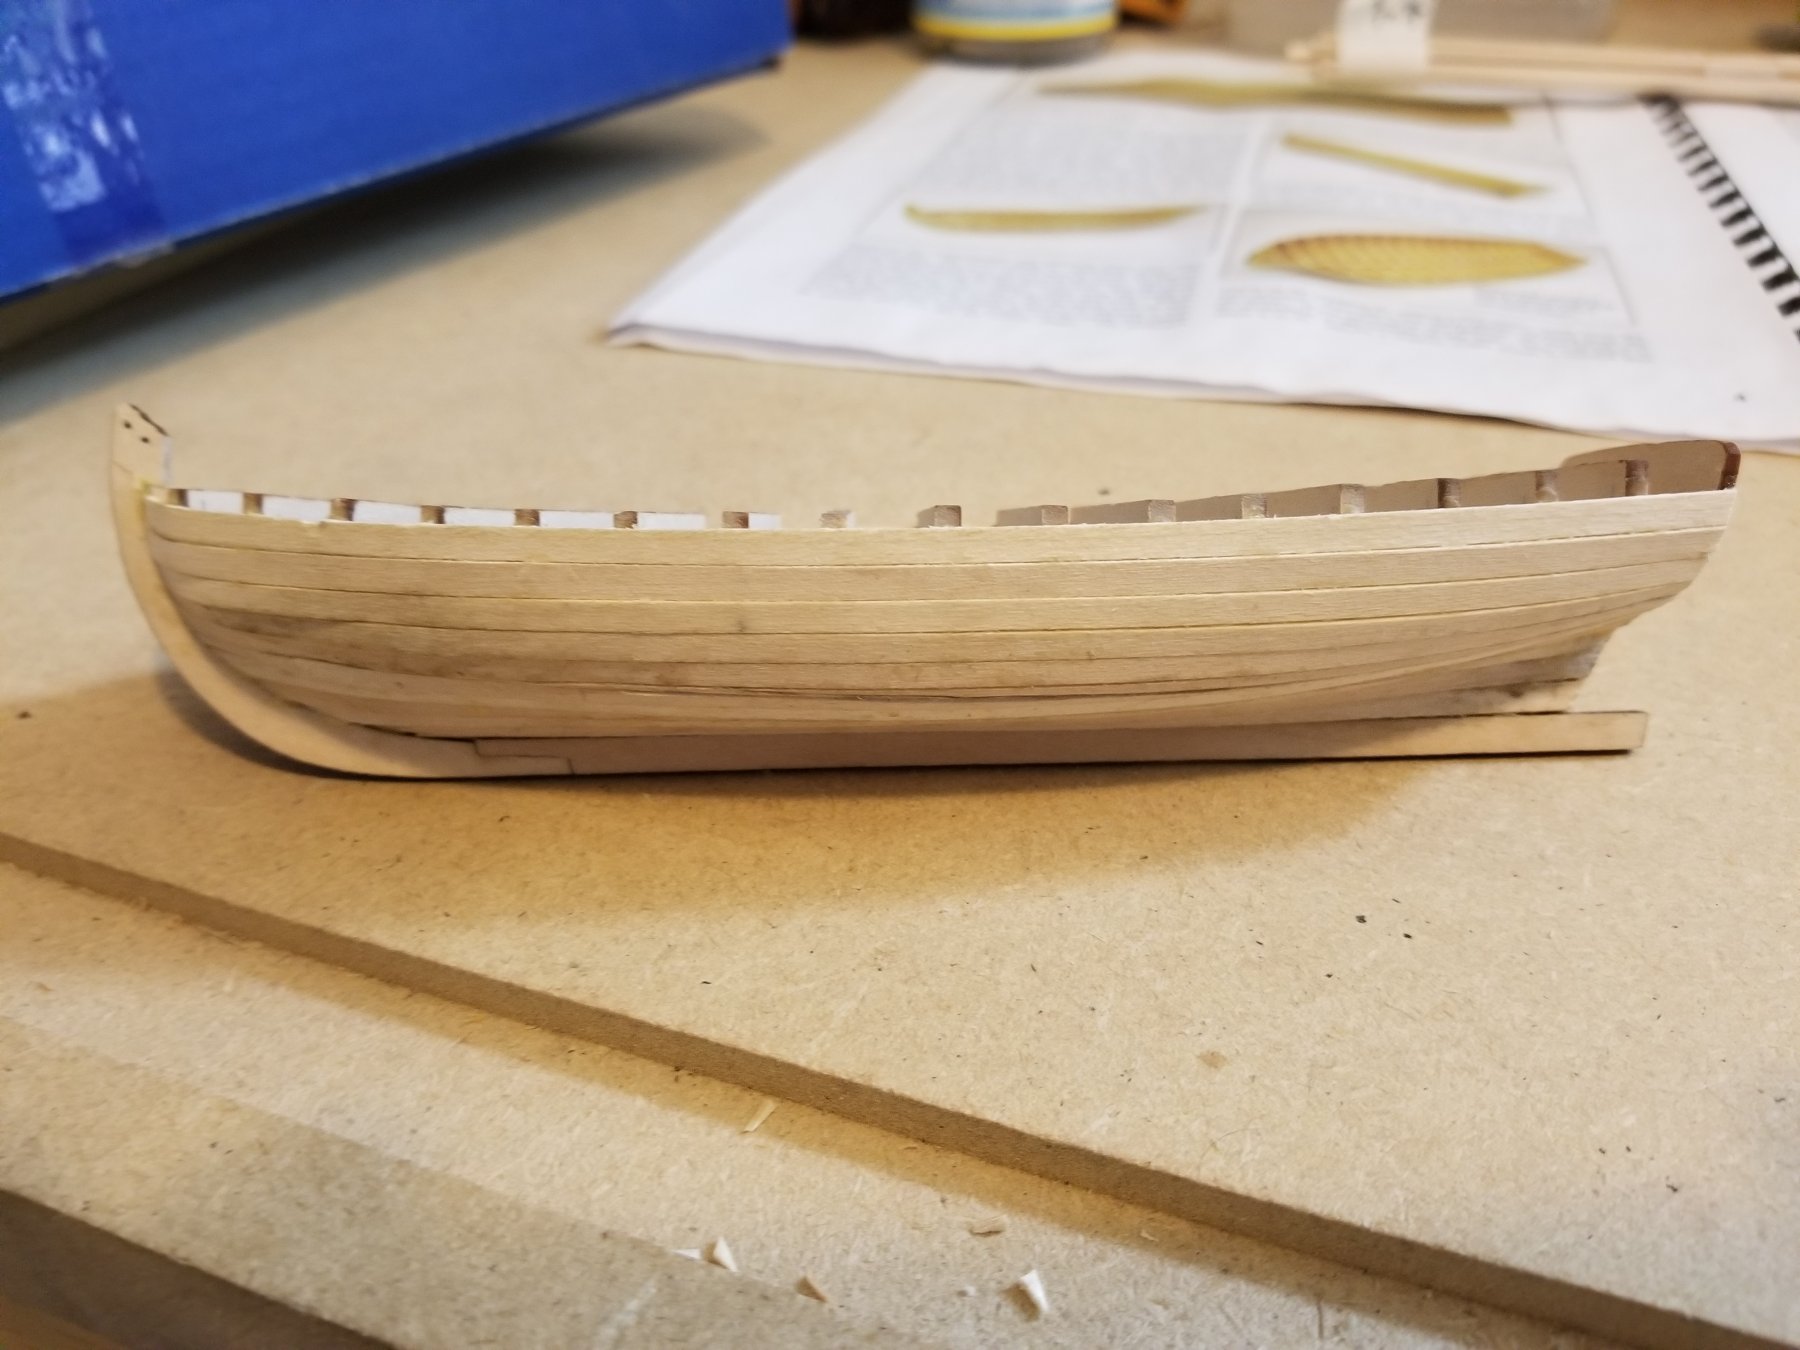
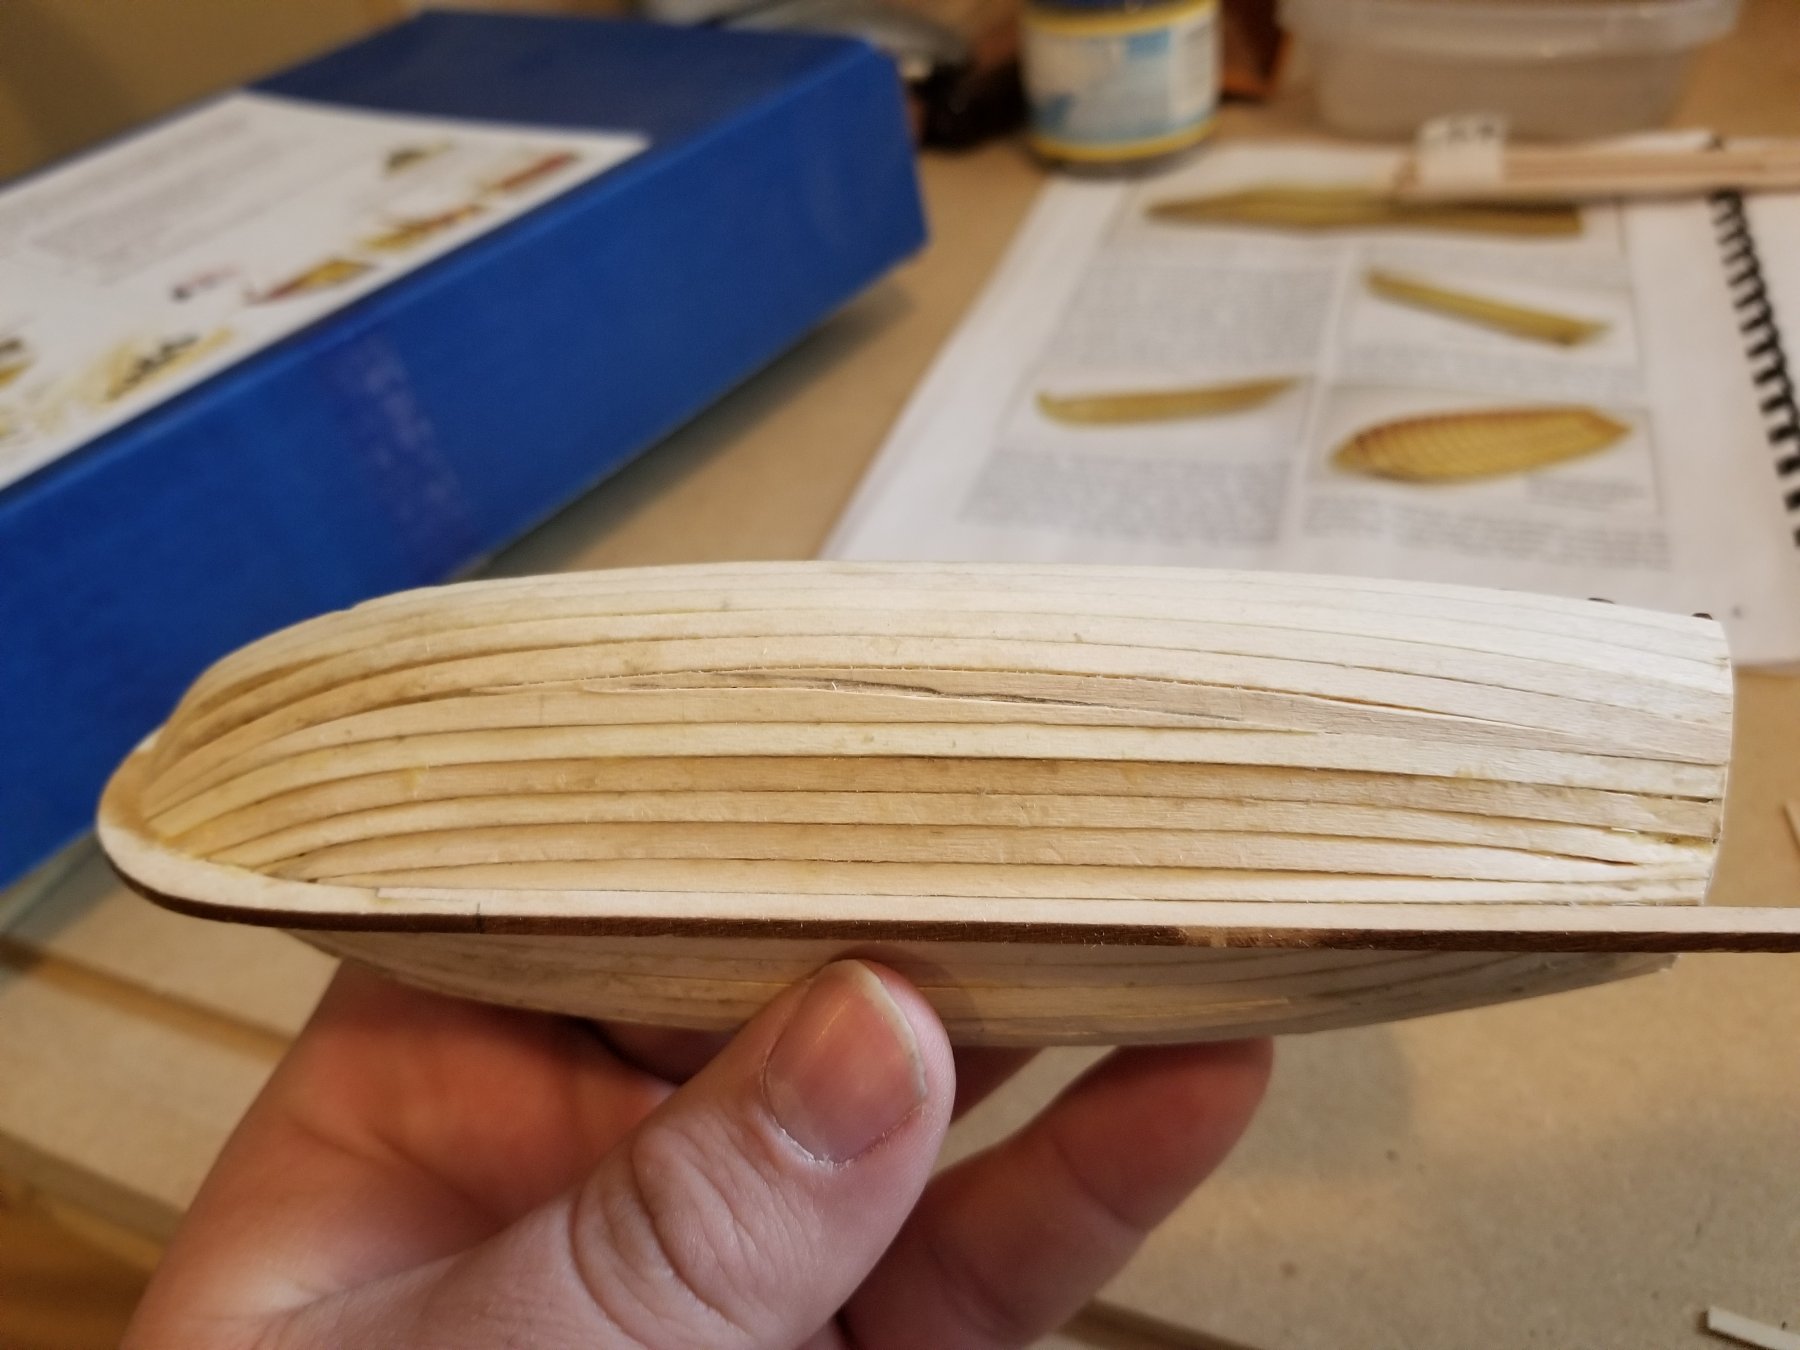
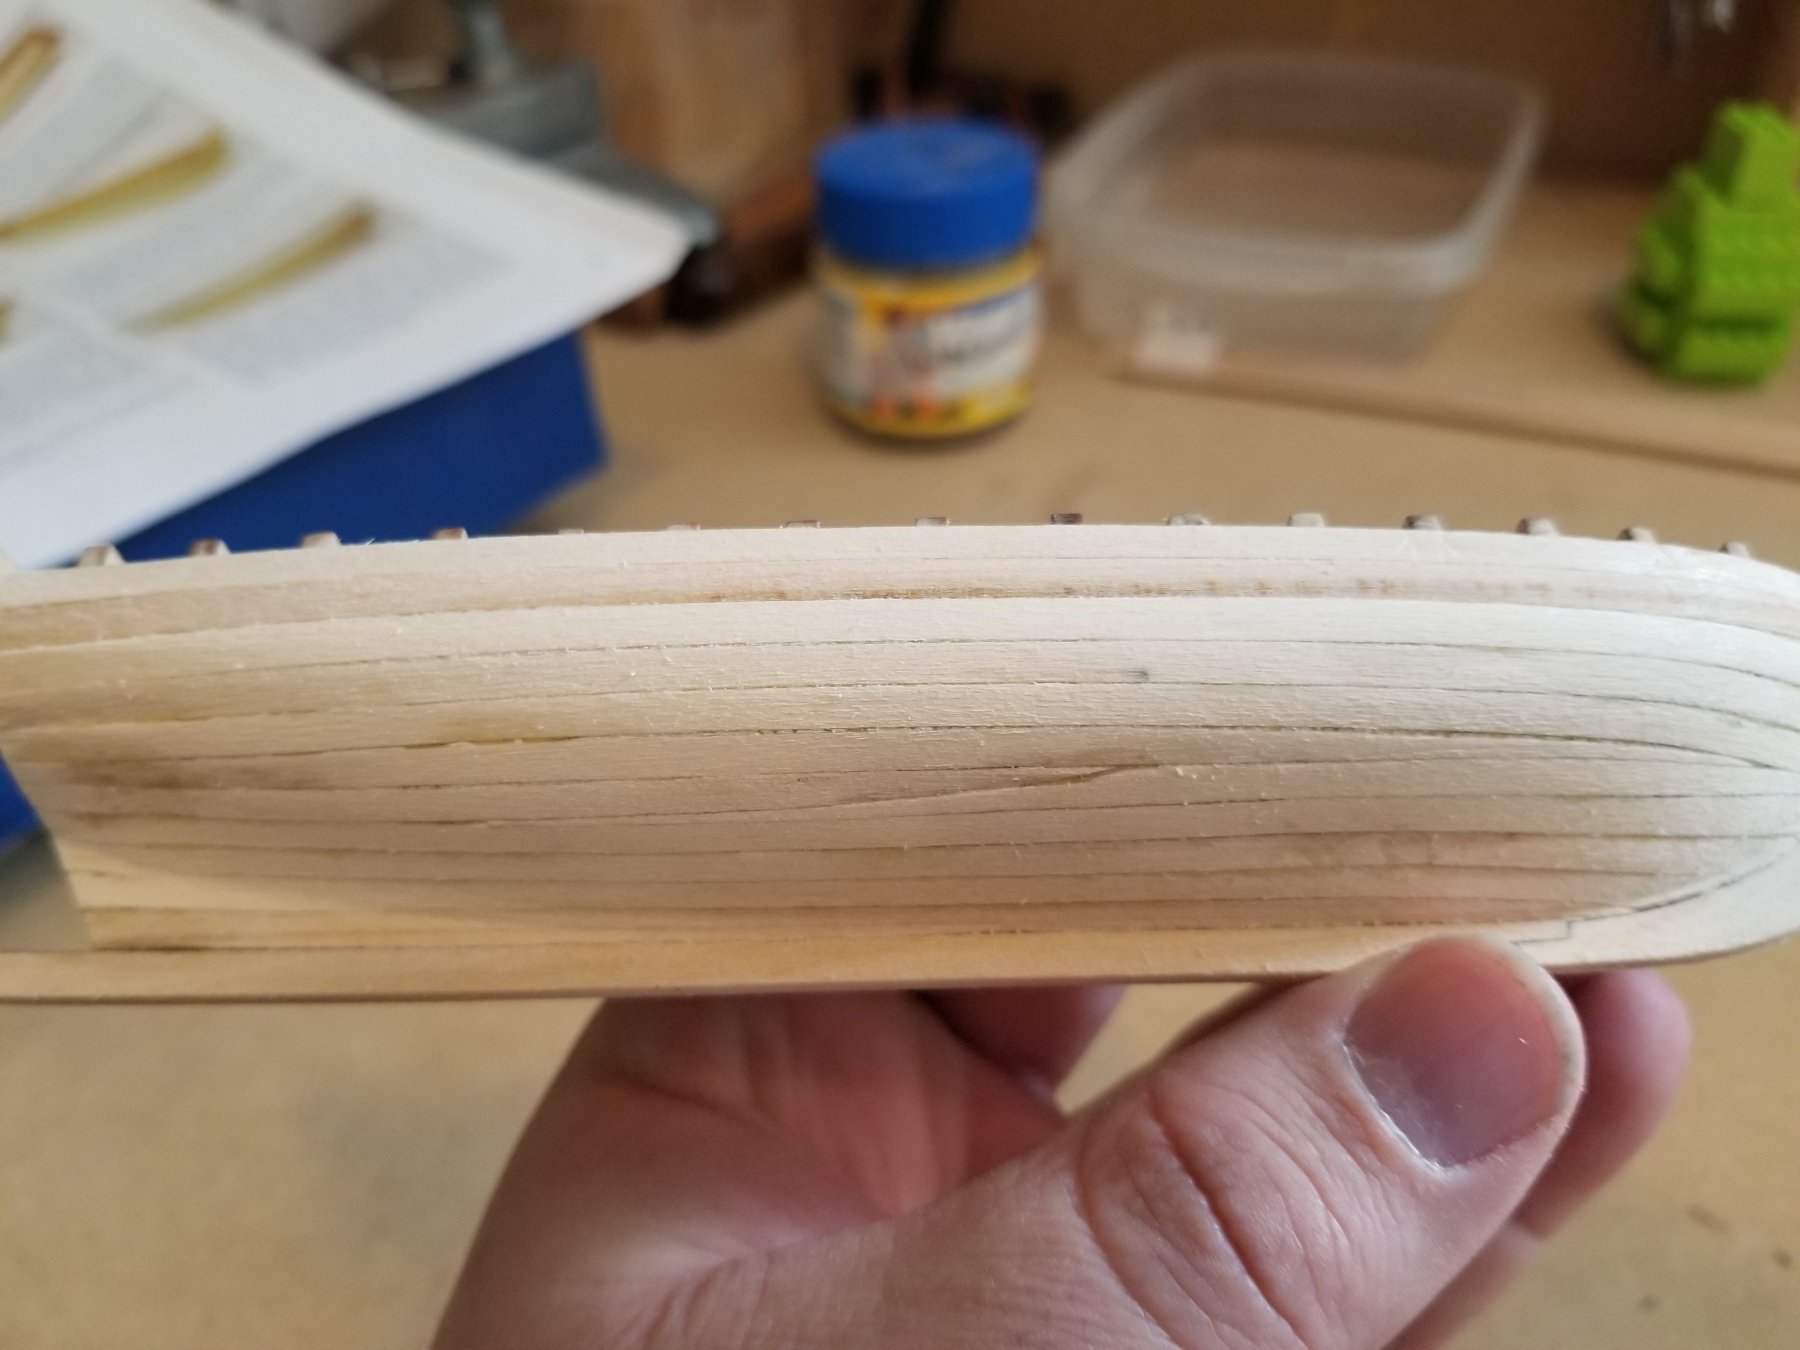
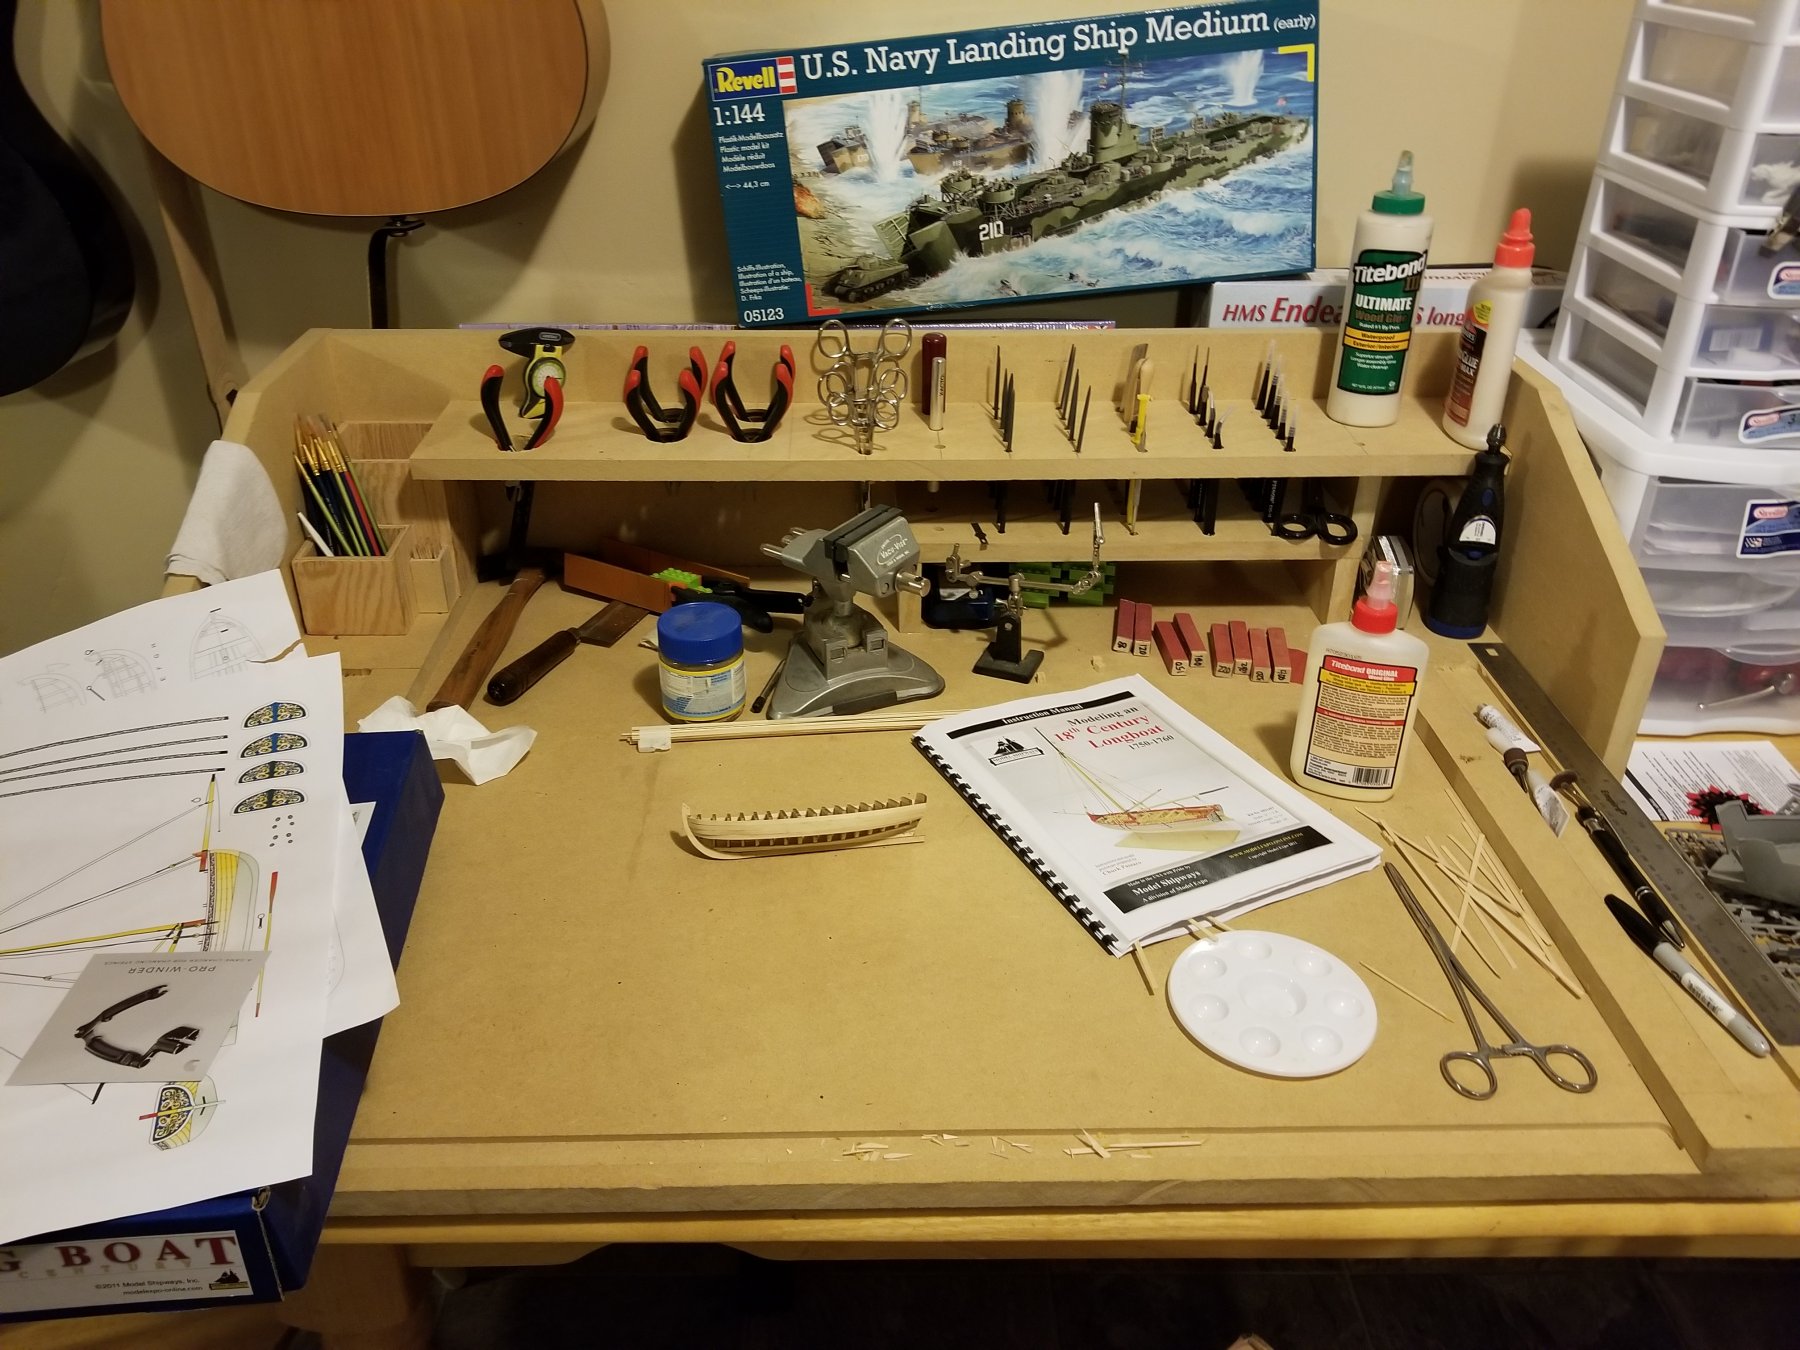
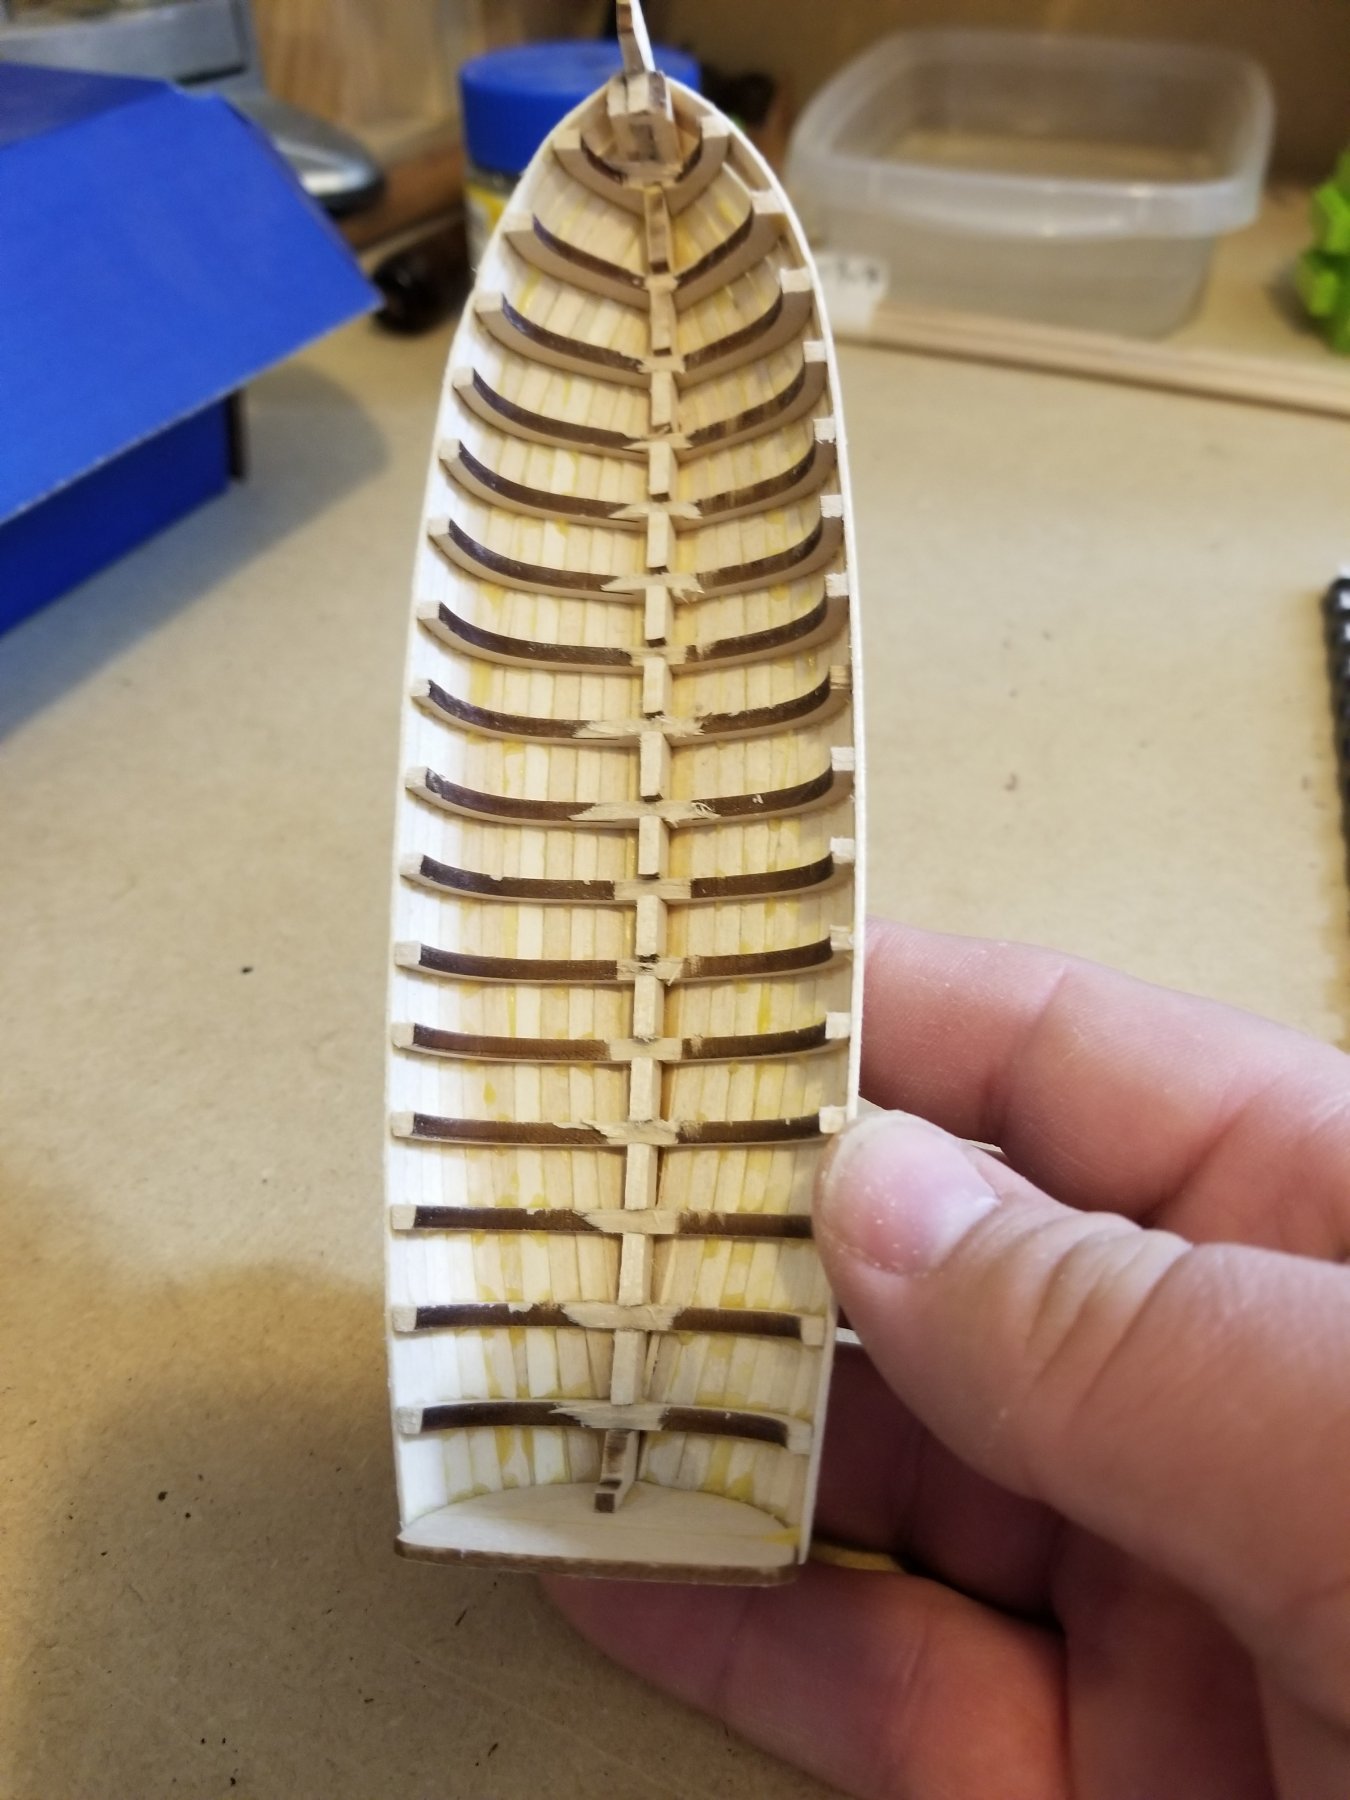
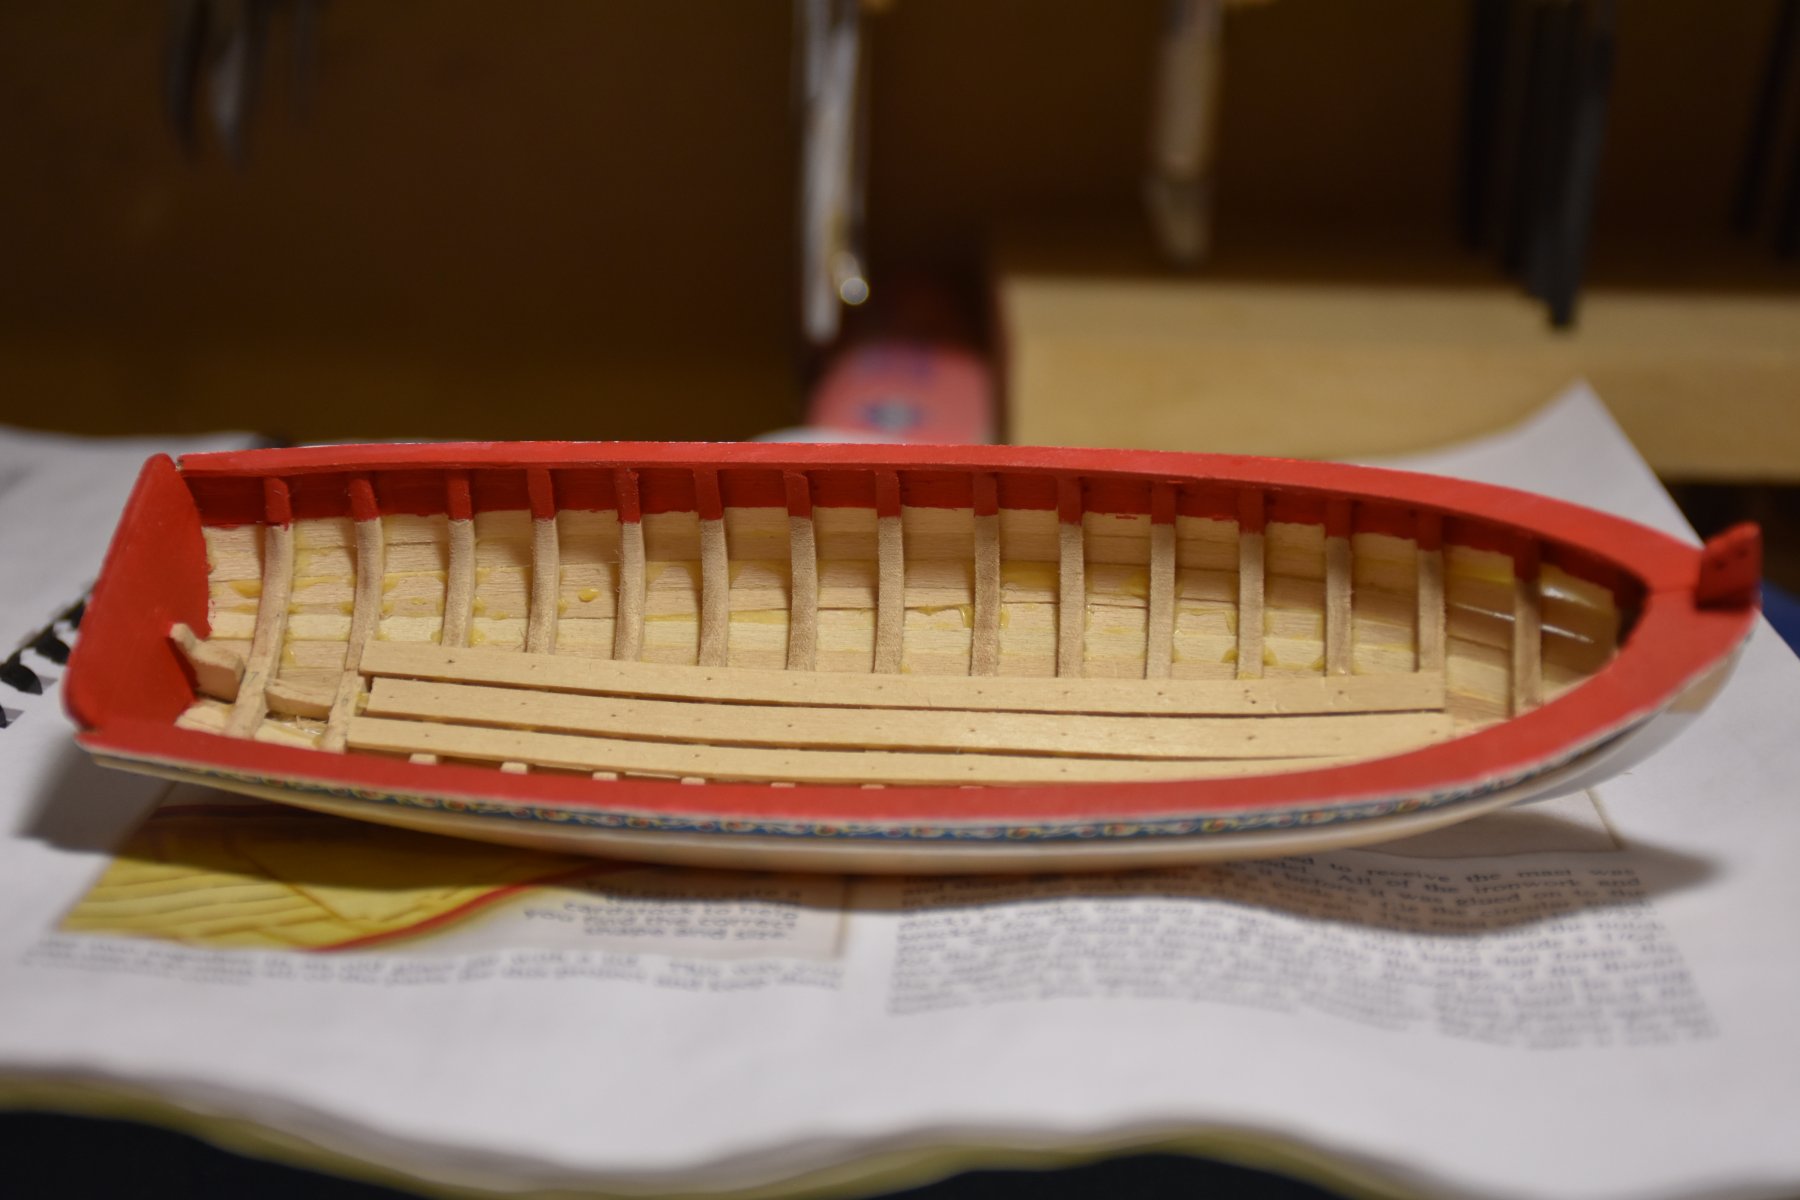
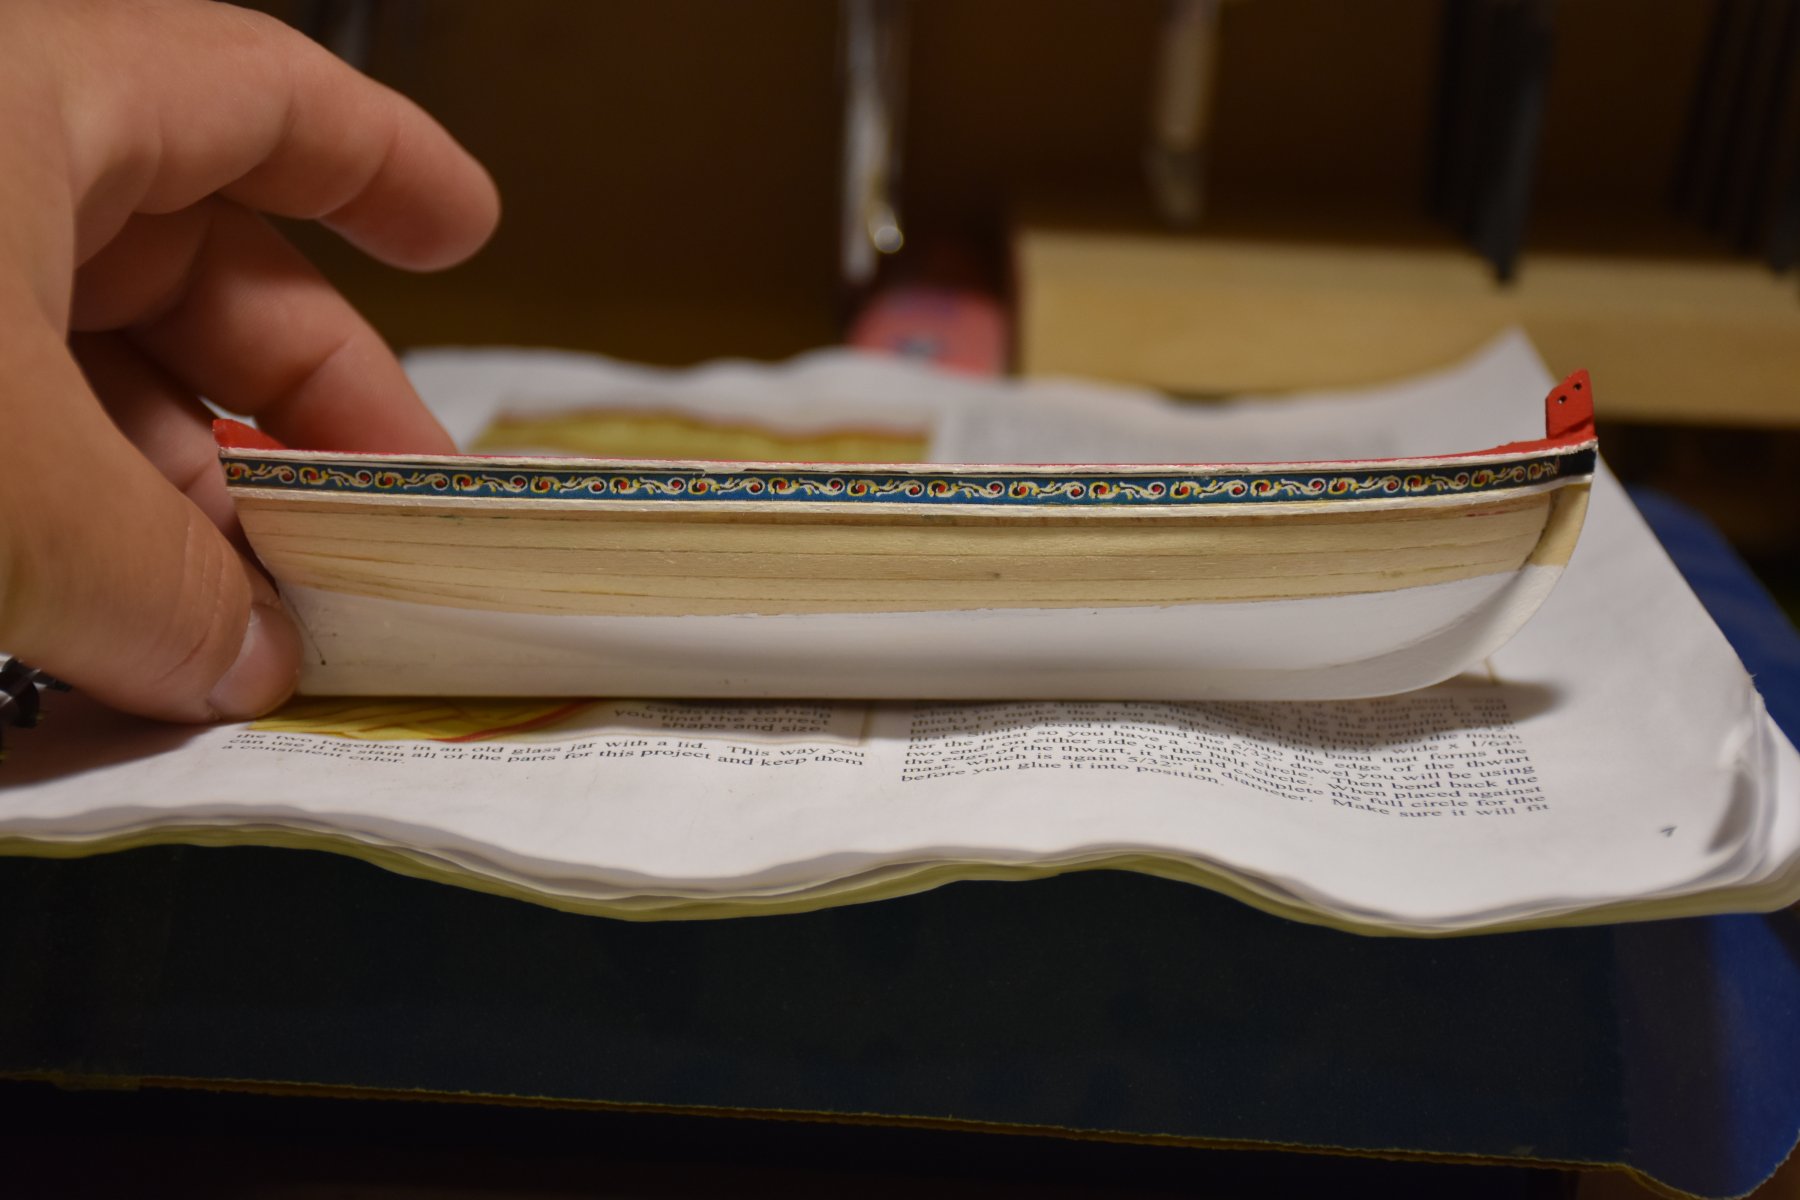
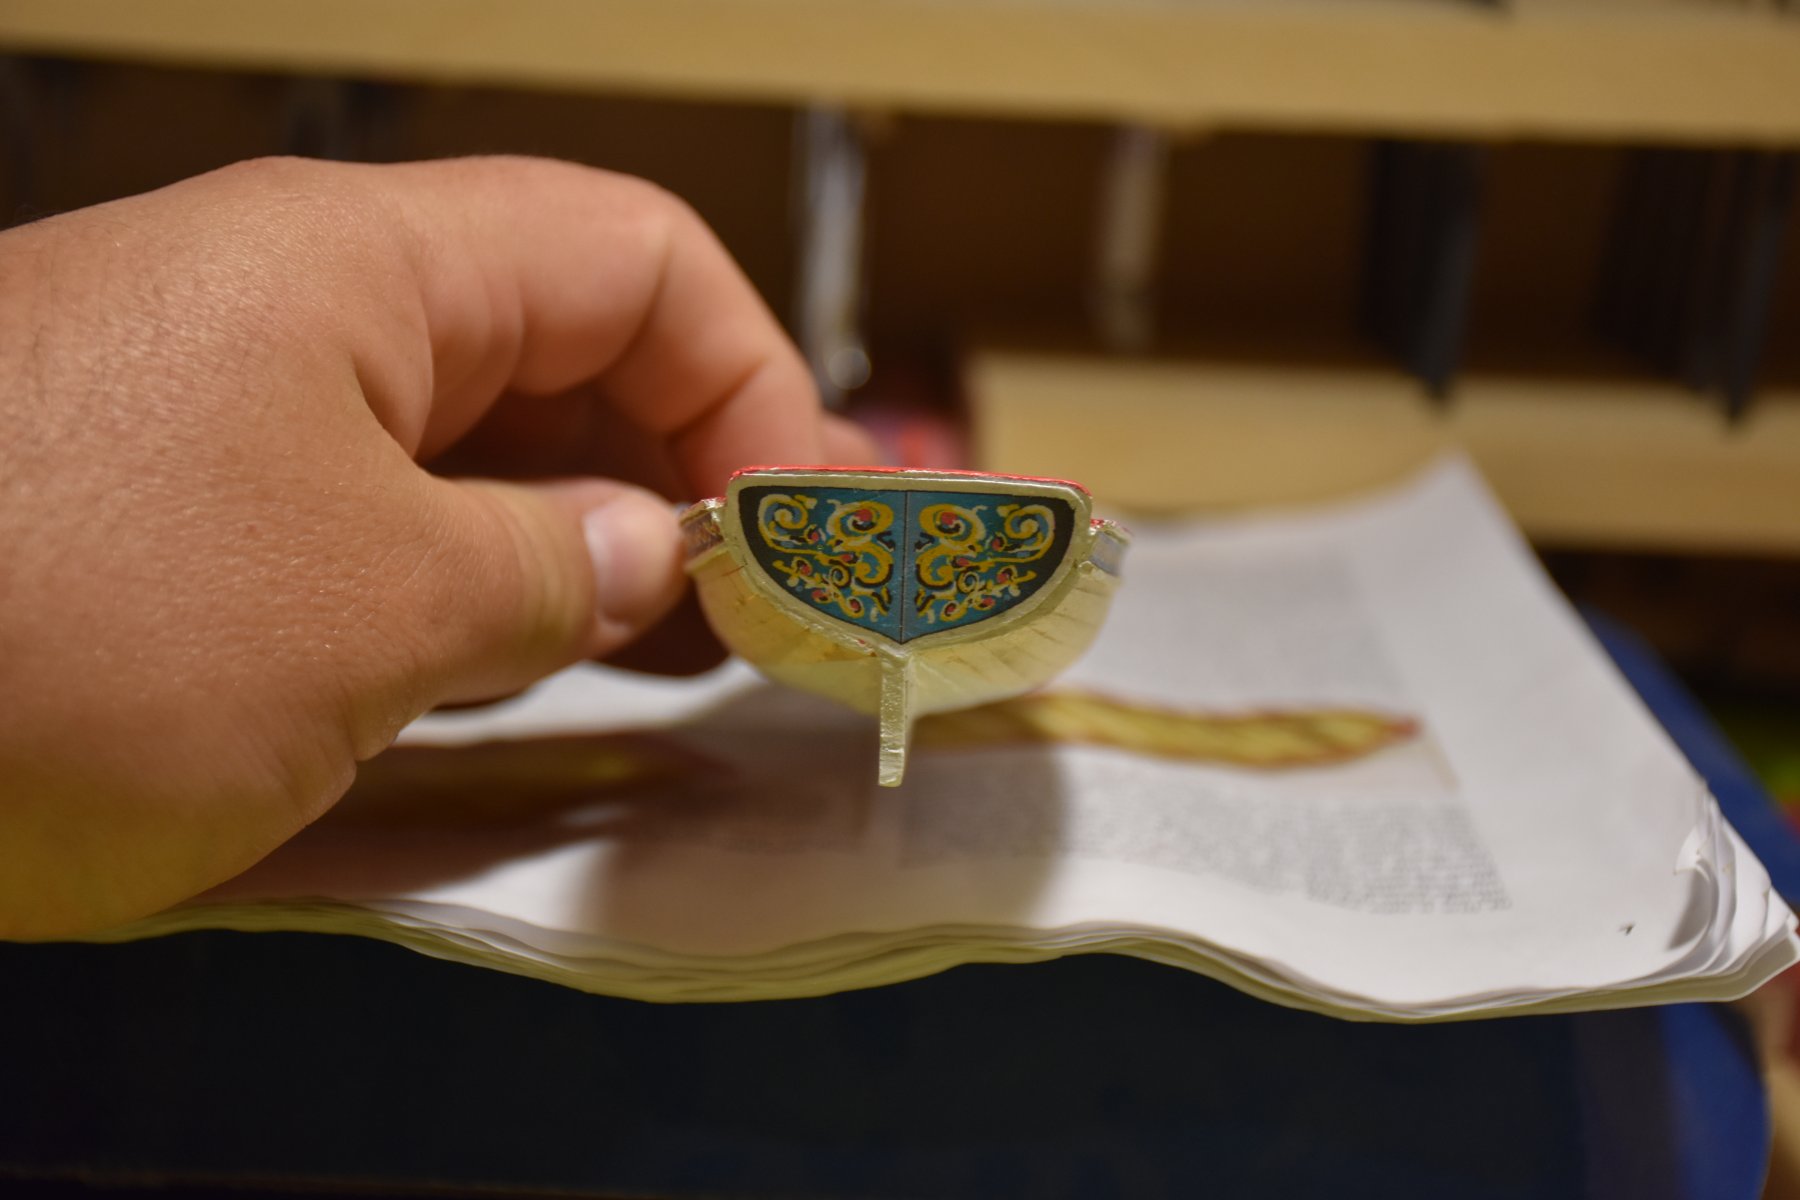
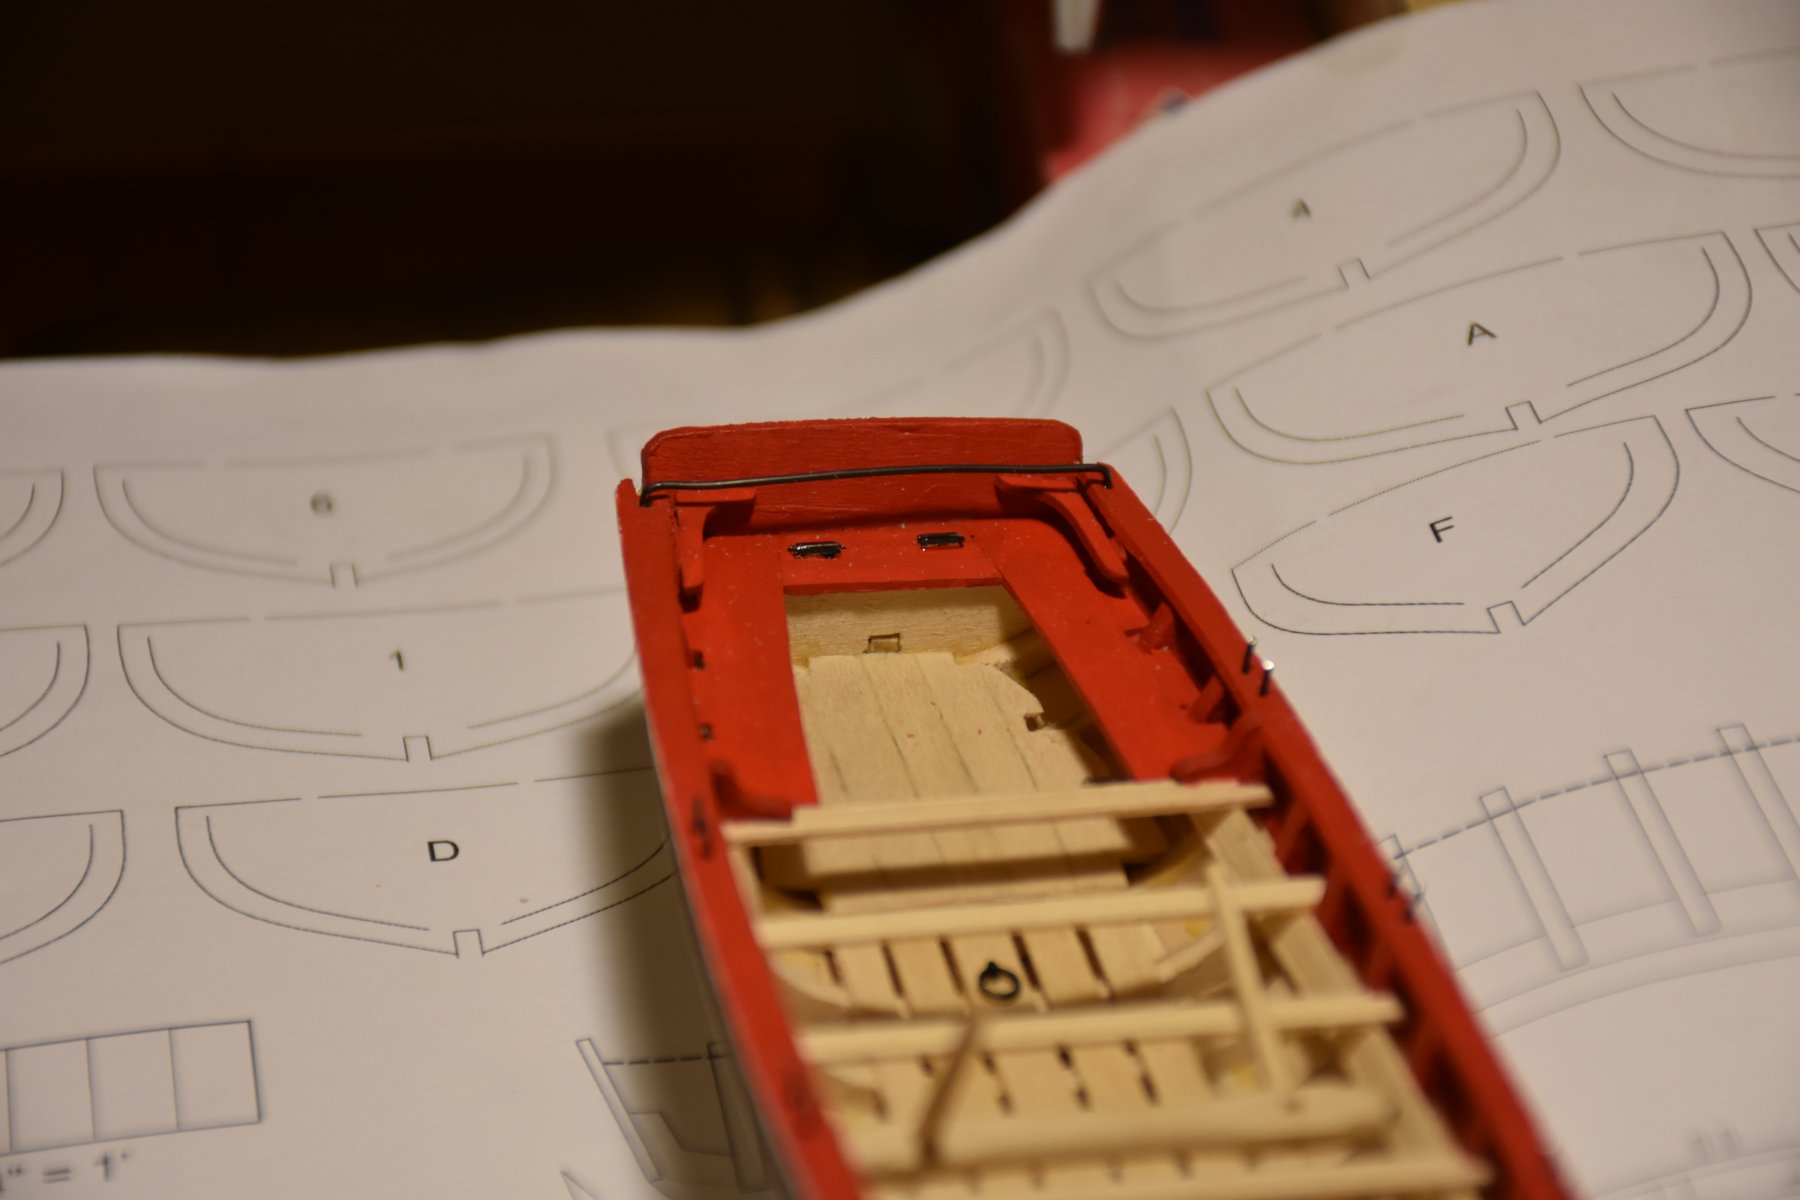
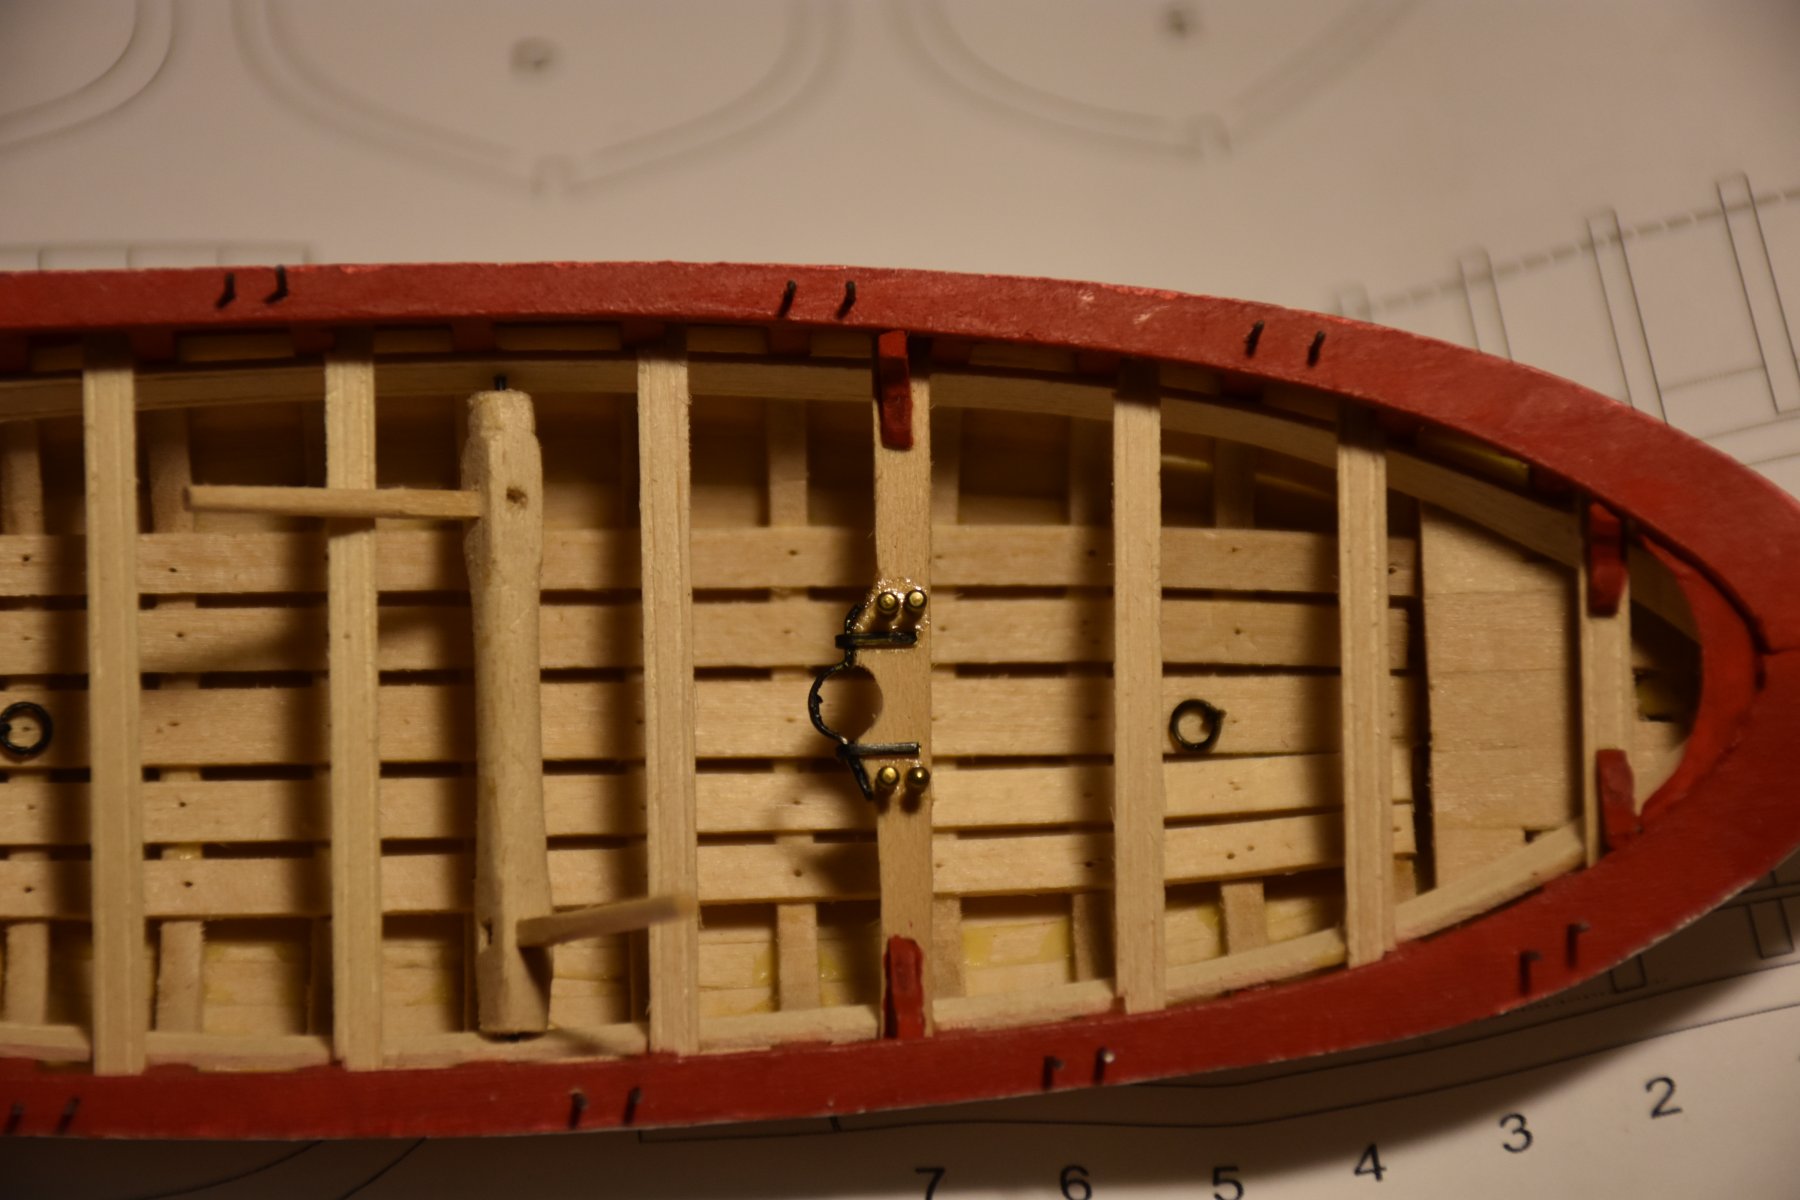
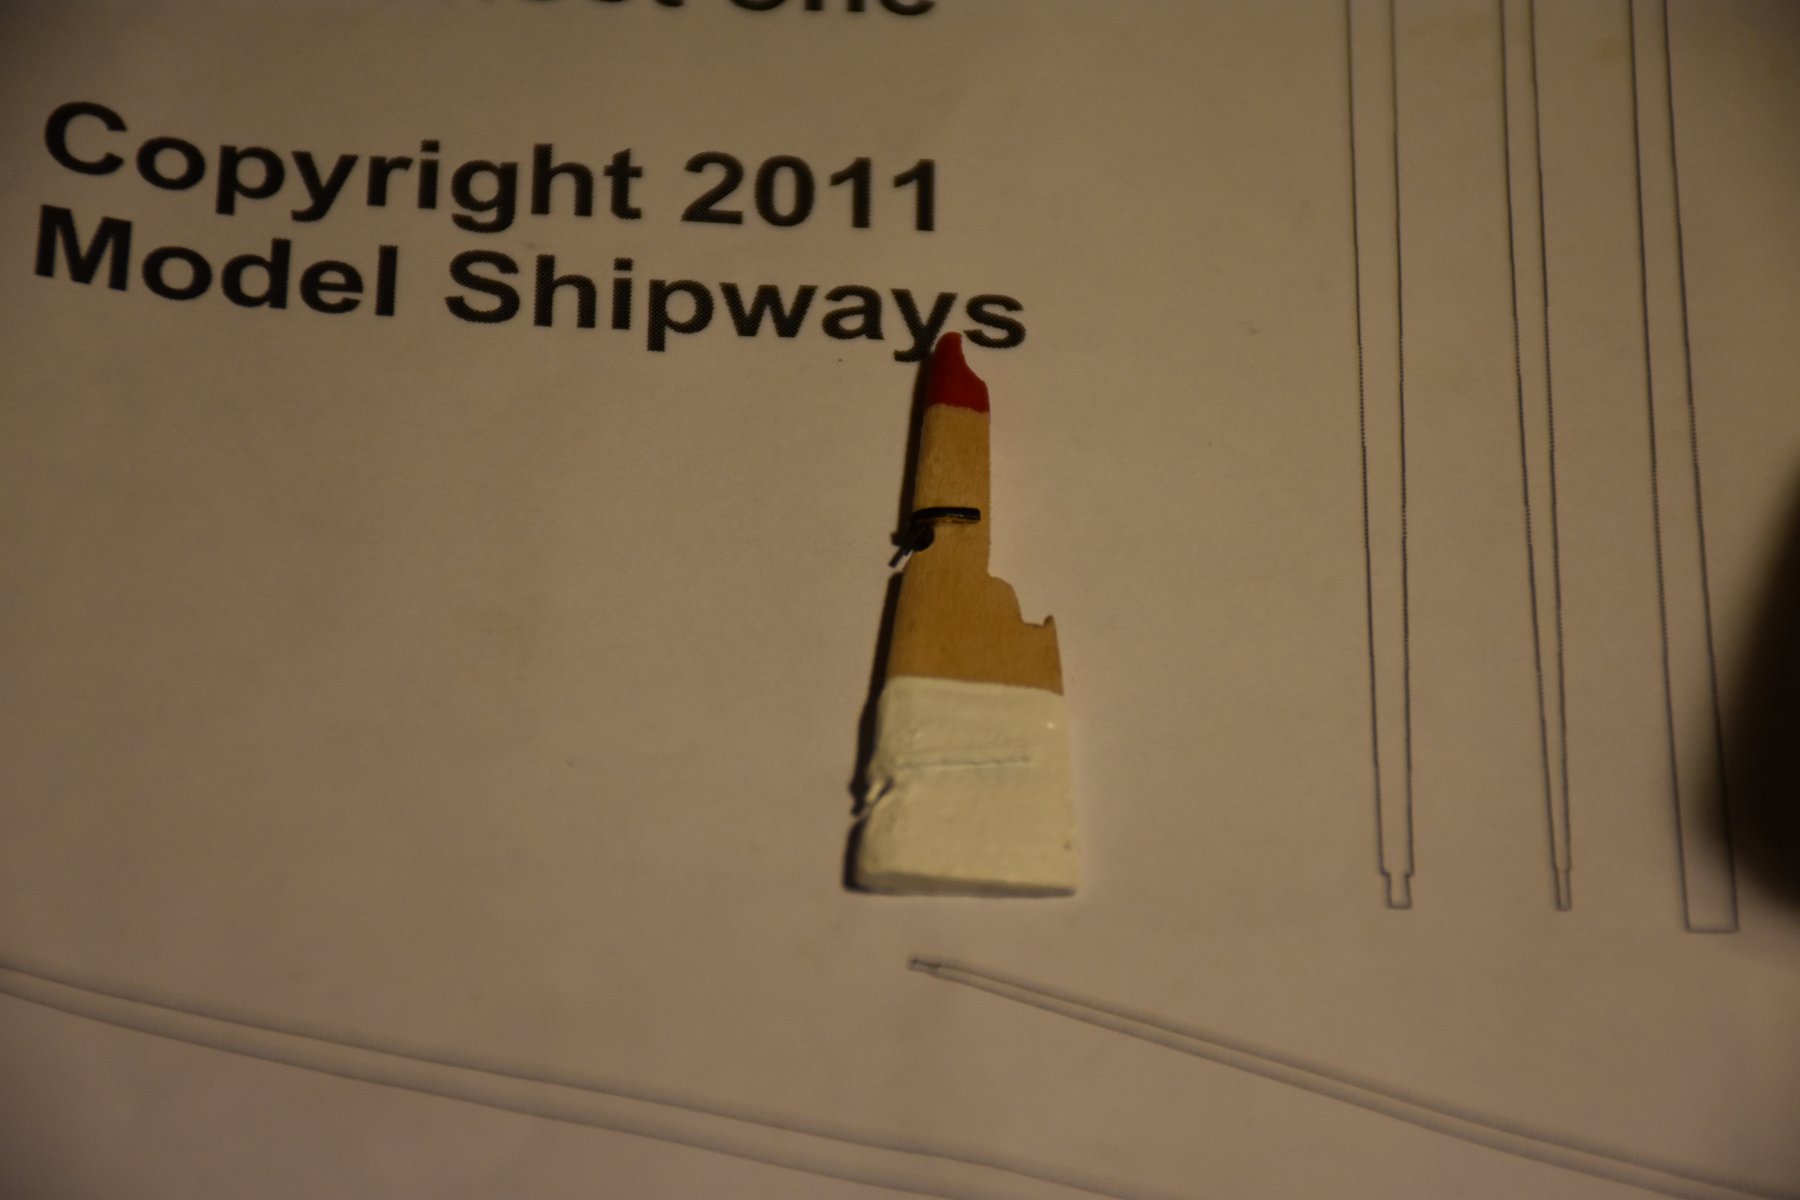
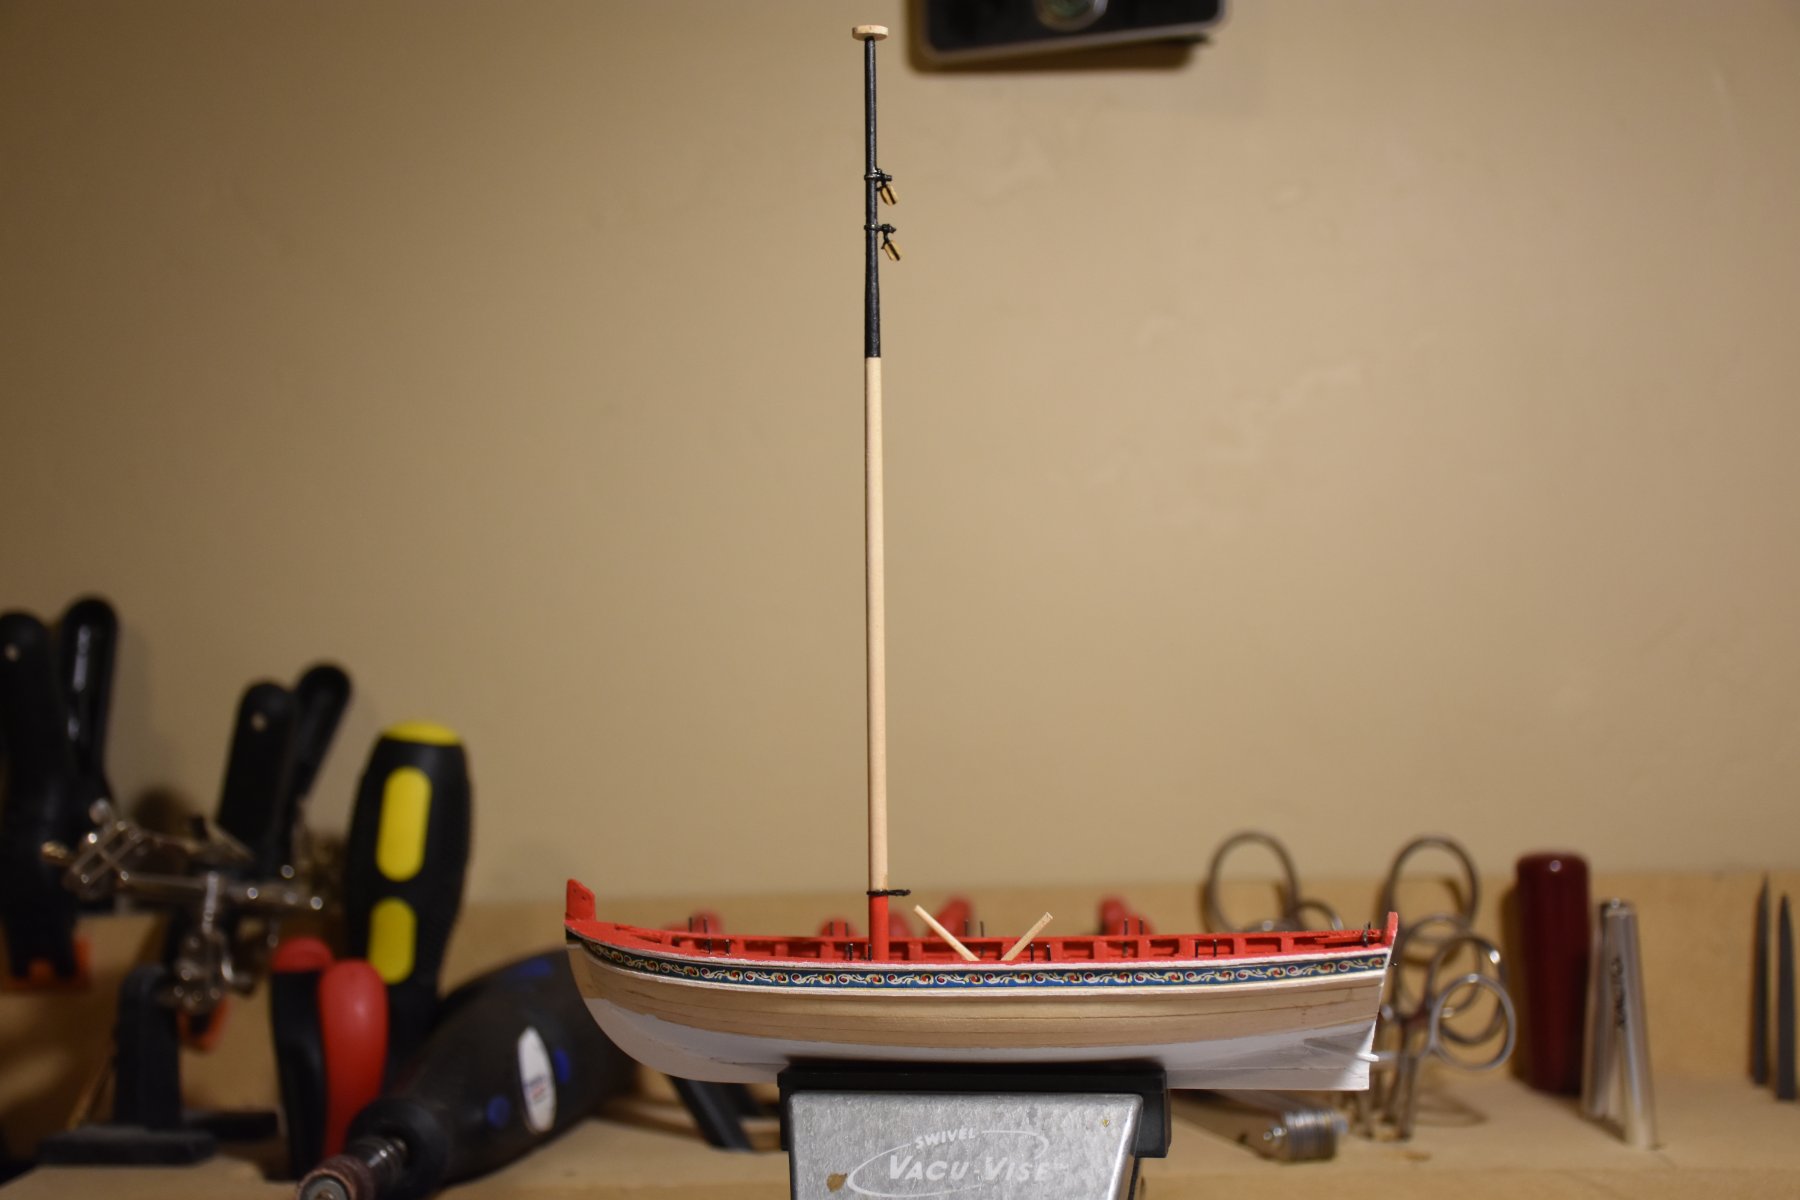
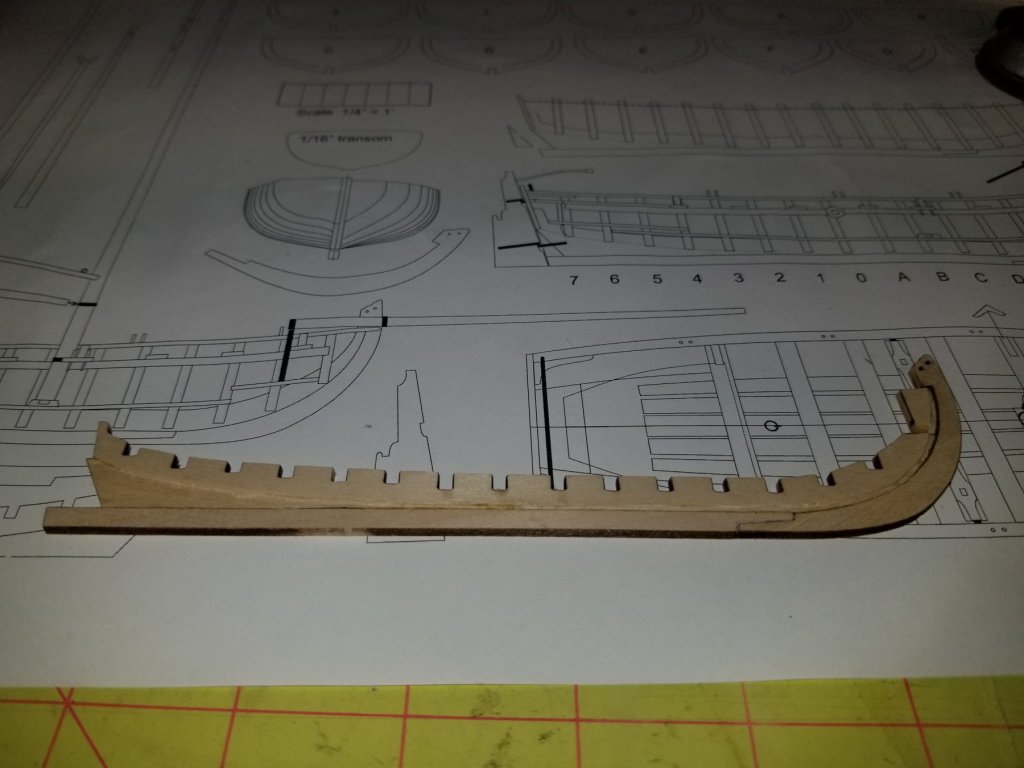
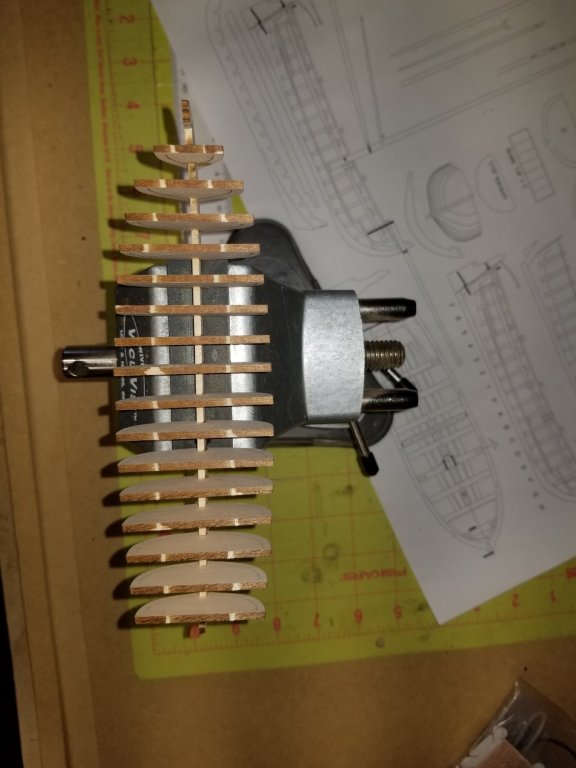
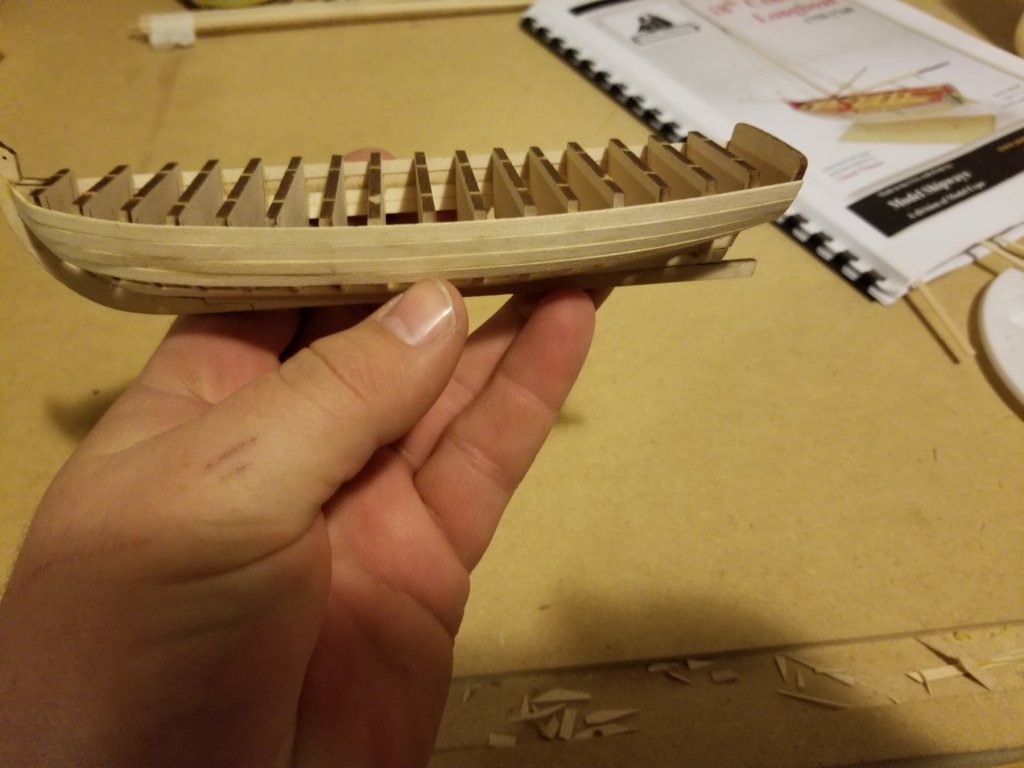
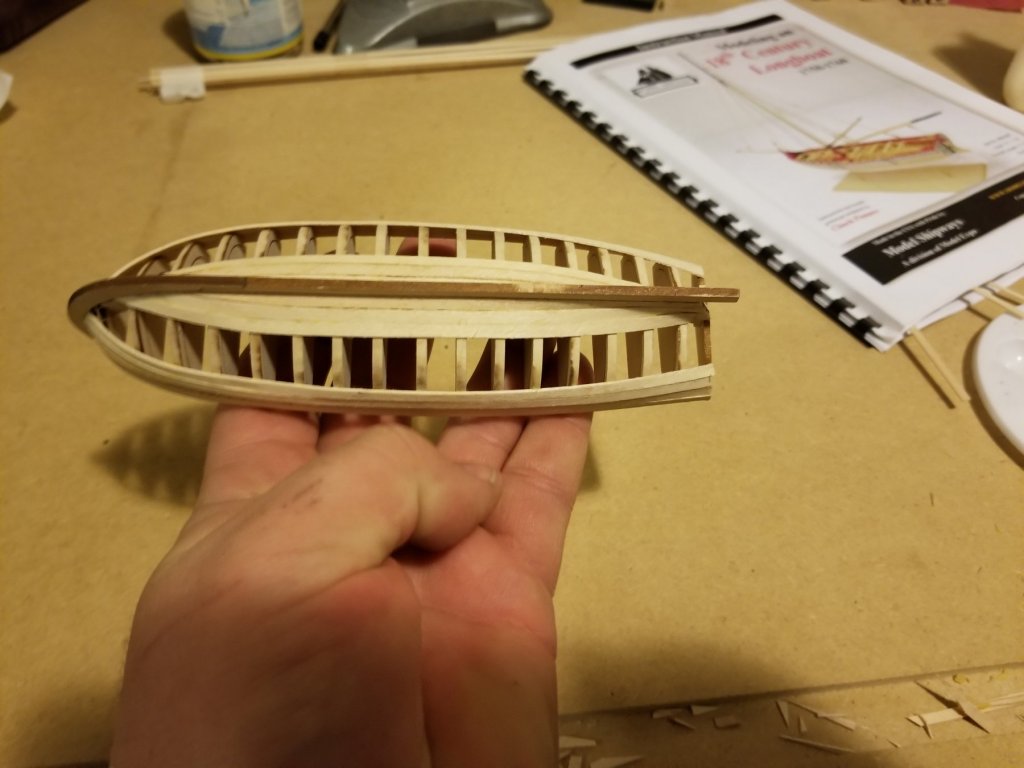
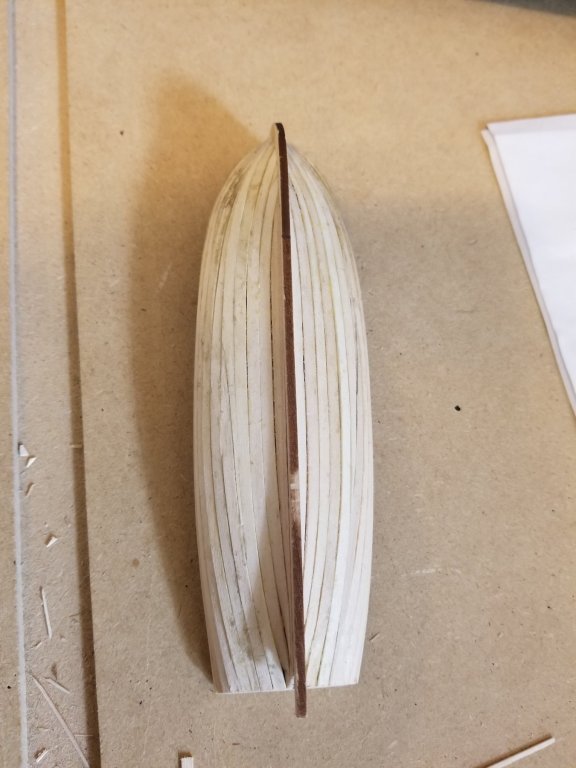
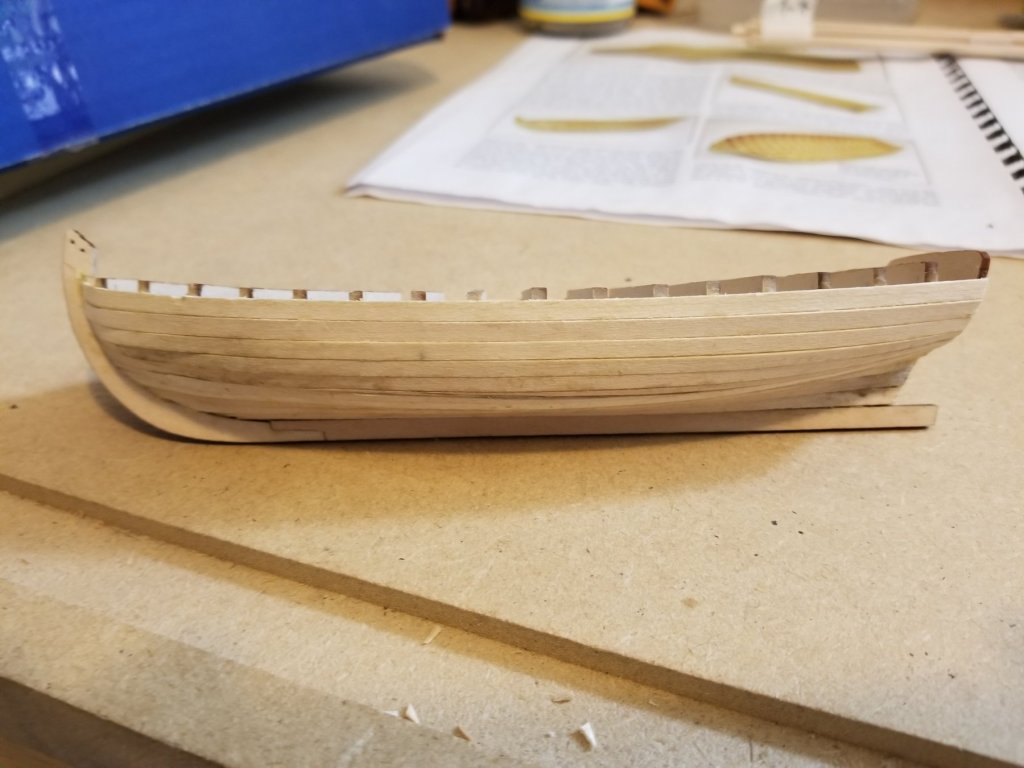
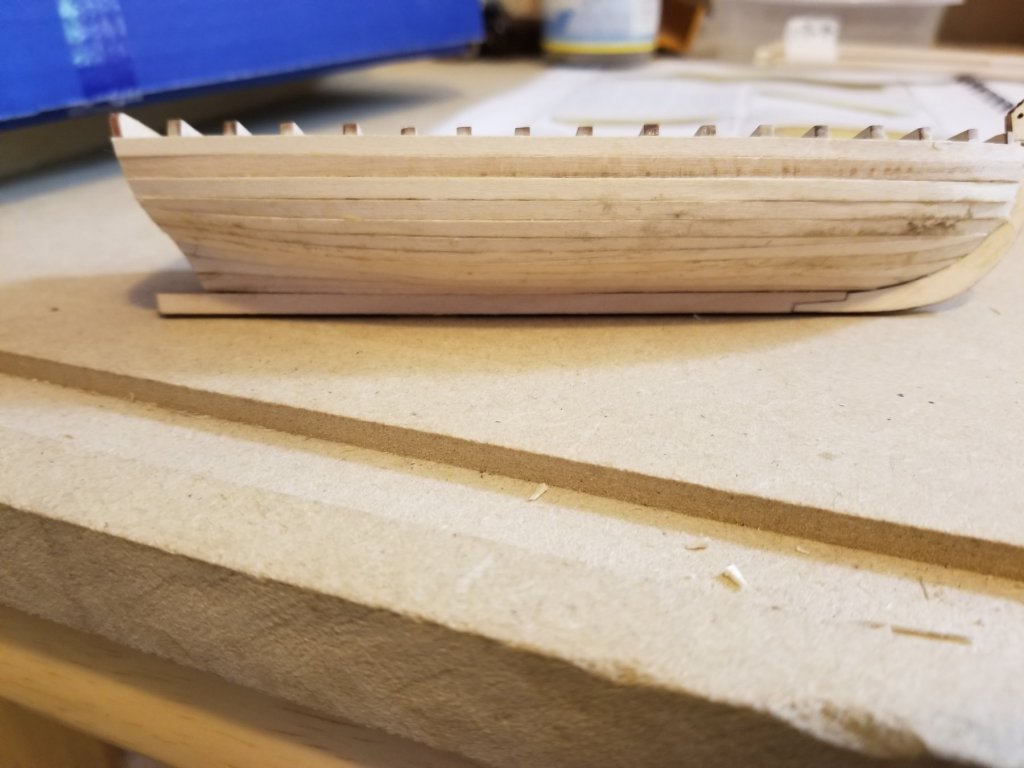
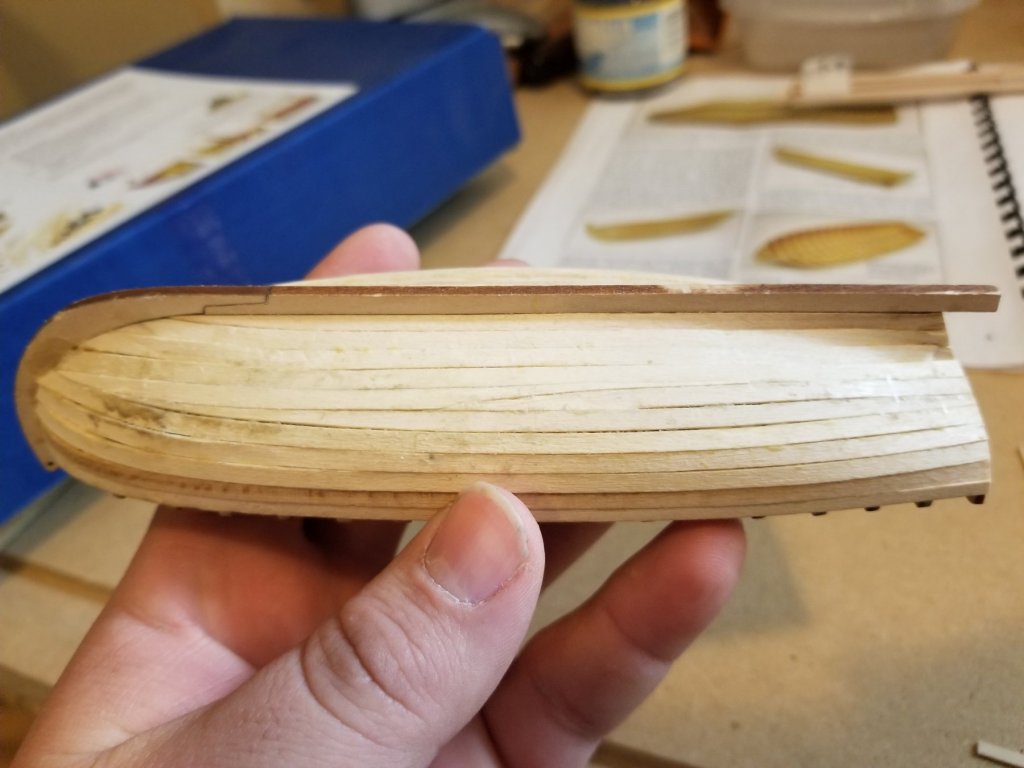
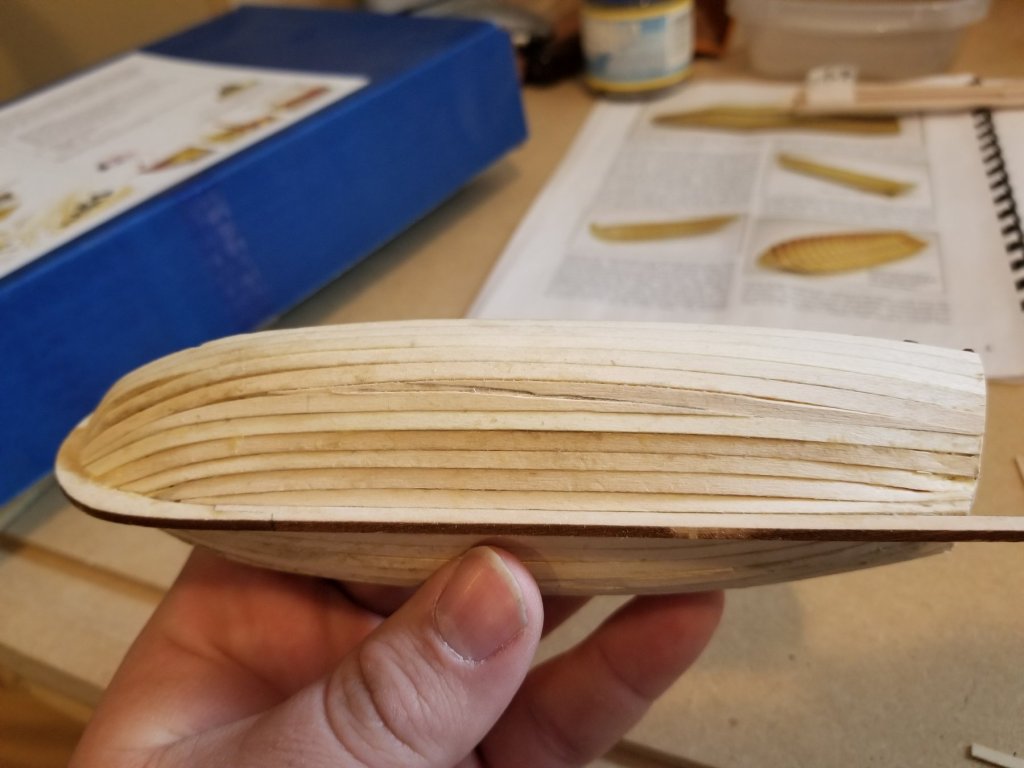
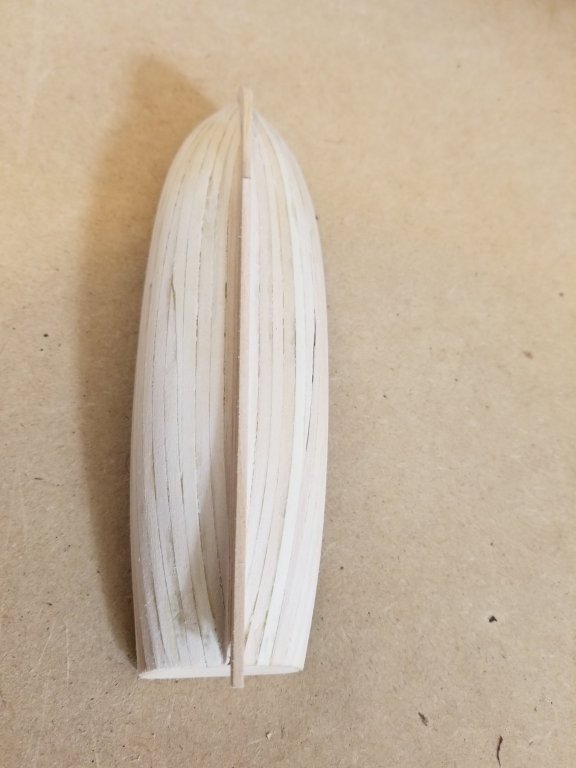
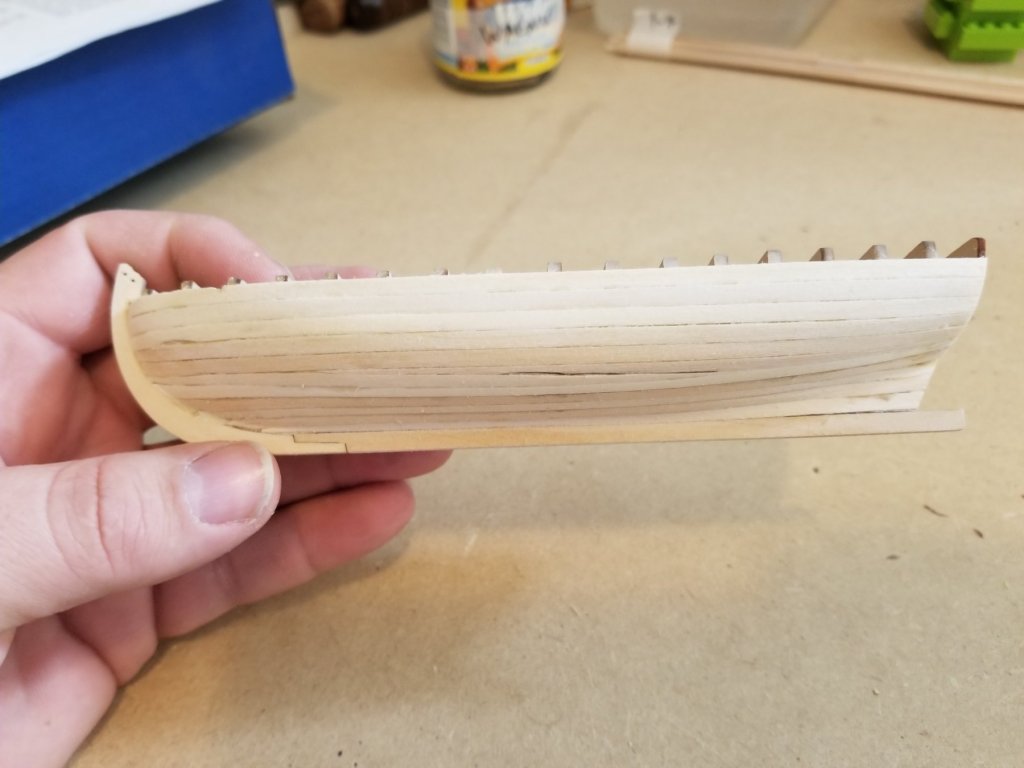
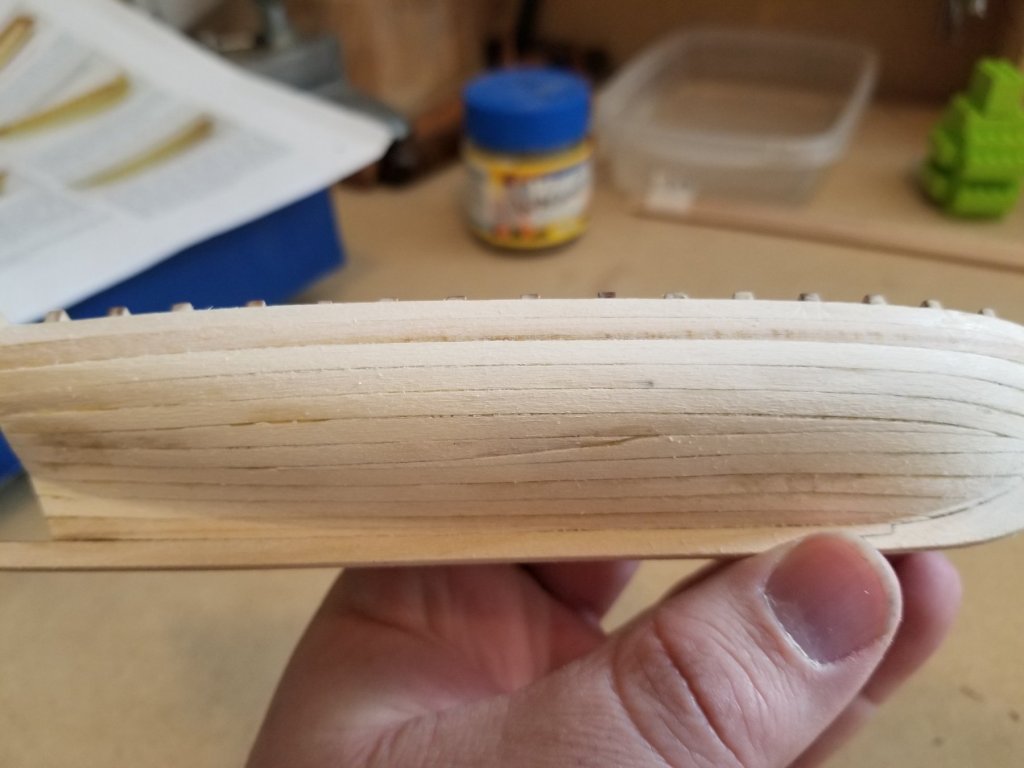
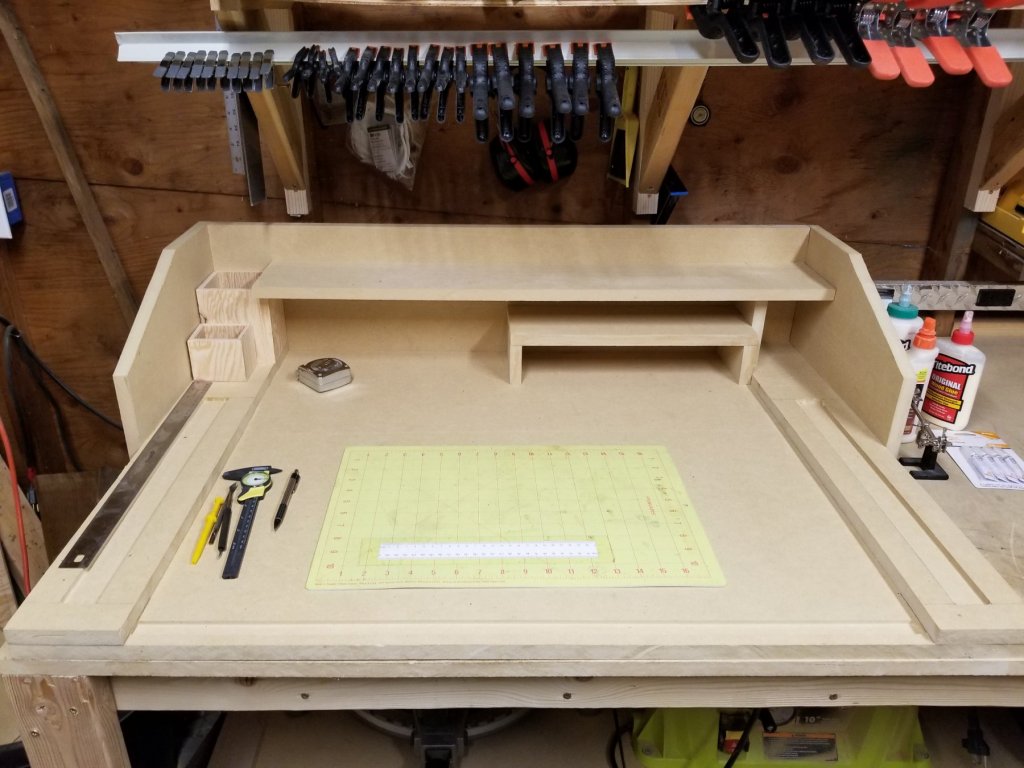
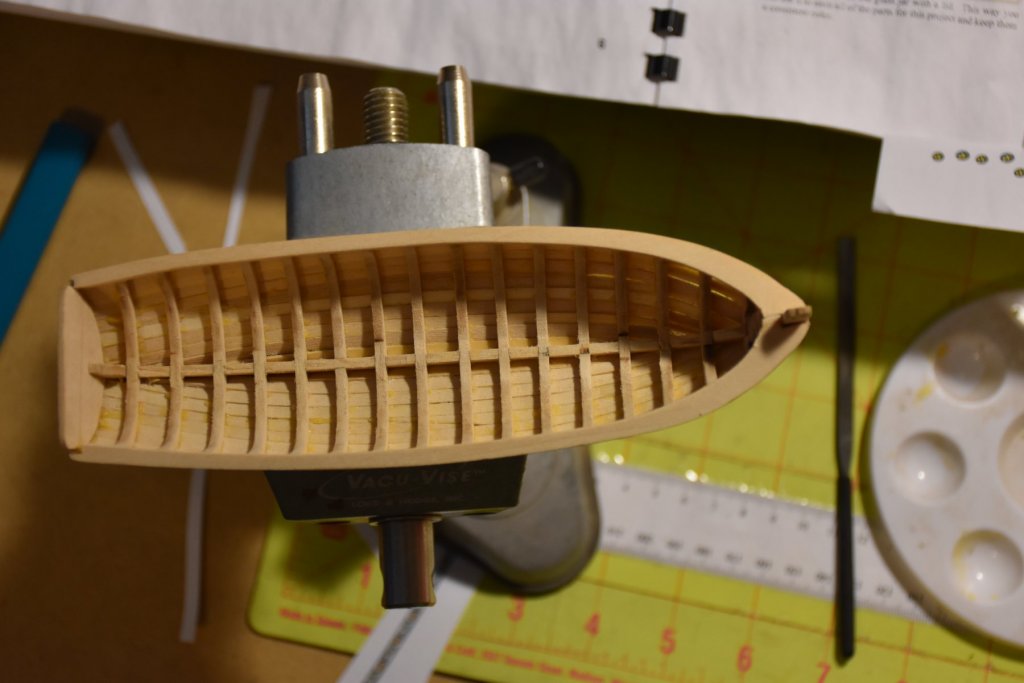
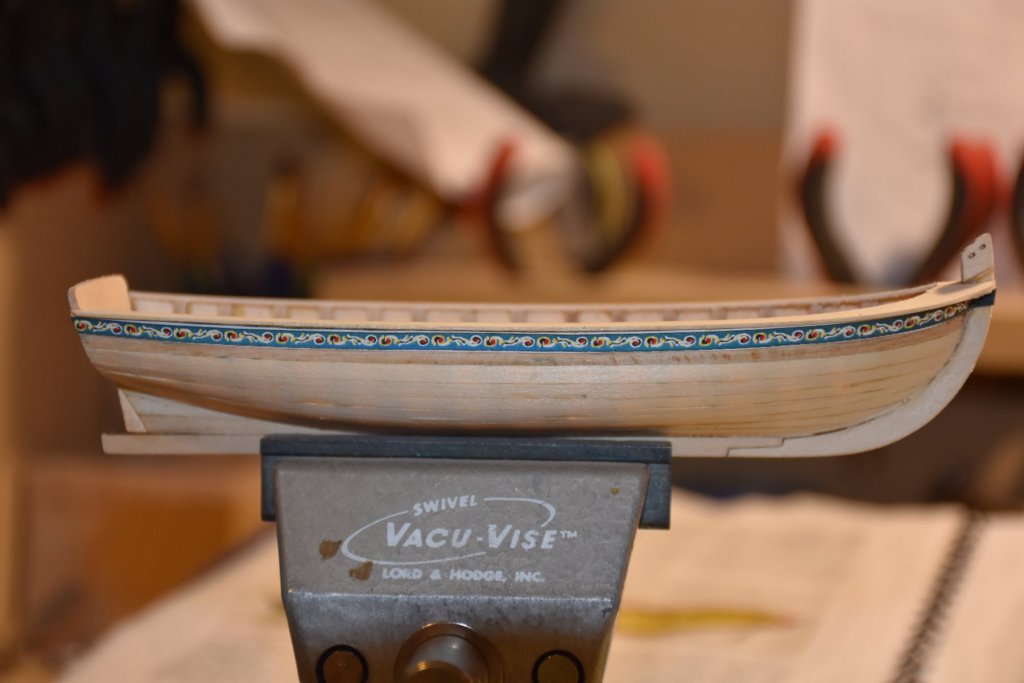
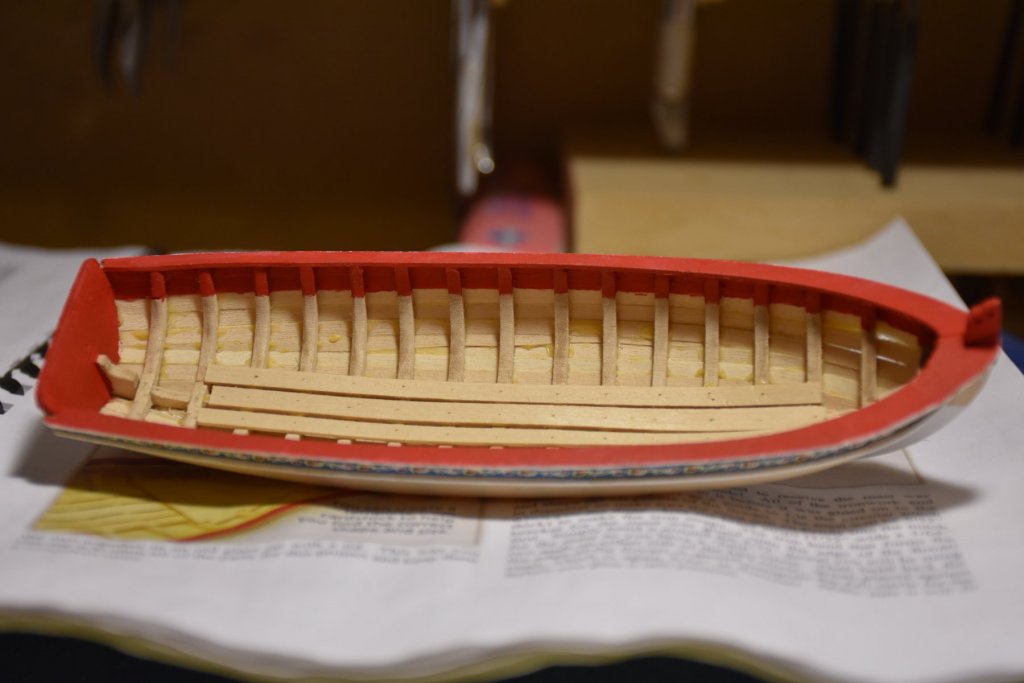
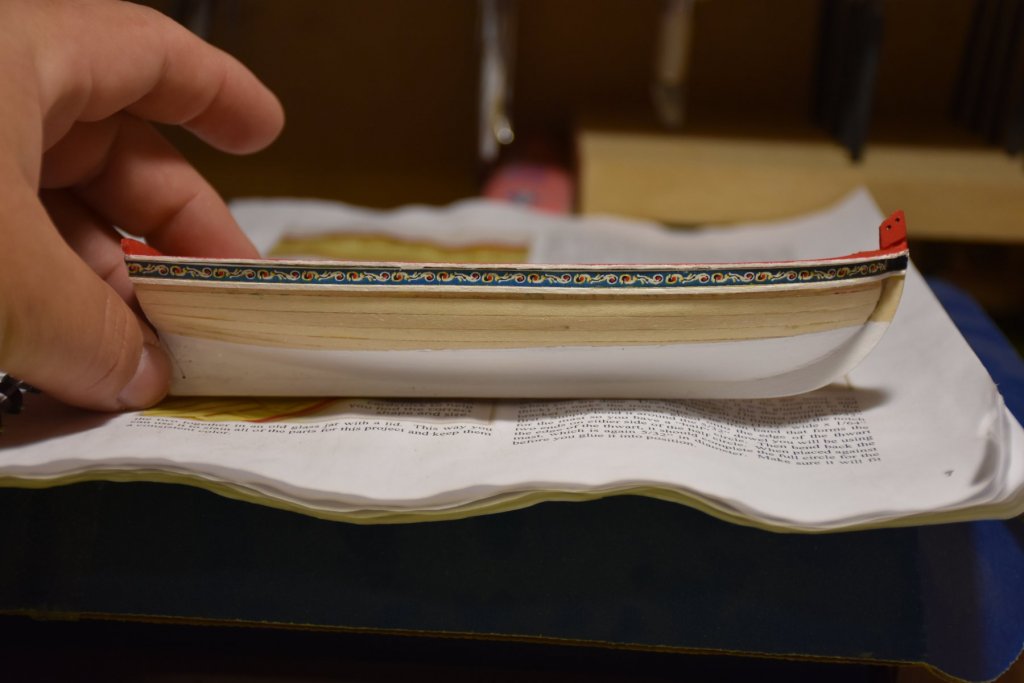
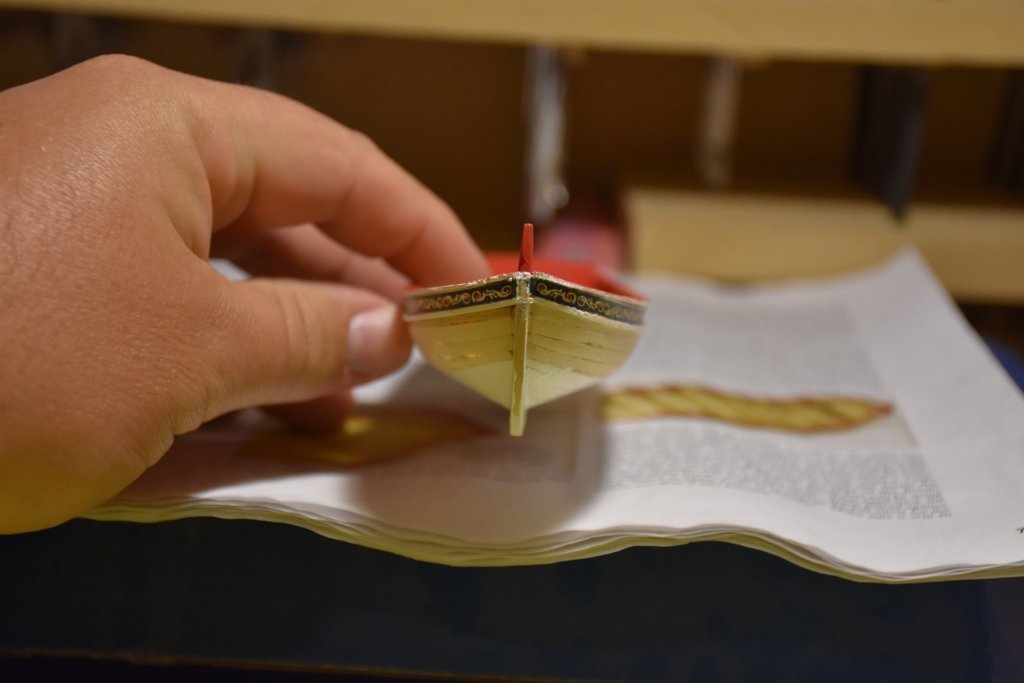
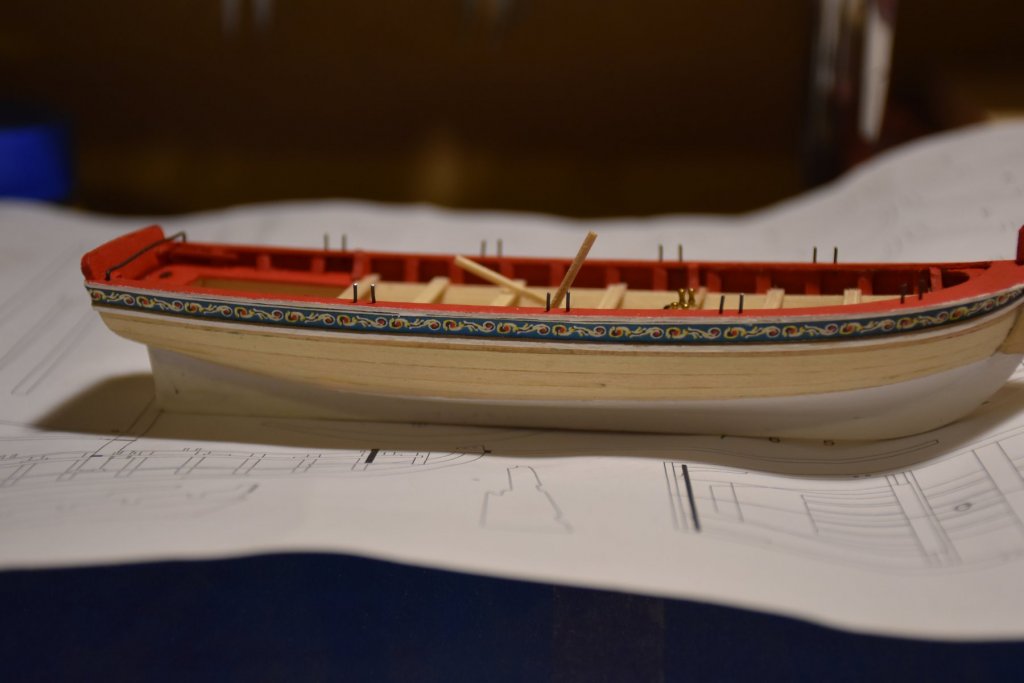
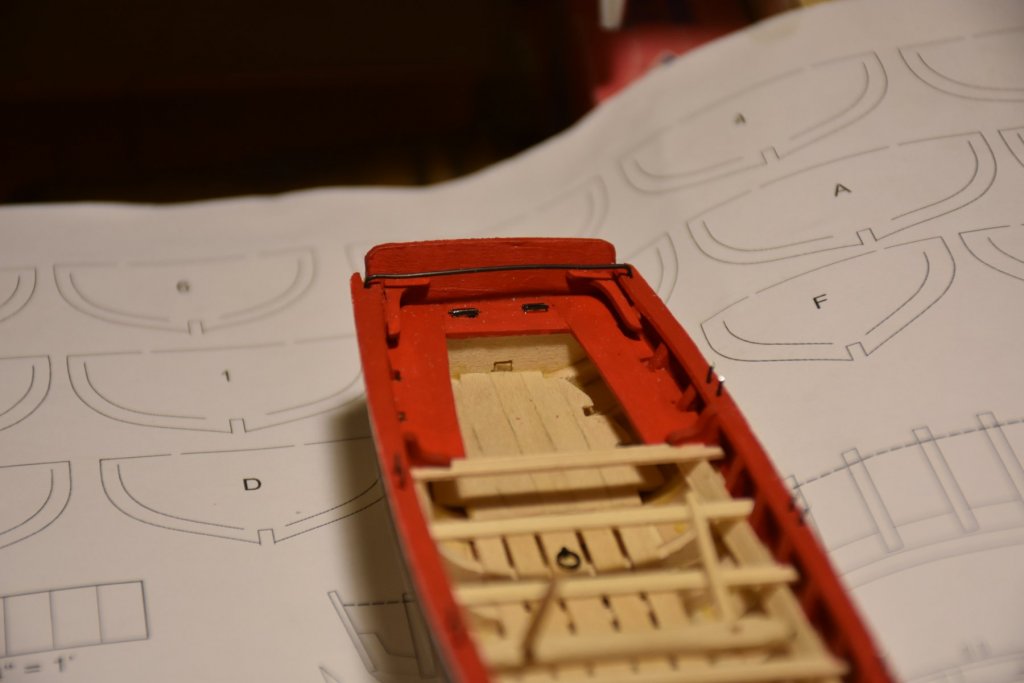
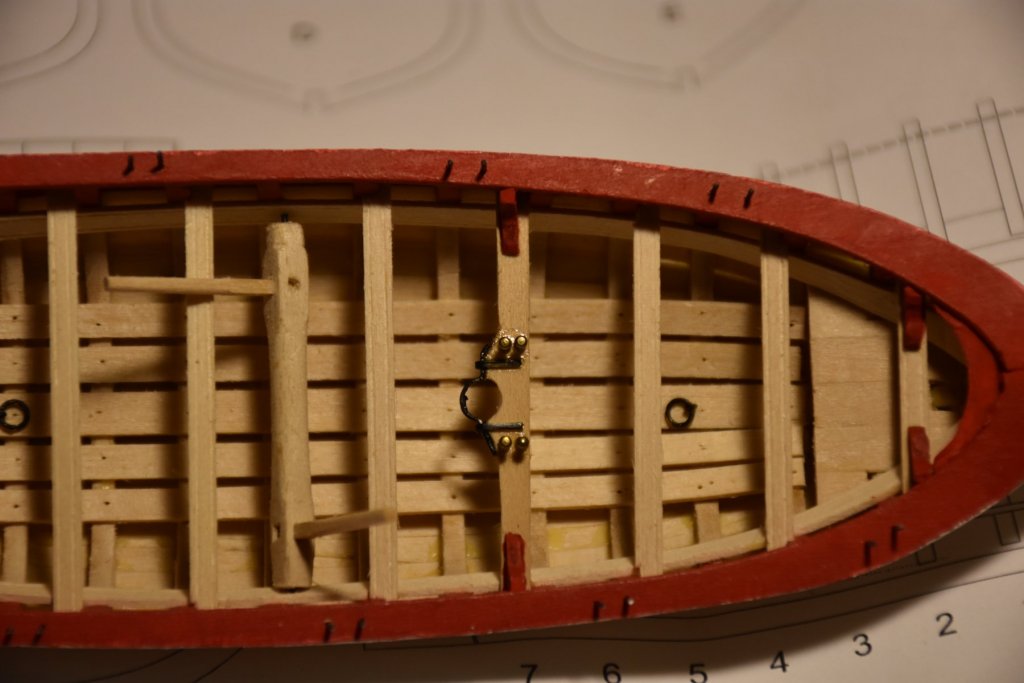
Technically this is my second build log, but it will be my first complete build. The first being the HMS Endeavour's Longboat by AL, however I never got very far with it before I switched to this one, then this sat on the shelf for almost 2 years and I have finally came back to it to finish it. I deleted the build log for the Endeavour's Longboat because there wasn't much there and I don't plan to go back to it for quite some time. My next build is to arrive Tuesday, the Model Shipways Syren US Brig, I'm excited to get started on something much bigger than this little guy, but this one has been fun. I have done a lot of plastic car and airplane models as a child, as an adult I have made some remote control rock crawlers, I also enjoy assembling and painting fantasy miniatures. I have never built a wooden model ship before, but it has always been something I have wanted to do. So here are some photos showing my progress along the way, I'll try to add some commentary as I go. Unfortunately I didn't get a picture of opening the box and the contents, however I did the same with this kit as I did with my Endeavour shown below. I went through and took inventory of all the parts and put masking tape tags identifying what the various parts are. Here is a workstation and tool storage I built. Next up is attaching the false keel, then adding the bulkheads. I did all this back in September 2017 when I purchased the kit. Then for whatever reason, life I guess, I didn't come back to this until February 2018 when I started planking. I think maybe I was a bit scared of the planking, not wanting to mess it up. In the end I think it came out ok, especially after painting, but I have since done a lot of reading and now know what I could have done differently. By the end of March 2018 I had completed the planking, sanding, and removing the insides of the bulkheads. Then it stayed like above until the end of last month when I started working on it again. I am now nearly finished, I only have about 3 more things to tie on for the rigging and finish carving out the pedestals for it to sit on. After starting up again, I sanded away all the laser marks from the inside of the bulkheads, added the cap rail, friezes, paint, and began working on the inside details. I had attempted to make the cap rail out of a single solid piece of material, but it ended up splitting on me on the port side of the stem. I also broke the stem off at least twice during the whole build so far. Here is the rudder and the mast attached. I still have to add the friezes to the rudder, it is removable not permanently attached. I have almost all the rigging done, I did not get photos of the bowsprit, boom, or gaff, but they are made and attached. So there she is for now, that's all the photos I currently have. I will post more as I take them. I have to finish rigging the jib, attach the anchor, and paint the oars and I believe I'll be done. I certainly learned a lot from this kit, I have purchased the Granado by Caldercraft, but I wanted something with more instructions before I tackled that one, which is why I chose to purchase the Syren just last week. I'll begin it shortly, and look towards the Granado after I complete the Syren. There are certainly things I could have done better with this little boat, but as long as I realize that and learned from my mistakes, my next one will be that much better.


- 8 replies
-
- 4
-

-
- model shipways
- finished
- (and 1 more)
-
Thank you for the sketch, I understand now, I will try it.
-
Thanks for the info, I'm still a bit confused though. I'm lost on step 3 and the third turn with overhand knots. Then on step 4, do we keep those 3 turns of thread on the dowel and use the needle to go under those threads and wrap them with that thinner thread? I looked up what serving is and found pictures of jigs that hold a straight thread taught while you wrap it with another thread. What your describing doesn't sound like what I saw in those photos so I'm confused there on step 4. Thanks again, there is so much to learn. Not only how to actually build these ships, but the lingo behind it all. I'm about half way done with the rigging on the 18th Century Longboat, just did my first shroud and 2 sets of deadeye's, I think it turned out well, I'm enjoying this hobby very much.
-
Thank you both, very good information and pictures, thank you very much.
-
I am very new at building model ships and am in the rigging stage on the 18th Century Longboat by Model Shipways. I am also doing a lot of reading and research on various topics for my next build the Model Shipways Syren. I believe I understand the difference between running and standing rigging, running is basically any rigging that moves to control the sails, standing is the support rigging that holds up the masts, it does not move. Pardon my incorrect or lack of terminology, my question is, the thread or rigging used to attach a block to a mast or boom, etc, should it be black since that part of the rigging wouldn't move? Wouldn't that part of the rigging permanently hold the block at that location on the mast and the hole through the block or wheel/pulley on a real ship, would be for the tan running rigging? So should I be using black or tan thread to attach the blocks to a mast? What about a block that would have an eye for a hook or other rigging line to run through it? Thank you much! Oh and one other quick side question, I see the word "strop" used often, but can't quite figure out what it means. I have looked in the various guides or books in the Articles Database and that word is not listed in either the Steel - Art of Rigging or Biddlecomb 1848 - The Art of Rigging.
-
Thank you all for your info, I have purchased the Caldercraft and was very surprised it arrived from the UK in just over 48 hours from the time of purchase. I decided for my first larger ship to go with the cheaper of the two options. I think after this one is done I really like the Amati victory model Revenge, and I think my skills will be sufficient for a ship of that depth. I have only looked at the contents, not yet taken an inventory. I am a single parent of a 9 year old boy and my parents usually buy a Christmas gift for him to give to me, they would never spend this much however. So I decided to buy it for myself and I will let them pretend to order it for him to give me. I have been dropping hints to him and my parents will guide him to that choice of gift. So for now it will remain on my shelf out of sight until Christmas, until then I have an Artesania Latina HMS Endeavour Captain's Longboat and a Model Shipways 18th Century Longboat to keep me busy and teach me the appropriate skills needed to tackle a ship like this.
-
I can't seem to find any comparison between the two, they are nearly the same in size and the same scale. What differences are there? Is the Amati version worth the extra cost of $200? The Amati seems to be a bit more detailed in the photos but I can't quite tell, I have been looking at both on the Ages of Sail and Ship Wright websites. I have searched the forums here but haven't found any direct comparison or explanation of any differences. Thanks.
-
I have always wanted to get into model ship building and now I finally am. I have built plastic models as a kid and as an adult I have built and painted many tabletop miniatures for hobby only, never have played the games, and recently since buying my house 2 years ago I have a small workshop and have gotten into woodworking. I have been working in a hospital where a doctor has built and donated model wooden ships for display all around the hospital, seeing them has inspired me and since I have recently just wrapped up my last woodworking project I thought why not start a ship. So before doing any research I looked on Amazon first, after finding a model that was labeled for beginners I searched around for better pricing and Tower Hobbies had it a bit cheaper and a coupon as well. So I should be receiving the Artesania Latina 1/50 Endeavour Longboat on Tuesday. I have been doing a lot of research the past few days and while that is still a good kit to start with I have learned a lot just by reading stuff on this website, and have already got a list of some basic tools like files, hemostats, small pliers, cutters, pin vice and bits, tweezers, etc to buy. I will be making a purchase next payday for these tools as well as a few books and I think I will grab the Caldercraft HM Gunboat William as well. I like the appearance of that ship, the opening to the lower deck, and the larger size. Those two should keep me quite busy for quite a while. I look forward to learning more and getting started as soon as all my things arrive. I will likely start with the Endeavour Longboat first and will start a build thread when I begin. Matt