Matt H
-
Posts
181 -
Joined
-
Last visited
Content Type
Profiles
Forums
Gallery
Events
Everything posted by Matt H
-
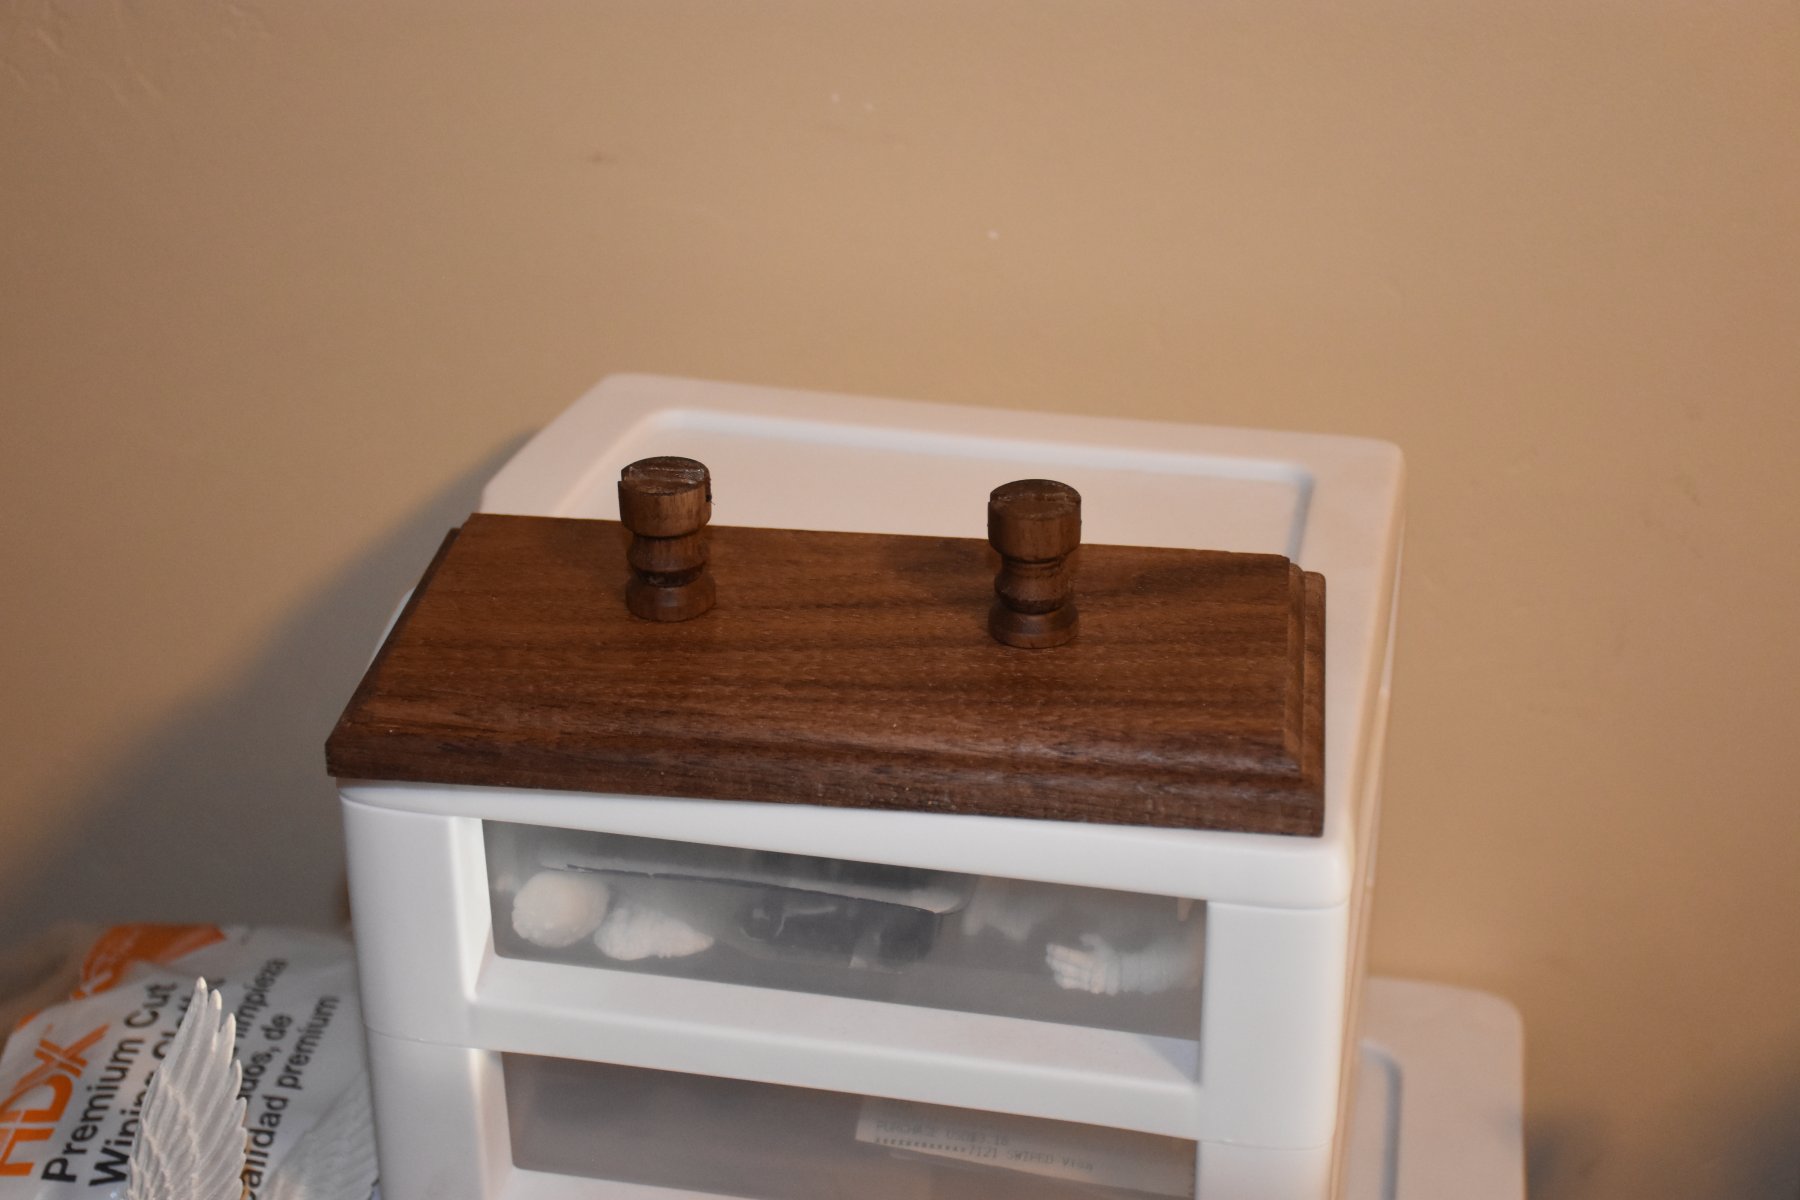
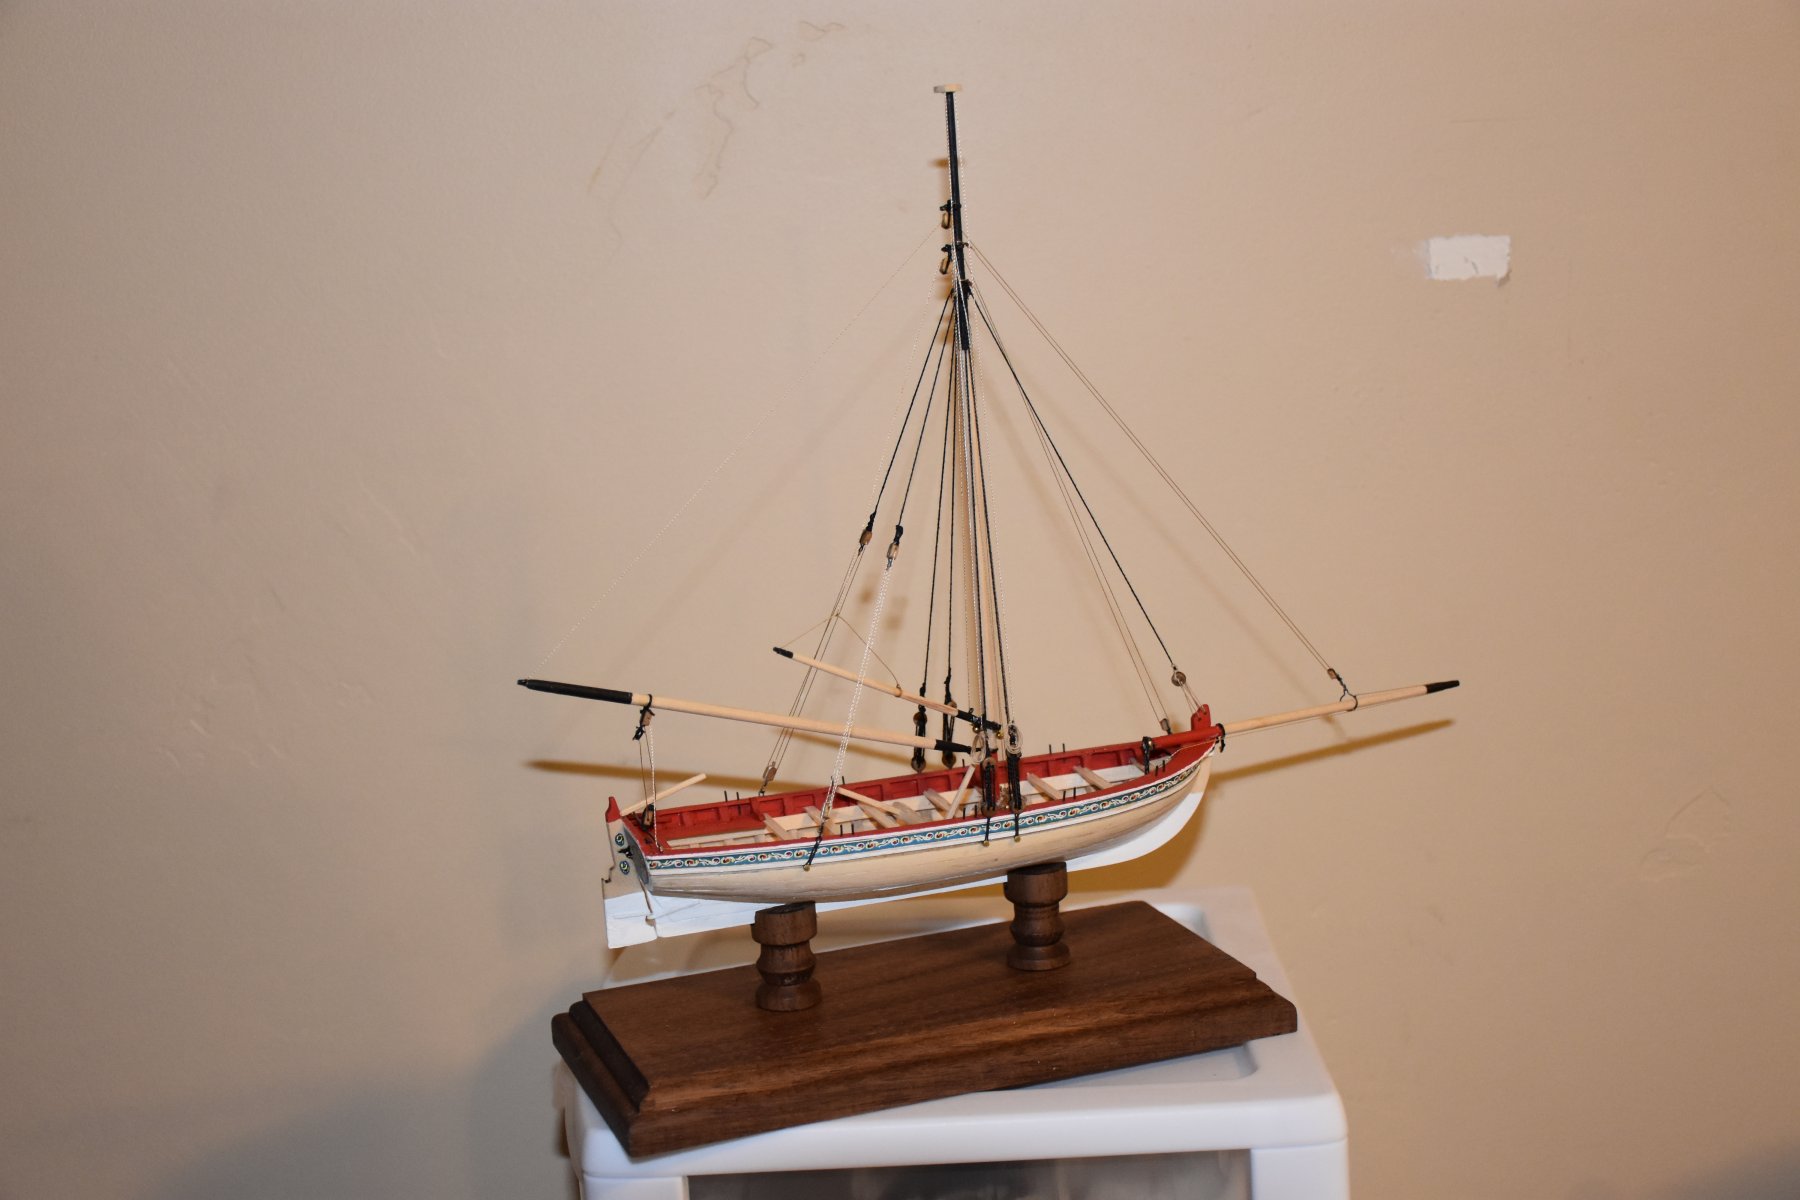
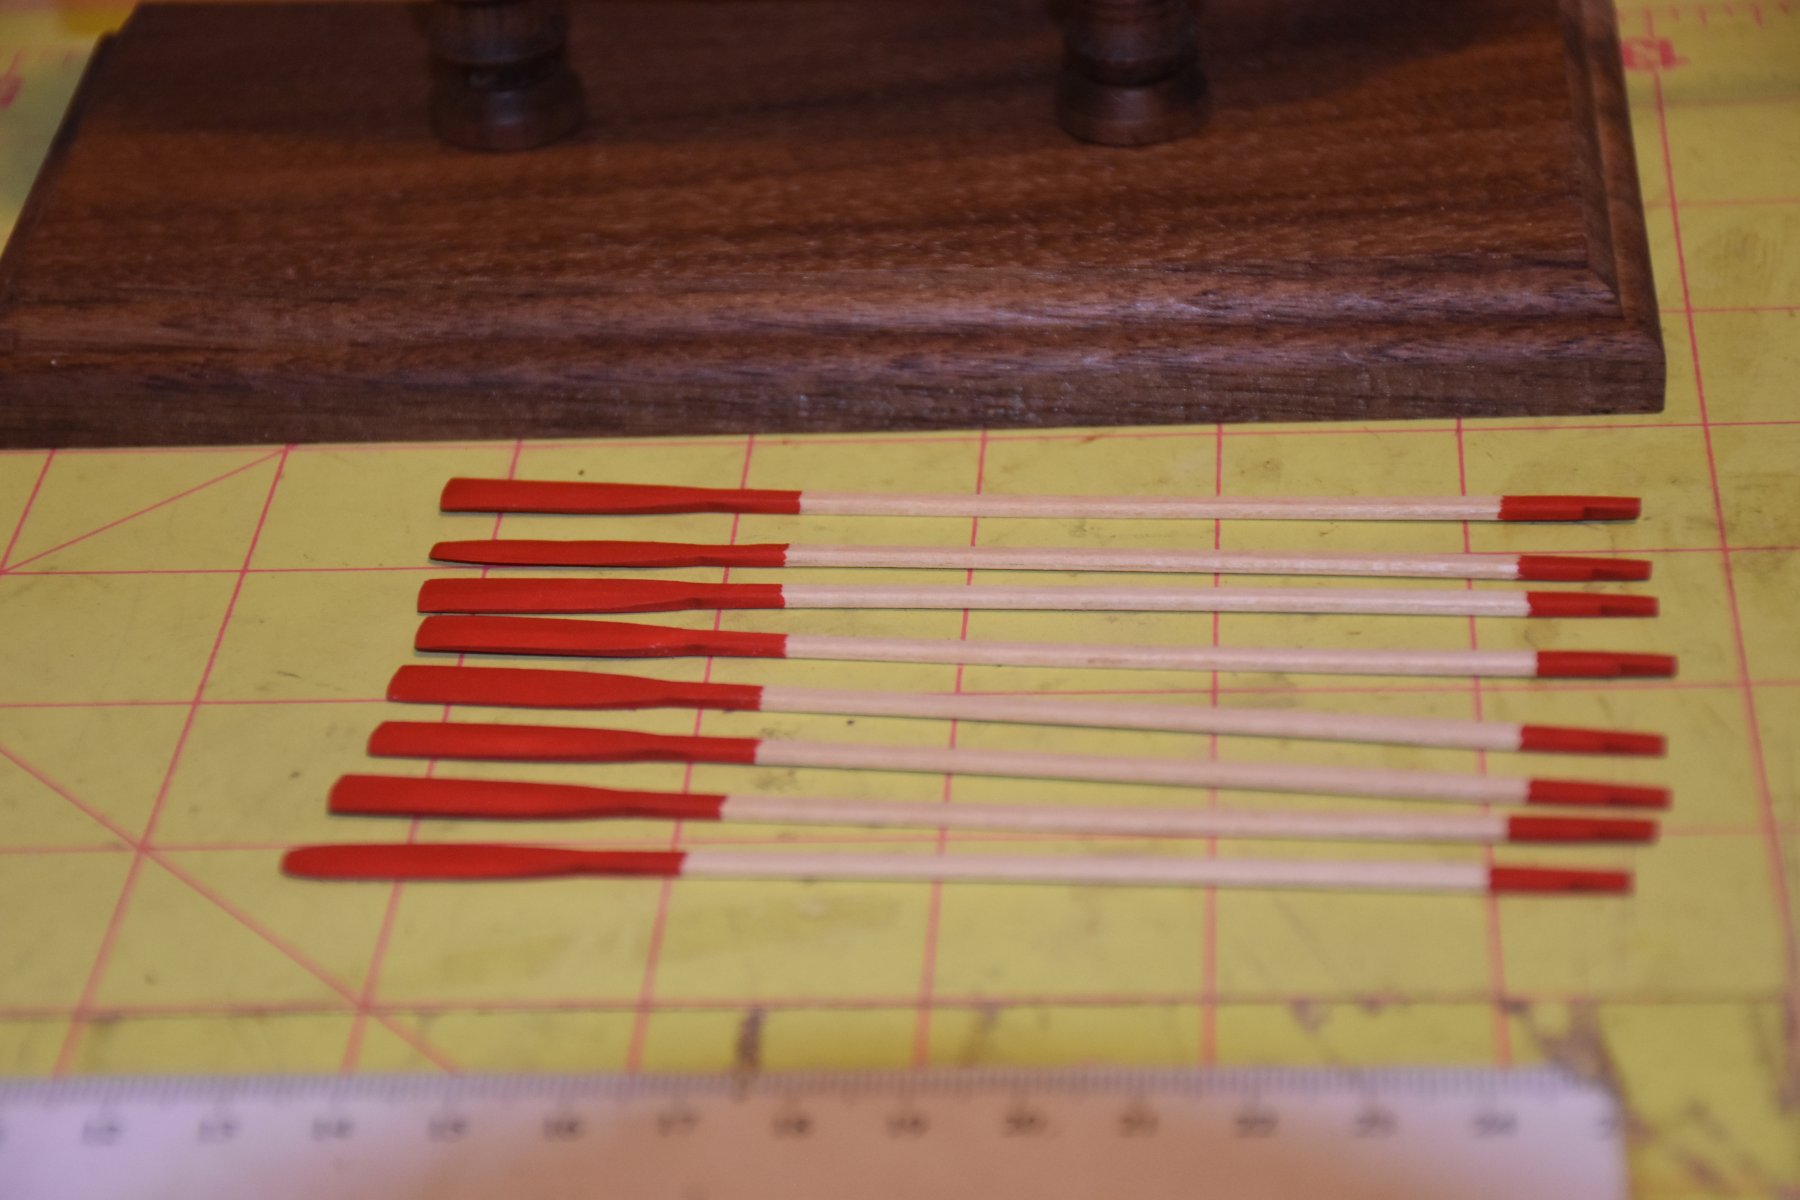
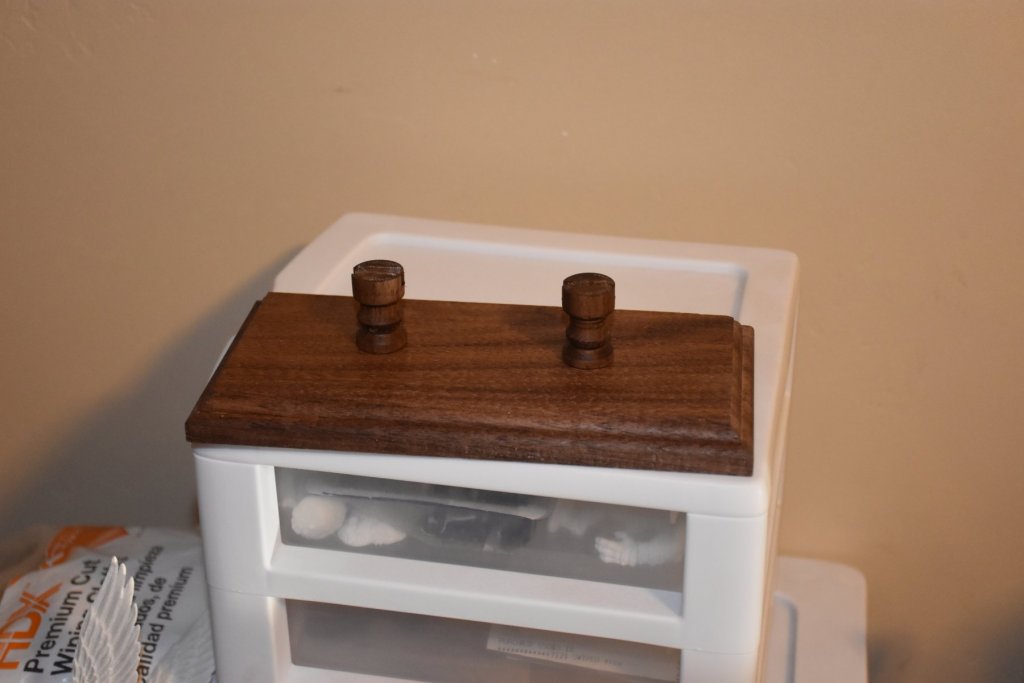
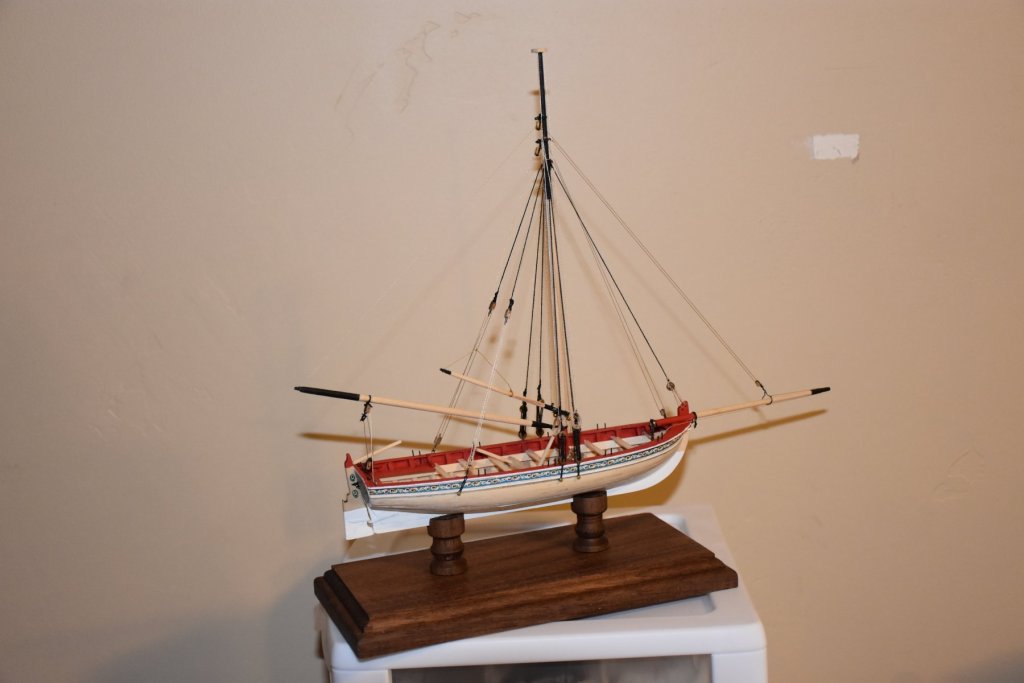
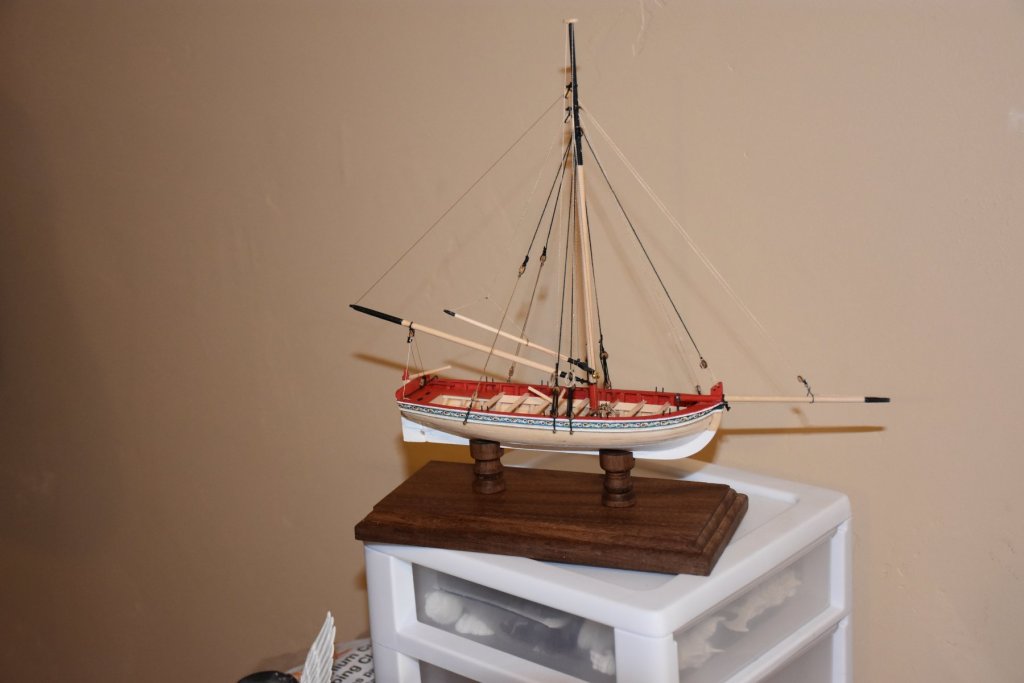
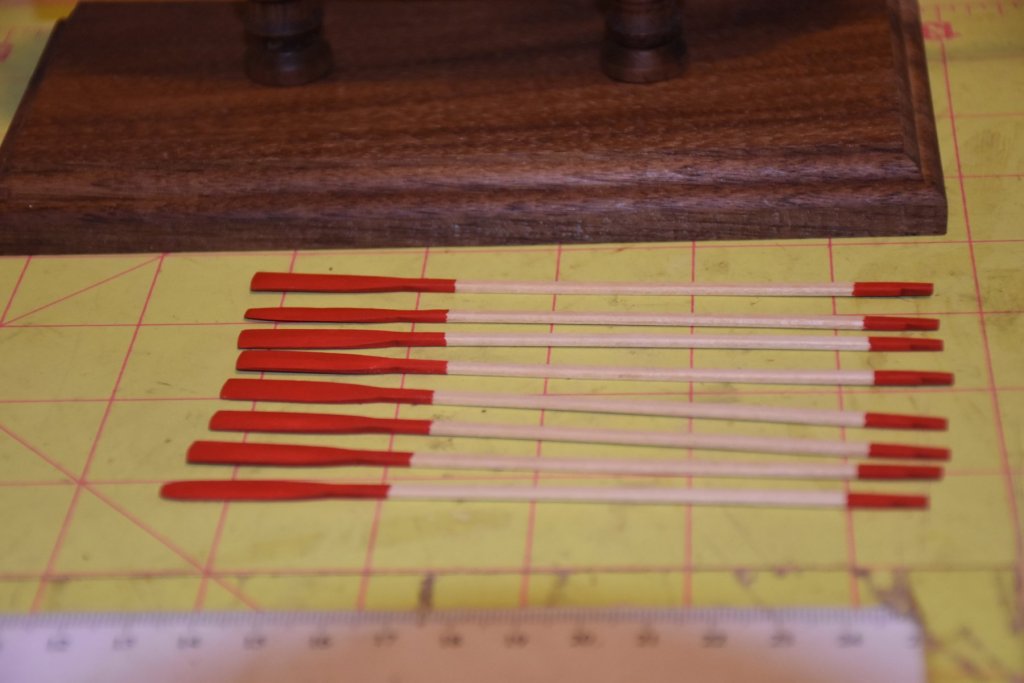
Just about done now, here I have my base I cut out of walnut and routed an edge to it. I also made two pedestals for the keel to sit in, also made out of walnut, and turned on my lathe. Both are coated in danish oil. I made the cut outs for the keel to sit in a little too big, so I placed double sided tape inside them to prevent it from leaning in the pedestals, and easy removal if I ever need it. Here she sits in on the base, with the rudder installed finally. Lastly here are the oars all painted up.

- 8 replies
-
- 6
-

-
- model shipways
- finished
- (and 1 more)
-
Good info, makes me glad I purchased the Caldercraft.
-
Hello and welcome, your build looks really good so far, enjoy the rest of it and hopefully many more to come.
- 6 replies
-
- 4
-
-
- first model
- newmember
- (and 4 more)
-
Thank you for the info, there is much to consider.
-
Hello and welcome.
-
When working with a kit designed as a single plank on frame, can you add a second planking? If so what, if any, modifications need to be done to allow for a second planking? I am getting ready to do my second build, and I didn't realize that it is a single plank on frame kit, although it is coppered so most of the hull will be covered up.
-
Planking Model Ships
Matt H replied to alpayed's topic in Planking Techniques's Planking Downloads and Tutorials and Videos
Thank you for sharing, I just downloaded it to my various other digital "Ship Books", as the folder on my computer is called. I'll be reading through it in the days and weeks to come as I begin my second build. -
I asked that same question a couple of years ago, here is a link to my question and the responses I got. Unfortunately I got busy with other things I and haven't started the Granado yet, in fact I just finished my first ship, the 18th Century Longboat and have ordered the Syren for my next build. It is due to be here Tuesday, I chose this one from Model Shipways because of the extremely detailed and lengthy instructions. I did choose the Caldercraft Granado and the instructions seem pretty good, but I didn't feel like I was quite up to the task to take on that ship yet. Although I don't know that there is much of a difference between the Syren and Granado in terms of difficulty, size, and overall similar shape and construction, I just felt the instructions with the Syren would better suit me at my level of experience. I also was able to get it on a pretty good sale last week, so there's that. Anyhow, here is the link and if you have any questions about the kits contents I'll try to answer them to the best of my ability and if needed can take some pics of the materials.
-
Looks great so far, I'll be following. I just finished my first ship, the 18th Century Longboat, and the Syren is my next build. It is due to arrive on Tuesday.
-
Hello and welcome.
-
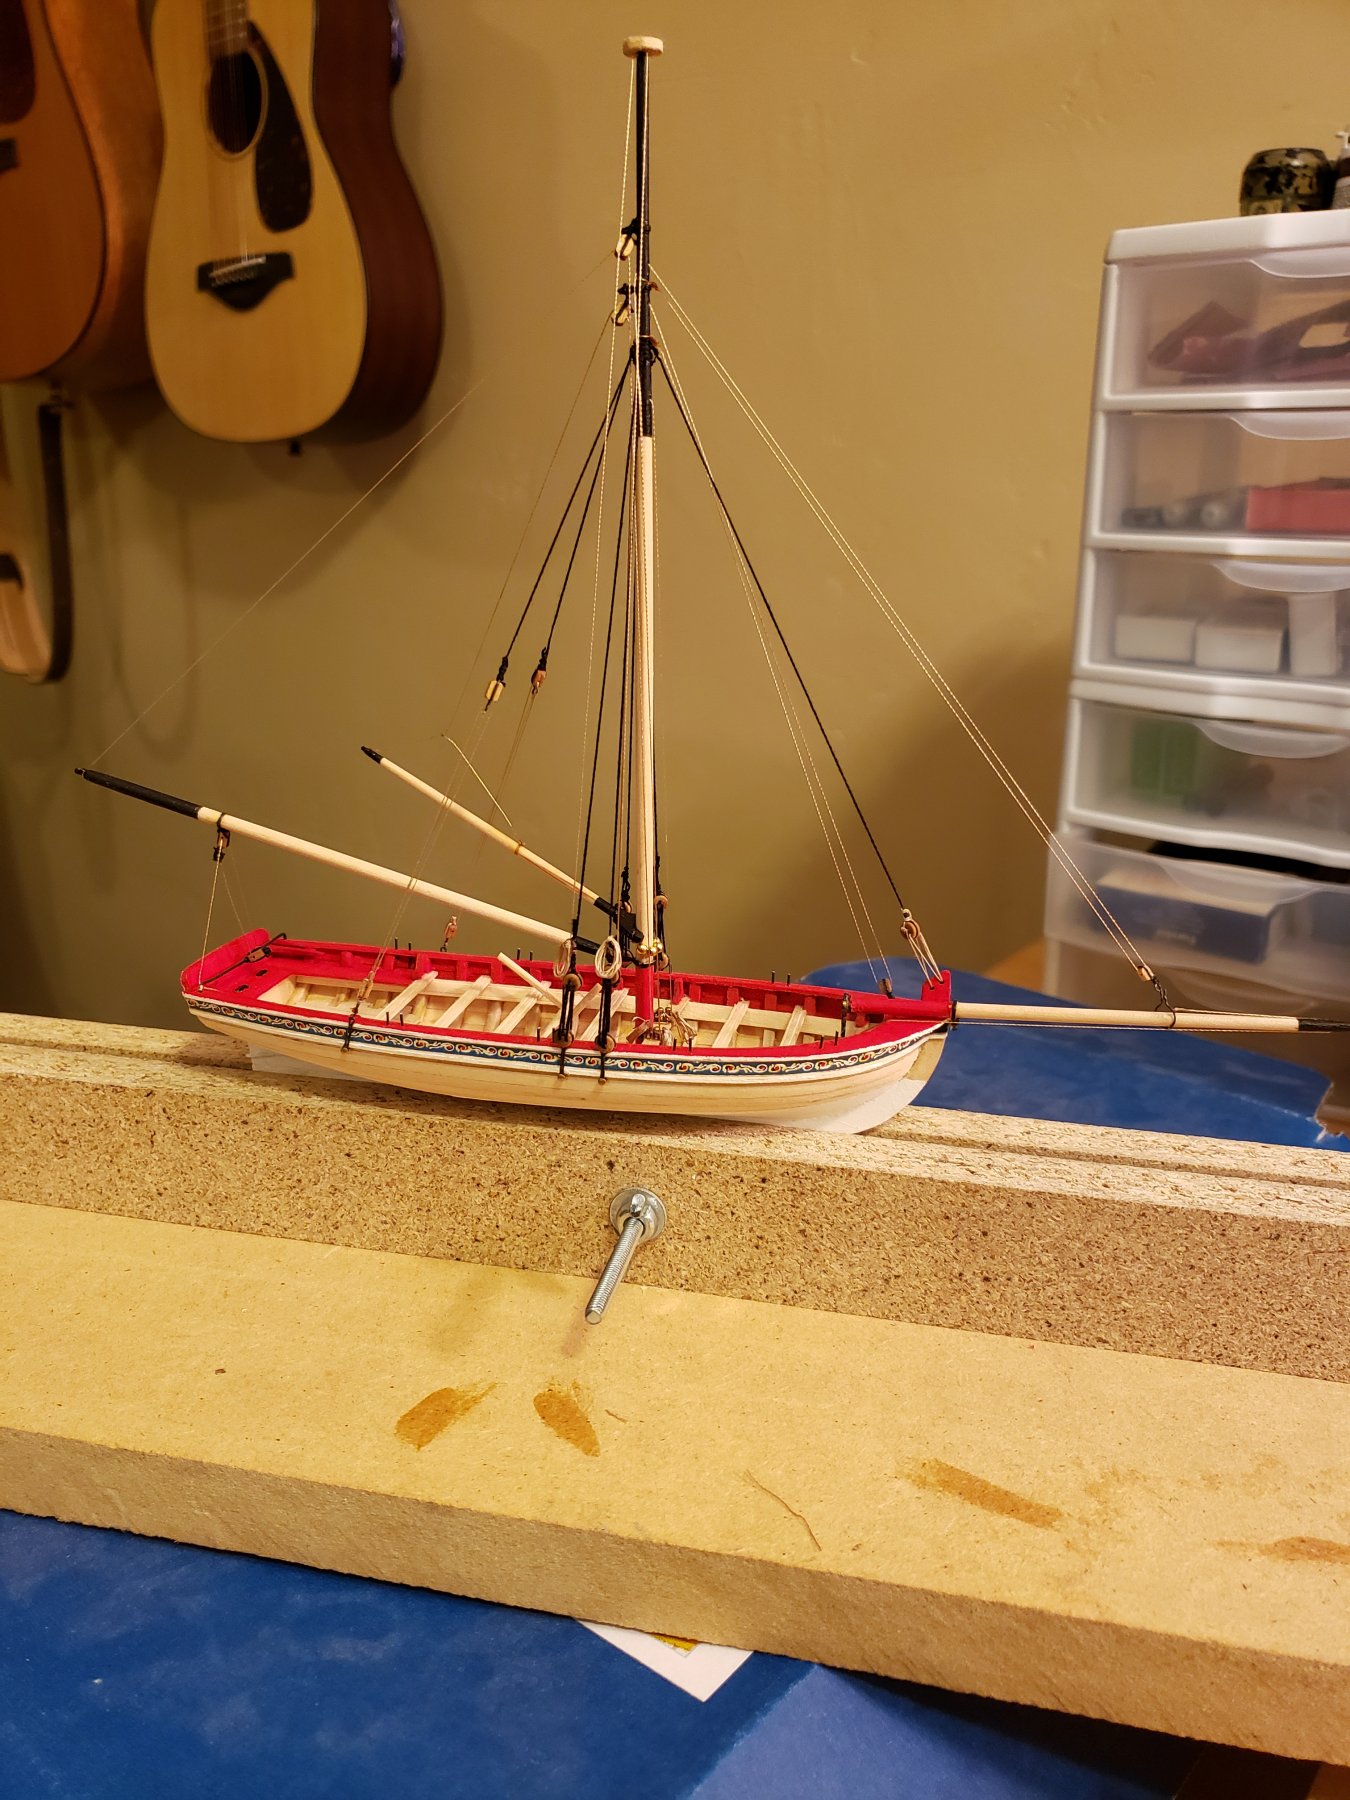
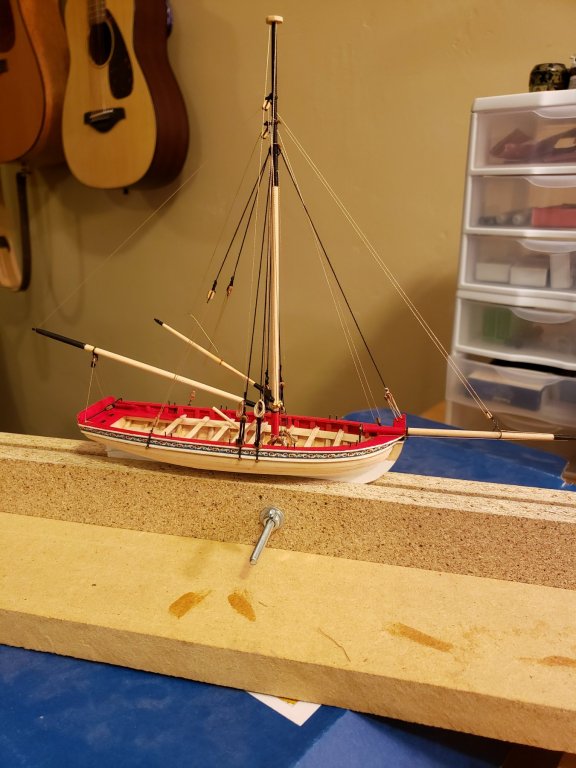
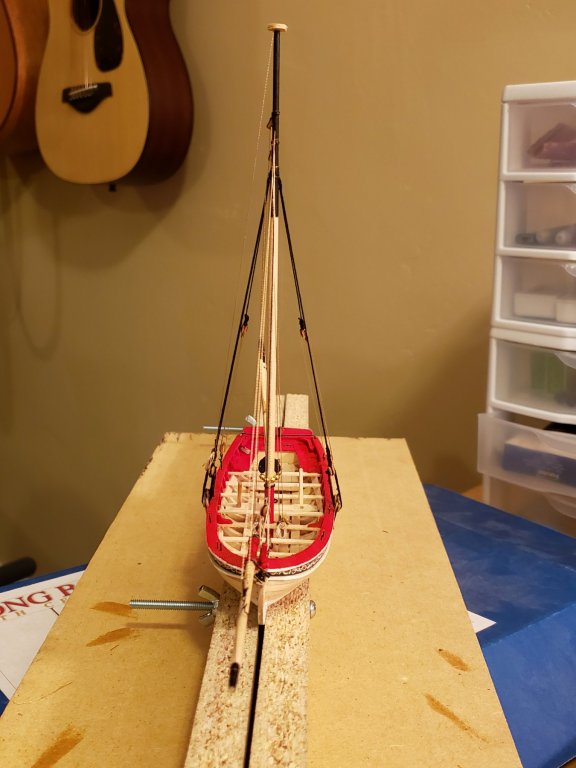
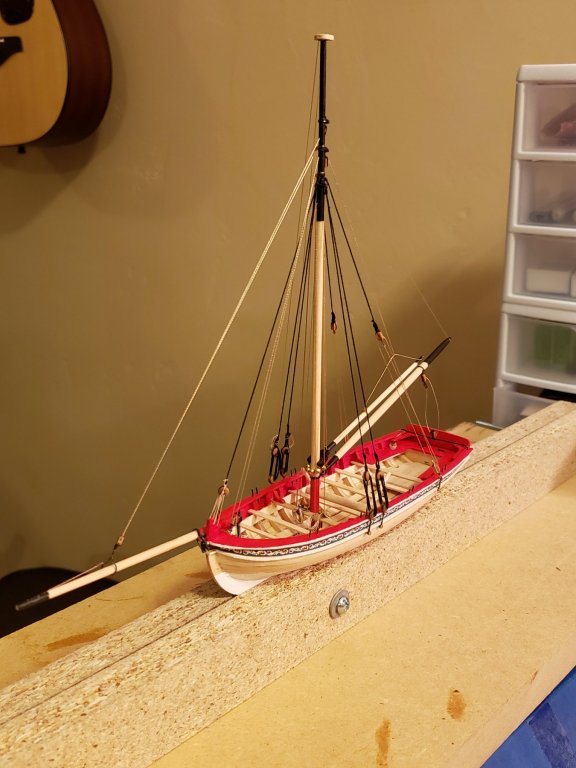
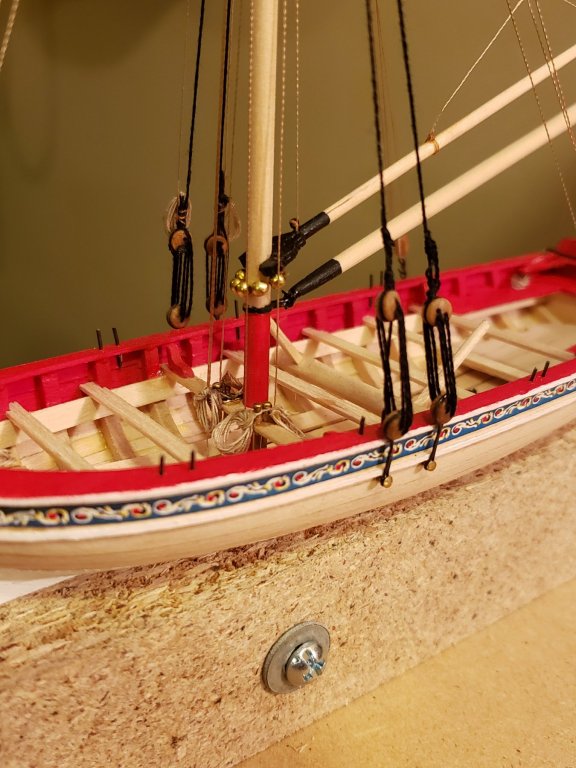
Ok more photos, here she is fully rigged. All that is left is to sand, shape, and paint the oars and blacken and attach the anchor. I just ordered some Novacan Black Patina so we'll see how that works for the blackening. It won't be here for a week or so, I'll update when I'm done with the oars.
- 8 replies
-
- 5
-
-
- model shipways
- finished
- (and 1 more)
-
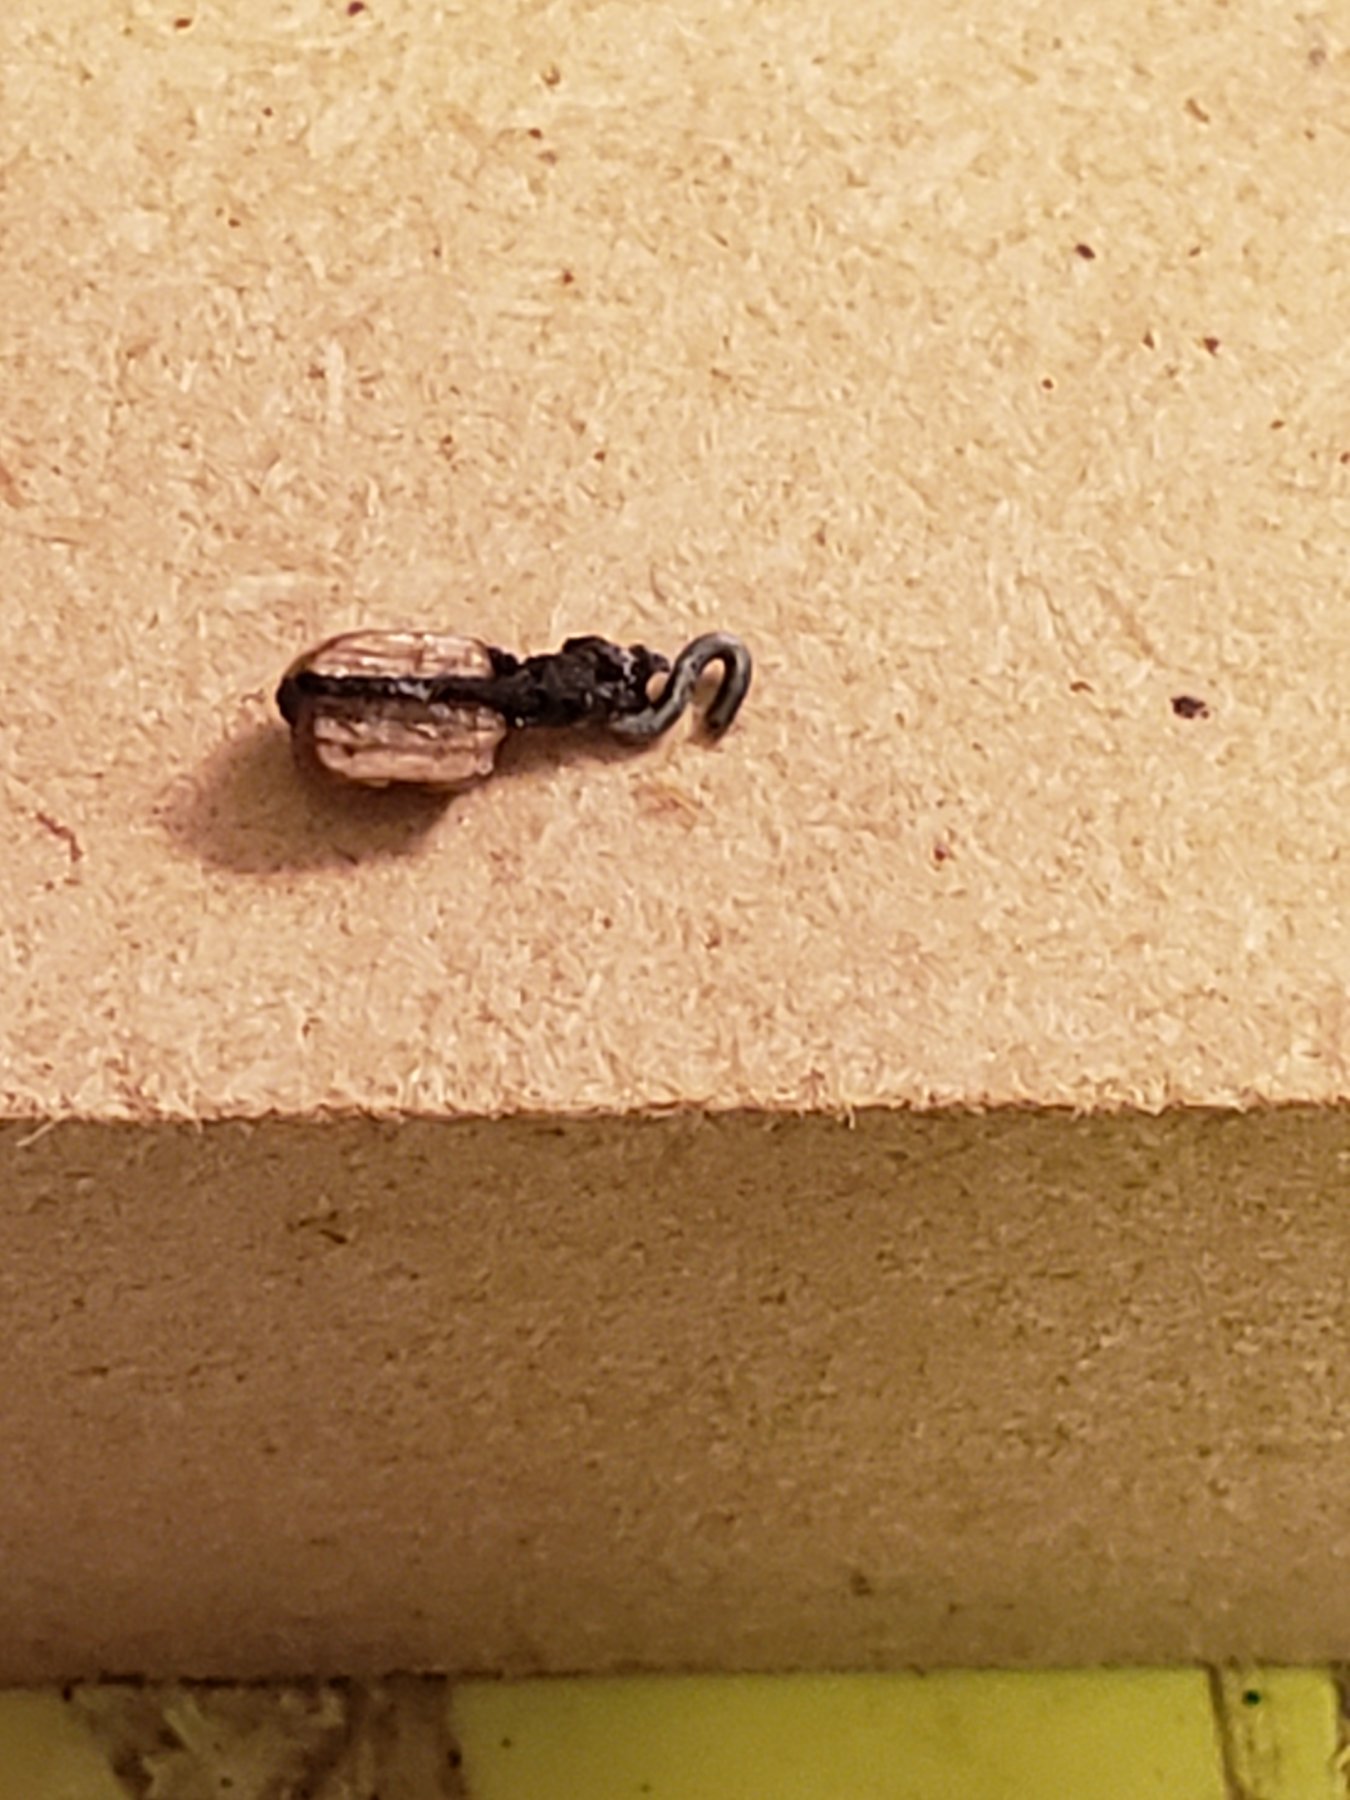
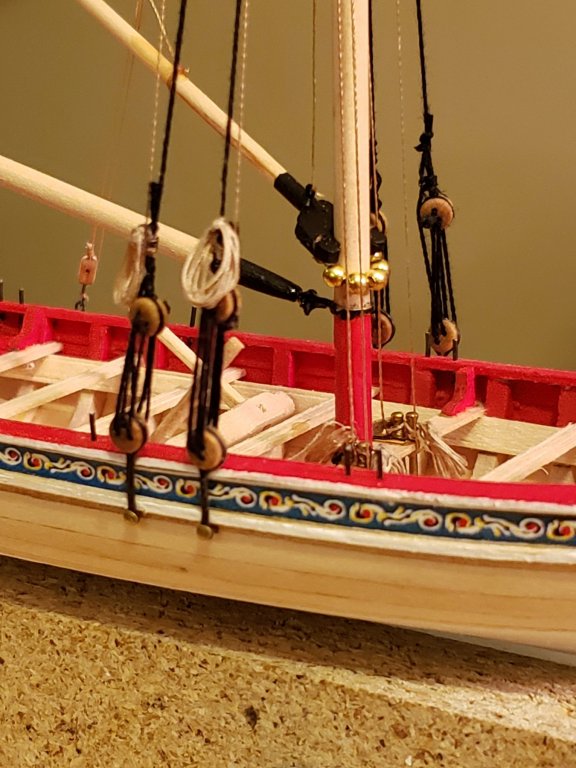
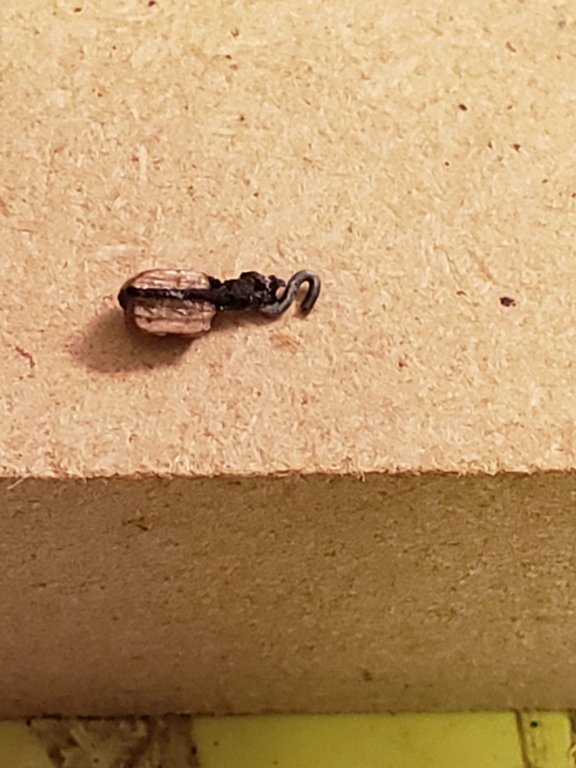
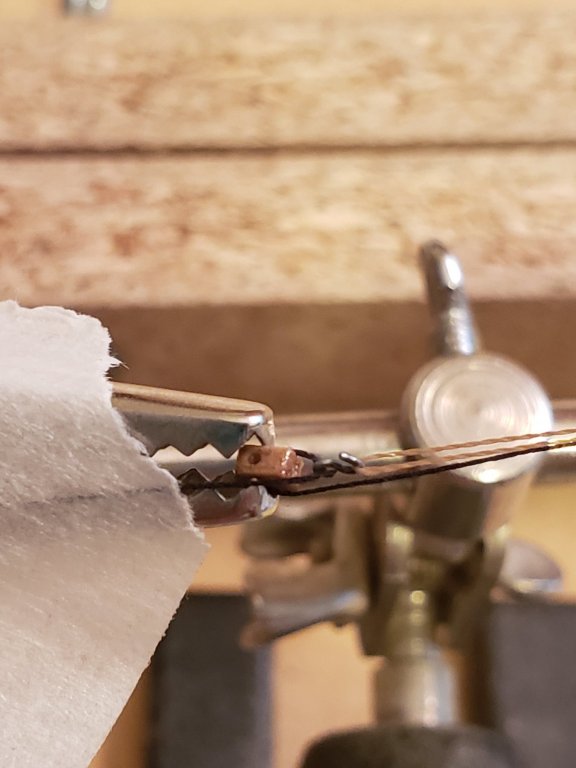
My first attempt came unraveled, my second attempt started to come unraveled as well, but I managed to put some CA glue over the whipping and was able to salvage it without having to redo it. I think the gap between the hook and the block are too large, but I'll leave it as it is and practice on some slightly larger blocks to get better.
- 8 replies
-
- 1
-
-
- model shipways
- finished
- (and 1 more)
-
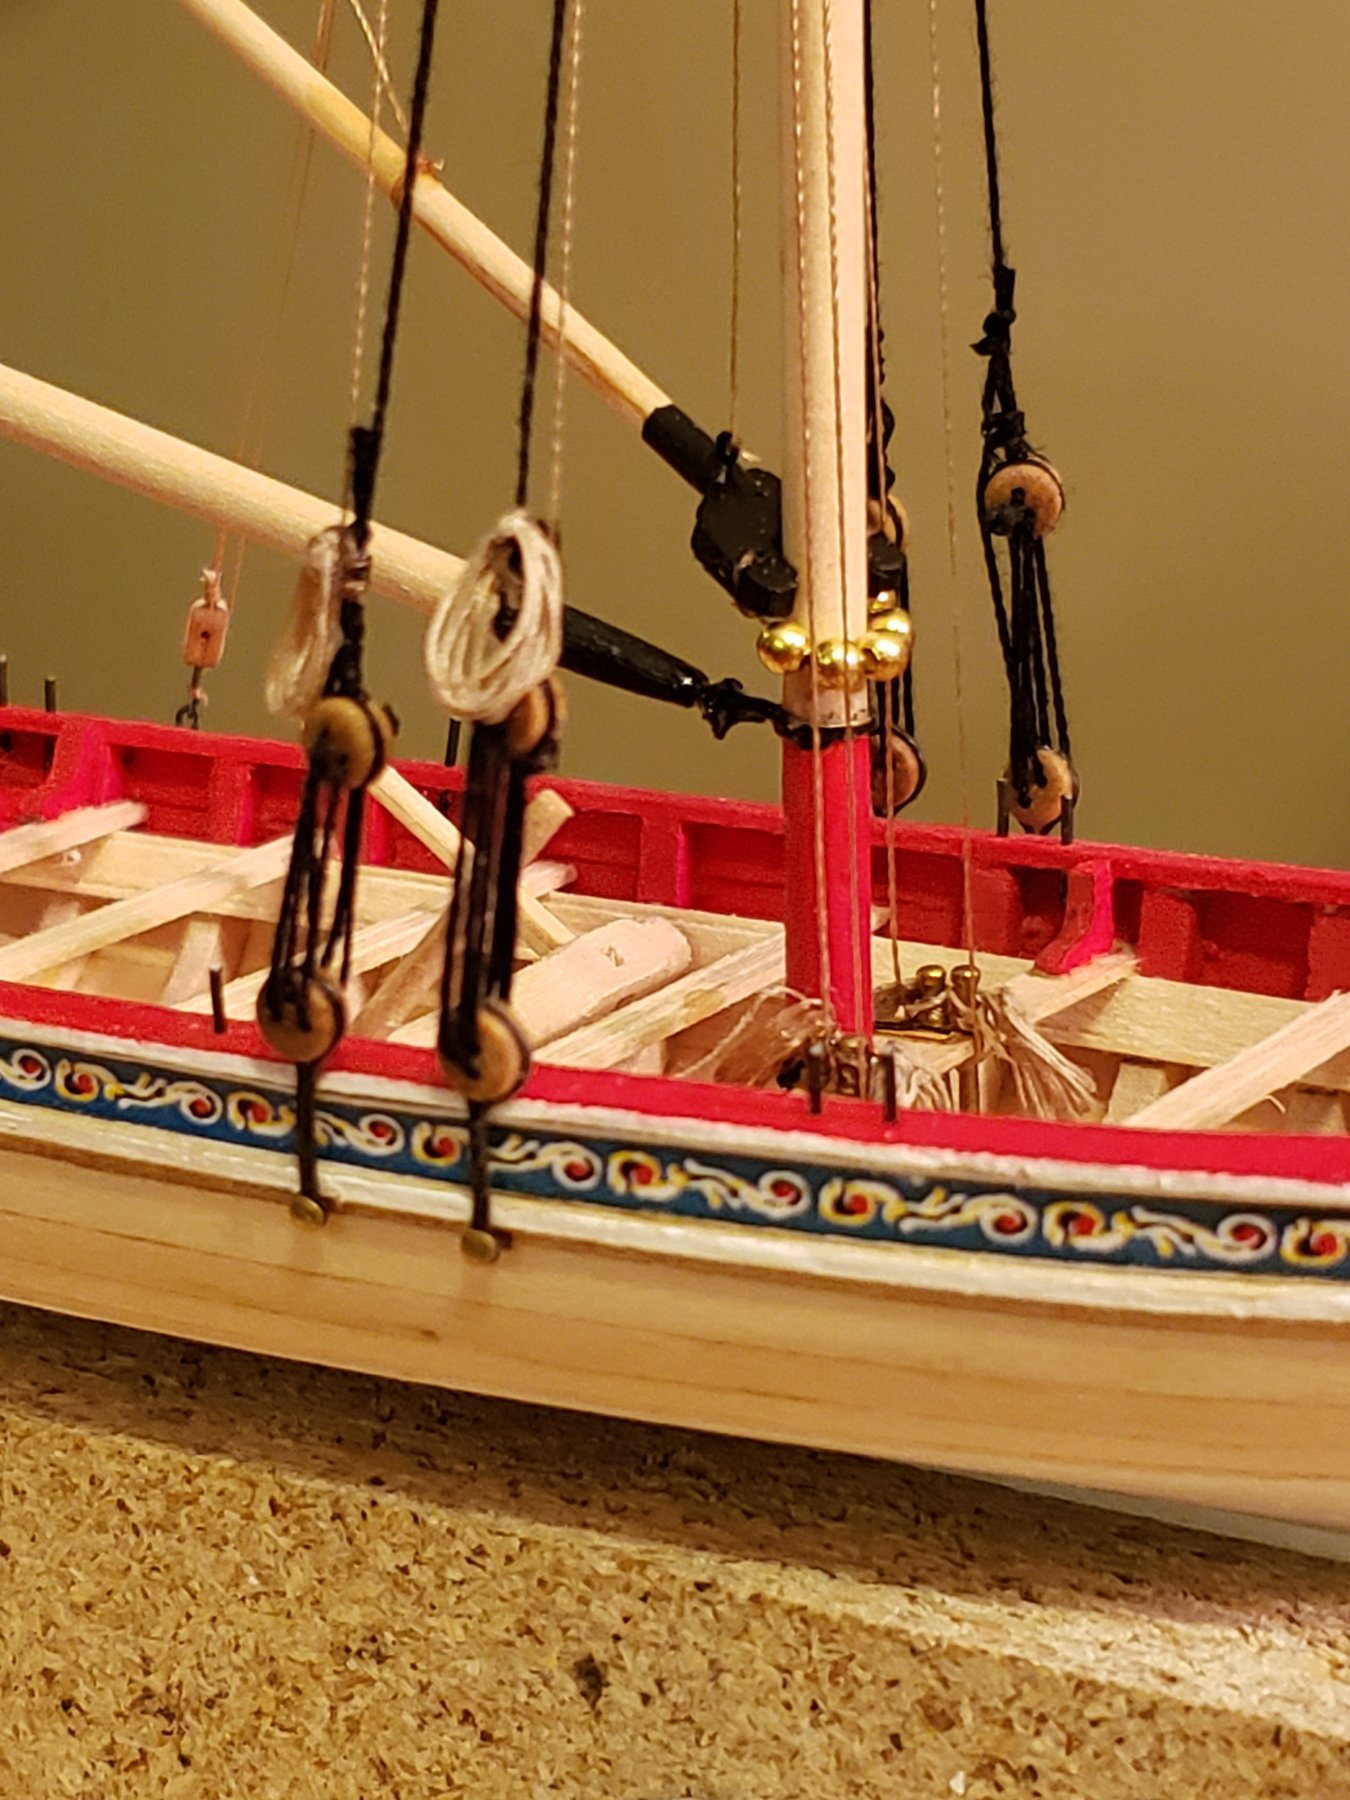
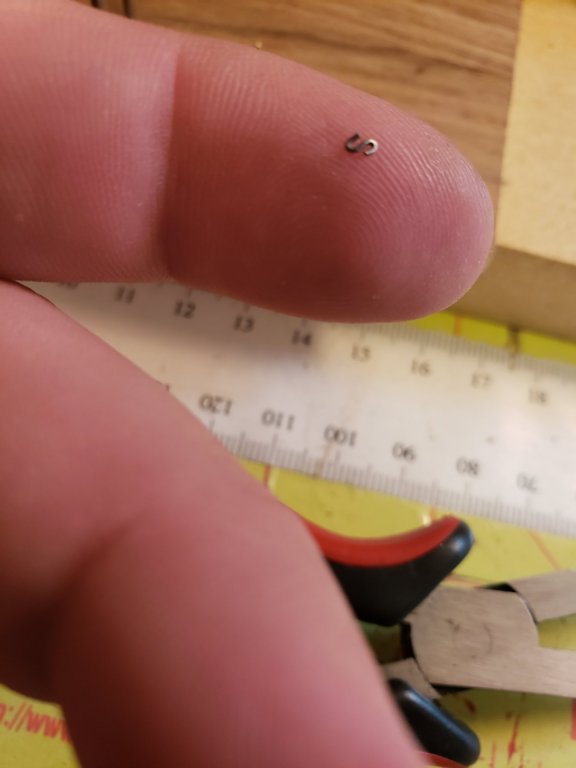
Small update and a curiosity question. This is my first time working with a 3/32 block, and I have to make and attach a hook to it. I found the images on this site http://www.modelboatyard.com/stropping.html very helpful. My question is, is there an easier or faster way to do this? I know with time and practice I will get better but it takes me a few minutes to setup what you see in the images below, and that is just the setup, I still have to apply the whipping. Here's the hook I made. And here is my setup in my third and fourth hands to hold so I can tie the whipping. I applied a small dab of CA glue to the left end of the block to hold the thread. The tan line is to hold the hook taught while I apply the whipping between the hook and block. Again I'm sure I'll get faster at this, but is this the only way to do it and keep it accurate? I have read that people simply use glue and overhand knots, and it is likely at the scale we work with that it may not be noticeable, however I would like to keep things accurate and true to form.
- 8 replies
-
- 4
-
-
- model shipways
- finished
- (and 1 more)
-
Hello and welcome.
-
Hello and welcome.
-
Hello and welcome.
-
Hello and welcome.
-
Hello and welcome.
-
Hello from the one part of Michigan that isn't near water.
Matt H replied to Shantyboy's topic in New member Introductions
Hello and welcome. -
Hello and welcome.
-
Hello and welcome.
-
Hello and welcome.
-
Hello and welcome.
-
Welcome
-
Good looking work, welcome.