JpR62
-
Posts
699 -
Joined
-
Last visited
Content Type
Profiles
Forums
Gallery
Events
Everything posted by JpR62
-
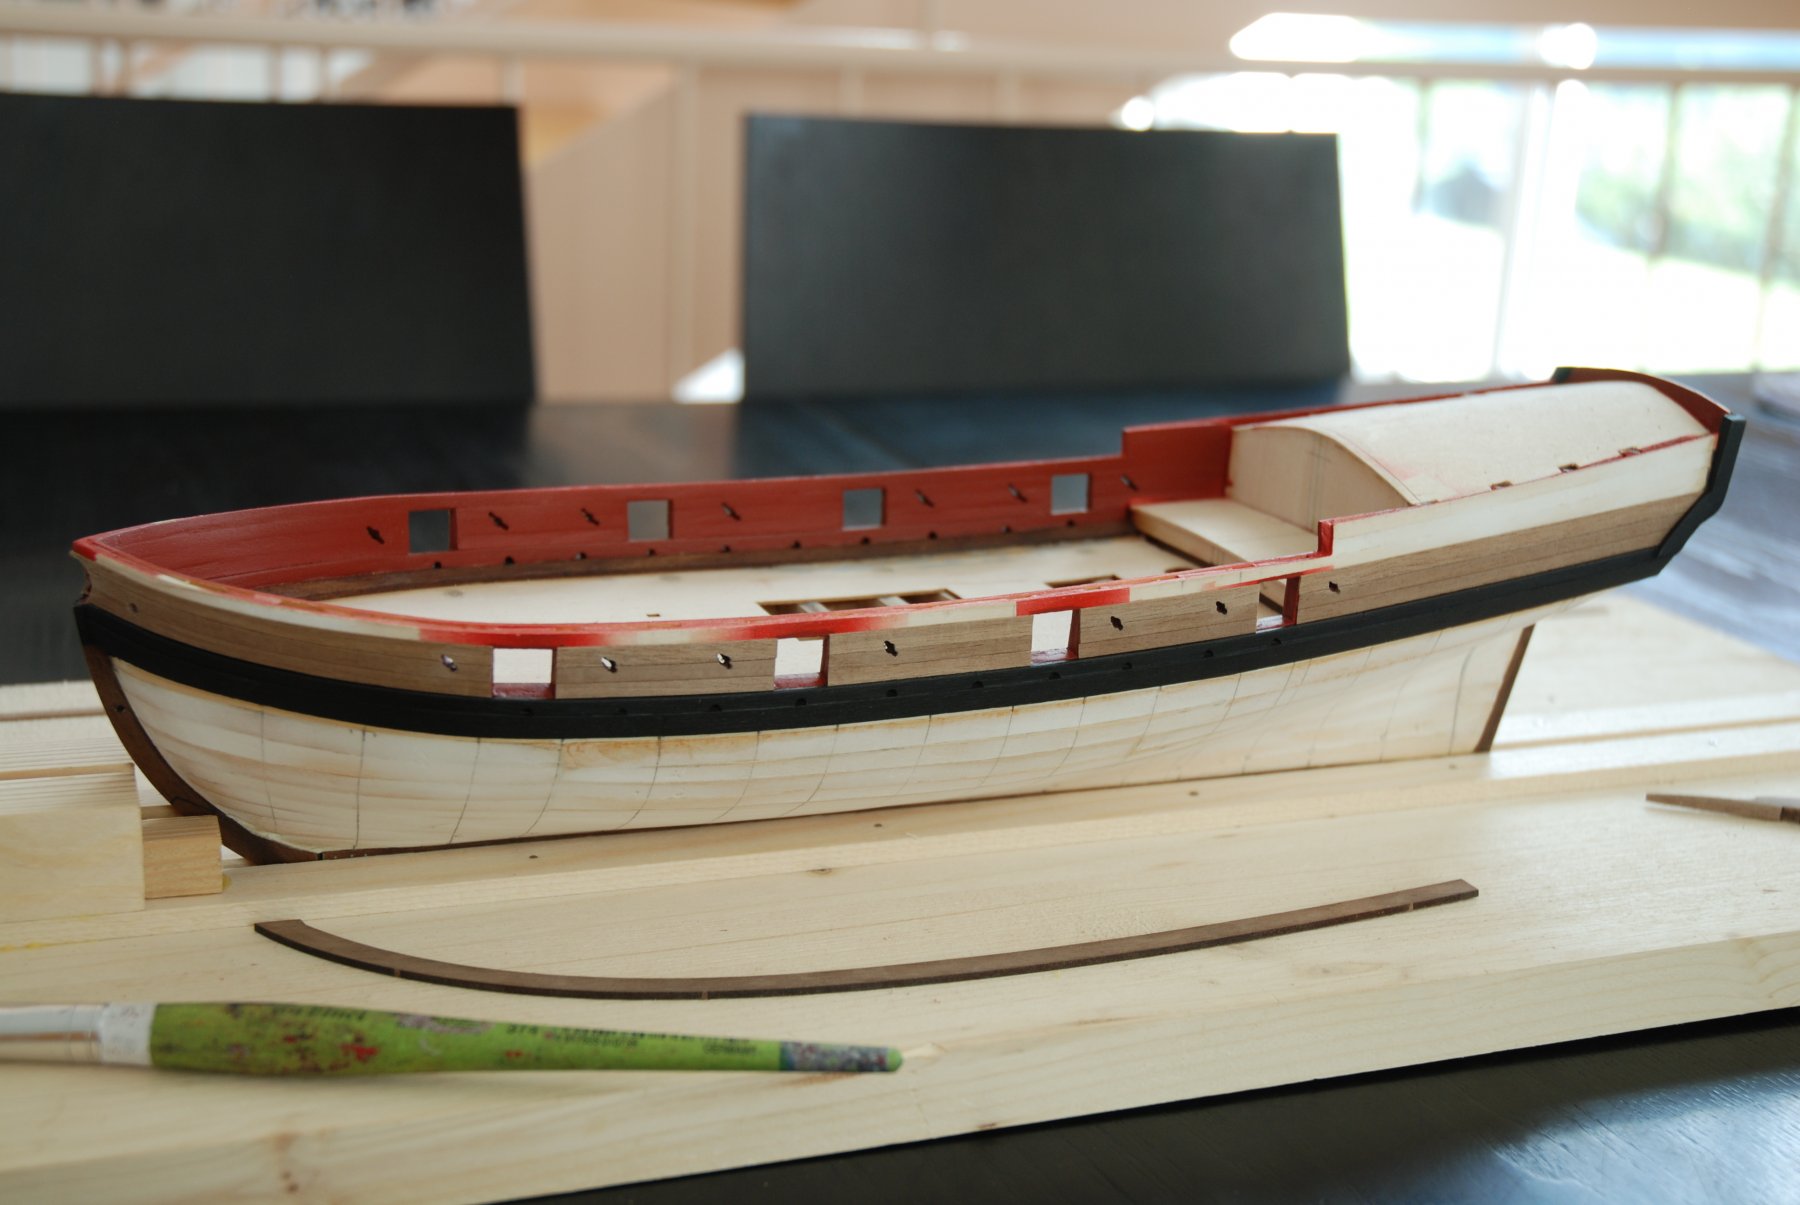
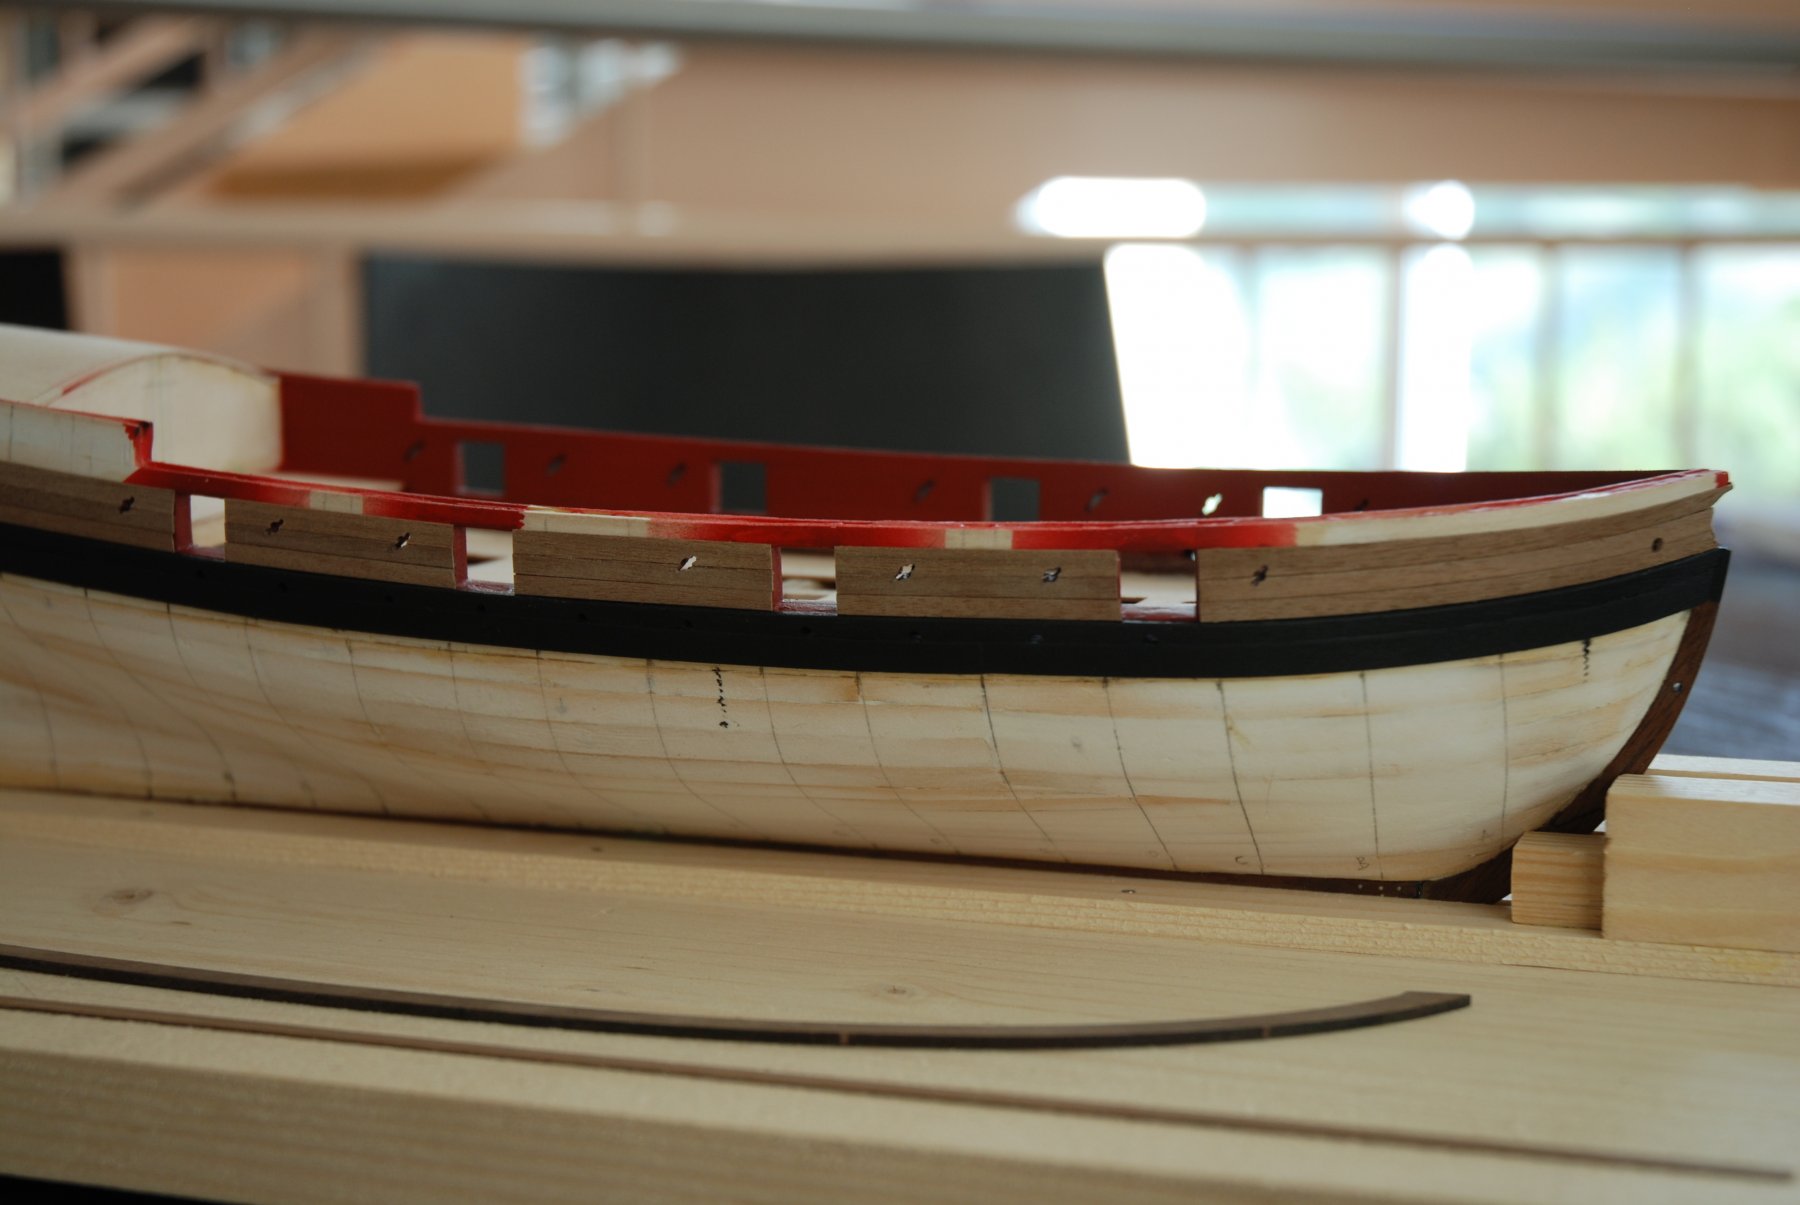
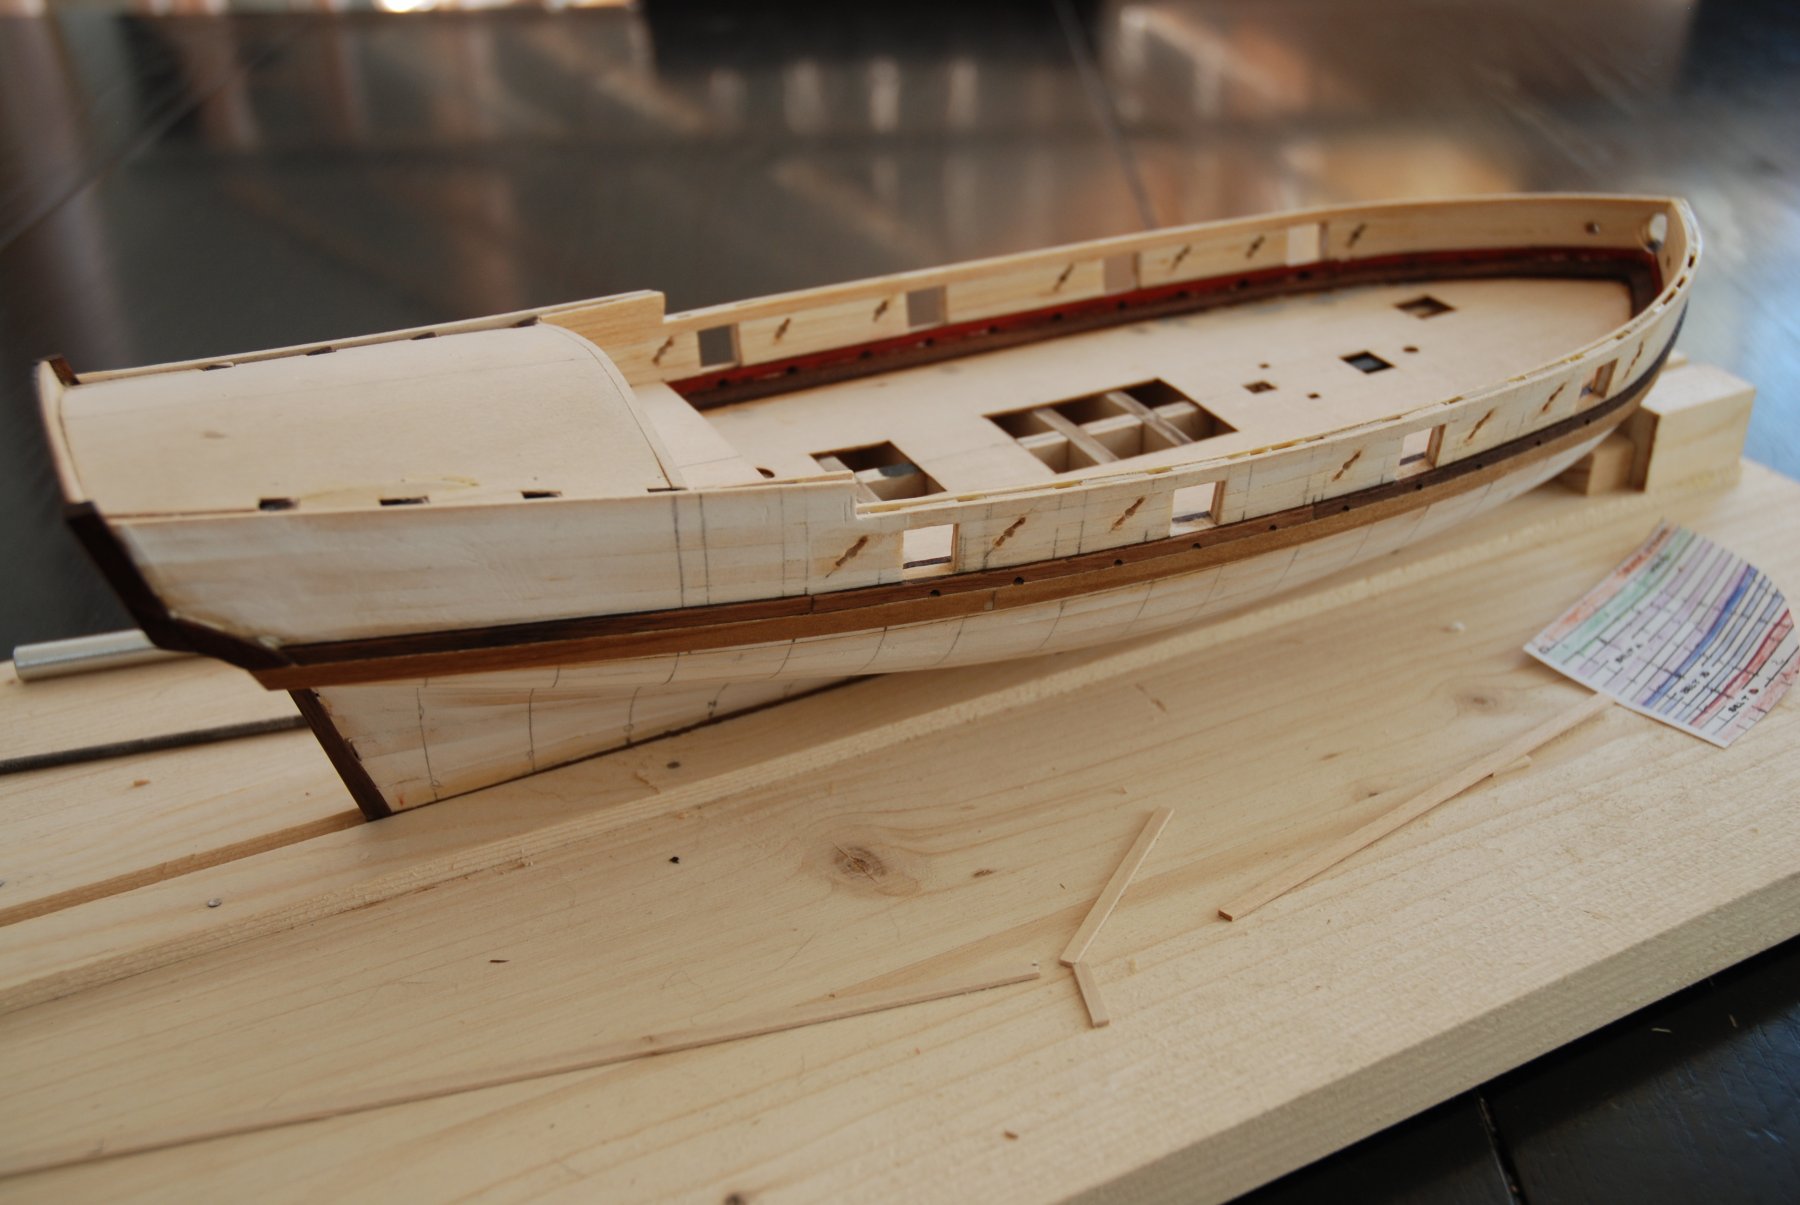
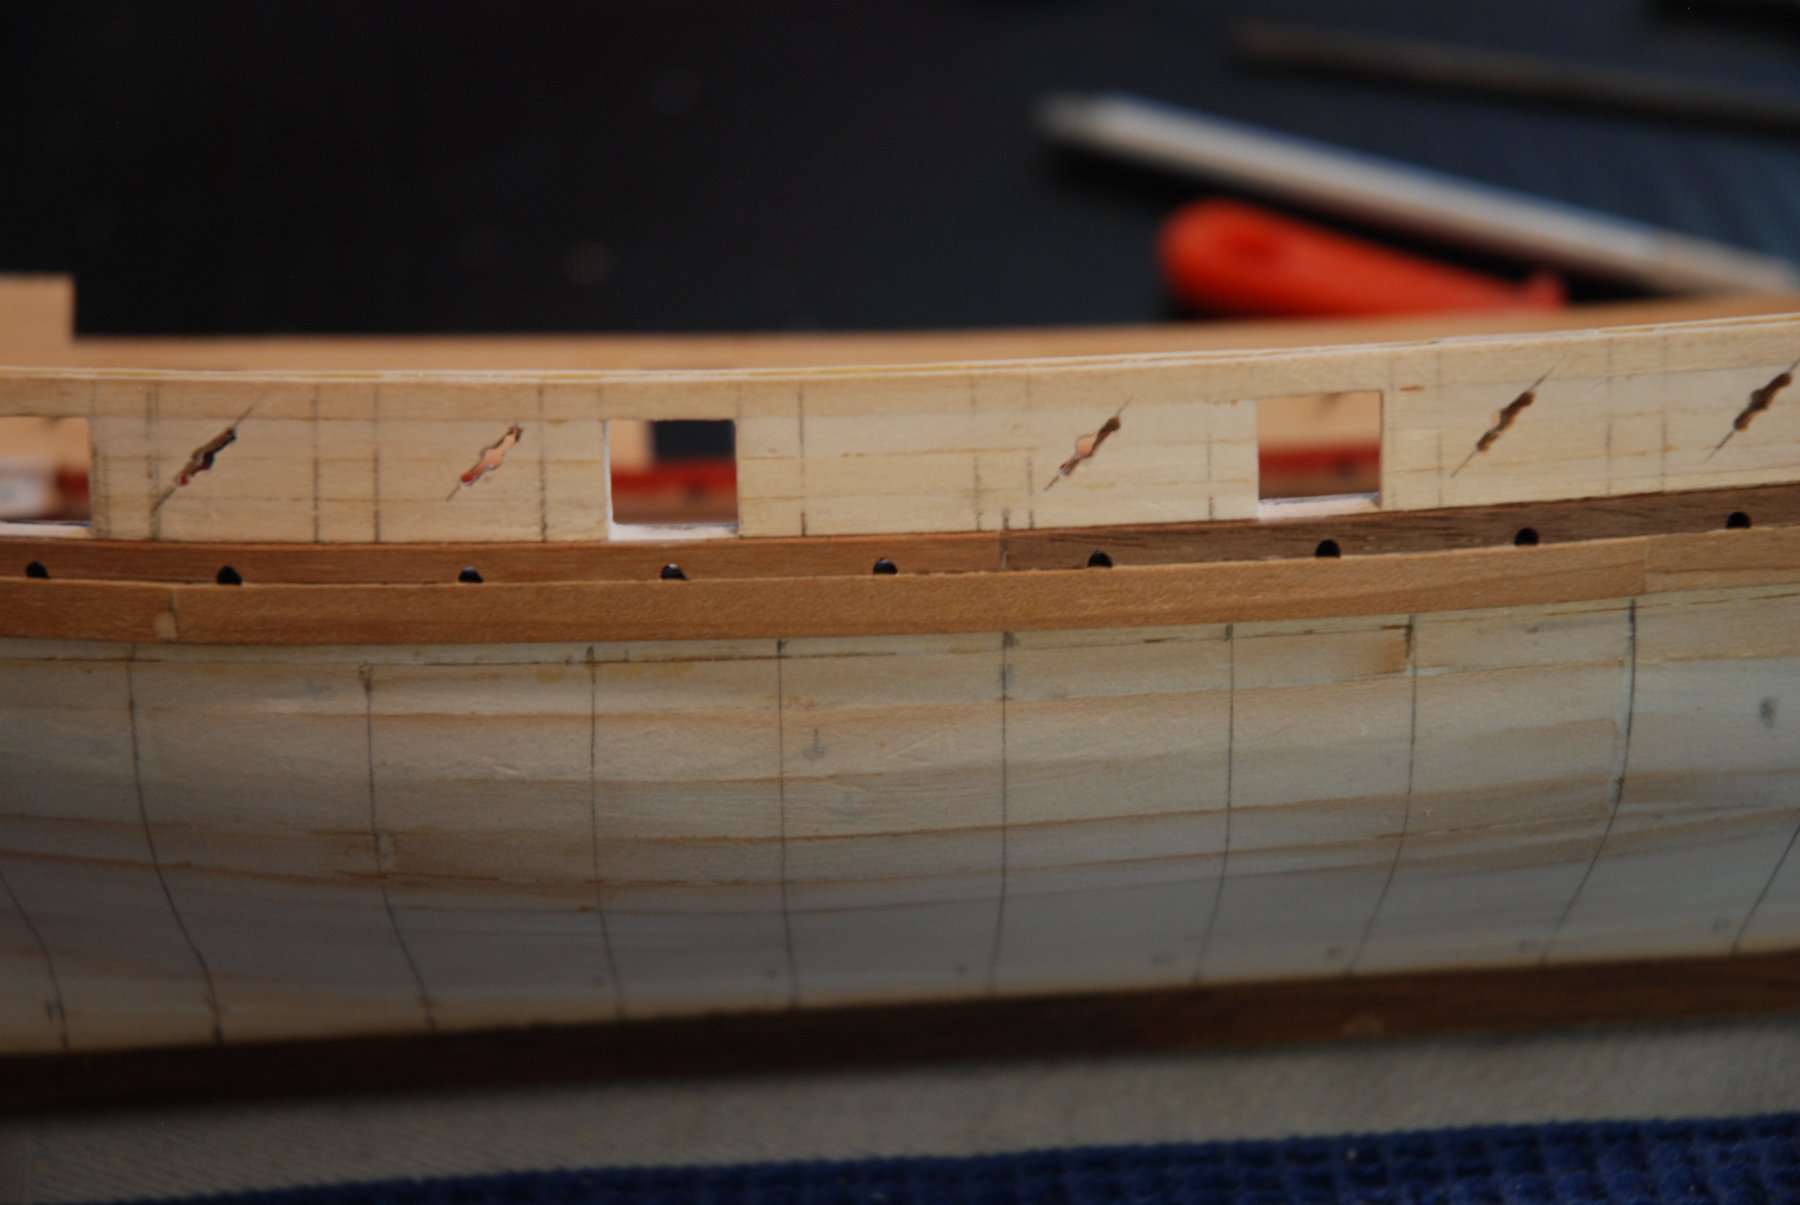
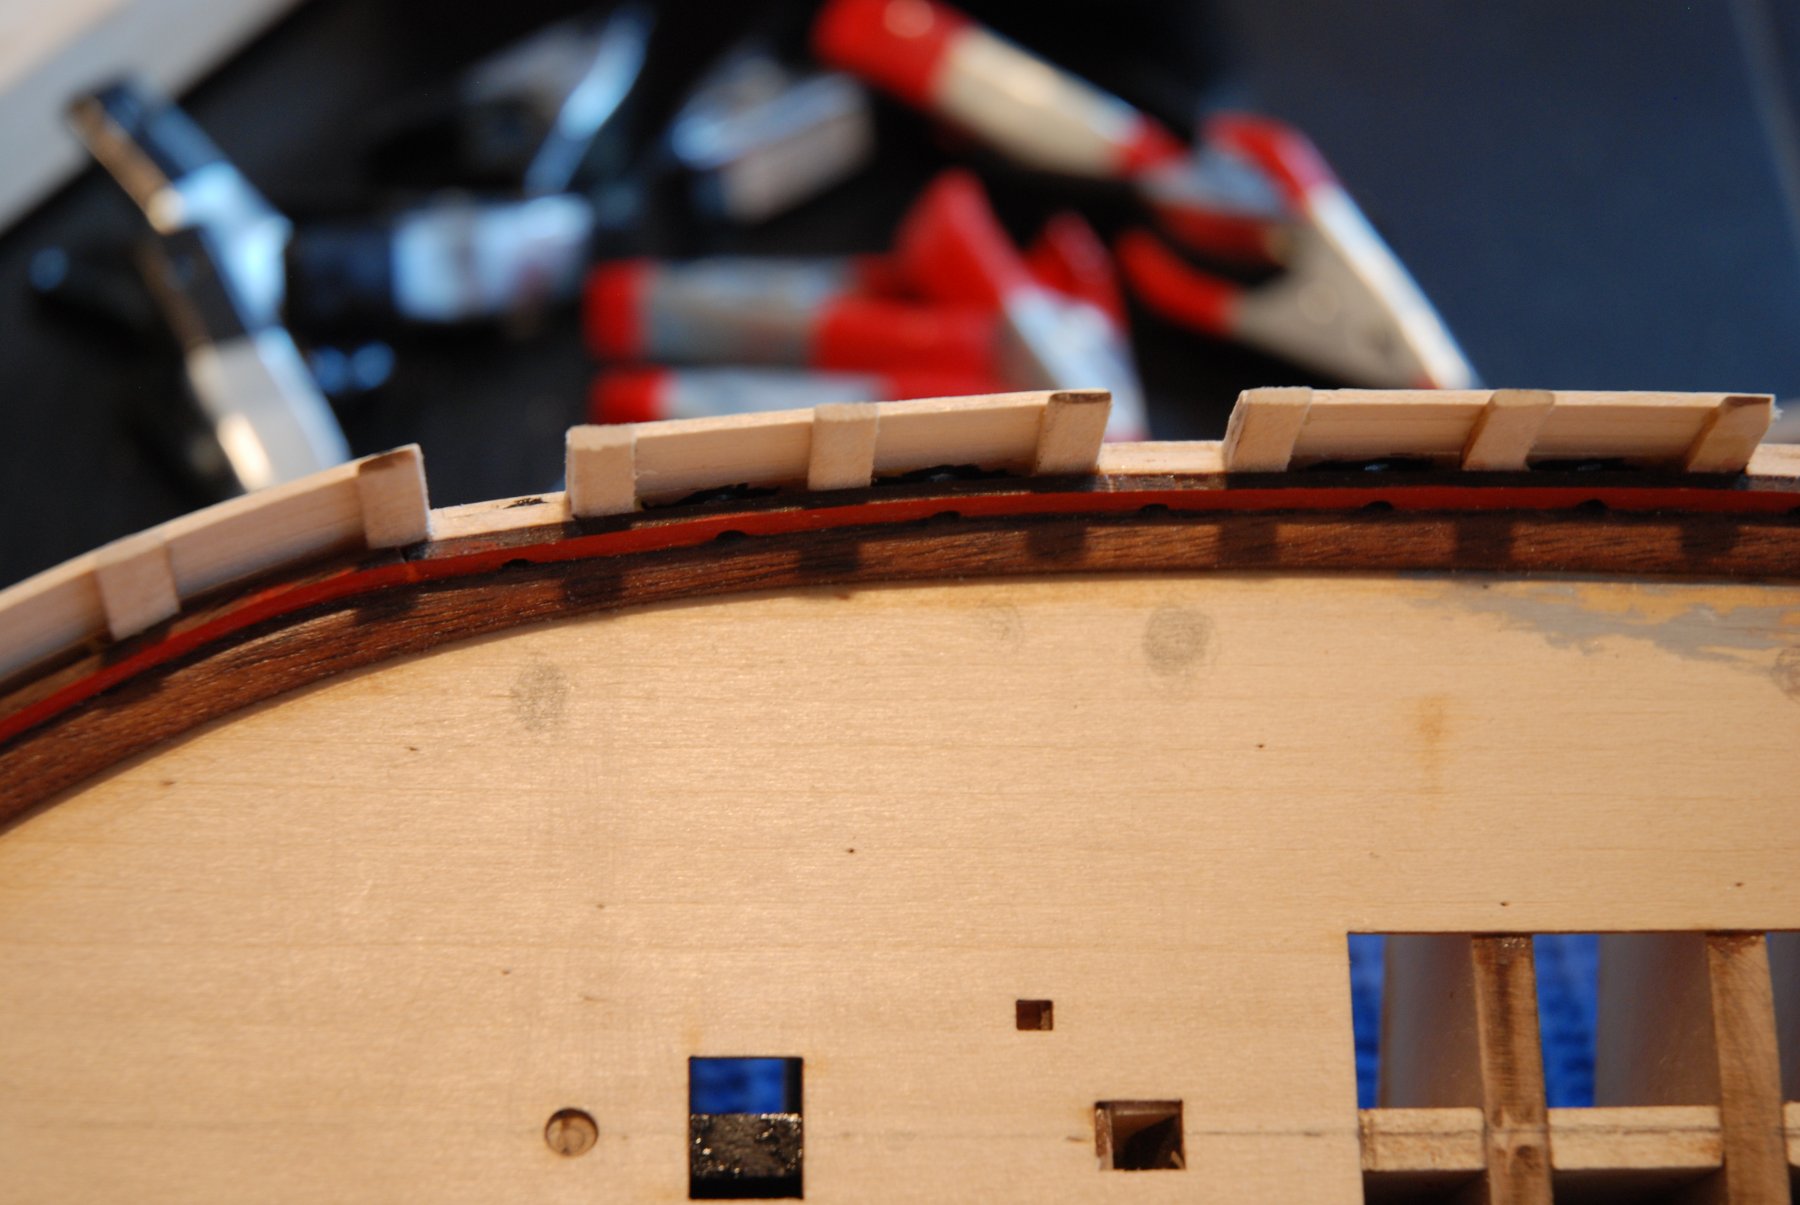
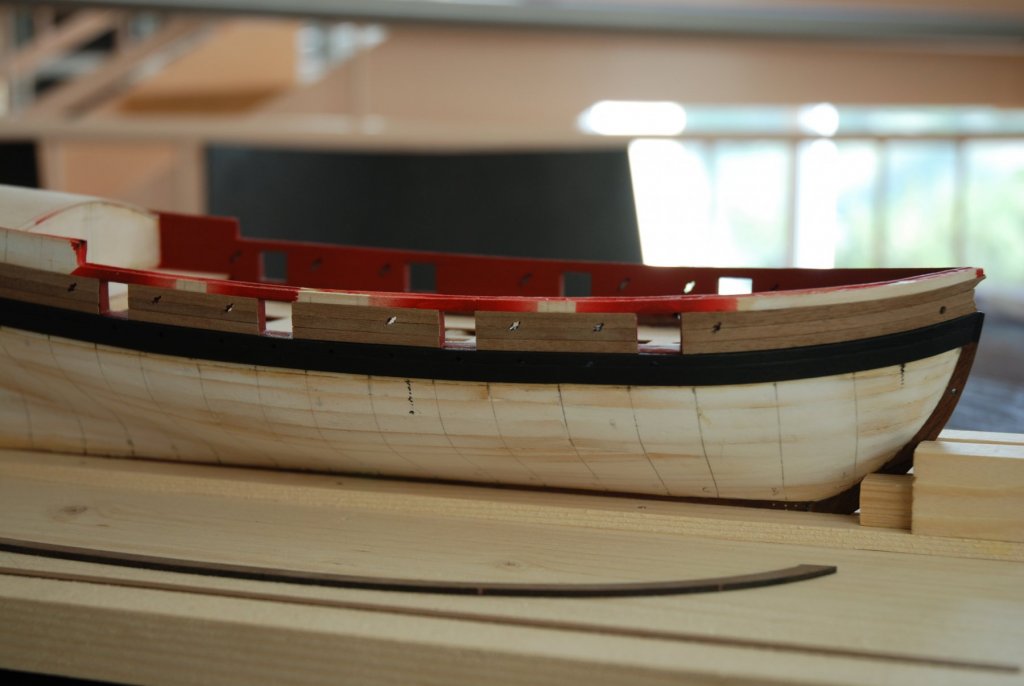
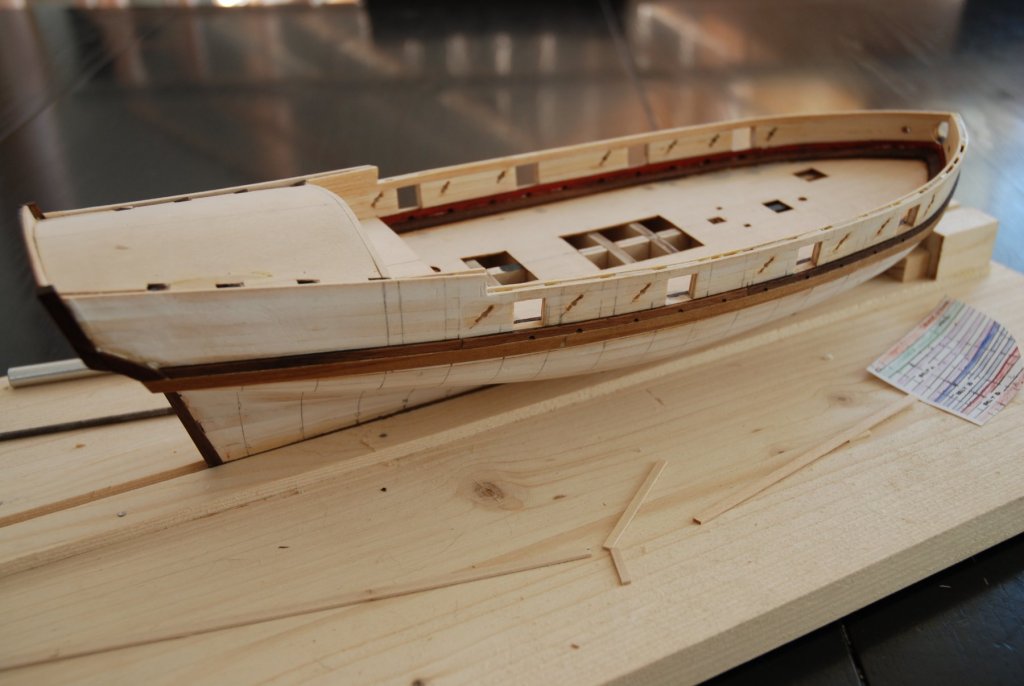
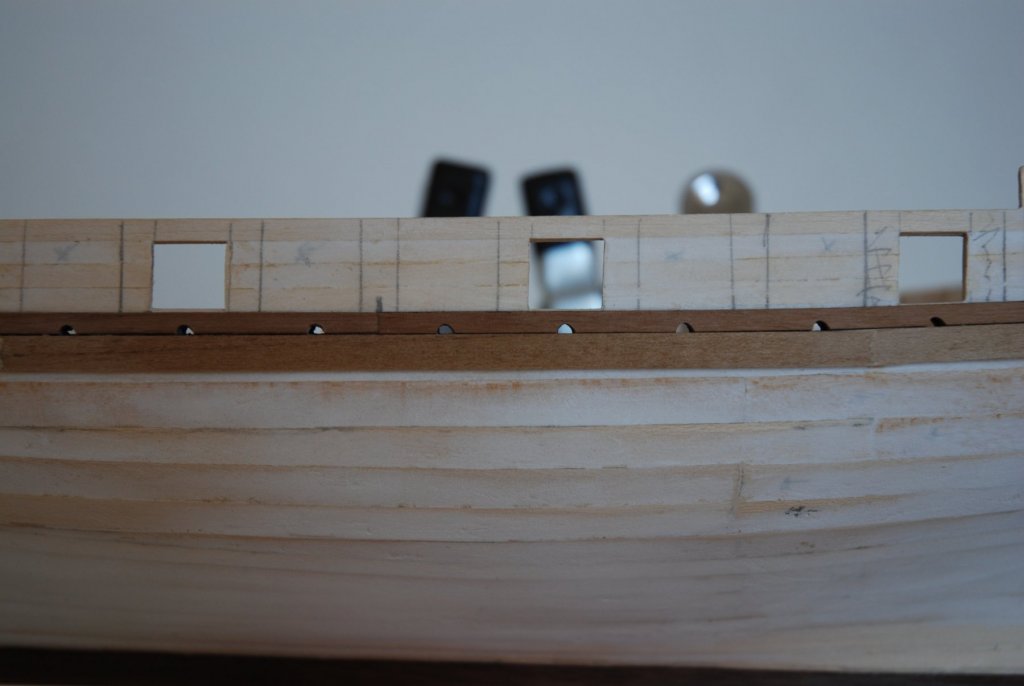
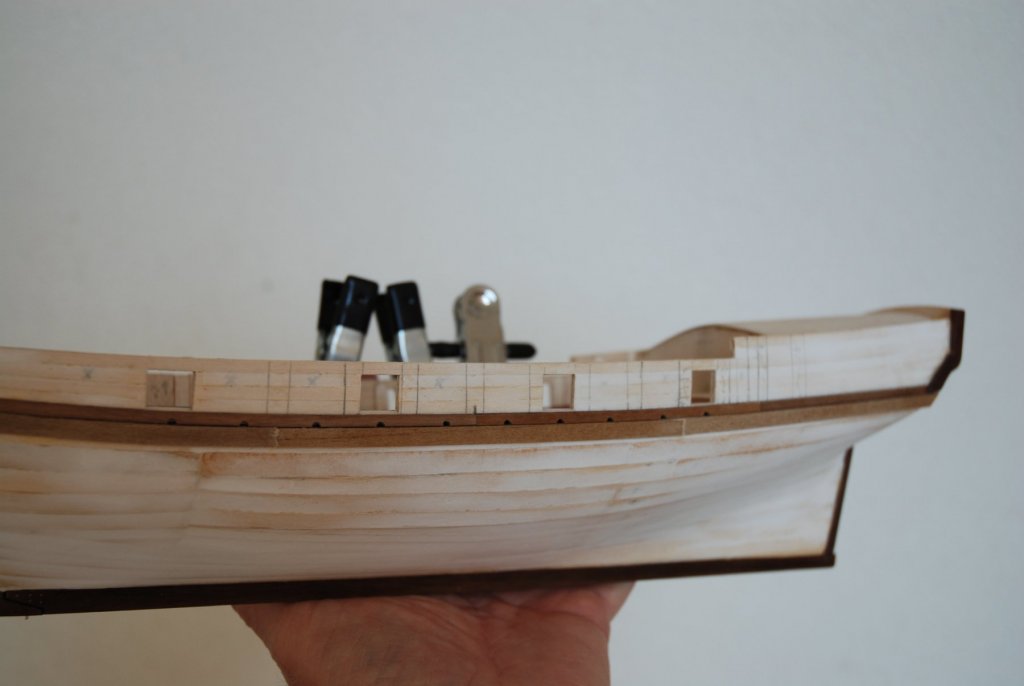
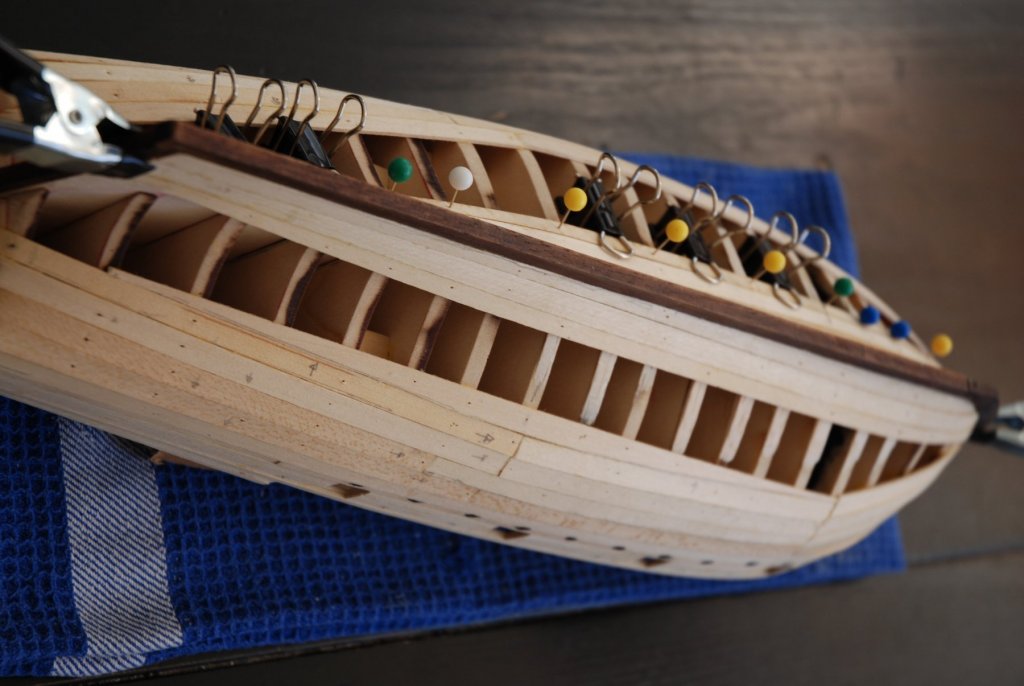
 As I was traveling to Netherlands last weekend to accompany my brother-in-law who defended the colors of Switzerland at the European Brass Band Championship, I have not made much progress. But as they won the title, it was an unforgettable moment... Let's take the course of my build : I begin the last planking of the upper hull. I have used 0.5 mm strips of walnut instead of the wood provided by the kit. The strips come from Marisstella and is more flexible. It's pleasure to use it. I also opened the sweep ports. I will probably use a strip of alaskan yellow cedar for the sheer strake. I just ordered it from Syren Ship Model Company and I know that I will receive it in the coming days because the service at Syren Ship Model is always perfect and fast.
- 164 replies
-
- 10
-

-
- first build
- model shipways
- (and 2 more)
-
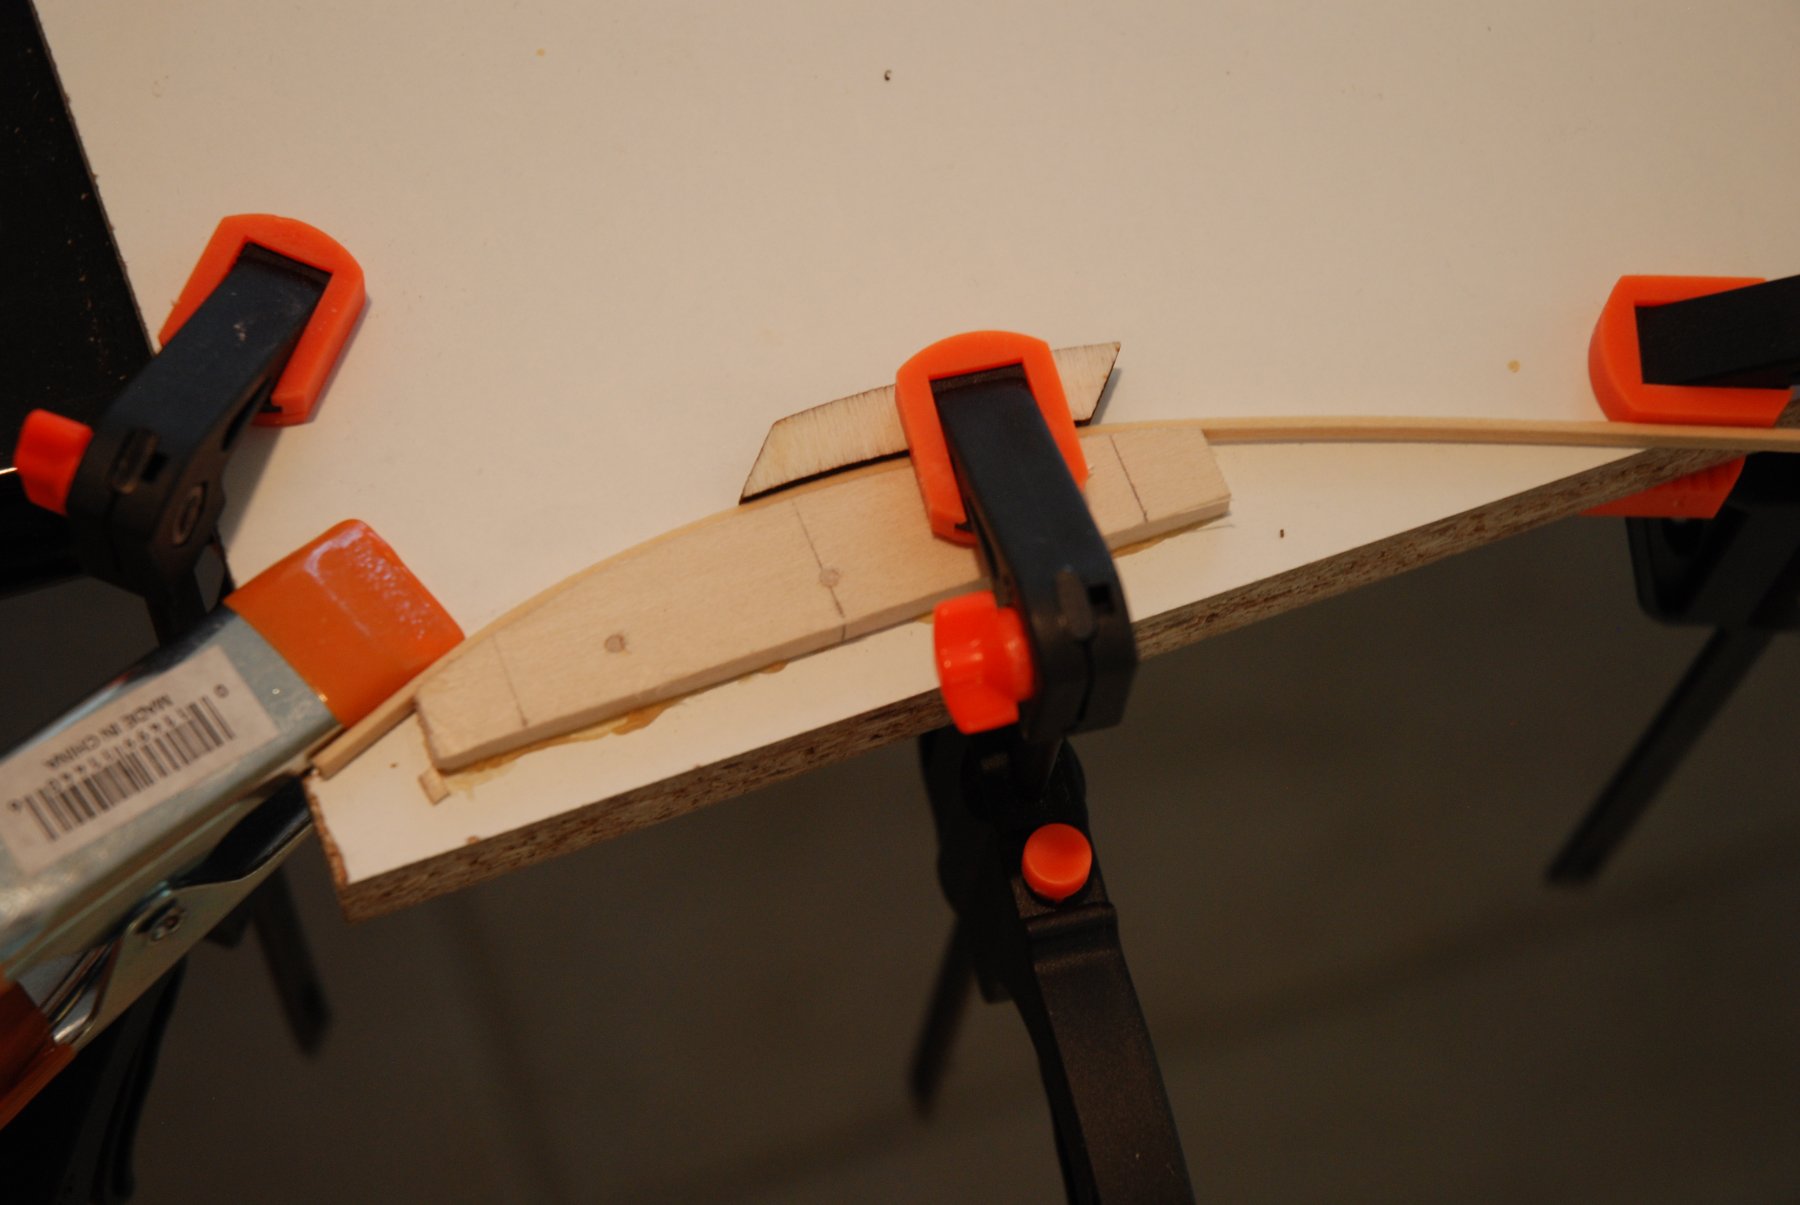
Small advance of the week. The second row of the planks was glued (plank 3# and 4#). I followed the steps described in the manual. I have to confess a little deviation from the instructions. After bending and twisting the plank 3# with heat, I soaked the first two inches of the plank in hot water during a few minutes ant put it in place (without glue) to obtain a more precise shape. I waited the next day to start gluing it. A little sanding is still needed on the lower outboard side near the bow to flush with the plank 1#. Now, I will begin the last row. I have a little question : as this last three planks are not clinker planked, is it useful to mark the edge of the planks with some 2B pencil ? It seems to me that no but I'm not sure...

- 103 replies
-
- 8
-
-
- queen anne barge
- Syren Ship Model Company
- (and 1 more)
-
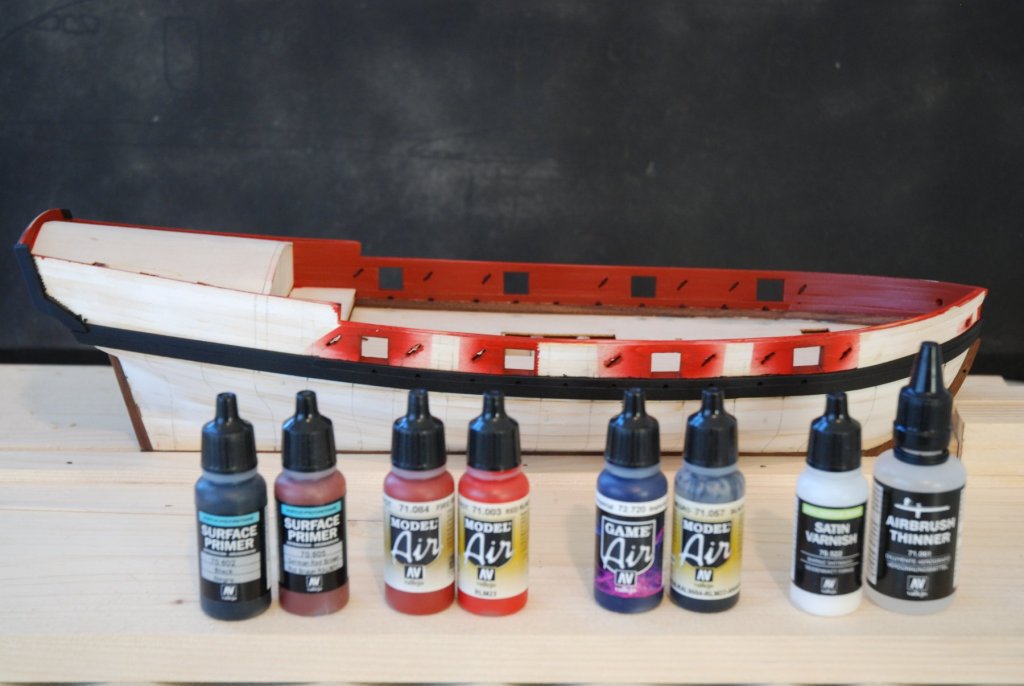
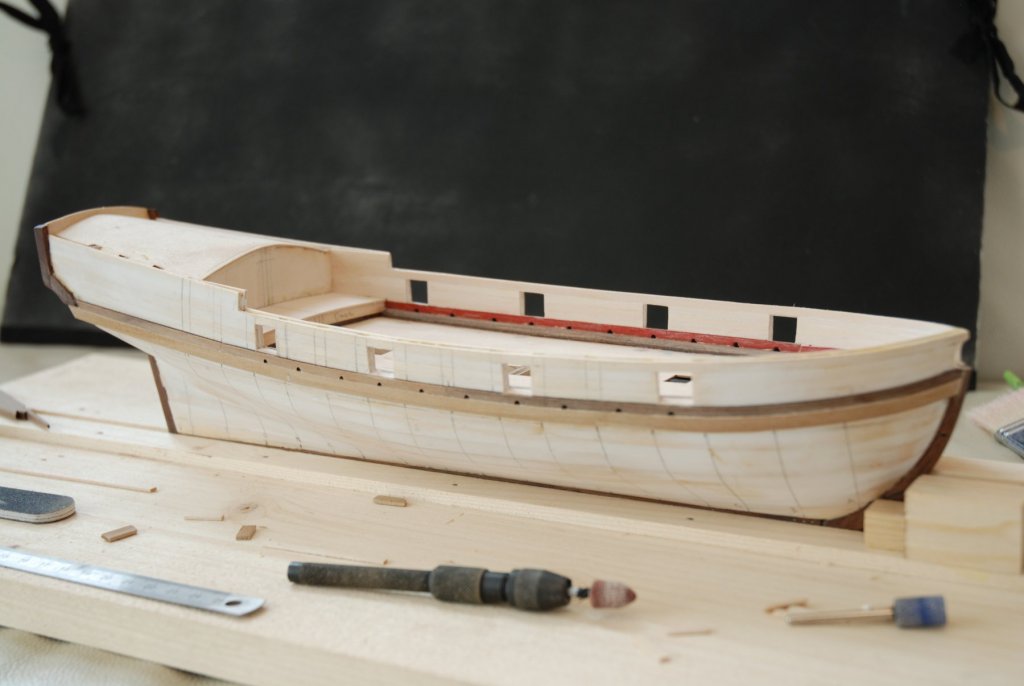
The painting phase is over. I used my old airbrush for this task. After protecting the parts that should not be painted, I applied a basecoat using the following colors : Surface primer 70 605 German Red Brown for the red parts and 70 602 Black for the wales and the fashion pieces. Then I applied 6 light coats of acrylic paints during three painting sessions. I used a mix of Vallejo Model Air 71 084 Fire Red color and 71 003 Red color in the proportions of 3 parts of Fire Red for 1 part of Red. For the black color, I mixed Black 71 057 with some drops of Game Color 72 720 Imperial Blue (a very dark blue) to give a little more shine to the color. I waited one day between each session. Finally, the next day I applied a light veil of satin varnish diluted with a few drops of airbrush thinner always using my airbrush. I can now begin the final planking of the hull. I will begin with the upper part.


- 164 replies
-
- 13
-
-
- first build
- model shipways
- (and 2 more)
-
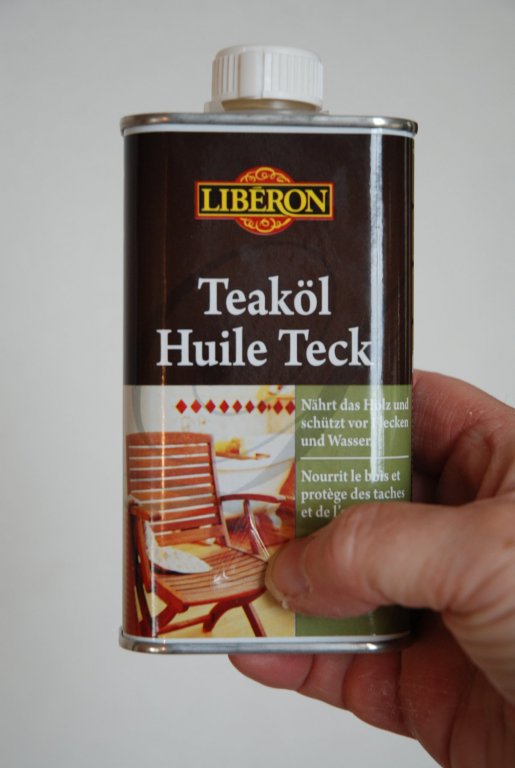
Thanks Ian and all the likes. Ian, it's not really pure tung oil. It's a french product from 'Libéron' based on linseed oil and tung oil. I did not sand down before gluing the planks. I use a drop of titebond original wood glue and a drop of zap medium CA+ to glue the planks. And I did not have any particular problem.
- 103 replies
-
- 5
-
-
- queen anne barge
- Syren Ship Model Company
- (and 1 more)
-
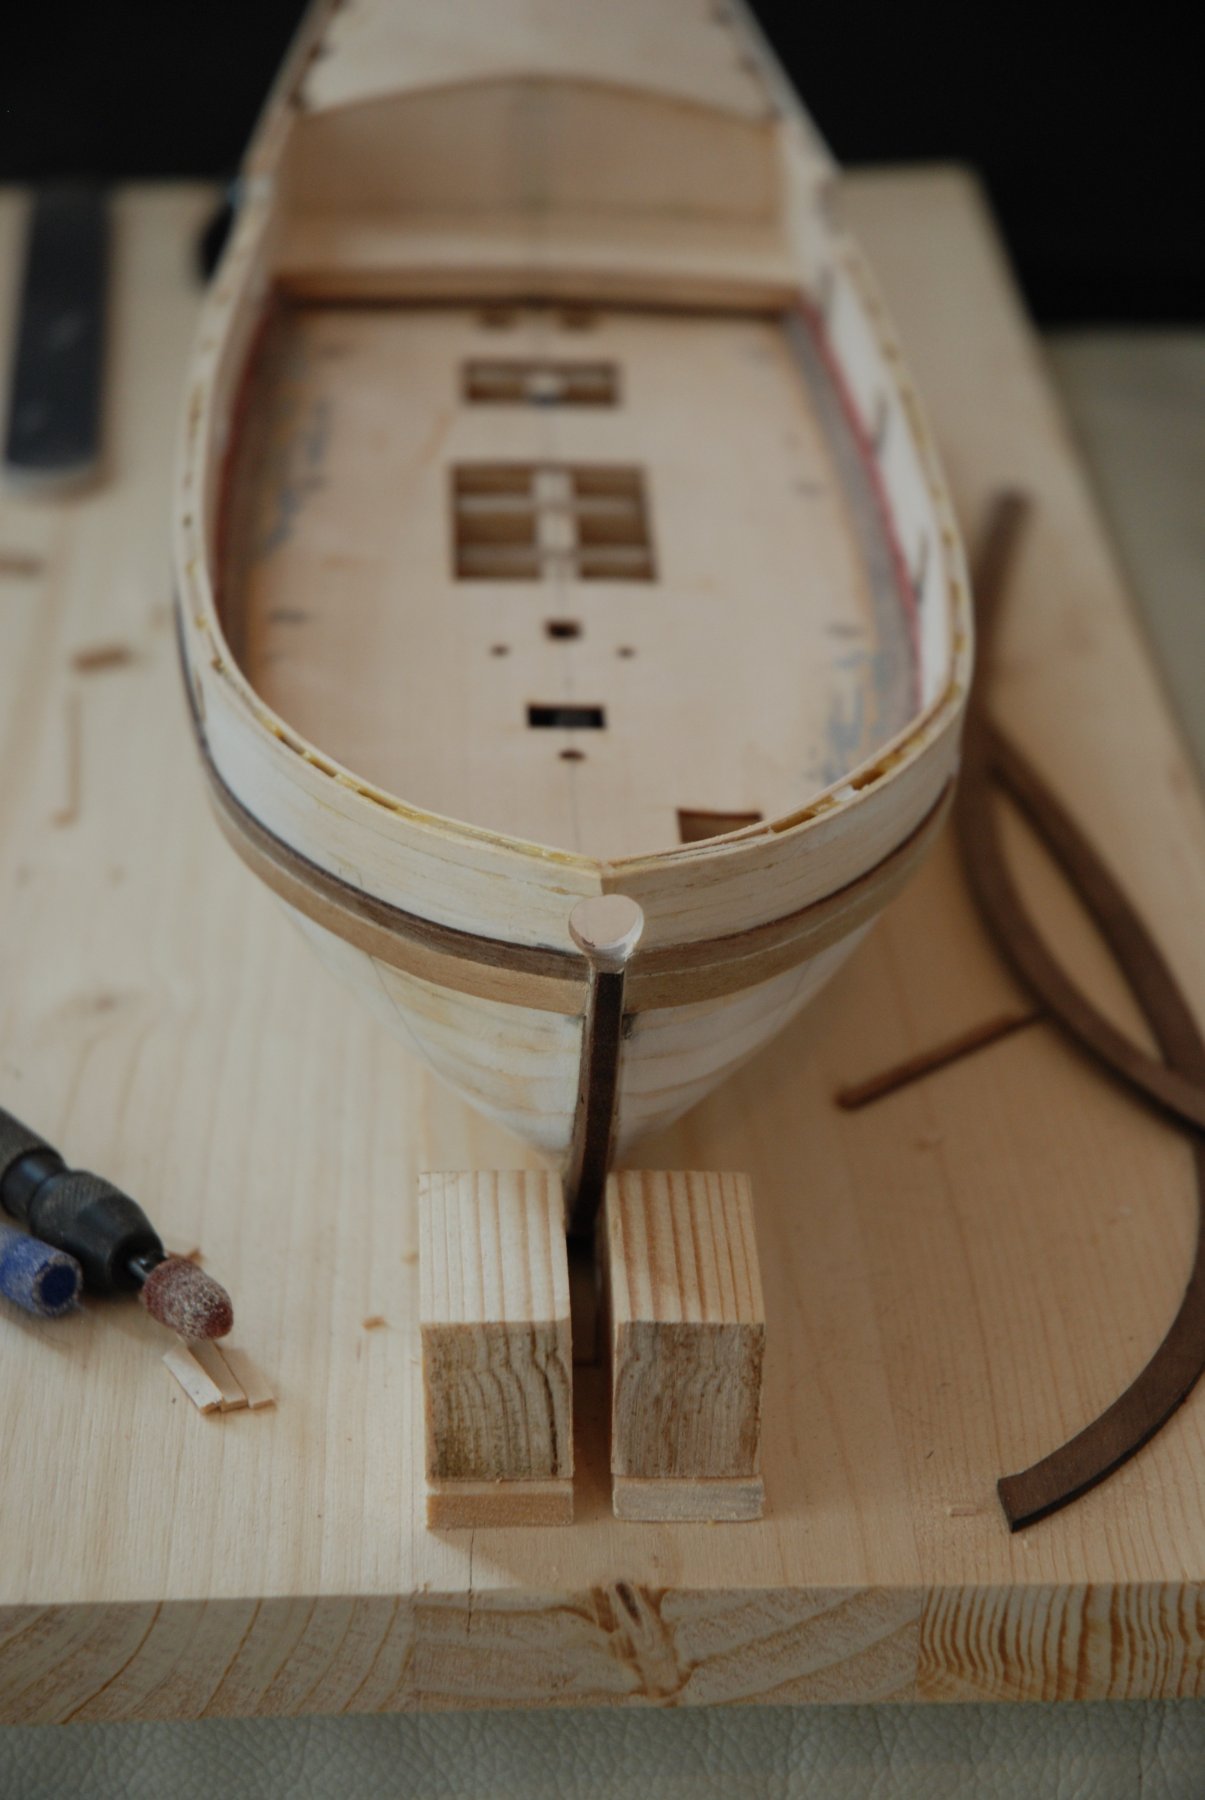
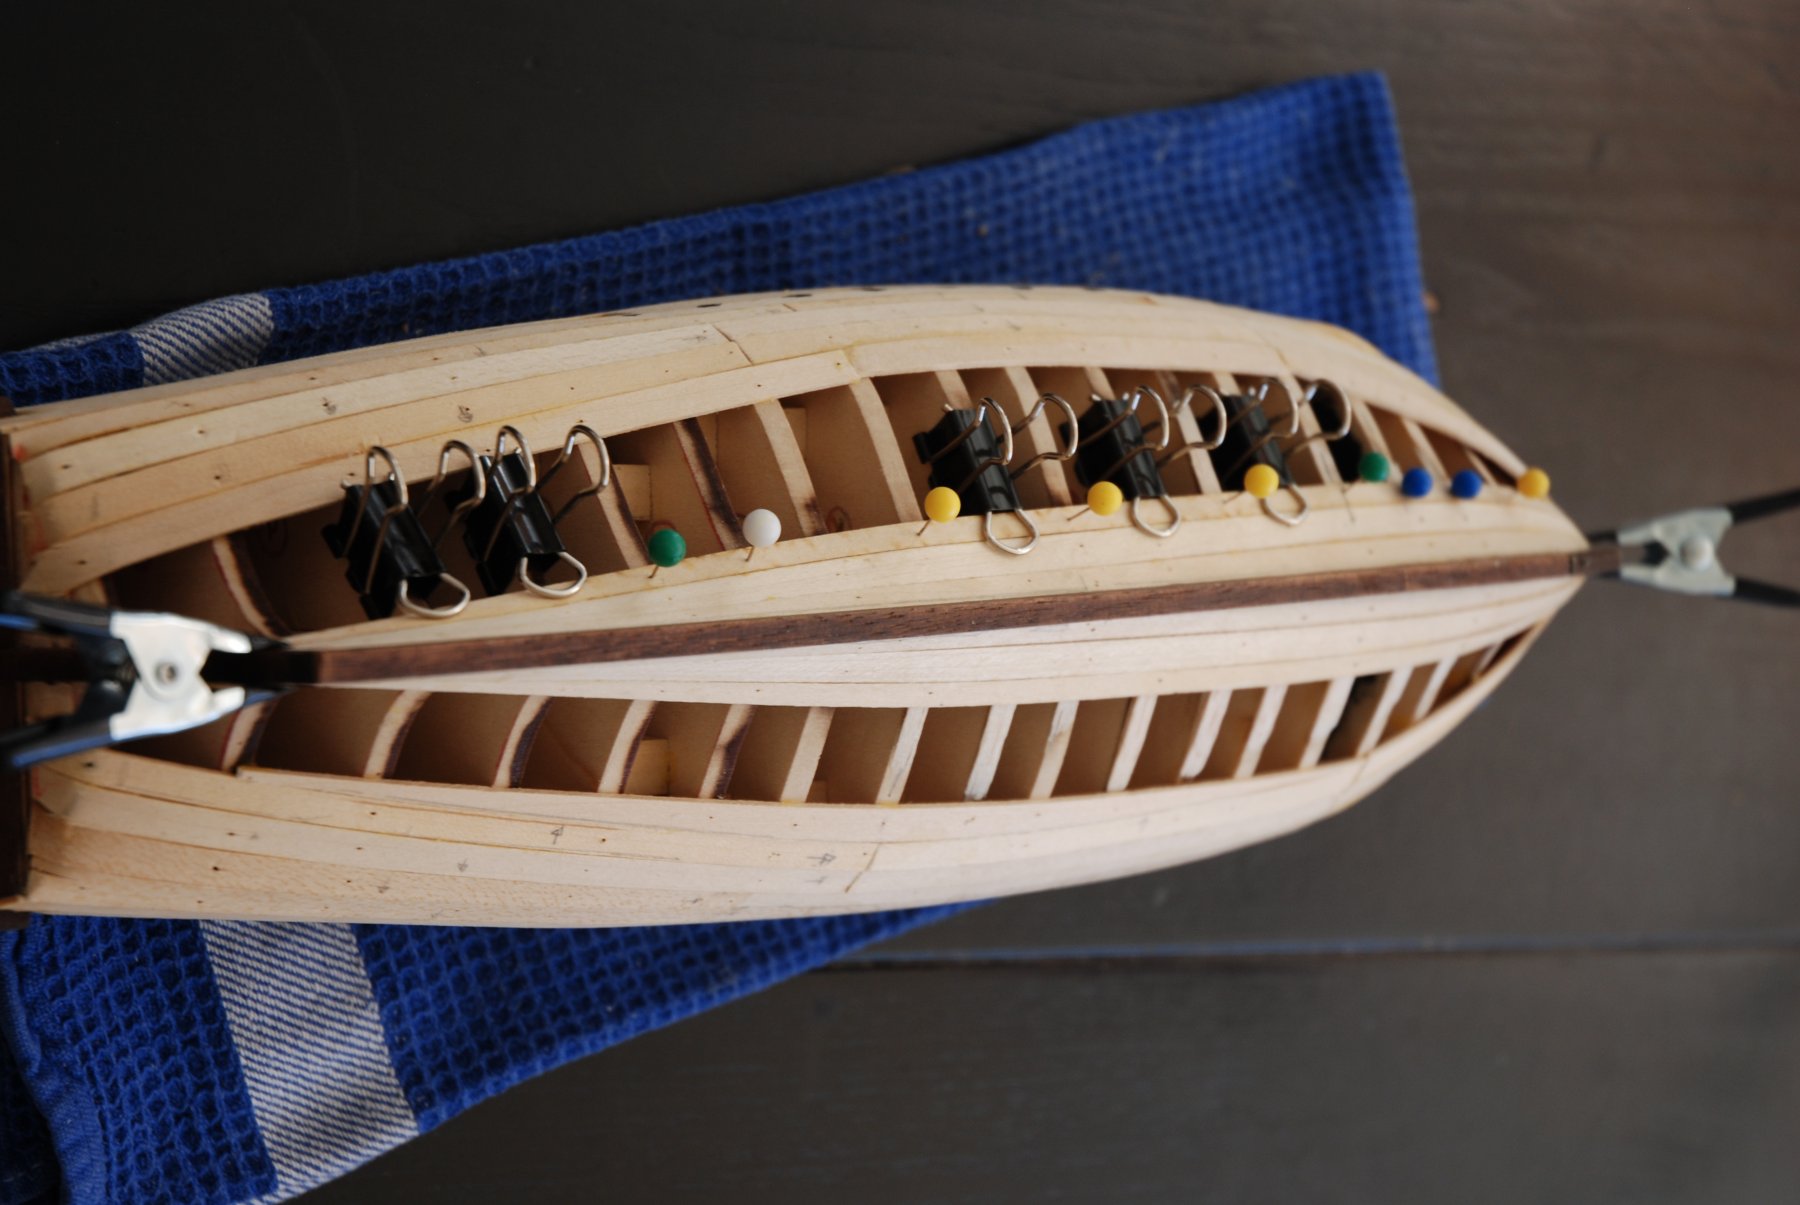
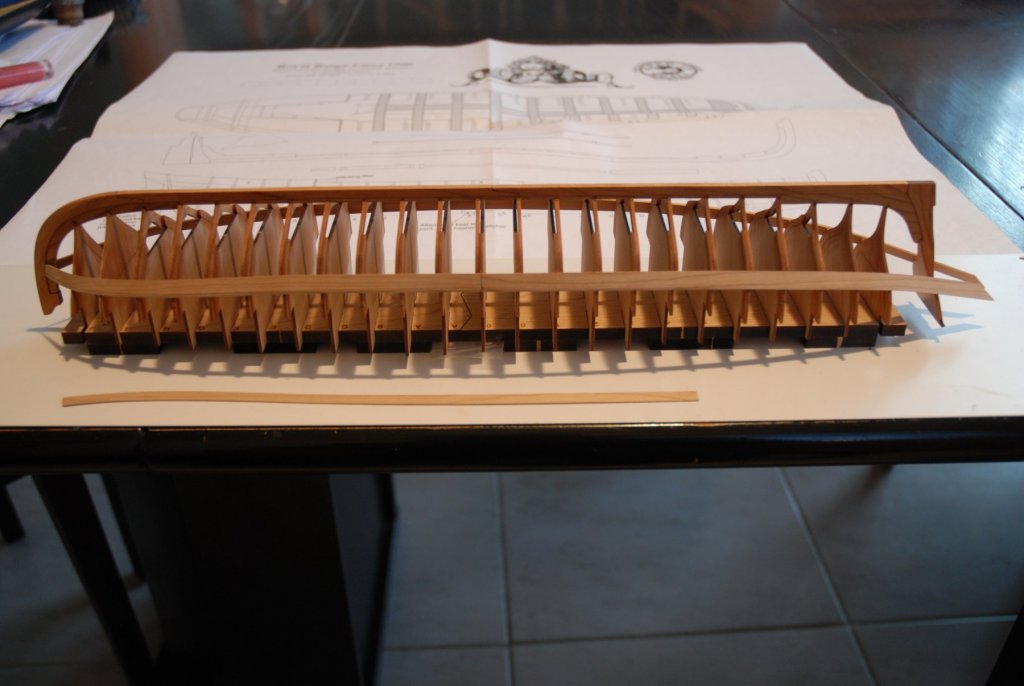
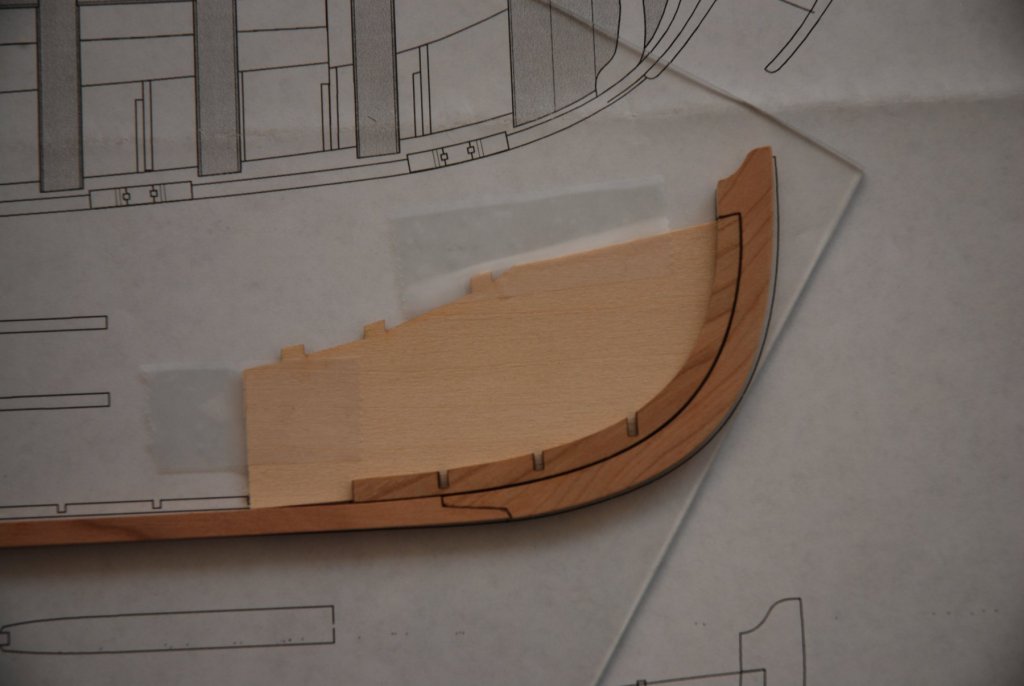
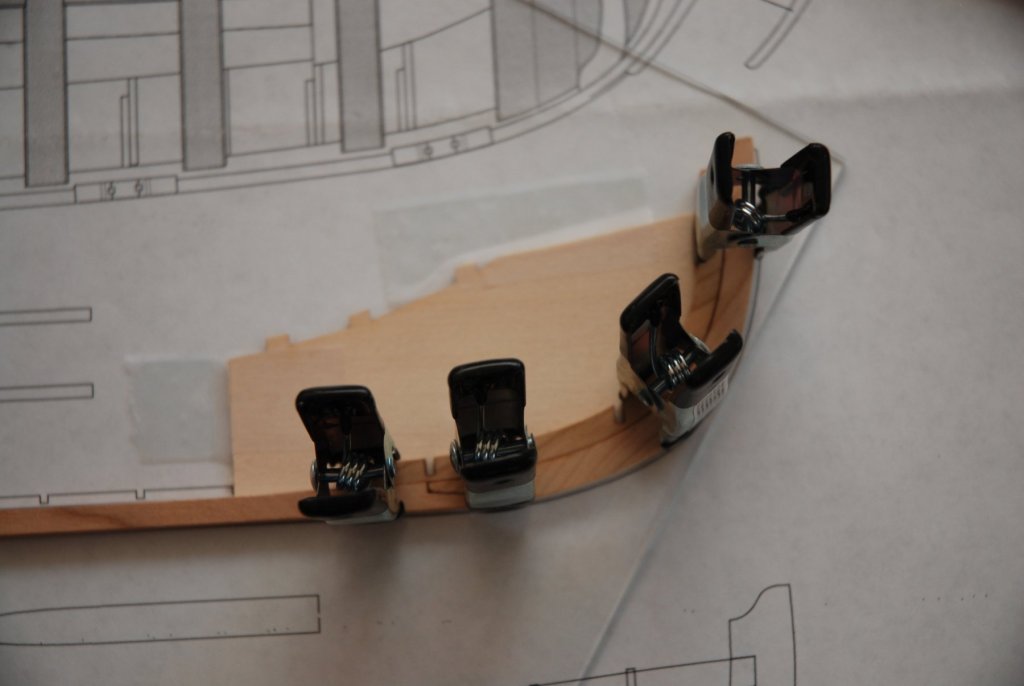
My work on the Queen barge advance quietly. I have glued the frames on the building board paying attention to the direction of each of them. Then I applied a coat of tung oil. Finally I have glued the planks #1 and #2 on each side of the barge. For the plank #1, I begin on the port side and everything goes well. But when I bend the plank for the starboard side, I twist the plank in the wrong direction... Yes it's very easy to forget which way we need to twist it... And naturally when I try to twist it in the opposite direction happens what should happen... I broke the plank ! Luckily the Syren Ship Model Company provides an extra exterior barge planking set. As I had to order some cannons and swivel guns to upgrade the armement of my Armed Viriginia Sloop, I just had to add this set to my order. As always with my orders at Syren Ship Model Company, I received the packet in the same week. And this time, when you take care of the direction of the twist everything is easier... Now I will work on the plank #3. I just have clean the laser char. Its time to bend and twist. But I can work more quietly because this time I will be very careful on the direction of the twist...


- 103 replies
-
- 13
-
-
- queen anne barge
- Syren Ship Model Company
- (and 1 more)
-
Weathering wood
JpR62 replied to JpR62's topic in Painting, finishing and weathering products and techniques
Thanks for the answers. I will do some research with the term "bitumen". -
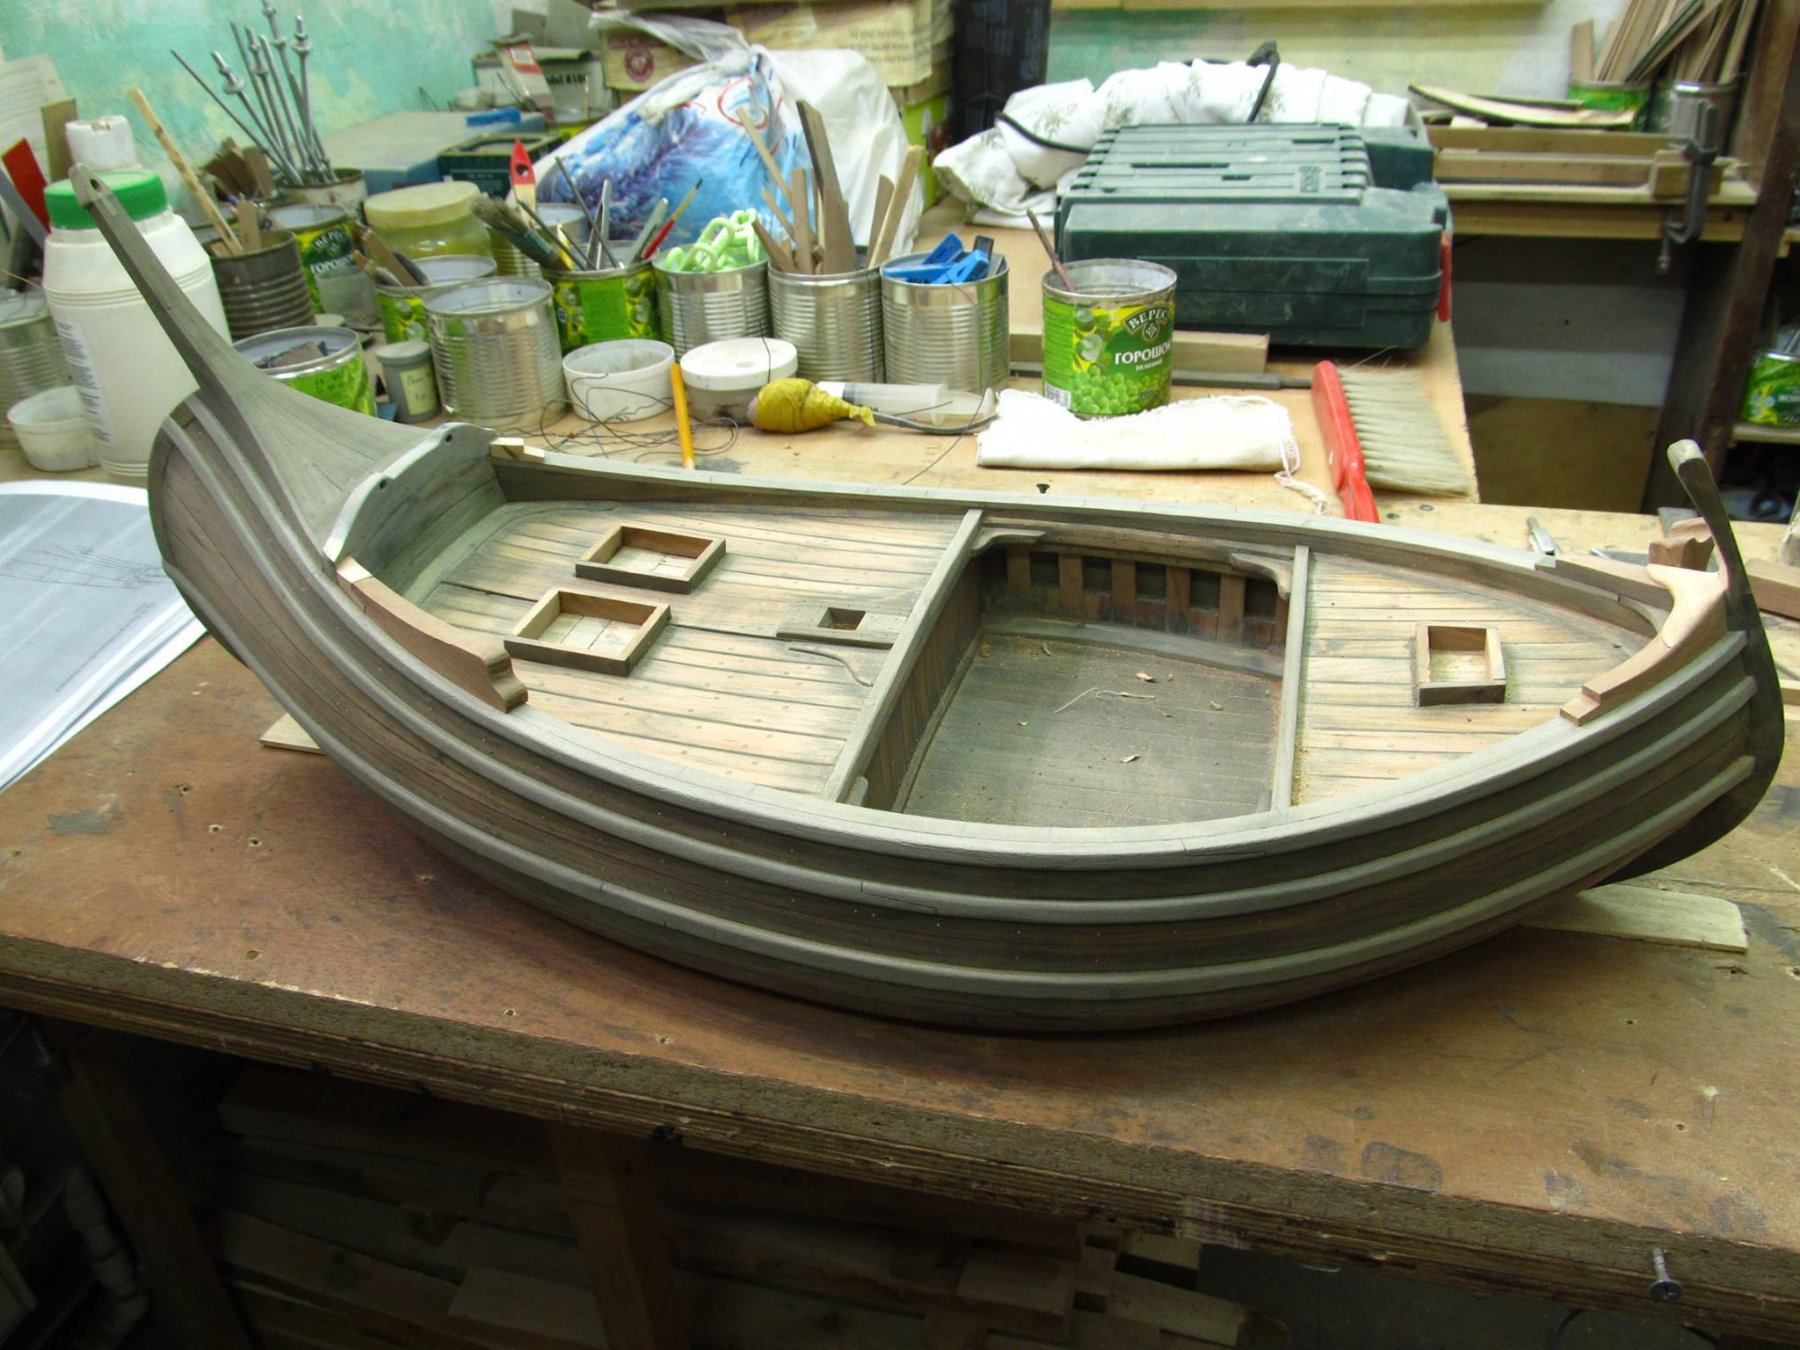
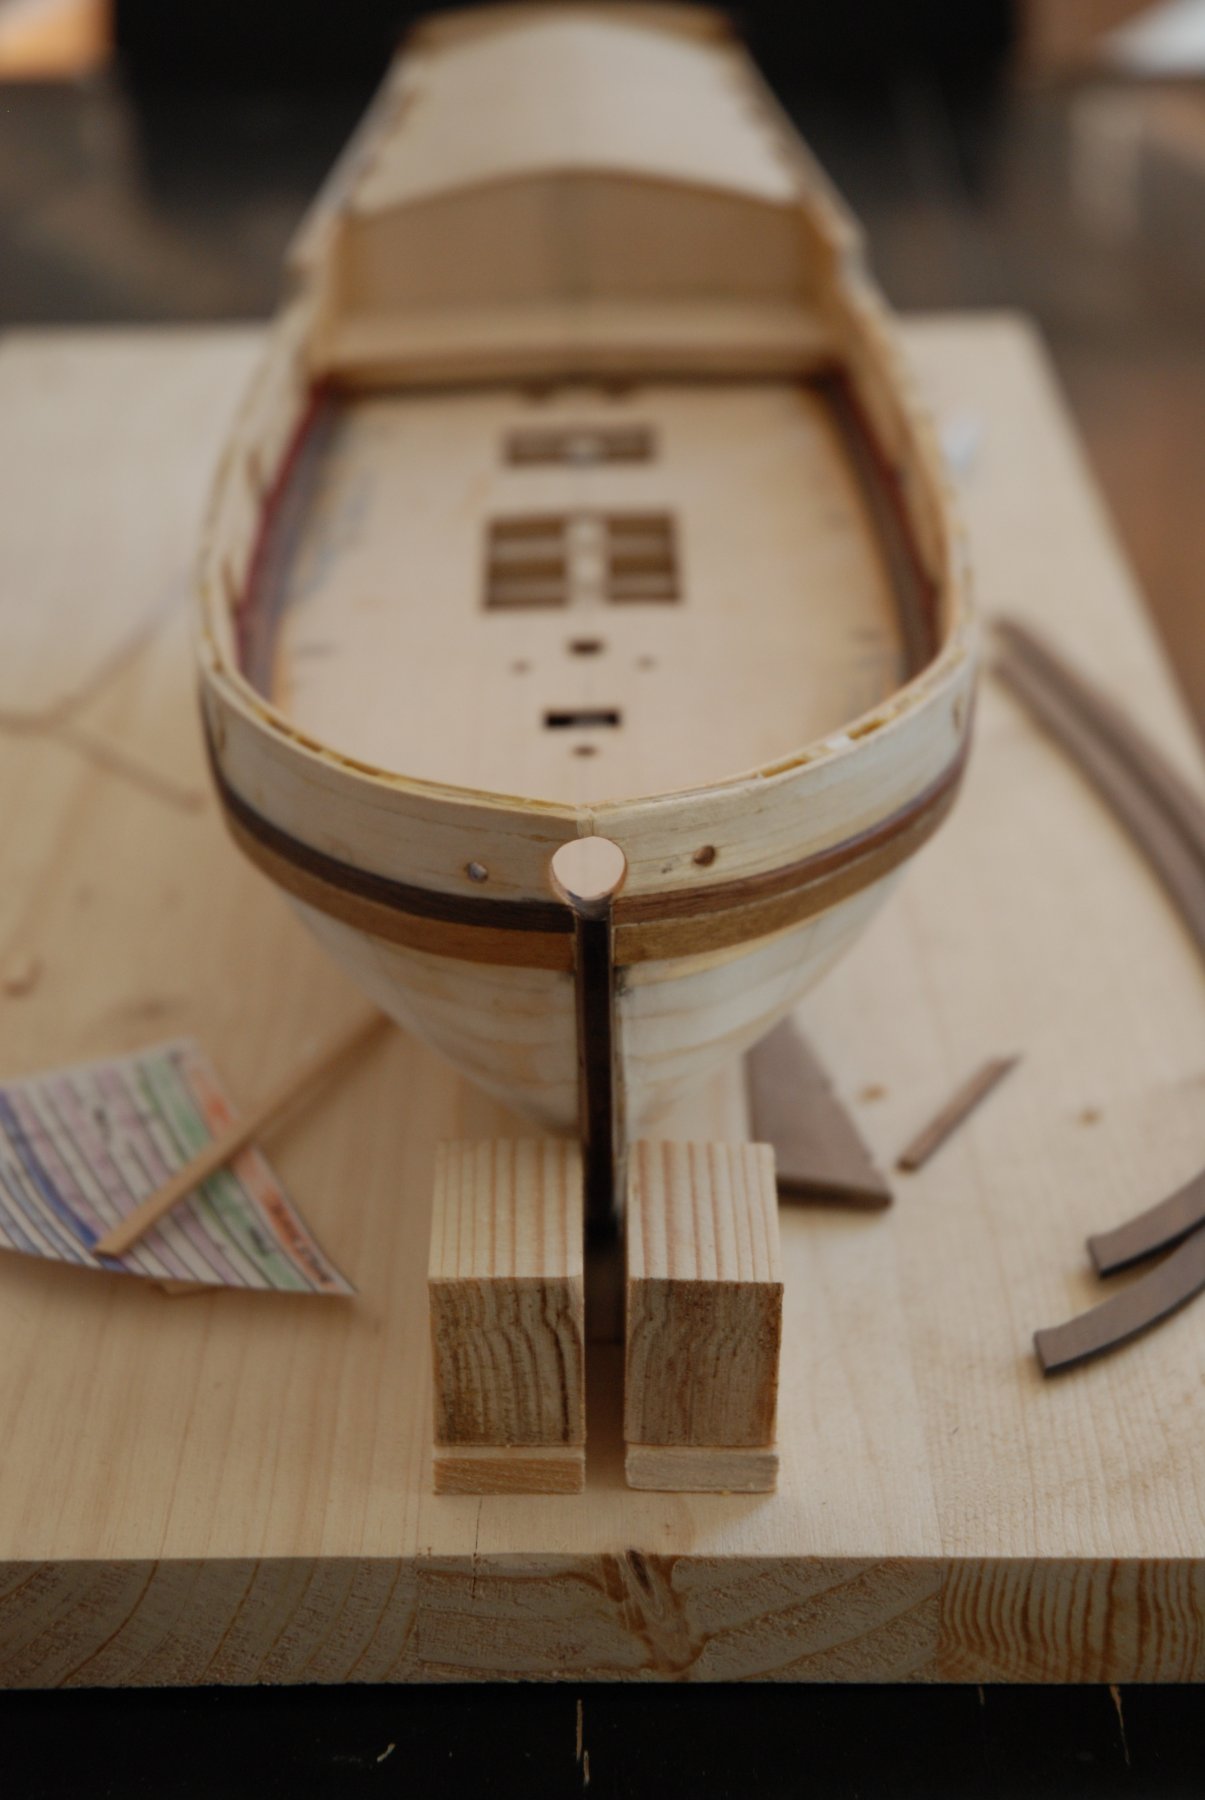
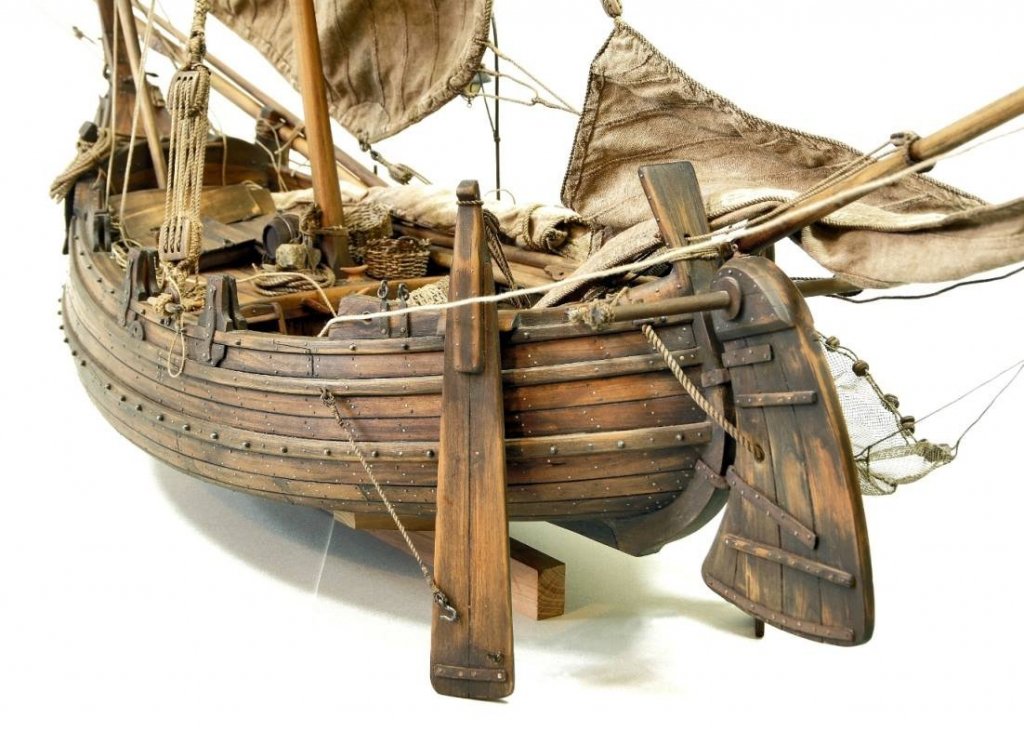
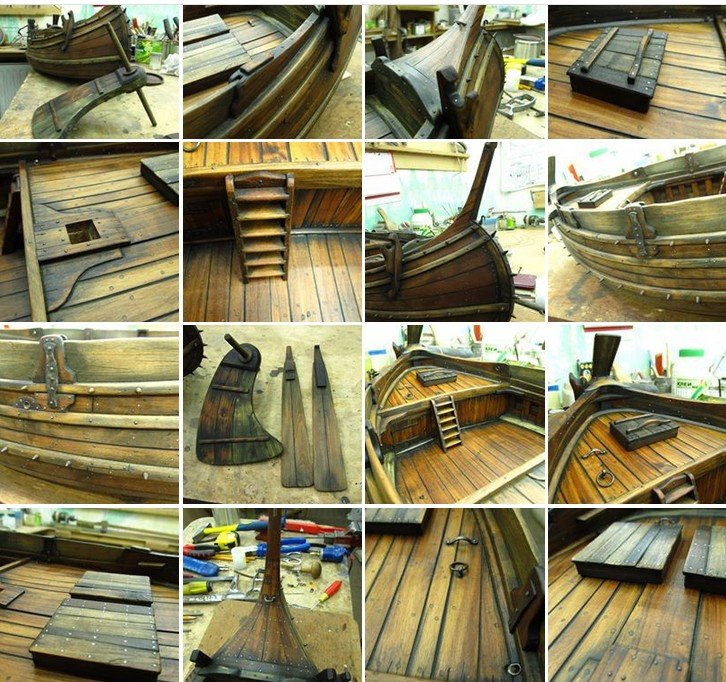
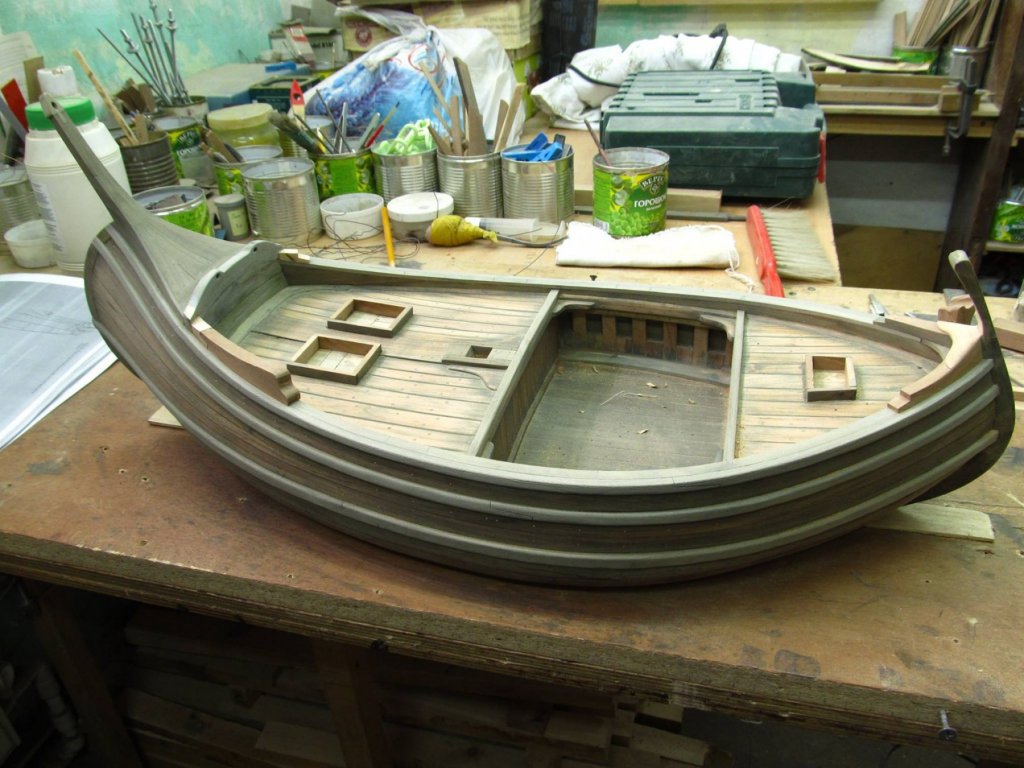
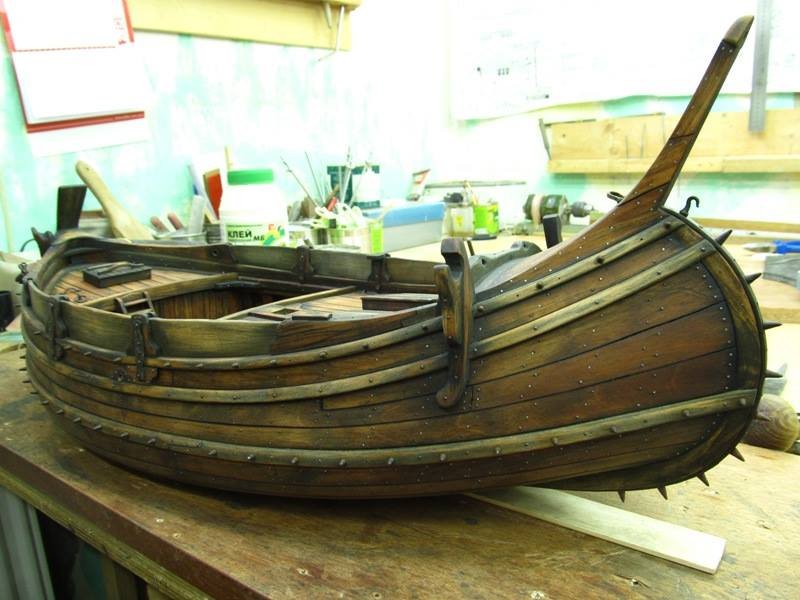
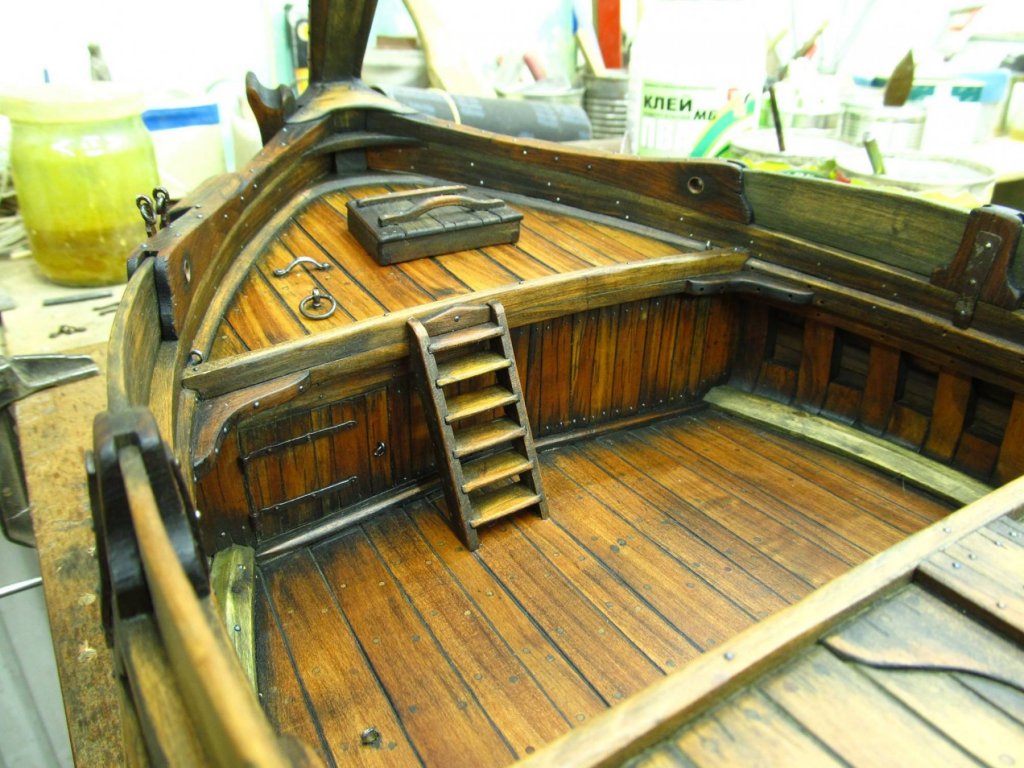
I found on facebook a photo album of a beautiful Portuguese fishing boats at the 1:16 scale. I join some of the photos founded on this album. My question: do you know which techniques were used to obtain this result ? For those who are interested, you can consult the complete album at the following address : https://www.facebook.com/pg/Shipmodels.ua/photos/?tab=album&album_id=571832076319604 The team that build this model is an Ukrainian company.
-
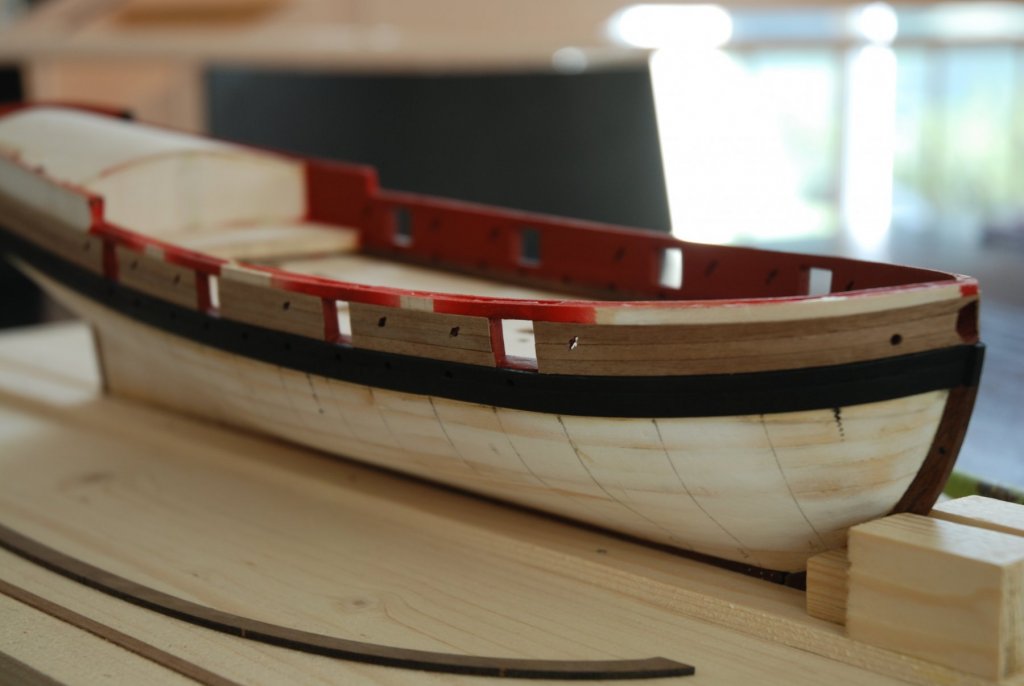
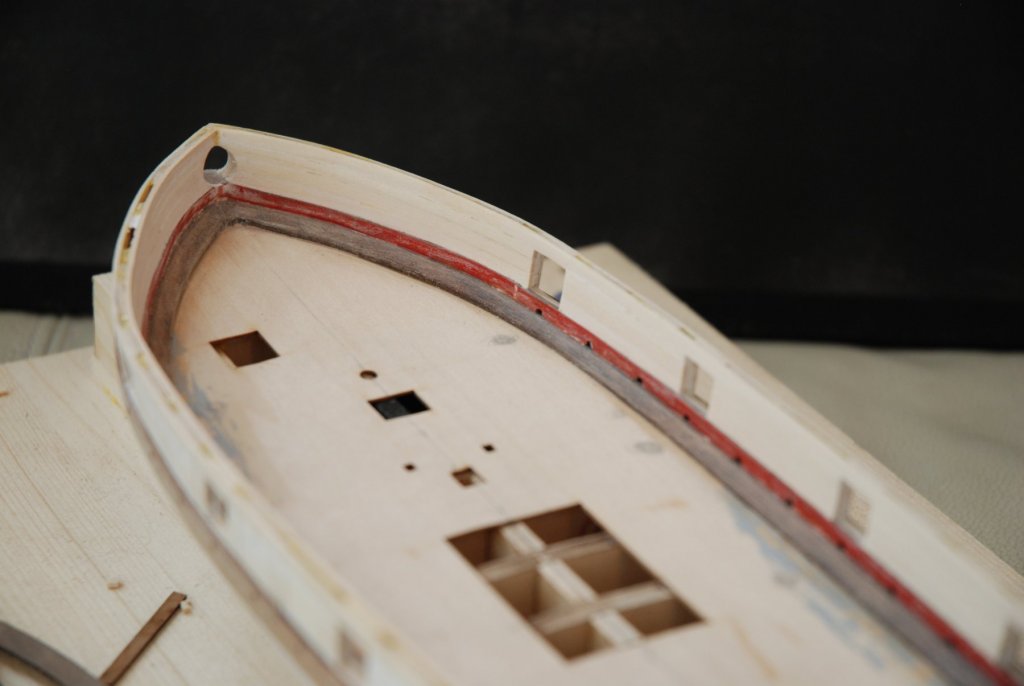
The hawse holes are drilled. I apply a layer of teak oil on the wales and on the black strakes. I'm ready to apply the black color on the wales and the red color on the inside planking. I will keep the natural wood for the waterway. And as I just received the acrylic colors, it will time for the painting phase...

- 164 replies
-
- 12
-
-
- first build
- model shipways
- (and 2 more)
-
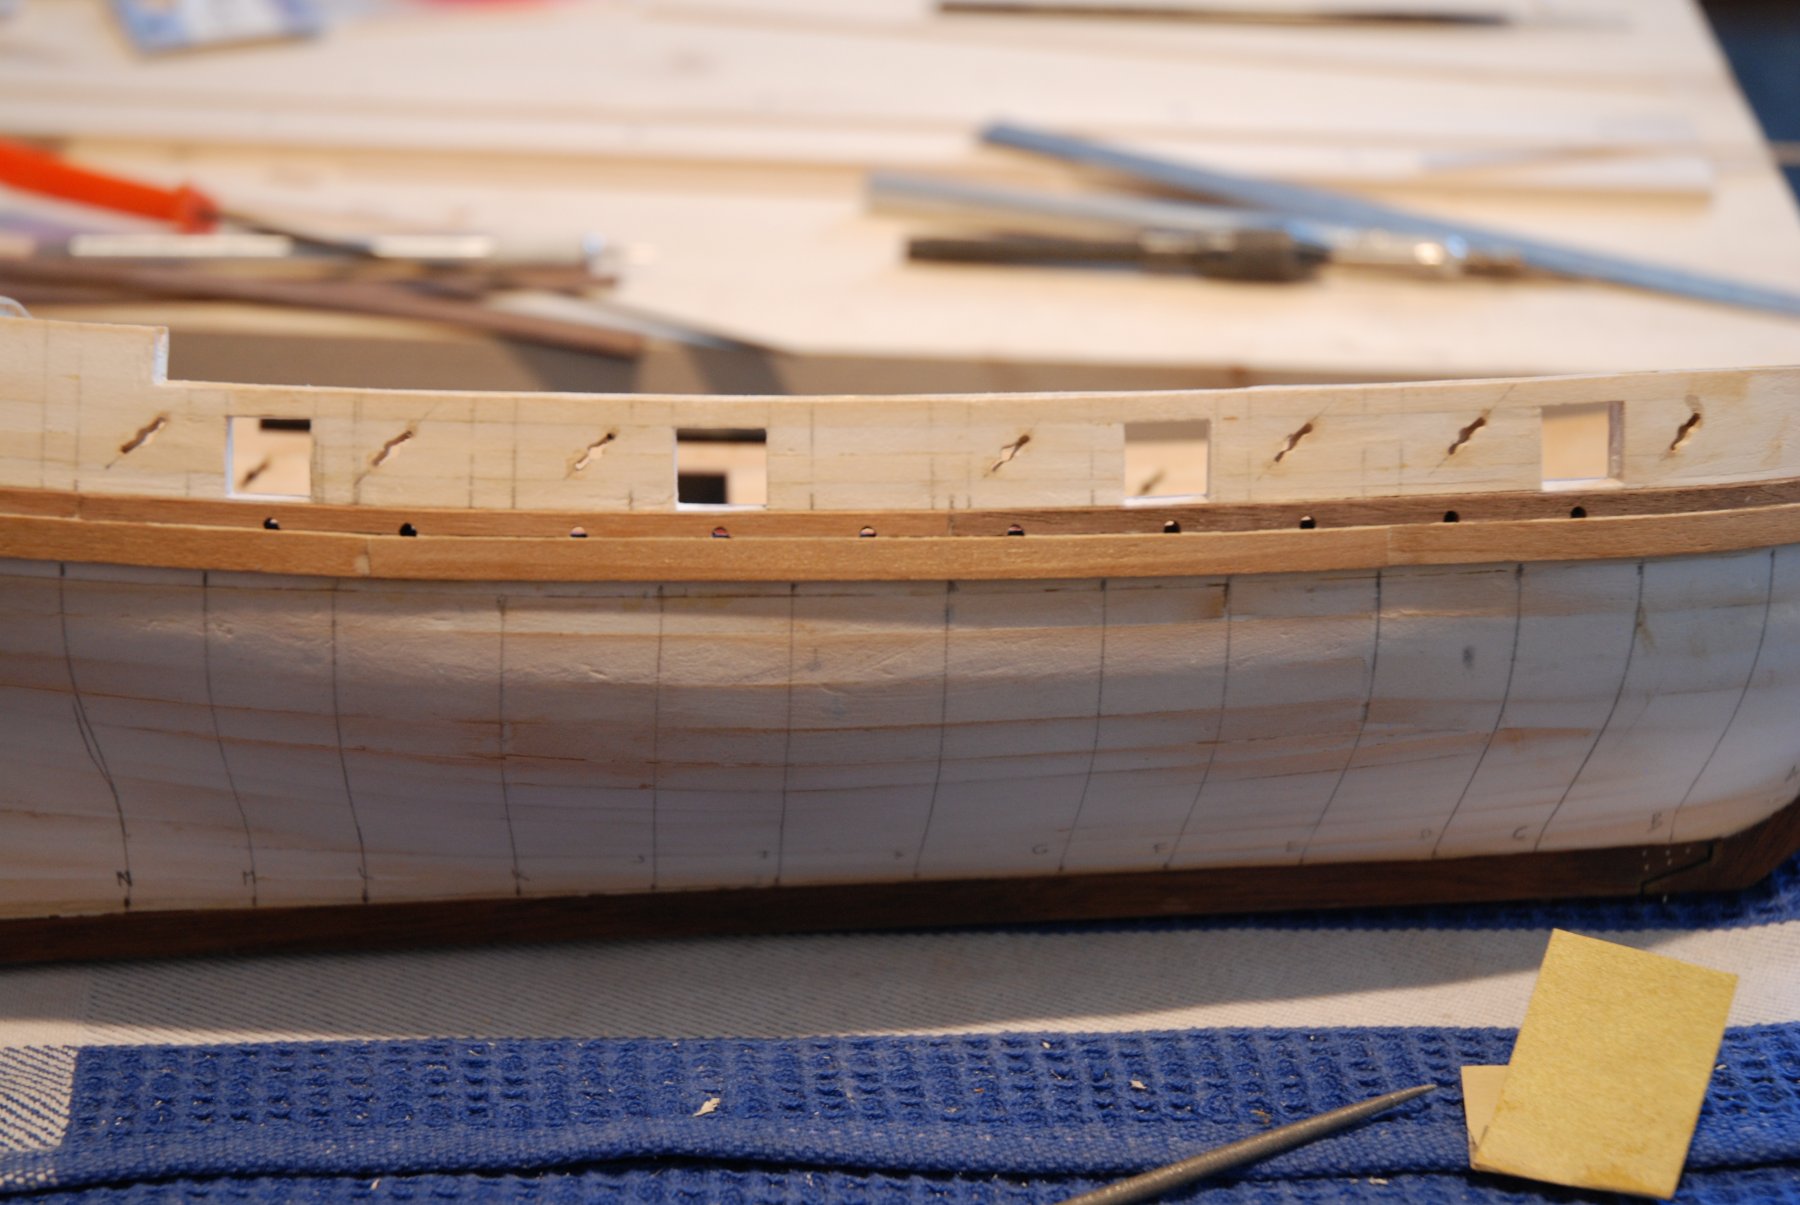
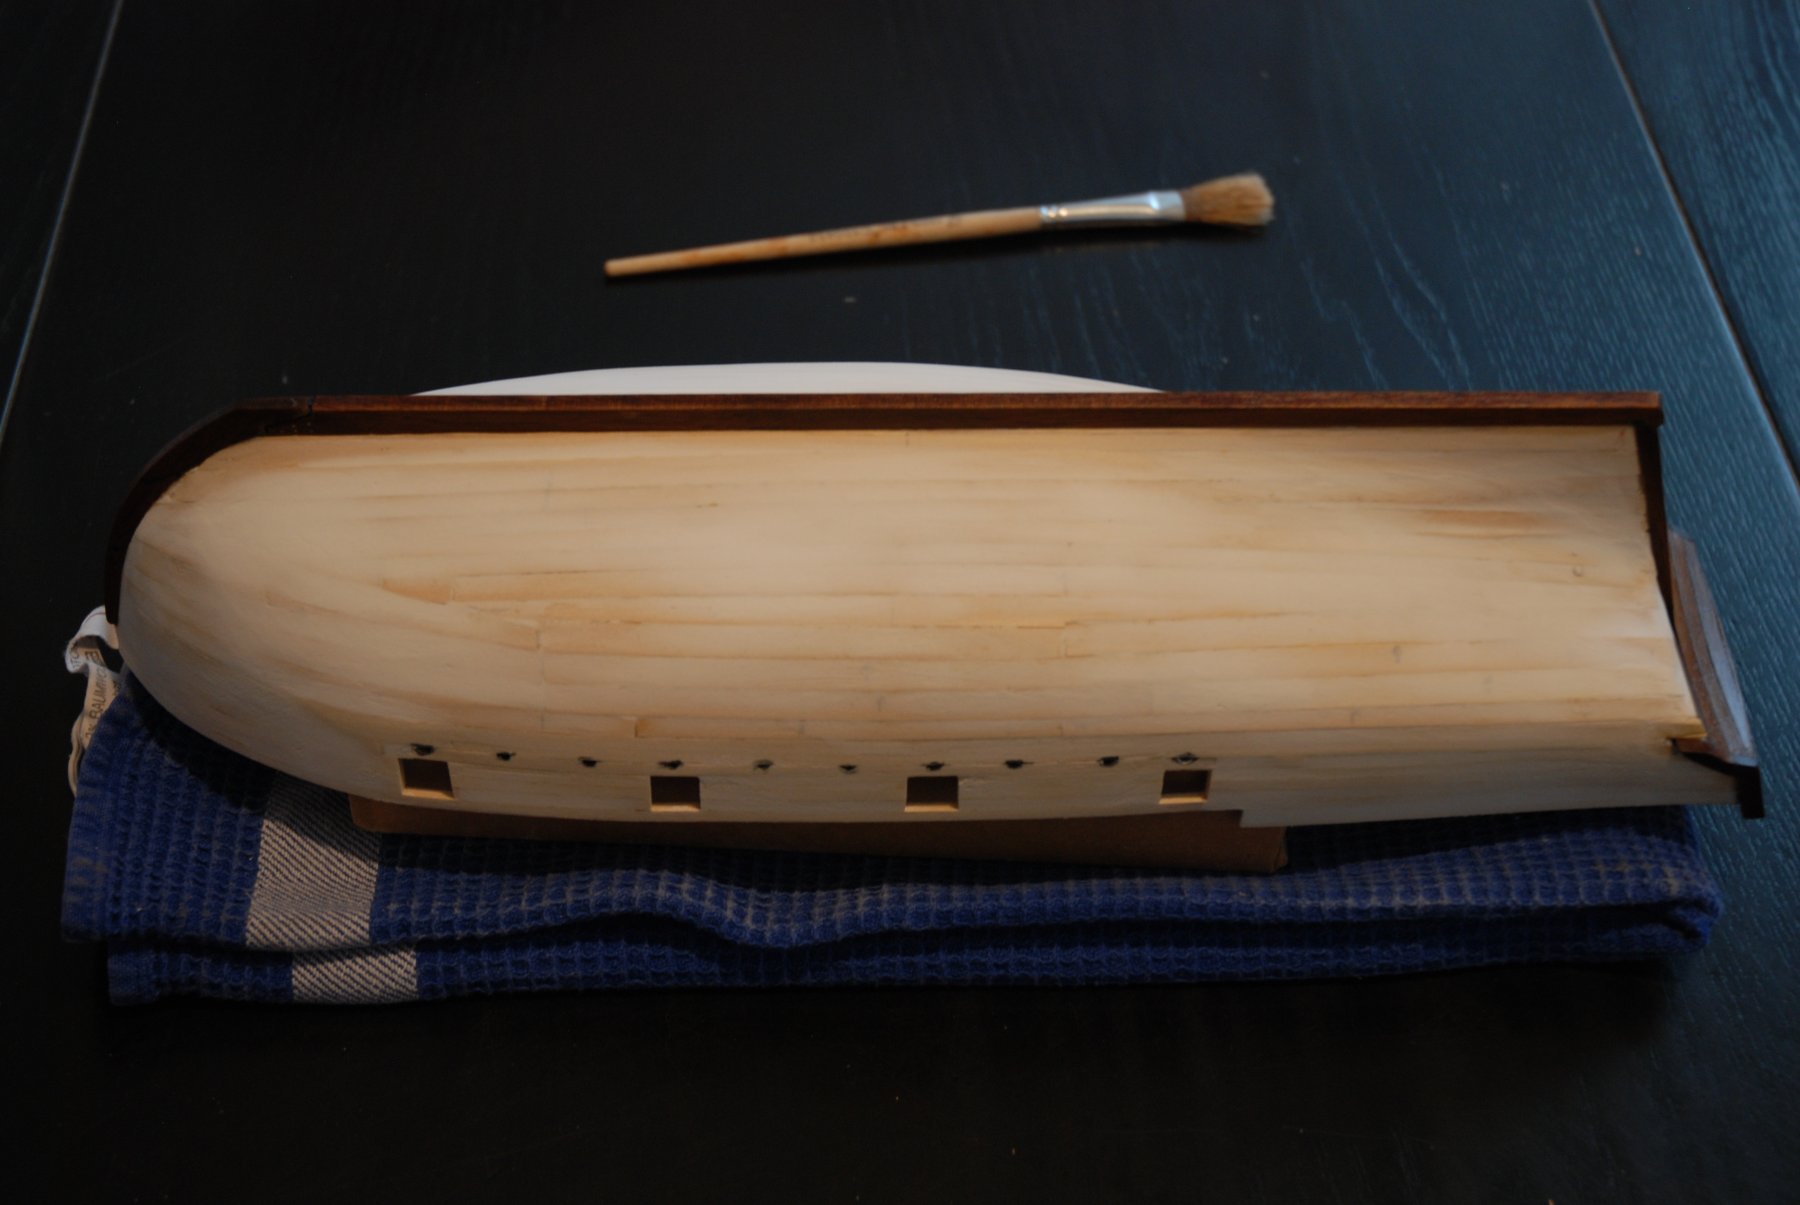
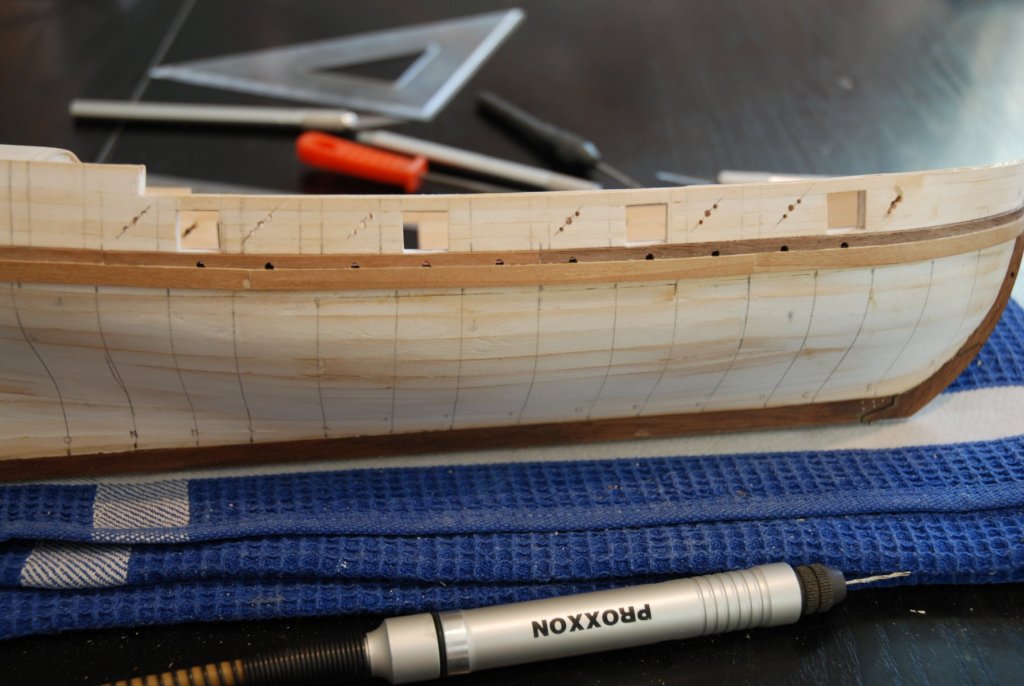
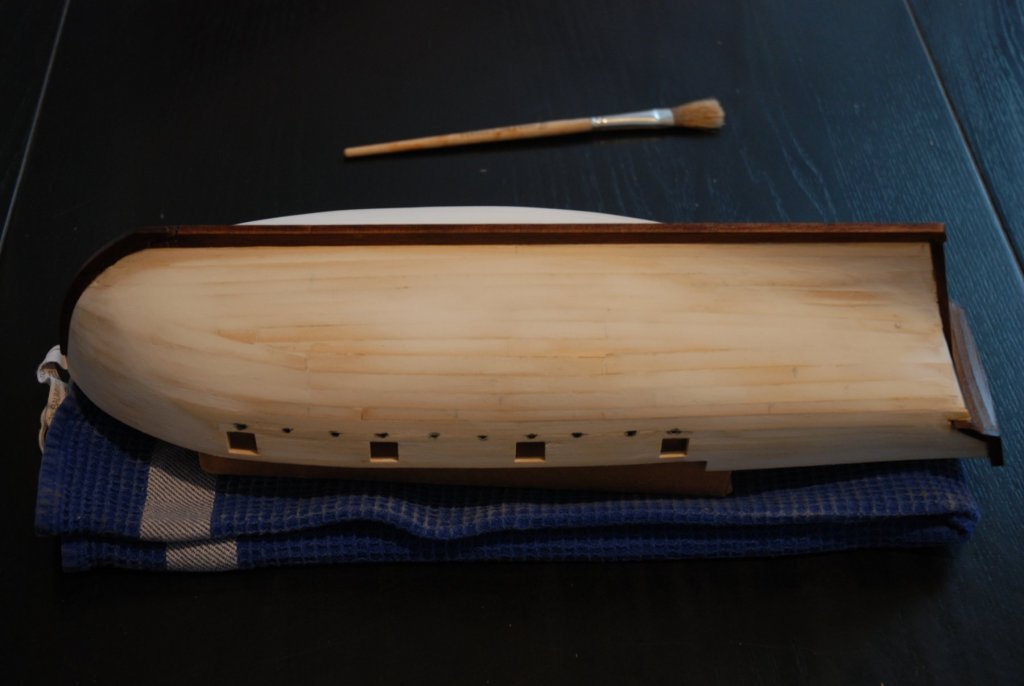
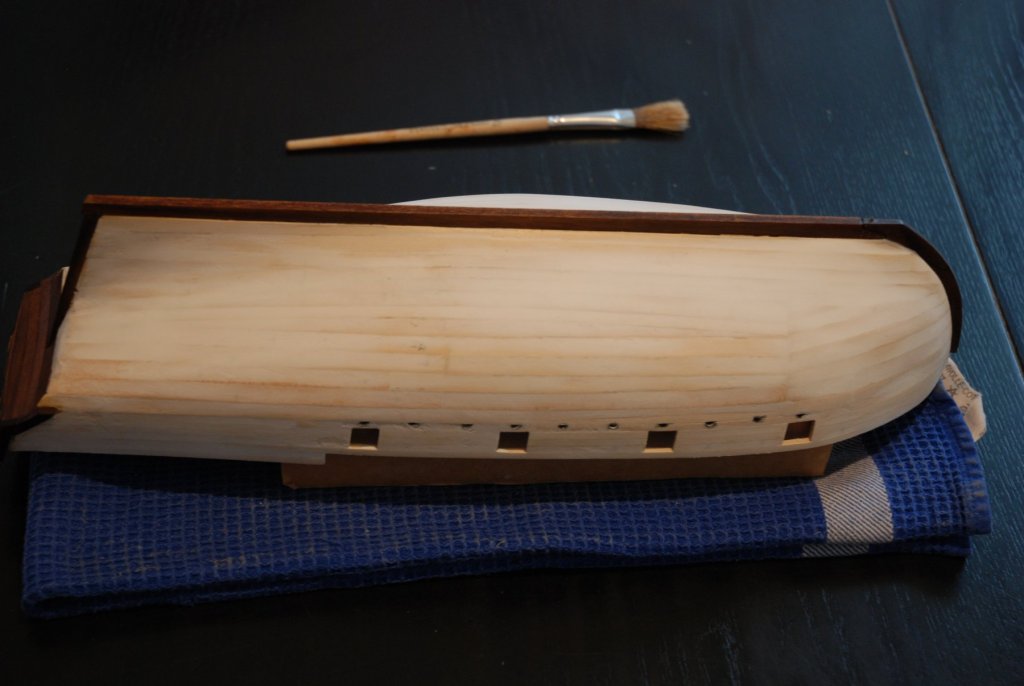
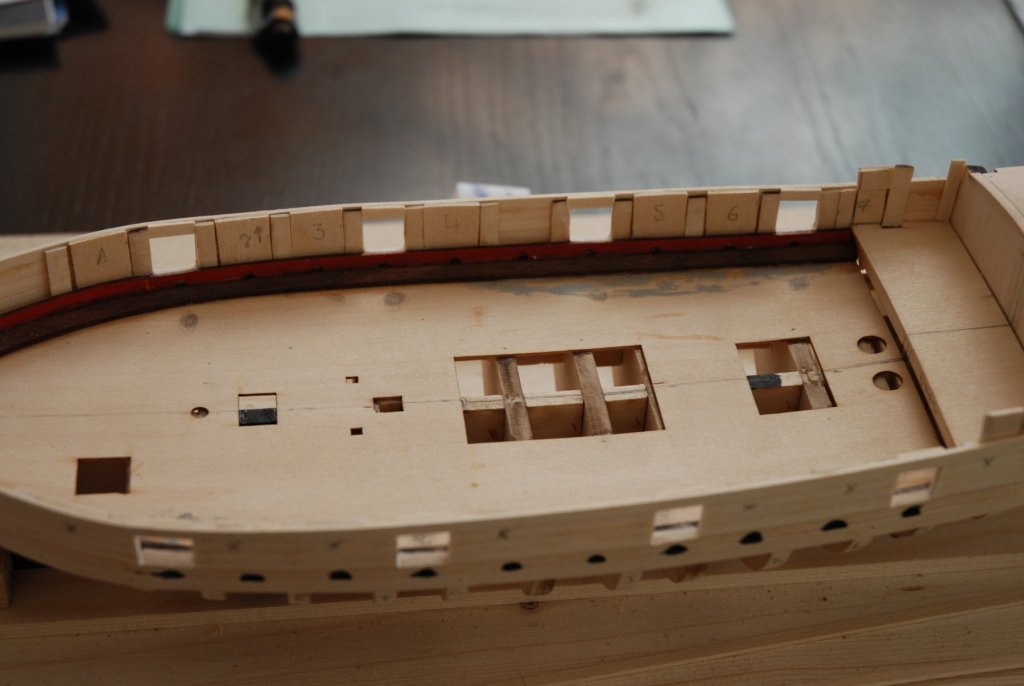
Thanks Brian and all the likes. As I'm waiting on the painting, I decided to open the sweep ports. I carefully mark the position of the main opening and trace diagonal lines in a 45 degree angle. I drill three holes, one bigger in the center and two others distant from 2 millimeters. Then I open the space between the central hole and the two others holes with a cutter (x-acto blade No 11). I use some walnut filler to draw a more regular size and shape. When the putty is dry I use a small piece of sandpaper to finish the work on the sweep ports. The fourteen sweep ports are done. It was very hard to obtain identical shapes... But I can live with the result.


- 164 replies
-
- 14
-
-
- first build
- model shipways
- (and 2 more)
-
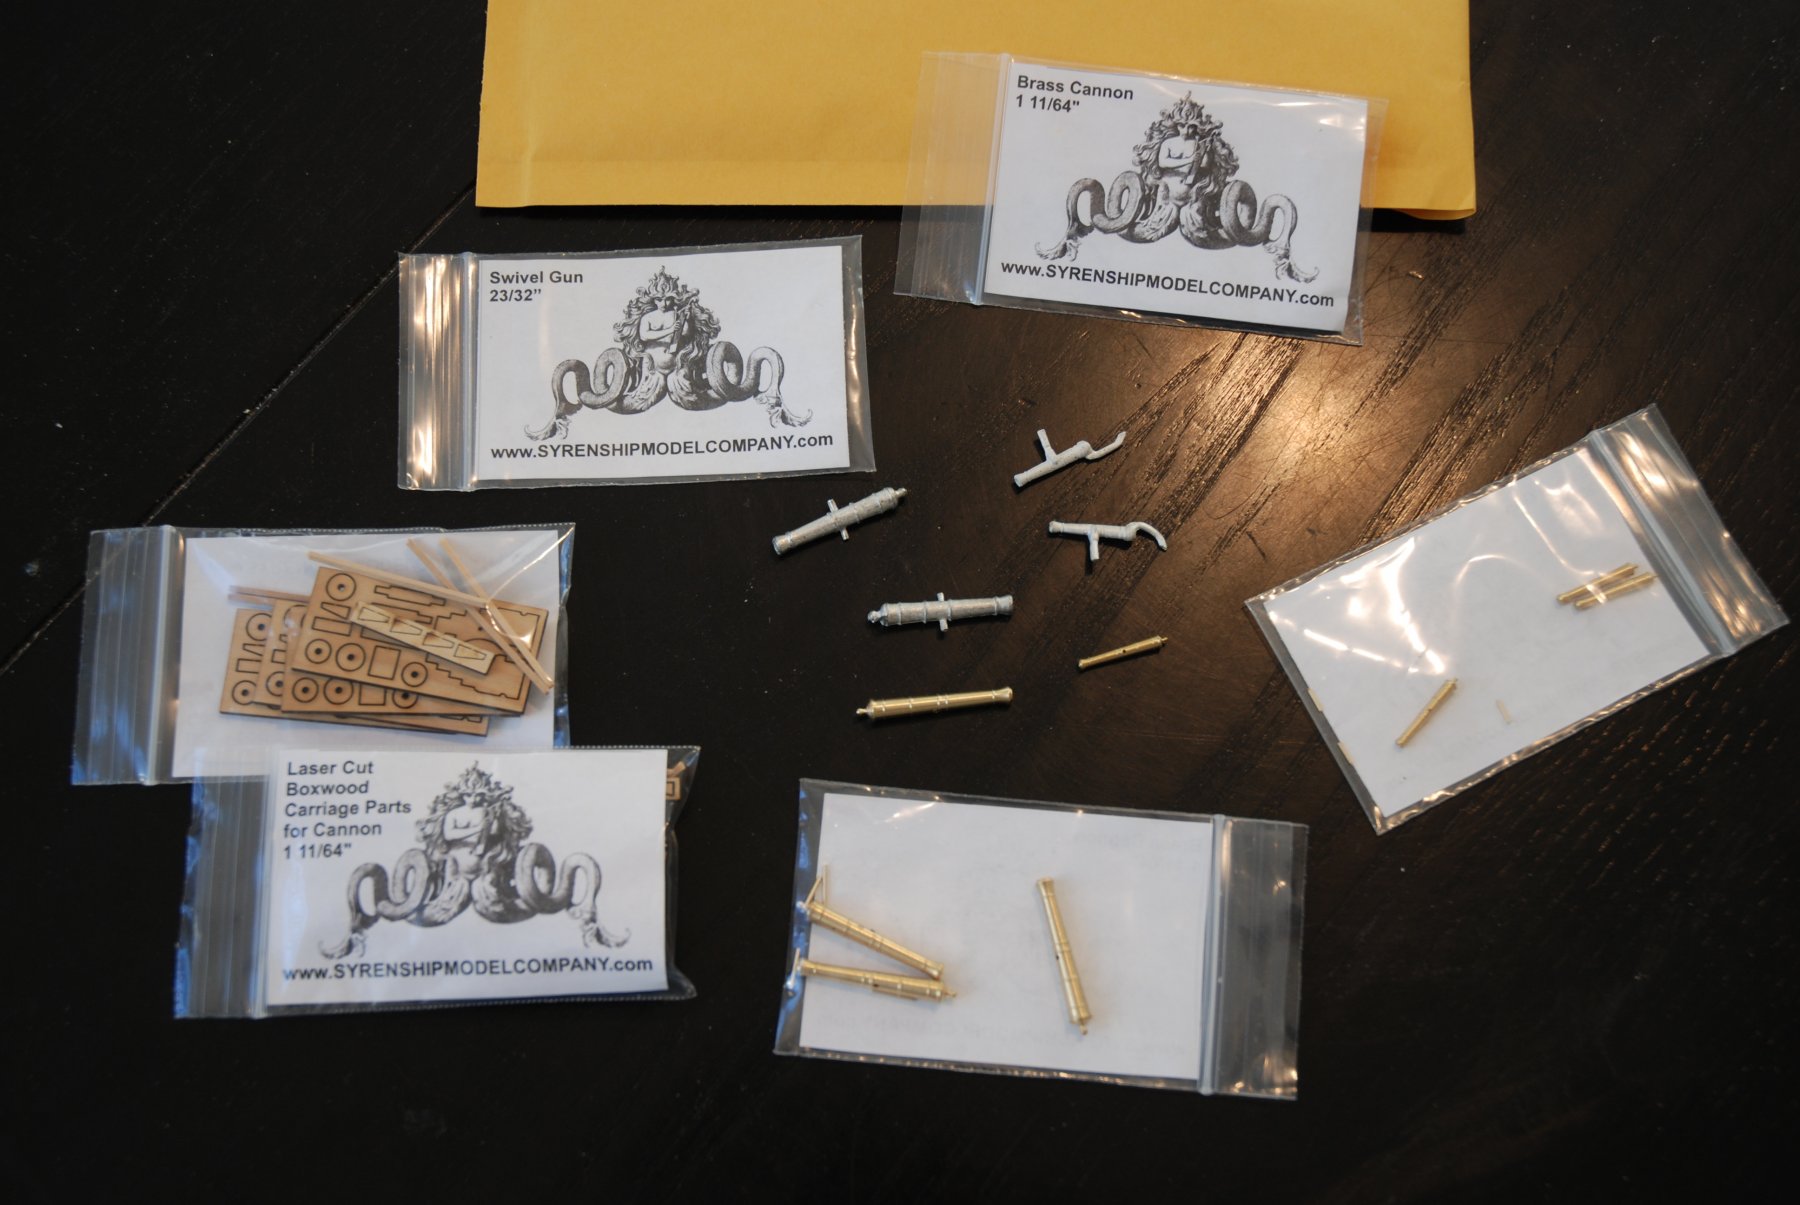
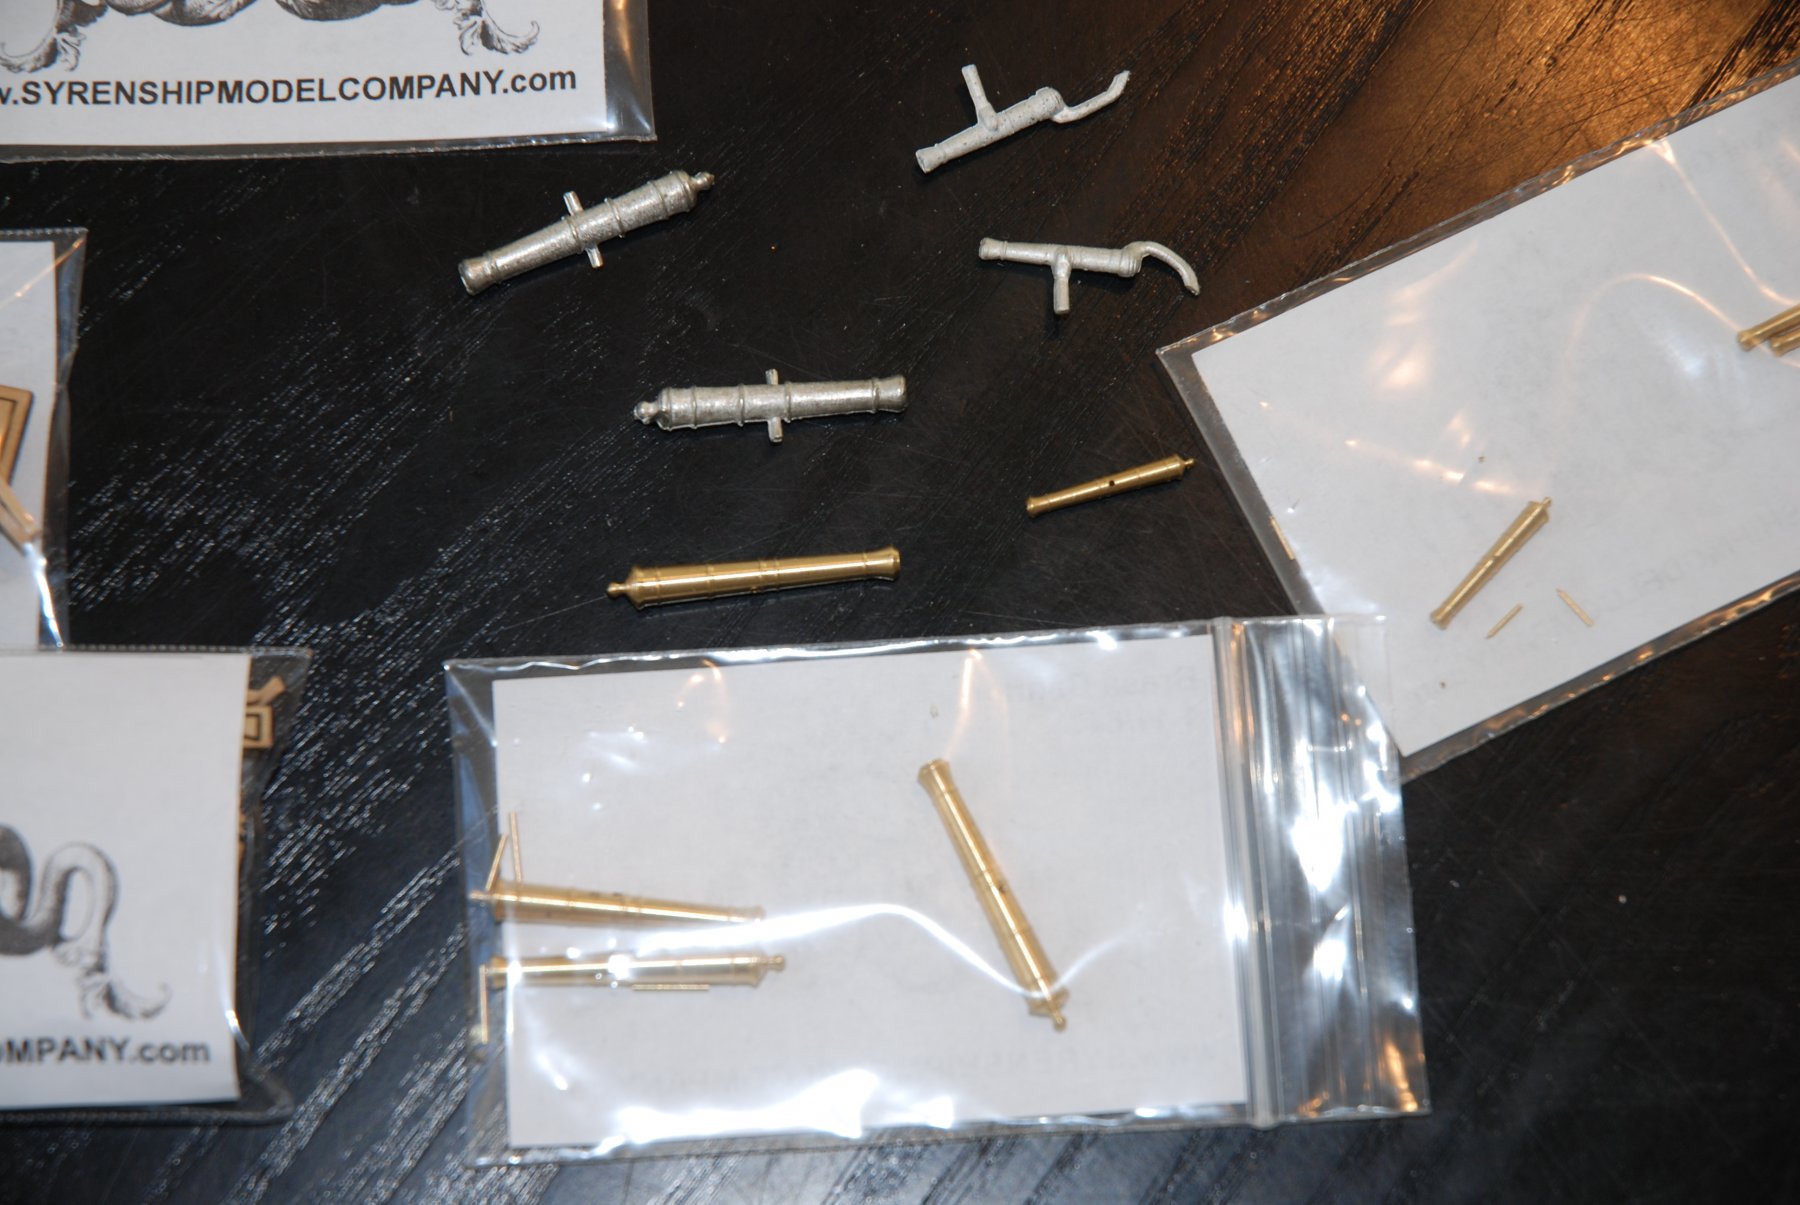
Thanks Dave and all the likes. Today I received a small package from Syren Ship Model Company. I have decided to replace the cannons and swivel guns by those produced by Chuck. And I'm not disappointed. They are superb. I order also the carriages.


- 164 replies
-
- 10
-
-
- first build
- model shipways
- (and 2 more)
-
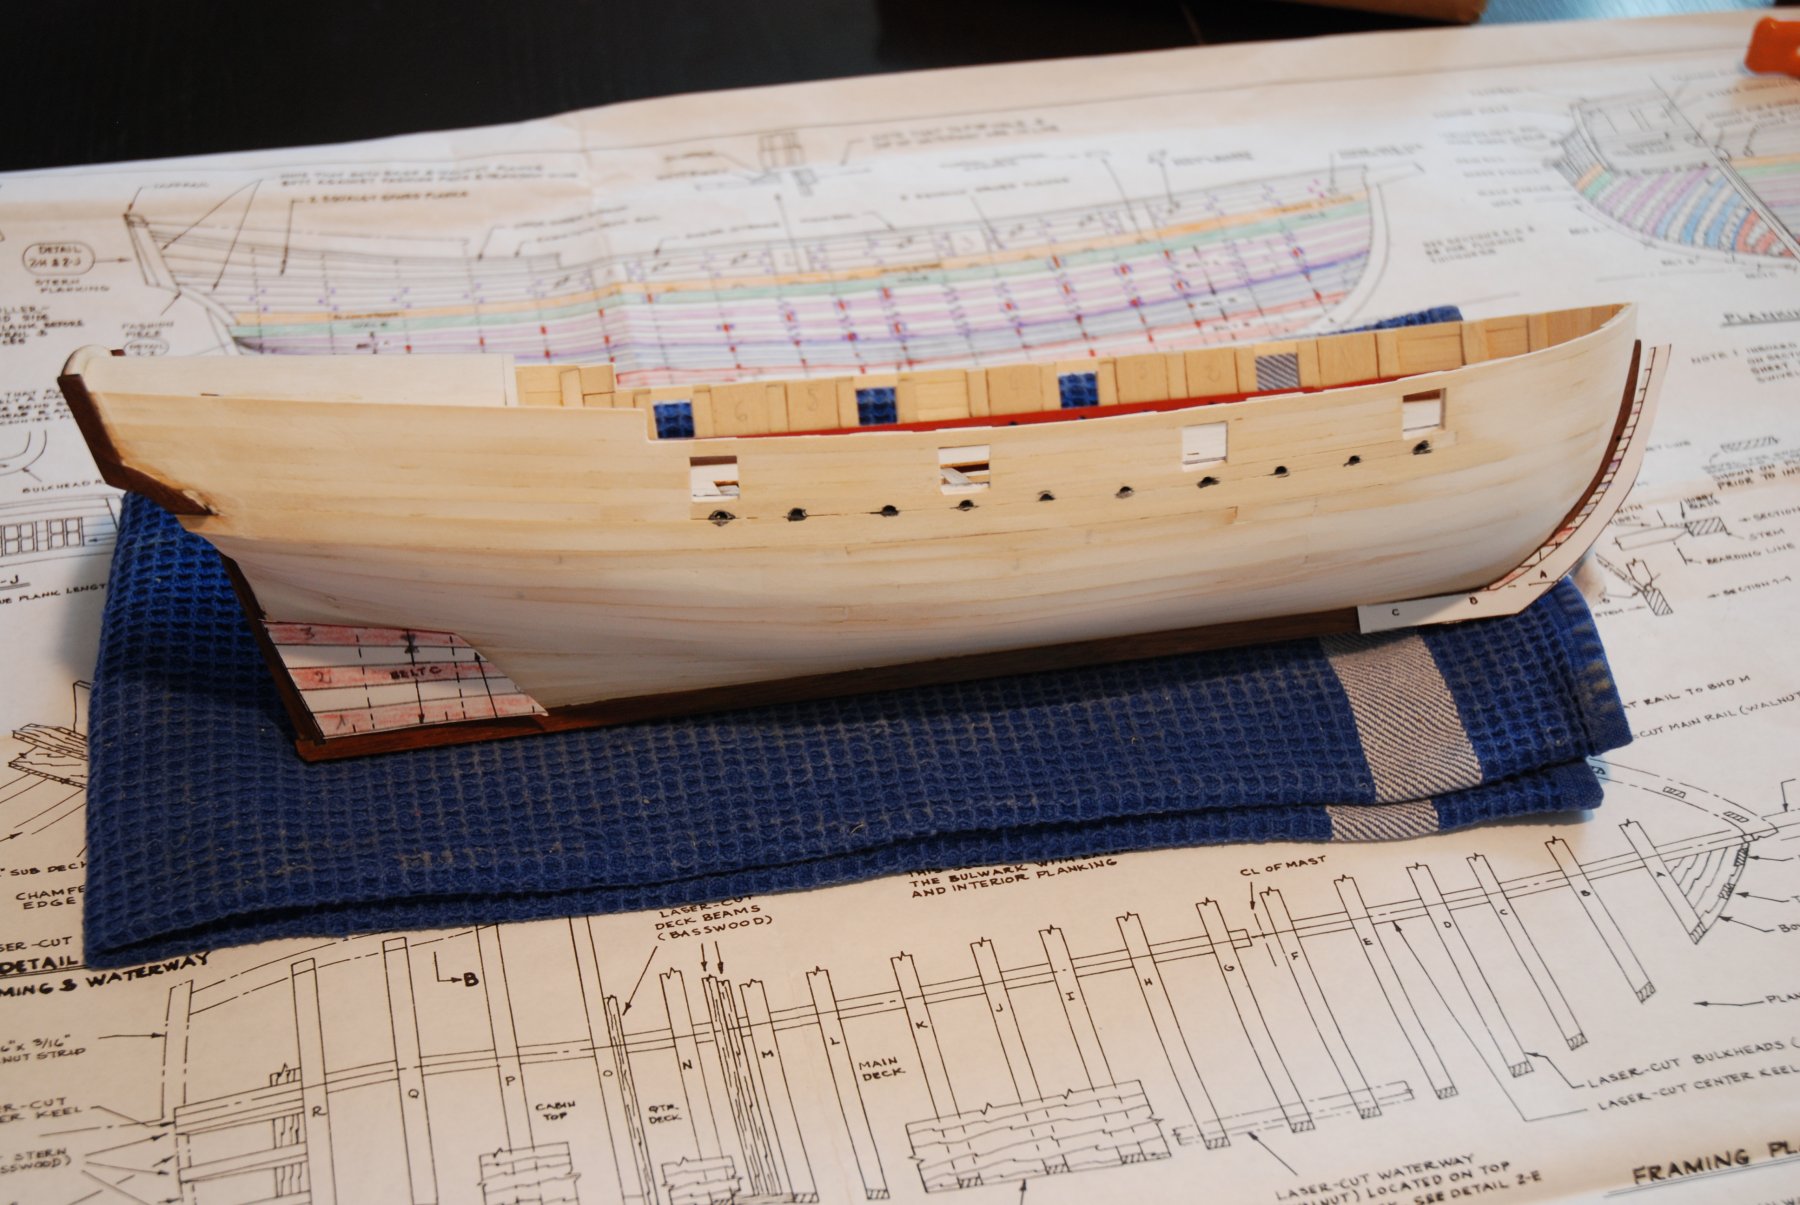
The second inner planking is done. I choose to use basswood strips instead walnut as I will paint the inner planks in red color. It was a very pleasant job. I prepare also the lower part of the hull for the final layer. I use the plan as reference to trace vertical lines at the emplacement of the different frames. It will be more easy to divide each belt in 6 equal parts at each frame as the belt A and B will count 6 rows of planks. I hope to be able to determine more easily the shape of the various planks... I open carefully a hole for the bowsprit. I choose to drill this hole directly at the good size. Now I'm waiting on my order of Vallejo air model red and black colors to begin the painting job. A little question: can I already open the sweep ports and the hawse holes or it is simpler to wait to have ended the final layer of the outer planking ?

- 164 replies
-
- 9
-
-
- first build
- model shipways
- (and 2 more)
-
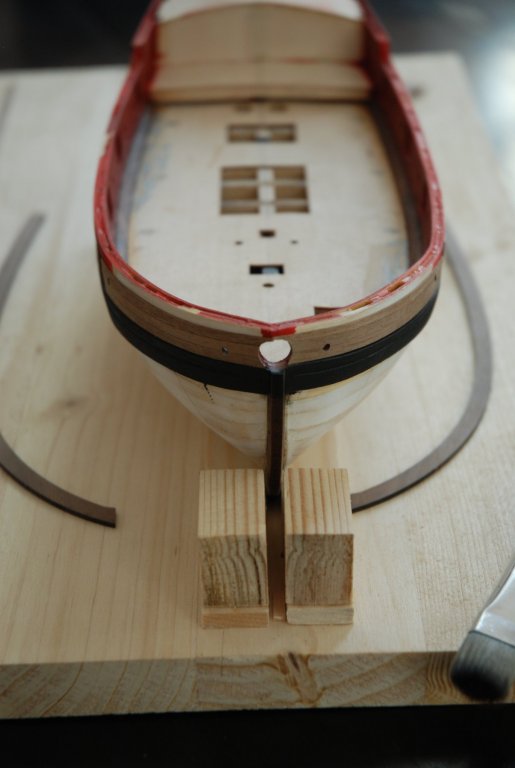
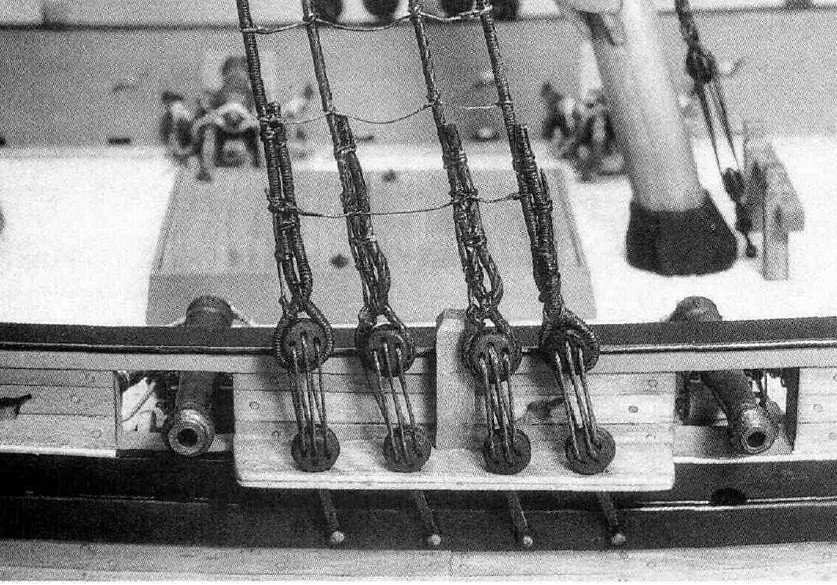
Thanks John for your opinion. I will probably opt for the schema inspired from the Feldman's model. Thanks to all the likes. Progress of this week. I have glued the final wales and black strakes. The scuppers have been pierced using a small rounded file. The alignment is not so bad. We can look through them. I will paint the wales and the black strakes in black with some acrylic paint. First a little sanding is required.

- 164 replies
-
- 12
-
-
- first build
- model shipways
- (and 2 more)
-
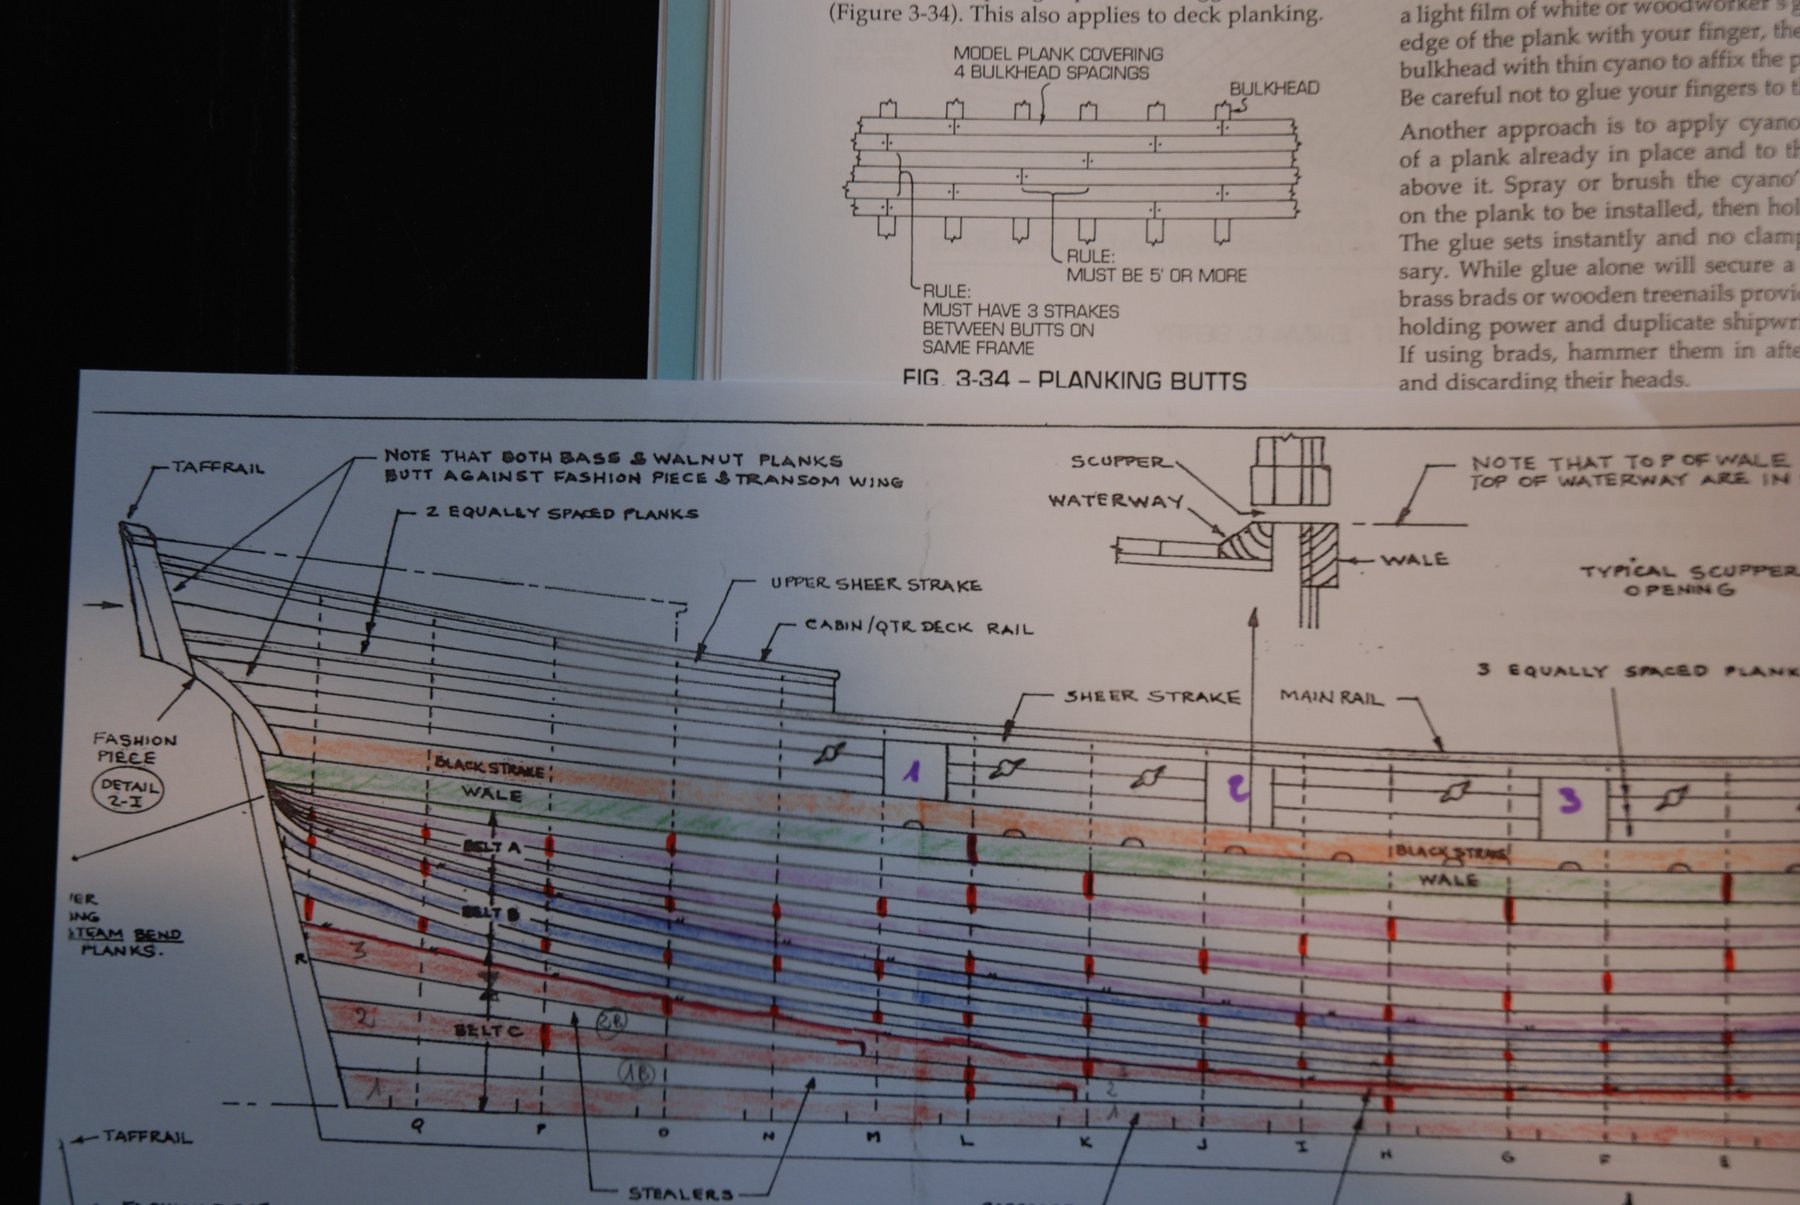
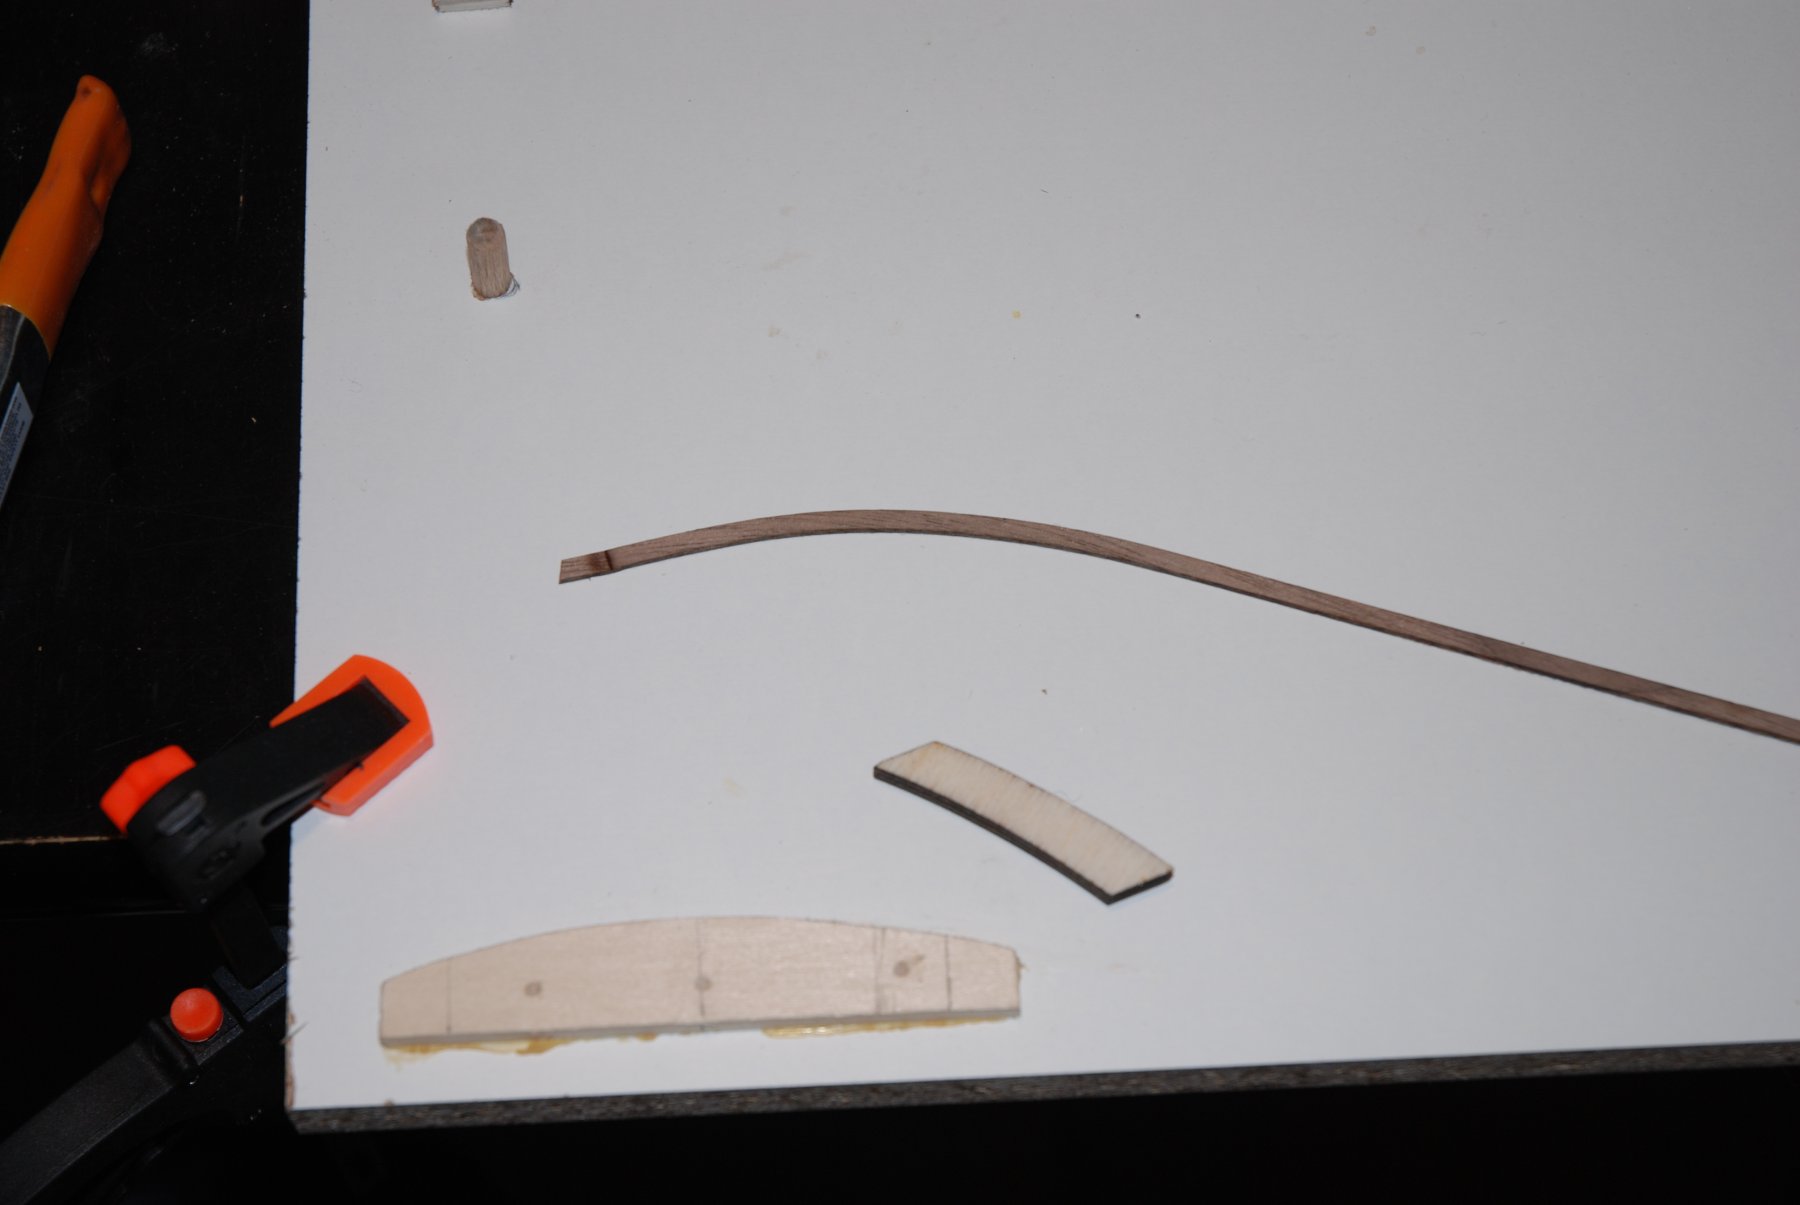
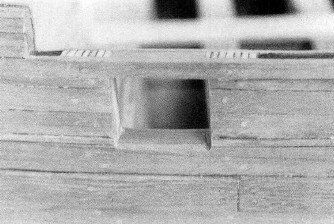
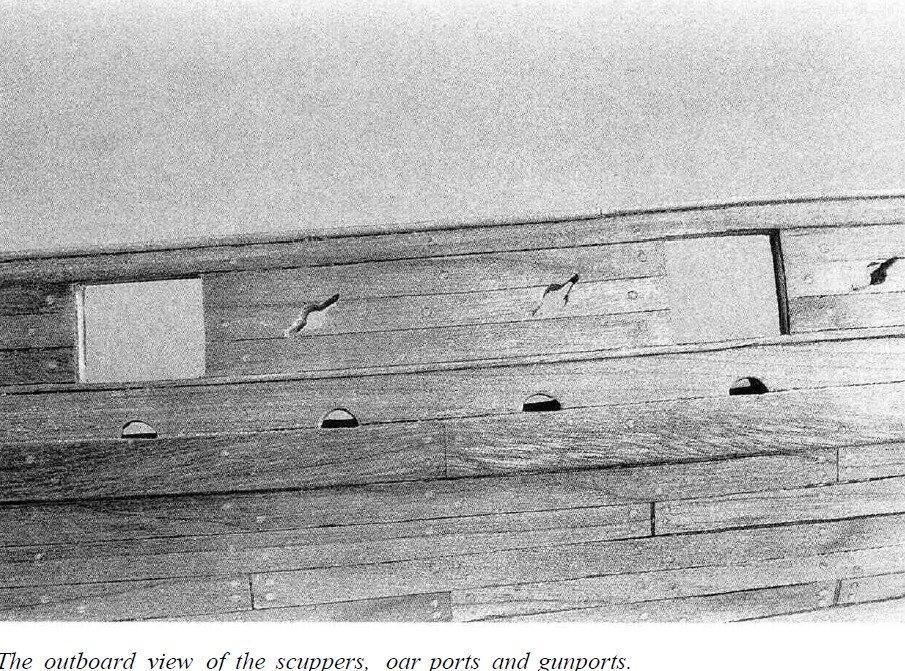
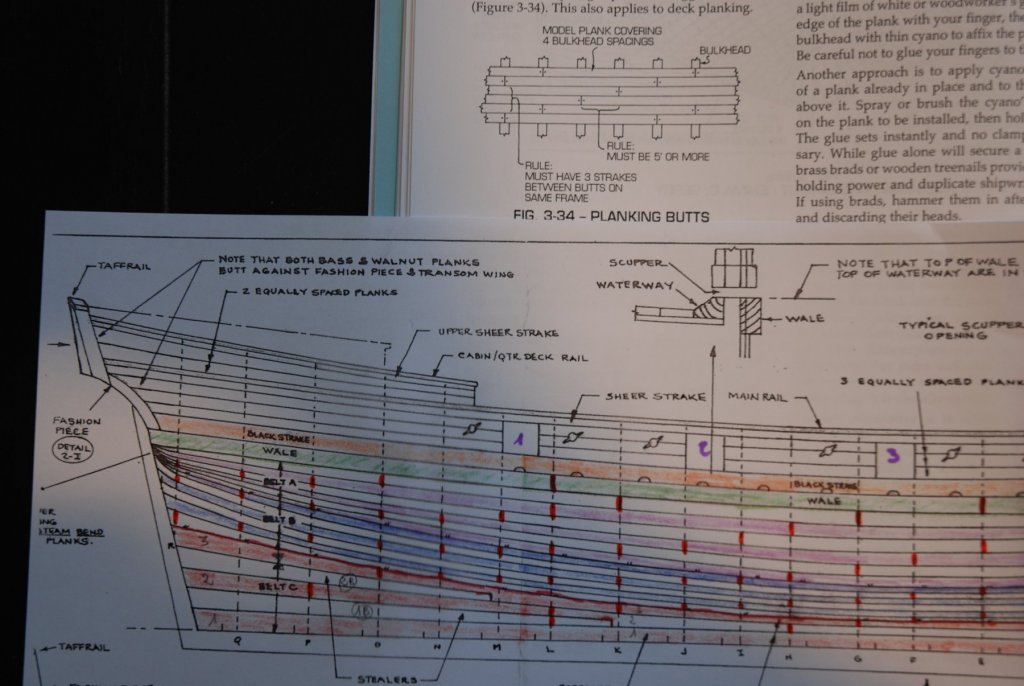
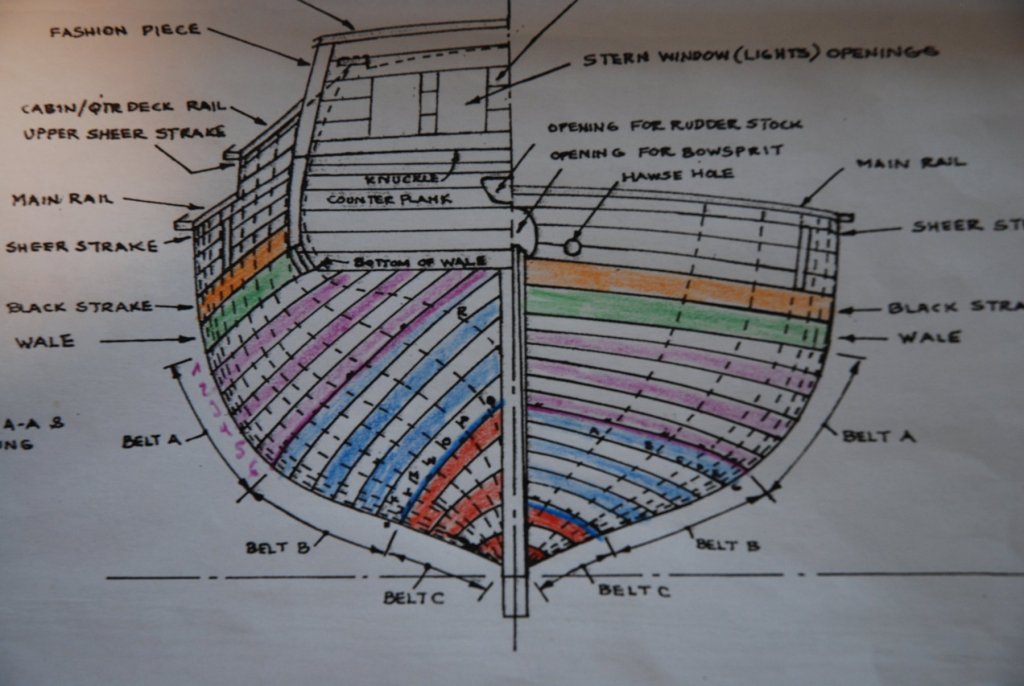
Thanks John and all the likes. Continuing to study the photos of the original model from Clayton A. Feldman ("Modeling an armed Virginia Sloop of 1768"), I try to reproduce his planking schema. First, I discover that the wale was made in three parts: the first part from stern to the end of gunport "1", the second part up to the middle of the space between gunports "3" and "4". The second picture allows me to reproduce the planking schema under the wale at the position between the gunports "3" and "4". And finally with the last picture, I see that the the first plank under the wale must end between gunports "3" and "2". I try to draw the planking drafts on a copy of the plan. But, as the length of the planks is a 5 bulkheads covering, I never have an ending of a plank at bulkheads "L" and "G"... Can I use this planking schema or should I use the more classical model plank that covers 4 bulkheads (my last photo) ? Your opinion is welcome...

- 164 replies
-
- 10
-
-
- first build
- model shipways
- (and 2 more)
-
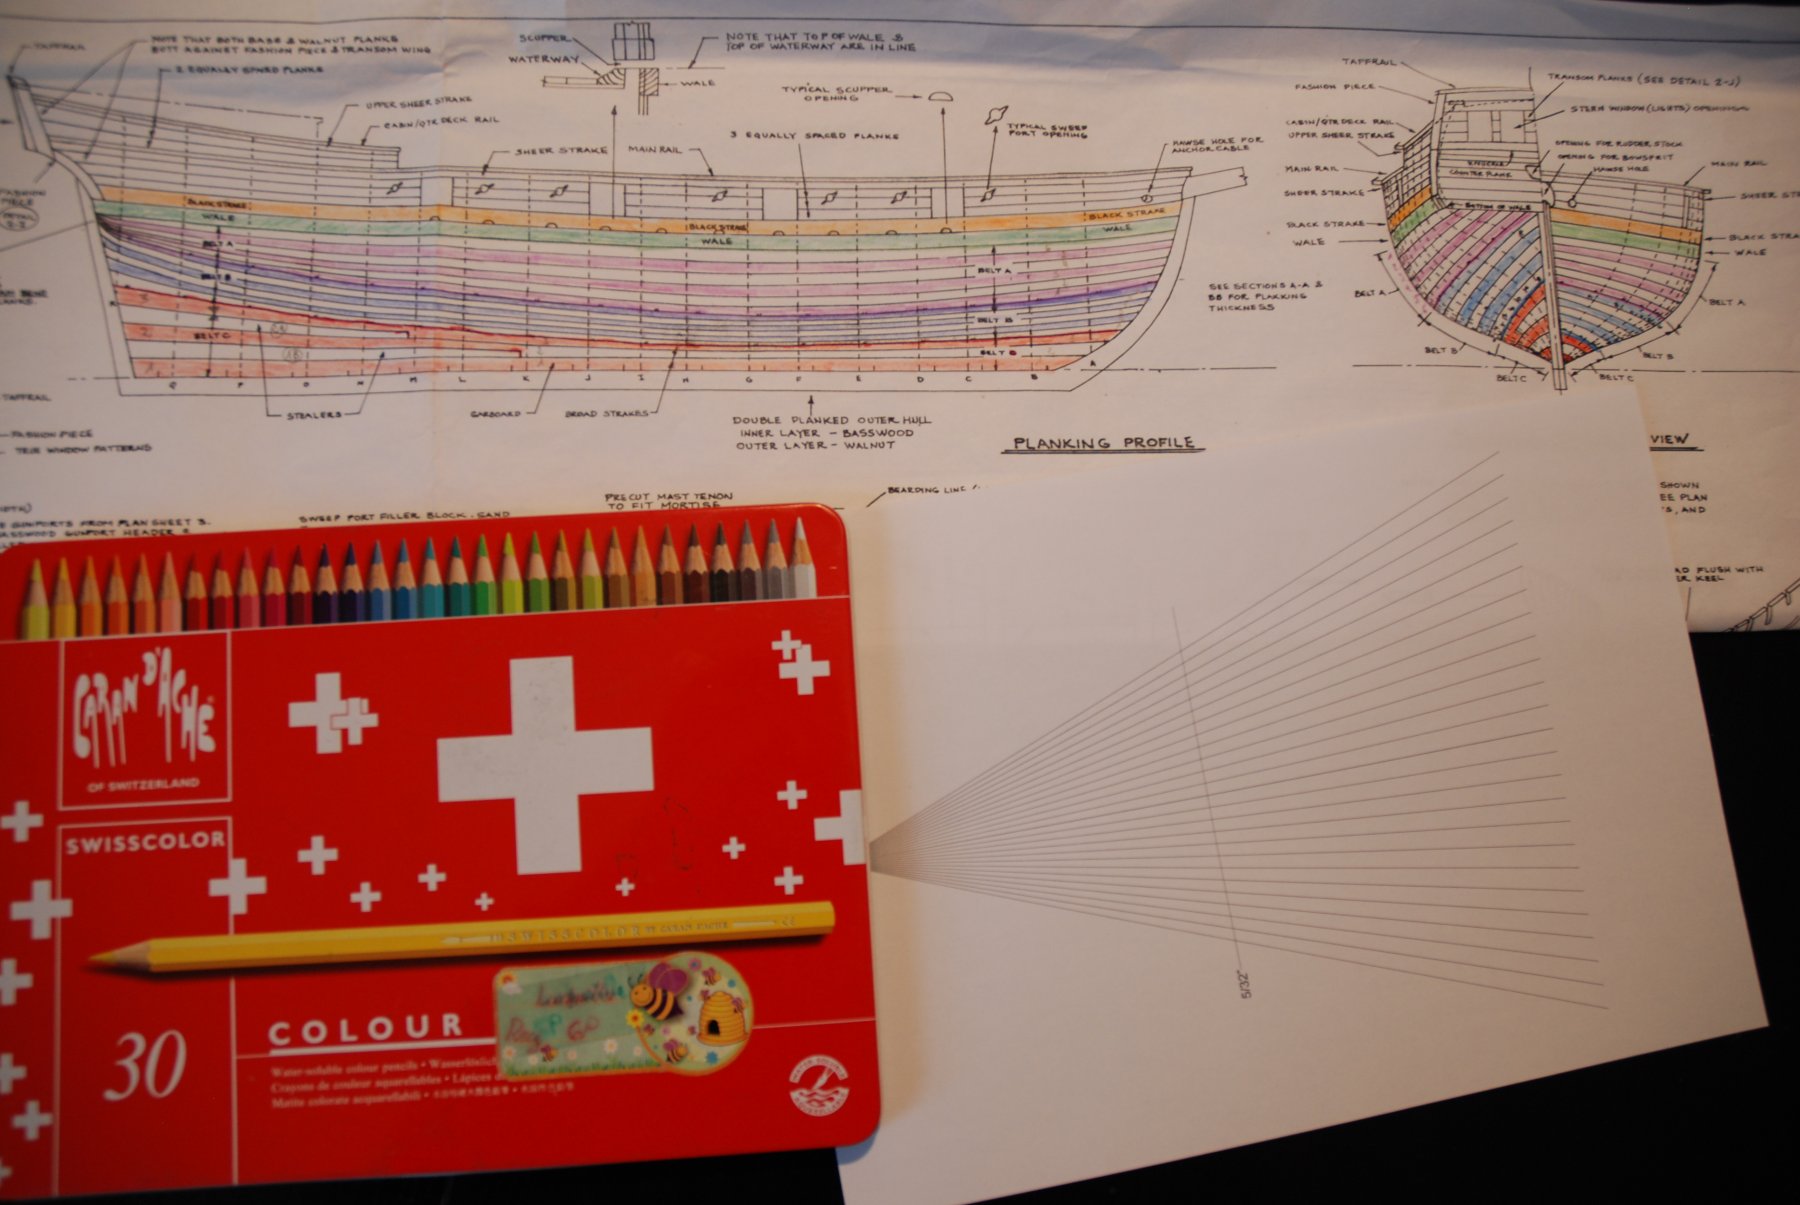
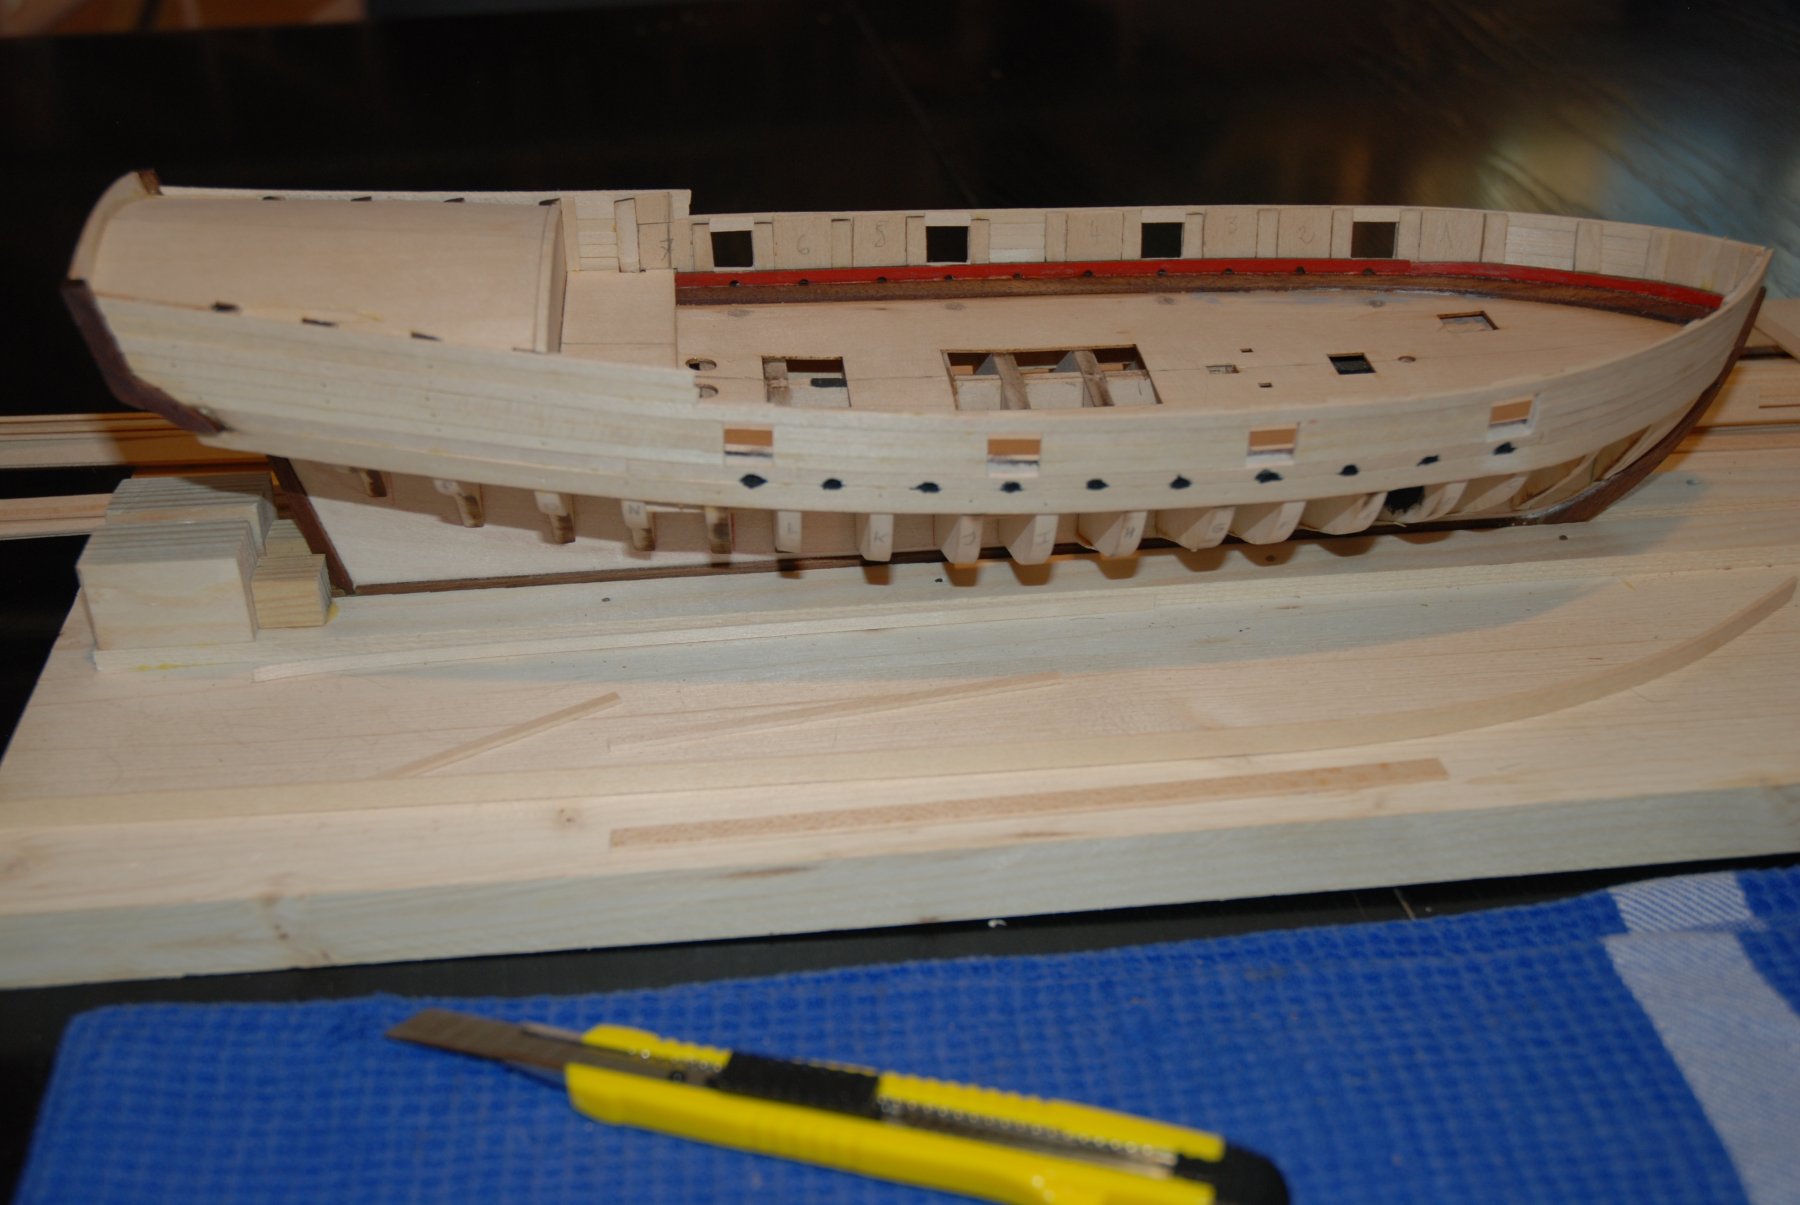
A lot of of lightweight filler and sanding... I hope that this first planking will do his job for the final layer... I'm studying the good way to achieve this next part of the build. I will try to applied the method described by master Chuck in the chapter 5 on the Winchelsea: 'Planking below the wales'. So I take an old box of colouring pencils who belonged to my son and I represent visually the three belts that will divide the hull. So I can have a pretty good idea of the position which I must applied the tape.


- 164 replies
-
- 16
-
-
- first build
- model shipways
- (and 2 more)
-
Superb job Rusty. She becomes beautifully. A nice source of inspiration for me.
- 120 replies
-
- 4
-
-
- queen anne barge
- Syren Ship Model Company
- (and 1 more)
-
Thanks Rusty and the likes. Yes I confirm, it's a very pleasant build. Chuck did a great job !
- 103 replies
-
- 6
-
-
- queen anne barge
- Syren Ship Model Company
- (and 1 more)
-
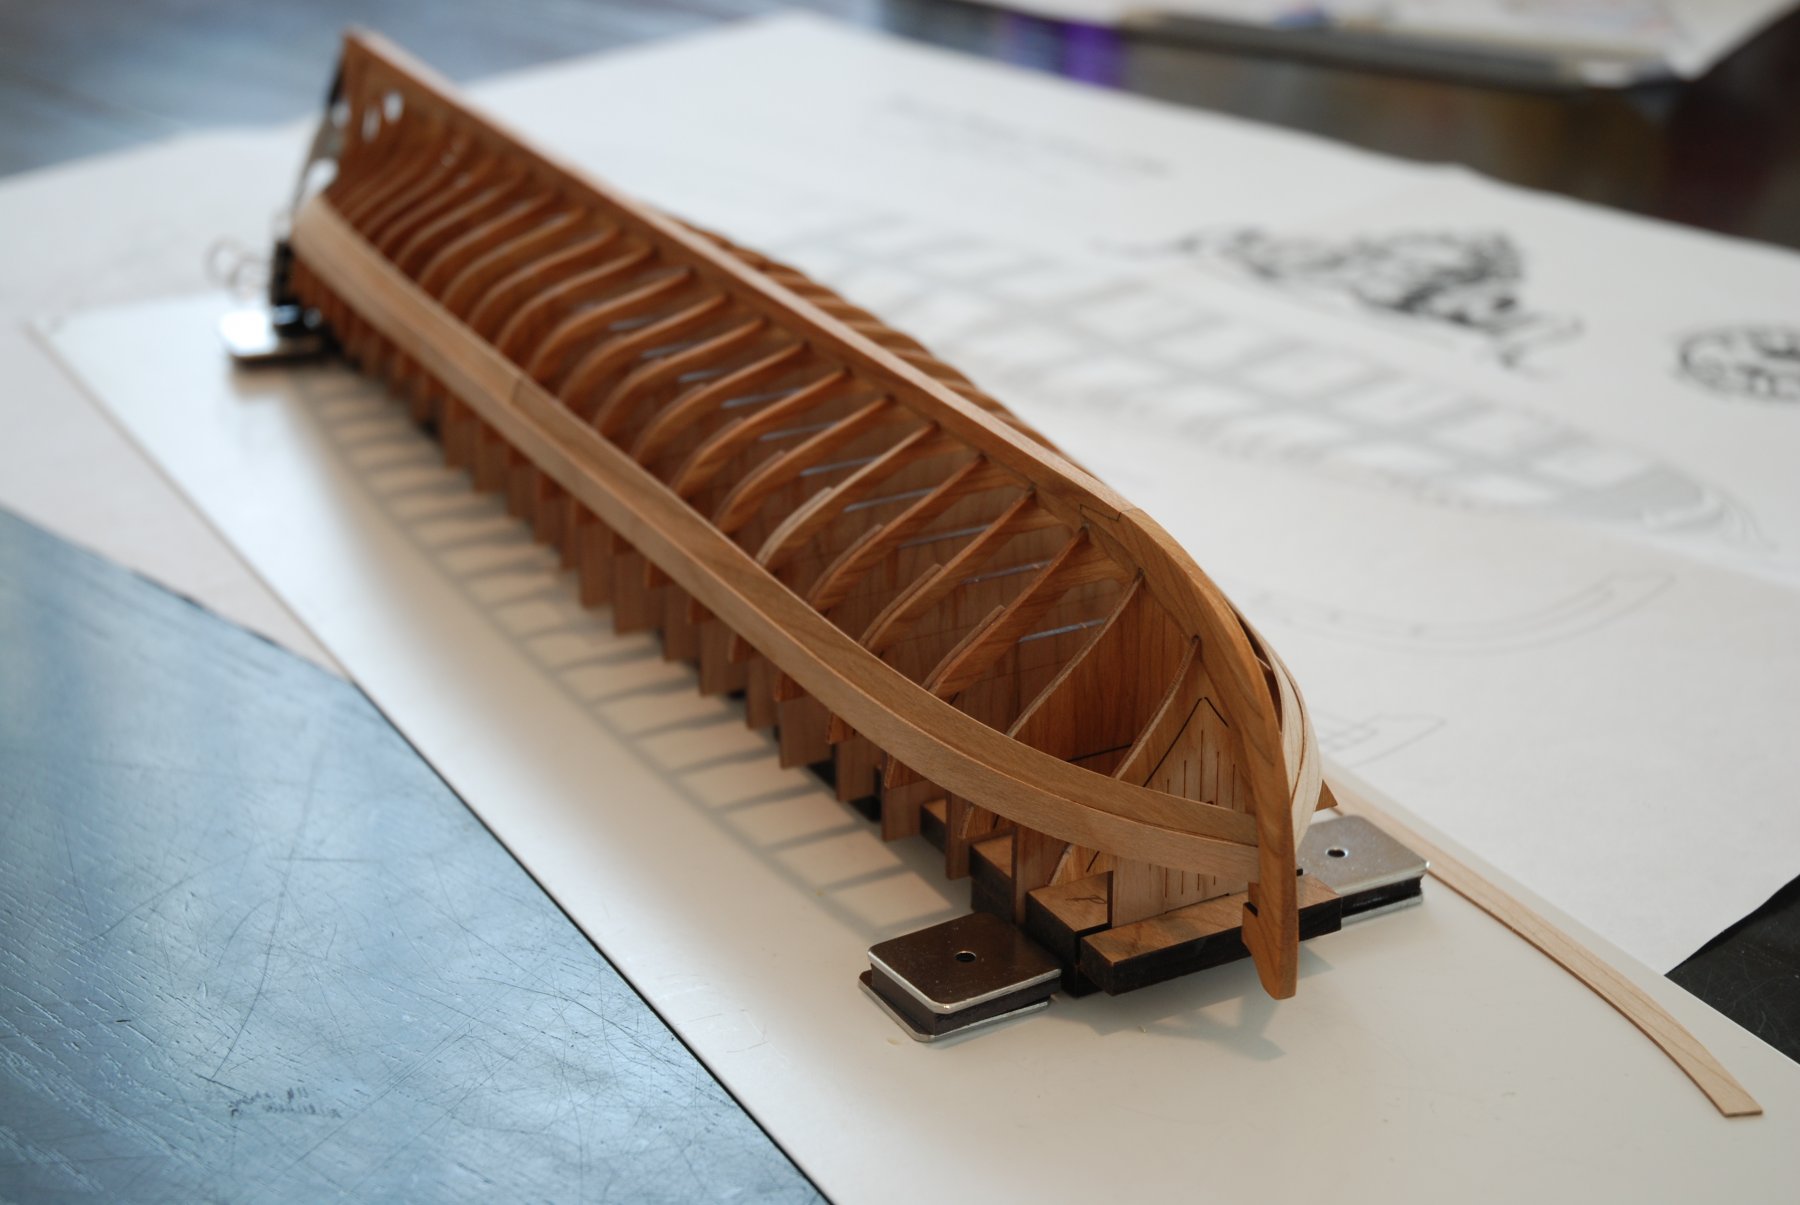
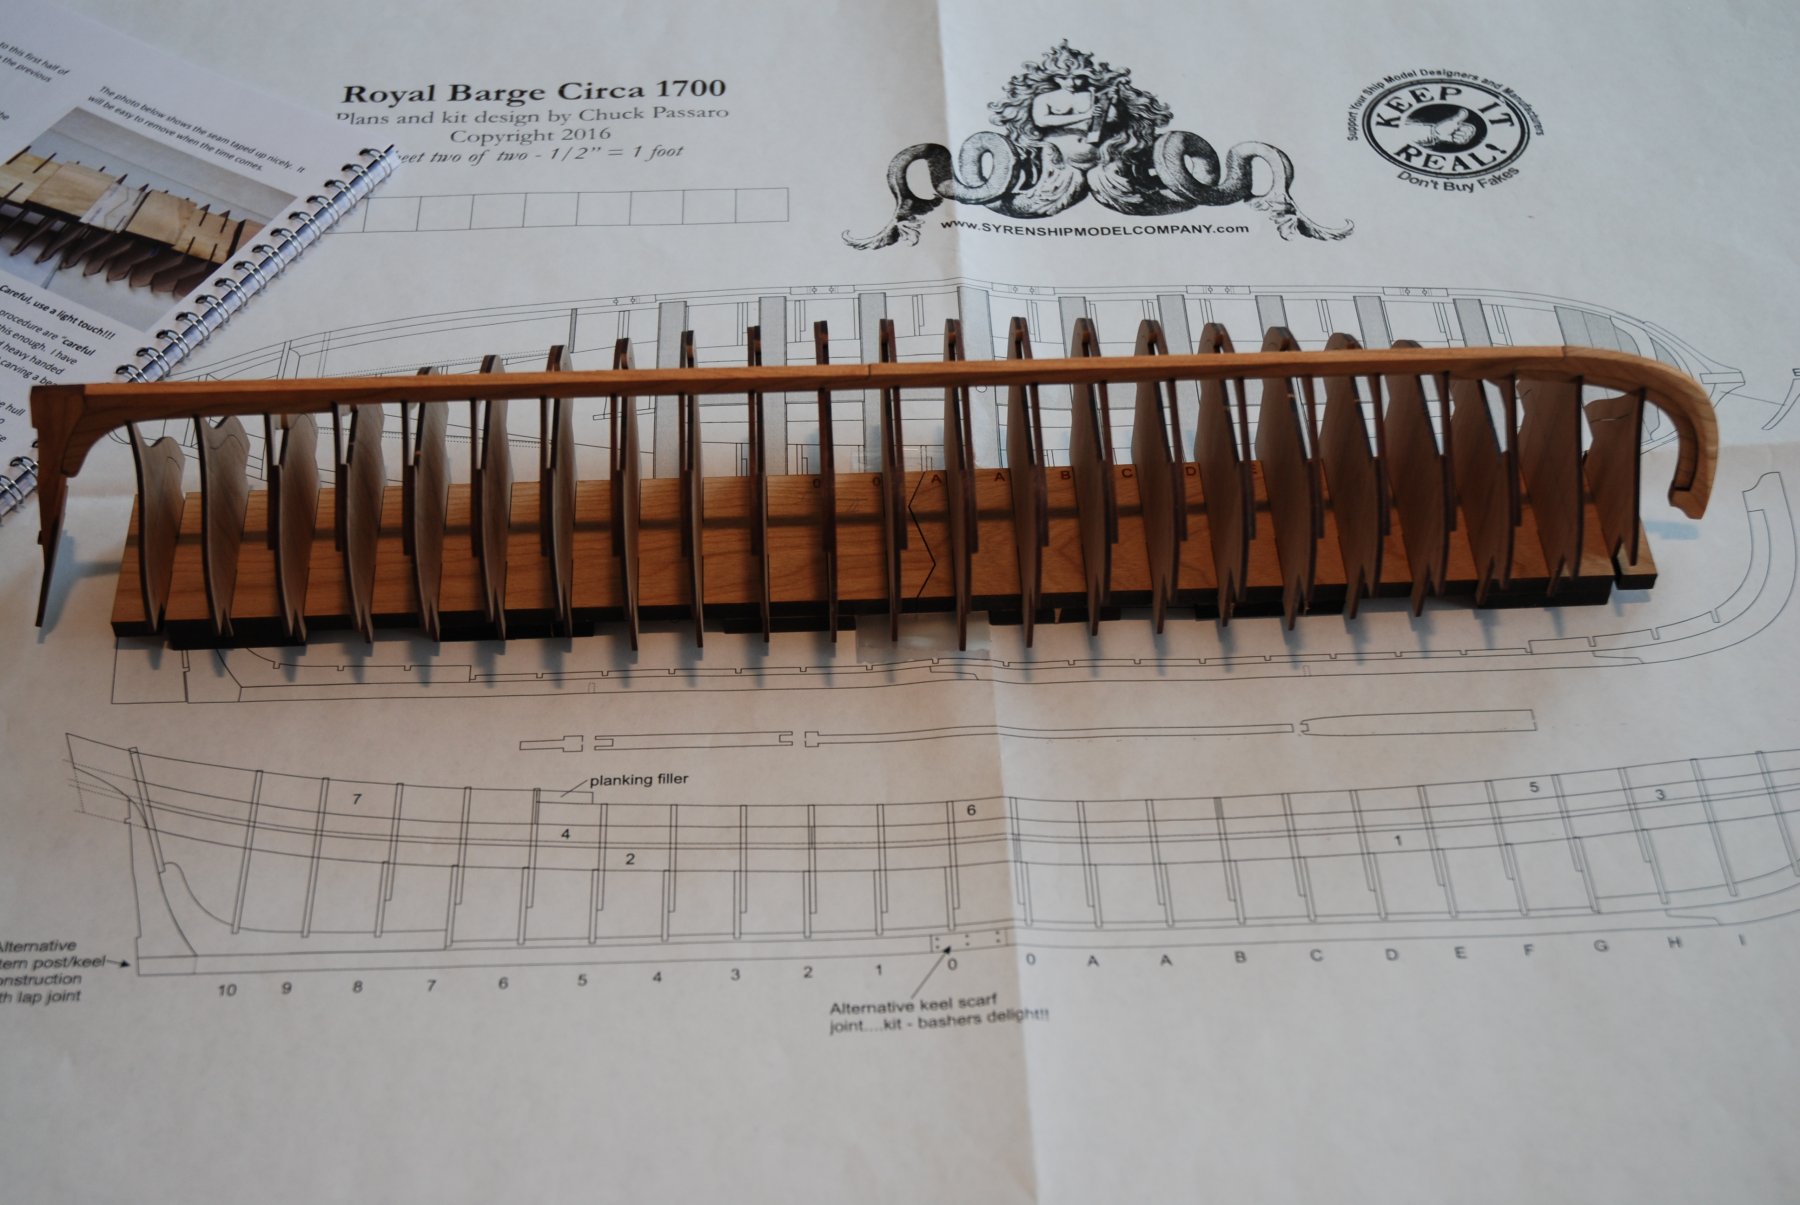
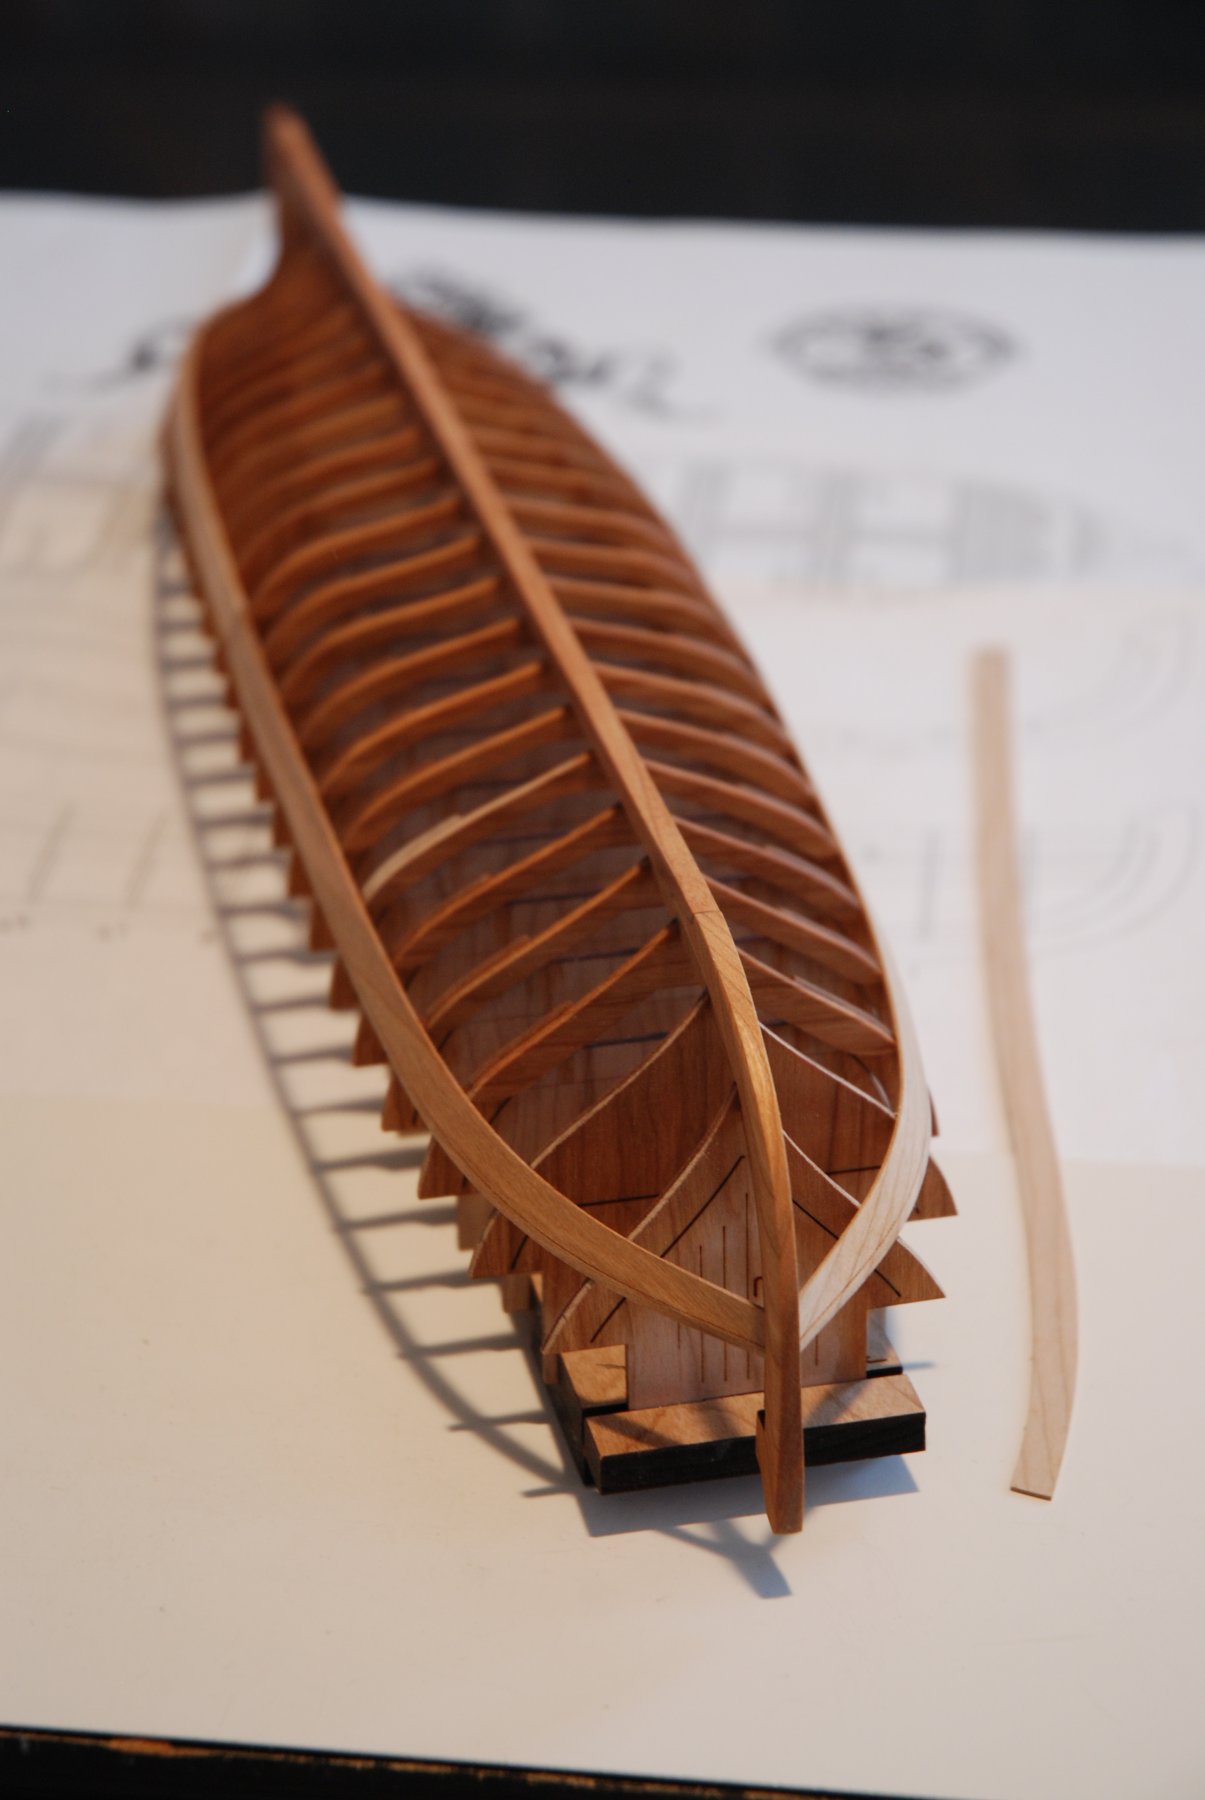
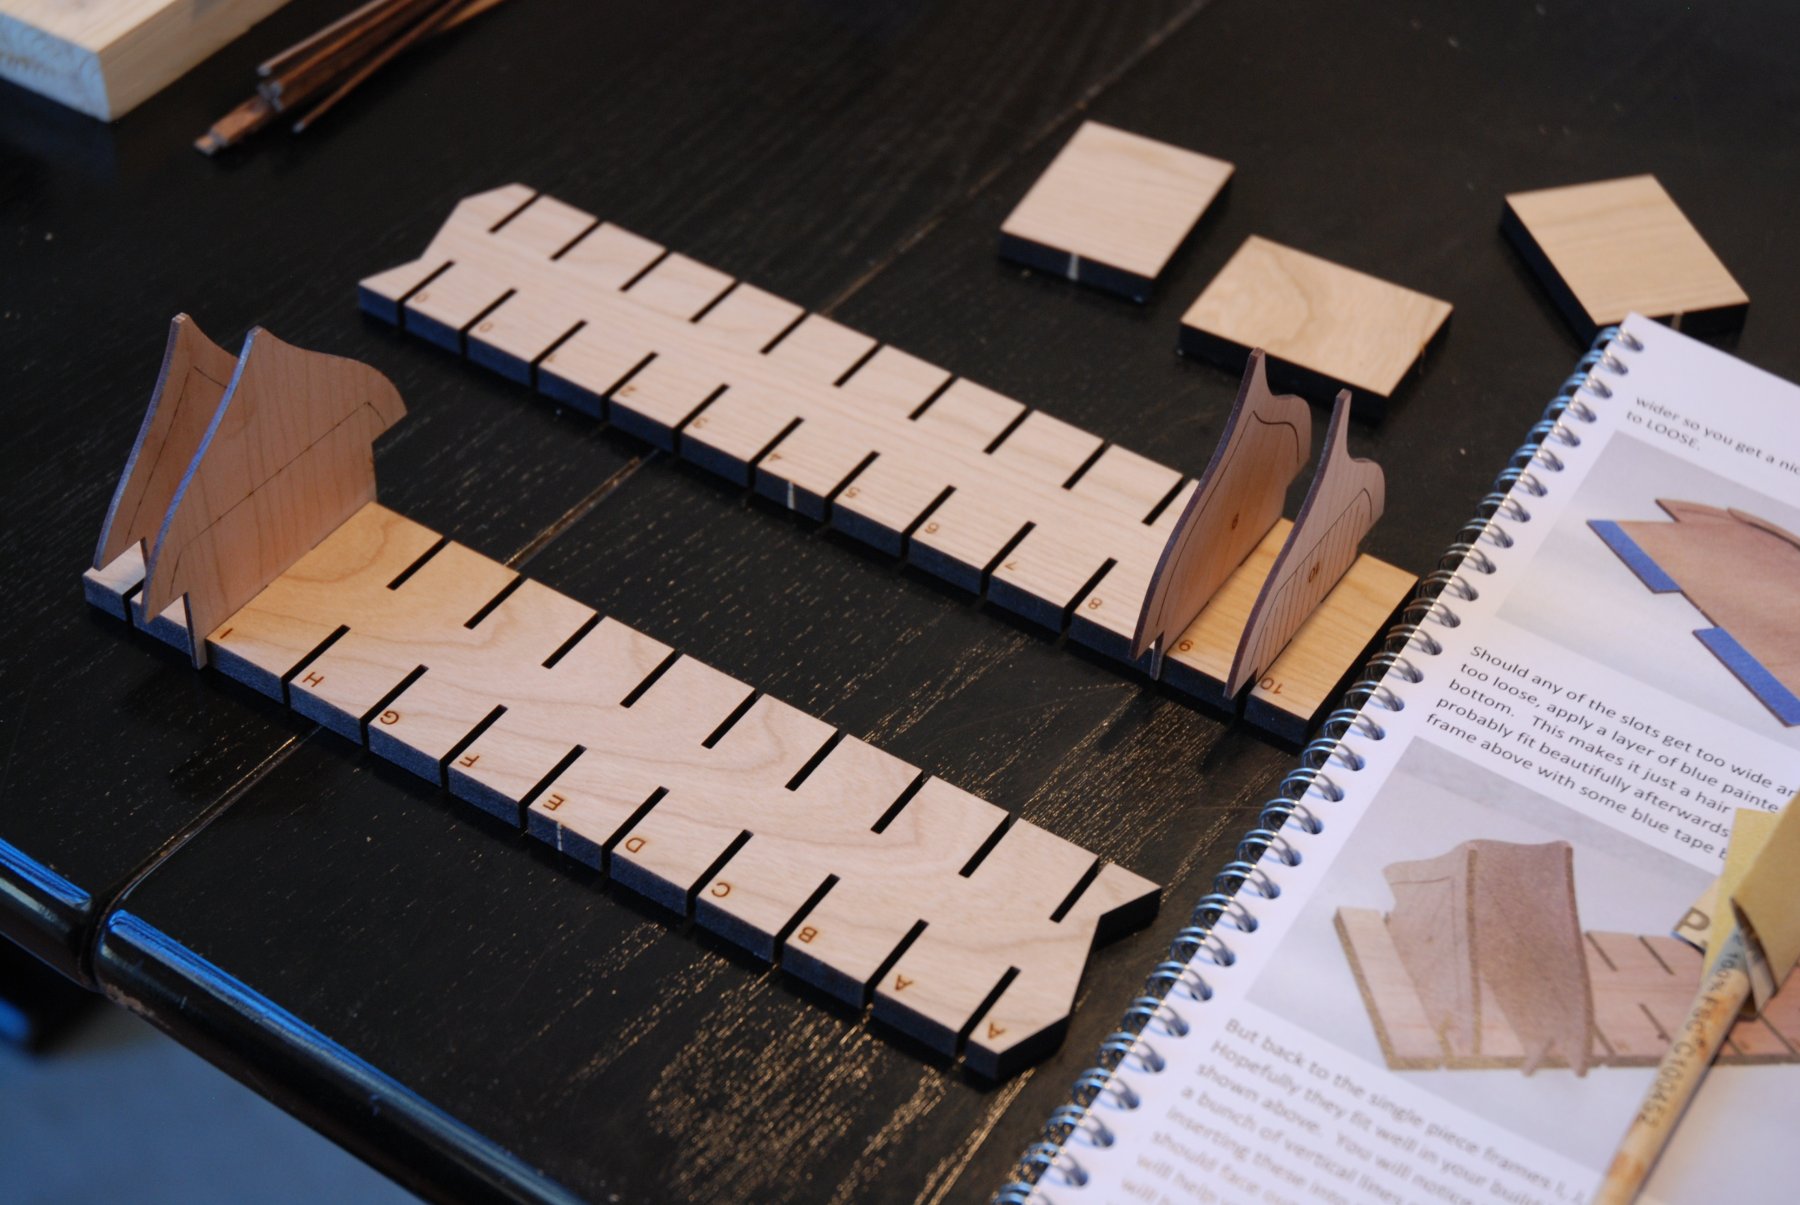
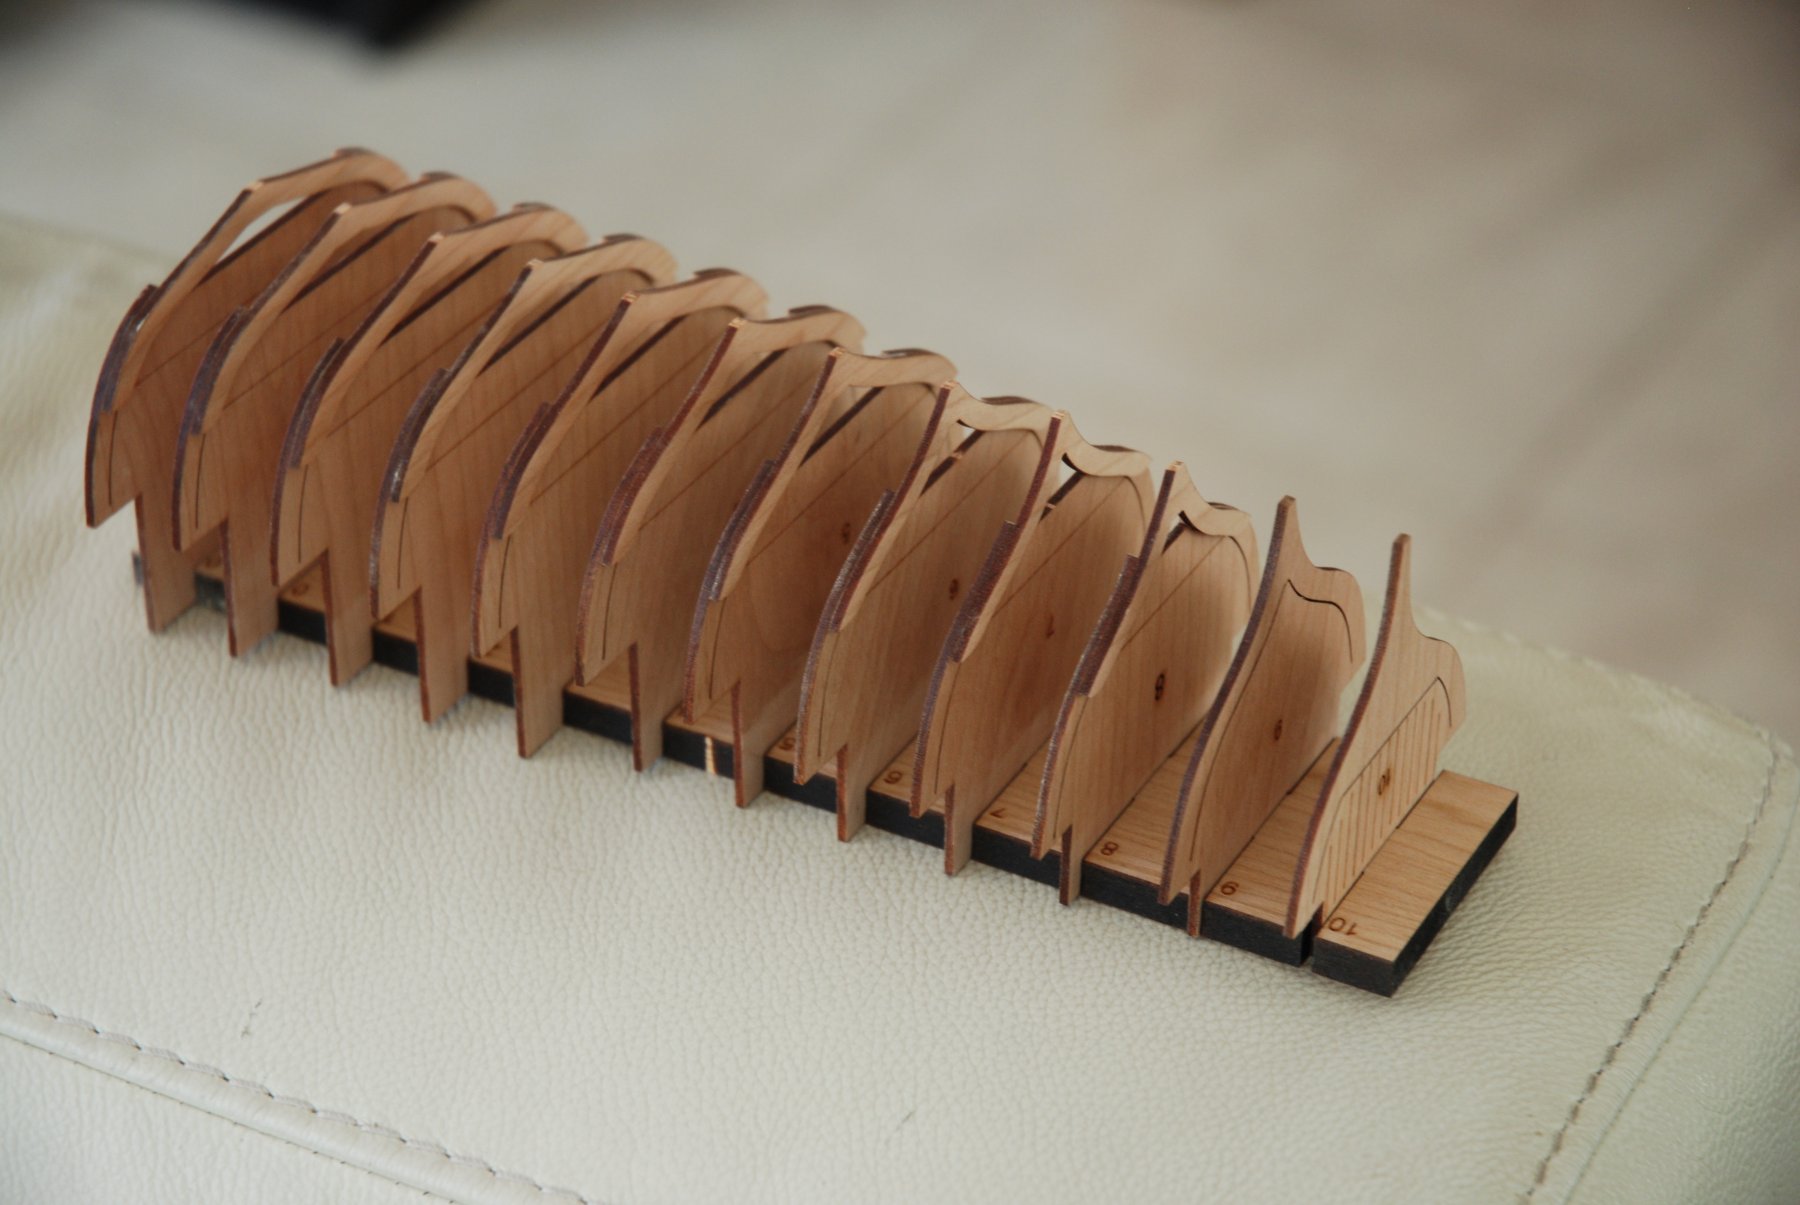
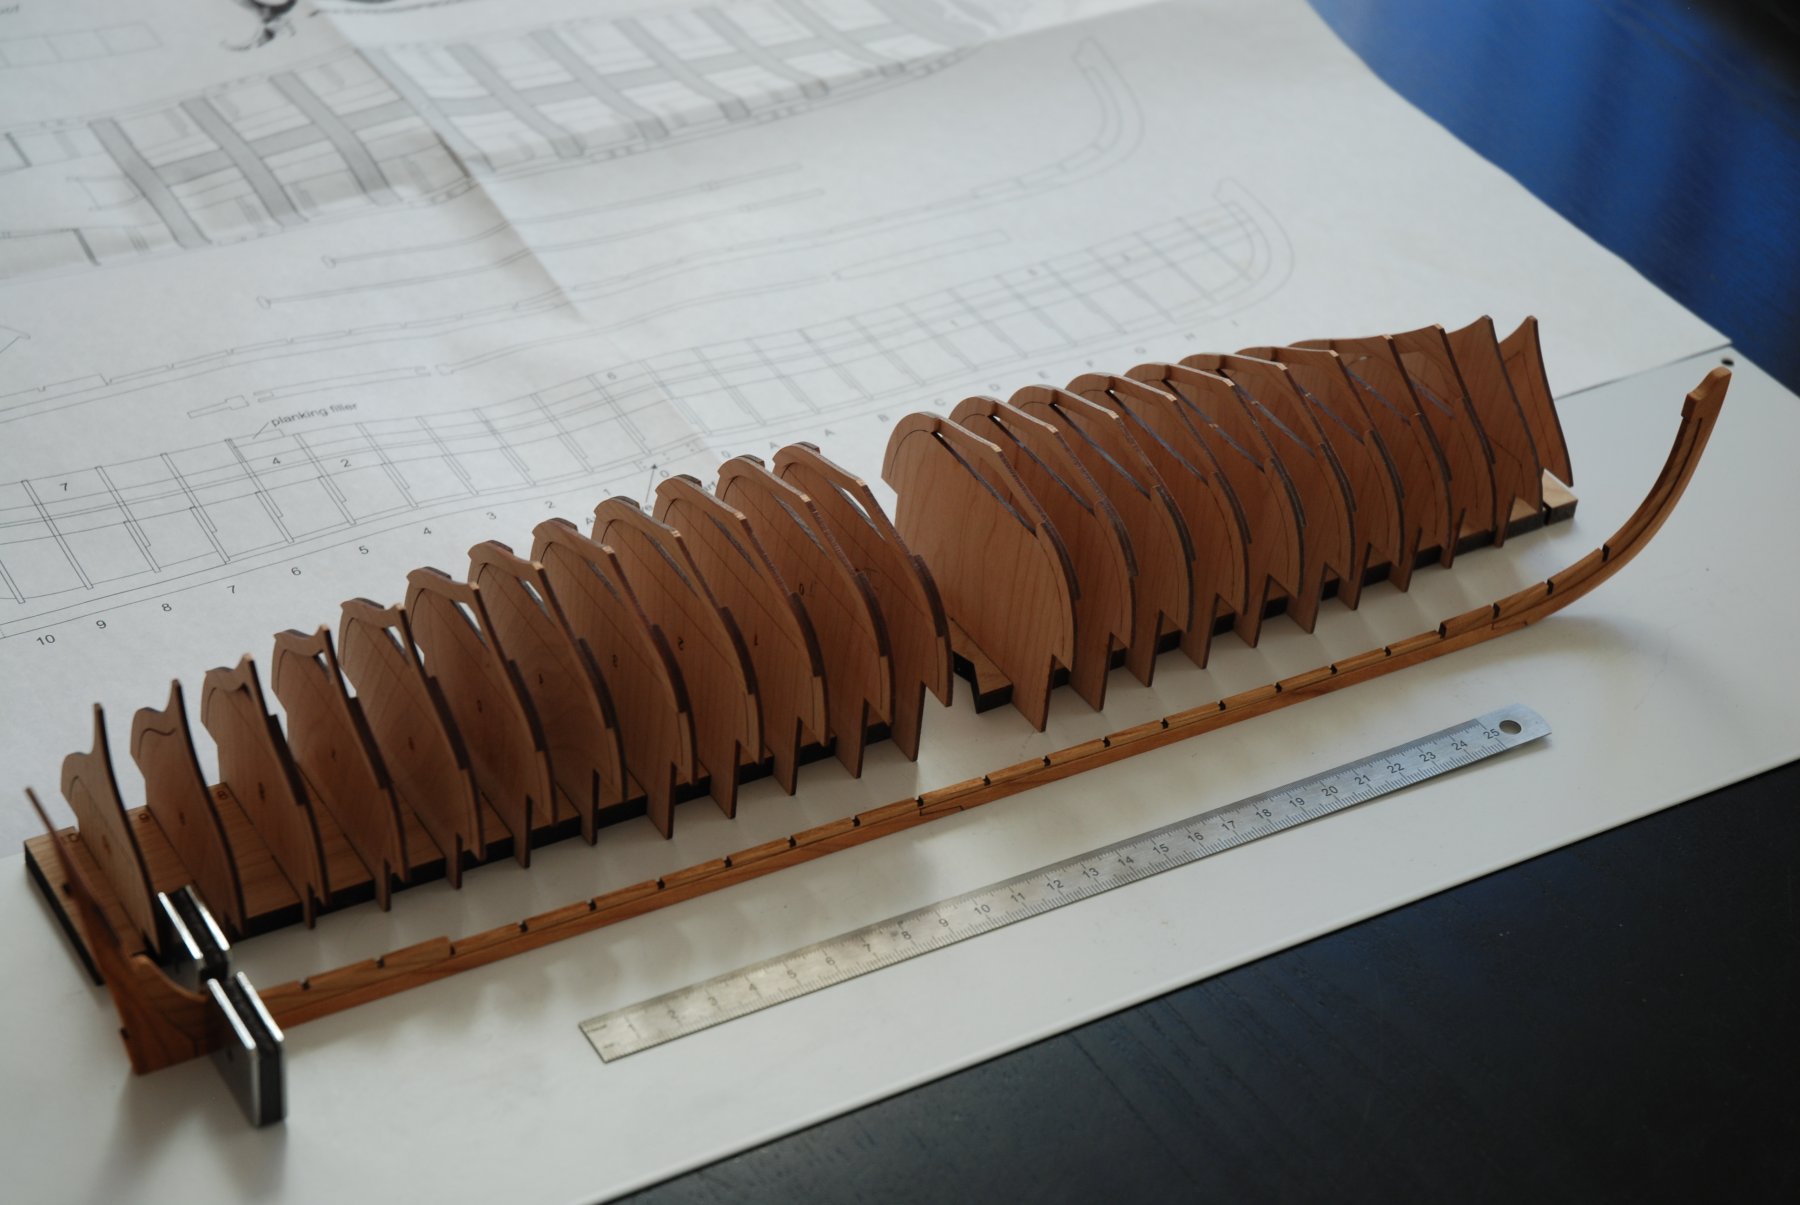
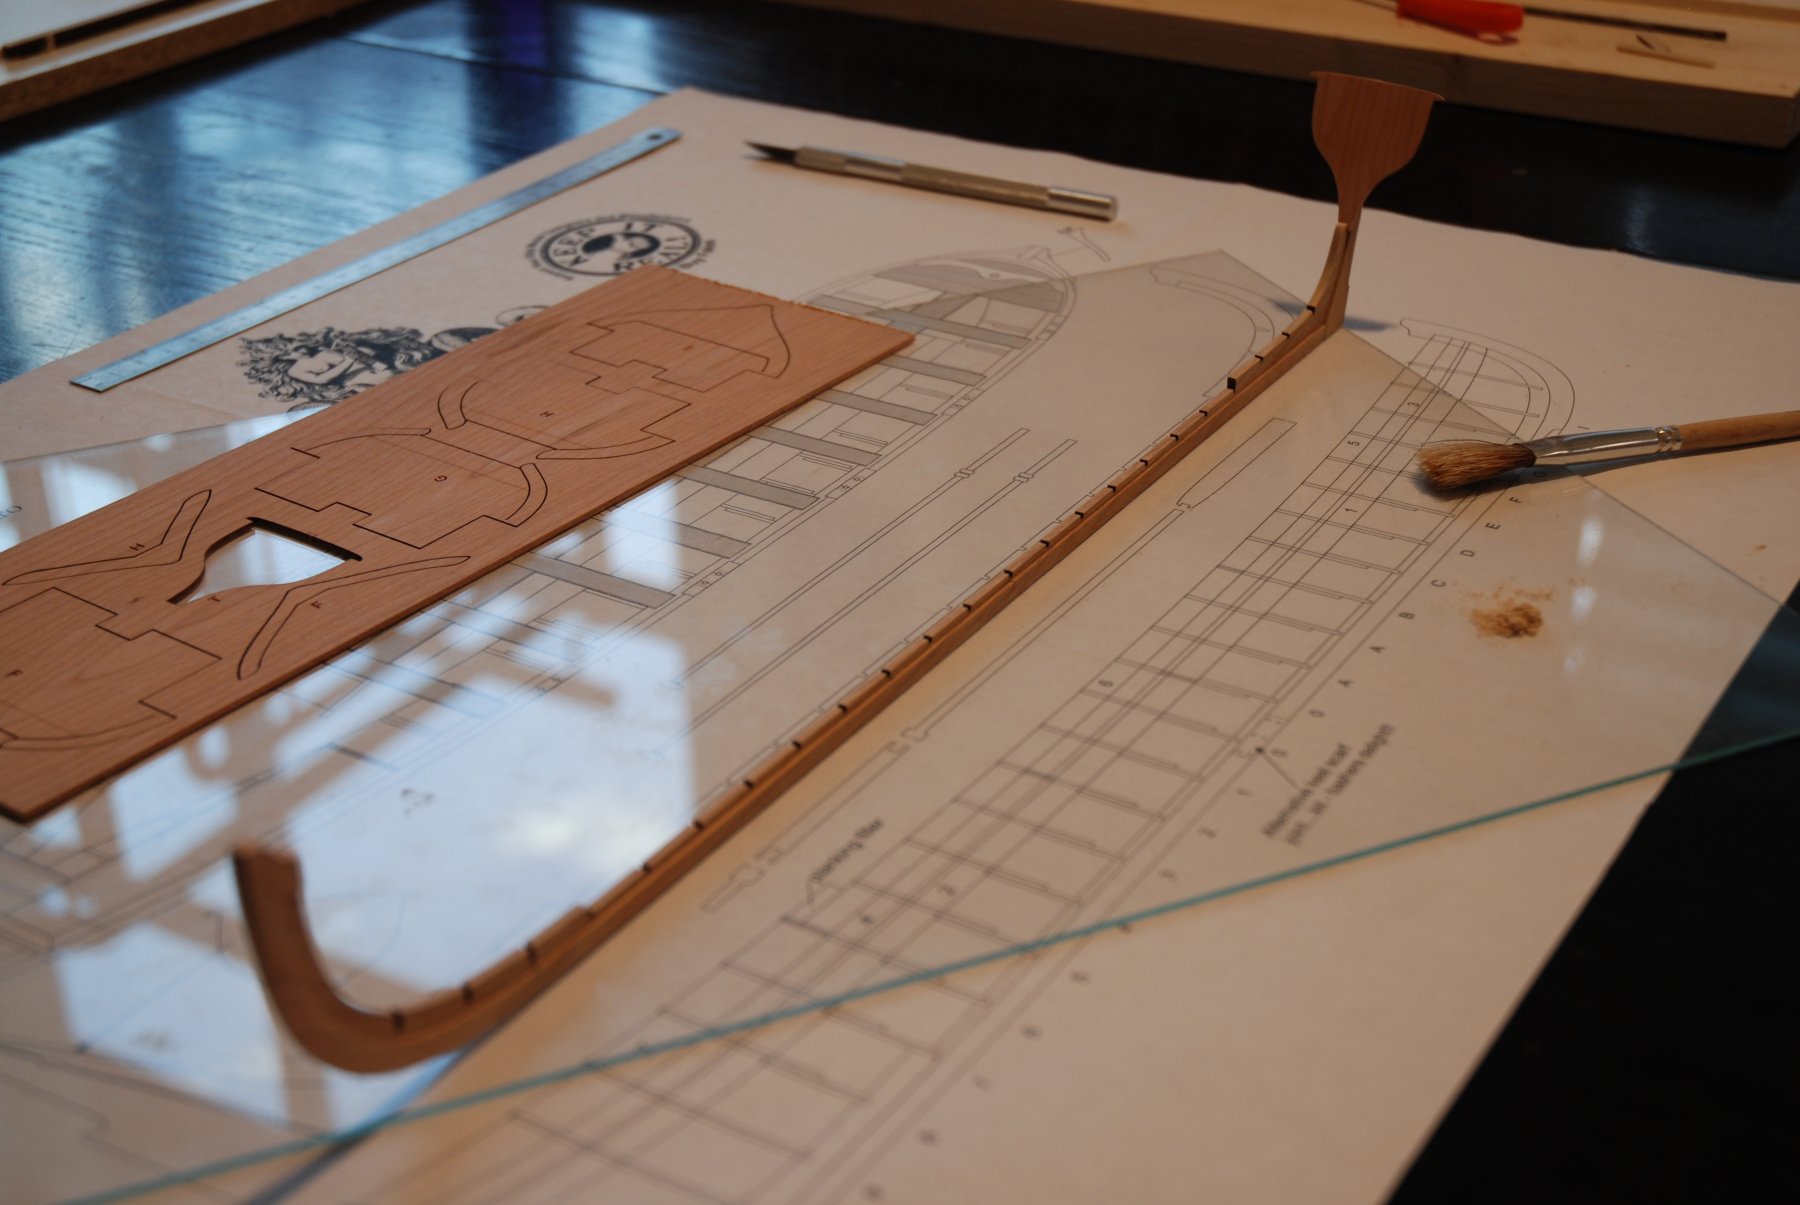
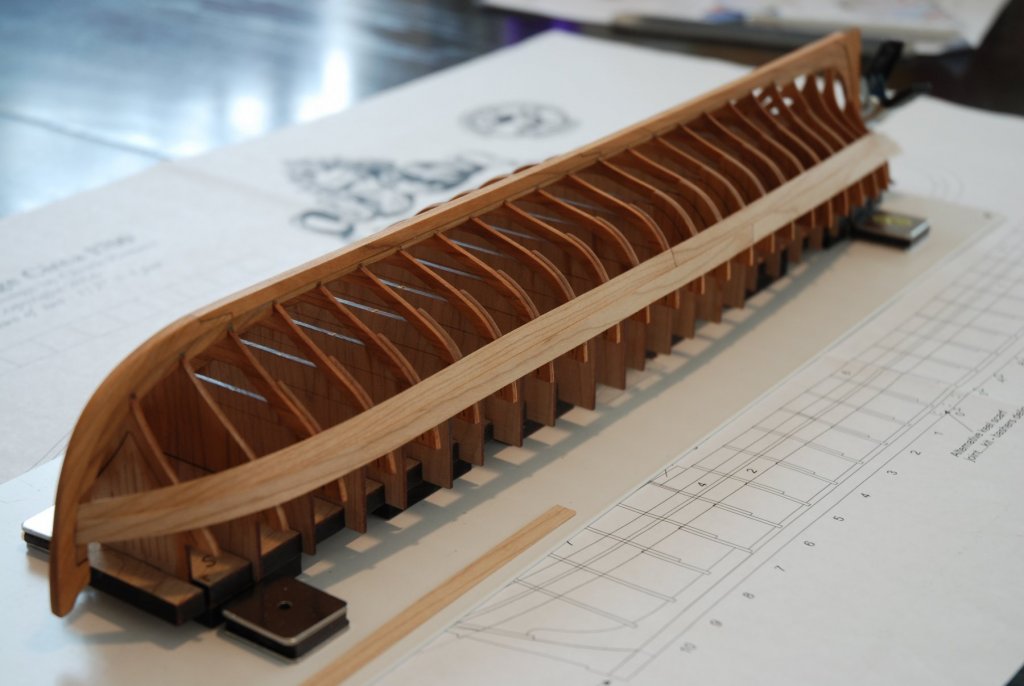
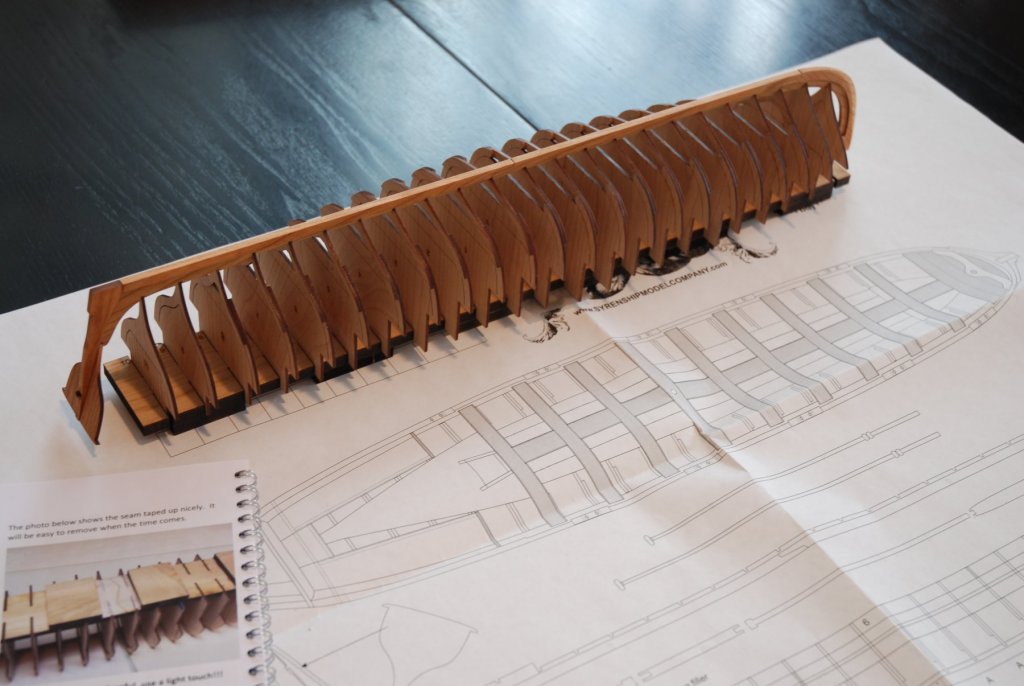
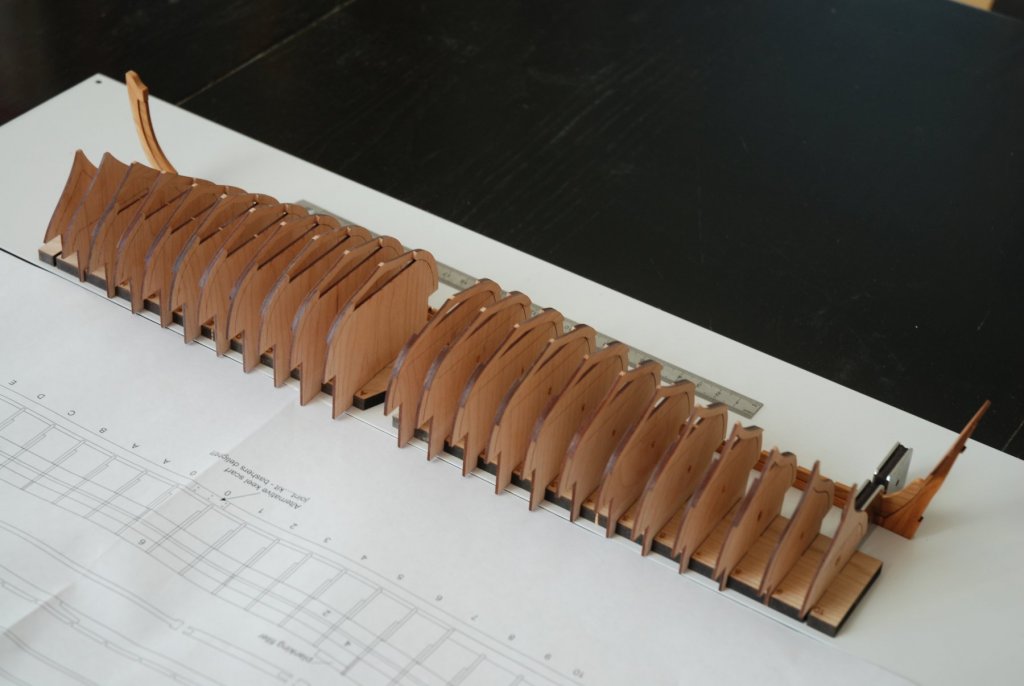
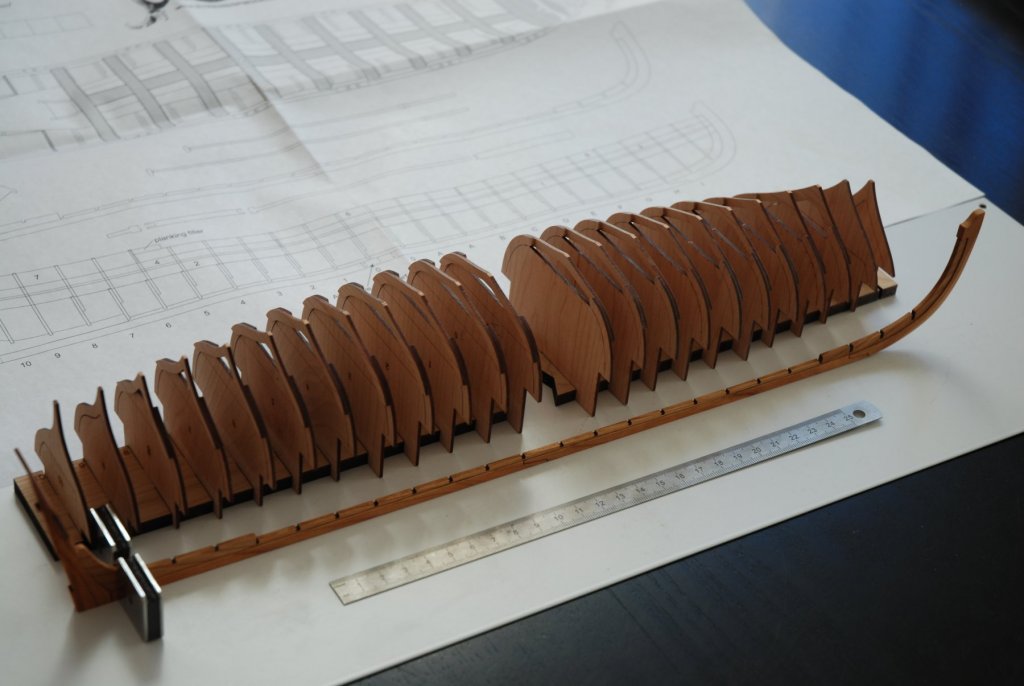
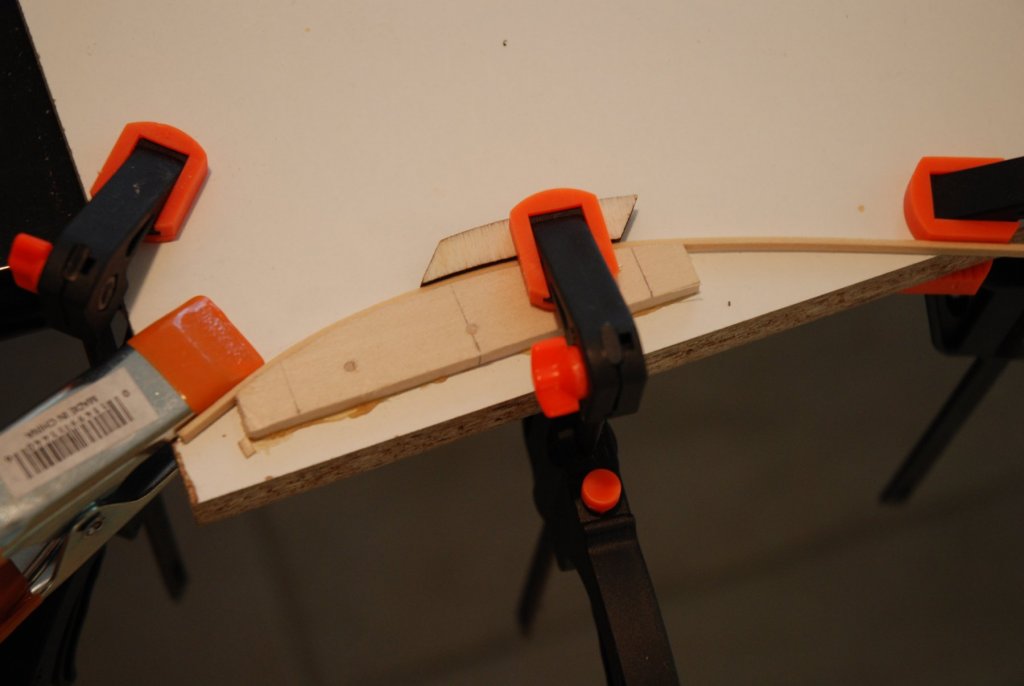
In parallel of the build on the Armed Virginia Sloop, I work softly on this magnificent barge. I follow faithfully the instructions of the excellent manual. The instructions are precise and built on a very educational method. The teaching profession should have also been one of Chuck's professions in a previous life... As I work in the computer world, I was able to print the manual on a good laser color printer. Just follow the instructions and take a lot of fun in the build of this kit. Nothing is glued. It's just a test to see how it will be. Following the log of Rustyj, I notice that the two frames 0 should not face in the same directions. I will correct this when it will be time to glue the frames. That's the luck to follow build logs on this forum !


- 103 replies
-
- 15
-
-
- queen anne barge
- Syren Ship Model Company
- (and 1 more)
-
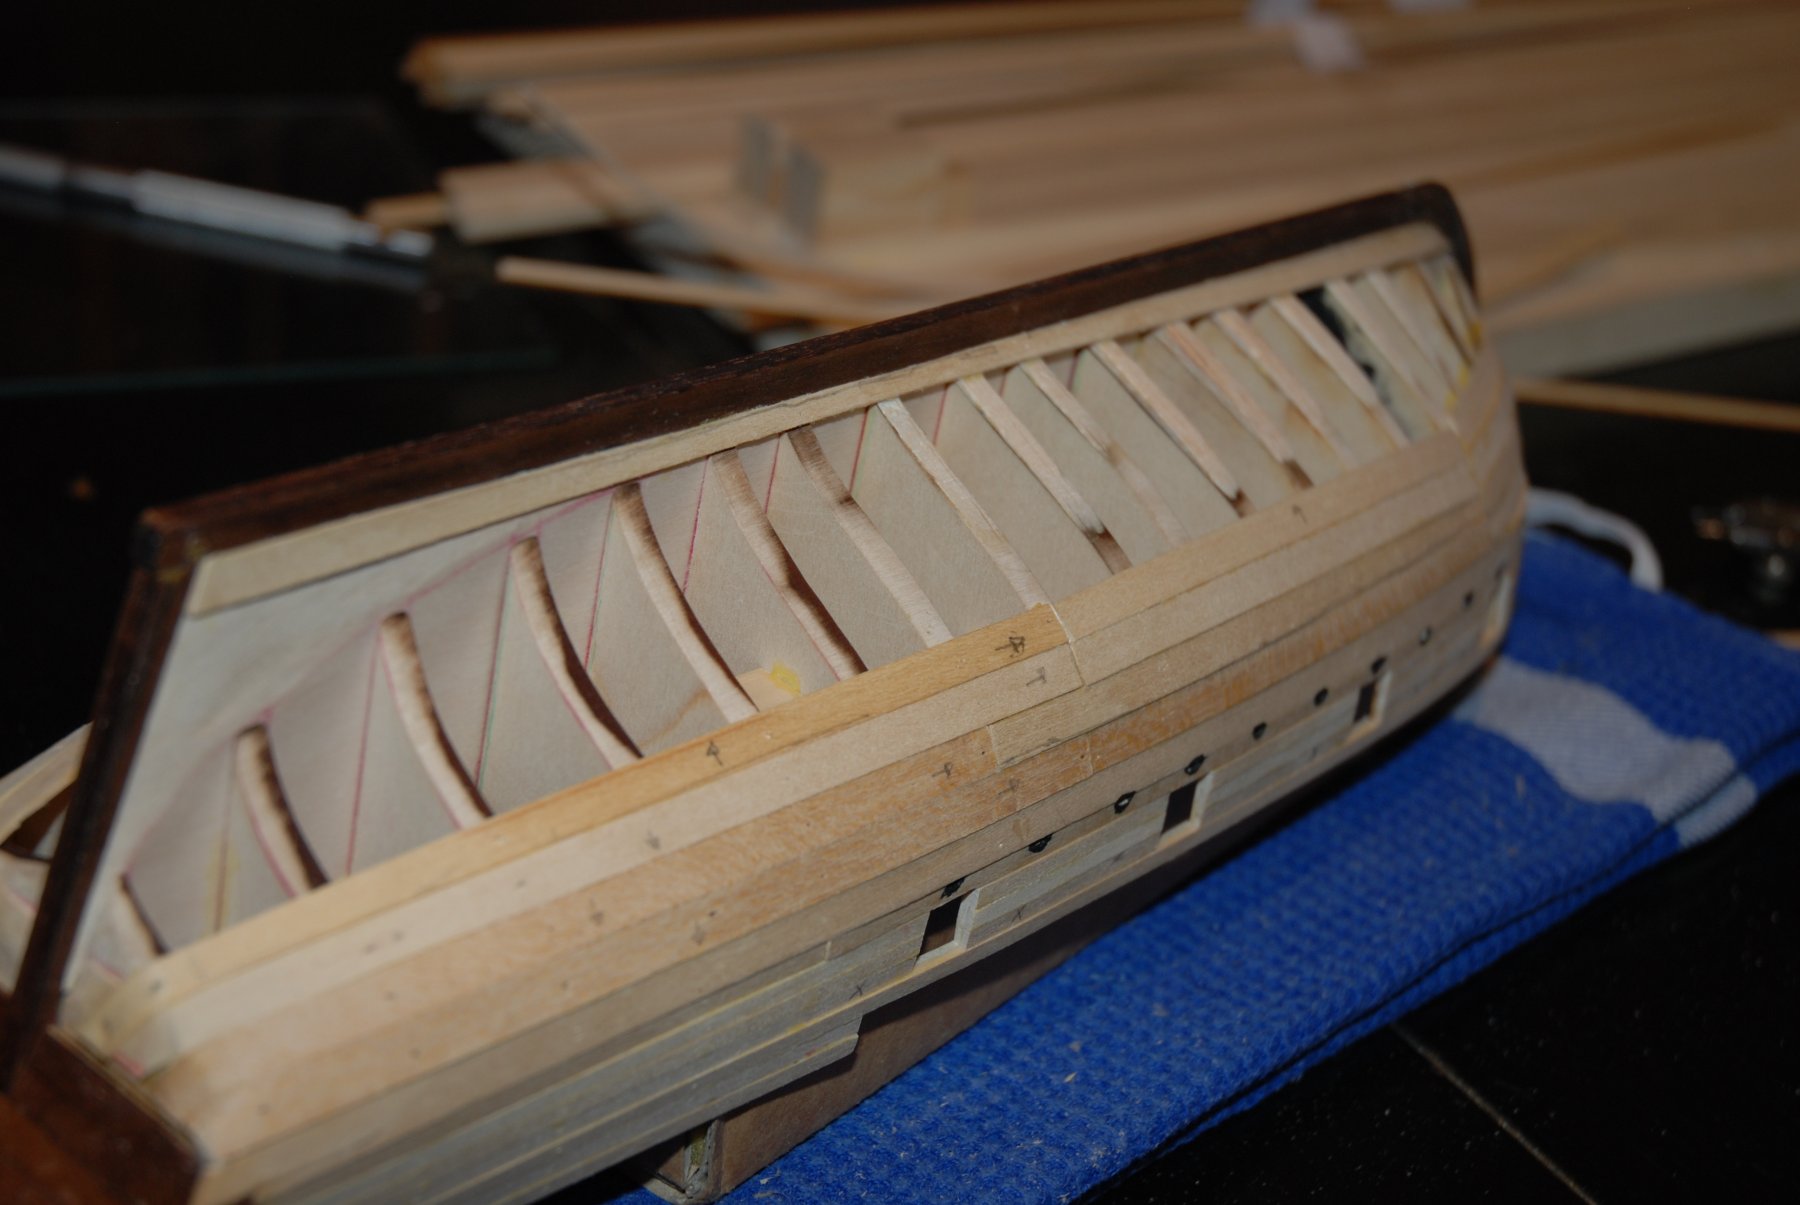
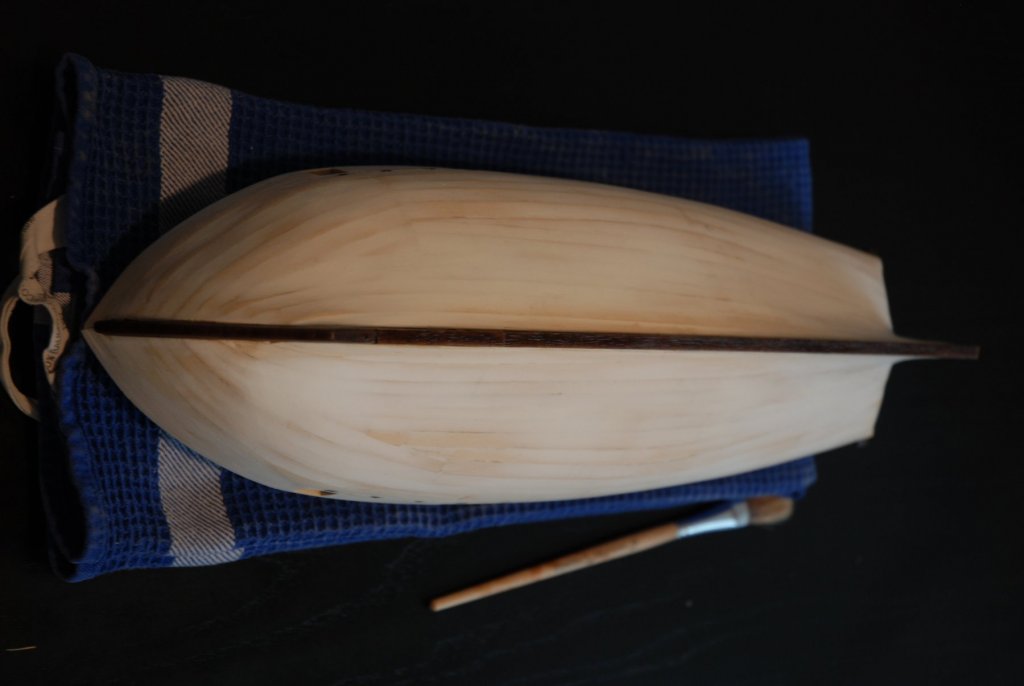
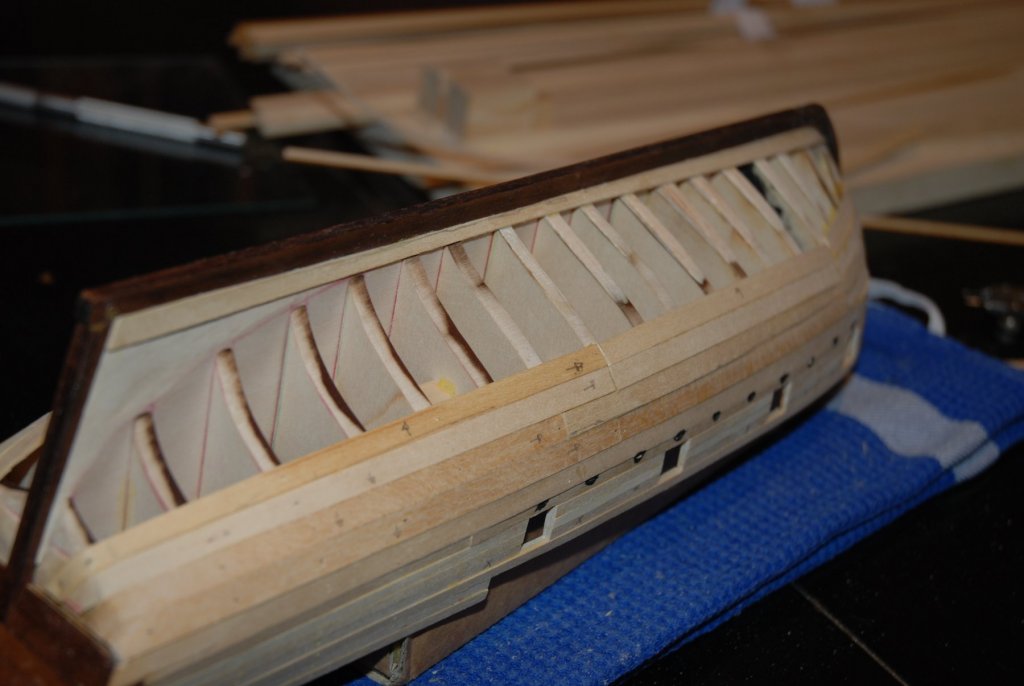
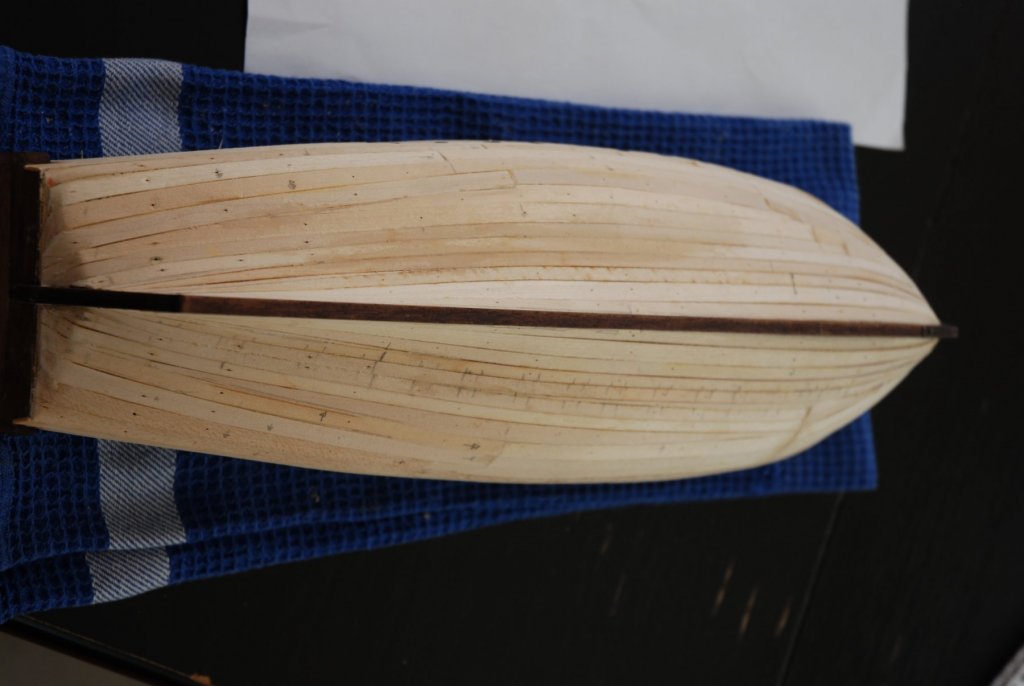
The first planking of the hull is done. It was a very interesting experience. I learn a lot and I must change my way during the process... When I try to cut the first plank under the wales, I never arrive to spile it from the 1/4" basswood strip... So I decide to pose this first plank in three parts. It was a big mistake... After four rows, I understood that if I continue in this way, I will never arrive to finish my hull... So, when I began with the garboard, I have taken a couple of hours to find the method to spile the strip, but finally I have arrived to something acceptable. So the planks near the garboard are more in a traditional method. I have used 1/4" strips to fill the space between the upper and the lower parts of the hull... and some strips cut in special shapes... The next time, I will adopt a more academic method from the beginning... But as it's only a first layer, it was acceptable. Now, I will use some lightweight filler and a good sanding to finish this first step.


- 164 replies
-
- 13
-
-
- first build
- model shipways
- (and 2 more)
-
Thanks all for your kind words. I'm sure this build will be very pleasant and peaceful. And I know that I can count on your support.
- 103 replies
-
- 2
-
-
- queen anne barge
- Syren Ship Model Company
- (and 1 more)
-
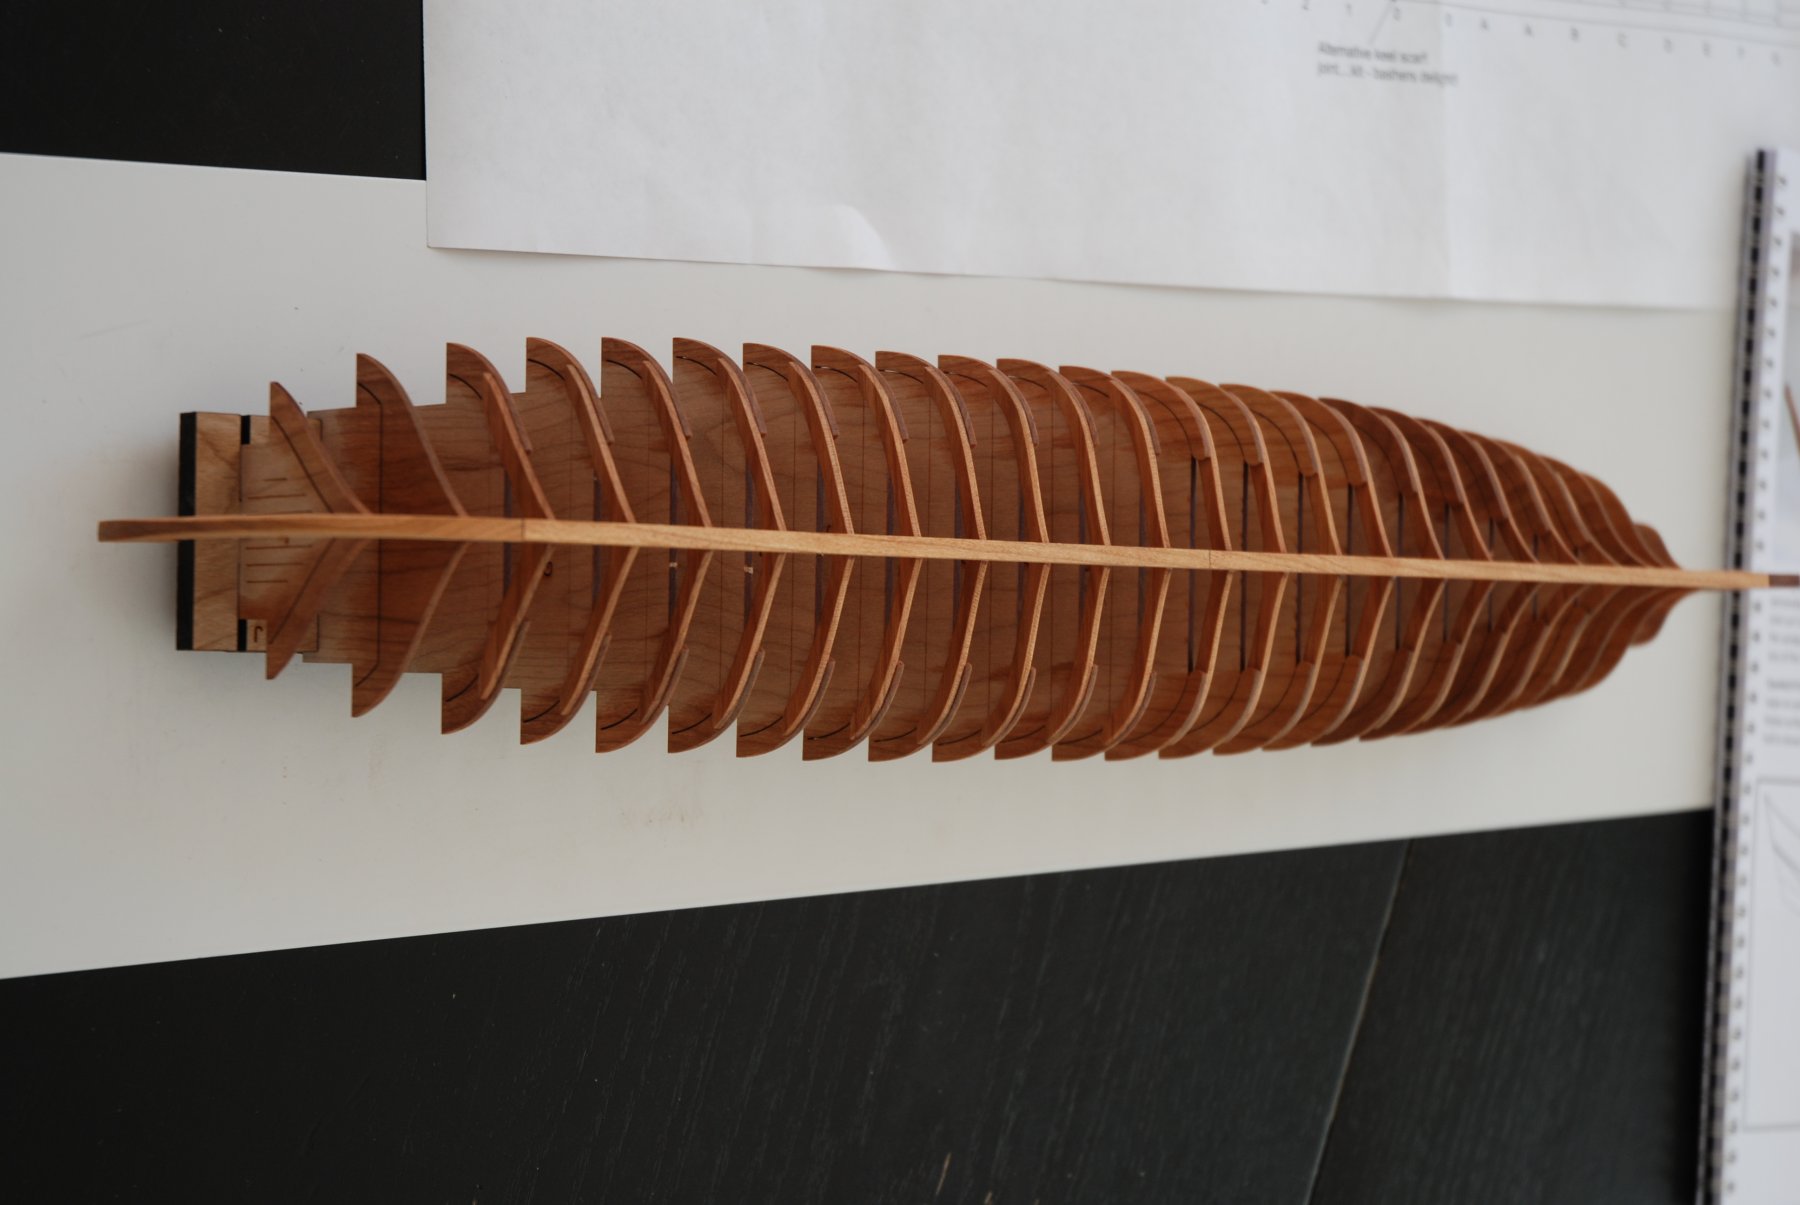
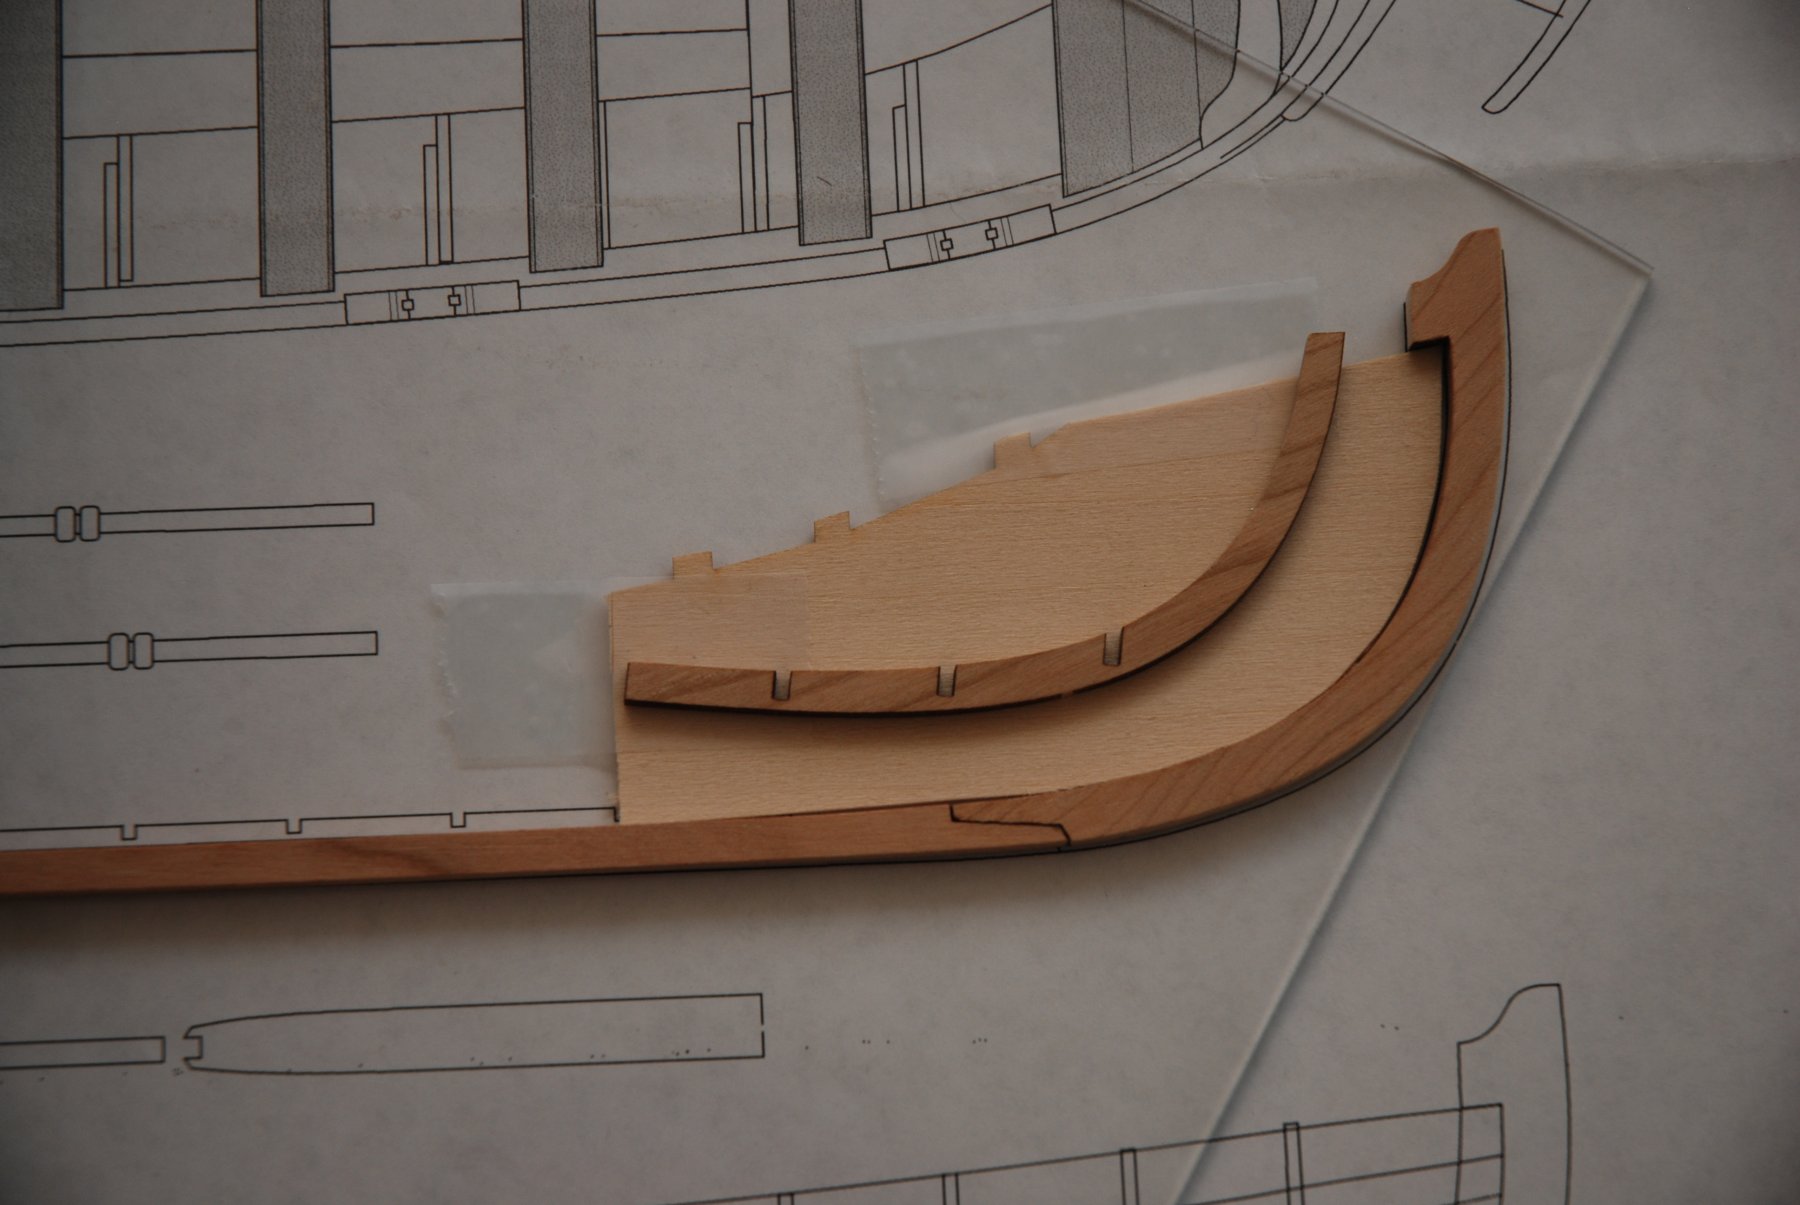
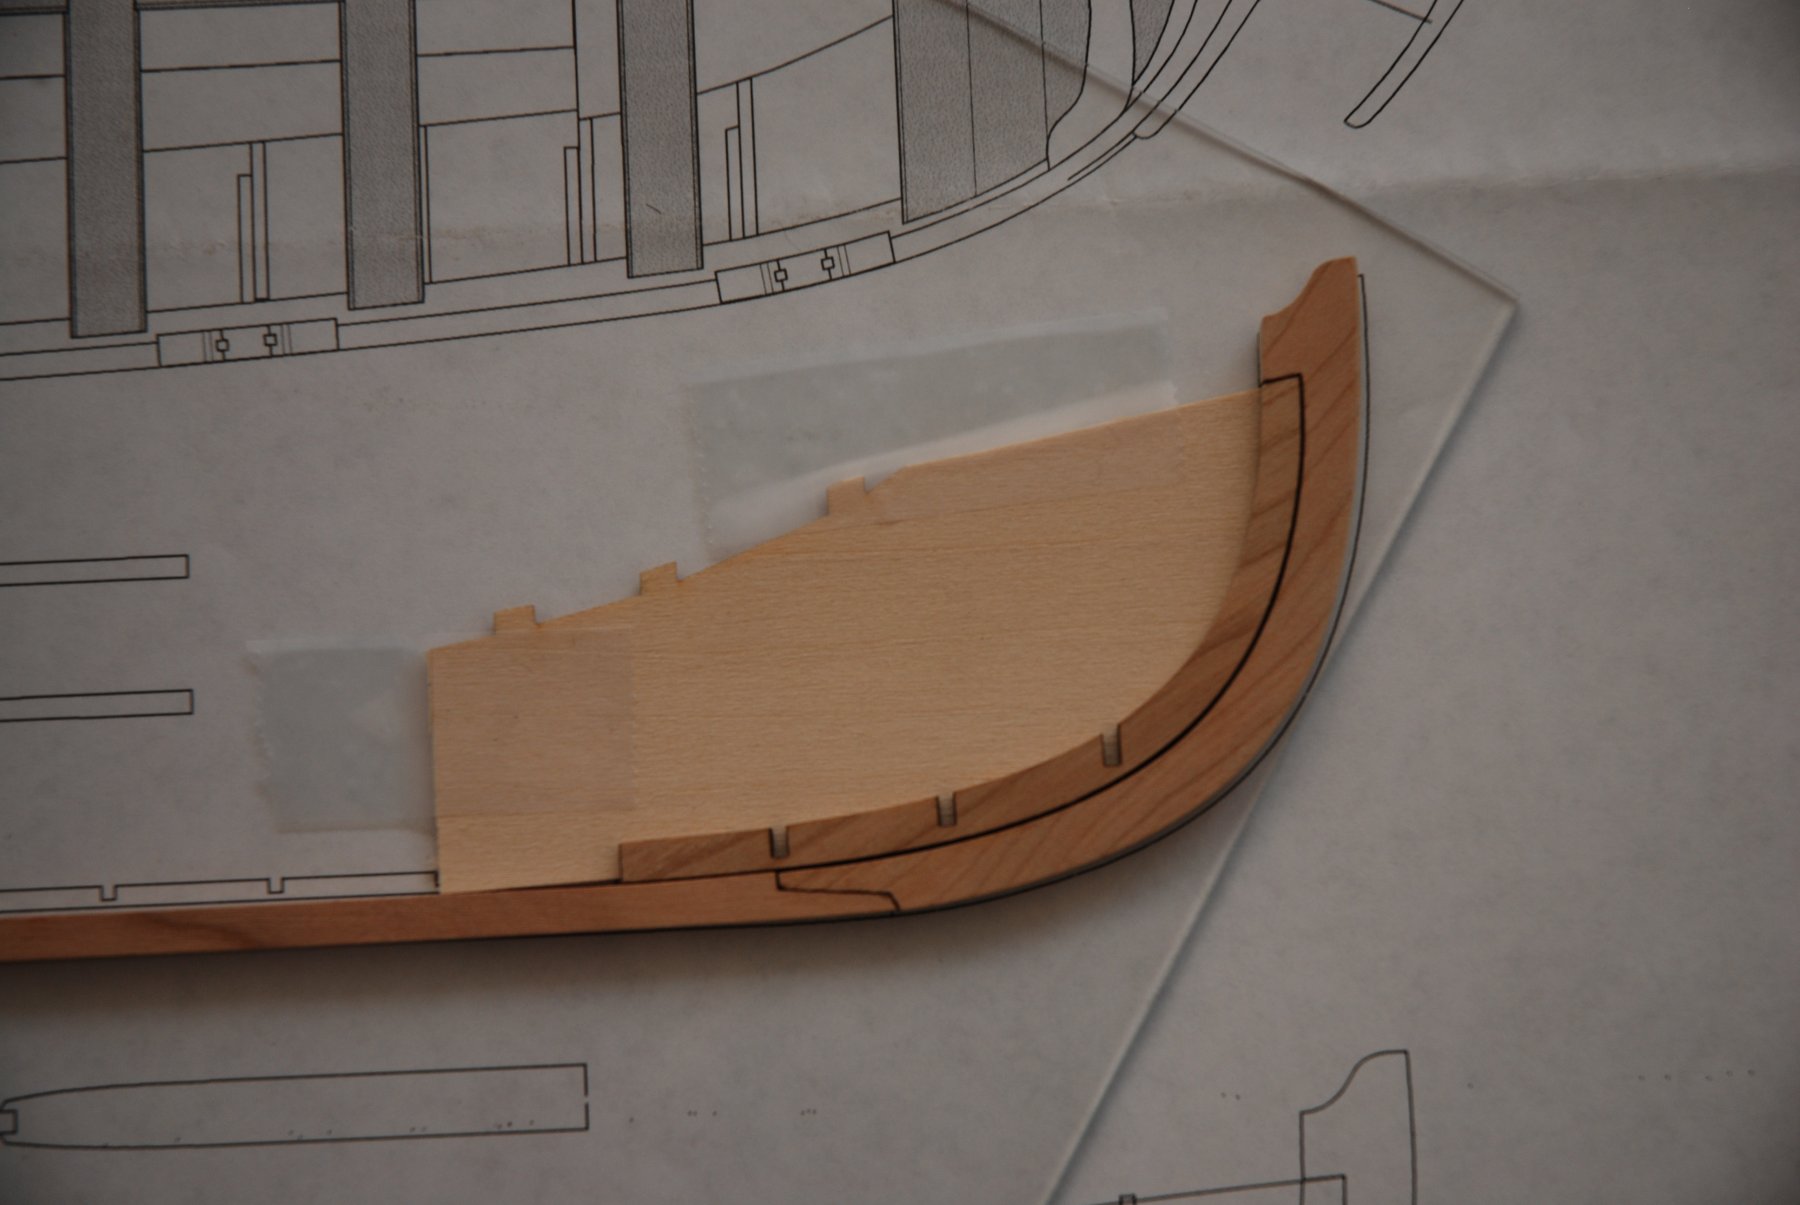
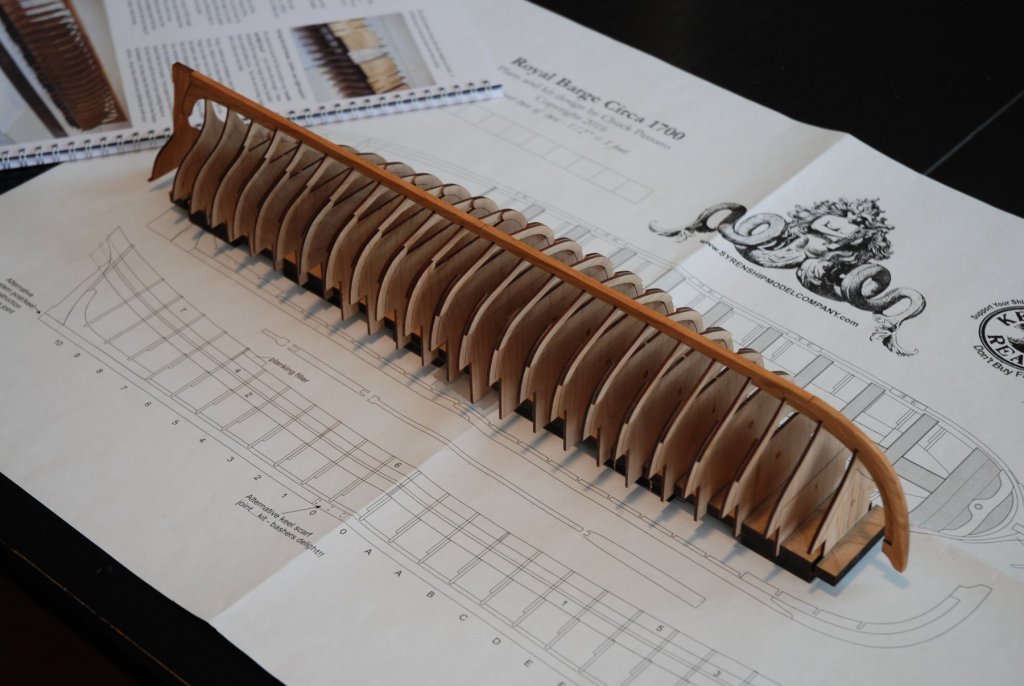
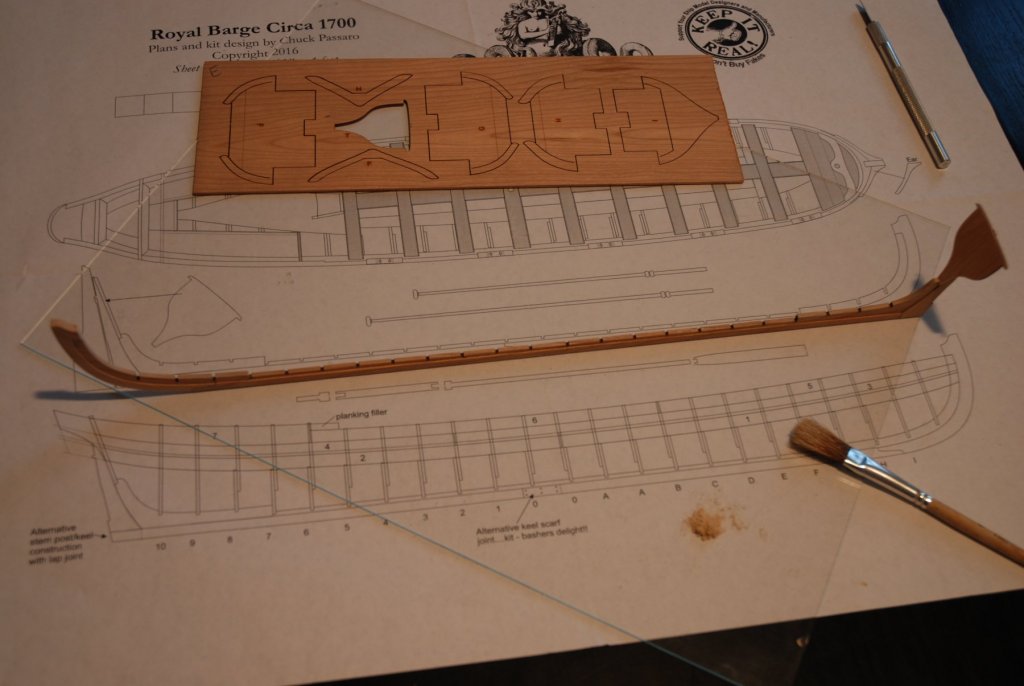
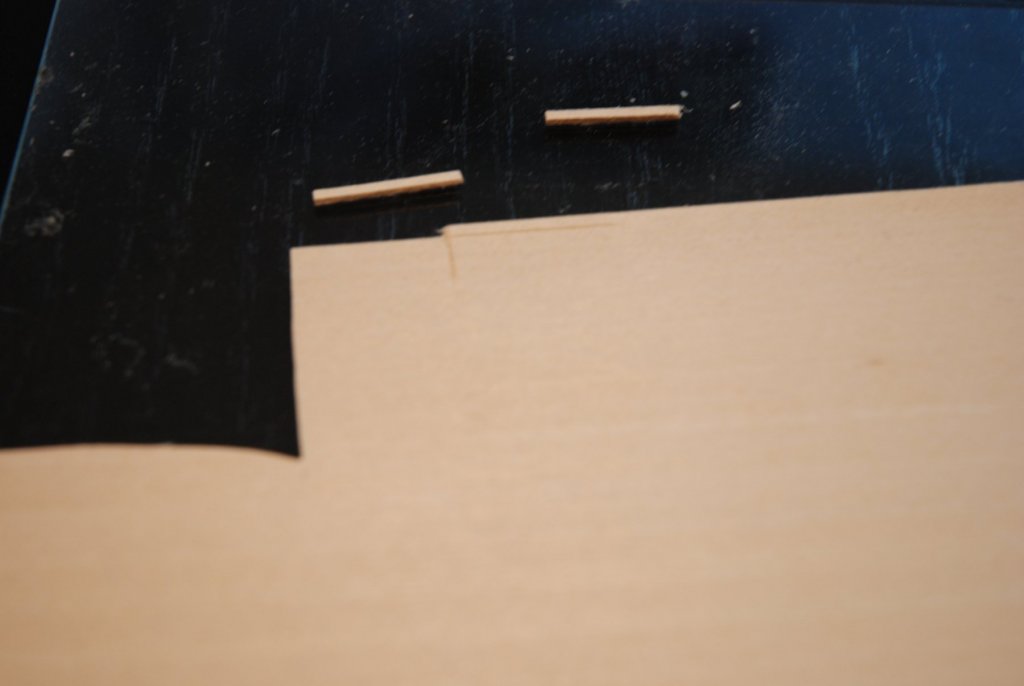
As my first planking on my Armed Virginia Sloop build fill my time since two weeks, I decided to begin a new build. It allow me to practice a new type of work during this repetitive phase on the AVS build. When I began in this hobby, I was attracted at once by barges. Quickly, my choice was reduced to three models: the 18th Century Longboat from Model Shipways, the english pinnace, an another Model Shipways model and the Queen Anne Barge from Syren Ship Model Company. You will notice that this three models were designed by the same developer : the great master Chuck Passaro. It quickly seemed that the most appropriate choice lived in the Queen Anne Barge. And this for many reasons. At first, this model seem more suited to a modeler having not many experience. Chuck has designed a wonderful kit which contains all the elements necessary to simplify the work of the builder. The barge has only three strakes of planking. Furthermore, all oft he outboard planking has been pre-spiled and two sheets of laser cut planks are supplied, one fort he port and the second fort he starboard side. The second reason form y choice, is the quality of the manual of instructions. Chuck must have been teacher and writer in a previous life… The manual is read as a novel and numerous photos illustrate the very precise explanations. You have only to follow the instructions and all will be fine. The last reason is the quality oft he model. As with his previous model, the Cheerful cutter, Chuck has again designed a ´must to have´ kit. The quality of the laser cut is one of the best currently and the concept of the kit is innovative. Everything is thought to simplify the work of the modelist. The Syren Ship Model Company is, for me, one of the leader in this market and I look forward to the next model… It will be mine too. I have the great fortune to be connected on this forum when Chuck announced the release of the first set of eleven Barge kits. I was lucky because within half an hour everything was sold… One week later, my precious was at home. Another indication of the seriousness of the Syren Ship Model Company. But now it's time for the build You just notice that I used a piece of scrap 1/32" basswood to help me to center the two pieces on the top of the keel. So I have better luck that these two pieces have a regular 1/32" lip on both sides. For the rest, I just follow carefully the Chuck instructions... It will be time to prepare the frames.


- 103 replies
-
- 15
-
-
- queen anne barge
- Syren Ship Model Company
- (and 1 more)
-
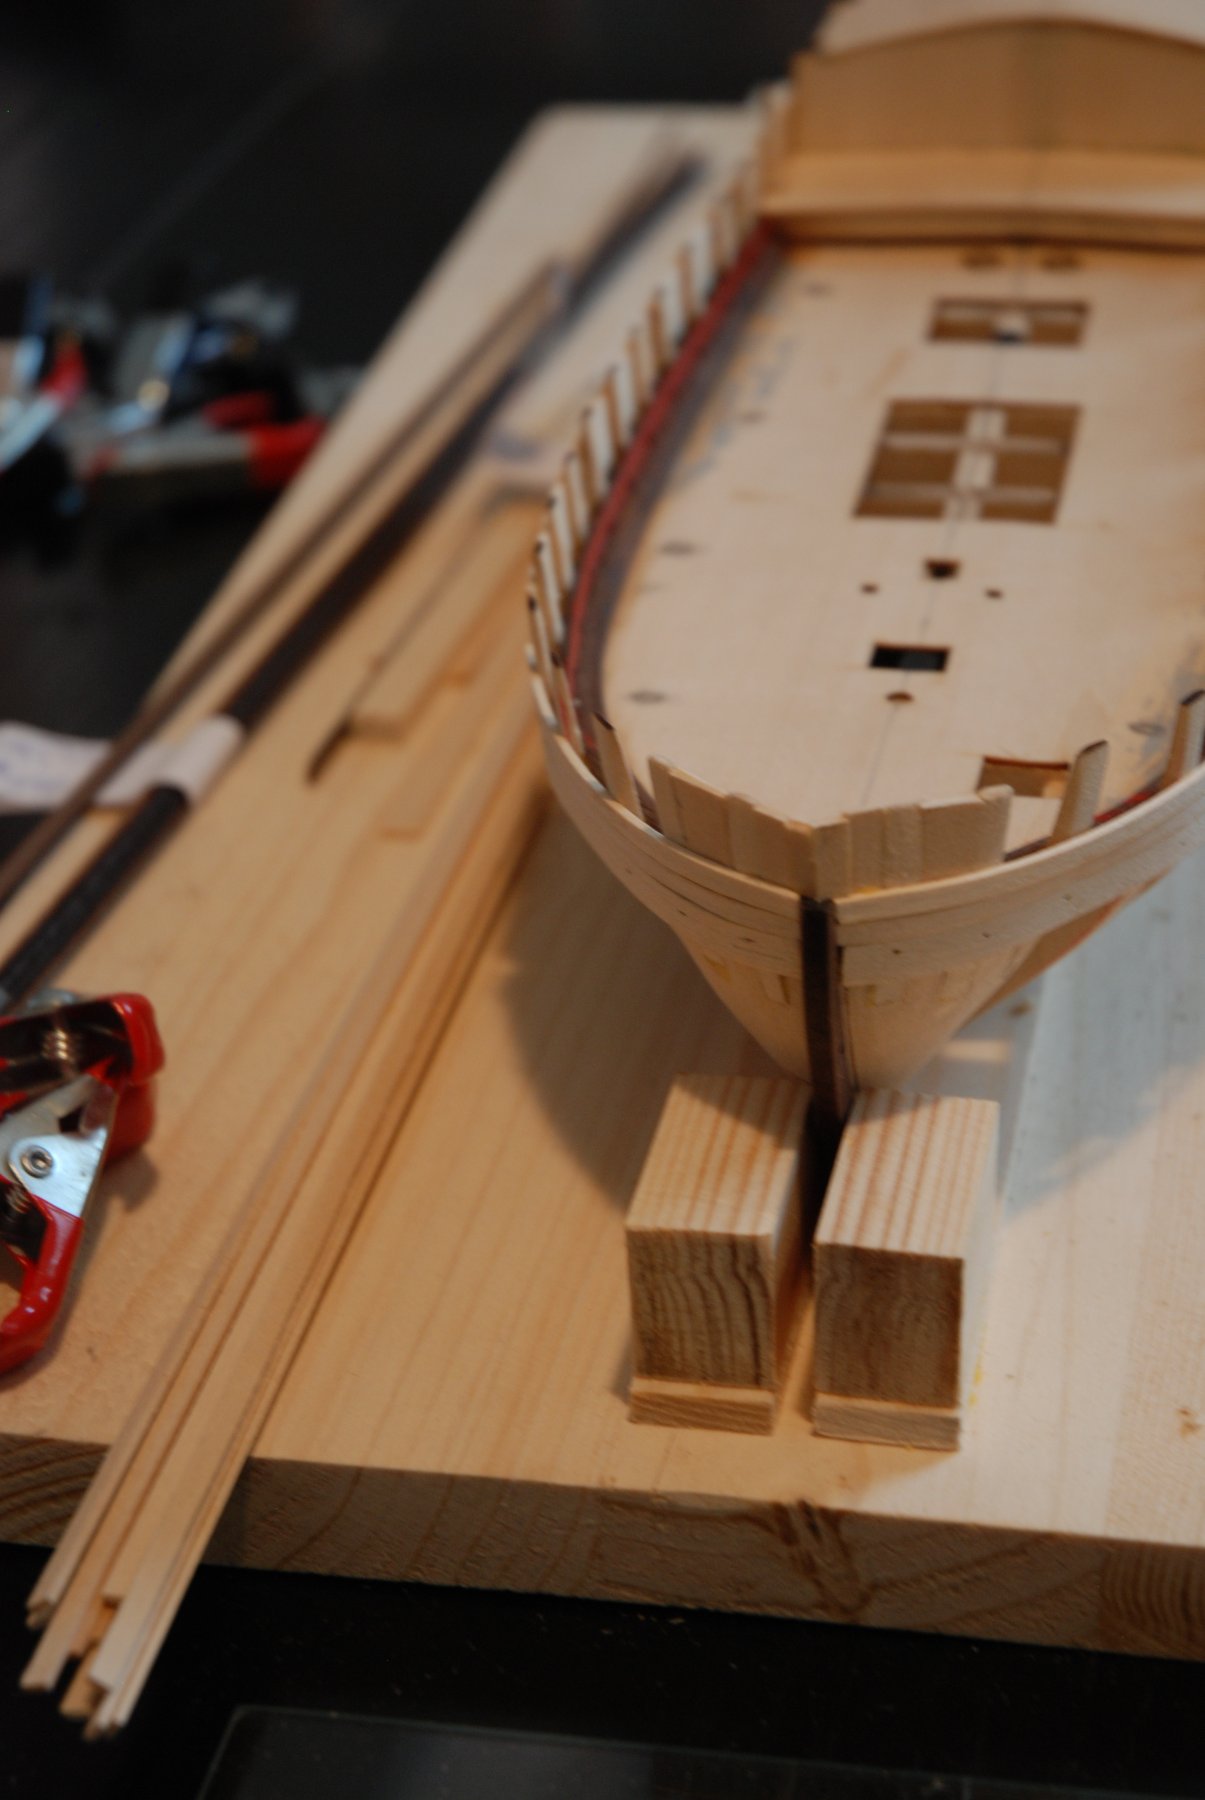
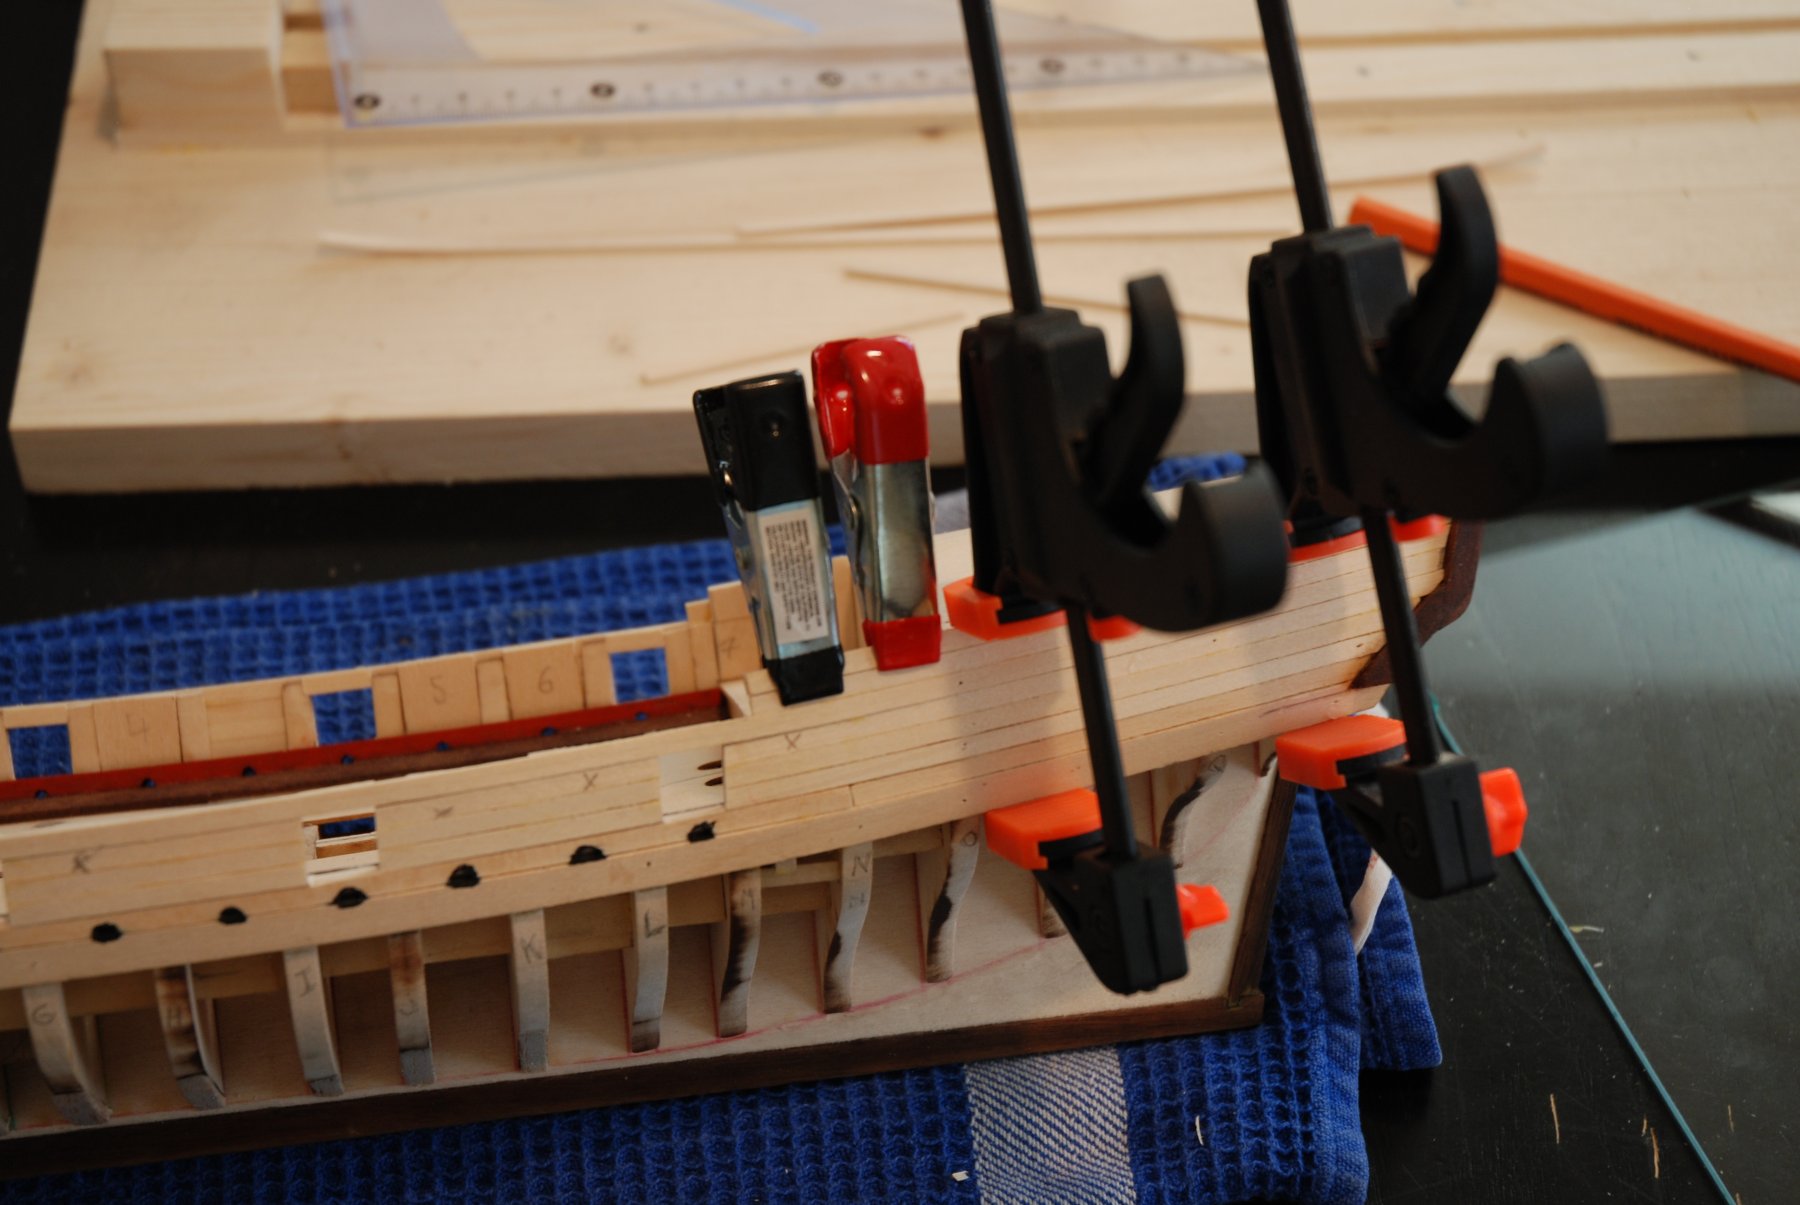
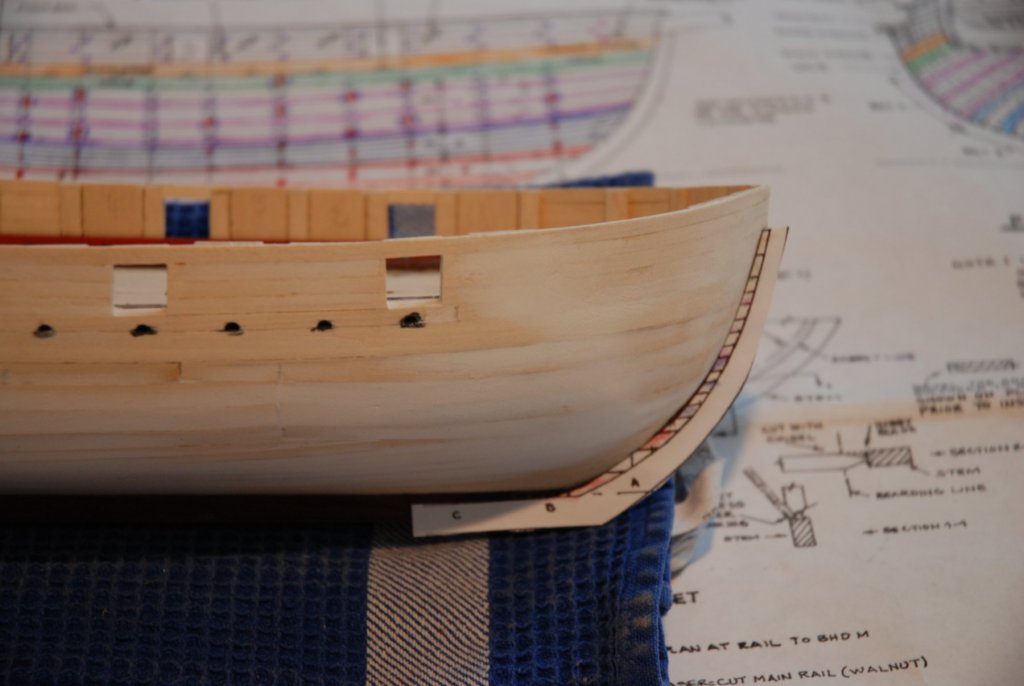
As my daughter had a week of school holiday for the sports winter, I have also taken vacation. During this week, I could work a lot on the AVS. It was a very interesting part of the build without great problems. I used always the same template to bent the strips at the bow. I have add some fillers at the bow between the bulkheads extension. So it was more easy to glue the planks. When all the planks over the black strake have been glued, I cut them at the correct length in every gunport. I have also cut some filler pieces from a sheet of 3/64" basswood to close the gunports. The same sheet of basswood was used to cut fillers and added them between the extensions of the bulkheads at each position where I will need to open the sweep ports. Finally I added the two last planks at the cabin. The first planking above the black strake is over. It was a very pleasant job. Now it will be more tricky with the first planking below the wale... It will be probably much more difficult...


- 164 replies
-
- 10
-
-
- first build
- model shipways
- (and 2 more)
-
Thanks Wallace, DocBlake, GuntherMT and all the likes. Without the B. Hunt practicum I never arrive at this step of my build. But I not only refer to it, I use too the addendum from John H. Earl and naturally all the wonderful logs on this forum. I try to refer as a maximum of sources. GuntherMt and DocBlake, a big thanks for Your advice.
- 164 replies
-
- 4
-
-
- first build
- model shipways
- (and 2 more)
-
Great job. I will remember the tip to cut the false deck in sections for my next buildings. Thanks.
- 359 replies
-
- 6
-
-
- prince de neufchatel
- model shipways
- (and 1 more)
-
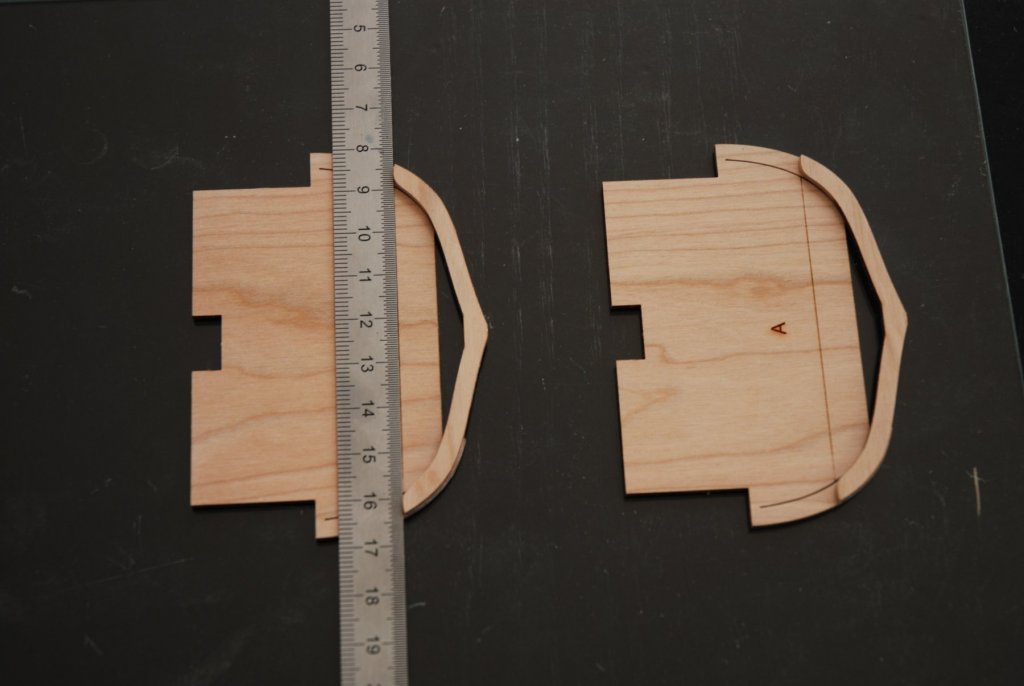
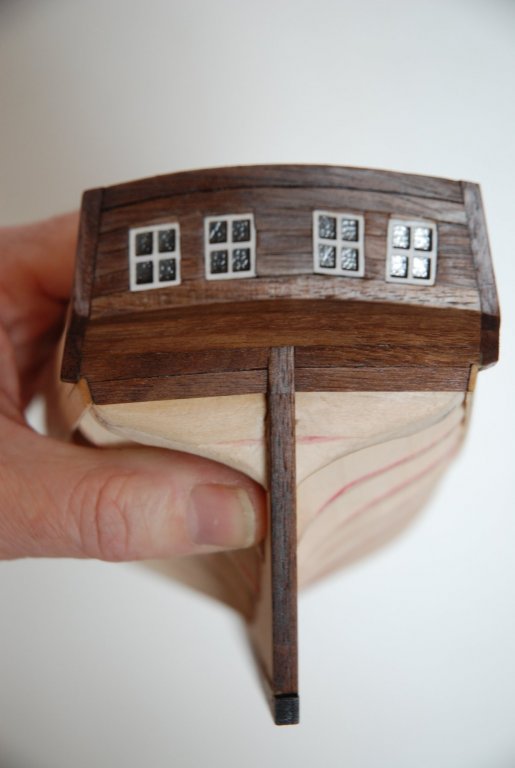
Not really happy with the curve of the fashion pieces, on next day I play again with my little files and try to obtain a more smooth shape. A new coat of teak oil was applied. The result is a little bit better. Now it's time for a less difficult part of the building with the first external planking of the upper hull.
- 164 replies
-
- 8
-
-
- first build
- model shipways
- (and 2 more)
-
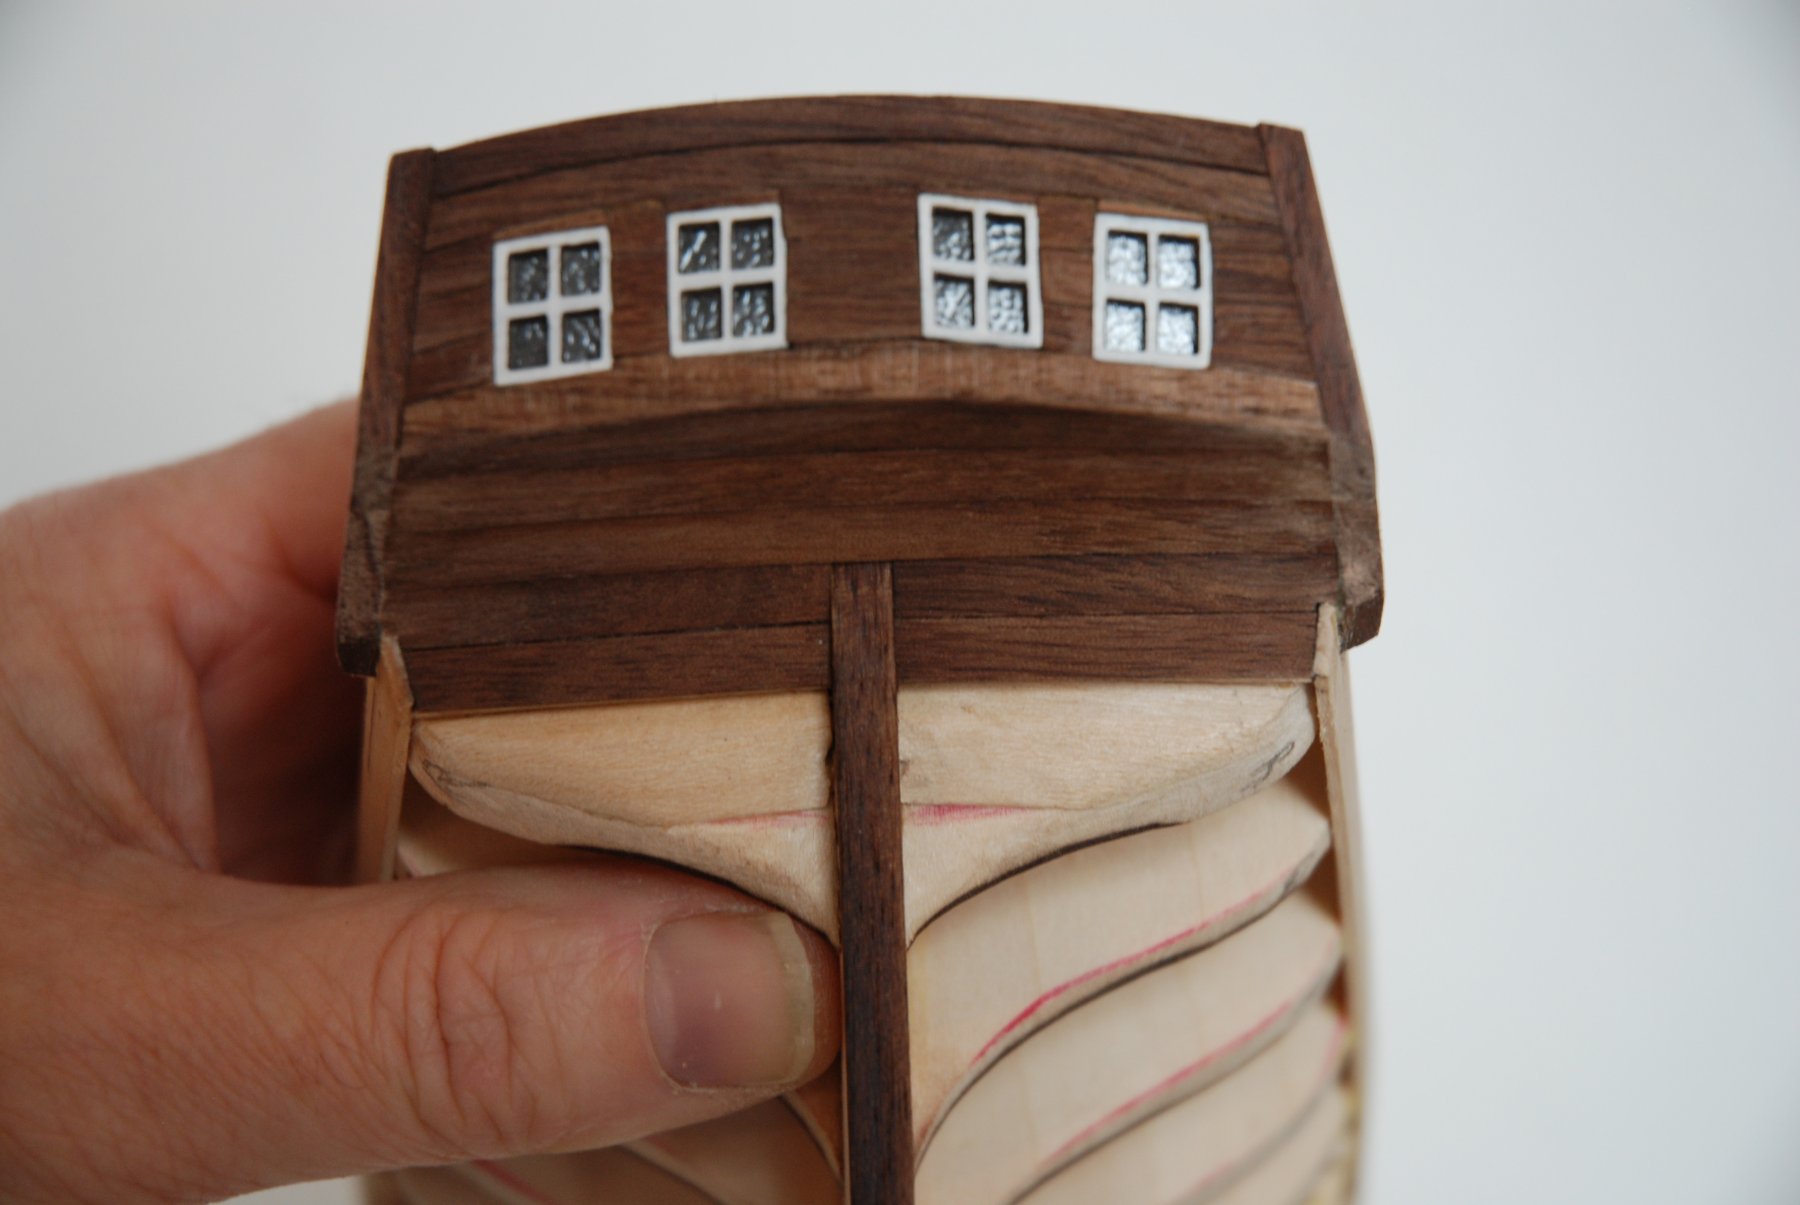
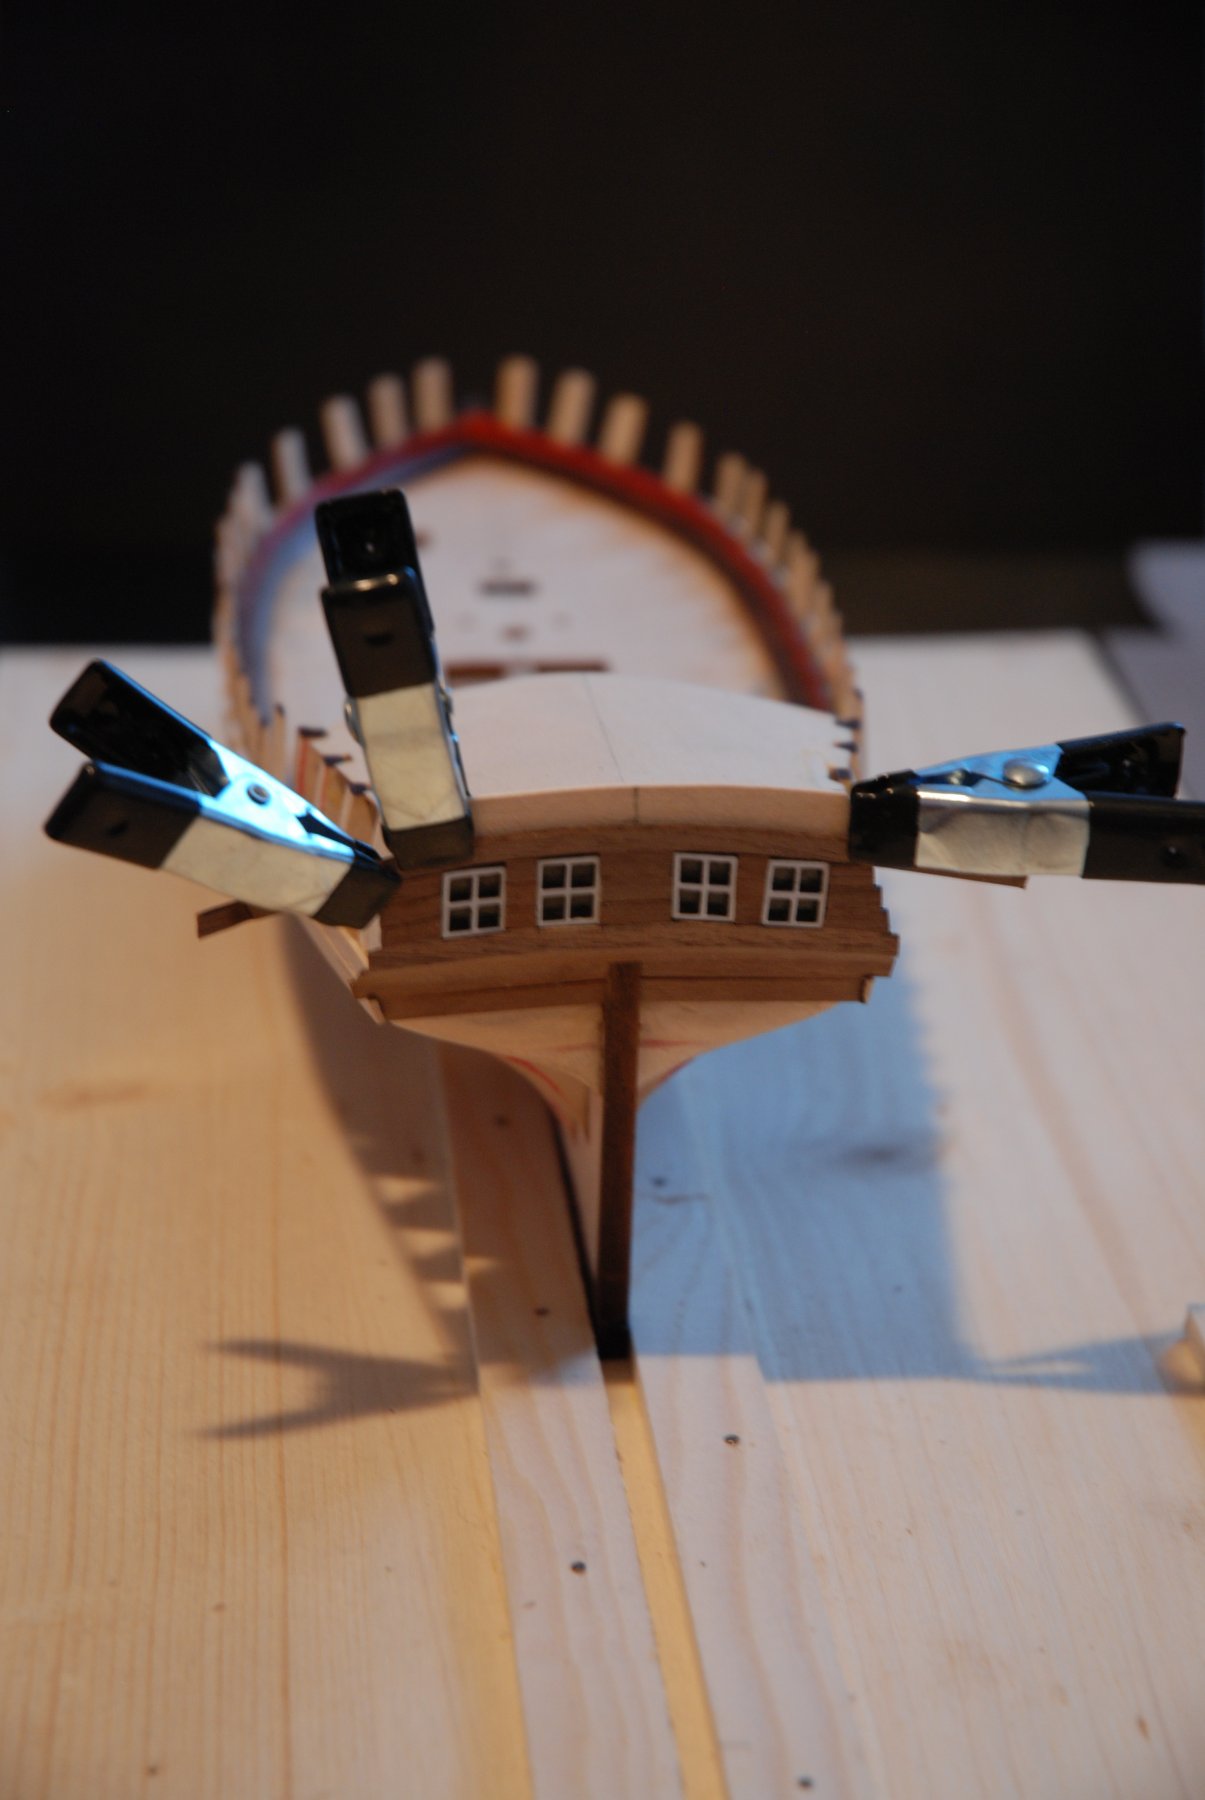
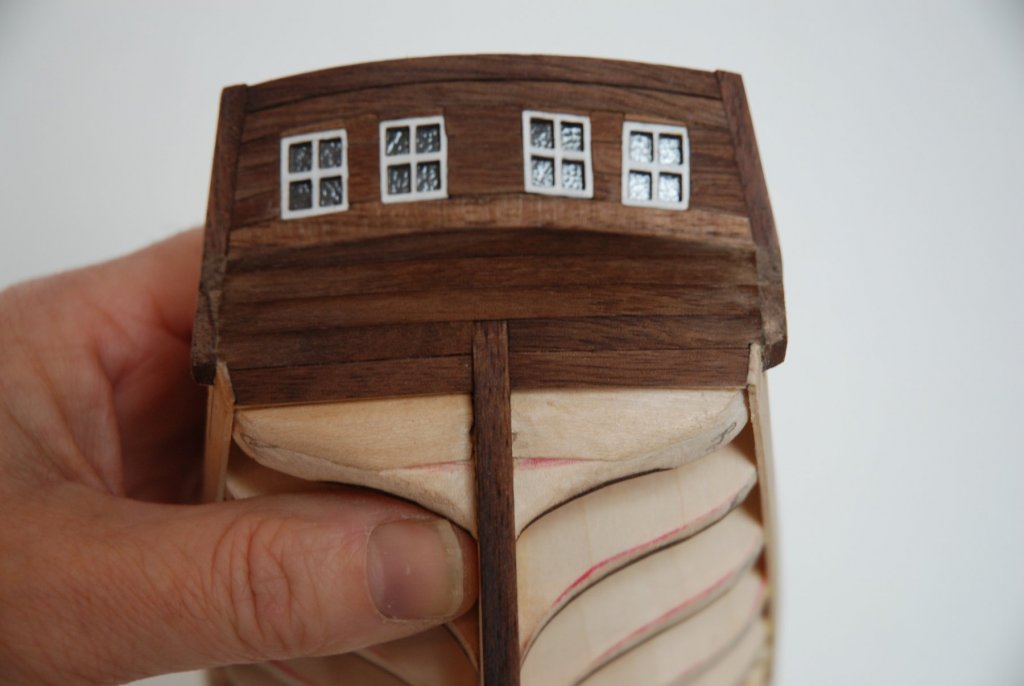
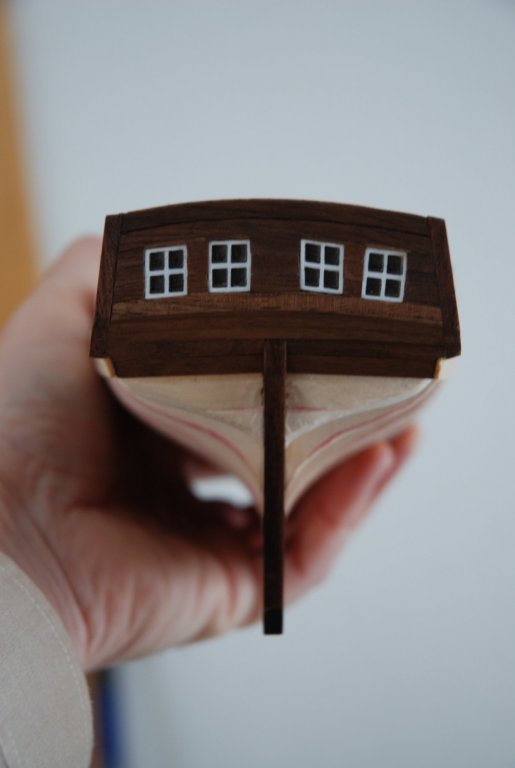
Thanks GuntherMT. I think I will have questions when it will be time to work on a more technical job like planking the hull... I have finished the second layer of planks on the transom & counter. For the counter, not really a difficult job. For the transom, the first plank is cut from a piece of walnut so I can open the little spaces for the windows. All the others planks are bent using the same template that I have used to cut the first layer planks. I just glue it on a board and brace the mount with three toothpicks as treenails. The strips are soaked in hot water and bent using this template. When the last plank was glued, I cut the excess of the basswood first layer. Following the excellent practicum of M Hunt, I put the fashion pieces in place. You notice that I have paint beforehand the windows with Vallejo white acrylic color. I like the contrast between the white of the windows and the dark of the walnut strips. I finish my work with a layer of teak oil.

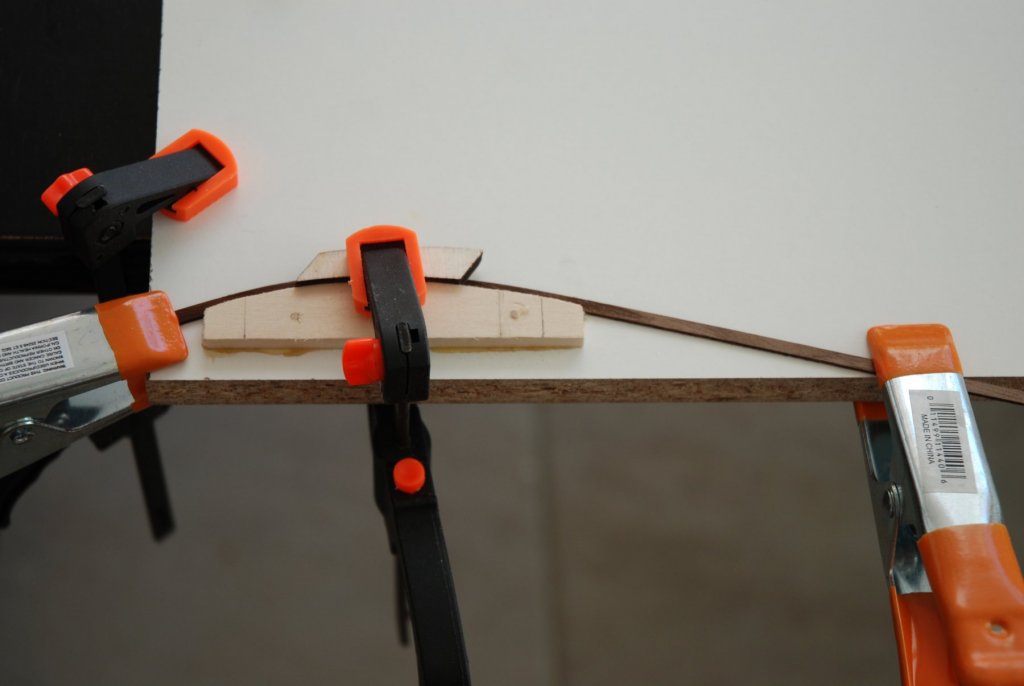
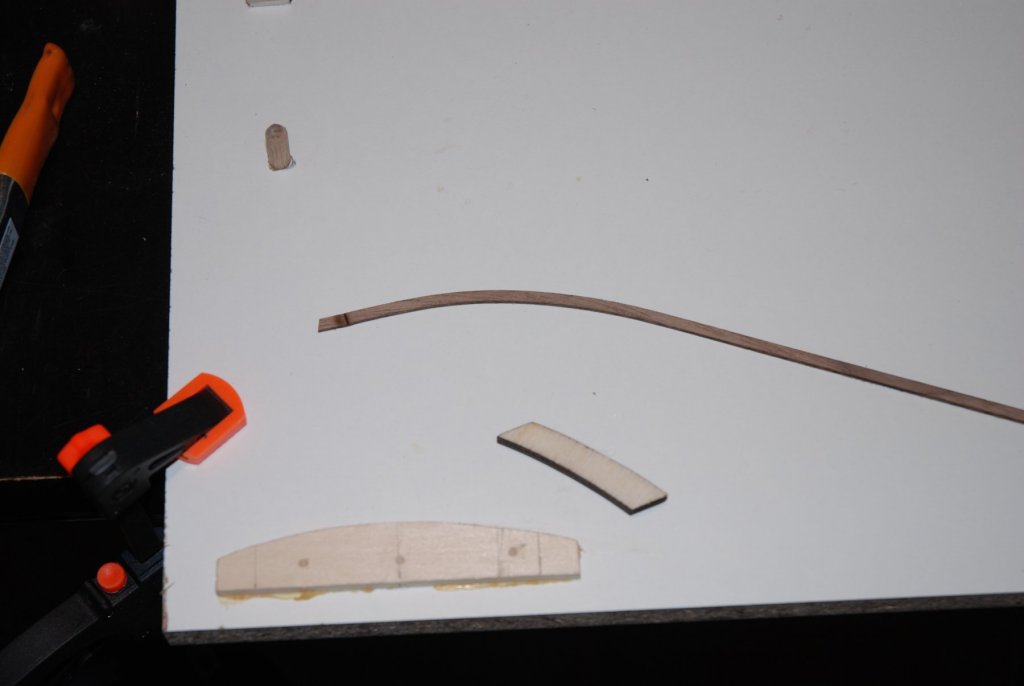
- 164 replies
-
- 9
-
-
- first build
- model shipways
- (and 2 more)