JpR62
-
Posts
699 -
Joined
-
Last visited
Content Type
Profiles
Forums
Gallery
Events
Everything posted by JpR62
-
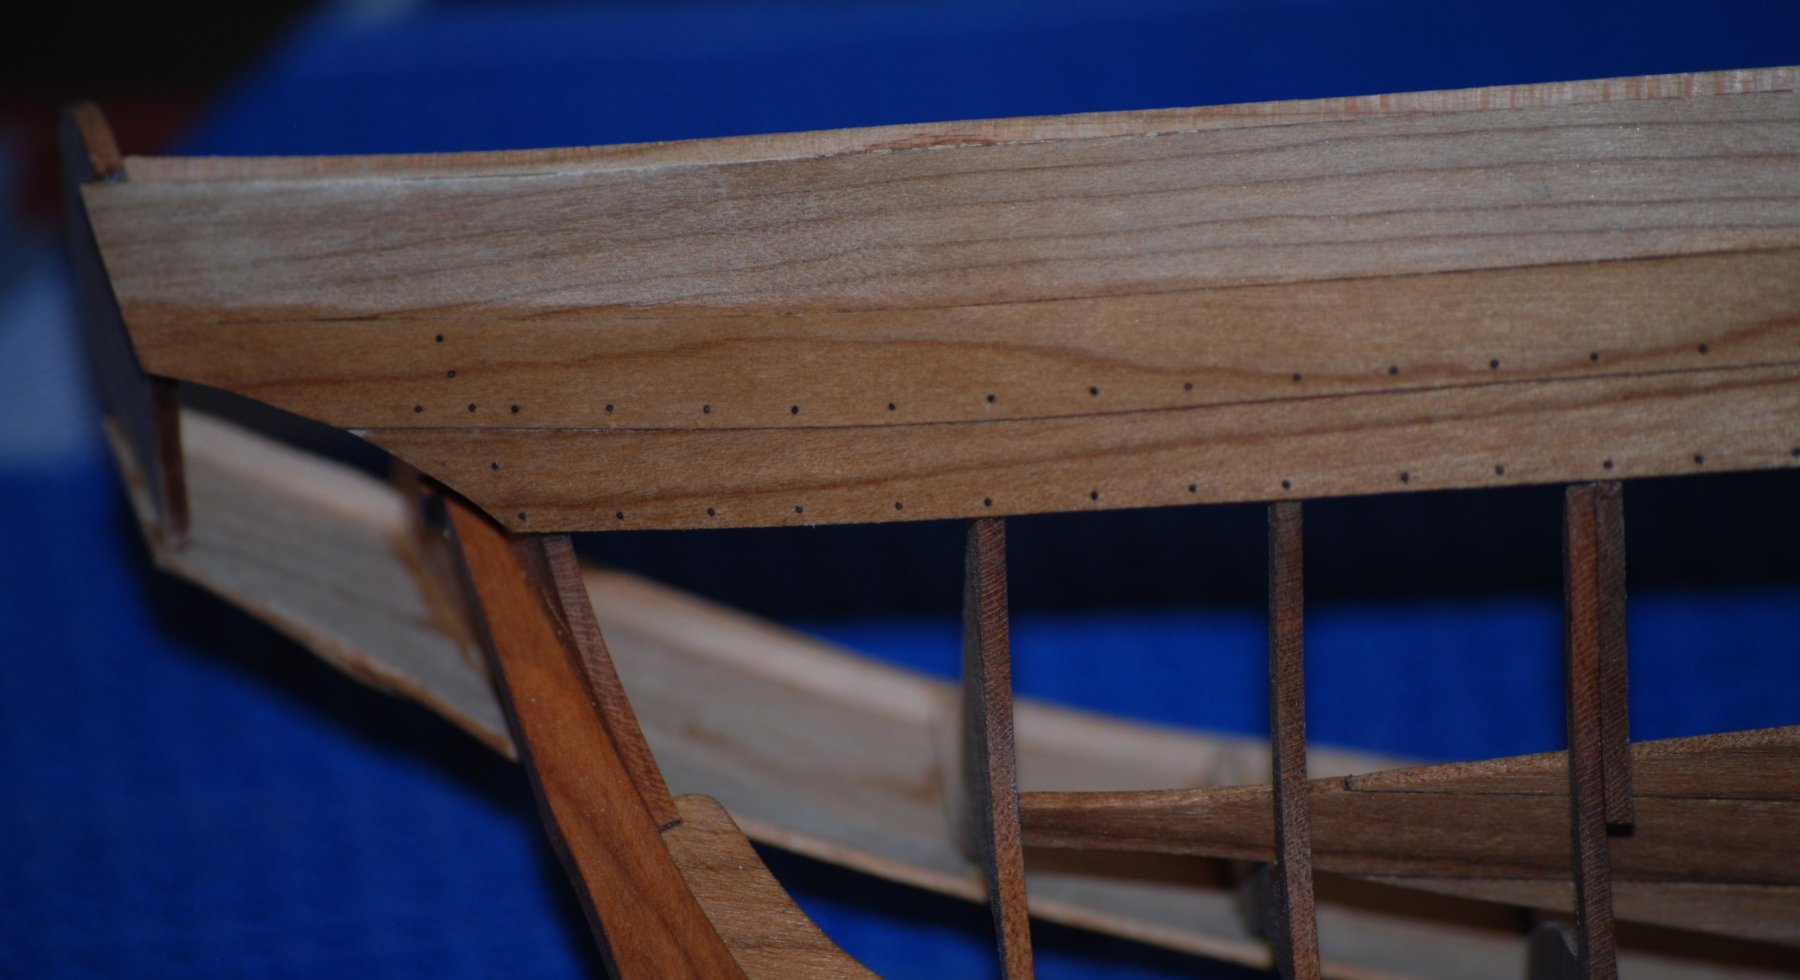
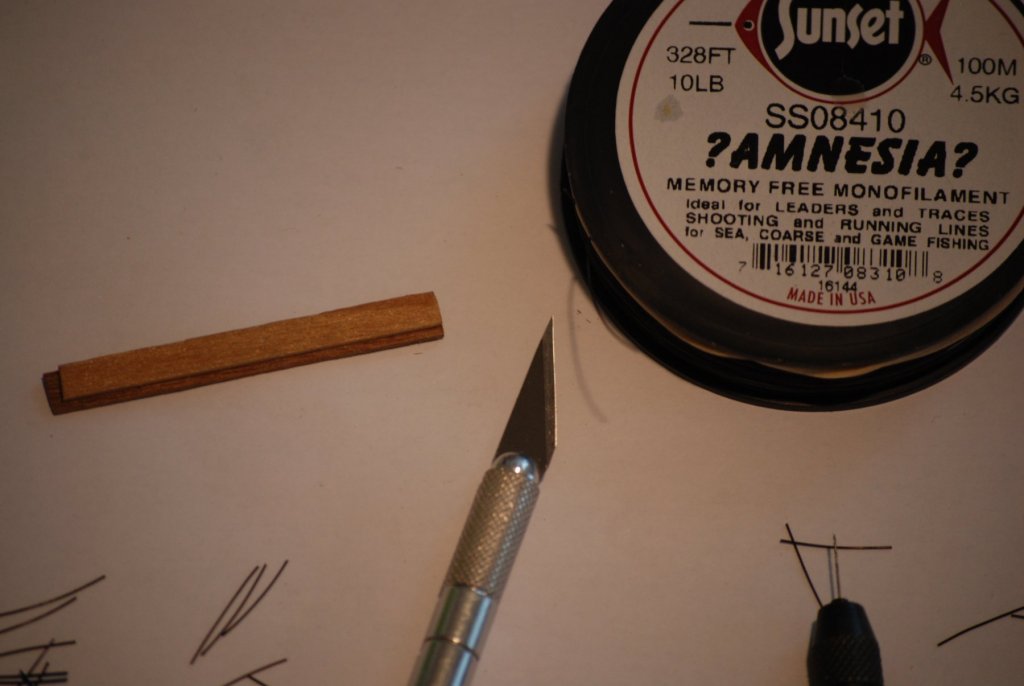
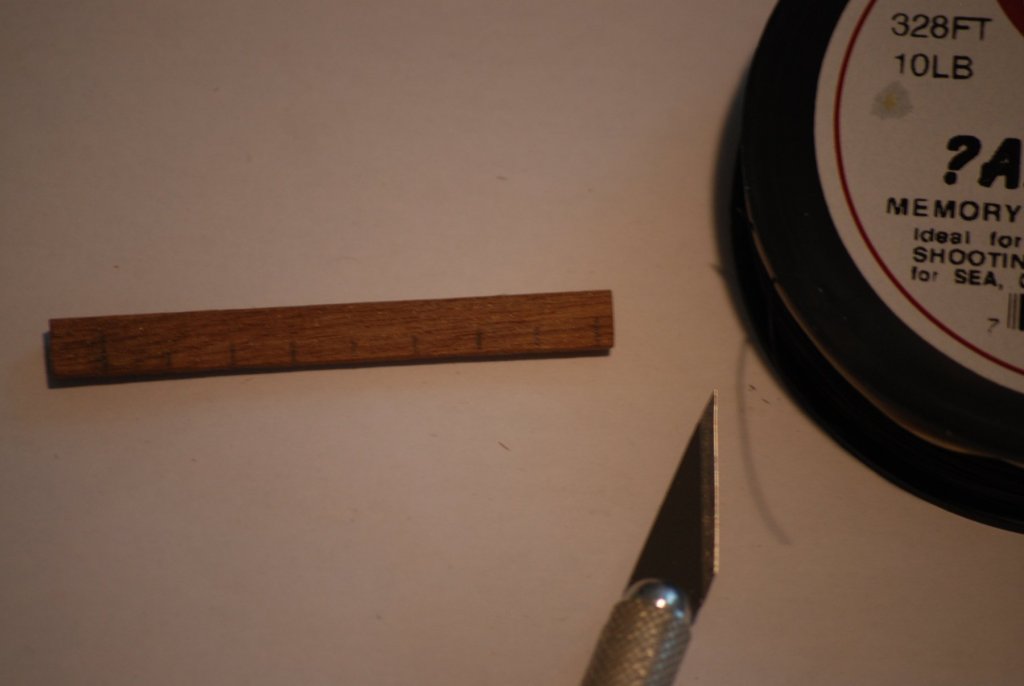
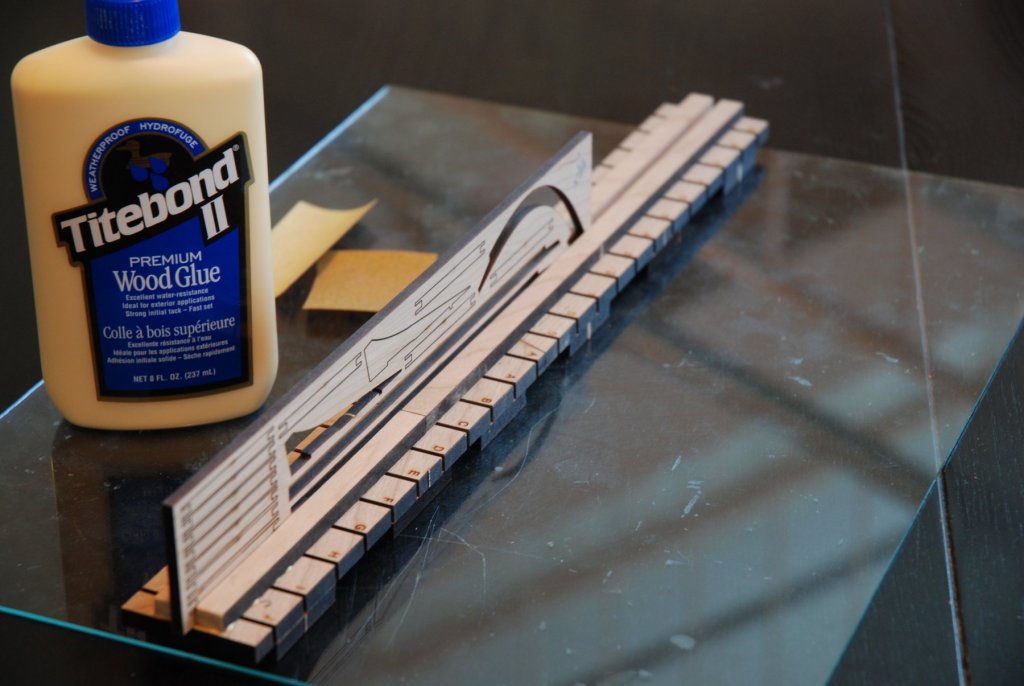
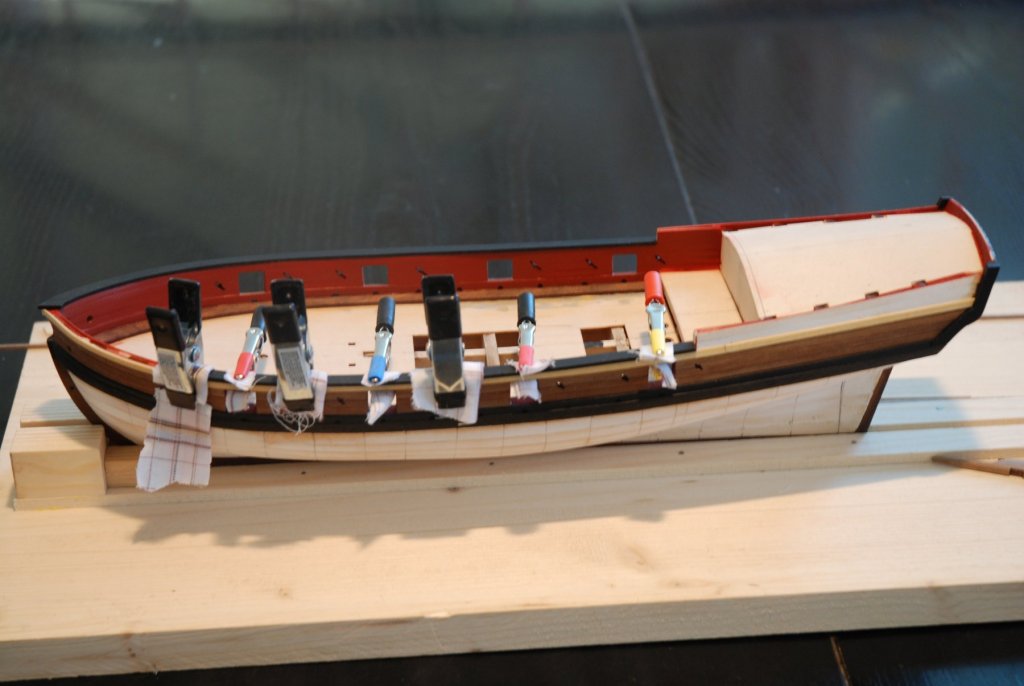
 The process of treenailing is finished. I decided to put two nails between the frames. I ordered some 10lb black line so that the result is light enough. I built a jig by gluing two strip of woods leaving a gap of 1mm between the two pieces. On the opposite side, I then traced, with a well-sharpened pencil, small marks at a distance of 6mm. Then just put the jig at the bottom of the plank and mark the location to drill using the needle holder. You will have the mark at one millimeter of the bottom edge and spaced 6 mm. To put the treenails I followed the instructions provided by the manual. The size of the drill bit is 0.3mm. Just be sure to use a sharp blade to cut the line. It took a while because there were a little over 300 treenails to glue... but I am quite satisfied with the result. Now it's time to work on the moldings and to take out my brushes...
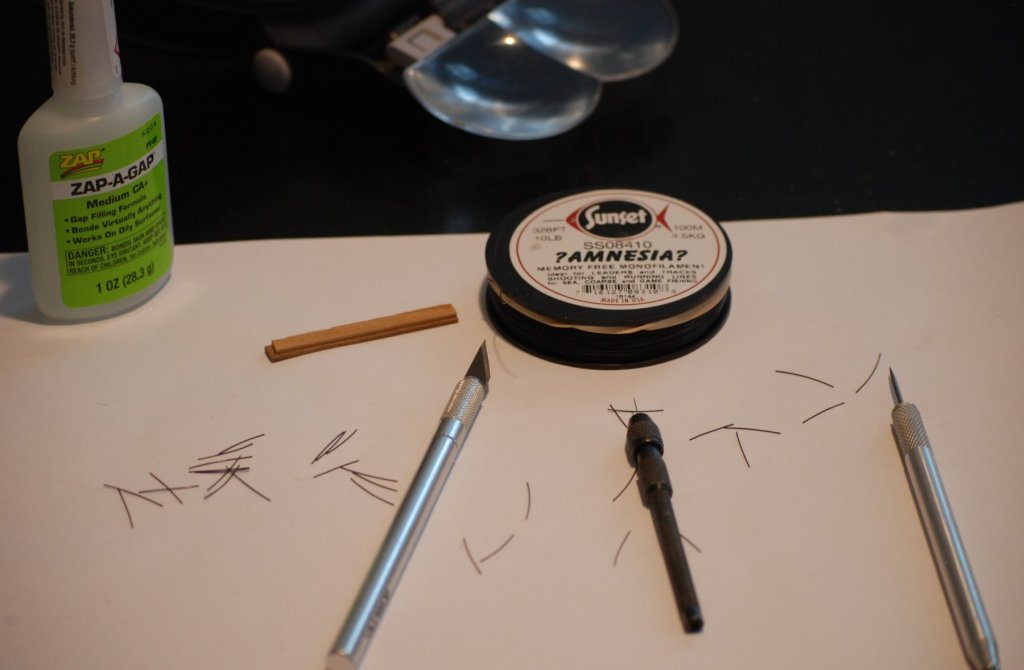

- 103 replies
-
- 9
-

-
- queen anne barge
- Syren Ship Model Company
- (and 1 more)
-
How to get colors by playing on the different essence of the woods. Superb result !
- 128 replies
-
- 2
-
-
- mordaunt
- battle station
- (and 1 more)
-
A new jewel in sight ! Thanks for sharing the process of planking the hull. Always very informative to review this process. It seems so simple...
- 421 replies
-
- 6
-
-
- medway longboat
- Syren Ship Model Company
- (and 1 more)
-
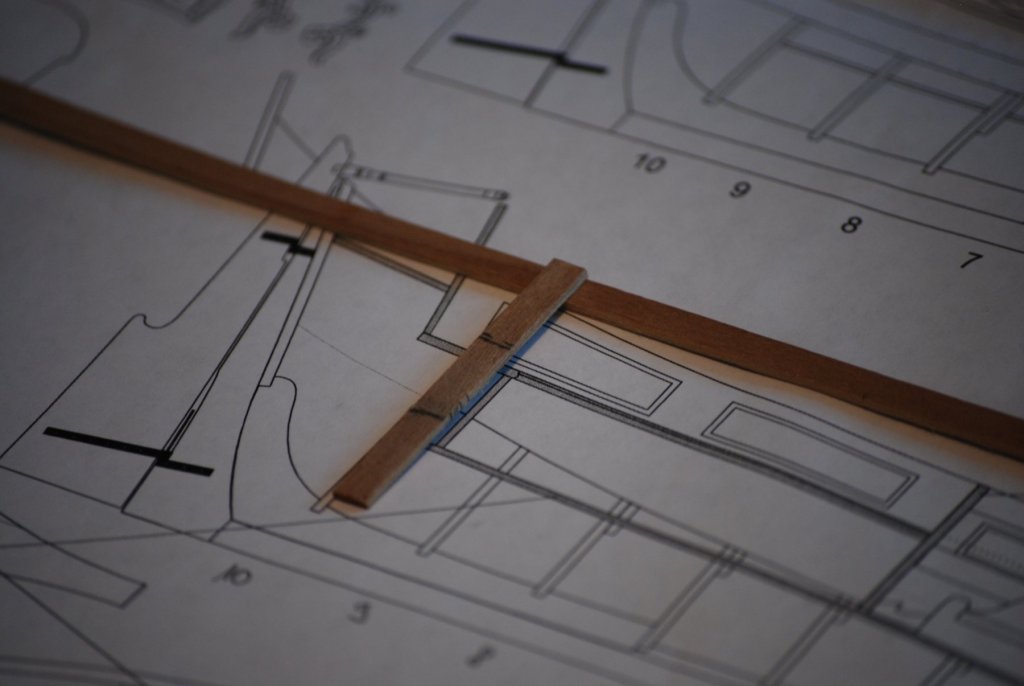
Thanks James and all the likes. James, building this barge is a great happiness. I'm sure you'll appreciate I begin to study the phase of laying the interior boards. Not being sure of my work on the fairing of the interior frames, I build a little jig to see if my fairing is ok. I first traced the positioning of the bench tops on each bulkhead after having reported all the measurements taken from the plan (always using the little tool). I then photocopied the plan and glued it on a scrap of wood. After having cut the piece with a cutter, I obtained a measuring instrument that allows me to visualize if the bench tops can be positioned correctly. And the result only confirmed what I doubted: the interior fairing on the bulkheads 9 and 10 is not enough. I know what I have to do ...

- 103 replies
-
- 9
-
-
- queen anne barge
- Syren Ship Model Company
- (and 1 more)
-
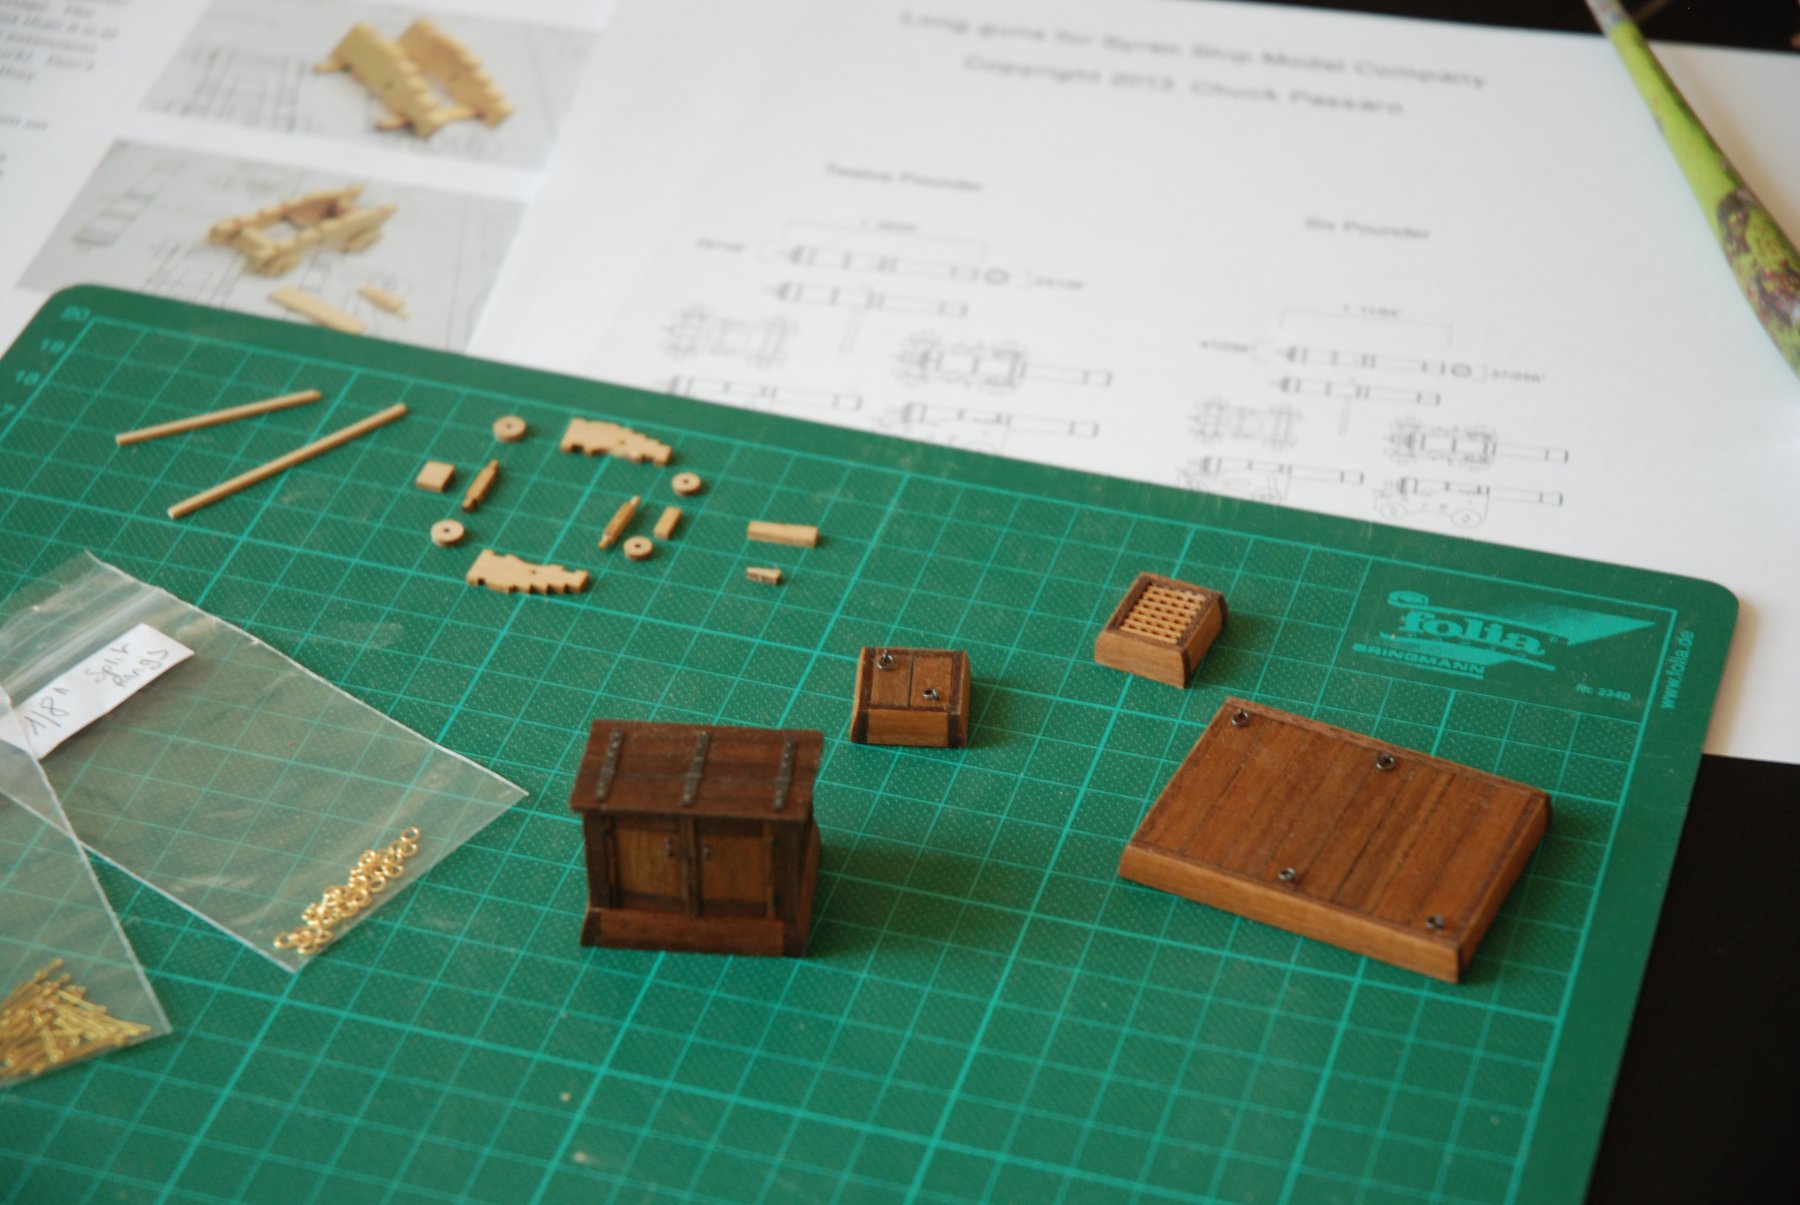
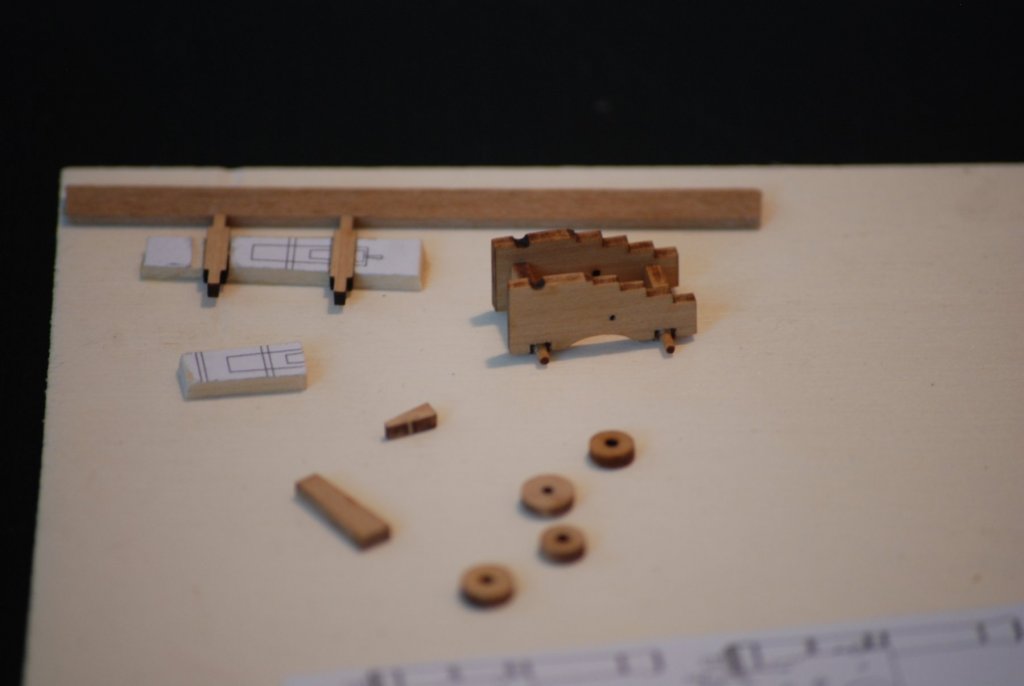
Not a big step forward on my build. I just finished building companions. As there will be 6 guns to build, I started the work by creating a small jig to help me to correctly position the different elements.

- 164 replies
-
- 9
-
-
- first build
- model shipways
- (and 2 more)
-
Beautiful concept as usual. I like using the little tips discovered when building previous models. Work always so precise and beautiful. Thank you for your work. I'm waiting for what's next
- 421 replies
-
- 6
-
-
- medway longboat
- Syren Ship Model Company
- (and 1 more)
-
I can only confirm the words of Tigerdvr, it would make a beautiful kit! I continue to follow this construction with ever more interest. Thanks for sharing!
- 128 replies
-
- 3
-
-
- mordaunt
- battle station
- (and 1 more)
-
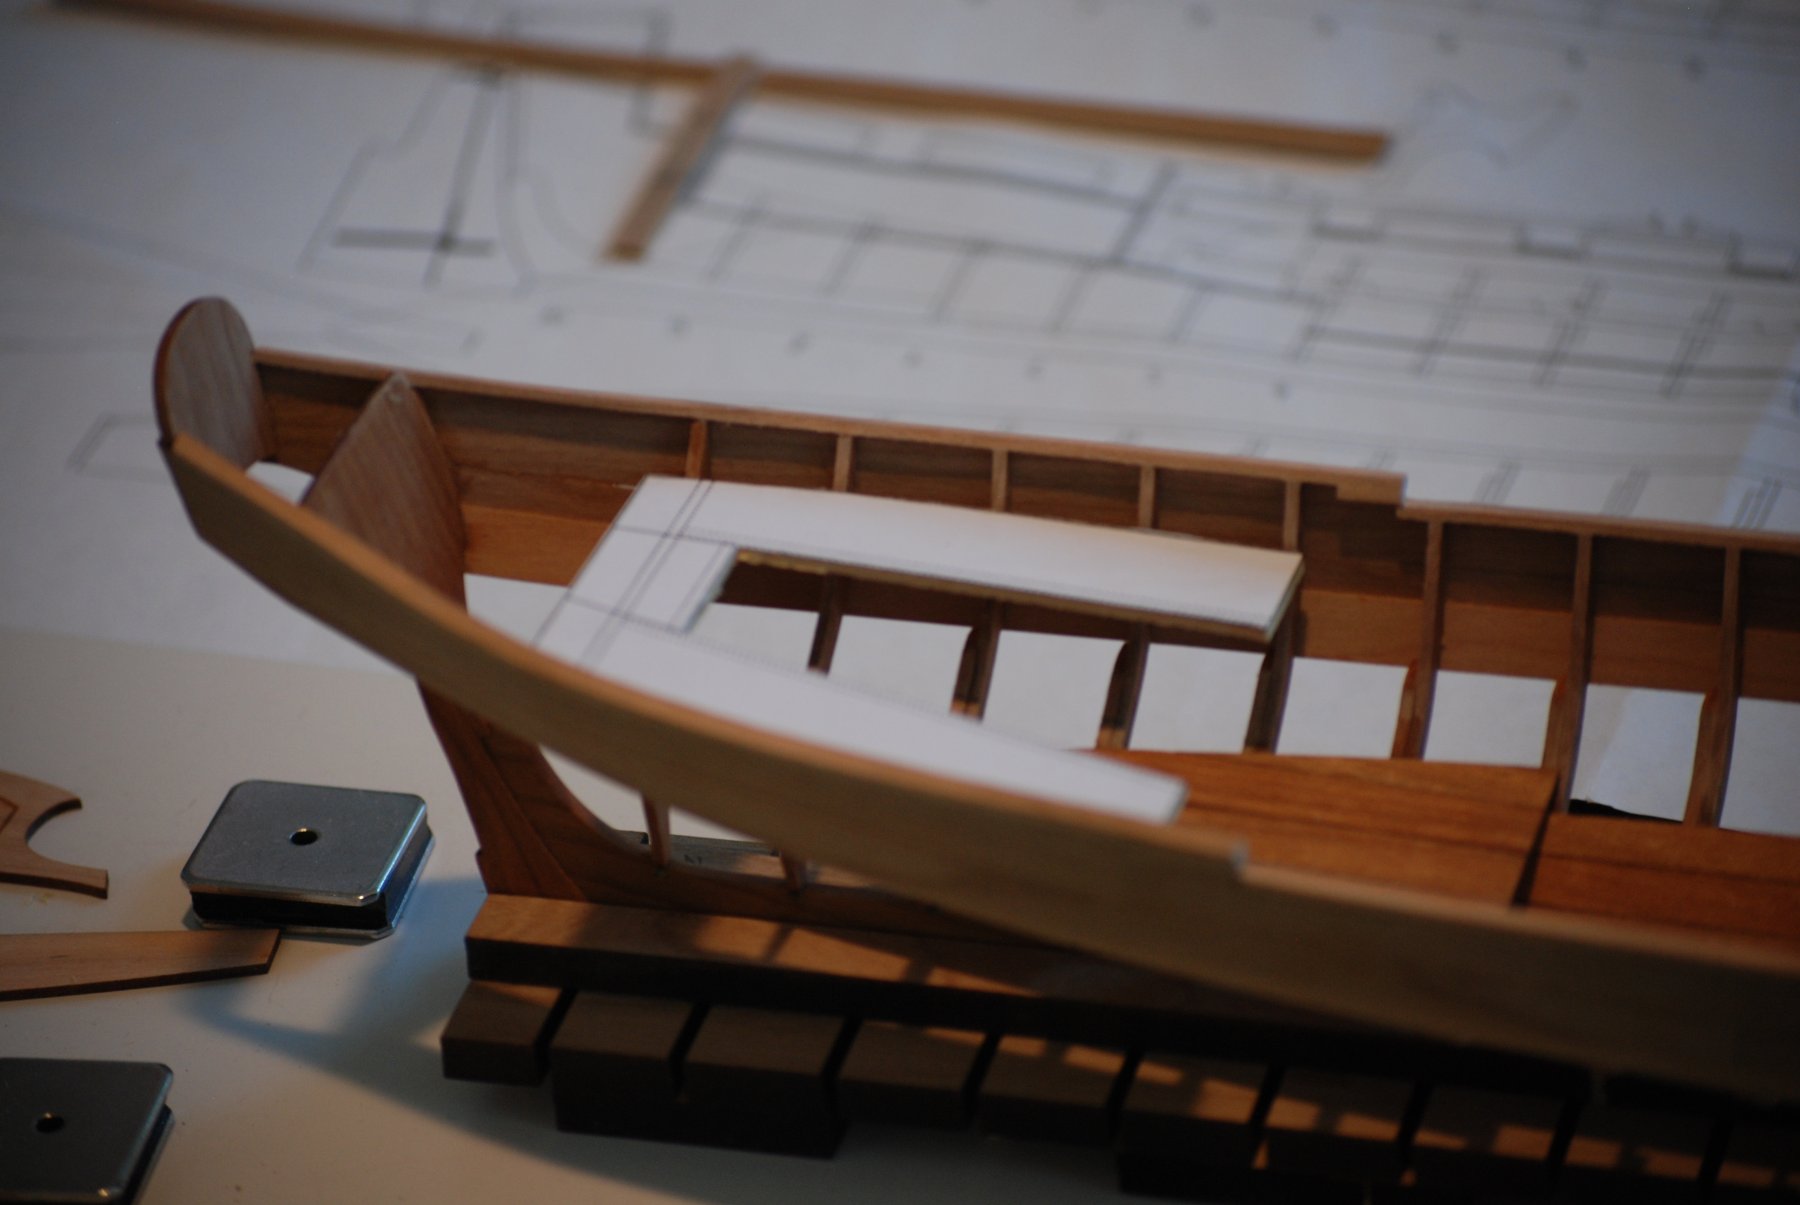
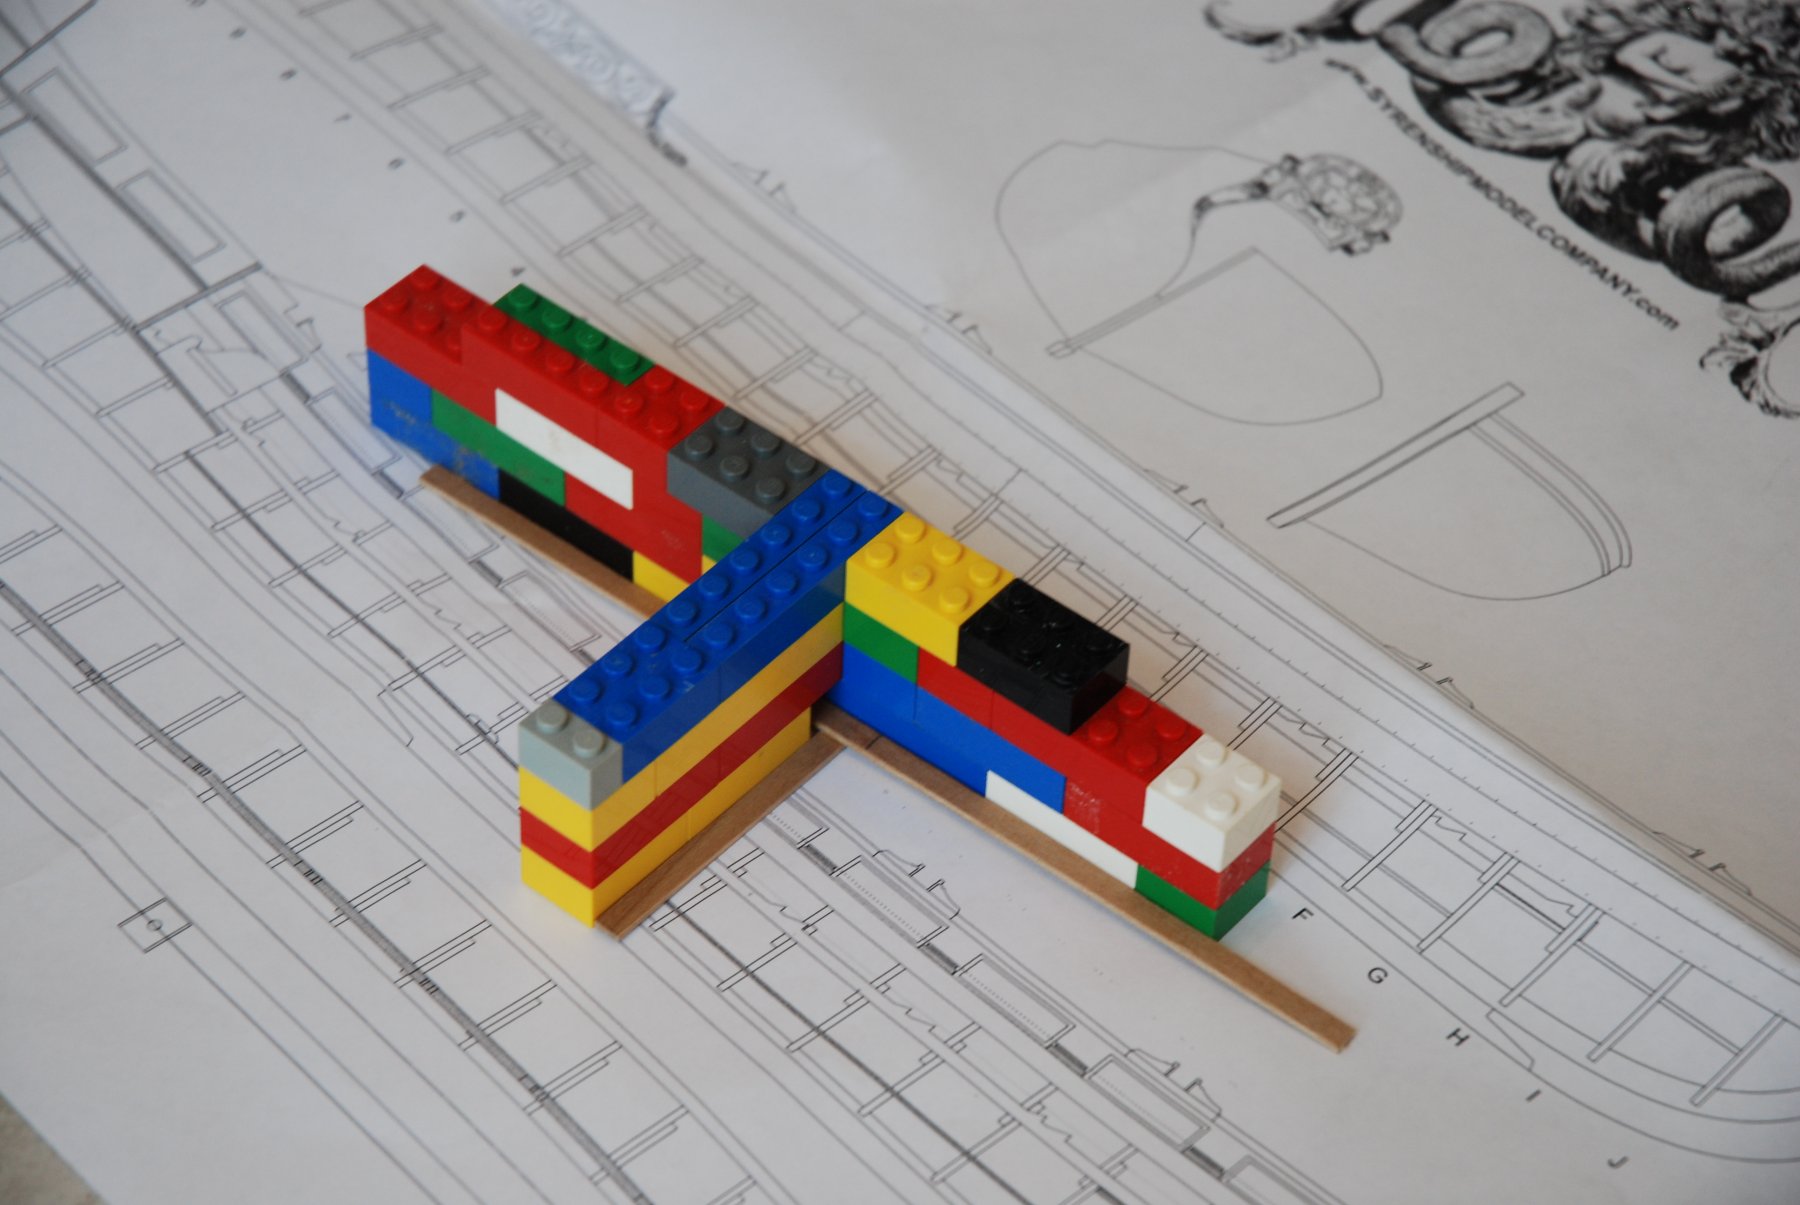
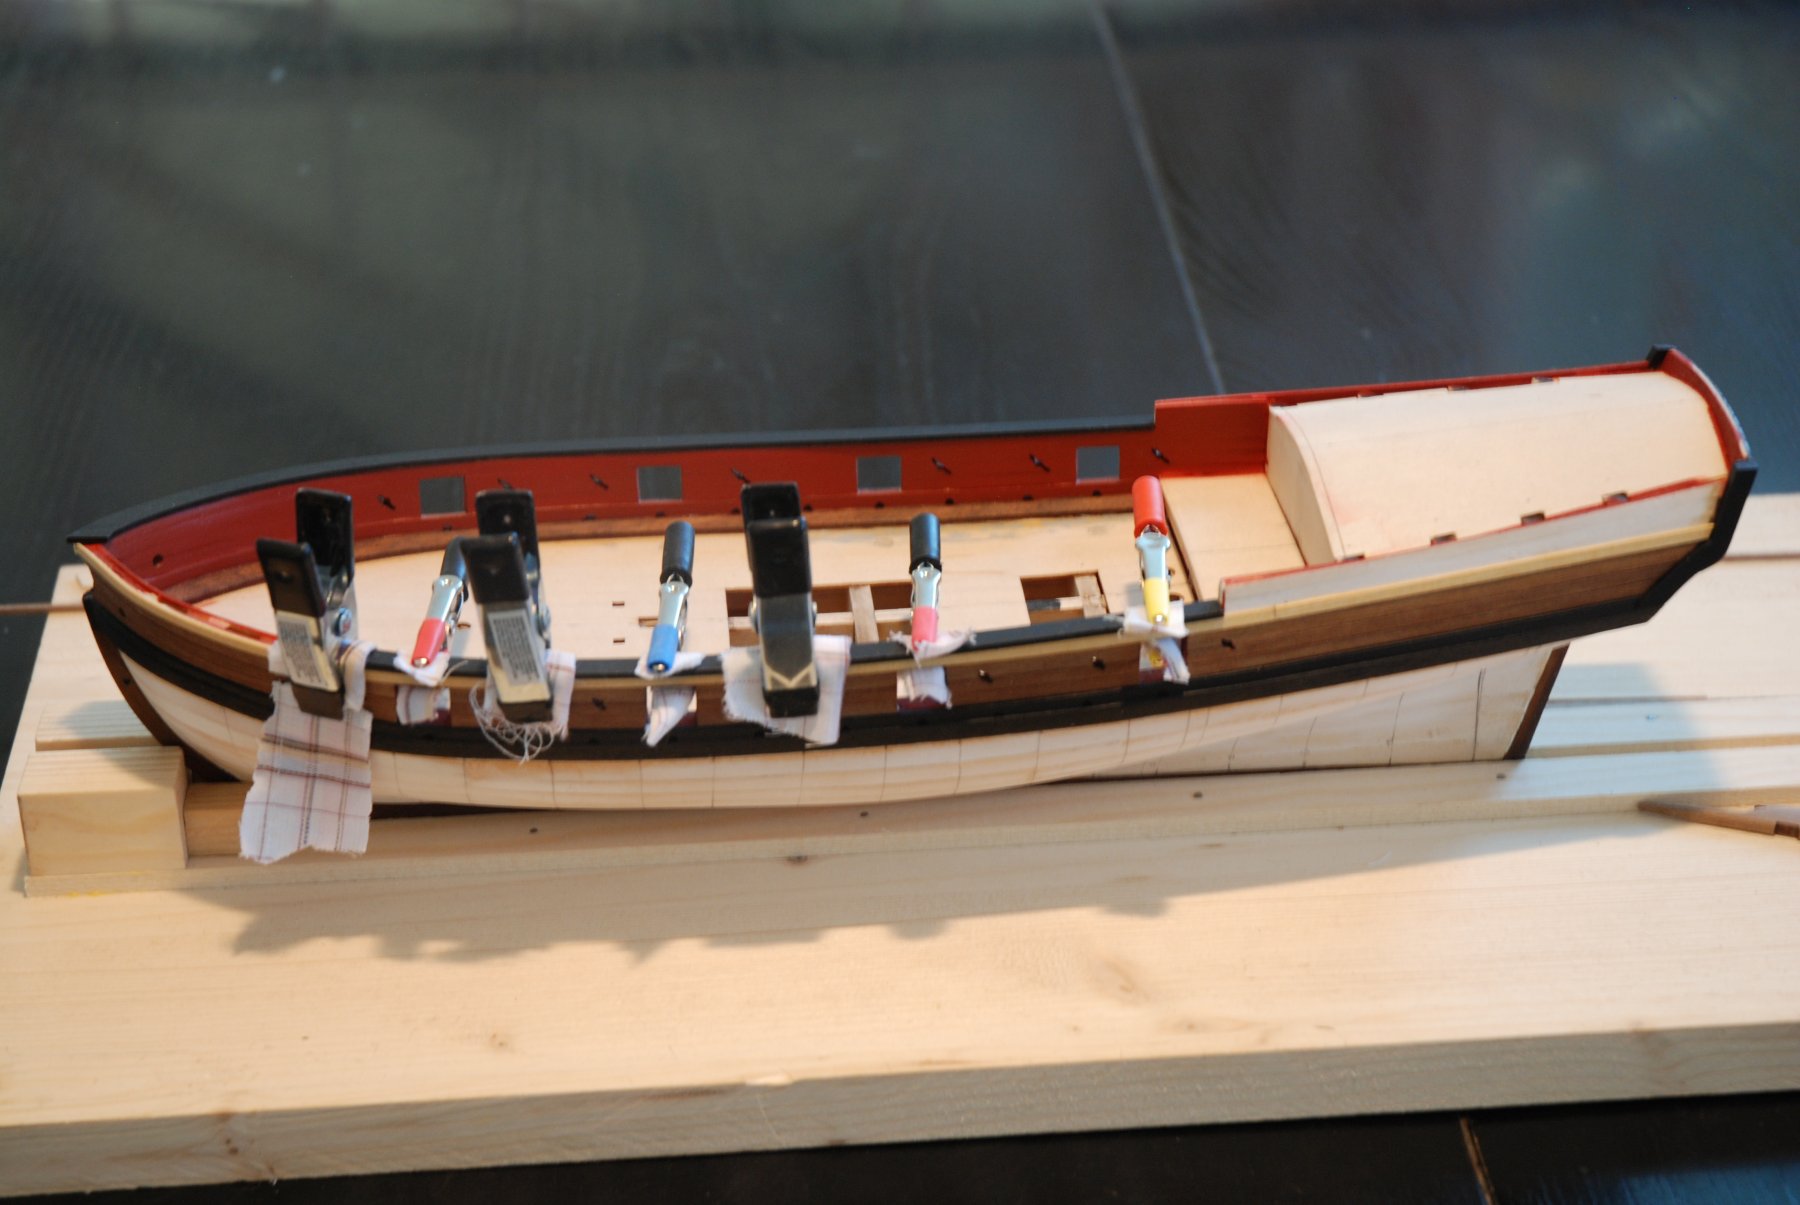
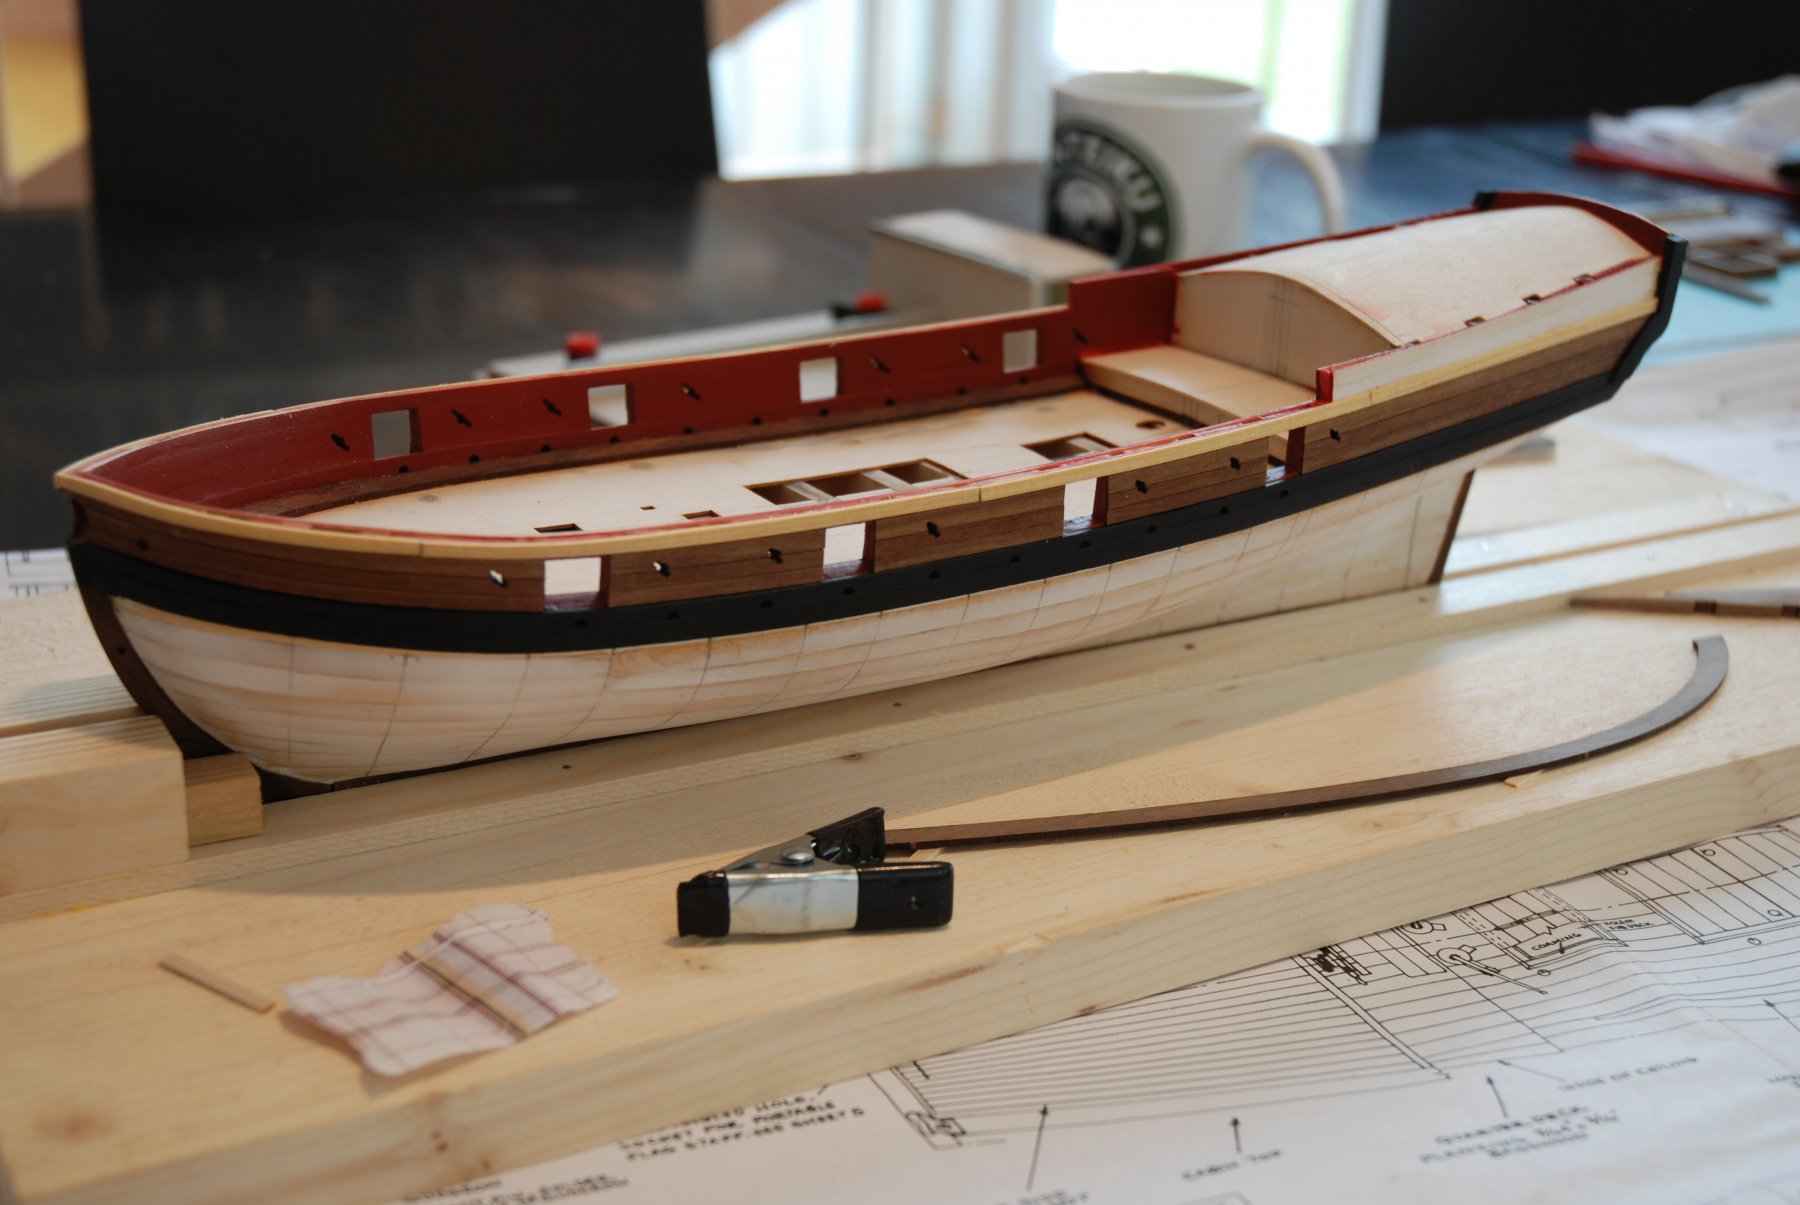
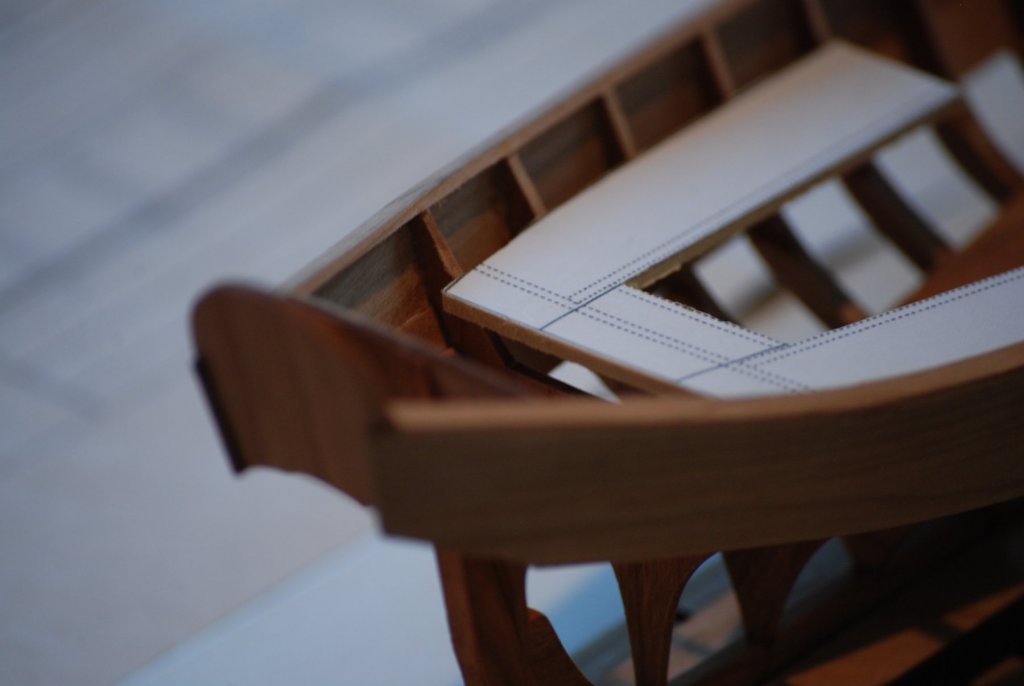
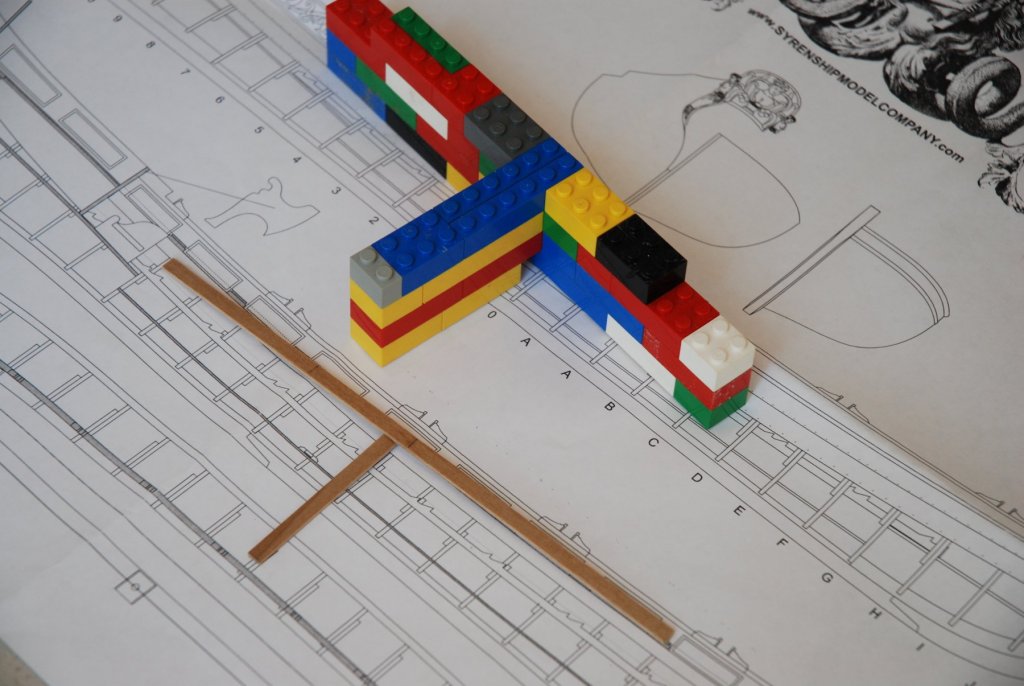
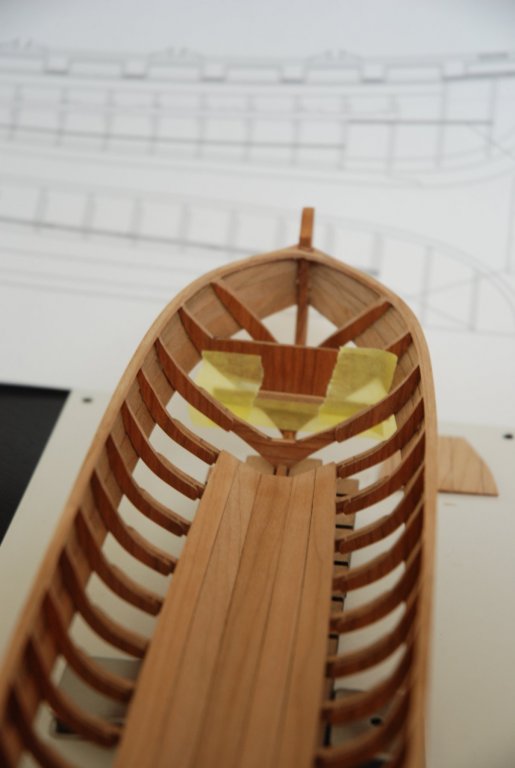
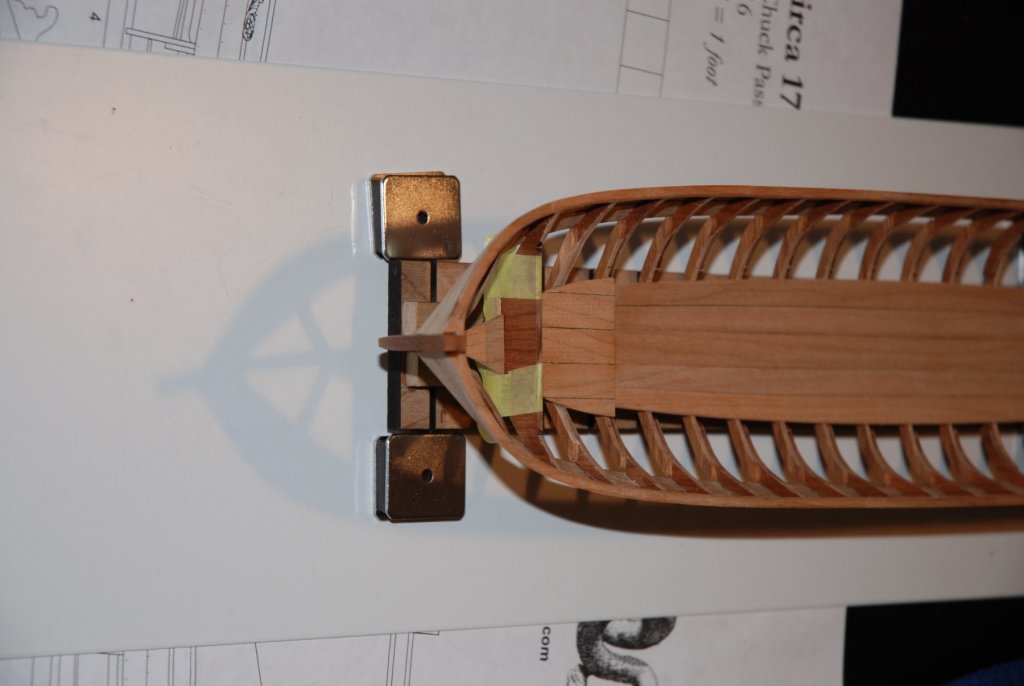
The floorboards are done. I have begin with the center platform which did not pose any particular problems. Little bending and twisting are necessary on some of the laterals boards. I then built the small tool that will position the other two platforms. I took out the 'legos' of my children to help me get a perfect angle... The only difficulty encountered was the positioning of the forward platform. Once the measurements were made using the tool, I had trouble positioning correctly the part to stick against the bulkhead 10. Finally, I found a solution using a small stick temporarily glued to the correct height using some protective tape. I repeated the exercise for the front part of the platform. I still have to apply some teak oil before to work on the treenails.


- 103 replies
-
- 12
-
-
- queen anne barge
- Syren Ship Model Company
- (and 1 more)
-
I reserve a seat and look forward to it. It will surely be a wonderful project. The prototype is already superb !
- 128 replies
-
- 3
-
-
- mordaunt
- battle station
- (and 1 more)
-
Beautiful model. Thank you for sharing your work !
- 190 replies
-
- 1
-
-
- pinnace
- model shipways
- (and 1 more)
-
Thanks Christian and all the 'Likes'. Christian, I can only agree with your remark : the design of this barge is a must ! While waiting to finish laying the boards of the center floor, I prepared the two others platforms. I just mark on side of each board with a a pigma brush from Sakura Corporation. Looking at the picture, I realize that a small sanding on the sides is required...
- 103 replies
-
- 6
-
-
- queen anne barge
- Syren Ship Model Company
- (and 1 more)
-
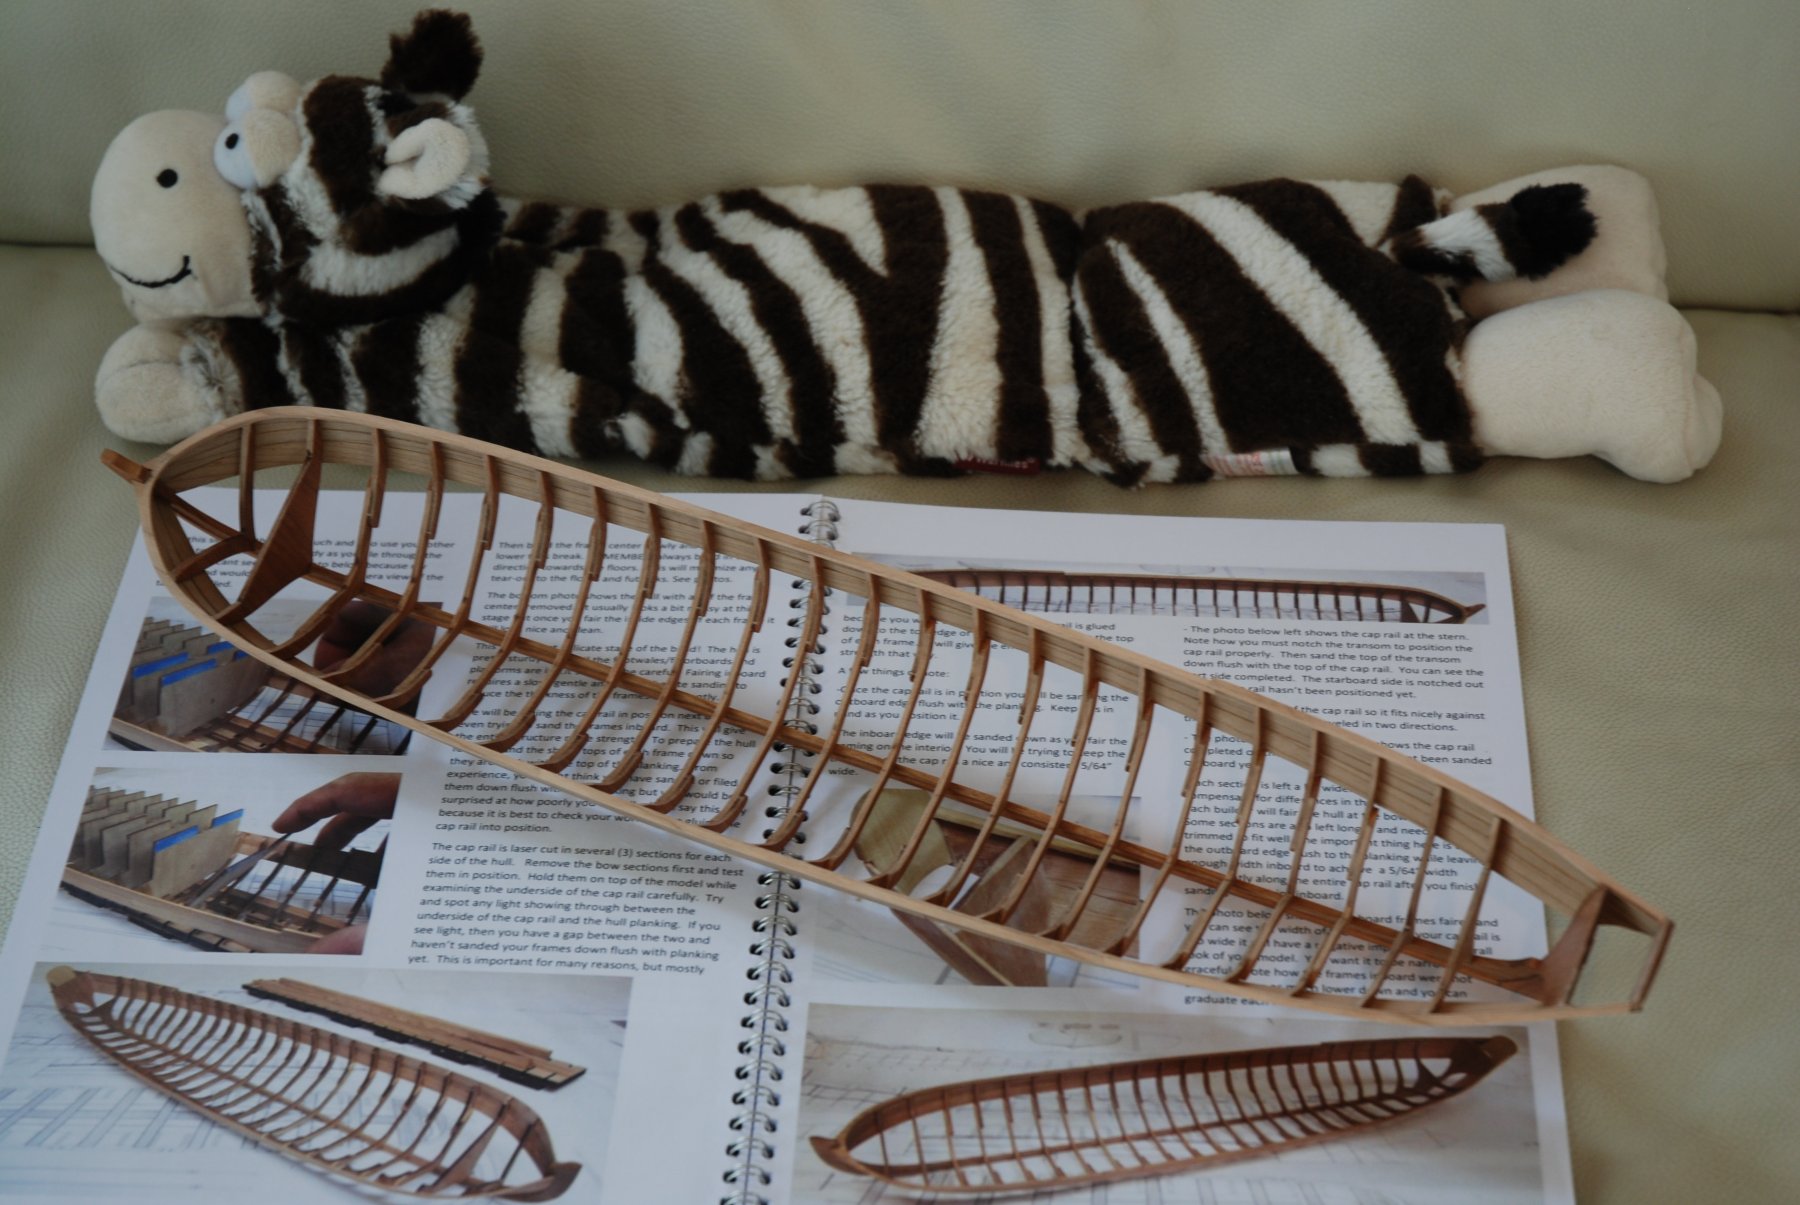
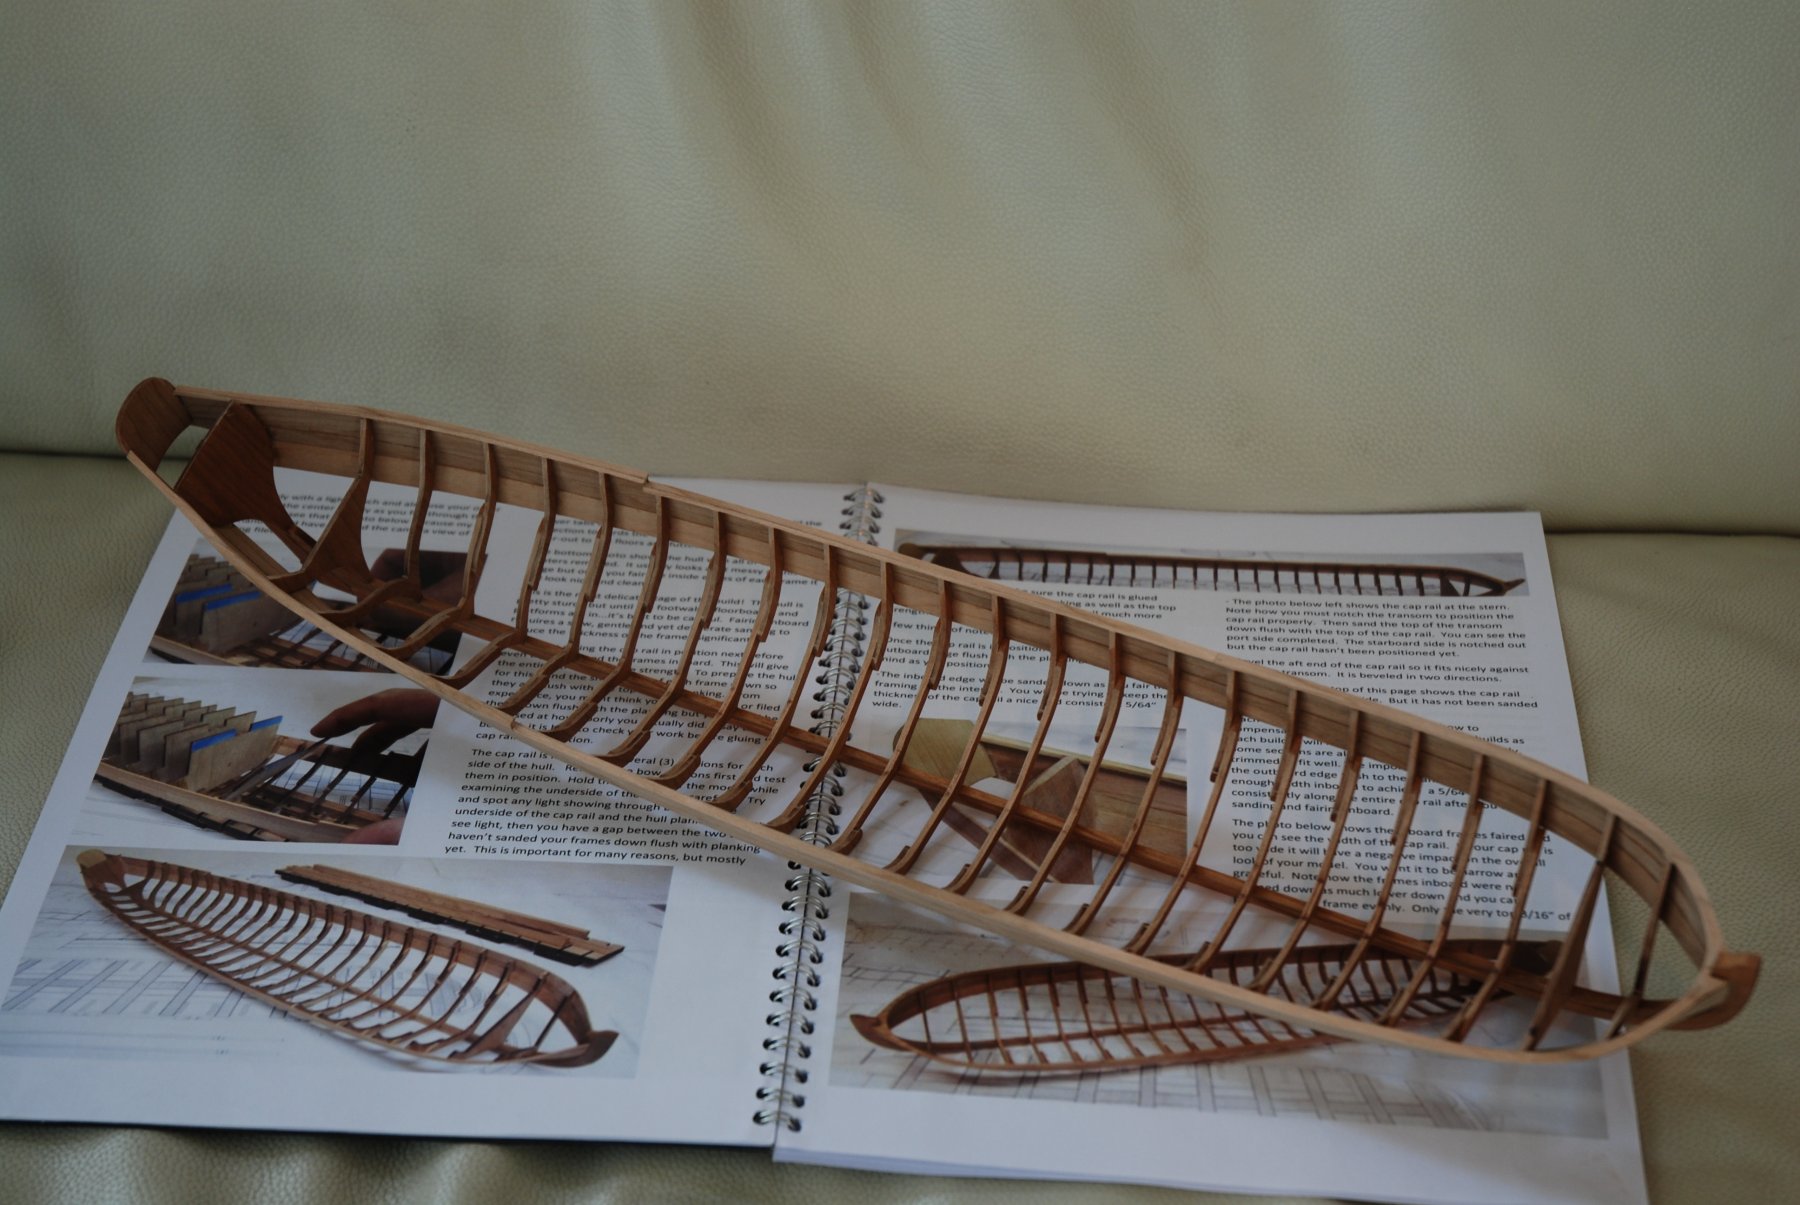
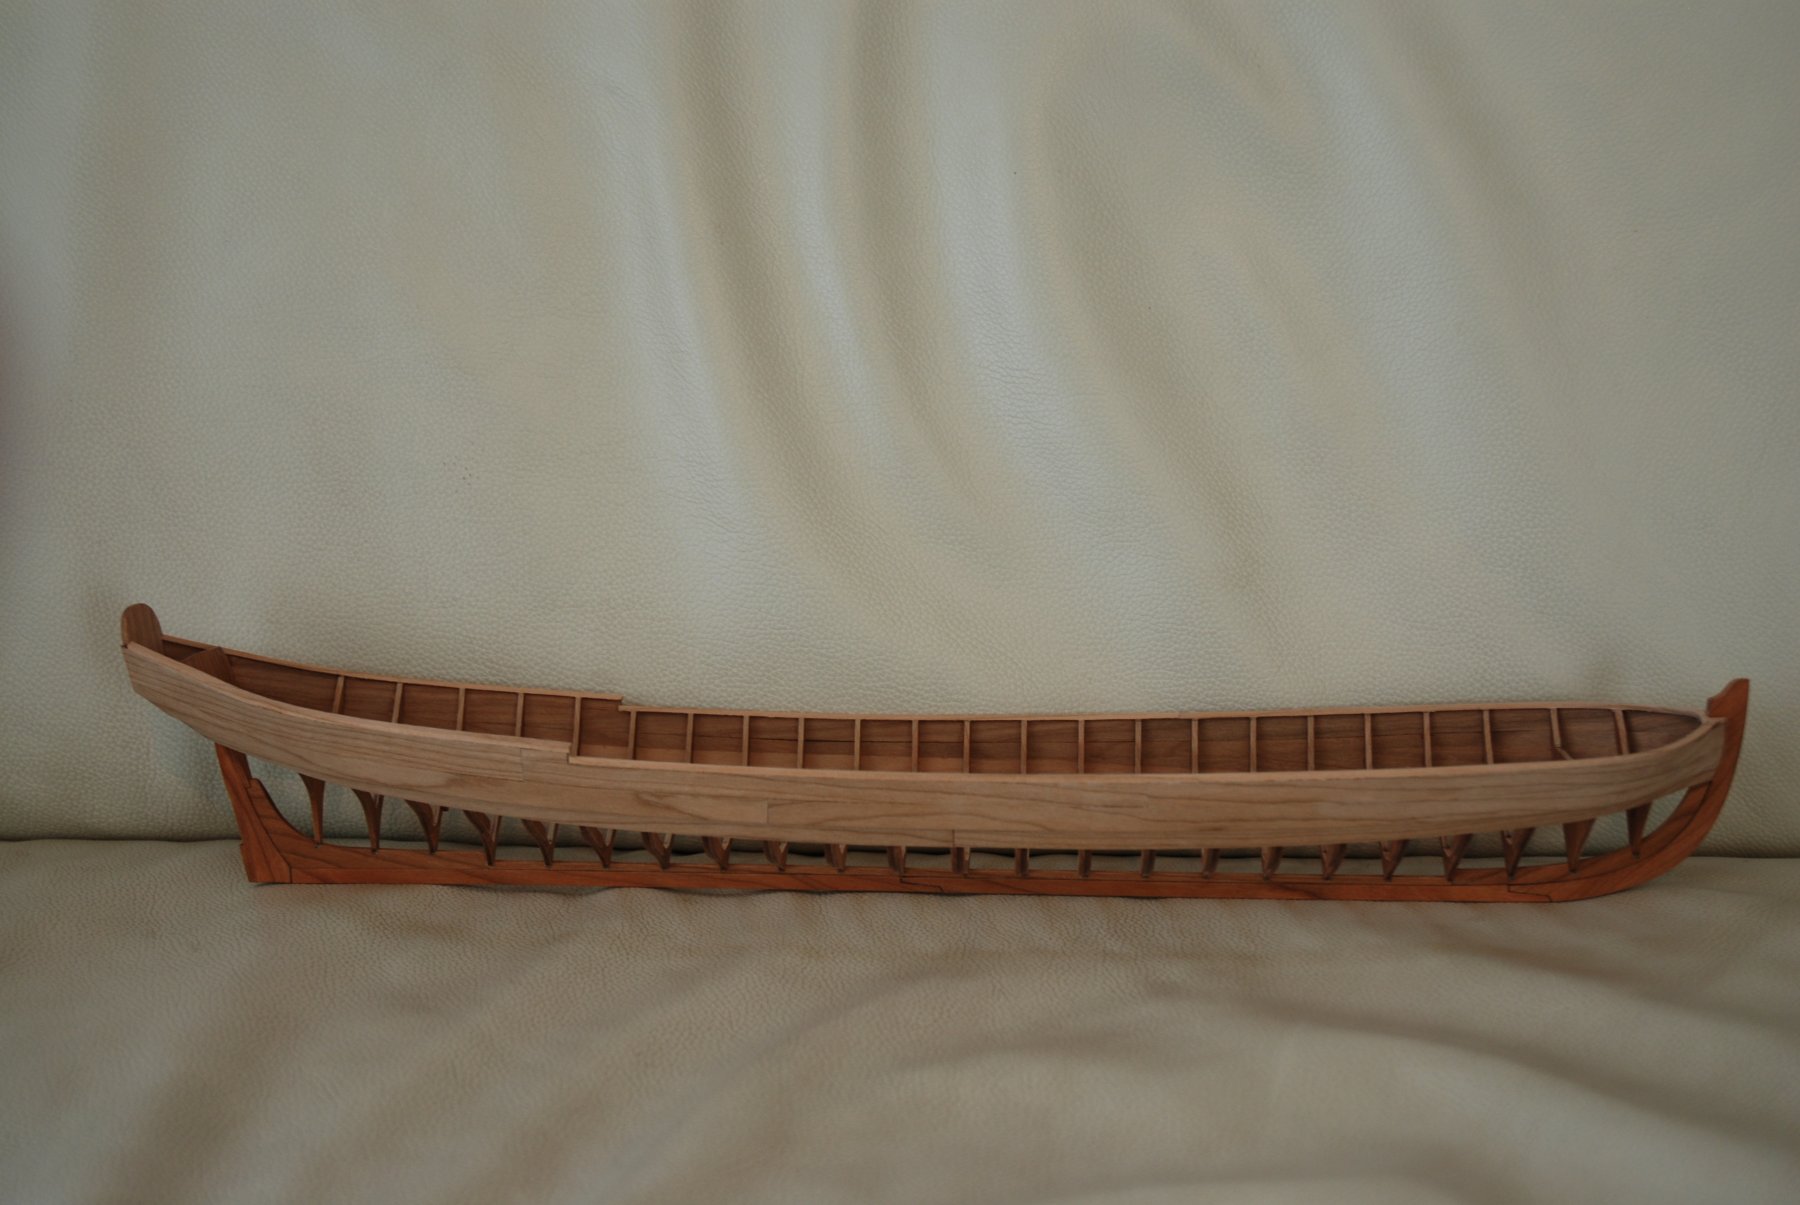
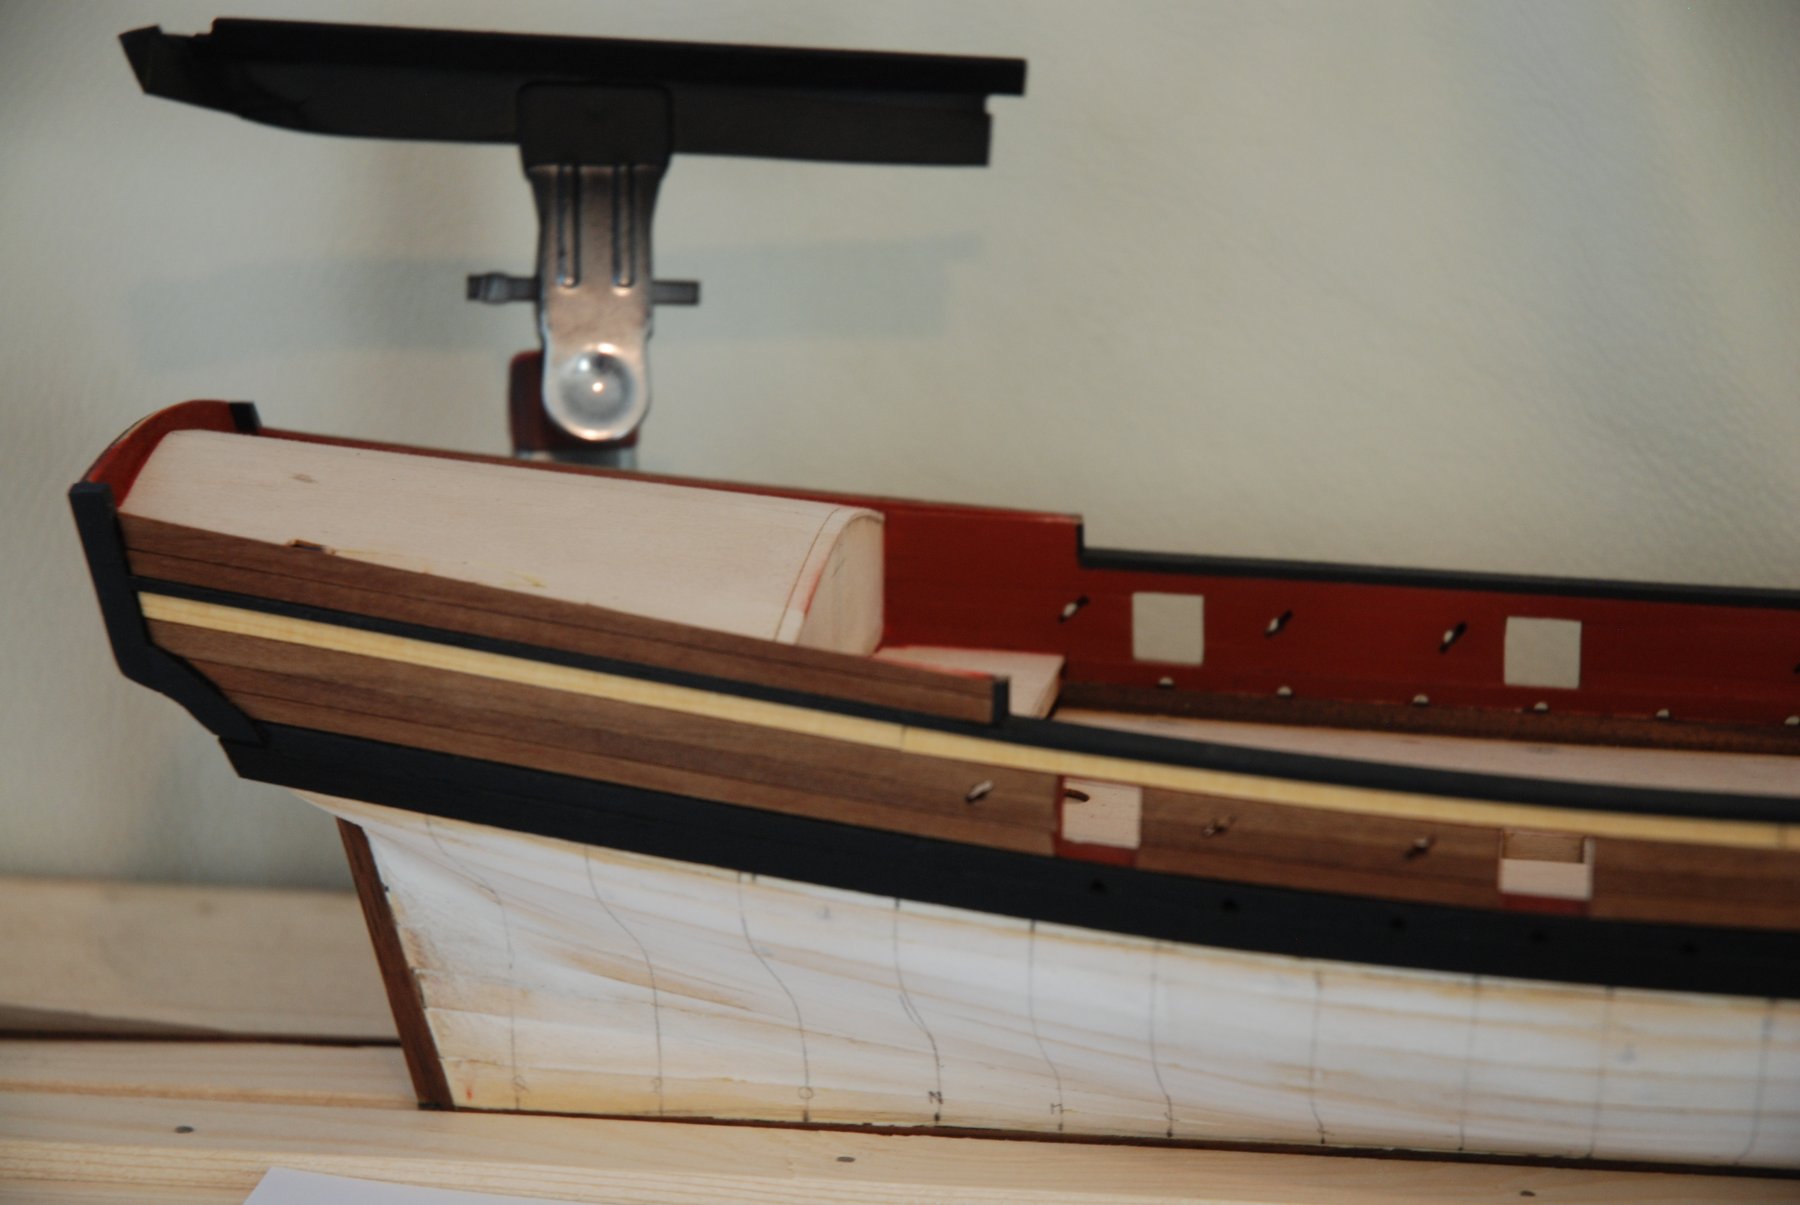
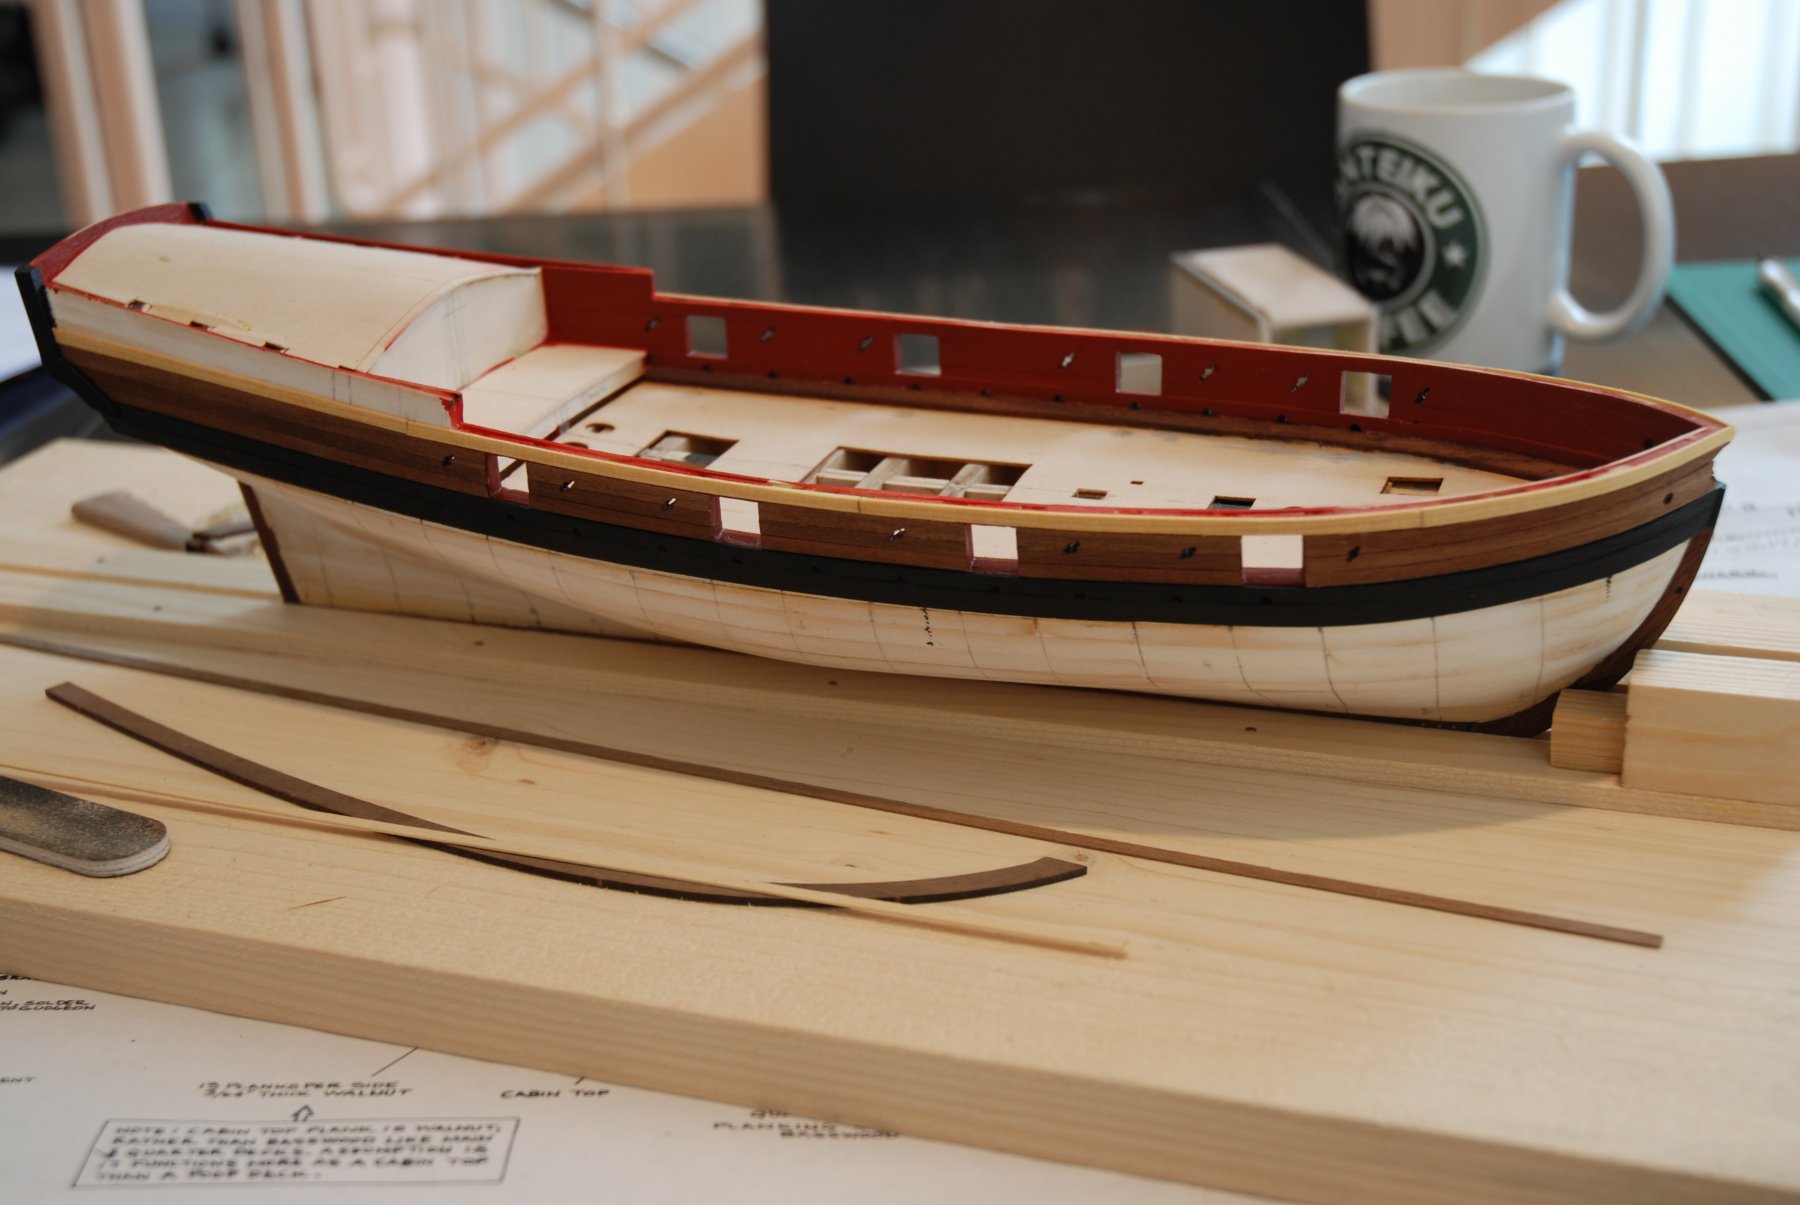
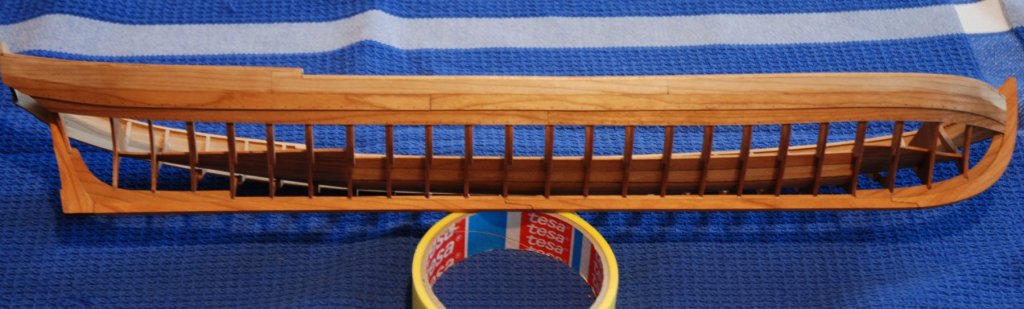
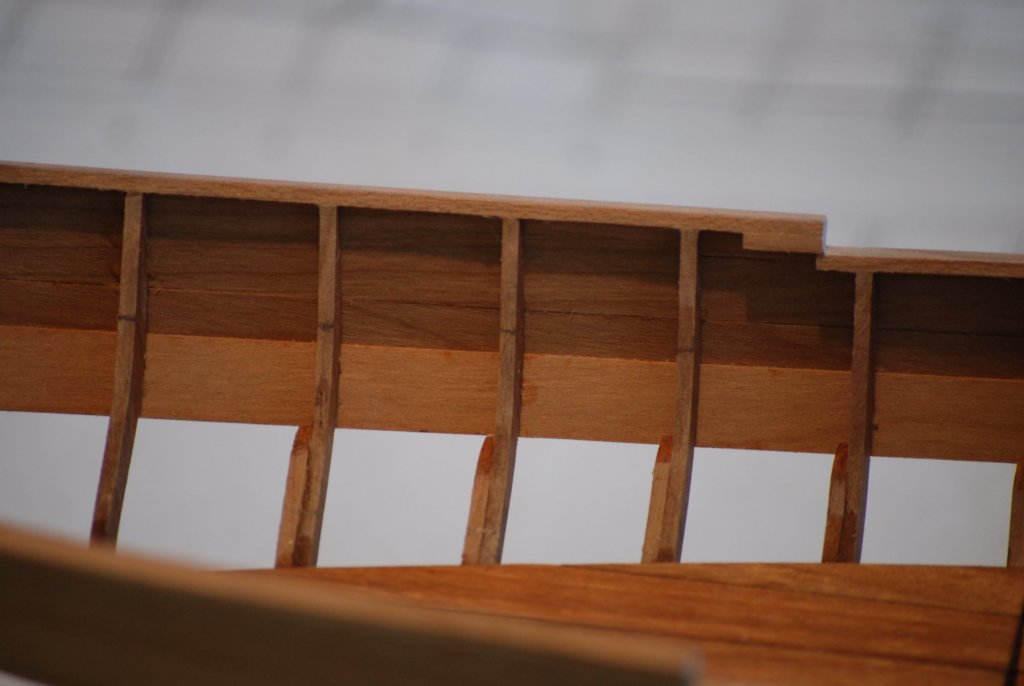
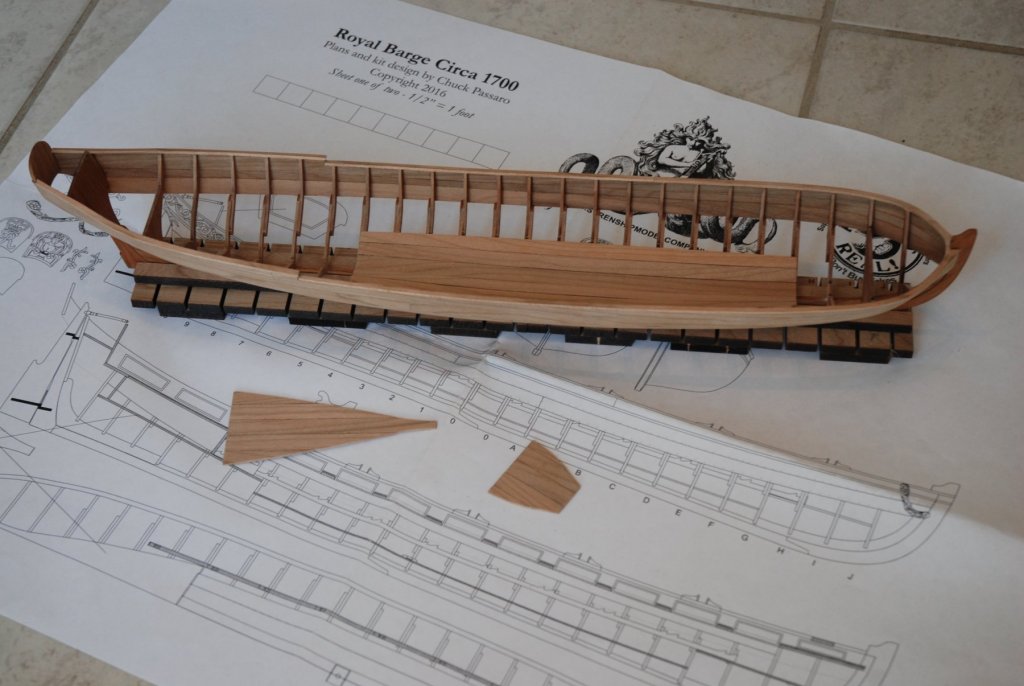
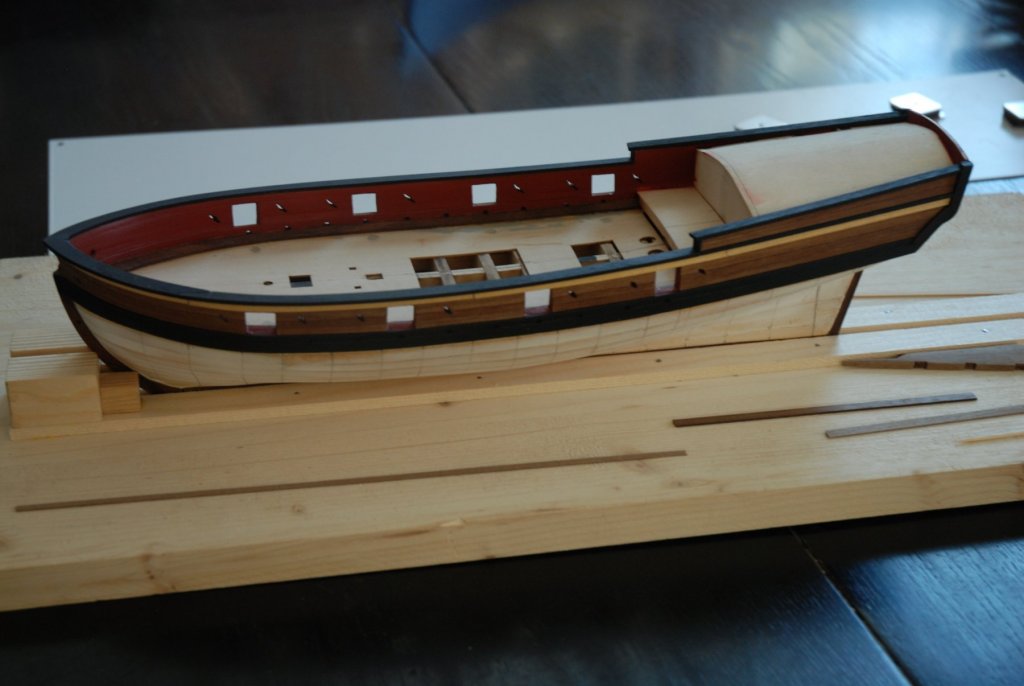
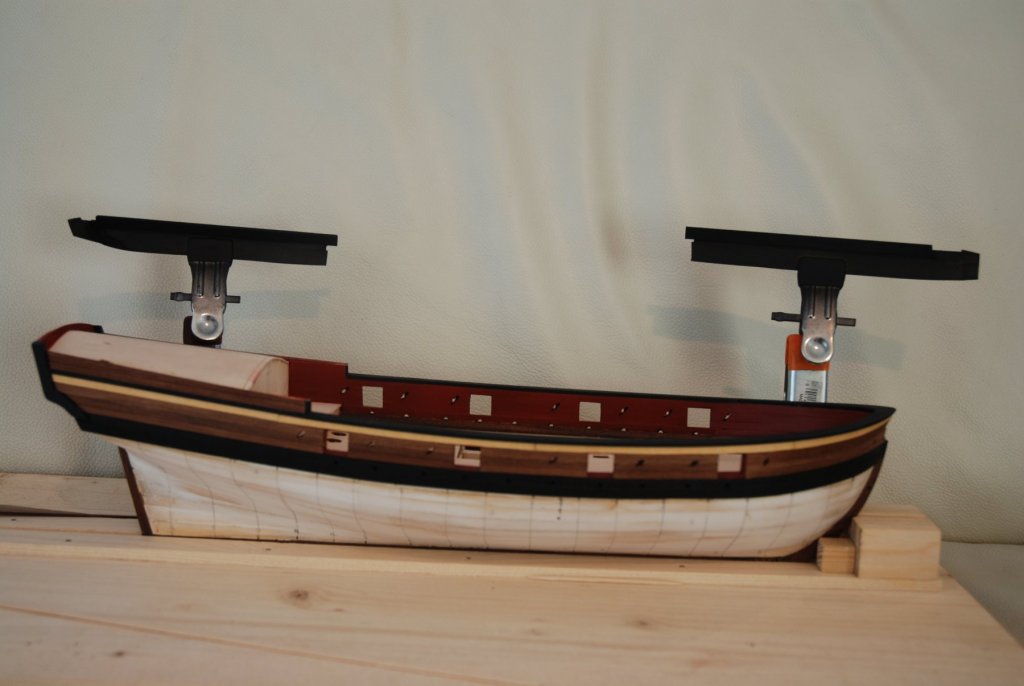
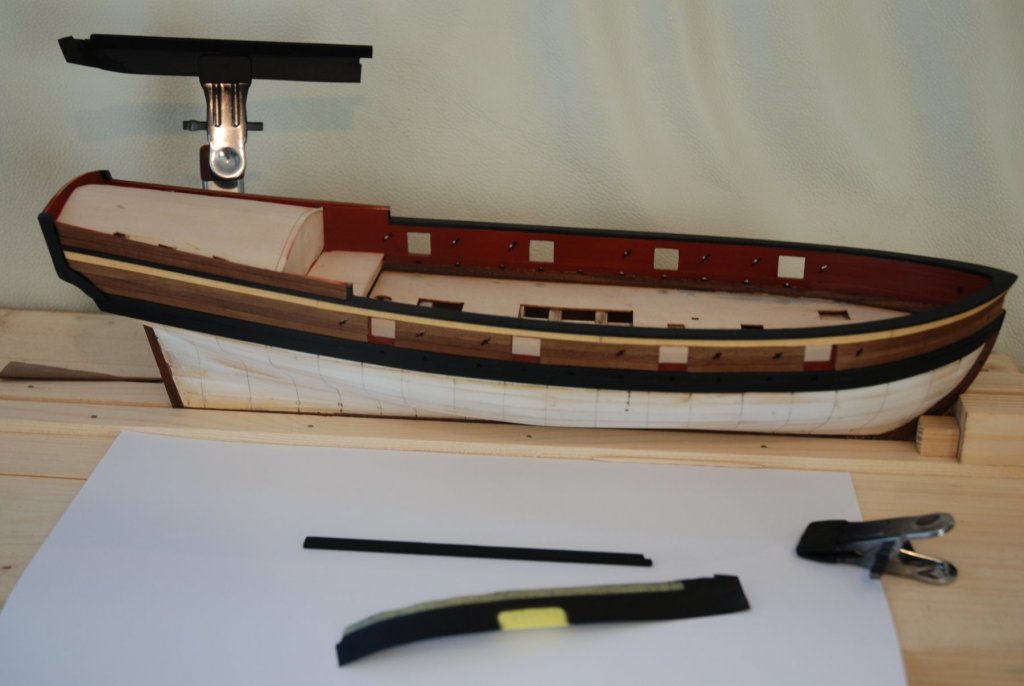
The cap rail is in place. The three sections were glued quite easily because the width of the pieces is generous. So no problem to position the cap rail. Just make sure you have enough width when you will sand the pieces. Sanding the cap rail was more time consuming than expected. After having sanding the outboard edge flush with the planking, I drew with a compass open to a width of 5/64" a line all along the top of the cap rail. I have the view of the area to be eliminated. I completed this step in three work sessions. By chance it's the FIFA World Cup, so I was able to work while listening to the broadcast of the match on my TV. You just have to stay calm when your favorite team scores a goal... It was a bit more difficult during the Swiss-Serbia match ! I think that this step is important and that it is necessary to devote the necessary time because it gives you the final aspect of the barge. I will now work on the floorboards.


- 103 replies
-
- 9
-
-
- queen anne barge
- Syren Ship Model Company
- (and 1 more)
-
Requesting feedback for future MSW Group Projects
JpR62 replied to Chuck's topic in Group Projects on Model Ship World
I'm very interested. A longboat at the same scale as the barge will be an interesting project and for me the opportunity to learn new techniques. If the distance is not a problem, I'm in, preferably for a kit version. -
Requesting feedback for future MSW Group Projects
JpR62 replied to Chuck's topic in Group Projects on Model Ship World
I agree with Dave and Eric. A stern section would be a very good idea. When I see what is preparing for the next Admiralty Models October 2018 Workshop, I can only regret to live so far... https://modelshipworld.com/index.php?/topic/18207-admiralty-models-october-2018-workshop/ -
Thanks Jim and Dave for your support and thanks to all the 'Likes'. I begin to appreciate the contrast between the black main rail and the yellow of the alaskan cedar used for the sheer strake. The rails for the cabin/quarterdeck are now glued. It's time to prepare the taffrail.

- 164 replies
-
- 9
-
-
- first build
- model shipways
- (and 2 more)
-
Thanks Chuck, Rusty for your kind words and thanks to all the 'Likes'. Chuck, it's more easy to obtain a good result when the design of the model is perfect and the instructions clear and precise
- 103 replies
-
- 4
-
-
- queen anne barge
- Syren Ship Model Company
- (and 1 more)
-
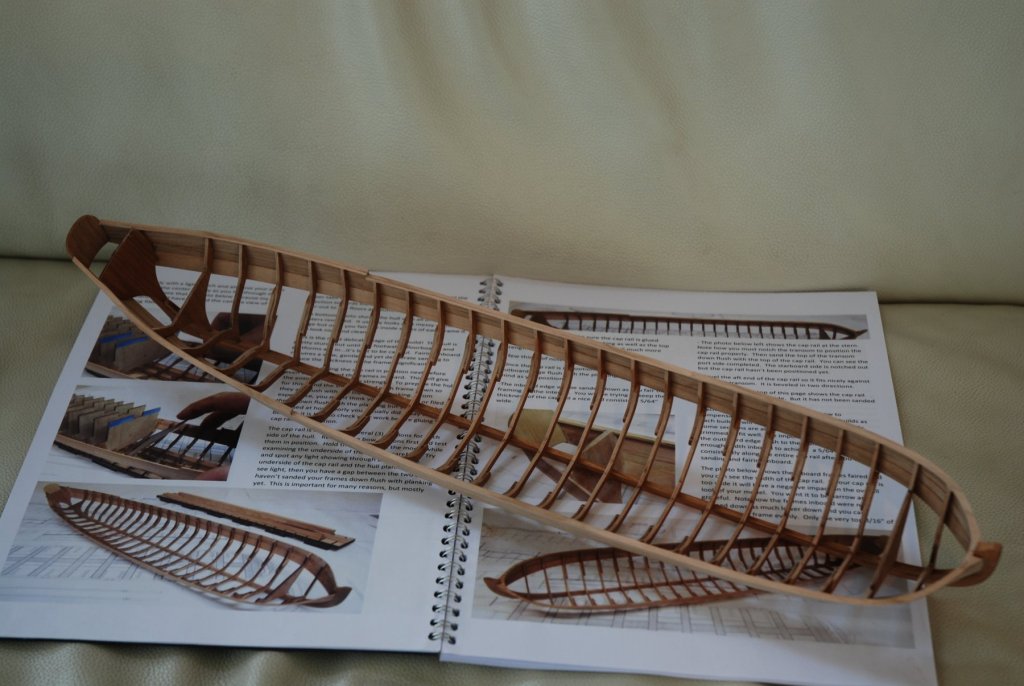
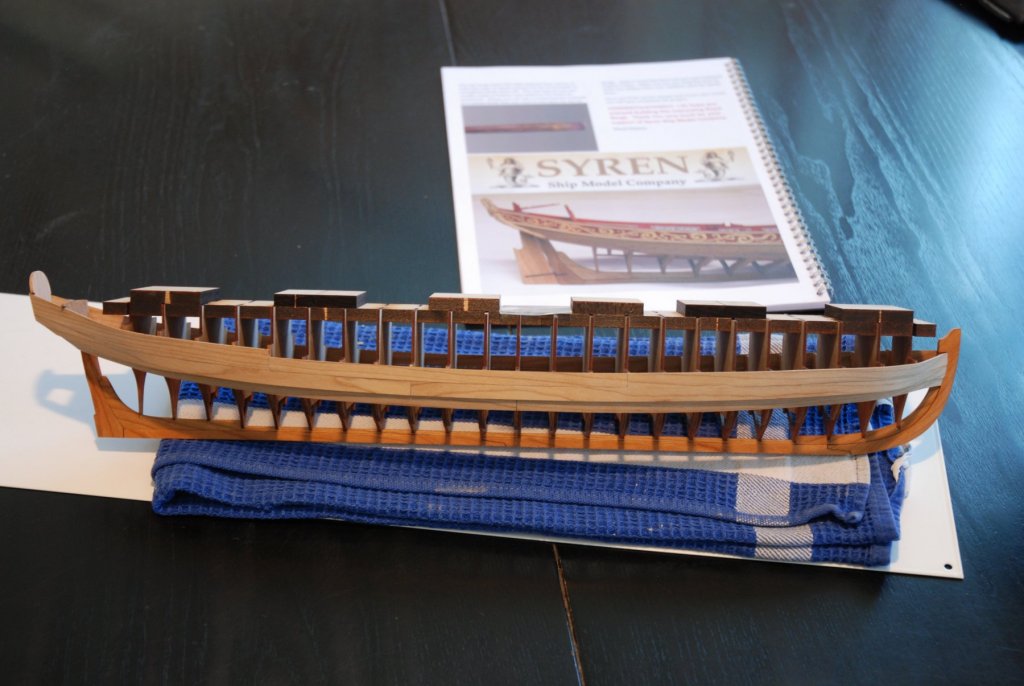
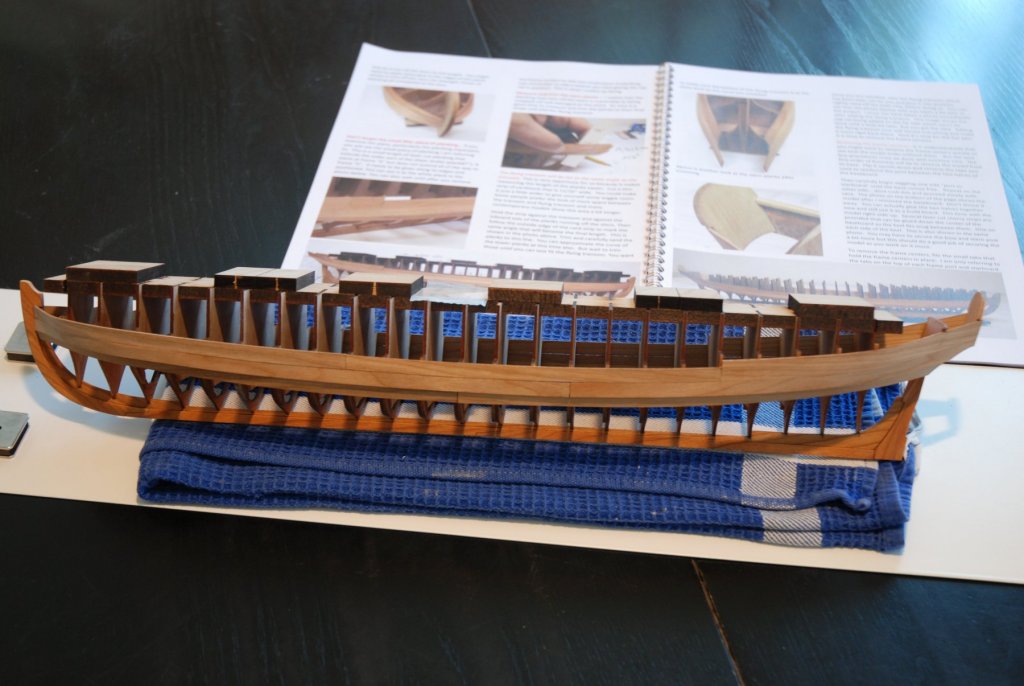
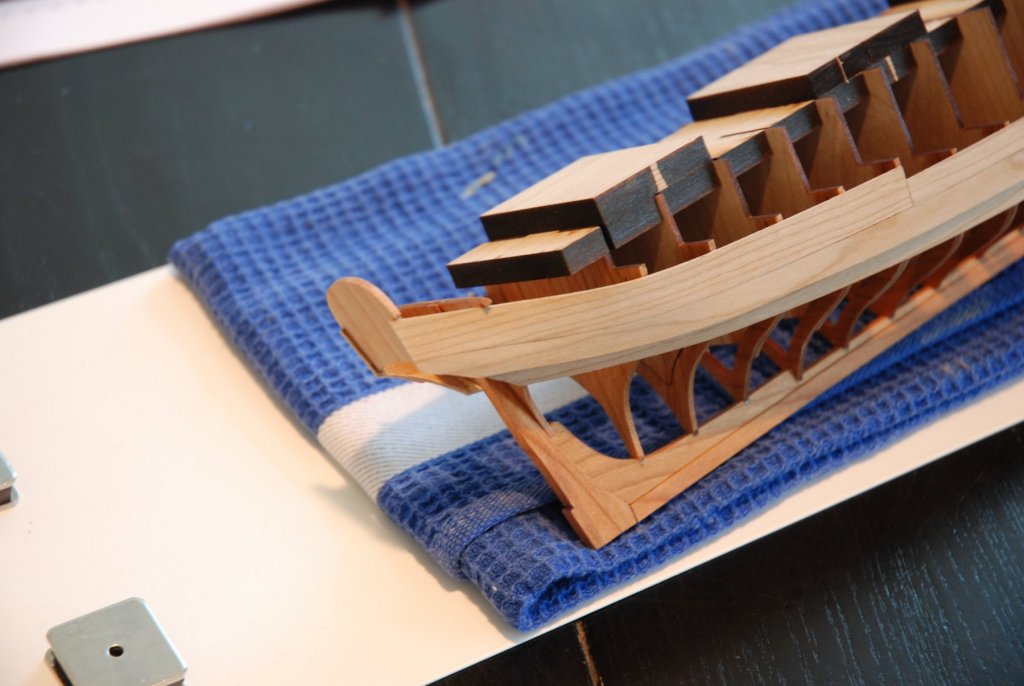
Thanks for all the 'Likes'. It's done. The frame centers were removed. I used for this step four different tools : I started cutting with a triangular files. Then I enlarged the cut with the semi-circular file (the rounded shape used on the inside of the hull). Then I continued using the little saw. The cut is delicately finished using the cutter. Once again just one tip : work gently. Only the first frame to remove is a little more complicate because we have little room to bend it... Then the workspace gets bigger and bigger... I just started to sand the tops of each frame down so they will be flush with the top of the planking. It's the preliminary step before to glue the cap rail.

- 103 replies
-
- 8
-
-
- queen anne barge
- Syren Ship Model Company
- (and 1 more)
-
Thanks for all the likes. I finished the planking of the upper hull. The main cap rail is in place on the two boards. I have prepared the two cabin rails. Once the form is defined, I glued them temporarily on a protective tape so that received several layers of paint using my airbrush. Always the same mix of colors: a few drops of Vallejo Black (71 057) color with some drops of Game Color (72 720) Imperial Blue (in a proportion of 7/3). I still have to glue them in place...

- 164 replies
-
- 11
-
-
- first build
- model shipways
- (and 2 more)
-
Chuck, thanks for your little reminder on the last parts of the planking. The two small pieces have been added. Andrew, this model ship is a must to have ! Syren Ship Model Company produced a little marvel ! And thanks to all the likes. Just a small advance this week. I have removed the model from the base. The key word is 'Take your time'. Go slow and push alternatively from port to starboard. I was a little worried before I started but finally this step happened more easily than expected. Just proceed slowly. Then I prepared the build board gluing together the two parts and adding cherry strips provided in the kit. Now it's time to remove the frame centers...

- 103 replies
-
- 12
-
-
- queen anne barge
- Syren Ship Model Company
- (and 1 more)
-
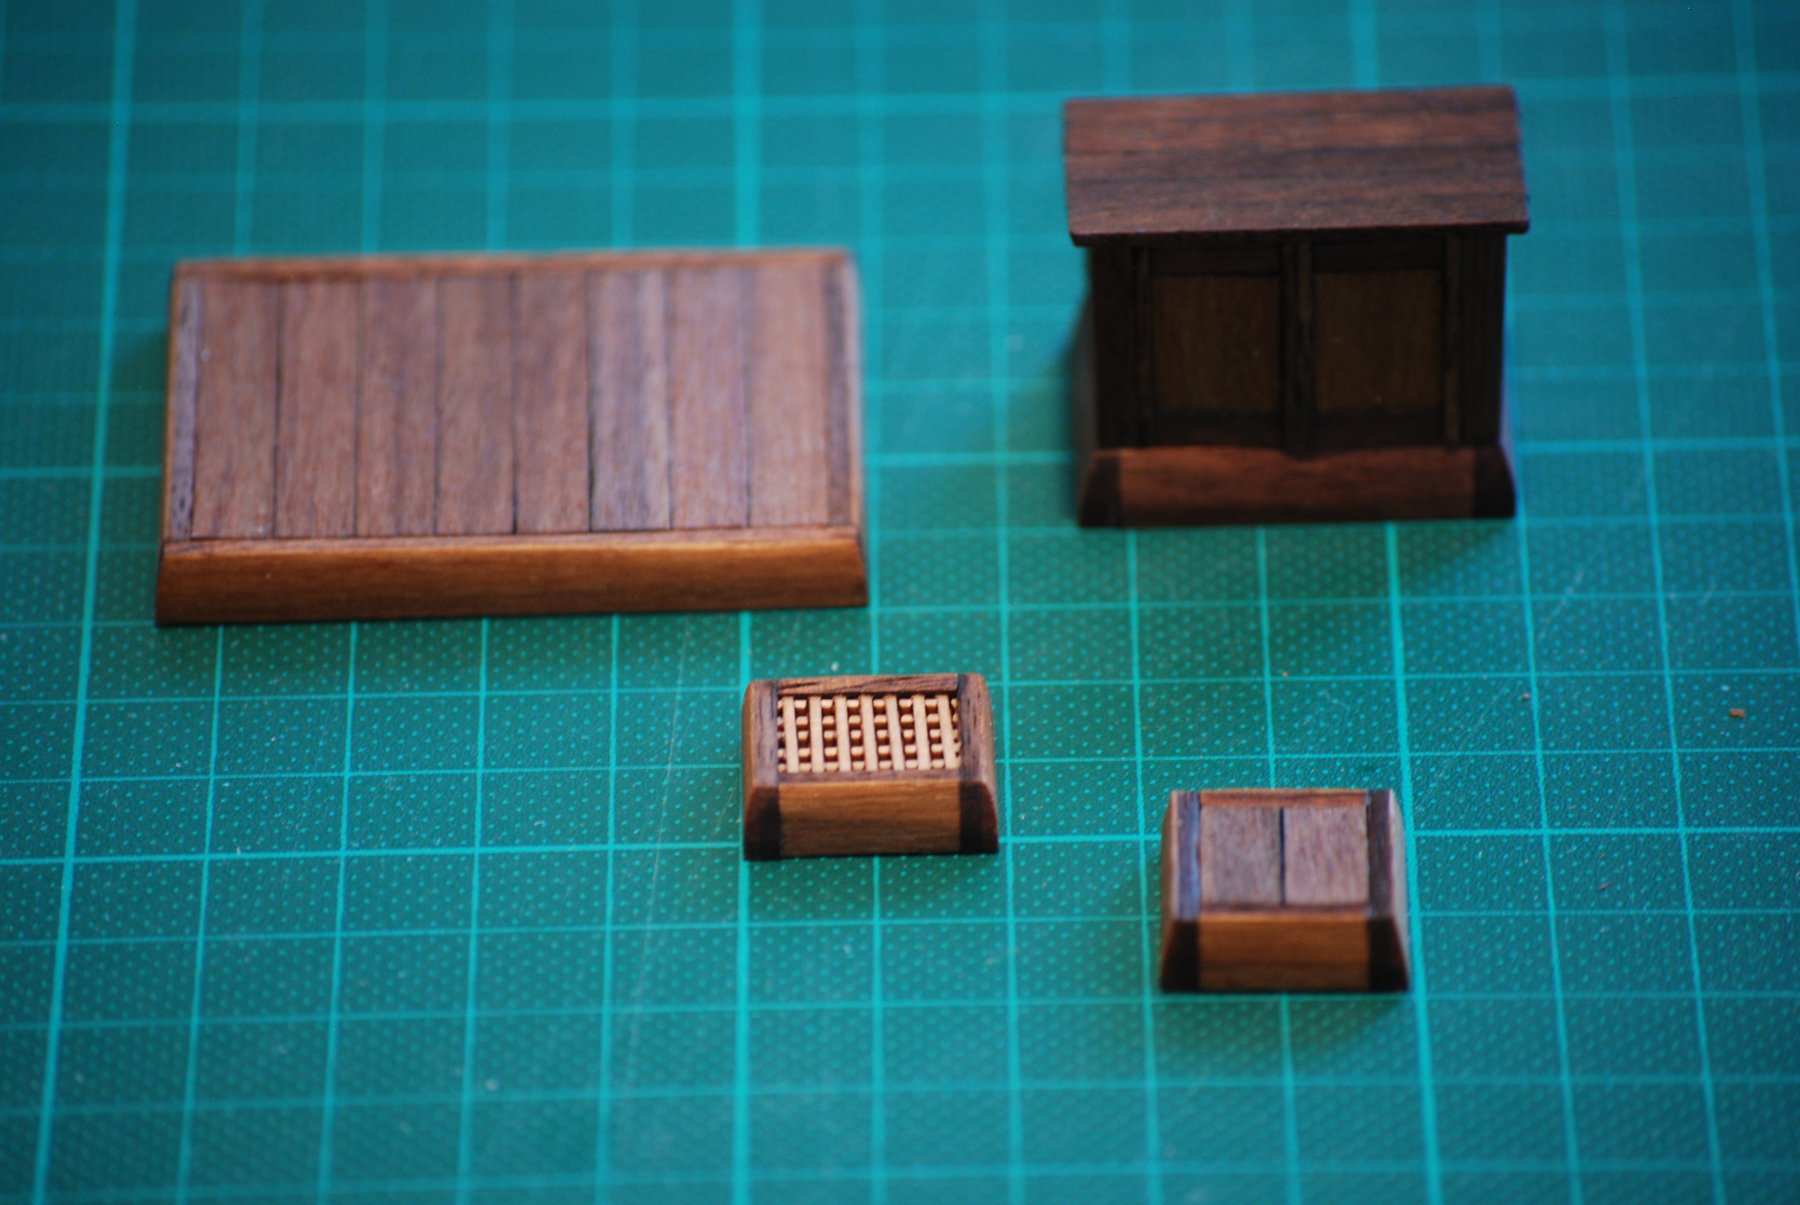
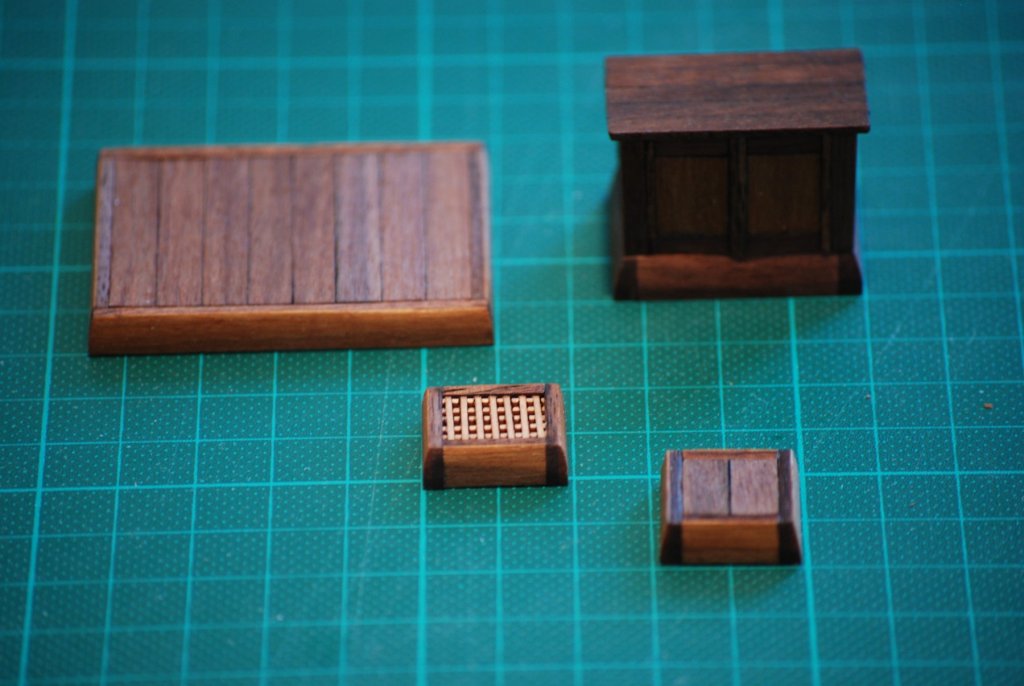
Thanks captgino and Ryland Craze for the like. I finished my first grating hatch. Not completely satisfied with the result, one of the sides of the grating not being really squared. It's time to add the final details on these deck companions : eyebolts, ringbolts, hinges... I started laying the main cap rail. I ran a problem with the fit of the rail at the bow and I had to cut it in two parts. I only used one of the two parts, the cap rail part at the bow being cut from the original walnut sheet. The joint between the two parts has been scarfed. The starboard main cap rail is already glued and the port back part is in progress...
- 164 replies
-
- 10
-
-
- first build
- model shipways
- (and 2 more)
-
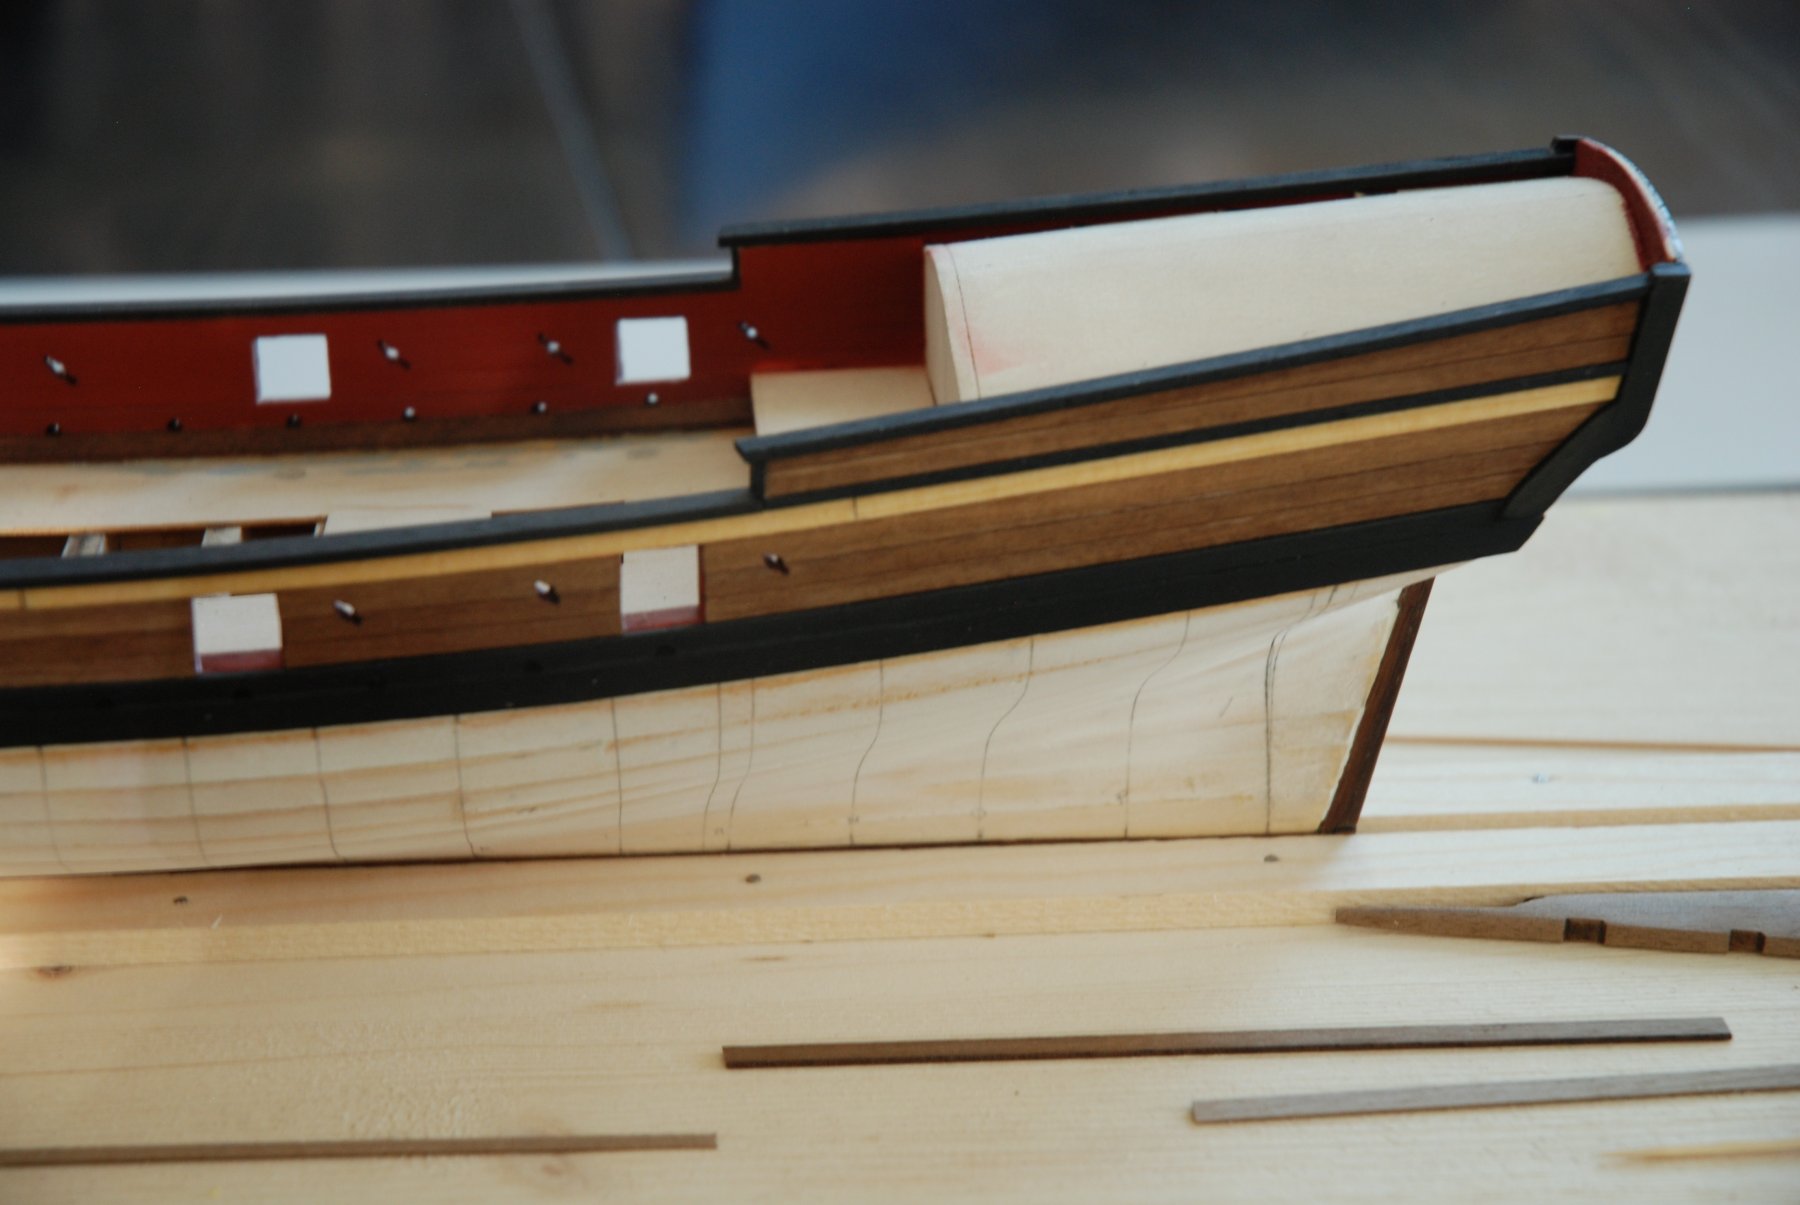
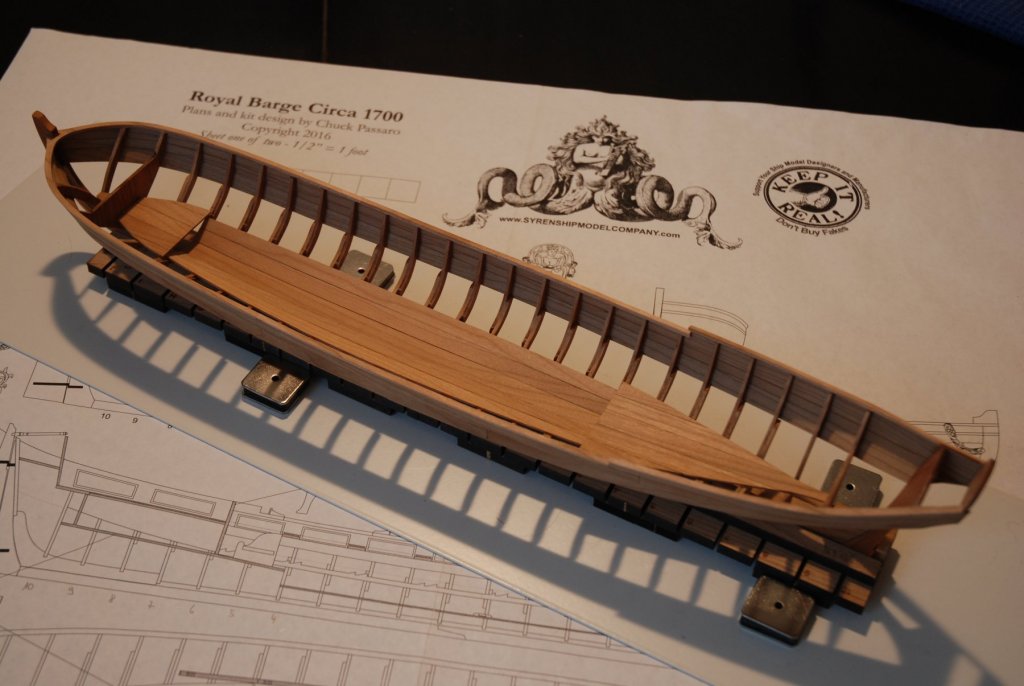
In parallel with my work on the deck details of the Armed Virginia Sloop, I made a small advance on the build of the Queen Anne barge. The last row of planks is over. I also measured and trimmed the planks at the stern. The flying transom was posed and the barge then takes its final shape. Now it's time to remove the frame centers... The construction of this model is a real pleasure the kit being for me an example of what is best on the market. A little question : As we can seen on the next picture, I kept a little overflow (perhaps a little less than 1/32") on the trimmed planks 7 and 6, exceeding the flying transom. Can I keep it or should I be level with the flying transom ? Thanks in advance for the answer.

- 103 replies
-
- 8
-
-
- queen anne barge
- Syren Ship Model Company
- (and 1 more)
-
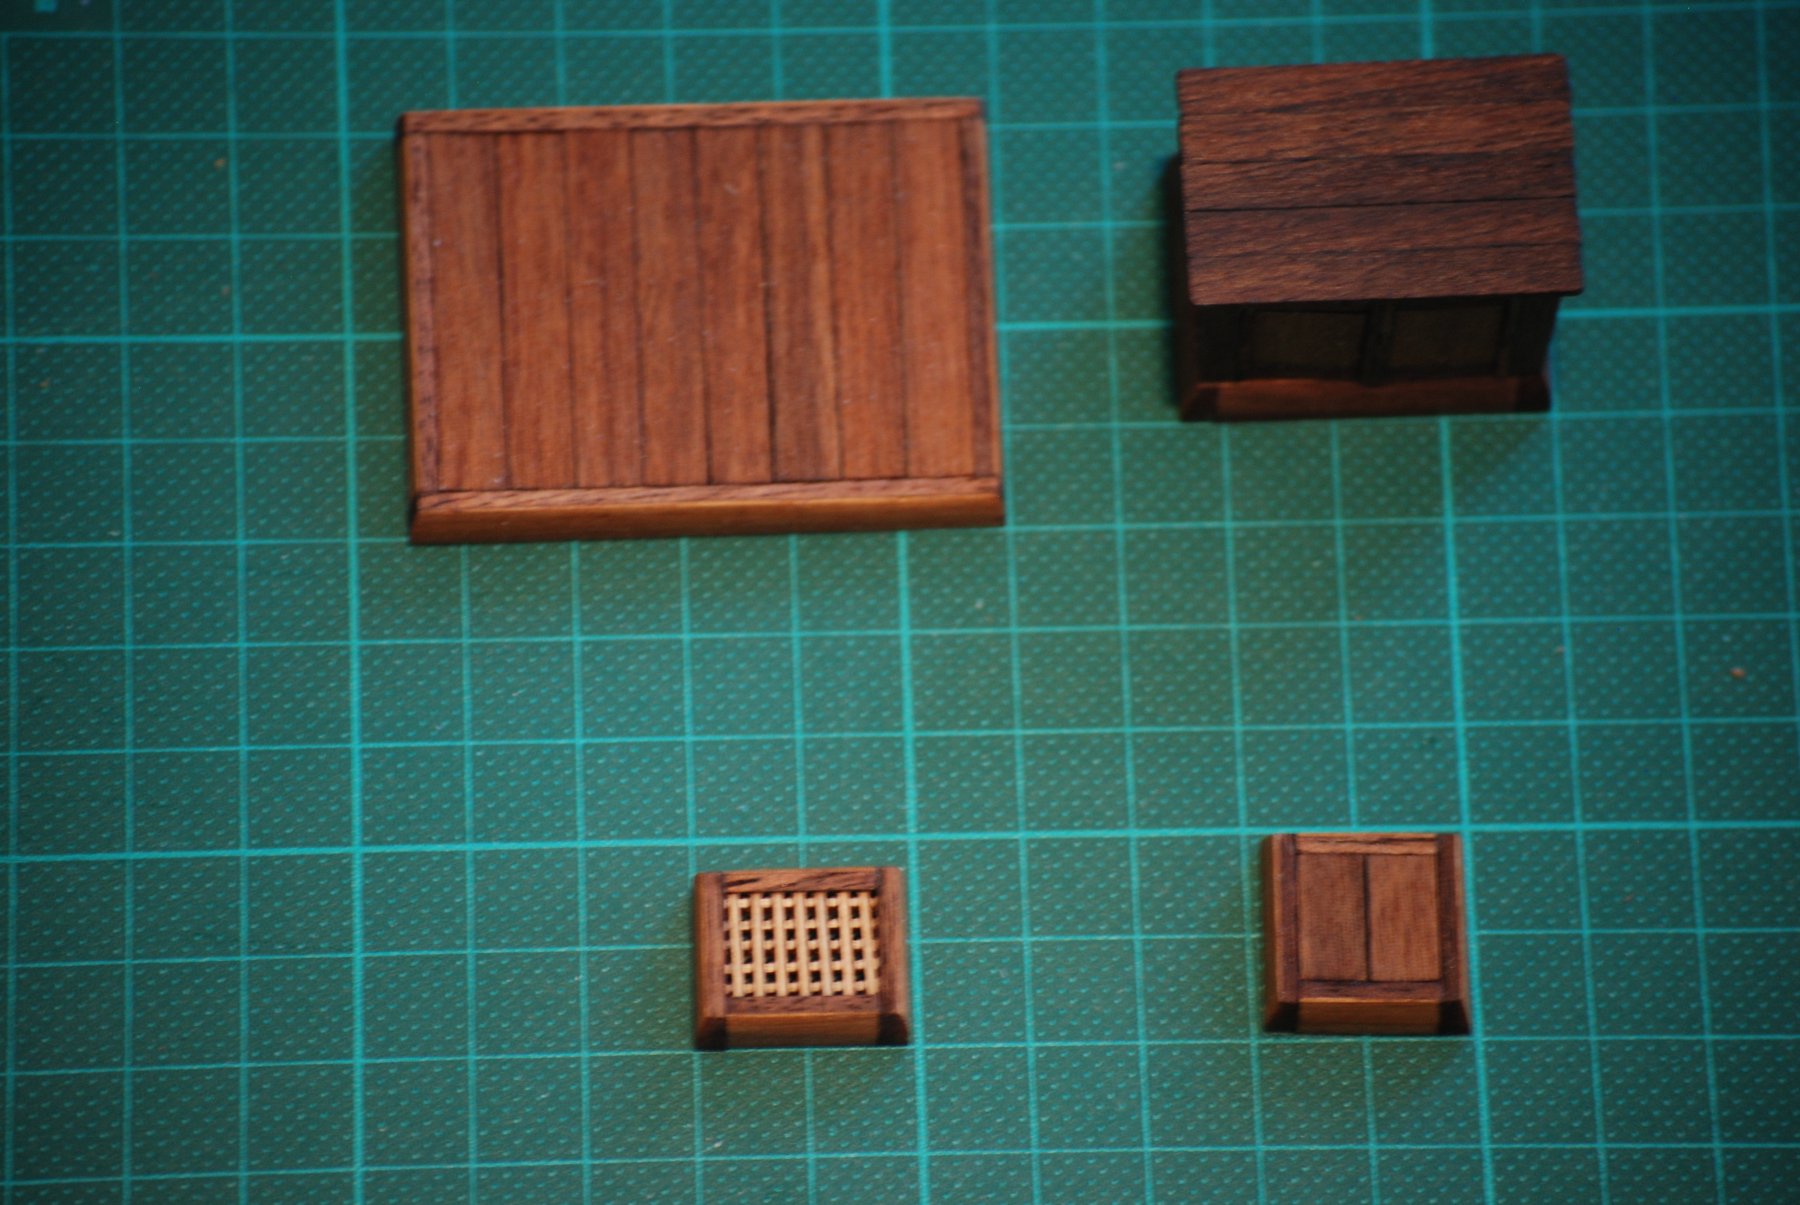
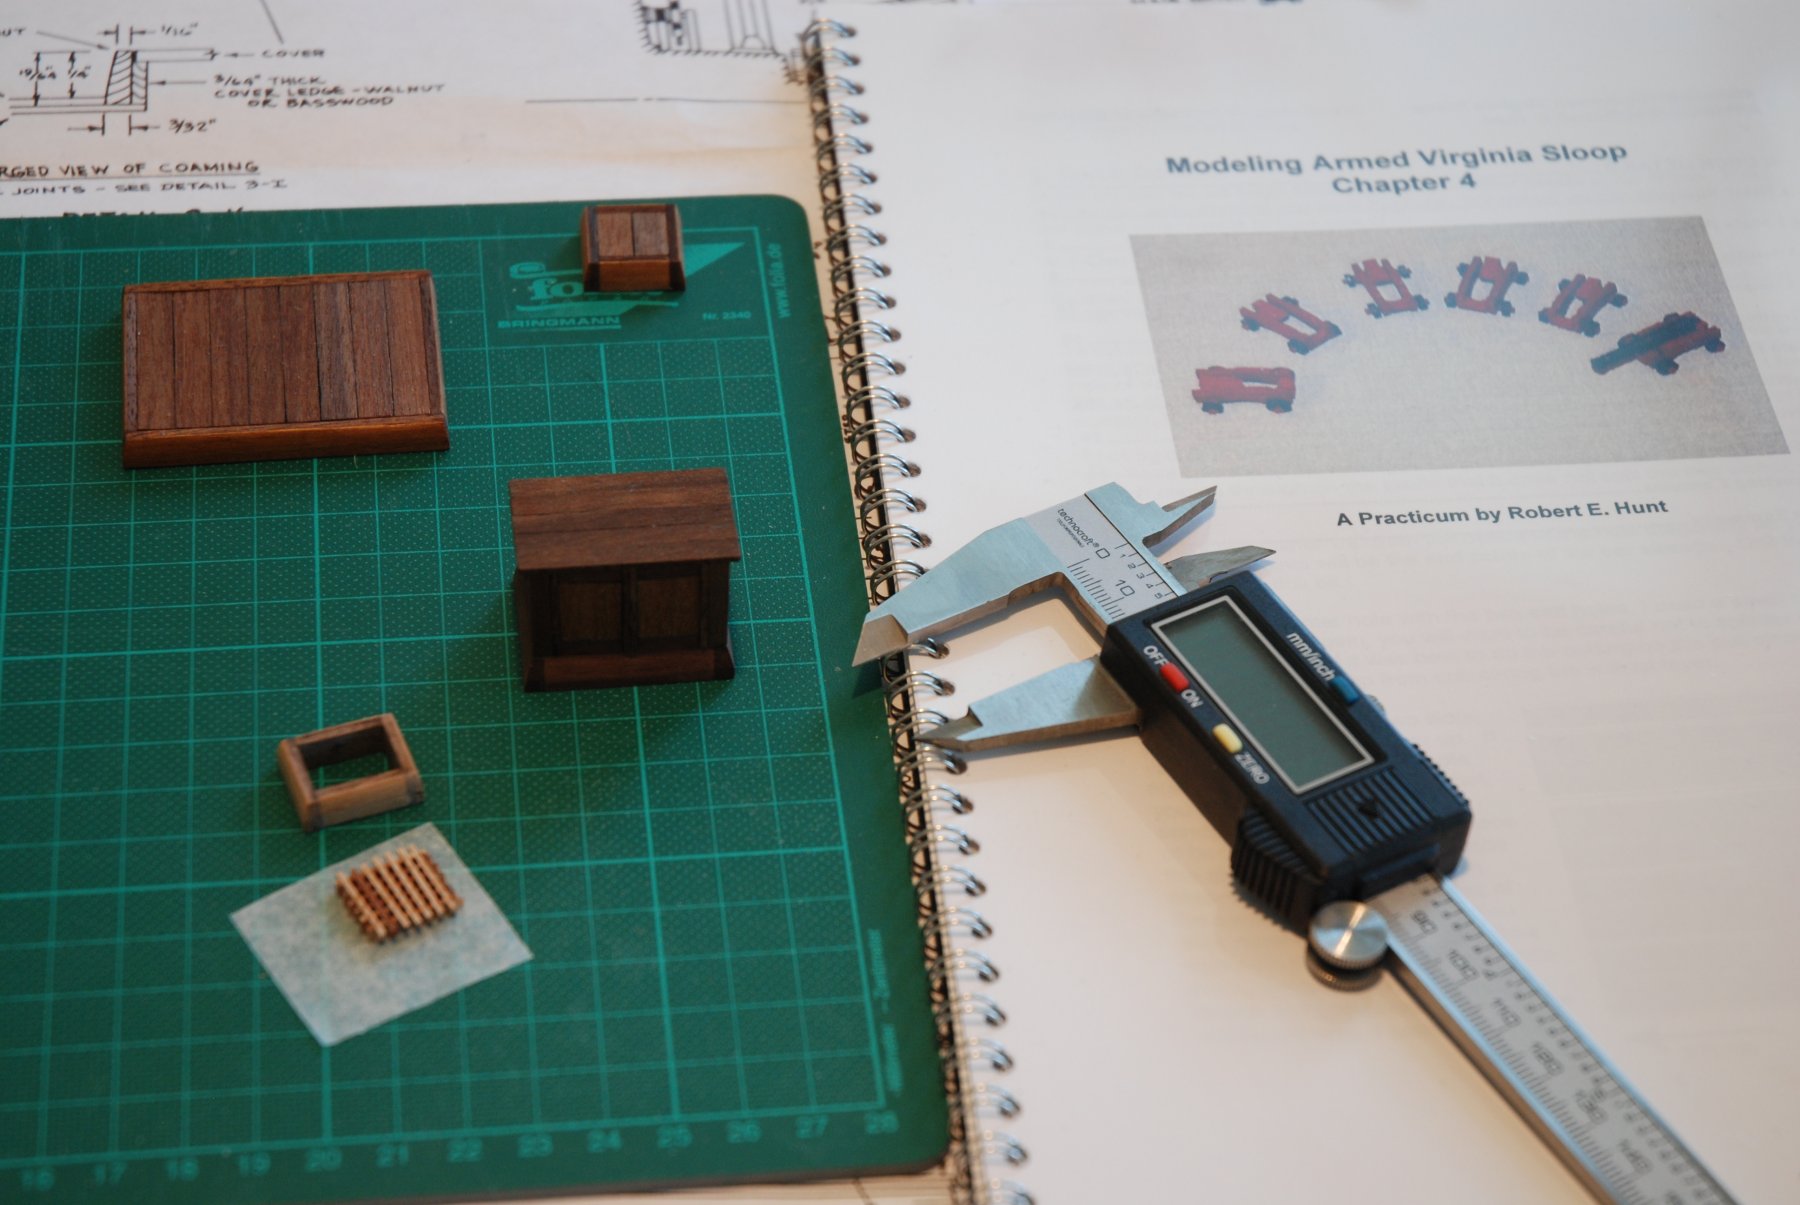
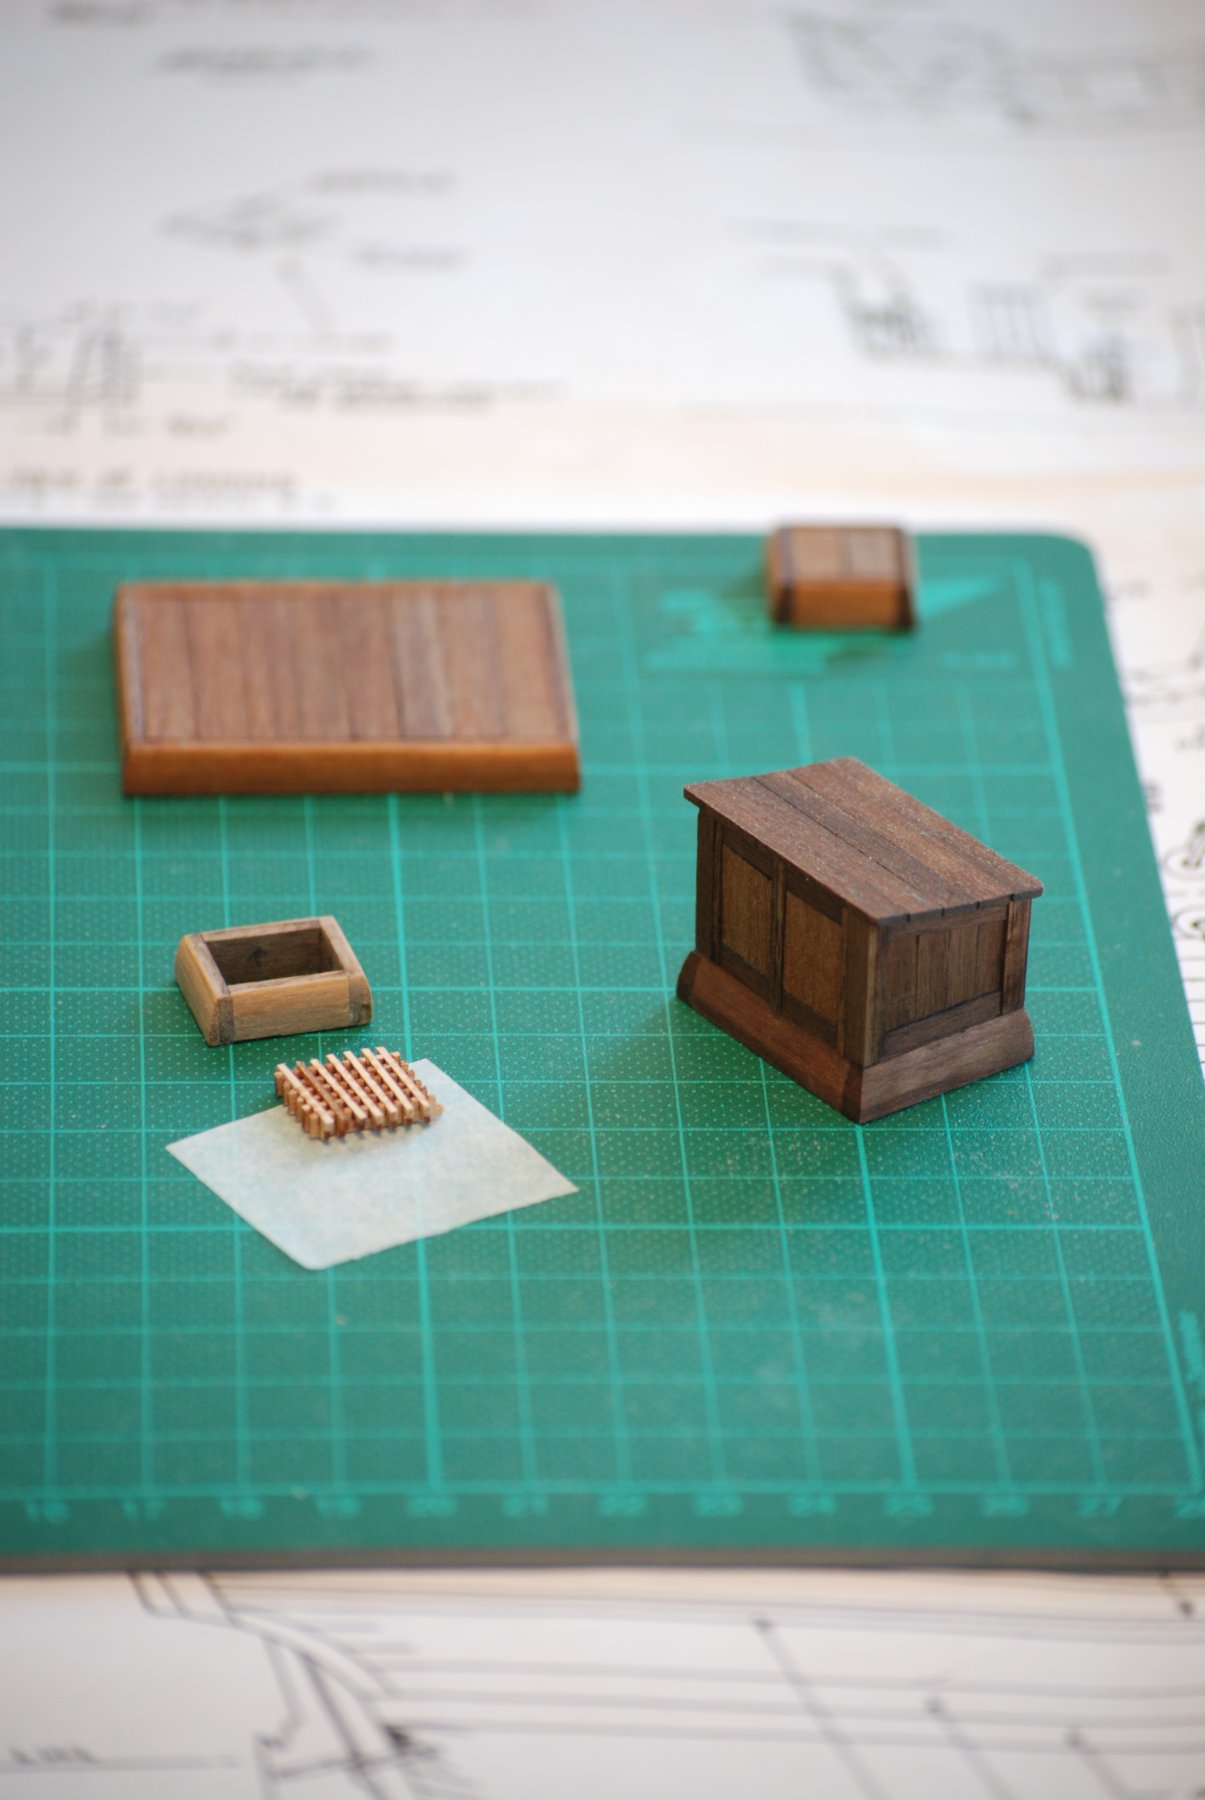
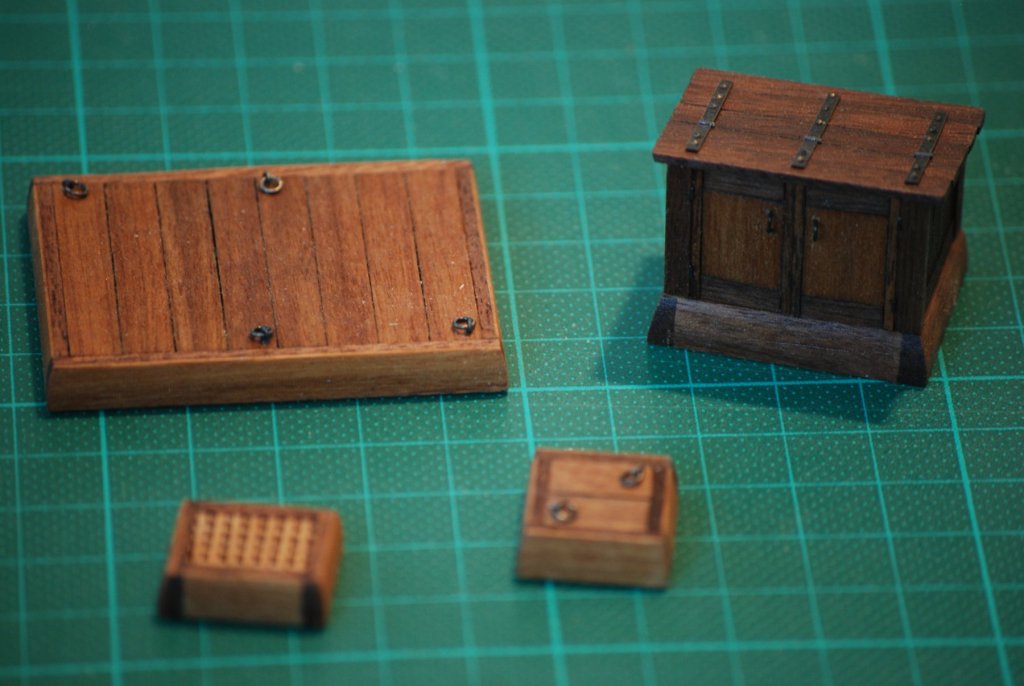
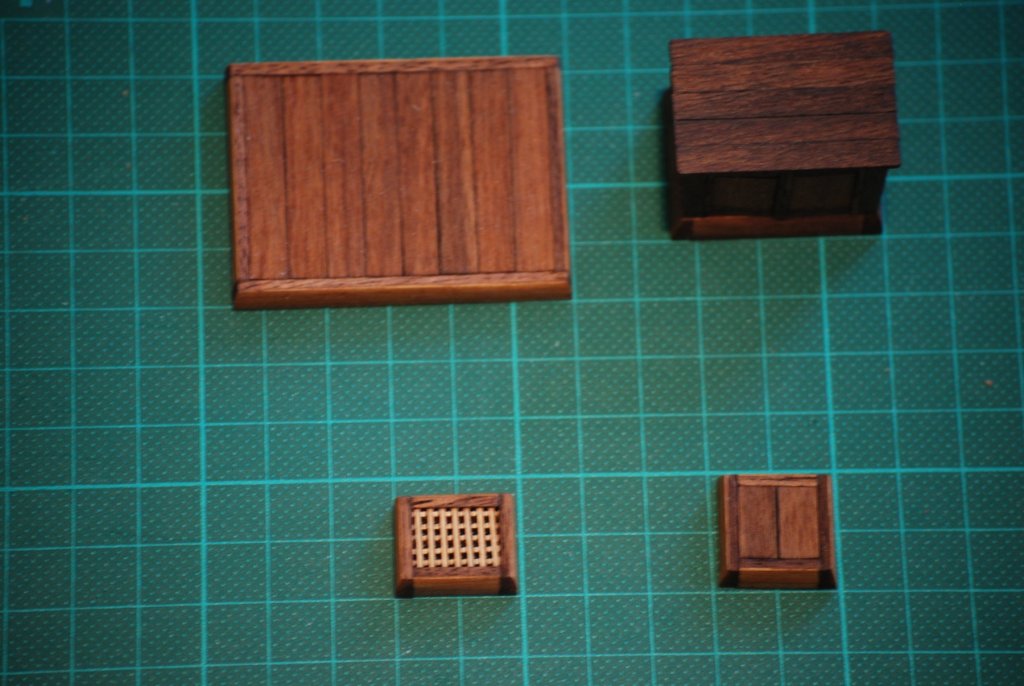
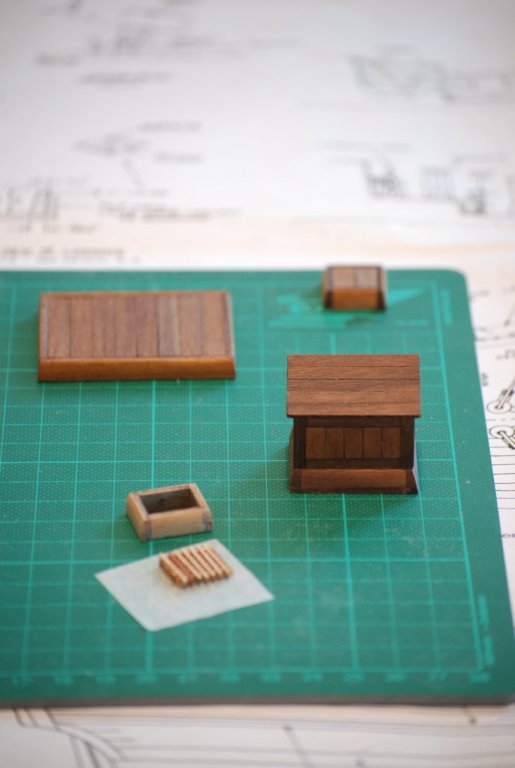
This last week, I worked on the companionway. It took me longer than expected. It is not less than 57 pieces of wood that make up this deck detail. But I really enjoyed this step. As it is my first companion build, the Robert E. Hunt practicum has been very useful. I just followed precisely the different steps described in the manual. The digital caliper is essential to be as accurate as possible. I just started the build of the grating hatch which will be the last component needed before I can start the main deck planking. But before that I'll finish the main rail.


- 164 replies
-
- 11
-
-
- first build
- model shipways
- (and 2 more)
-
Thanks Brian, Dave and all the likes. The build of the deck details is really a very pleasant job. The cedar is easy to work and the result looks good to me.I think the contrast with the black of the main rail will be nice. I hope so.
- 164 replies
-
- 1
-
-
- first build
- model shipways
- (and 2 more)
-
Thanks Chuck for your kind support. As I work in parallel on the Armed Virginia Sloop, it does not move very fast... I should probably finish the third row of planks this week. I will post an update shortly.
- 103 replies
-
- 1
-
-
- queen anne barge
- Syren Ship Model Company
- (and 1 more)
-
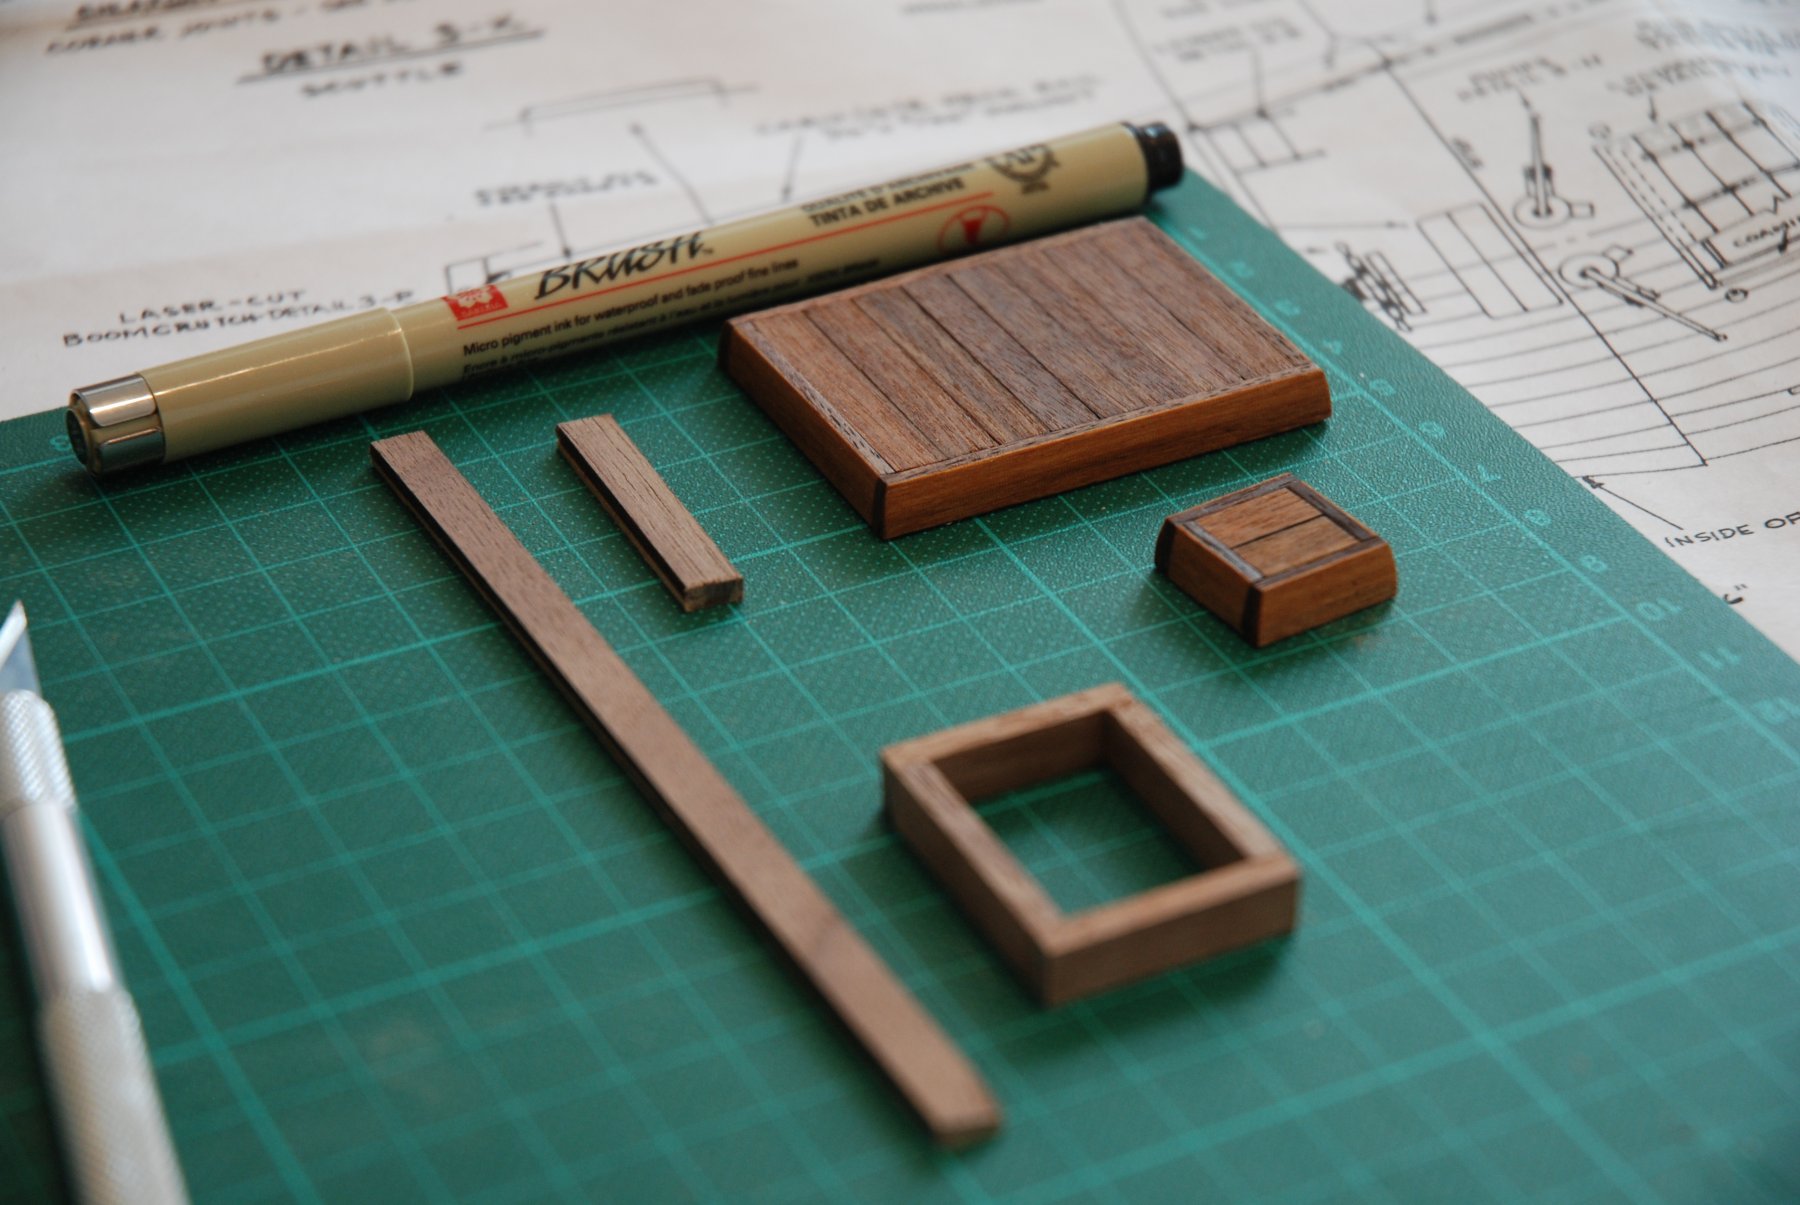
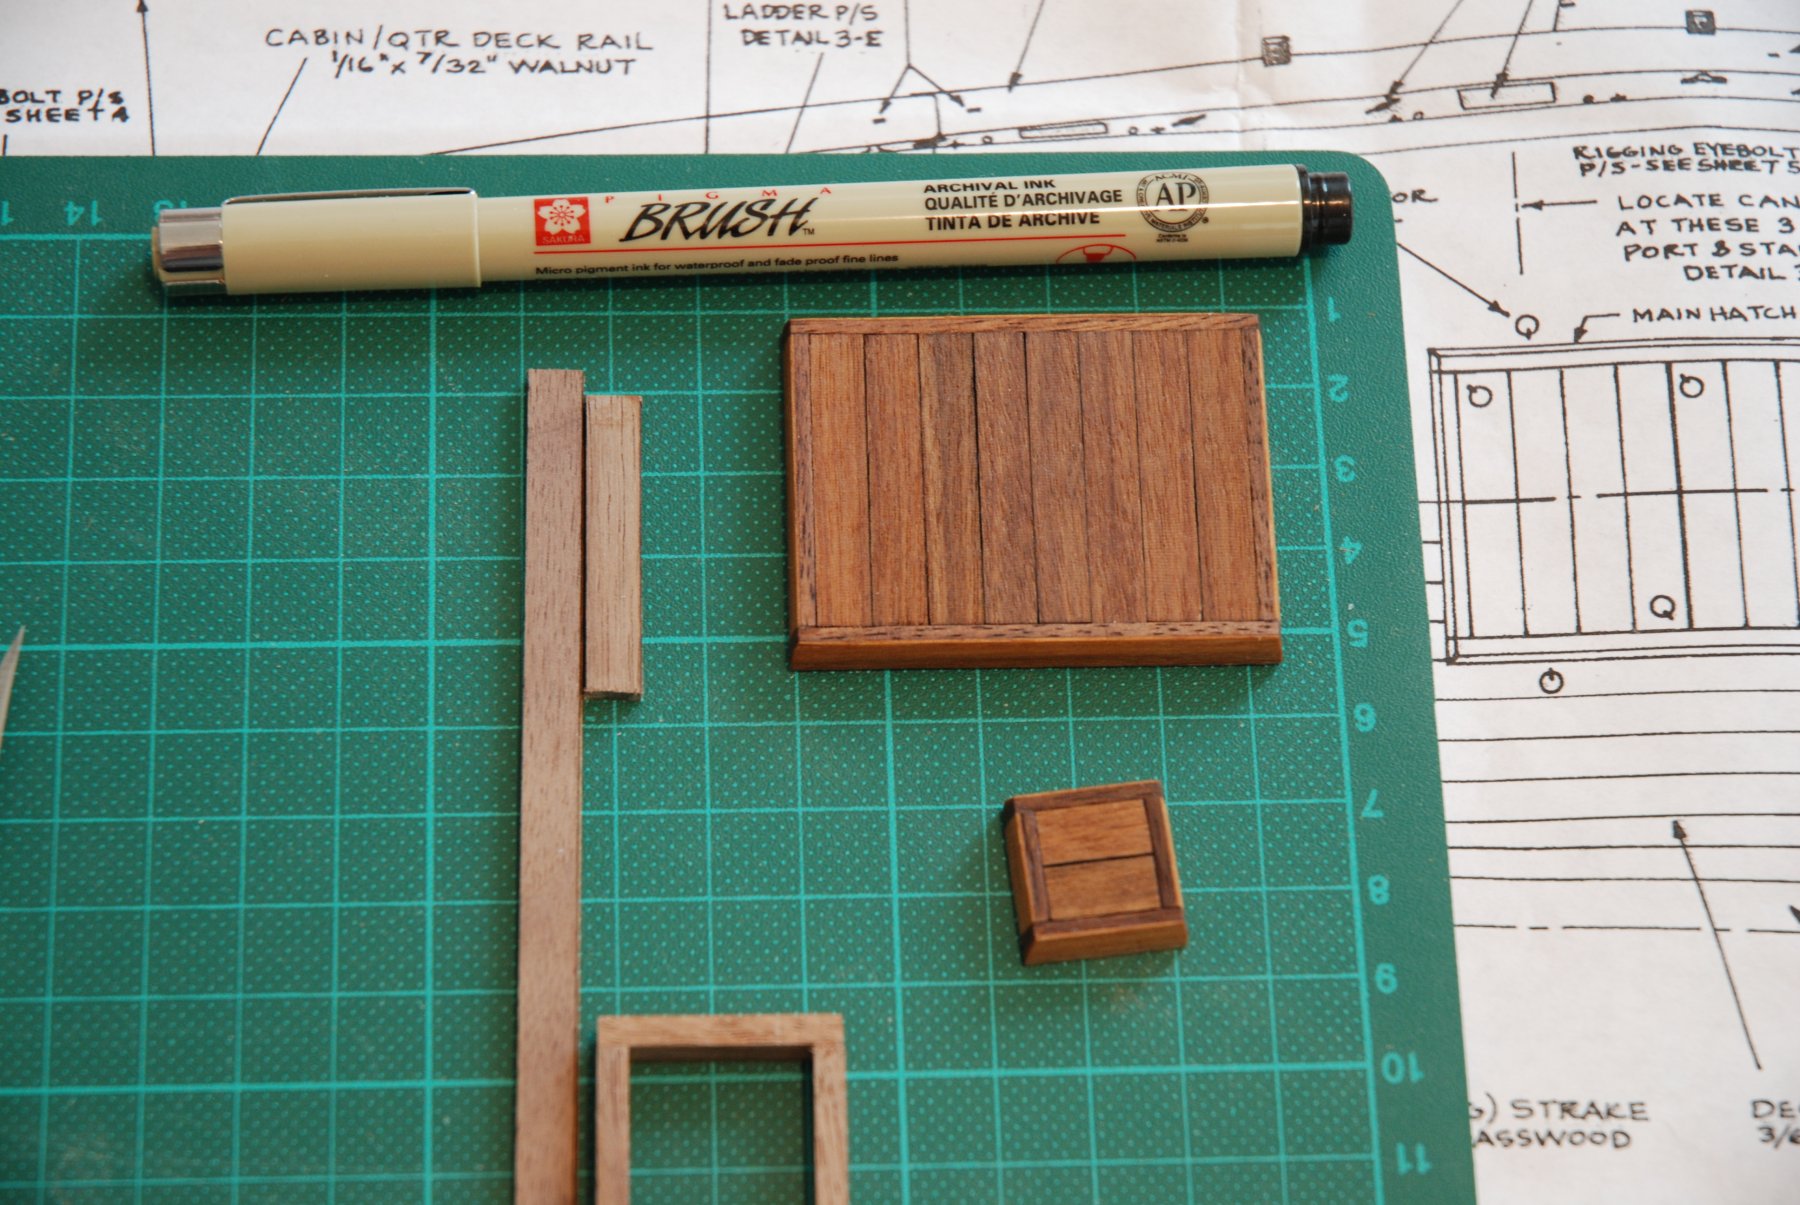
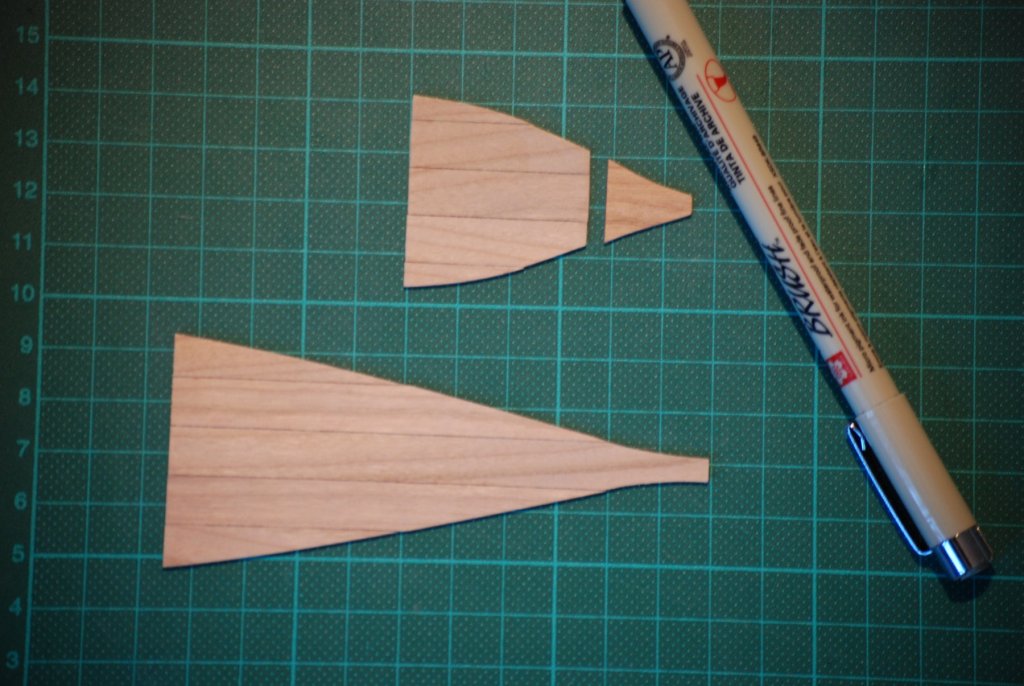
Thanks all the likes. Waiting on my alaskan yellow cedar, I started to build the deck furnitures. Normally I must use a walnut 3/32" thick x 1/4" wide strip for the coaming, but I can't find it in the stock of strips delivered with my kit. Luckily, I found the solution in the excellent log written by GuntherMT: I have glued together a .030" thick x 1/4" wide strip with a 1/16" thick, so I have obtained the required 3/32" thick strip. After this preparation, it's just a measurement case. I have used a digital caliper to measure the different parts to build the furniture. I begin with the main-hatch coaming and the scuttle hatch coaming. To bring out the joints between the planks, I marked one of the faces with a black Crayon brush Sakura Pigma. The result is interesting. I just started the build of the Companionway with the coaming. This will be the next part of the deck details build... As I quickly received my order from the Syren ship model company, I continued with the pose of the sheer strake. I made it with a strip cut from an alaskan yellow cedar wood sheet. I will try to play on the contrast between the different kinds of wood to avoid having to paint the sheer strake. I marked the junction between the four successive planks with a 2H pencil. This is unfortunately a little too pronounced in my opinion. Next step to accomplish : the main cap rail.


- 164 replies
-
- 12
-
-
- first build
- model shipways
- (and 2 more)