JpR62
-
Posts
699 -
Joined
-
Last visited
Content Type
Profiles
Forums
Gallery
Events
Everything posted by JpR62
-
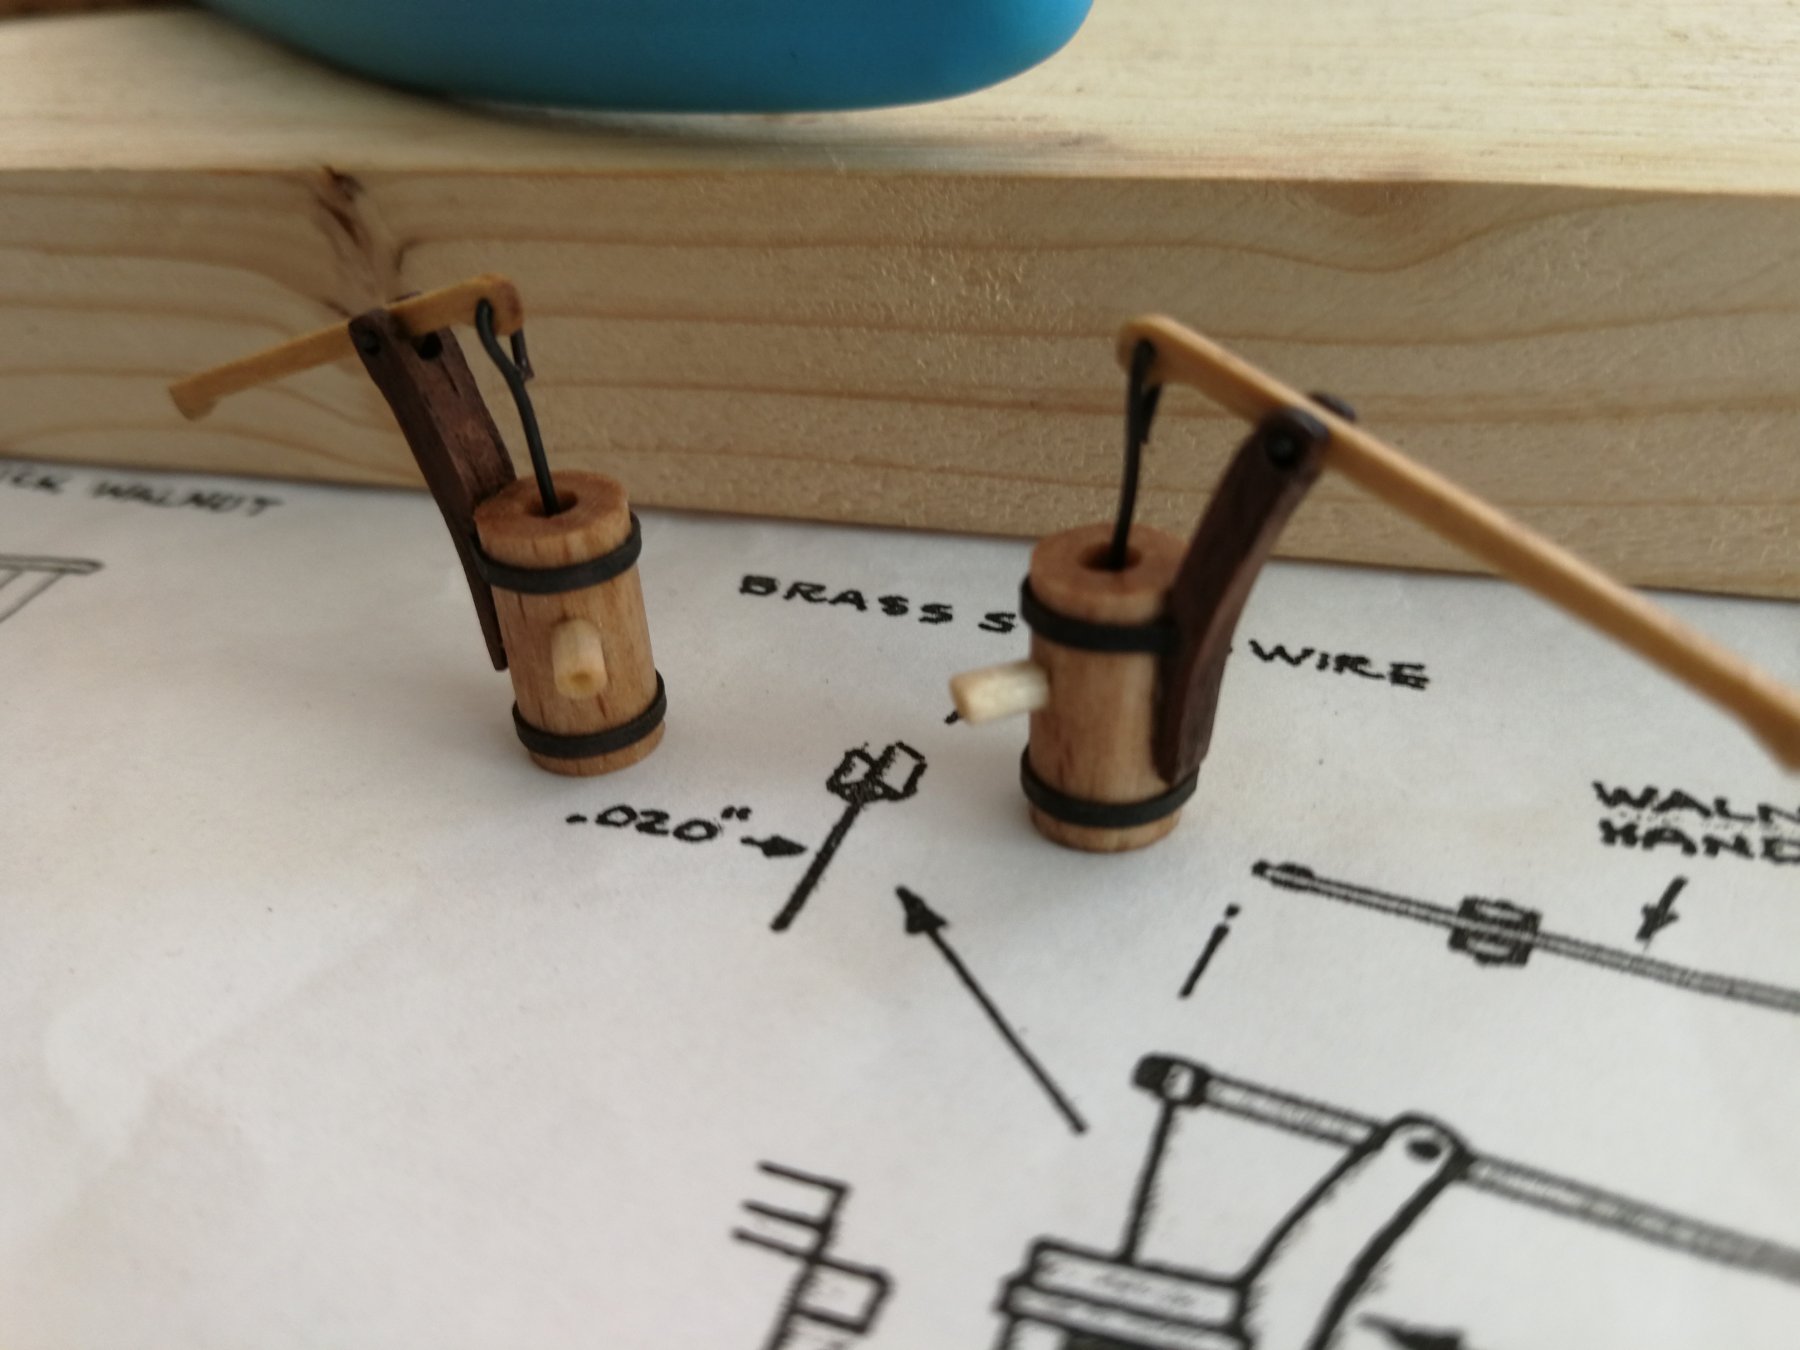
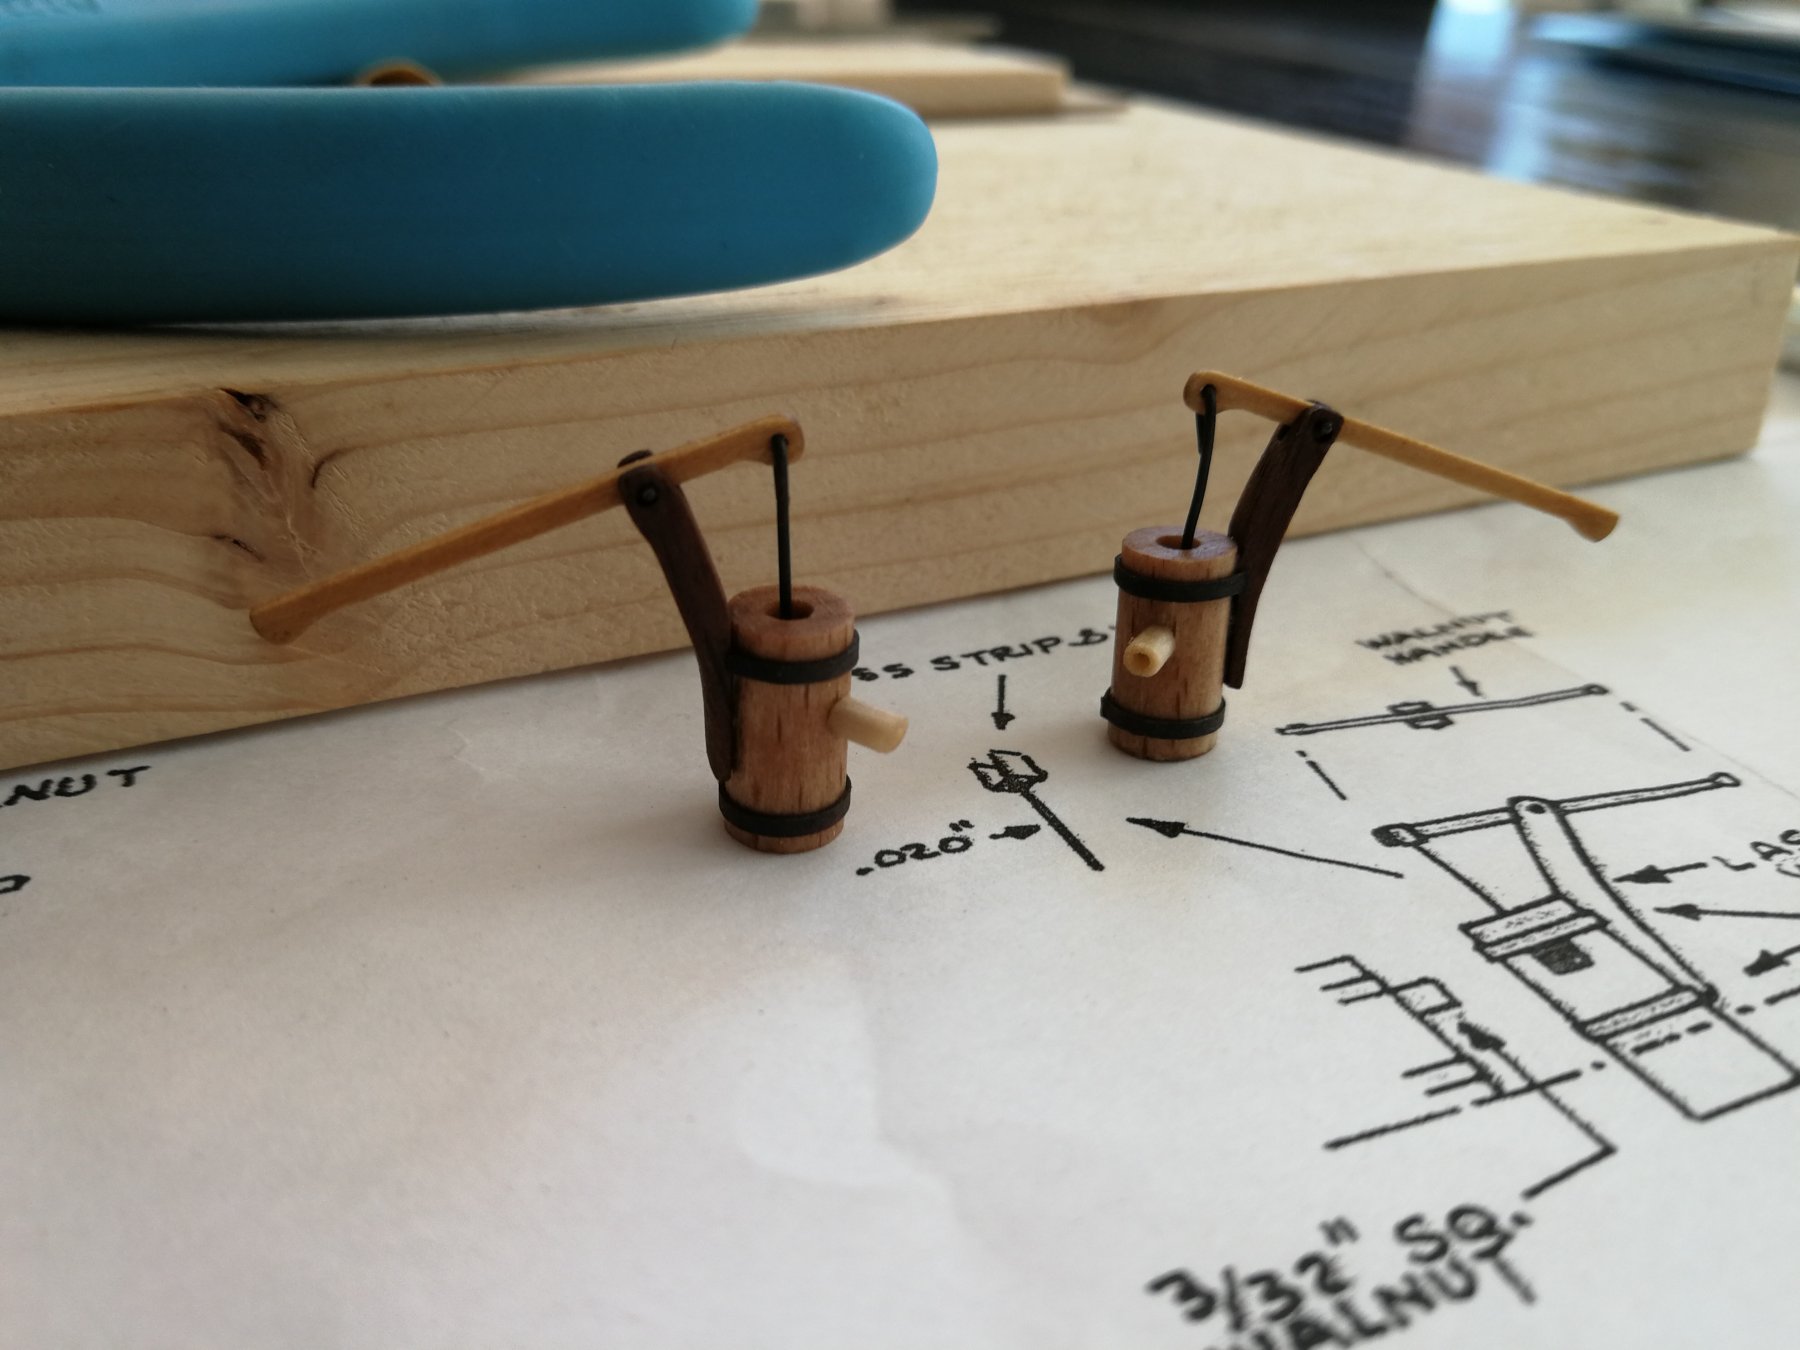
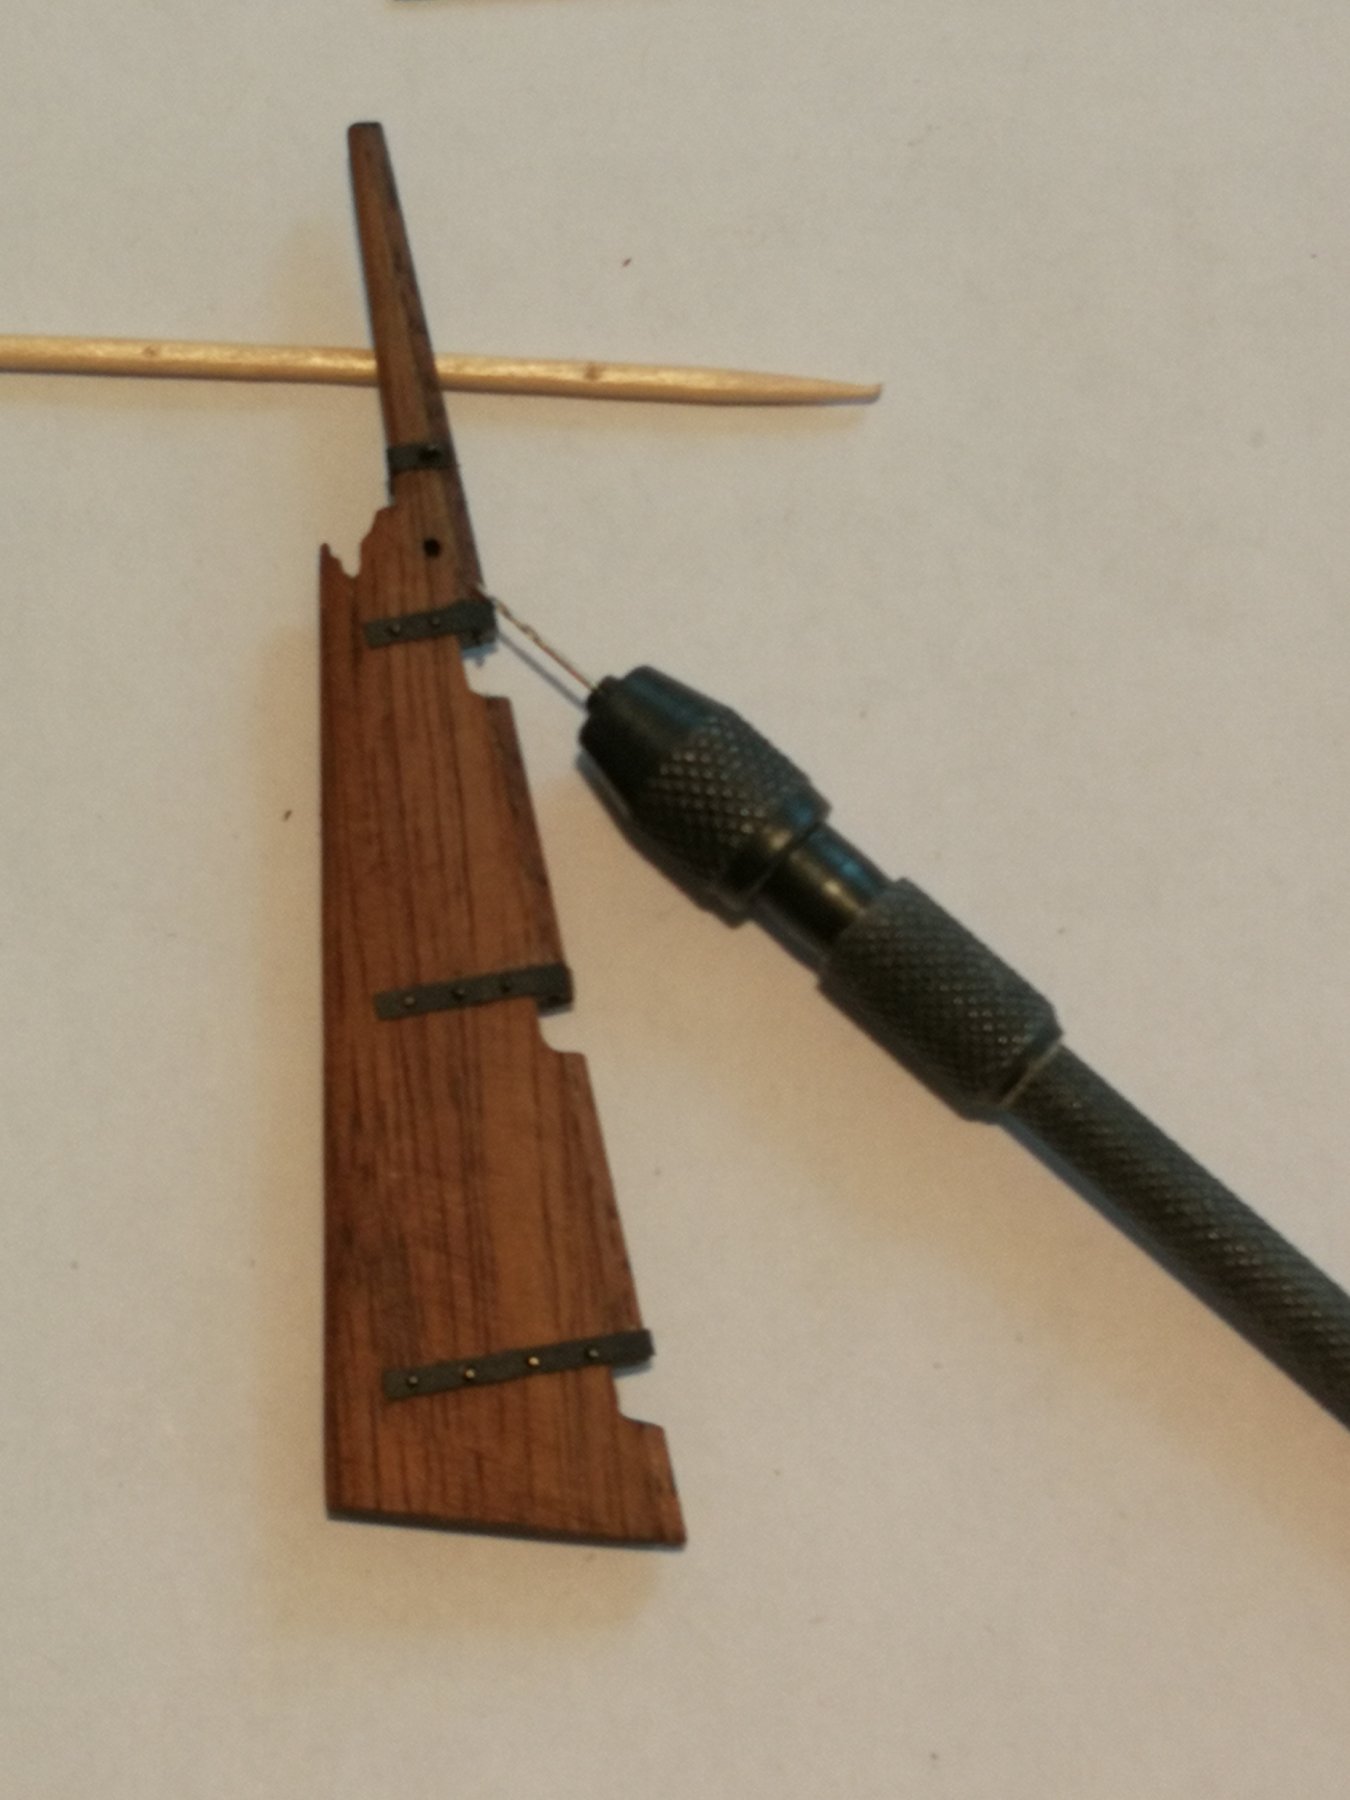
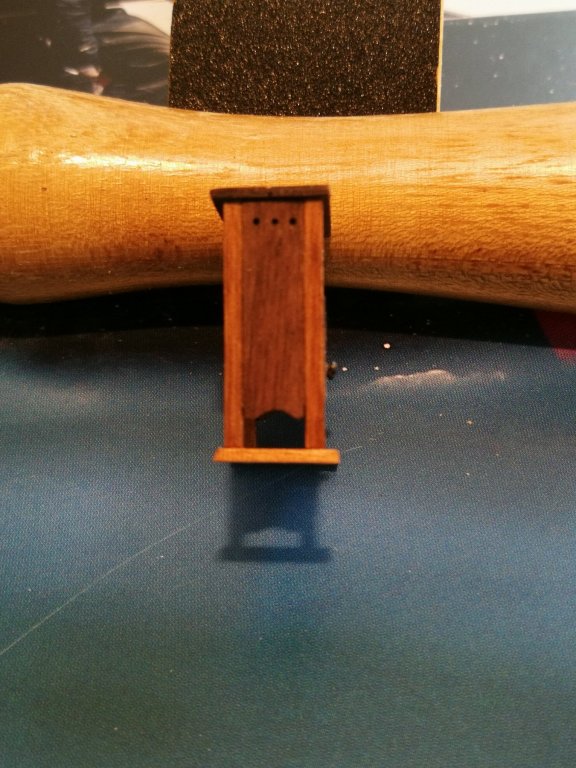
 Small advance of this week-end. The elm tree pumps are done. The metal reinforcement band is simulated using some black card stock strips. Now it's really time to work on the catheads...
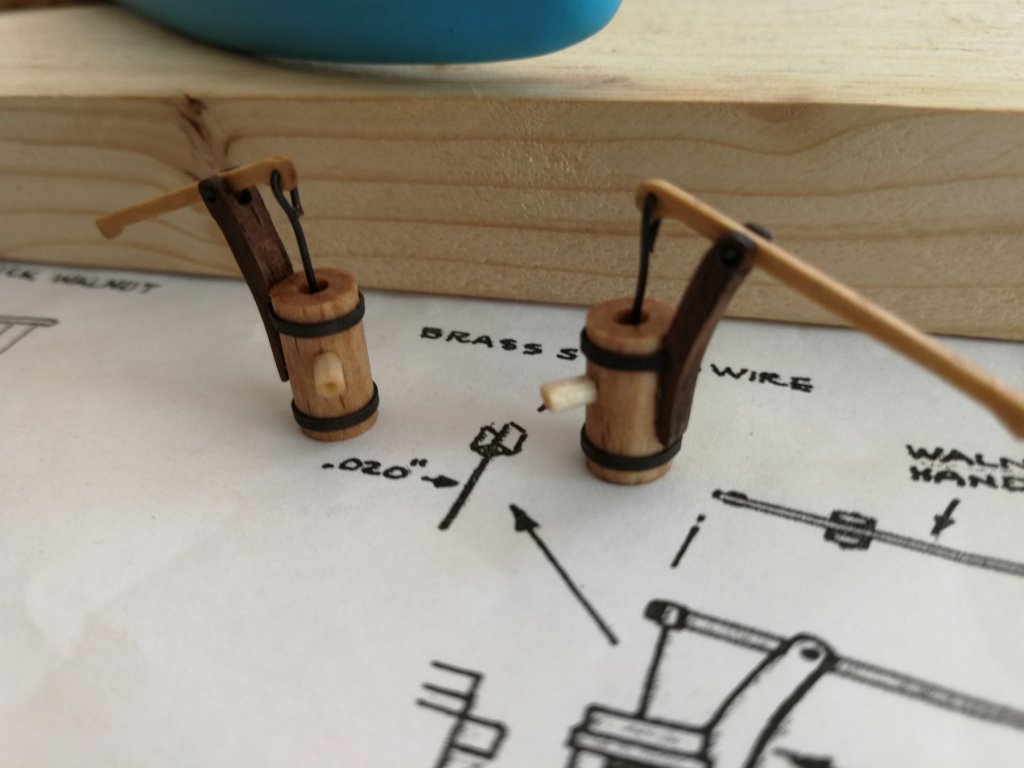

- 164 replies
-
- 13
-

-
- first build
- model shipways
- (and 2 more)
-
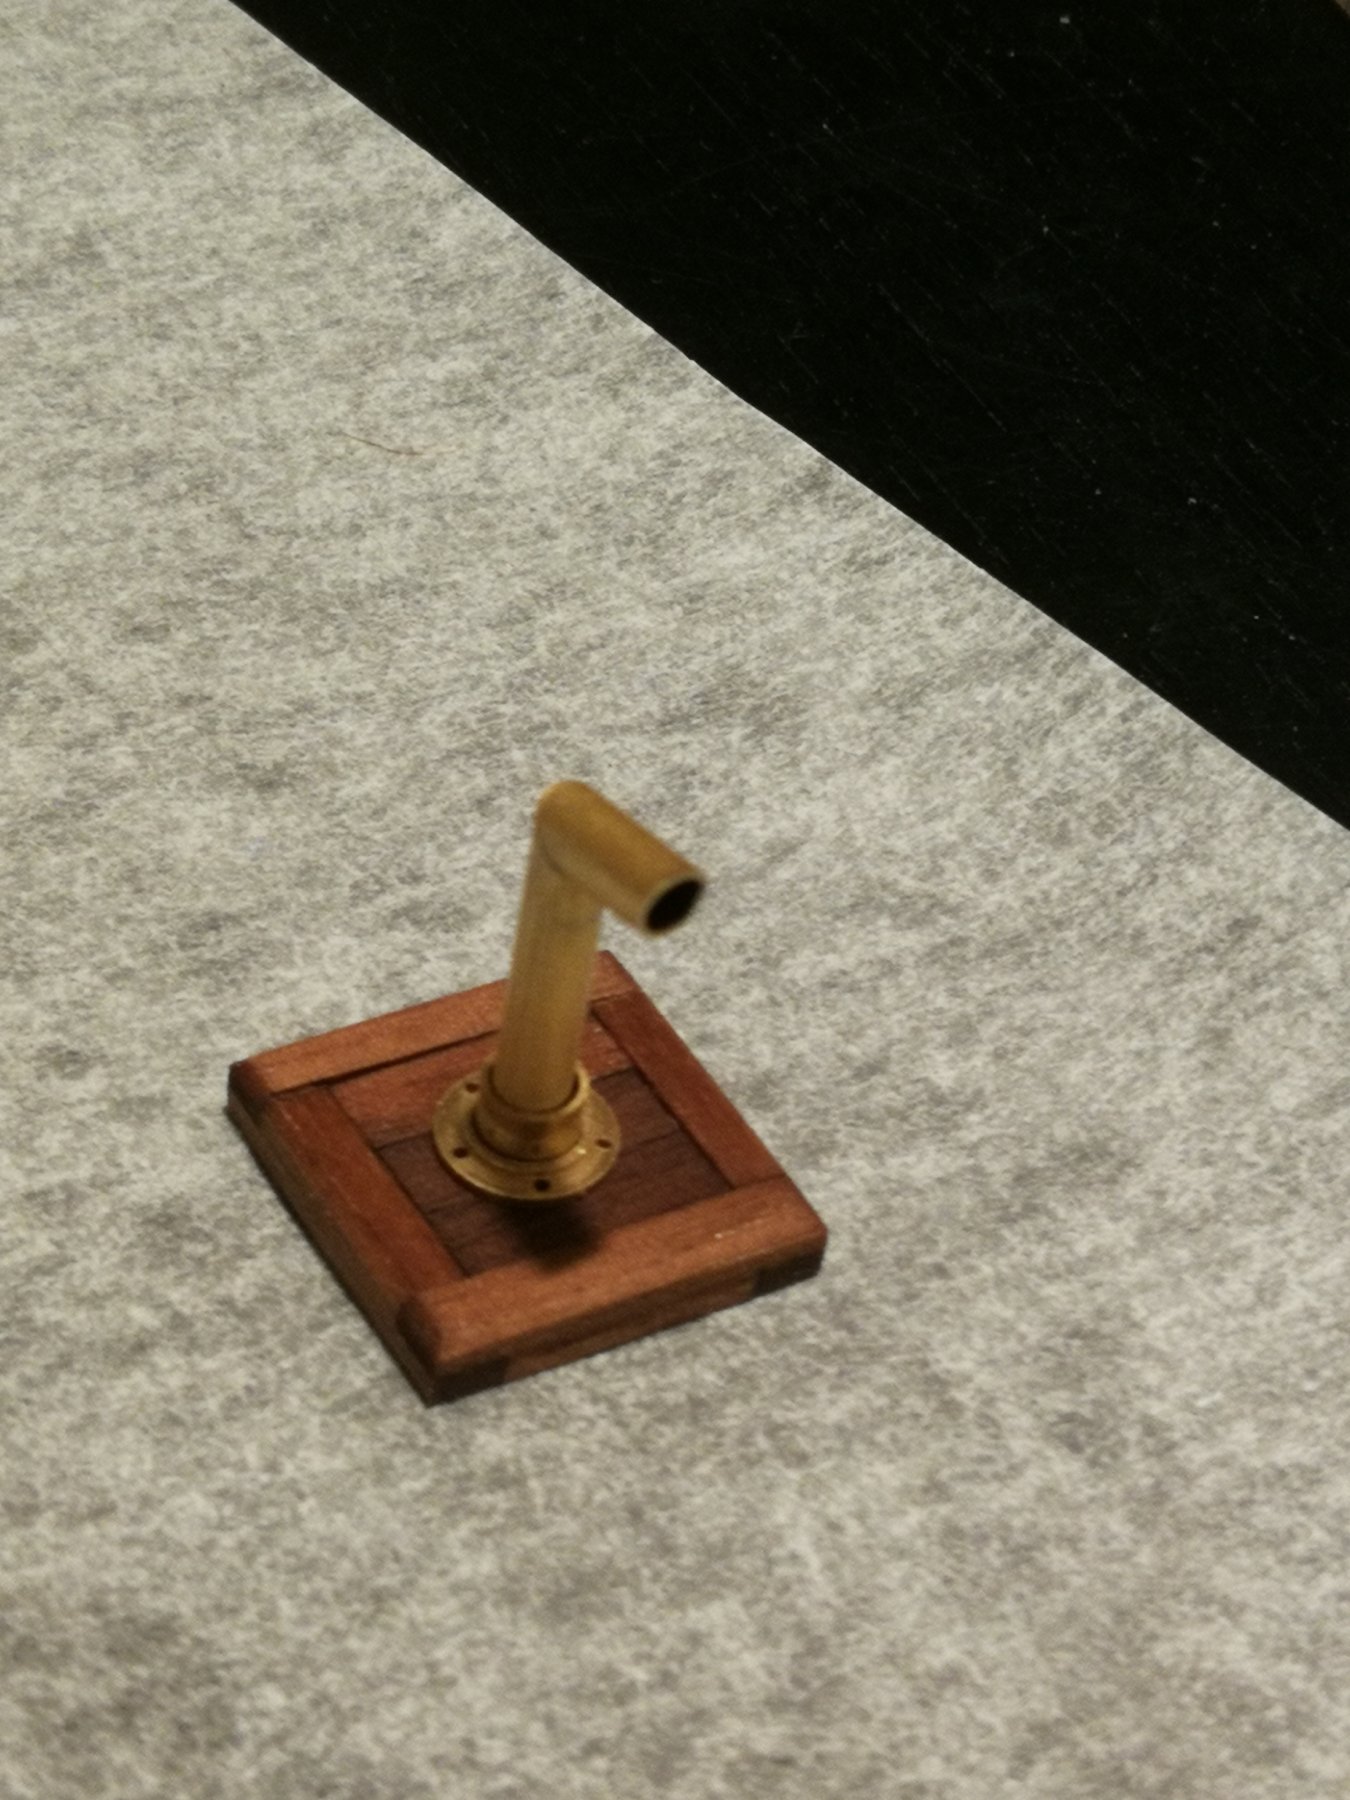
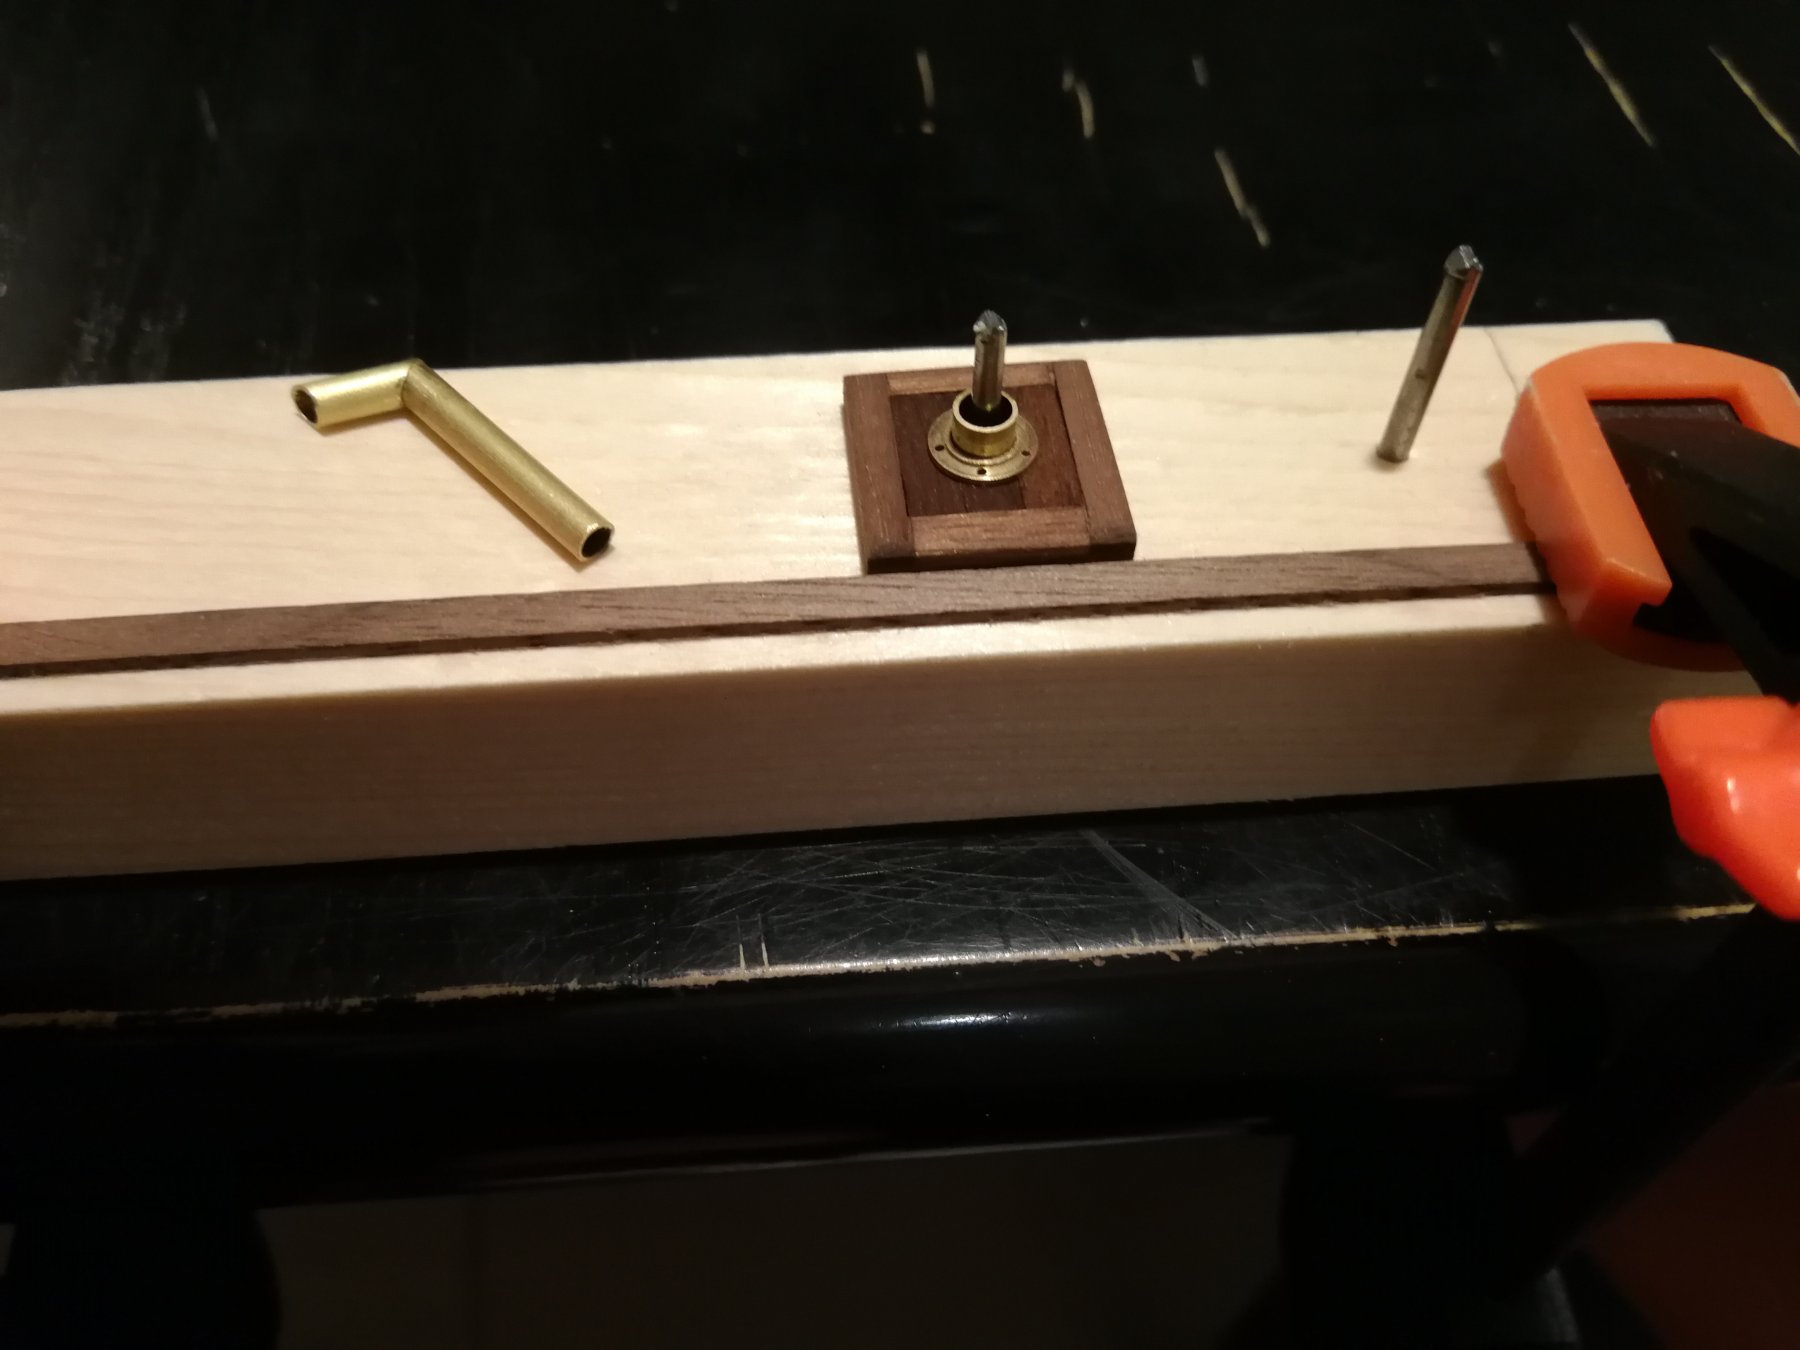
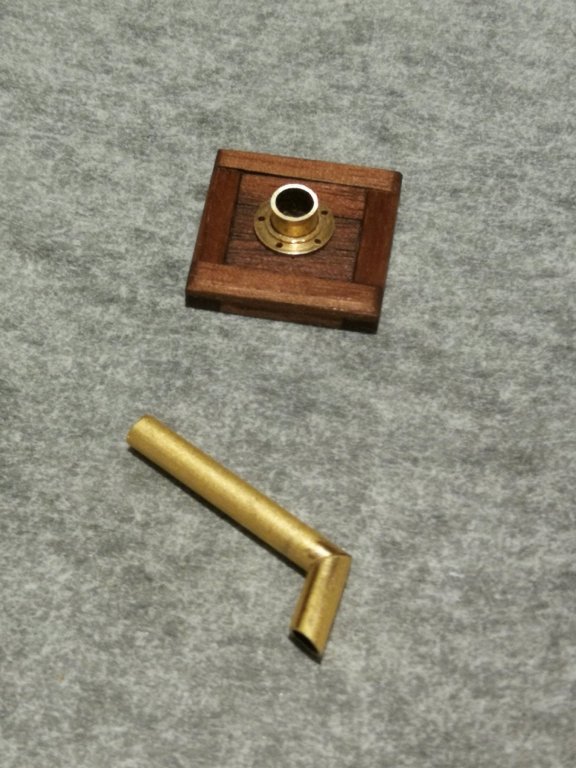
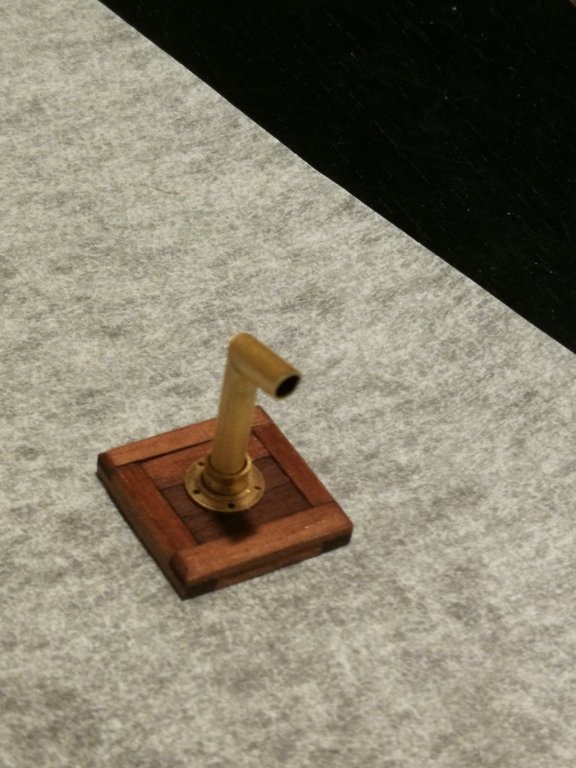
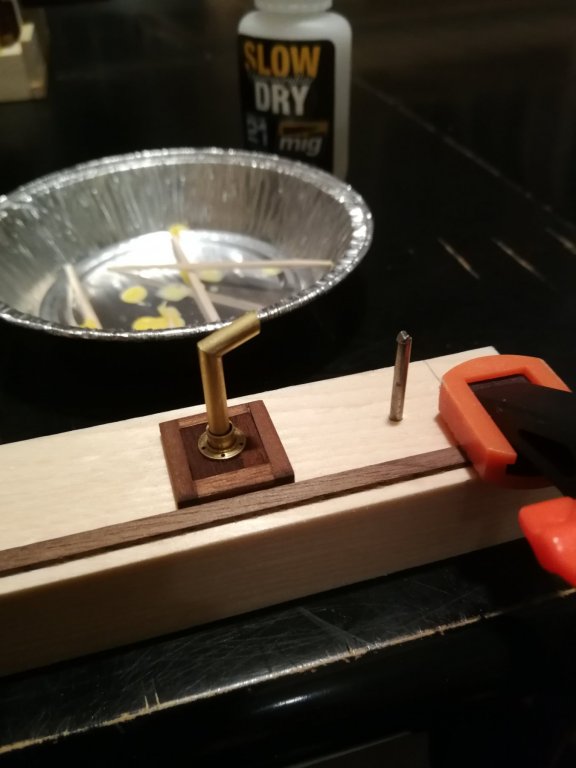
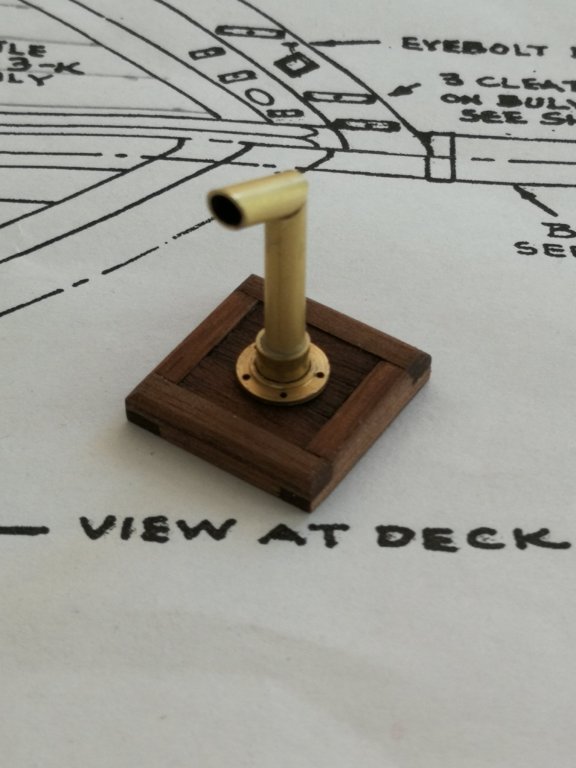
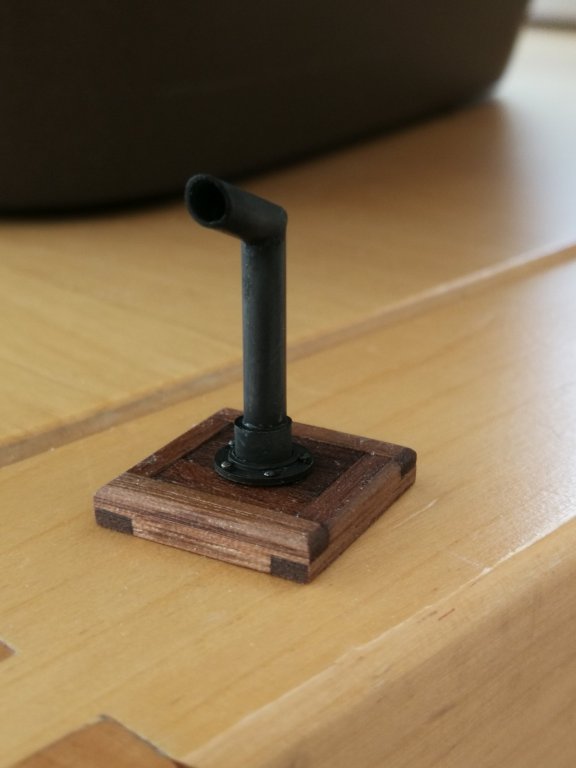
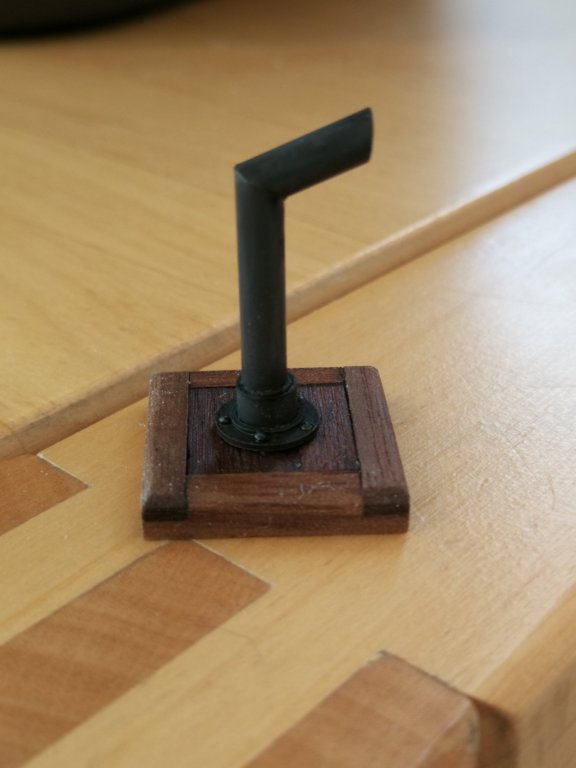
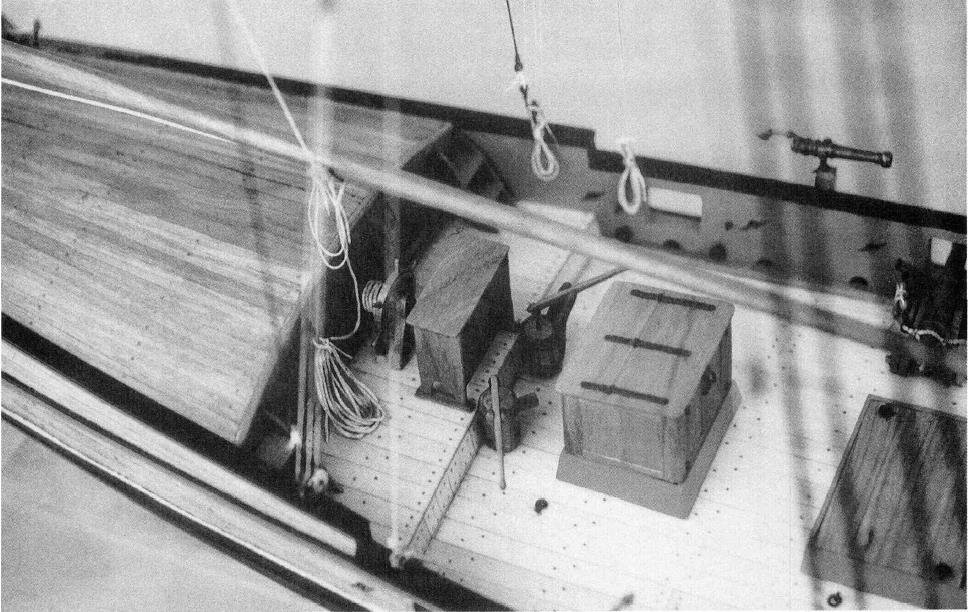
Thanks to all the 'Likes' and to all the people who follow my log. This week I work on the galley stack. I was not fully satisfied with the galley stack provided in the kit and with the way to mount it. So I decided to build a new copy from brass tubes. The base consists of a porthole found in my parts inventory and of a small section of a brass tube. The galley stack consists of two segments of brass tube glued together. I also replaced the simple square of walnut by a pad deck a little more detailed. A fitting test to see how that looks. I build a little jig in order to mount the galley in a correct angle. The space between the base of the galley and the tube is filled with a little epoxy paste (magic-sculpt) The smoke pipe is blackened before being glued to the deck pad. Small rivets are finally added. I'm now working on the elm tree pumps.

- 164 replies
-
- 11
-
-
- first build
- model shipways
- (and 2 more)
-
Thanks Captain hook, your build log on the AVS is for me a great source of inspiration and an example to follow 😉 CaptainSteve, a big Thanks for Your kind words. But I have a secret. I have the best mentor I can find : the modelshipworld forum ! 😊 This provides the best advice and methods. Just follow the work of people like Chuck, Rustyj, Dubz, Stuntflyer, Gahm,... and so many others who are for me the best teachers. And there we realize that the room for improvement is still large ! I follow also your work on the Queen barge with great interest 😉
- 164 replies
-
- 3
-
-
- first build
- model shipways
- (and 2 more)
-
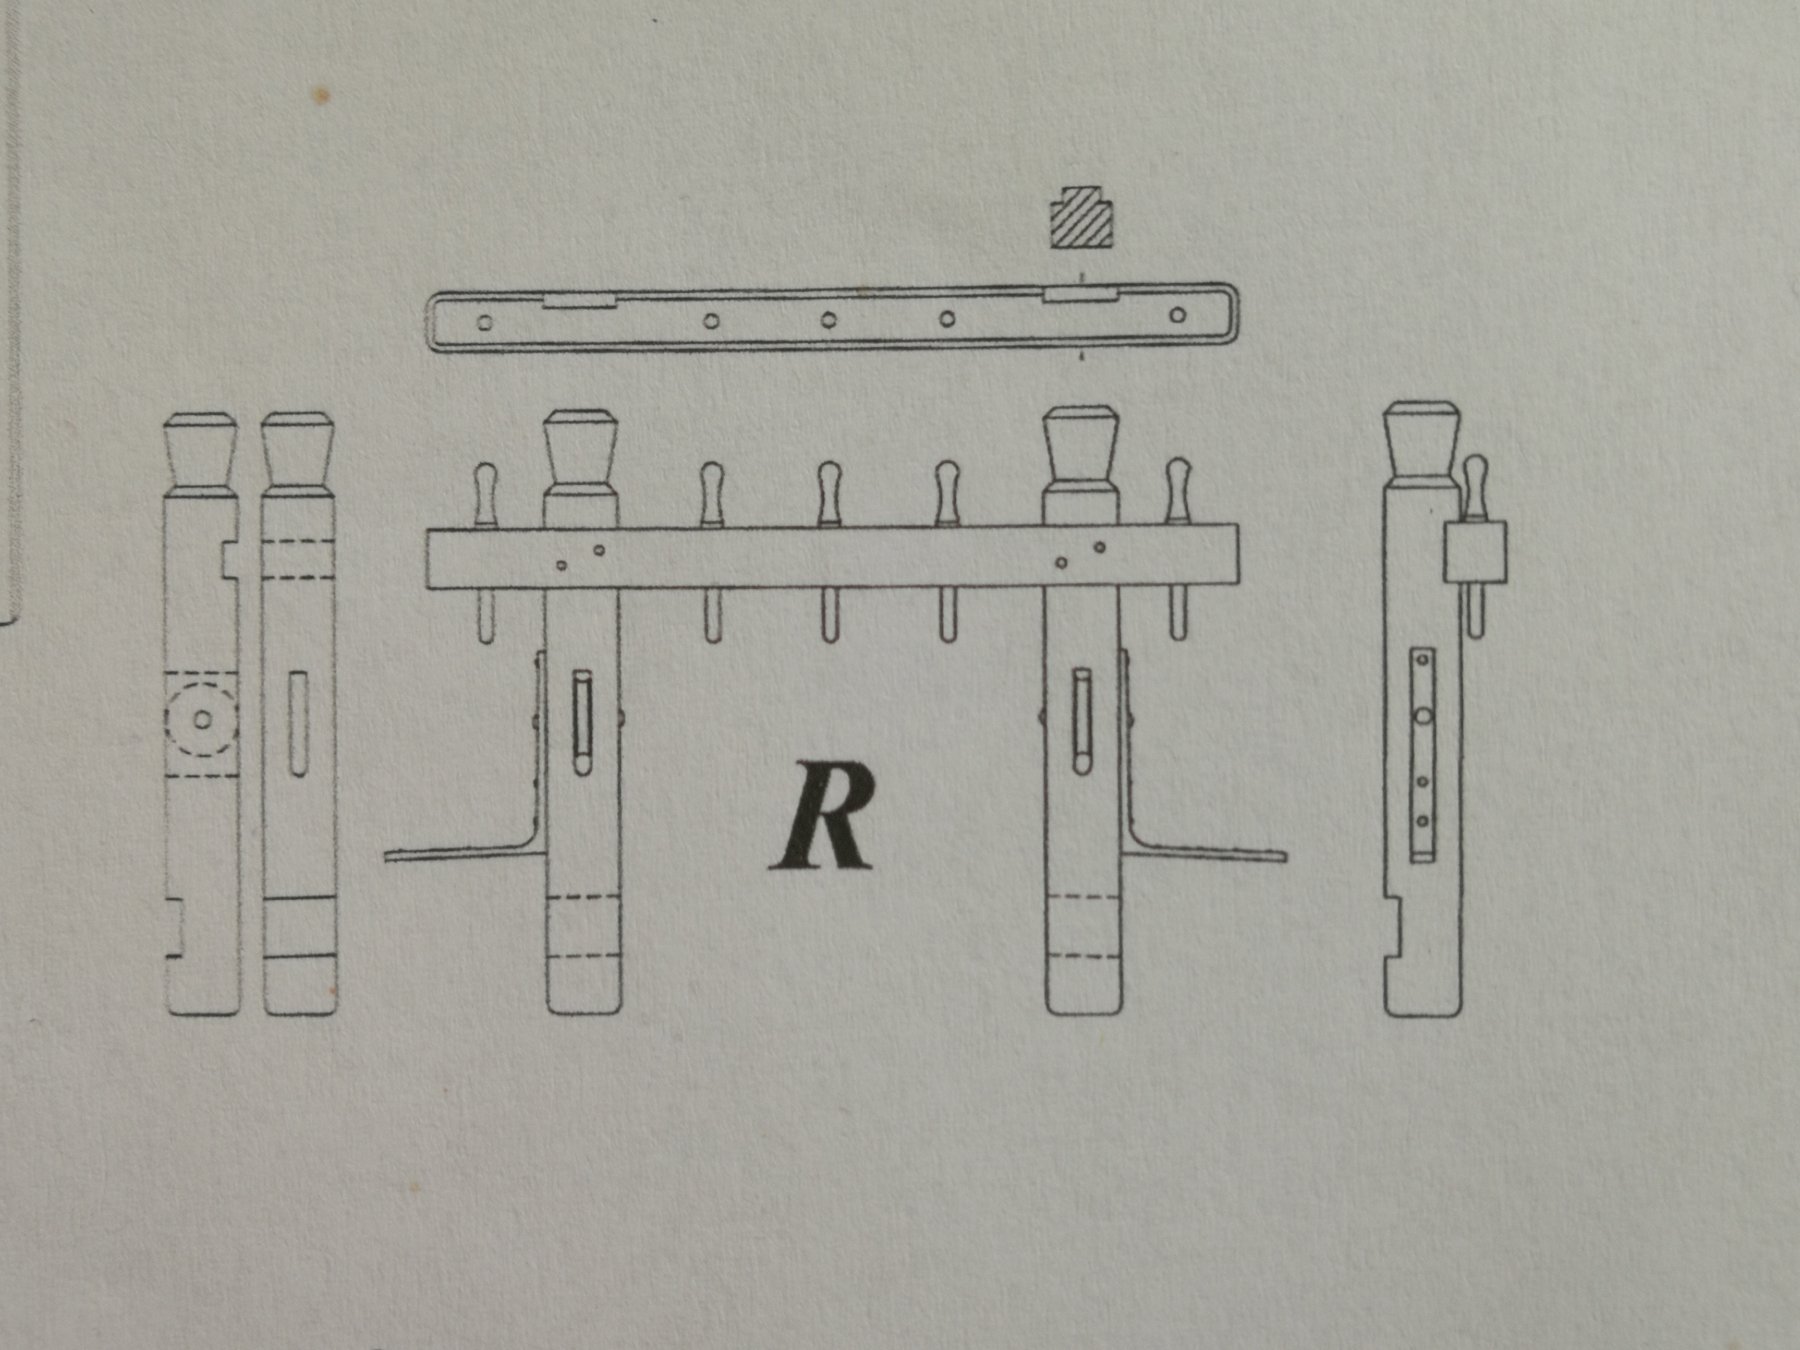
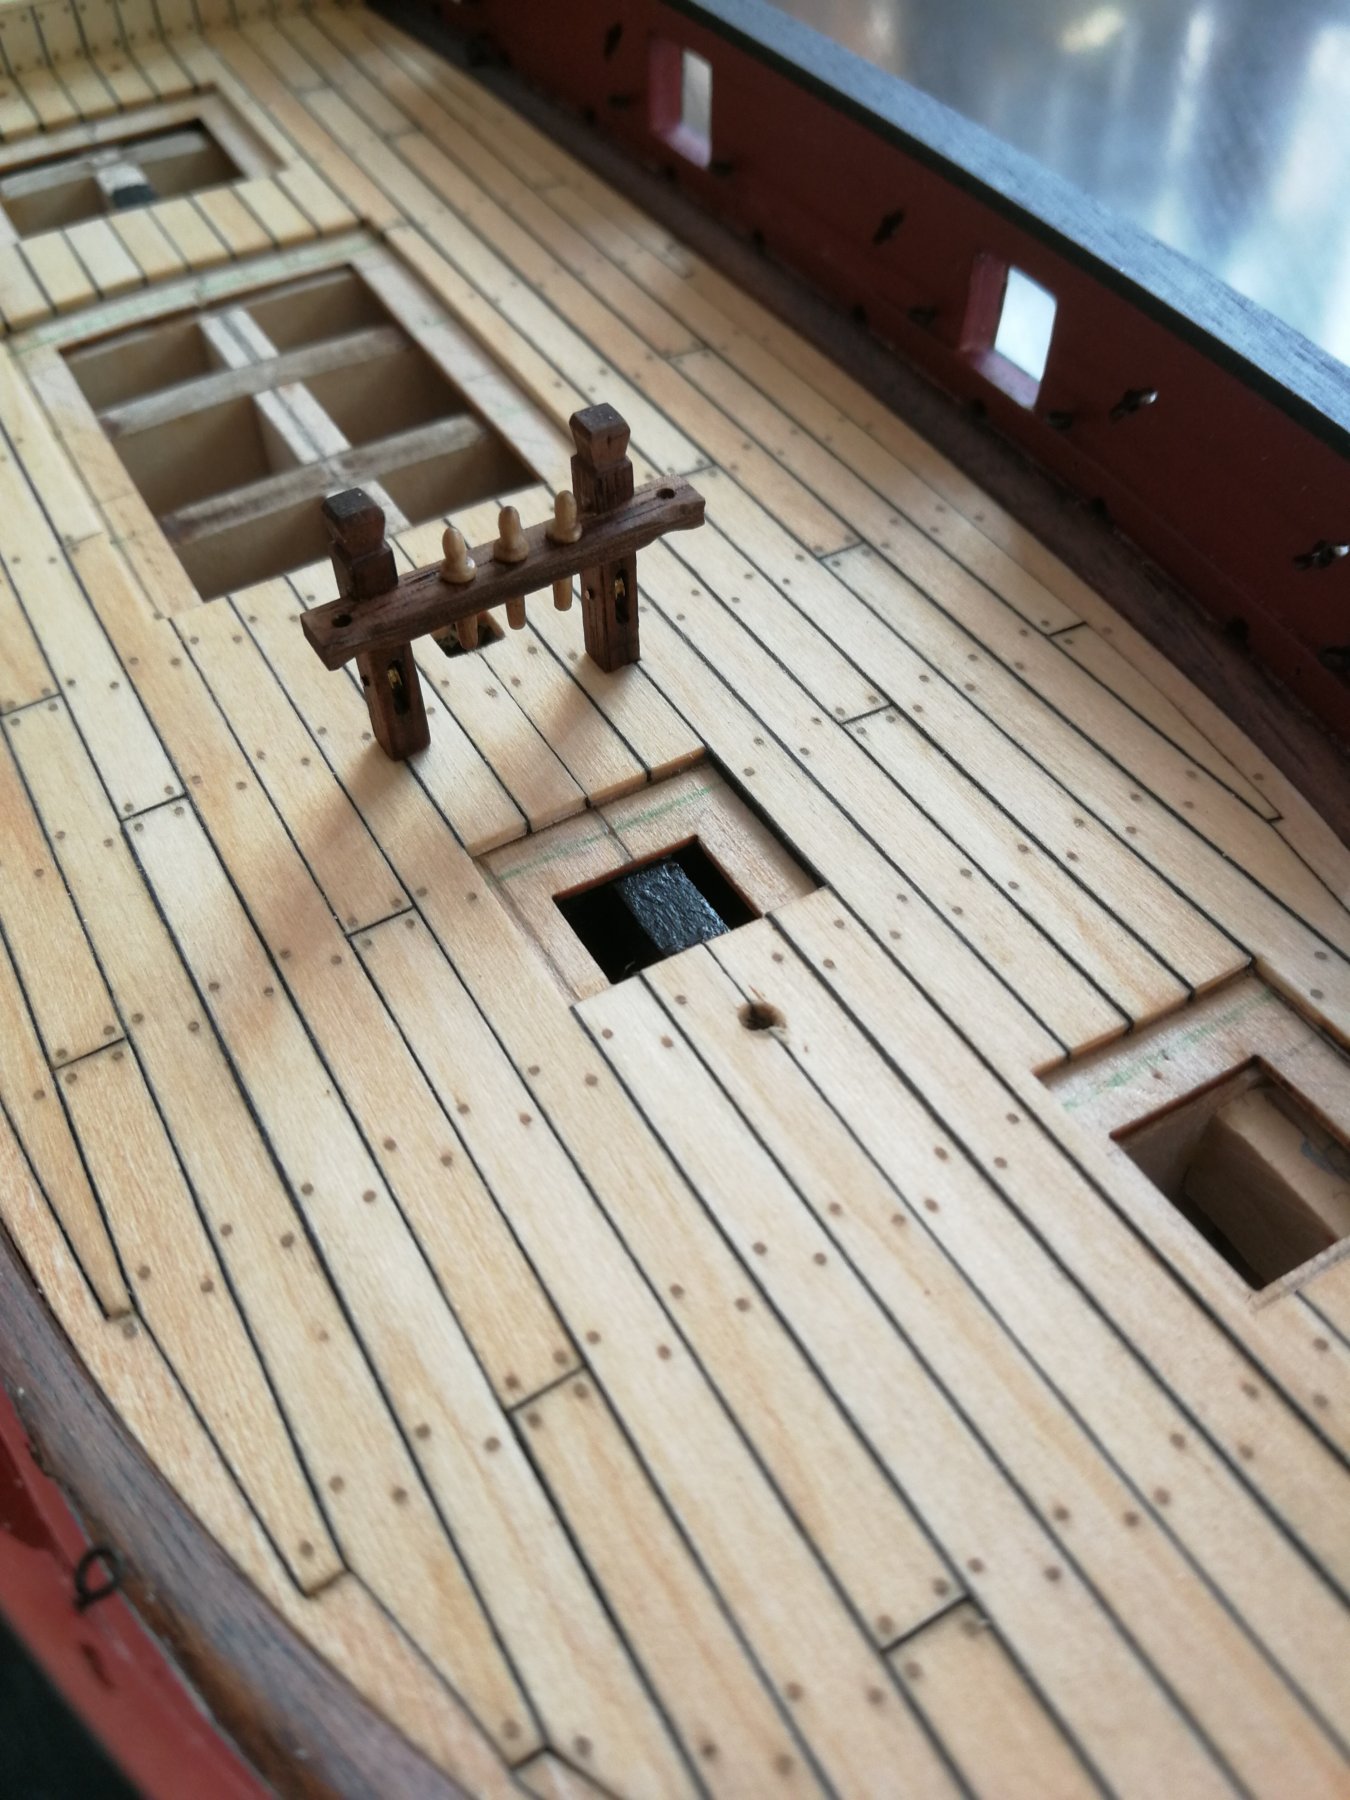
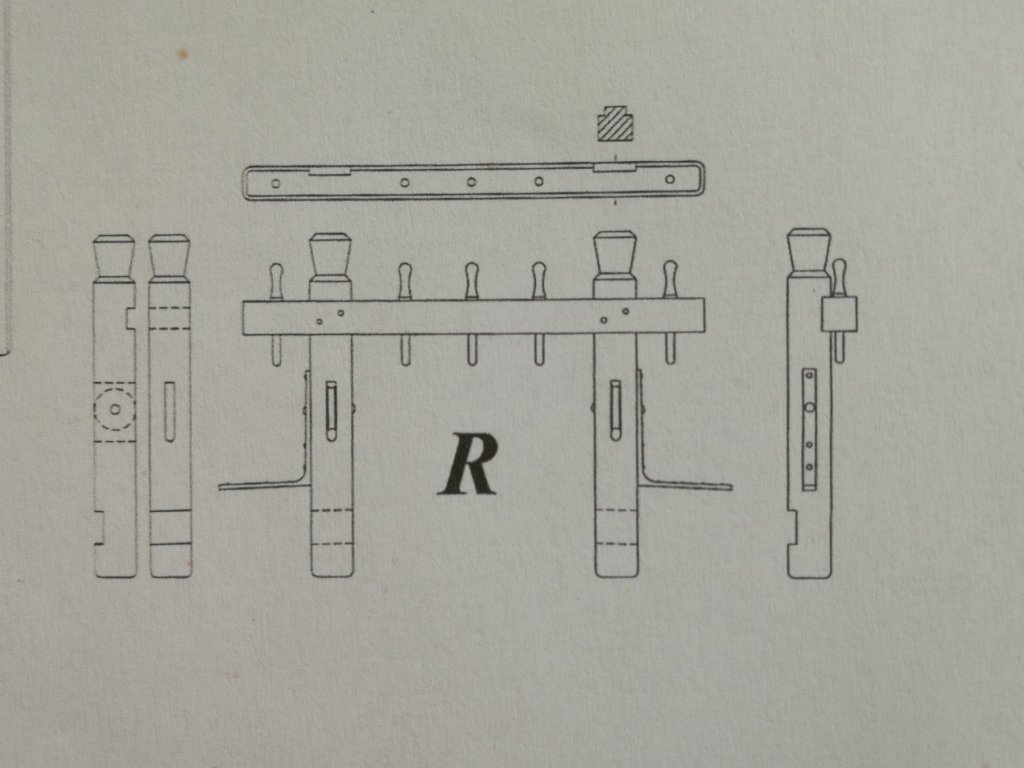
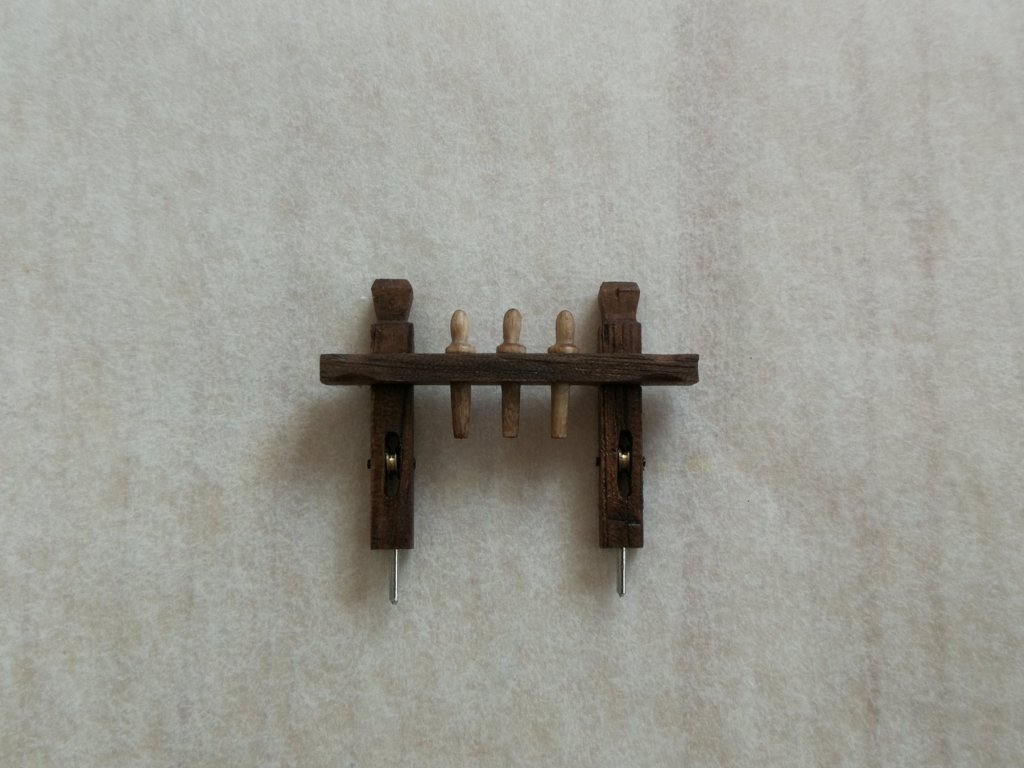
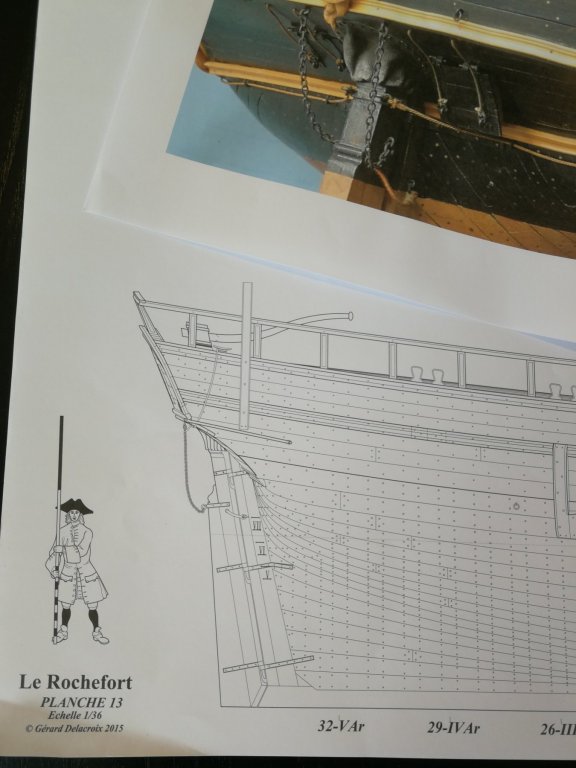
Thanks to all the 'Likes' I have worked on the riding bitts this week. It will be located just in front of the mast. The riding bitts as described in the instruction manual did not really like me. I found a more detailed version in the excellent monograph from the 'Editions Gérard Delacroix' on the small vessel 'Le Rochefort'. So I took inspiration from this plan to add some more details. A test fit with the riding bitts in place (not glued) just to see. The pin rails are a little to thick 🙁 It's really small to work... I'll try to do better next time 😉 Now I'm working on the galley smoke stack.


- 164 replies
-
- 13
-
-
- first build
- model shipways
- (and 2 more)
-
Superbe ! Quelle précision ! et merci de partager votre merveilleux travail !
-
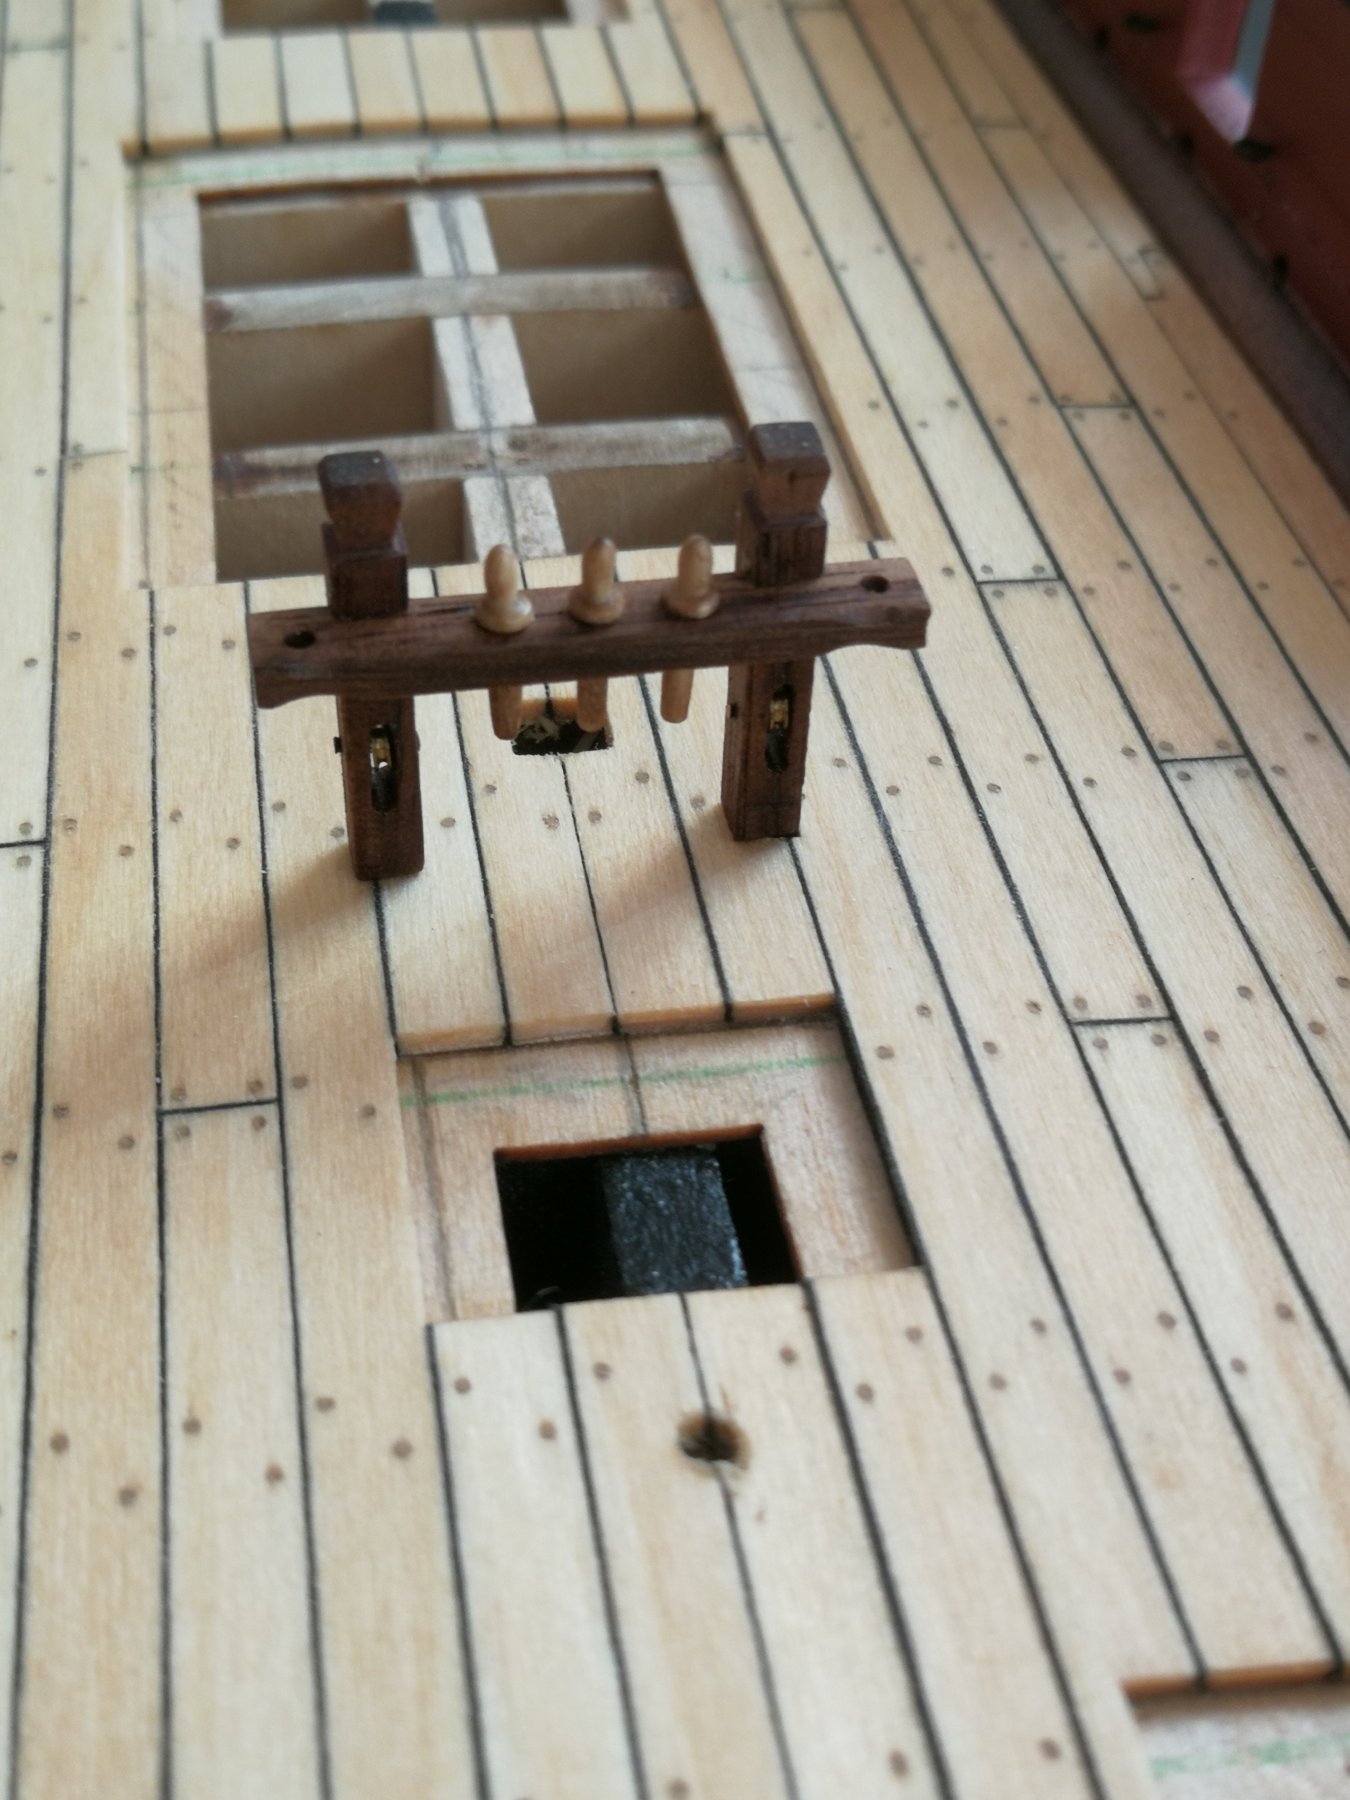
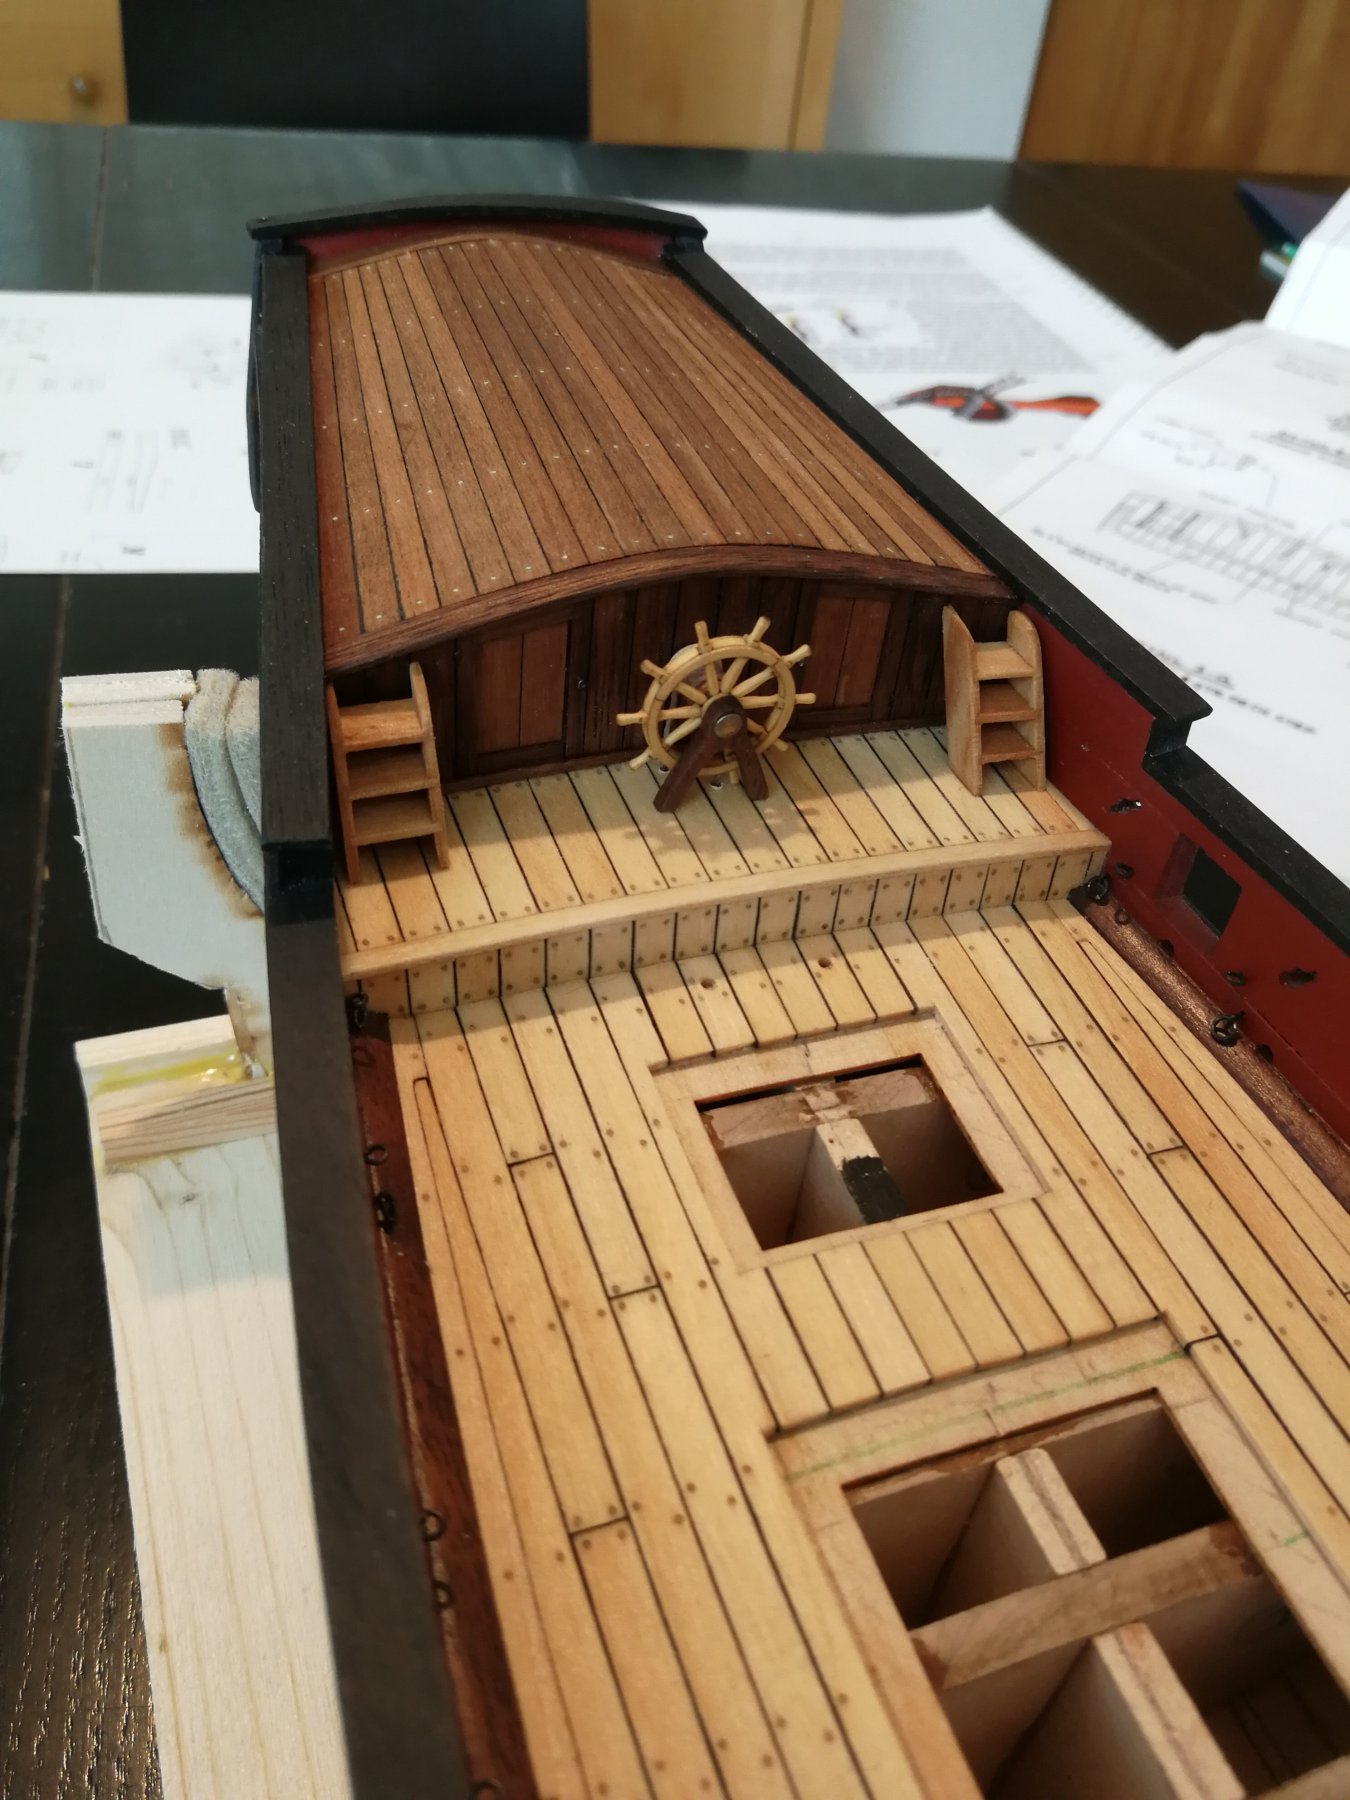
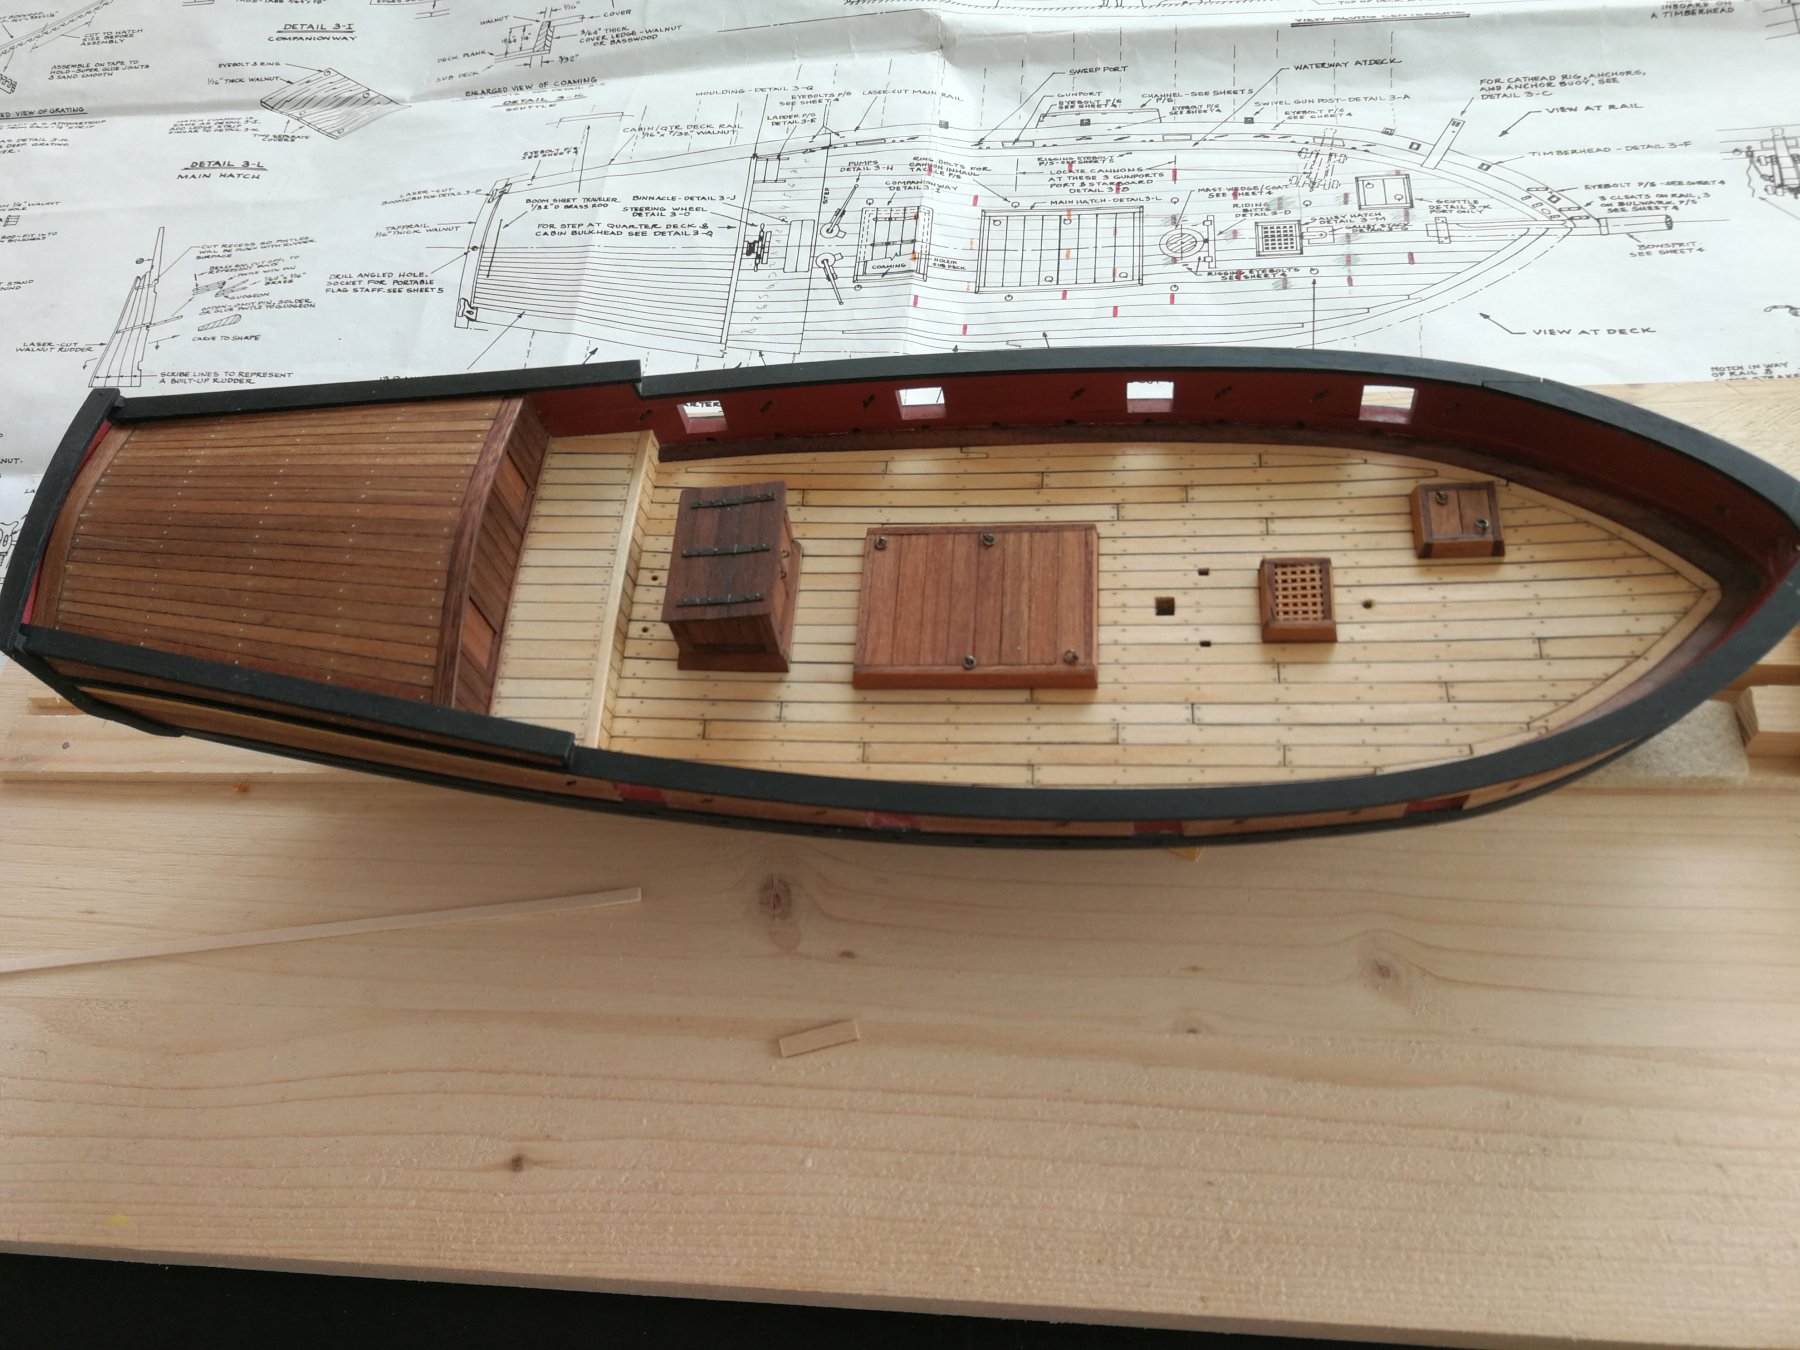
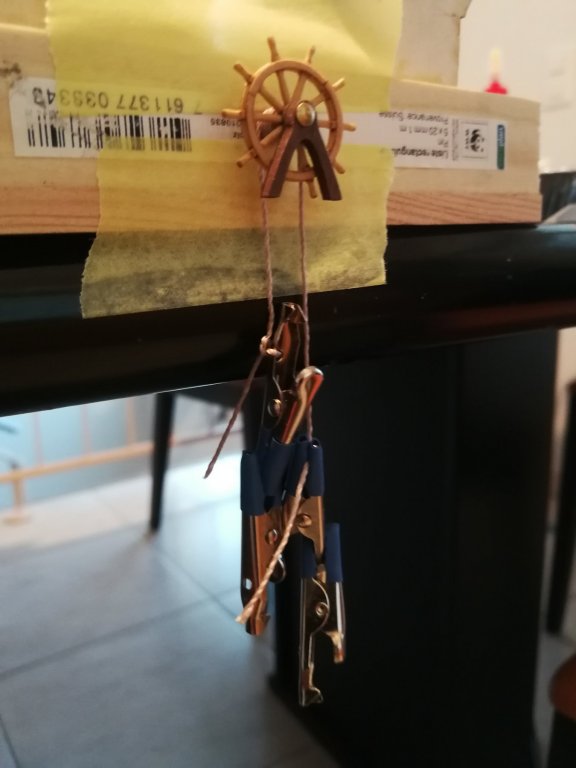
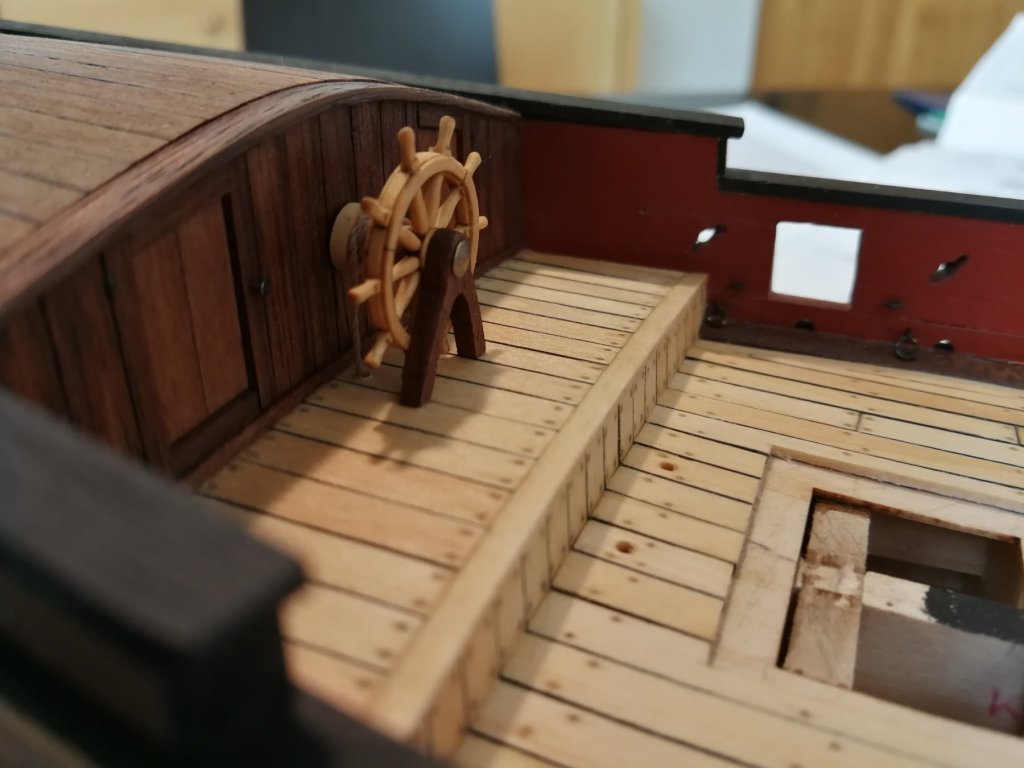
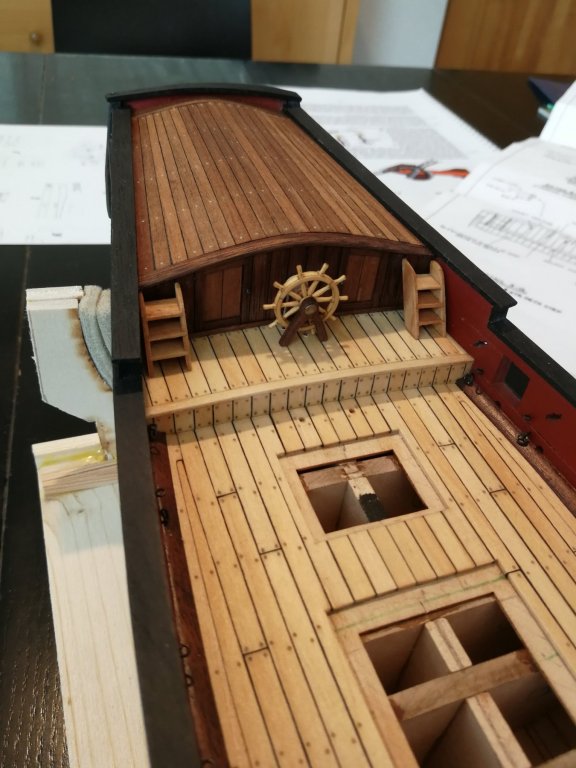
Thanks Gary for your encouragement and thanks to all the 'Likes'. The ship's wheel is finished and the tiller line has been added. The wheel was suspended at a jig and the rope coated with a mixture of white glue diluted with water. It will be easier to pass the end of the rope in the two holes drilled in the deck. The two quarterdeck ladders have been added Very happy to see some parts of the deck furniture definitely finished.


- 164 replies
-
- 13
-
-
- first build
- model shipways
- (and 2 more)
-
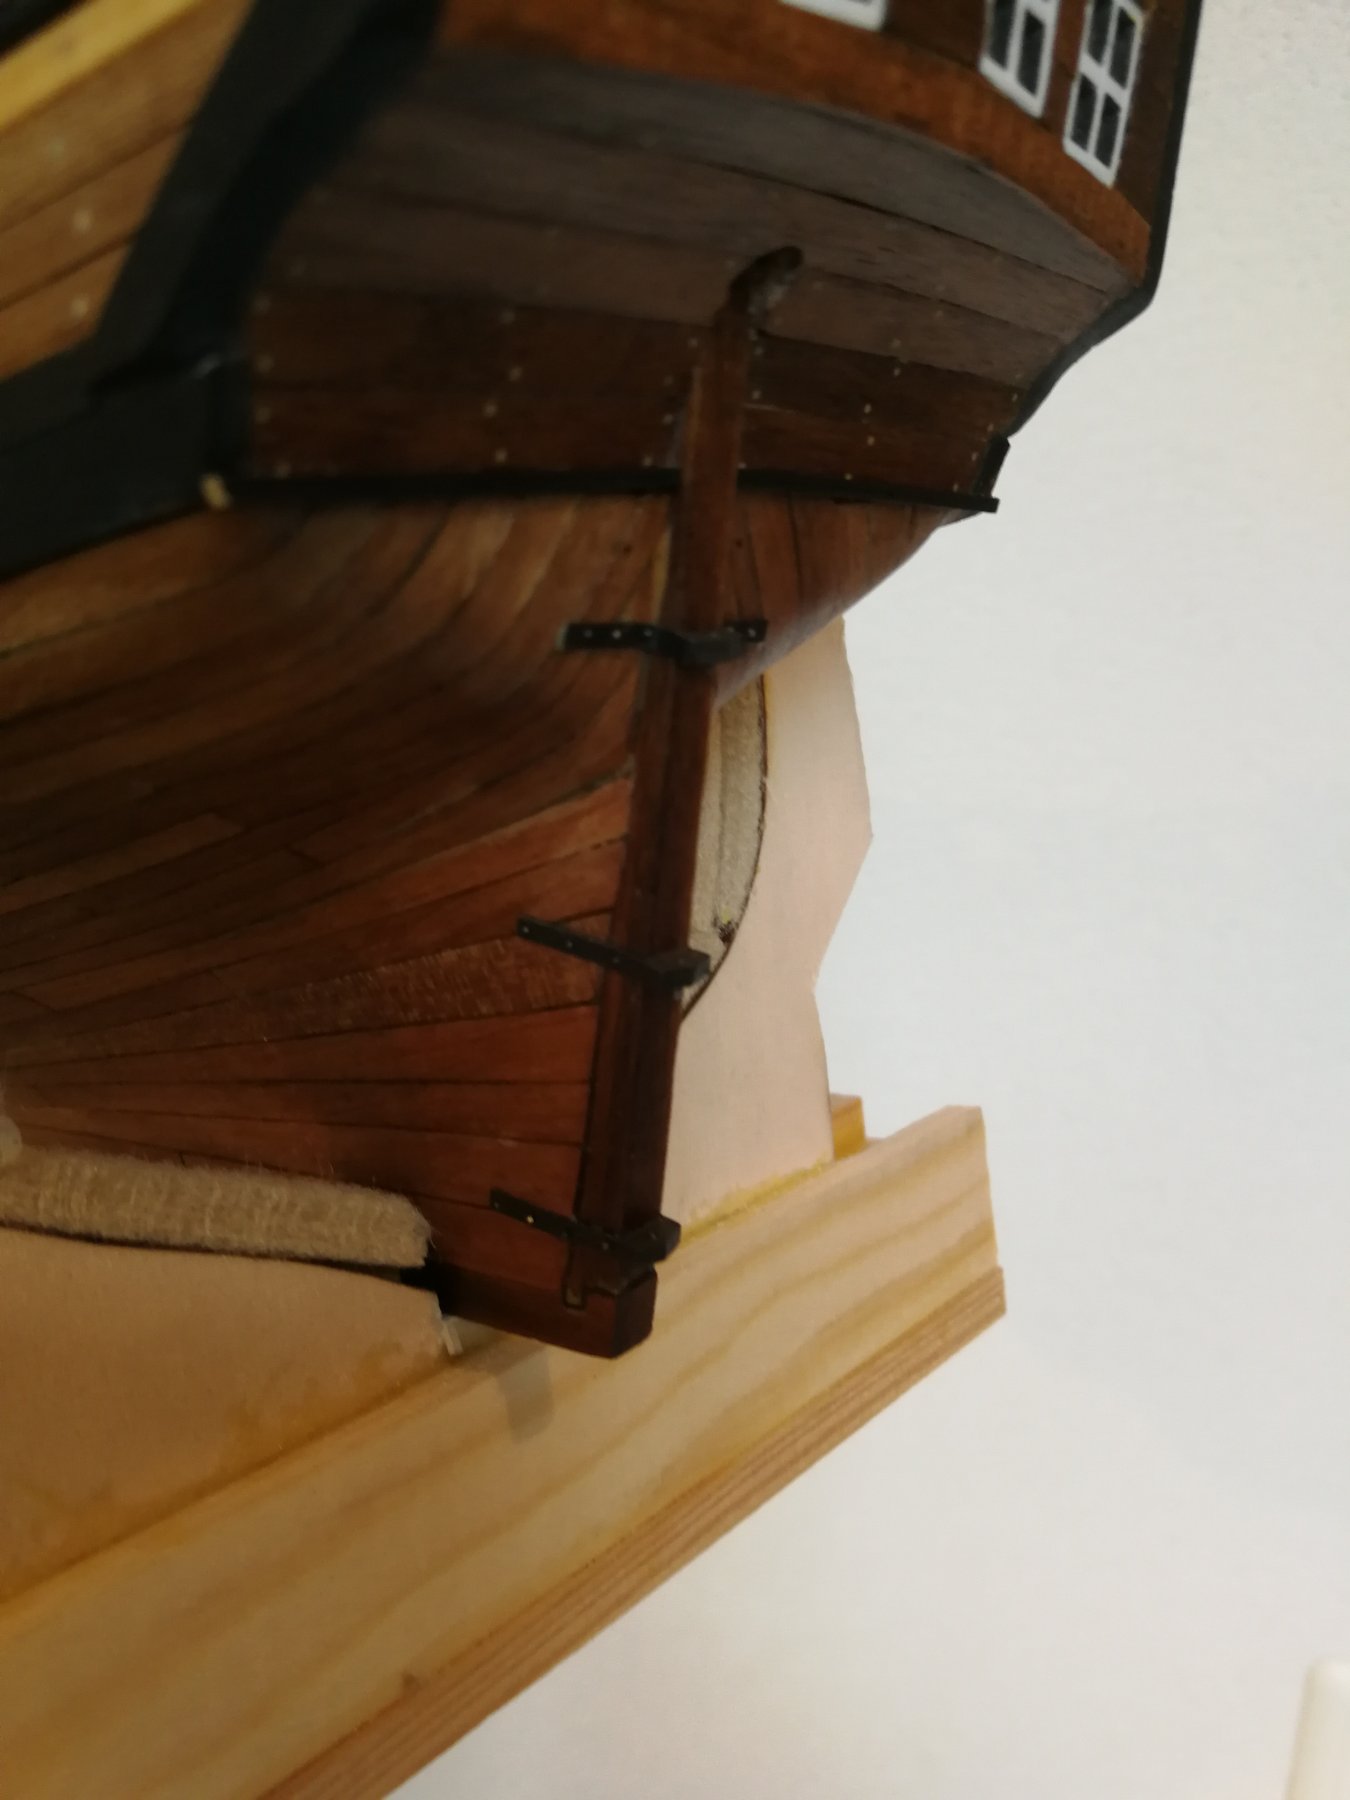
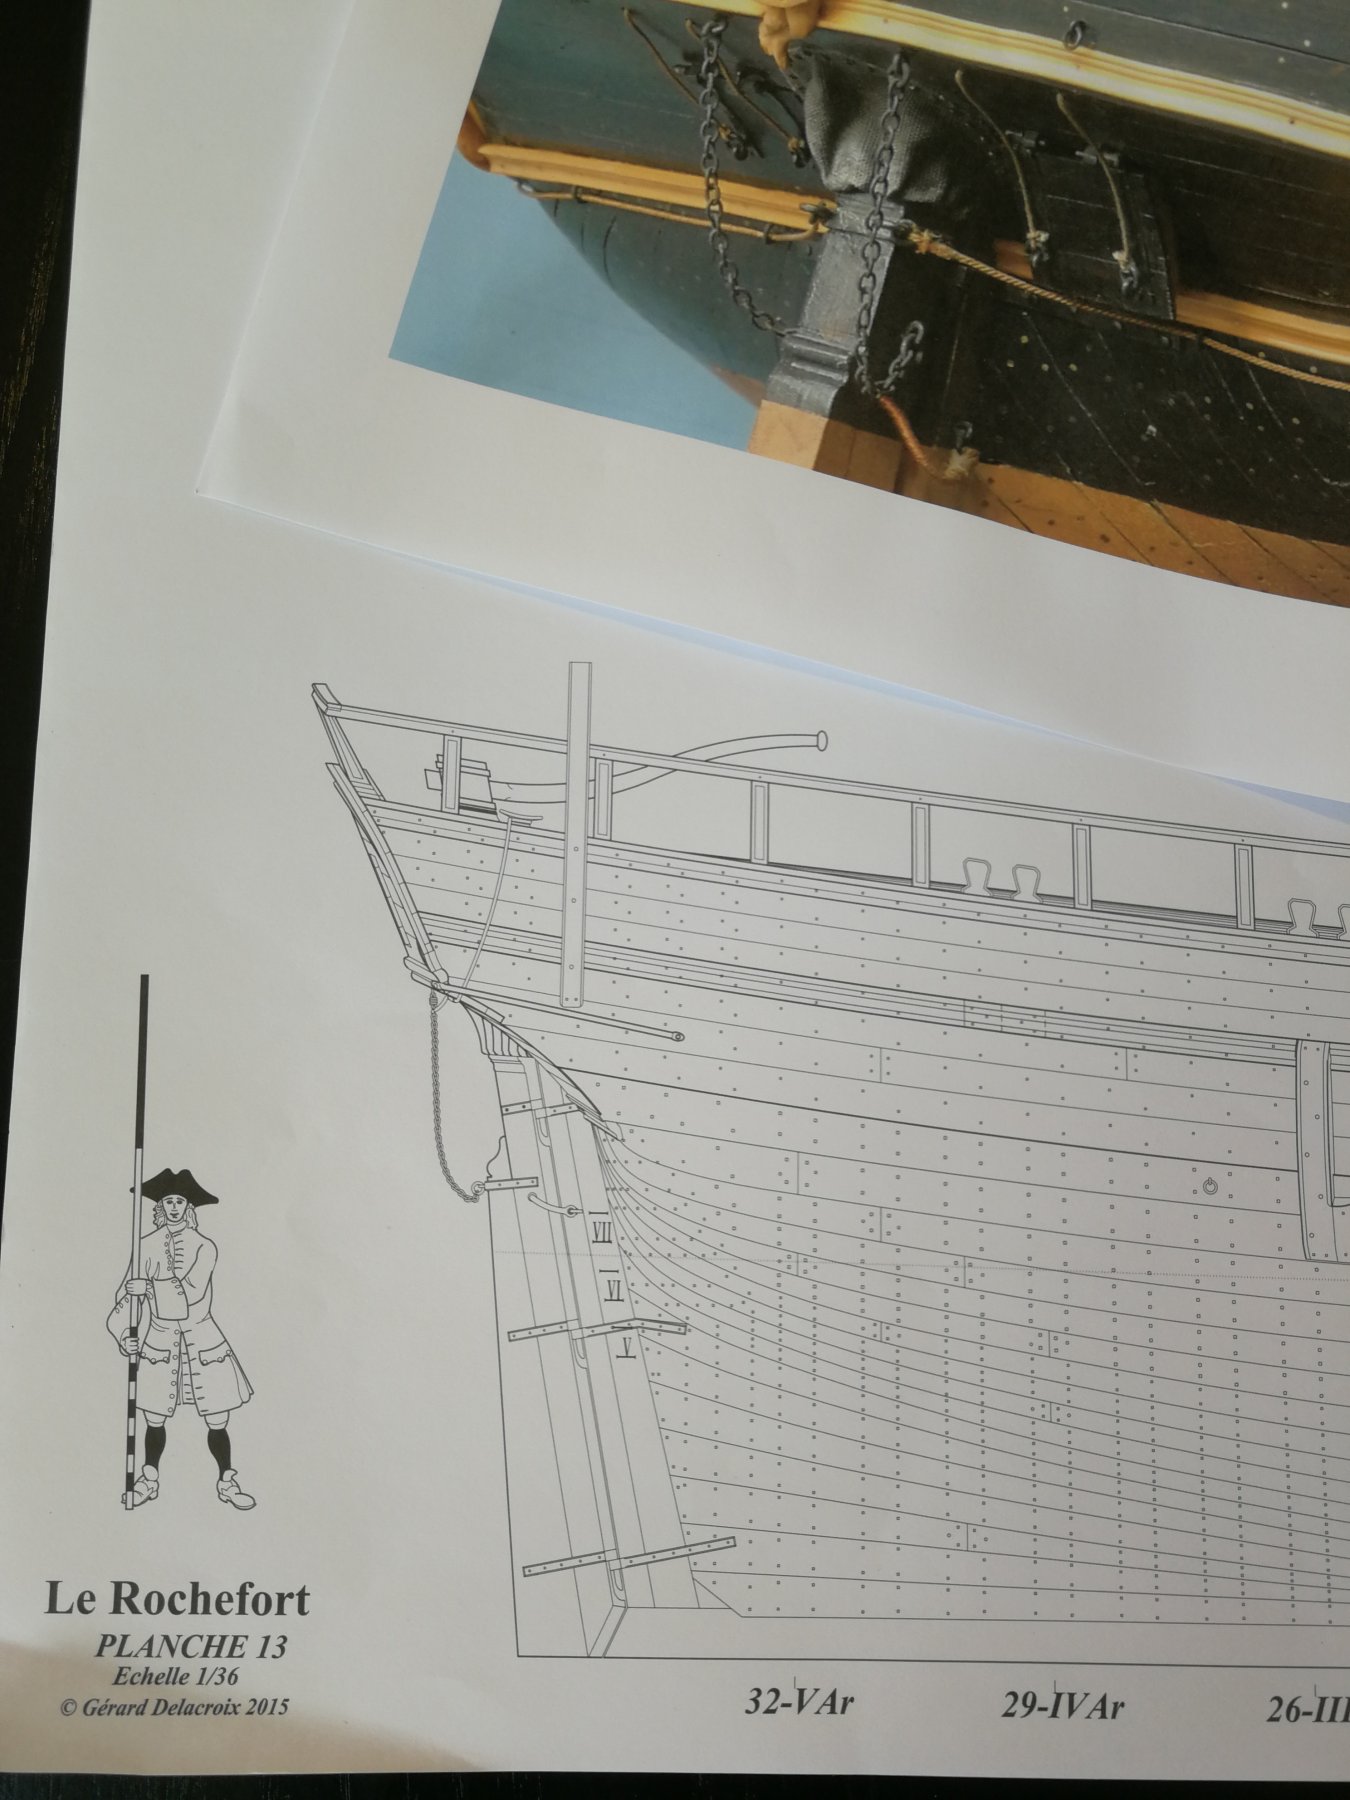
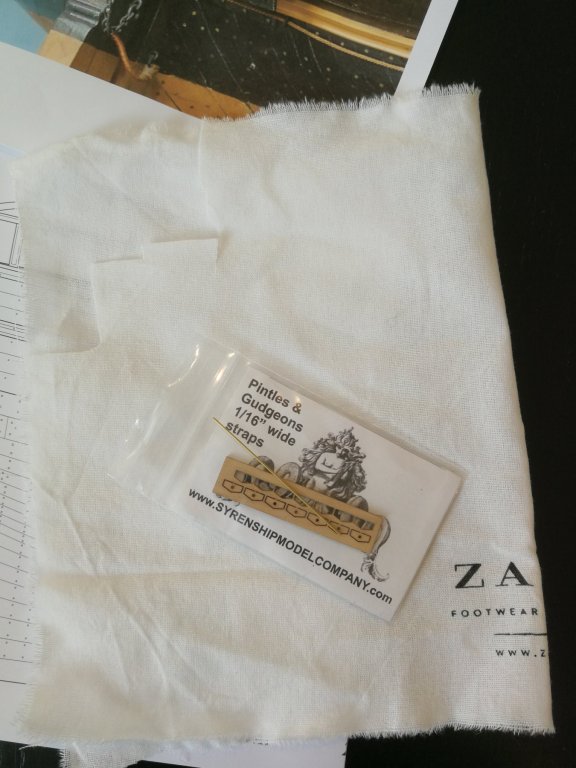
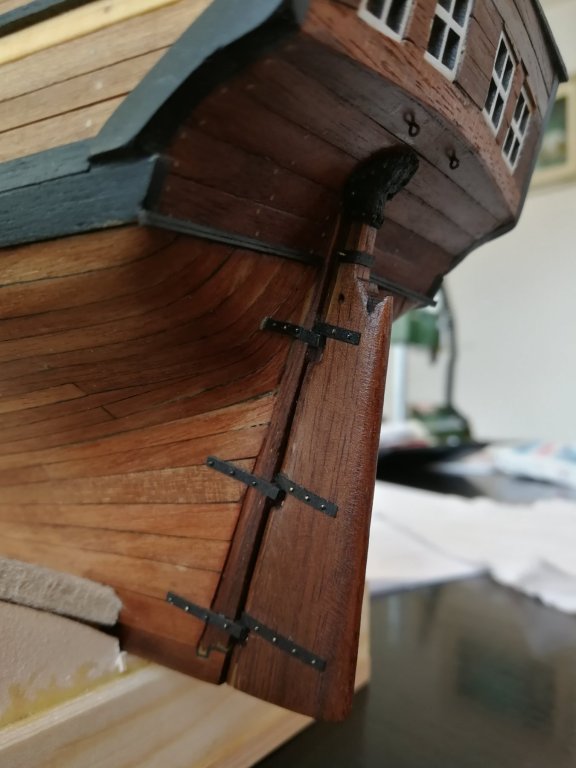
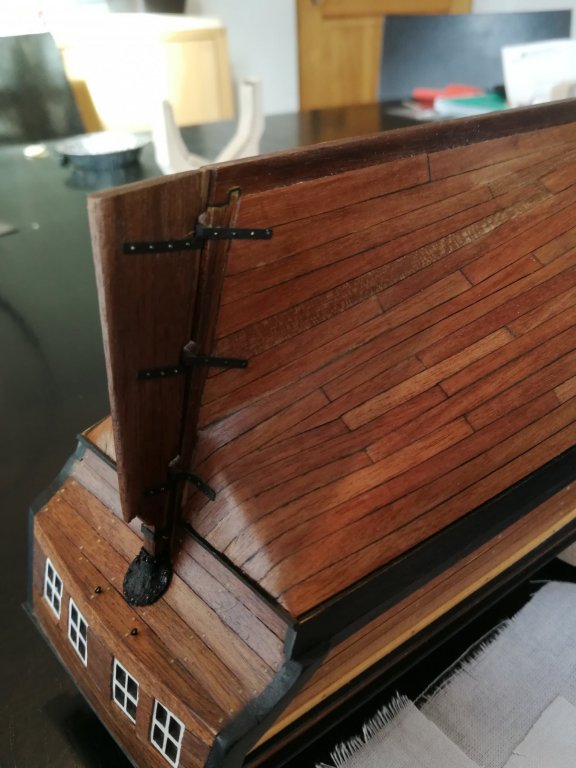
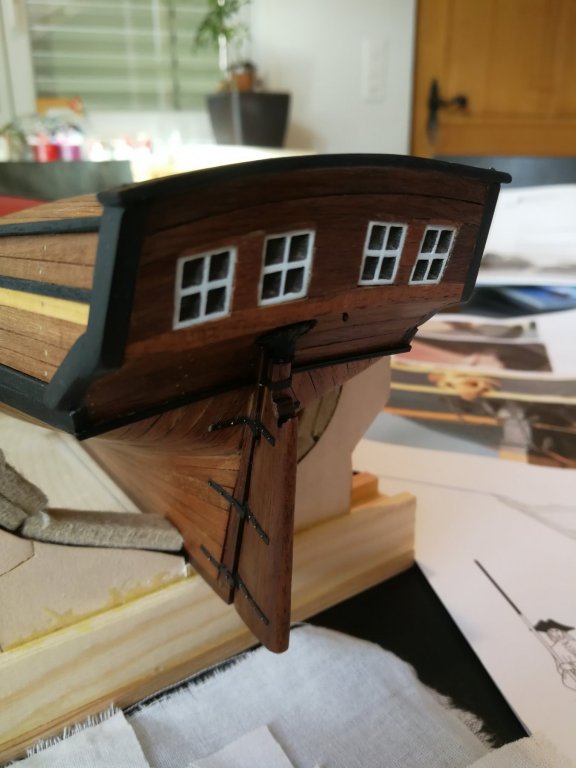
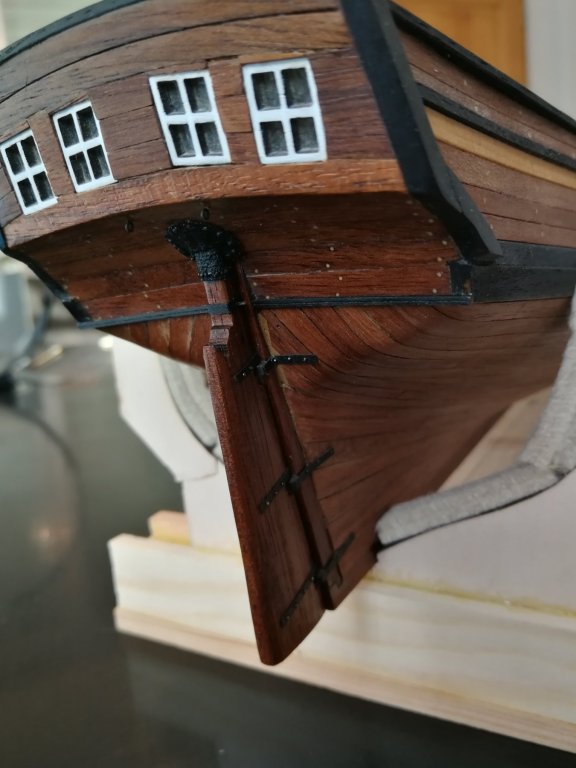
Thanks to all the 'Likes'. The rudder is placed. I first added the pintles and gudgeons on the stern post. I followed the instructions from the Cheerfull manual. As always the instructions are very precise and instructive. I wanted to add some more details founded on the net and in my personal documentation. I bought lately an excellent monograph from the 'Editions Gérard Delacroix' on the small vessel 'Le Rochefort'. This yacht has the same tonnage as the Virginia Sloop and is from the same period. We can see the 'safety' system (système de sauvegarde) of the rudder. I decided to add these details. Some photos of this system have been found on the net and a very detailed description of the method to simulate it was found in the wonderful log 'Pimp my Sherbourne' written by Dubz. A piece of fabric cut from an old little bag of my daughter was first reinforced with CA glue in order to obtain a precise and clean cutting. The piece of fabric was tinted with a black permanent marker and the glued in place. Finally, nails were use to simulate the mode of fixation The chain and the rope will be added later. Next step : the catheads...

- 164 replies
-
- 13
-
-
- first build
- model shipways
- (and 2 more)
-
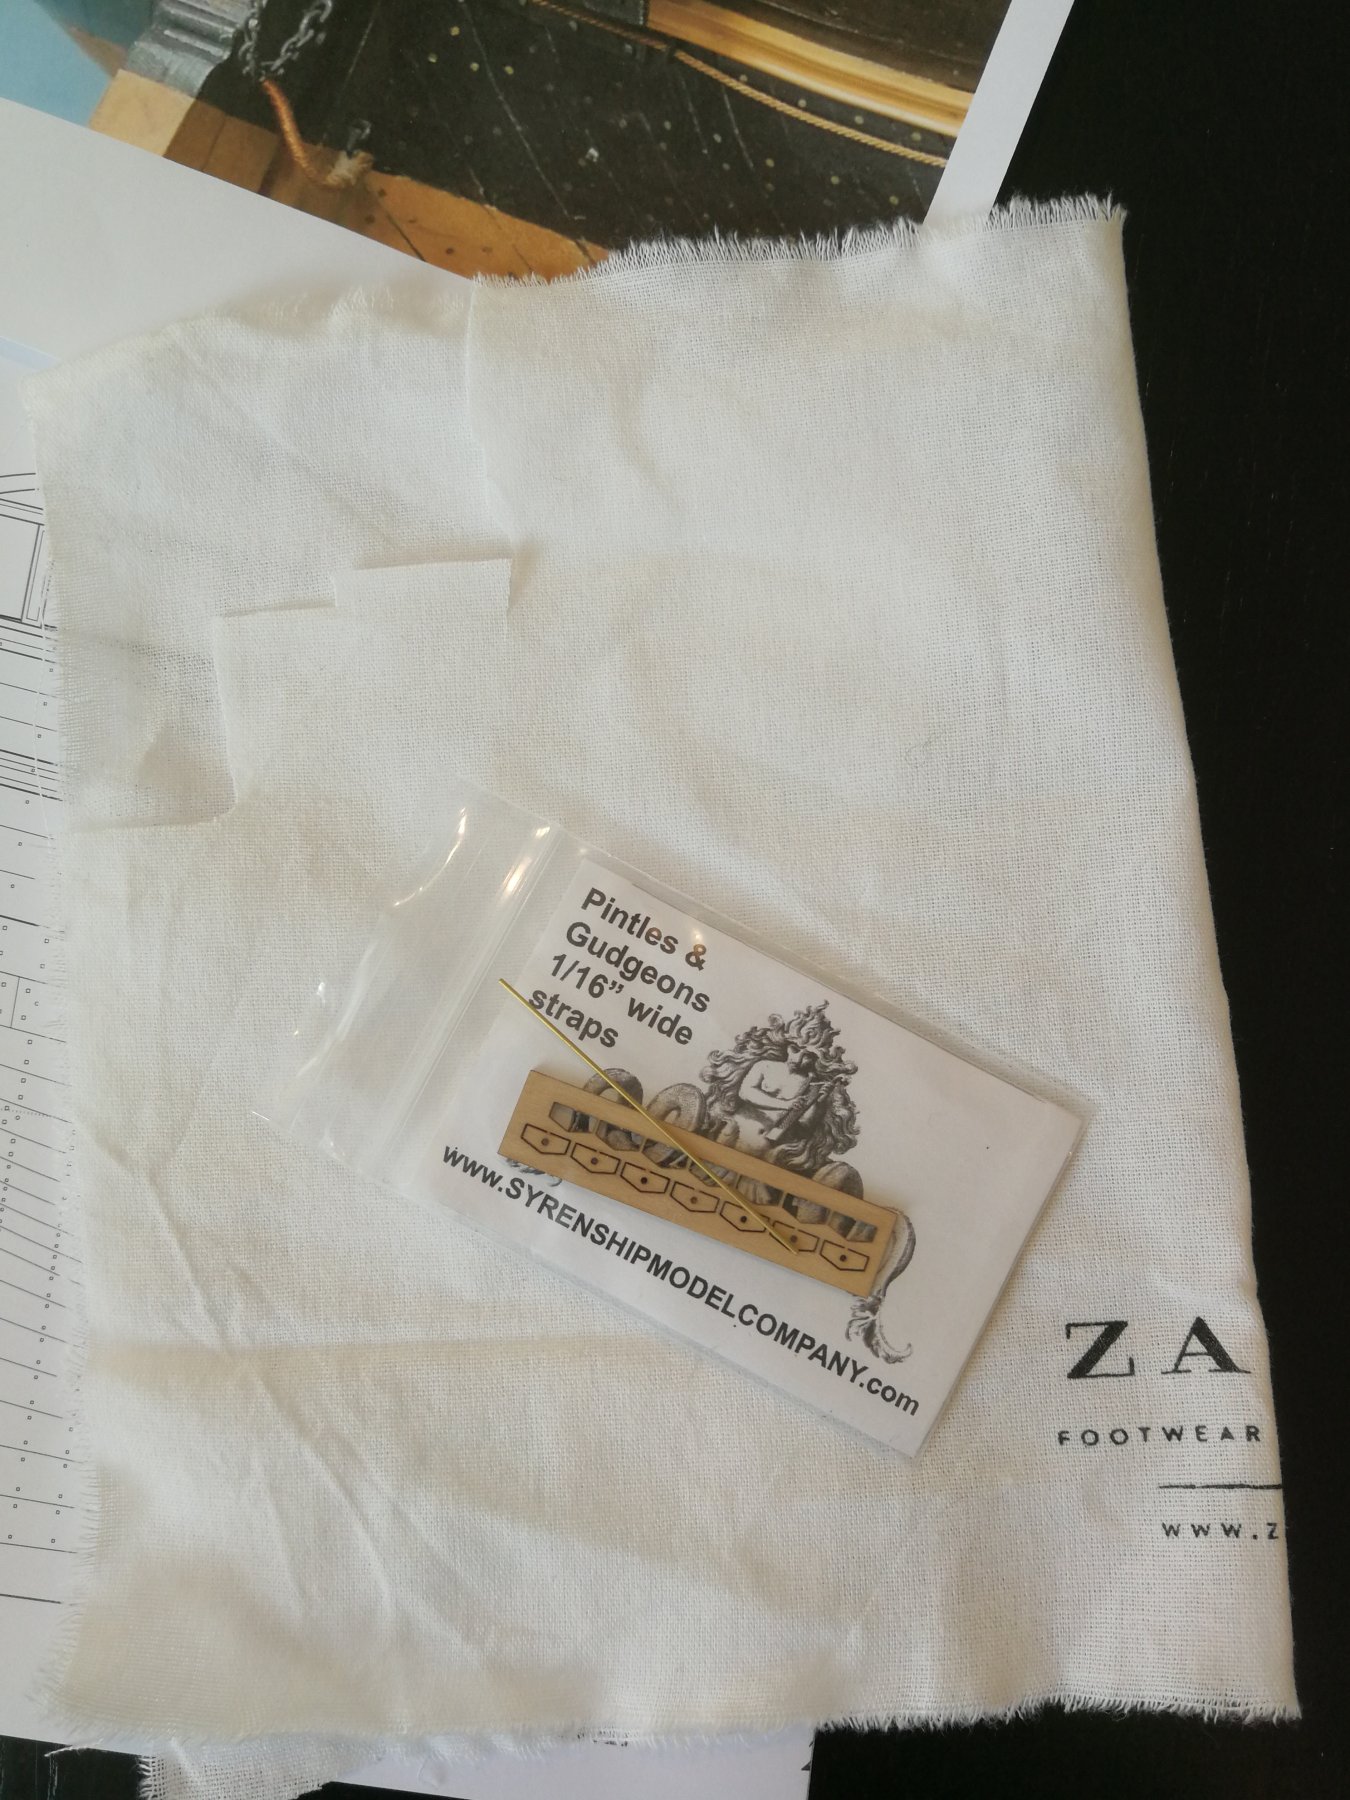
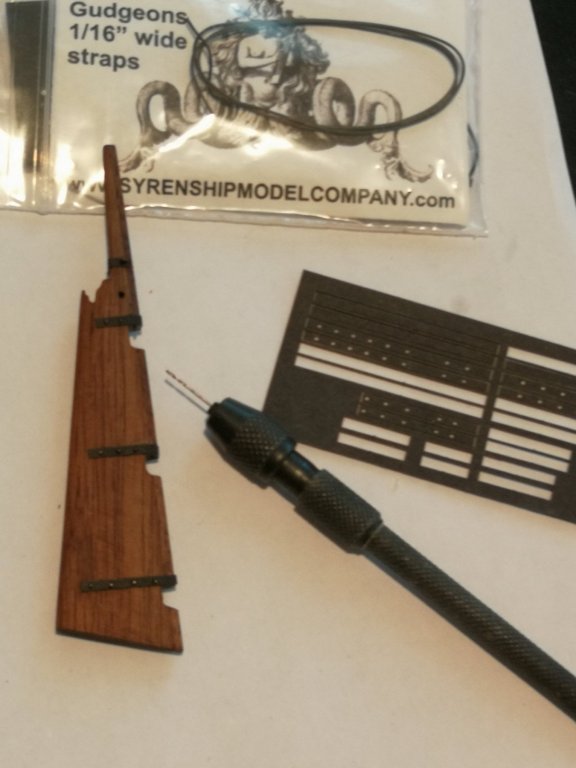
Small update on my build log. The rudder is ready to be set up. As I don't have actually tools for metal working, I used the mini kit 'Gudgeons and straps' from Syren. I added two eyebolts for the chain and drilled a hole for the safety rope. I have to think about buying a soldering kit because working metal must be surely interesting...


- 164 replies
-
- 11
-
-
- first build
- model shipways
- (and 2 more)
-
A beauty ☺️ I always appreciate your tips. When I saw the idea to use binder clips to prevent breaking the bulkheads, I thought, why dit not I think about it ? The simplest ideas are often the best. But You have to found them 😉 The Winchelsea will is going to be a wonderful kit. Thanks Chuck !
- 1,784 replies
-
- 5
-
-
- winchelsea
- Syren Ship Model Company
- (and 1 more)
-
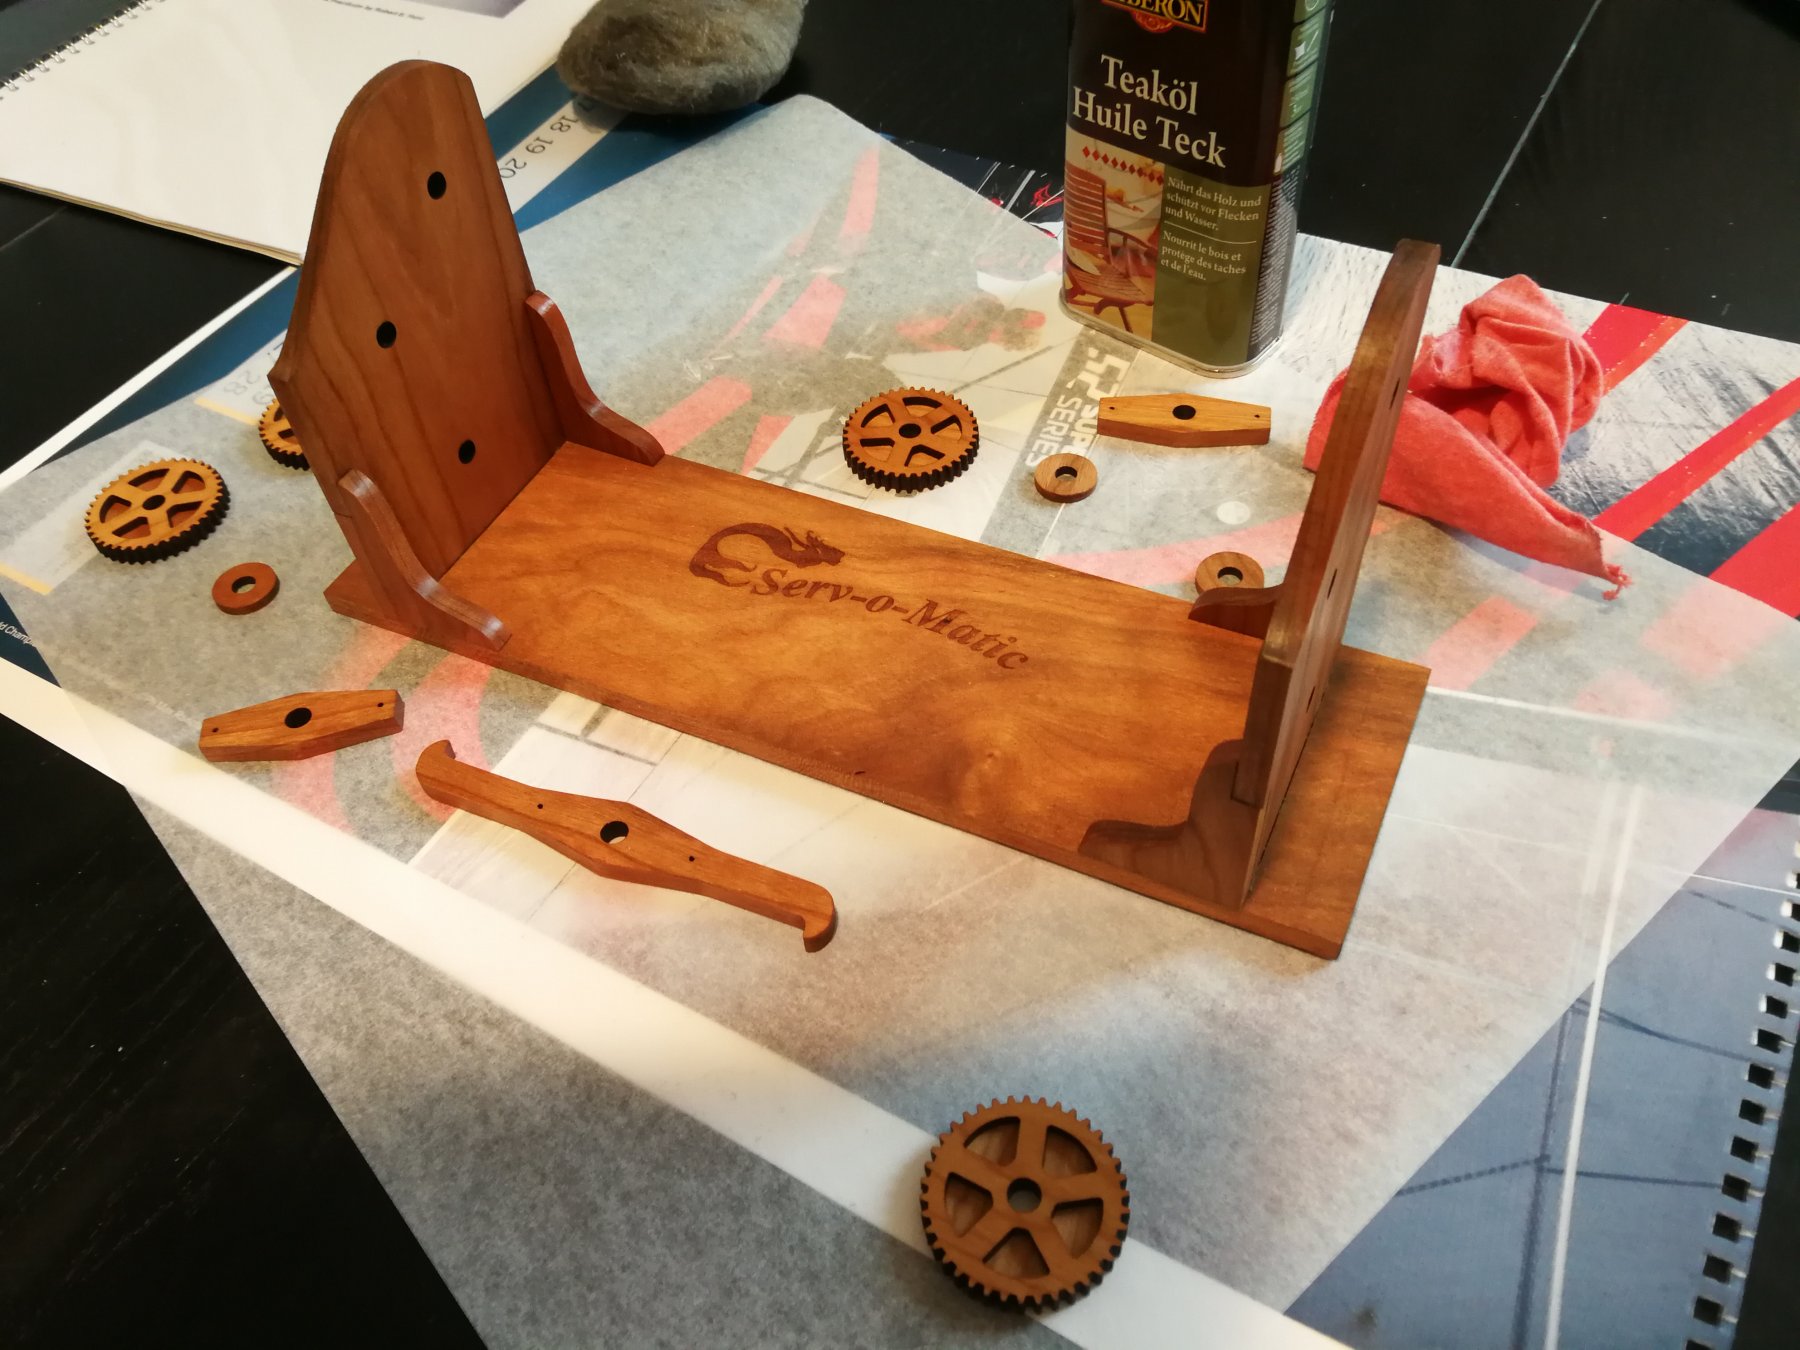
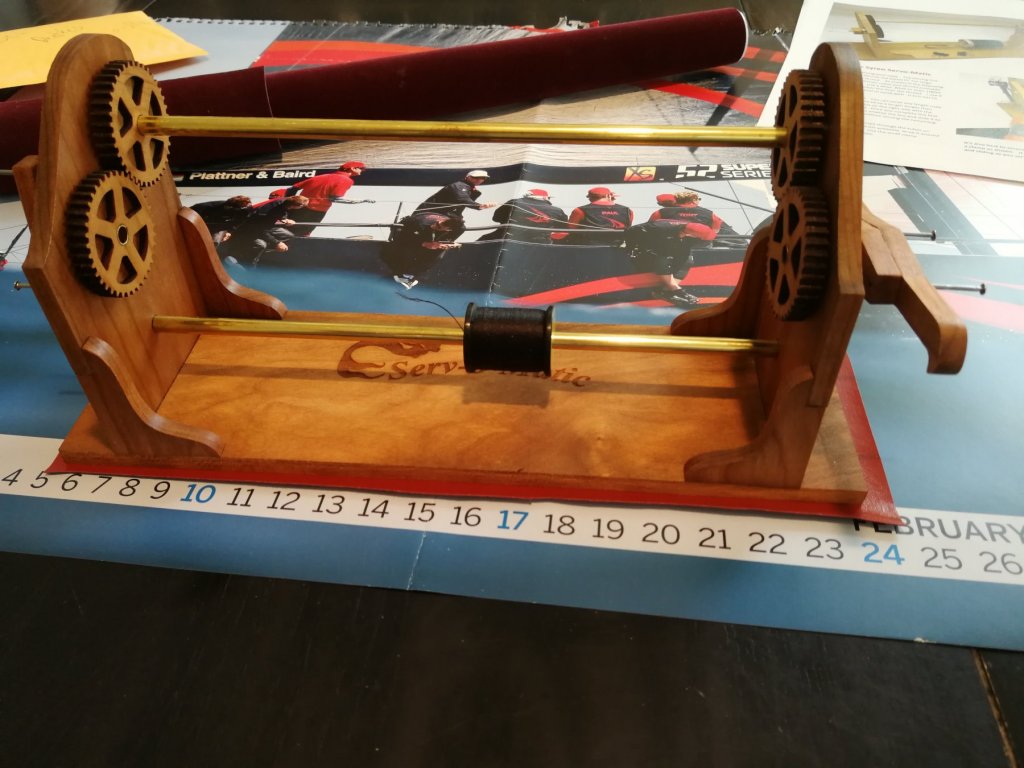
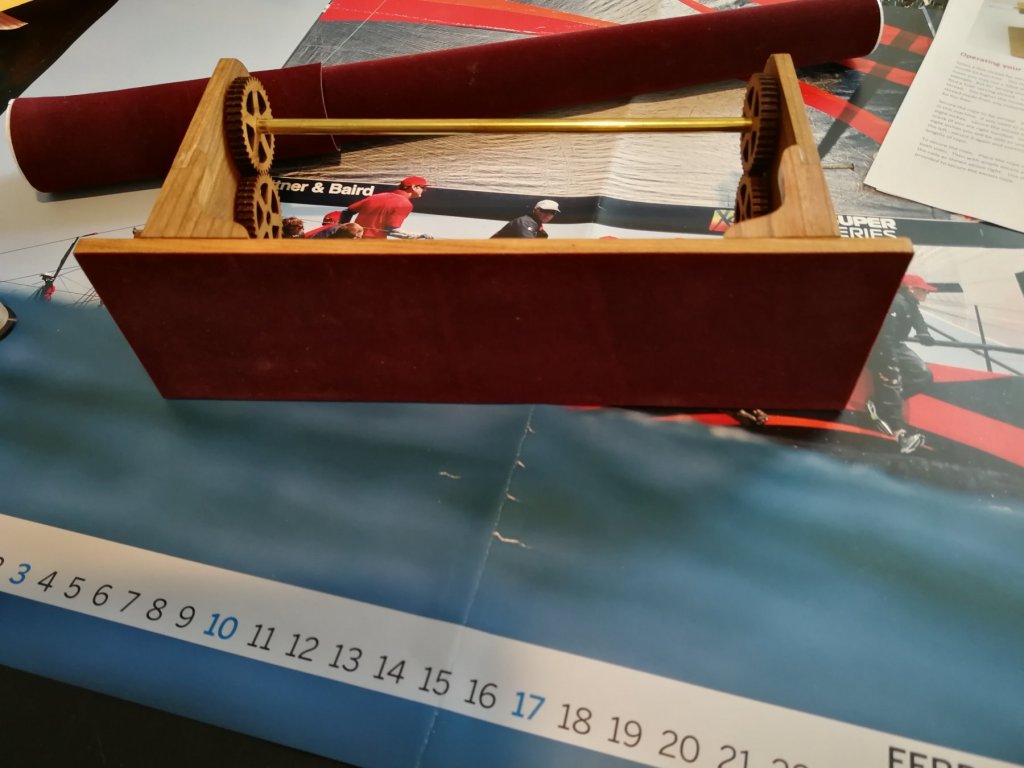
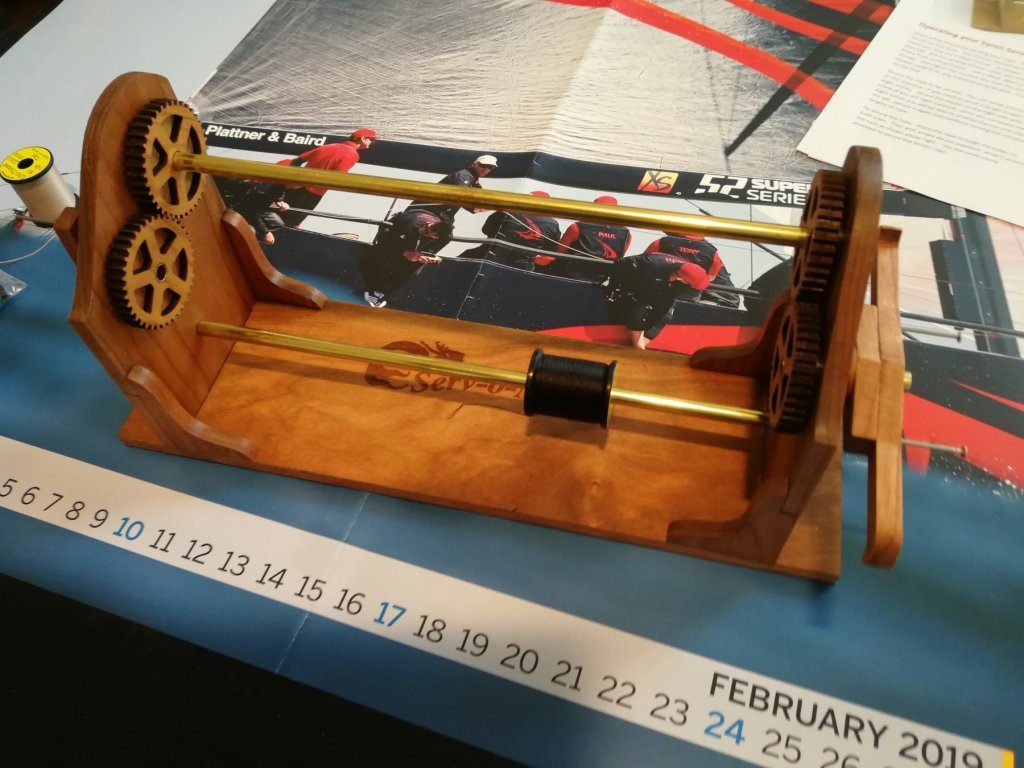
I'm already anticipating the rigging work. In order to use served ropes on my model, I ordered some time ago, the Serv-o-matic from Syren Ship Model Company. As advised in the instruction manual, I first cleaned all the laser char from each piece. My Proxxon was very useful for this step. I then applied two thin layers of Liberon teak oil. The assembly is not very complicate and as usual with the products from Syren Ship Model the instruction manual is very detailed. The only change I made from the instruction is the addition of a piece of red velvet sticker under the Serv-o-matic. Once glued, I precisely cut the piece of velvet. I just have to make my first piece of served ropes...

- 164 replies
-
- 5
-
-
- first build
- model shipways
- (and 2 more)
-
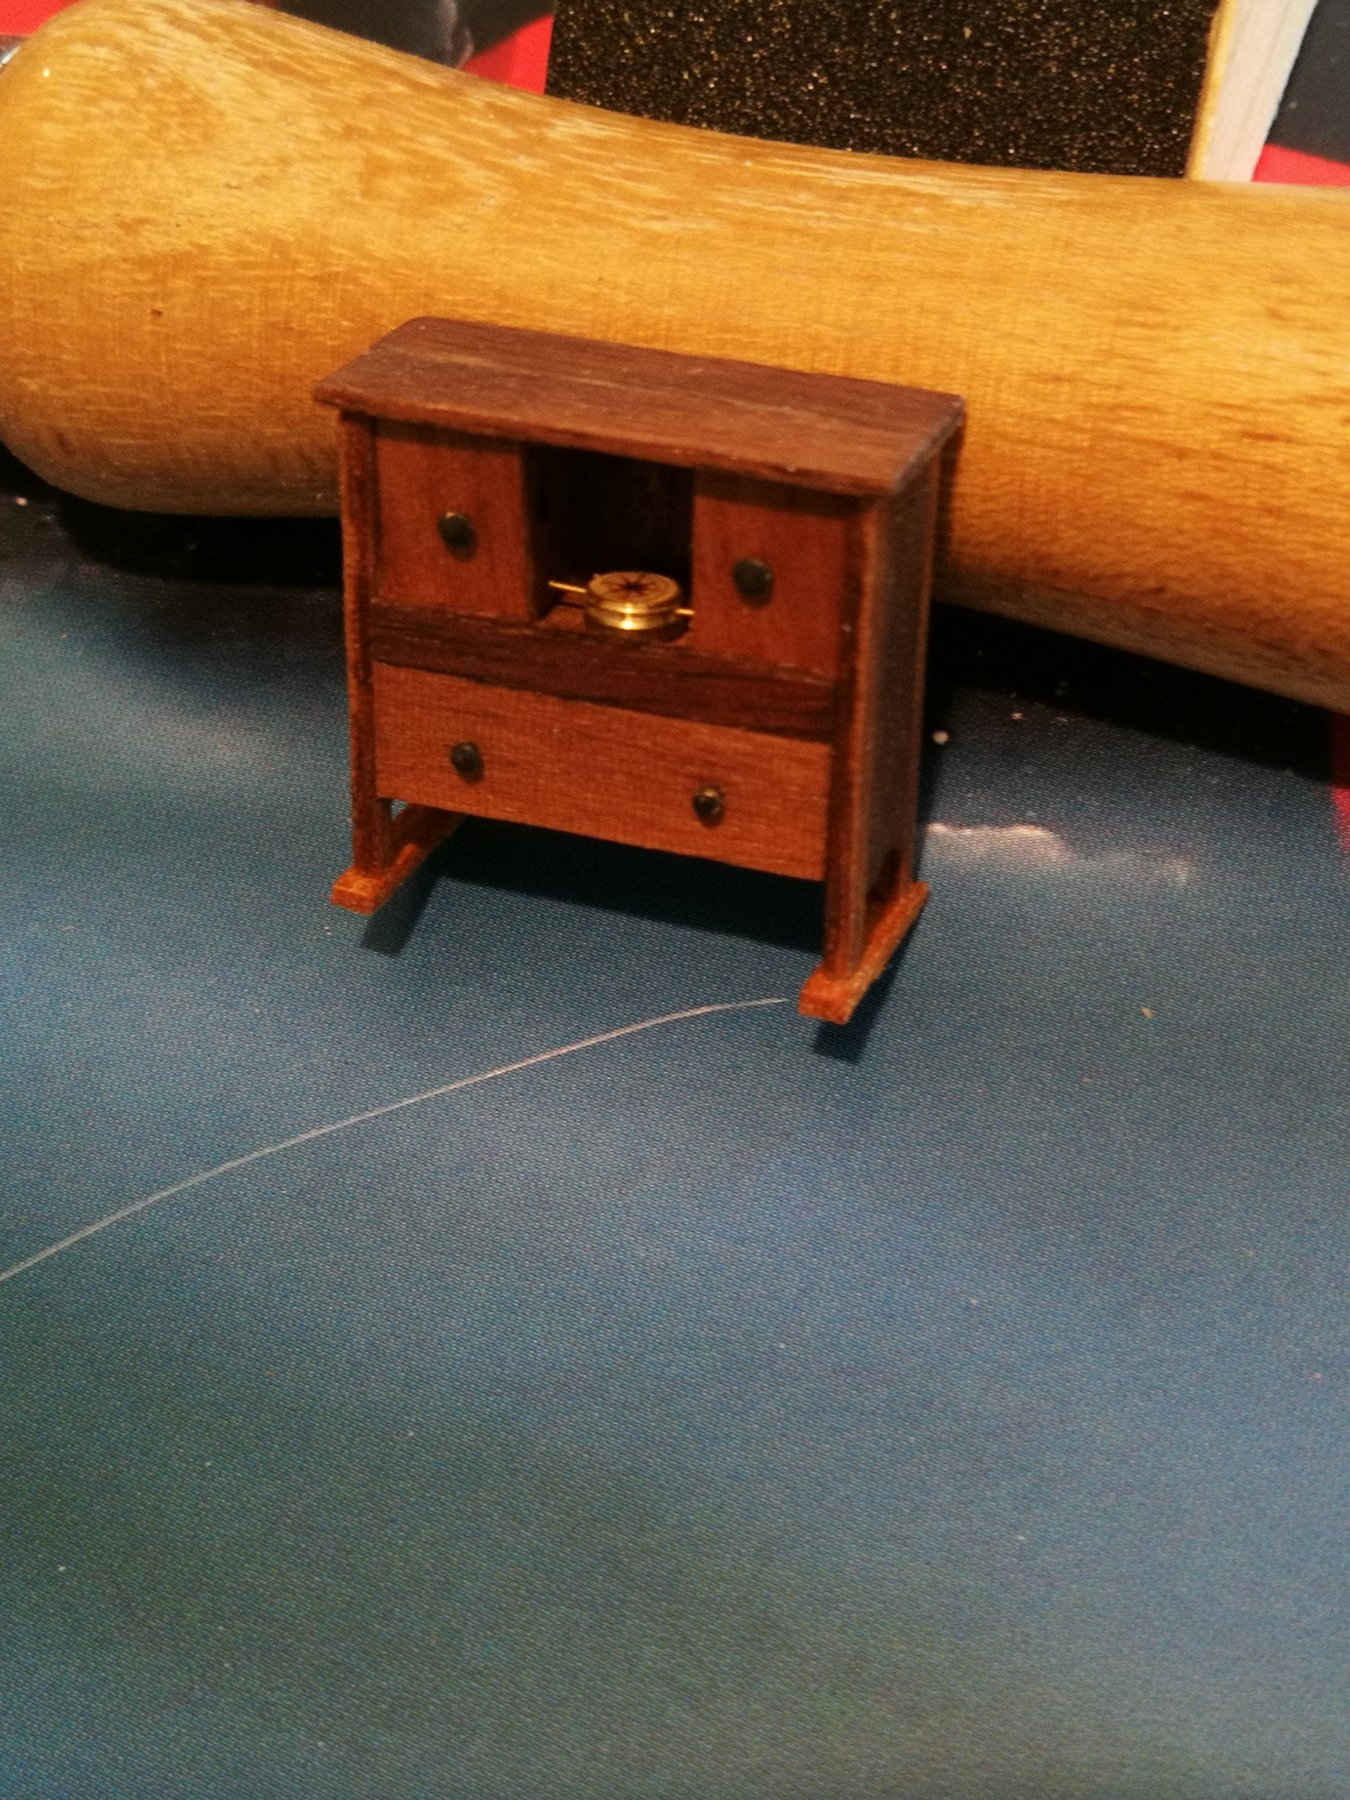
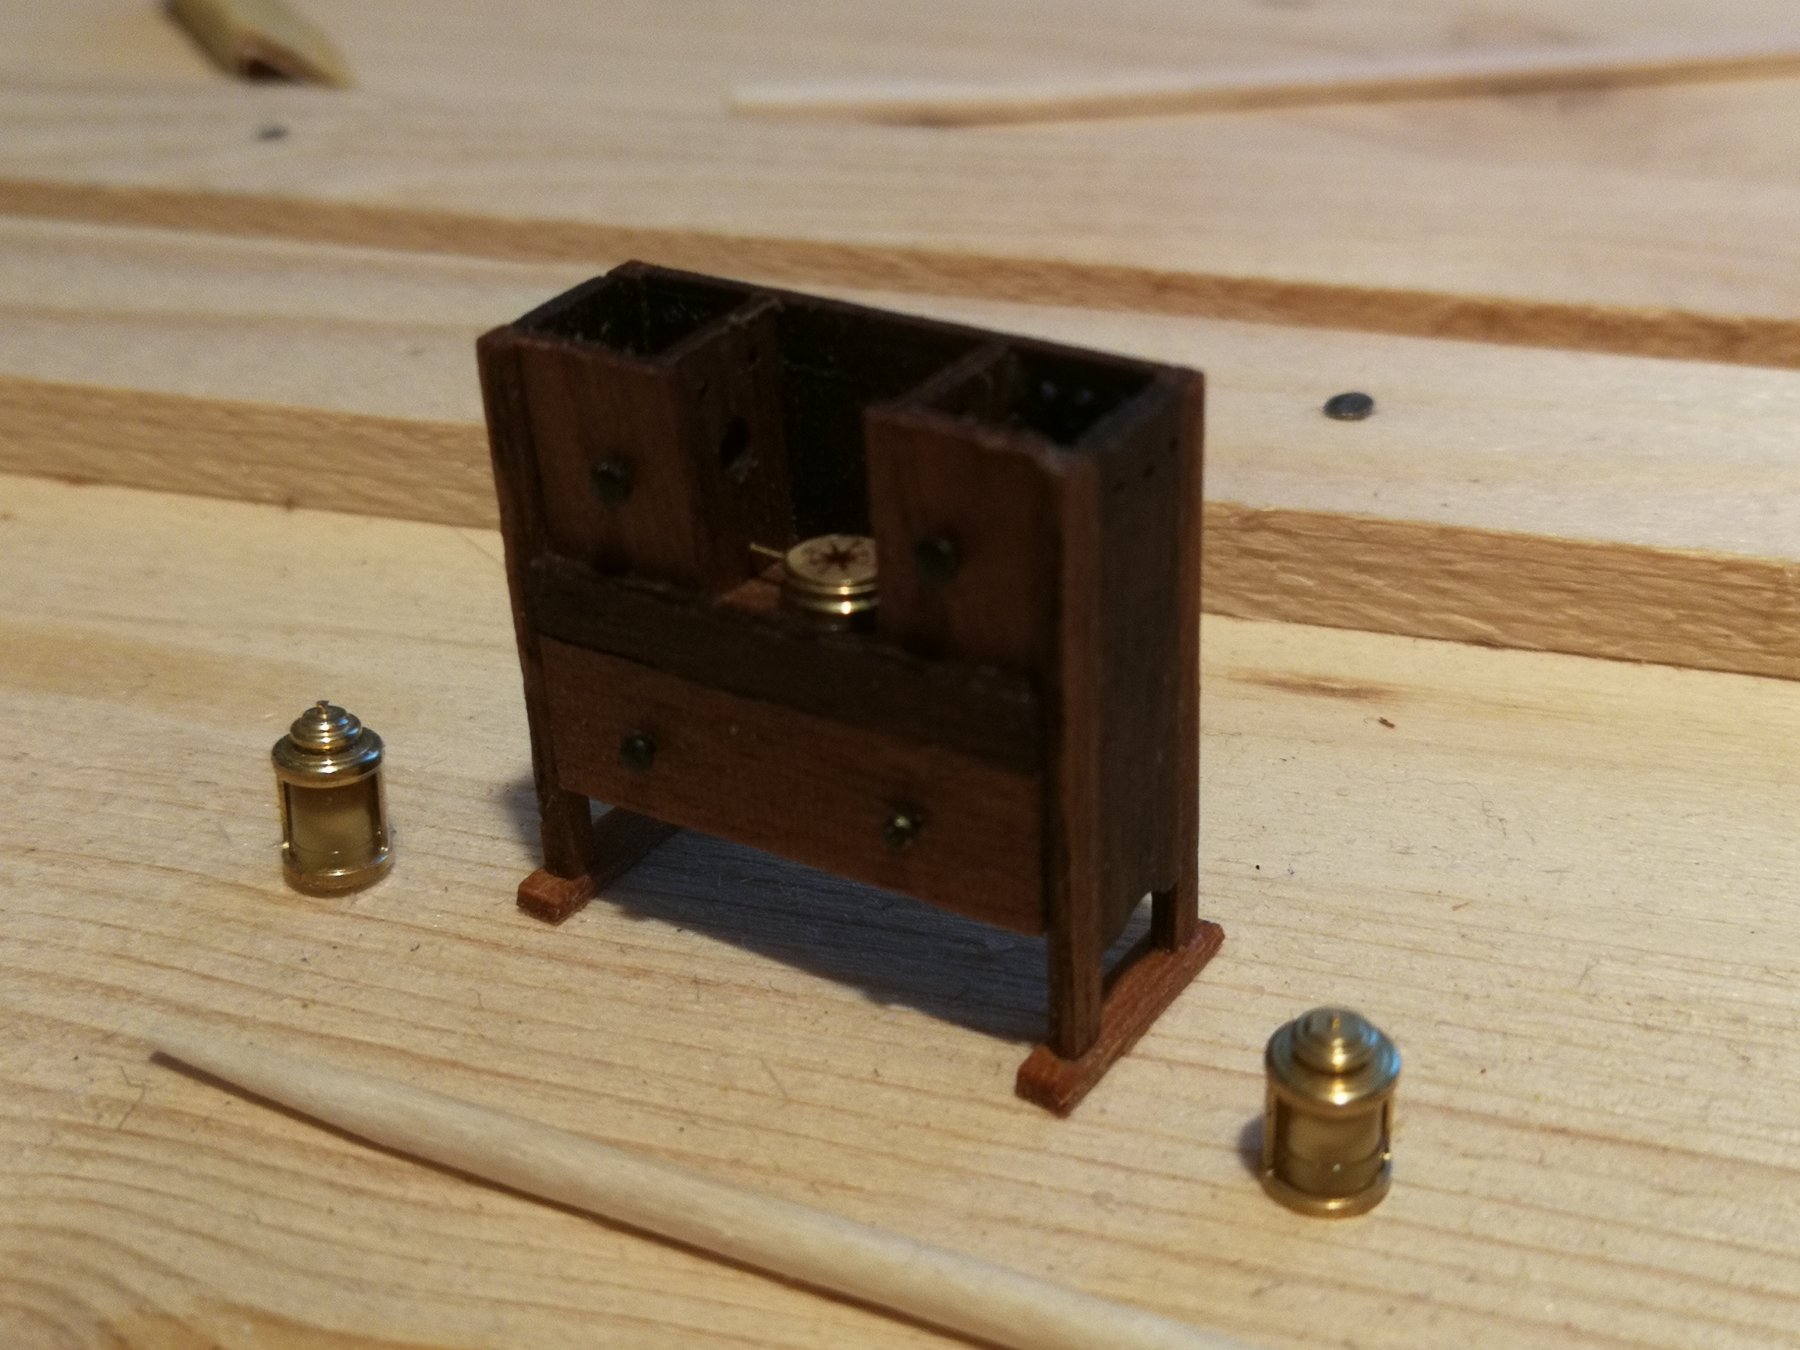
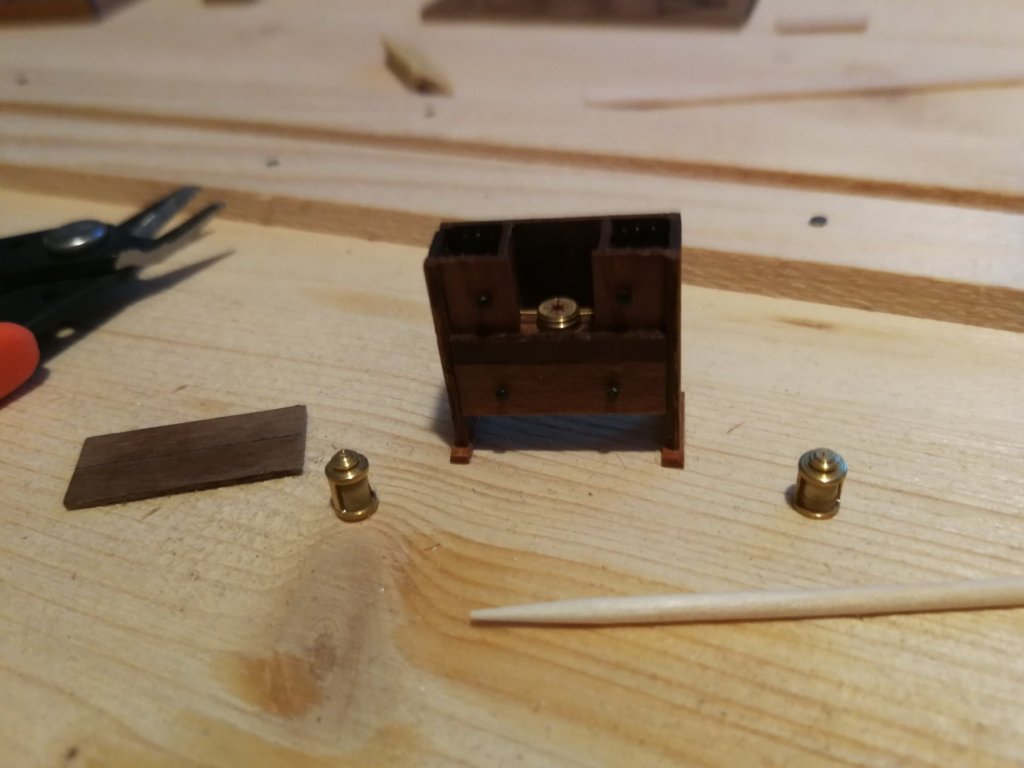
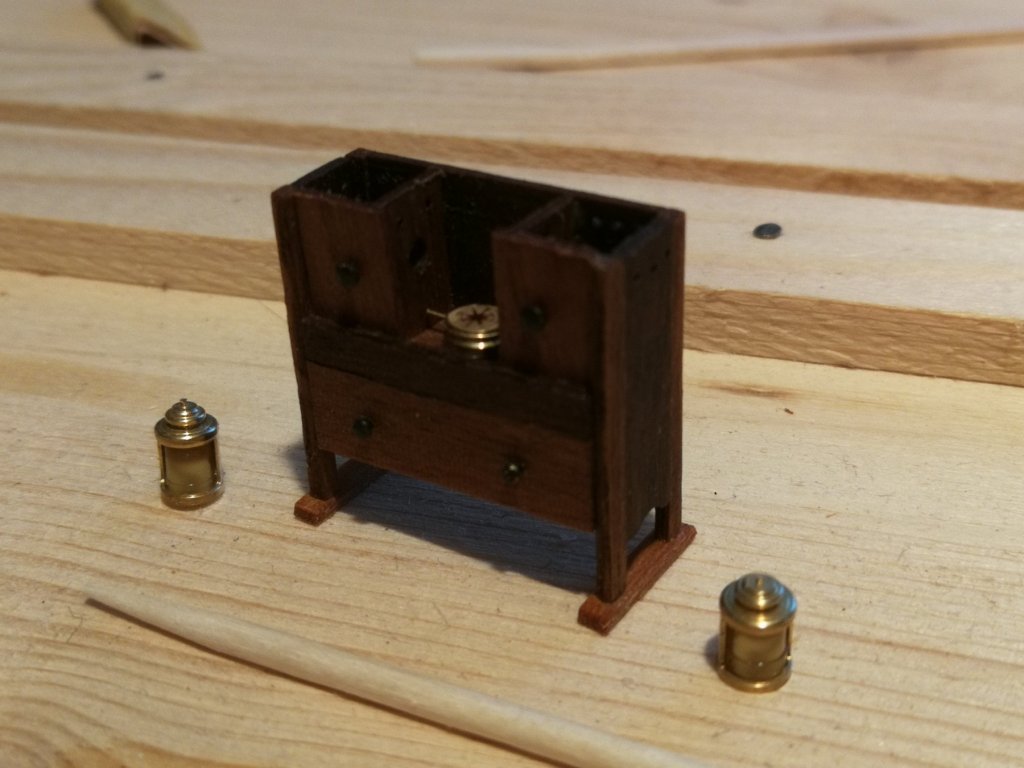
This week I worked on the binnacle. I added small details : the compass in the middle and two small petroleum lamps in each compartment on left and right side. The lamps were bought at RB Model. For the compass, I used the lower part of a RB lamp. I filled it with AB putty and I glued a compass rose image found on internet and scaled down with MS Word. A drop of gloss varnish to simulate the glass. I know that we will not really distinguish the lamps once the upper part will be glued. But we will guess their present through the hole drilled between the compartments. Small holes have been drilled on the sides and on the back for ventilation of the lamps. I will now focus on the rudder...


- 164 replies
-
- 10
-
-
- first build
- model shipways
- (and 2 more)
-
Thanks SpyGlass and to all the Likes. I used two different ways for the caulk. On the hull, I used archival Ink (Pigma Brush) from Sakura. Only on one side of the plank. For the deck, I used black cardboard glued on on side of each strip. On my next project, I will probably try to use thin rod of black hornbeam or thin plastic film (as described by Kortes in his build log on the Friech Boeir Yacht Sperwer).
- 164 replies
-
- 3
-
-
- first build
- model shipways
- (and 2 more)
-
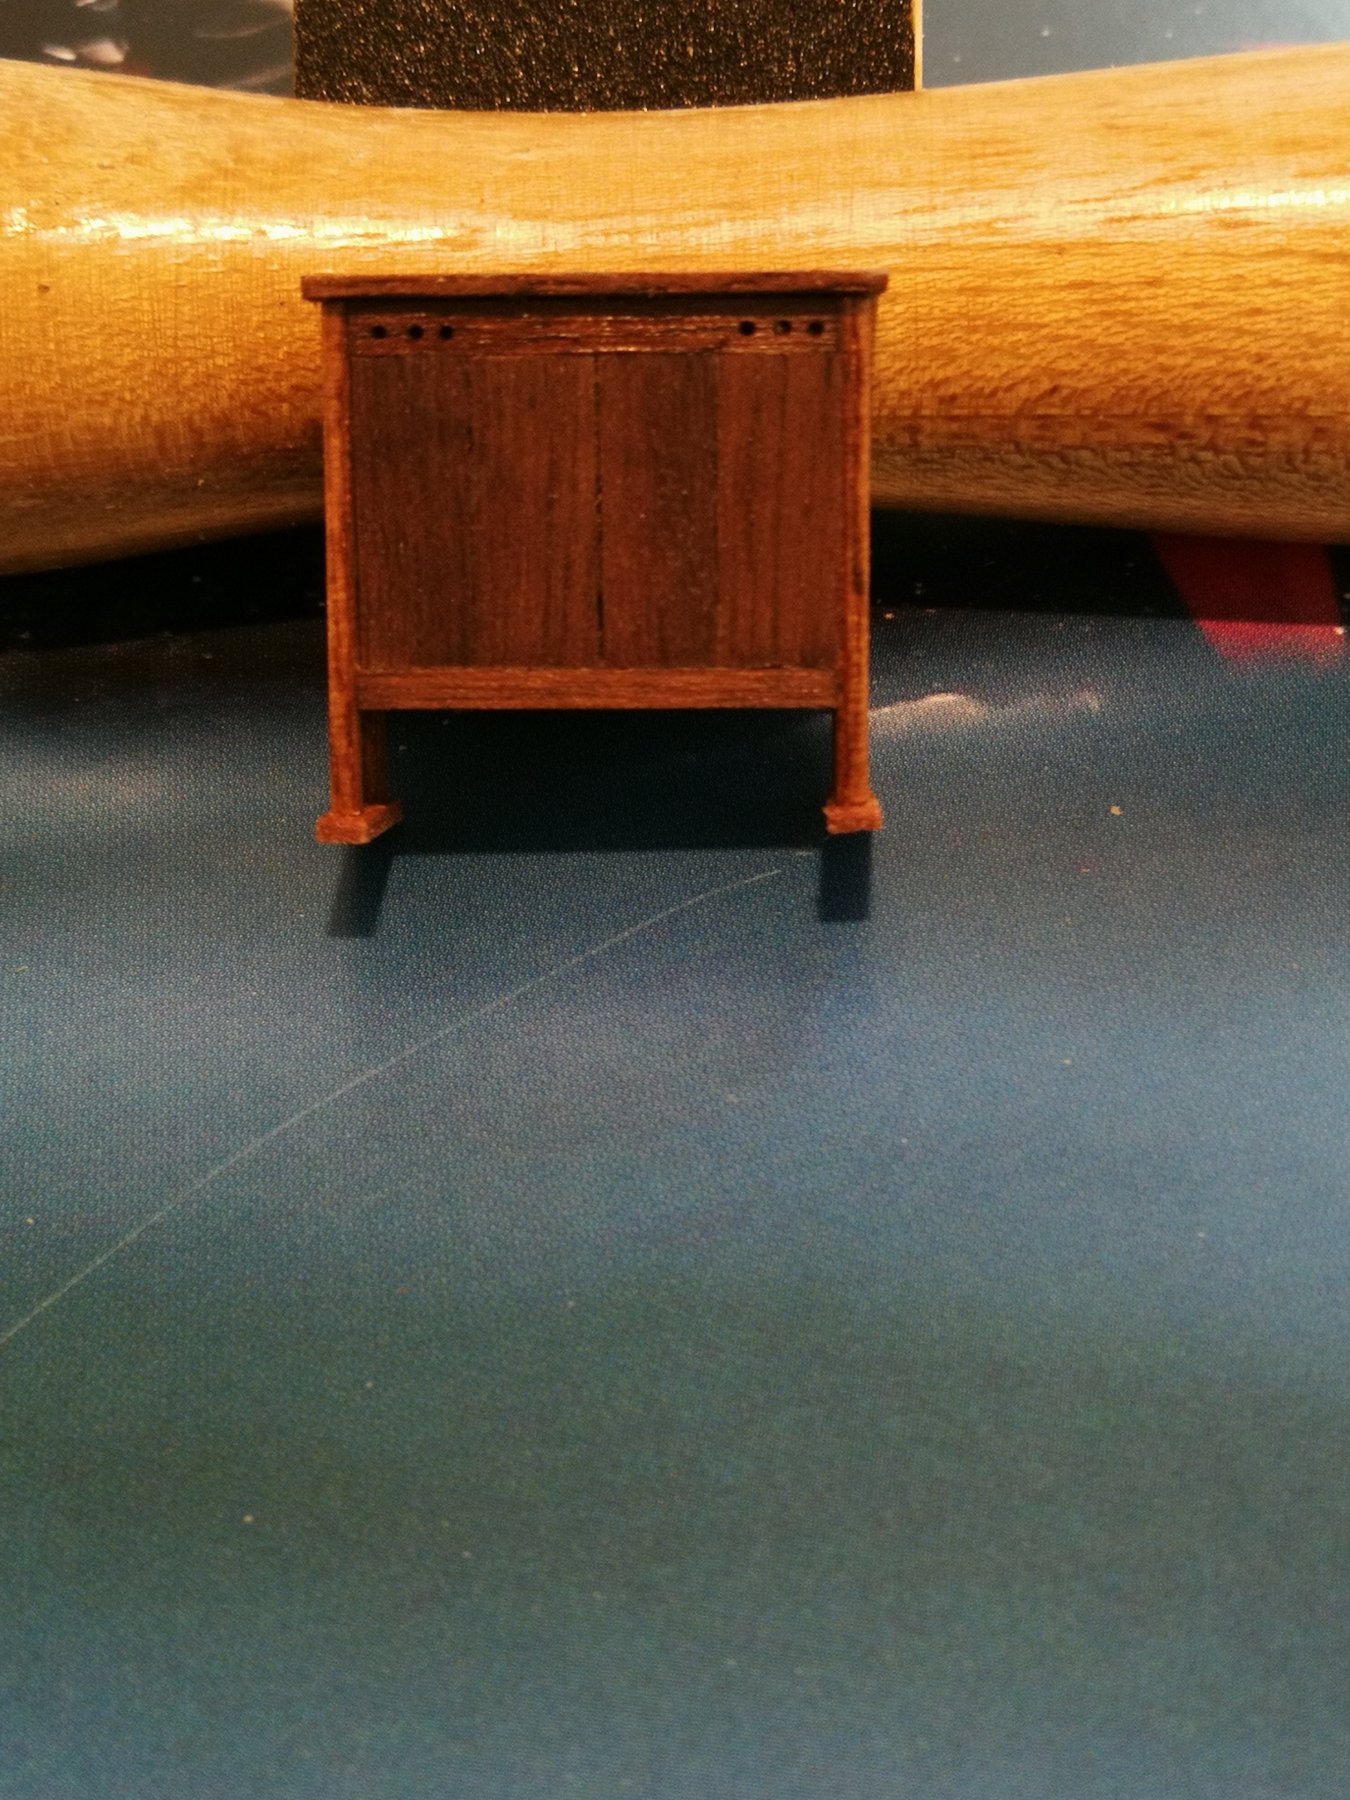
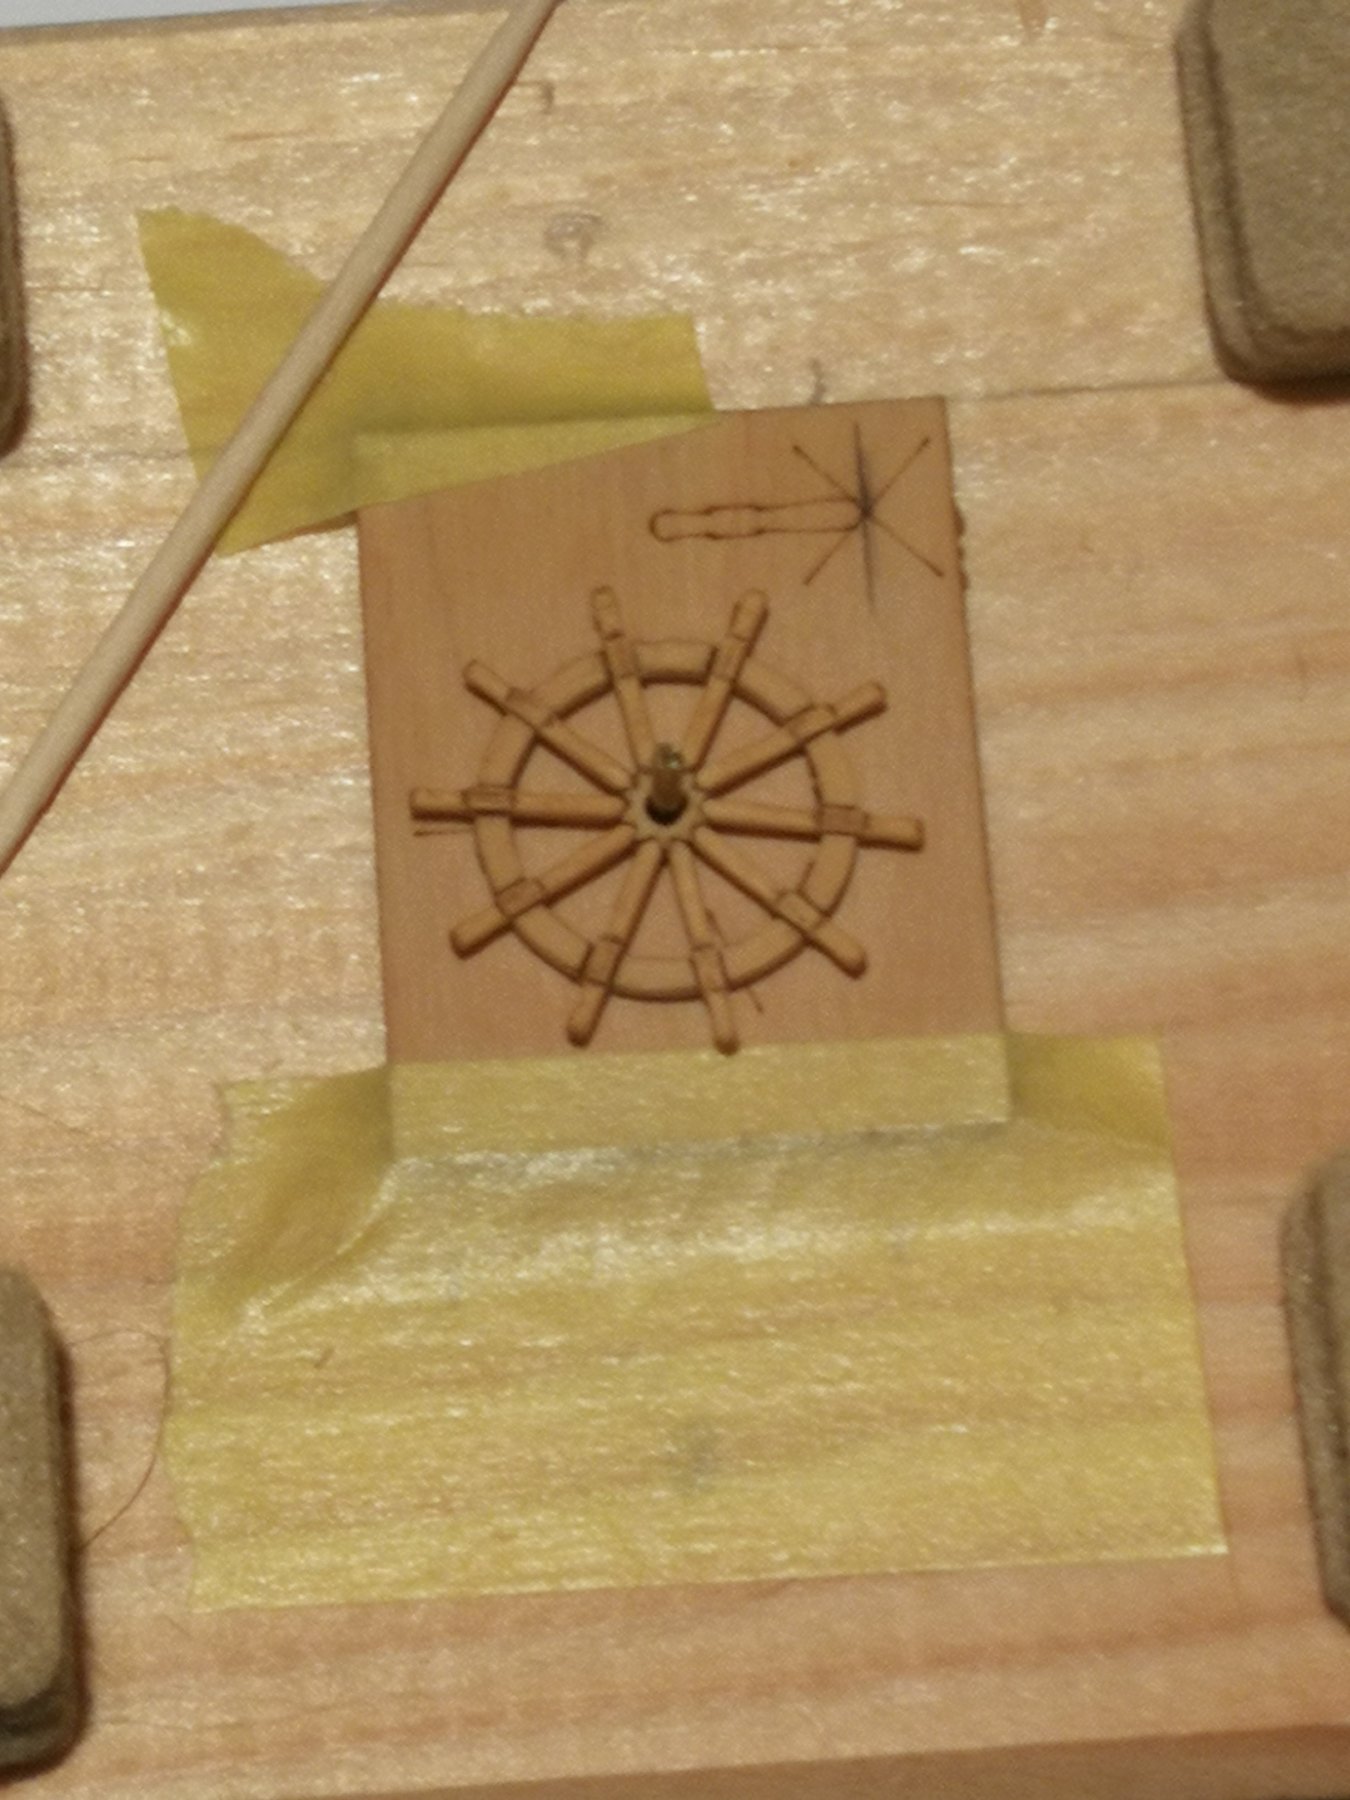
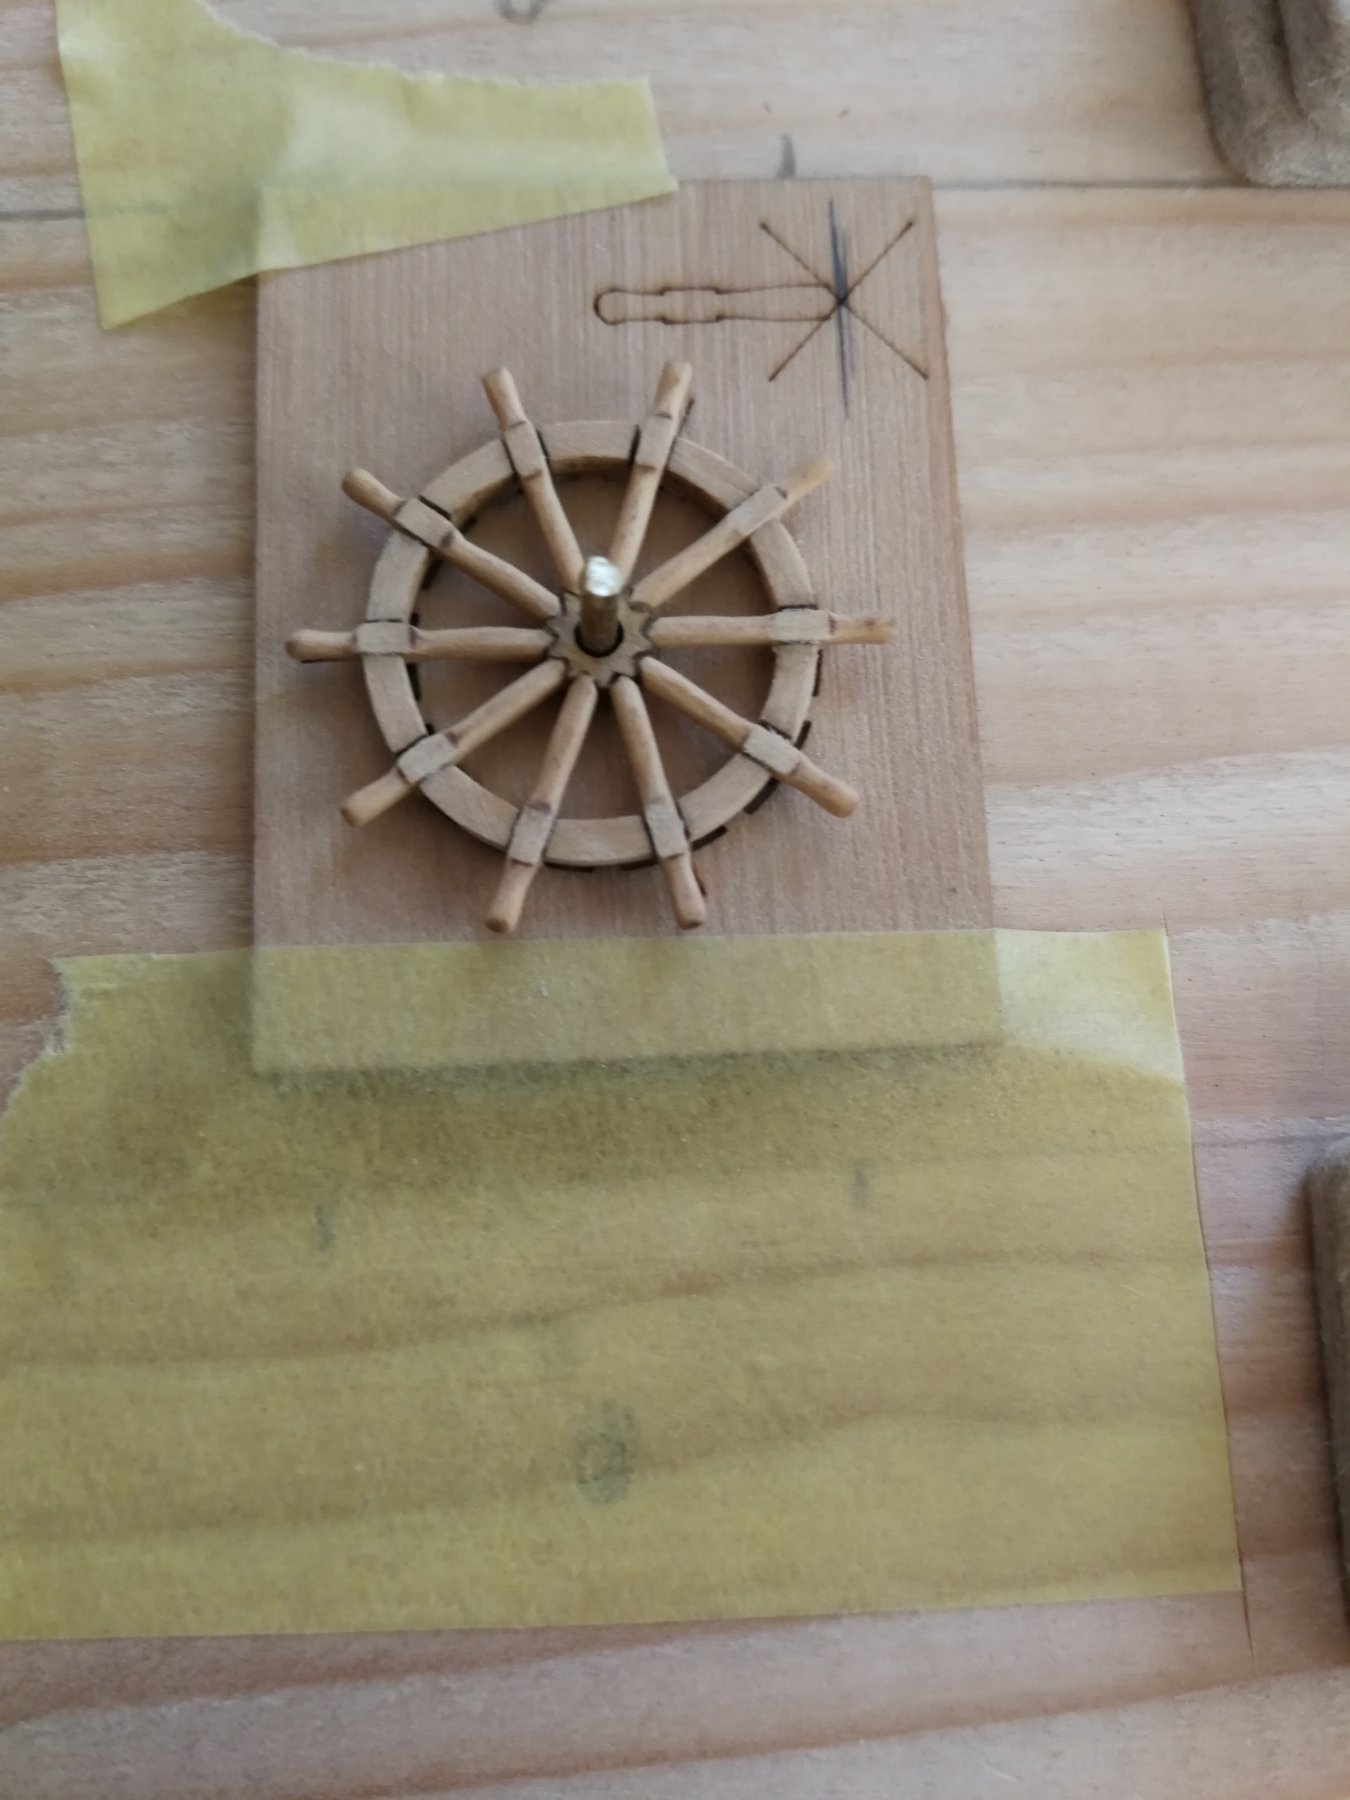
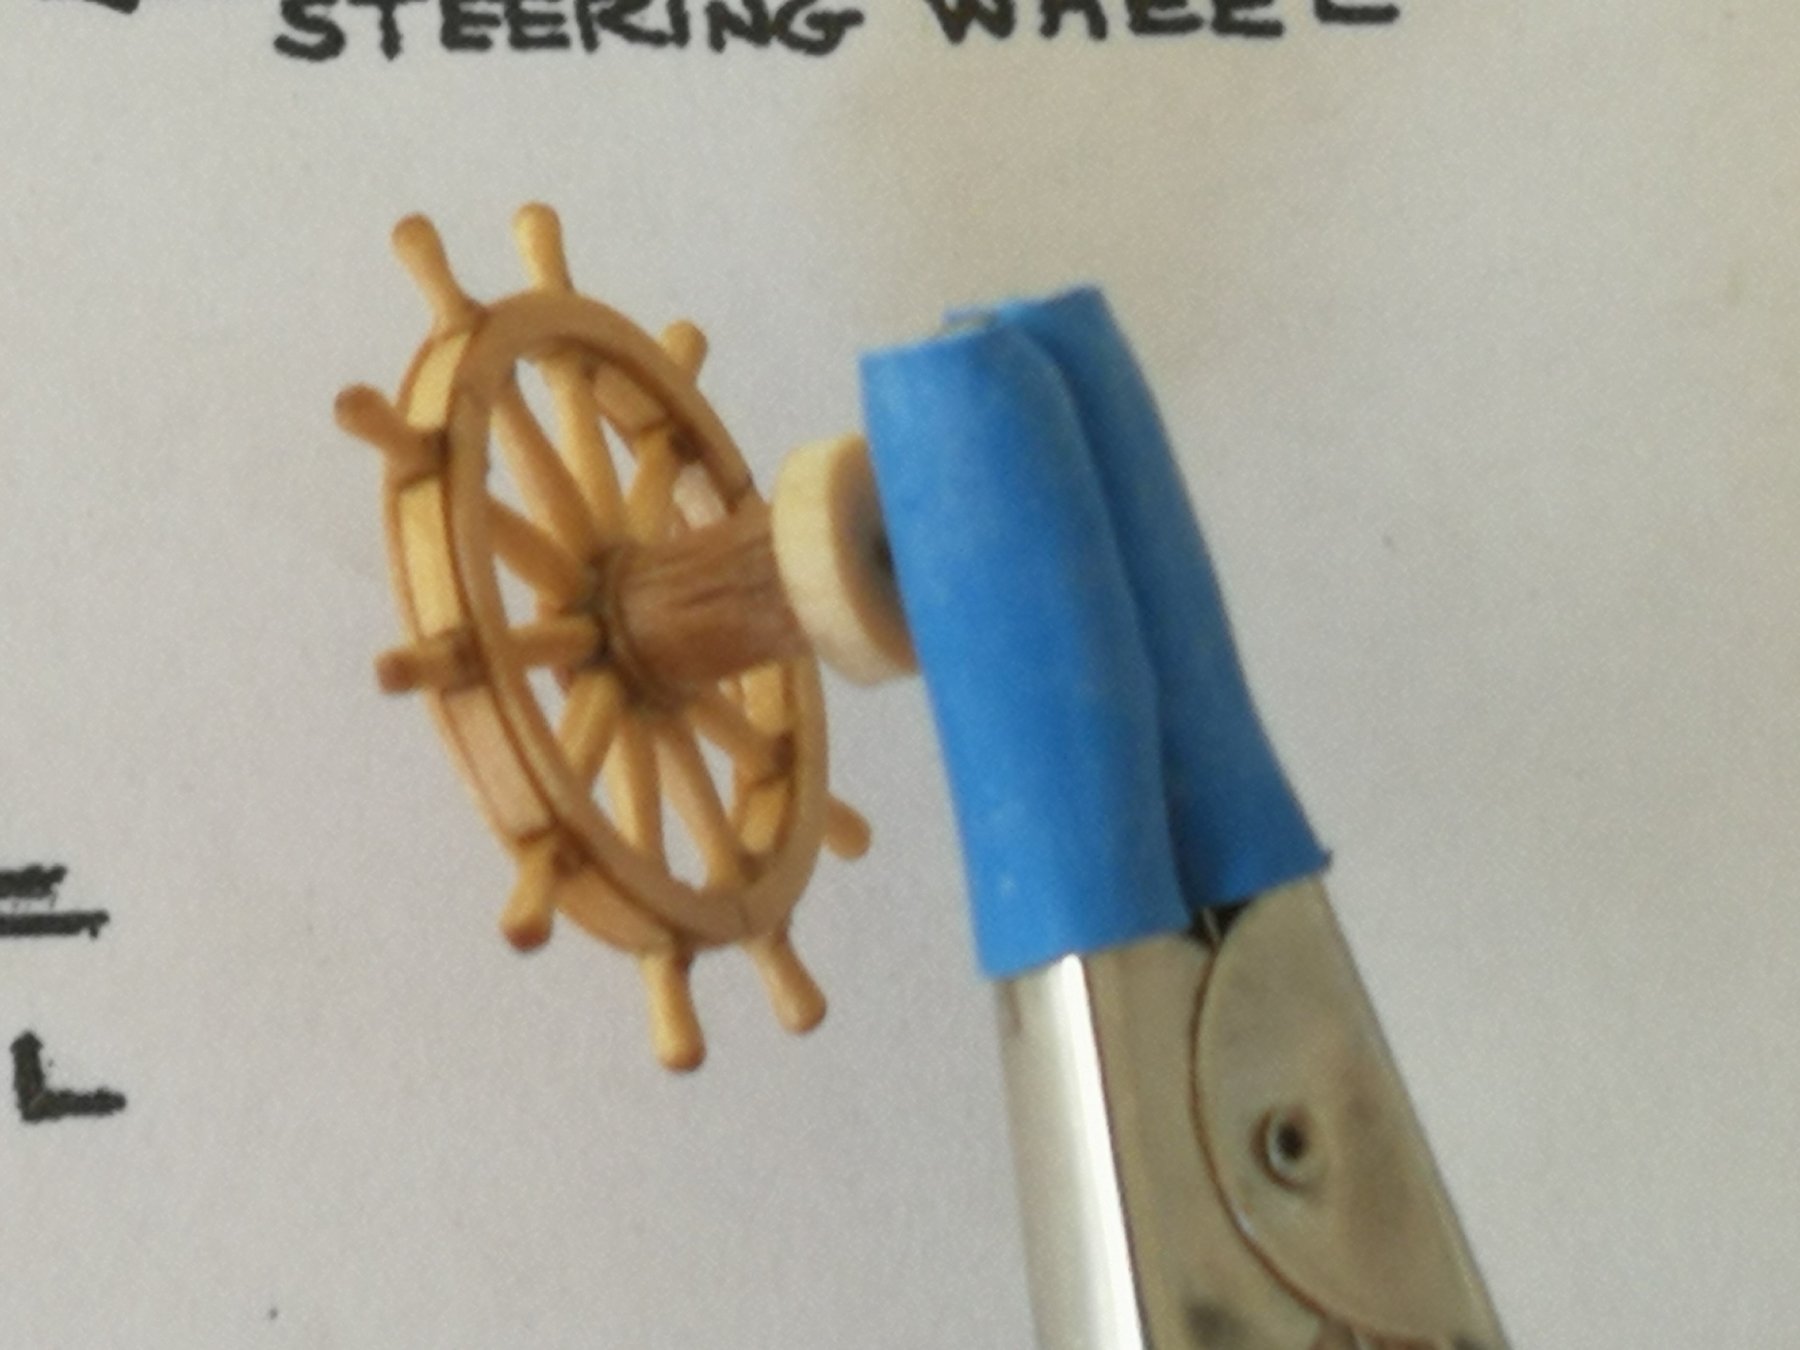
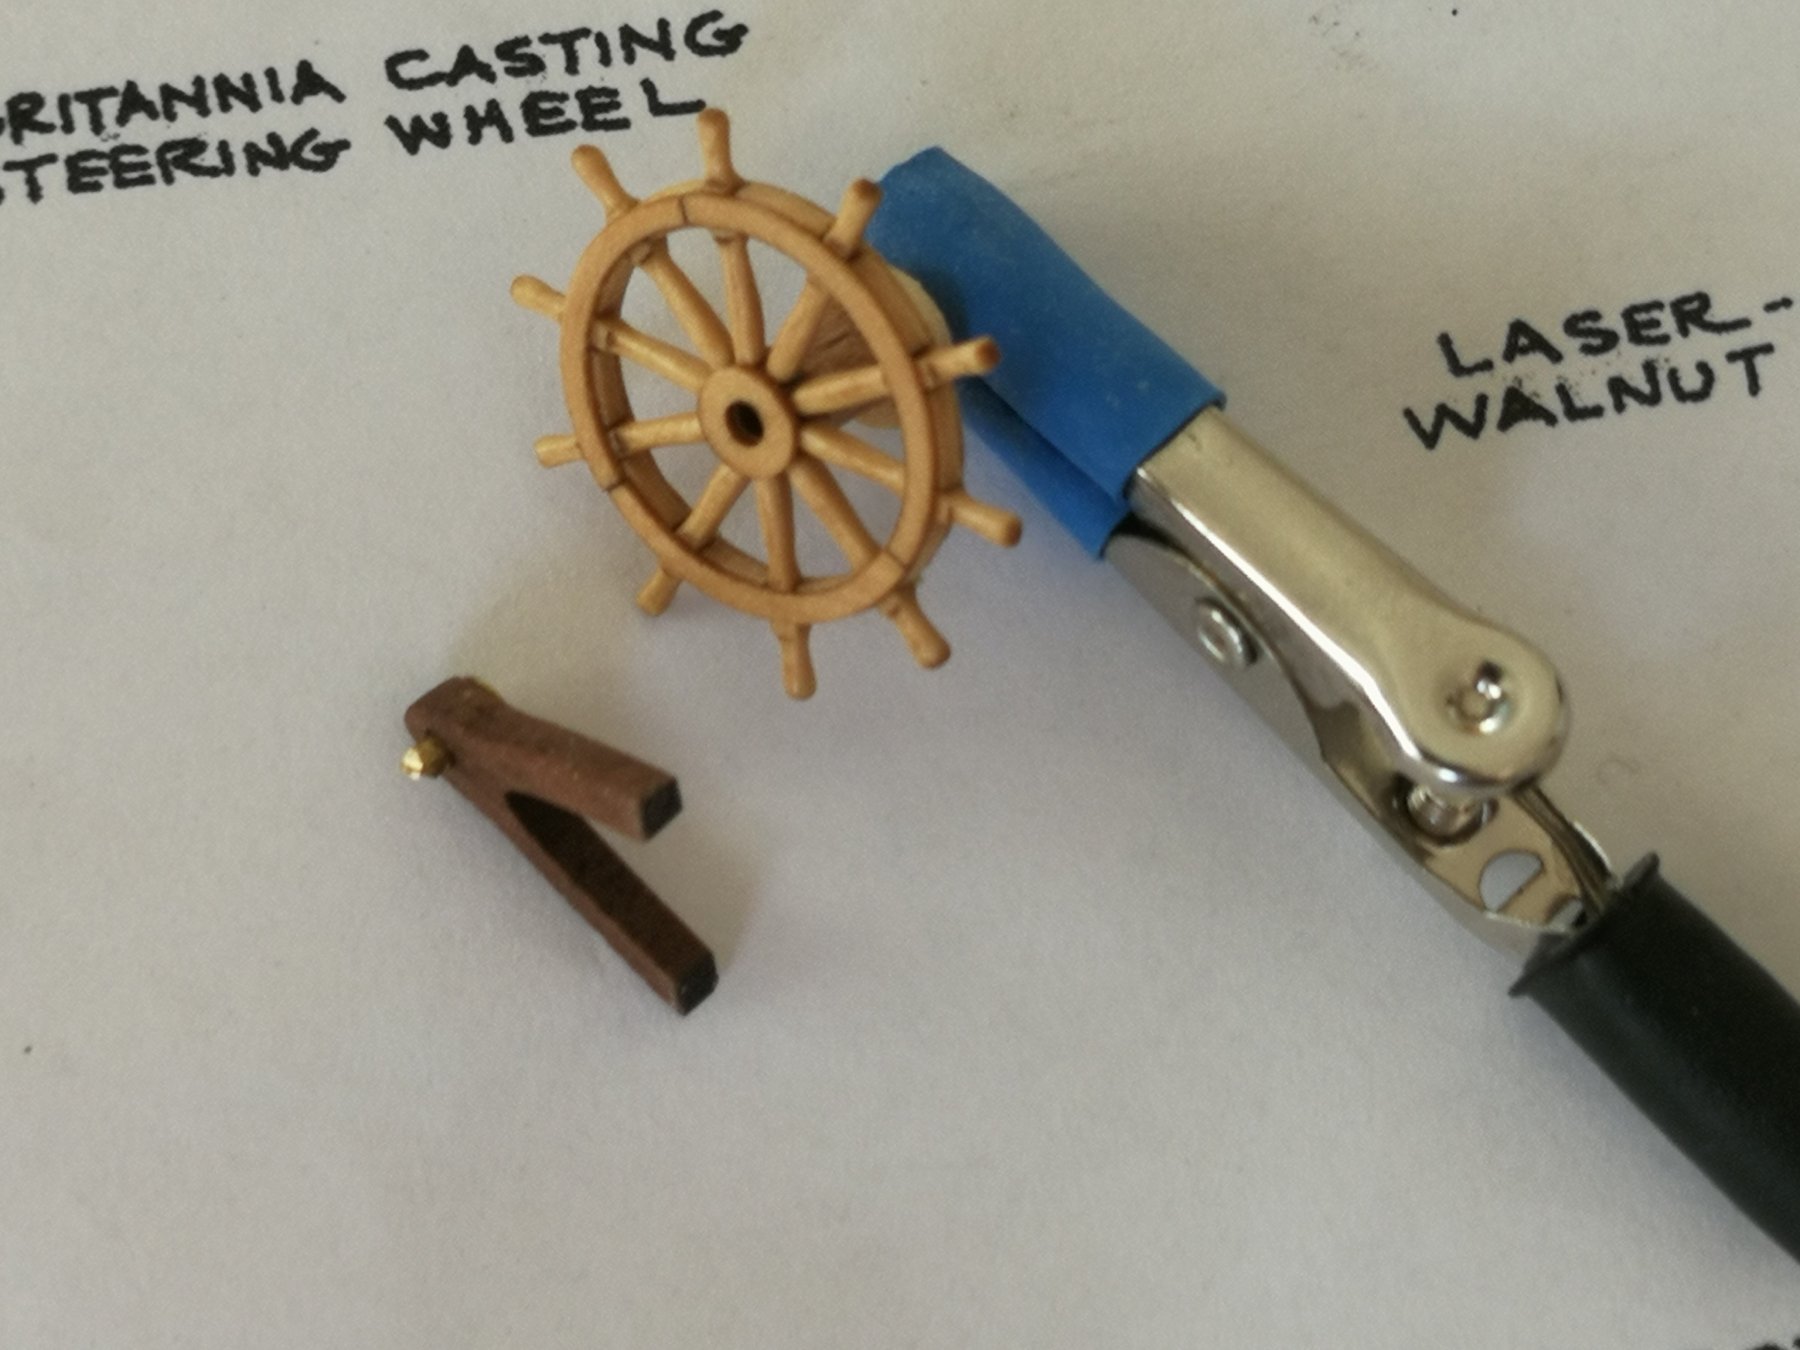
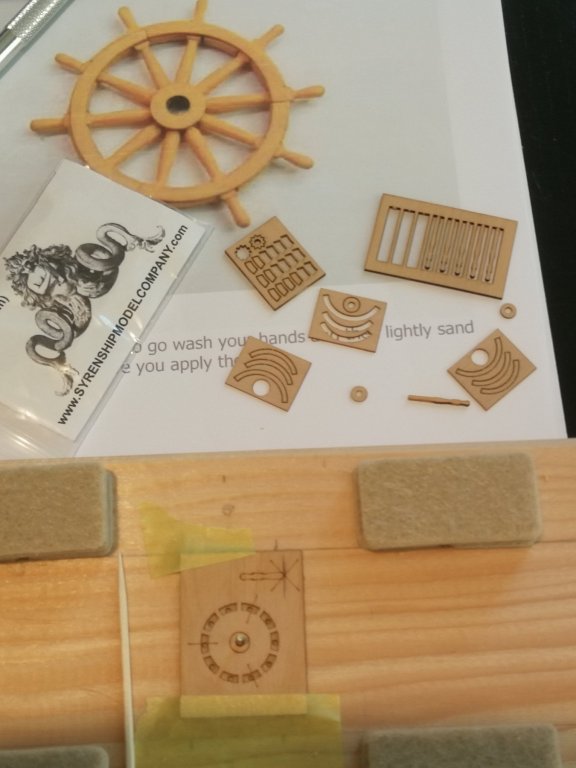
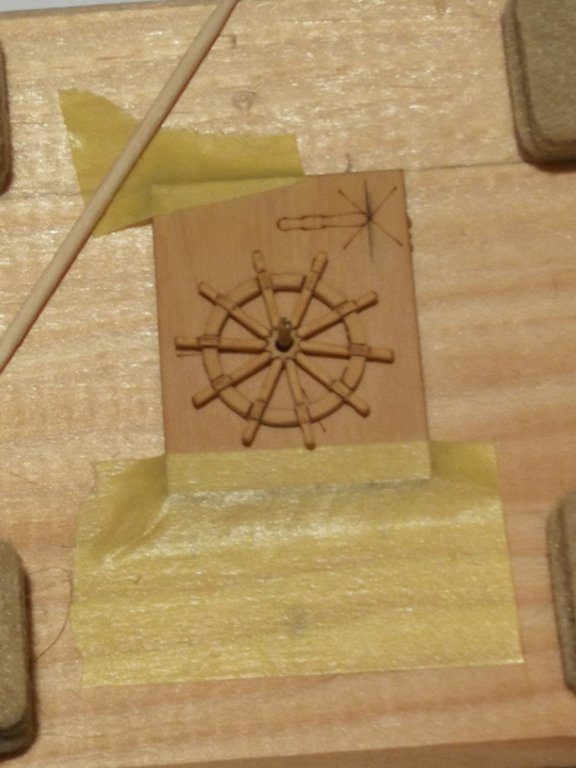
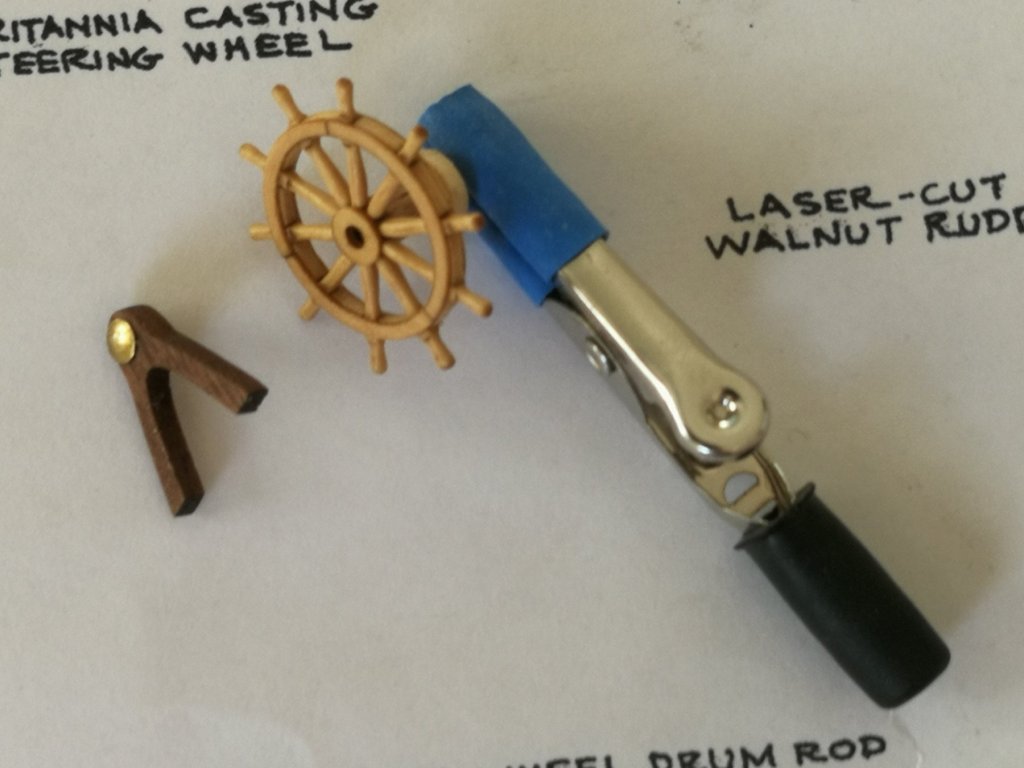
Thanks for the 'Likes'. This week I worked on the steering wheel and his drum. As the wheel provided in the kit is a britannia casting, I have decided to upgrade with a wheel from Syren Shipmodel Company. It's the 15/16" (24mm) version, the smallest of the two produced by Chuck. The instructions for building the ship's wheel mini kit can be found on the internet sit. As usual, the instructions are clear and precises with a lot of pictures. The only change I made is to secure the jig on a piece of scrap wood using a nail. I'm sure everything is centered and nothing moves when building the wheel. The drum is built using two segments of wood dowel A small brass nail is used to attach the ship's wheel to the laser-cut walnut stand. The head of the nail will be blackened using some liver of sulphur gel. I must also add the tiller line...


- 164 replies
-
- 14
-
-
- first build
- model shipways
- (and 2 more)
-
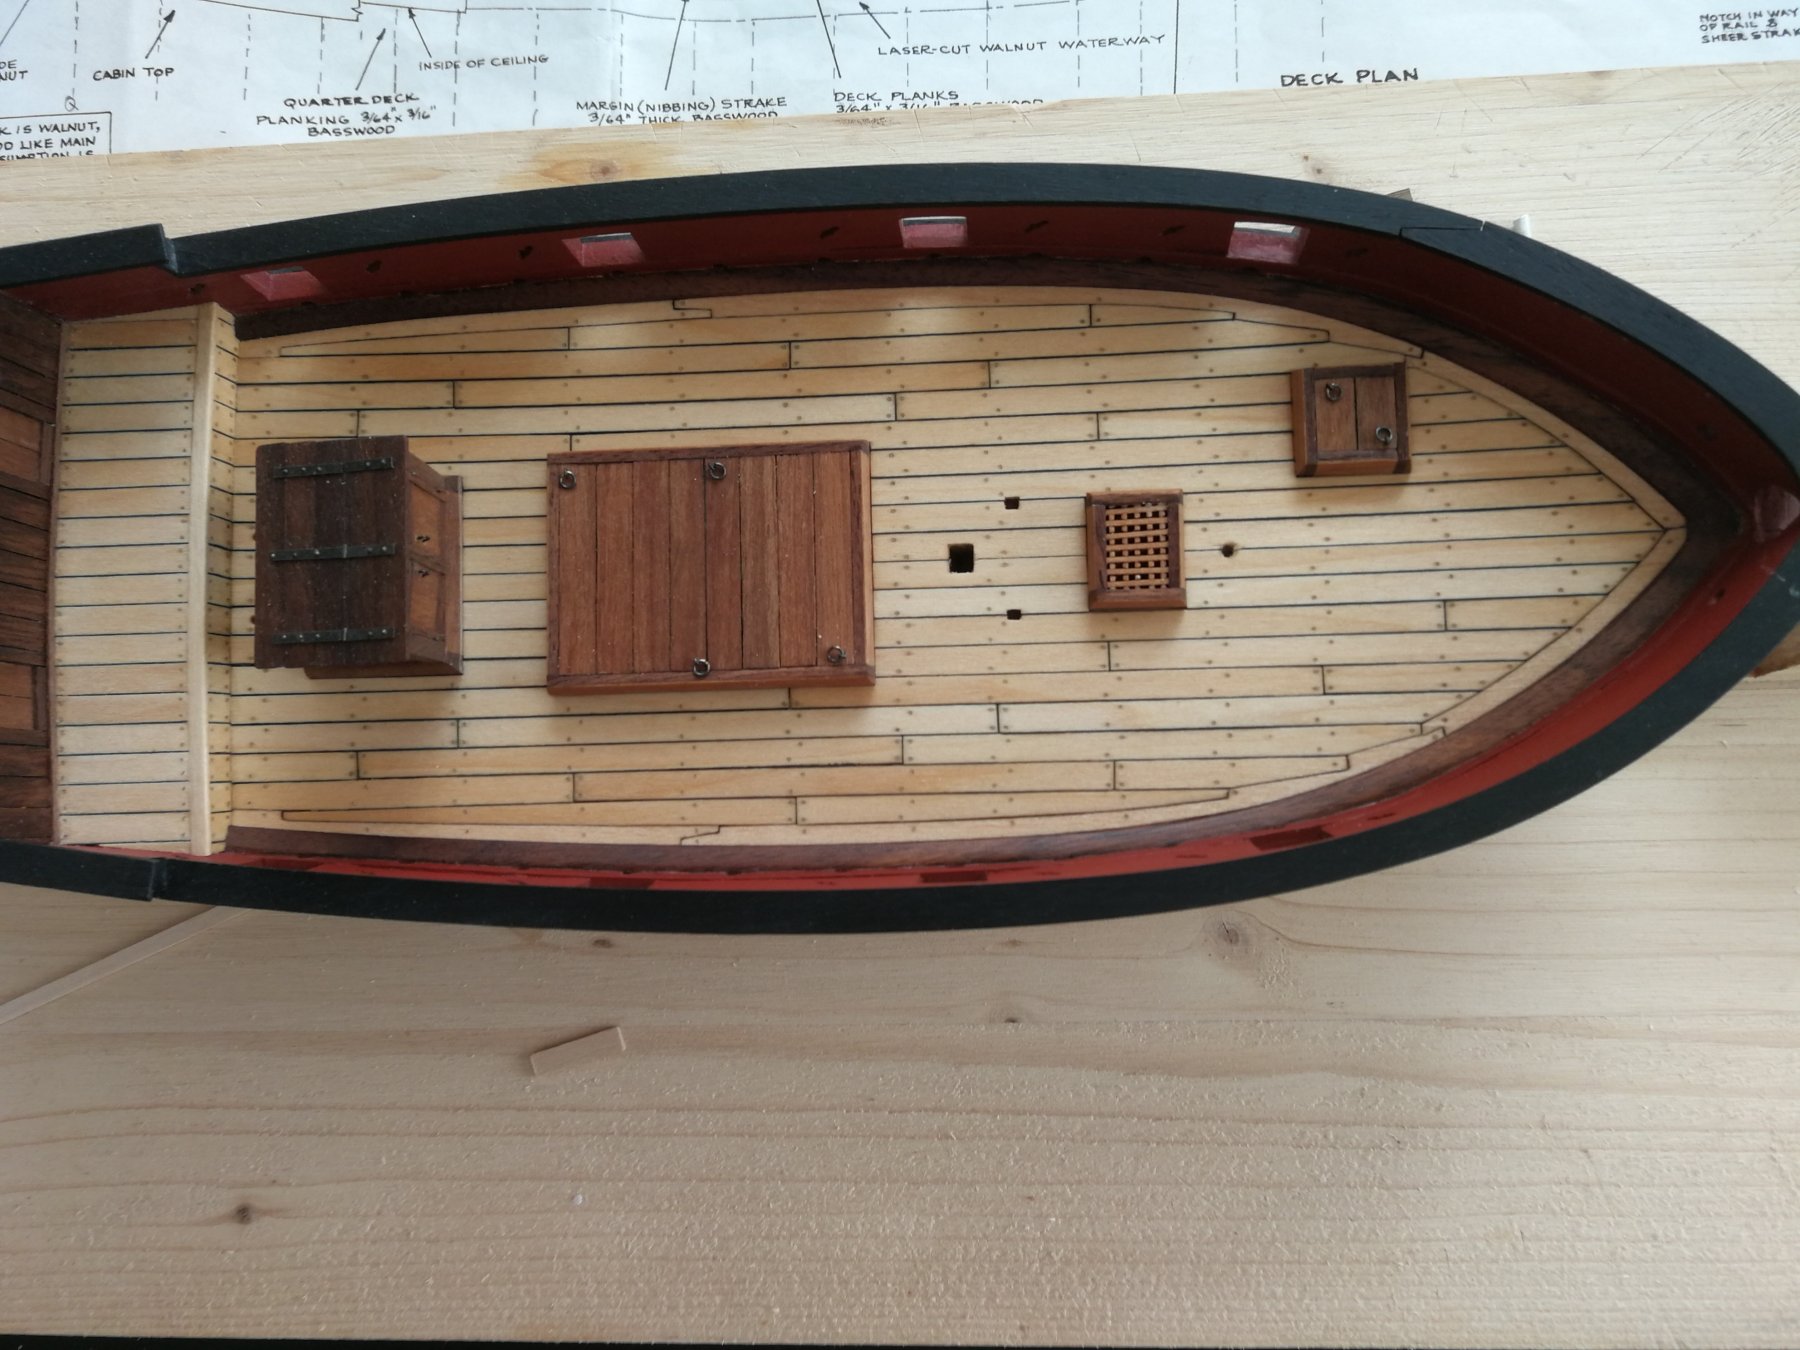
The treenail job is done. I followed the method used by Chuck Passaro for his Revenue Cutter Cheerful build : the holes were filled with some Minwax wood putty (a mix of Golden oak and natural pine with a ratio of 50%). For the schema, I was inspired by two pictures found in the excellent book 'Modeling an armed Virginia Sloop of 1768' by Clayton A. Feldman. This book is a great source of inspiration. and the result on my model I will work now on the ship's wheel and the catheads.


- 164 replies
-
- 12
-
-
- first build
- model shipways
- (and 2 more)
-
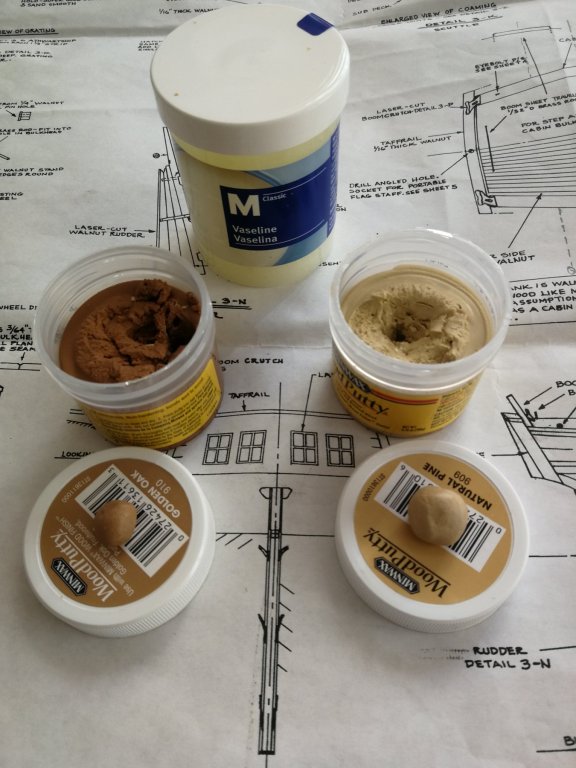
When I need to use my Minwax wood putty to imitate the treenails, I found the putty that had hardened in his box. After some research on the web, I have found this video that contains a solution : https://www.bing.com/videos/search?q=minwax+wood+putty+soft&&view=detail&mid=48DA9105B2B16B26D88C48DA9105B2B16B26D88C&&FORM=VRDGAR So I buy a small box of petroleum jelly (in Europe that product is named Vaseline) and it does his job : the putty has a second life
-
The kit is perhaps terrible but the result is beautiful. Congratulations on this handsome model. I am amazed at your work and hope that you will have fun again on your next project. Best regards
- 359 replies
-
- 4
-
-
- prince de neufchatel
- model shipways
- (and 1 more)
-
Wonderful job on this gun Jason ! I also prefer the 0.3mm line version that fits better with the breeching ropes. Thank You for sharing your beautiful work.
-
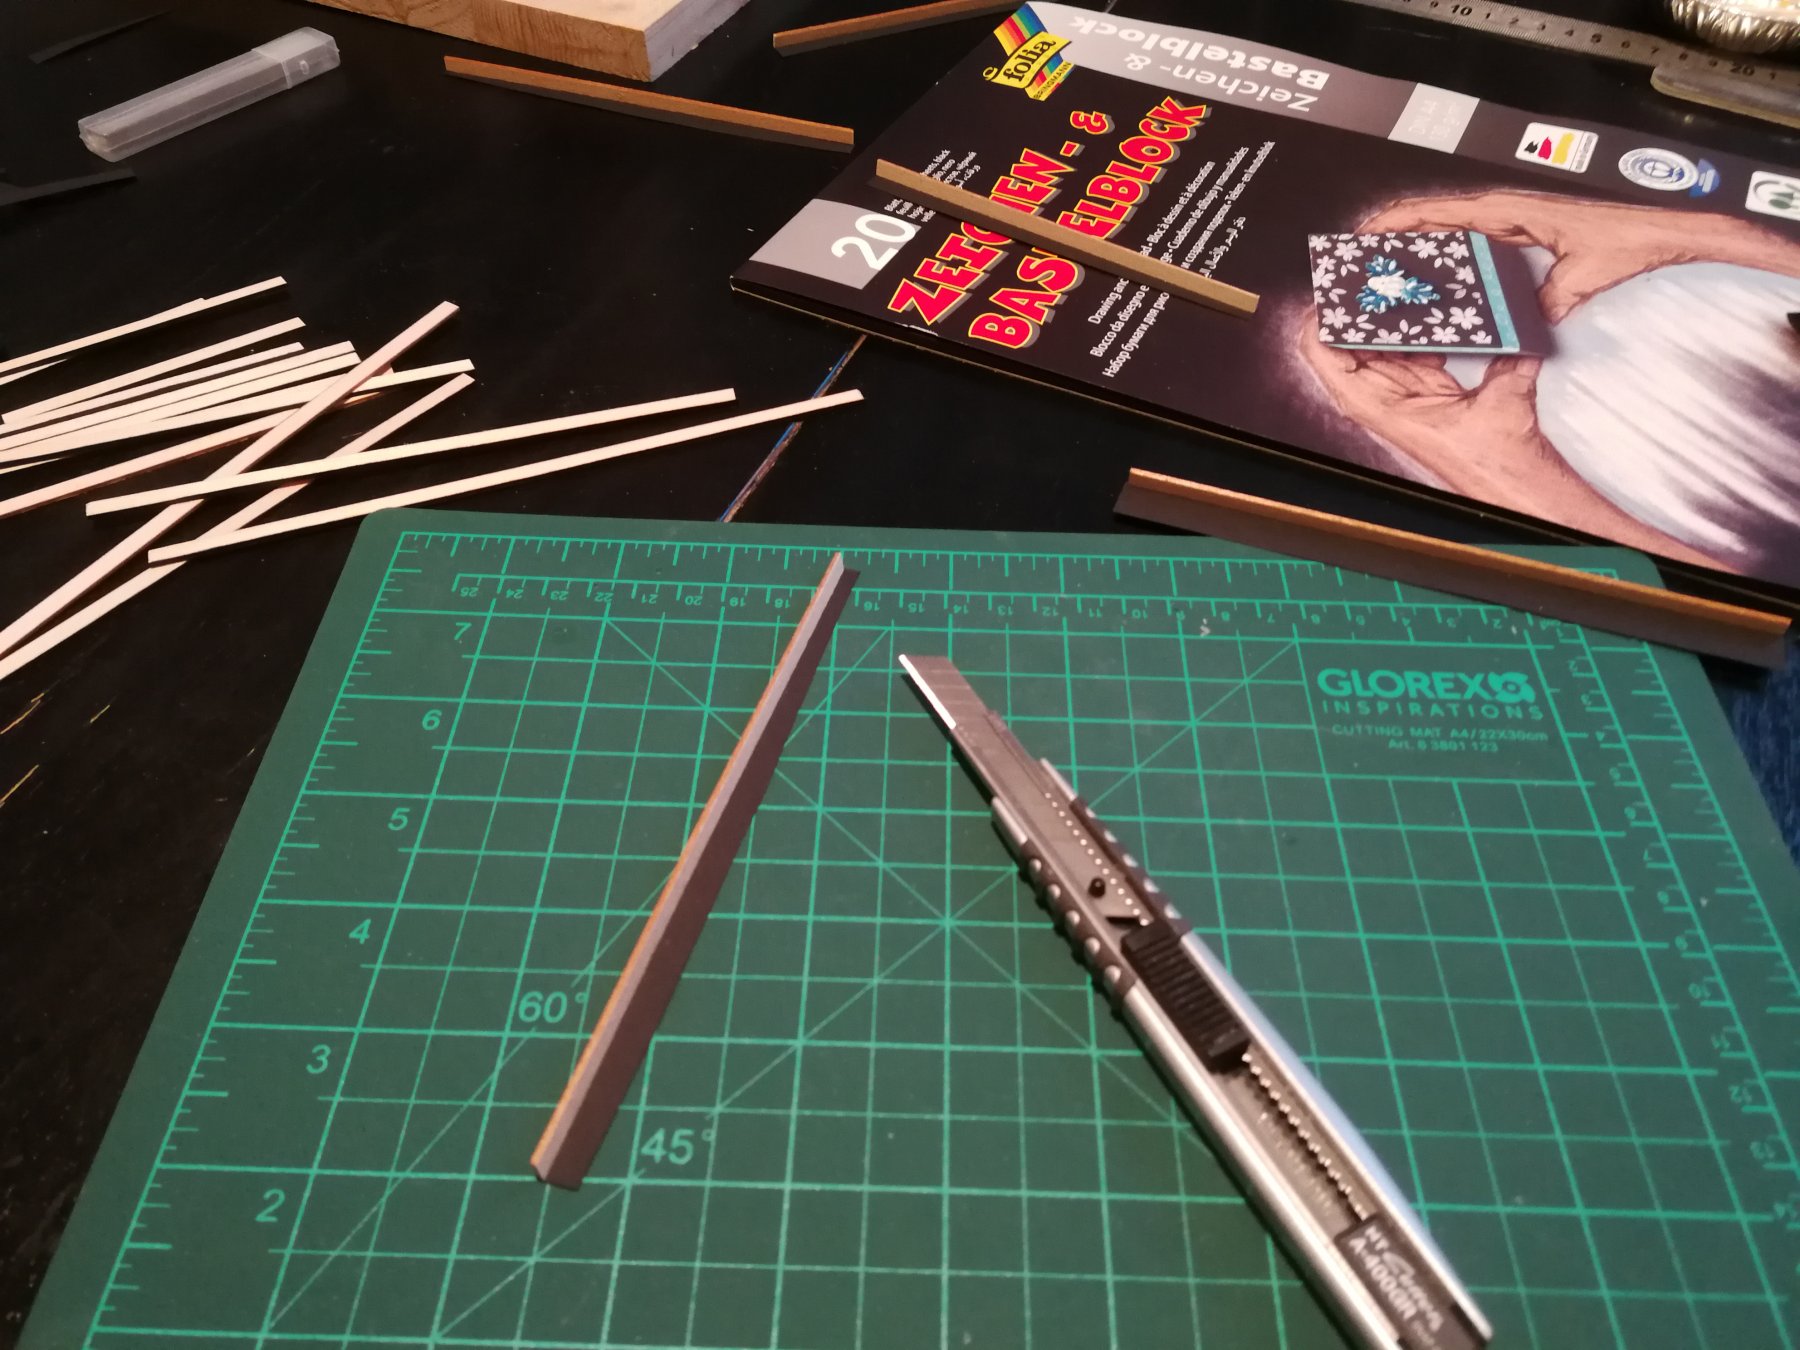
Thanks Dave, Bruce and all the 'Likes'. Dave, as this is my first ship, I focus on building techniques. I will test the weathering techniques during future builds. But it's true that I prefer to avoid painting the wood and prefer to play with the different types of wood. Bruce, finally I used the basswood strips provided in the kit. I have ordered some maple wood but when I received the strips I realized that the strips were too wide (a mistake in the conversion from inch to mm 😯). Since I do not have a table saw, I decided to use the basswood from the kit in order to be able to respect the deck plan. It's been a year since I started this build log and I must say that it was really very interesting and full of challenges. I would never have arrived at this result without this forum that contains a wealth of information and advice. A big Thank You to all who share their techniques and tips 😊
- 164 replies
-
- 6
-
-
- first build
- model shipways
- (and 2 more)
-
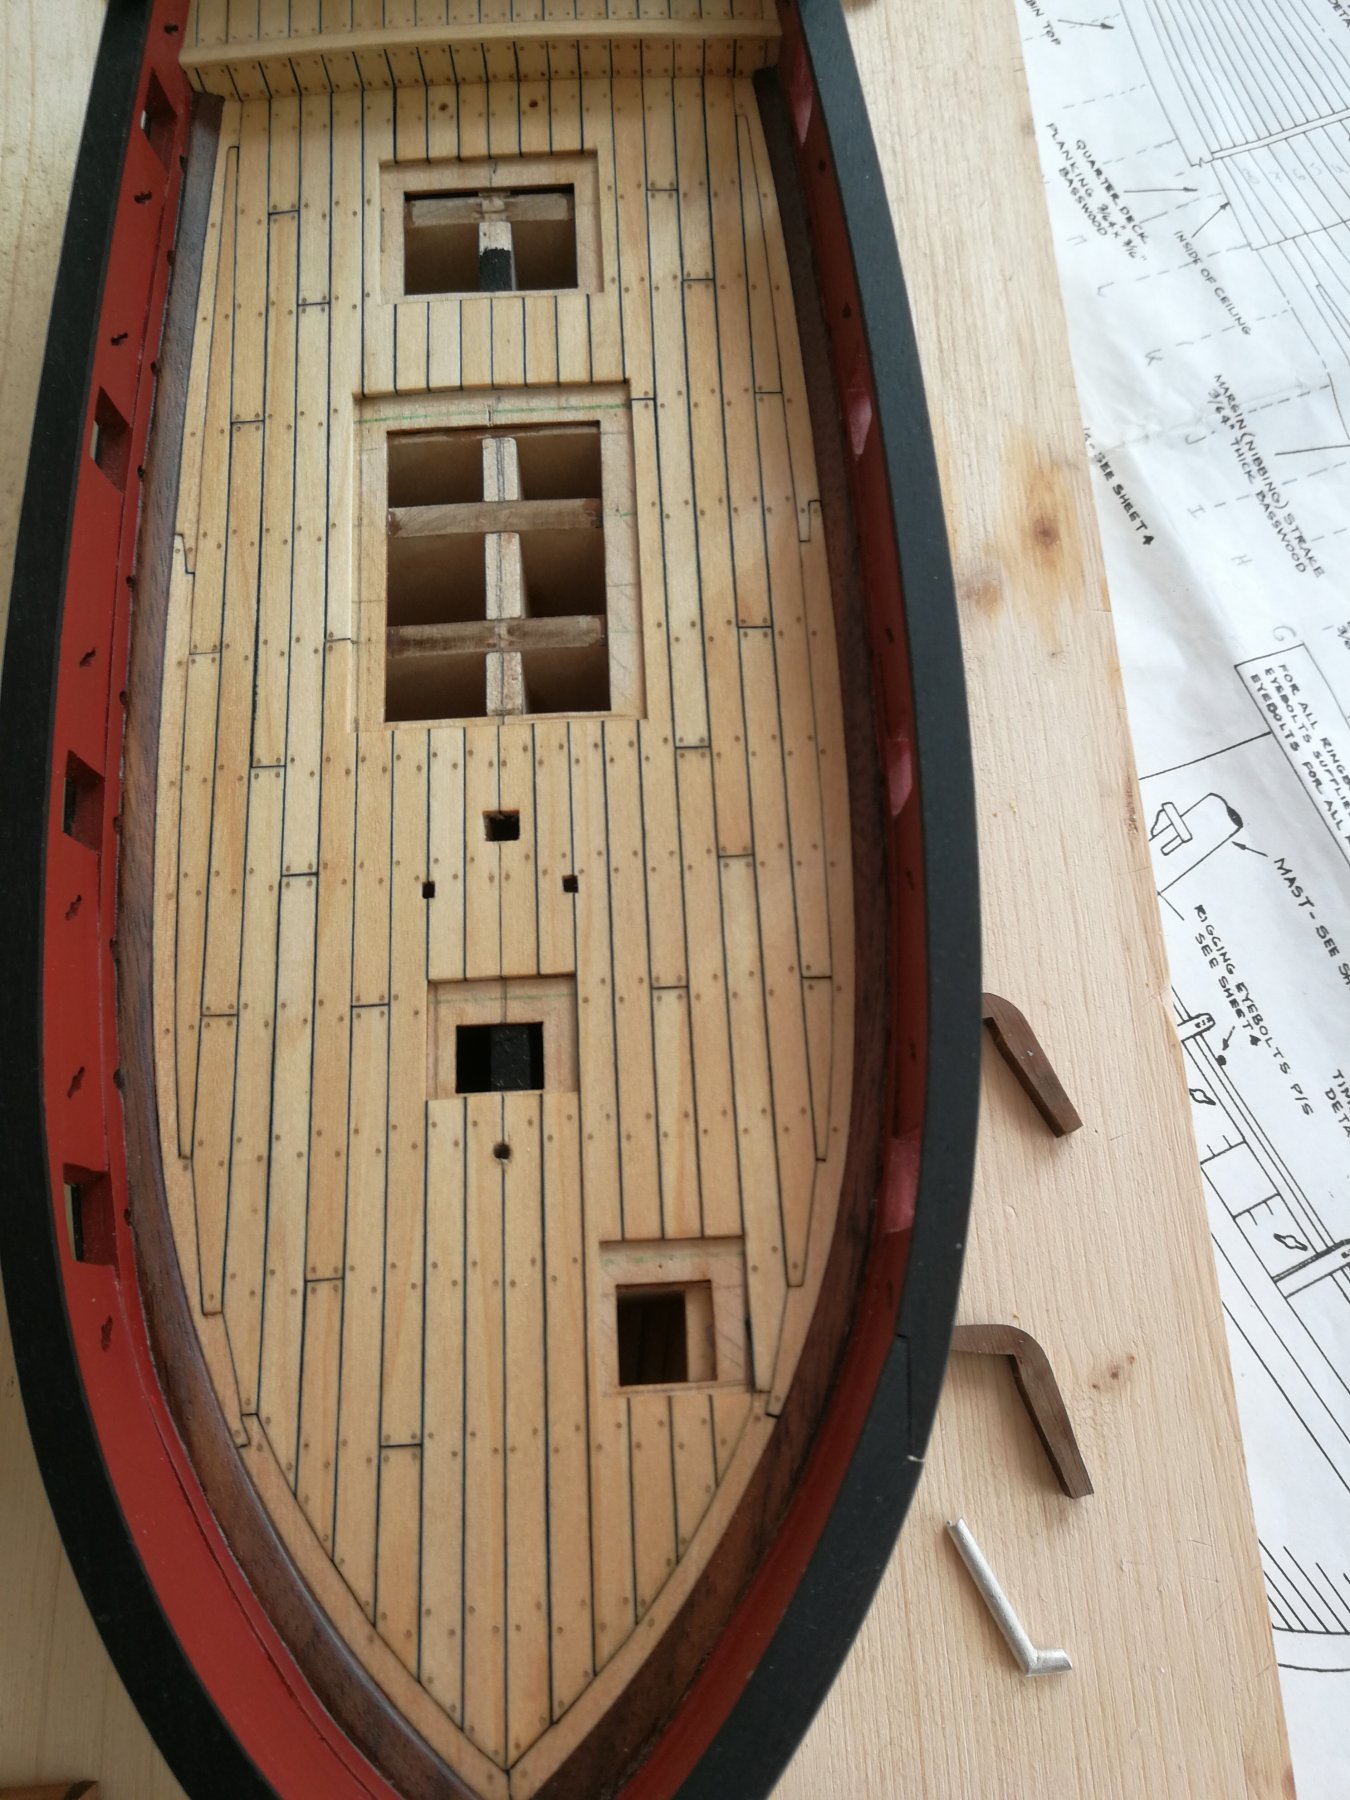
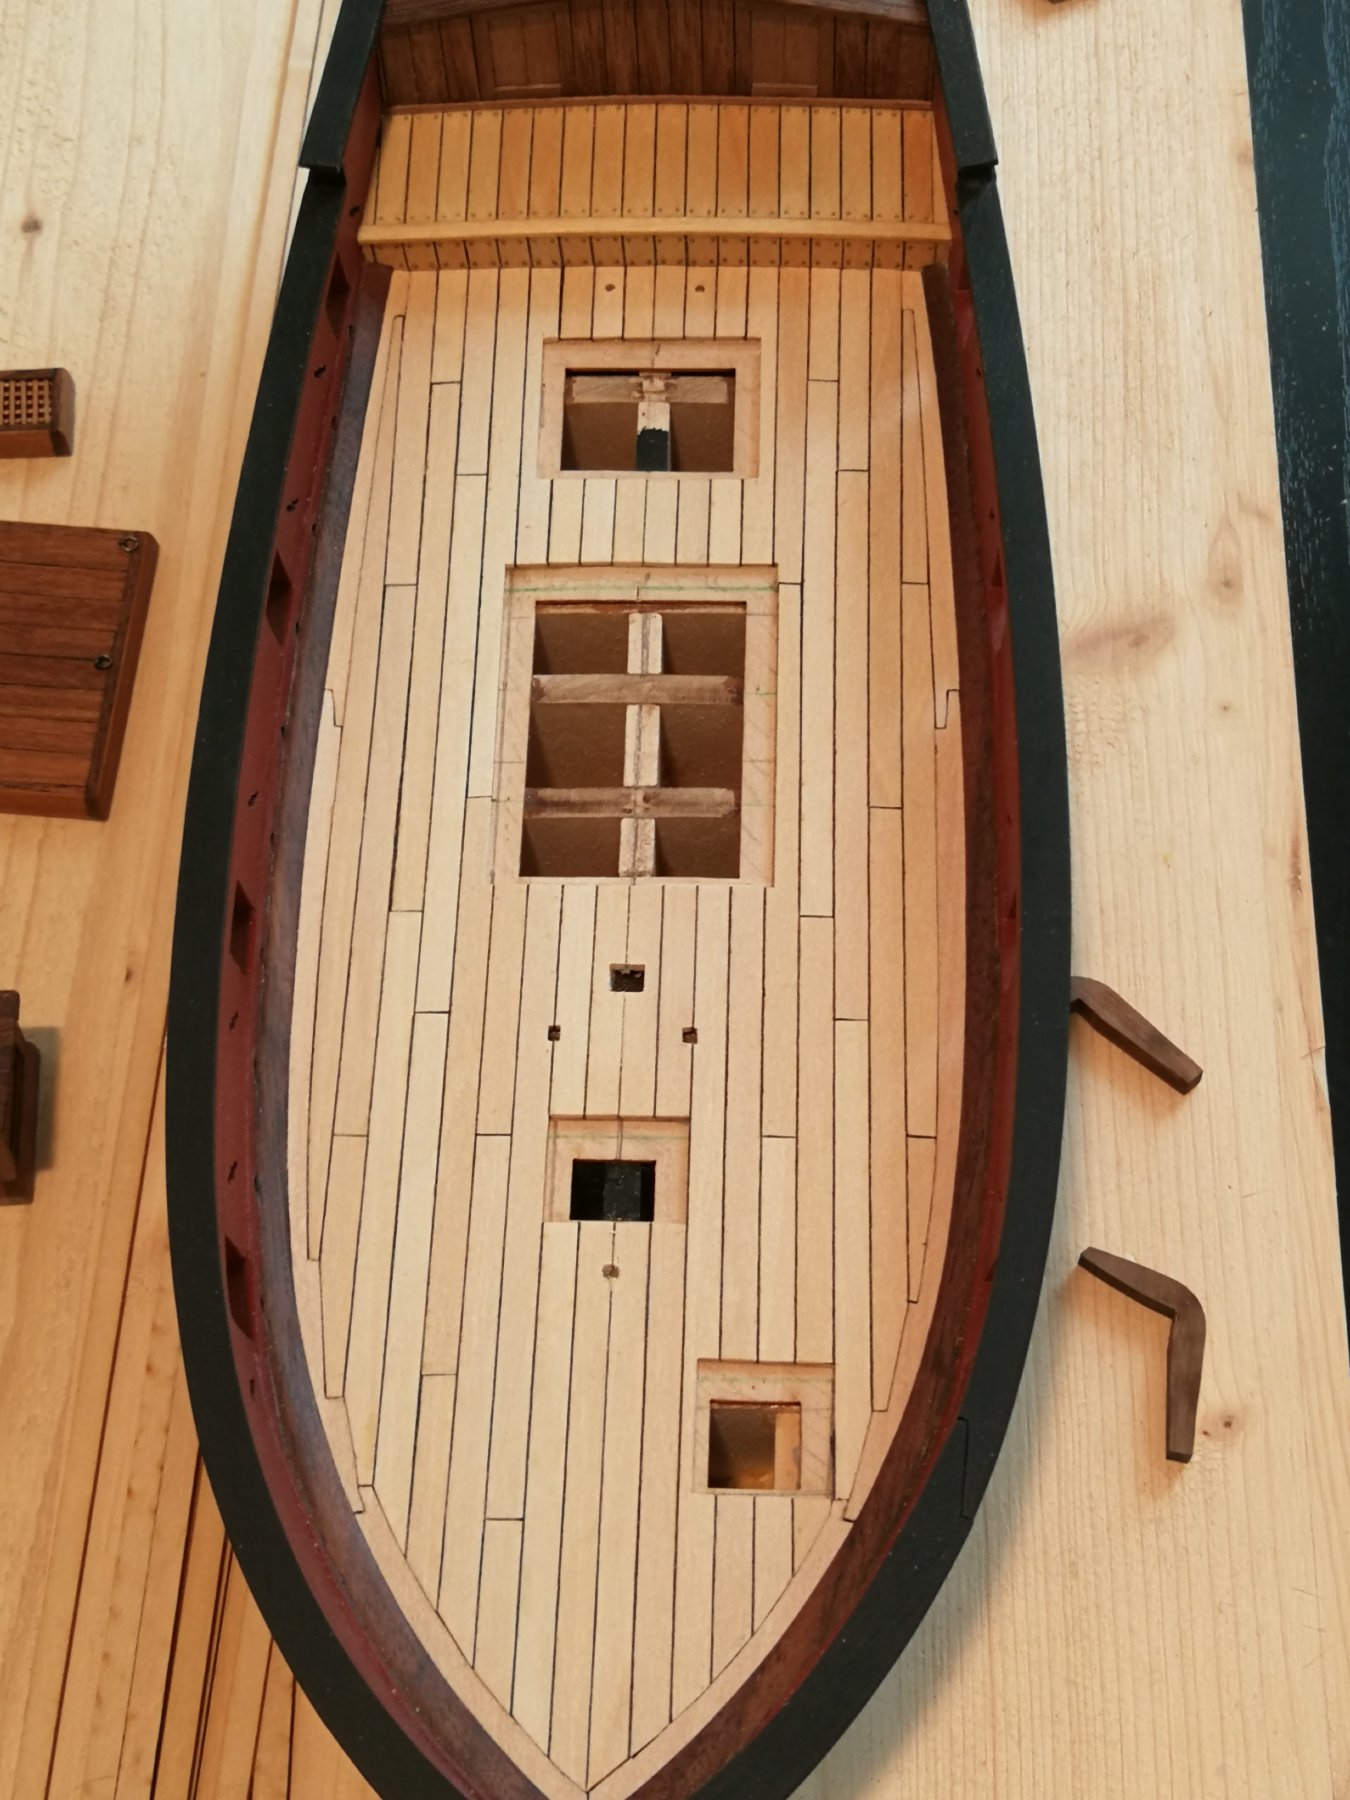
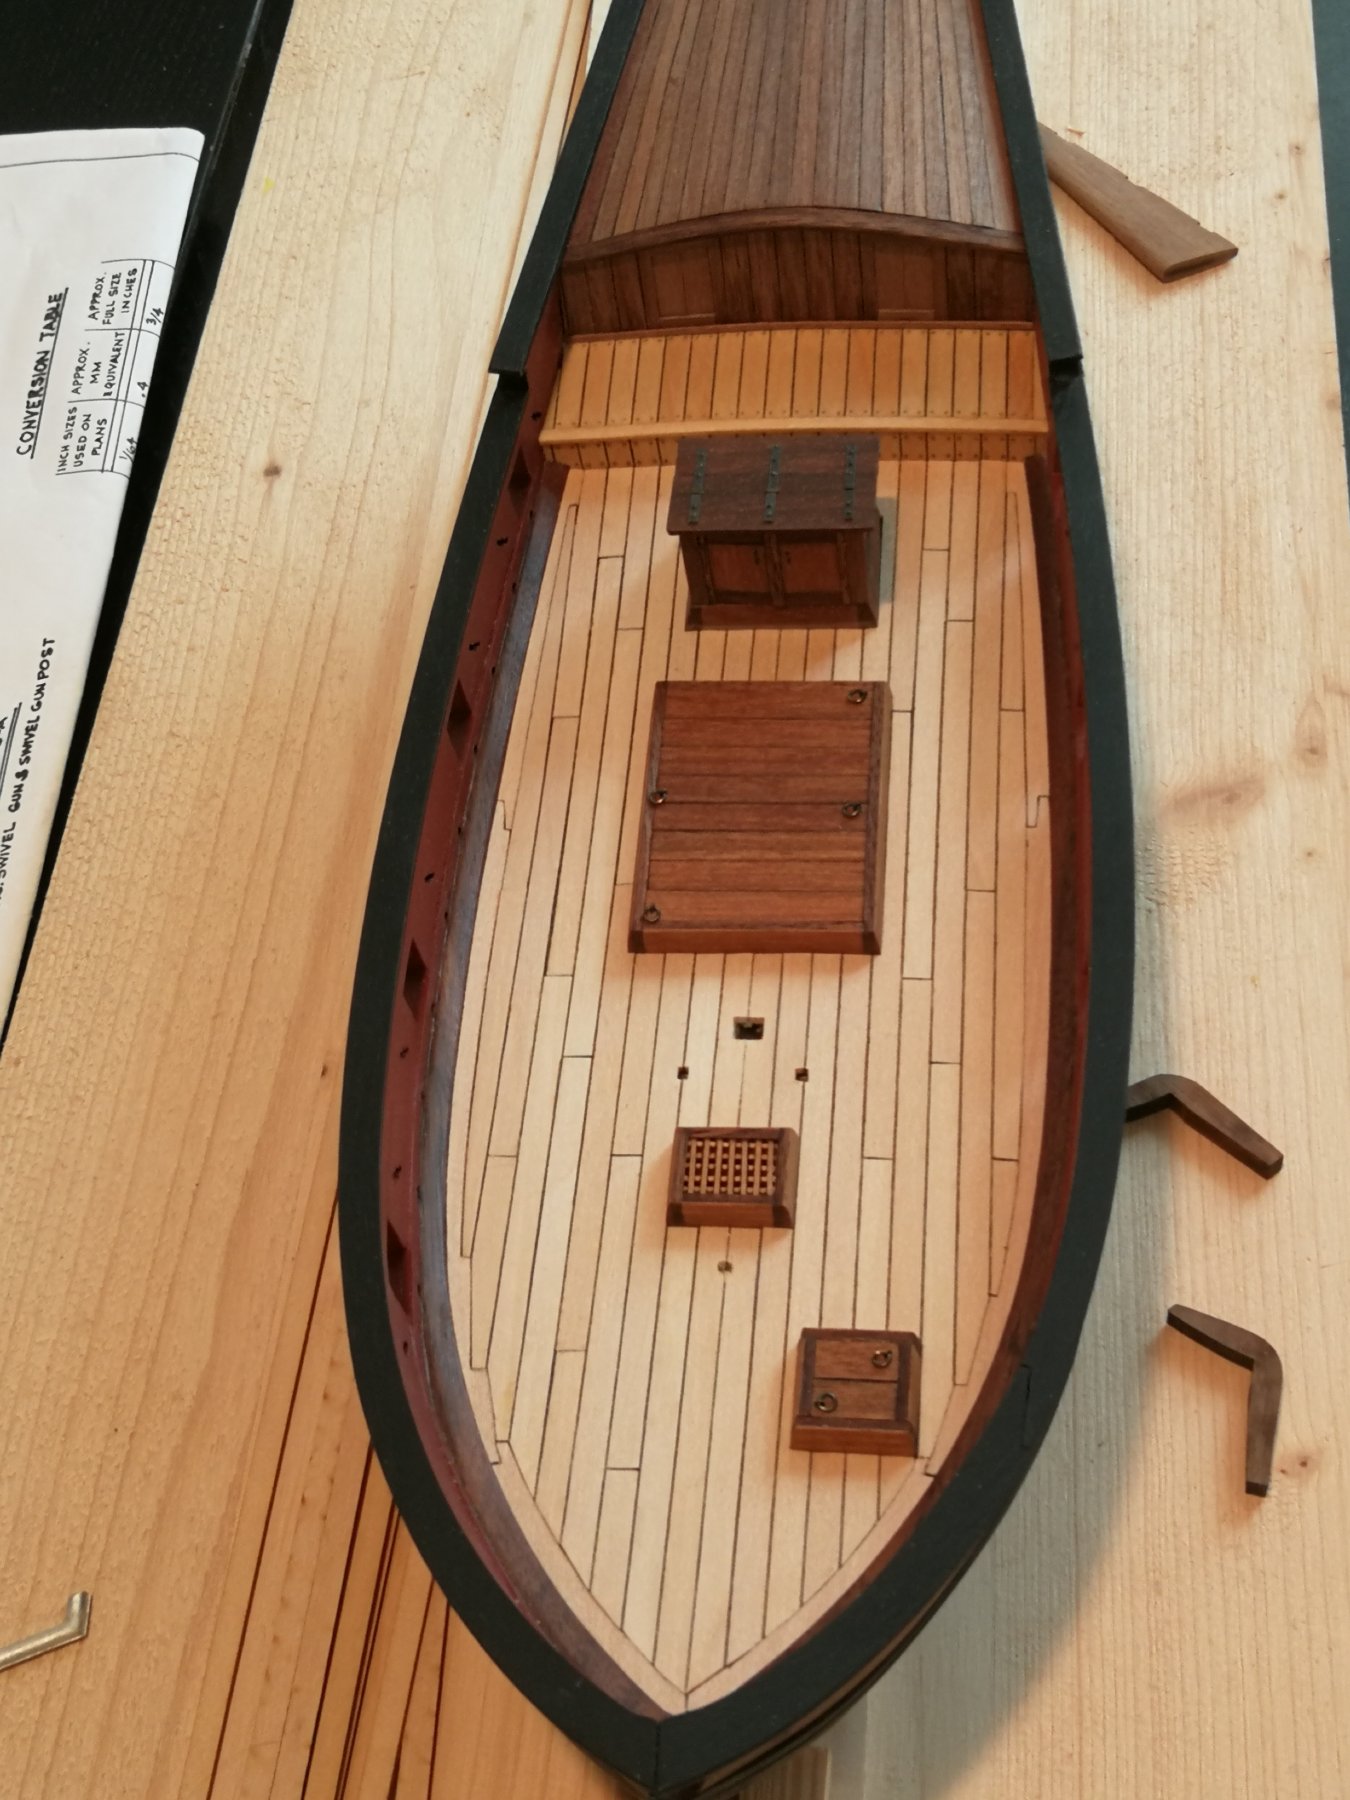
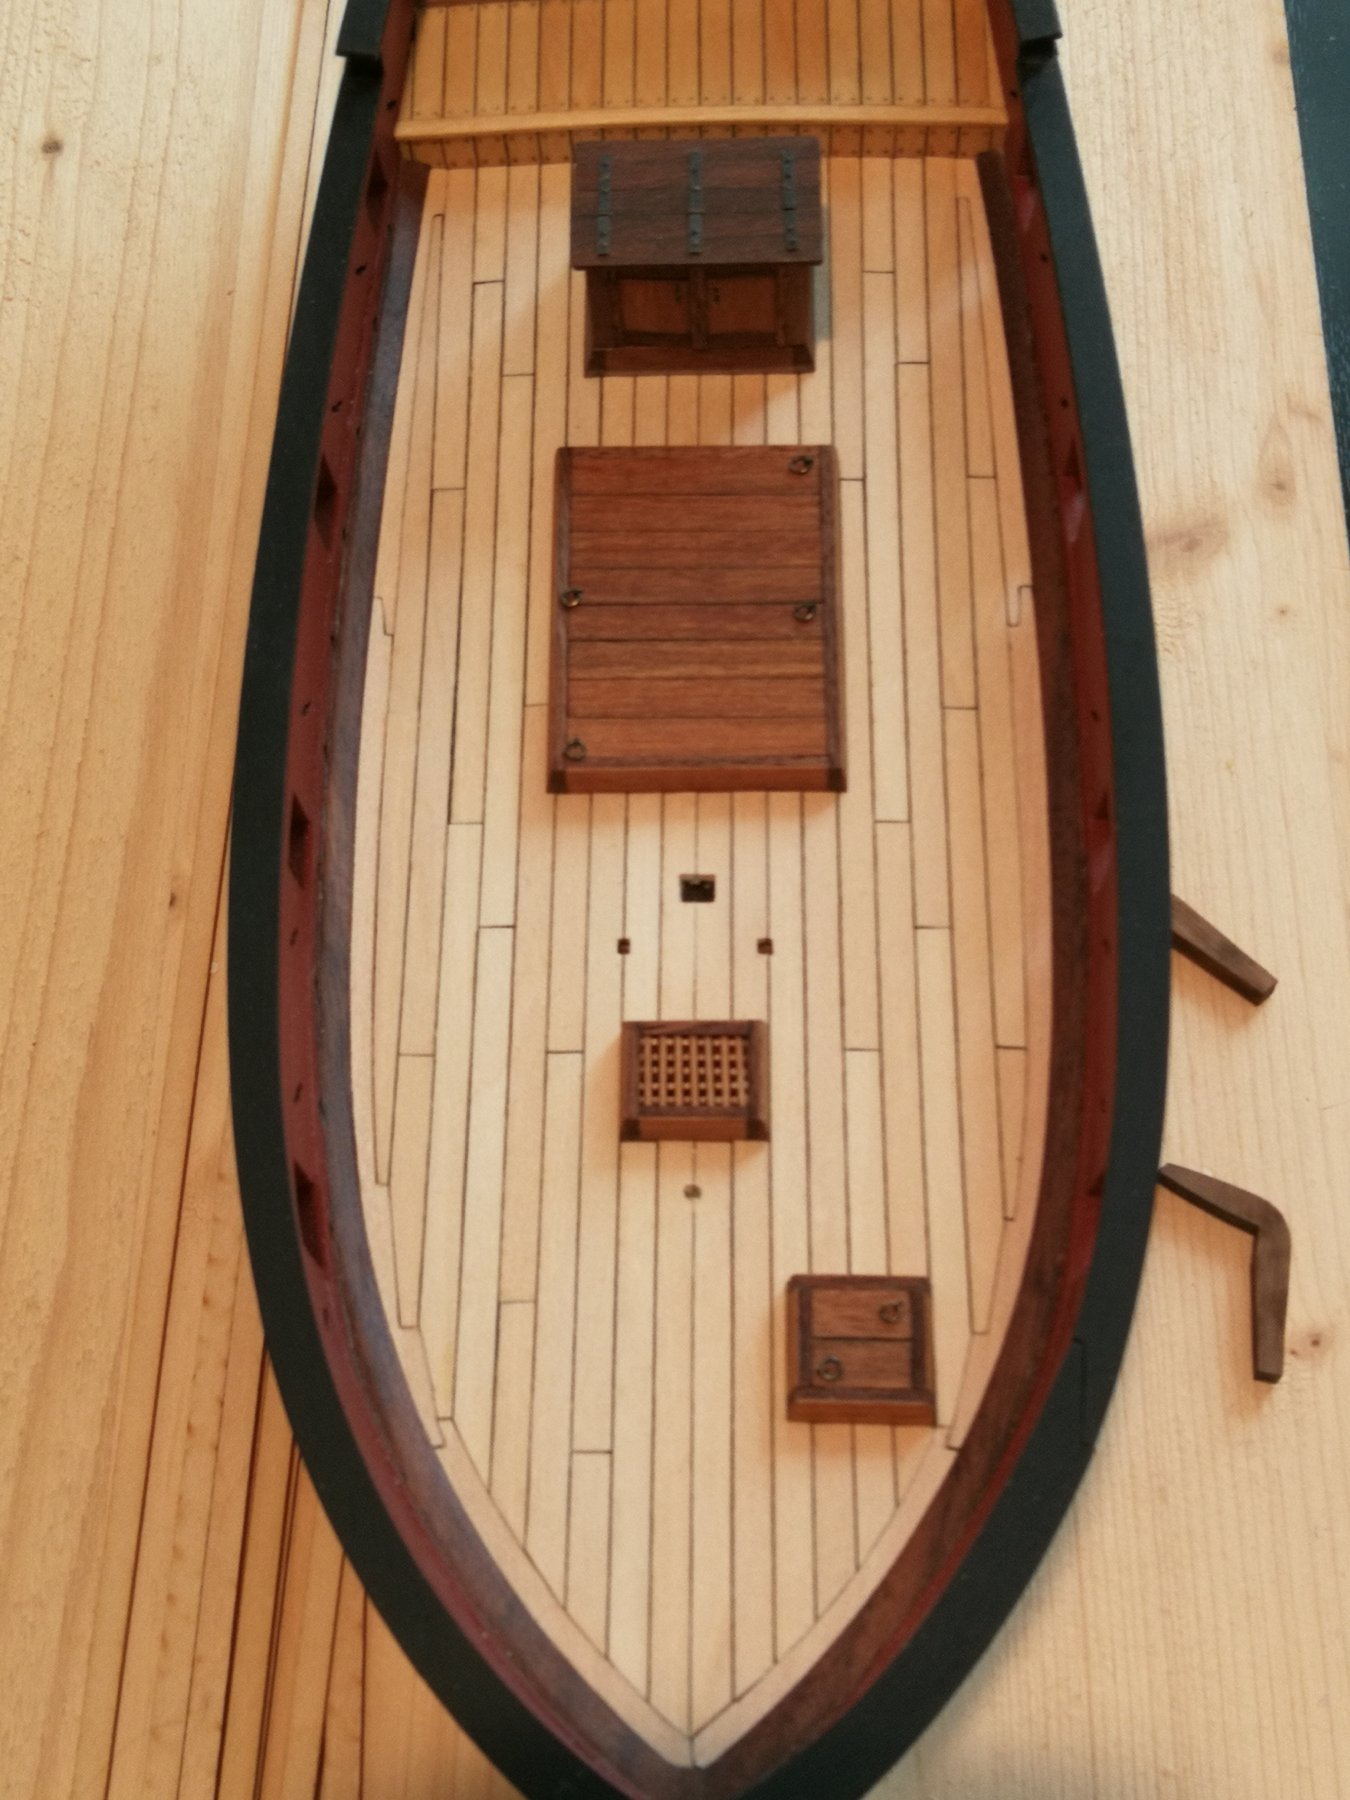
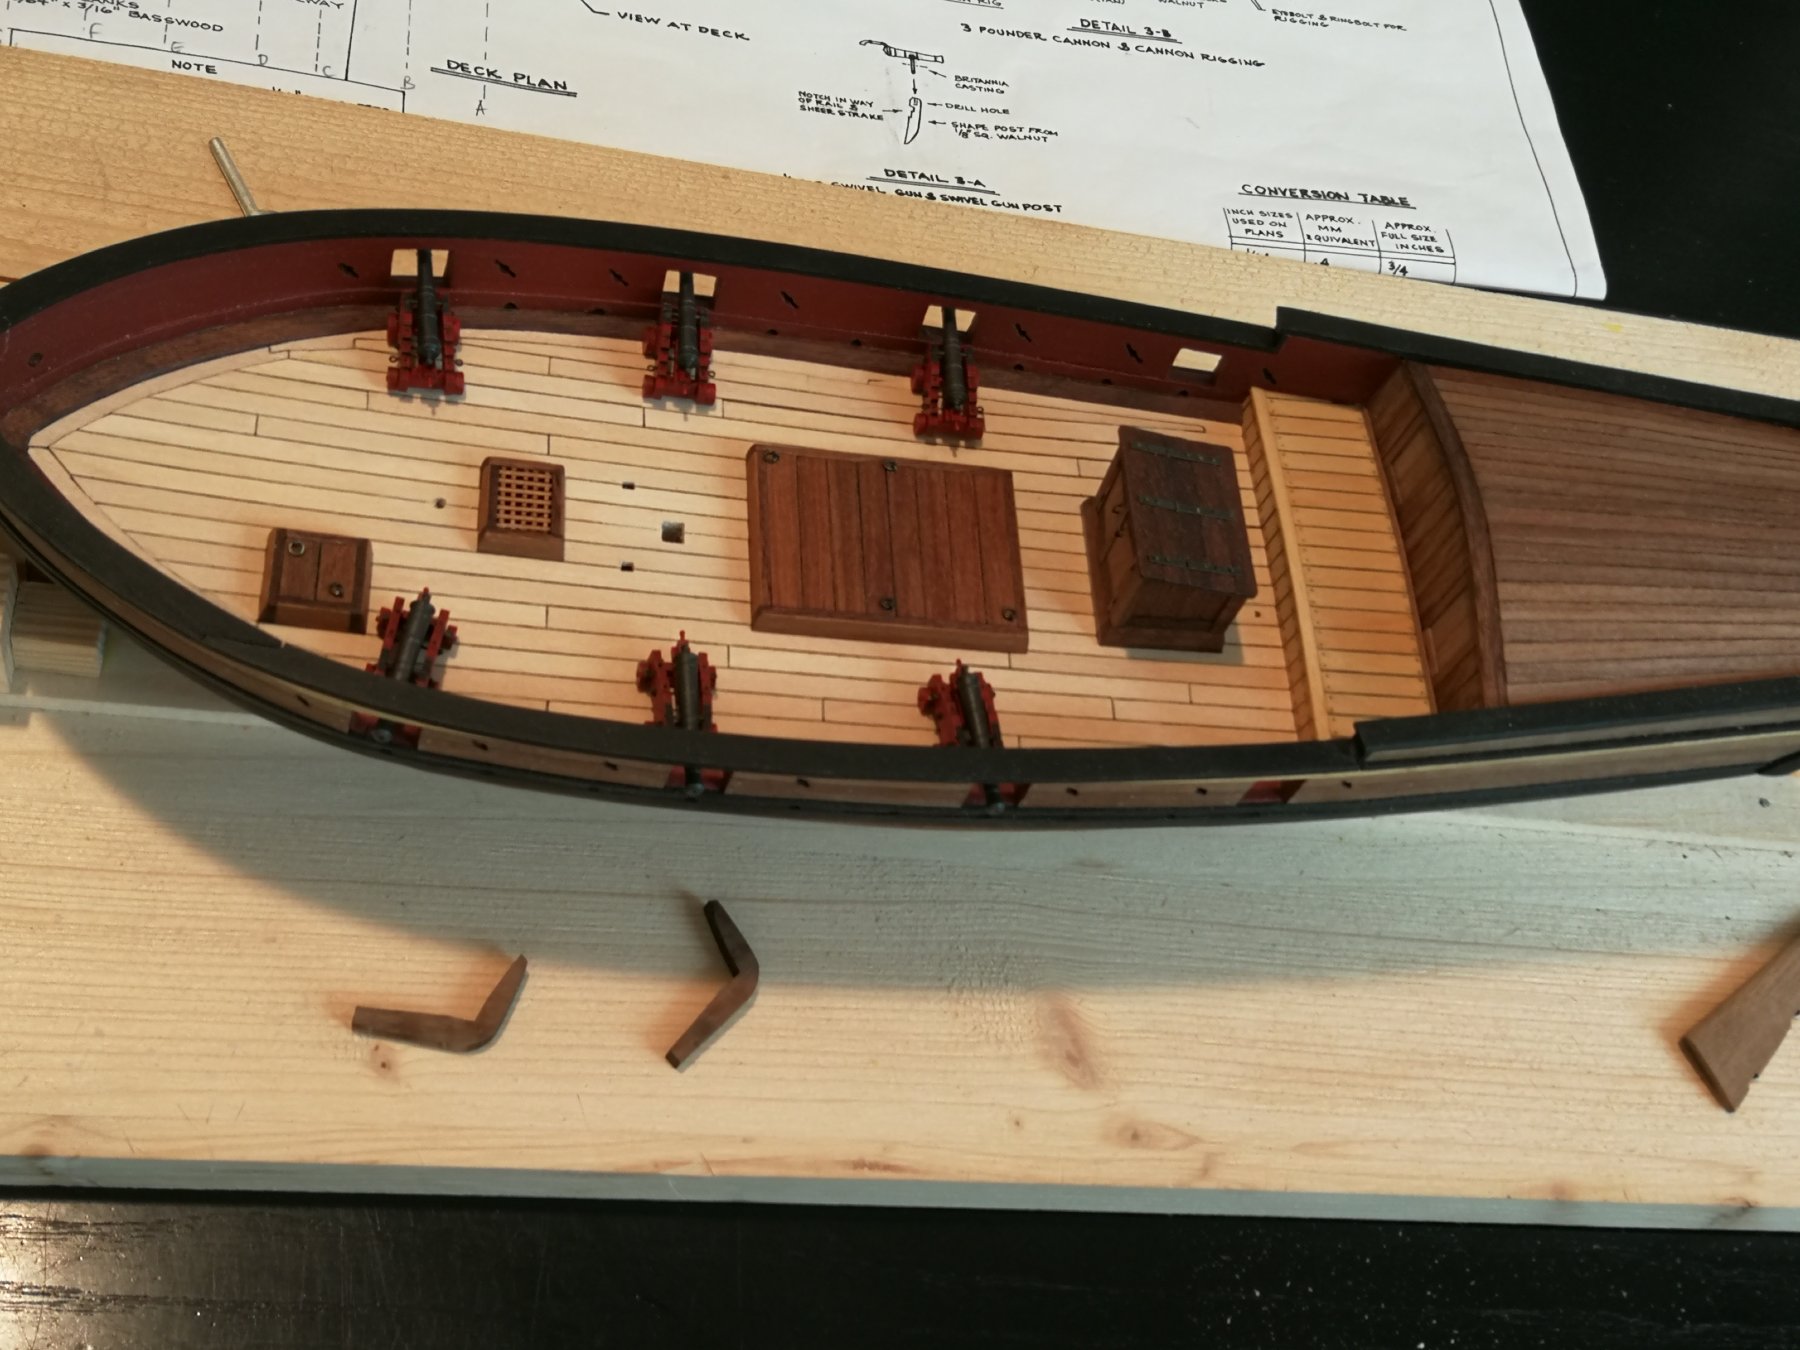
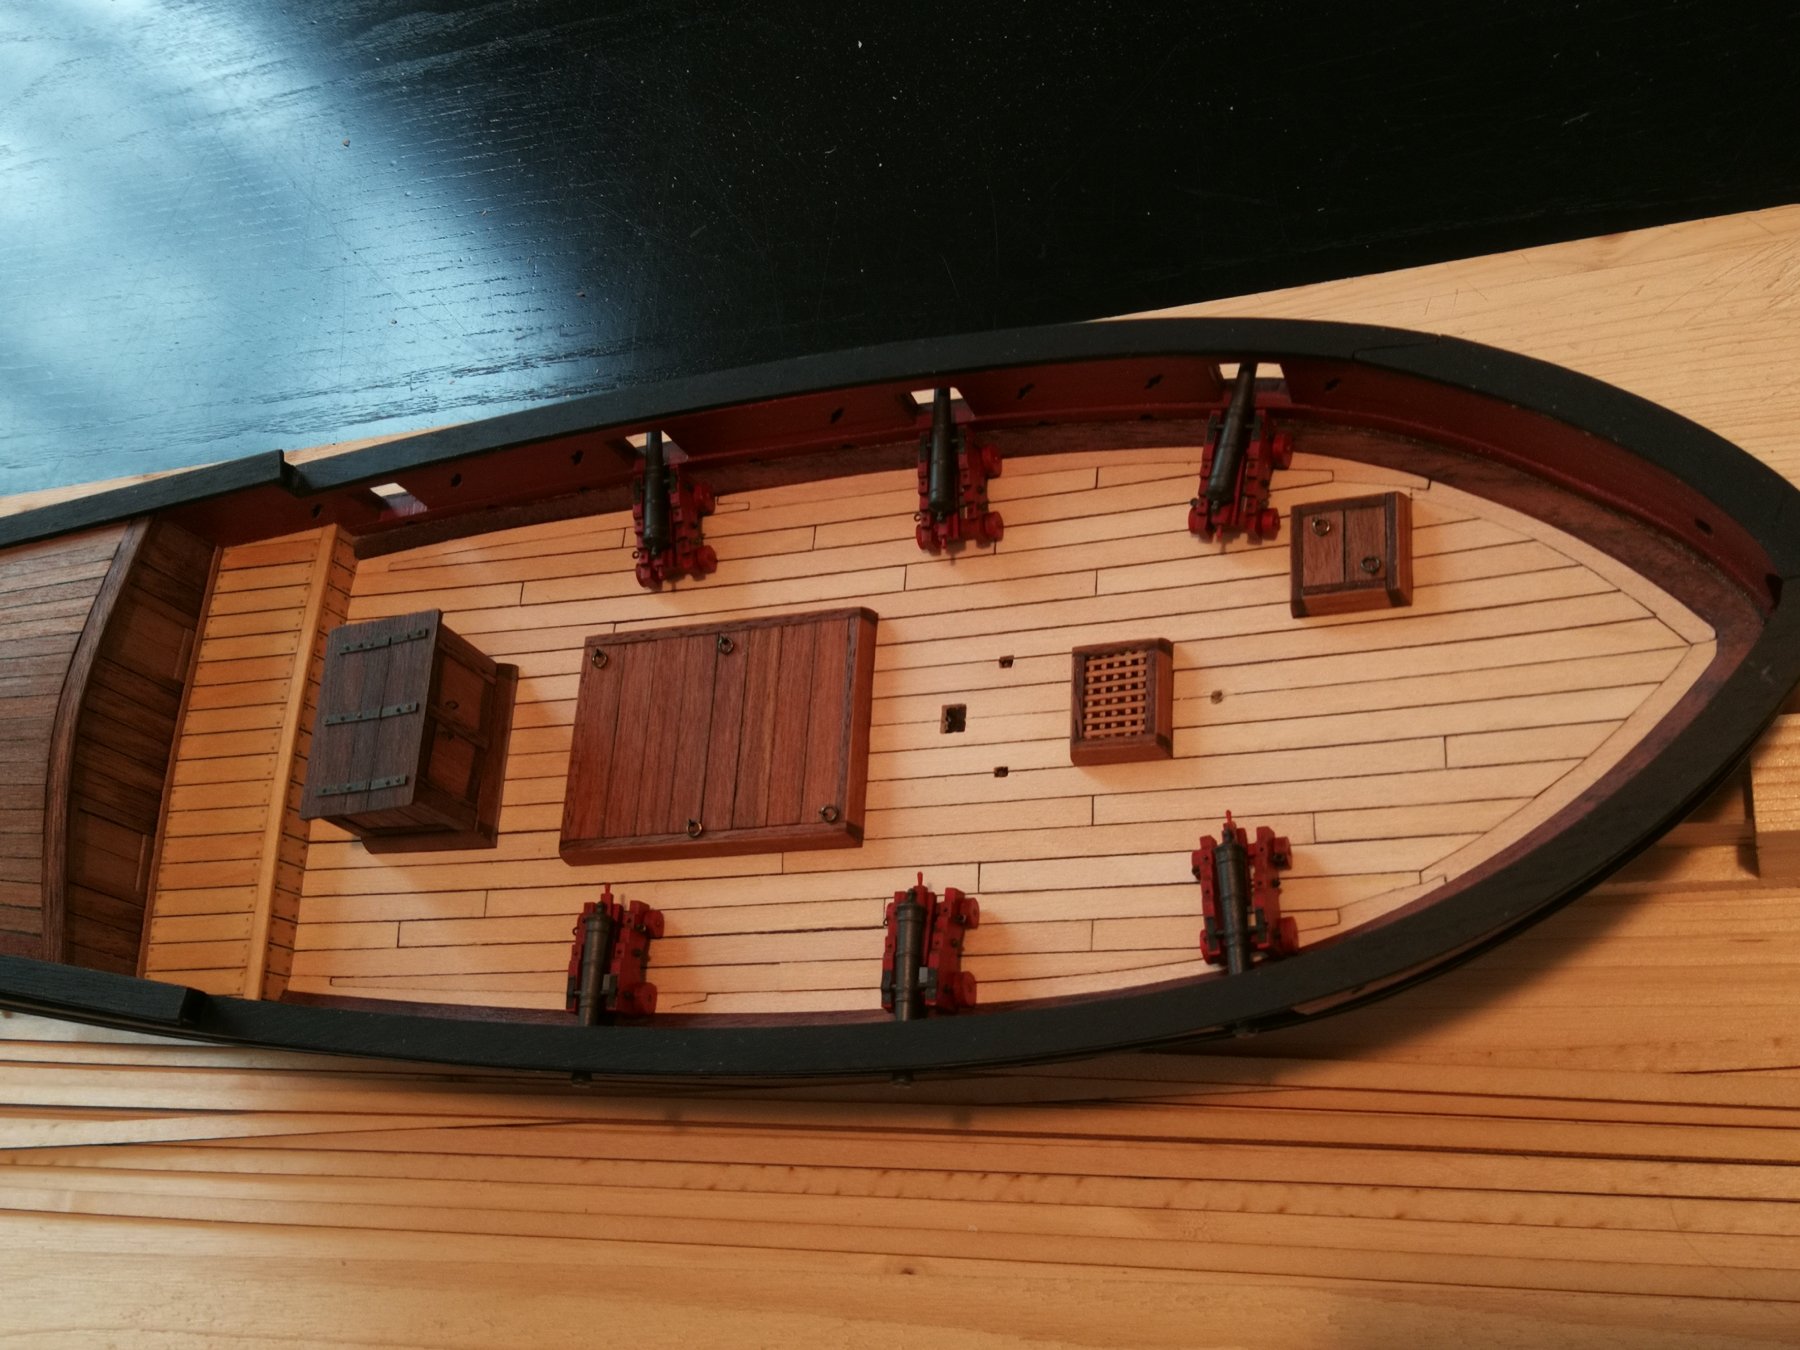
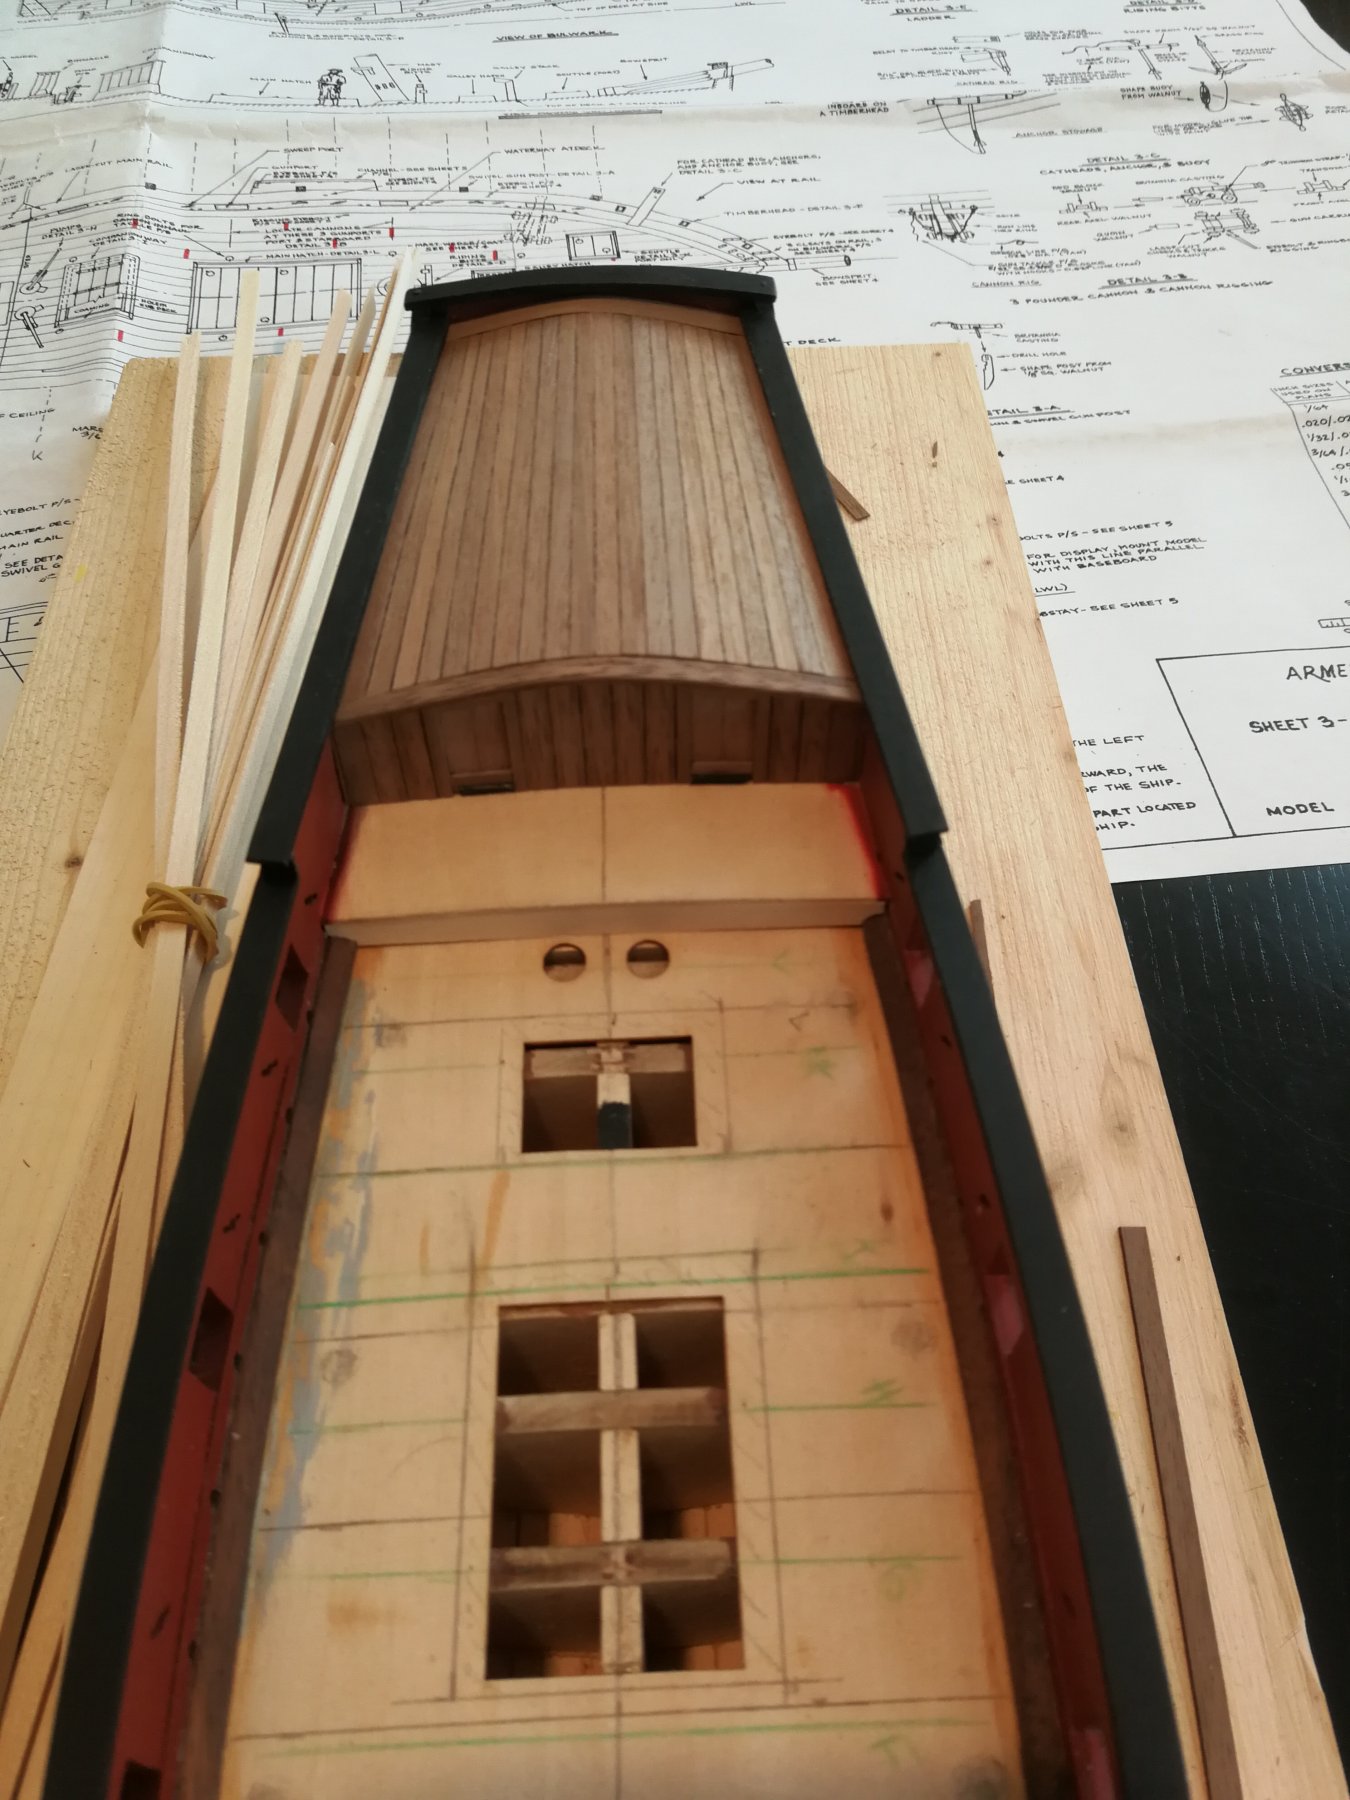
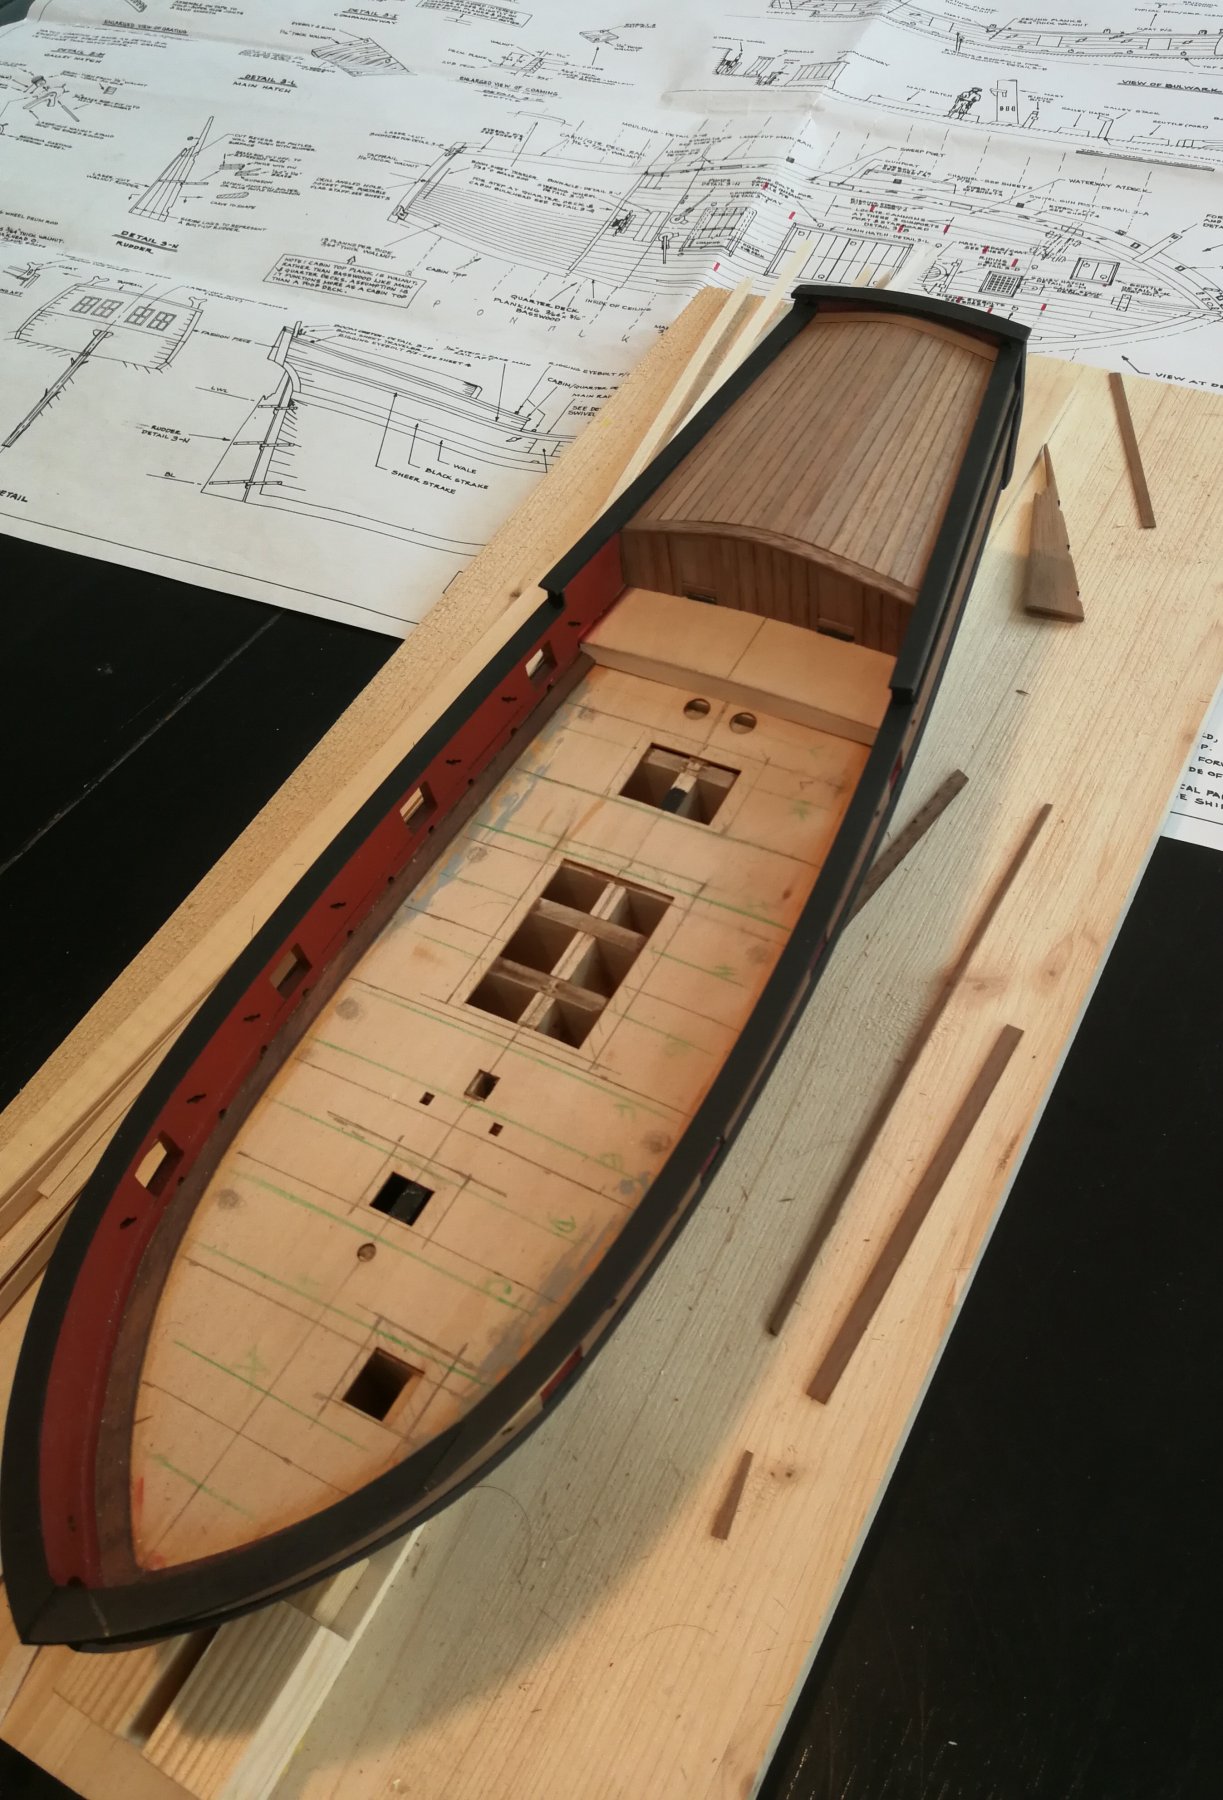
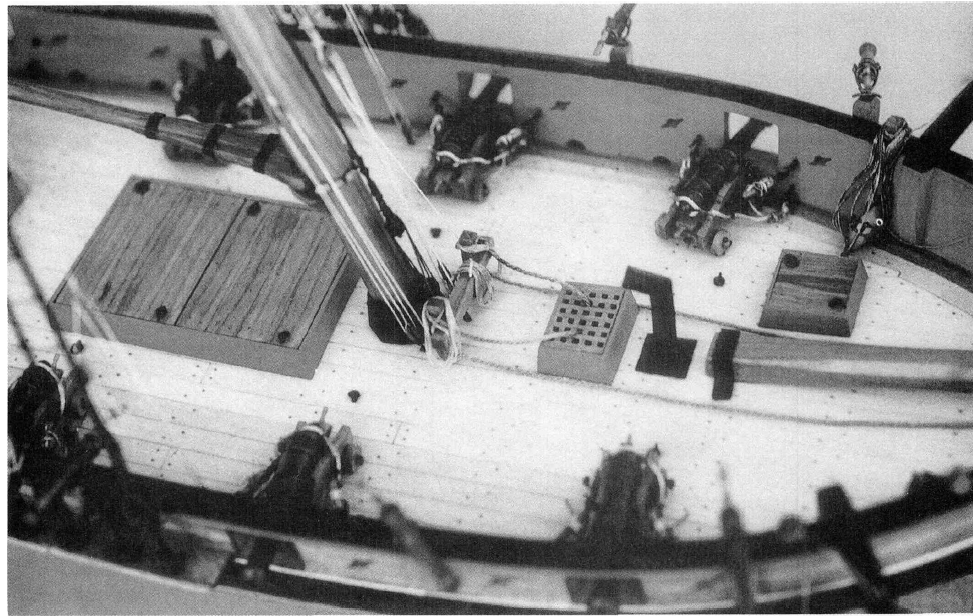
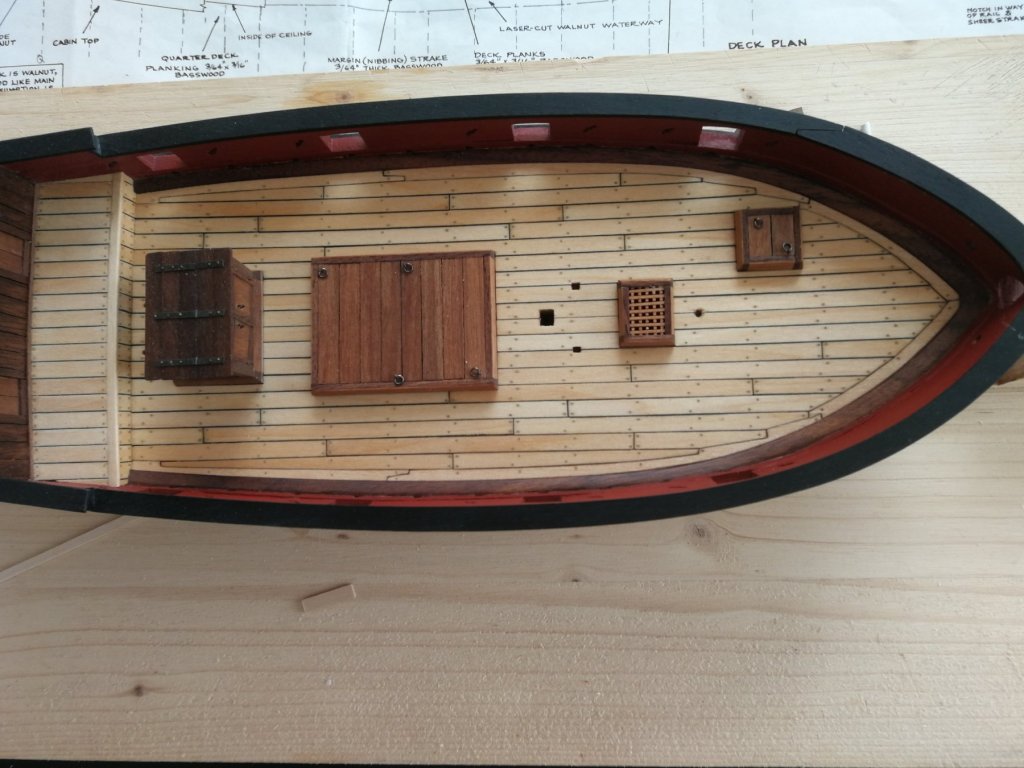
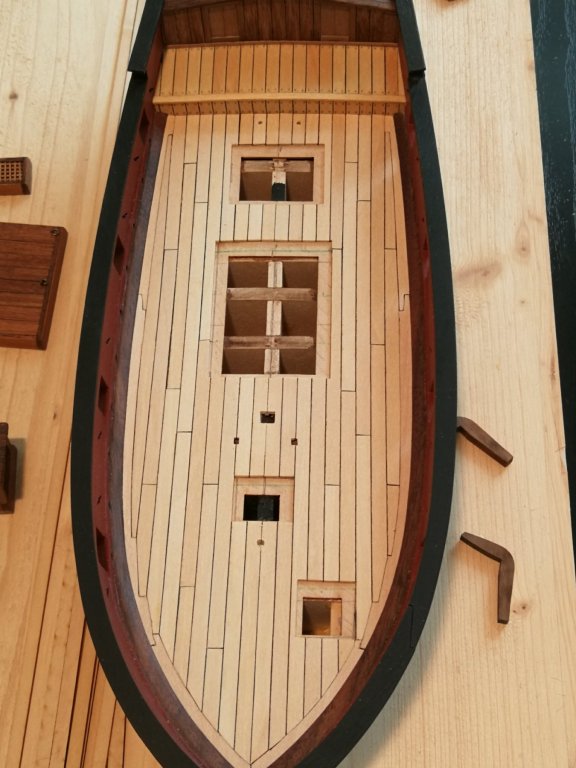
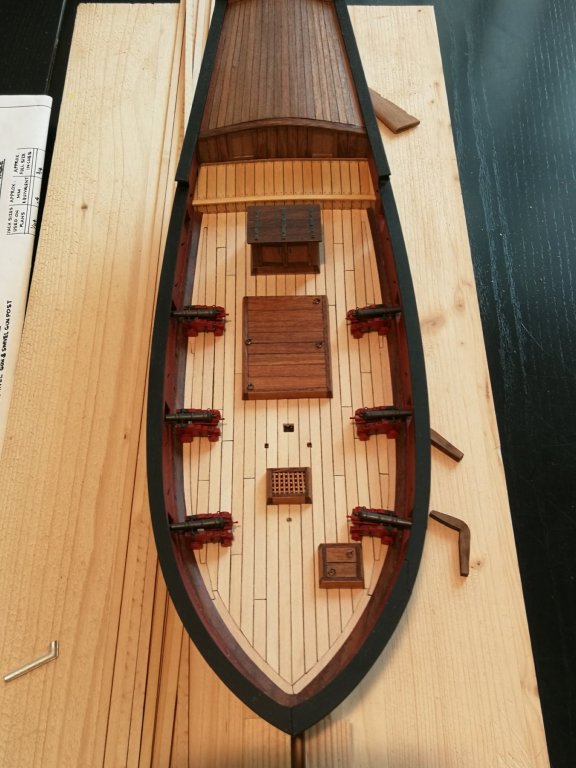
Thanks Dave for this kind comment and thanks to all the 'Likes'. I just finish today to plank the deck. I continue to simulate the caulking with black cardboard. The margin plank was a little tricky and took me several hours of work to find an acceptable fit. A blank test with the deck structures and finally I could not wait to test the setting of the guns. The installation seems to me correct. Now it's time for a little sanding and for the treenails. There is still a lot of work but it's really exciting to guess the final result.


- 164 replies
-
- 16
-
-

-
- first build
- model shipways
- (and 2 more)
-
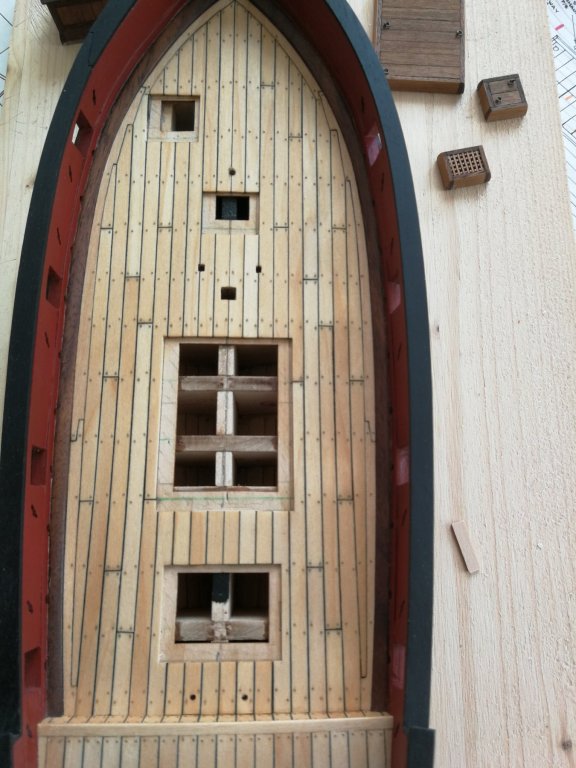
The planking of the deck started : first step with the quarter deck. I simulated the caulking with black cardboard I'm currently working on the treenails : I drilled the holes (0,6 mm) and simulated the treenail with Minwax wood putty (Golden Oak). Work is not finished...


- 164 replies
-
- 12
-
-
- first build
- model shipways
- (and 2 more)
-
Thanks Dave and for all the likes ! 😊
-
I always appreciate your judicious choice of woods. I will follow this build with interest. 😊
-
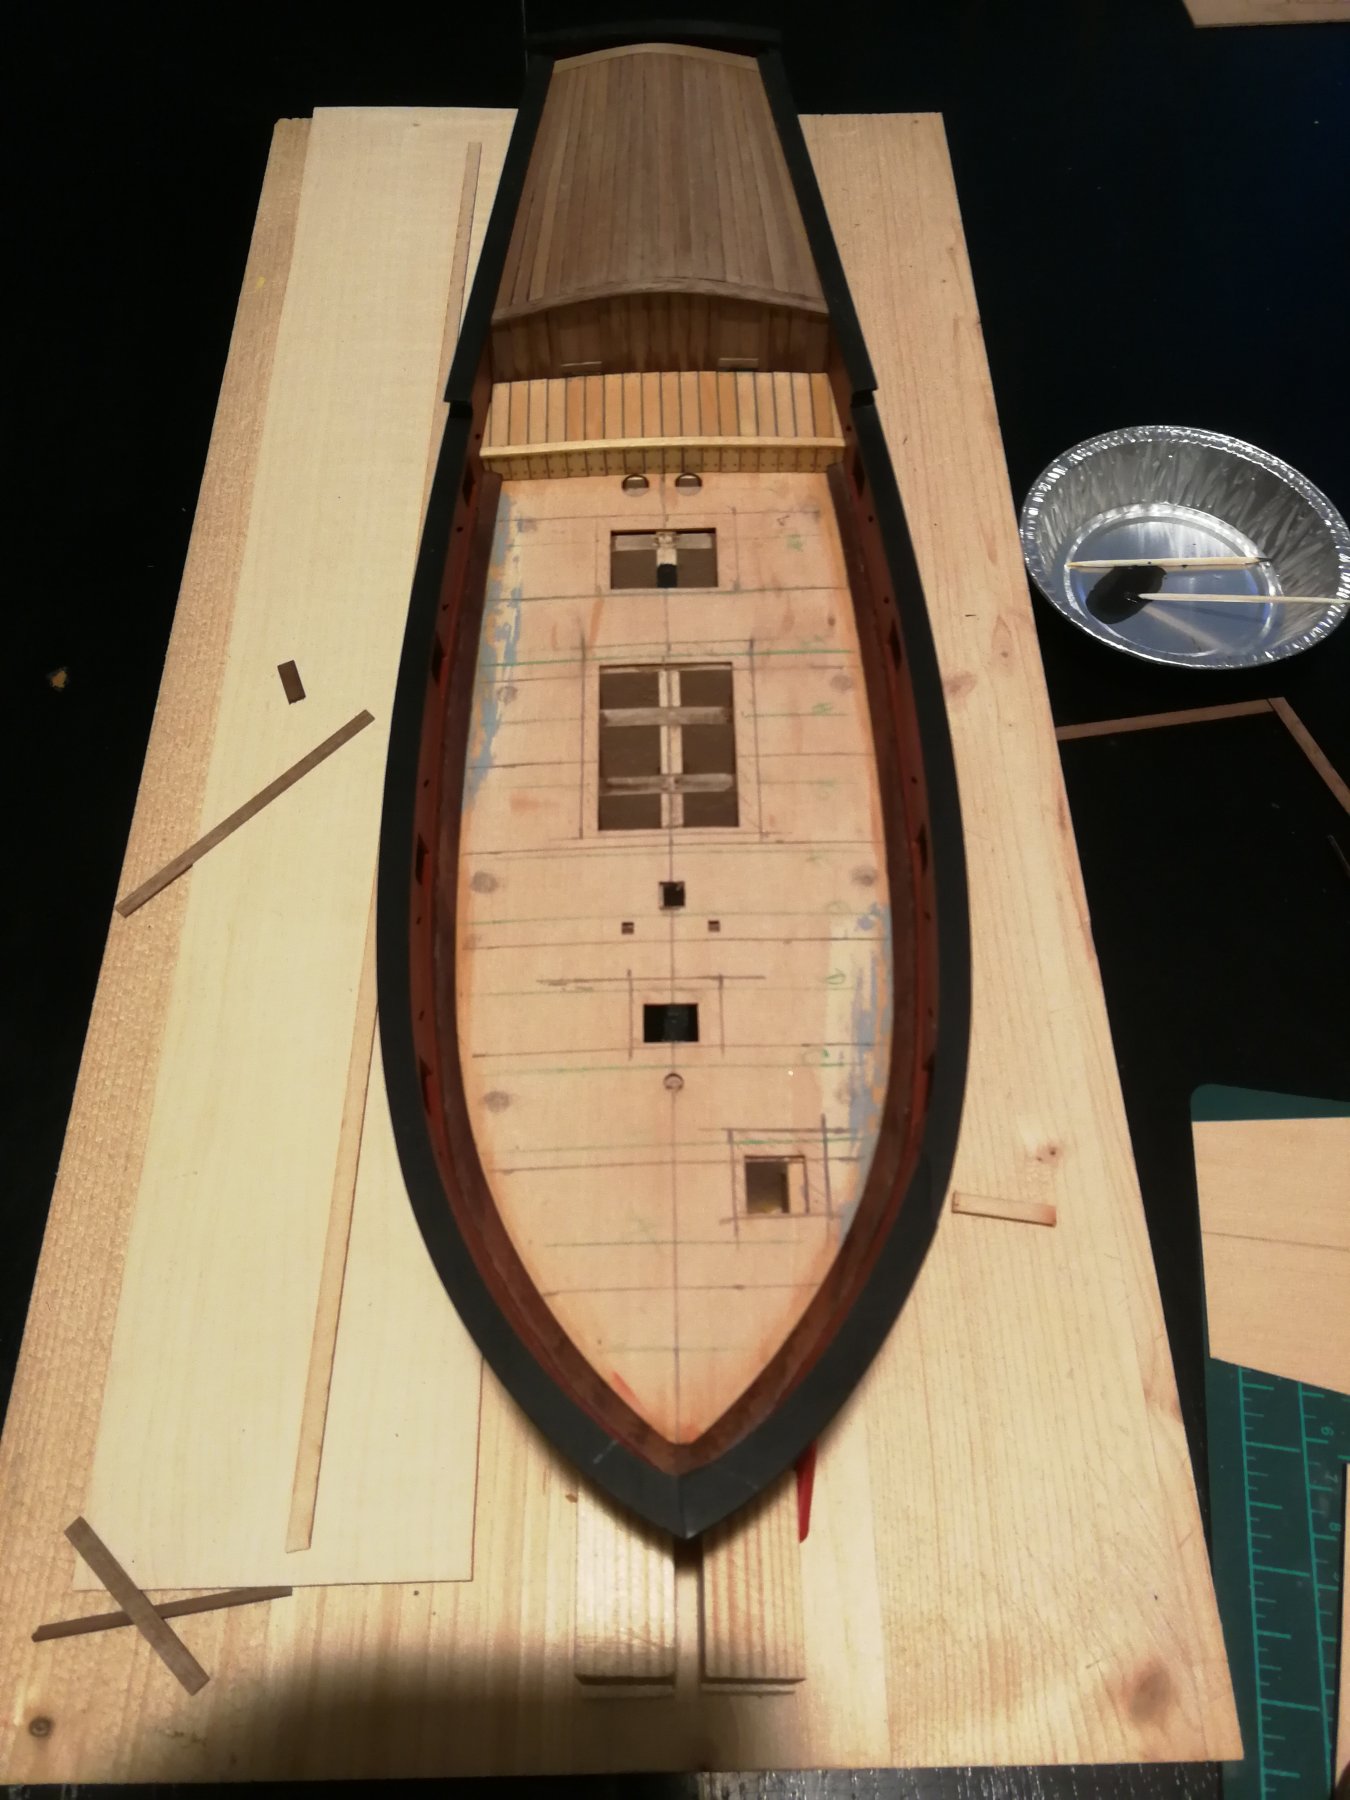
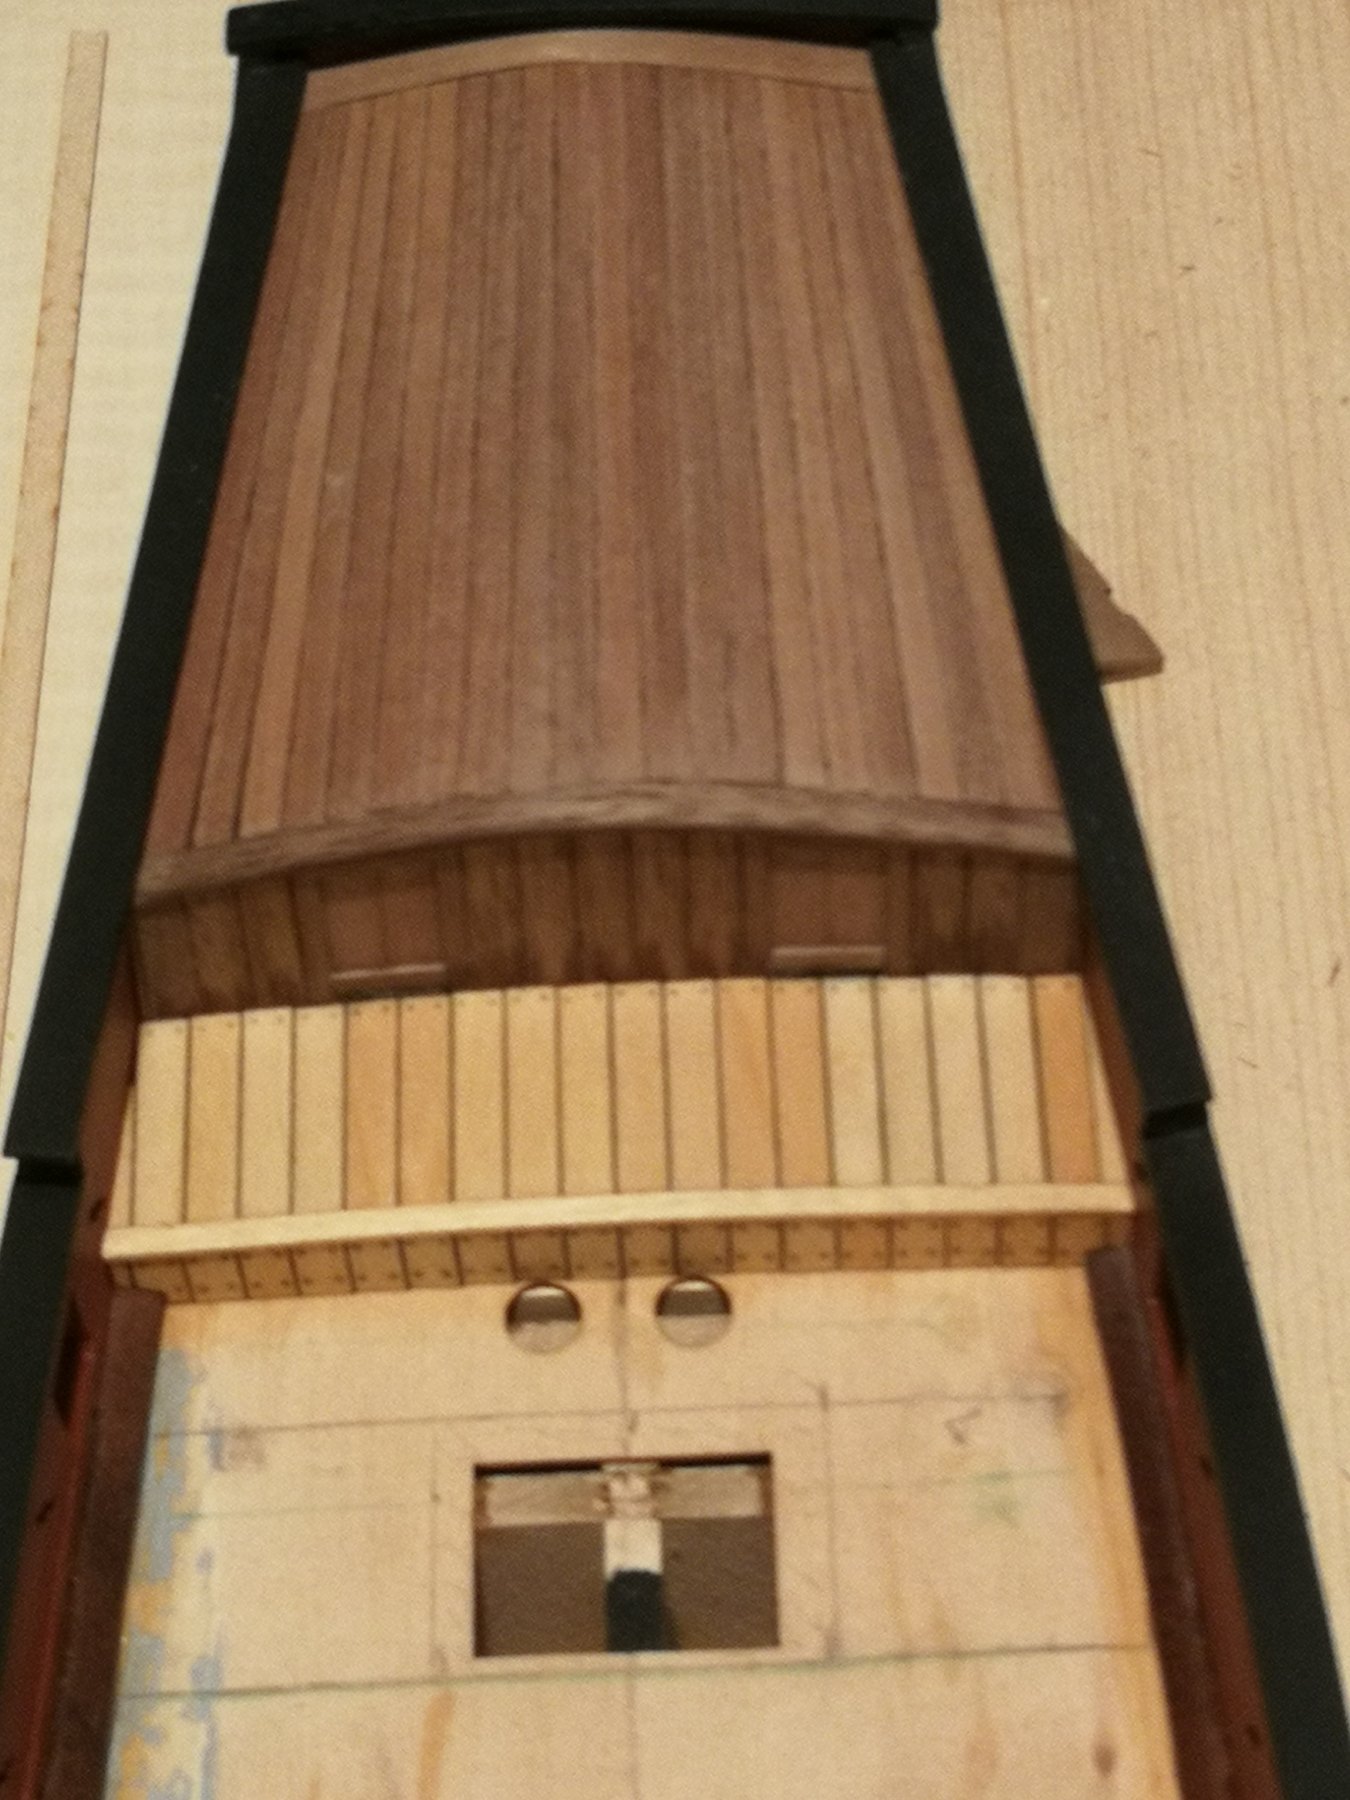
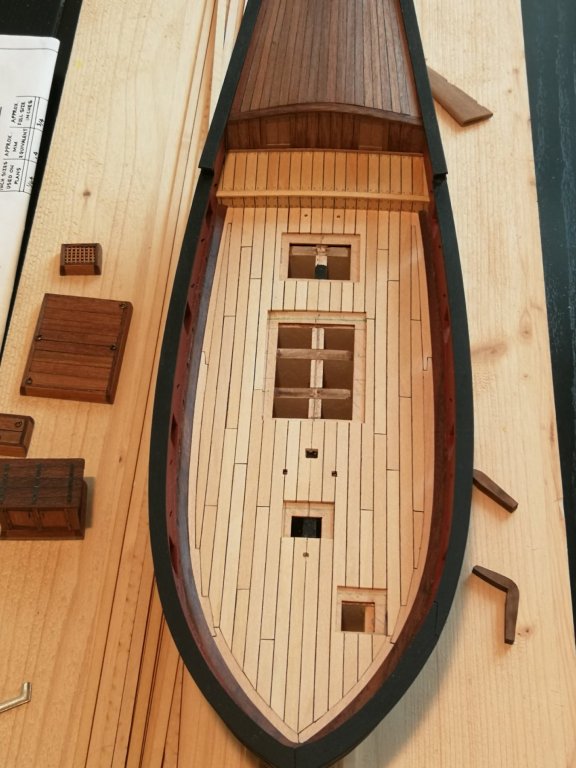
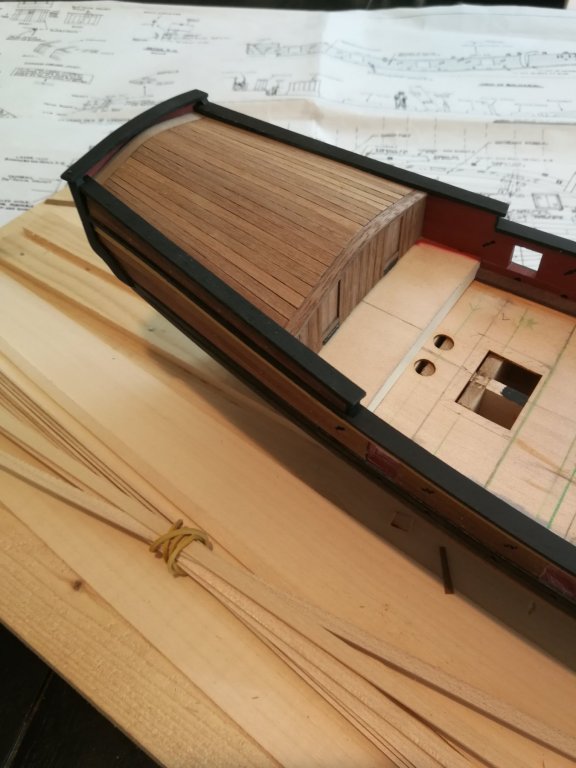
Merci Jean-Philippe pour vos voeux. Toutes belles fêtes de fin d'année à vous aussi ! Thanks to all the 'Likes'. I started working on the deck and it's pure pleasure. The cabin wall planking and doors have been added to the quarter deck. The poop deck planking is also finished. I still have to sand everything and give a coat of teak oil. For the deck planking, I have ordered some maple wood. I will start with the quarter deck planking.


- 164 replies
-
- 14
-
-
- first build
- model shipways
- (and 2 more)
-
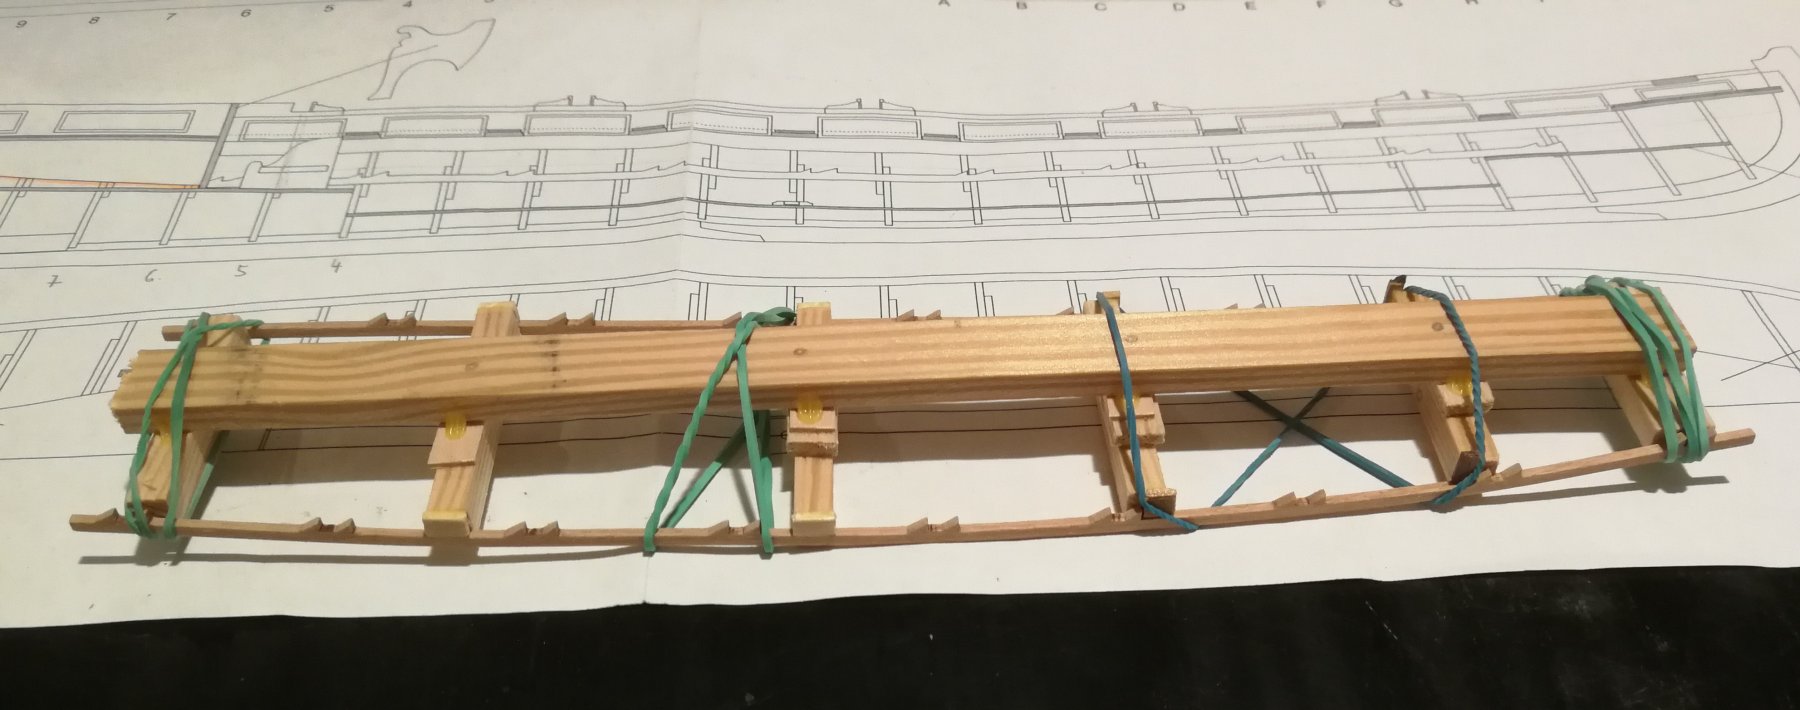
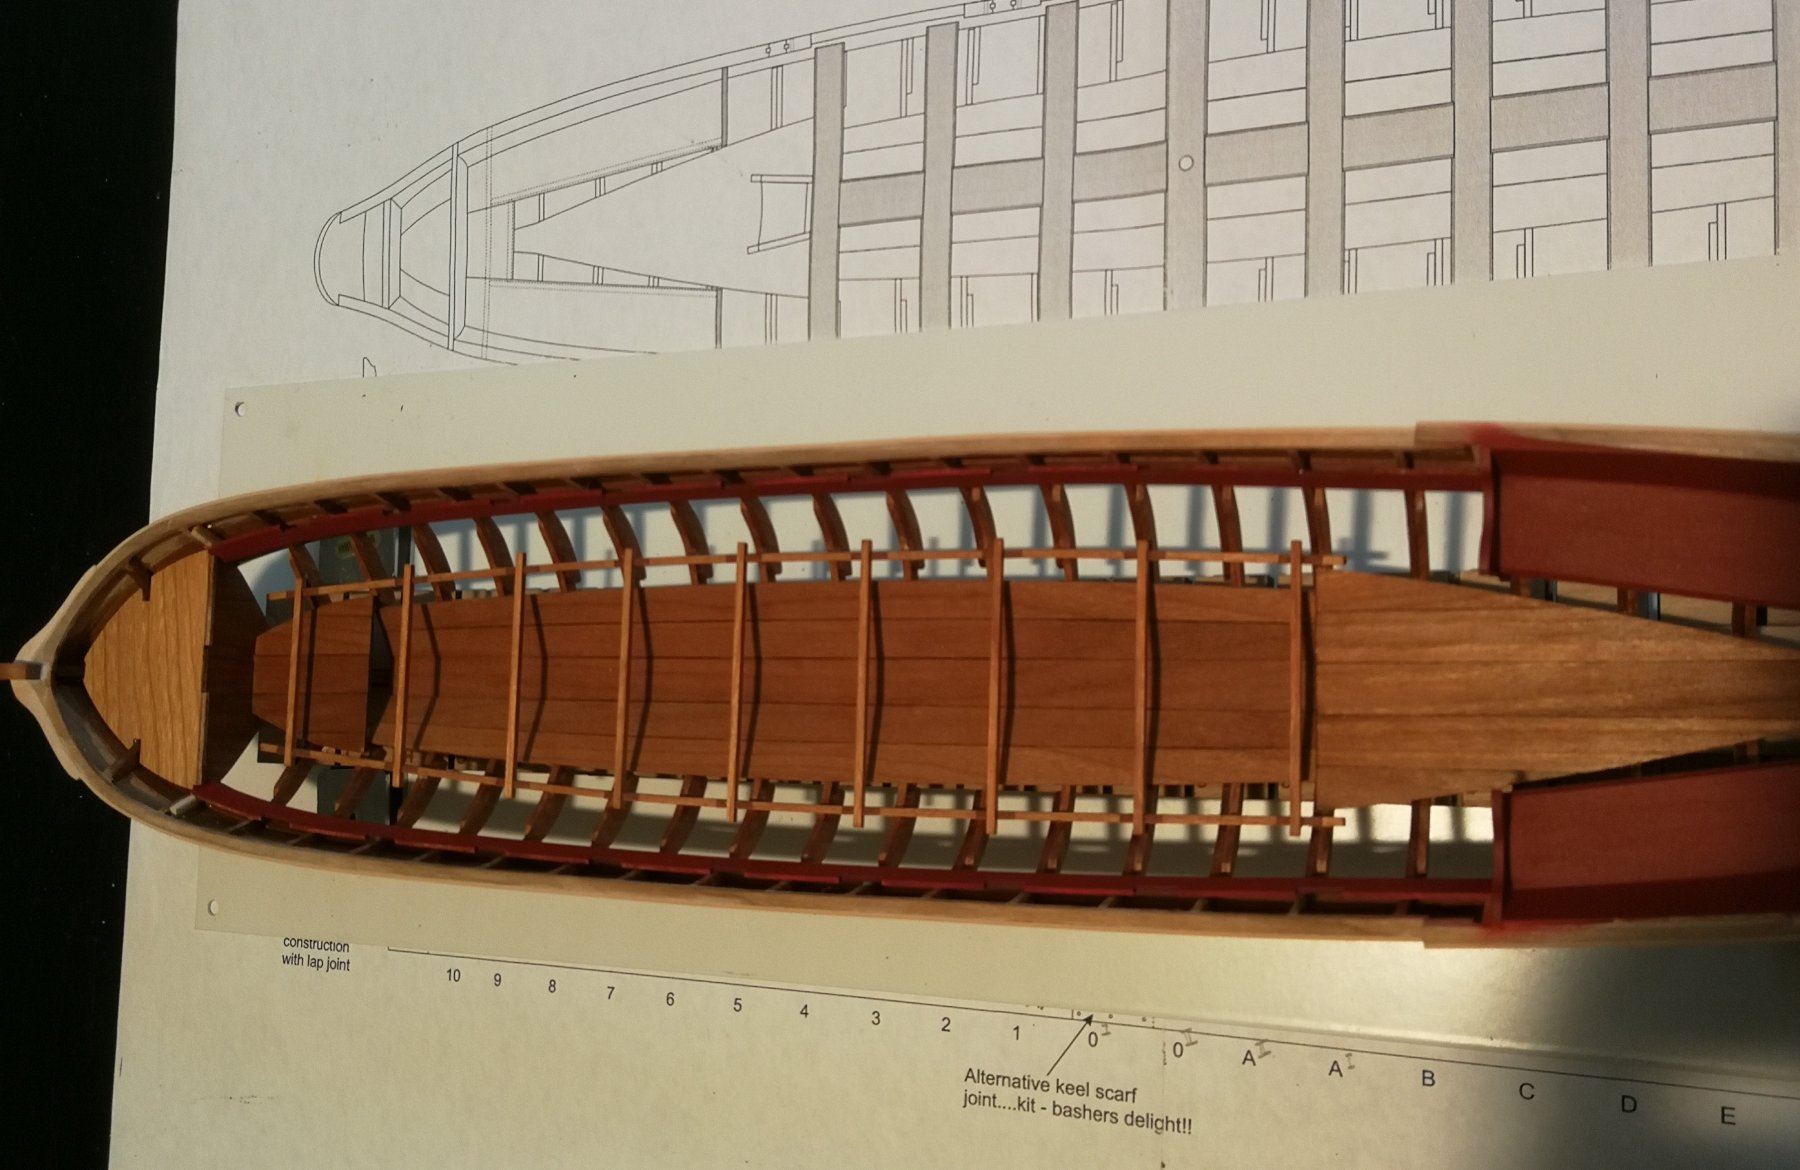
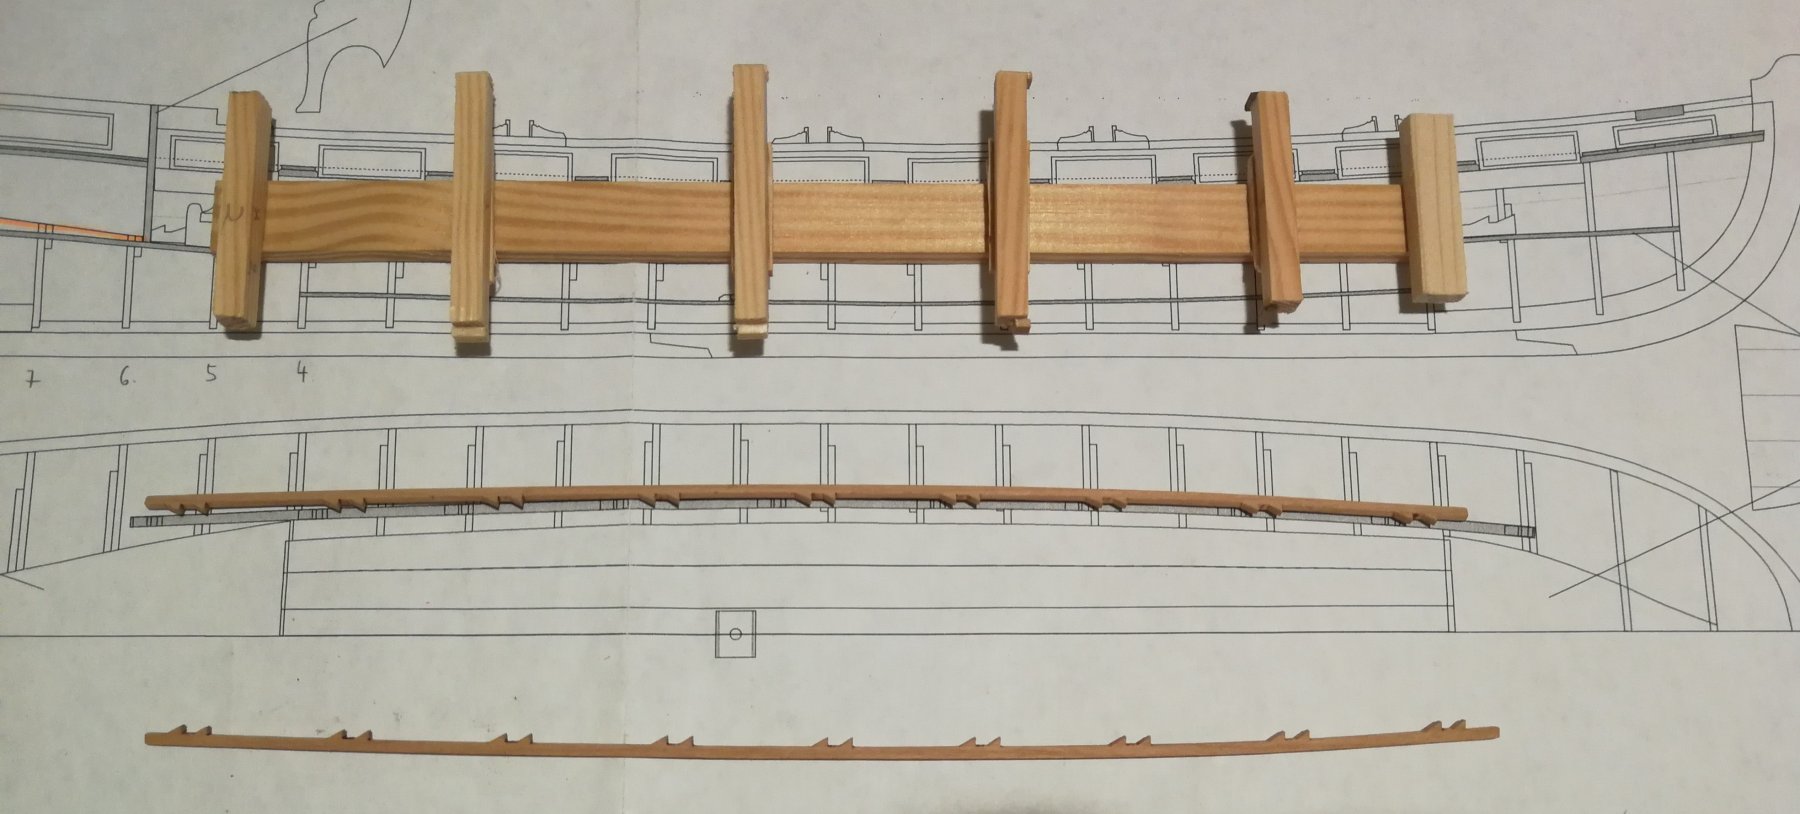
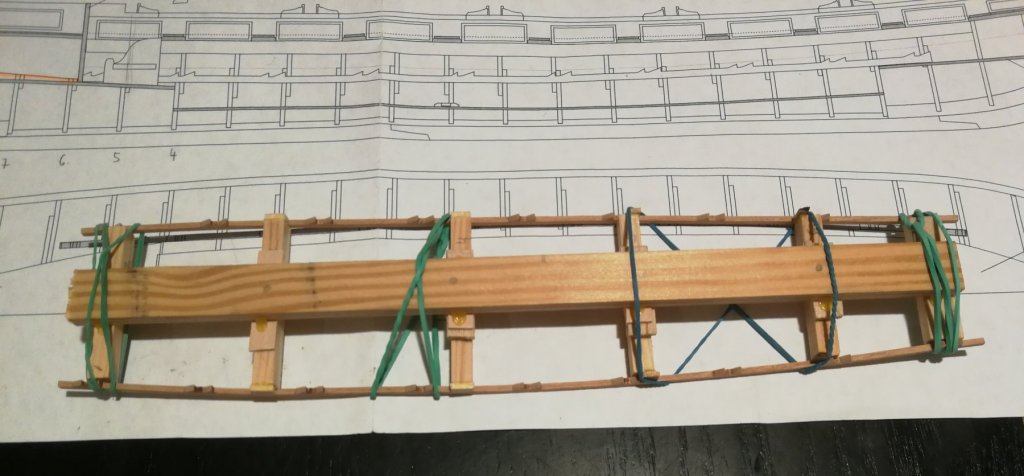
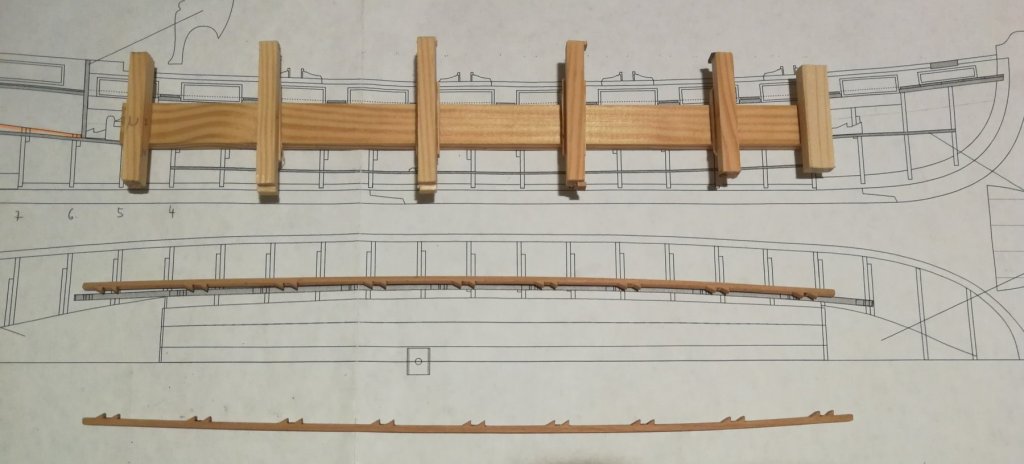
The stretchers are in place. I first bend the two long thin timbers using the jig that I have build. Two minutes in hot water and the I fixed them on the jig using rubber bands. After a few hours, they kept their shape. This way of doing things facilitated the final positioning I can now add the thwarts...


- 103 replies
-
- 9
-
-
- queen anne barge
- Syren Ship Model Company
- (and 1 more)
-
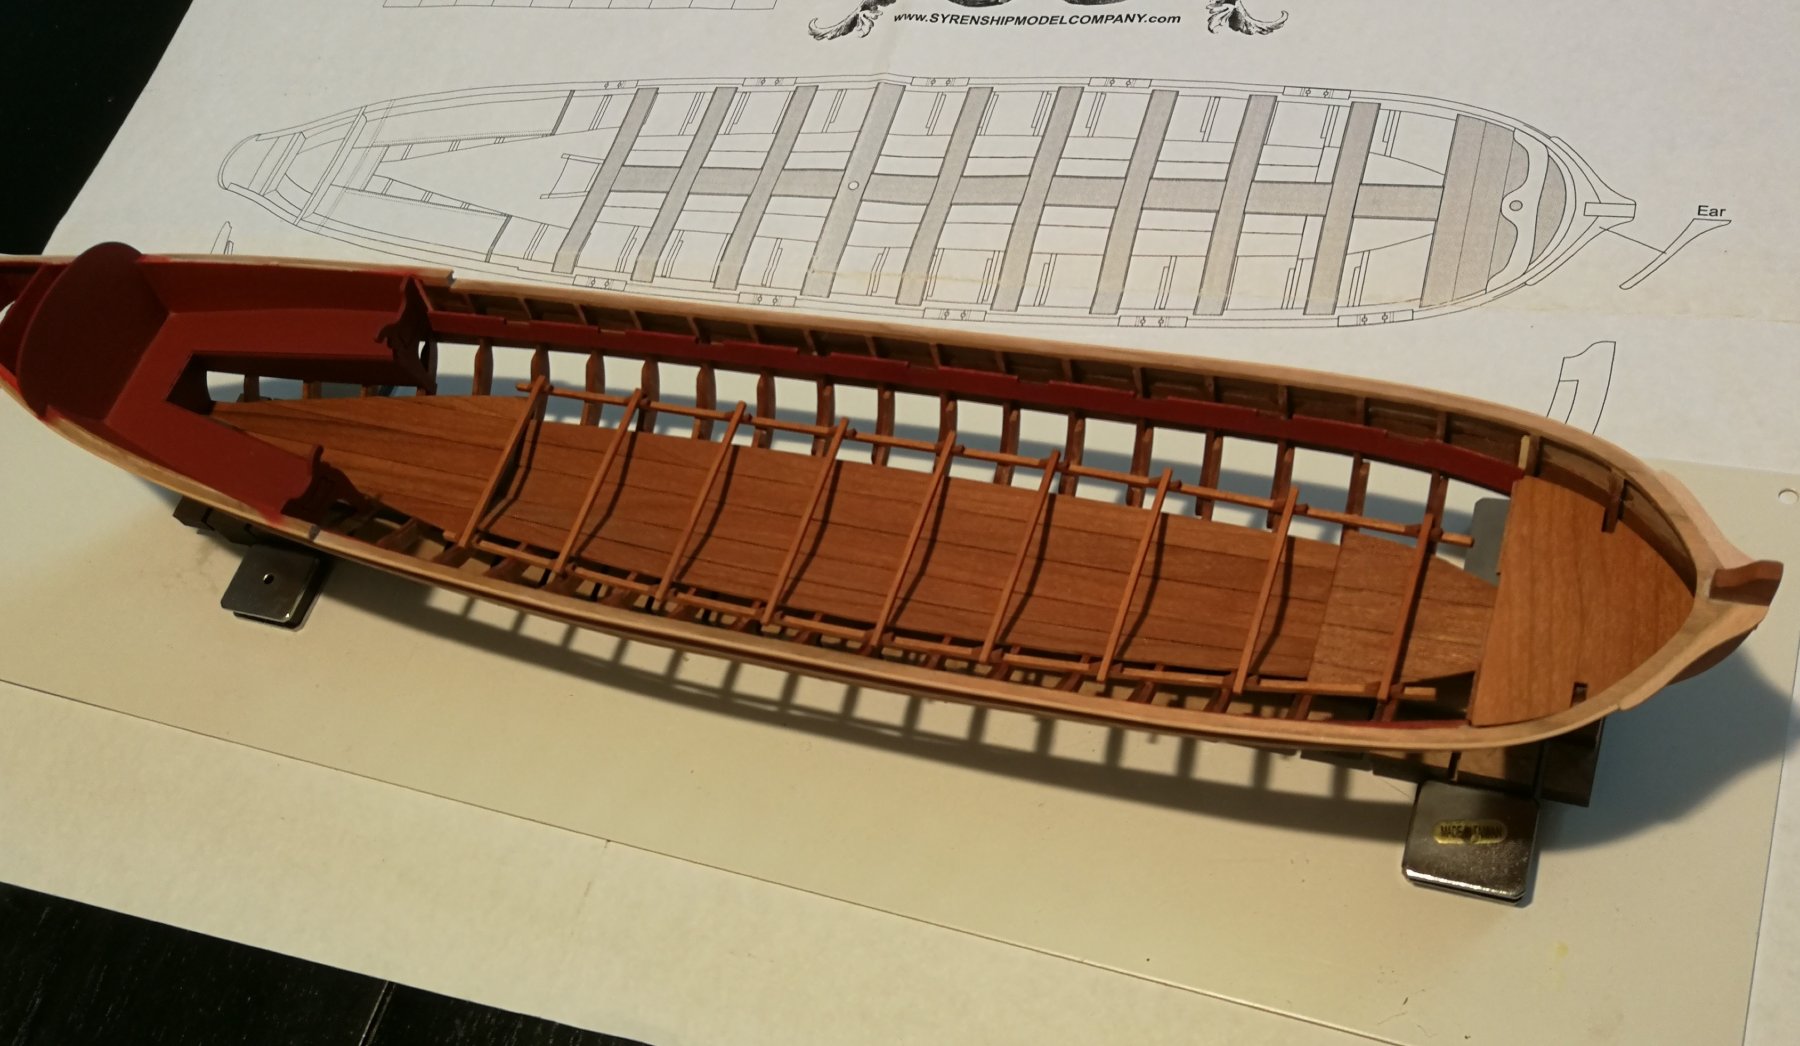
Thanks Michael and all the 'Likes' Michael, for the paint, I use Vallejo Model air color and Winsor&Newton Galeria Acrylic. It's a little complicate but as I started with this recipe, I follow it at each step of painting : (From right to left on the picture) Two coats of Vallejo Surface Primer (mix of 70 605 German Red Brown and 70 624 Pure red) ratio 50/50 One coat of Vallero Model Air 71.084 Fire Red mixed with Game ink 72 086 (ratio 50/50) Then three coats of Windsor&Newton Crimson with a little part of Burnt Umber and at the end three or four coats of Vallejo 71.084 Fire Red mixed with 71.003 Red (ratio 50/50) When possible, I apply the Vallejo layers using an airbrush. I think it's the Fire Red that gives the slightly darker color...

- 103 replies
-
- 5
-
-
- queen anne barge
- Syren Ship Model Company
- (and 1 more)