JpR62
-
Posts
699 -
Joined
-
Last visited
Content Type
Profiles
Forums
Gallery
Events
Everything posted by JpR62
-
 Superb job ! Precise and clean ! I like the choice and the warm shade of wood species. Magnifico ! Do you upgrade the wood or user the one provided by Marisstella ?
- 190 replies
-
- 1
-

-
- ragusian
- marisstella
- (and 1 more)
-
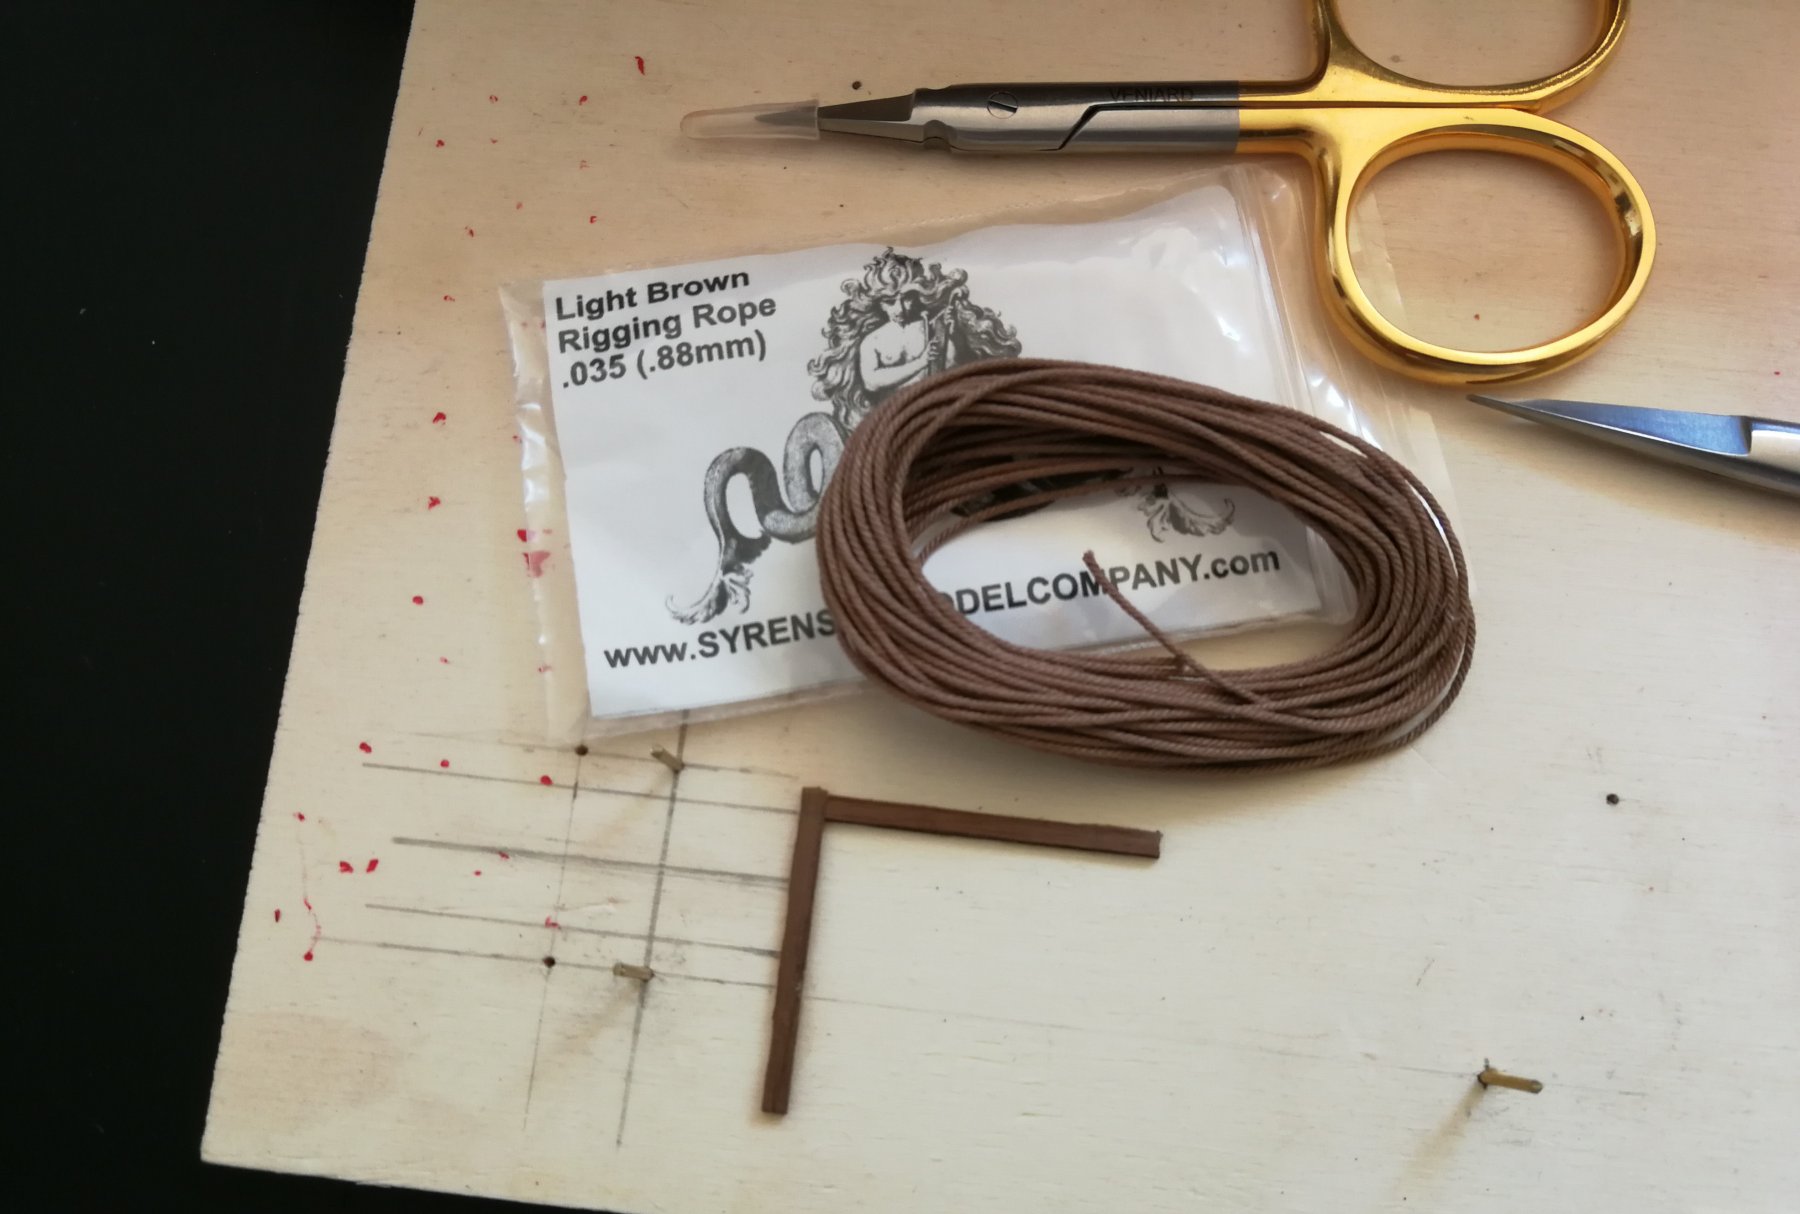
Thanks CaptainHook and Dave. That's exactly the answer to the question I was asking myself : do I have to do the tackle and the rope coil with only one length of rope or separate the process in two parts. It seemed me easier to make a separate rope coil but all the pictures posted in the different build logs show me one long rope lying on the deck waiting to be rolled 😉 I will follow your valuable advice and use your method. Thanks for your help and thanks to all the 'Likes'. I'm just waiting on an order of some Syren ropes 😊
-
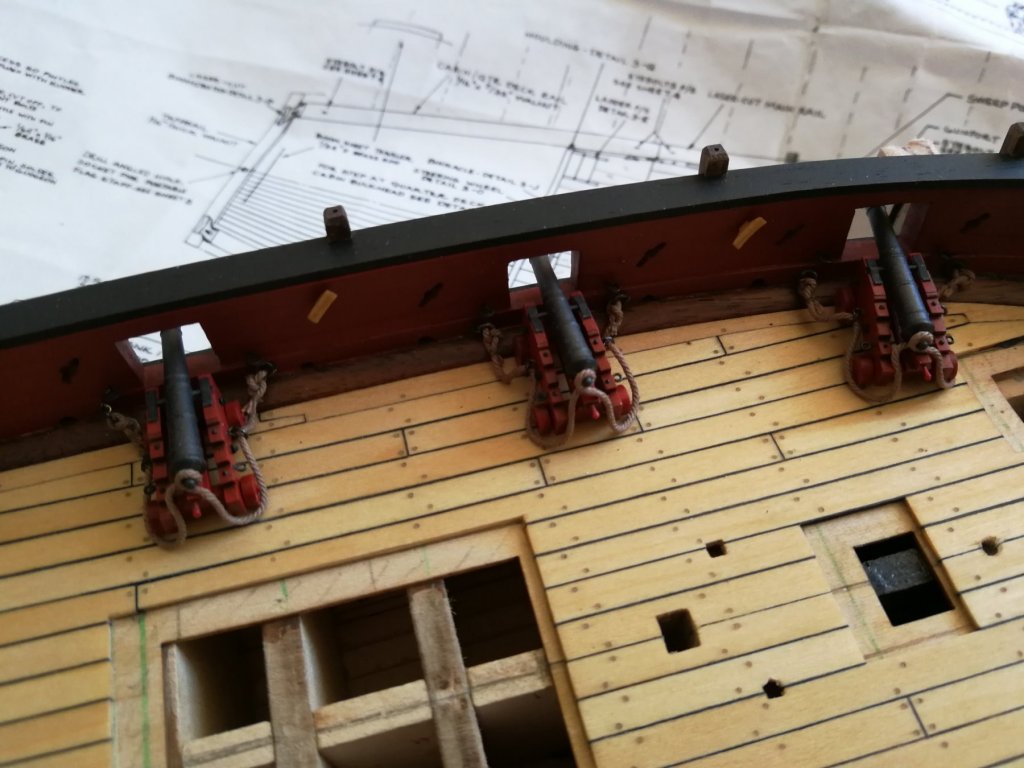
Thanks to all for looking on my build. The breech lines of the 6 cannons are finished. I upgrade to some Syren ropes and I have not regretted it. I have build a little jig to be regular in my work. For the installation of the breeching ropes, I was inspired by the wonderful work of Beef Wellington on his HMS Jason build log. Time to try to make the gun tackles and their rope coils.


- 164 replies
-
- 10
-
-
- first build
- model shipways
- (and 2 more)
-
I really like this ship ! The building is beautiful and precise. Glad you could get back to the shipyard. Bravissimo.
- 190 replies
-
- 2
-
-
- ragusian
- marisstella
- (and 1 more)
-
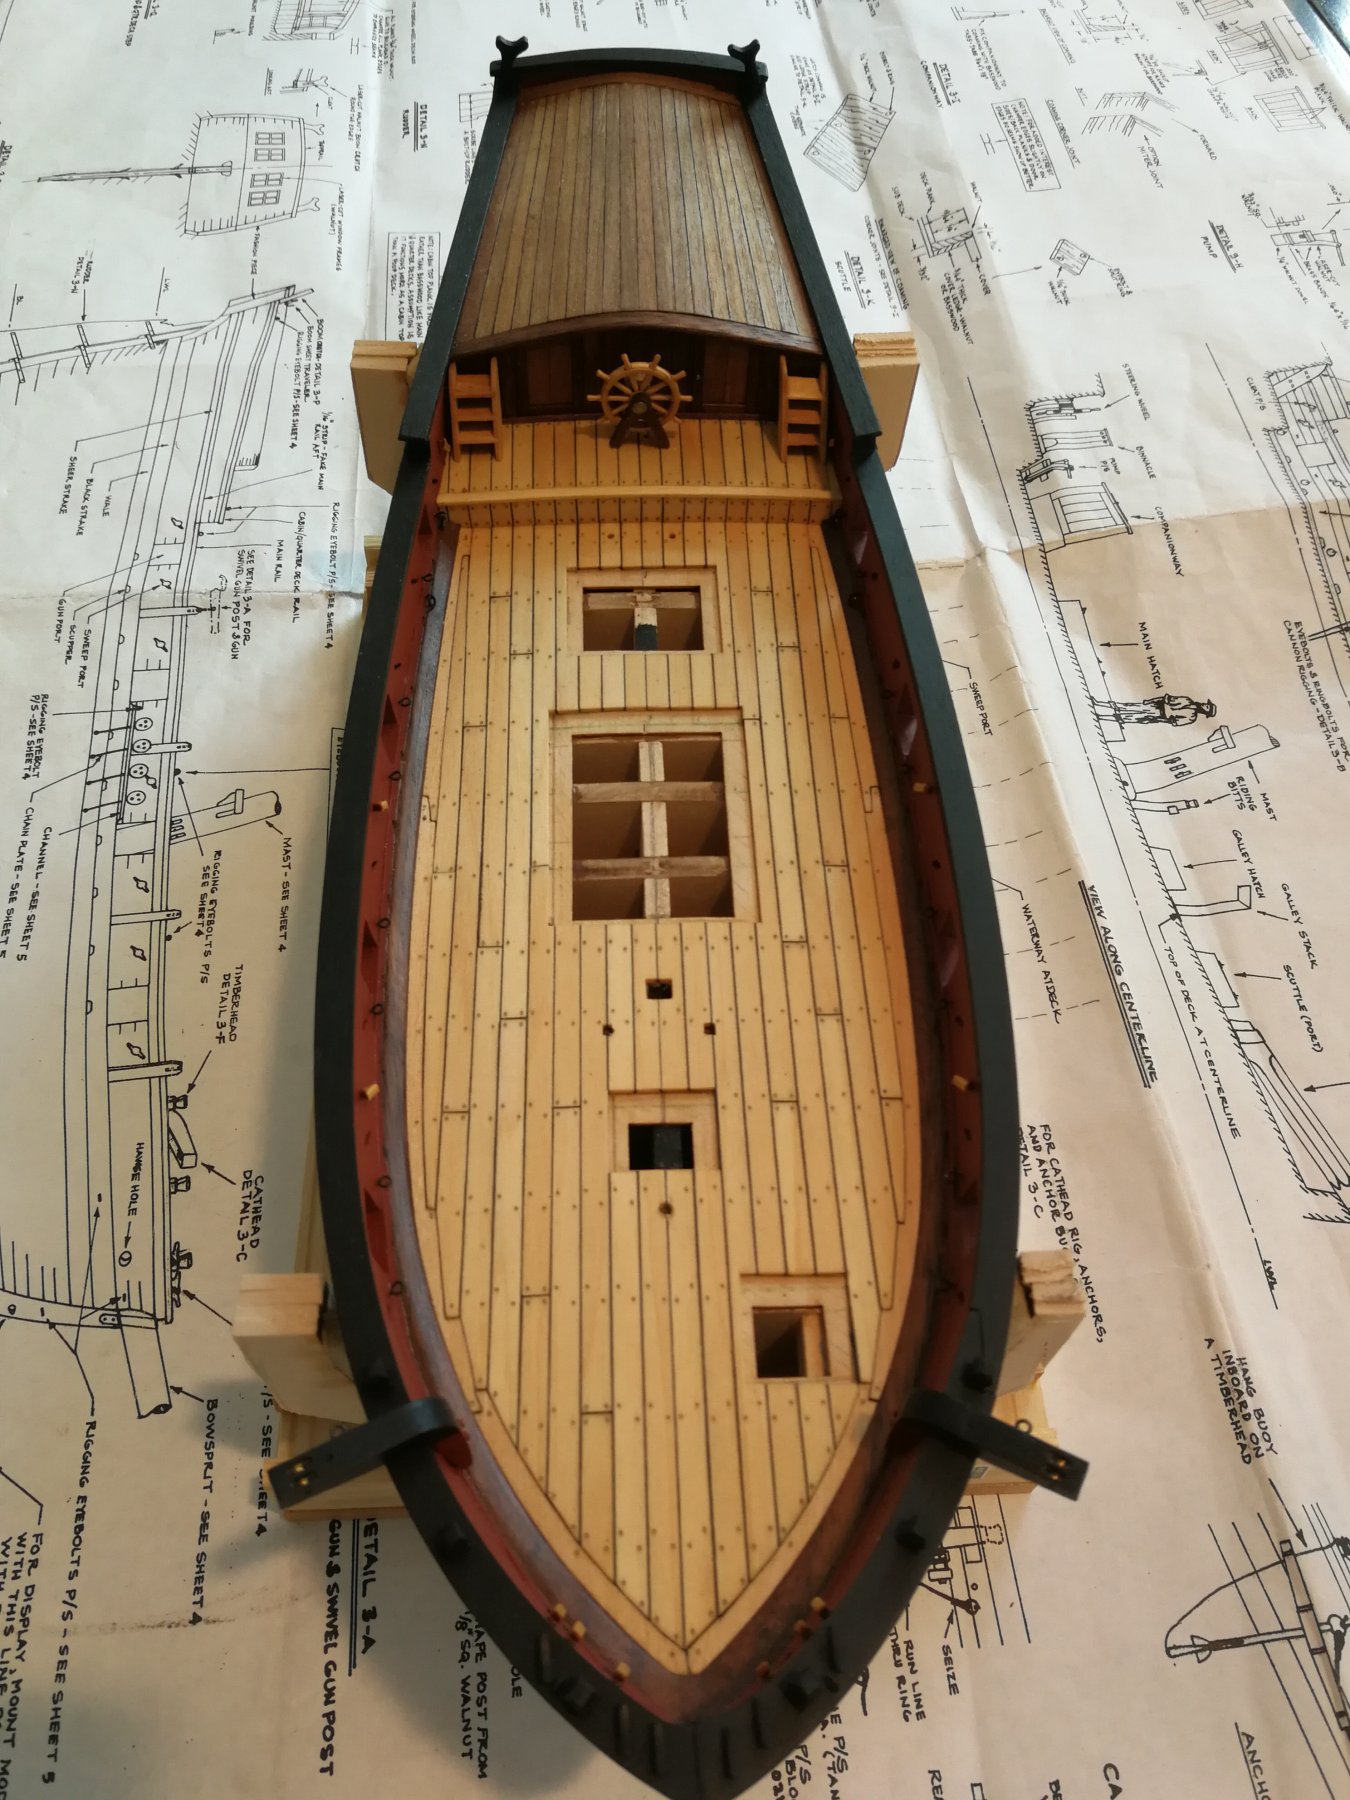
Thank you Dave and all the 'Likes' The pedestals for the swivel cannons are done Time to discover a new job : rigging process of the cannons. I will begin with the breech lines...


- 164 replies
-
- 11
-
-
- first build
- model shipways
- (and 2 more)
-
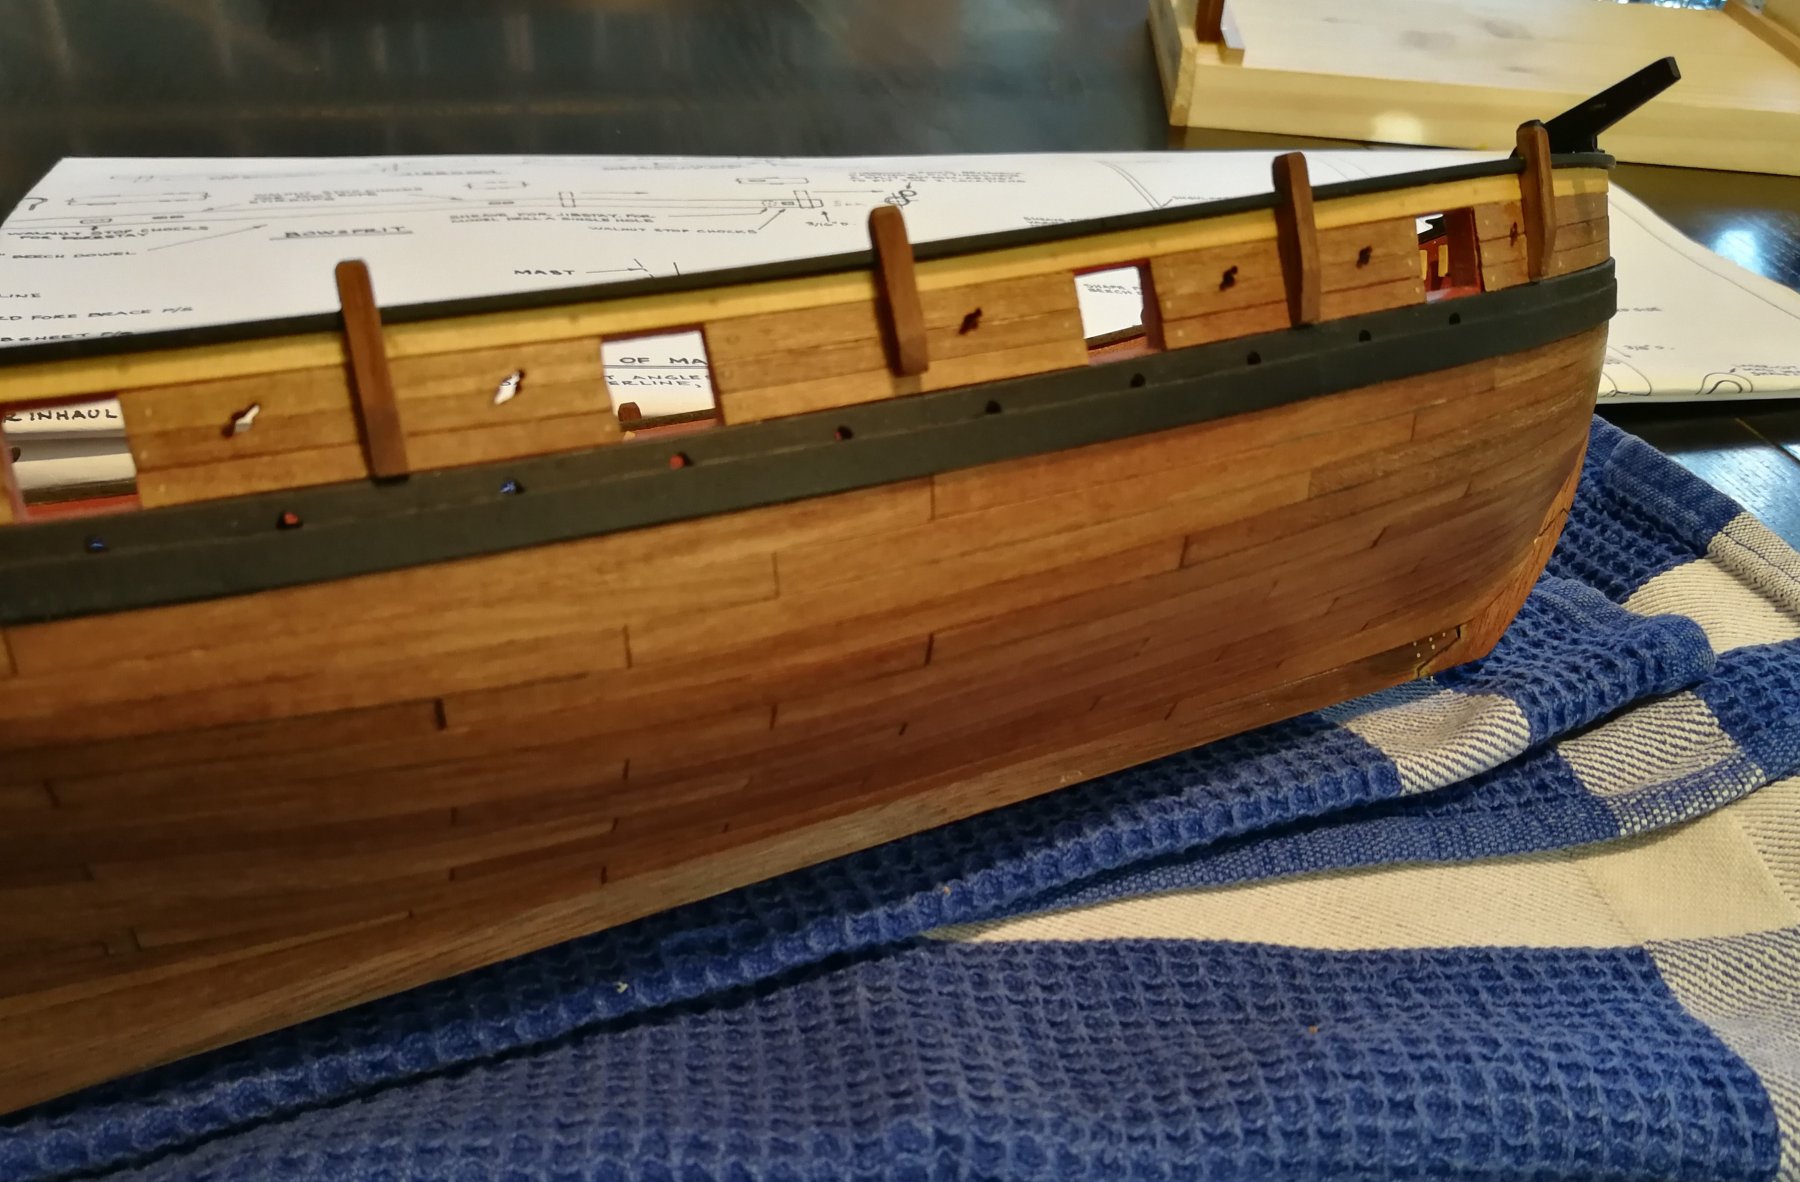
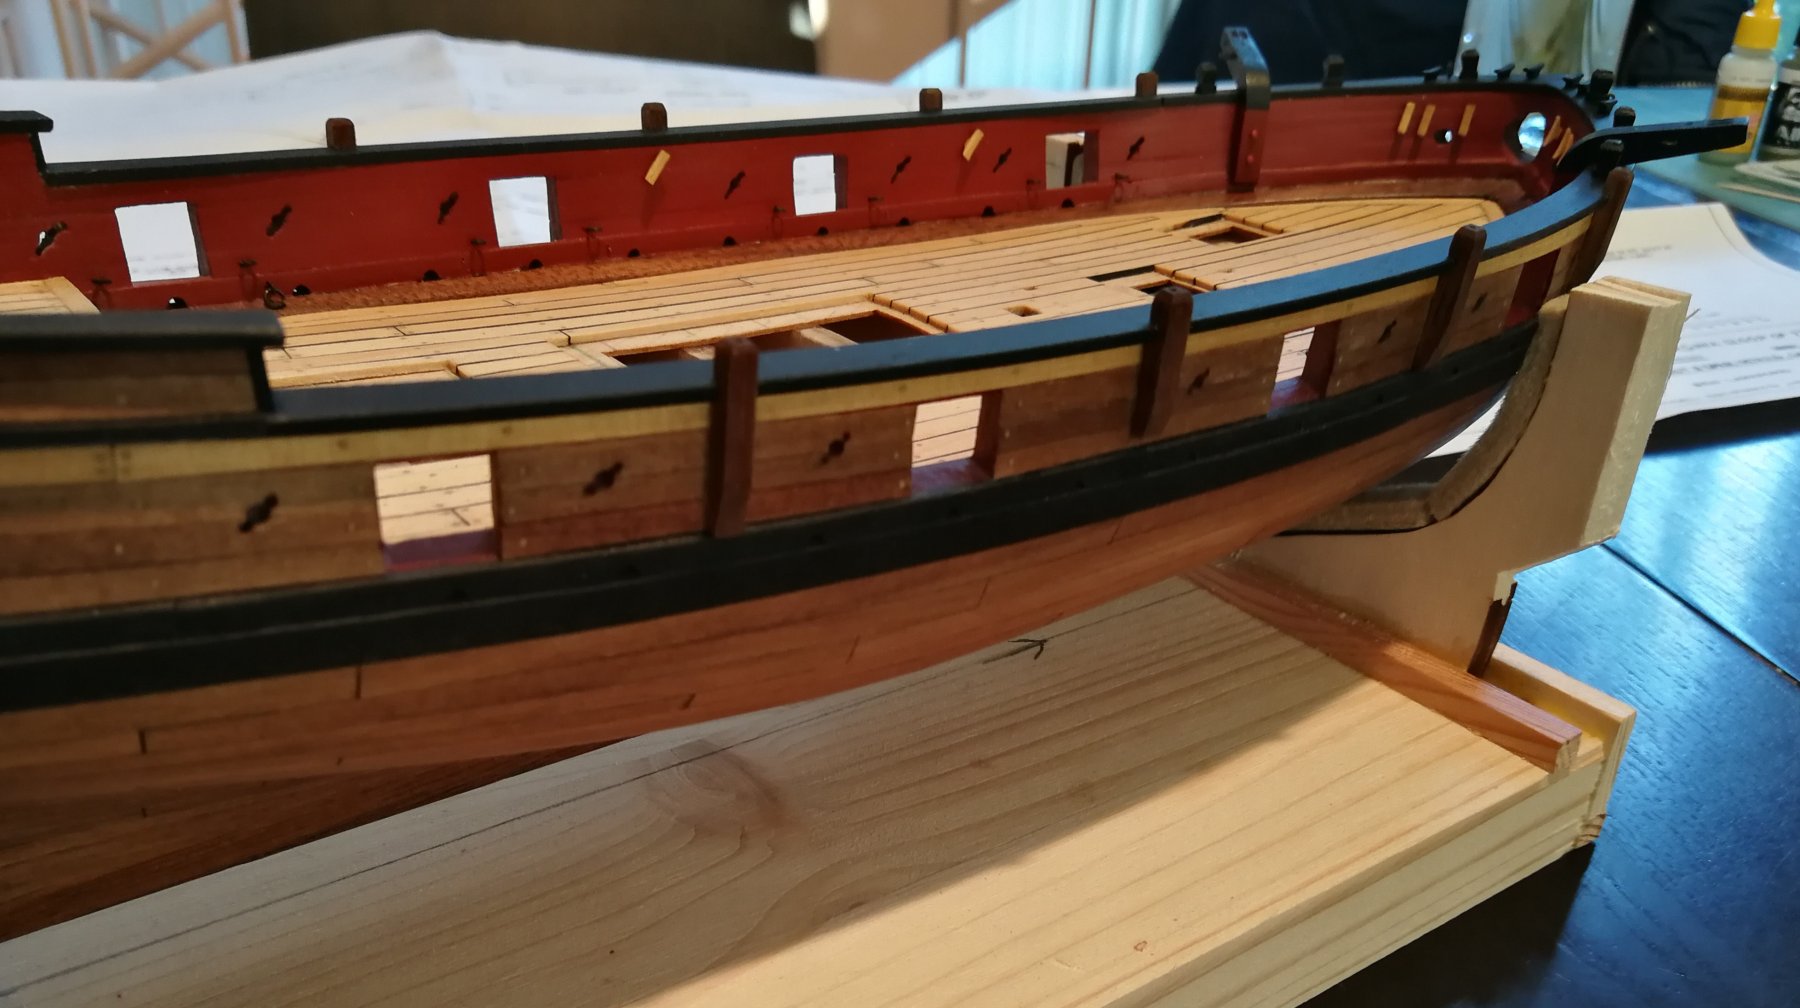
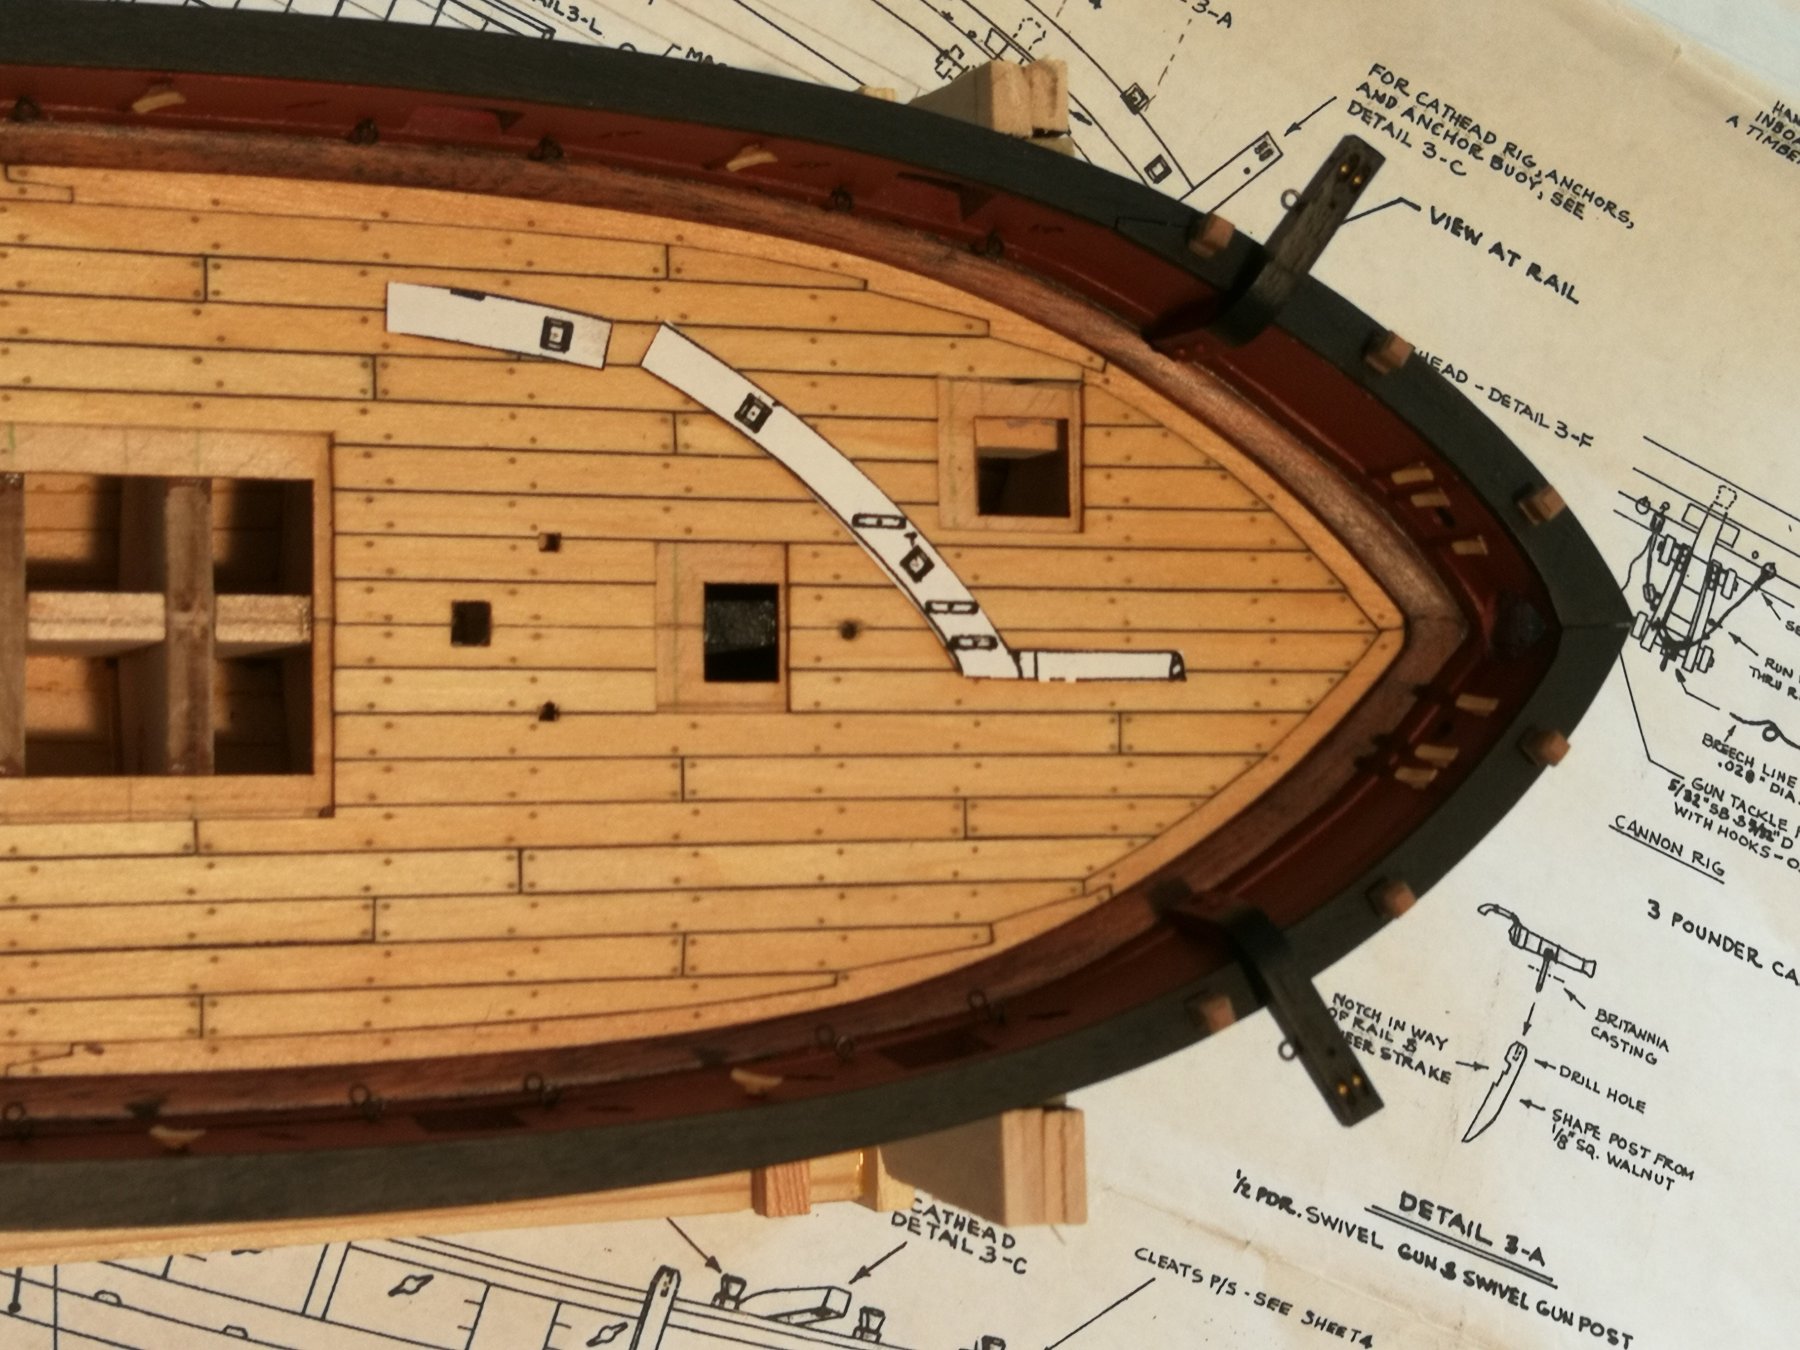
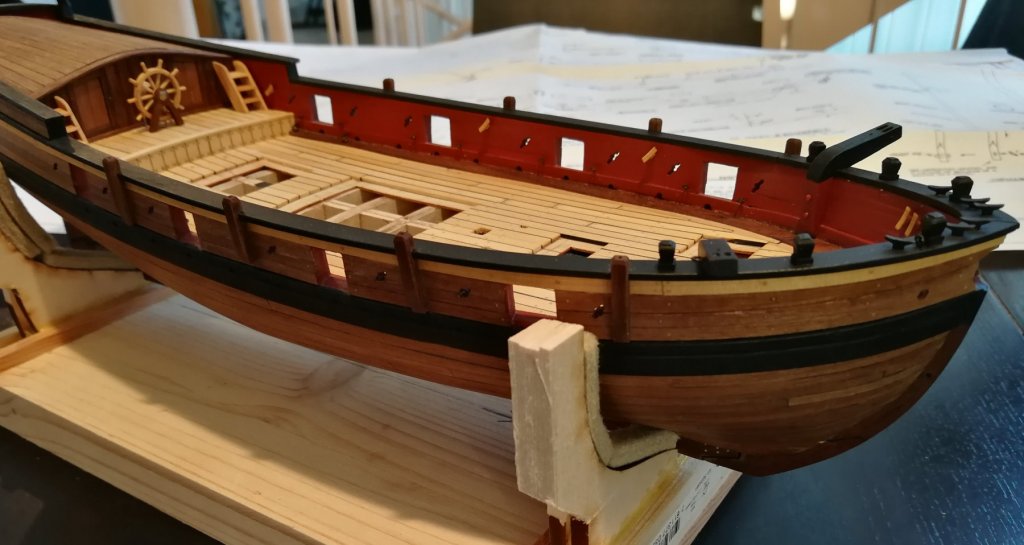
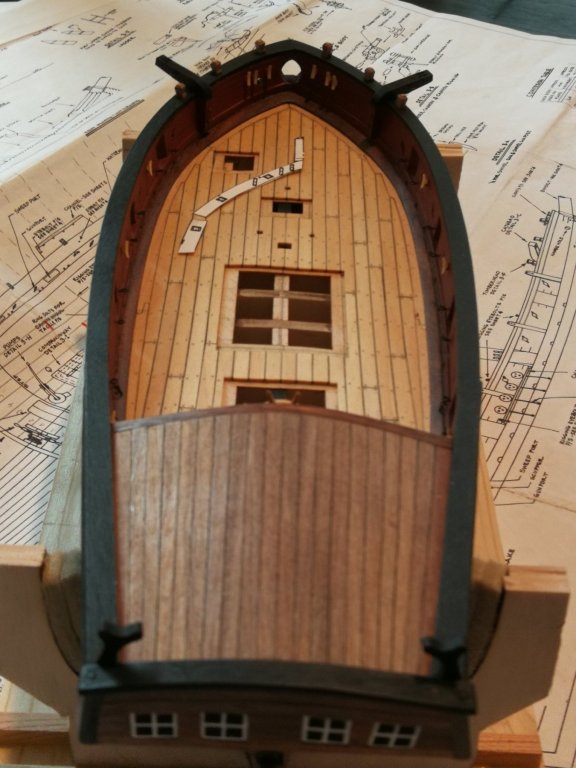
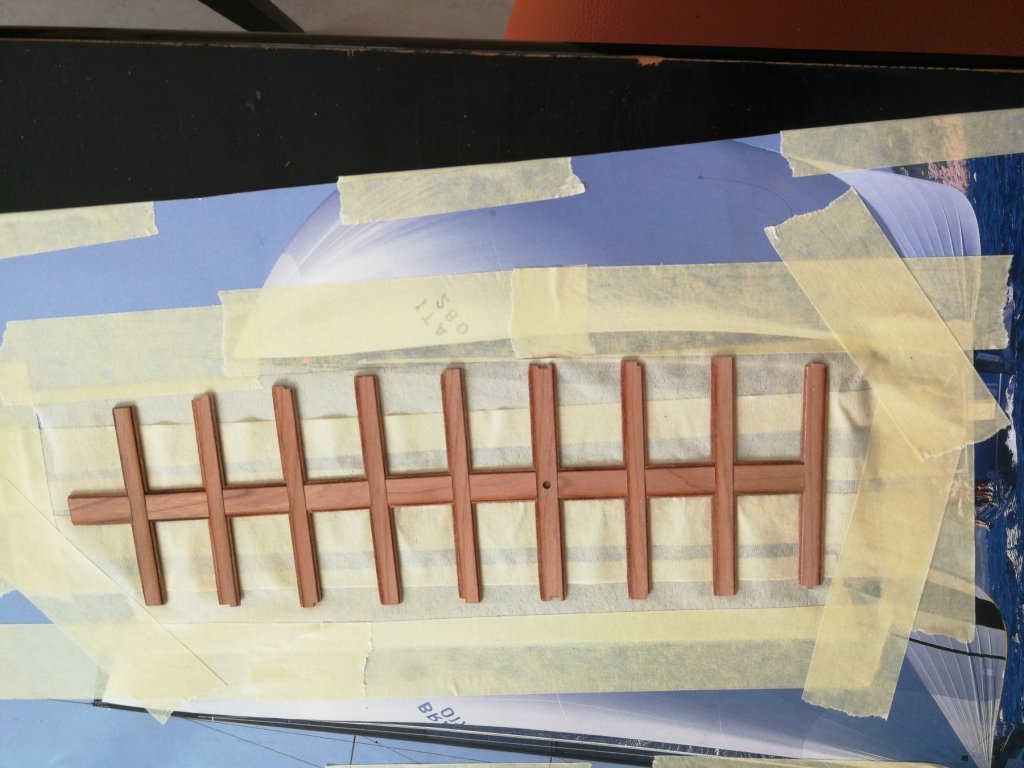
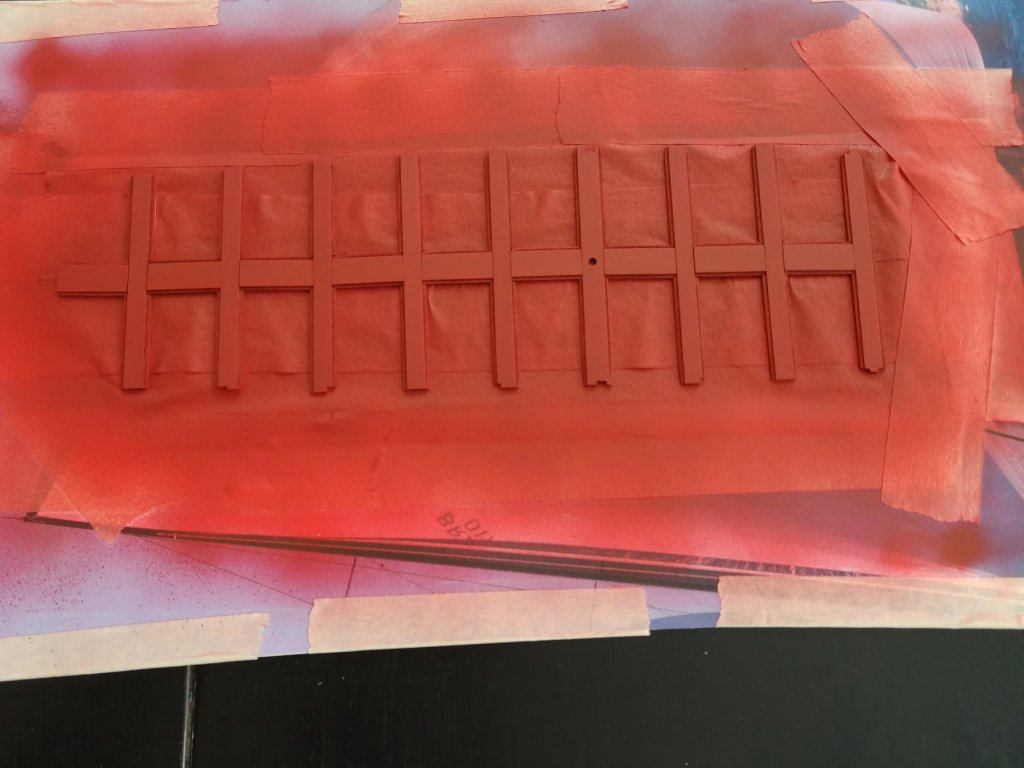
The timberheads and cleats on the cap rail are painted. I hesitate on the finish to adopt for the cleats on the bulwarks. I saw three possibilities used in the different build logs : keep the natural color of the wood (current situation), paint them in red or paint them black. The logic would seem to lean towards red... I still have to make the eight pedestals for the swivel cannons. This will be my next step.

- 164 replies
-
- 15
-
-
- first build
- model shipways
- (and 2 more)
-
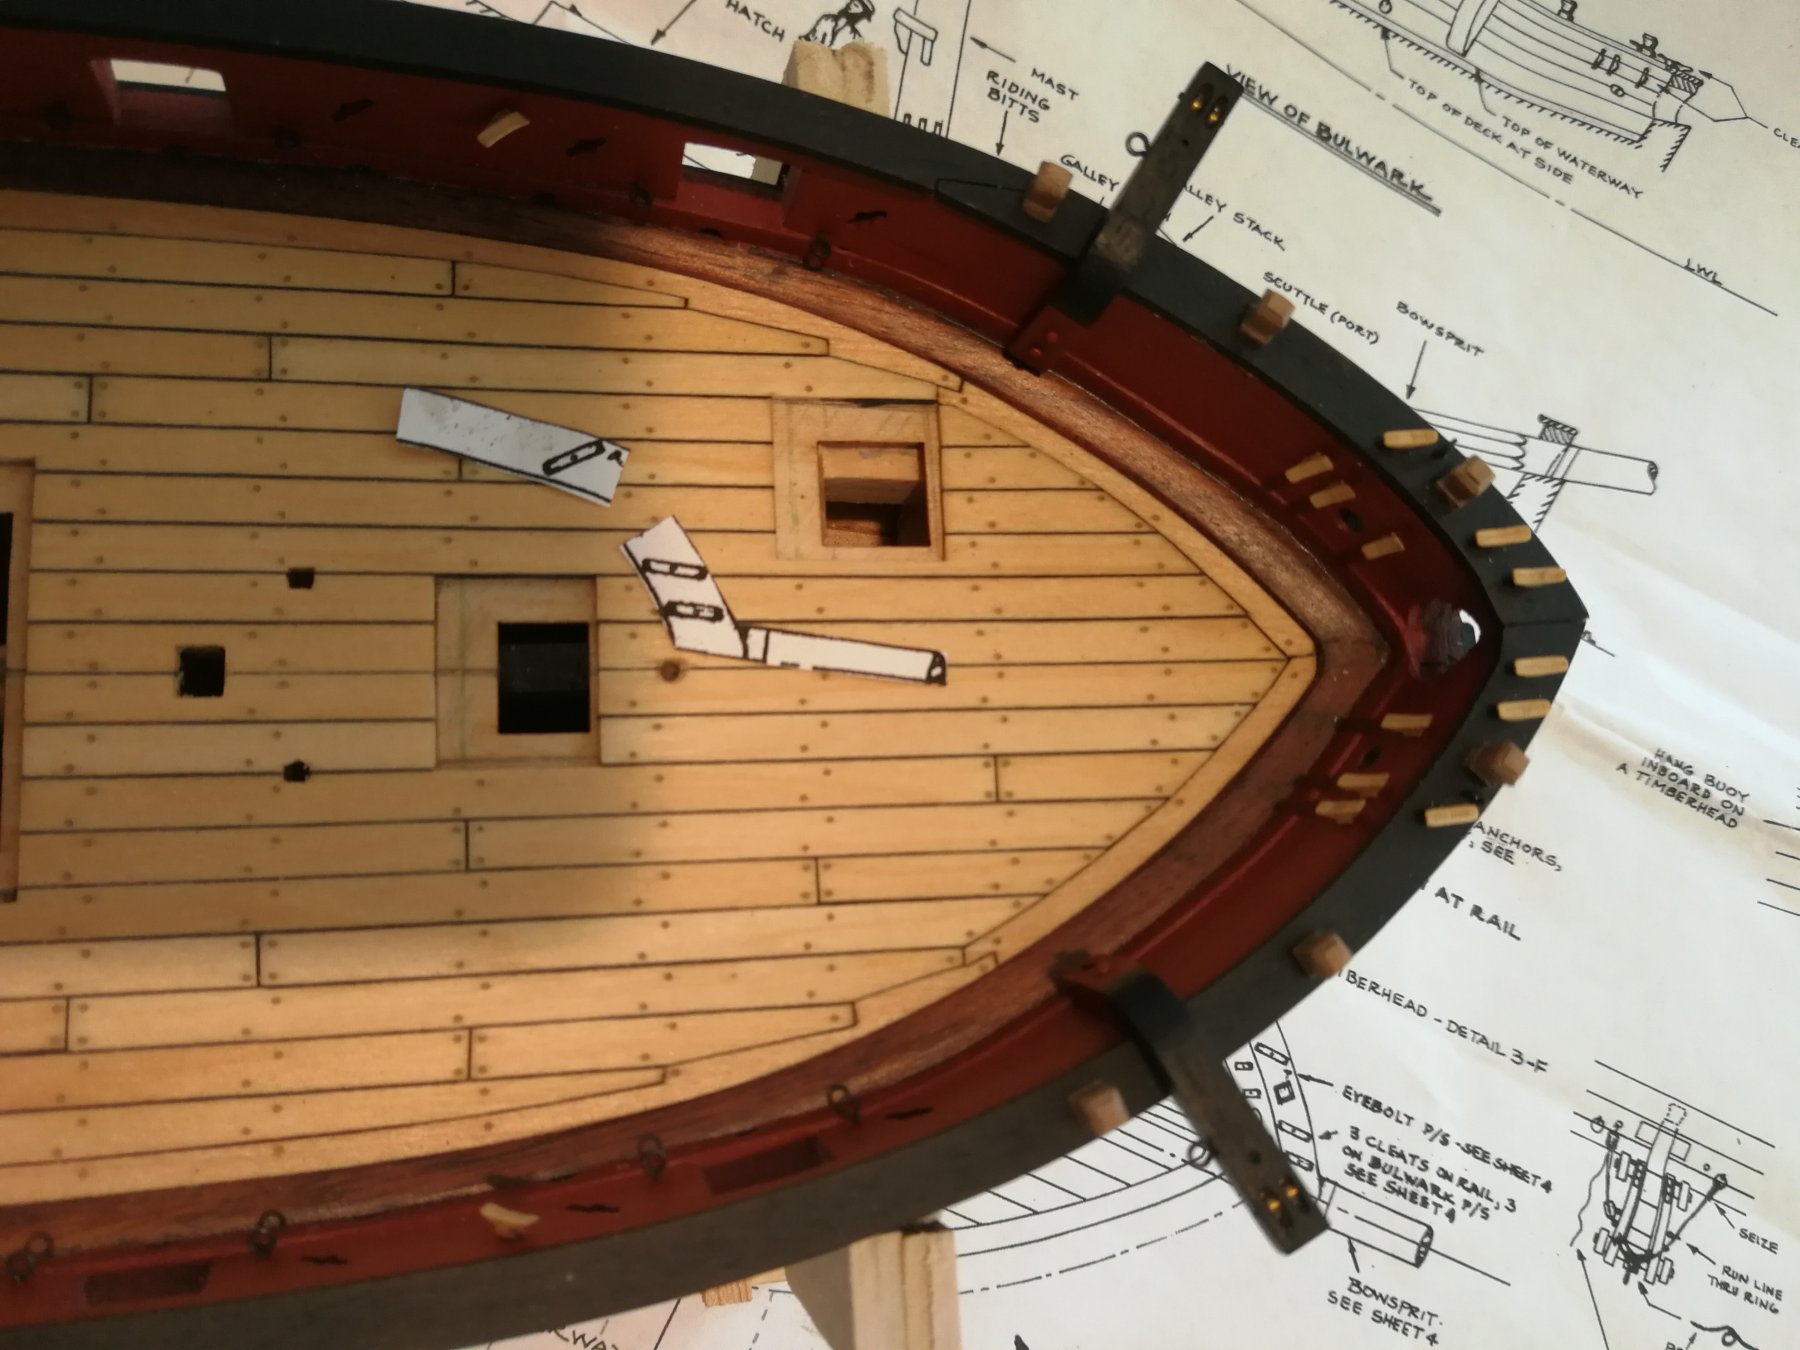
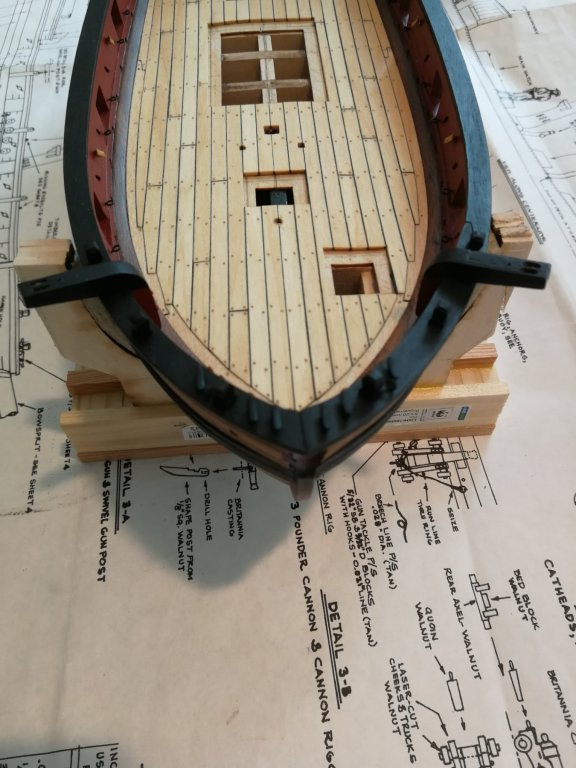
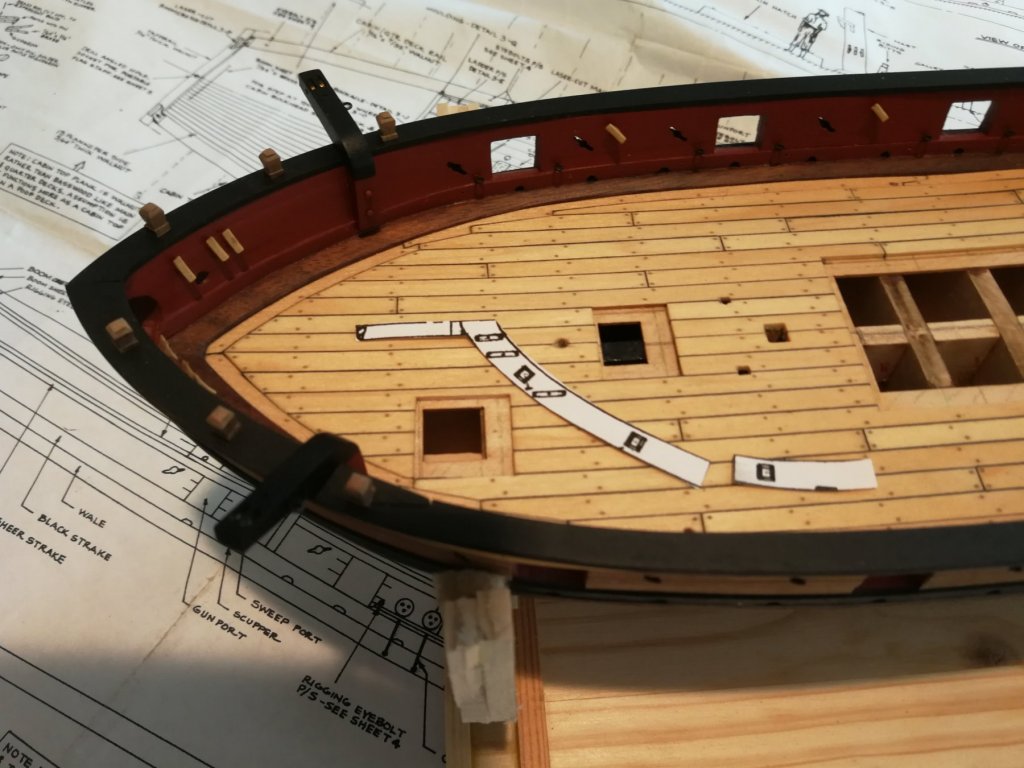
Finally, the last six cleats have been added on the top of the cap rail. Again, a photocopy of the cap rail plan was used to determine their positions.

- 164 replies
-
- 8
-
-
- first build
- model shipways
- (and 2 more)
-
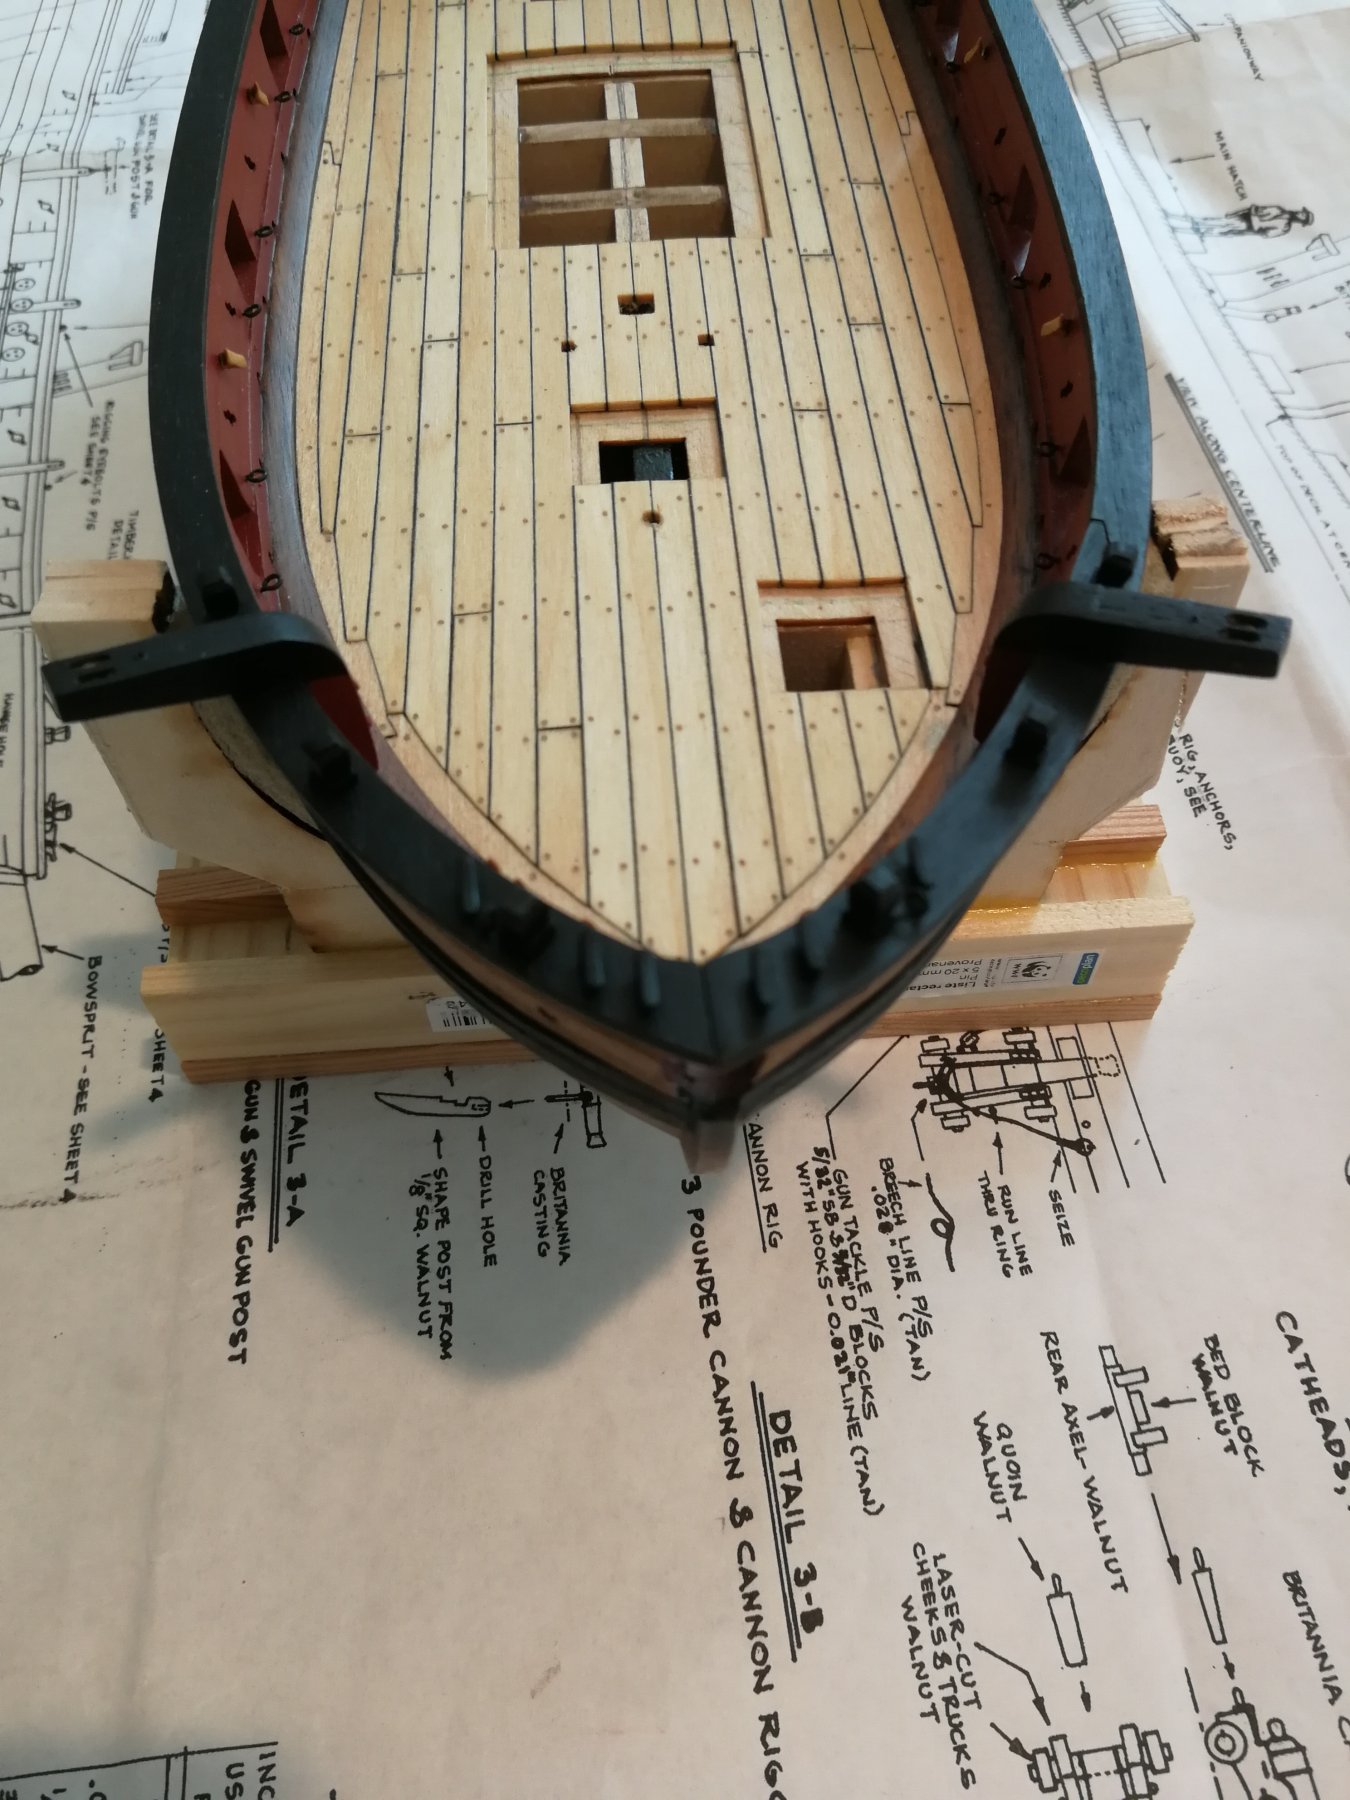
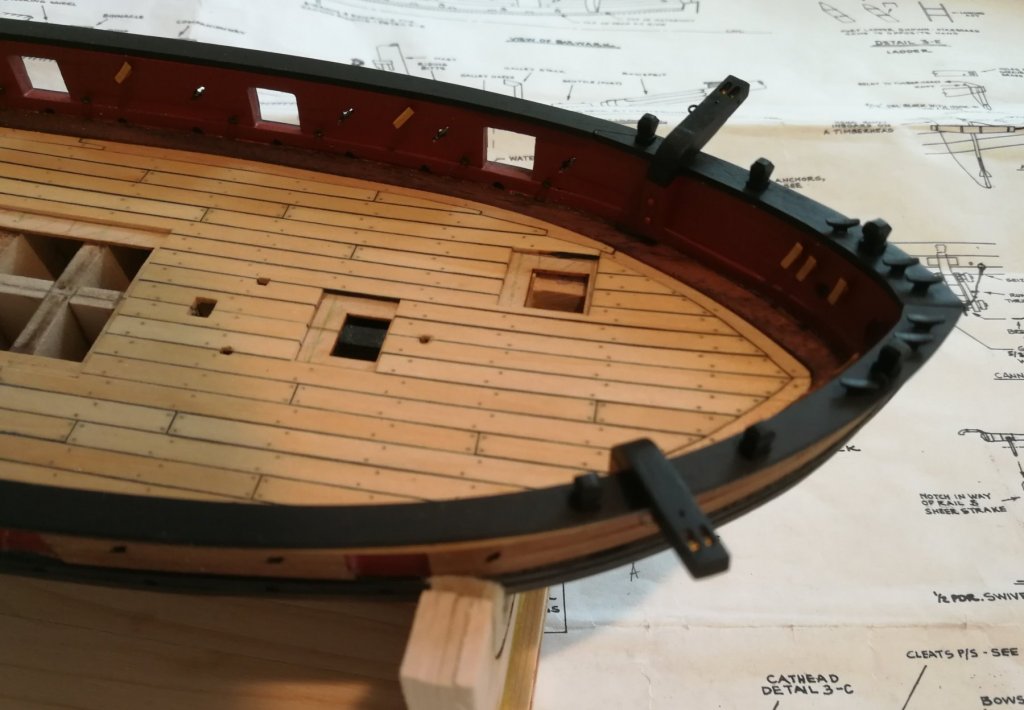
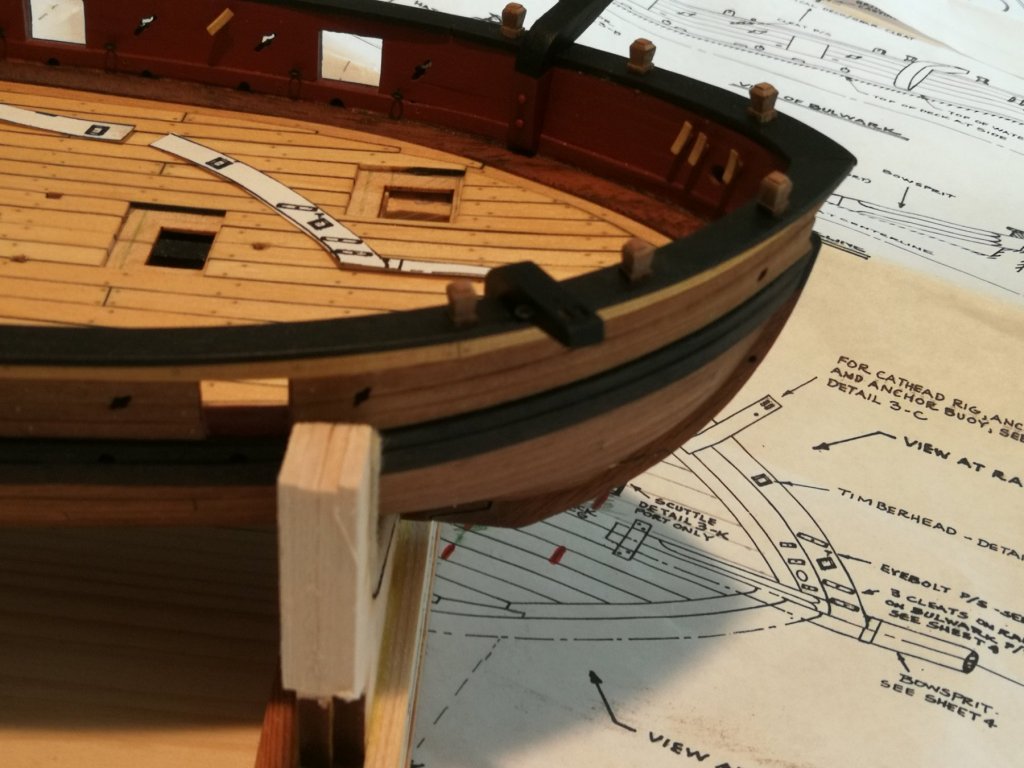
The catheads have been added. I used a photocopy of the cap rail plan to accurately determine the position of the timberheads. I followed the advice given by Chuck in his build log of the HMS Winchelsea: a little square from a 3 mm strip was glued on top of the timber to "simulate" a nice carved detail and then sanded thinner. All the cleats comes from Syren Ship Model.

- 164 replies
-
- 8
-
-
- first build
- model shipways
- (and 2 more)
-
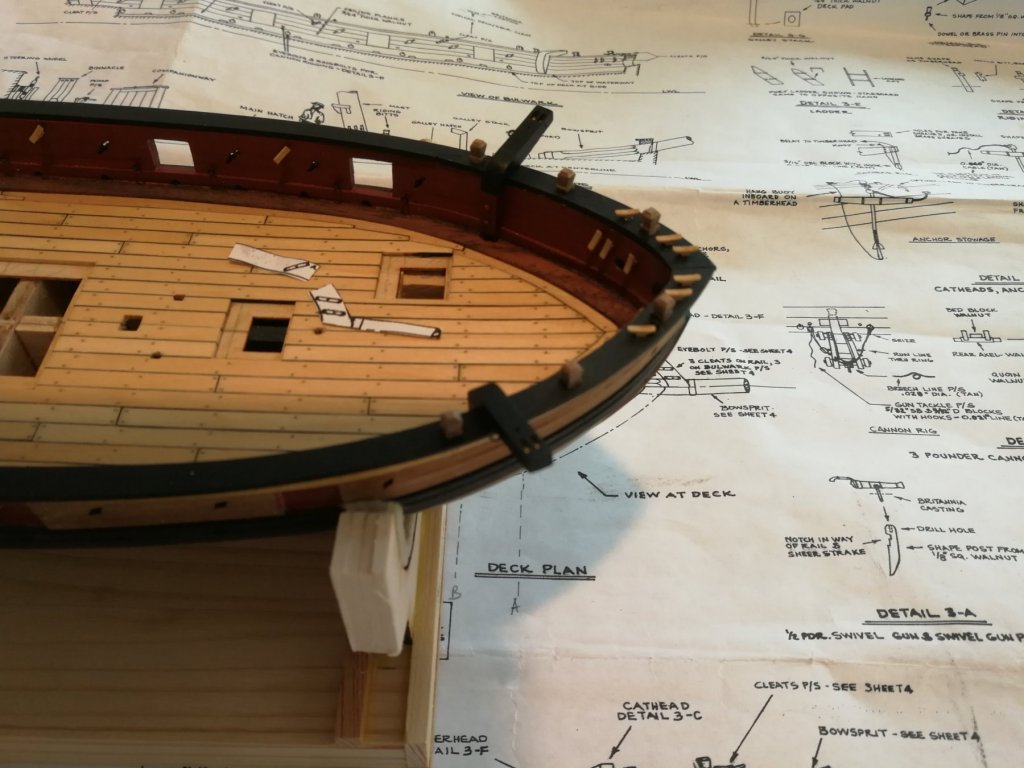
Thanks to all the 'Likes'. As I was rather focused on my queen Anne Barge, the advance is rather modest. I have added some small details on the deck equipment. The boom crutches have been glued. The cleats comes from Syren Ship Model : 5mm boxwood cleats.


- 164 replies
-
- 8
-
-
- first build
- model shipways
- (and 2 more)
-
Thank you for sharing your wonderful work. Beautiful ship model ! 😊 Looking forward to following your next build log .
- 574 replies
-
- 1
-
-
- cheerful
- Syren Ship Model Company
- (and 1 more)
-
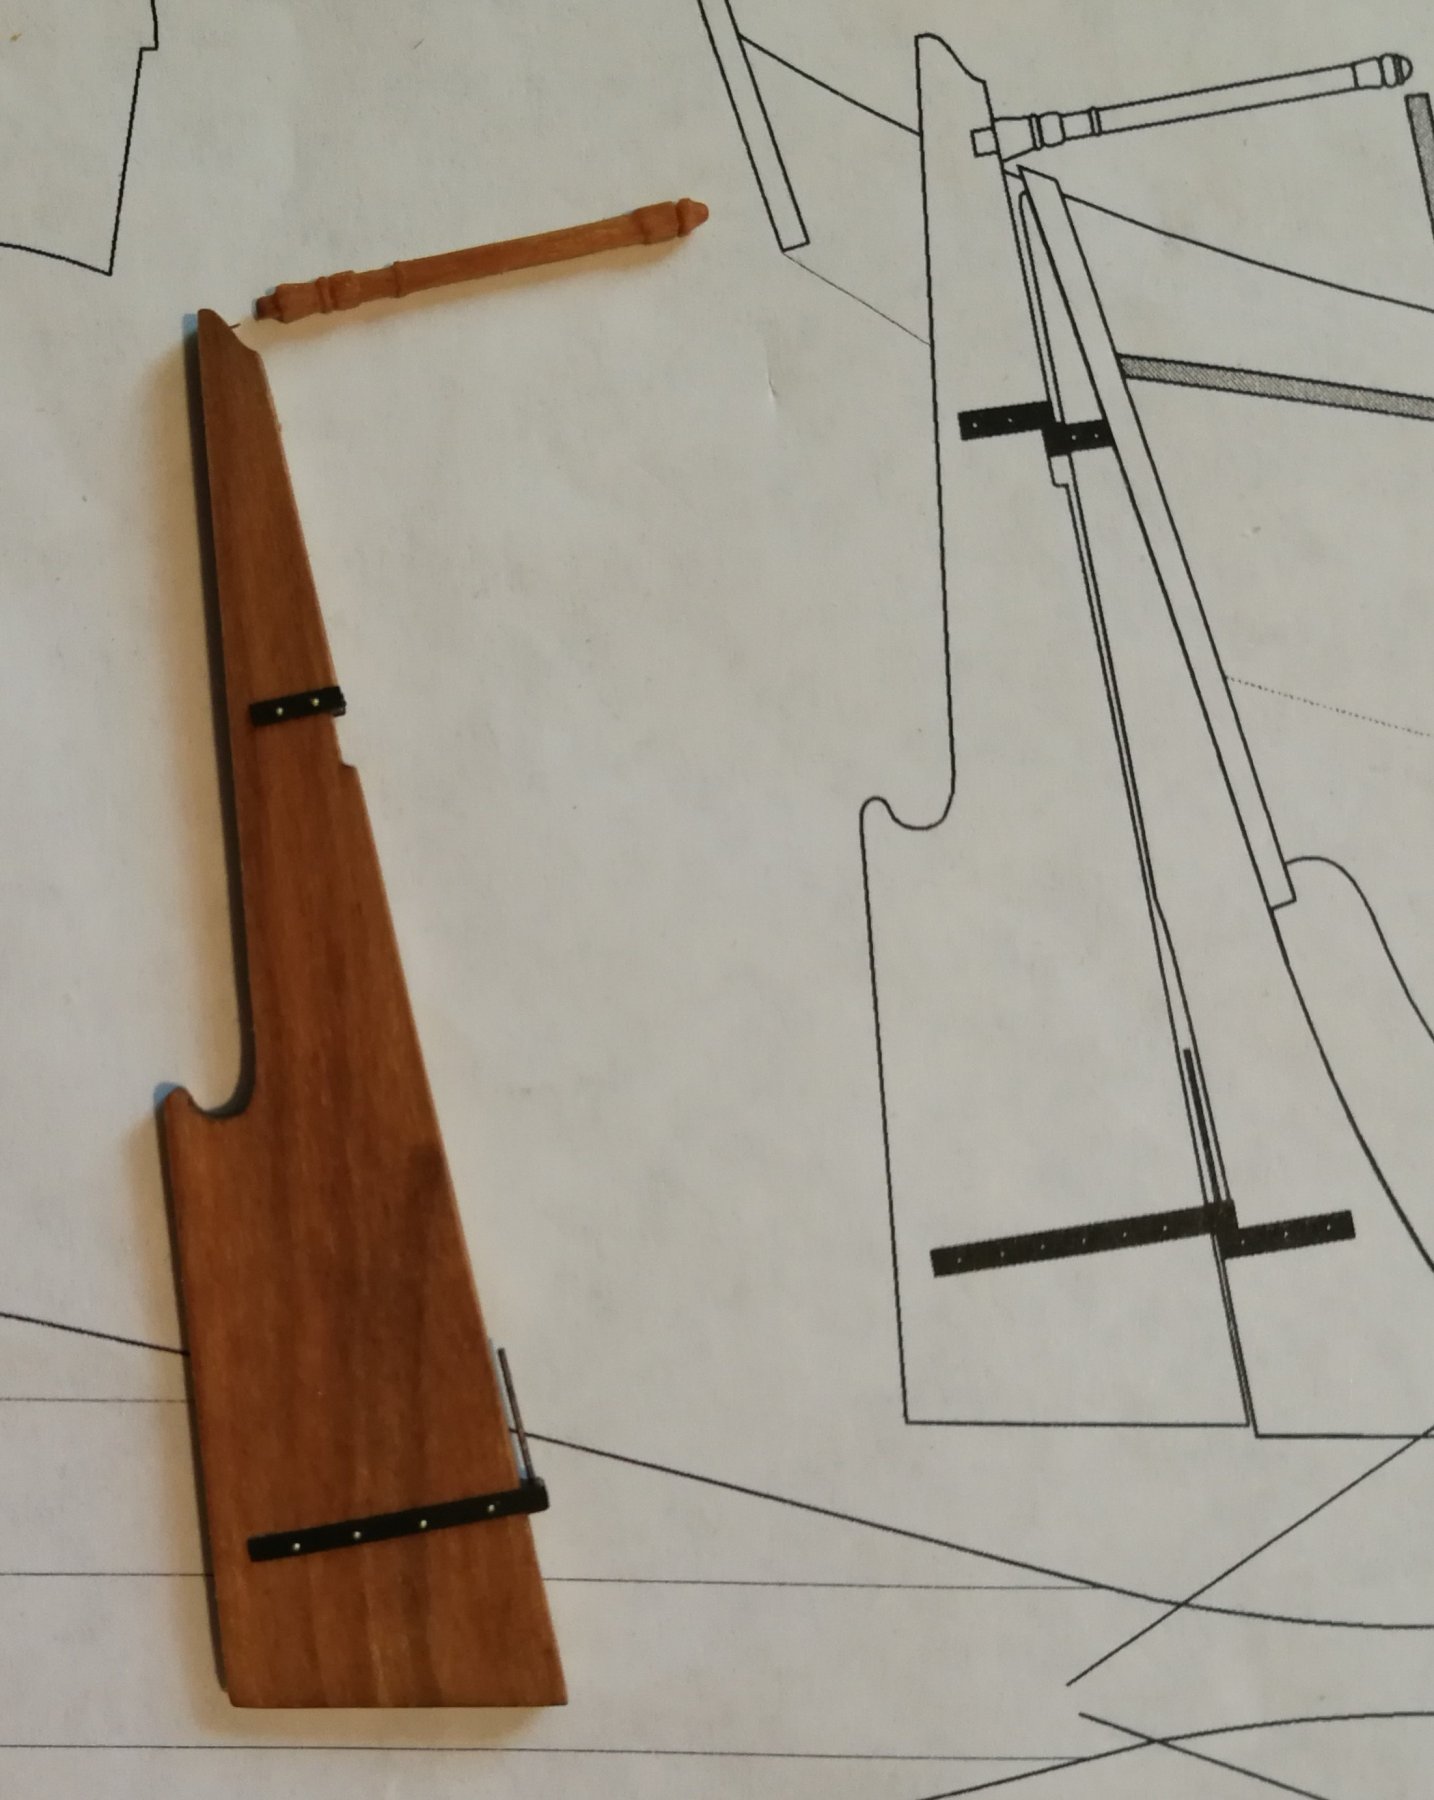
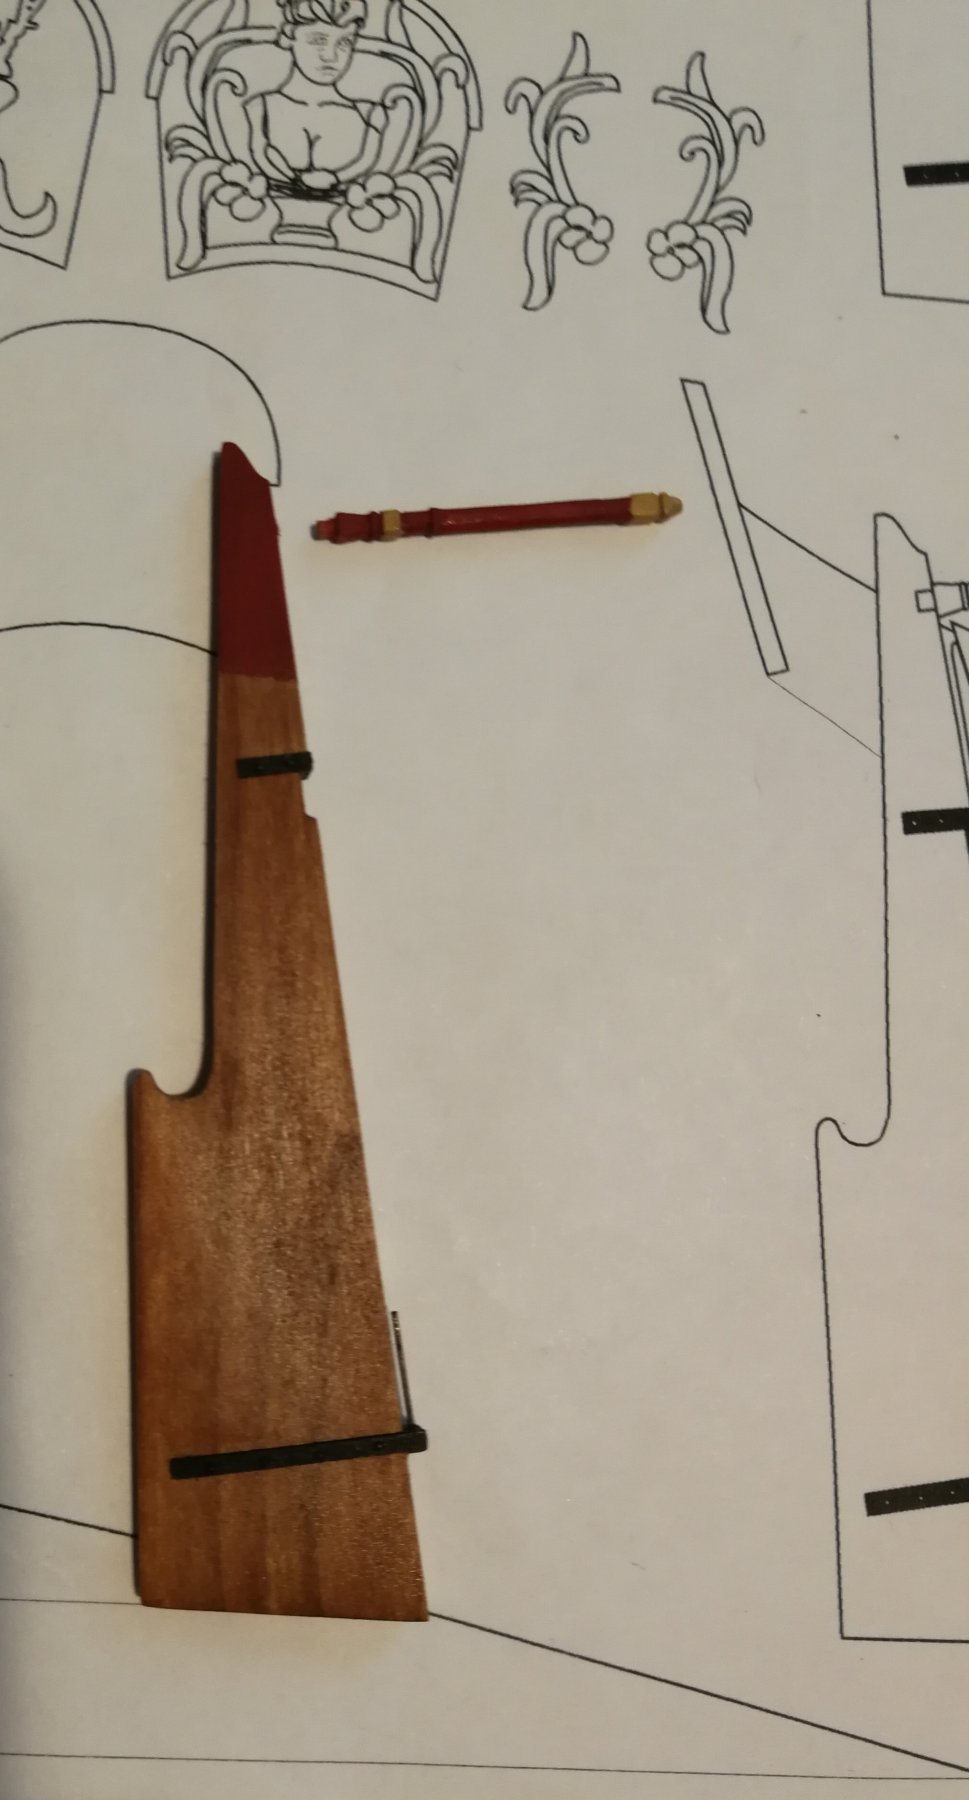
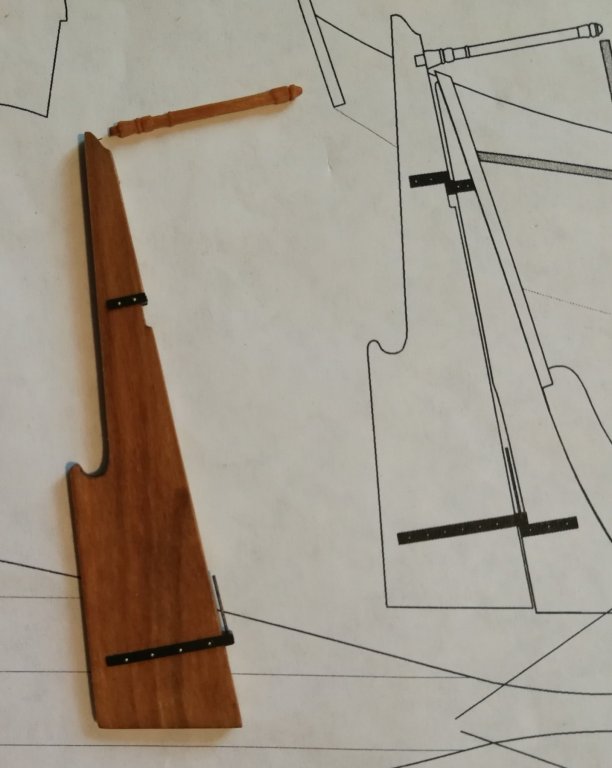
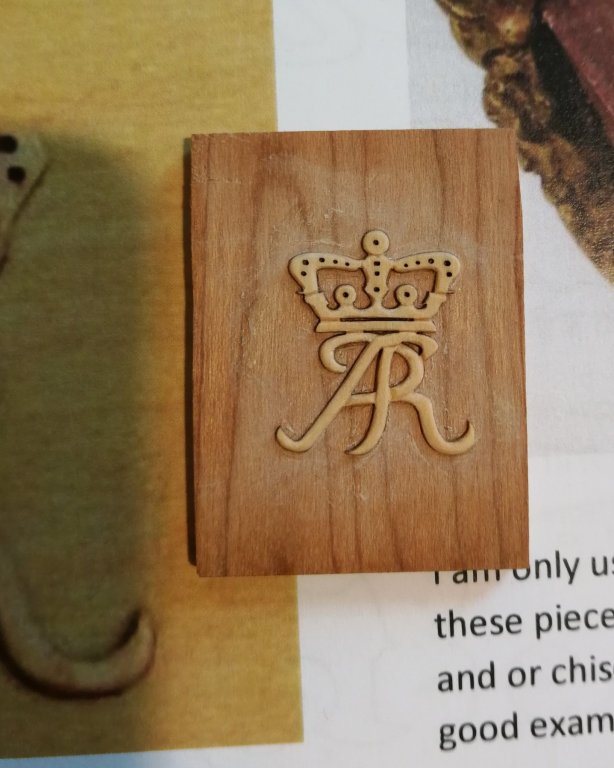
The Queen Anne cypher was separated from his backing piece (one night in the alcohol bath) and glued. I worked on the rudder. I followed the instructions strictly. Ah ! this manual ! What a pleasure ! I also added micro bolts of 0.4 mm. The tiller was simply carved from a 1/16" x 1/16" cherry strip using a sharp #11 xacto blade. After painting, the two pieces was glued. Time to work on the two flags... and continuing to carve...


- 103 replies
-
- 22
-
-
- queen anne barge
- Syren Ship Model Company
- (and 1 more)
-
Queen Anne Barge by Beckmann - 1/24
JpR62 replied to Beckmann's topic in - Kit build logs for subjects built from 1501 - 1750
She is beautiful ! I really like having put the oars in place and the baseboard is pleasing. Stunning work ! -
Thank you for your kind words and the Likes. Chuck, not too difficult with a kit of this quality and more that motivates to work well. 😉 Just to not rush. Michael, yes, it's really nice to be able to learn about carving with great starting carving blanks. I did not plan to carve all the seven pieces, but I'm still going to try to do it. It's so pleasant and the carving blanks are so beautiful !
- 103 replies
-
- 3
-
-
- queen anne barge
- Syren Ship Model Company
- (and 1 more)
-
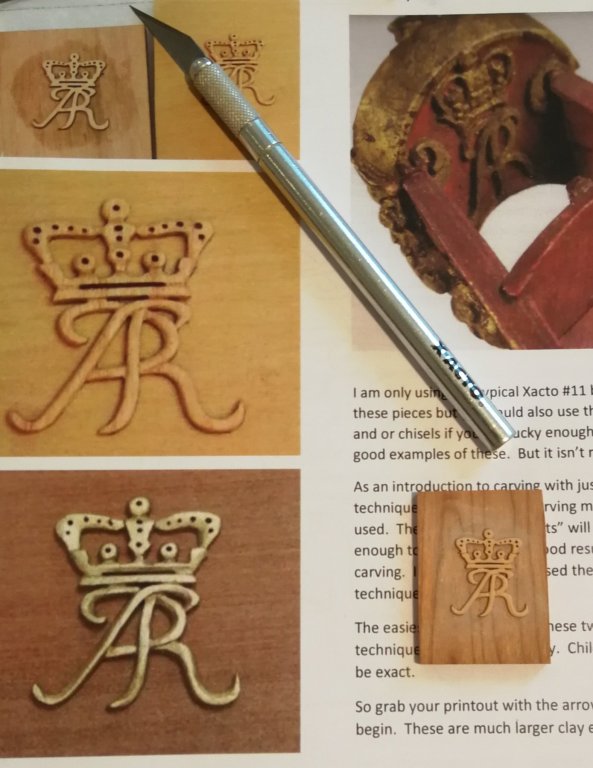
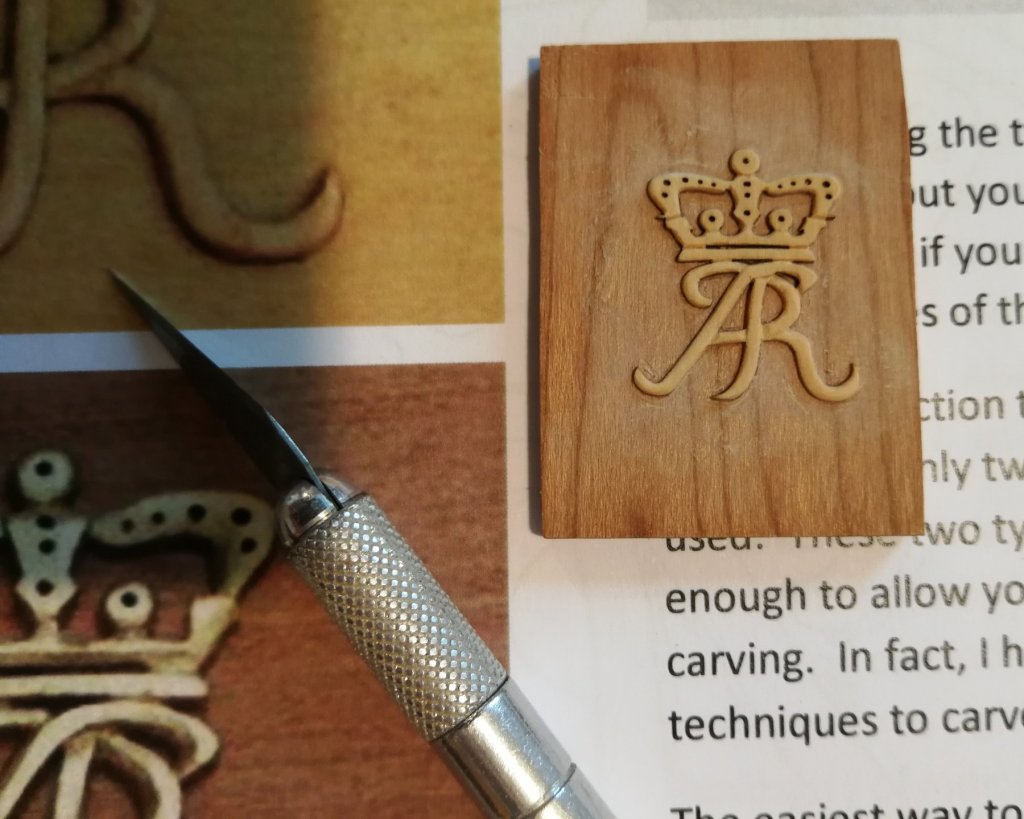
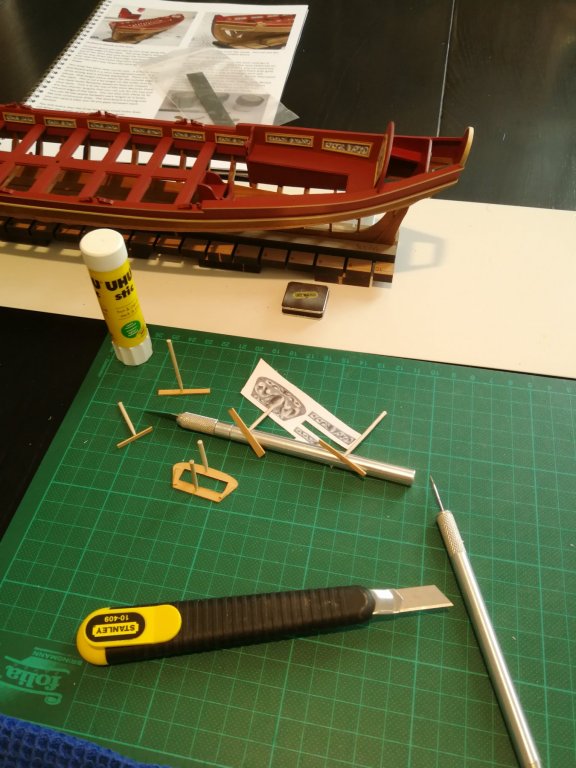
Thanks to all the 'Likes'. The Queen Anne cypher was glued on a scrap piece of 1/8" thick cherry. I used some Uhu stick's glue. When everything is dry and strong, I started by removing the residue of laser chart and rounding the edges using a sharp #11 blade. I referenced the drawing found in the appendix of the instruction manual. The arrows added on the drawing are very useful to know the right direction of cutting. Finally, I made a light sanding with a small piece of sandpaper. I have to hope that the separation with the backing piece goes well... The carving of the next 6 pieces will probably be more complex but I will mark beforehand with a pencil the stop cuts on the drawings and on the carving blanks.
- 103 replies
-
- 13
-
-
- queen anne barge
- Syren Ship Model Company
- (and 1 more)
-
Thanks to all the 'Likes'. The resin castings are in place. I will start now to carve the Queen Anne cypher.


- 103 replies
-
- 17
-
-
- queen anne barge
- Syren Ship Model Company
- (and 1 more)
-
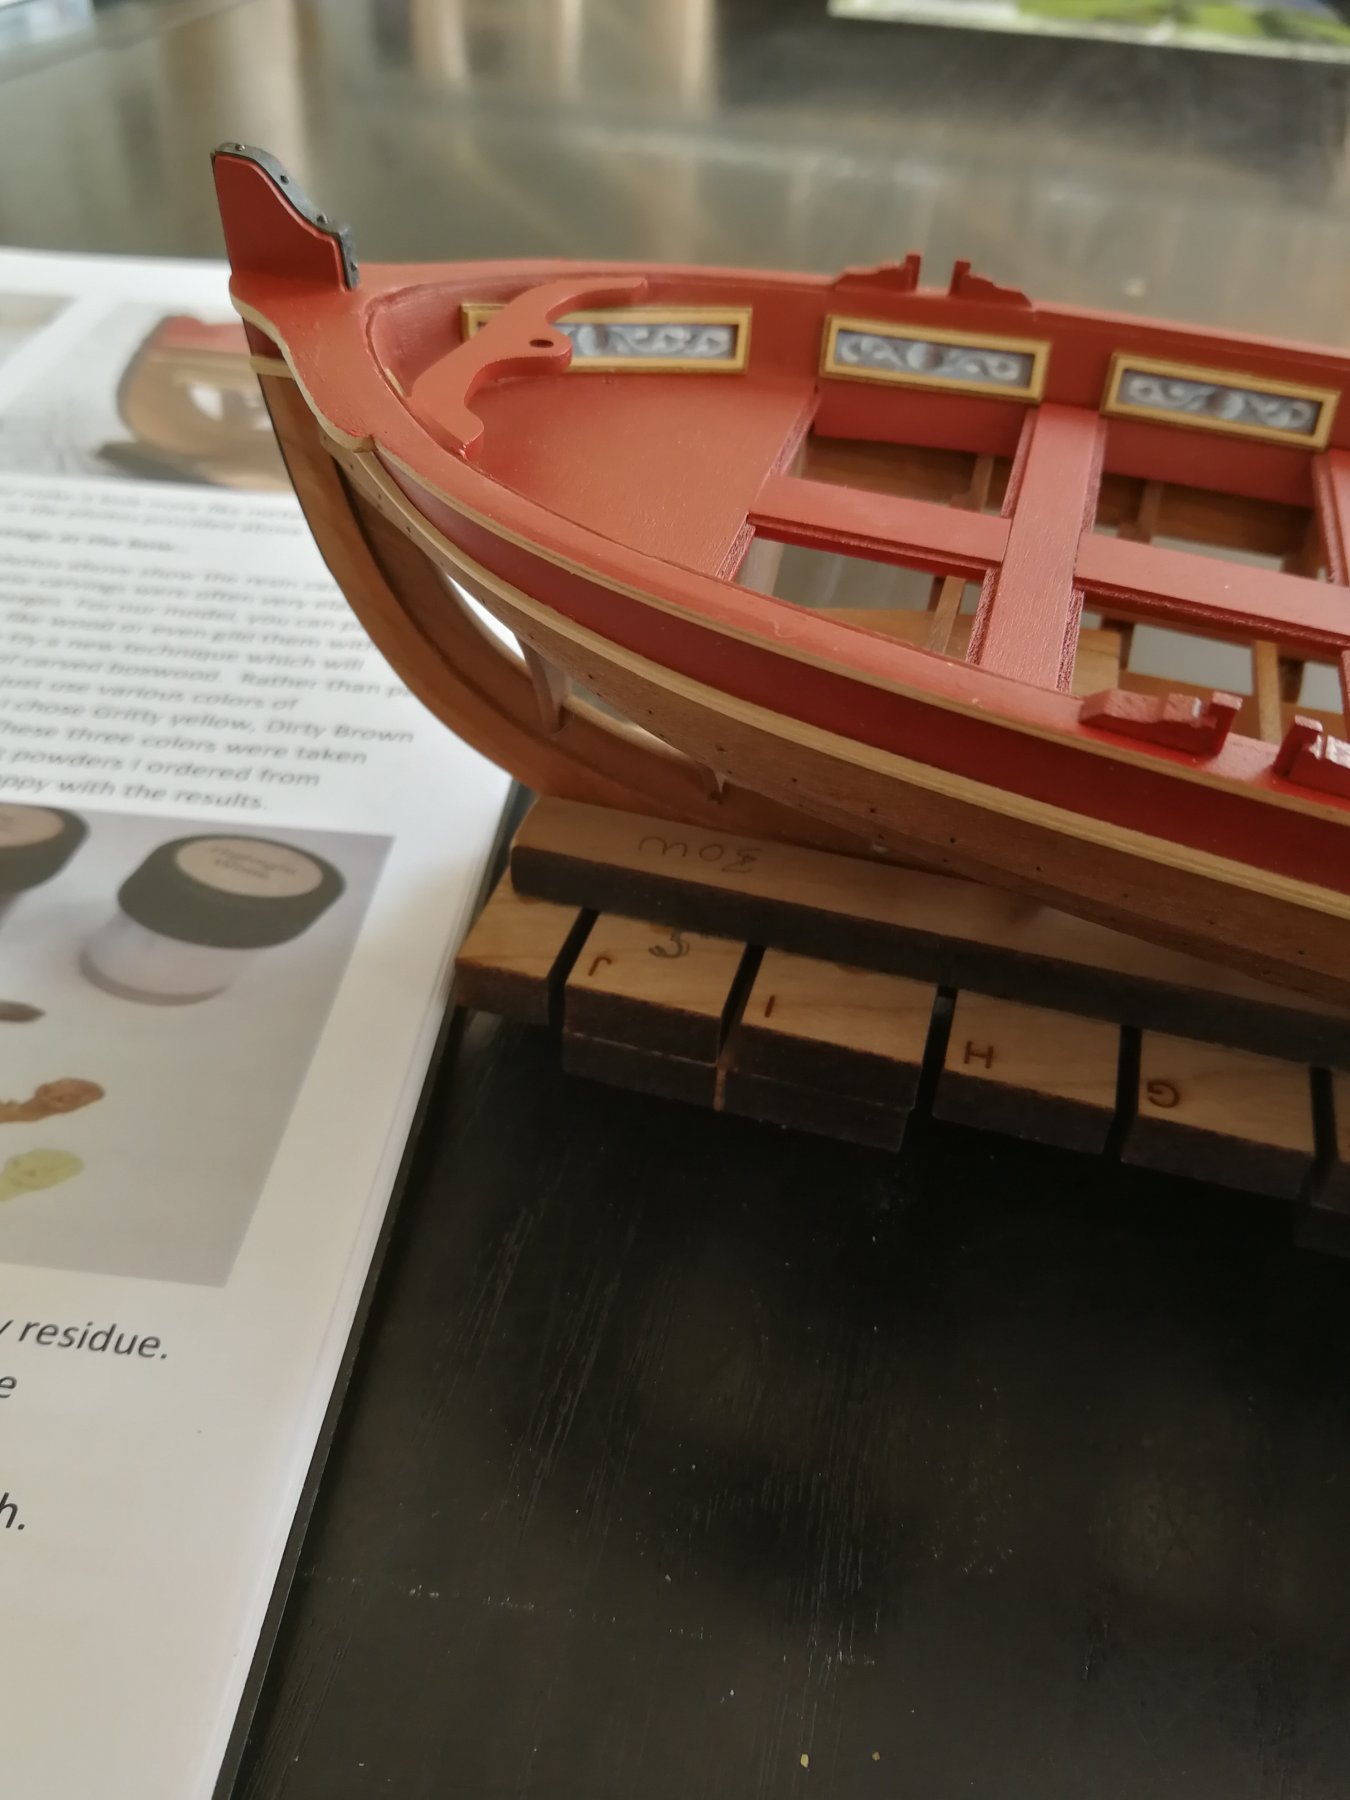
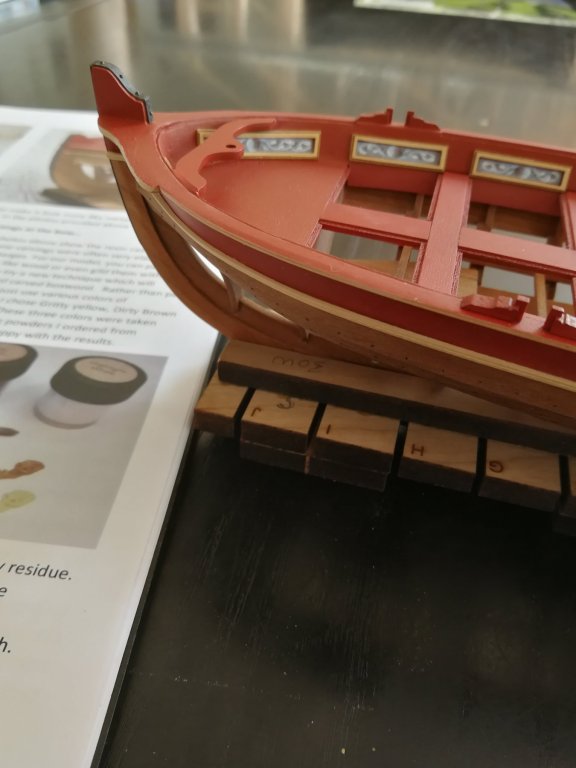
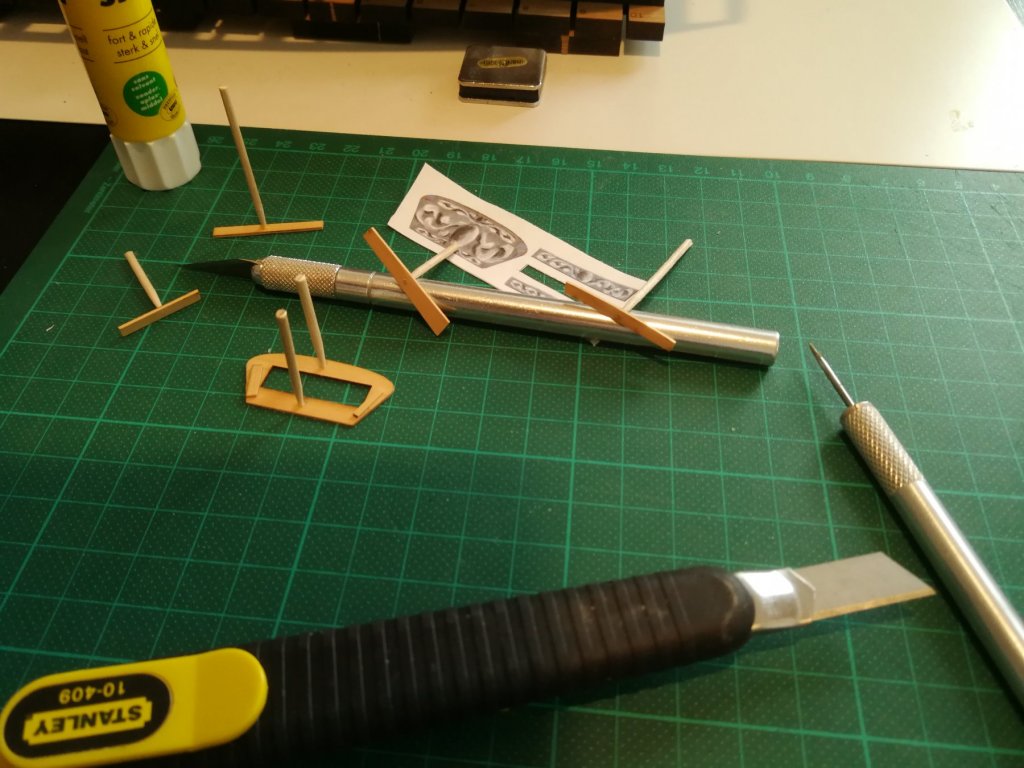
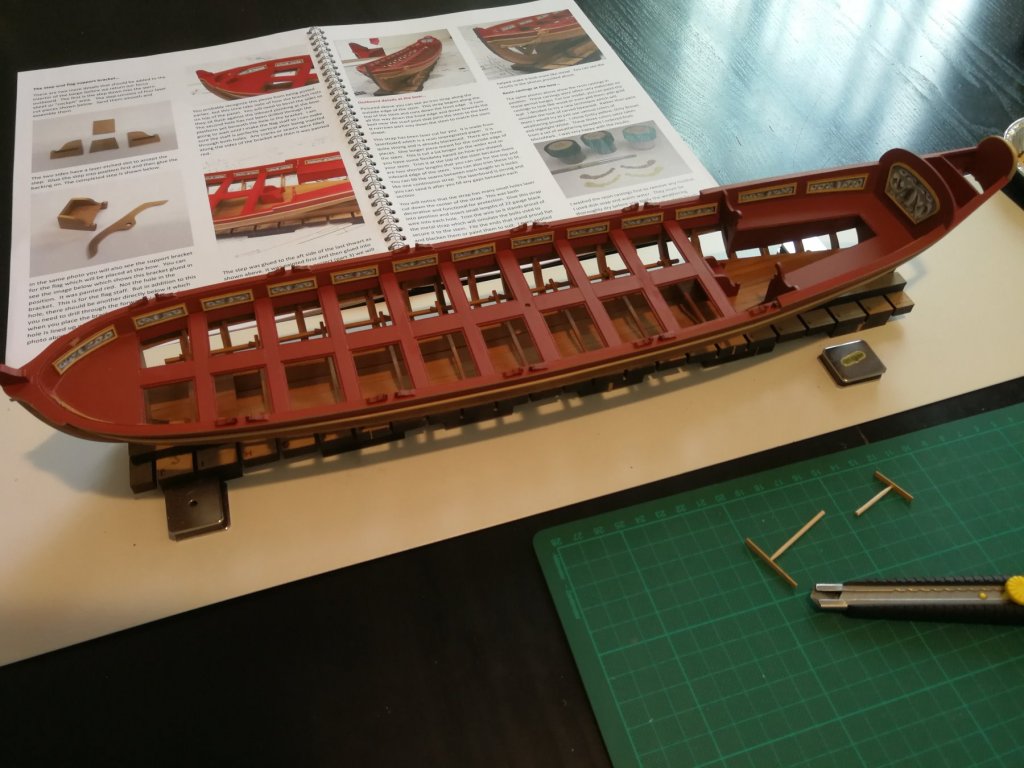
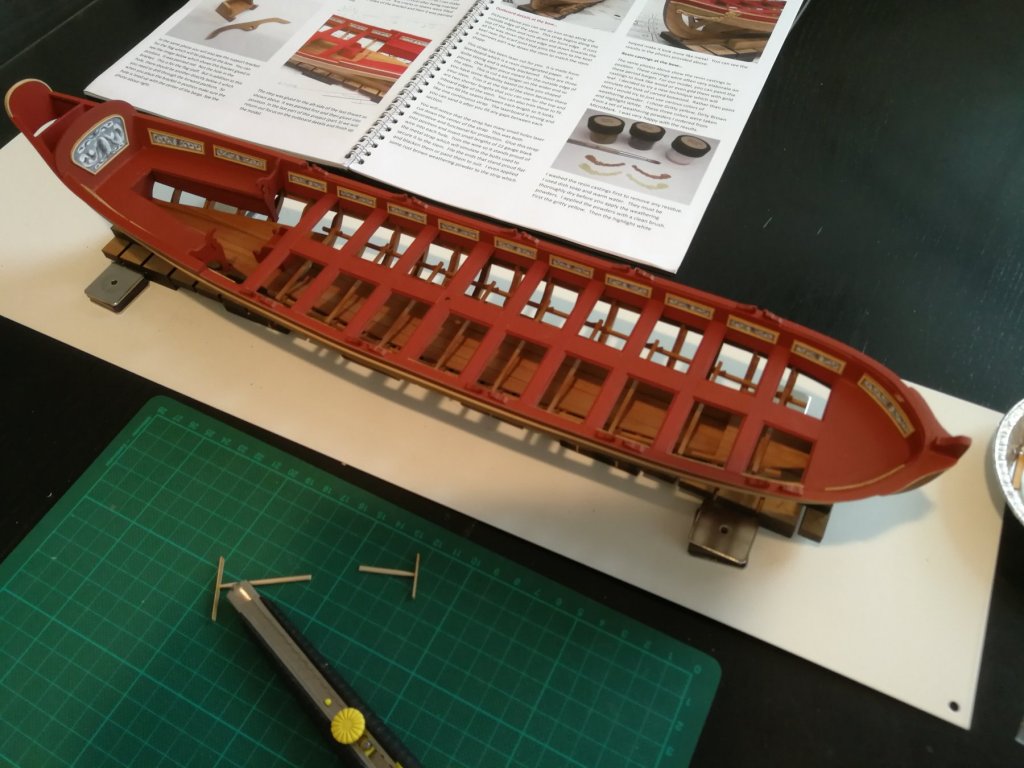
Thanks to all the 'Likes' The iron strap was glued. It is composed of three parts. The seams between each length was filled with some modelling epoxy. The support bracket for the flag has also been glued and the seam filled with some colored lightweight wood filler. The whole is sanded with fine-grit sandpaper and receives some touching up of paint. The bolts have been simulated. I still have to apply some rust brown weathering powder to the strip. It's time to begin to place the resin castings... and then to carve...

- 103 replies
-
- 9
-
-
- queen anne barge
- Syren Ship Model Company
- (and 1 more)
-
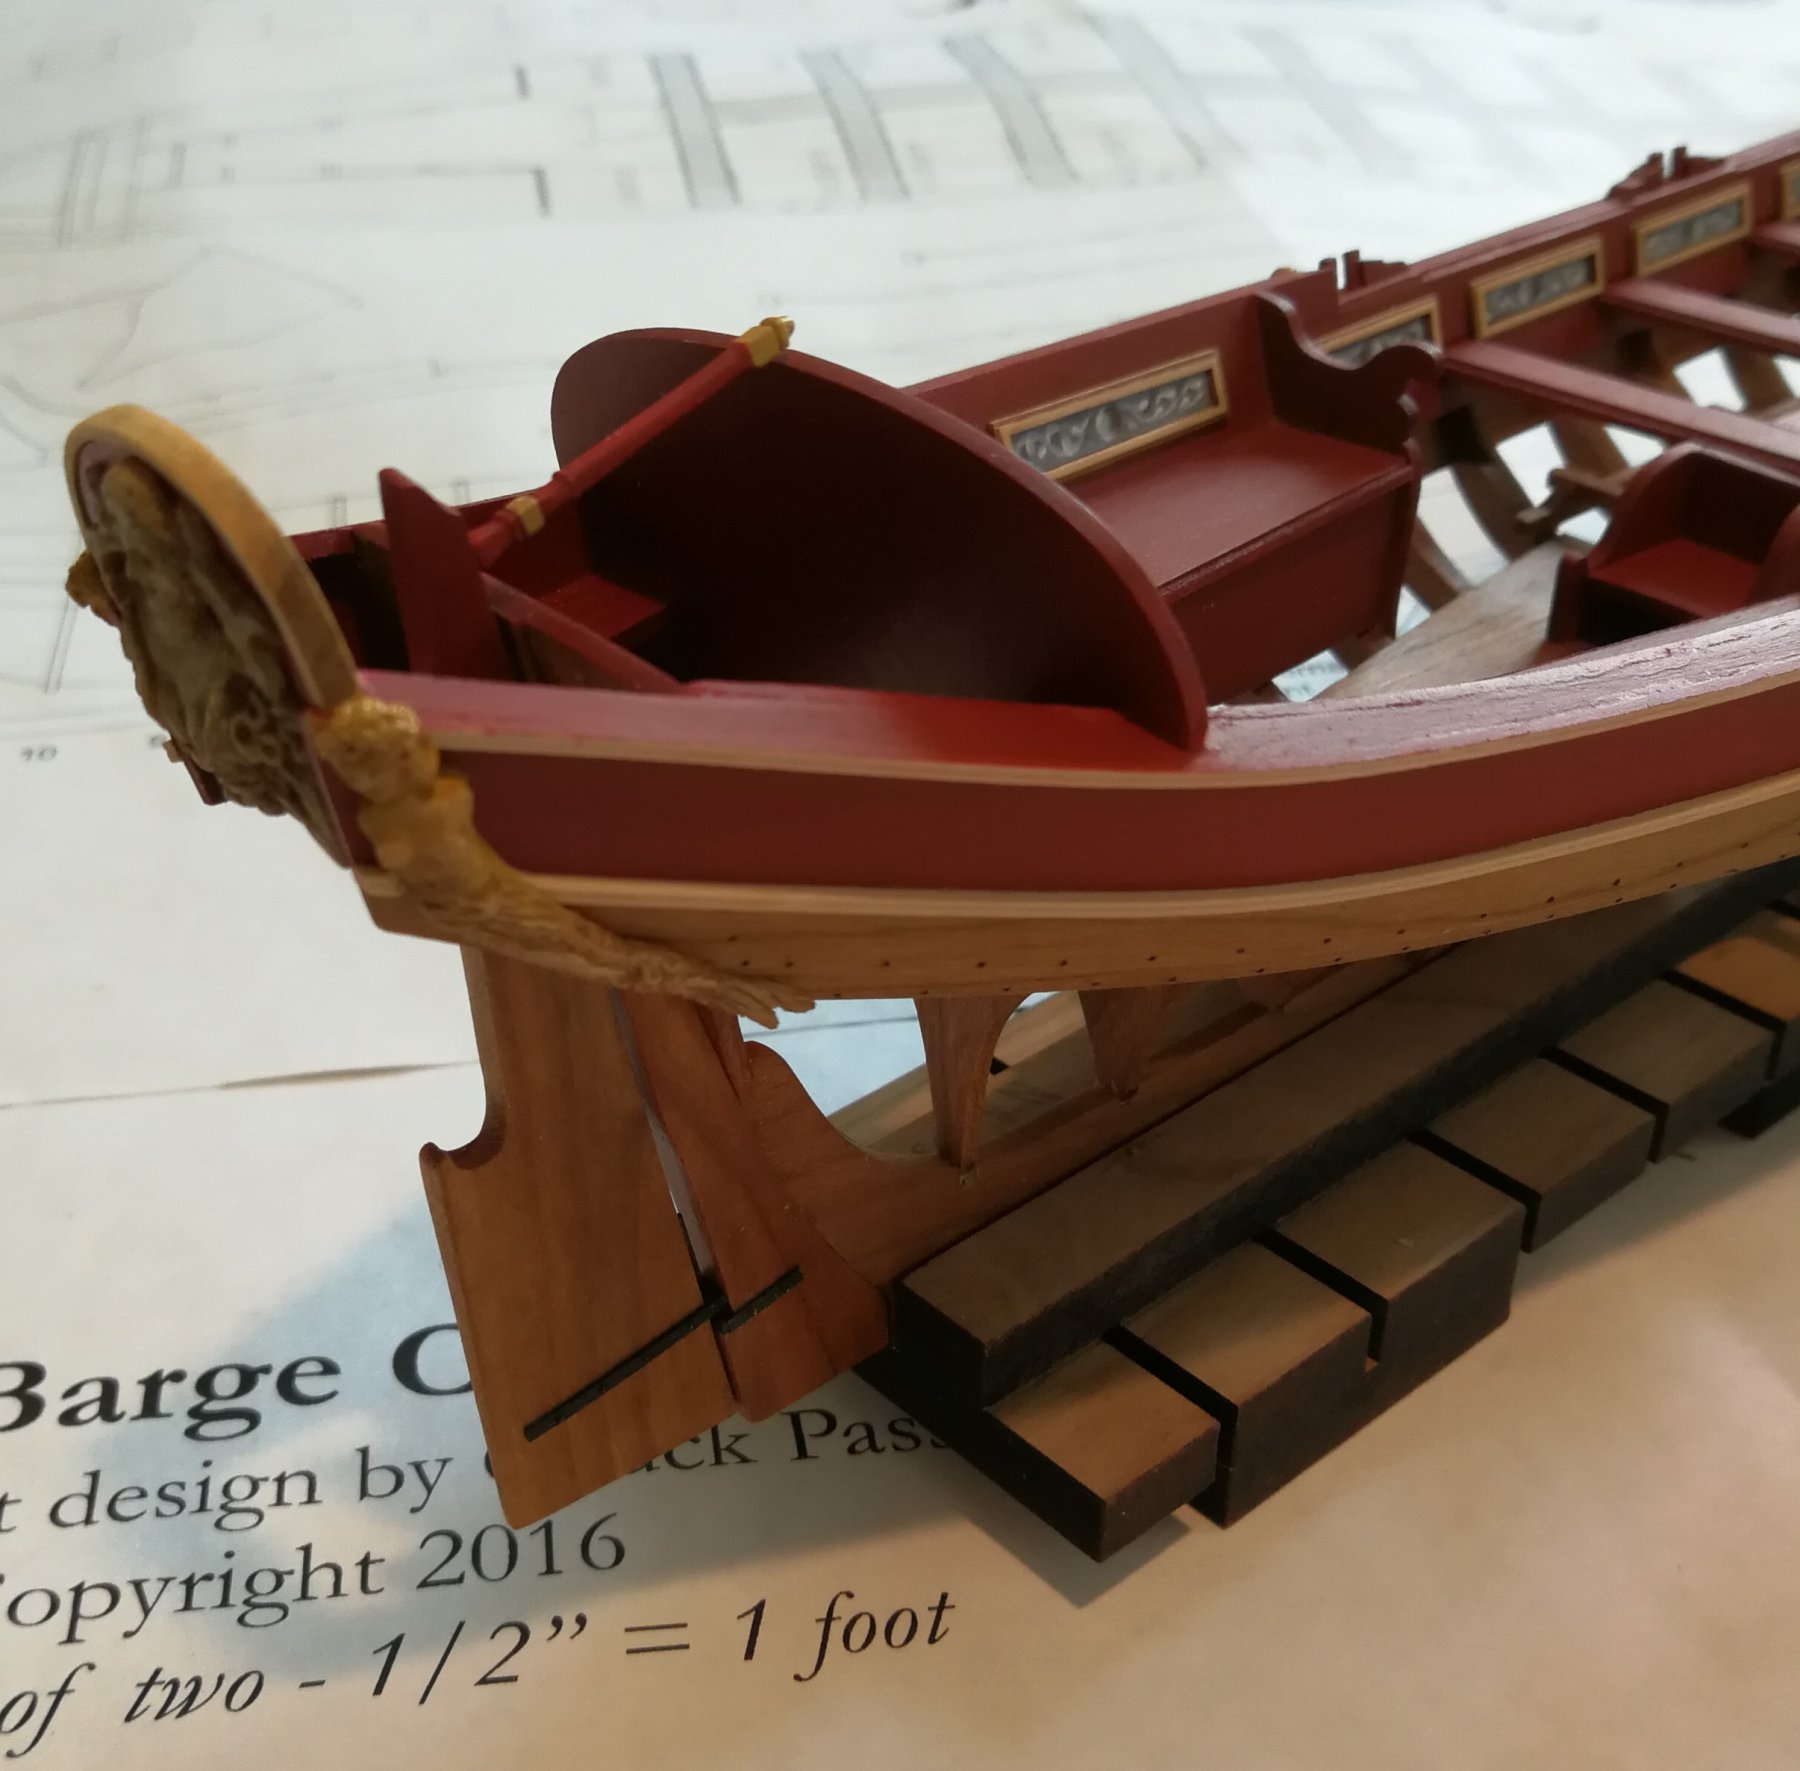
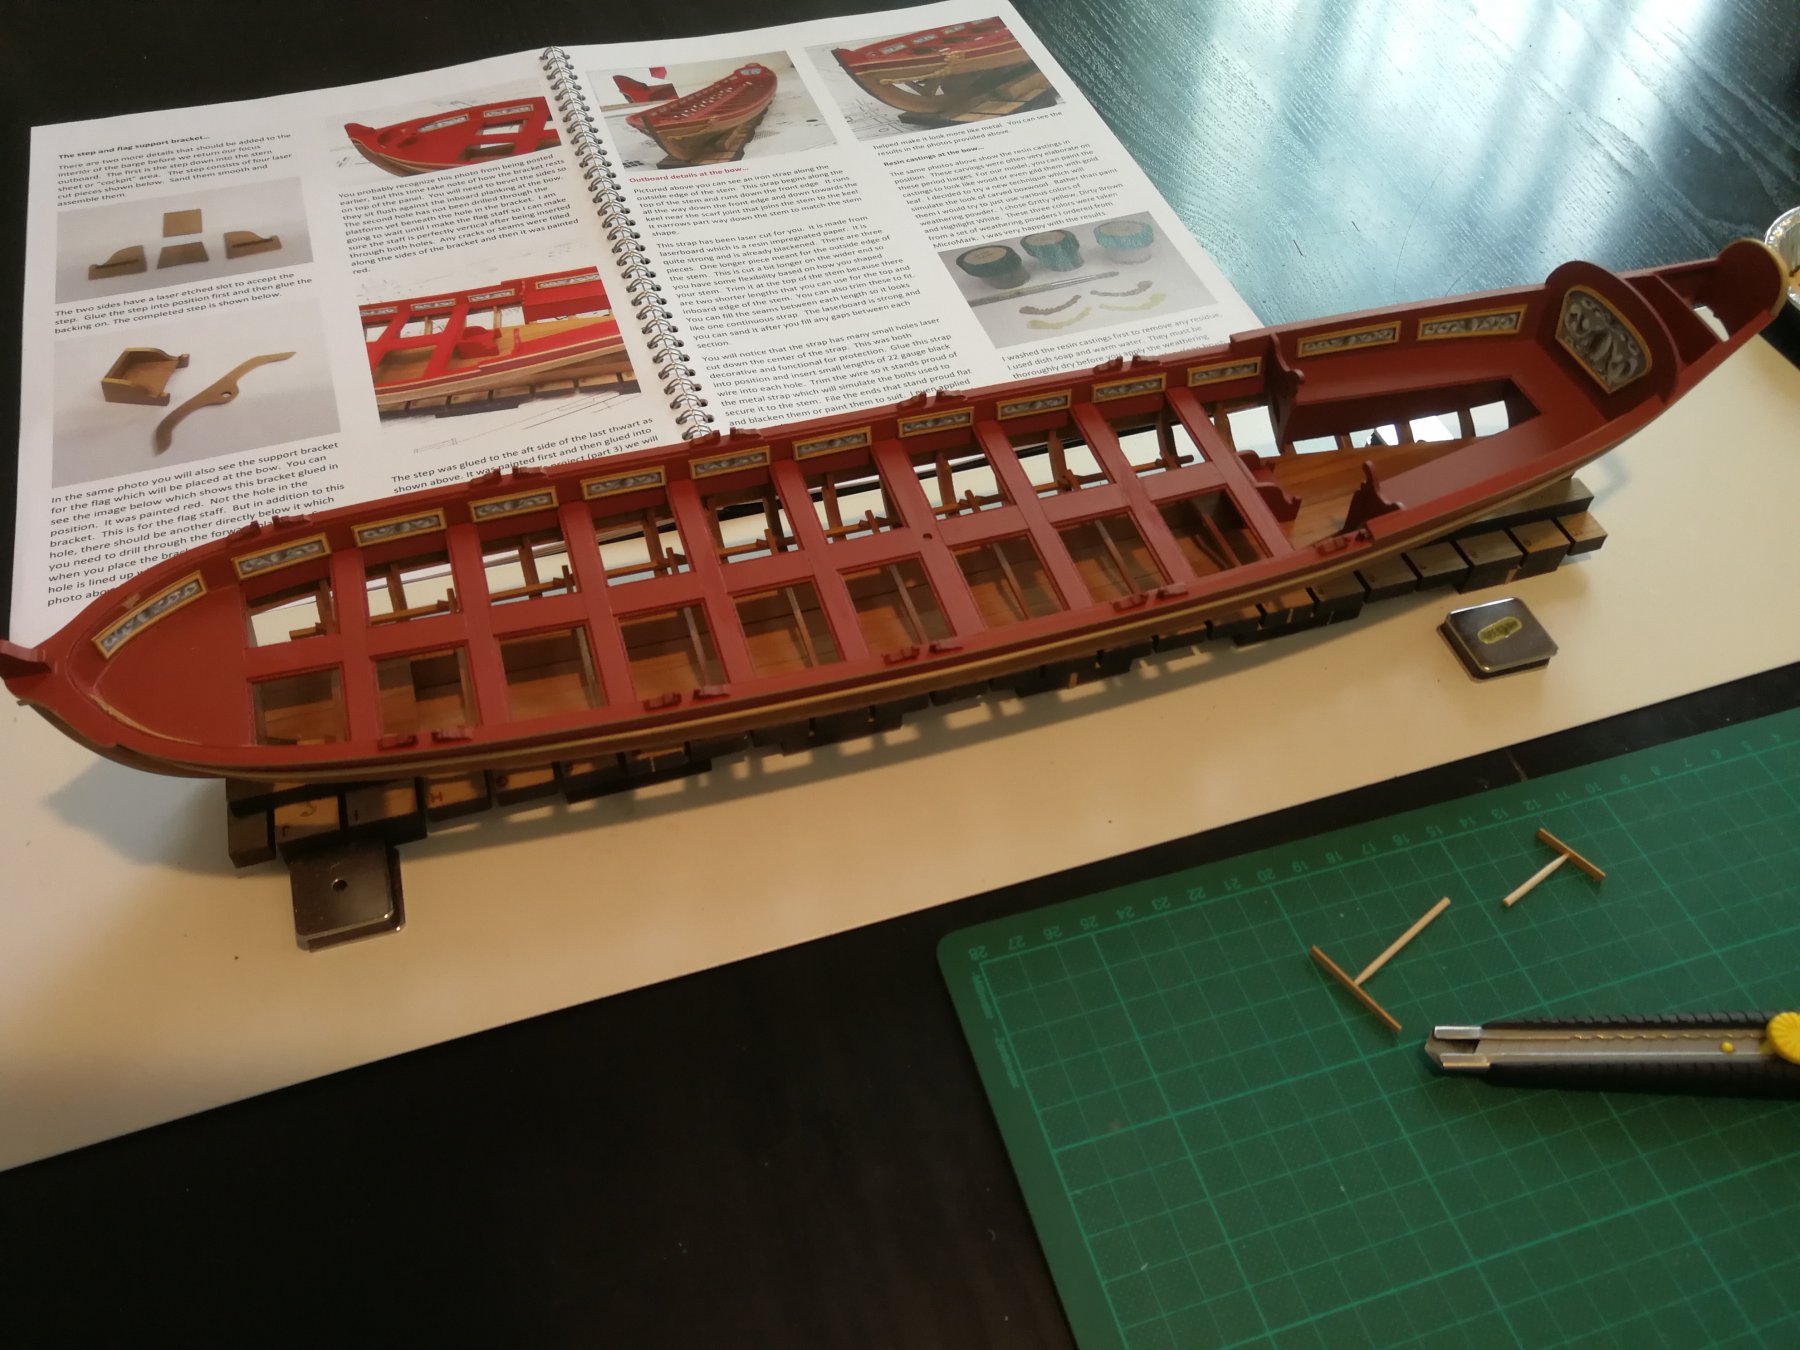
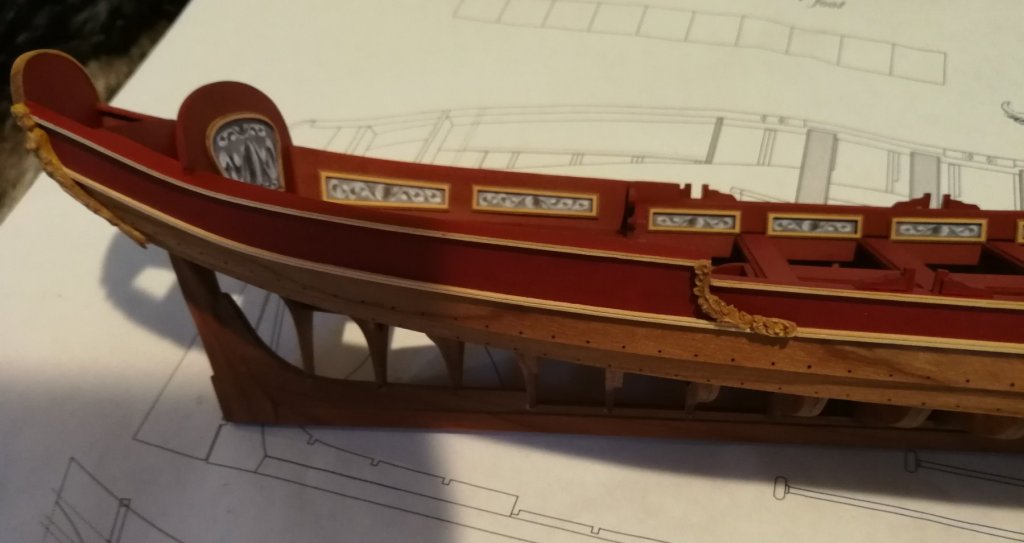
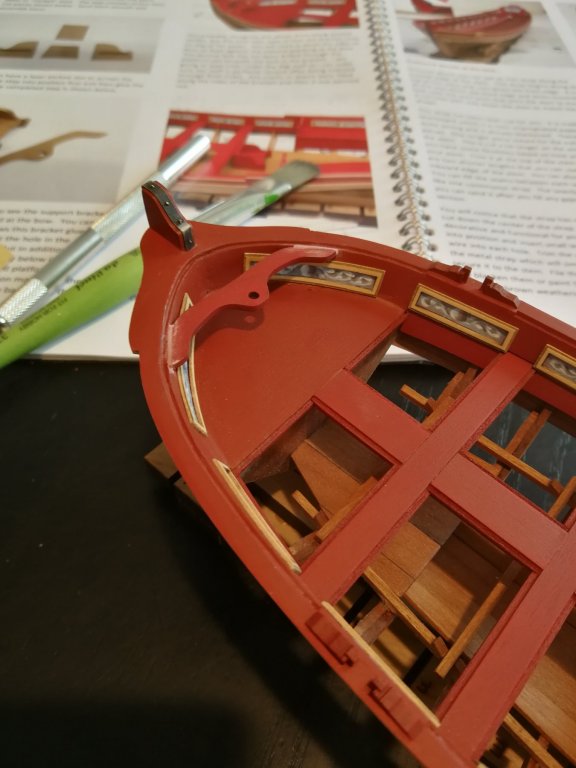
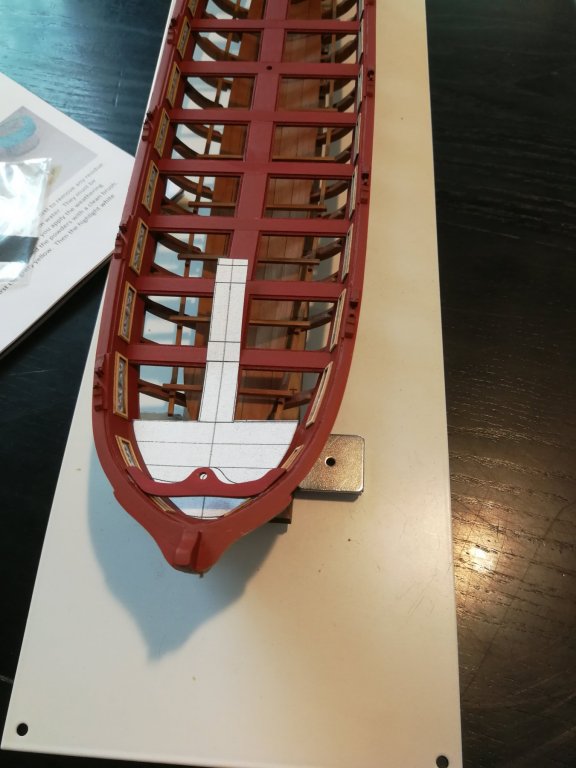
Thank you for your kind comments and for all the 'Likes'. Vossiewulf, help I got and I still have some. Just read the beautiful build logs found in this forum and you will always find a solution. 😉 Your log on the Lady Nelson is an example in this area and I'm attentive to it. Great source of inspiration and motivation. 😊 Pat, Chuck did a great job on this kit and this greatly facilitates the job. I finished laying the paper friezes. I just built quickly some jigs using the inner shape of the panels. A small hole, a toothpick, a little sanding stroke once the assembly done and we have a help to cut the rounded shapes of the friezes and to ensure they are well in place once glued. Time to work on the last details at the bow. I take this opportunity to wish happy Easter to everyone !
- 103 replies
-
- 9
-
-
- queen anne barge
- Syren Ship Model Company
- (and 1 more)
-
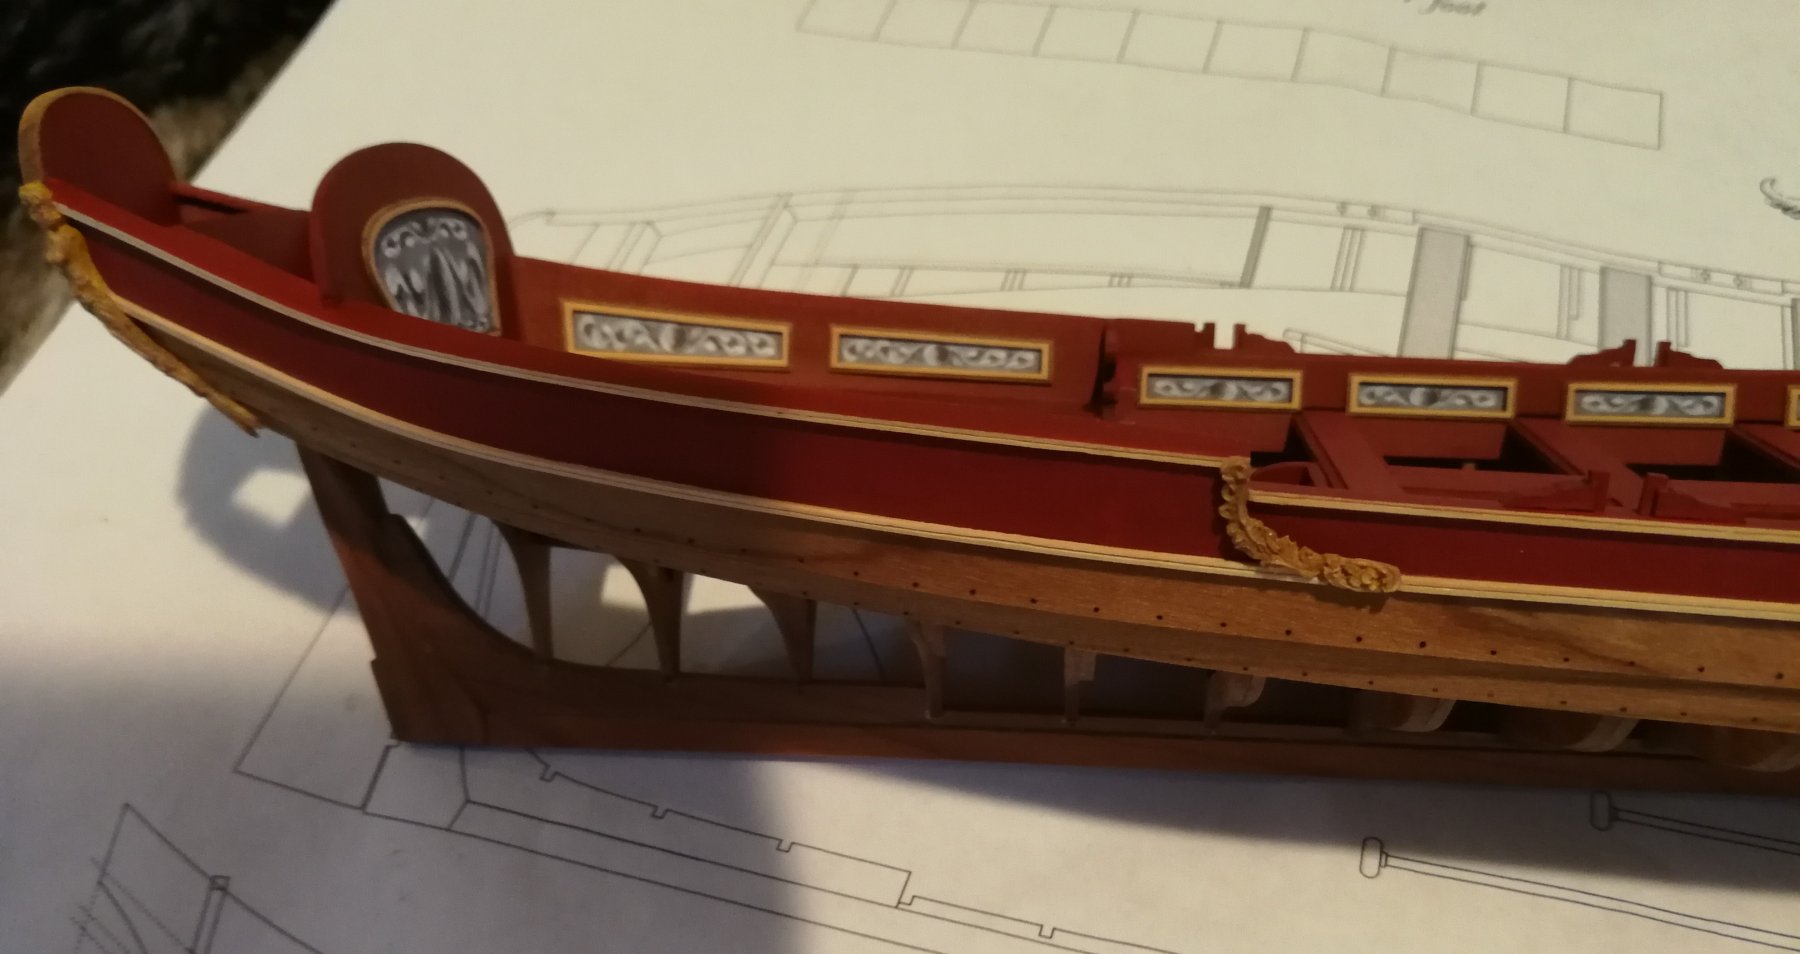
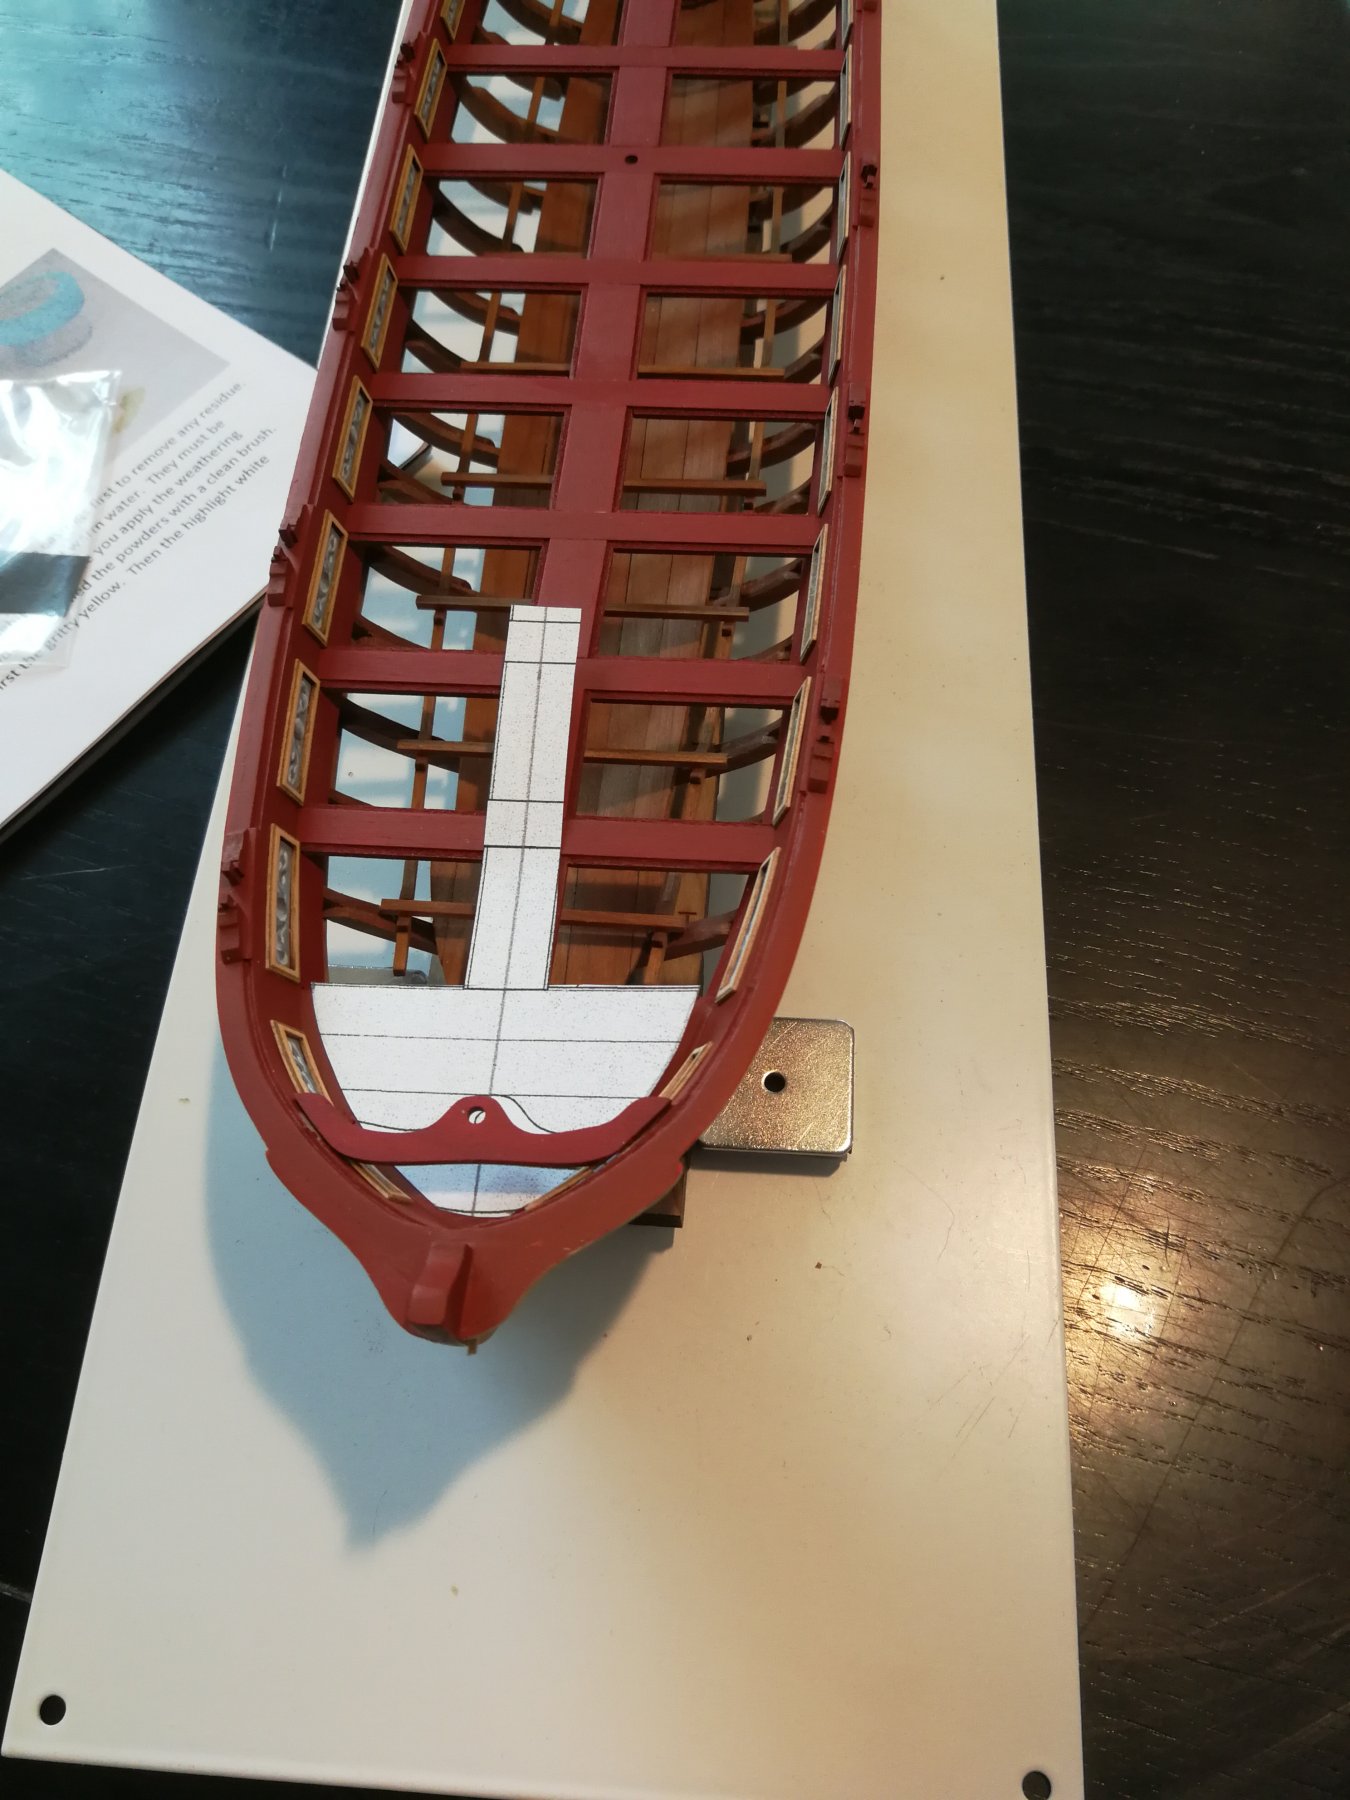
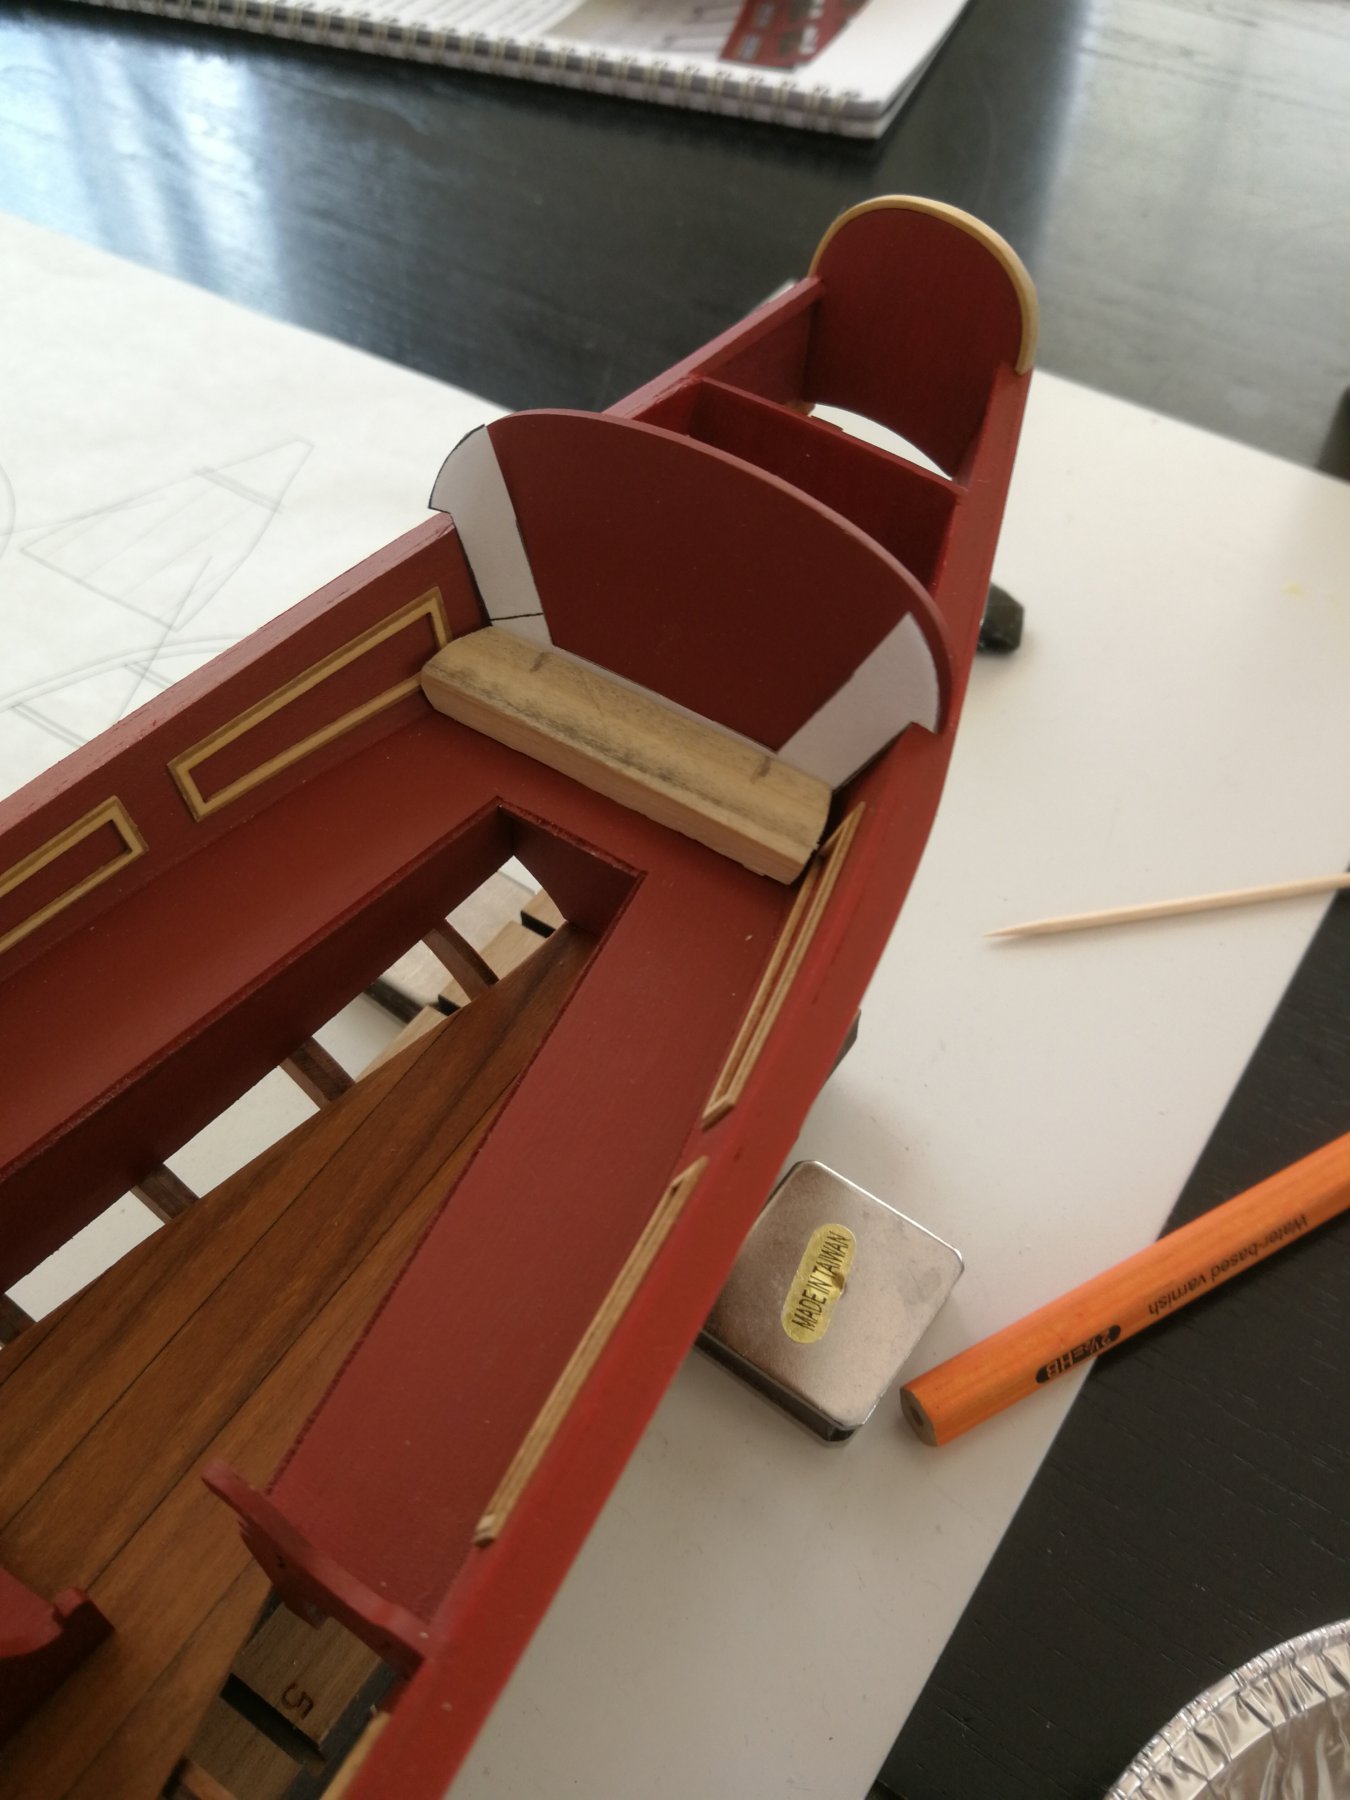
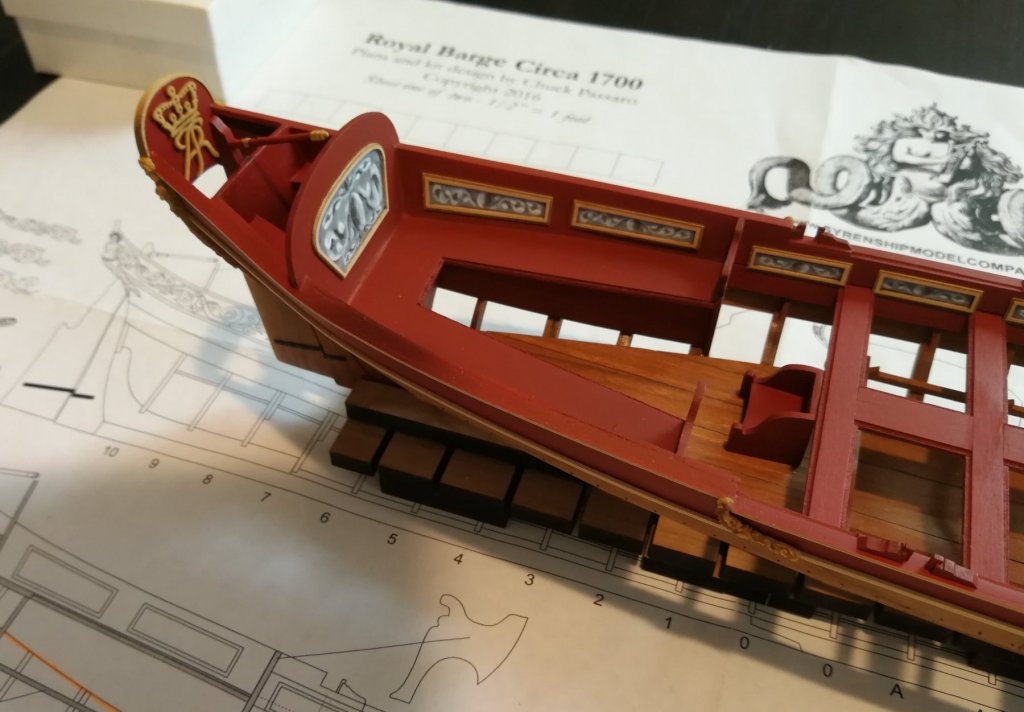
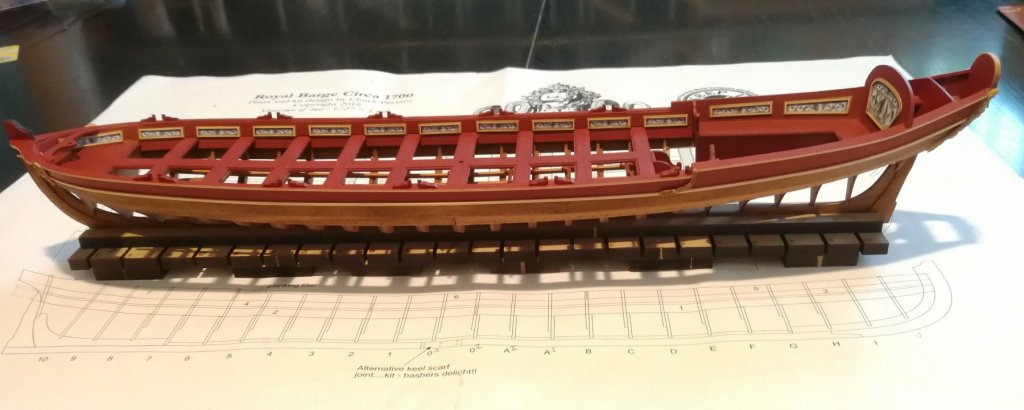
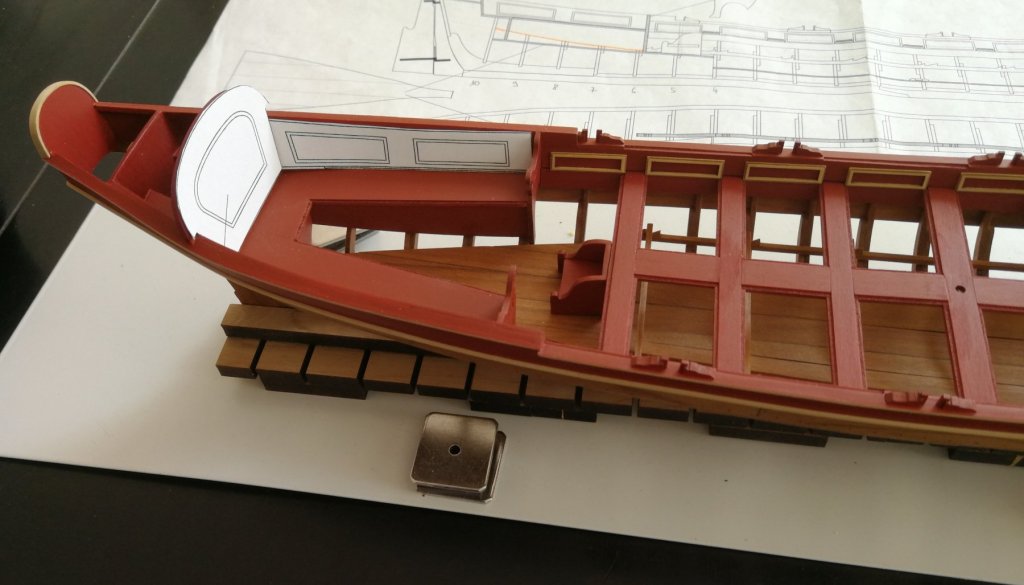
Thanks to all who follow the progress of my build. Since yesterday was Holy Friday and I was on leave, I was able to advance on the laying of the boxwood panels. For the 20 small side panels, no particular problem, they position themselves on top of the thwarts. At the stern, I photocopied the plan and cut out the useful parts to precisely determine the position of the panels. A piece of wood of the right height quickly shaped will help to install the panels. Time to add the paper friezes.


- 103 replies
-
- 11
-
-
- queen anne barge
- Syren Ship Model Company
- (and 1 more)
-
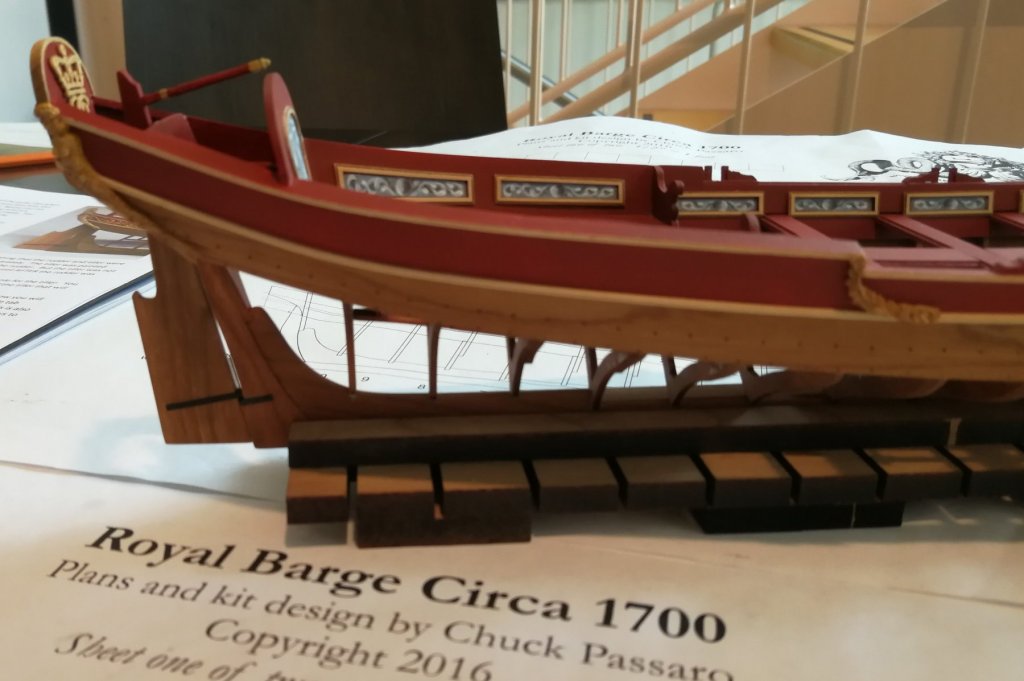
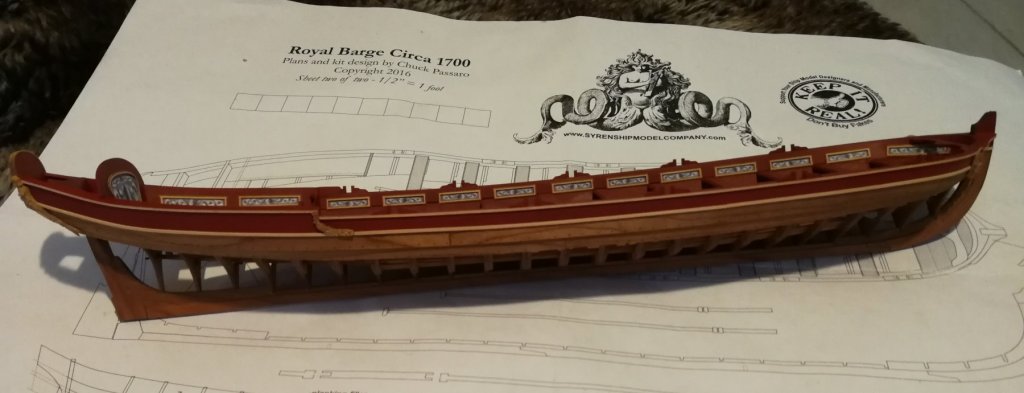
Thanks Chuck and all the 'Likes'. Chuck, Your Barge is a real dream to build. All the elements fits perfectly and Your instruction manual is clear and precise ! An example to follow 😉 I finished my last big stage of painting. But before doing it, I glued all the thole pins. I don't like to glue painted elements... Do not be surprised by the space between the two inside planking : as the future boxwood panels will be positioned on top of the thwarts, this small gap will finally hidden by them. I also placed the seal between the two parts of the lower molding at the future emplacement of a resin casting. Just hope that my calculations are correct... I was a little afraid of the border between the cap rail and the upper molding. But after a little sanding using a fine-grit sandpaper I'm pretty satisfied with the final result.

- 103 replies
-
- 8
-
-
- queen anne barge
- Syren Ship Model Company
- (and 1 more)
-
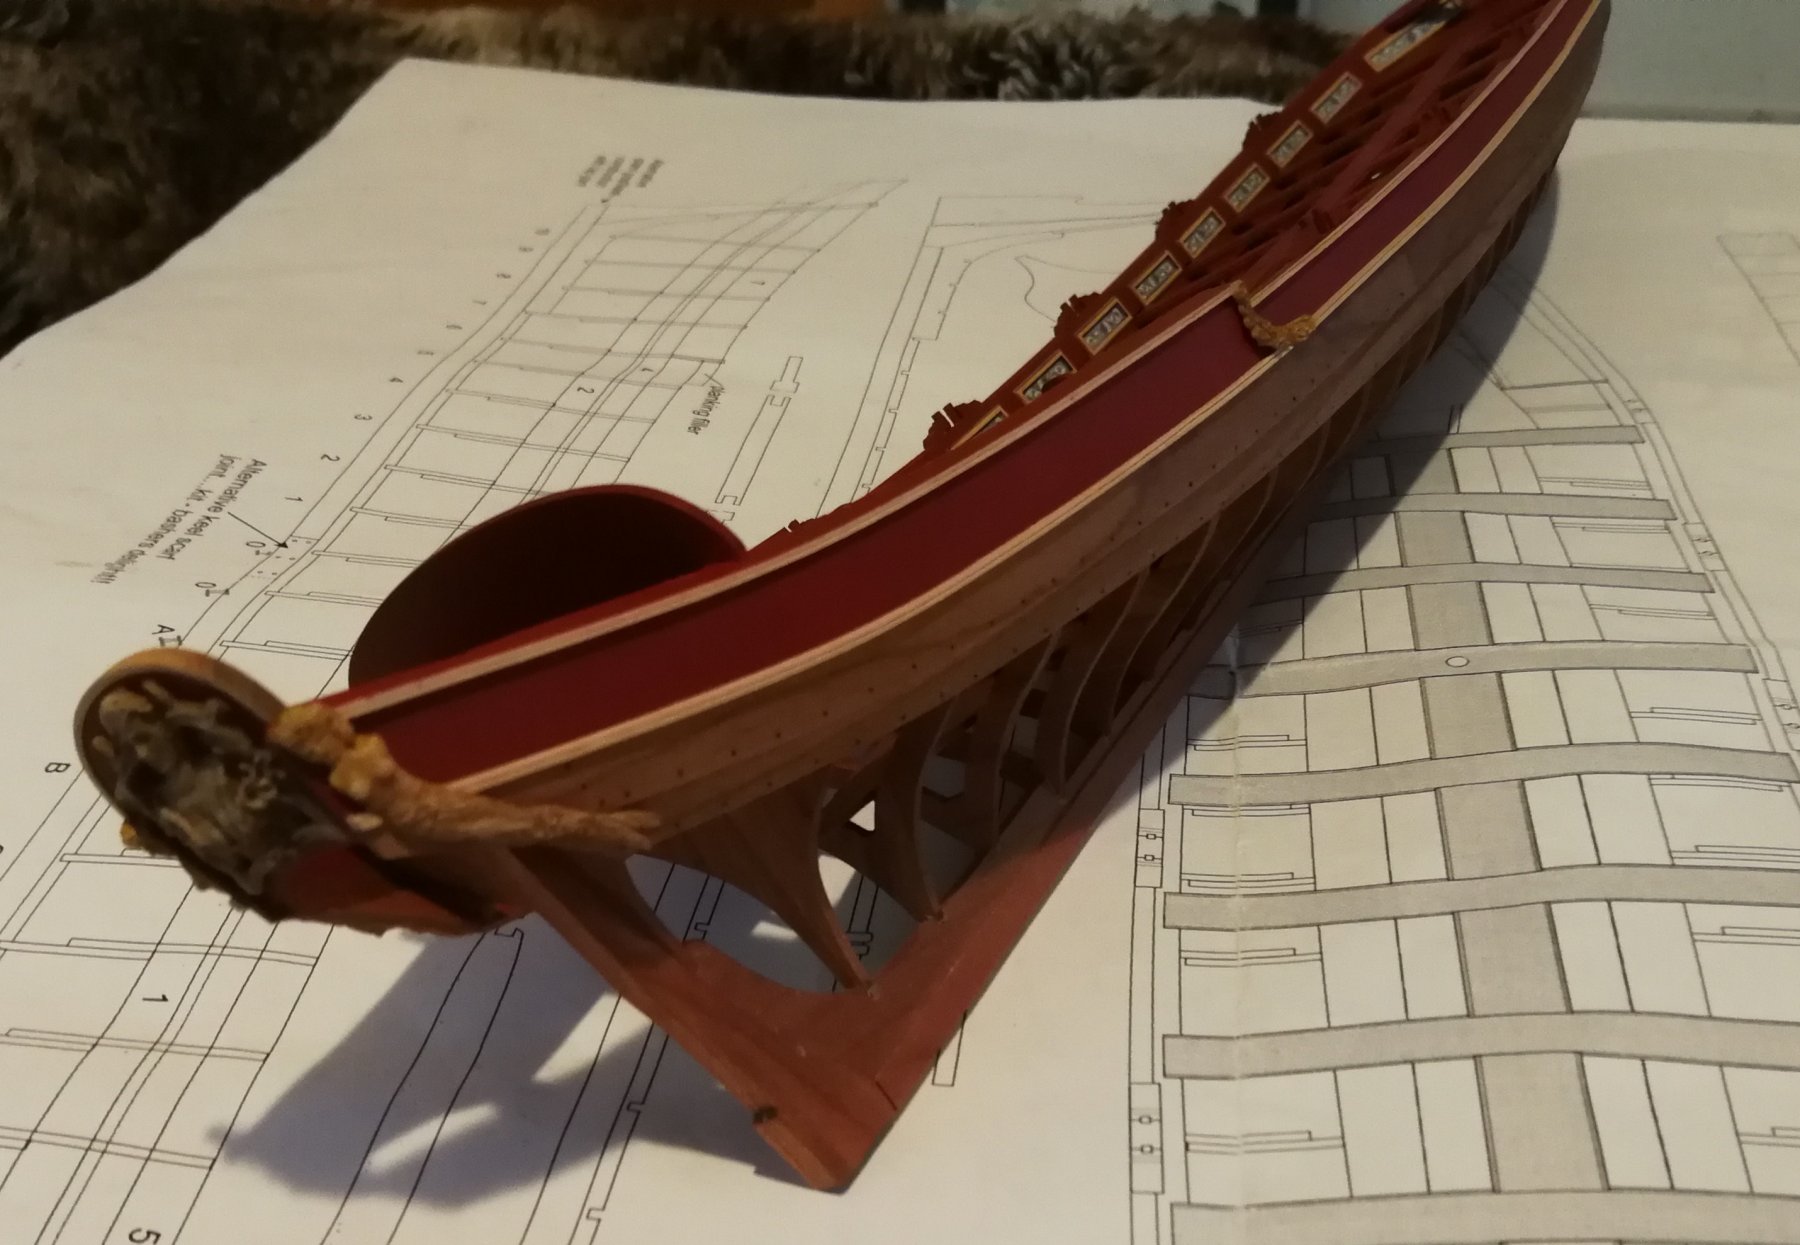
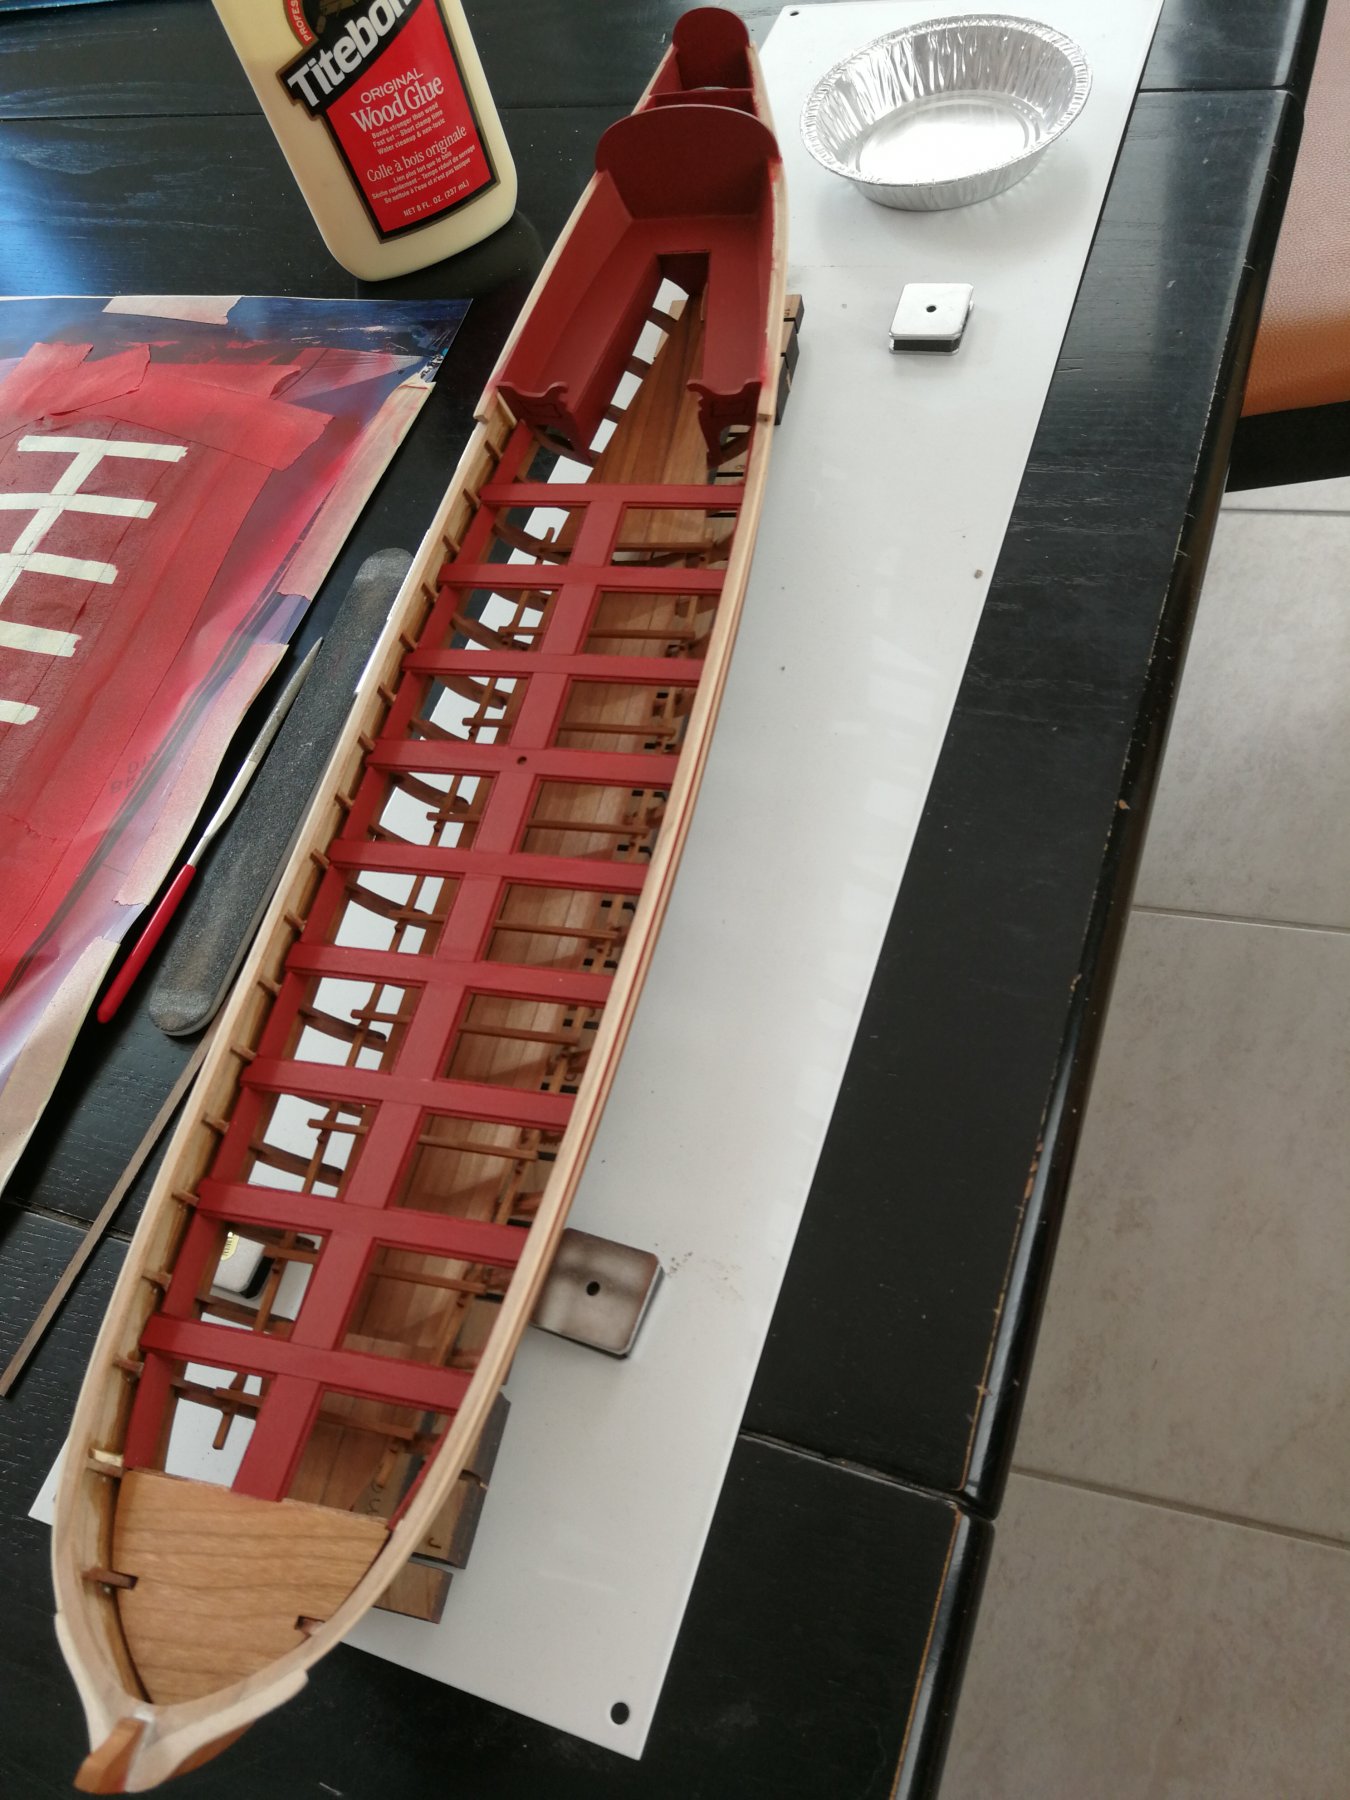
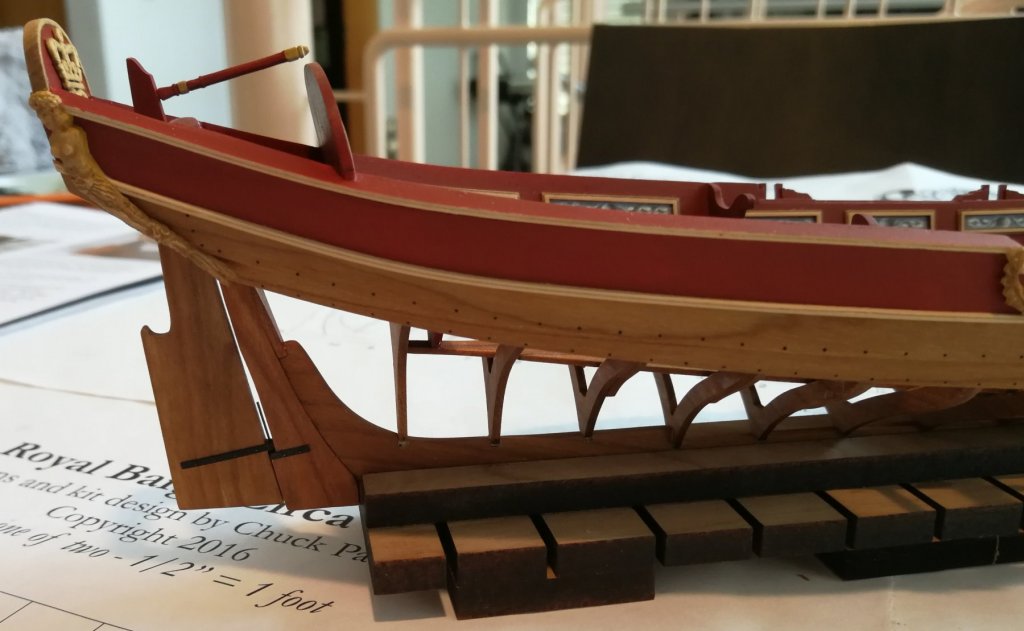
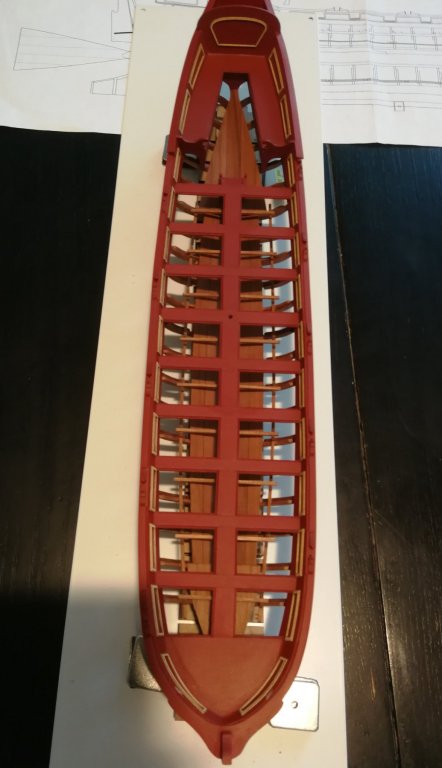
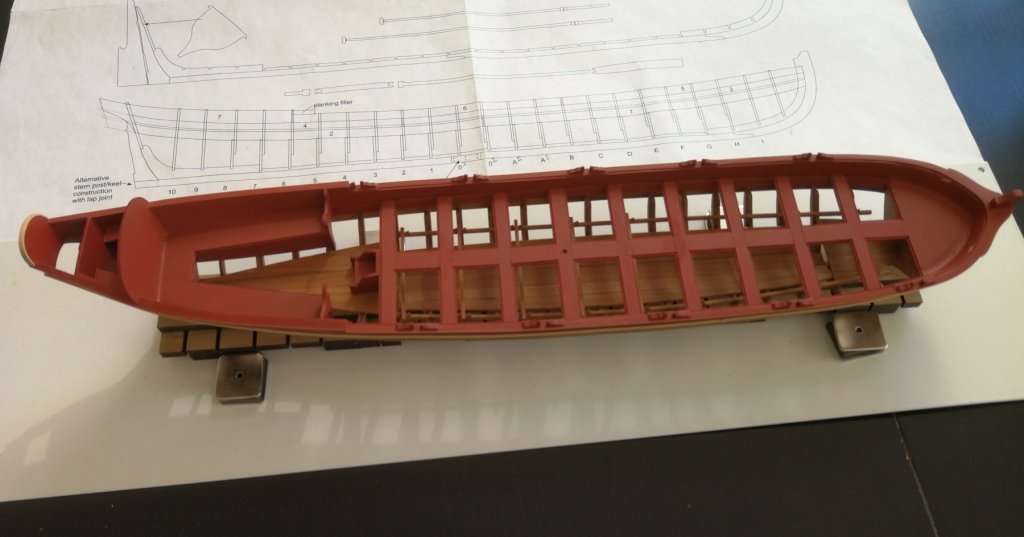
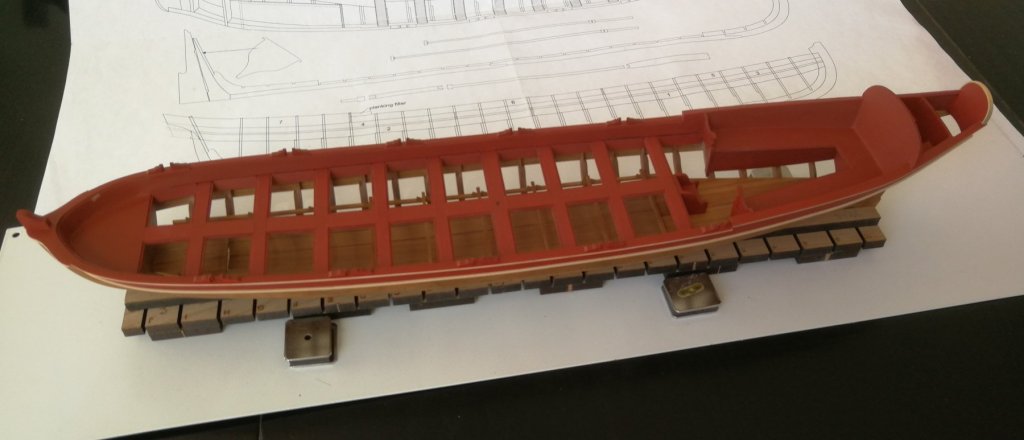
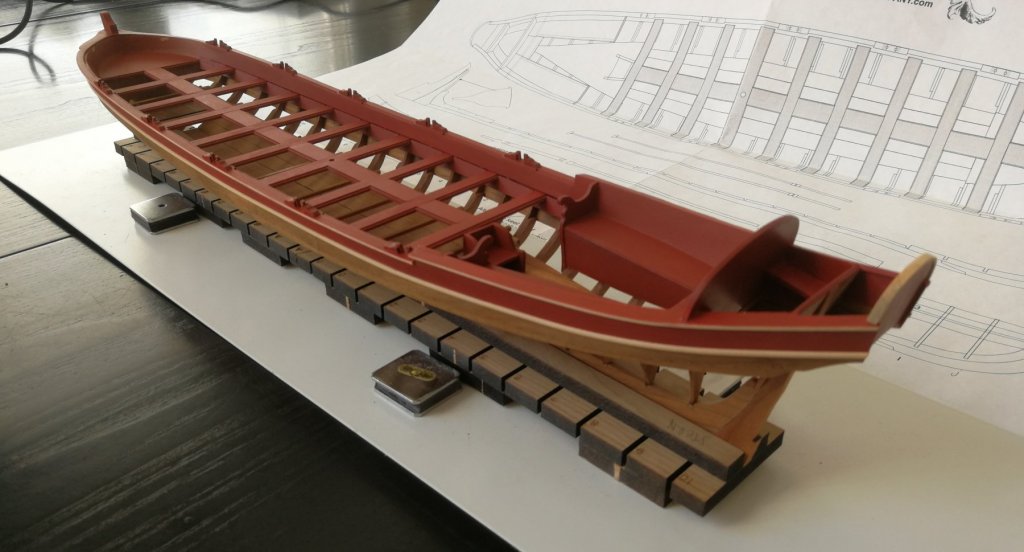
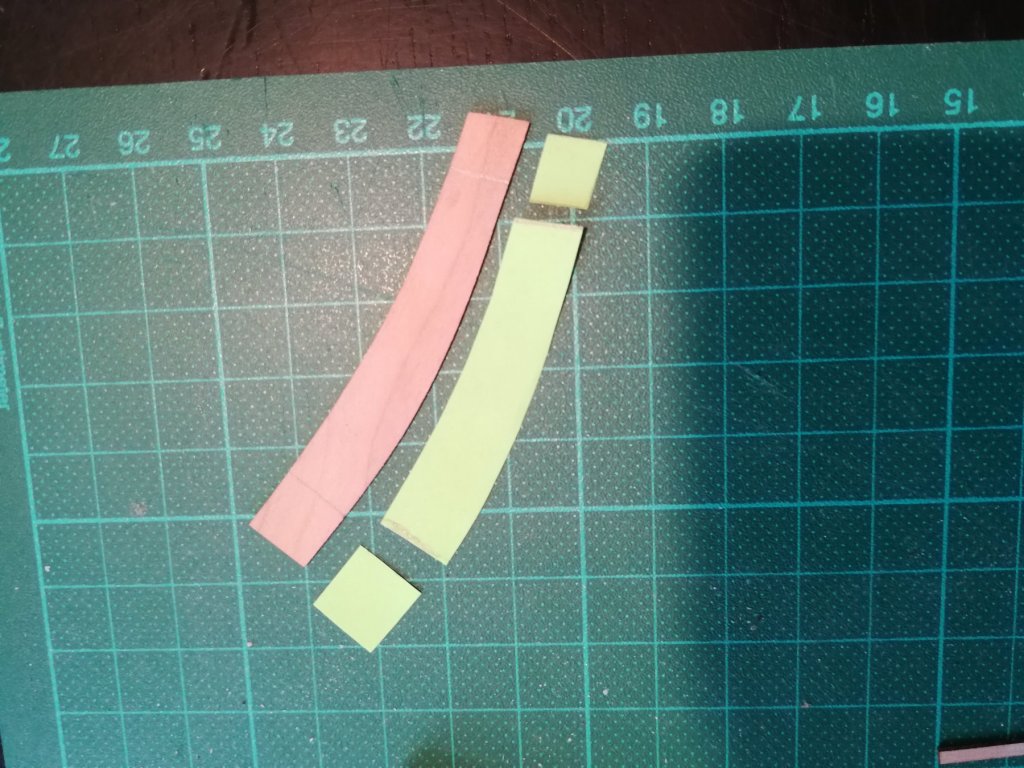
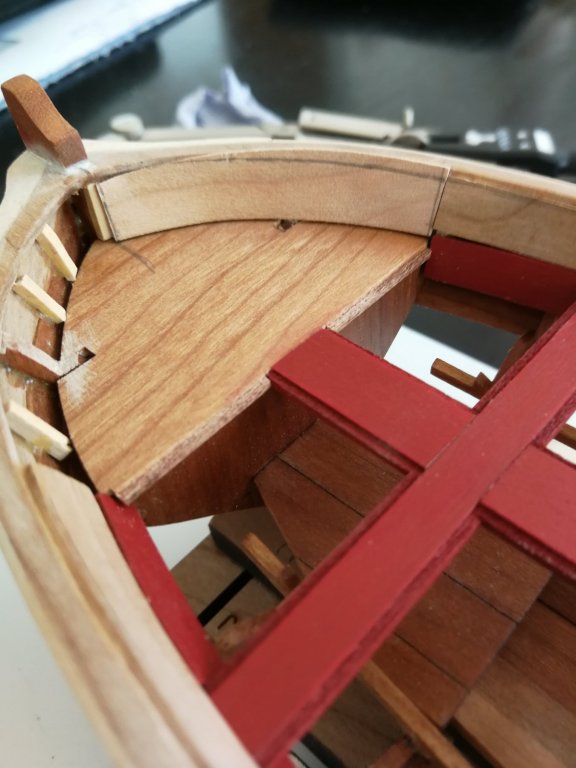
A little update on my build log. I finished the inside planking. For the shorter curved piece at the bow, I replicated it on a cardboard so I could cut it to the right length. I then curve it in shape and before gluing it I marked its height wit a compass. I finally sanded it to the right width using an emery board before gluing. All the spaces are filled with wood filler and sanded smooth. I'm ready for the last stage of painting...
- 103 replies
-
- 11
-
-
- queen anne barge
- Syren Ship Model Company
- (and 1 more)
-
Queen Anne Barge by Beckmann - 1/24
JpR62 replied to Beckmann's topic in - Kit build logs for subjects built from 1501 - 1750
Superb work. She becomes beautiful with the ornaments in place. -
Beautiful progress ! Glad to be able to follow this excellent work. That motivates me 😉
- 48 replies
-
- 4
-
-
- queen anne barge
- Syren Ship Model Company
- (and 1 more)
-
Superb new detail. Perfect as usual 😉
- 231 replies
-
- 1
-
-
- model shipways
- armed virginia sloop
- (and 1 more)
-
Thanks for the 'Likes' Beckmann, I will probably leave the panels and the ornaments in natural wood. But I have not really decided yet. CaptainSteve I forgot this step. 😐 In fact, in the instruction manual, we only talk about this piece when we pose the flag. I hope it will be not too difficult.
- 103 replies
-
- 2
-
-
- queen anne barge
- Syren Ship Model Company
- (and 1 more)
-
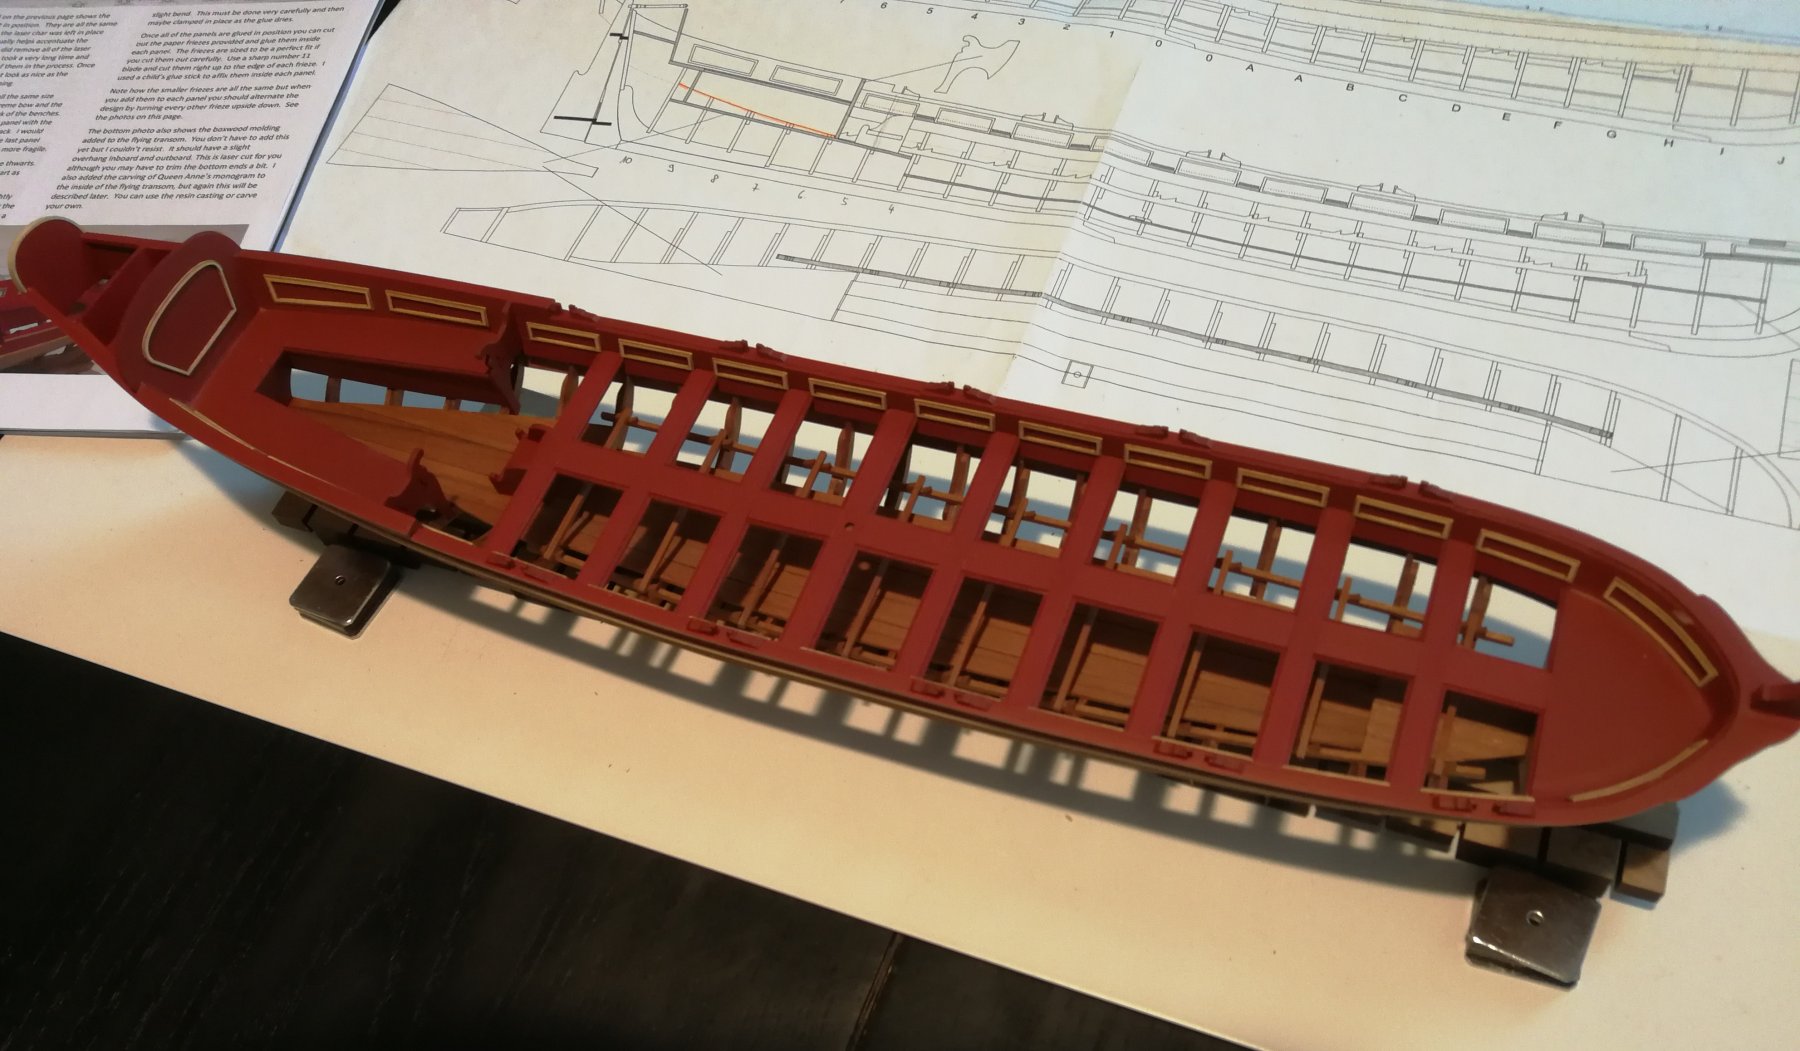
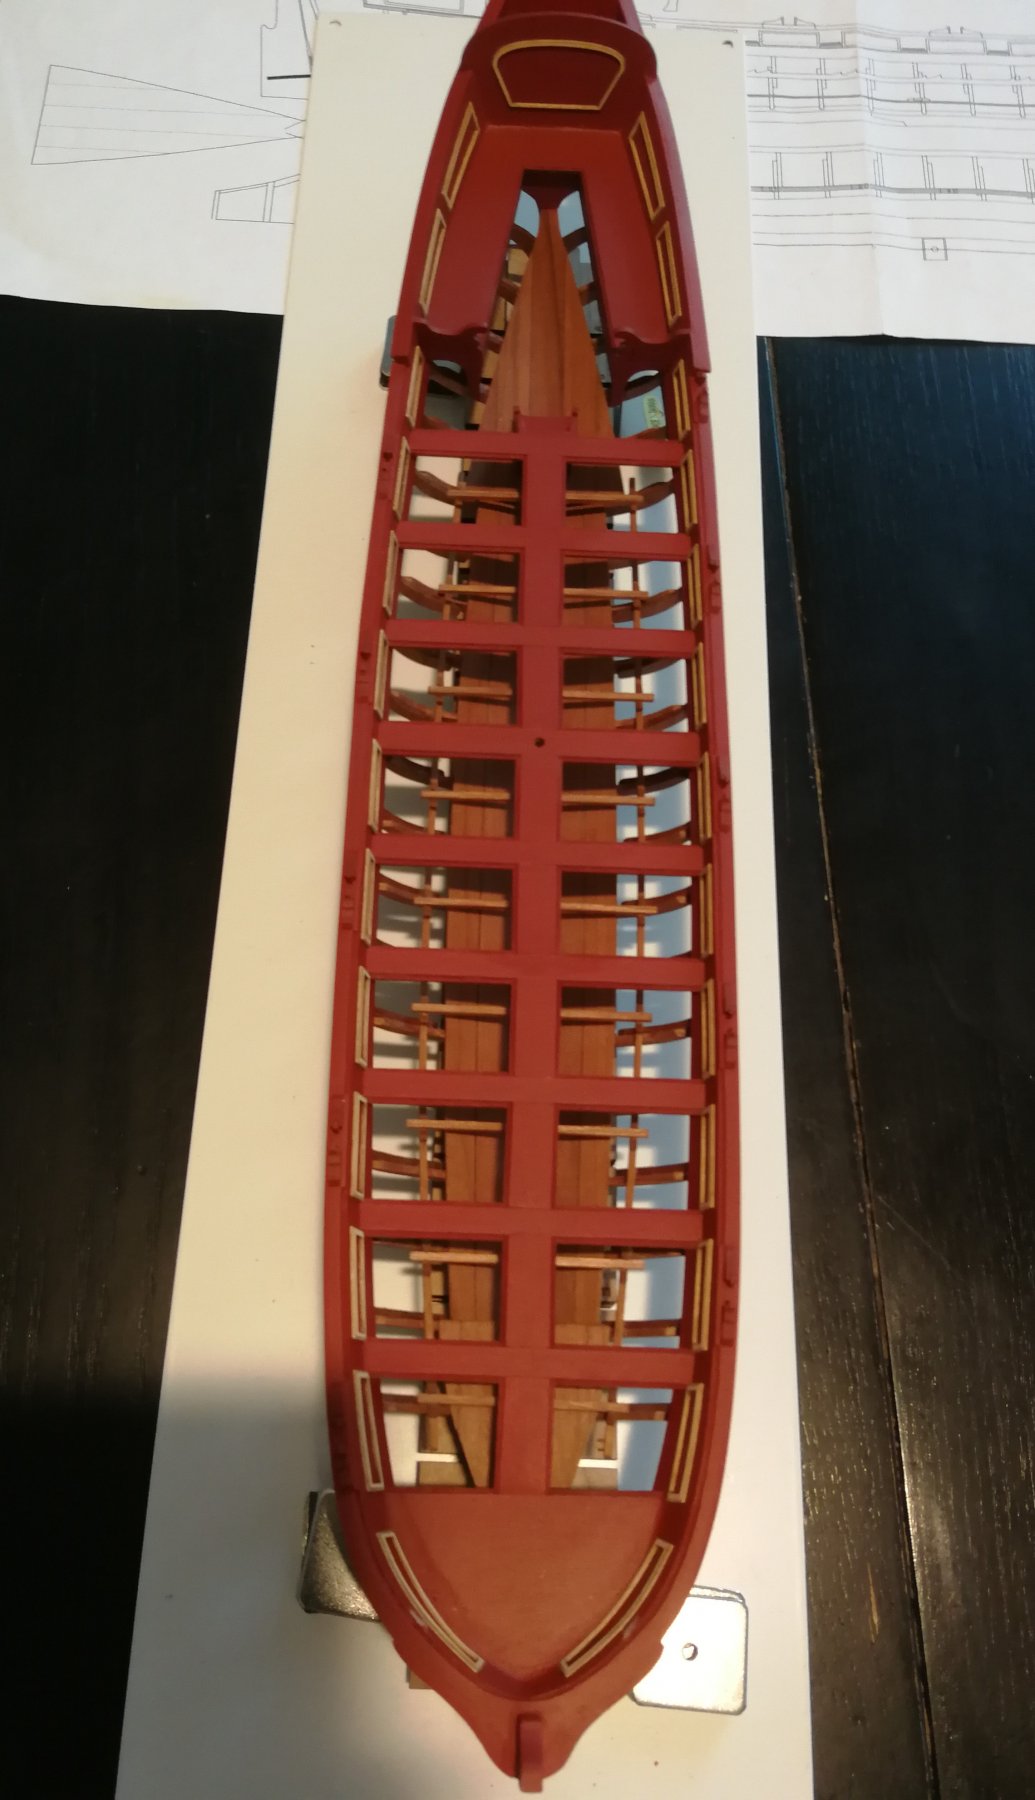
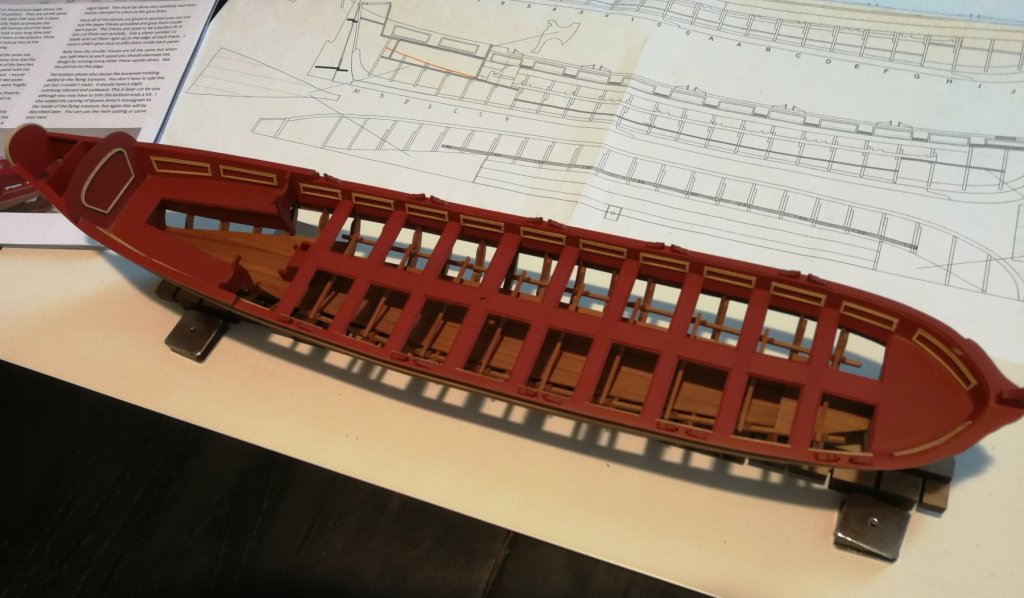
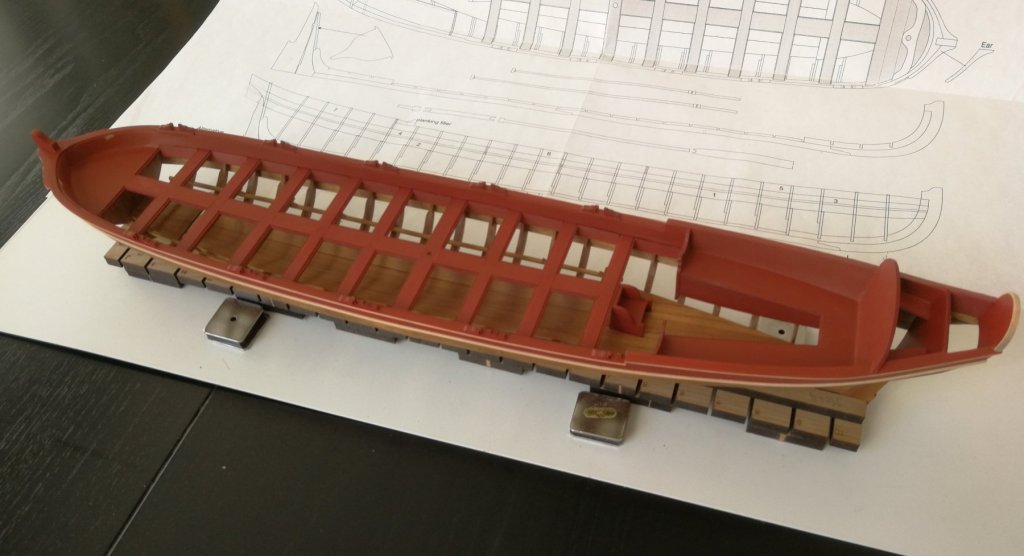
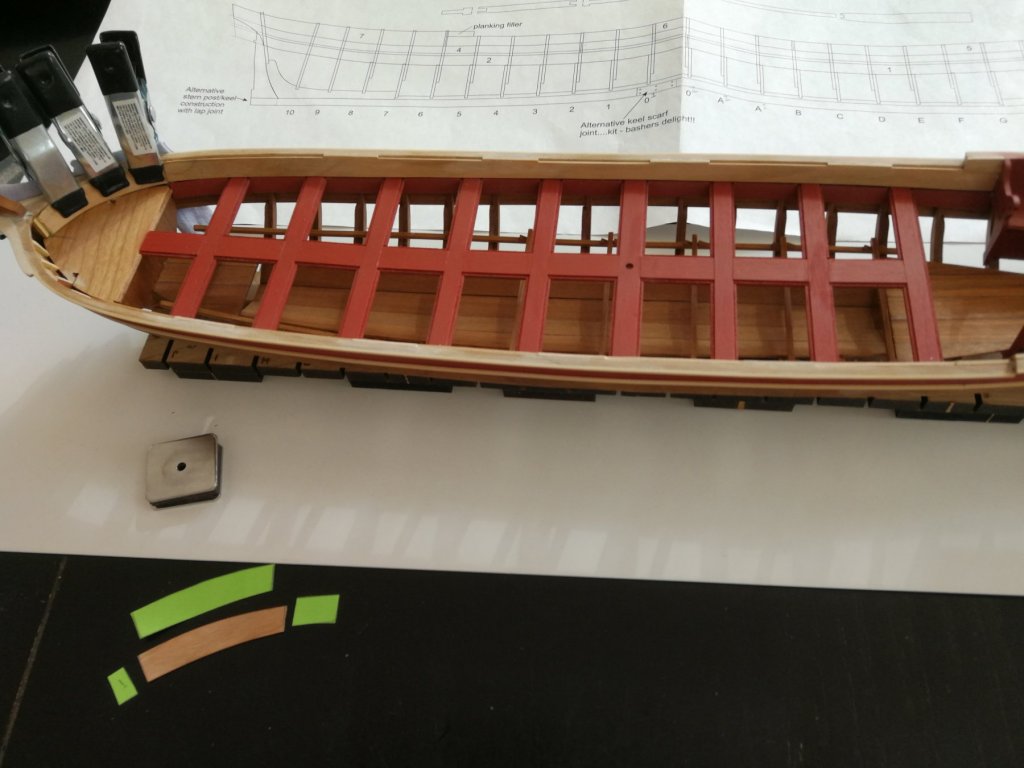
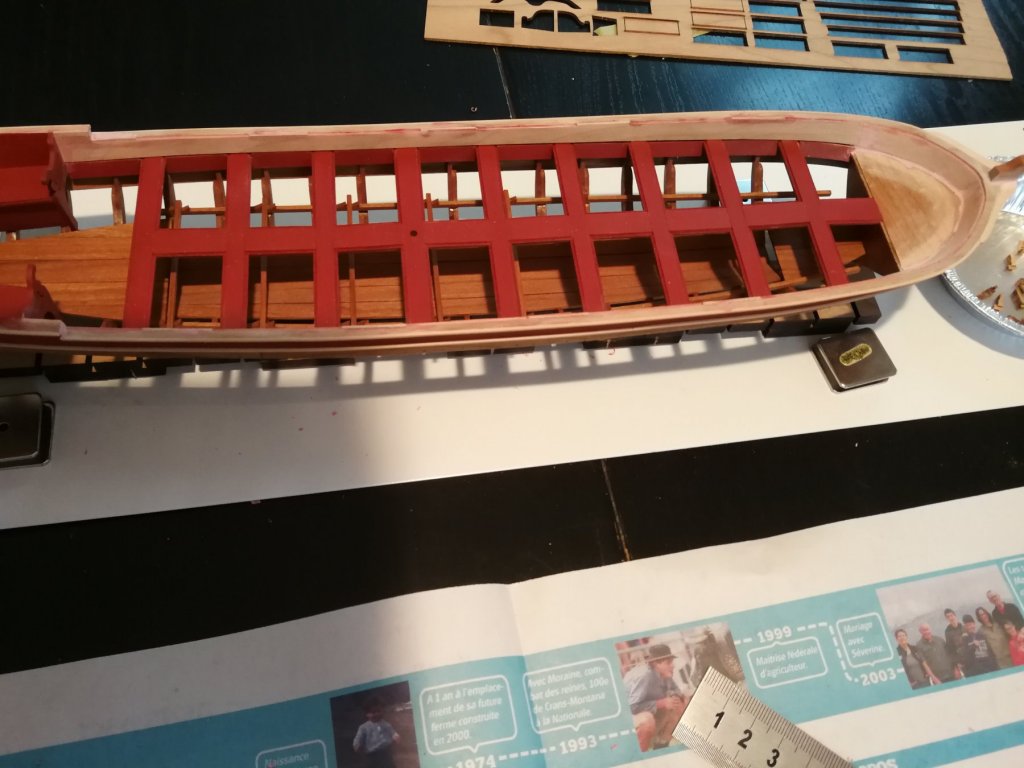
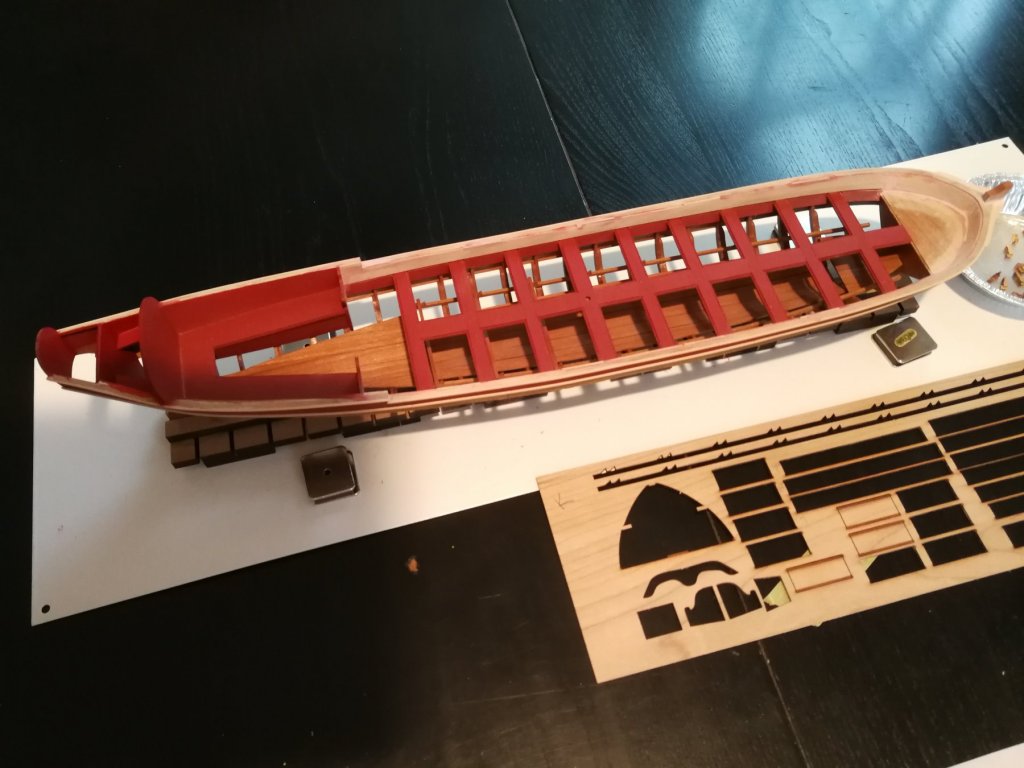
Three months already... As I'm rather focused on my Armed Virginia Sloop, progress on the Queen barge is rather slow 😉 But I continue to advance when I get tired from the A.V.S build. So I worked on the thwarts. I first prepared all the pieces and made a test fit. Each piece was then numbered when I disassembled them for painting. I pasted them on a double sided tape so I can paint all the thwarts together. I then glued the pieces one after the other. I will now finish the inside planking. Always so much pleasure with this build. Just that the advancement is not as fast as I would like...


- 103 replies
-
- 7
-
-
- queen anne barge
- Syren Ship Model Company
- (and 1 more)