HOLIDAY DONATION DRIVE - SUPPORT MSW - DO YOUR PART TO KEEP THIS GREAT FORUM GOING!
×


JpR62
-
Posts
699 -
Joined
-
Last visited
Content Type
Profiles
Forums
Gallery
Events
Everything posted by JpR62
-
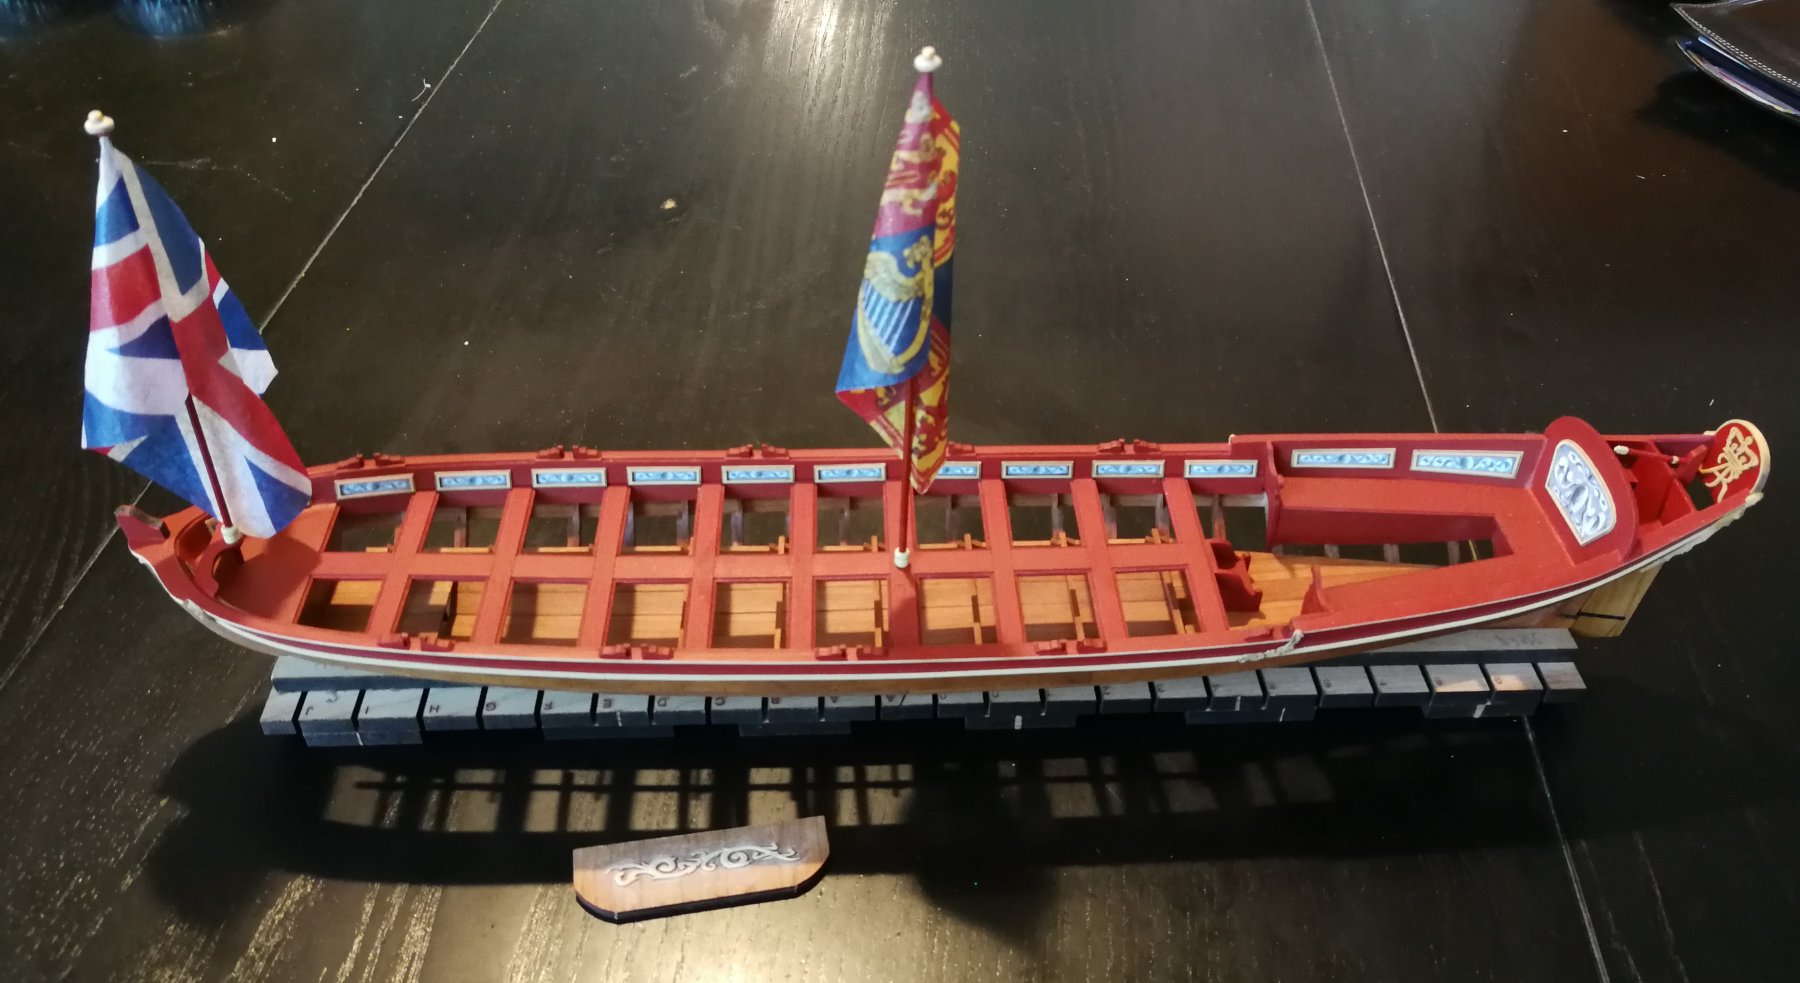
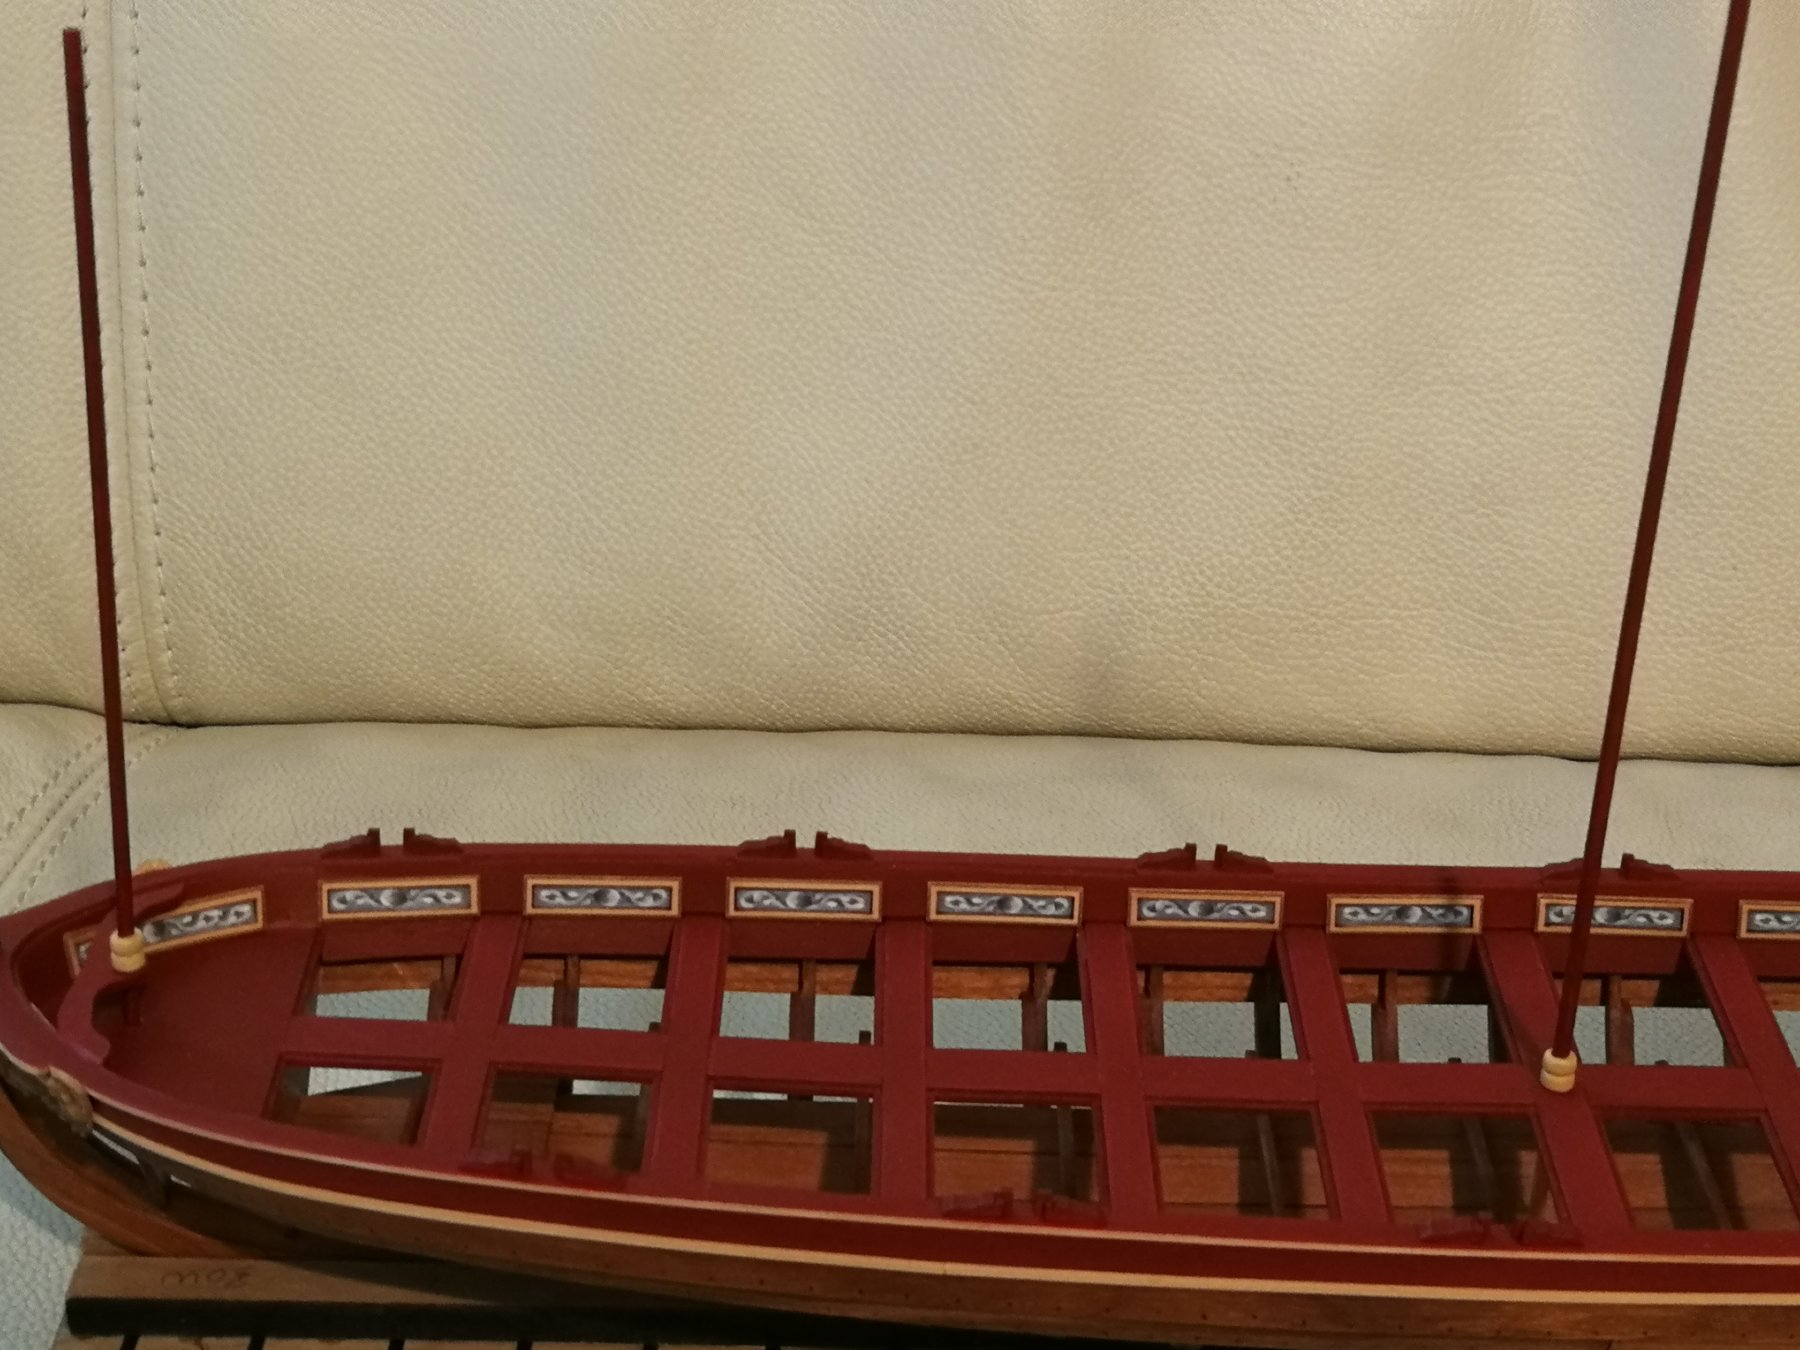
 Thanks for all people who follow this build. I just simulated the bolts using 25 lb. black monofilament and added the transom. As always with Syren Ship, just follow the instructions and all fits perfectly.

-
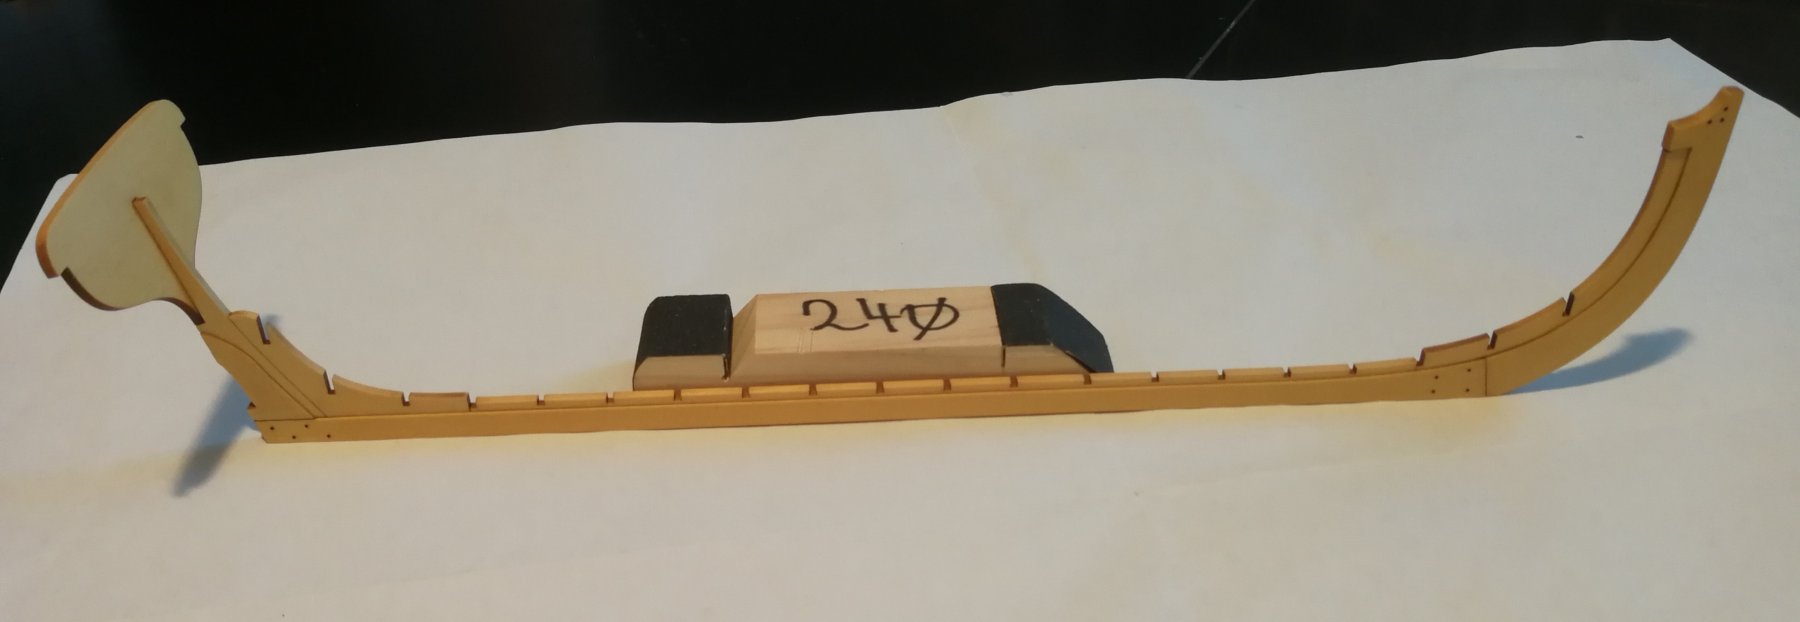
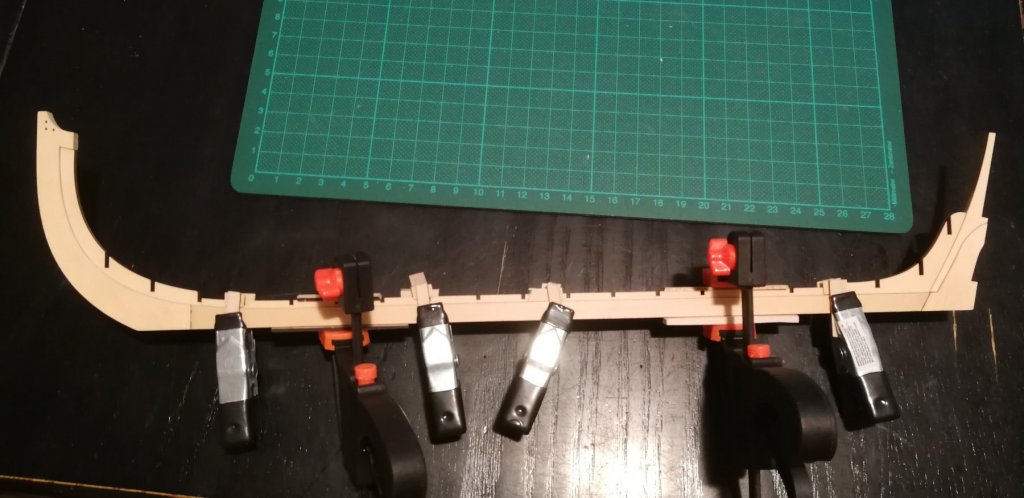
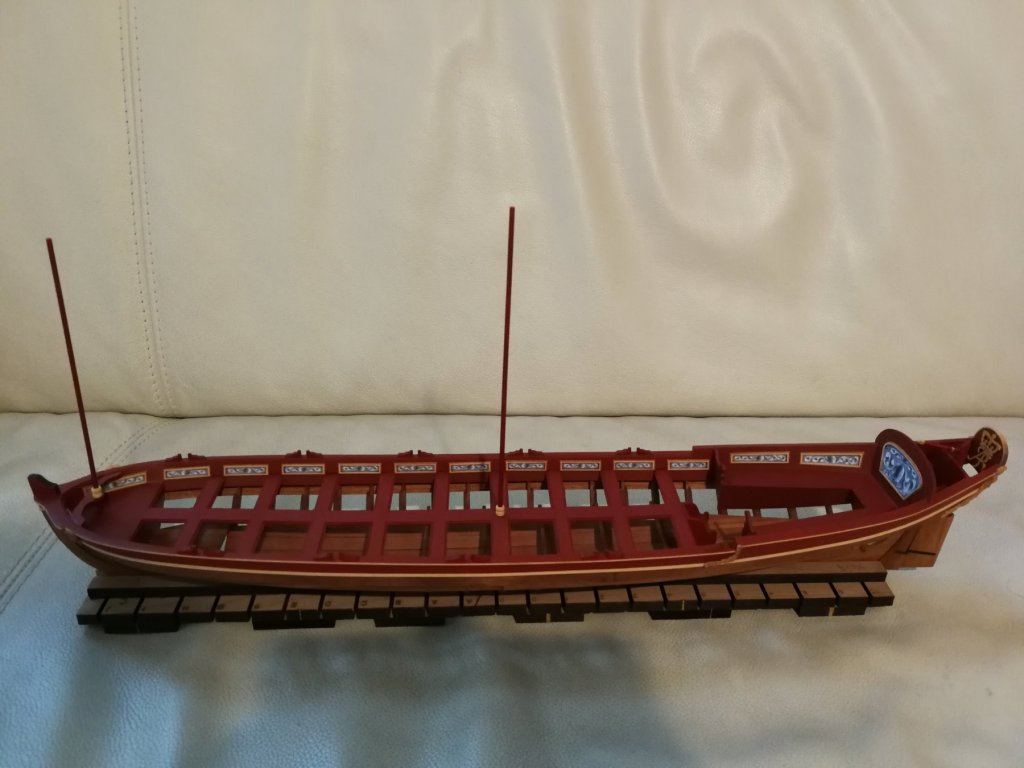
As I finish the Queen Anne Barge, it's time to begin to build the Medway longboat. It is again a real pleasure to work on a kit of this quality 😀


-
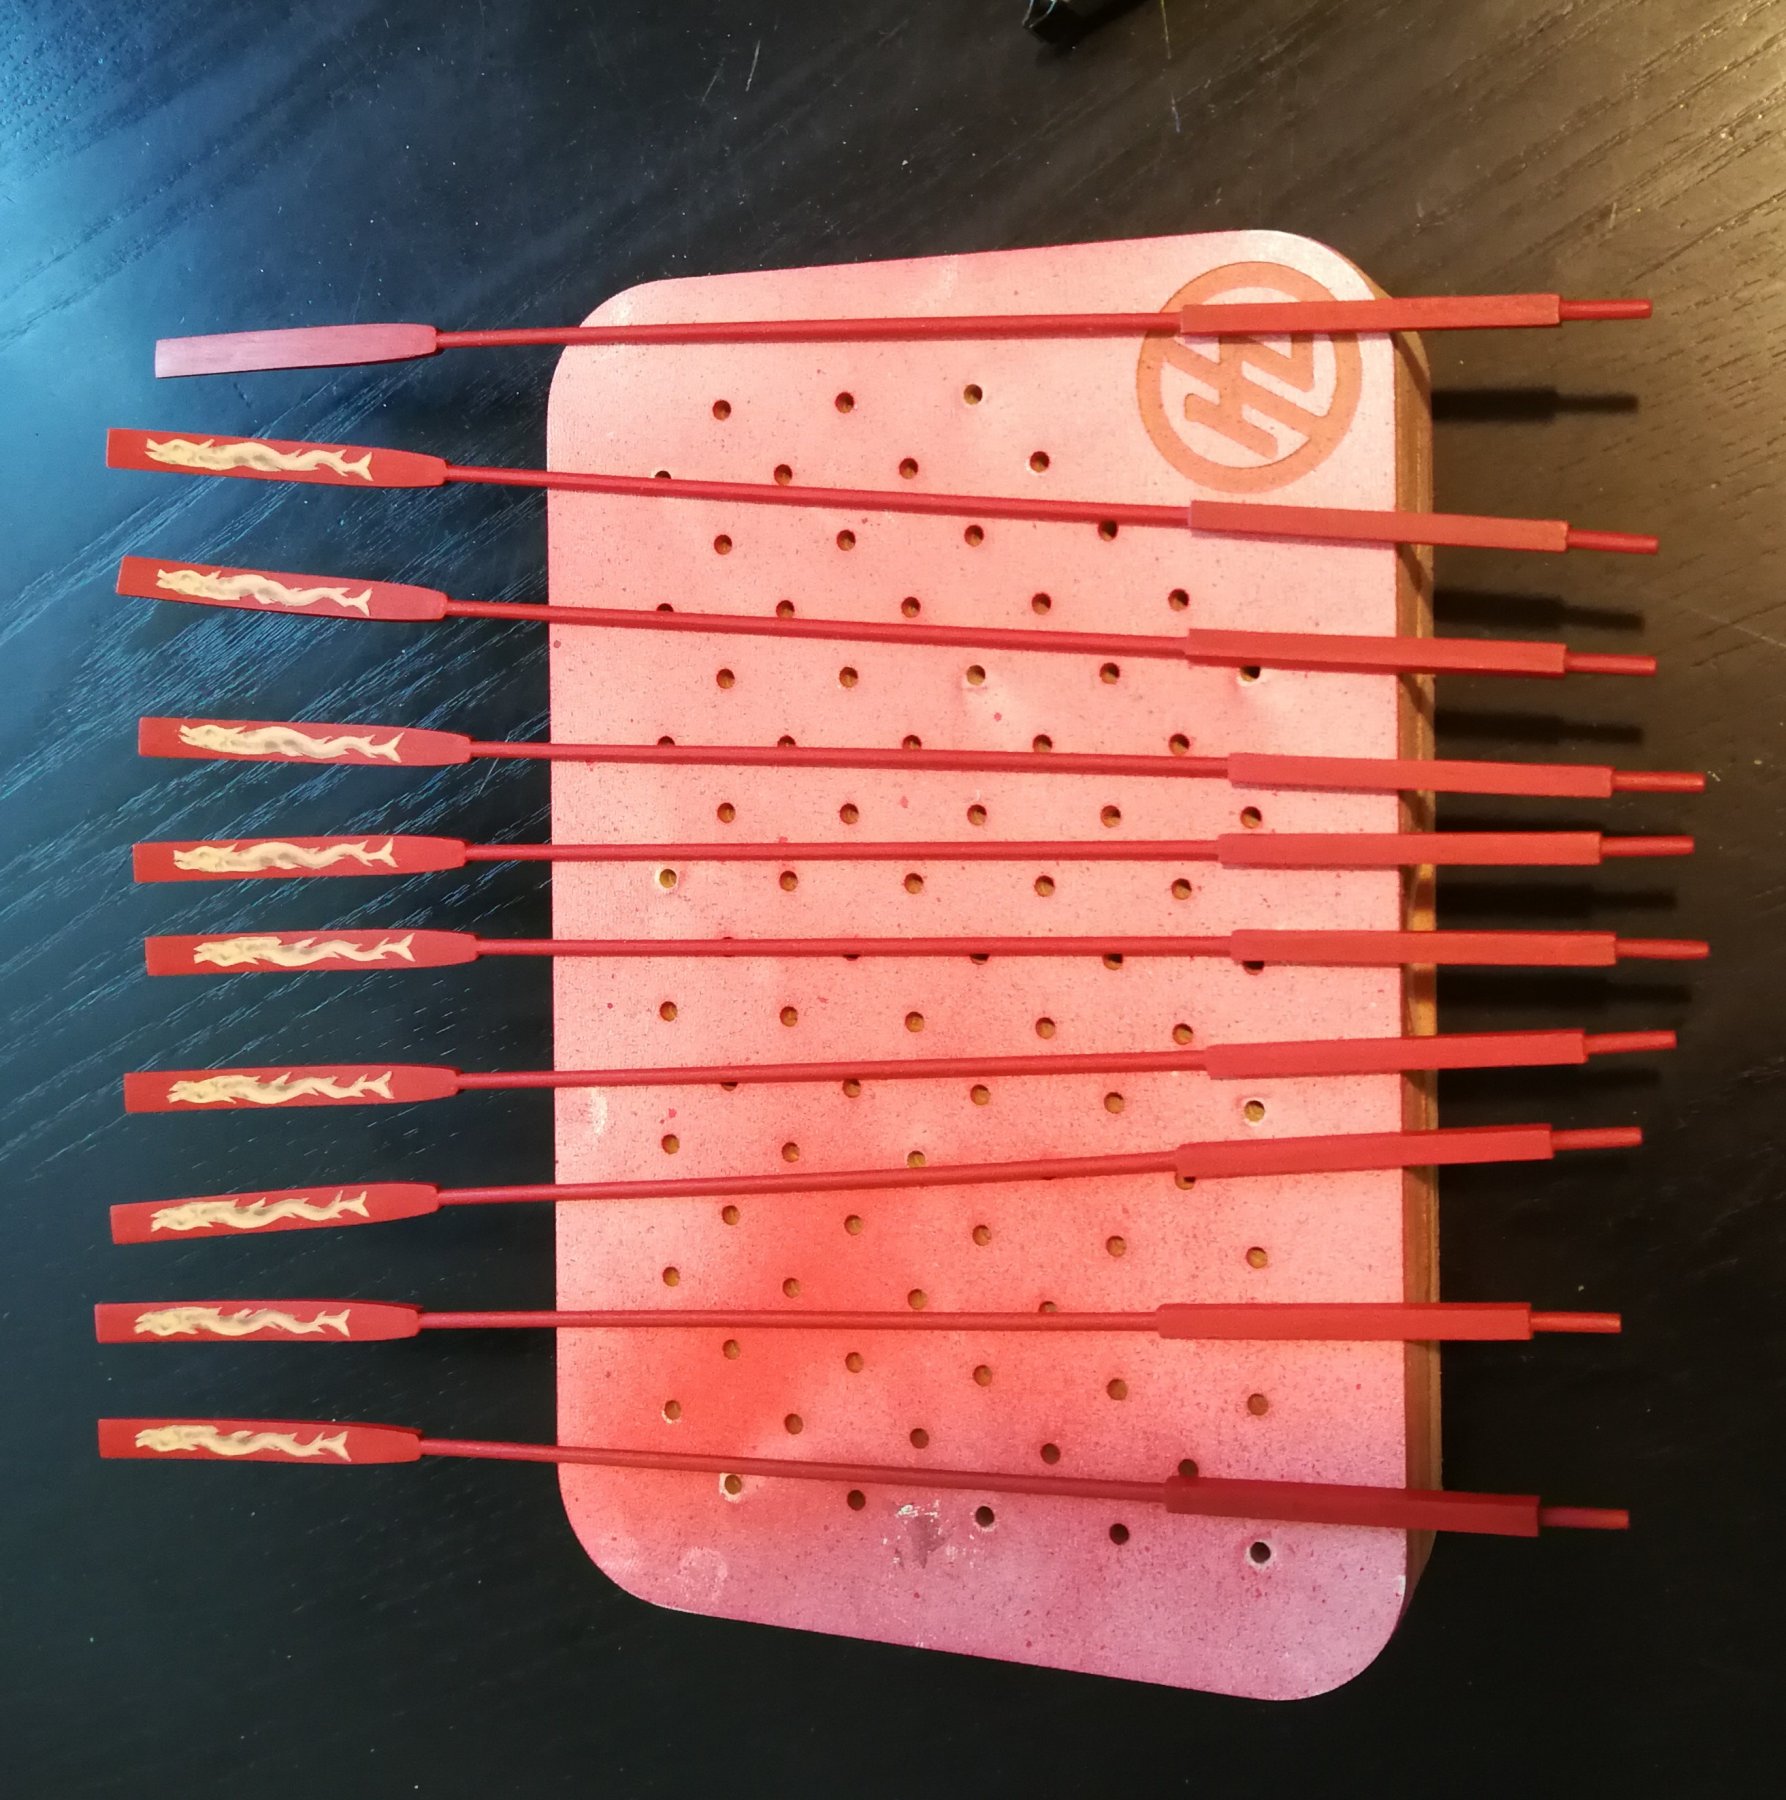
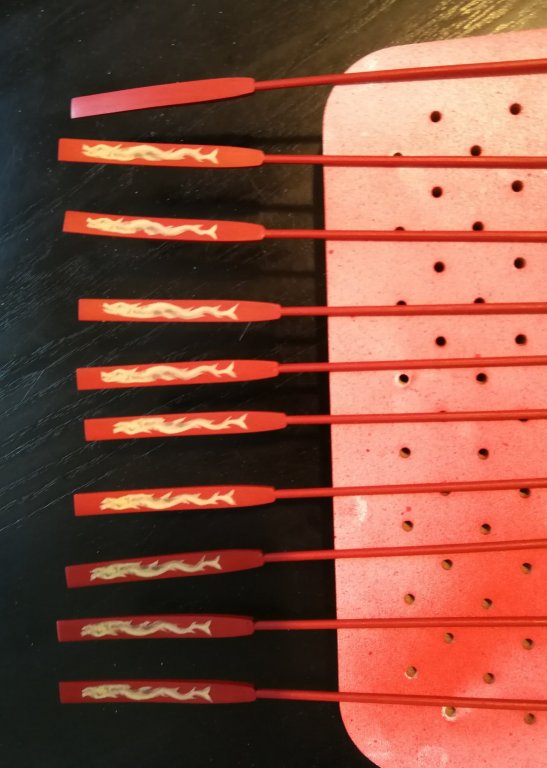
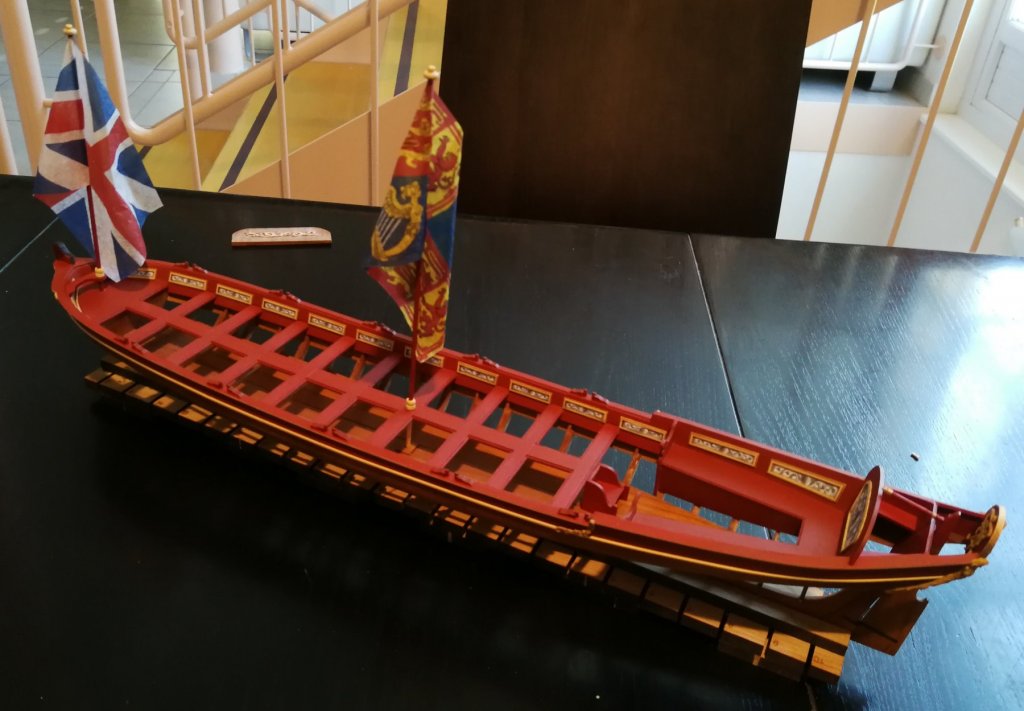
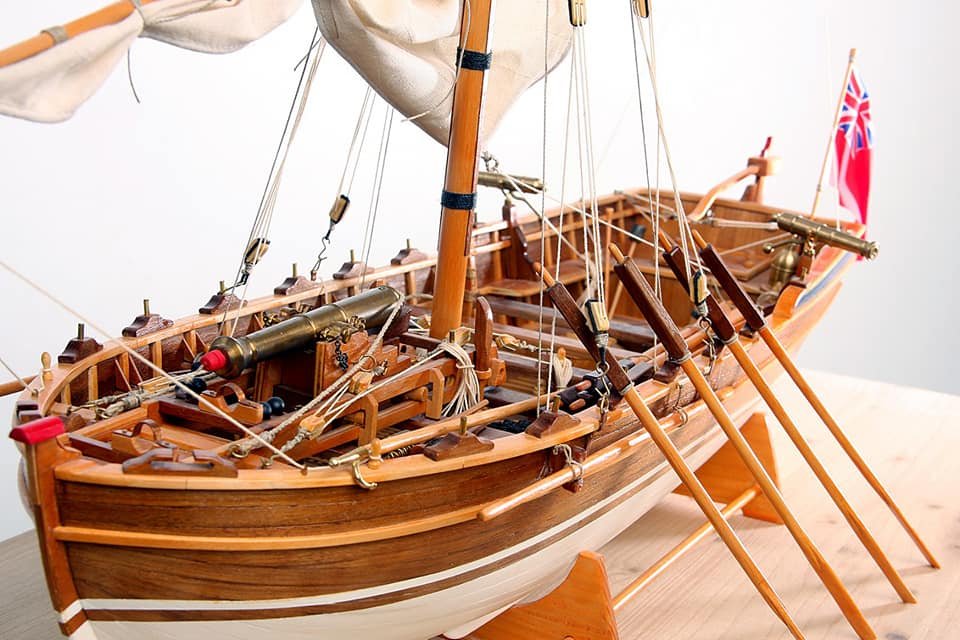
The oars are almost complete I just need to add the thin tape around the tip of the blade. The Flags have also been added. I think the flag at the bow need more folds... I just have to finish the carvings...


- 103 replies
-
- 17
-

-
- queen anne barge
- Syren Ship Model Company
- (and 1 more)
-
HMS Winchelsea (1764) 32 gun frigate GROUP PROJECT INFO
JpR62 replied to Chuck's topic in Group Projects on Model Ship World
Building the Winchelsea is in my projects but not right now. I'm currently finishing the Queen Anne Barge and have the Medway longboat in the starting blocks 😊 I do not have the necessary tools (no scroll saw, table saw or mill) for the moment. I will probably wait on the plywood bulkhead set as the purchase of a scroll saw is currently not planned. I would also use the laser cut parts. -
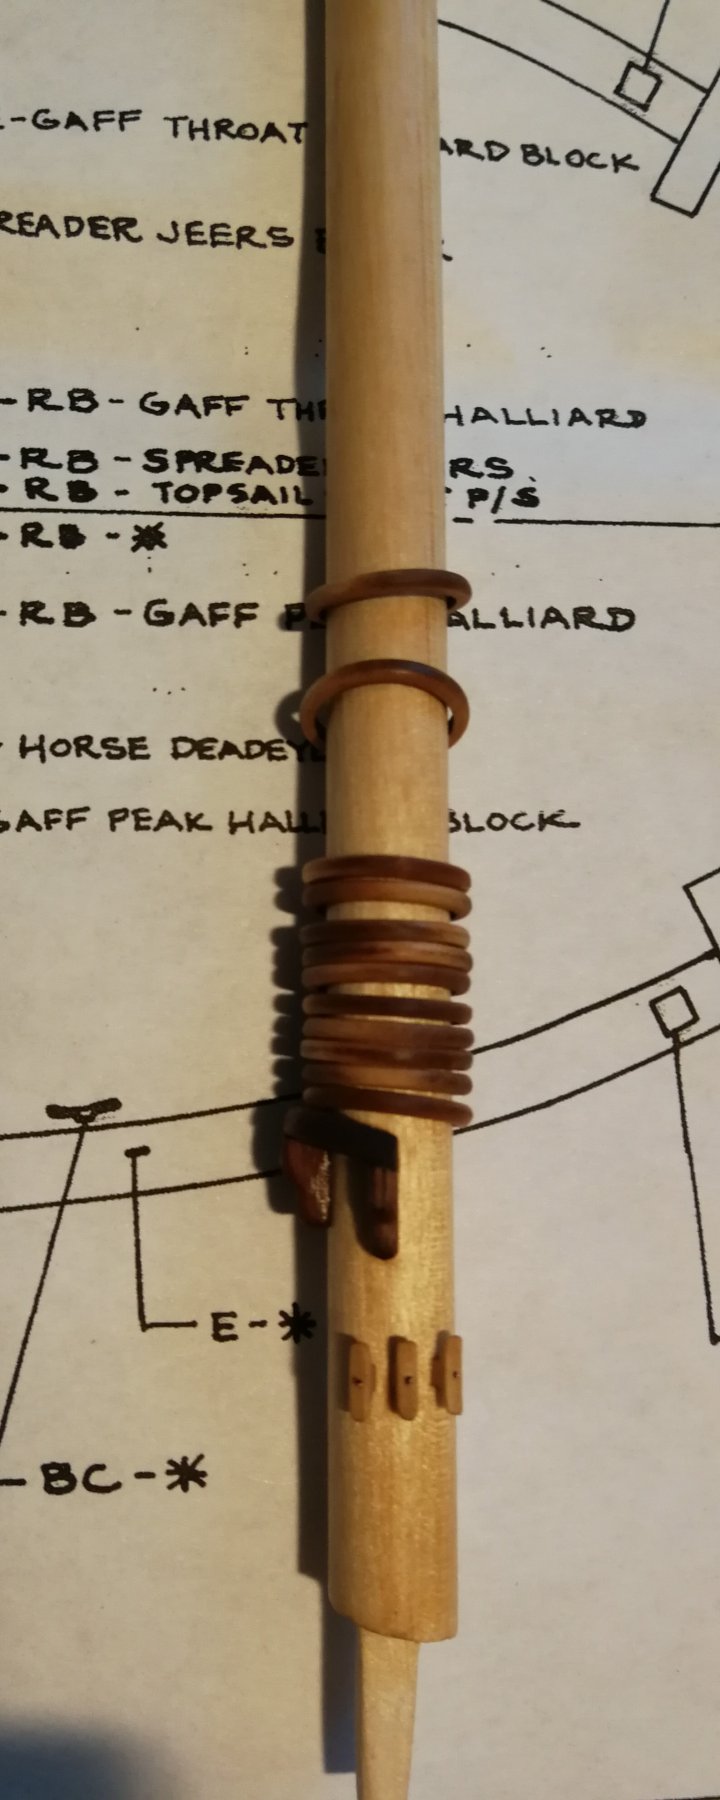
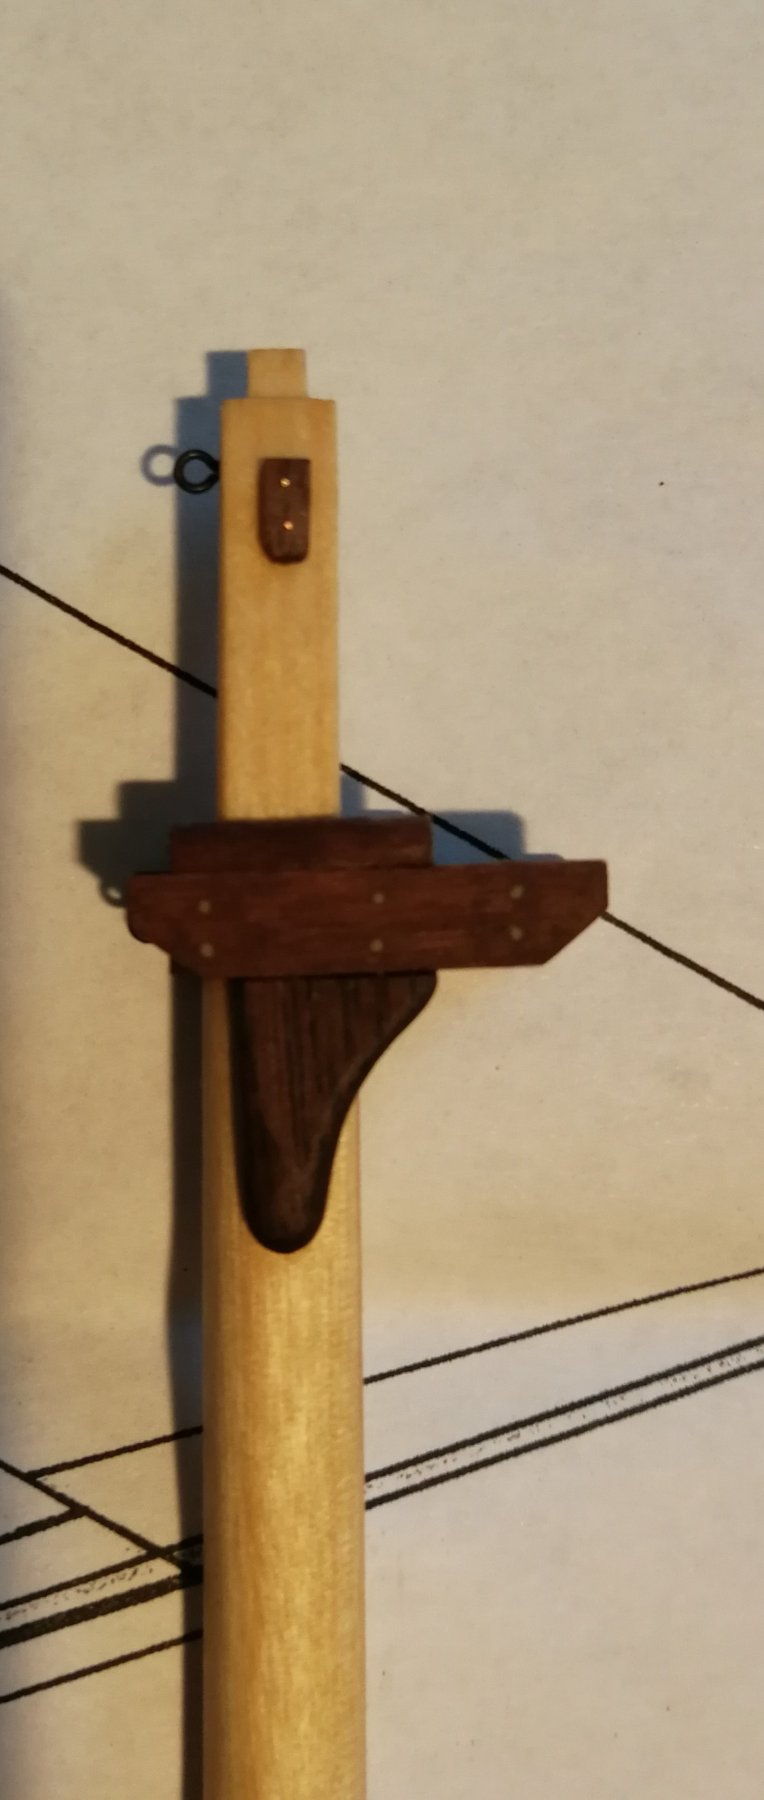
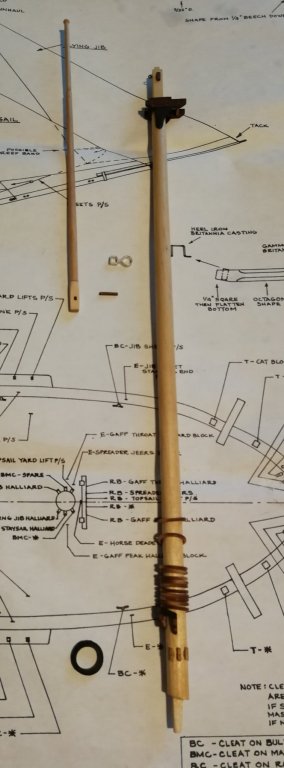
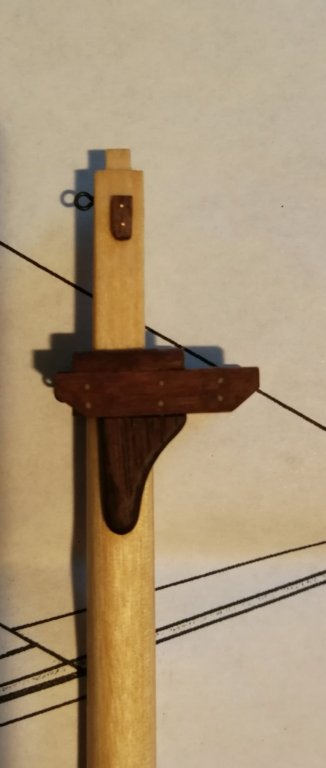
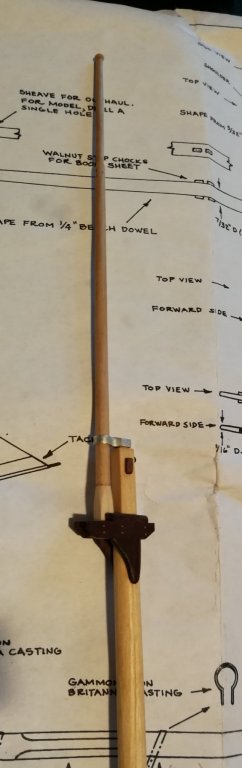
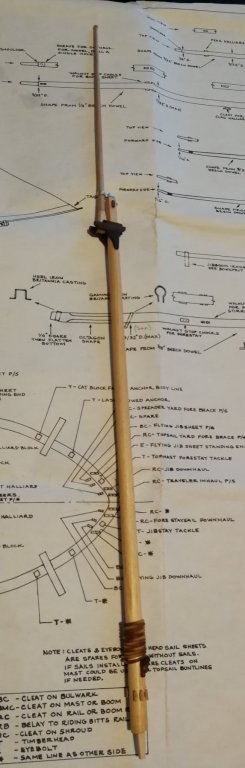
Thank you to all the 'Likes'. I finish to built the lower mast and top mast. I replace the metal cast hoops from the kit by the mini-kit from Syren Ship. The 5 mm cleats also come from Syren. I just simulate the nails with some black colored wire (0.32 mm) Mast mounting test. The mast cap casting must be burnished. The fid passed through the rectangular slot prevents the topmast slipping through the top. I will now work on the bowsprit and jibboom.


- 164 replies
-
- 5
-
-
- first build
- model shipways
- (and 2 more)
-
US Brig Syren by Gahm - Model Shipways
JpR62 replied to Gahm's topic in - Kit build logs for subjects built from 1801 - 1850
Wonderful job. This jolly boat is a beauty ! -
Thank you for the answer 😀. So I will secure the oars in their thole pins with glue and a help of a little pin made with thin wire.
-
As for my Queen Anne Barge I think to put the oars in position of use, I would like to know if I must tie the oars to the oar locks. I found a wonderful example on this site that shows that the oars are attached to the thole pins (on a armed longboat). Is it the same for a ceremonial barge like the Queen Anne Barge ? If yes, how to attach the oars to the thole pins (type of knots) ? Thanks in advance for your help.
-
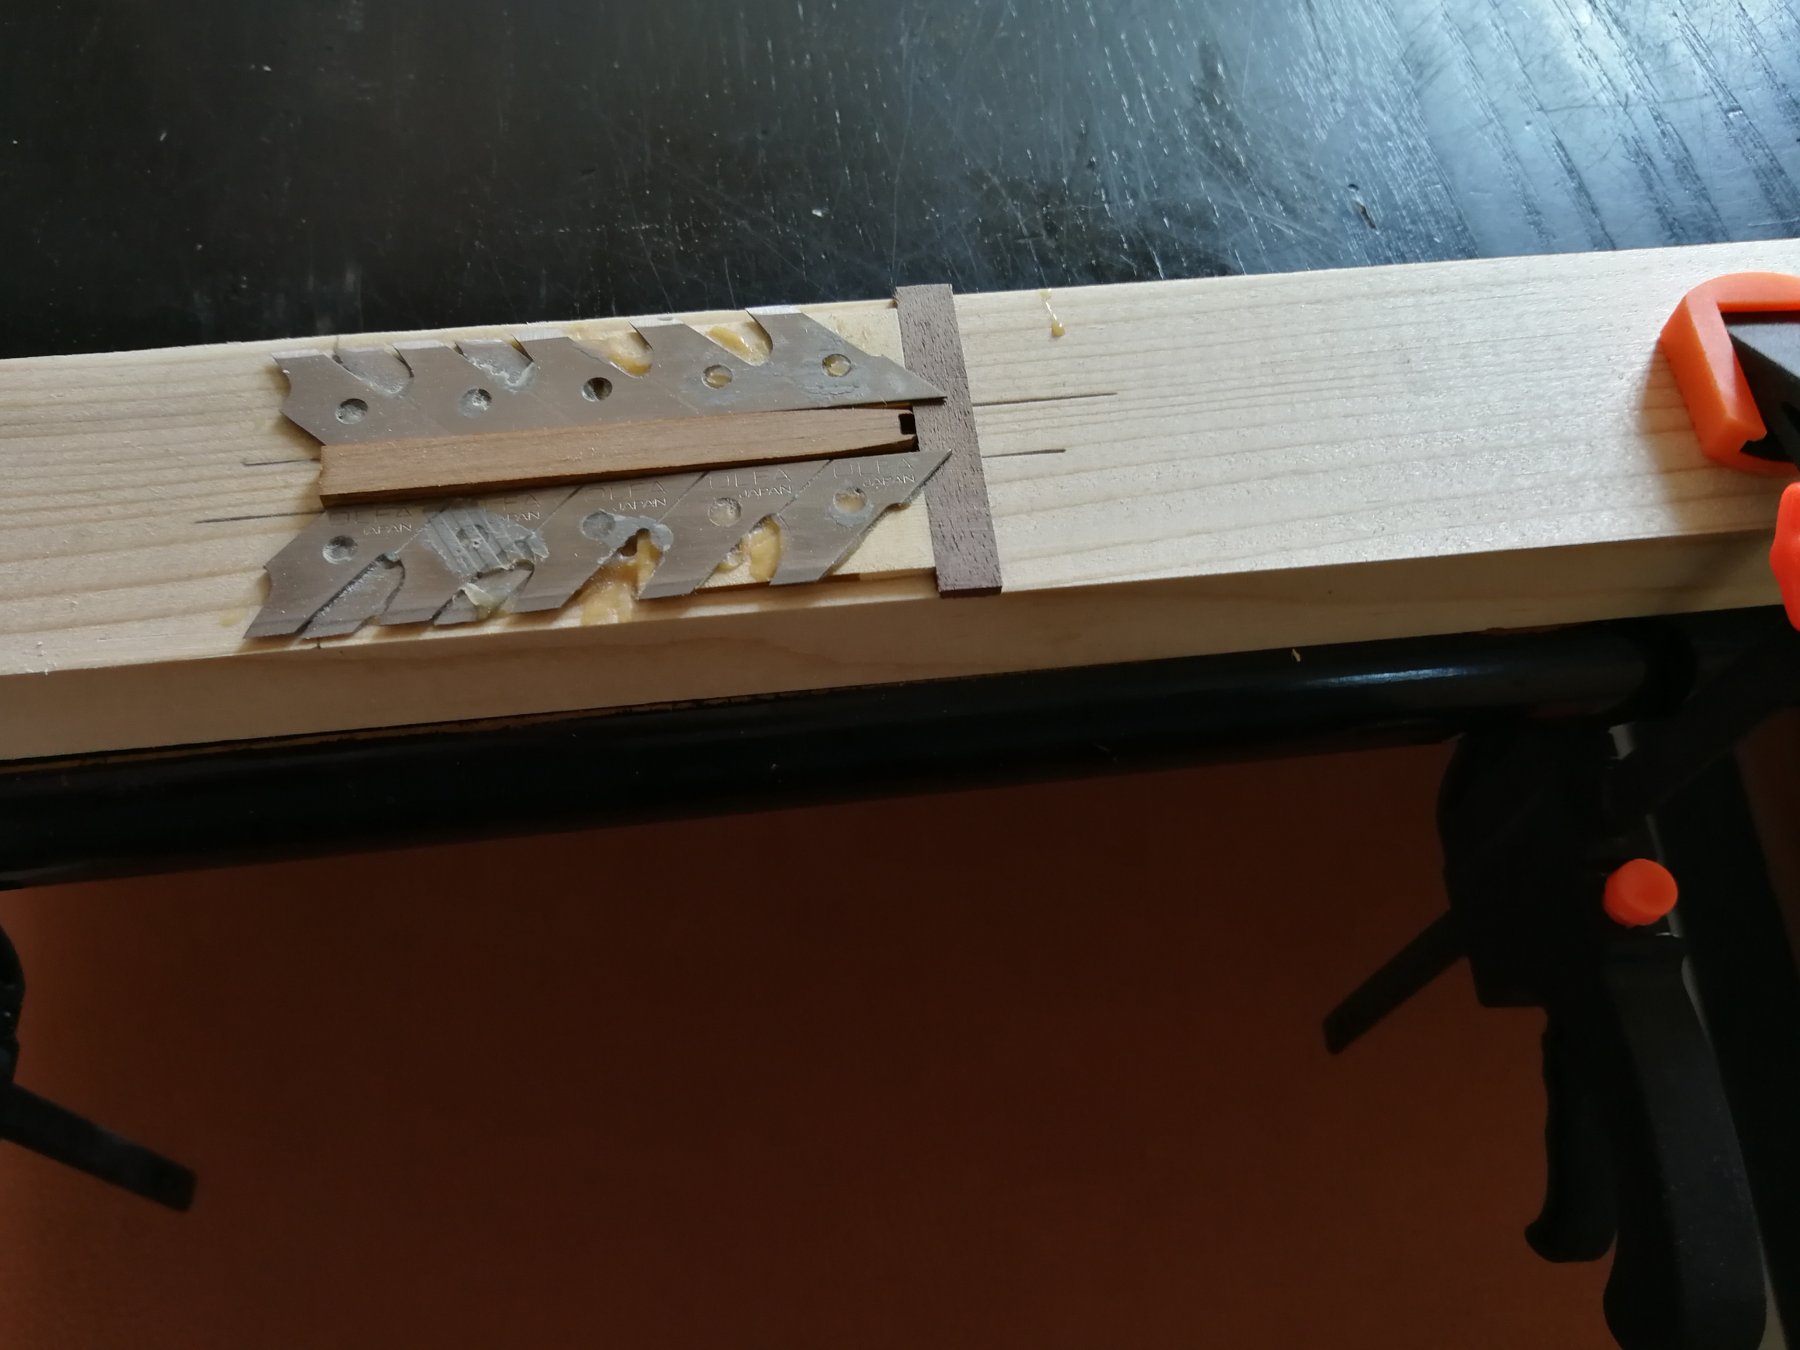
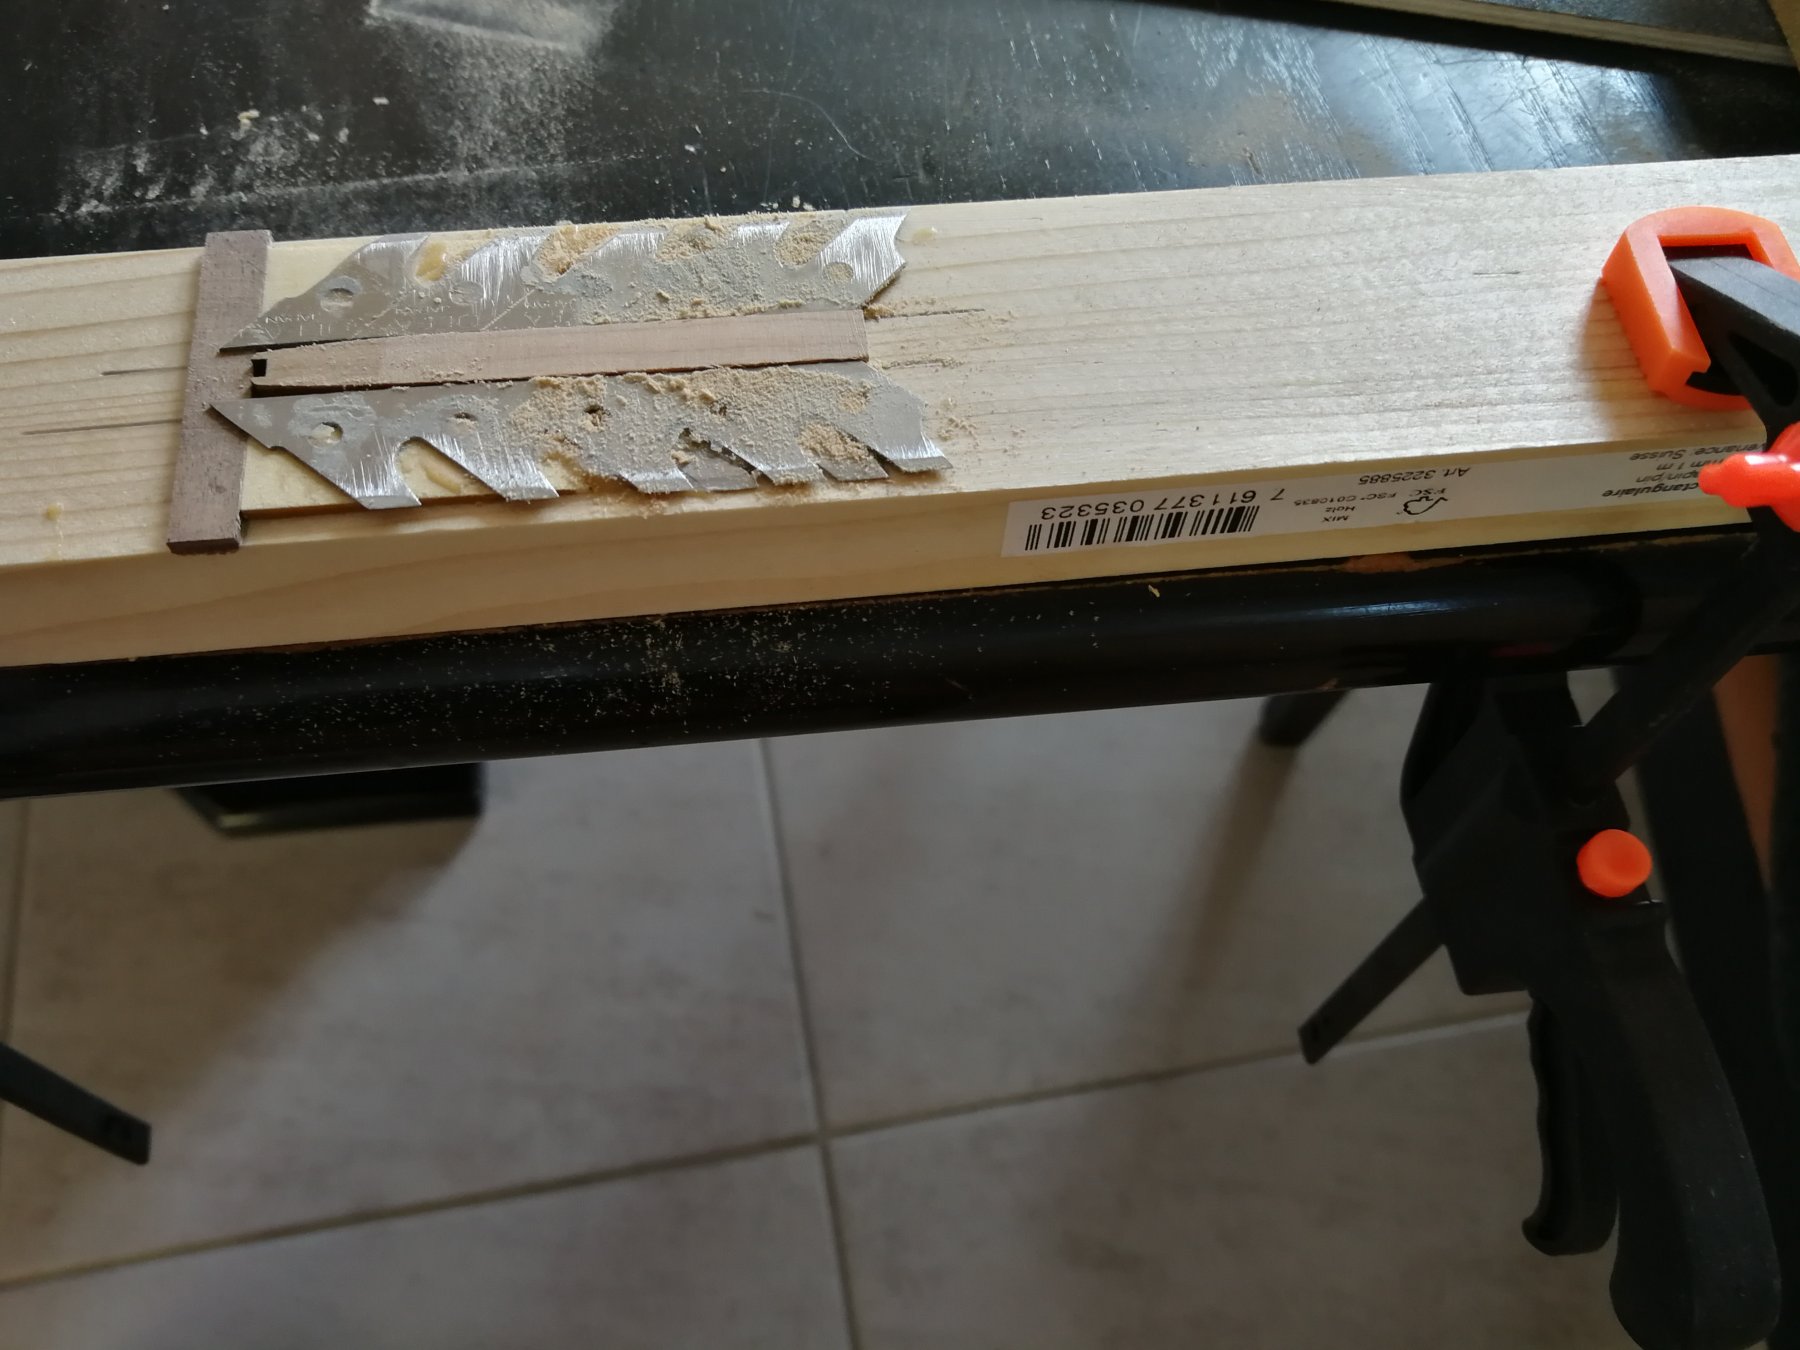
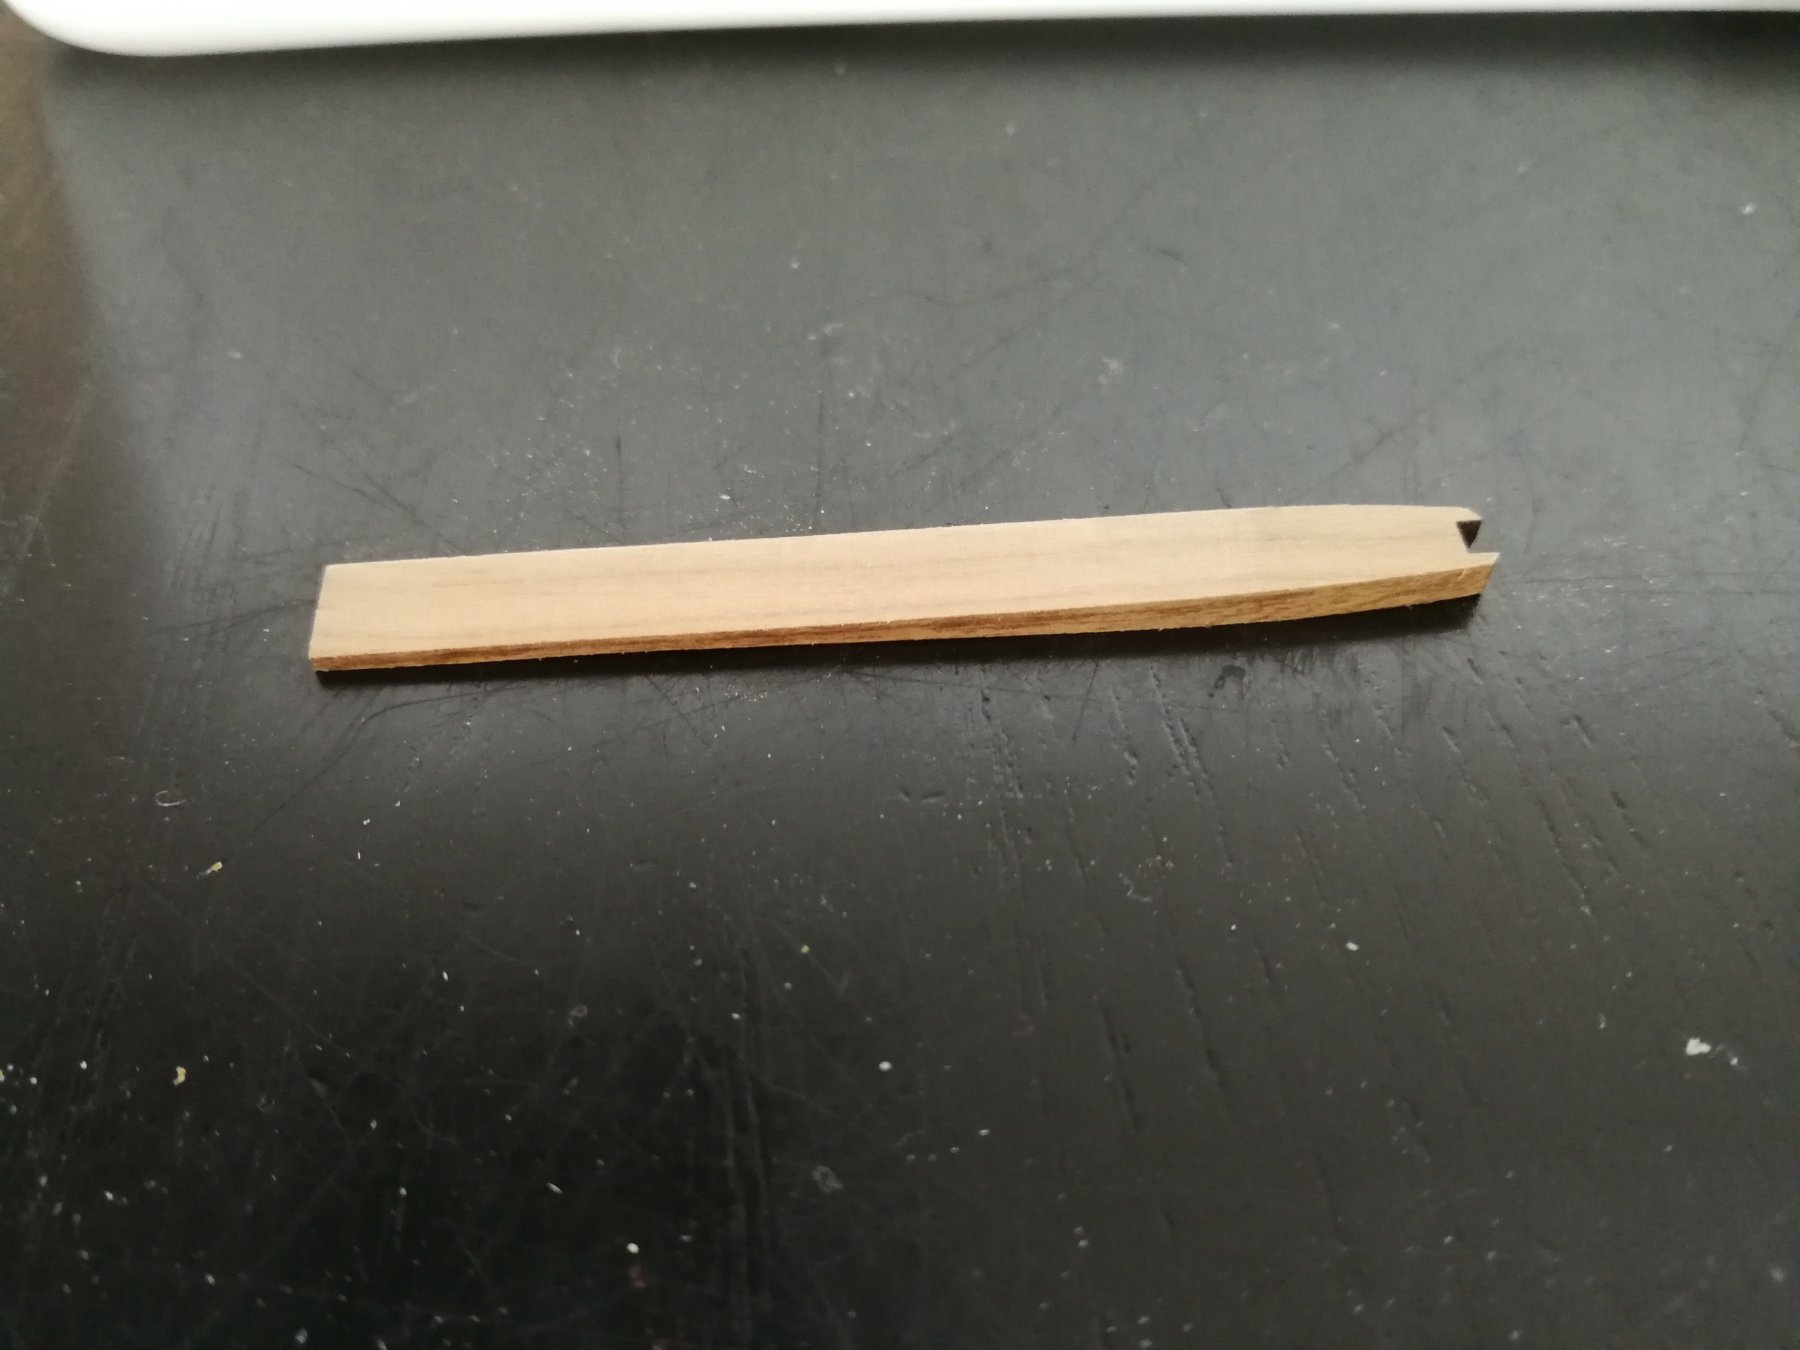
In parallel, I worked on the oars. The problem was to find a solution to repeat the regular shaping of the blades. I built a little jig for this. Just turn the blade halfway in order to have a regular angle on both sides. Then the blades are slightly bent All the four pieces are finally glued together The ten sweeps are ready for the painting phase...


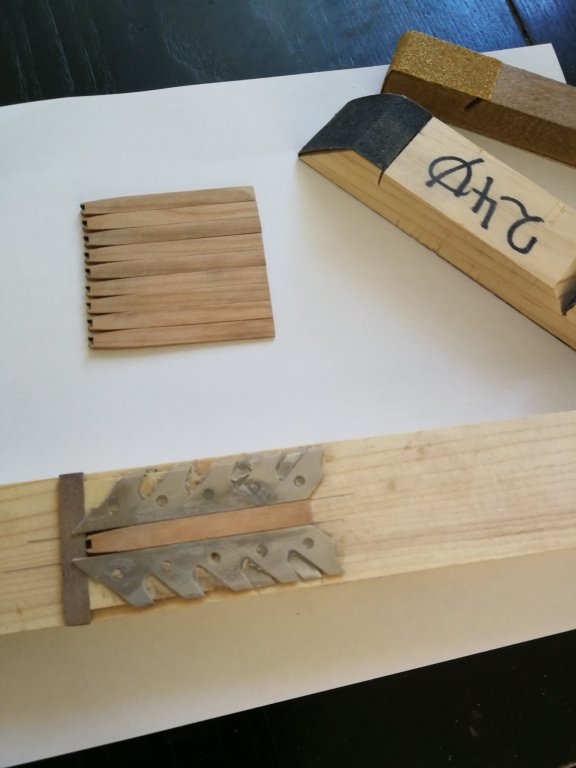

- 103 replies
-
- 16
-
-
- queen anne barge
- Syren Ship Model Company
- (and 1 more)
-
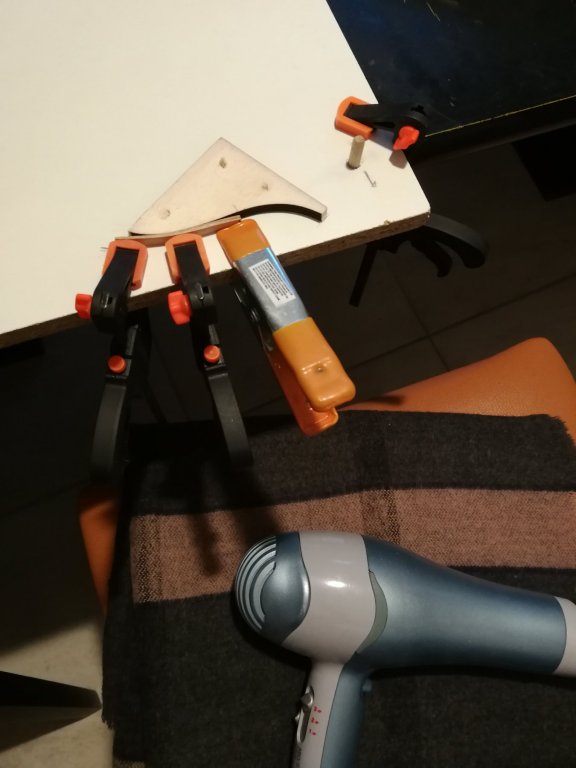
I just made a little advance on the flag staffs. They are in place waiting on the flags.

- 103 replies
-
- 5
-
-
- queen anne barge
- Syren Ship Model Company
- (and 1 more)
-
Great sense of detail ! I really like this broken window and the fact of having used real glass is an undeniable plus. Well done. Wonderful work !
-
Always so beautiful ! I like this warm color of the wood and you do a superb job !
- 190 replies
-
- 2
-
-
- ragusian
- marisstella
- (and 1 more)
-
Superb work for a beautiful kit !
-
Always a pleasure to see your work. So precise and clean. Wonderful job on the gratings.
-
Thanks for all the likes. Captain_hook, I still have a lot of work before I finish... and I work in parallel on the queen barge 😉 Not a great advance. I just come back from a week holiday in Paris. Too bad that the National Maritime Museum is closed. But I still had 2 beautiful days at the Army Museum. Beautiful collection of armor and naturally very complete display on Napoleon's time. I just put in place all the elements constituting the deck. Before starting my work on the masts, I will focus again on the queen barge. It's time to set up the oars 😉
- 164 replies
-
- 10
-
-
- first build
- model shipways
- (and 2 more)
-
Thank you ! Your videos are always instructive and educational. I always wait for them with great pleasure.
-
Good start Bob. Very happy to see and to follow this new build !
-
Wonderful work. Always a pleasure to follow the progress of the project. Inspiring and motivating ! Thank you
-
Chuck, thank you for your nice comment. As I have been working theses past weeks on my other build (rigging of the canons of the Armed Virginia) and it took a long time..., he did not have a big step forward. I just finished to add the two flag staffs... But I will start working on the oars quickly 😉
- 103 replies
-
- 2
-
-
- queen anne barge
- Syren Ship Model Company
- (and 1 more)
-
Superb ! It was worth taking the time because the result is just beautiful ! A beautiful setting for an equally beautiful ship ! Wonderful work !
- 231 replies
-
- 4
-
-
- model shipways
- armed virginia sloop
- (and 1 more)
-
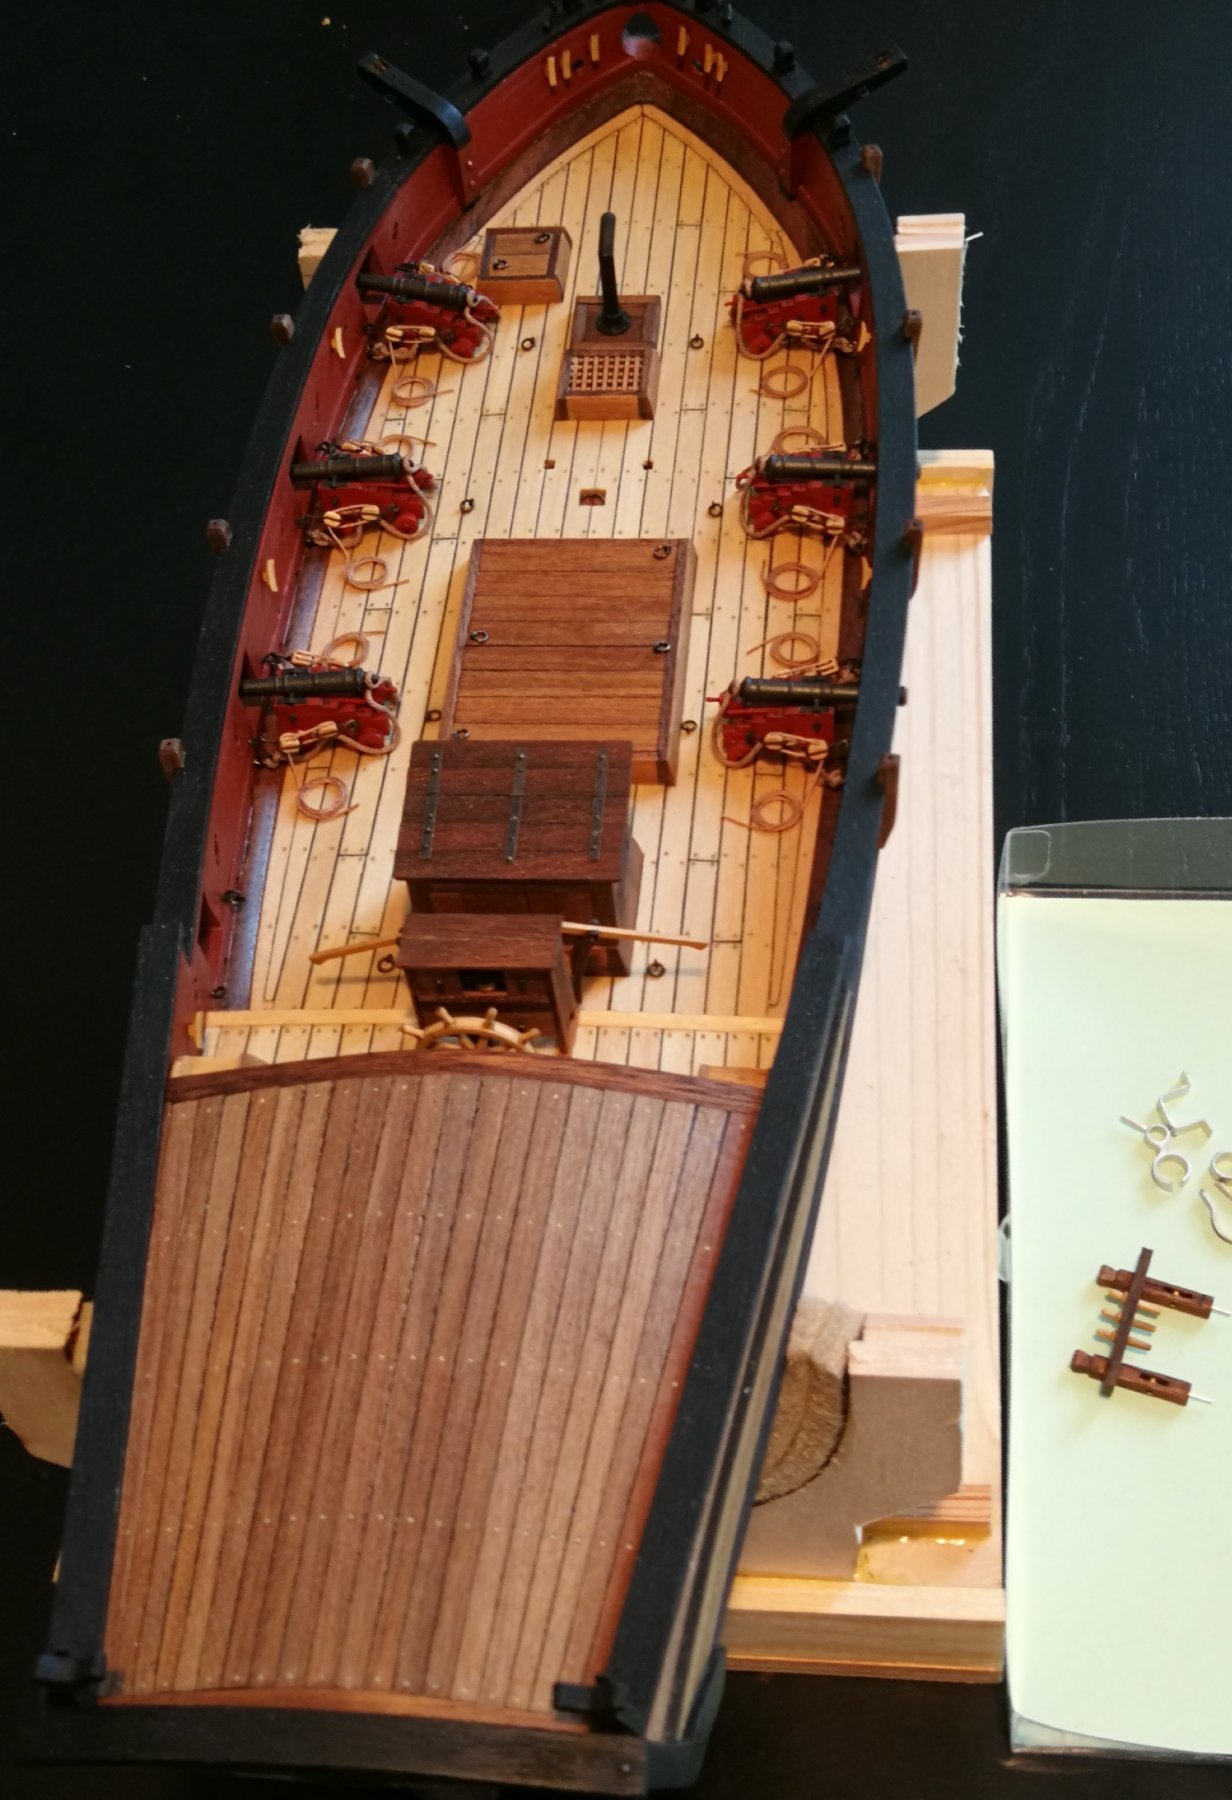
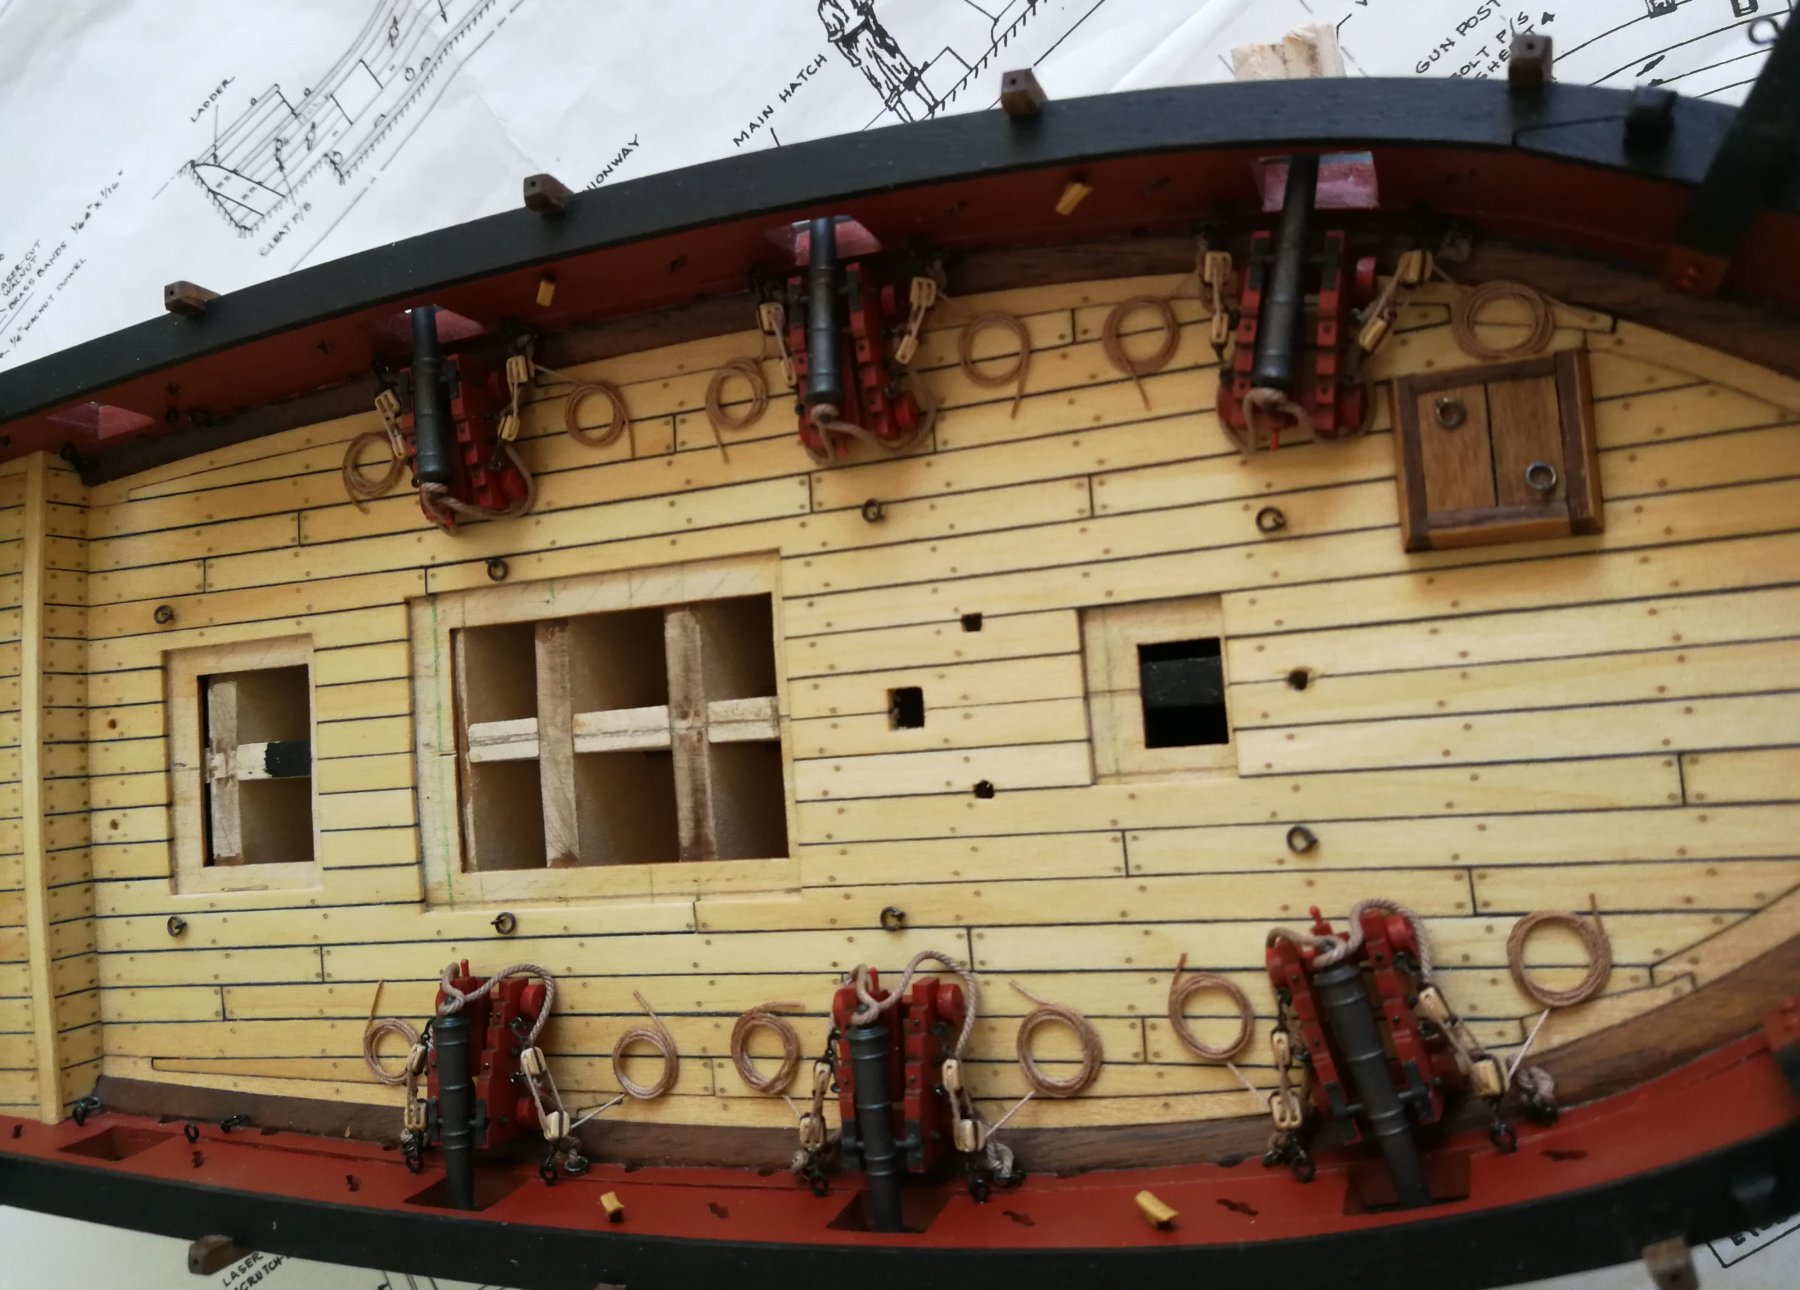
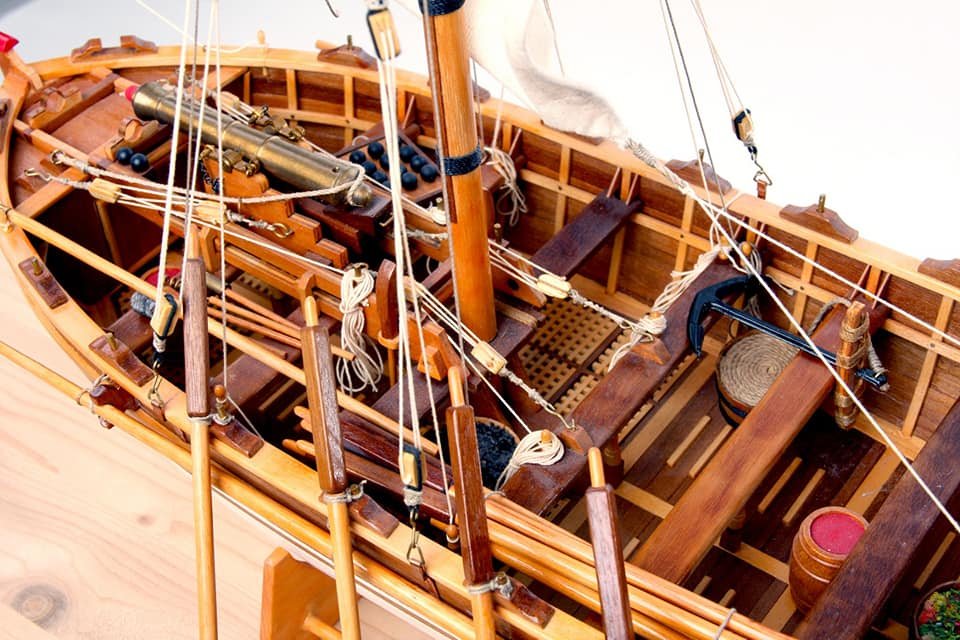
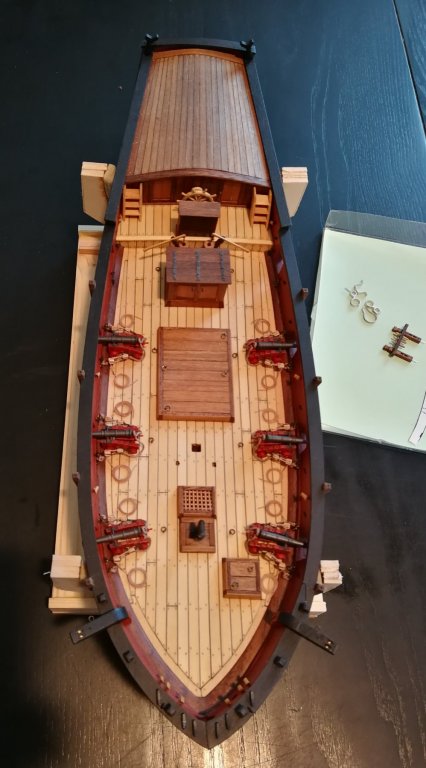
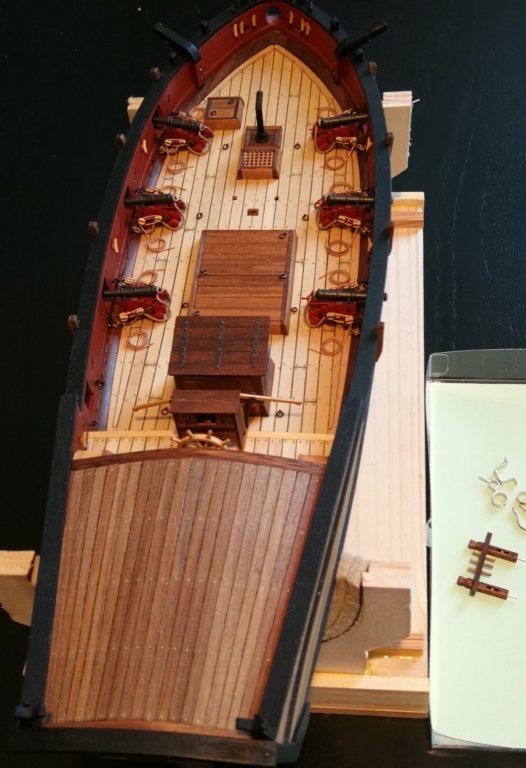
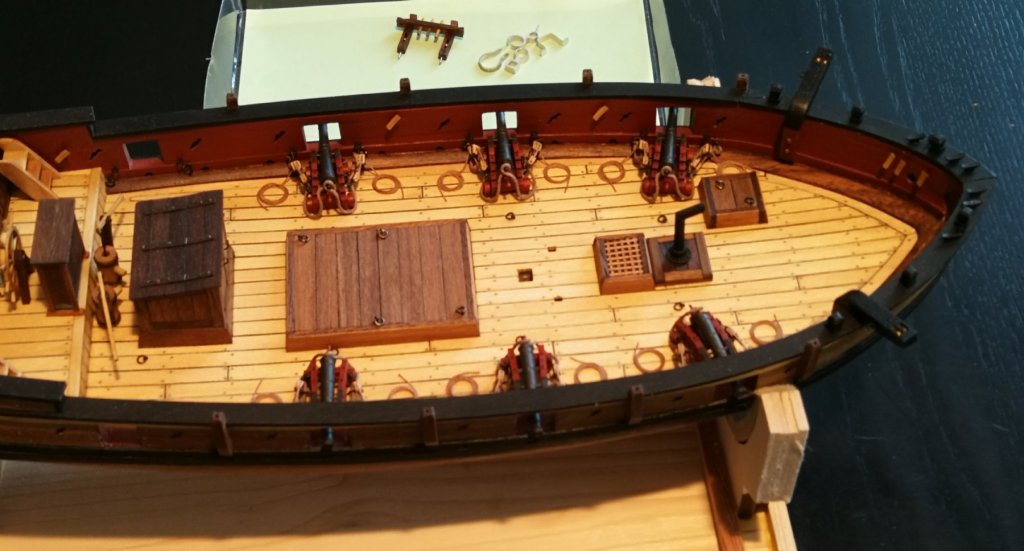
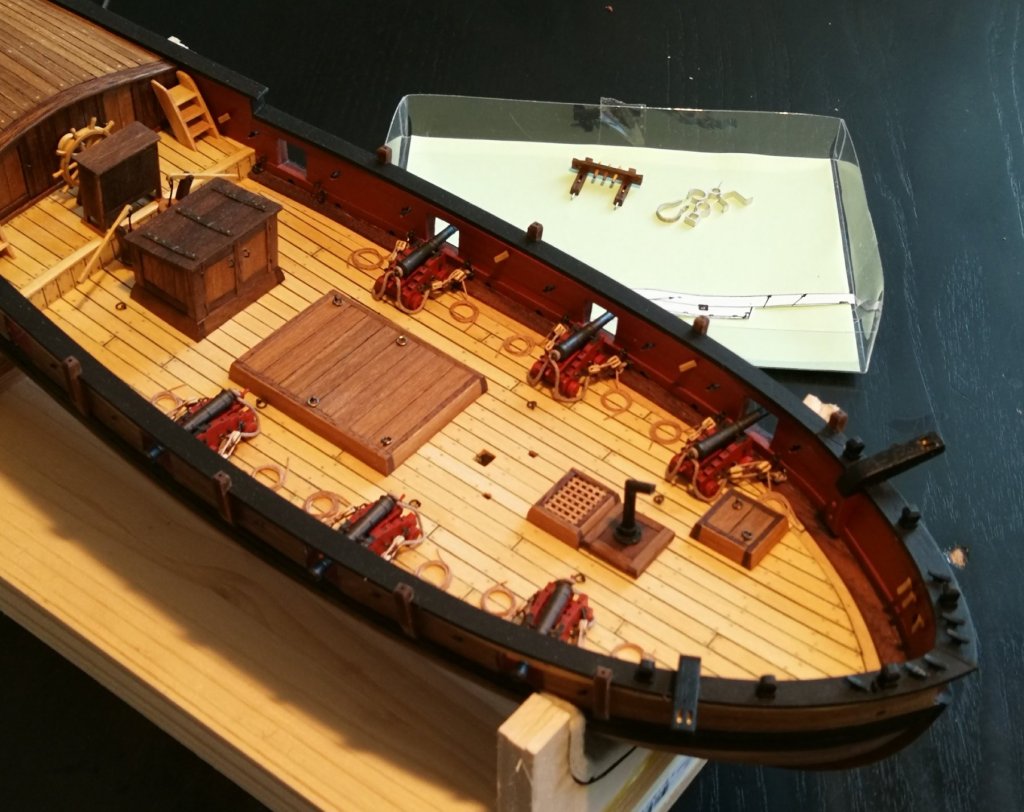
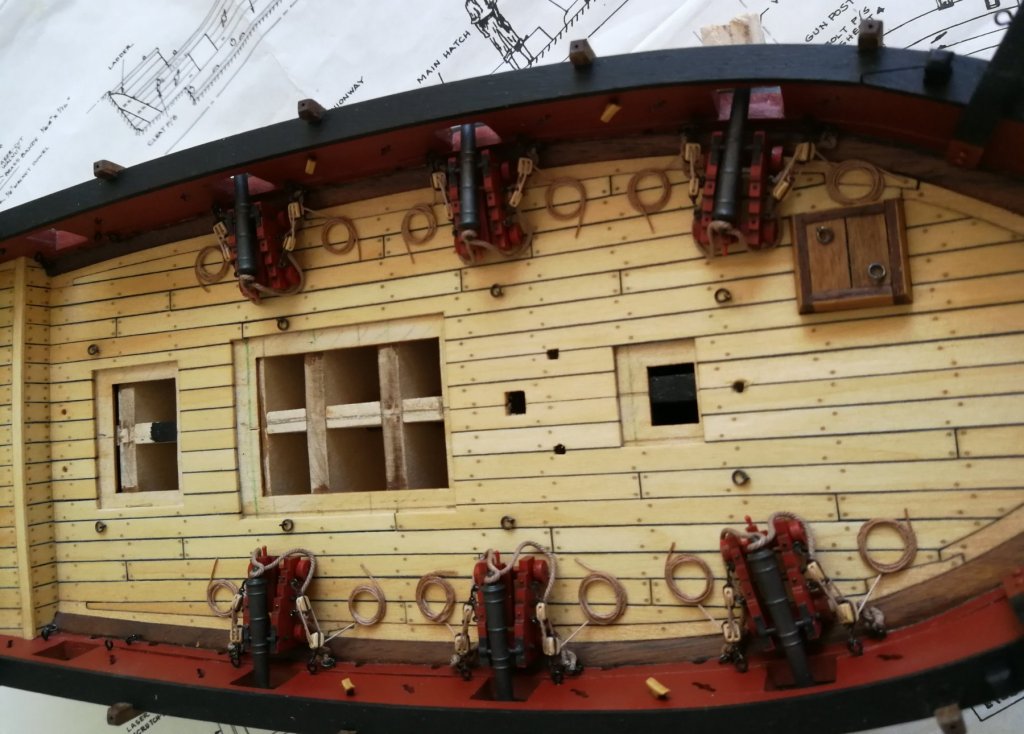
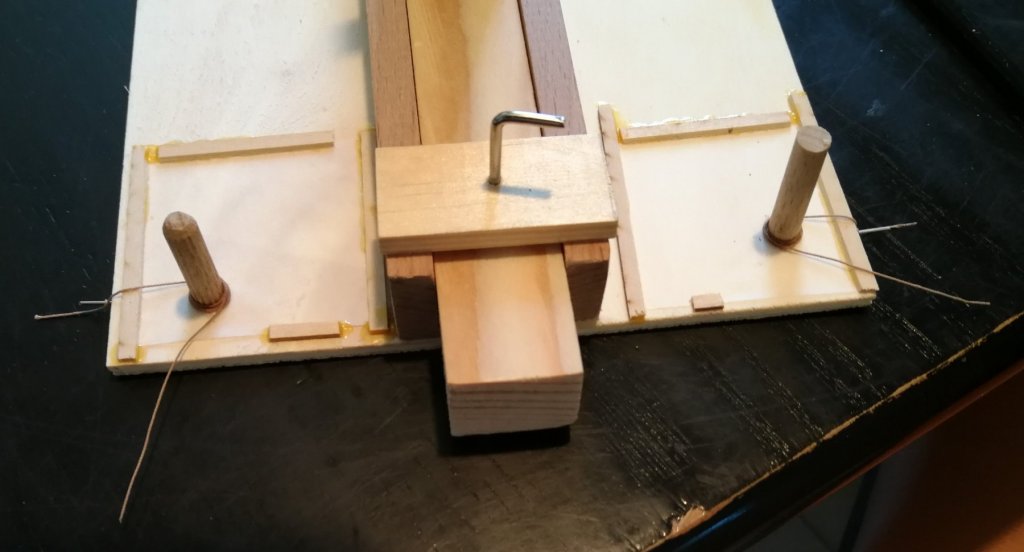
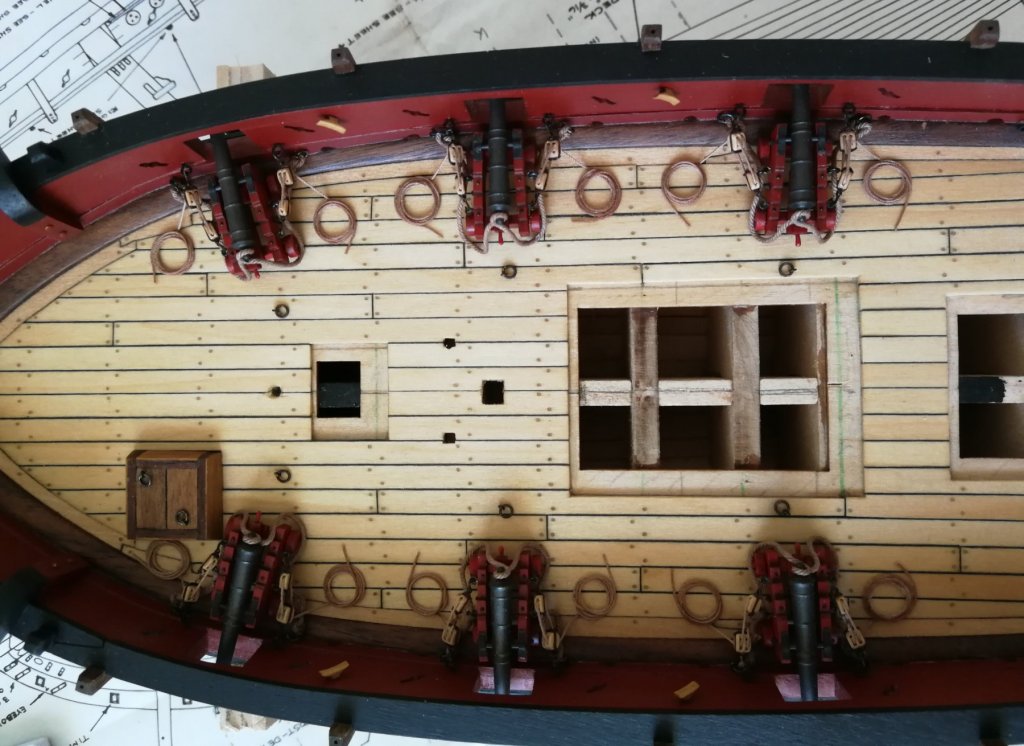
Thanks for all the 'Likes'. I finished my work on the cannons. I really enjoyed this part of my project. I first build a little jig to help me set up the blocks. I followed the advice of CaptainHook and Dave for the rope coils. After setting up the tackle rope and blocks, I cut the rope and have glued it directly onto the deck. I improved my jig by adding two stations for formatting the rope coils... When the separate rope coil is ready, I just have to transfer it from the jig to the deck. I glue the rope coils onto the tackle's end. I will now be able to set up all the others elements of the deck ☺️

- 164 replies
-
- 11
-
-
- first build
- model shipways
- (and 2 more)
-
As usual the result is superb. Great work Bob and a nice step accomplished !
- 78 replies
-
- 4
-
-
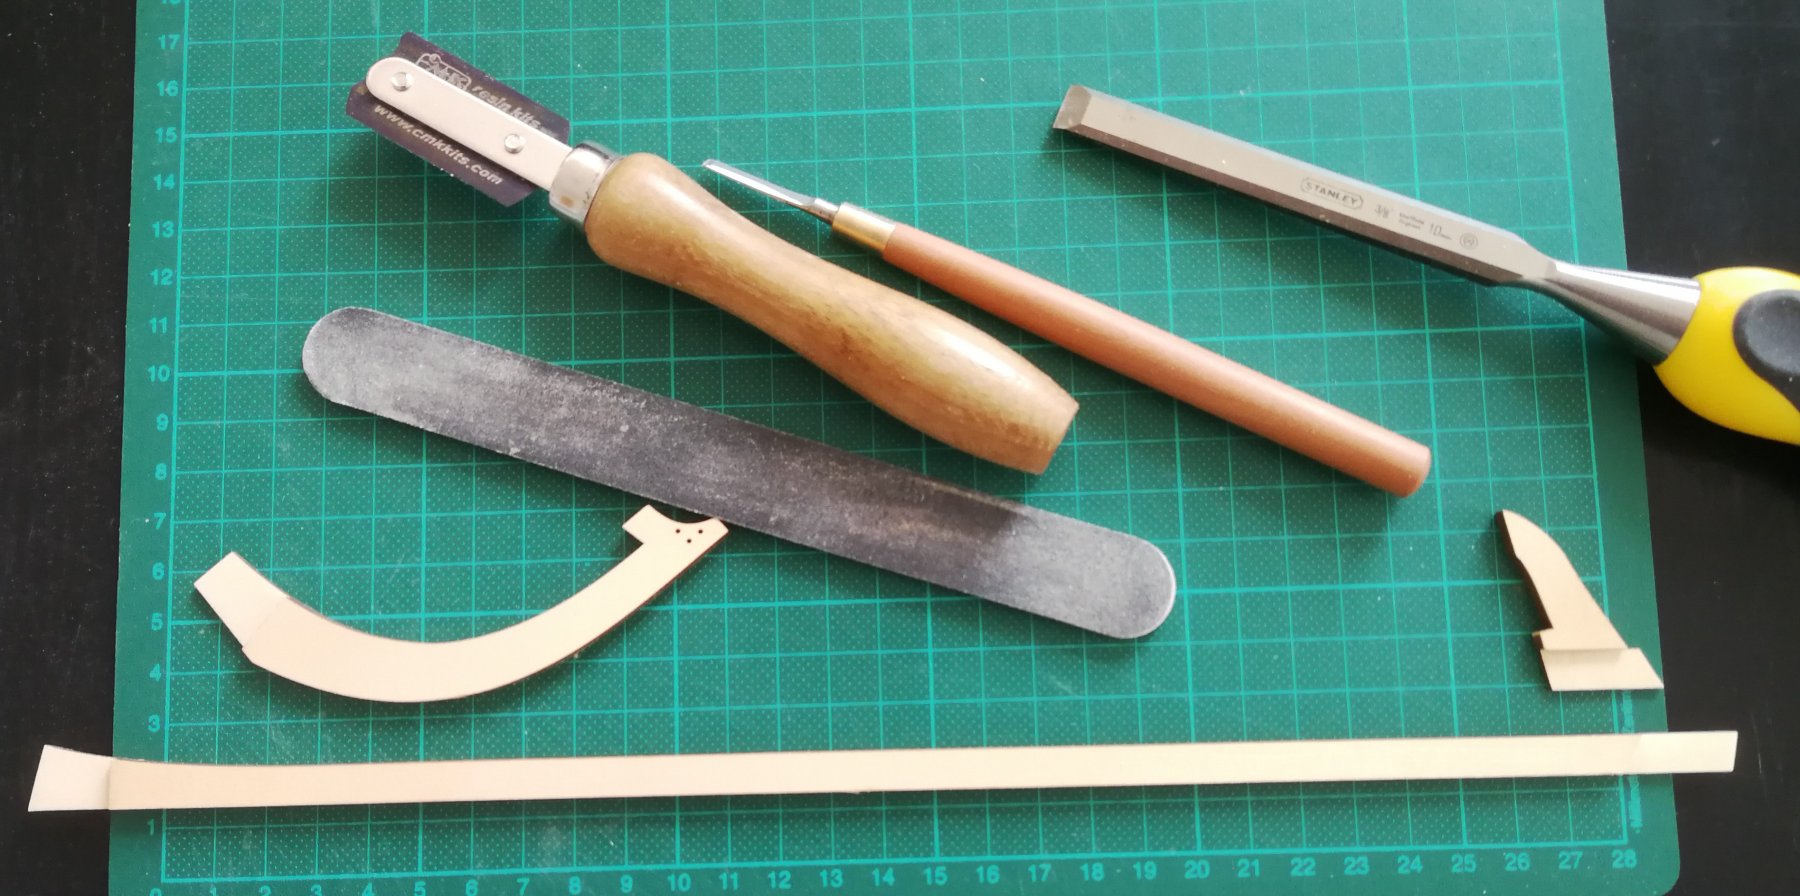
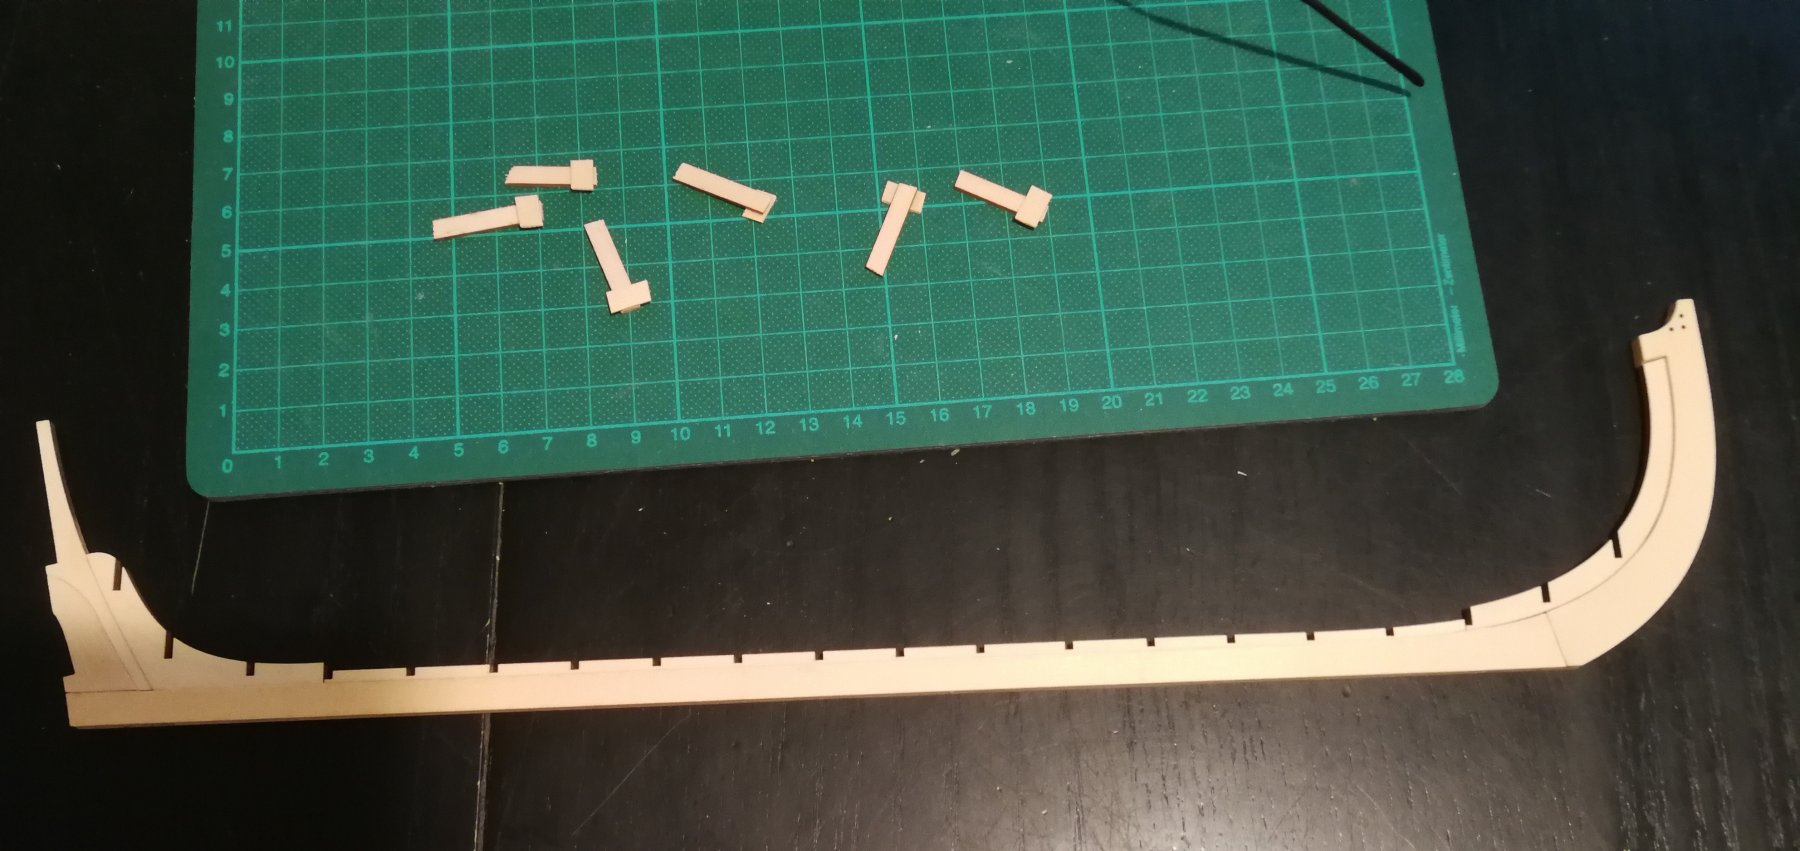
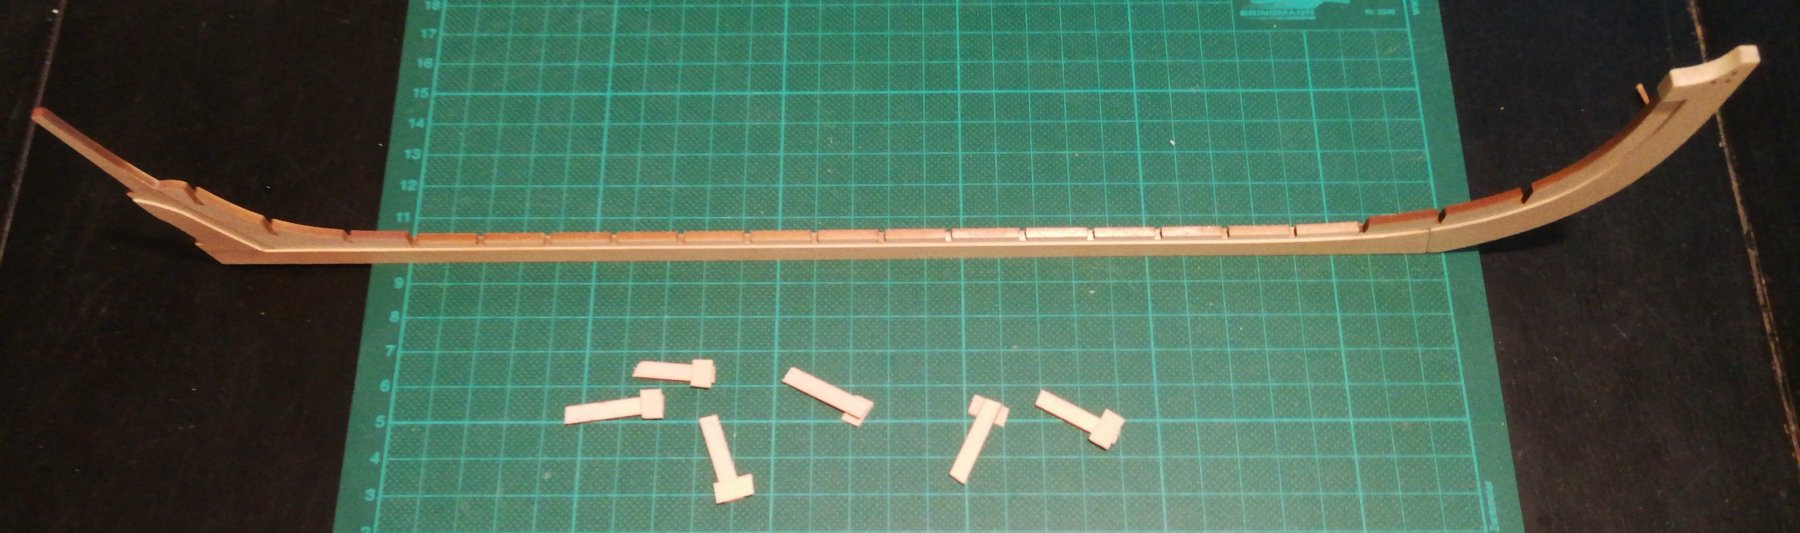
- medway longboat
- Syren Ship Model Company
- (and 1 more)
-
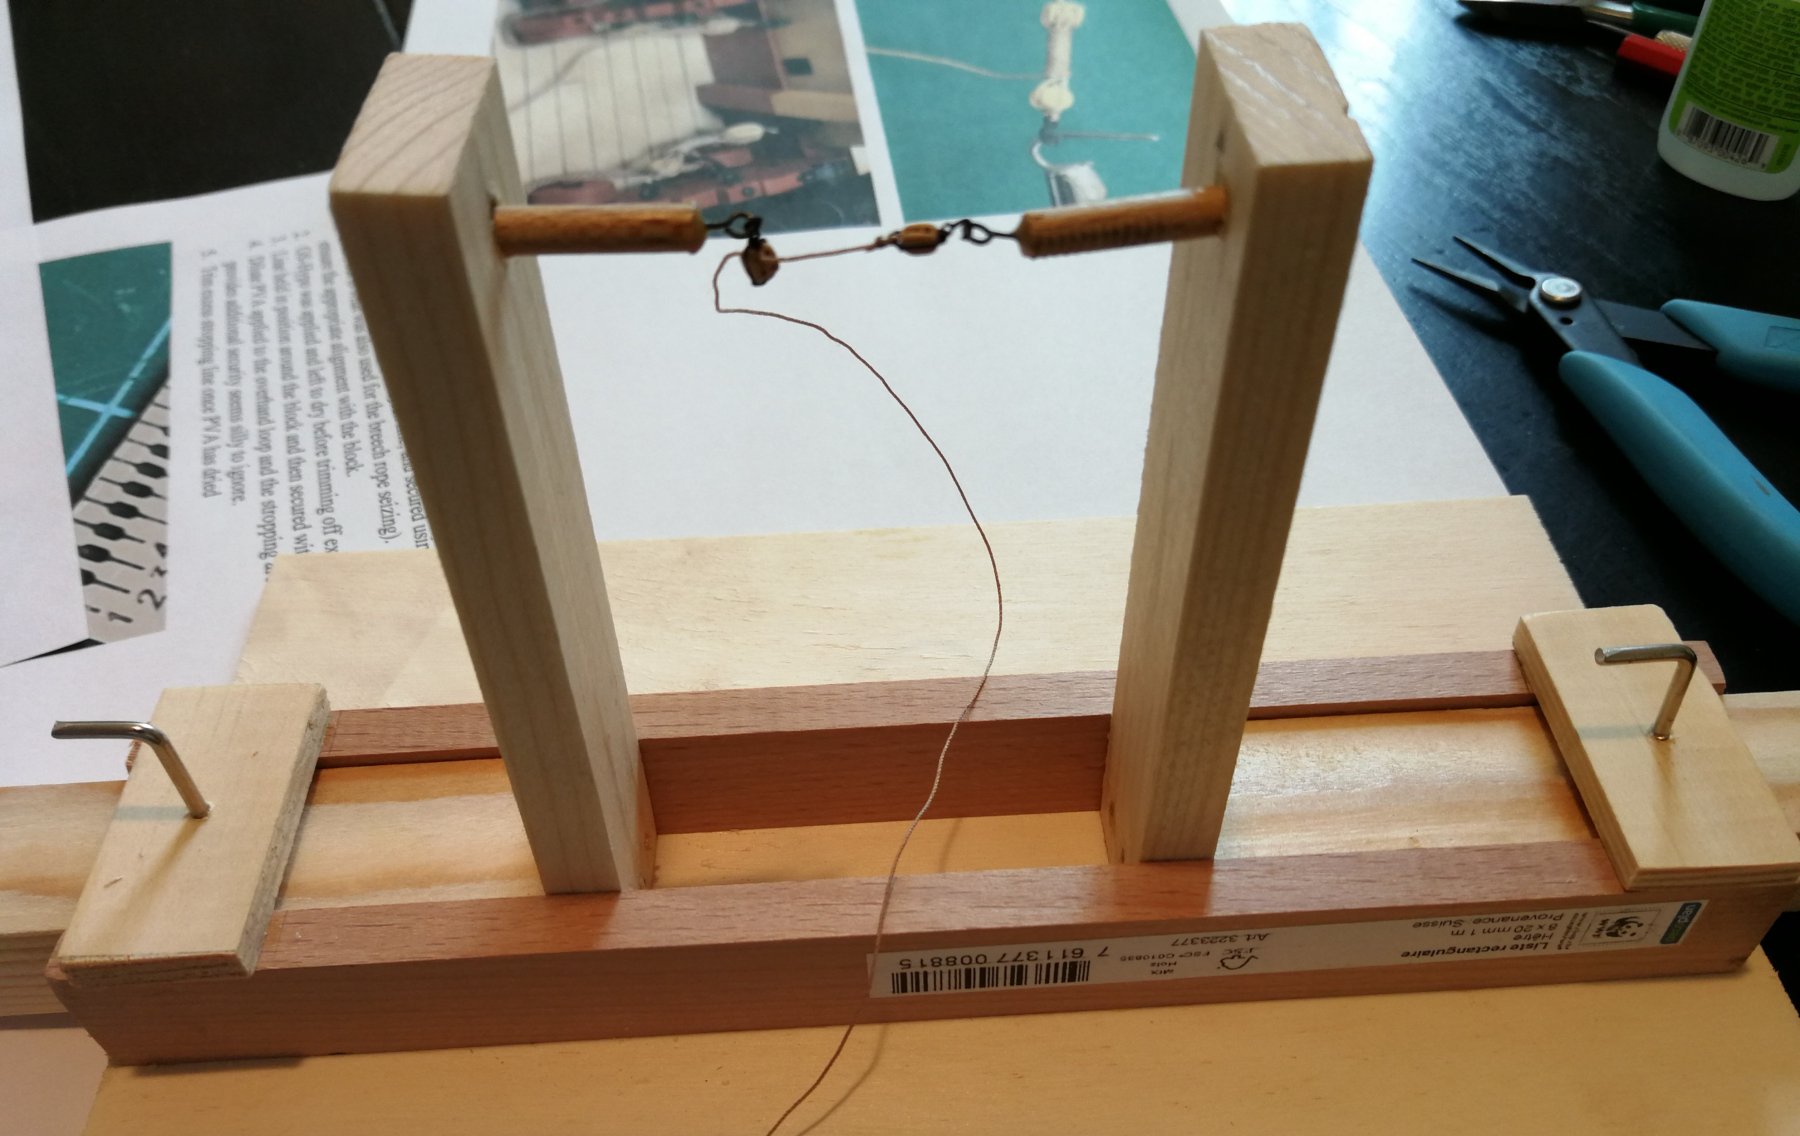
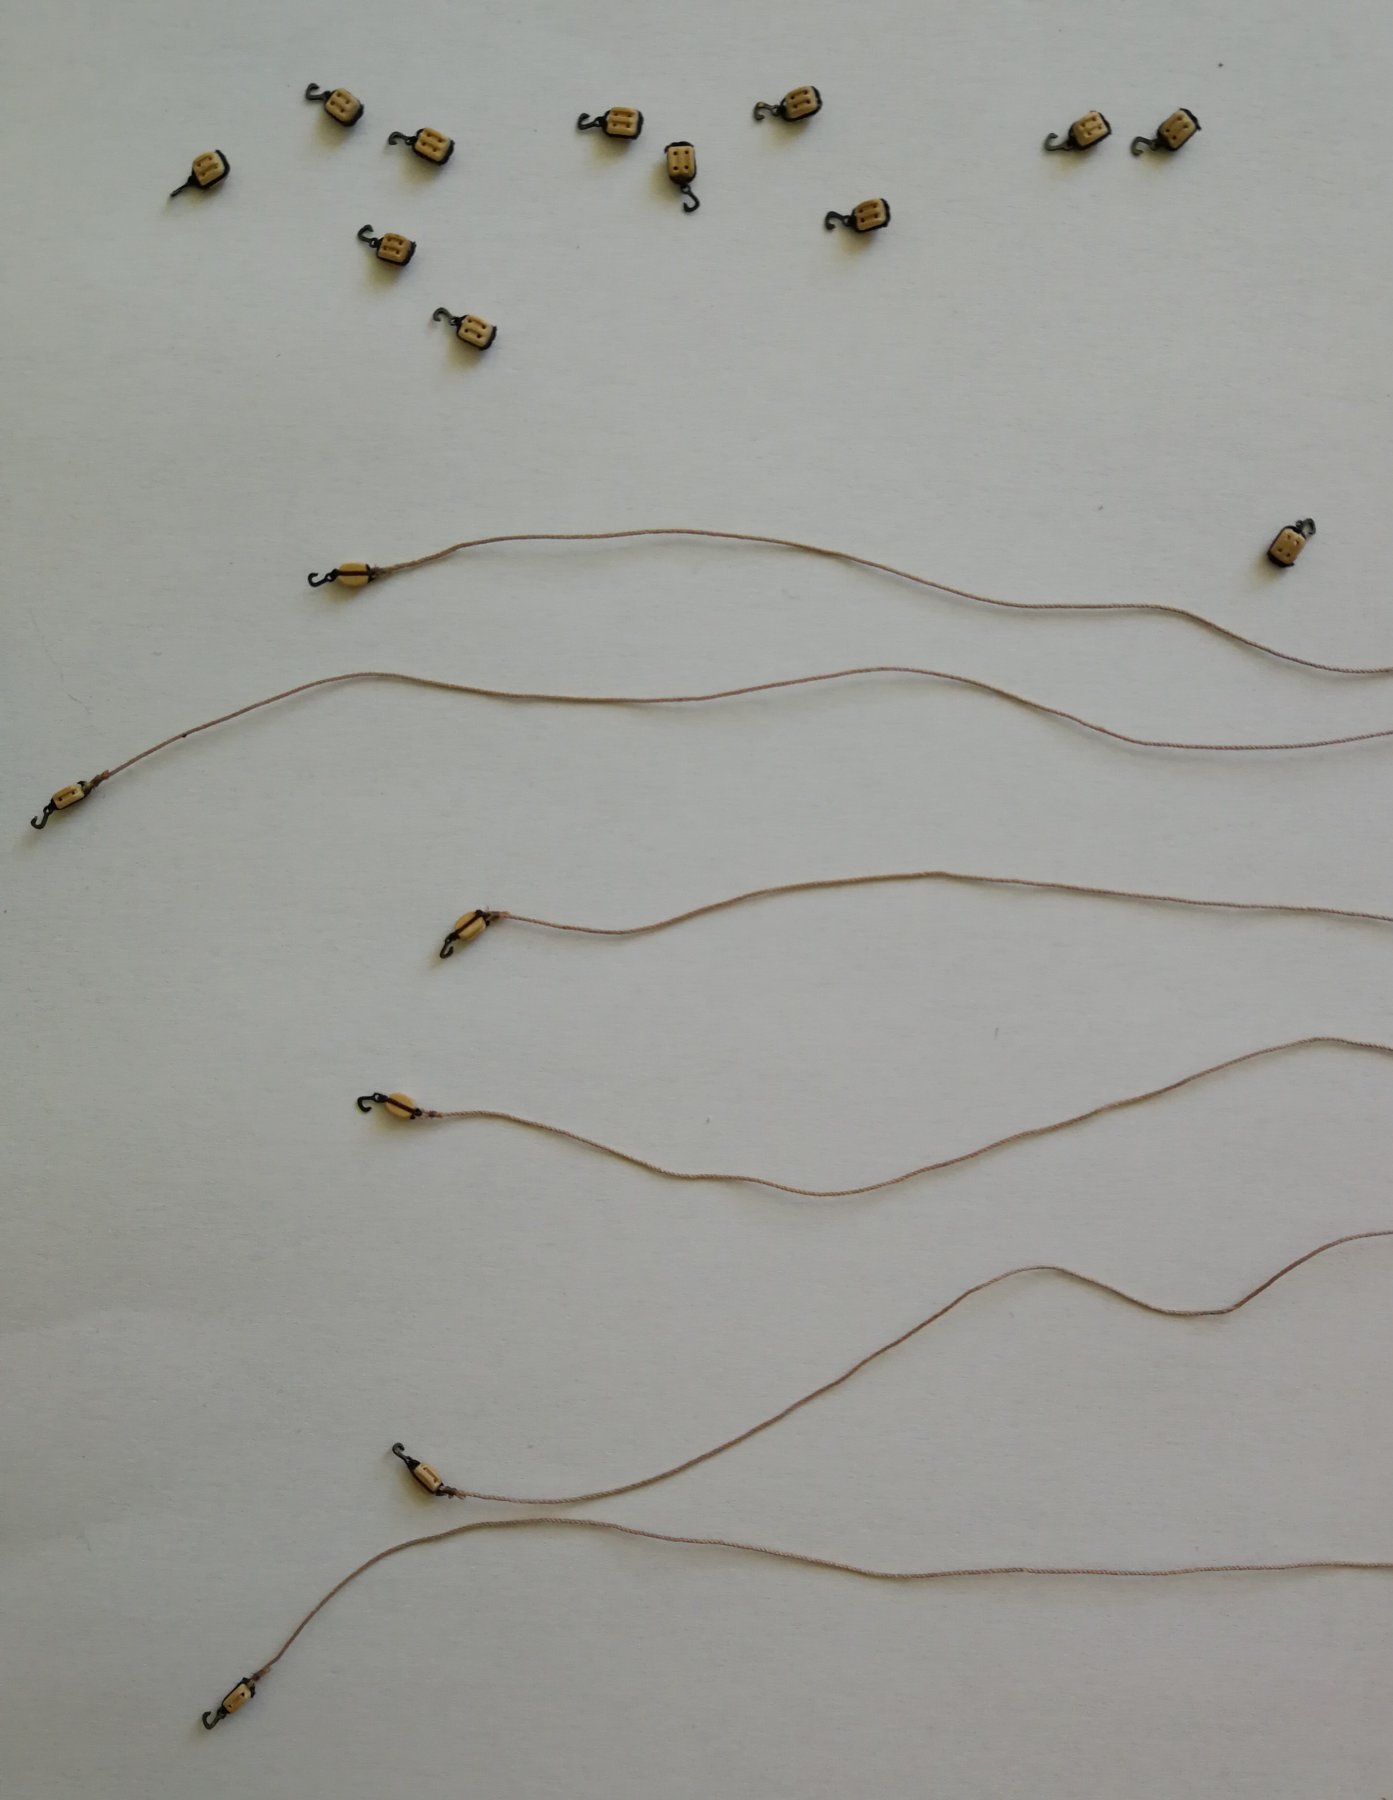
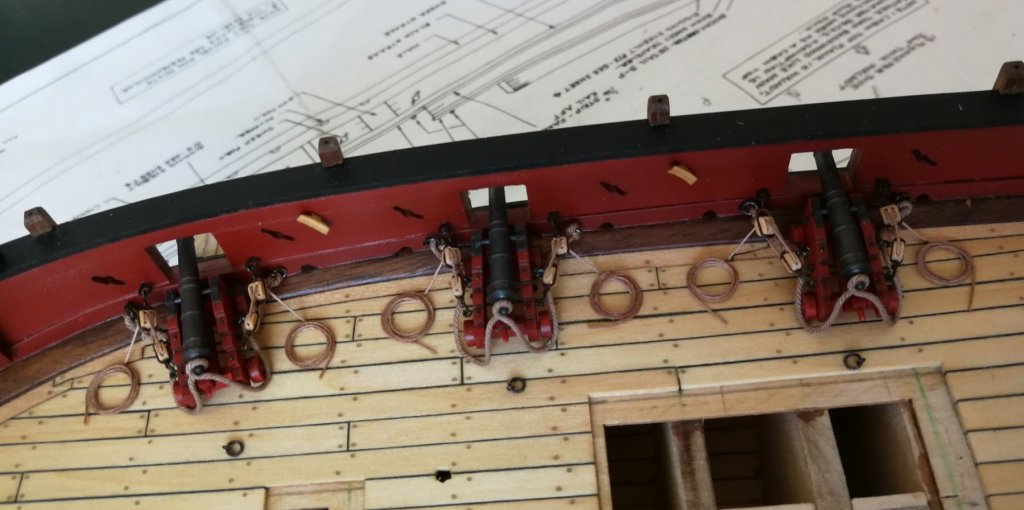
The blocks and the tackle ropes are done. All the components come from Syren Ship : 3mm hooks, 1/8 single and double blocks and .012" ropes. I use the method described by Bernard Froelich in his excellent book 'L'art du modélisme' for prepare the blocks : I first pass the brown rope through the hook and tie a single knot, then I glue it all at the top of a block with a micro drop of CA. I pass the rope on each side of the block and tie the rope with a single knot at the bottom of the block. I apply some white glue diluted to fix this single knot. When everything is dry, I cut the ends of the rope and add a micro drop of white diluted glue. At this scale the single knot at the bottom of the block mimics quite well the splice. Now time to assemble the blocks. I found this excellent design that show the process to follow. There is no more to...
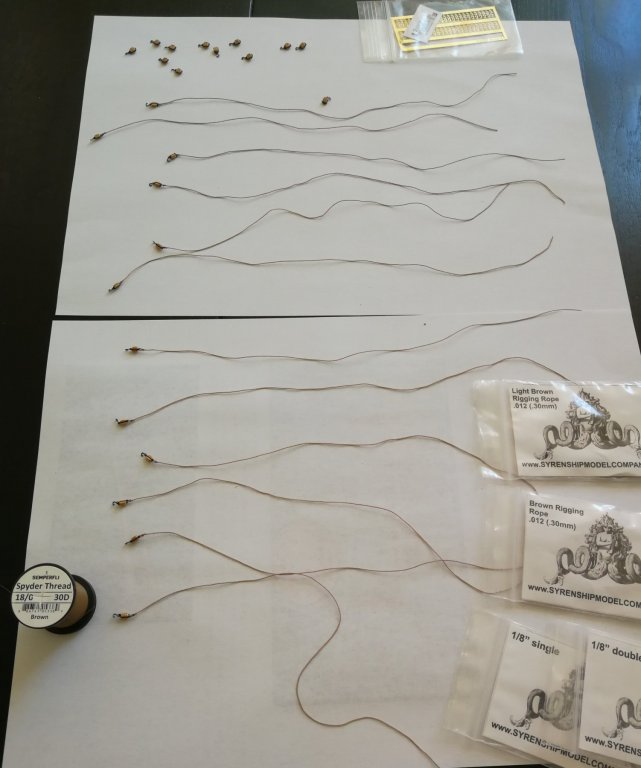
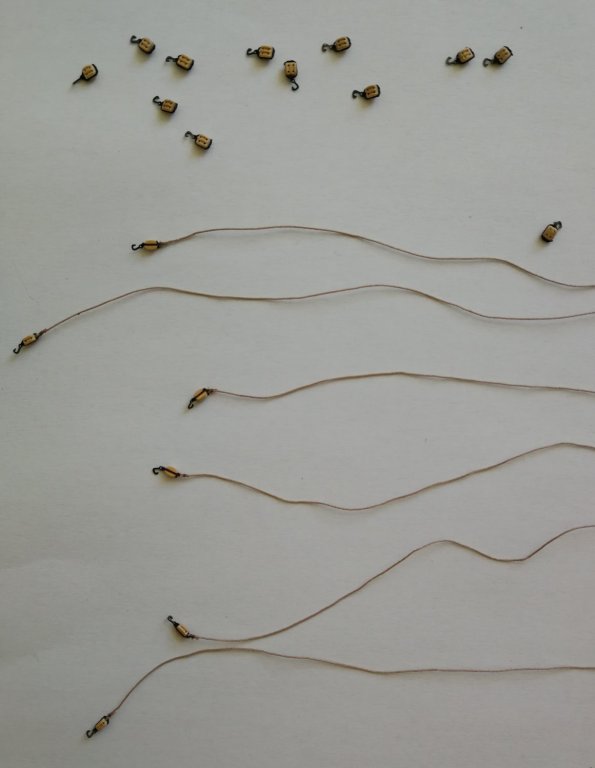
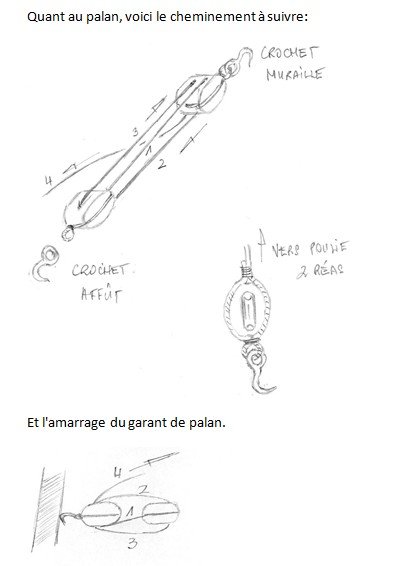
- 164 replies
-
- 10
-
-
- first build
- model shipways
- (and 2 more)
-
Thanks for the video. Very educative and I learn a lot of techniques. Patrick, The videos can be watched with subtitles. By default their are in Russian language but if you activate the automatic translation, you can choose french subtitles. It's still a pretty rough translation but it did help me understand the process. It is necessary to activate the subtitles at the level of the setting of the video then to select the automatic translation in the desired language. That's still the google translation 😉