HOLIDAY DONATION DRIVE - SUPPORT MSW - DO YOUR PART TO KEEP THIS GREAT FORUM GOING! (Only 64 donations so far out of 49,000 members - C'mon guys!)
×


Mldixon
-
Posts
152 -
Joined
-
Last visited
Content Type
Profiles
Forums
Gallery
Events
Everything posted by Mldixon
-
Both, I use a program called zbrush, it is a digital sculpting program. The figures are posed or manipulated in Daz. The entire pump assembly is modeled in Sketchup and exported as a 3d model in scale 1:48, then imported into Daz. This is essential to getting the pose correct for the model. Then its exported out and into zbrush where details are added to make it more 17th ship friendly. Some guys buy 3d stl printers thinking they'll just whip out parts, but the reality is most models require specific scale and position, and just buying scale figures in a generic pose dosen't always work for all models. The aft end of my winnie is an example of getting figures in the right positions for the ship. Thanks for the question and I'm glad you think they're awesome, I'm a little biased but I like them also.
-
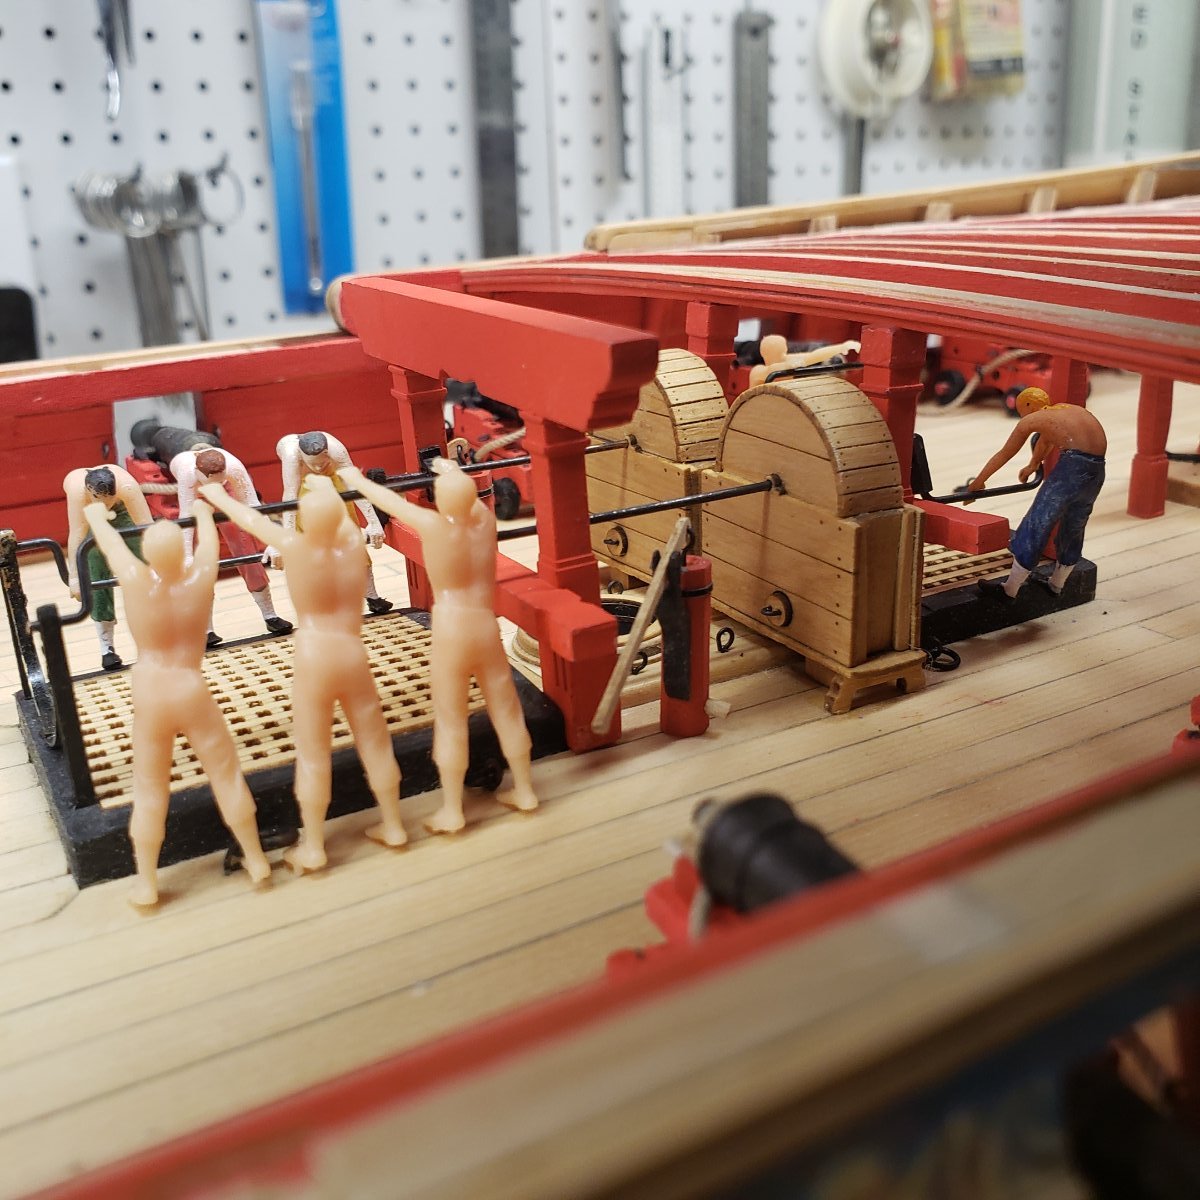
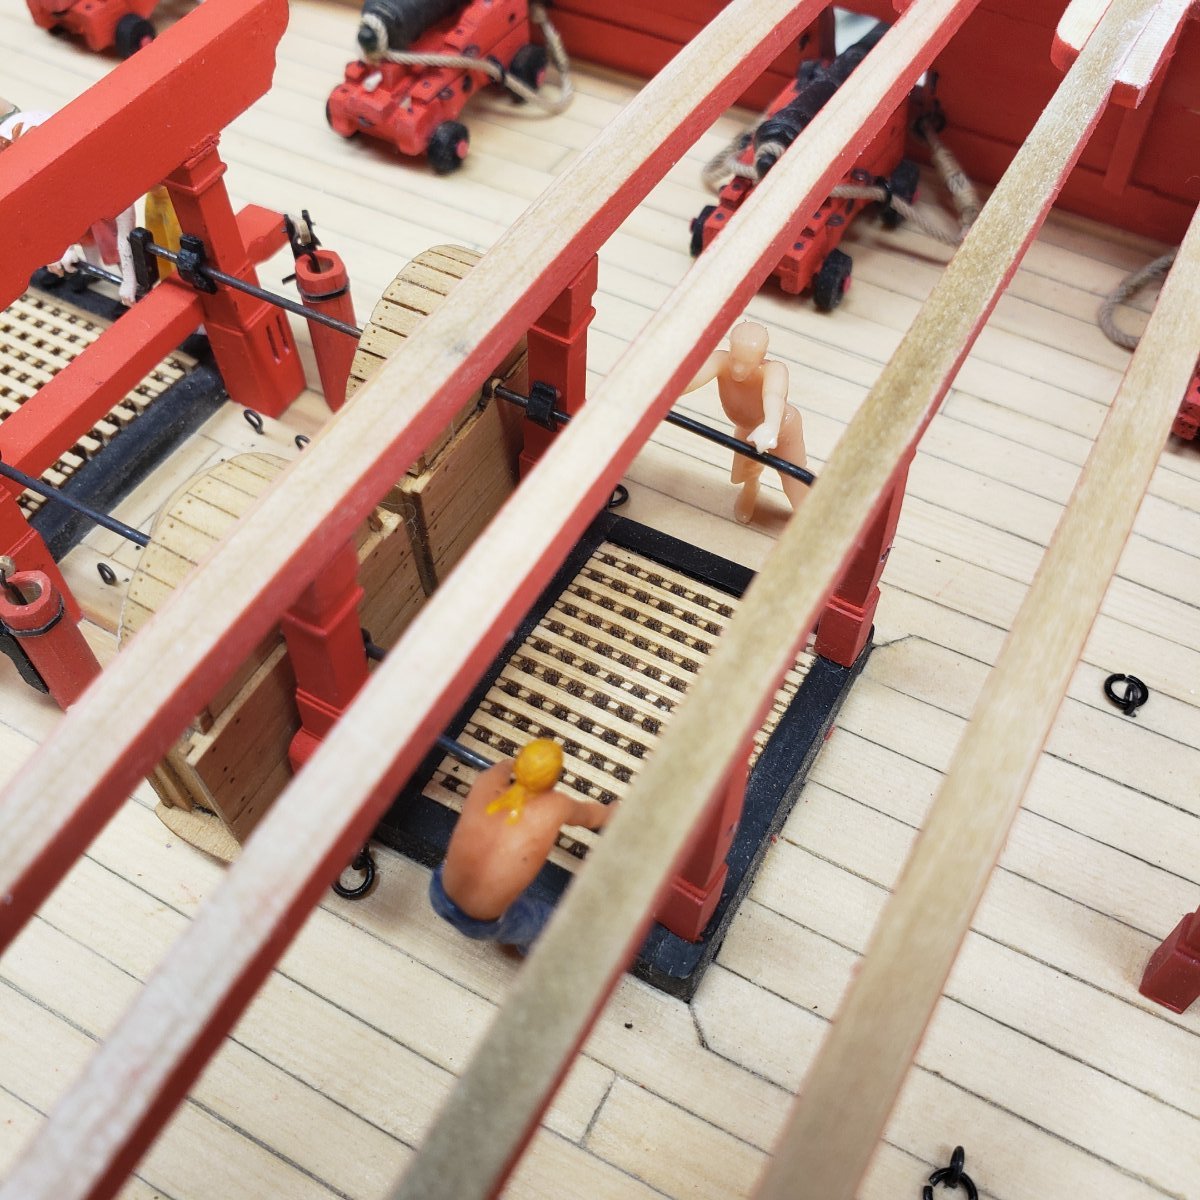
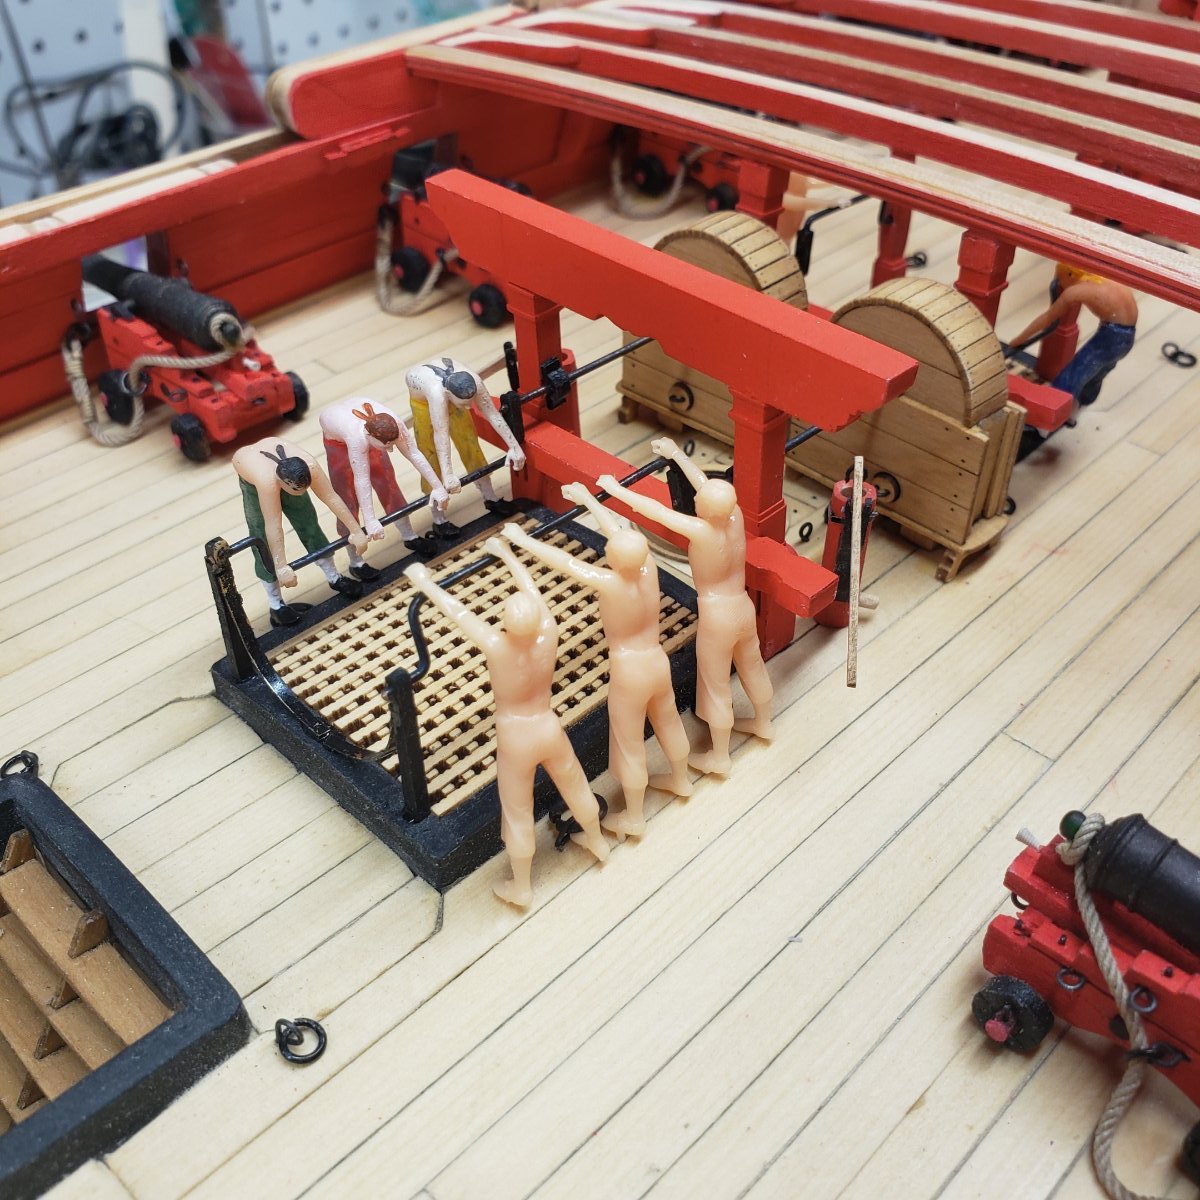
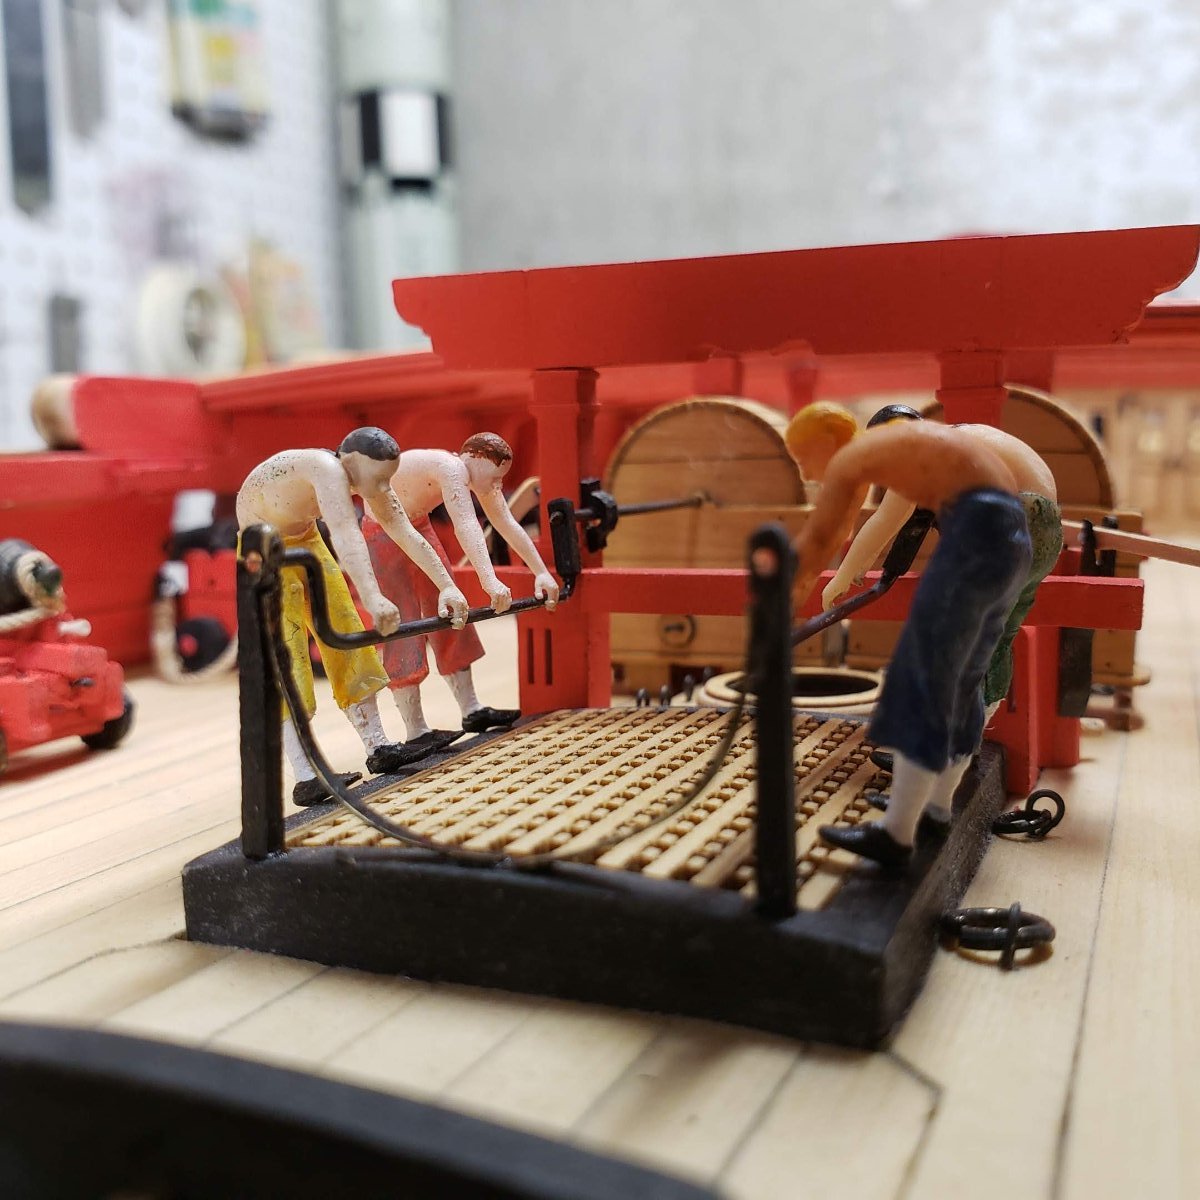
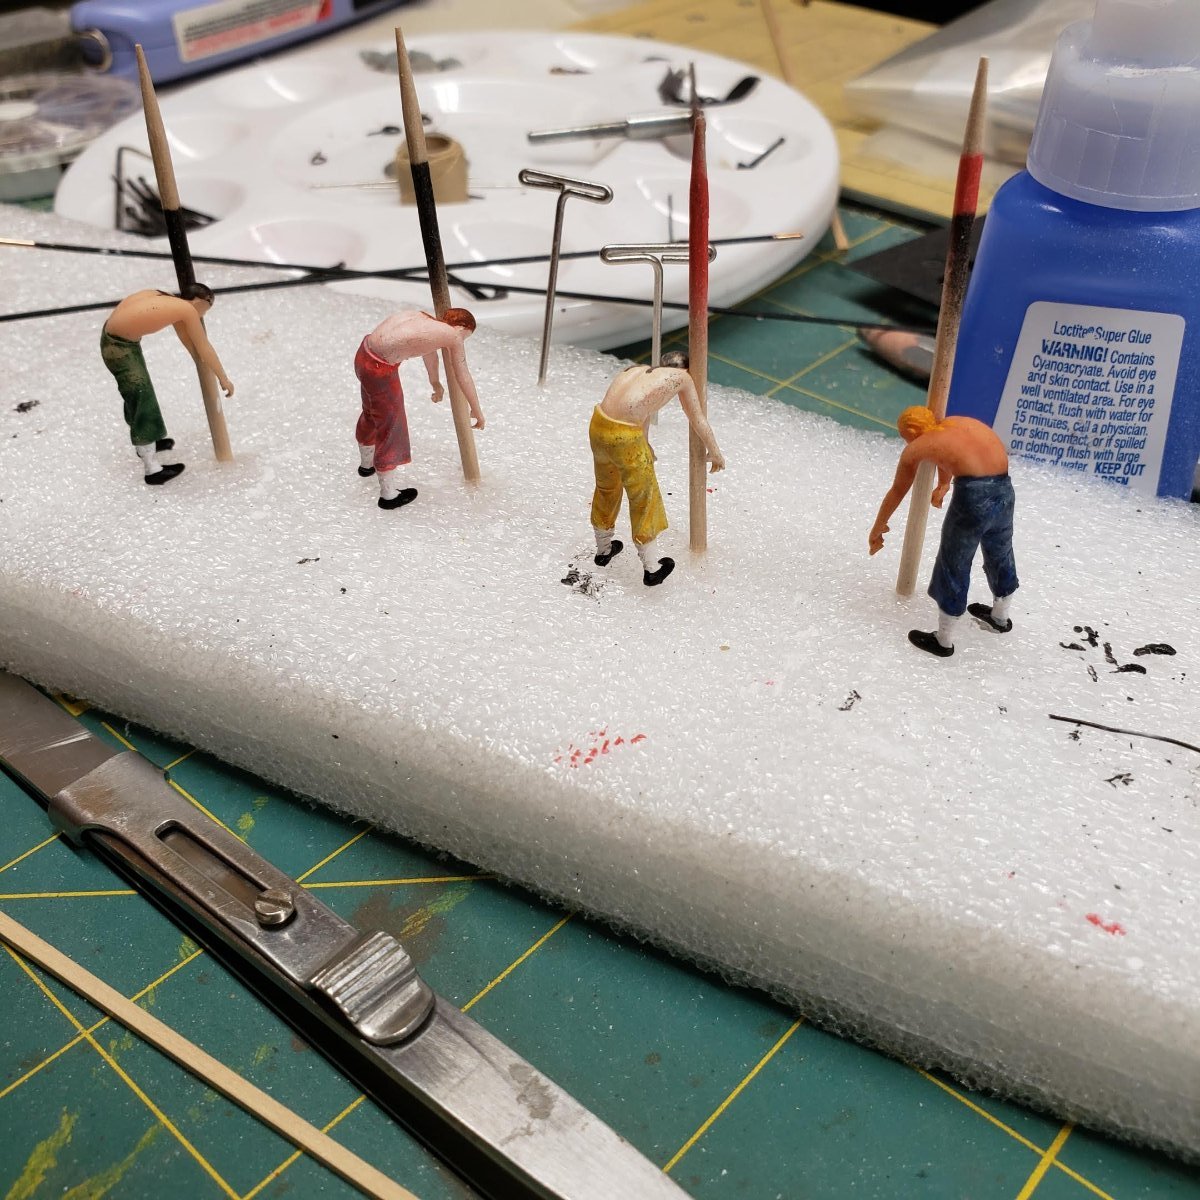
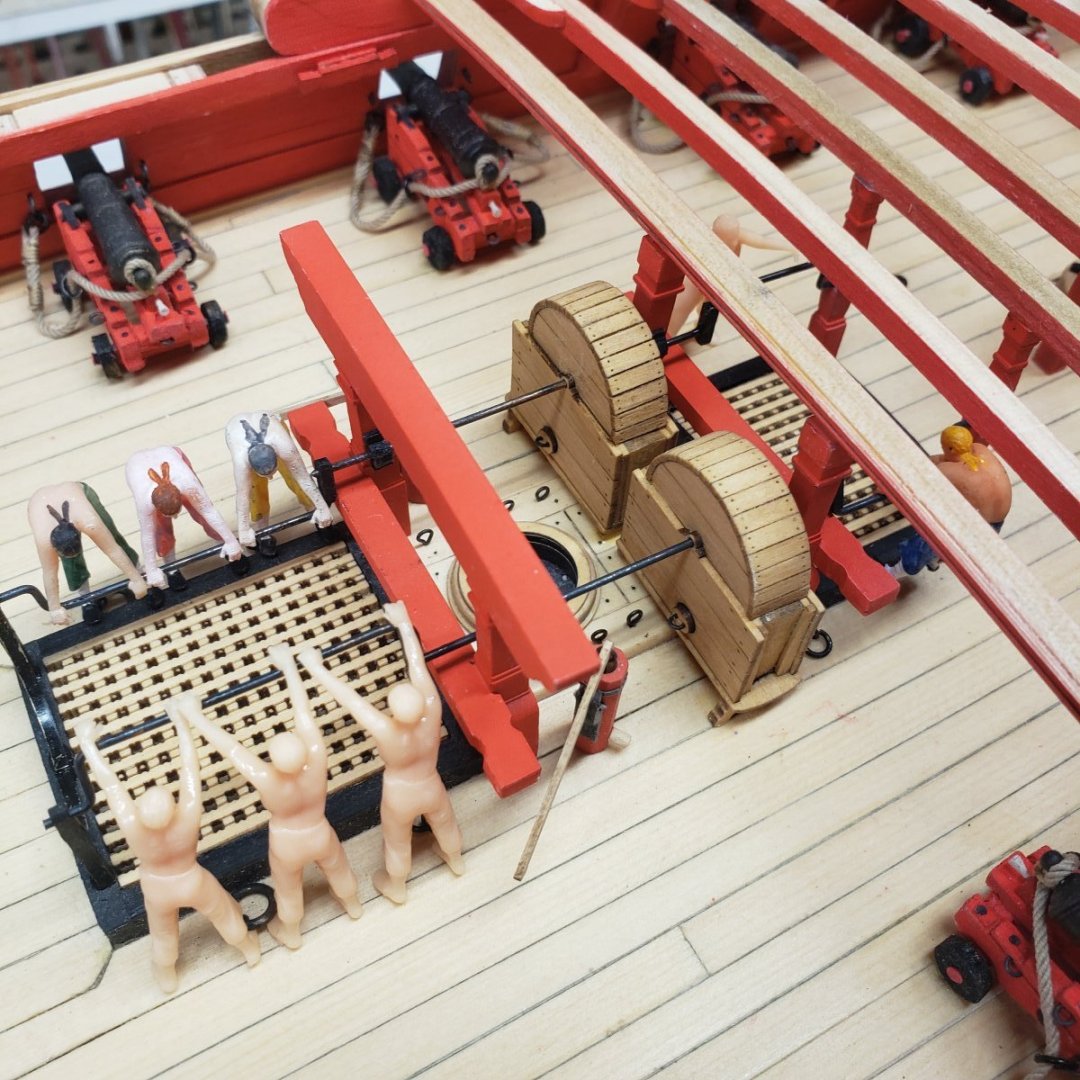
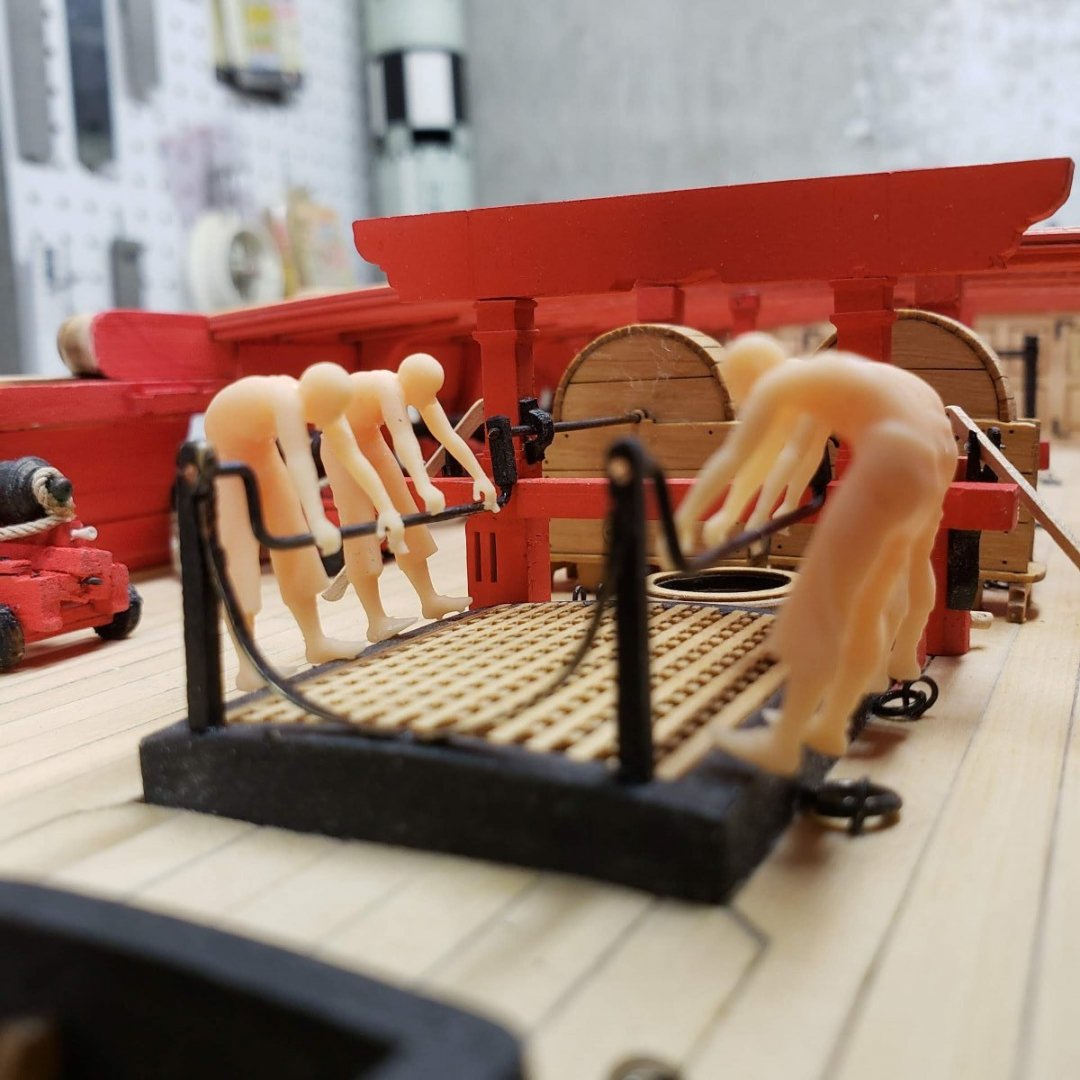
So I gave some thought to Gregory's observation on opposing pump crews, and I agree that they must have worked in cadence with one up and one down, makes sense, so no one had busted knuckles. But I wasn't there, thank God, so who knows for sure... Pics are of new crew members in the raw, no paint yet. On the high stroke. I will wait till much later to make the decision as to whether these guys will make the cut.


-
Thanks for the Beautiful work comment
-
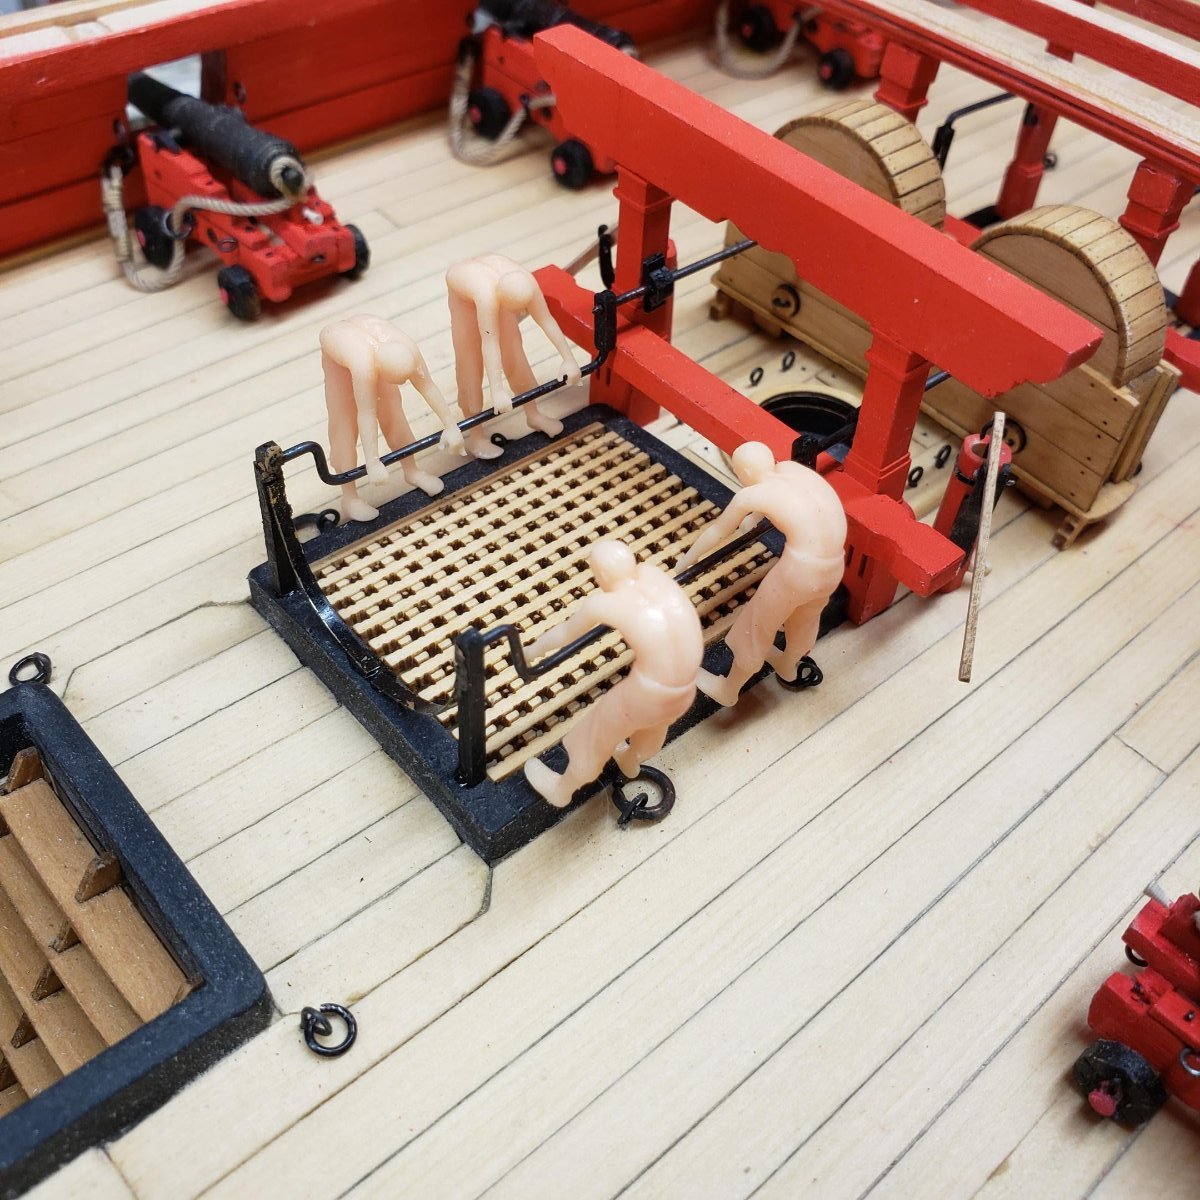
I dont beleive the chain pumps were interconnected, so they operated independently of each other, the rear pump crew will be on the upstroke of the cranks, so that will be the 180 degrees. But I could sync the other side so one one was up and one was down, just haven't gotten that far yet....
-
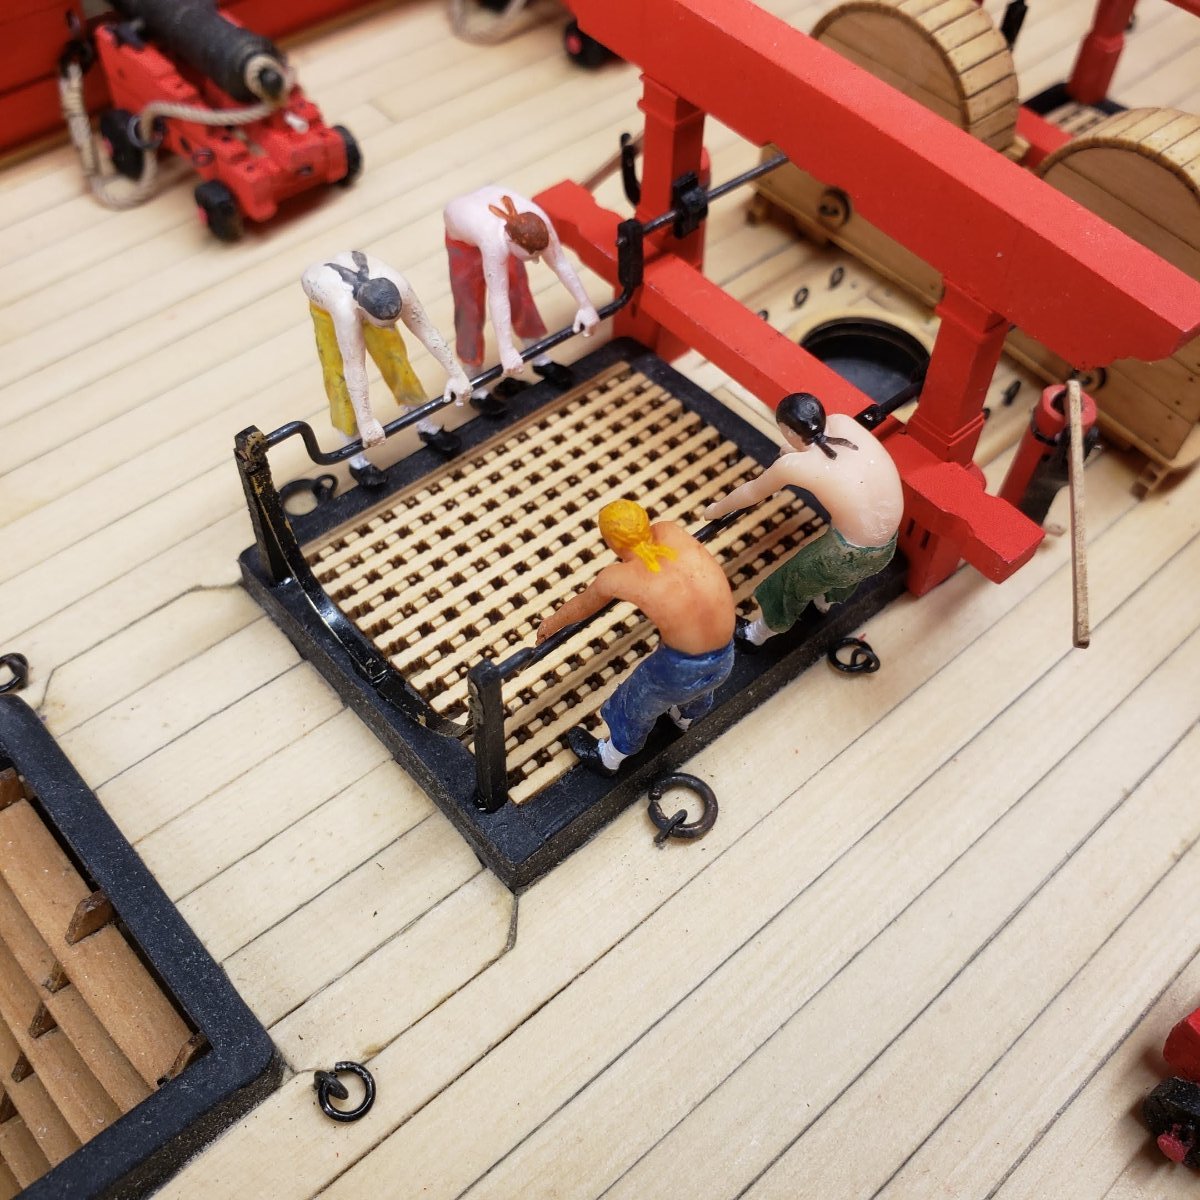
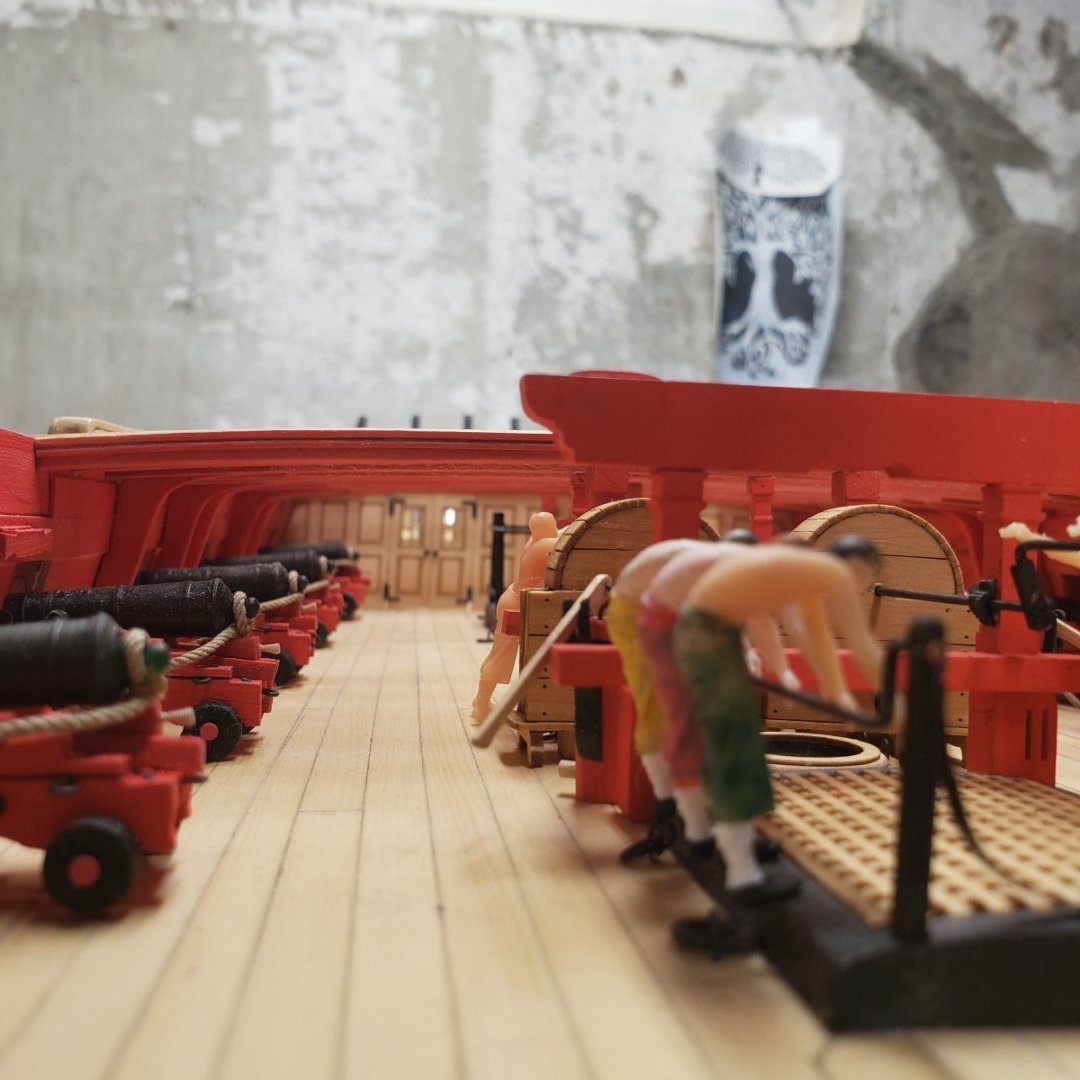
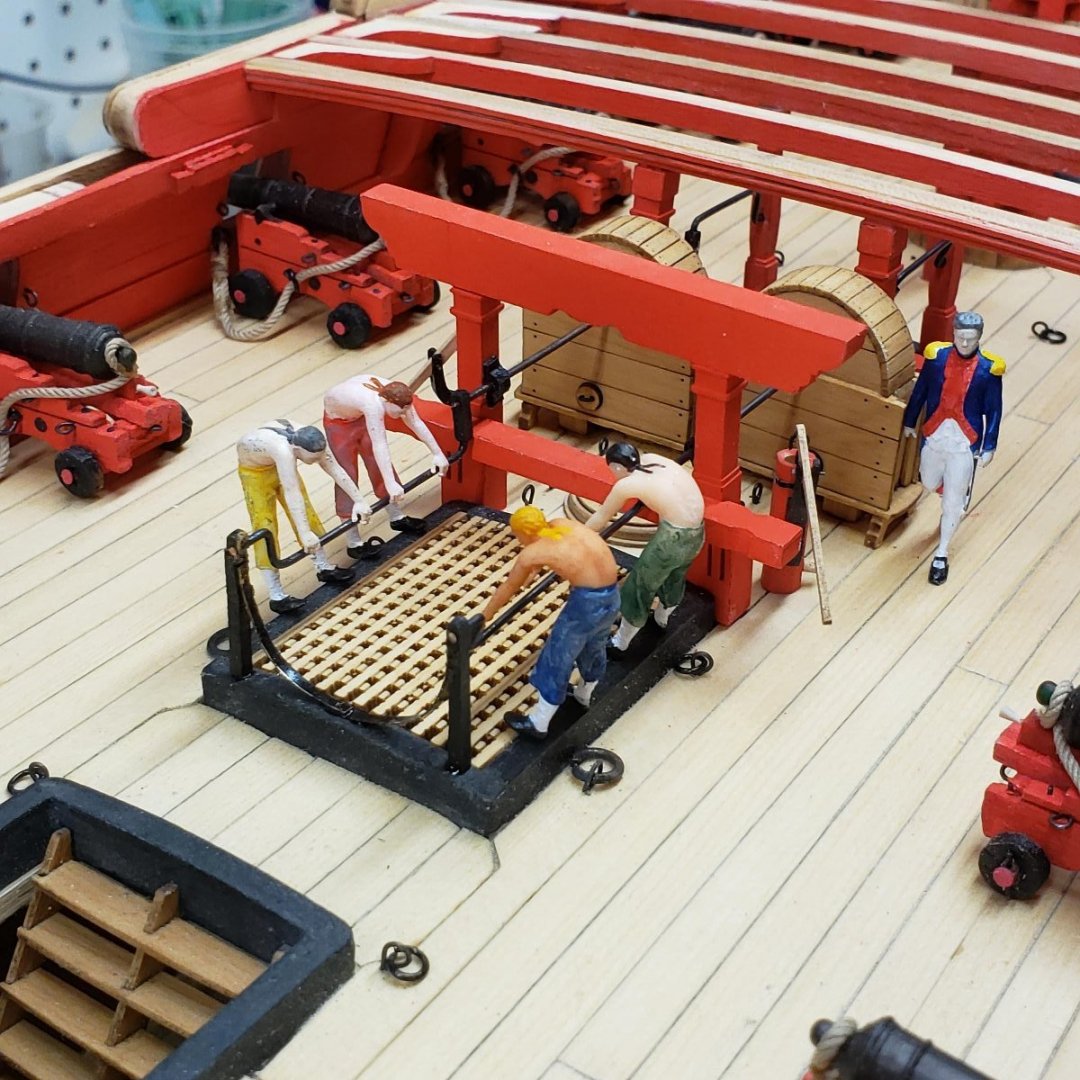
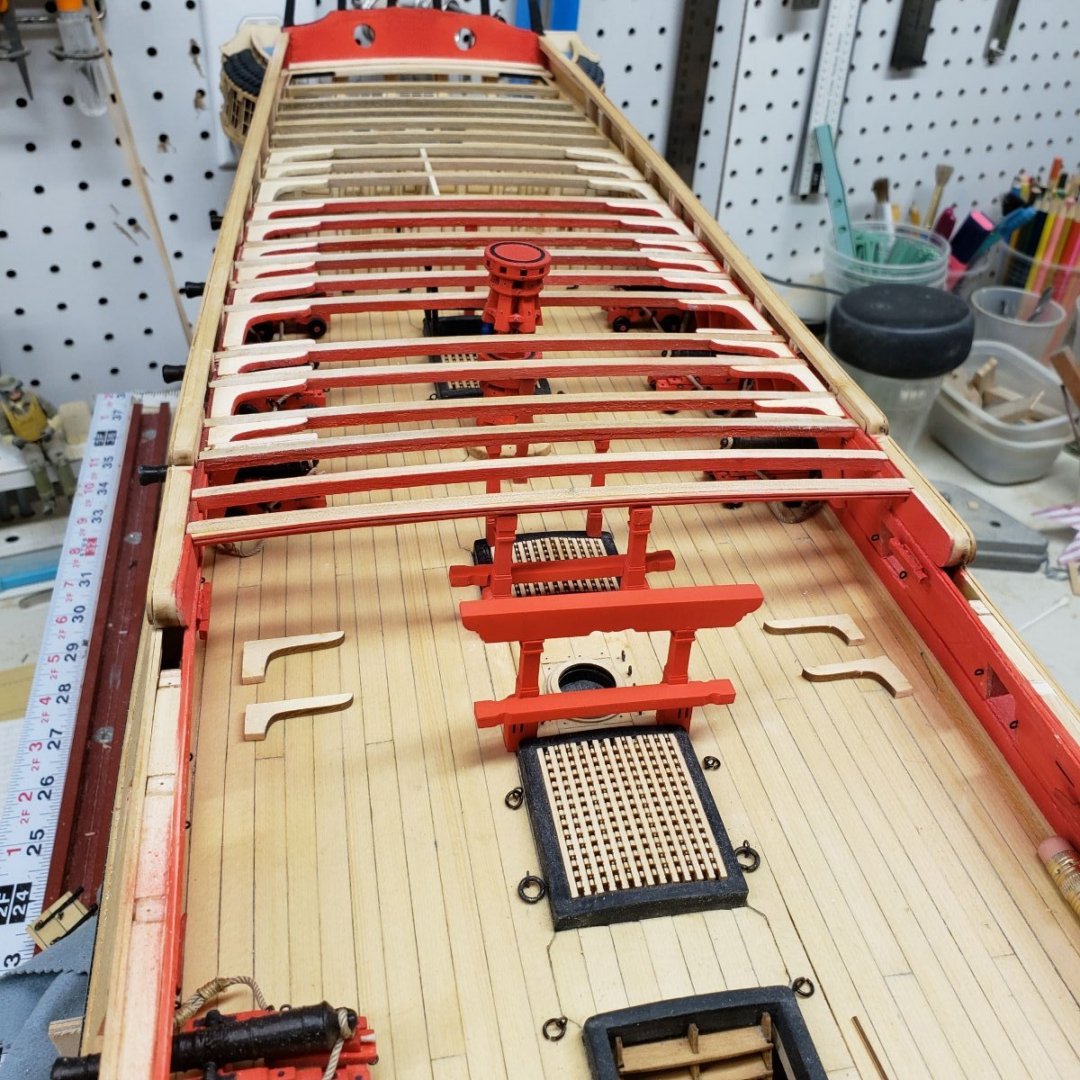
Finished chapter 7, chain pumps area was tedious work, but within reach of my limited skills. Needed the magnifiers and a lot of referencing of the prints to get to the end result. Then I added in a pump crew, I have not finalized the design just yet, this was mostly just to establish scale and position I showed the captain figure in one of the shots to make sure the figures were true to size. I had to go back and look at those chain pumps, they were large, at first I thought something was wrong. The elm pump was not as hard as I thought it would be, I guess I'm getting used to these tiny part manipulations... Any way photos attached. Cannons are set up to this point, still no lids... No weathering powders at this point, I will add that at the very end. Chain crew in raw state for posing Another view Holding up toothpicks while getting paint job. In position with captain figure as reference. He wont be there in the final model I like the look so I am going to finalize it by making each figure a little different in the pose, and of course do a much better job of painting... Looking down on the chaps Here is a screen grab of the actual model before printing


-
With many credits to your skills as a teacher...
-
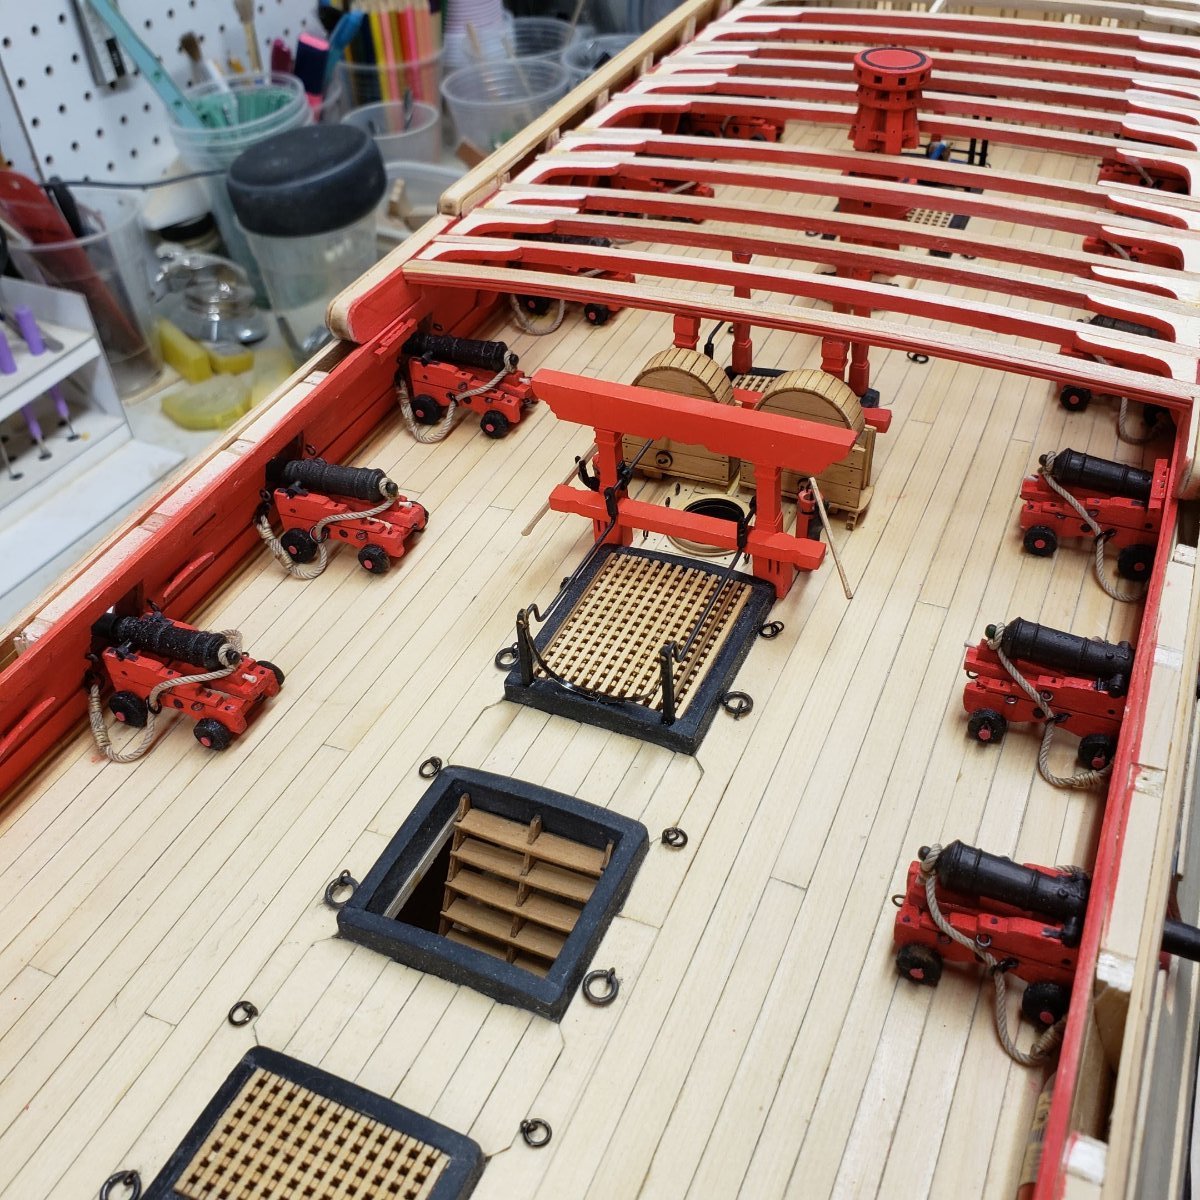
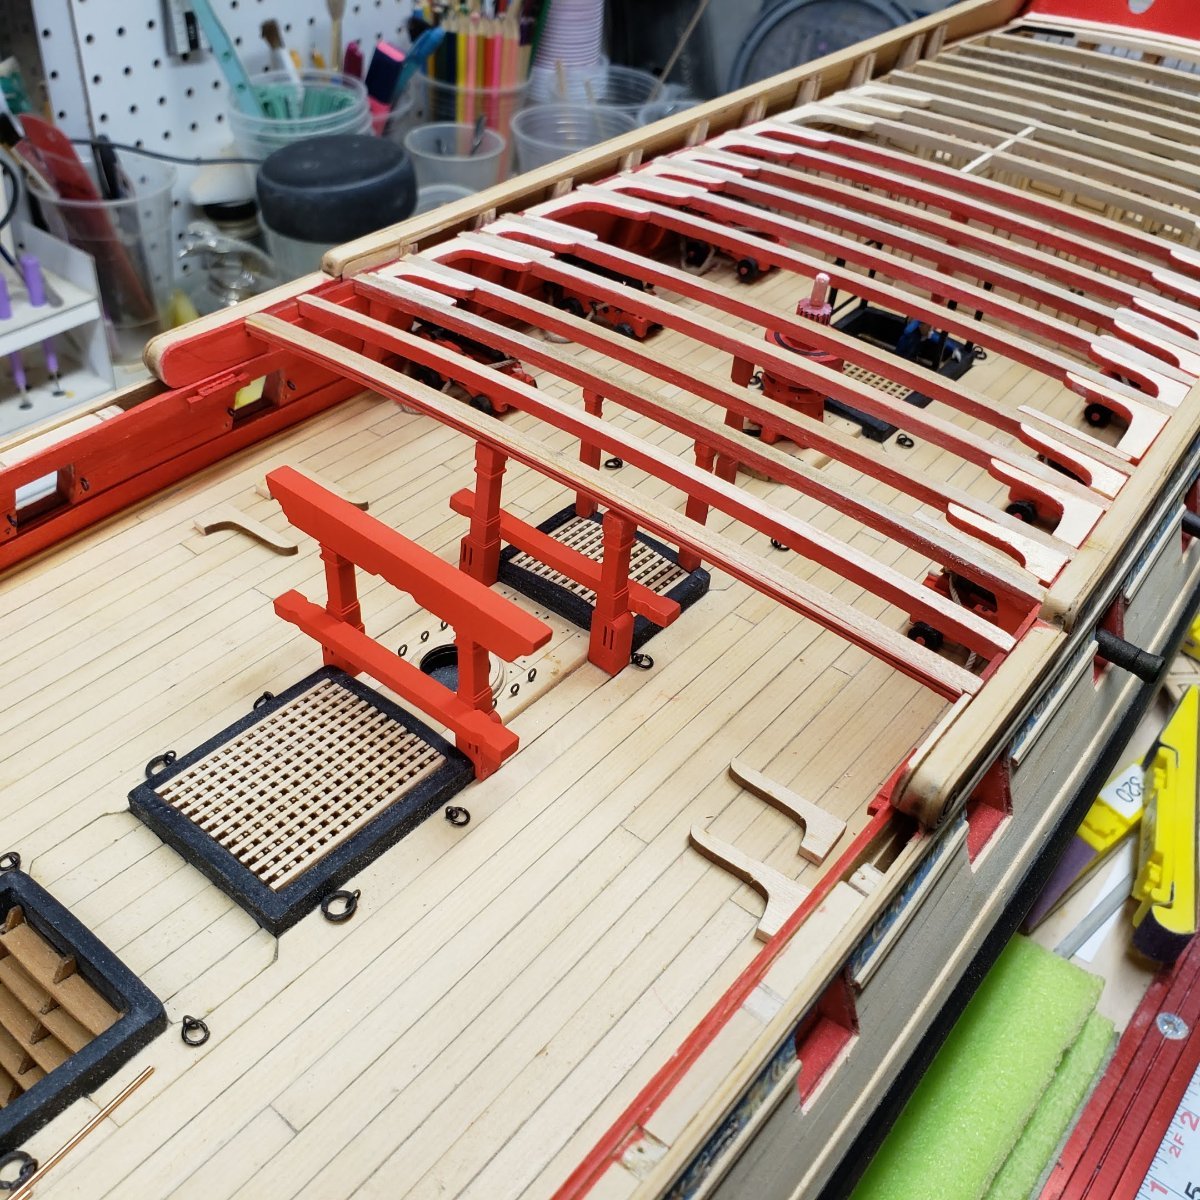
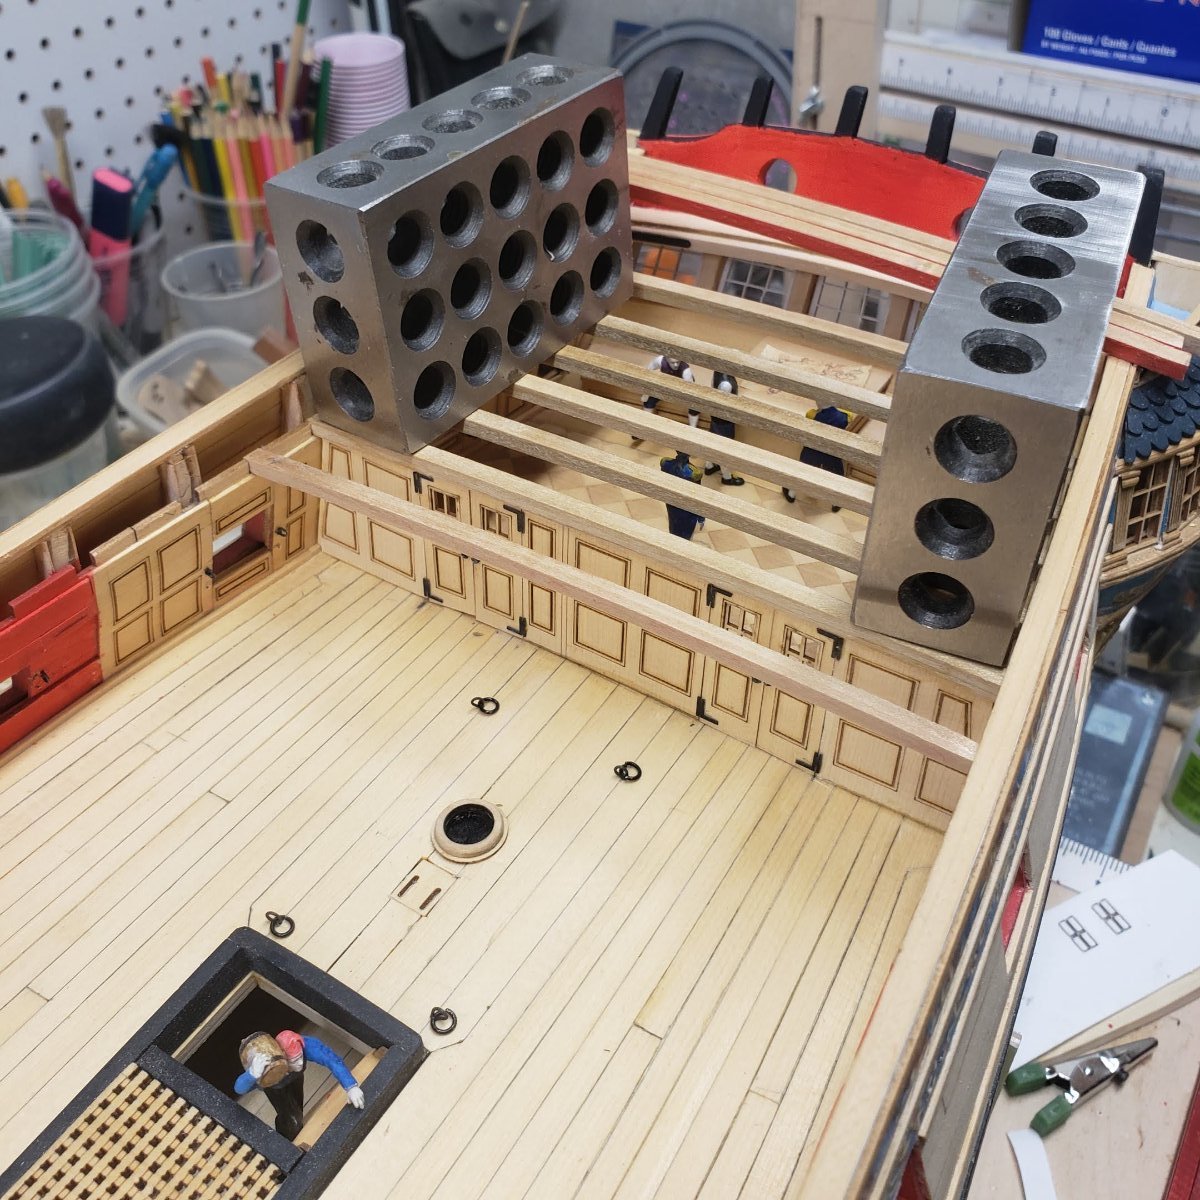
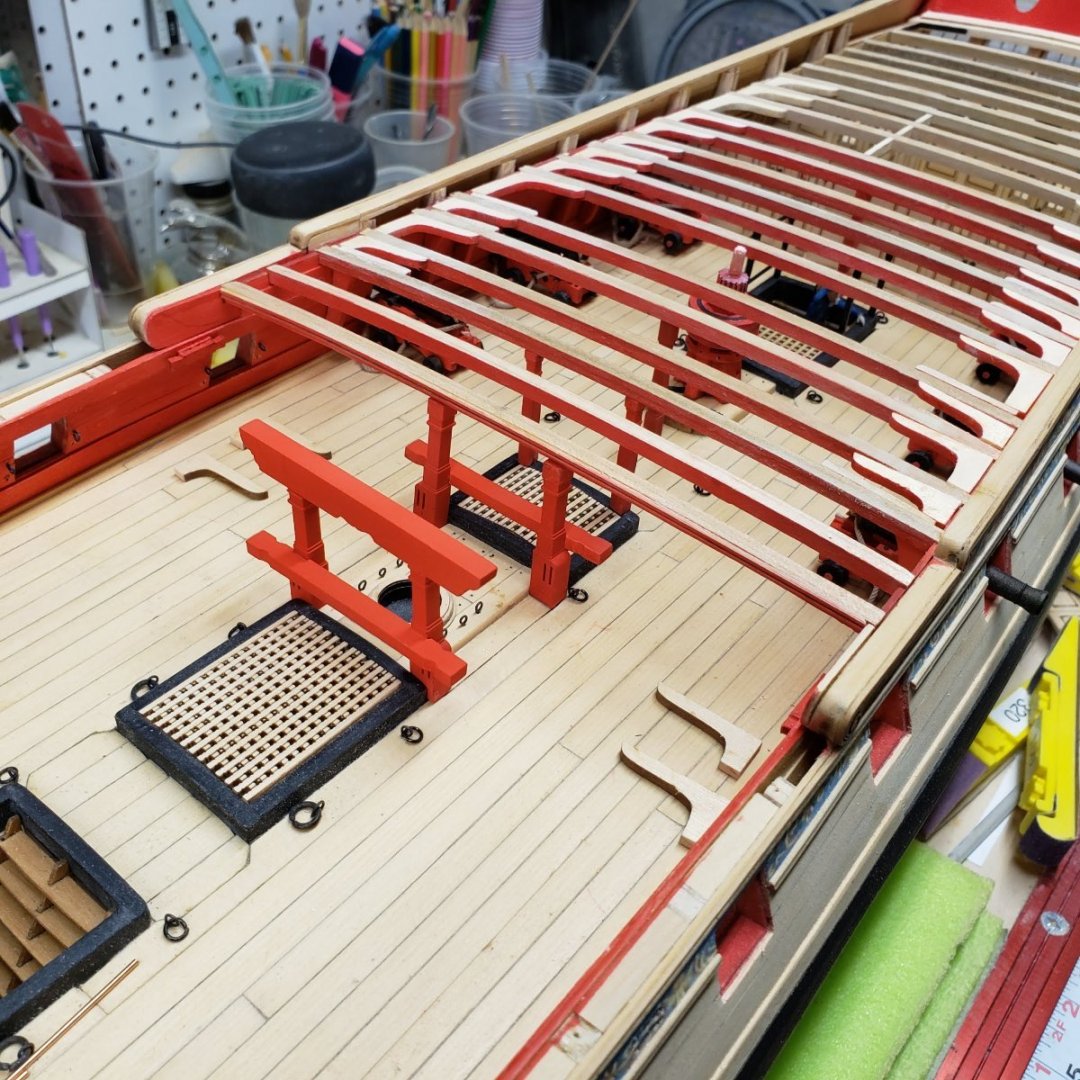
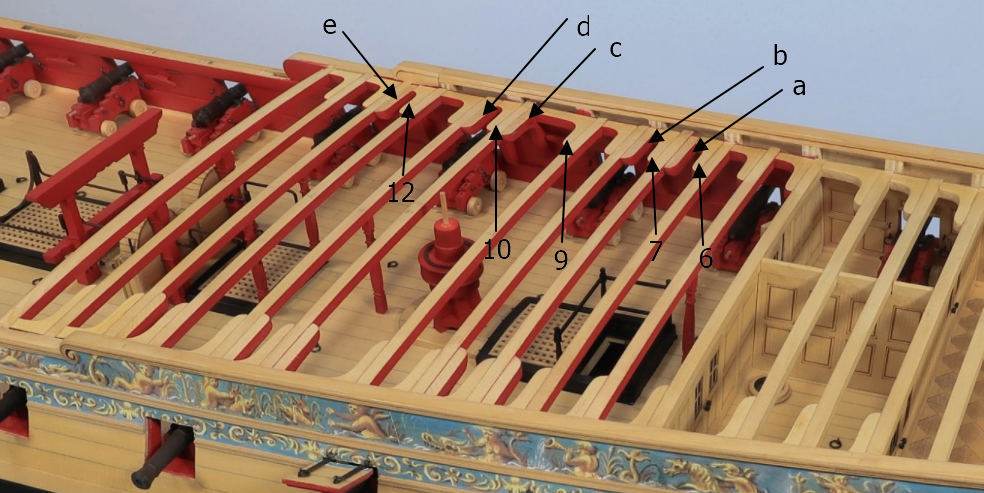
I've been working my way forward, I used 123 blocks to weigh down the beam over the aft bulkhead section as the glue set... I had to make a reference sheet to keep track of all those lodging knee, and hanging knee locations, this was a big help. Those Stanchions and railing around the companionway, were a bit of a trick... pinning them with wire was a lifesaver, as I bent them out of position twice. Just had to nudge them back straight thanks to the wire pinning...paying attention to the details in Chuck's descriptions. I went ahead and did the breeching ropes on the cannons at Chuck's suggestion. I'm very happy with the look. Going to have to blow out all the debris with airbrush after I complete these areas, still no lids on the cannon opening, a wise decision as I have been breaking a lot of the smaller items by not paying attention. But I'm getting better about it. On the lower right is a balsa laser cut template I made to check the fits against the bulwarks... The jeer bits and Gallows are just positioned waiting on the next step which will be the chain Pumps I made a Elmer's white glue and crimson red paint mix solution to make a caulk, I then painted the gaps in the hanging knees with this mix, It dried and did a pretty good job of making my hanging knees fit the Bulwarks. Far from perfect, but I'm having fun. I am fine tuning the figures in Zbrush before printing again...

-
Thanks for the Info , I'm sure about all the rigging of the gun, but the breeching lines might be the a nice compromise. I'm probably going to do one gun in action with some figures as I have now committed to a diorama theme of sorts. Looking forward to the reopening of the store.
-
Yes, I was testing out how hard it would be to make 28 of these, and unfortunately did not have the proper size ropes on hand in the color I needed. Which brings me to the next question. What size is appropriate and when do you think the store will open again?
-
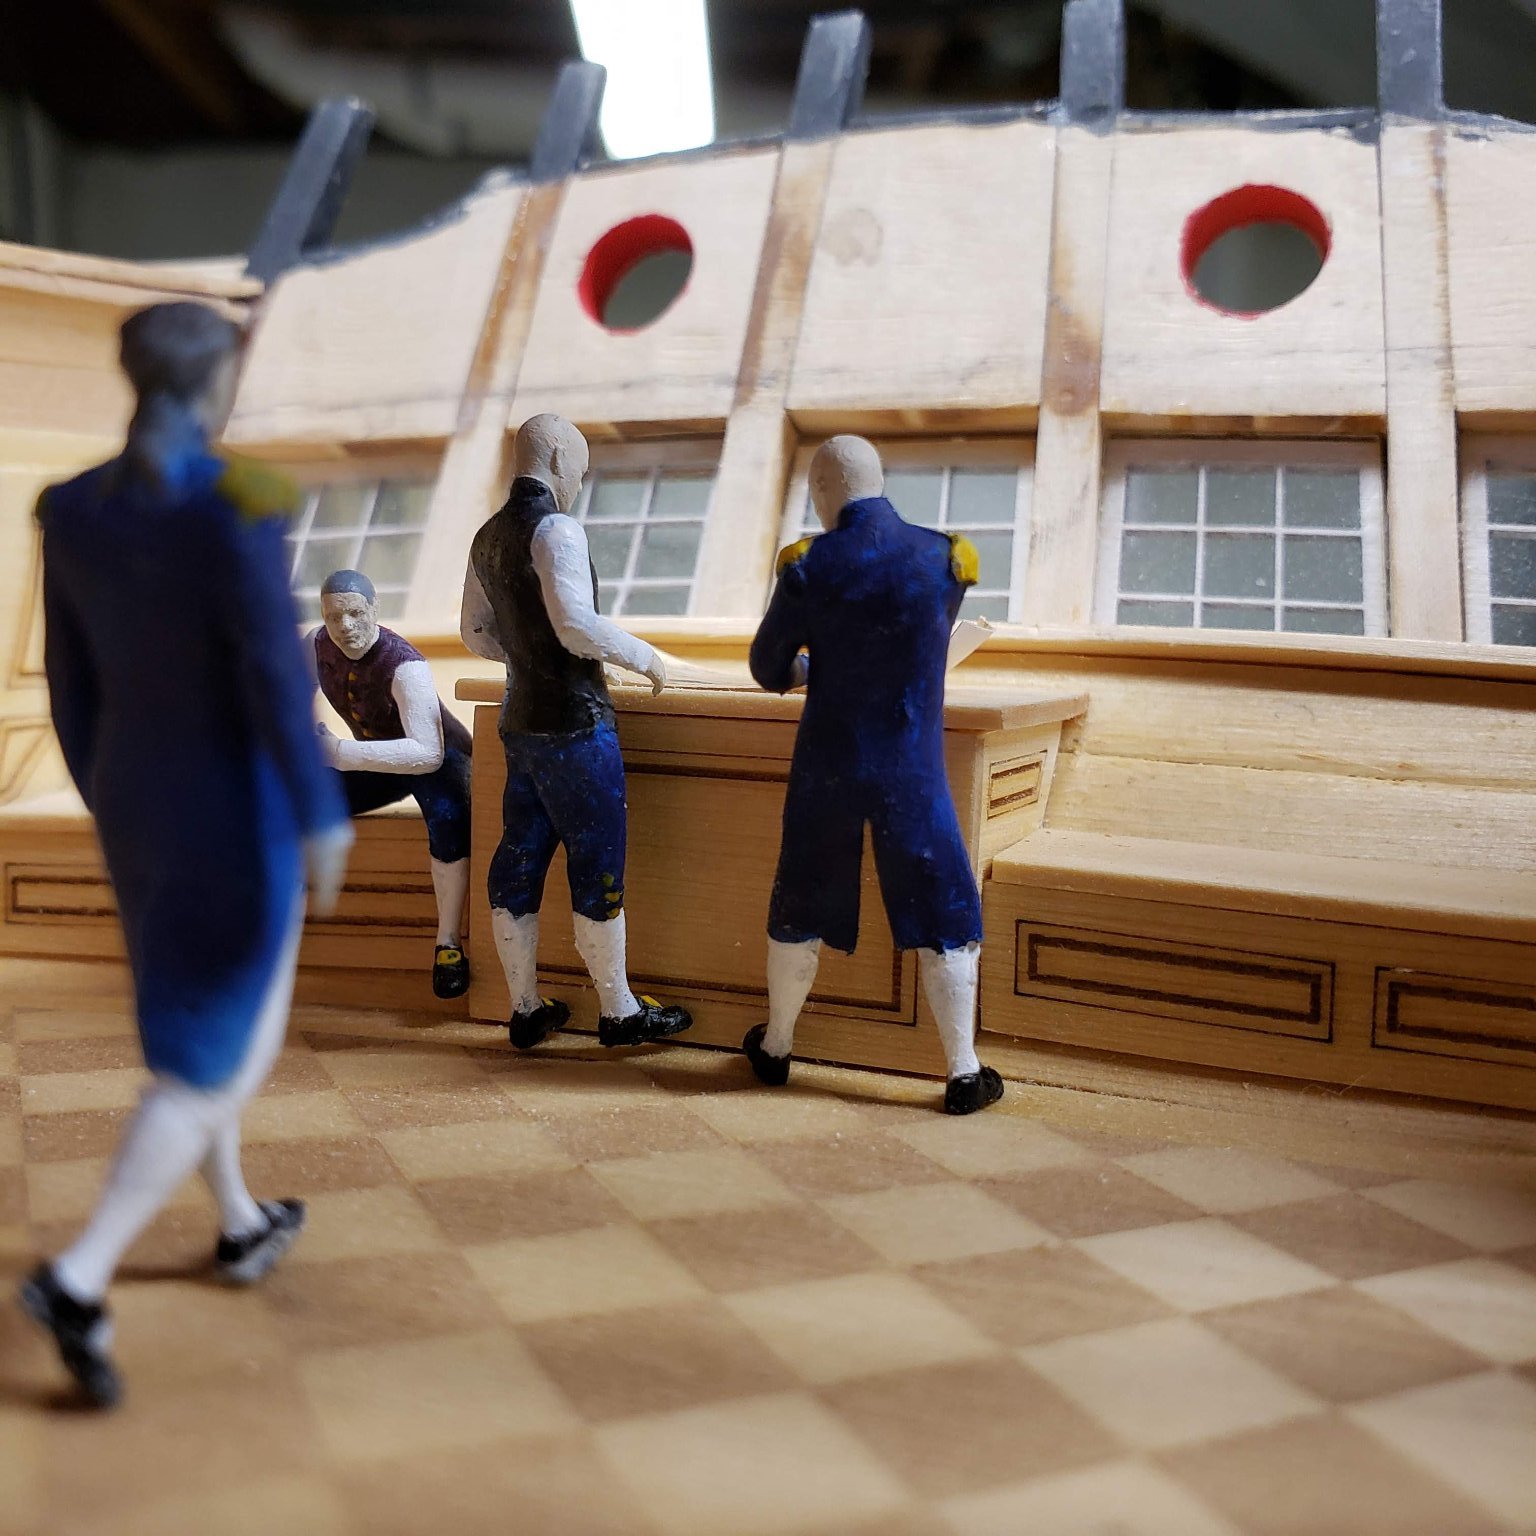
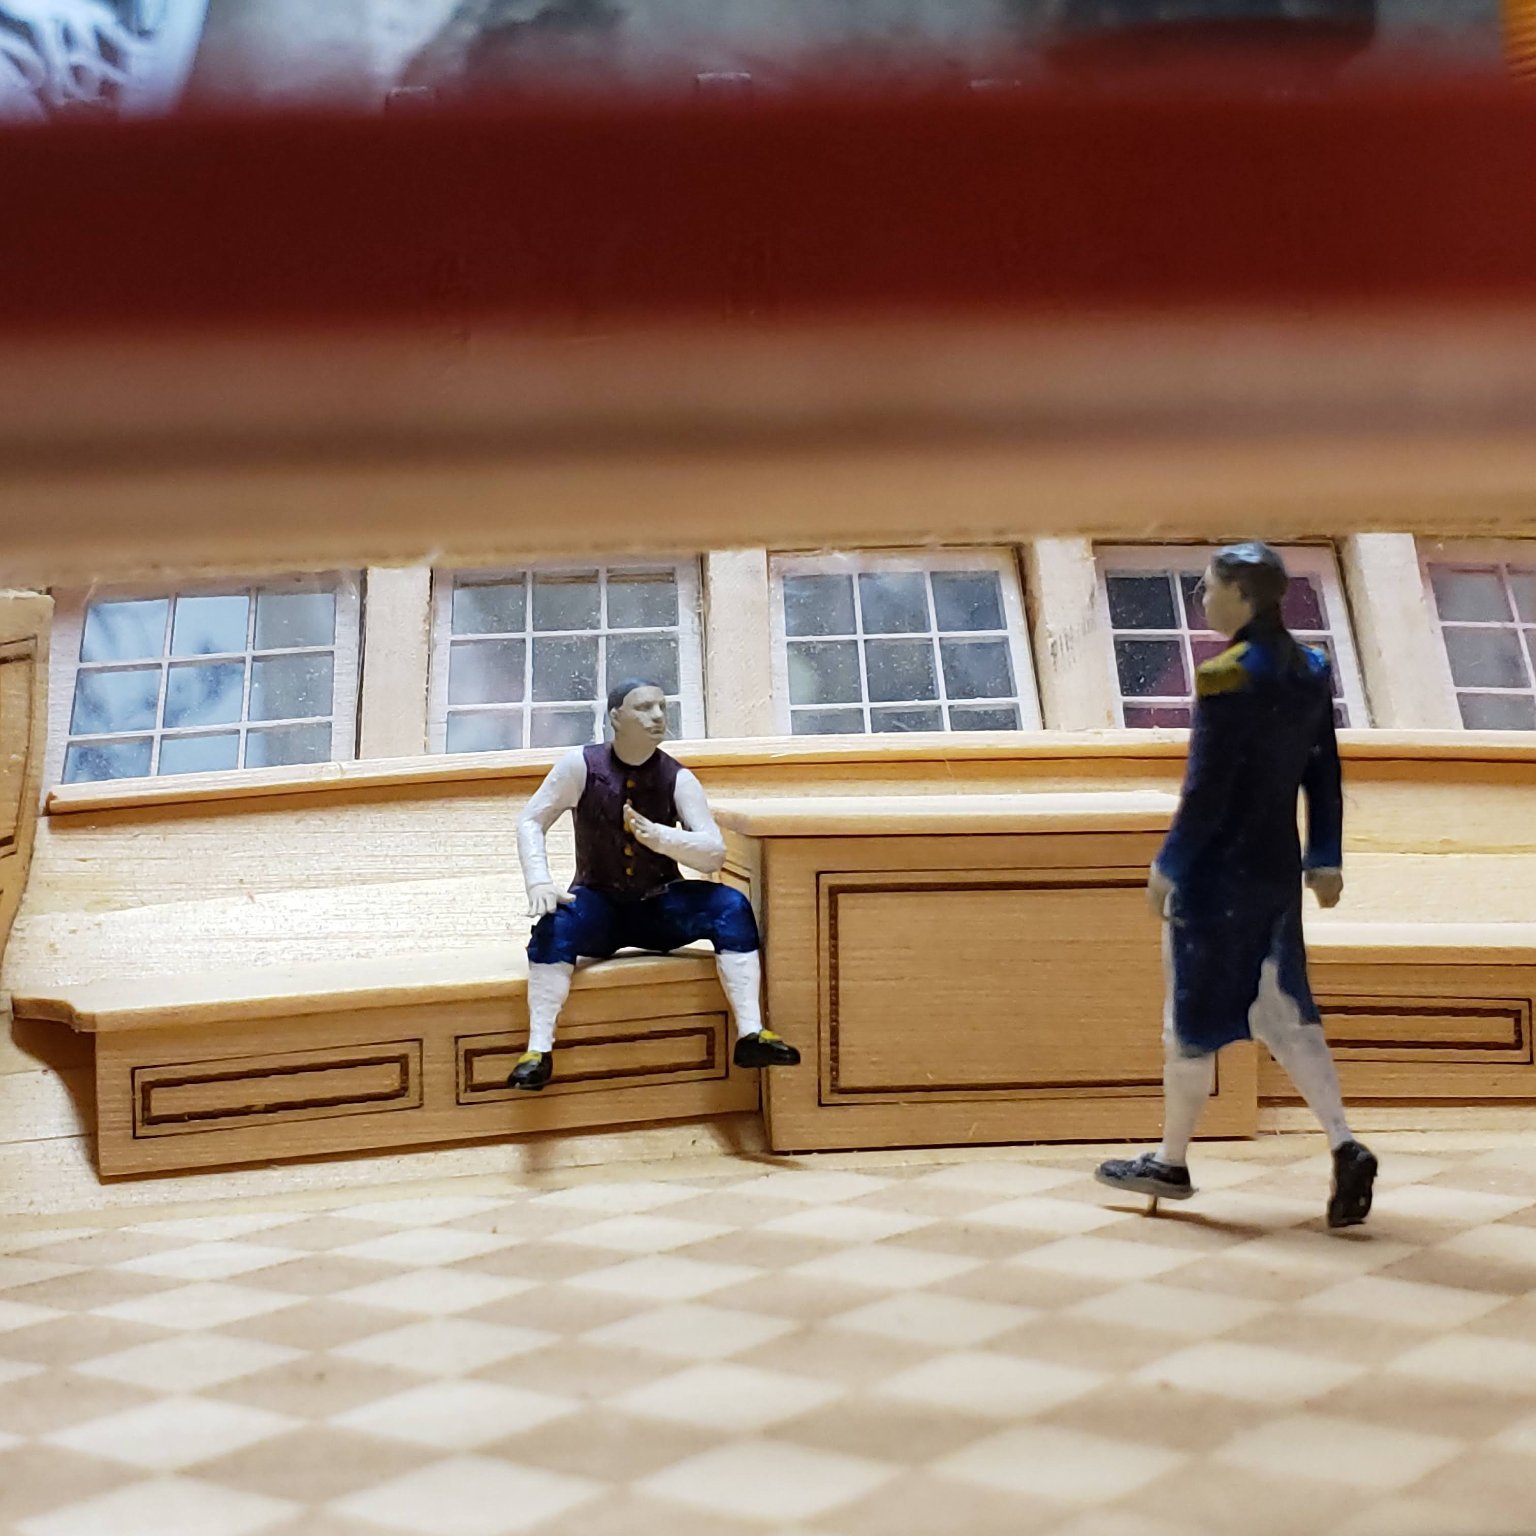
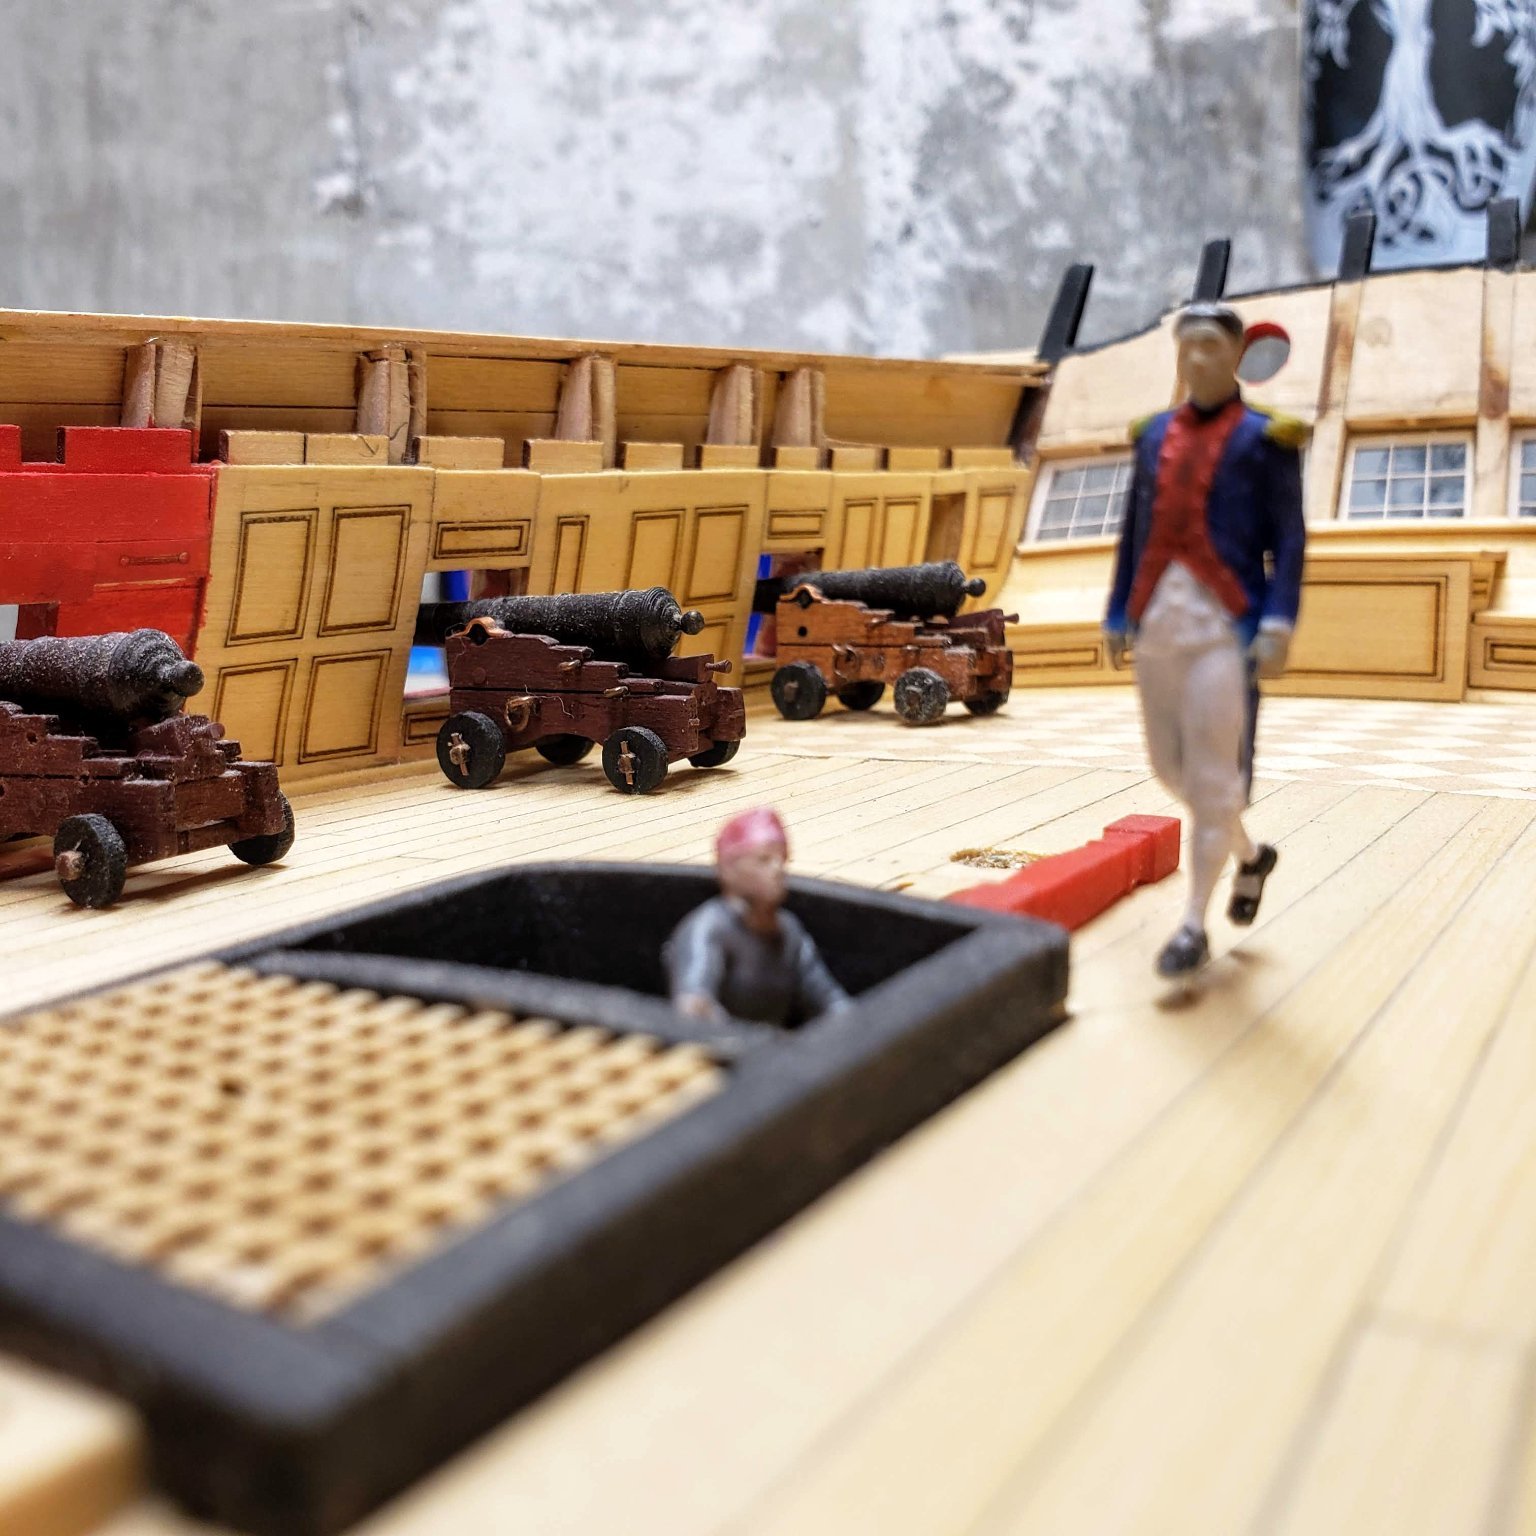
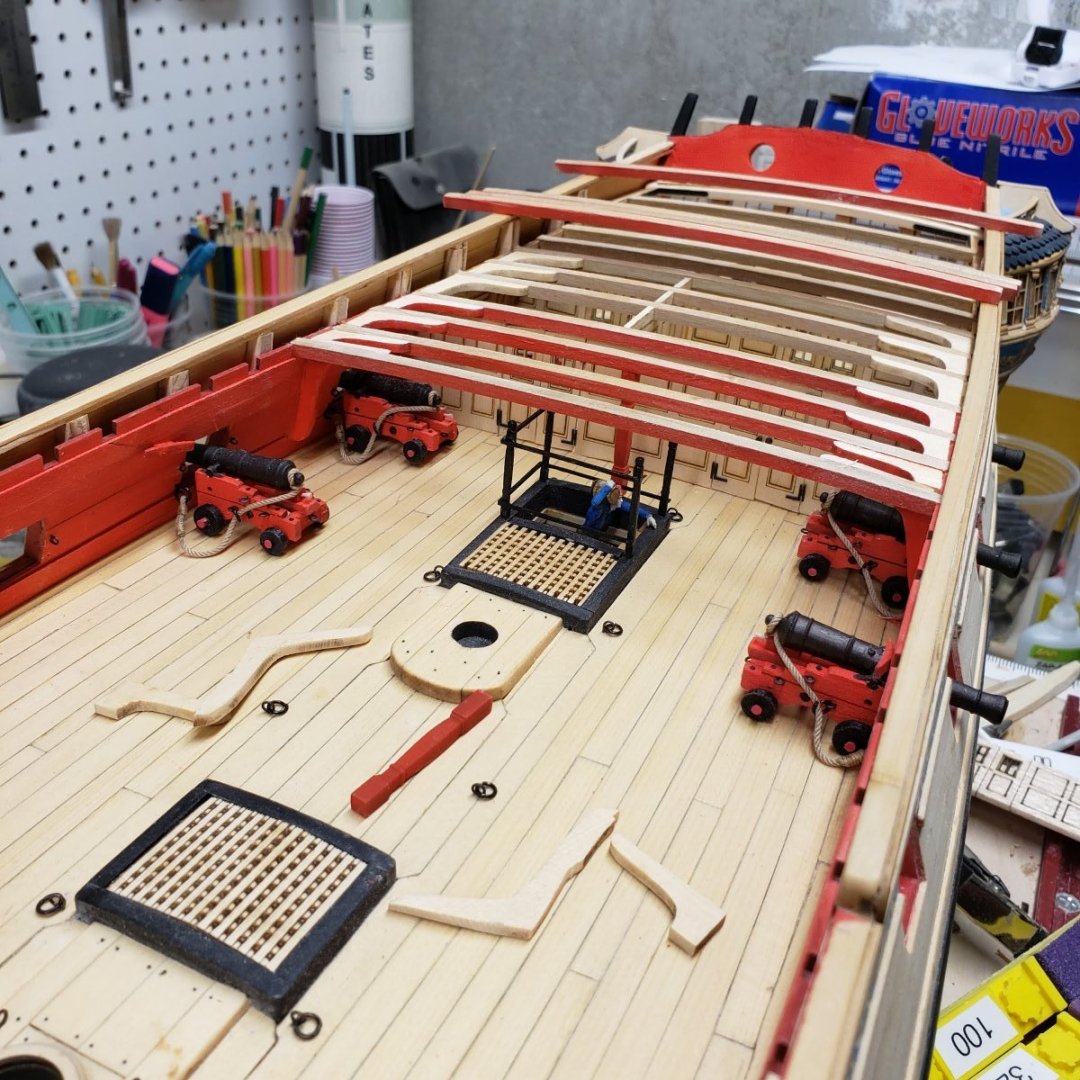
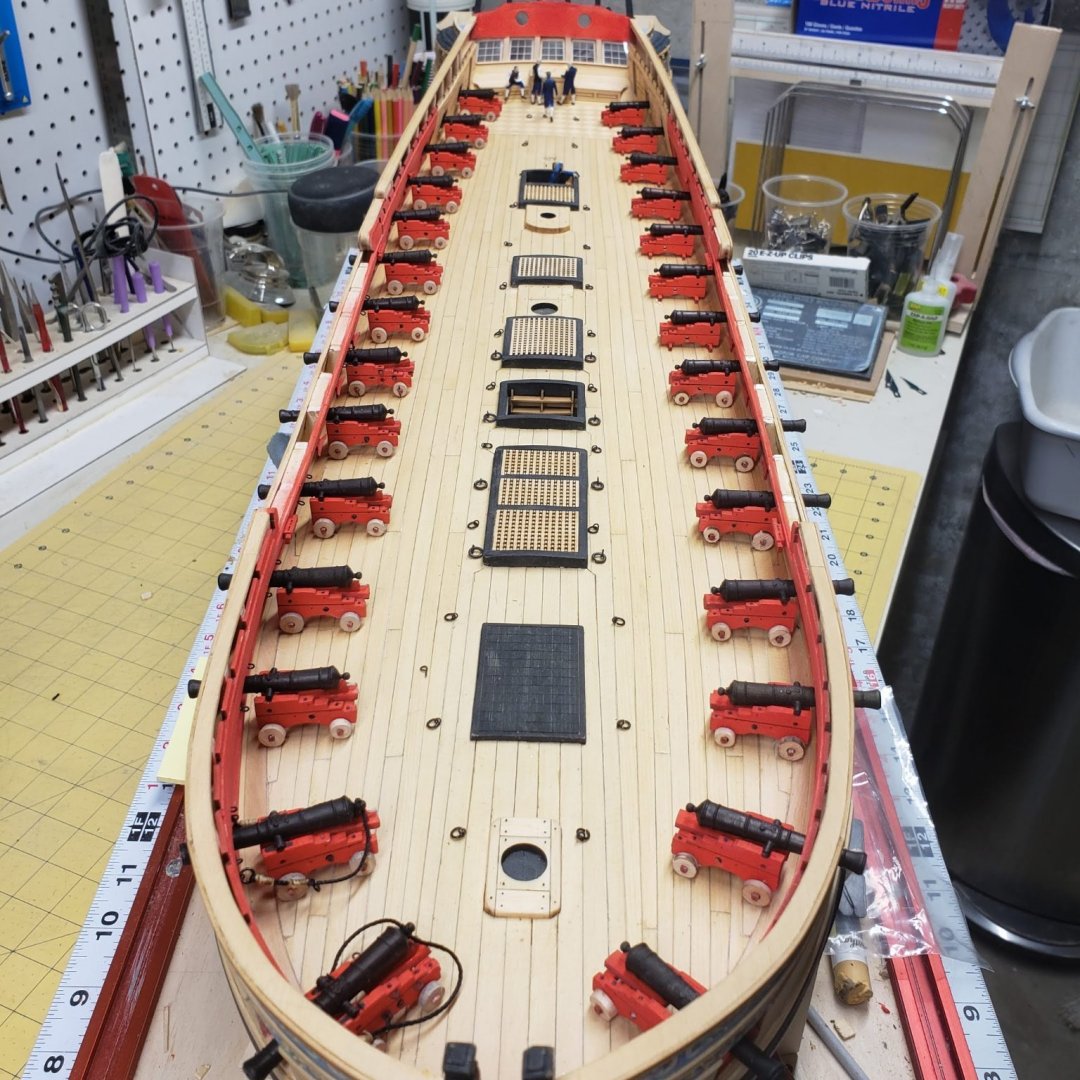
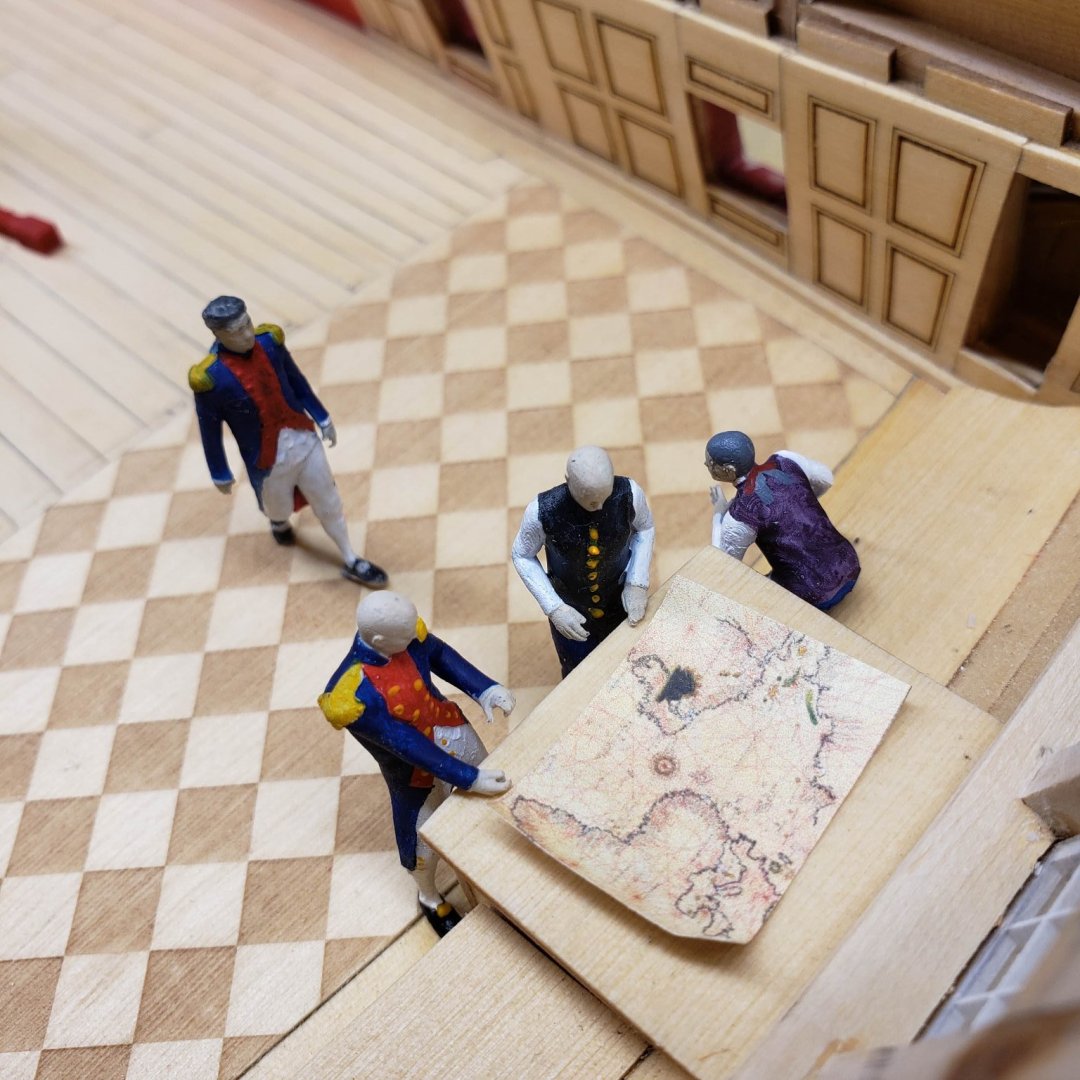
Working out deck cannons for the moment, a lot of repeating elements. Thought about rigging the lines on the Cannons, but soon changed my mind on that for the moment....kind of in limbo for the moment as I think about the carriages and if I am going to be sorry if I take the wrong turn here. Anyway a shot down the deck with a bunch of not quite completed guns. Also added some pics of the officers looking at the maps and cooling their heels, so to speak, These guys are complete and in place for better or worse. I am going to add haircaps to the two bald ones on the map table


-
I found them at Zorro for about $5.99 each sold in sets of two. They fluctuate in price. I've passed on adding more due to high cost. They're made by Bessey xcl2.
-
Thanks.
-
Thanks for that heads-up Chuck. Figure head on hold...
-
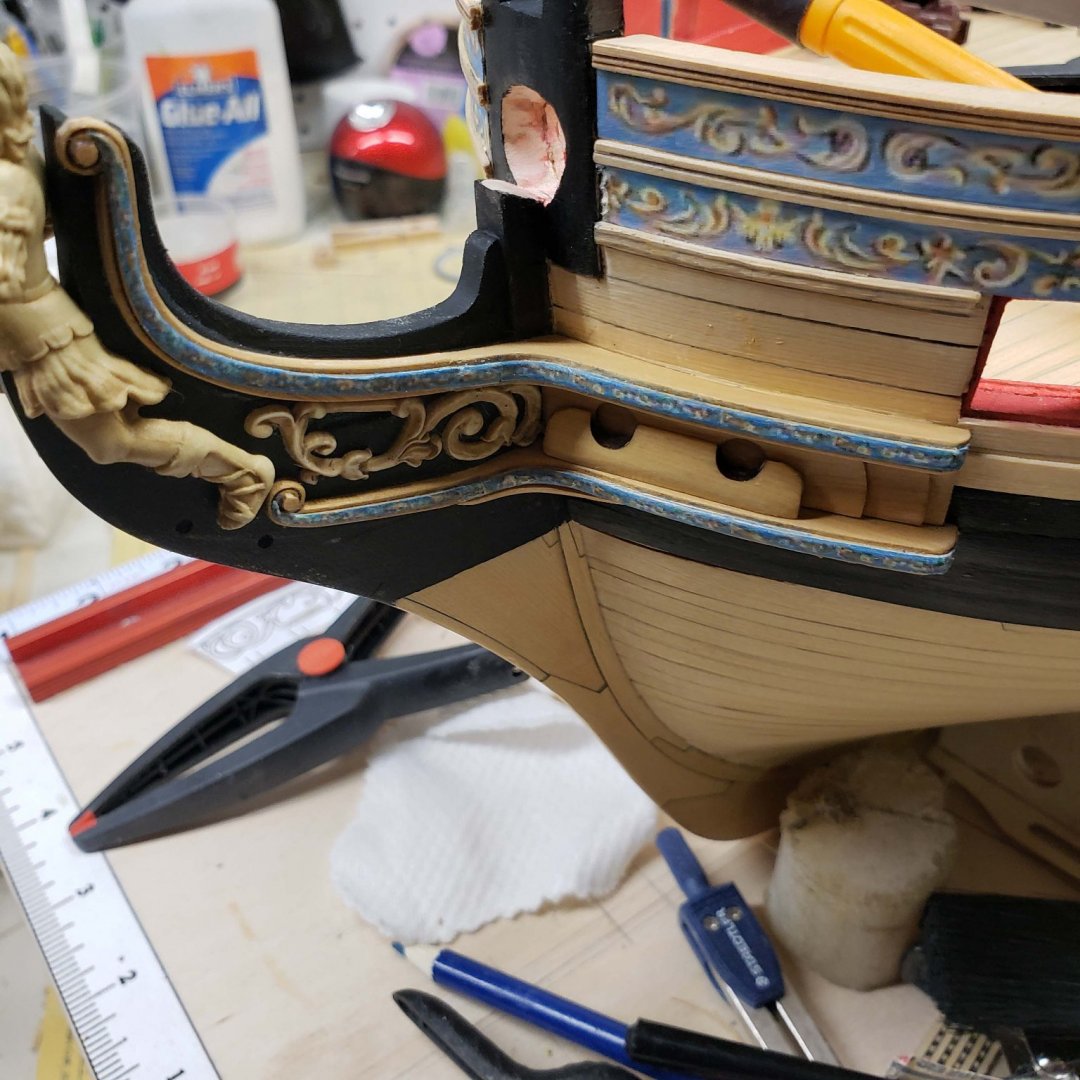
Port side Hair brackets finished. Truly a time consuming and hair pulling exercise in Modeling. I am most likely going to take off the frieze and reapply new ones as I am not happy with the overlap areas. The Bow wash still needs to be painted black, and the figure head is not glued on yet. Lids for the cannon's are on hold for now. In the interest of not having to make repairs to them. Looking forward to finishing this area as I have many loose ends to tie up. I have about 12 hours into this side over 3 days.
-
Sorry to hear about mini me, but if it was made for Chuck there exists a 3d file that can be reprinted. I've never seen Chuck so I don't know if that was a full body scan or was done through photos, either way making a model from scratch is a tall order. But I appreciate the confidence you have in my ability
-
Just incredible workmanship. You should be very proud when you get a chance to display that. Hopefully many will get to enjoy this. Unfortunately many of my models just become dust collectors....
-
When did mini me go missing? I thought I saw him in recent posts.
-
Thanks, looking forward to moving forward
-
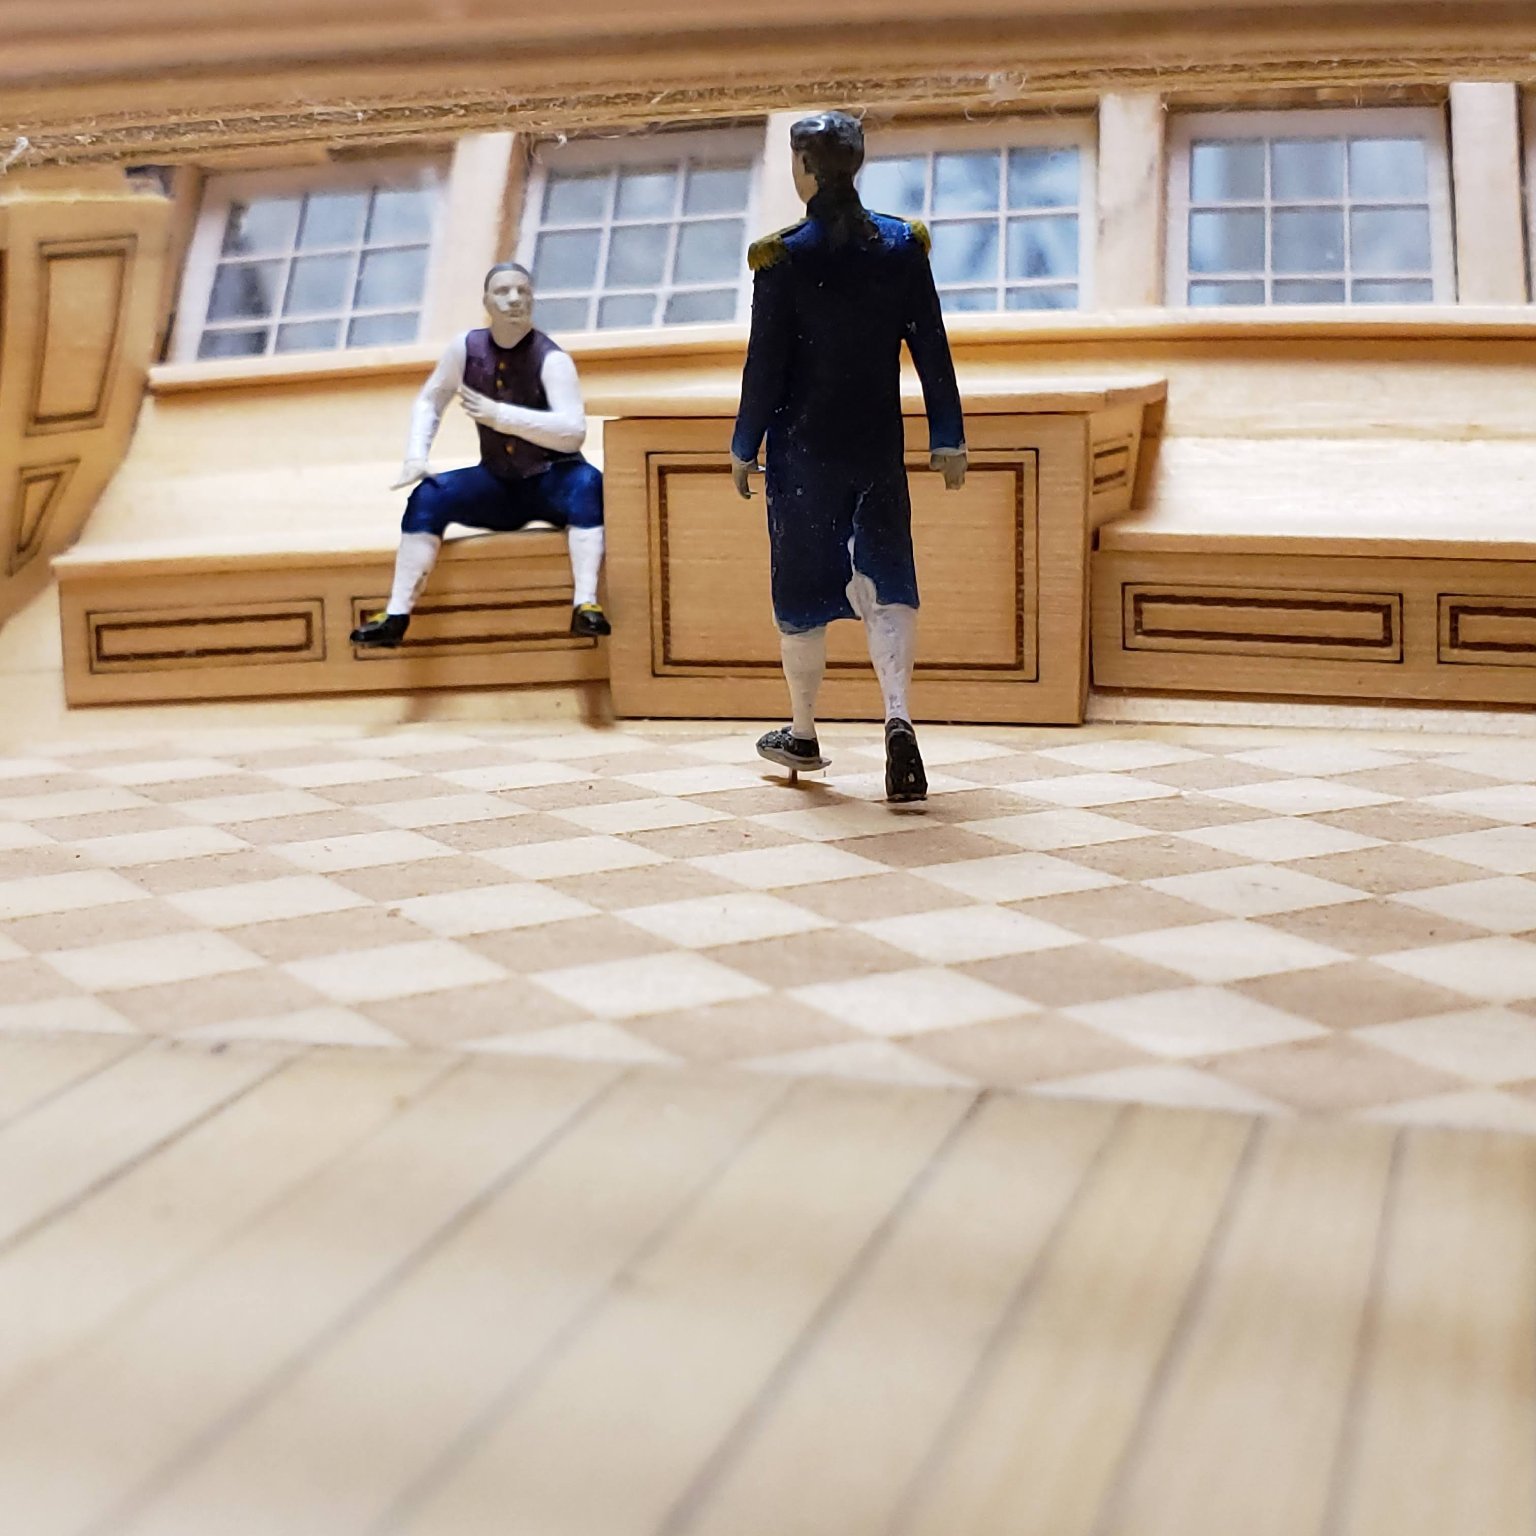
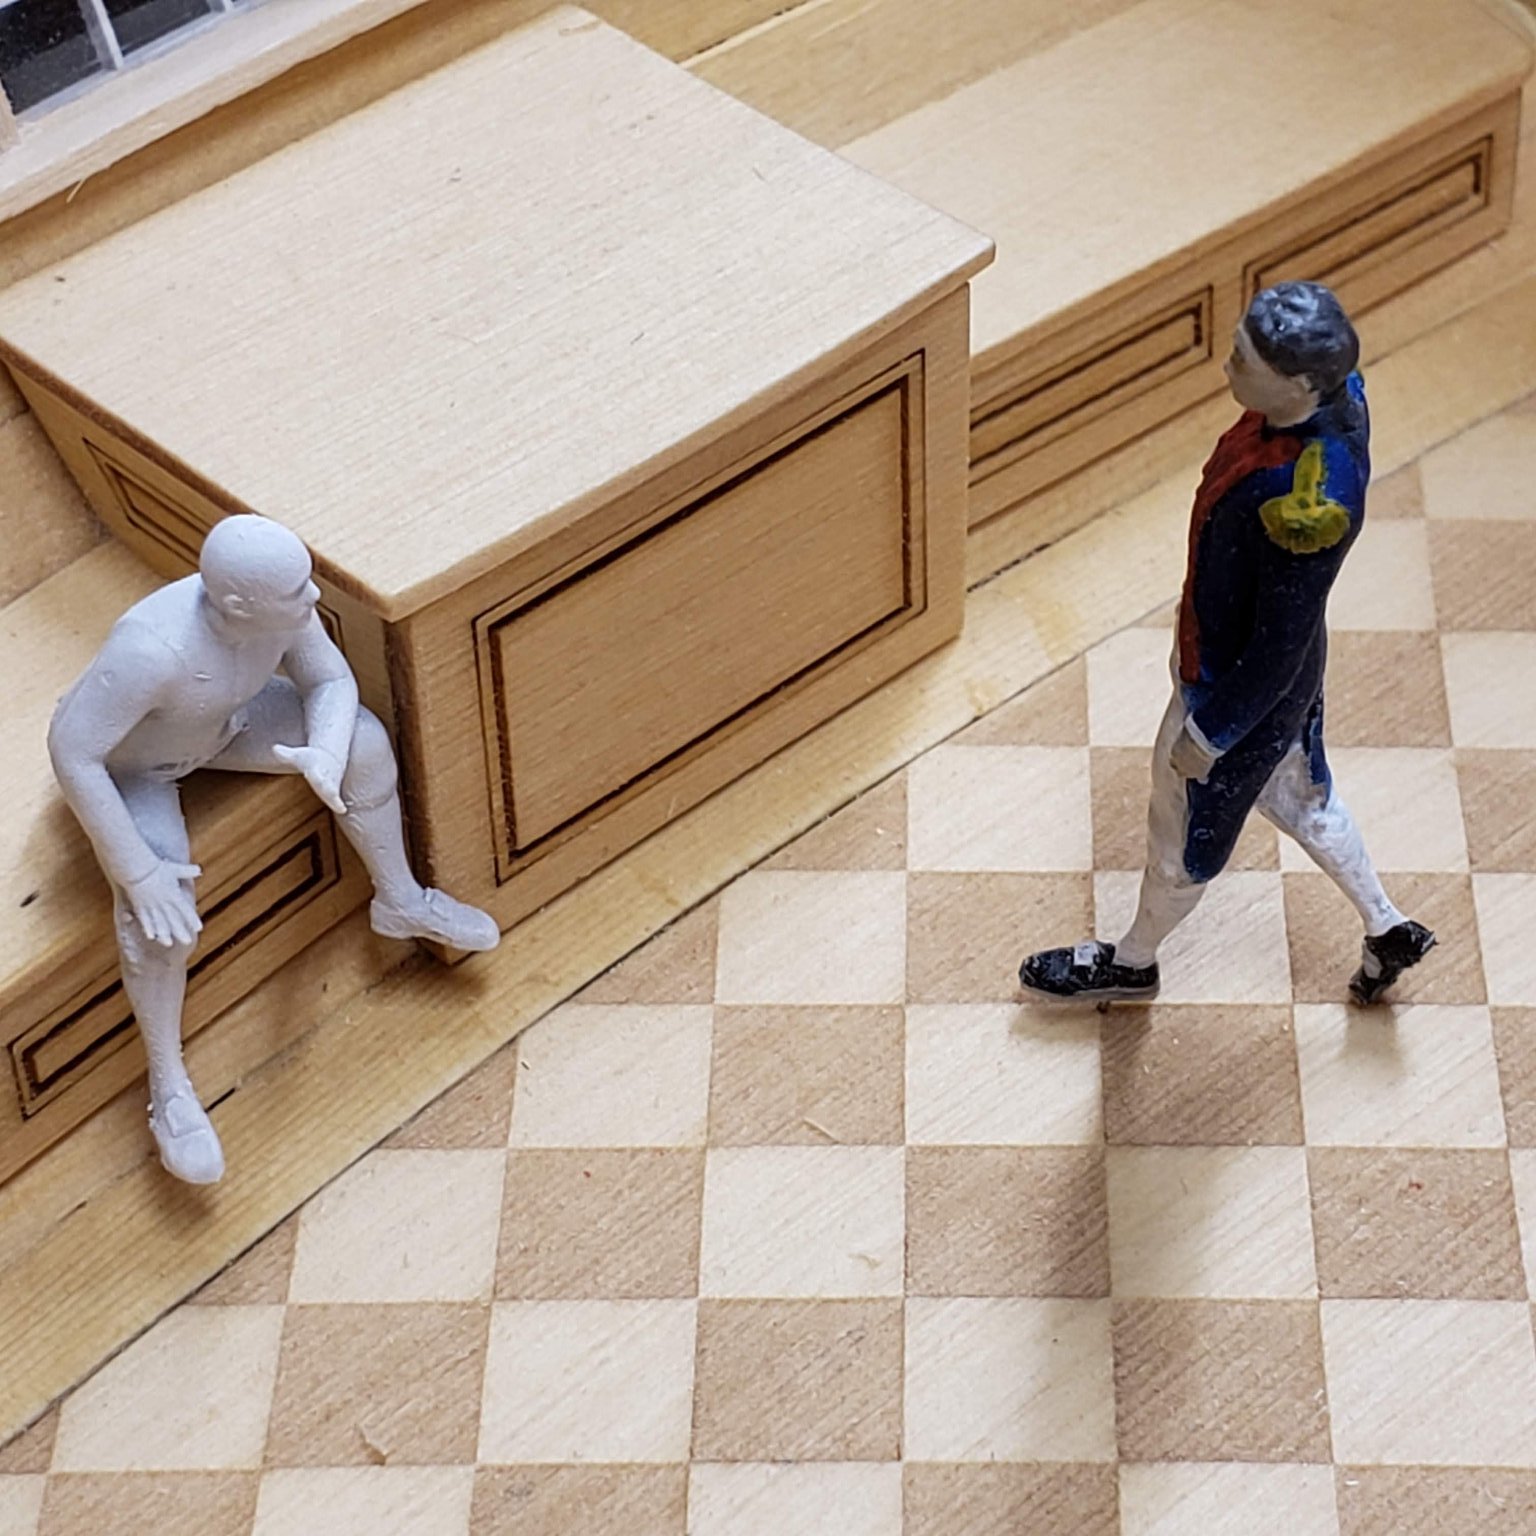
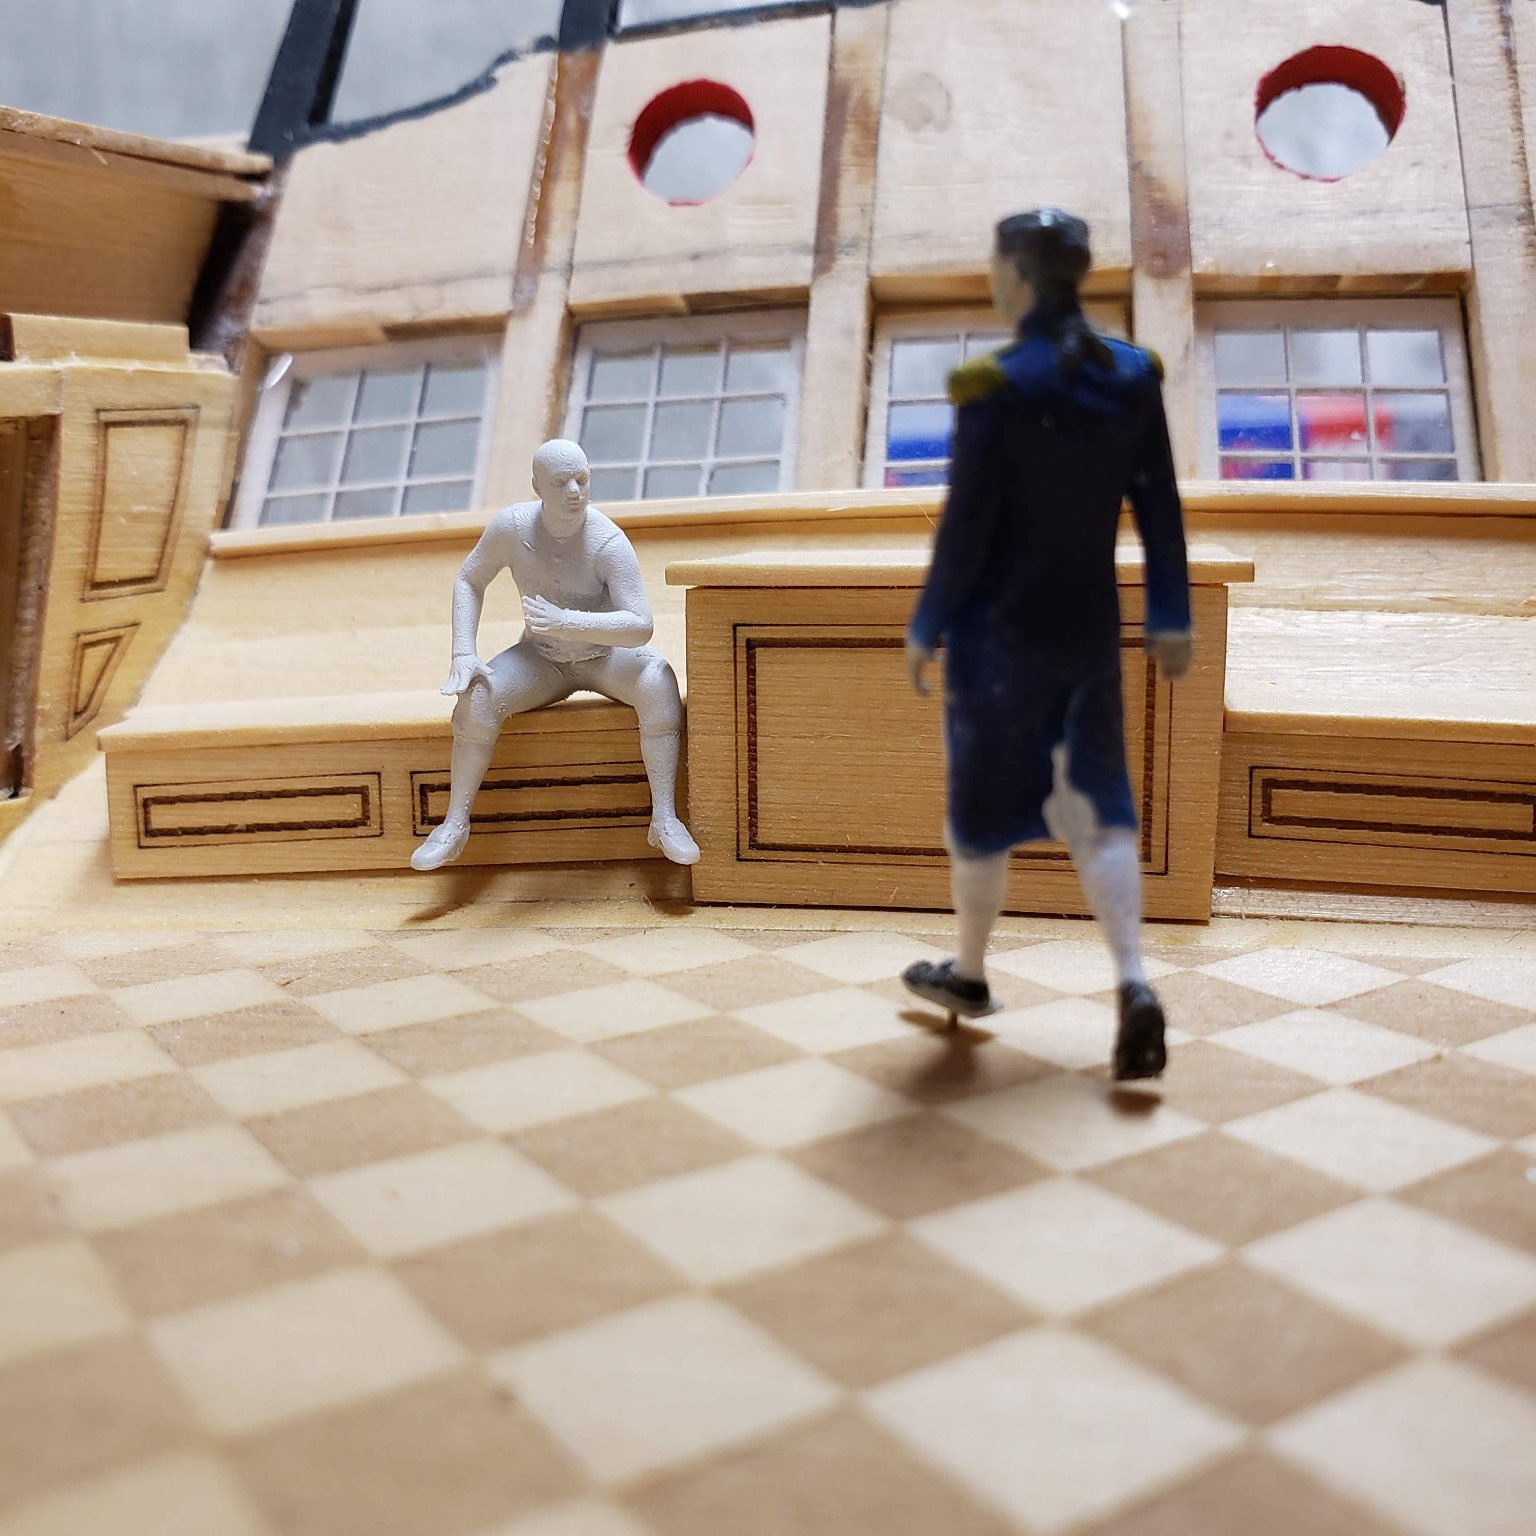
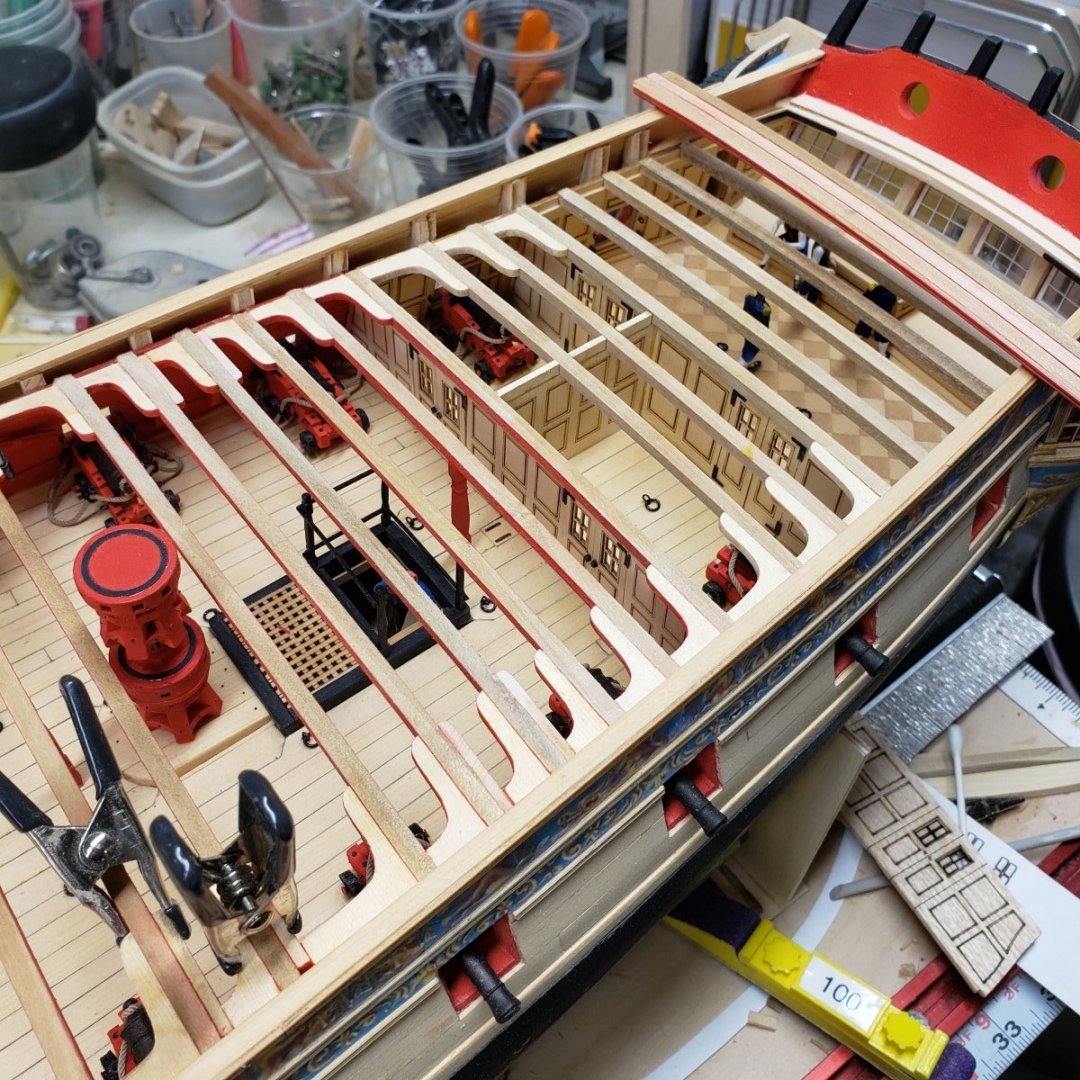
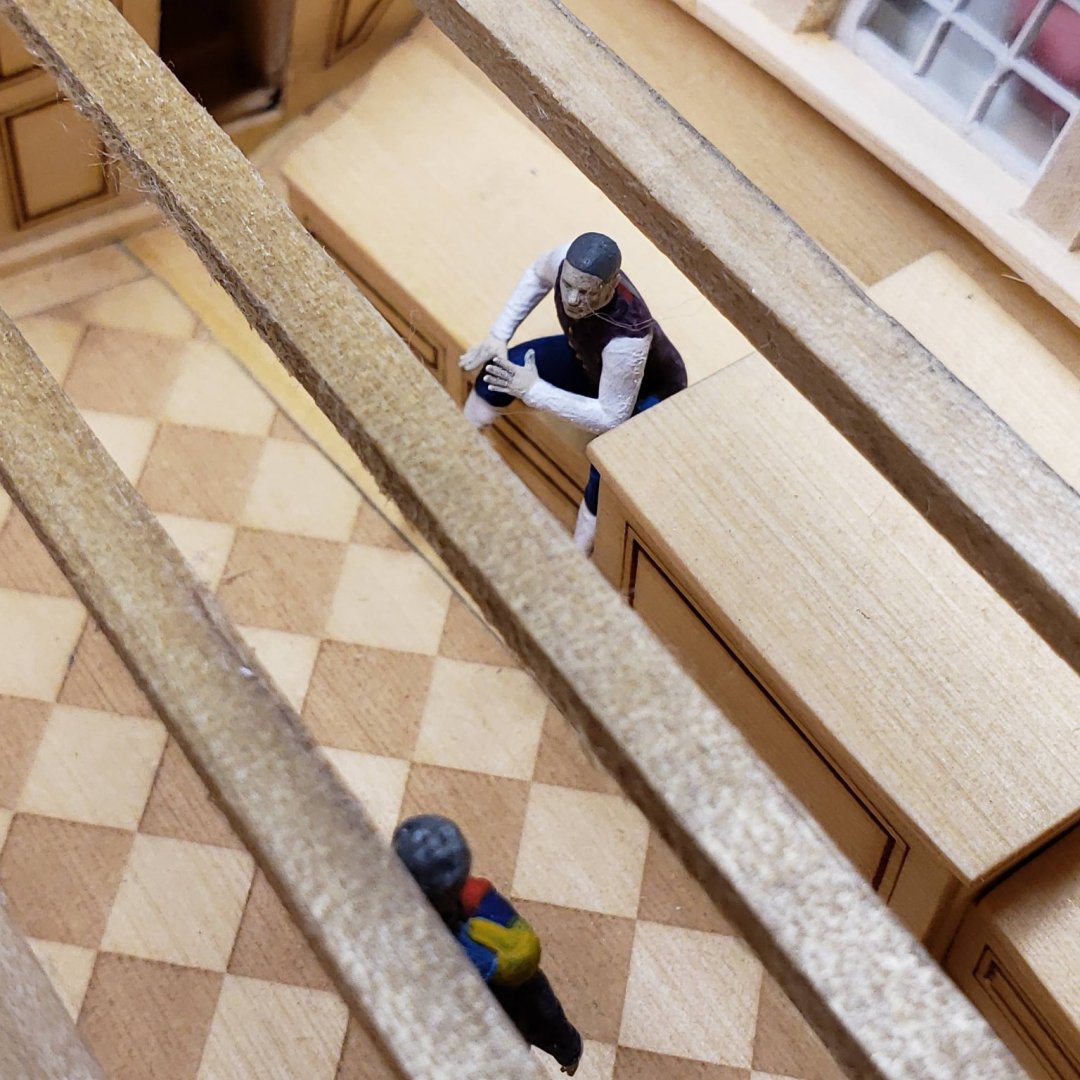
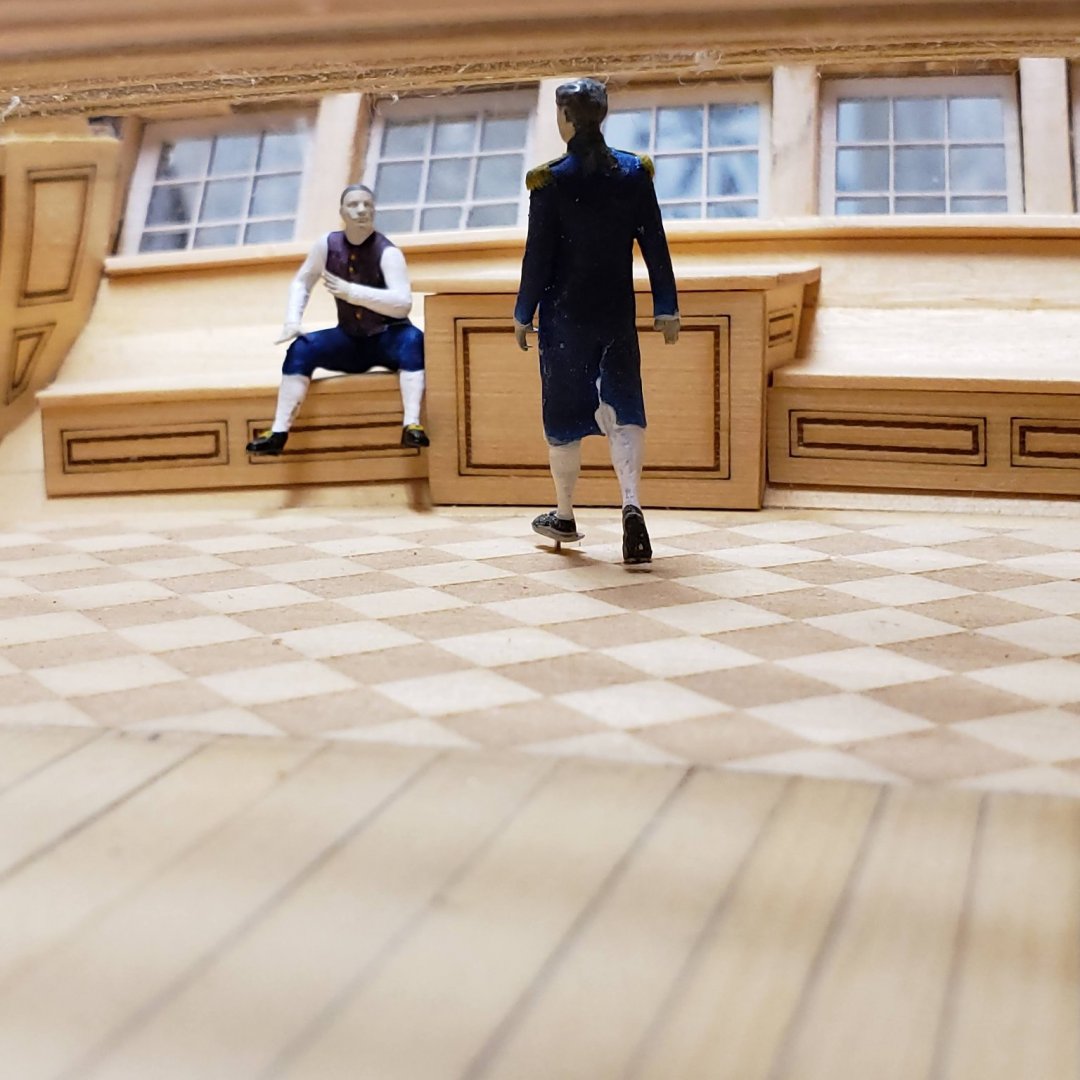
So this is a follow up to the seated first mate in the captains quarter. I painted him and placed some of the beams to see what it looks like. I think this is Ok. I need to get on with these areas so I can button them up and move on with catching up to Chuck and the build. Photos were shot at deck level and the captain walking was not set firmly into the deck yet. I will most likely CA these into place when I have them all settled into place. Cotton swab hair hanging off the beam in this overhead shot, those were cut by the cnc and have not yet been finished.

-
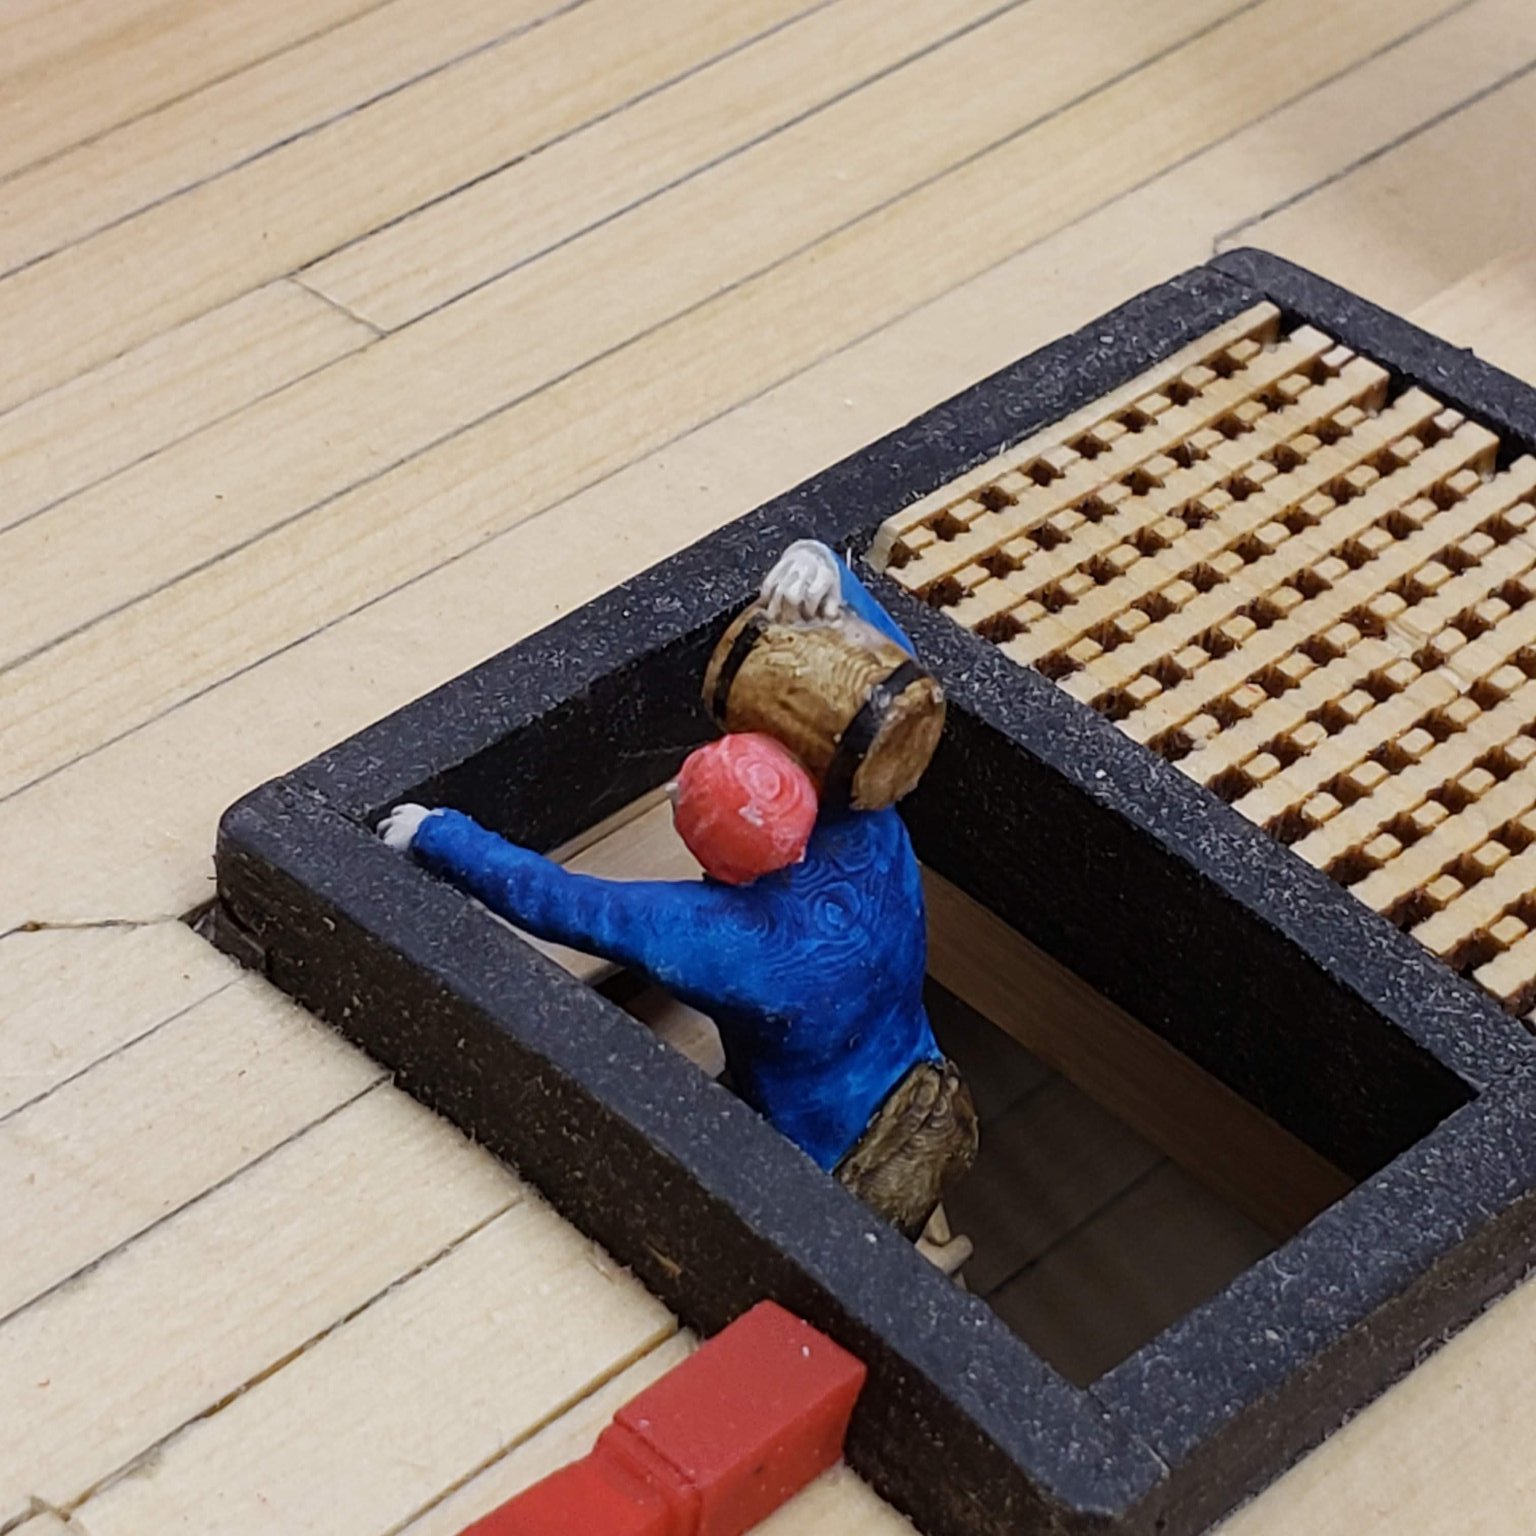
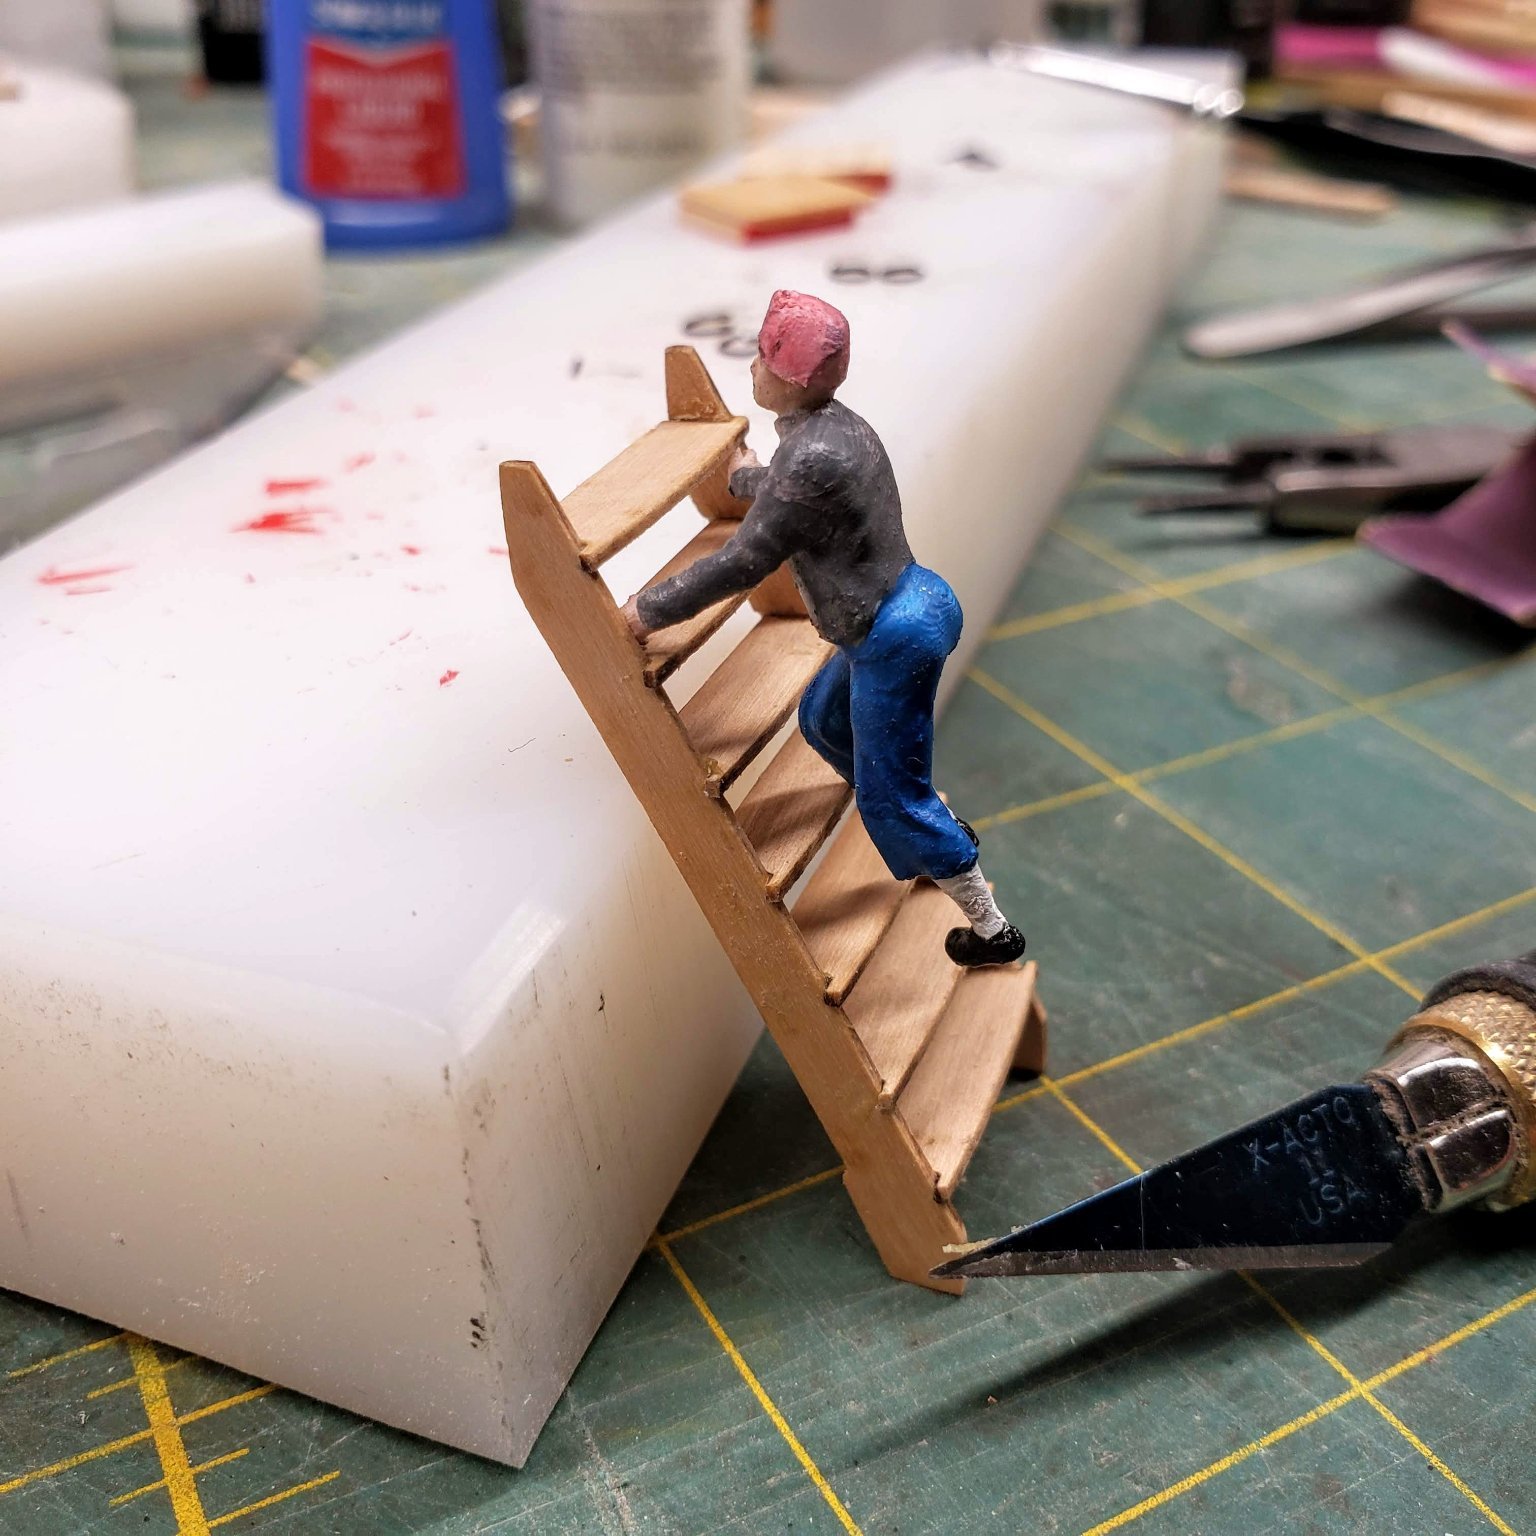
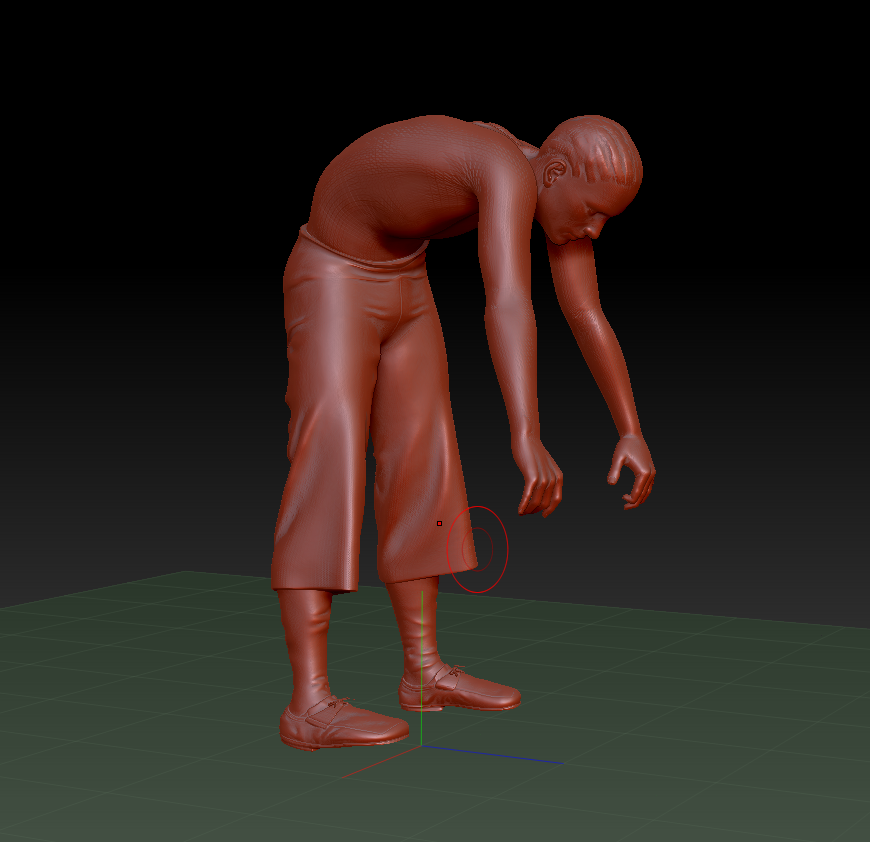
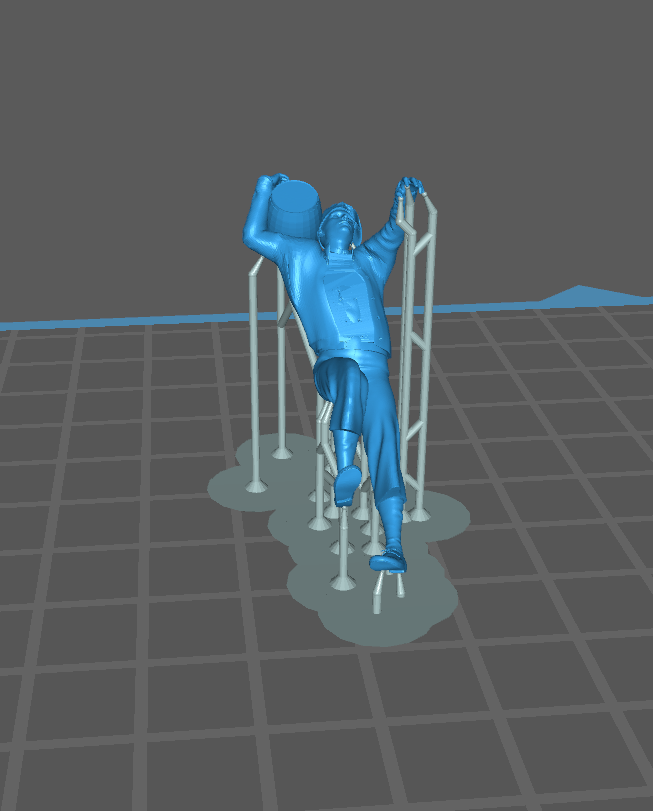
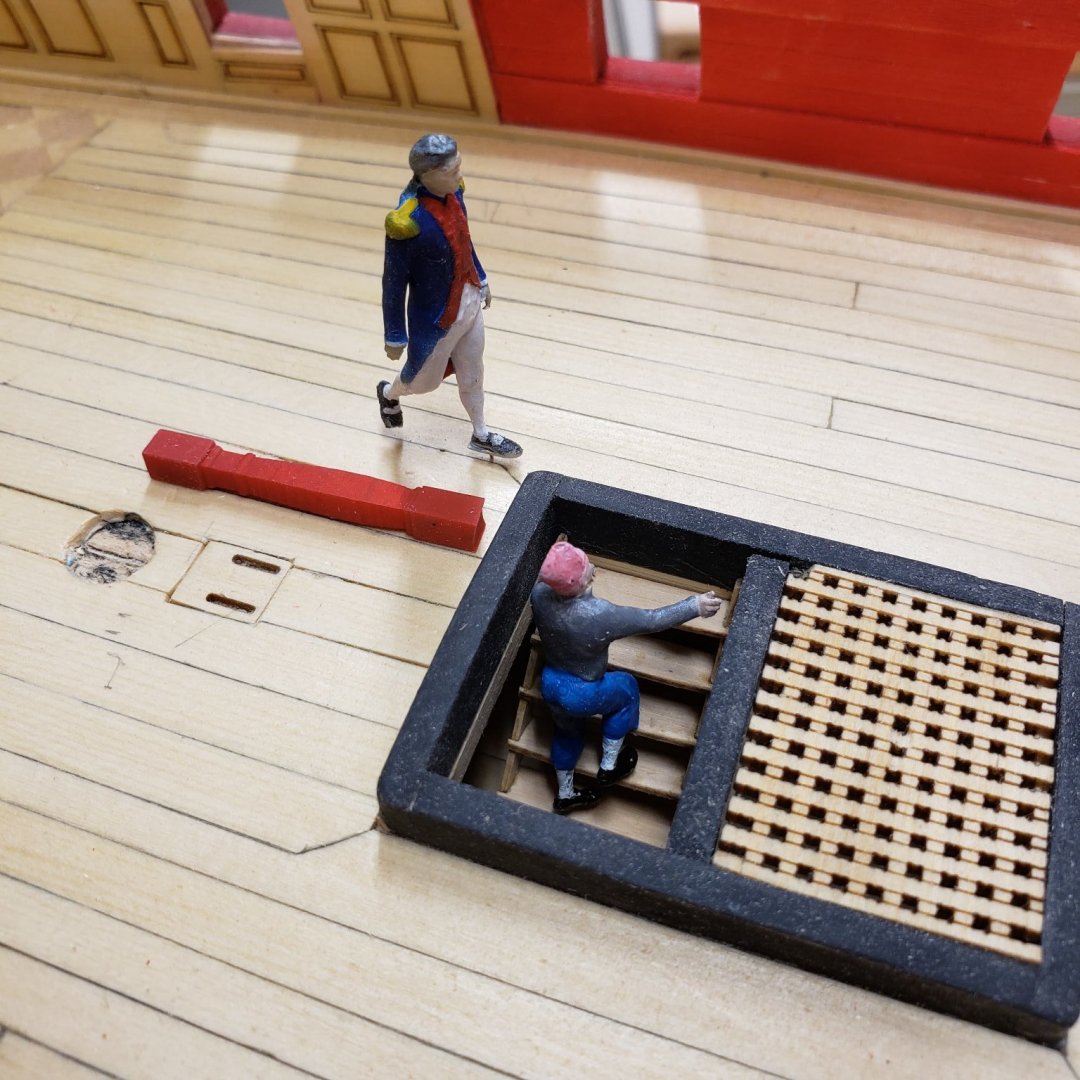
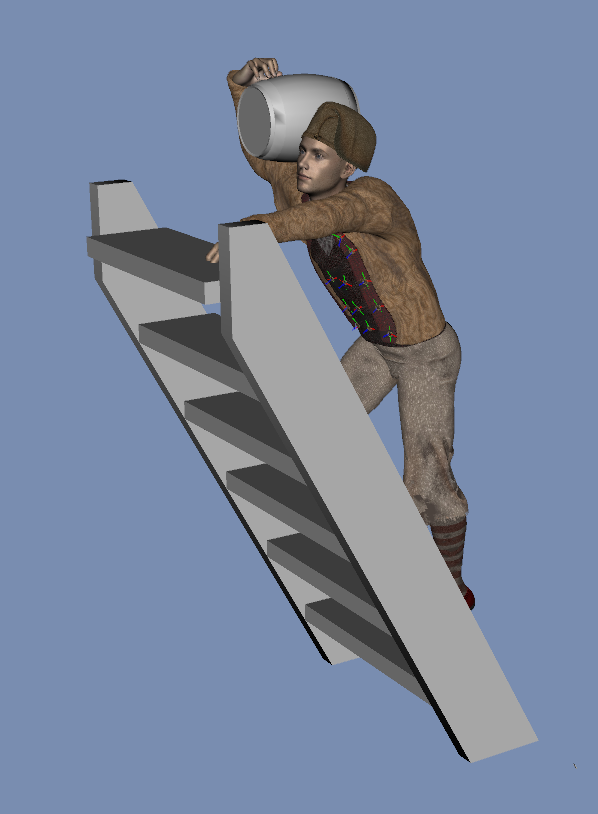
Well I'd like to say it's a simple process, but it's not. I am using 4 different software programs, and an Anycubic Photon Mono X printer. You have to create the various poses to fit the scene you want the figures in. So you have to 3d model the ships parts. I use Sketchup Pro to do this. Then you have to export that as a 3d Model and import that into your poser program. Then you get into the whole scale problem, all of these programs have to be adjusted so that the scale is accurate across the transfer of the files. So that is all well and good, but now you need to have the actual models of the figures along with the clothing. Then you use the imported ship scenes and pose the characters. Now you export the figures after you are happy with them to yet another program, this one repairs and make the models solid so you can print them. Then you export that as an STL file to a slicer program that cuts the model into .02mm slices and prepares it for printing. Then you add supports so that the character will print correctly, wait about 2 hrs for the printer to finish, remove it from the printer, wash with alcohol, rinse with water. Prime white with an airbrush and them put on Magnifiers and paint the little guys, if you have the shakes, you'll never get them painted. I sometimes have to strip and repaint as many as three times to get it right. I have been doing this for awhile so it's not so bad for me. You need to be well grounded in the digital world, I have a lot of the software from other ventures and I purchased the 3d printers for fun. As you might guess the learning curve is steep and if you had to purchase all the programs, etc. etc. you would most likely throw in the towel. I am self taught on this. I use the crash bang method of learning which results in a lot of failures before you finally get it right. this is the deck hand with barrel on the ladder. The ladder was molded in Sketchup 2021 Pro and imported in. Same with the barrel. Ladder makes sure you are posing the Deck hand to the model correctly, this is why scale is so important. Here is the figure ready to be sliced and printed, the vertical white poles are the supports, without those the print would not work. and the figure printed and primed, but not yet finished. they are so small that it is maddening to work with them
.png.c91937429b9780b97612666fb5276a78.png)

-
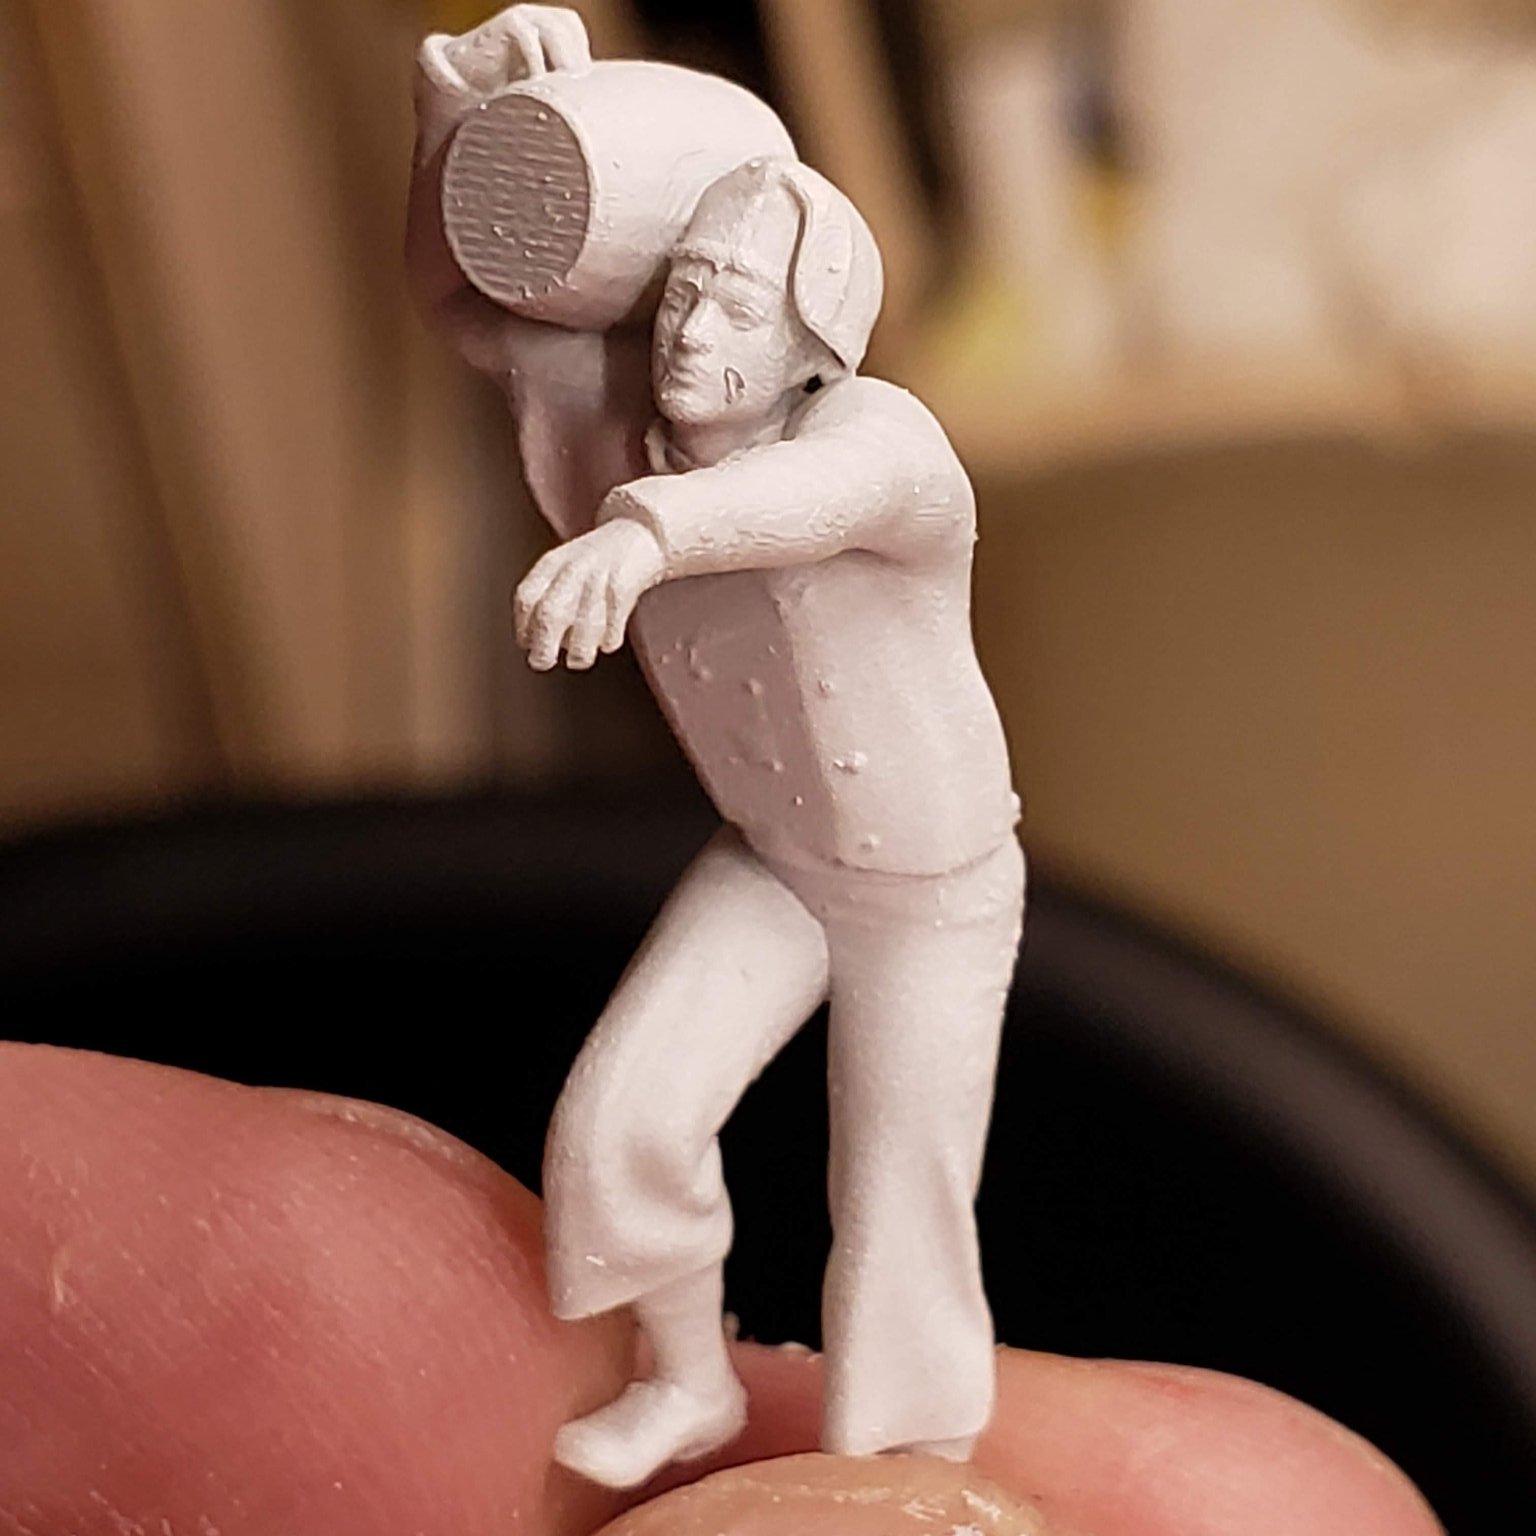
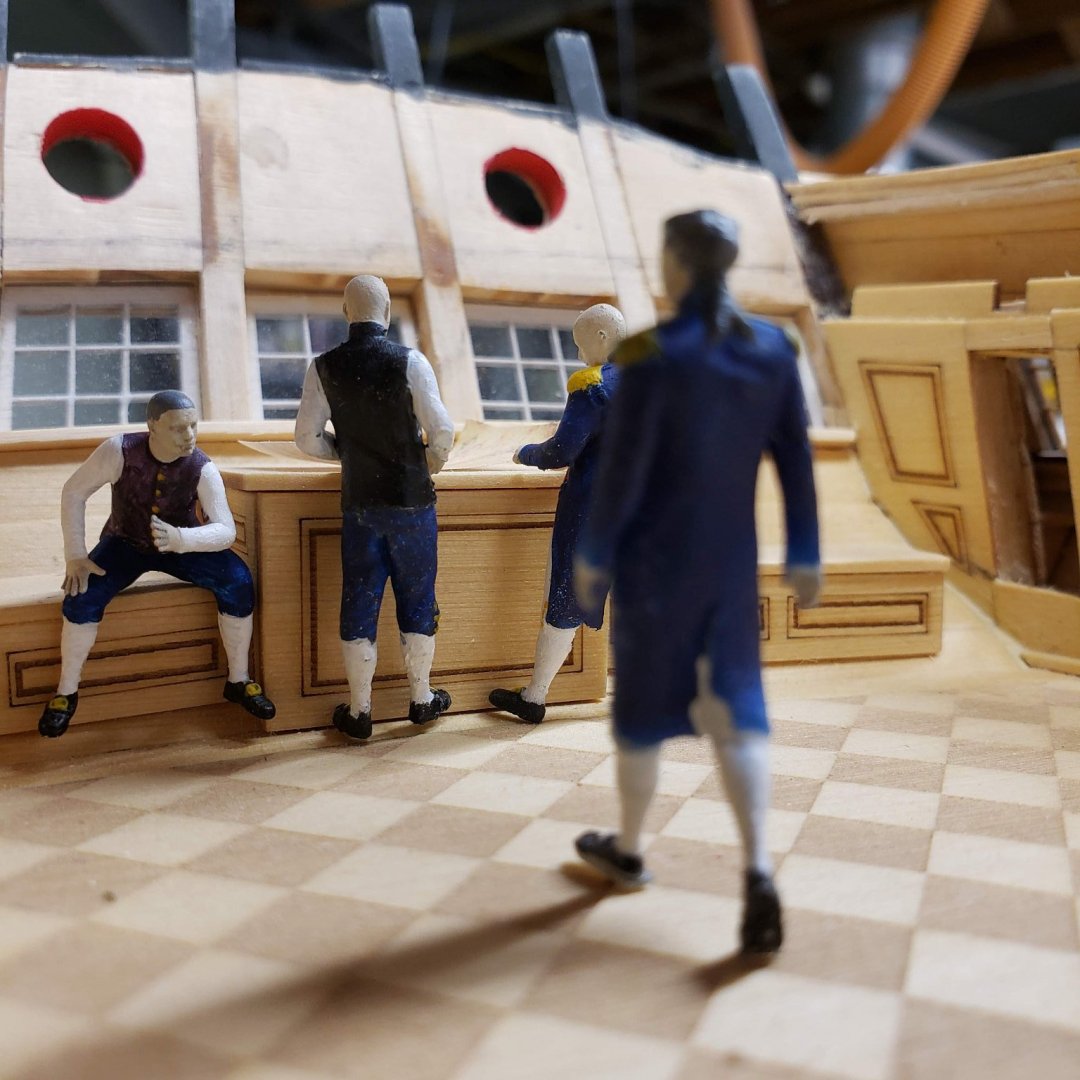
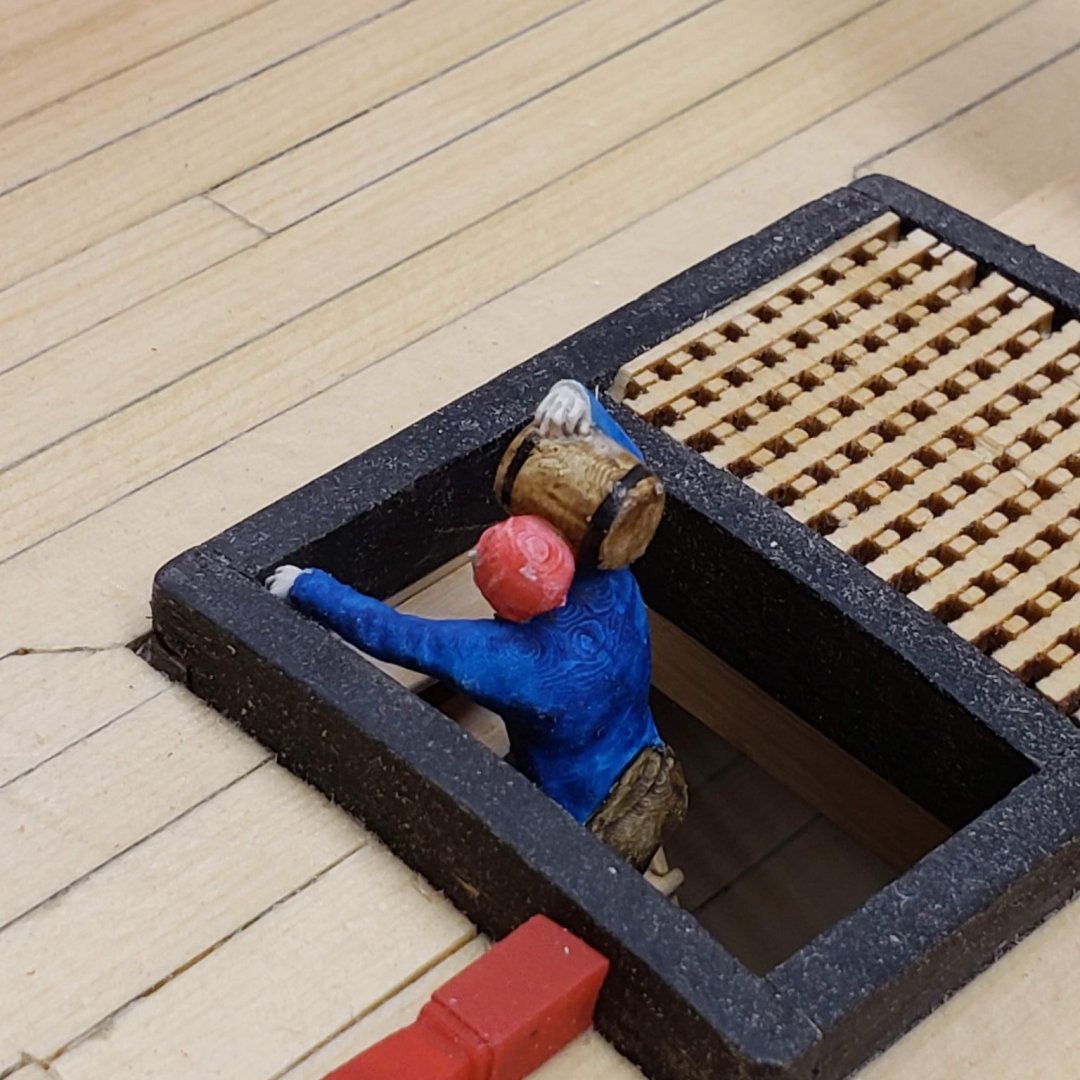
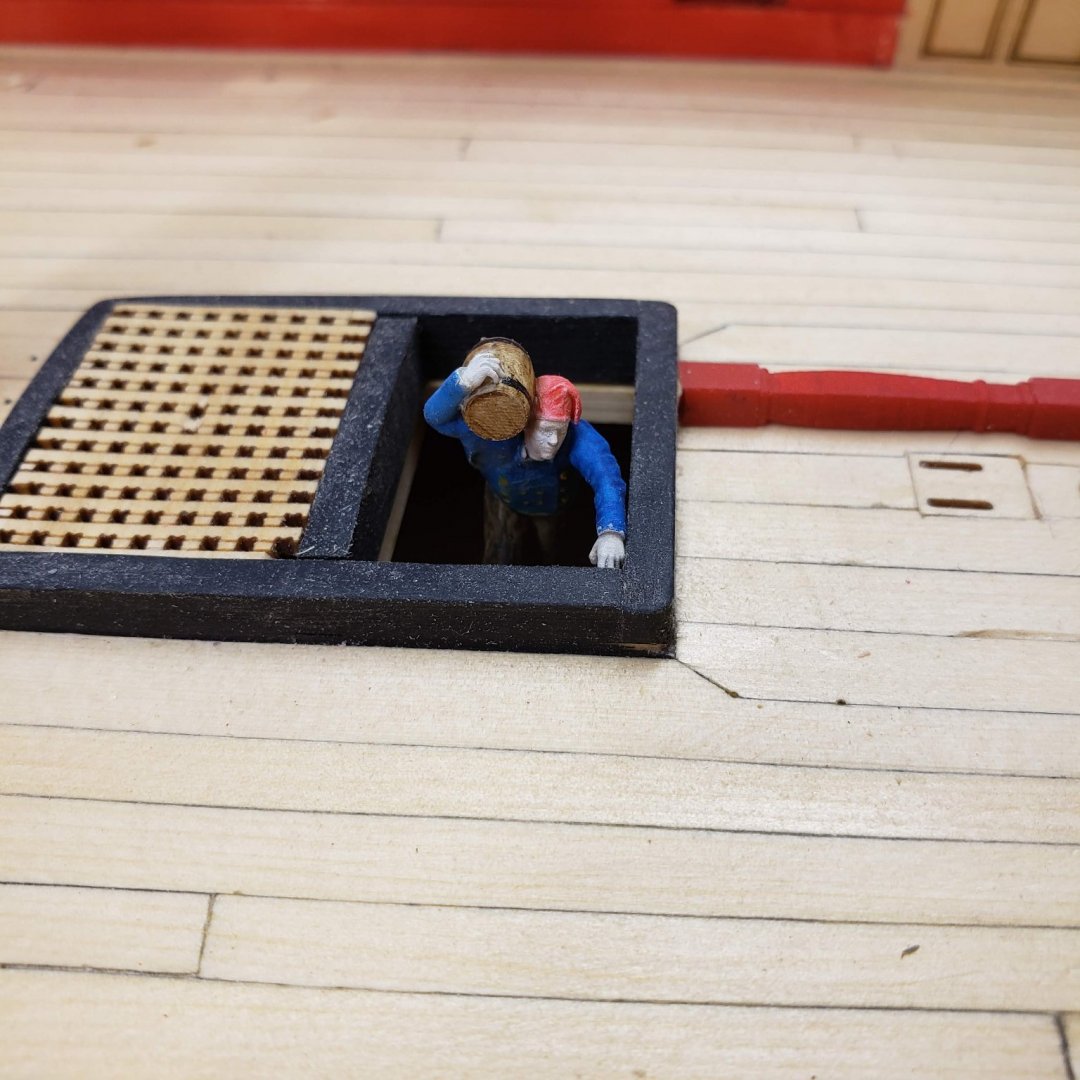
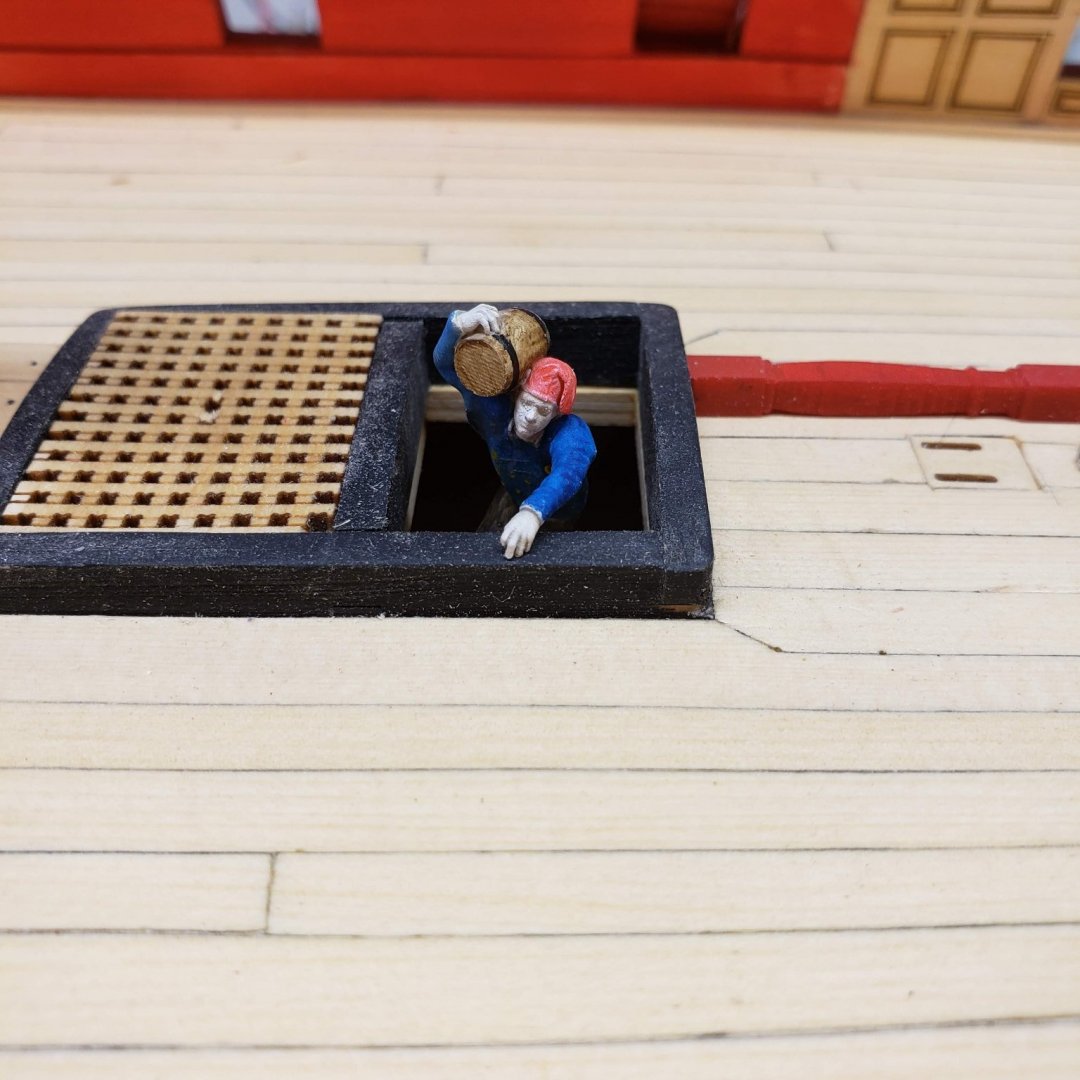
This is a follow up to the Powder Monkey, he is now carrying a cask of Powder, I also am giving some thought to another area that is going to be hard to access later. The sitting first mate. I think I am going to add more figures and have them standing and looking at maps on the Rudder box. His feet do not touch the floor as an average chair seat is at 18" and this bench is about 28" off the deck. Anyway for those interested the pics follow....


-
So I have arrived at placing the ladders, and it dawned on me that I would probably need to add the figures to the ladder before installing it in the final position. I printed out the figure and painted it quickly as a test to see if this was true...and it was. So I decided to make a figure carrying out a powder keg for the guns from the hold. Anyone who knows the appropriate ladder to place this figure, please speak up. I have not printed the actual figure with the Powder Barrell, but will do that soon. I have included some images of what it most likely will look like. All of these are being scaled for the Winnie so I had to build scale models of the ladder and the Powder Keg so that I could Rig the figure in the appropriate stance.


.png.f8b86b71e9d6bed10fcd4b90e6fc2d7a.png)
.png.ee1ff91c5e8b1bb5509e1b8f703128b0.png)
-
Well Chuck after my adventure with hull planking, I think the harder the better, for me this is a skill learning experience and I look forward to whatever you toss at us.... as long as it includes some instruction
- 1,784 replies
-
- 3
-

-
- winchelsea
- Syren Ship Model Company
- (and 1 more)
-
Were all the deck guns on the Winnie 12 pounders? I was wondering about the upper deck guns, in case they are 6 pounders.
- 607 replies
-
- 1
-
-
- winchelsea
- Syren Ship Model Company
- (and 1 more)
-
I rotated my tablet to view your pics , and the thing rotated the picture so it was still upside down...oh well, That upside down captain looked great, and I wish I was making a much progress as you. Great job.
- 105 replies
-
- 2
-
-
- winchelsea
- Syren Ship Model Company
- (and 1 more)