HOLIDAY DONATION DRIVE - SUPPORT MSW - DO YOUR PART TO KEEP THIS GREAT FORUM GOING! (Only 64 donations so far out of 49,000 members - C'mon guys!)
×


Mldixon
-
Posts
152 -
Joined
-
Last visited
Content Type
Profiles
Forums
Gallery
Events
Everything posted by Mldixon
-
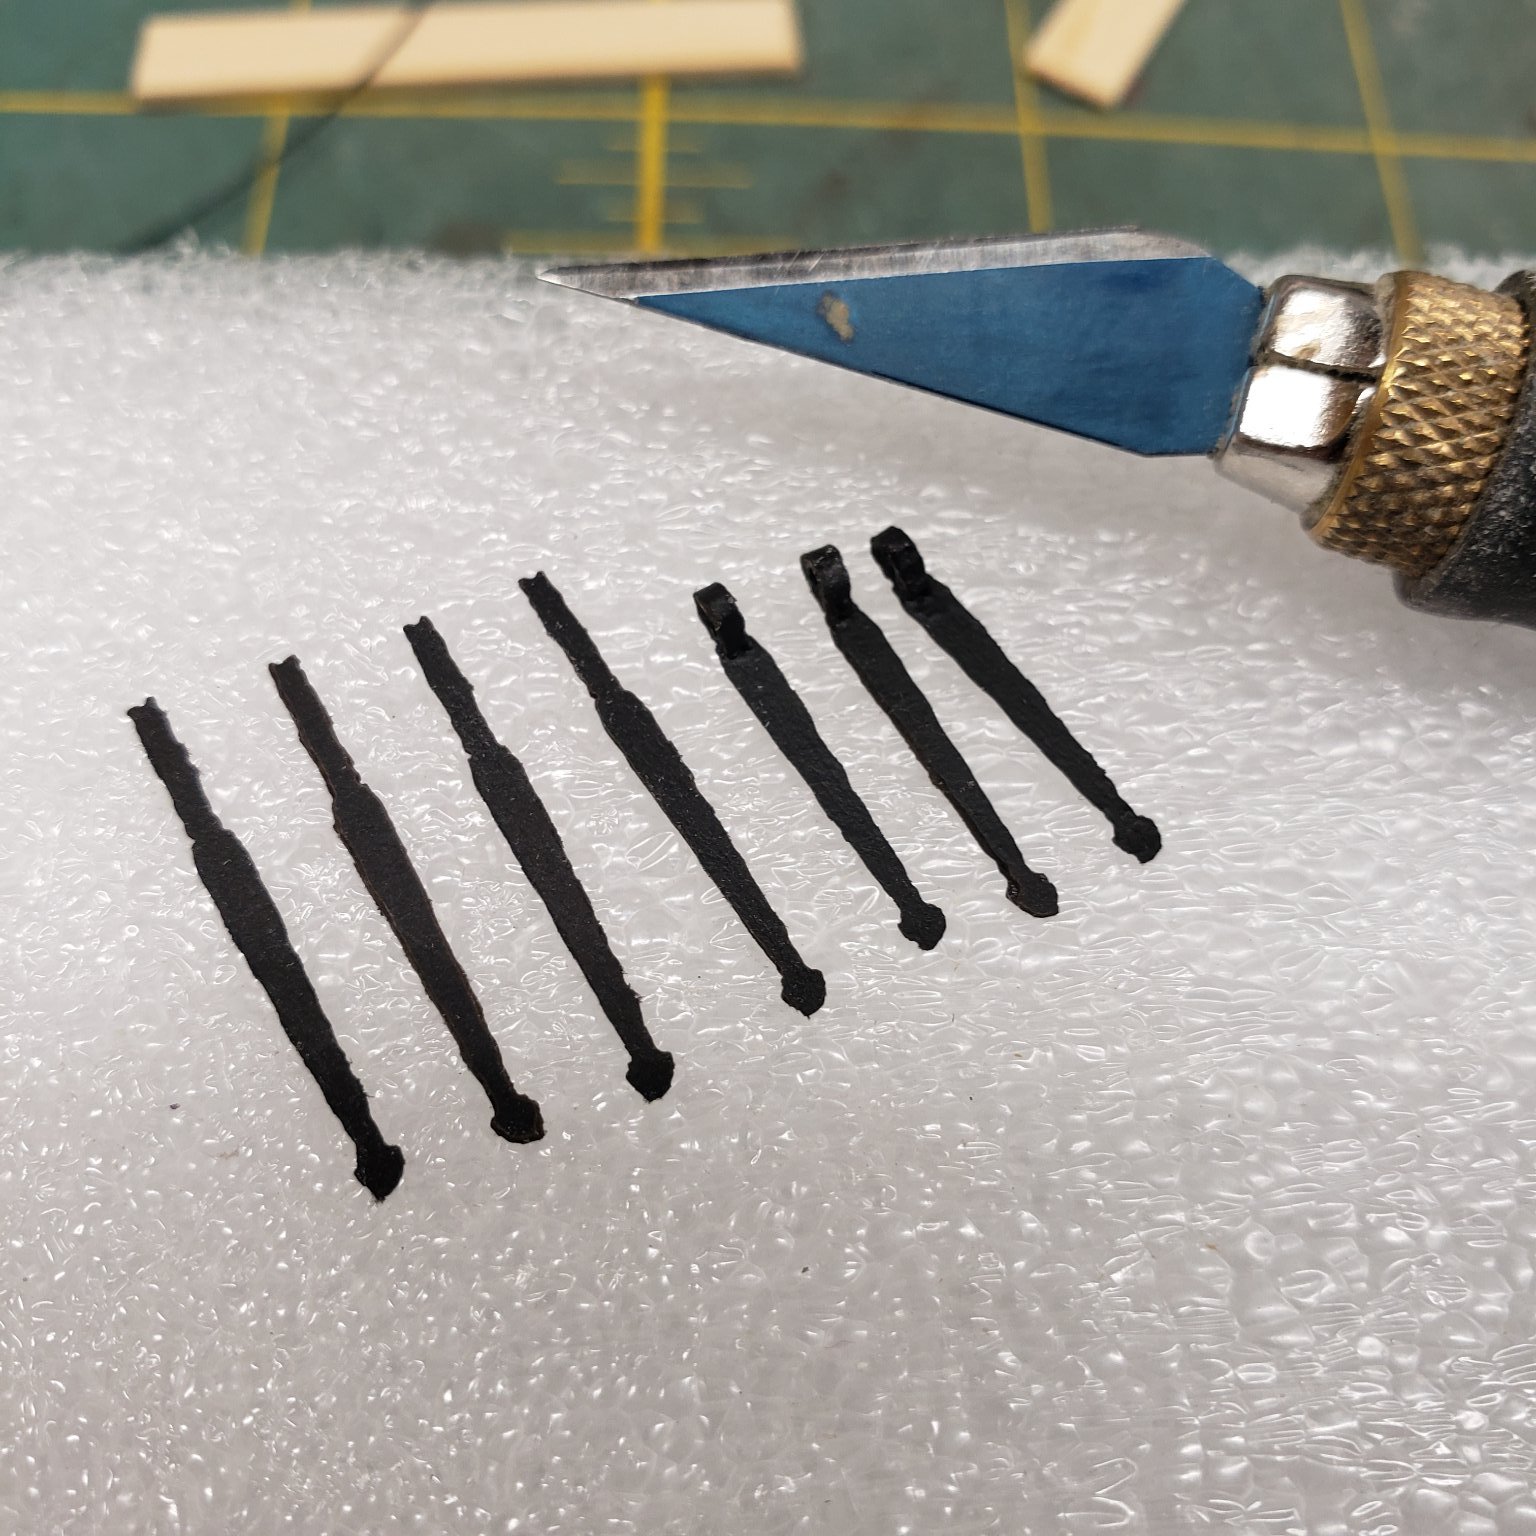
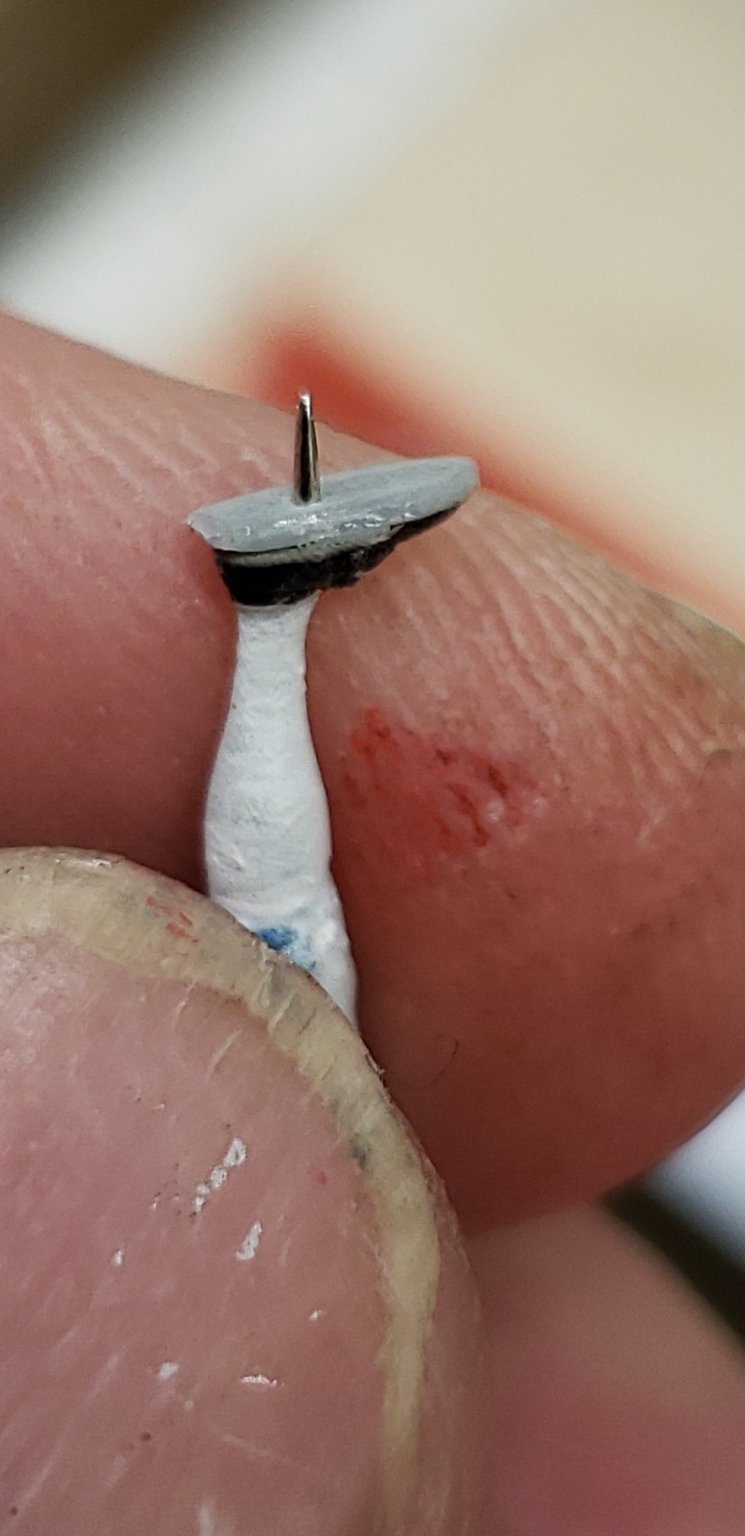
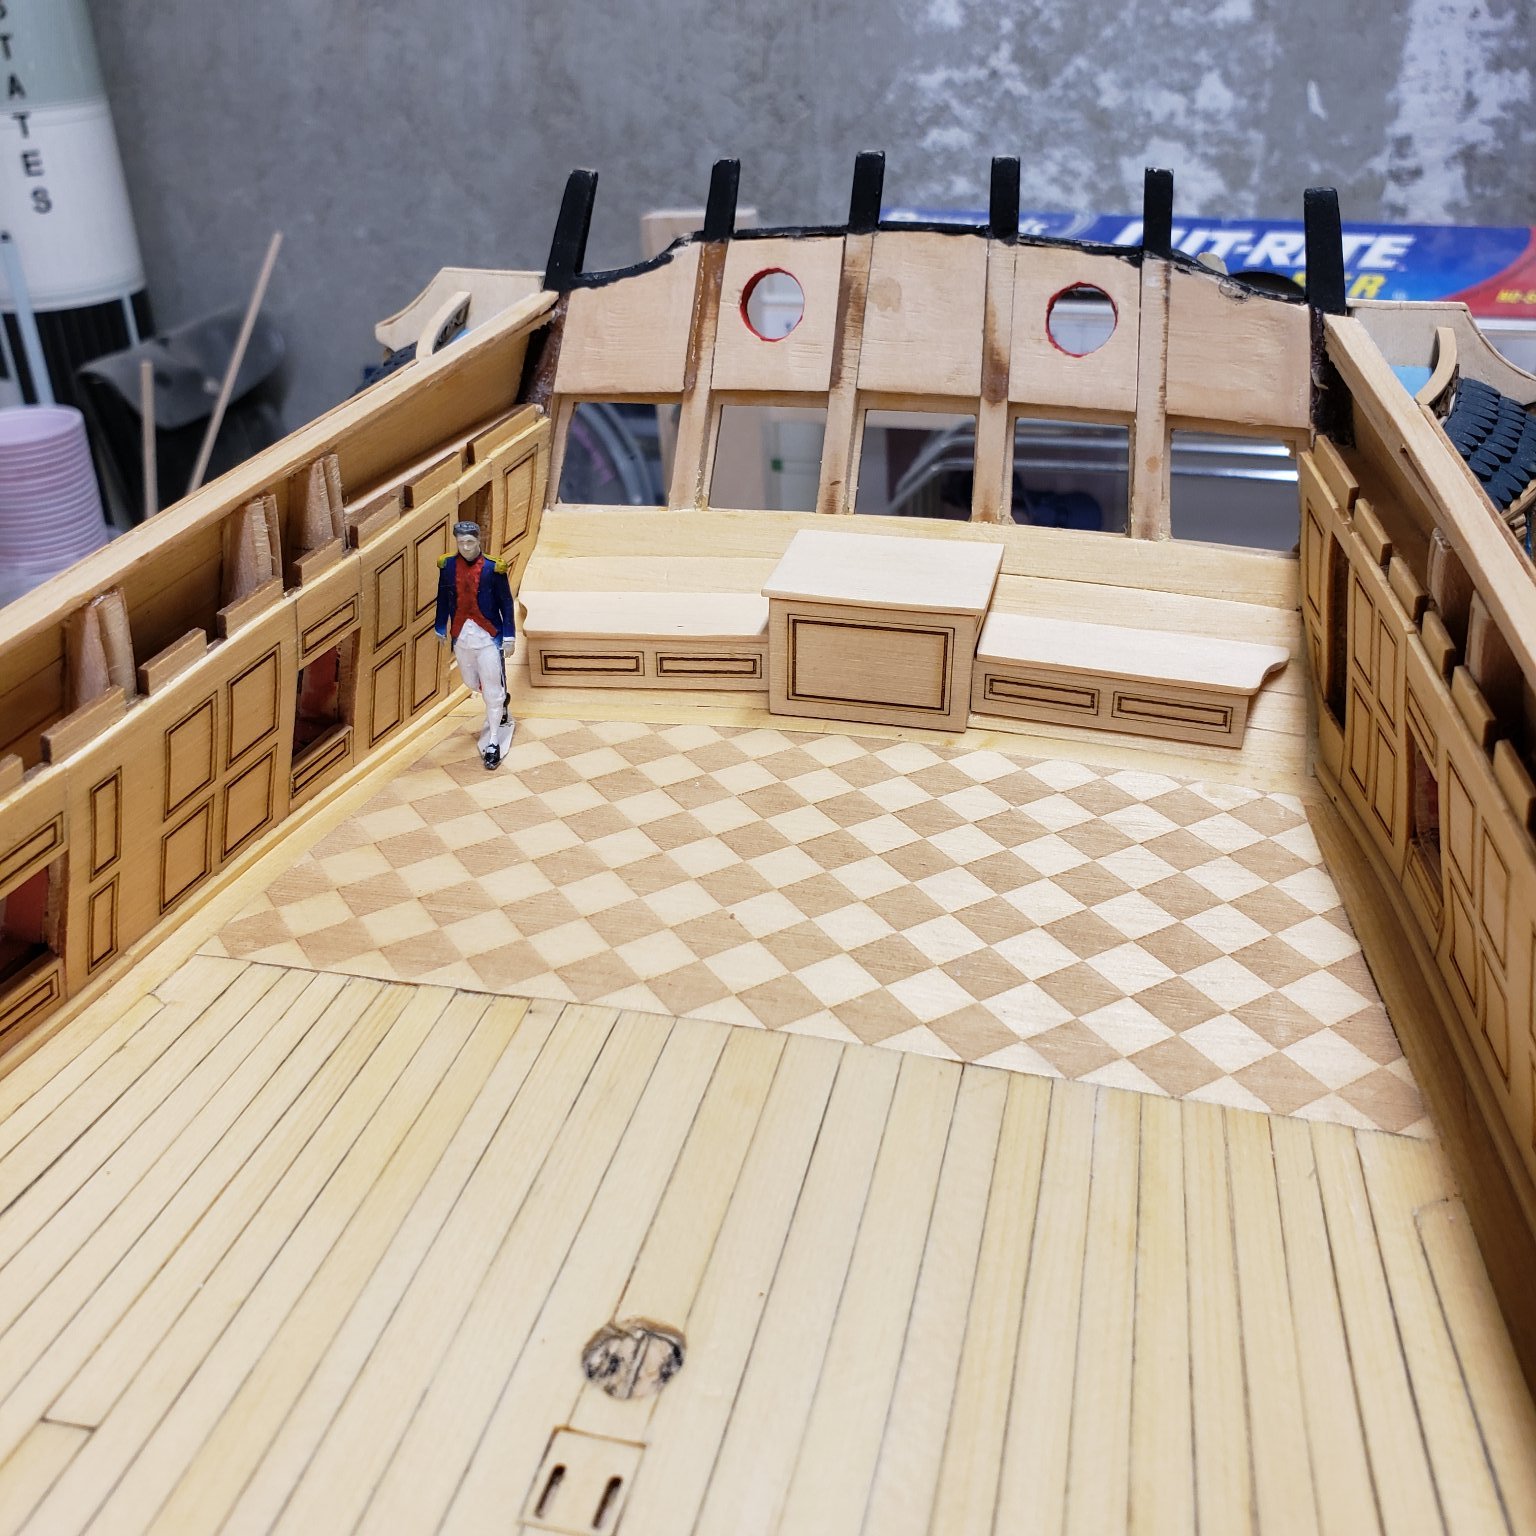
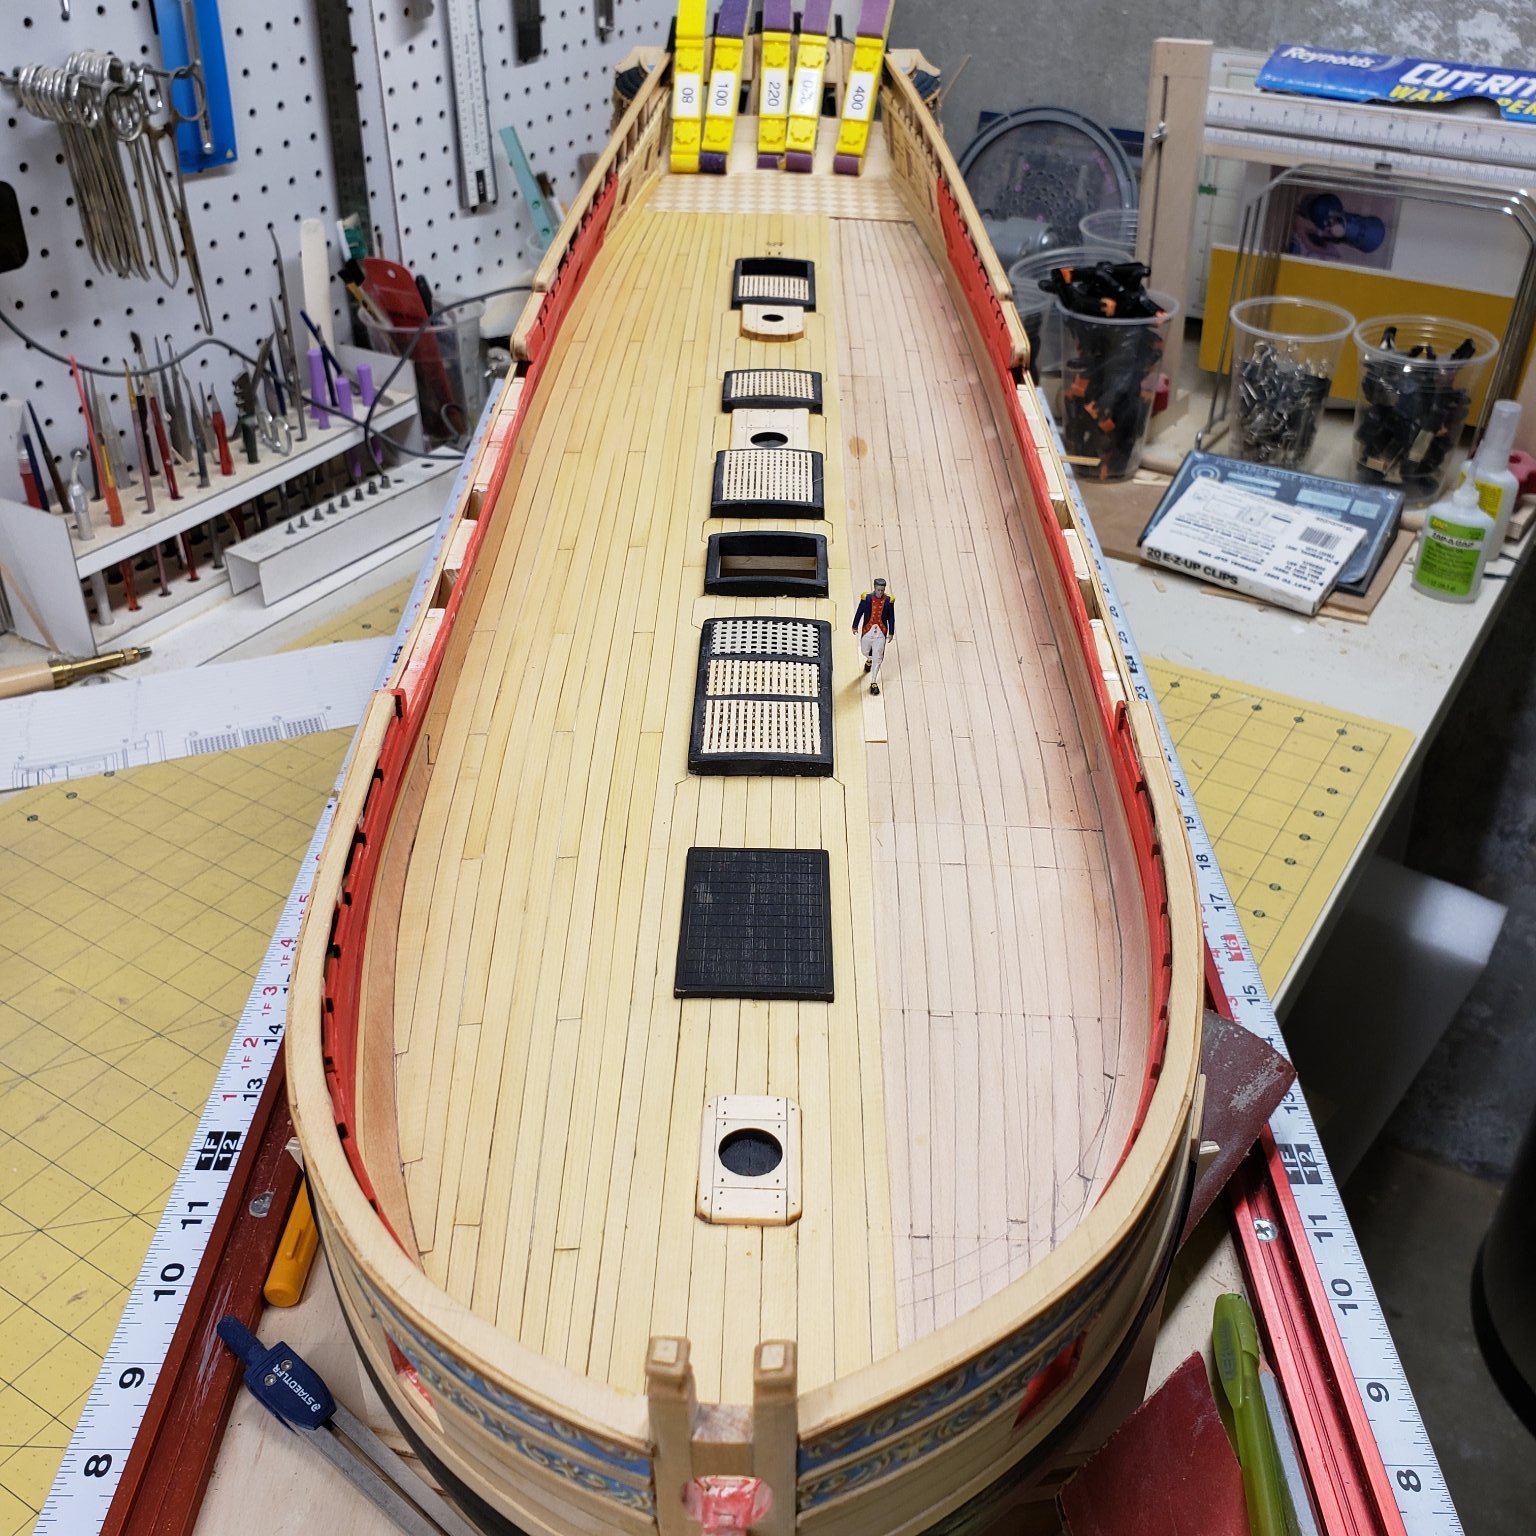
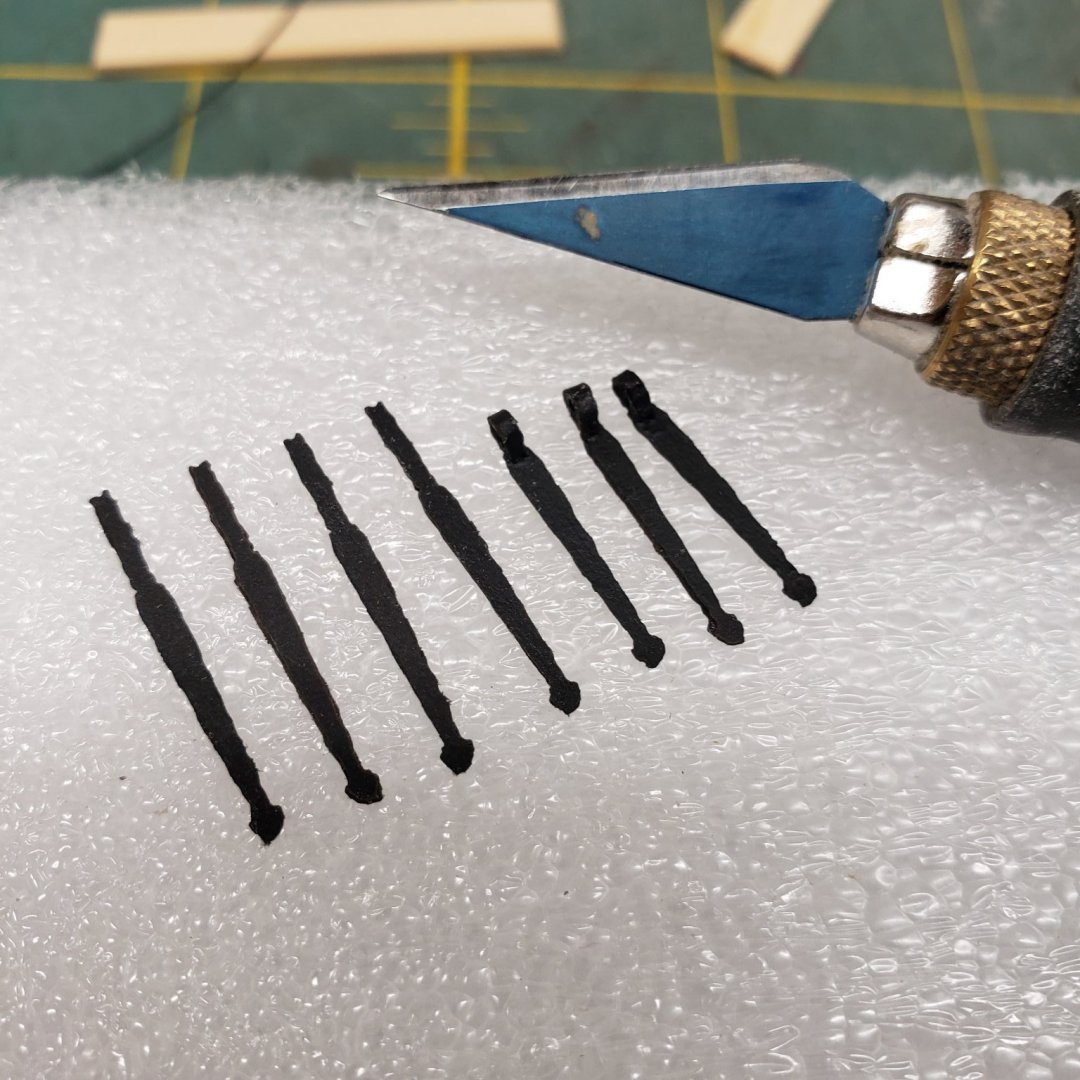
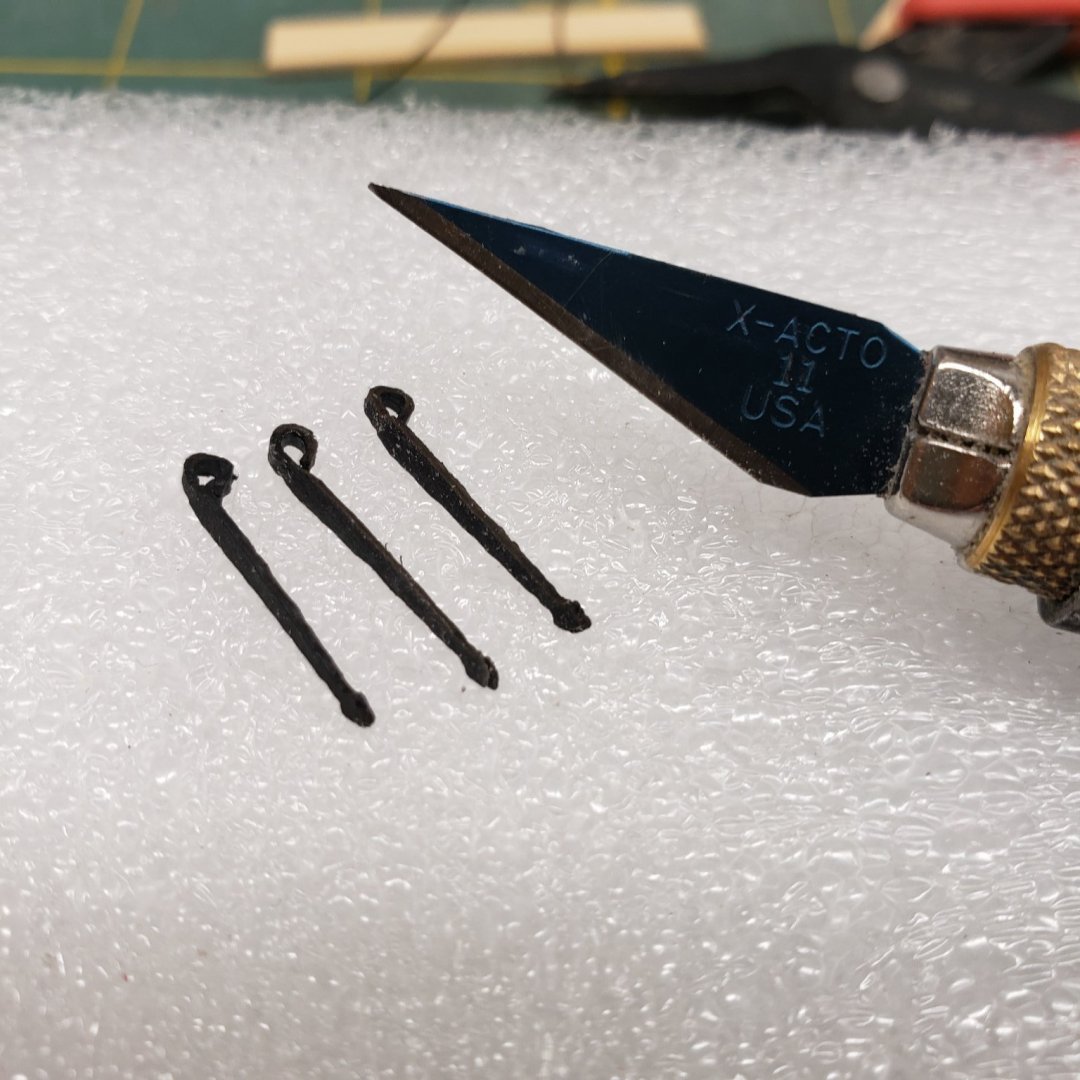
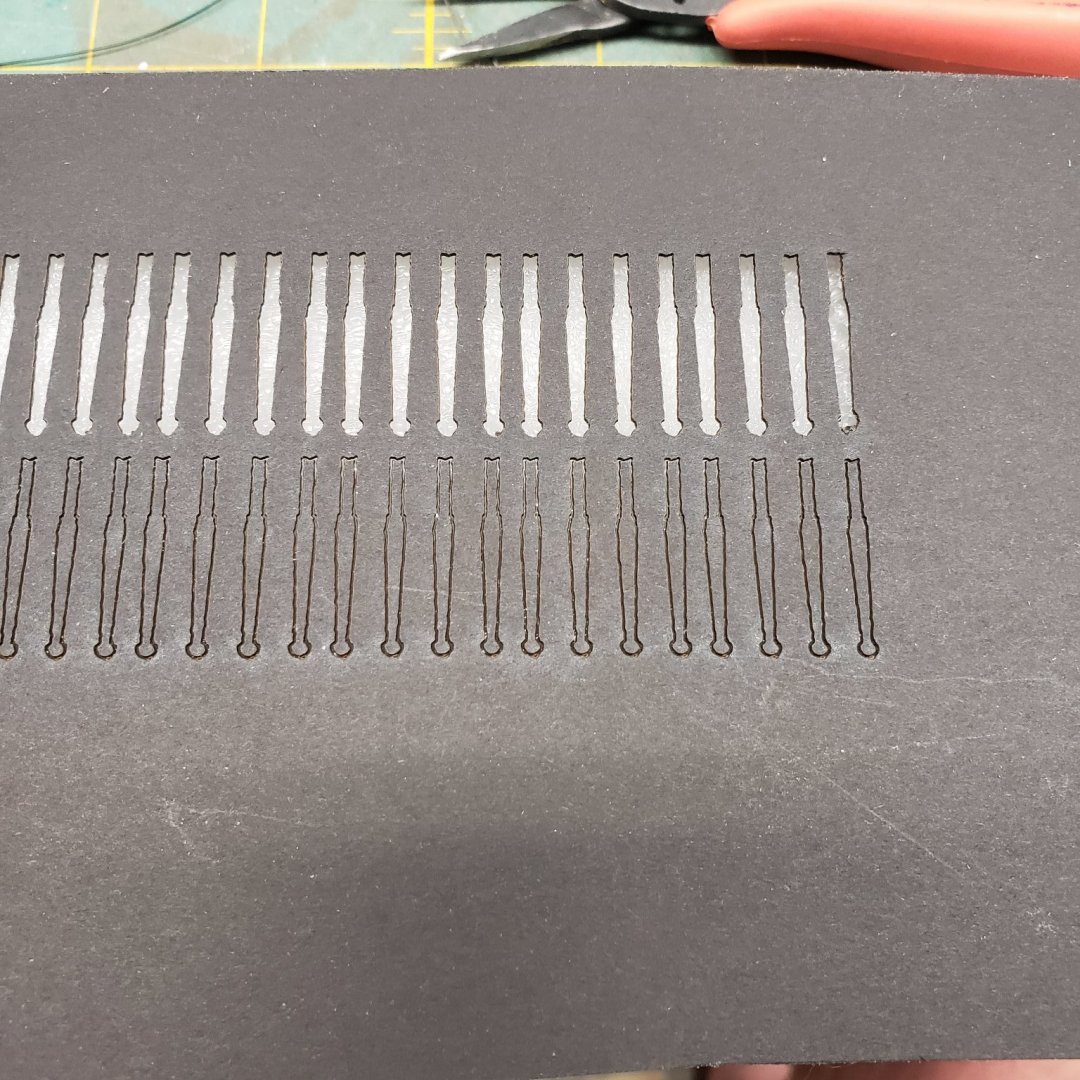
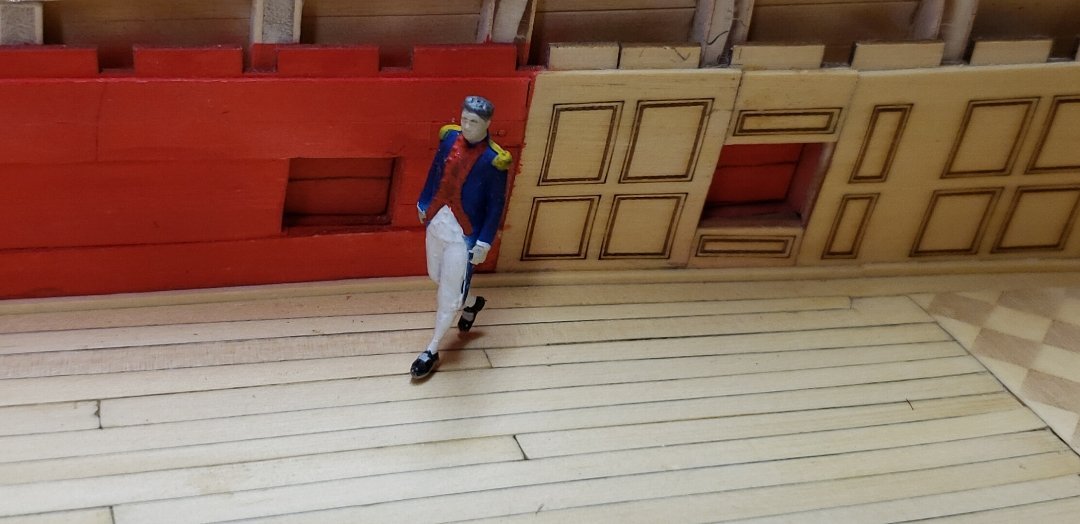
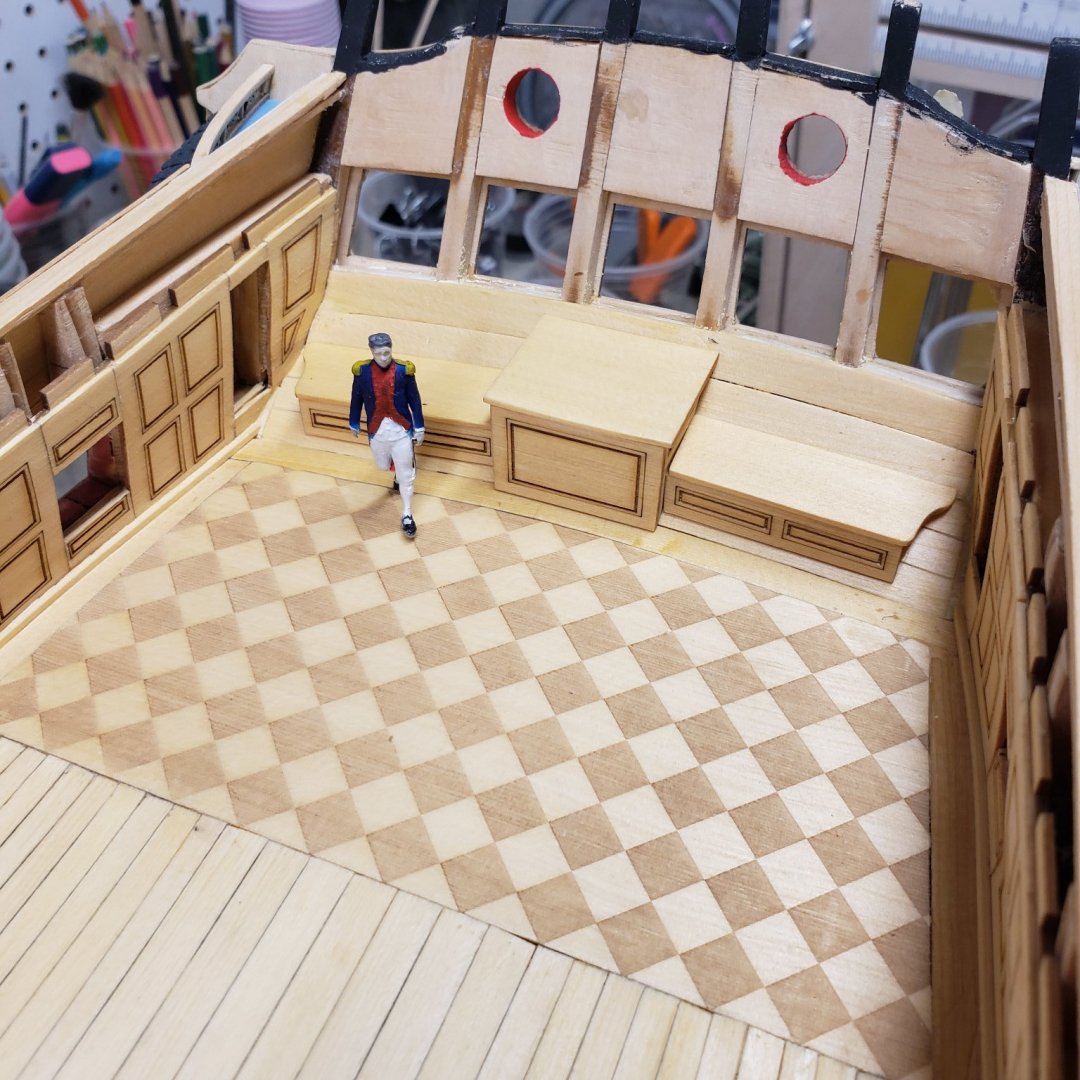
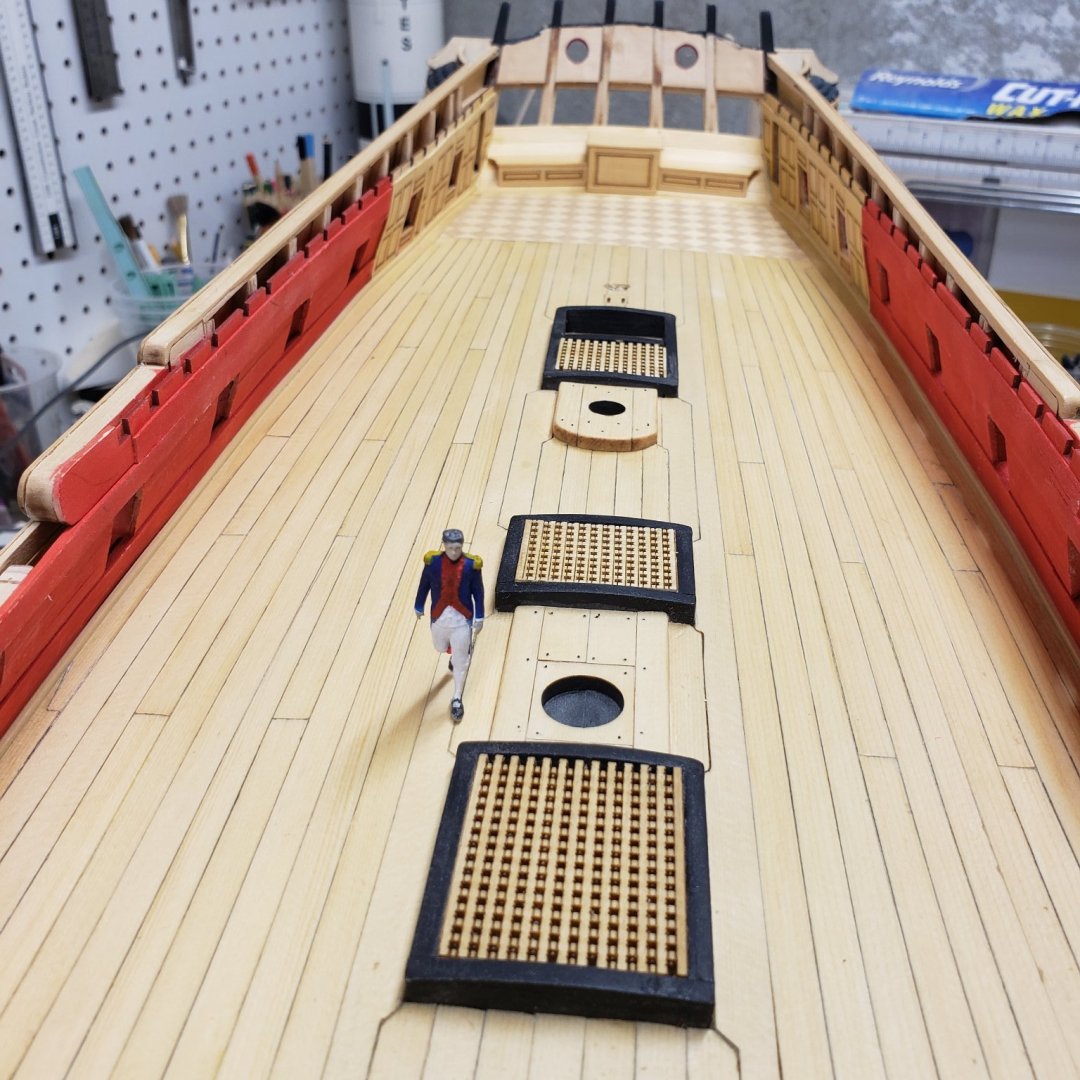
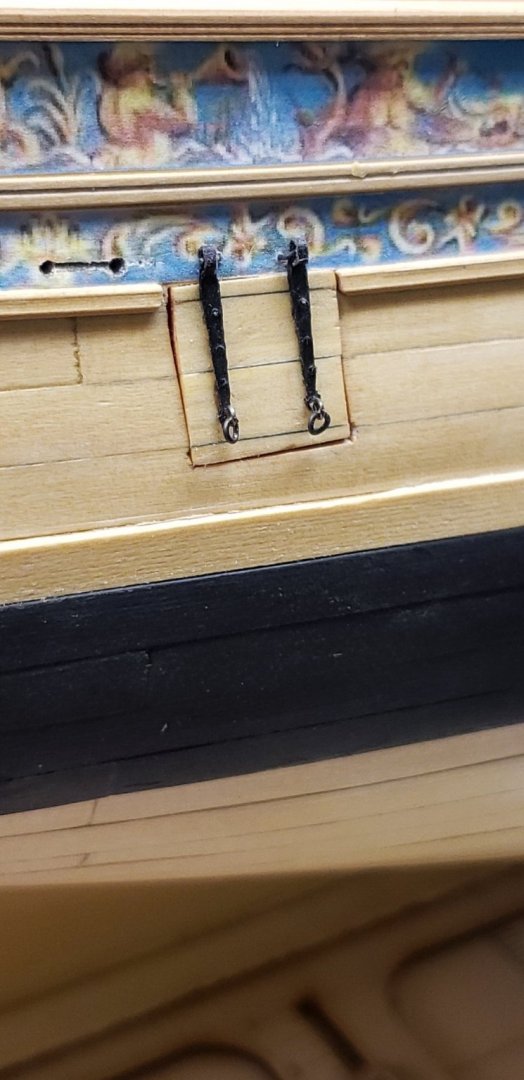
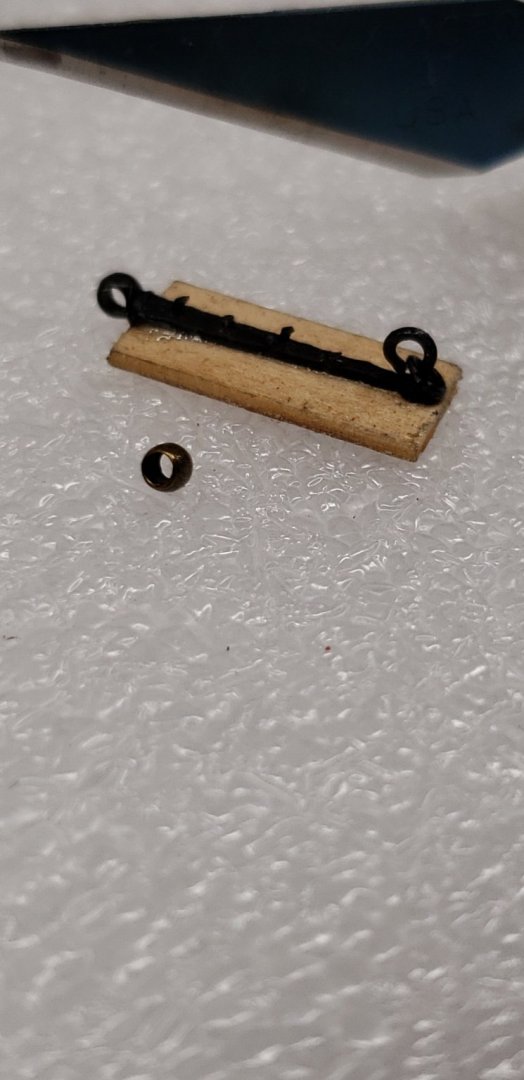
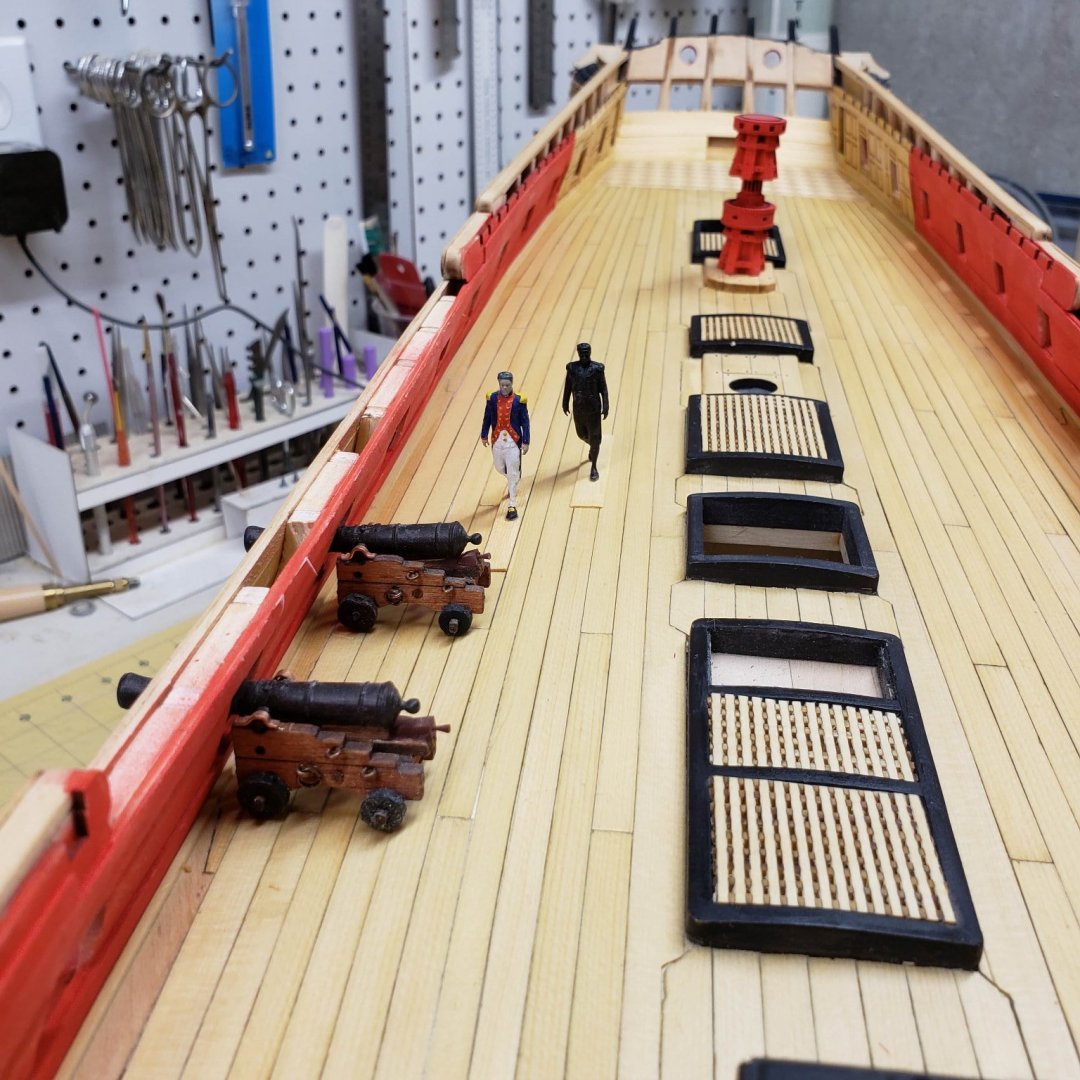
So i finished the rudder and the rudder box and seats Then I moved on to the lids for the gun ports.... I laser cut the hinges from black laser board about the same thickness as the brass version. I did not let the laser drill the holes. I did that manually i turned the end of the laser board tab with jewelers pliers and hardened with a touch of CA water thin... They are not very big as you can see from the photo, I made the edges a little wavy so as to make it appear to be hand wrought by the smithy...left side the drop from the laser board, right side turned thimble for the hinge pins... This was an experiment with a jewelers fitting for a necklace in bronze 1mm hole, glued on with CA and painted. I wasn't too hot on this so I passed on it and went with the laser board turned end. And here is what they looked like installed. I guess I'm going to go ahead with this as it looks great to the eye without magnification . And I inserted a pin into the foot of the Captain, so I could get him off the plank and more mobile. This has worked out great as I can now put him down anywhere on the deck with no damage. The above hatch cover was cut with a laser as an experiment just to see if I could do it. The one behind the captain was the first try and the one in front was the second try, I like these better than the other ones , so I'm going to proceed to cut all of these and sand and finish them for the final model. That's it for me now. Just got to decide how many gun ports I'm going to open and close, and if I'm going to do them all or just the ones Chuck has shown on his model.


-
I did the Winnie hull in sketchup, check my build thread, there are some pics...I haven't mastered rhino yet so no plugins.
-
I agree, I also like the painted one. Architectural models use shadow figures so as not to compete with the primary design, just thought I'd try one. Oh, and all black figures are much easier to paint.
-
Nice work, I run Rhino5 also, but prefer Sketchup for quick work. Sorry to hear you're having to raise anchor and move. Looks like you got her packed nice and tight for the future.
-
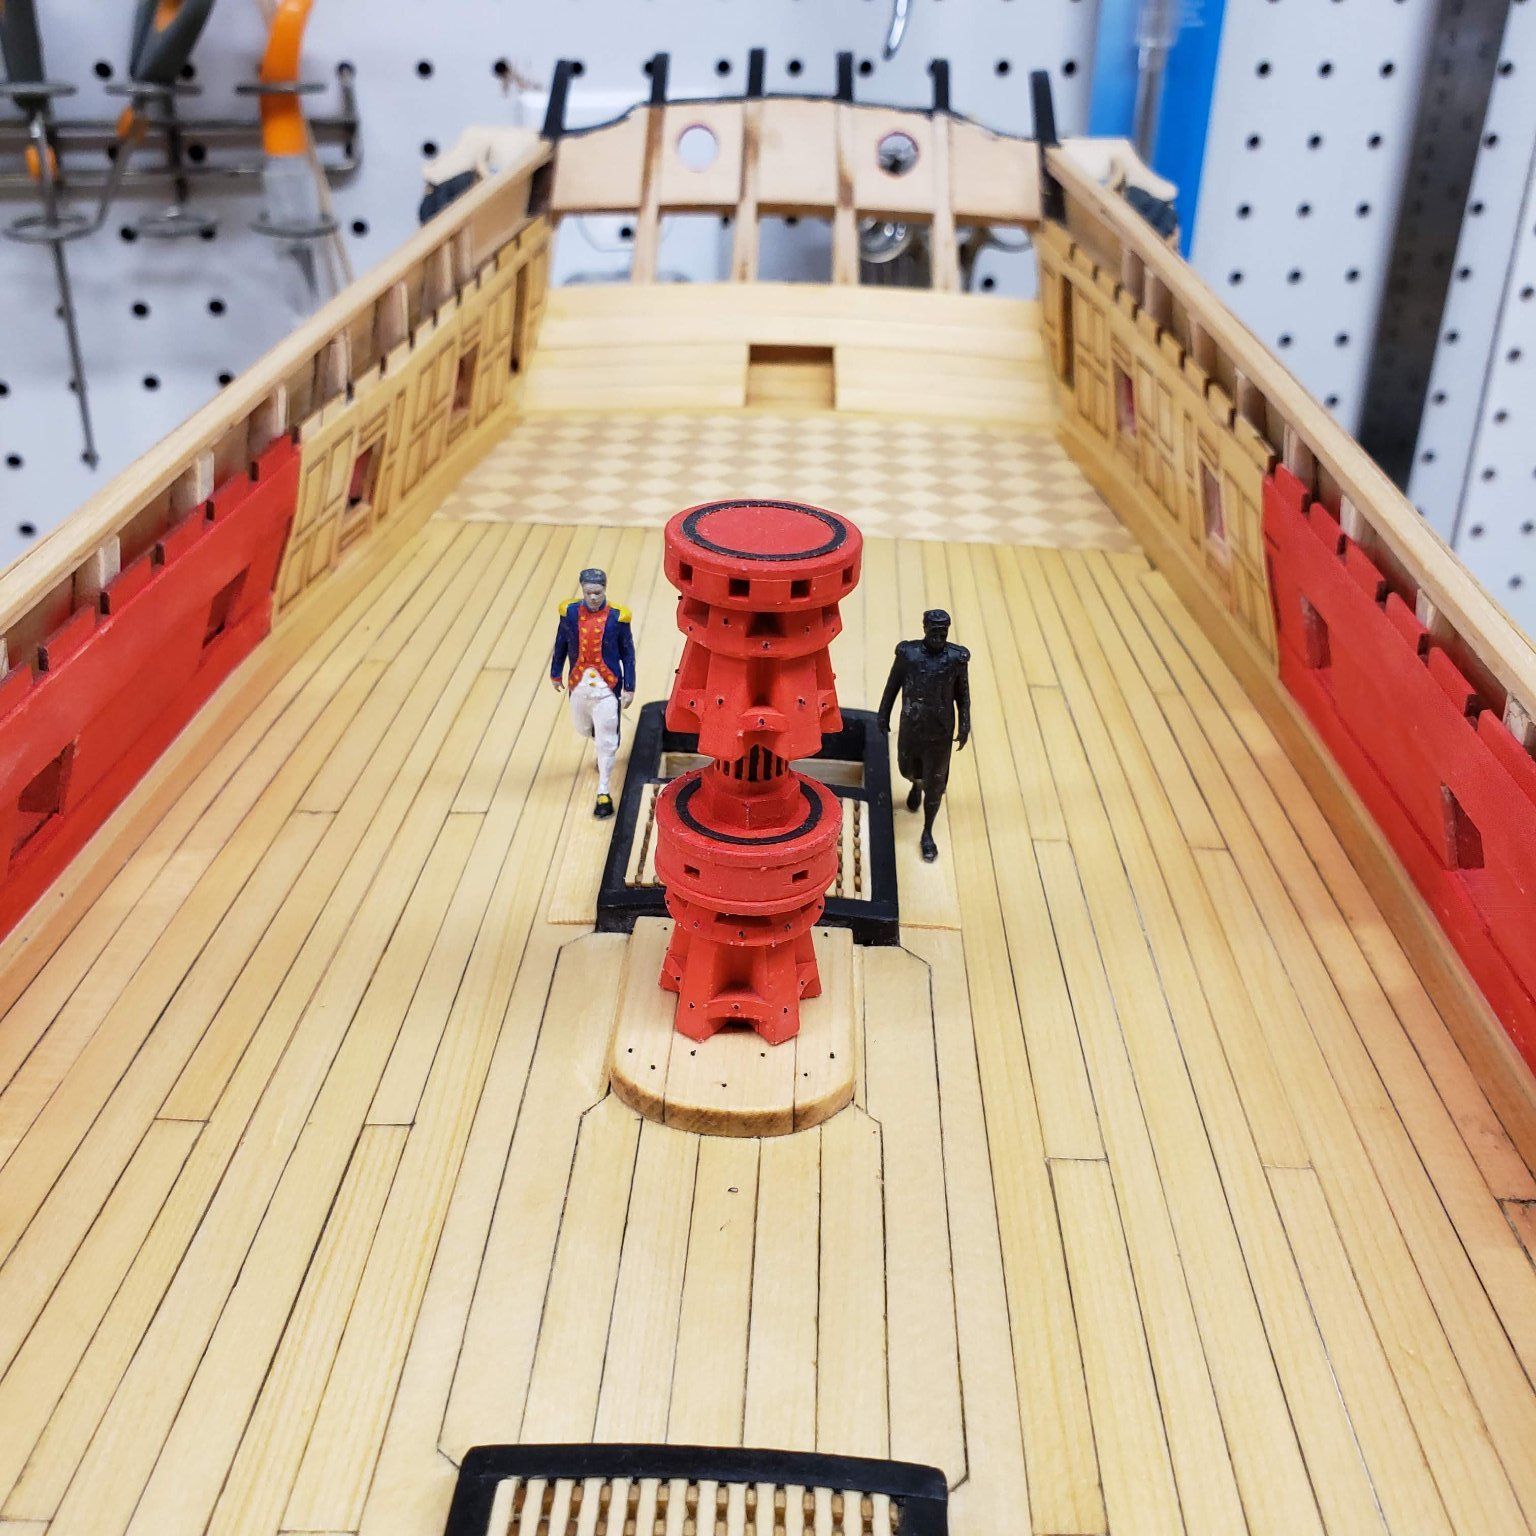
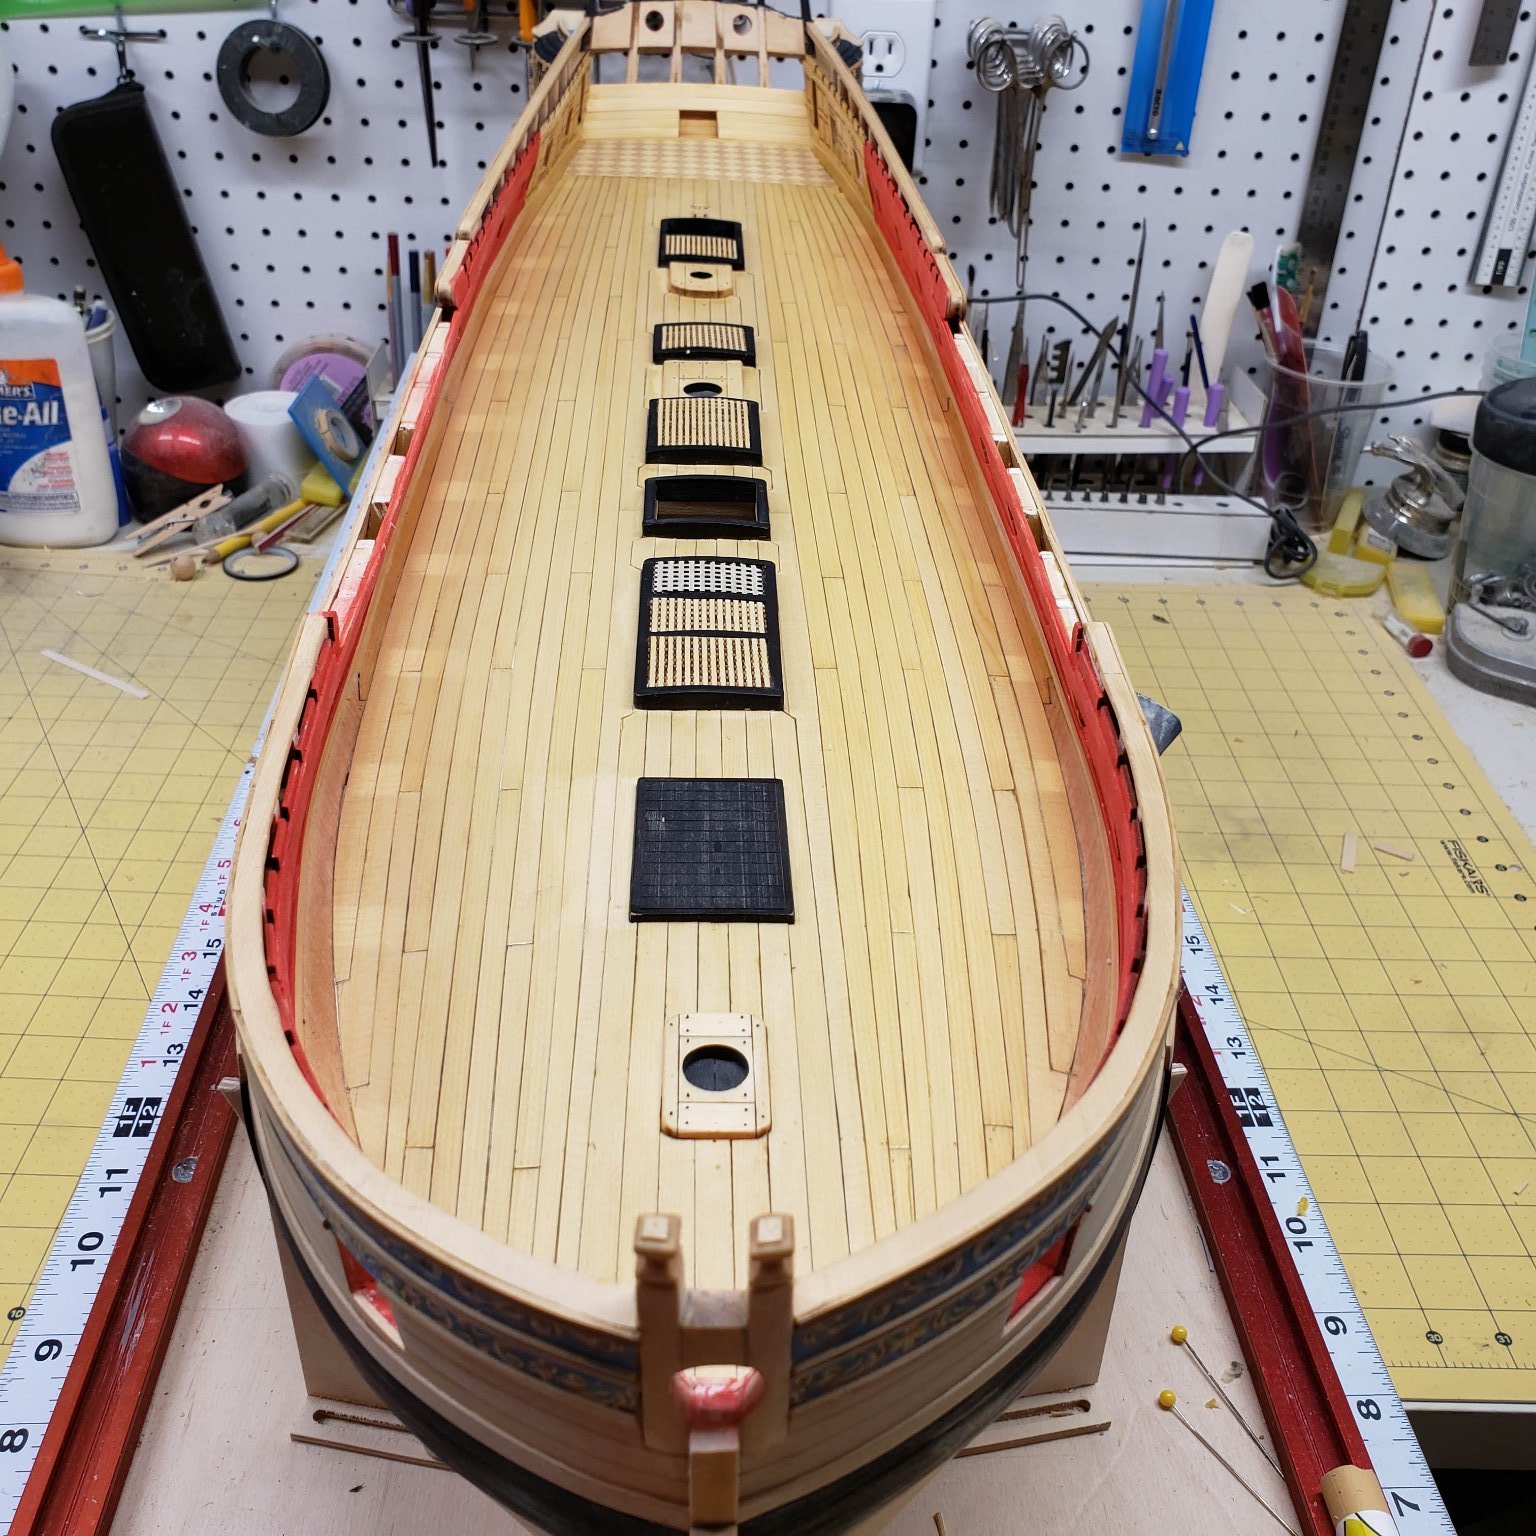
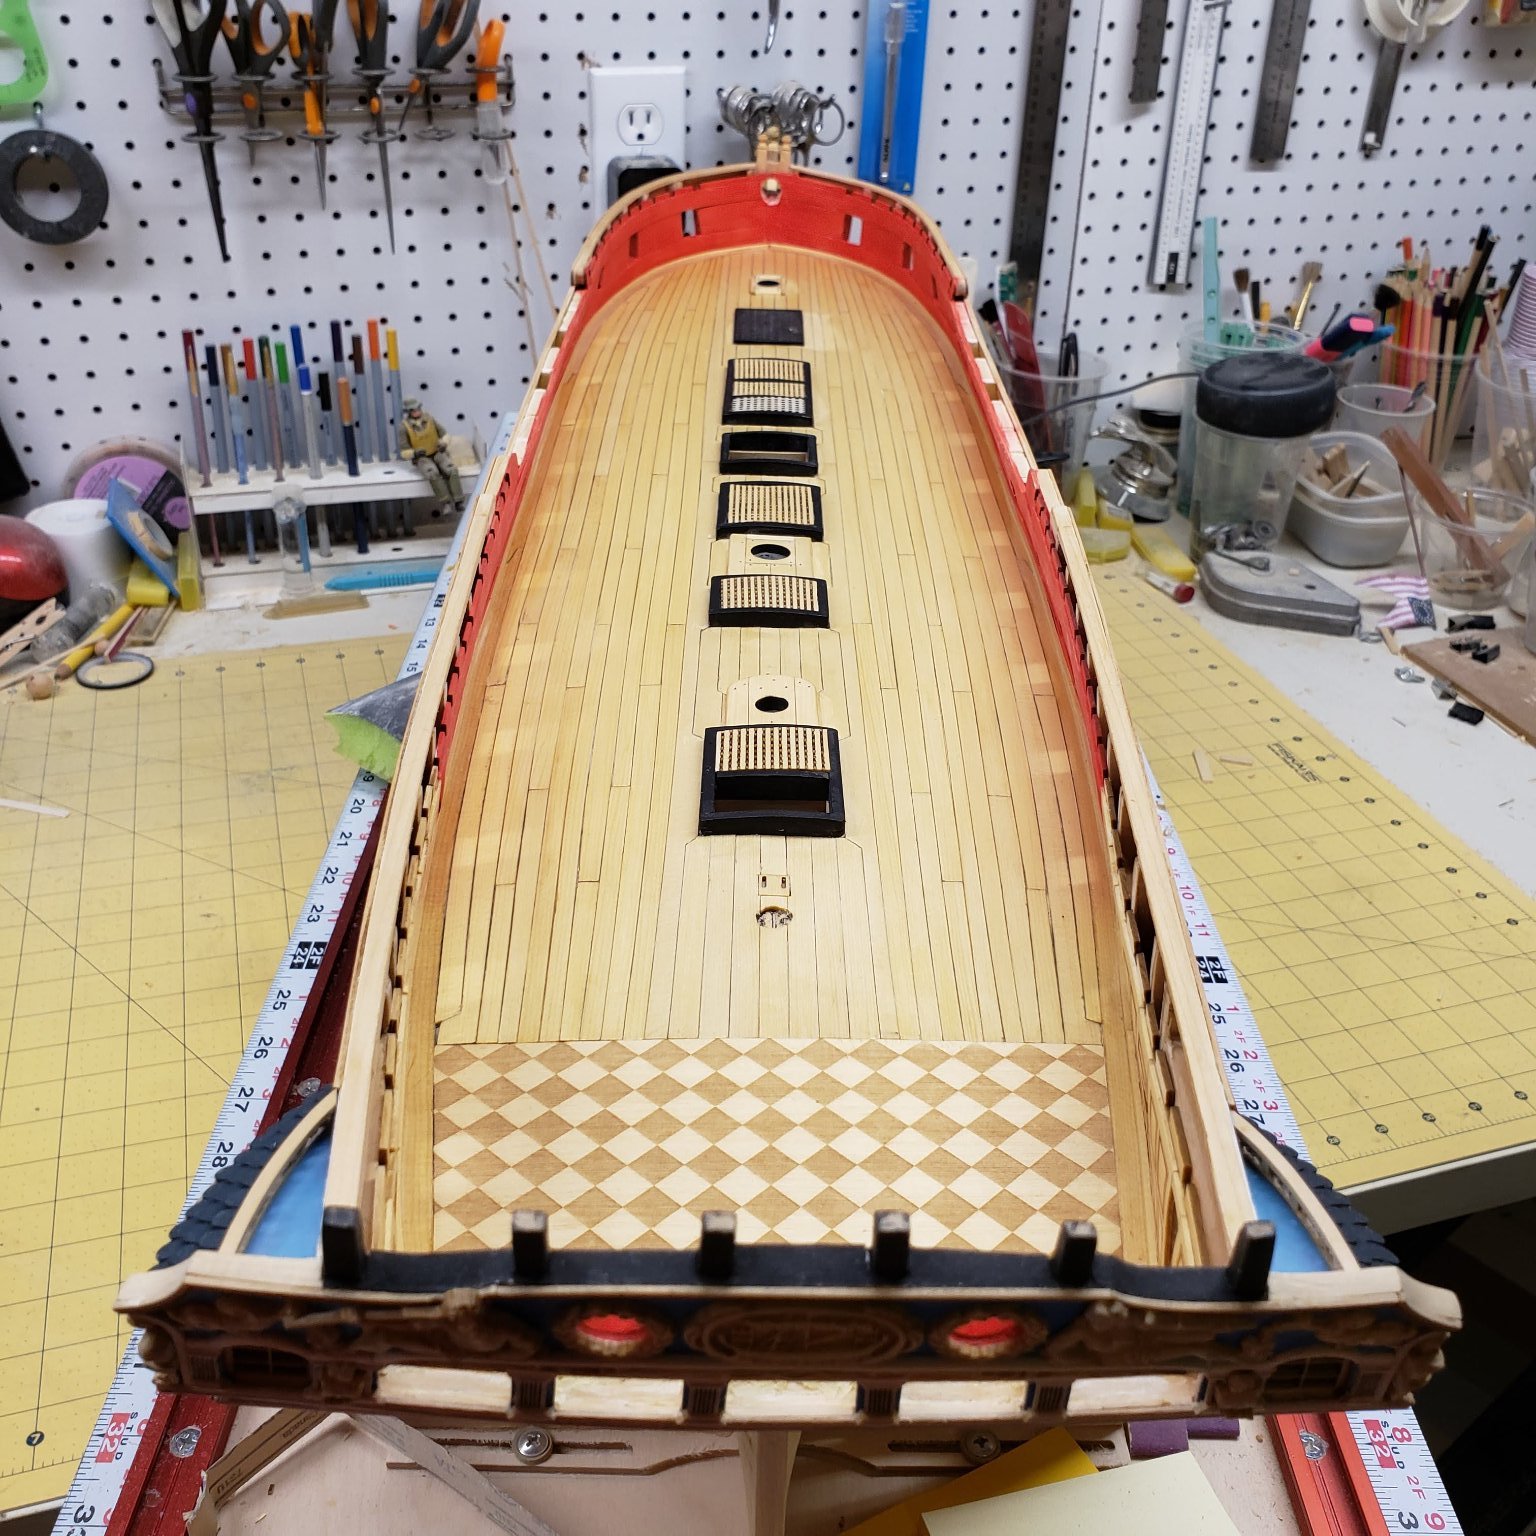
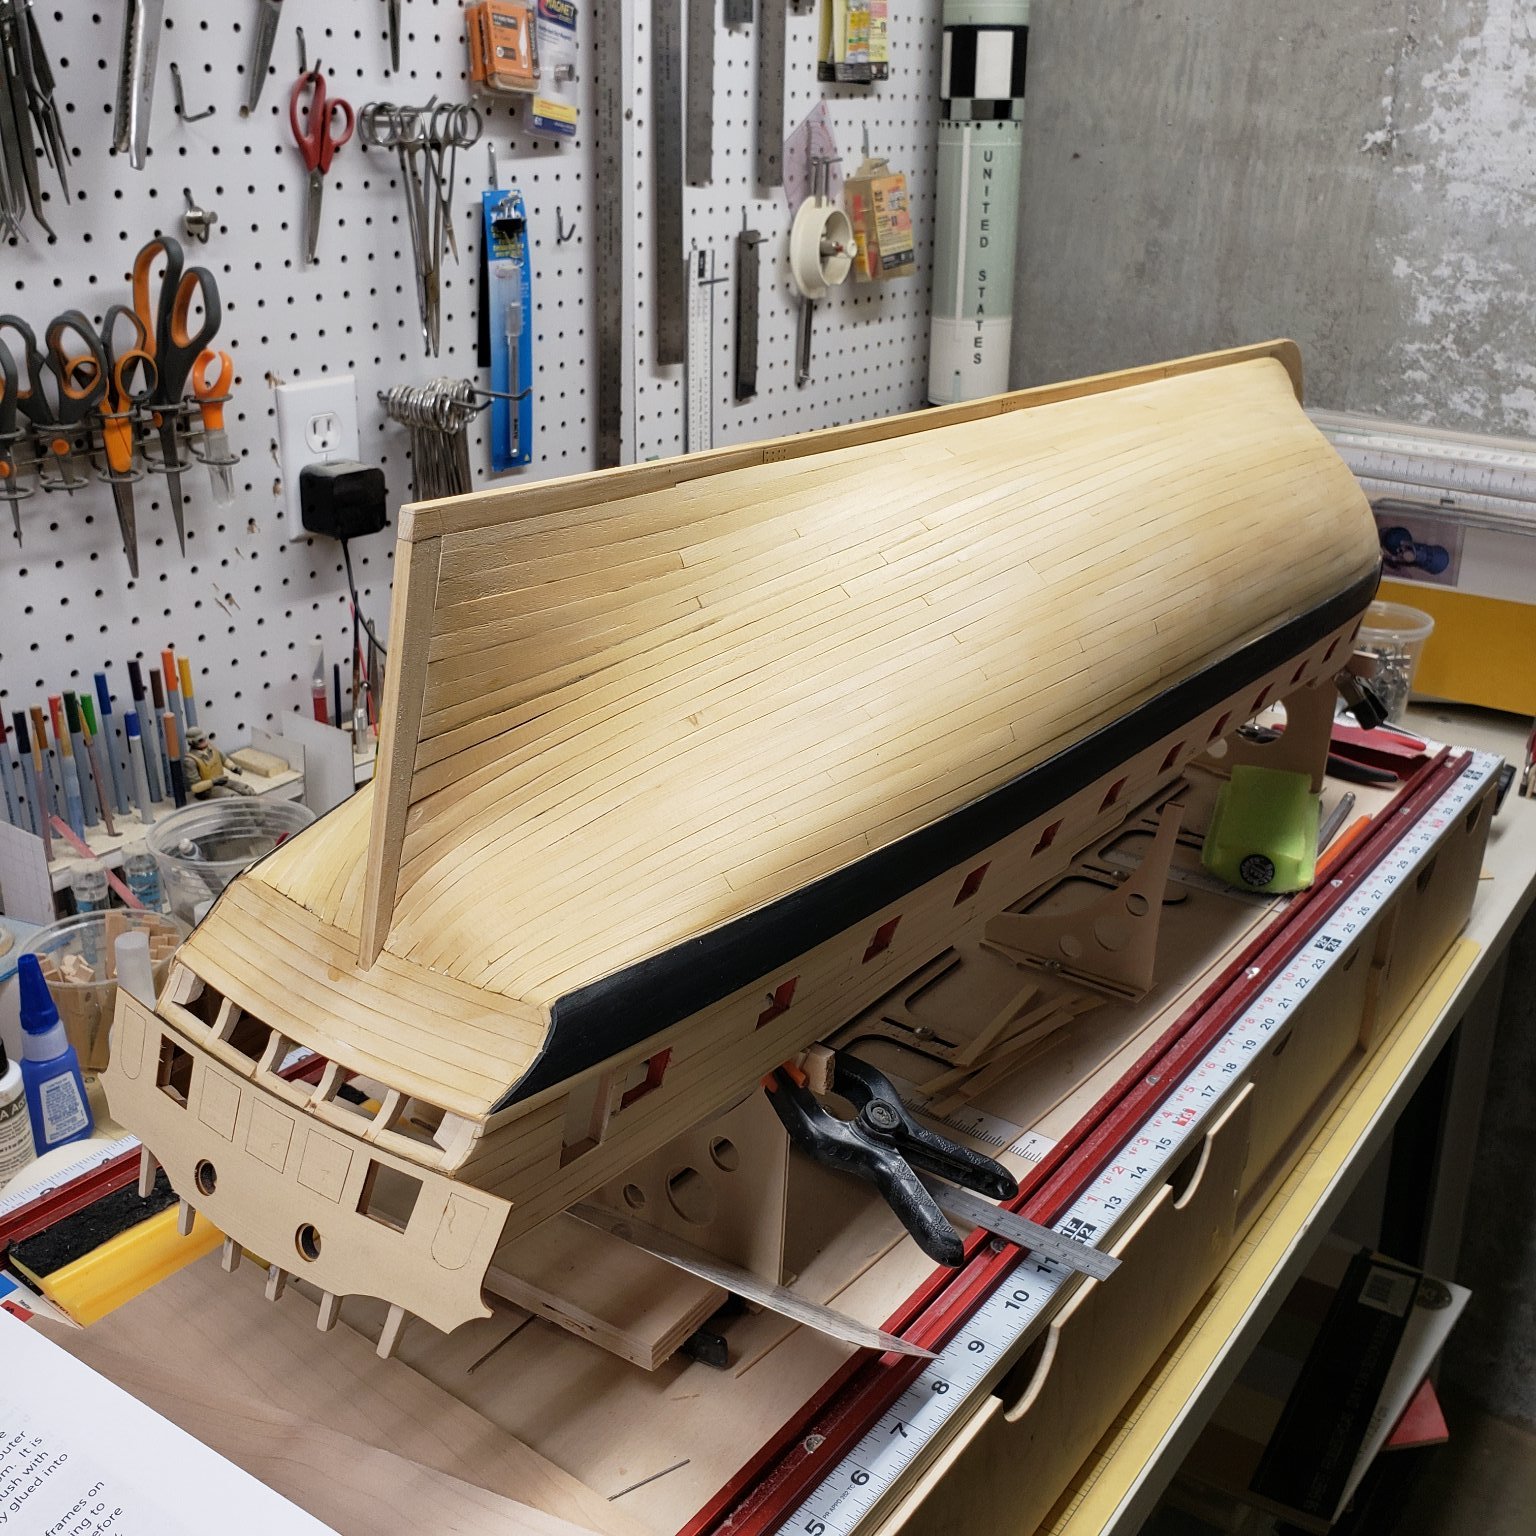
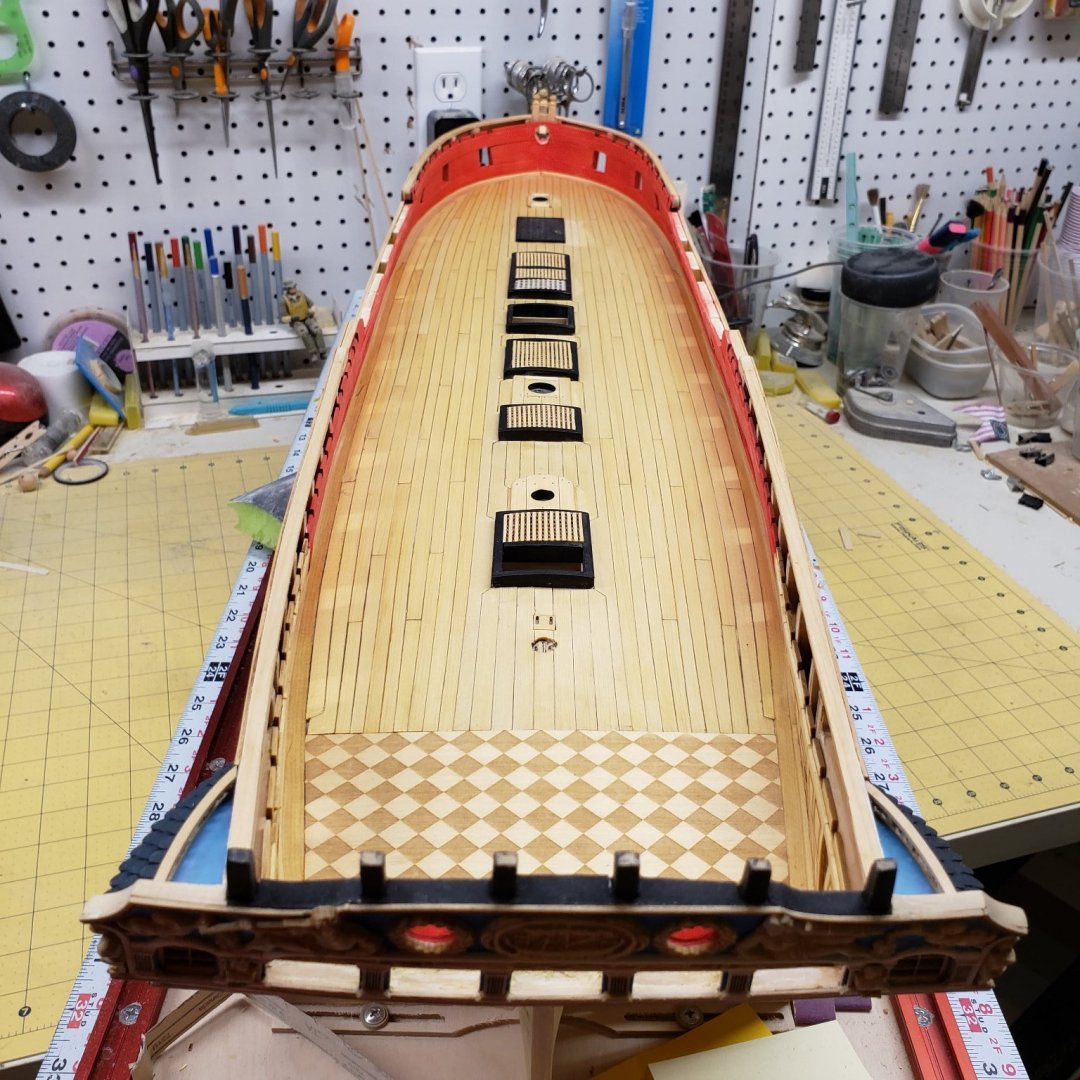
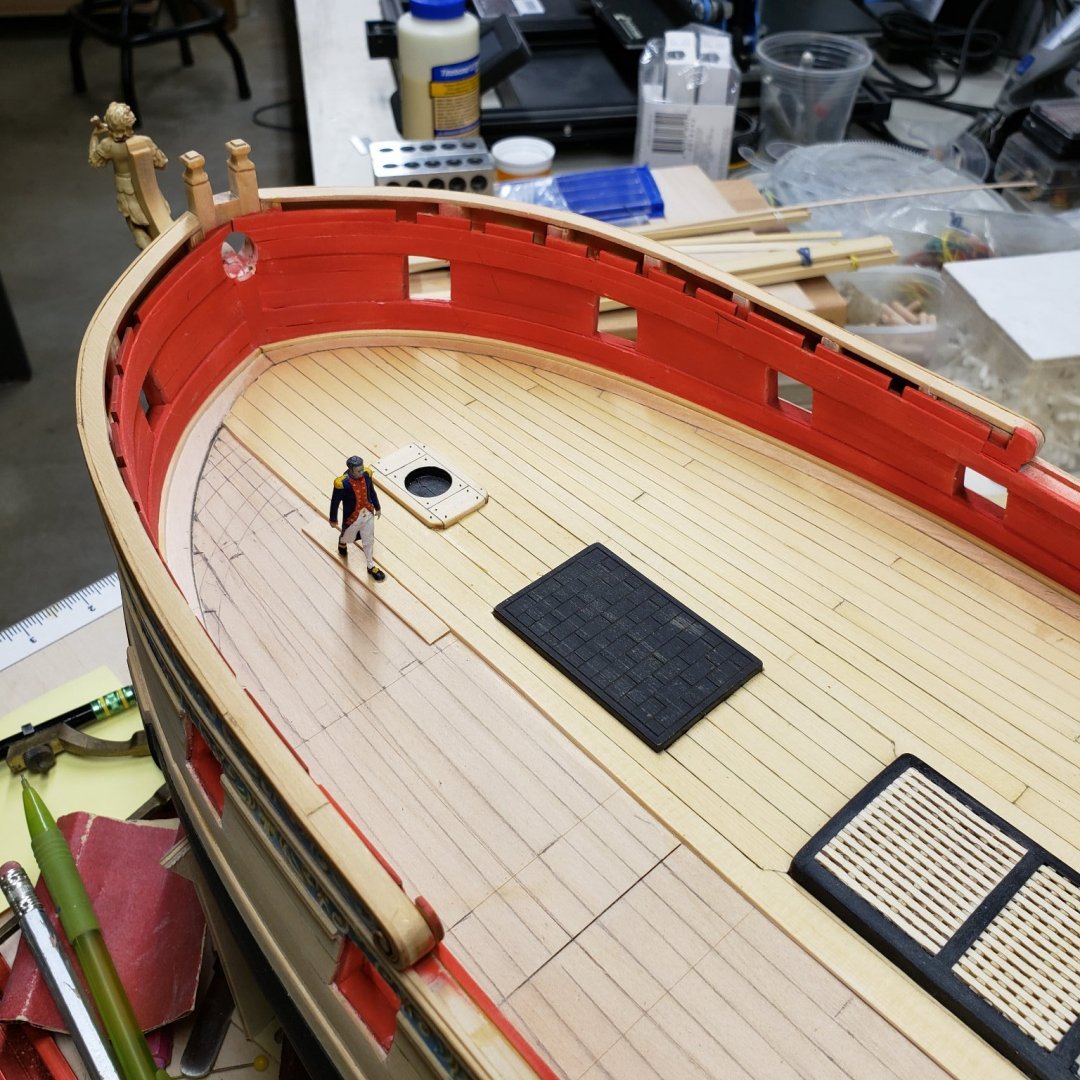
So today I finally finished Chapter 4 with the deck planking, It wasn't as hard as the hull planking, but it's sure not a stroll in the garden...put on the WOP to keep it somewhat clean. Now onto chapter 5 Work in progress photo, braces to keep it down while glue sets After WOP coat I've been playing around with the captains and am trying out an all black shadow figure Nothing permanent, just kind of looking it all over for effect. I've decided to remove the grating and try again, not happy with the way they look, thinking about chapter six and the guns.


-
Been there, done that. I got very good at plank replacements. But it was always worth it. Nice job on your ship.
-
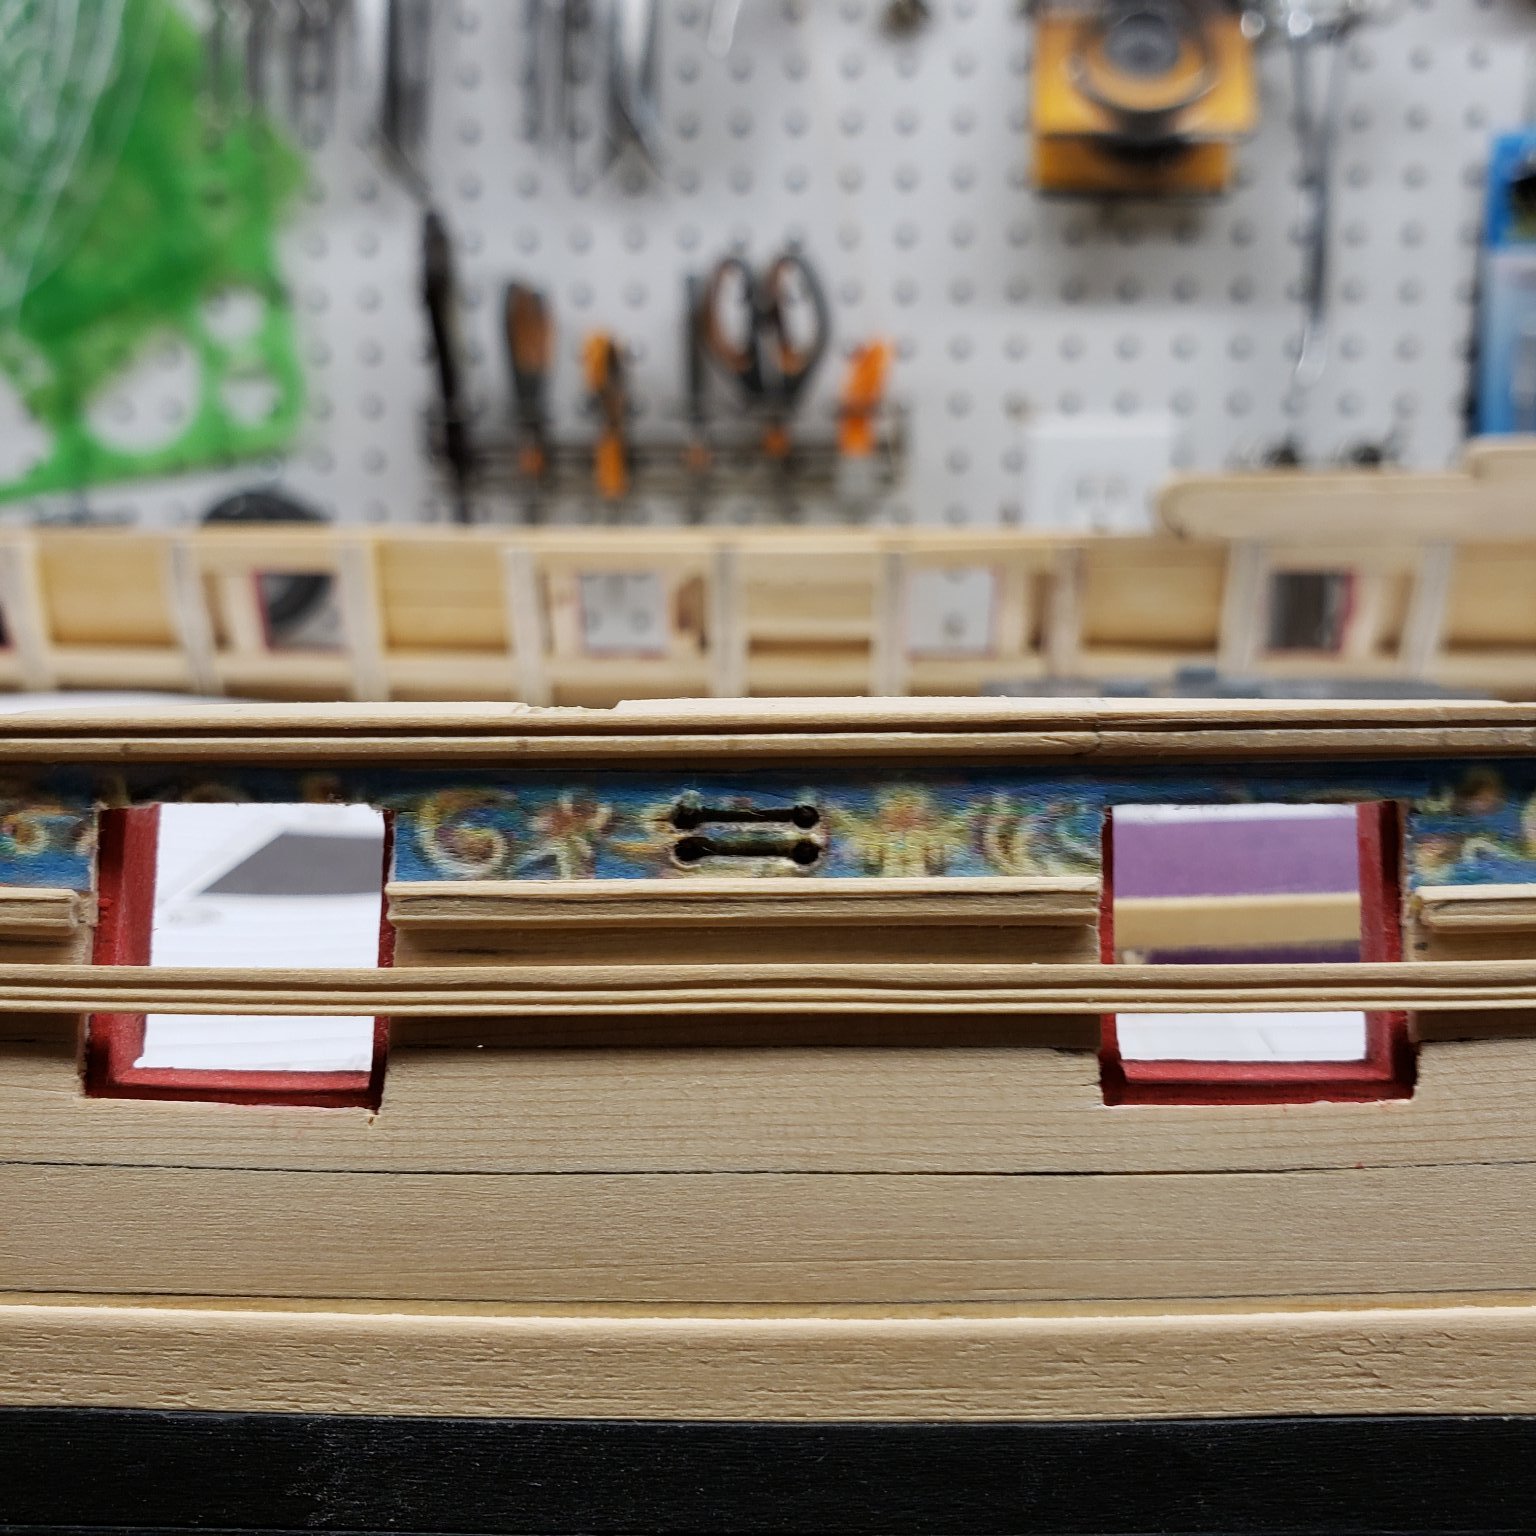
Thanks, I'm actually entertaining the idea of removing the moldings and replacing them, but I'm a little hesitant to potentially wreck the ship ...
-
Wow, I have a Charles Morgan sitting in the box. Bought it on ebay for a song. Now you've got me interested in this again...
- 105 replies
-
- 2
-

-
- winchelsea
- Syren Ship Model Company
- (and 1 more)
-
Good to know, I counted planks on a lot of photos just to be certain myself..."Same Boat"...good humor😁
-
Thanks, the molding didn't make it to this version maybe the next one
-
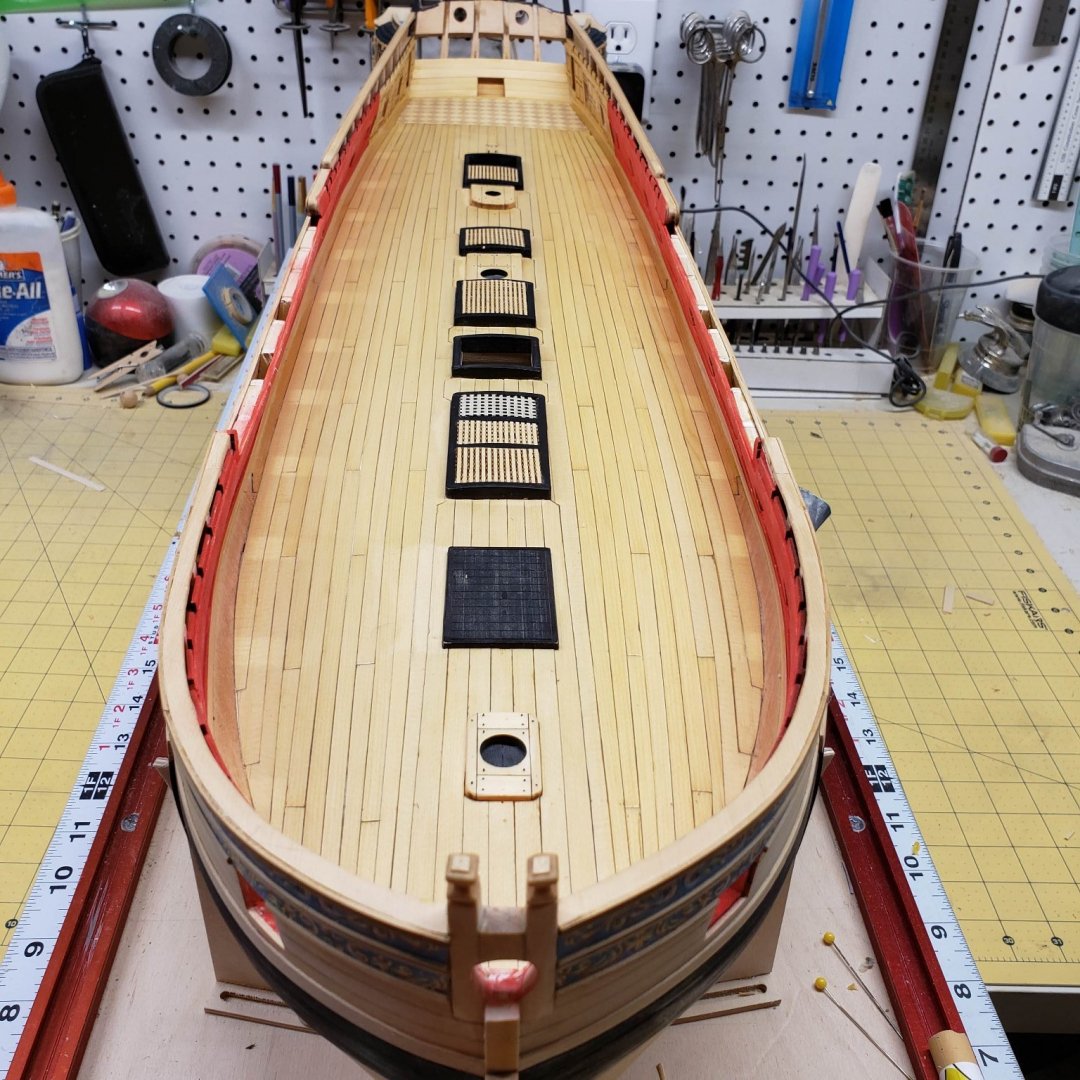
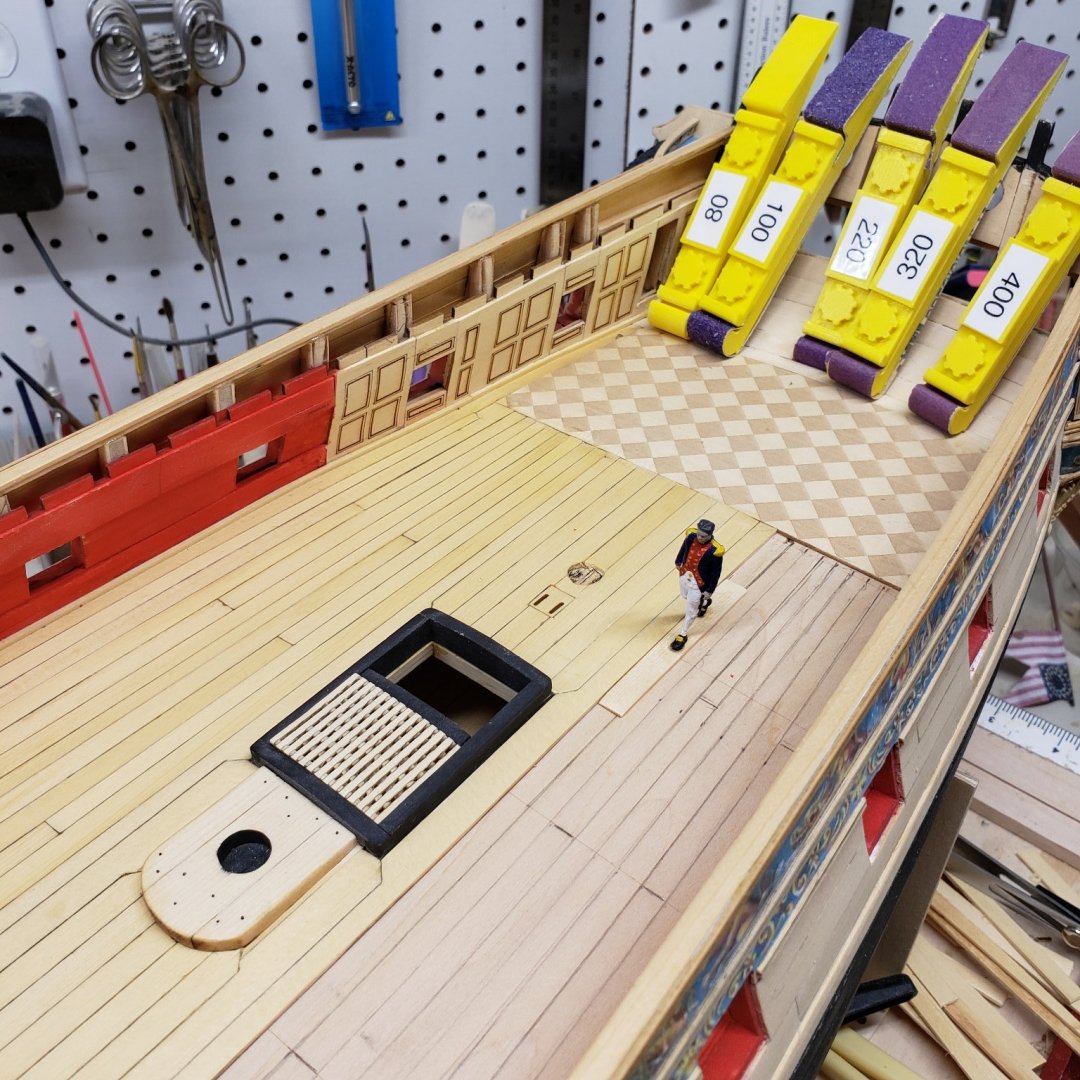
Half of the decking now completed, it took longer than I thought it would. This is the second attempt. I'm curious as to the decking count, I looked at the print and it was laid out differently than the actual decks I have been looking at in other peoples photos. I got 10 planks in width to the margin planks, while the print showed 13 planks to the margin planks, and the first planks were laid full width to either side of the center line and not centered on the whole width of the deck. Just checking to make sure we are not following the prints for the decking.... I also knocked out two windows in the Q gallery with my fingers as I was positioning the deck planks. I had to replace these and that was not fun. The captain has his own plank to walk... This is right after I put on the wipe on Poly to protect it from further dirt.


-
Just killing some time while I await the supplies to start the next chapters.....
-
Thanks.
-
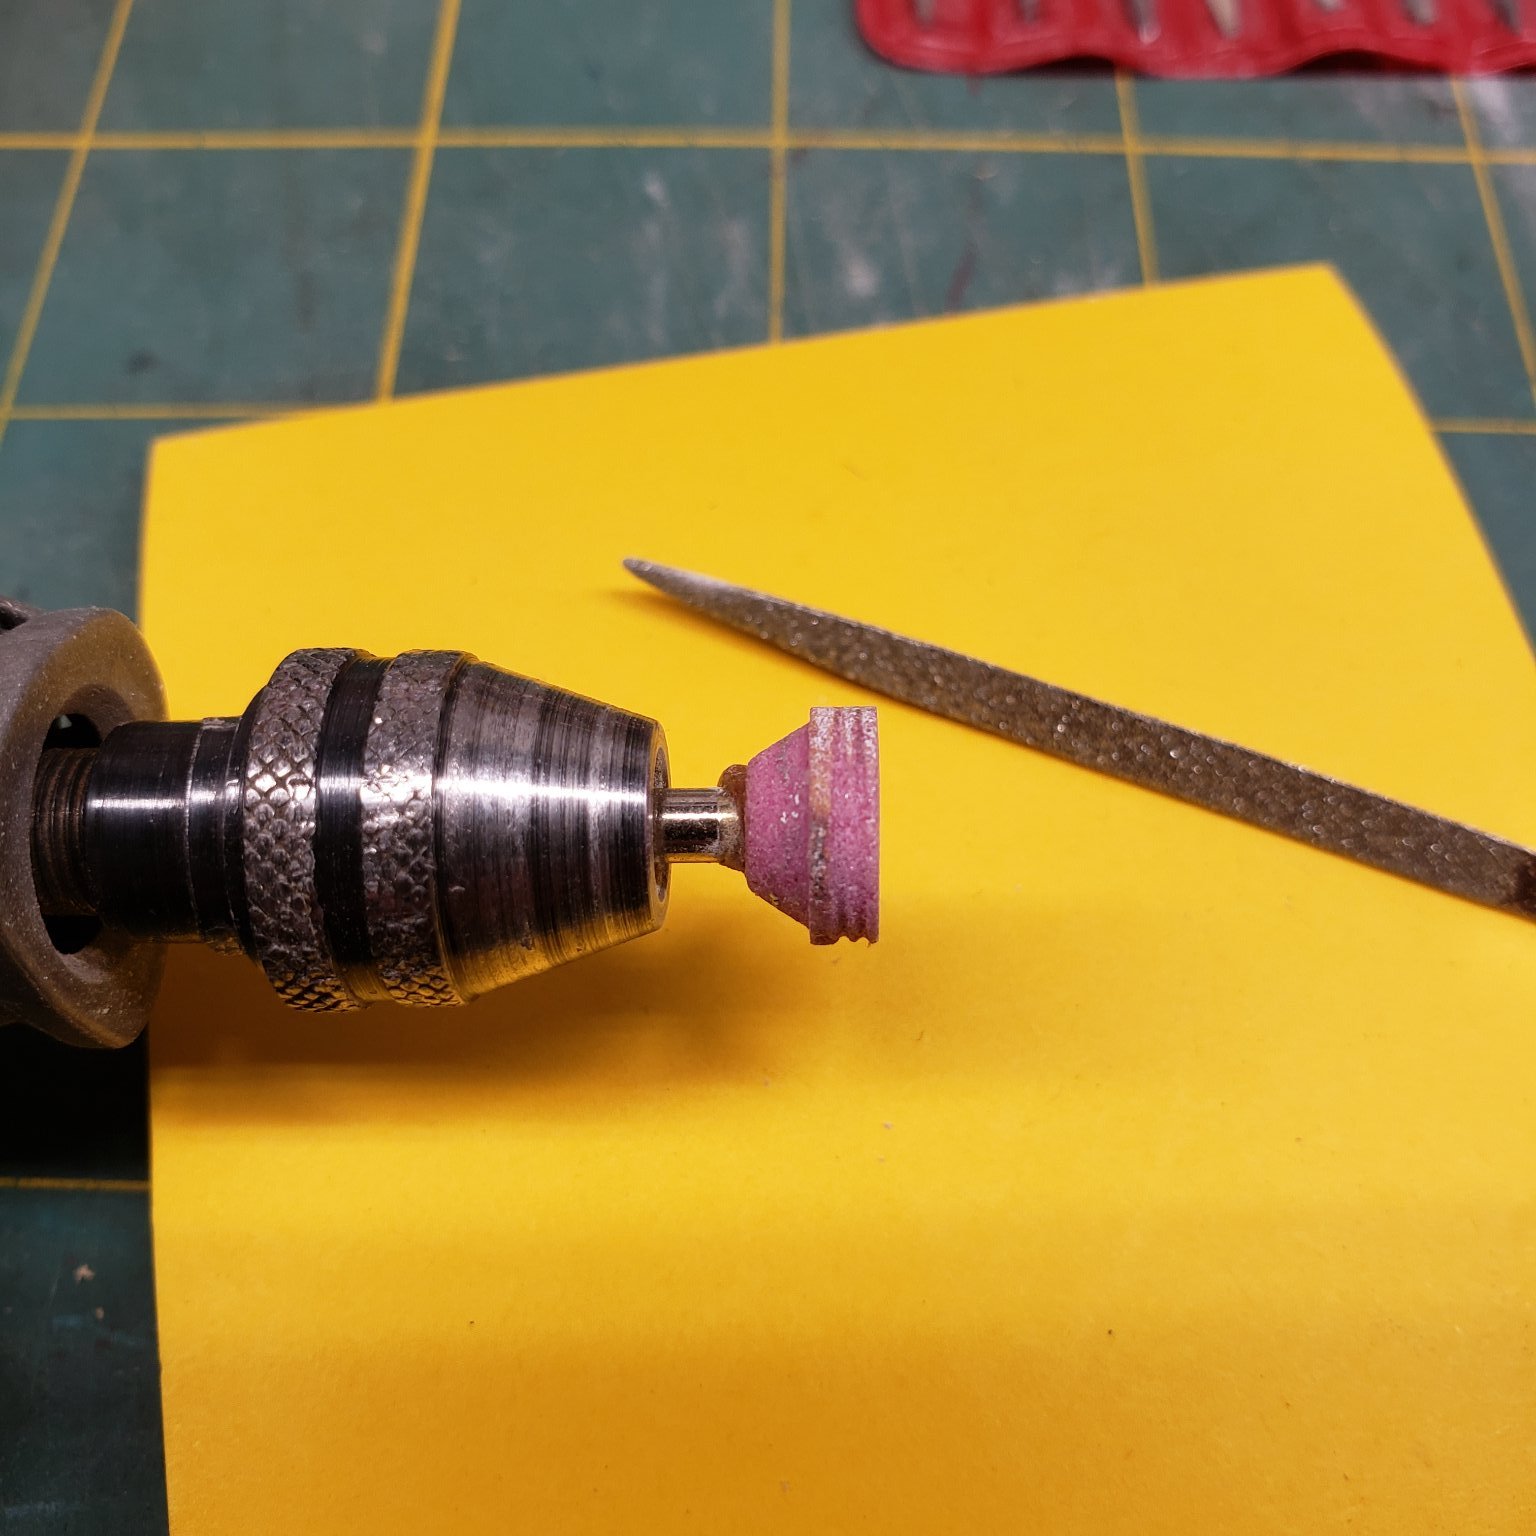
I took the stone that was ground to the profile and used it to grind the steel blank for the scraper, and then scraped the molding per the usual steps. I ground the stone because that was easier to control then hand filing the steel blank.
-
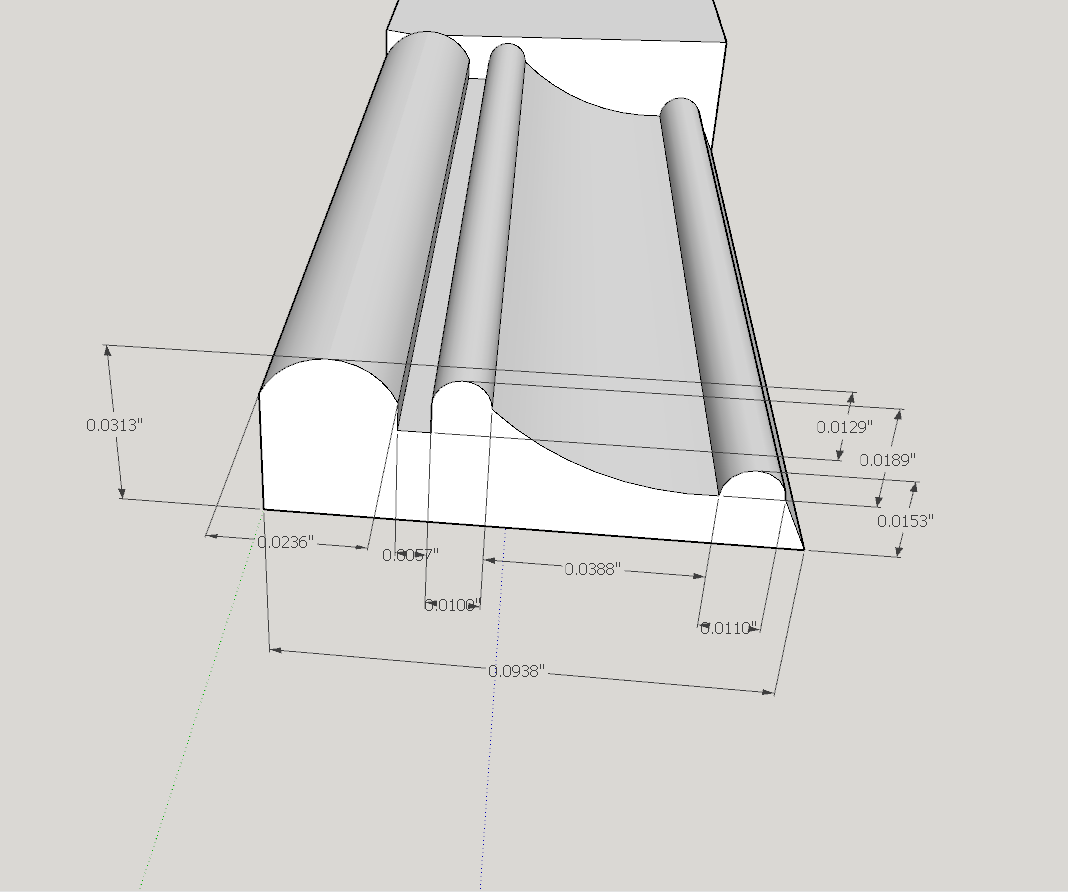
So after some thinking about it, I was able to solve my molding profile problem. I took a Dremel stone and used a diamond file to dress the profile of the molding into the stone while it was rotating. I don't know why I didn't think about this before...I was a machinist in the USAF and this is something we did all the time. Of course that was many decades ago, and I have many files in my head that I cant access as rapidly as I wish. Here is a shot of the new profile next to the one I made for the Winnie, too late to change so it will have to wait for Winnie 2 And here is the stone on the end of the Dremel after dressing with a Small diamond file.


-
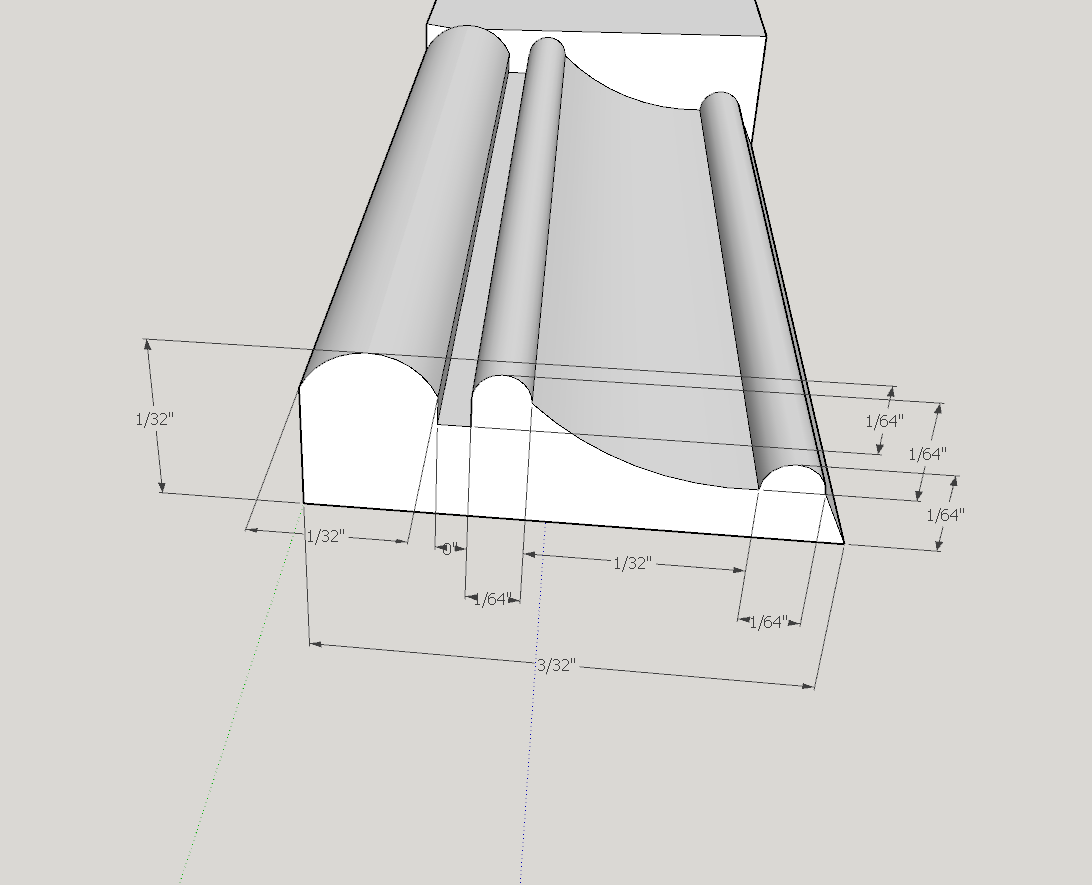
I am using Vcarve Pro for my CAM and sketchup2021 Pro for my design work....been doing this a long time...lots of steps to carve such a small profile see the attached image. for dimensions, the runout on the spindle would most likely ruin the part, then there is the problem of clamping it and keeping all 14.5 inches of it dead straight so the profile is correct along it's entire length. I'm pretty sure the cutters to mill this would break unless the feeds and speeds are dead nuts. Given all that I don't think I want to go down that rabbit hole....but thanks for the offer. If you are successful keep me up to date. In decimal inches below
-
Well thats easier said then done. The real skill is getting a profile ground at such a small scale. I'm not sure it is worth it, unless I was making hundreds of feet...but something to think about....
-
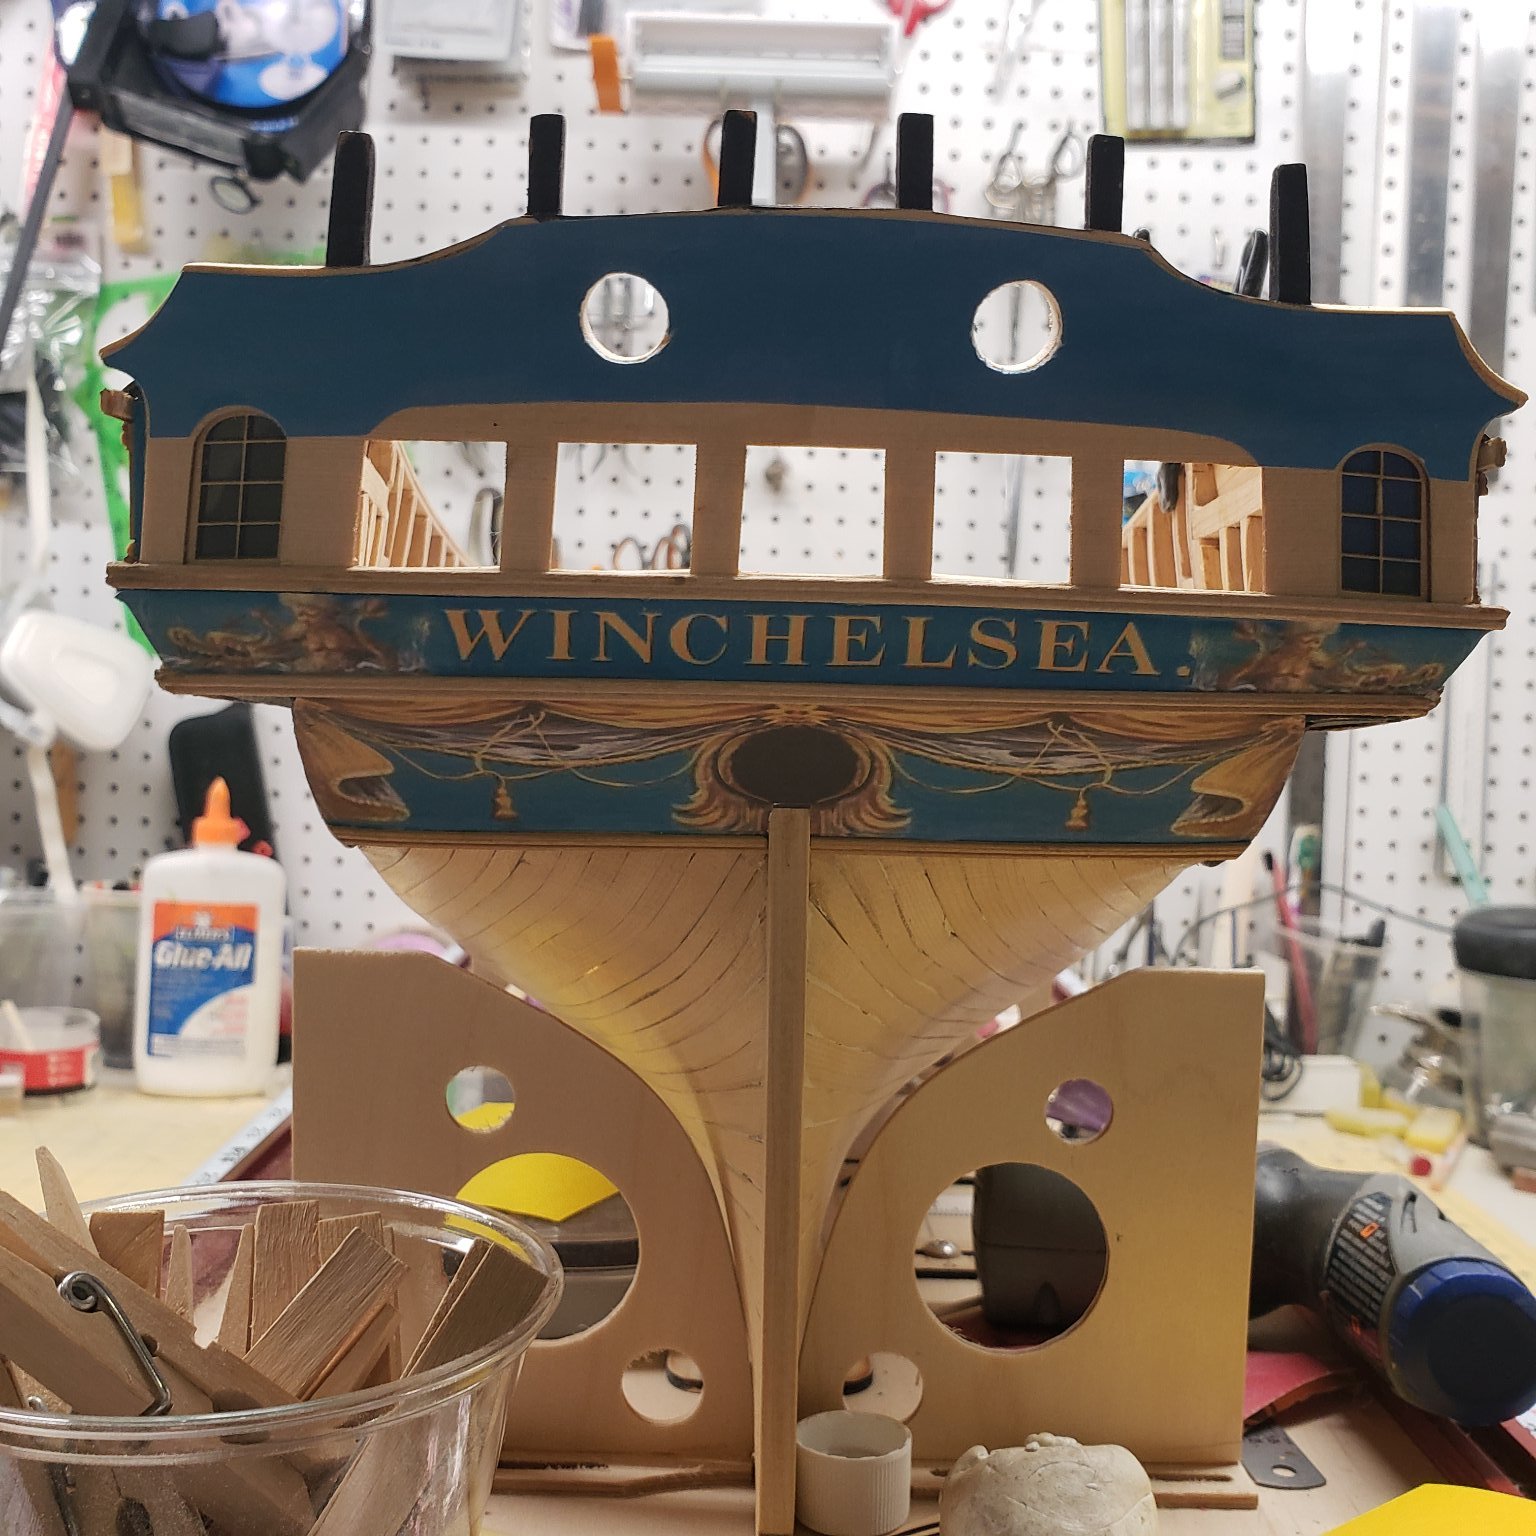
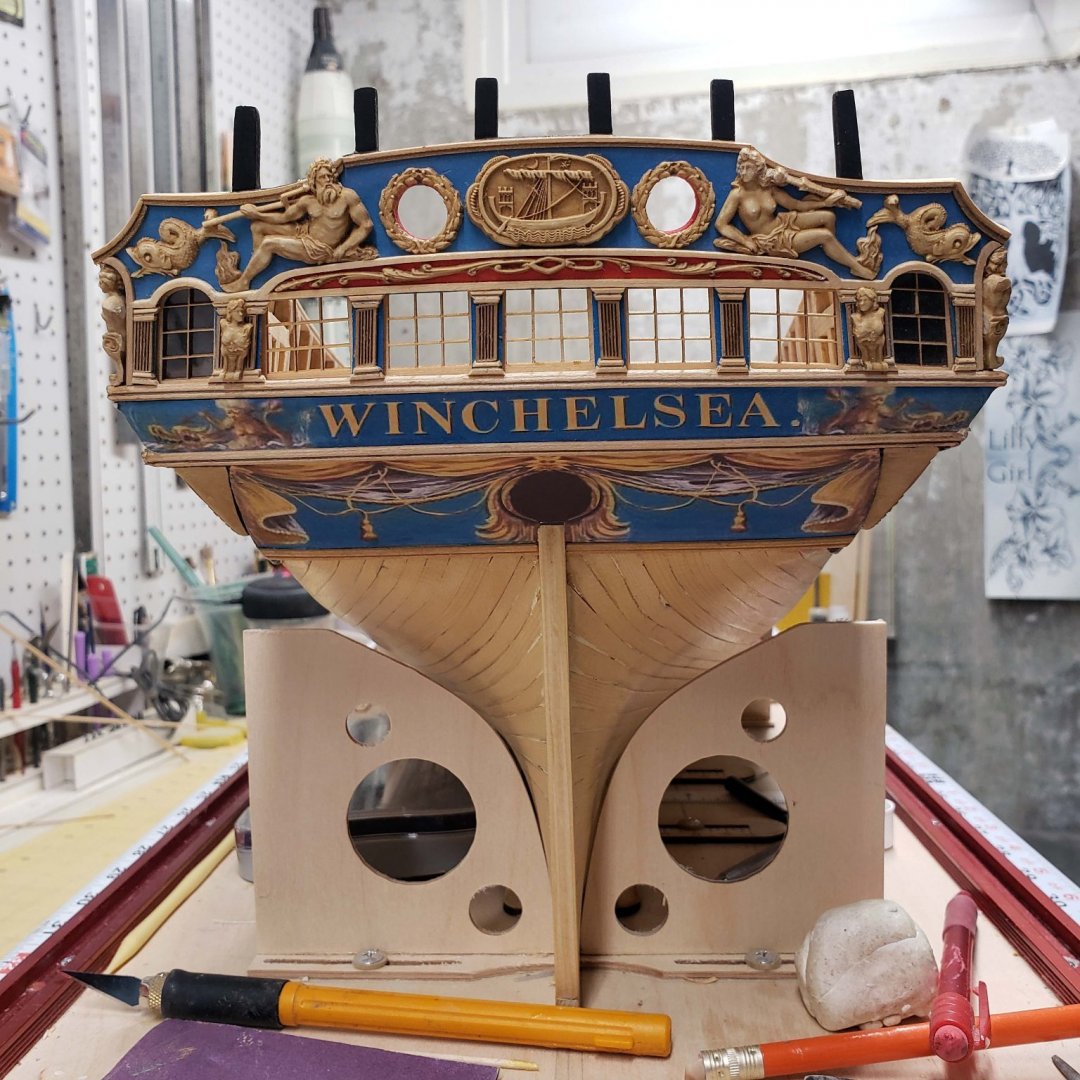
So I finally got through Chapter 3, the transom is complete, the windows were just sitting in the frame to check the fit again. Overall I'm happy with the ship at this point, but it is not going to win any Blue Ribbons I am going to have to learn how to make scraped moldings better, It really brings the model down. But at this point it is now Model Ships 101 for me and I will just continue to make errors and learn the ropes....I have many more pics...but none worthy to post. So onward and upward.
-
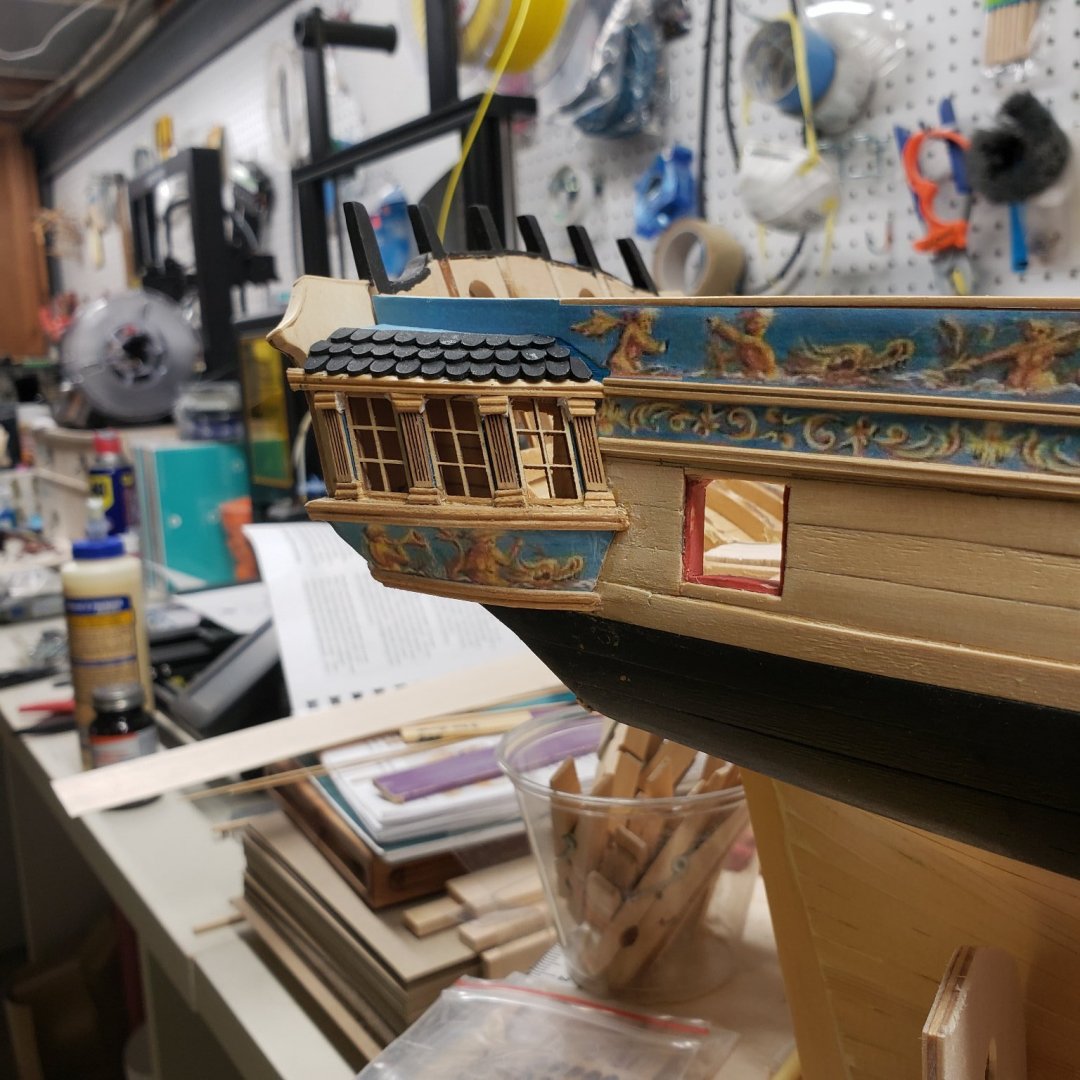
I've made a little progress...not real happy with it, but very happy to have made it this far The camera is so unforgiving in details, I look at the model when I'm done for the day. Then when I go to post pictures I have to go back to the model to make sure it the same ship. I think I will be happy with it when I finish. Haven't done all the stern yet So this is the second try on this so its going to have to do for the time being... It looks much better at a distance, and as I add more details I added a turntable under my workstation so that I could work on both sides, very useful when trying to get it symmetrical turntable.mp4

-
Oh, I've been rebuilding over and over, I also read and study, but not enough I guess...My qgalleries are on the second set, Chuck obviously knew this was coming. In regards to the figures, I am currently underway on a print run...soon I hope to have something in hand.
-
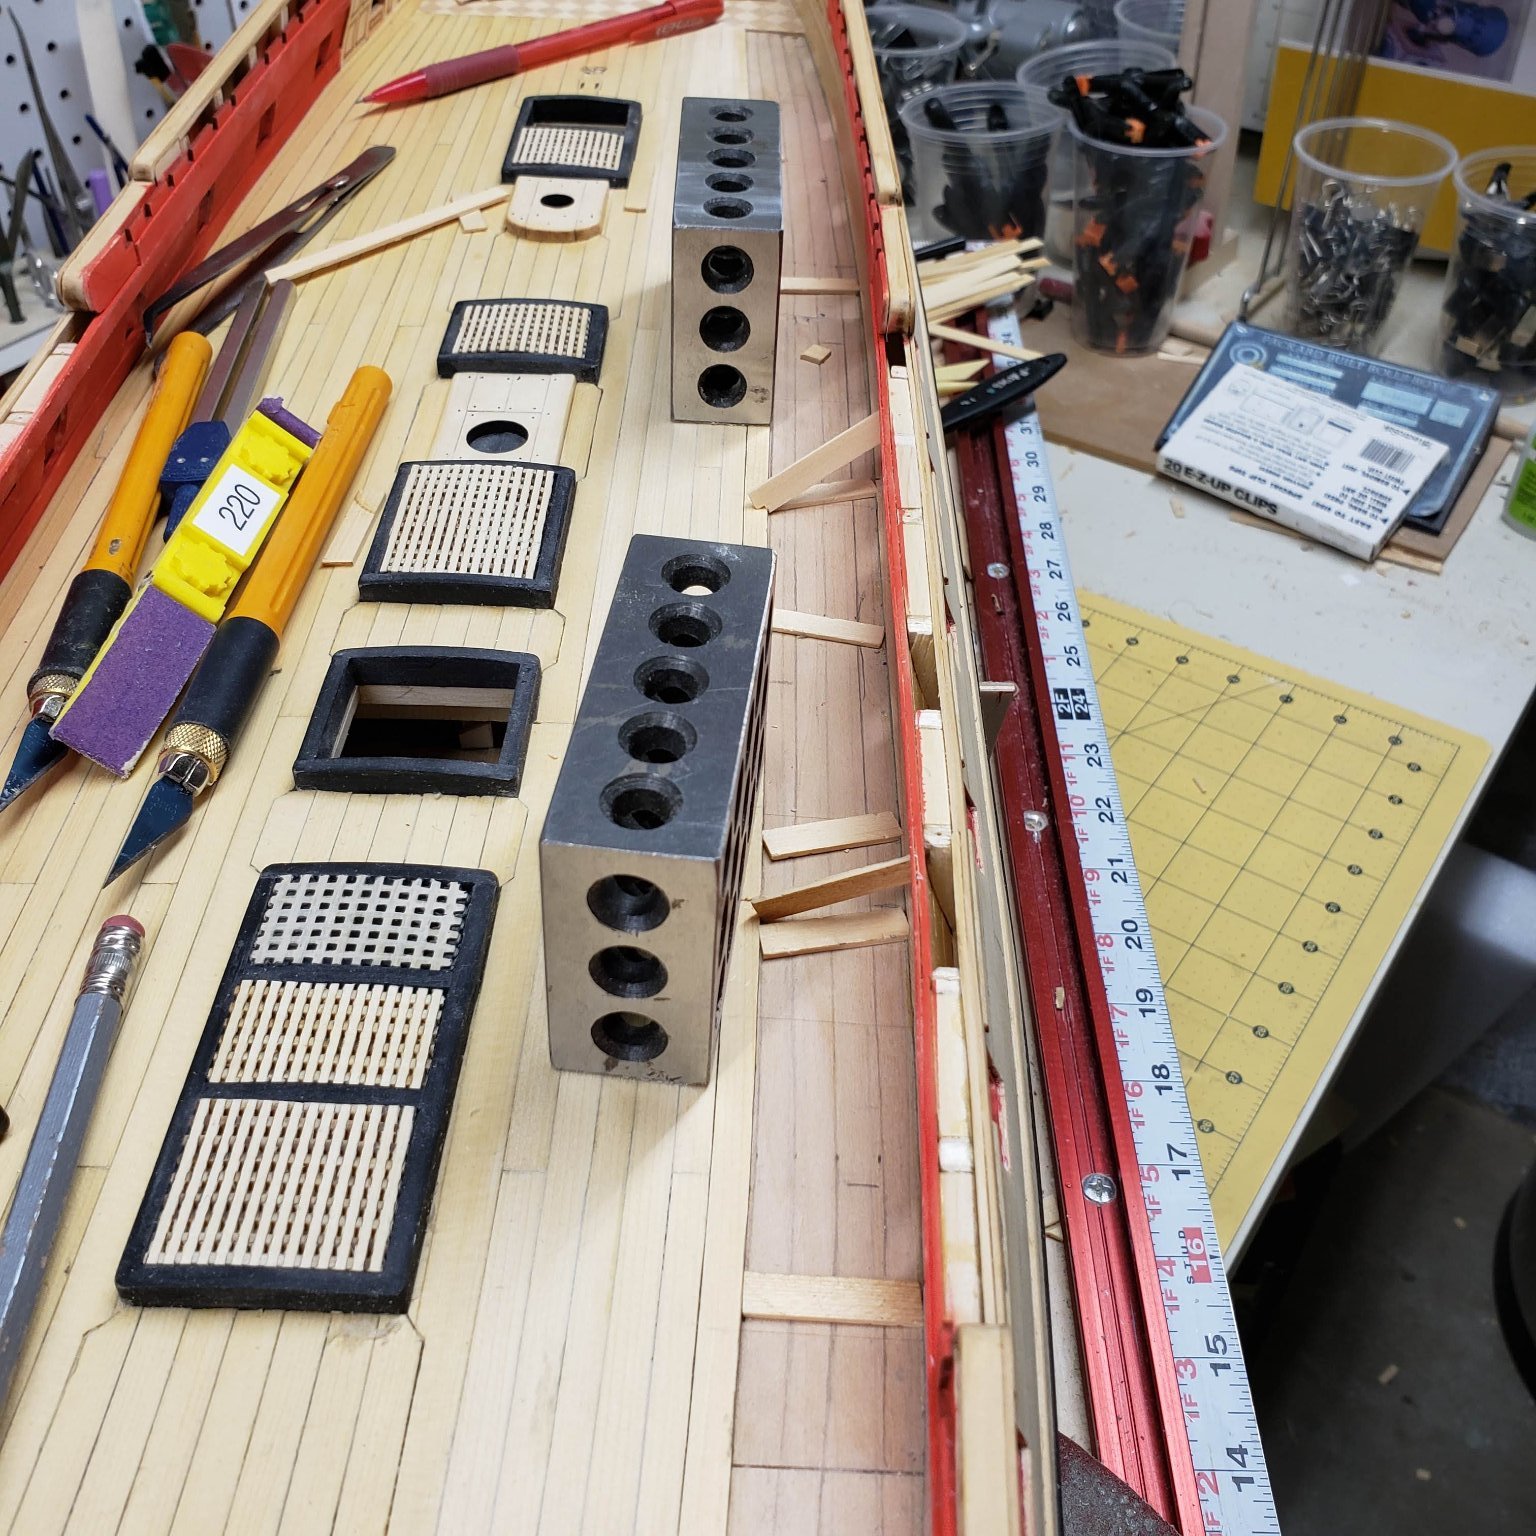
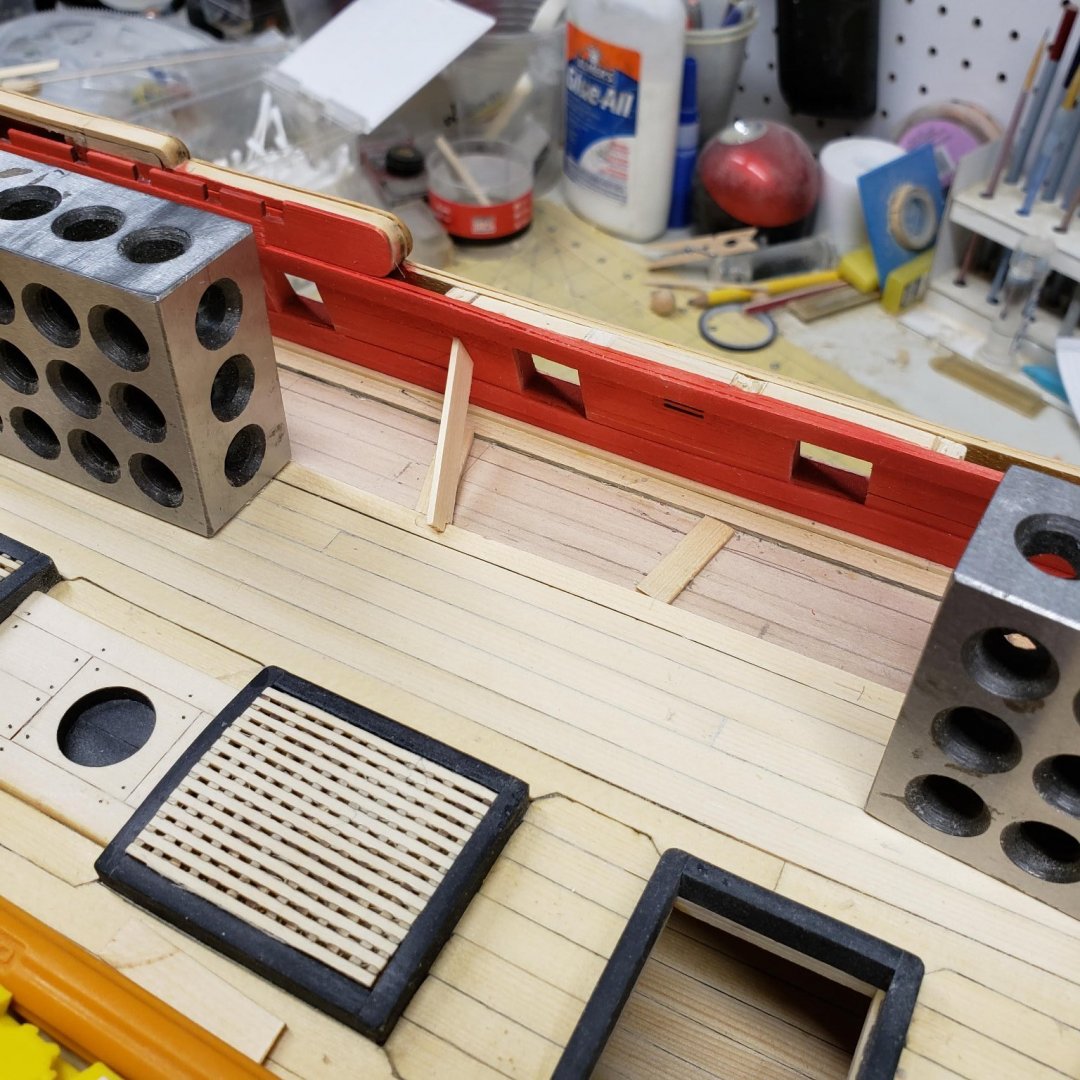
If you're referring to the Gantry it was my not so original design and I cut most of those items on my cnc and laser. The T tracks you can get on Amazon the steel blocks with the holes are called 123 blocks, Amazon again or Ebay. So as far as I know you can't just buy them, if I can be of additional help let me know
-
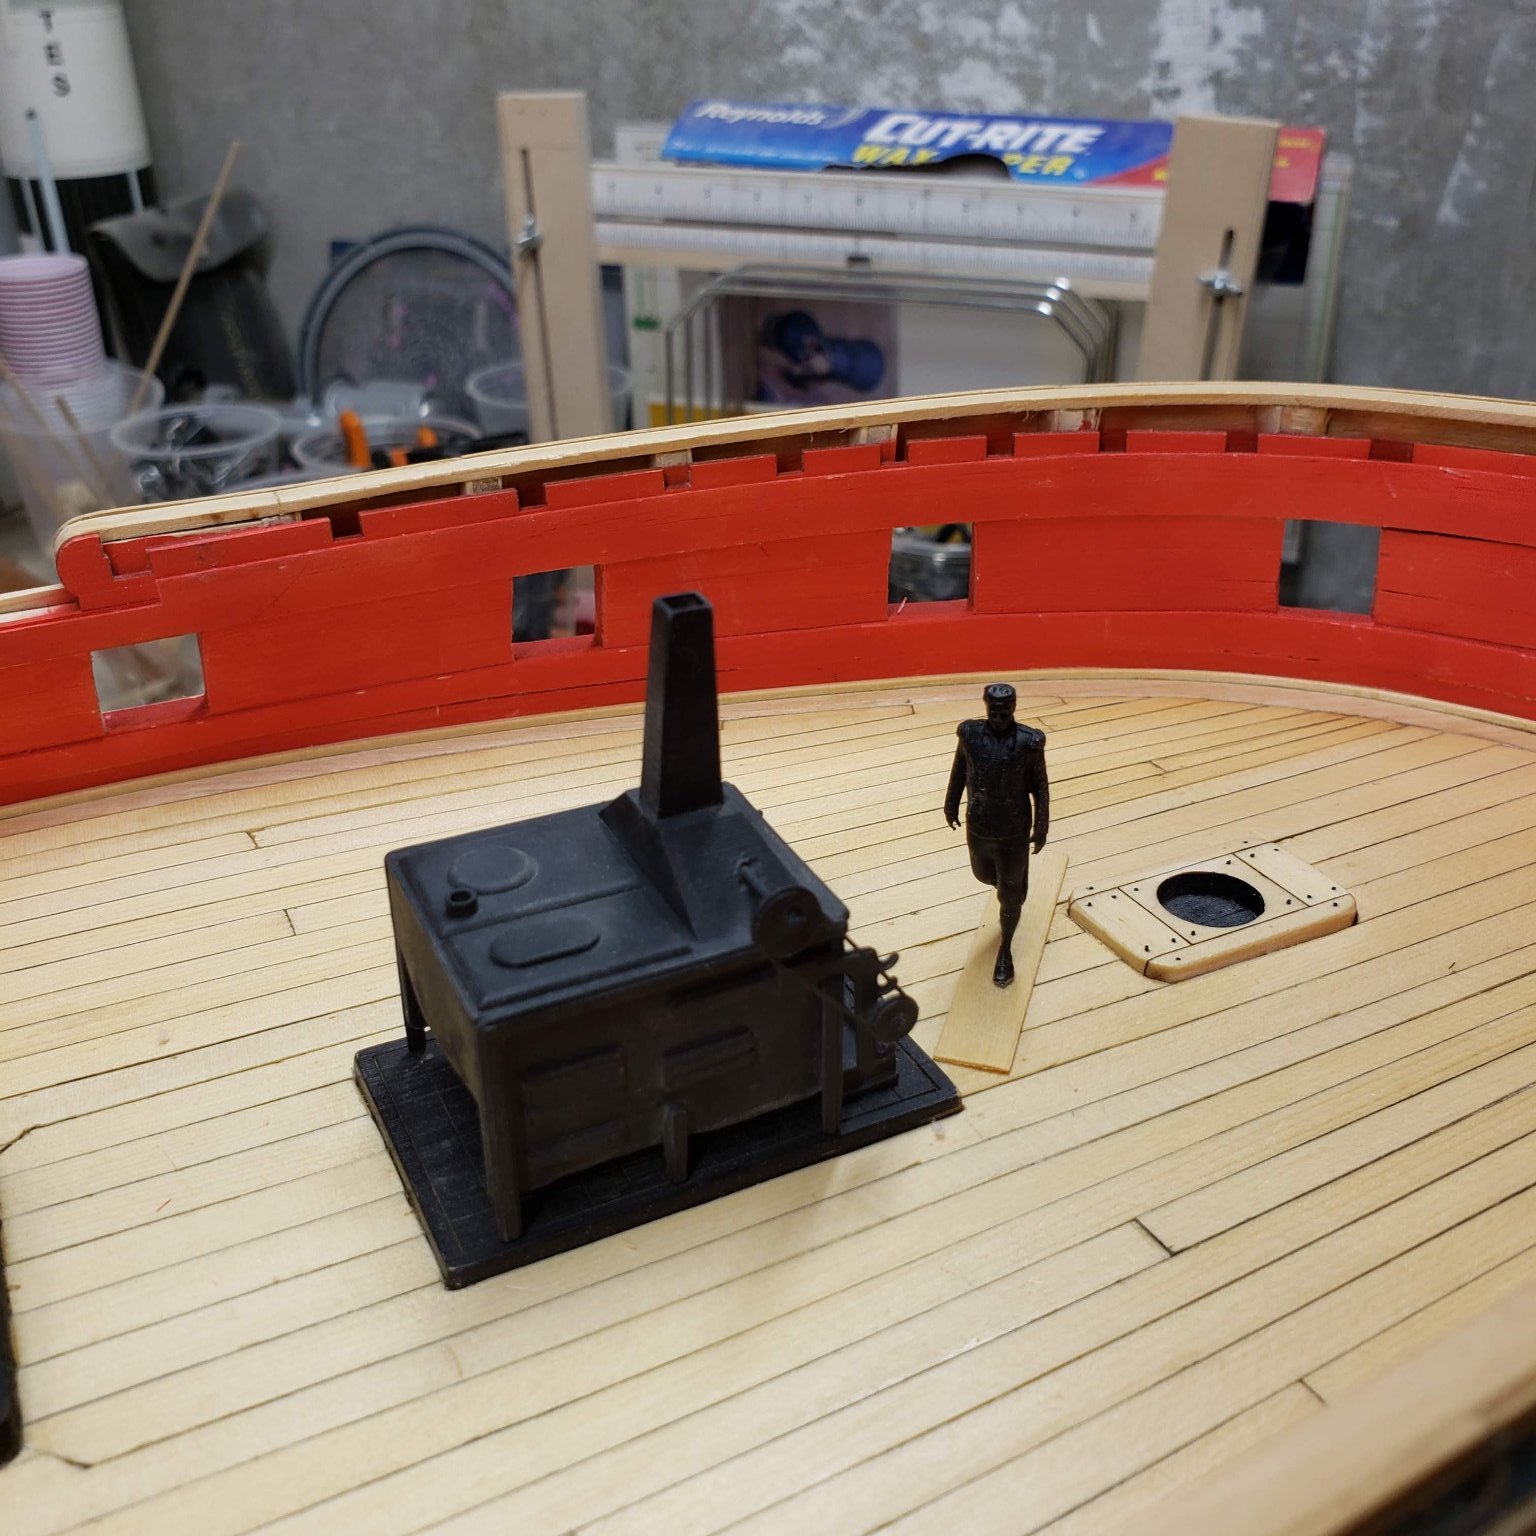
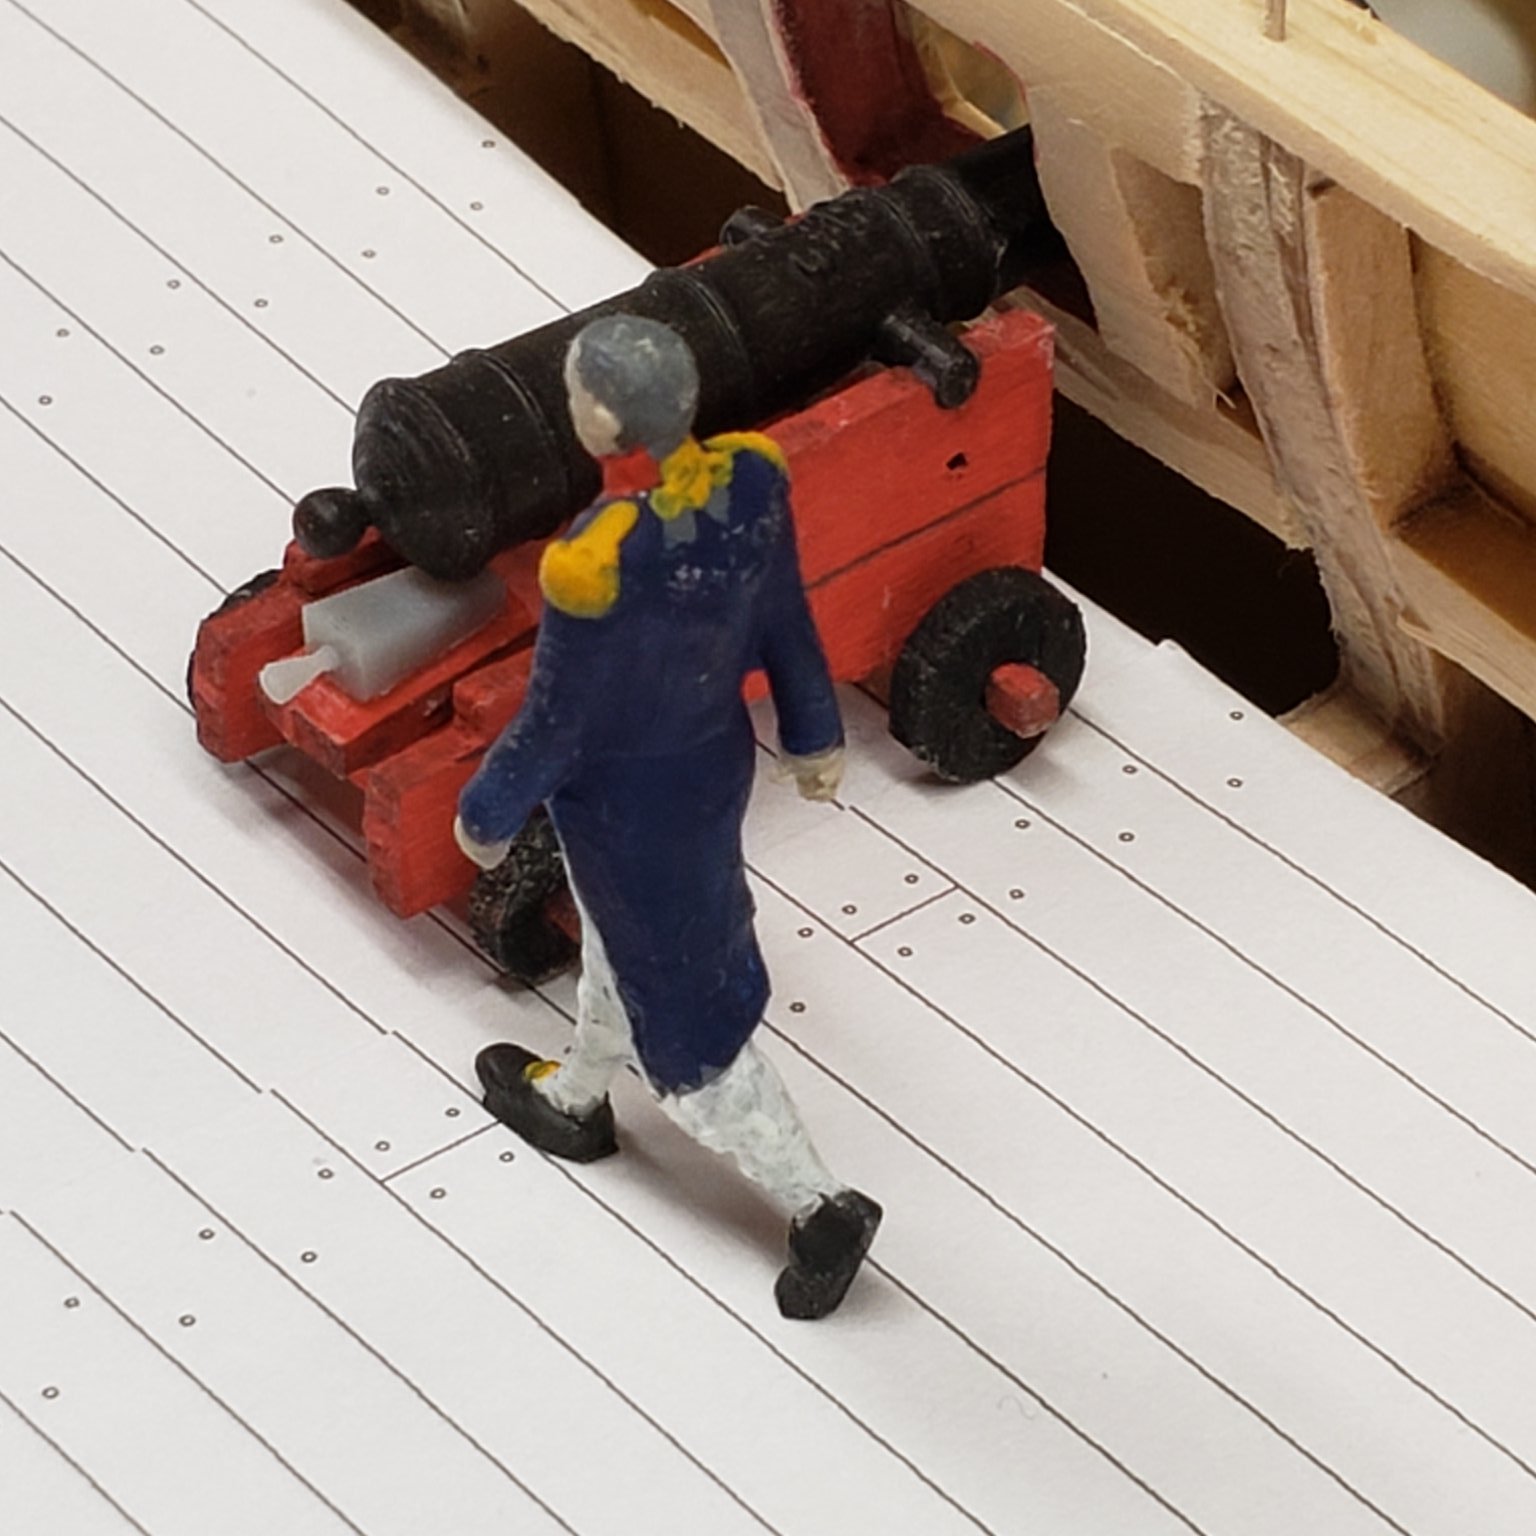
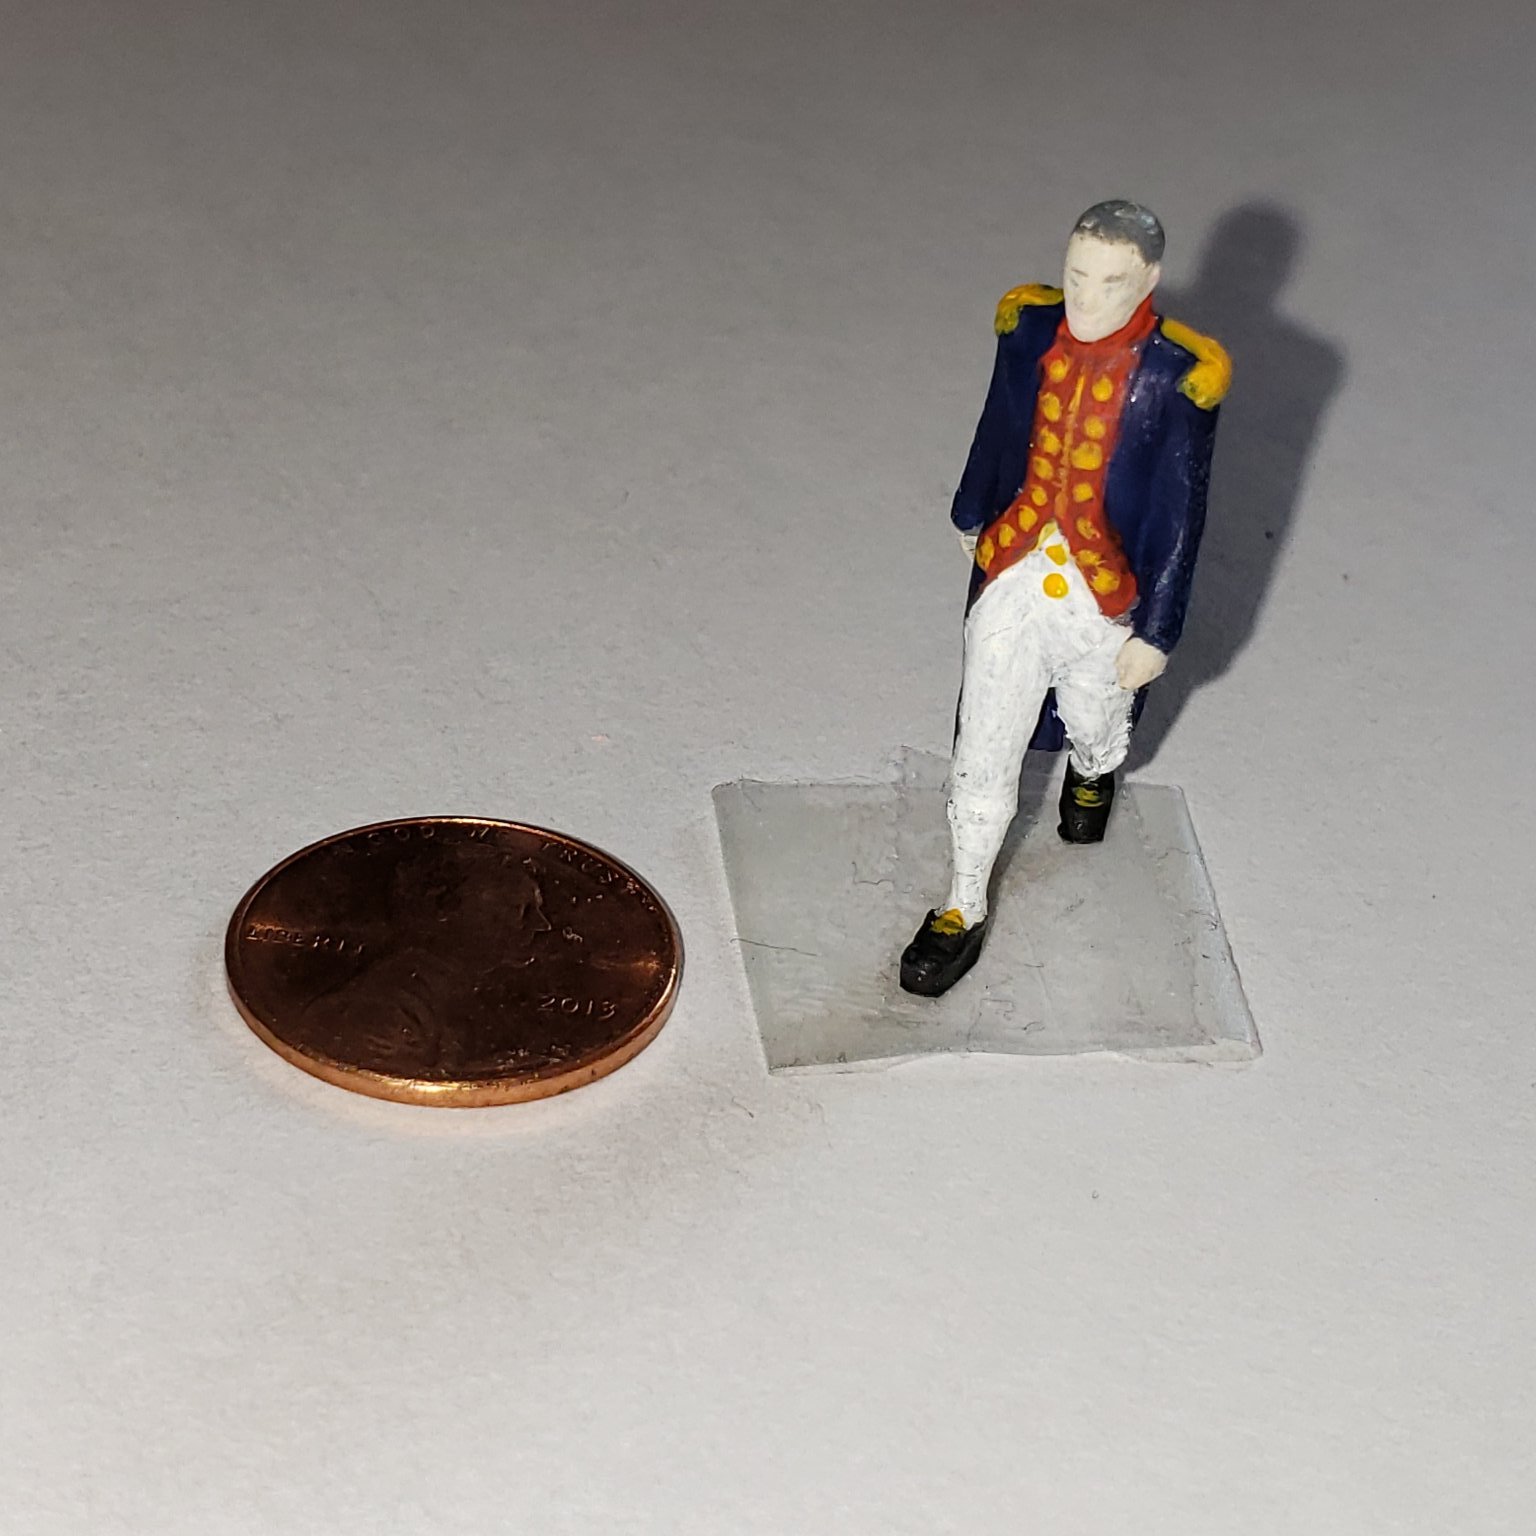
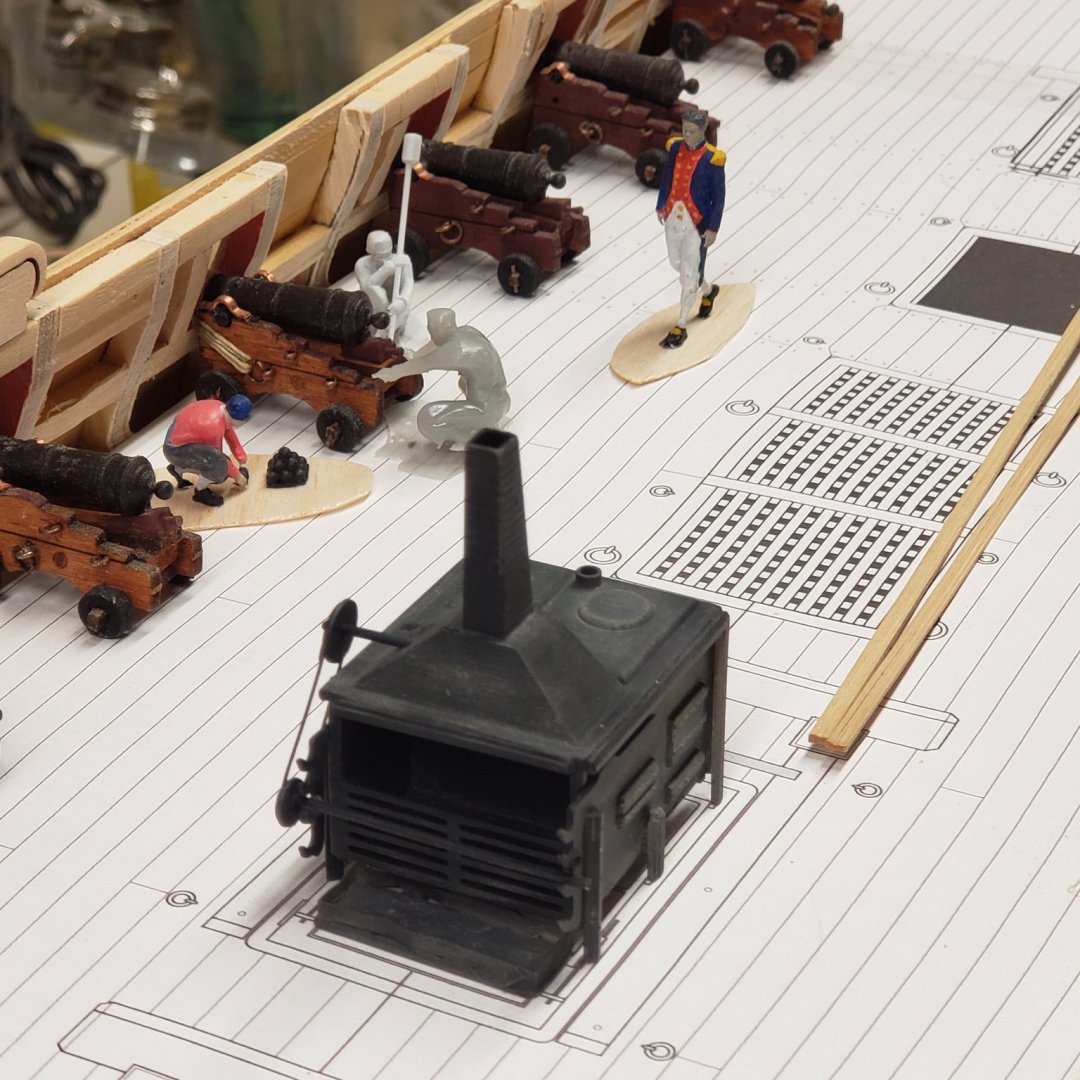
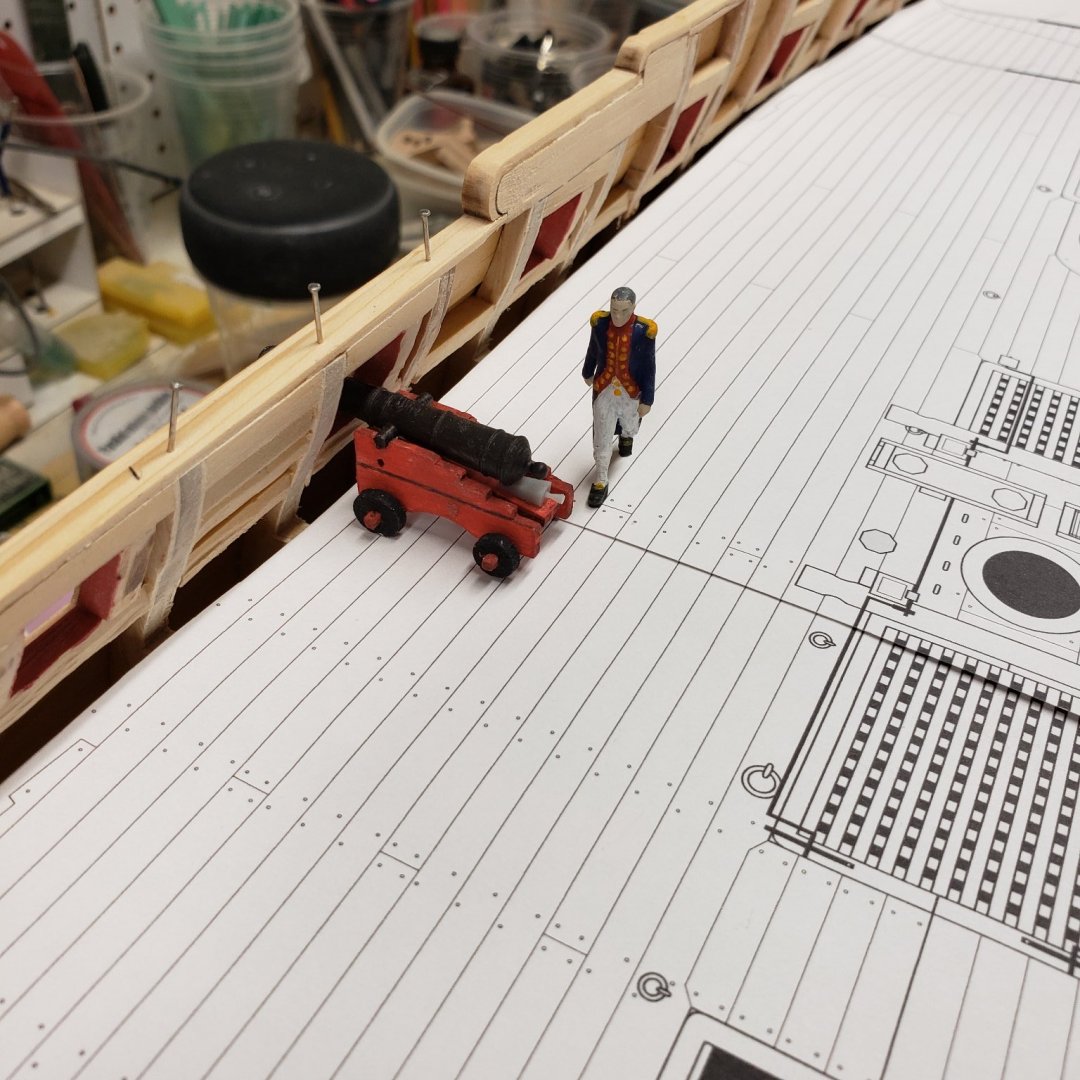
Thanks Chuck, I agree, i already have another set of bulkheads cut out, so I'm most likely going to practice some more....it is a skill I would like to master. On another note, I saw where you were having problems finding the figures in scale. I made one and have attached some photos. It is really hard to get the finer details at this scale. It looks good with the eye in the real world view, but when you put on magnifiers and take photos that you can really close in on it does not hold up well. I have included the figure on the Winnie it was scaled to 1:48 based on a 5'10" height. Let me know if you think this looks to be the right size next to that cannon Printed figure painted in a hurry, this is just a preliminary attempt to see if I could do it.
.jpg.990106abf93c7e1e96f2836e1f8067ac.jpg)
.jpg.c3ea917db41dd0128d1858ed4d358660.jpg)
.jpg.94b04fa5b677f06b58b08a41f653a1b4.jpg)


-
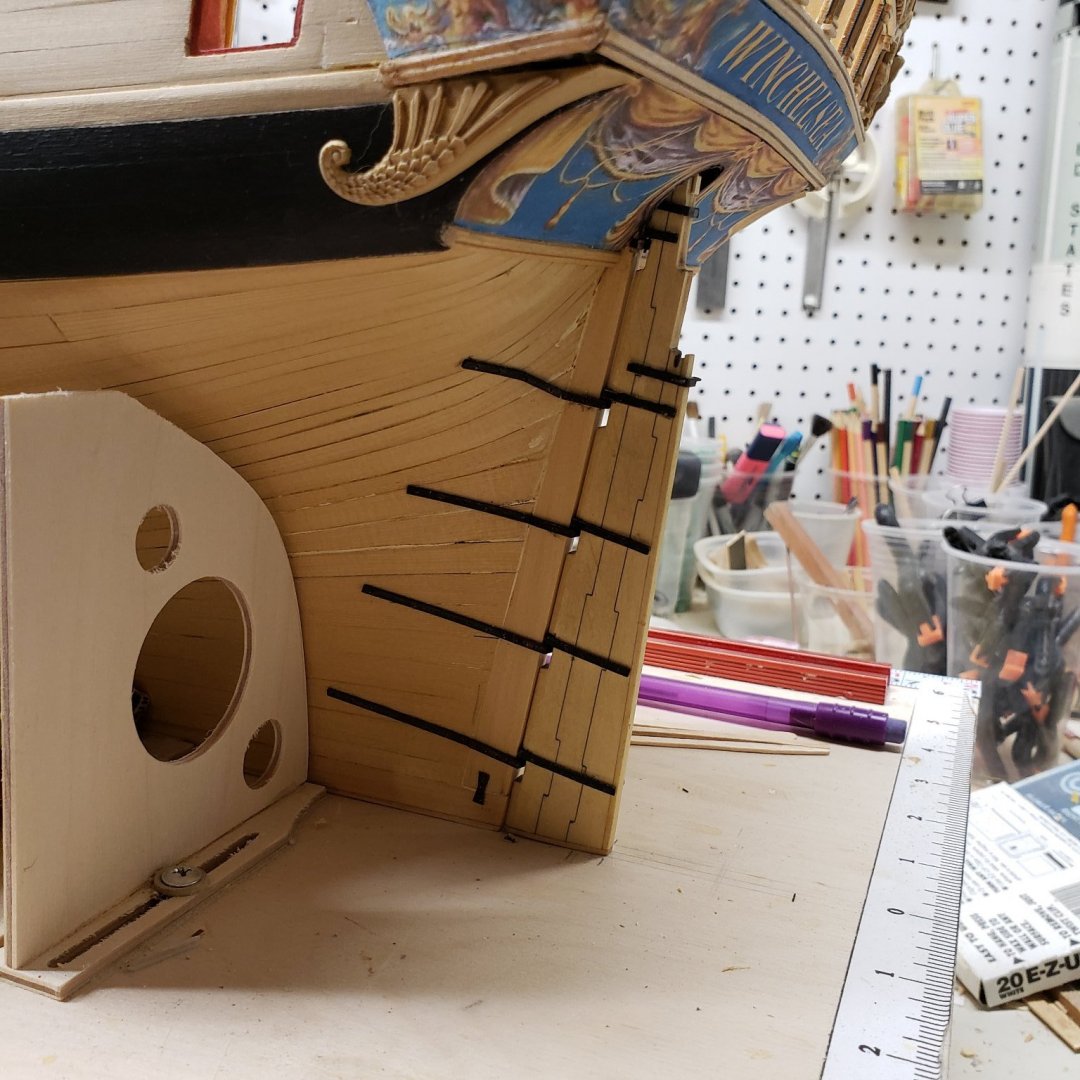
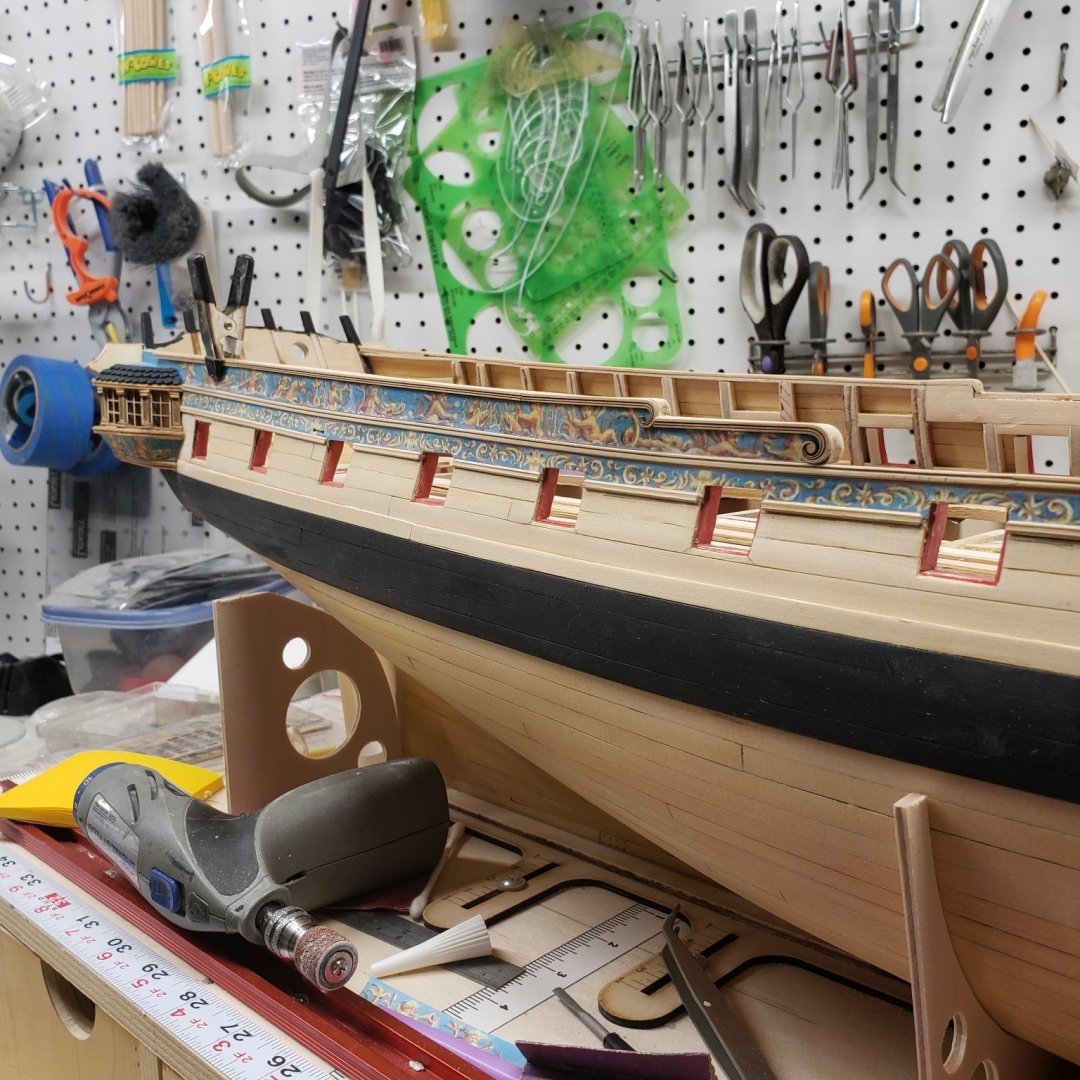
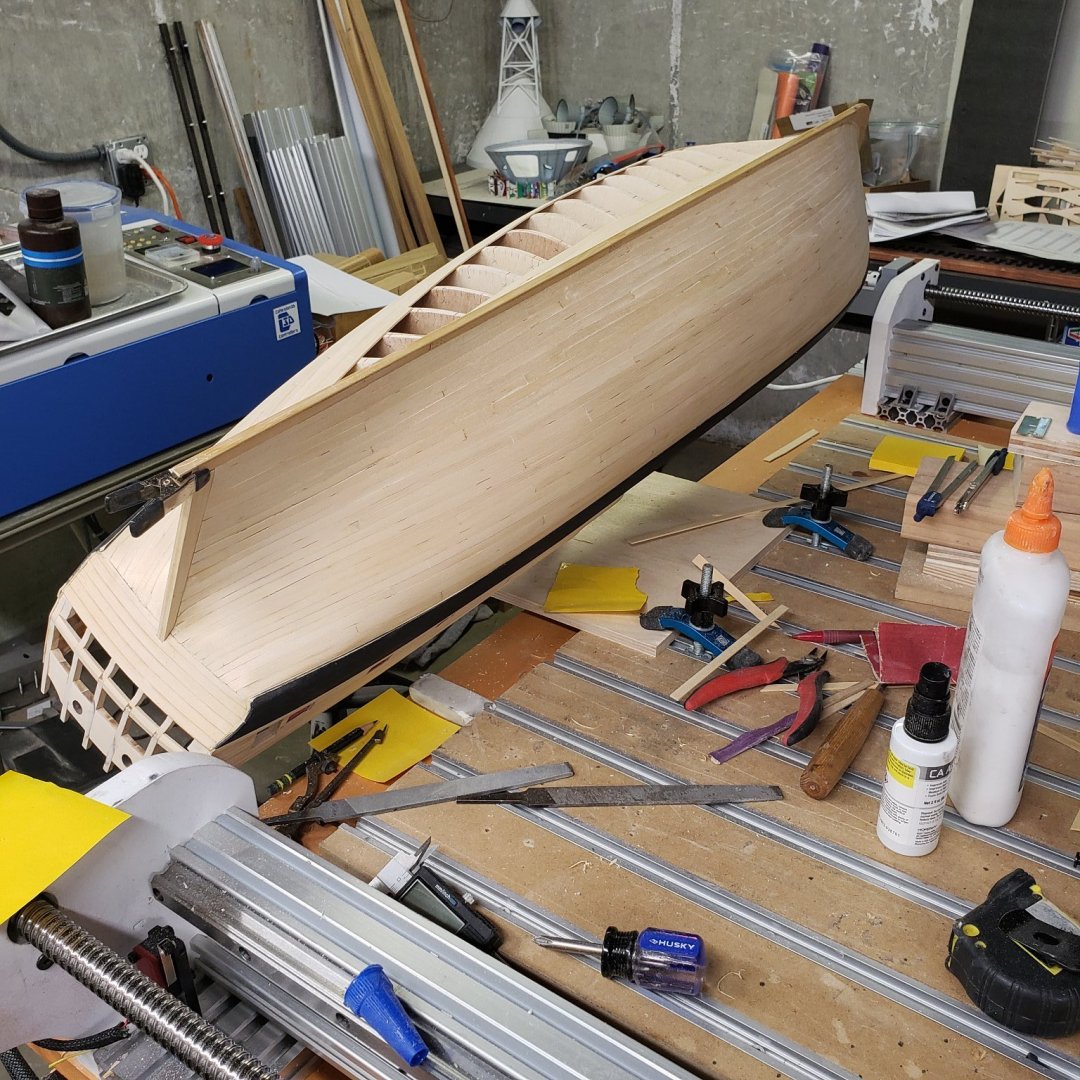
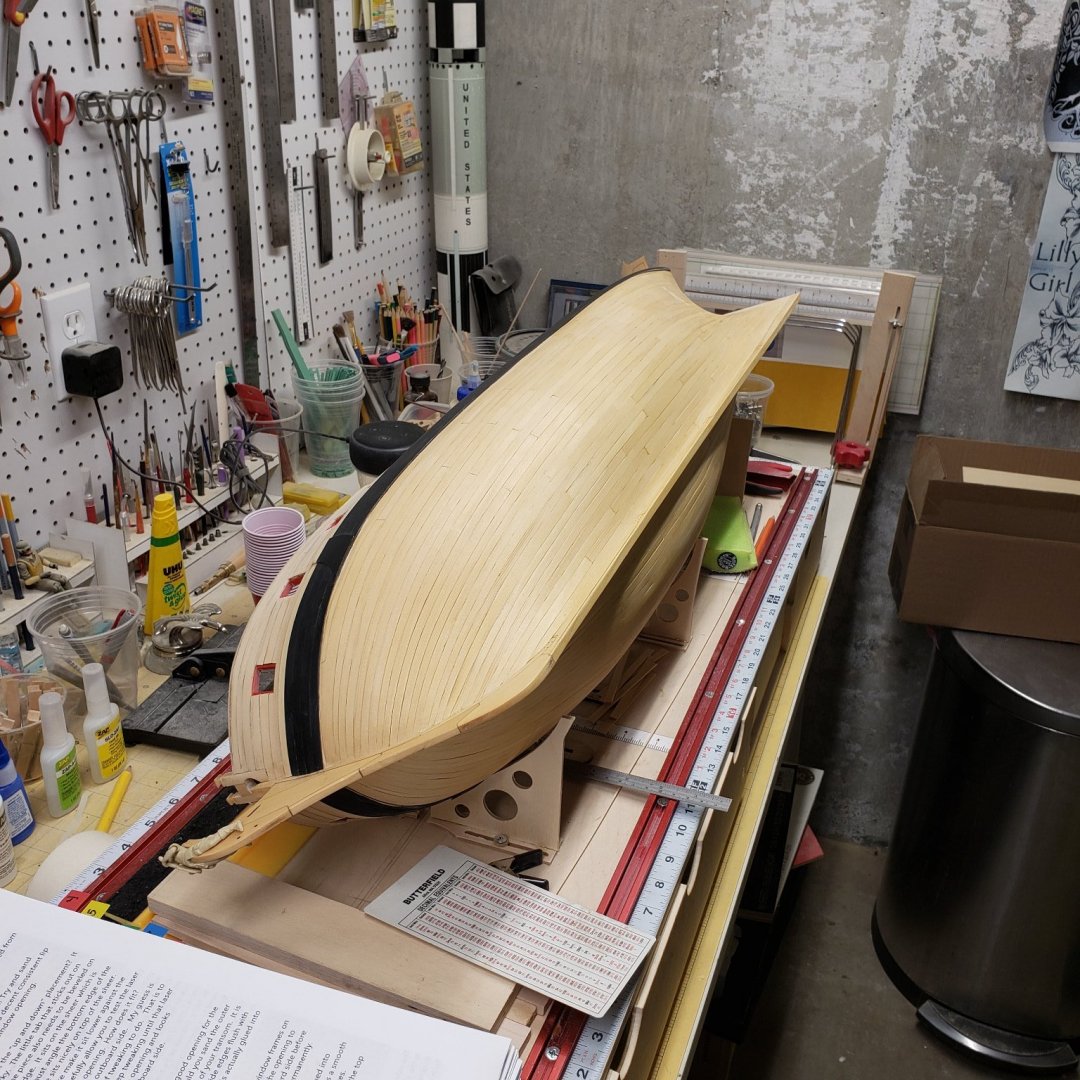
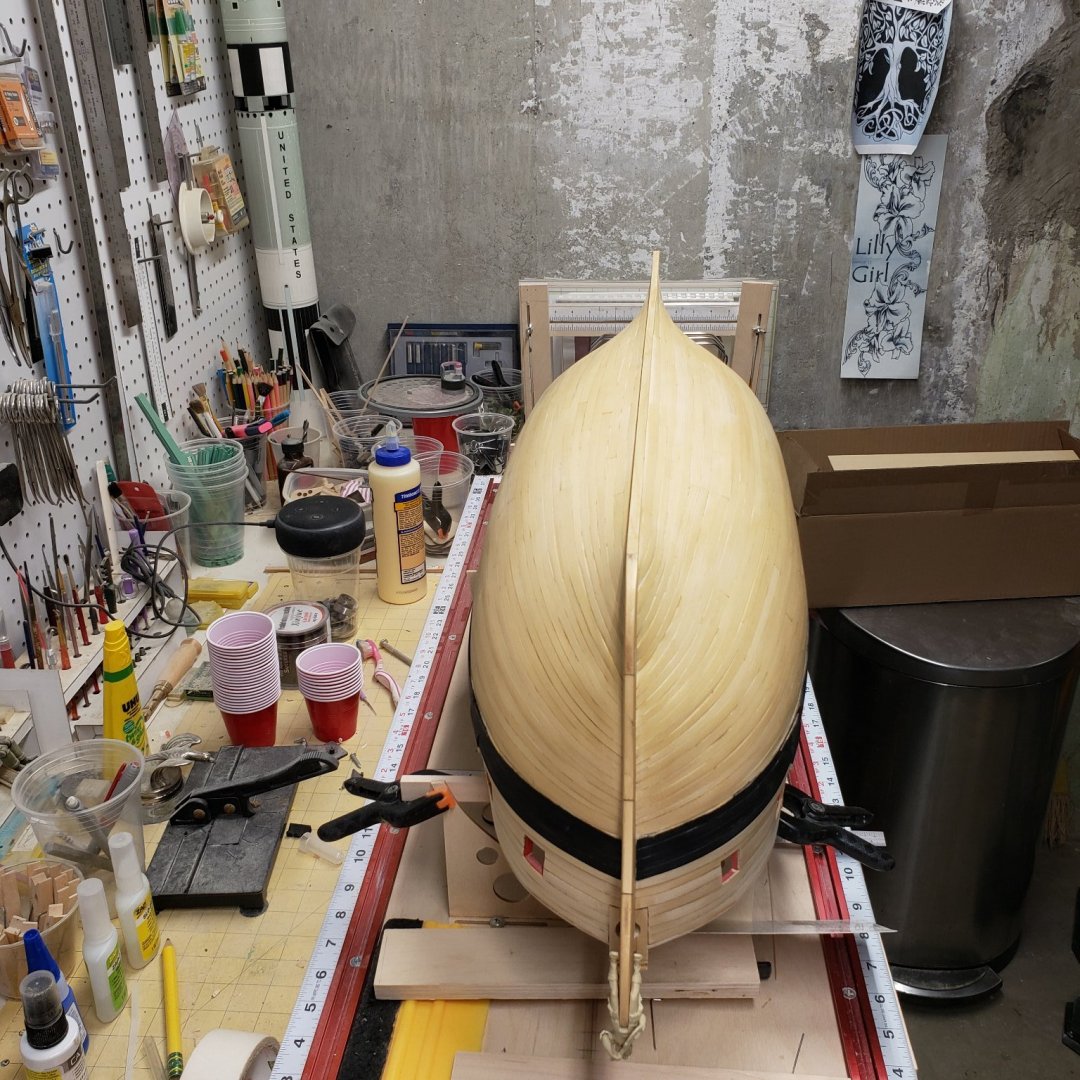
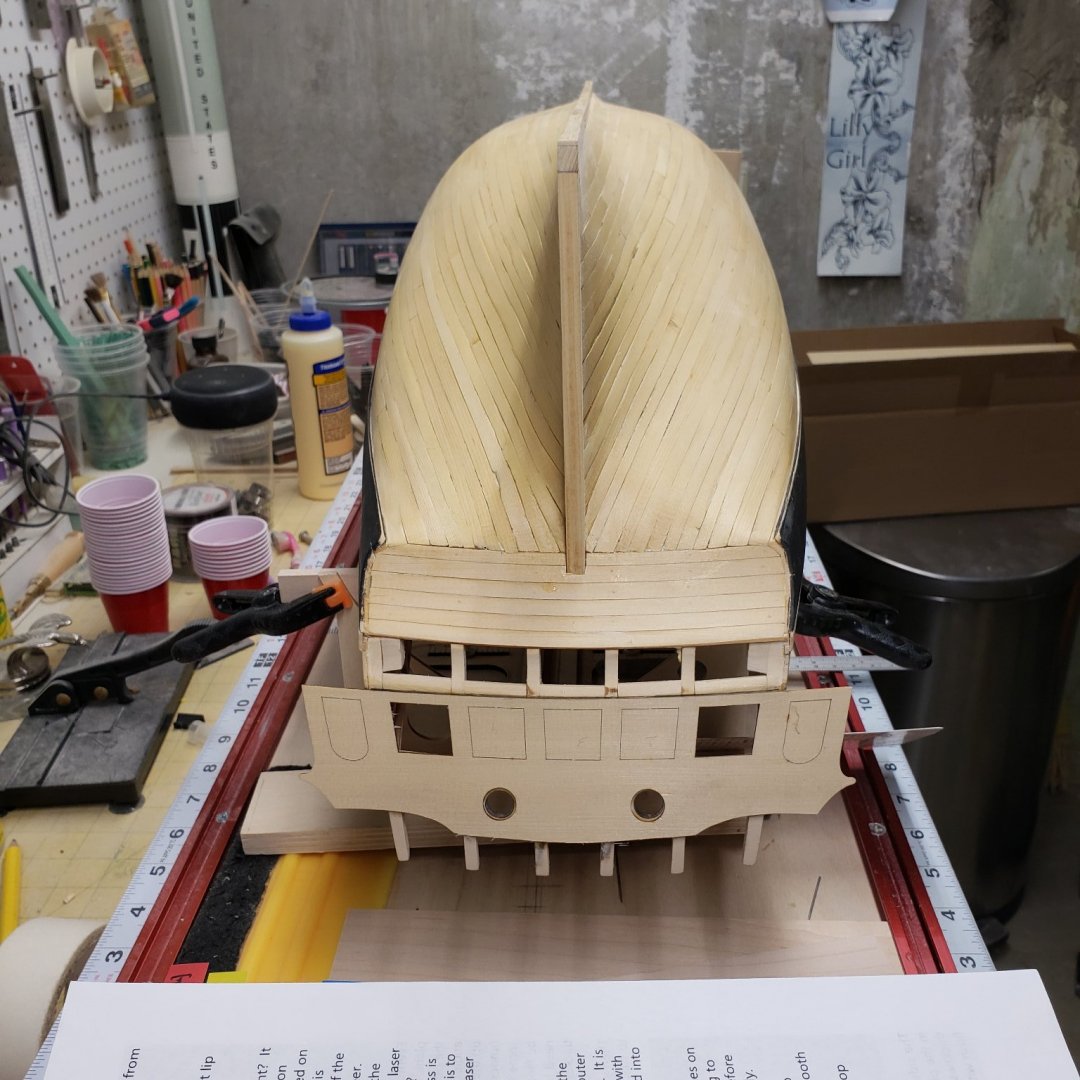
The good news is I'm still alive... sol I finished the planking of the hull, I guess it's gonna have to do, as I will probably die of old age before I get it the way I truly want it. This was a progress photo planking the last side A finished shot, rubbed on a coat of poly to try and keep it clean and this shot shows why Chuck suggested I sand a little more, Obviously it was not enough, The transitions for a smooth Hull are quite a challenge and I'm guessing doom a lot of models to the burn barrel, I truly struggled with this end of the hull, after numerous attempts I just threw in the towel, I did however recognize that the model looked pretty good when sitting in the cradles....I also noticed that a lot of these areas are going to disappear behind details as they are added. So I'll quit trying to reason why this is OK and just admit that it is a mediocre attempt. To conclude...As they say in the Opera, its not over till the fat lady sings, and she is just starting to hum... till next time.


-
Love the new shipmate, nothing like a dog...
- 642 replies
-
- 1
-
-
- winchelsea
- Syren Ship Model Company
- (and 1 more)
-
A bit wavy is a understatement, that is part of what is bothering me. Also I am having a lot of trouble at the stern with those turns and bends. But I am becoming quite proficient at removing planks, cleaning the area and replacing them.🤕