Tim Moore
-
Posts
357 -
Joined
-
Last visited
Content Type
Profiles
Forums
Gallery
Events
Everything posted by Tim Moore
-
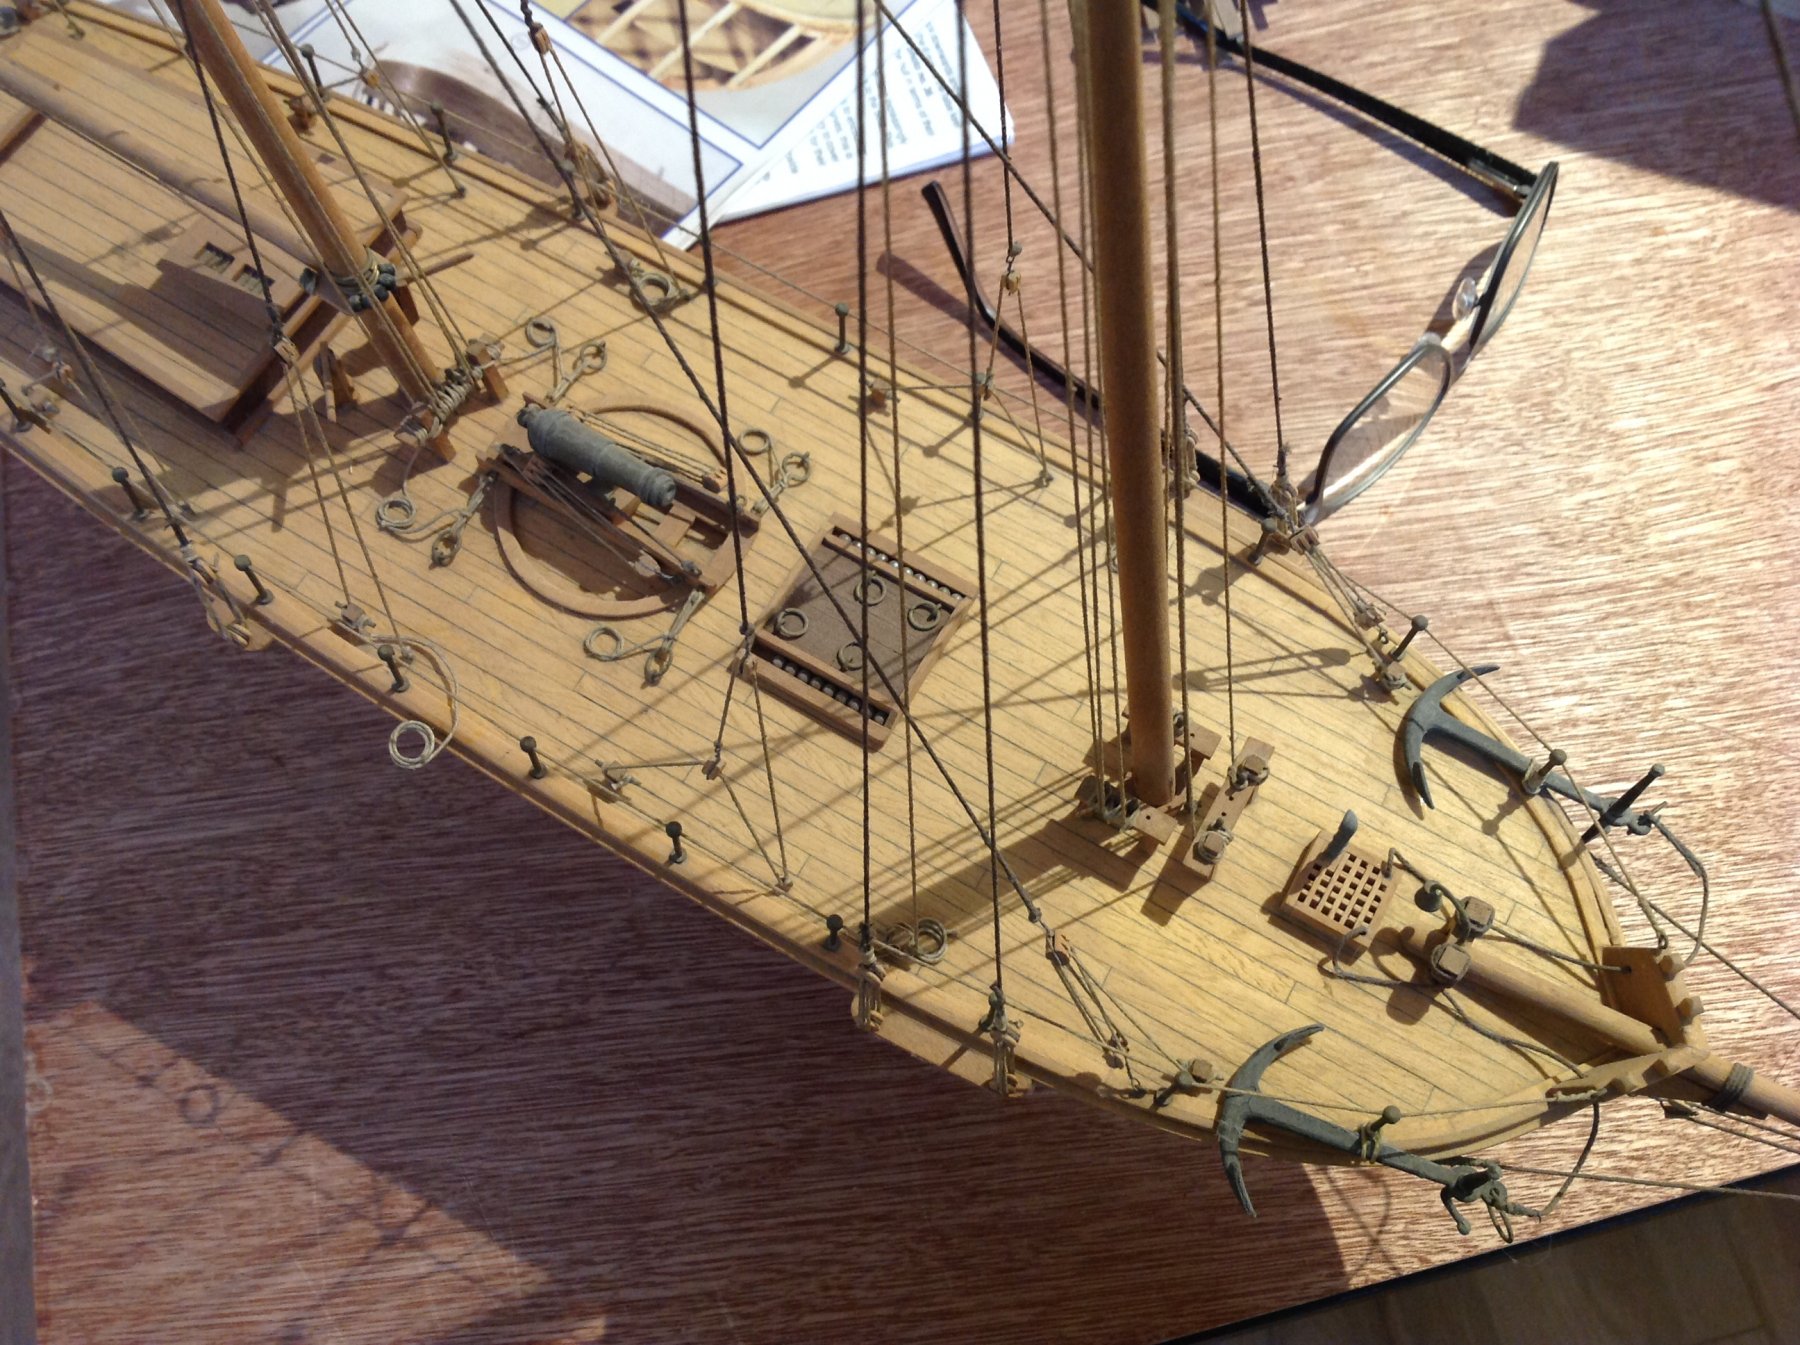
Side strakes etc all finished, just pondering the paint job again. Always a bit hesitant to cover up nice woodwork with paint, but I think I'll give it a go.

- 171 replies
-
- 6
-

-
- artesania latina
- bounty
- (and 1 more)
-
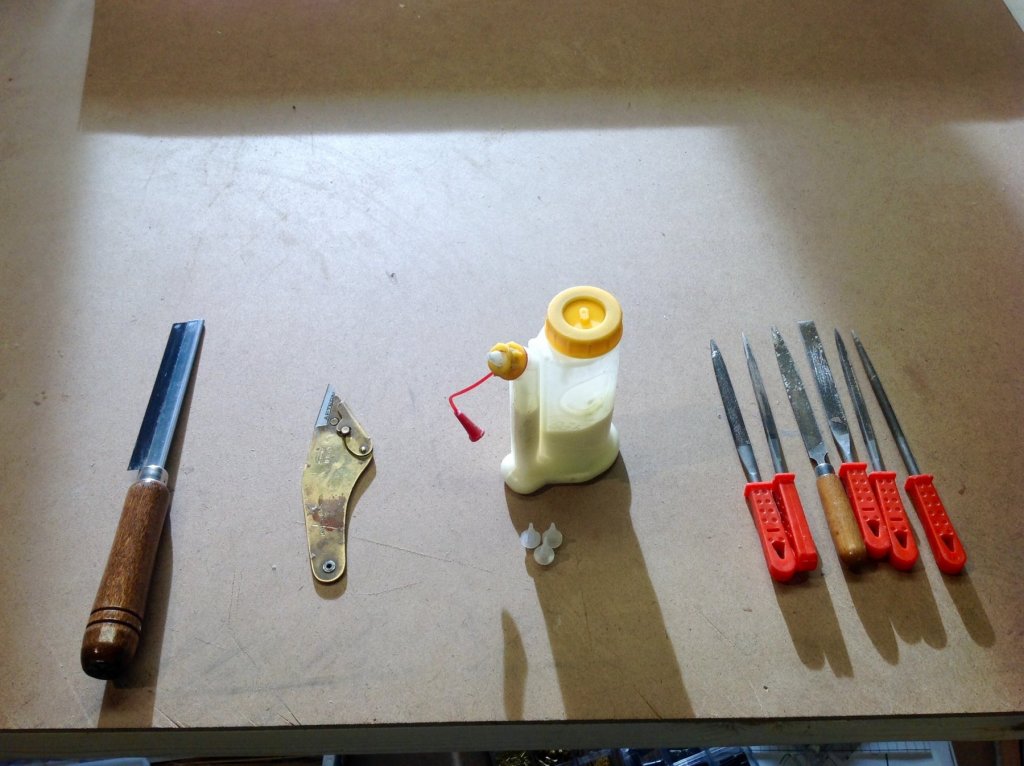
My top 4 most useful tools
Tim Moore replied to Tim Moore's topic in Modeling tools and Workshop Equipment
Bob - I picked up the babe bot glue dispenser at Lee Valley tools in Toronto. -
My top 4 most useful tools
Tim Moore replied to Tim Moore's topic in Modeling tools and Workshop Equipment
Hey thanks - I could really use that icraruler and will pick one up next trip to lee valley, and I'll check out the veritas as well while I'm there. I haven't really found good clamps yet and could really use some better ones. I have lots of the plastic spring loaded jobs and a couple of others, but if anybody has a proven favourite for precision holds I'd be interested to hear. Tim -
4 basic tools that I've found to be the most valuable in my model boat building. From left to right: 1. Ultra thin razor saw 2. Razor blade holder used for cutting fur - cuts like a laser, perfect for cutting thread and fine wood trimming. 3. Wood glue dispenser with micro nozzles. never clogs, reliably dispenses tiny controlled drops 4. small files of various sorts
- 27 replies
-
- 10
-
-
Beautiful work Peter. Museum quality craftsmanship.
- 236 replies
-
- 2
-
-
- artesania latina
- kitbashing
- (and 2 more)
-
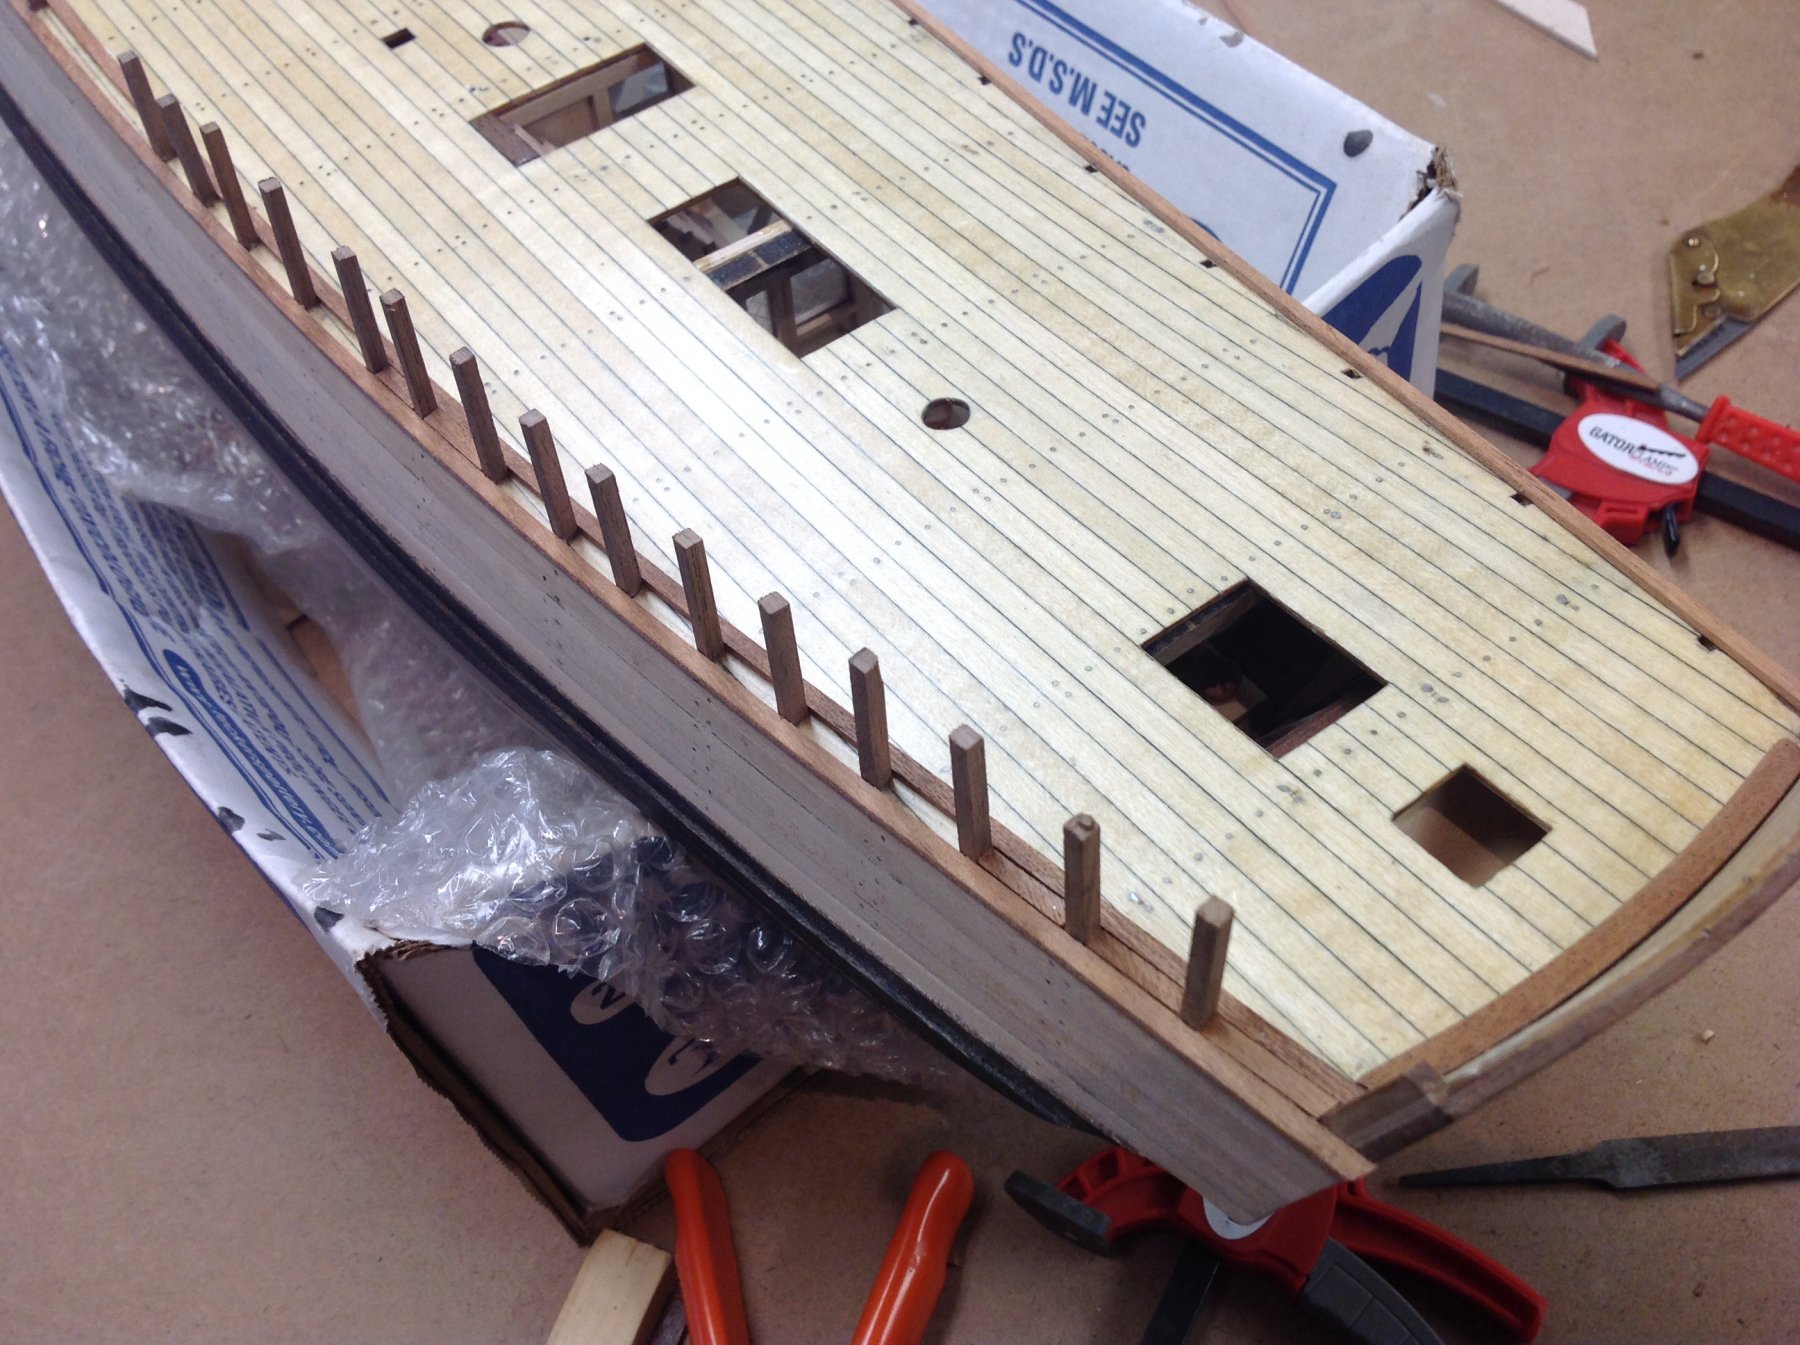
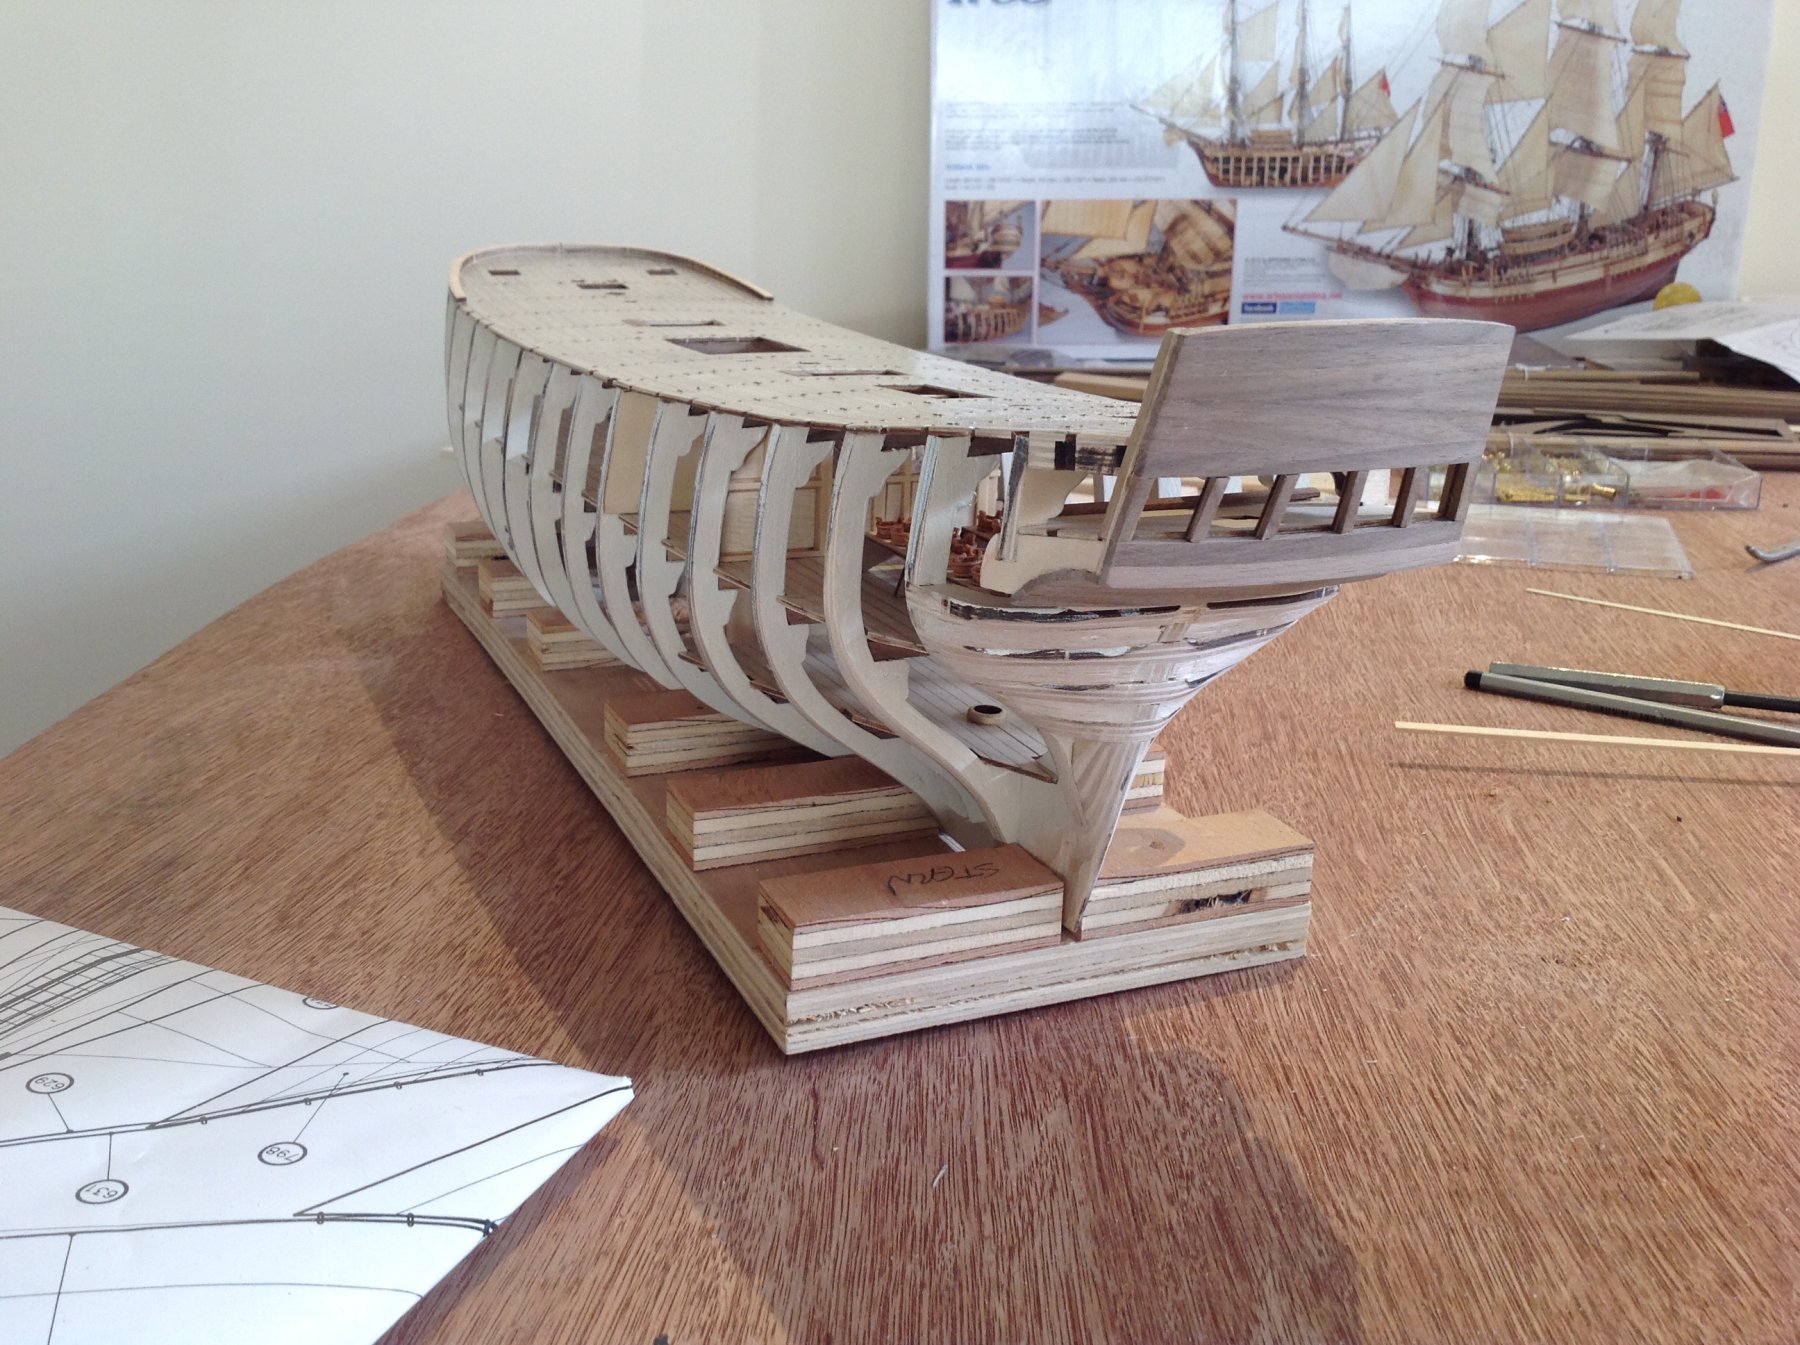
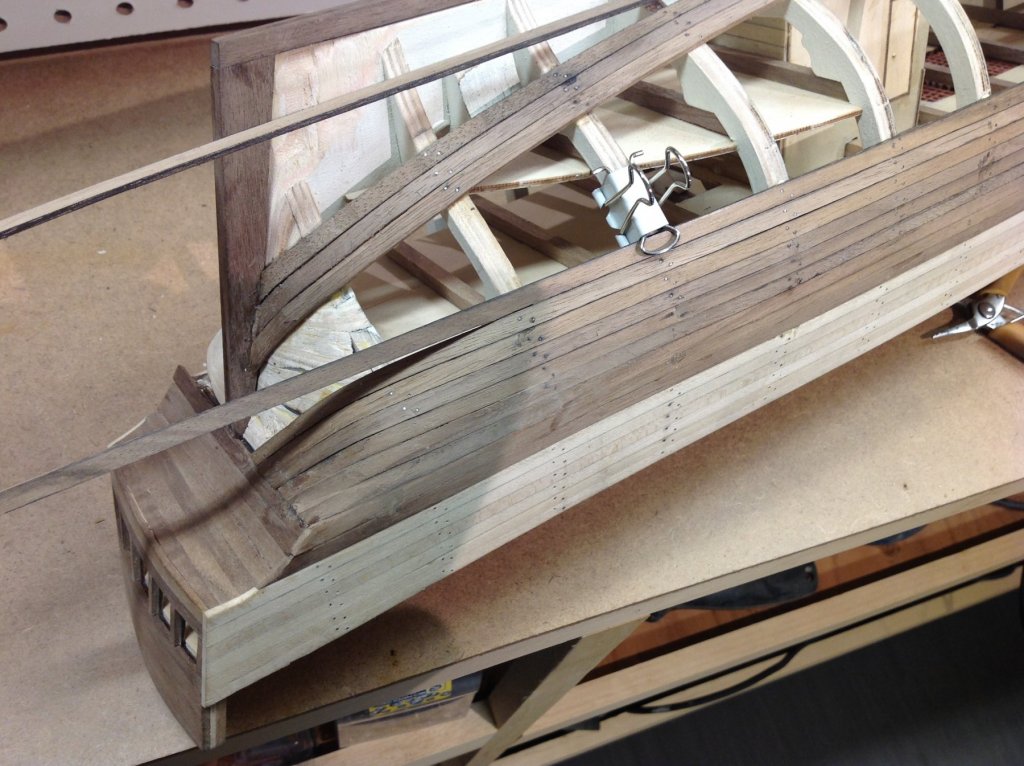
Installation of the stern timbers and waterway isn't illustrated very well on the plans but is explained somewhat in the text. I drilled the base of the timbers and inserted a small chunk of dowel to act as a tenon to fix them into the deck, and then reinforced with the waterway both sides and between. This should give them enough rigidity to build up the upper planking at the proper angle while staying true. Found three separate historical paintings of the bounty that appear pretty consistent, so I'm going to proceed according to those in terms of my colour scheme.


- 171 replies
-
- 6
-
-
- artesania latina
- bounty
- (and 1 more)
-
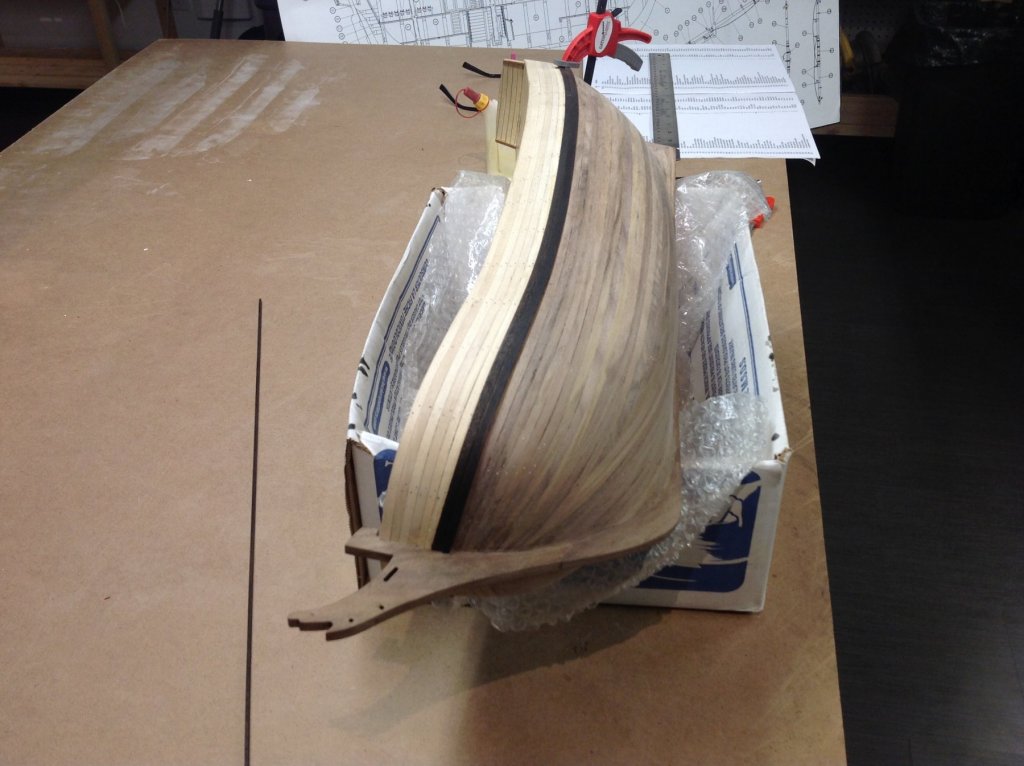
Thanks Wallace... the rowboat from Spain with the missing nails must be running into trouble, so I've decided to just get on with it using krazy glue instead of my preferred white glue and nail method. finished the planking, did a little more planking on the 'open' side than the plans suggests, because it looked a little arbitrary and unfinished to me. The frames are painted white for contrast to make the interior structure a little more visible. Just finishing the wales, which I've stained ebony. When the nails eventually arrive (he says, hopefully) I'll go back and install them and sand and finish the hull. In the meantime I'll proceed with the bulwarks etc. Pondering what to do for painting, I'm presently leaning towards leaving the natural walnut below as it's pretty dark when varnished, ebony stained trim, natural basswood or light stain on the upper with red interior bulwarks perhaps. Going to be a decent sized model.

- 171 replies
-
- 5
-
-
- artesania latina
- bounty
- (and 1 more)
-
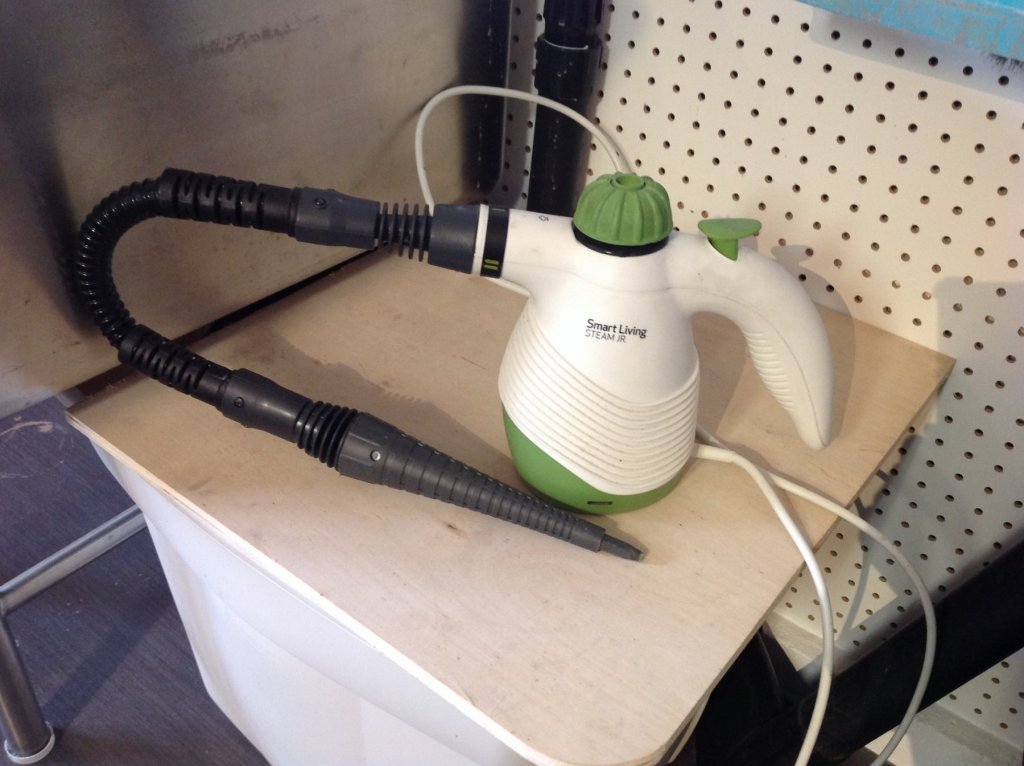
Got it through Amazon...."smart living steam jr."
-
You're very welcome Ronald. Good luck, I agree with you the stern always seems the trickiest part of any build to me. FYI this is the steamer and nozzle I've been using on the Bounty, which has some difficult bends. I found a couple of minutes steam on the plank at most is all that's necessary and it will bend safely and easily. I've found the steam & clamp in-situ process works better and faster for me than employing jigs for complicated stern geometry. For the bow, I steam and pre bend a bunch of planks at once using a plywood form cut with jigsaw that approximates the bow.
-
Hi Ronald. I have tried a jig but my method now is just to glue and nail planks beginning with the bow, and when I get to the last couple of frames at the difficult stern area, I place a piece of tin foil under the plank to protect the ship and use a steamer on the end of the plank, then clamp it more or less in place to get the correct form. After it dries for a few hours I trim as necessary for perfect fit, and glue the plank to the stern.
-
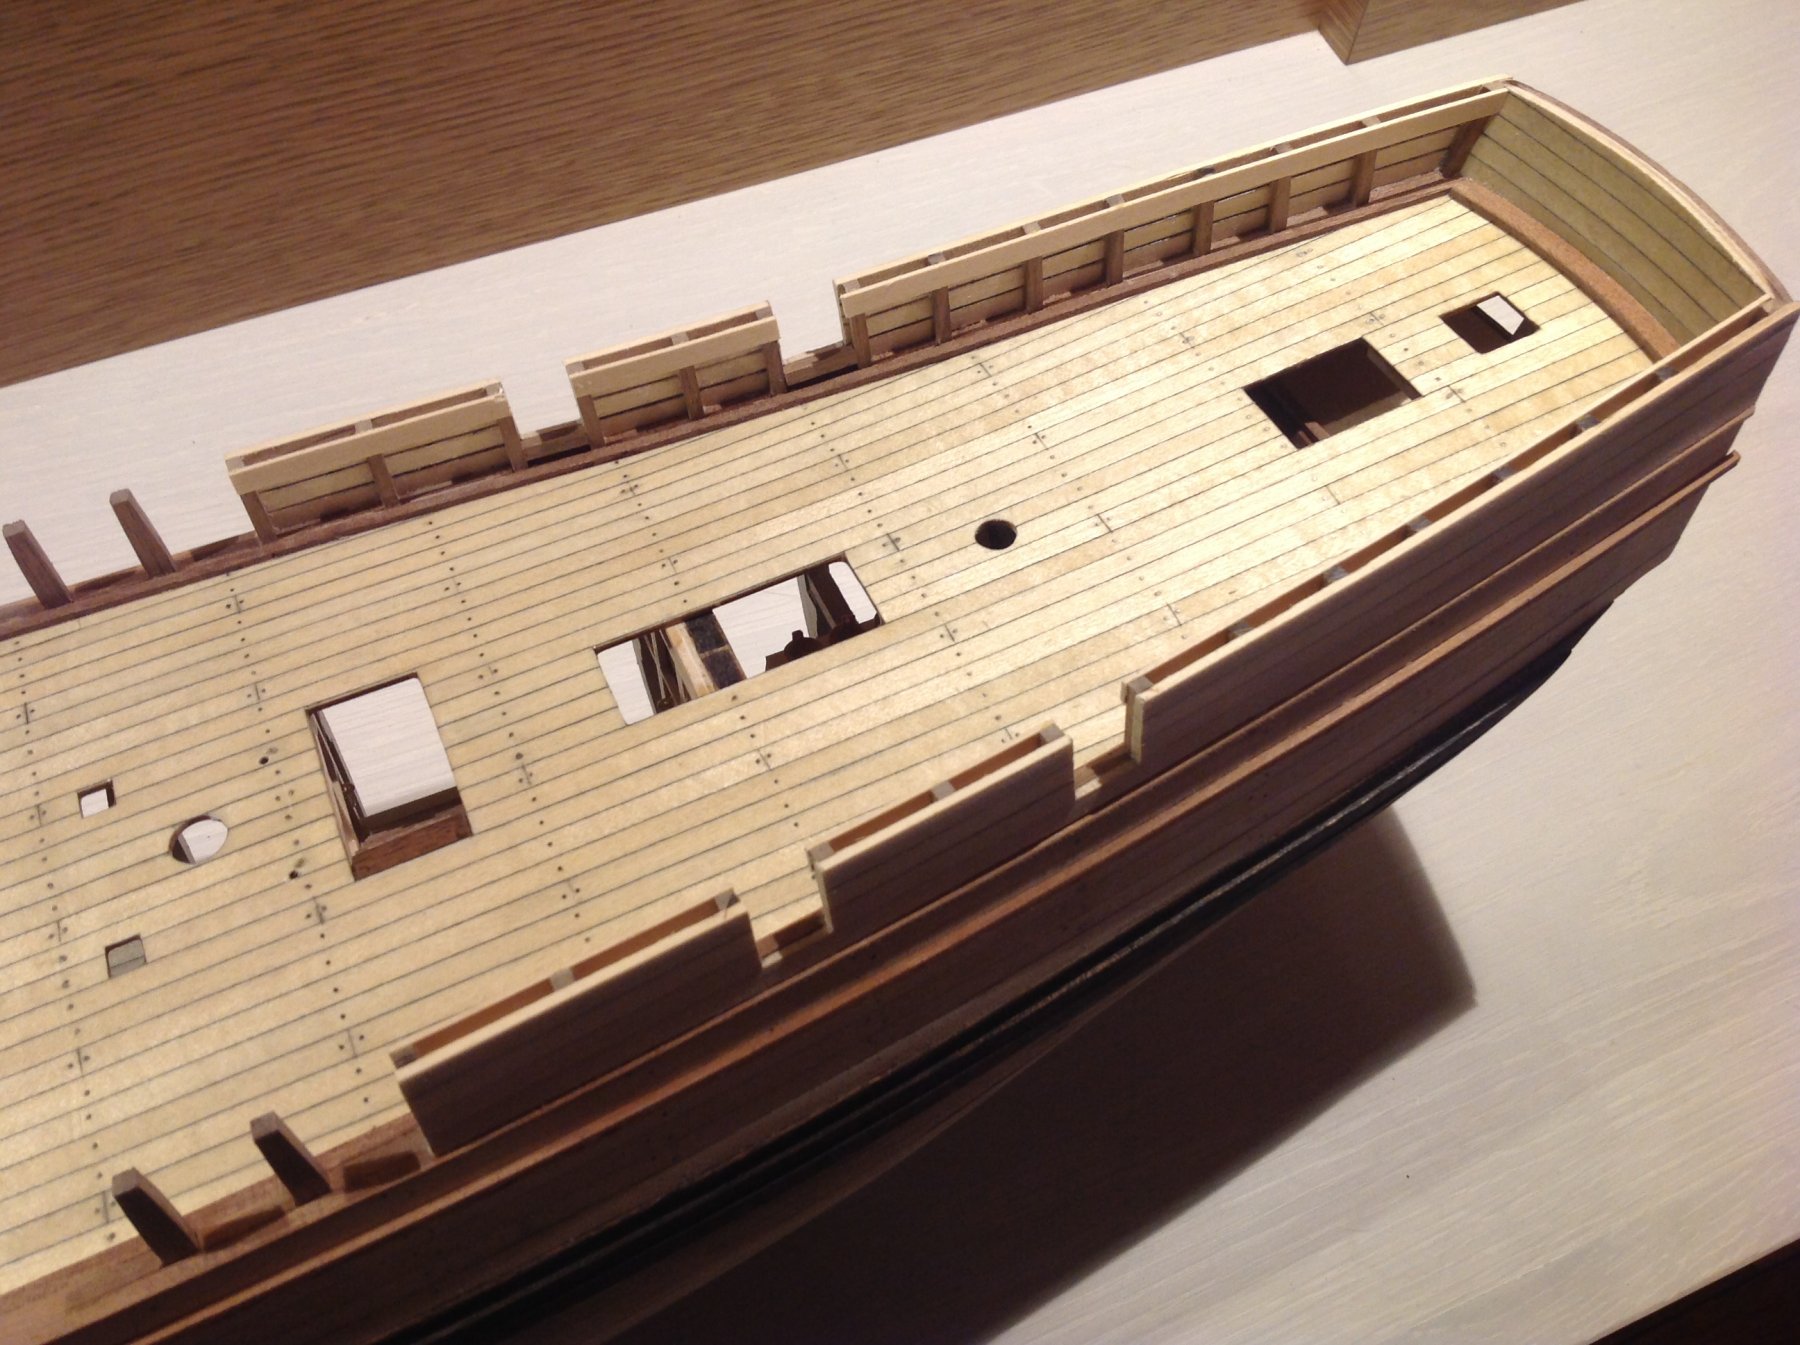
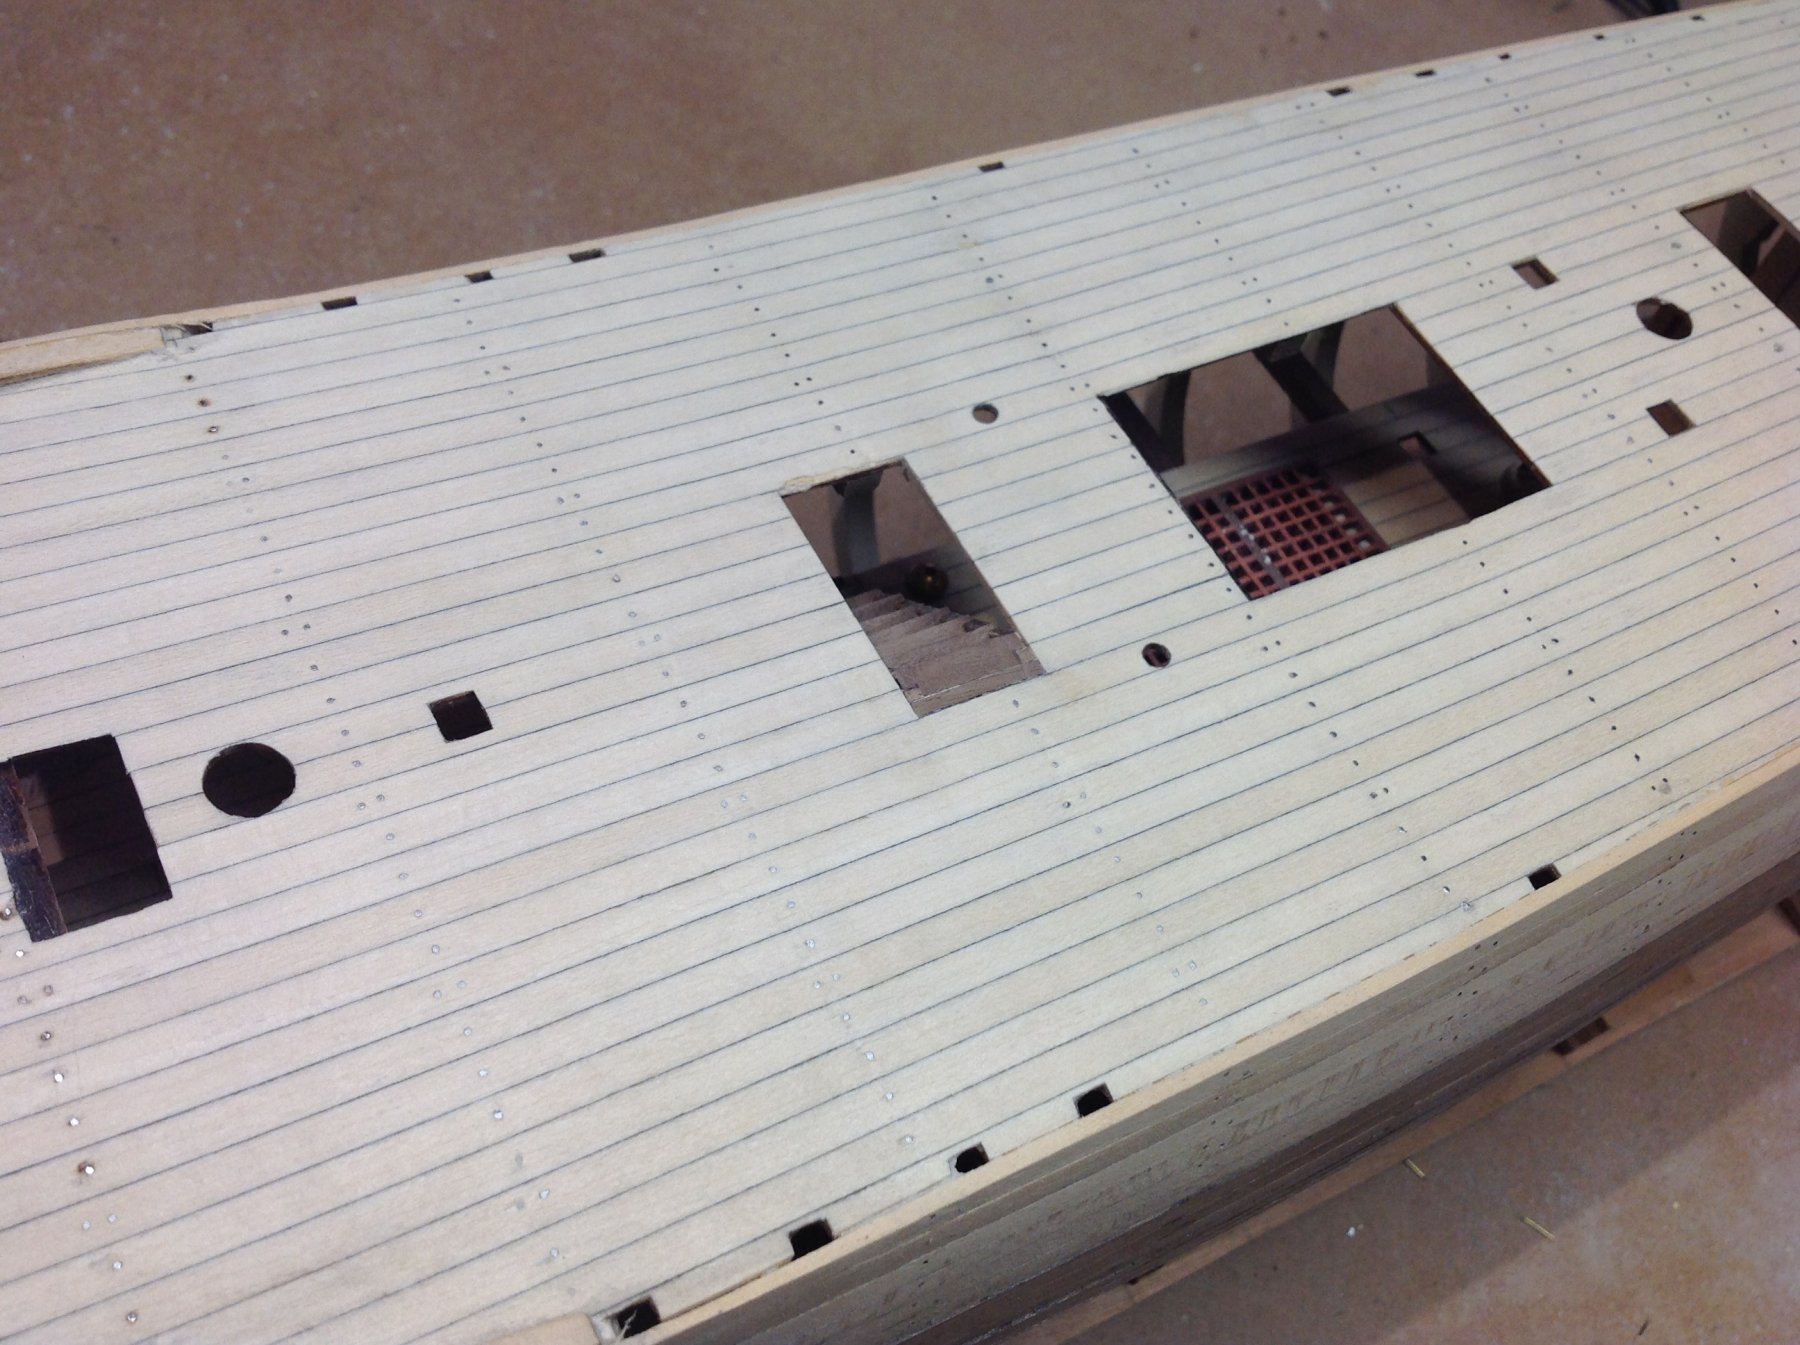
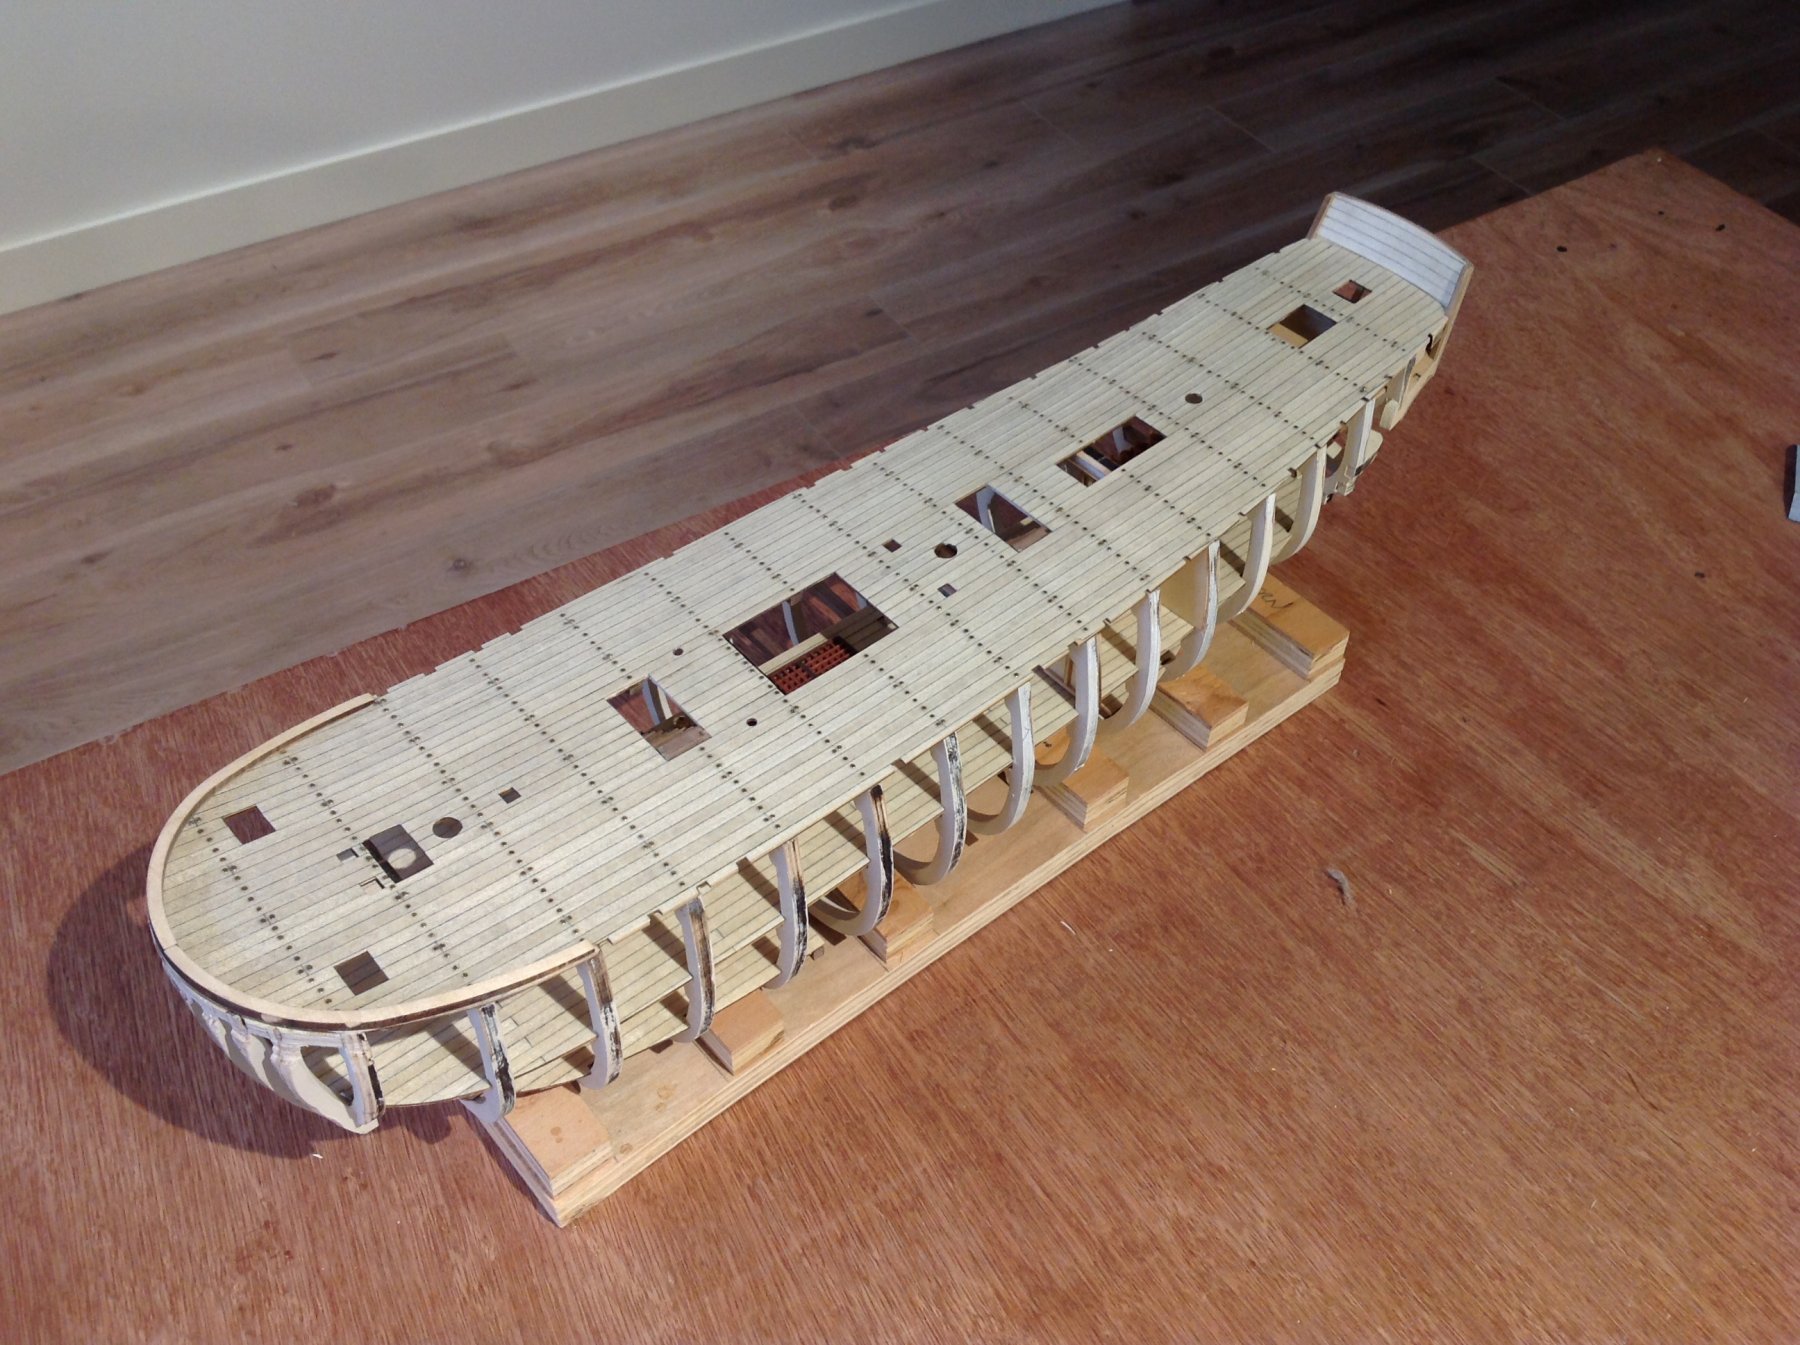
Latina is sending me the missing nails from the kit - after checking parts list there were supposed to be 1500 but there were only about 500. It'll be interesting to see how long to get a package Barcelona - Toronto. So while I wait for those to complete nailing the hull planking I've decided to use the delay to revisit the balls up I made of the nails on the deck. Filed down the heads (easier said than done) and sanded it all down. Much happier with it now, although I wish I had chucked the wafer thin 0.5 mm basswood in the kit and found some better quality 1mm deck material to work with from the get go. I find basswood usually looks lousy and blotchy when stained, even after using wood conditioner, so I guess it'll have to just be satin poly? If anyone has a suggestion otherwise I'd appreciate hearing. Just looks a bit light for authenticity.

- 171 replies
-
- 5
-
-
- artesania latina
- bounty
- (and 1 more)
-
Planking complete on the closed side without any real issues, not sanded yet. Regrettably not nearly enough brass nails provided in the kit to do even half the job according to the recommended nail pattern. Ran out a couple of days ago and trying to economically source some 10mm pins so I can continue, no luck so far.

- 171 replies
-
- 5
-
-
- artesania latina
- bounty
- (and 1 more)
-
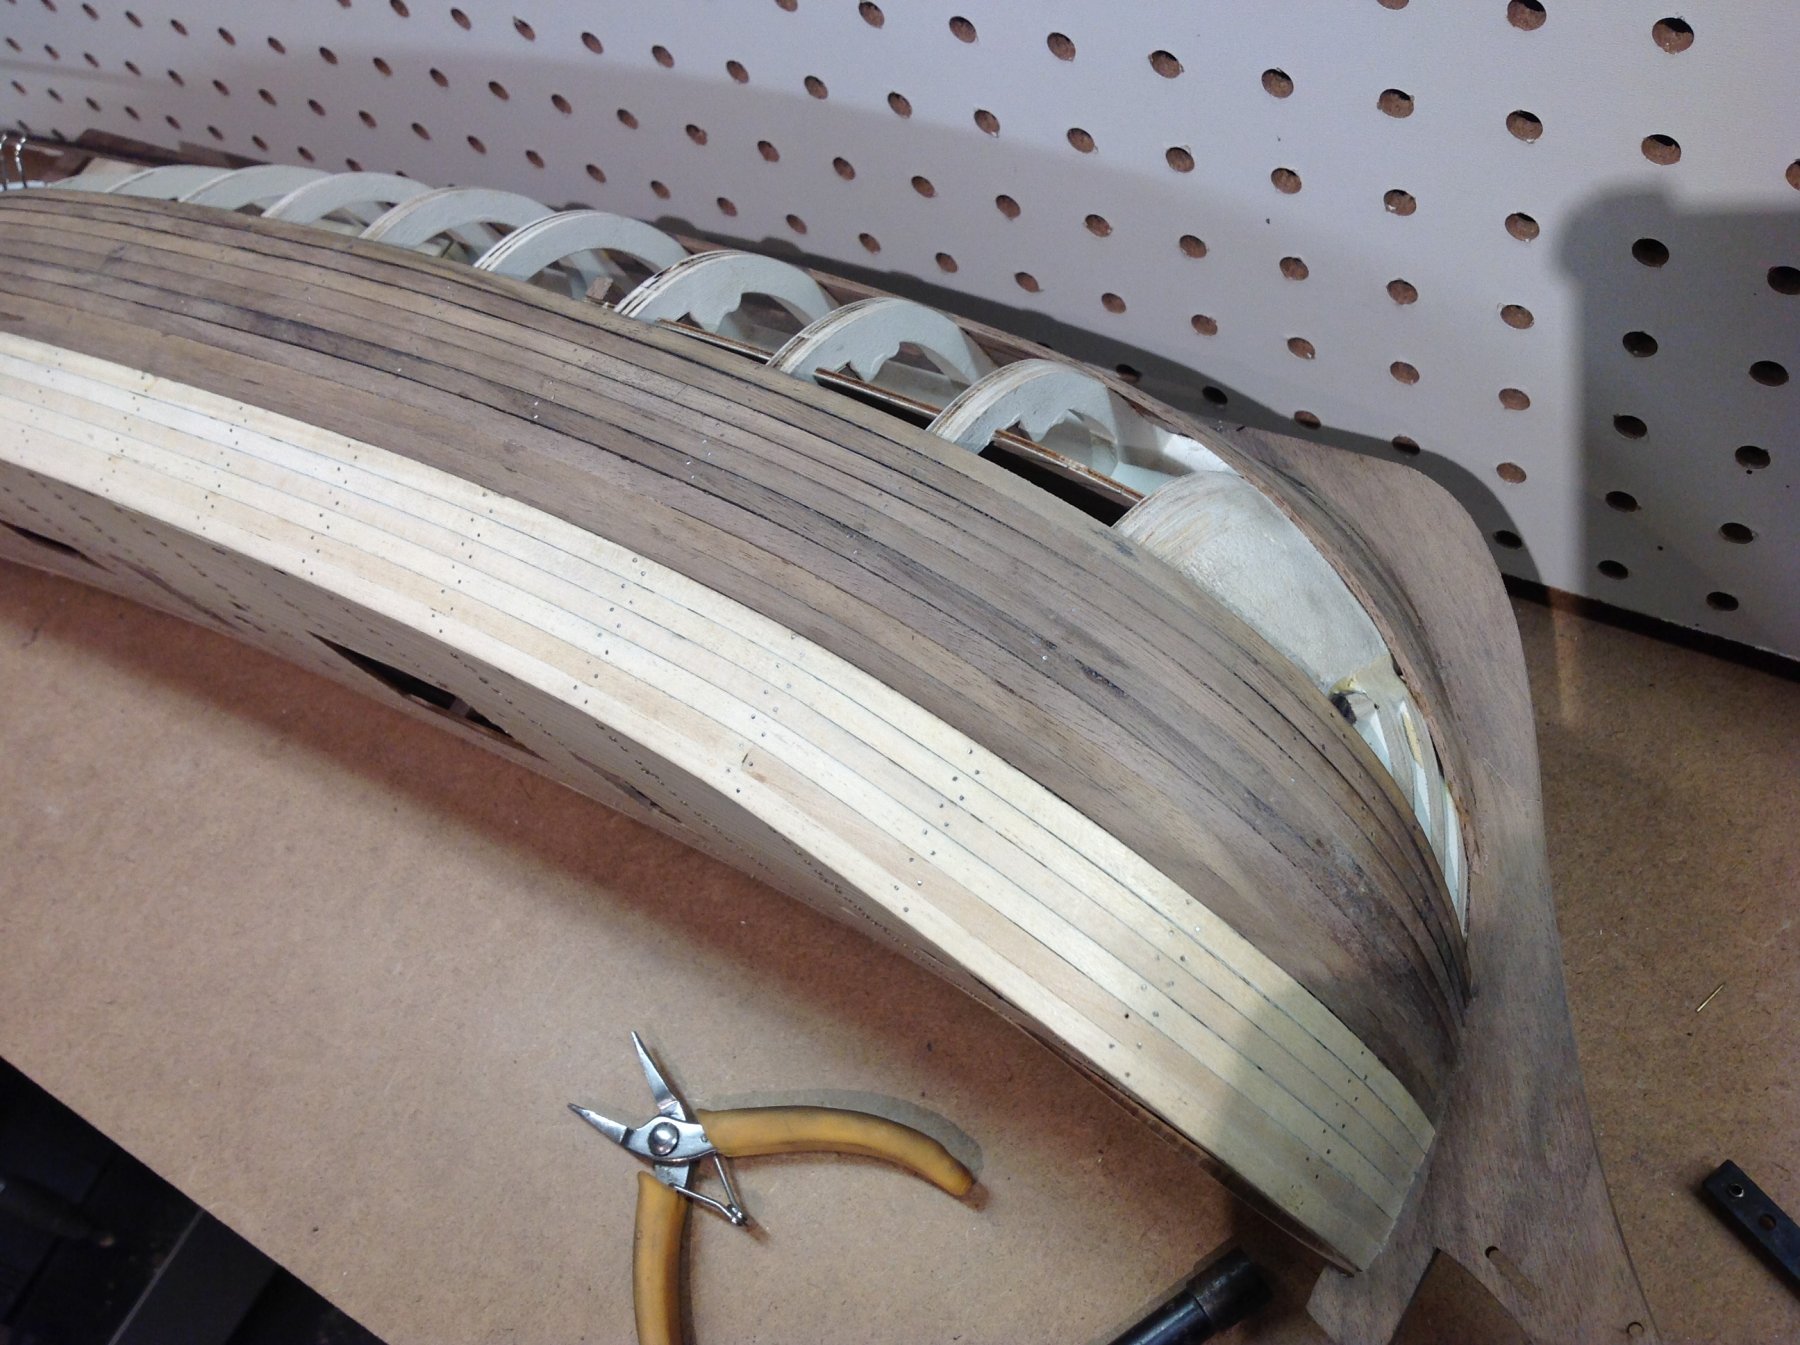
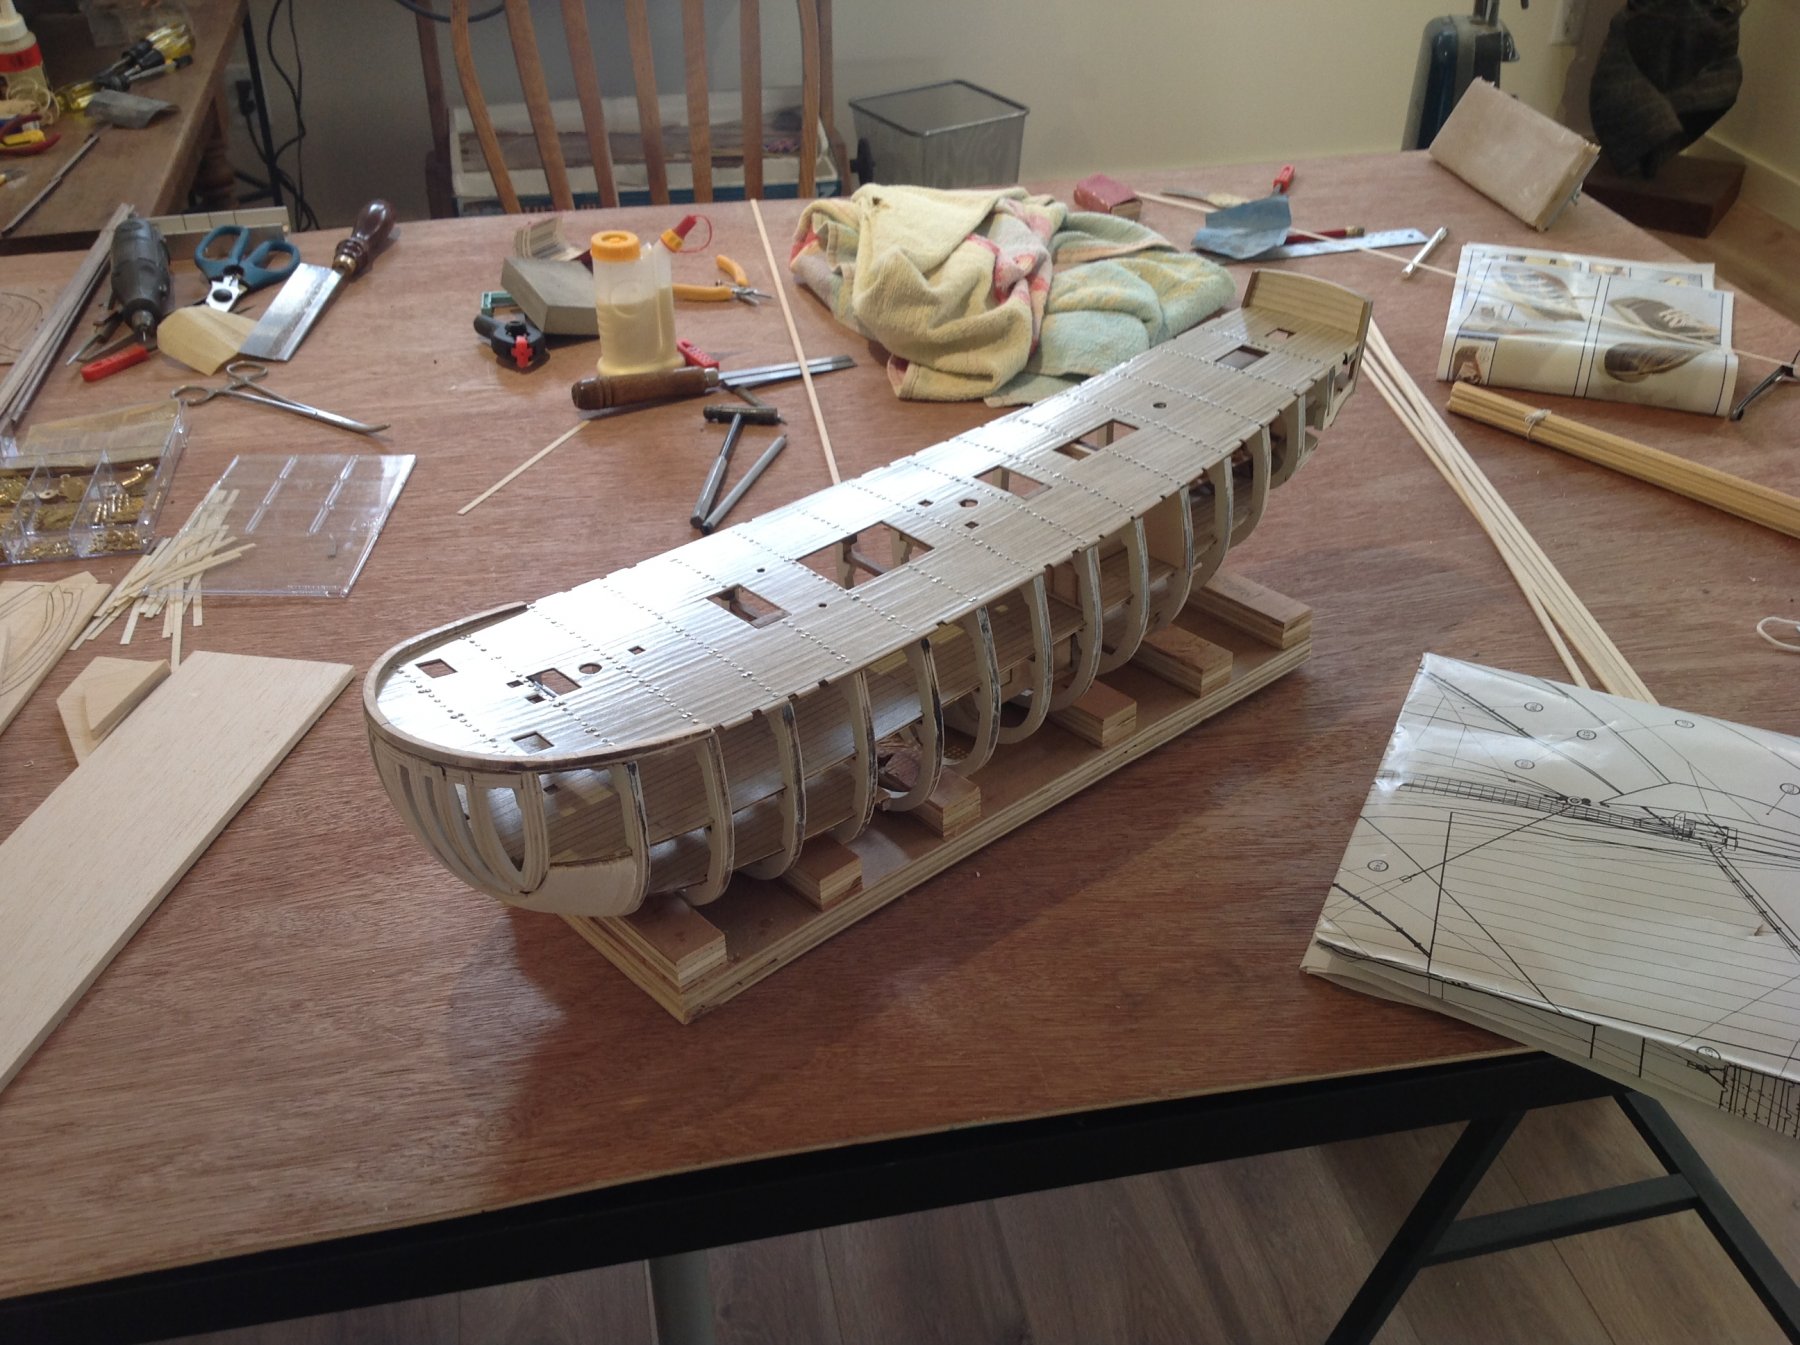
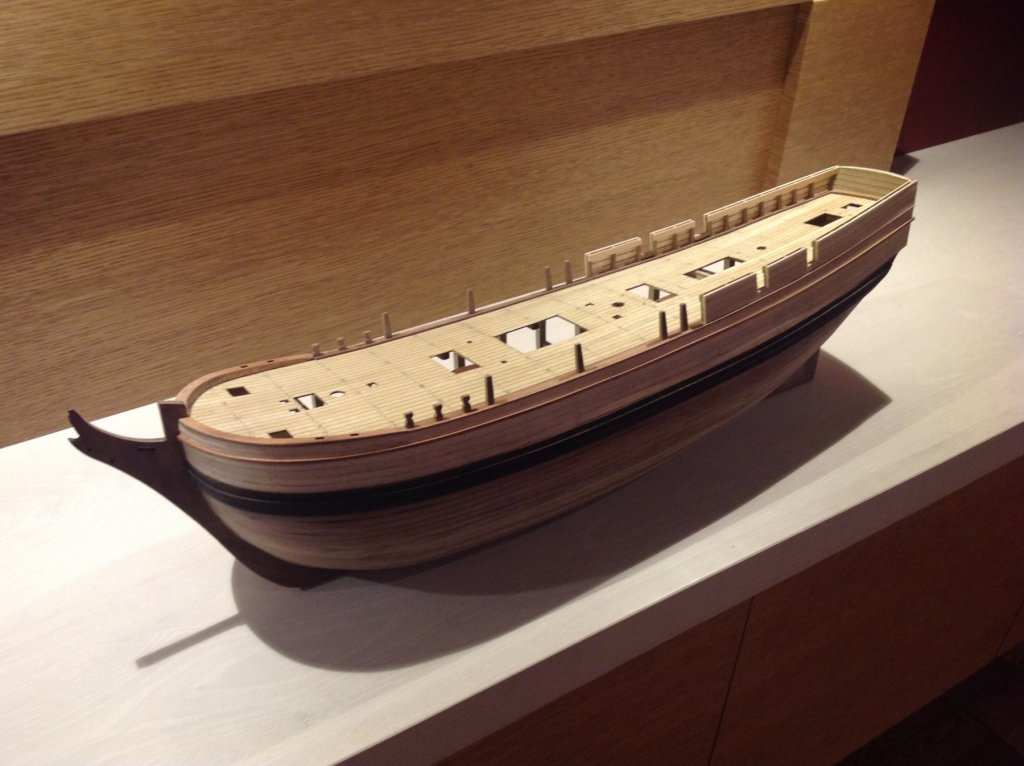
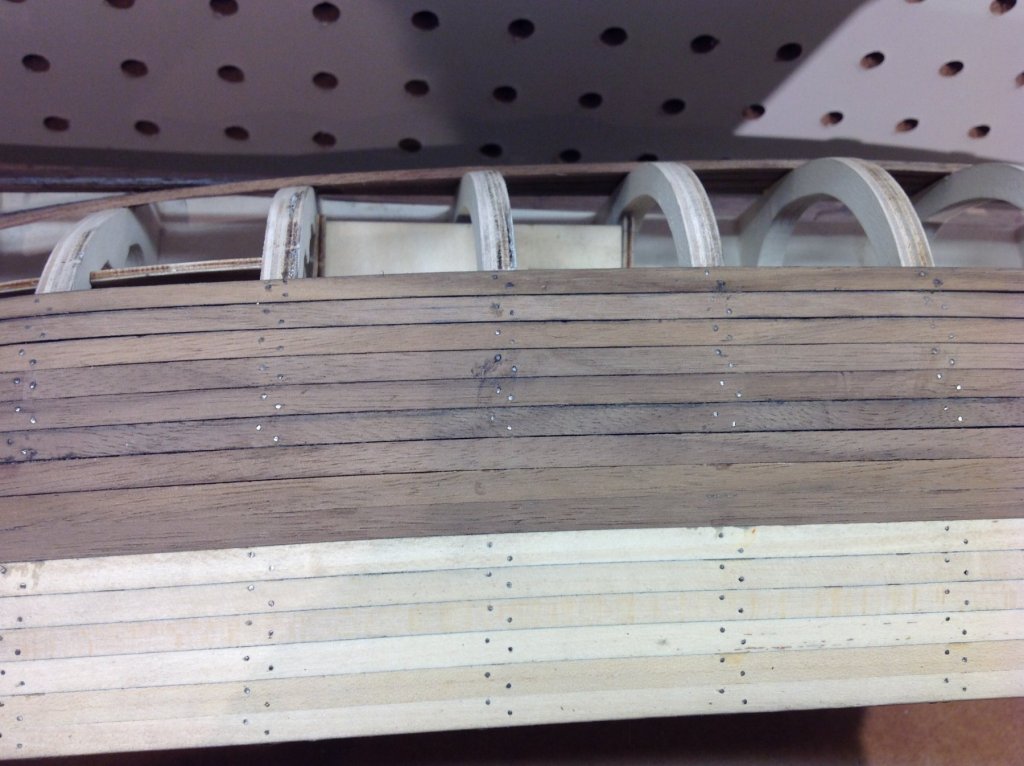
I'm back! Sorry for that ridiculously long hiatus but had to shelve the Bounty temporarily while I completed some bigger builds.... one of which was building a studio attached to the house, so now I have a great workspace to build model ships etc. Anyway I digress, back to the dirty job of hull planking. My own technique is to lay it on in sections, reducing width at the bow. I pre bend the planks for the bow curve using a steamer and clamps, and then glue and nail working back to the stern when dry. For the stern I steam the plank in situ to create rubber wood and clamp it into its final location. I use plain carpenters glue, snip the heads off the nails and file the top flat, then set nail on the planks with a small hammer. The "instructions" called for nailing and then filing the heads off after the fact which I can only imagine would lead to a dogs breakfast in my hands, if it is even doable. Looks a bit rough but will look beauty after sanding.

- 171 replies
-
- 4
-
-
- artesania latina
- bounty
- (and 1 more)
-
Hi Rob...I use a soft pencil (5b or anything like that) and rub it along the edge of both sides of the plank just before gluing it on. Looks a bit messy when you do it but once you give it a light sanding it gives definition to the planking or decking, and replicates the caulking between boards in the real thing.

- 171 replies
-
- 4
-
-
- artesania latina
- bounty
- (and 1 more)
-
Thanks Antony. Keen on getting back to Blighty and visiting Devon some day, I'm from Preston originally before we emigrated to Canada. I'm not sure if I want to paint the hull yet so decided to do the graphite treatment in case not. Just completed some nailing which turned out pretty well once I worked out a system. Going off for a holiday shortly and will tackle the main planking in walnut when I get back.


- 171 replies
-
- 6
-
-
- artesania latina
- bounty
- (and 1 more)
-
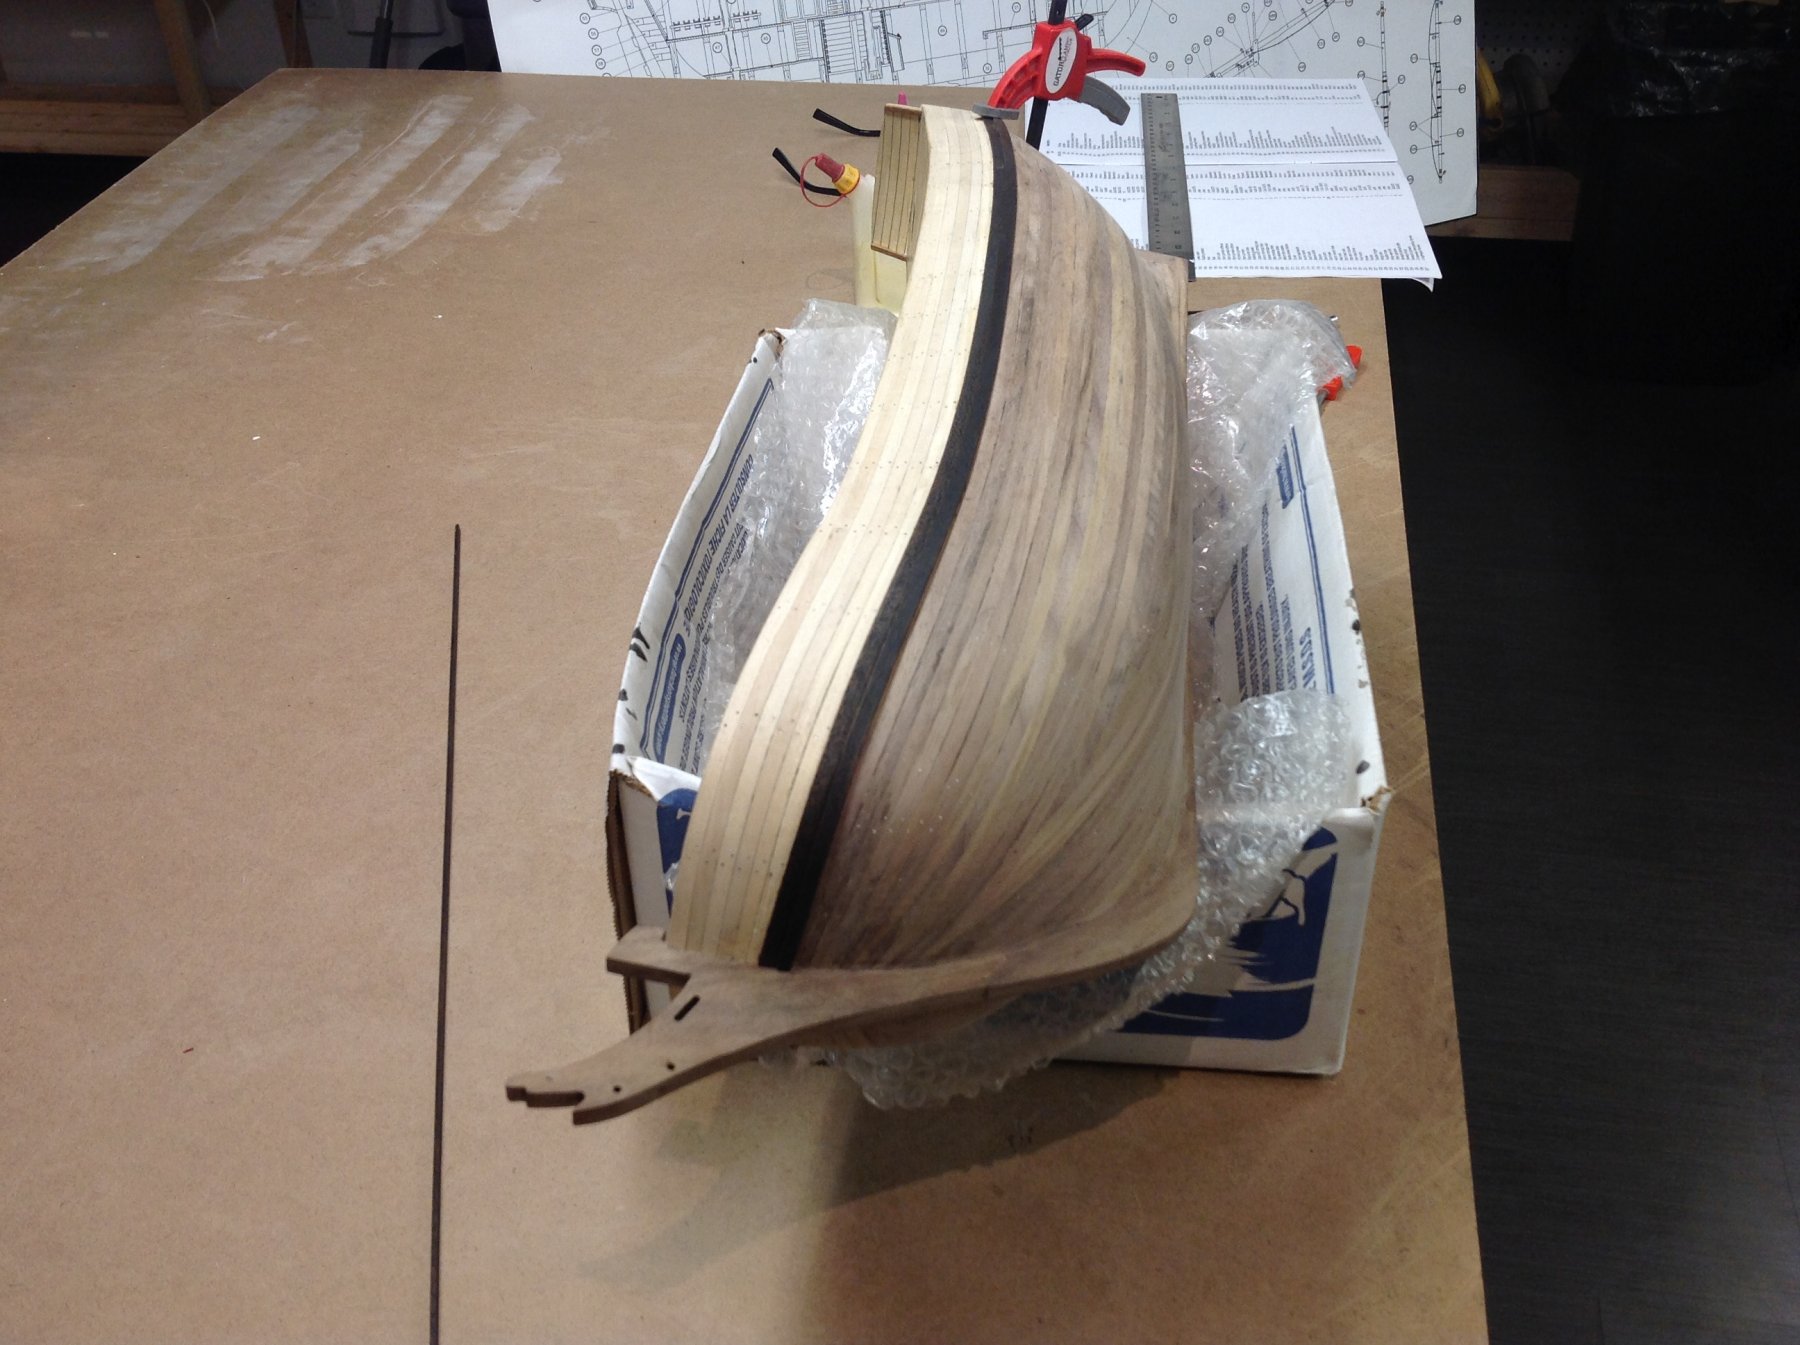
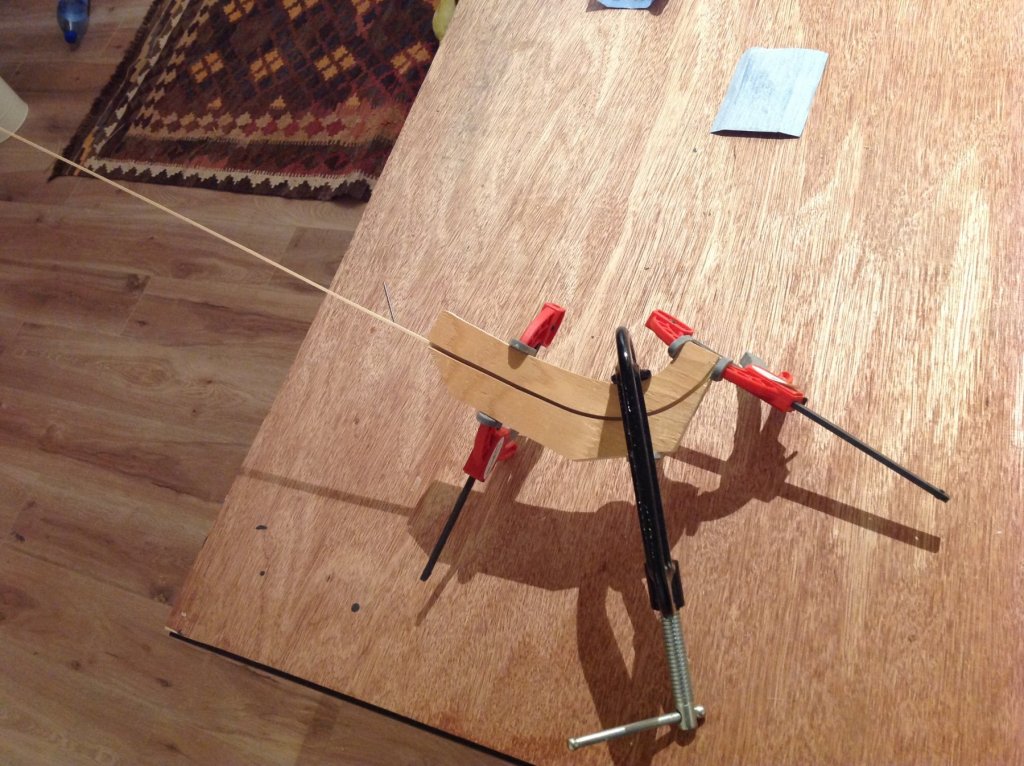
Epoxied the stem and keel and planking underway...made a jig as suggested from 3/4 ply, and after a short soak the 2mm basswood was easily moulded. After they dried a few dots of gel superglue, 3 frames at a time and a few seconds of finger pressure to fix the planks. Tapered the planks progressively to the bow, backfiled the top edge and did the graphite treatment before gluing.


- 171 replies
-
- 10
-
-
- artesania latina
- bounty
- (and 1 more)
-
Question for any experts.....I've installed some bow and stern blocking and am ready to start planking this beast....wouldn't it be better to install the keel, stem and stern post before planking rather than trying to fit it after? The AL instructions leave it till later but I'm inclined to plank up to an already fitted keel etc... Is there a best practice on this point?


- 171 replies
-
- 6
-
-
- artesania latina
- bounty
- (and 1 more)
-
Great thanks Jim I'll try that.
-
Having read through the "instructions" (I use the term loosely) on this kit a little further it is apparent I may have been a tad optimistic about them. As you get further into the build, they get more abbreviated, semi intelligible and barely useful, as if the writer lost interest in the job. Thankfully though there are decent plans, a good parts list and photos to refer to.
- 171 replies
-
- 3
-
-
- artesania latina
- bounty
- (and 1 more)
-
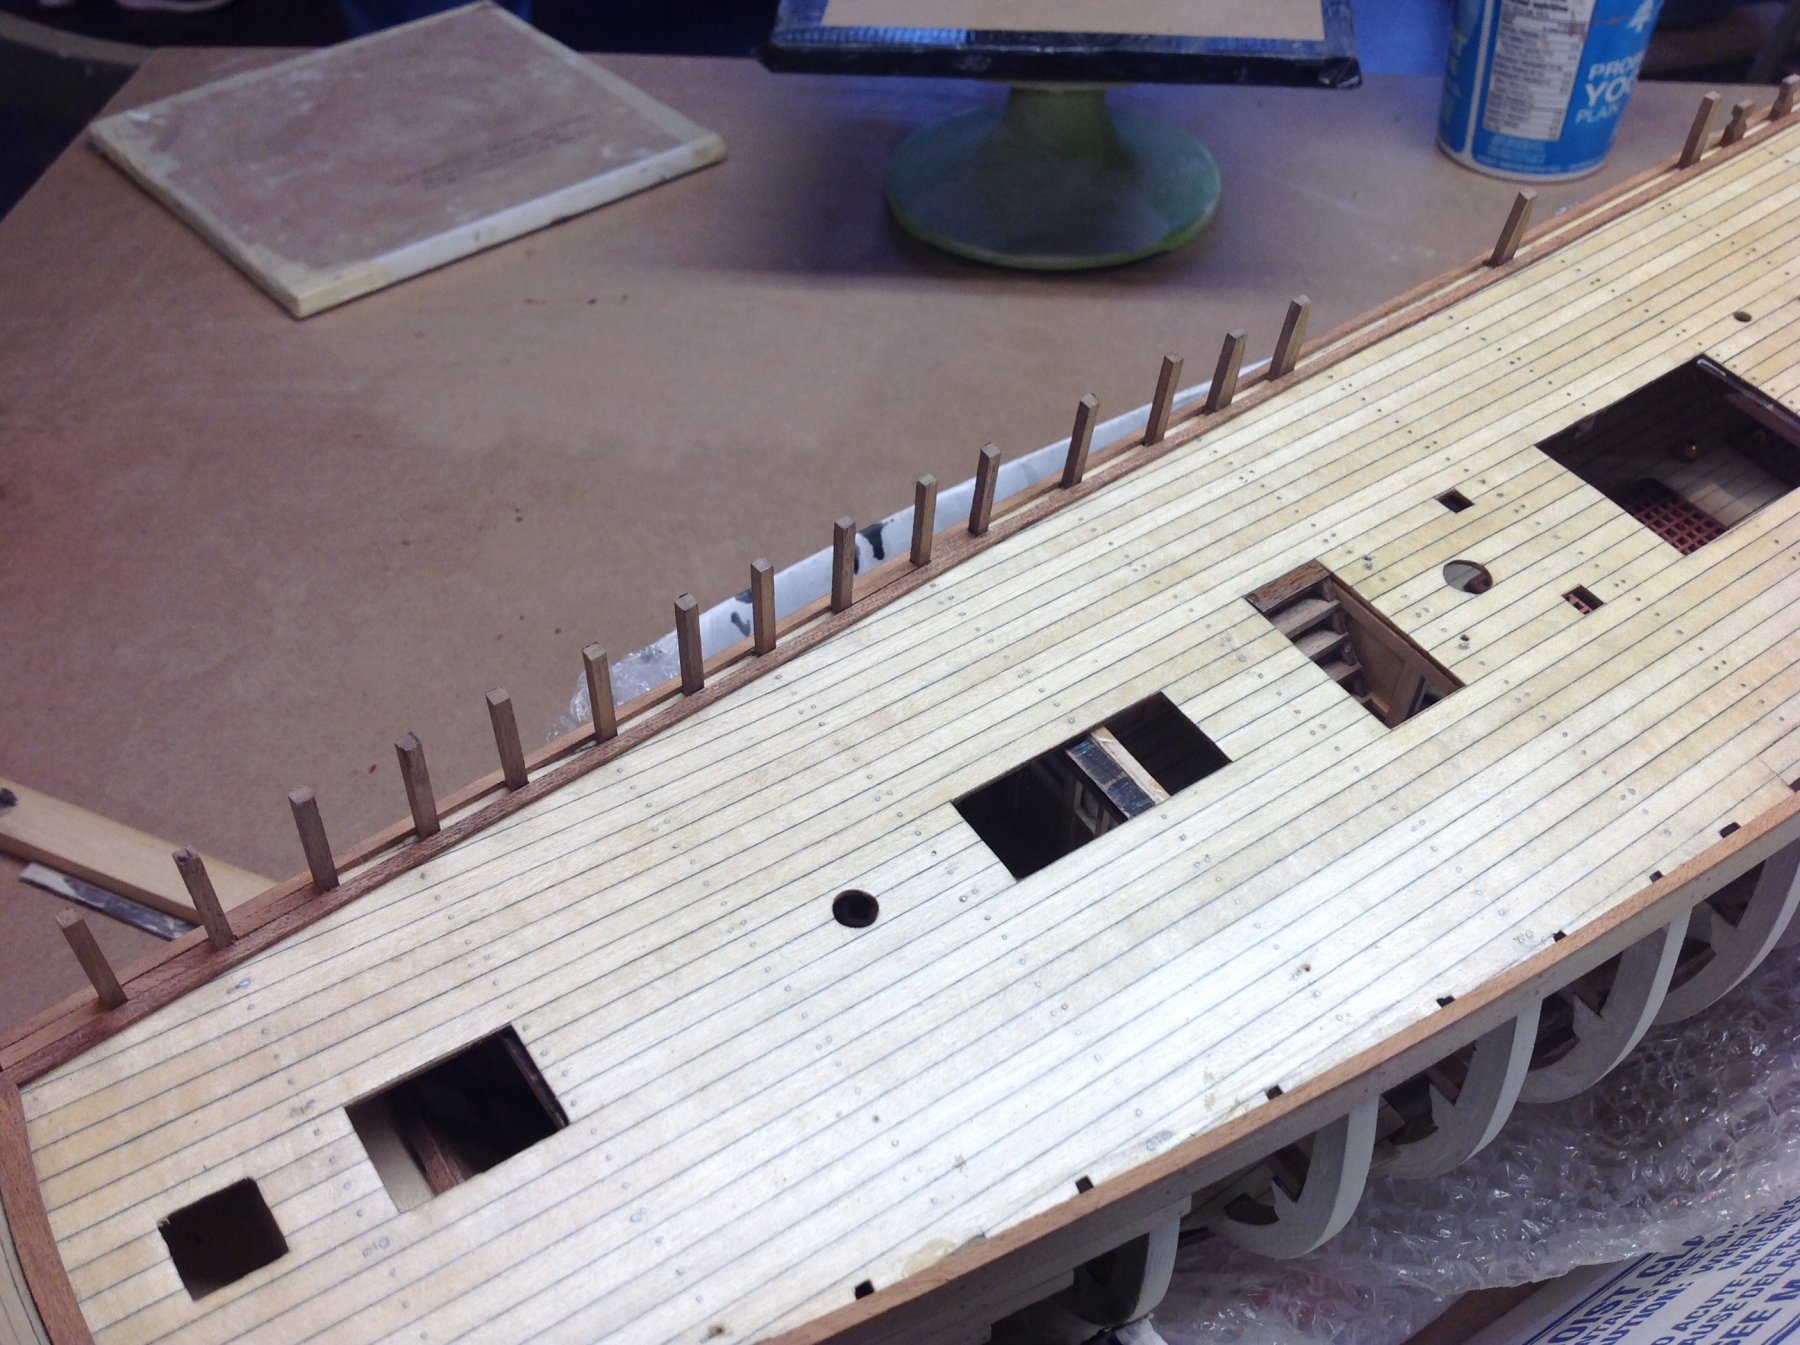
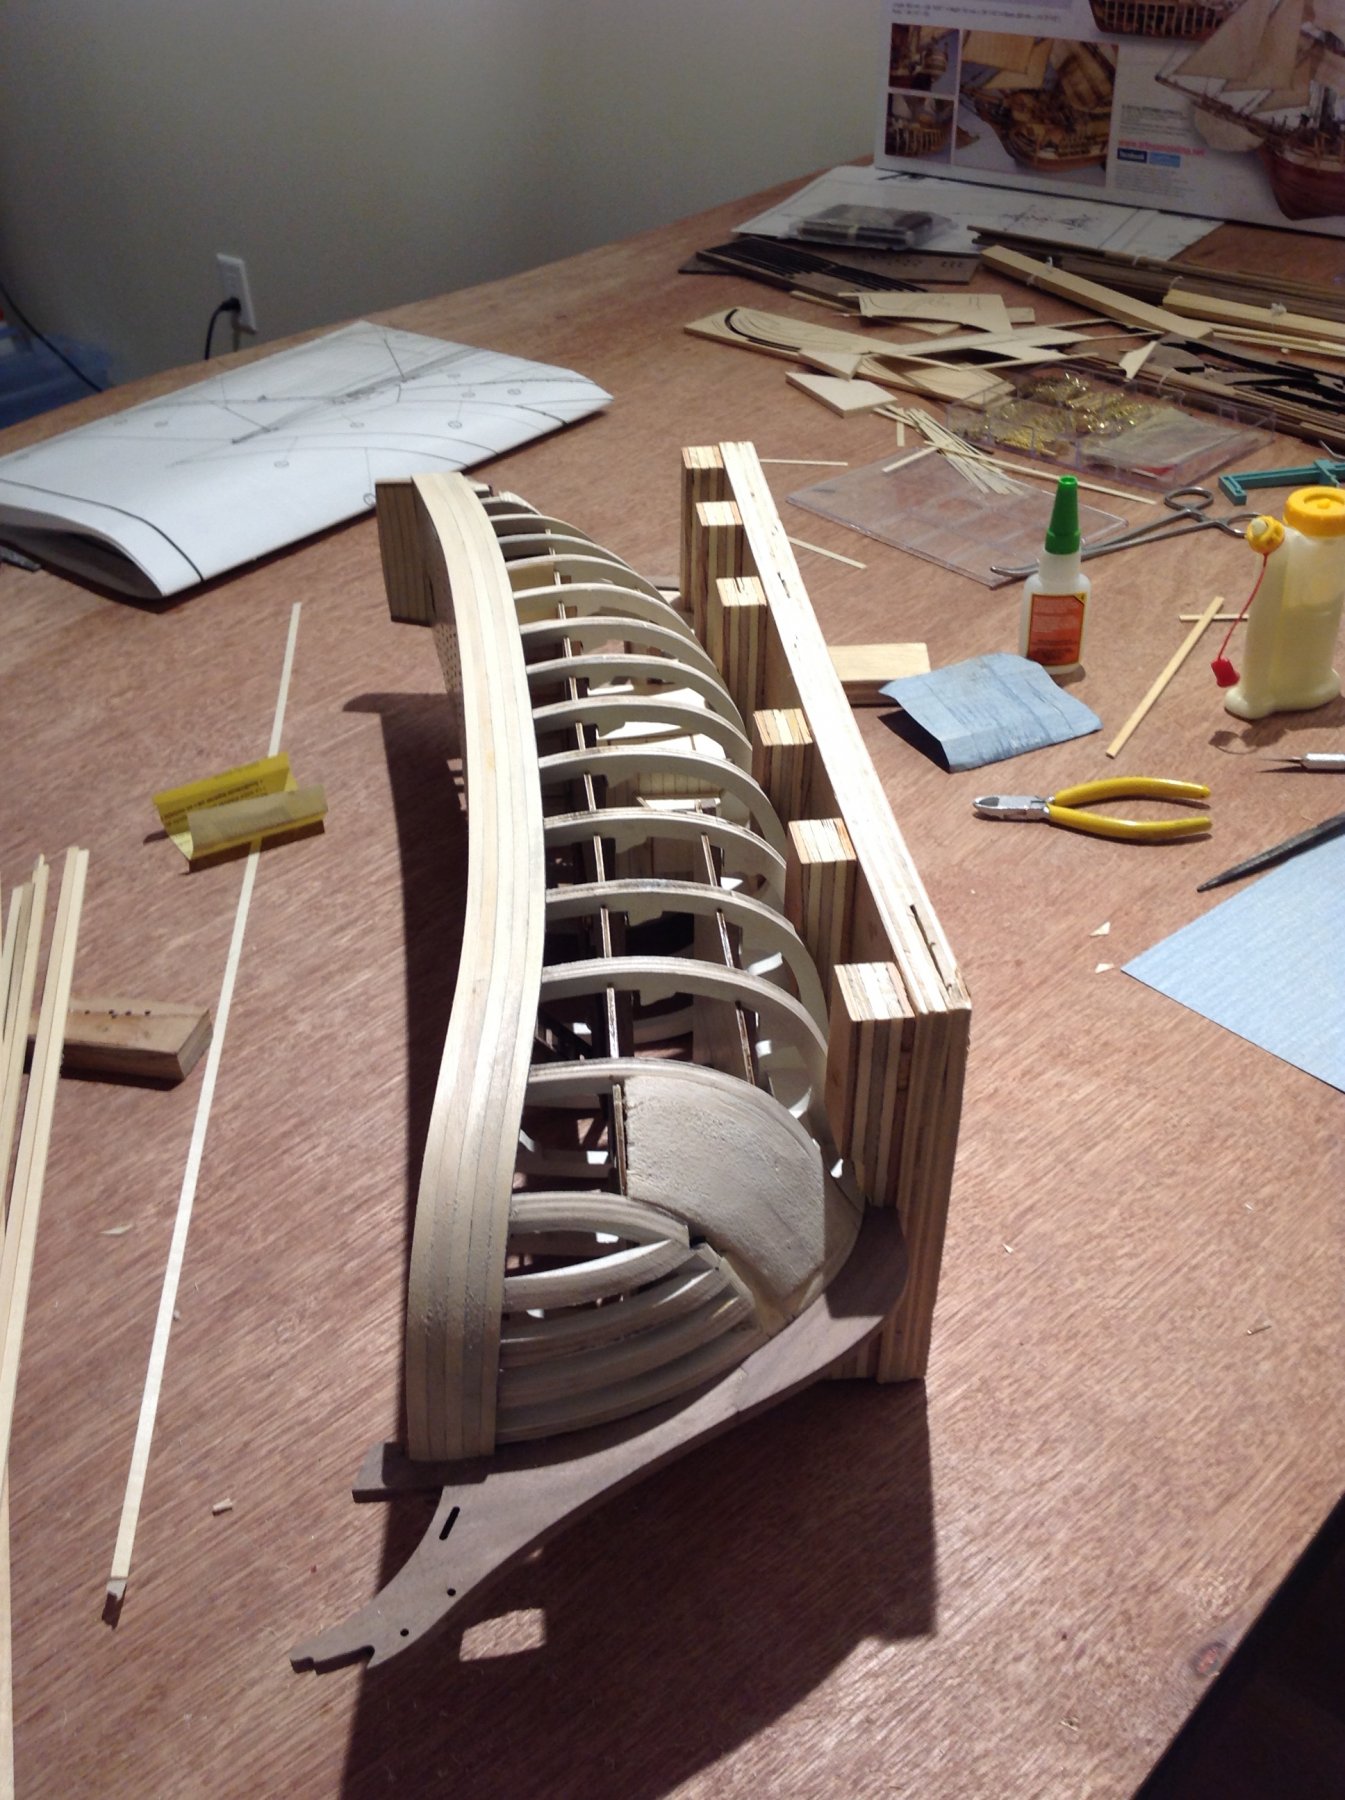
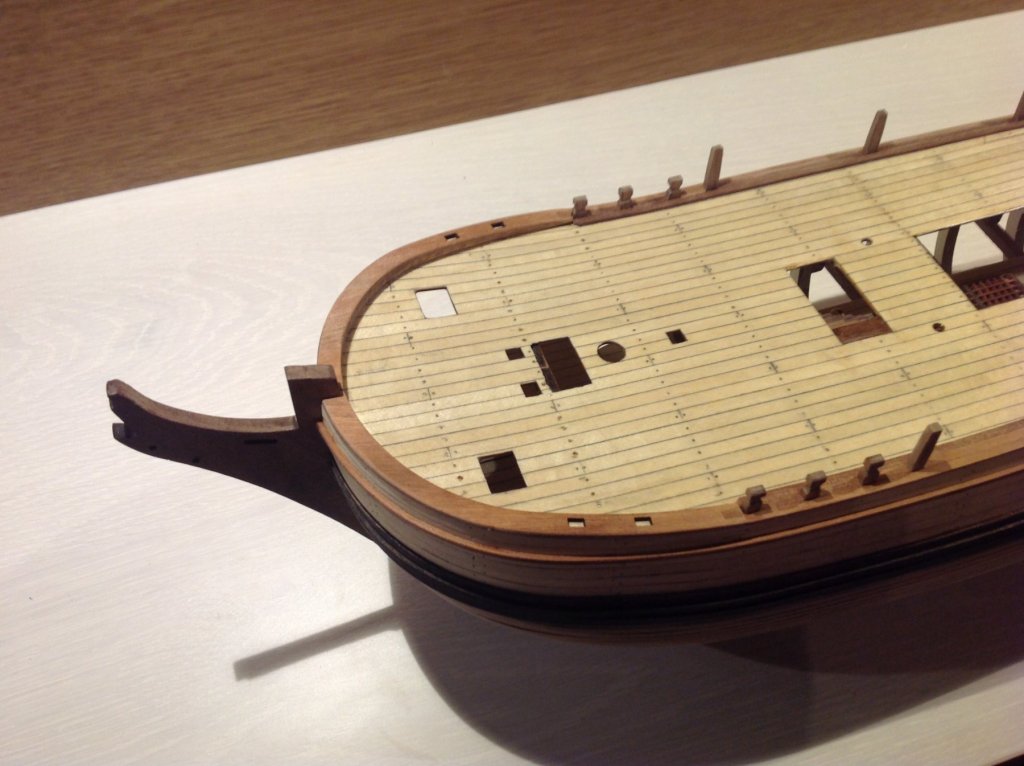
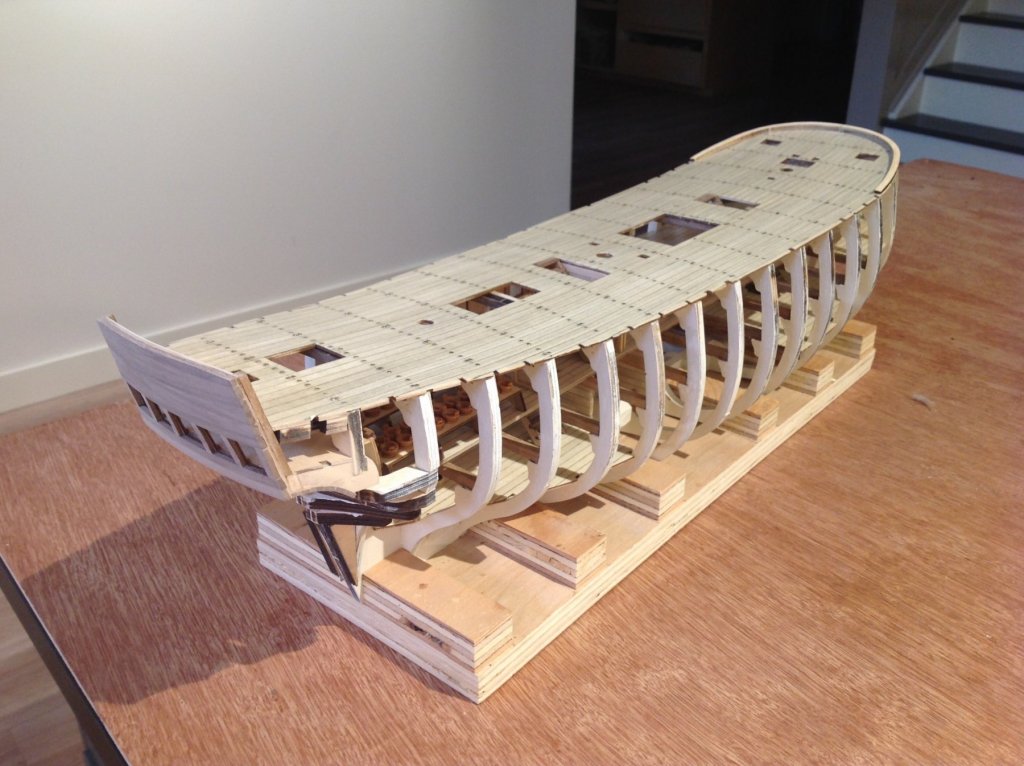
Thanks! Just finished the basic structure, main deck and added the stern architecture, now it's on to filing it all down to get the right hull geometry for planking. The deck nails provided in the kit are brutal - clown pins, totally out of scale. Used a simplified four butt shift pattern due to the size of them, but still not really happy with the result.

- 171 replies
-
- 8
-
-
- artesania latina
- bounty
- (and 1 more)
-
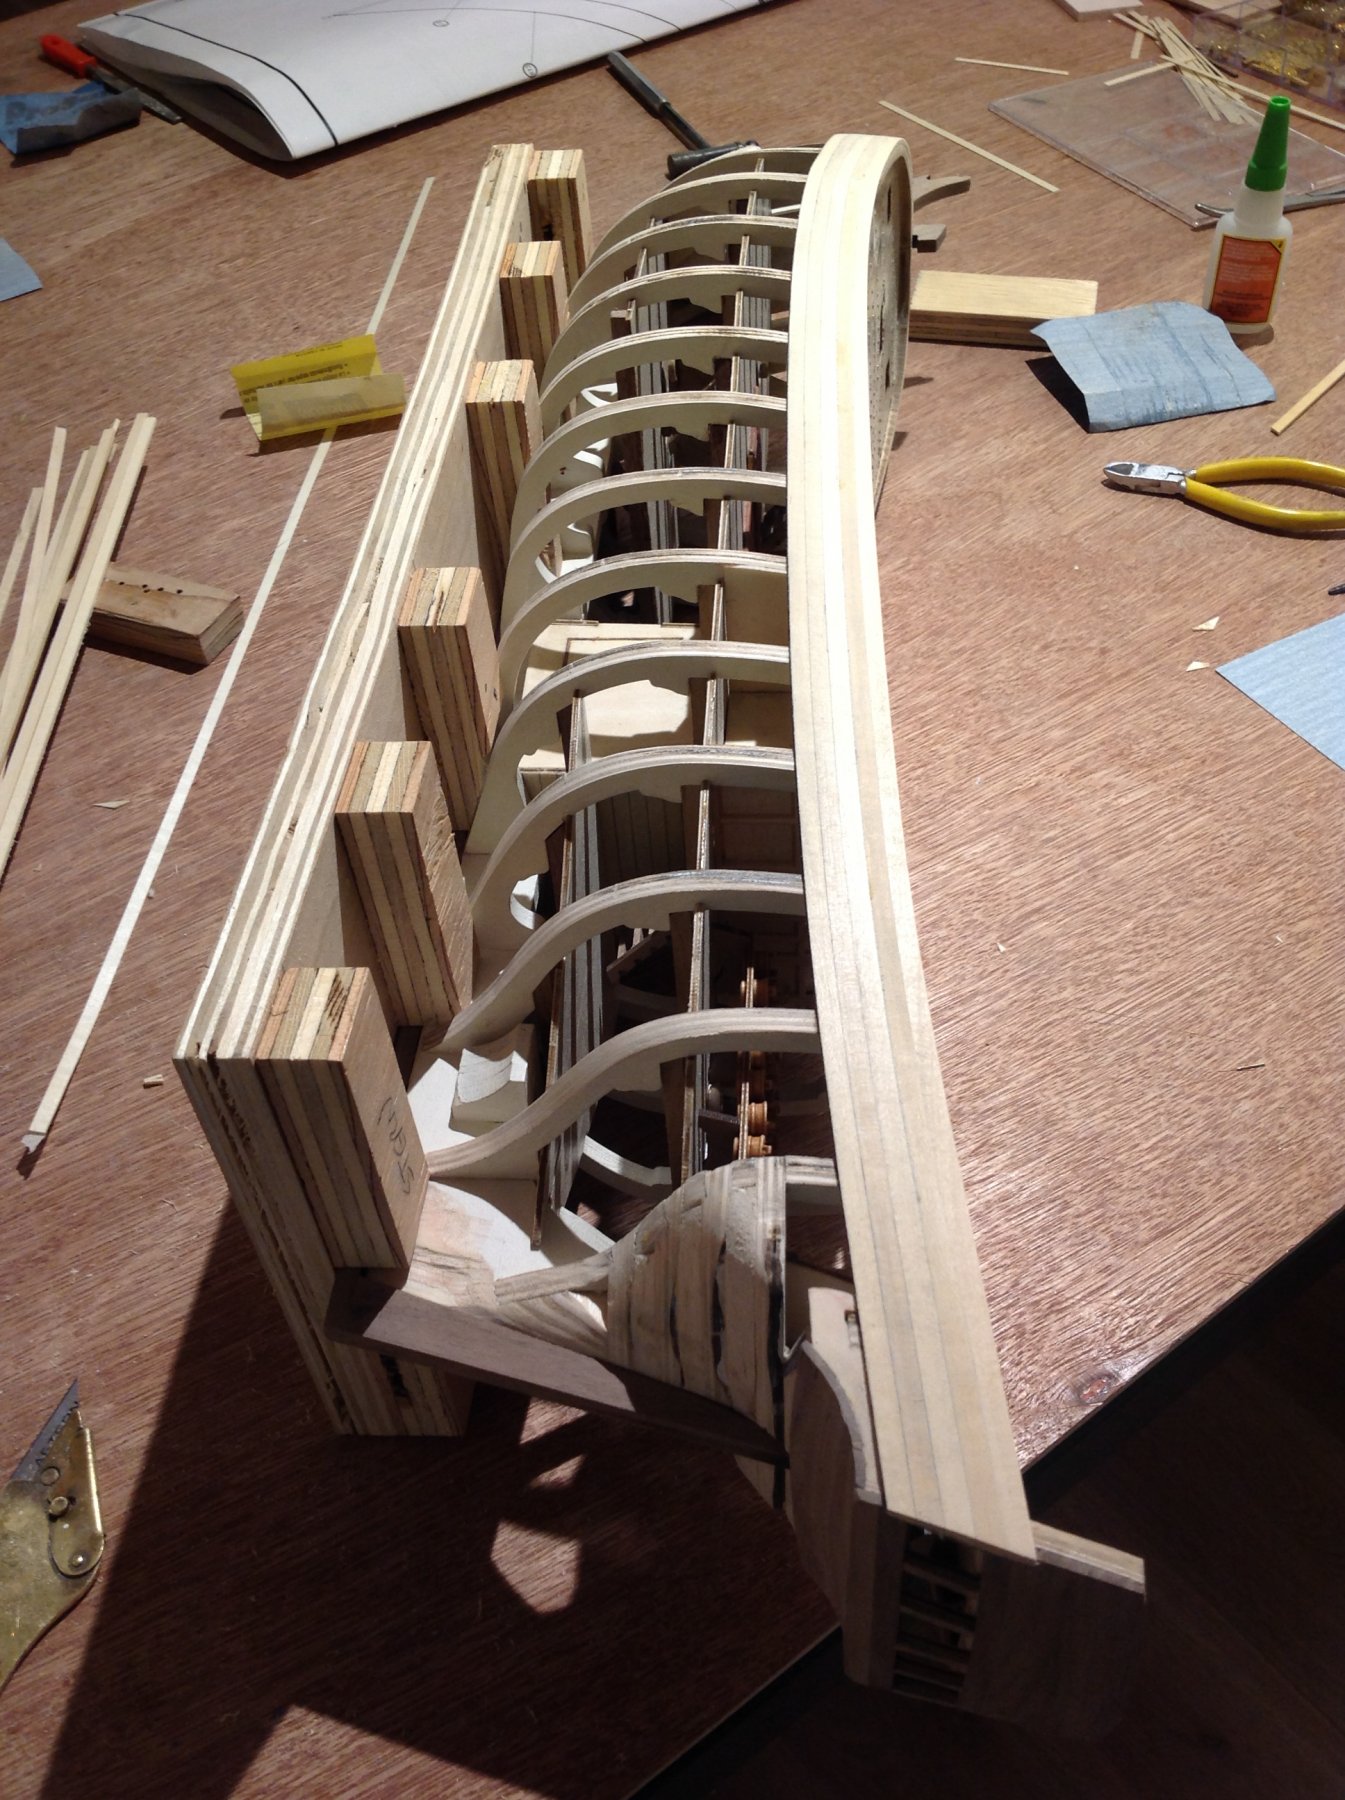
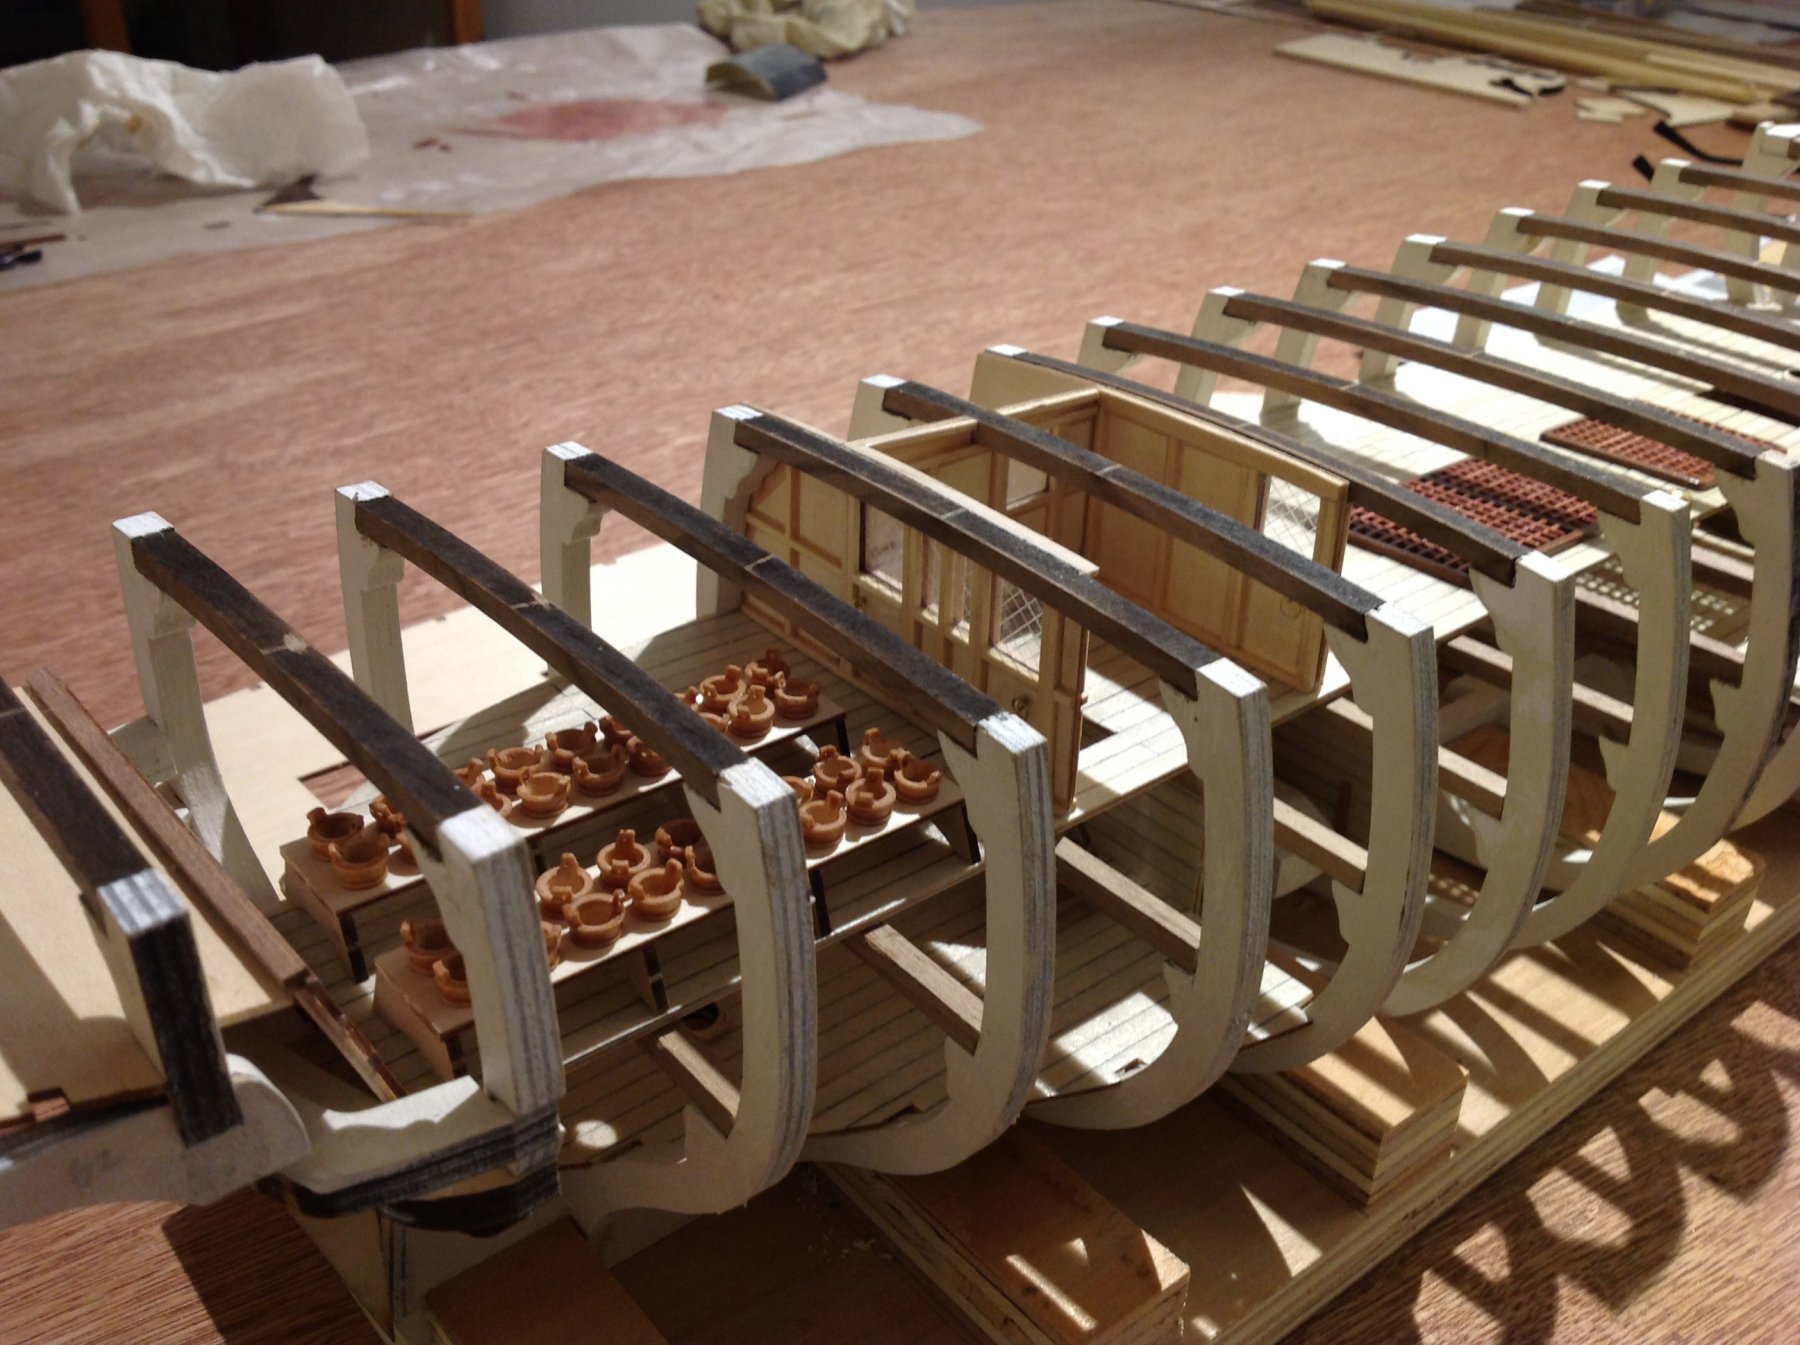
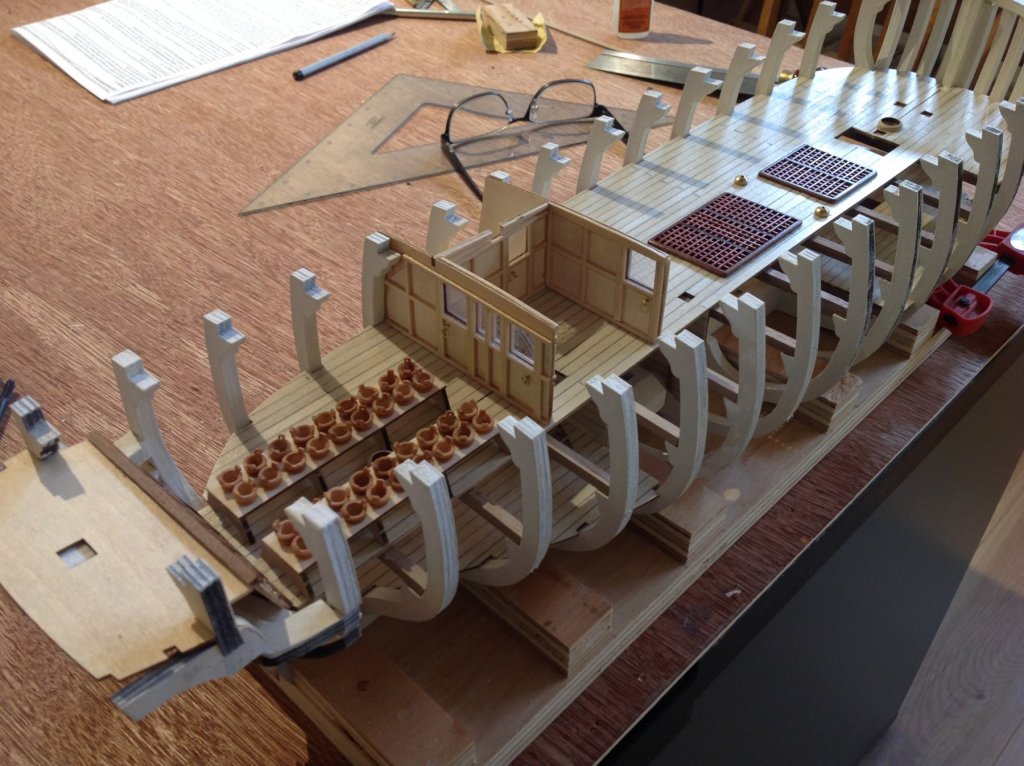
I started this build a couple of weeks ago and am just catching up with my posts as I just joined the modelshipworld community....from here on I'll try and keep it current in real time. Finished the lower deck assemblies, cabins and some stairs. The Latina instructions arent perfect but there's enough information to get the job done. Just the main deck to do and then structure is complete and it's on to the dreaded planking phase...mostly 2x5 walnut planking it looks like, but some pretty aggressive curvature is required. If anybody has any genius advice on a preferred method of bending planks please do pass on, I'd appreciate knowing how you have done it and any tips. I've done a few but always seems a struggle to avoid breakage.

- 171 replies
-
- 13
-
-
- artesania latina
- bounty
- (and 1 more)
-
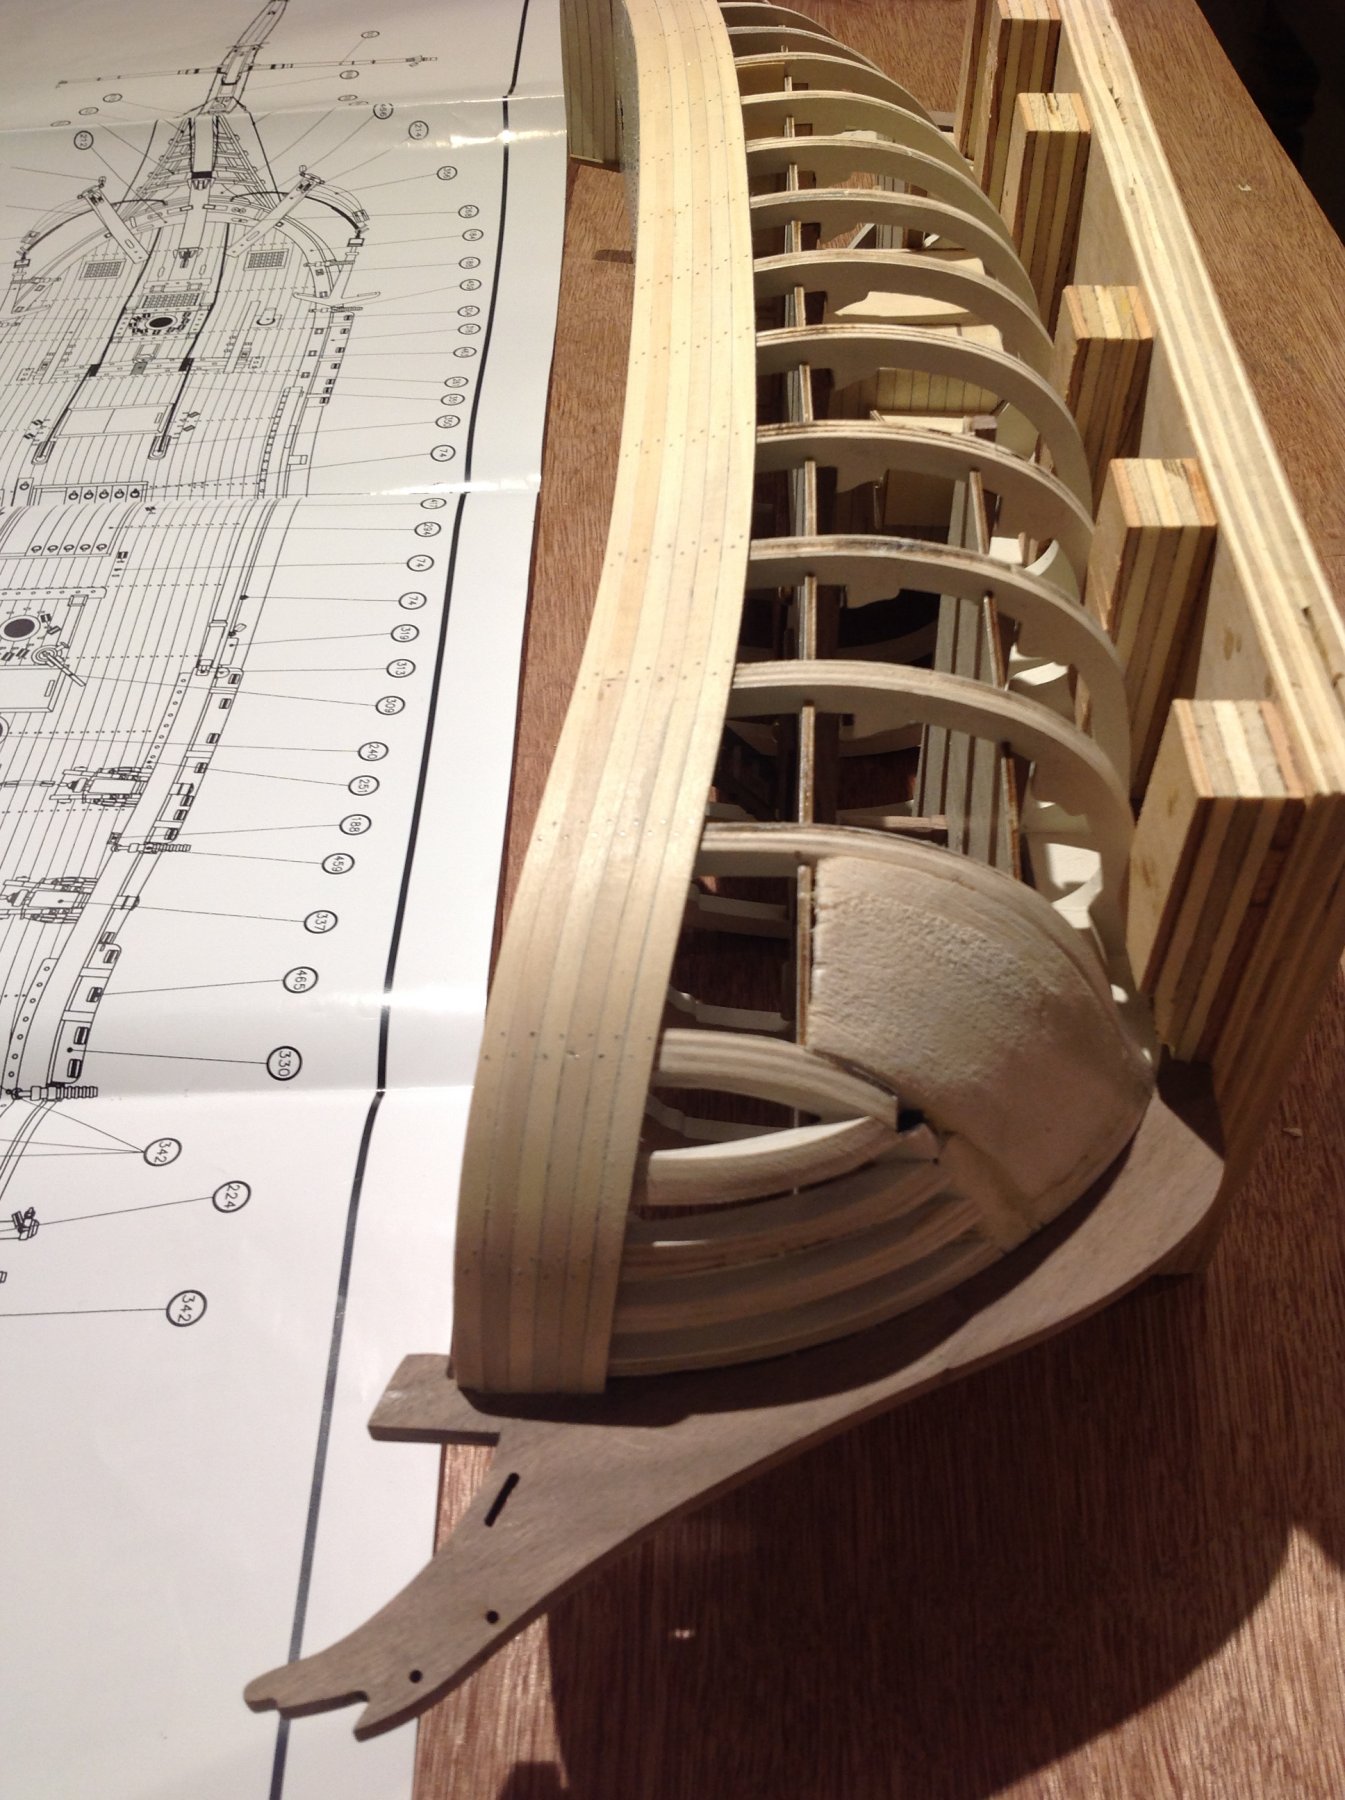
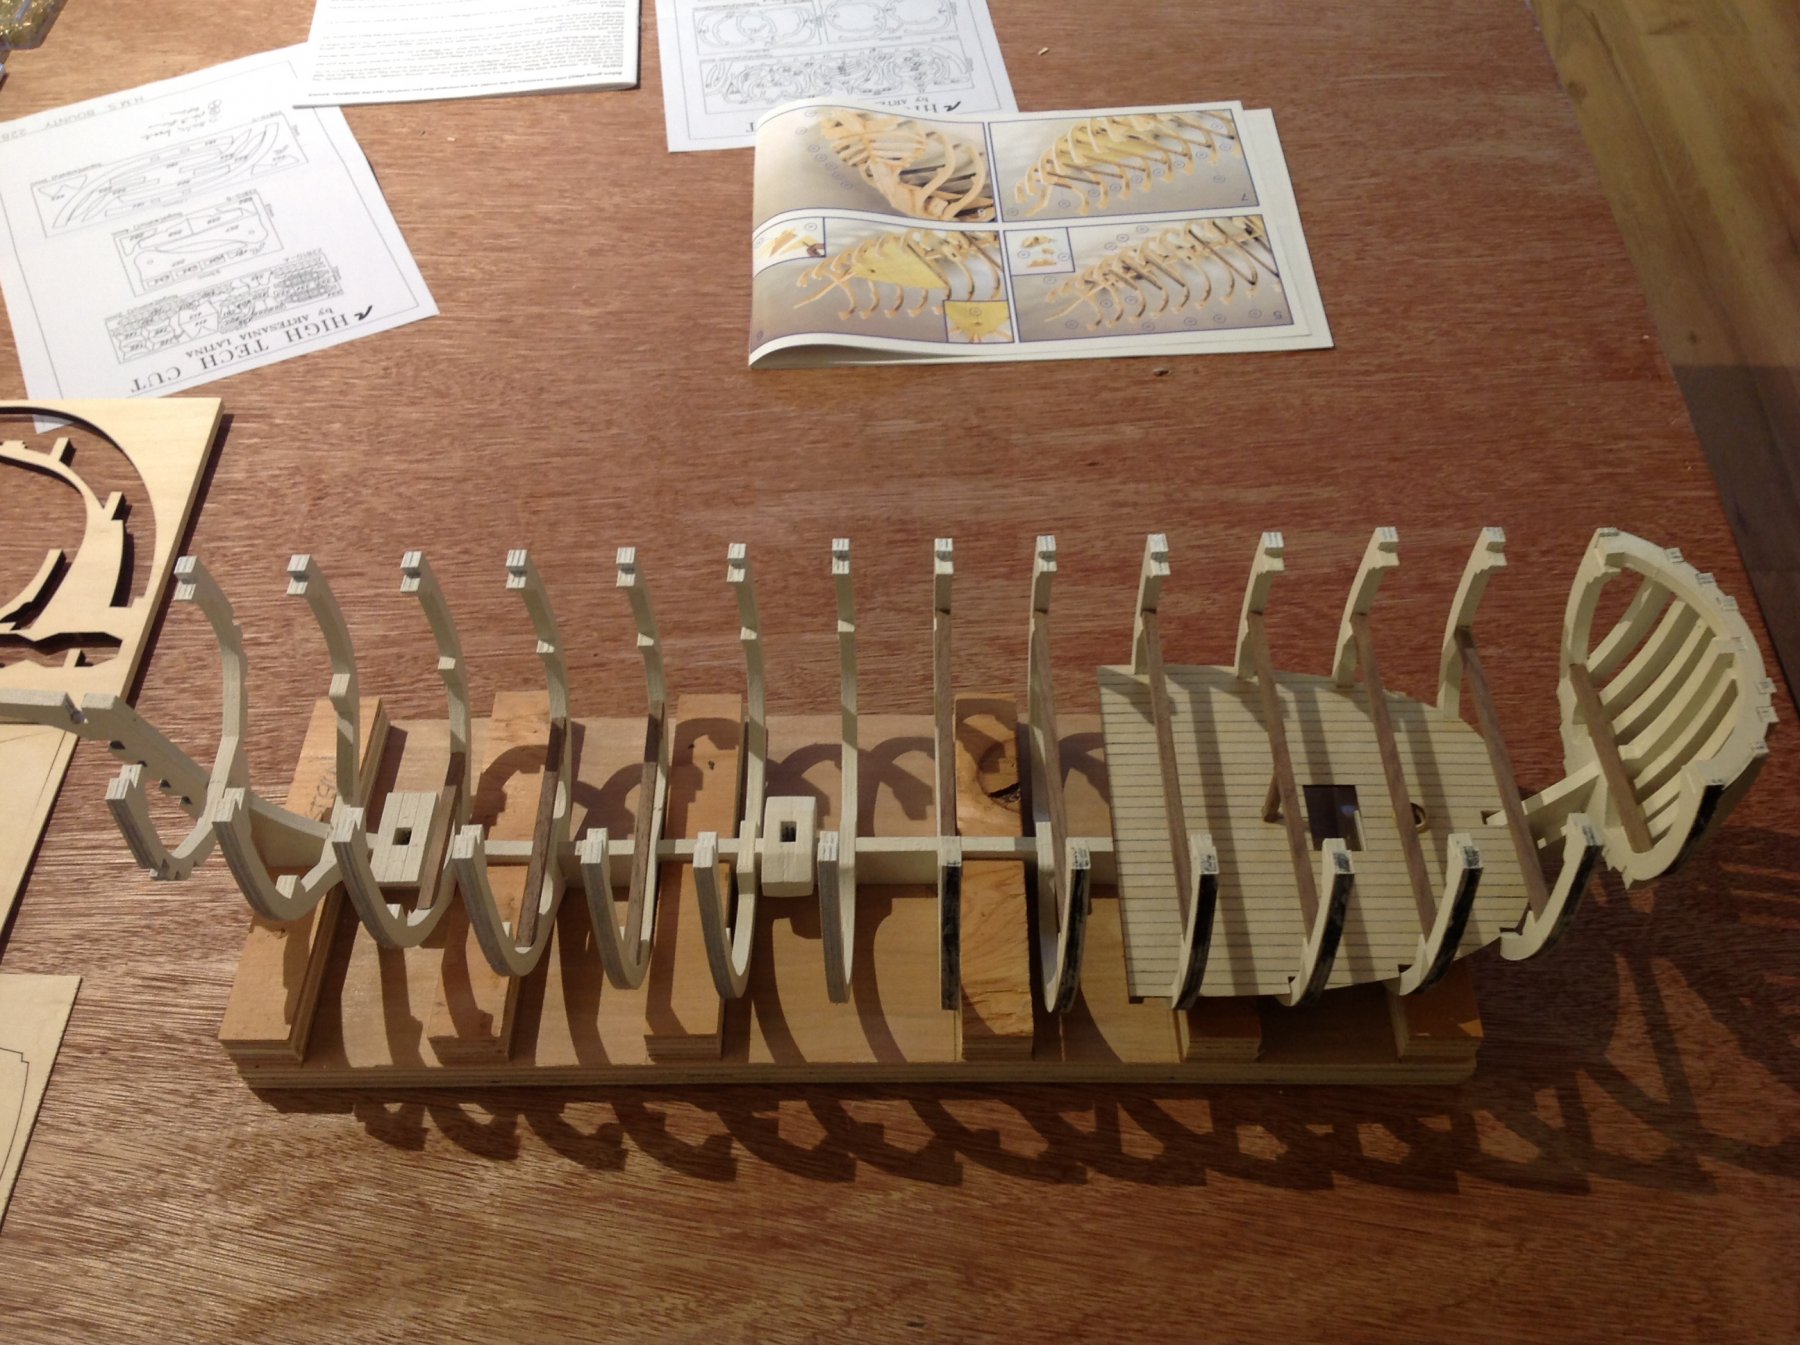
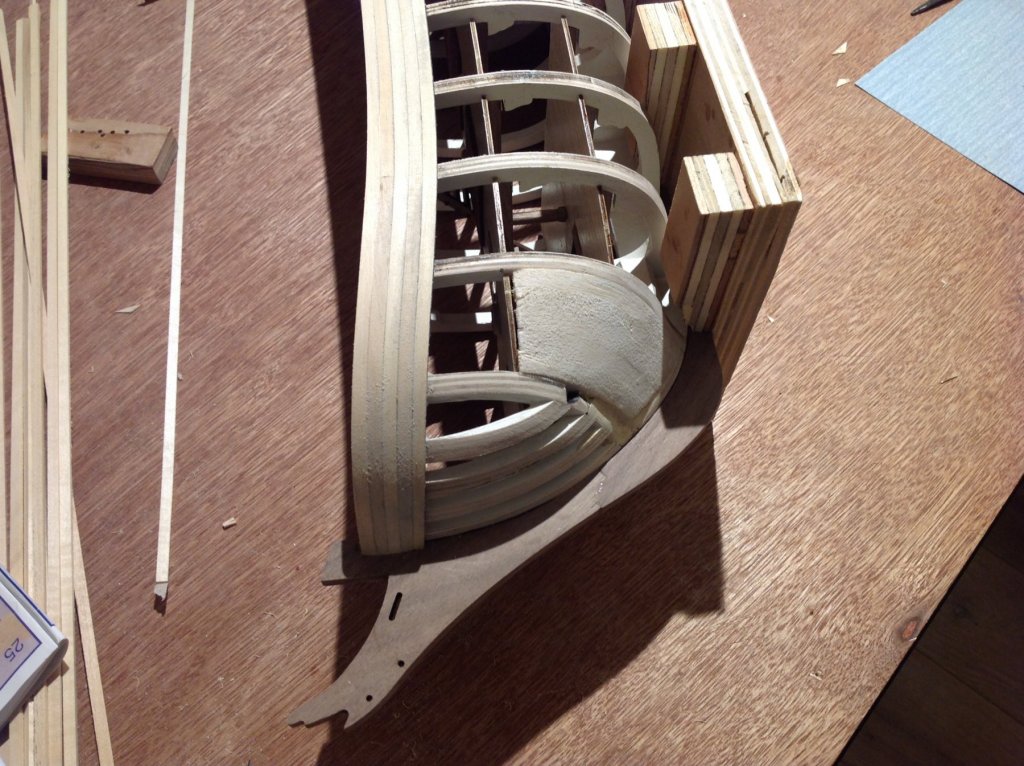
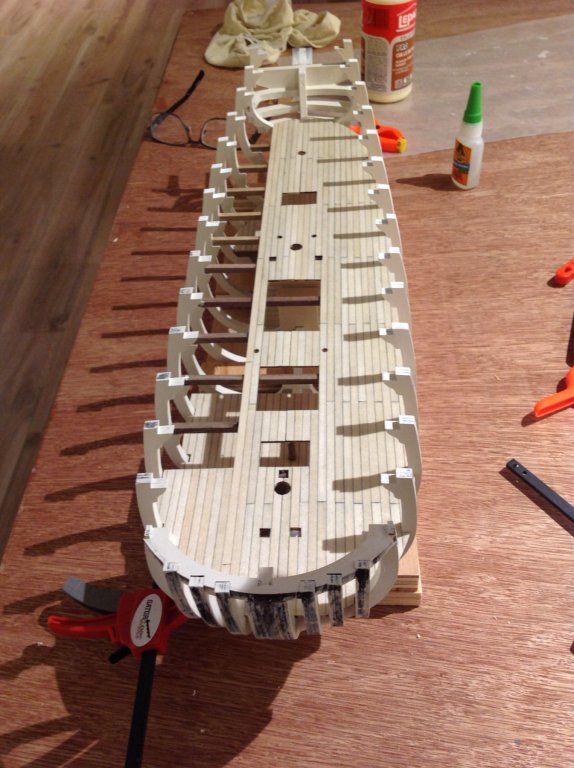
Lower decks and hold well fabricated and installed. Cut the planking into 6" sections to replicate a 25' plank at 1/48 scale. Frame seems a little more fragile than I'd like but hopefully will be more stable when the upper beams and deck are in place.

- 171 replies
-
- 11
-
-
- artesania latina
- bounty
- (and 1 more)
-
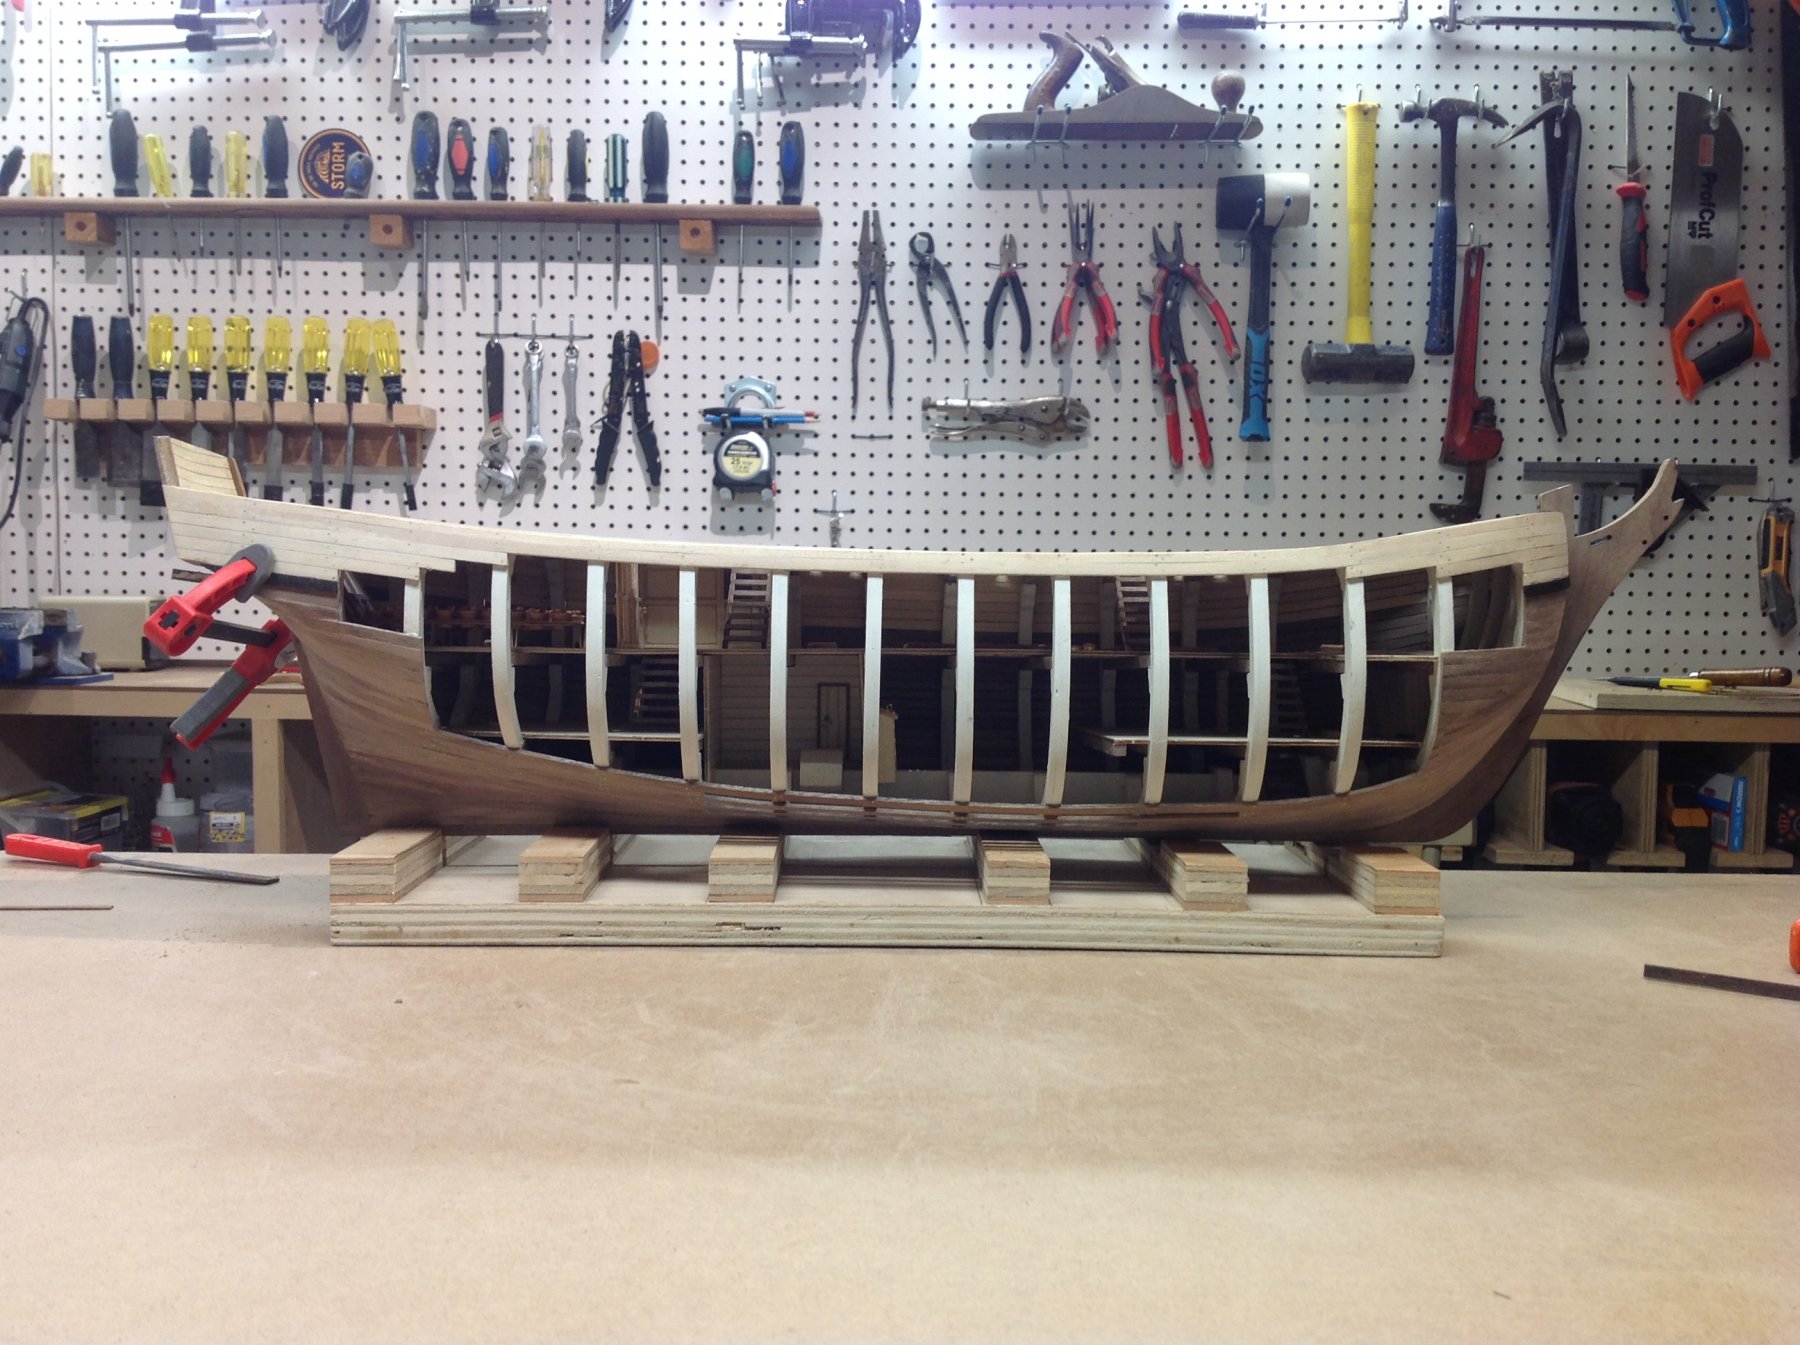
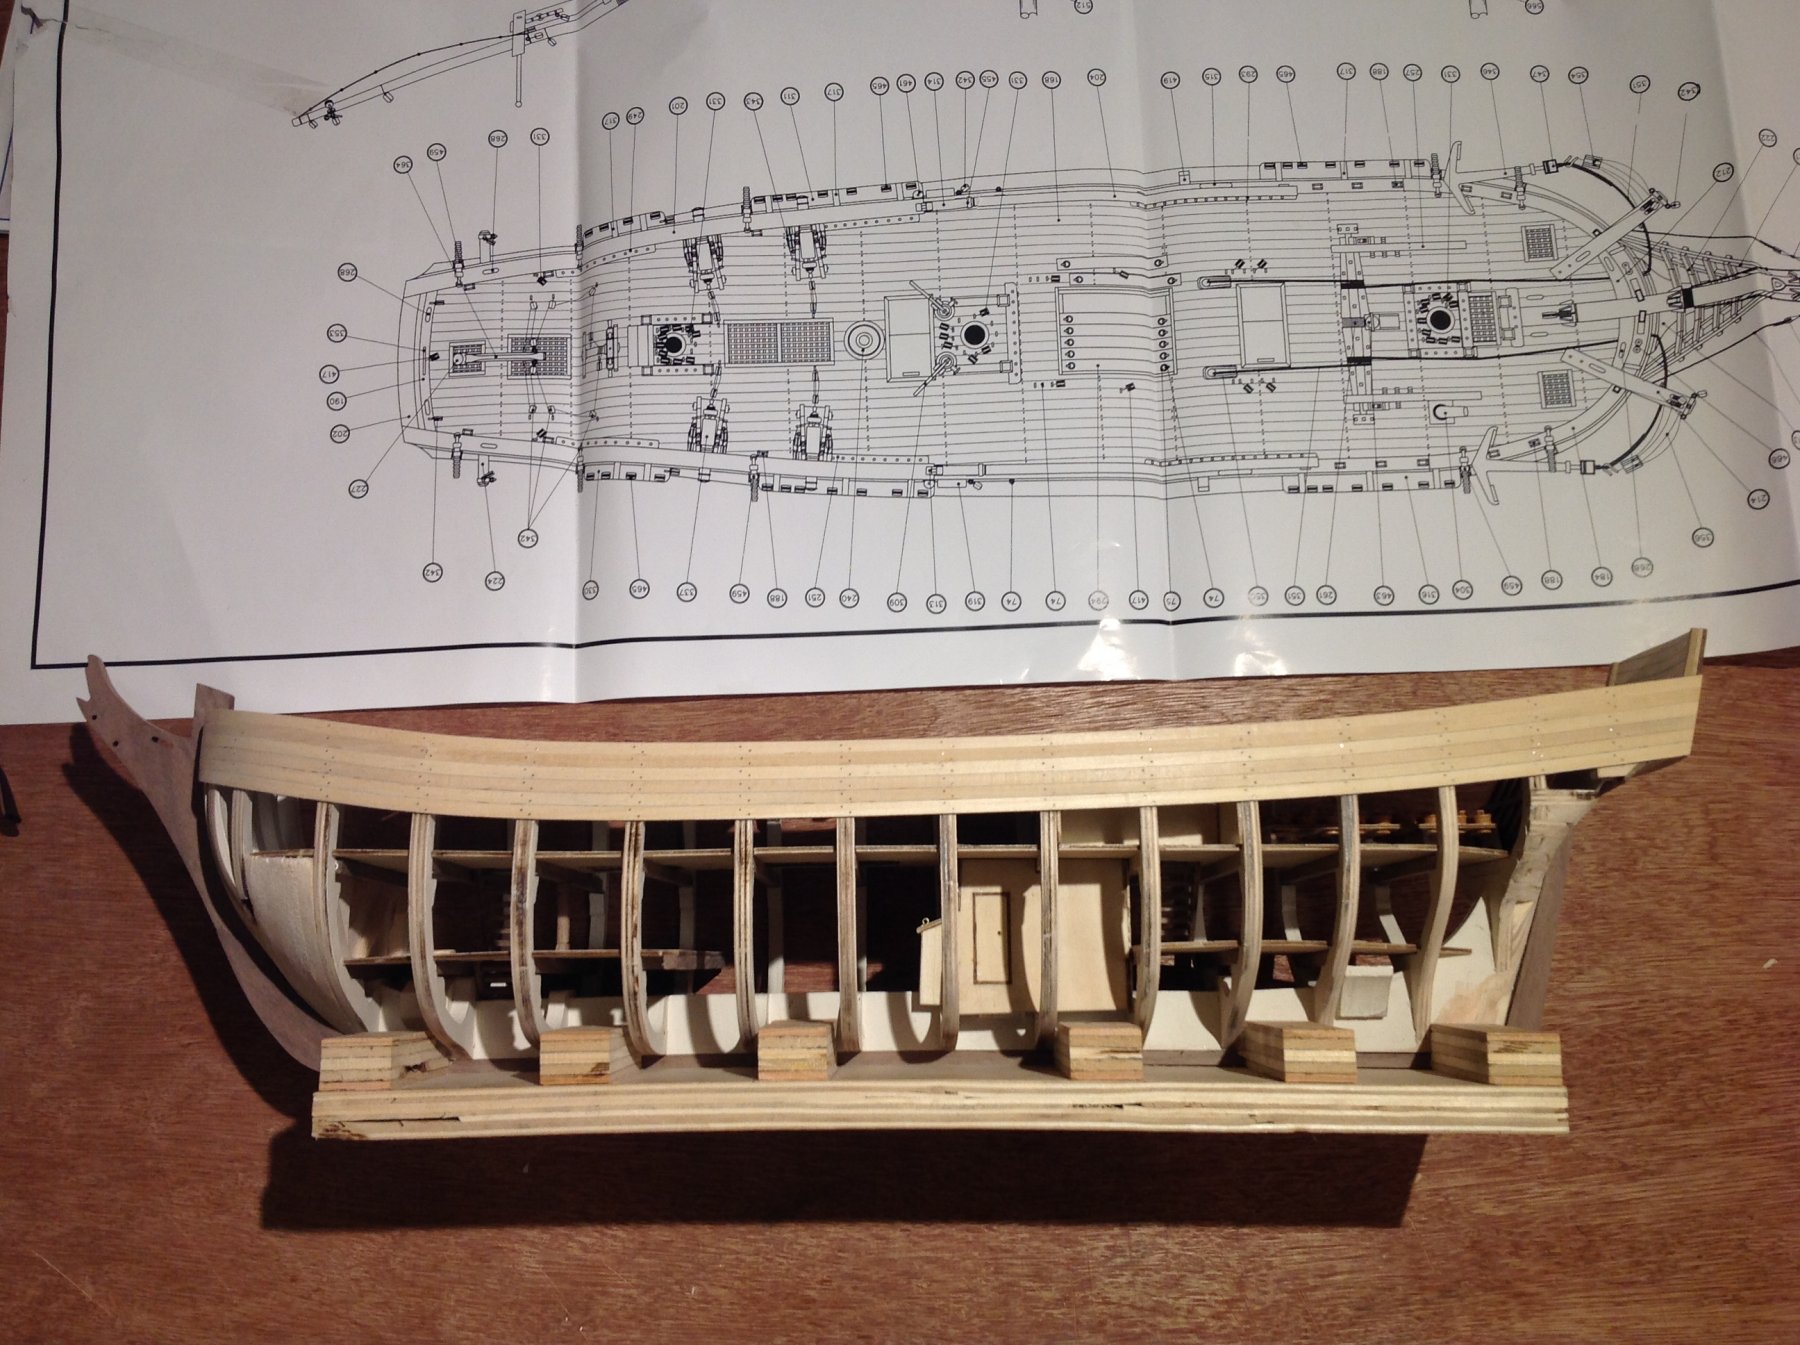
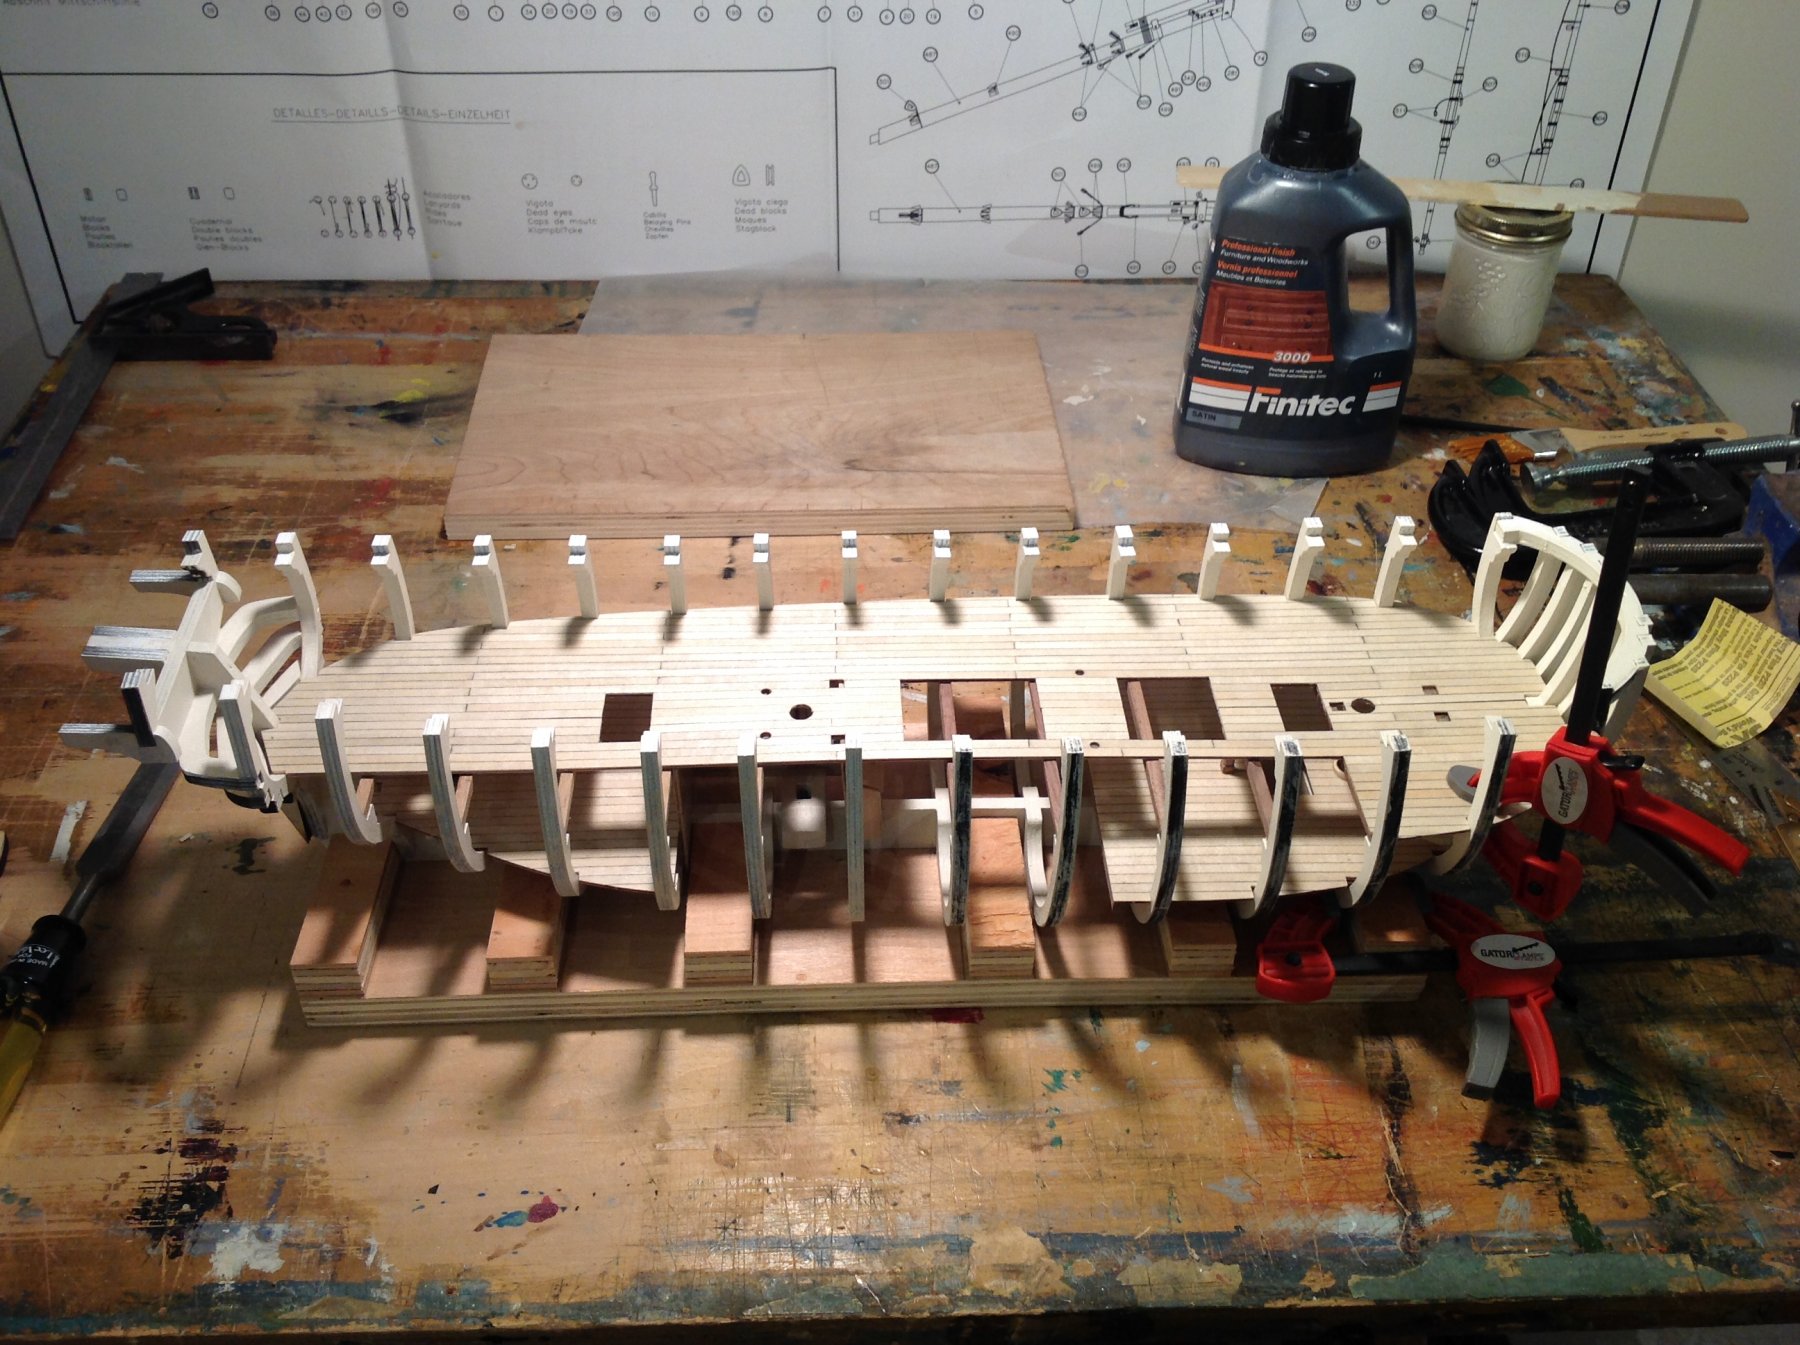
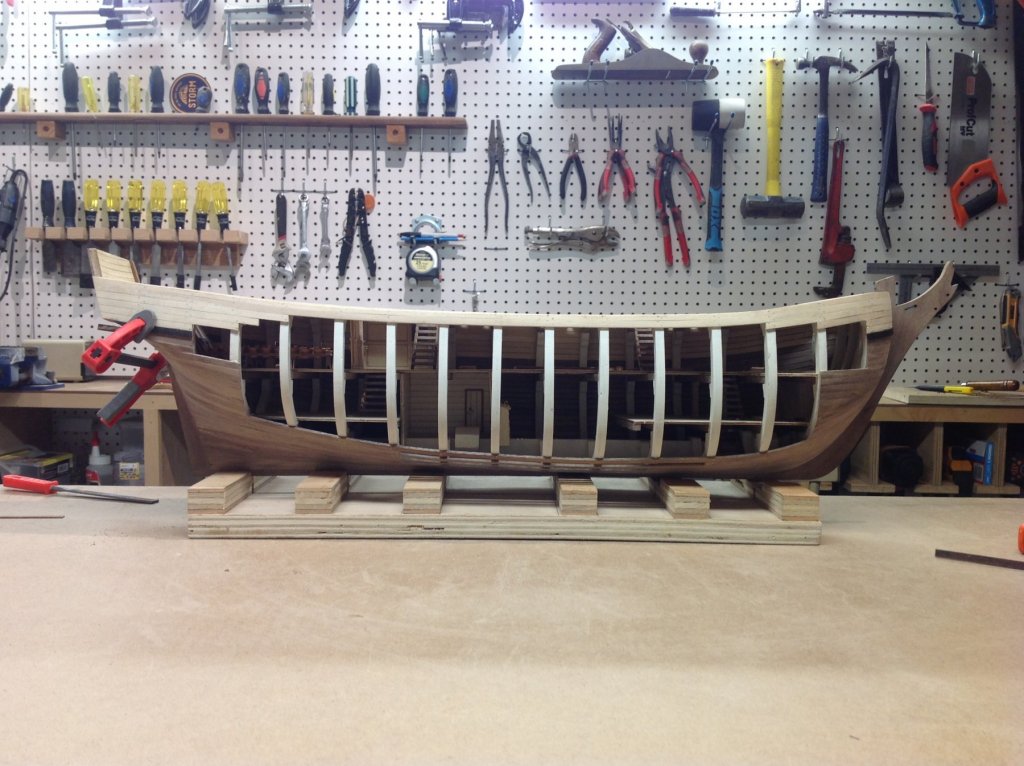
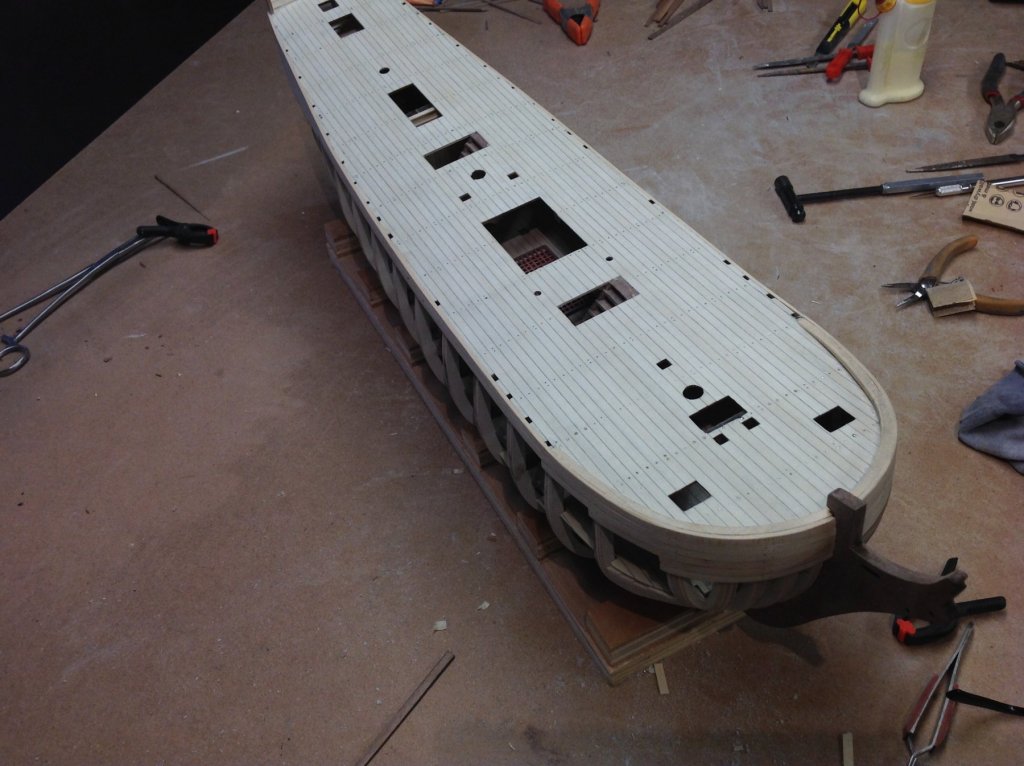
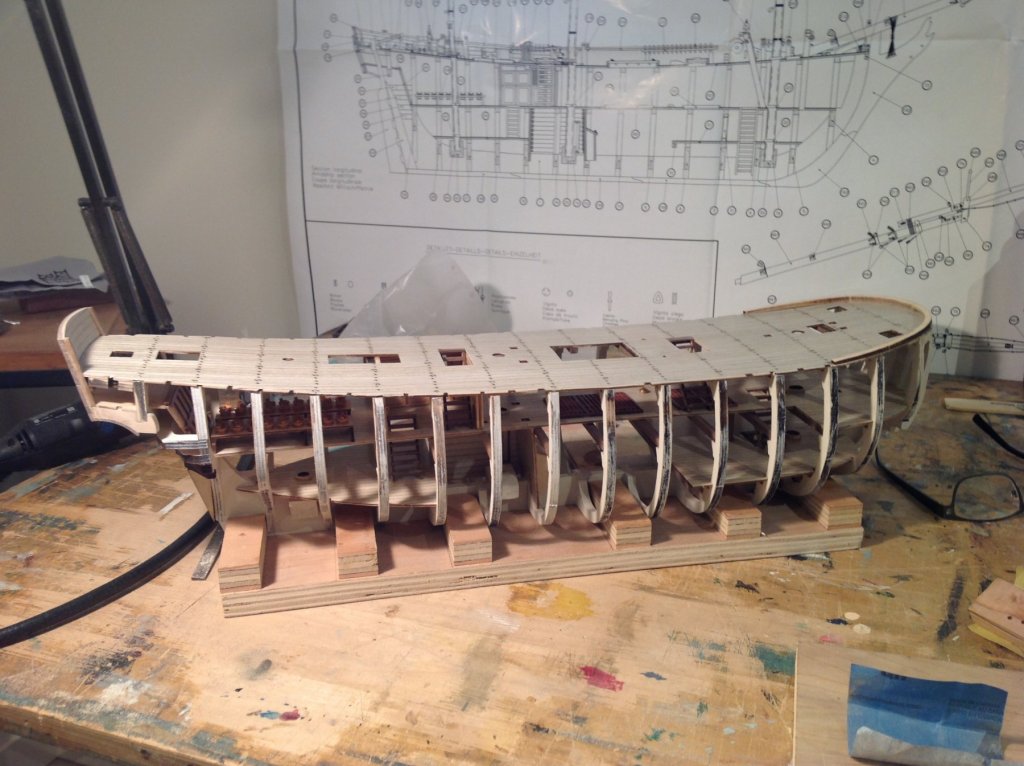
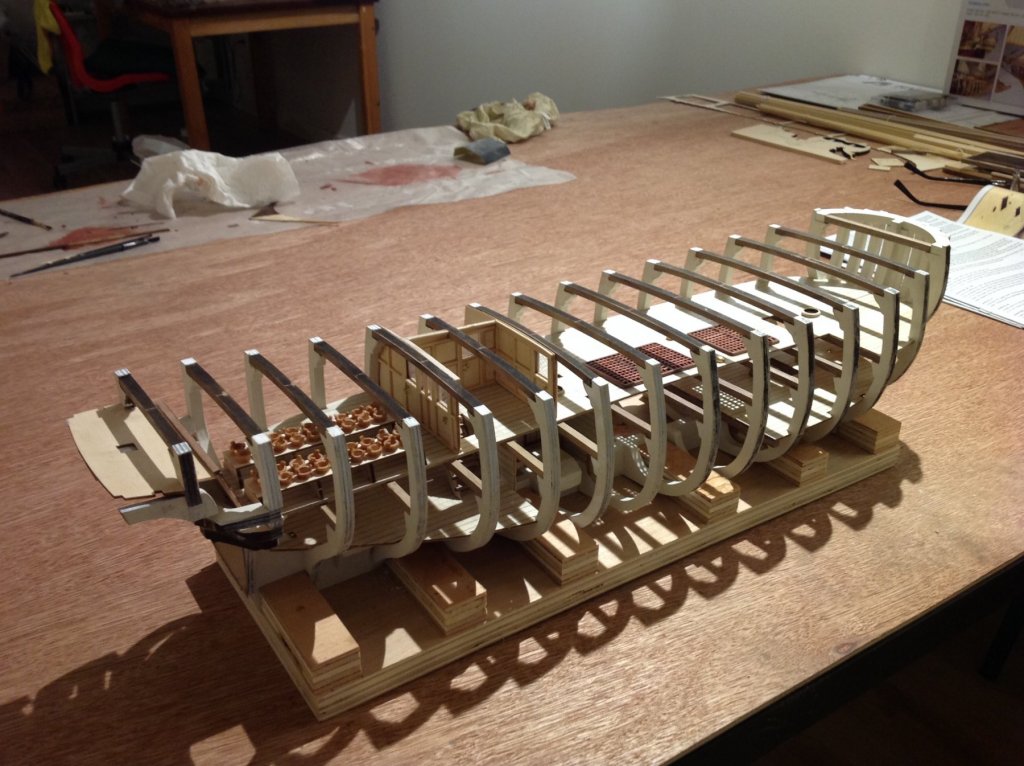
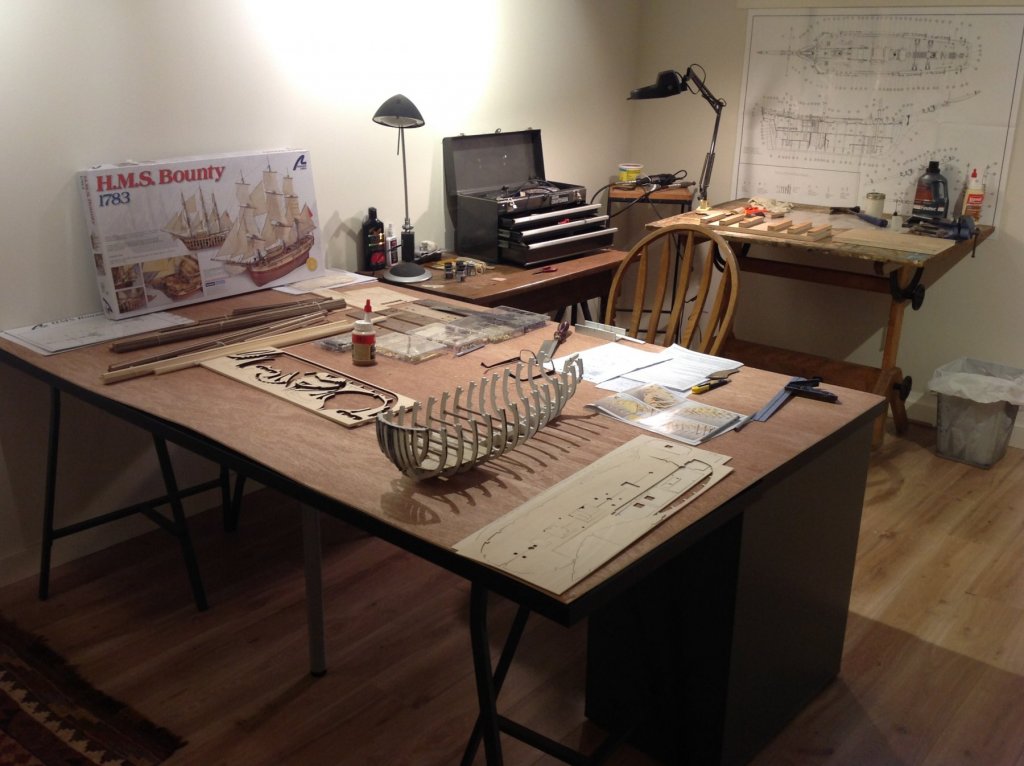
Hi all. Recently completed the Miss Severn by Legend model boats, but can't yet get it on the water seeing as it is winter here in the great white north. My winter+ project is the Latina 1/48 Bounty. Should look good beside Cook's Endeavour on my display shelves when complete. It's a single plank on frame design with an exposed interior below decks rather than the usual double planking on plywood bulkheads. Created a simple plywood building slip to ensure the hull stays true during construction, and decided to paint the ribs maritime white to provide contrast with all the timber and flotsam that will be on display below decks. Not the walnut finish suggested by Latina but I've seen a museum model done this way and it was a beauty.

- 171 replies
-
- 7
-
-
- artesania latina
- bounty
- (and 1 more)