Tim Moore
-
Posts
357 -
Joined
-
Last visited
Content Type
Profiles
Forums
Gallery
Events
Everything posted by Tim Moore
-
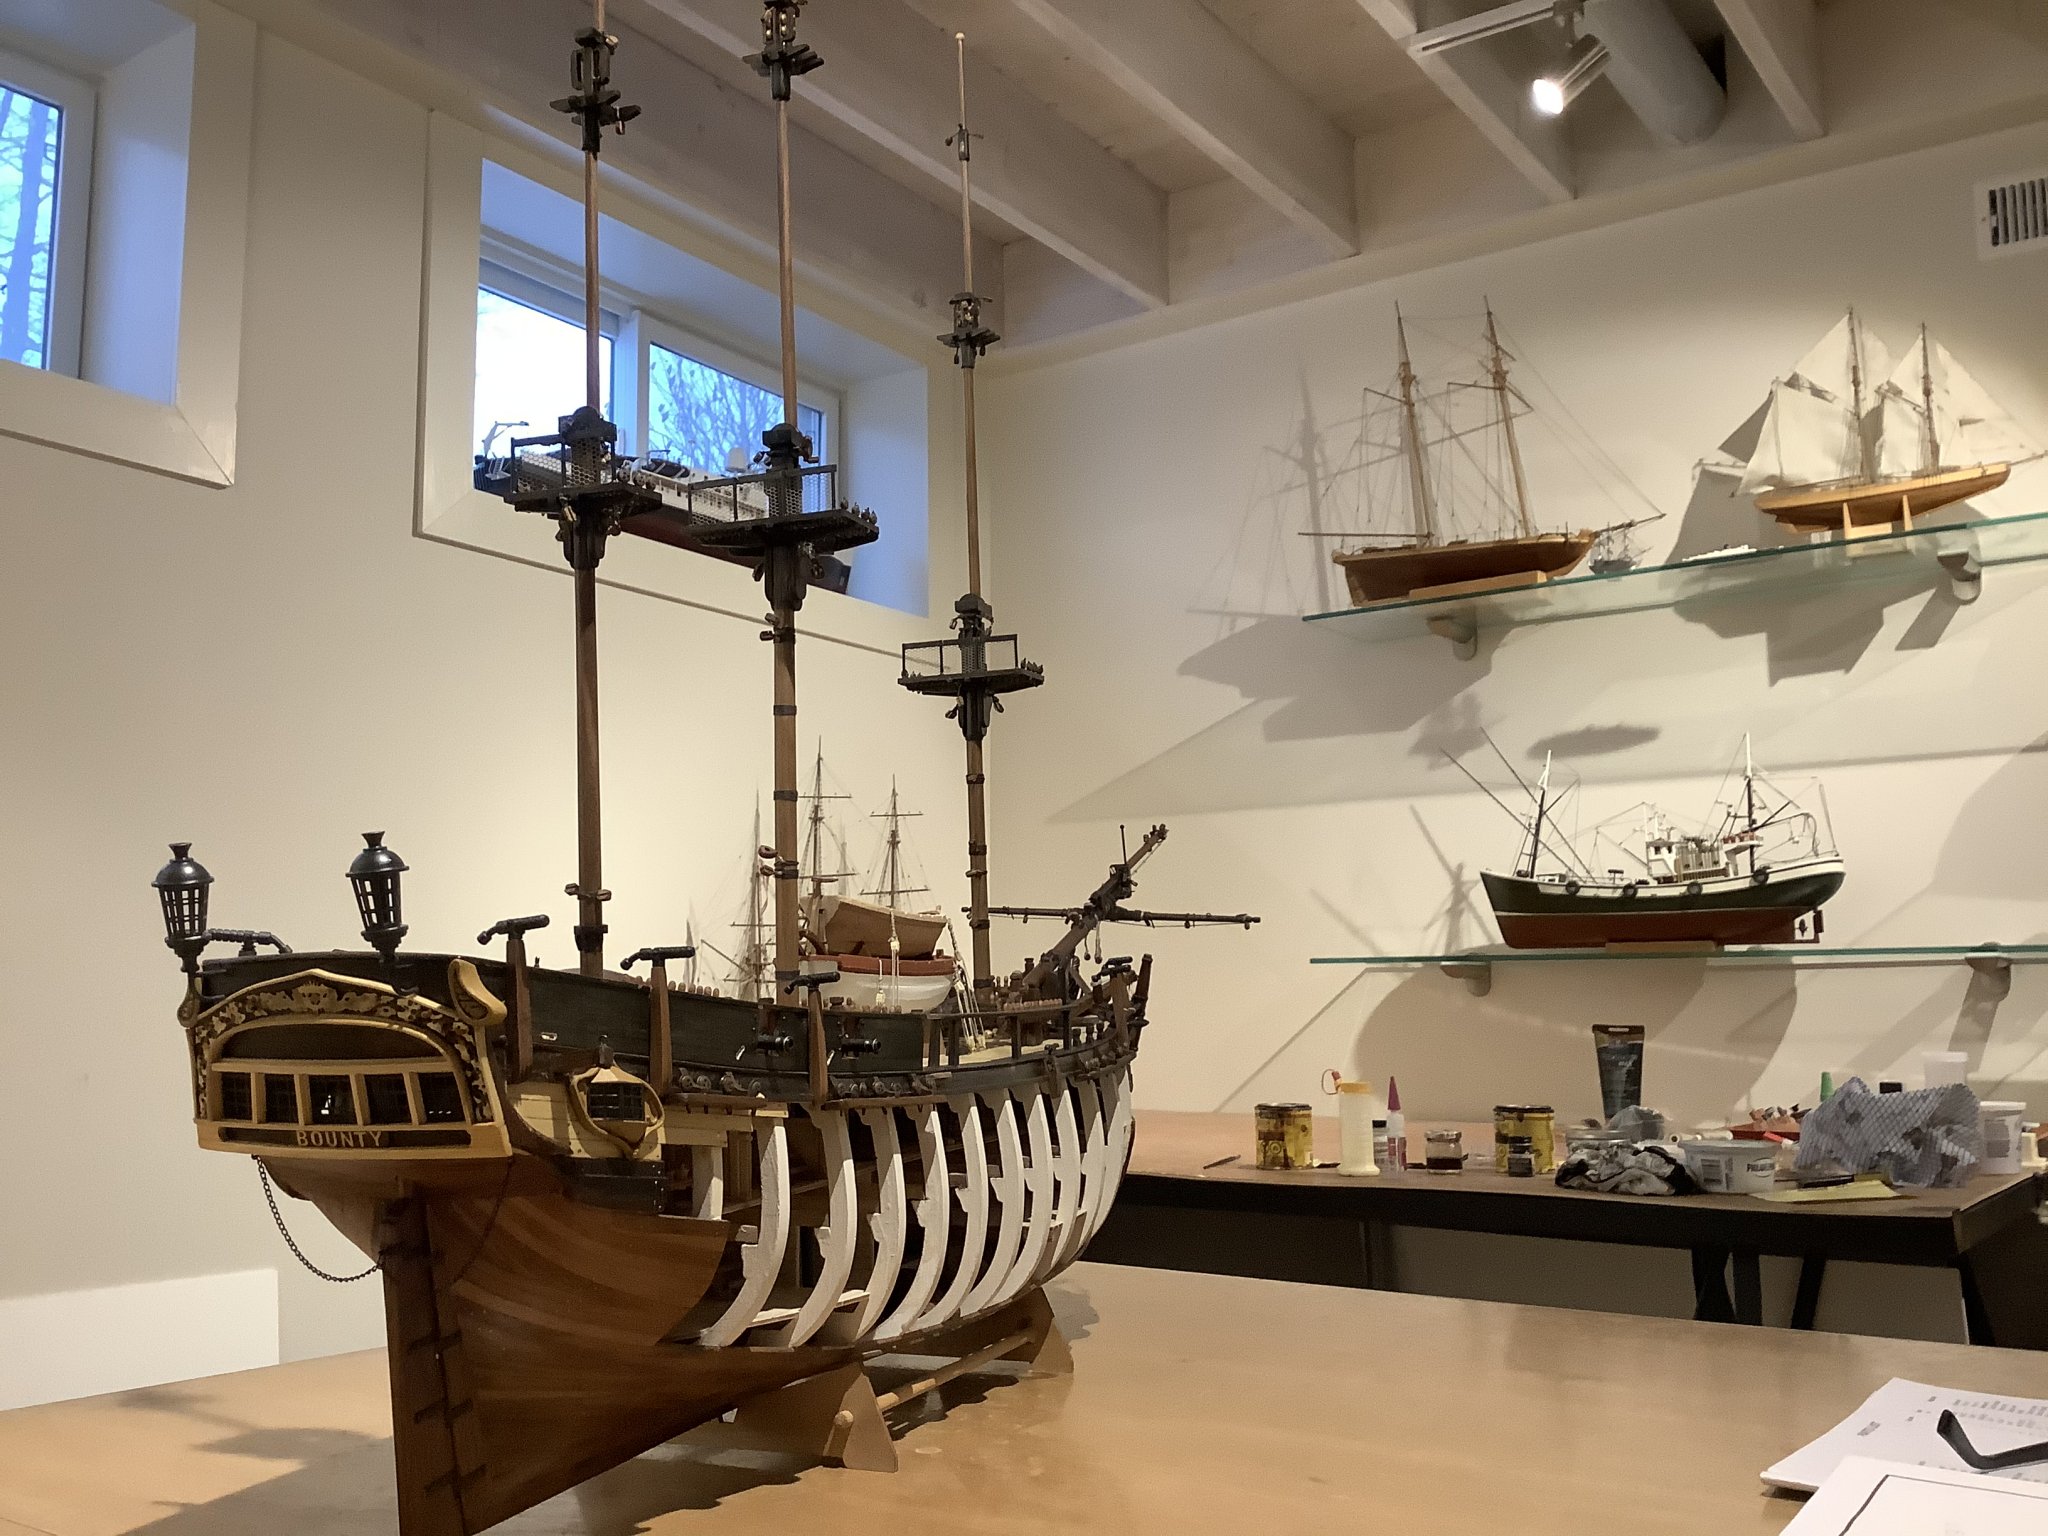
Thanks Nils - much appreciated coming from an accomplished scratch builder; and likewise to all for the likes. Im currently splicing together pieces of walnut from the remains of old completed kits to make up some of the Bounty spars as there were a few pieces of dowel missing from my kit. Knew I saved all those bits and pieces for a reason.
-
Thanks Mark. Yes been pushing the Bounty onwards, in the groove on completing the rigging. Looking forward to seeing your Victory work when you are able to get back at it.
-
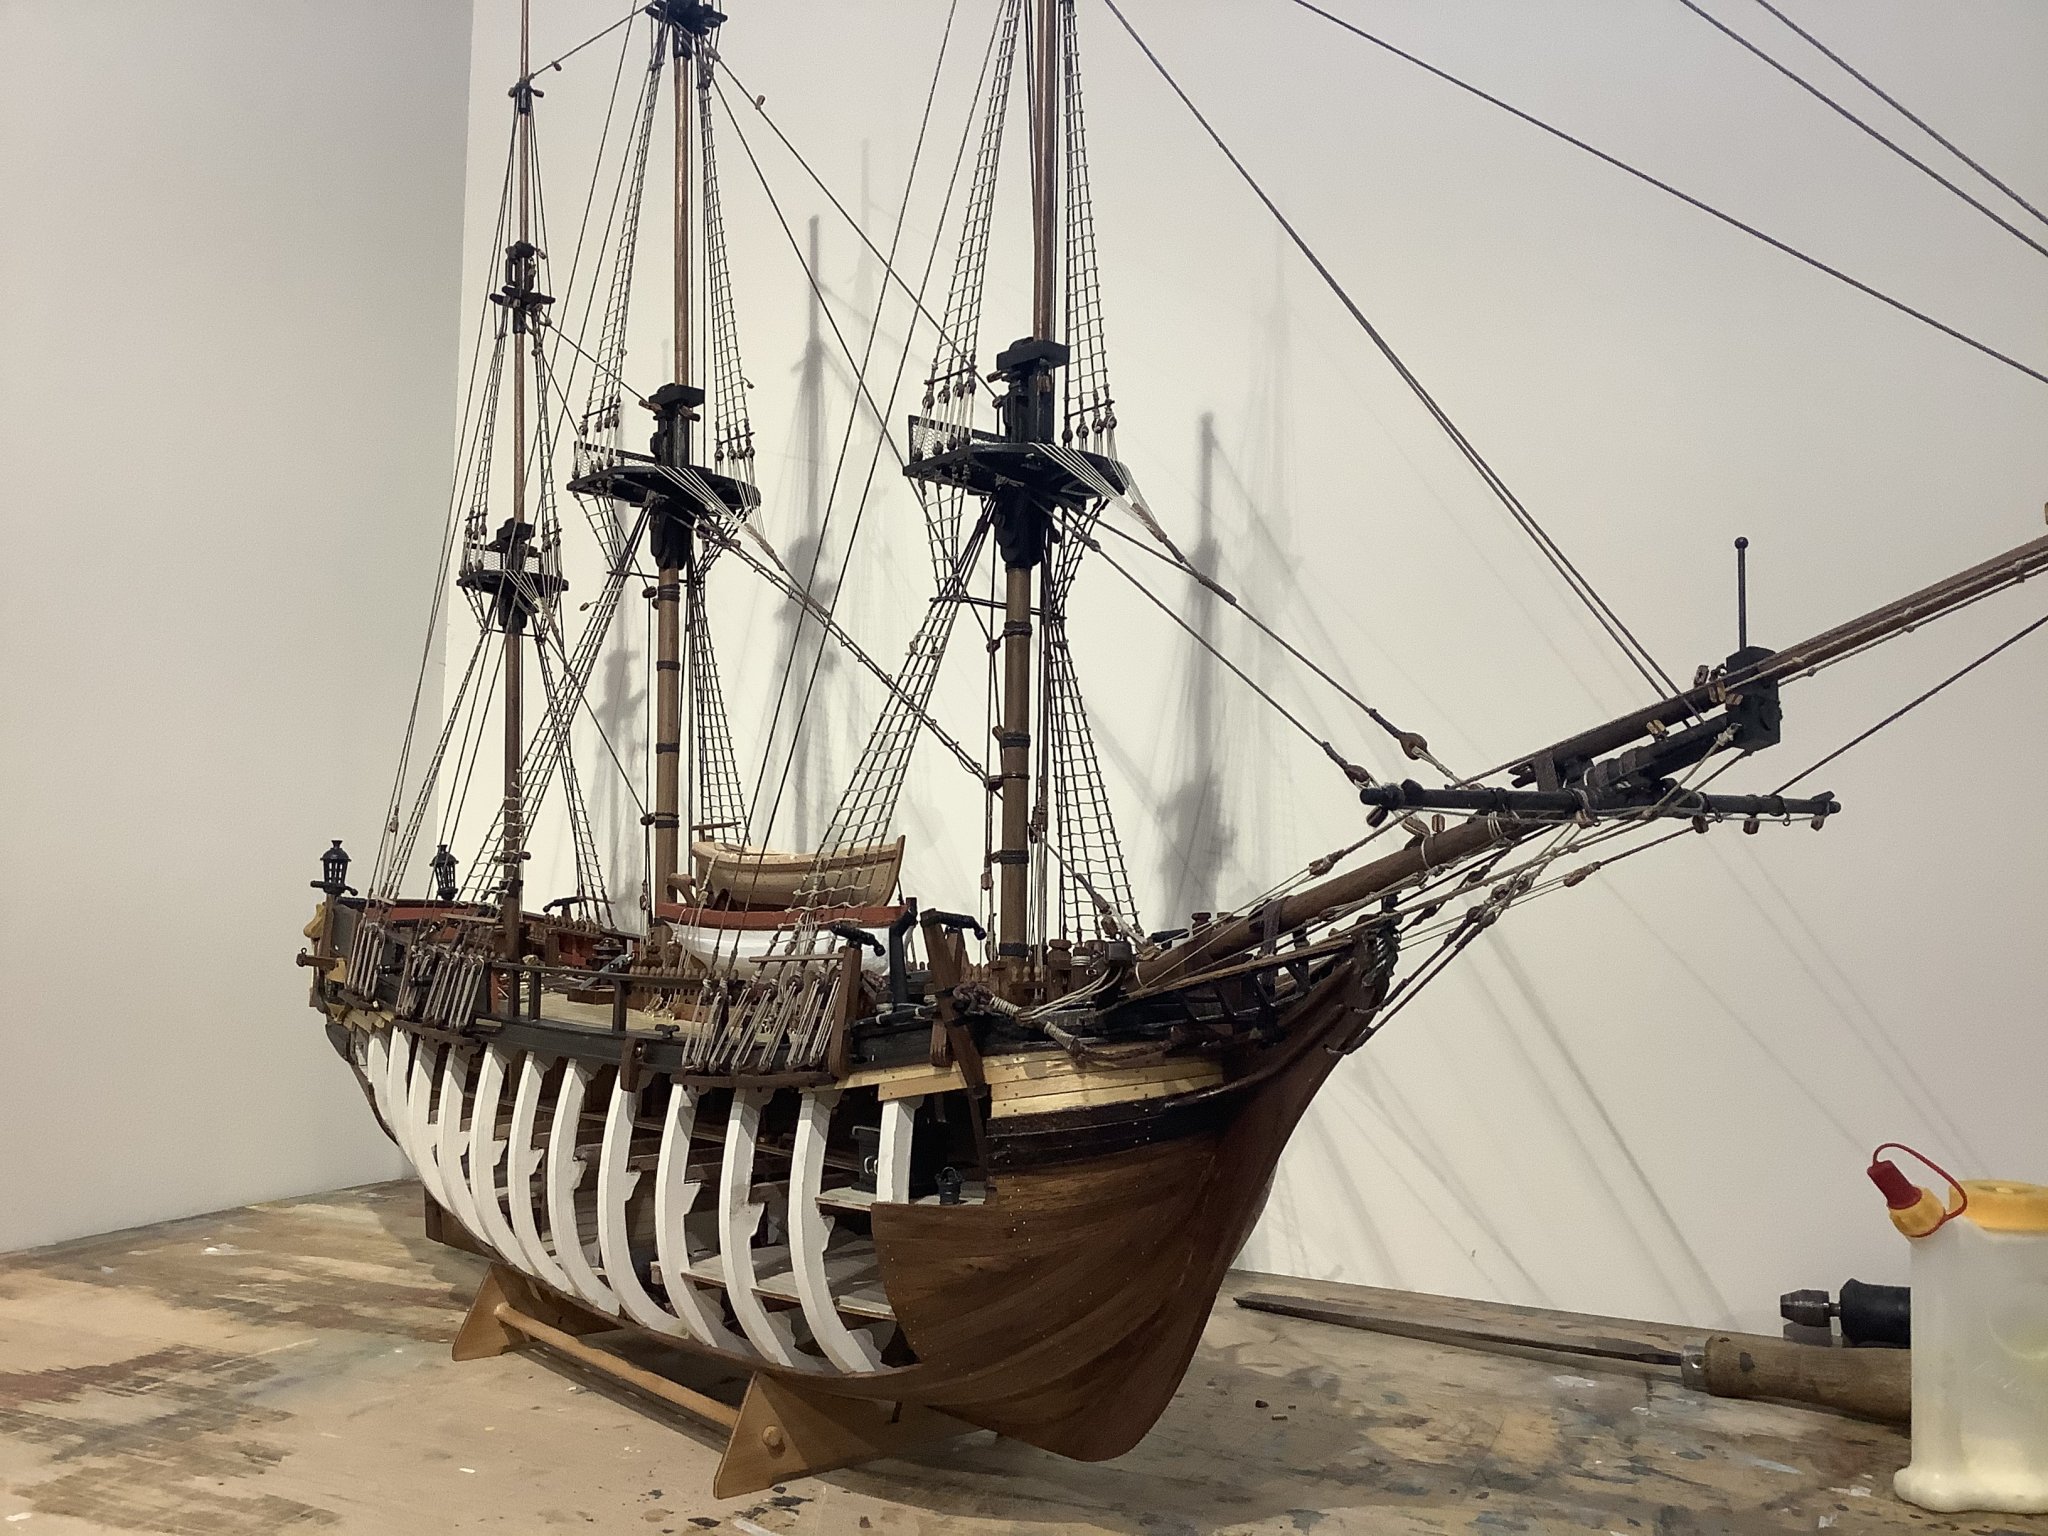
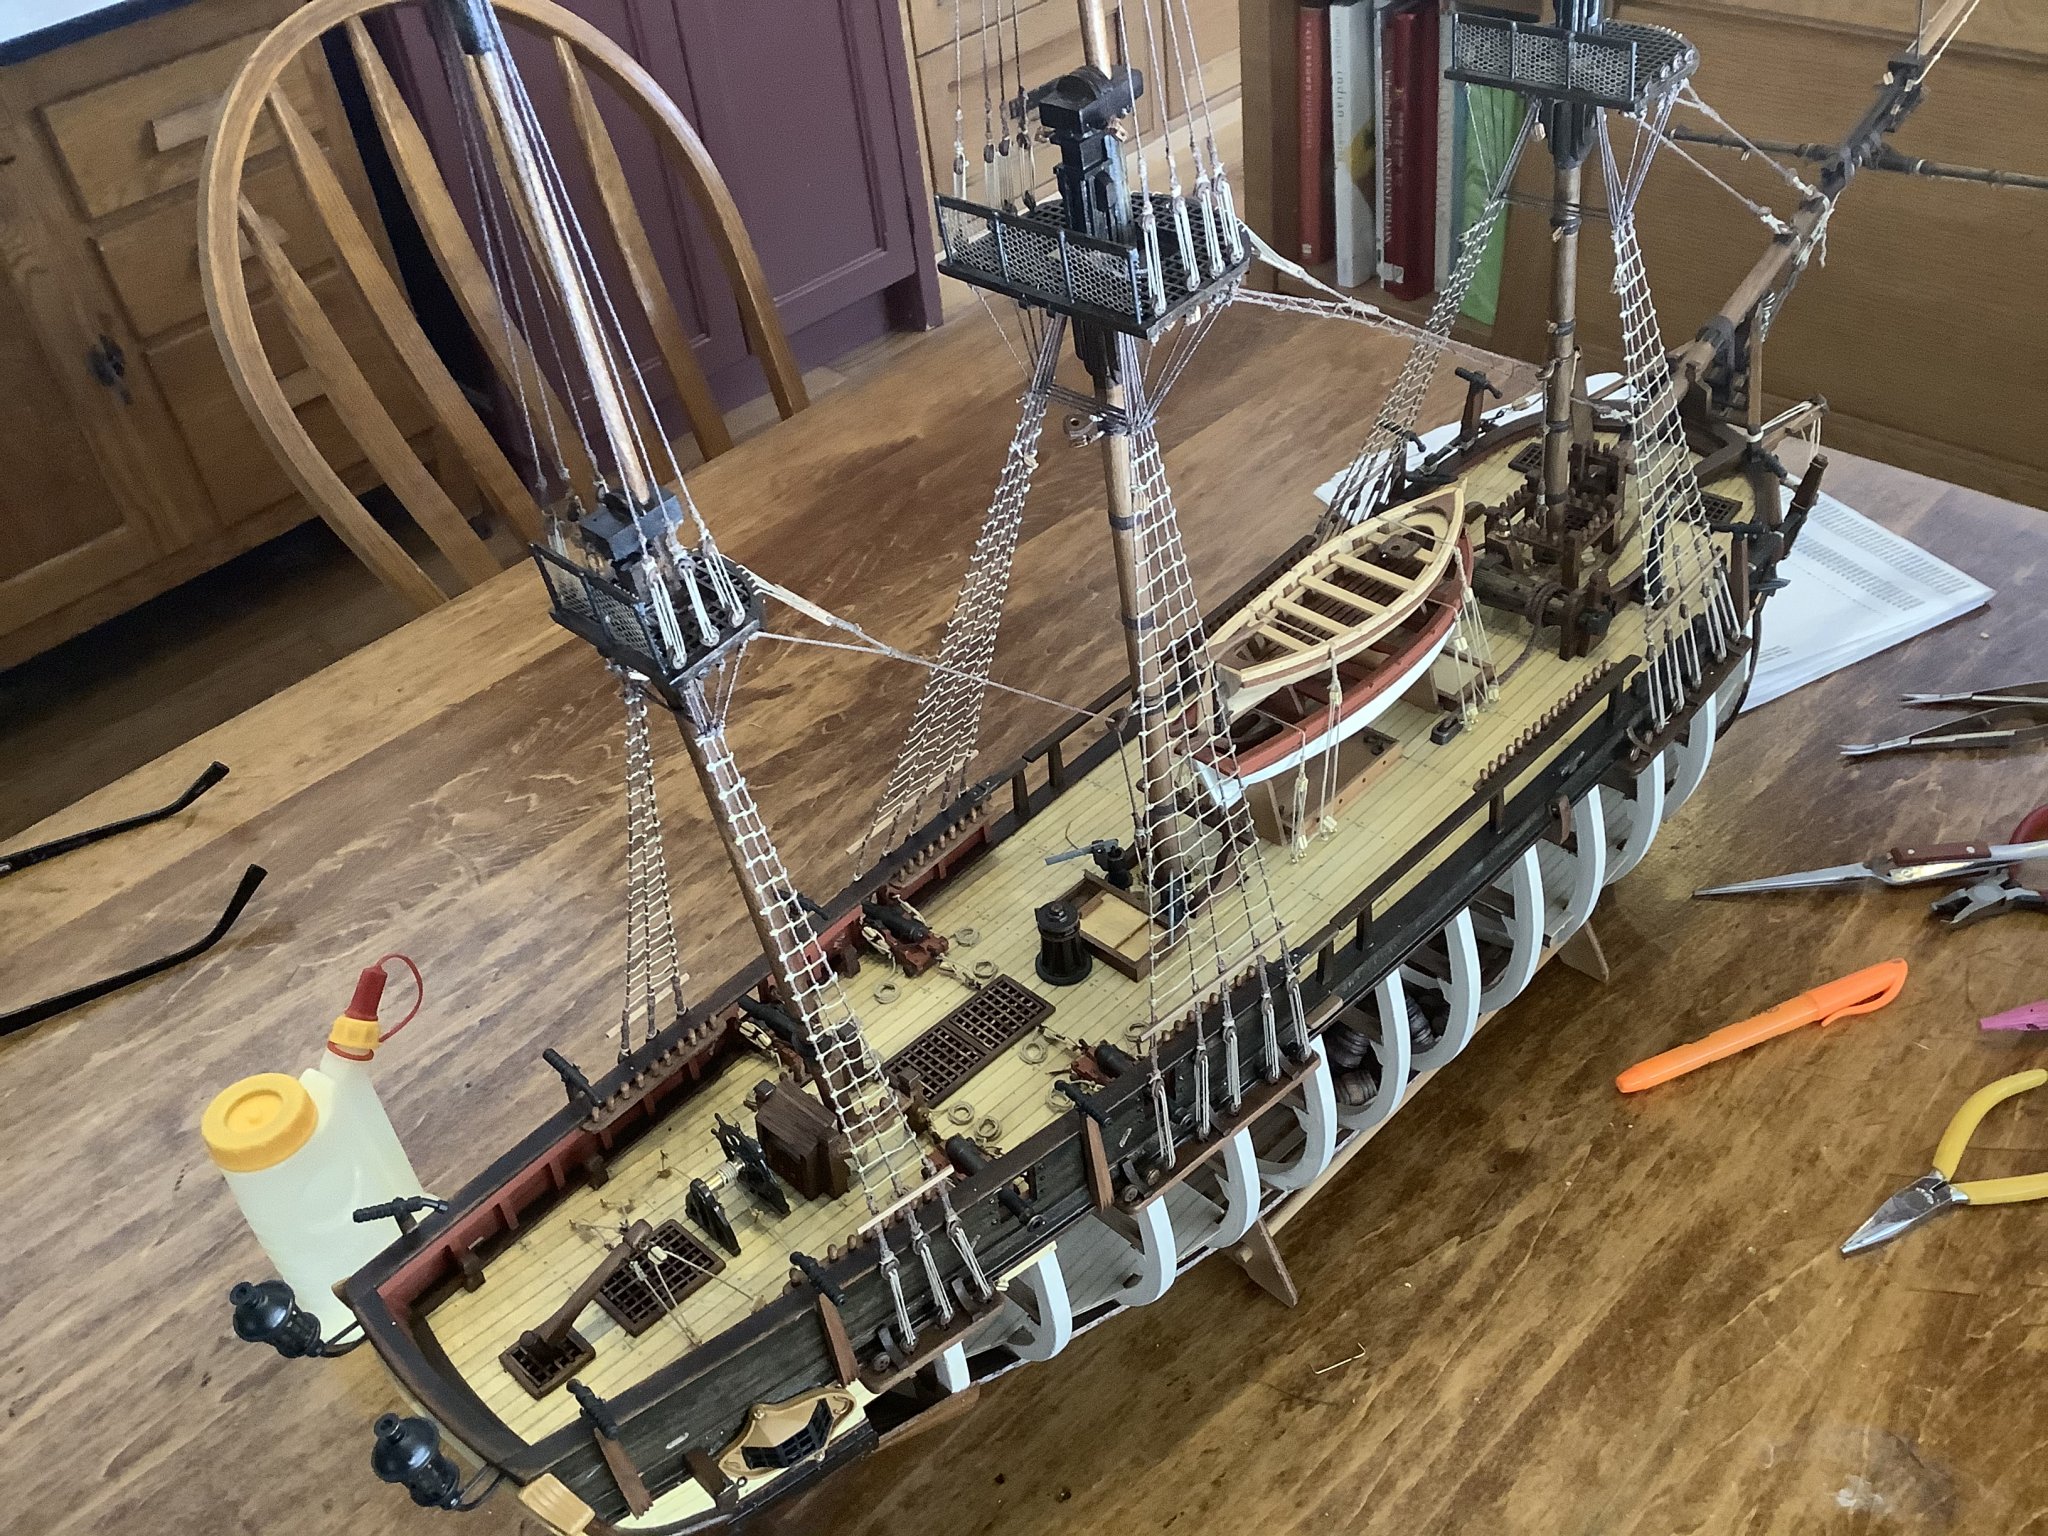
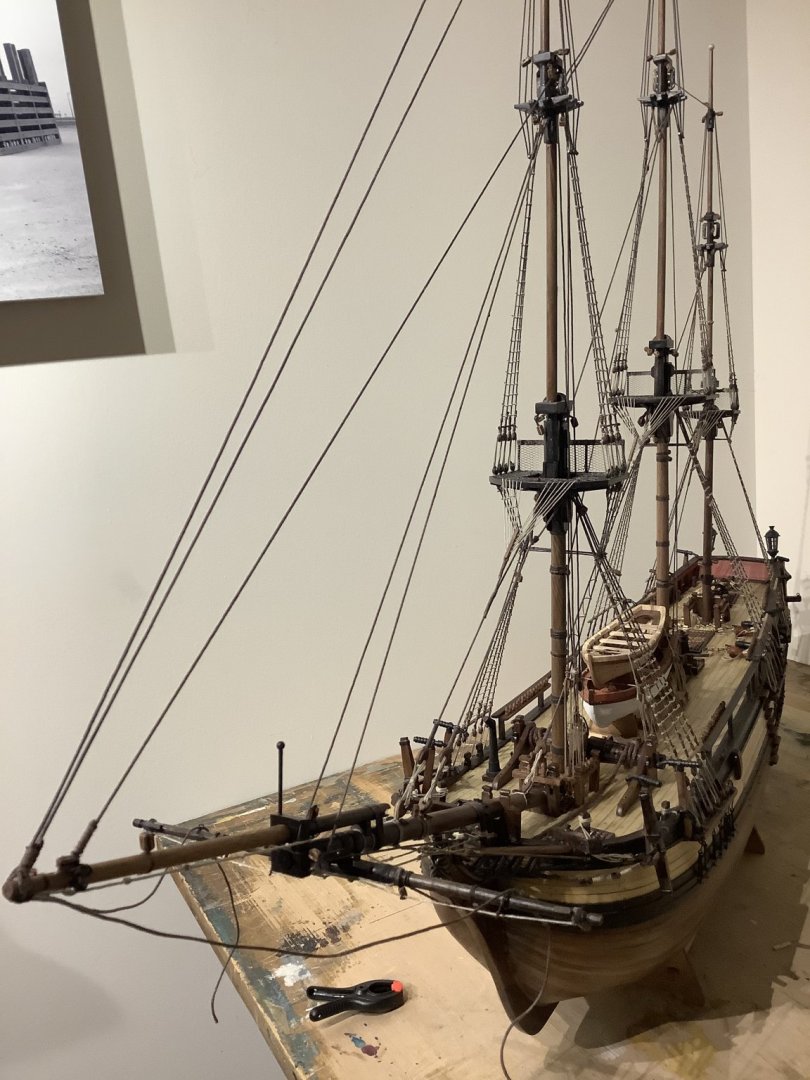
So that’s it for the fixed rigging - next step is the running rigging and sails, so I’ll have to head back to the wood shop, fire up the drill press and finish fashioning all the yards and attachments.


- 171 replies
-
- 9
-

-
- artesania latina
- bounty
- (and 1 more)
-
Thanks Yves, and everyone for the thumbs. Just about finished diagram 5 of the 21 Bounty rigging plans. Drawings are ok except for a few educated guesses that need to be made, and a few errors in numbering. Made a little more tedious by the fact there was no dark thread provided in the kit except for one small spool of 0.8mm brown that ran out immediately, so I’ve had to stain the natural stuff as I go along. Managed a fairly even taughtness of all the lines so far without any of the back stays in place yet, which is a good sign.
- 171 replies
-
- 8
-
-
- artesania latina
- bounty
- (and 1 more)
-
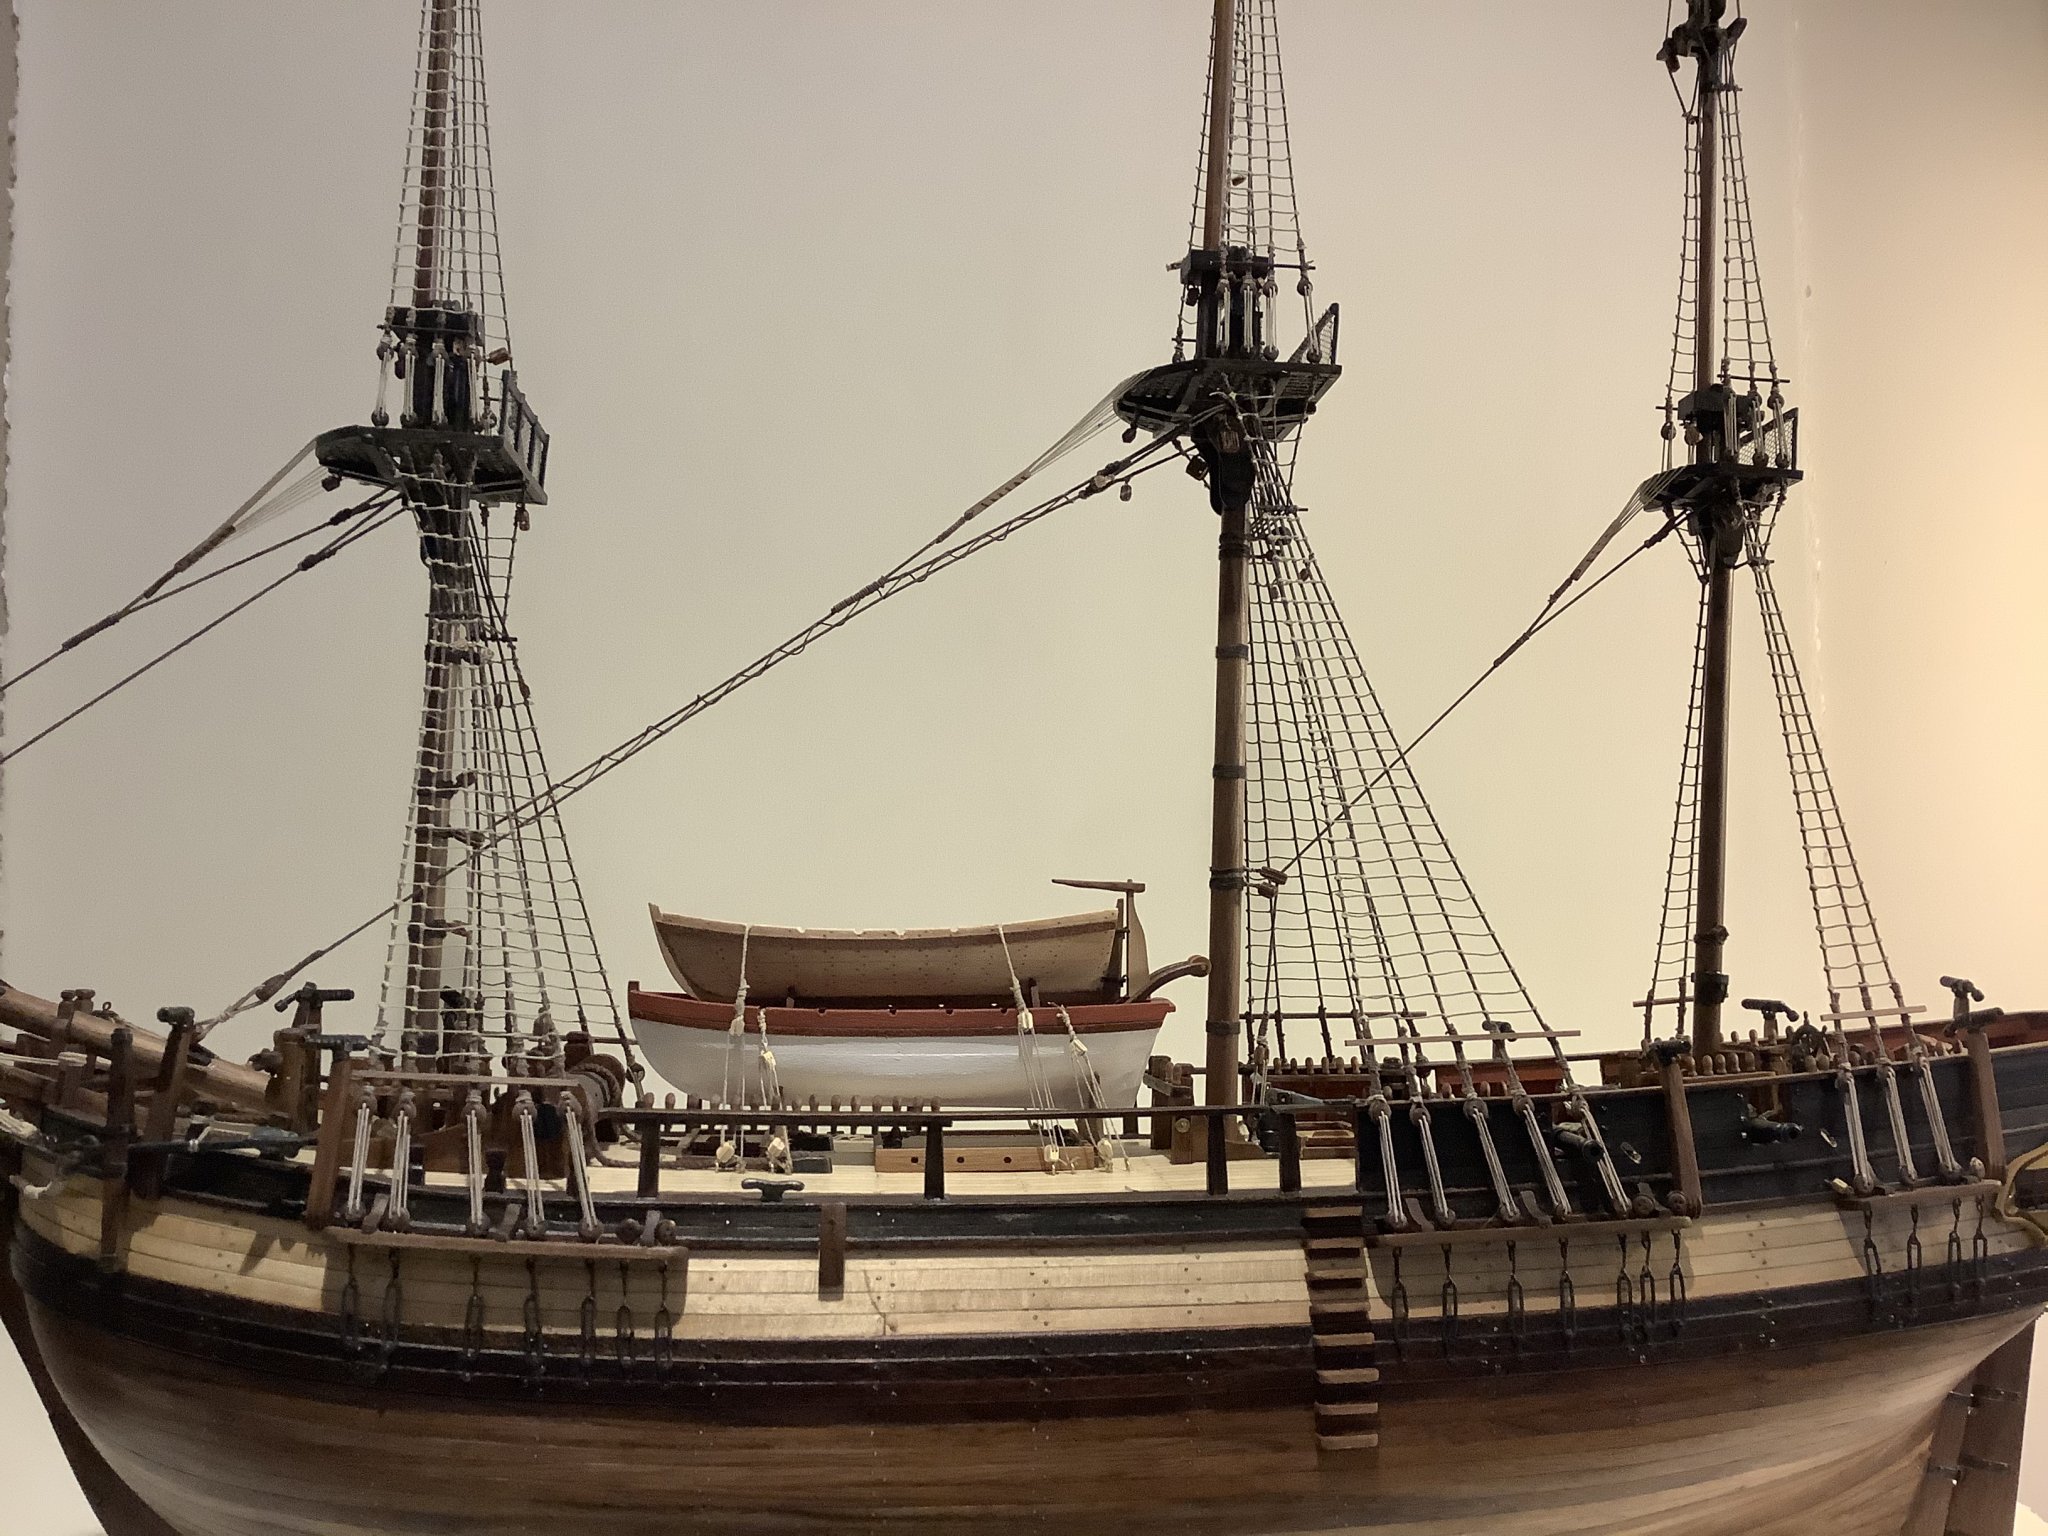
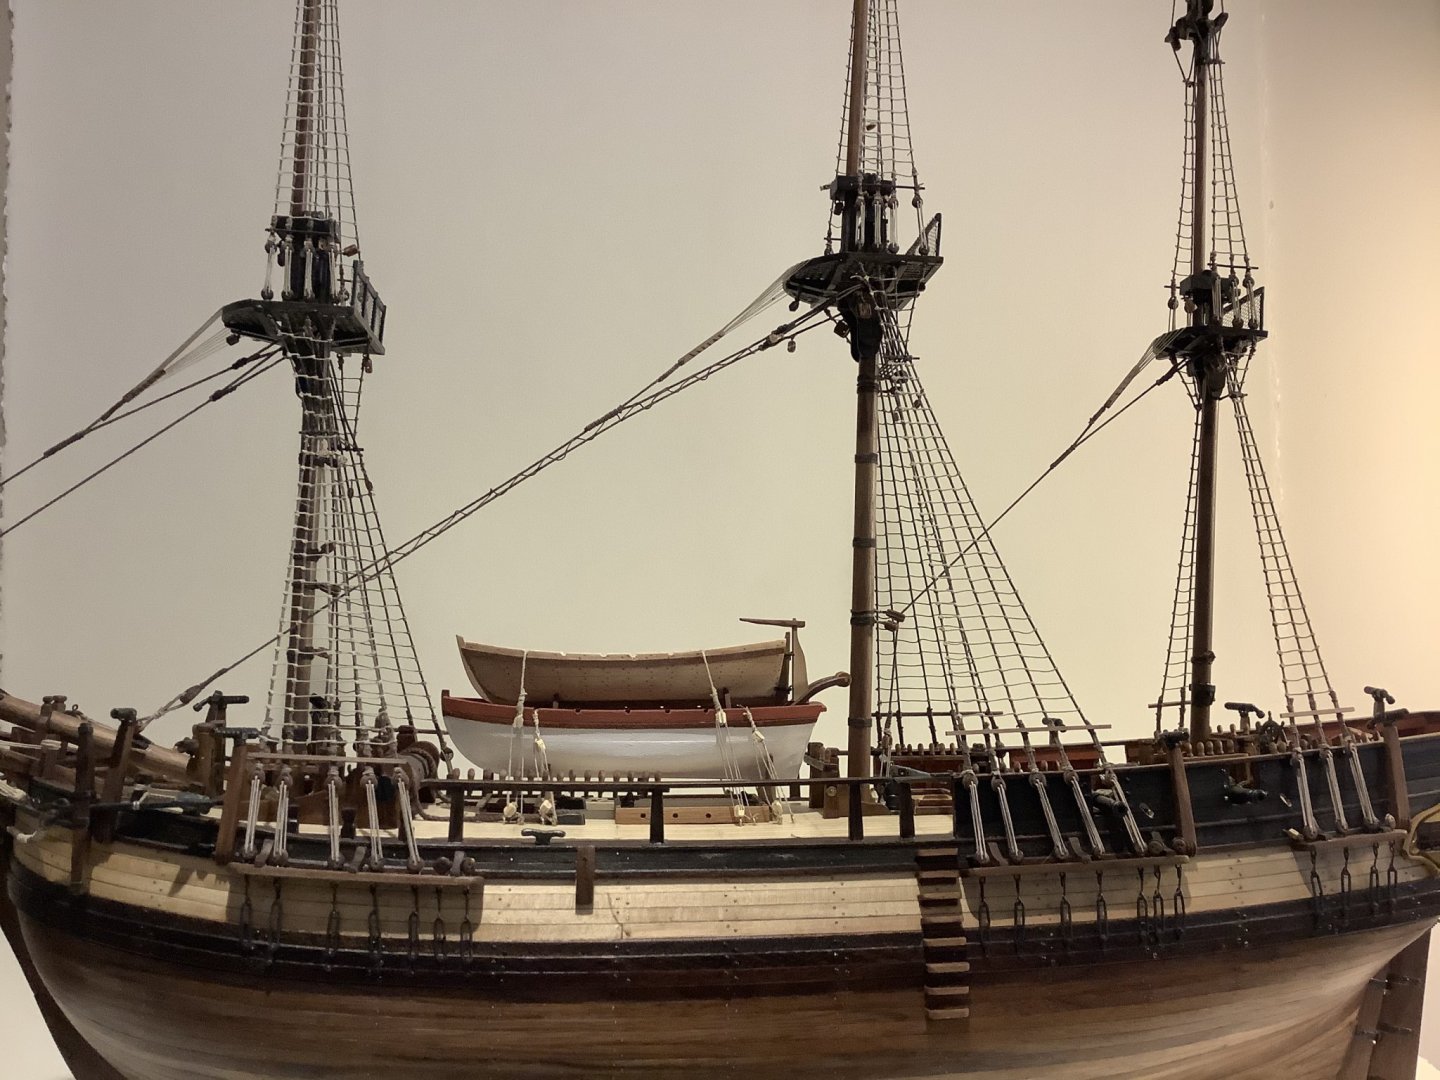
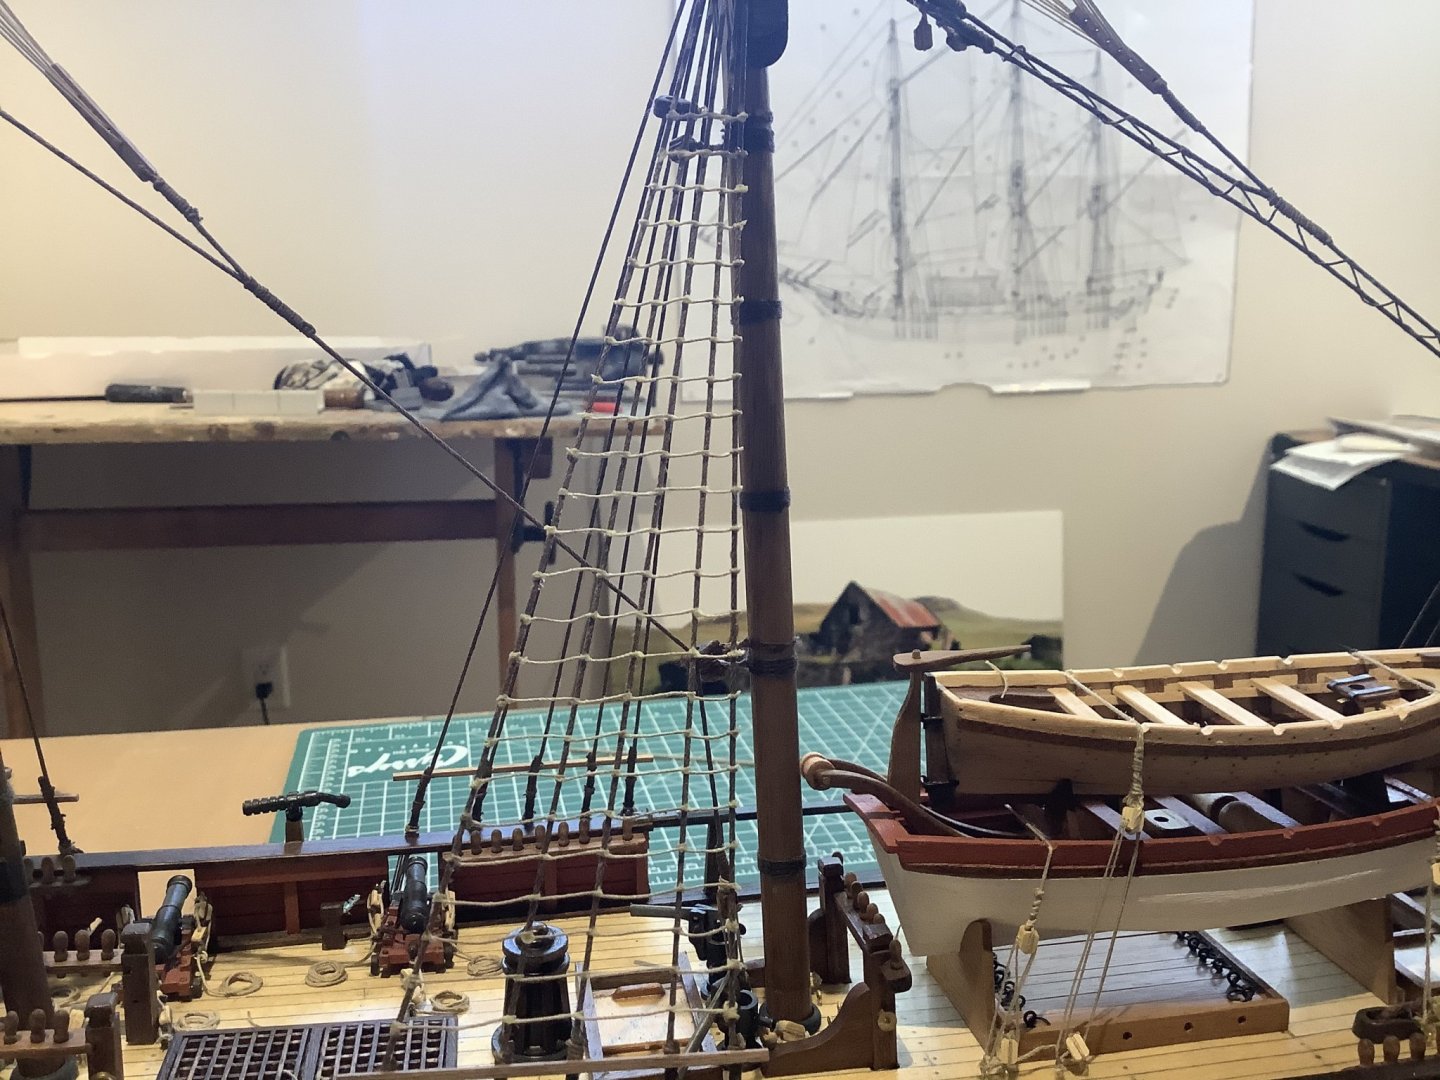
Just over 1200 knots later, the Bounty ratlines are all done.


- 171 replies
-
- 9
-
-
- artesania latina
- bounty
- (and 1 more)
-
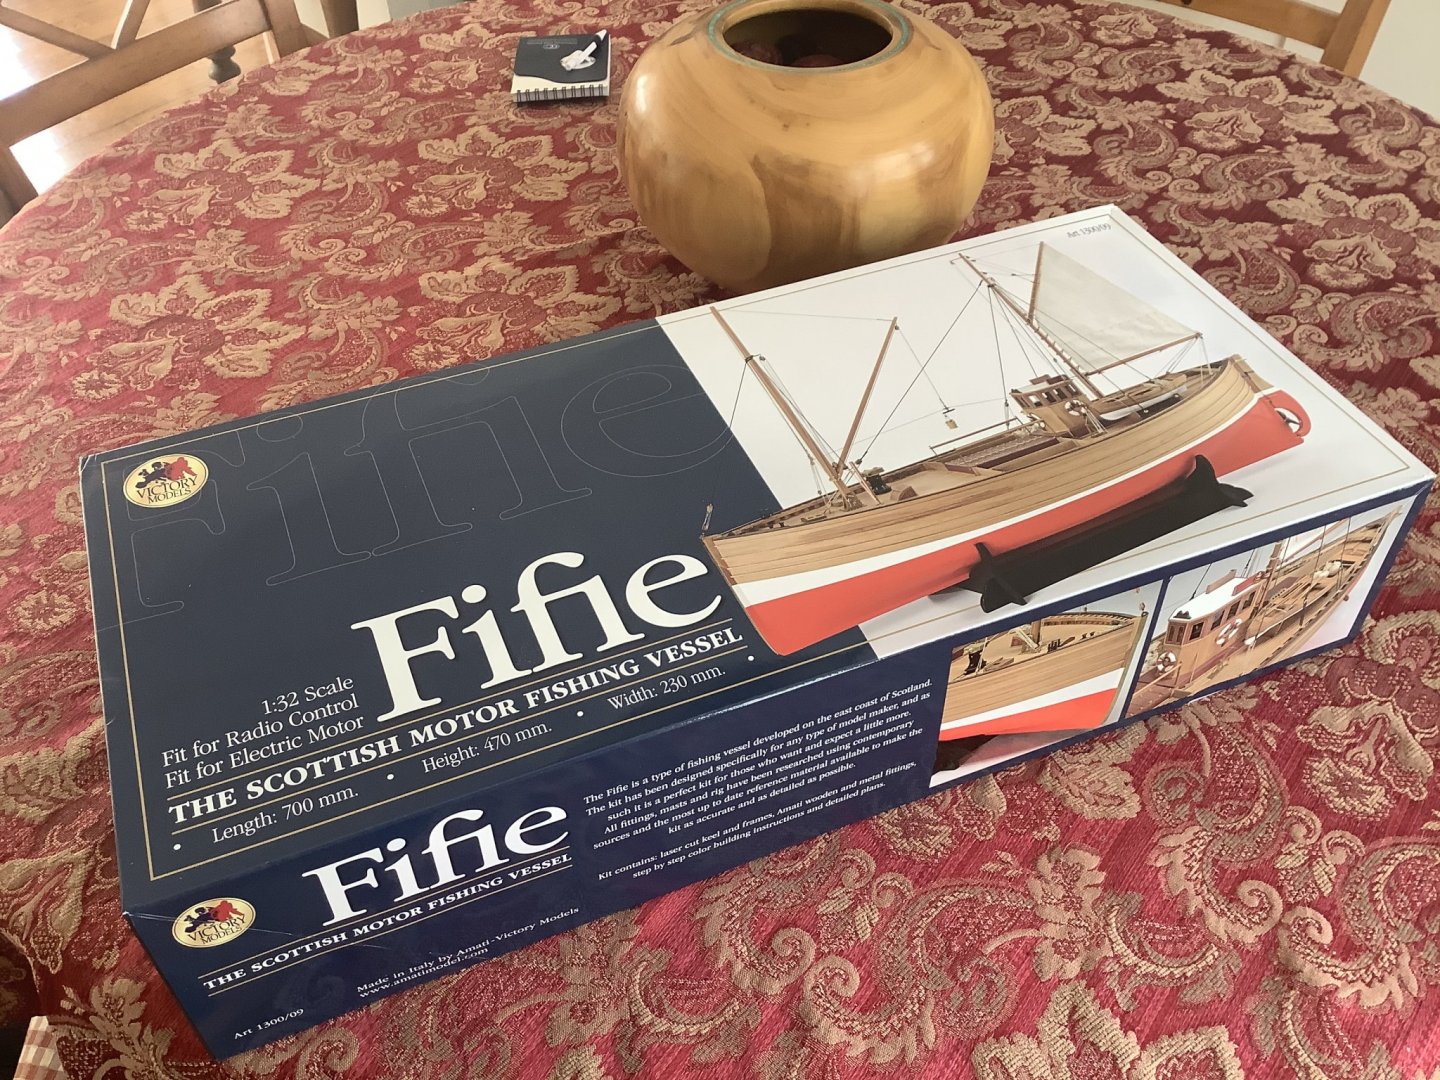
Thanks Sam...fixed part of rigging is well on the way to completion, just one more set of upper shrouds and the upper ratlines to go. Good job for a cold February here. My next project just arrived in the post... decided this lovely little fishing boat would be a nice change of pace after the rigours of the big Bounty. I’ll maybe do a build log if no one has done one by the time I start on the Fifie. Looks like a really nice and substantial kit.

- 171 replies
-
- 4
-
-
- artesania latina
- bounty
- (and 1 more)
-
Thanks Yves...means a lot coming from you... The shrouds are all in now, just starting the ratlines. I’ve tried different techniques, including clove hitches at the ends and at each shroud line. What I find is, it’s more important for final appearance sakes to keep from distorting the shrouds with all the ratlines install finagling - so now I just install a square knot one end and simple loop de loop over each shroud after. I squeeze each junction with tweezers to get the beeswax to hold everything, then a drop of glue. I can do them pretty quickly this way without messing up the shroud alignment. It’s also easier than a lot of knotwork given I only have two functioning fingers to work with. The most critical part of ratlines though is selecting the appropriate brand of scotch to get you through this strangely satisfying but interminable process. I’ve just opened a bottle of Te’ Bheag which seems effective. The bottle label also coincidentally gave me inspiration for my next project, which I ordered from ages of sail last night.

- 171 replies
-
- 6
-
-
- artesania latina
- bounty
- (and 1 more)
-
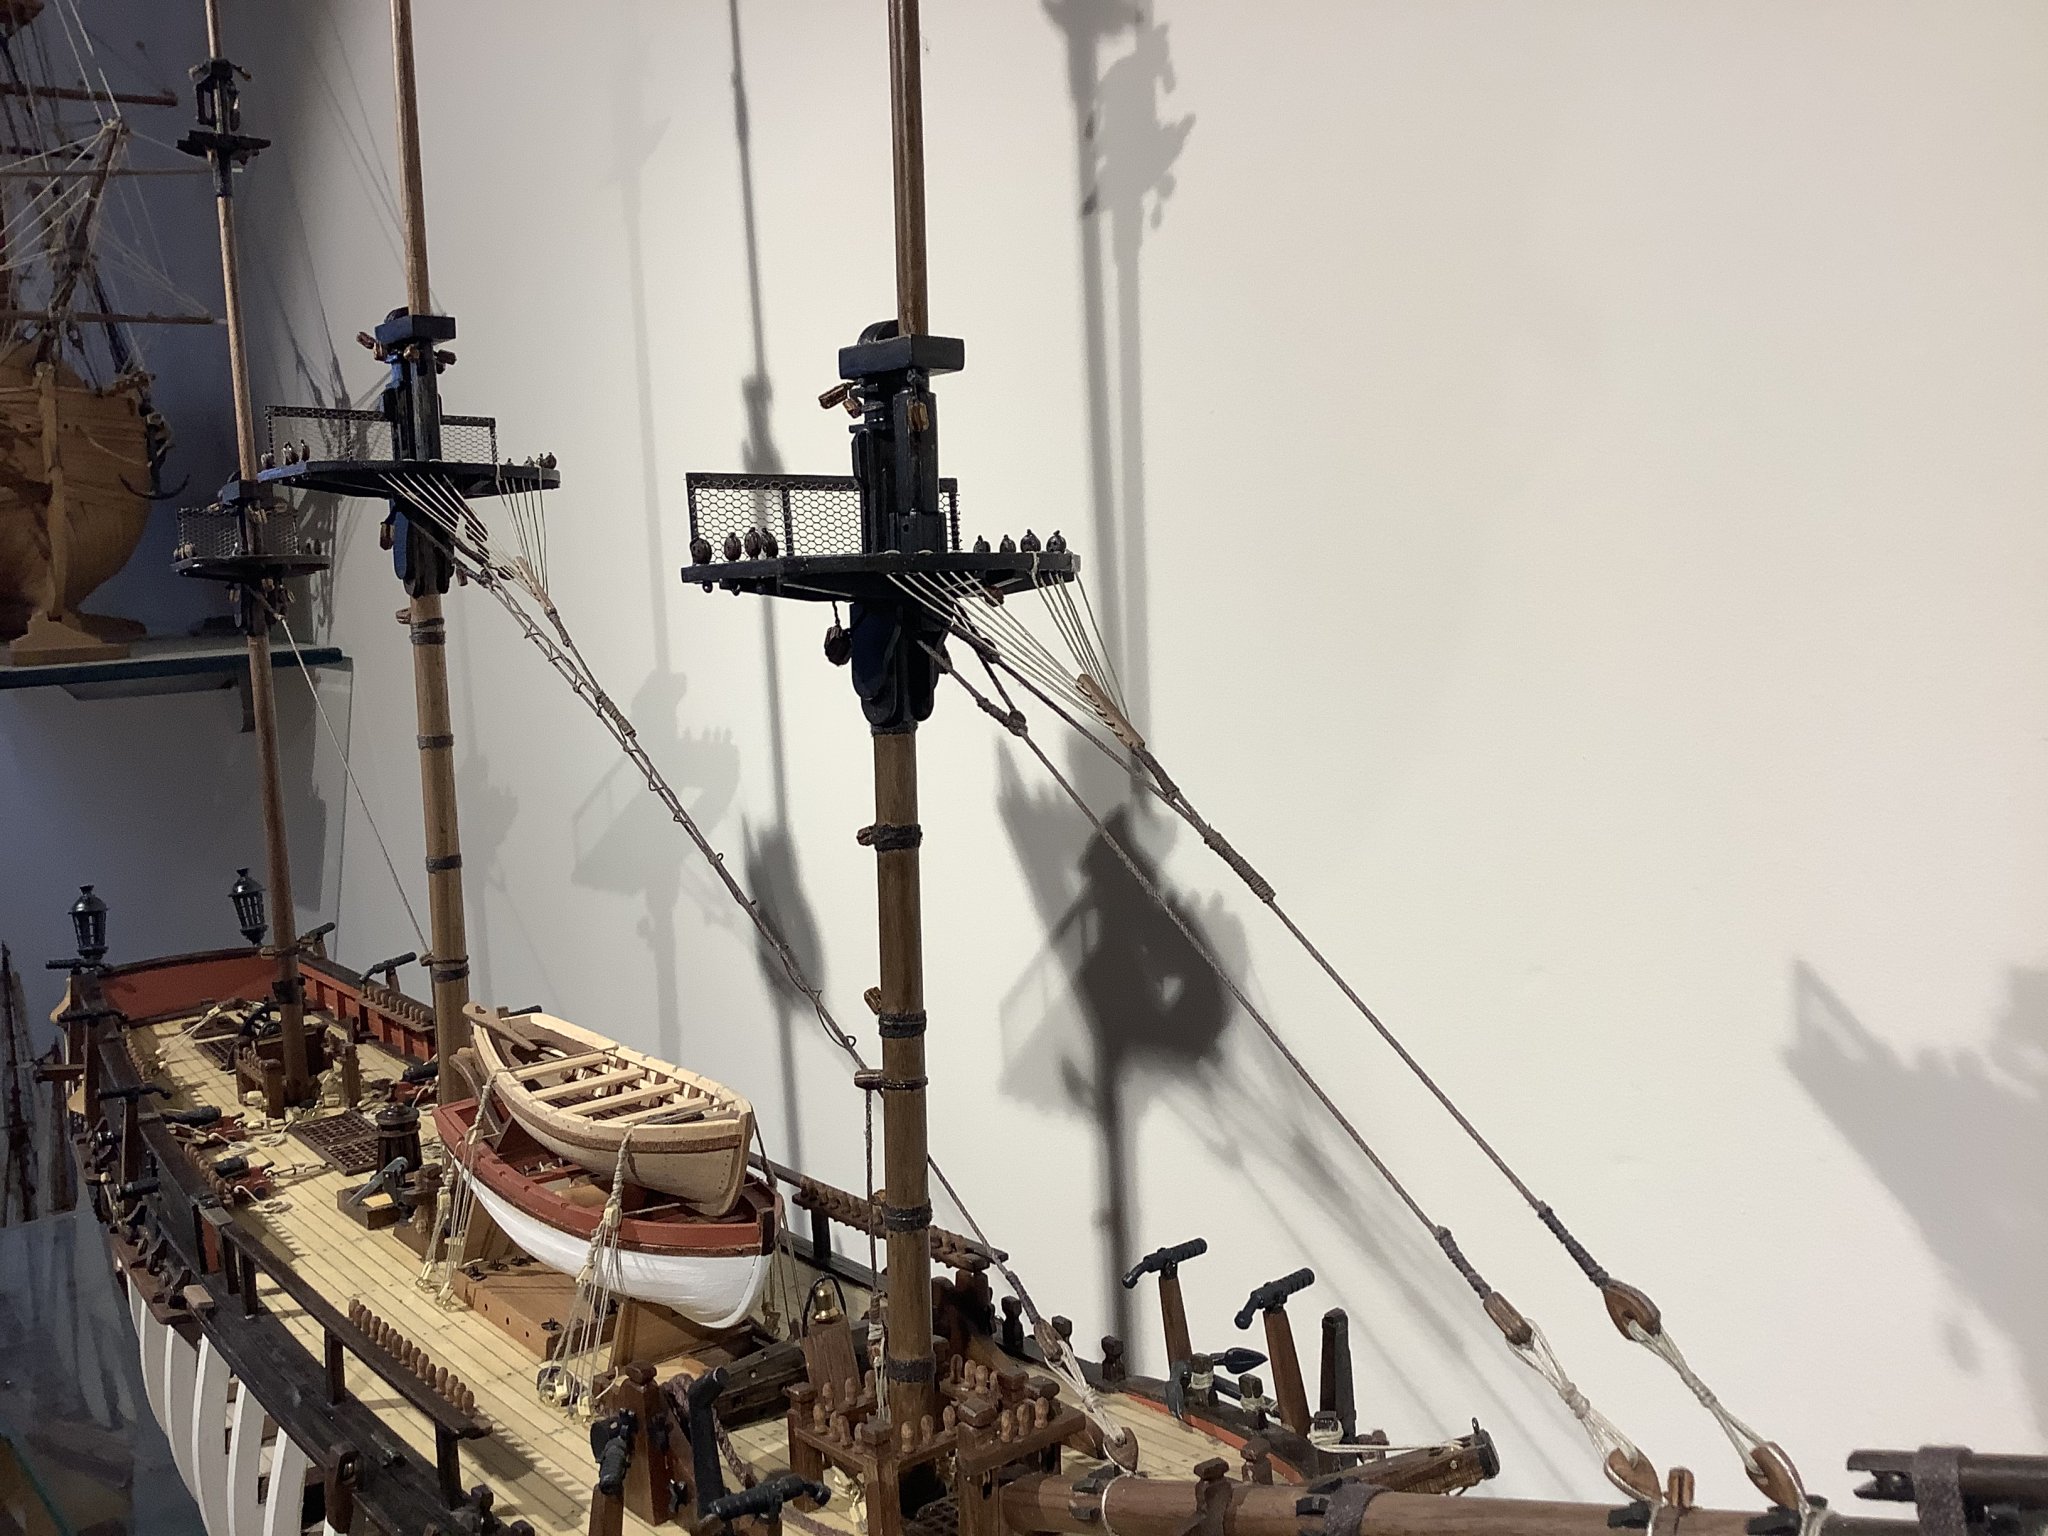
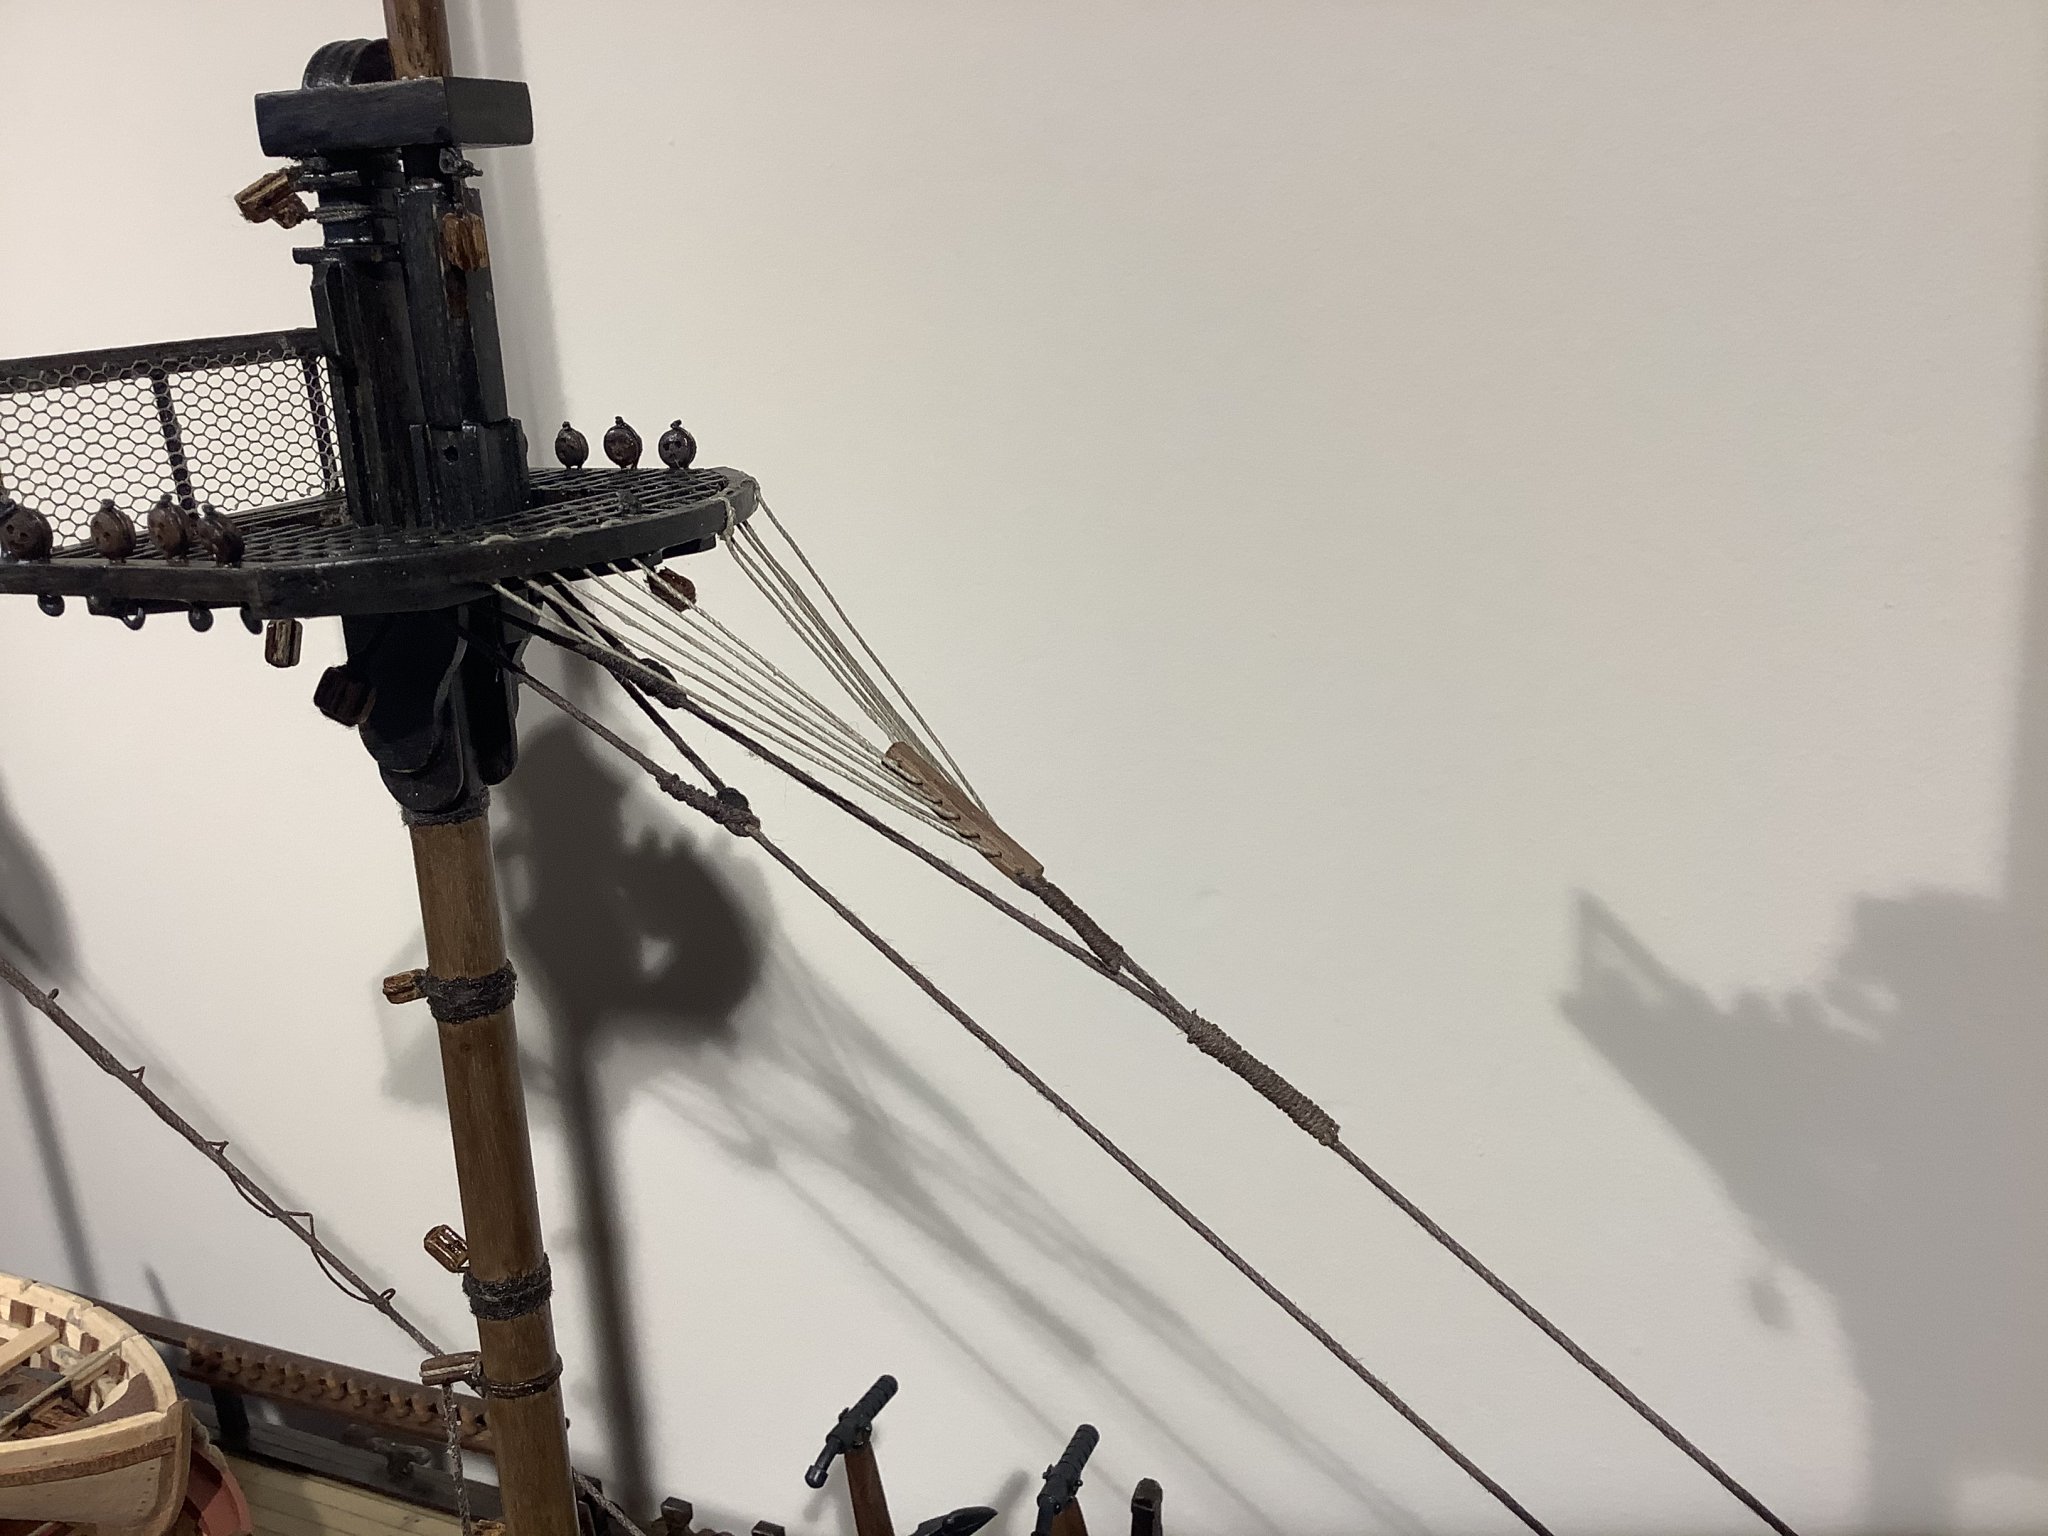
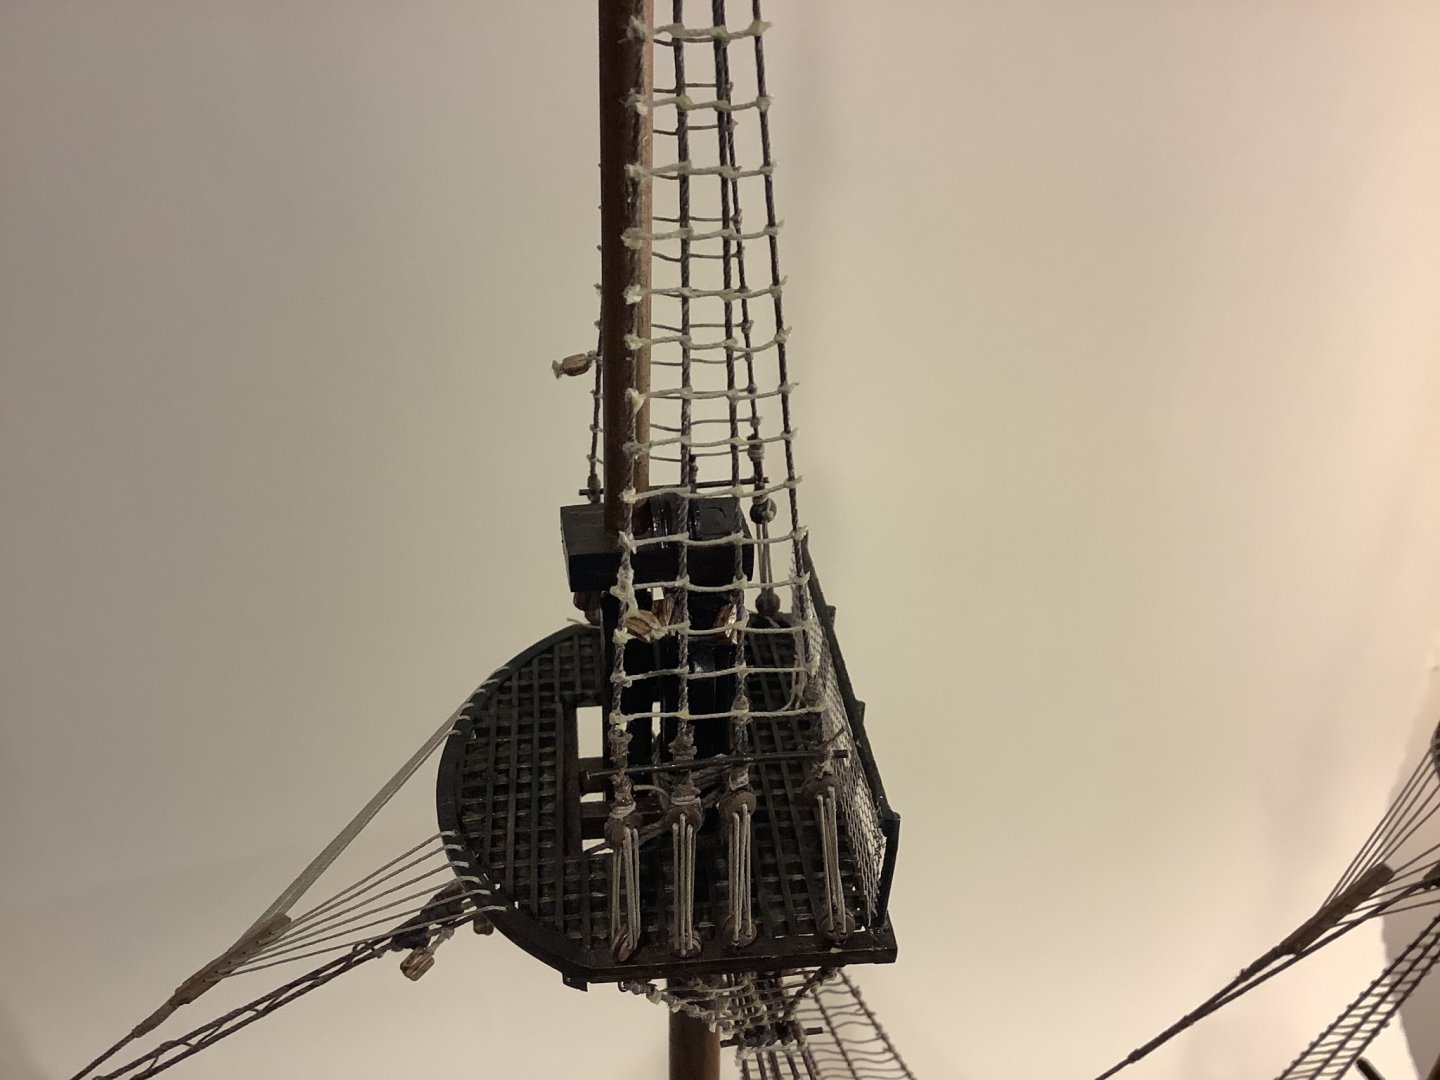
Thanks Matt. It is, too bad AL is out of business. The Bounty is a big build to work on, almost a metre long when finished. Overall it’s a nice bit of kit. Ok, I knew there was something off...so third times a charm, now these are.... finally.... proper crows feet I think. Hey, every build can be a bit of a relearning process. Piece of cake once you realize how it’s done.
- 171 replies
-
- 6
-
-
- artesania latina
- bounty
- (and 1 more)
-
Thanks Mort... I’ll try that. I made a proper job of the second crows feet at the mainmast. After doing it I realized I’d made a hash of the first one on the foremast, so Ive now pulled that mess off and redone it properly. Much better.


- 171 replies
-
- 8
-
-
- artesania latina
- bounty
- (and 1 more)
-
Done...sewed the lacing through the stays, seemed the simplest approach rather than knots. Should look ok once I tighten it up and a drop of glue on the joints.
- 171 replies
-
- 7
-
-
- artesania latina
- bounty
- (and 1 more)
-
Fun with the Bounty rigging...there is supposed to be a zigzag lacing between the two stays on the mainmast...tried two times to tie a zigzag pattern using 0.15mm thread between the two 0.80mm stays using simple knots...very difficult to get it looking consistent so pulled it all back off for now. There’s got to be a clever way to do this - if anyone has done it and has a method please let me know.
- 171 replies
-
- 7
-
-
- artesania latina
- bounty
- (and 1 more)
-
Yay the first line of real rigging is aboard! Foremast stay. Have to be honest, wouldn’t mind subcontracting a few hundred hours of Bounty rigging to some elves.

- 171 replies
-
- 6
-
-
- artesania latina
- bounty
- (and 1 more)
-
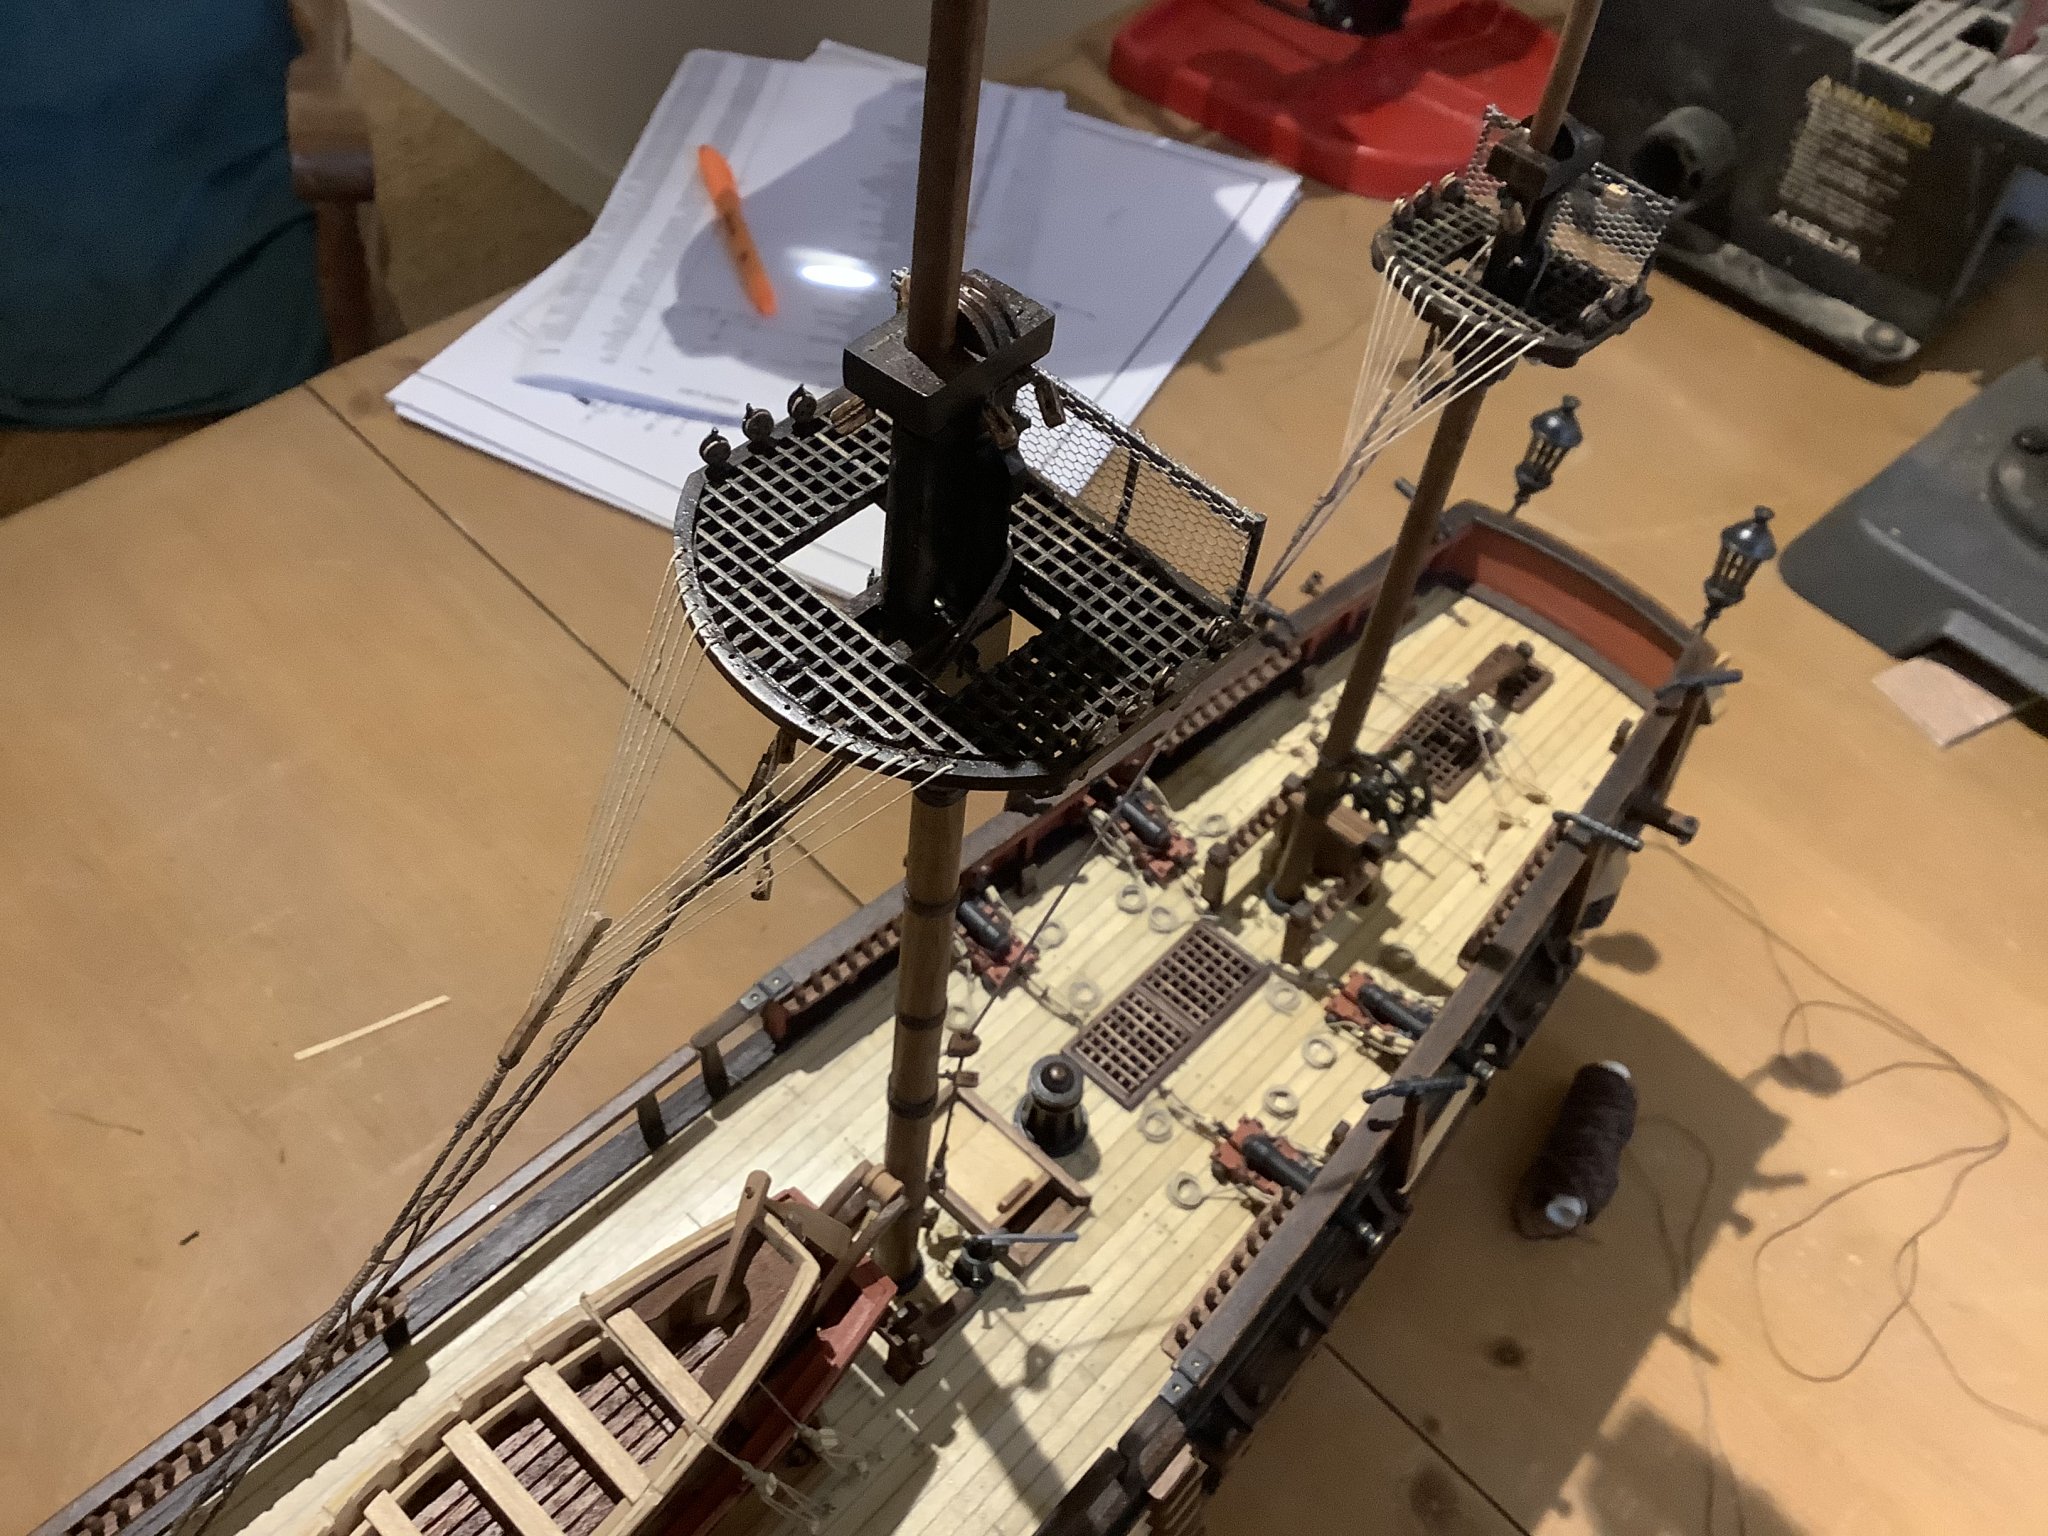
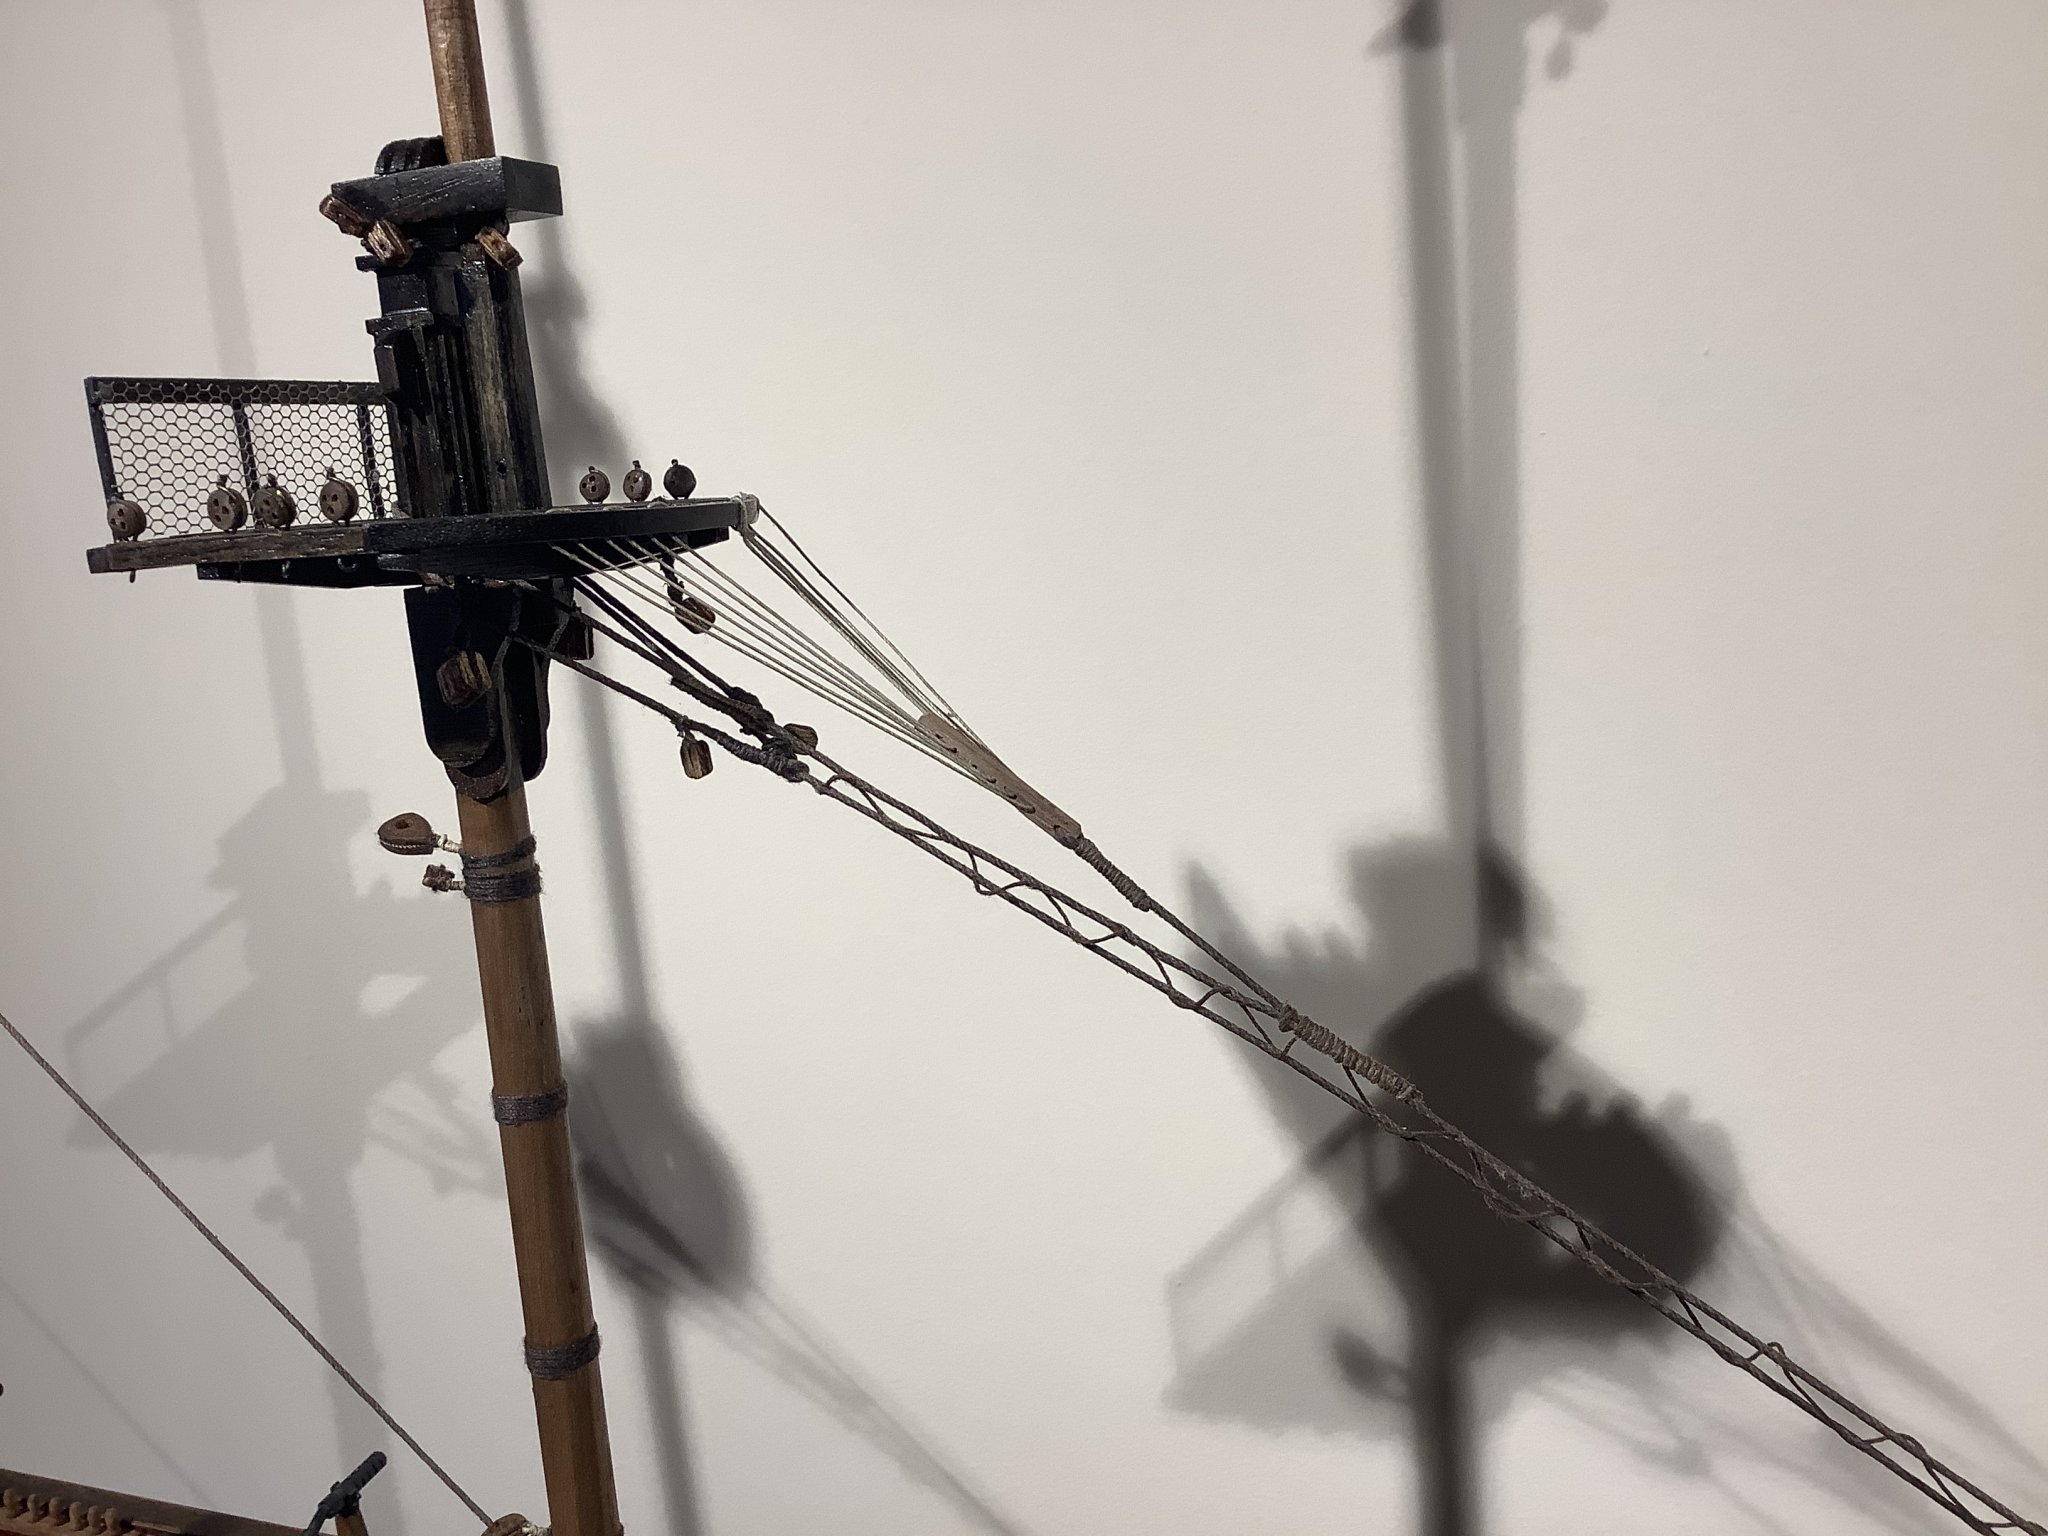
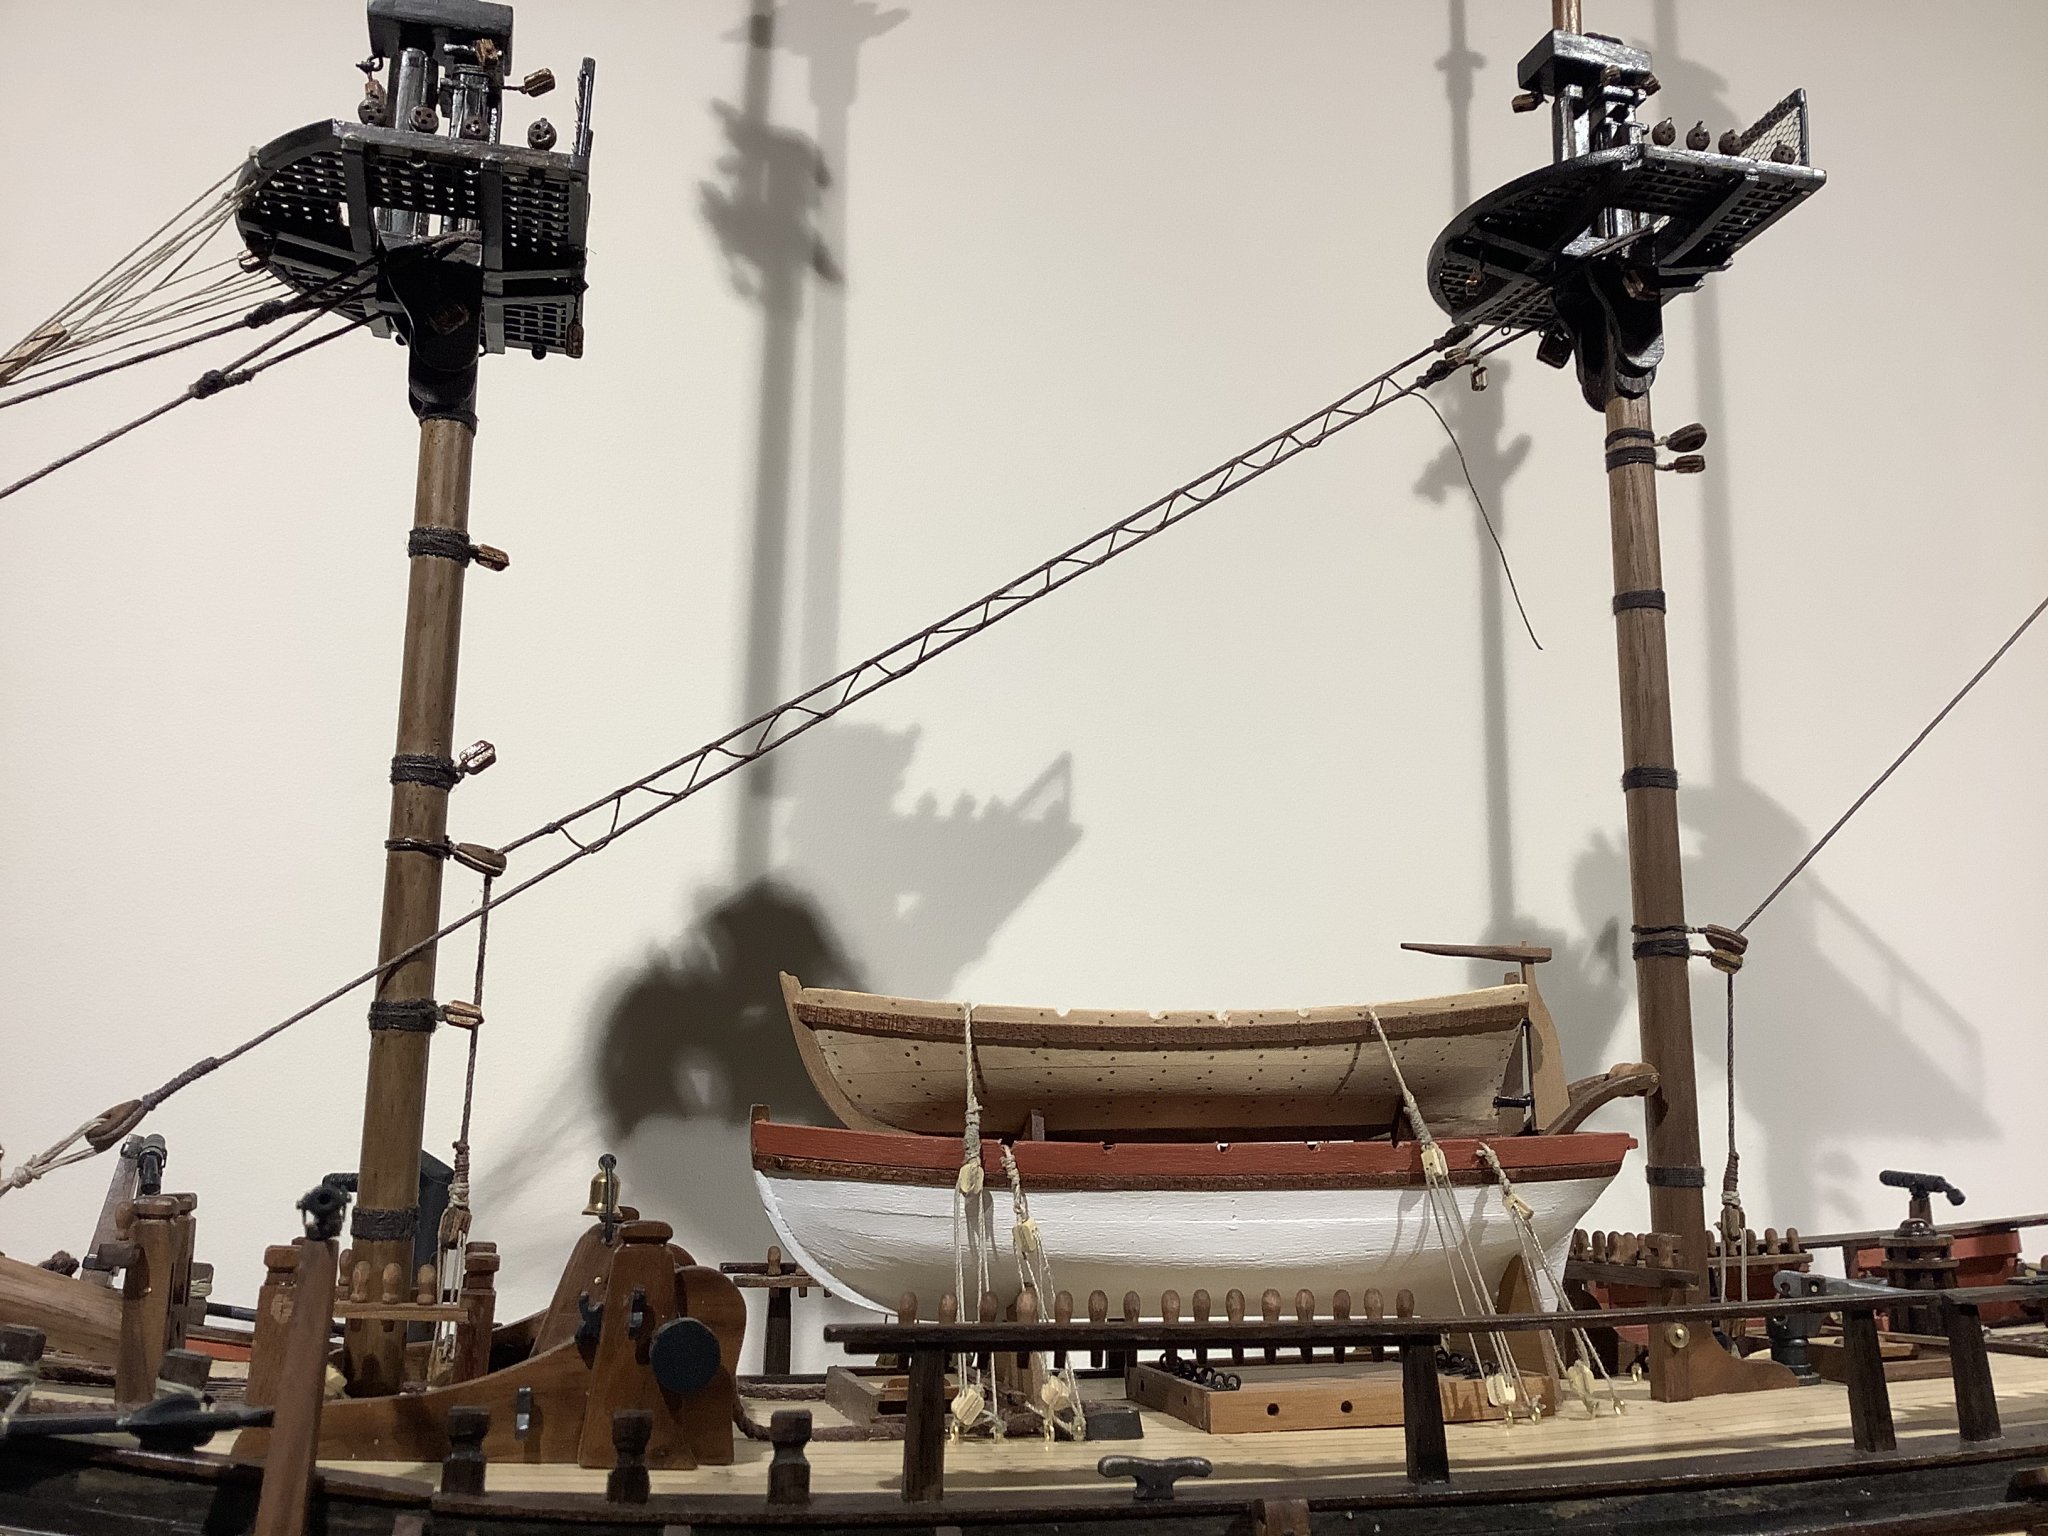
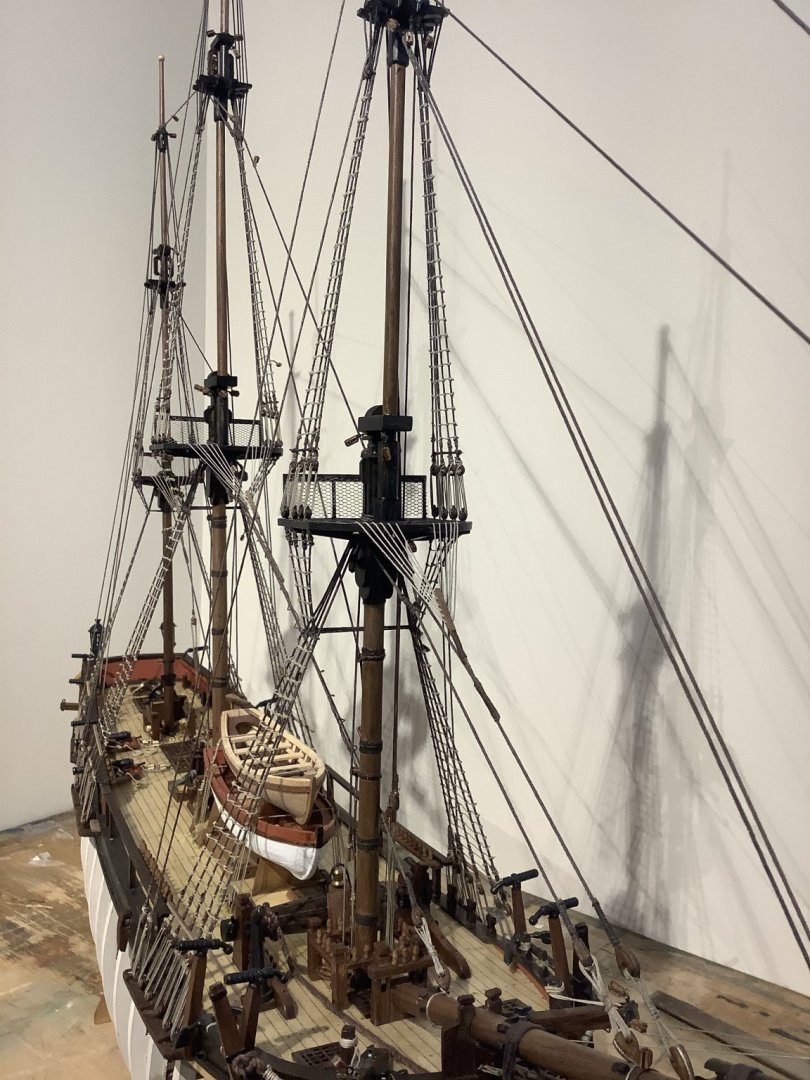
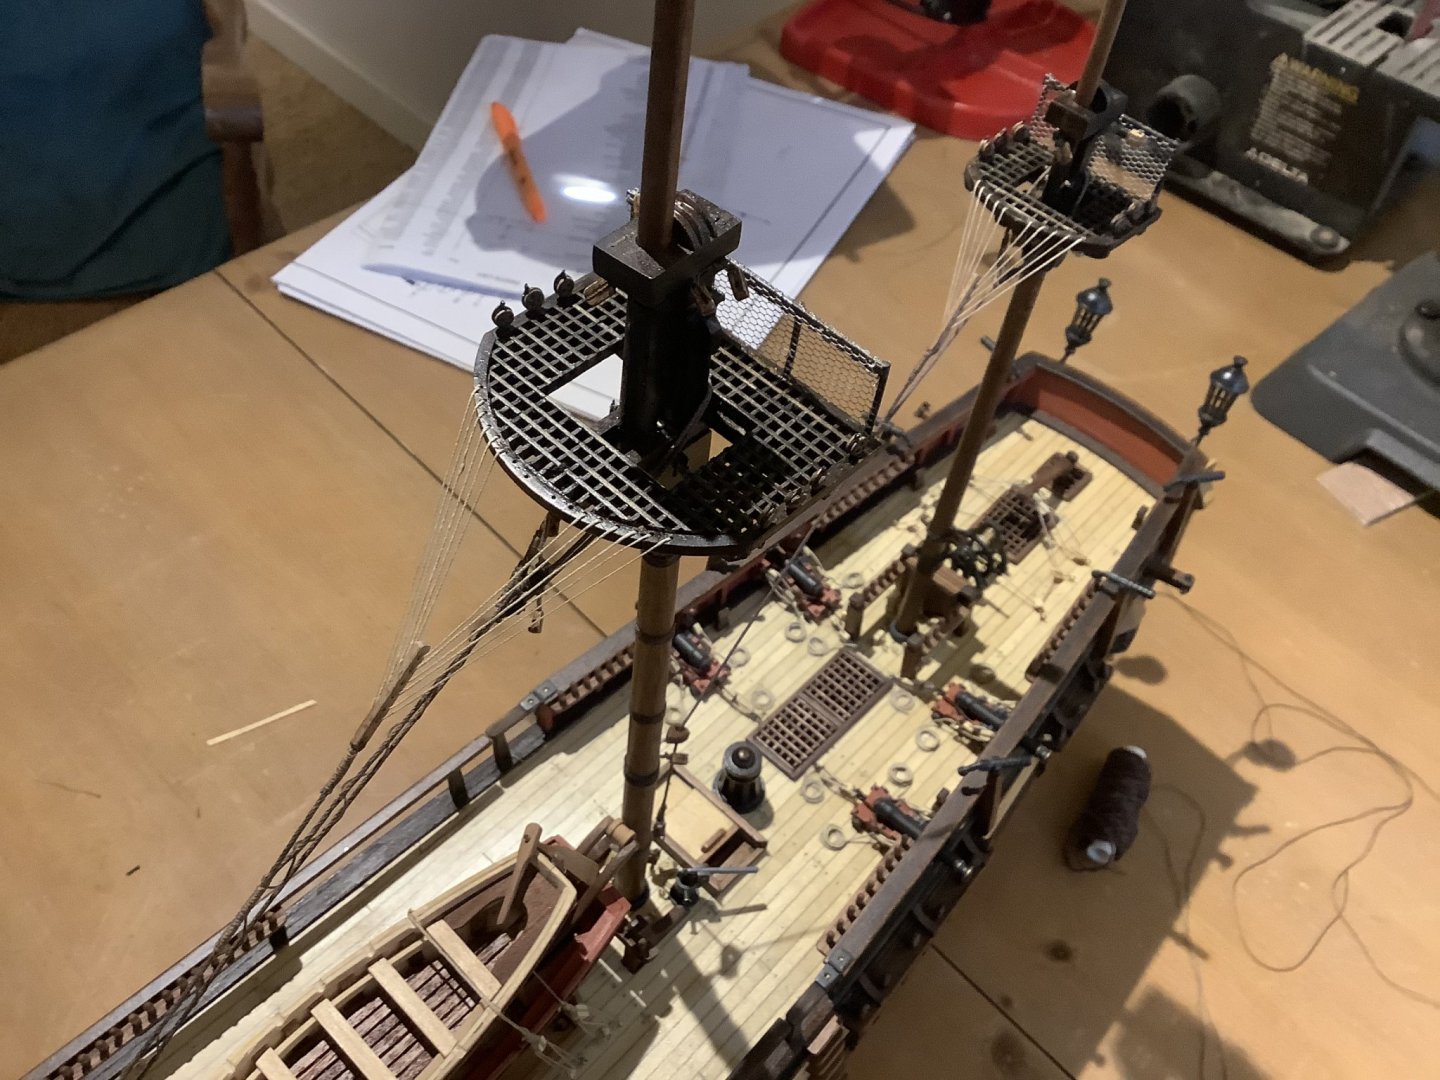
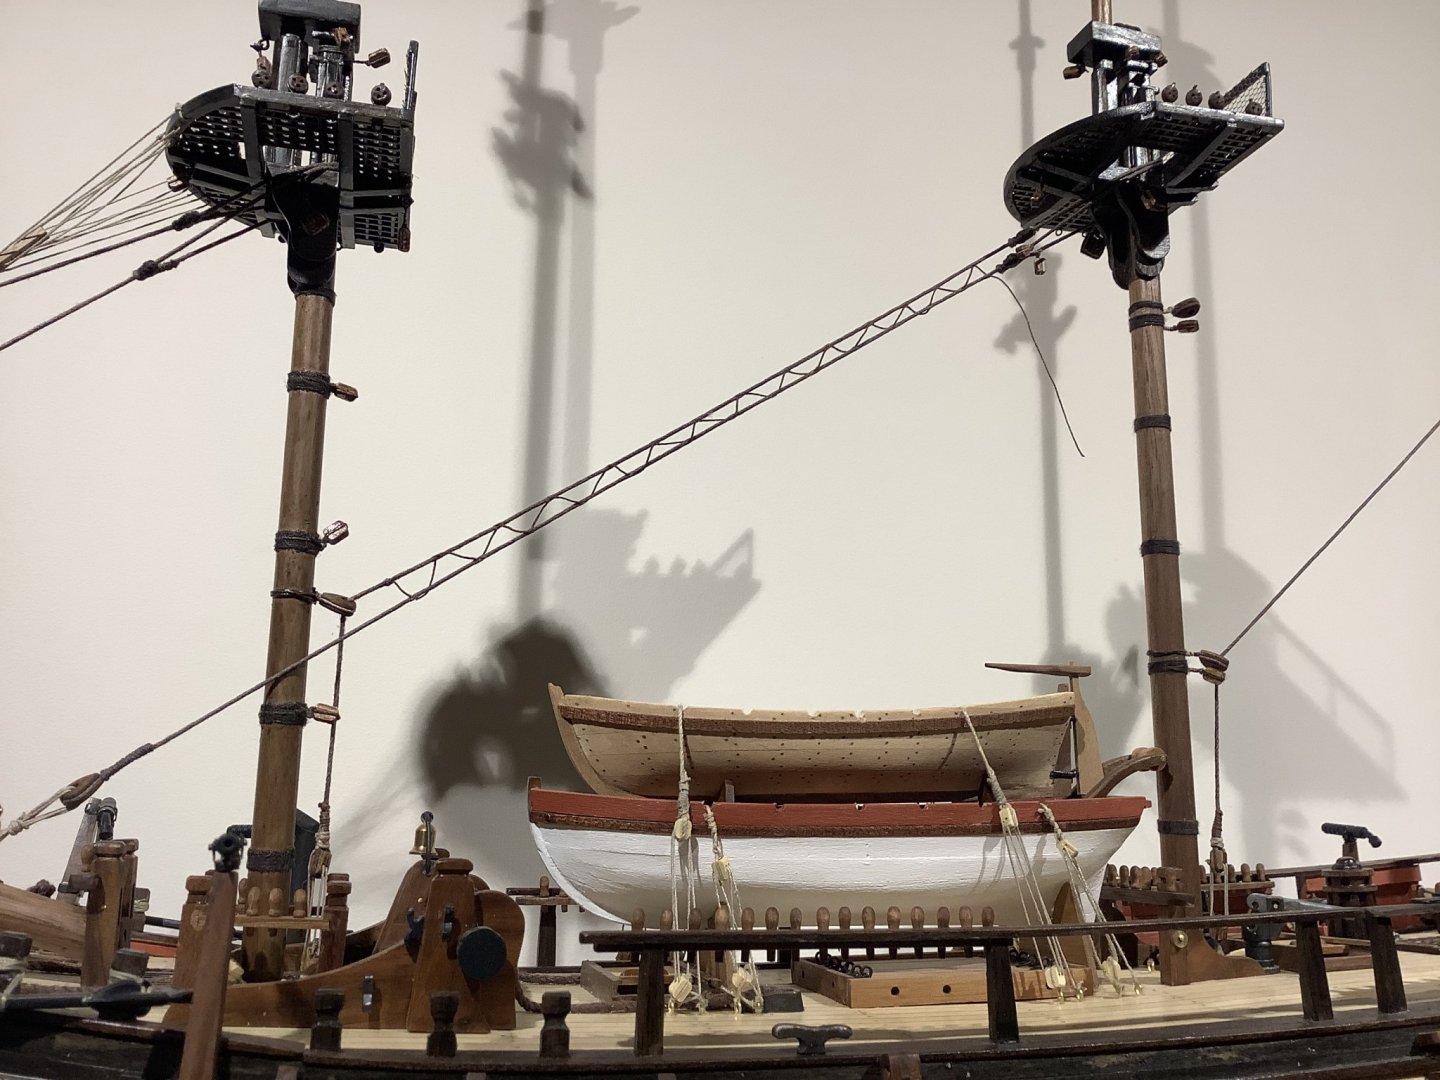
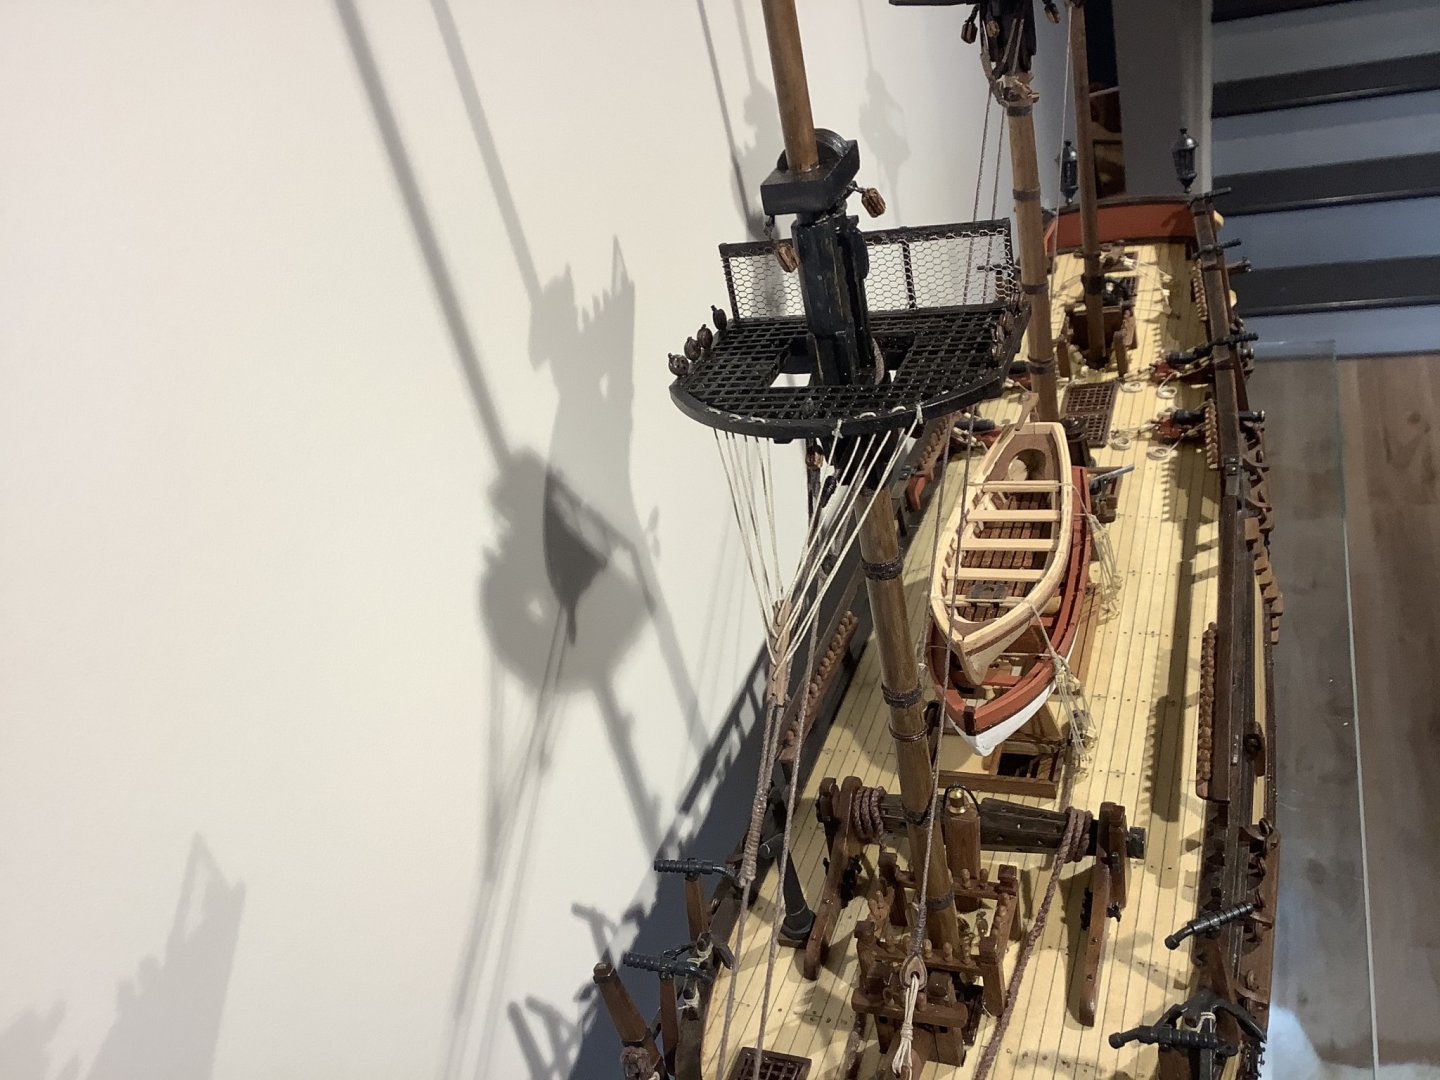
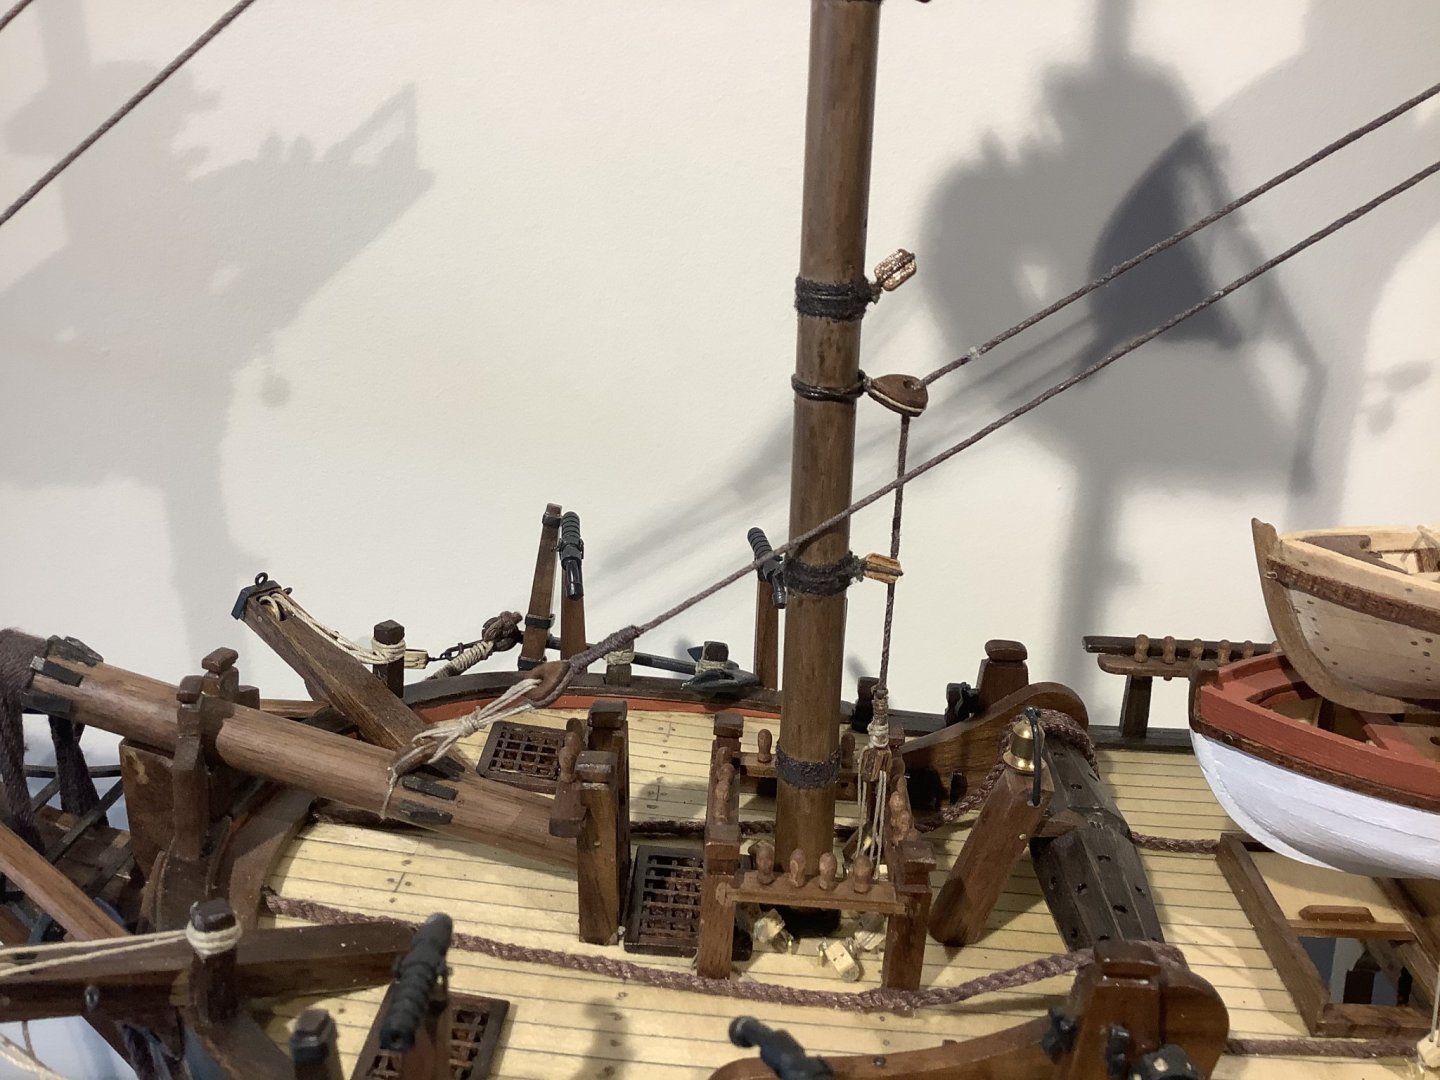
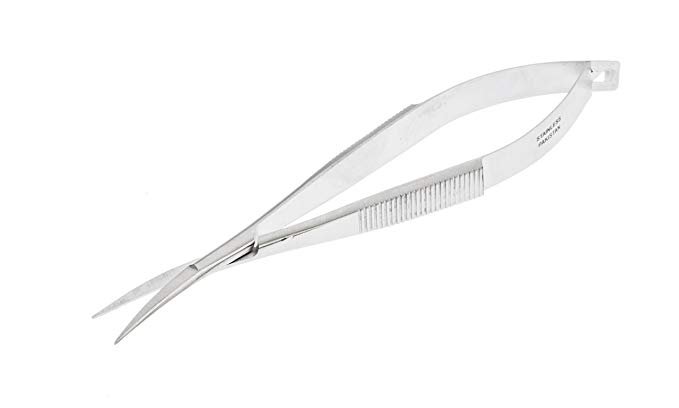
So the masts are all fitted and now finally installed with all the block and tackle attached. Nothing too earth shattering to report as the work is sort of repetitive. The most time consuming task hasbeen deciphering the AL mast drawing. I create a lead for the blocks by tying the block in a basic square knot, twisting the open leads a few times and rubbing a little CA on the twist before tying off the blocks to the mast. I rubbed the blocks with a little chestnut stain to make them look a little more in keeping with the rest of the ship’s patina. Got some of those cheap opthalmic scissors on amazon to snip thread, and I have to say they are going to be invaluable for the rigging, much better than the razor blade or nail clippers I had been using. Now on to some of the fixed rigging and ratlines - I’m going to fashion and install the yards and booms later.
- 171 replies
-
- 7
-
-
- artesania latina
- bounty
- (and 1 more)
-
kit review 1:32 Fifie – The Scottish Motor Fishing Vessel by Amati
Tim Moore replied to James H's topic in REVIEWS: Model kits
James: just wanted to say thanks for the work you do in your reviews of this and other kits - your consistent and straightforward approach is exceedingly helpful. -
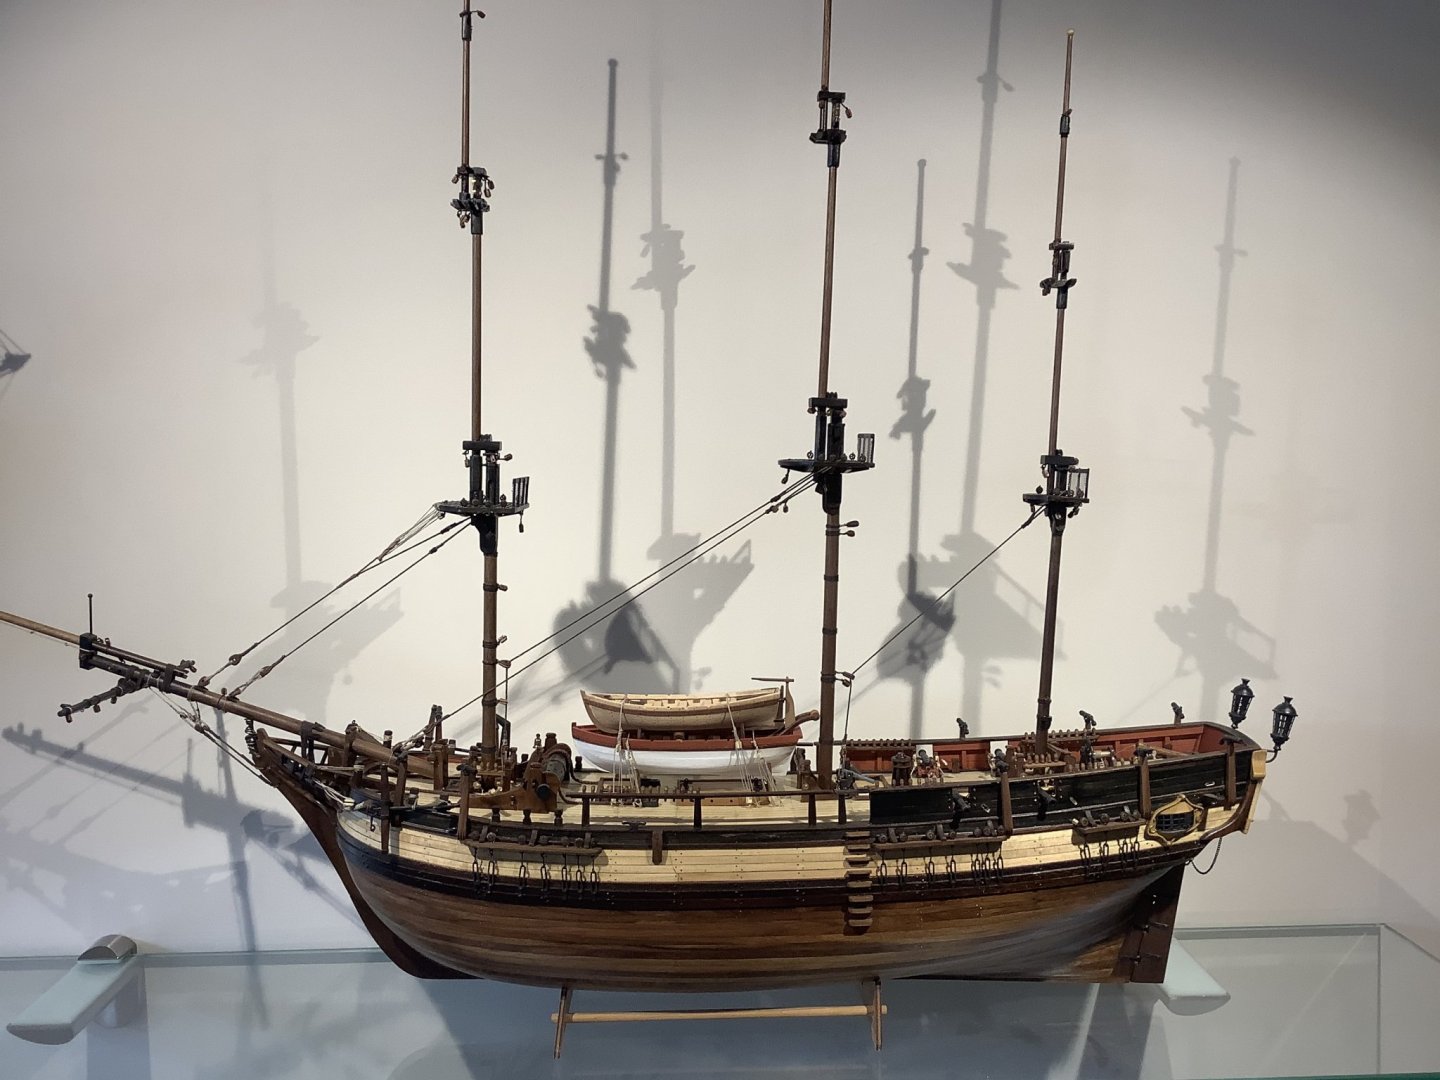
Bonehead move while finishing the masts...I had finished the foremast some time ago and forgot I used an acrylic satin finish since I was working inside the house...just finished the main and mizzenmast and forgot about that, and used my usual oil based finish. The oil deepens the walnut tone so end result was the foremast was way lighter than the others. looked like completely different wood. Thought about sanding it all down and starting over but I mixed a few drops of ebony+chestnut stain I had lying around with some of the oil varnish and applied it over the foremast and it seems to have matched it up with the others so the difference isnt noticeable. 5 minute job as opposed to hours which is sort of my strategic approach to ship modeling and life in general. Perfect is the enemy of good.

- 171 replies
-
- 6
-
-
- artesania latina
- bounty
- (and 1 more)
-
Thanks for all the likes...it’s about this time on a build that I start thinking about my next one...Right now I’m thinking about something at 1:35 scale like the Amati America’s cup yacht Endeavour, or perhaps a fishing or working boat like a tug or icebreaker at similar larger scale if there is anything out there. Never done an Amati, don’t know about their plan quality as compared to AL? Also not sure where I can get their kits up here. I usually support local, but honestly the Canadian hobby shops seem ridiculously overpriced. I’ve also always wanted to do the 1:200 HMS Hood given the history of that I’ll fated battleship. Having seen Yves fabulous rendition of the U Boat going on here though I’m not sure I can live up to the challenge of plastic and the bar he’s set. Don’t know about you but typically I like to alternate between completely different types and vintages of ships in my builds.
- 171 replies
-
- 1
-
-
- artesania latina
- bounty
- (and 1 more)
-
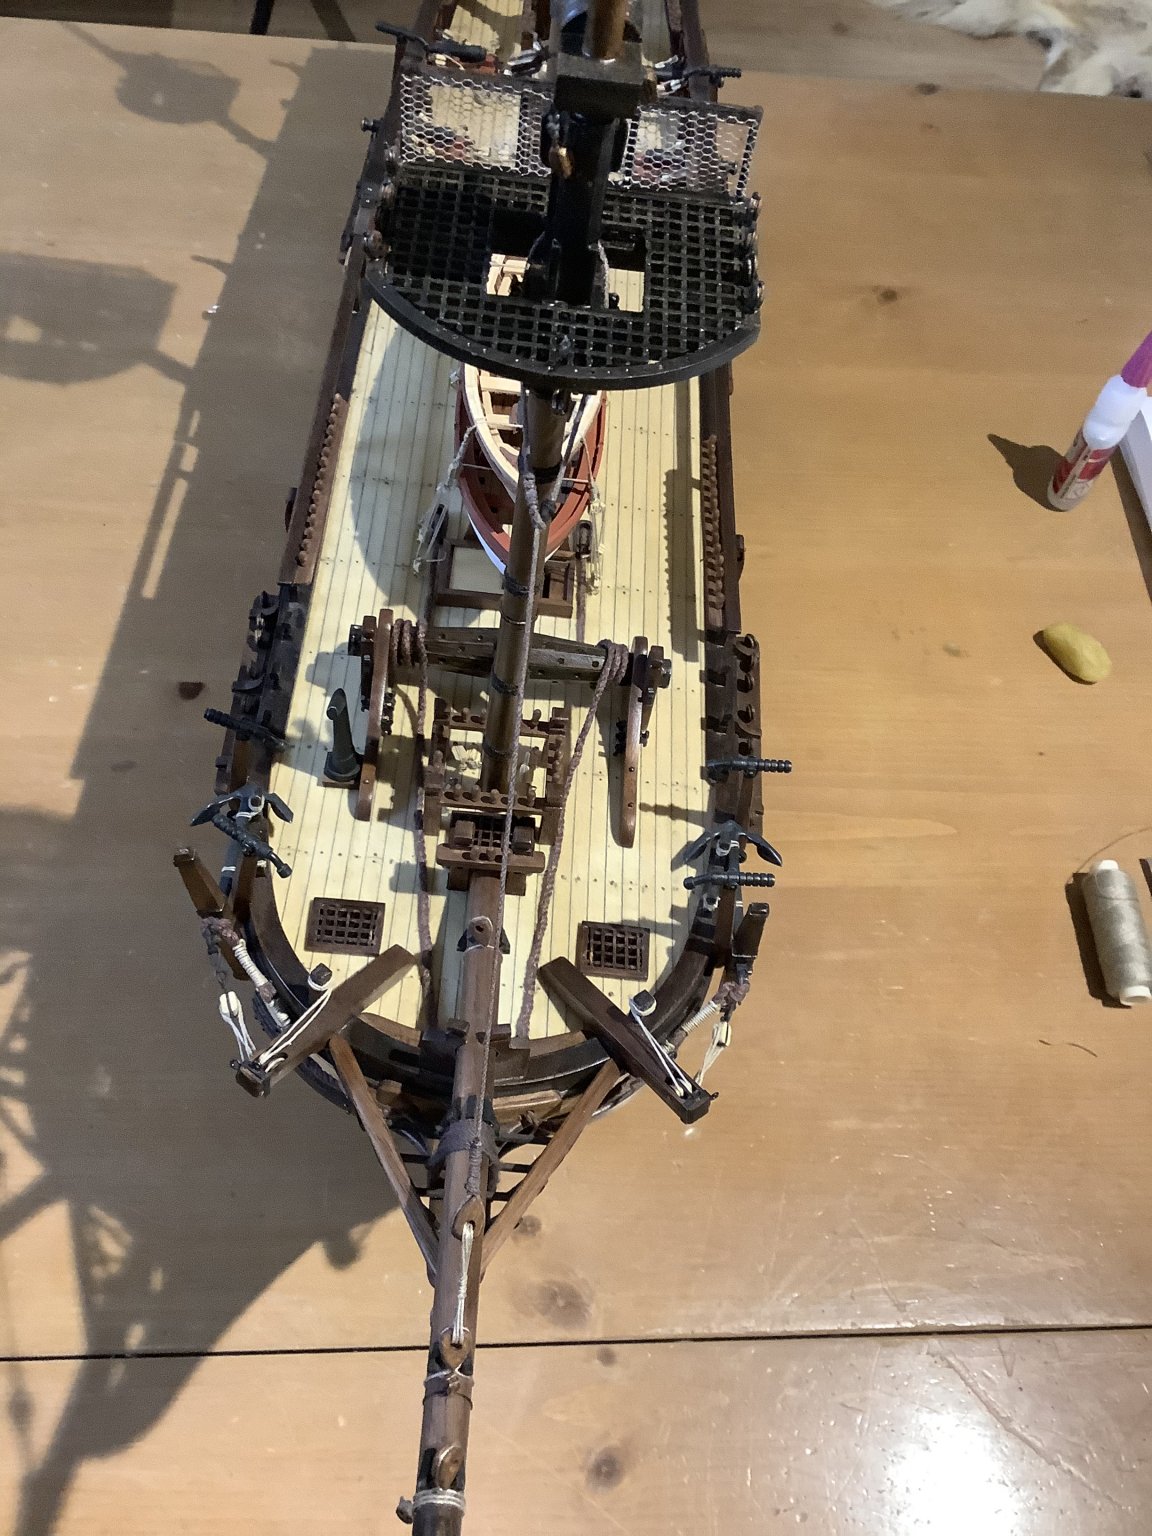
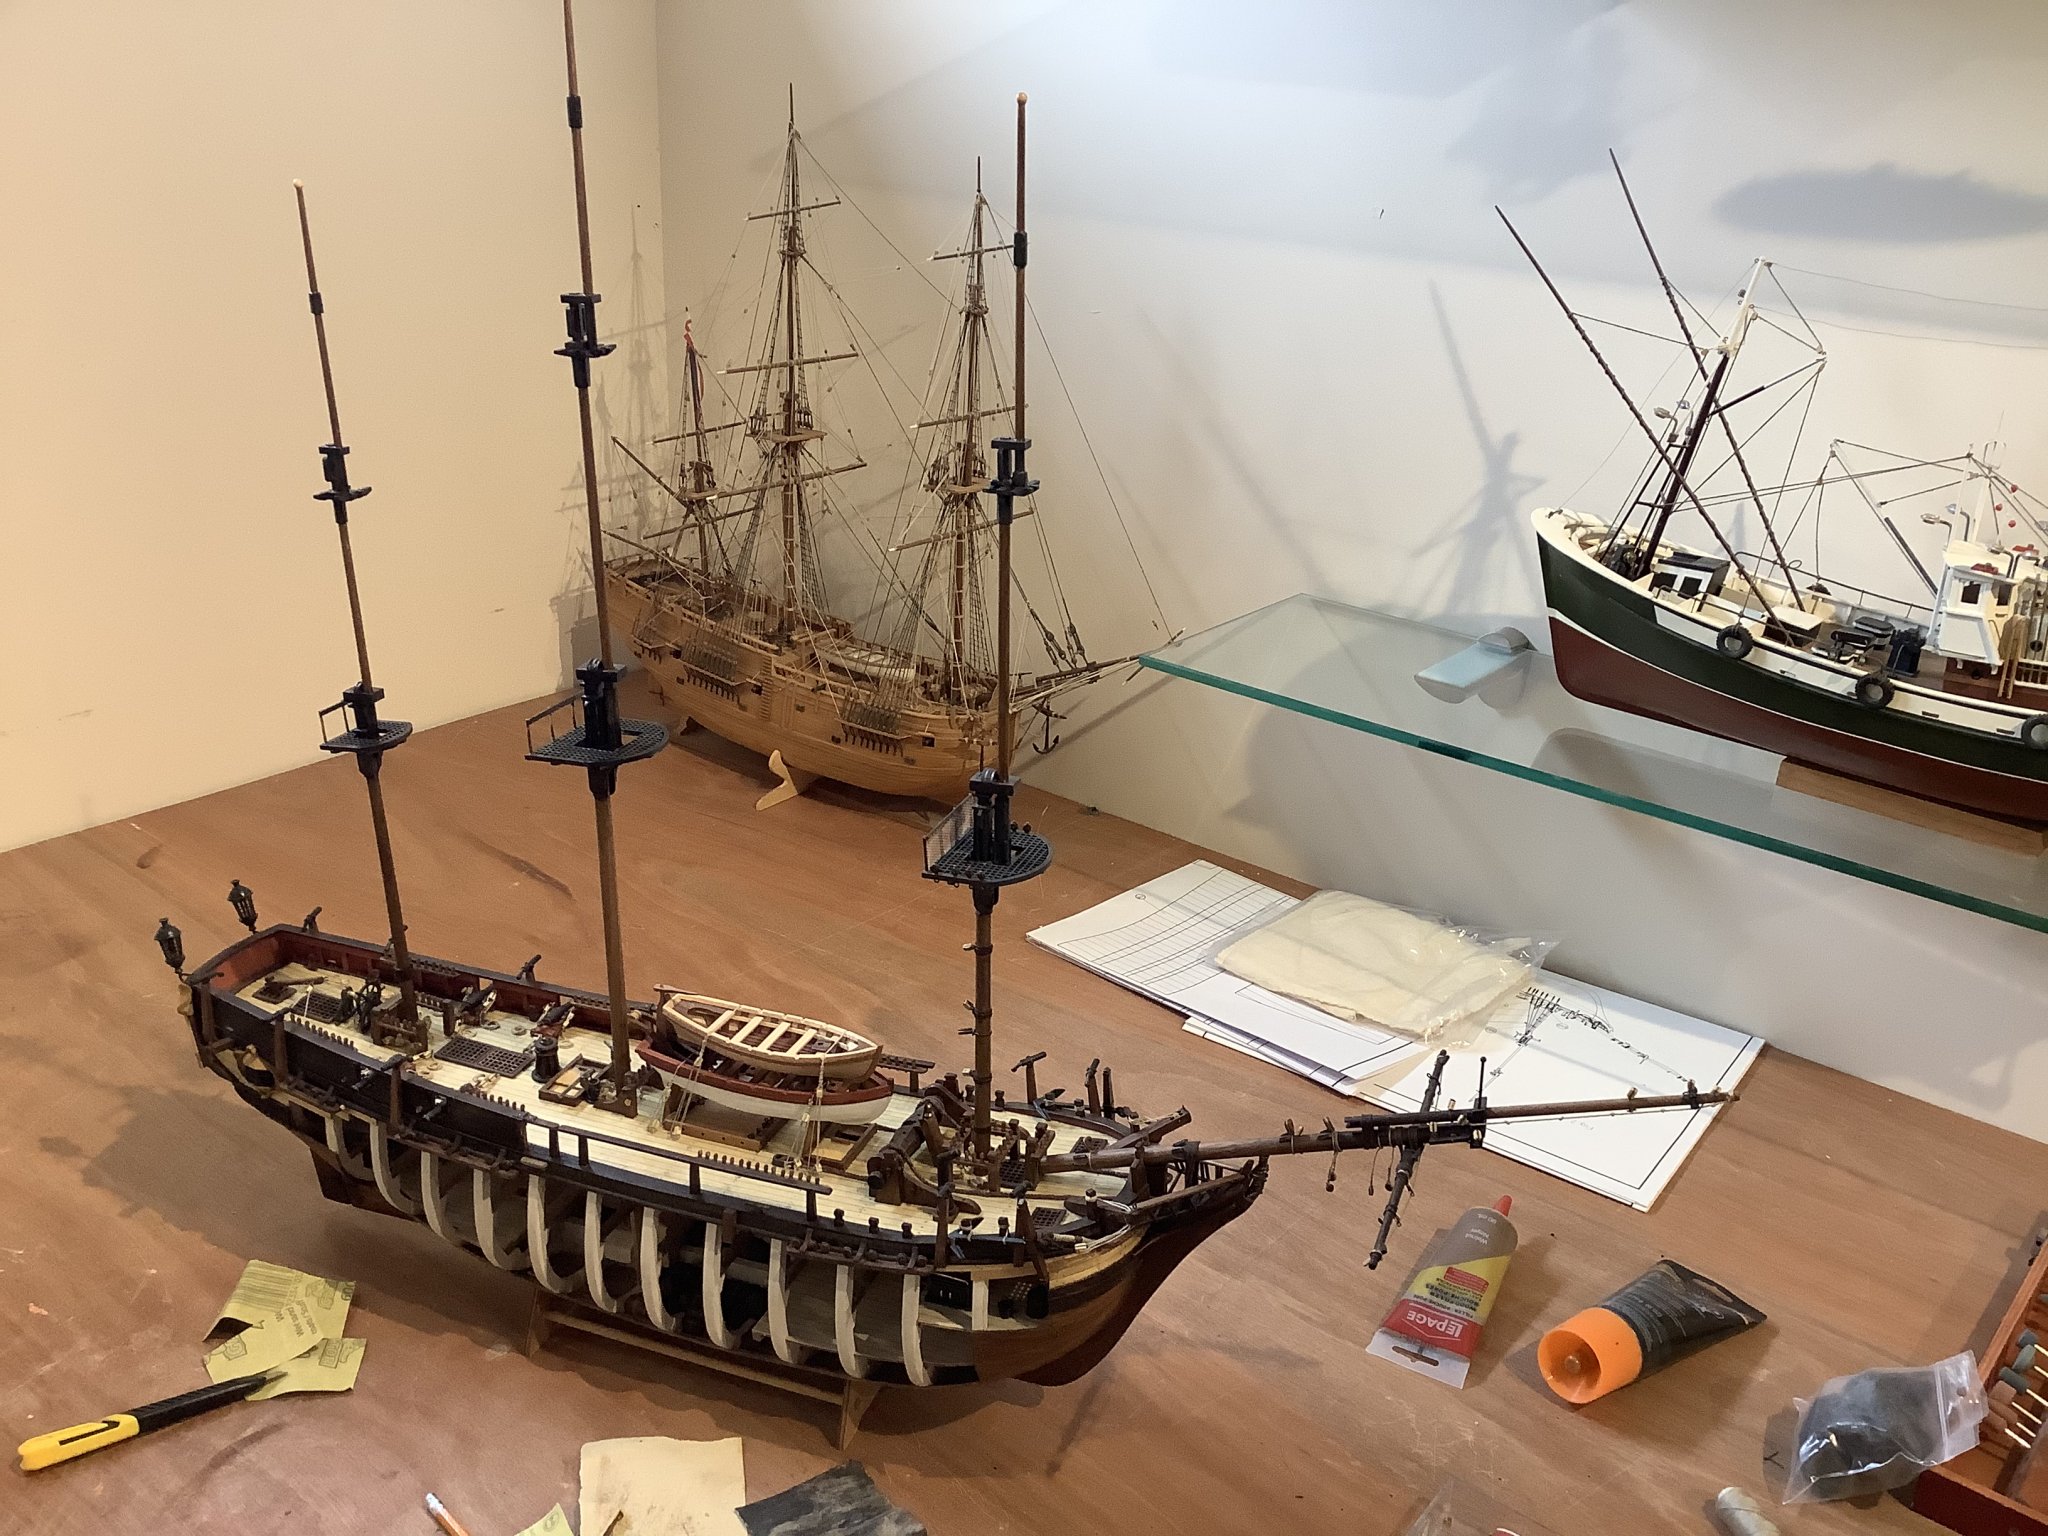
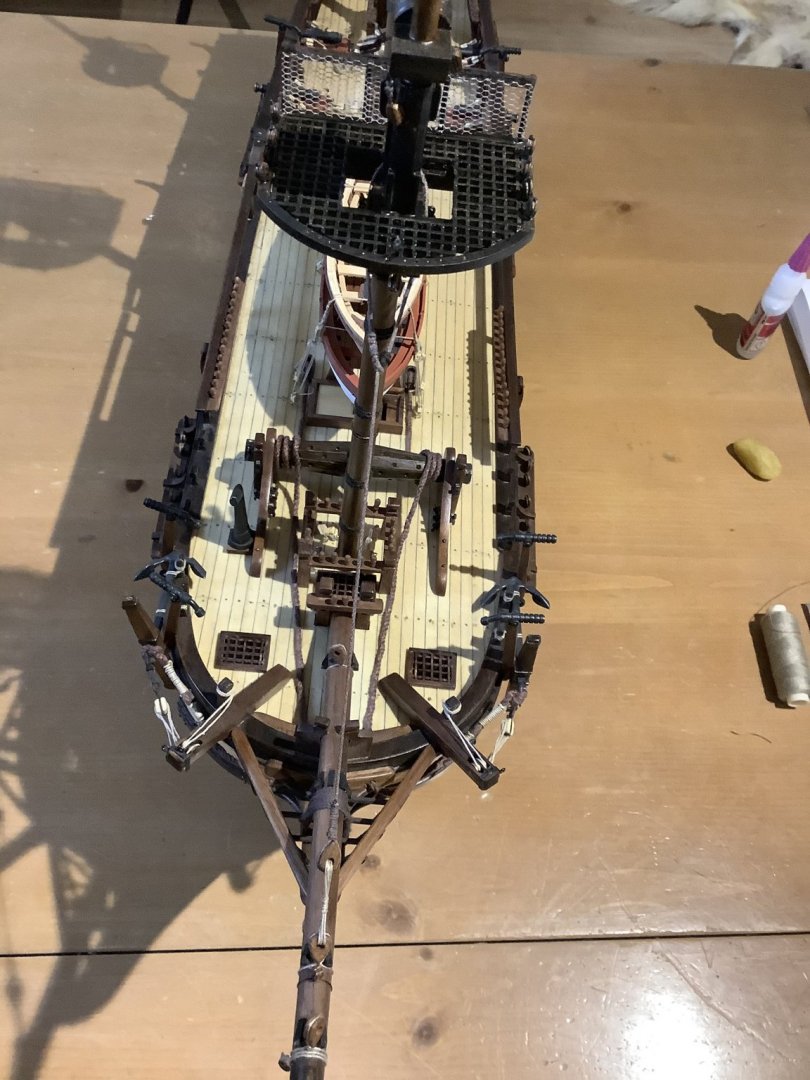
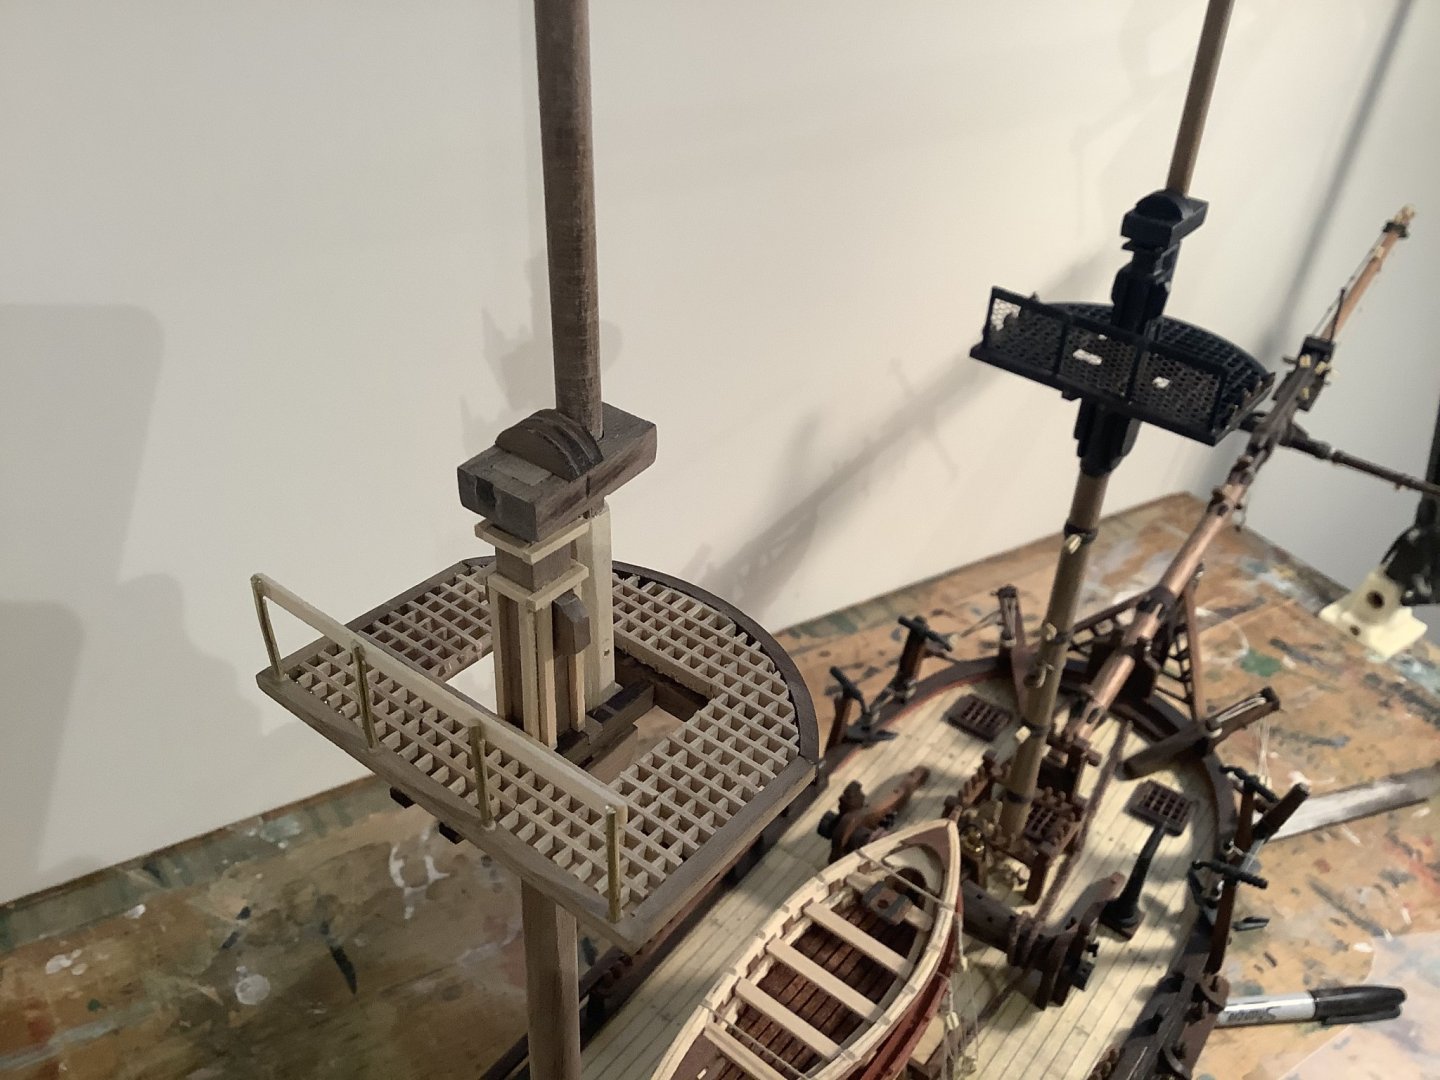
Foremast and main complete, working on the mizzenmast. No real issues, just a bit repetitive. Thankfully they are all true and in line above deck and fitted nicely through those multiple layers of holes through the lower decks. Think my goal is to fabricate, finish and attach all the paraphernalia to the masts and all the yards etc, this winter. I’m working on construction up north this spring for a few months then I’ll pick up with the rigging after the summer. At least that’s my plan.

- 171 replies
-
- 6
-
-
- artesania latina
- bounty
- (and 1 more)
-
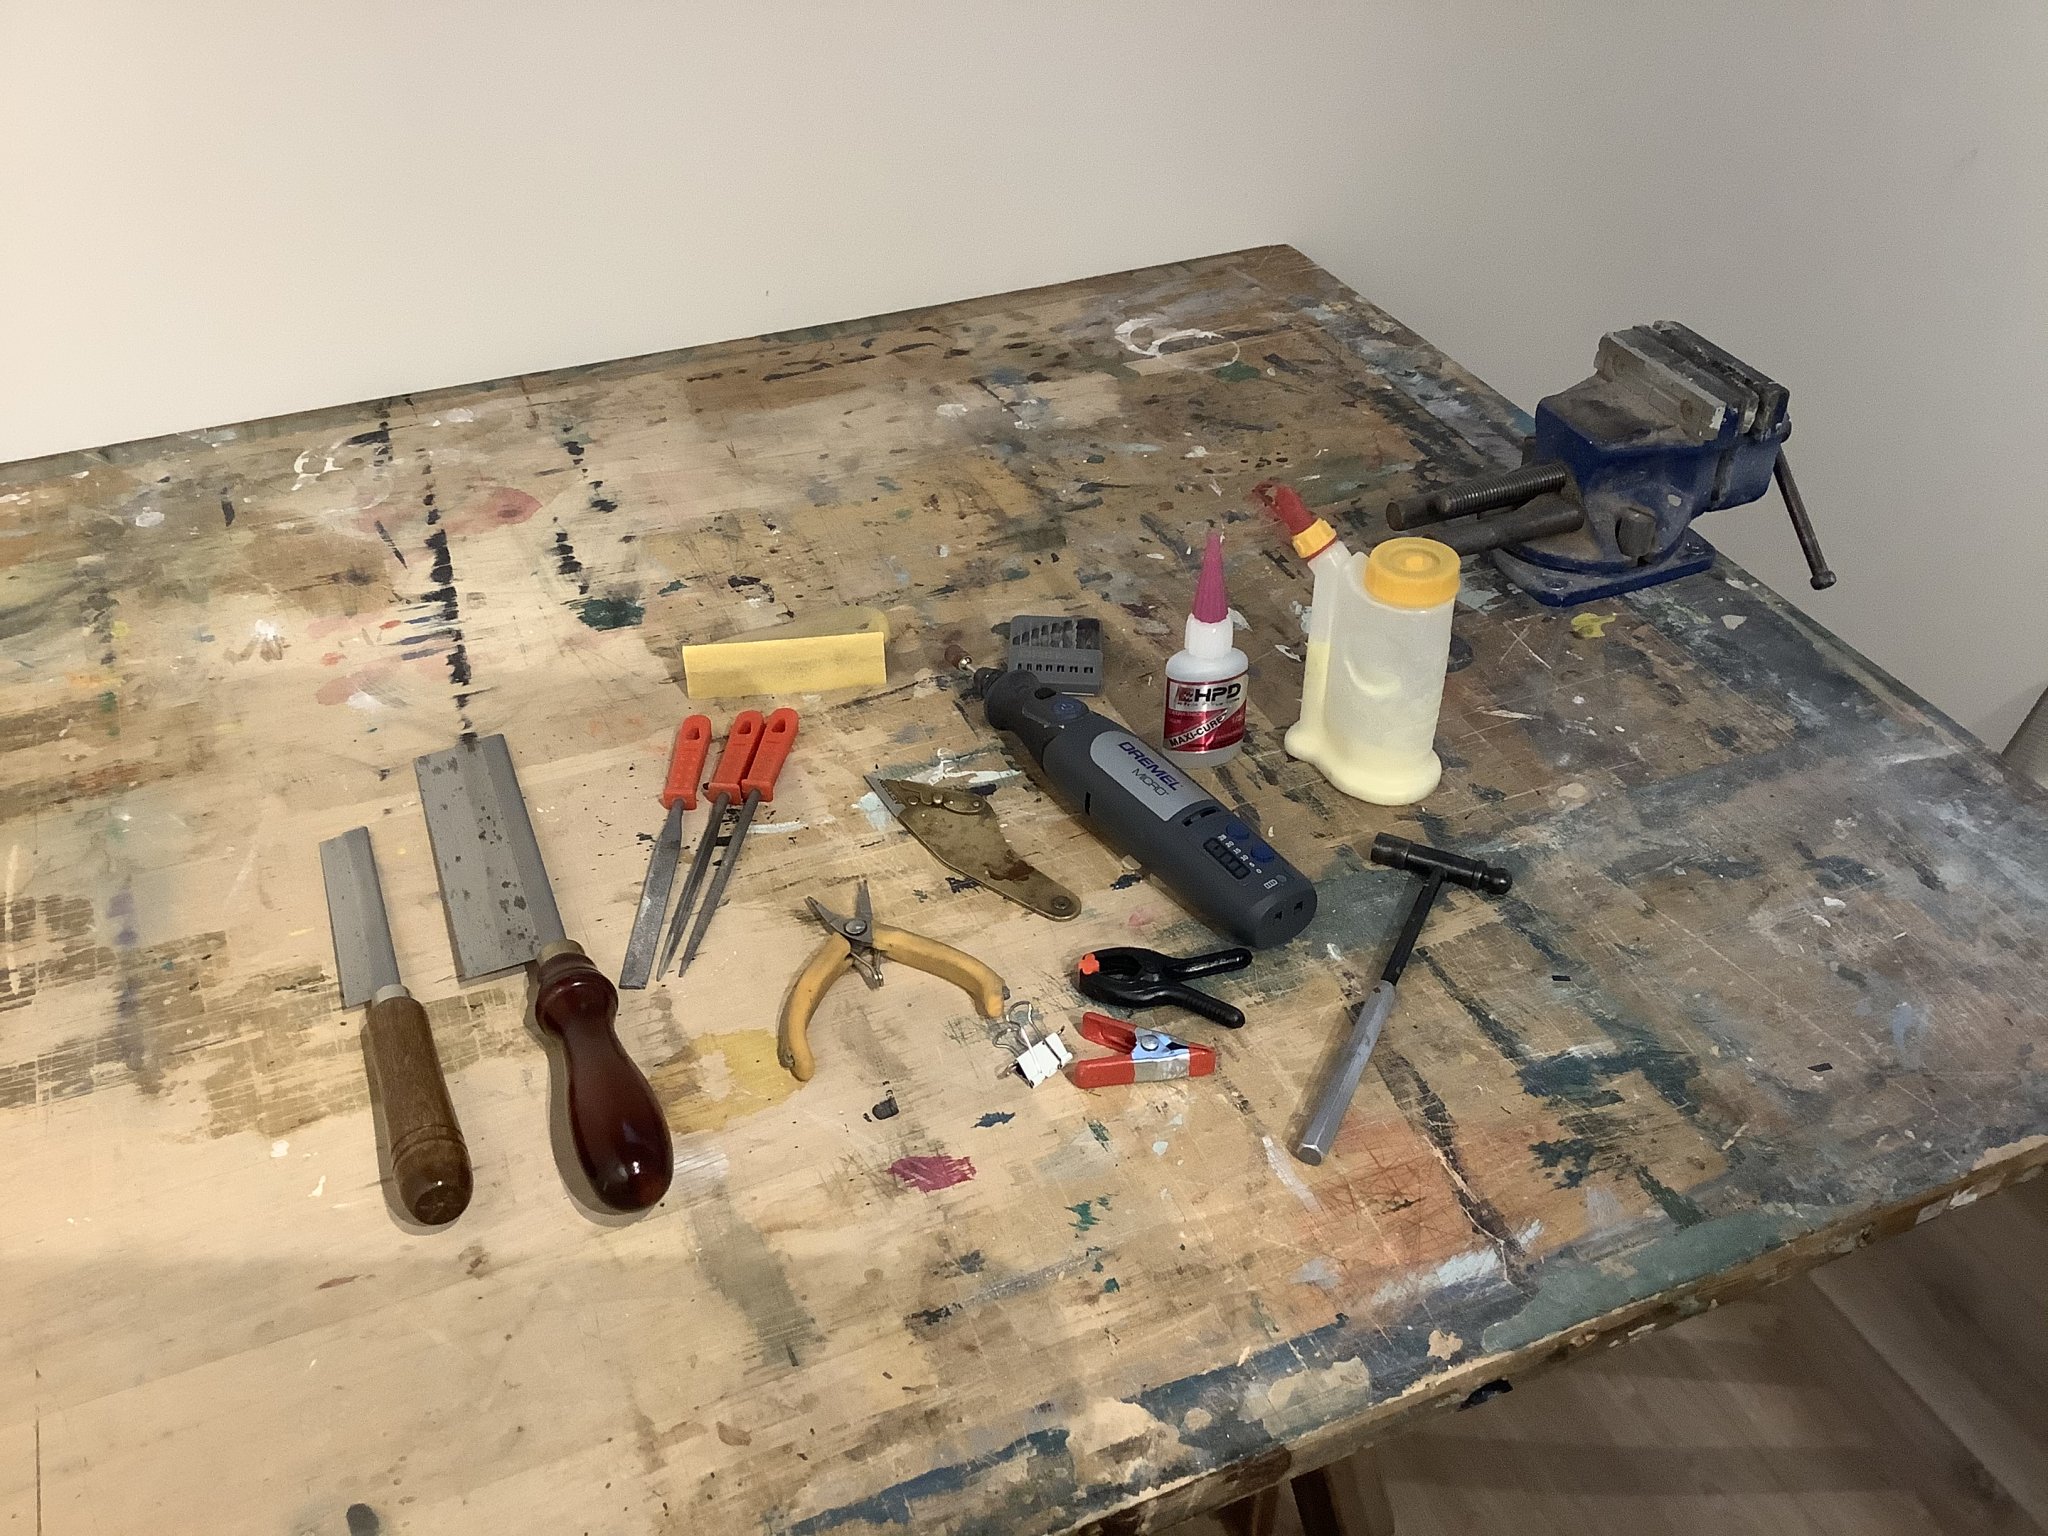
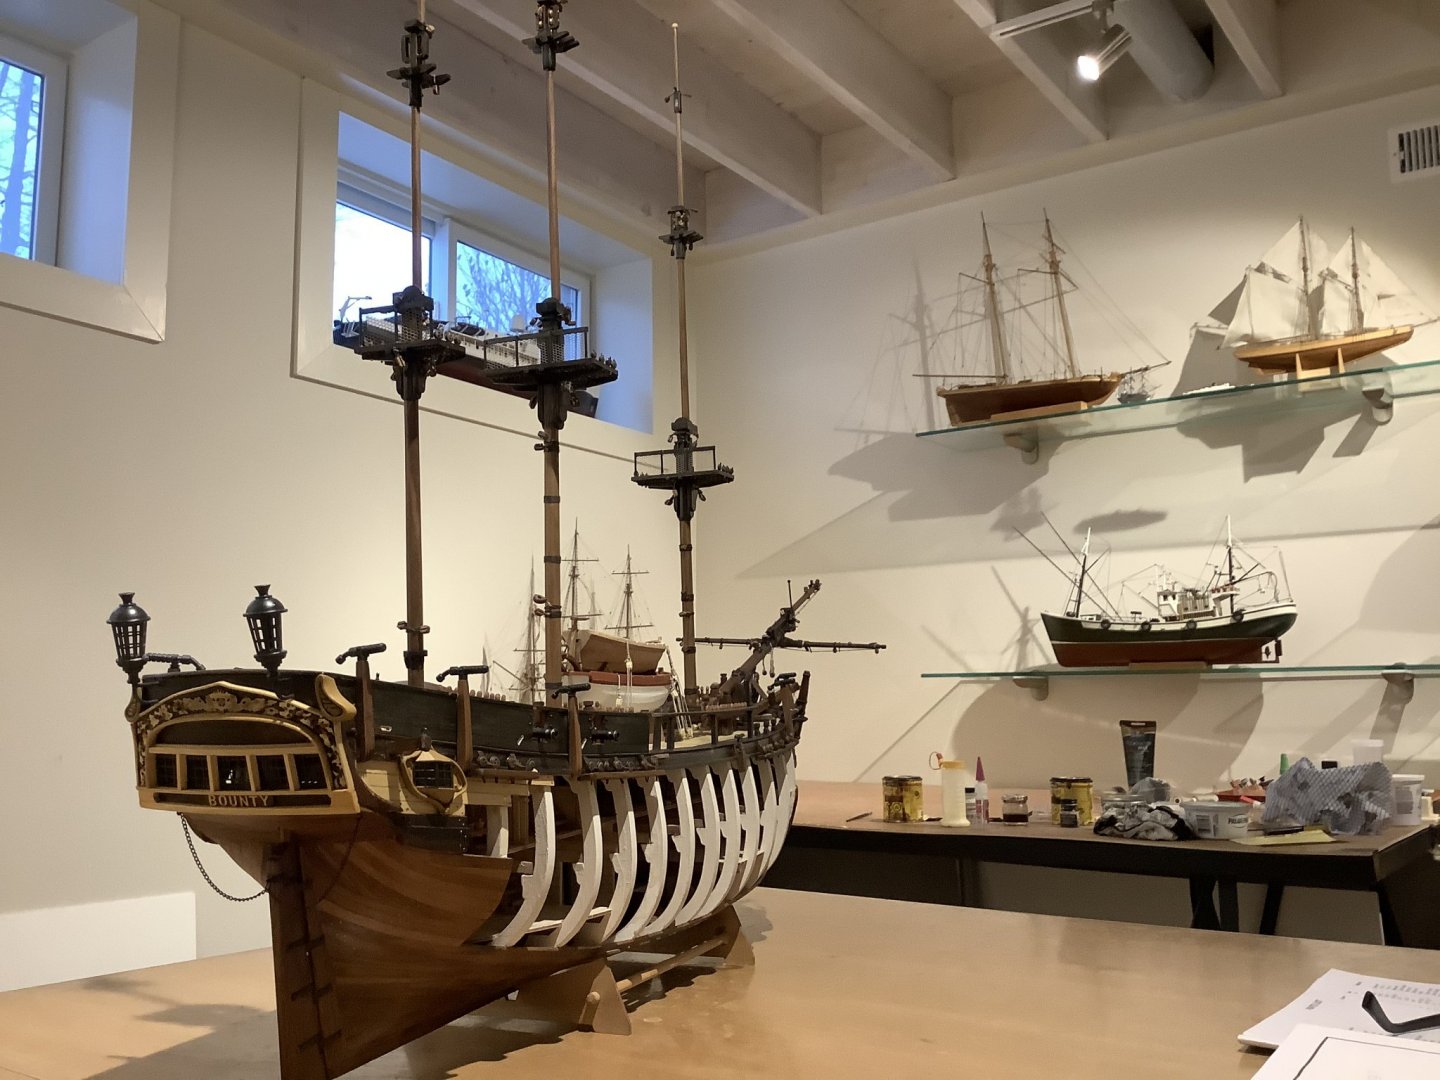
Hi Jeff - Hope you enjoy that build. I’m presently working on a cut away Bounty myself and have finished a number of wooden ships and boats. Some specialty tools I’ve tried but find I never use much. Others are really helpful. That bulb thing for nailing you mention I tried using once but now gathers dust in my toolbox (I just pre drill and use my little hammer). You will probably find out what works best for you through trial and error like me. The picture shows all the basic tools I have come to use all the time and which work really well for me. They always seem to be front and centre on my work table and have been invaluable to me over the years for cutting, shaping and fashioning wooden boat models.

-
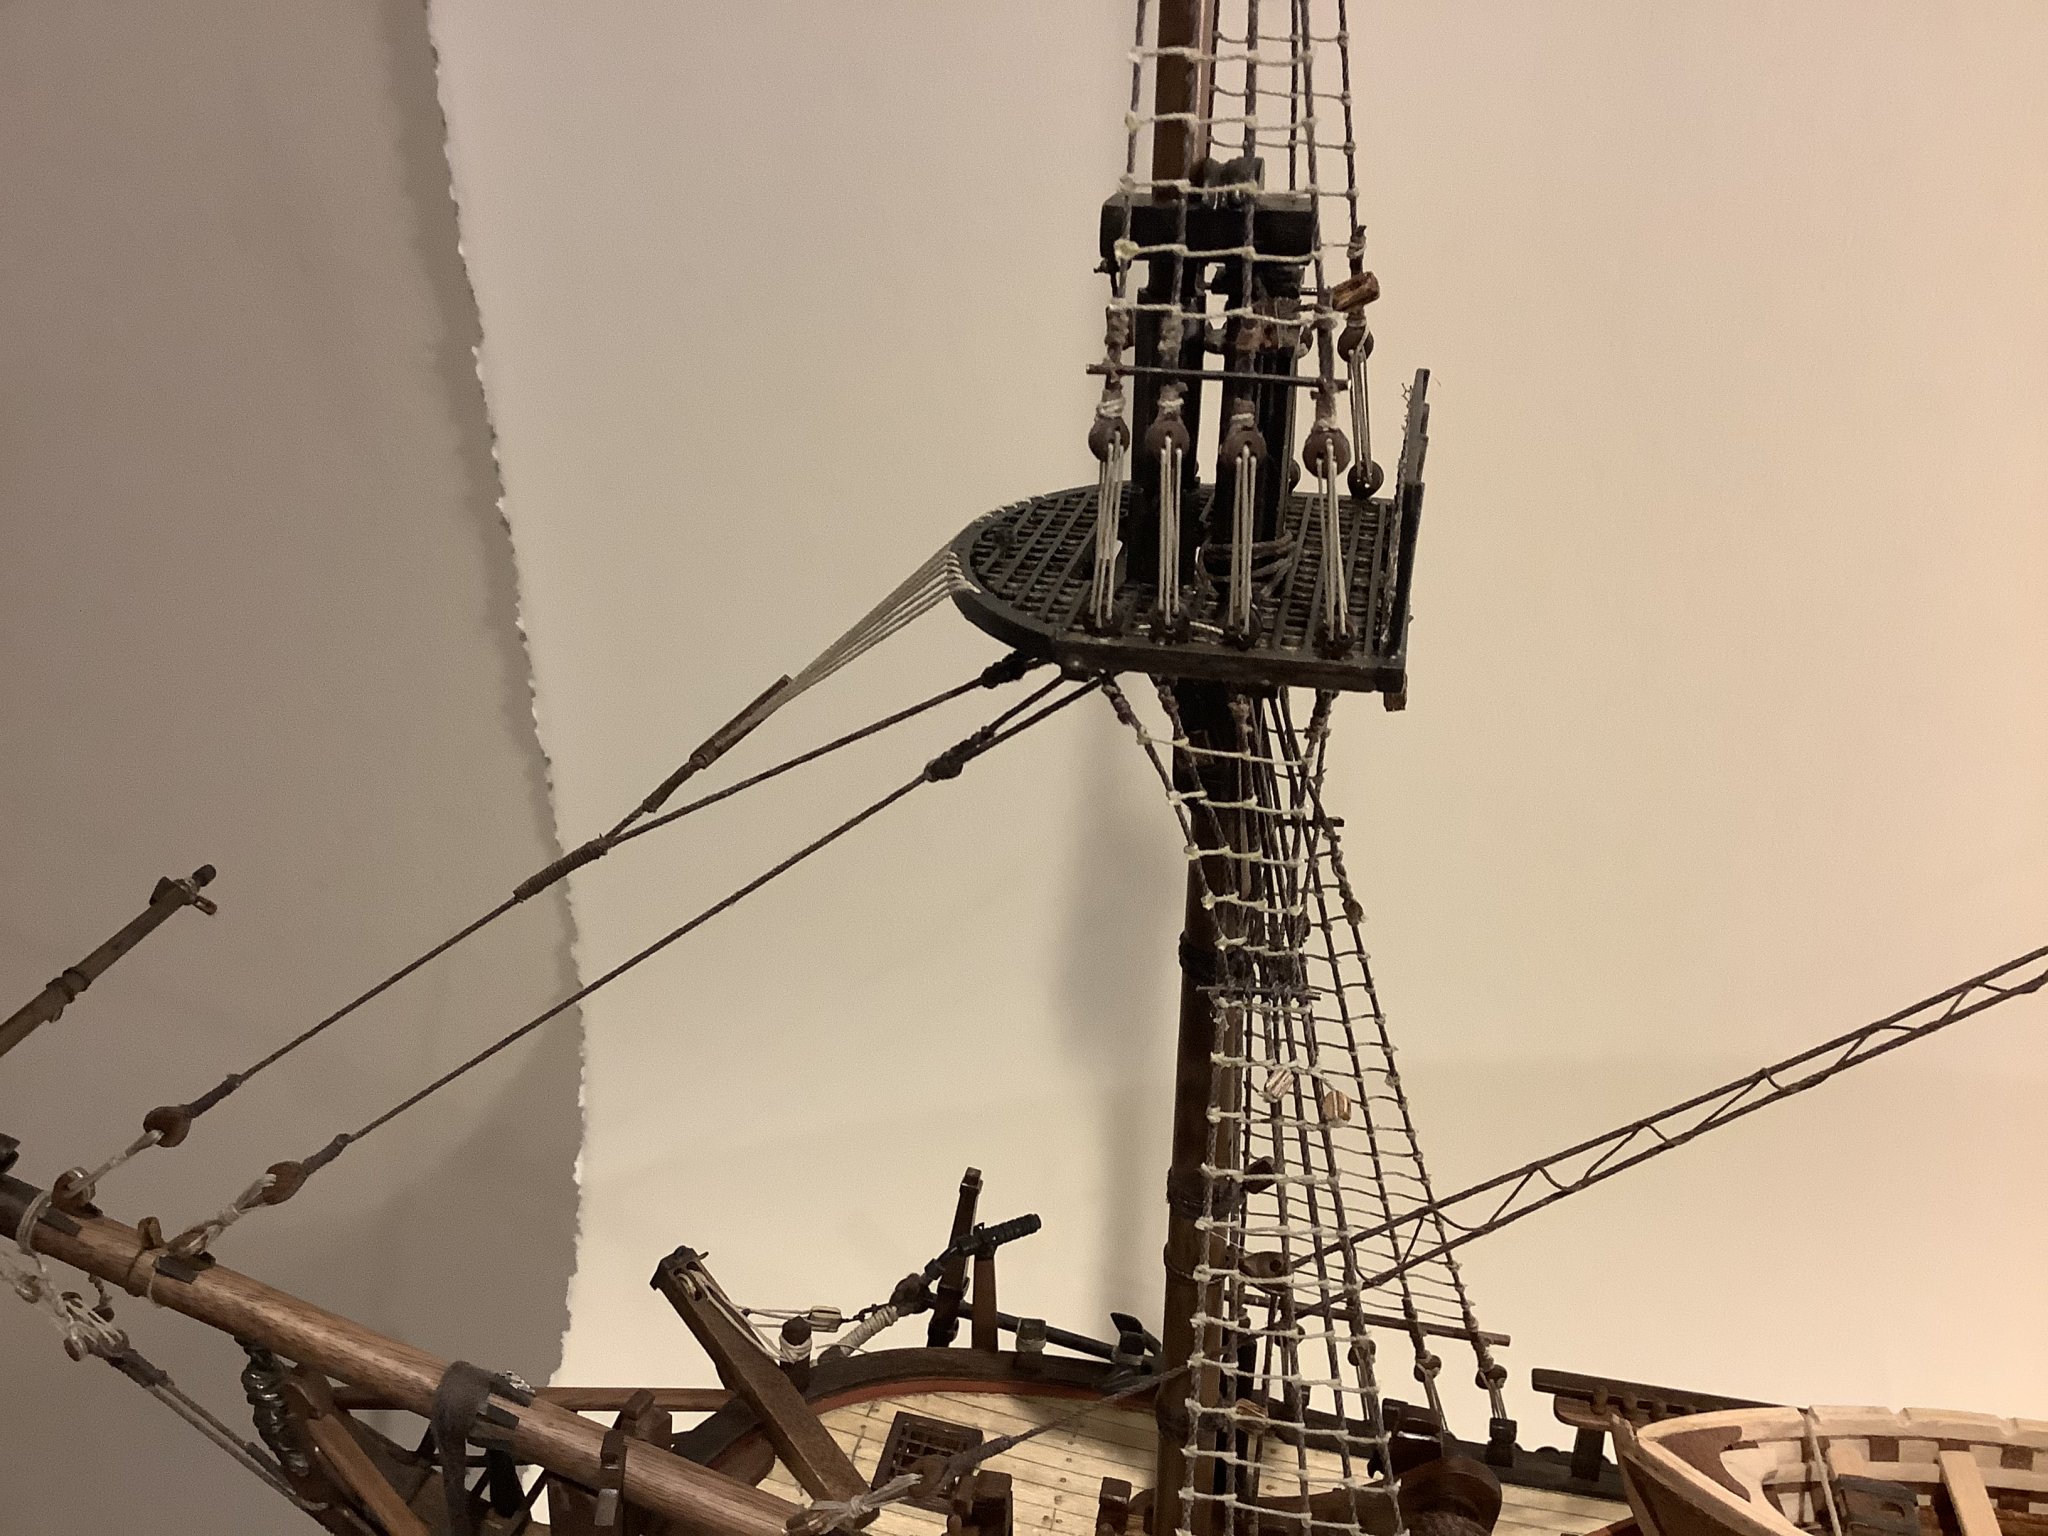
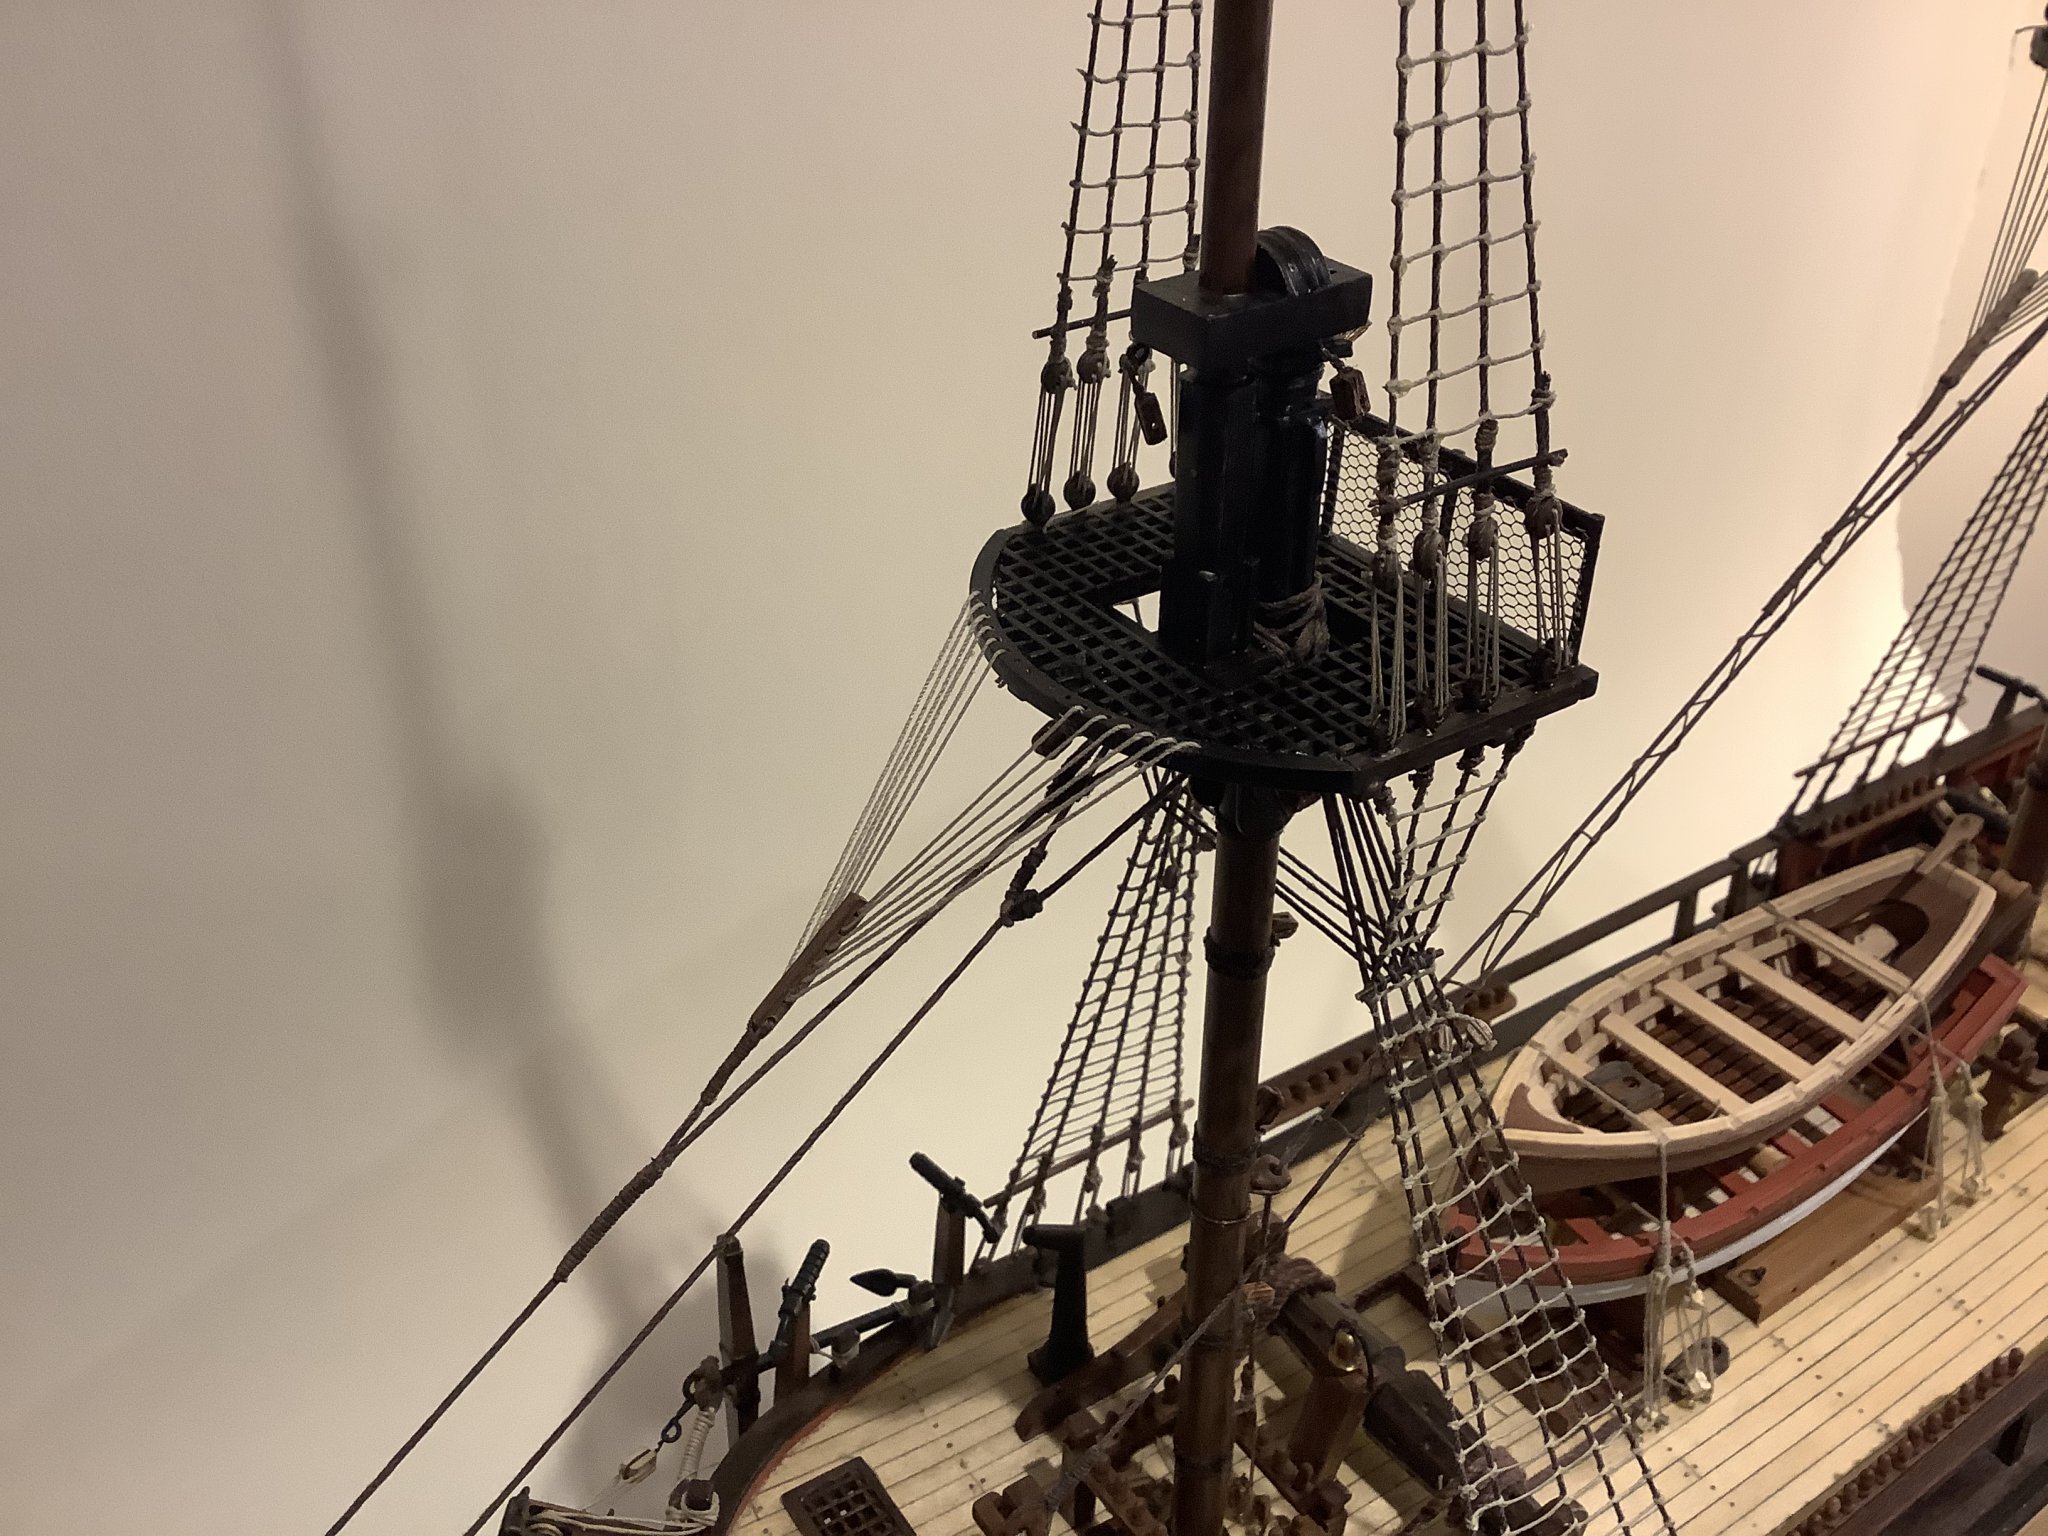
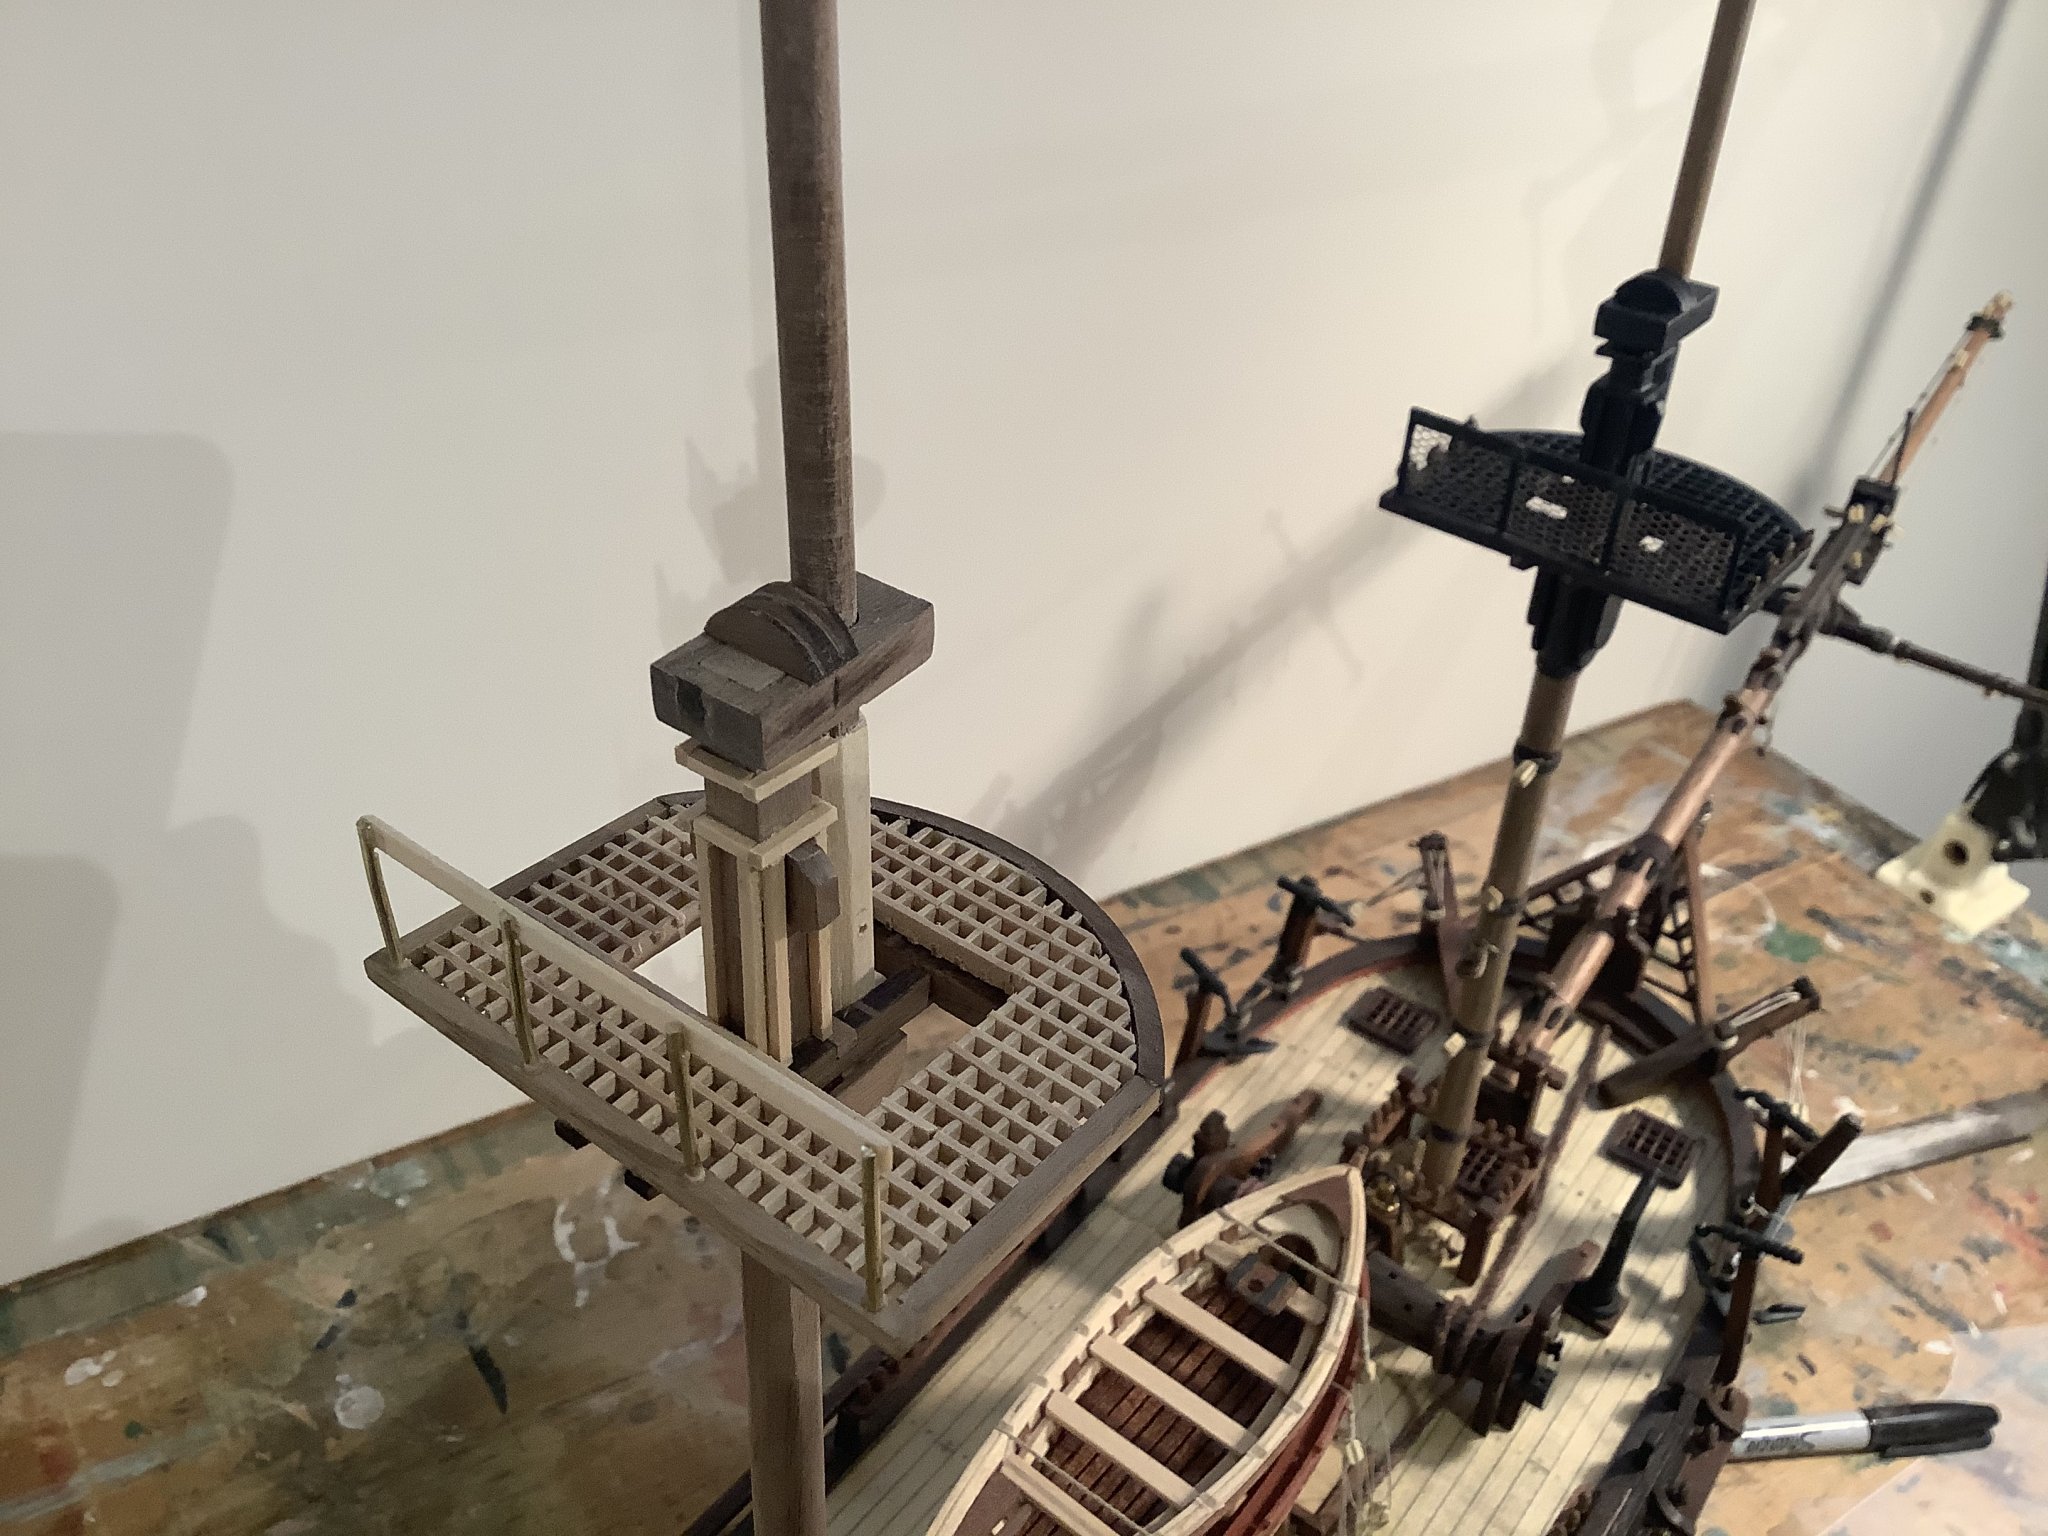
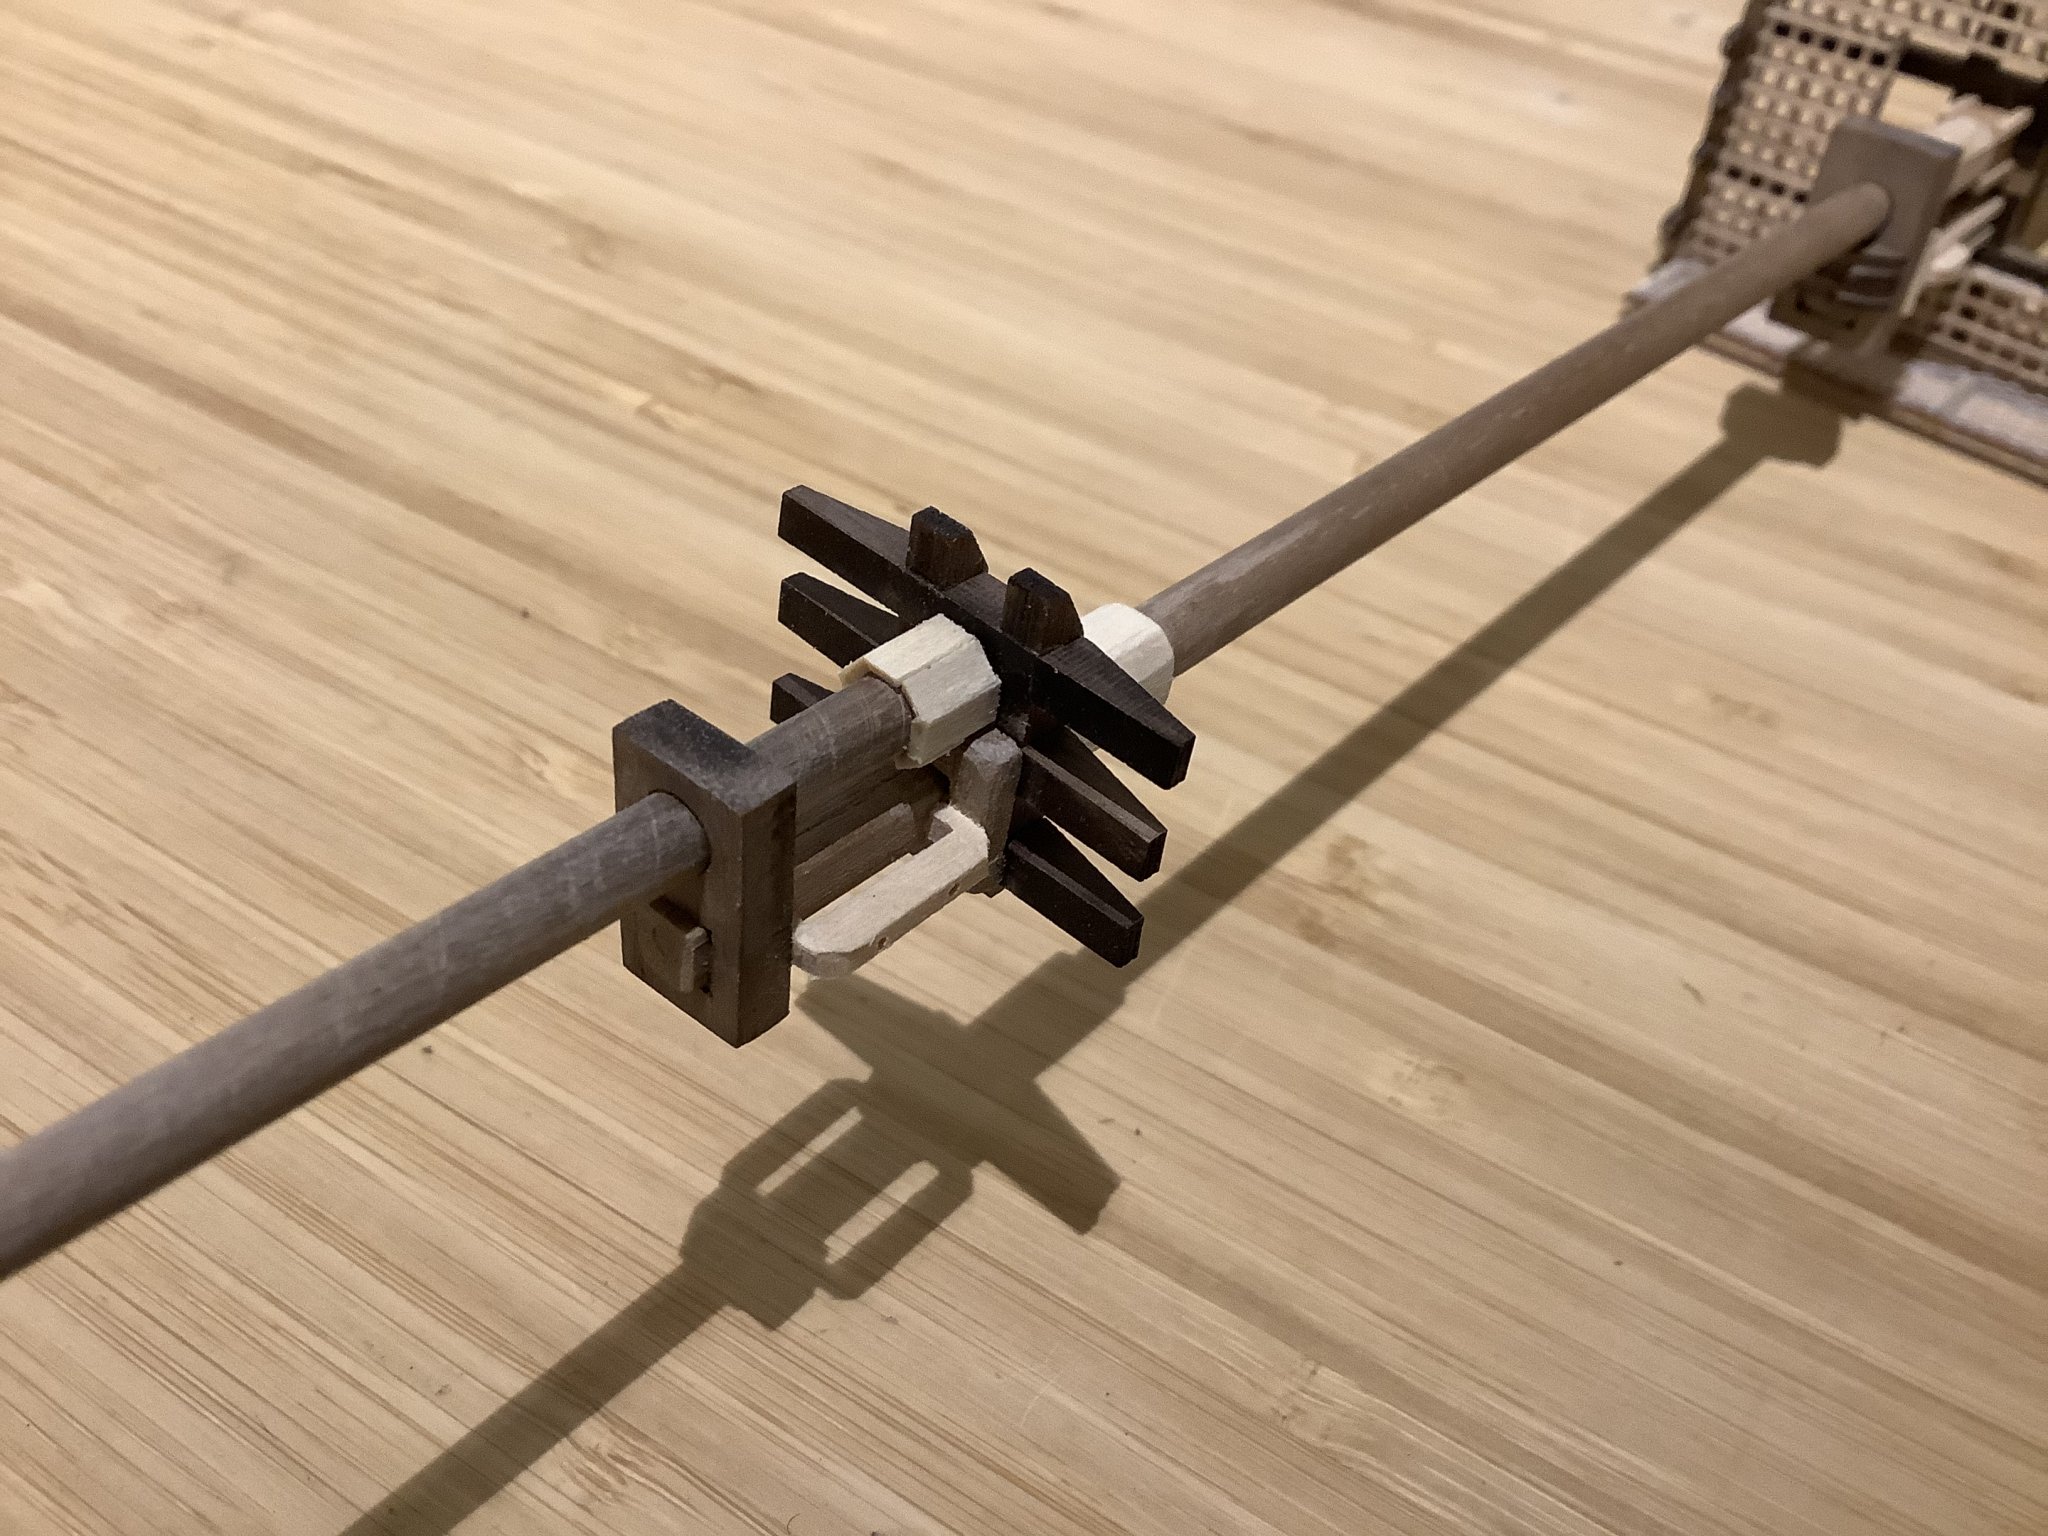
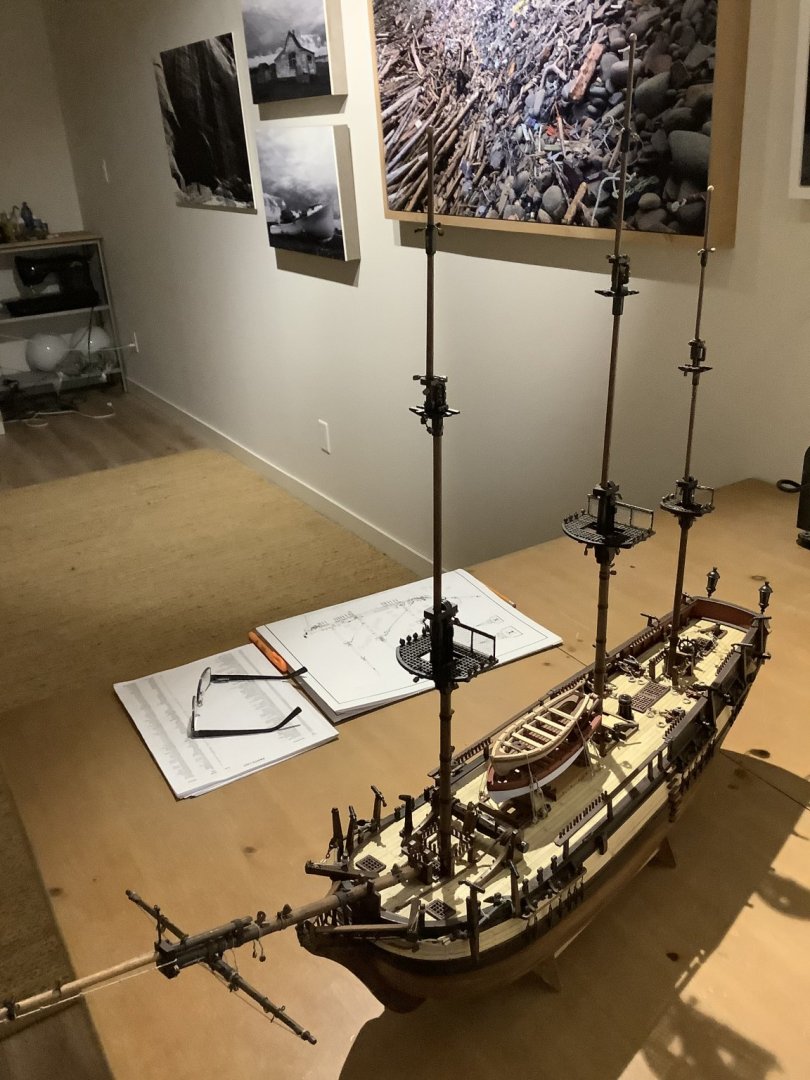
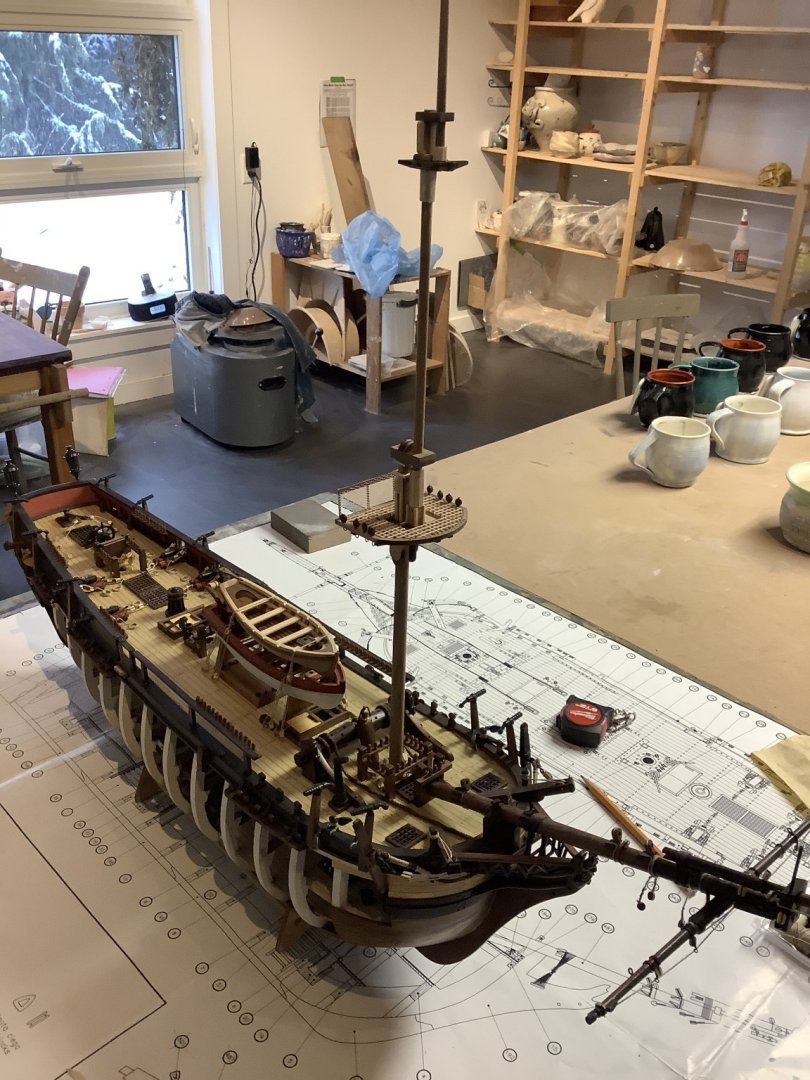
Thanks Stuglo. Working on the masts, which are substantial little projects on this Bounty. This is my rendition of the foremast assembly before some final trimming, sanding and staining/finishing, after which I will attach all the associated doodads. Nautical term. The instructions peter out rather abruptly in this kit, almost like they ran out of gas or just lost interest down at Artesania Latina HQ. There is a ludicrously detailed and unnecessary explanation about how to fashion the grating, then ‘good luck finishing’ more or less. Doesn’t really matter since a good set of plans are what’s essential.
- 171 replies
-
- 9
-
-
- artesania latina
- bounty
- (and 1 more)
-
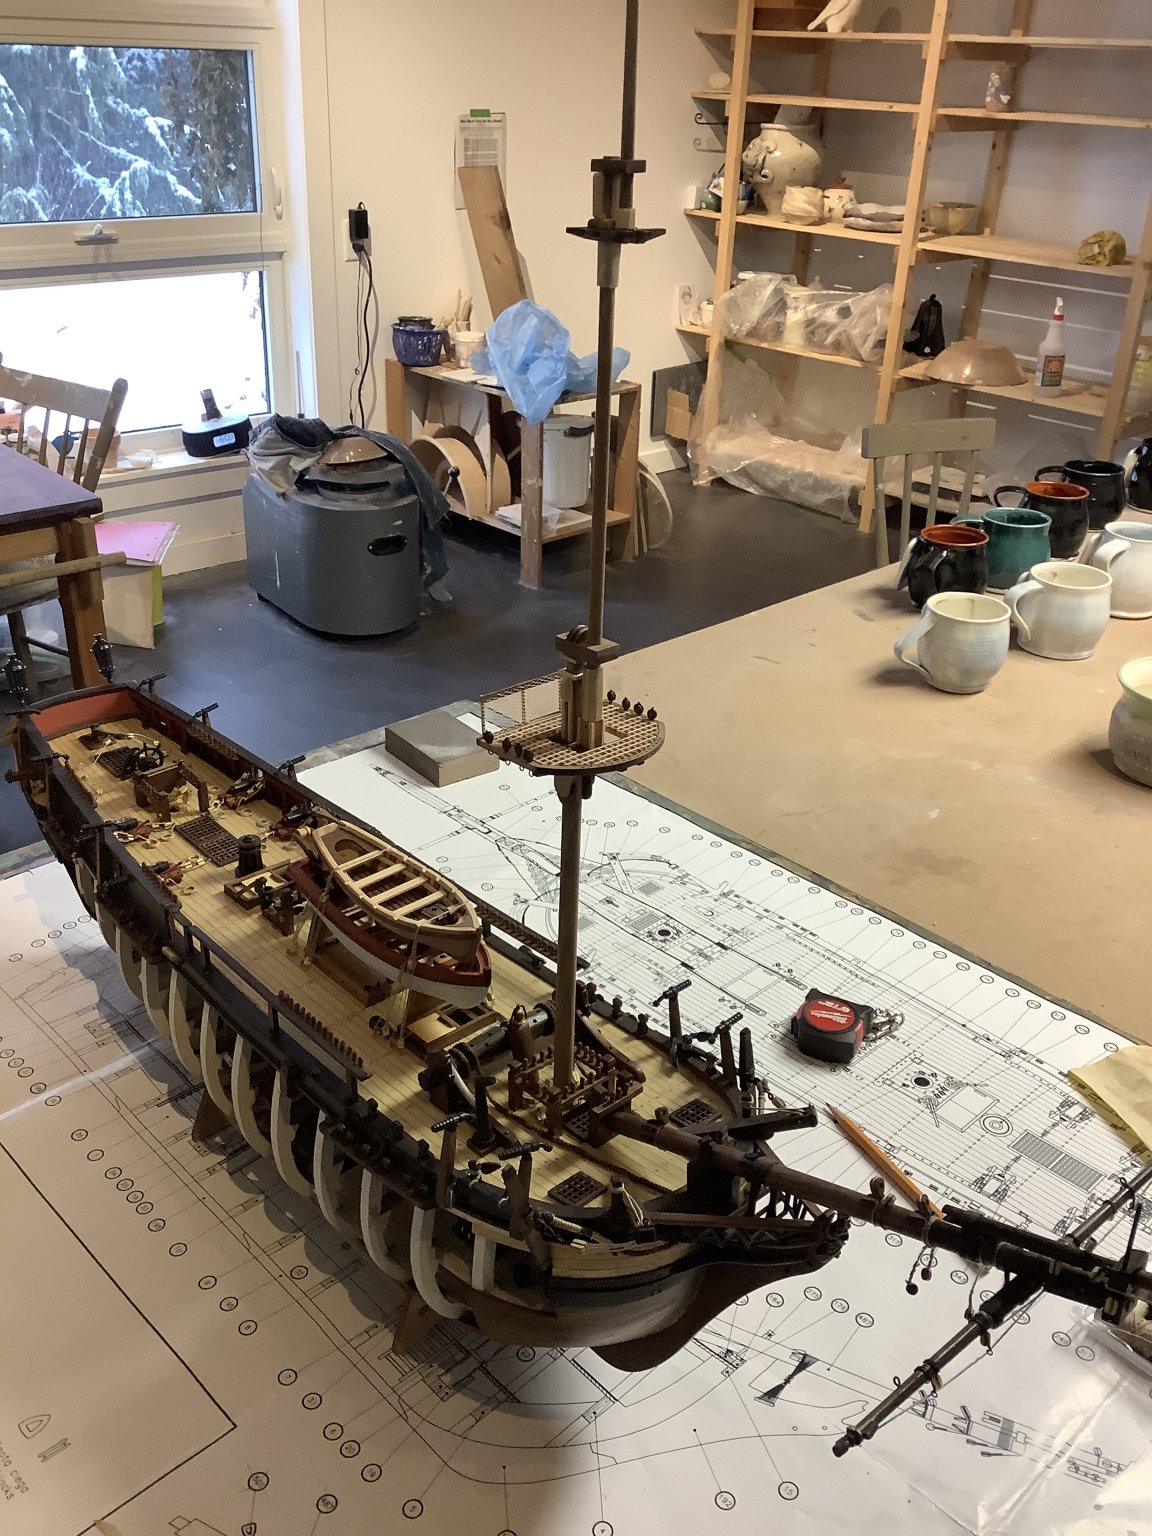
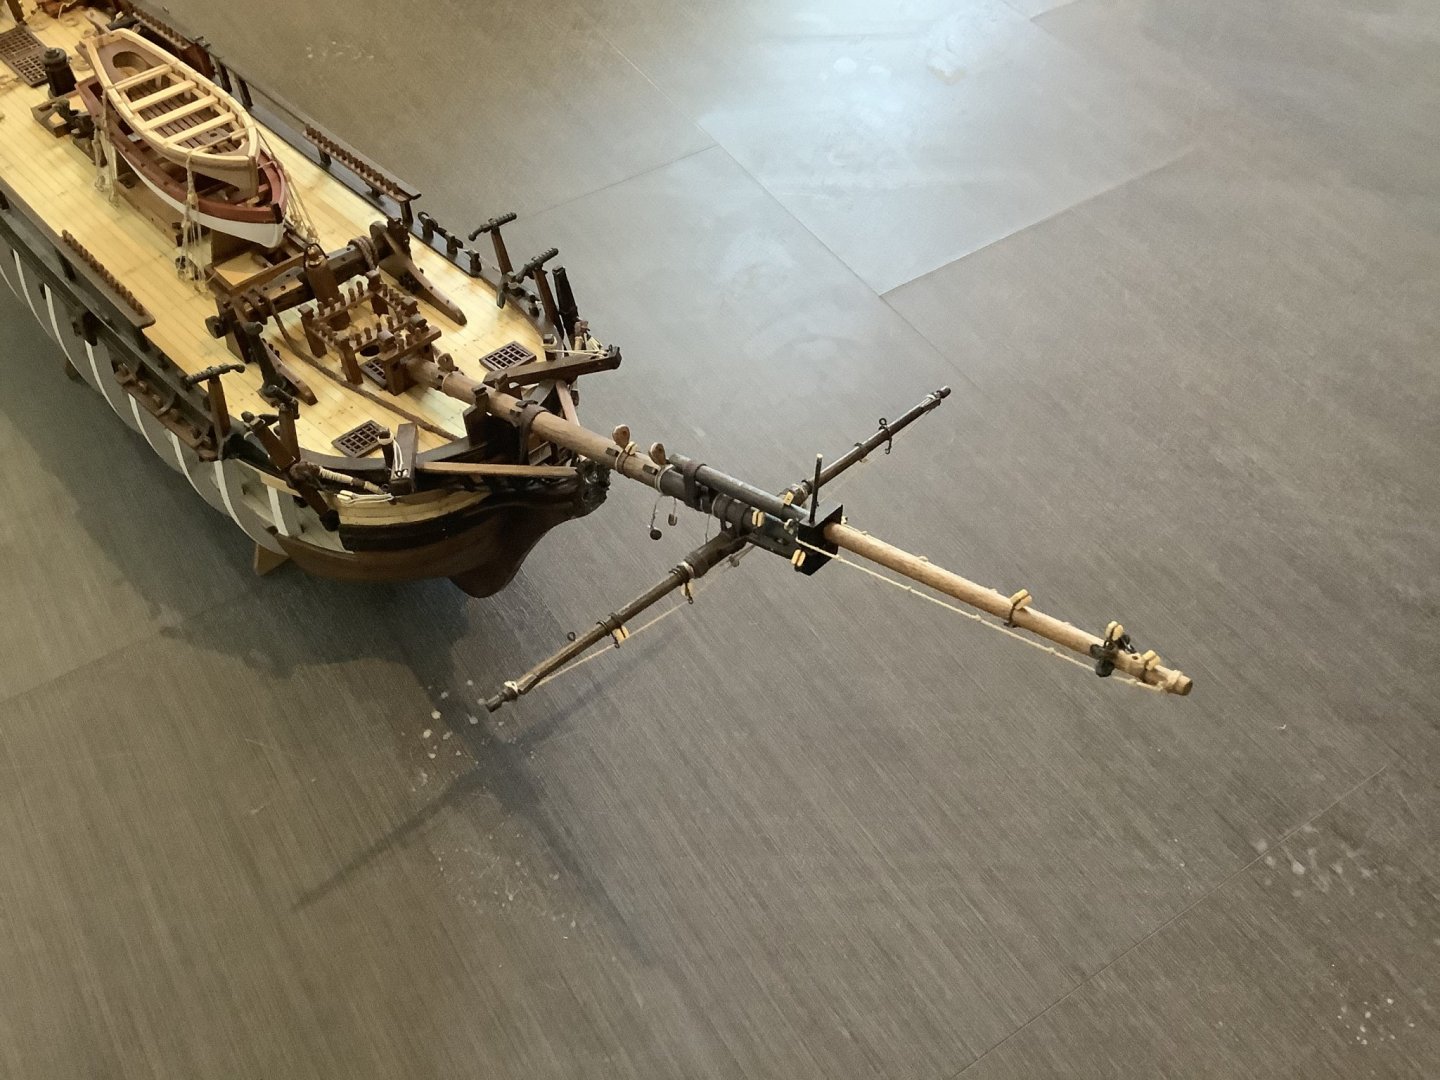
Bit of a slowdown on the shipbuilding front owing to a back injury while building that cottage. Hard to concentrate on tiny details with the sciatica raging down my leg. Finished the bowsprit and now working on the foremast assembly. A bit cranky at the moment over trying to determine the correct form of the various wood parts that go into parts of the masts. A 3D drawing or picture of the base structure prior to rigging would help with some of the educated guesswork. But that’s probably just the leg talking. Just dry fitted the foremast on the ship and thankfully it fits perfectly through all the decks and into the slot in the keel. Just dumb luck really, I should have checked this much earlier during assembly with the 10mm dowel in case anything was out of alignment.
- 171 replies
-
- 6
-
-
- artesania latina
- bounty
- (and 1 more)
-
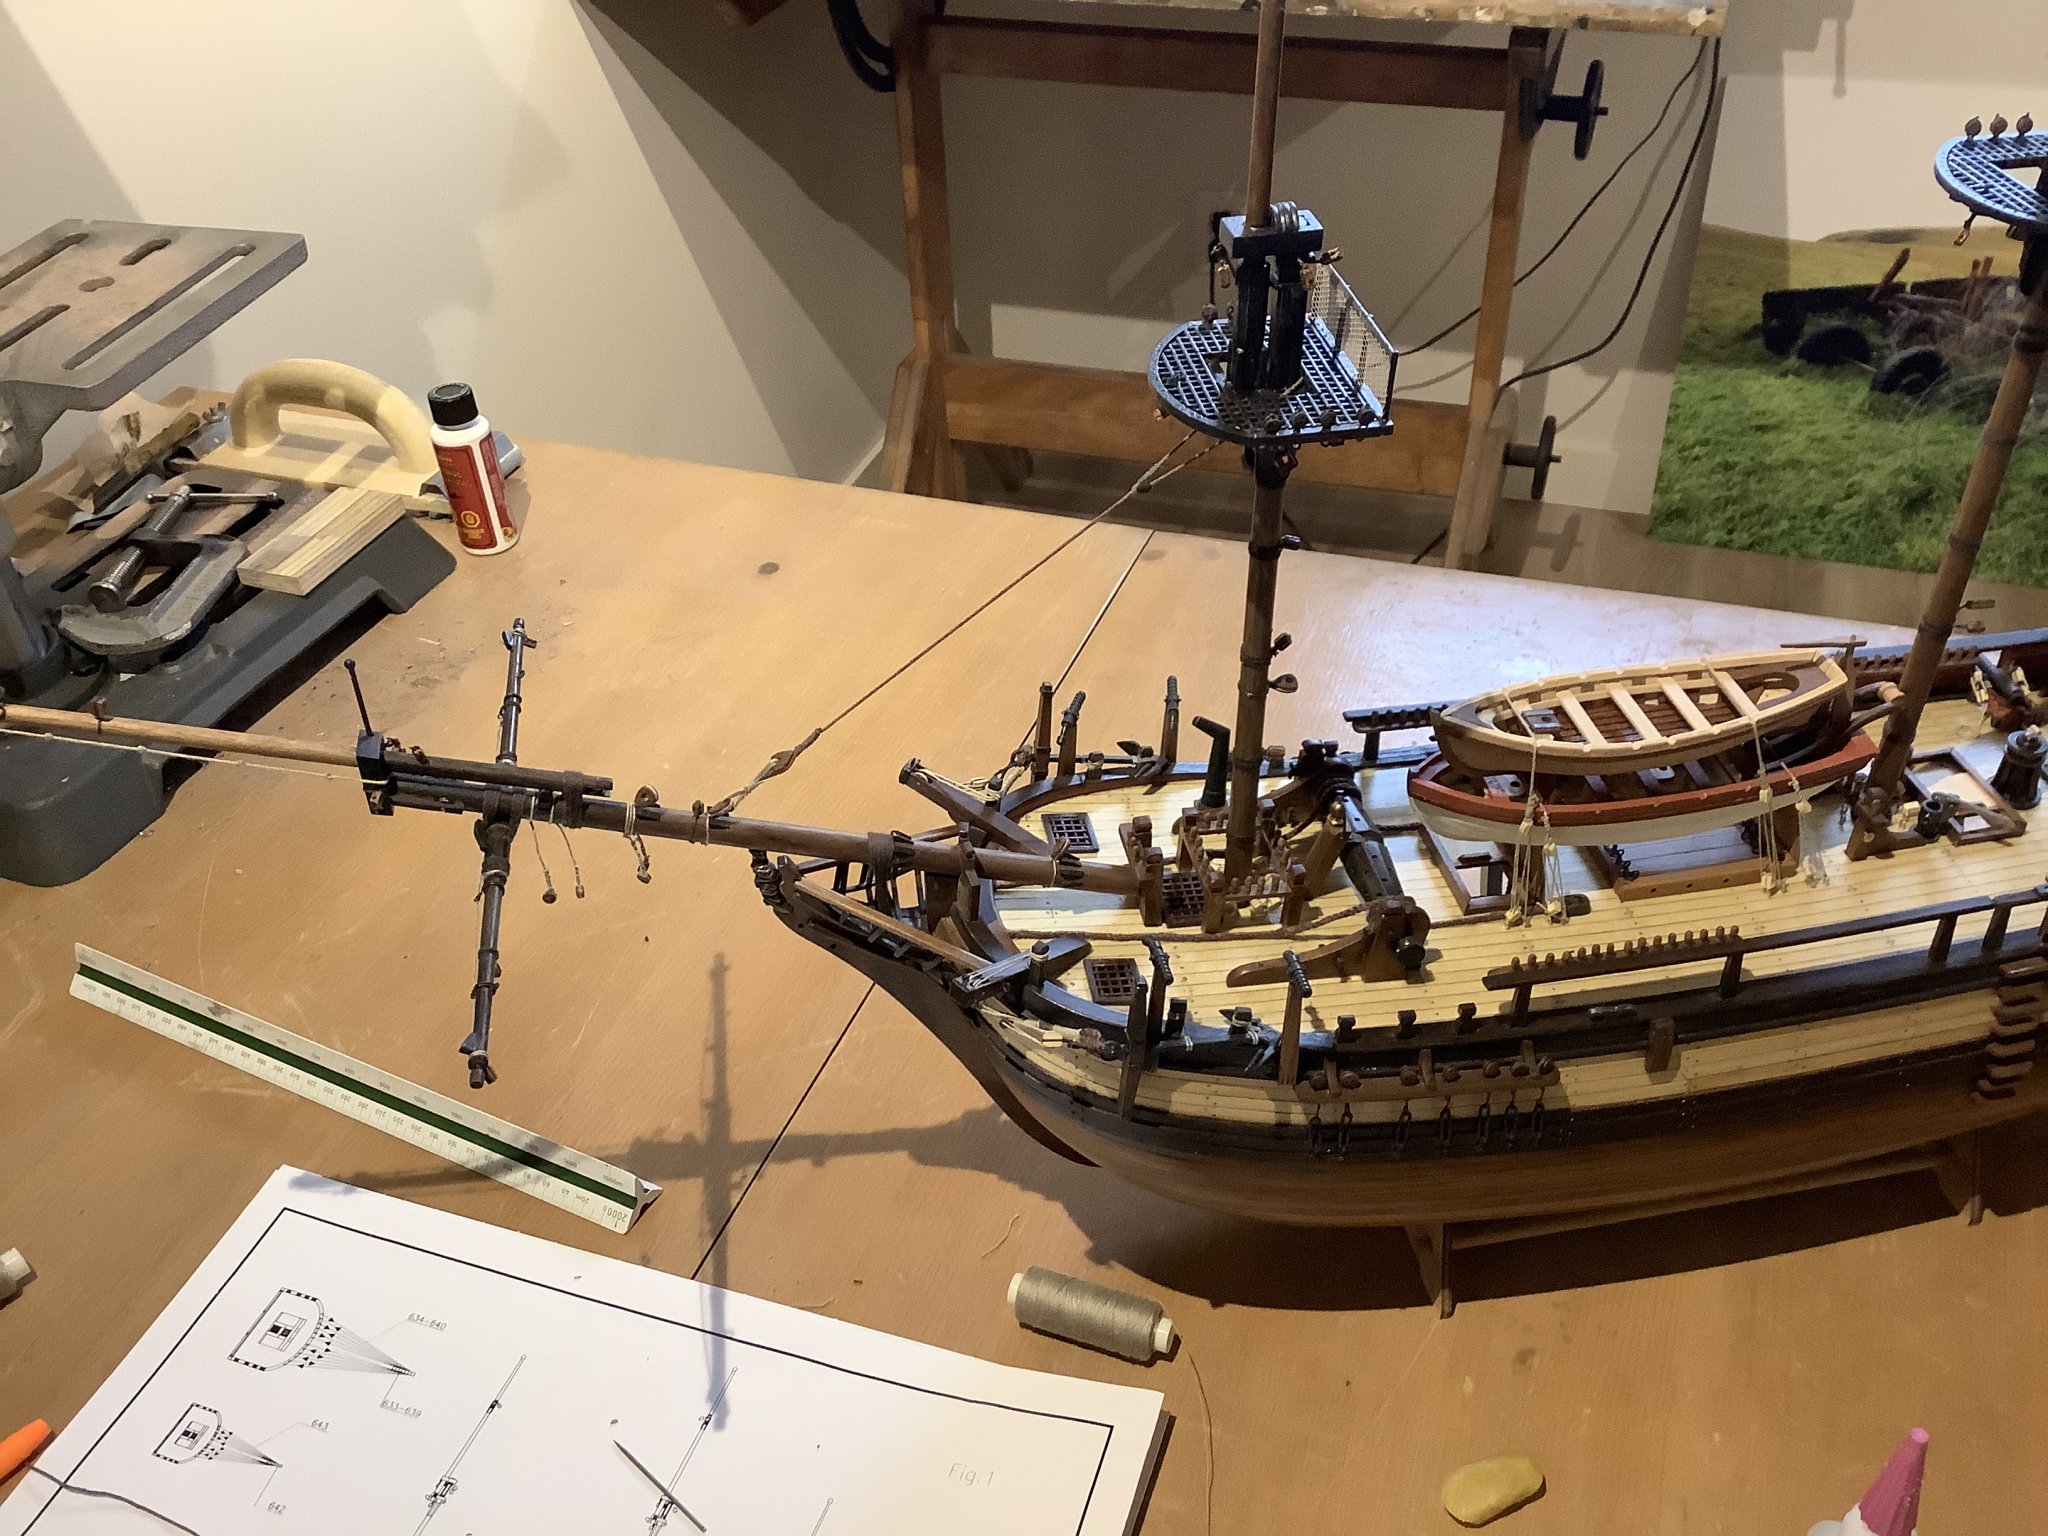
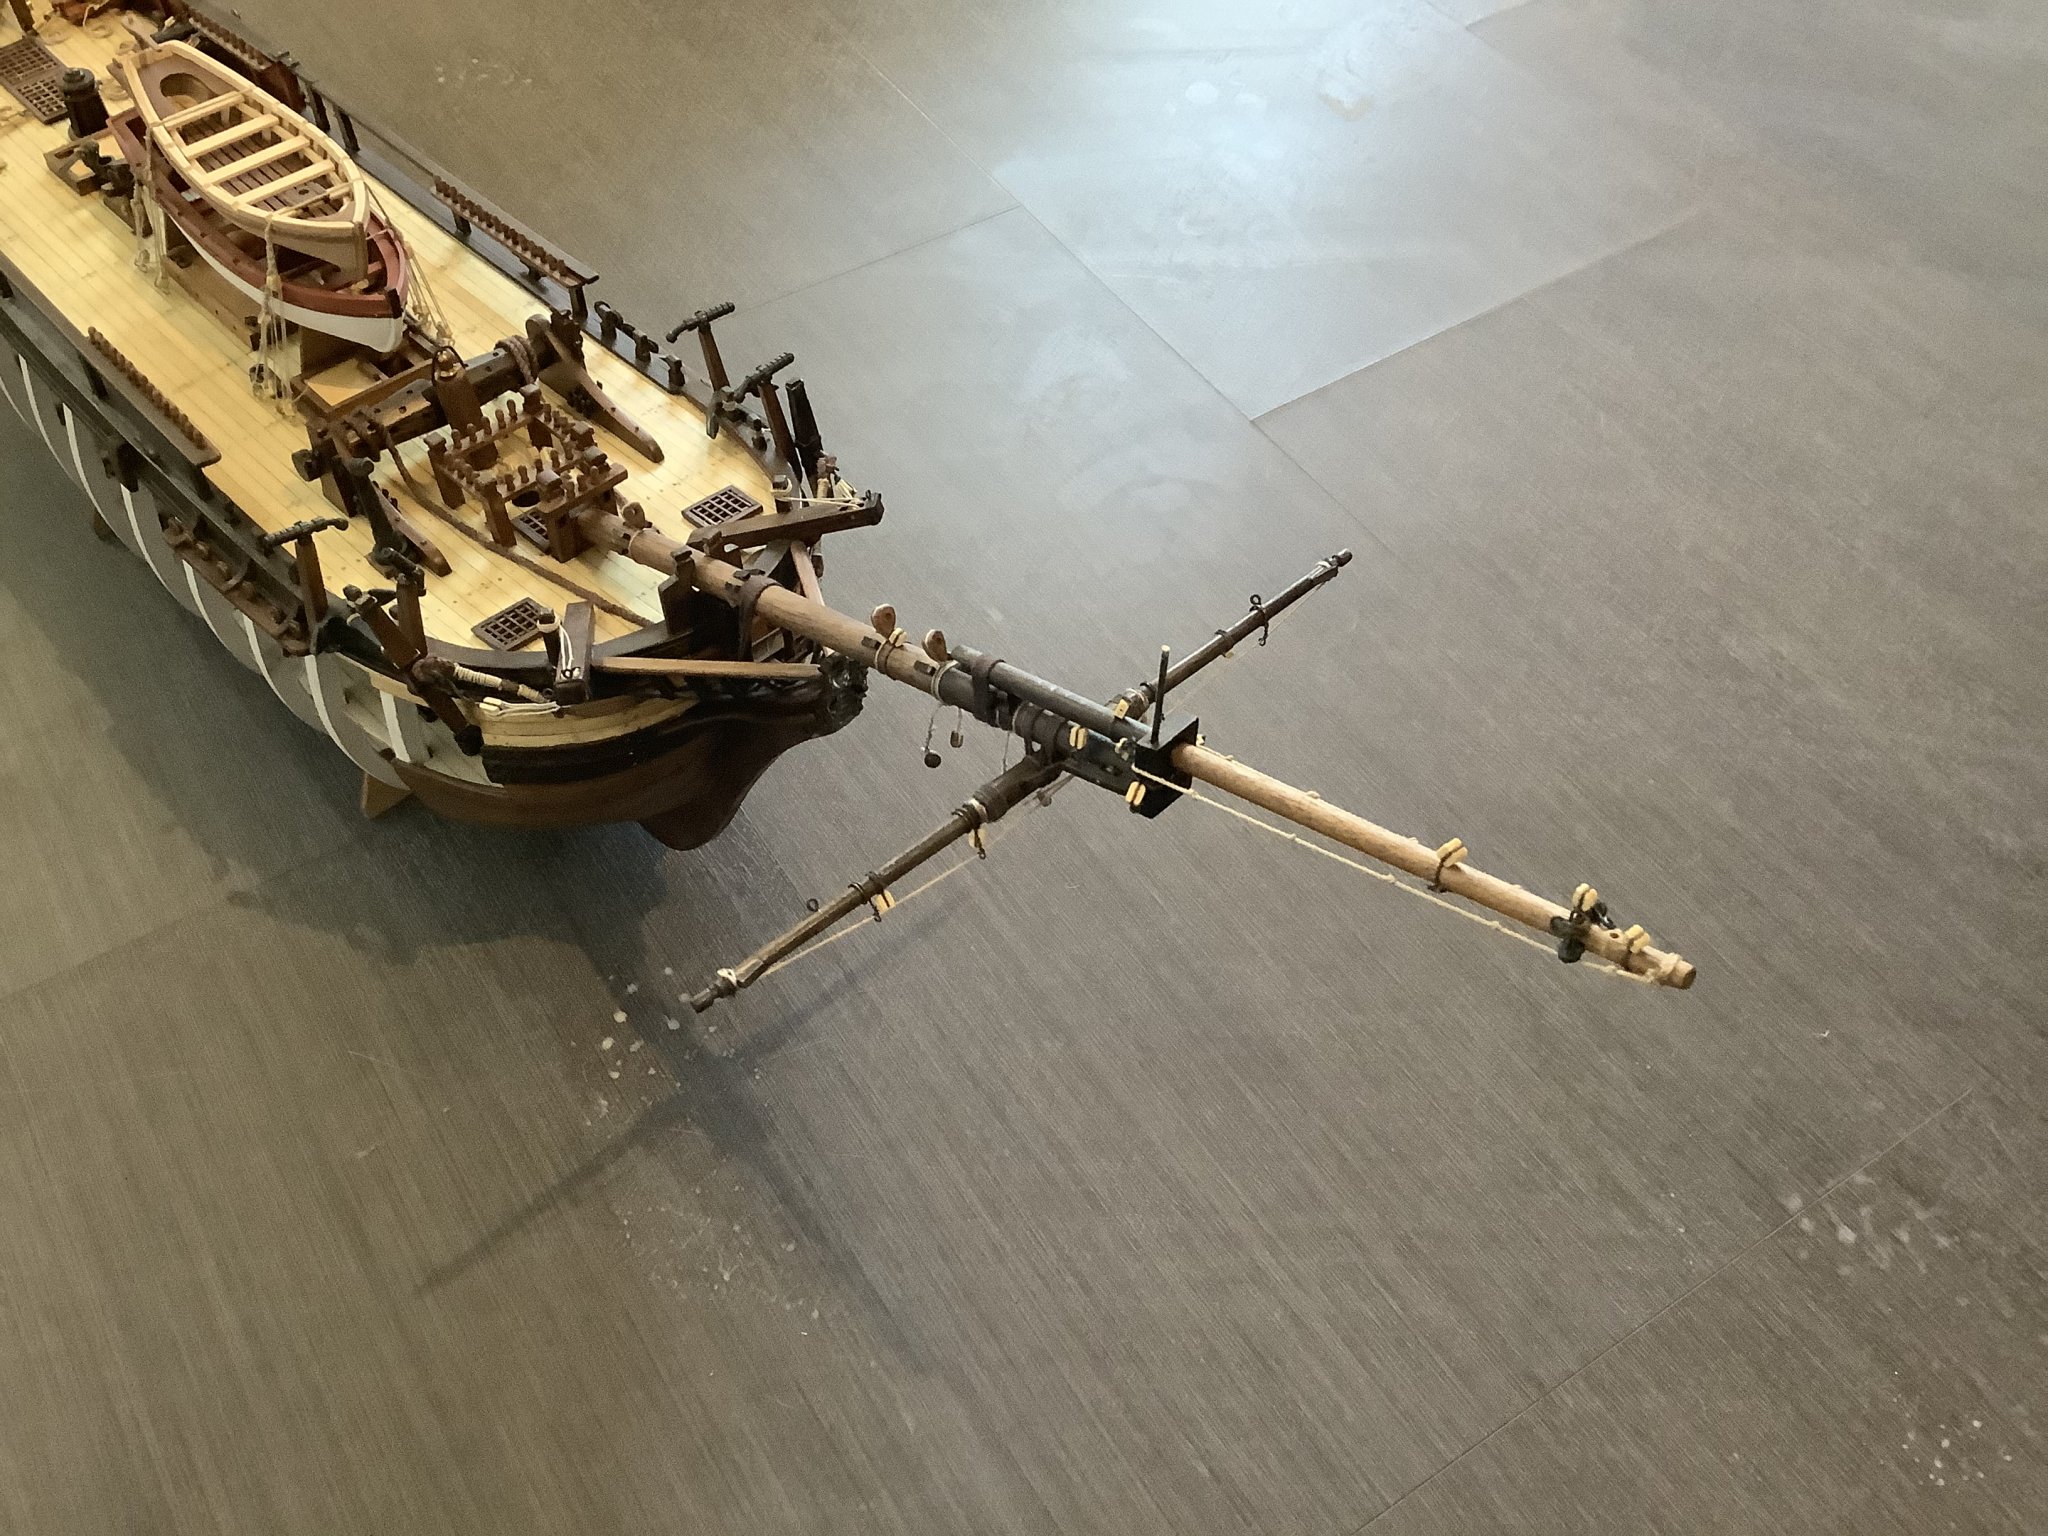
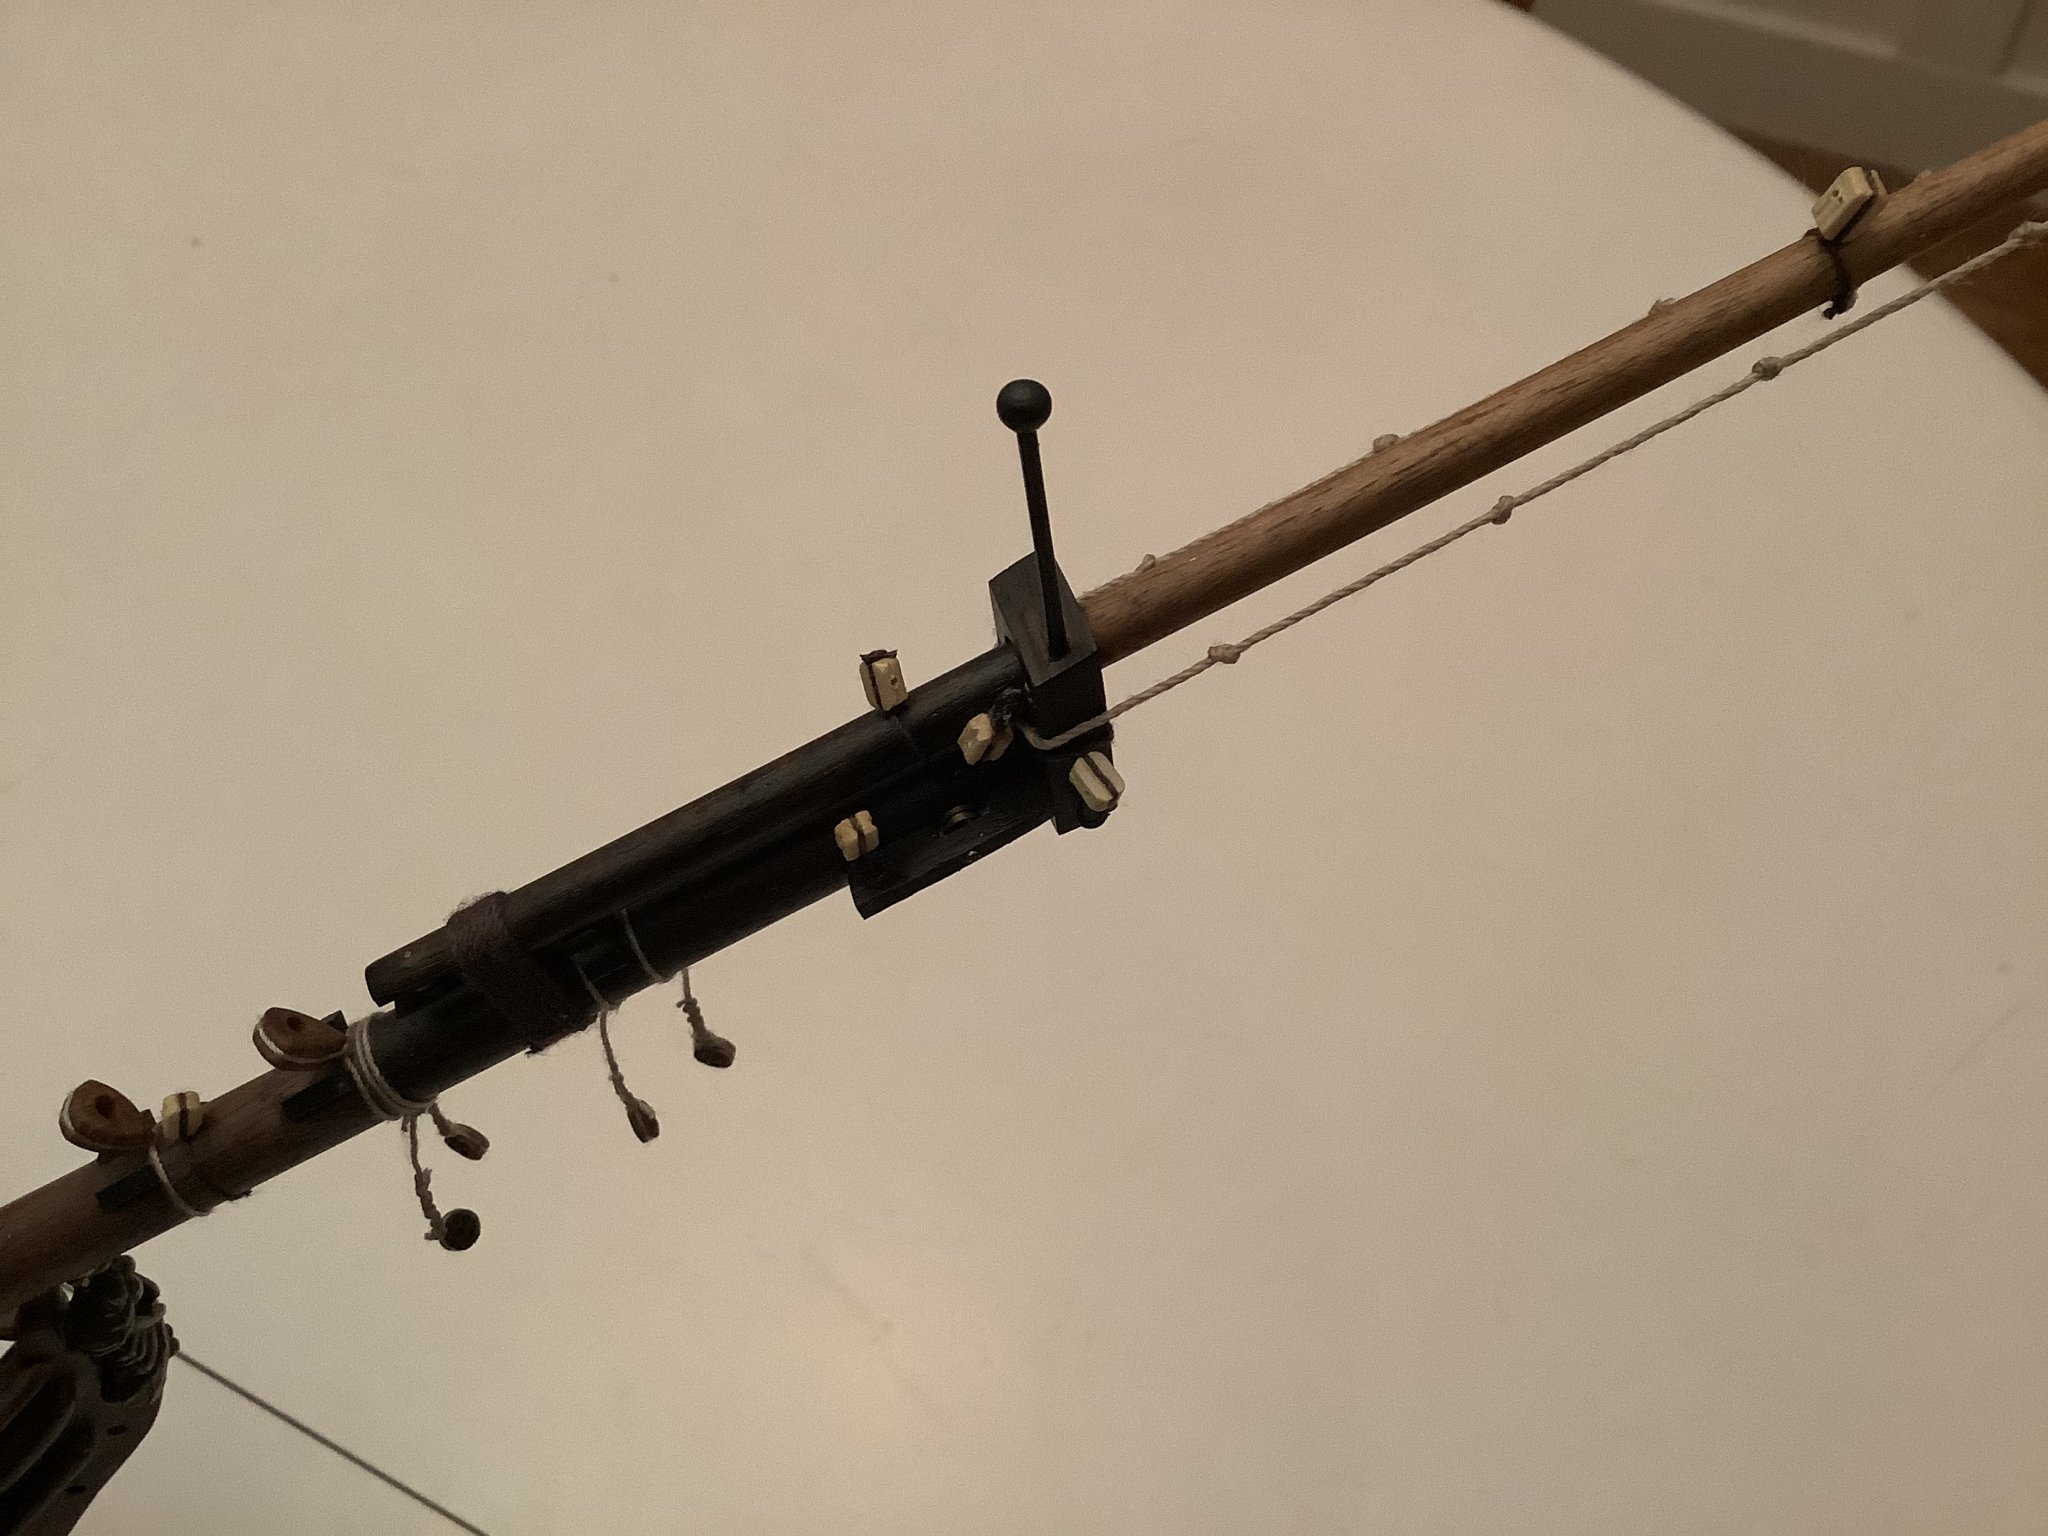
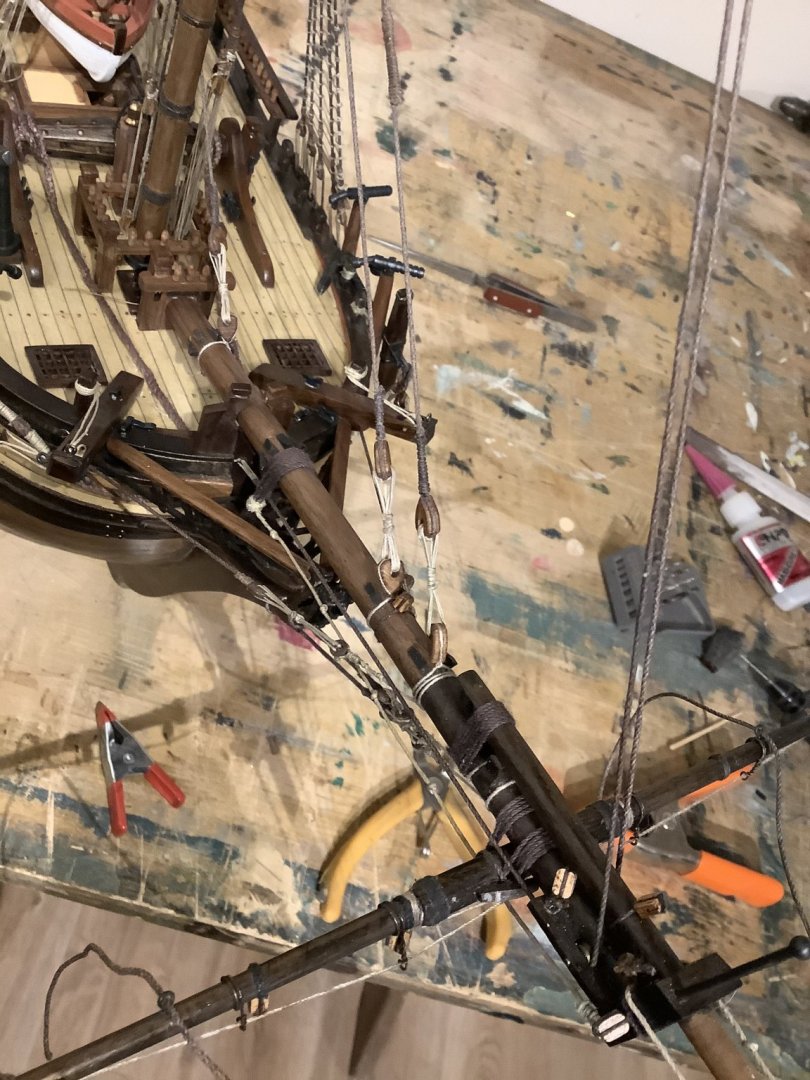
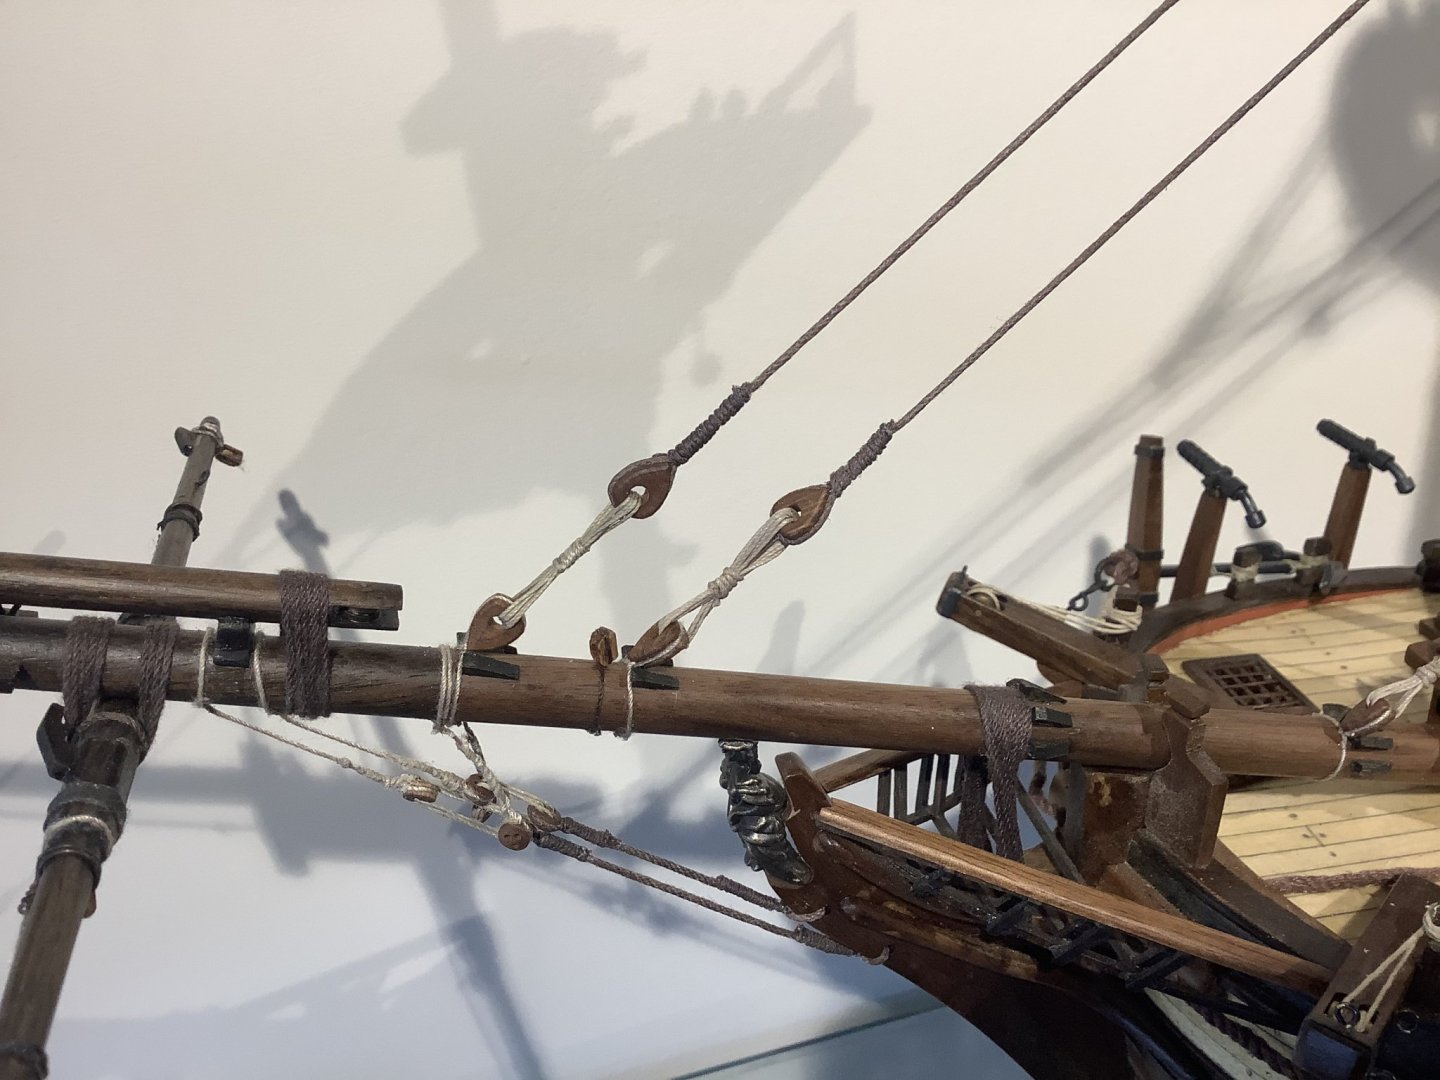
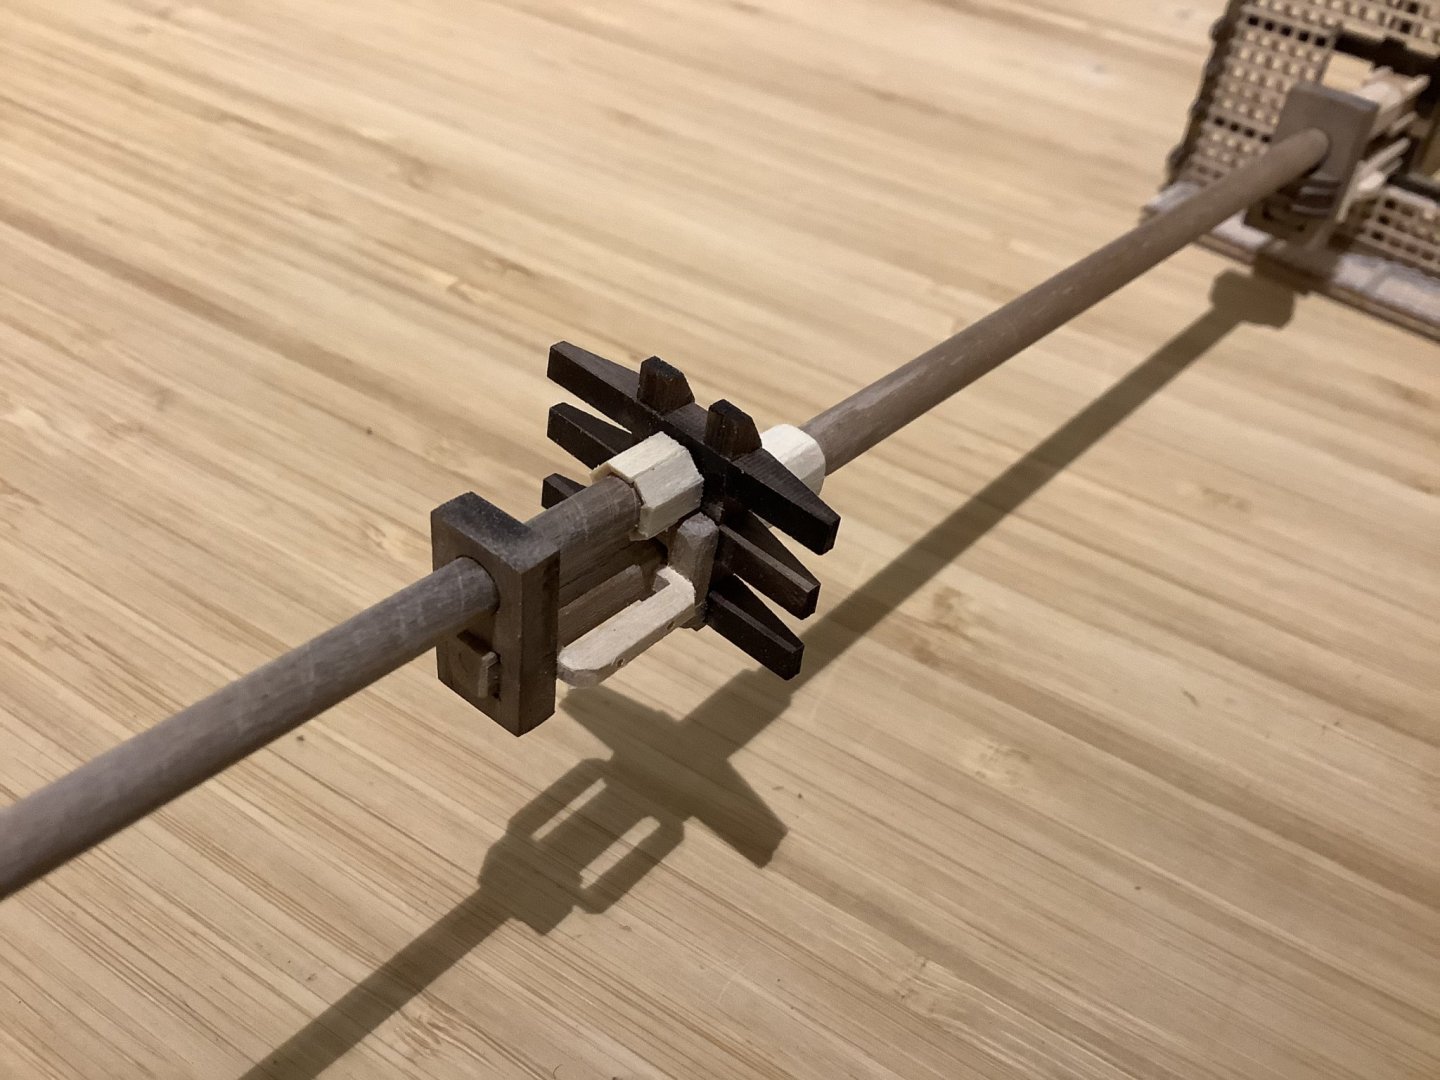
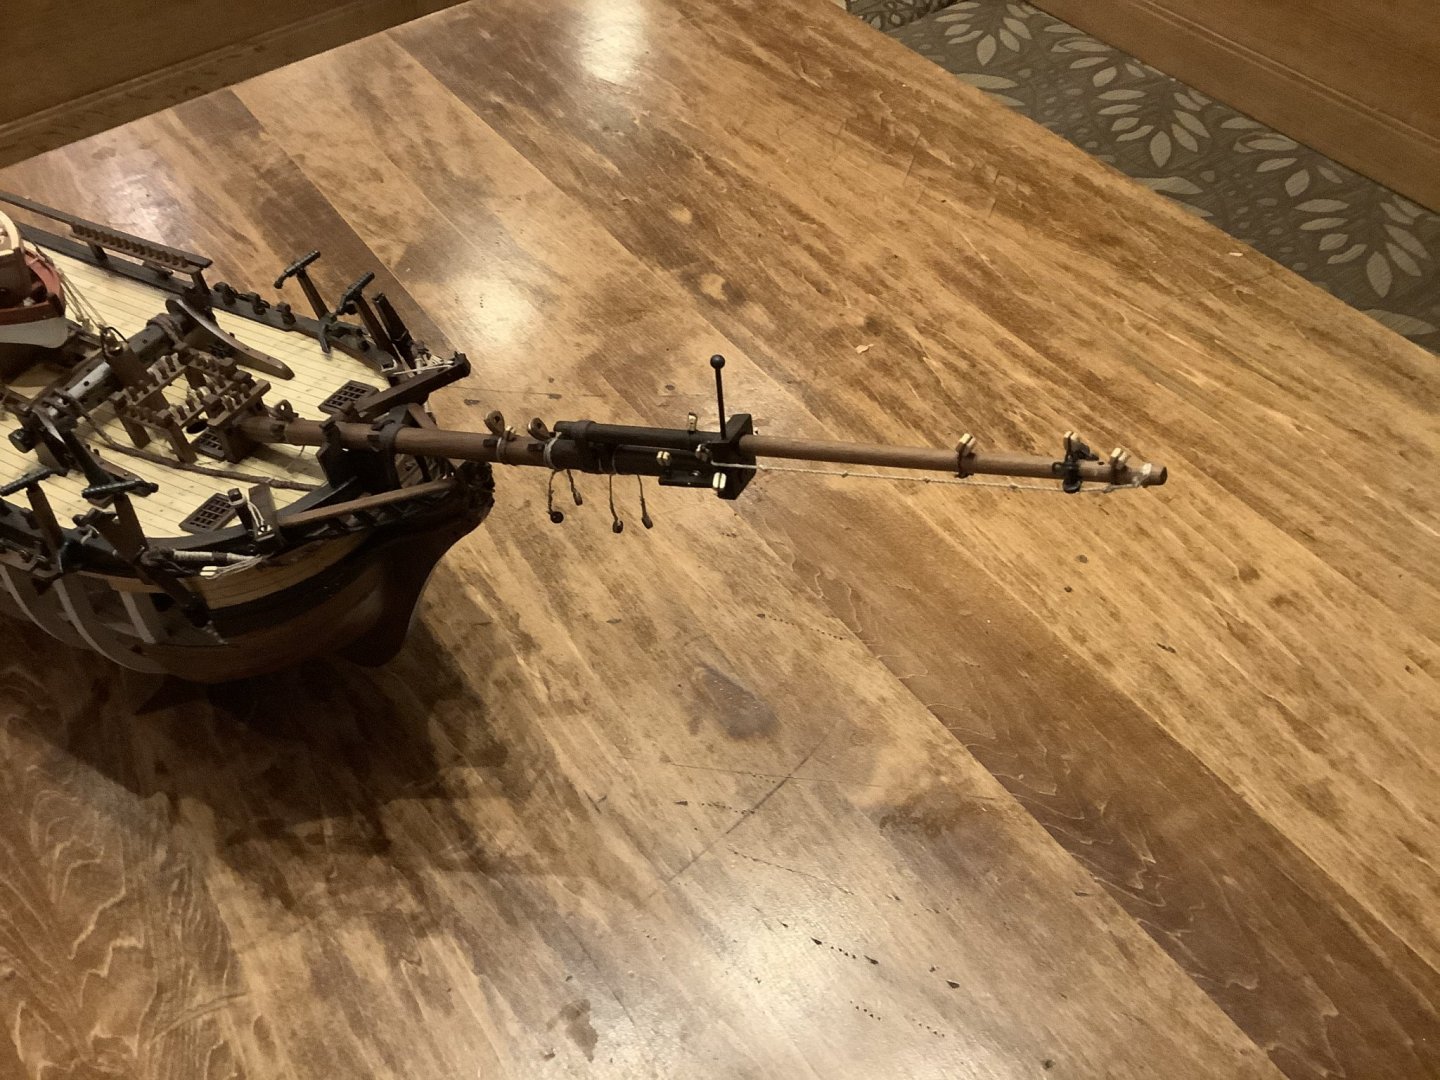
Had a few days at the cottage construction project, now back with the Bounty. Been perusing the mast and rigging details. They’d be relatively straightforward for Mr. Spock of the enterprise but to me they look about as easy to follow as the wiring diagram for a nuclear control room. Fitted the bowsprit and its apparatus without any real trouble. Followed my usual theme of spar varnish on the walnut, with the centre section stained ebony. Haha Now that I see it in place I think that damn ball at the top of the spike just looks way too big - Think I need to replace that. On to masts and spars.

- 171 replies
-
- 5
-
-
- artesania latina
- bounty
- (and 1 more)
-
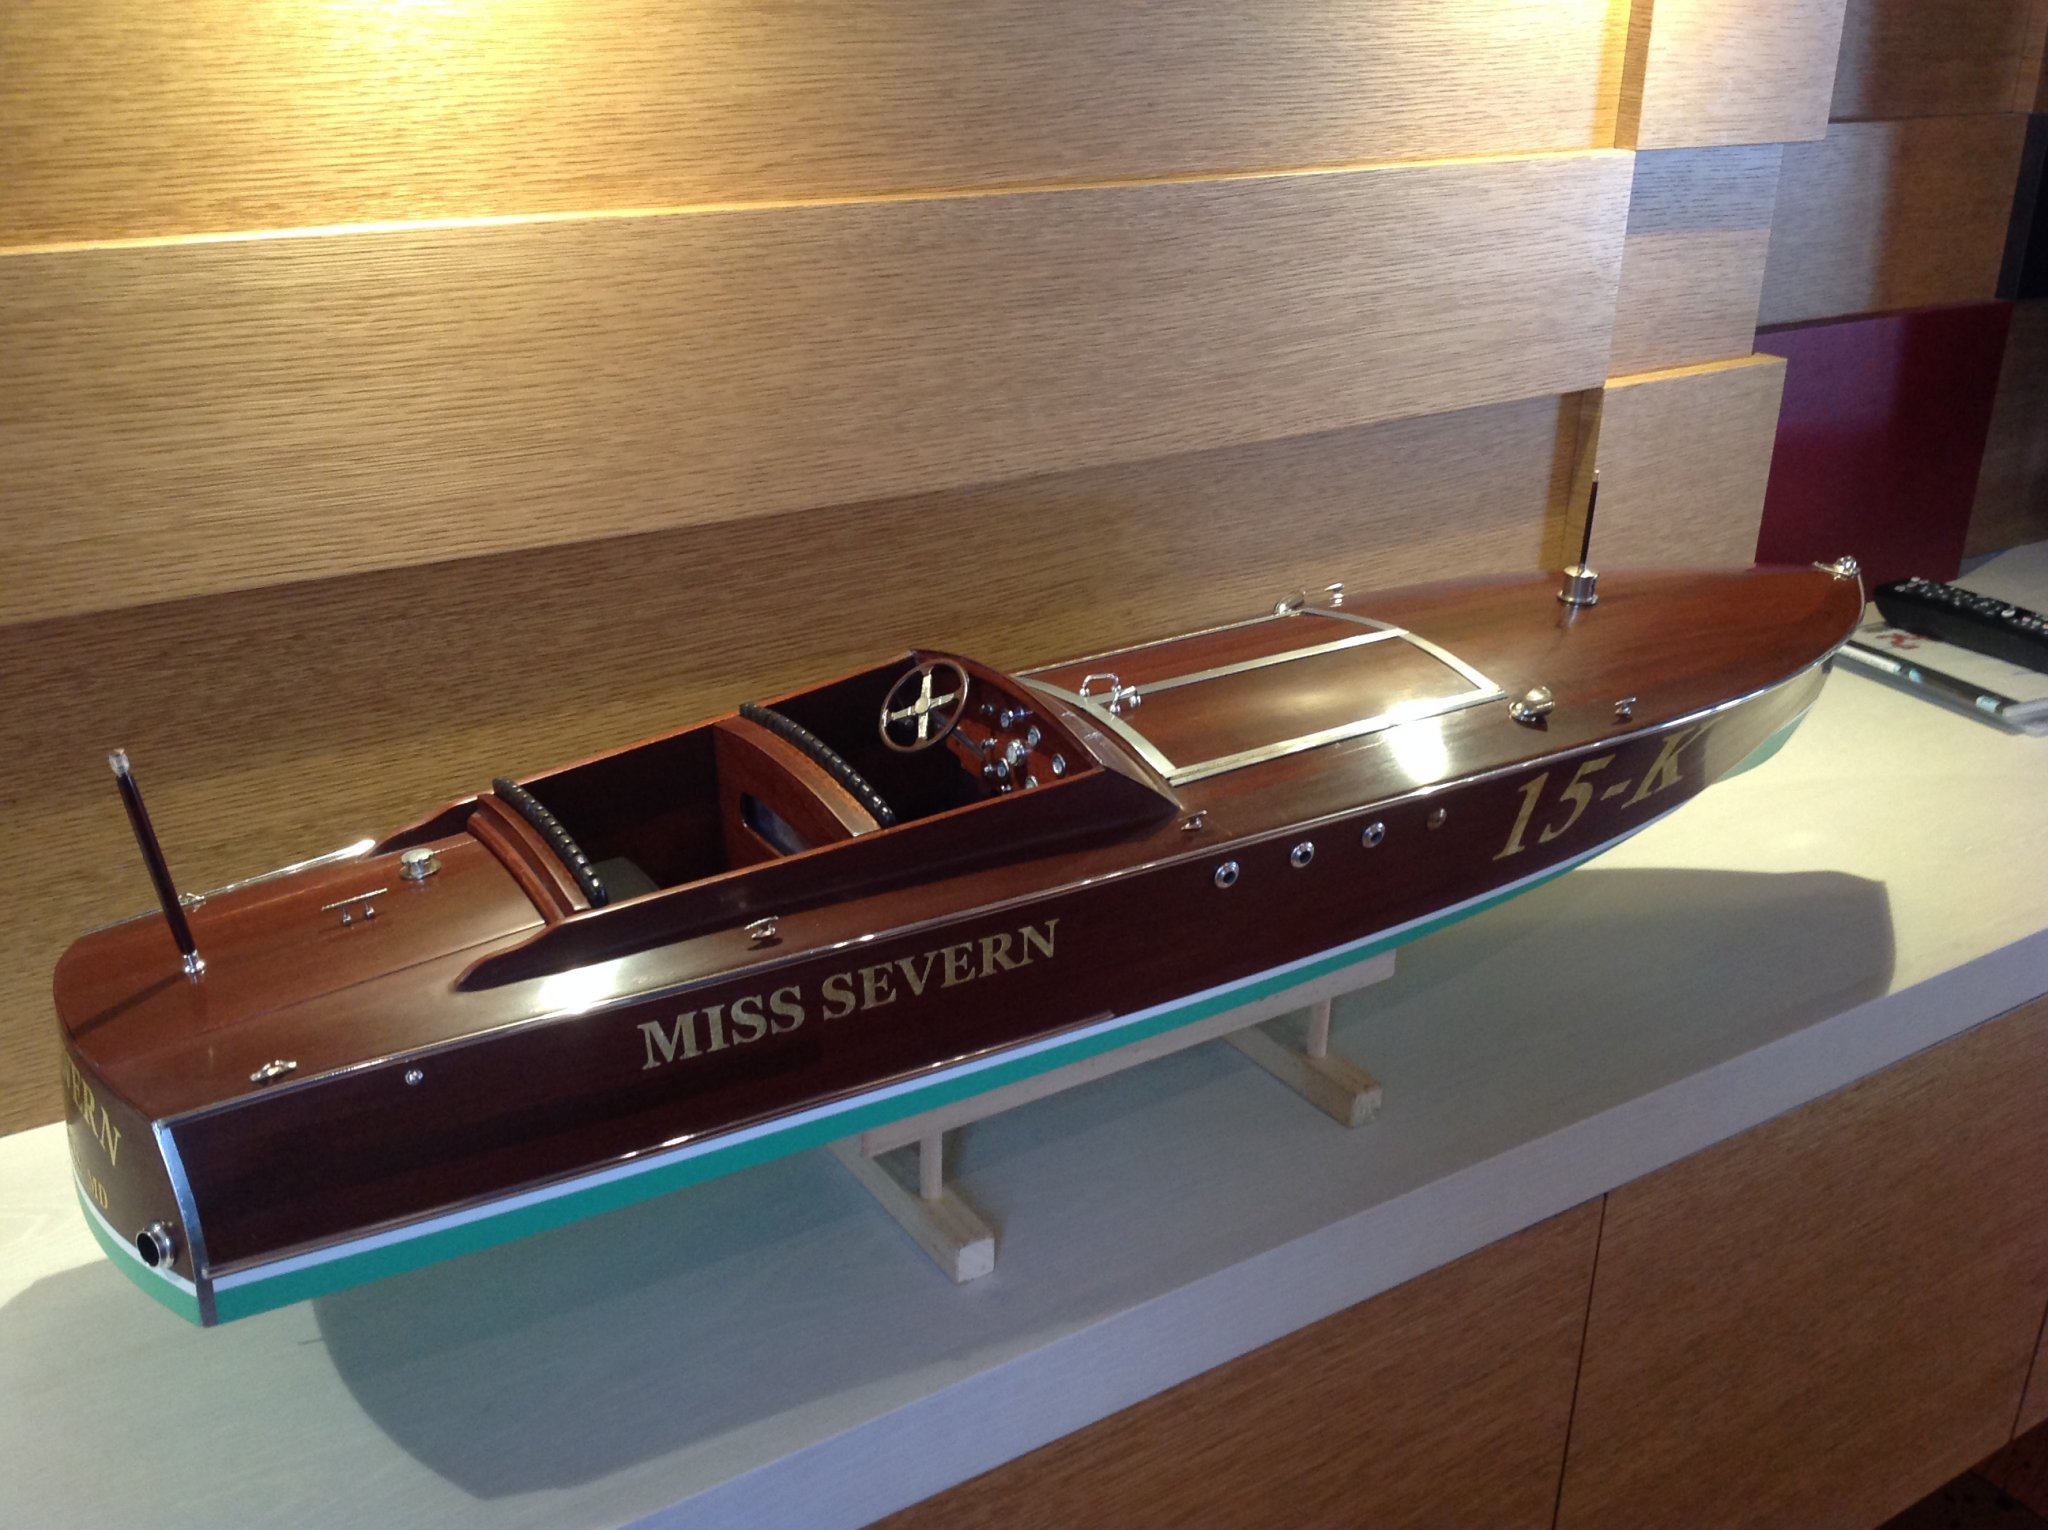
Hi Mike. That colour is going to look sweet with the mahogany when you get the Typhoon finished - used a similar colour below the waterline when I did my Miss Severn, thought it risky at the time but really liked the contrast in finished product.

-
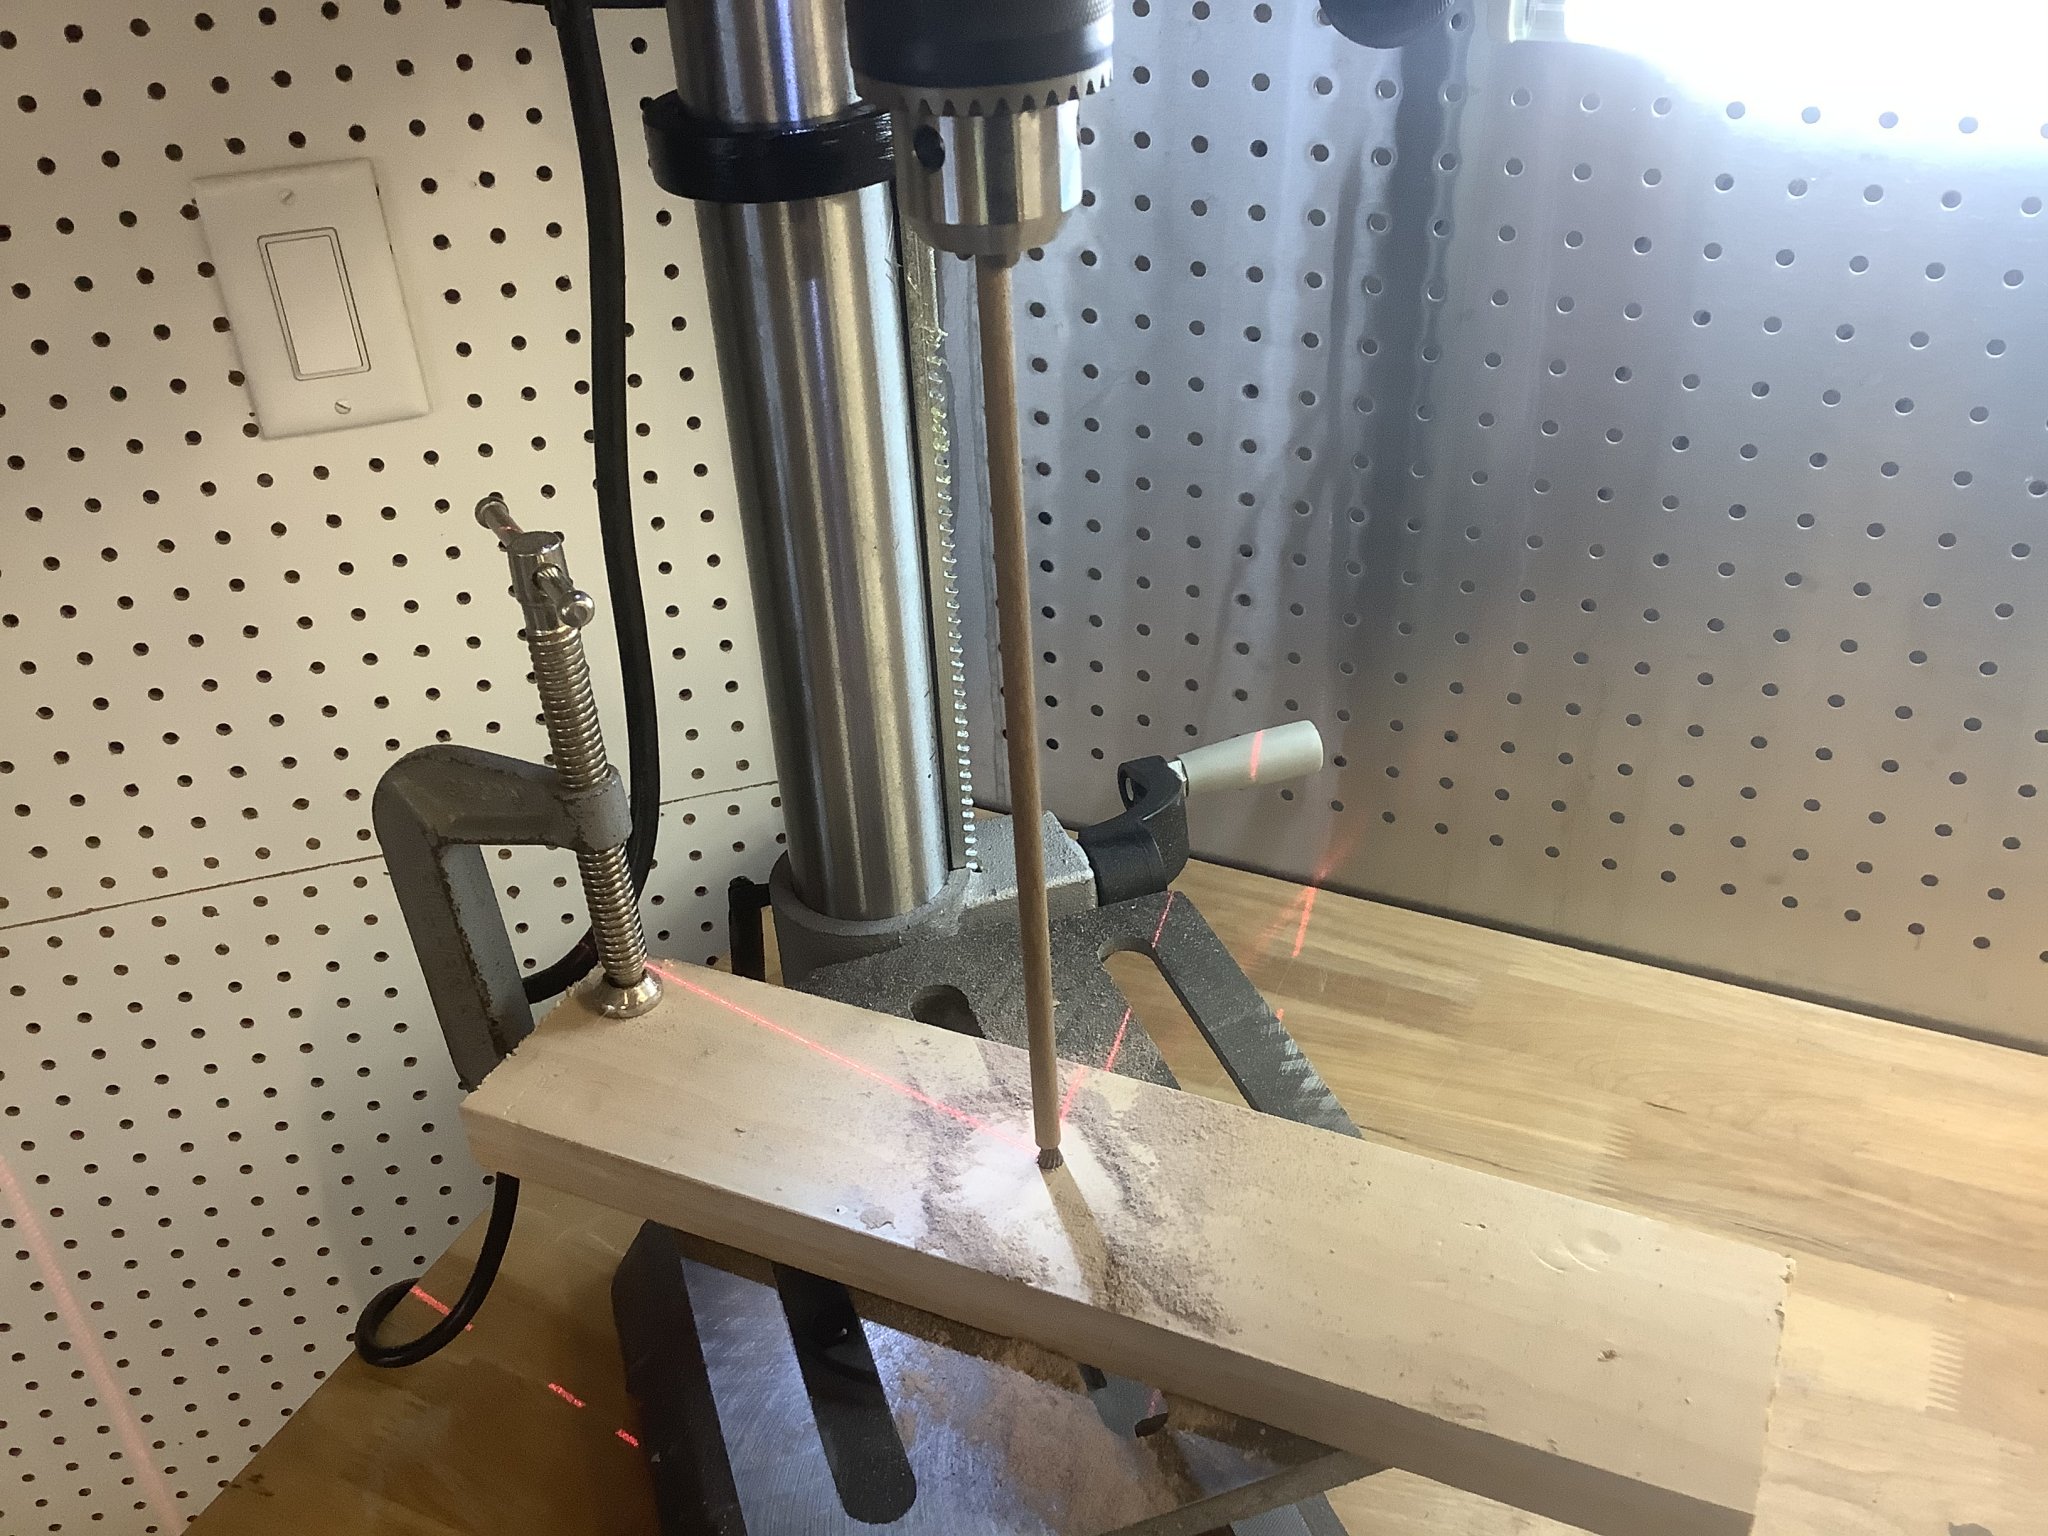
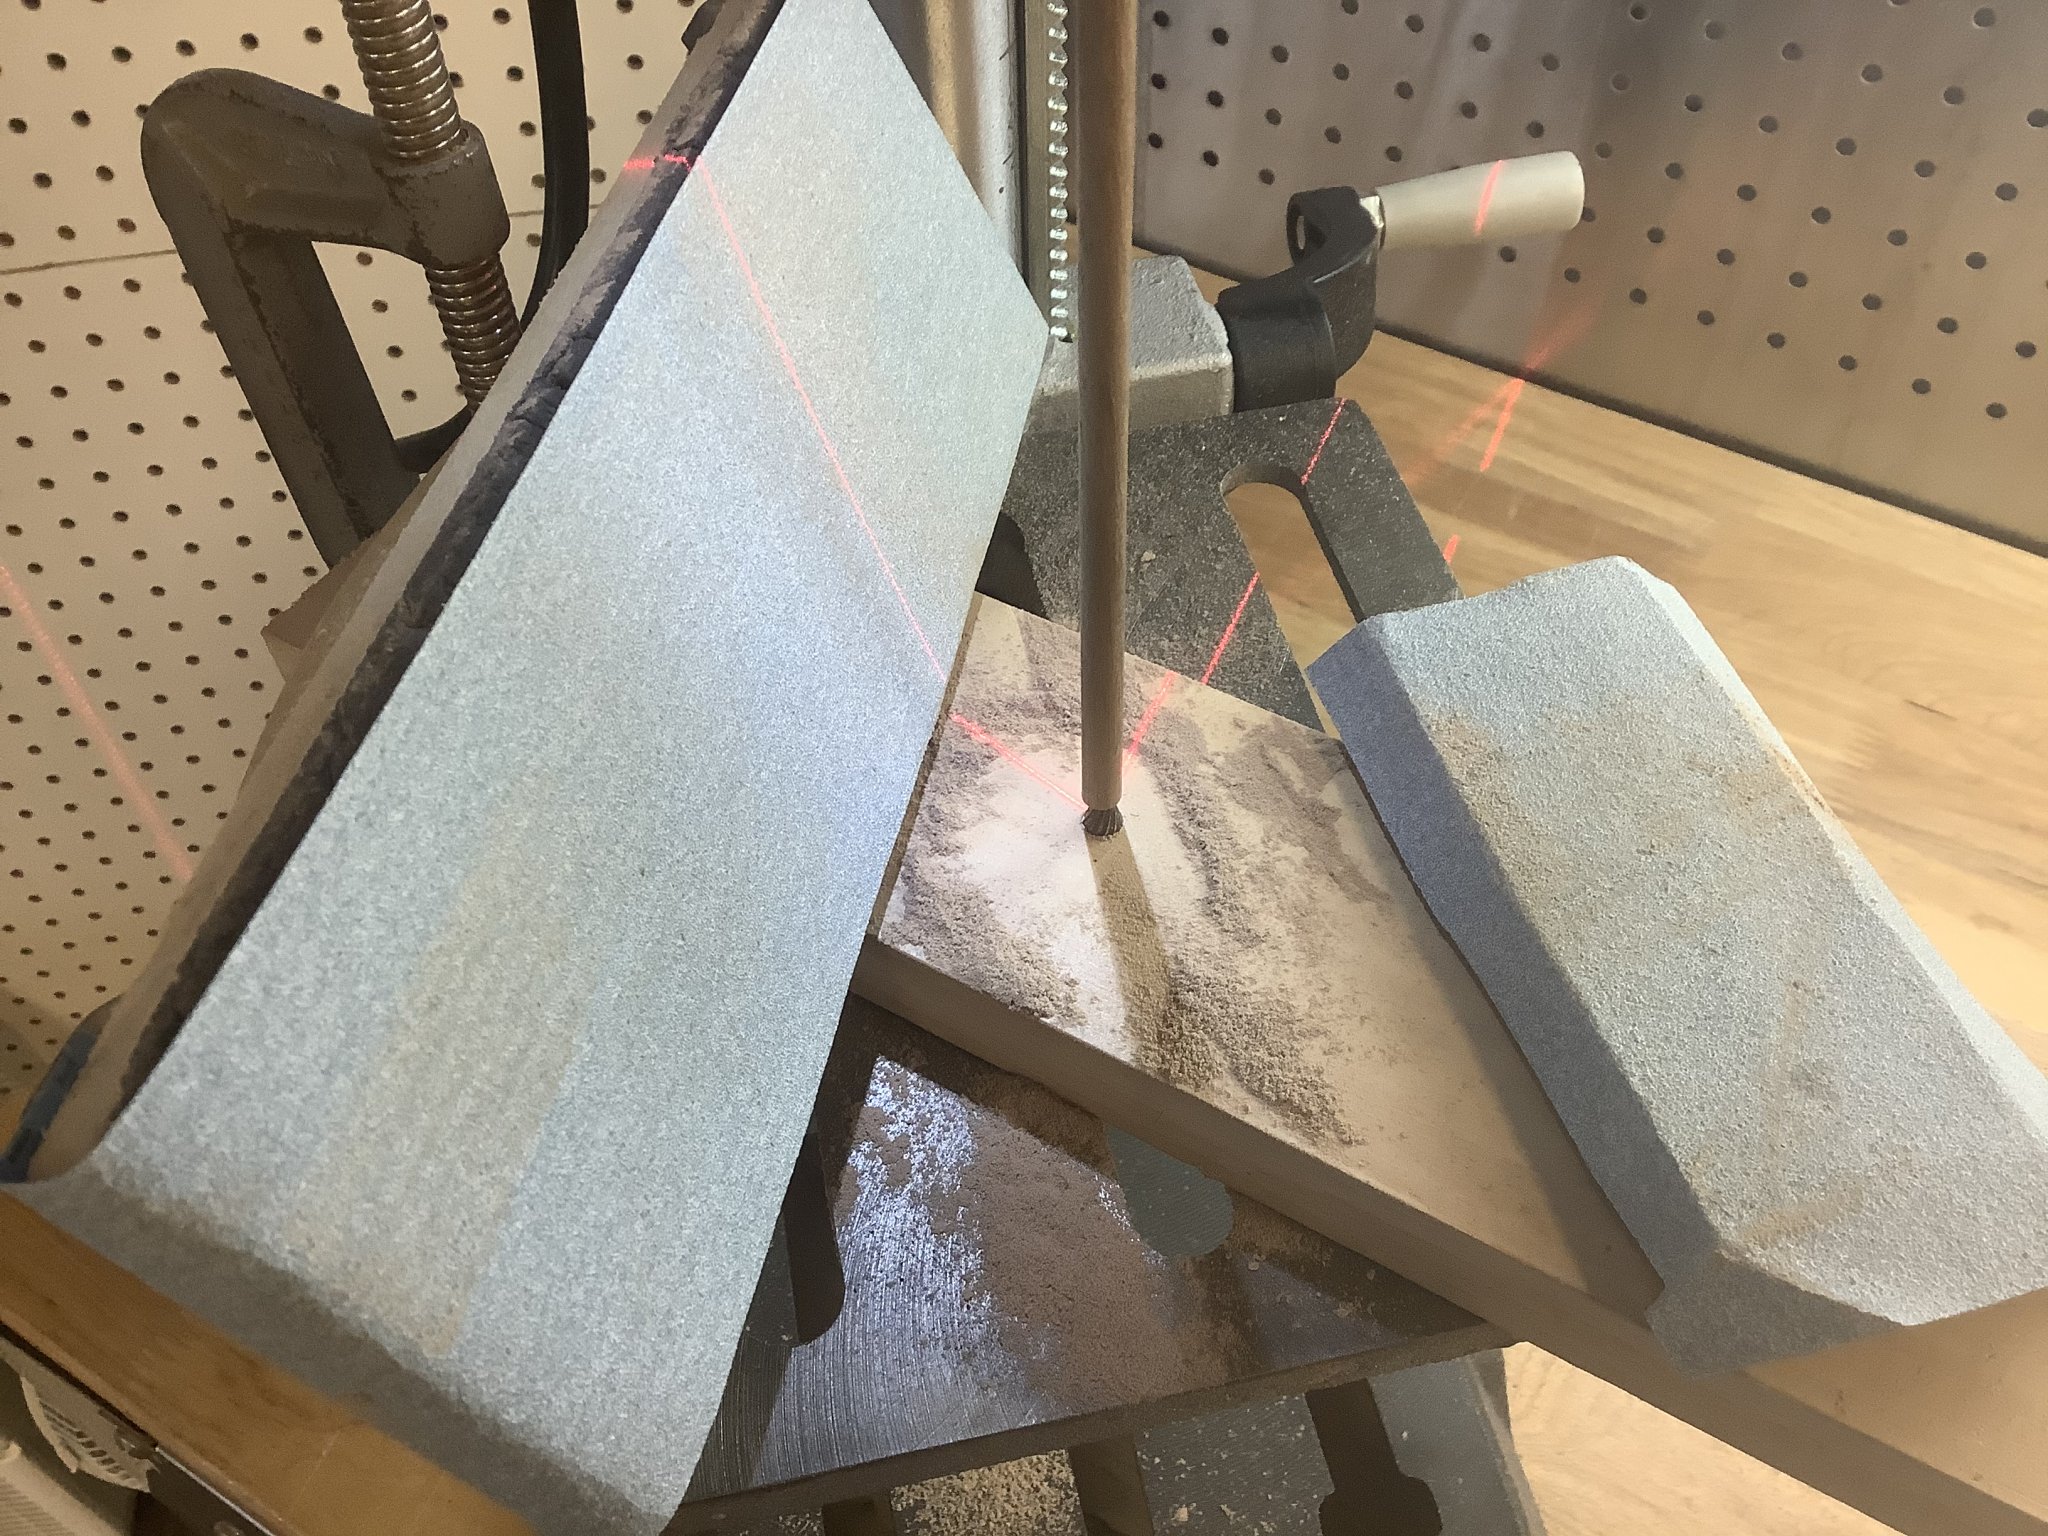
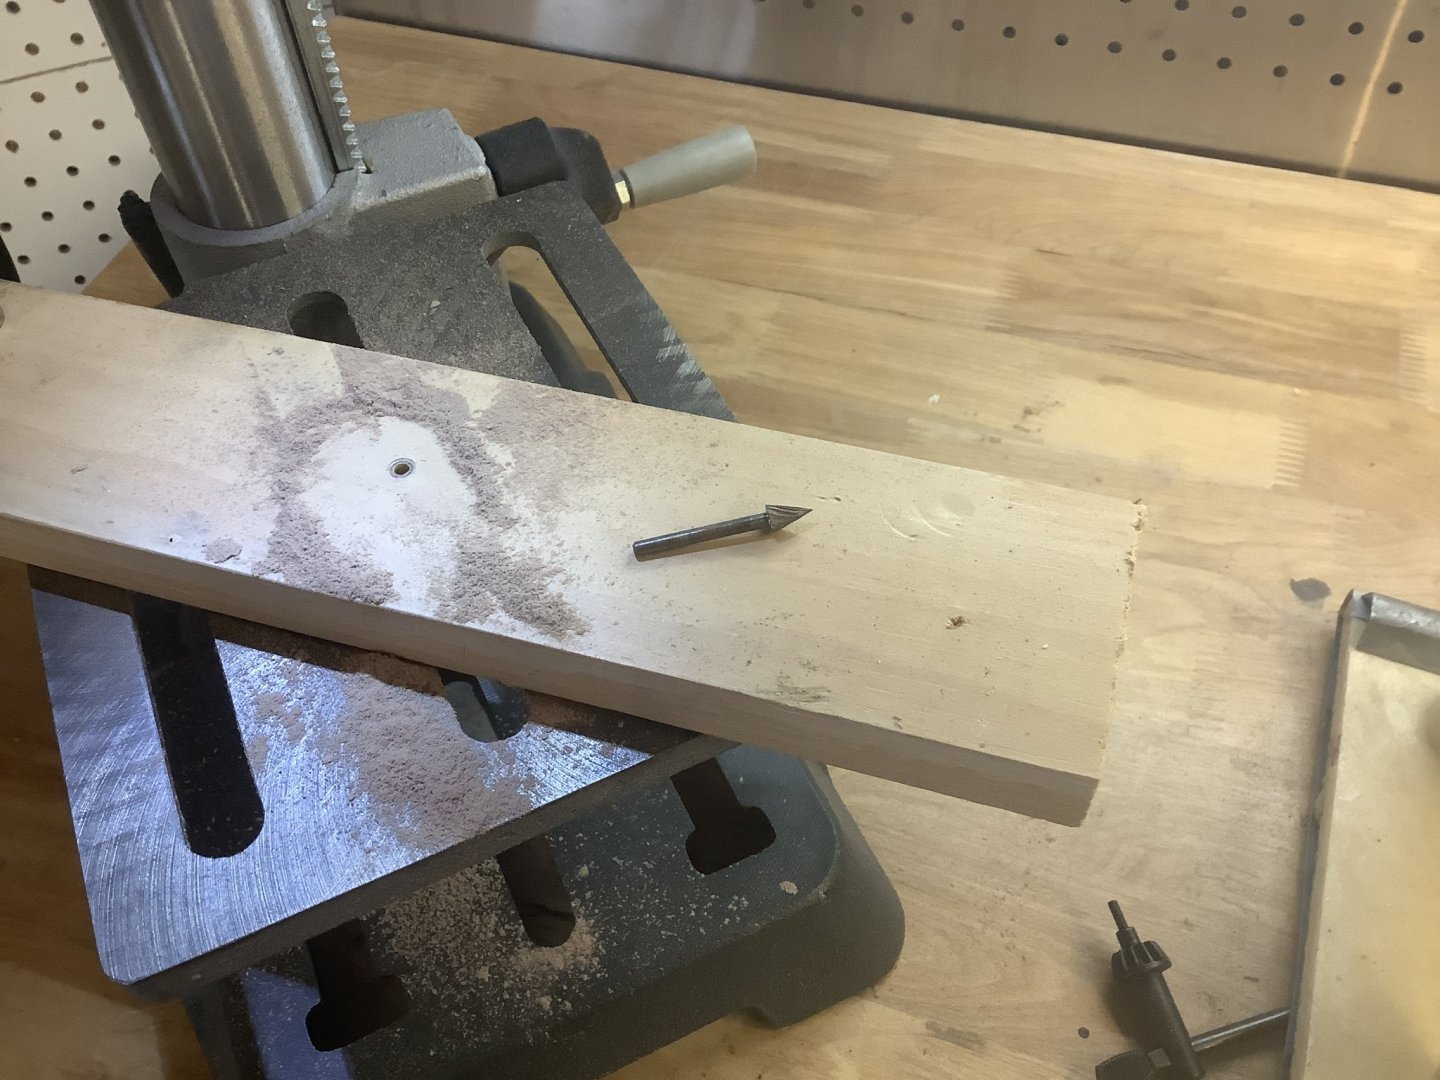
First time I’ve had the pleasure of using a drill press to taper the masts, bowsprit etc. Man it sure makes it fast and easy. I used a step drill bit from my Dremel for the lower spindle, drilled a hole same size as bit shank in a piece of wood and clamped to the drill press table. Bit of oil on the shank. Created a shallow hole in the dowel to seat the spindle and raised the table so it is set. Drill on low speed and a couple of sanding blocks with medium paper and it’s done less than a minute, ready for final fine sanding etc by hand.


- 171 replies
-
- 4
-
-
- artesania latina
- bounty
- (and 1 more)
-
Cool! Perfection. It is such a pleasure to see your craftsmanship, and how you execute every detail.
-
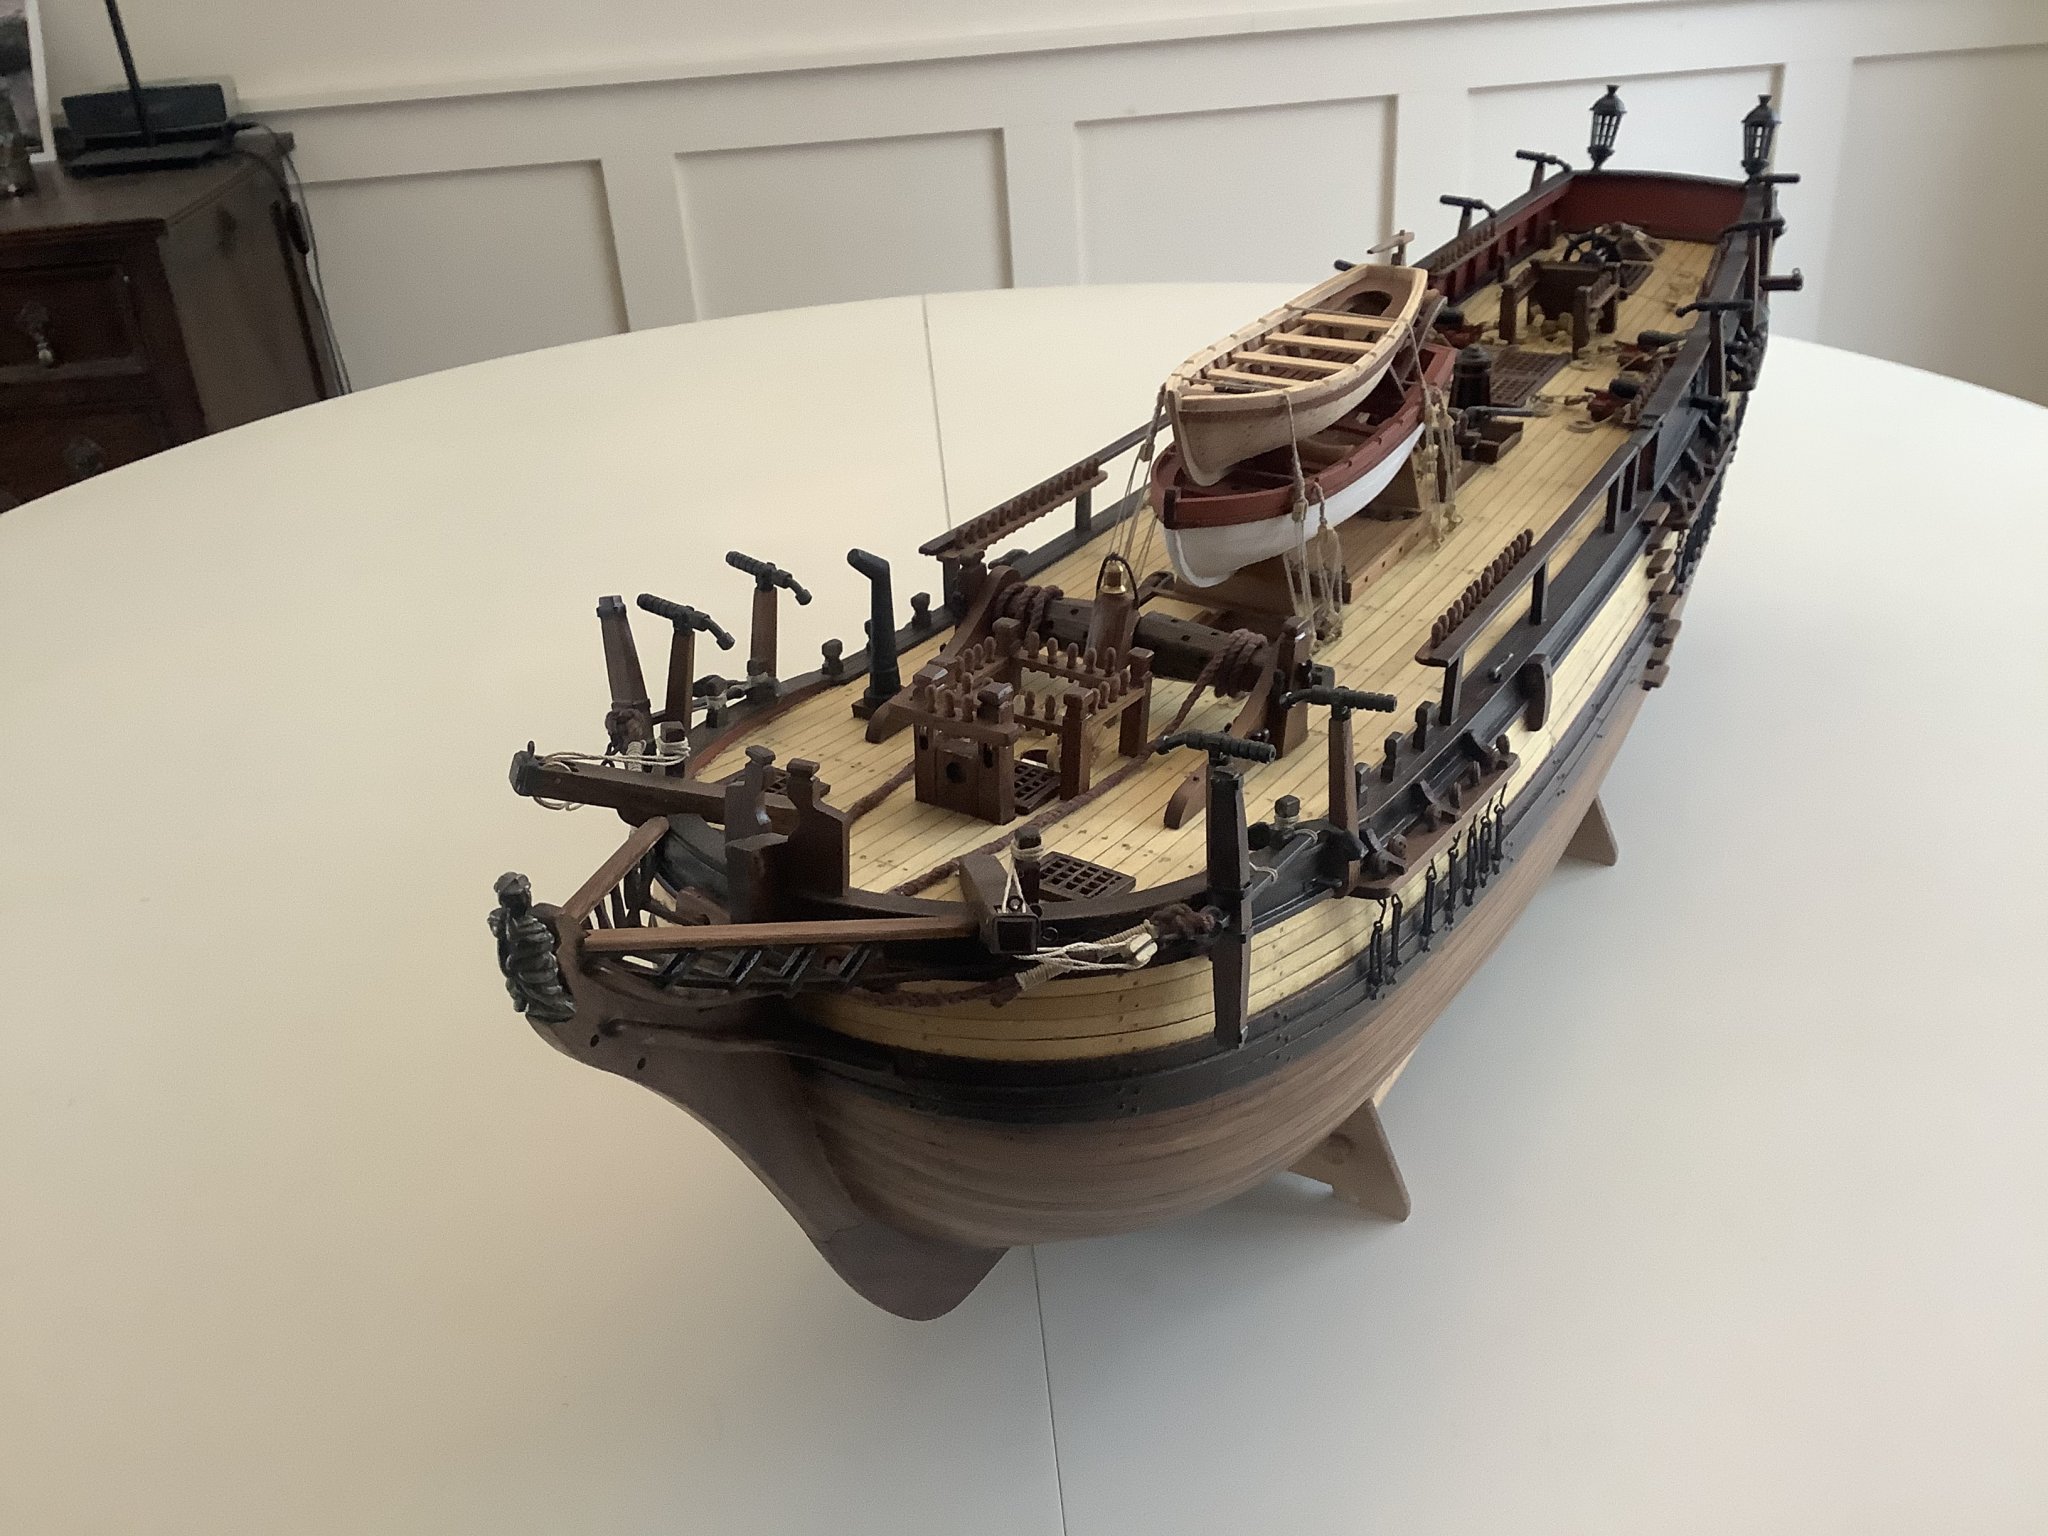
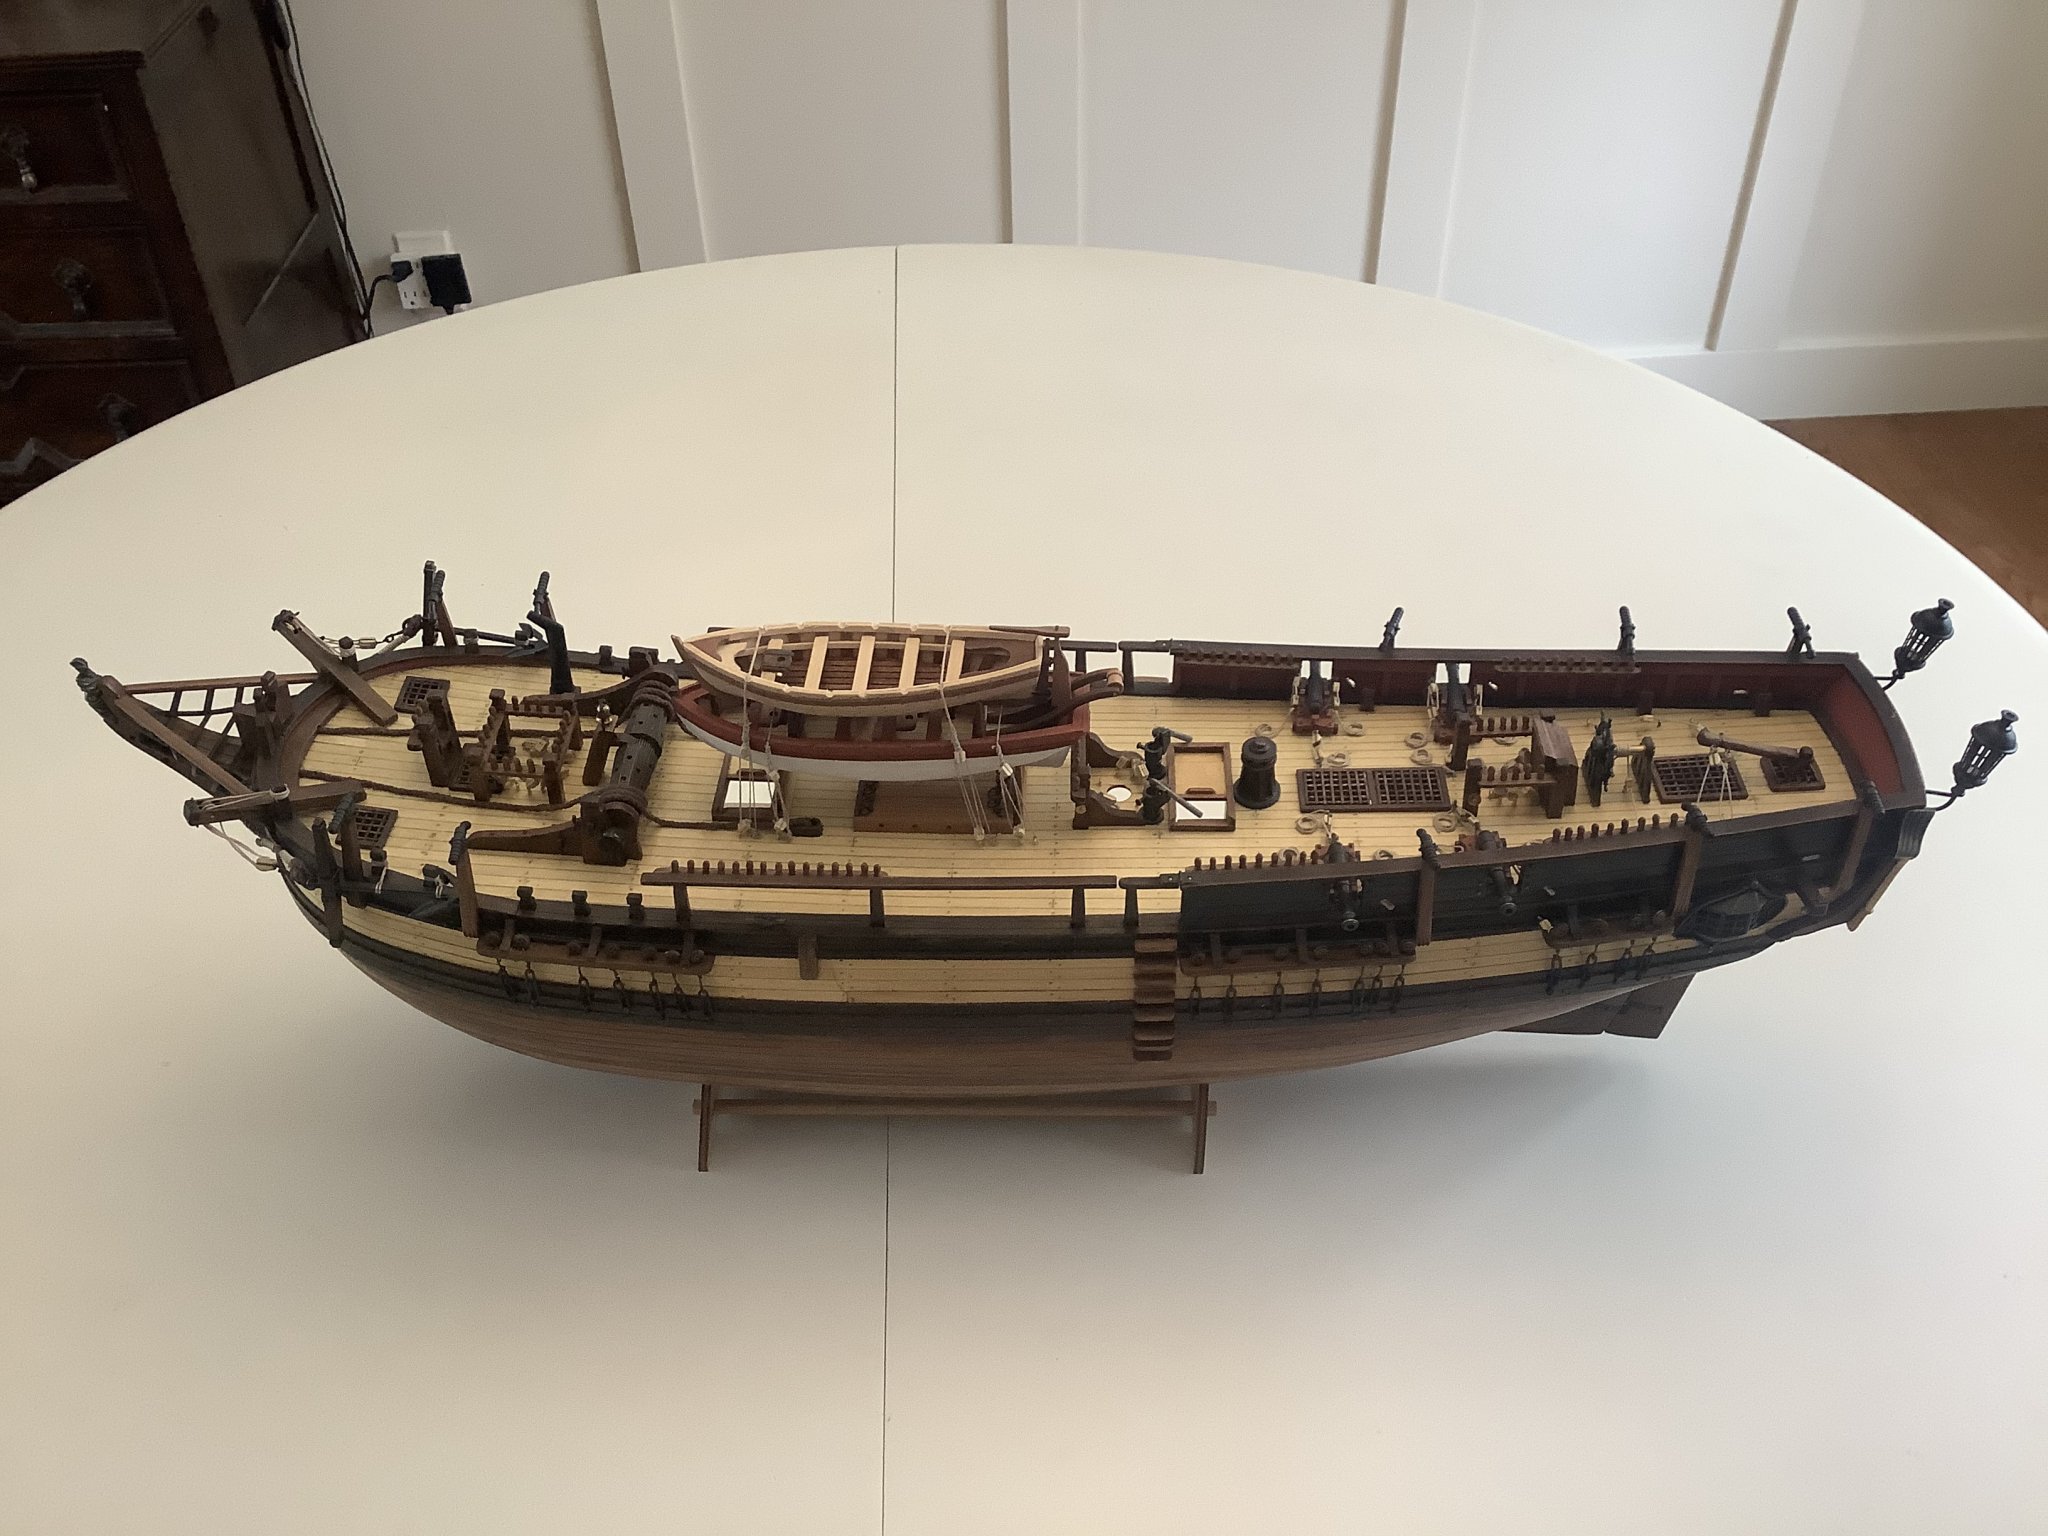
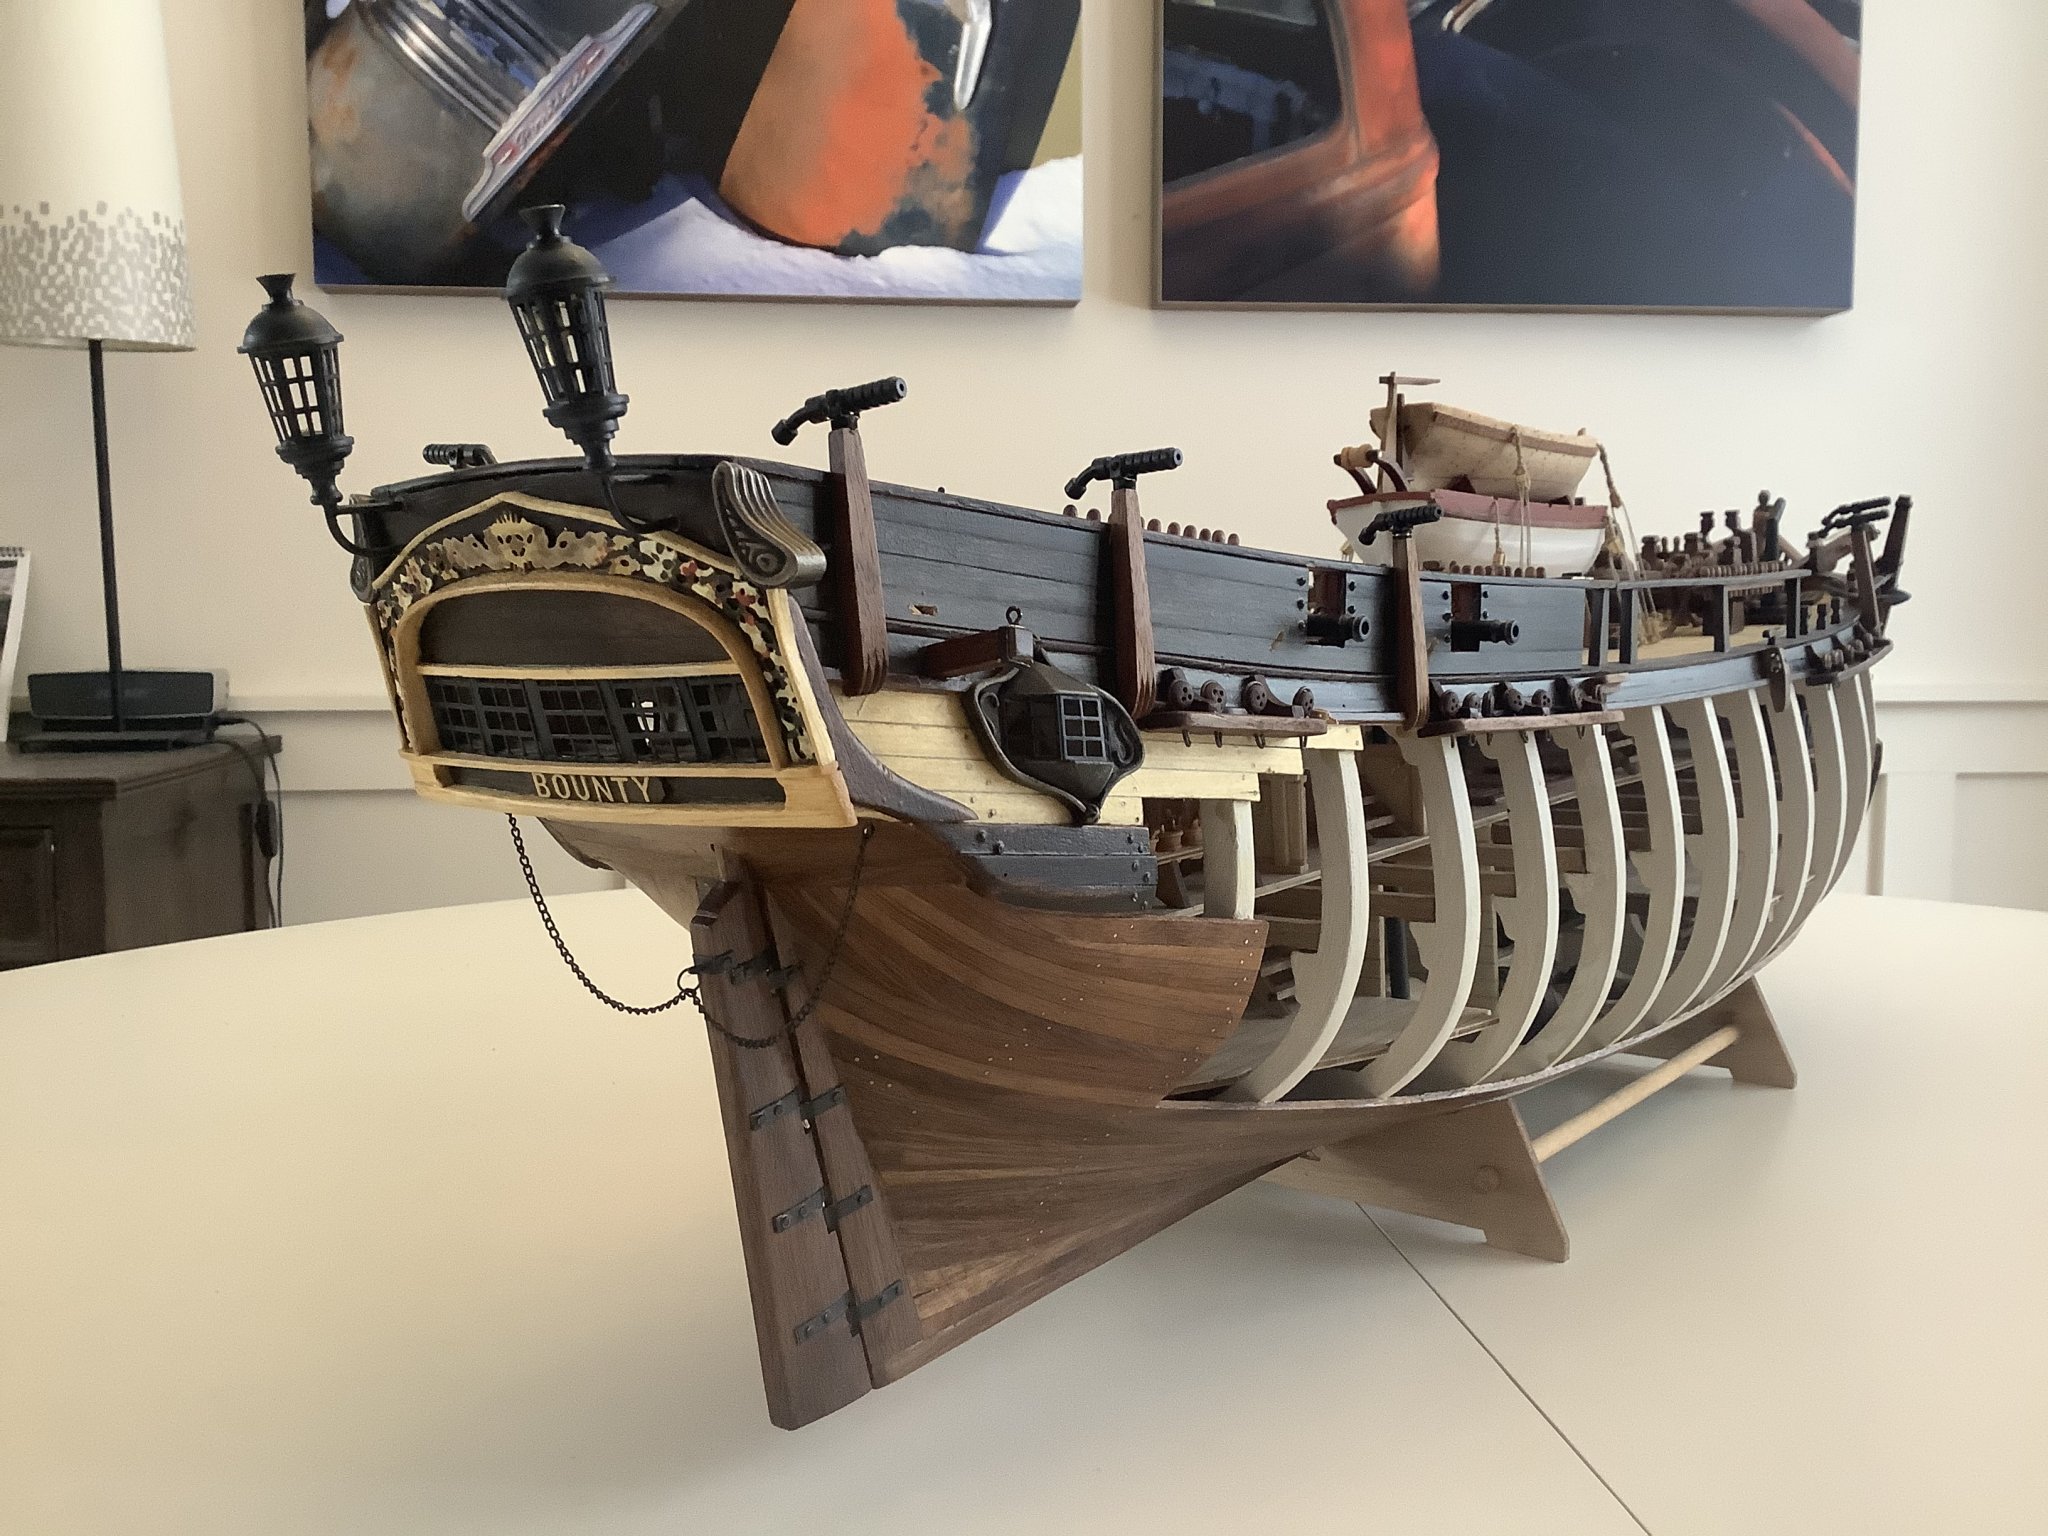
Thanks Mark! and everyone giving the thumbs up. So the base Bounty is now all finished, except for a little detail trim painting fore and aft that I’ll take care of when I get a chance to pick up a few paint colours. Pretty nice kit when all is said and done. Now it’s on to the bowsprit and mast assemblies. Going to need my drill to do the tapering I guess, which stupidly is still up at that cottage so may be a slight delay. Unless I can think of someone with a lathe or drill press can drop in on.


- 171 replies
-
- 9
-
-
- artesania latina
- bounty
- (and 1 more)