
HOLIDAY DONATION DRIVE - SUPPORT MSW - DO YOUR PART TO KEEP THIS GREAT FORUM GOING! (Only 27 donations so far out of 49,000 members - C'mon guys!)
×

Haze Gray
-
Posts
223 -
Joined
-
Last visited
Content Type
Profiles
Forums
Gallery
Events
Everything posted by Haze Gray
-
 Thank you Steven, some of those pictures I had but some were new to me - many thanks for the link (every photo helps!!).
- 132 replies
-
- 3
-

-
- charles martel
- battleship
- (and 1 more)
-
Some truly amazing work here Richard! My hat's off to you for tackling a project this big - I can't wait to see it finished and in the water!!! What have you been using to laser cut the wood parts?
-
If I was restricted to only one type of printer I'd have to chose FDM (but luckily I don't have to make that choice!) . You can get some pretty astonishing results with FDM nozzles that are sub 0.4mm - I've use 0.3mm before and it's big difference in the amount of detail you can resolve. There's still a lot of development in the FMD space - E3D is developing a nozzle change system that's a lot like swapping an air tool https://e3d-online.com/blogs/news/rapidchangerevo so going for 0.4mm to 0.3 or smaller could be a very fast change. Don't get me wrong though, if there was an affordable SLA machine that had 1500mm Z and 300x300 build plate I'd have one - but I can't see ever fully ditching FDM for SLA entirely based of the type of models that I print. Changing materials (PLA to ABS) on a FDM is quick and painless compared to changing to a different resin for SLA. SLS seems like it would have most of the benefits of both SLA and FDM but oh my - that's getting into really expensive territory.
-
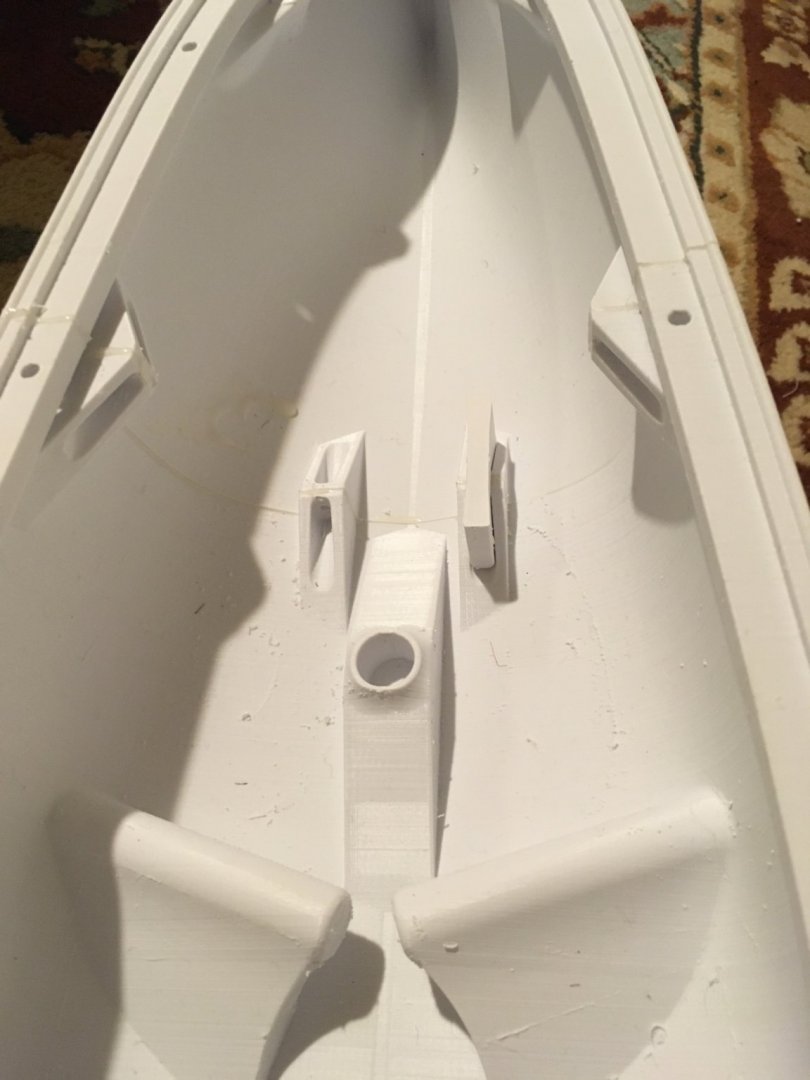
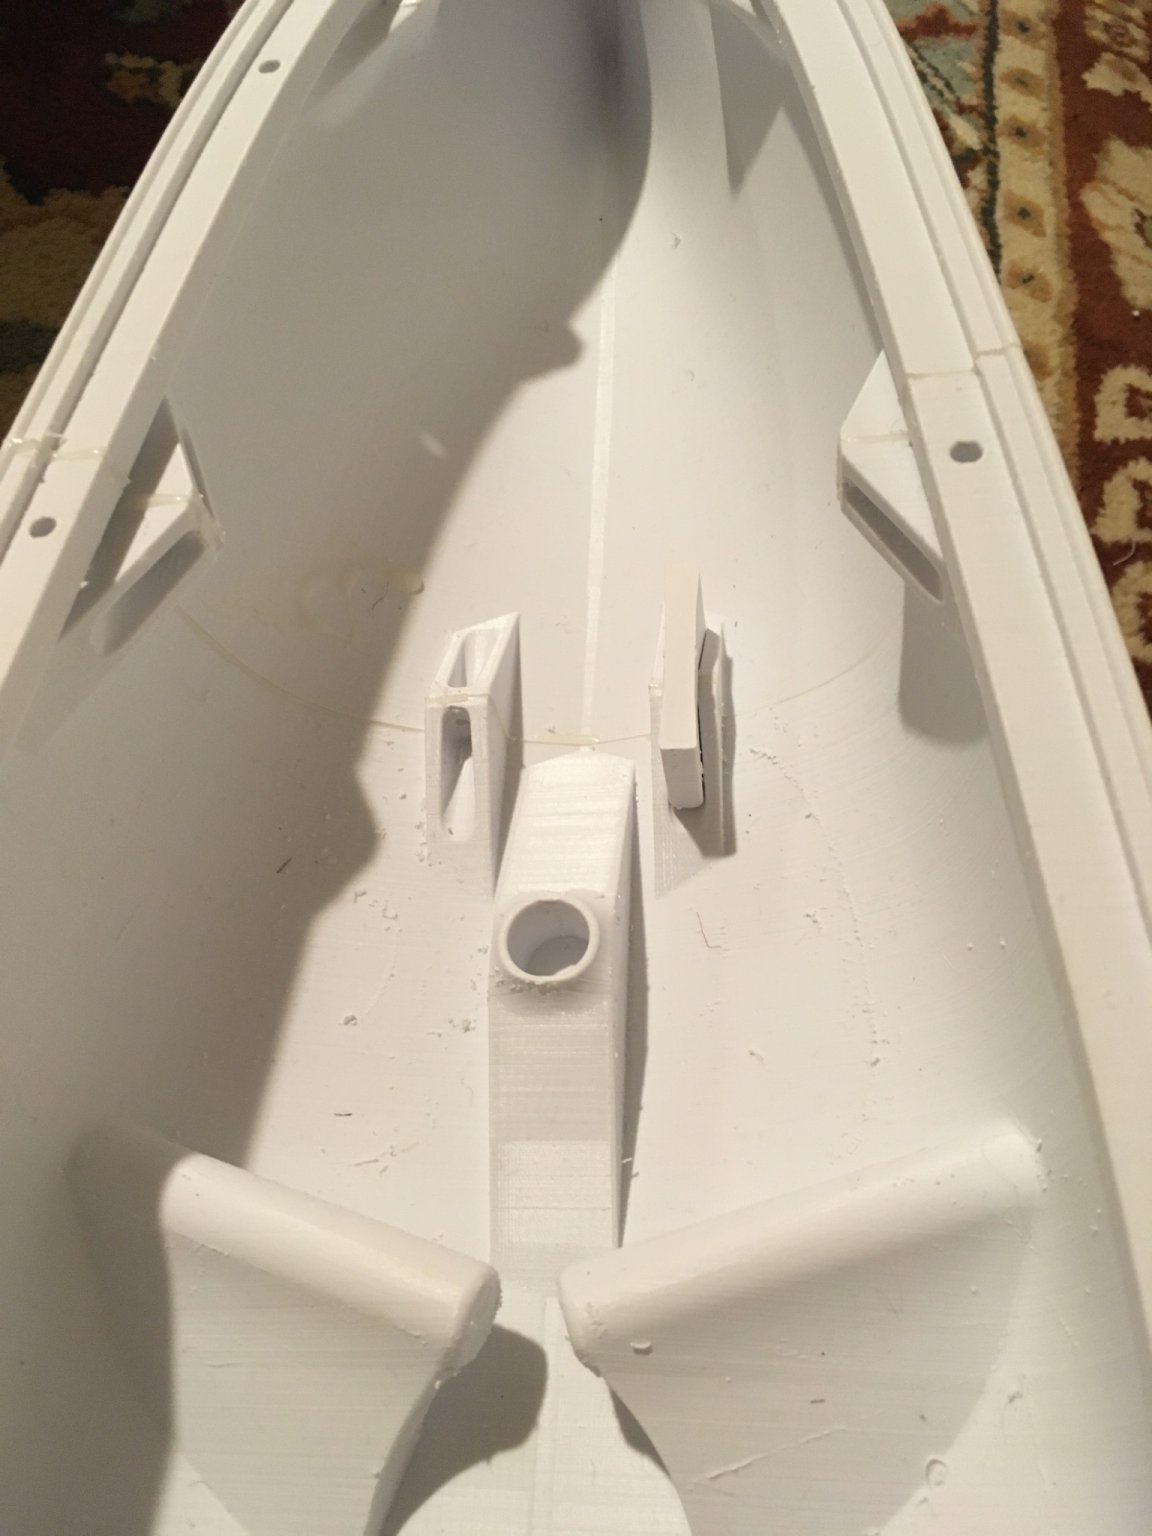
I already use somewhere between 4-7mm (sometimes more) for the mating surface. Rather than a flange along the entire length of the edge I use a reinforced flange but only in specific areas.
-
Kevin, overall how well are those square locating pins working for you? Originally when I started designing hulls for 3D printing I decided not to use them since I wanted a solution that both located and applied some clamping pressure - I use a kind of socket on either side of the hull sections to join and clamping tabs when mating them.
-
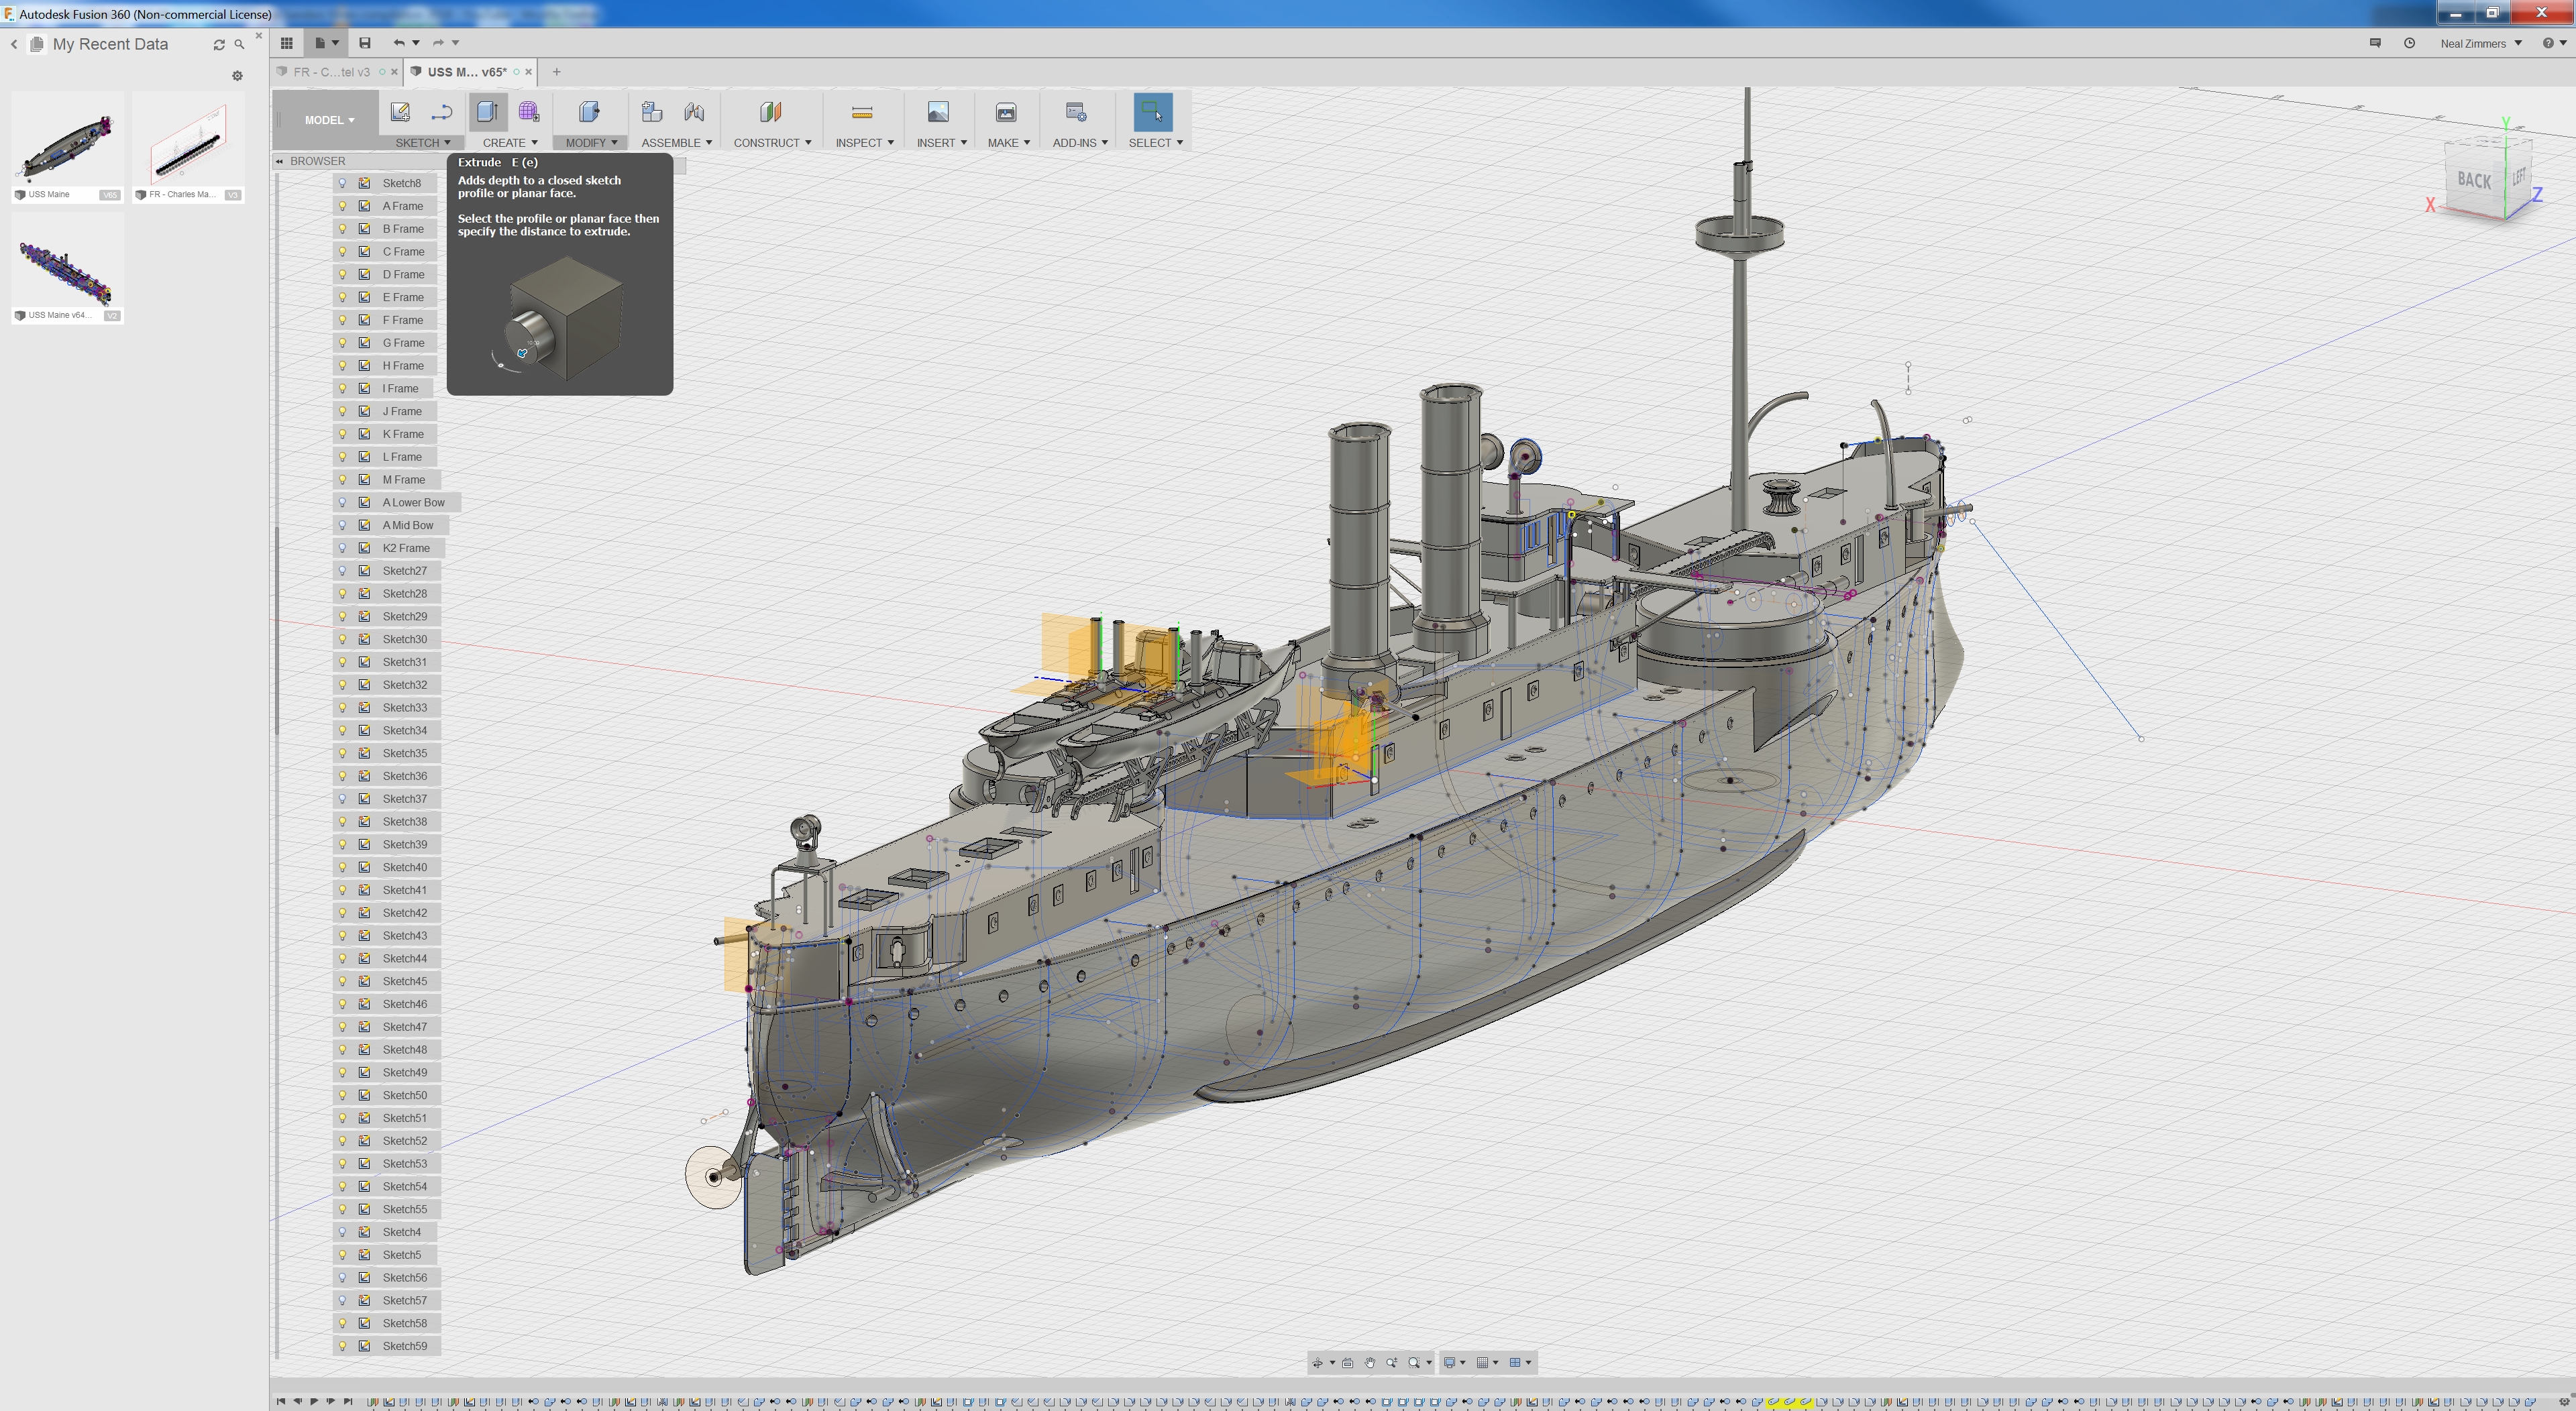
Kevin, for me 99% of the time I keep history on in Fusion 360 - so if I discover an error in my work I can attempt to go back and fix/change it. Sometimes that's works great, and sometimes it also drives downstream effects and completely wreck things ...but it does provide a chance. Sometimes I'll save a particular state and then remove the history and save as a separate version and carry on from there. It's all personal choice of course....
-
Count me in on the Rhino session as well (whether live or video). Question on Rhino - is it mostly just for modeling or does is also have a workspace similar to F360 & SW? When I'm working on a model for 3d printing there's a lot of tools that I use to align, cut, combine, offset, etc on solids. F360 isn't the best when it comes to the creating the model but it feels pretty strong in the CAD arena.
-
Hi Egilman, Kevin probably has the best idea for attempting this in fusion 360 - using 3d sketch to draw a spline and manipulate the control points to get the right angle and curve but that could be little messy/time consuming but could be made to work. Since I really only design ships based off frame/hull lines I don't have any meaningful experience doing a hull without them.
-
Hi Egilman Is this boat something that you will also be 3D printing? looks like it would really be a treat to run (and fast) on the water for sure!
-
Egilman's description of calibrating the drawing to known dimensions is a very good writeup. One challenge that may present itself is when you don't have perpendicular lines to calibrate. Since I do a lot of older ships where the plans are rough and don't show reasonable detail down the the individual frames or the only available reliable measurement is LOA (length over all) or the two extremes of the ship are at different elevation (stern high and bow low) drawing a calibration line at an angle won't get you the right size. I've also found that (for me) it's hard to draw that calibration line perfectly horizonal which can impact accuracy.
-
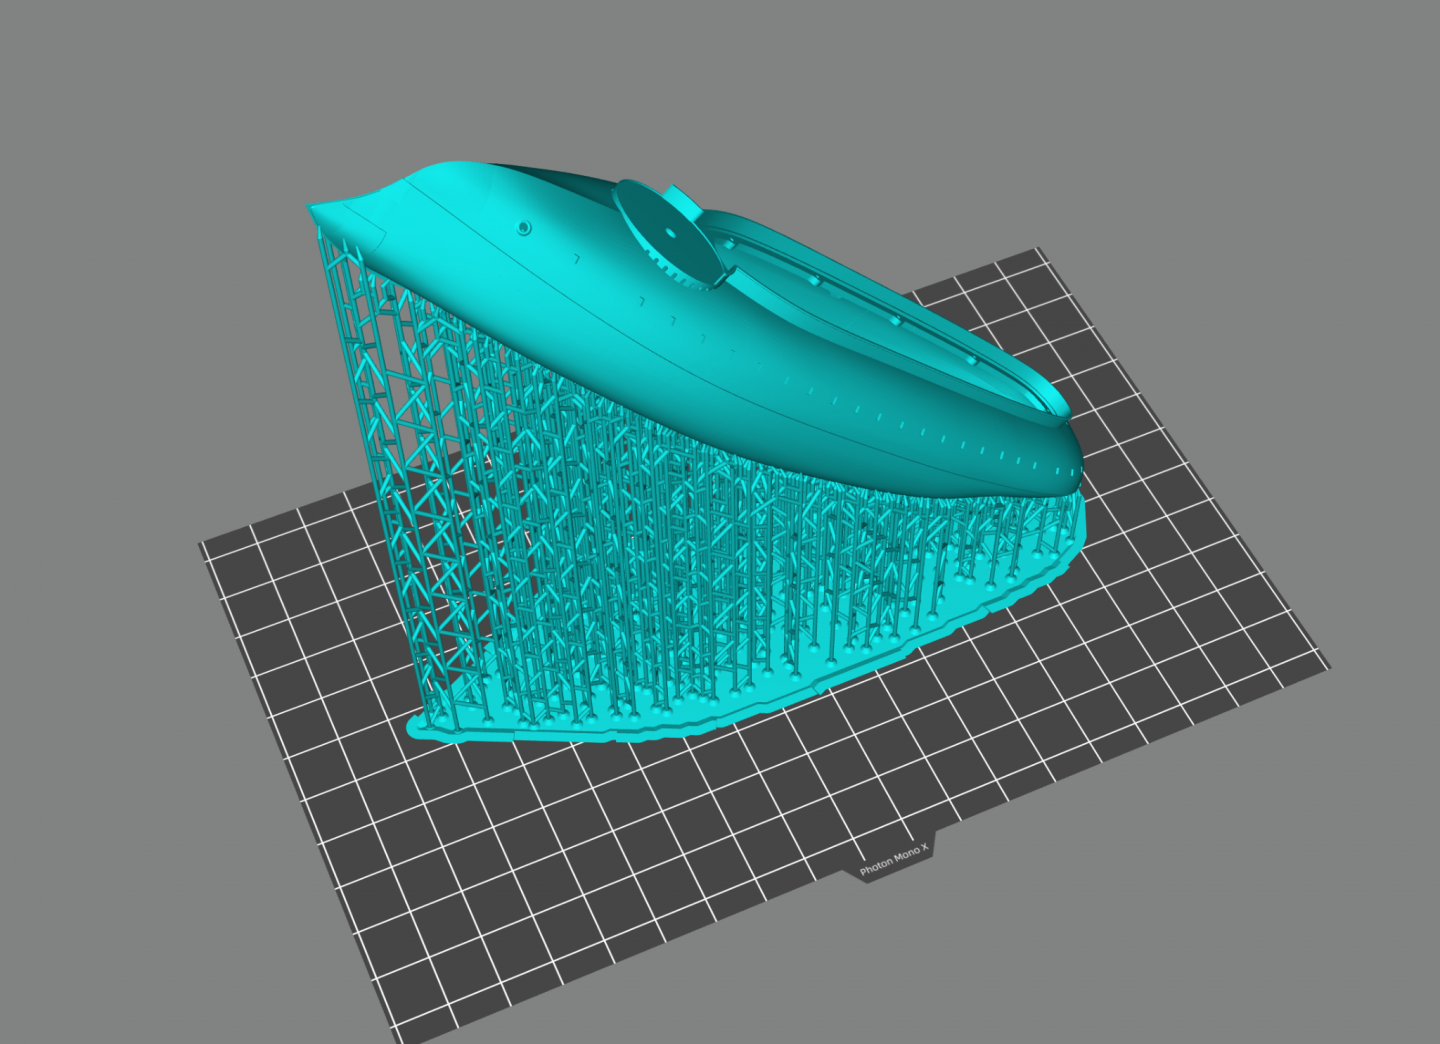
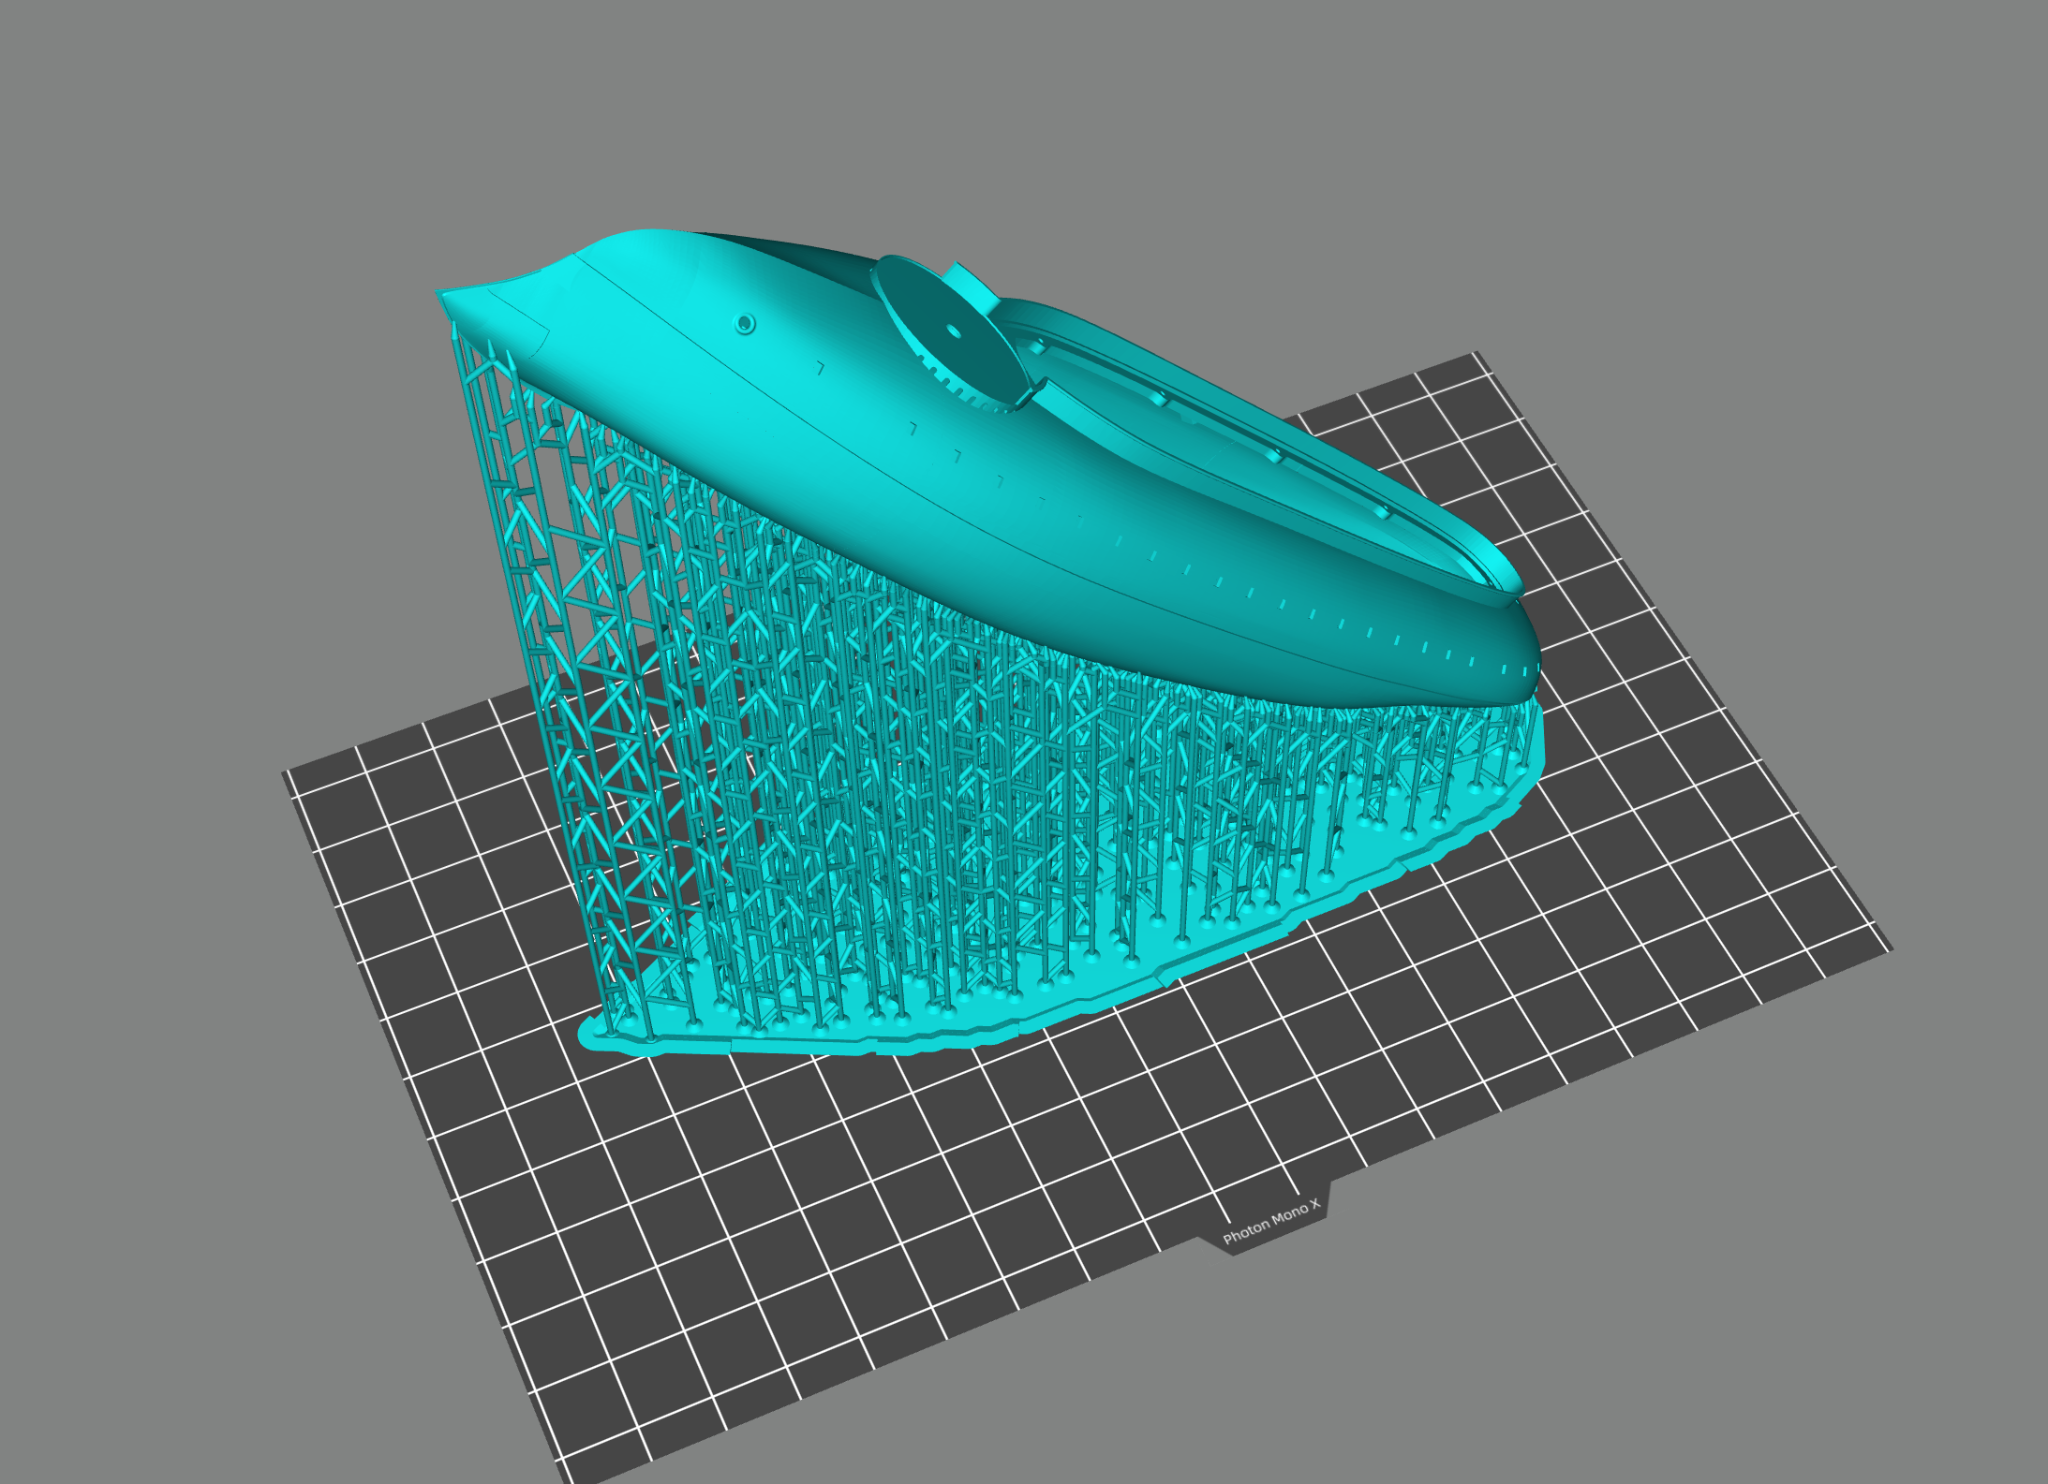
First time printing the Ram I had problems - the raft was truly fused to that laser etched build plate - worked way too good plus I hadn't really dialed down my exposure settings so it came out essentially fully cured- despite all the razor blades and other sharp metal tools I used that sent brittle pieces flying it took me 20 minutes to clean off that build plate essentially ***zero damage*** and I was not being careful at all. Adjusted my settings and used the original build pate I got with the printer and the ram print worked out just fine even if I had gone way overboard on the support.... so much easier to get off the build plate with just a razor blade and only just a few seconds. does appear that the MonoX can print holes that are under 0.5mm diameter where as the Photon S I had to use .8mm and up
-
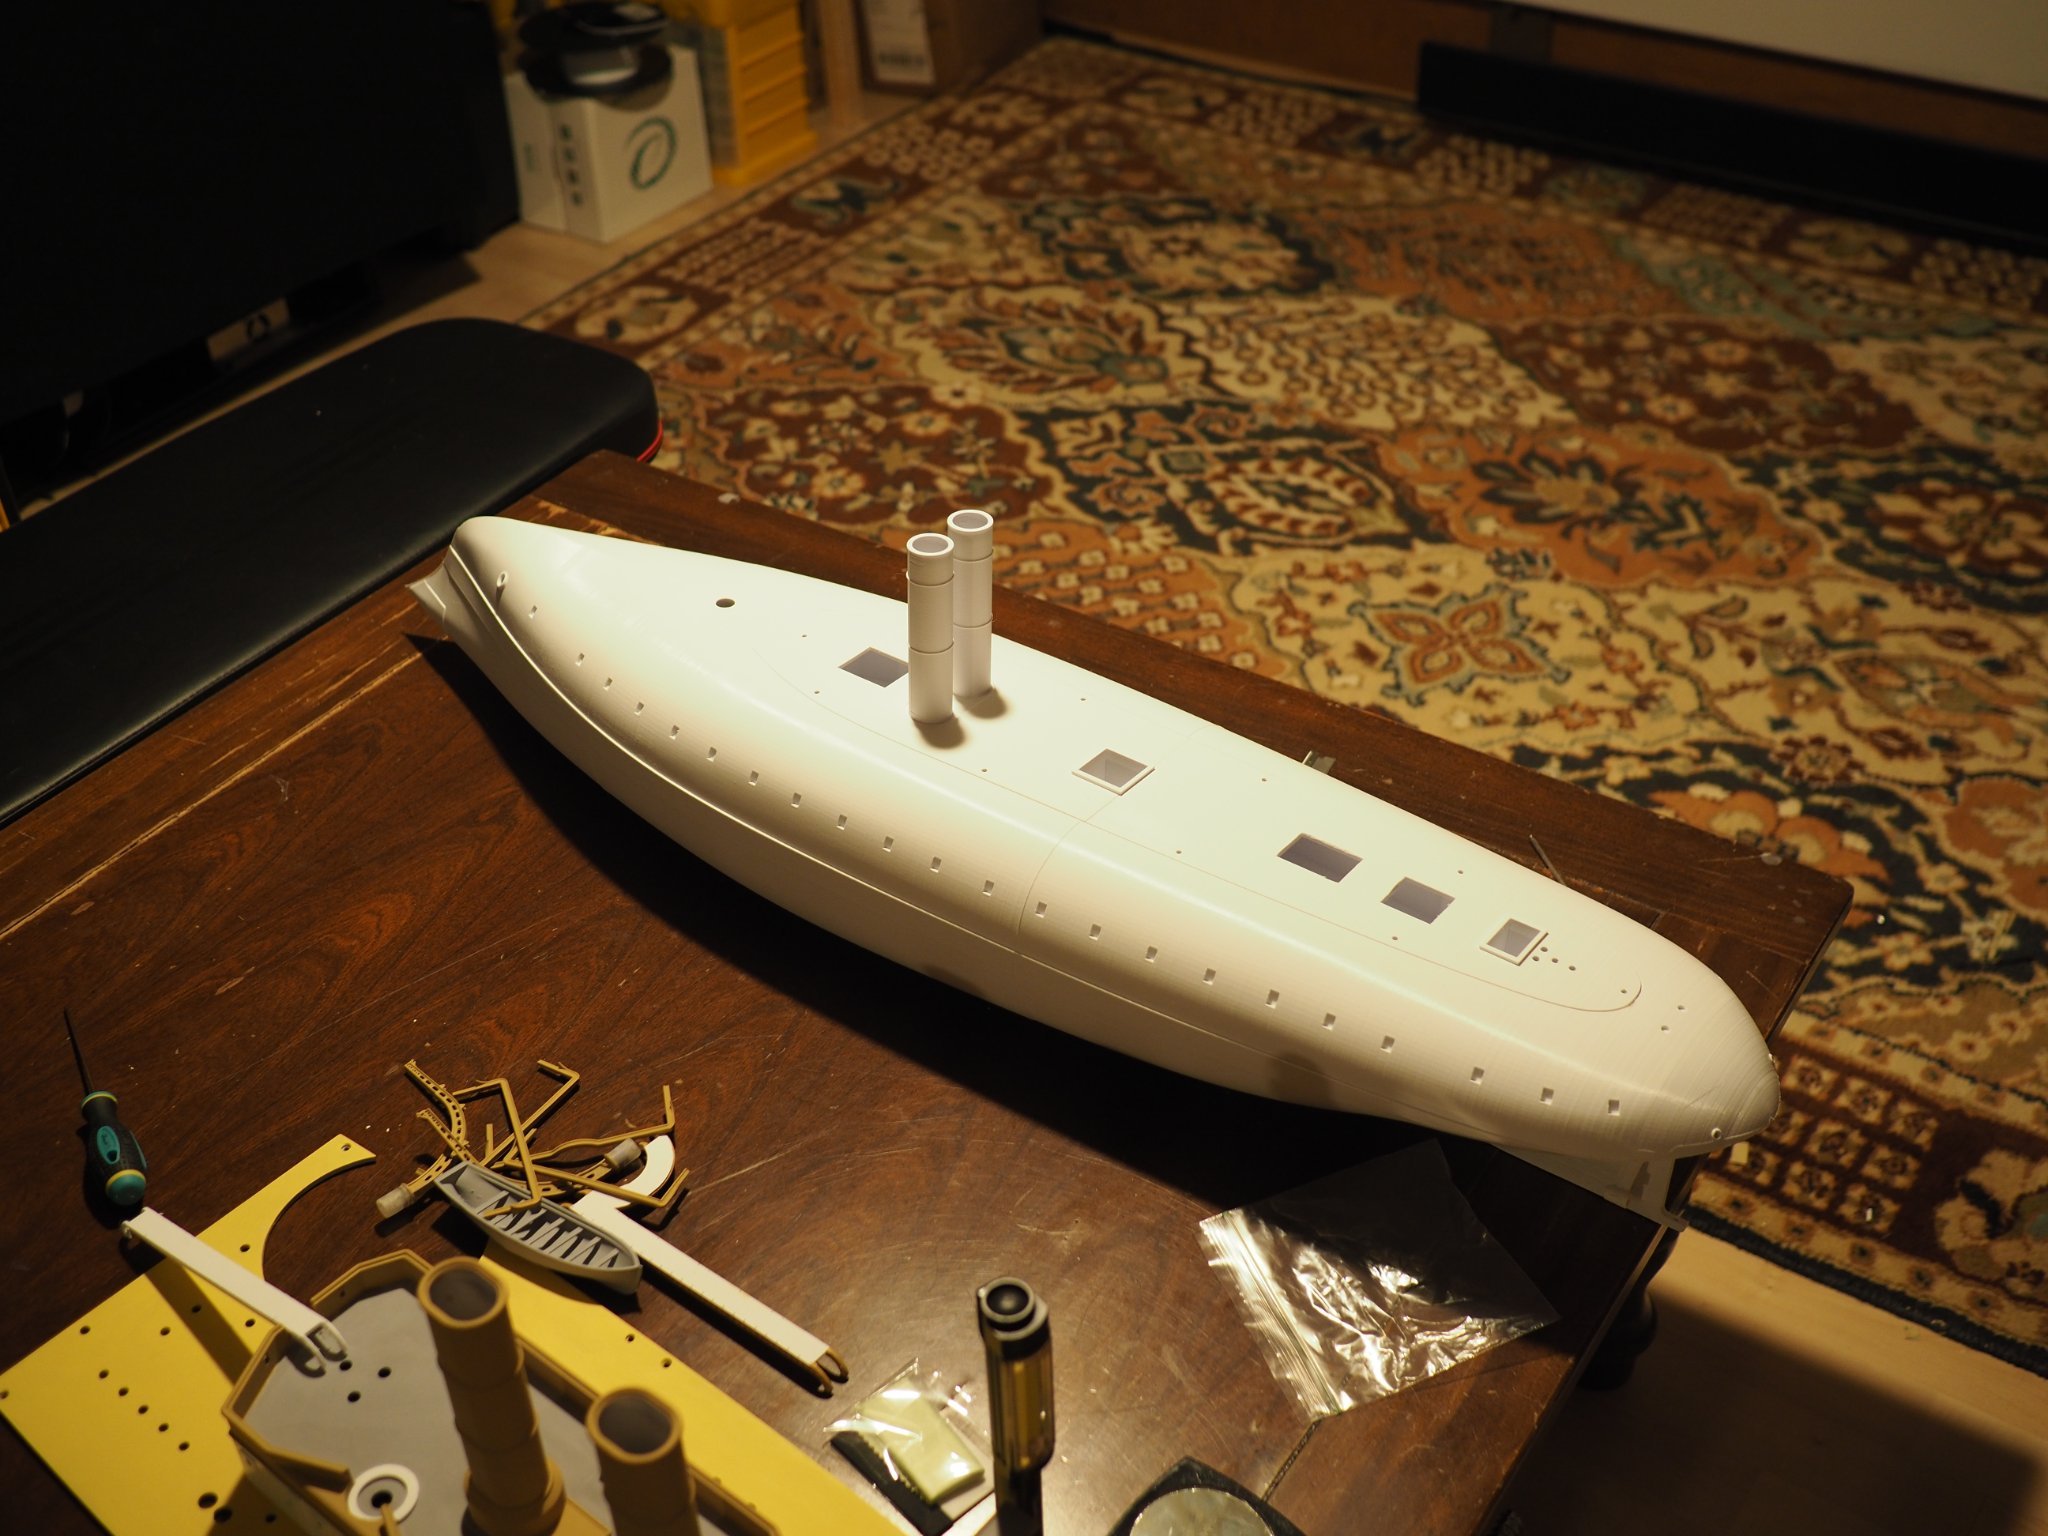
Hello Max, when you are ready please share your you version of the Charles Martel - I will be happy to see how you design it and hopefully it will be more accurate than what I have ! - I really wish there more information available on this ship. Here's another French Ship relaxing on the table waiting for more parts.....

- 132 replies
-
- 7
-
-
- charles martel
- battleship
- (and 1 more)
-
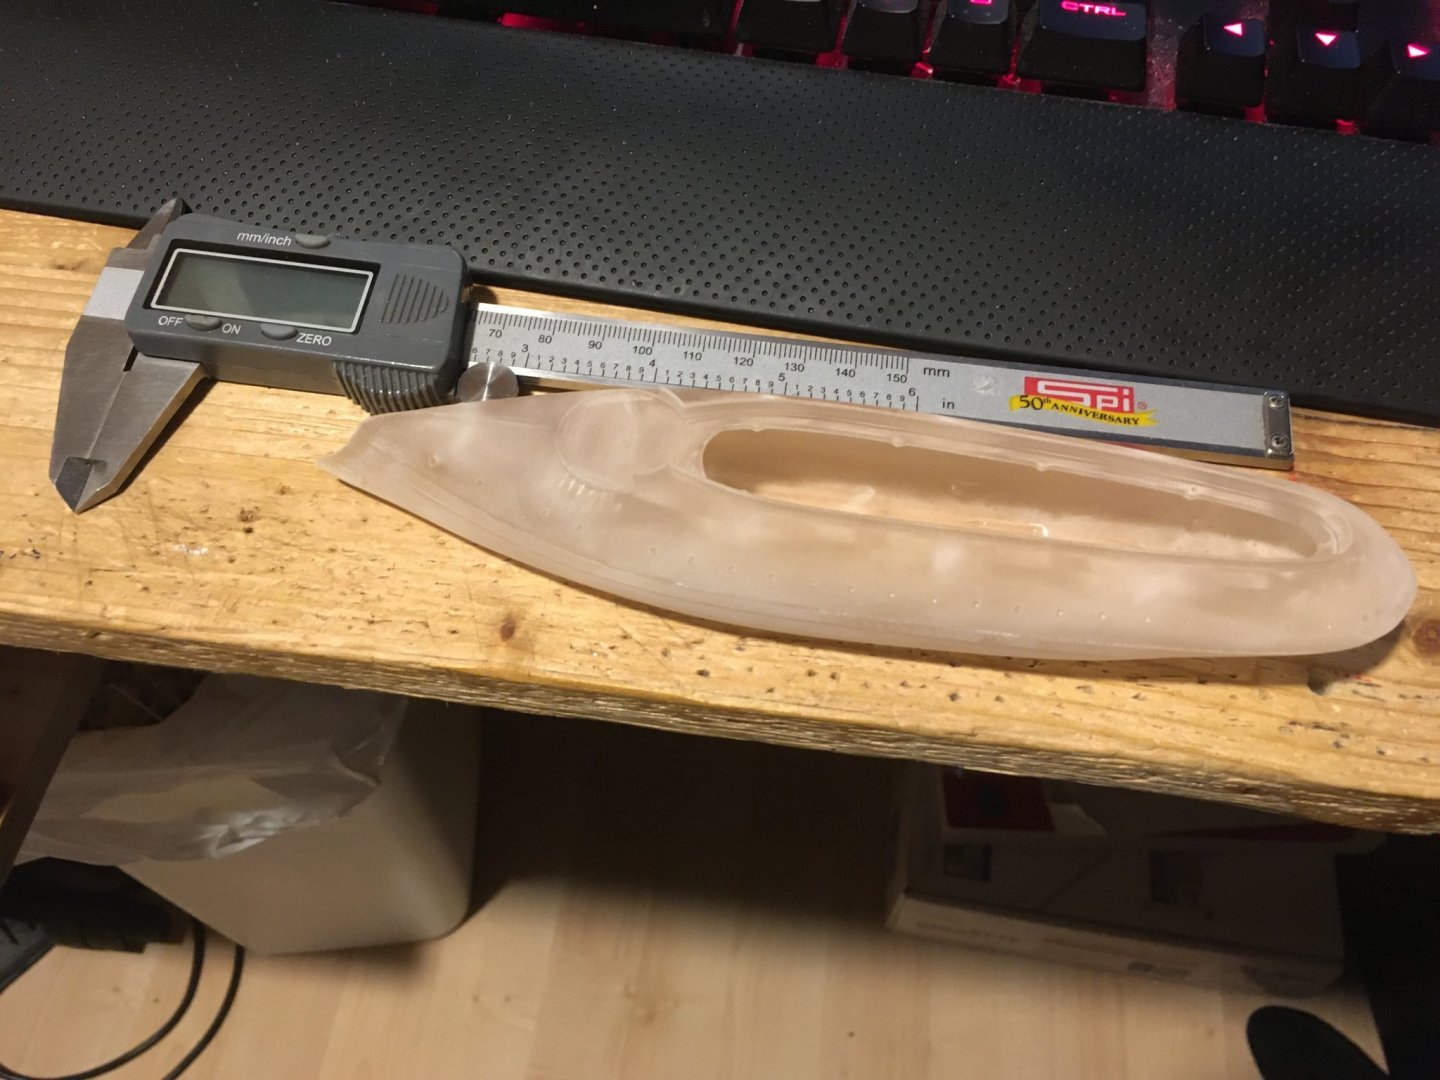
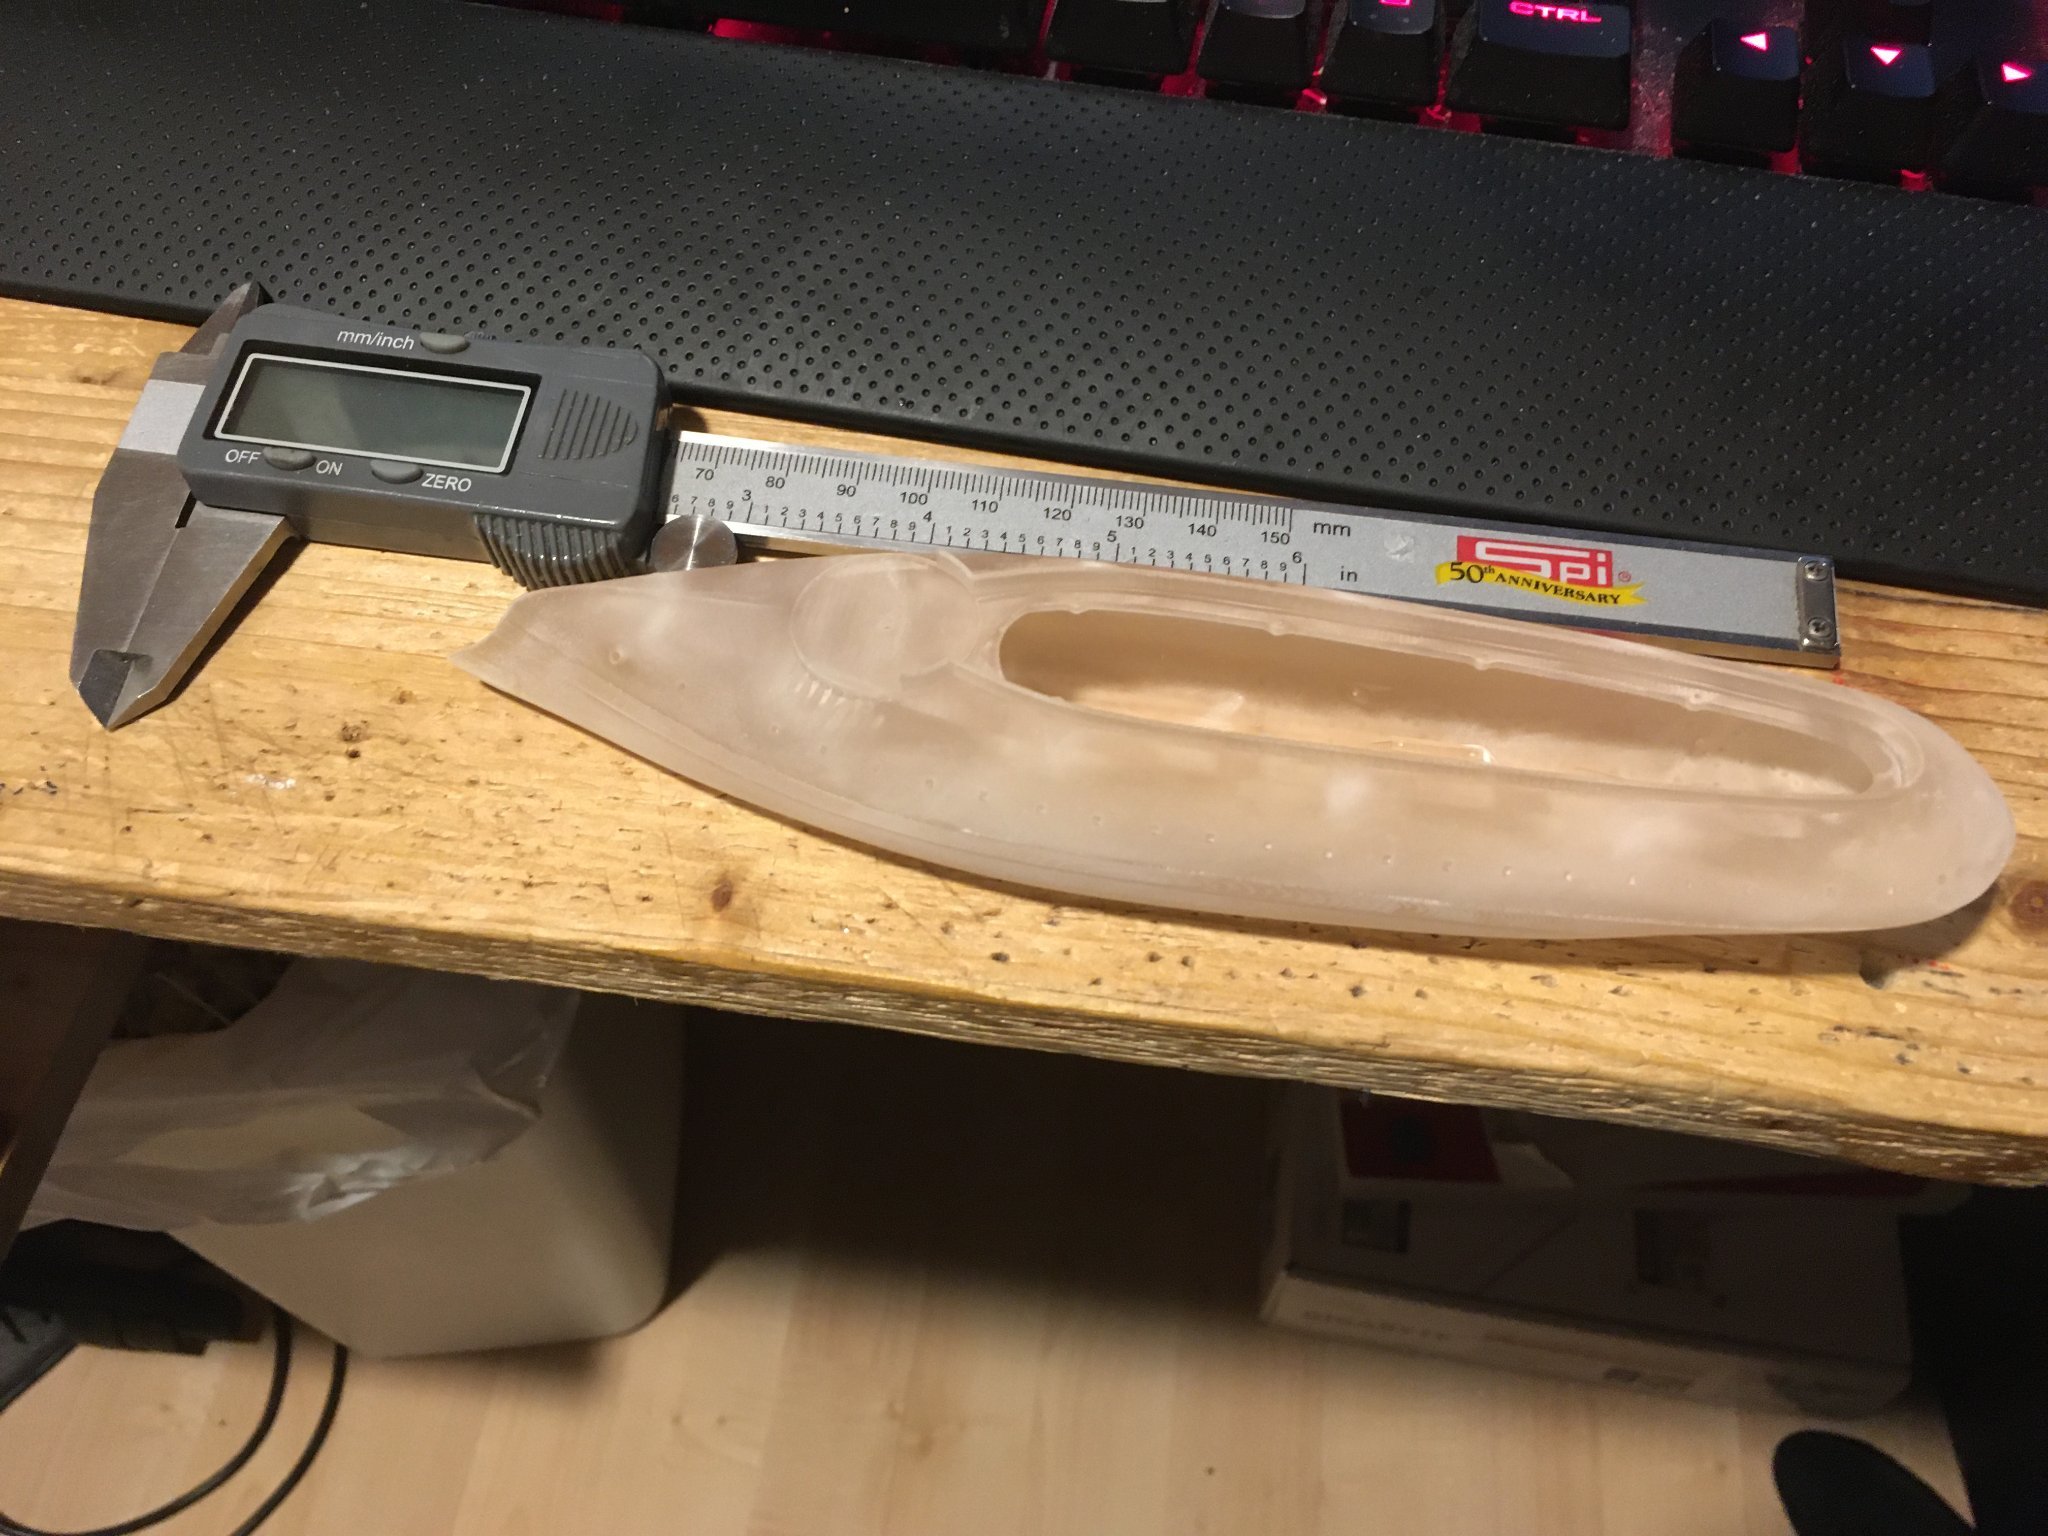
Okay so I'm back to printing on the Mono X using clear resin again with settings off that G-drive document - we'll see how it goes. Throwing caution to the wind - I'm going to try printing out a 1/350th scale version of the French ram Cerbère from around 1870 (which I currently have a 1/72 scale hull of already printed). fingers crossed.....
-
I doubt it will last long - most of the build surface looks sand/glass blasted - I expect the high level of aesthetics will be over after the first print gets scraped off 😃
-
I received two things today - the replacement LCD for the Photon S (already installed now and working but it's not a fun proceedure). Also received the new (replacement) build plate for the Mono X **finally came!** - low and behold it's got the laser etching that's found on the upcoming Anycubic DLP printer. It didn't come with any mounting bracket or hardware (shoot) but I'm still pleased with it -
.thumb.jpeg.81f1646a5f1a696d7b08440a09808593.jpeg)
-
No thump could also mean layers are not attaching to the part - which will become visible once the retraction lifts the part above the level of the resin 😃 From experience the lager the contact area of the part the more likely you will thump with a higher report....
-
Hi Ron, pretty easy actually, you can just pour some in by the corner.
-
Jasseji , have you thought about setting up a camera up there? If you have a rasberry Pi and a webcam there's a couple of programs (like Octoprint that's used for driving 3d printers and even slicing for prints + cam or time lapse) that would give you some piece of mind - you can access the rasberry pi via wifi on your phone.
-
Humm - it always worries me when I don't hear a mild to medium thump - but you're probably right - really loud thump = low resin, pour in resin and you deaden the sound....
-
Yeah, you probably just jinxed yourself! 😃
-
So, funny thing happened, after I got the Mono X printer setup I put on a screen protector before trying any prints (scheduled for the next day) and, because it was late at night, I forgot to torque down the vat screws.... next day I pour in the resin for the first print and hit go....bed comes down...a little bit of suction and up the vat goes but I grab it and pull it out and away thinking "that was an awesome save"..... then I saw shower of resin coming down off the build plate onto the LCD.....a few expletive's ran though my mind before I remembered the screen protector was on there. totally worked, totally saved my butt... Honestly I think cling/saran wrap might do just as well - more likely it will stick to the glass than to the FEP - either way if you're clumsy like me make sure you have that LCD protected.
-
Hello Max, thank you for your kind words. When you start working on a model to 3D print please start a topic and show us your progress. Which ship do you intend to choose first? Привет Макс, спасибо за добрые слова. Когда вы начнете работать над моделью для 3D-печати, начните тему и покажите нам свой прогресс. Какой корабль вы собираетесь выбрать первым?
- 132 replies
-
- 3
-
-
- charles martel
- battleship
- (and 1 more)
-
Looks fantastic! I love the old star trek ships!
-
The Bow of the Magenta seems quite unique (even among French ships). It has kind of a symmetrical break above and below the the waterline.... it's captivating for sure. I don't think I've seen ships with a similar bow like that but maybe there are others?
-
Hi Egilman, If you have fusion 360 there might be some ways to repair the mesh in that software: https://forums.autodesk.com/t5/fusion-360-design-validate/repairing-a-mesh-that-is-quot-not-watertight-quot/td-p/6759616 or this: https://knowledge.autodesk.com/support/alias-products/learn-explore/caas/CloudHelp/cloudhelp/2019/ENU/Alias-Modeling/files/GUID-7829272F-4B5A-4418-824D-4D4BC505306B-htm.html I don't usually work with meshes but if you send me the file I can attempt to close it and make it manifold but no grantees for success. By the way, I saw you've had some priting issues - what resin are you using? There's a spreadsheet where users have reported settings that have been successful using the mono X here: Anycubic Photon Mono X - Google Drive maybe that has settings that will work for you. - Neal Oh, I almost forgot to mention - ambient air temp can be important - 70° or above is ideal, lower temps seem to preclude good bed adhesion.
.jpeg.854d962db6e7ce77661c80c055c97cc9.jpeg)

