HOLIDAY DONATION DRIVE - SUPPORT MSW - DO YOUR PART TO KEEP THIS GREAT FORUM GOING! (Only 24 donations so far out of 49,000 members - C'mon guys!)
×

Haze Gray
-
Posts
223 -
Joined
-
Last visited
Content Type
Profiles
Forums
Gallery
Events
Everything posted by Haze Gray
-
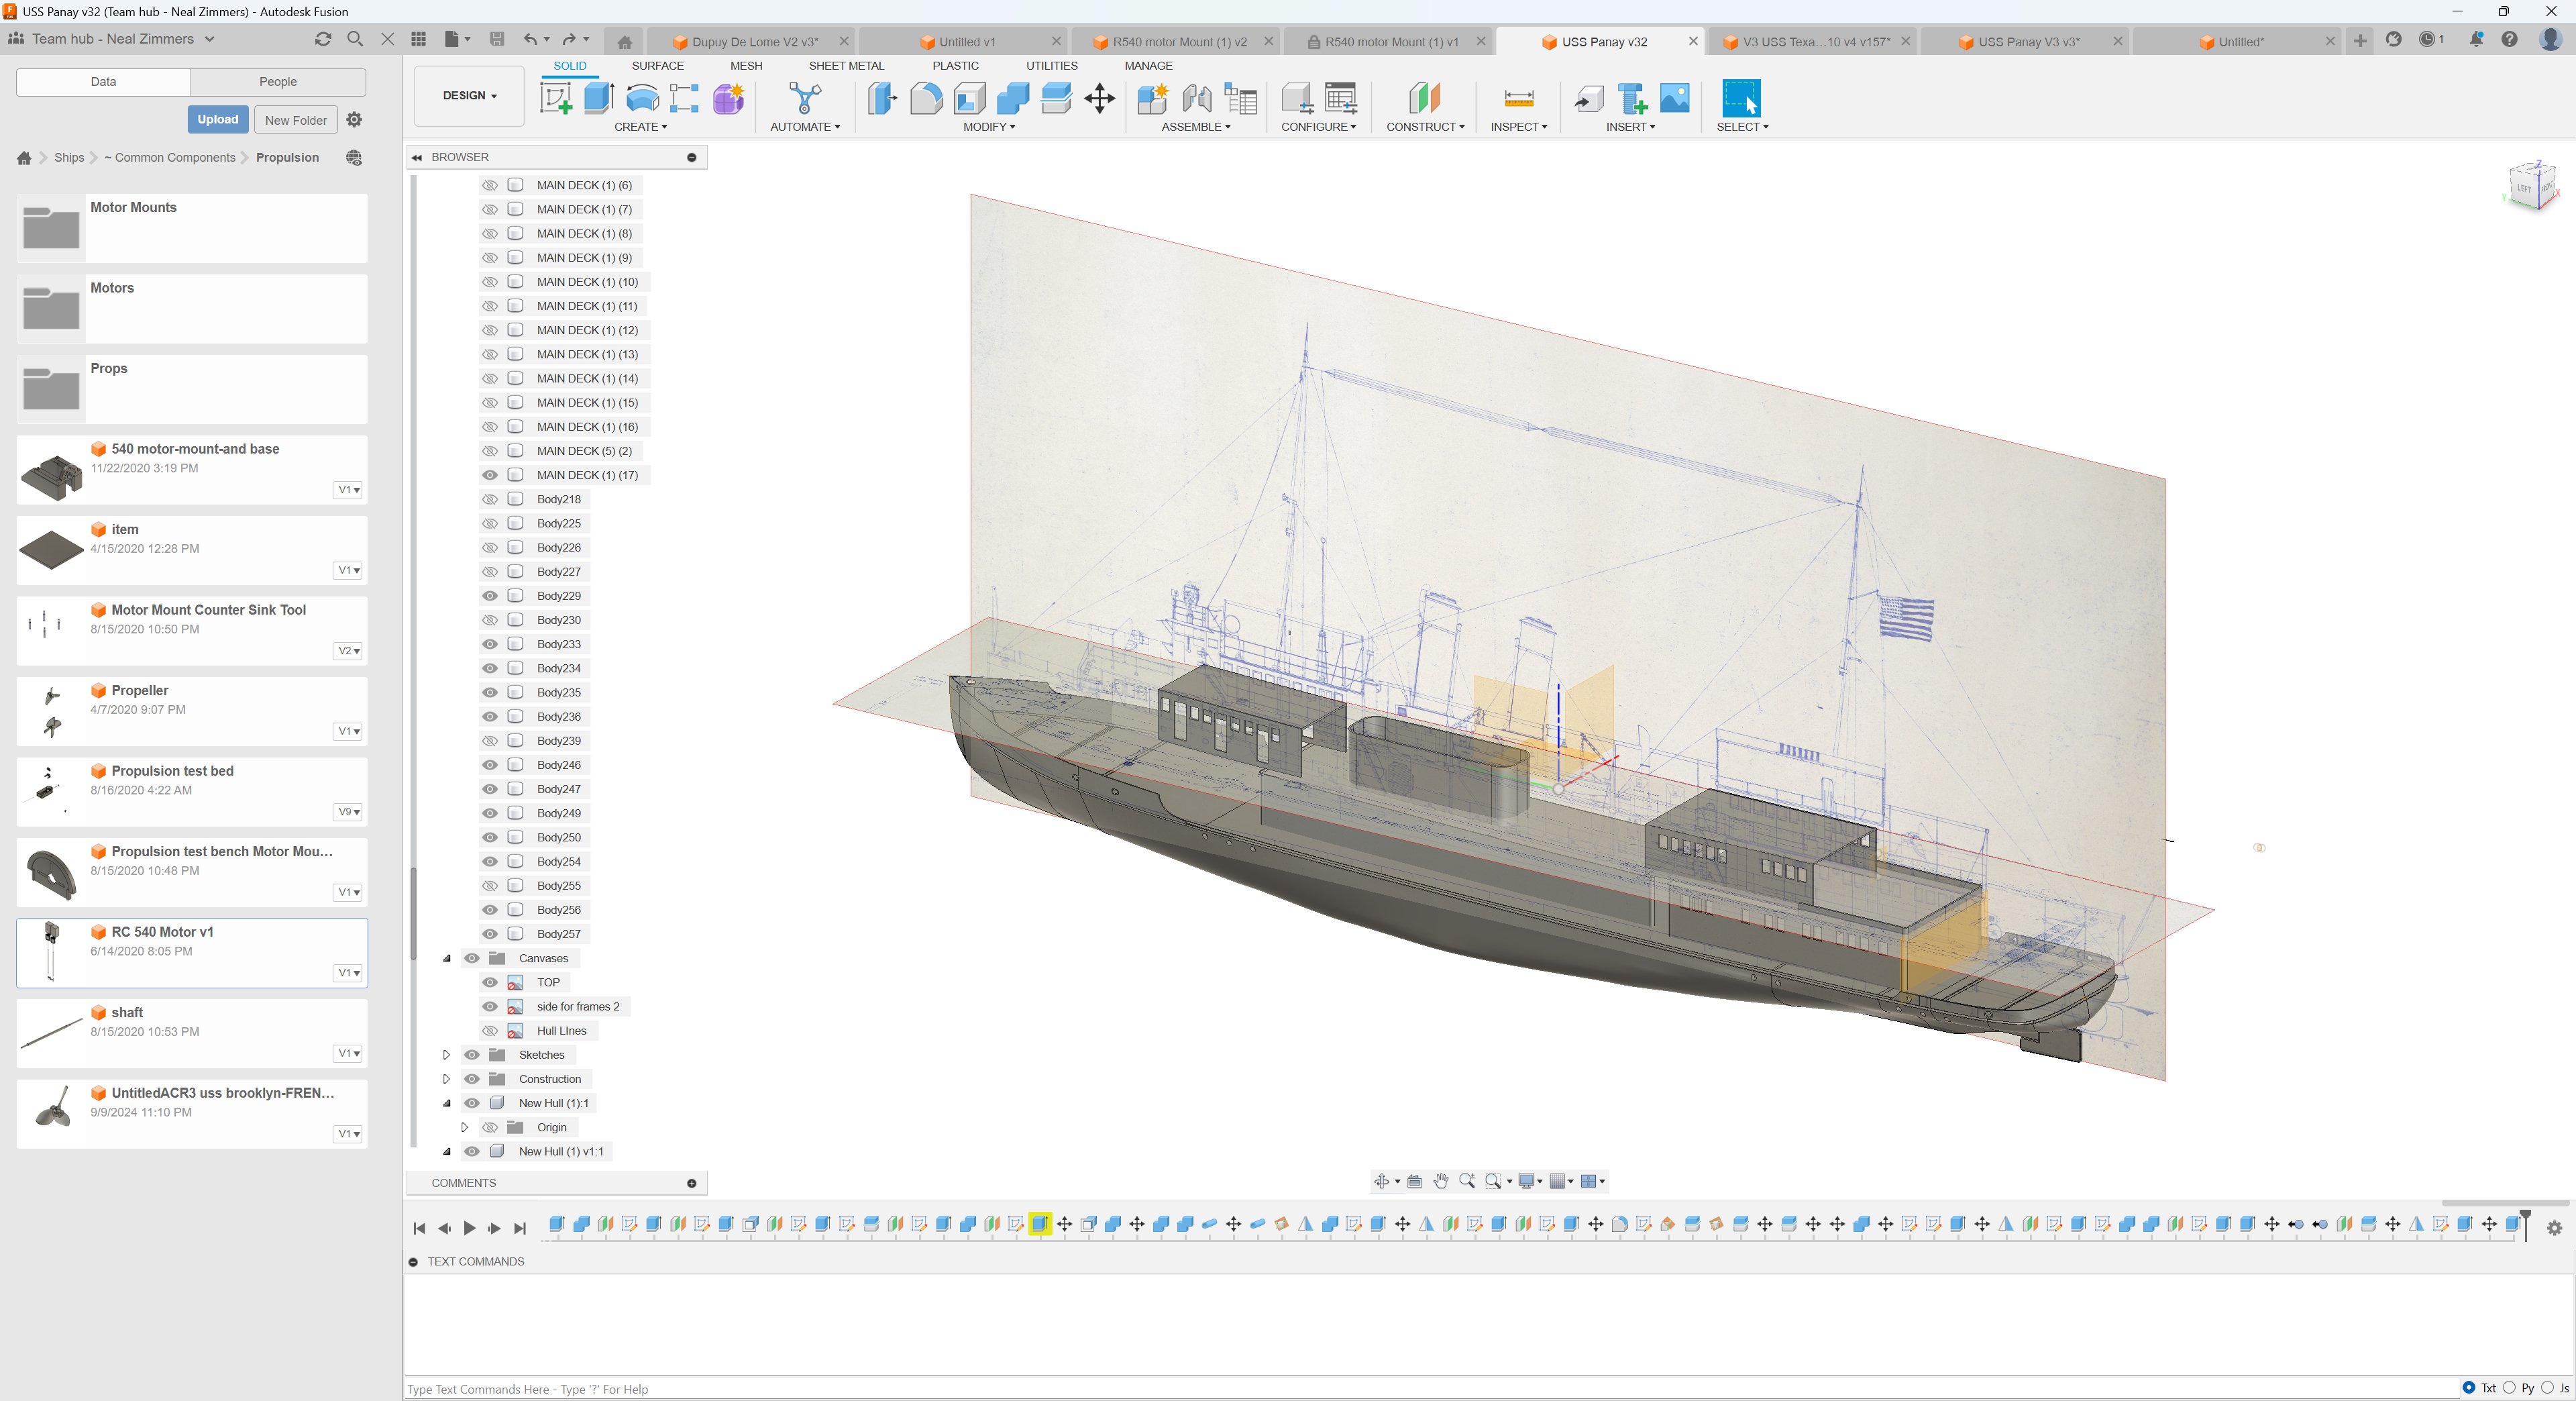
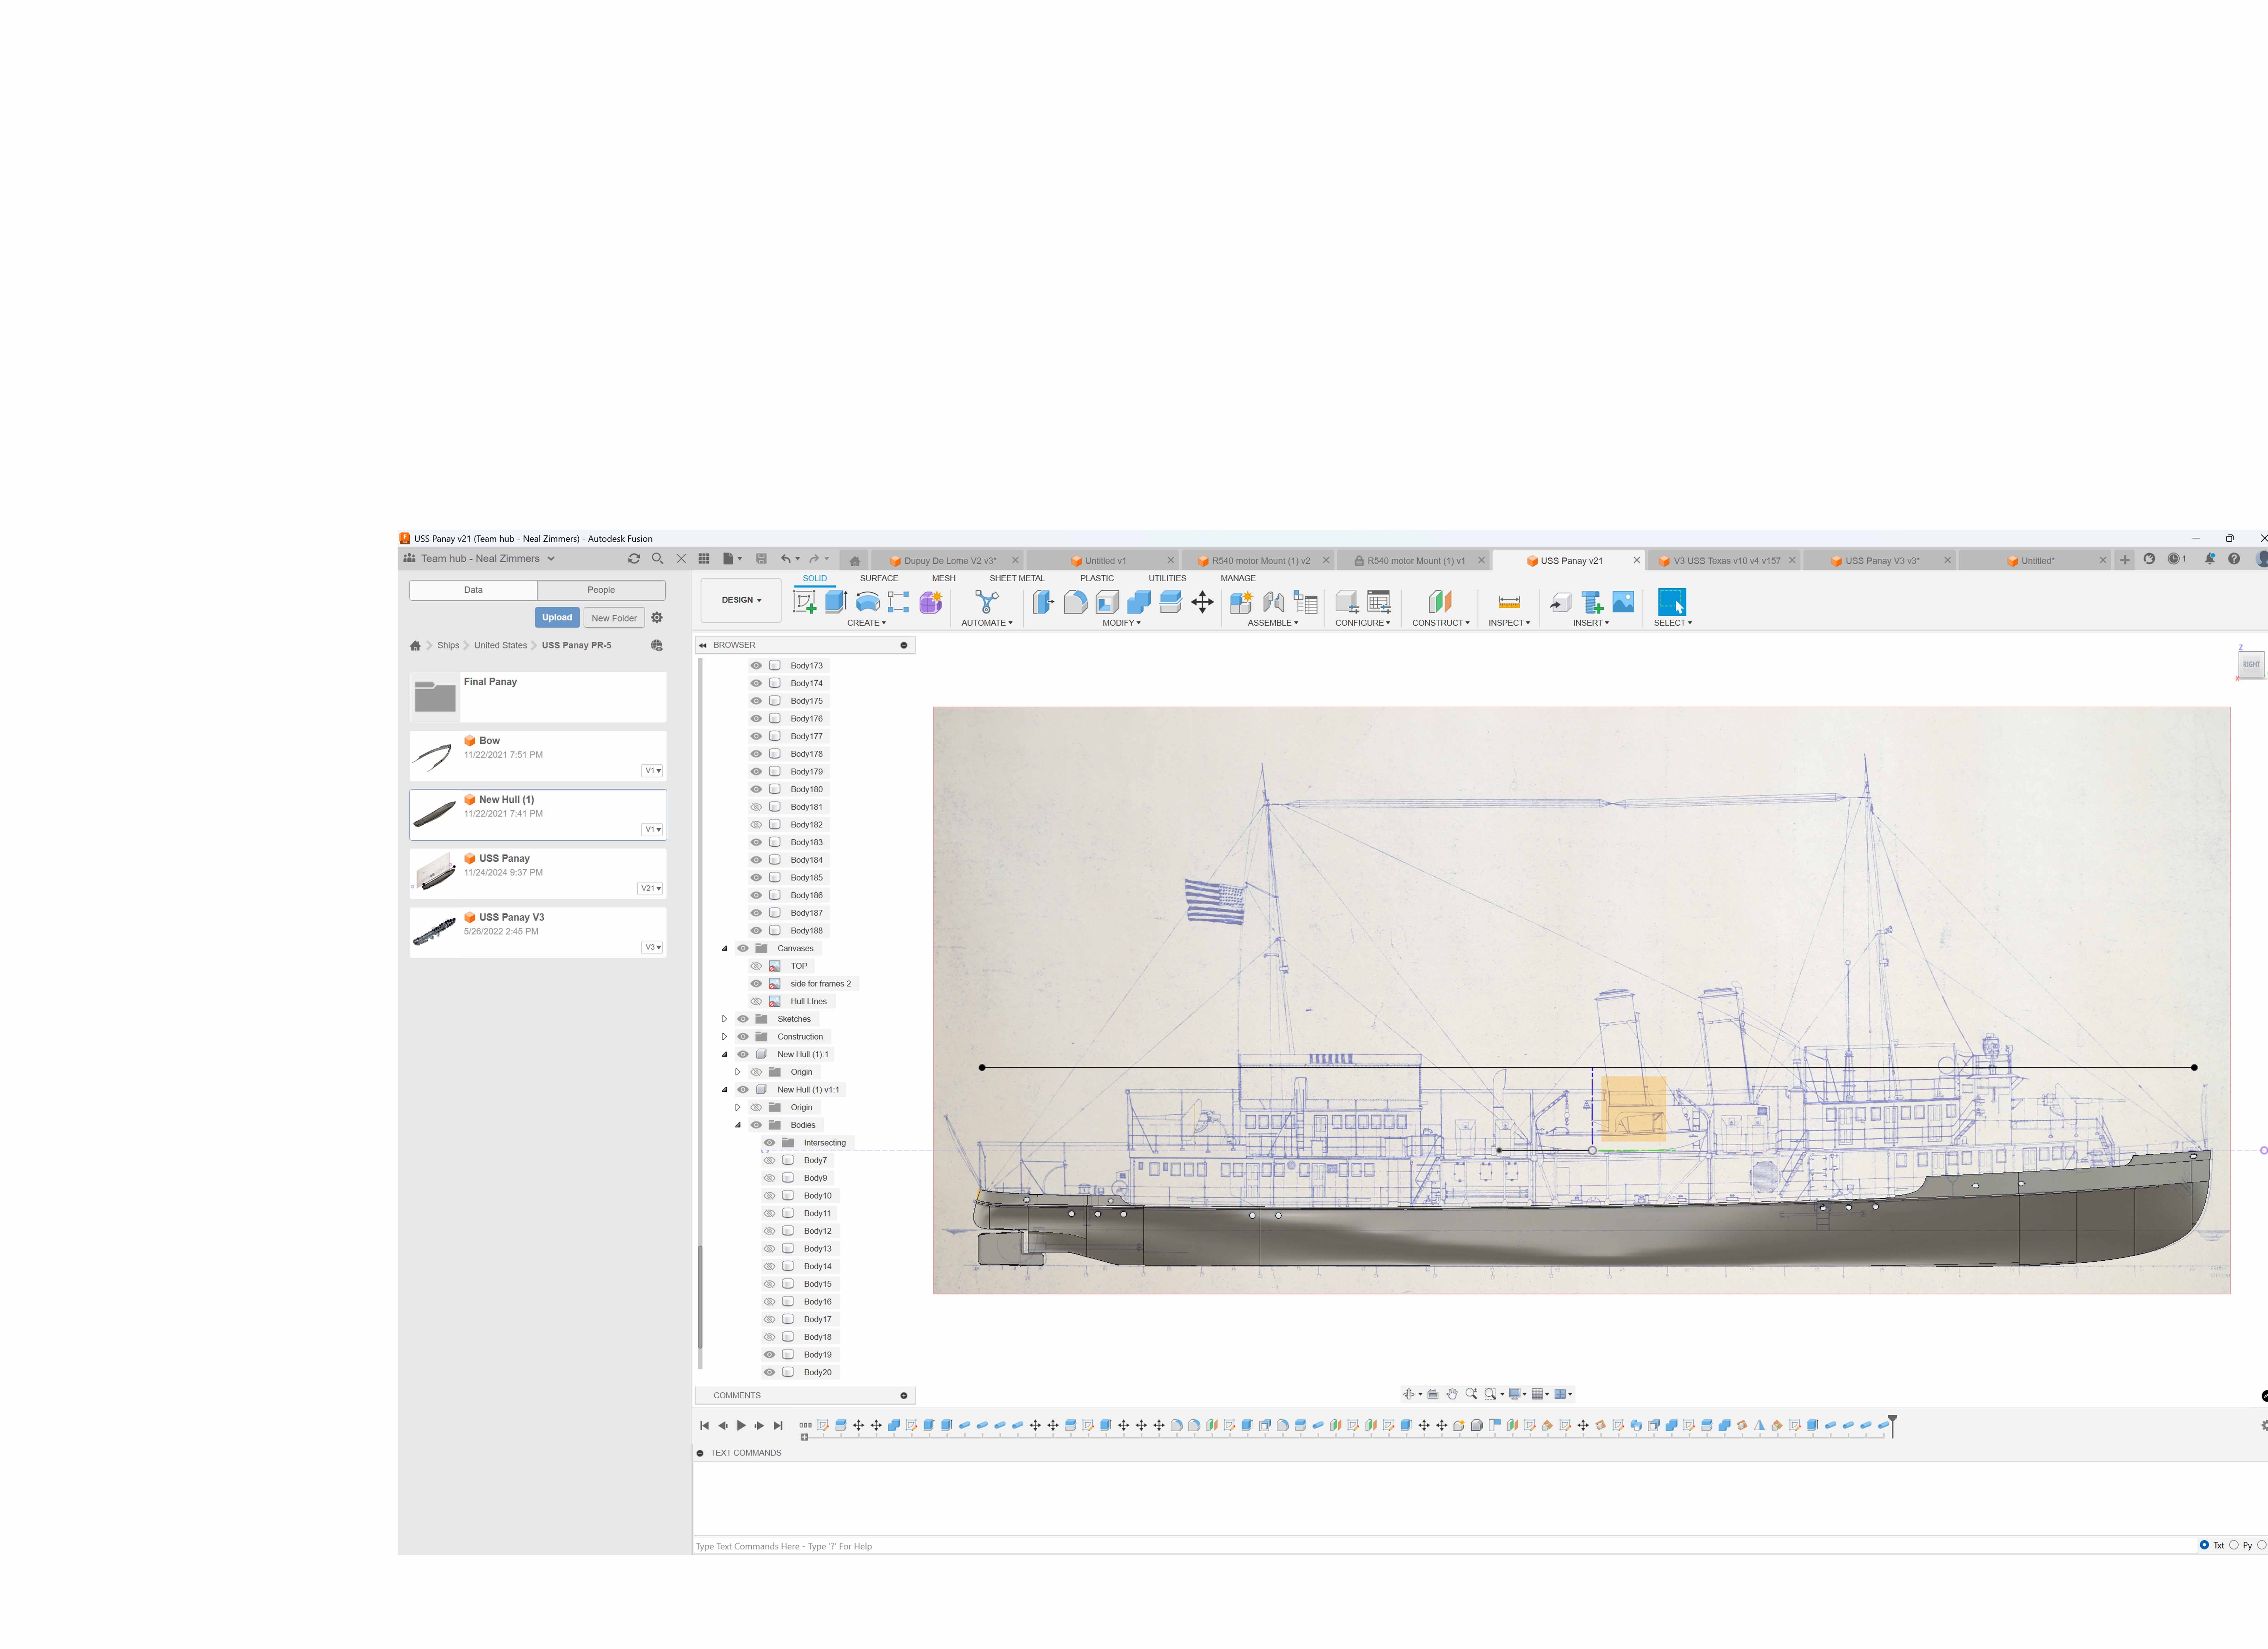
 I'm sure I'm not the only one who has seen and enjoyed the movie "Sand Pebbles" - I remember watching it on a tube TV back when I was a kid and was completely captivated by it. And although the USS Panay was not the ship from the movie the Panay still has similar design ques and has an interesting history.....While the design of the hull was difficult and less than perfect, I've started working up the ship and will enjoy building it out!
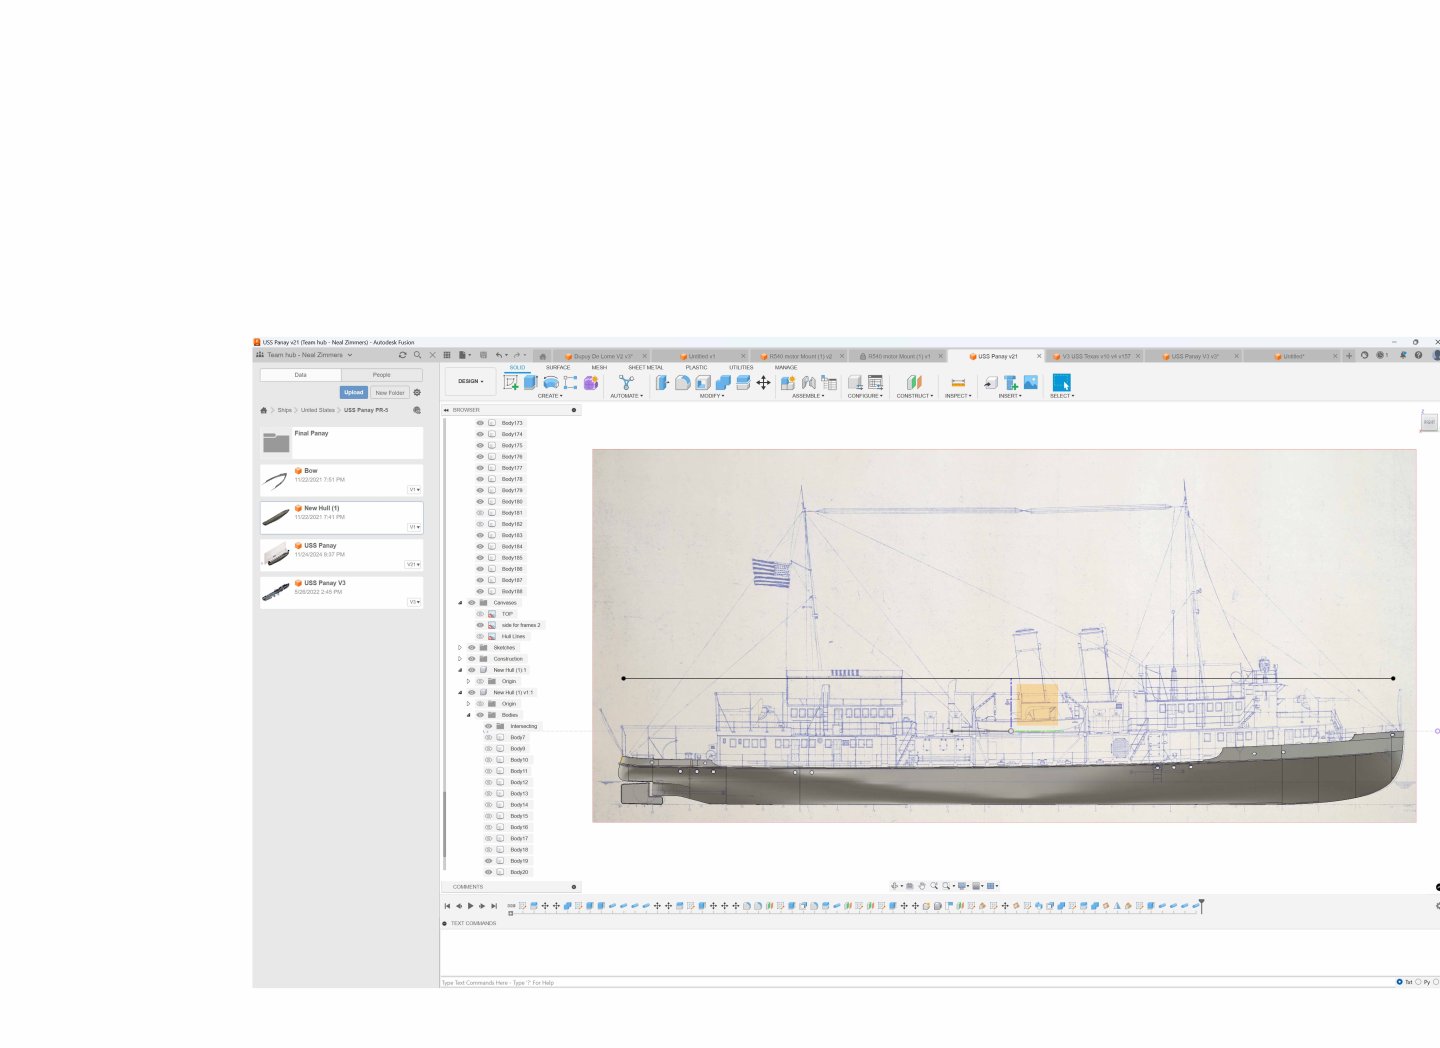
-
The Georgios Averof is one of the ships that took me a long time to find enough data to actually model and even then, this will be a tough go of it. It's also going to be the largest 3D printed ship I've ever done - at 1/72 scale it's about 6ft long compared to the USS NewYork which is 5.3 ft long. Here's some details from wikipedia: Georgios Averof is a modified Pisa-class armored cruiser built in Italy for the Royal Hellenic Navy in the first decade of the 20th century. The ship served as the Greek flagship during most of the first half of the century. Although popularly known as a battleship in Greek, she is in fact an armored cruiser and is the only ship of this type still in existence. The ship was initially ordered by the Italian Regia Marina, but budgetary constraints led Italy to offer it for sale to international customers. With the bequest of the wealthy benefactor George Averoff as down payment, Greece acquired the ship in 1909. Launched in 1910, Averof arrived in Greece in September 1911. The most modern warship in the Aegean at the time, she served as the flagship of admiral Pavlos Kountouriotis in the First Balkan War, and played a major role in the establishment of Greek predominance over the Ottoman Navy and the incorporation of many Aegean islands to Greece. The ship continued to serve in World War I, the Greco-Turkish War of 1919–1922, and the interwar period, receiving a modernization in France in 1925 to 1927. Following the German invasion of Greece in April 1941, Averof participated in the exodus of the Greek fleet to Egypt. Hopelessly obsolete and prone to mechanical breakdowns, she nevertheless spent the next three years as a convoy escort and guard ship in the Indian Ocean and at the Suez Canal. In October 1944, she carried the Greek government in exile back to liberated Athens, after the withdrawal of the German army. In 1952, she was decommissioned, before being moved to Poros, where she was berthed from 1956 to 1983. From 1984 until today, she has been reinstated on active duty as a museum ship in the Naval Tradition Park in Faliro, Athens. After maintenance in late 2017, she achieved seaworthiness state once again, allowing the ship to sail (towed) accompanied by Greek frigate Kountouriotis (F-462) to Thessaloniki Greece where she received more than 130,000 visitors over her 53-day stay.
-
At 1/72 it's not going to be a small ship. Time to start making space in the workshop!
- 6 replies
-
- 3
-

-

-
- swedish navy
- Destroyer
- (and 2 more)
-
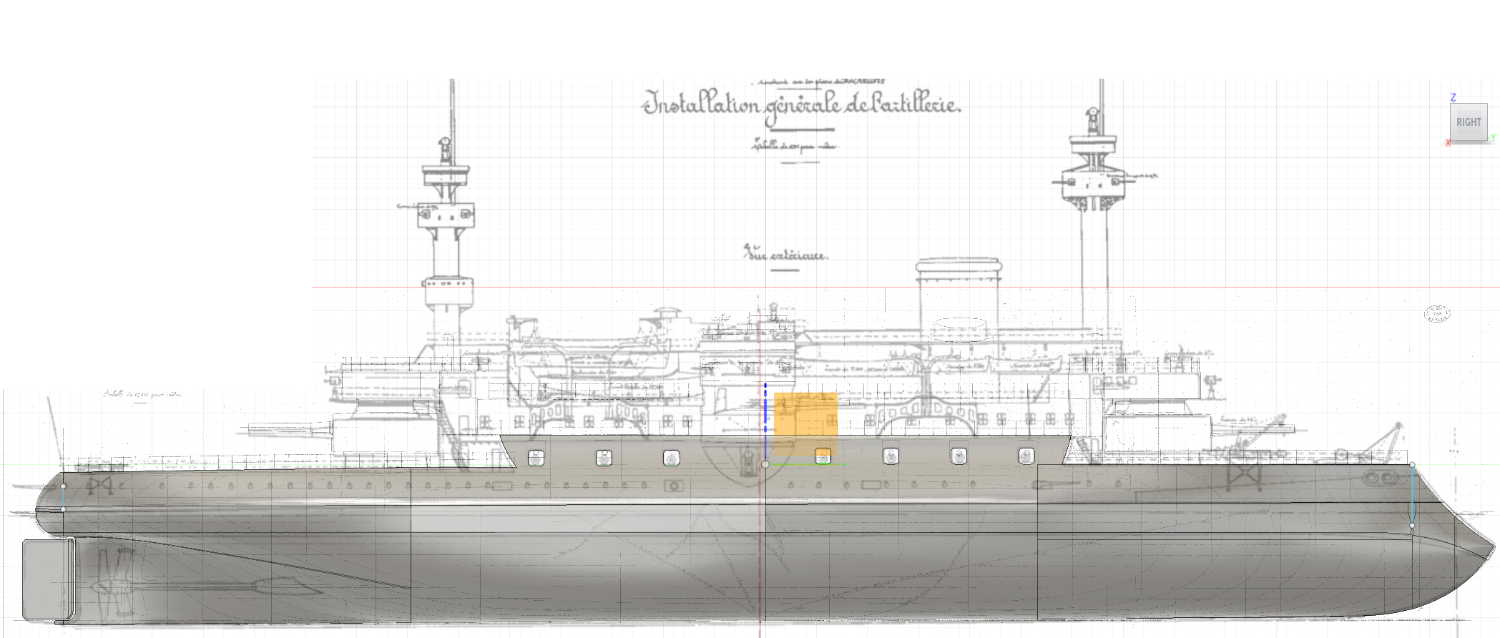
Painted the bottom of the French Ram Belier - so thought I would share a pic

- 132 replies
-
- 8
-
-
- charles martel
- battleship
- (and 1 more)
-
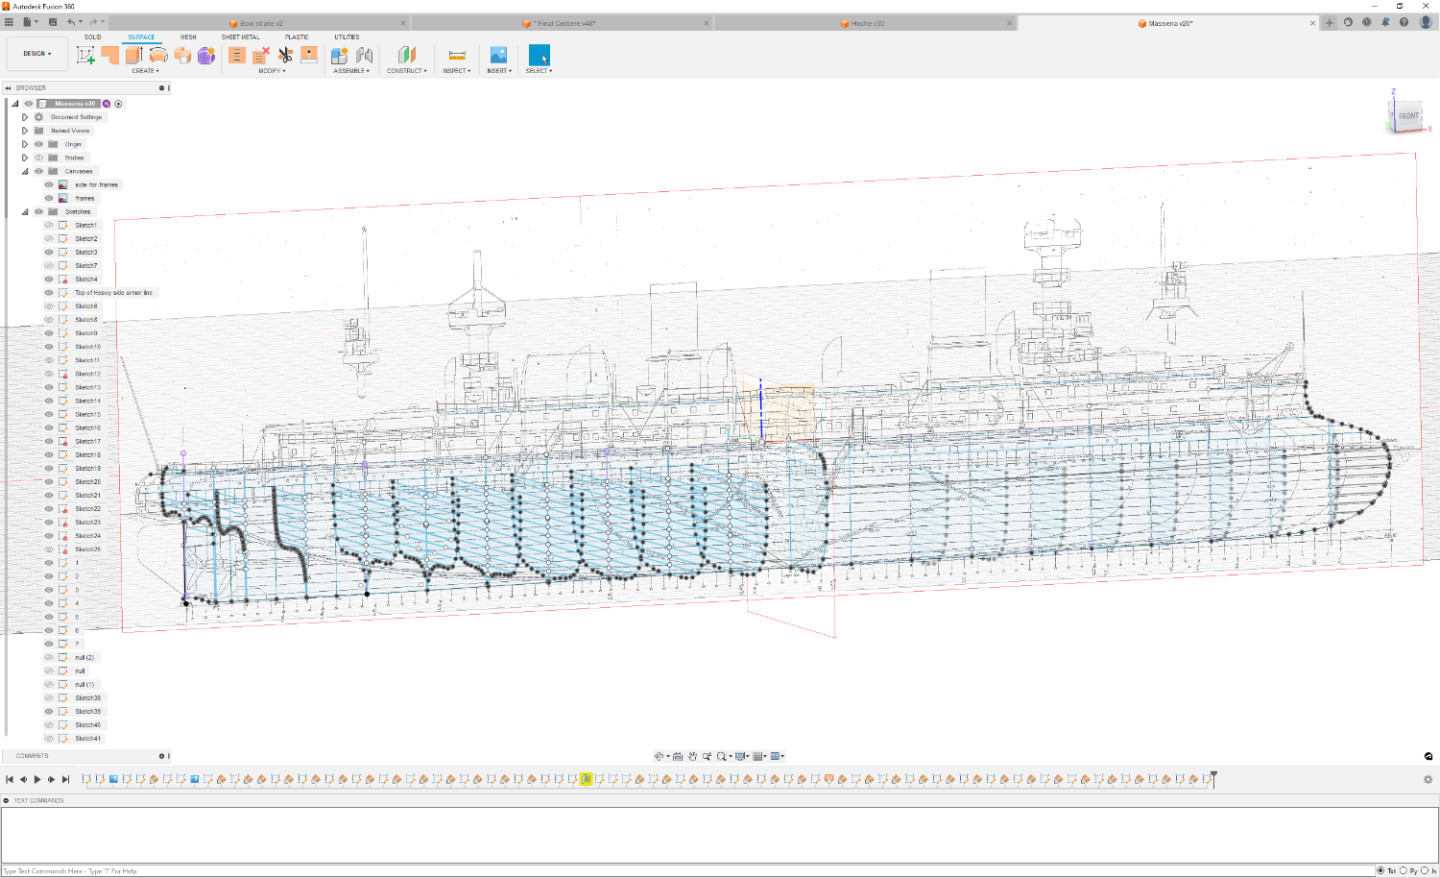
Started working on the Messena today - one of my most favorites and looks do-able...
- 132 replies
-
- 5
-
-
- charles martel
- battleship
- (and 1 more)
-
Hello GreaverBlade - I do get inquiries from time to time about the 3D/STL files but at this time I don't have plans to make them available (maybe some time after I finish the ship!) I will say that the major sections of the hull are fairly large, the stearn section is 375mm in height and maybe 290mm at it's widest....so typical printers like Ender 2/3 are not going to work. However, for those of you that are interested in building some of the ships I design I usually print a 1st draft to prove out everything fits, etc. I do sometimes make those drafts available to interested modelers provided they cover whatever the cost of the filament & shipping of the components would be. I have this ship that I've been tinkering with but it's been slightly challenging.

- 132 replies
-
- 11
-
-
- charles martel
- battleship
- (and 1 more)
-
3D cannon barrels
Haze Gray replied to allanyed's topic in CAD and 3D Modelling/Drafting Plans with Software
-
Love the work you’re doing on this ship - I especially found how you float tested it to be a great idea - most of the boats I build are too big for the bathtub !!!! by the way how long is your ship end to end?
-
Outstanding work Valeriy! You are very much an inspiration to us here on this site! Bravo! I have learned a lot from you work on varyag and hope to apply much of that on my next project.
-
Are you using design spark mechanical? I just recently downloaded it - need time to figure it out.
-
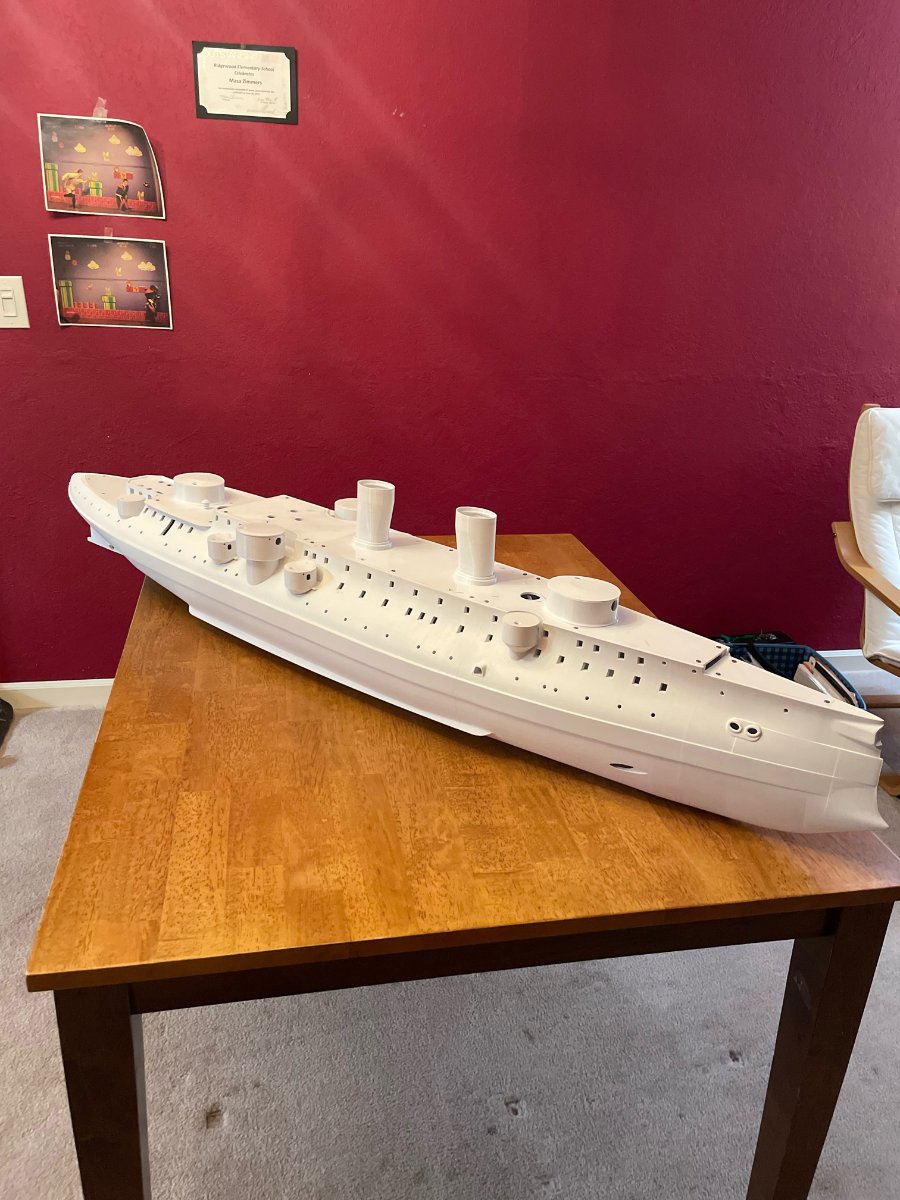
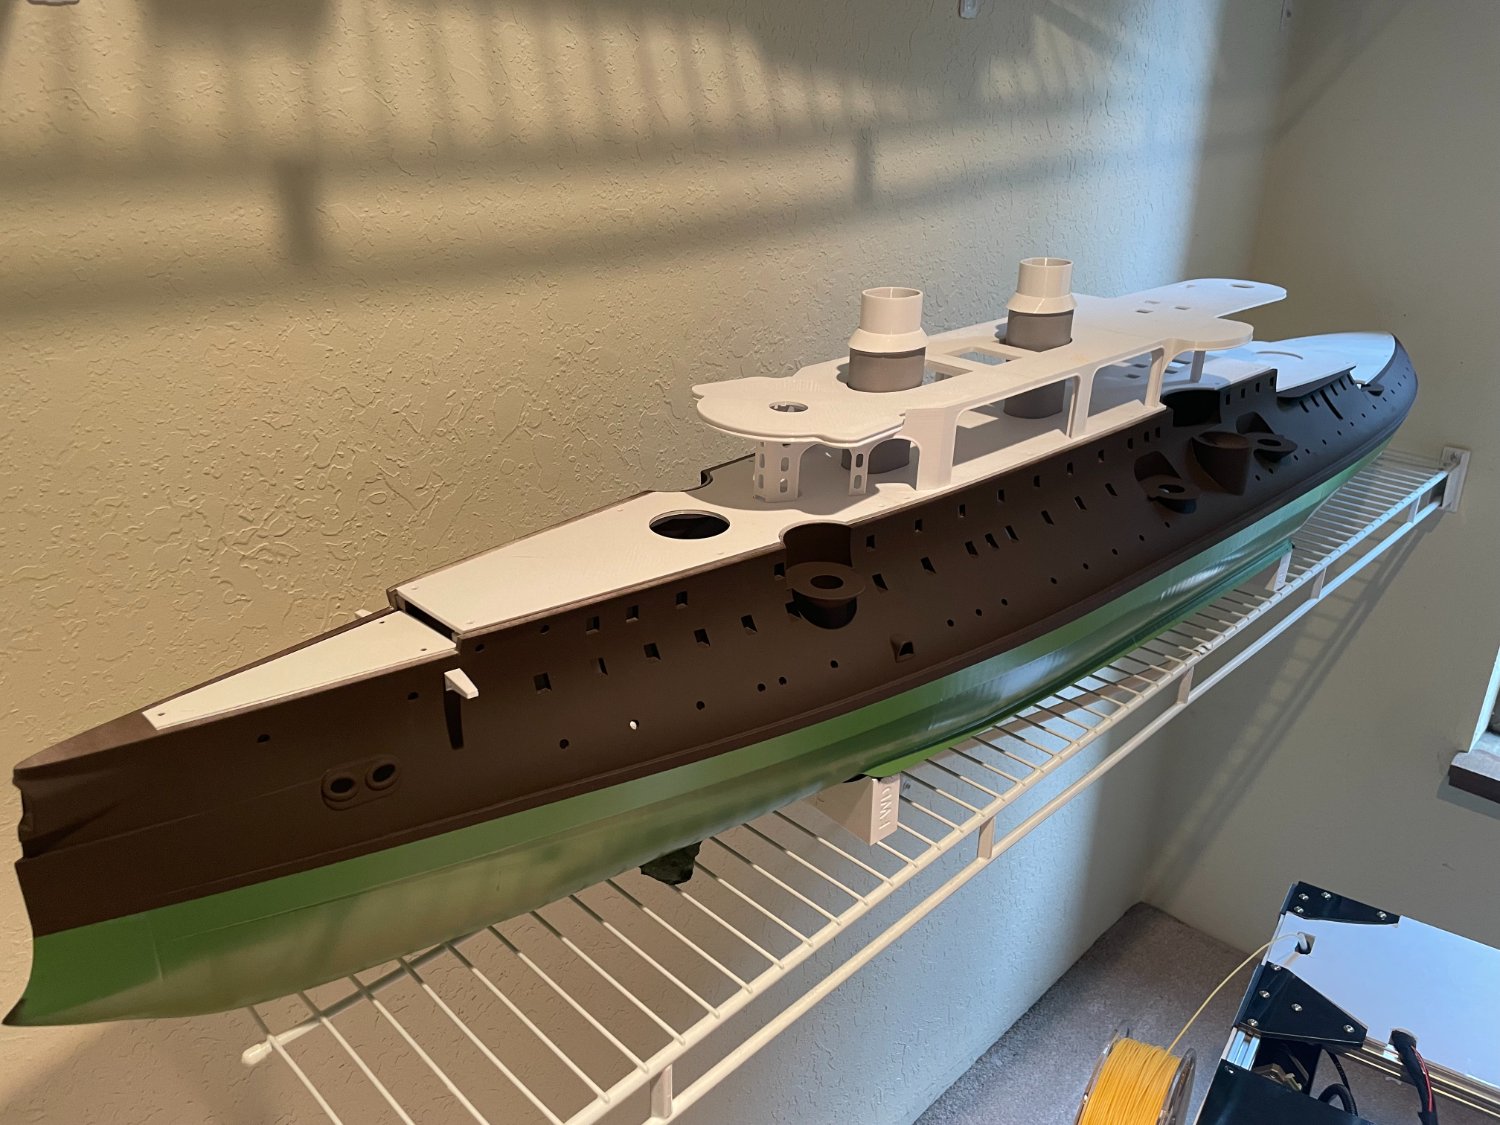
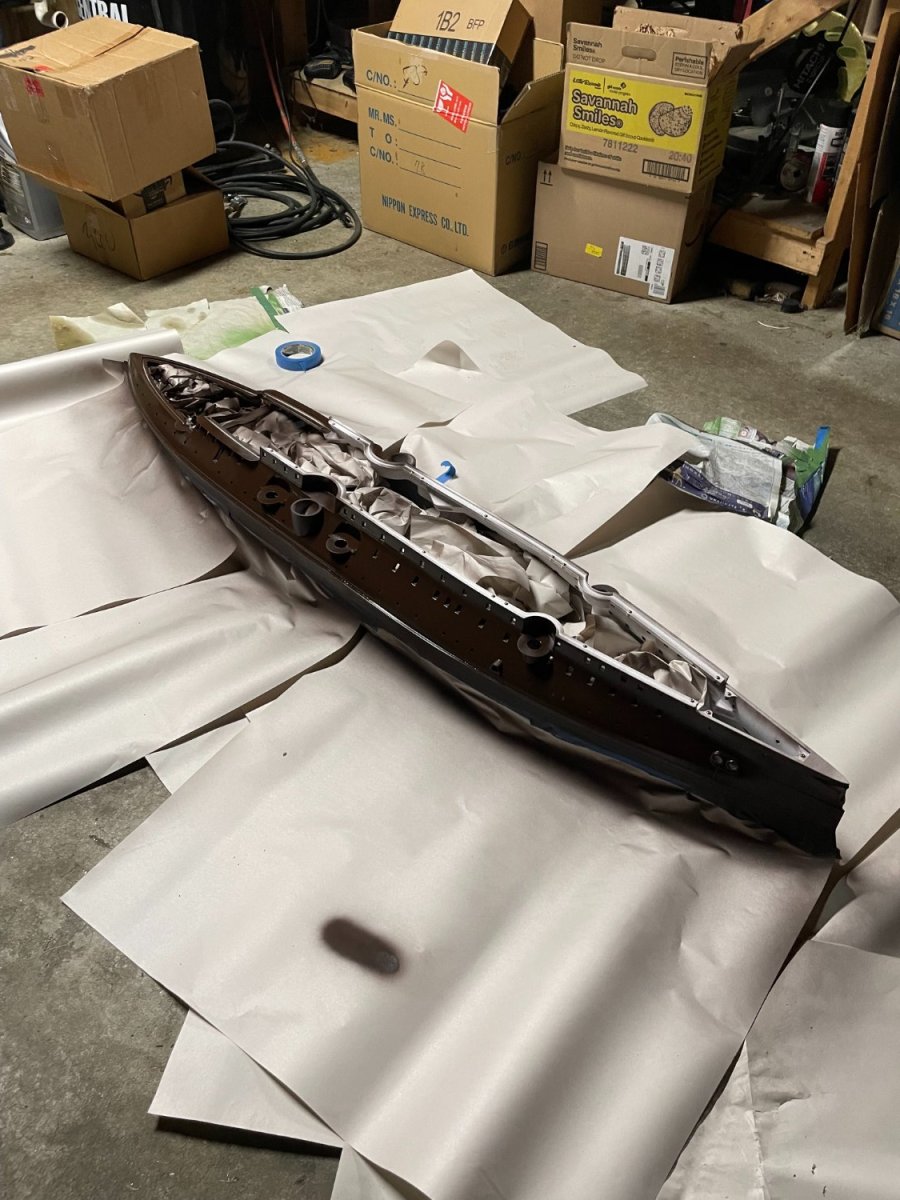
Just an update - painted the hull back in October. lots of parts not shown.... they are all stuffed inside the hull while I wait for warmer weather to paint more.


- 132 replies
-
- 14
-
-

-
- charles martel
- battleship
- (and 1 more)
-
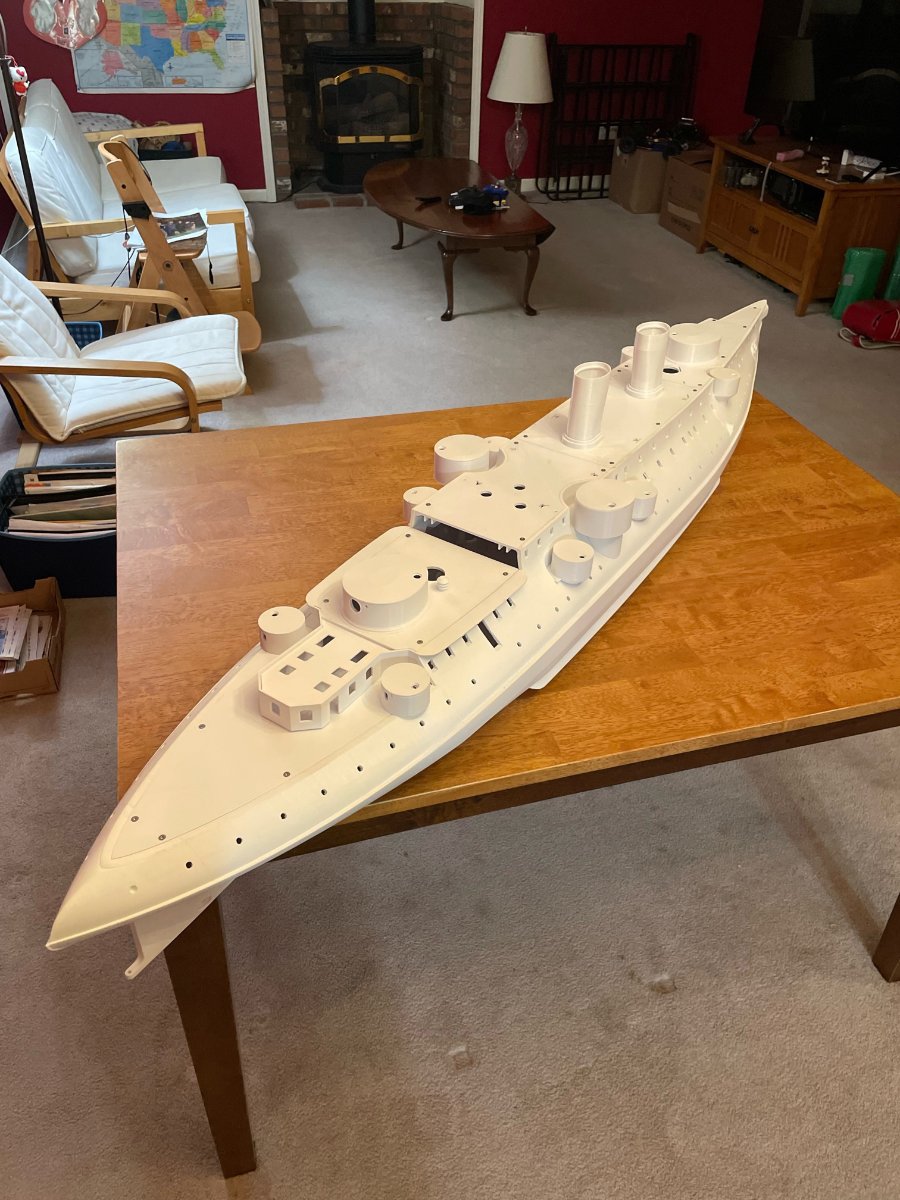
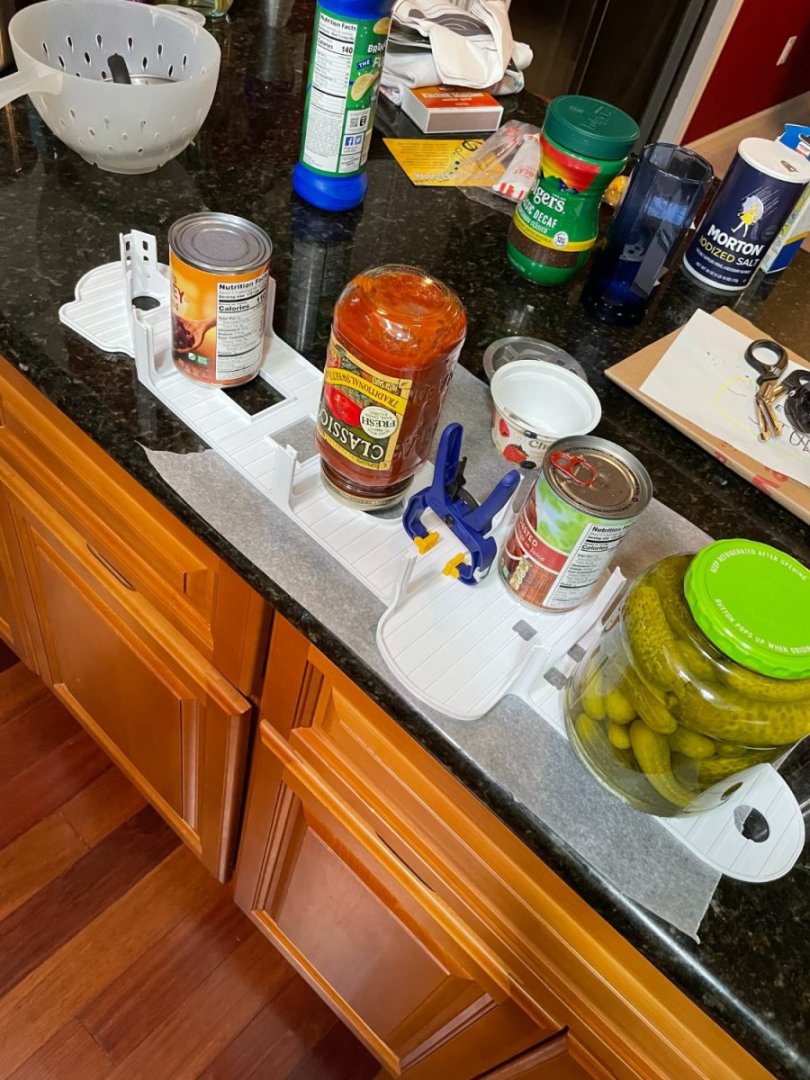
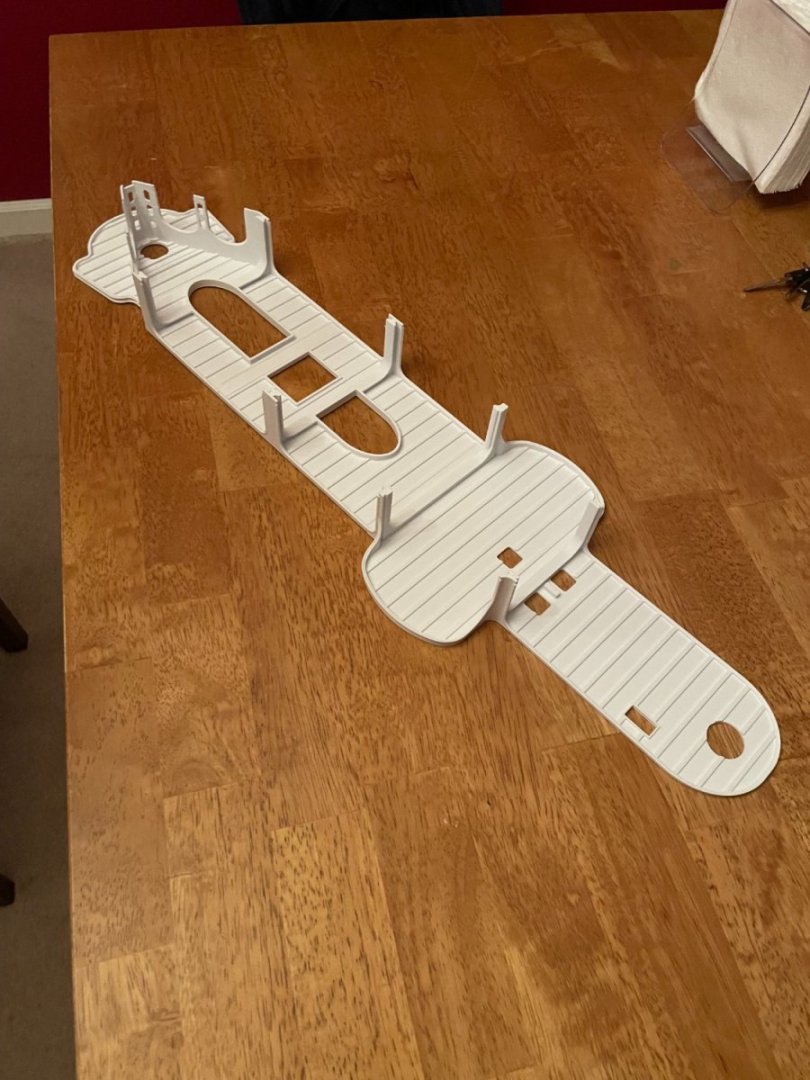
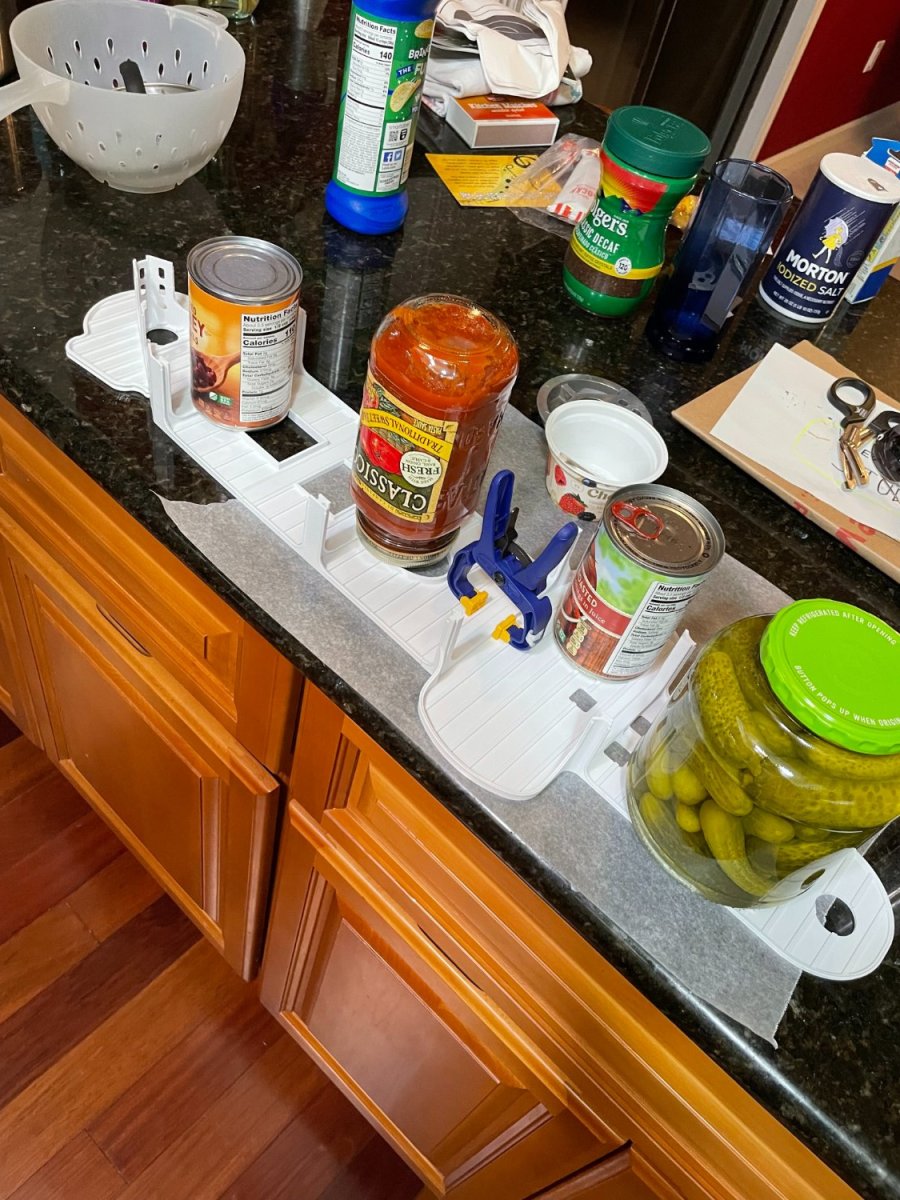
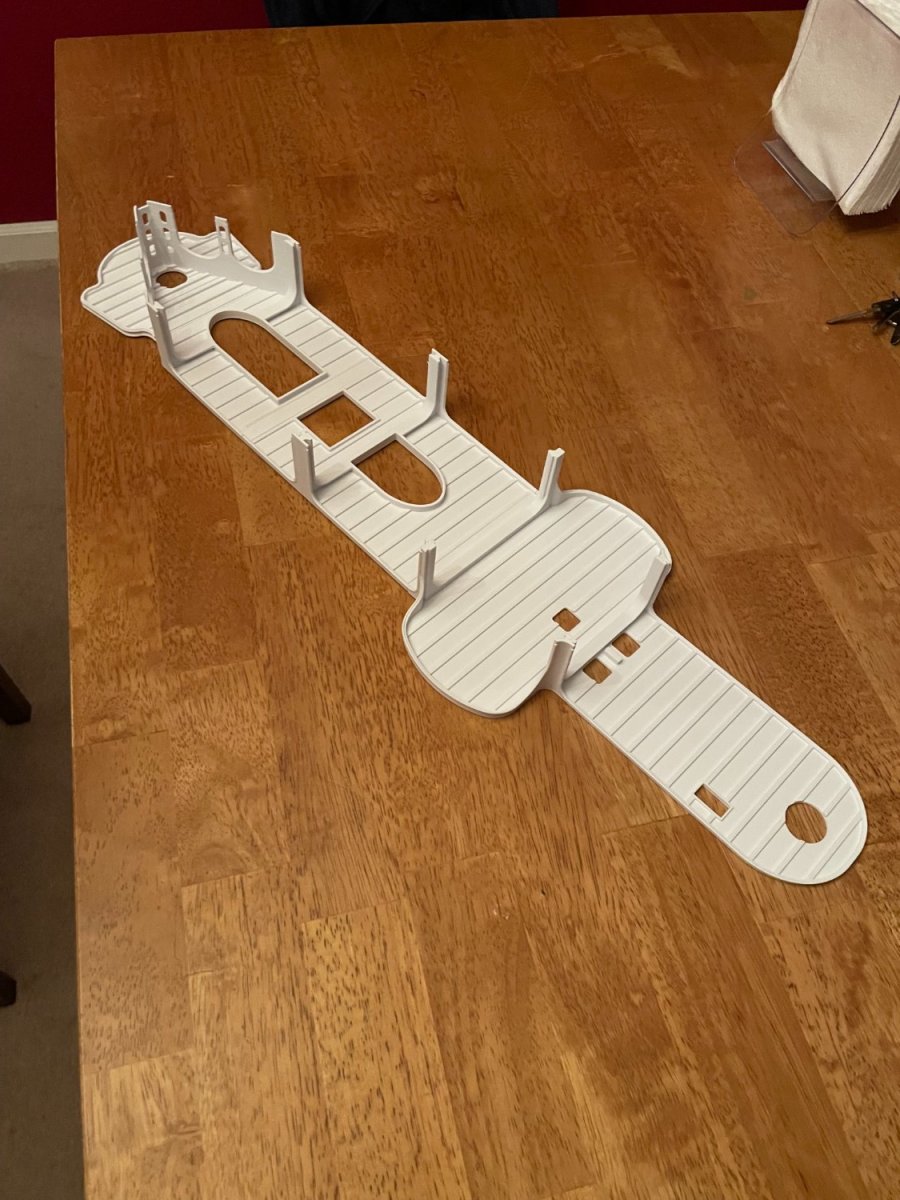
Hello all, just an update - all I've printed all the major components I'm starting down the path of putting together the assemblies and getting things ready for painting. Here I'm gluing the 3 parts of the spar deck together - the kitchen is a great place to do so since the granite countertop is quite flat and there's a wide variety of heavy objects that I can use to hold things in place .... while the epoxy is curing I can also make a sandwich so kitchens are a real win-win scenario in my opinion! and finally the completed part:
- 132 replies
-
- 14
-
-

-
- charles martel
- battleship
- (and 1 more)
-
Hello Dancooper - at some point in the near future I'll make the STL's available - the USS Maine was the first ship I modeled and it could use some cleaning up + a build guide. I'll try to work on it over the next few months and will reach out to if/when I am able to release it. in 1/72 scale the hull parts are fairly big - a 3d printer bed size of at least 280mm X 280mm Y and 250mm Z is recommended. what kind of printer do you have?
-
Yes, my knees are being "utilized" but at the moment I'm just placing parts one by one - so they only take abuse for 15-30 seconds.... My knees are in fairly good 'nick' but I still take it easy.
- 132 replies
-
- 4
-
-
- charles martel
- battleship
- (and 1 more)
-
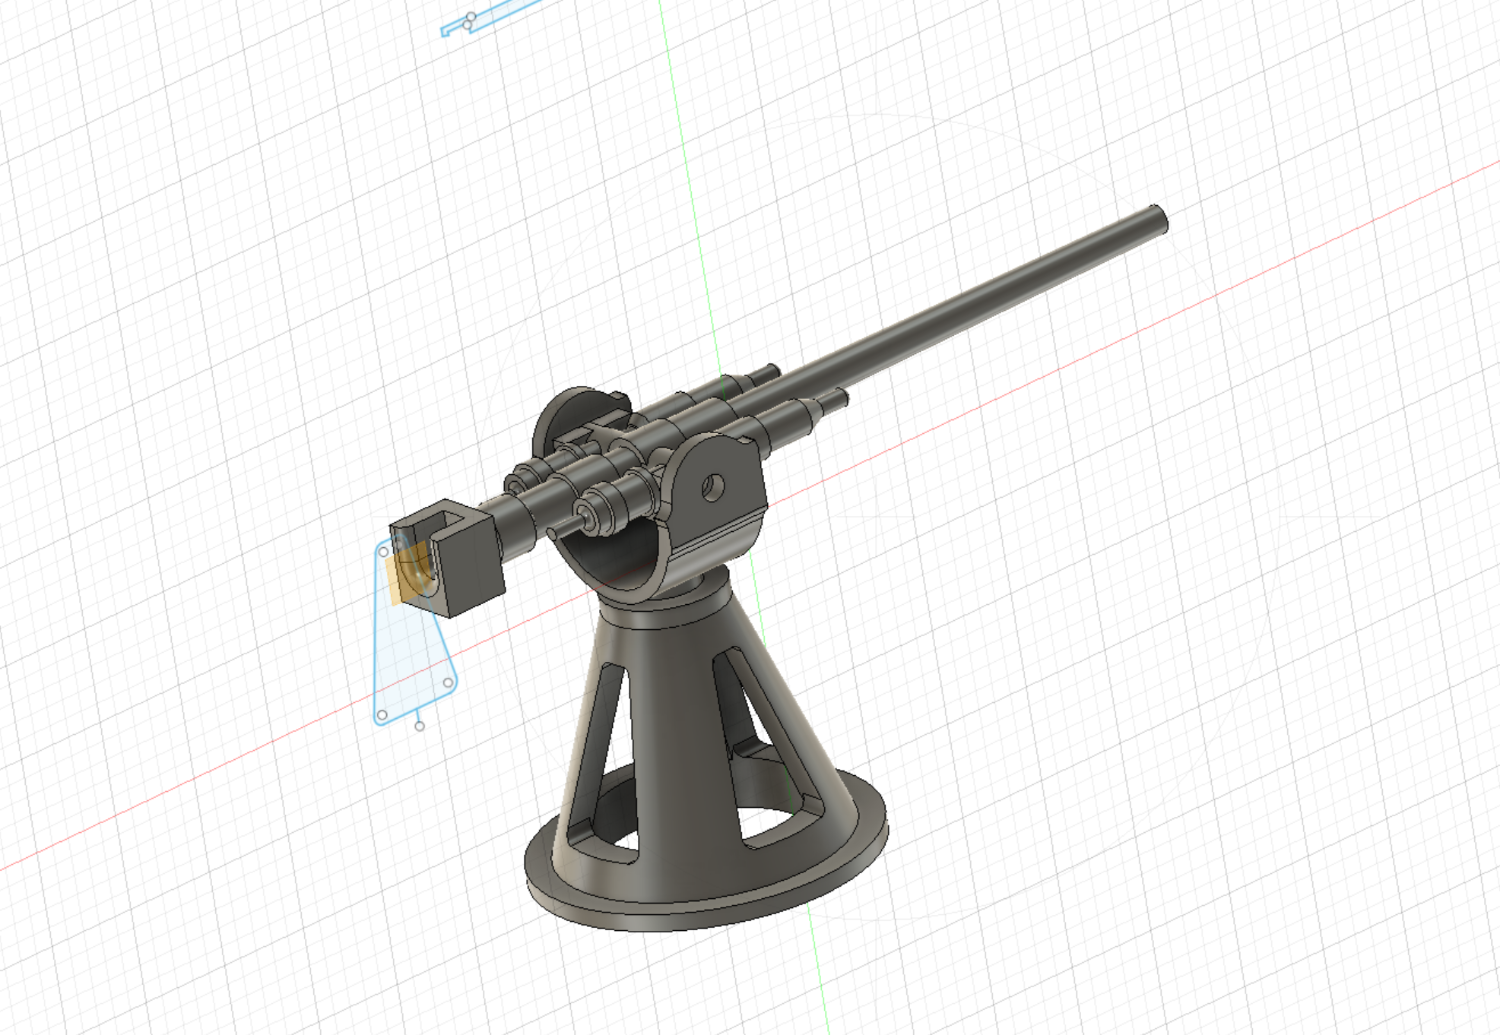
So, I really like how unique the French armaments are - here's the Canon de 65 mm Modèle 1891 - love it! I can't design it exactly per its real configuration since even with resin printing some accommodations need to be made but happy with the result. The Charles Martel had four of these on board.

- 132 replies
-
- 10
-
-
- charles martel
- battleship
- (and 1 more)
-
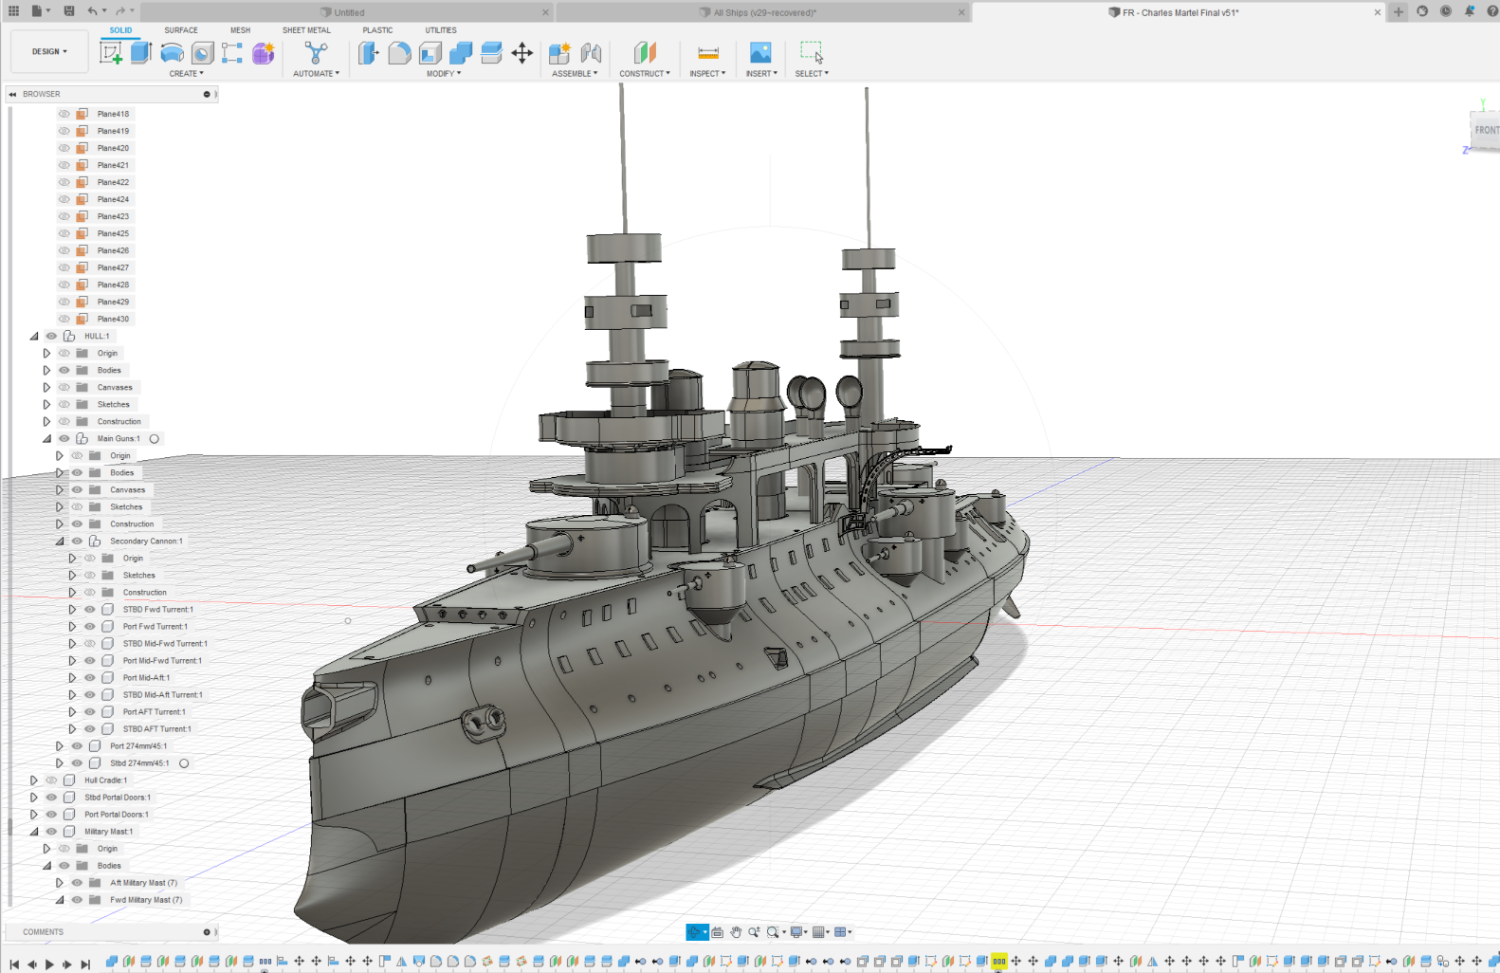
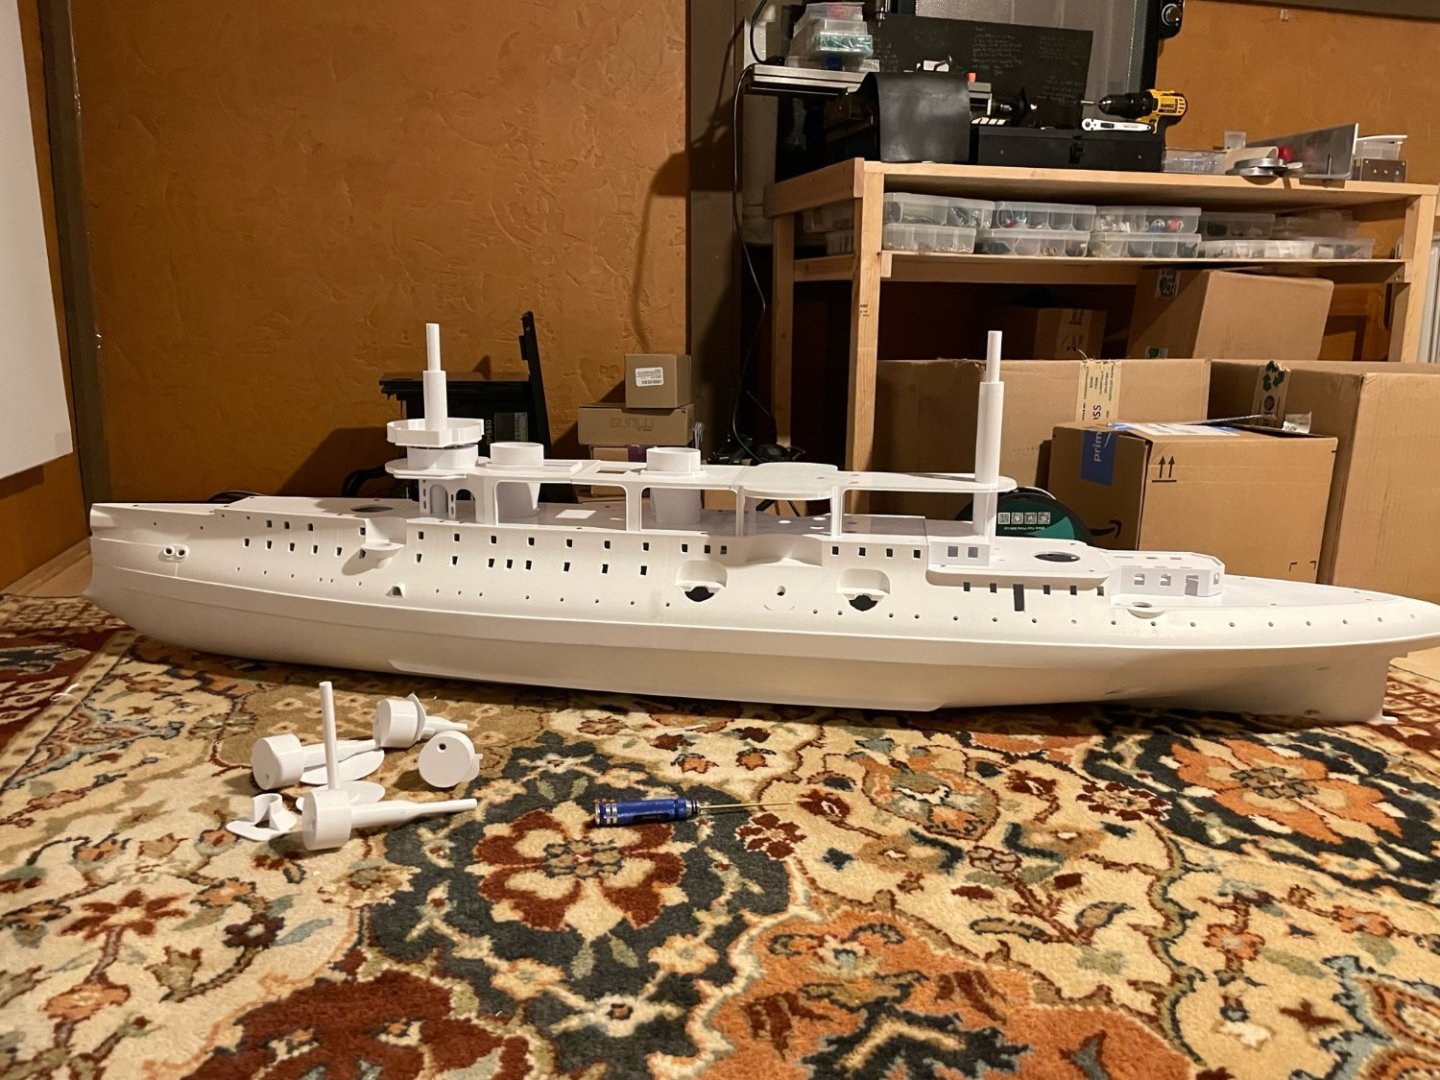
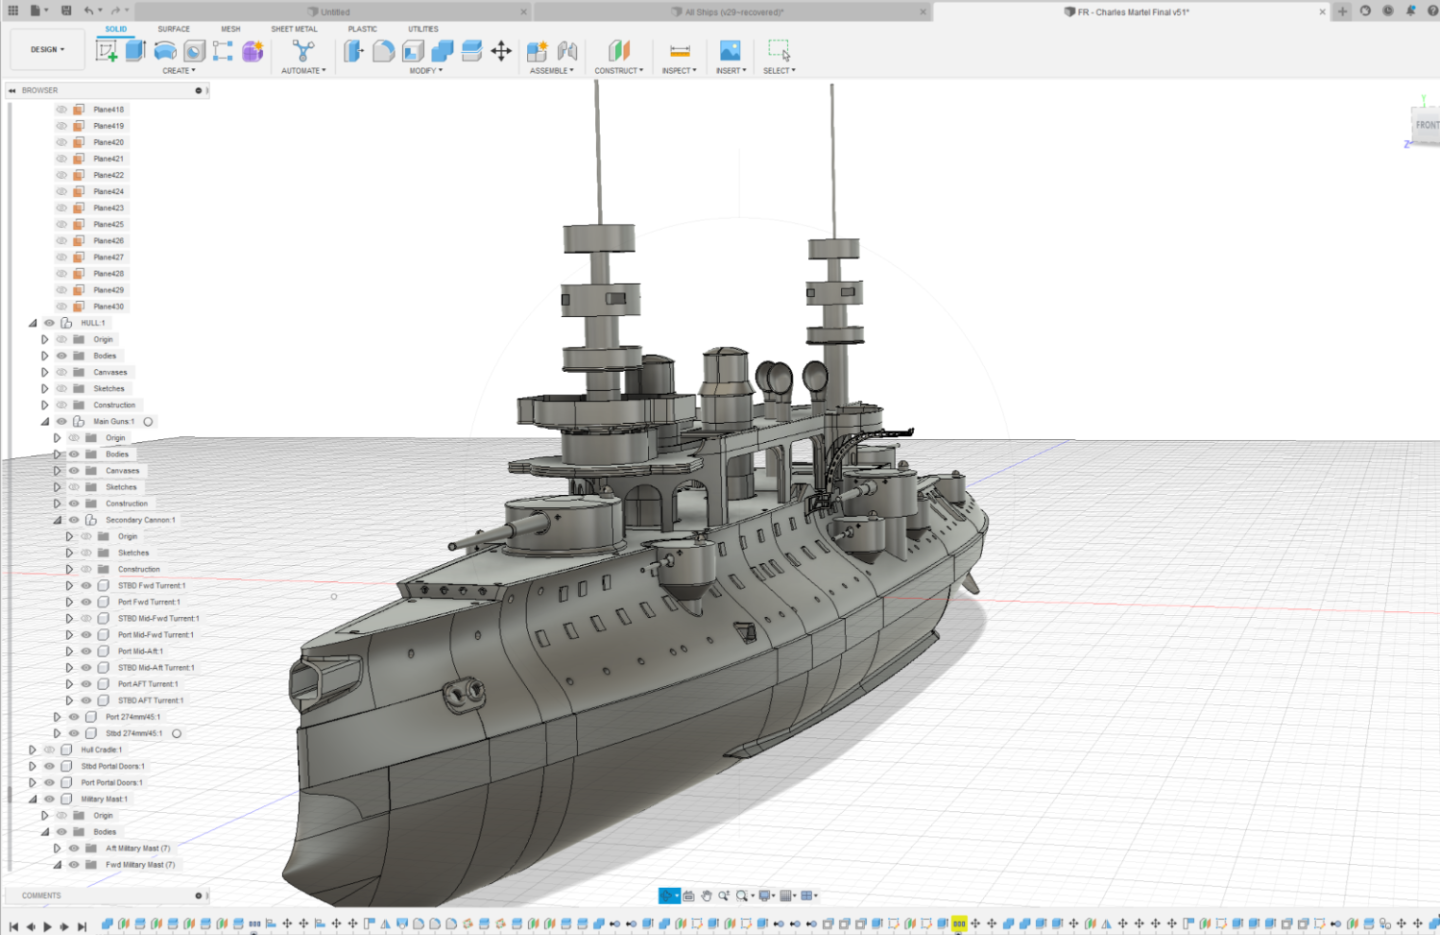
Hi Wefalck - I will say that it's a lot easier to make mistakes in CAD but also much faster to correct them in CAD - sometimes I don't notice a problem until I actually print out the parts and realize they don't fit/look like they should... While I've never had to re-print a hull (thank God) everything from the deck up has a strong chance that I'll need to re-print after correcting/modifying them. I think that with a complete set of plans and traditional construction techniques could be just as fast or faster than what I'm doing. While I've created 973 Bodies in fusion many have been combined so by my count, I've only actually printed out 112 thus far. Here's what the Charles Martel looks like at this stage....
- 132 replies
-
- 10
-
-
- charles martel
- battleship
- (and 1 more)
-
Thanks Lou - I think the term masochist applies in my instance 😃
- 132 replies
-
- 5
-
-
-
- charles martel
- battleship
- (and 1 more)
-
I've been keeping the printers busy......... but I think I have about 100+ more parts to design and print (at least)...
.thumb.jpeg.d021aeca39e18846abbe731d80aa5207.jpeg)


- 132 replies
-
- 12
-
-
-
- charles martel
- battleship
- (and 1 more)
-
HSwMS Äran by Nirvana
Haze Gray replied to Nirvana's topic in - Build logs for subjects built 1901 - Present Day
I'm impressed that you got that support structure printed without supports! Well done! Looking forward to seeing the upper deck take shape too. -
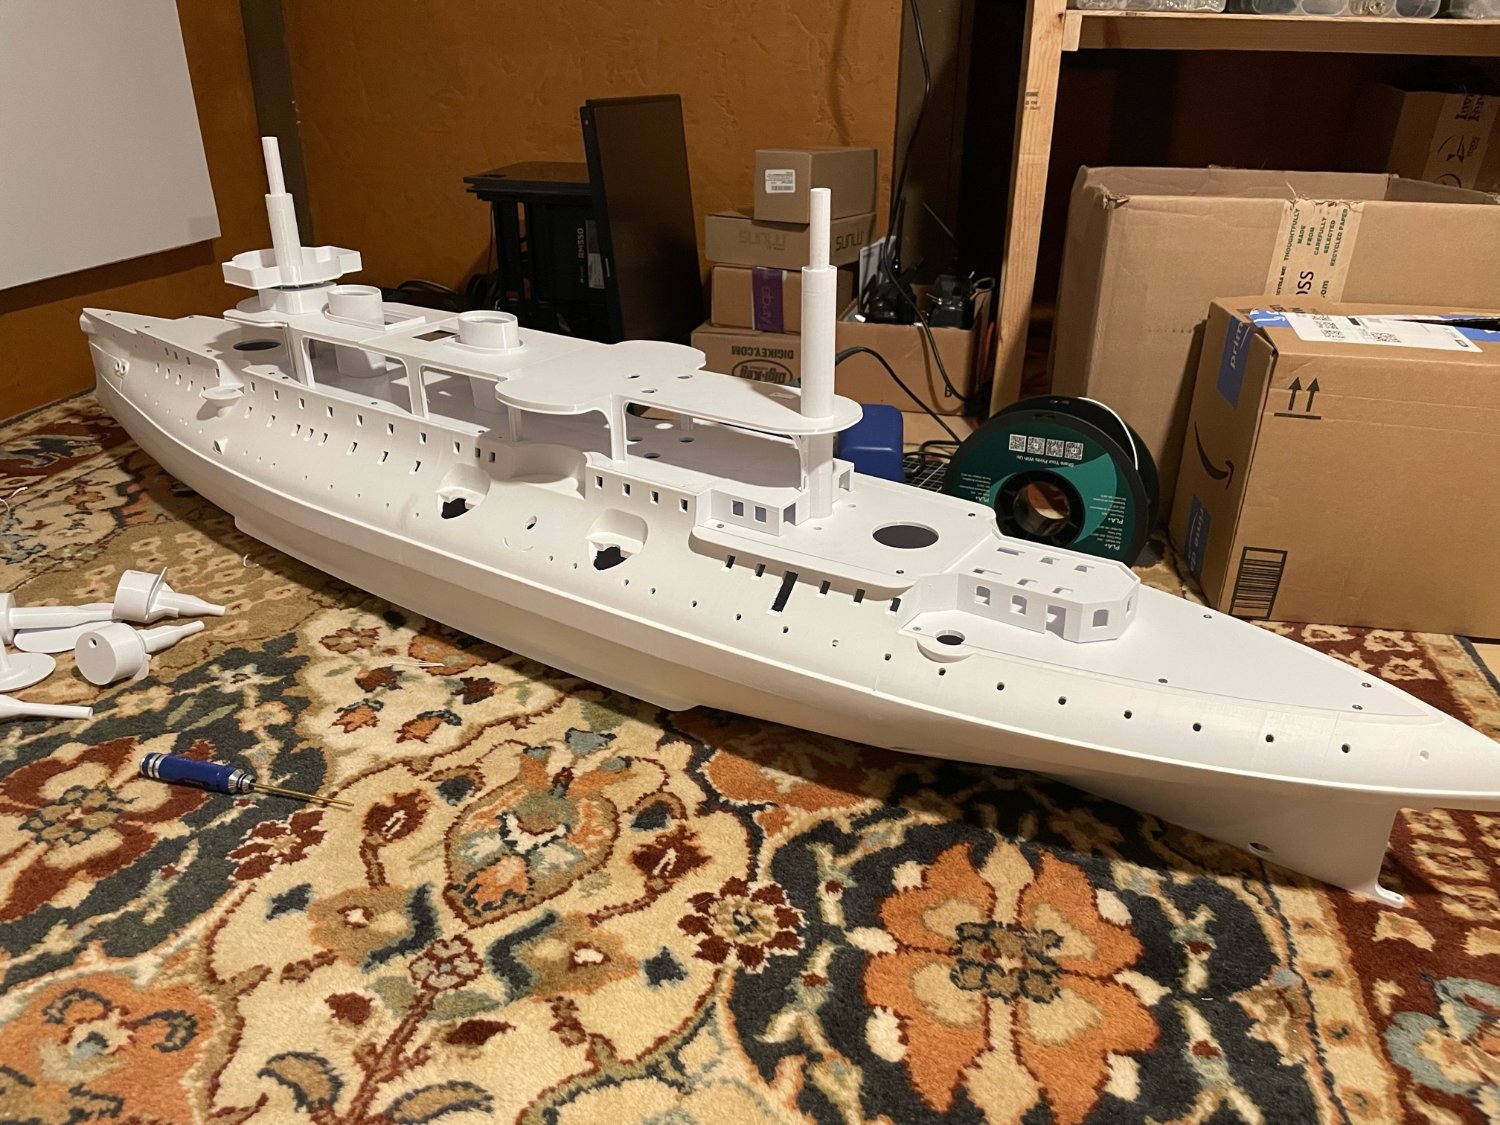
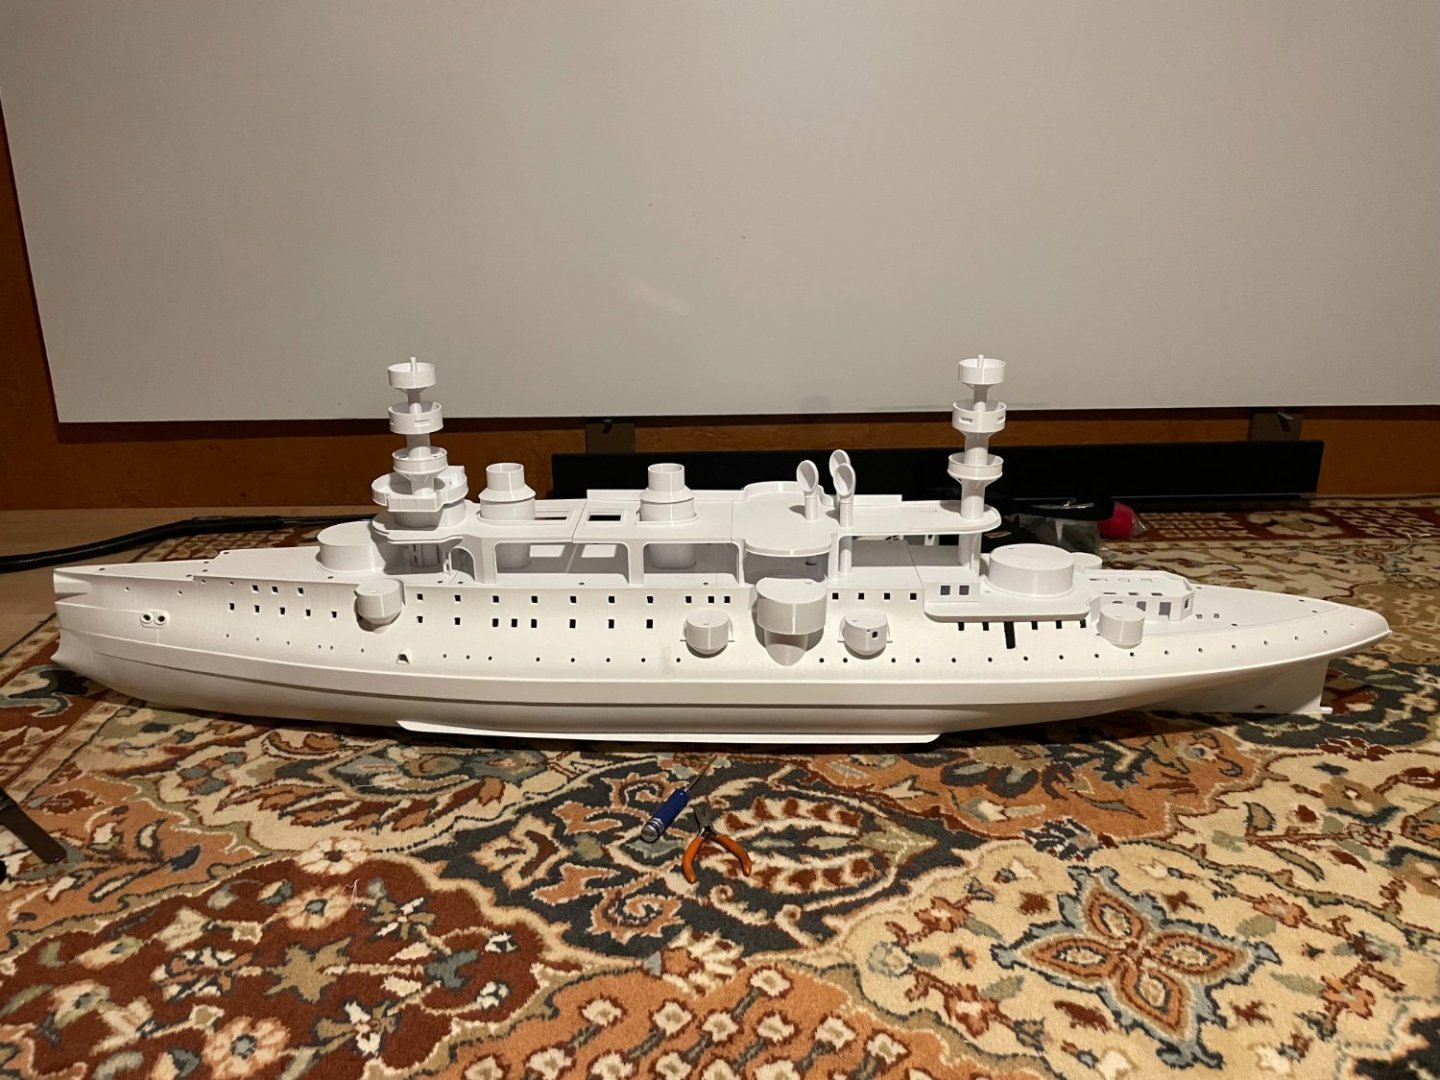
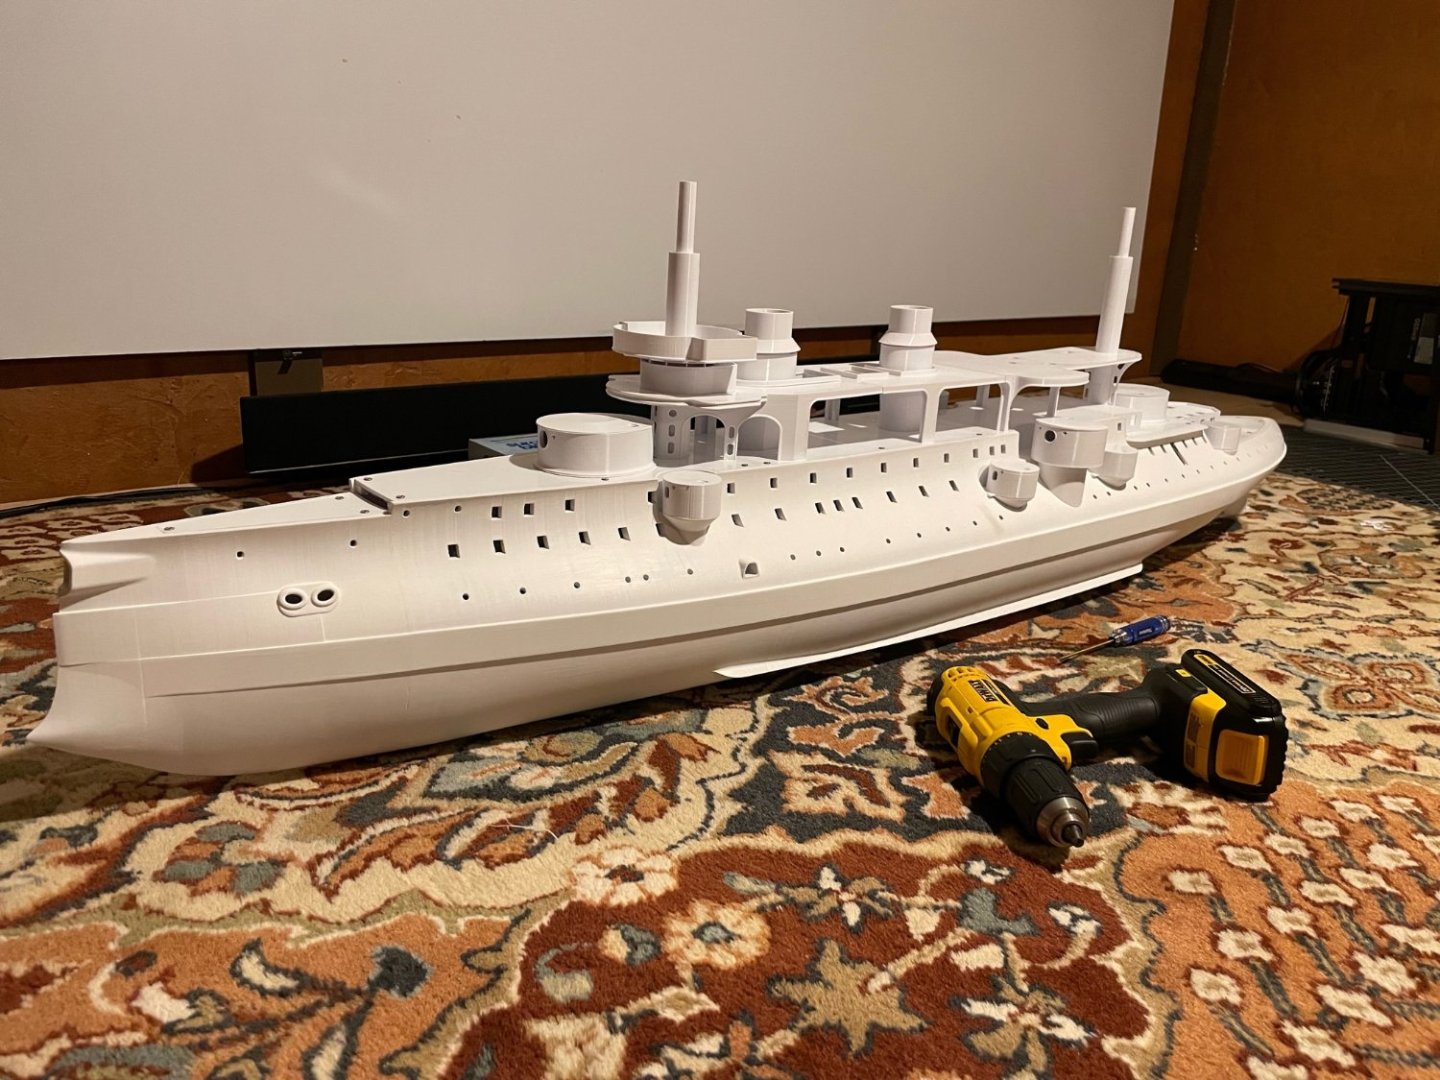
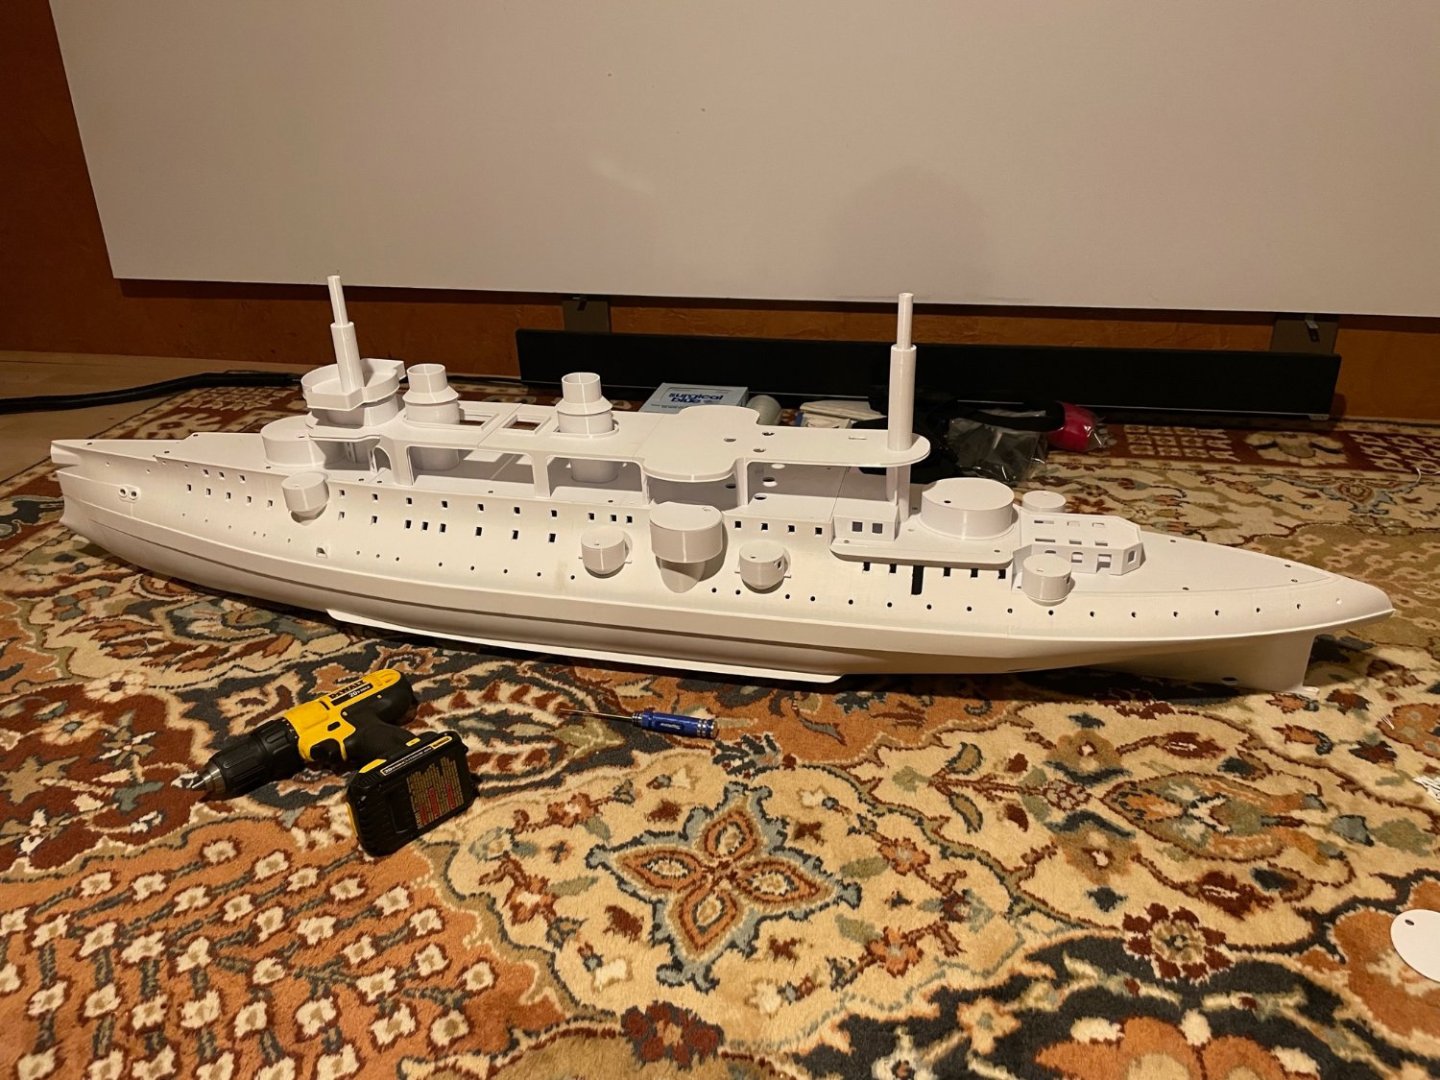
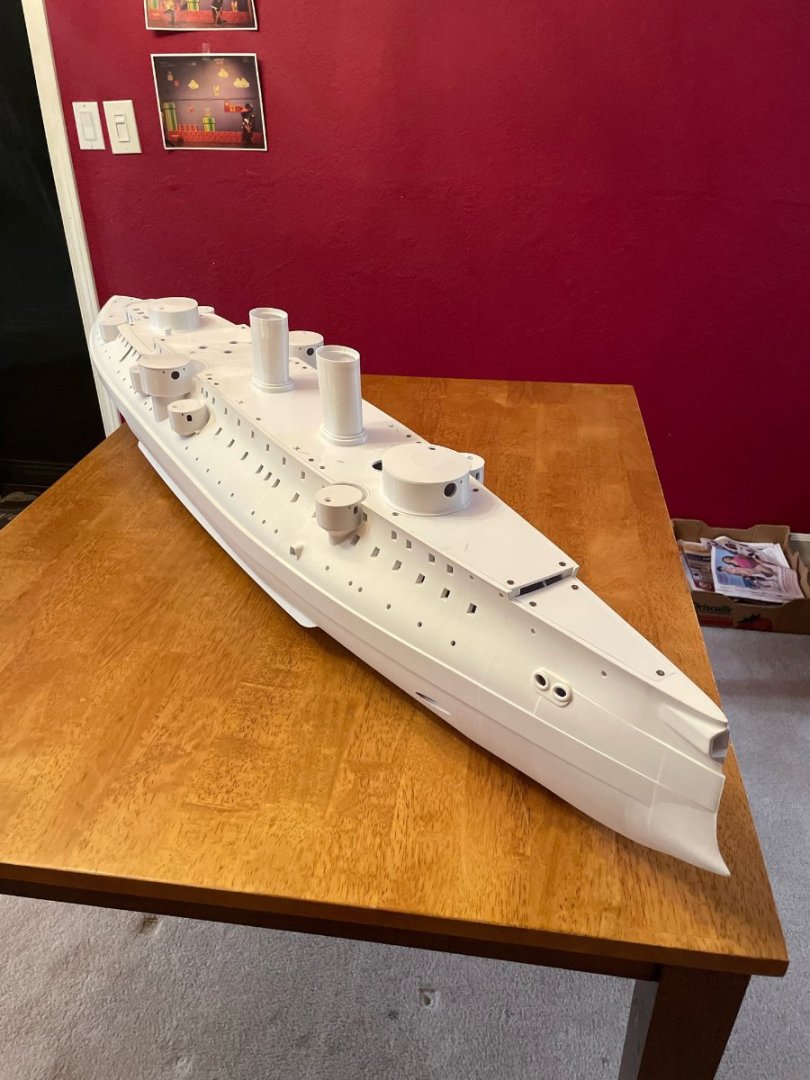
Thought I would provide an update on the Charles Martel - been busy studying lots of photos since there's a lack of complete drawings (especially for structures above the deck). Happy to report that I am starting to understand a lot more about the ship and making changes that the cad model reflects. Still much to do but here's a look at the actual model progress thus far:

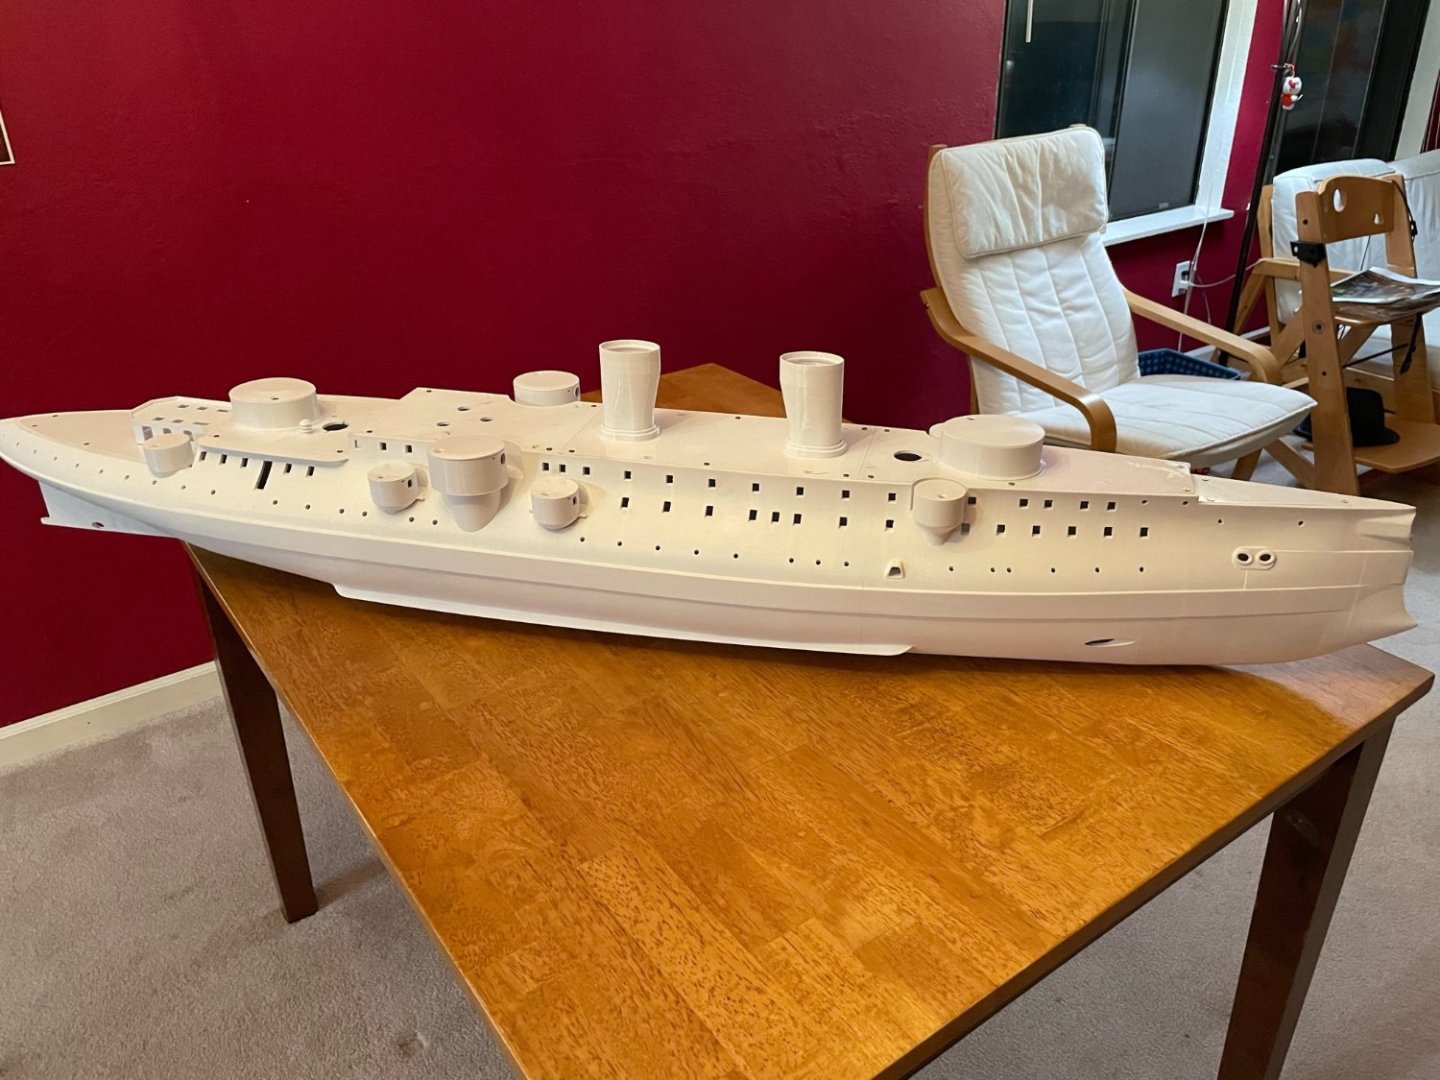

- 132 replies
-
- 12
-
-
-
- charles martel
- battleship
- (and 1 more)
-
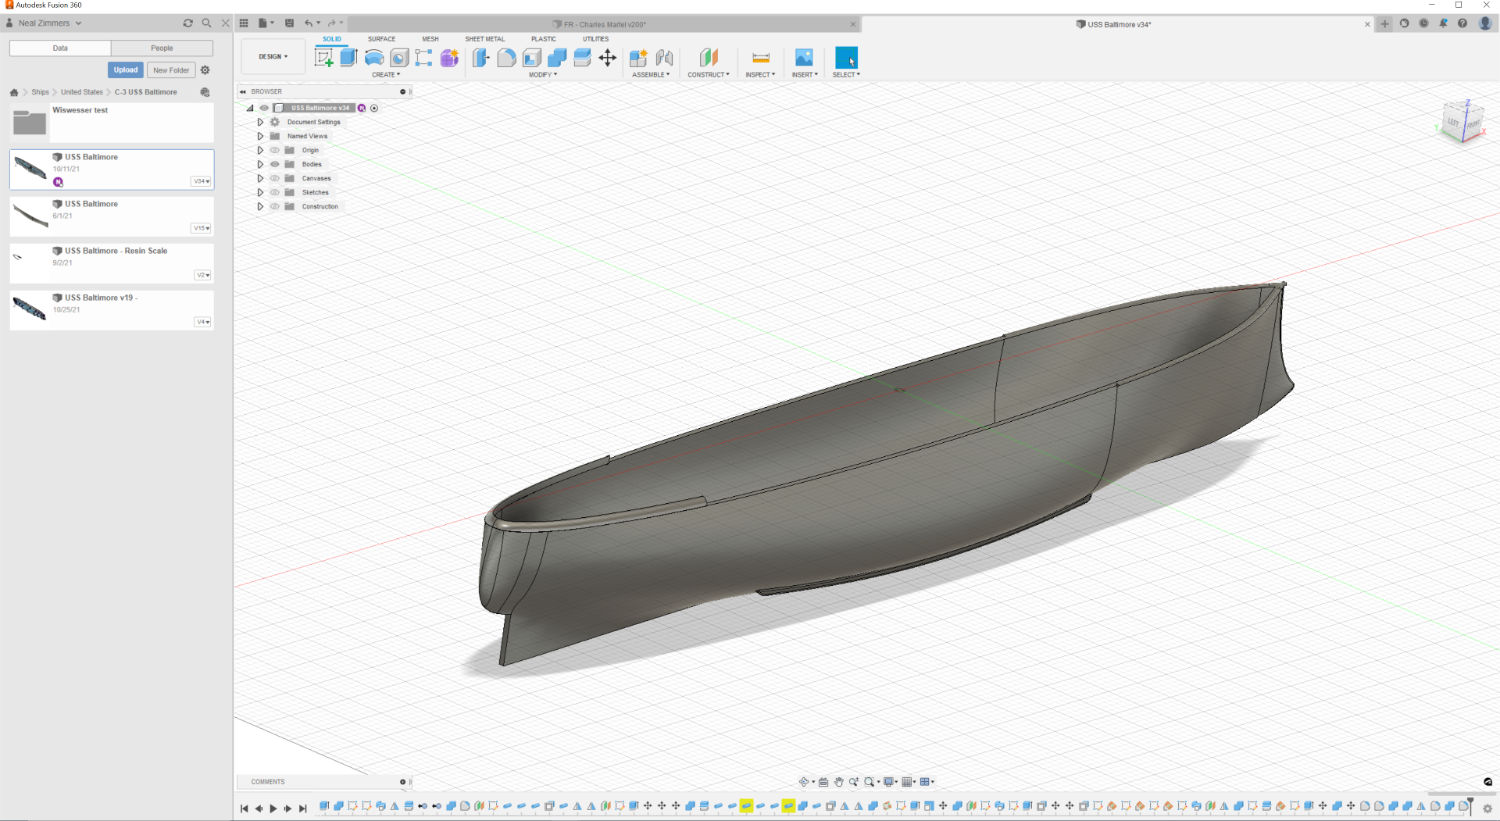
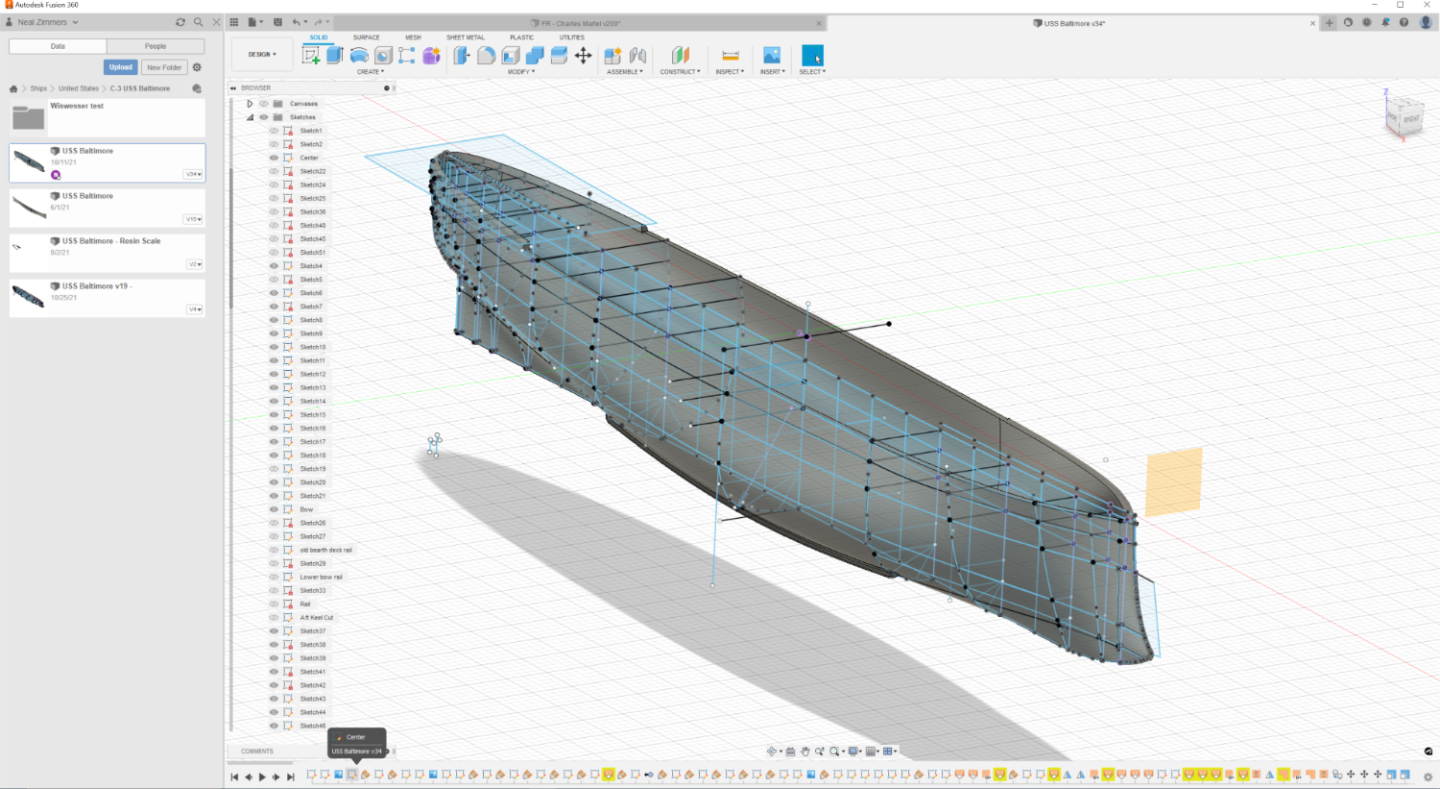
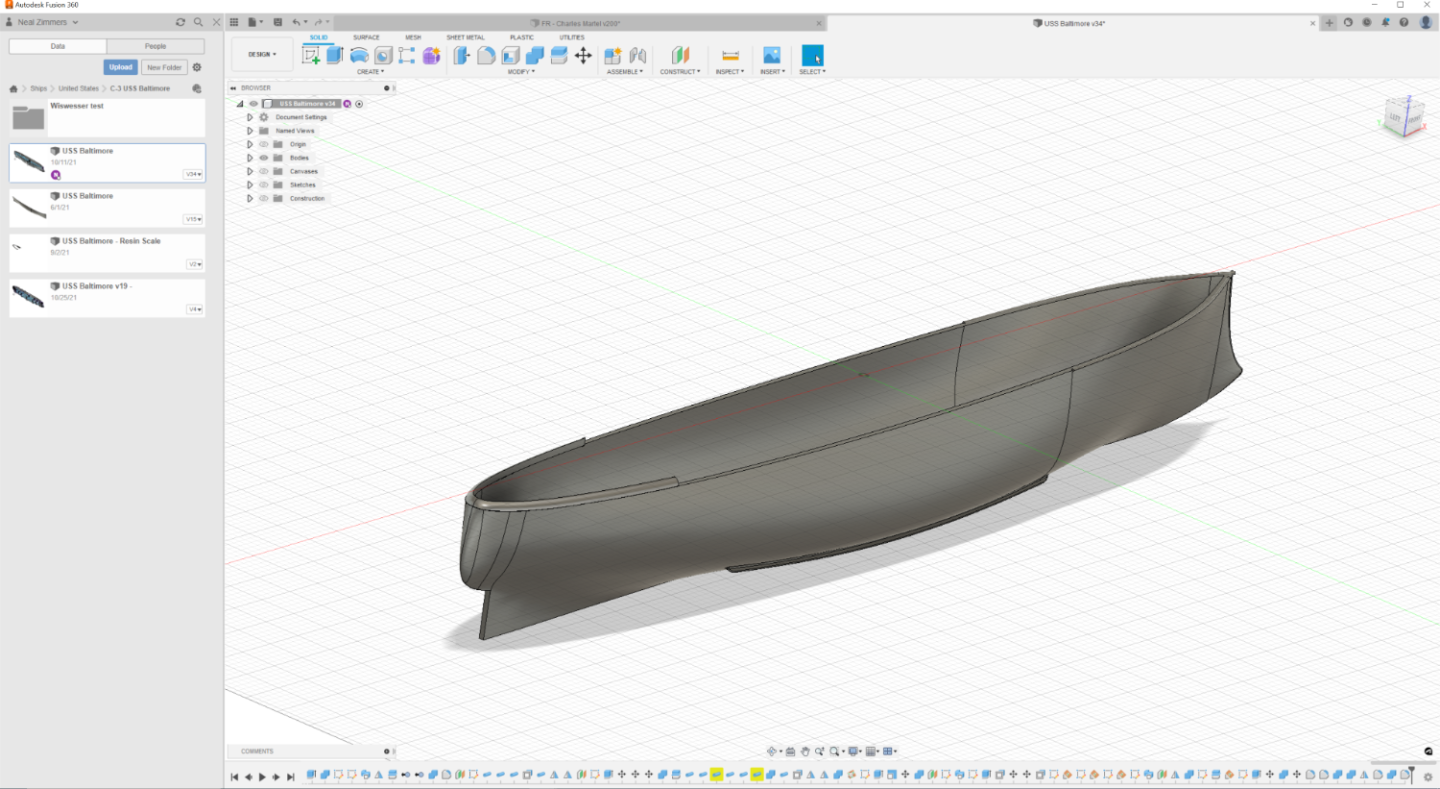
Hi Dr. Per - yes I'll write something up with some photos - no printing yet on it (printers are busy with Charles Martel parts). If I remember correctly - there's a connection between the USS Baltimore and a famous inventor from Sweden
-
Well I did kind of forge ahead and got the hull created in Fusion 360. To be honest each hull has it's own problems to solve - here's the model with some details show as to the frames and rails that I put in to make it as smooth as possible.
-
Thanks JReeves - good to hear from another tumble home adorer! A 1/96th static model would be 2 inches shy of 4 feet long and ~ 8 inches wide. This is something I could probably print but I need to make some adjustments to the model. I'm going to be moving to a new place so 2-3 months before I even get things setup to make an attempt at that scale. I do have her sister ships in mind to do as well (Messena, Brennus, Bouvet, Jaureberry, and Carnot (yes...Carnot!.... this one will be huge challenge!).
- 132 replies
-
- 4
-
-
- charles martel
- battleship
- (and 1 more)
-
Back when you were having extrusion issues I was thinking it could due to not enough pressure on the filament and it might be slipping - but looking at the distortion on the gear maybe you had it screwed down extremely tight..... but I've never seen plastic filament actually deform metal - that a first for sure!
- 460 replies
-
- 4
-
-
- Finished
- Flower-class
- (and 1 more)


.jpeg.183b8a3deddfcadae0ed4667c5a00d61.jpeg)