HOLIDAY DONATION DRIVE - SUPPORT MSW - DO YOUR PART TO KEEP THIS GREAT FORUM GOING! (89 donations so far out of 49,000 members - C'mon guys!)
×


Tector
-
Posts
62 -
Joined
-
Last visited
Content Type
Profiles
Forums
Gallery
Events
Everything posted by Tector
-
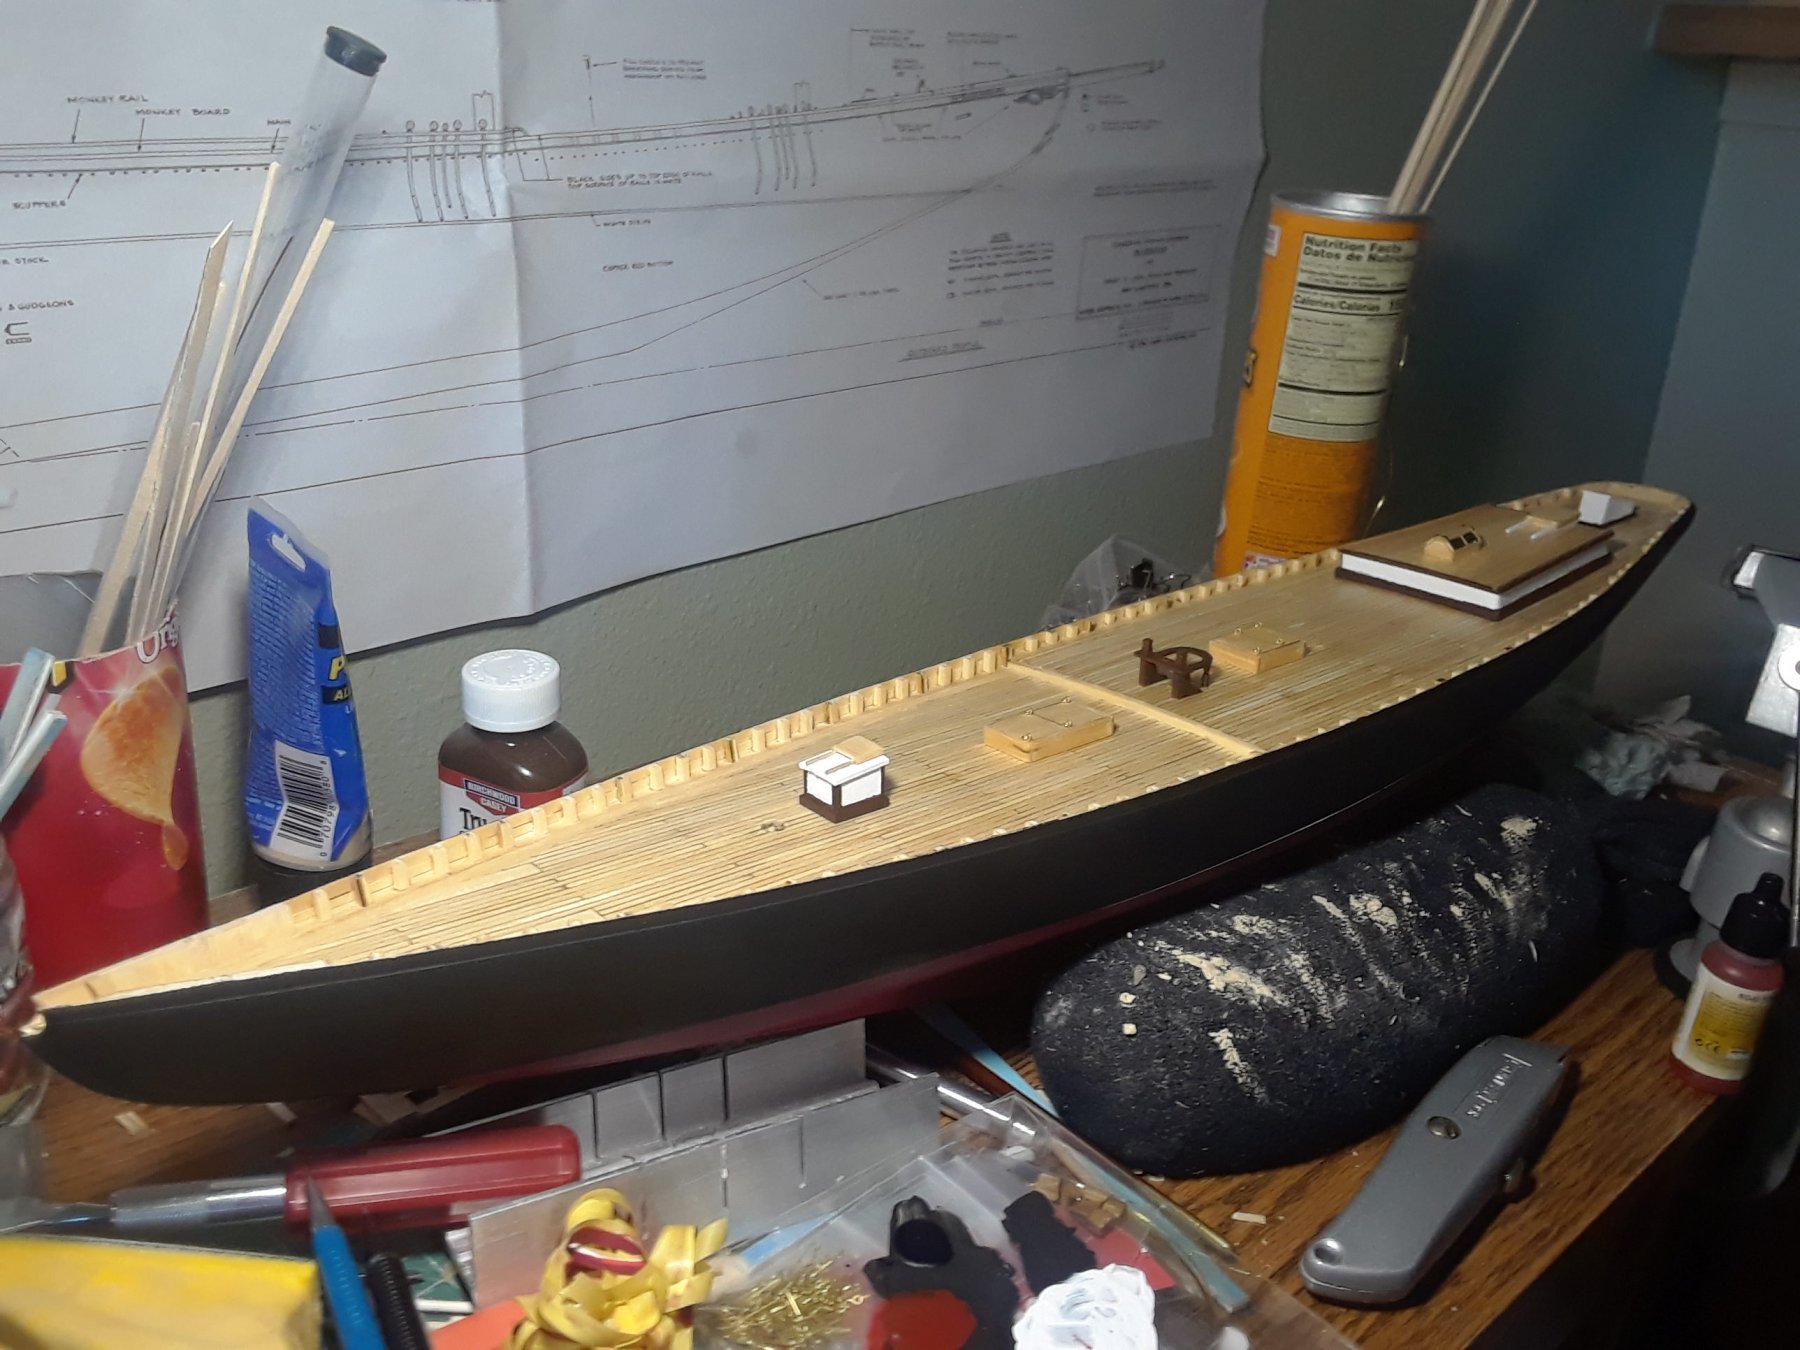
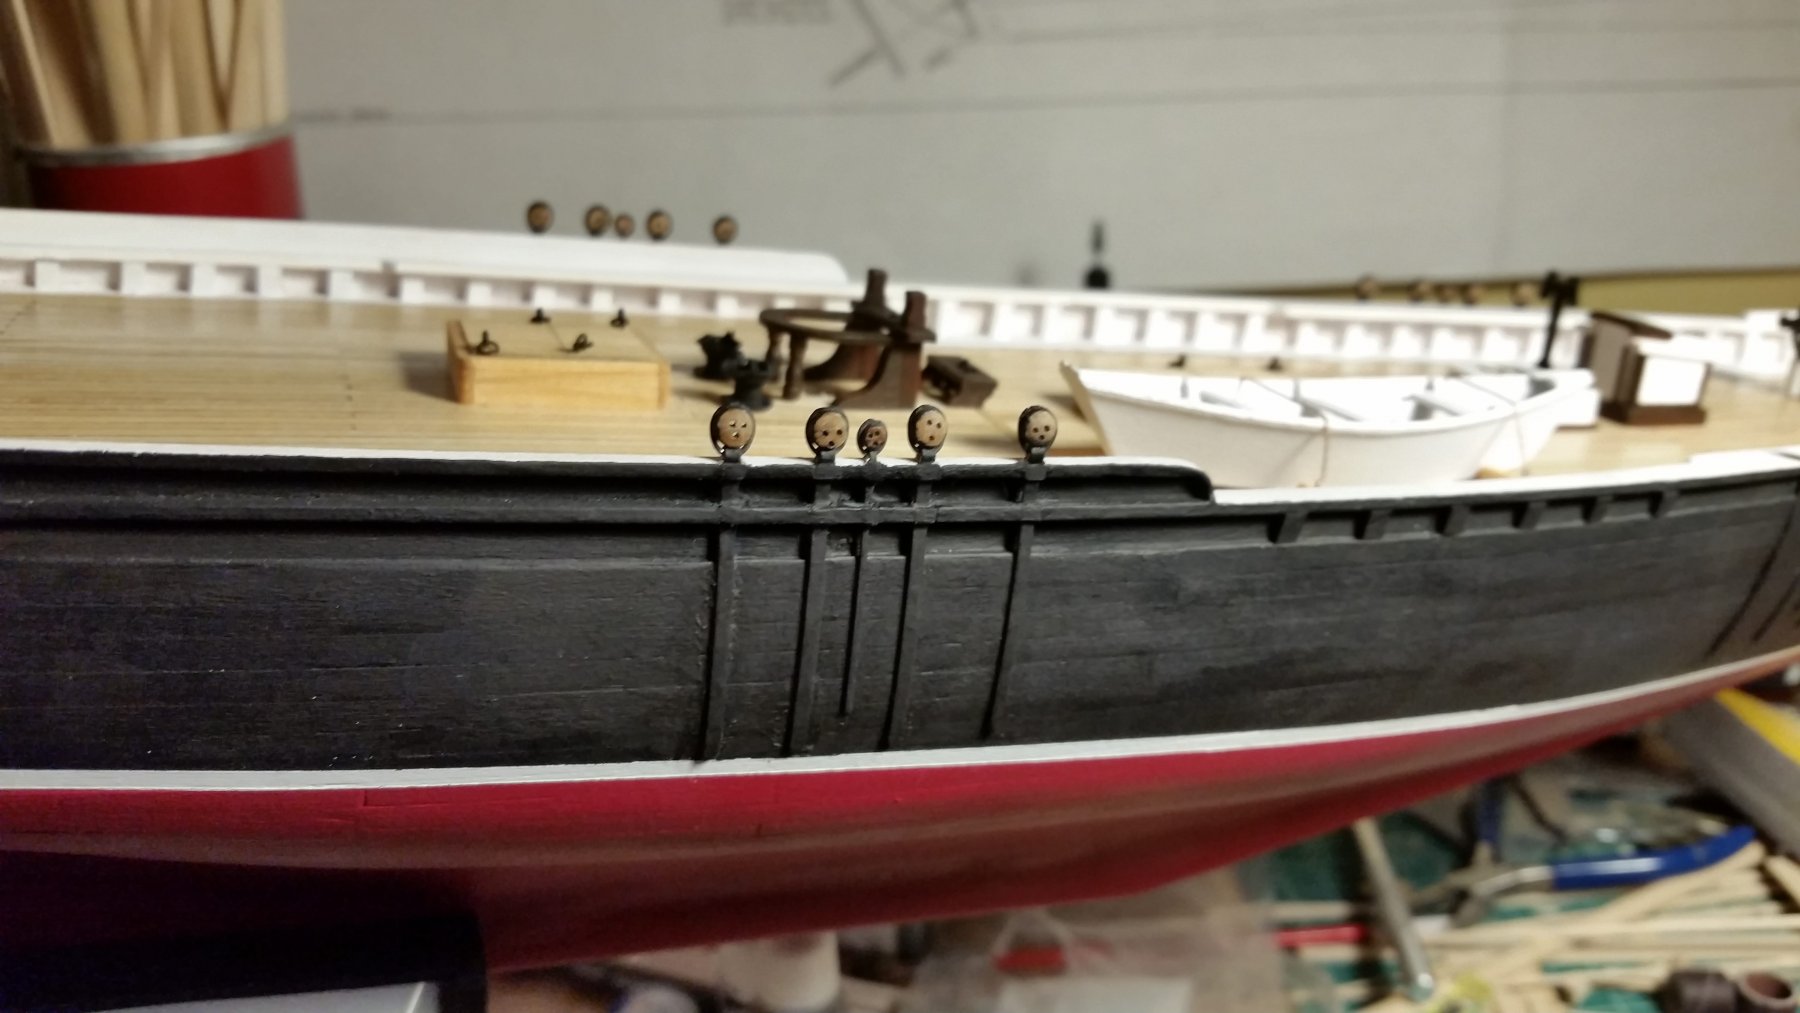
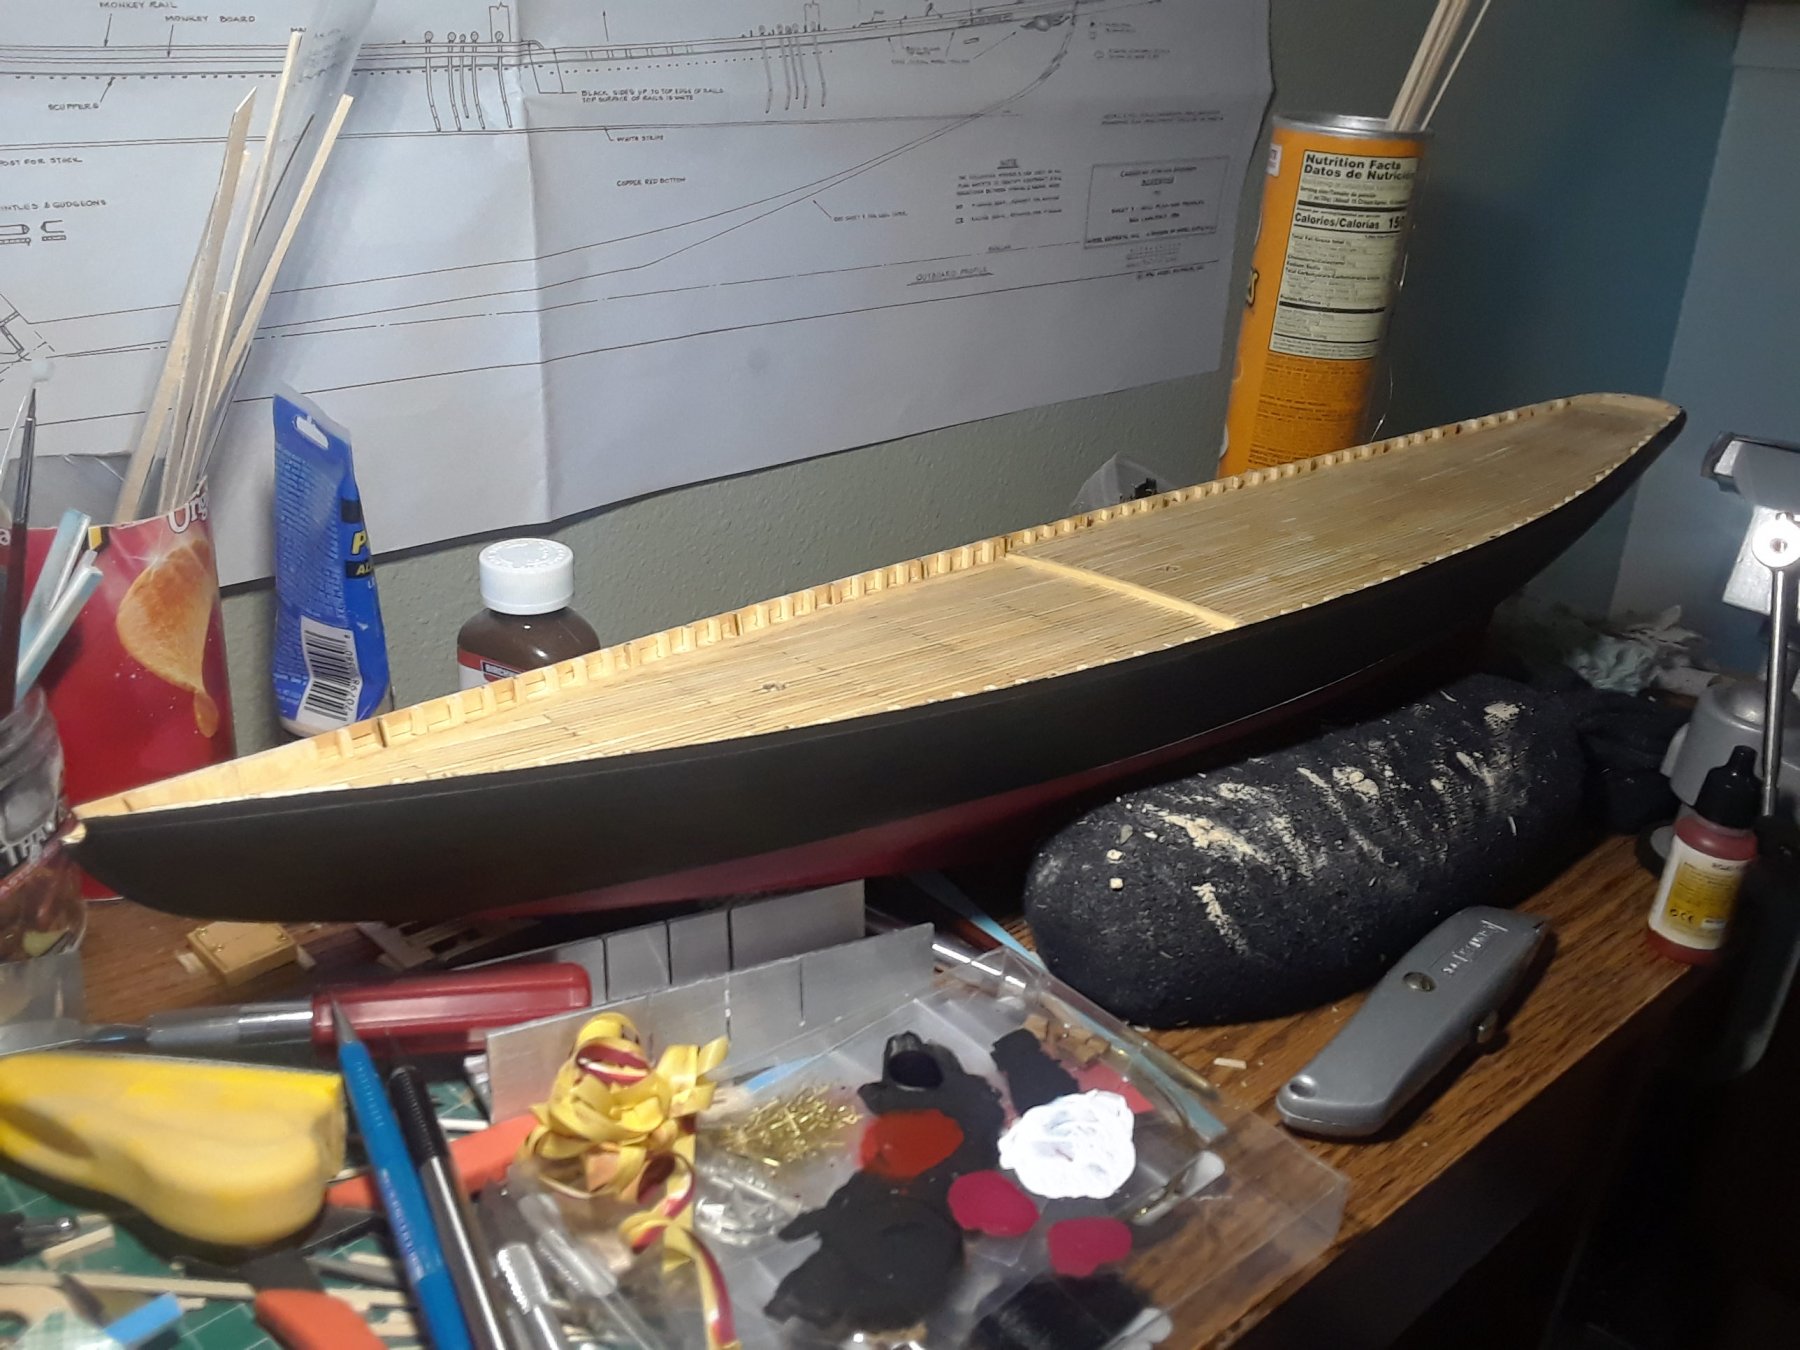
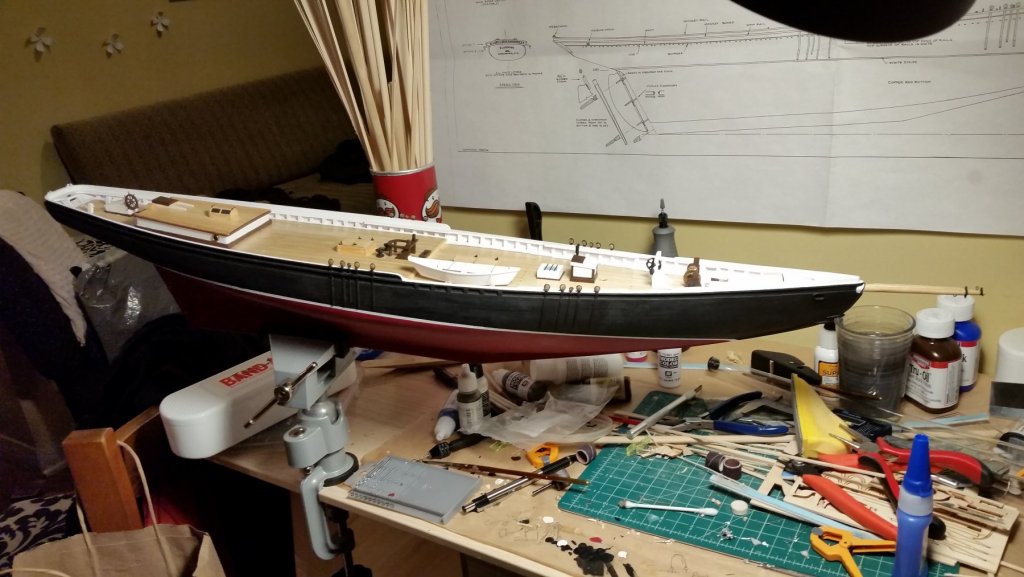
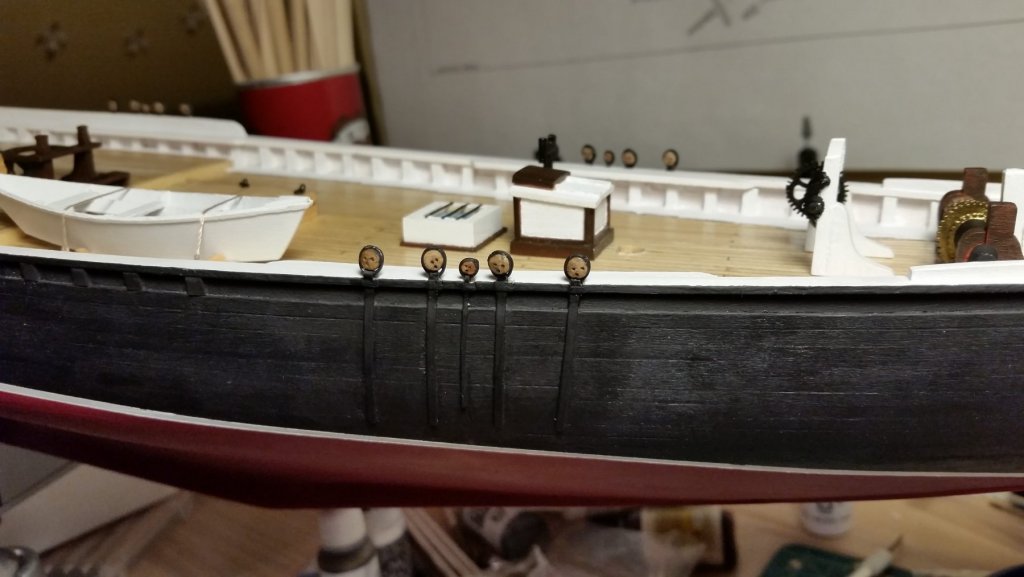
 Here we can see the hull with some of the deck fittings resting more or less in place where they would eventually be installed. I found it very helpful to draw out each individual item as a basic shape and then work out a process for construction to help me wrap my head around what needed to happen. Someone once said that building wooden models is best understood as a bunch of smaller projects that are subsequently glued together, and I came to appreciate the wisdom of those words as I was doing this. I spent a remarkable amount of time thinking about how to go about installing the rails. I was not at all looking forward to executing a two dimensional bend of a plank, so what I wound up doing was creating port and starboard patterns for the rails that would splice together to allow them to be formed from the included strips of wood. The pattern making consisted of getting a clear template for the line of the rail and then measuring out the required thickness at 1cm intervals with my calipers and then connecting the dots. This was laid over the strips of wood and marked out for cutting. After this, it was simply a matter of trimming and installing the rails, and finally sanding them to shape. This is also the last photo of the model at our old home in Anchorage, AK. A couple of weeks later, it was carefully packaged and in the mail to our new home in Vancouver, BC. Happily, the Bluenose made the trip in one piece. Here she is, in our new home in Vancouver, at my new hobby table. I started working on her bowsprit not long after arriving back in Canada and also started working on her chainplates and deadeyes around the same time. Here they are, installed. By this point, I had started installing deck furniture as well. On a lot of models that I’ve seen, the chainplates are installed over top of the rails, but this is not strictly accurate according to the plans. I opted to go in and cut out notches for these and then go back and fill them in afterwards. For all the aggravation that it caused, I am glad I did. The model looks far better for it. Sharp-eyed viewers will probably note that she’s short on dories and might be missing deck fittings, particularly pertaining to her machinery for’ard. The Shipways plans make reference to various things being removed from the ship when she was racing—apparently, the crew were even known to remove the ratlines from the shrouds to reduce wind resistance. This is supported by archival footage of Bluenose racing—it is clear that a lot of equipment was removed from the deck and either left ashore or stowed below.

- 38 replies
-
- 4
-

-
- bluenose
- model shipways
- (and 1 more)
-
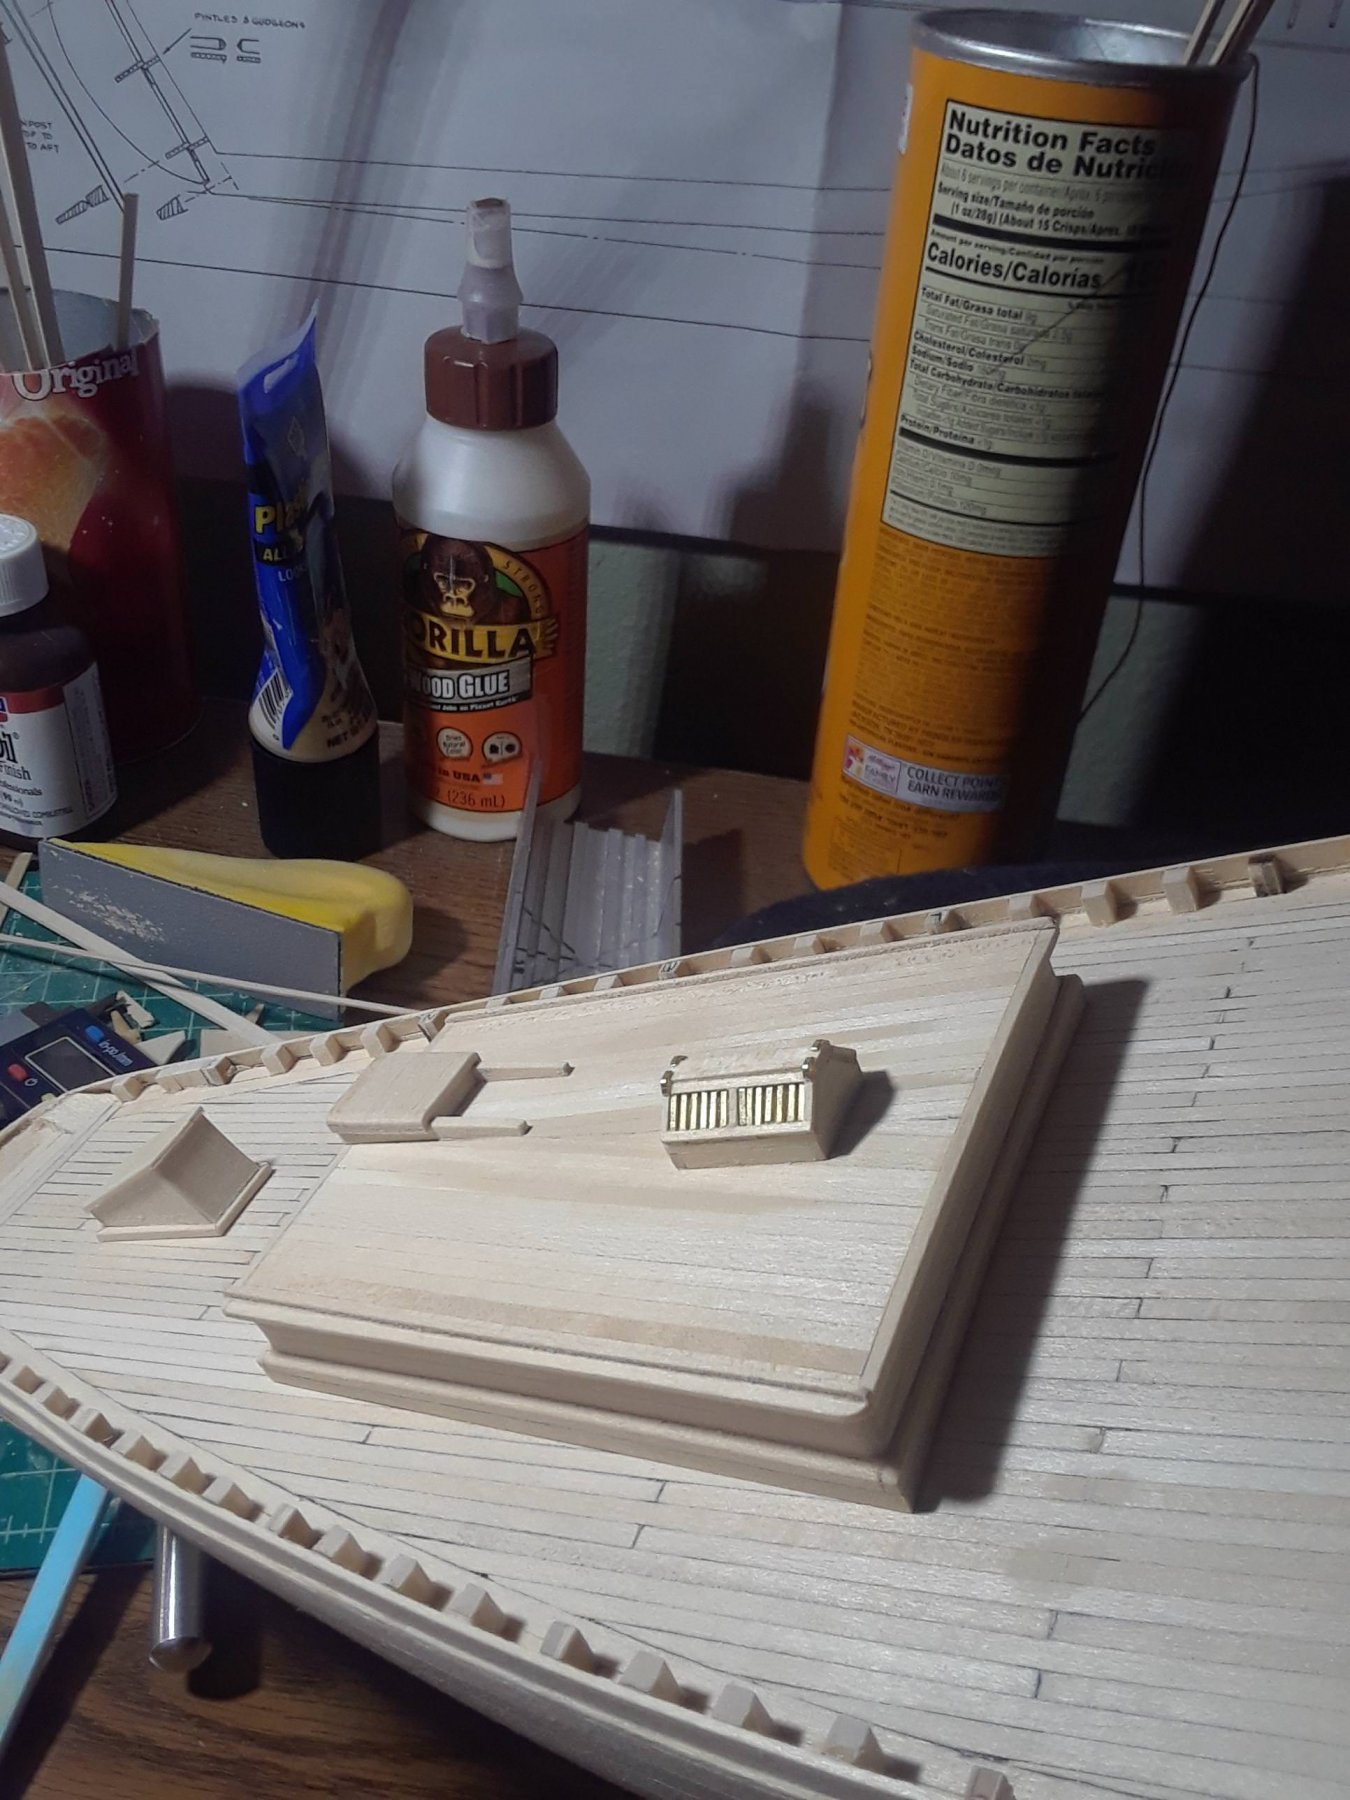
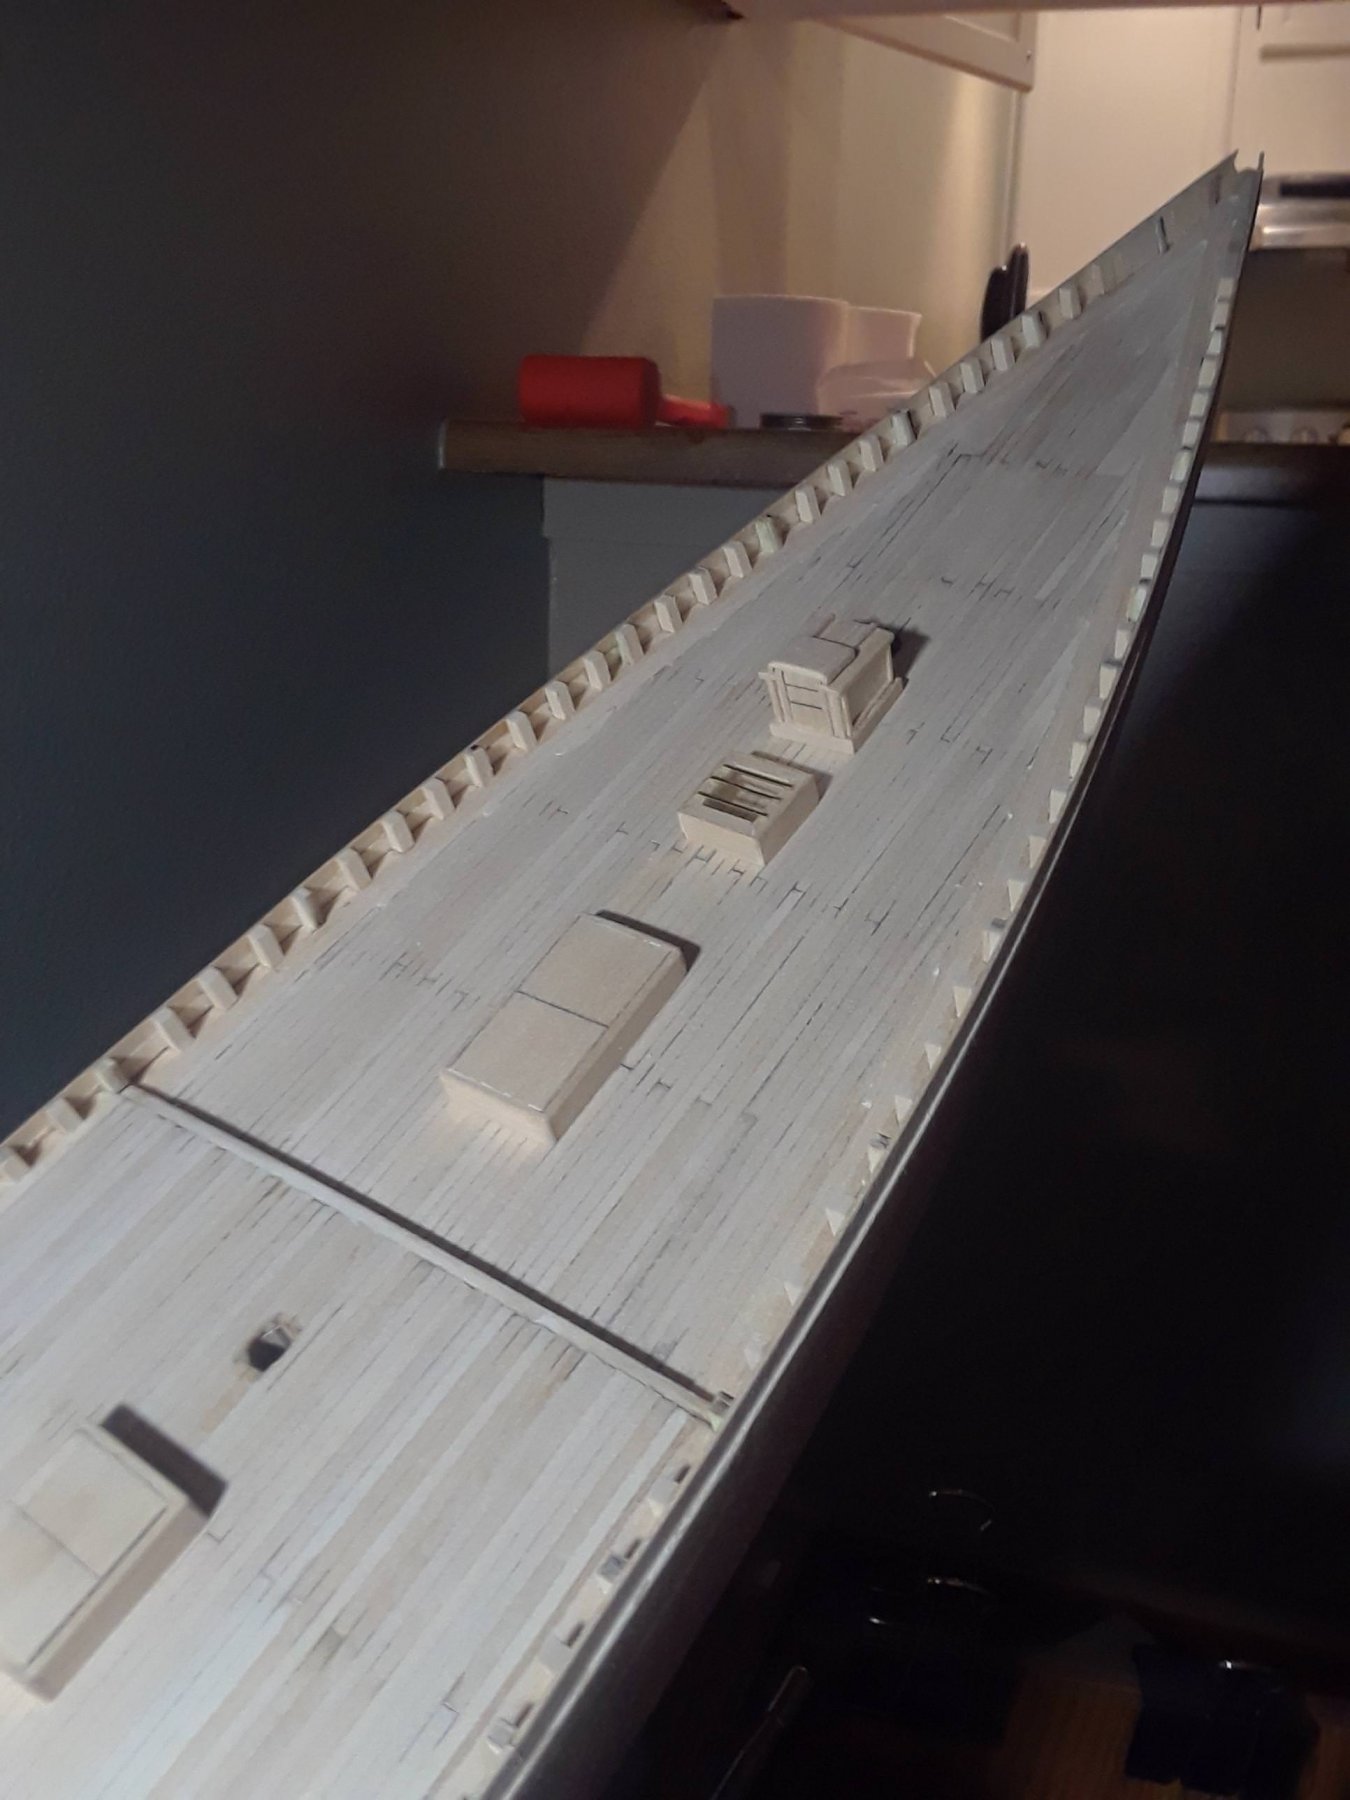
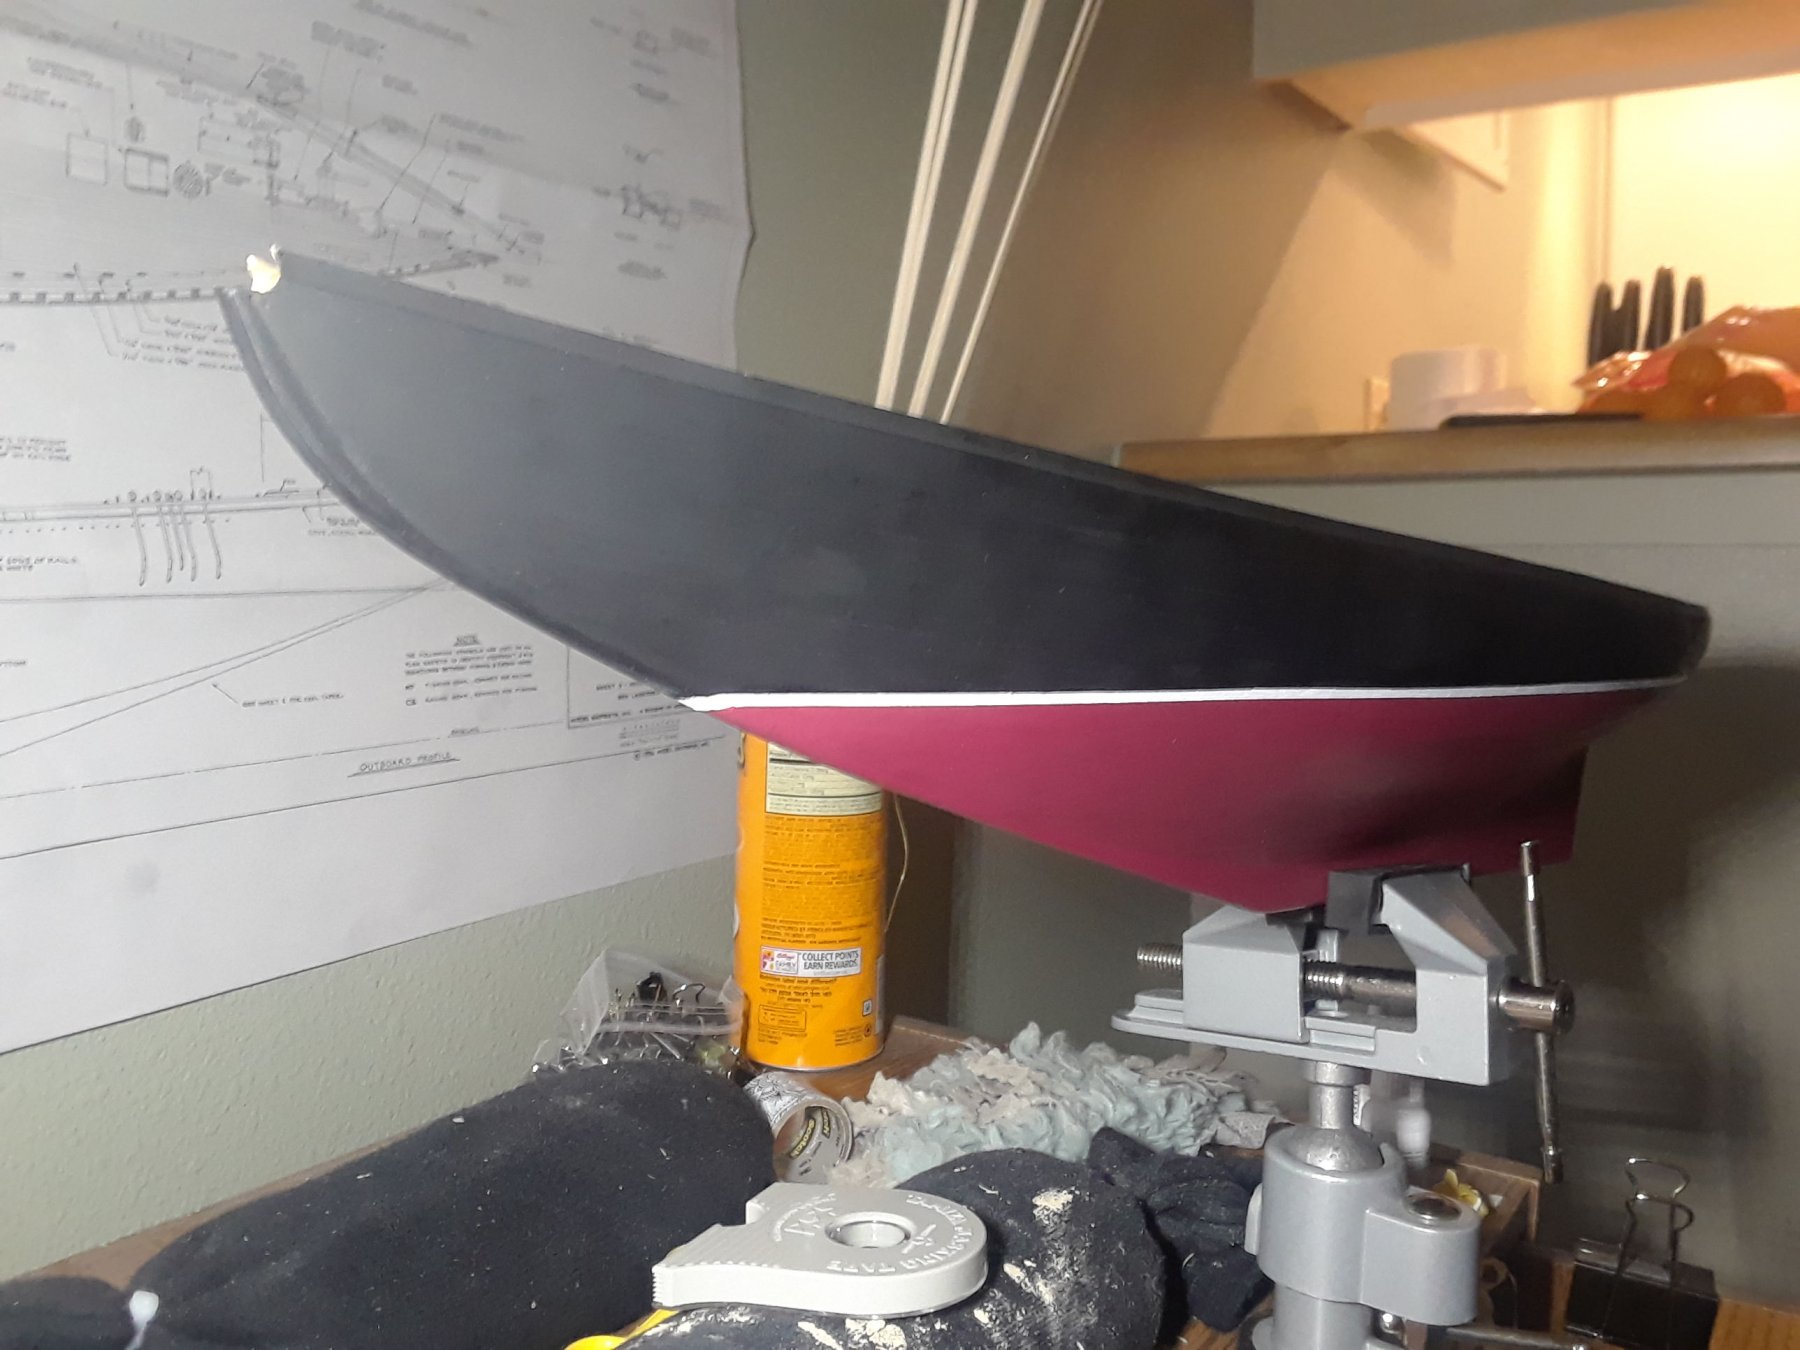
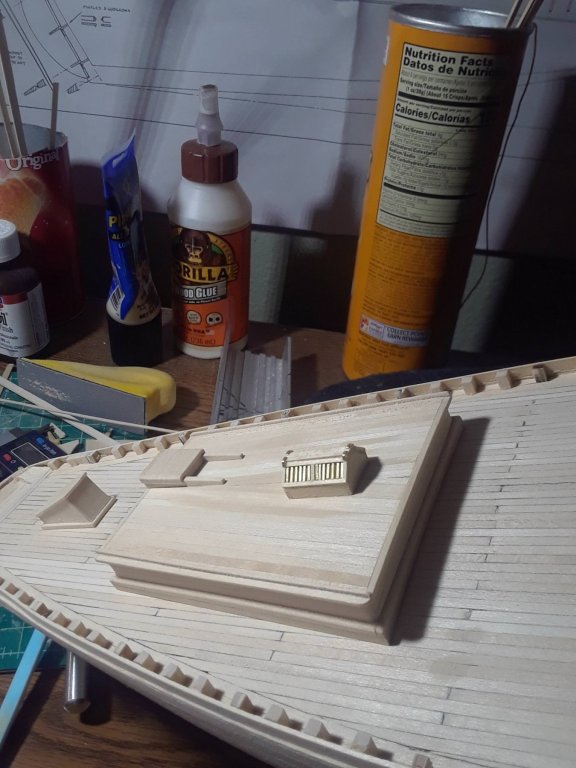
I see your point. What you're suggesting conceals the bulkheads far better than the method I wound up using. I'll keep it in mind going forward. You can really see the lines in the deck in the next series of pictures. At this stage, I took some time to prepare the various bits of fittings for the deck and hull—mainly as I was still trying to figure out how I was going to install the various railings. I fell into the habit of taking lots of measurements off the plans, then checking them, drawing out what I needed to do to figure out how I was going to do it, then checking the measurements again and finally committing. In the case of the mail rails, I made a template of the overall curve of the rails on both sides of the hull and then measured inboard the distance shown on the plans to create something that would install with relative ease. For the most part, it worked. In the case of the largest cabin, I spent quite a bit of time trying to figure out how to match the curve of the deck to ensure a snug fit… and finally found the answer watching a guitar repair video of all things (why I was watching this, I have no idea—I have no musical talent whatsoever). I wound up putting a piece of sandpaper on the deck and gave the cabin a few passes over that to help it match the curve of the deck. Worked like a charm! As a part of this process, I vigorously sanded the deck to ensure that it had a smooth finish. I was quite pleased with how the deck turned out, particularly in the aft section of the schooner and wanted to show that off… so after a couple of exploratory tests on some scrap I applied a couple of coats of Tru-Oil, gave it a gentle sanding when it was dry and then another coat to round things out. I still hadn’t decided on what the overall finish was going to be. But then I wound up taking the plunge and painting it and I haven’t regretted it. The waterline was laid out by taking measurements off the plans and then poking a pencil through a paper cup at the appropriate level (I think I cribbed this technique from a log I saw here, it’s not my idea) and used this to mark the line on the model when it was appropriately braced and held at the right level. This line was then used as a guide to mask out the waterline, which was painted by brush with several coats of a high-pigment white model paint. I took care to really burnish the tape to minimize leakage, but still had a couple of small spots to touch up all the same… but not too many given the sheer length of the masking. One of the things that I love about Bluenose is that she can look like she’s going fast while sitting still and I like to flatter myself by thinking that even my humble efforts capture that aspect of her.


- 38 replies
-
- 4
-
-
- bluenose
- model shipways
- (and 1 more)
-
Hmmm. Thanks for sharing that, I will take that into account in future builds. As I recall, the instructions were a little vague on precisely how to go about it, so I just worked to make sure I didn't have two butts immediately next to each other. This is something of a retrospective build log; the photos in my last post were taken in early June 2018. I wound up painting the model and so now the butts of the planks are not particularly visible (as shall be seen shortly).
-
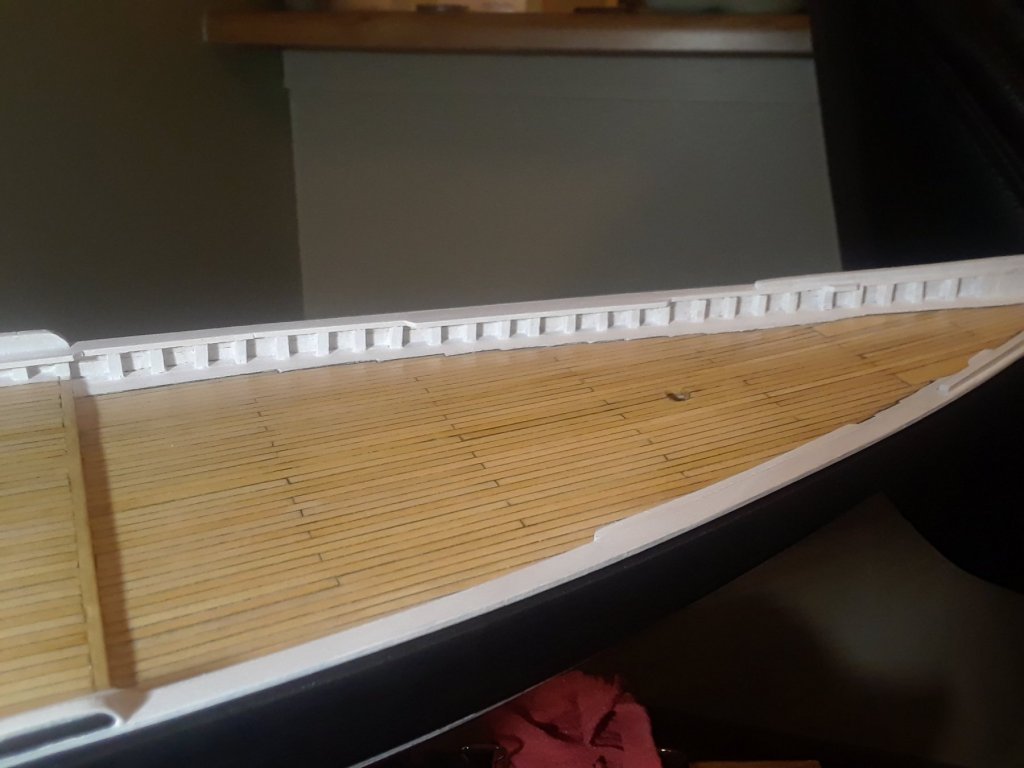
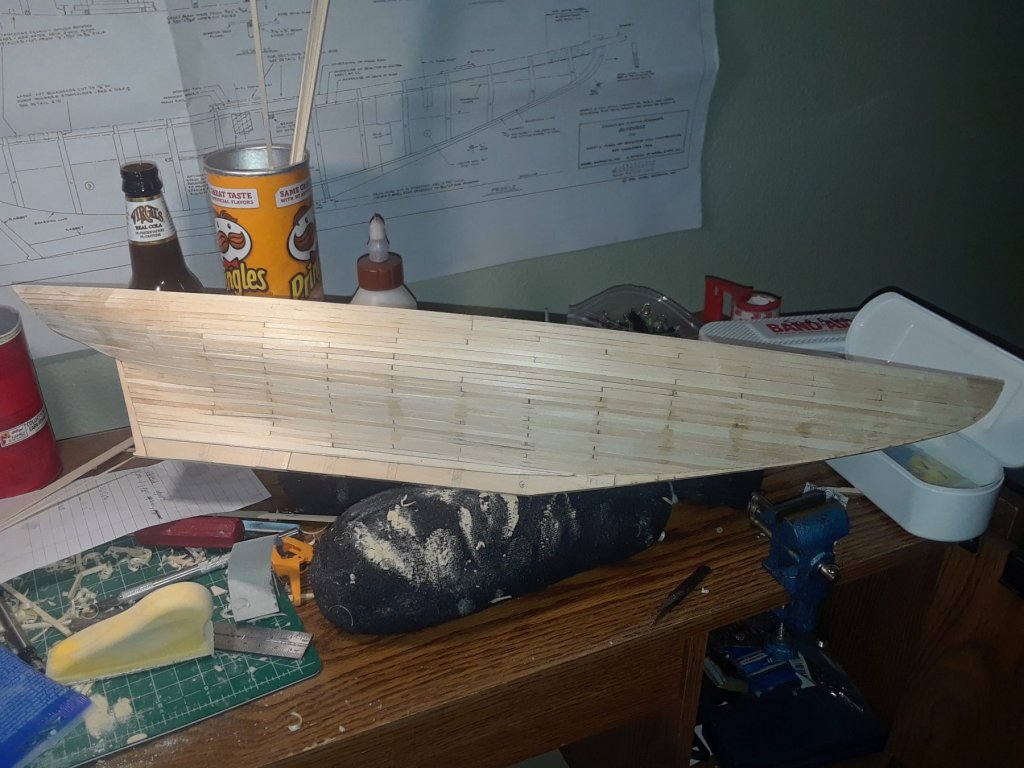
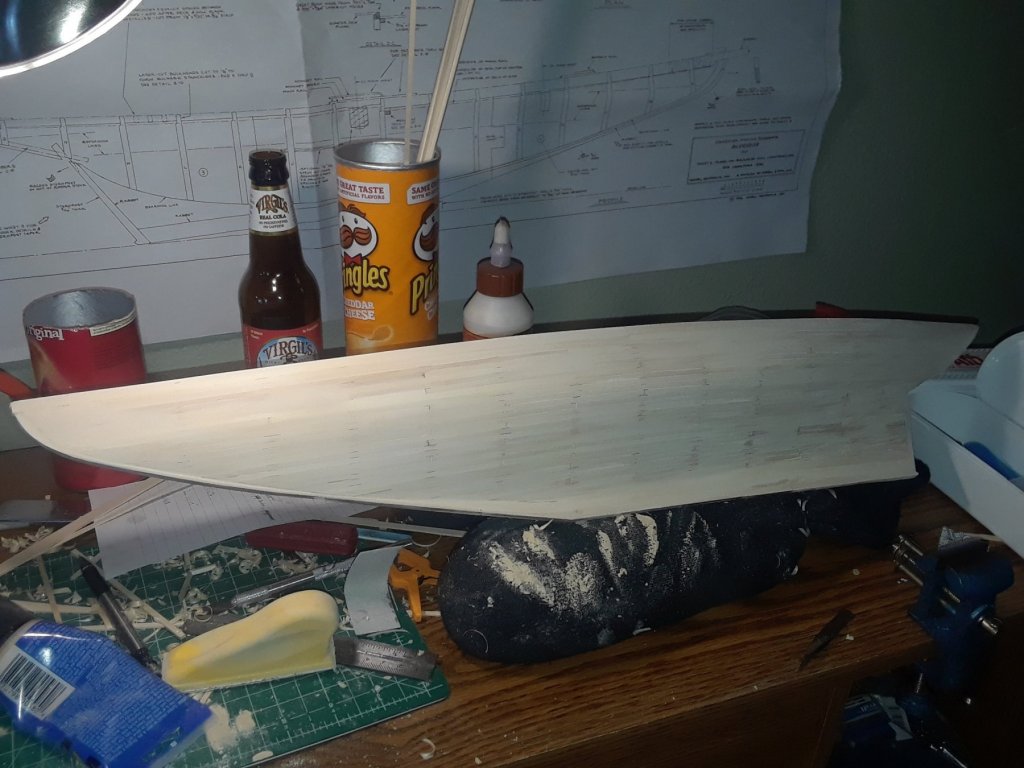
The waterways were the first planks added. They went in relatively easily, though if I could do it again, I would go back and pre-notch and shape the inner strips before installing them as that process was quite a pain once they were already on the hull. I also noted not long after getting the waterways in that something wasn’t quite right with one of the bulkheads—it had shifted at some point and was out of square. After a bit of cutting, sanding and swearing, this was corrected and all was well. I remember being impressed at how even just adding the waterways greatly stiffened the hull. On my previous attempt at building Bluenose, I failed to properly appreciate how important the fairing process was to the end result of the hull and it really showed-- the planks I had installed had more lumps and bumps and gaps than a country road in Nova Scotia. Building the longboat kit first allowed me to better understand this process and that lesson was applied to Bluenose. I spent a few hours sanding down the bulkheads little by little and checking the angles with a plank to ensure that the angles matched and that there were no lumps or hollows in the run of the planks. Where necessary, thin strips of scrap were added and sanded down to correct for hollows. The extra attention was absolutely worth it, as it turned out. When it came time to plank the hull, the process proceeded extremely smoothly. Very few stealers were required, and the garboard strakes went in with relative ease. Schooners like Bluenose have very graceful lines and it makes laying down planks a breeze. I felt no small satisfaction in finishing the planking as it was this step that had beaten me before. What followed that was hours and hours of sanding, filling and sanding and yet more sanding to ensure that the hull had a smooth finish. Getting there was a pretty big win for me. At this point I hadn’t settled on whether I wanted to paint the model or go for a natural finish. But again, the effort was absolutely worth it and I had a very real demonstration of how vital proper preparation is when planking. And yes, my construction cradle consists of a pair of socks filled with rice and tied off with zip ties. It makes for a really flexible and sturdy holder for a model that is very inexpensive. And for the wits that are no doubt wondering, no, the rice is considered a total loss and will not be eaten later on. Just a quick note: I experienced the same issue as other builders of this kit in that the keel pieces didn't completely line up. I resolved this by sanding the proud half of the keel until it was level with its counterpart and filling the gap in with wood filler.
- 38 replies
-
- 6
-
-
- bluenose
- model shipways
- (and 1 more)
-
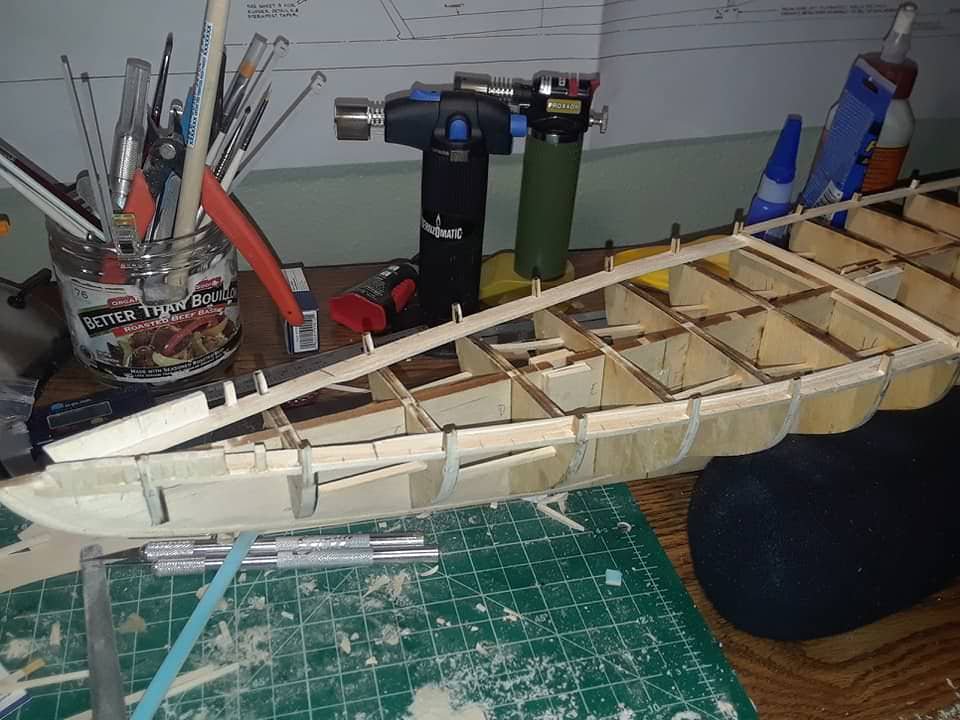
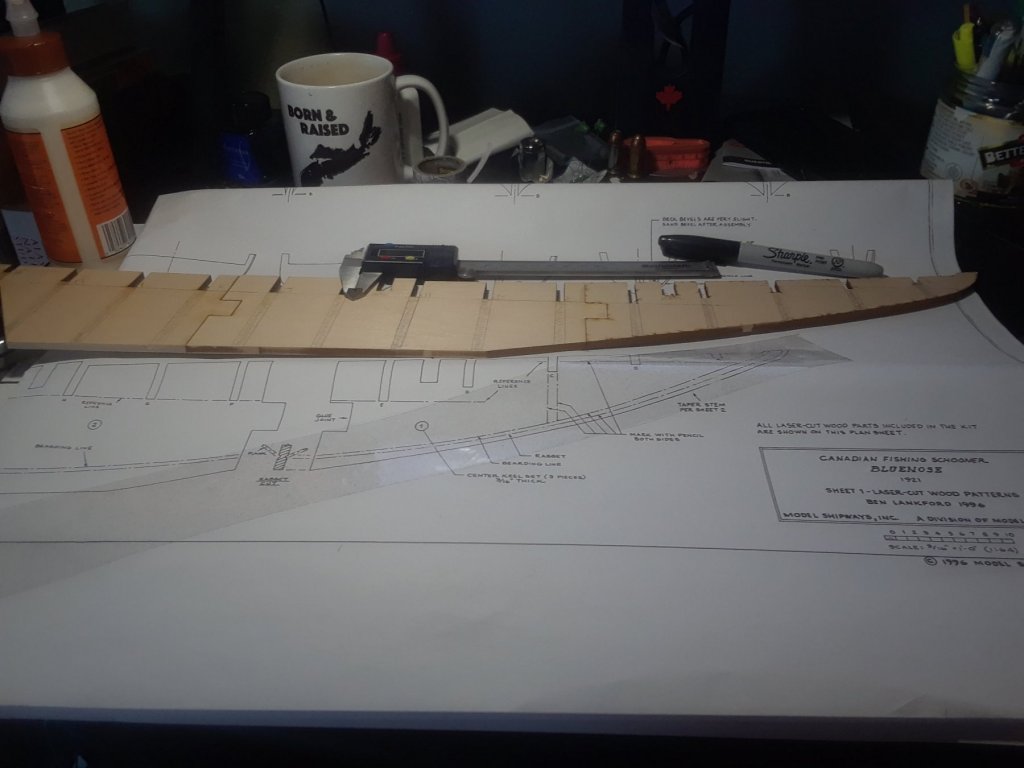
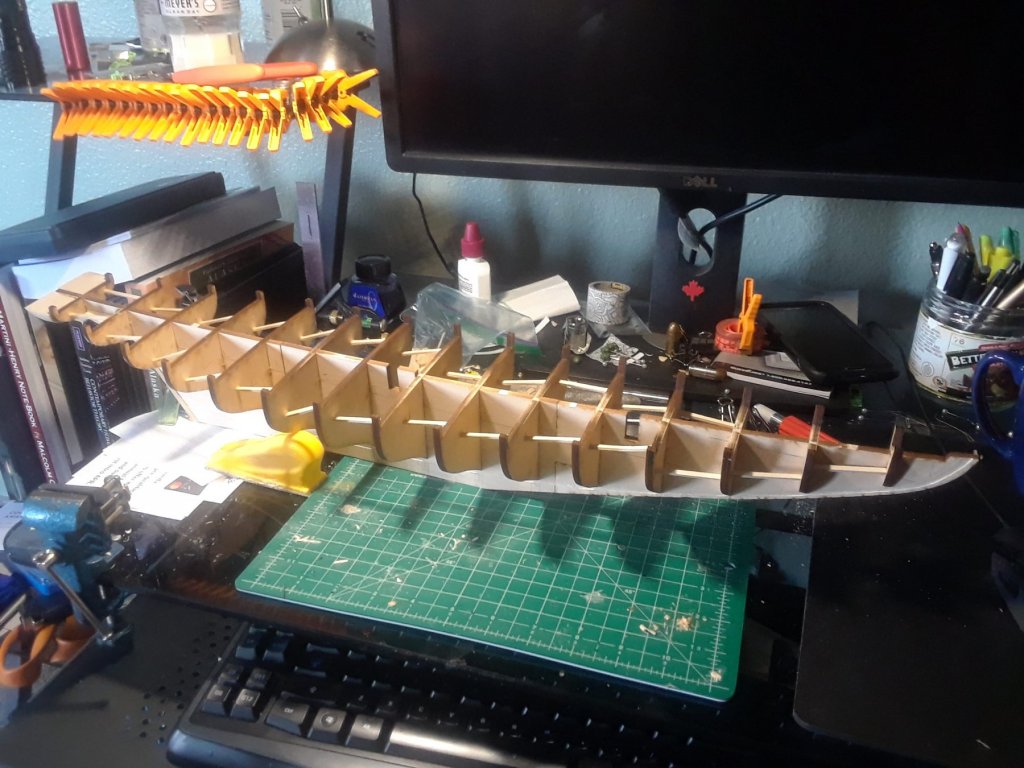
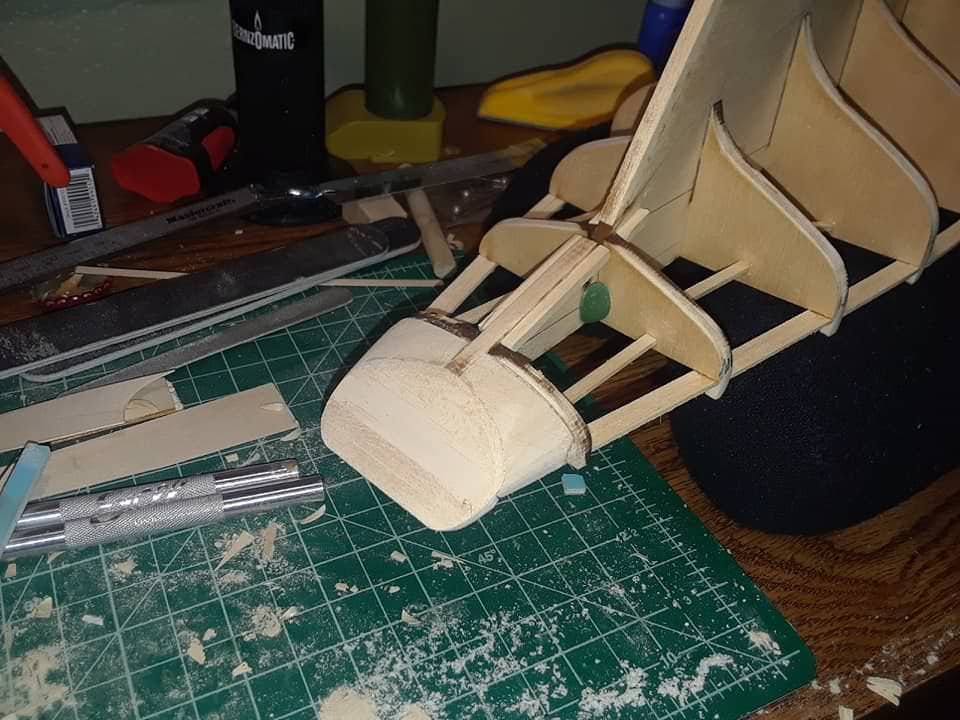
I’m a proud Nova Scotian by birth, but employment has taken me far away from home. Perhaps a little homesick, I decided last May to take on the Model Shipways Bluenose as a means of reconnecting to a home that I haven’t seen in years. I grew up when the Canadian Heritage Moments were an extremely common sight on the CBC, and I remember always being thrilled at the one that featured Bluenose, because as a boy it always seemed to me that her story was proof that interesting things did indeed happen in Nova Scotia! I had been toying around with the idea of building a wooden ship for some time prior to this, and wound up getting the Model Shipways 18th Century Longboat kit as a warm-up exercise. I thoroughly enjoyed that build and the kit turns out a really beautiful result even with novice skills. I fell in love with the medium and the subject and it confirmed my feelings that it was time to take on Bluenose. I had actually attempted to build a model of her years and years before but the planking stage defeated me and I wound up passing the kit on to someone else, returning to plastic, resin and metal models for quite some time. As any reader can well attest, building wooden ships requires a different mindset than just about any other style of miniature construction and at that time I wasn’t there yet. Bluenose is well attested to in the historical record and there is a wealth of knowledge and information out there about her appearance down the years. Starting out, I made a very conscious decision to mostly not concern myself with this too much—what I really wanted to do was recreate what I imagined as a boy, standing on her deck as she heeled over under her press of sail. I respect them that devote the immense amount of time, effort and skill into ensuring that their models are near-perfect representations of the real deal, but my aim here is a little different. This being a learning experience for a larger-scale build, I am making allowances for my relative lack of skill and I’m not going to beat myself up for not producing a museum-quality piece right out of the gate. I have, however, made a lengthy list of deviations from what is correct or optimal, and written down a lot of notes on best practices and lessons learned as I’ve progressed through the build. I have a rather specific vision in mind when it comes to what the model will eventually look like. I intend to represent Bluenose in port after a day’s racing, so her sails will be furled. I’m personally not a fan of displaying a model with a full set of canvas as I find it’s very tricky to get right at the scales we are working at… and those sails never look quite right just hanging there anyways. I’m also toying with the idea of dressing the ship—presenting her with all kinds of bunting tossed aloft to celebrate the day’s events (and spelling out something particular in the signal flags, but that's still in the far off distance). The day that the model arrived (early May 2018), I got down to assembling the keel and laying out the markings for the bulkheads, as you can see here. My other hobby involves shooting antique rifles, so the digital caliper that I use for measuring cartridge length was pressed into service for this task and it’s been a godsend ever since. Next came the matter of installing the bulkheads. I chose the MSW kit after reviewing the build logs from this very forum and it did not escape me that several builders noted quite a bit of flex in the keel, and that the stern could be very delicate and prone to snapping if not reinforced. I used a bunch of scrap and even green stuff putty to build reinforcements that were added to stiffen the hull for planking and to add strength to the stern while it was being worked on—I did not want to see that snap off while I was fairing the bulkheads!
- 38 replies
-
- 5
-
-
- bluenose
- model shipways
- (and 1 more)
-
The top rail is a little intimidating and takes some thought but once you get a process down it's not so bad. You'll do just dandy, I am sure!
-
I'm working on this same kit (build log coming shortly). I reinforced my keel with scrap wood and also used bits of scrap to create reinforcing struts between the bulkheads and also added a couple of blobs of green stuff putty to that narrow keel section in the stern to further strengthen it when it came time for fairing. It looks like you're well on your way with this one. I really enjoyed planking mine, and the rabit that I cut into my keel wasn't nearly so nice as the one you've made.
-
That website (Paper Shipwright) has a model of CGS Canada, and it's at a reasonable scale. I am putting some serious thoughts into buying the paper kit and adapting it into a plank on bulkhead/mixed media model because I have always loved the lines of that vessel and she's so delightfully obscure.
-
Good luck and welcome from another Canadian! I have an Artesania Latina Bounty as the next project in my build queue... but I don't think I'll be getting to that for quite a while yet.
-
Hello and welcome from a fellow Canadian. I'm Nova Scotian originally, but relocated to Vancouver, BC in the fall by way of Alaska. I'm working on a Model Shipways Bluenose, myself. I love that schooner; she looks like she's going fast just sitting there.
-
It looks great so far. That was the first wooden kit that I ever completed, and I finished it up not long before joining this forum. It's a great starter, and a lot of fun to build.
-
http://www.navy-marine.forces.gc.ca/en/navy-life/youth-paper-models.page There's a couple of versions of an RCN Maritime Coastal Defense Vessel there for anyone that is interested. Free, of course.