Kenneth Powell
-
Posts
276 -
Joined
-
Last visited
Content Type
Profiles
Forums
Gallery
Events
Everything posted by Kenneth Powell
-
 Just a little FYI - The current edition of Wooden Boat magazine (WB 303) has a write-up about the extensive work being done on the Emma C. Berry. The story is in the Currents section starting on page 14 and has a few photographs. One shows the nibbed aft planks just like the model calls for. Also, in this issue is a very good article on Biloxi Luggers. Featured prominently is my father-in-law Captain Ronald Baker and his lugger King Arthur. - Kenneth
 -
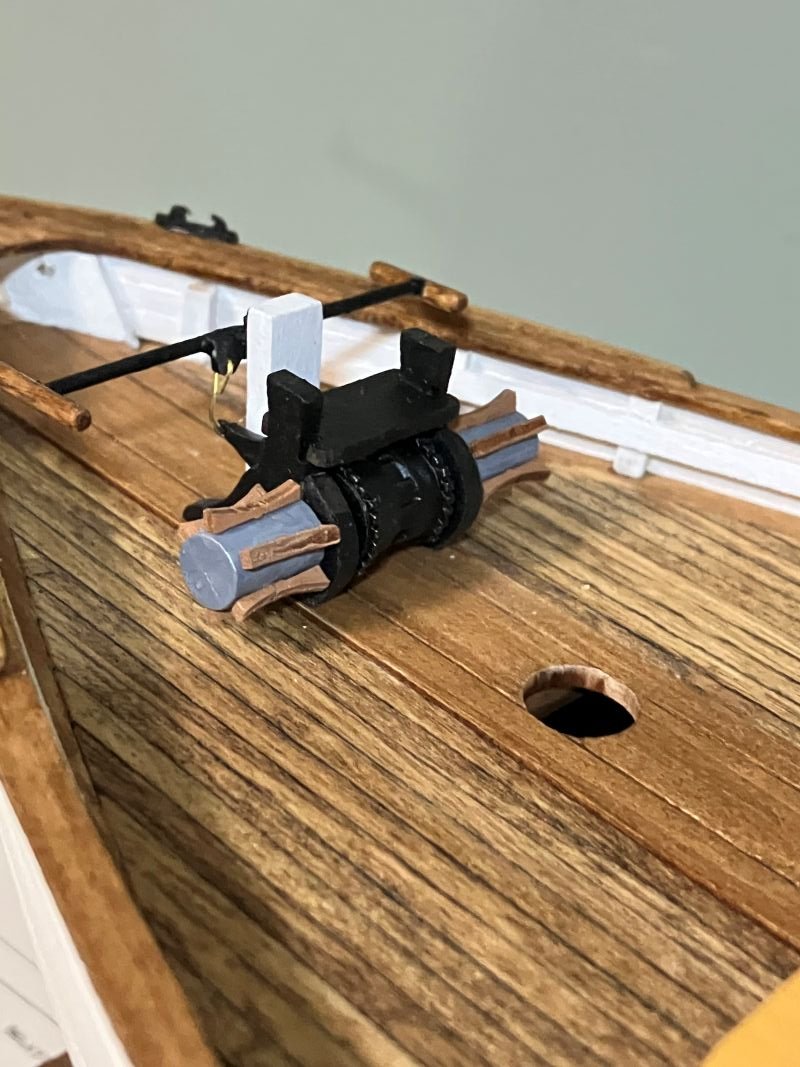
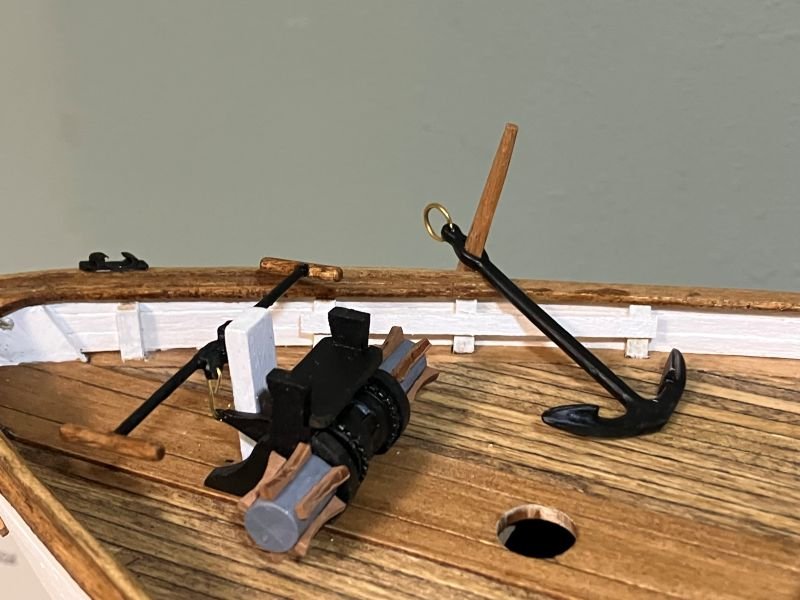
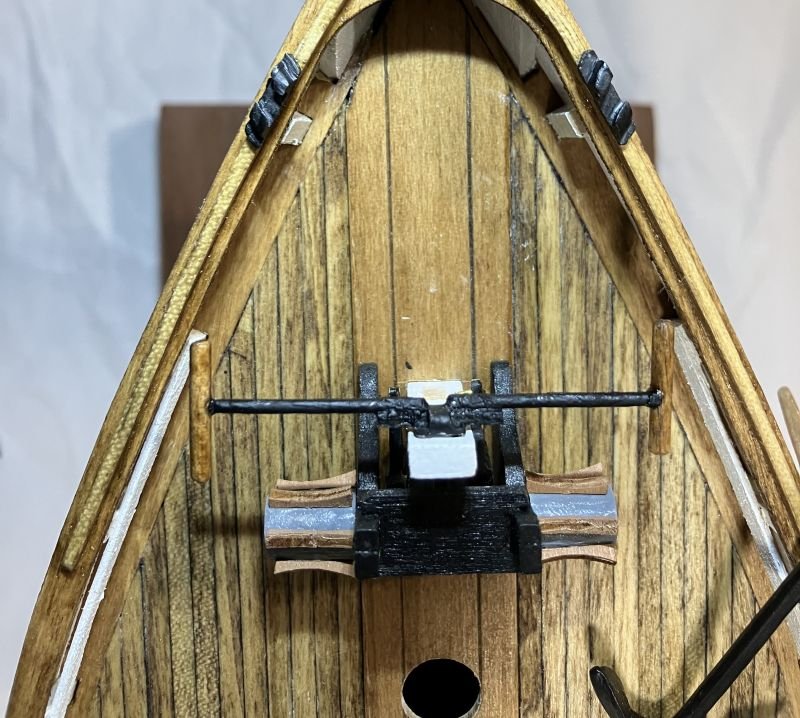
Hello, I'm back at it. I decided to move ahead with the windlass. It can certainly be used on a pleasure boat. Tricky little bugger, at least for me I cut the heads off 1inch brads for brake bars and used the smallest wooden dowel for the handles. But only Slim and his best friend Bones can fit between the handle and the bulwarks. Note: The laser-cut wood whelps are very small and fragile. I broke three while sanding the residual from the sheet. One of the halves got taken by the bilge monster so I made another whelp from a piece of scrap oak. The color doesn't exactly match so I turned it to the bottom. I also started on the trailboards. Once I get the billet head and scroll work done, I'll post photos. I'll start working with brass soon; something I haven't done before. Any advice is appreciated. The parts list of the kit lists two 1/64" X 3/32" X 12" brass strips, but none were included. What was included are two 1/32" X 1/16" X 12" strips, which isn't needed. I got Model Expo on the phone and replacements are ordered. They were very nice. Thanks for dropping in, comments welcome - Kenneth
-
Thanks everyone for the likes and the comments. I'm going to switch back over to my ECB build and finish her. Thanks - Kenneth
-
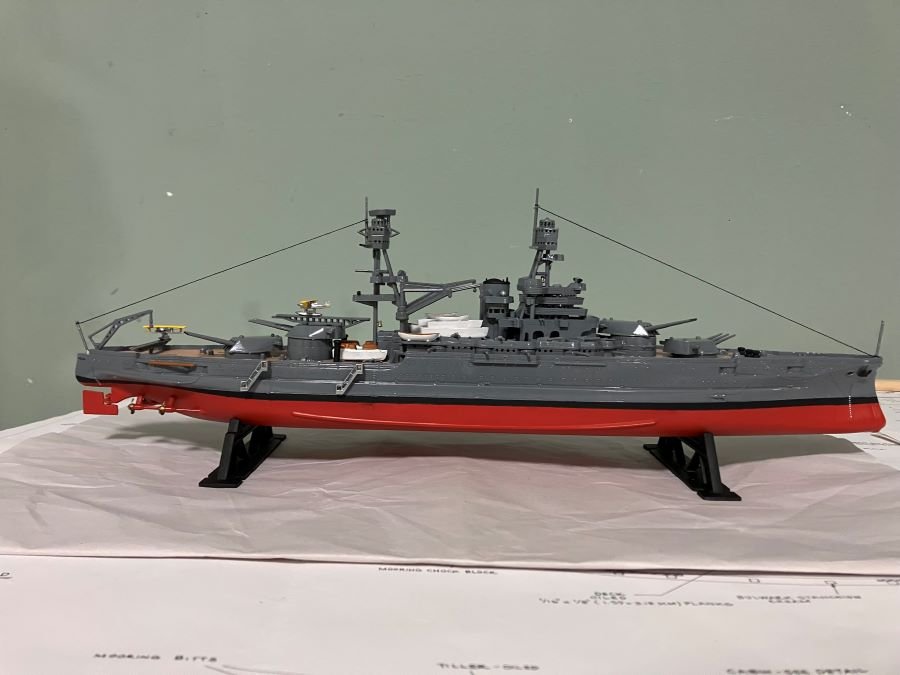
Hello Everyone - She's finished I really enjoyed this build. Mostly because it was a gift from my son, but also because going back to plastic for a while was a challenge. A word about the kit: While not perfect, it was still serviceable. The instructions had no words, only drawings, but the box does say skill level 4 which probably means that the builder should have enough experience to follow the drawings. Comments welcome - Kenneth
-
Thanks, guys for looking in and adding a cool history lesson to the build log. Johnny - That does seem like a rough job. ddp - I followed the link and enjoyed reading the history of the ship in the photograph. - Kenneth
-
Outstanding project and it's coming along great. - Kenneth
-
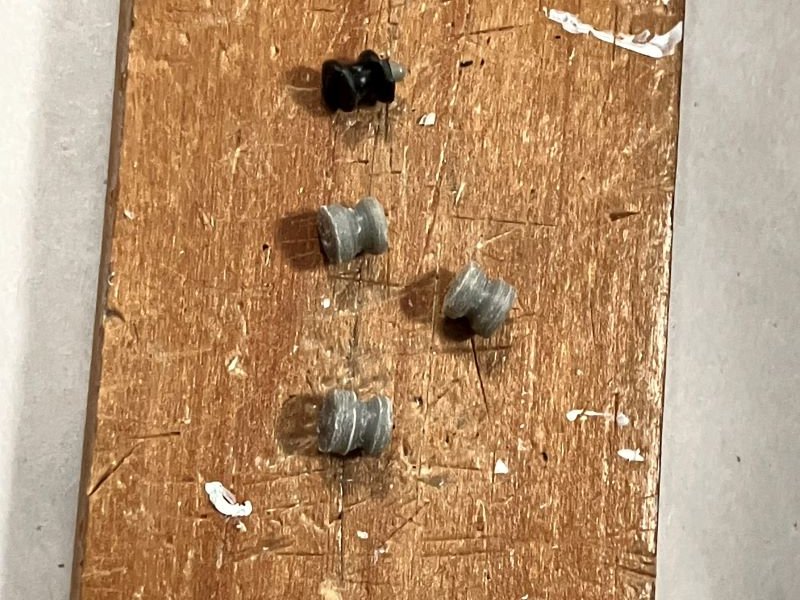
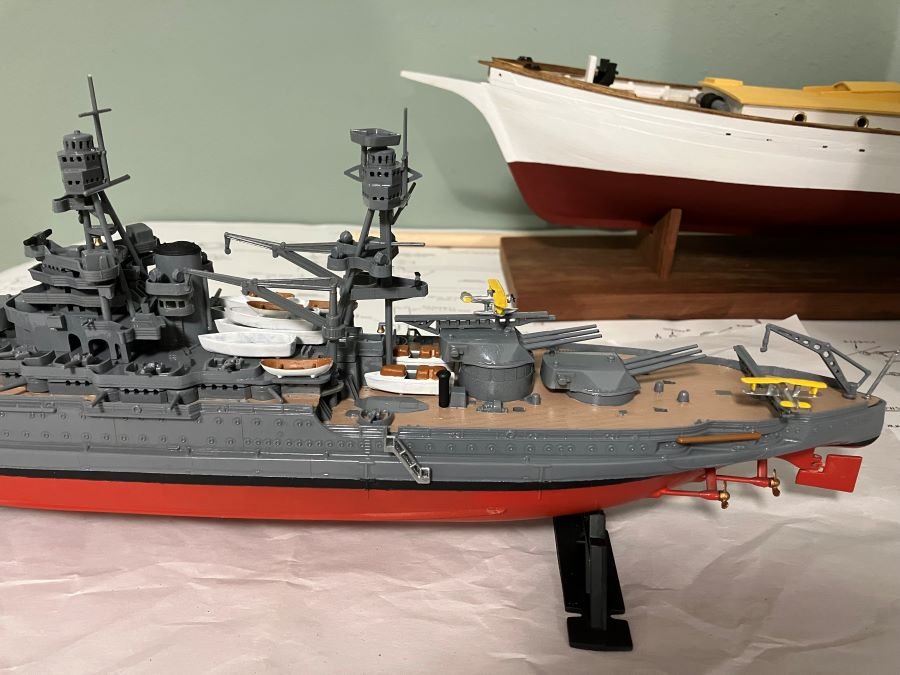
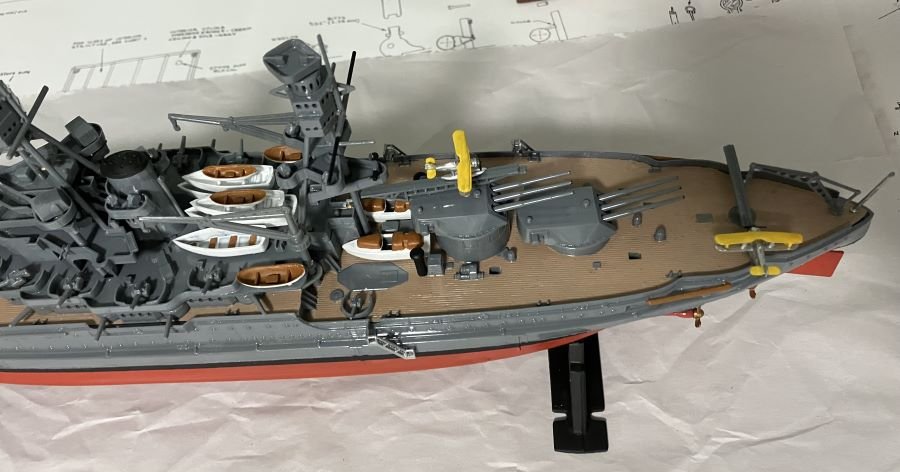
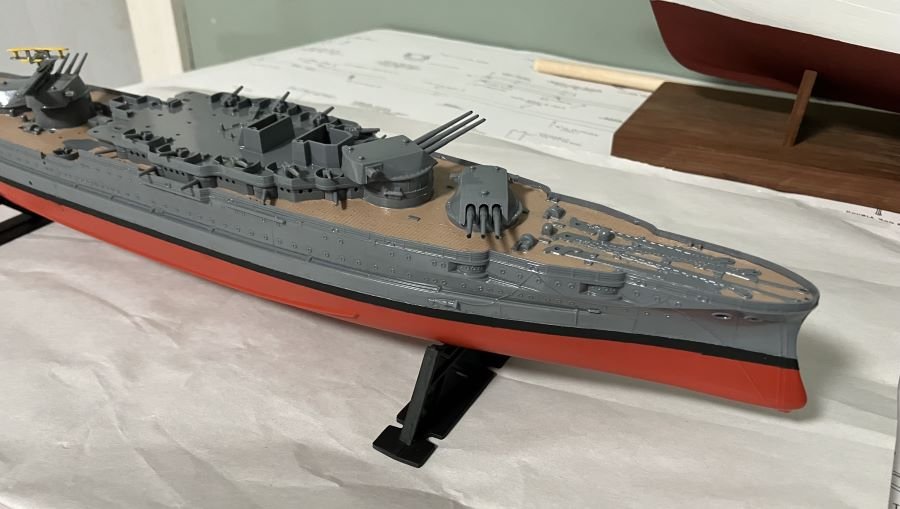
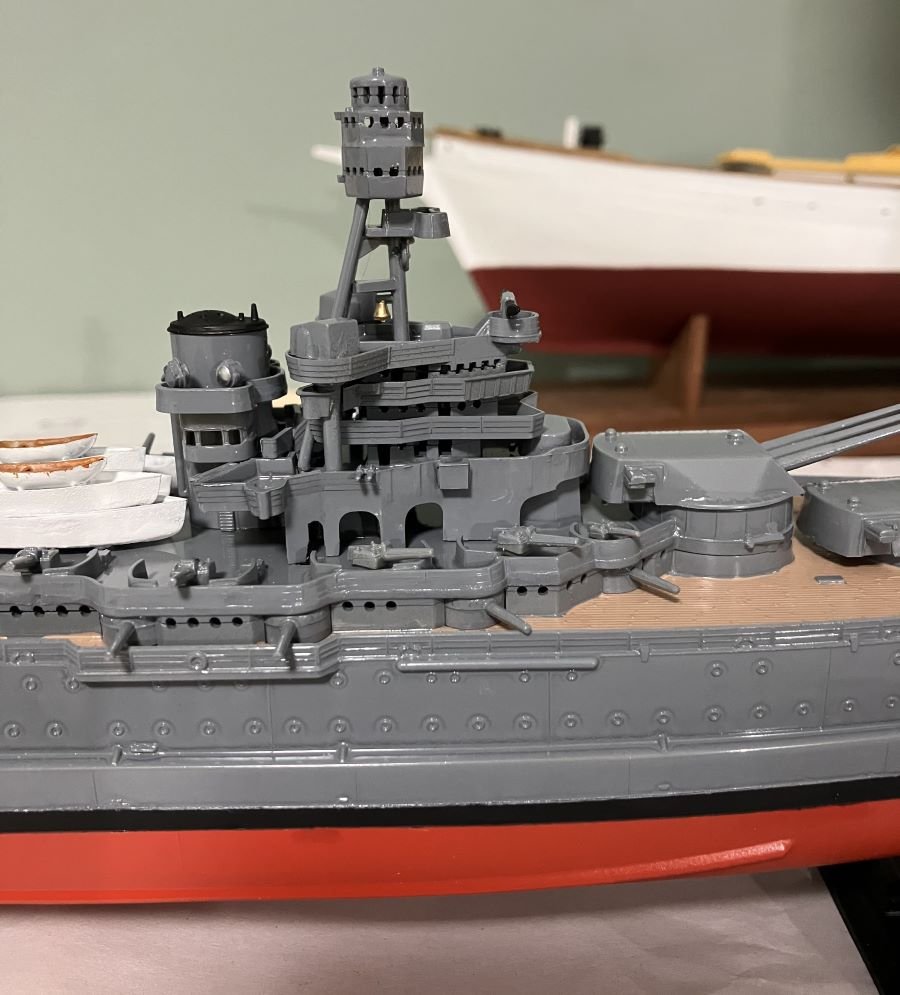
More detail finish work - Home-made capstans next to the only surviving one from the kit: A little large but going any smaller would have been too much and they do seem to blend in. I inserted a piece of the plastic tree into my drill and shaped it the same way we shape wooden dowels for mast and spars and such. Note: the plastic does not like sandpaper, had to use files. Main mast and stern section with boat cranes: All done except decals and possible rigging. Then a full compliment of photos from different views. Comments welcome - Kenneth
-
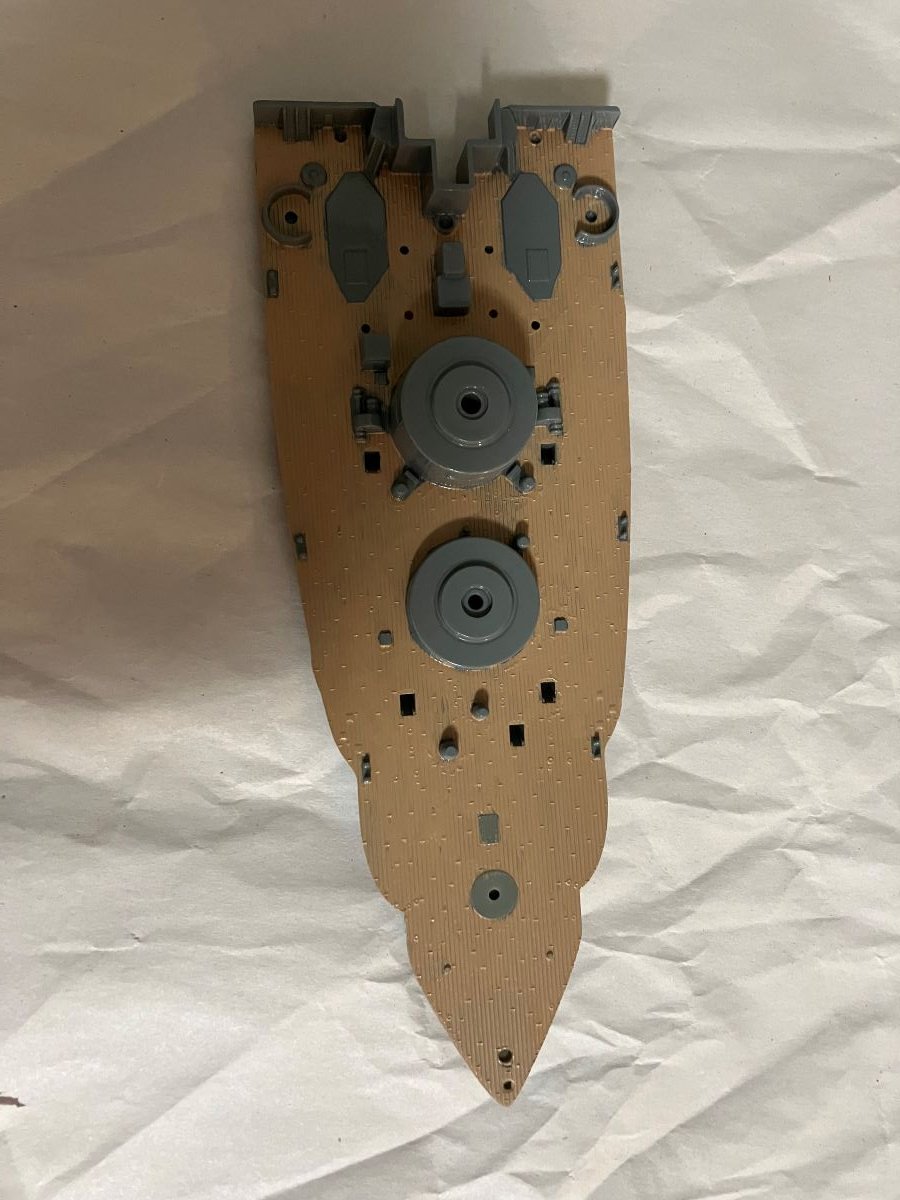
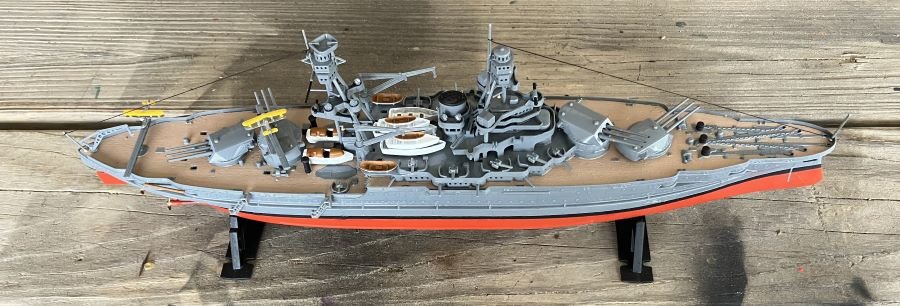
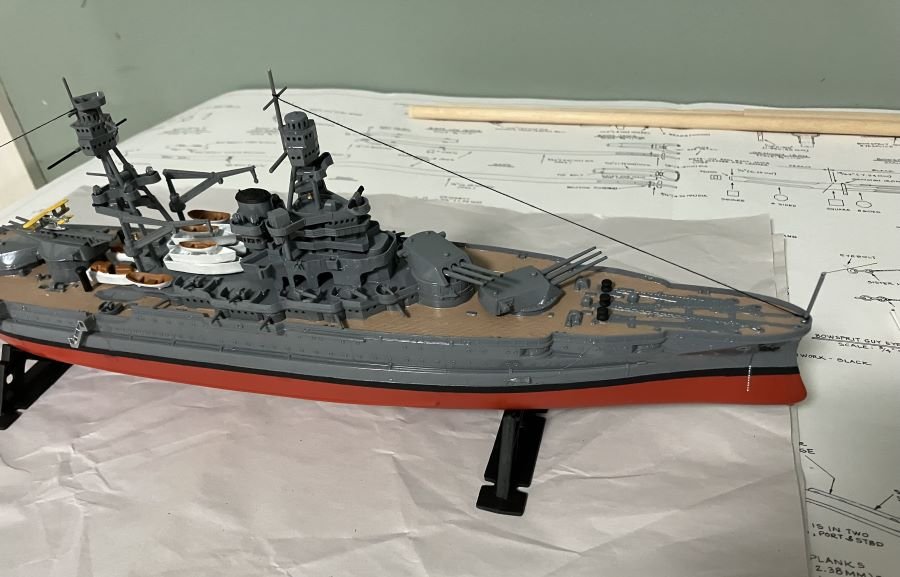
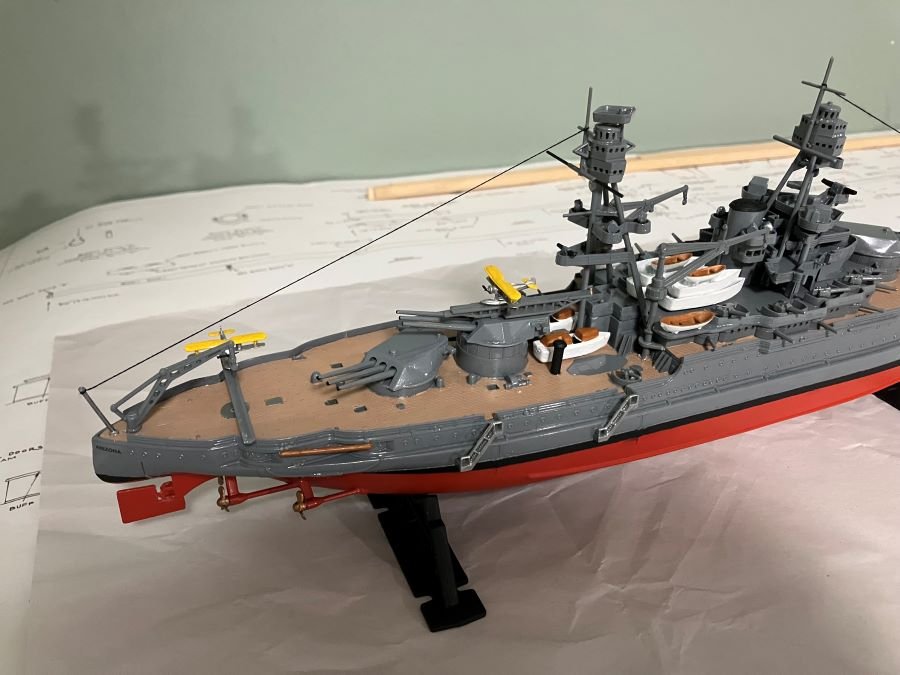
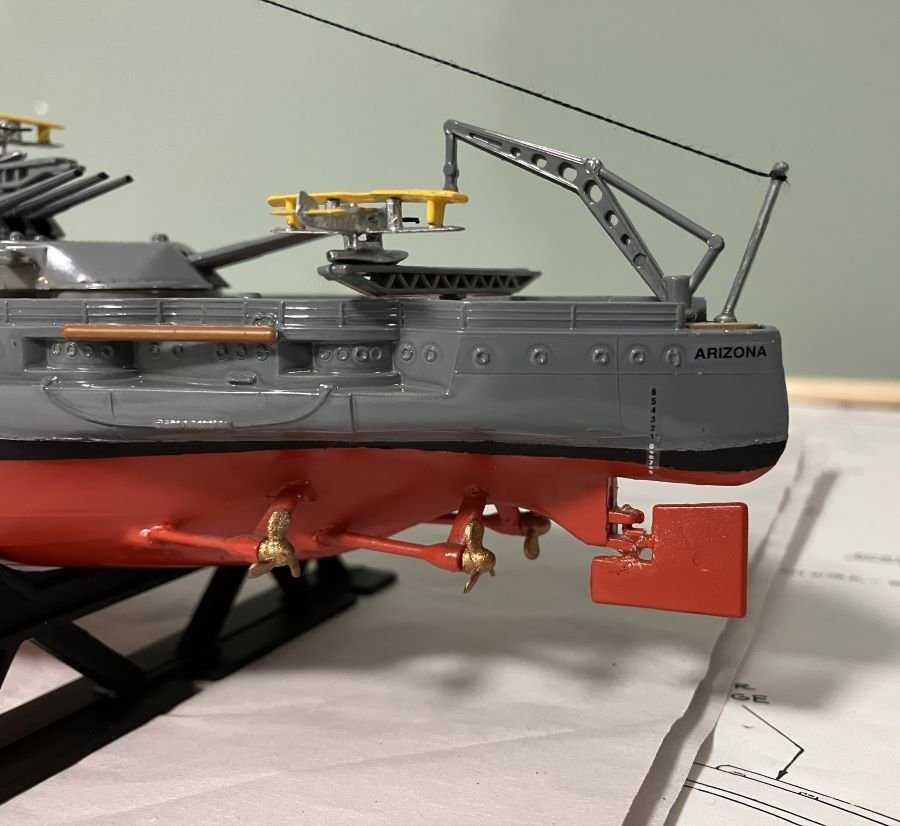
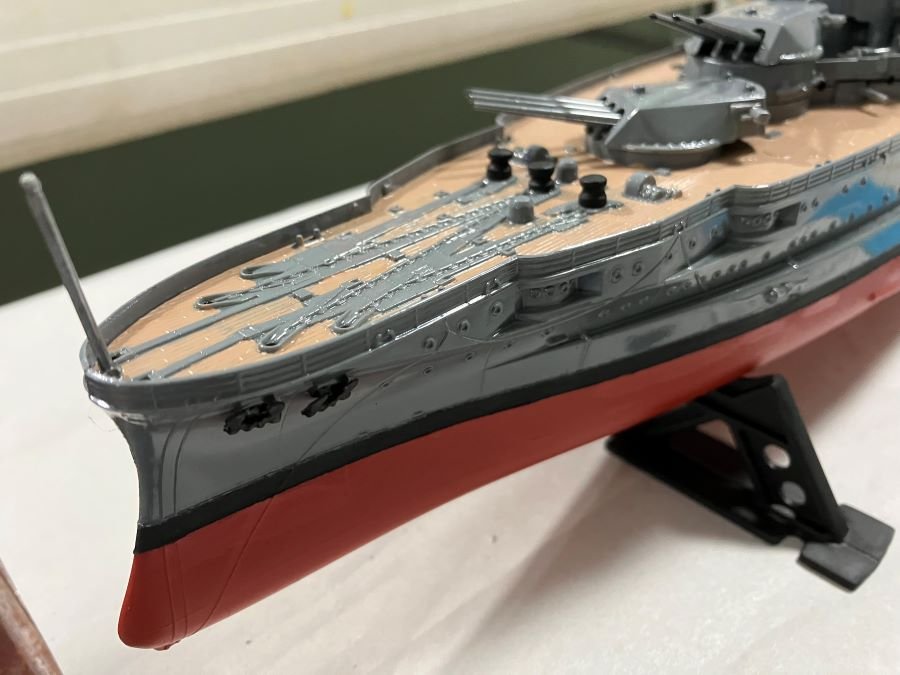
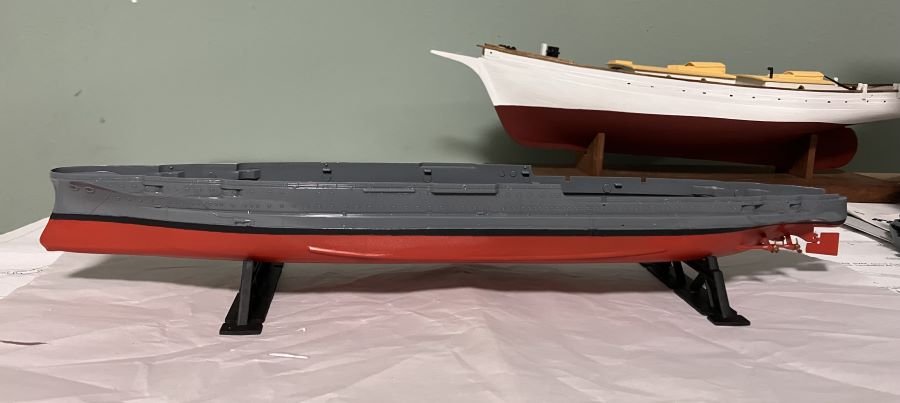
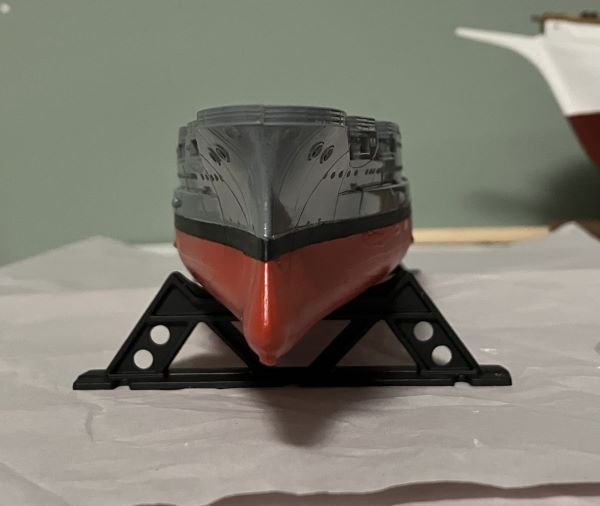
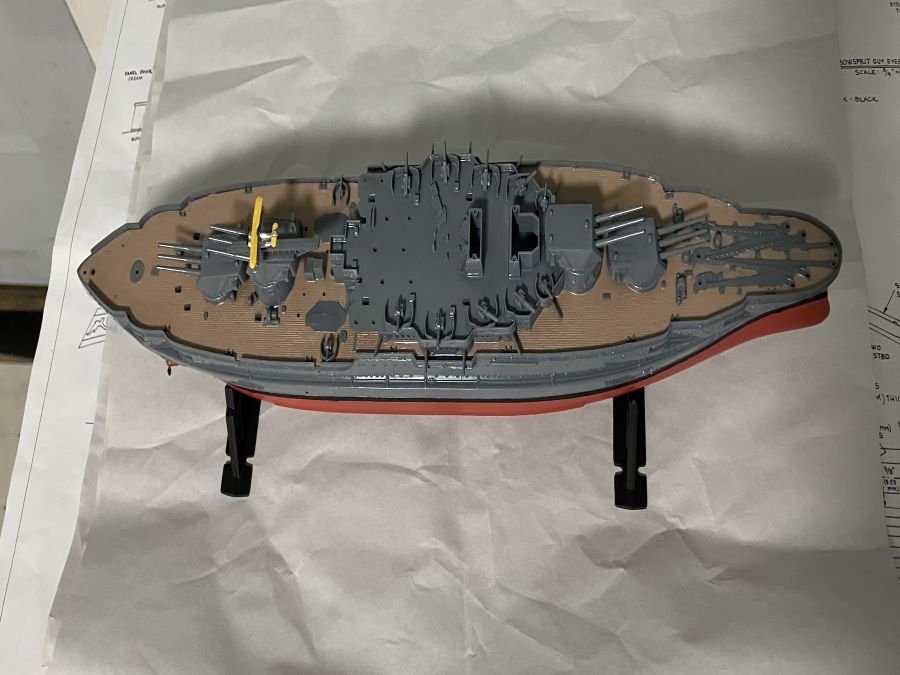
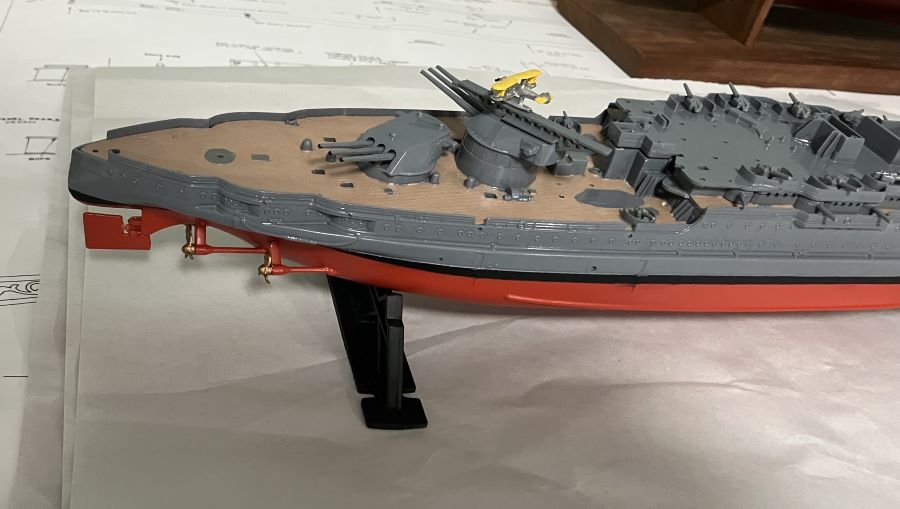
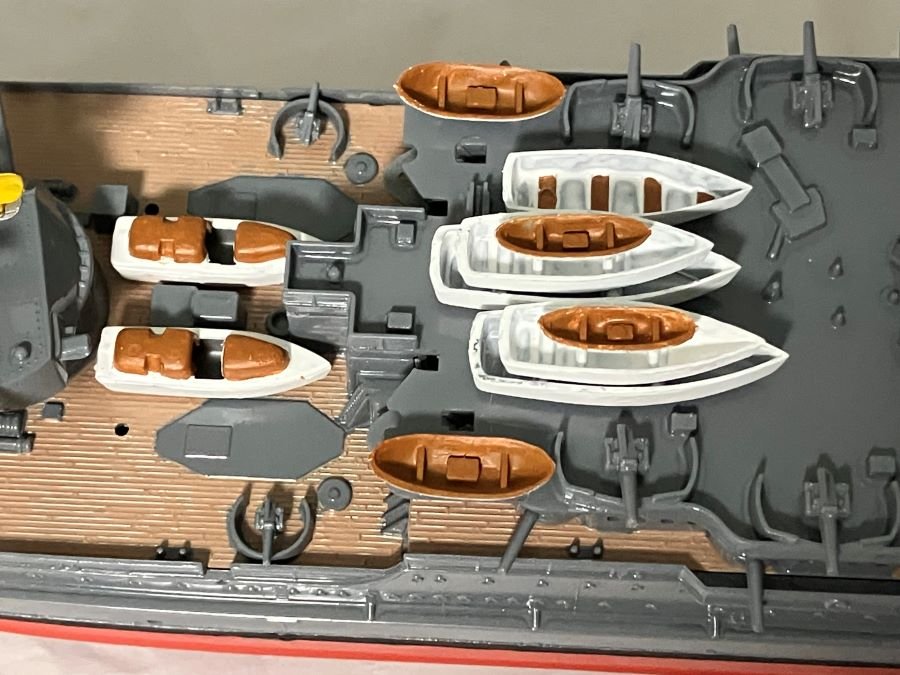
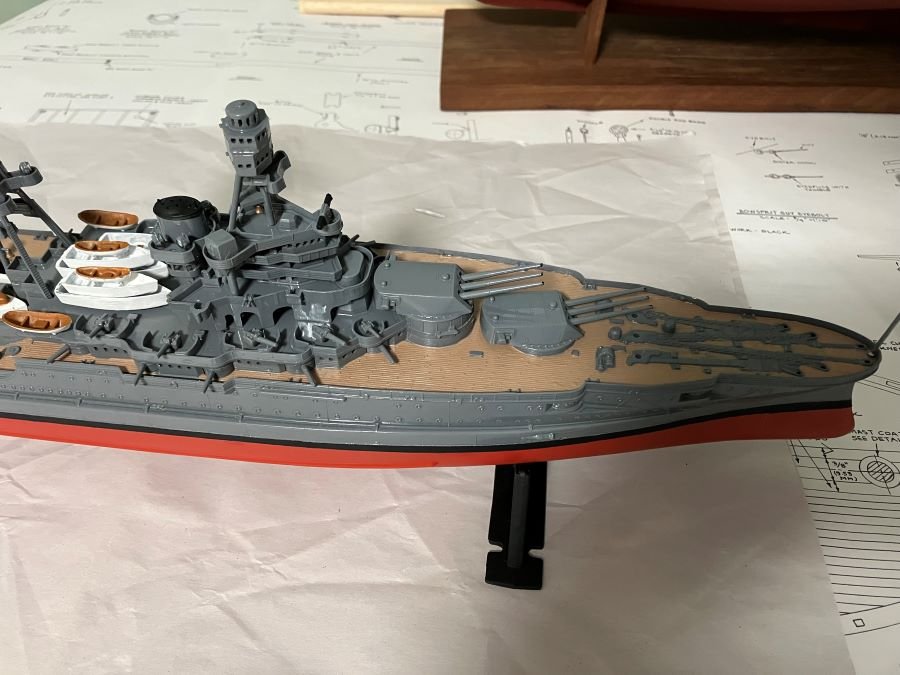
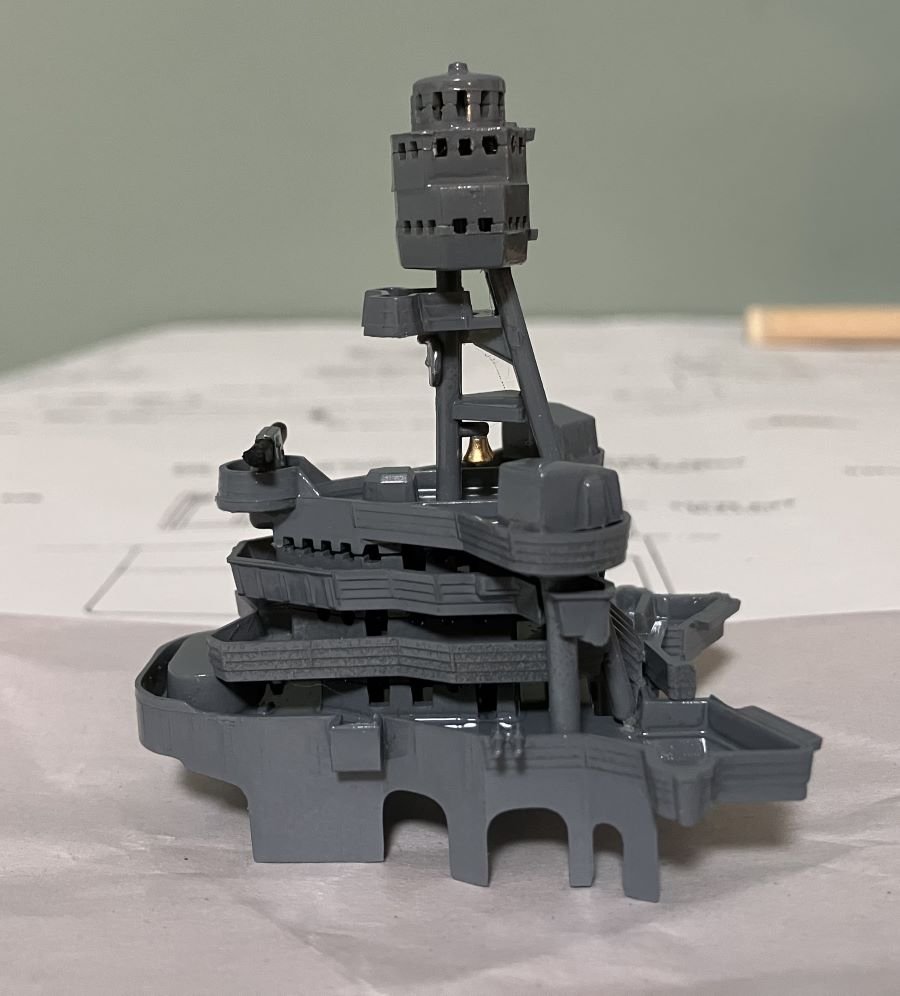
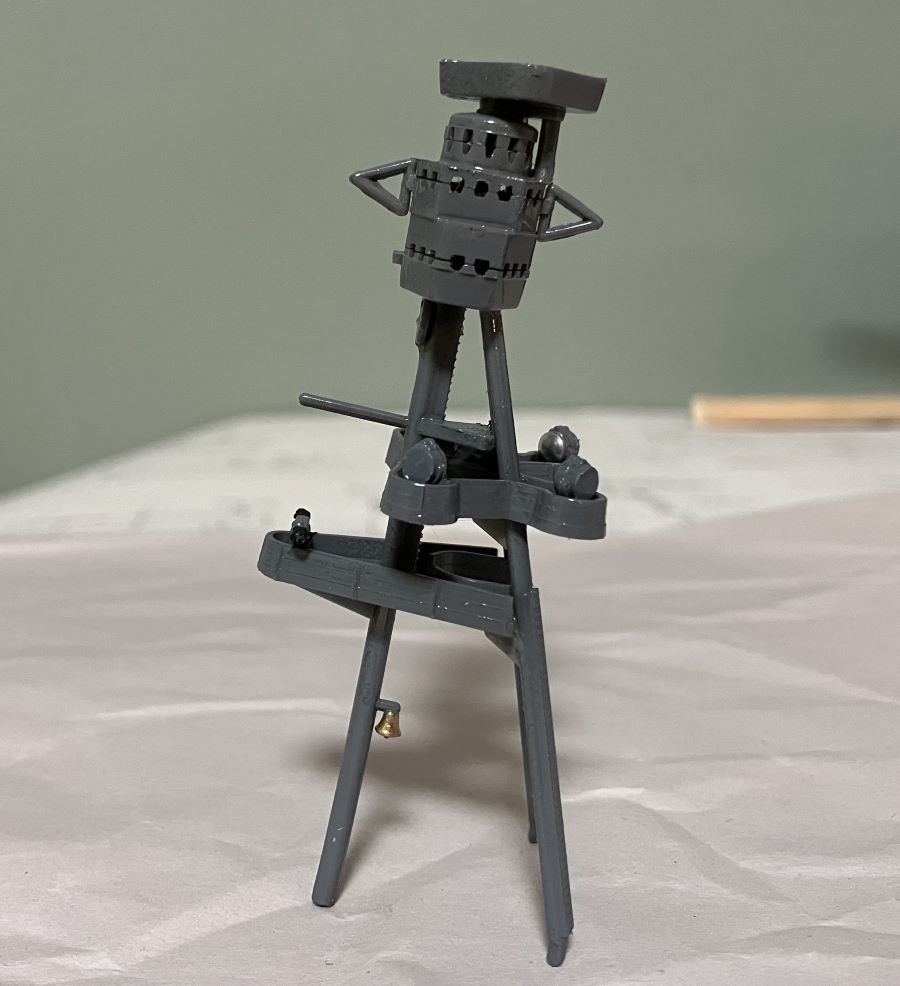
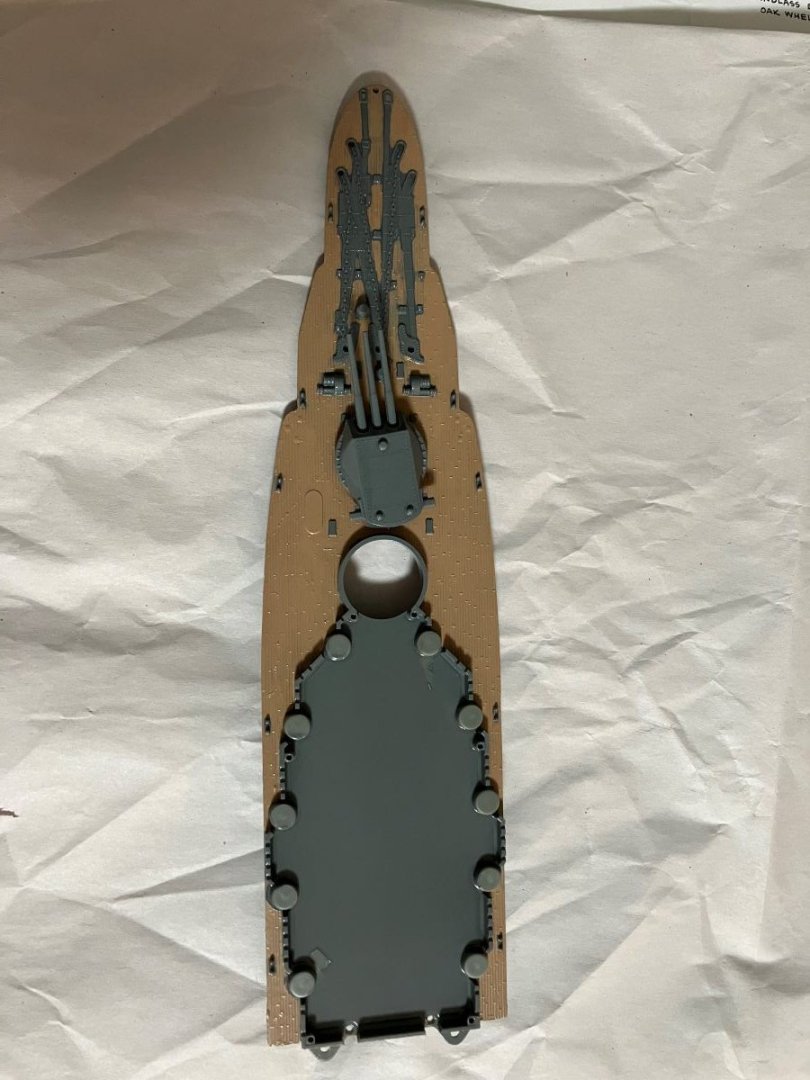
Hello Everyone - I got the hull painted, stripe and all Got the deck installed. With this kit the guns can turn Looks like she's shooting the ECB. At this point and because I did a lot of painting ahead of time, progress is moving pretty quickly. All the boats Superstructure and stack: After review of the photos and before hitting submit, I noticed a paint spot on a boat I'll have to correct. Things are moving along so I should finish in a day or so. We'll see how long the honey-do list is first. Comments welcome - Kenneth
-
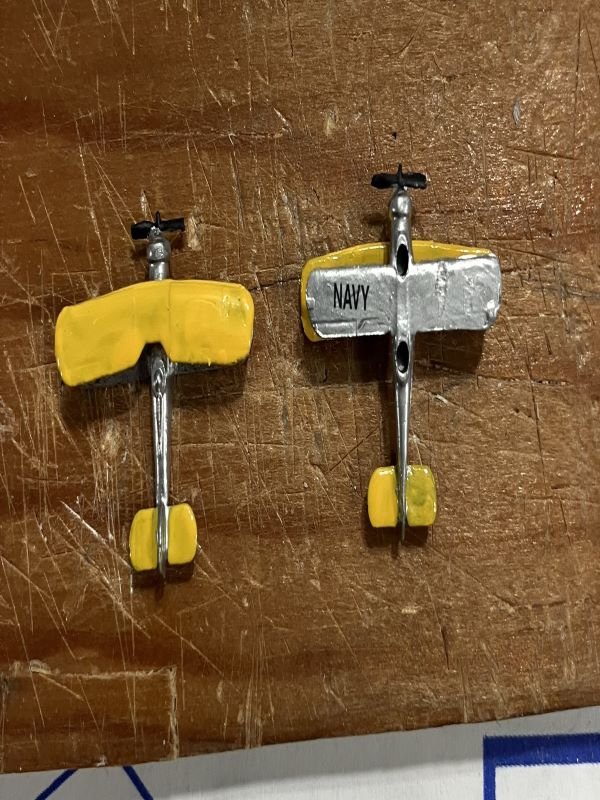
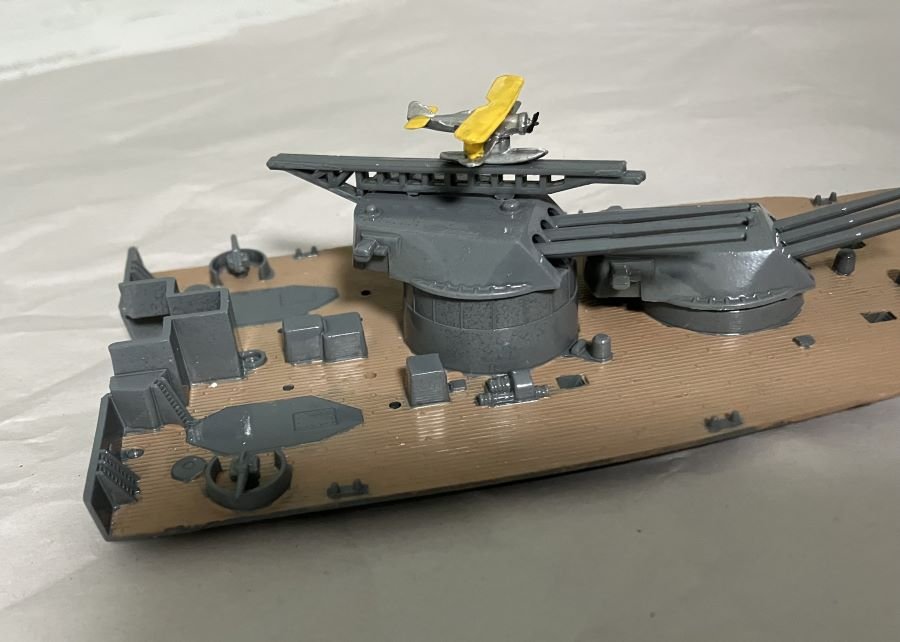
Hello everyone - Thanks for the likes. The sea planes: Hey Yves, my only surviving Pyro box and a Lindburg box: I did build the models and also saved the instructions. Comments welcome - Kenneth
-
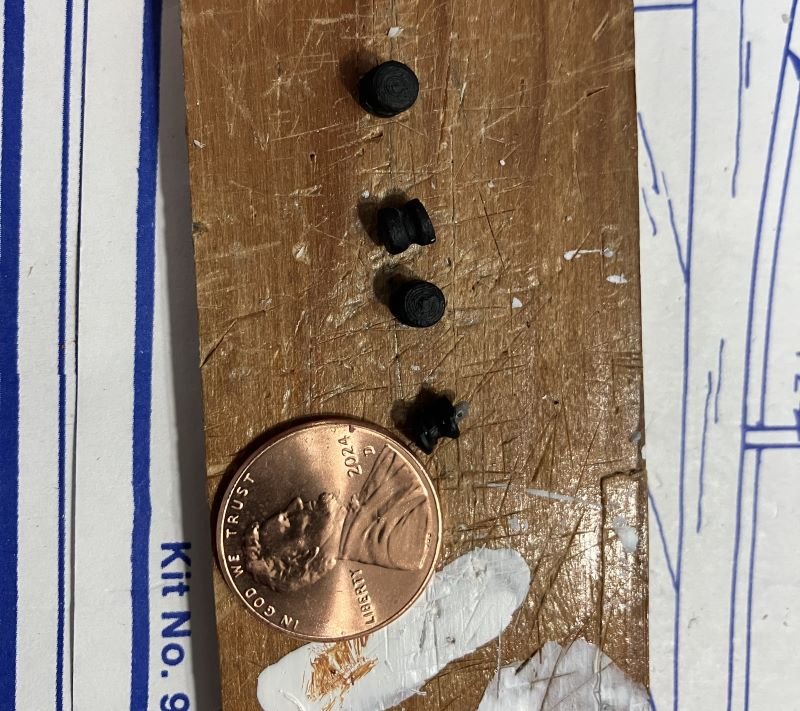
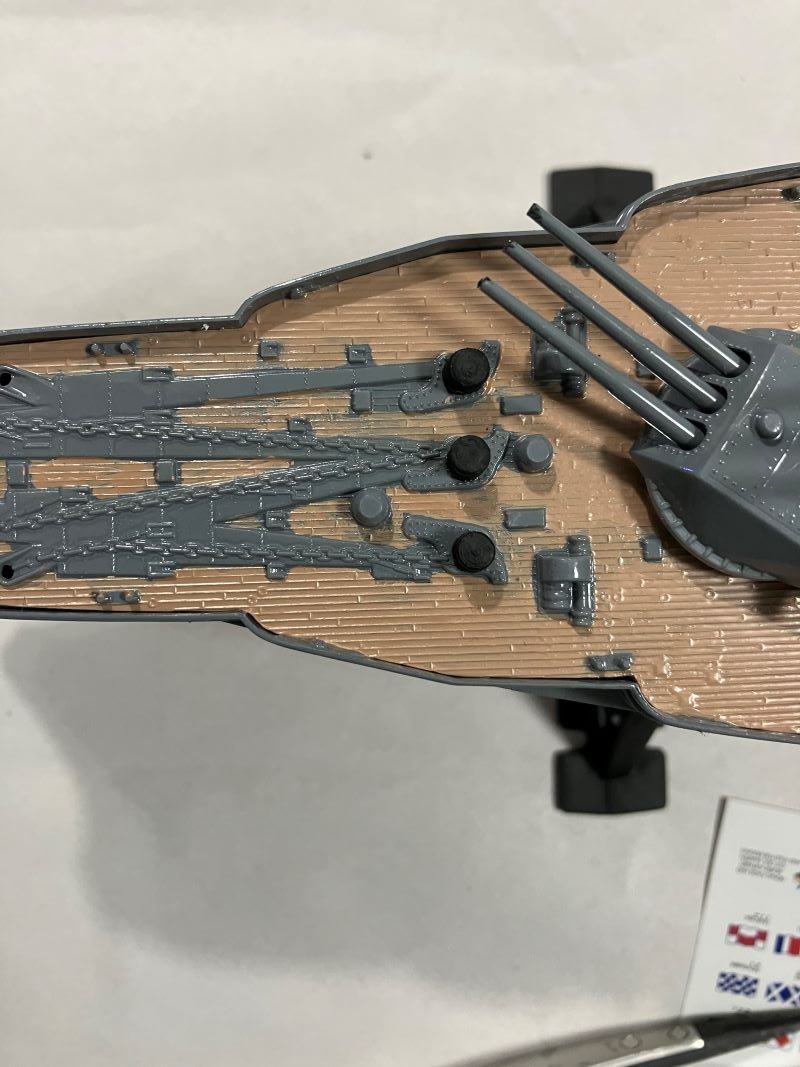
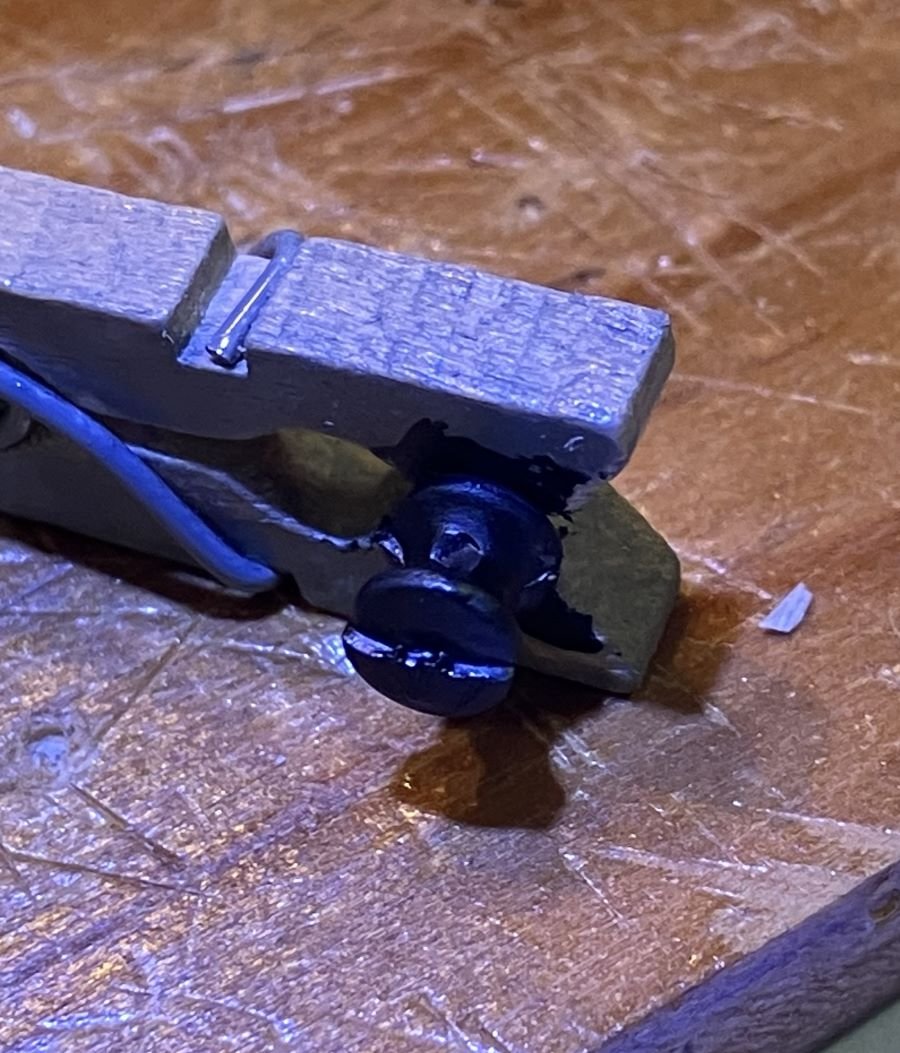
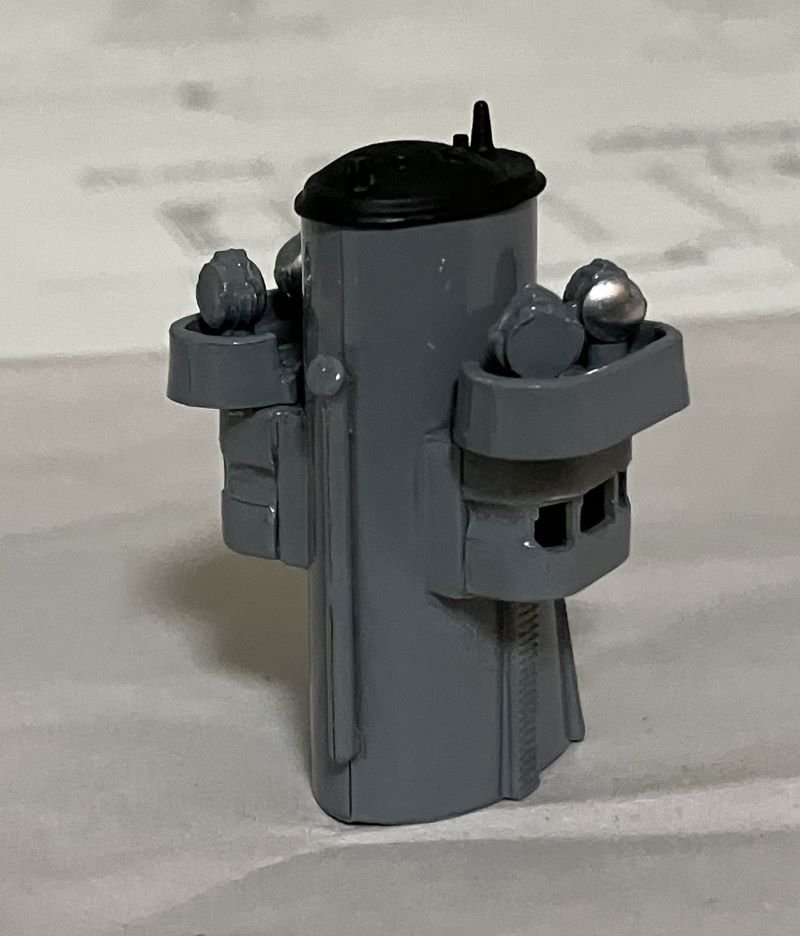
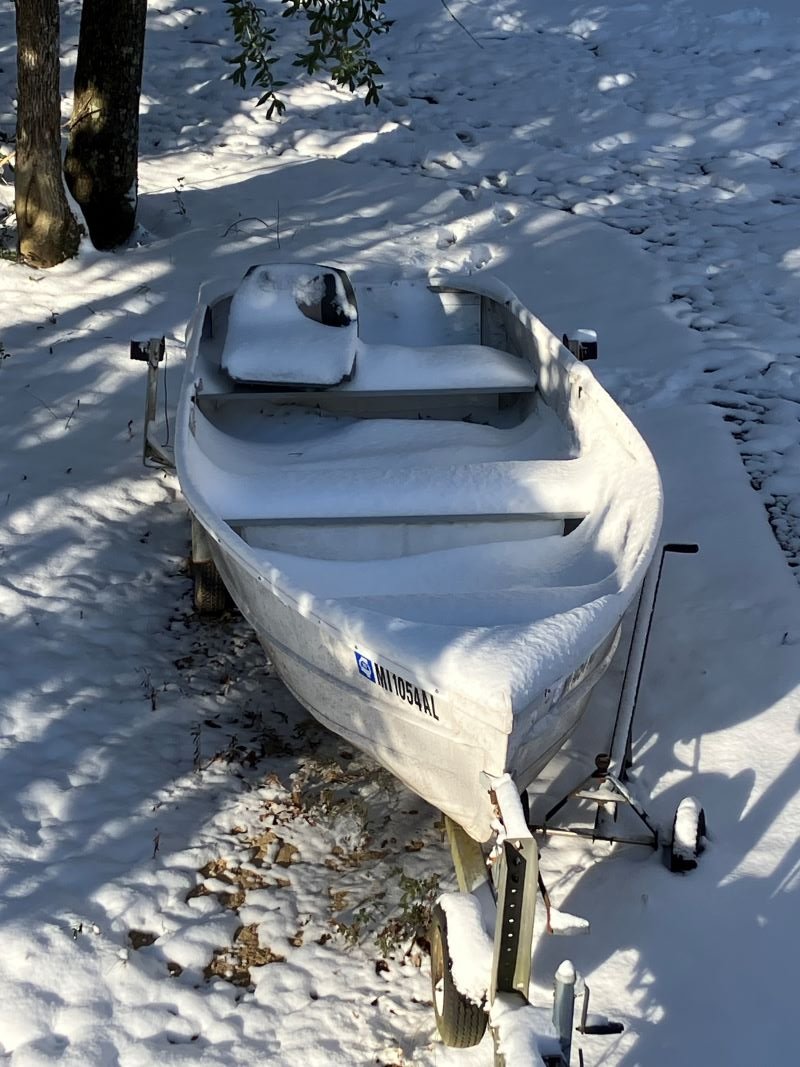
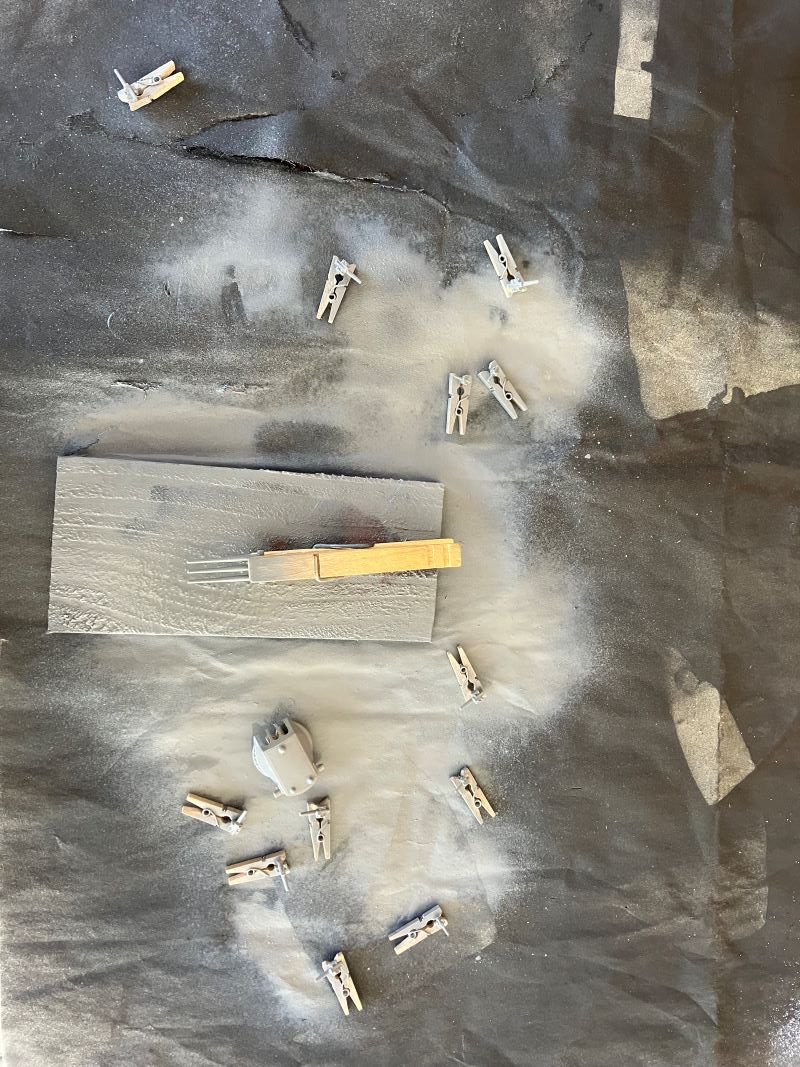
Thanks everyone for the visits and likes and comments. As far as the quality of the kit, look at this photo of a capstan. You can see how far off the 2 halves are. A lot of the parts are like that, and excessive shaving and trimming make them too small, so you have to compromise. By the way, one was pinched too hard by the forceps and shot across the build table. For the life of me I can't find it. The bilge monster must have it. I plan to make new ones, either from a wooden dowel or the plastic 'tree' of parts. Photos of parts assembled and painted I did my best on the tan color of the deck Taping and painting the black stripe on the hull is in progress. We'll see how it turns out. Spray painting is out of the question right now. I usually spray paint on the back deck, but we just had a once in a lifetime snowstorm down here on the Gulf Coast and temperatures are super low. It's even too low in the garage. My poor skiff: We aren't used to this. We got 4 - 5 inches at my house. It was like walking through powdered sugar. The best technique for driving in snow: STAY HOME. Take care everyone - comments welcome - Kenneth

-
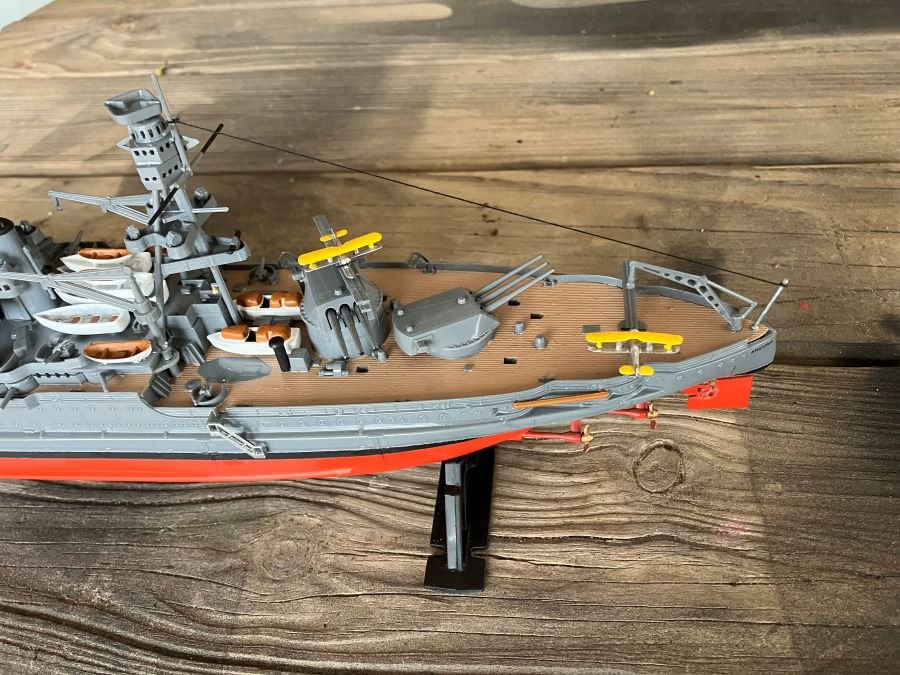
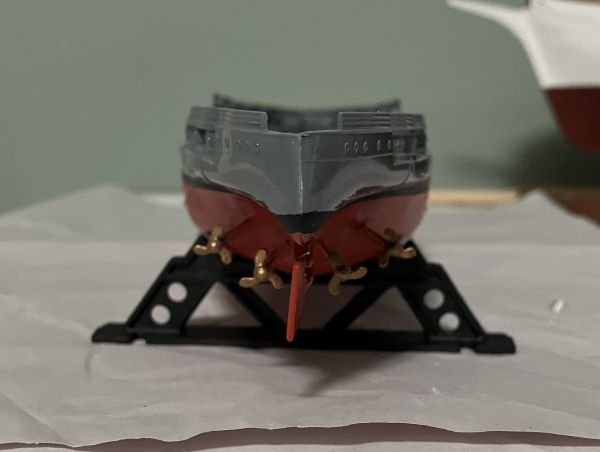
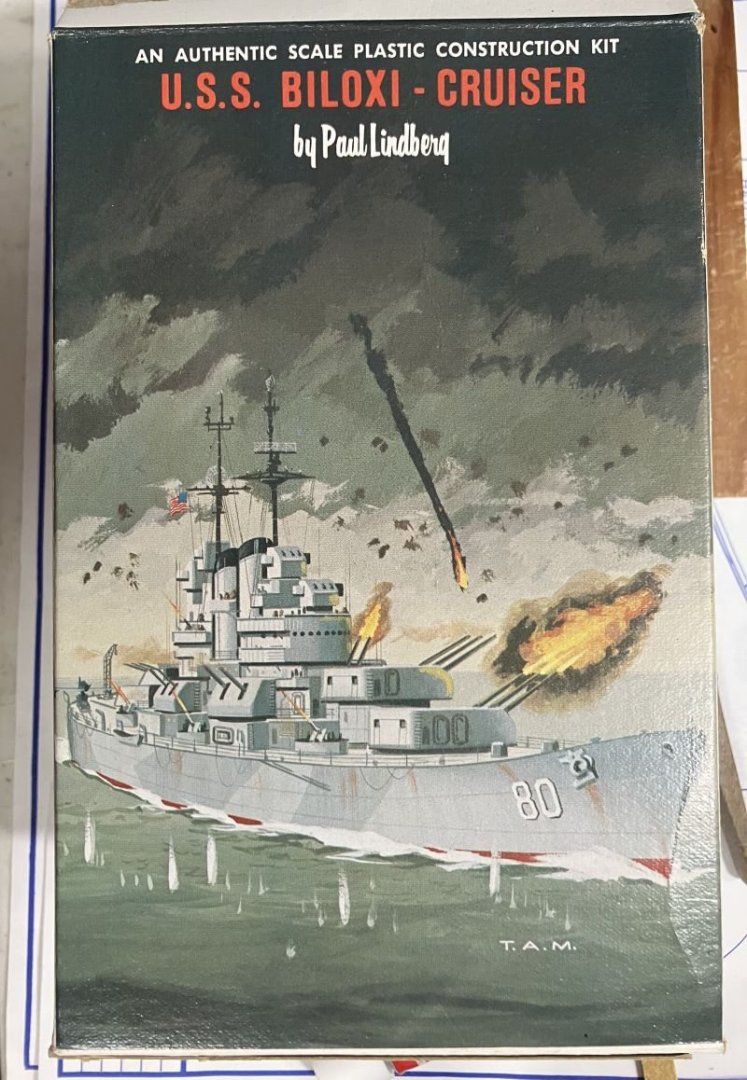
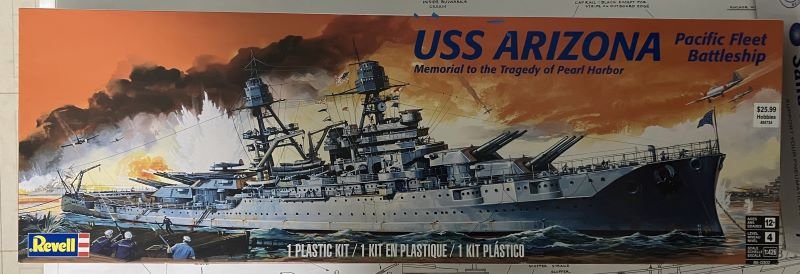
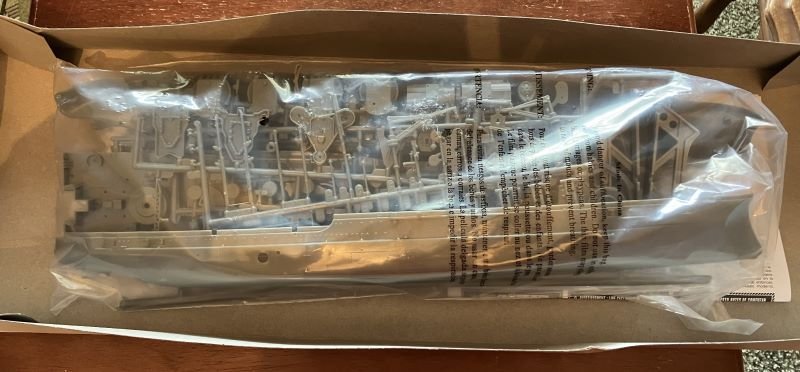
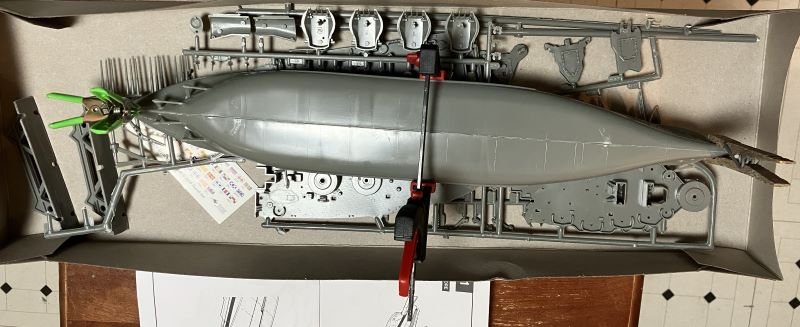
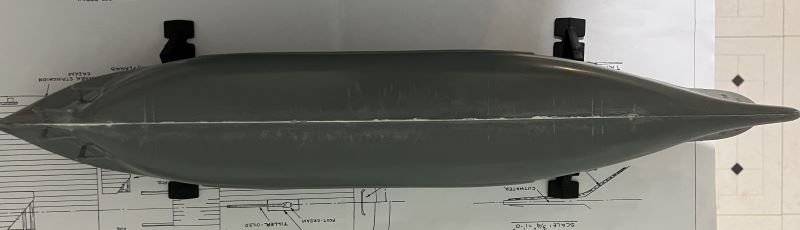
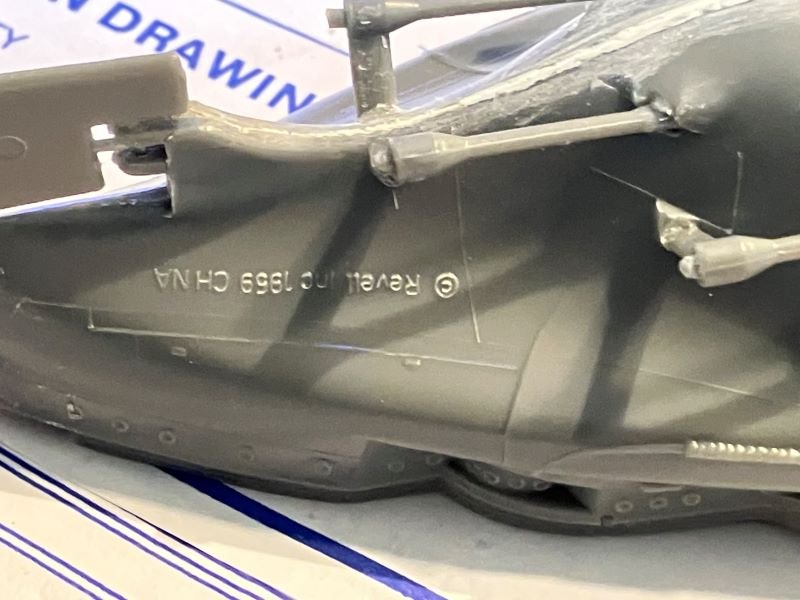
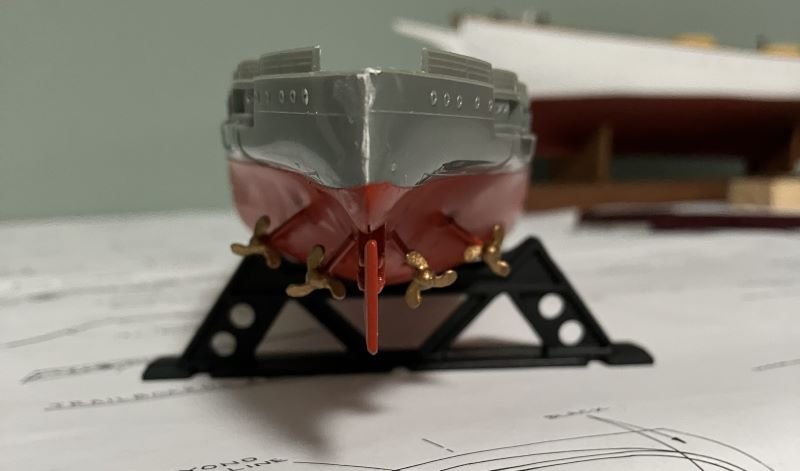
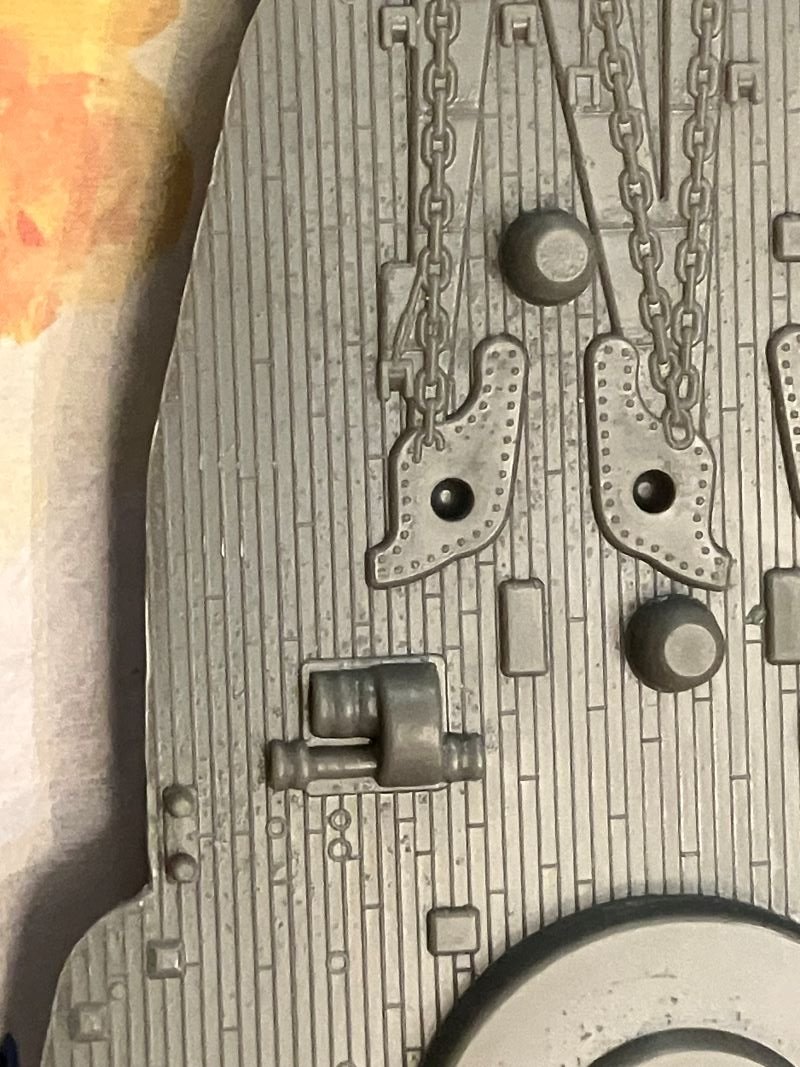
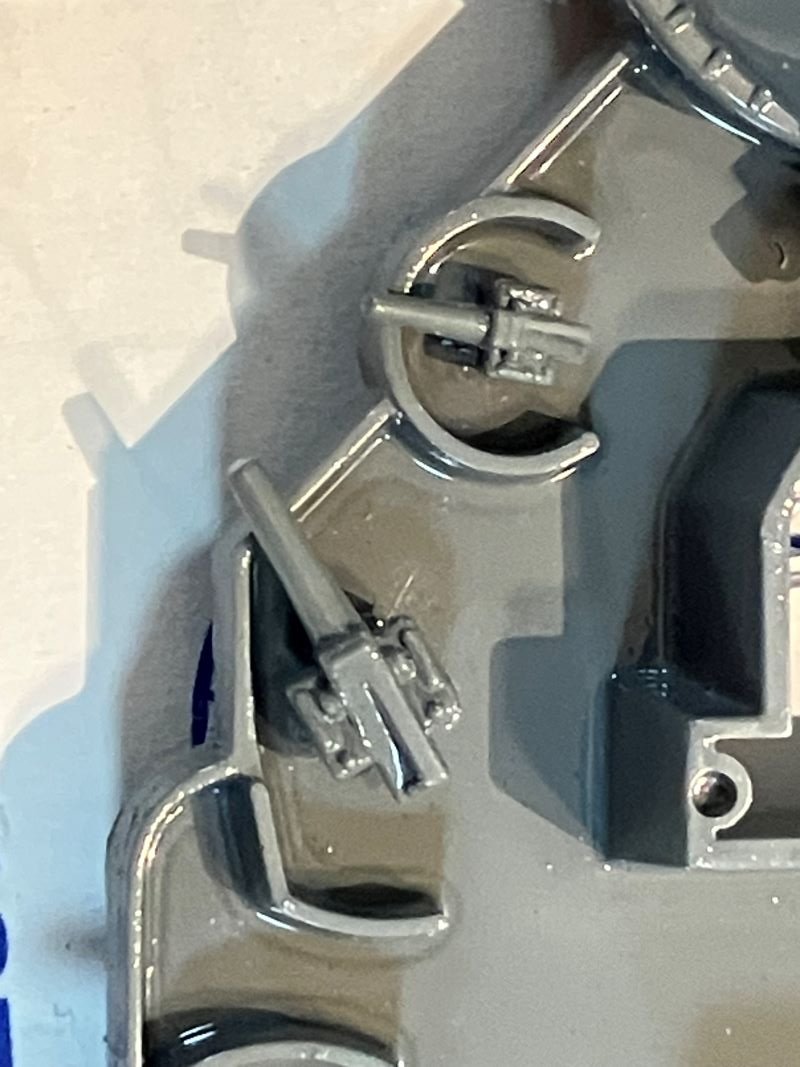
Hello Everyone - This is the first plastic ship I've attempted in many years. As a kid we used to build all the old kits including Revell, Monogram, Lindburg Line, and of course Pyro. My son gave this to me for Christmas and I'm going to jump right on it. Cool box Everything in a sealed bag The hull halves were a little tricky to align. It took a lot of trimming So I used contour puddy The copyright stamp is not exactly subtle Small parts getting spray painted - guns I had hoped to leave the gray color of the kit, but removing the parts from the 'trees' and trimming left marks, so I used Testers gray spray paint. Parts assembled after spray painting Decent detail: deck planking, guns, and even right hand and left hand propellers I taped the hull for the bottom paint and the deck for the gray. I will spray paint the 2 deck pieces then paint the wooden decking by brush. I would just spray the entire thing but I don't want paint accumulation to cover the detail. Thanks for looking in and comments welcome - Kenneth

-
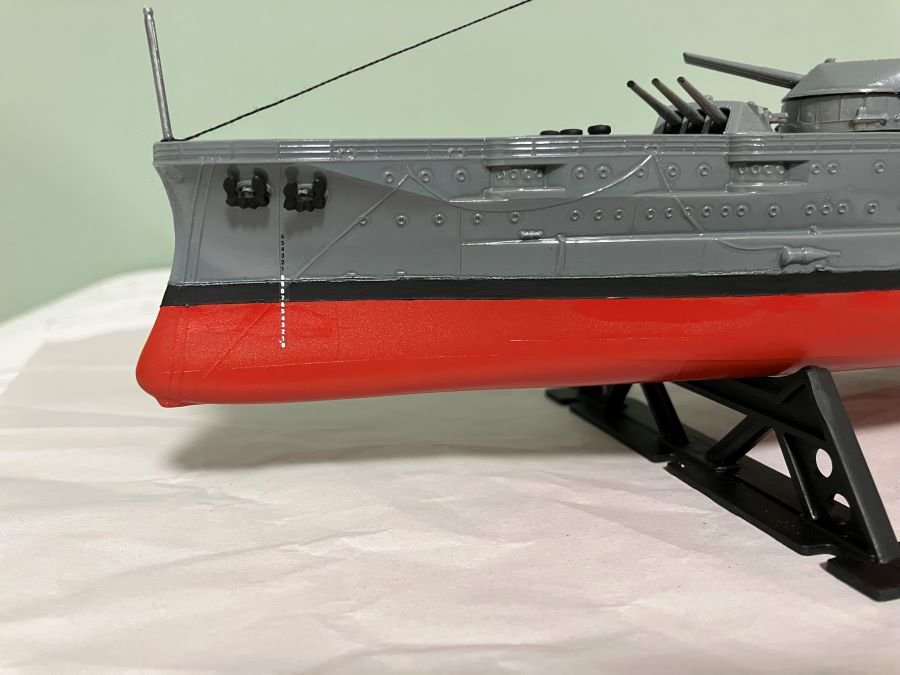
Hello Everyone and I hope your new year is starting off well. I'm going to pump the brakes on this build for a short time. My sun gave me a kit of the USS Arizona for Christmas and I'll do that one, then return full blast to the EMC. Current photo with work on painting and finishing small parts: See you in a little while - Kenneth
-
Thanks Keith and Eric for stopping by and your comments. I've been piddling a bit on the EMC between honey dos and family matters and may post some photos soon. - Kenneth
-
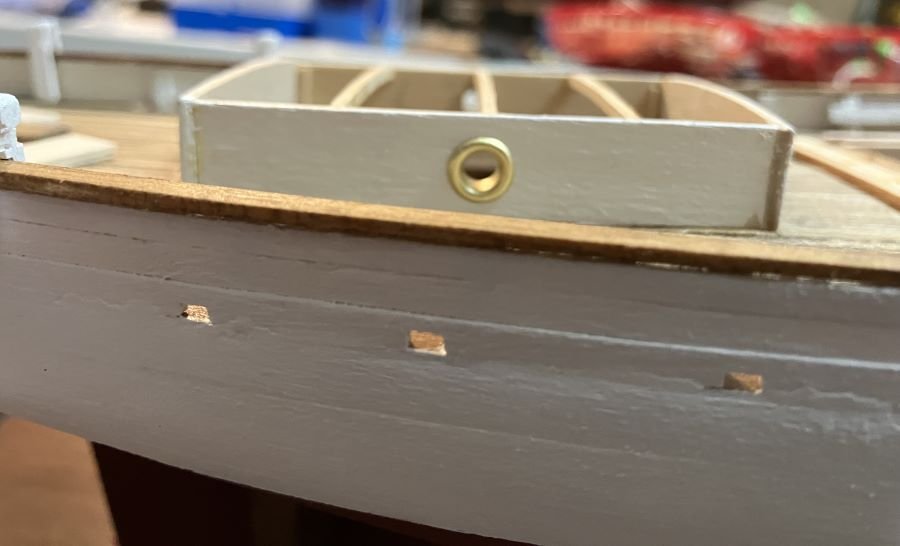
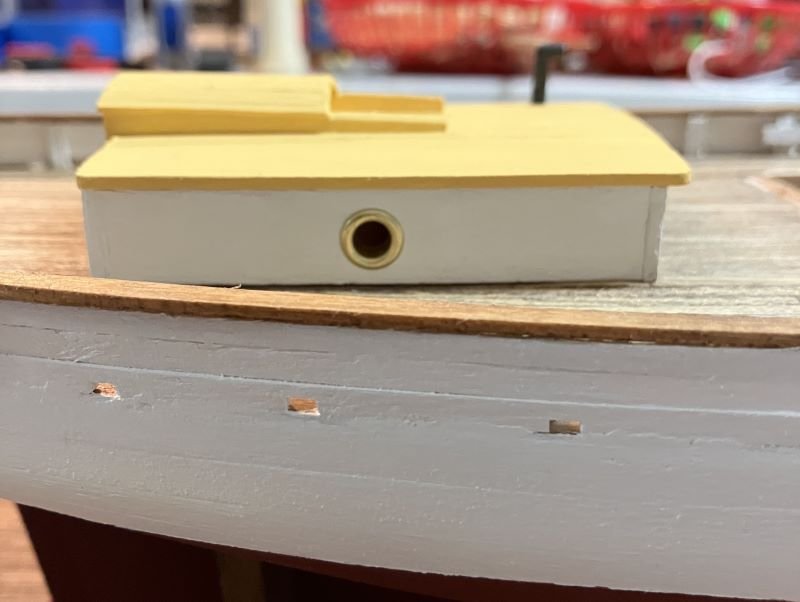
One thing I wanted to mention is that these eyelets at this diameter and the scale of the model give a port hole about 10 inches - a good size for a family boat. Things are getting busy, so if I don't log on for a while have a very Merry Christmas and a Happy New Year. Thanks - Kenneth

-
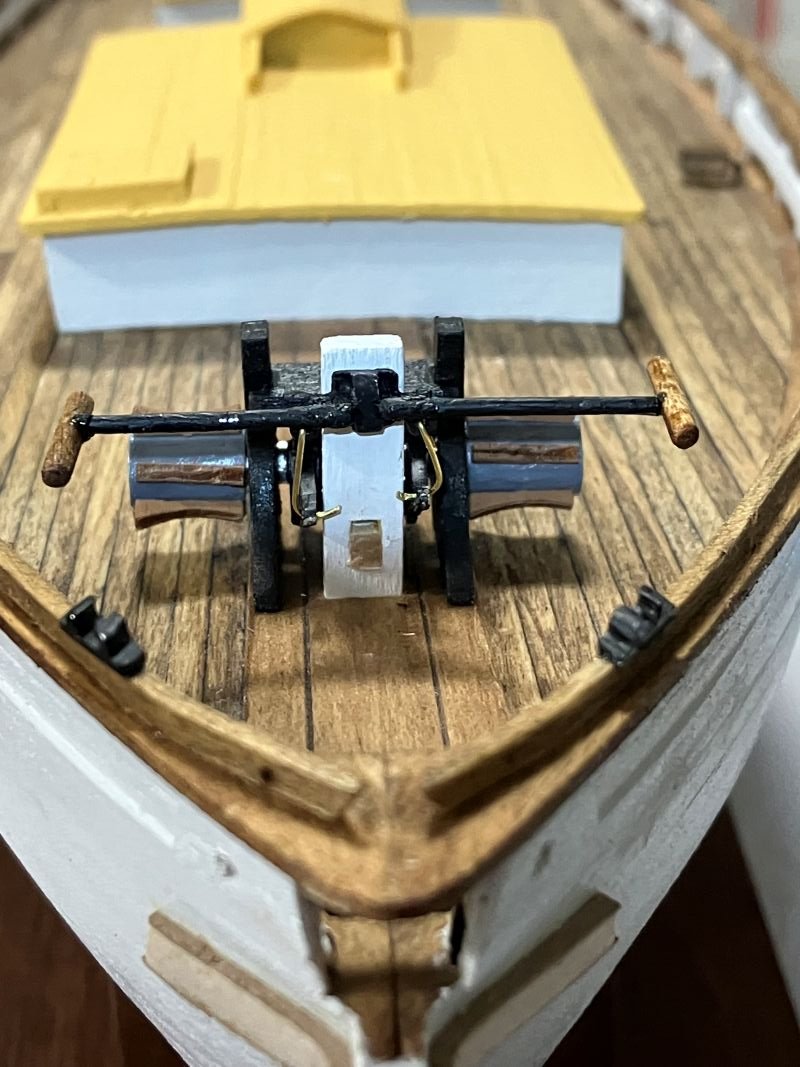
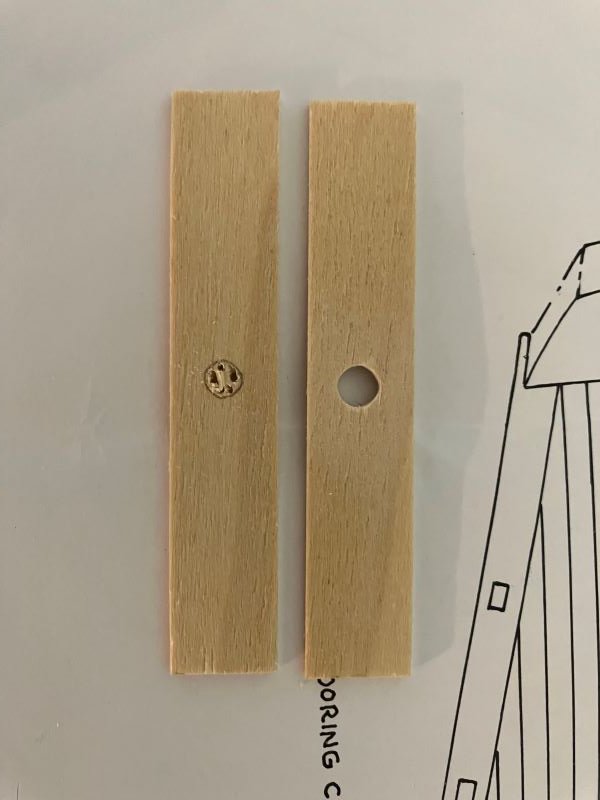
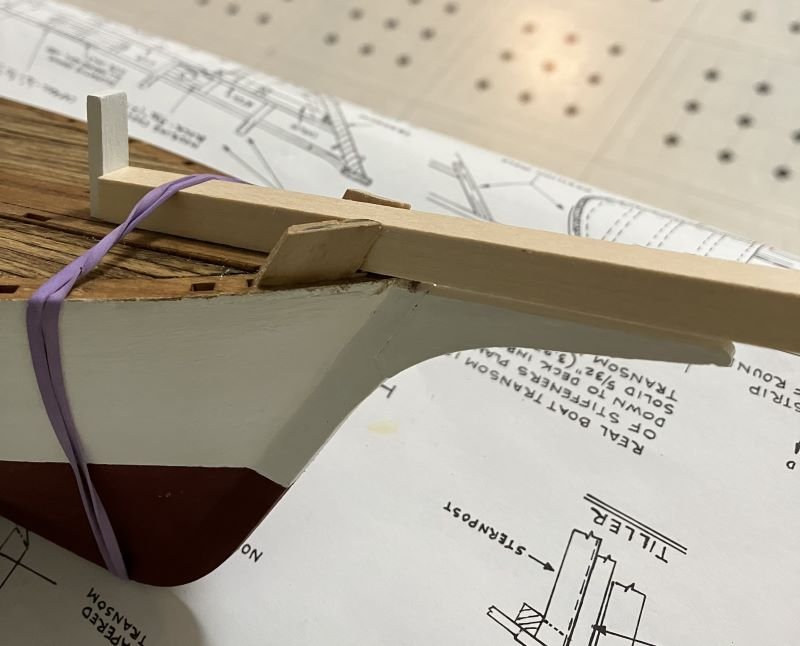
Hello everyone I've completed and installed the rudder and tiller A trick everyone knows: I drilled tiny holes in the top of the rudder and bottom of the post and installed a trimmed pin to hold them stronger together than glue only. The instructions call for round holes and straps, so here they are. I cut them from card stock. The small tab at the bottom end of the keel broke off some time ago. It actually made it easier to install the rudder with its post, just slid right in. The tiller fit right in the square hole in the post I made by drilling a round hole and cleaning it with a scalpel blade. The metal parts in the kit are not the best and need a lot of cleaning and filing. Be careful not to file off too much. Comments welcome - Kenneth


-
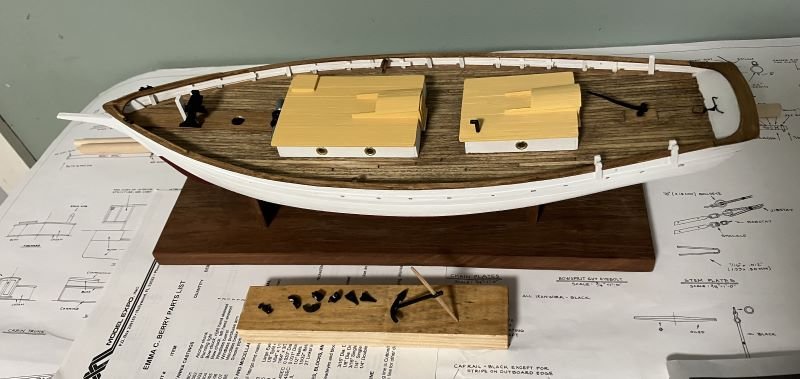
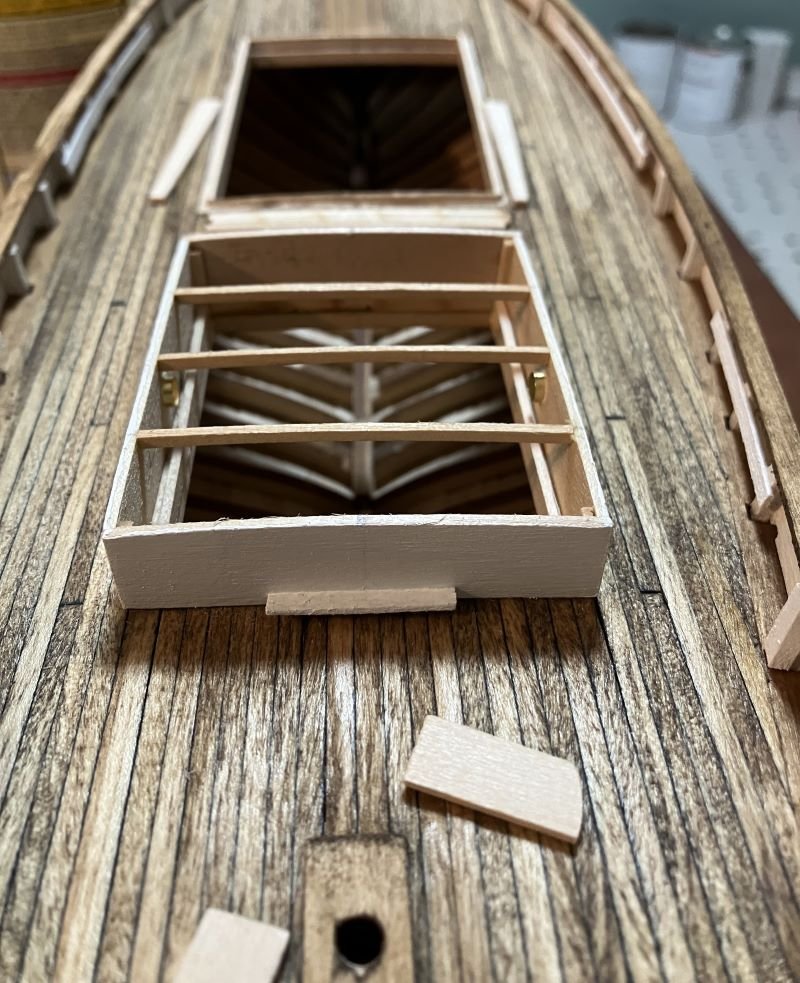
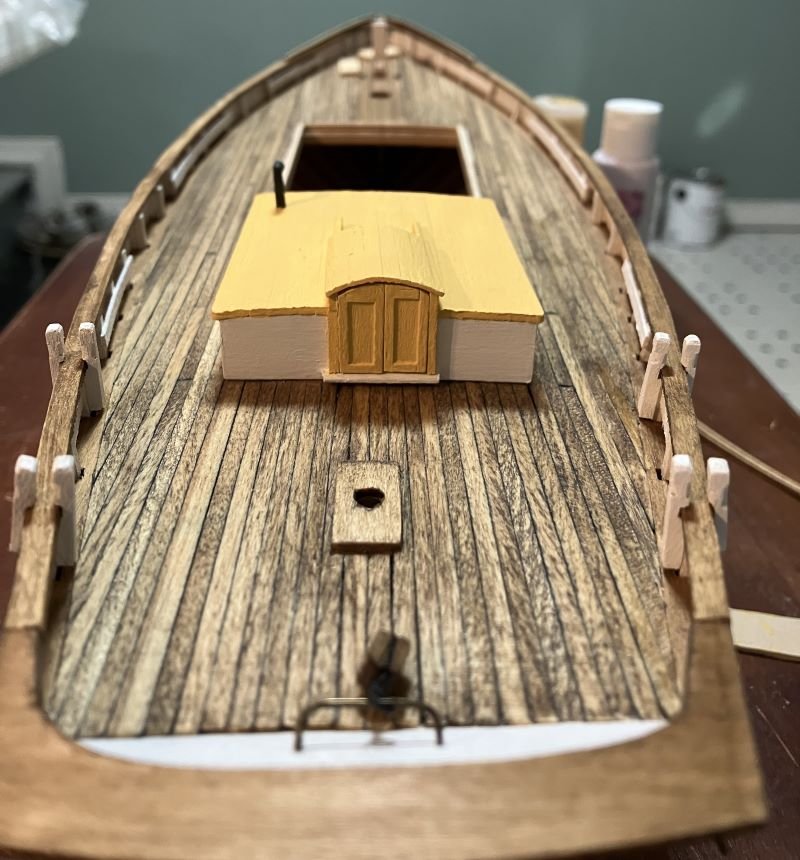
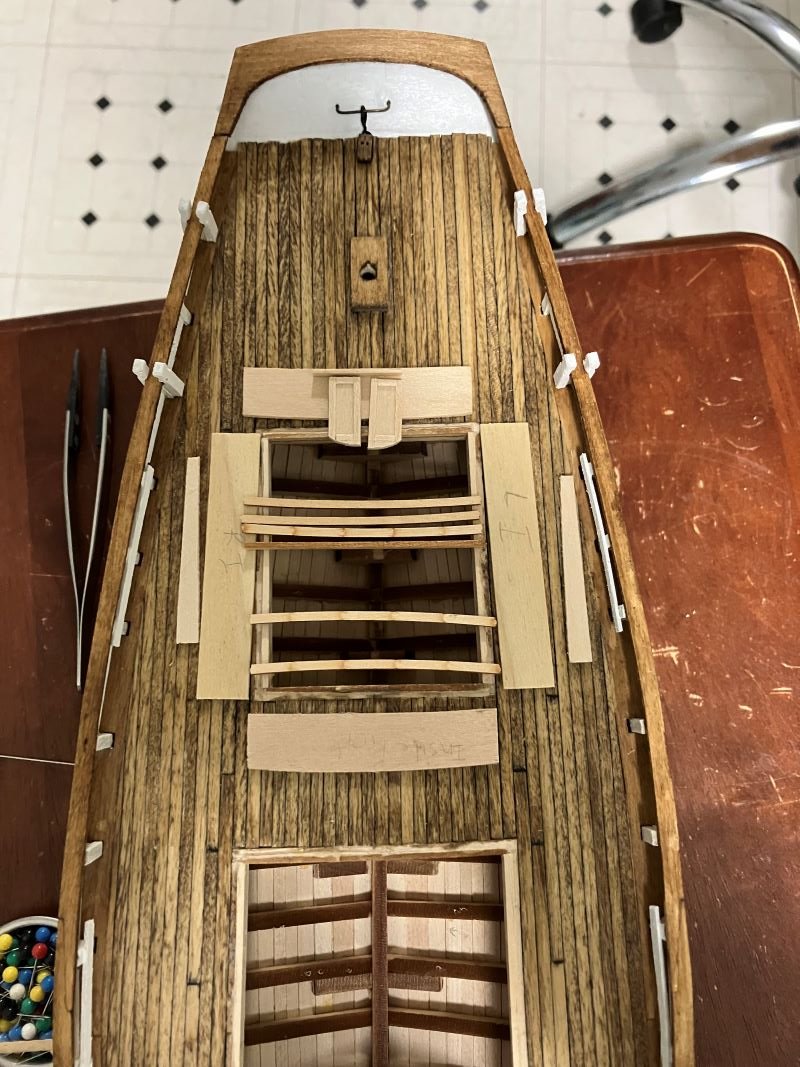
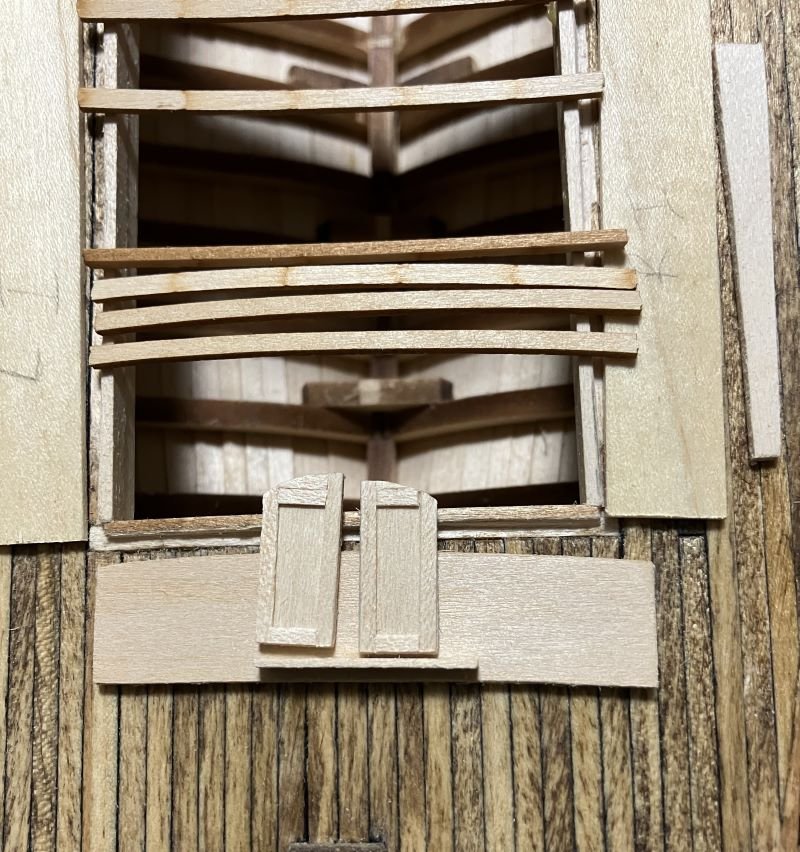
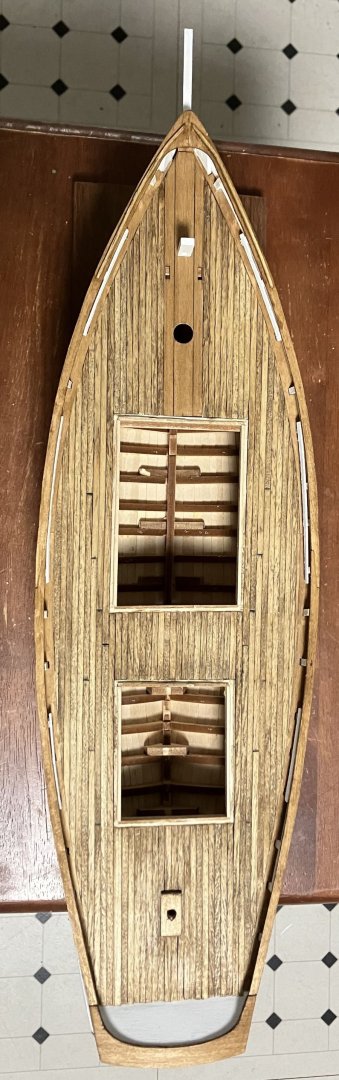
Thanks, Nirvana for looking in and the compliment. And now what I've all been waiting for: The second cabin is complete. It's built just like the first only a little bigger. I used the left-over spacers between the intermediate deck beams from the laser-cut sheet for the cabin top beams. The curve was exact and had plenty of needed width. Just had to sand off the char and cut to width. All finished with the hatch cover and trunk in place. I'm working on the rudder and tiller now and will then complete the other hull details. Comments welcome - Kenneth


-
Oops, looks like photos got out of order on my last post. User error, I'm sure. - Kenneth
-
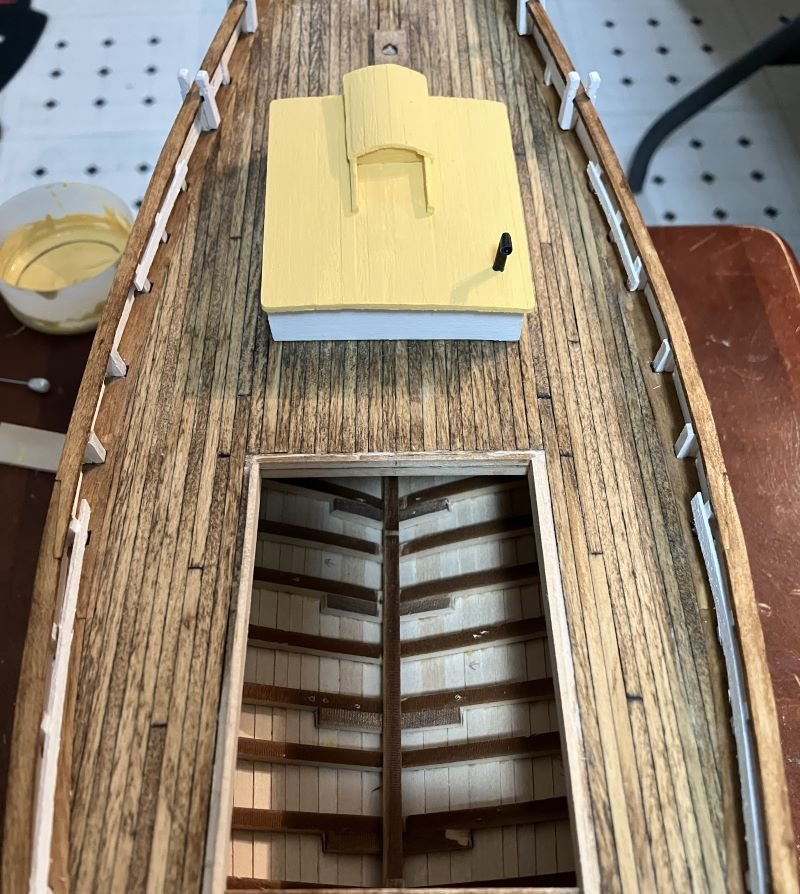
Surprise, Everyone - portholes Easy to make. Trace the eyelet and drill inside with tiny bit then finish with rat tail file. Also, I used a single wide plank because I didn't want the drilling and filing to cause damage to the joint. I used these eyelets and just pressed them in. They are already brass so no additional painting. But I did paint the sides beforehand to make everything clean. I simplified the framing because I'll cover the entire roof. All finished I left the hatch off this cabin and will place it on the front, larger cabin. Spoiler alert ... I'll put 2 port holes on each side of the forward, larger cabin. Comments welcome - Kenneth

-
Thanks, Phil I will certainly give it a go. Kenneth
-
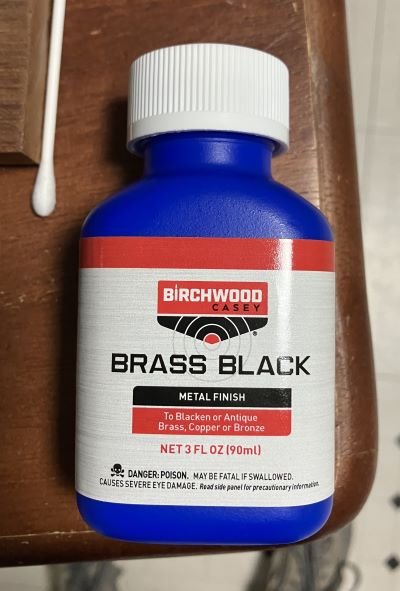
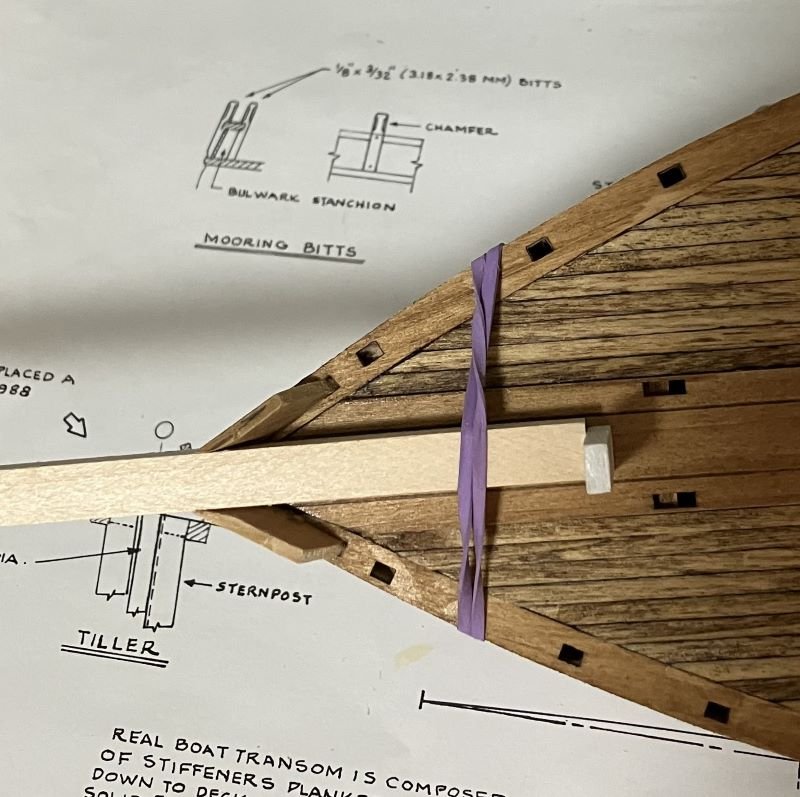
Hello, everyone. It's been a little while since I posted. Since then, along with life and stuff, I made and installed the stern mooring bits and the main sheet horse with its block. Also, I've started building the cabin truck. I like how my panel door turned out. I'll continue to work on the cabin trunk and build the larger cabin trunk along the same lines. I tried something new and attempted to blacken the brass rod used for the main sheet horse using Birchwood Brass Black. It worked okay and I'll practice with it before I start on the upcoming brass work on the mast and spars. If anyone has any tips and time savers, I'm listening. Question - should I blacken the brass pieces before soldering or blacken the finished part? Comments welcome - Kenneth
-
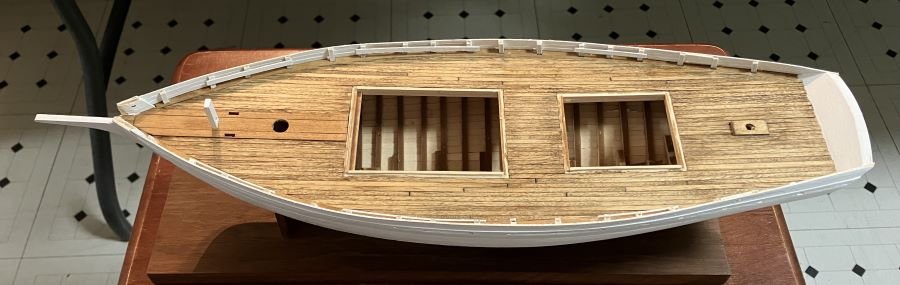
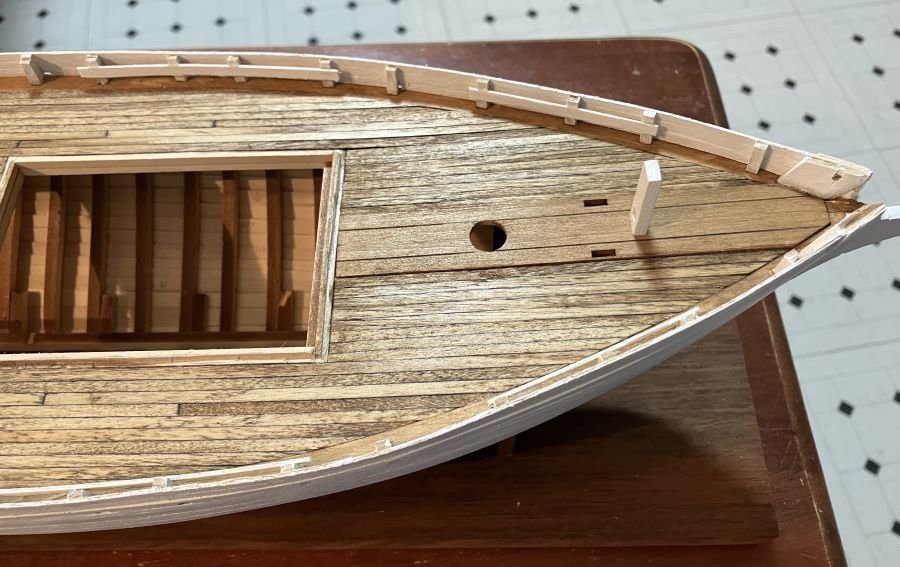
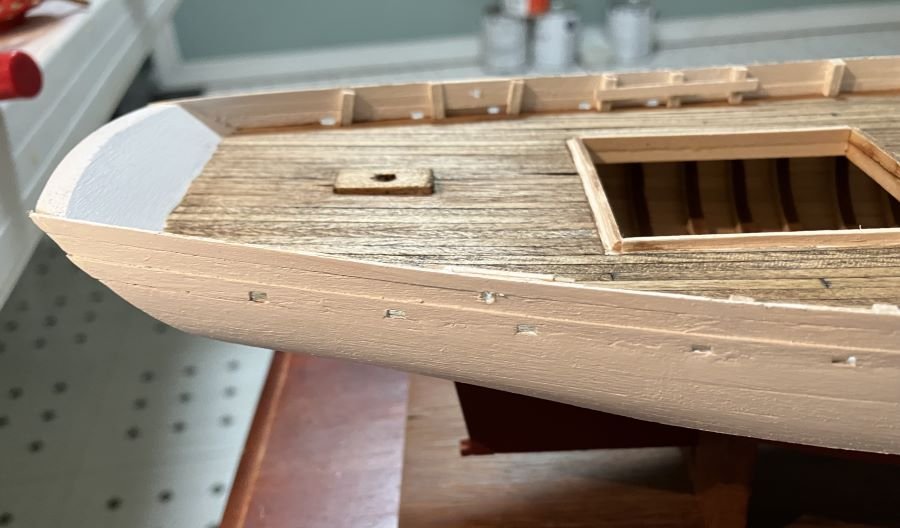
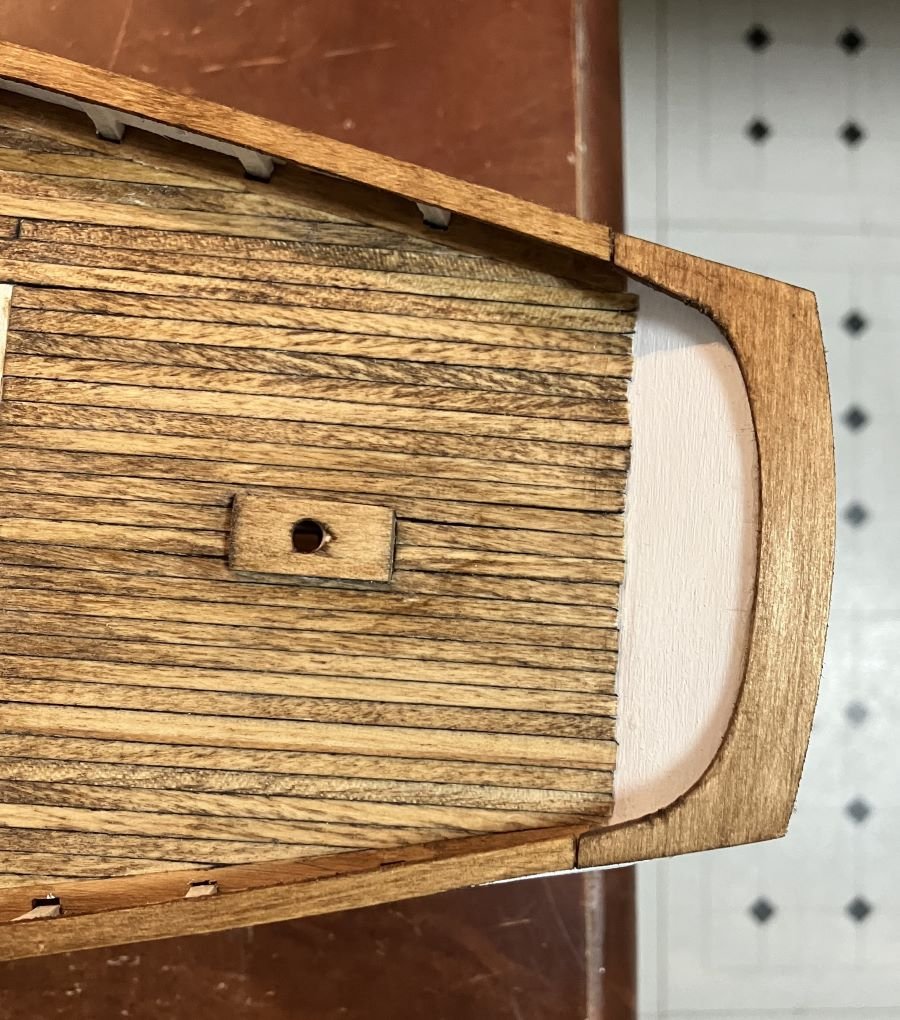
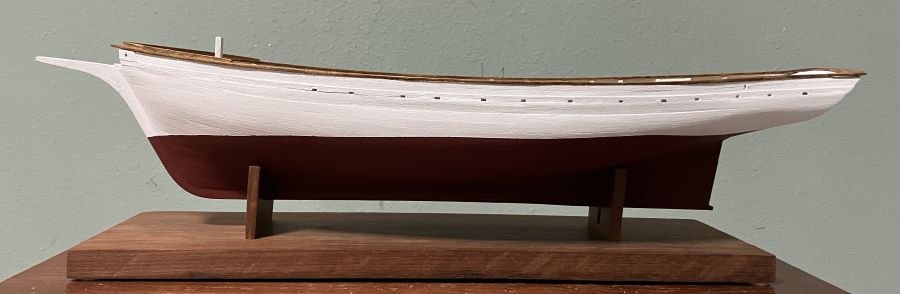
Hello, Everyone - I finished the stanchions and bulwark planking Then added the cap rails and buffalo rails Profile shot I didn't go in the exact order of the manual because I wanted to have enough room to paint the bulwarks before the rail caps were in the way. The laser-cut stern rail was too small when I fit it into position, I'm sure I did something along the way to cause it. So, I cut one to size from stock bass wood. It always seems that things dry-fit better than final glued result. Adding hull details is next, then I'm going to clean and touch up everything before mast and spar construction. Comments welcome - Kenneth
-
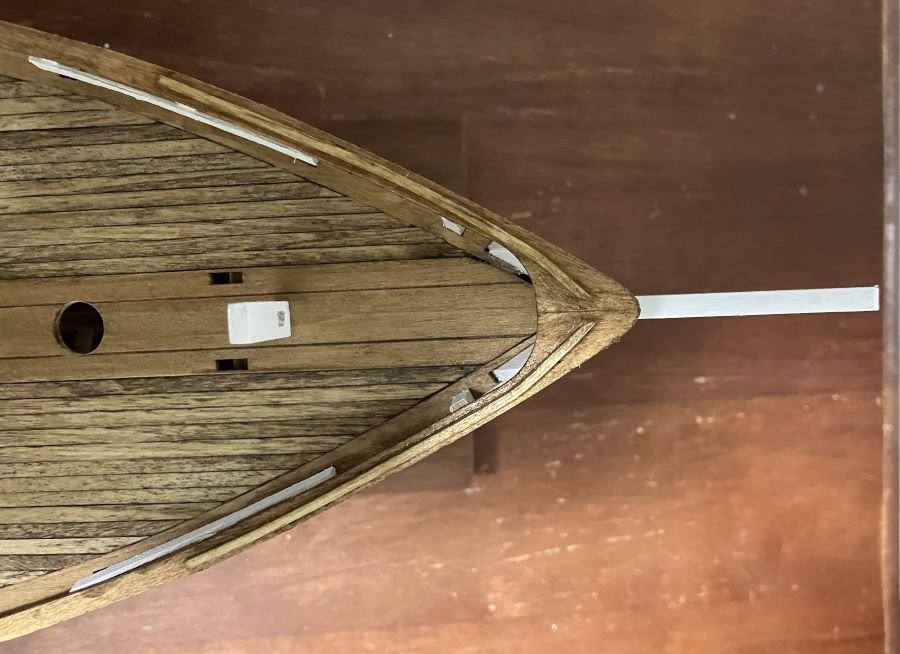
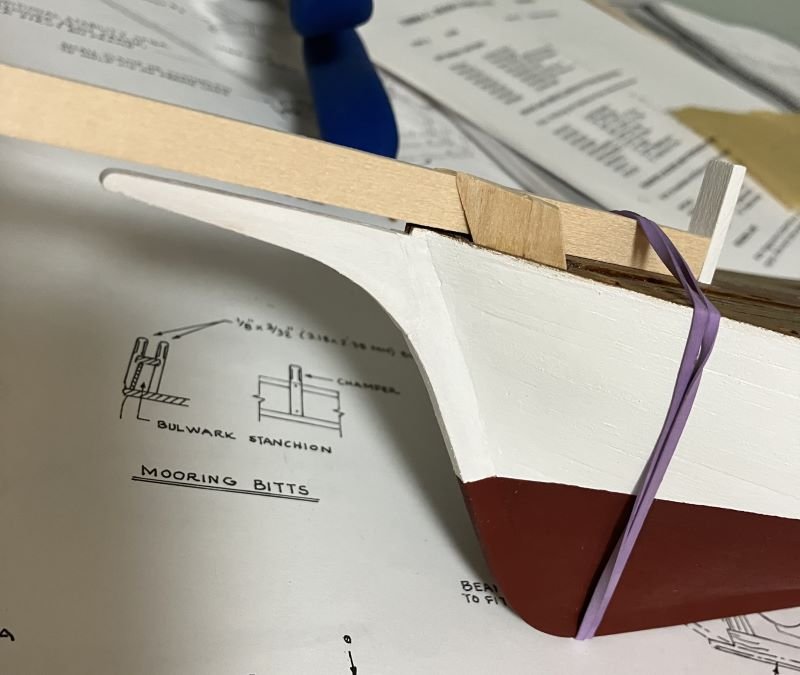
Knightheads: I actually thought ahead and strapped the stock wood for the bowsprit to get a more accurate fit. Stanchions are next. Thanks for looking in - Kenneth
-
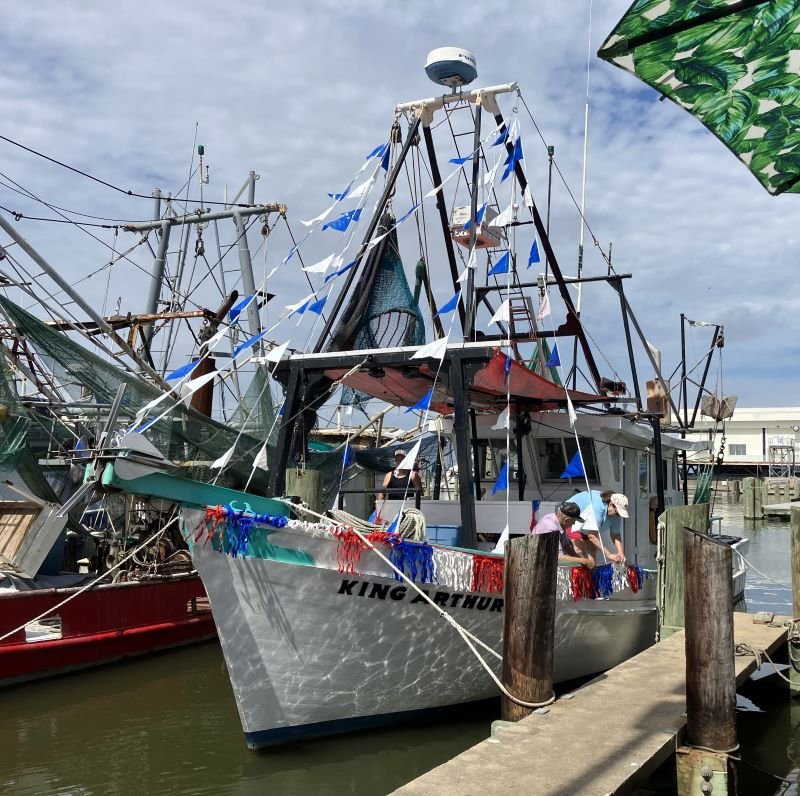
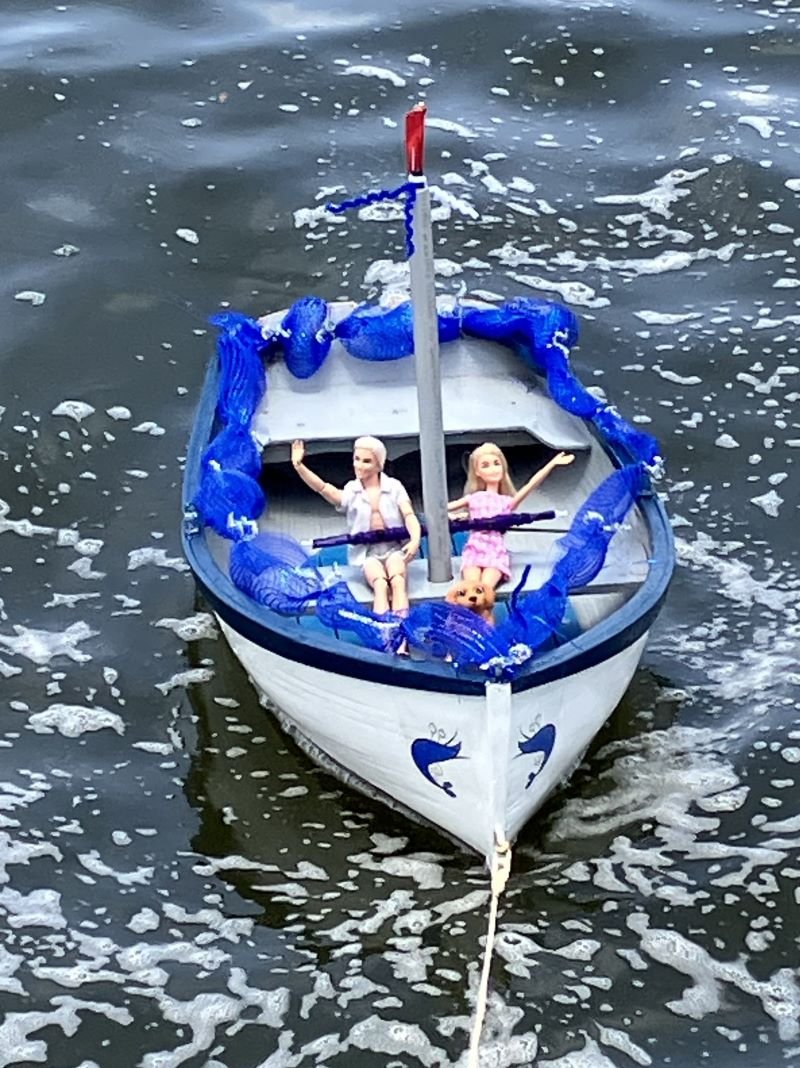
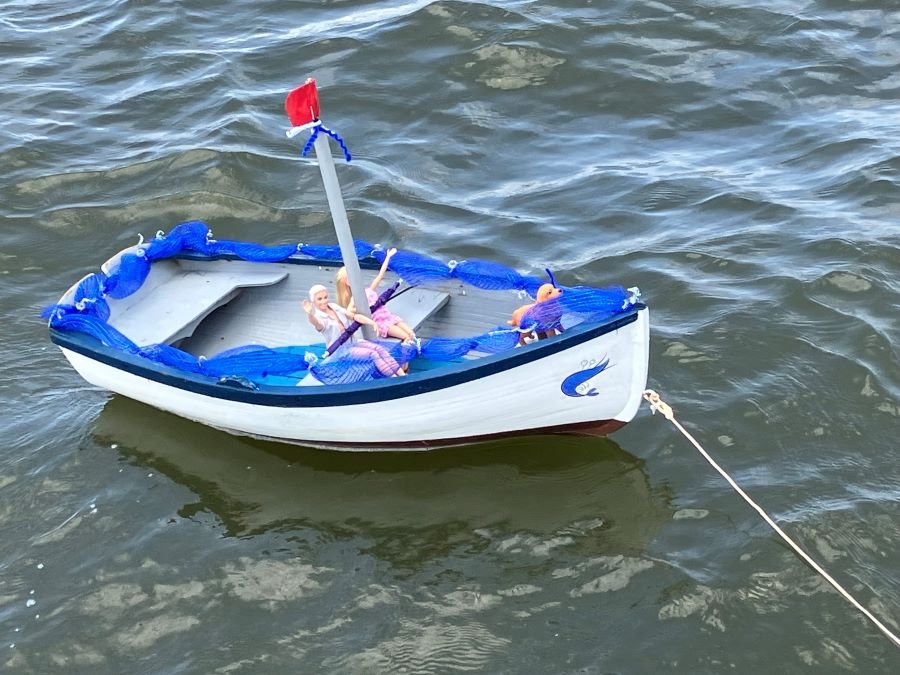
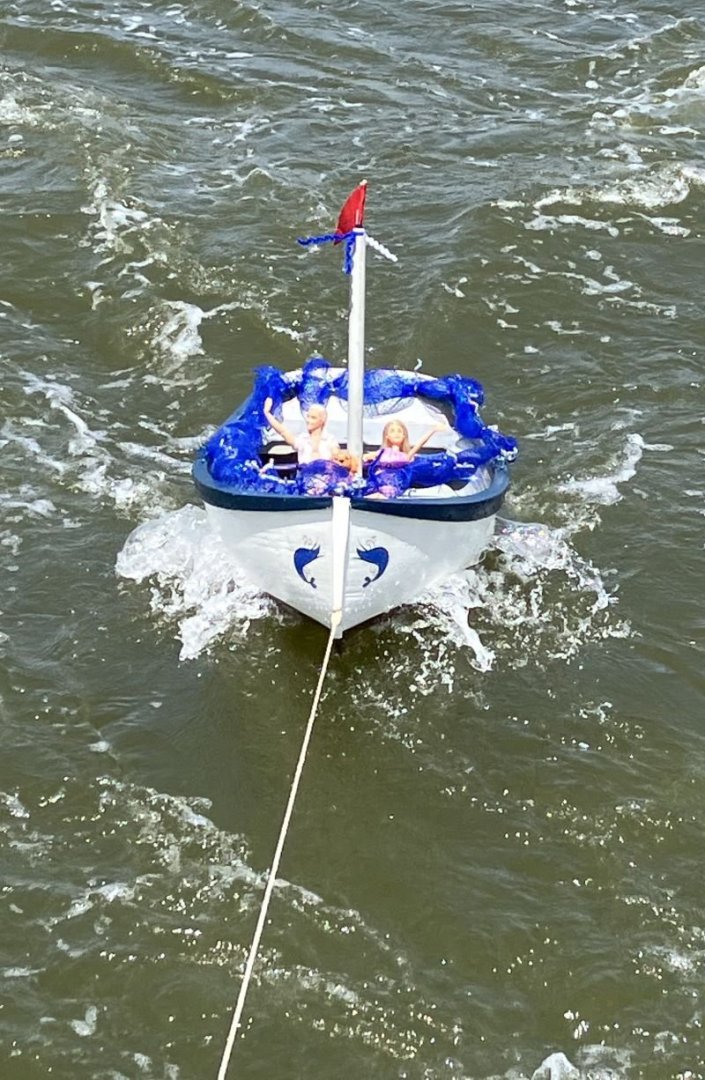
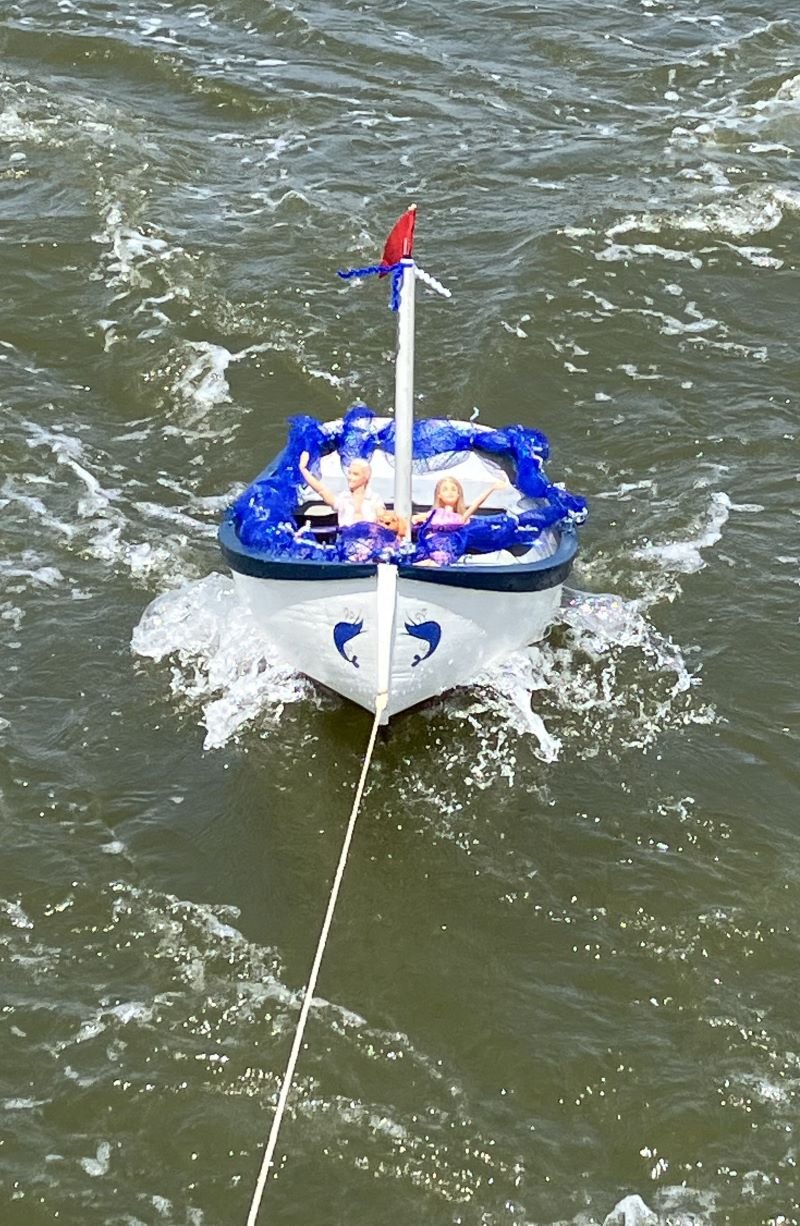
This past weekend was the annual blessing of the shrimp fleet here in Biloxi. It's a local tradition with the crowning of the Shrimp King and a pageant for Shrimp Queen and a special blessing mass at St. Michael church. The admiral's family takes it very seriously and decorates her dad's boat every year. Her and her dad and one of the 5 brothers just getting started: F/V King Arthur; a 42 ft. wooden Biloxi lugger built by local masters. Of course, what's a parade without Ken and Barbie? My father-in-law built the little dingie from the Expectant Father's Cradle Boat Book by Wooden Boat magazine. He strip-planked it and made it seaworthy for the grandkids to play with. We also tow it behind the shrimp boat during ceremonies for people to see. We have a blast. I used the same jig to build an actual cradle for my son right before he was born; but it doesn't float. Thanks for checking in - Kenneth