HOLIDAY DONATION DRIVE - SUPPORT MSW - DO YOUR PART TO KEEP THIS GREAT FORUM GOING! (Only 13 donations so far - C'mon guys!)
×

Kenneth Powell
-
Posts
276 -
Joined
-
Last visited
Content Type
Profiles
Forums
Gallery
Events
Everything posted by Kenneth Powell
-
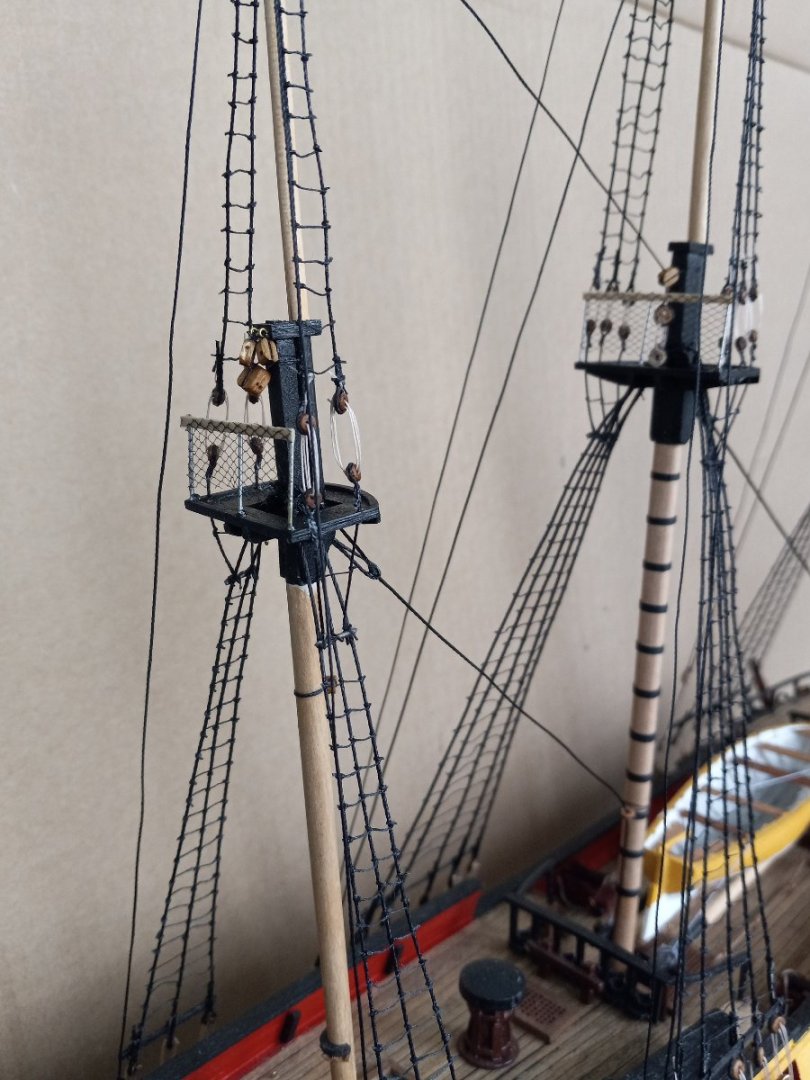
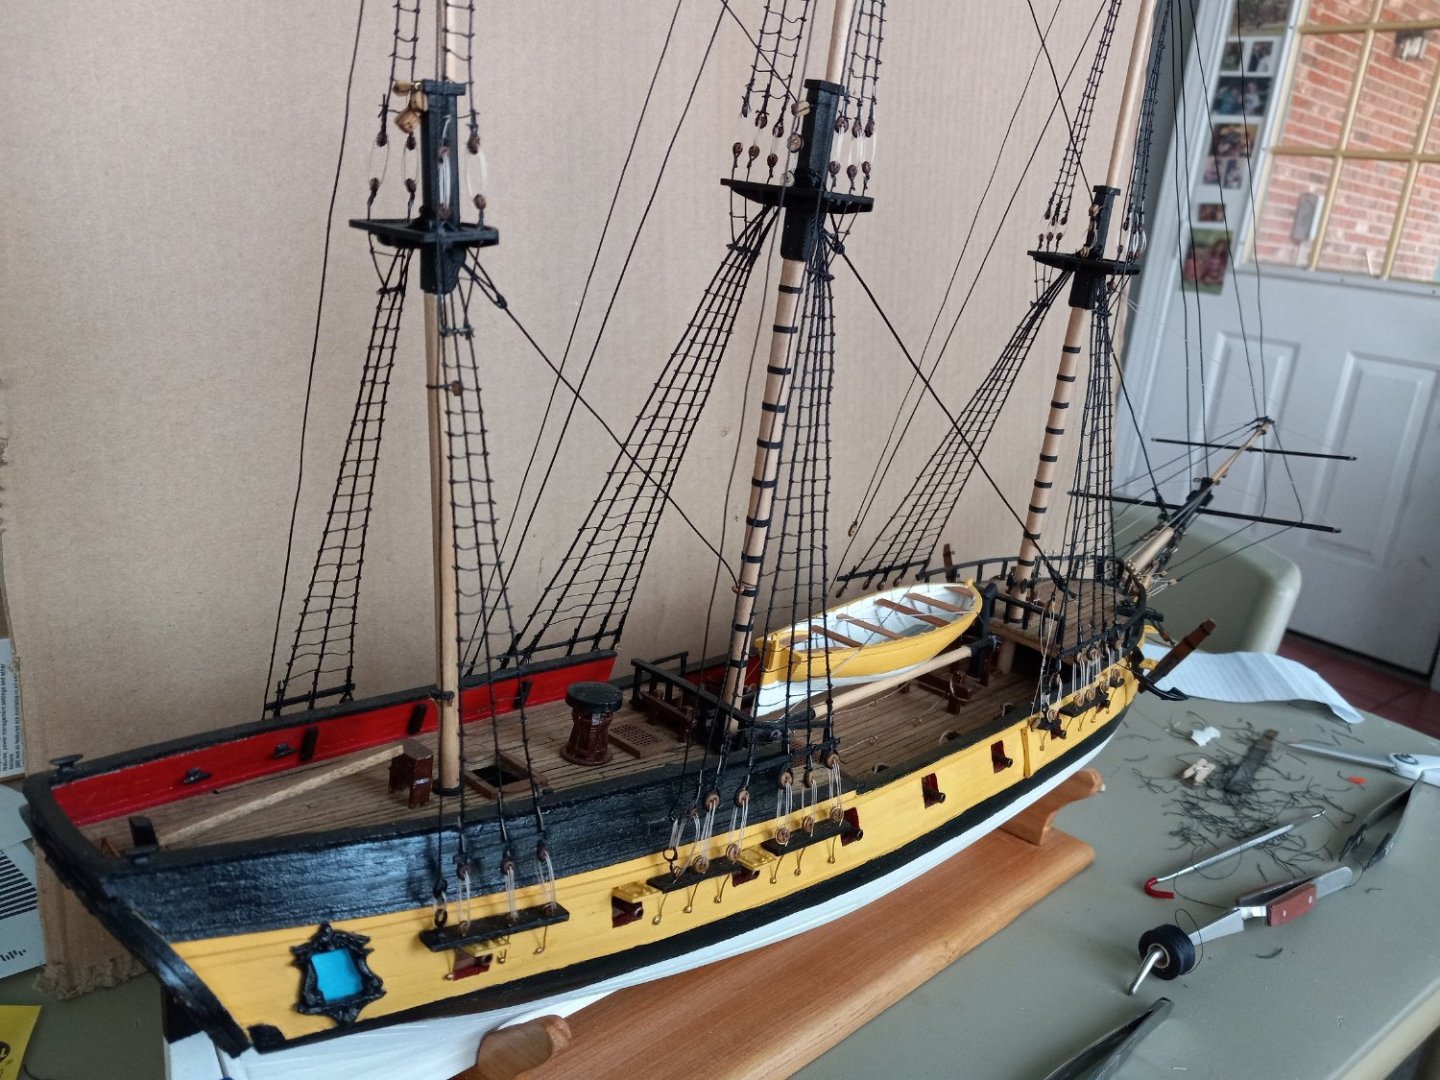
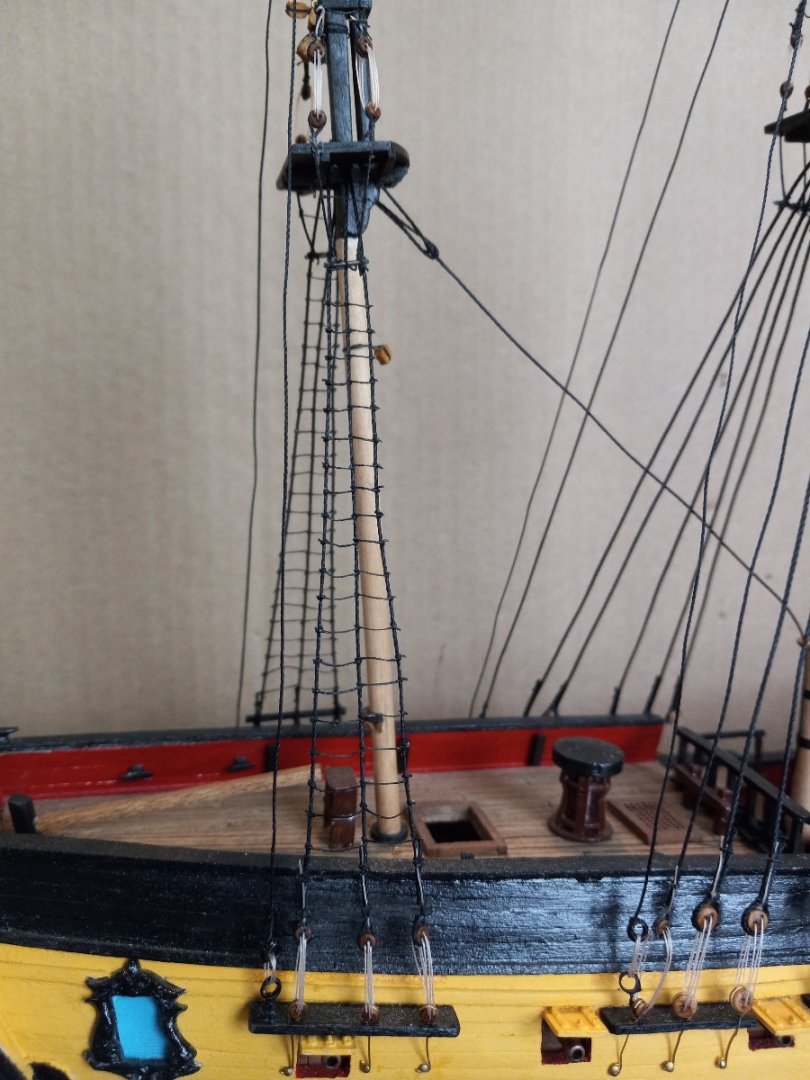
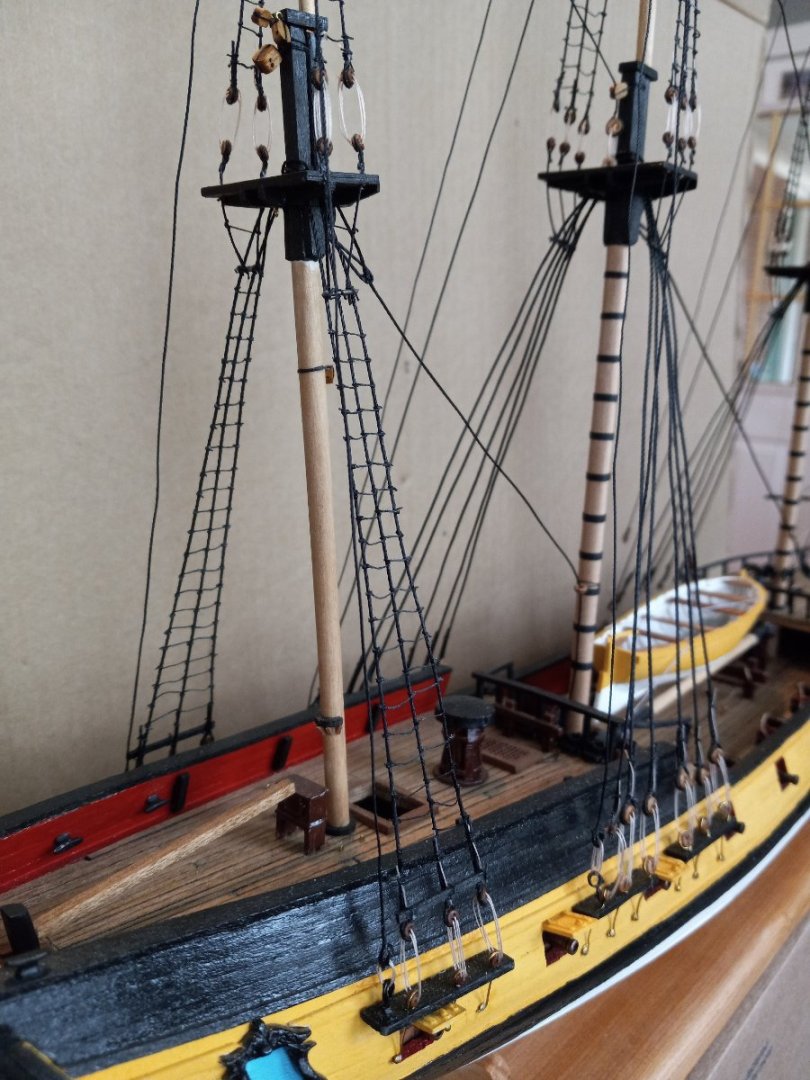
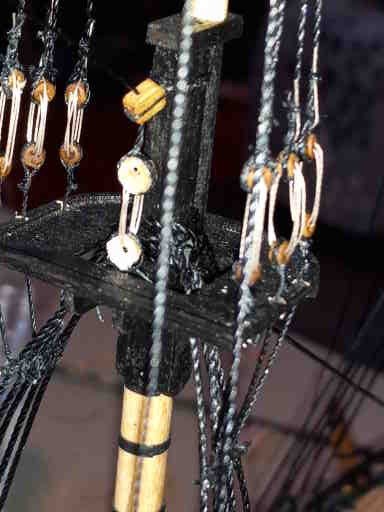
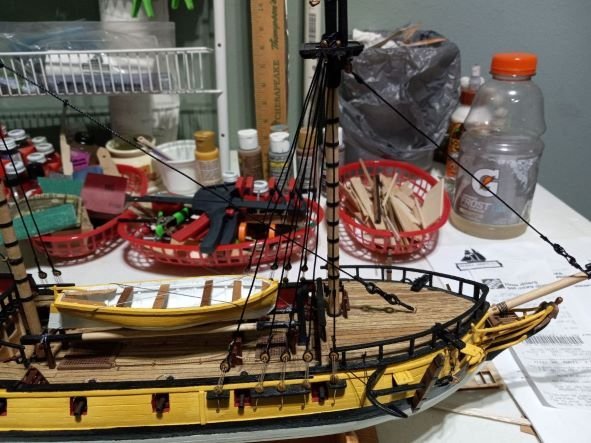
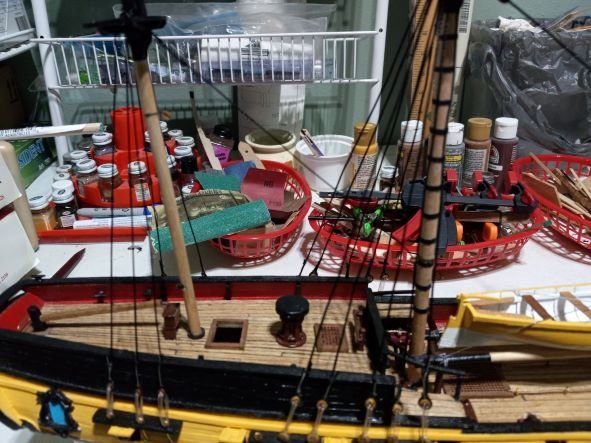
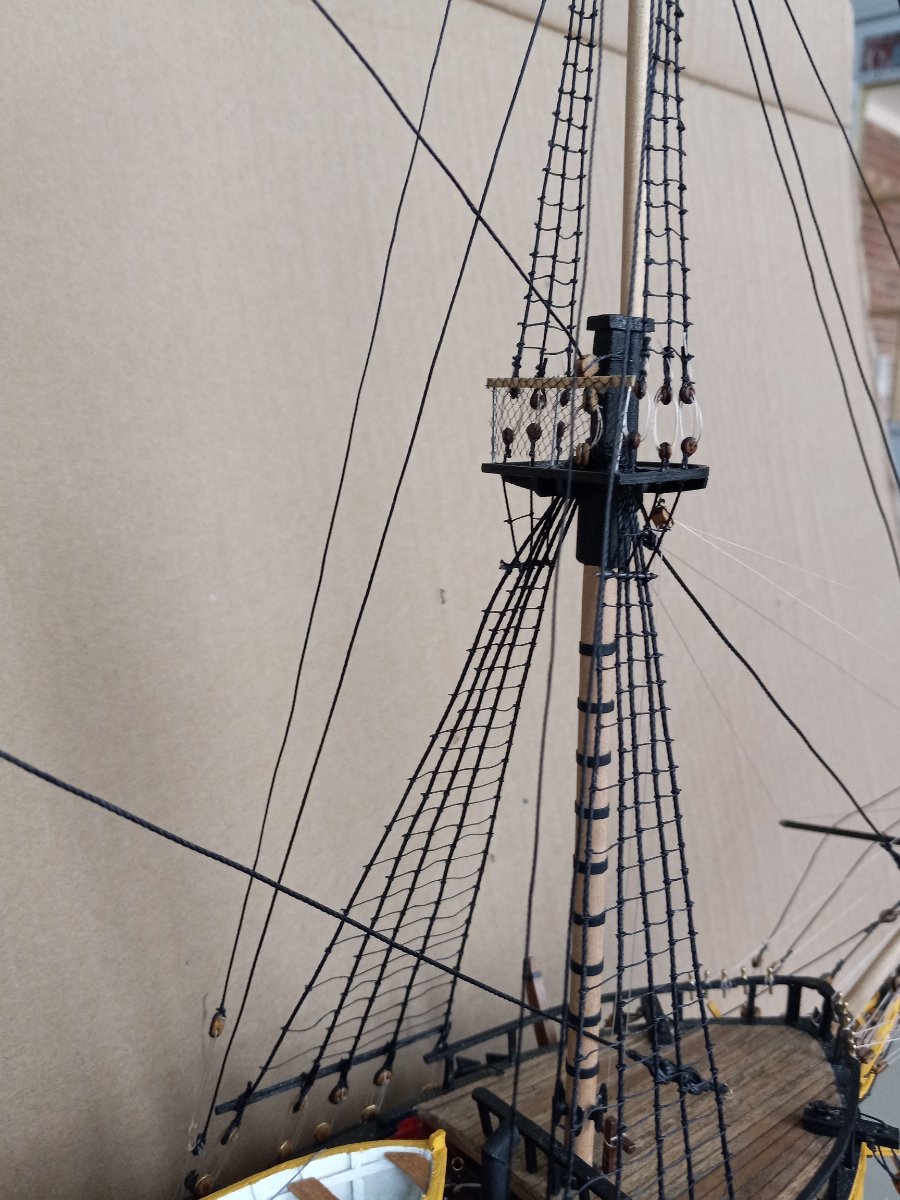
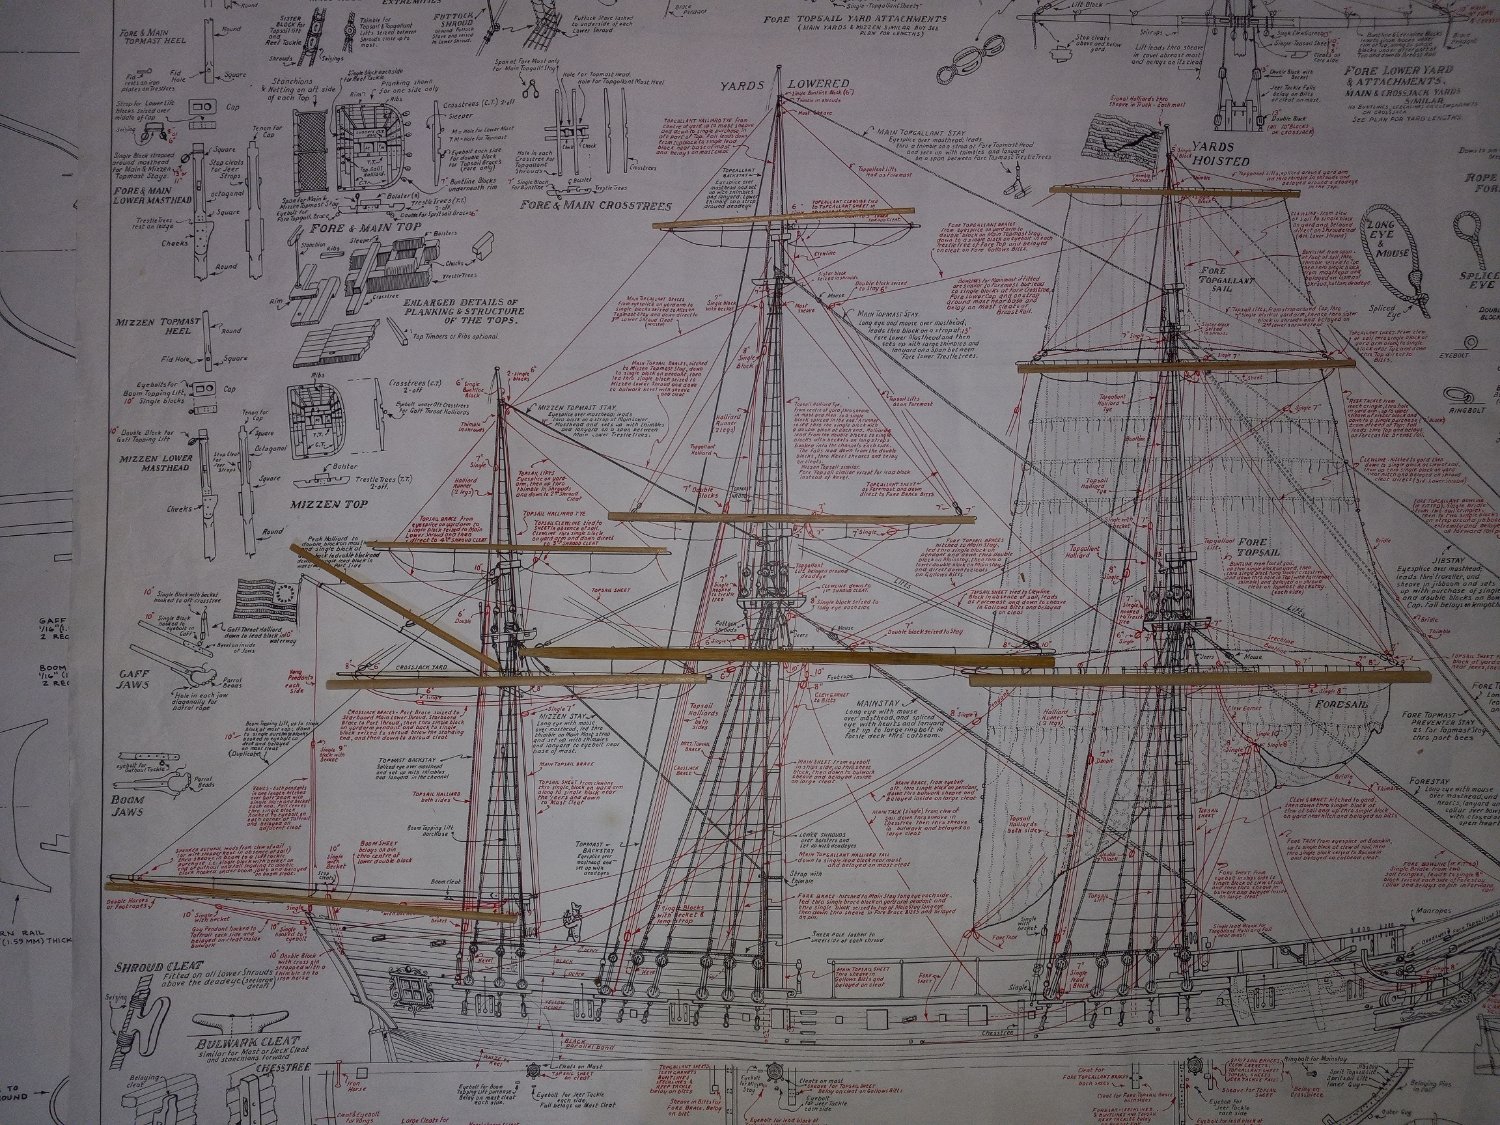
 Thanks Everyone for the Likes and comments. I built and installed the 3 netting guard rails. I cut the heads off long straight pins and cut them to length. The netting is what my Admiral suggested from the craft store. These photos show how my ratlines improved from upper to lower. I also have the gaff, boom, and spars cut to length from appropriately sized dowels. I'll be working on those next. Merry Christmas and a Happy New Year to All! Comments welcome - Kenneth
- 152 replies
-
- 7
-

-
- rattlesnake
- Model Shipways
- (and 1 more)
-
Cruise other build logs and ask, ask, ask. This is a great site and members are happy to help. The rigging looks scary because it's jumbled on one sheet, I'm going through that now. When the time comes, just go one line at a time. Study the plans and read the manual over and over again. Hope this helps - Kenneth
-
Milestone!! All ratlines completed! I've never worked on shrouds and ratlines like this before, so I really feel accomplished. It seems the more I did, the easier it got and better they appeared: Now on to a few details and then gaff, boom, and spars. The light at the end of the tunnel is getting brighter. Comments welcome - Kenneth
- 152 replies
-
- 8
-
-
- rattlesnake
- Model Shipways
- (and 1 more)
-
Moving right along and looking great. - Kenneth
-
Not in mine. The drawing shows the thickness of the wooden transom and metal stern piece with the DIY fashion piece . . . At least that's the way I did it. Some parts of the plan drawings are from the real ship. - Kenneth
-
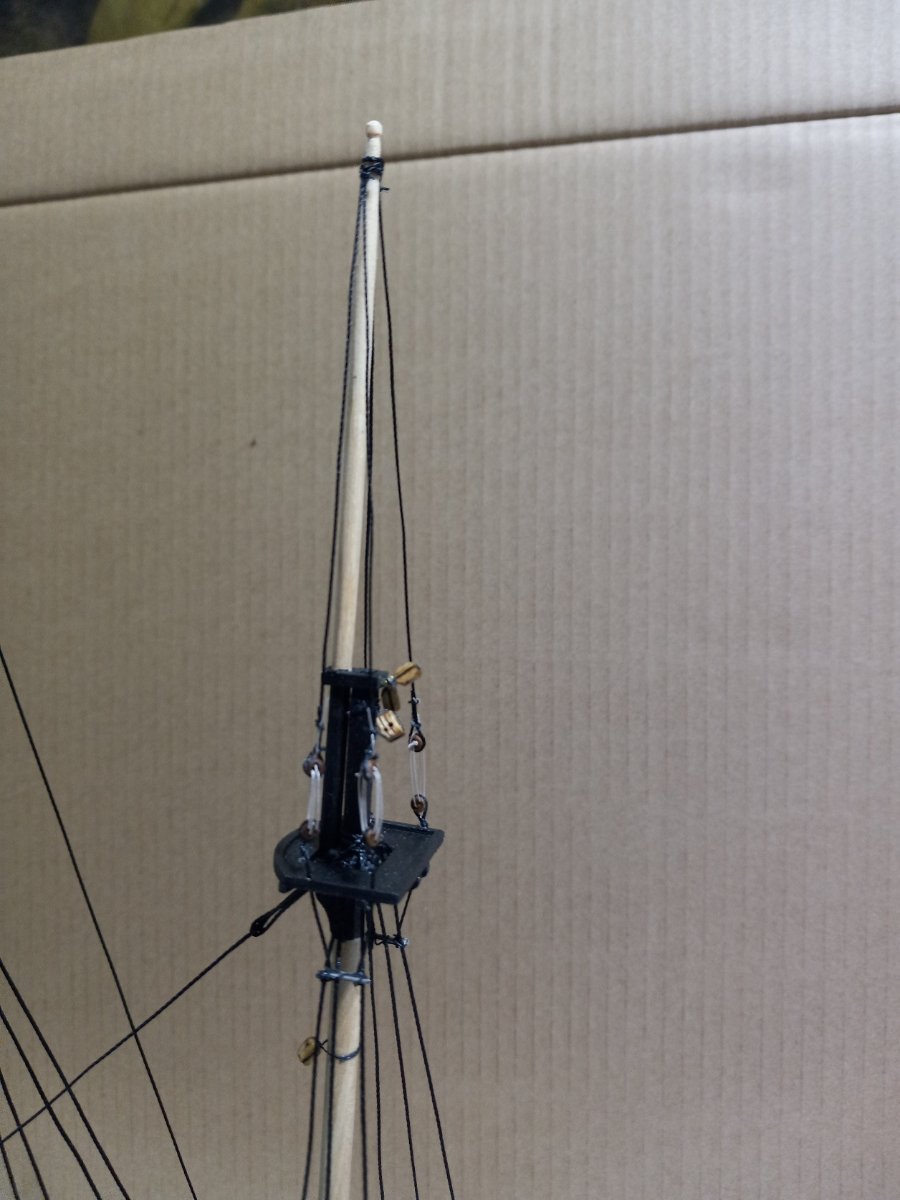
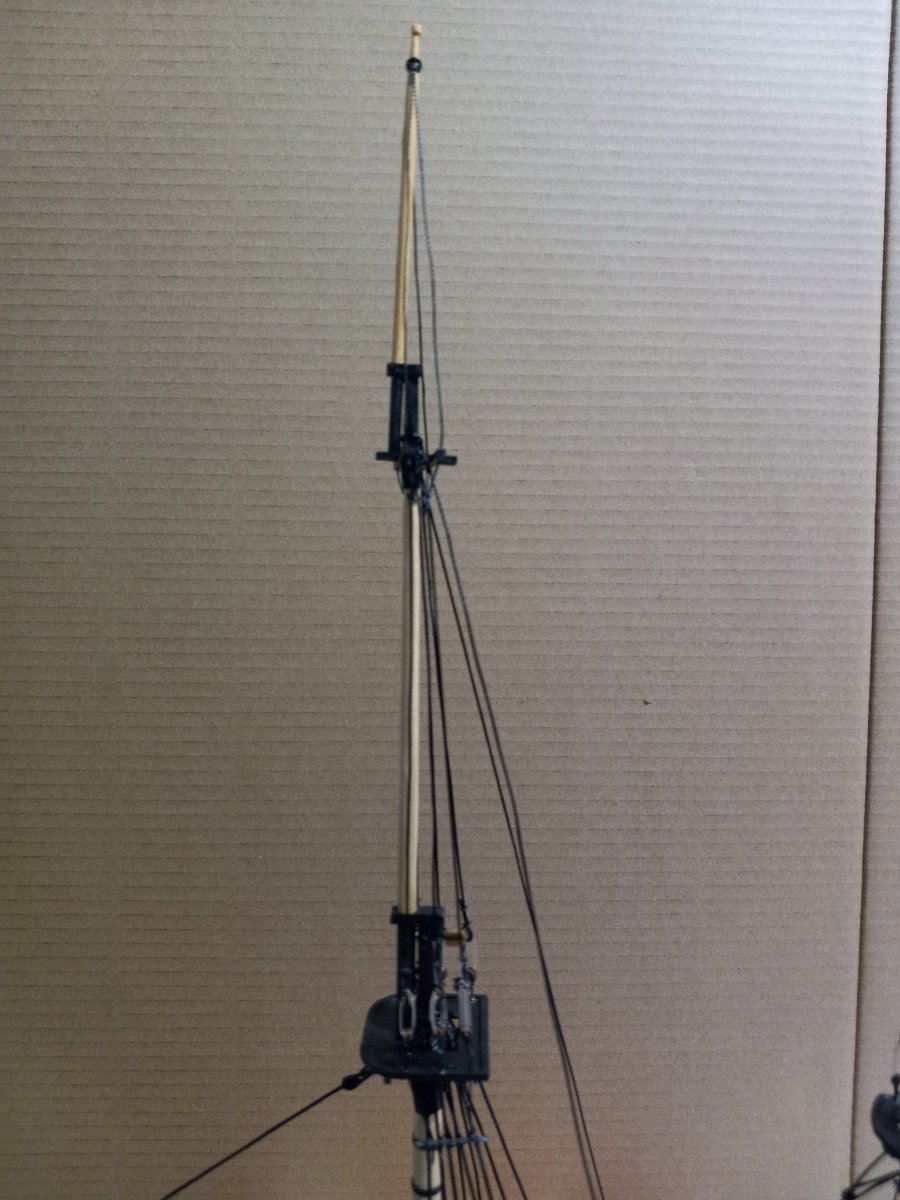
All upper and lower mizzen complete. I hope I'm getting better at this, can't tell. Comments Welcome. Thanks - Kenneth
- 152 replies
-
- 4
-
-
- rattlesnake
- Model Shipways
- (and 1 more)
-
My bottom white was interior latex satin house trim paint from Lowe's. It flowed well and covered well, and I had a bunch of it. Also, I knew how it would look because I used it on most of the trim in my house. The black is latex satin from Home Depot sold in a small can. I did use the gray at first but didn't like it, so I painted red over it. I brought the admiral to Michael's and went through all the shades of the colors I wanted for the model in the craft paint section. Again, they flowed well and covered well and I do like the results. Keep the box open and think outside of it and call on your knowledge and experiences (and the admiral's). - Kenneth
-
Mine fit pretty snug and I was able to make them flush to the inside of the transom. They give the appearance of being recessed. You could fill the gaps with really thin wood strips or card stock. Hope this helps - Kenneth
-
Thanks Everyone for the likes and comments. - Kenneth
- 152 replies
-
- 1
-
-
- rattlesnake
- Model Shipways
- (and 1 more)
-
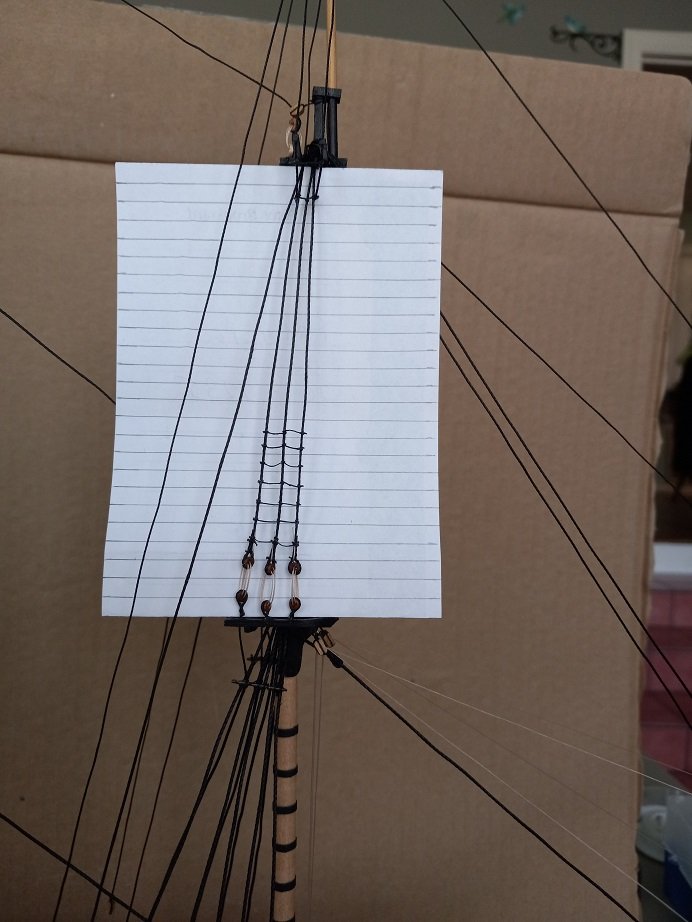
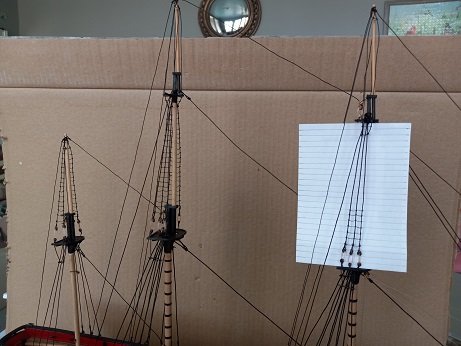
Working on upper ratlines. In the photo above it seems I'm off a little from my lines, but when I pull the paper up close things are right-on. Slow going but once I can sit for a while and get in a rhythm, it really moves along. One thing that has helped is that I moved the model from my basement with no natural light to my sunroom with northern exposure. Here in the Gulf South I get plenty of indirect sunlight year-round. I can see better and natural light improves my mood to tackle these tedious or what I preserve as difficult items. I'll march on and complete the ratlines. Comments welcome - Kenneth
- 152 replies
-
- 6
-
-
- rattlesnake
- Model Shipways
- (and 1 more)
-
The metal is easy to bend by hand if you take your time and progress slowly - no heating required. I filed, sanded and bent by hand both the wood and metal a little at a time until they fit each other and the hull. Hope this helps. - Kenneth
-
Enjoy this build. Everyone on this site is helpful and talented. - Kenneth
-
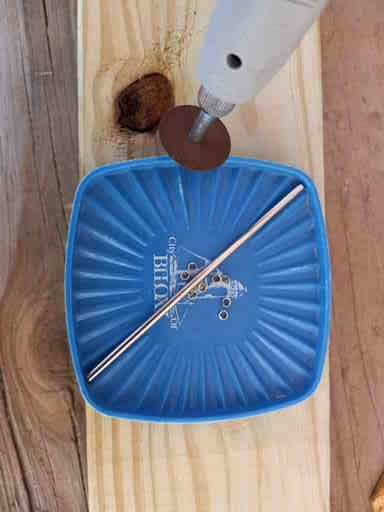
Jon - Thanks for the suggestion. I tried it and it worked. I used the rotary tool to cut small slices then painted and rigged them up. I actually lowered the tool and tube into a cardboard box while wearing safety glasses to keep the micro-sized disks from flying away - or putting an eye out. This is why I like this group. Excellent tips from very talented people with no criticism, just encouragement. Ratlines are next. Comments welcome - Kenneth

- 152 replies
-
- 4
-
-
- rattlesnake
- Model Shipways
- (and 1 more)
-
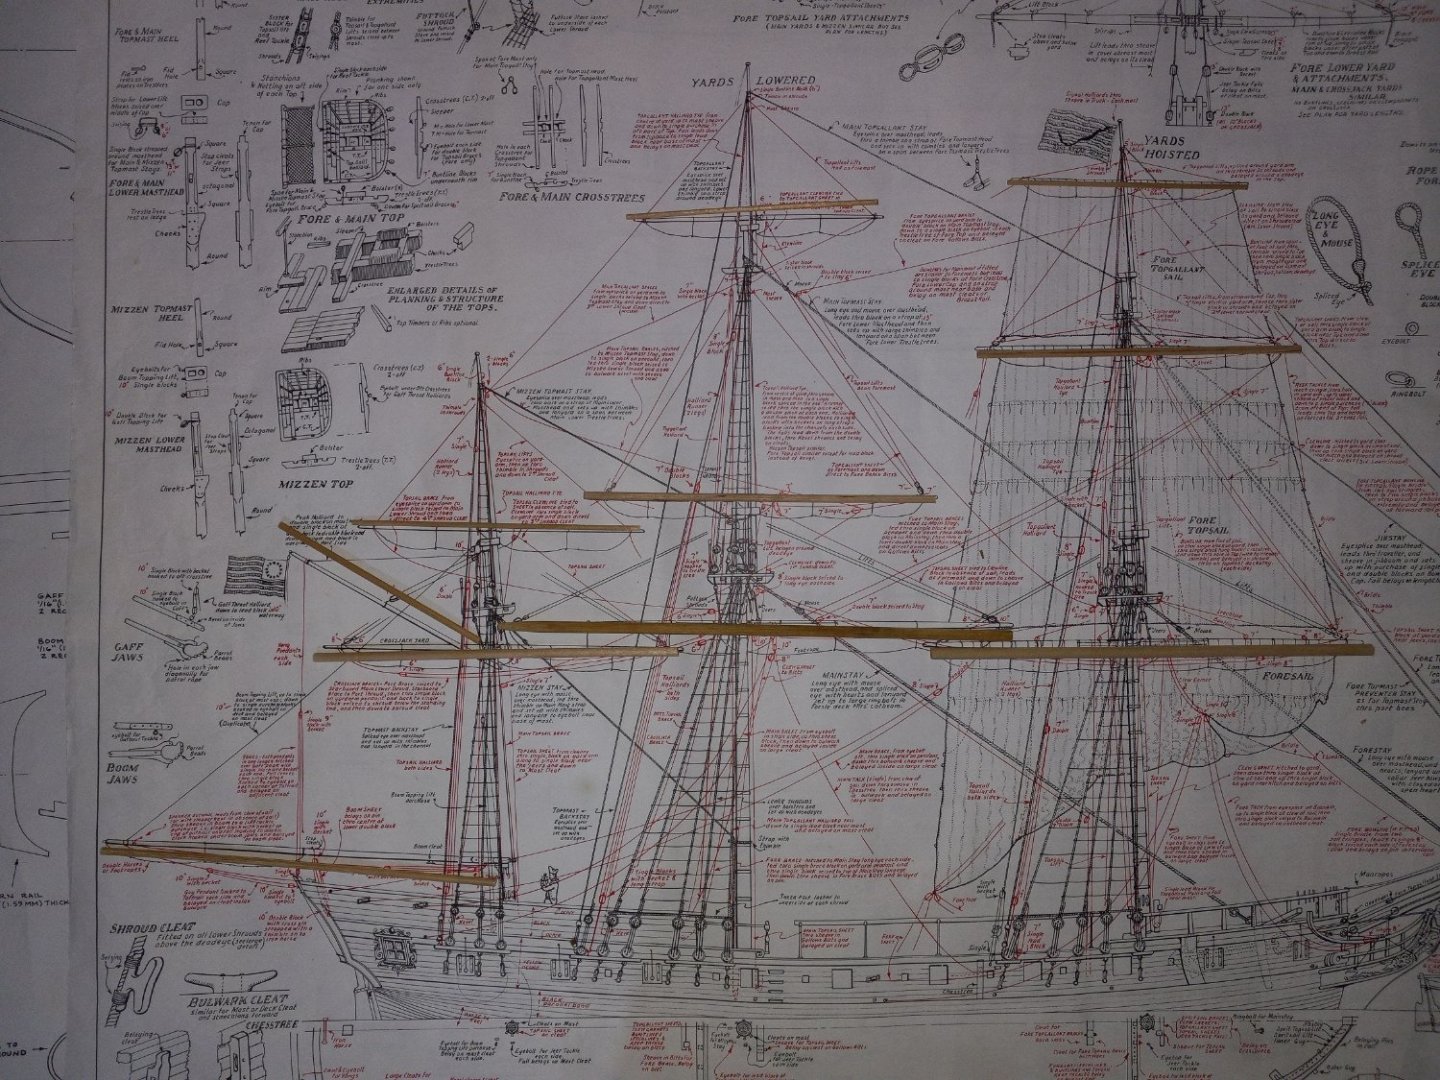
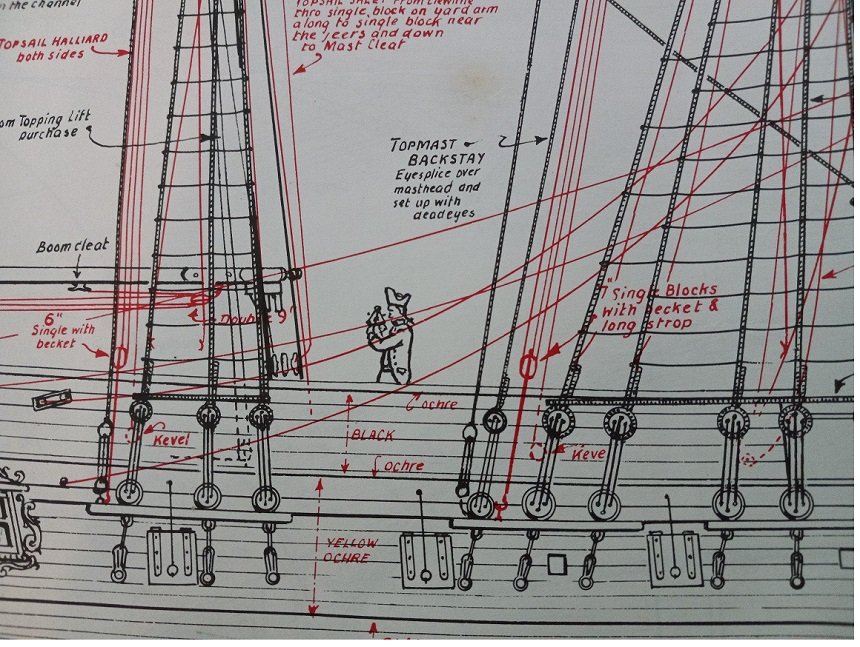
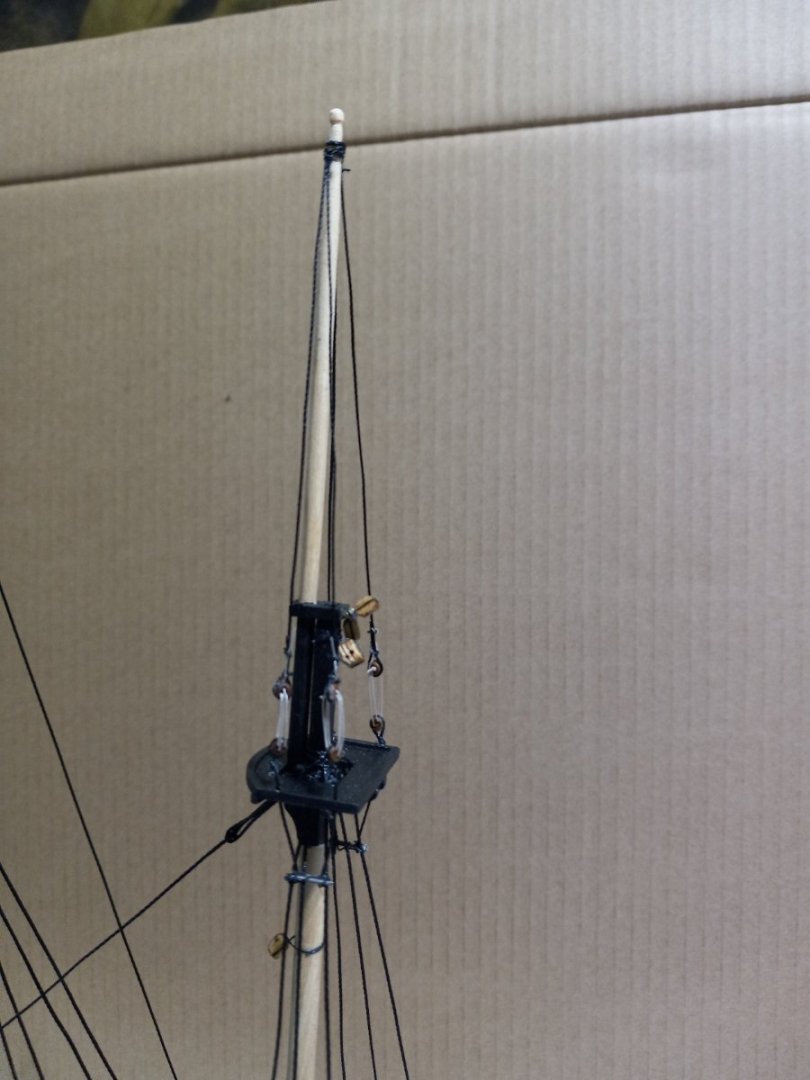
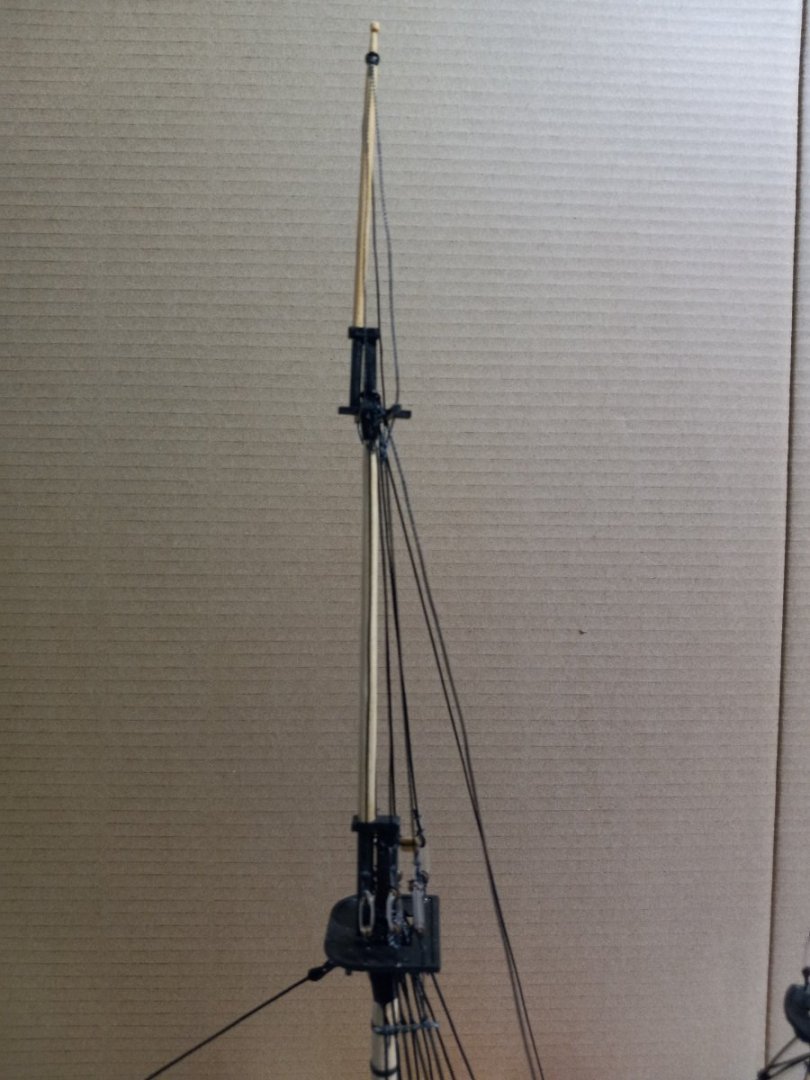
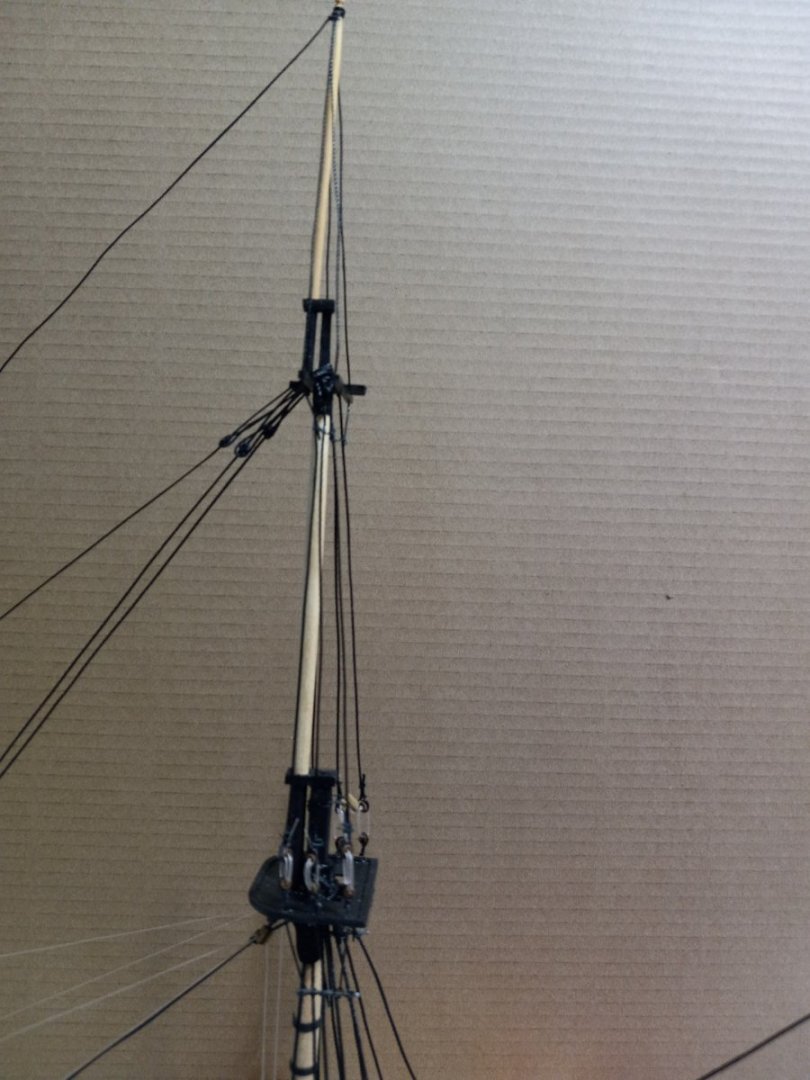
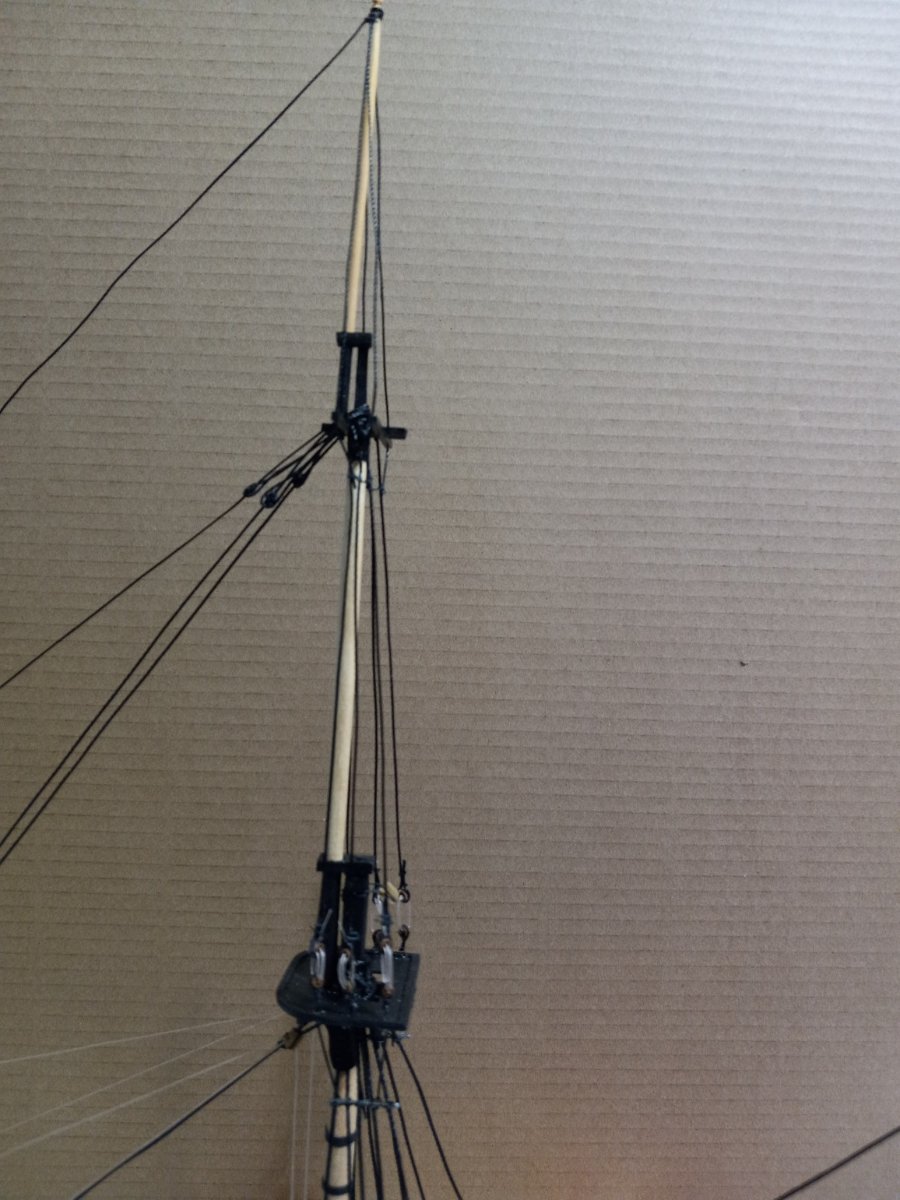
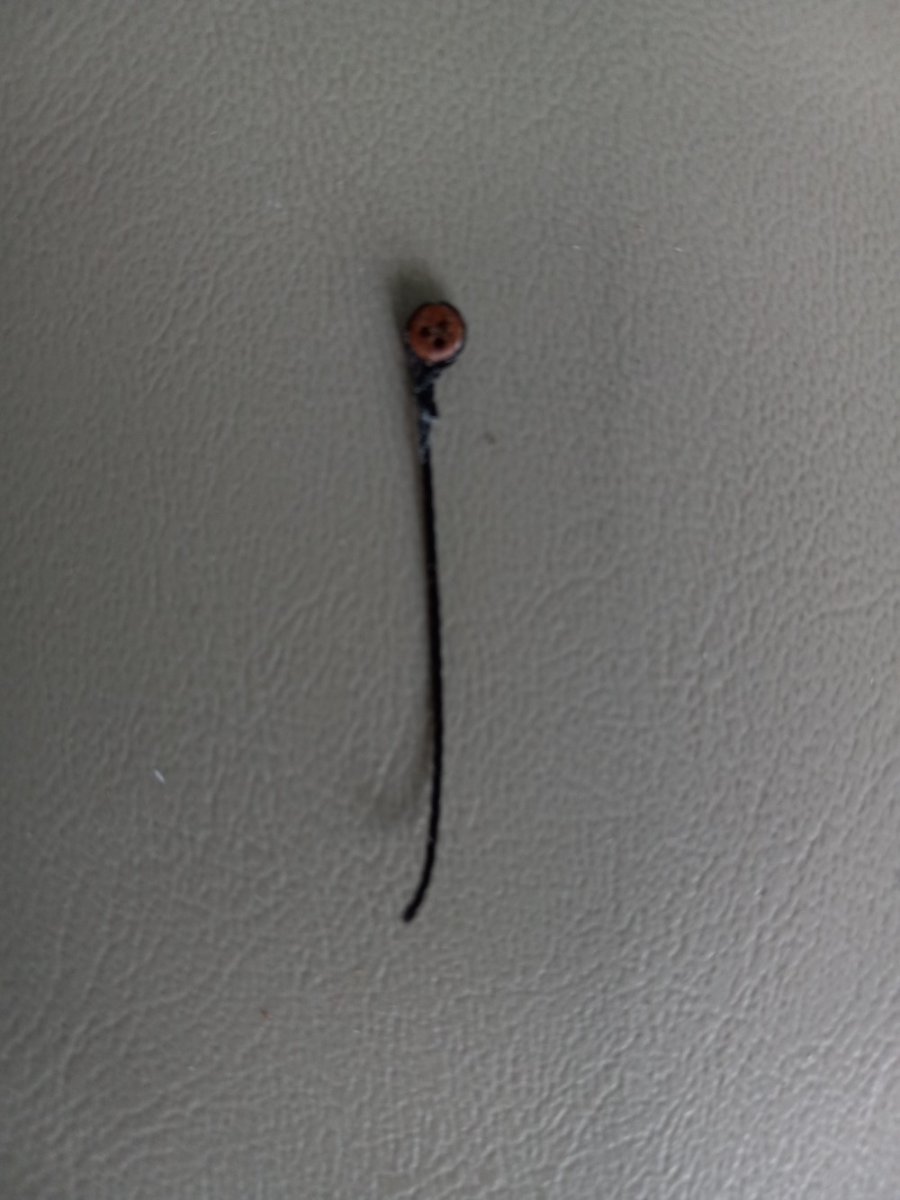
I've been working on backstays. The plans call to use thimbles. The way I made them was to bore a hole into the end of a dowel then slice them off. When I used what I considered the appropriate size, they split. The instruction book said it's possible to hollow out a deadeye, but they split. What worked for me was to go up very little in size on the dowel and bore the smallest hole possible that would accept the rigging line. It took a while to sand them under magnification. They look a little oversized and a touch out of scale compared to the plans, but here they are: This is how the plan looks: This is how my model looks: I have a bunch more thimbles to make and a few backstays to finish. Comments welcome - Kenneth
- 152 replies
-
- 3
-
-
- rattlesnake
- Model Shipways
- (and 1 more)
-
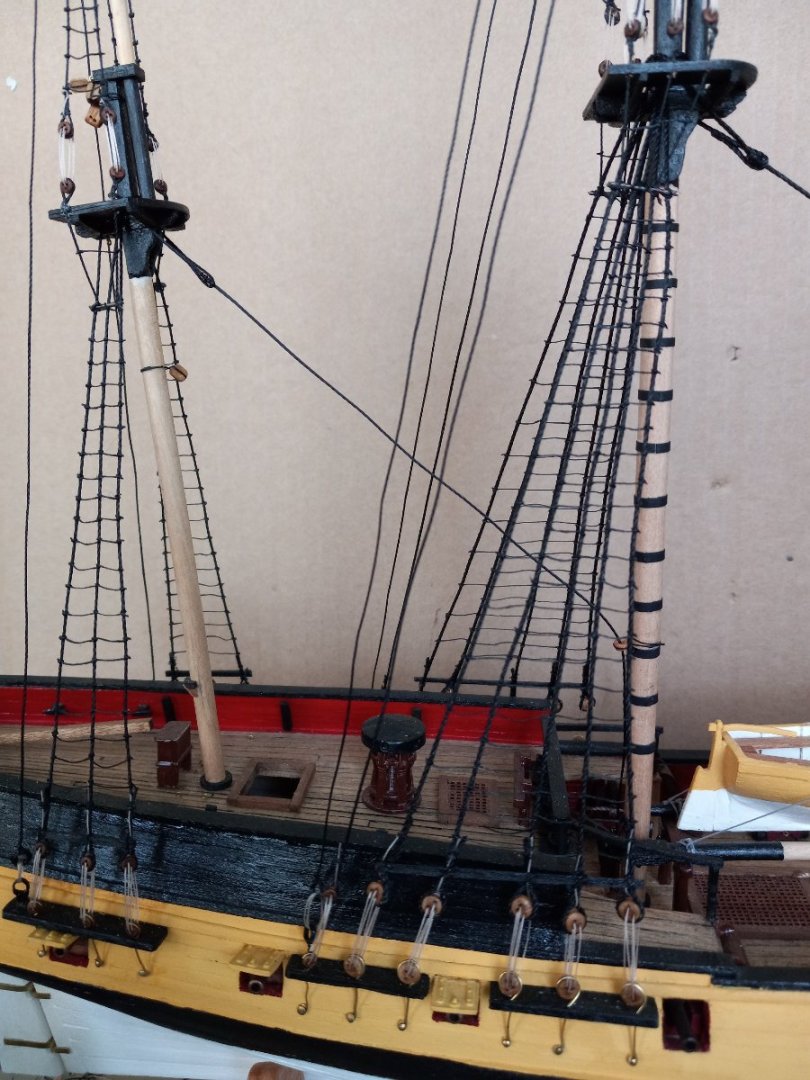
I finished all the shrouds and thing did line up - mostly. I'll work to complete the standing rigging. Comments welcome - Kenneth
- 152 replies
-
- 4
-
-
- rattlesnake
- Model Shipways
- (and 1 more)
-
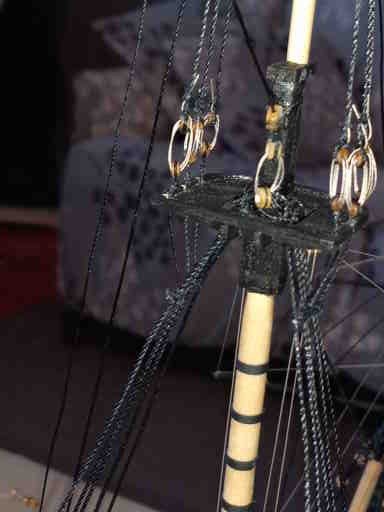
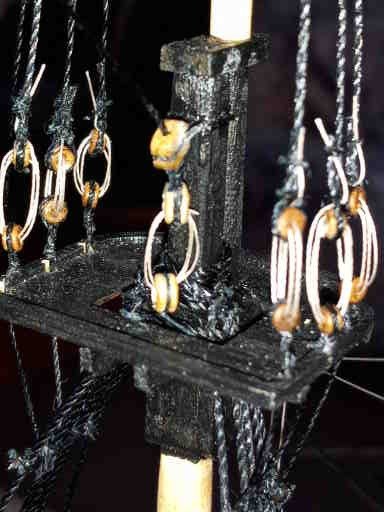
Upper shrouds. Man, these things are small. I tried to add the metal hook and all but decided to make this way. Trying to solve that issue is another thing that put me so far behind. Comments welcome - Kenneth
.jpg.0e6d0516a9d7cc6b55e0d46476668016.jpg)
-
Hey Dave - Thanks for looking in. The build is going slow. Life and stuff always seem to get in the way. The heat index today should top at 112 here on the MS gulf coast so I think I'll stay in and work on upper shrouds. - Kenneth
-
Awesome Build!
-
I can't believe it's been this long since I've posted. I did complete the lower shrouds. Thank goodness the wood is patient. Comments welcomed. Stay Safe - Kenneth
- 152 replies
-
- 7
-
-
- rattlesnake
- Model Shipways
- (and 1 more)
-
I hope you are recovering well.
-
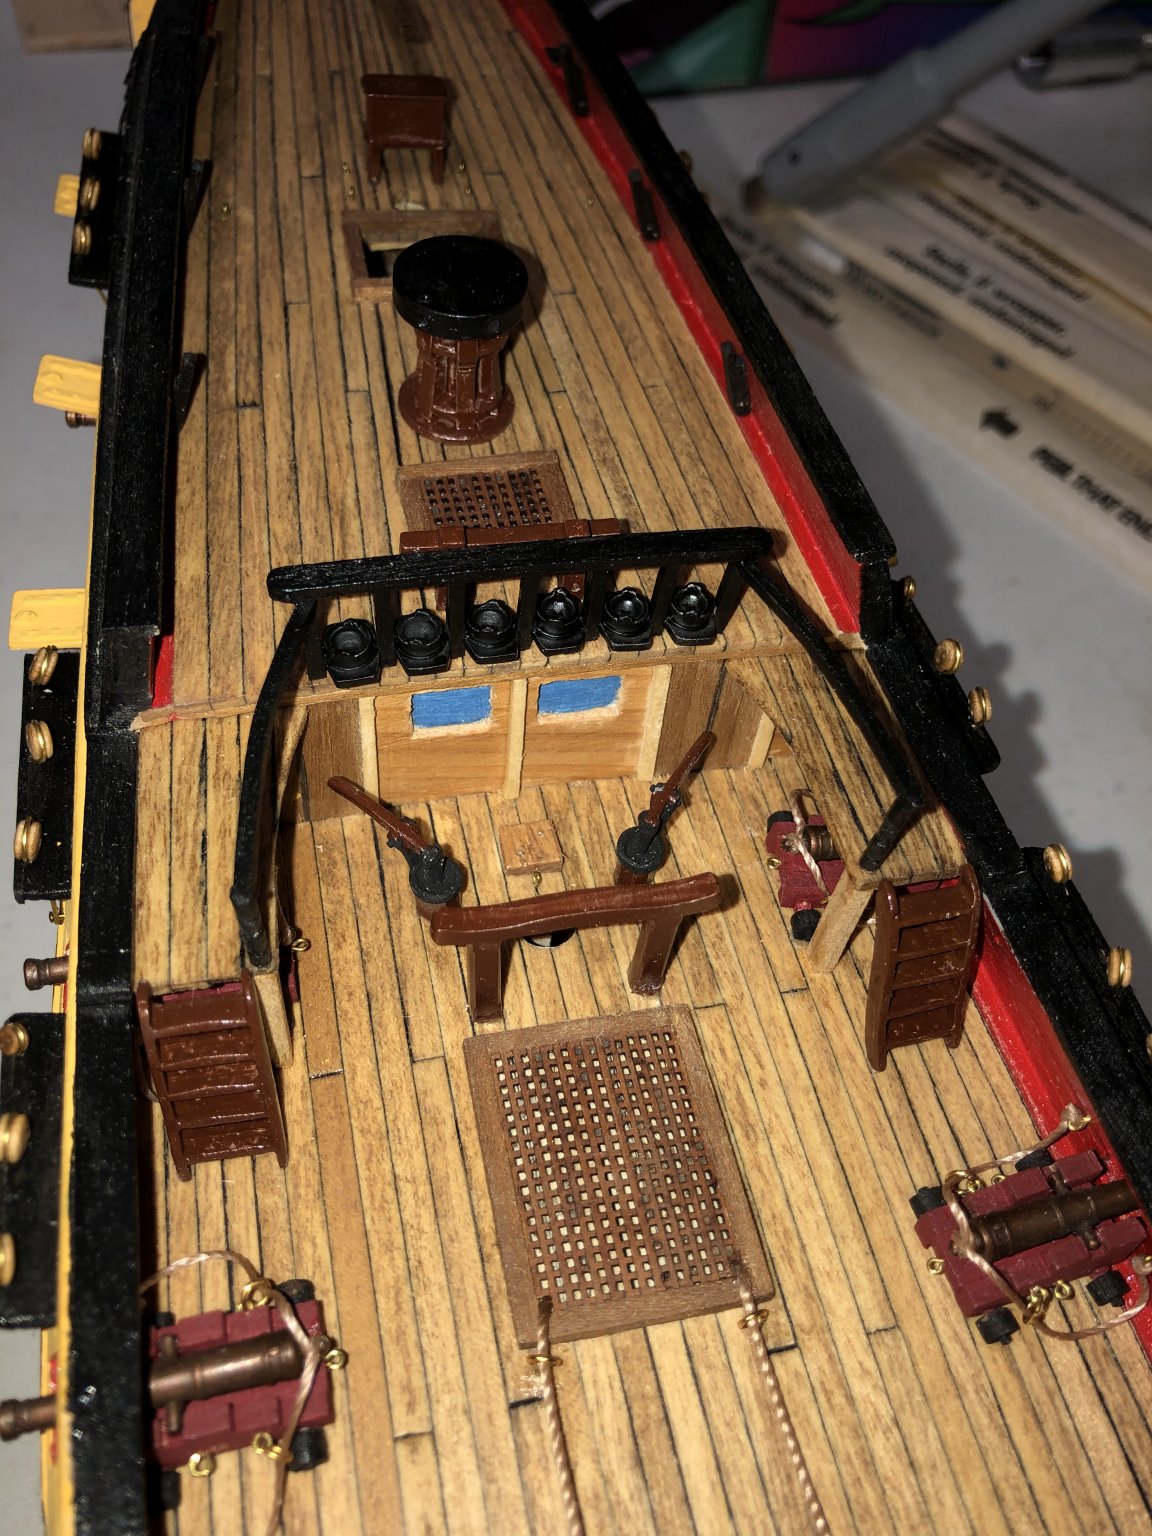
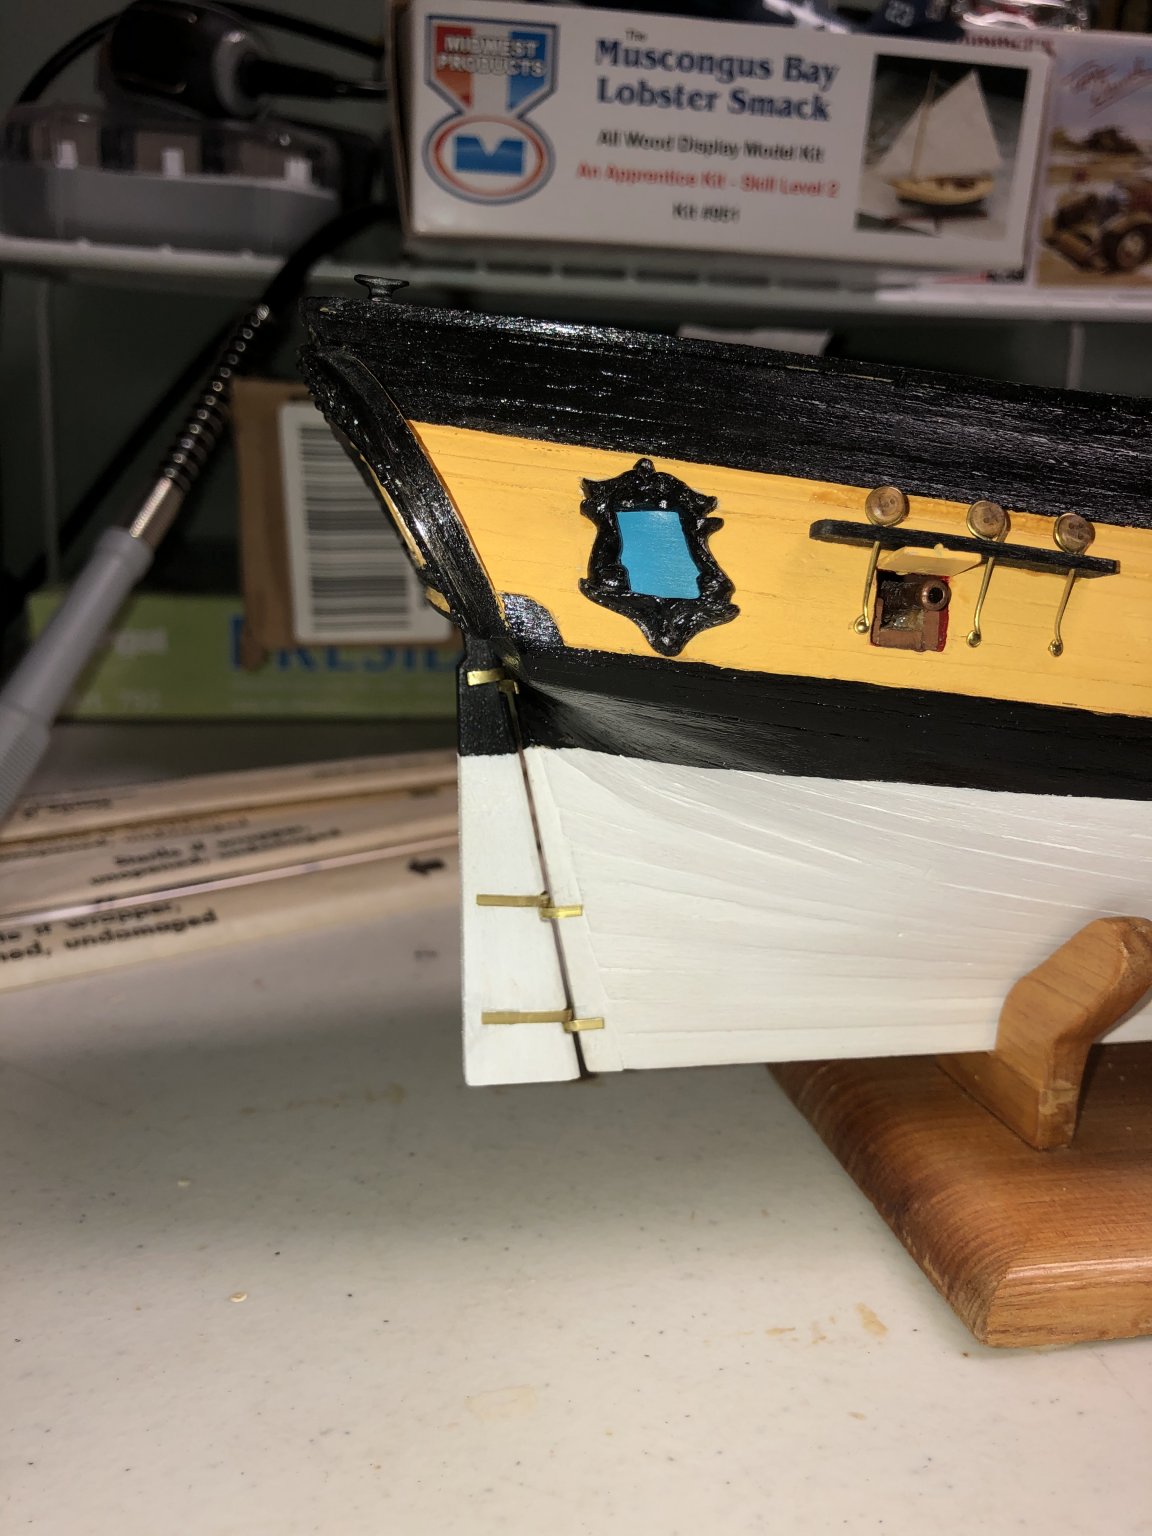
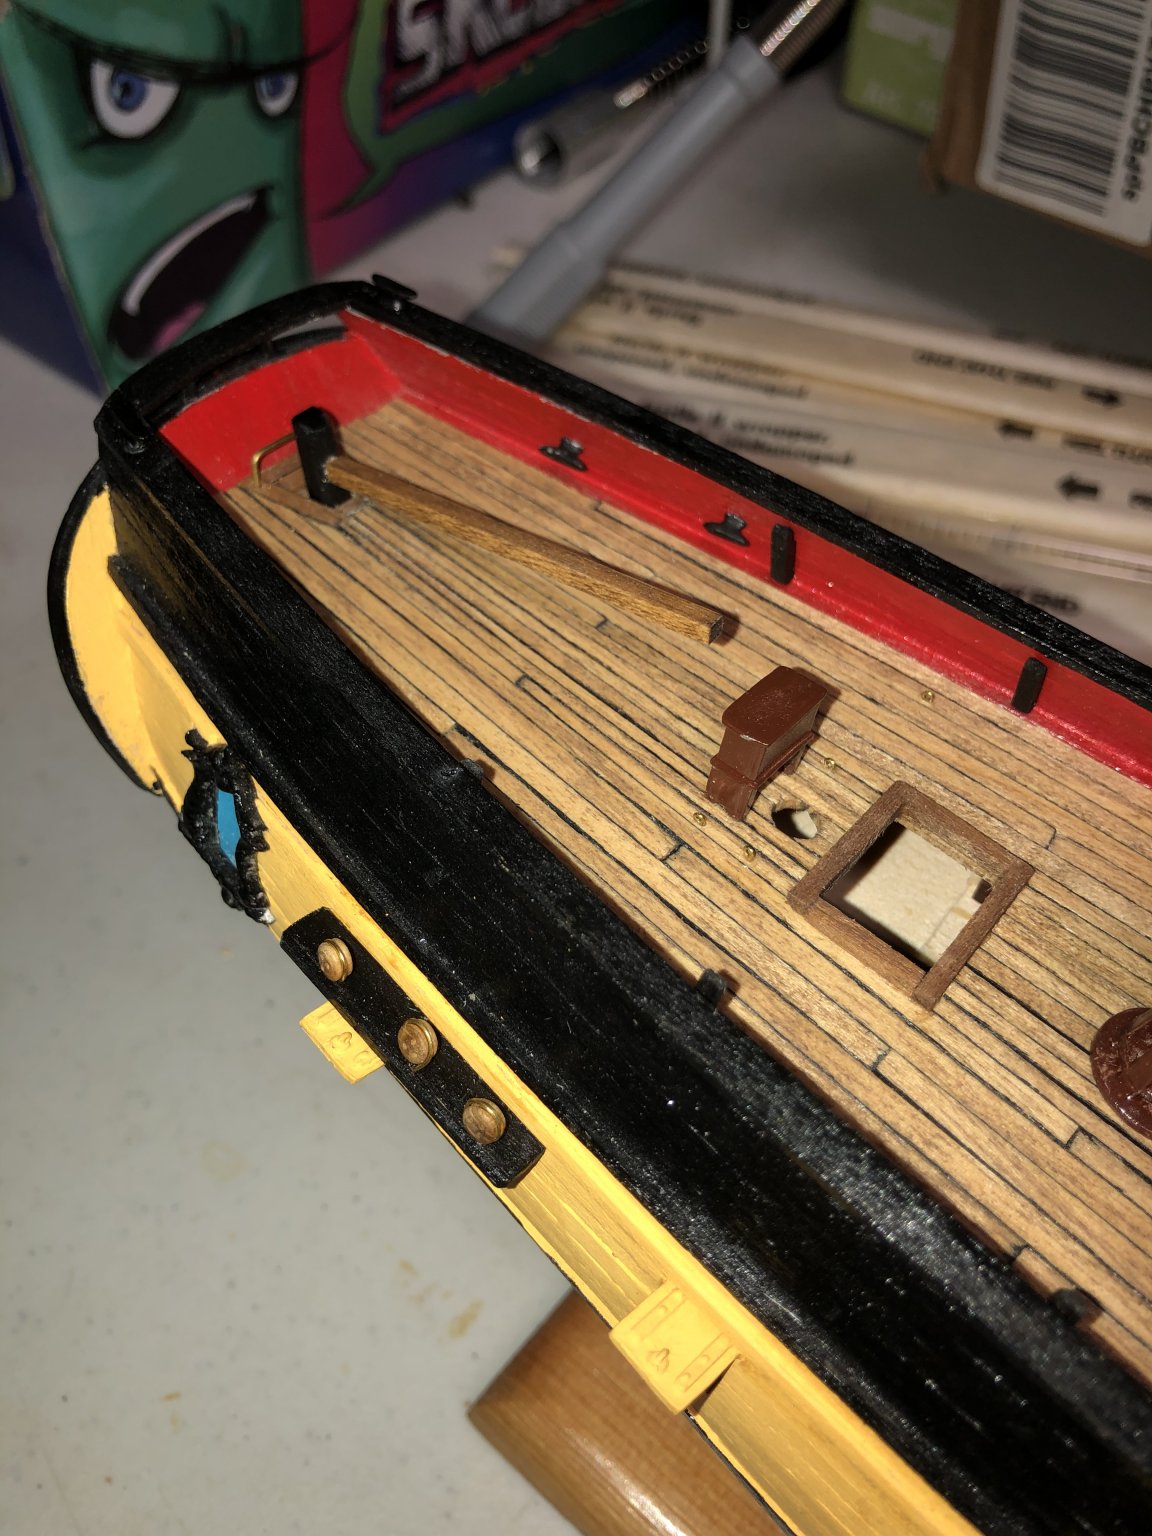
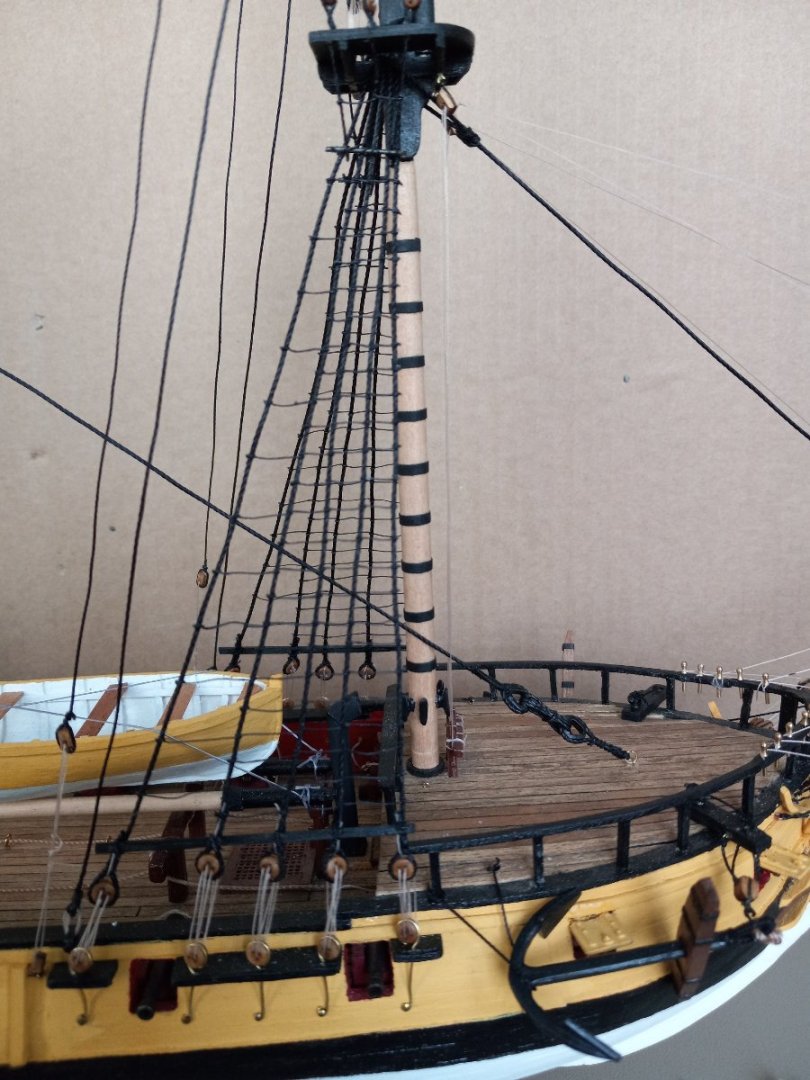
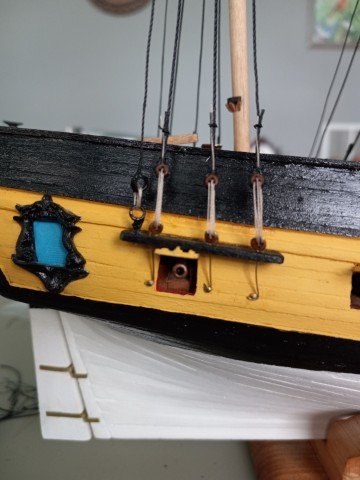
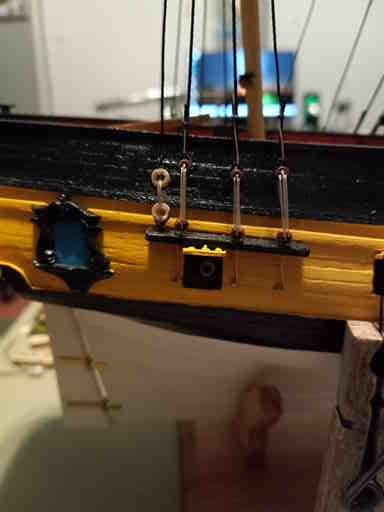
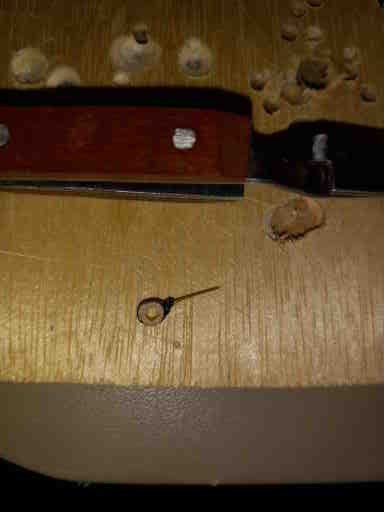
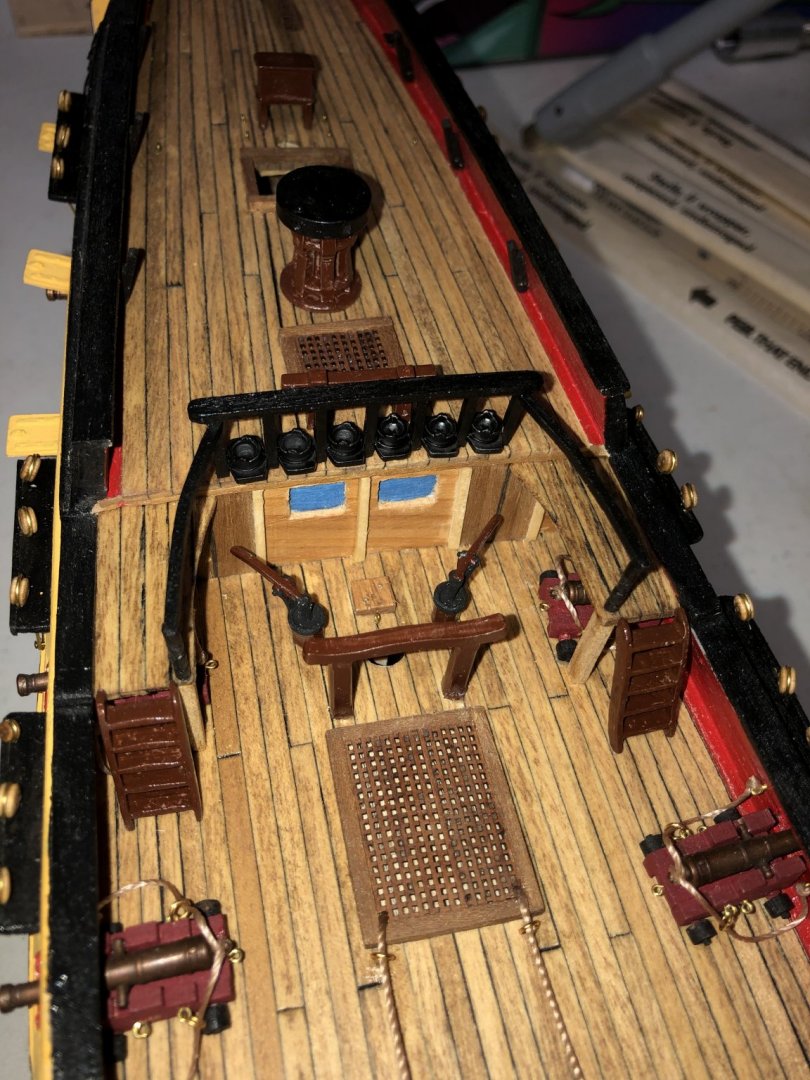
I haven't posted in a while but I have been working on my Rattlesnake. Along with that I've been home teleworking and I'm more busy now that ever. But, I do enjoy not spending gas money on my daily commute to the sunroom. Some cleats installed: Also see the kevels in the above photos. I made 6, 2 were backwards and 1 split. I was surprised how quickly I cut the 3 new ones. I guess I was in a groove. I made a gig to build the chainplates: I've installed the chainplates but haven't taken photos; somehow I skipped that but will make up for it. I put together the rails with the deck buckets. I couldn't find too many models with the deck buckets but I did add them: Also the front rail: Then the hand rails to the deck buckets: Next I installed the rudder and tiller: That's it for now. With afternoon temperatures around 94 - 97 and heat indexes between 105 - 110 here on the Gulf coast, I'll spend more time in the indoor shipyard. Comments welcome. Take care and stay safe - Kenneth
.jpg.5a1915ae6b392098df5bd84988fbbe02.jpg)
.jpg.2cdb864dd9a36609c9c68bd8e30ab6a9.jpg)
.jpg.2dce5a7f1cc338276ca55eaa5eb21839.jpg)
.thumb.jpg.0ded3d0a9efe6f8bc8f1db58a184df36.jpg)
.thumb.jpg.83c9159a0429532c017331c0c93459e1.jpg)
.thumb.jpg.54a551dab2bfd829a78c2d825a96f511.jpg)
.thumb.jpg.68dfd96633814d88f09f75f73756f38f.jpg)


- 152 replies
-
- 4
-
-
- rattlesnake
- Model Shipways
- (and 1 more)
-
Awesome! Seems we're looking through water at the shallow bottom. Kenneth
-
This is really looking great and growing before our eyes. Issue Slim sun block before the FL sun bleaches his bones 😀 Kenneth


.jpg.86f41f0ff3ad8f737feab6f3431cb8db.jpg)
.jpg.d1ac0fc0eb9b89efbf273ee44cd0e9da.jpg)
.jpg.aa0e1be0e3e1b8b4784d7c12ba7e0d9c.jpg)
.jpg.725a3546bddcd049246e58b8c89aa29e.jpg)