HOLIDAY DONATION DRIVE - SUPPORT MSW - DO YOUR PART TO KEEP THIS GREAT FORUM GOING! (89 donations so far out of 49,000 members - C'mon guys!)
×

Kenneth Powell
-
Posts
276 -
Joined
-
Last visited
Content Type
Profiles
Forums
Gallery
Events
Everything posted by Kenneth Powell
-
 One of my photos got out of order in my last post - user error. - Kenneth
 -
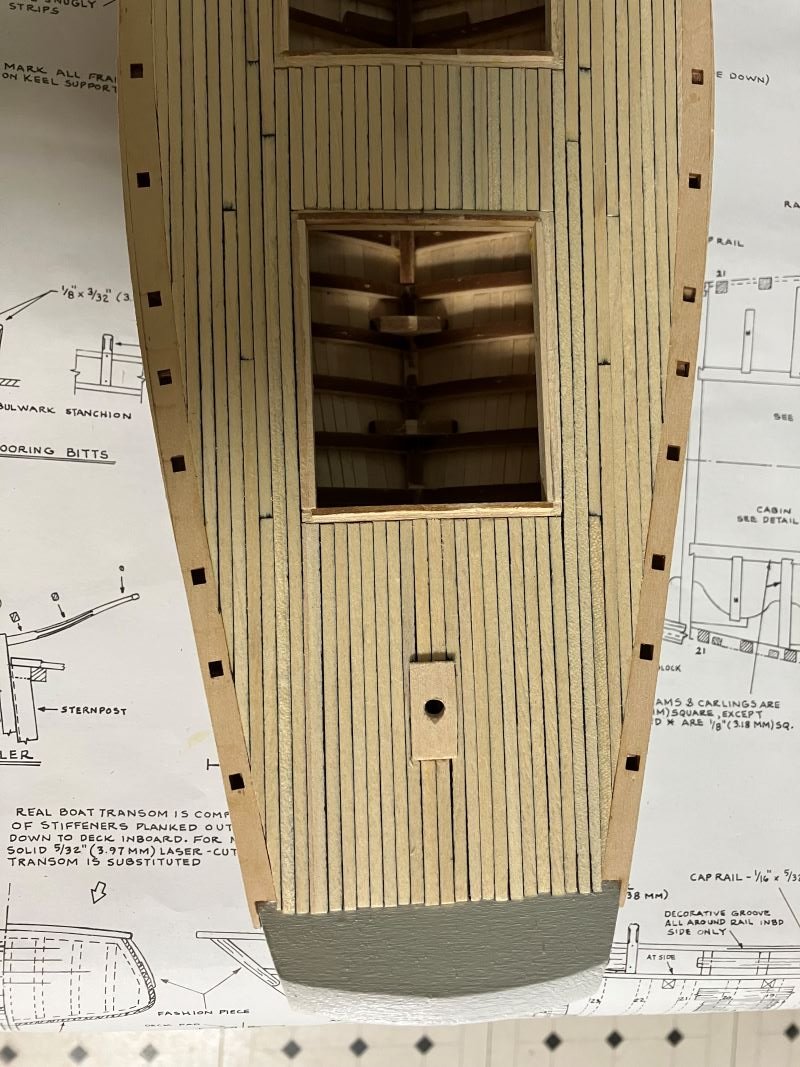
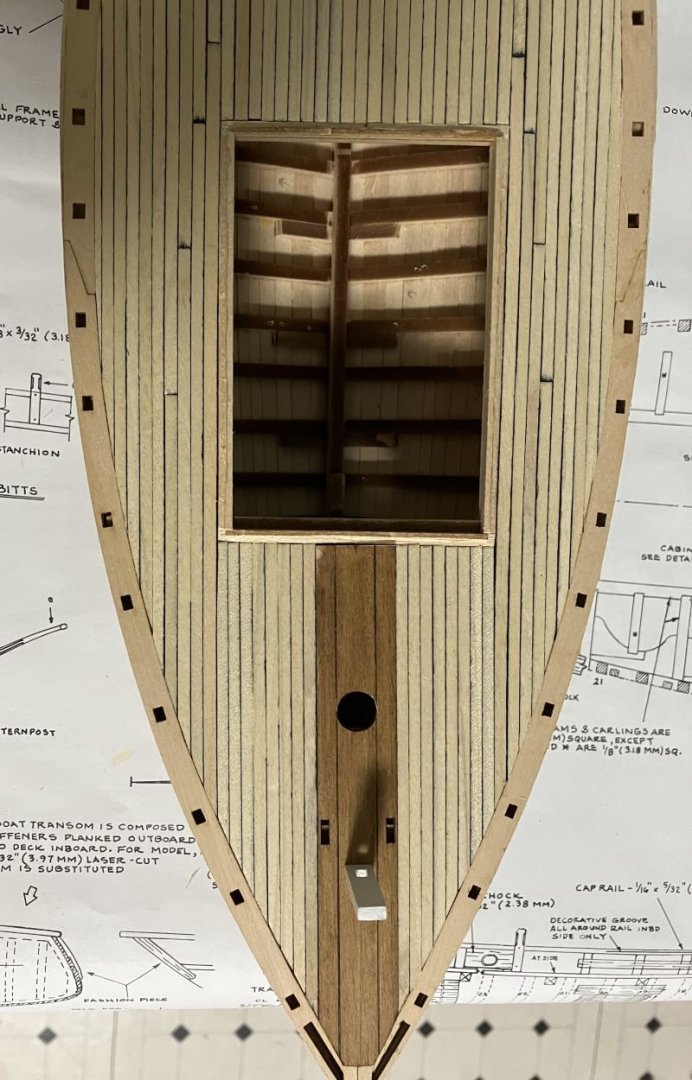
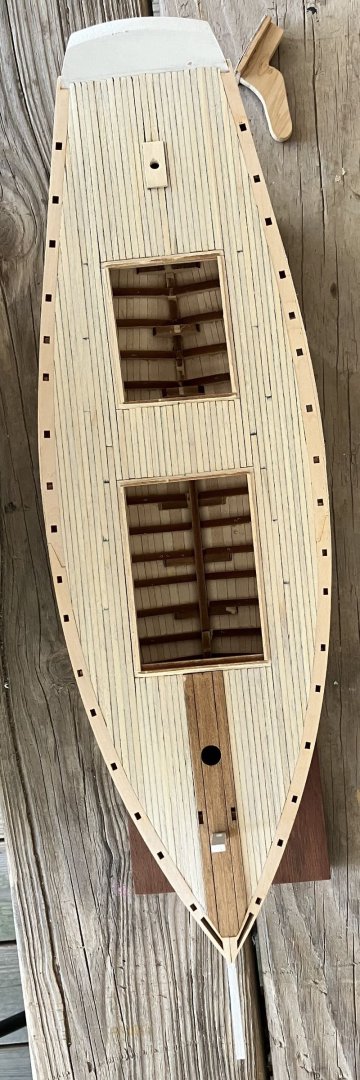
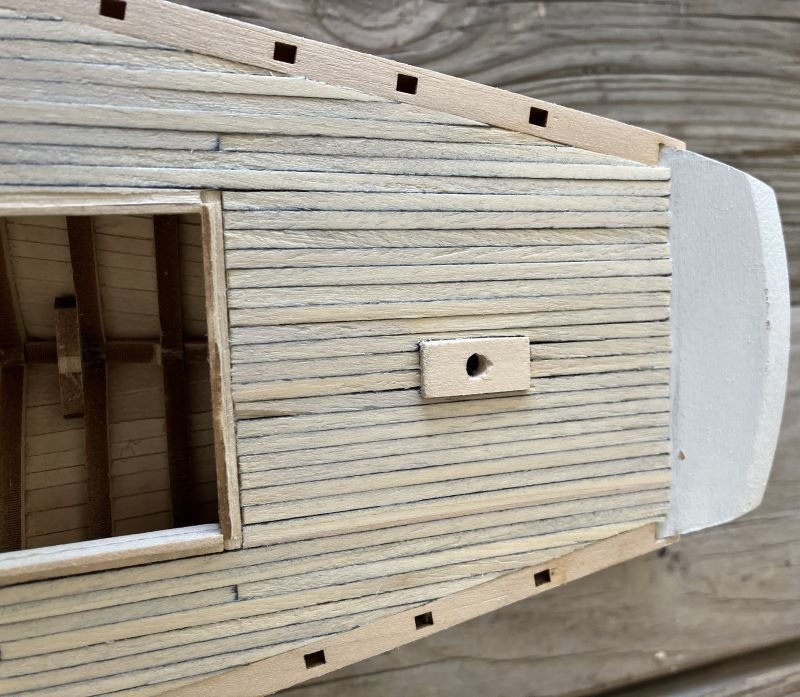
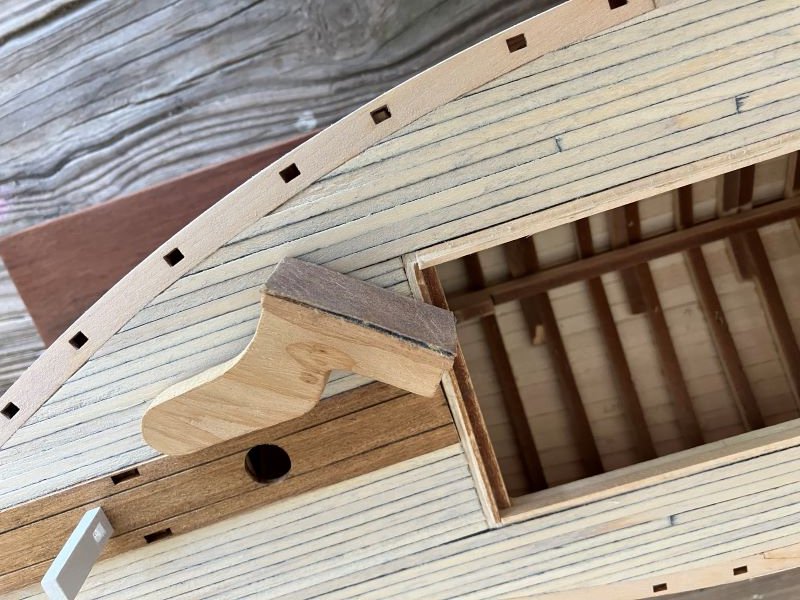
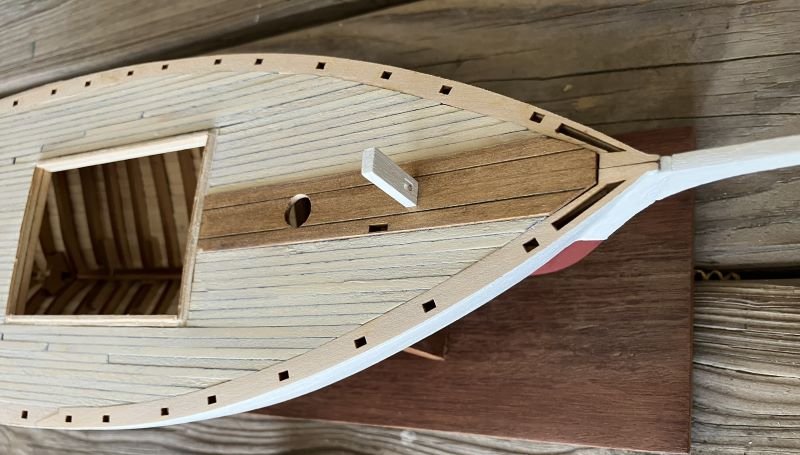
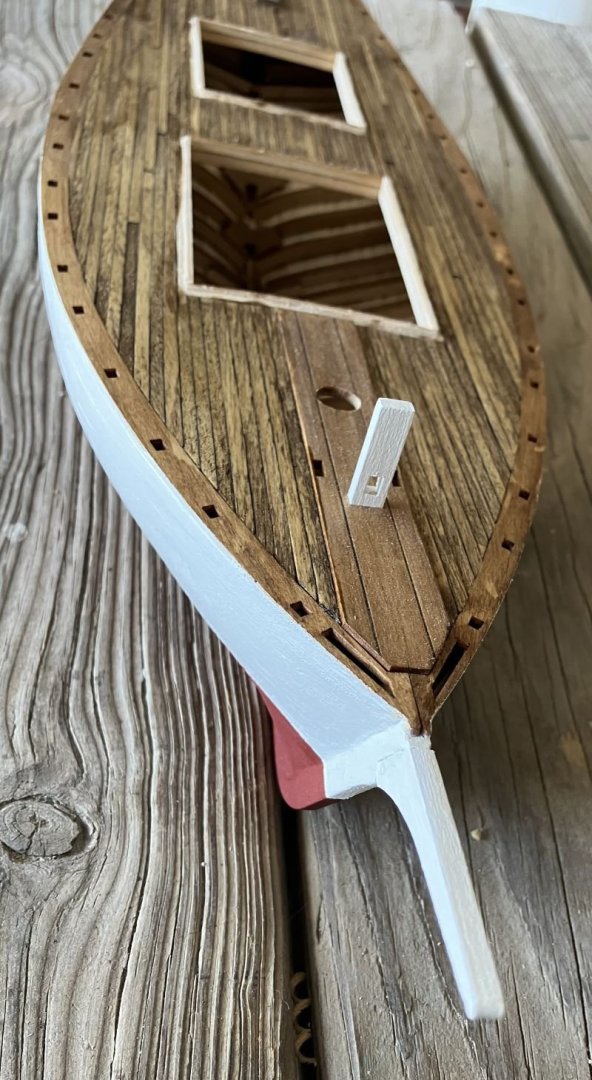
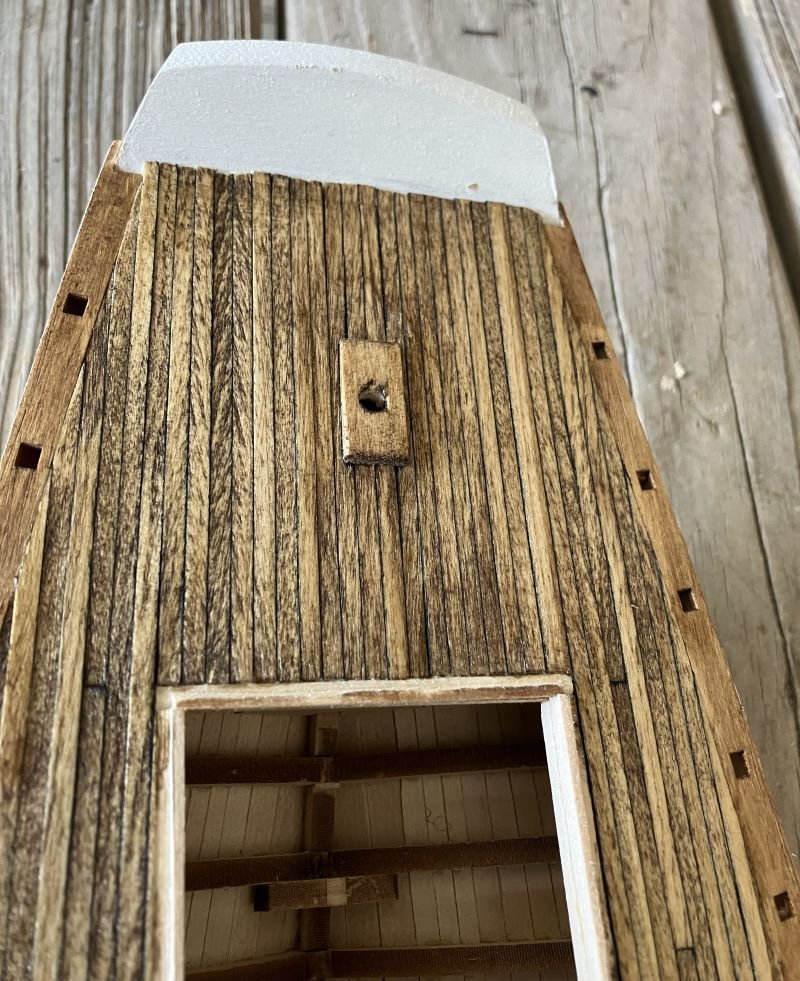
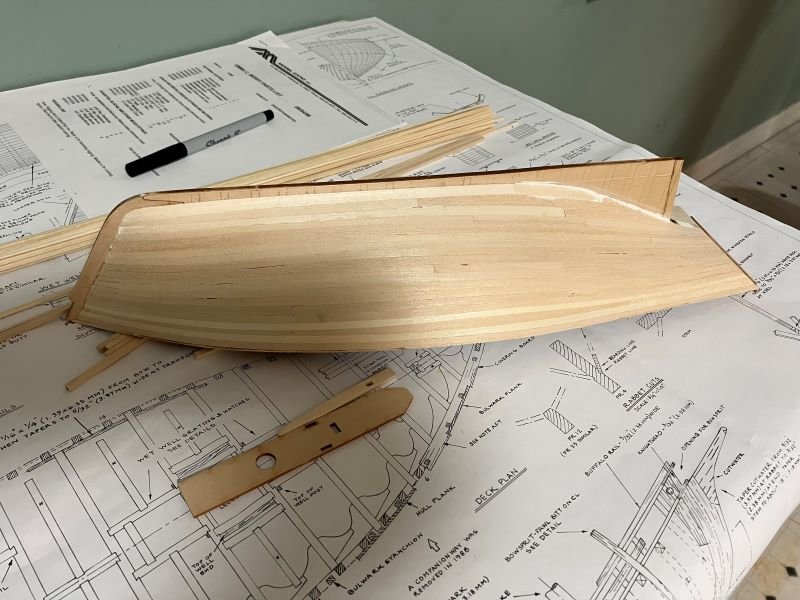
All Decked Out Planks installed with a few butts. I used a sharpie to mark plank edges with mixed results. In fact, it smeared a little during sanding even though I waited until the next day to let everything dry. A #2 pencil maybe would have been better; lesson learned. Next was sanding. First with 150 grit then 220 grit. For the tight spaces I put the boot to it. I made this little sander from a piece that broke when I was making the stand for the Rattlesnake. It works well. A note about this kit: The instruction manual, dated 1997 says the rudder stock pad is laser cut, but it is not. It doesn't exist even though it's on parts list, dated 1998 as part of the 3/32 inch laser set. The windless pieces are cut on the 3/32 set with the kingplank even though they are listed as being on the 1/16 inch set. Crazy! The rudder stock pad was cut from stock and drilled at the appropriate angle. The plans called for it to be 1/4 inch wide, but that is too narrow for the 5/32 rudder stock - at least for me. So, I made it 3/8 inch wide and trimmed the deck planks around it. Stained I used Varathane Golden Oak. It seems to neutralize the bleeding sharpie. You can see where the wood of the laser cut parts stained differently from the kit supplied planking strips. But that's okay. Next up is constructing the bulwarks and I have a lot of reading and studying to do. Comments welcome - Kenneth
-
Thanks Chris for the fix. Thanks Yves for the post. Plenty of work boats here in Biloxi have been converted to family boats by using the space of the hold. There's plenty of room for a salon or a bunk area. - Kenneth
-
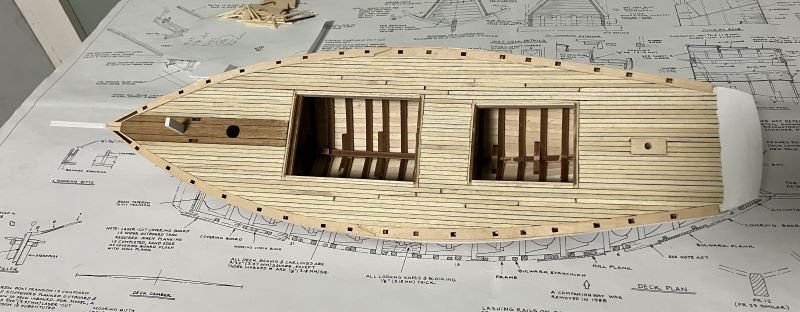
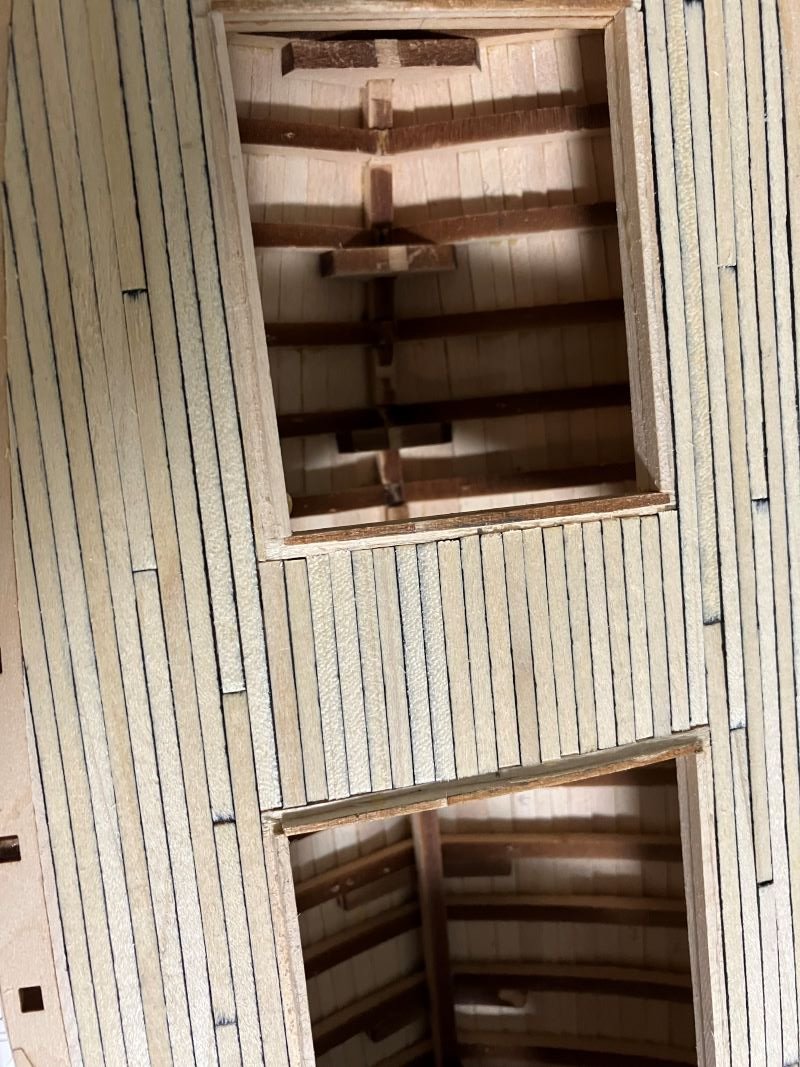
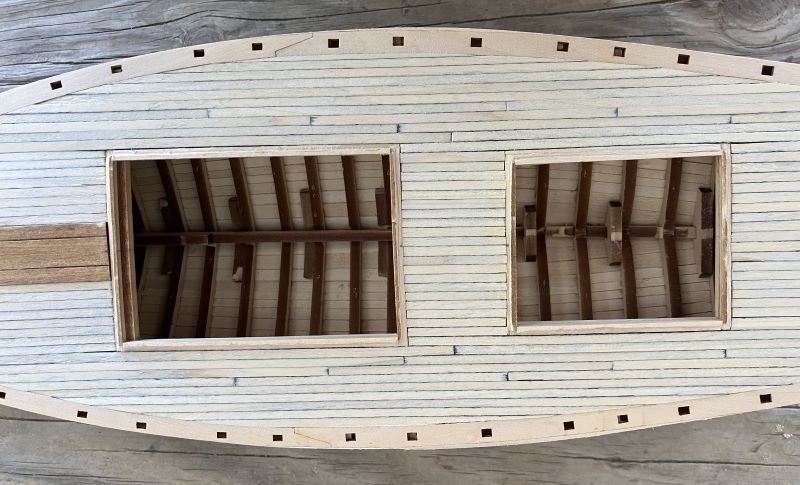
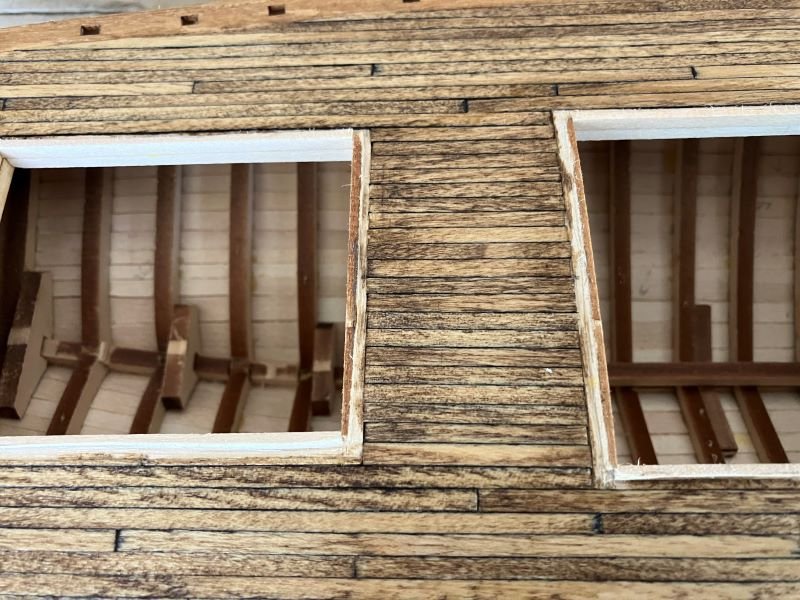
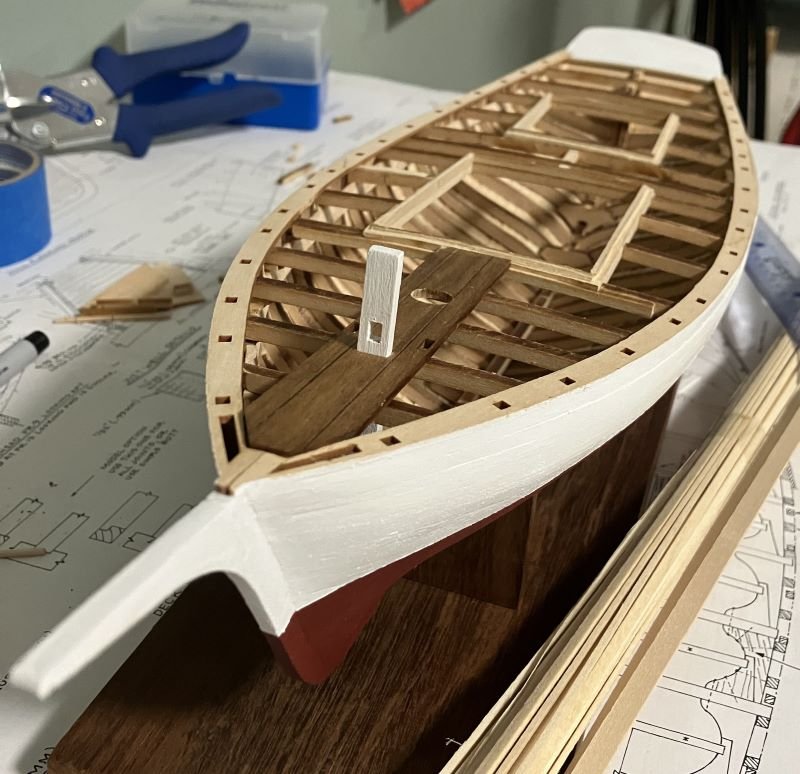
Somehow my previous post was posted again. Probably user error. Anyway, now that the stand is completed and in use, I started on the deck. The kingplank and bowsprit pawl bitt were installed. An old ice pick was used to scribe the kit-suppled kingplank then the grove was traced over with a HB 0.5mm mechanical pencil. I painted and stained now to make a cleaner job. The comings for the cabins have also been added. This really shows the layout of the fore and aft cabins of my idea of a pleasure boat. I've never built comings this way and I like it. With the Rattlesnake I just glued the hatches and gratings right on the deck. The process went fairly quick by trimming 1/8 stock with a #21 scalpel then cleaning up with a #11 blade and small file. And I still have all my fingers. Comments welcome - Kenneth
-
Your cannons are great! You're building a wonderful model. - Kenneth
-
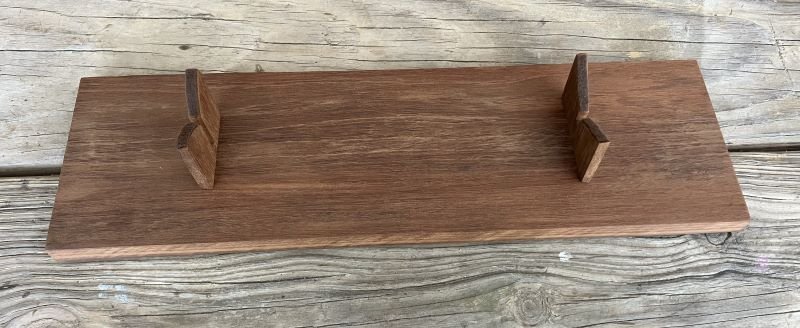
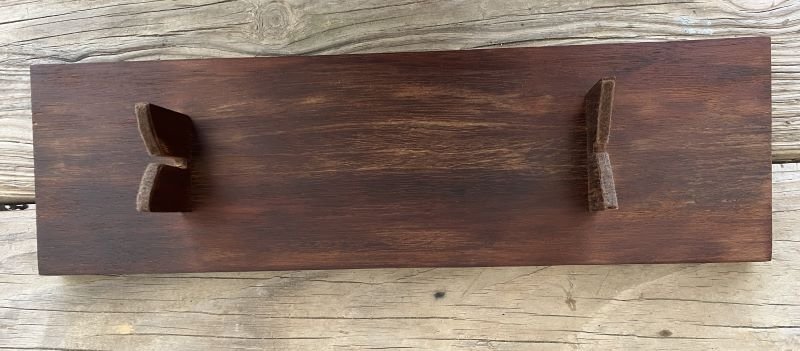
Hello, I built the stand. I have a couple of very old, very dry pieces of teak and trimmed one to build it. It is so dry and void of natural oils, I was able to glue uprights onto the base and it adhered pretty well. The felt strips also stuck. I used Formby's Lemon Oil Treatment to give it some life and I think I heard slurping sounds from the old, dry wood. It's a little dark now but it should lighten as the wood absorbs the oil. I'll give it a couple of days and set the hull on the stand and start with the deck. Comments welcome - Kenneth
-
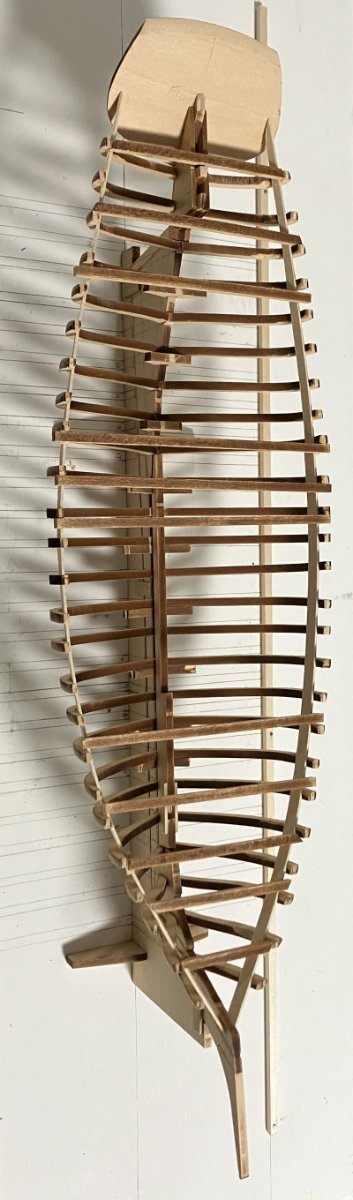
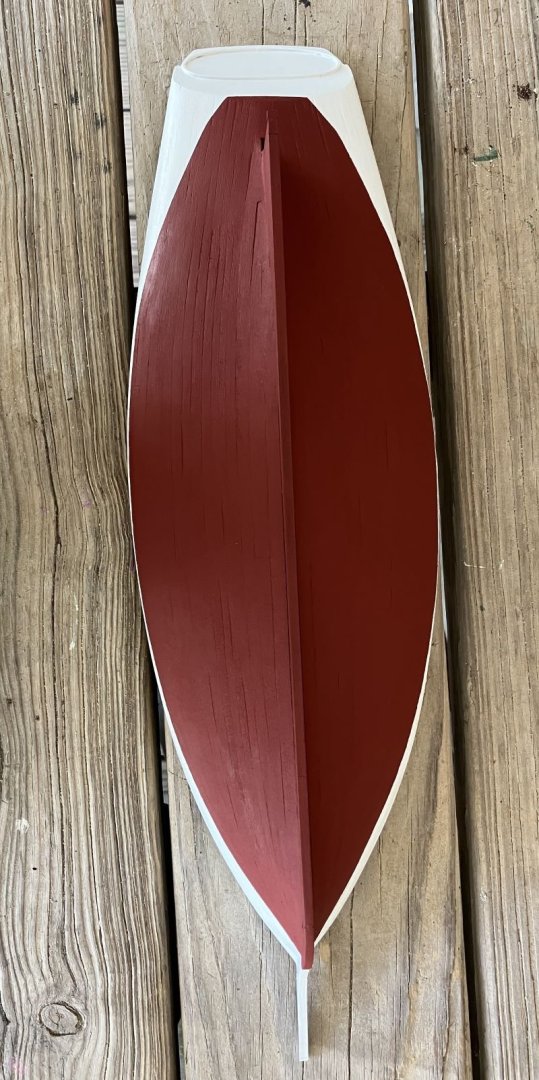
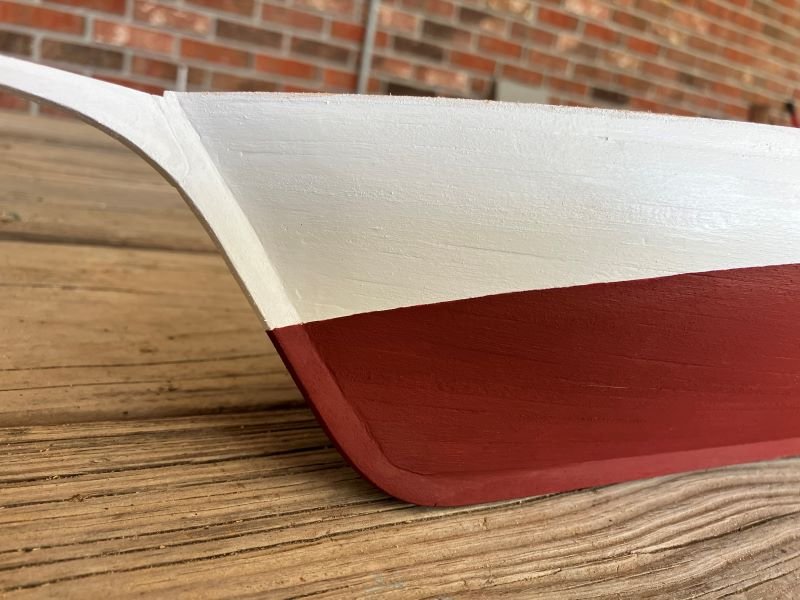
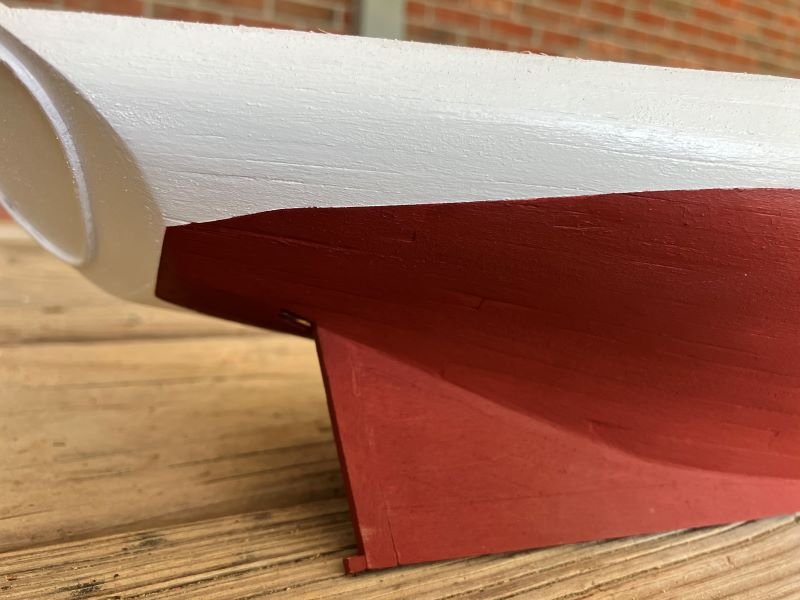
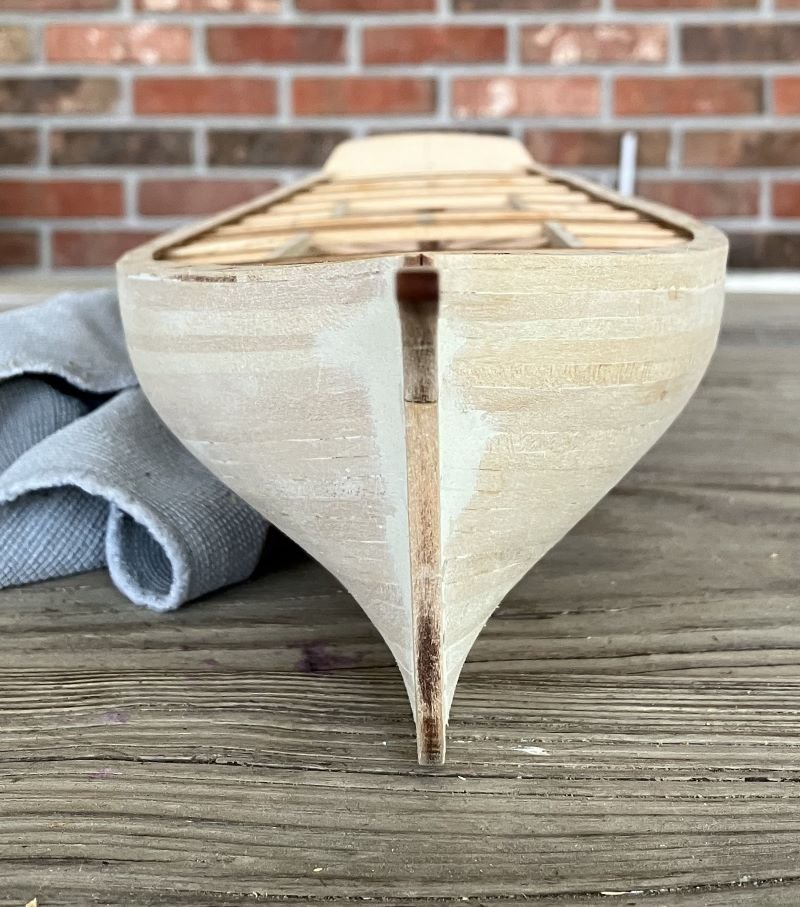
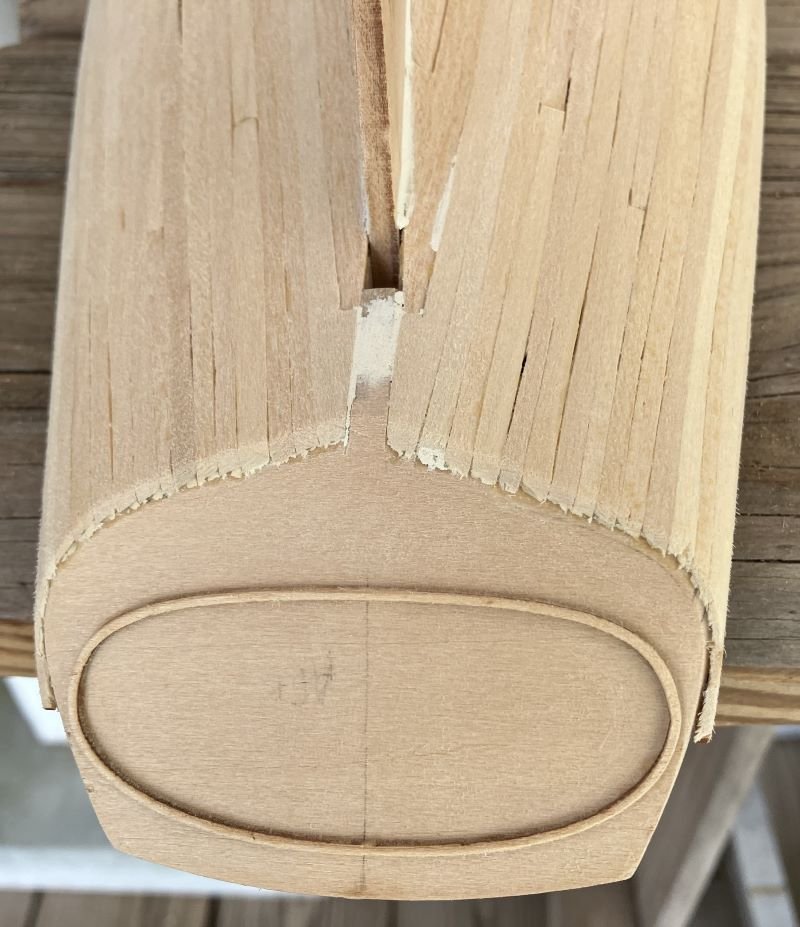
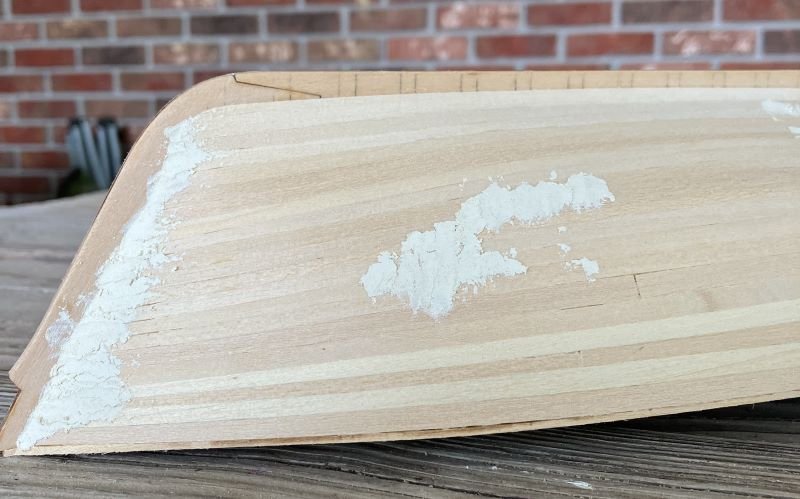
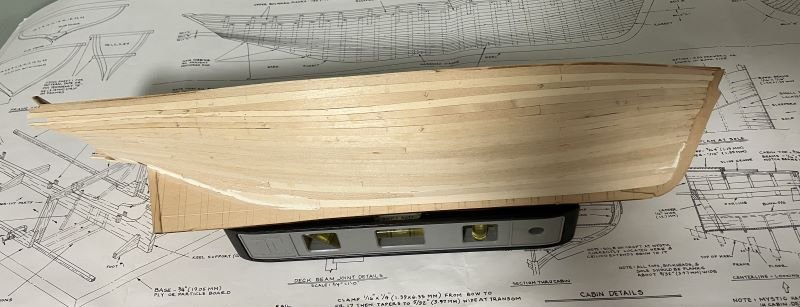
A long view photo that really shows the profile of the hull. Thanks - Kenneth

-
Thanks, JacquesCousteau for the compliment and the question. I plan to completely plank the deck. I didn't really consider leaving it open. - Kenneth
-
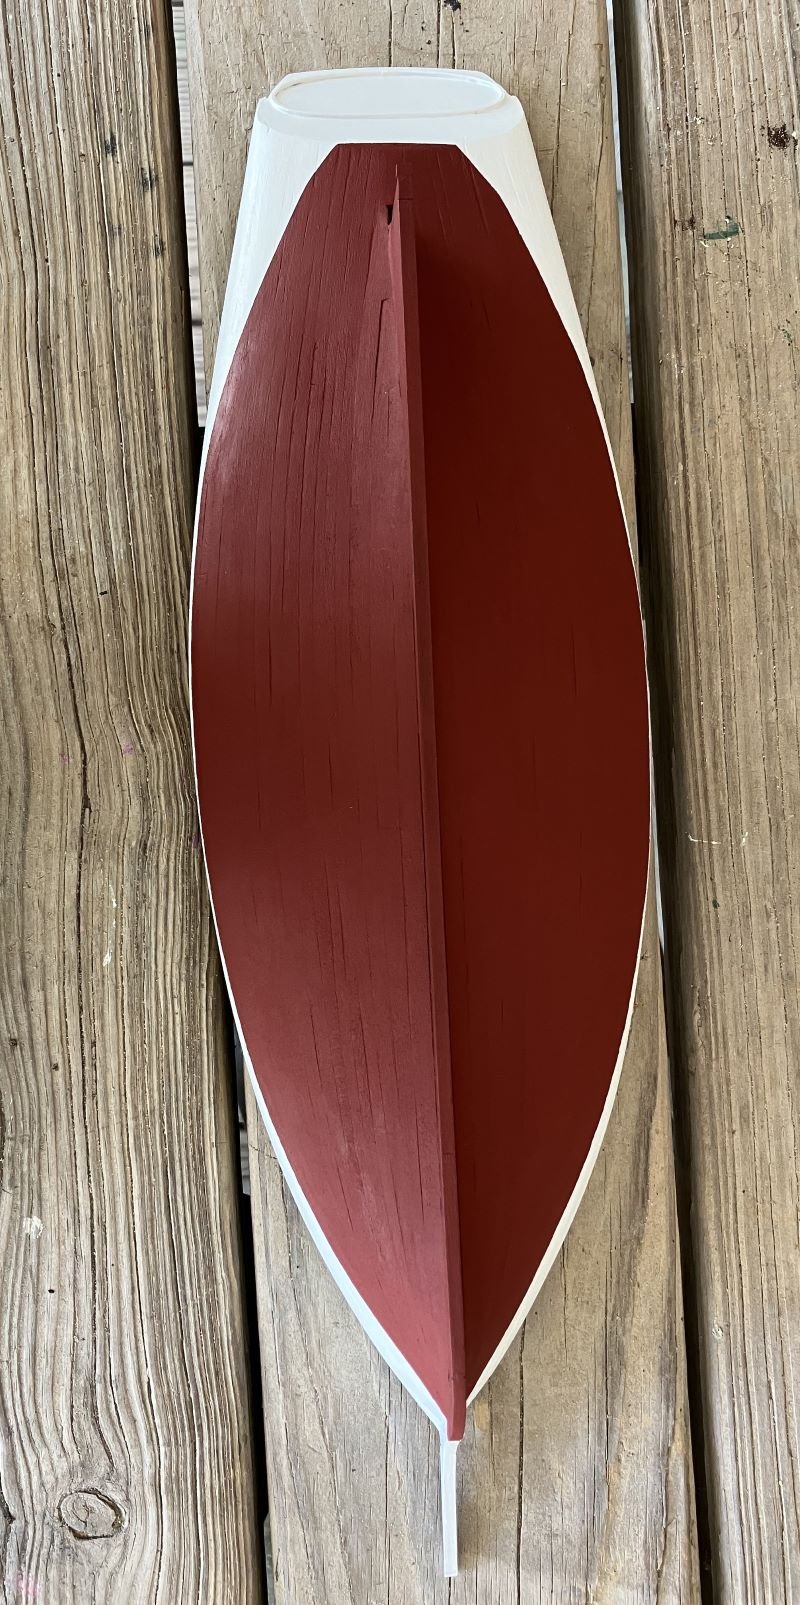
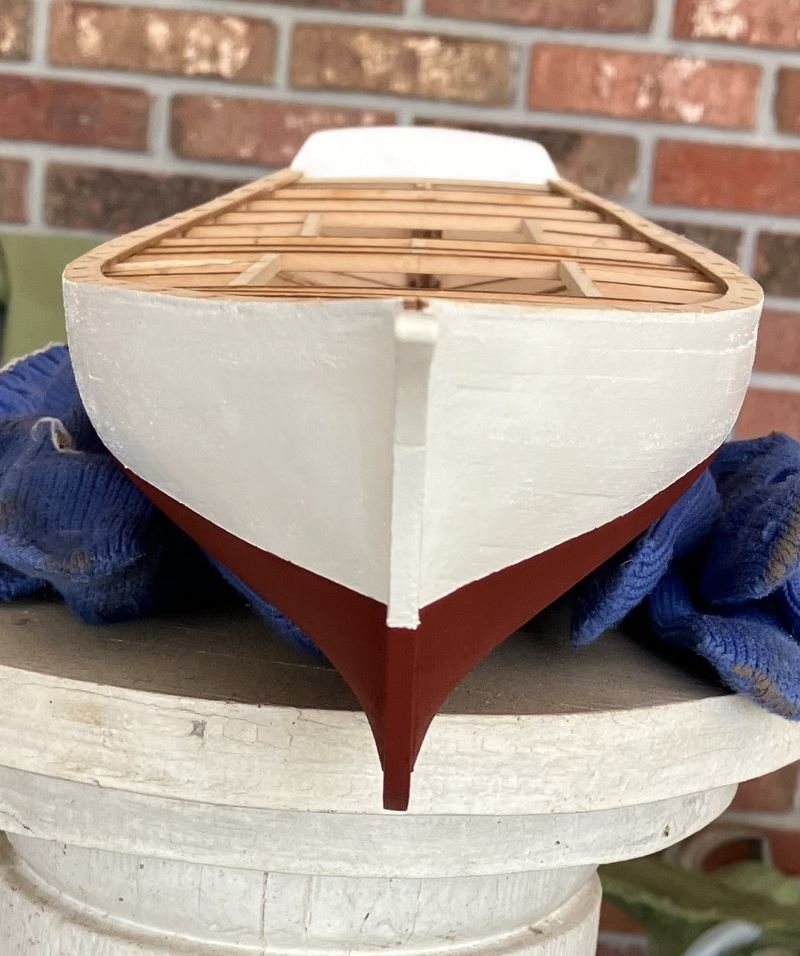
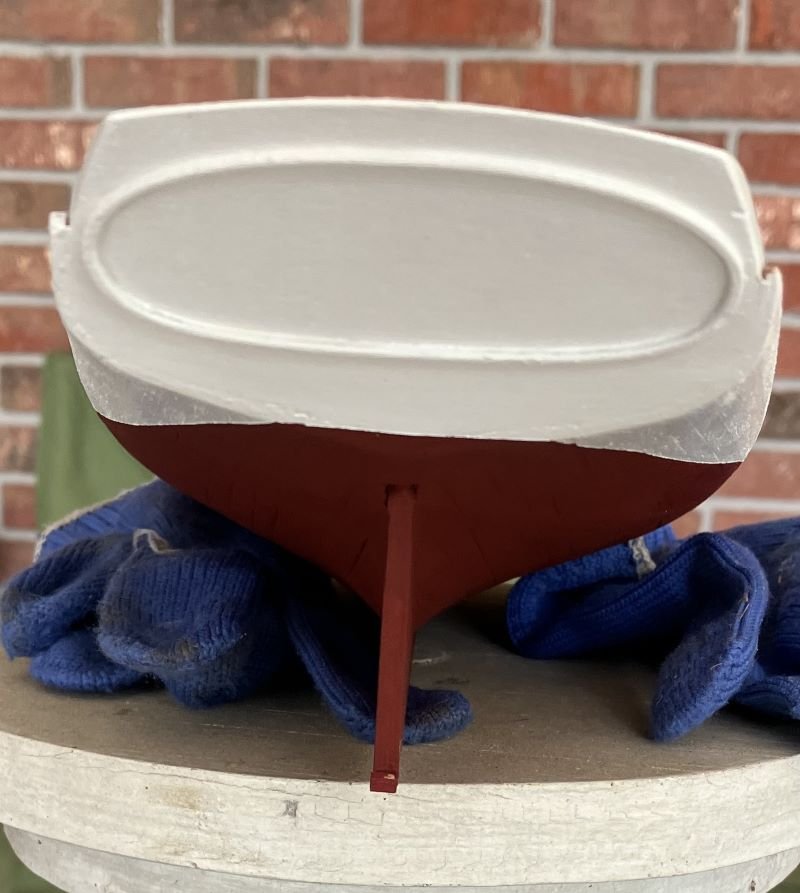
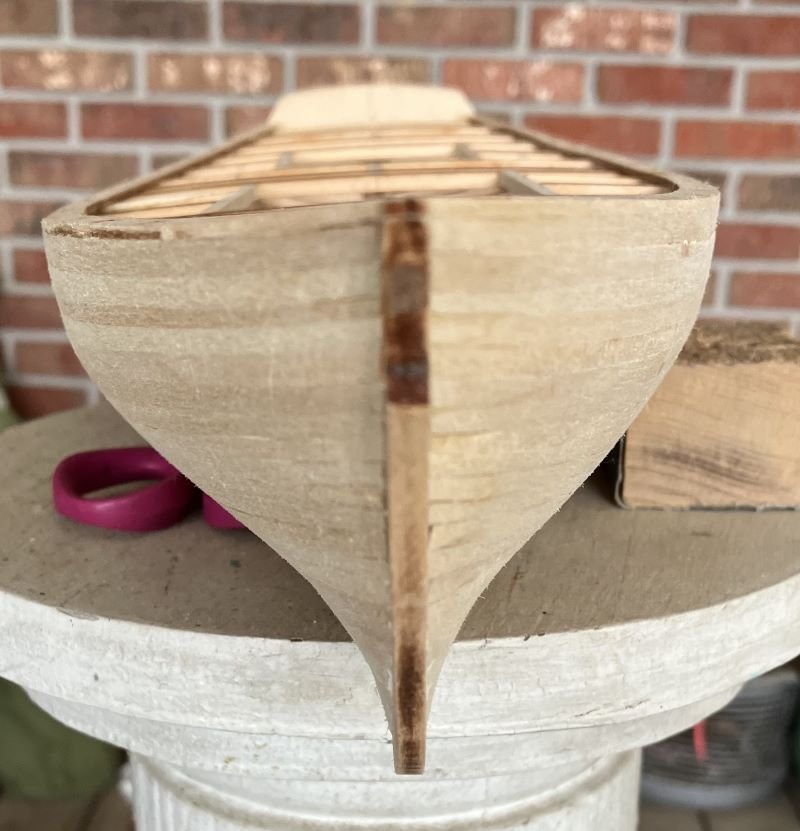
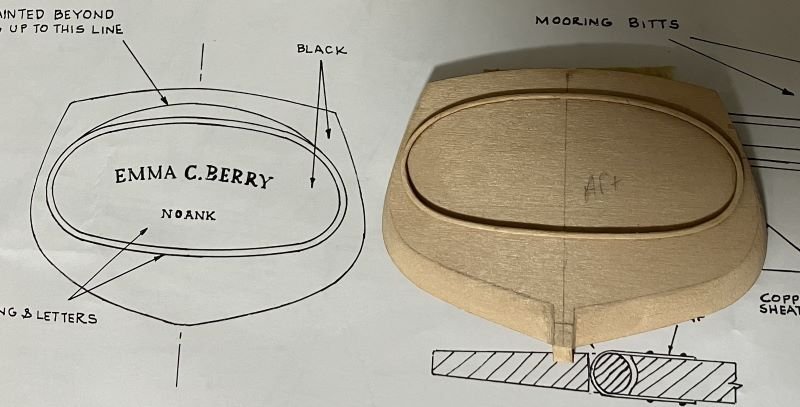
After 2 coats of Valspar ExpressCoat semi-gloss interior extra white 935350 and 3 coats of Crafters Edition 72006 Barn Red acrylic paint and back and forth many times with touch-ups, I think I have it. More touch-ups may be made, keeping in mind that the more micro corrections are attempted, the more things may go wrong. The planks are certainly visible, but it is a wooden boat. I really like the shape of this hull, and excellent sloop. I choose white to keep along with the pleasure boat theme. The wooden boat show was held here in Biloxi and all the boats converted from work to pleasure were white. May Mystic Seaport forgive me. Now that all the upside-down work is done, I'm building a stand. Comments welcome - Kenneth
-
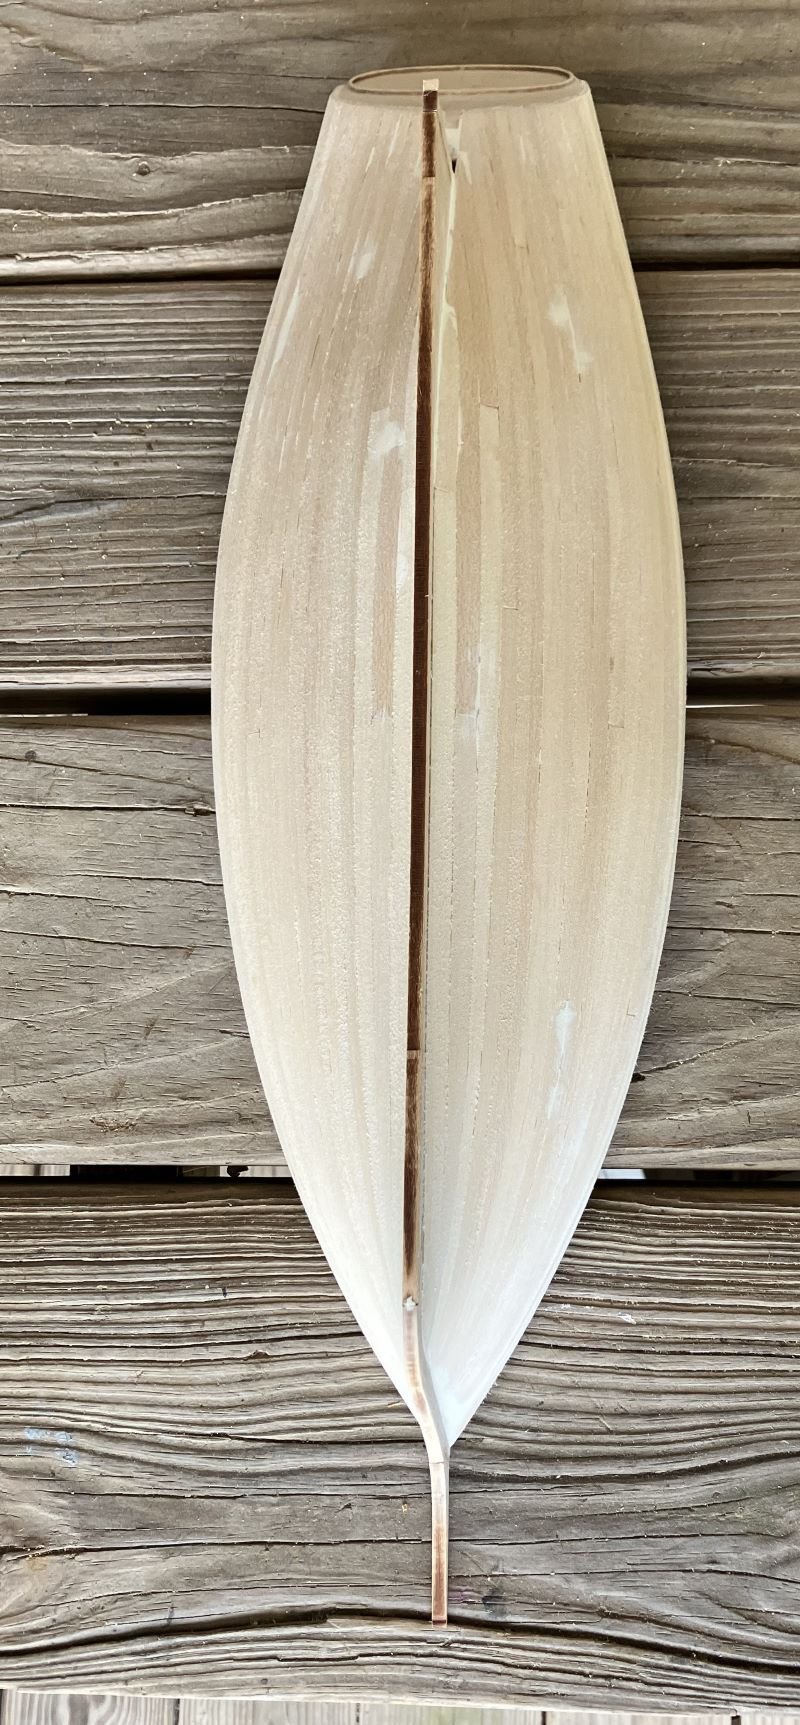
Hello - I've gone back and forth between filler and sanding, and I think I've gotten it done. I'm going to paint the outer hull next. A question to ponder before I start work on the deck - Does a pleasure boat need a windlass? The kit has one and I'm leaning towards adding it to the model. It can be used for things like anchor and sail movement, just not the fish cargo. And I think it would look cool. Comments welcome - Kenneth

-
Thank you, Allen - I did find the site very interesting. It comes with a nice film too that stresses the importance of keeping our historical vessels restored and intact. - Kenneth
-
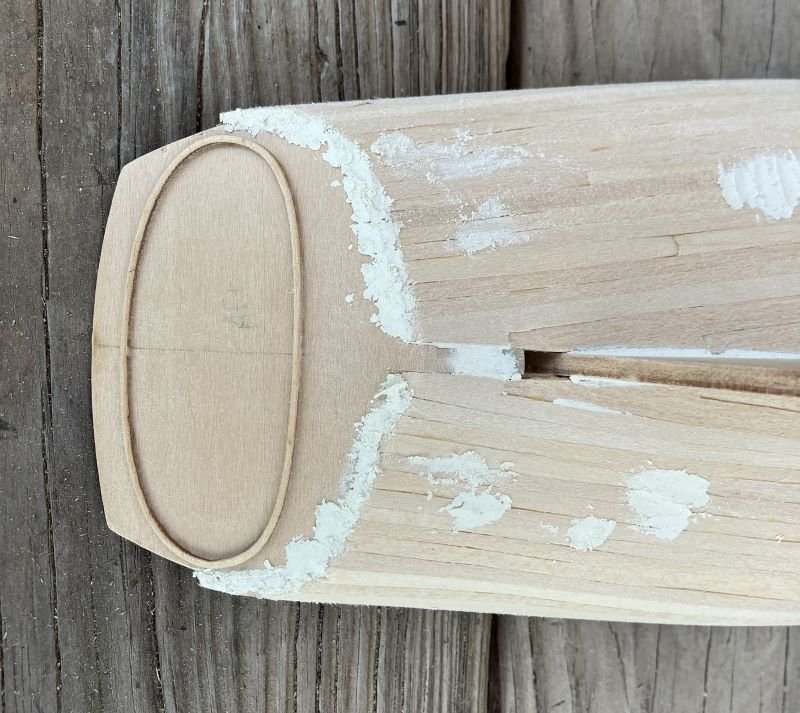
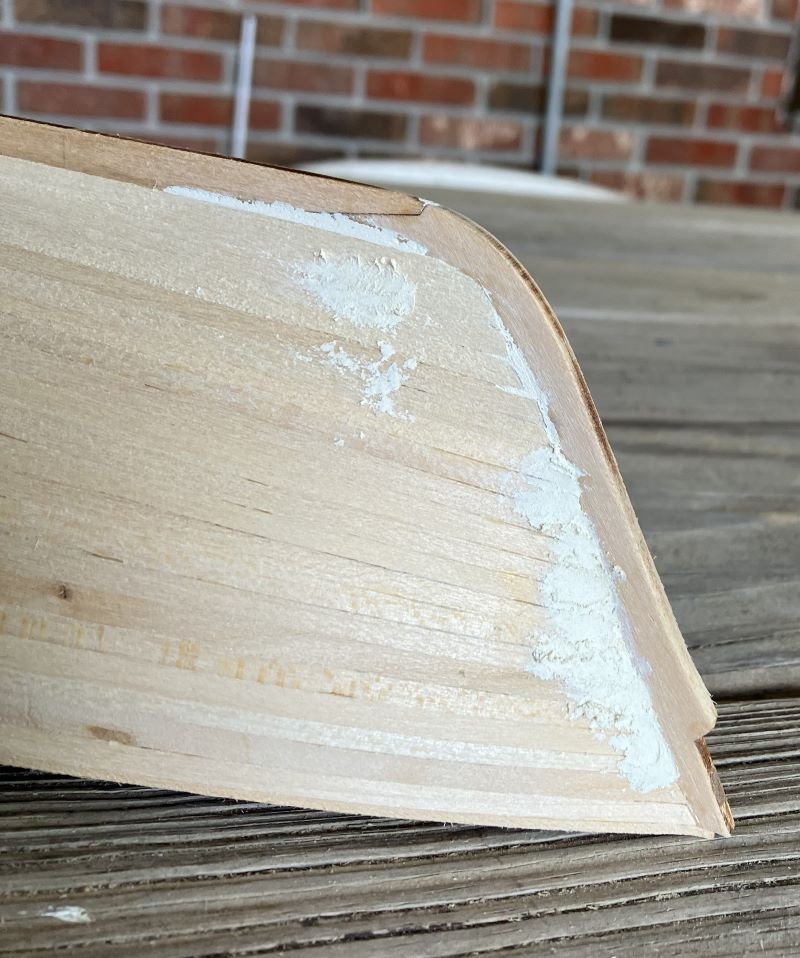
Thanks everyone for looking in and the likes. Went over everything with 150 grit. A little smoother and less fuzz. I then used filler on the most obvious gaps. I seems to be dry in just a couple of hours, but I'll wait a little longer and go over everything with 220 grit and see how it looks. I'm not looking for a glass finish, I like the look of planks on a wooden boat and I don't mind the beauty marks. Comments welcome - Kenneth


-
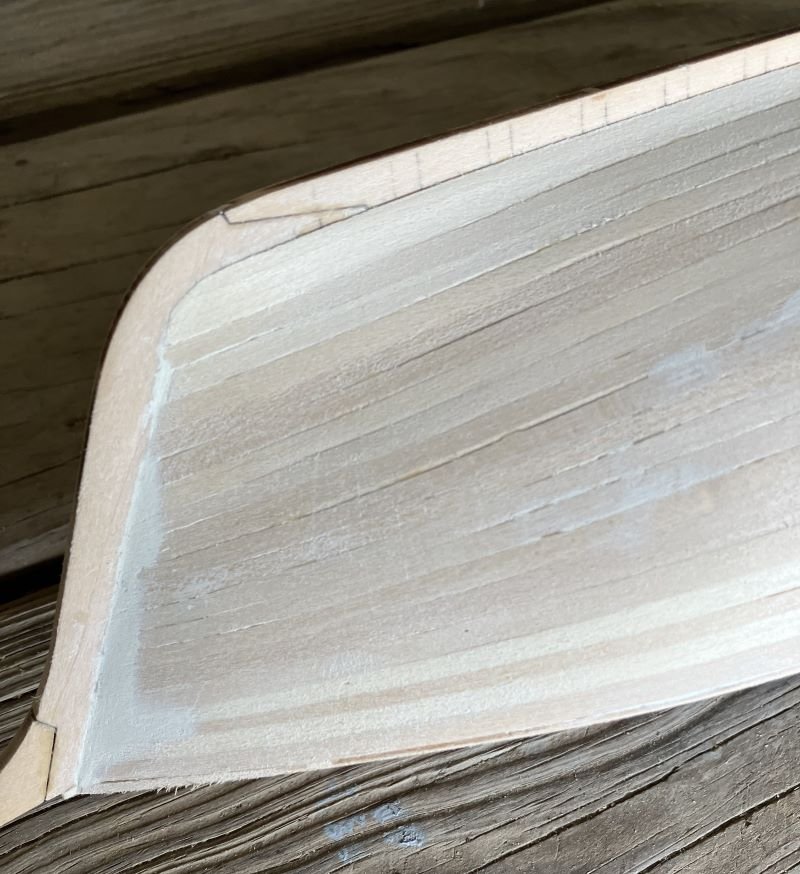
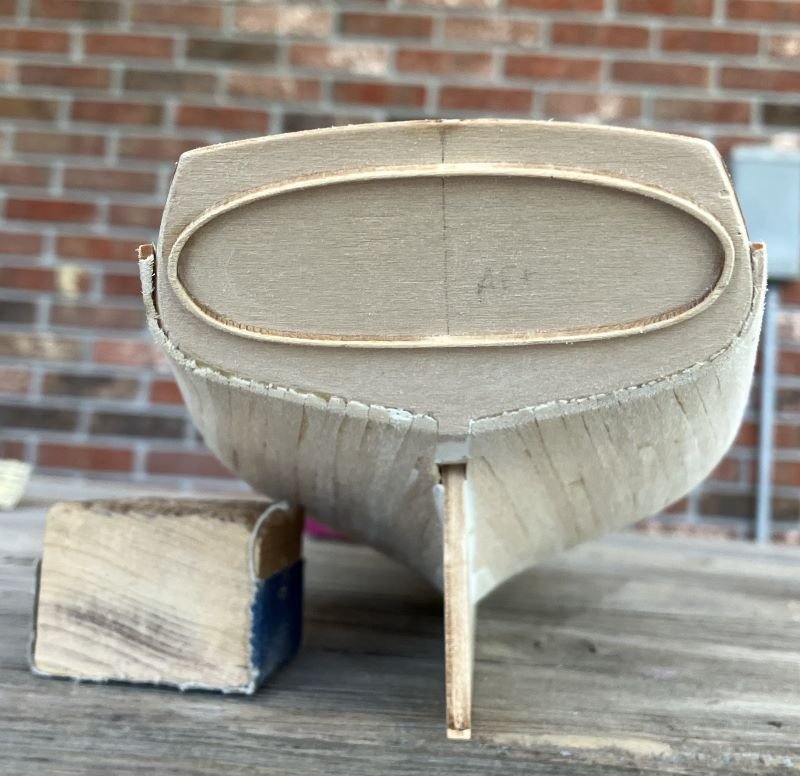
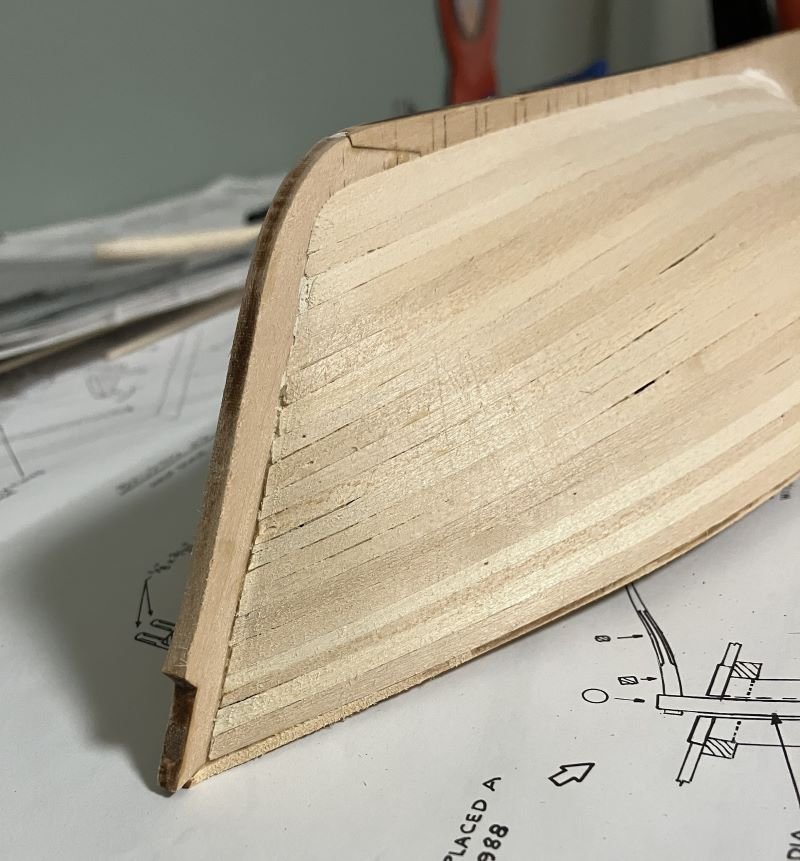
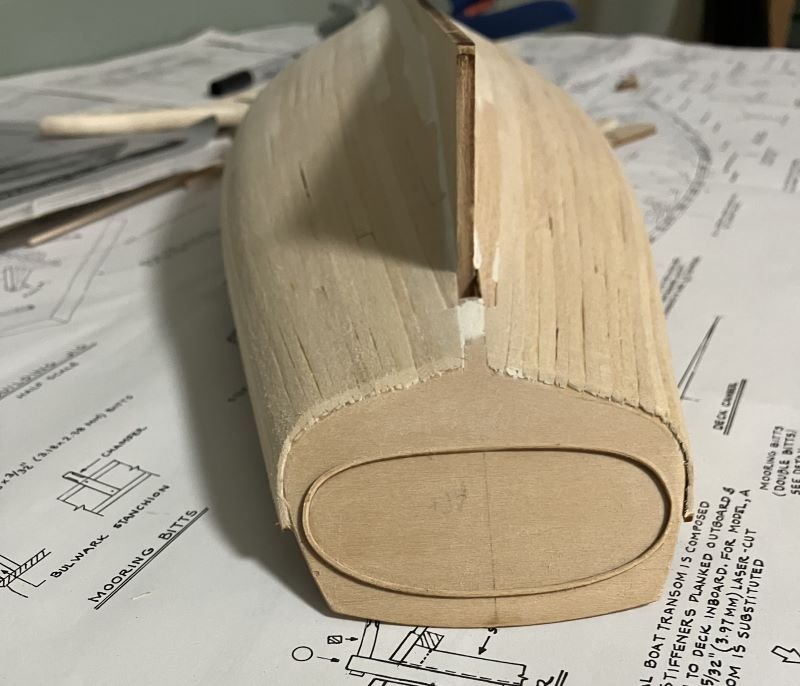
Hello Everyone, I've sanded to my heart's - and forearm's - content. 80 grit, mostly with a sanding block and some the old-fashioned way with fingertips. The instructions say to install the stern molding at the same time as the transom. I found it a little cumbersome to do the sanding with it in place and bumped it a few times. Future builders of this kit may consider waiting until after all the planks are sanded. I'll hit it with 150 grit next to remove the fuzz and get it more smooth. Thanks for looking in and May the fourth be with you - Kenneth
-
Thanks, Allan and to all the likes and comments. - Kenneth
-
This is the Model Shipways kit. I'm altering the deck layout and such to build it as a pleasure craft - a little kit bashing. Maury S is building the schooner rig on the scratch side of the site. Thanks - Kenneth
-
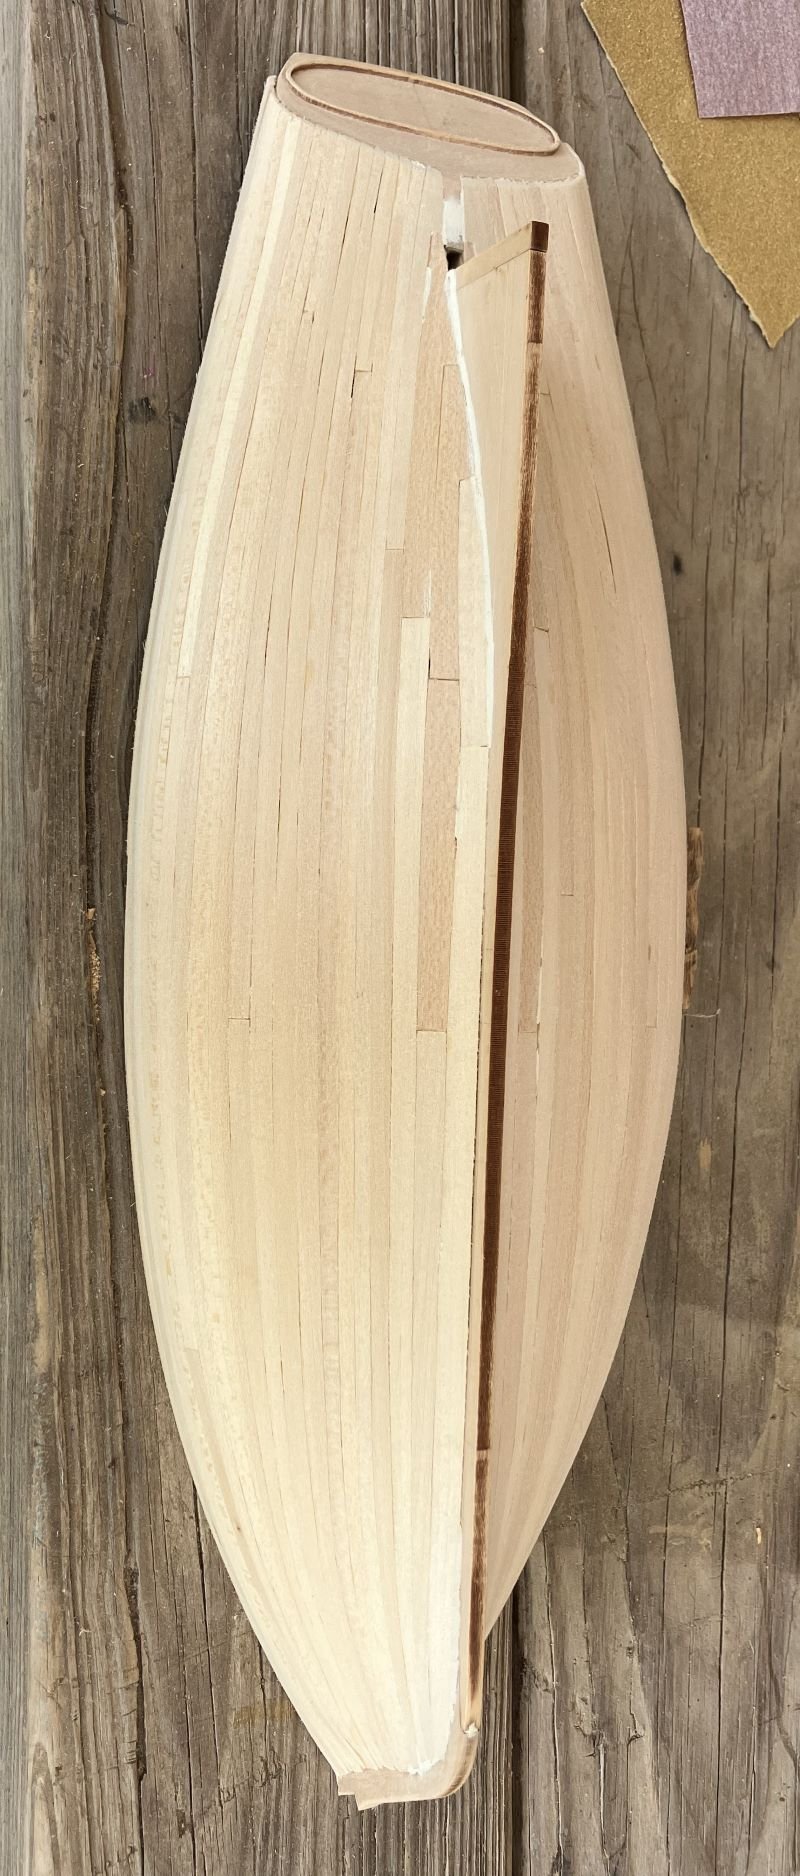
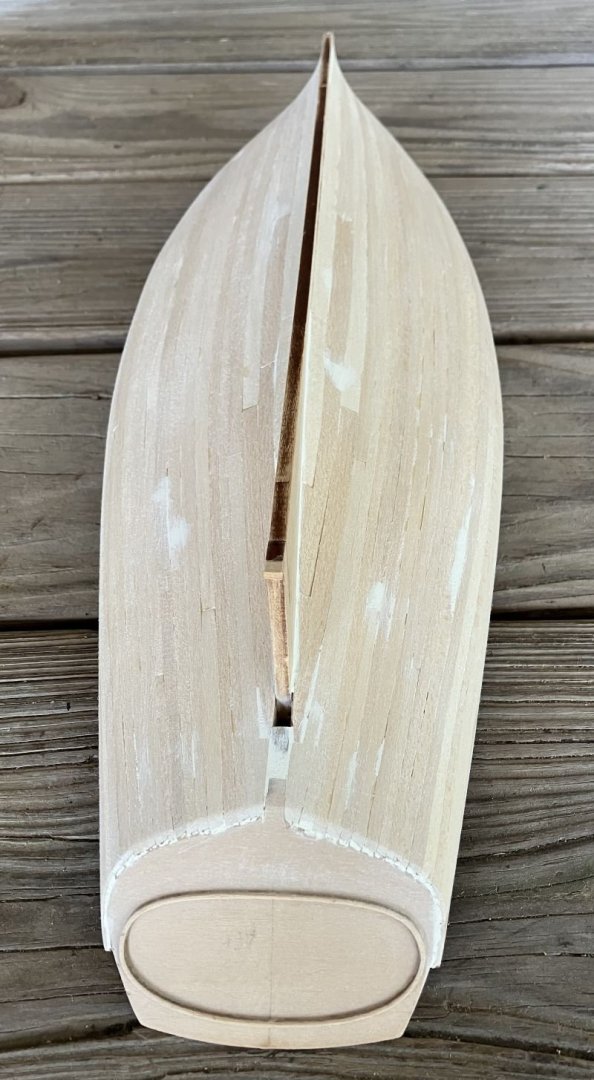
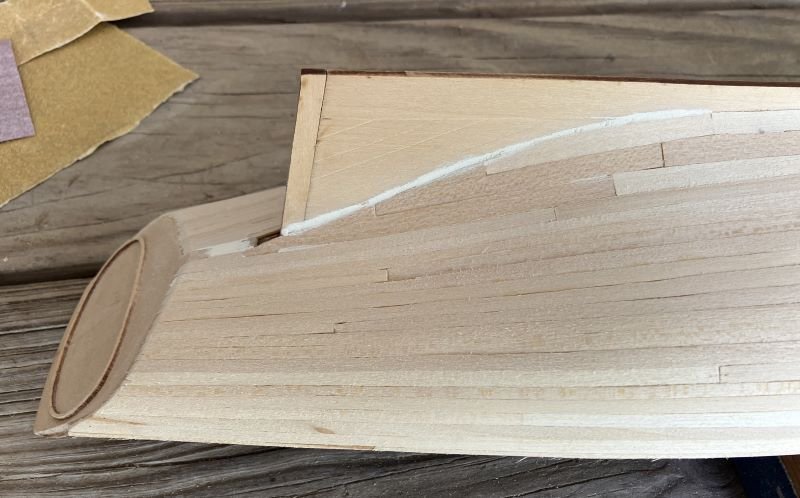
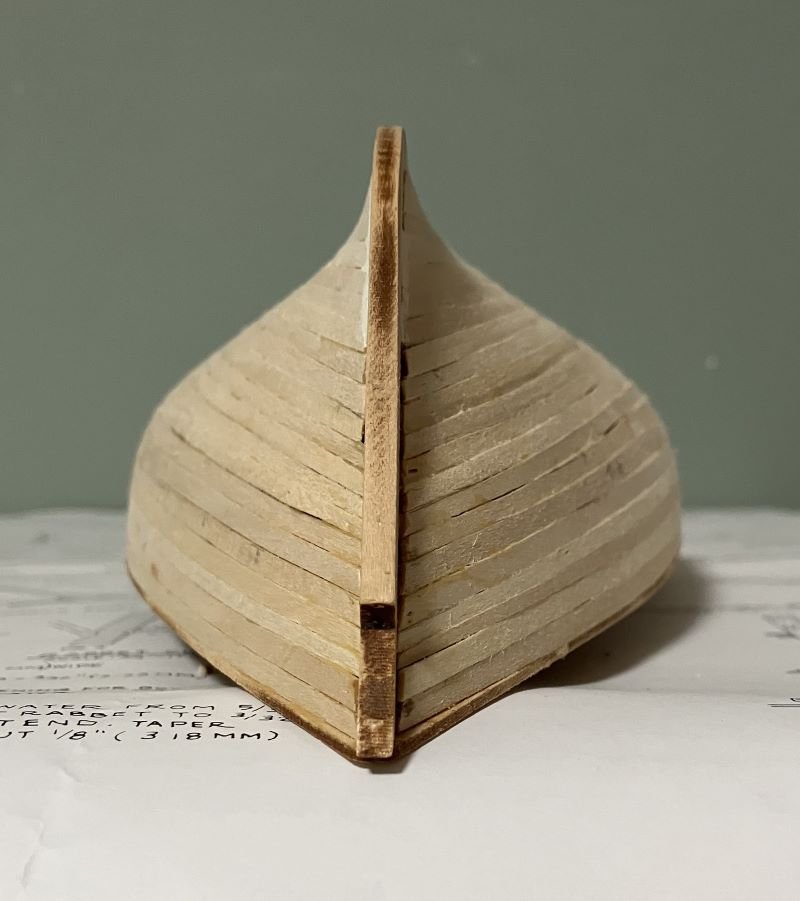
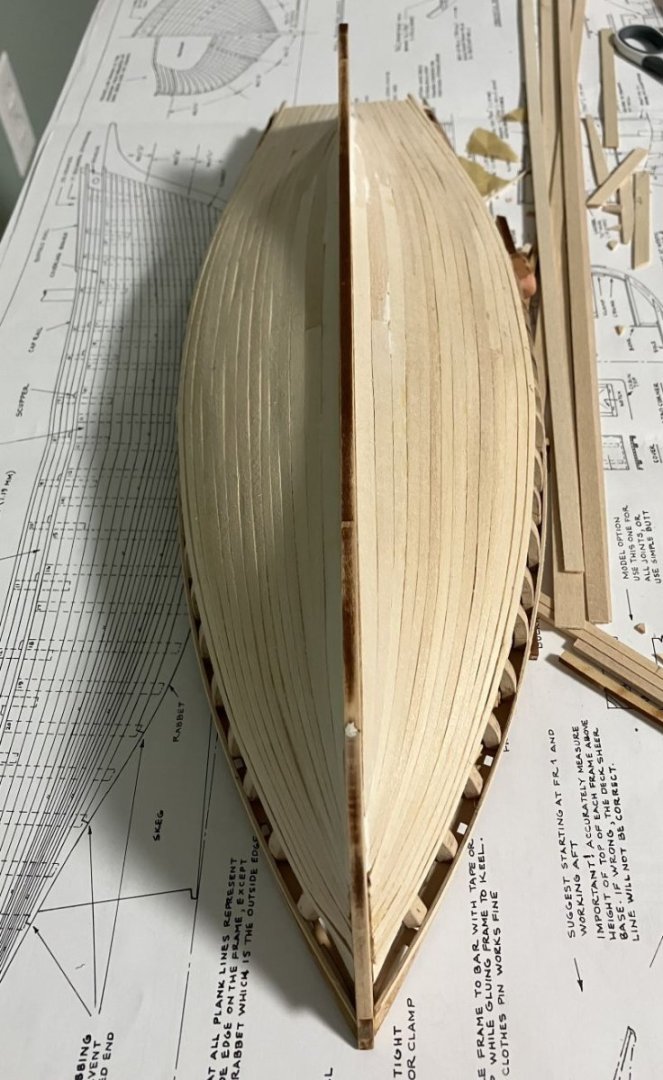
Hull planking is complete: Man, do I have some sanding to do. - Kenneth

-
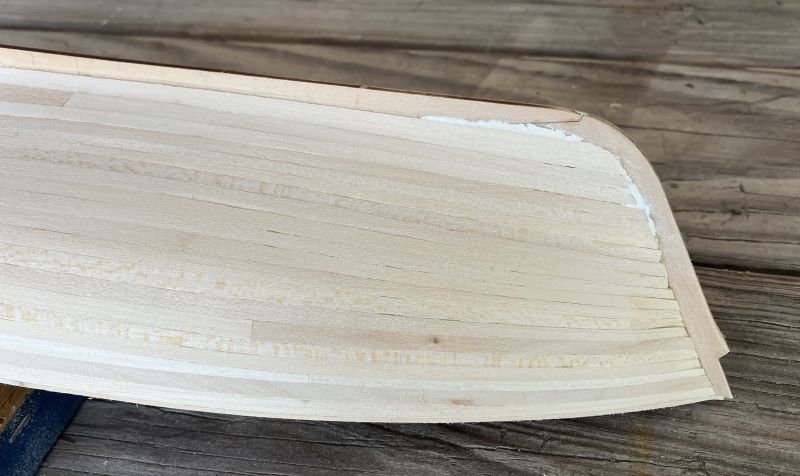
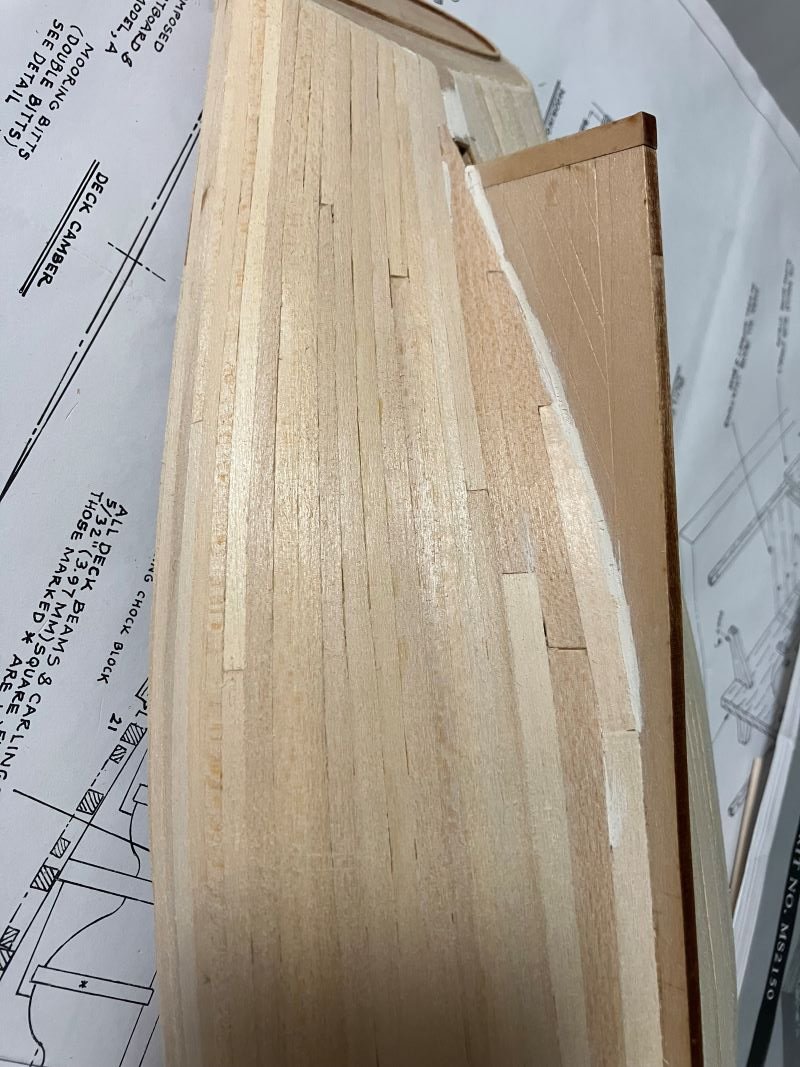
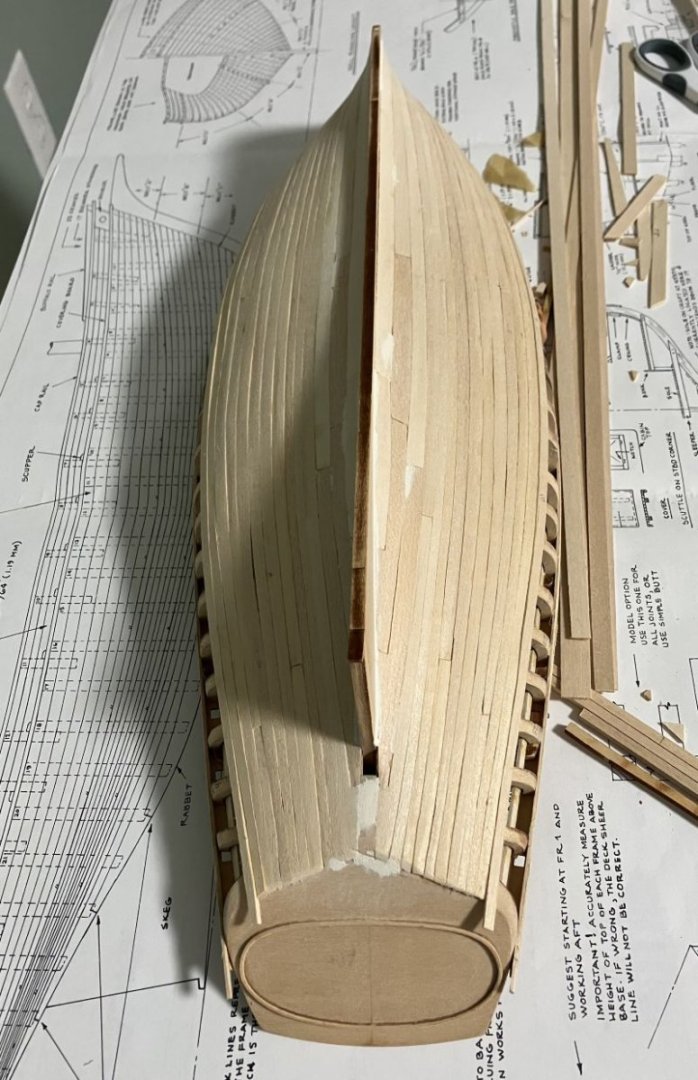
Hello Everyone - Checking in with some progress. Spring has sprung here on the gulf coast. So, I've been busy with yard work and honey does and stuff outside. Chores really take away time from hobbies. Anyway, I've finished belt B and sanded a little with 80 grit. I also added a plank in belt A and the sheer plank. The kit supplied planks are longer than the model, so I've mostly been able to cut one plank for the entire strake. Then I cut its duplicate for the other side - back and forth, back and forth. I kept the cut-offs and in the spirit of conservation of wood I can use 3 of them to make planks for one strake. I should be able to steal a few minutes here and there and set the rest of the planks. But I don't want to rush things either and get in a hurry. There has to be a balance. Then it's the 80 grit treatment followed by 150 grit. Then a few open seams and such will be filled and sanded. Comments welcome Thanks for stopping in - Kenneth

-
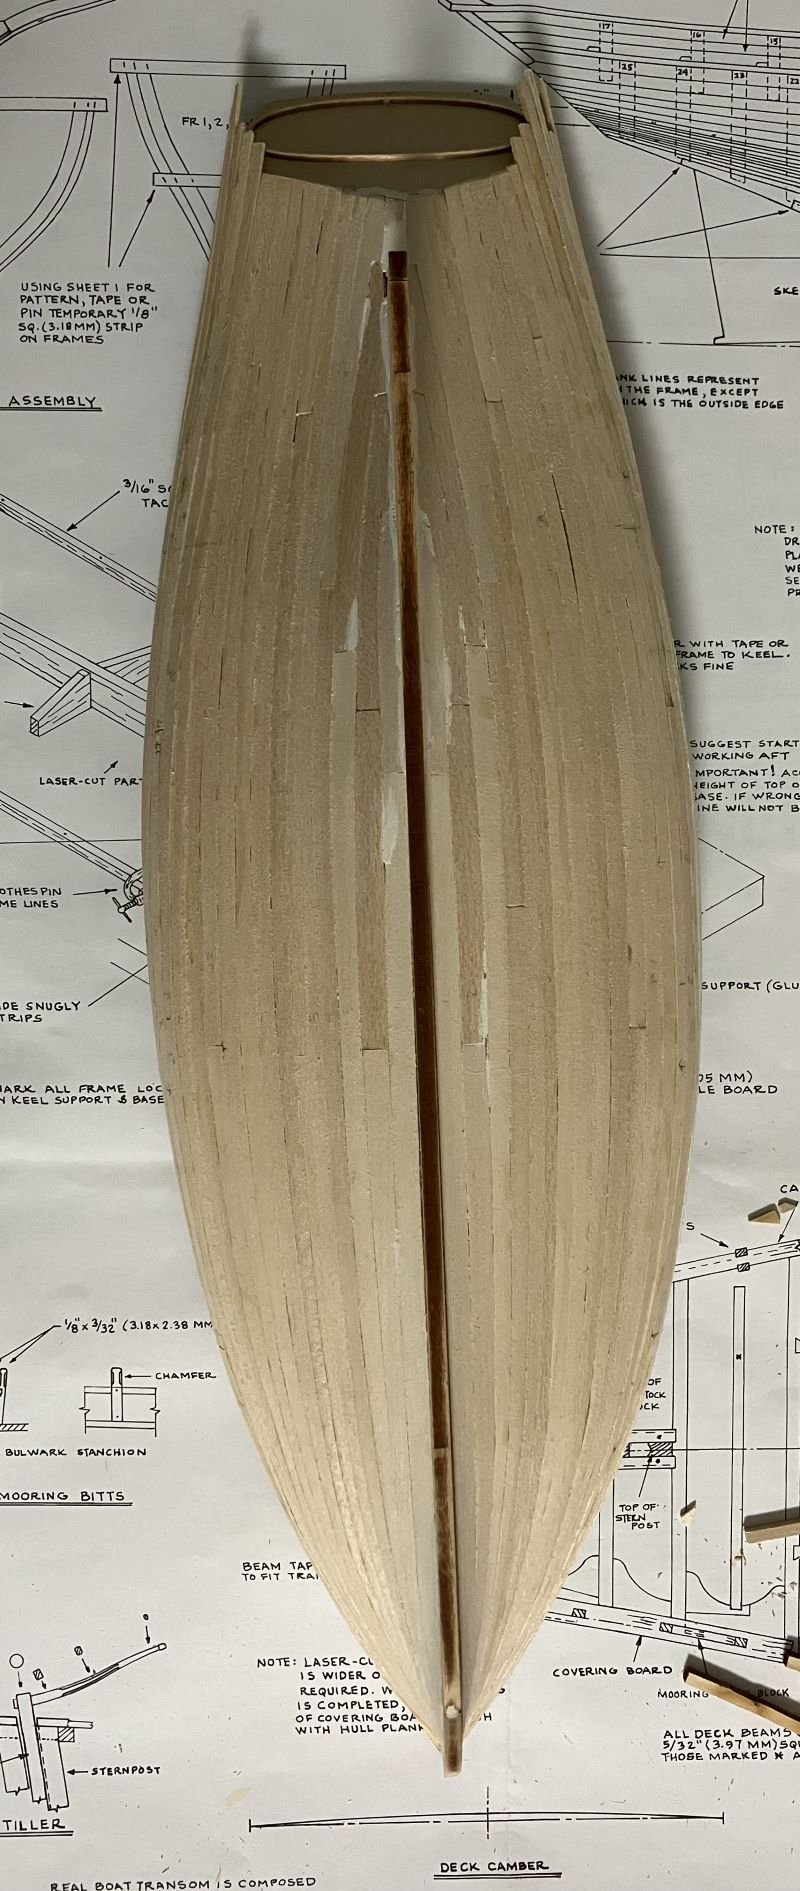
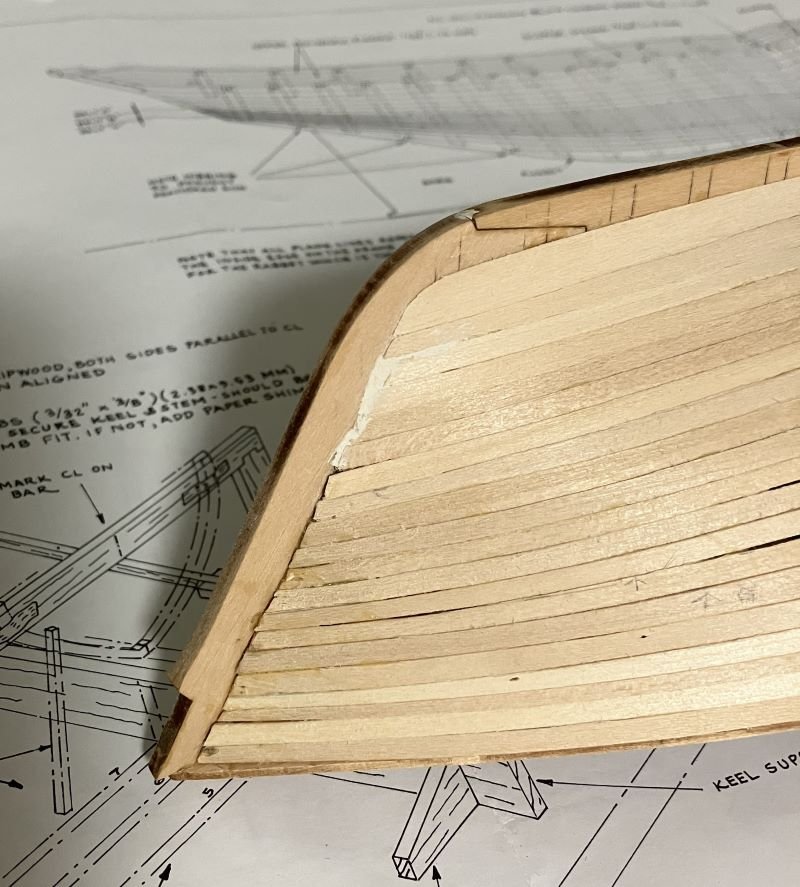
Hello everyone - Planking has started. The Modelshipways method of planking in belts works pretty well. It gives an opportunity to pause and check the progress and the math works out if the plan is followed. I followed it on my Rattlesnake and it worked well. I added belt C and sanded a little, then added a little putty in the seams. Once all the planking is complete, I'll sand and touch up everything. I won't use a lot of putty. The planks are visible on most wooden boats and I like the beauty marks. This is my first shot at nibbing hull planking, so please be gentle. Thanks - Kenneth
-
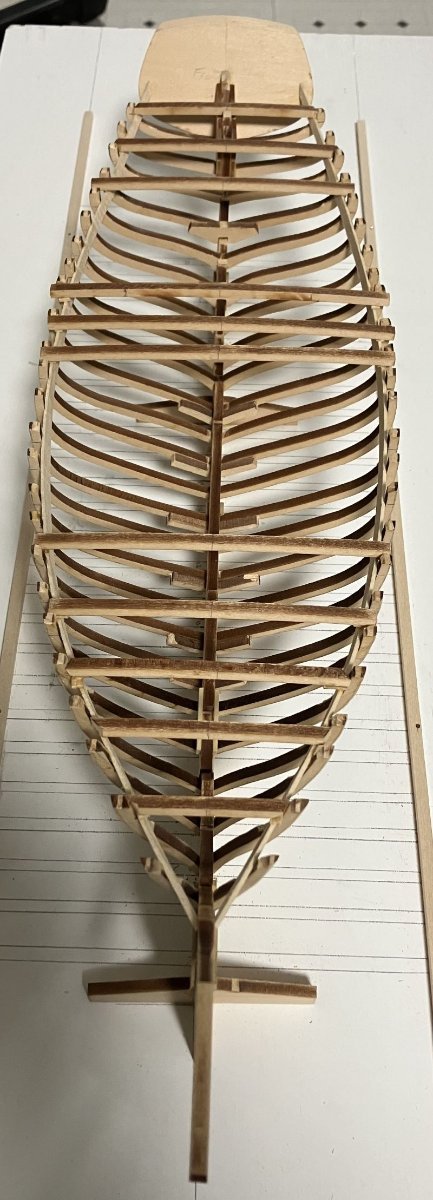
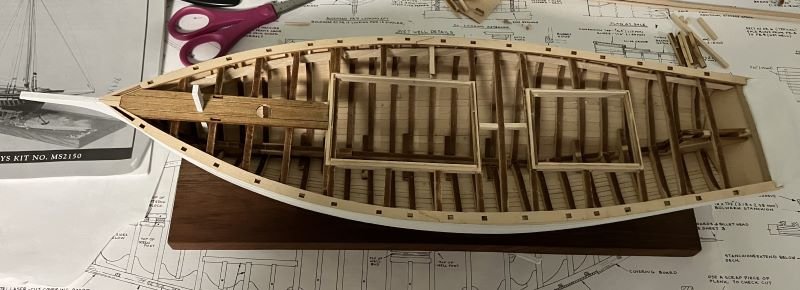
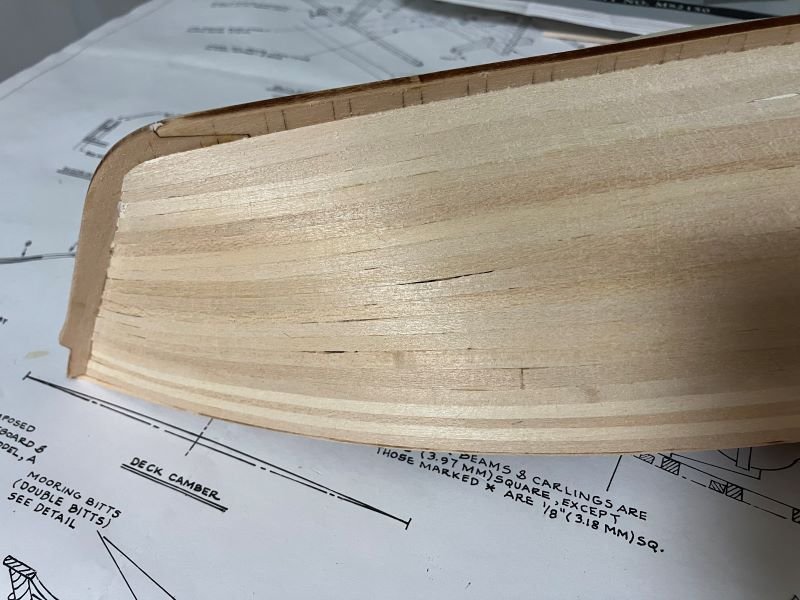
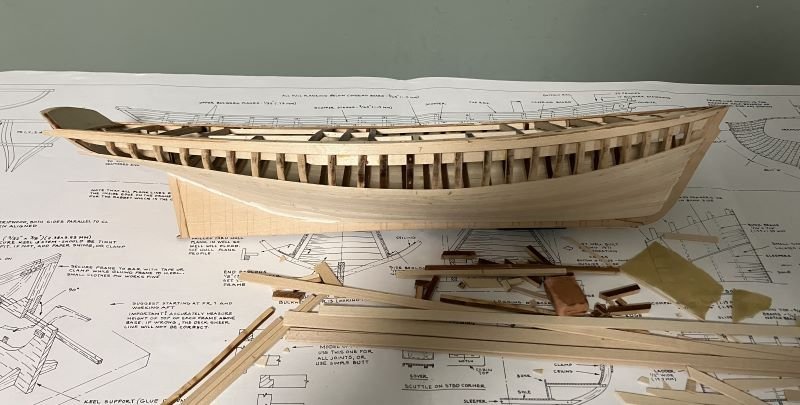
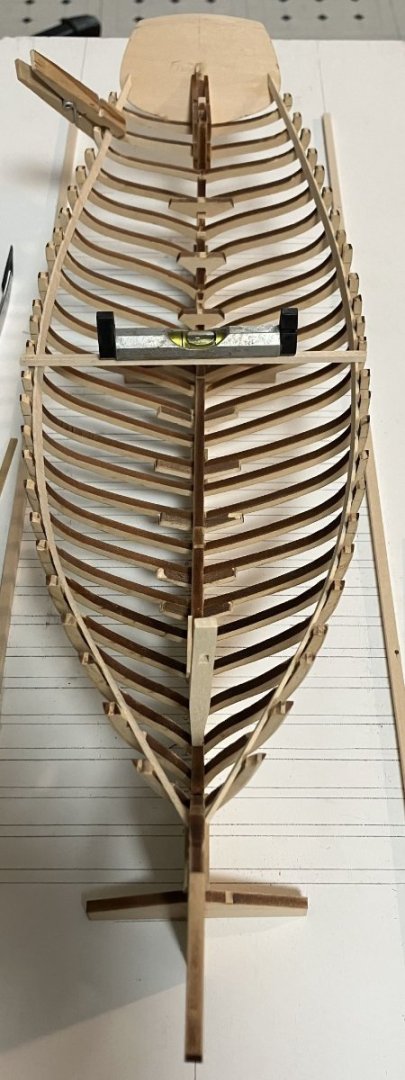
Thanks for the visits and the likes. I've finished the deck framing. I have a lot of sanding to do. I went across all the beams with a 1/16 inch thick piece of deck planking and checked all the beam heights and the sheer. They actually lined up pretty good. The strip at the transom seems a little off, bit it all lines up. It also seems solid and not too fragile. The forward cabin will be a little larger than the original cabin as seen in the photo. After sanding and double-triple checking heights and fairness, I'll install the covering boards. Comments welcome - Kenneth

-
Great build with the working rudder and all. Midwest does make very good kits and I really what you've with it. - Kenneth
-
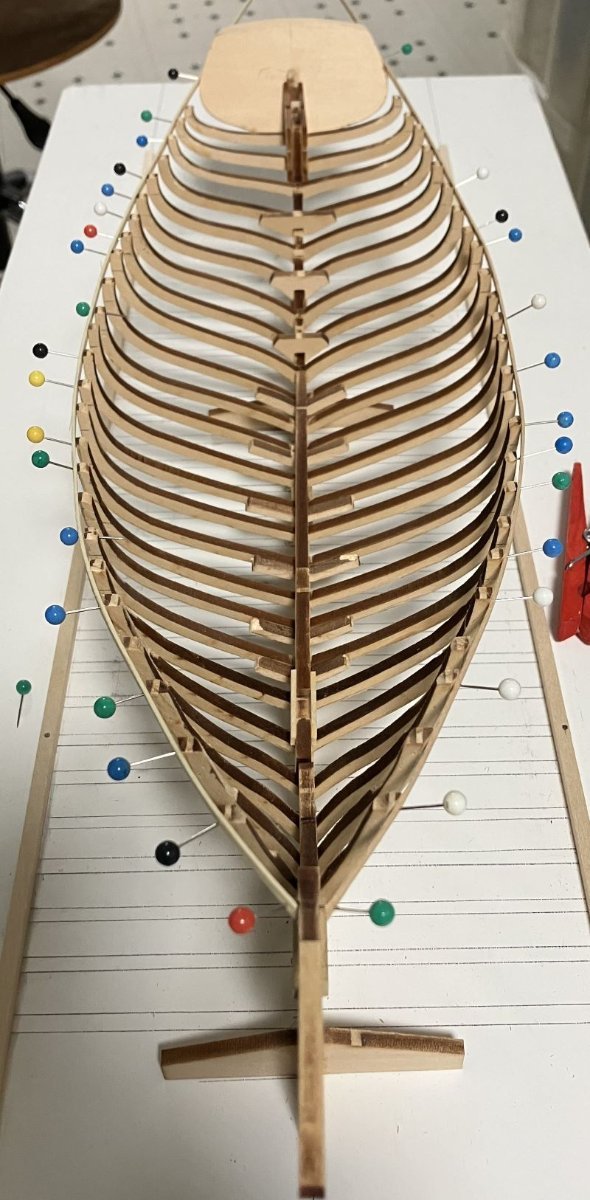
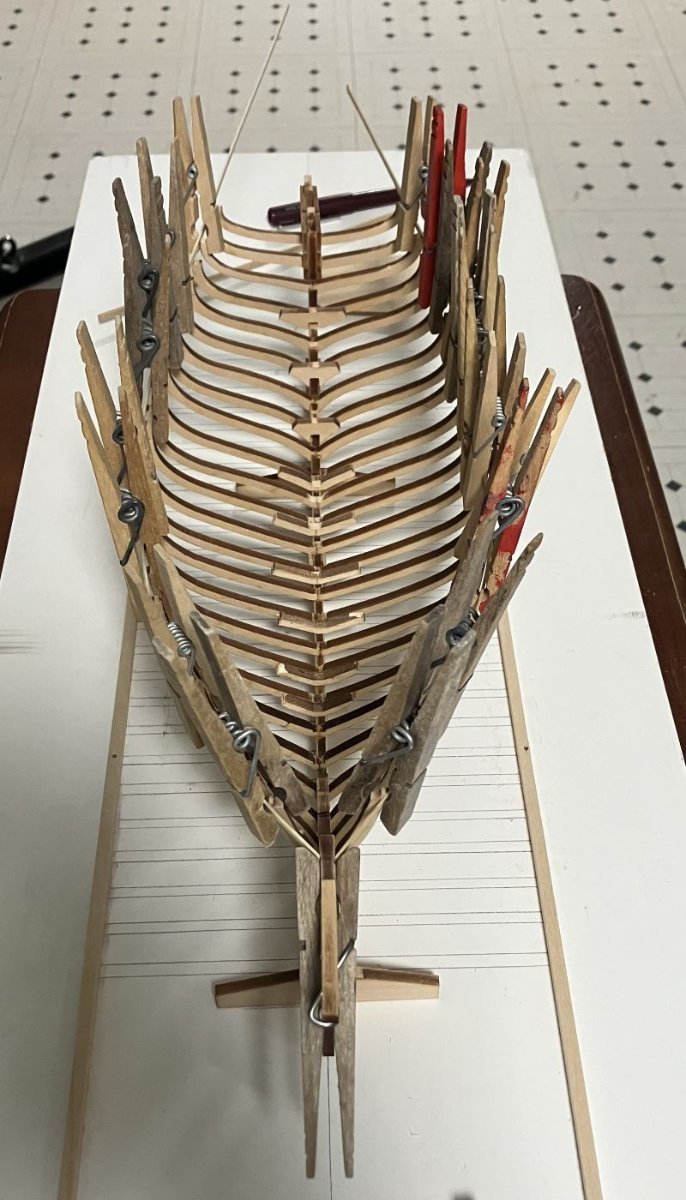
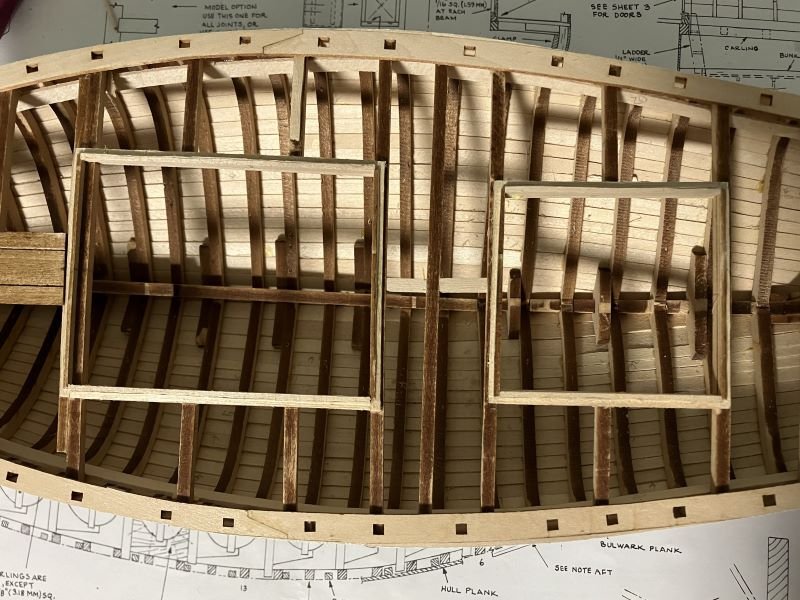
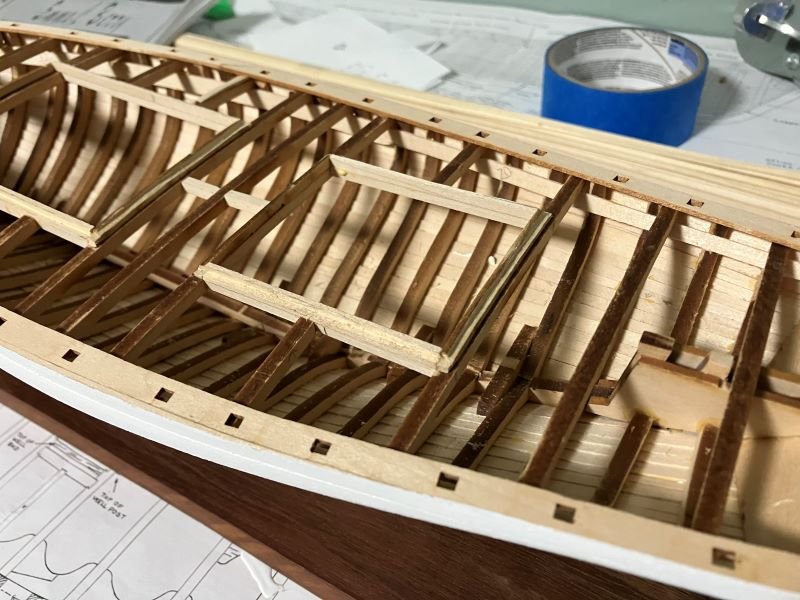
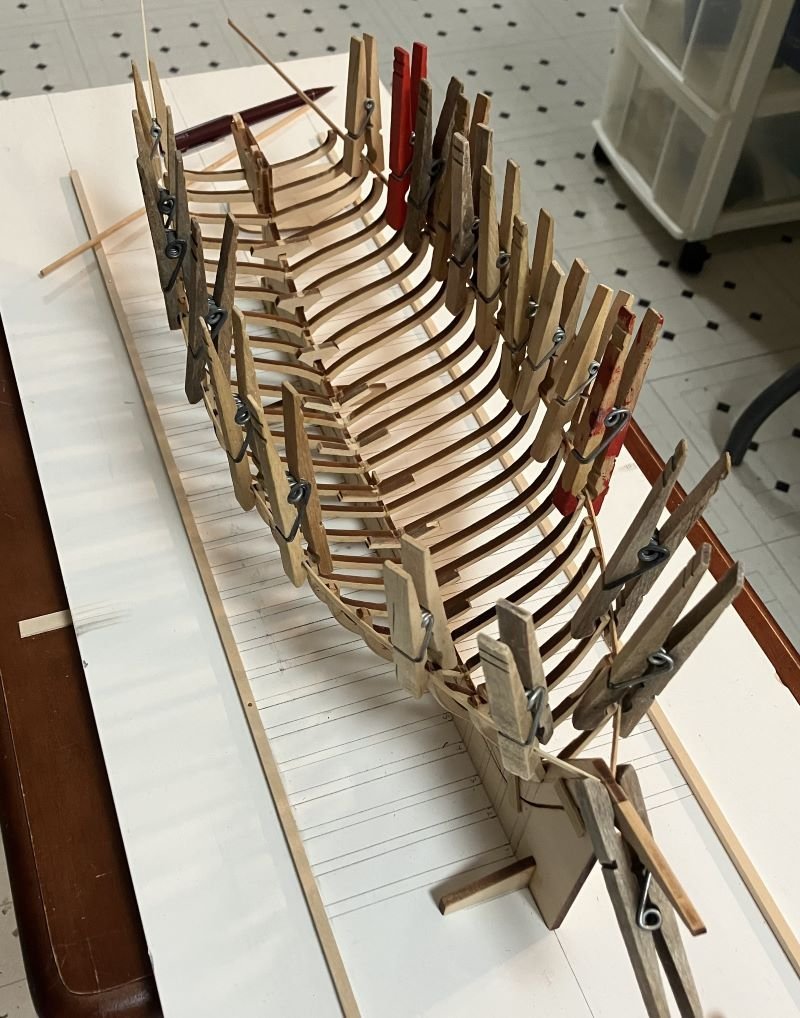
I exchanged clothes pins for push pins on the batten to make room to clamp the clamps. The clamp installed as per instructions with the bow sprit pawl just sitting there. Once the glue of the clamps dried, I went straight to installing the large deck clamps It was hard to edge bend the wide clamps to make the sheer, so some of the large deck beams have shims to bring them to the proper height. This is where I'm going off the grid. I'll frame the original cabin, then frame a larger cabin three beams forward of the original. The space can be seen in the above photos. - Kenneth


-
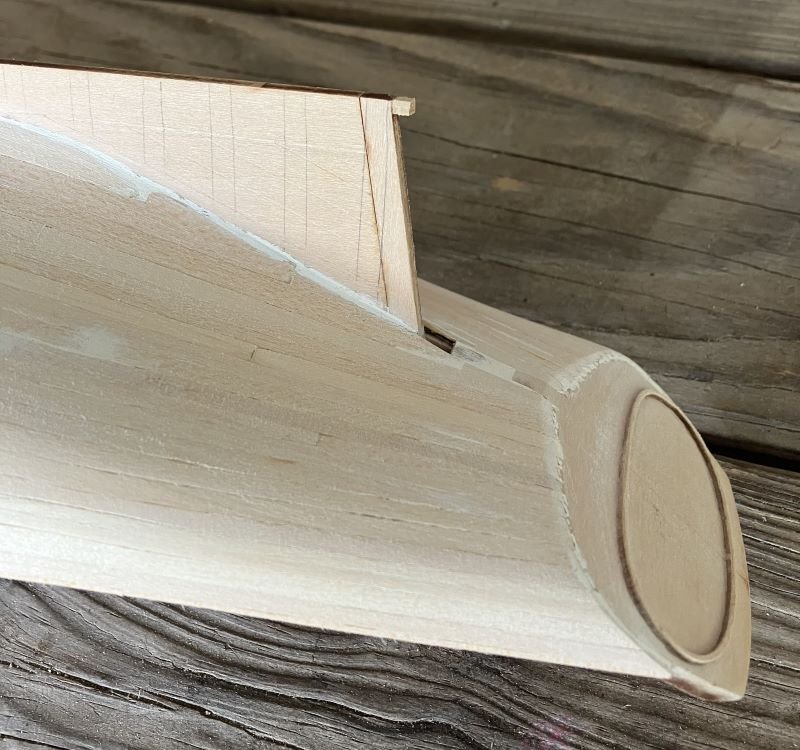
Carving the transom was fun and a little relaxing. The small molding proved to be fragile and broke once. So, I decided to glue it to the transom and then sand it to half round once it dried. Installed Clamps are next - Kenneth
-
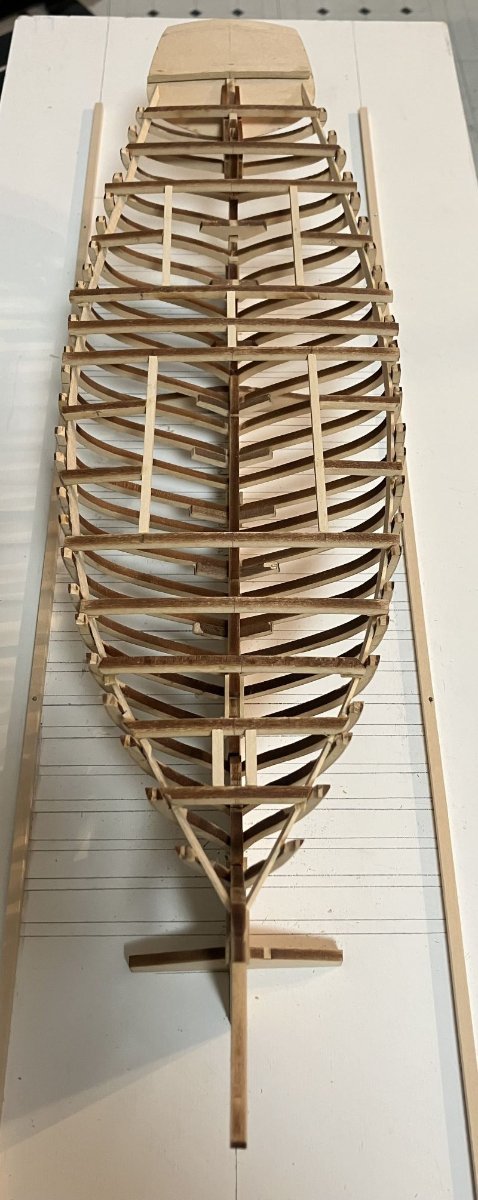
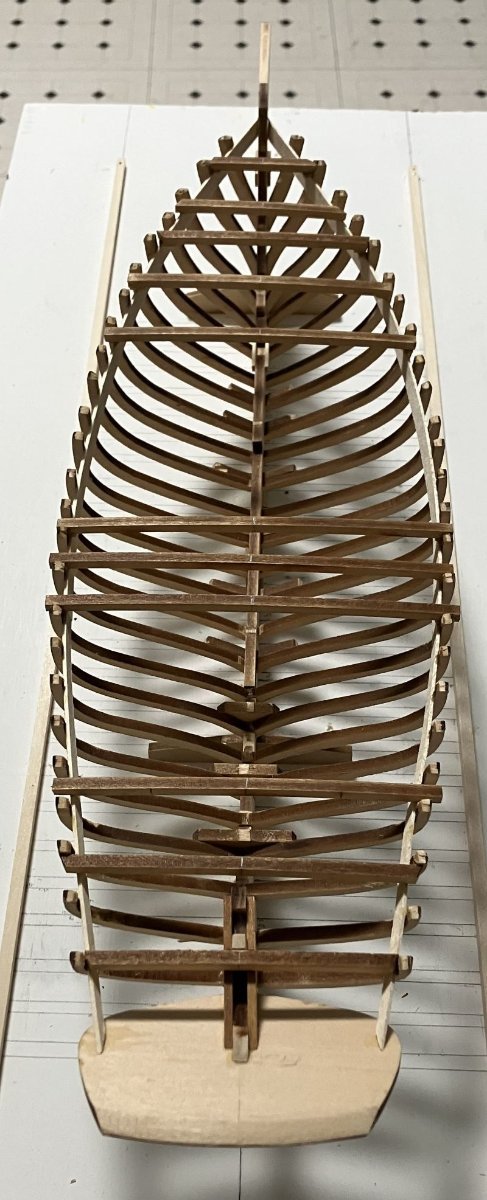
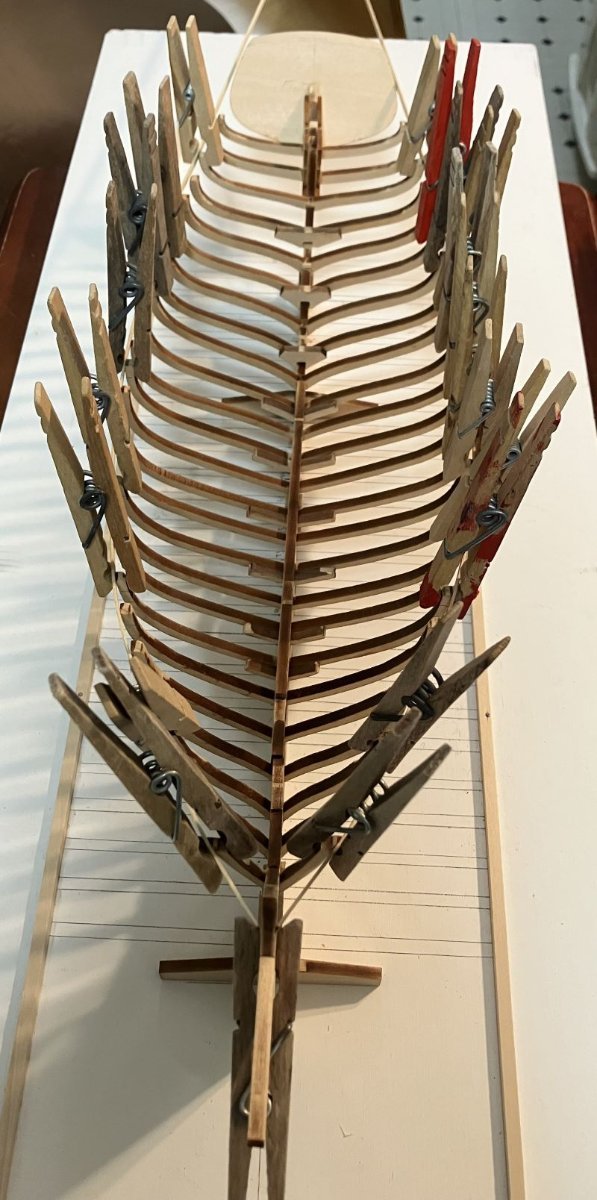
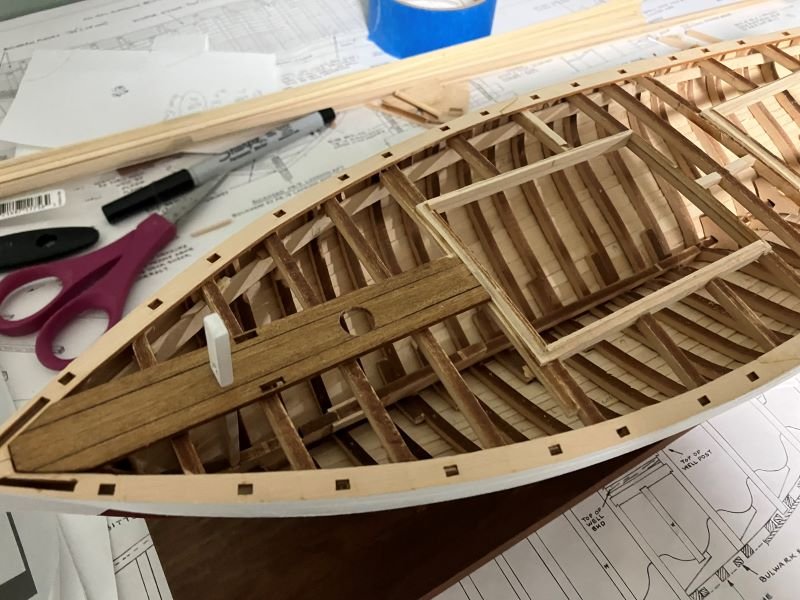
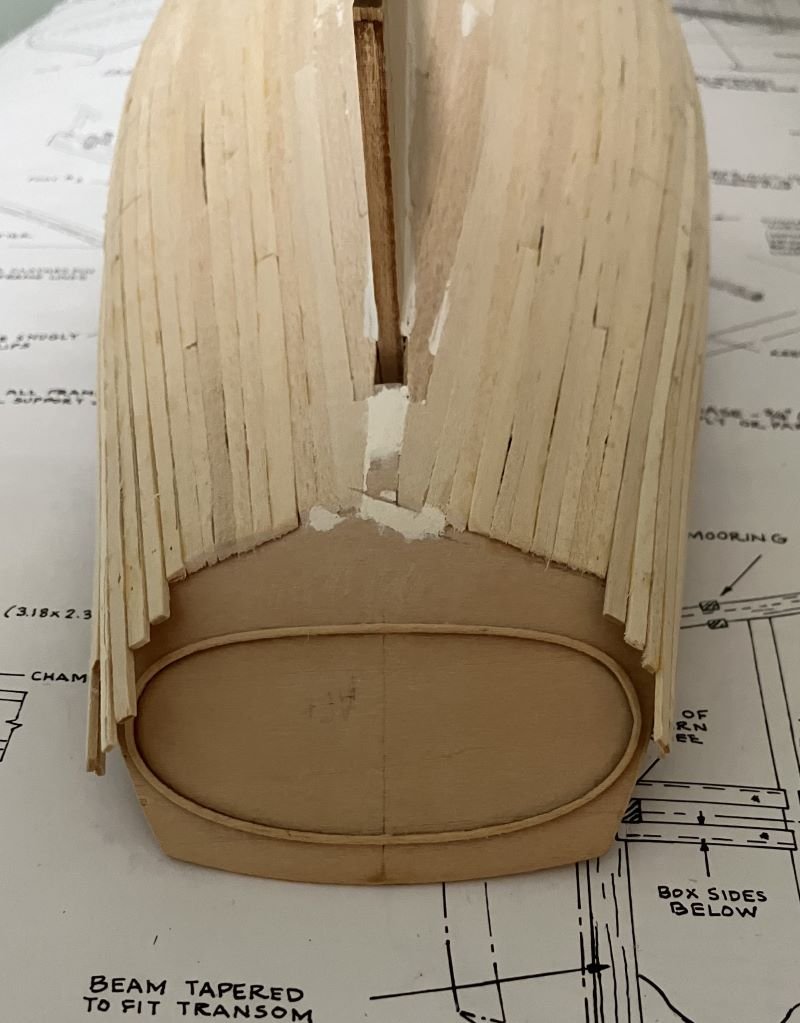
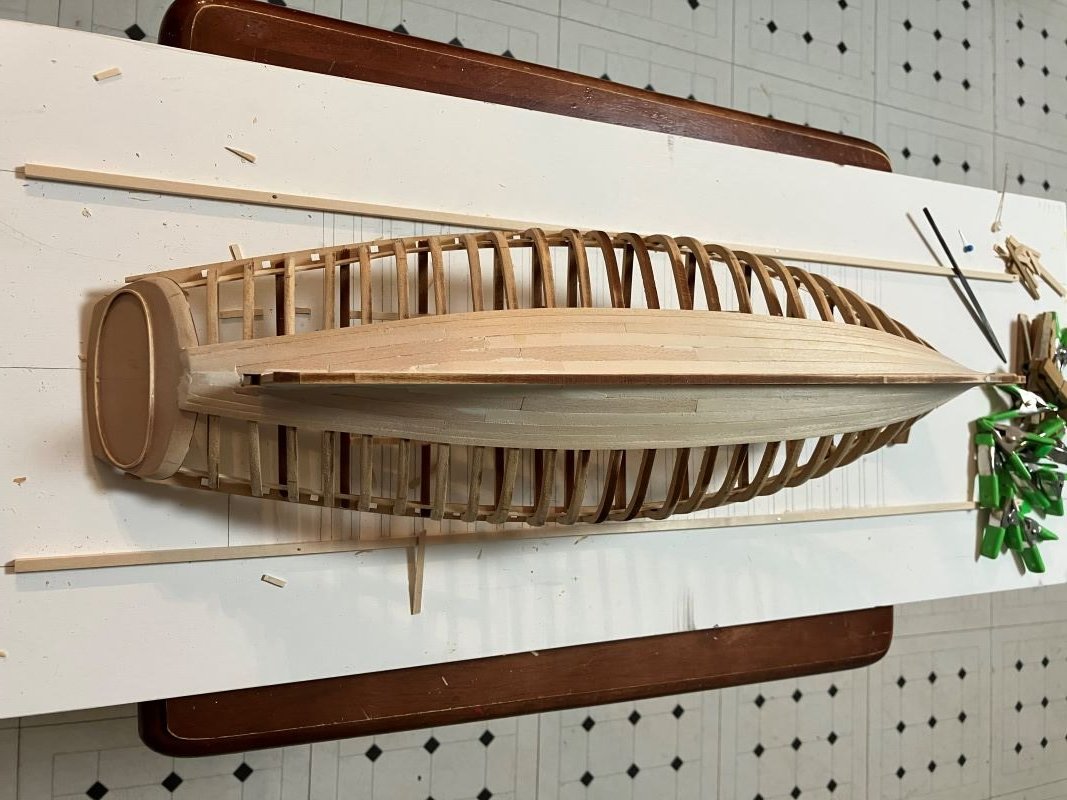
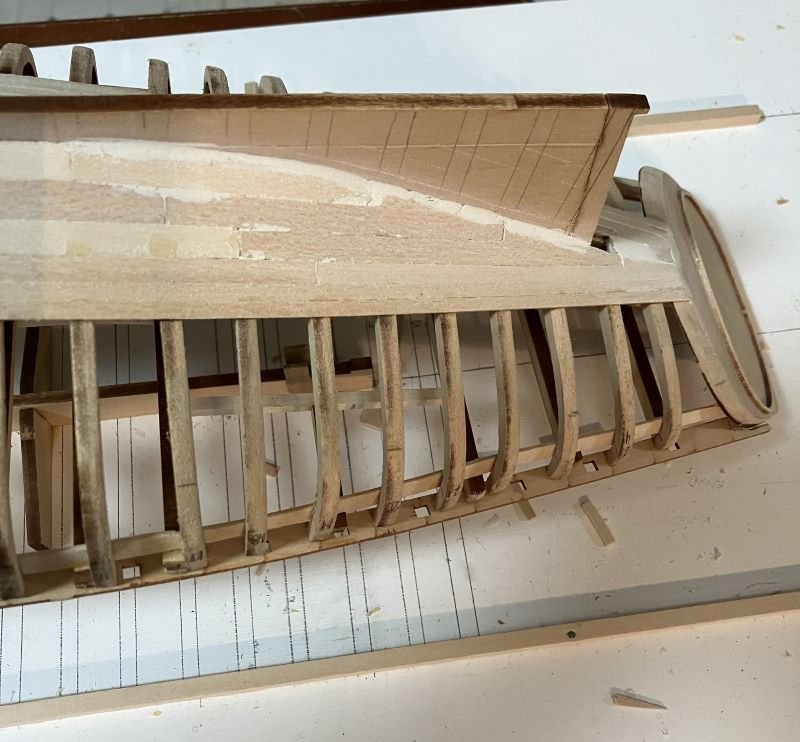
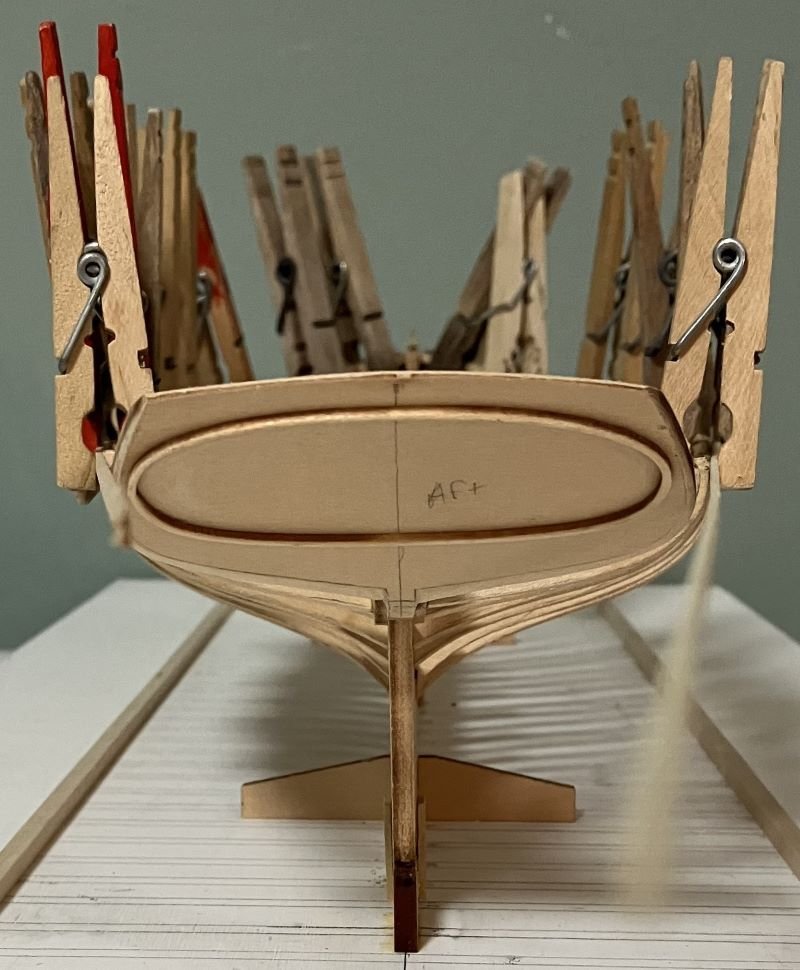
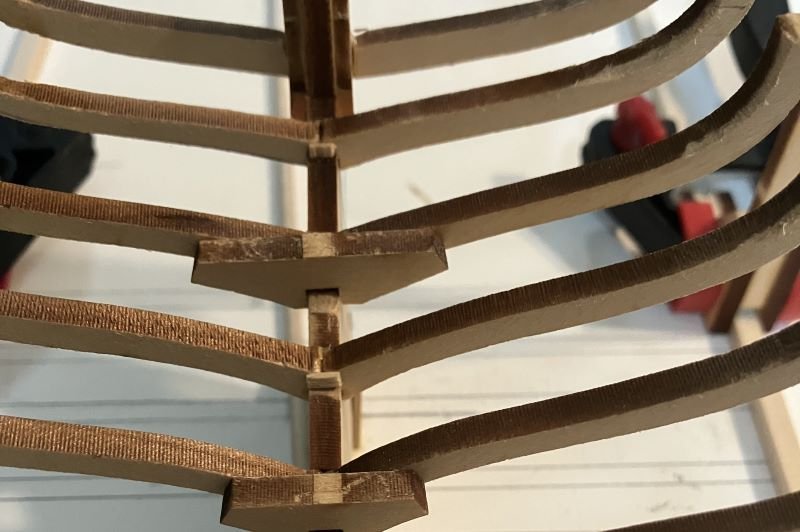
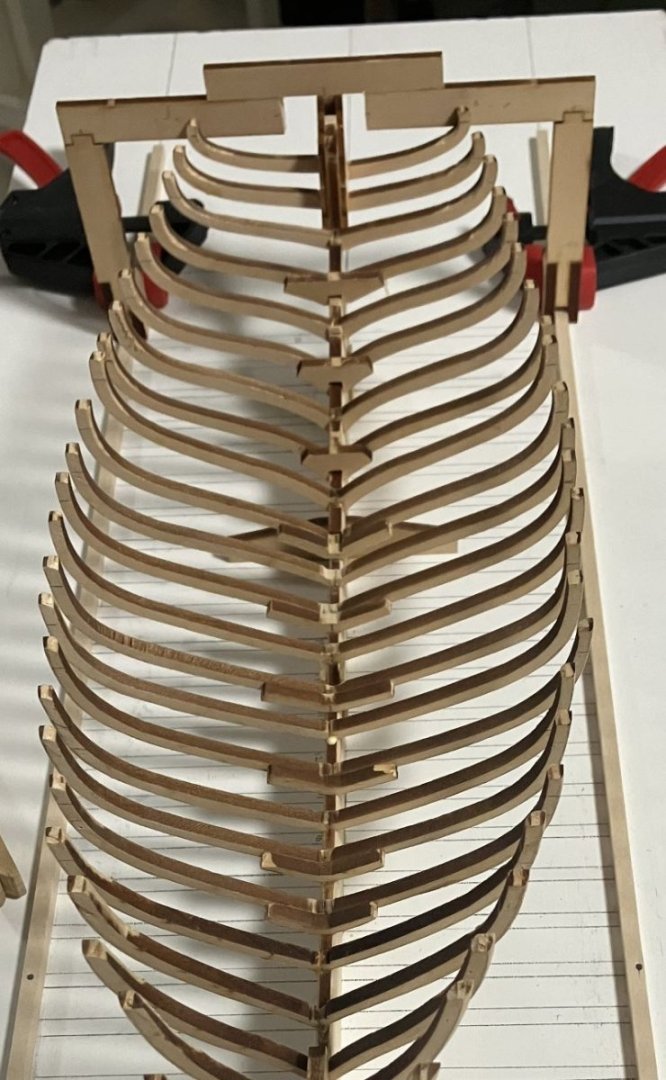
Hello, Everyone - The frames with no floors have a very small surface area for glue, so I cut a small piece of 1/32 strip and glued it to the front and out of the way before lifting them from the plans. They did help hold things together. I made my notch by cutting a piece from the laser cut sheet of the building fixture and gluing it on top. The thickness is the same and it's square. Then I carefully cut and removed the small section to allow the horn timber assembly to pass. There's no room for temporary strips on the last two frames, so I marked the height on the building fixture and clamped them in place. The temporary batten did tighten things up. She looks pretty fair and the clamps will finish holding things together. I will also dry fit the covering boards as I go to make sure things really fit accurately. Next on the list is to install the keelson and transom. Comments welcome - Kenneth

-
Outstanding work. She looks great. - Kenneth
-
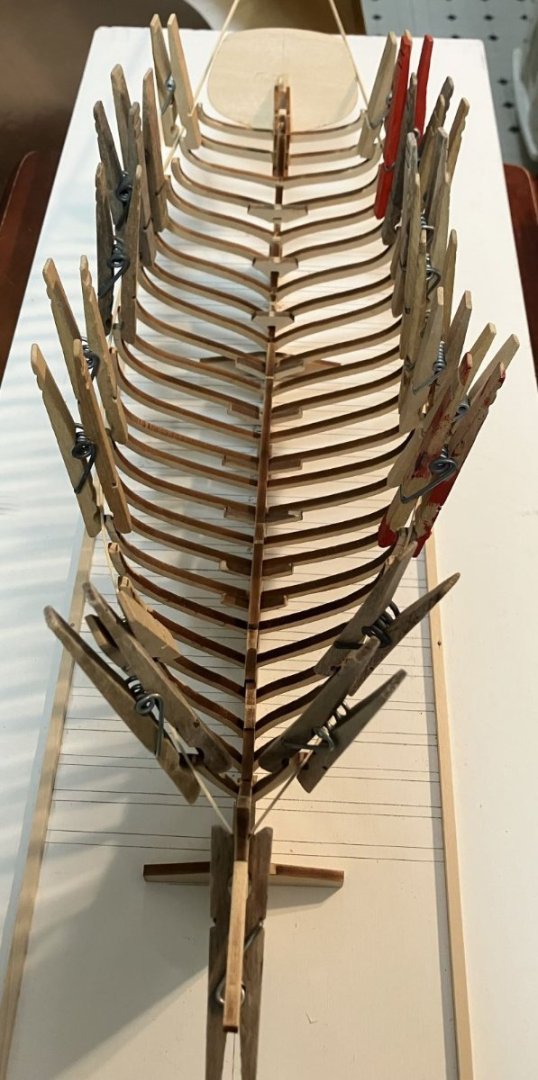
Update - I made it to frame 23 She looks a little snaggle toothed but the frames should pull in and level out with the clamps and battens. The keel assembly is too tall for the last two frames, so I'll have to cut a notch in the building fixture for them. It's important to check the height of each frame to keep the proper sheer. I've found that the height of each frame that sits on the keel is almost dead-on once it's made and glued. This is a really good kit. - Kenneth