MORE HANDBOOKS ARE ON THEIR WAY! We will let you know when they get here.
×


SIDEWAYS SAM
-
Posts
248 -
Joined
-
Last visited
Content Type
Profiles
Forums
Gallery
Events
Everything posted by SIDEWAYS SAM
-
Hi Alanyed and thanks for the input. Unfortunately I have already located and fixed in position the wales according to the profile drawing supplied with the kit. This seems to match the AOTS book but gives what appears to be a different planking run requiring stealers. I will check the contemporary drawings you reference but feel it's a little late to change course. I have trawled through other logs on this forum and found an enormous amount of information some of which is contradictory and some which is supplied by different kit manufacturers. I feel that I need to pick a direction and stick with it. Once again, thanks for the interest shown and have a good summer in Florida. Regards, Sam.
-
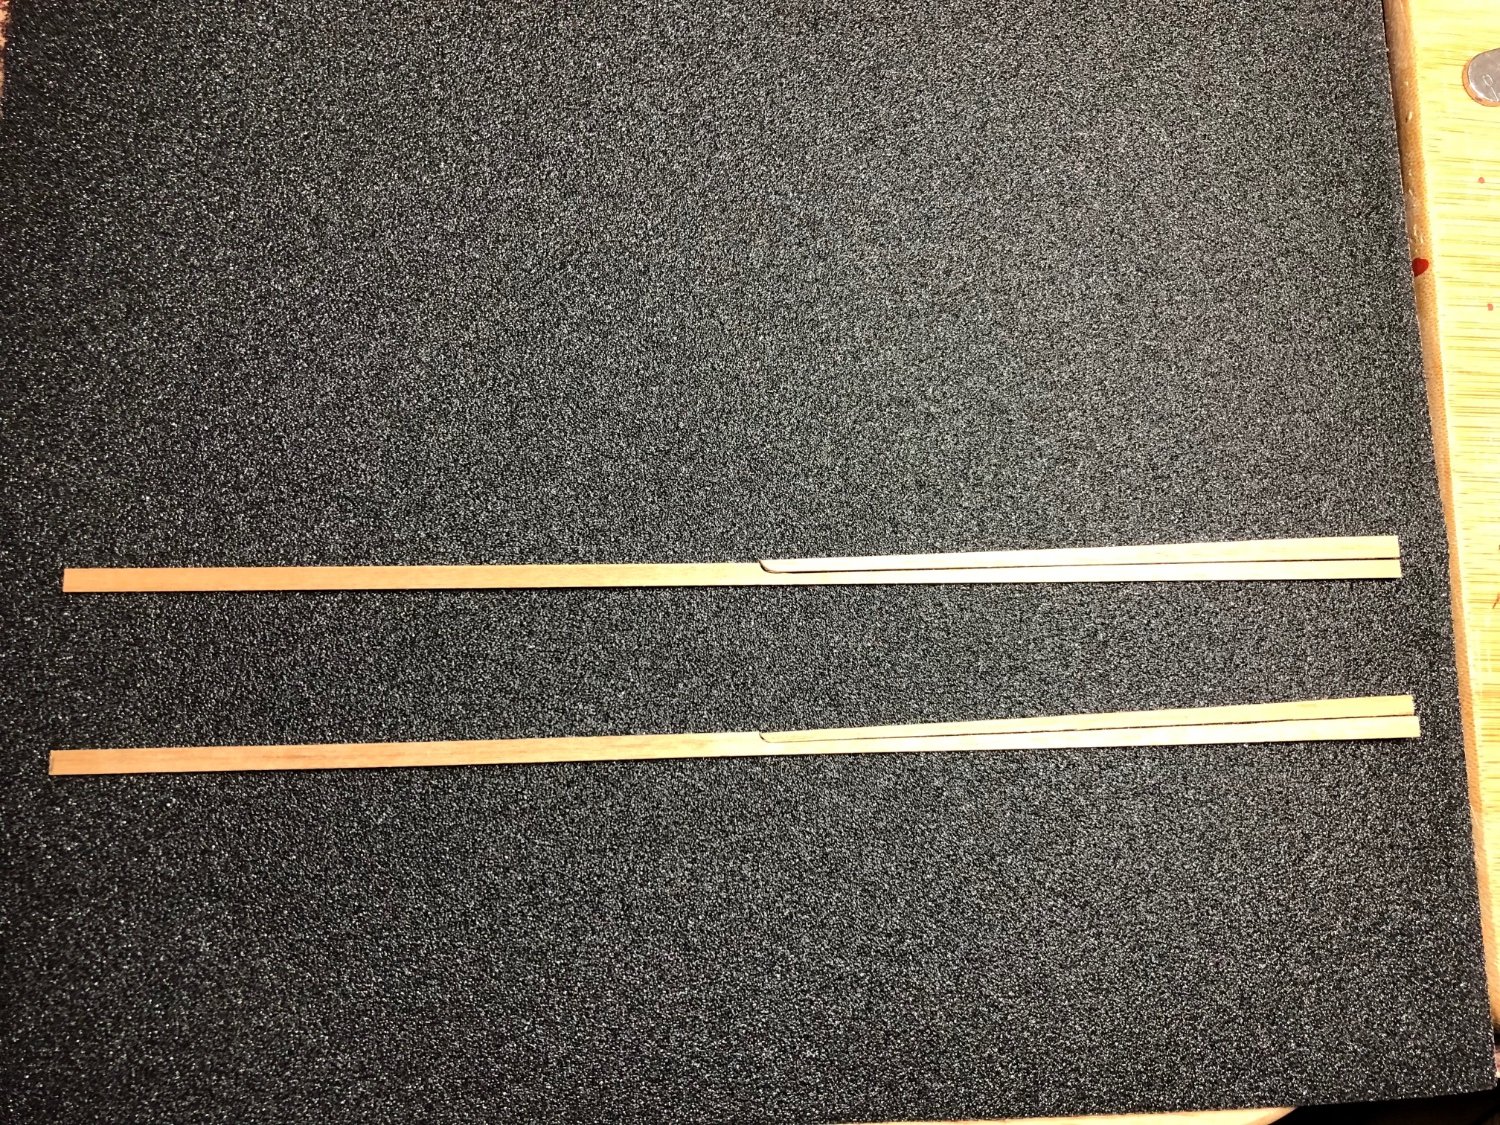
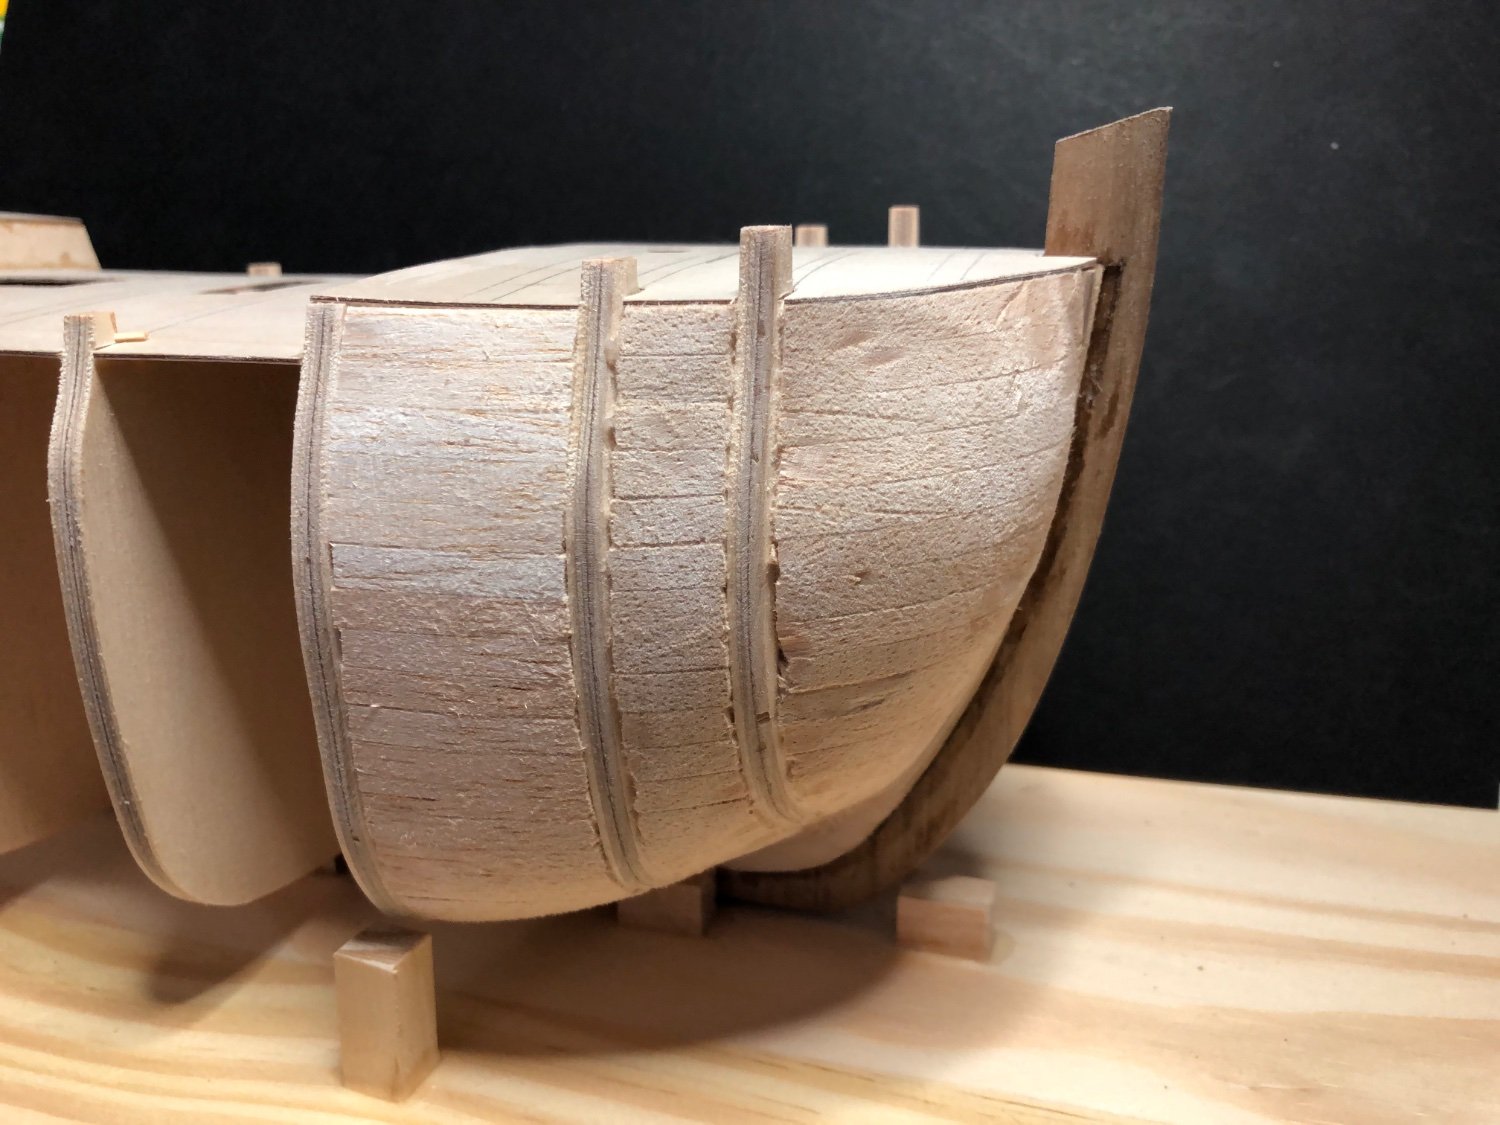
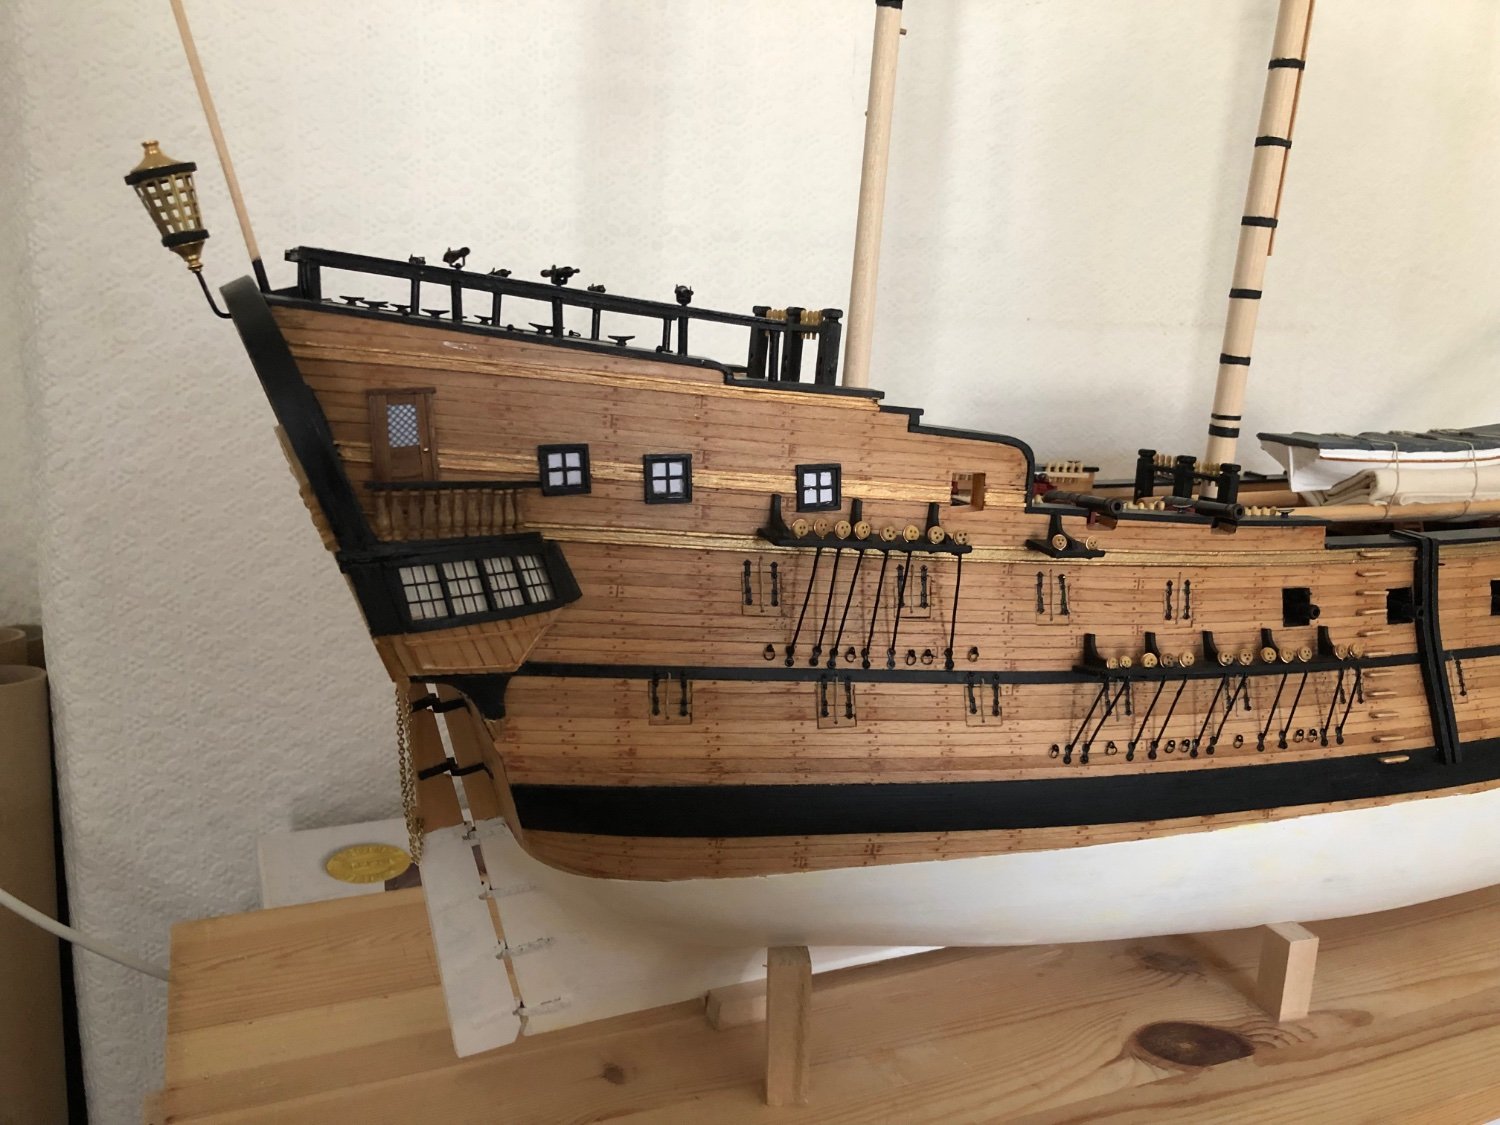
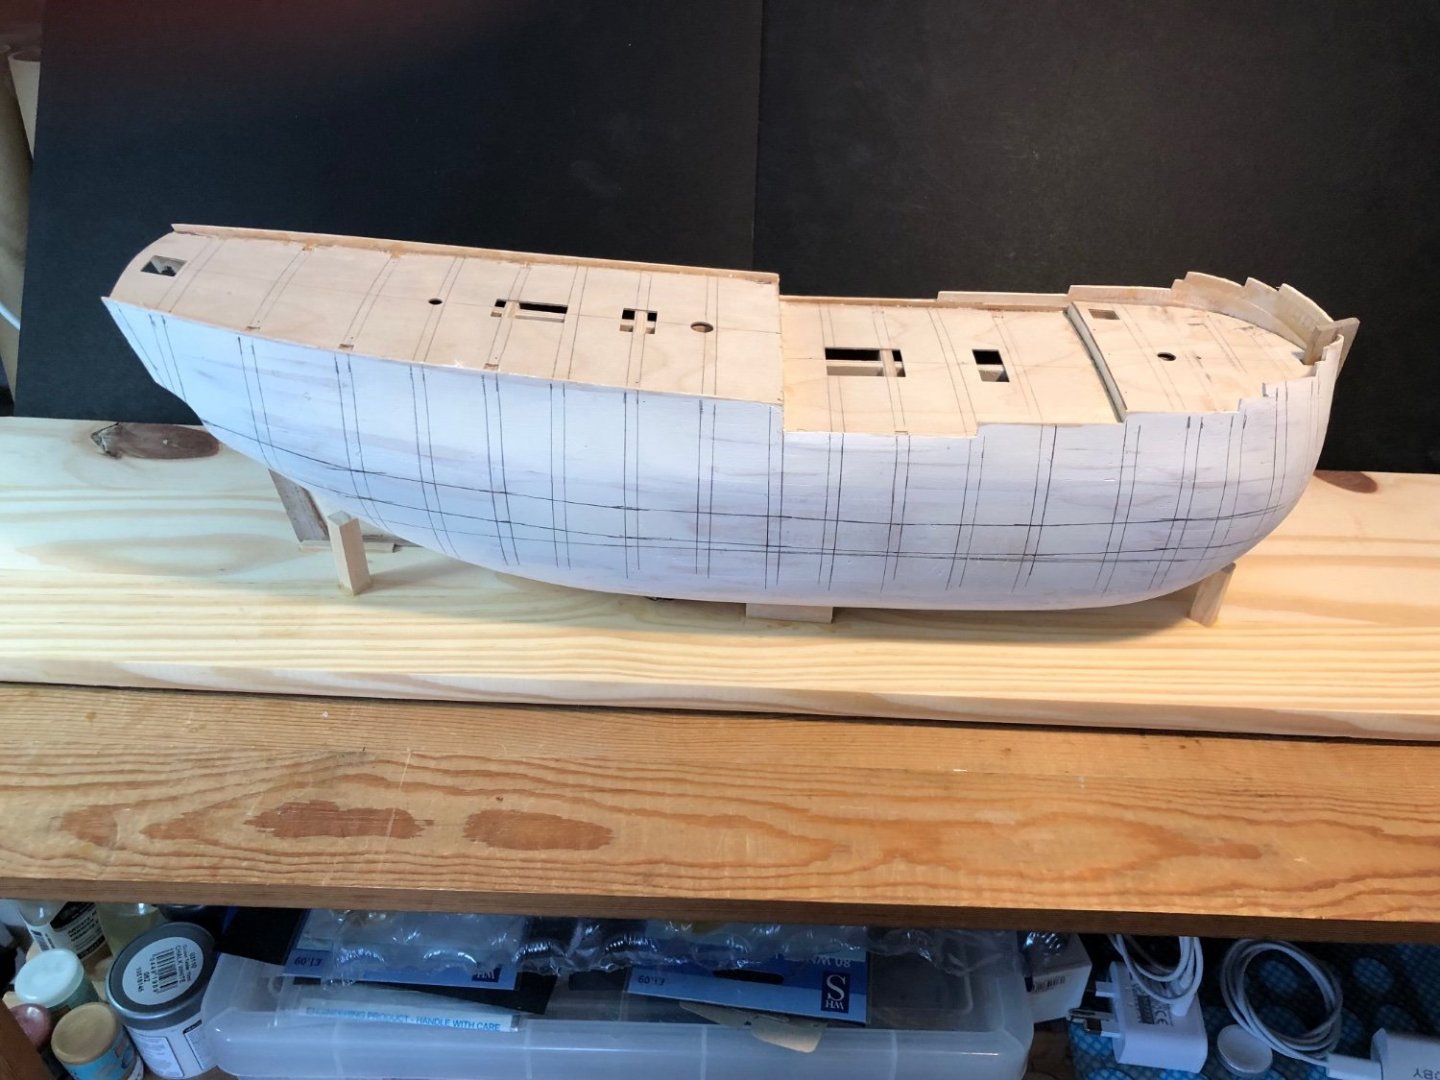
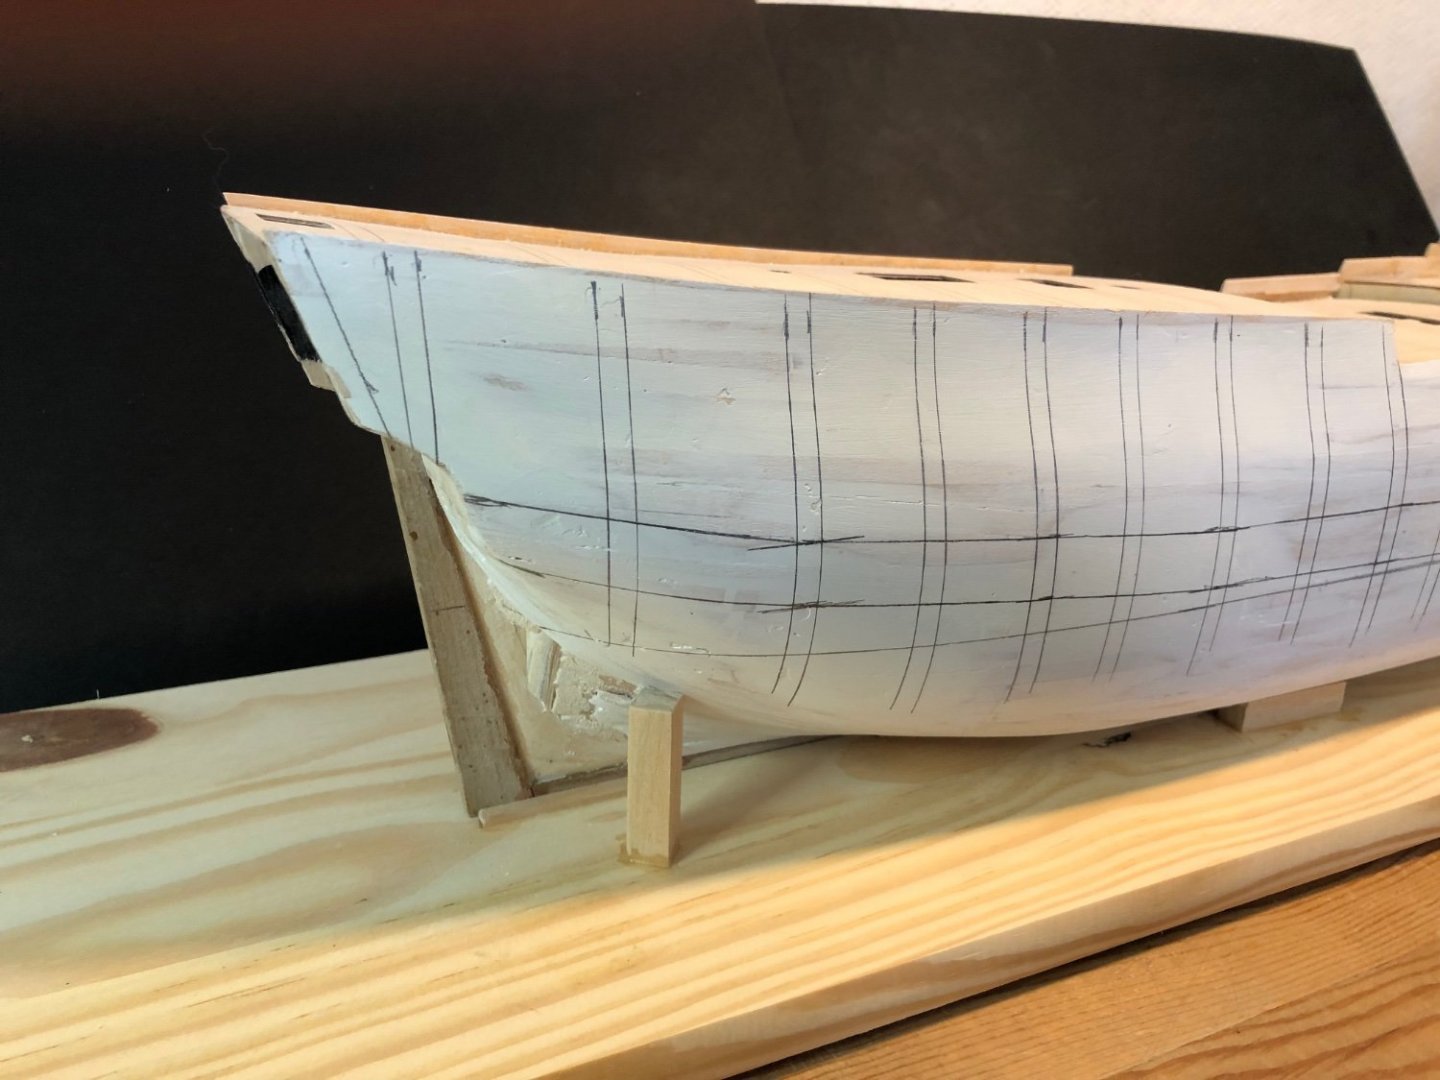
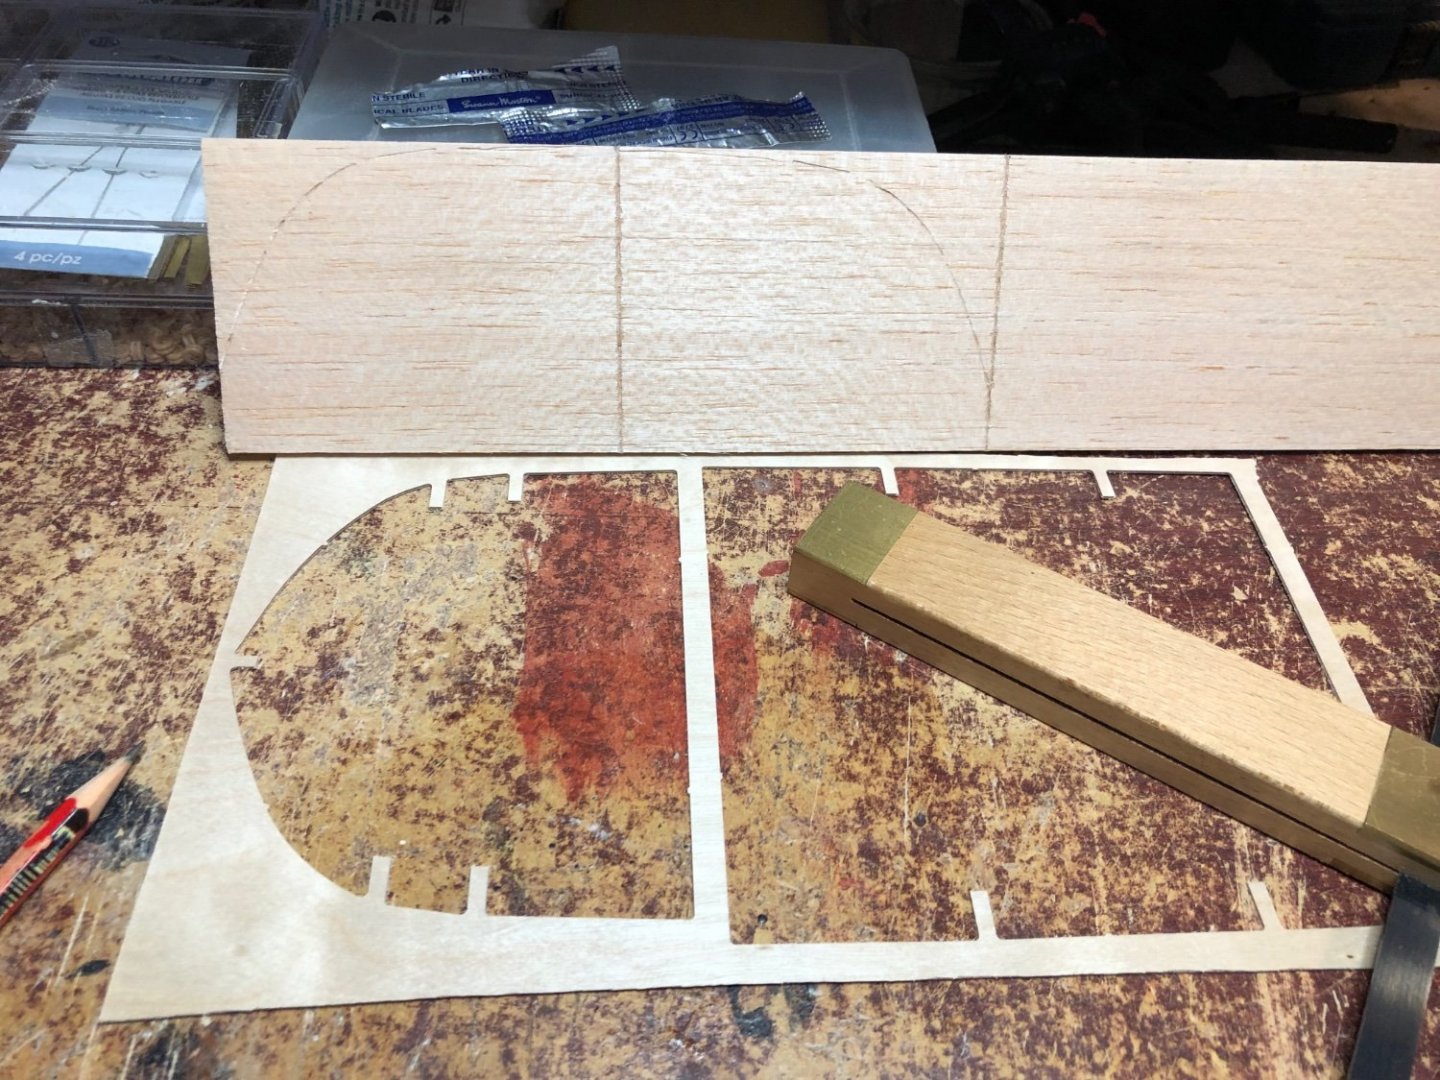
Hi, and thanks for the likes. Starting on second planking above wale. After a first measurement I think that towards the stern planks will need tapering and towards the bow I will need to fit two or three stealers. This build has a very busy hull so I will try to keep these towards the wale. Photo below shows the first run cut. Regards, Sam.

-
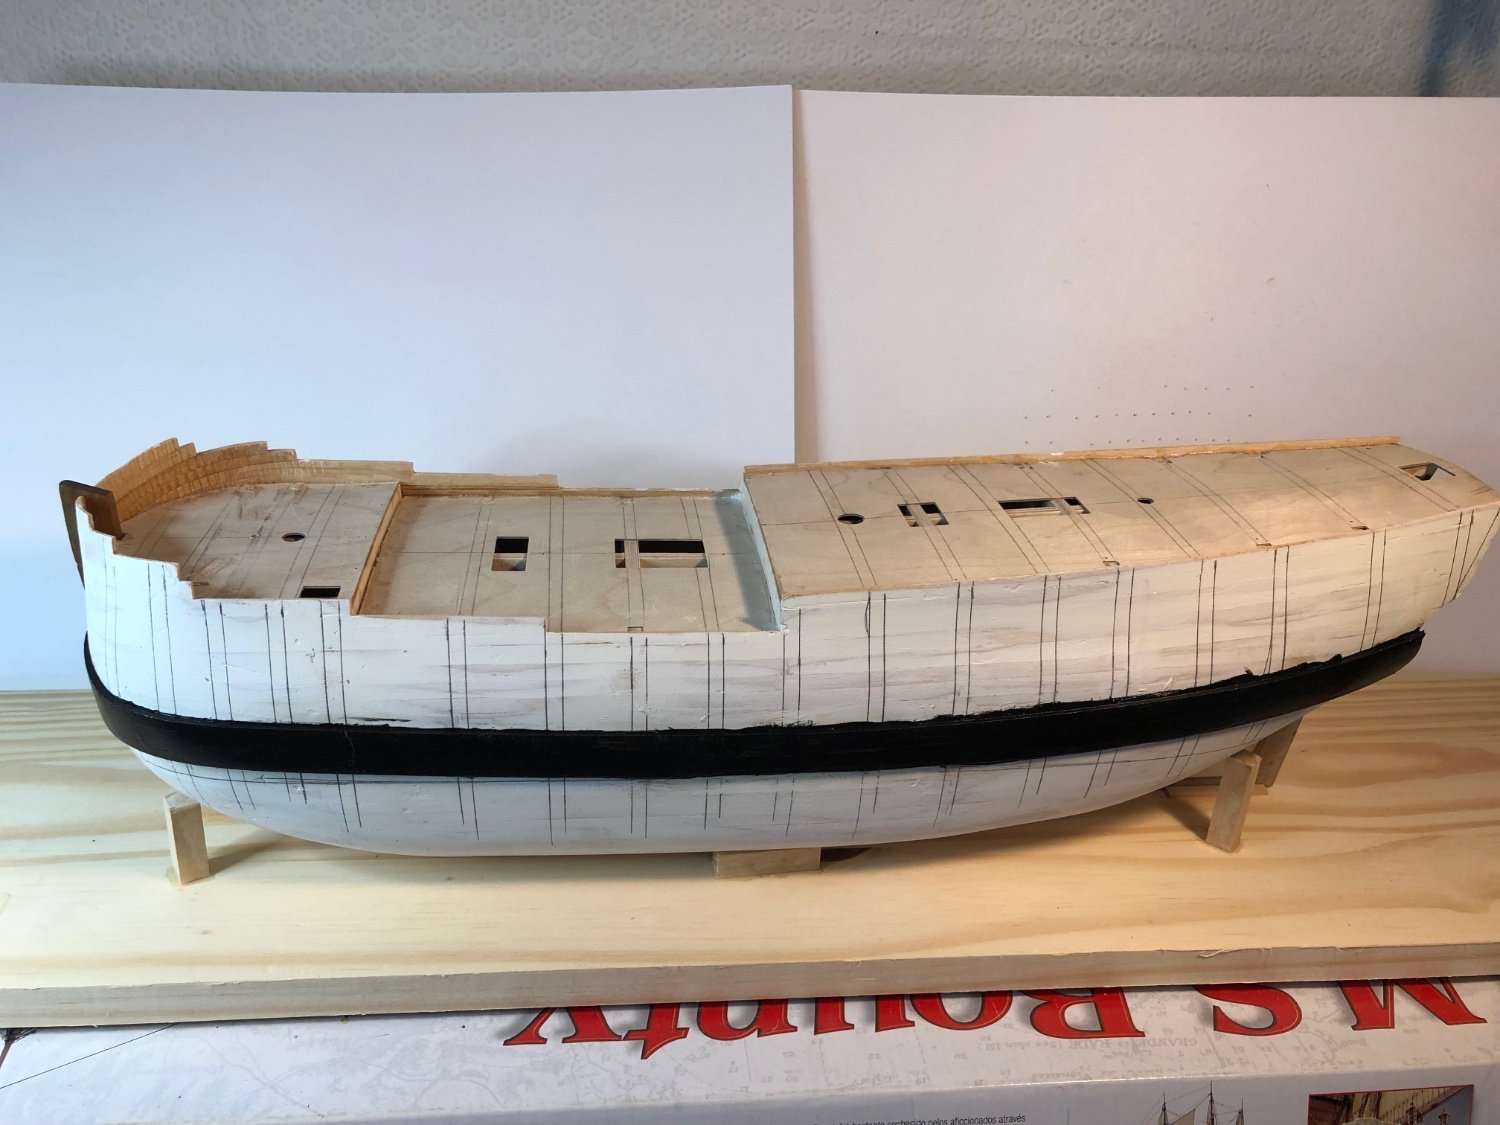
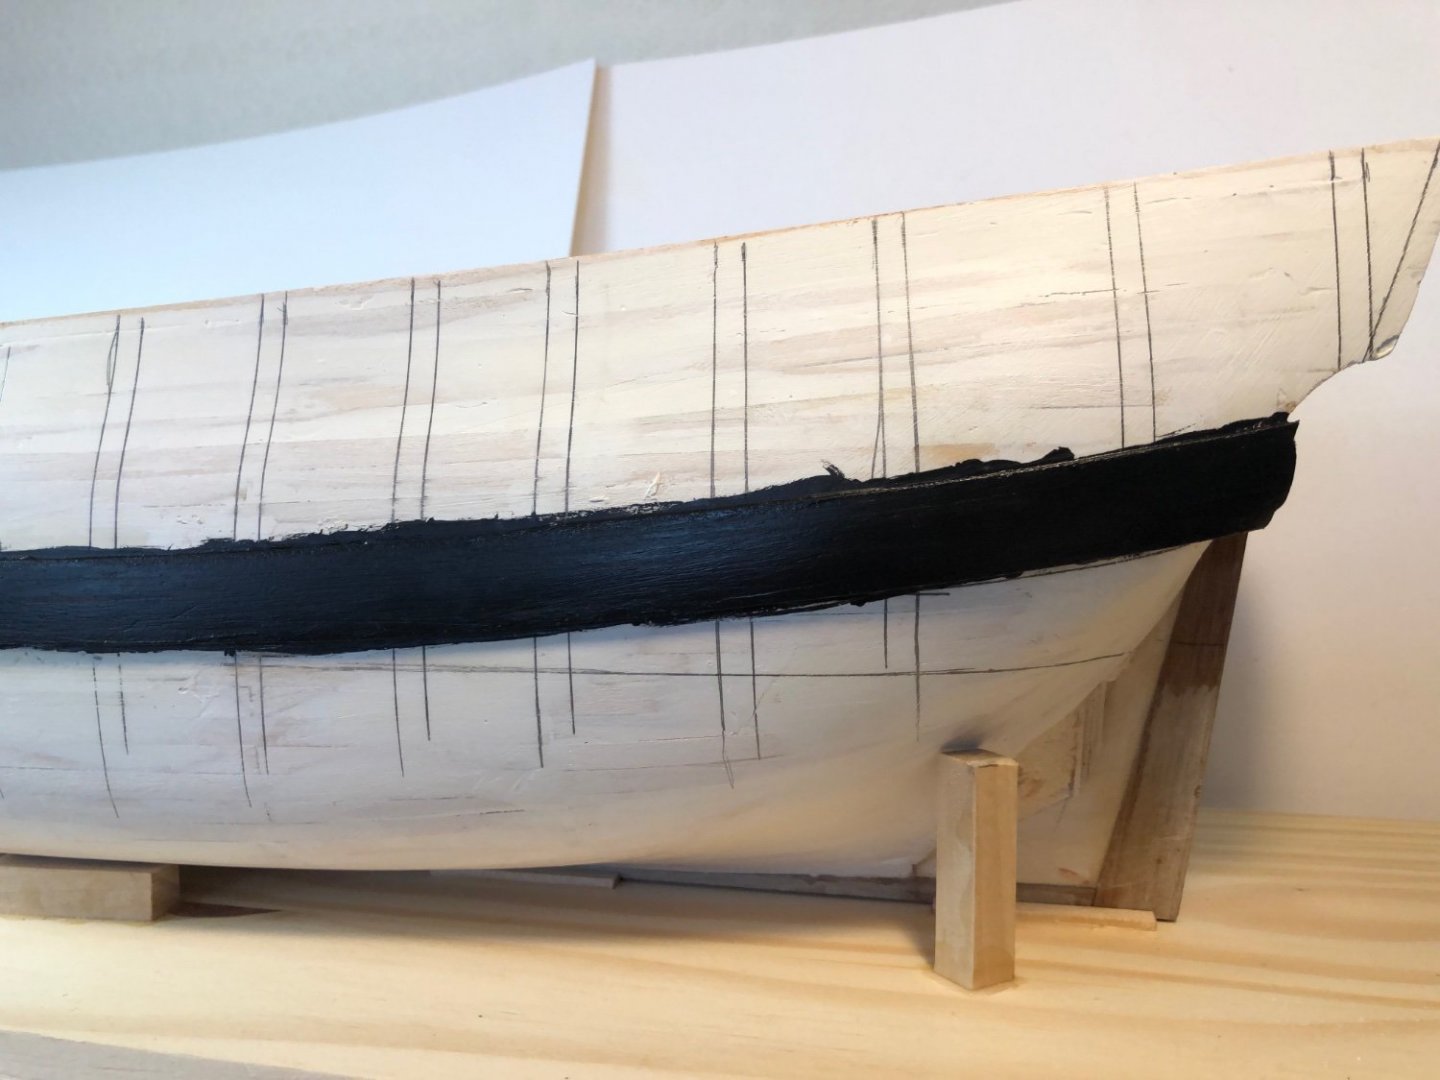
Hi, and thanks for visiting. Wales fitted, painted and varnished. Used Admiralty Paints Shark Black and Winsor and Newton Artists Satin Varnish over. Both one coat wonders and quick drying though the varnish takes a couple of days to fully harden. Was expecting trouble at the bows so used flexible beech strip. Went OK. Second planking next --- this will need thinking about. Using 4 x 1mm tanganyika for this along with 6 and 7mm wide strip for stealers etc. The shear strake will be notched to suit the channels. Easier now than later. Regards, Sam.

-
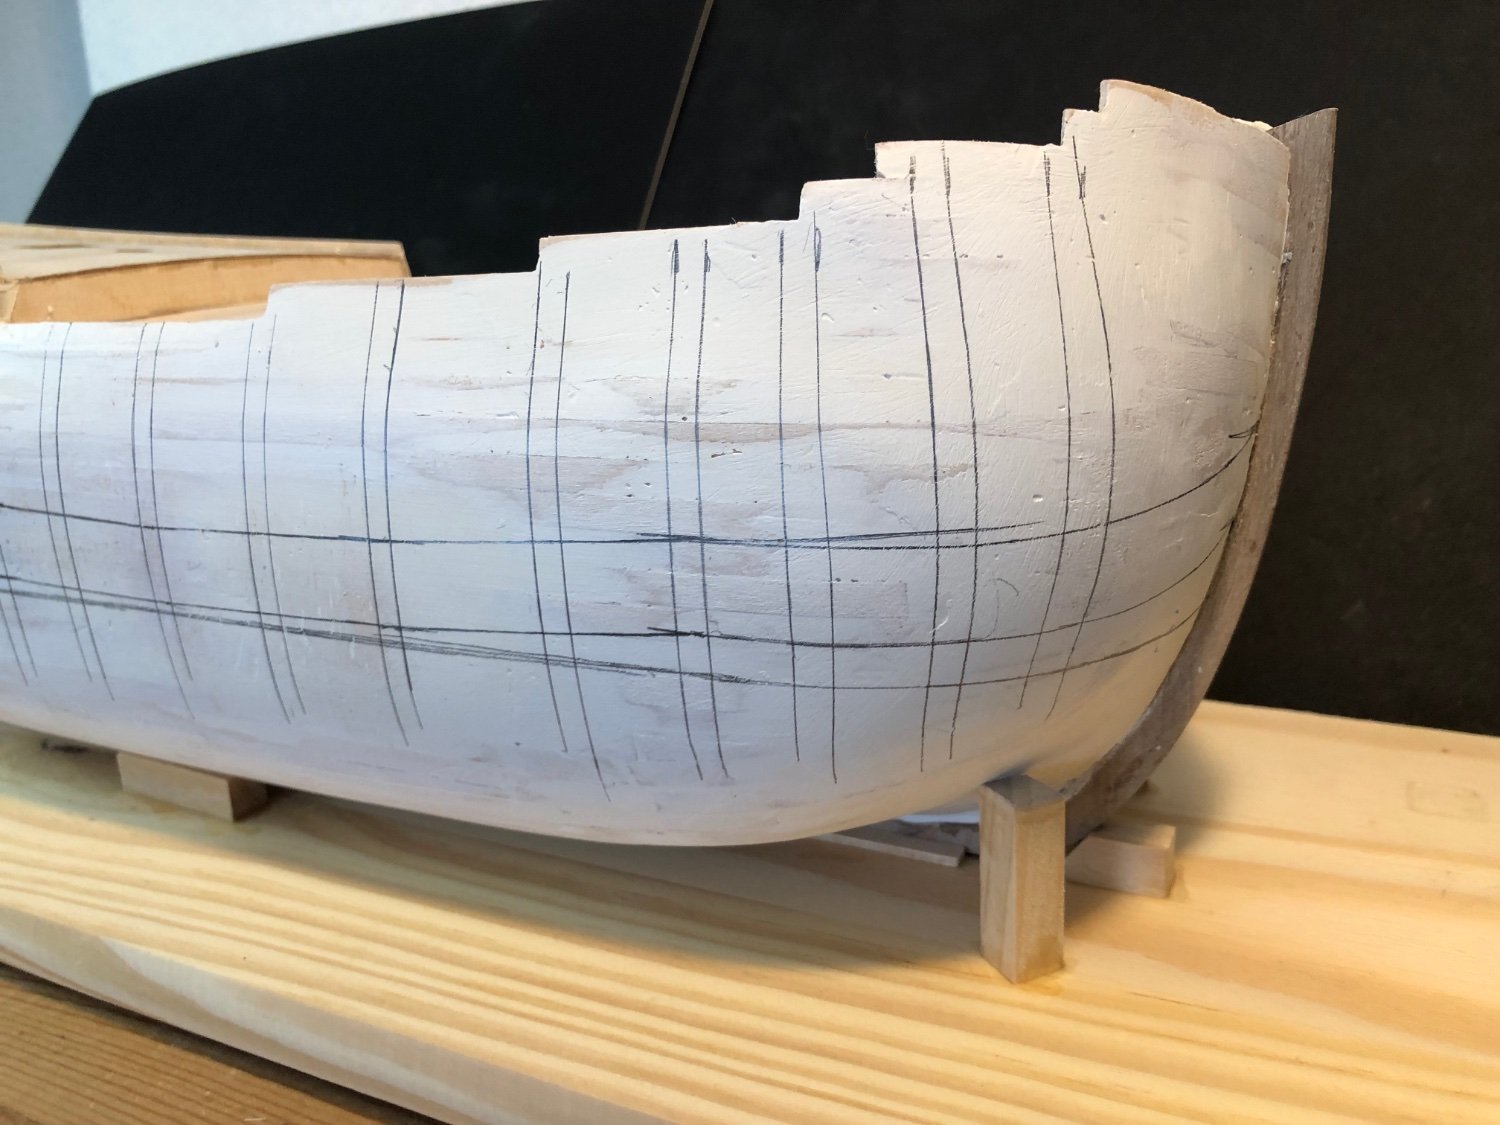
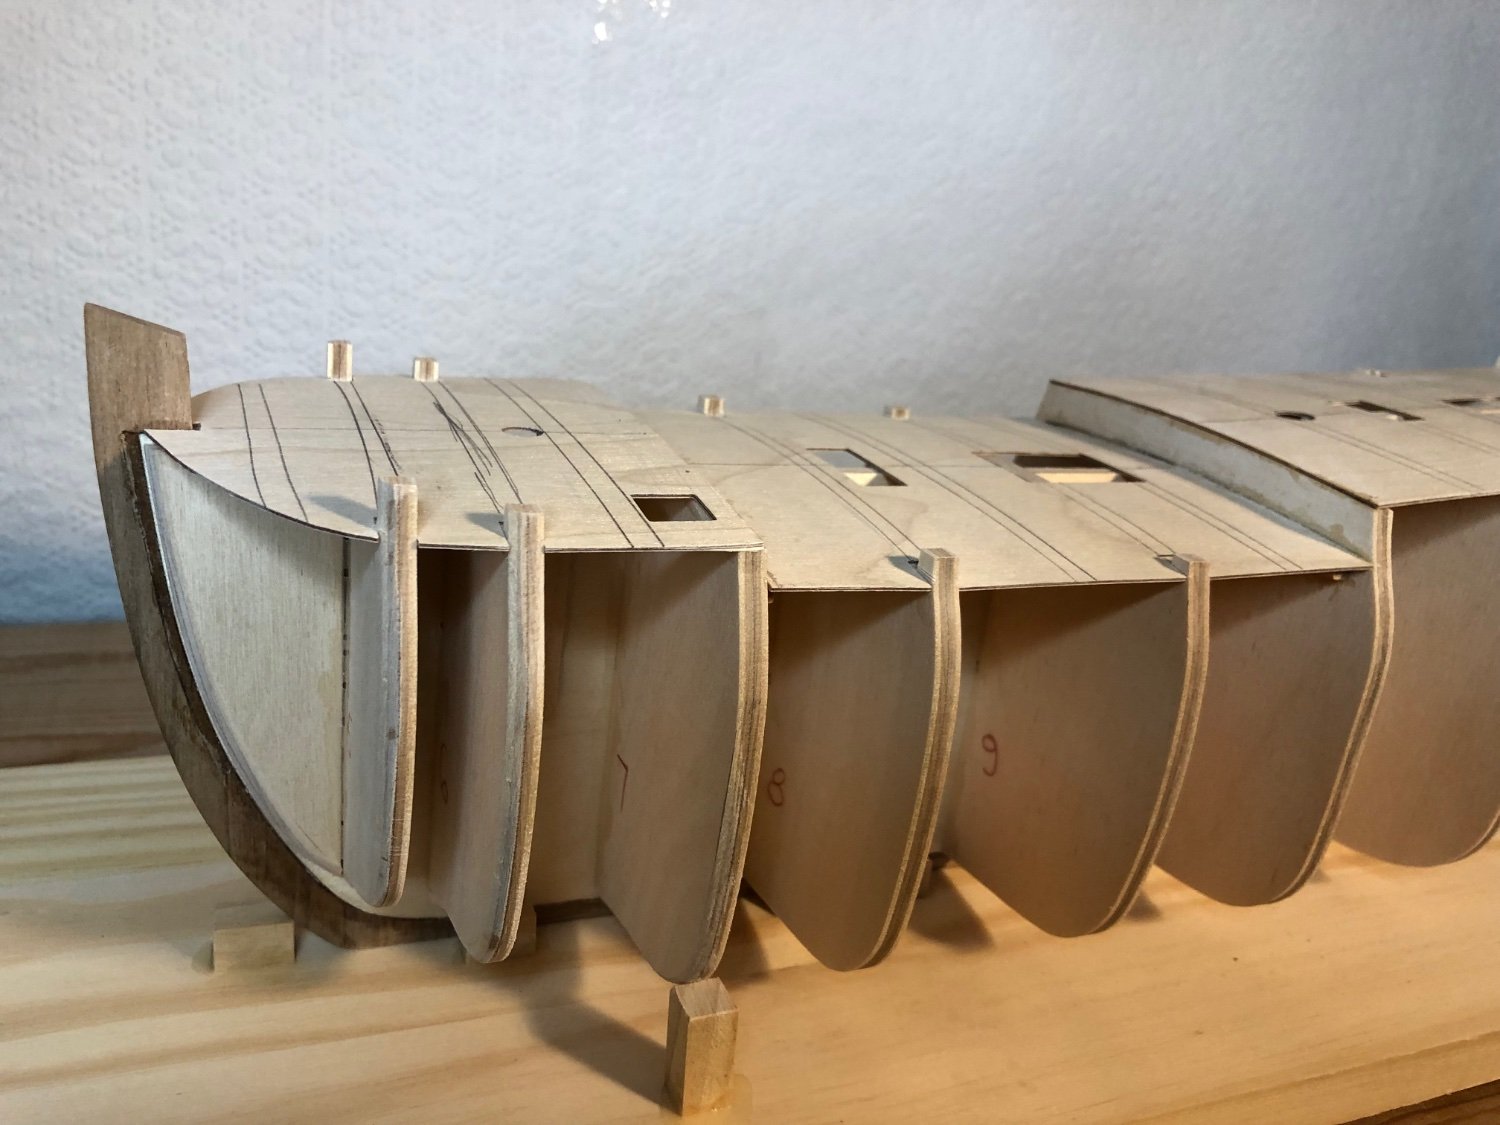
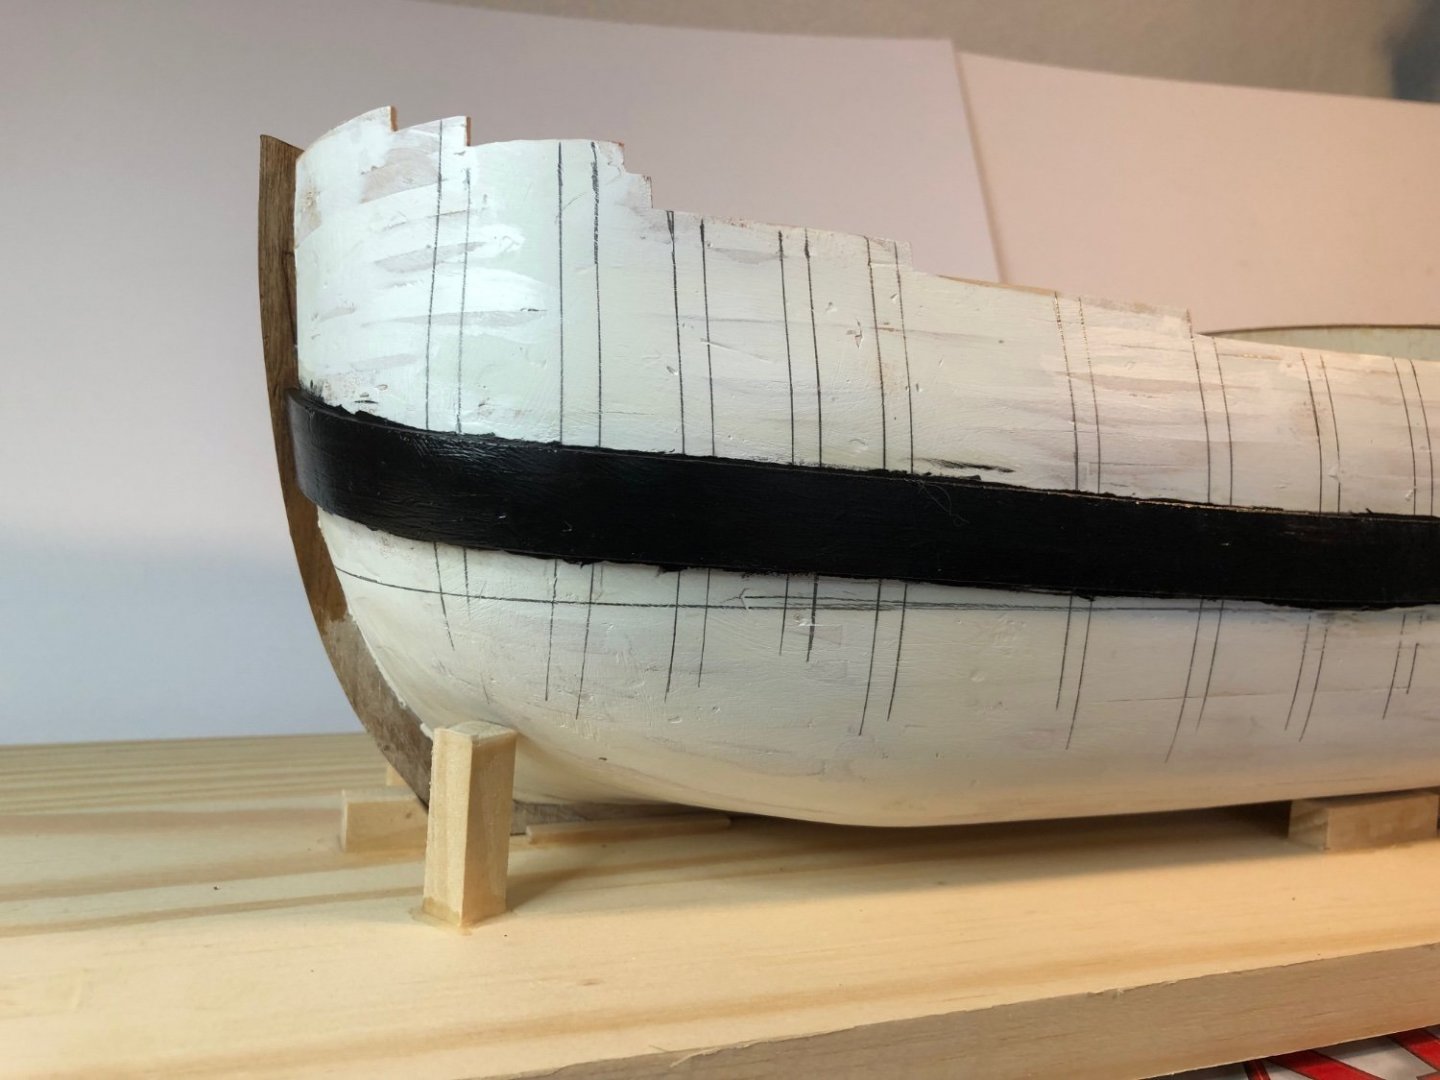
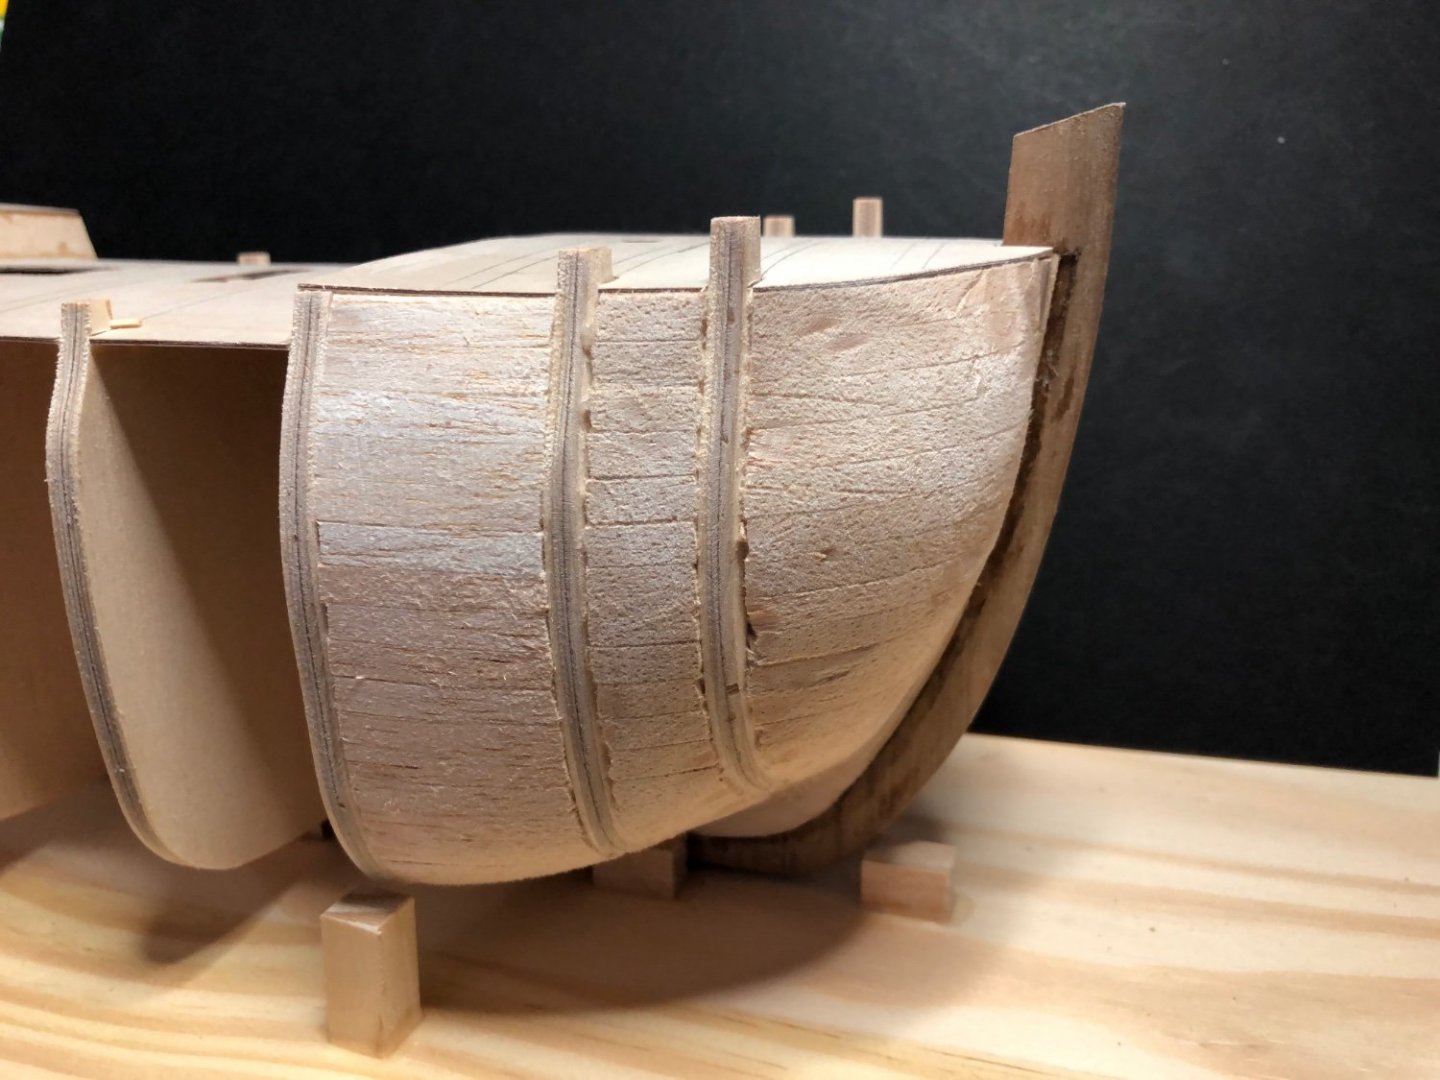
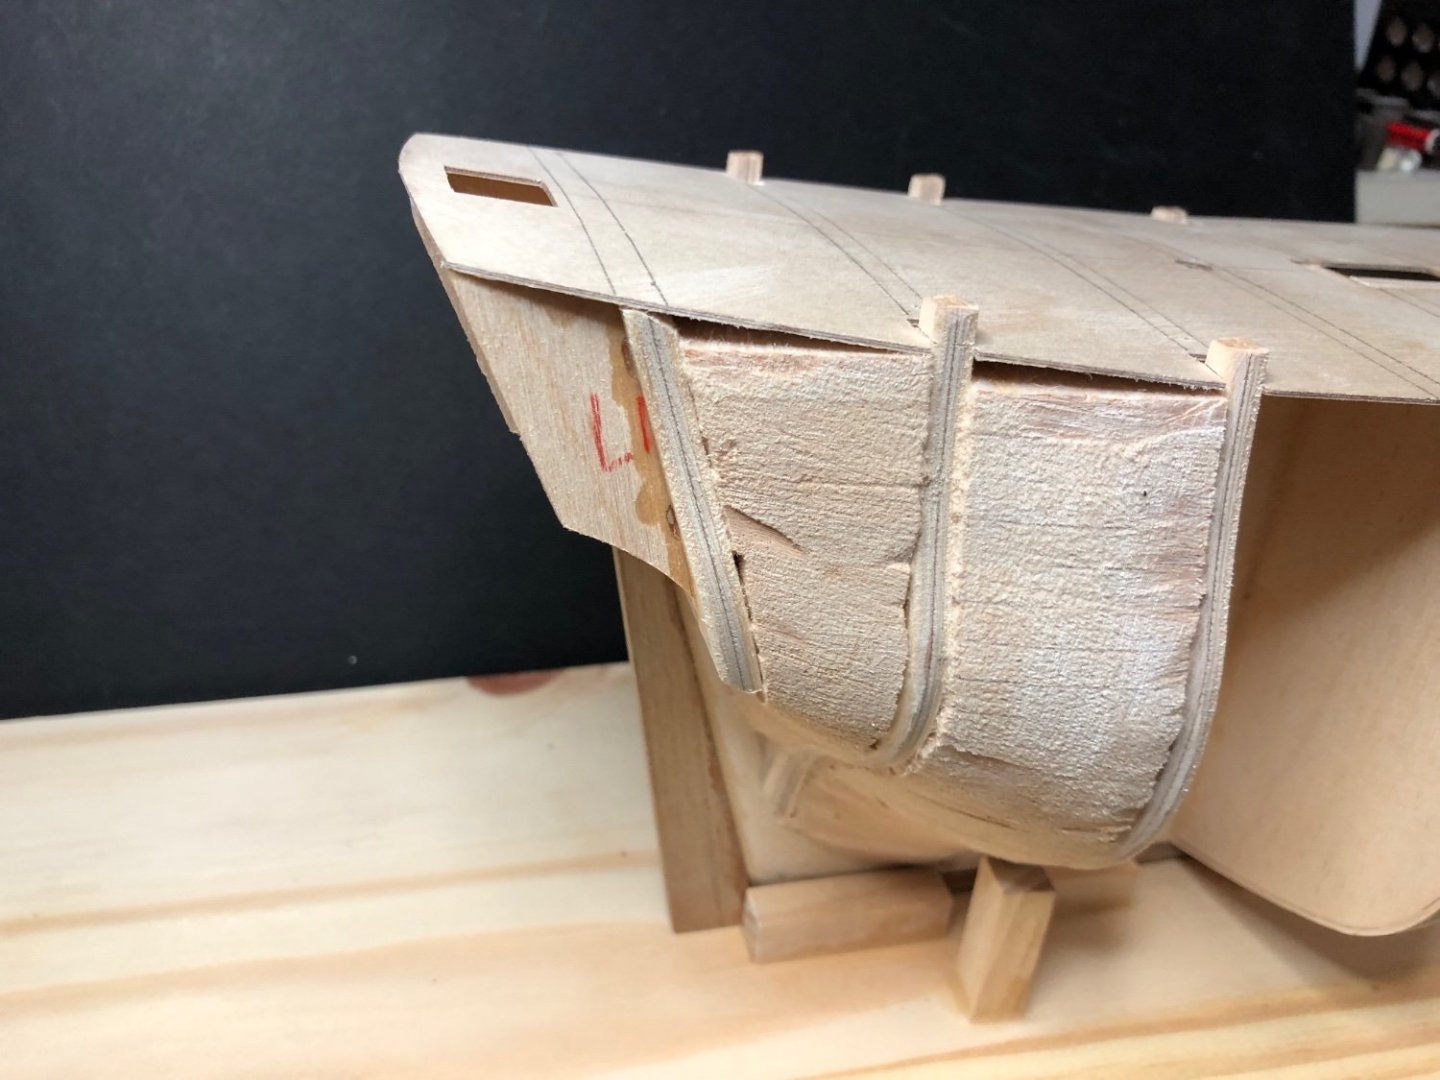
Hi, and thanks for the likes. First planking finished, whitewashed and marked with bulkheads, waterline and main 'wale. The top rail will be located to suit the second planking and the bows will be trimmed to suit the first line of second planking. The main wale will be located to suit the planking run. Marking out is a guide only. First planking was easier than expected but needed a lot of thought. Let's see how the second planking goes. Next is to fit the wales and stern fascia and, to plank the counter. The quality of the plans supplied has taken a lot of stress out of planking a bluff bow. Regards, Sam.

-
Hi Dave, Sounds like you are not getting the brass tube hot enough before applying the solder. The brass wire will heat up quickly local to the joint but the tube will have more mass and take longer to reach the required temperature. Thanks for the info ref. the Mondfeld book. This was difficult to find but eventually managed to locate a cheapish hard backed version from a bookseller in York. Estimated arrival this Saturday so I might as well cancel the weekend papers. Thanks again, Sam.
-
Thanks for the information Dave. I have Lee's book but not Mondfeld's. Are you using multicore solder or silver soldering ??? A low melting point solder sometimes helps but you do need a good source of heat. Again thanks for the info. Sam.
-
Hi Dave, Smart work on the yards. Using brass tube and wire for the boom irons is my preference too. Soldered joints are stronger and neater. Would it be possible to find out who's book you are referencing for yard development please ??? Best regards, Sam.
-
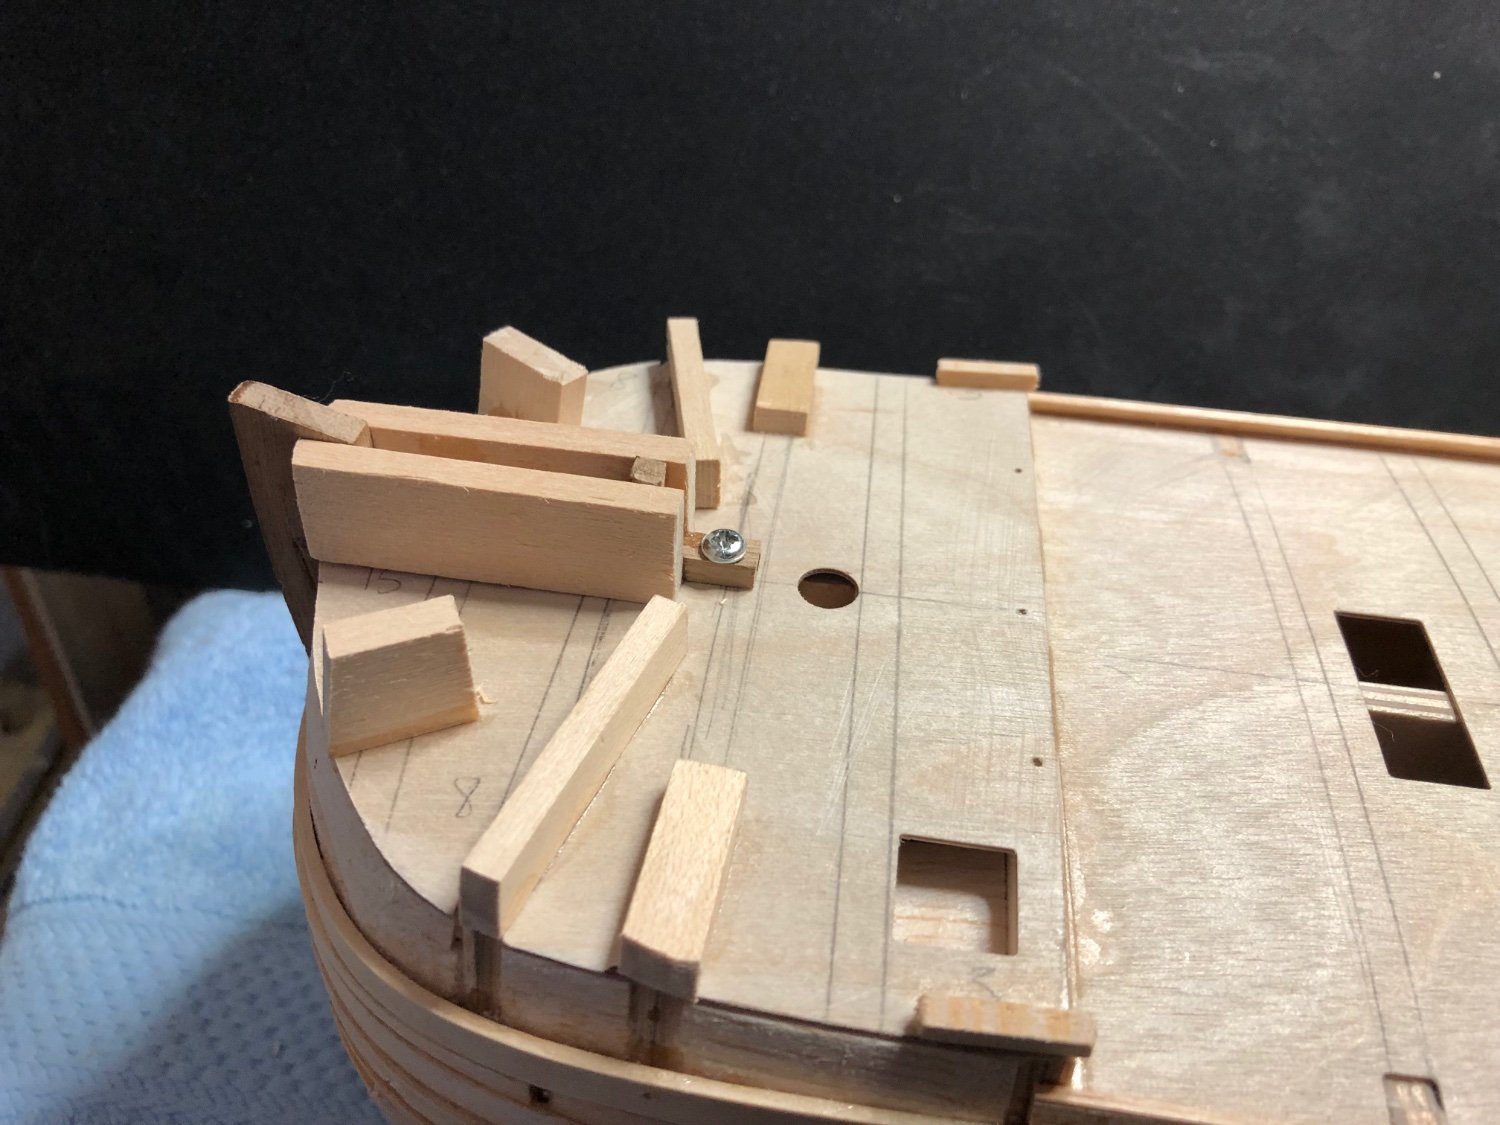
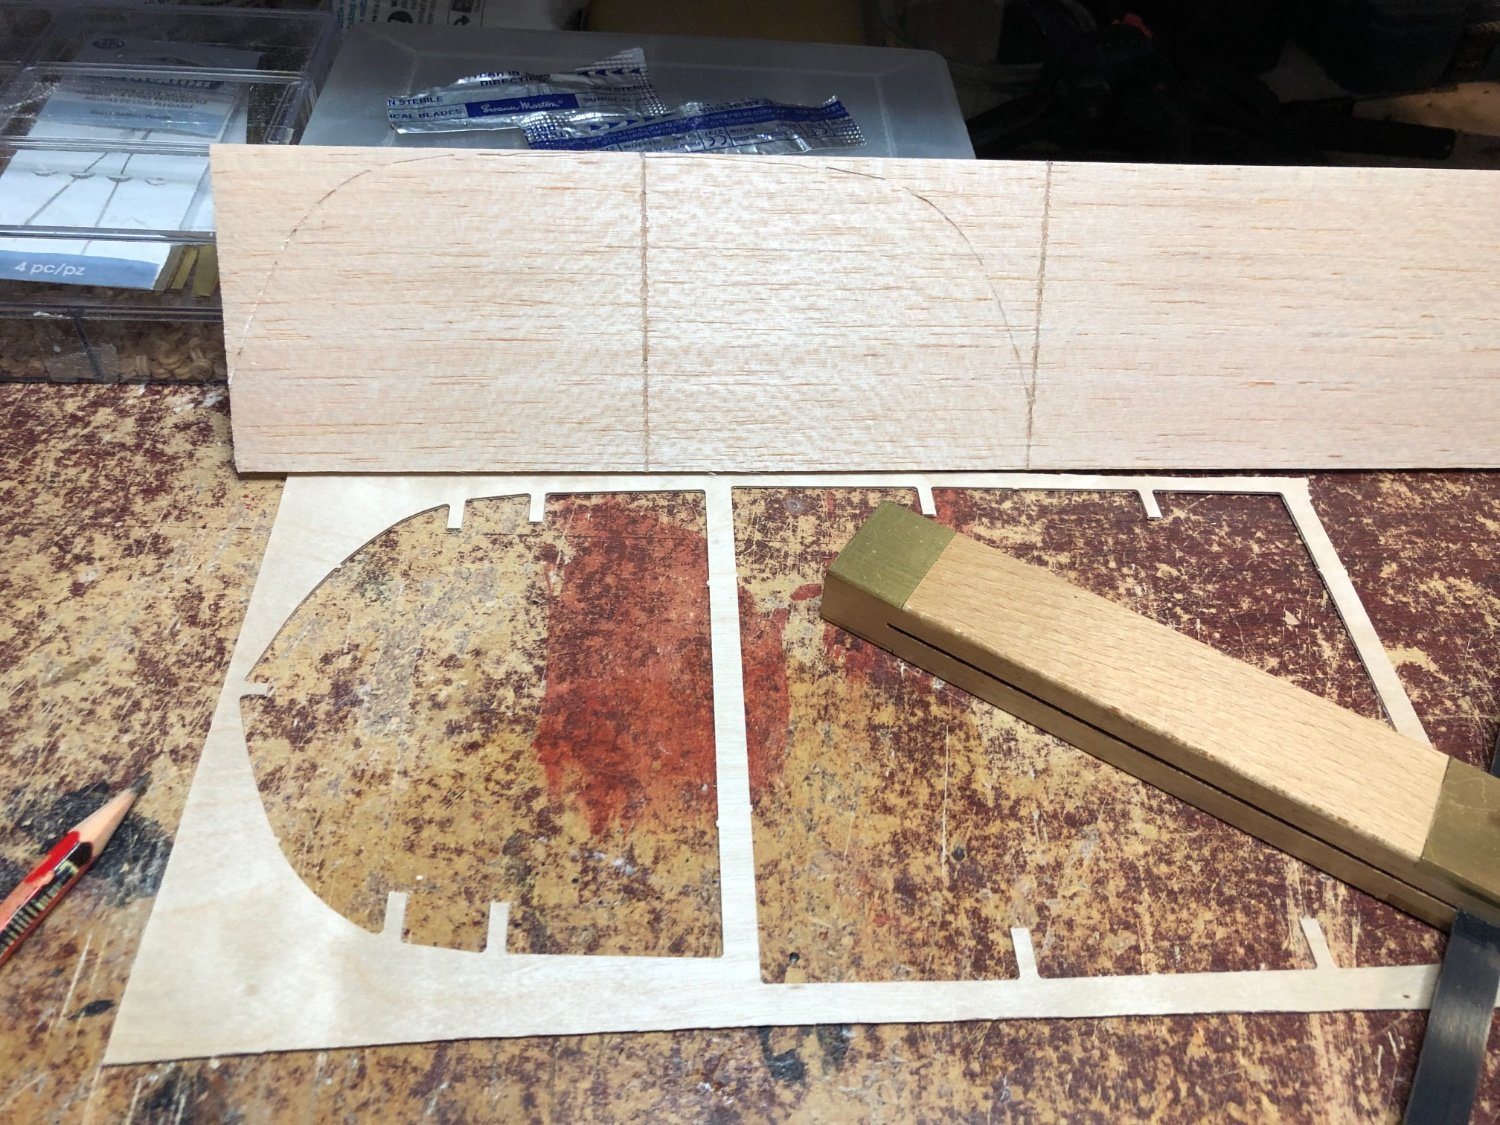
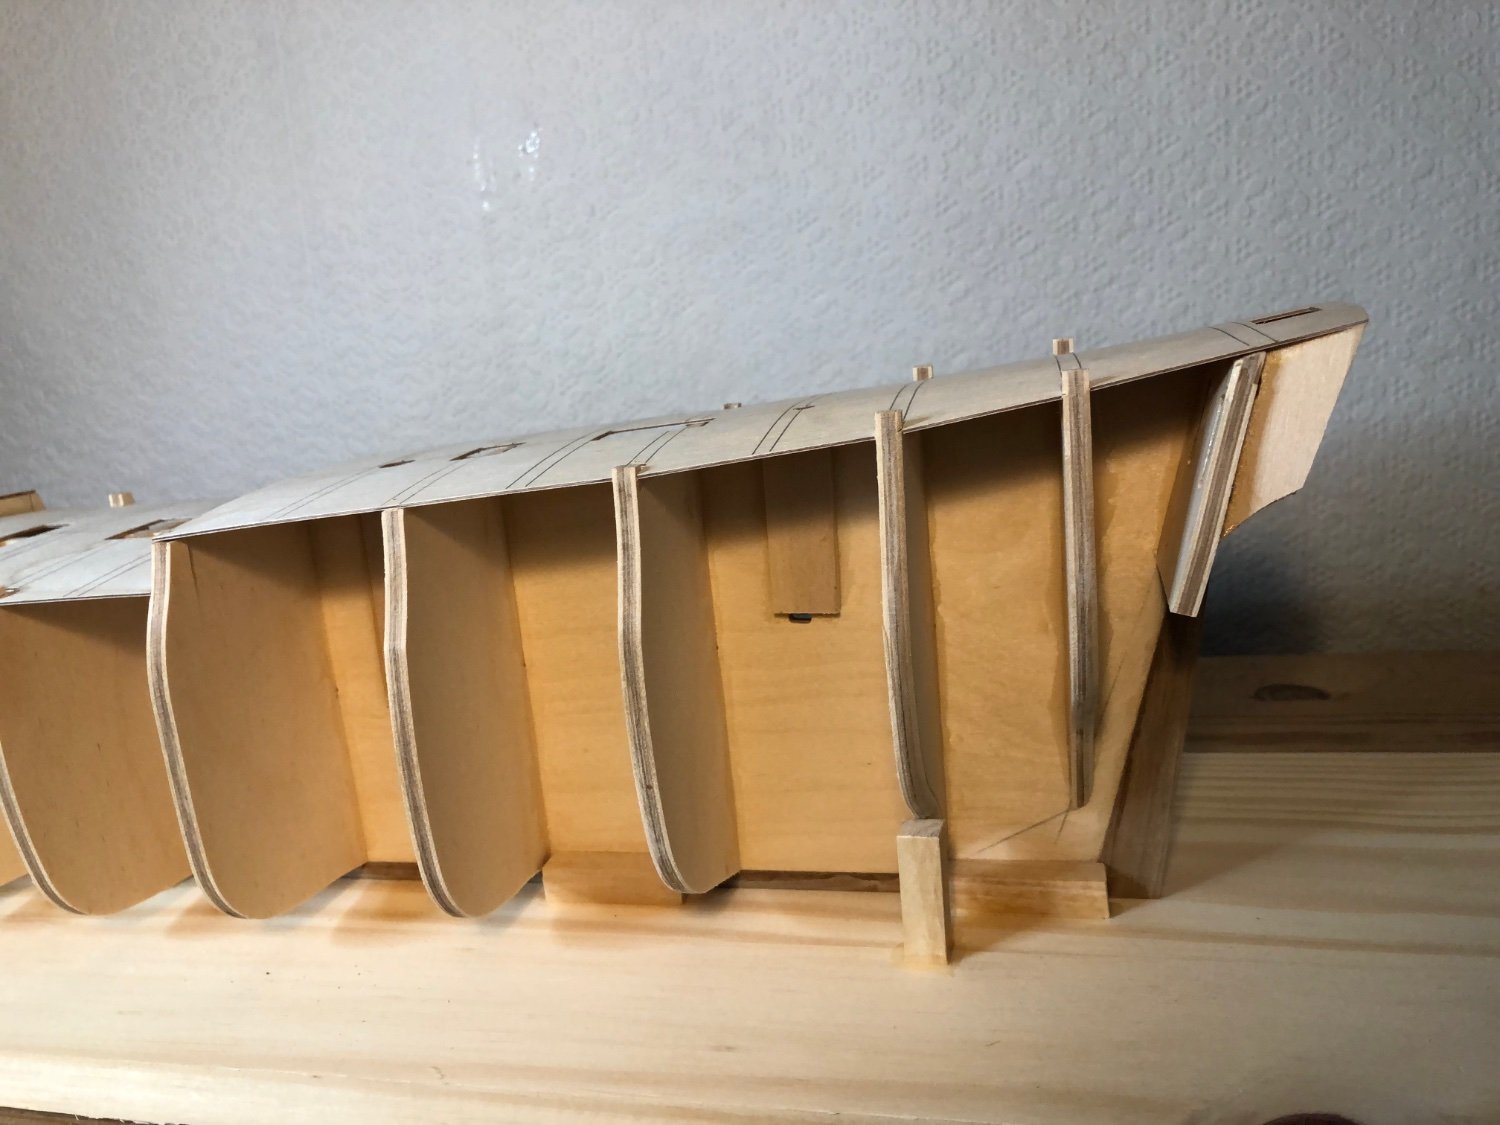
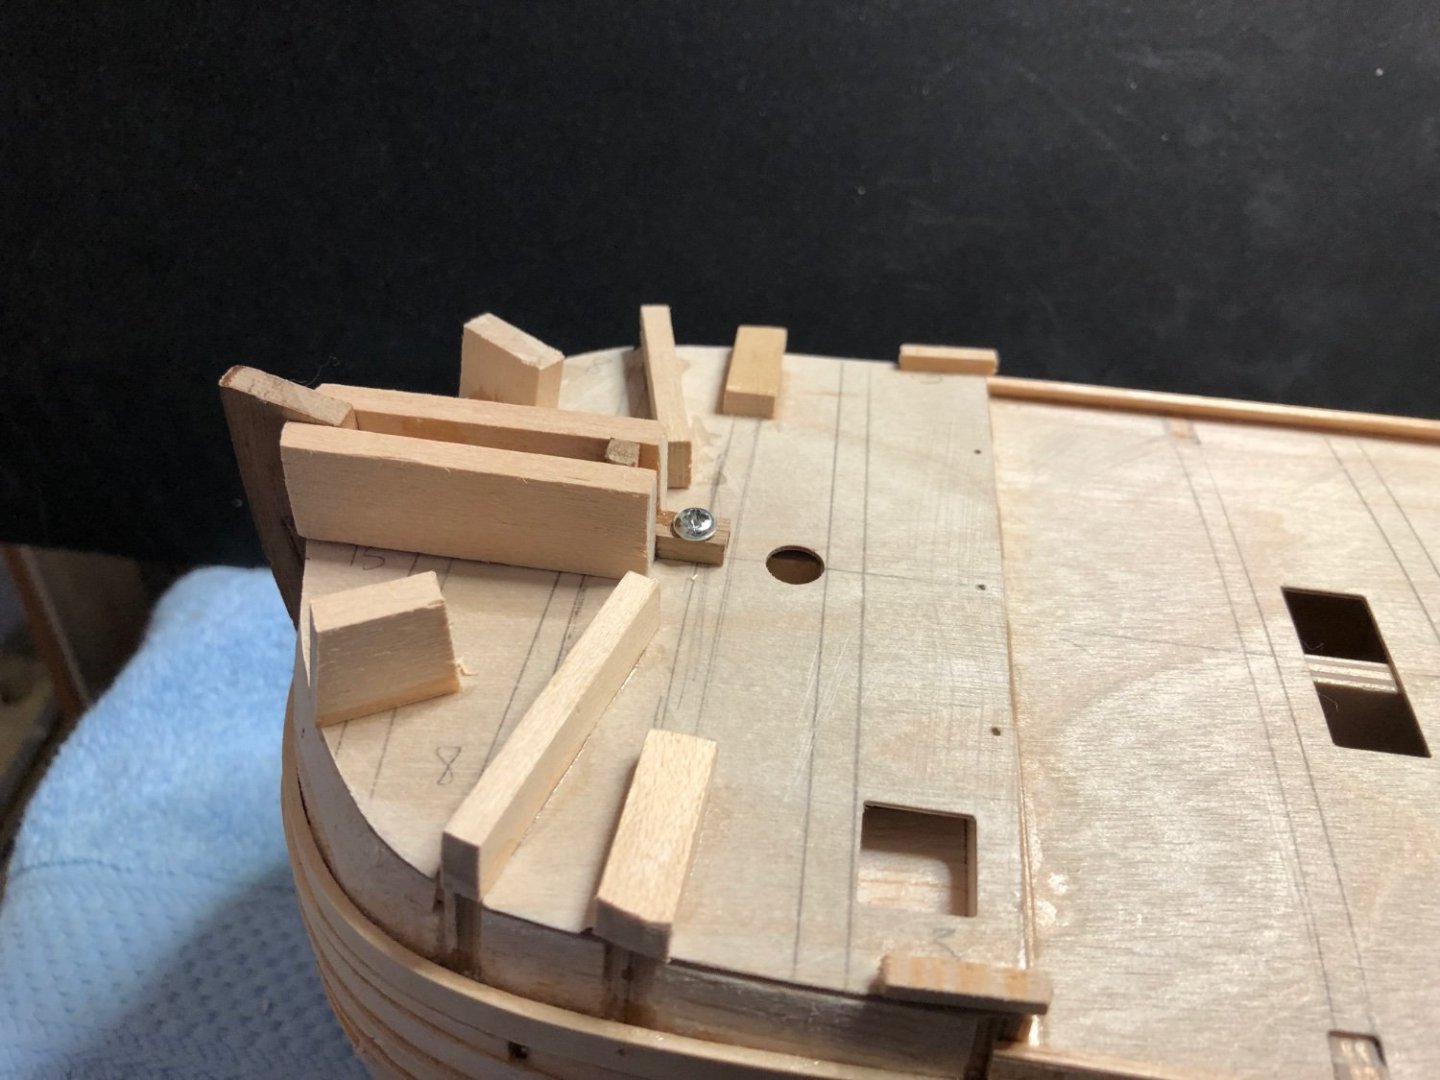
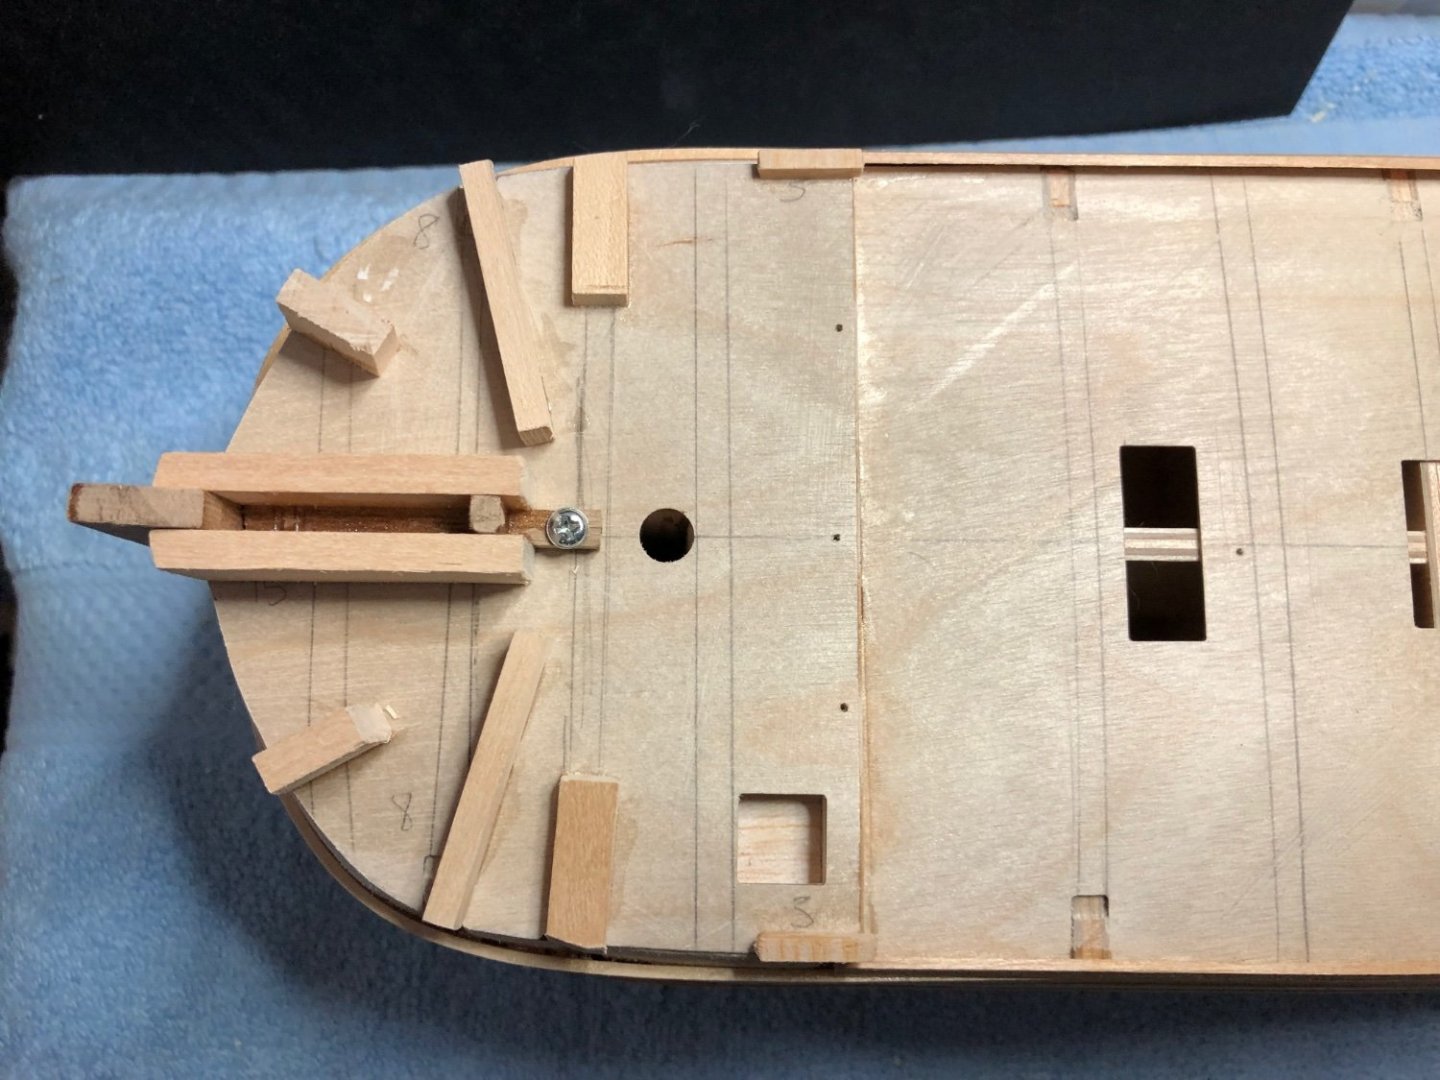
Still working on first planking. Planks above deck level at the stem look problematic to say the least. Instructions say to use the bulkhead extensions as guides then break them off before deck planking. Tried this approach on a previous build and caused so much damage I swore I would never do it again. Photo's below show my method of replacing with spare bits lightly superglued to the deck plus, a guide at the stem fixed with one screw. Before finishing the planking I detached parts 114 and 115 (forward capping rails) and dry fitted to check line of top edge of guides. Being Caldercraft they fitted perfectly. The bulkheads are from very good quality strong ply which makes detaching the upstands difficult. Also noticed a very generous supply of good quality strip for first planking. On some kits in the past this hasn't always been the case. Best regards, Sam.
-
First plank fitted to bulkheads. Allowed to follow it's own line at bow. Fitting slightly damp is easier than letting planks dry out fully. Instructions say that this plank should be fitted un-tapered. All other planks need tapering as required. So far, so good. Have a feeling that this hull will require lots of stealers. Best regards, Sam.

-
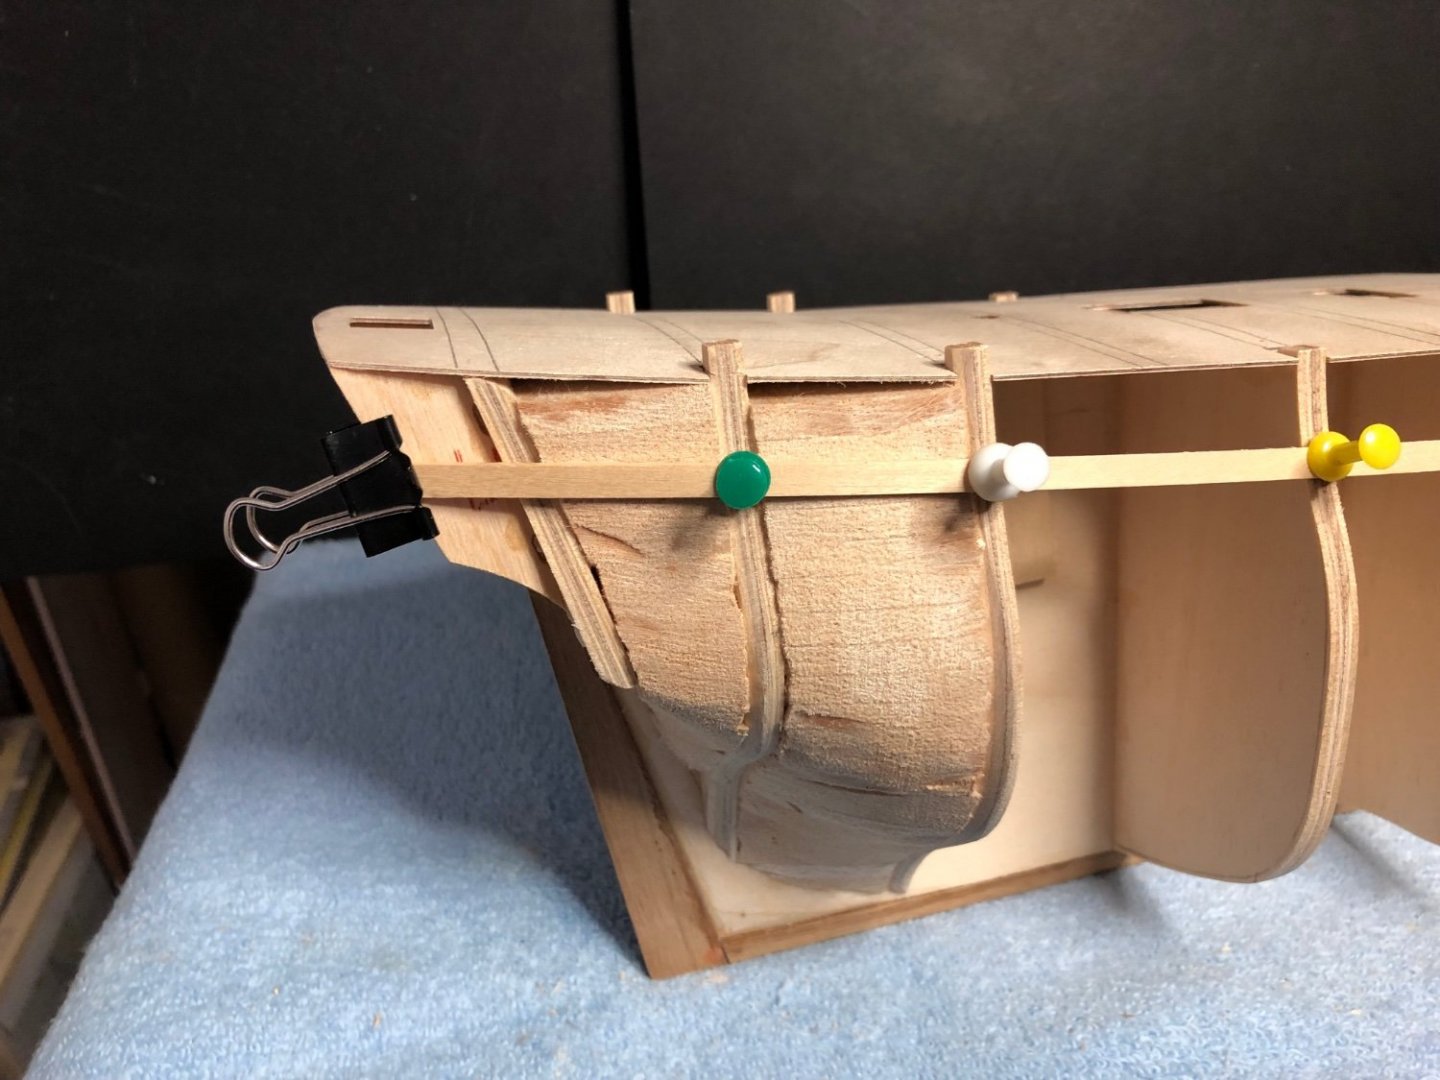
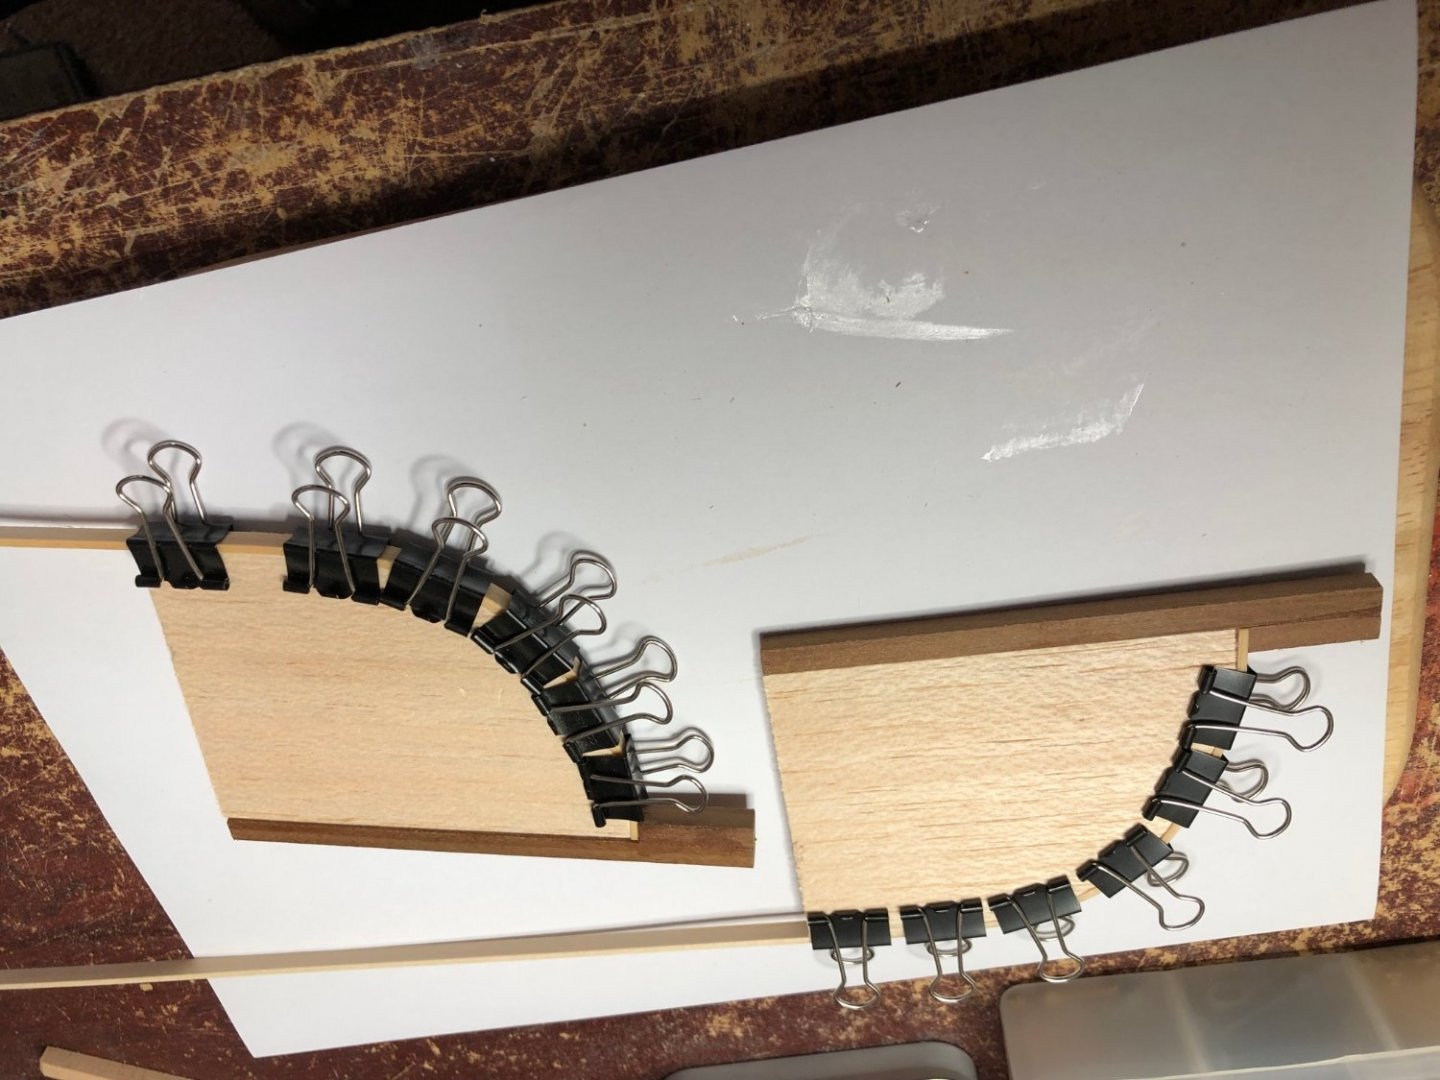
Started first planking. 5 x 1.5 lime strip provided appears to be excellent quality. Due to the thickness of the strip and, the very blunt bows I decided to build a simple jig to preform the bend required. Main body of the jig is 5mm thk balsa (because I had it in stock). Used the remains of the decking ply sheet as a template. Used 5 x 5mm walnut for the stops and small clips to locate and hold the strips whilst drying. Strips were pre-soaked in an electric kettle but not boiled for 20 minutes then placed in the jigs and the clips applied. Put on one side to dry and set in shape. Photo's of jig construction shown. The lime strip is excellent quality and bent without splitting. Best regards, Sam.


-
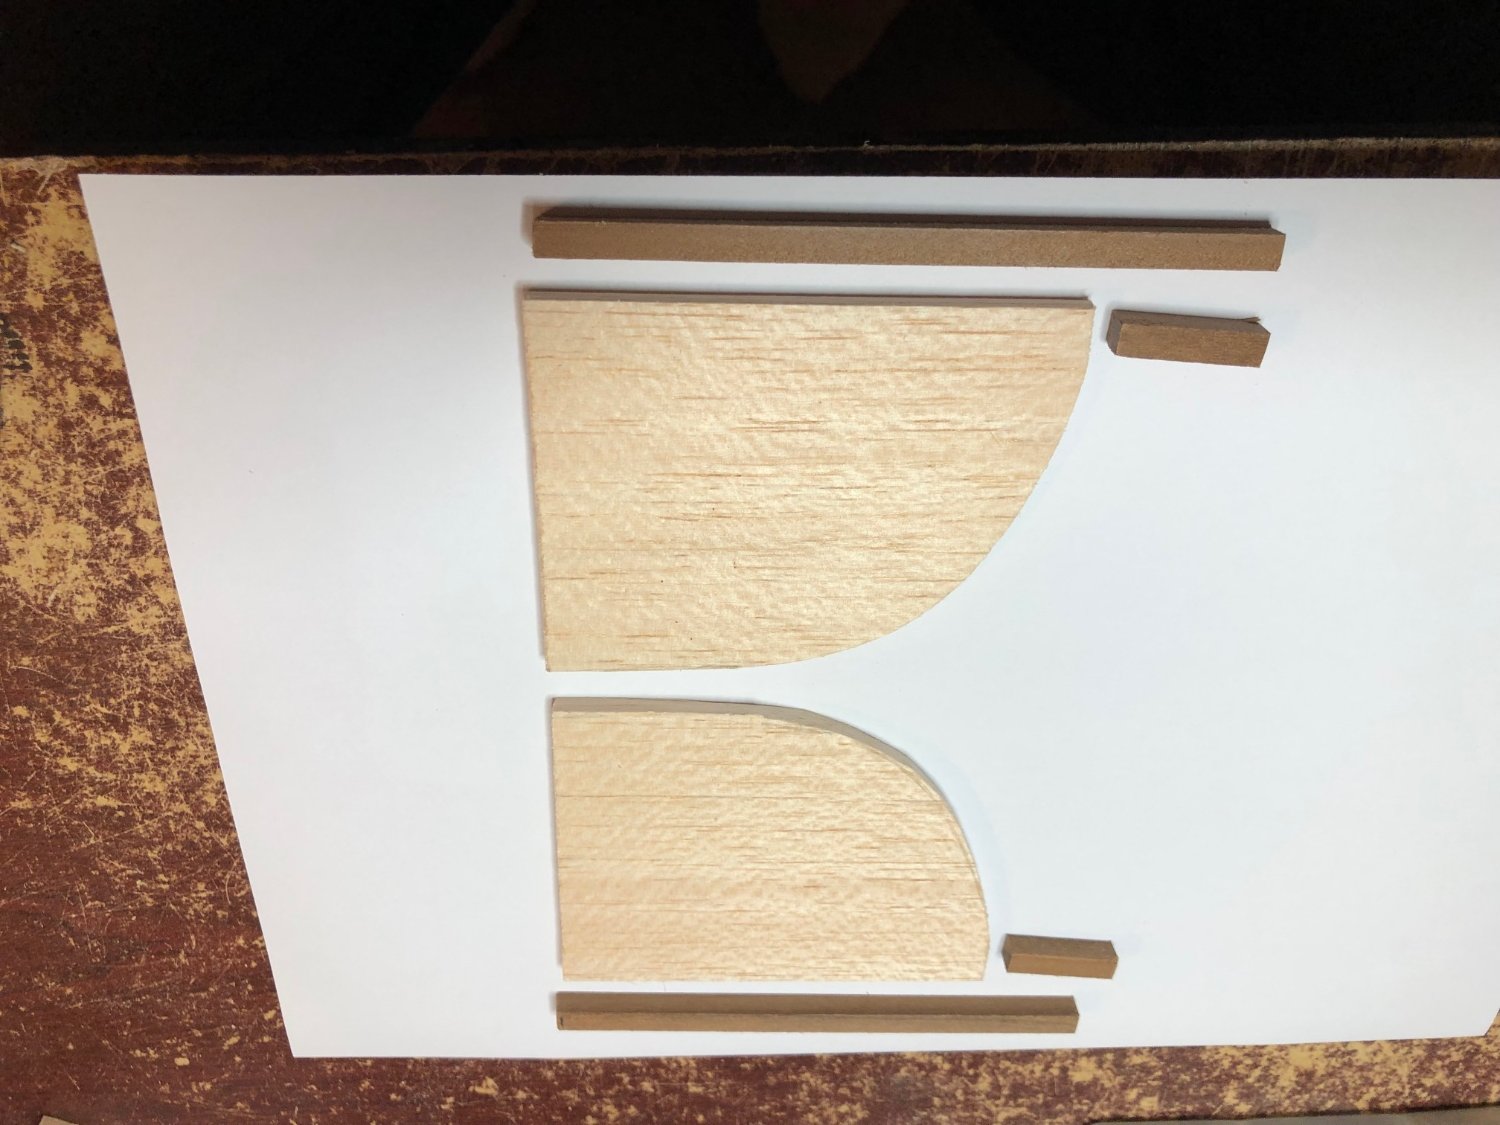
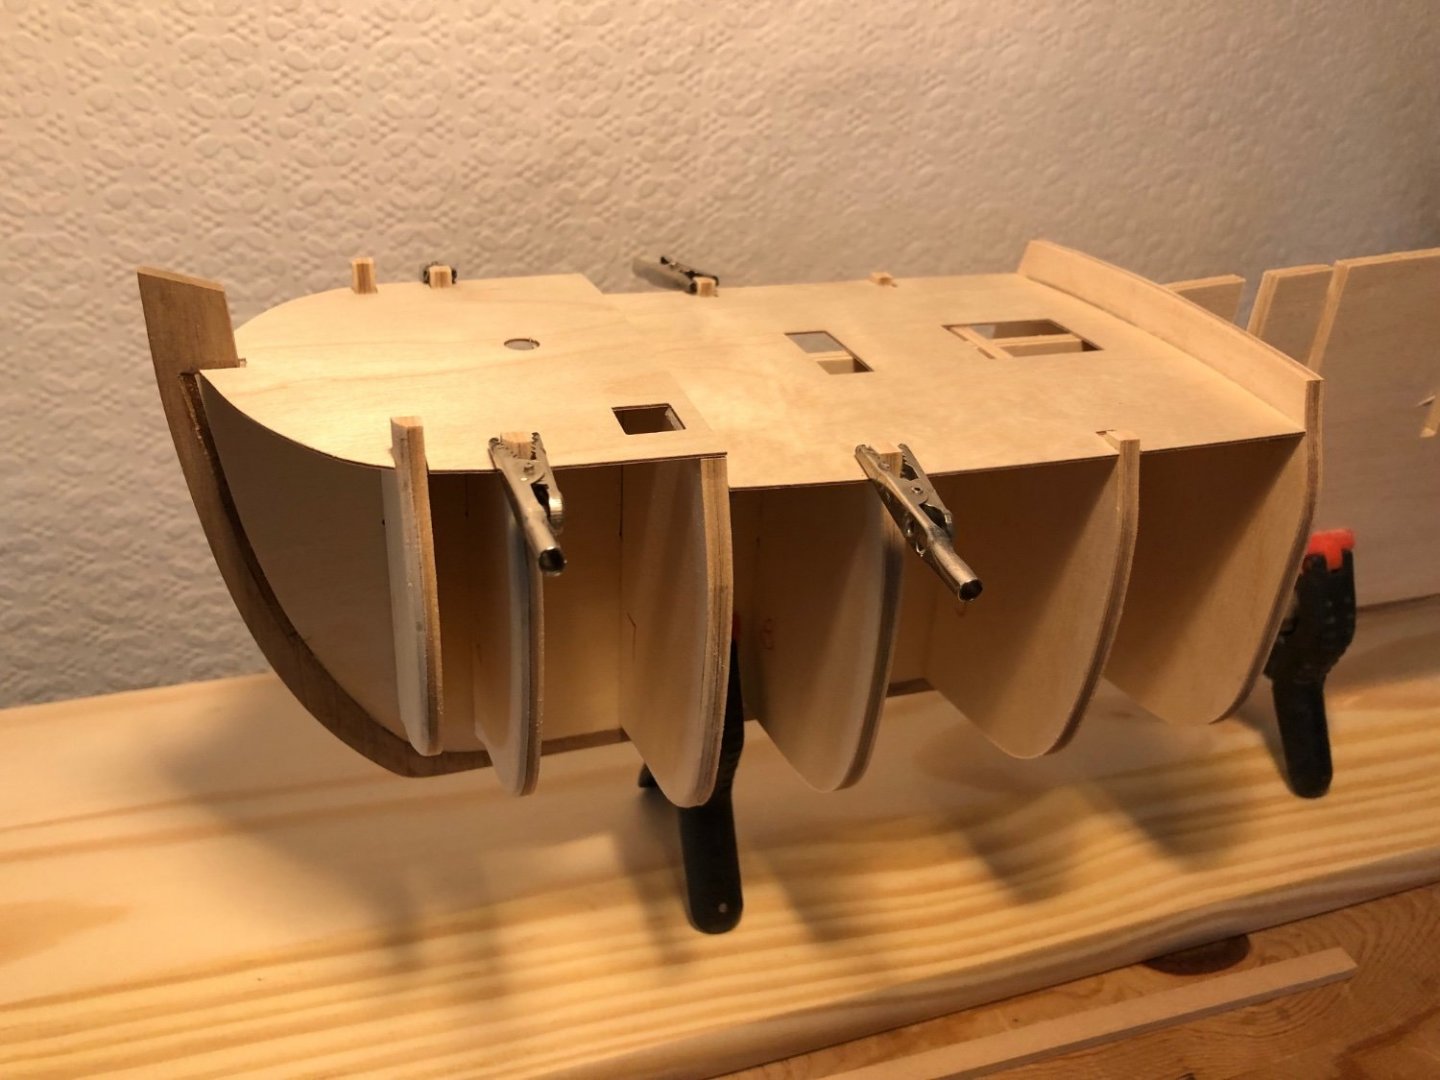
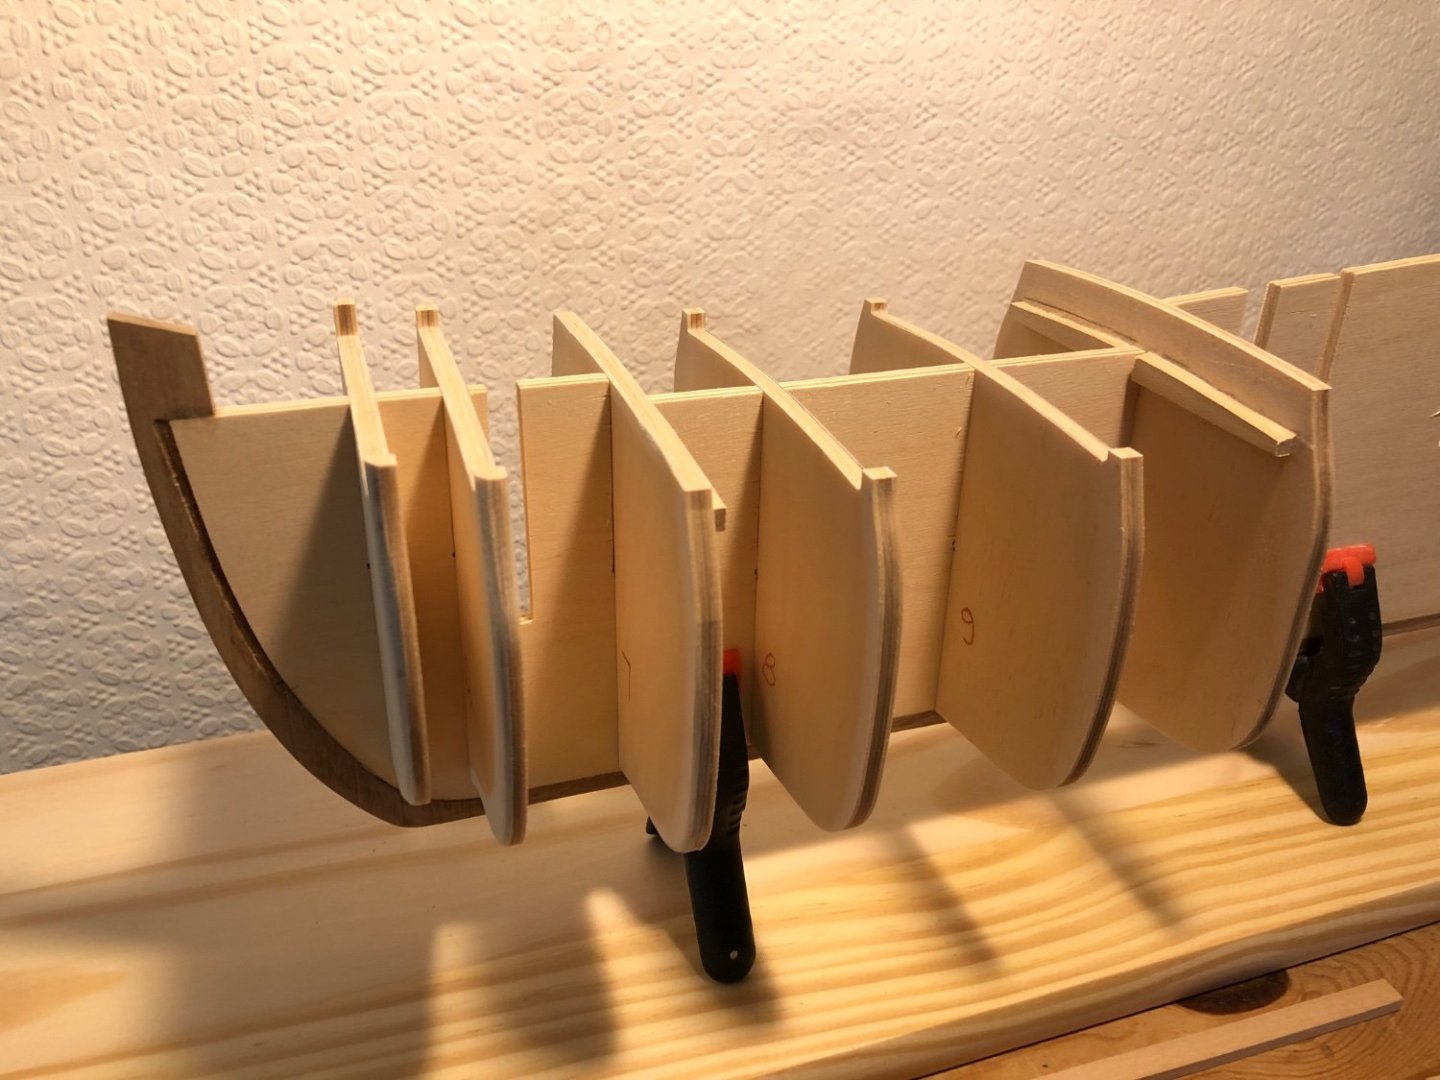
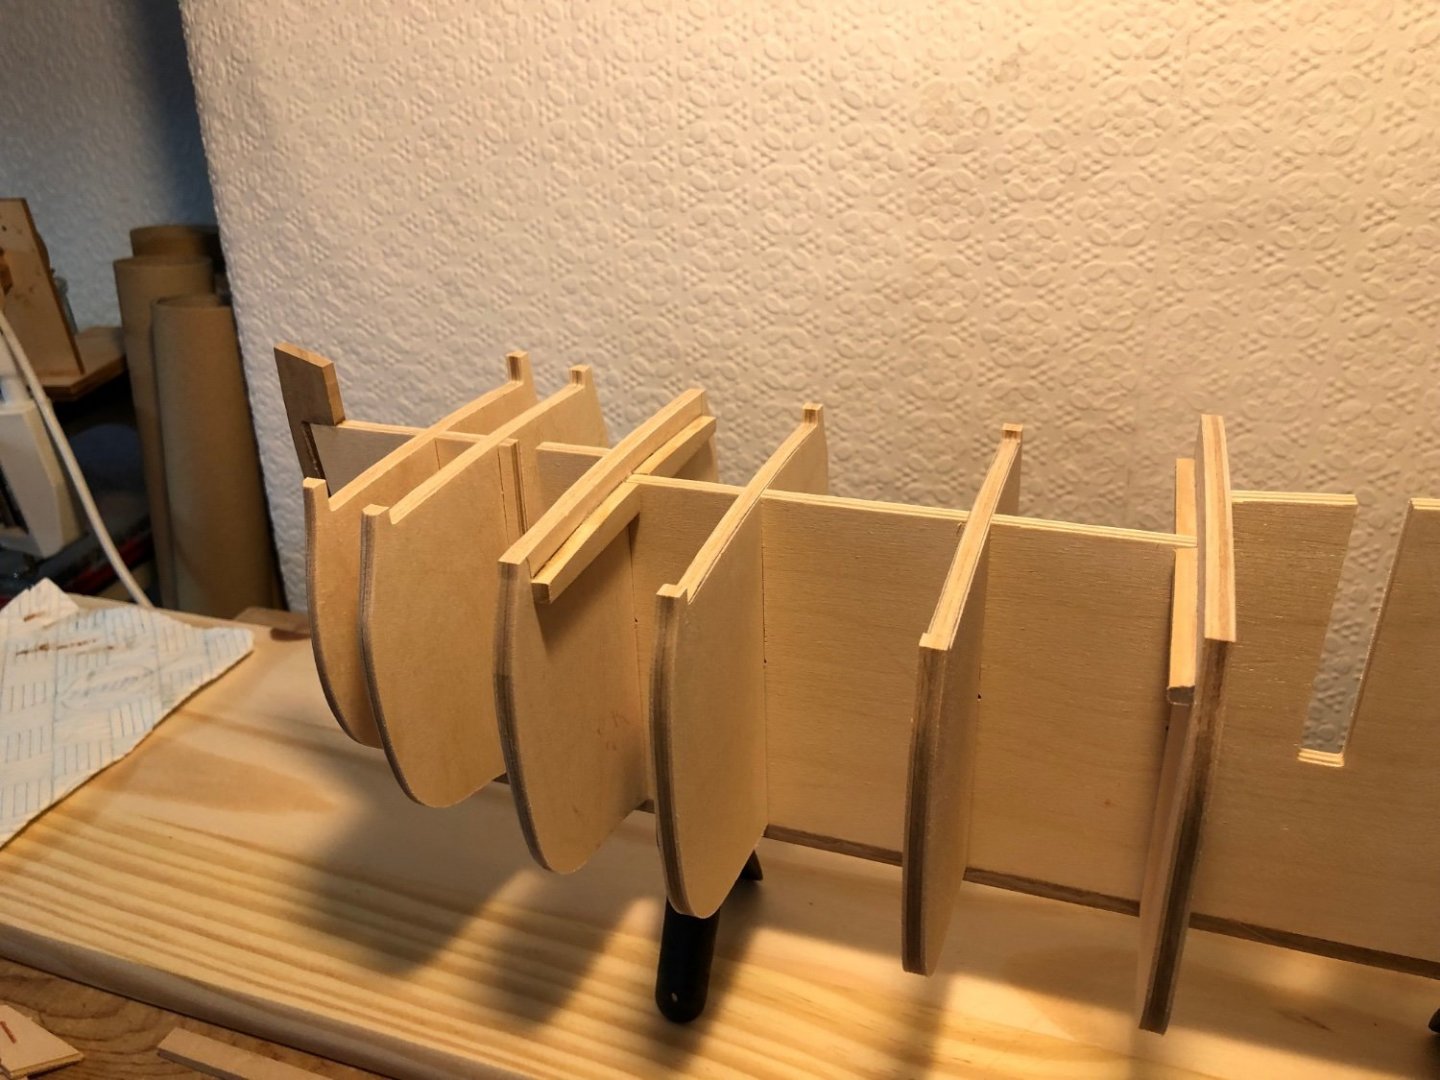
Blocking to stem and stern completed ready for first planking. Have already run a plank around to make sure everything fits. Would not like to try planking on this kit without it. Best regards, Sam.
-
Hi Dave, North East England and working in a garage ??? Hardy folk up there. I prefer the palm trees down here. Nice set up and looking forward to HMS Diana. Best regards, Sam.
-
Thanks for the comments Edward. This is my first Caldercraft kit and I am amazed by the quality. Best regards, Sam.
-
Welcome Old salt and thanks for the comments. Sam
-
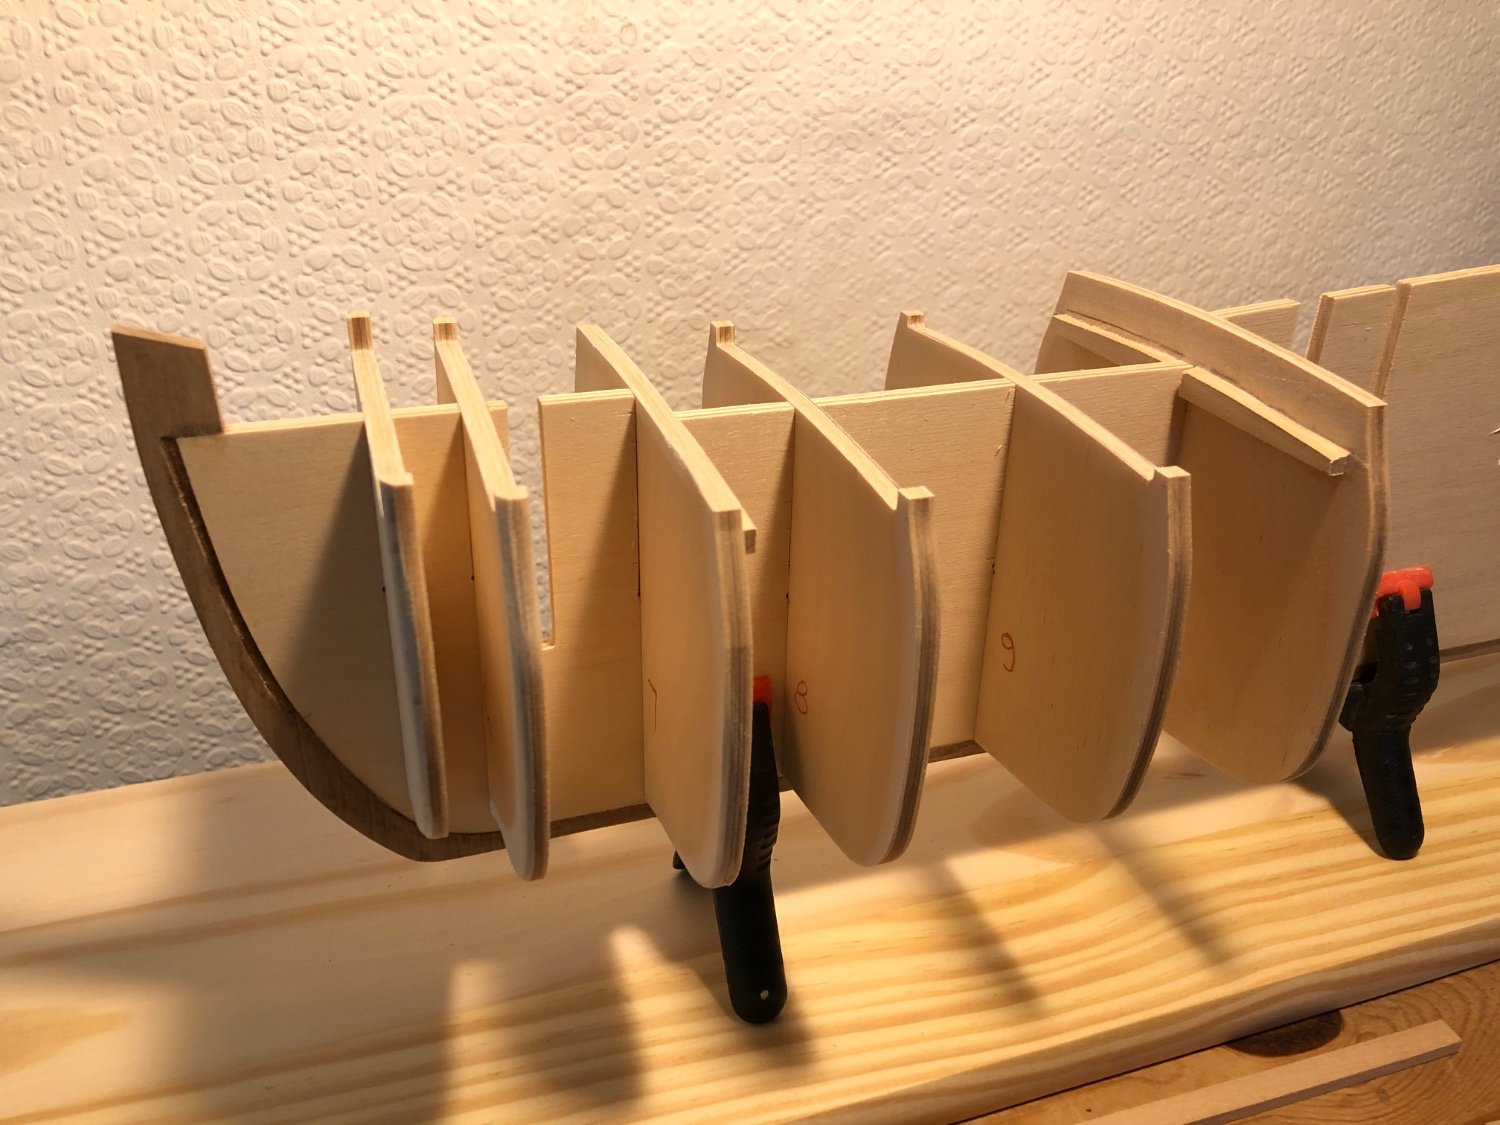
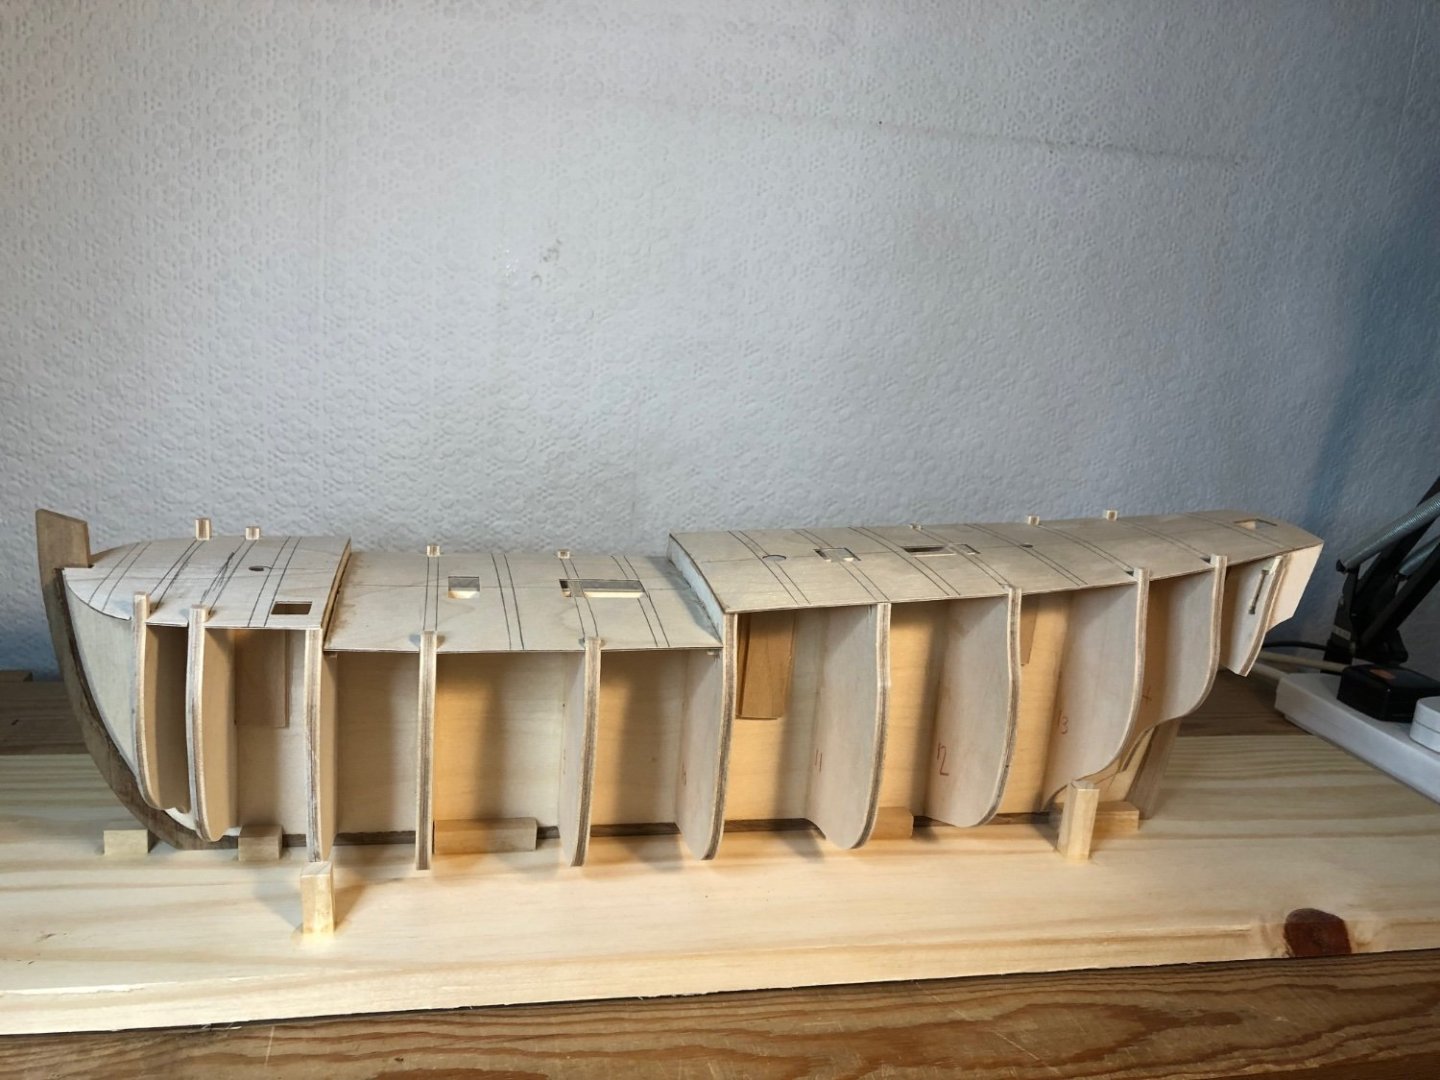
Hi and, thanks for visiting. Bulkheads and false decks glued to false keel. Jig built. This is a lot sturdier than it looks. Nothing warped and all slotted together with minimum work or trouble. Rear deck was approx. 3mm too long. According to posts on this forum this seems to be a deliberate design feature to give a better fit to stern plate. Next step is balsa blocking to stem and stern. Wouldn't like to attempt planking on this kit without packing especially at the stem. Best regards, Sam.


-
Bulkheads 5 and 6 added. False foredeck fitted. Deck supports to bulkheads 7 and 10 lowered to fit properly. Took a long tie to spot this error but once spotted it became very difficult to ignore. Dry fitting is important. Best regards, Sam.
-
Hi, and thanks for visiting. Bulkheads 7, 8, 9 and 10 dry fitted. Also false deck to central lower area. Bulkhead 7 -- chamfered to suit planking run. 8, 9 and 10 left square, mid ships so won't need chamfering. So far this kit is a dream to work on. Everything fits. Bulkheads were a perfect sliding fit onto false keel. Slots in keel needed opening slightly. It looks like the false deck won't need any work in this area . Next is the other bulkheads and false decks. Then forming pockets for the masts. Won't need the jig until I start glueing the bulkheads. Best regards, Sam.


-
A brief introduction to this kit --- Unpacked and contents checked. All complete and in very good order. Ply sheets perfectly flat and undamaged, All strip wood is of finest quality and straight as a die. Fittings and brass sheets perfect. Eight big sheets of plans. Full size plans are important. With my eyes measuring from reduced plans then scaling up or down is hard work. Ordered necessary paint pots with kit plus, balsa sheets for stem and stern blocking. Bought a building board from my local hardware shop. Already have wood glue and cyano in stock from my last build. Tanganyika strip supplied instead of lime so no extras to buy. Have a copy of Marquardt's AOTS book and, James Lees Masting and Rigging in stock also several logs (of excellent quality) on this forum Noticed from other logs on this forum that there may be a problem with the width of the mizzen channels but have found enough 2mm walnut sheet in my spares box to cover this. So all ready to go. First is to build the jig, then assemble the false keel and bulkheads and the false decking. Working as a draughtsman for 53 years, 20 of these using AutoCad I much prefer drawings rather than pictures so am really looking forward to working on this kit. Photo's to follow. Best regards, Sam.
-
Thanks for the comments Edward. This kit, like the curates egg, wasn't all bad and builds into an impressive model. In spite of the A4 sized plans, poor quality wood and some big mistakes in the laser cut parts I have enjoyed the build so far. A lot needed tweaking and some of the build is obviously wrong and needed replacing. Not a beginners kit by any means. Best Regards, Sam.
-
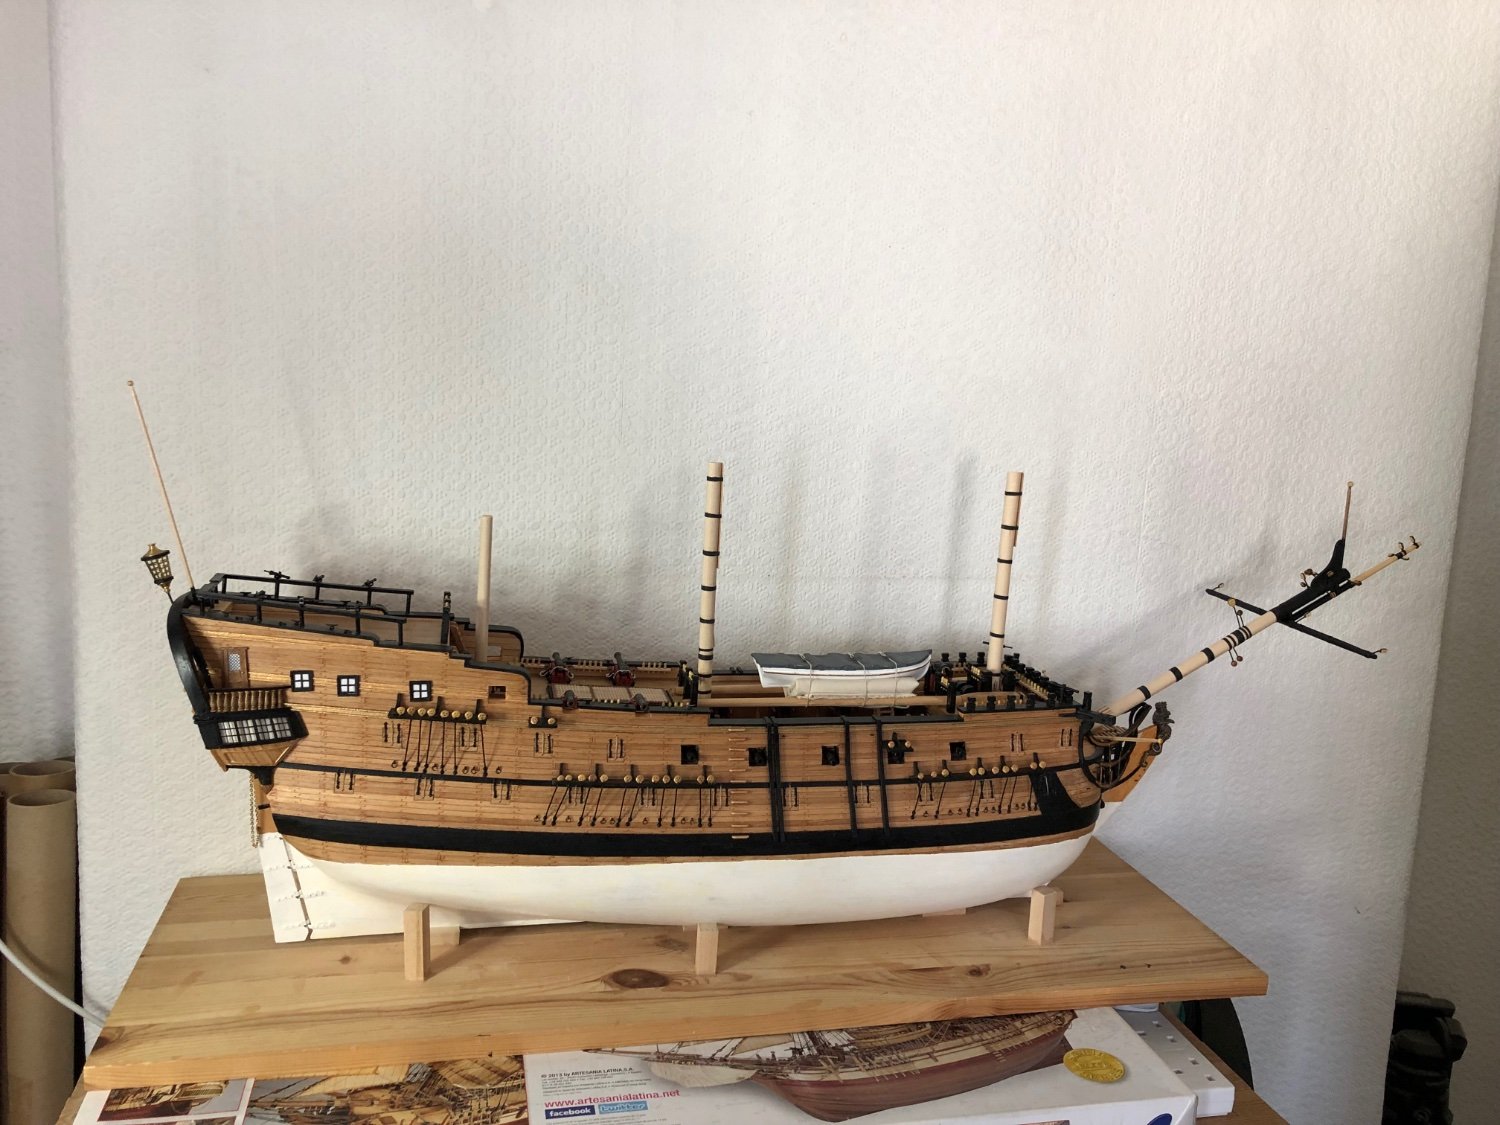
This is my last posting on this build for now. I have kept the plans and spare bits and intend finishing masting and rigging and, maybe sails when I have more room to work on this beast and, somewhere to store the finished build. Will be taking a week or so to clear and restock my workbench and will then start on Caldercrafts HM Bark Endeavour. Already had a peek in the box and the plans and, contents are miles better than the kit I have just called a halt on so looking forward immensely to building it. Have the AOTS book in stock and already trawled through some very high quality logs on this forum. Thanks to everyone for visiting and commenting. This will get finished eventually but probably not this year. Best regards, Sam.
-
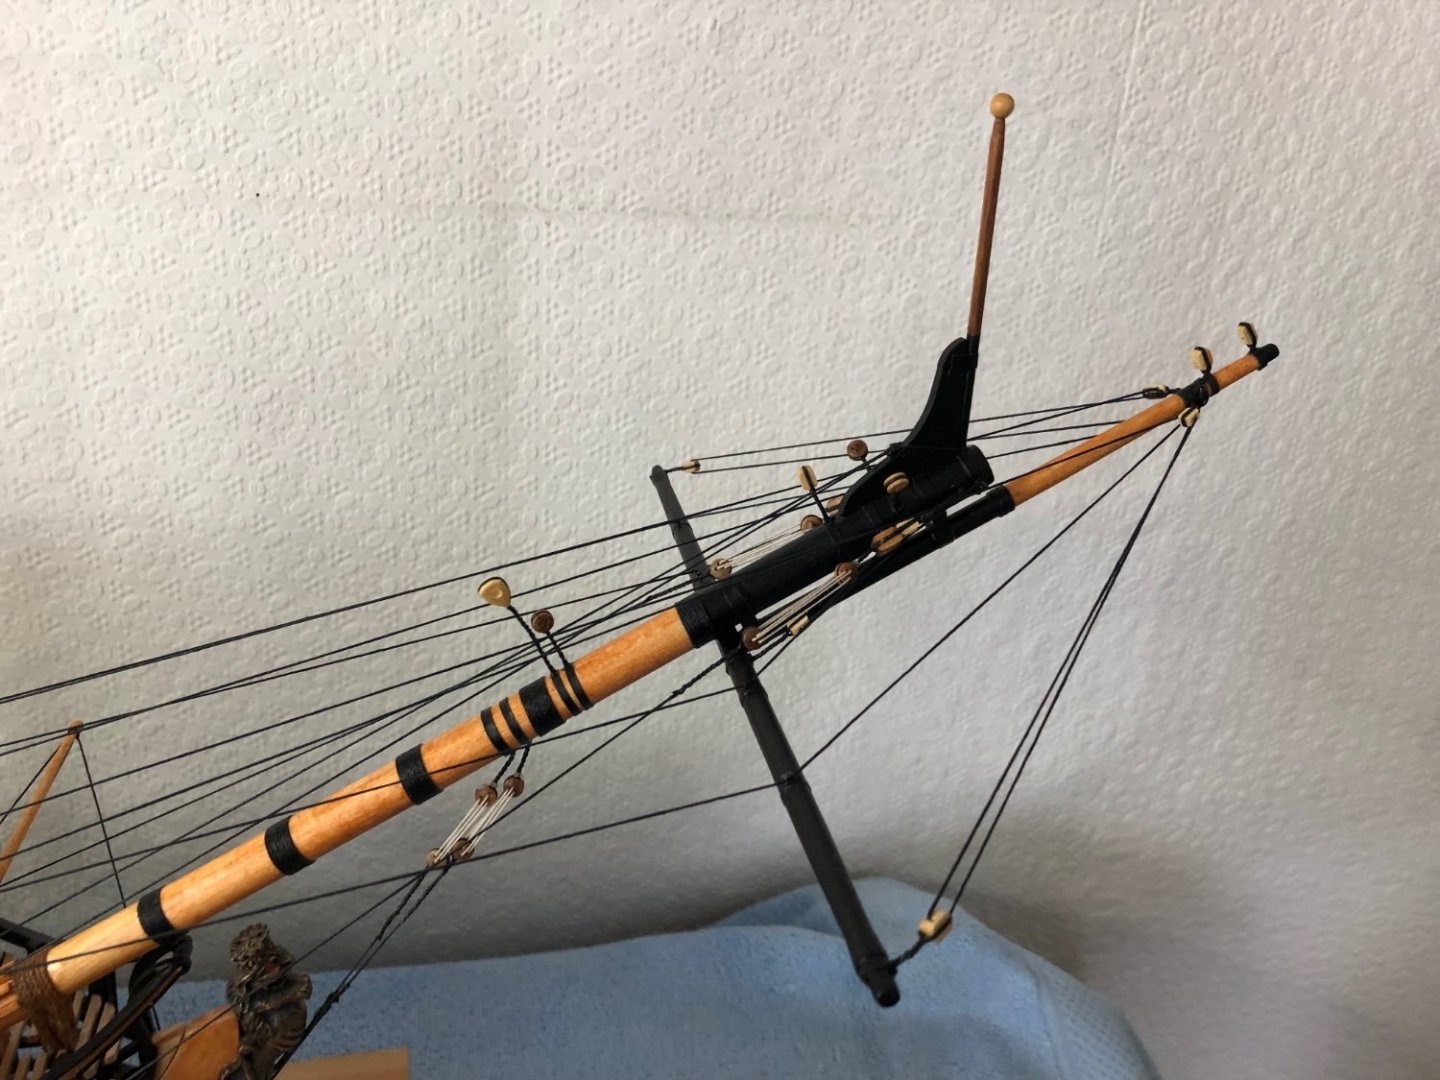
Hi, and thanks for visiting. Last two weeks spent on masts and yards. I live in a Cornish cottage built 1840 and with very low ceilings. Moving this beast about over the past two weeks I have snapped off the fore mast twice and the main mast once. Plus nearly lost an eye on the main lower yard and damaged the main ceiling light. I have already spent a small fortune on replacement parts. Enough is enough. Stub masts have been fitted plus the bowsprit. Length and width I can manage, height I can not. Masts need staining and varnishing and the bowsprit will be rigged. Then I will call it a day and move on. This decision has not been helped by the fact that I have already got Caldercrafts Endeavour in stock. After the ocCre kit the full size plans supplied are a revelation. Plus I have the AOTS book for reference and several very high quality builds on this forum. The next 18 months will feel like a holiday. There will be one more post after this showing the finished item. Thanks for visiting and the encouragement over the last 18 months. Best regards, Sam.

-
Hi Edward, Just found this build on the forum. A good piece of building nicely finished. Well done Regards, Sam
- 84 replies
-
- 1
-

-
- sherbourne
- caldercraft
- (and 2 more)
-
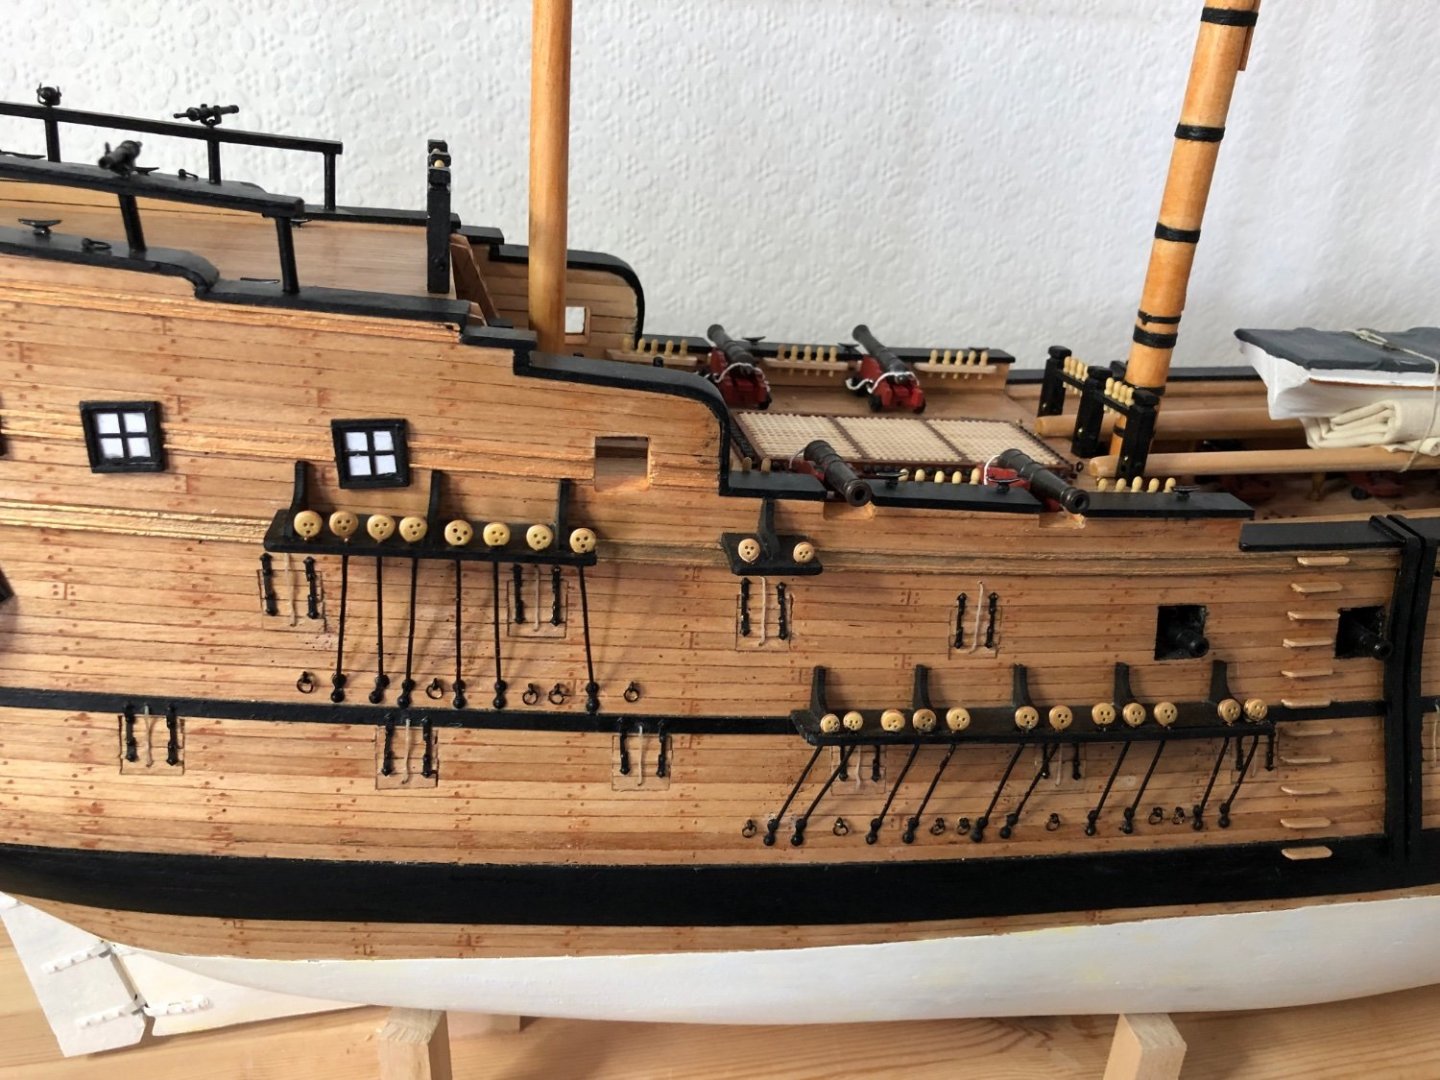
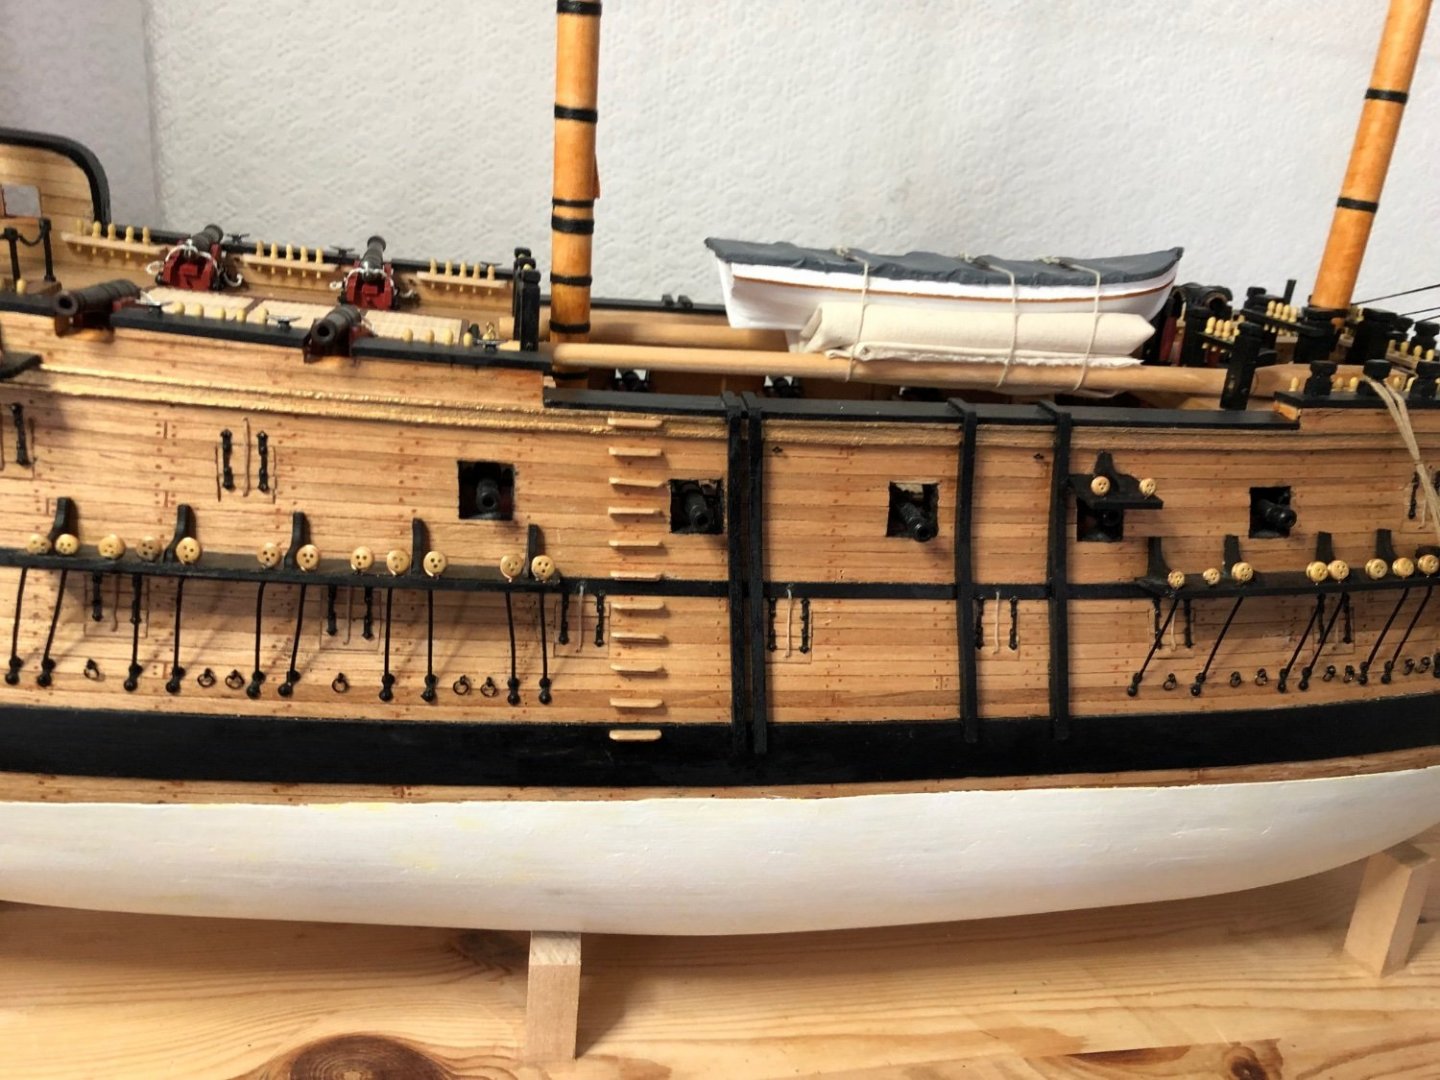
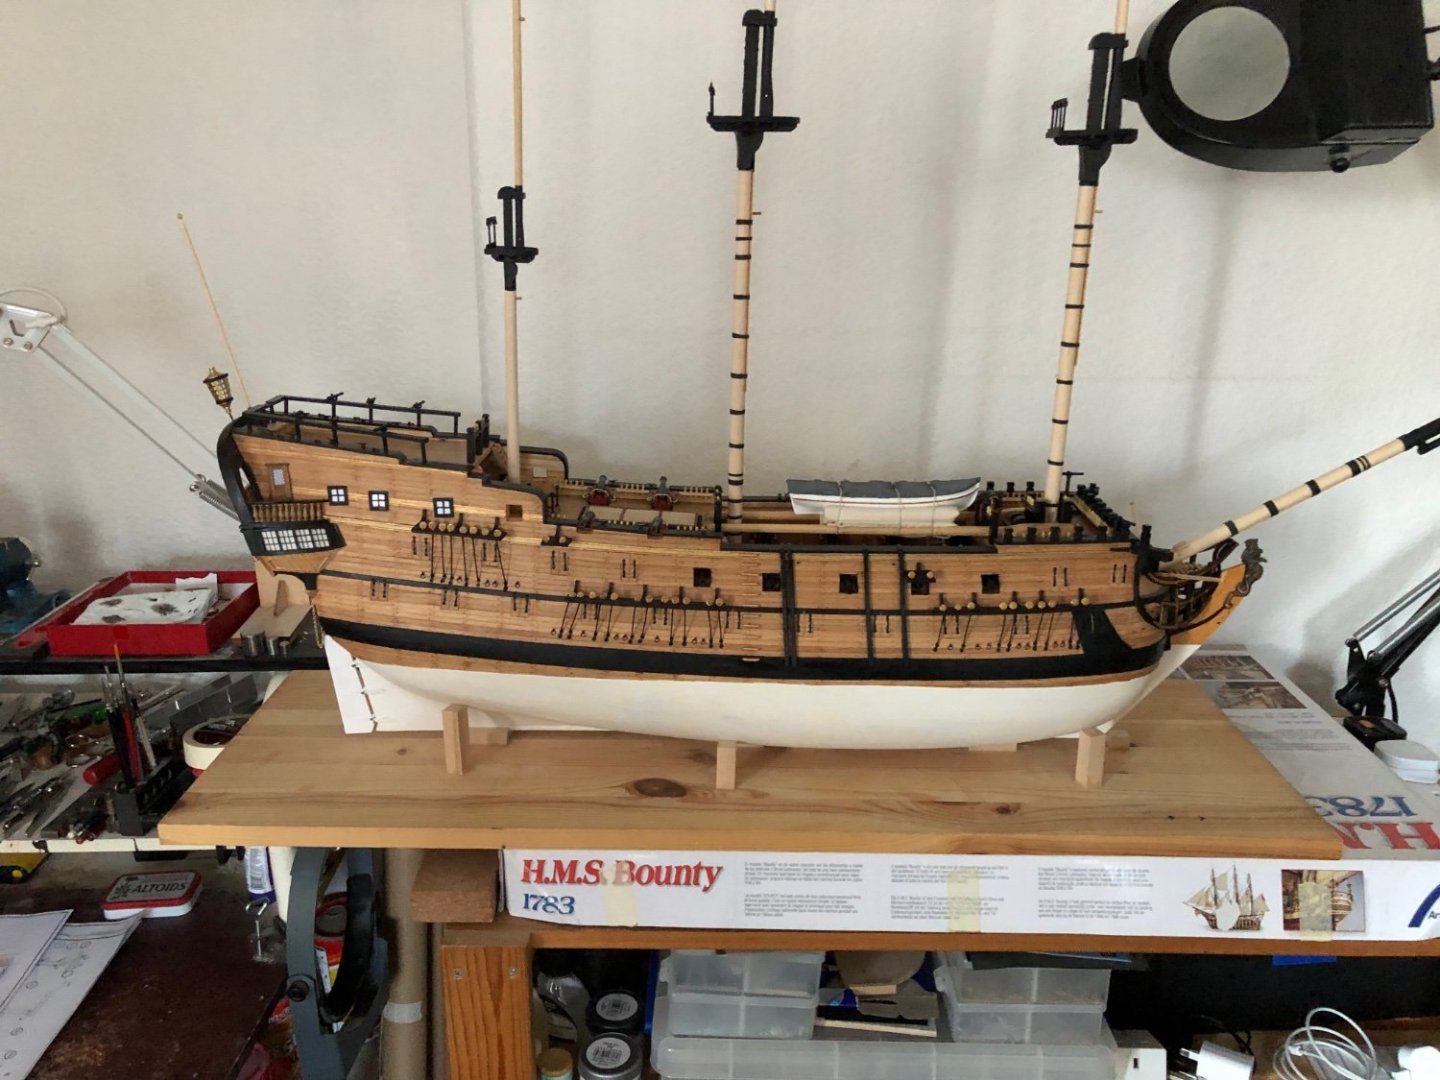
Thanks for visiting Edward. Will have a curry and a short break to celebrate. Have found this a challenging build but it is starting to look good. The only problem is the size. Regards, Sam.
-
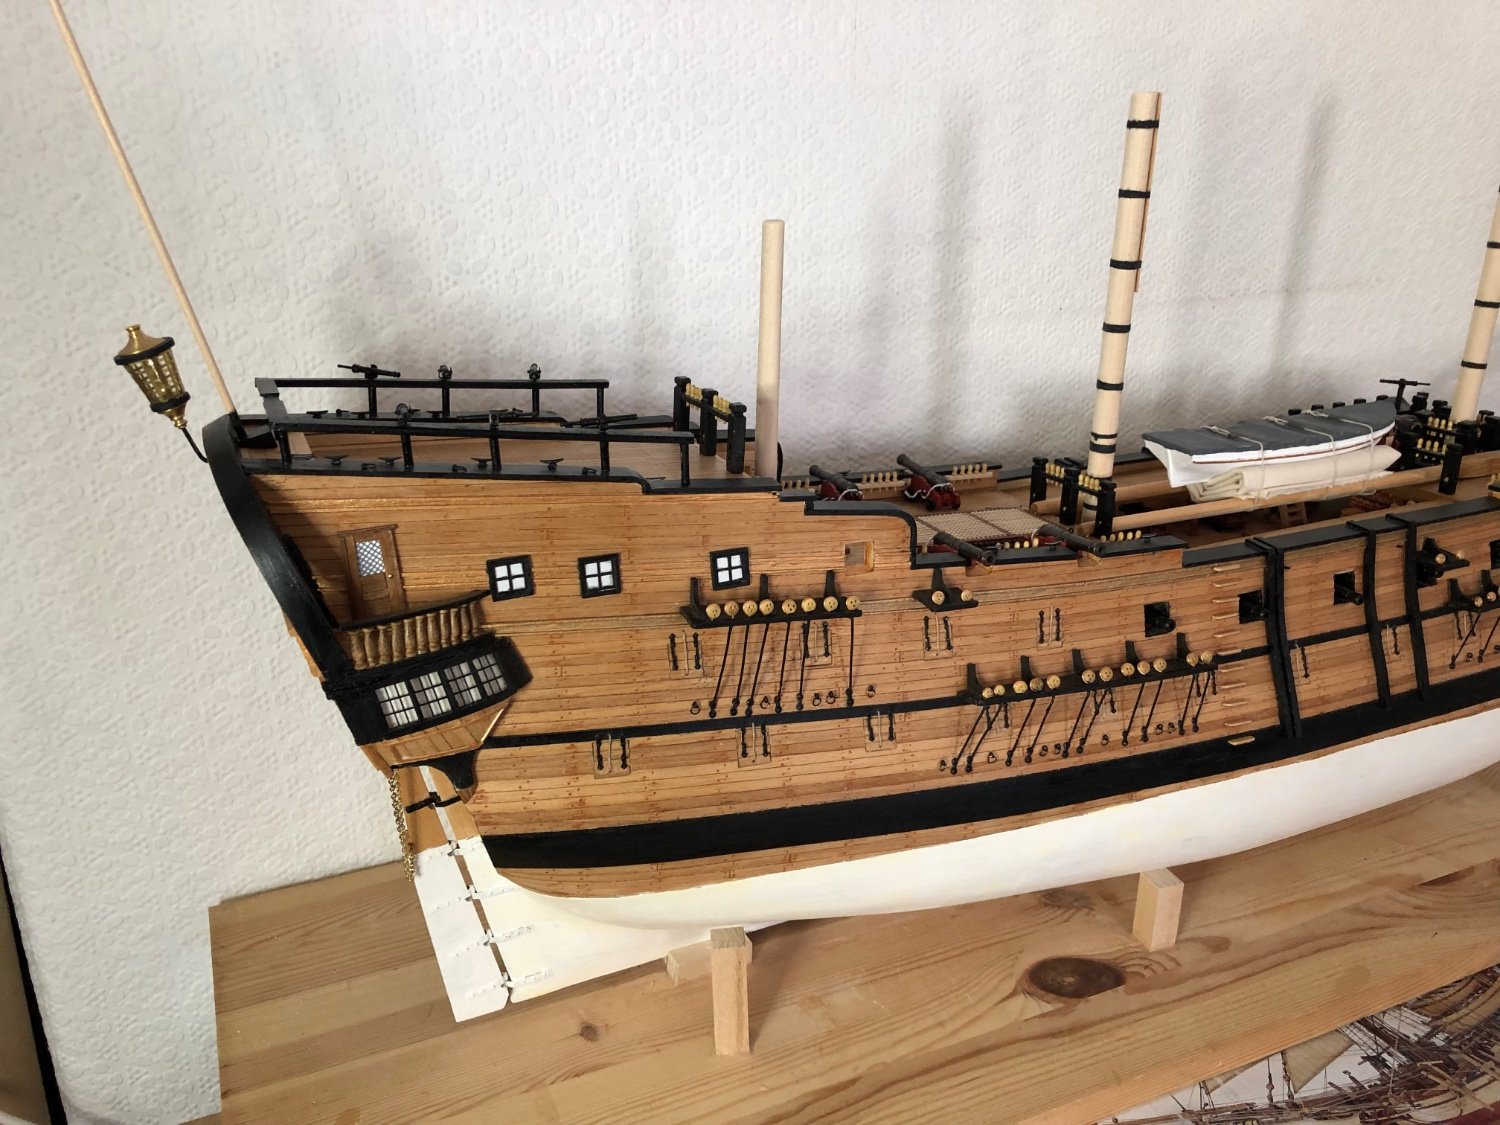
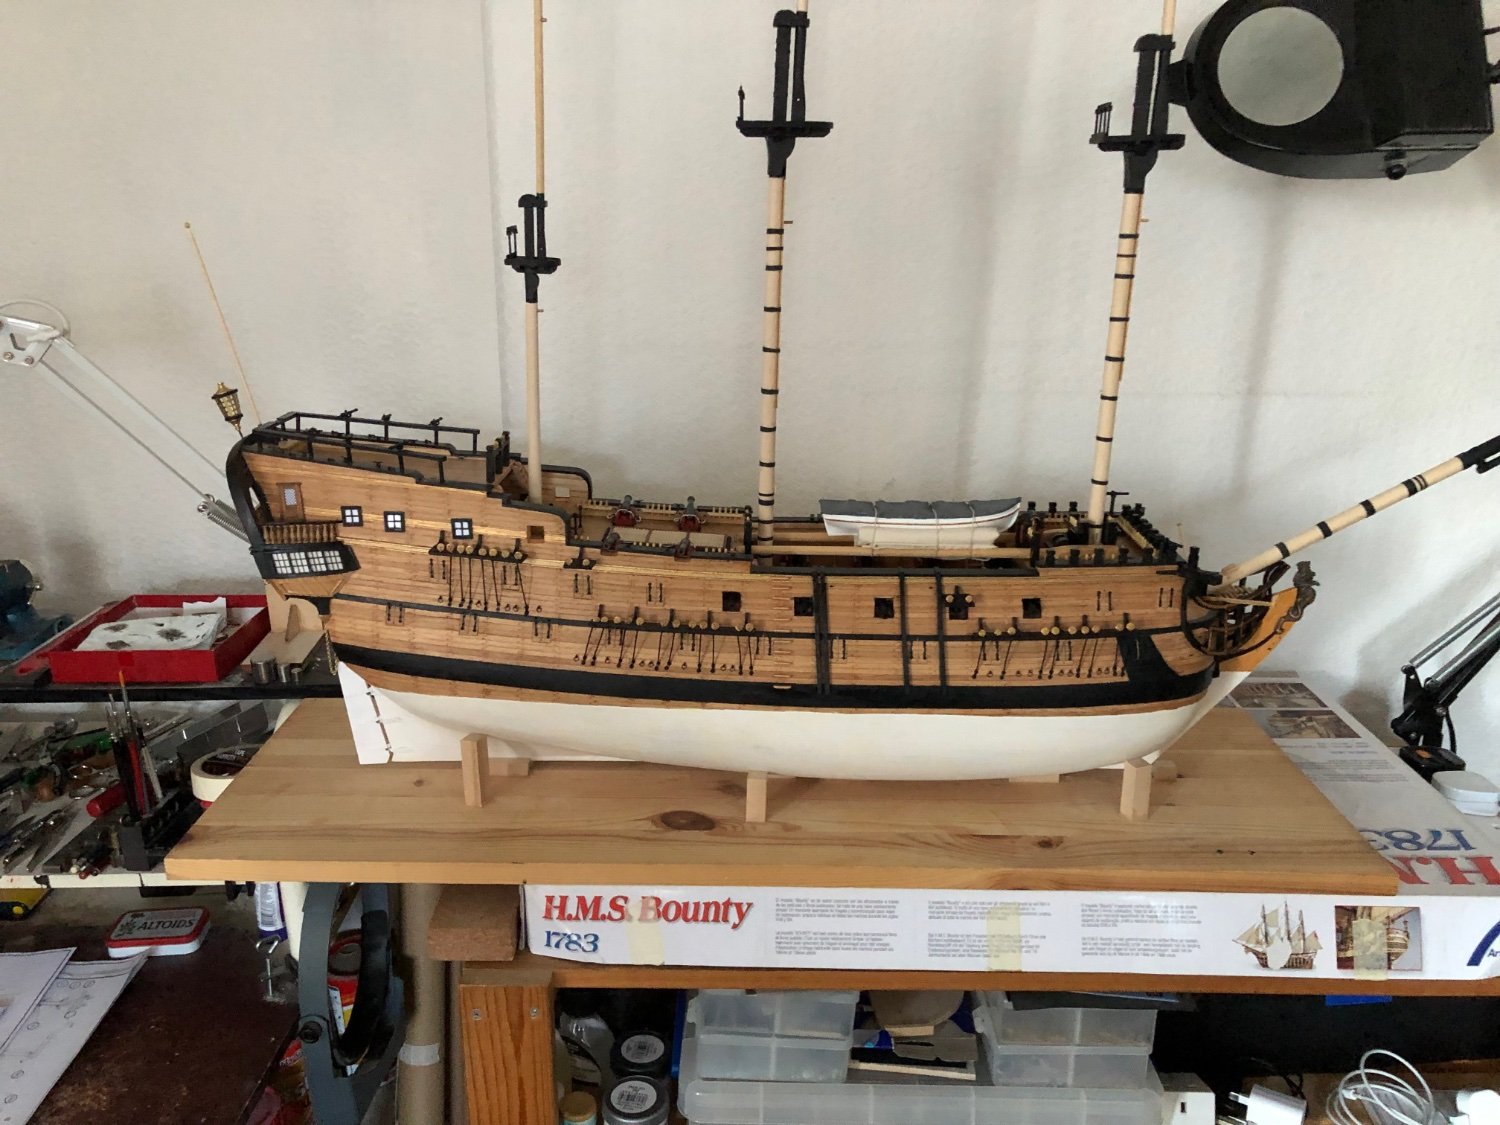
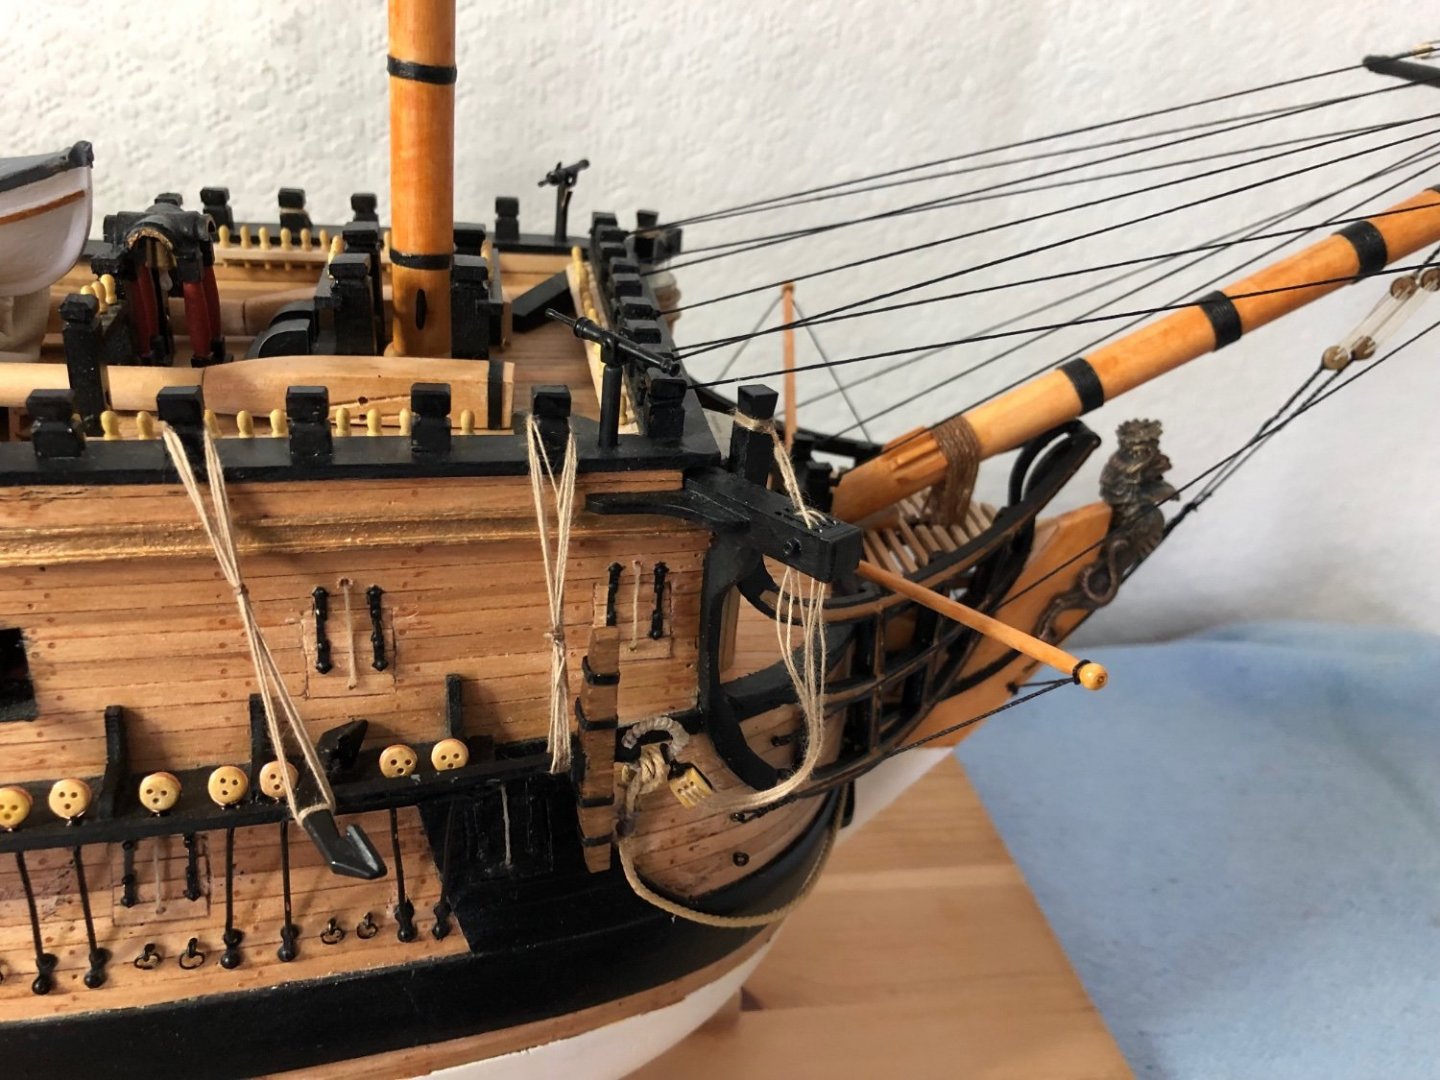
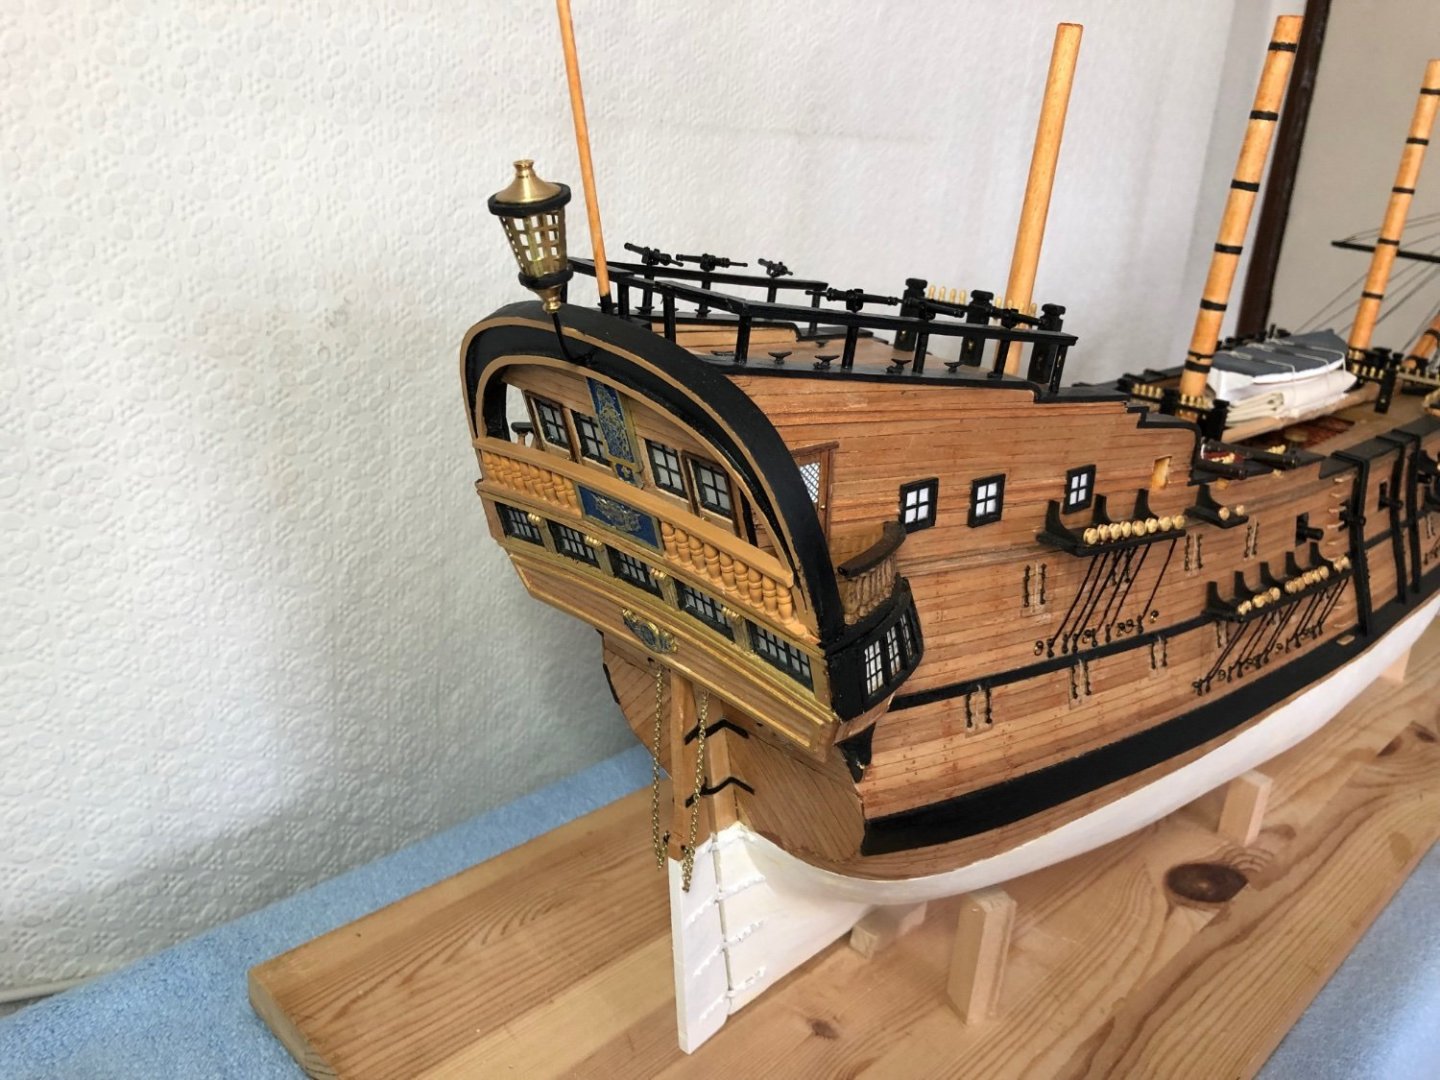
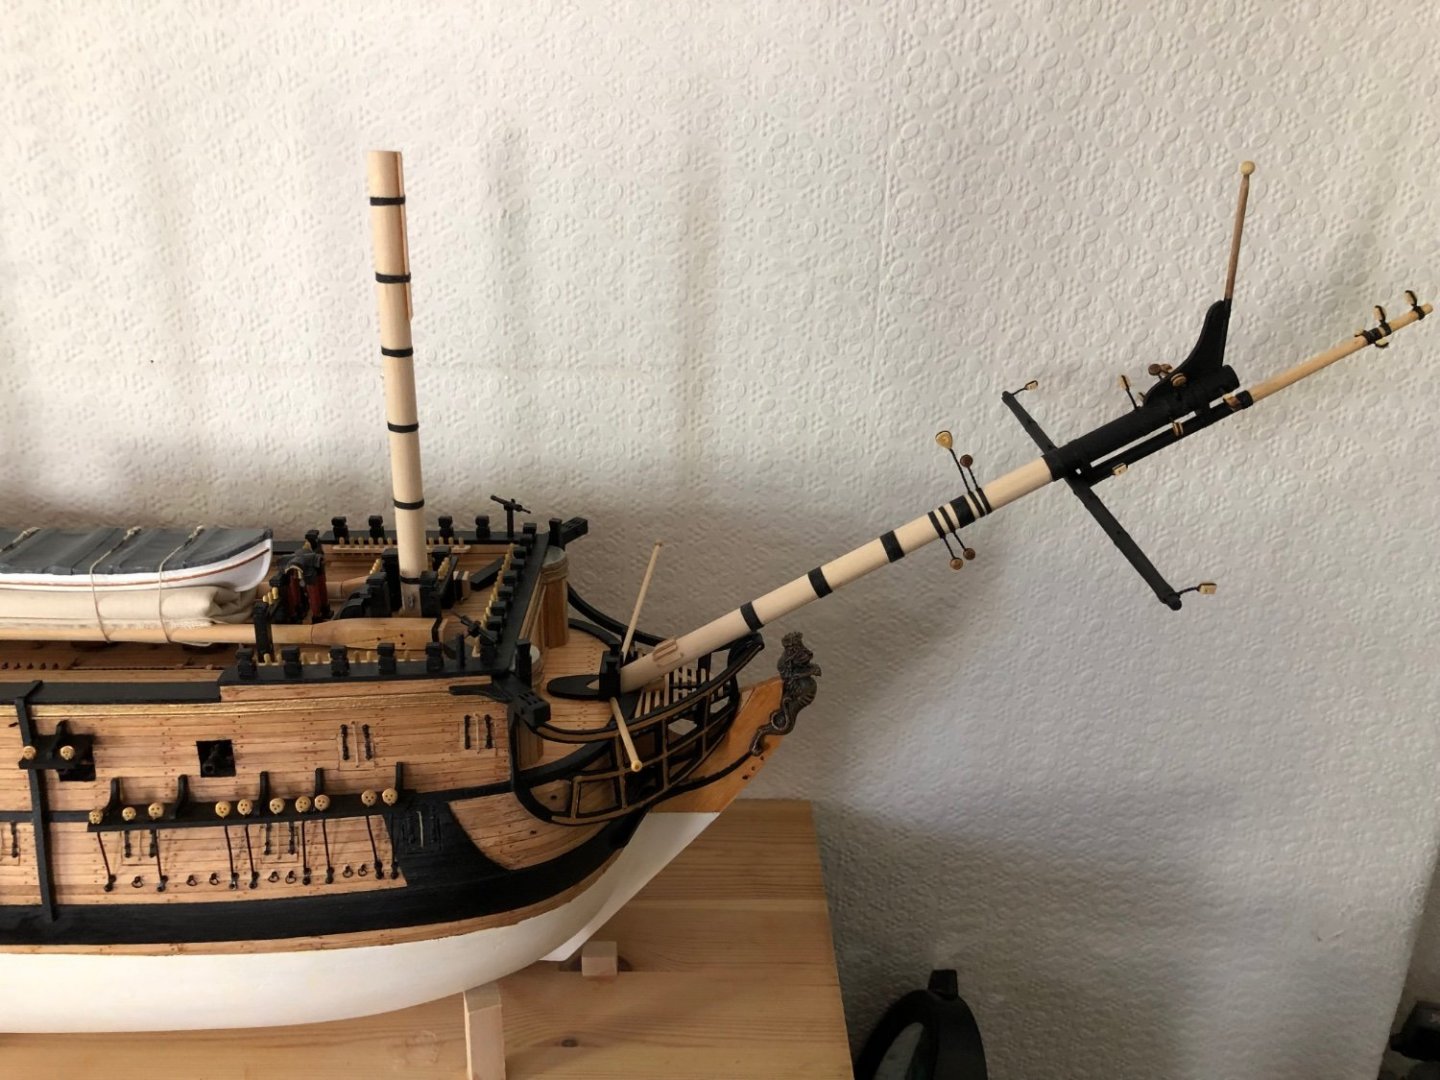
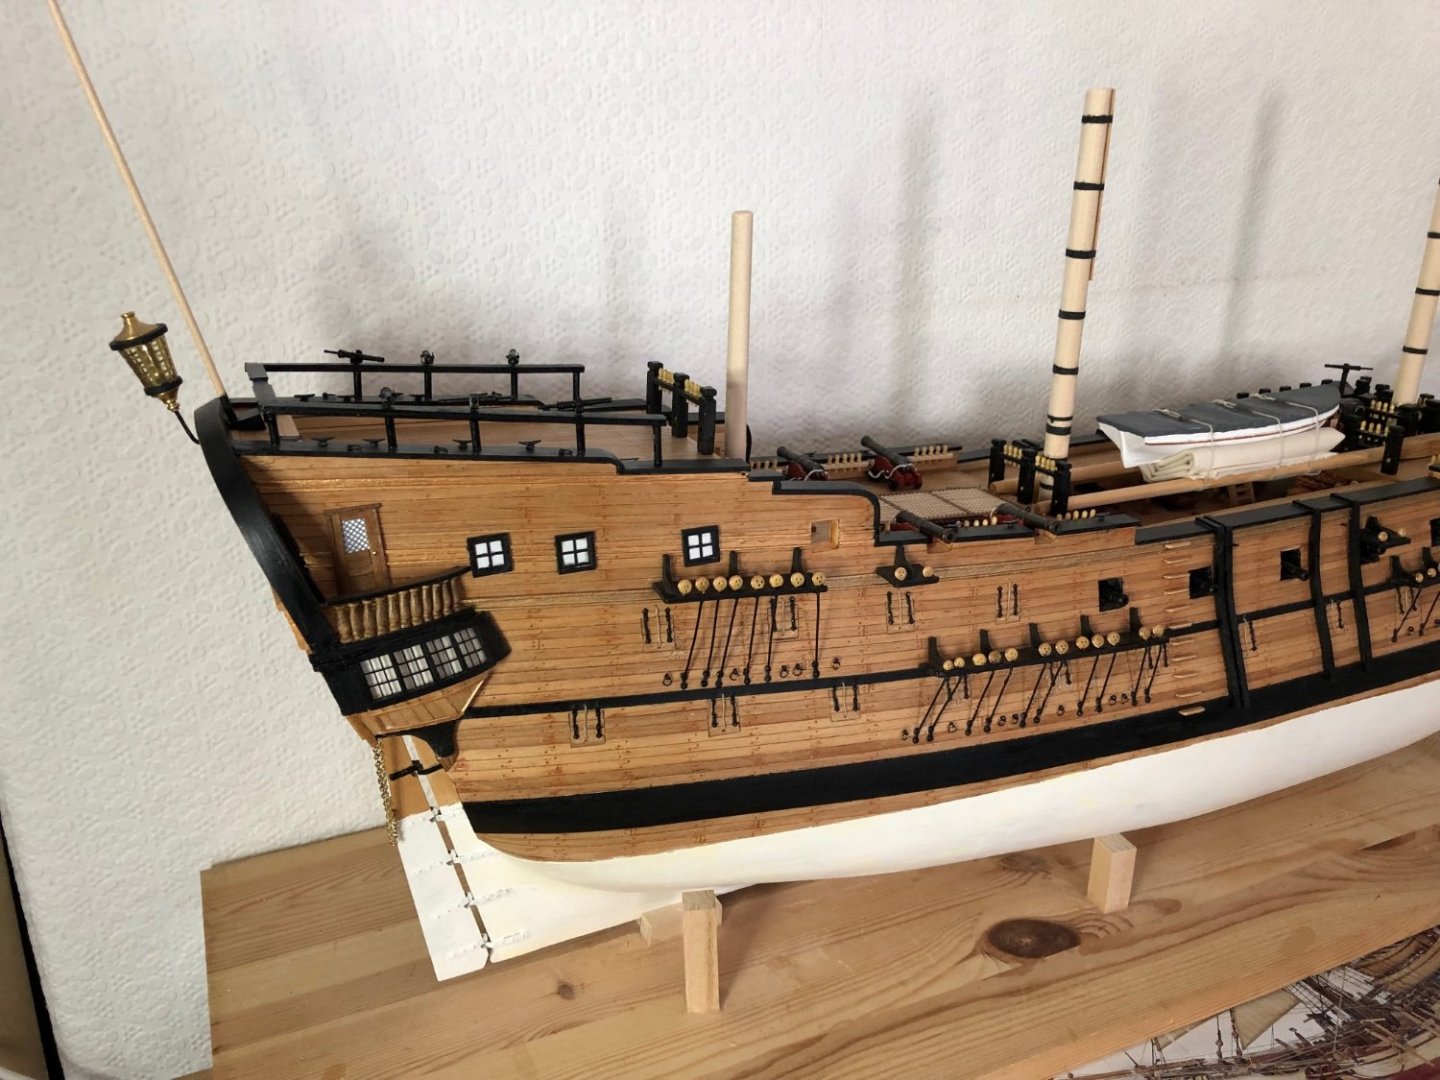
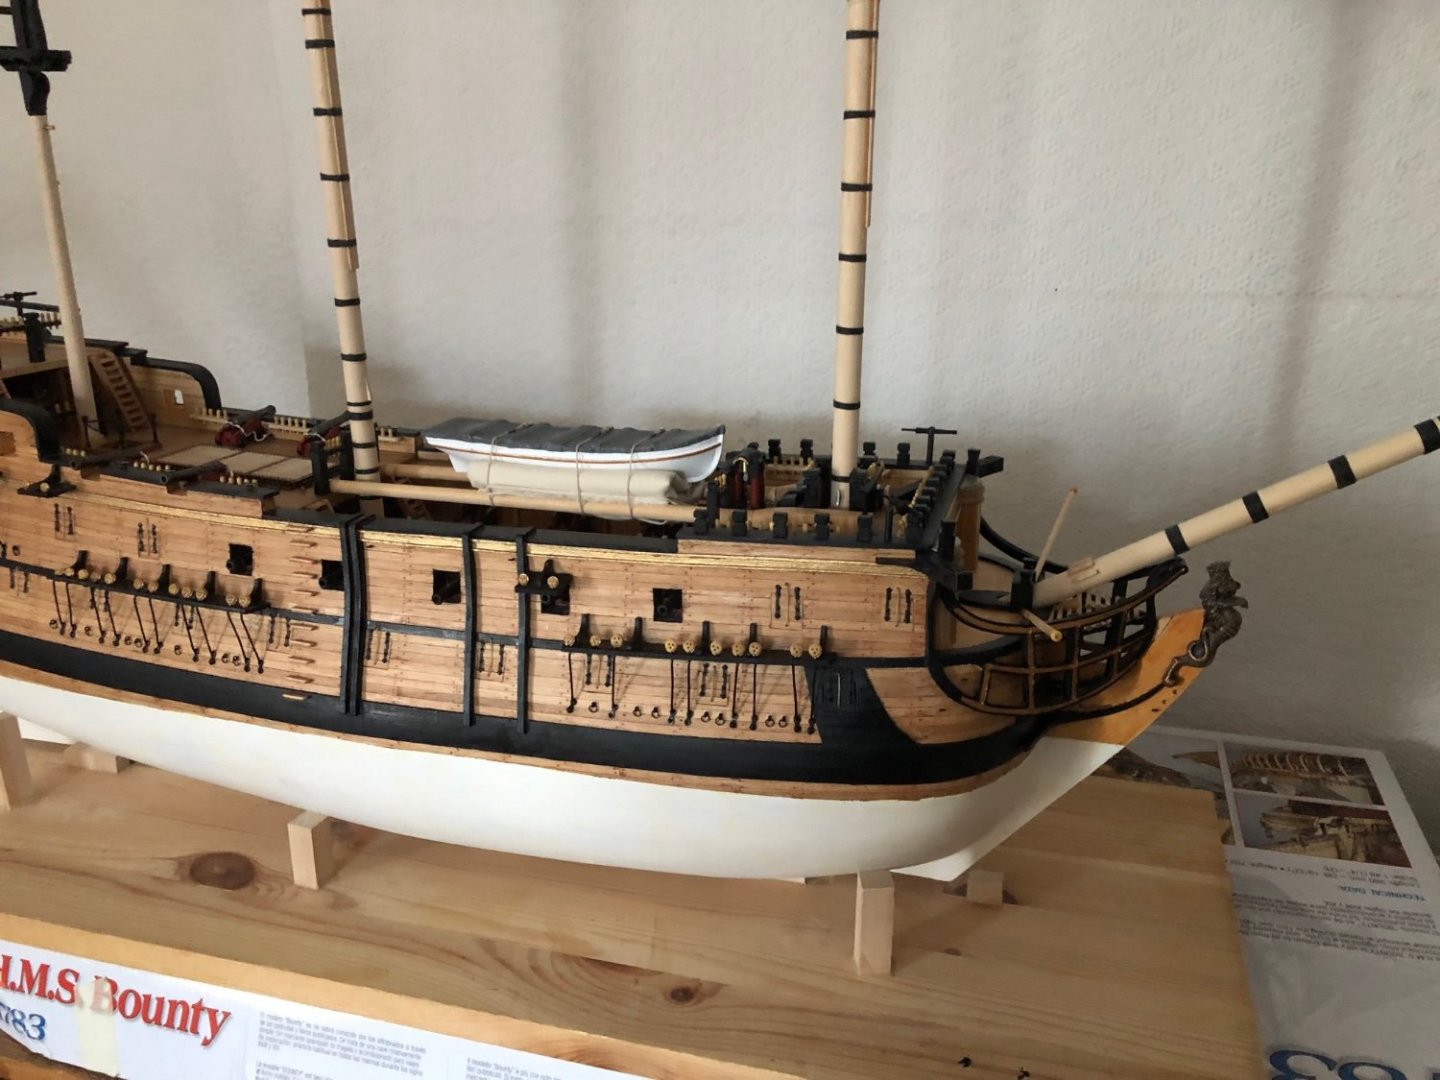
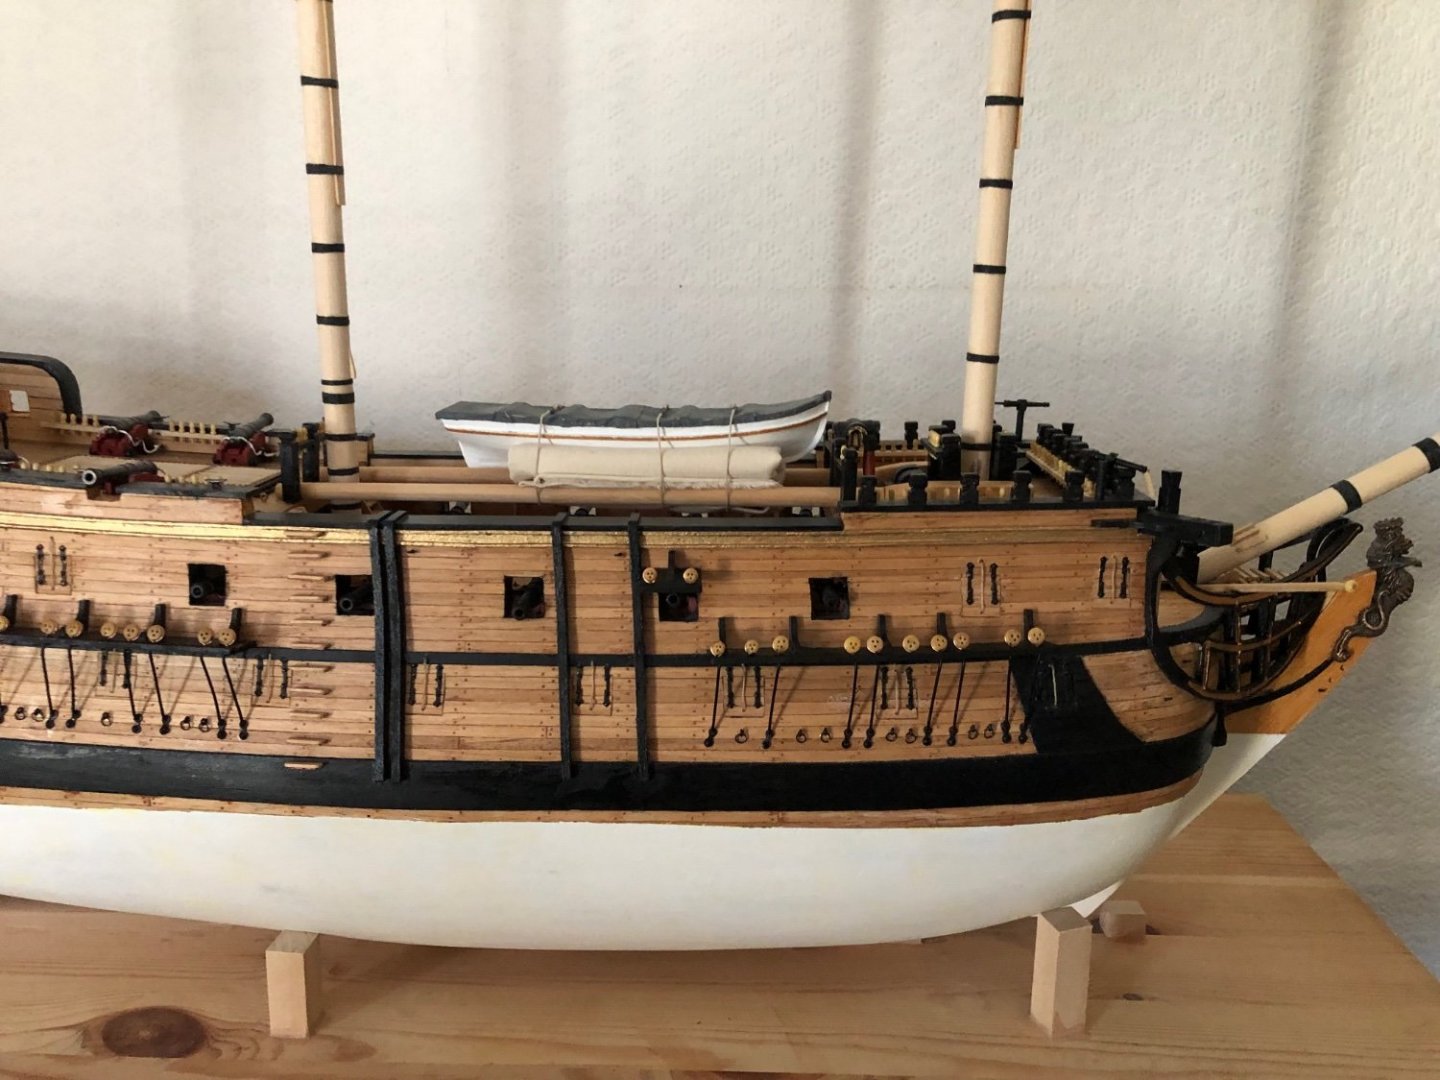
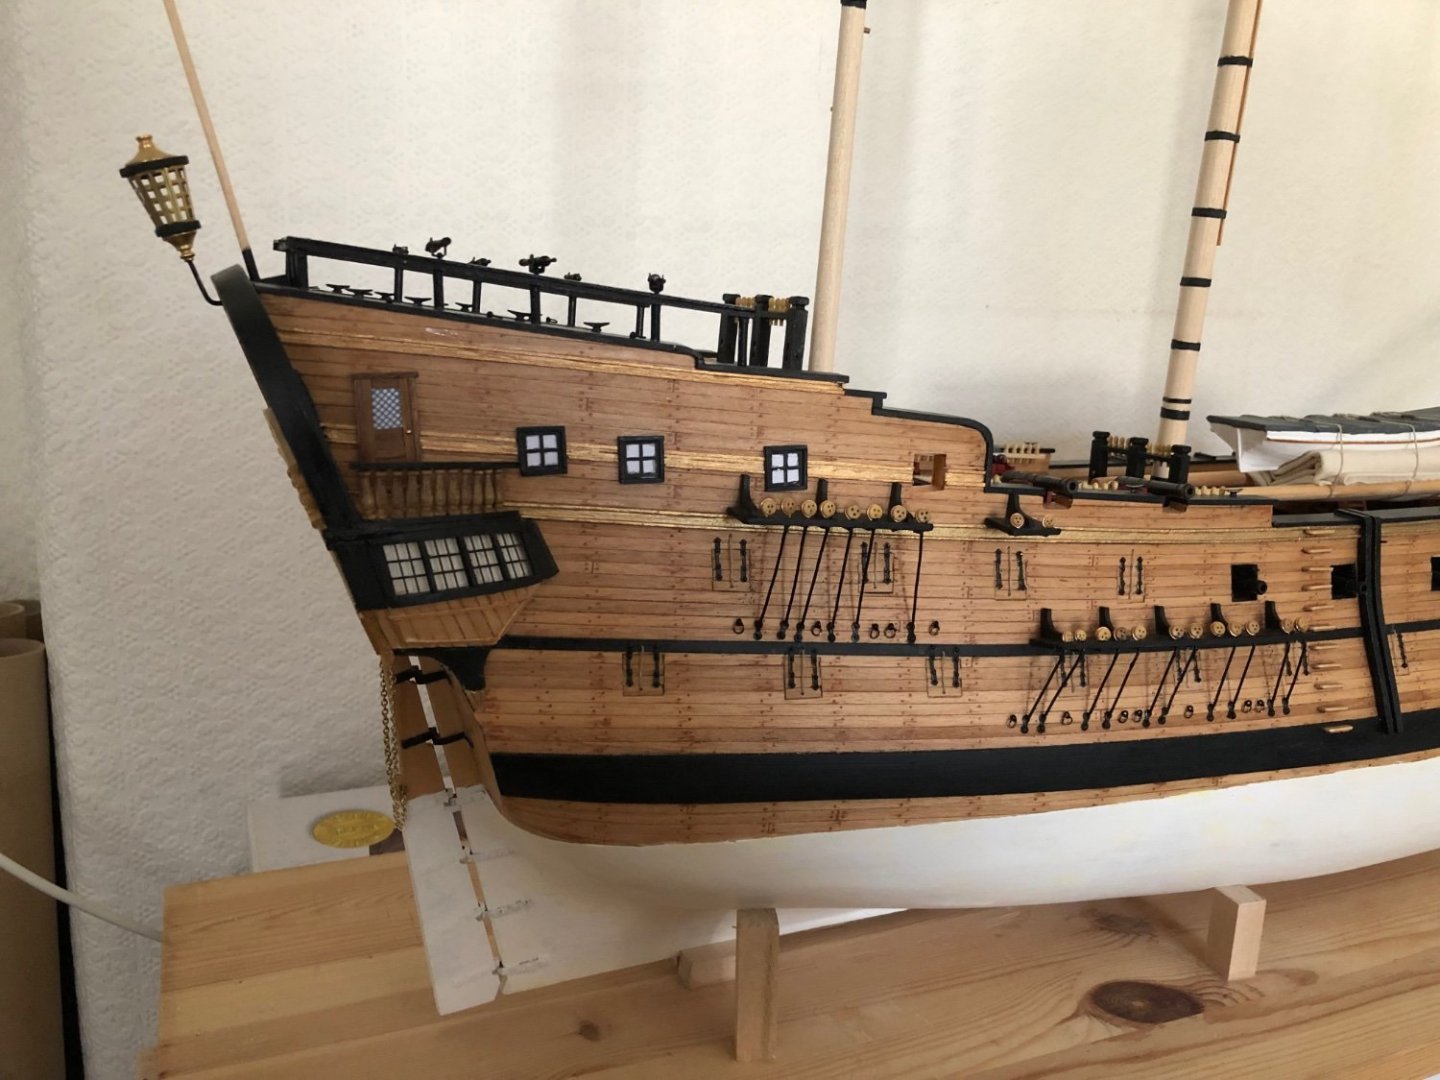
Hi, and thanks for visiting. The hull is now finished as far as I want. Next is blocks and bits to be added to the masts and bowsprit. Anchors will be added after the fore shrouds are in. Regard, Sam.
-
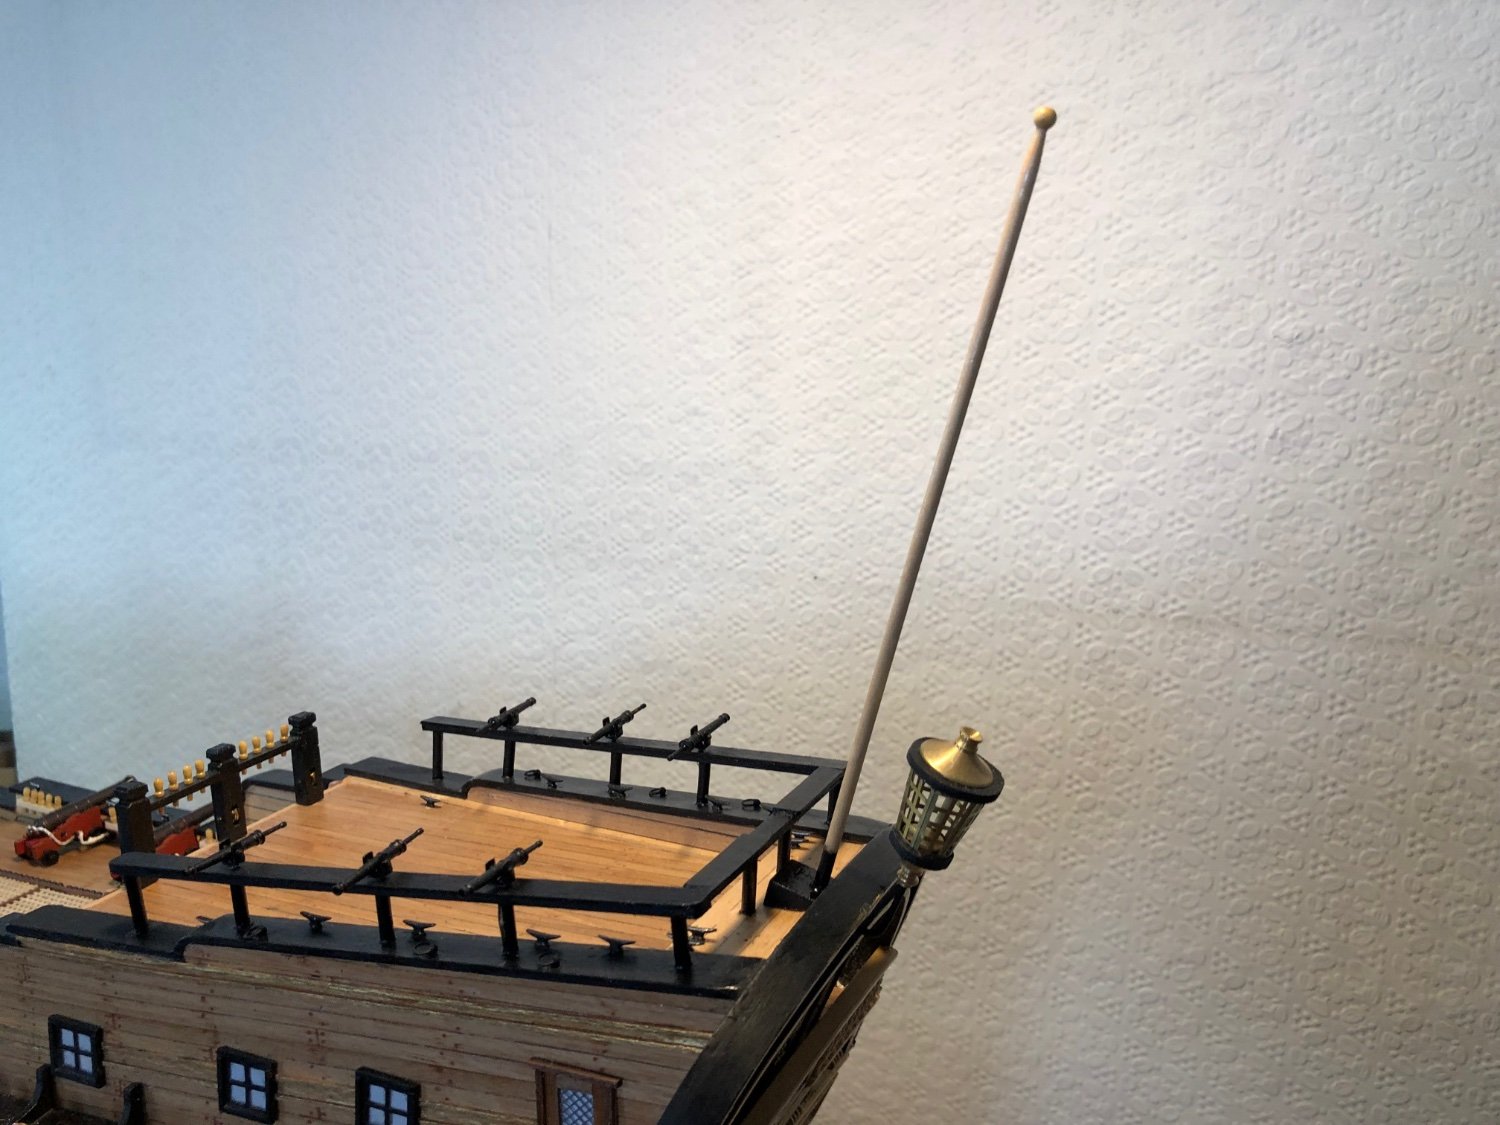
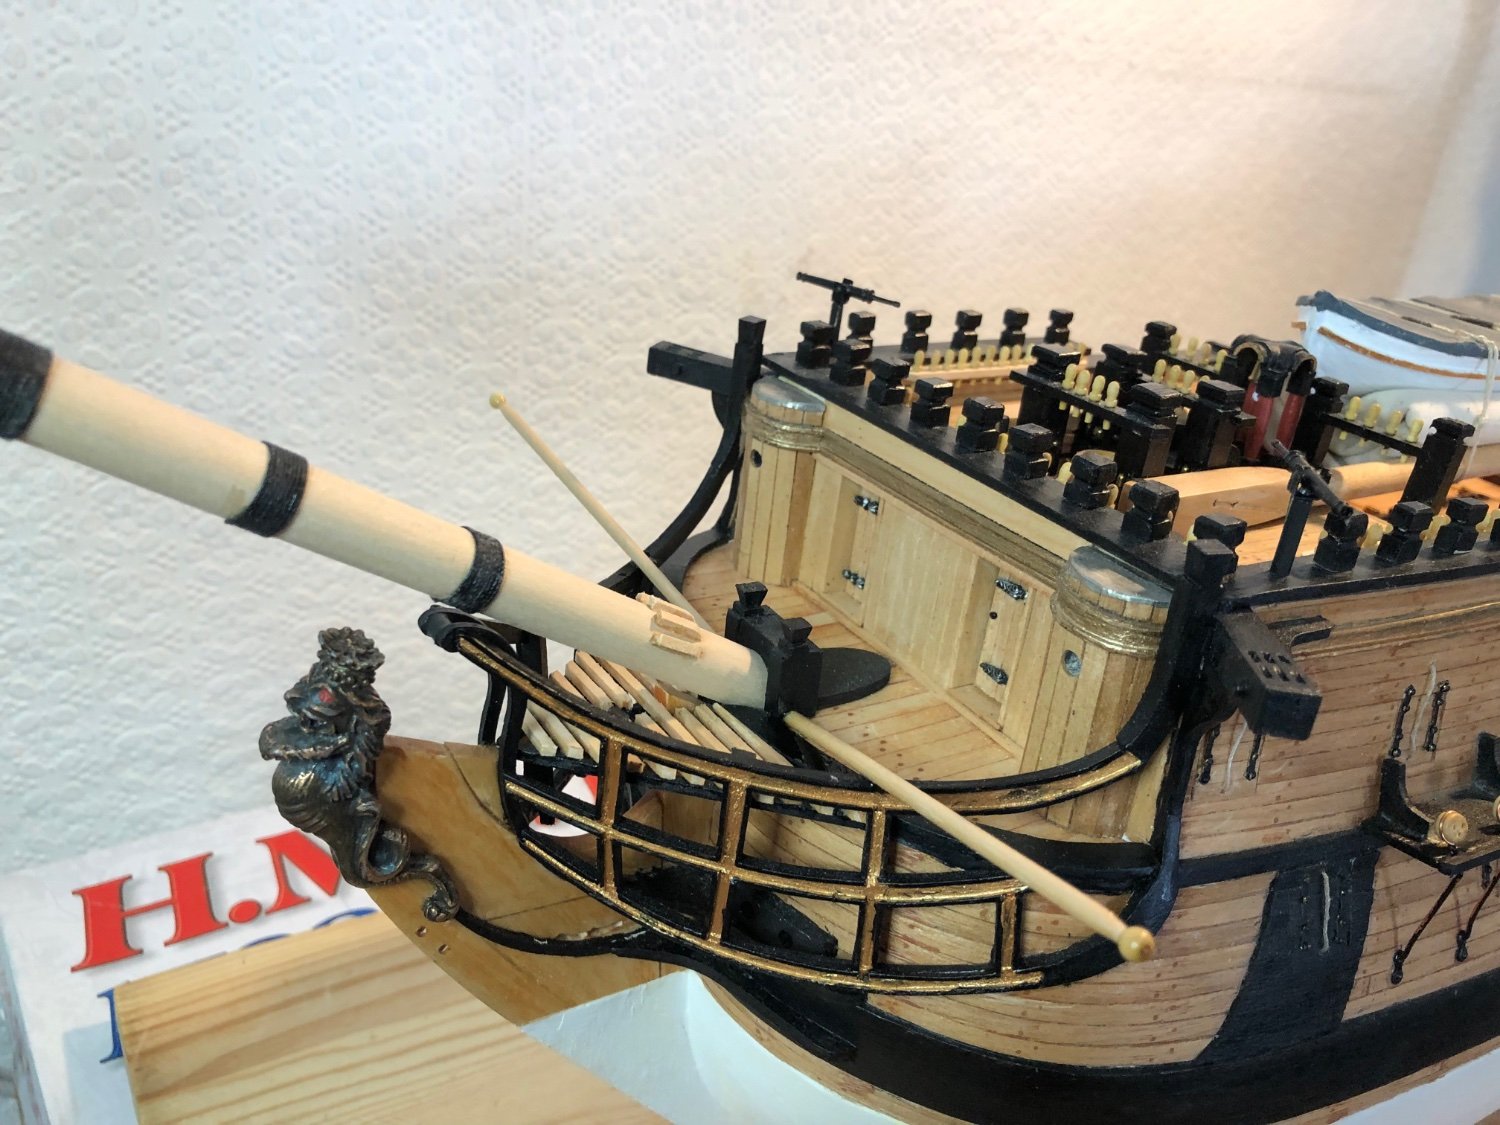
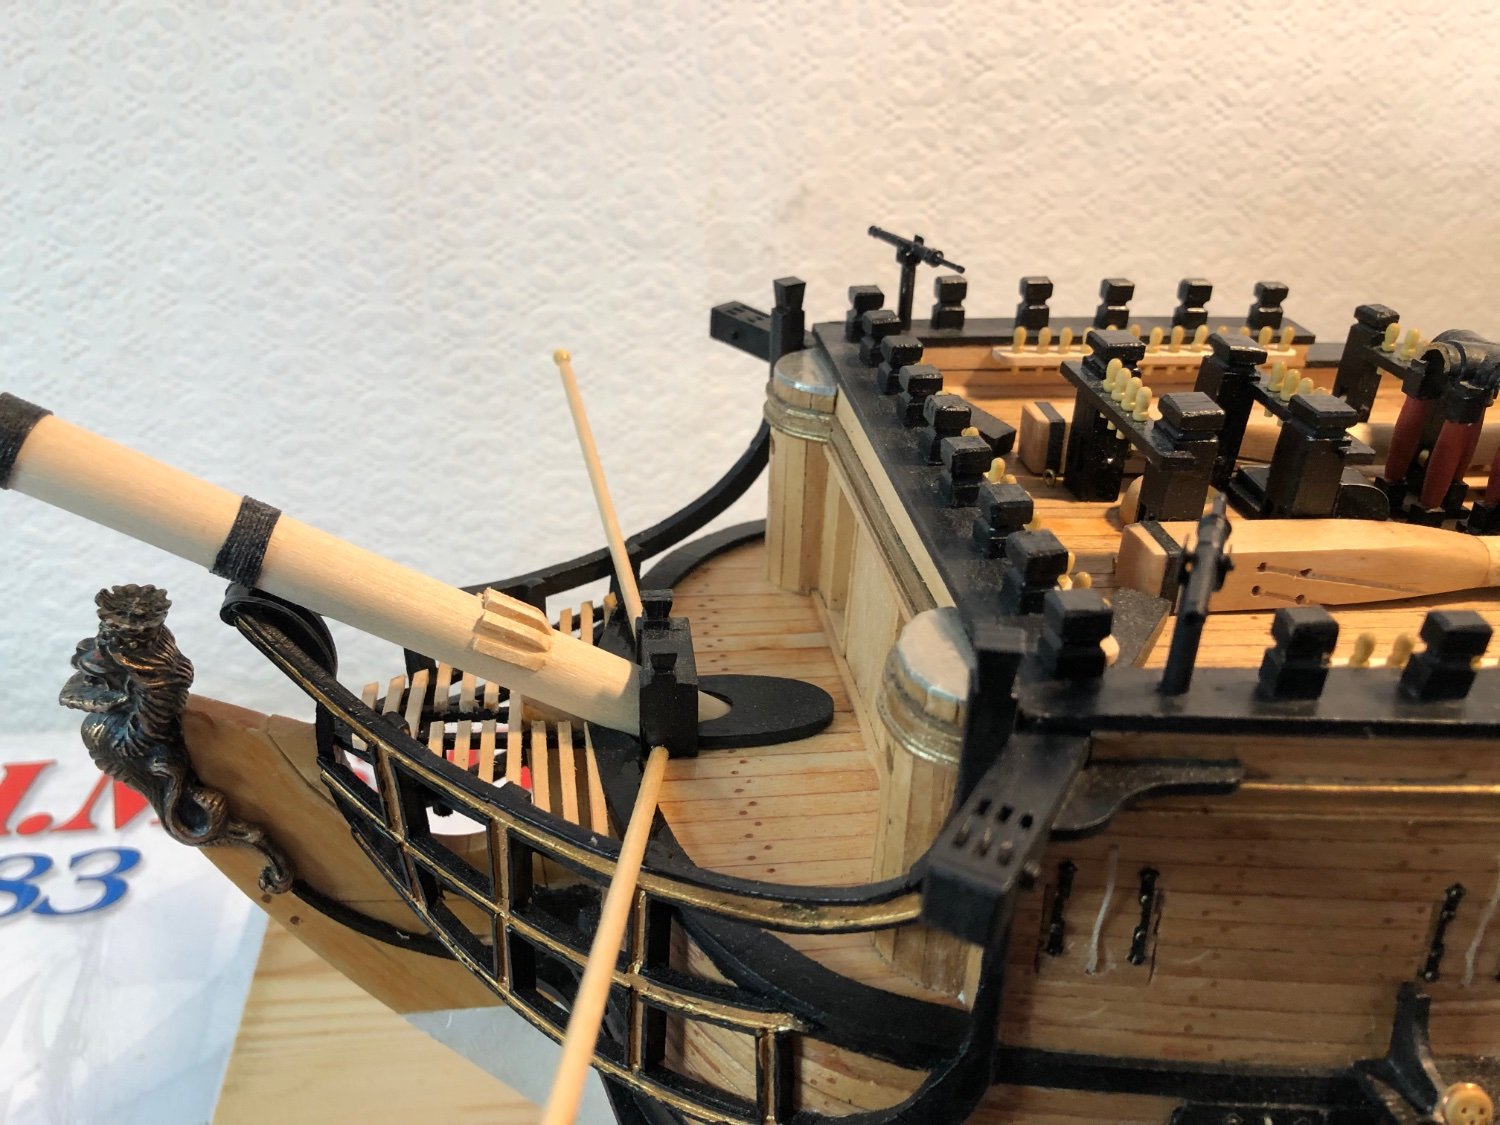
Hi, and thanks for visiting. Swivel guns mounted, boomkins fitted. Flagstaff and lantern in place. Only problem was the etched brass mounts for the swivels - the holes for the trunnions were too small. Turned a one hour assembly into an all day problem holding the brass whilst opening up the holes. Also cost me a fingernail. But we are getting there. Regards, Sam.