MORE HANDBOOKS ARE ON THEIR WAY! We will let you know when they get here.
×


SIDEWAYS SAM
-
Posts
248 -
Joined
-
Last visited
Content Type
Profiles
Forums
Gallery
Events
Everything posted by SIDEWAYS SAM
-
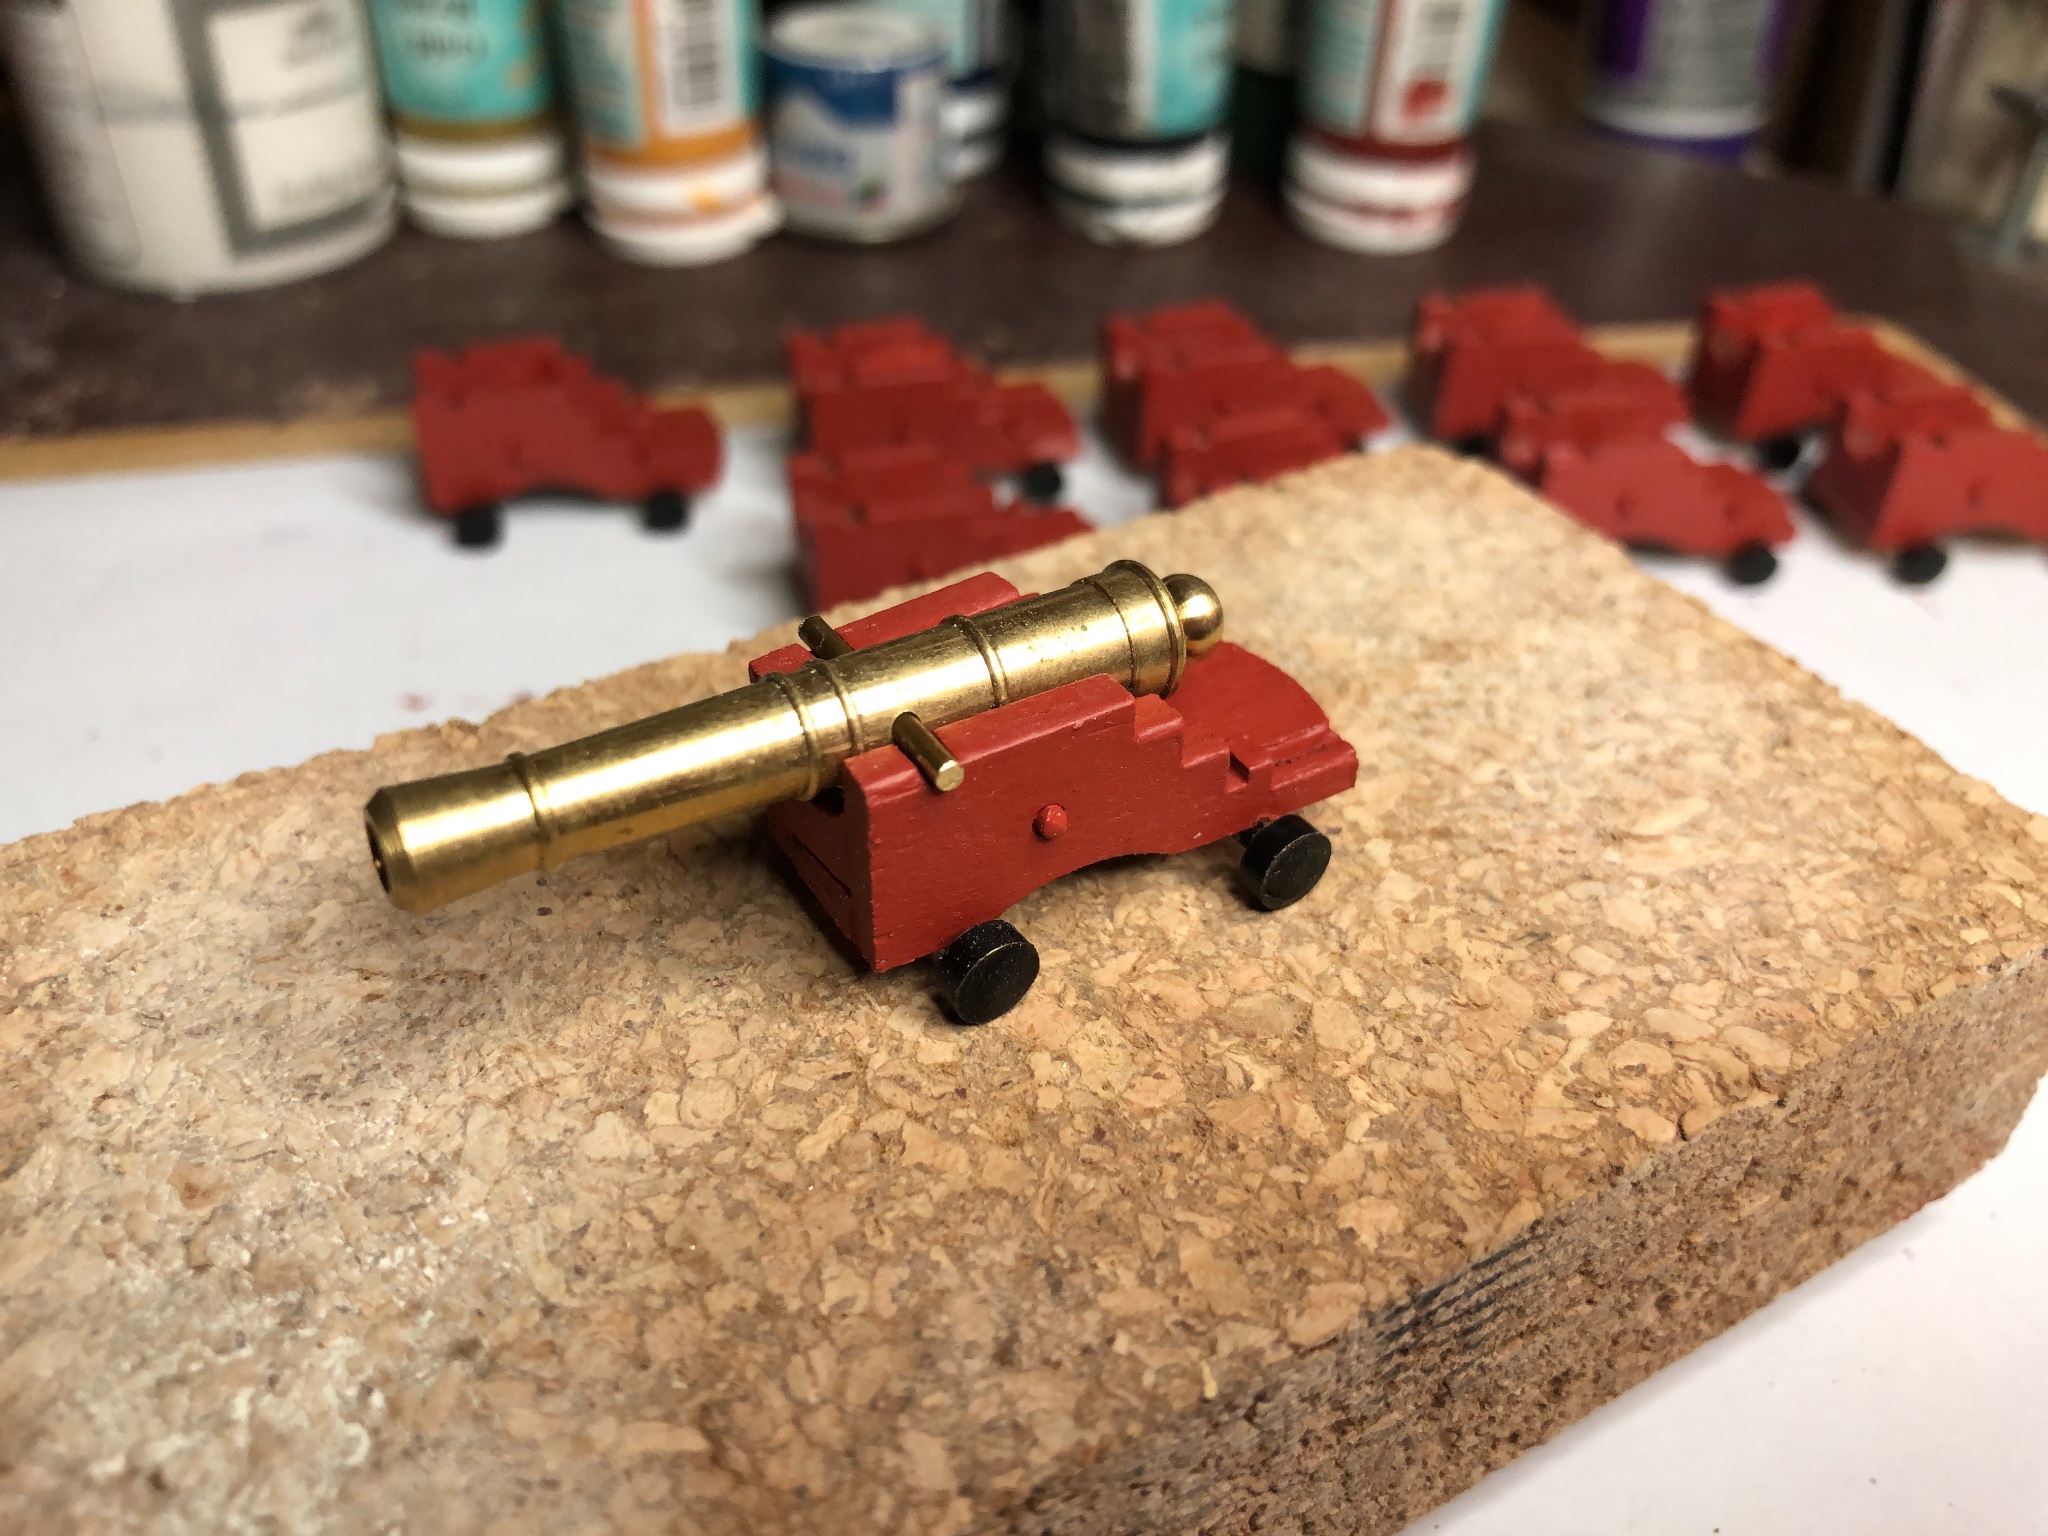
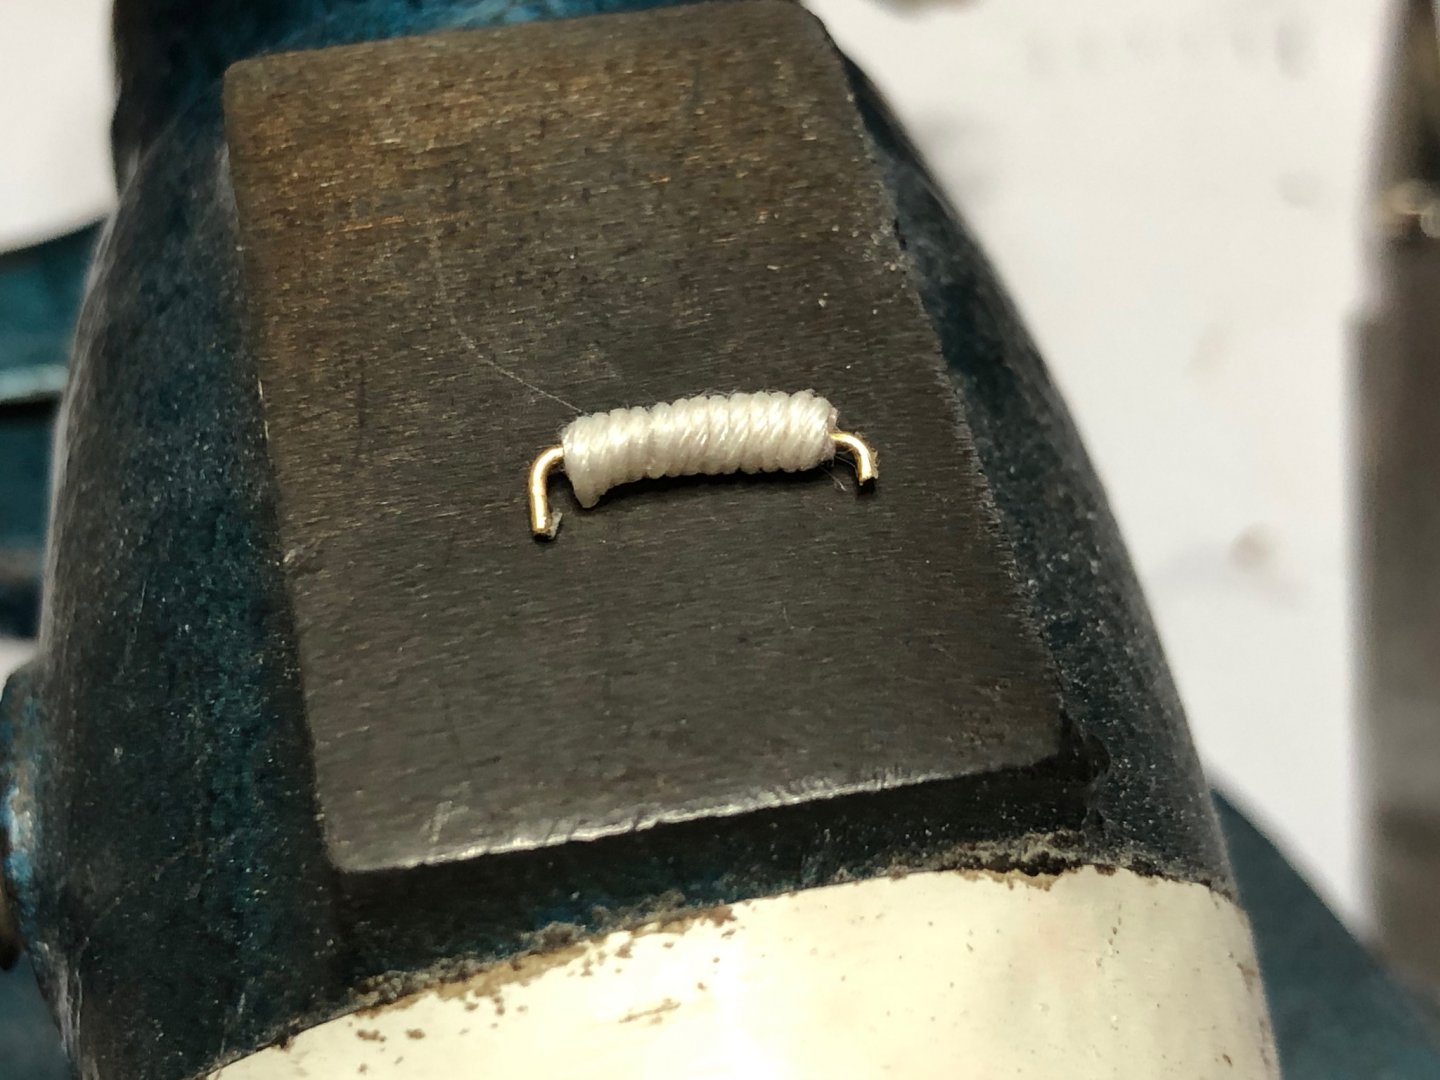
After several disastrous efforts at fixing gun tackles and not being able to source double blocks small enough not to look stupid I gave in. Final solution is a blatant lift from - Superdetailing the Cutter Sherbourne by George Bandurek. Carriages end up fixed in the "stowed position". 0.75mm line is coiled twice around a wire armature then trimmed to 1mm long and fixed in position. Not what I intended but the best I could come up with. Sam.

-
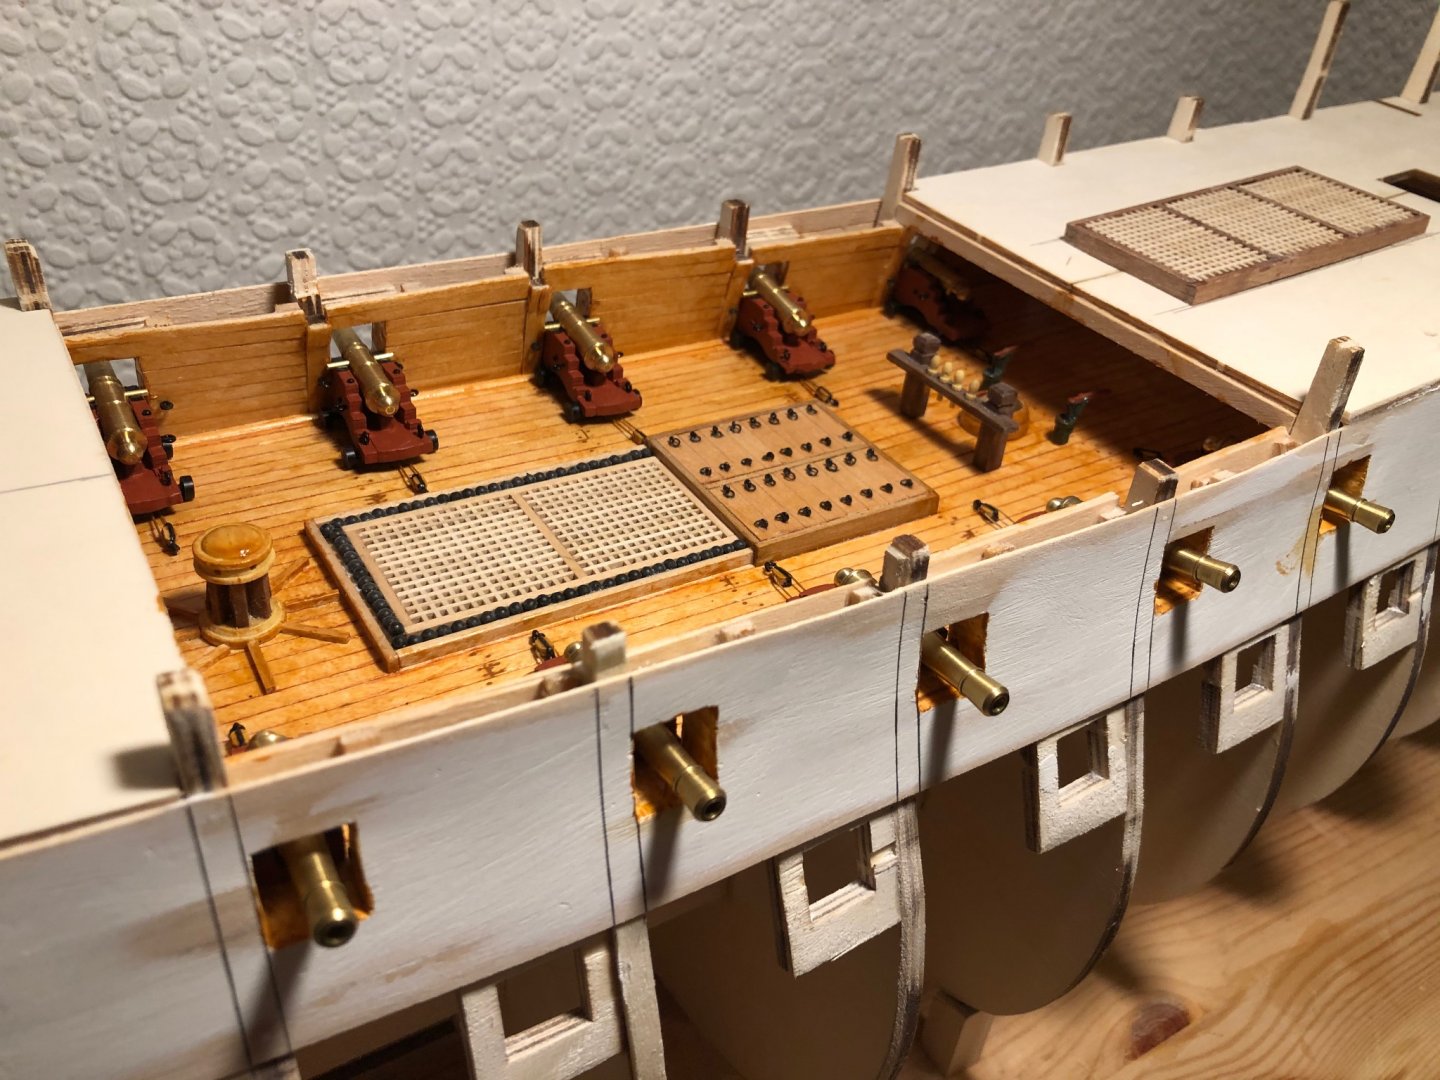
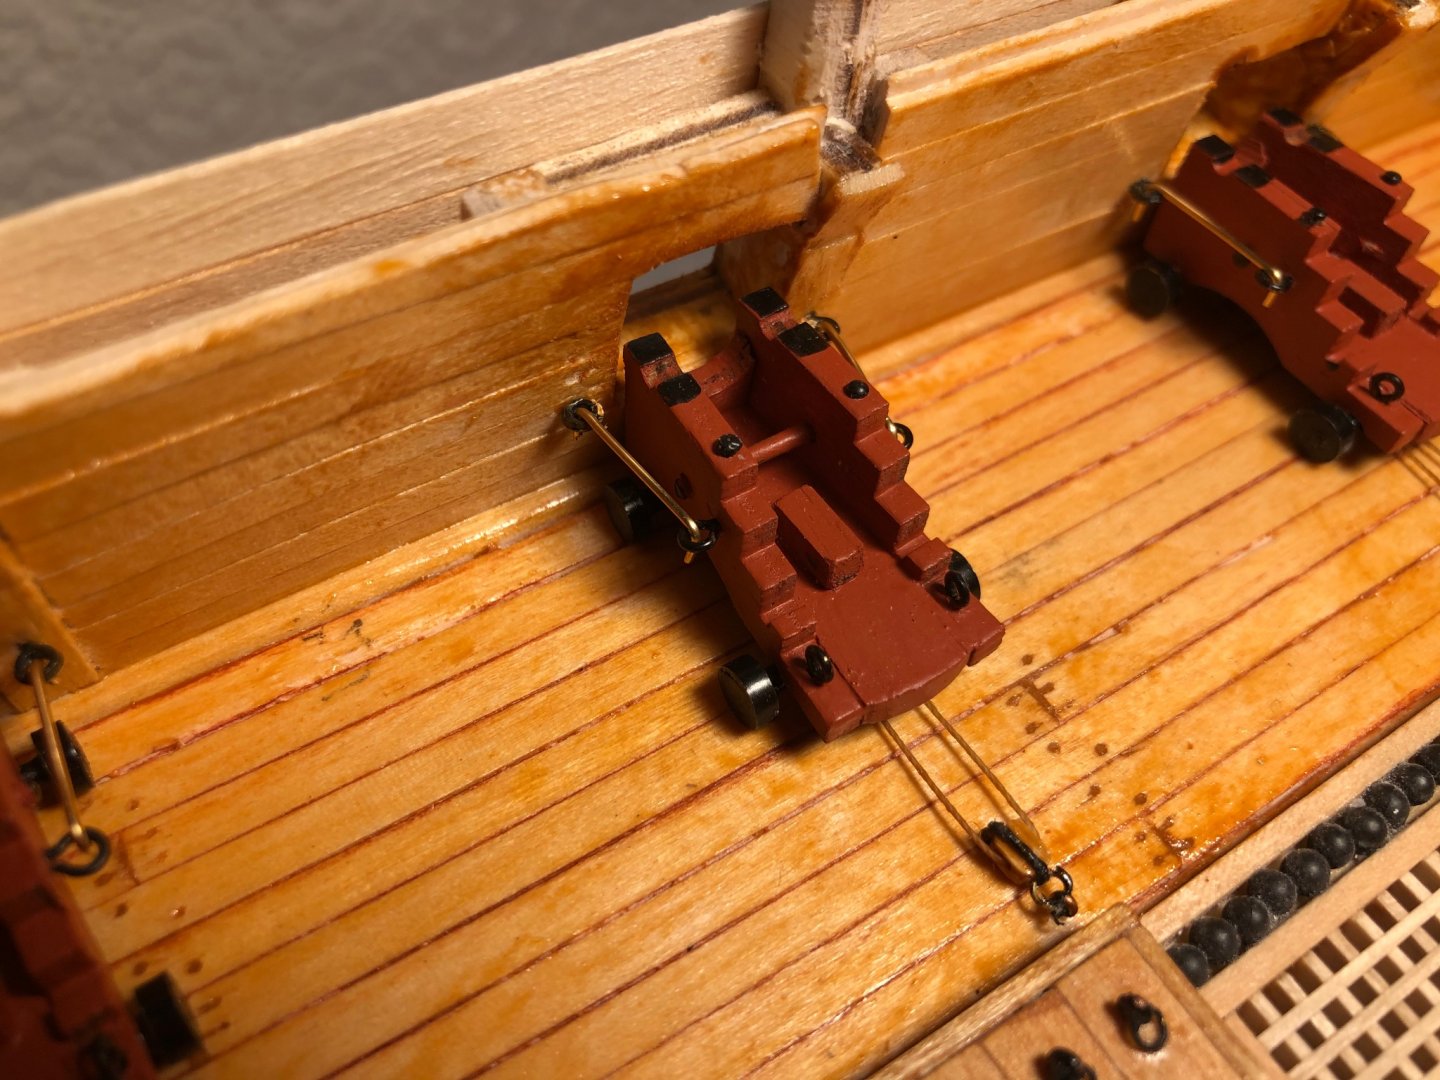
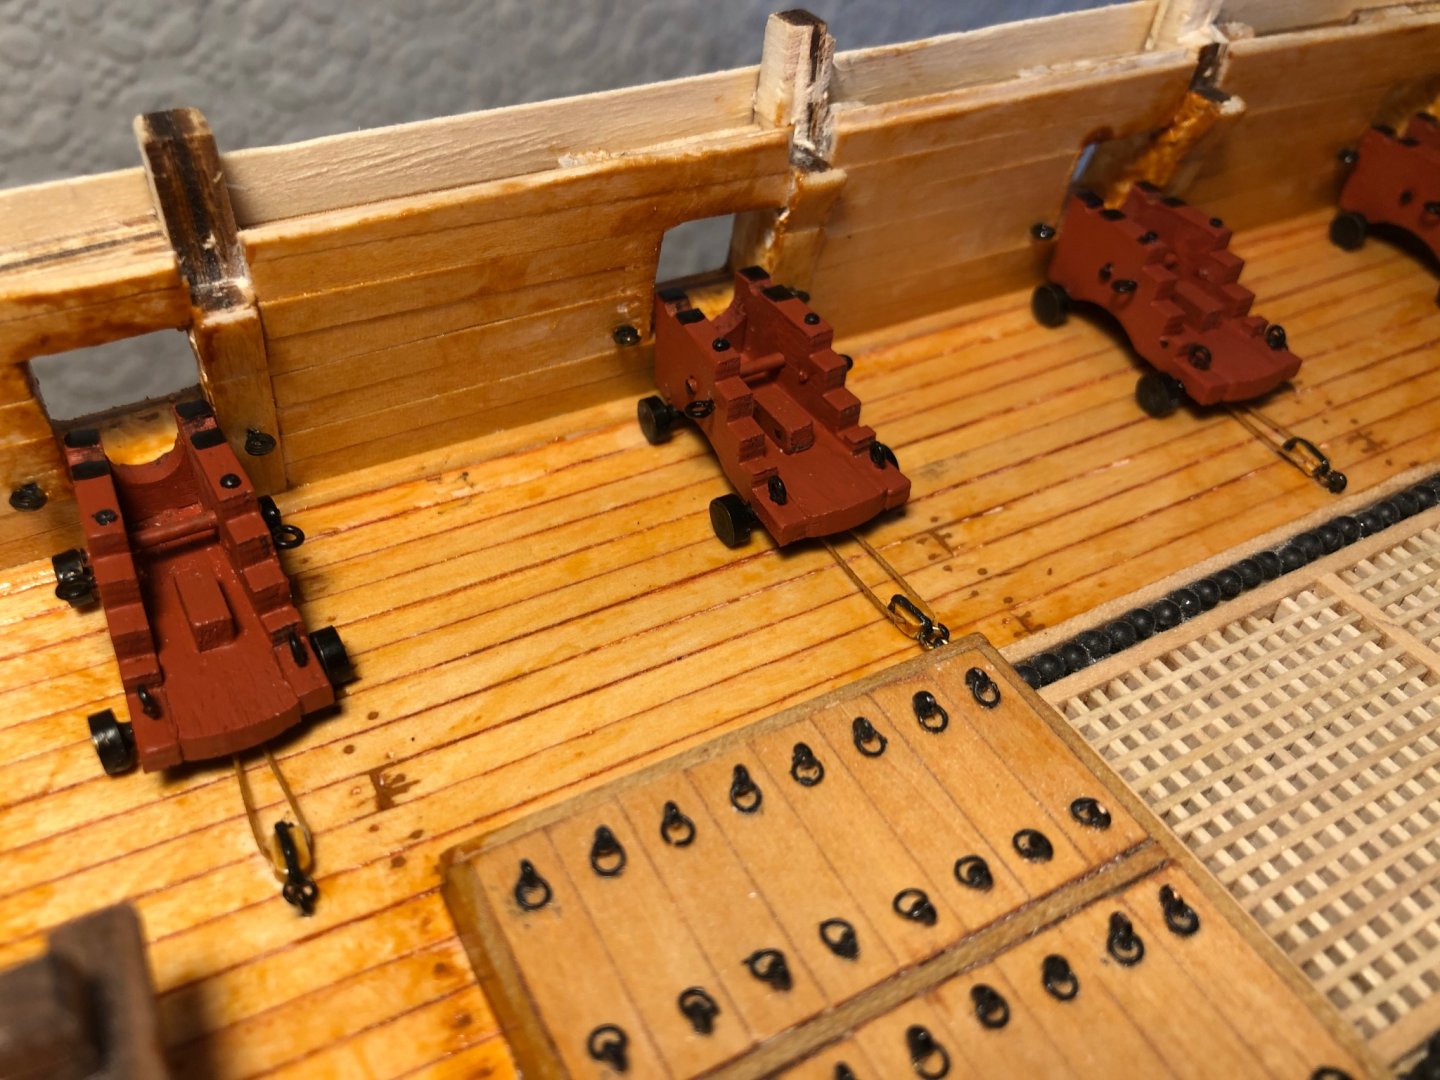
Thanks for the likes. Upper gun deck waist carriages finished. Next to install is the gun tackle. Cannon and breeching ropes will be fitted at a much later date. Tempted to install a bucket adjacent each position but wouldn't go any further. Then on with the upper decks. Sam.
-
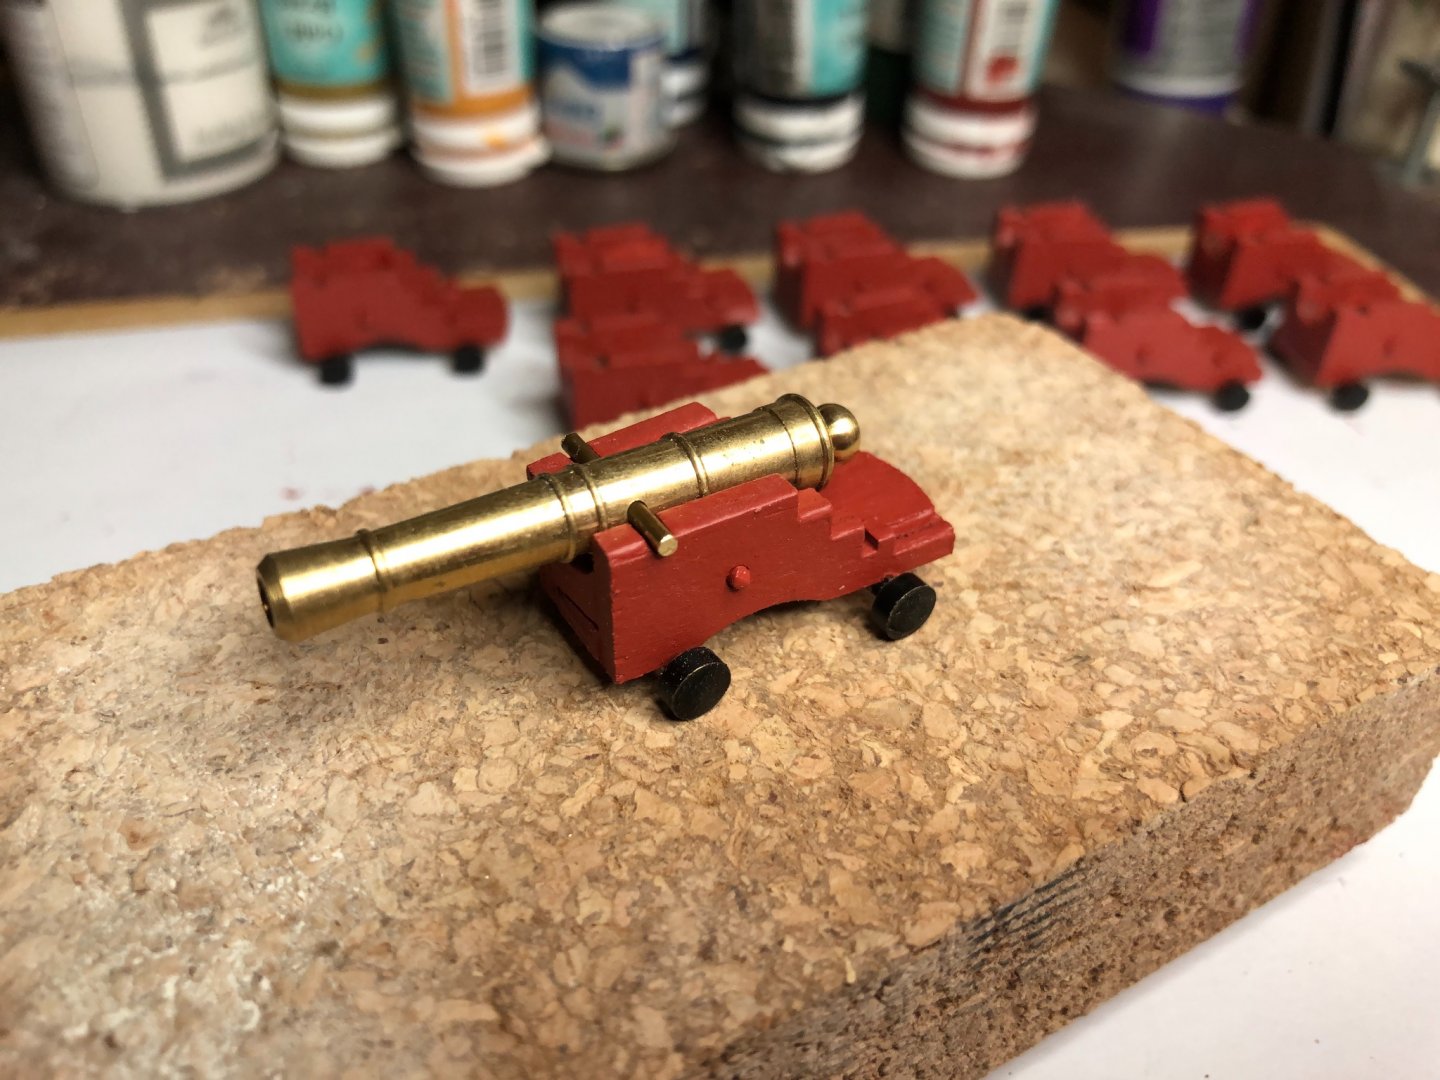
Basic waist cannon. Replacement barrels will be blackened and fitted much later. Bolts, eyebolts and rigging to be fitted then, carriages can be installed. After this step I can install the gangways and upper decks. Looking forward to something less fiddly. Sam.
-
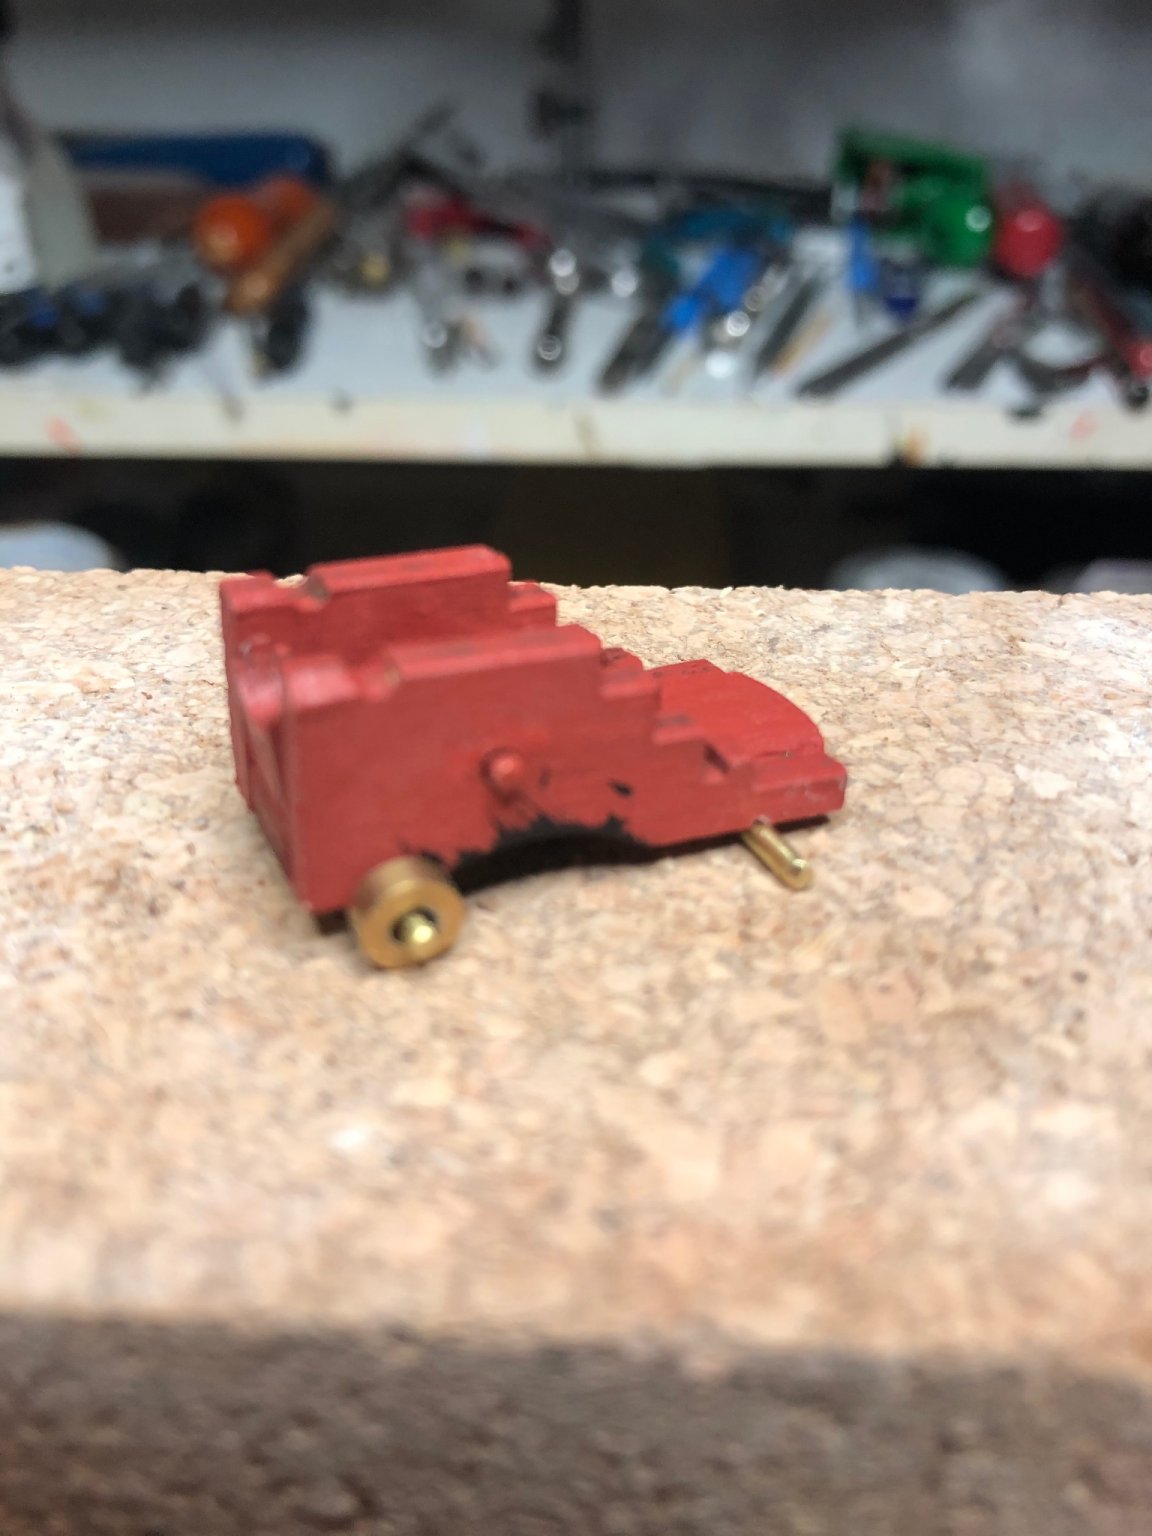
Thanks for the likes and, Marks comments. Still trying to hide the plywood edges on the carriages - on my third coat of paint. Wheels fitted to wooden axles and look better than the brass. This is all taking time but worth it - these are the details that make or break a model. Sam.
-
Starting to realise how big this build is. Your work is stunning. Sam.
-
Started assembly of 10 cannons - waist of upper gun deck. Fitted new scalpel blades and broke out a new razor saw to cut out the carriage parts. Assembled all the bits and then took stock. Bits missing from the plywood parts due to delamination. these will need several coats of paint to cover the plywood so decided to make good. Be as careful as you like - these bits will break. Trunnions pre-fitted to barrels and about half were deformed and needed straightening. Broke off three spoiling two barrels before throwing them all in the bin (not even the spares box !!). Replaced with barrels from spares box. Assembled basic carcase, applied first of many coats of paint and fixed axles. Axles are far too small for wheels provided - photo attached. Will be replaced with wooden cocktail sticks. Not looking forward to removing twenty axles without damaging the ply carriages. One step forward, two back. Can't find replacement carriages of the correct period or I would have binned this lot days ago. Should have taken more notice of Mark's postings ref. armament on this kit. Turning into an interesting build.

-
Hi Rowboat, This won't help much - I have tried before and after fixing yards. Easier to fix ratlines first especially at the top of the shrouds. You really need access to both sides of the all the way up the shrouds so after suits me. Both before and after are both difficult so - GOOD LUCK. It's very easy to distort the shrouds as you fix the ropes going up the mast. Sam.
- 195 replies
-
- 1
-

-
- enterprise
- constructo
- (and 1 more)
-
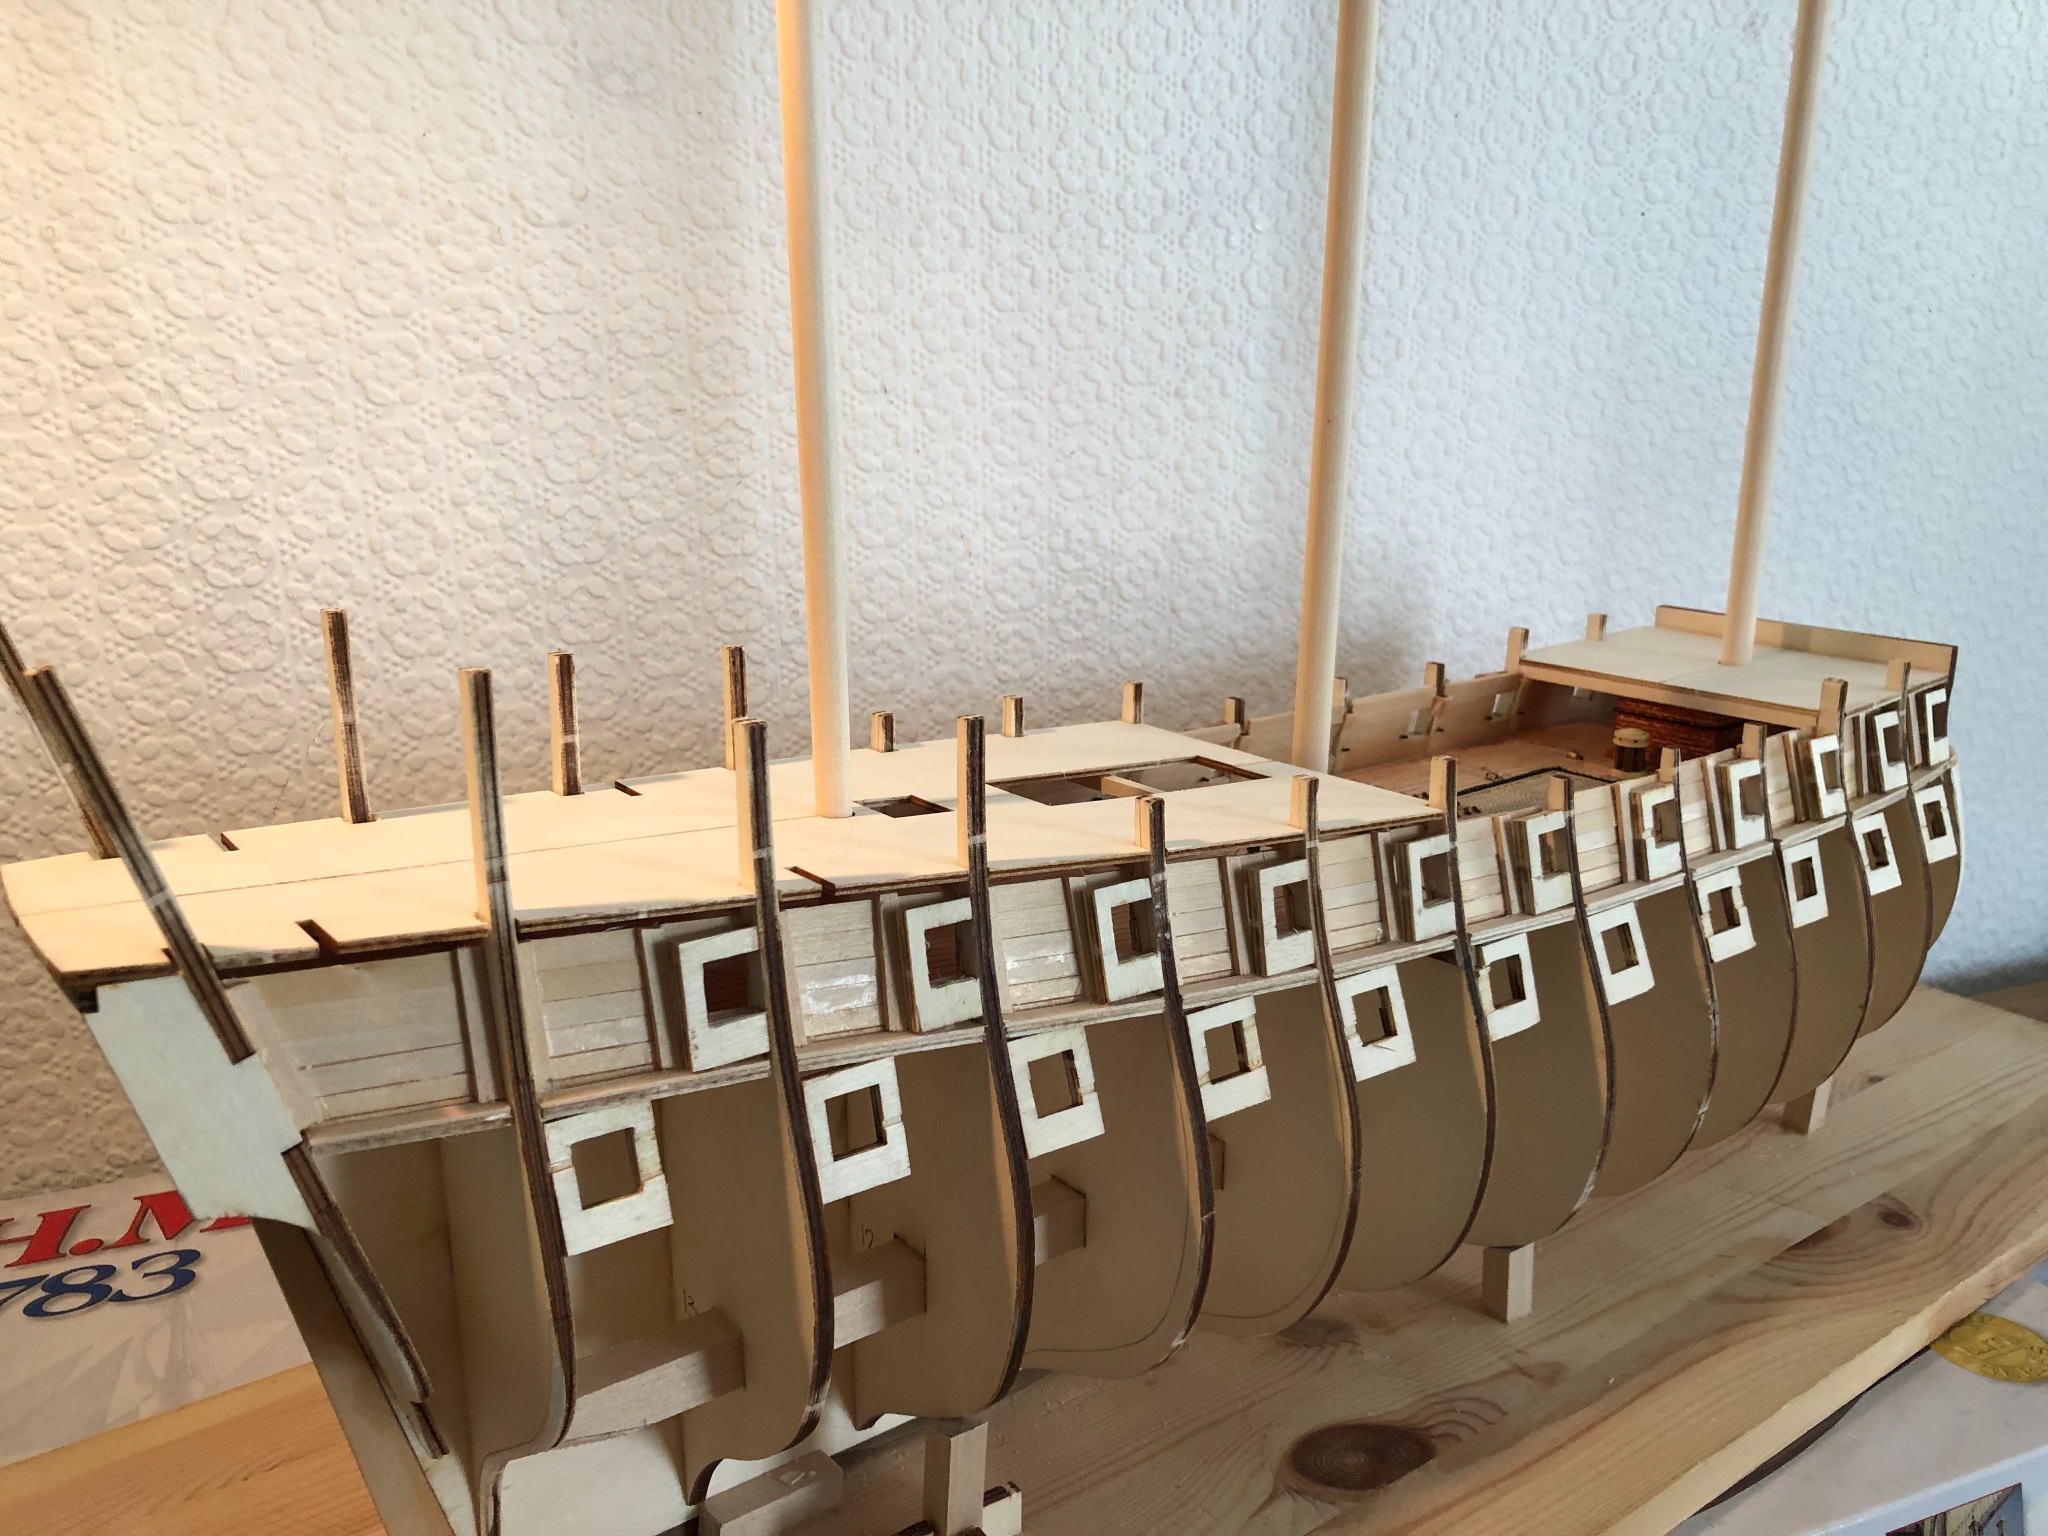
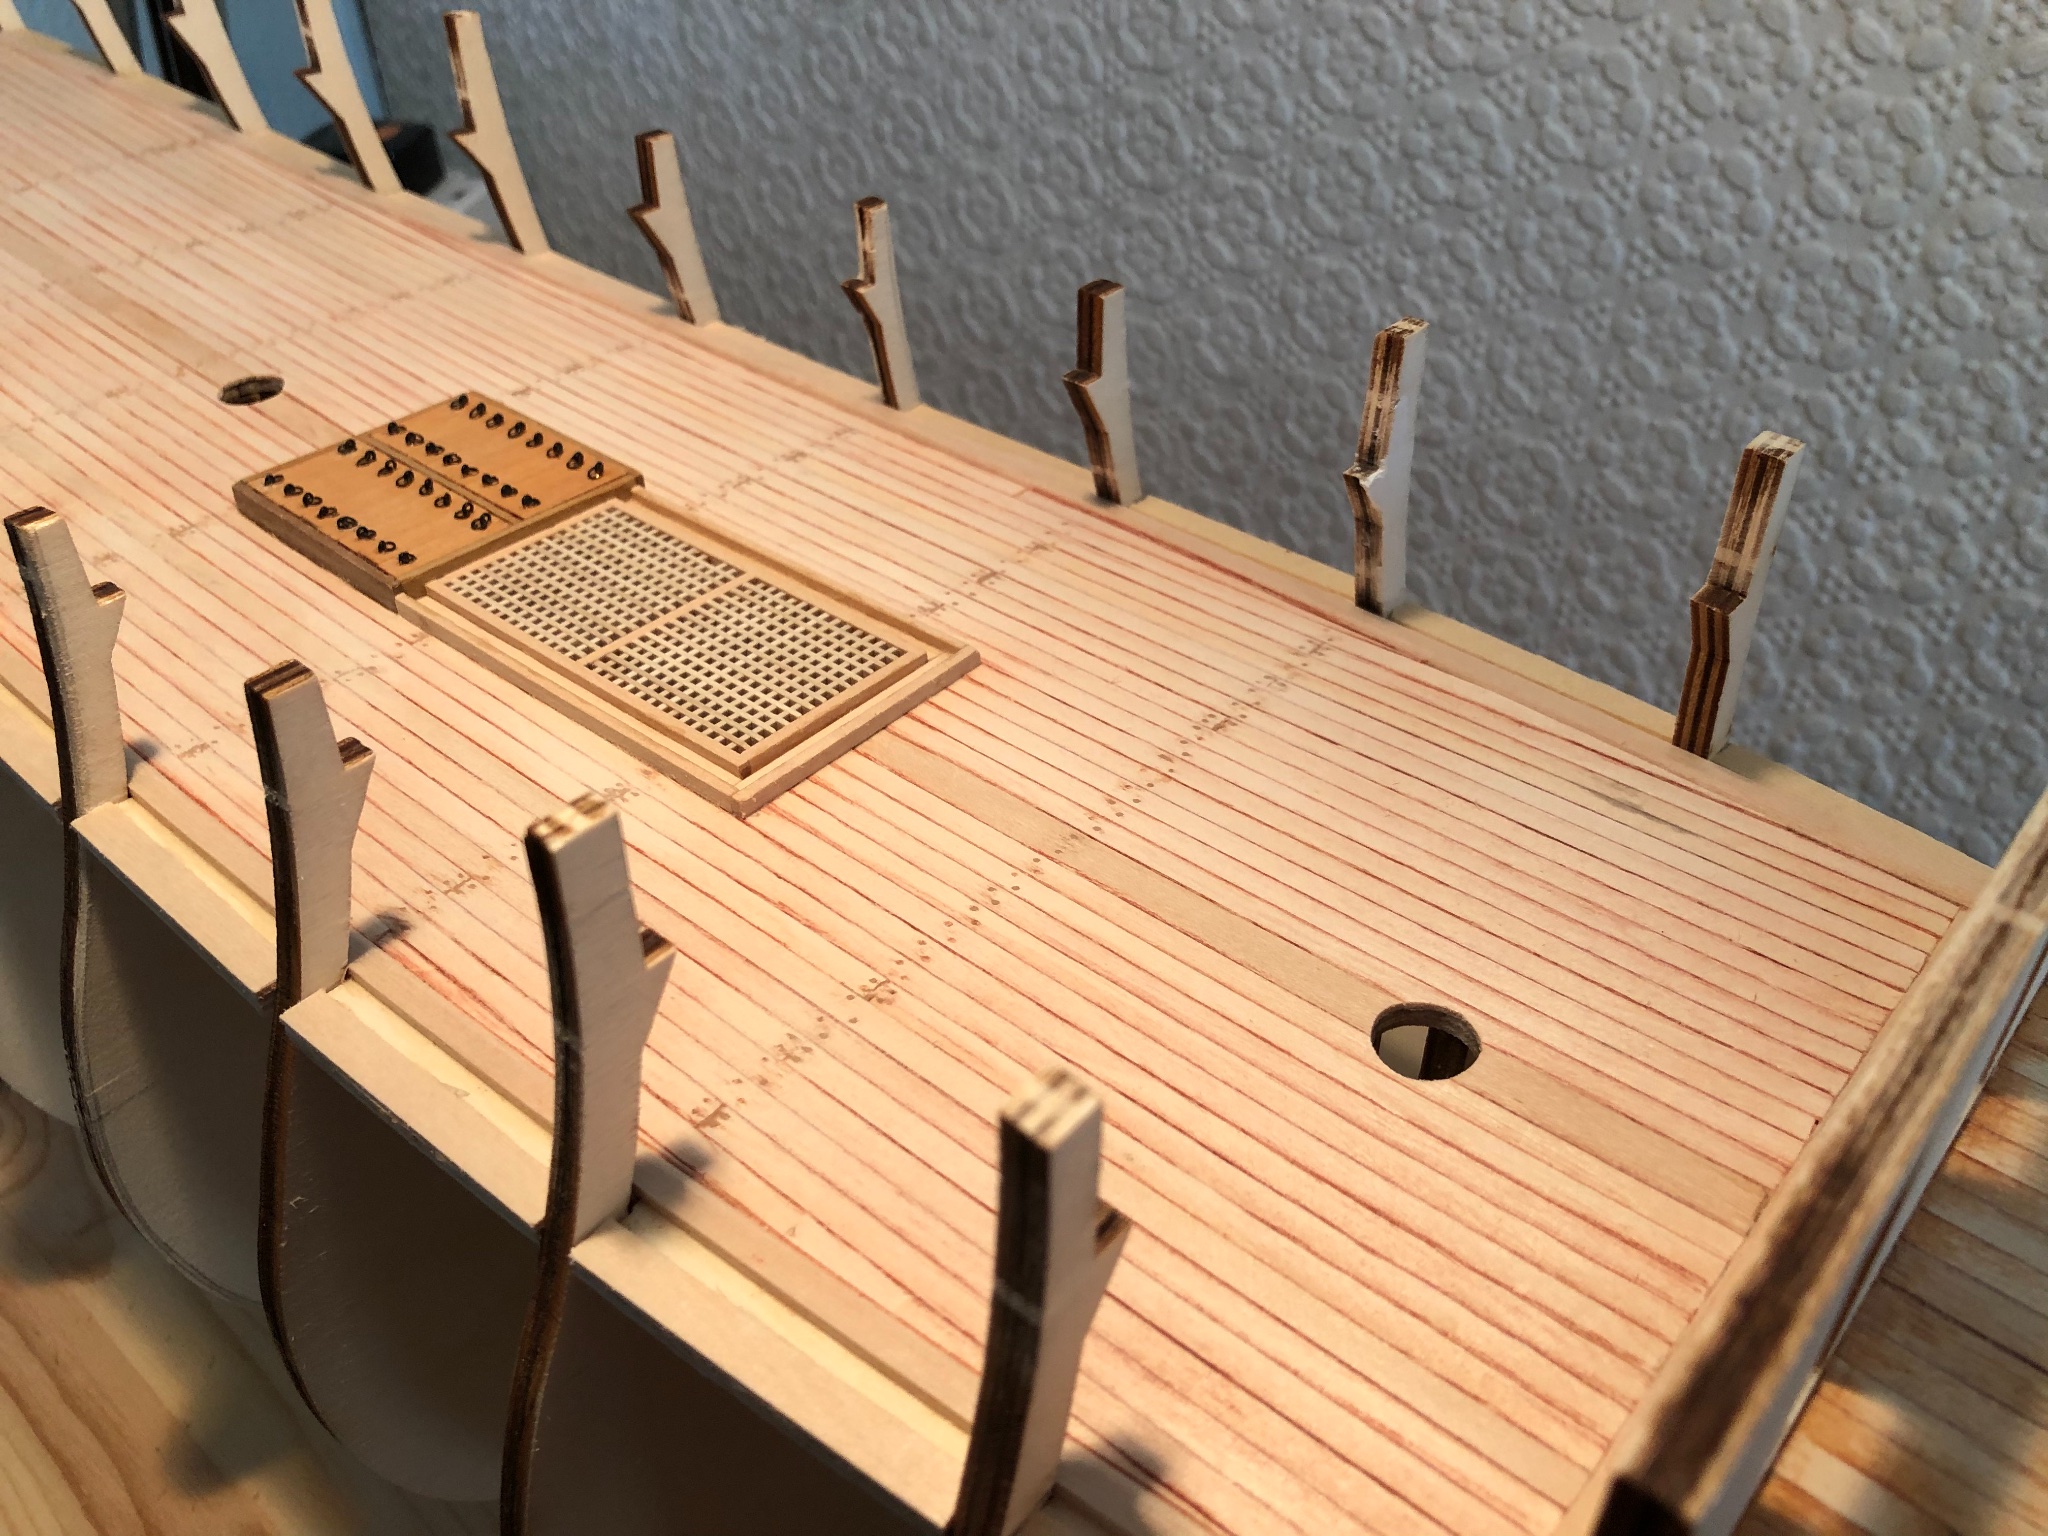
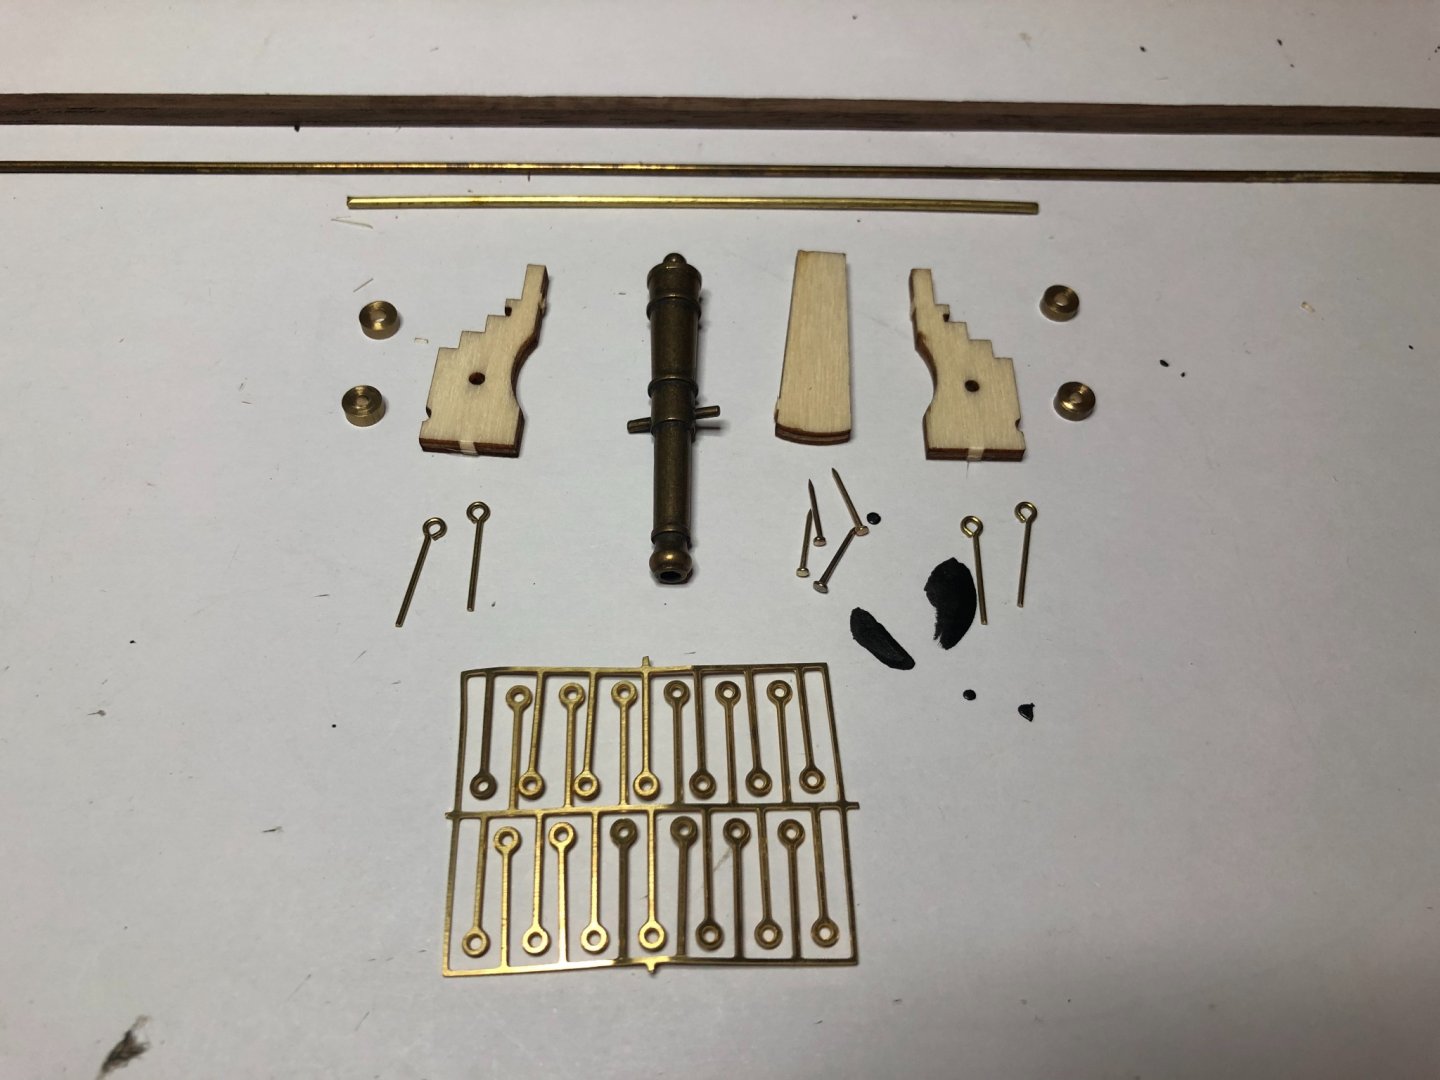
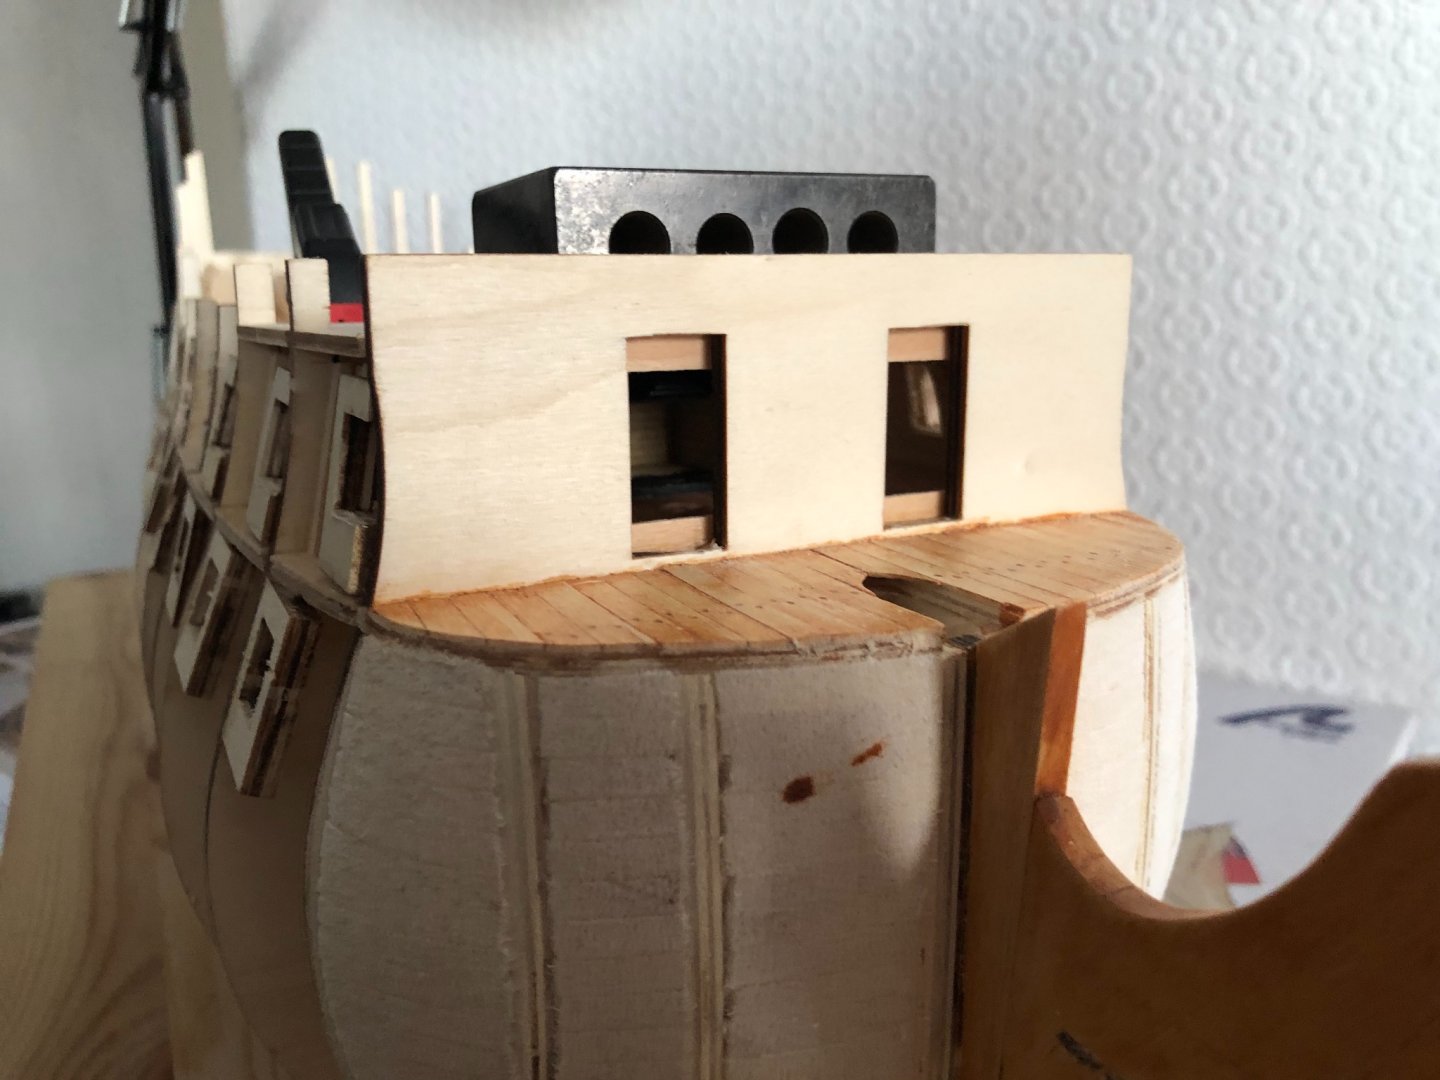
Started upper planking and lining waist gun ports prior to fixing upper gun deck cannon. There are ten cannon in view on this deck and I want to fix the carriages whilst I can still get in there and before the gangways are fixed. Just the carriages fixed and rigged at this stage. I can add the barrels much later. The cap squares will need to be painted on before fitting the carriages. Hopefully they will be partly hidden. Not impressed with all four wheels being the same diameter but as all the decks on this kit are flat and not cambered they probably thought different sizes weren't necessary. Will not be fitting the dummy barrels on this deck - having closed gunport lids instead. Thinking of the same for the lower gun deck. Photo shows bits required for one carriage before assembly and painting.
-
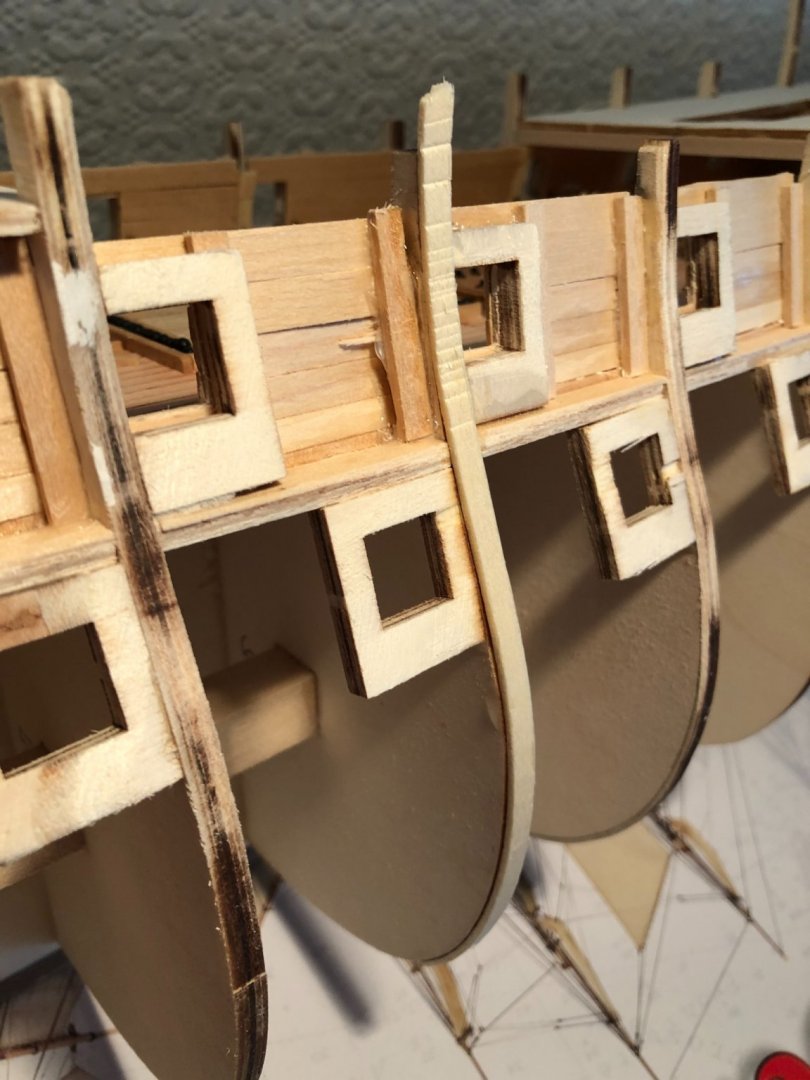
I knew that there was a problem with frame 7 when I planked the inner bulwarks. Now that the rest of the frames and gunports have been faired it can be attended to. Photo below shows 1.5mm thick packing attached to frame edge prior to sanding back. A pack, of equal thickness, is required on both port and starboard sides of this frame. So lazer cutting, not me getting the frames out of position. Will also have to trim back the inside faces of the frame above gangway level. All the other frames faired with the minimum of sanding but No.7 was short. Not bad compared to some kits I have struggled with in the past. Once the glue has dried it's on with the first layer of upper planking. Sam.
-
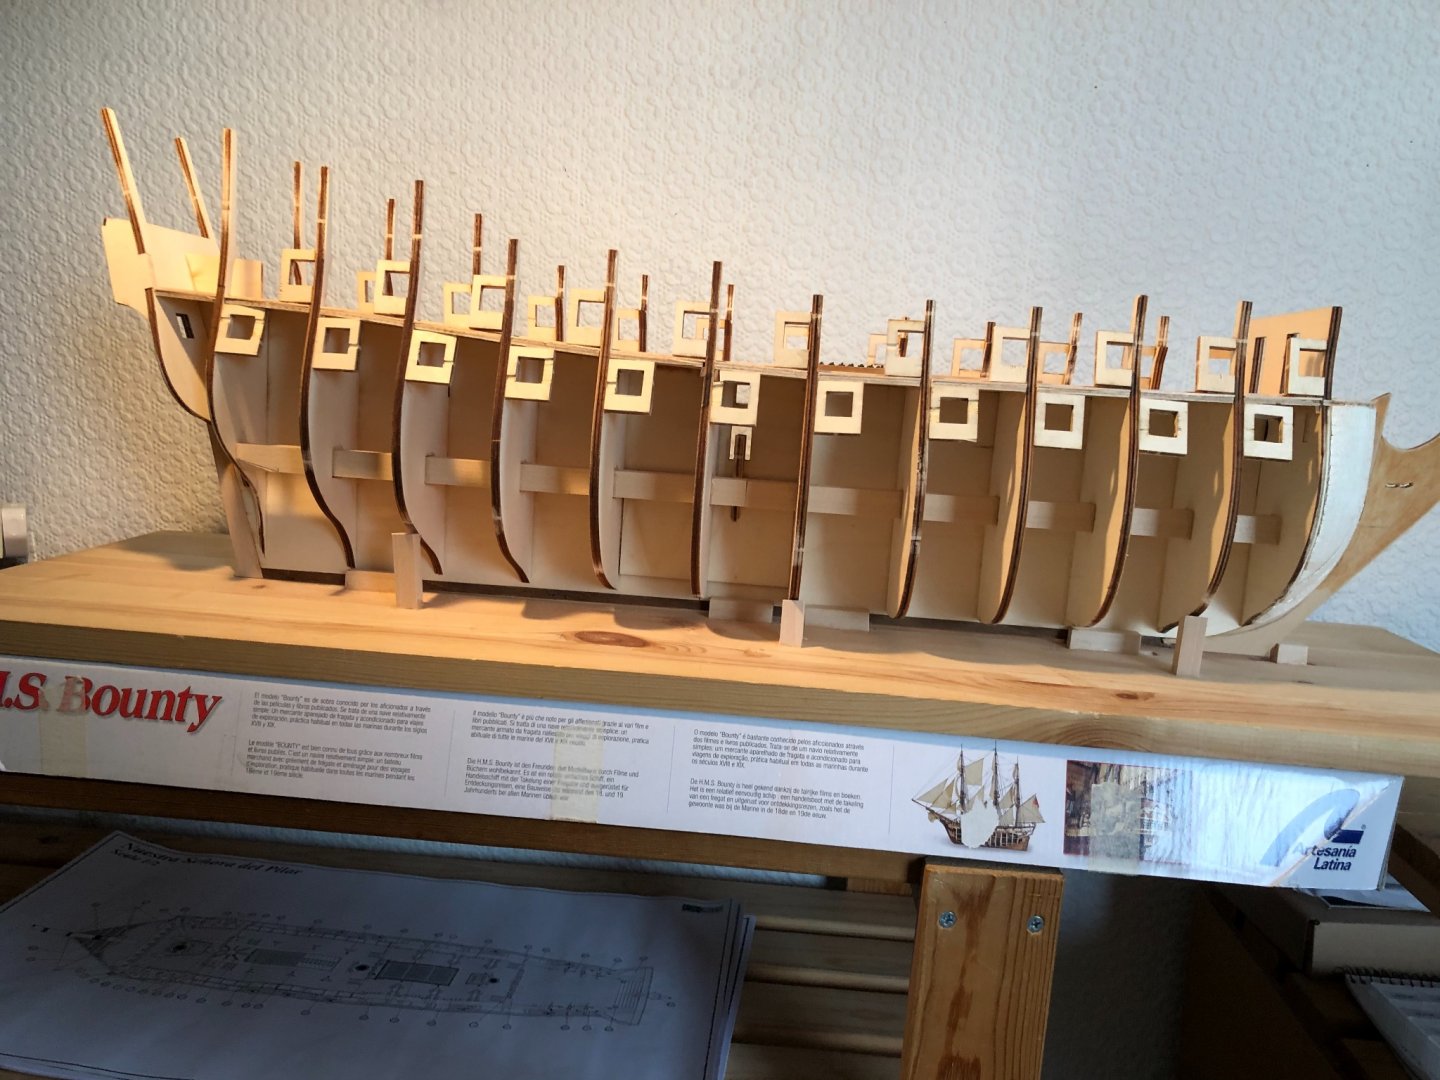
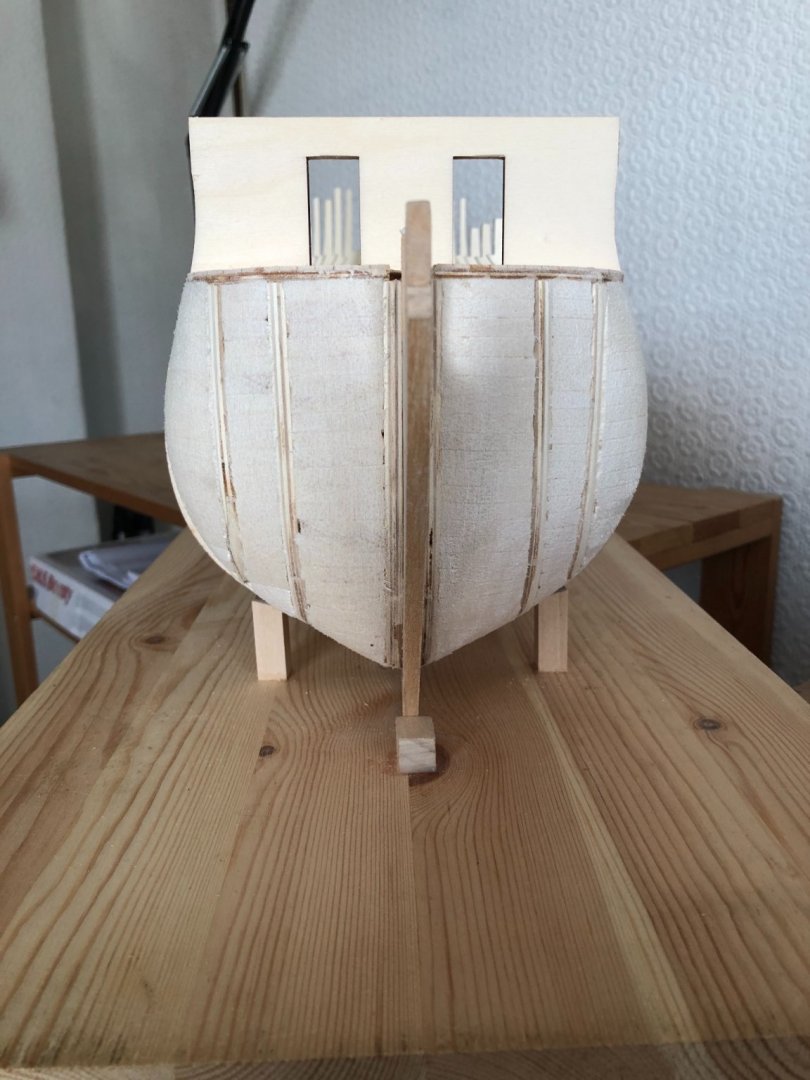
Quarterdeck beams and deck blank fitted. Masts dry fitted to prove they fit and are aligned. And they do fit. Better to find out now than later No real problems with deck blanks either. This is starting to go together better and is building into a strong and stable structure. Still worried about the length and slenderness of the aft support structure but haven't snapped one off yet. Next is the dreaded sanding to fair the frames and gun ports. Never look forward to this, the dust gets everywhere. Sam.

-
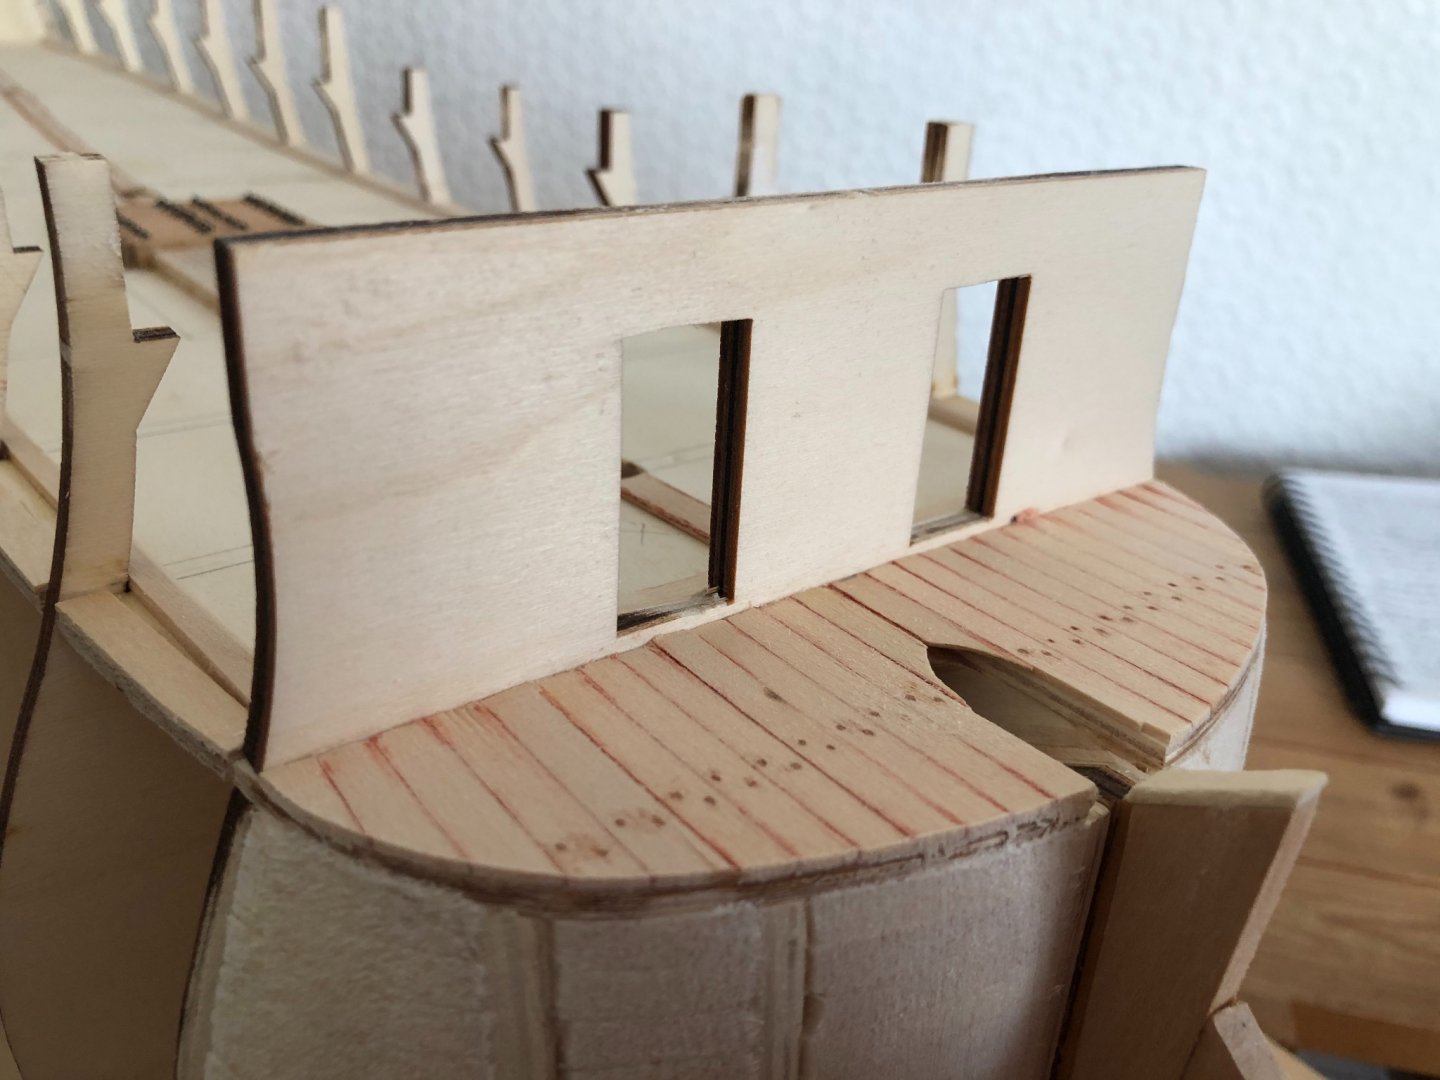
Forecastle deck beams and deck blank located and glued. Needed more fitting and easing than the upper gun deck. After filing found that one of the problems was that frame 4 is thicker than frame 5. Back to the poor quality ply. Couldn't line the rear of the deck with the support beam without filing out the slots so went for strength. Will cover the back edge later so that the deck blank and plank ends are hidden. Also glued in two supports at the back of the door openings to the bowsprit deck for later. This was a blatant lift from Mark Tiedens build log. Thanks Mark and, thanks everyone for the likes. Quarter deck next then some first planking around the gun ports so I can line them out. The waist decking I want to think about and won't install until after the guns are in position. Again, after reading Marks posts and, battling the kit instructions I think this may be the way to go. Sam.


-
Thanks for the likes. Forgot to finish off the capstan. Sam.
-
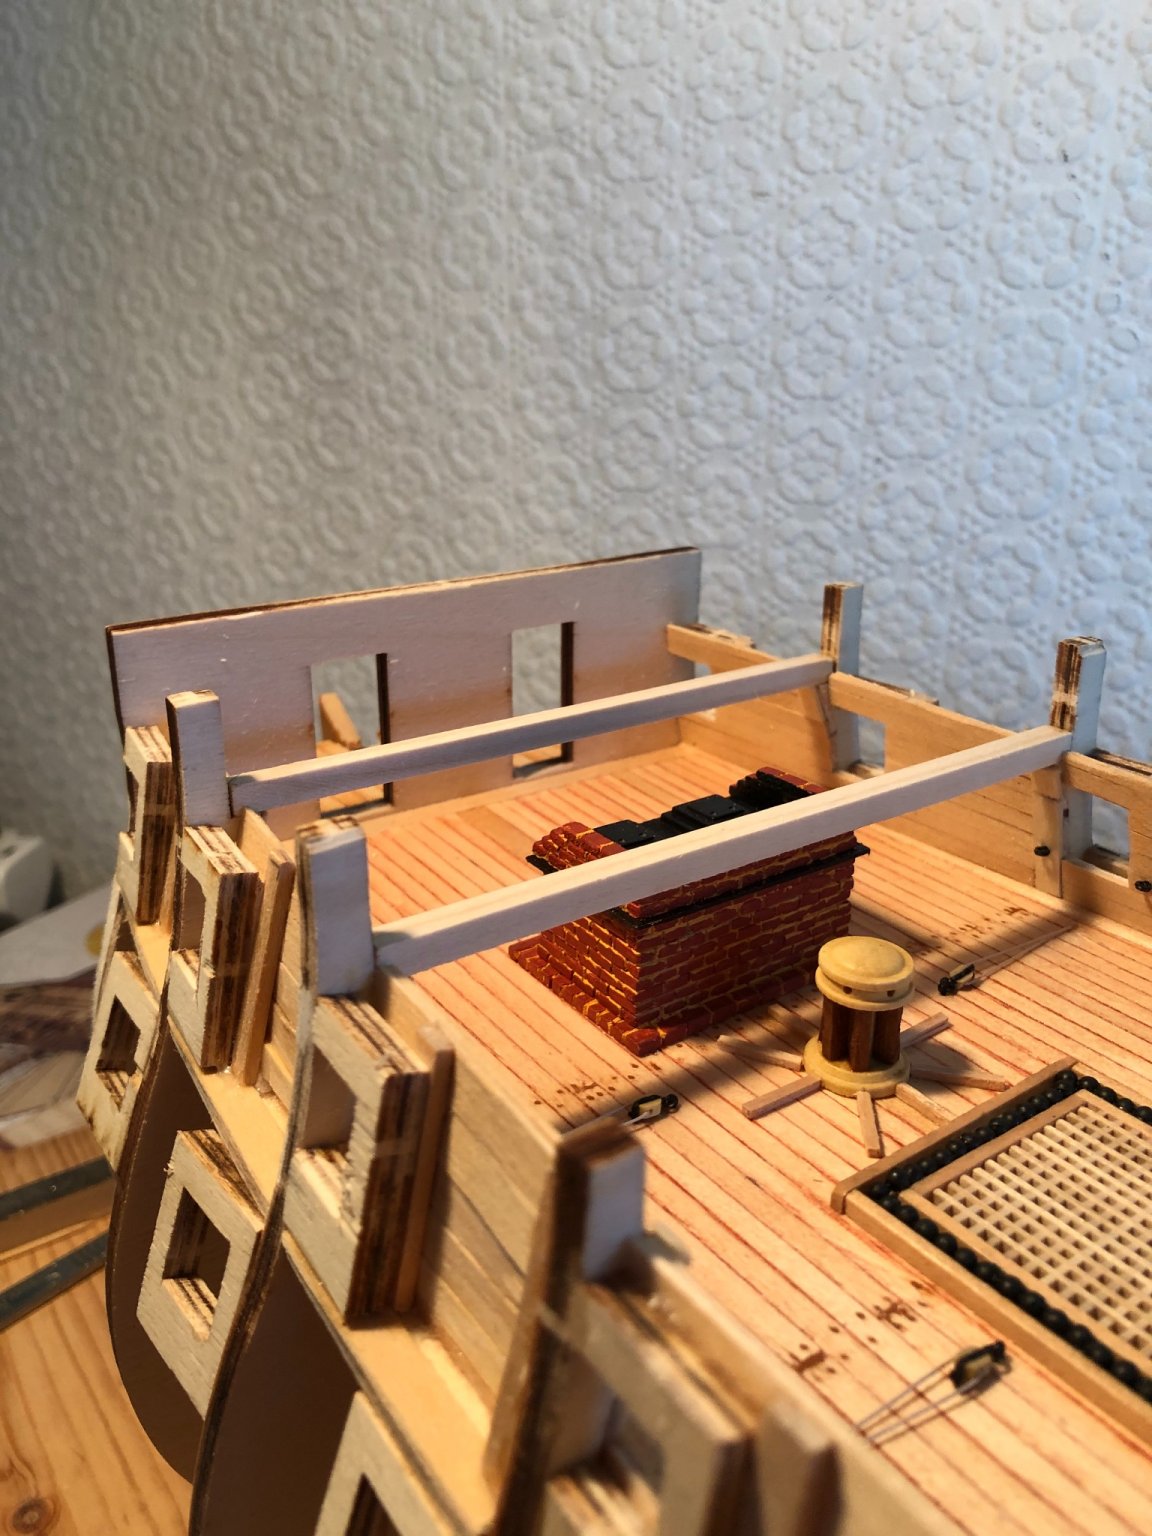
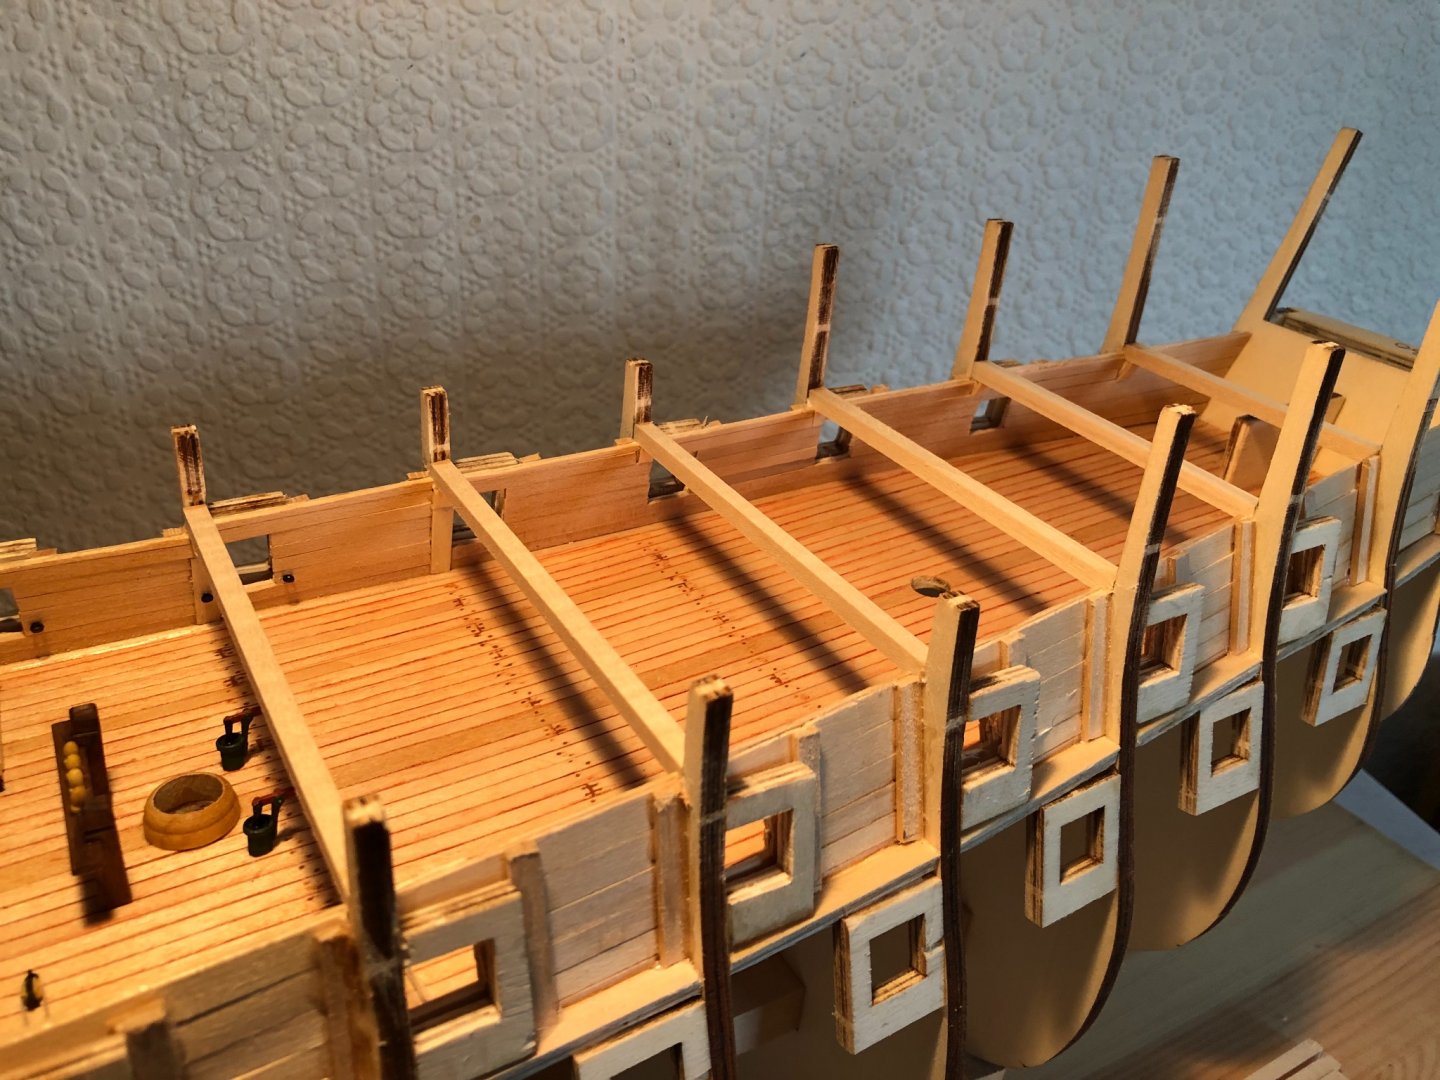
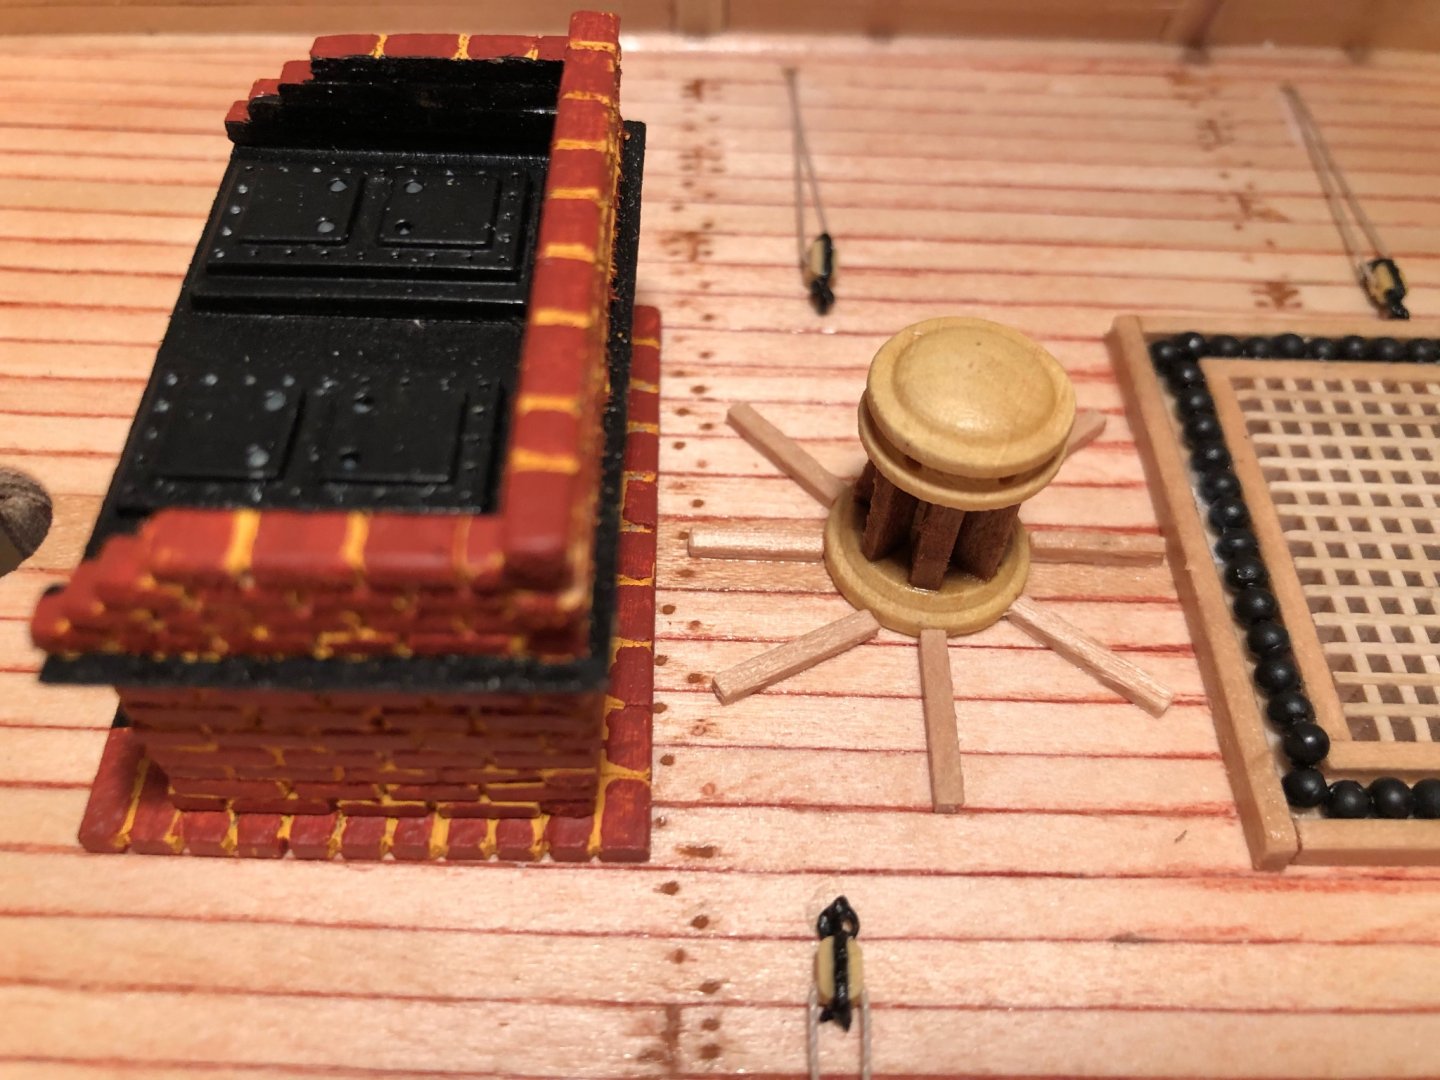
Upper gun deck furniture added while I can still get my fat fingers in there. Includes stove, pumps, cannon balls, main mast bitts, cannon train tackle and gun tackle eyebolts. Next is frame cross beams and upper decks.


-
Hi Sferoida, This is really looking good. Always look on your site and Mark Tiedens when moving on to the next step with my build. Keep up the good work. Sam.
-
Hi Bob, Thanks for the reply. Will experiment with both. Sam.
-
Hi Bob, I am a long way from rigging my latest but, like Hardee, am looking for inspiration. Have already absorbed new ideas from your posts - these will help a lot. What is your opinion on beeswaxing rigging (before or after fitting) to help it hang naturally ??? Obviously rigging under tension wouldn't need this but would waxing help the appearance of "kit" supplied material ??? Thanks, Sam
- 421 replies
-
- 1
-
-
- caldercraft
- granado
- (and 1 more)
-
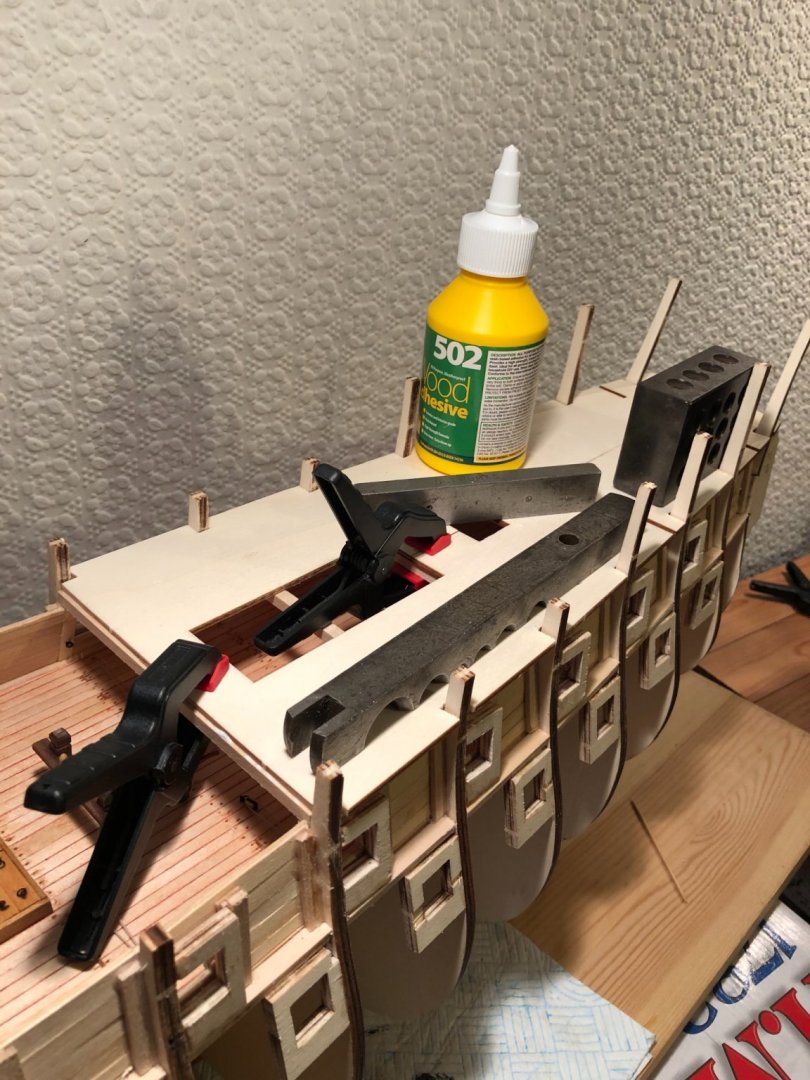
Gunport blanks fitted. Usual poor quality plywood. Laminations not properly glued together. No matter how careful you are they explode when separating from the sheet. I think that they need extra reinforcing before sanding down. The next step in the instruction book is to fix the inner bulwarks and looking at the state of the gun ports I think that might be a good idea, then try sanding. On a more upbeat note - one window frame mk. 45 was missing from the kit. Went on their website Sunday last and ordered a replacement. It arrived from Spain 4days later. That is customer service !!
-
Thanks for the likes. Still waiting for the ordered deck planking but in todays circumstances I will not complain. When it arrives I can use it for the upper deck and bulwarks. After exhaustive spares box diving found enough to complete the gun deck. Had to be inventive here and there but it appears to work. In stock for a while but didn't need bending. Used it all, only sawdust left. Just needs a final sanding and varnish. Shot racks fitted and tried to "weather" the beakhead deck. Have decided to go for a natural look so won't be painting the bulwarks, just 'wales rails and decorations. Should be more progress next few weeks using kit parts. Sam.

-
Good tip RMC. Sideways is fine, (it's the way I walk). Sam.
- 421 replies
-
- 1
-
-
- caldercraft
- granado
- (and 1 more)
-
Thanks for the rigging tutorial. Will be using these posts when rigging my latest. Sam.
- 421 replies
-
- 1
-
-
- caldercraft
- granado
- (and 1 more)
-
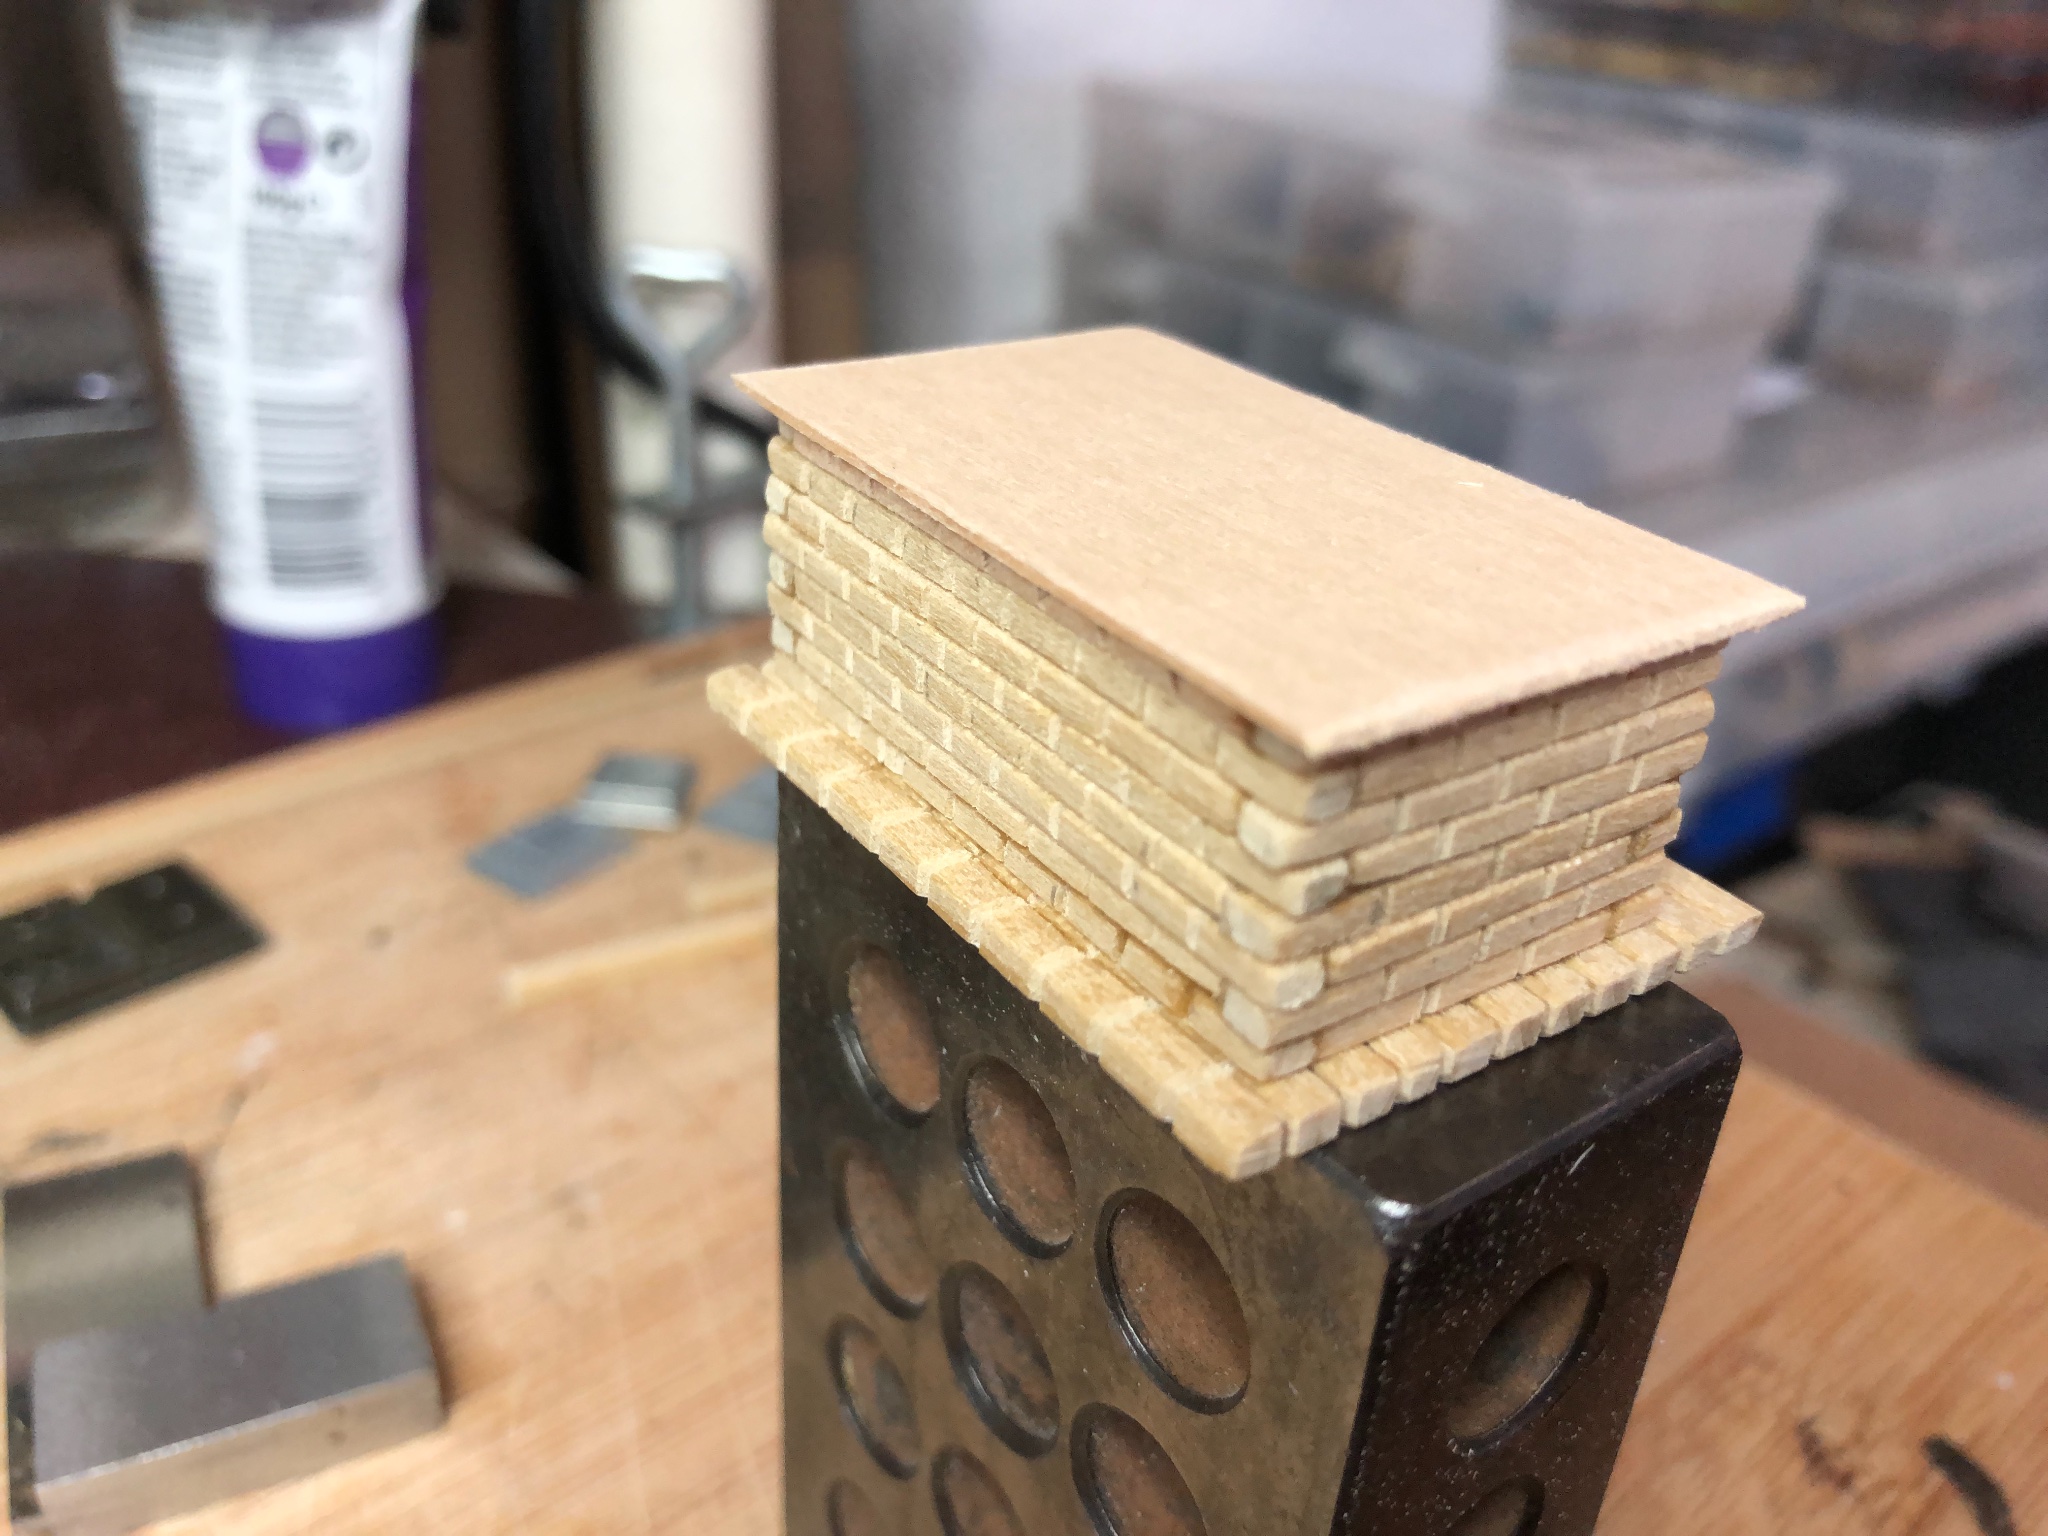
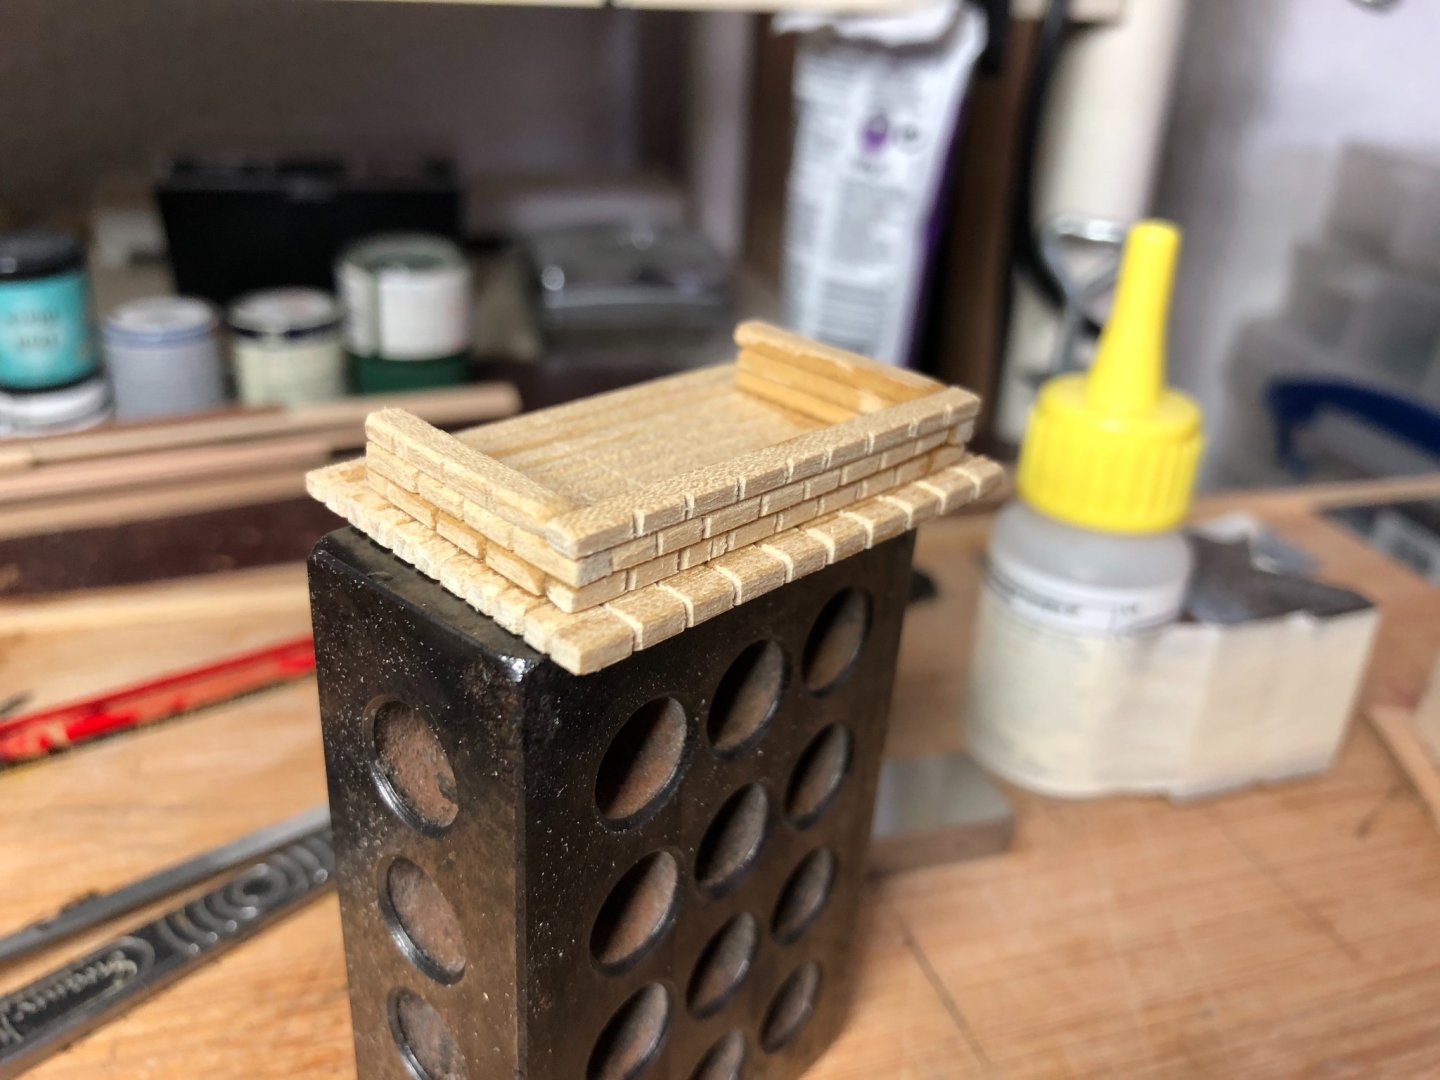
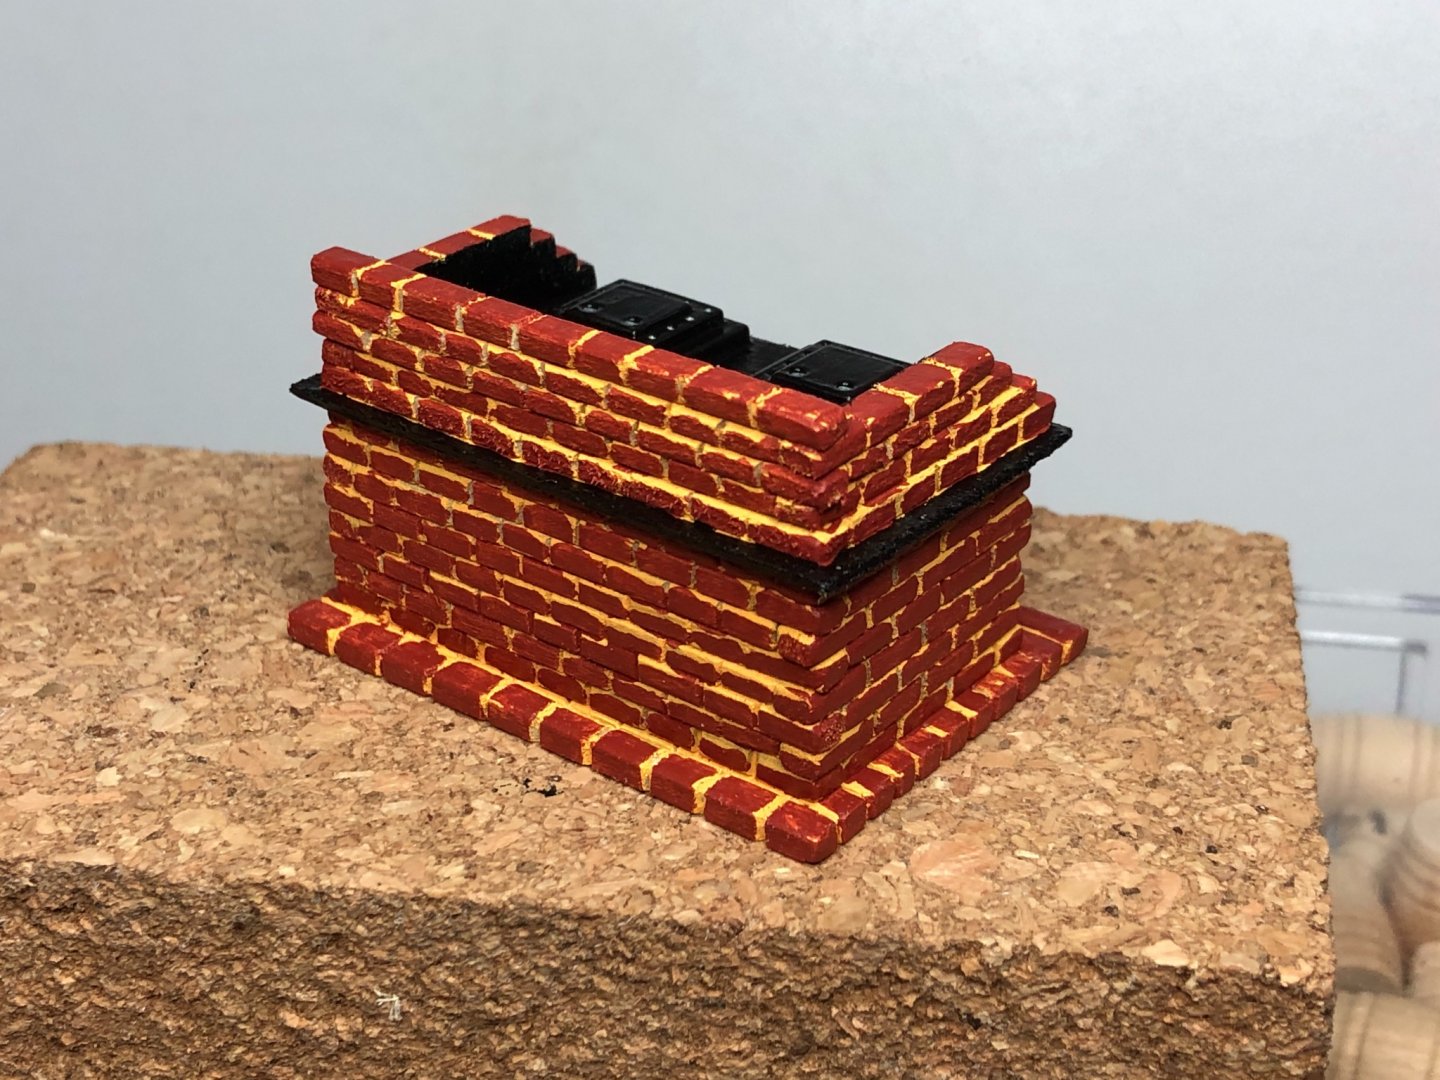
Still waiting for gun deck planking so thought I would have a go at the oven and surround. Once the decks and fittings are all in place you will only see the front and part sides. Even so had no intention of using the kit supplied plywood. The photo's show sequence of build. If I can find a small enough brush it needs a touch up when the paint is dry.

-
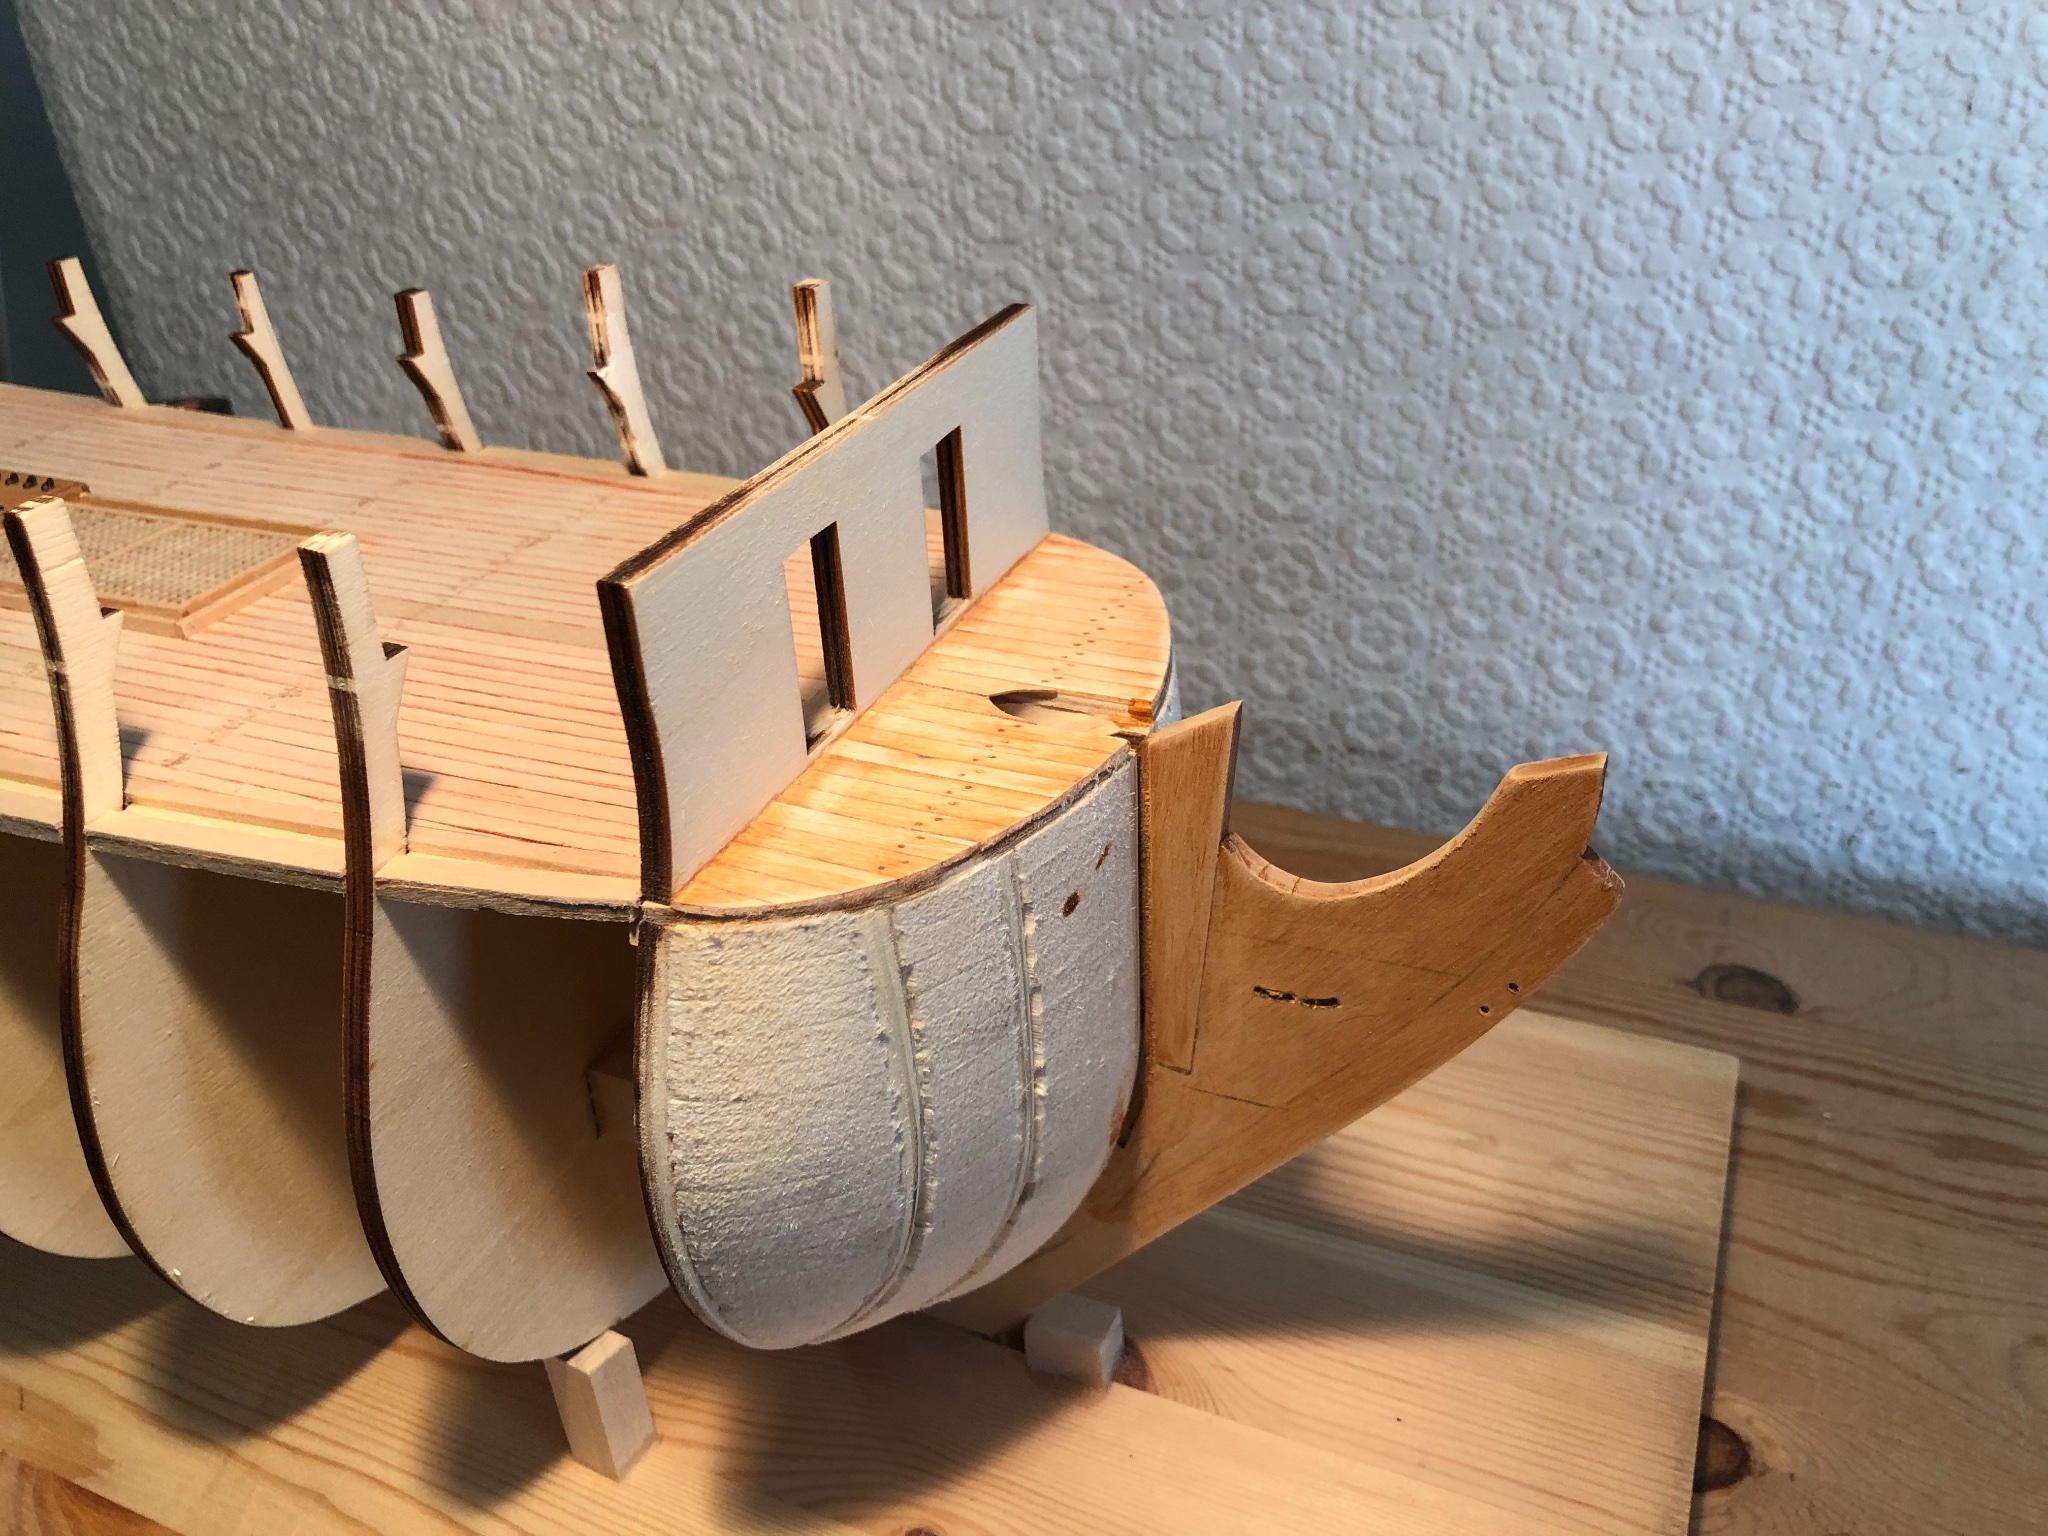
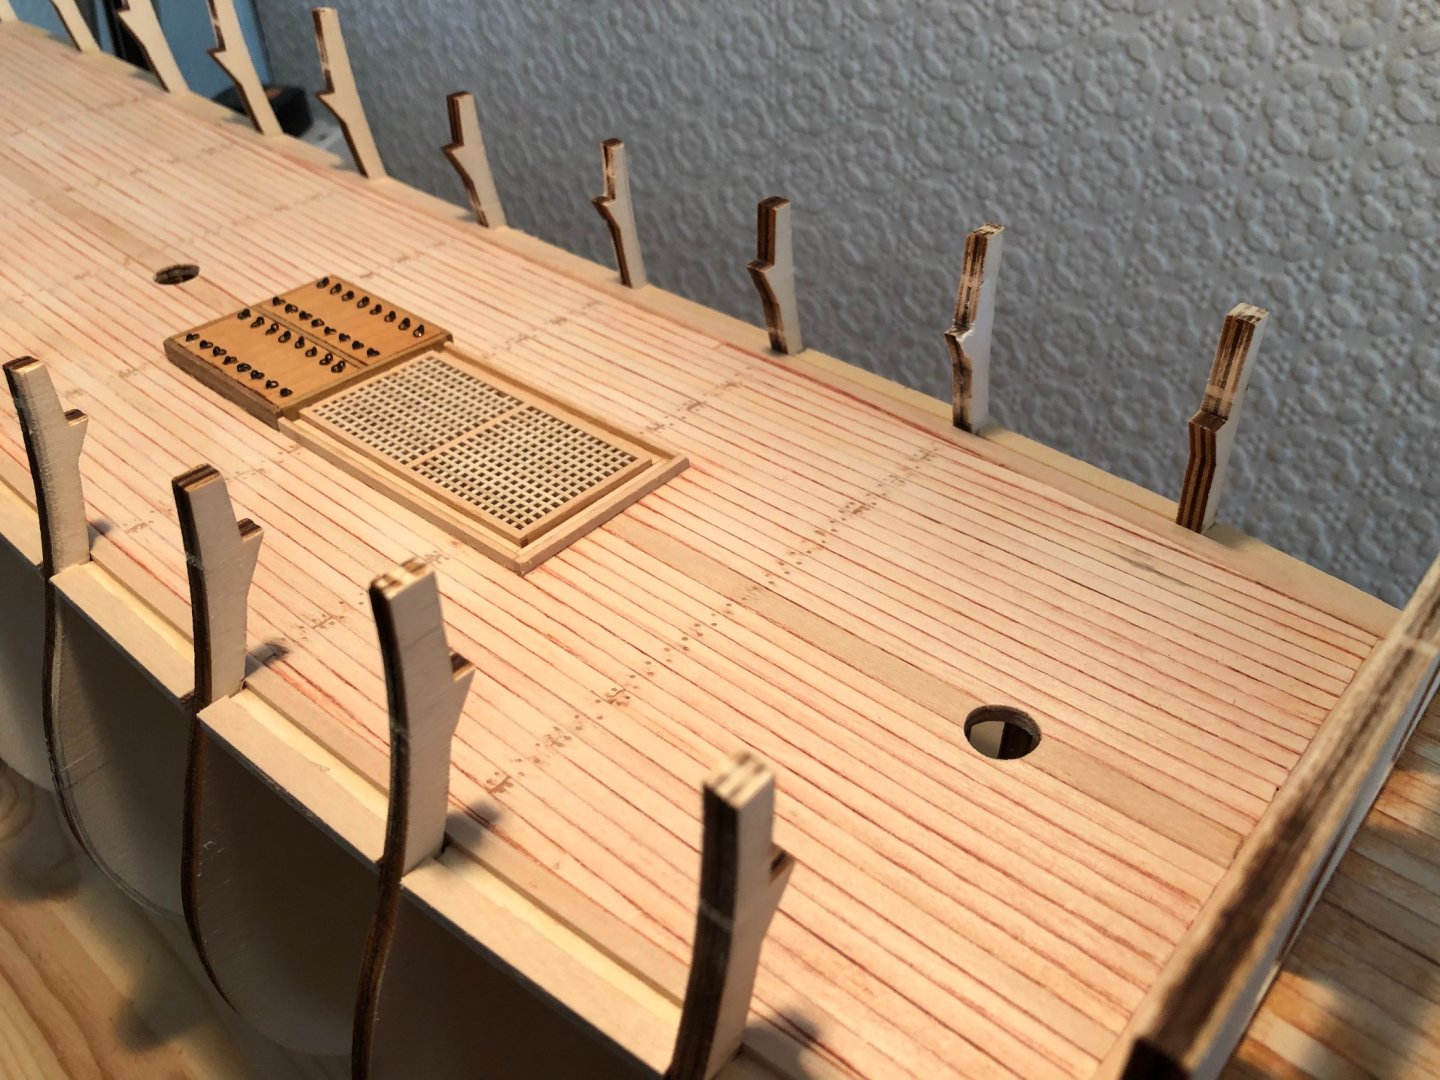
Not a lot of progress - waiting for deck planking delivery. Hatch and gratings added. Shot racks will go on after deck planking.E Bow blocking added. Just noticed that the stem foot packing needs adjusting. Not noticeable on the bench but photo's don't lie.

-
Like the hooks, much better than photo etched parts. Sam.
- 195 replies
-
- 1
-
-
- enterprise
- constructo
- (and 1 more)
-
You're welcome. Forgot to mention - when you have tensioned the lanyard apply superglue (with a toothpick) to the rear of the bottom deadeye at the last hole filled. This will keep everything where you need it to be while you finish the tie off. Keeps the lanyard between the deadeyes taut. Take the lanyard up the rear to the top dead eye and pass it through the small gap between the deadeye and the shroud fixing around the deadeye (from inboard to outboard). Then tie it off to the shroud above the deadeye. Sam