
mispeltyoof
-
Posts
91 -
Joined
-
Last visited
Content Type
Profiles
Forums
Gallery
Events
Everything posted by mispeltyoof
-
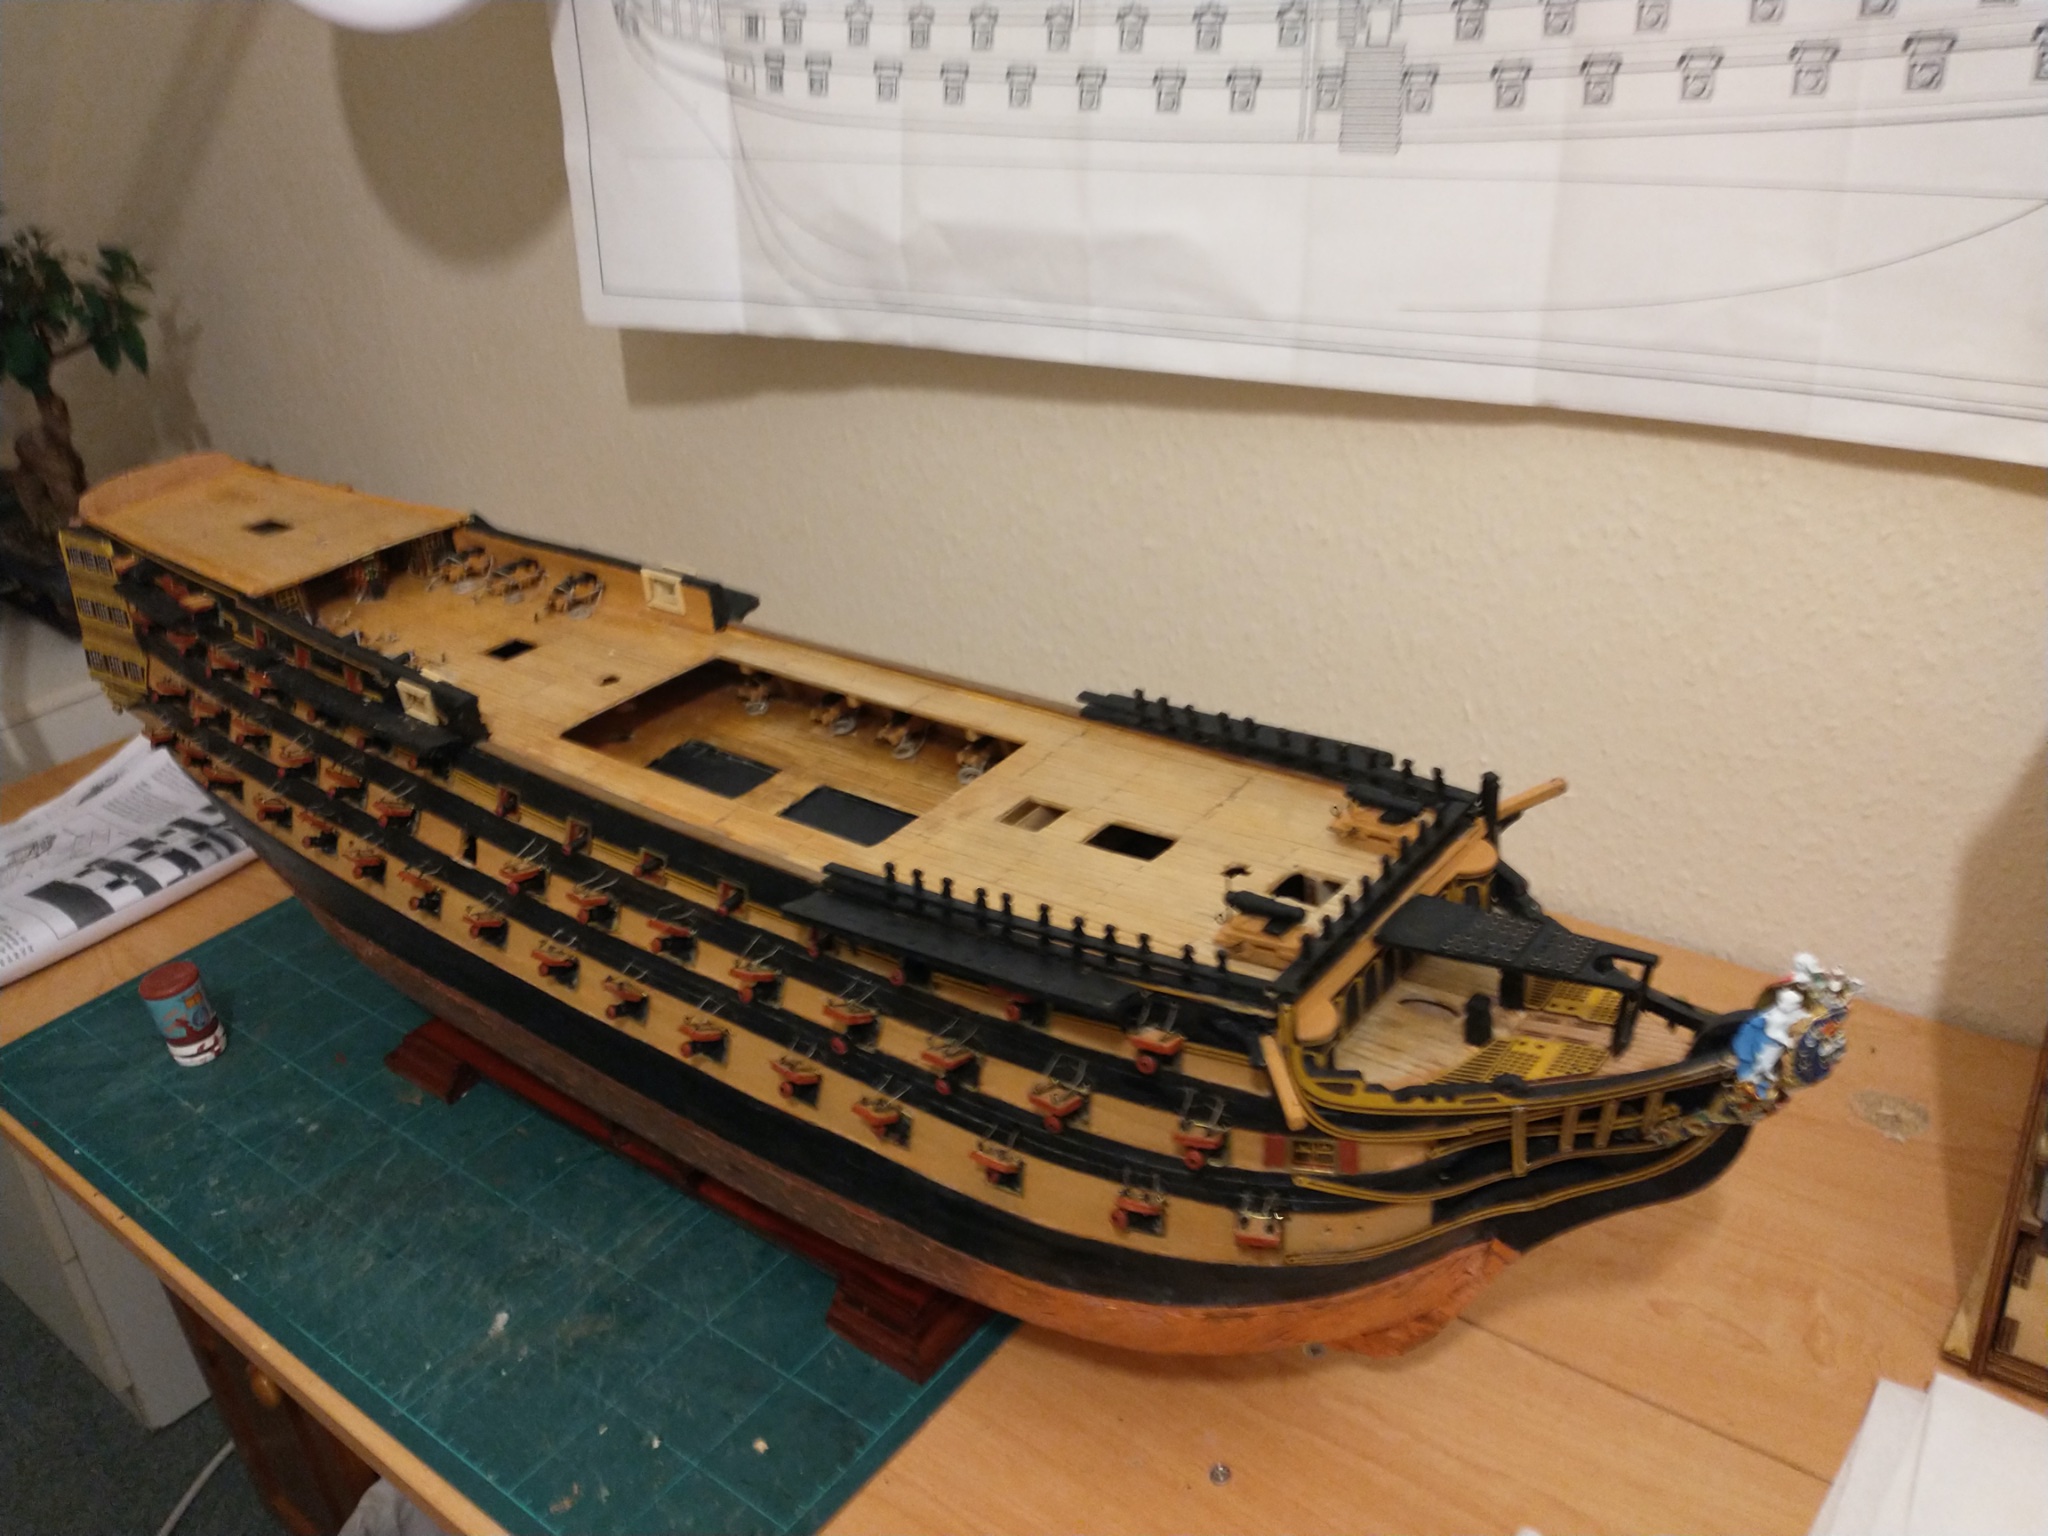
 I have the Panart Victory. Been working on it for fifteen months now. For the money (half the Caldecraft) I am happy to be “creative” over some of build. Details are obviously not as good but tolerable. The main problems I have had are the very,very sparse instructions meaning you have to study the plans constantly to understand what goes where and how to achieve hit. This is frustrating but rewarding when you manage to figure it out. My main complaint,which has driven me mad is the number of missing parts. These are frustrating because of “silly” bits missing. E,G not enough brass pins, parts which are described as brass in instructions are in fact printed on thin wood. Eyelets with three short,meaning having to buy spares which are cheap but not when postage added.two dummy gun barrels missing, shot garlands but no cannon balls. Deck gun carriage wheels and axles with four missing.Just enough tiny parts so if you drop or lose one you are stuck. All in all it is IMHO a good kit and worth the money but spoilt by quality control errors ,mainly count the bits correctly before putting them in packets.These could easily and cheaply be solved and would make the kit far less frustrating to build.
 -
Completed gratings. Sadly ,once again, thwarted by missing parts from this Panart kit. The grating pieces were there nut missing half a dozen. Maybe I’ve been unlucky but they are miserly in the extreme with small parts which aren’t expensive but are either insufficient in number or missing completely. Shame because it makes building this otherwise excellent kit frustrating . Luckily my last kit completed was a Caldecraft and It had some”left overs” so I could complete this task. Problem is ,of course,is that you discover the paucity of parts fourteen months into the build and you then have go to Cornwall models to hopefully order extra bits with often a delay and postage costs when if like Caldecraft they had decent quality control structures the build would be much more enjoyable
-
Please don't send me helpful comments explaining my errors as Im completely aware of my short comings and clumsiness. I see my ship building as a wonderful hobby that offers me many cognitive and physical challenges plus immense enjoyment. I do not see it as a competitive sport and am not interested to know that during a certain battle the ropes had only 16 turns rather than the twelve I have done :)

-
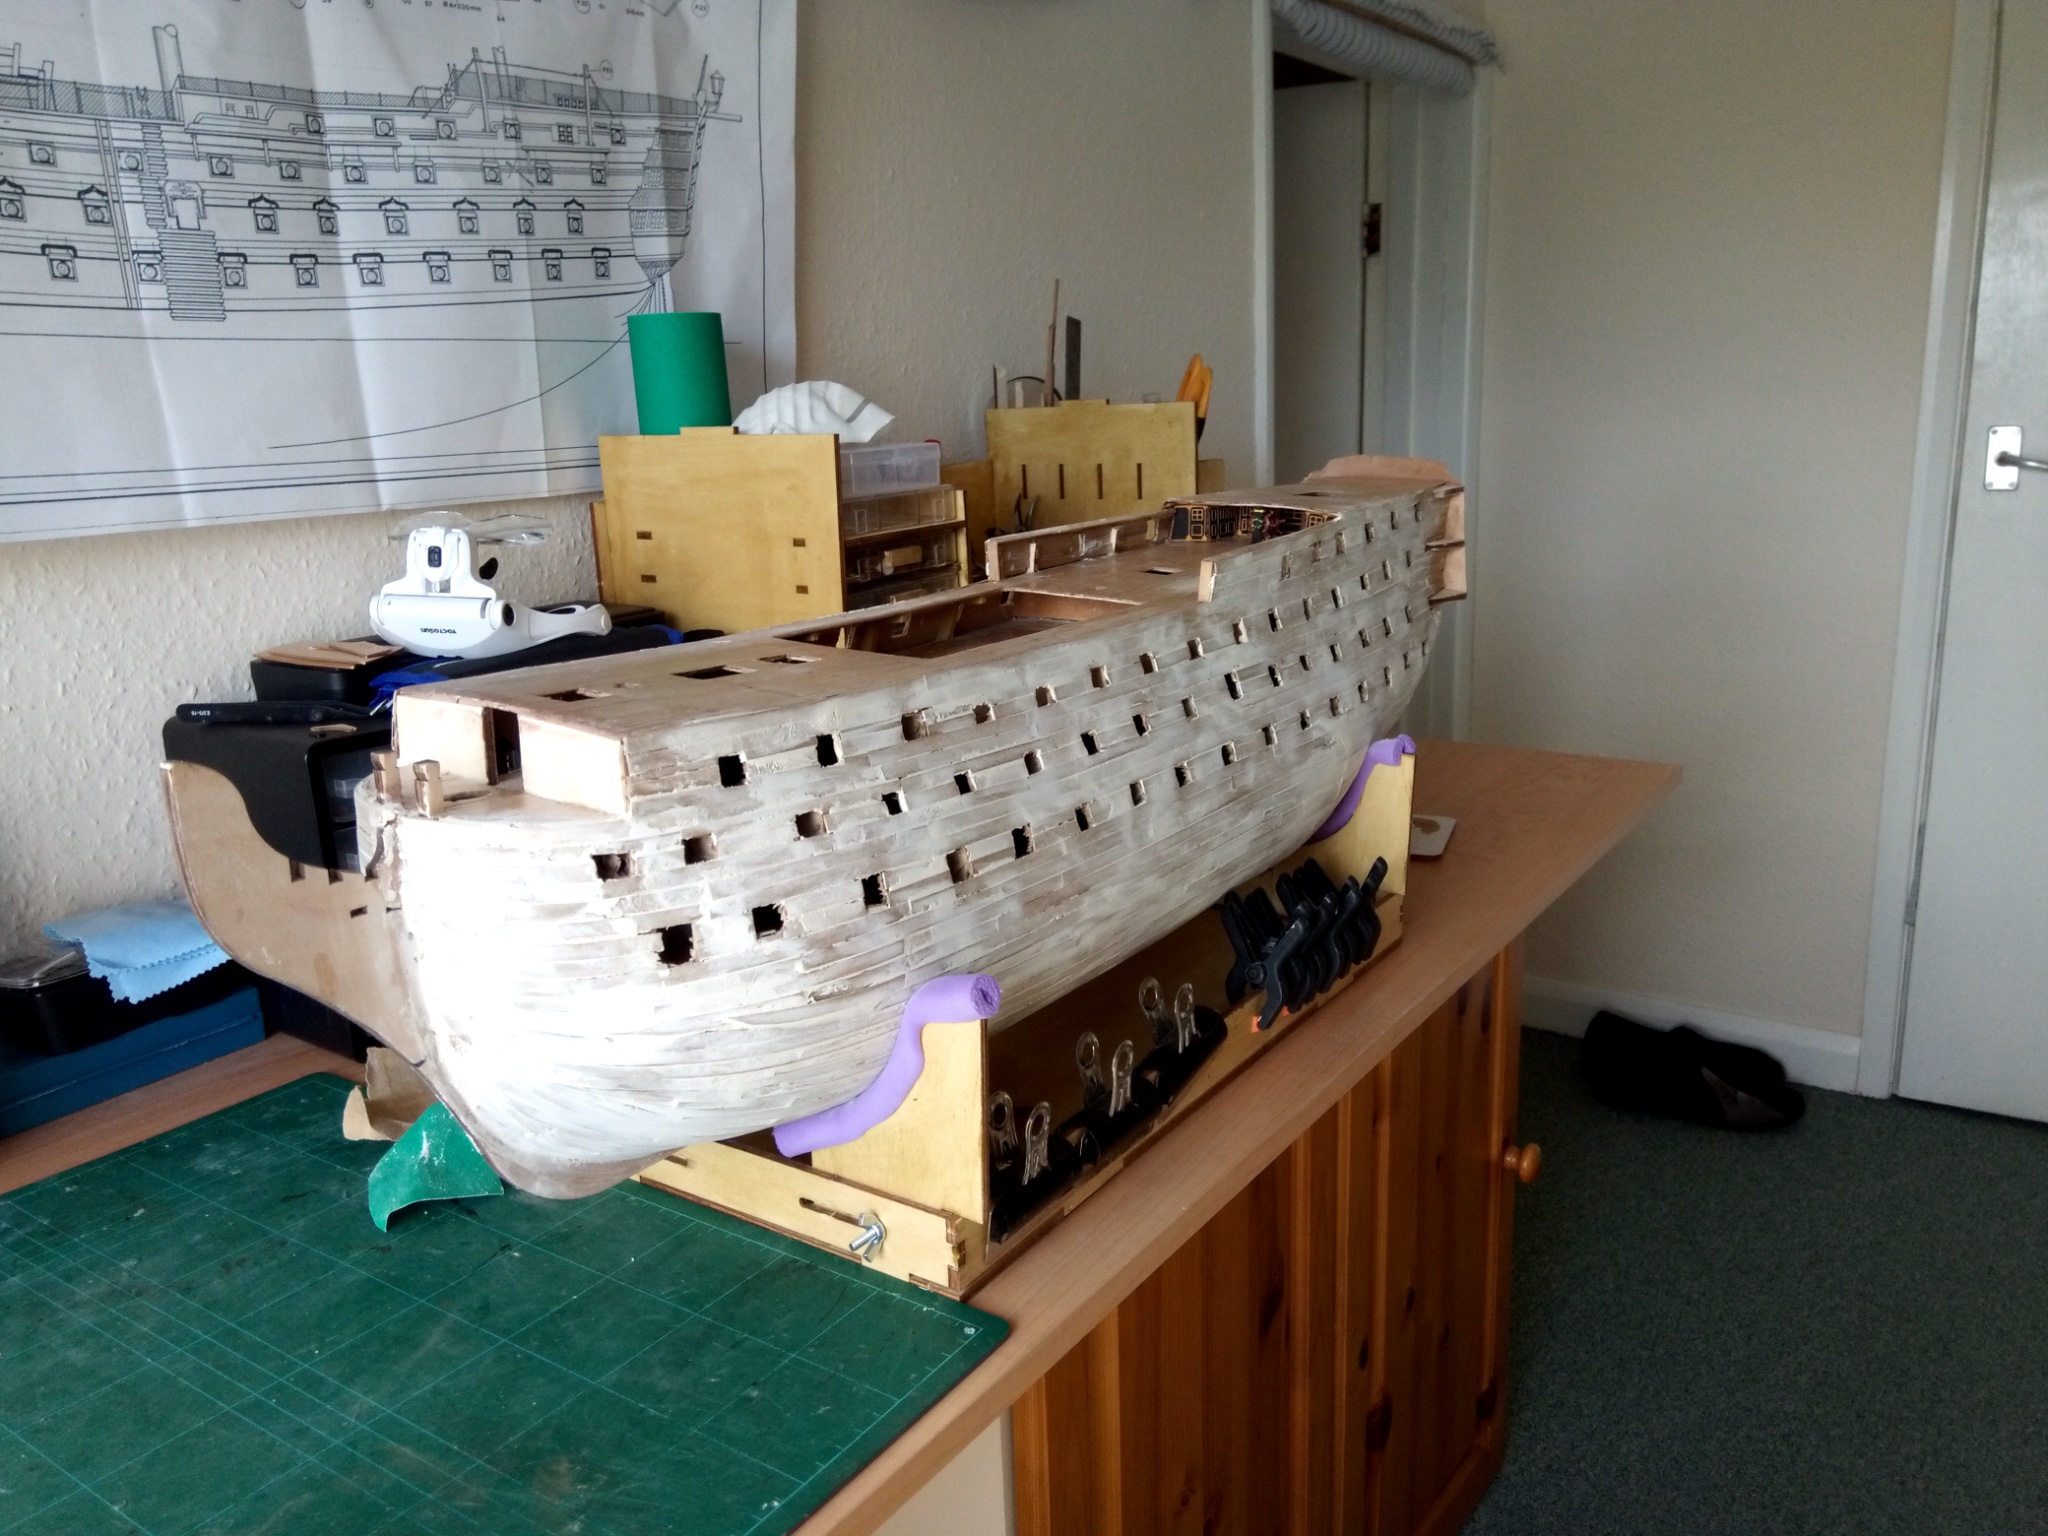
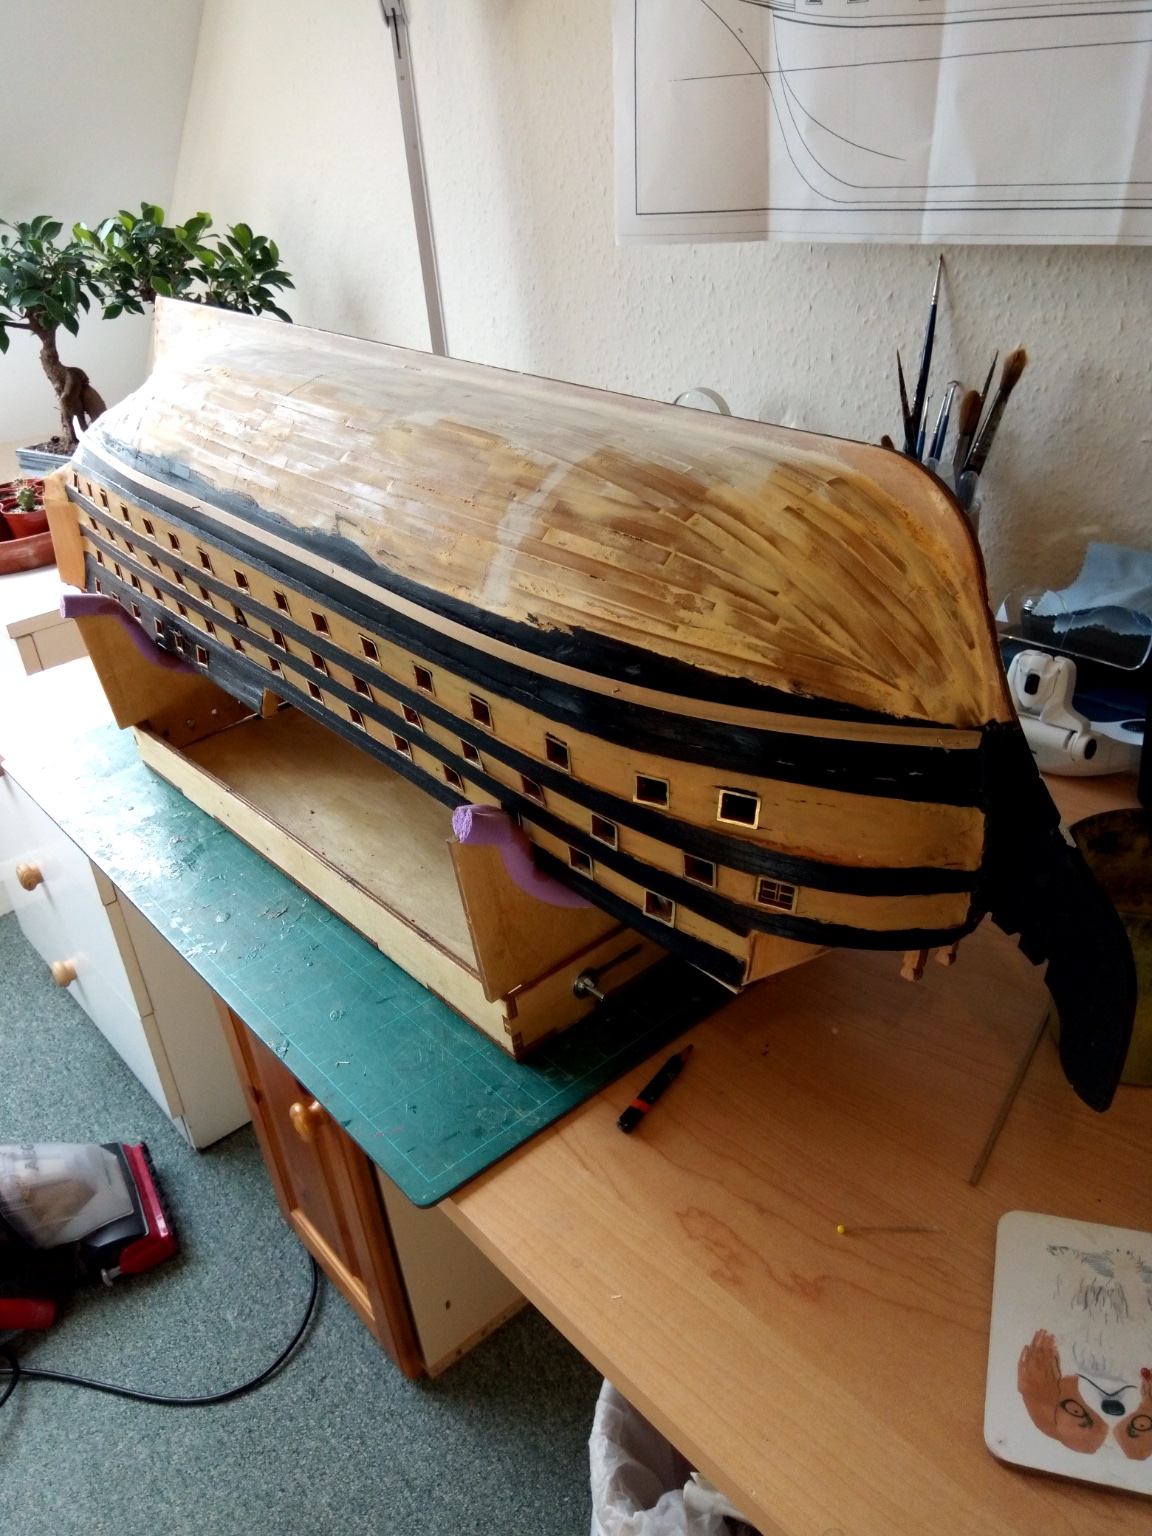
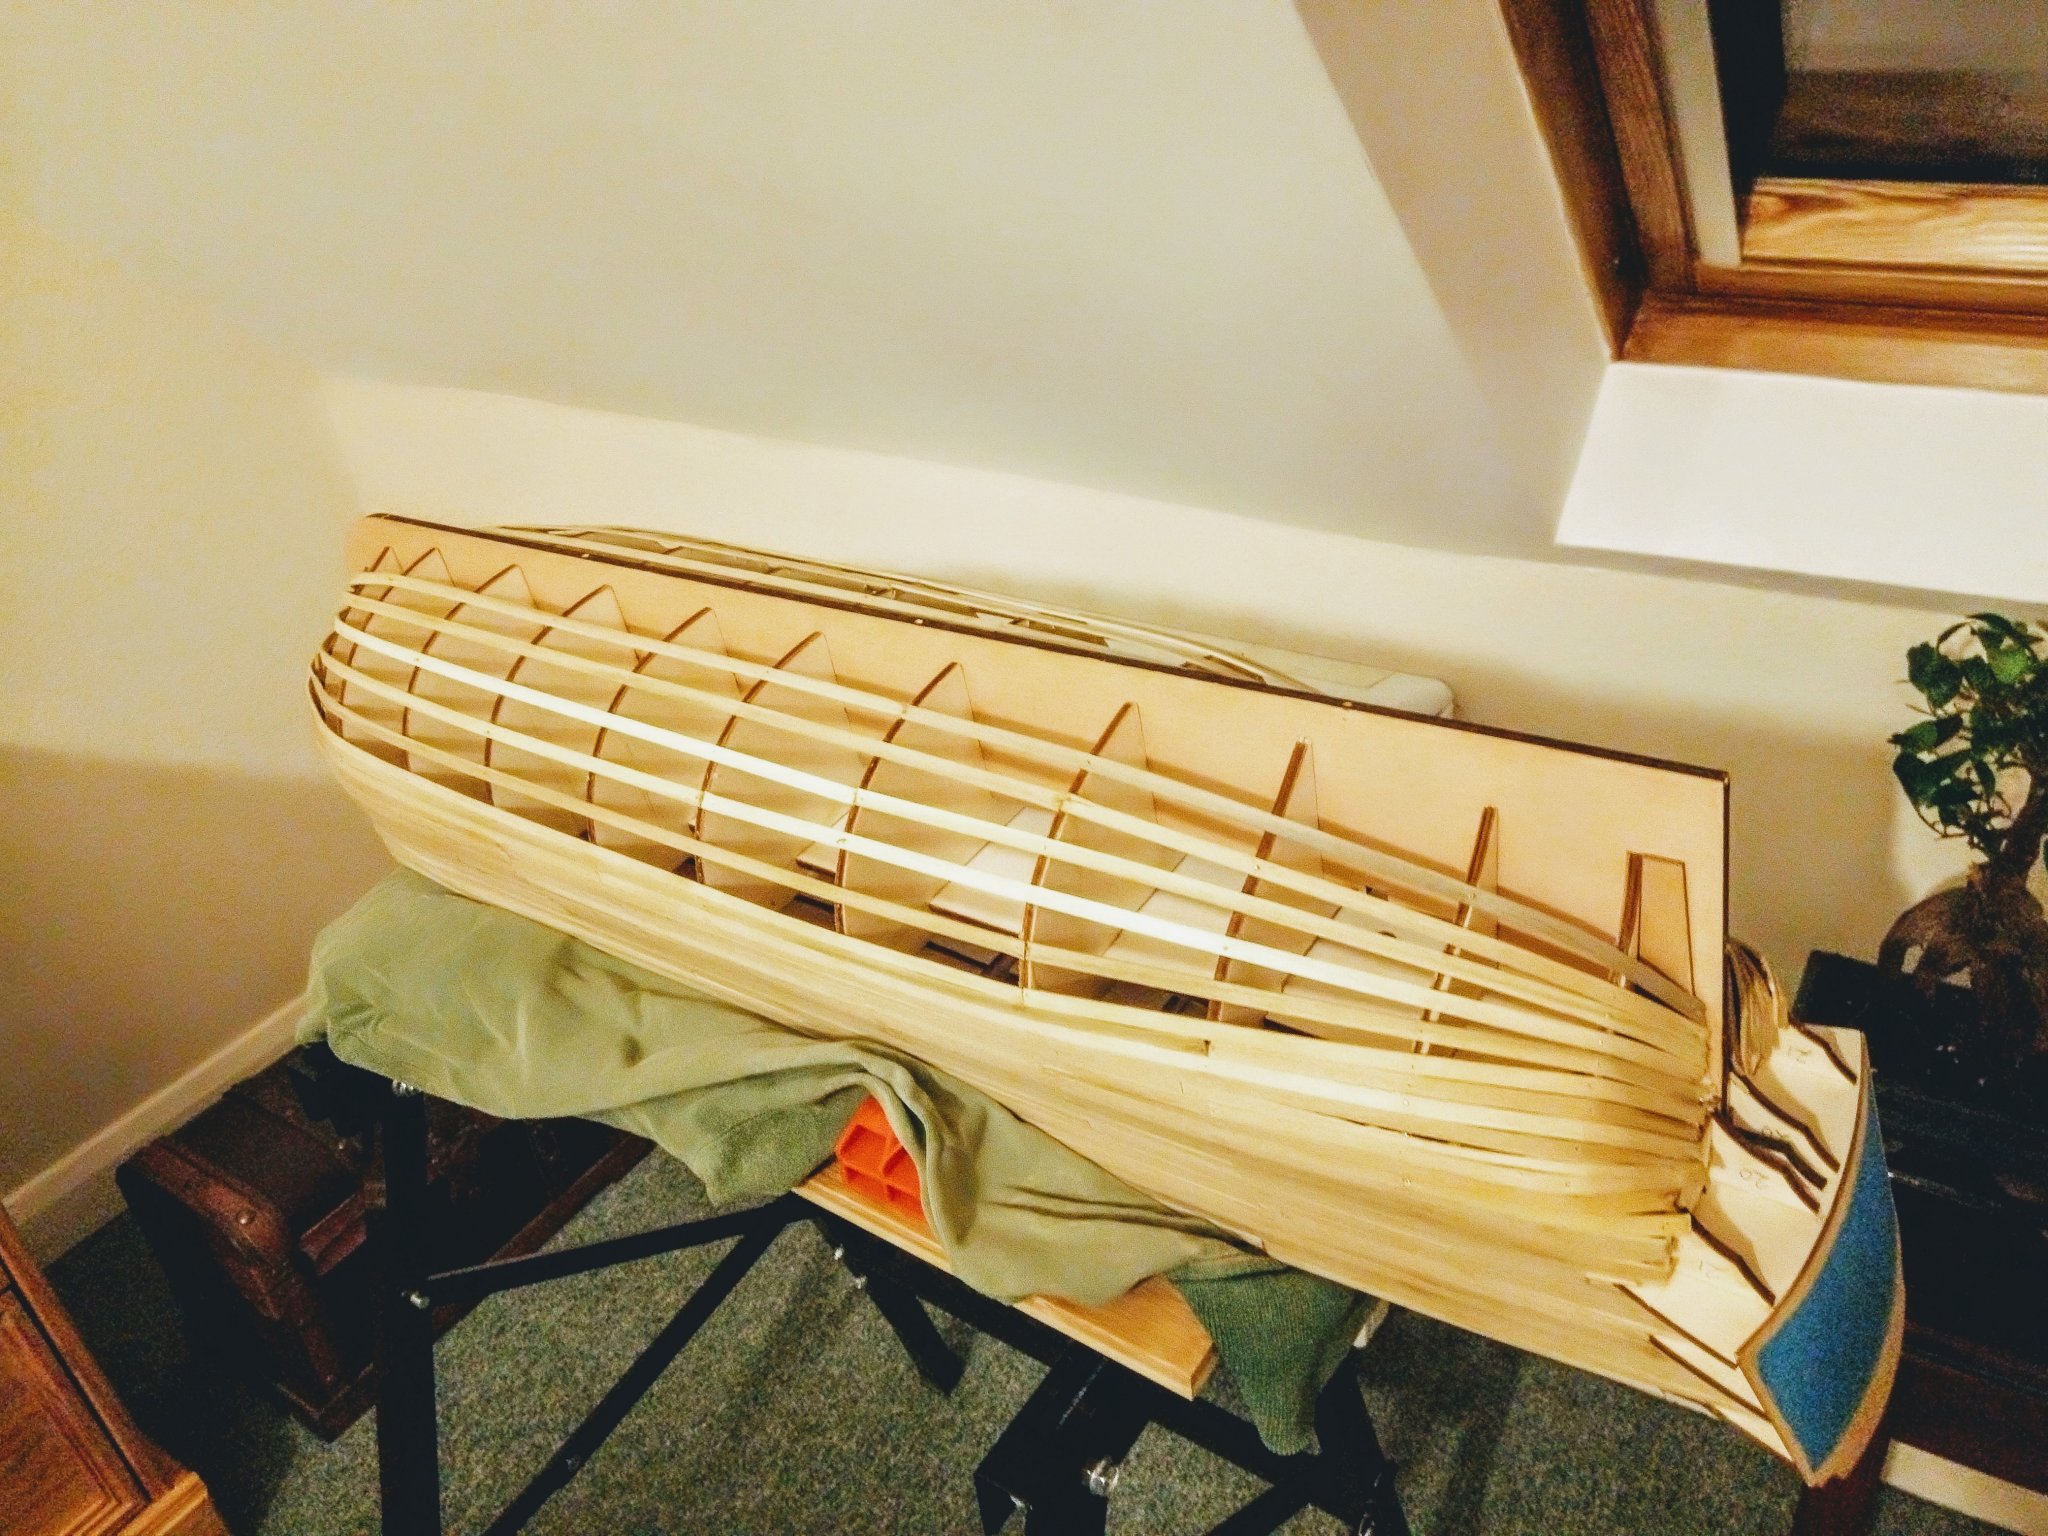
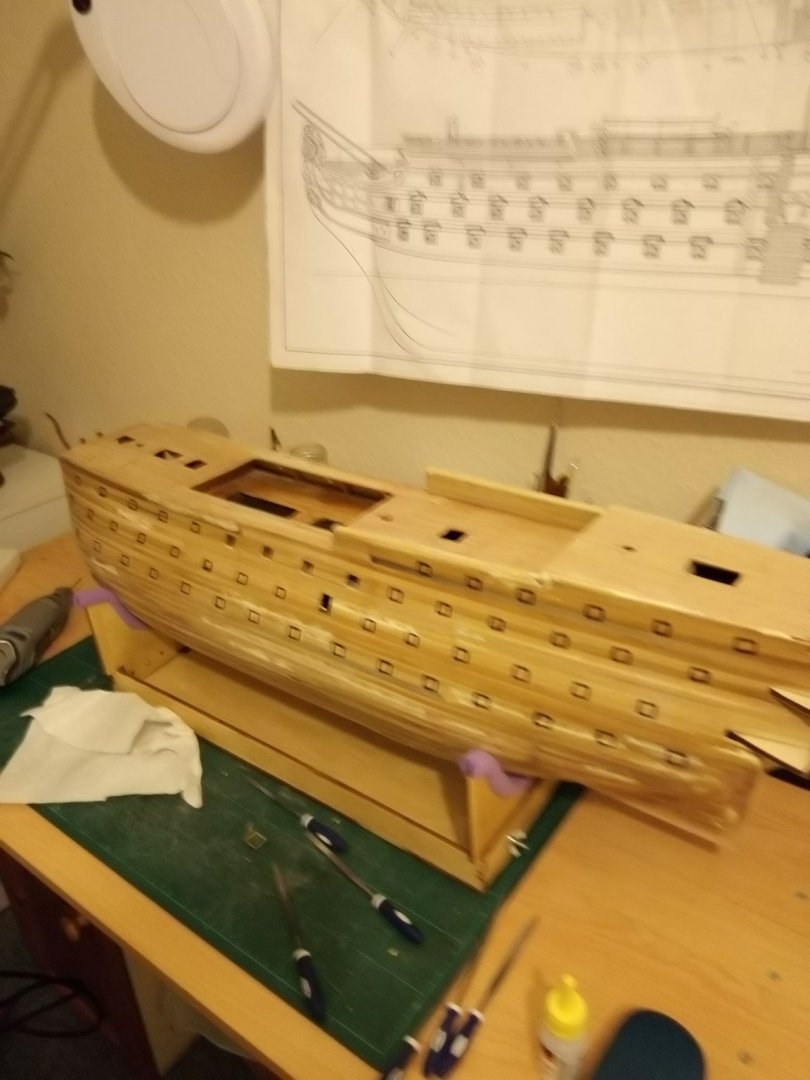
Had then to cut out the holes in the hull through two layers of planking following the dimensions on the plan. Filing them to shape wasn't easy (Im elderly with one eye and arthritic hands) so decided to fit a surround to straighten the "hacked out" openings in bulwarks. Then painted them to match what had been built originally.


-
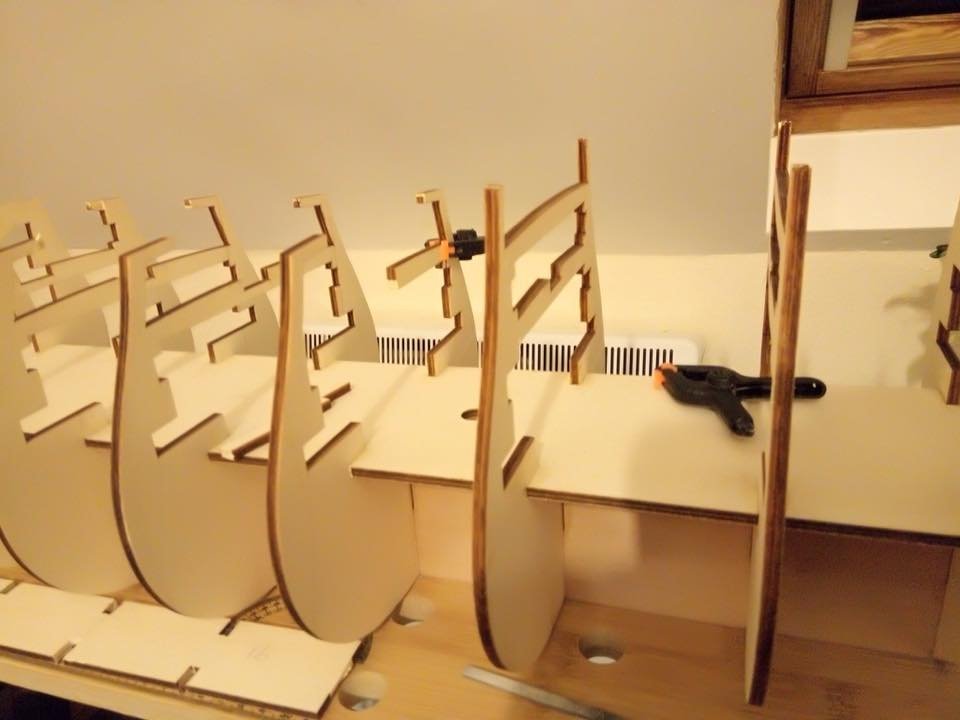
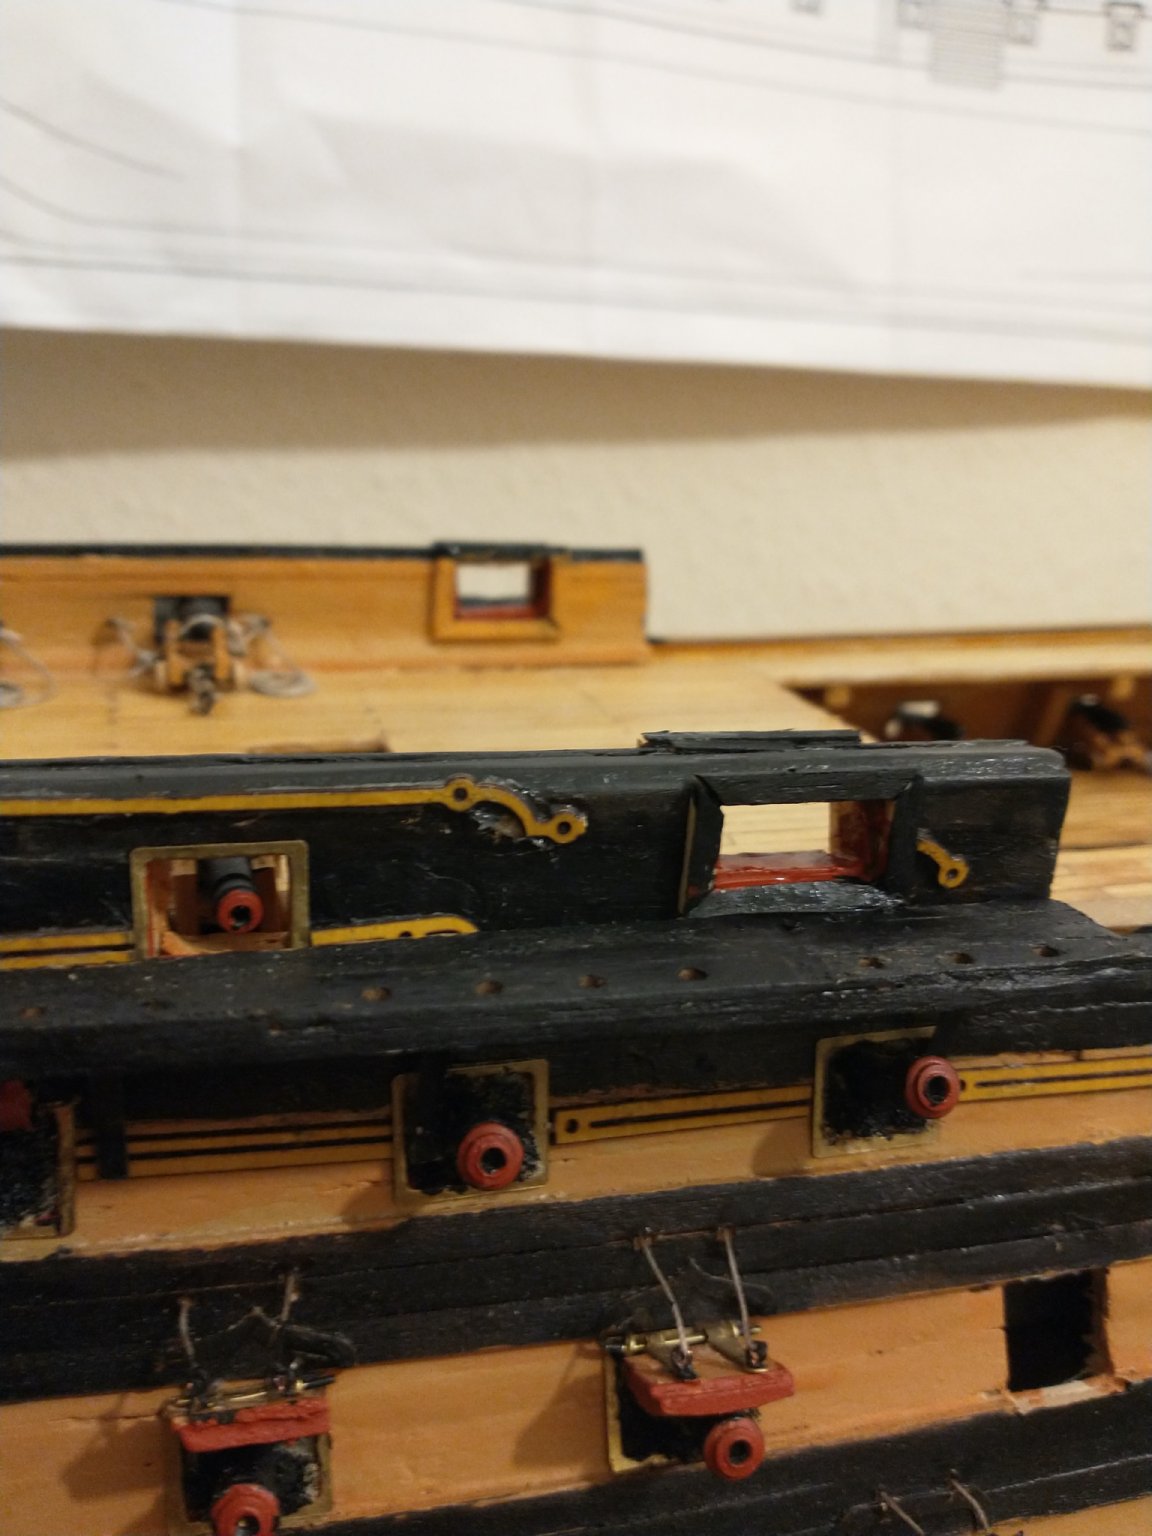
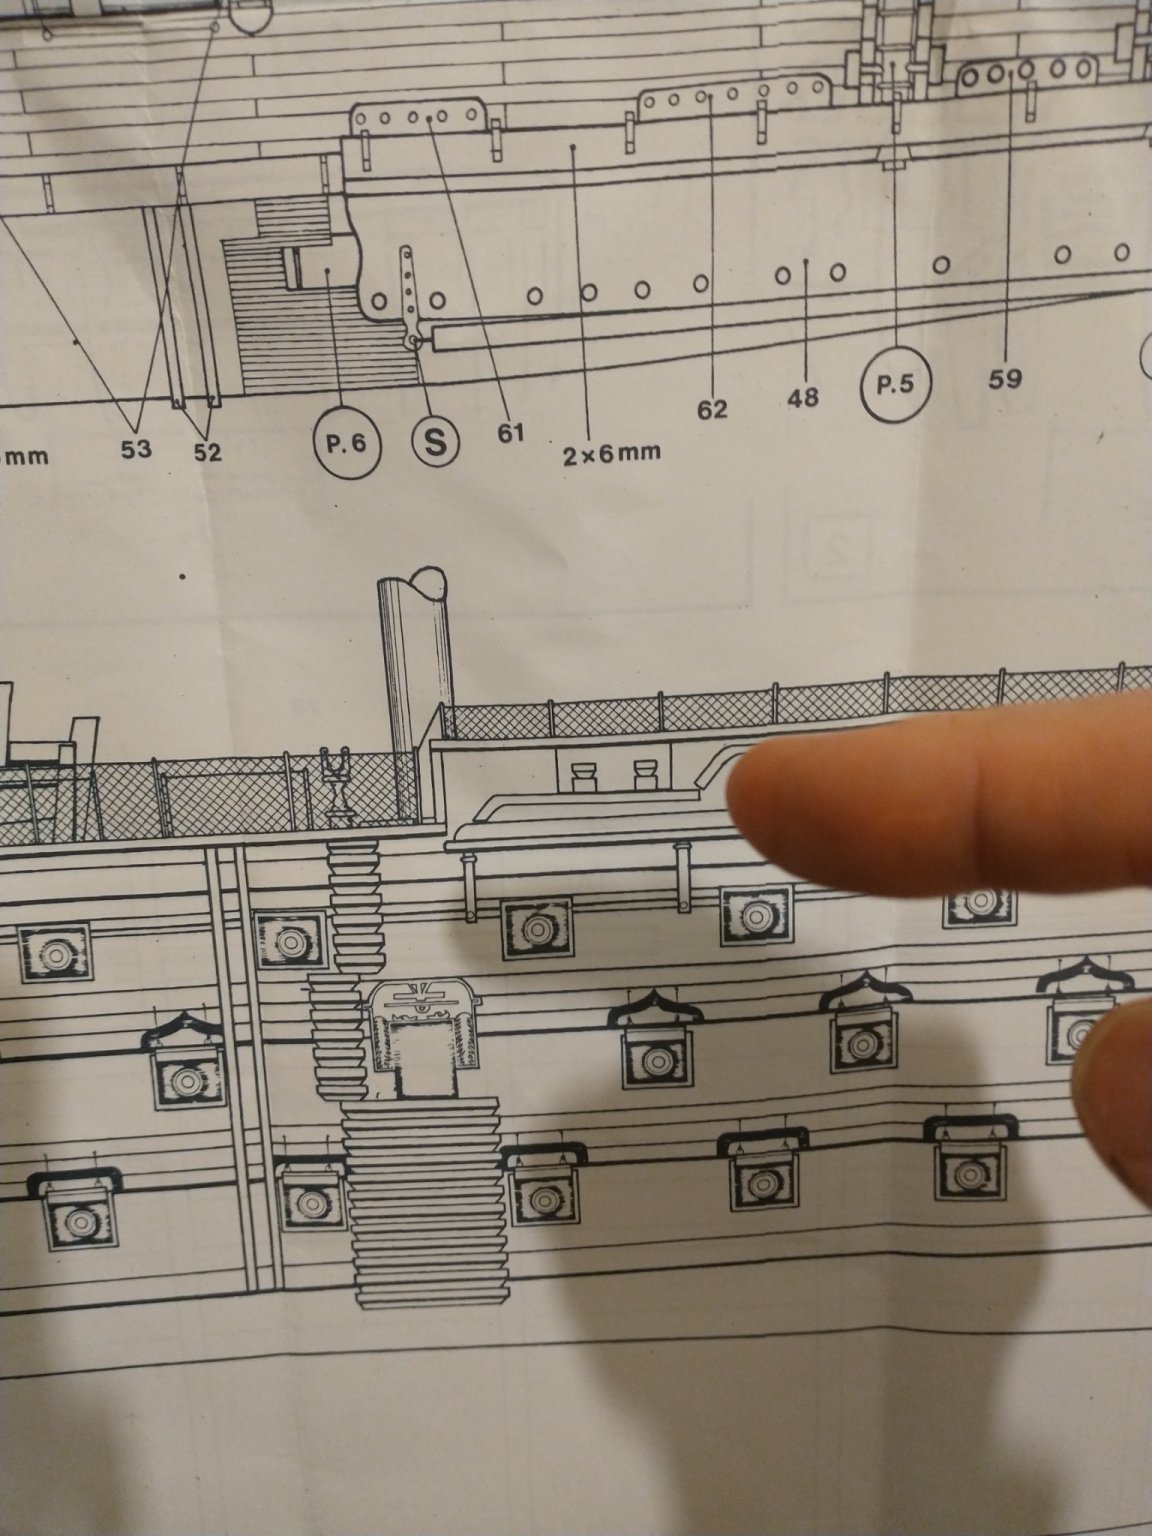
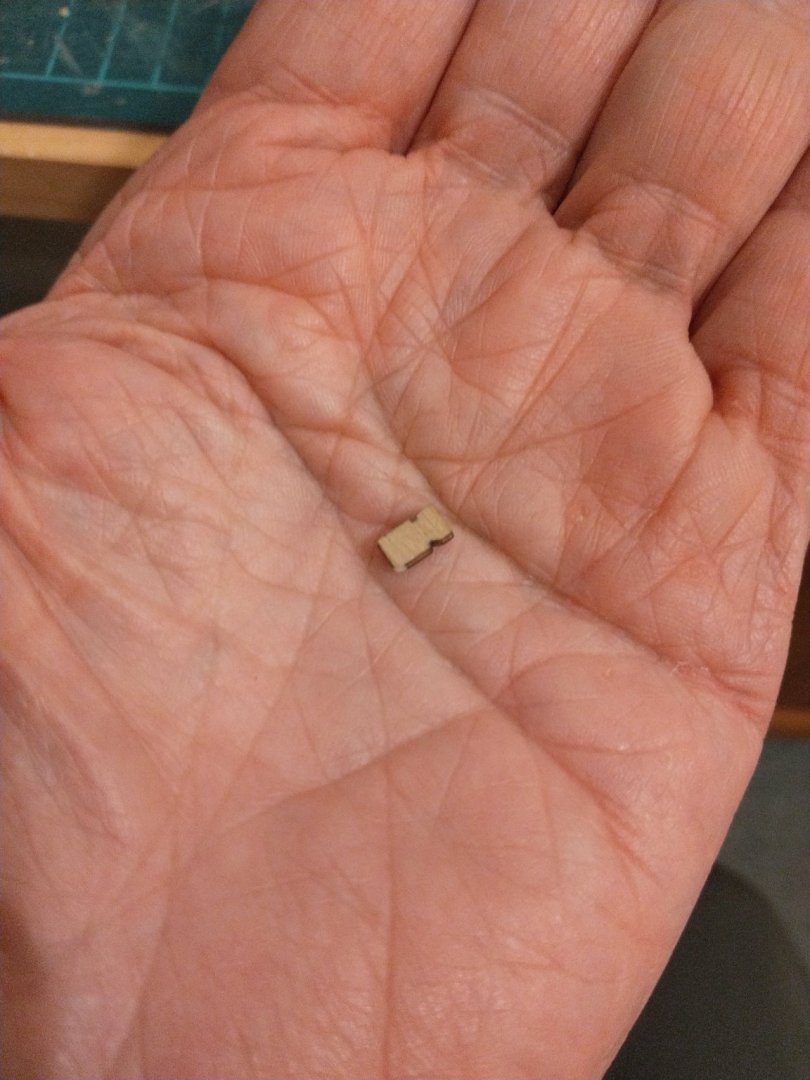
Spent a couple of days looking for the mysterious stanchions and finally discovered these minuscule parts hidden away on a piece of timber featuring many other bits.
-
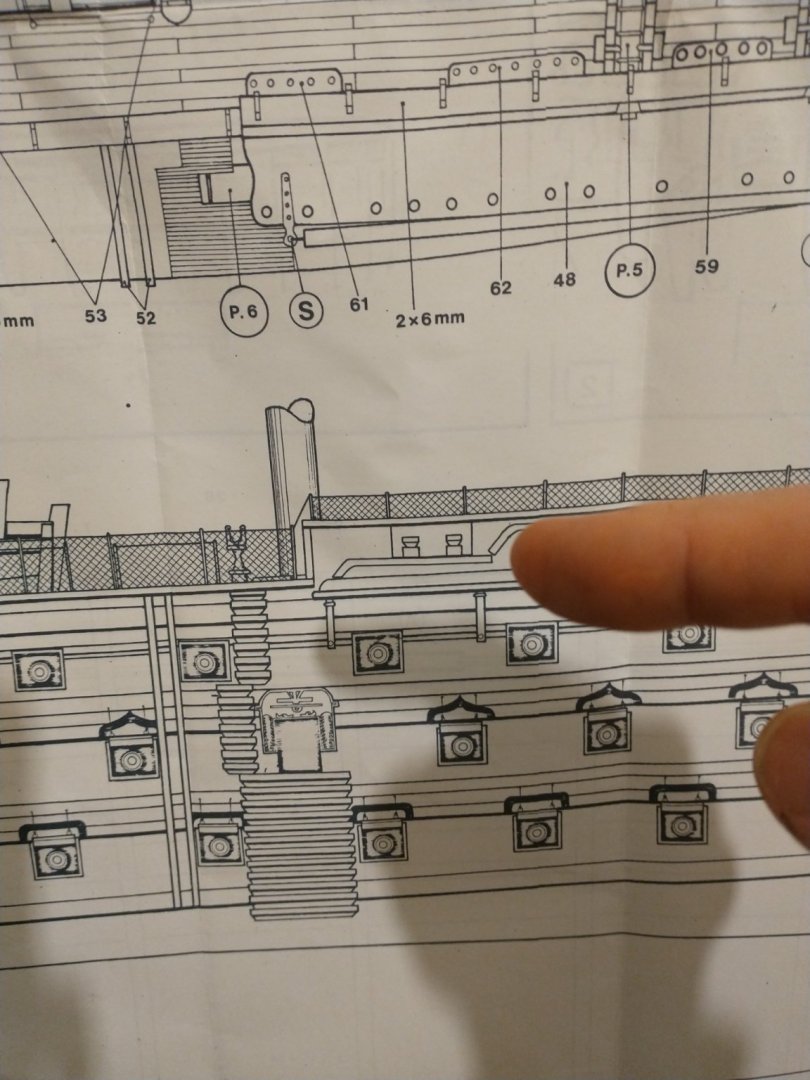
Very sparse instructions on this Panart Victory. So after cutting all the gun ports from the supplied template and following pics in instructions Im sat looking at the schematic and suddenly see this cutout with two stanchions which must have something to do with the rigging and needed down the line. Looked through the pics in instructions and no mention whatsoever of this ,and the gunport template ignores it too!.
-
Couldn’t agree more re missing parts. You are correct when you say you have no idea what’s missing until you get to that bit of build.I’m missing many eyelets,no gun carriage wheels,not enough dummy barrels and haven’t got to the rigging yet!
-
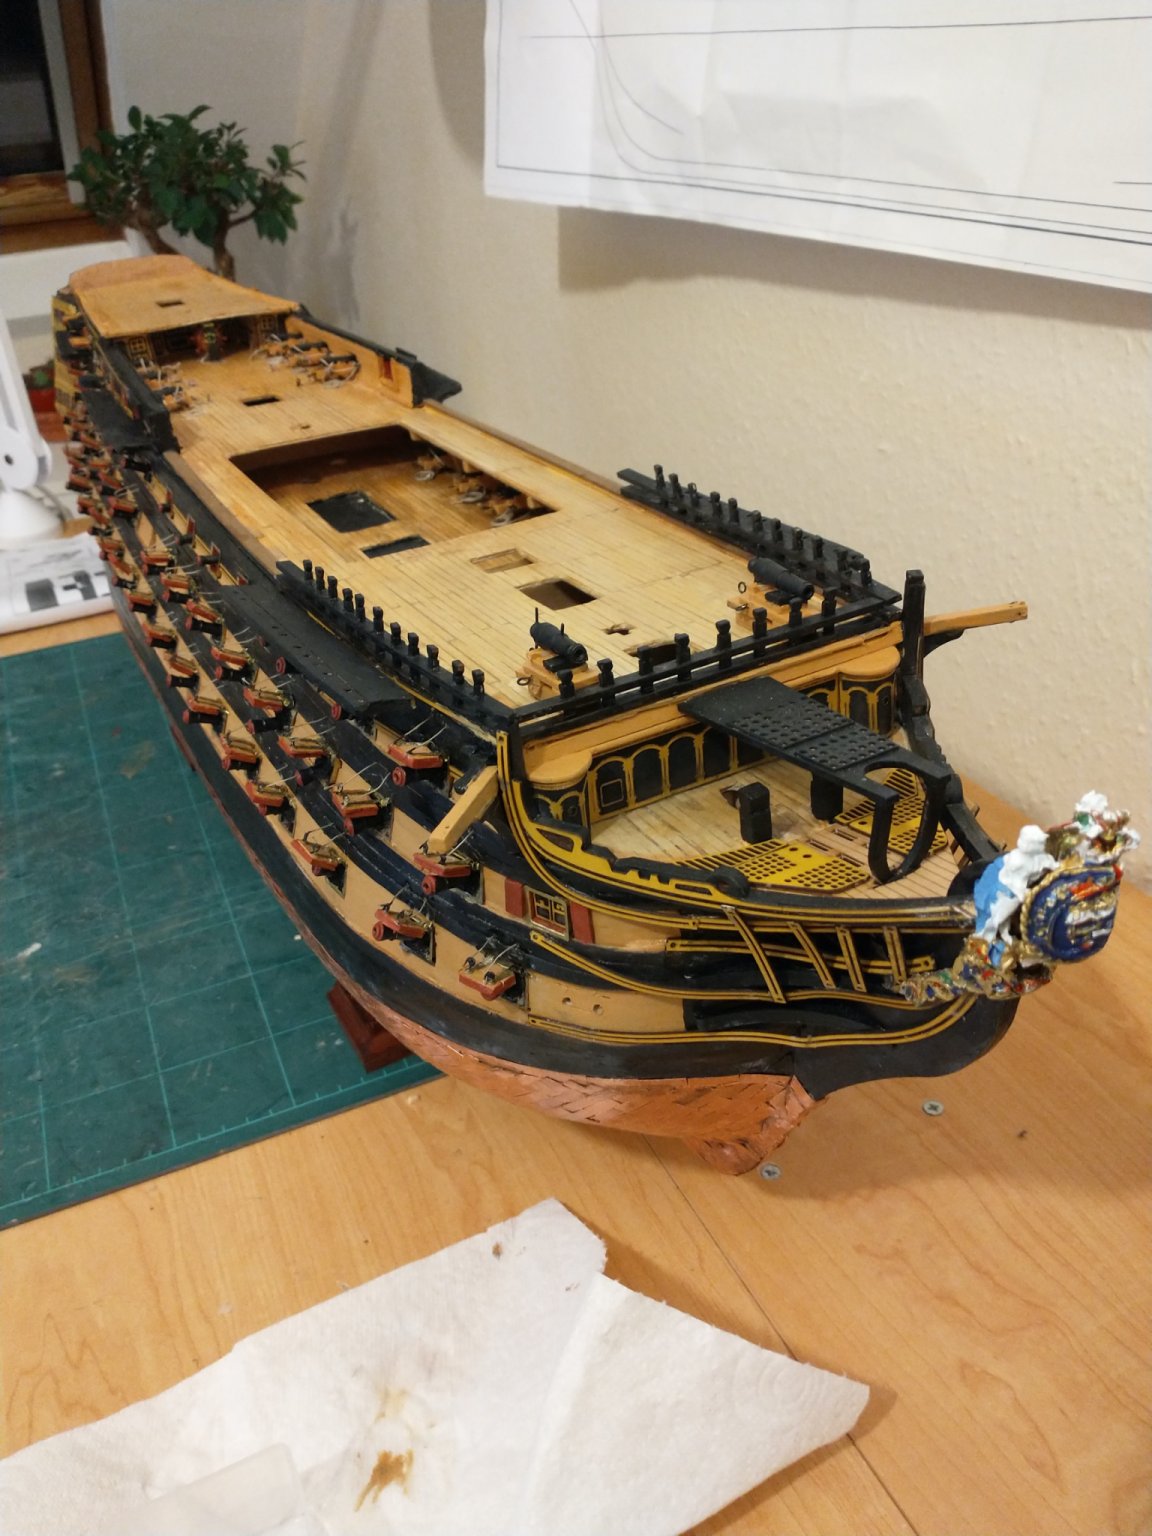
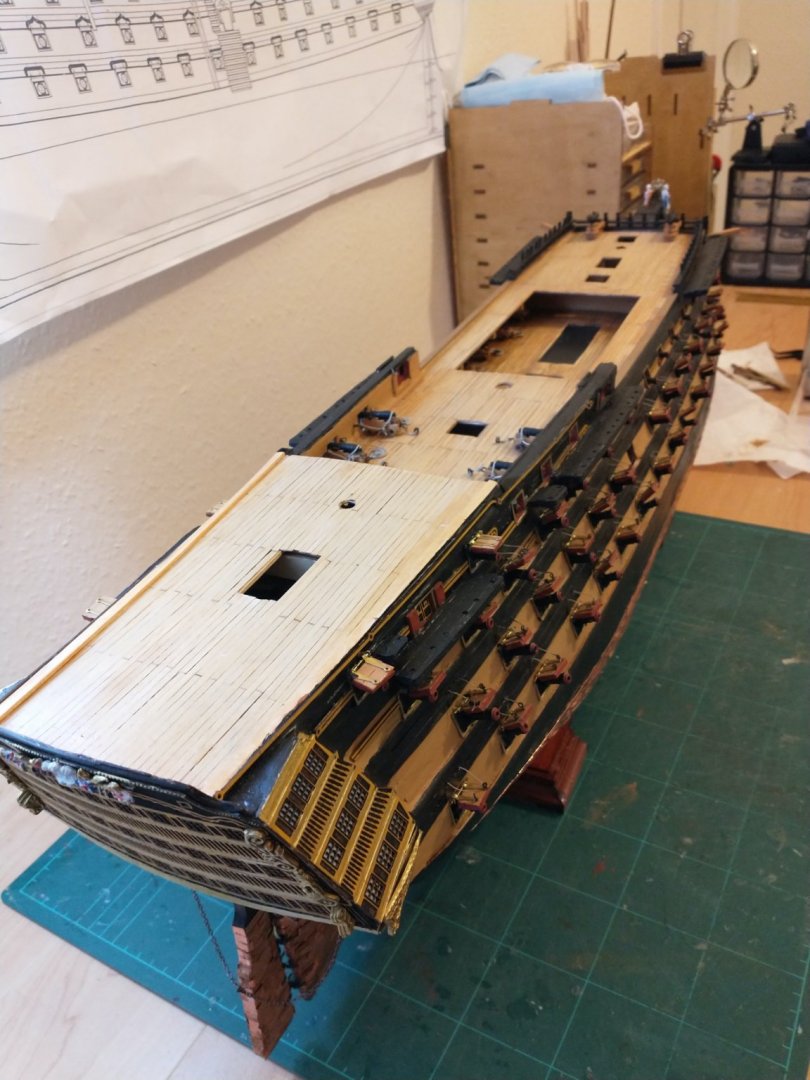
In my Panart kit the windows aren’t plastic they are in fact printed (complete with curtains) onto wooden sheet. Also where it often talks about drilling holes in the decorative brass bow decorations, these are also printed on wooden sheets instead.
-
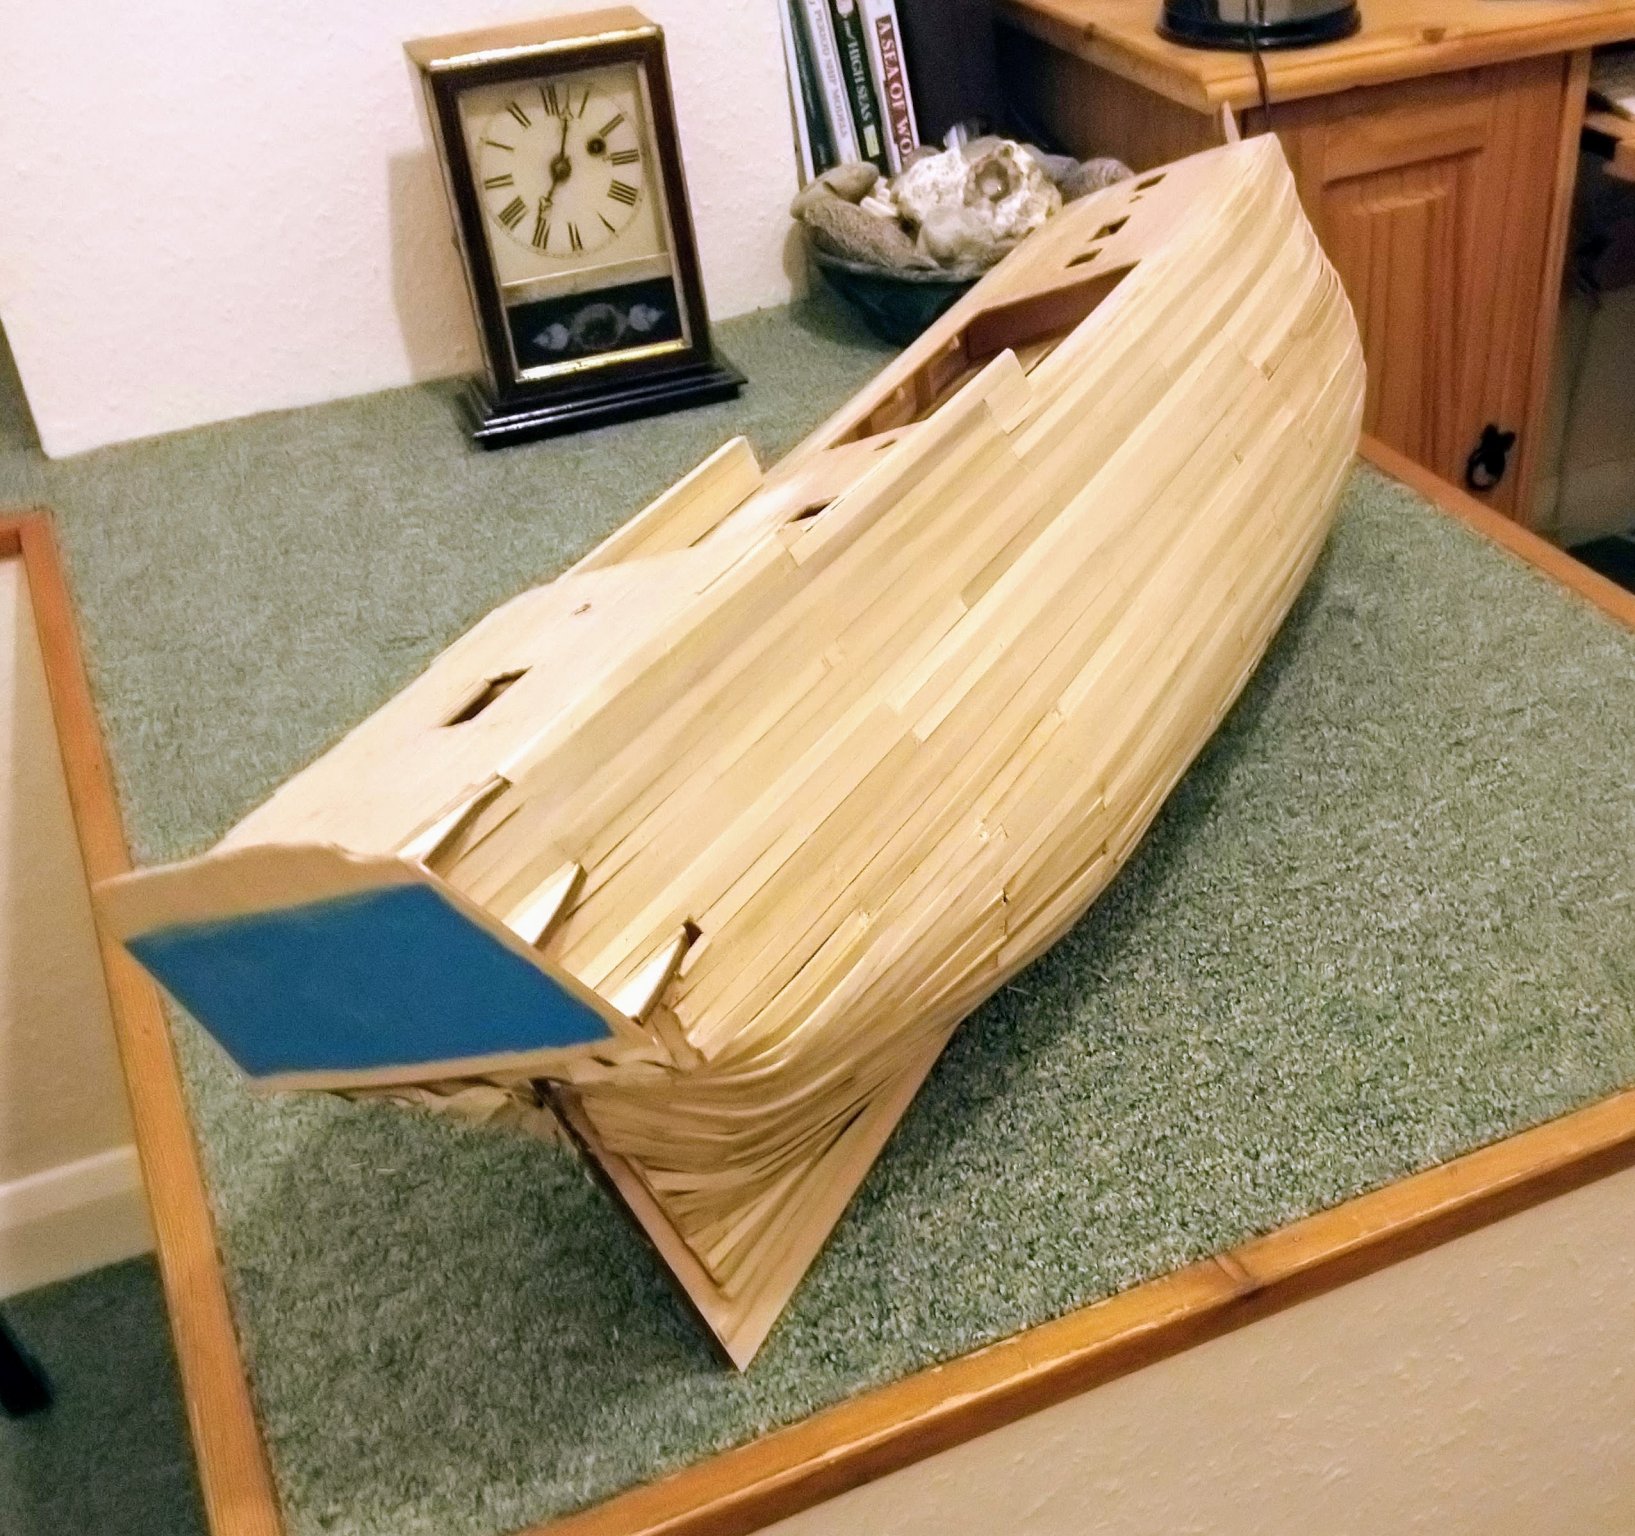
Begun cutting the gun ports. I decided ,after much thought<,to ignore the Panart instructions and cut the gun ports before the second walnut planking. I figured that it would be one less, and probably delicate, layer of planking to cut and file through, and would allow me to tidy everything up as I complete the second planking I intend to do the second planking to scale i.e. 5" lengths of plank. BTW in response the the previous comments I would mention that both the bow and the stern actually ended up quite adequate (if not fine)for me to quite happily begin the second planking when gun ports and smooth sanding completed so as the Bard said "alls well that ends well" :))
-
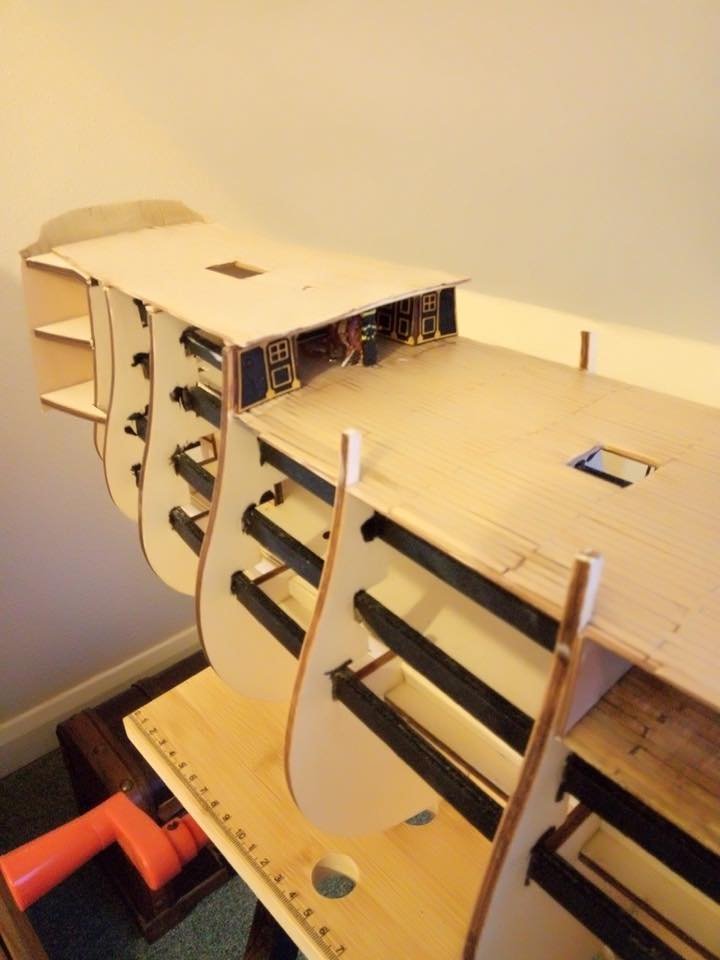
First planking finished. Obviously needs sanding and some bits of filling now. Decided to ignore the Panart instructions and decided to cut the gun ports next before starting the second planking.The bow and stern have planked well enough to move on to the next stage of sanding then possibly priming with a 50/50 PVA and water solution to secure the joints.


-
If it doesn't work (it always has before )then I'll change it to the biggest scratch built rowing boat ever.Need to point out these aren't attached they are what we call guide planks used as as guide lines.Don't worry all will be revealedl :))))
-
No problem .This bulwark doesn't give the correct shape to the original Victory shape. Don't forget this is the first planking and not important as it can be shaped and modified to the "correct" shape via sanding and filling. The walnut second planking is the one that counts.
-
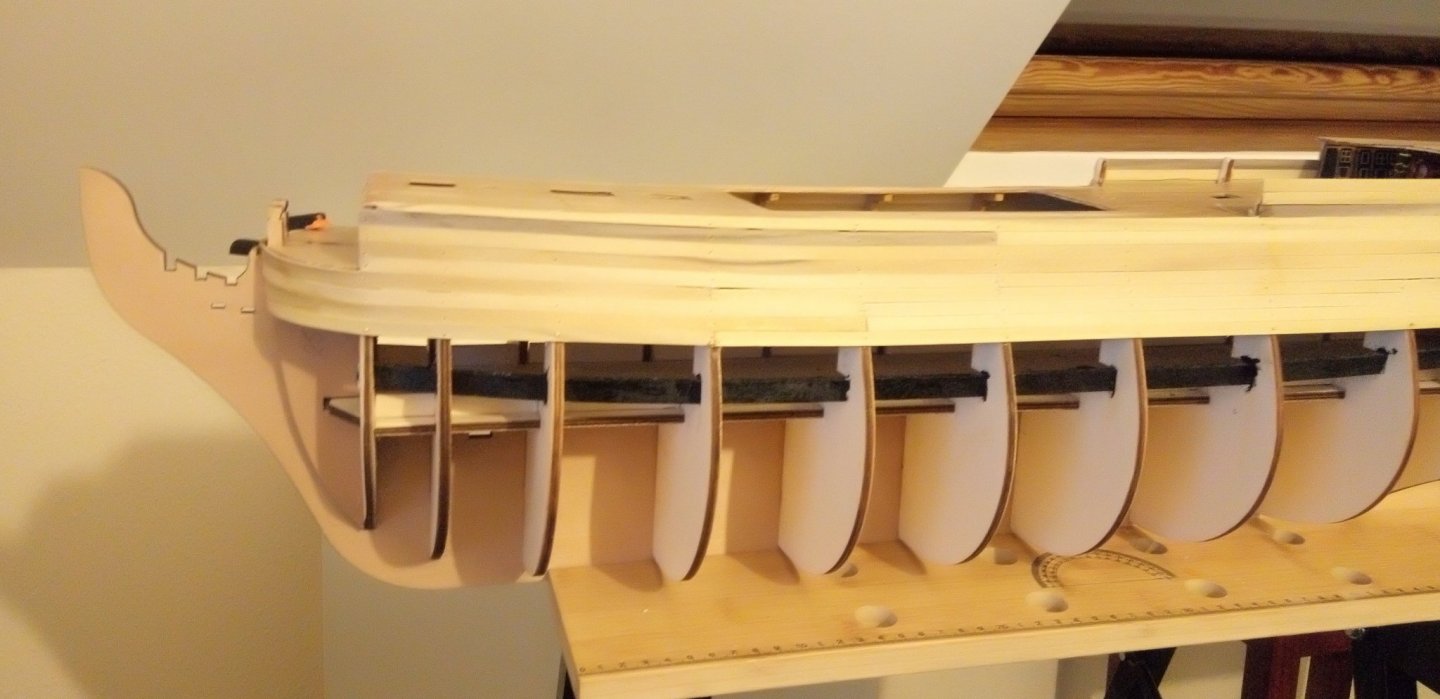
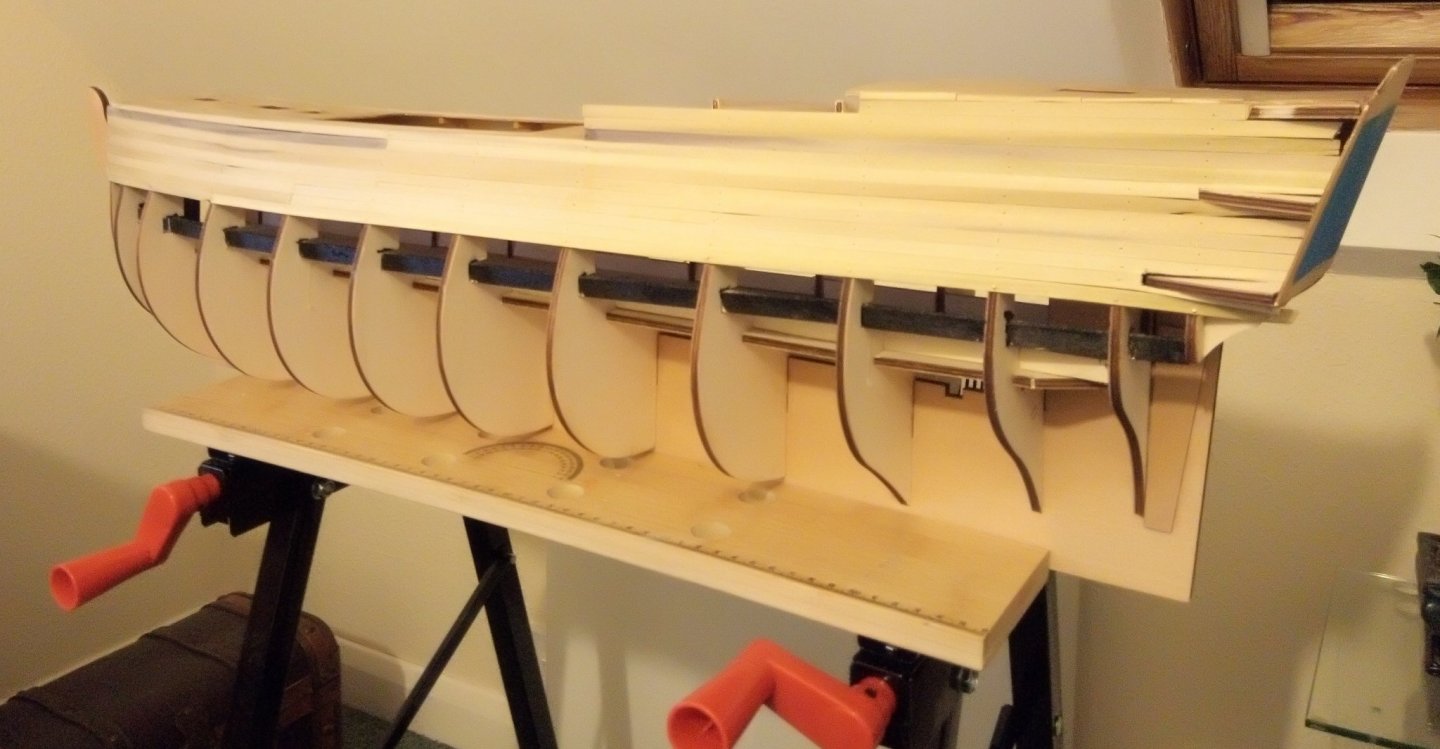
Cracking on with planking. Calculated planking flow by simply attaching two planks as temporary formers to get the gap reasonably correct.

-
Thanks for the English translation.Will be very helpful. I also am finding the videos on YouTube of the Model Space Victory.They generously post 26 videos of how to build their kit. Different to the Panart but most of the instructions are relevant. Watch for those cursed fumes from the CA glue that way madness lies!😂
-
I have just reached the nightmare of trying to plank the stern!!! I see some member has added a quote of "if all else fails read the instructions" He has clearly never built a Panart kit!!!!!!!! The so called instructions are a joke. Still looking at what you are doing has helped me enormously as I had started the stern and then ripped them off again as they looked ridiculous.
-
.First planking commenced . Two planks fitted per three hour session
-
I only ever come up with simple ideas Edward as I'm only a simple minded soul.🤣
-
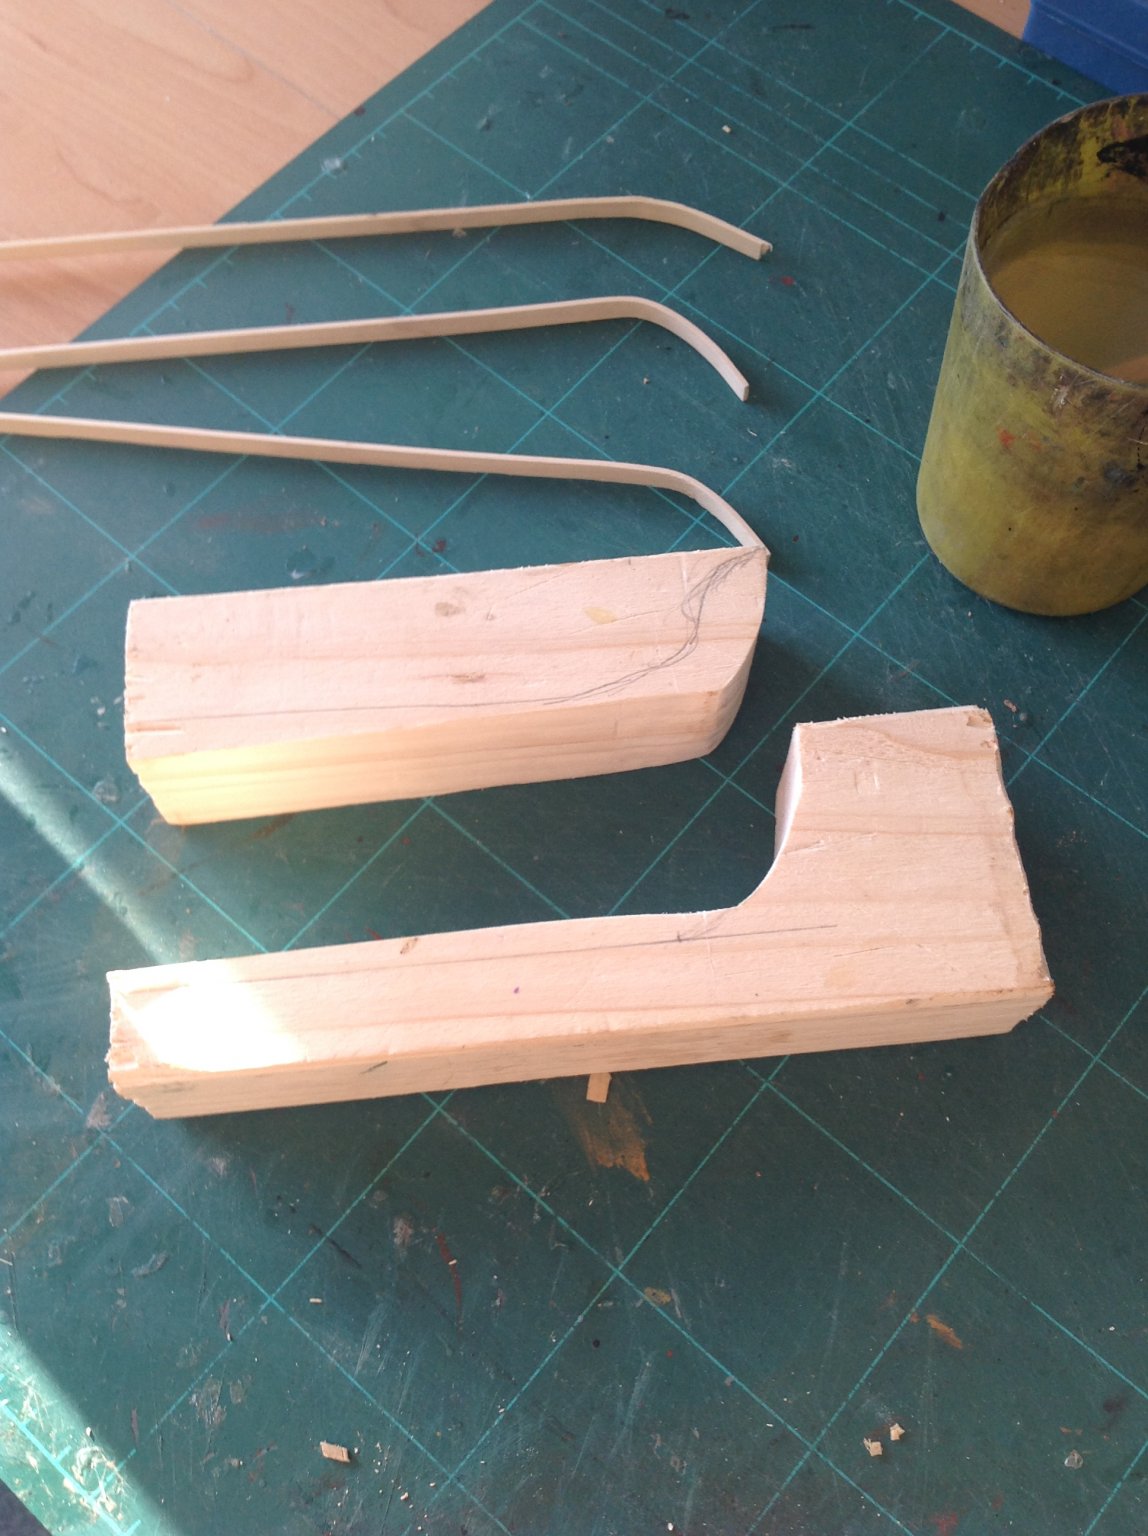
This is my preferred method of plank bending. Its simple, hassle free .enables me to bend several at once if needed and costs nothing. After wetting the planks I gently start a slight bend then place onto the former I have cut from an offset of baton found in my garage. I place the top part of the former on top then clamp (or fasten with rubber bands etc). After a period to allow the planks to dry remove the top and the planks. If I need to make any fine adjustments to the bend to ensure a perfect fit I can simply moisten the plank and gently adjust with fingers.


-
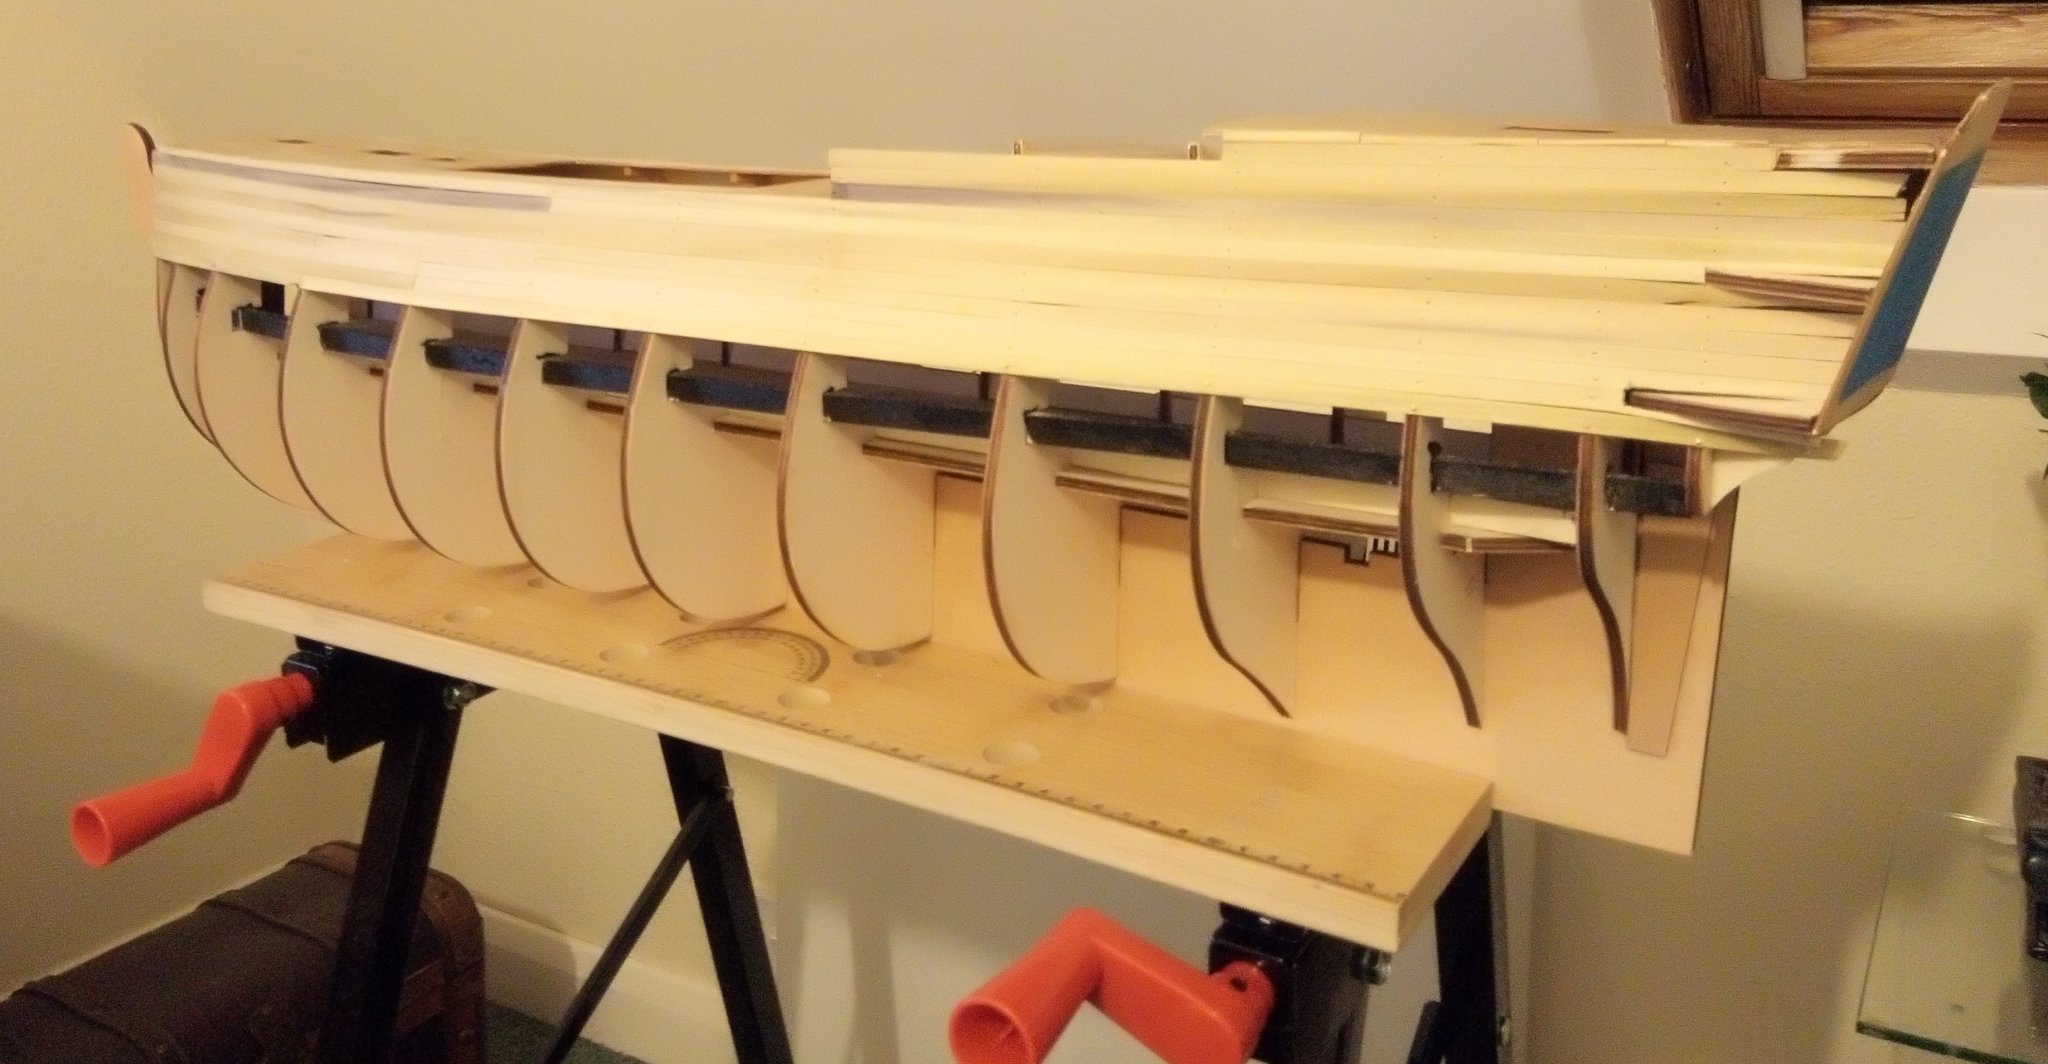
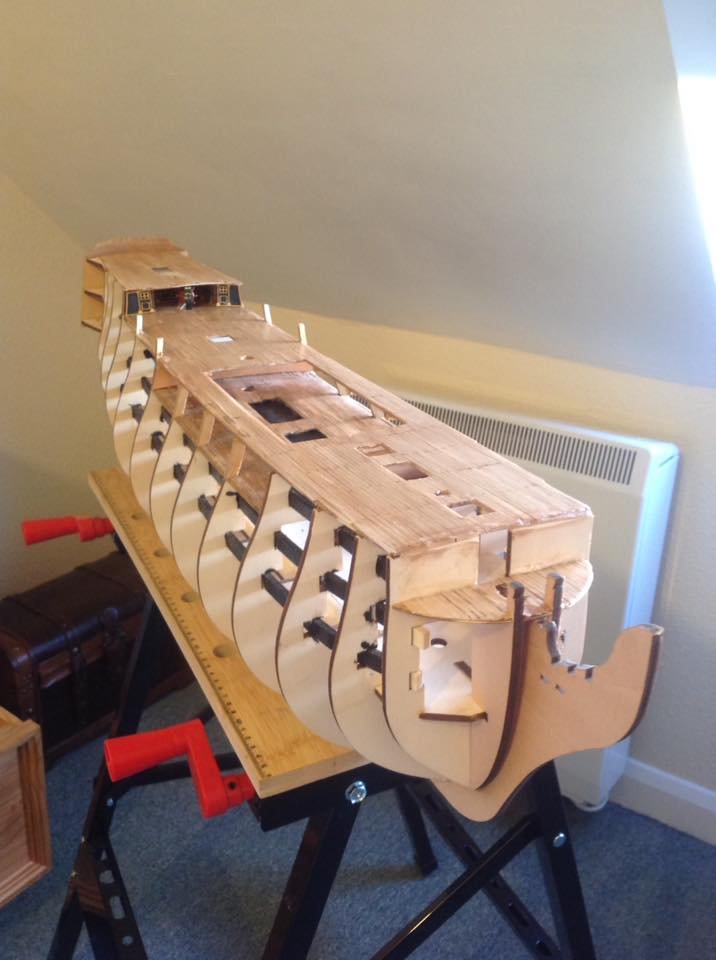
Just begun to bevel the bulwarks and start the first layer of planking.

-
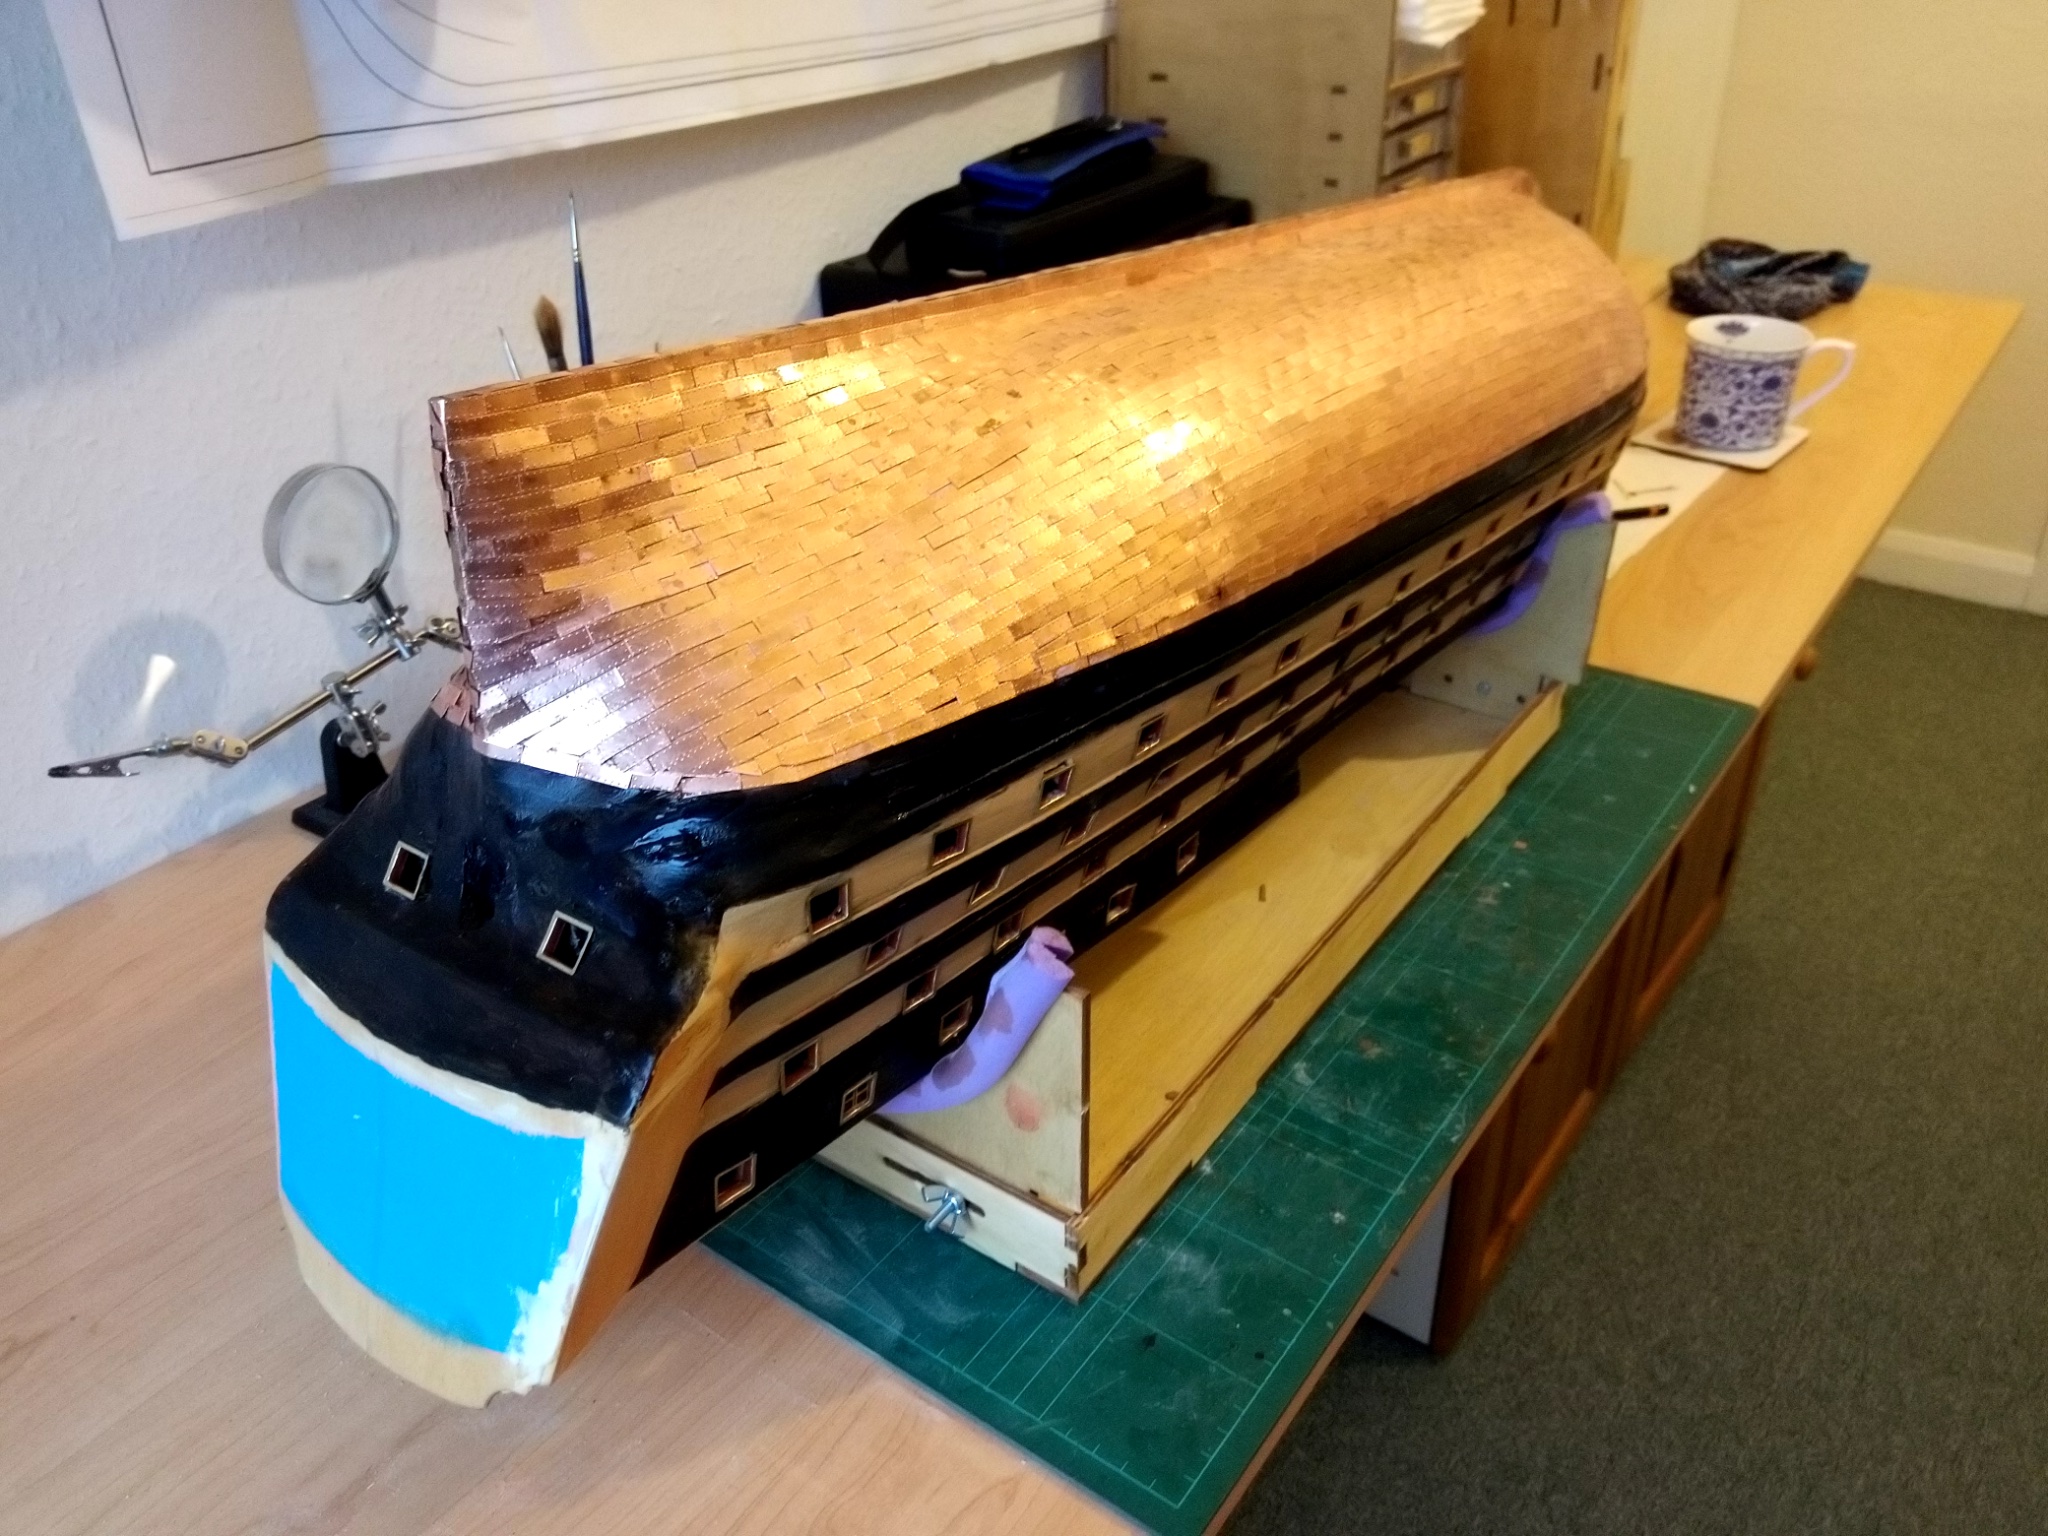
Hi David Good luck withe copper tiles. Need to be well ventilated! I tiled my Caldecraft Snake and used superglue and became even more light headed than usual after a couple of hours :))
-
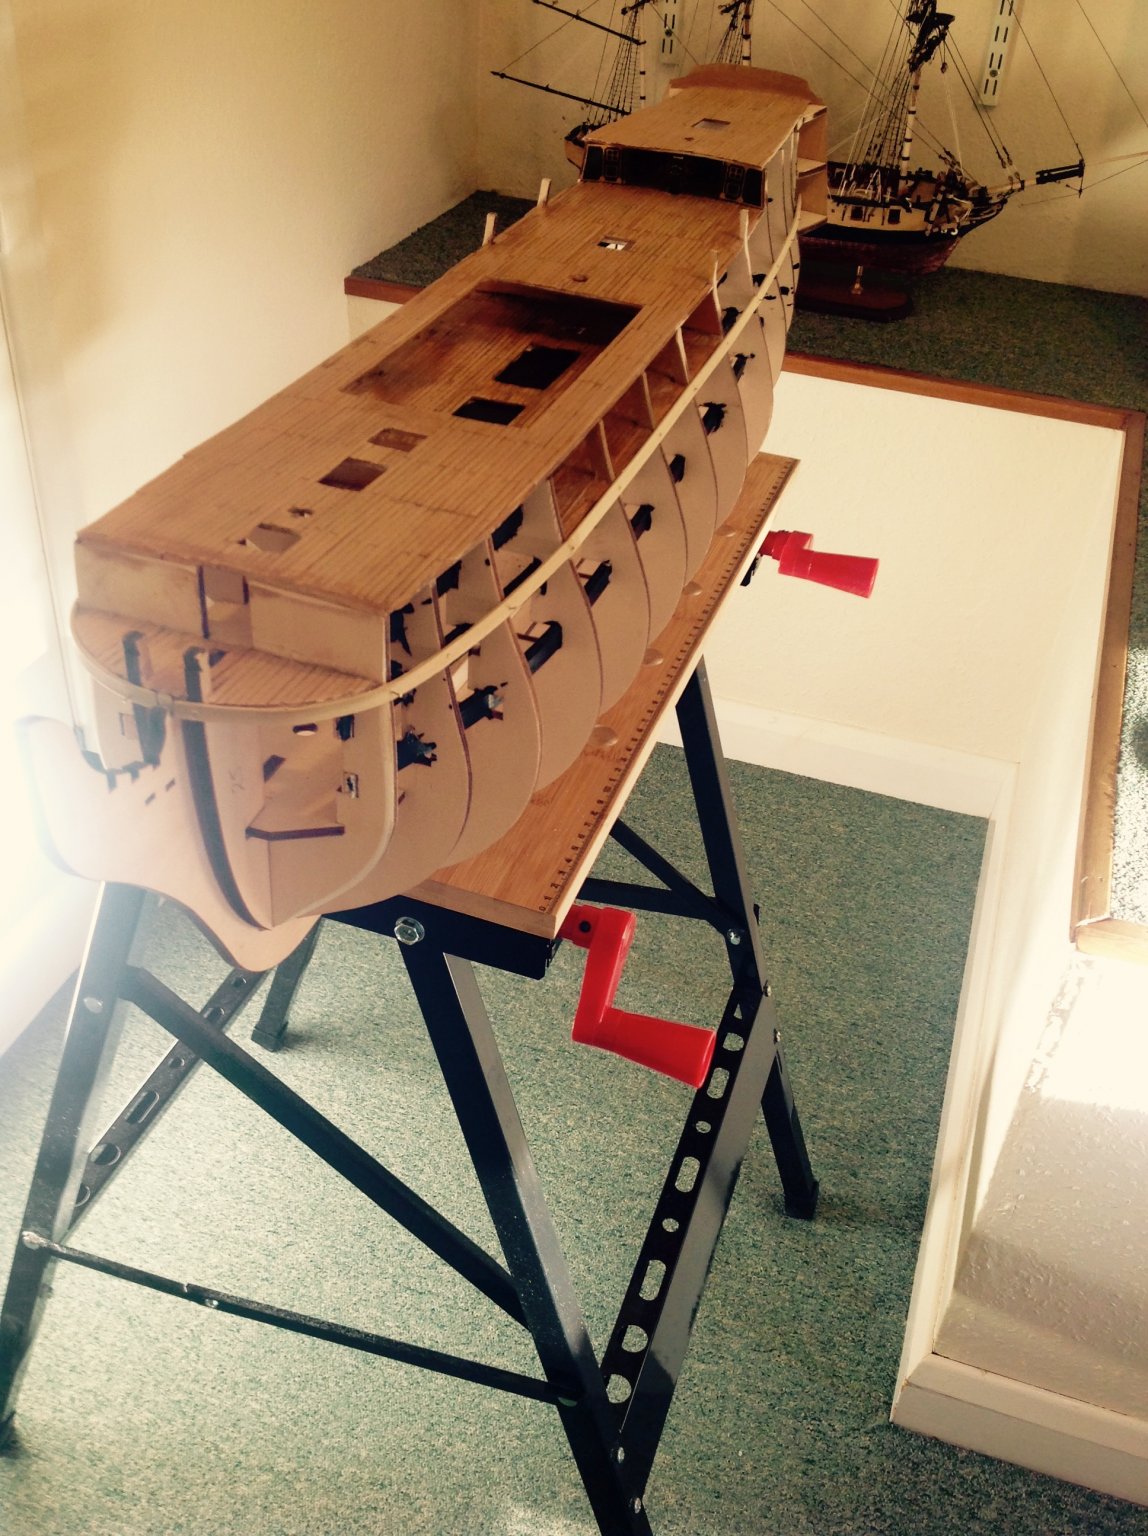
Hi Michel Yes the workmate was bought specially for my Victory build. Its working out brilliantly.Its completely stable whilst doing sanding or drilling etc and can easily be turned round when needed. Should be ideal when rigging etc.Much cheaper and I think better than commercial alternatives.
-
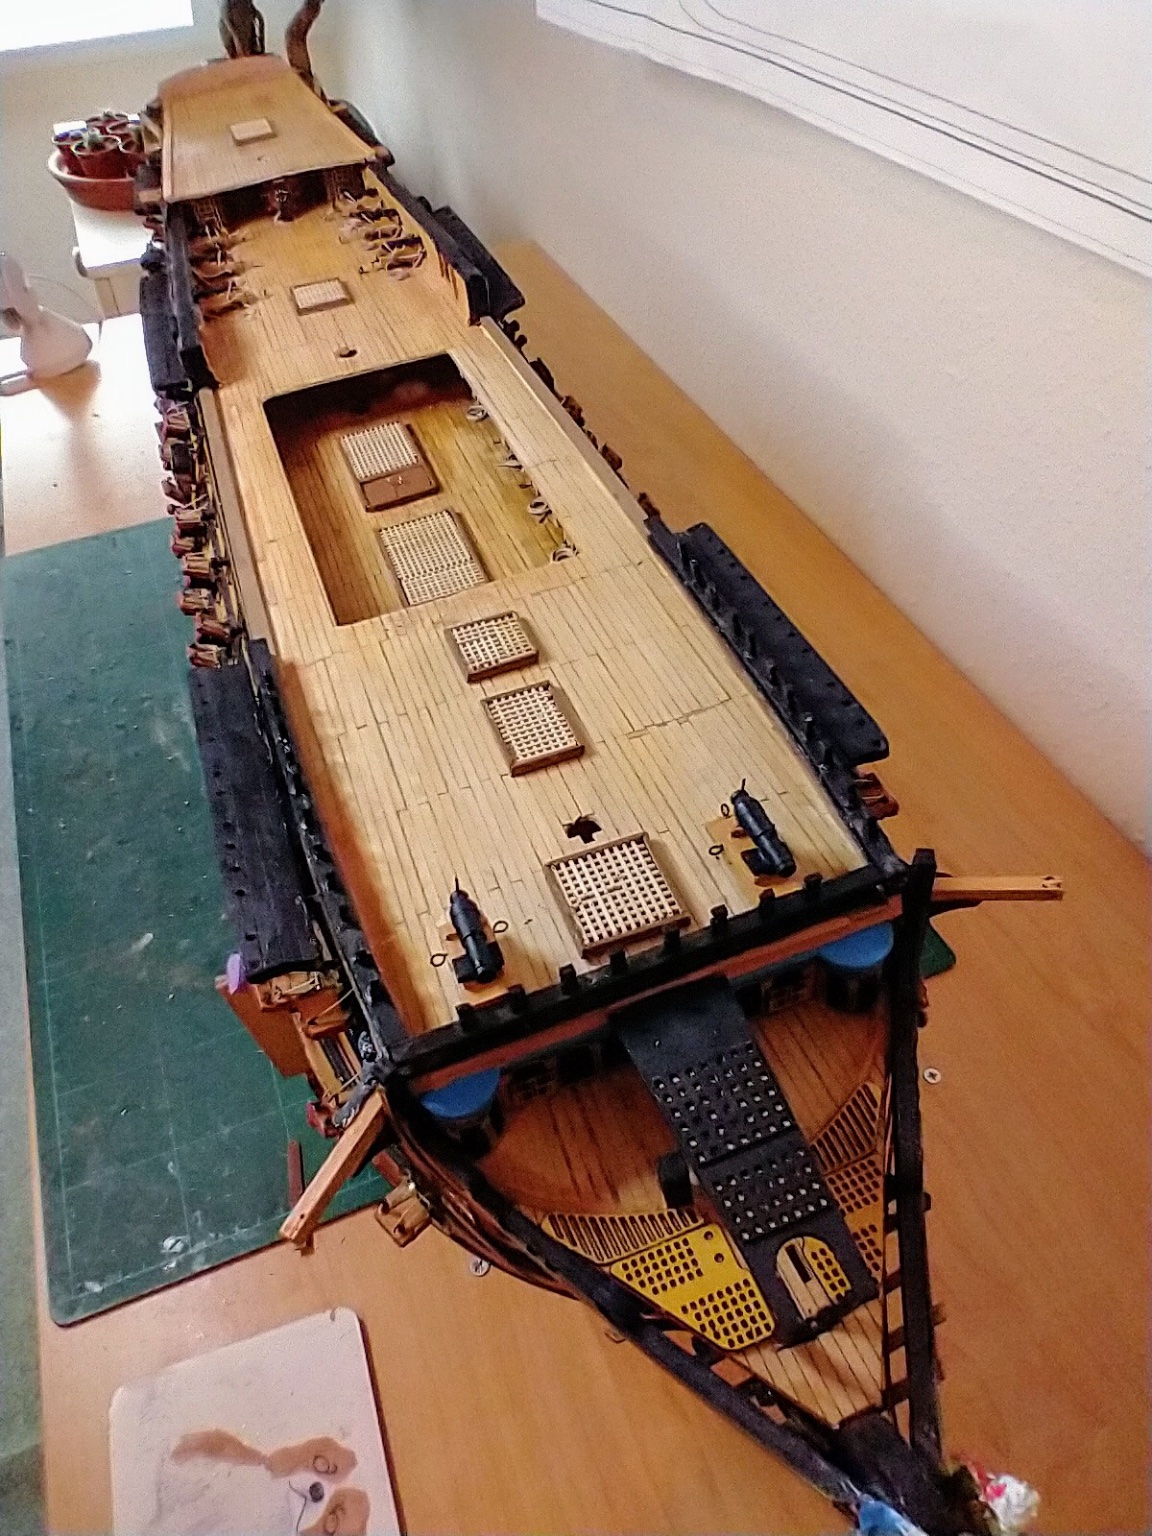
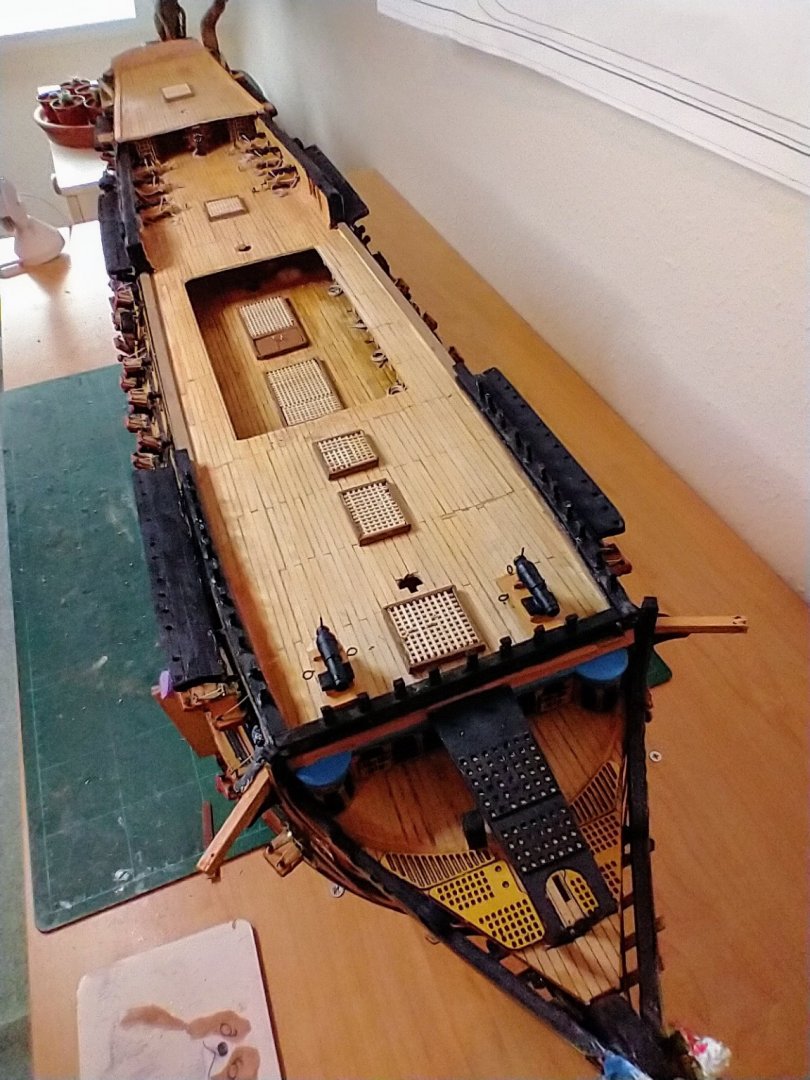
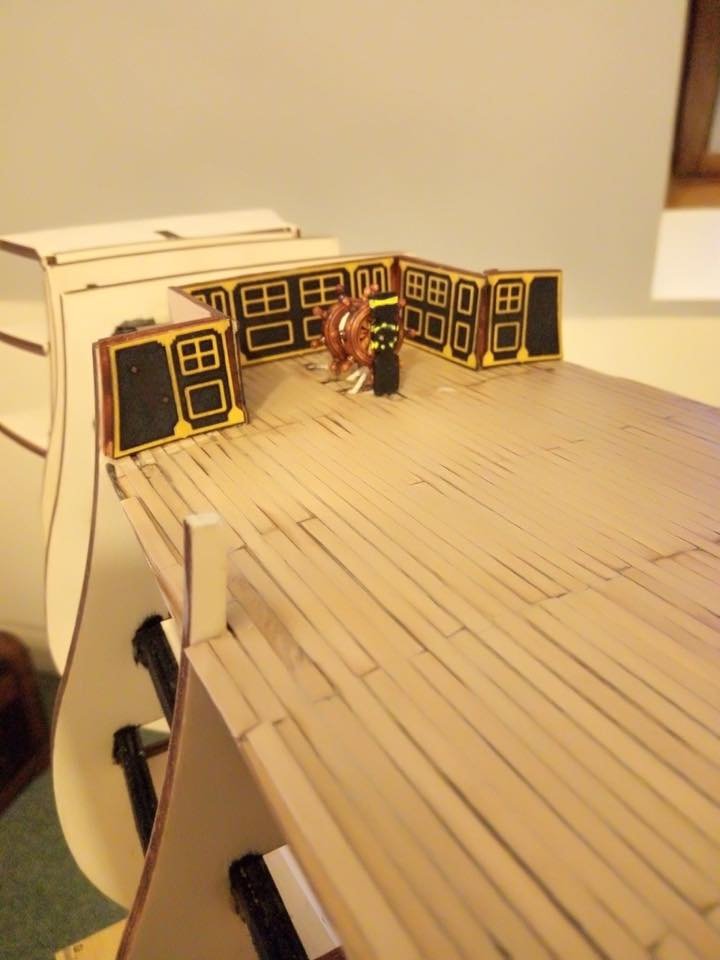
Decks fitted and planked and cabins ,ships wheel and ropes fitted and top of poop deck installed. Now need to sand and bevel bulwarks and where deck meets bulwarks before thinking about planking. This is likely to take a long time. Have decided to plank in smaller lengths rather than wrestle with full lengths. Waiting for Amazon to deliver planking clamps and electric plank bender before contemplating the actual first planking. Reading as many "guides" to planking and downloaded Caldecraft and DeAgnostini,s manuals. Useful (especially D'Agnosinis) Too much information tends to confuse but Im managing to get a "simple" guide for me to follow. The Panart instructions are very sparse and simplistic virtually saying bung the on and then paint the whole lot in PVA . One presumes so you can cover up gaps and errors. I want try to plank this excellent kit as well and as realistically as possible so I will avoid slapping PVA or indeed filler onto the planks if possible. :)) Time will tell!
-
First error was to break a bulwark by trying to push into position whilst trying to keep as tight a fit as possible. Not a problem as because of the strength of the bulwarks easy to repair.