KurtH
-
Posts
449 -
Joined
-
Last visited
Content Type
Profiles
Forums
Gallery
Events
Everything posted by KurtH
-
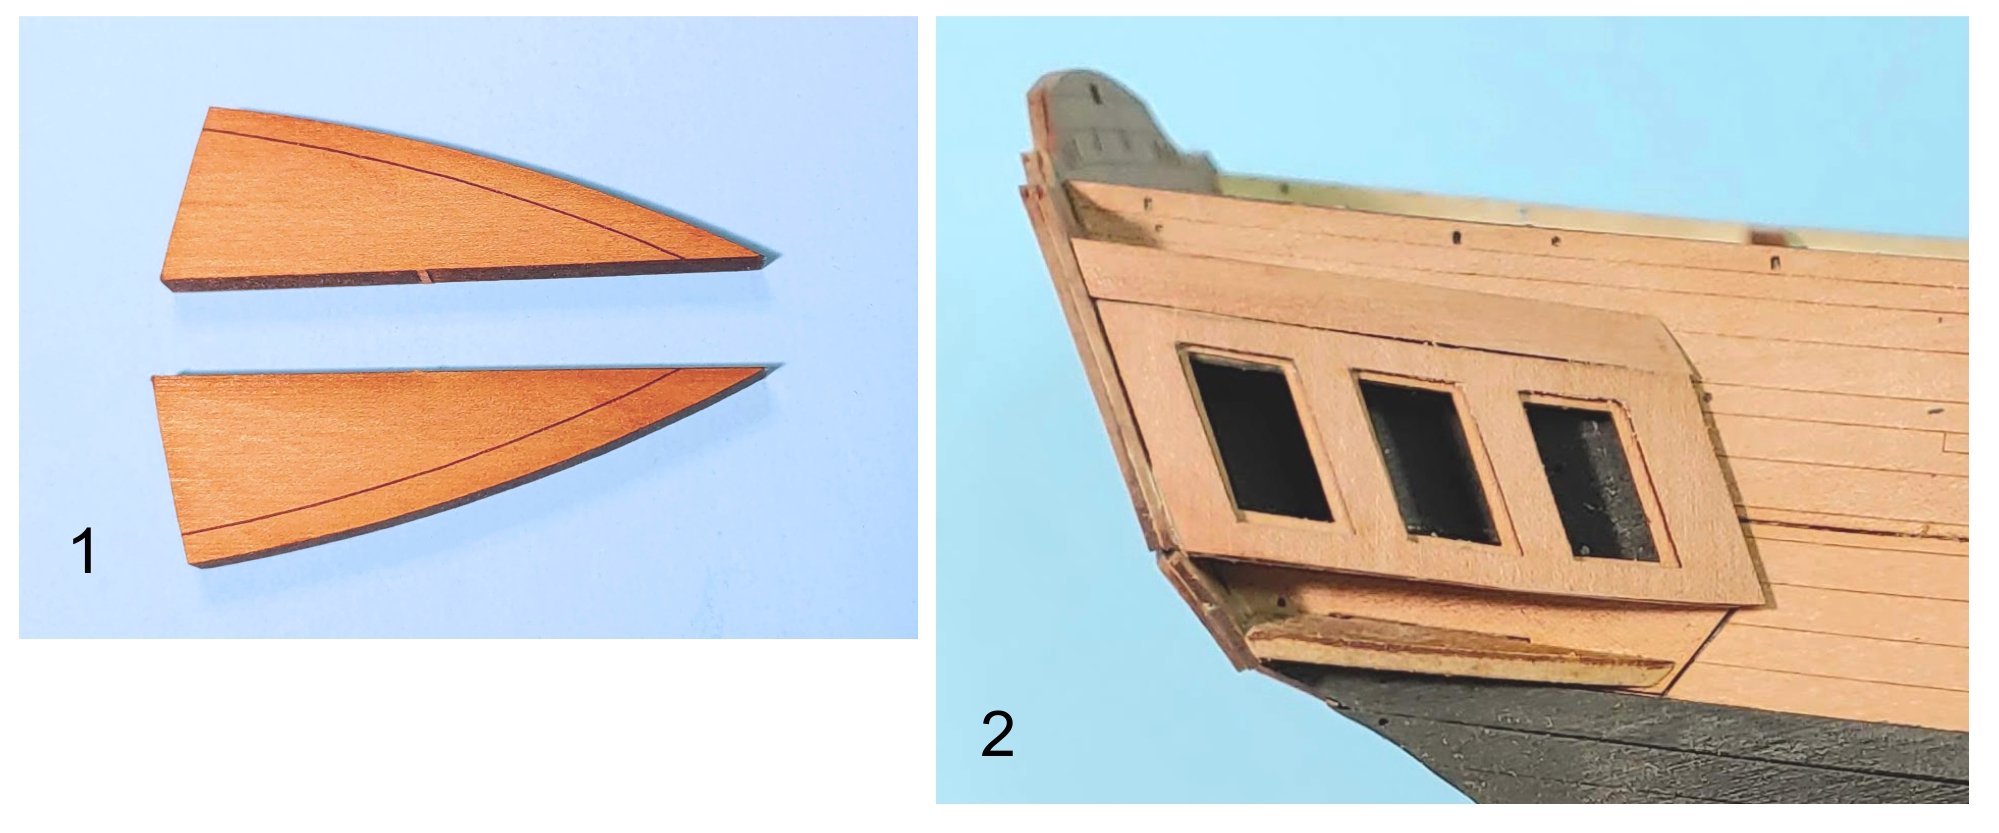
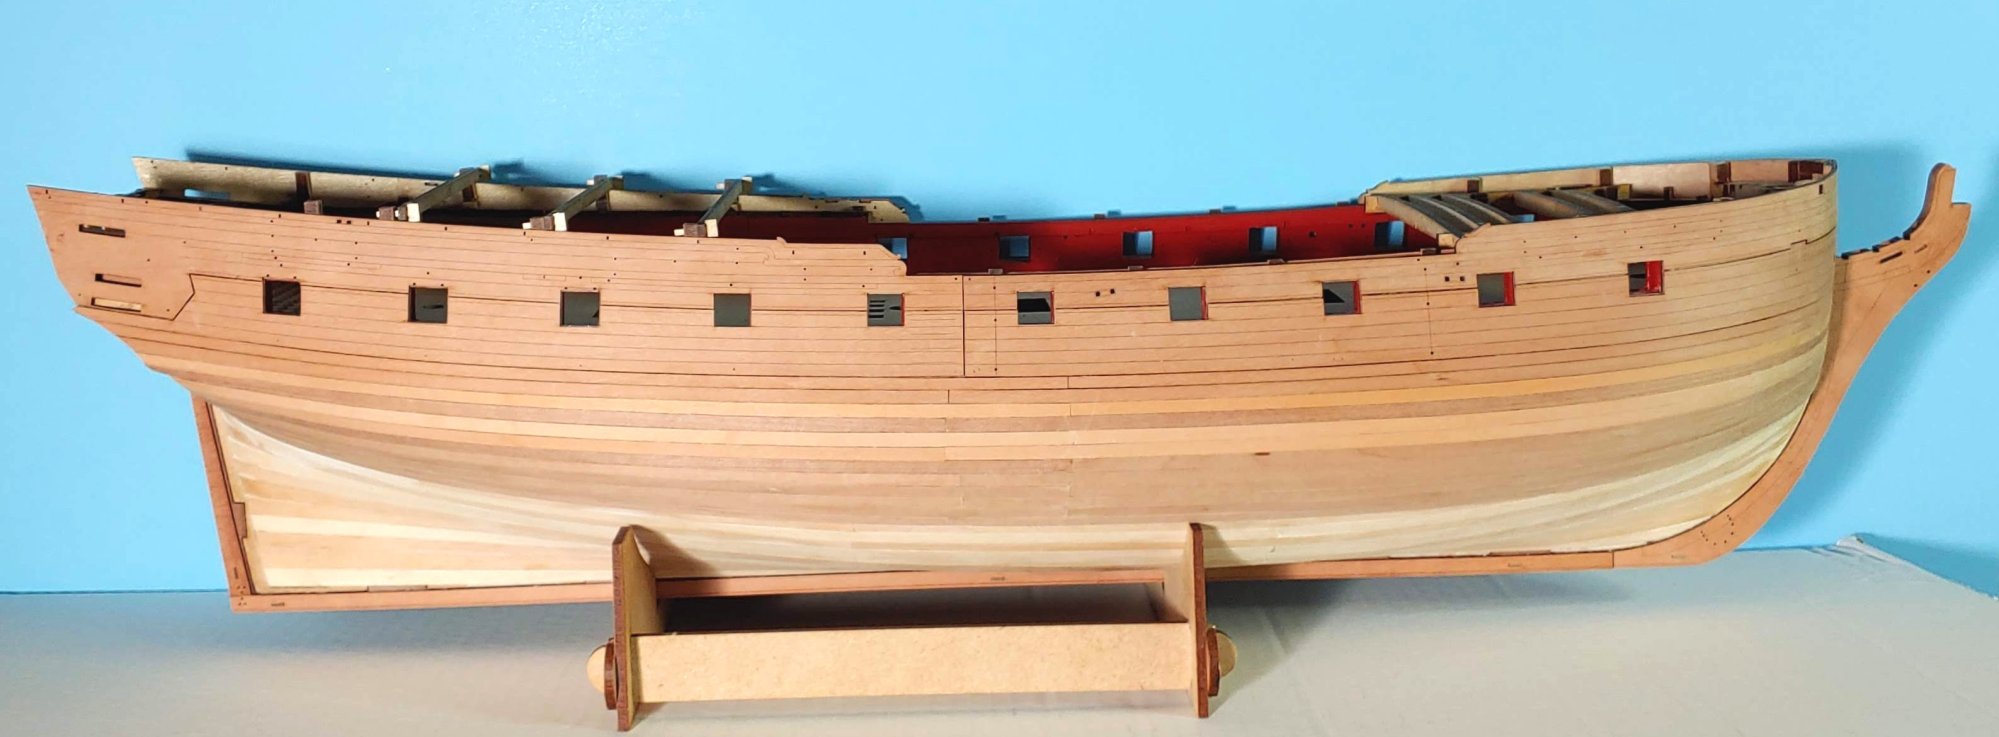
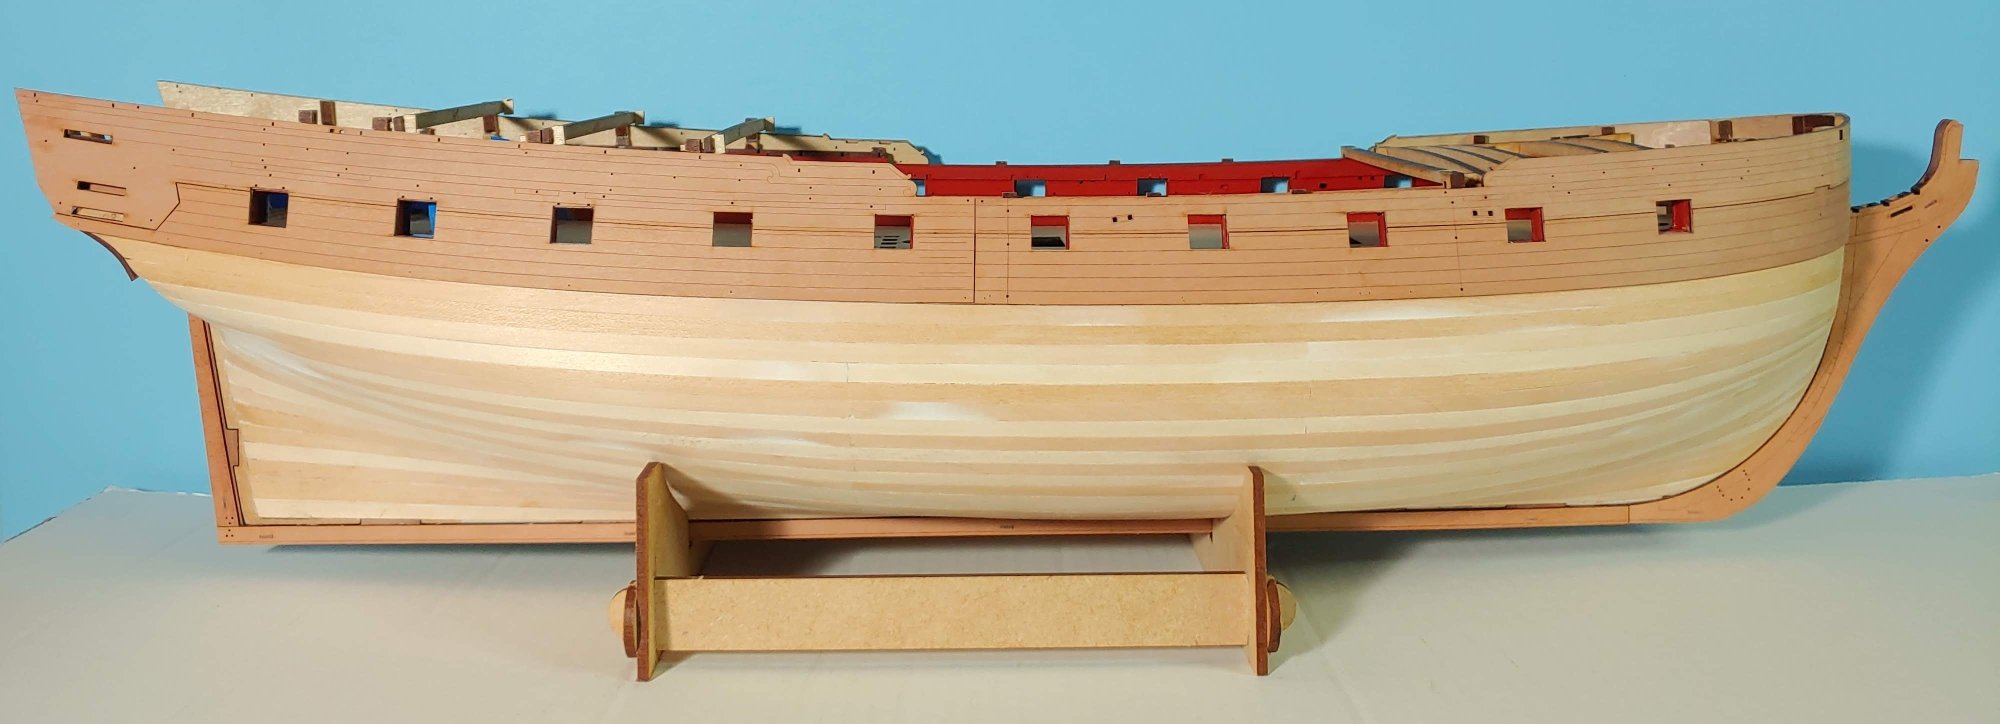
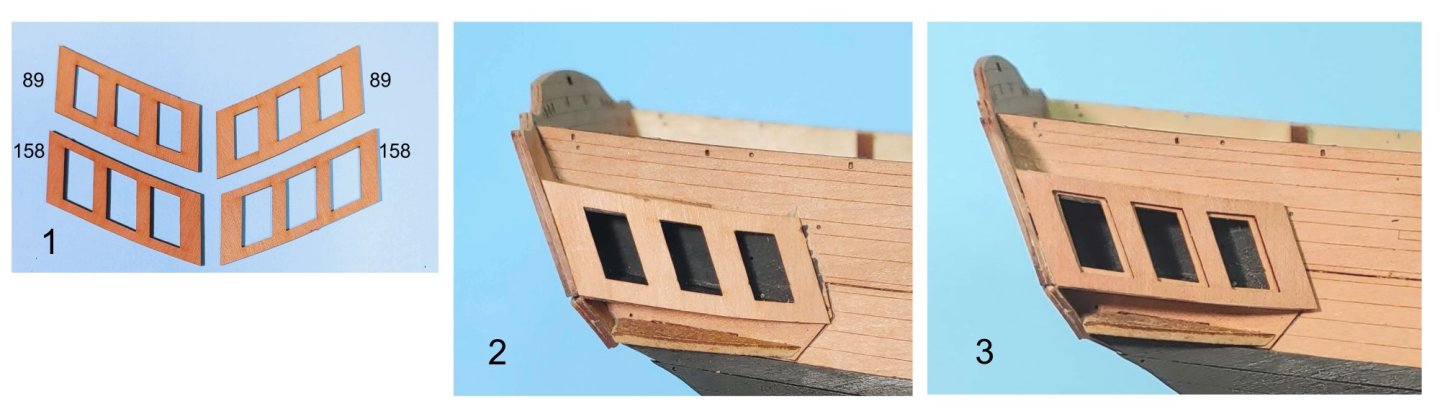
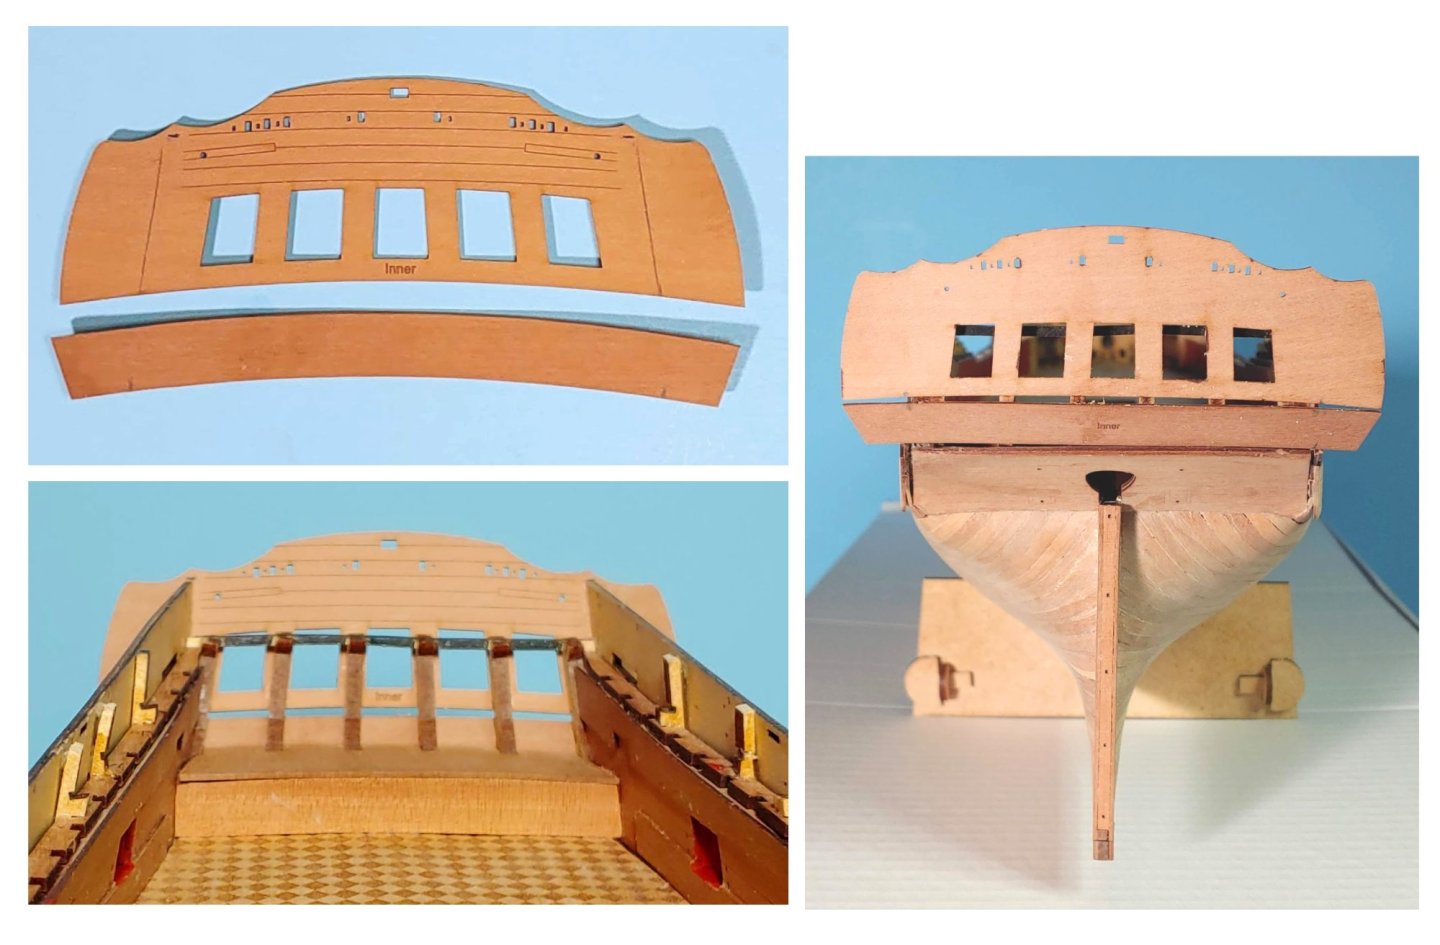
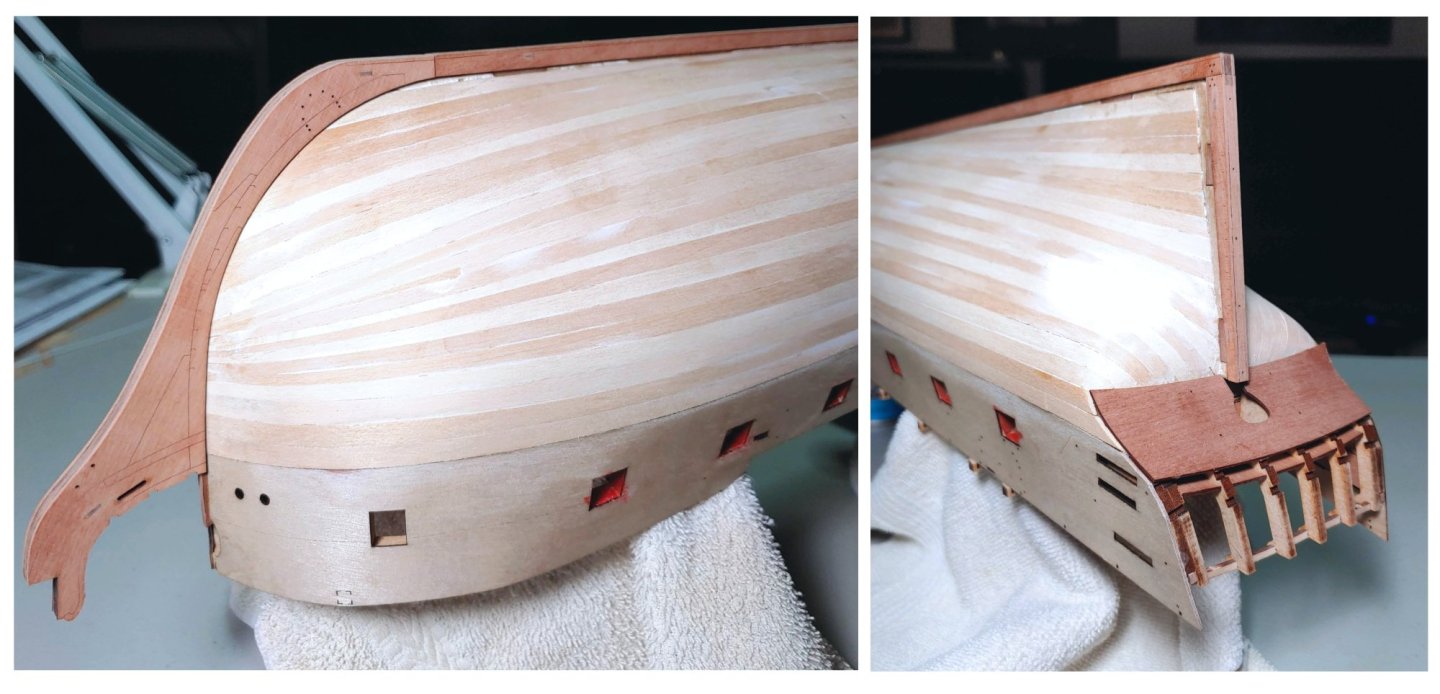
1. The outer transom and upper counter fasciae. 2. These fasciae glued in place. Having done a test fit of the rails, I have decided to attempt to fill the gap between these two with a strip taken from one of the wood sheets. 1. The inner (89) and outer (158) quarter gallery window patterns. 2. The inner pattern glued into place. I had to alter the lateral curve of the aft panel behind the windows to make it flush with the outer edge of the transom due to the error described in my previous post. It may look a bit odd to the observer who knows exactly what the gallery should look like when viewed from certain angles - disappointing but not catastrophic in my opinion. 3. The outer pattern glued into place. 1. The quarter gallery upper patterns. A scribed line is thoughtfully provided to aid in the shaping of this piece which becomes the roof of the gallery - yet another "leg up" by Chris Watton to maximize success of the build. 2. The quarter gallery upper pattern shaped, taking into account the altered curve of the window patterns, then glued into place. By the way, what looks like inadequate paint coverage in the wales is actually light reflecting off the grain of the wood.

-
Thank you Mark! Very much appreciated!
-
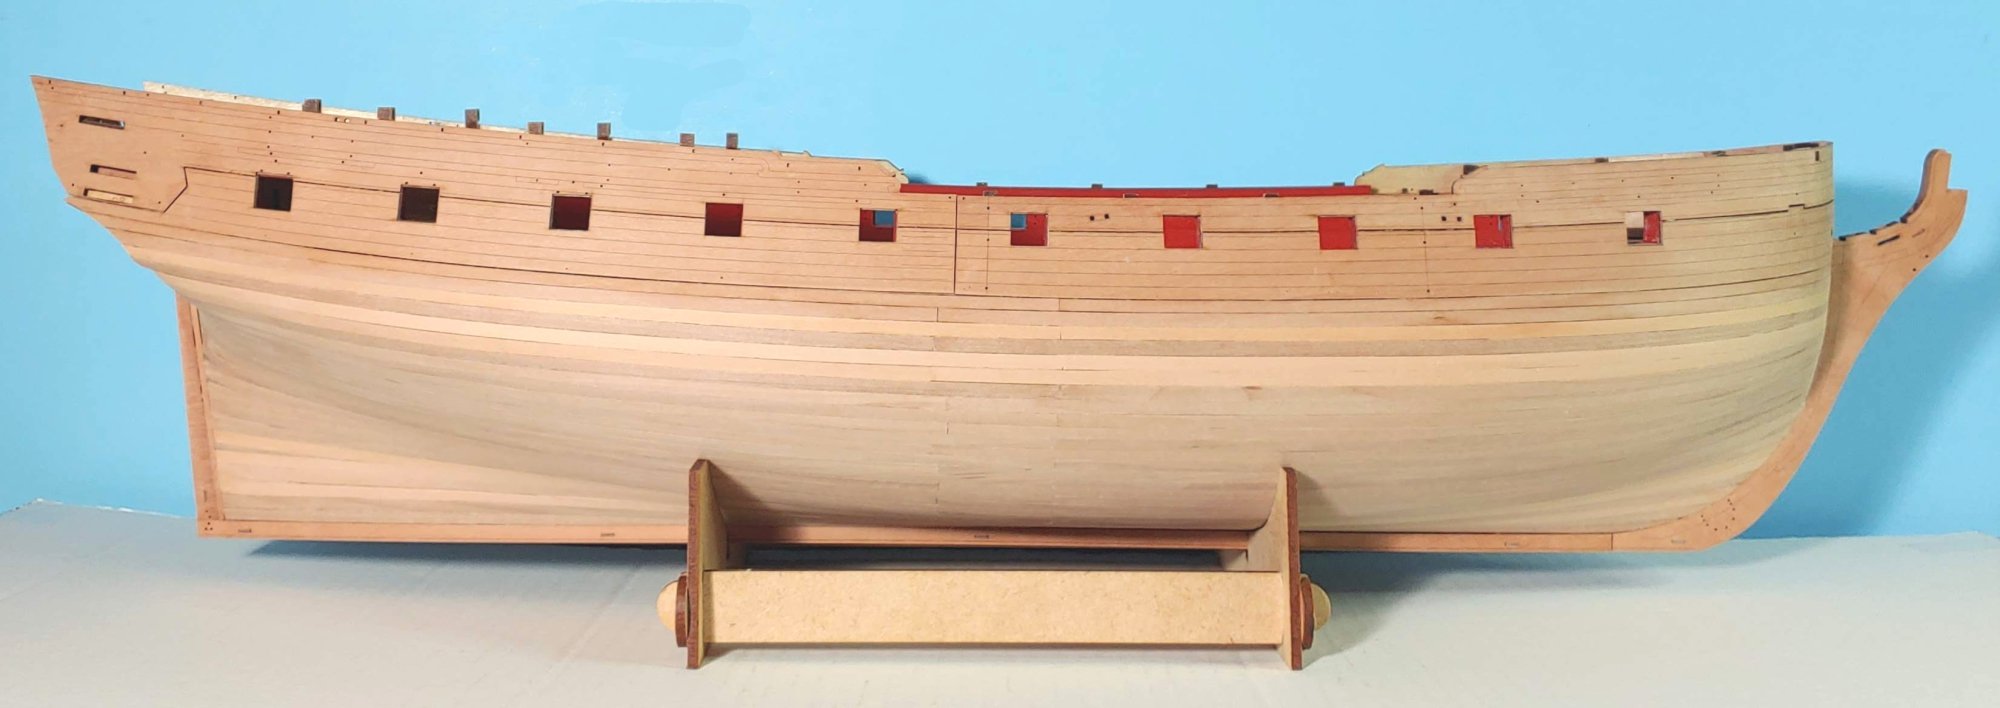
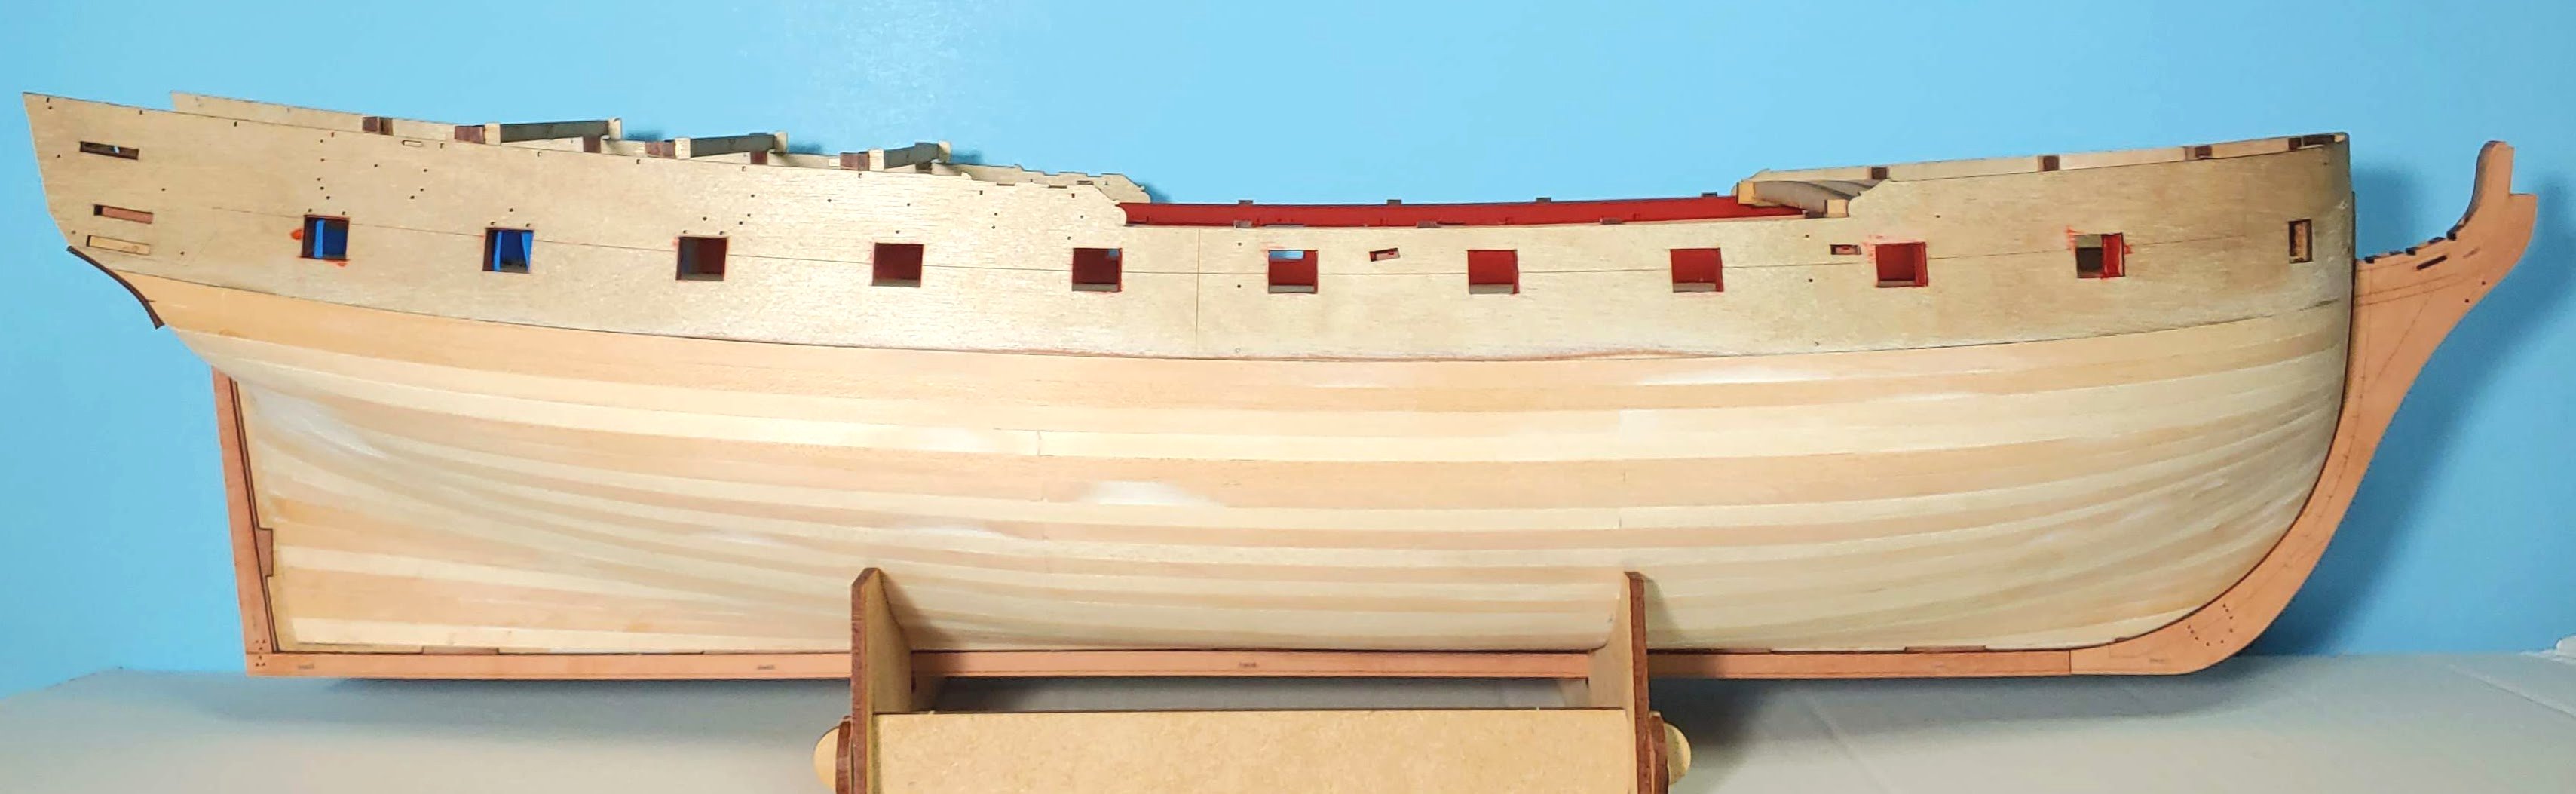
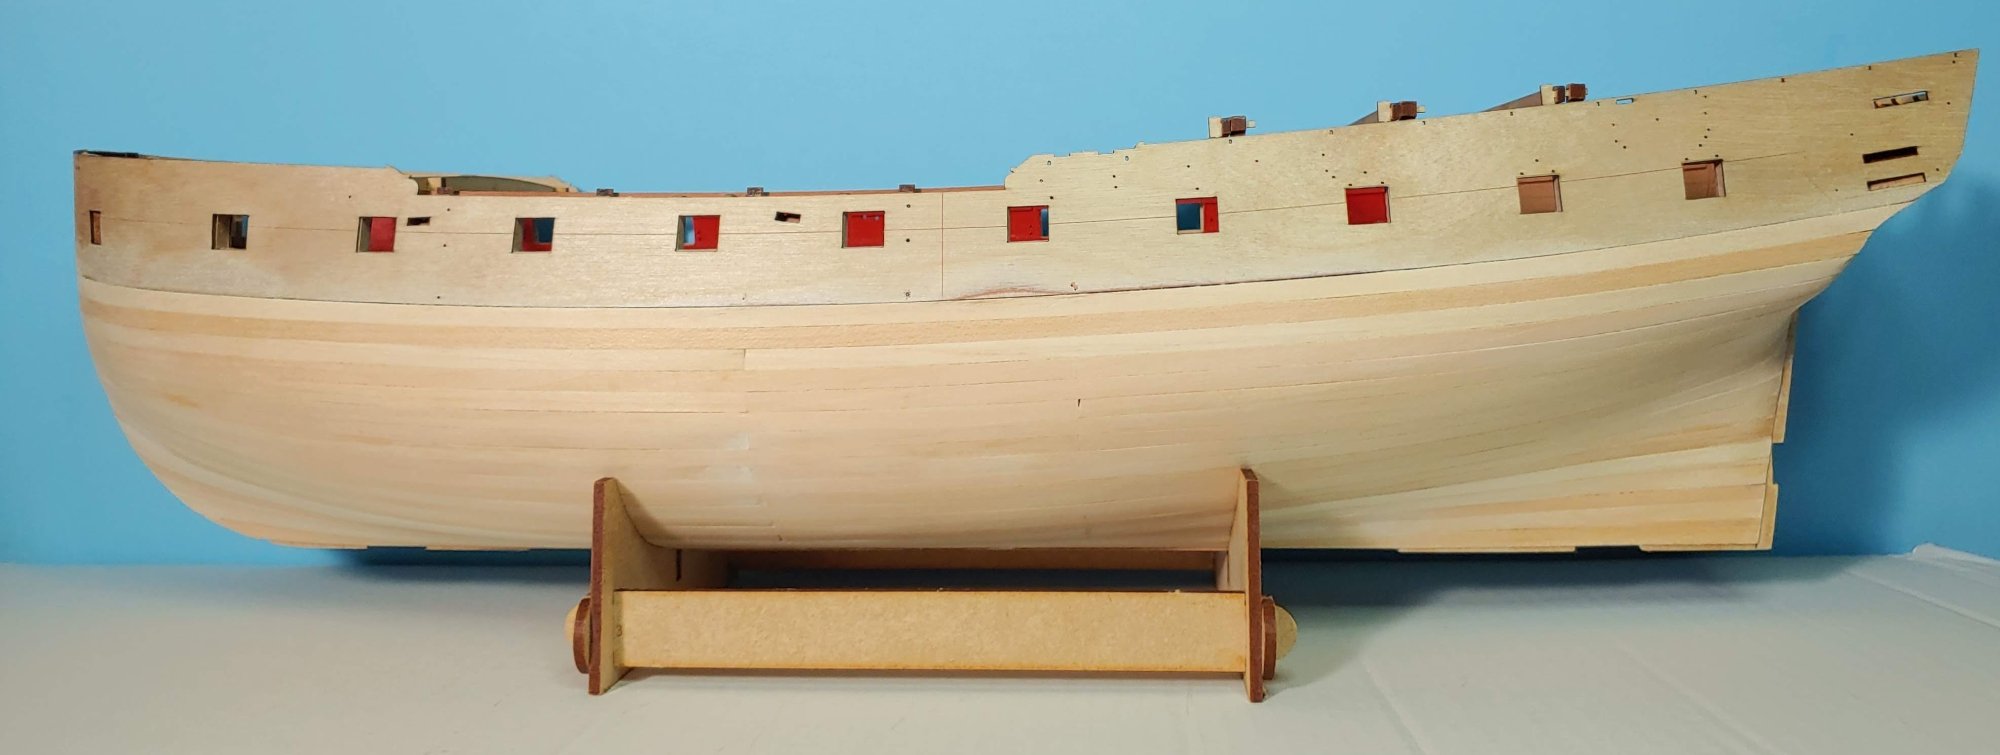
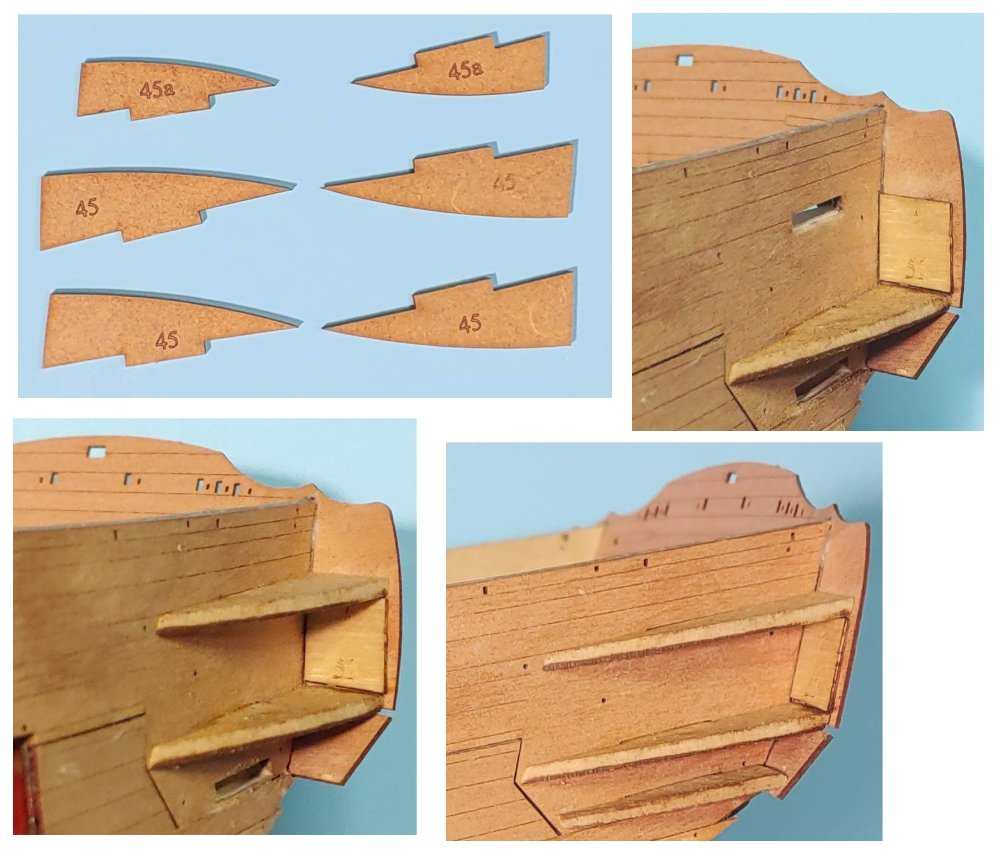
Nest up, the preparation and installing of the quarter gallery components: Beveling the outboard and aft edges of these patterns and the upper surface of their tabs allowed them to fit snugly and conform the the angle set by the spacers. Be sure to leave a space of 1.6 mm between the outboard corner of the lower part 45 and the outboard edge of the transom fascia. You may need to file the spacer back a bit to allow the space. This will accommodate the inner quarter gallery window pattern (.6mm) and the outer quarter gallery window pattern (1mm) so they will lie flush with the transom fascia edge so that the lower window rail will stand proud of the edge and stick out aft a bit so that it can be joined to the corresponding transom rail, presumably by a miter joint. If you do not want the upper gallery window rail to stand proud of the transom outer edge, you will need to allow 2.5 mm of space between the aft outboard corner of the upper part 45 to allow for the inner window pattern (.6mm), the outer window pattern (1mm), and the rail (.8mm). I did not pay sufficient attention to these details here, and am now paying the price for that as I struggle with fitting the window patterns, as will be seen in my next post. Next I painted the starboard wales. After having masked them off with 1/4" masking tape, I brushed on a coat of Vallejo Matt Acrylic Varnish followed by three coats of Vallejo black. Unfortunately, due to lack of proper ventilation facilities, I need to use water based products in my modeling, and avoid spray painting. As you can see, this exascerbated the grain rise already caused by soaking and handling during the installation resulting a a fairly rough surface. I tried using 400 grit sandpaper to smooth things out in the captain's cabin and nearly obliterated the engraved detail in the process so that is not an option. Fortunately, the model looks better at a normal viewing distance than it does in this photo. I anticipate that the same thing will happen on all painted engraved parts of the model. I am hoping the the addition of that wonderful PE decoration will distract the viewer's attention rendering the problem less noticeable.

-
One thing that I forgot to mention is that my hull was and is asymmetrical, being wider relative to the center line on the starboard side than on the port side. Yours may or may not have this problem, but I would suggest checking for that just in case.
-
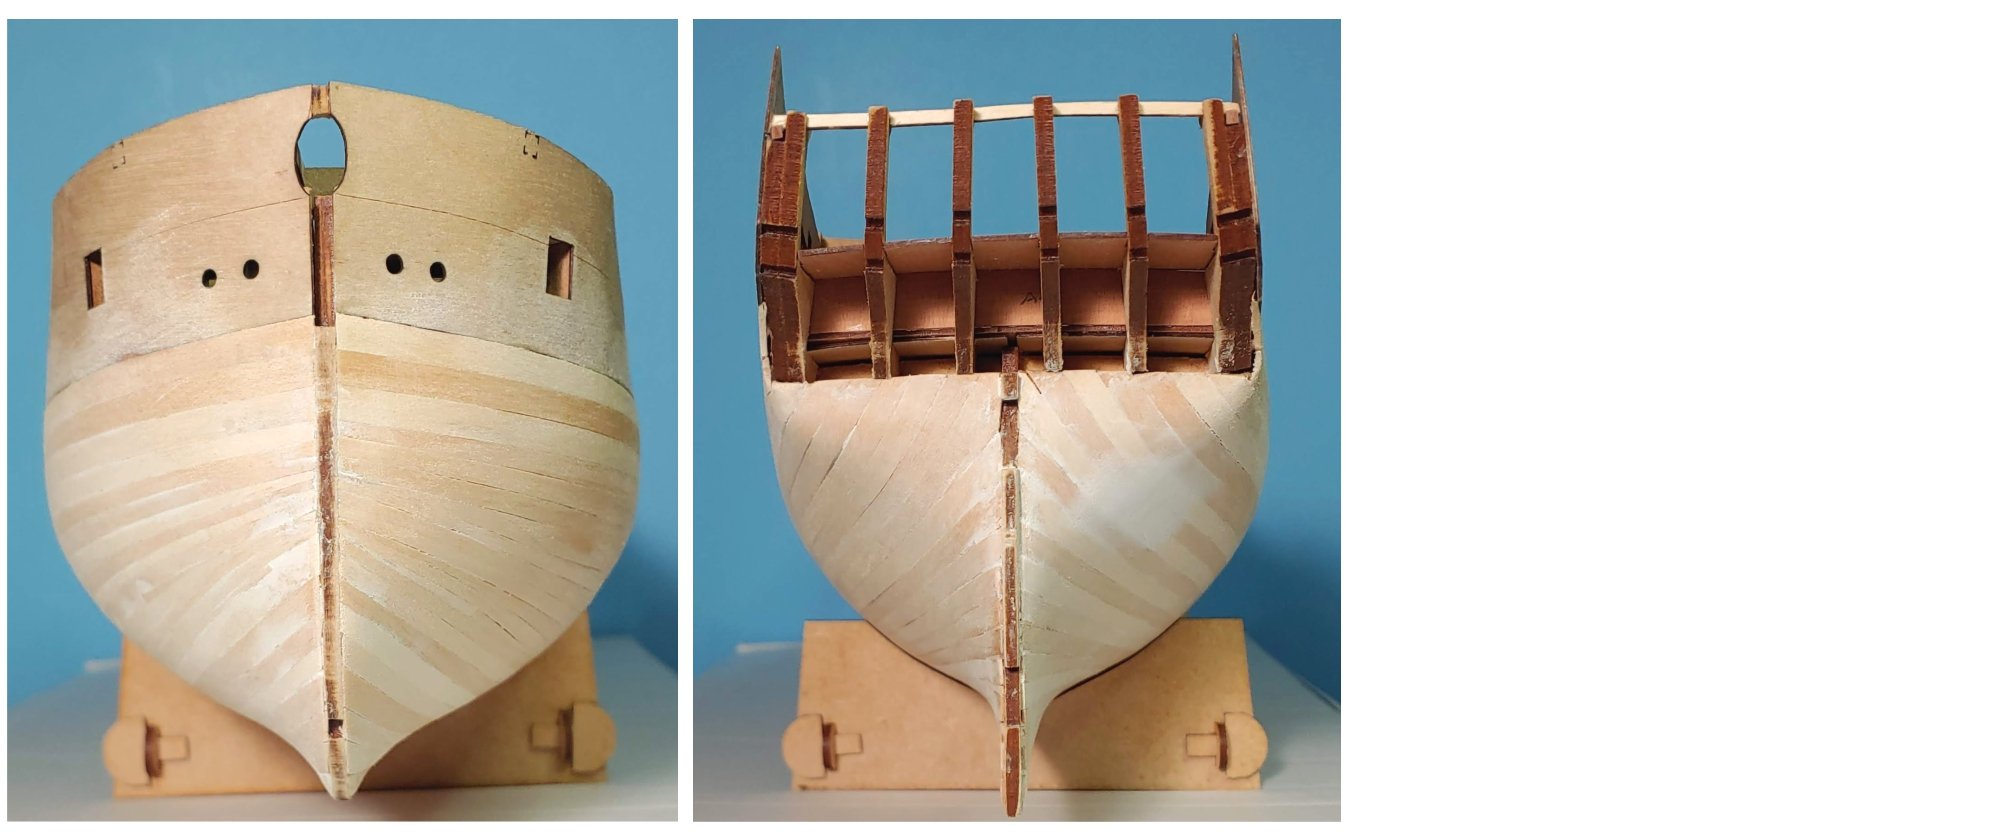
Welcome to the very small but courageous Bluejacket Connie builders. Mine was my first wood model kit, so it was a true baptism by fire. If you followed the plan for the cutting out of the hull profile, I would like to recommend that you test fit the PE transom provided by BJ before you plank the hull. You may find that the upper transom portion of the piece hangs out in space, and additional material may need to be added to the lower counter to correct the problem. A diagram of the cause of this problem appears at the beginning of my build log if you are interested. Also, if your carved hull is like mine, it has a counter clockwise twist to it, causing the sternpost to cant to starboard, and the stem to cant to port. My apologies if you are already aware of these issues. Best of luck with this build. I will be following your build with great interest. I am fascinated by the creative and resourceful solutions modelers bring to these challenges.
-
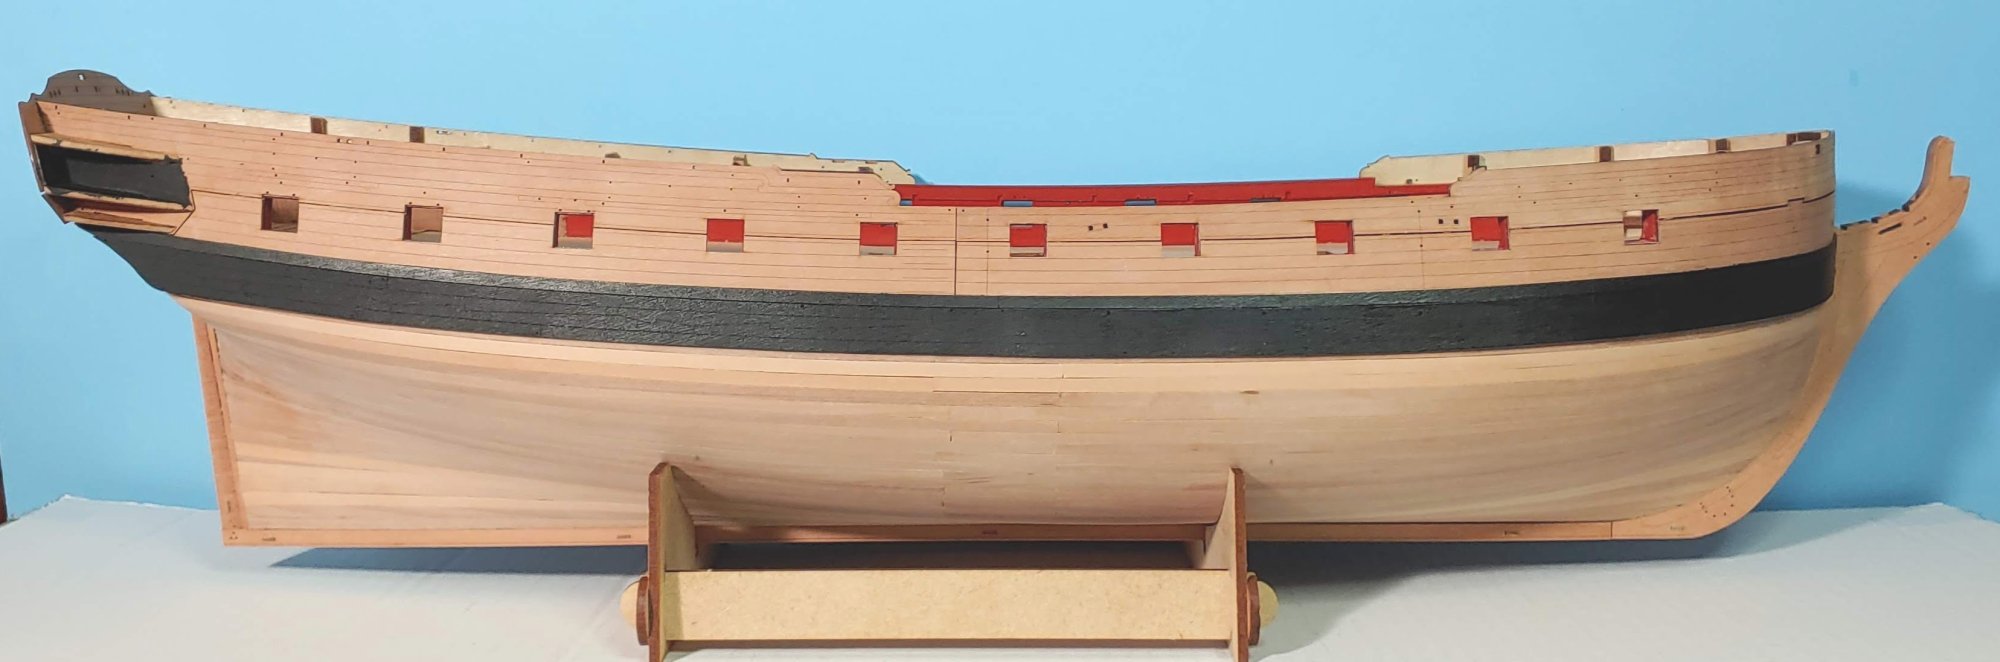
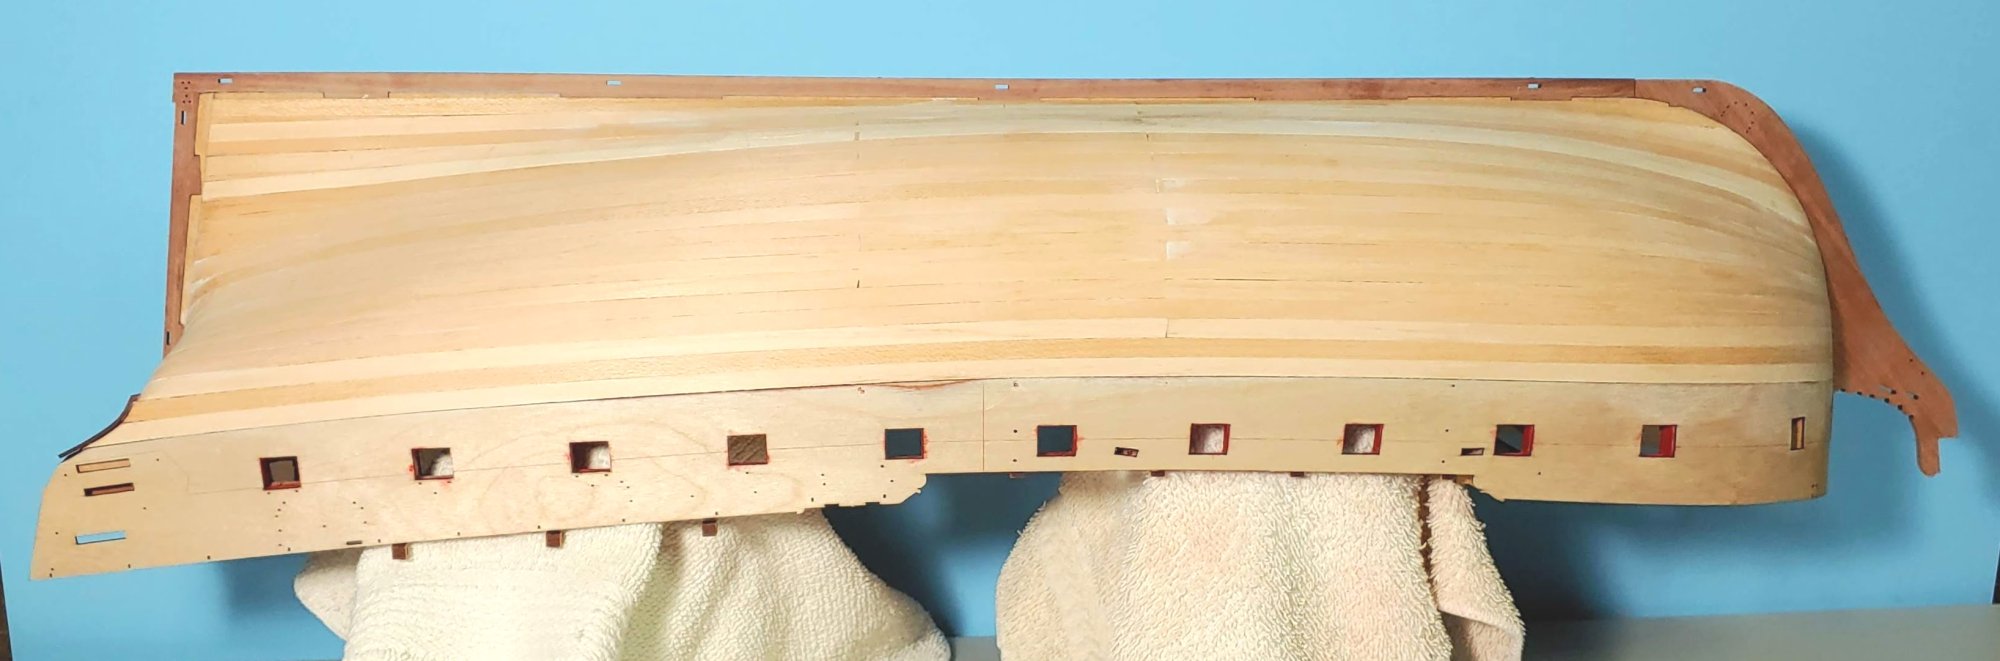
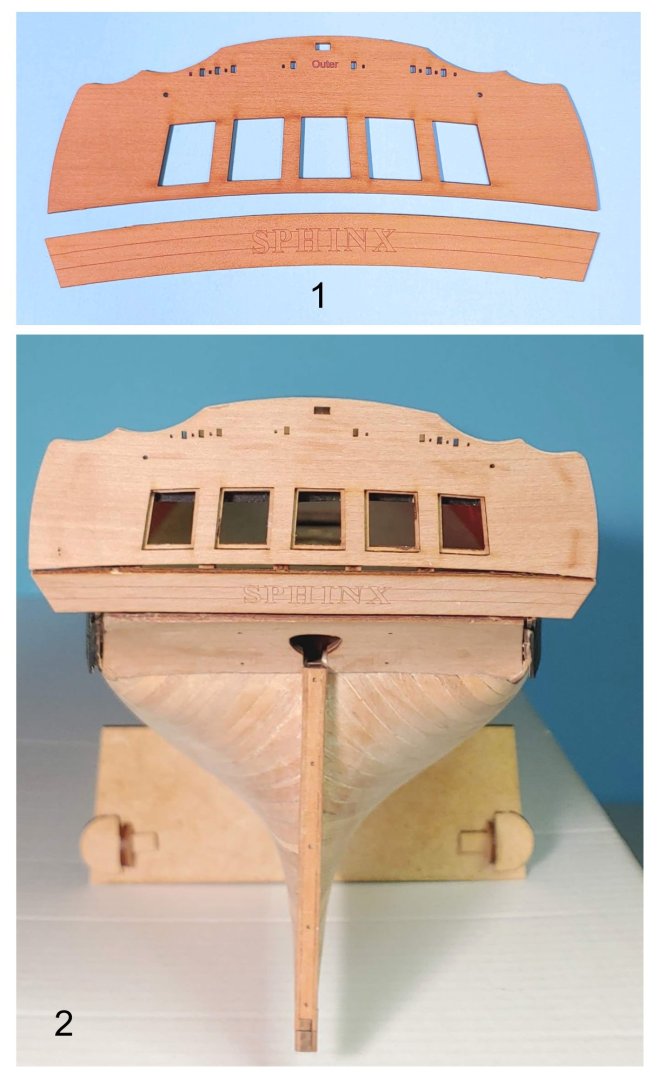
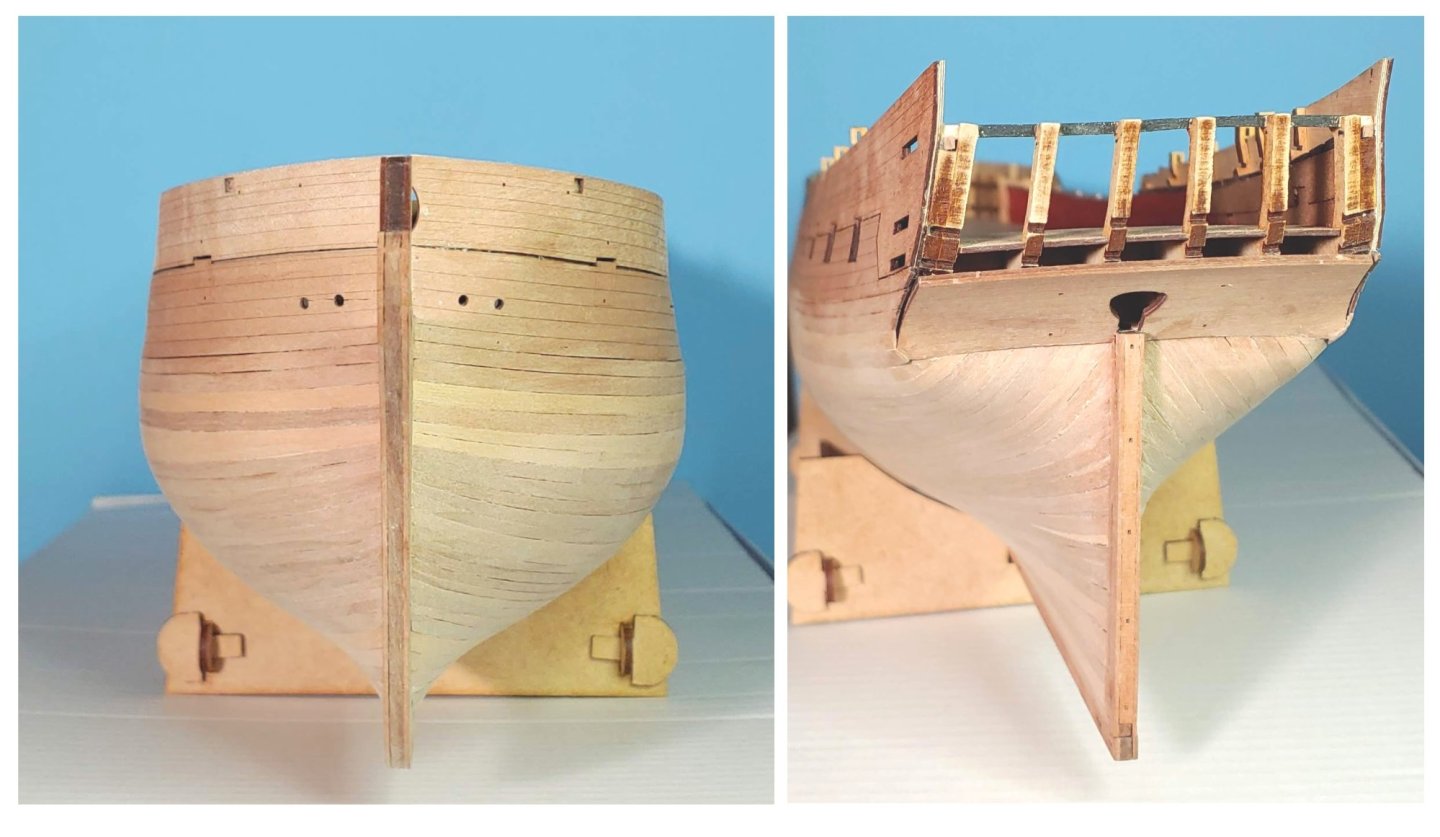
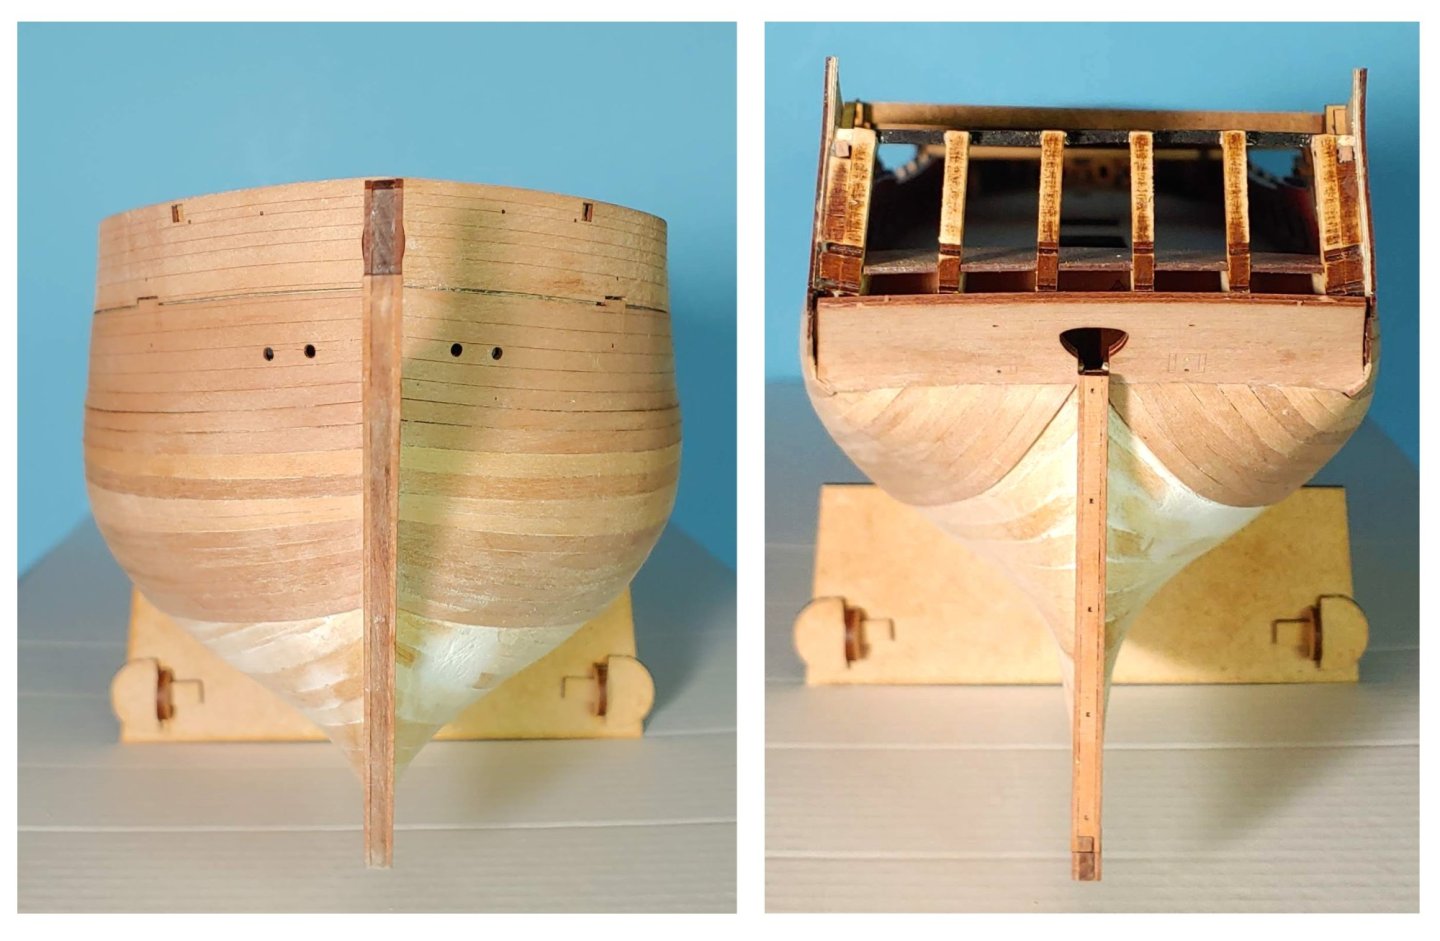
The upper counter - inner piece and stern fascia - inner glued into position: I departed somewhat from the prescribed sequence. First I dipped the parts in water then held them in position to get the curve, leaving them to dry as I formed and glued on the wales. Having clamped the stern fascia into the precise position, I marked it as you can see in the photo and glued that piece on first using those marks as a guide. I then glued in the upper counter - inner piece lining it up with the stern fascia. I do not necessarily recommend this procedure for everyone, but I felt more confident in getting the alignment of the pieces right this way. I anticipated that the stern frame spacer beam would be visible through the stern windows, having seen it in other builds. I therefore blackened it in advance to make it less obtrusive. Hopefully it will be hard to see once the window glazing and frames are in place. Some creative fettlin' will be necessary at the lower corners of the lower counter piece due no doubt to various errors on my part, but I would like to wait until the lower finishes of the quarter galleries are ready to be glued in before attempting that. I am hopeful that the result will be presentable, even if it is not completely authentic.
-
Thank you so much Mark. I greatly appreciate your kind words!
-
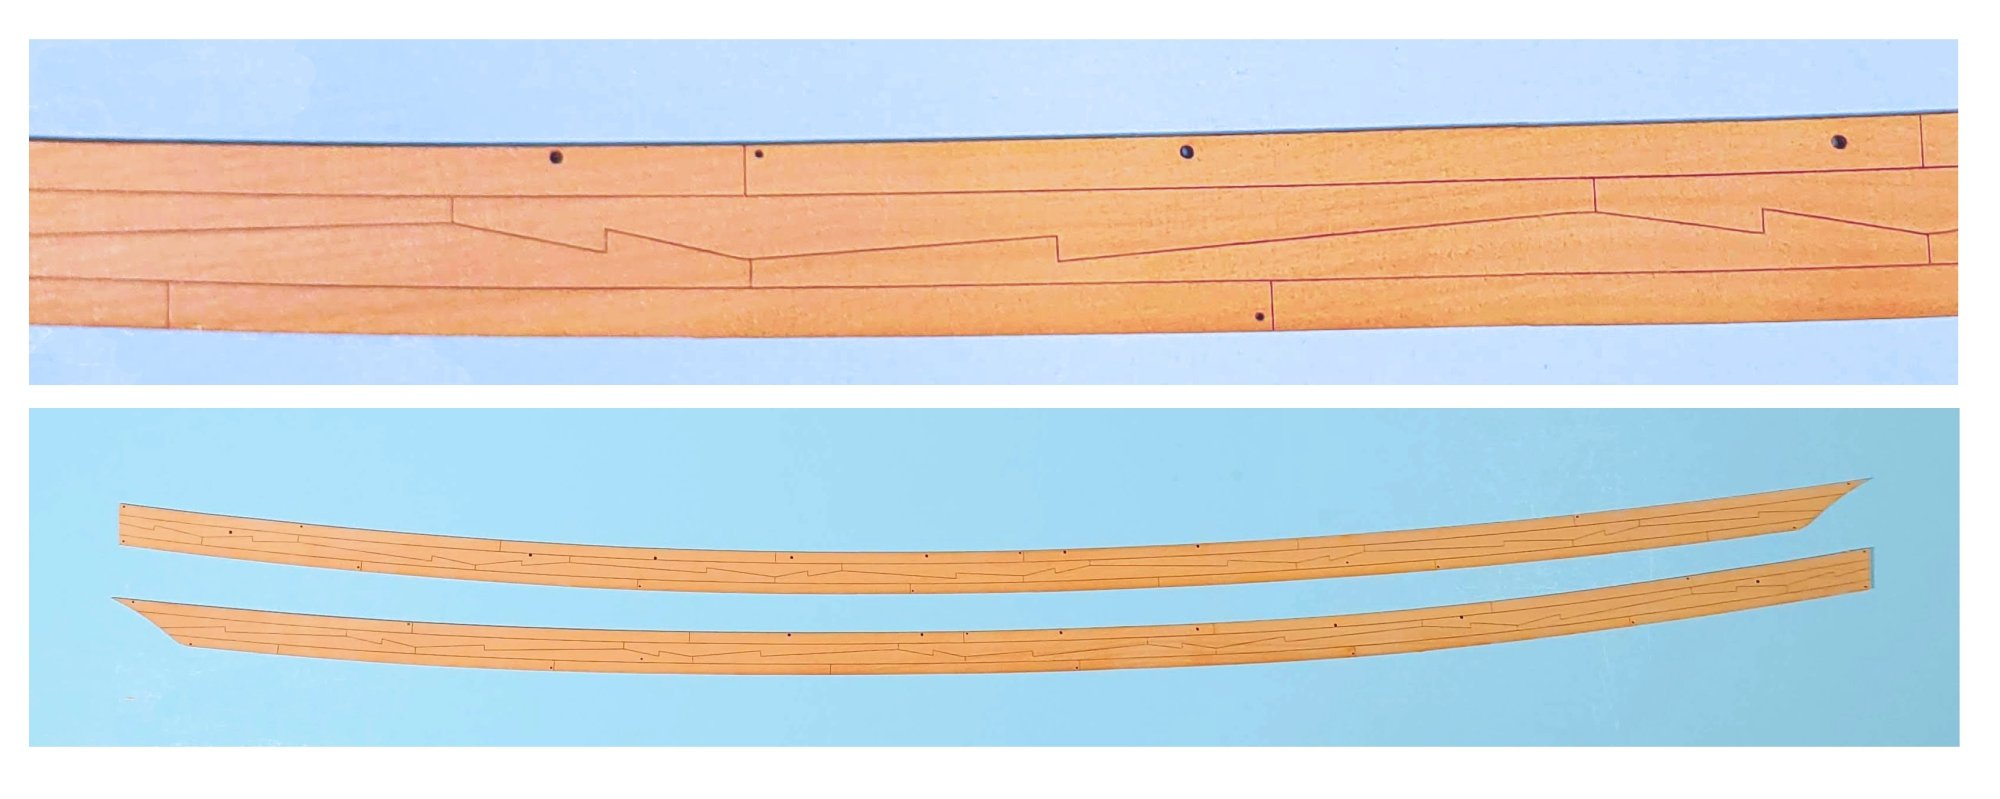
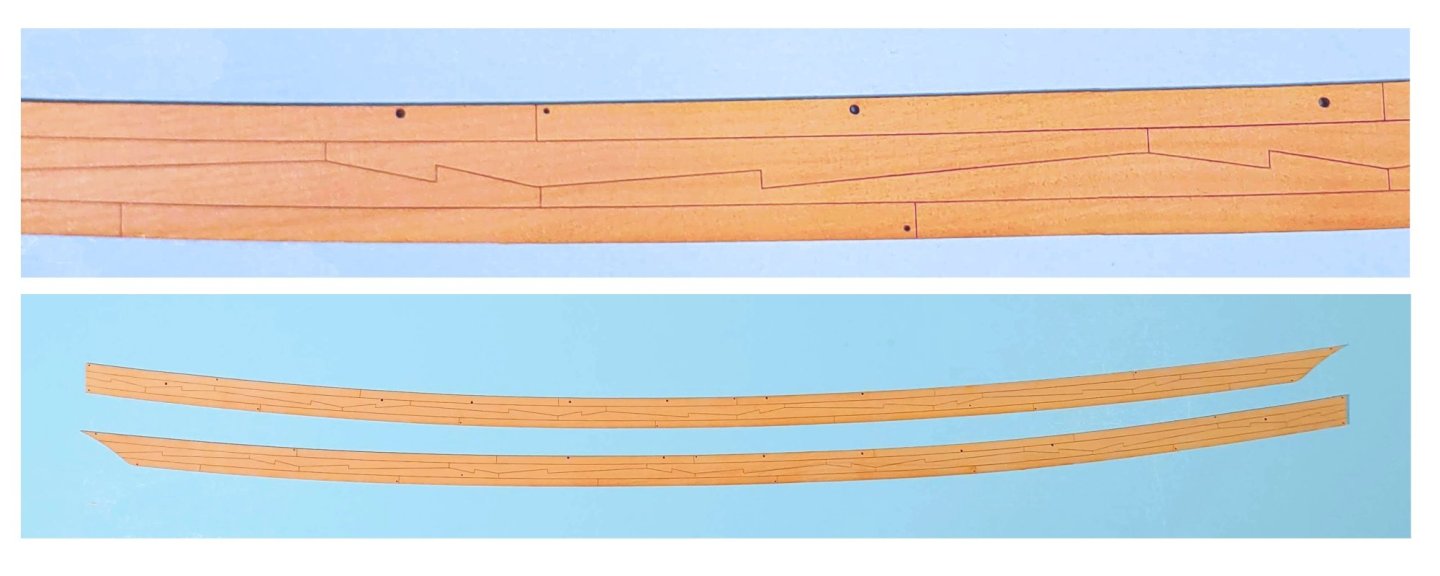
Here are the main wale patterns: Main wale patterns soaked and shaped: Main wale patterns glued in place: Here are the pre-cut strake above the main wale planks. The forward planks are soaked and shaped: Strake above the main wale glued in place:


-
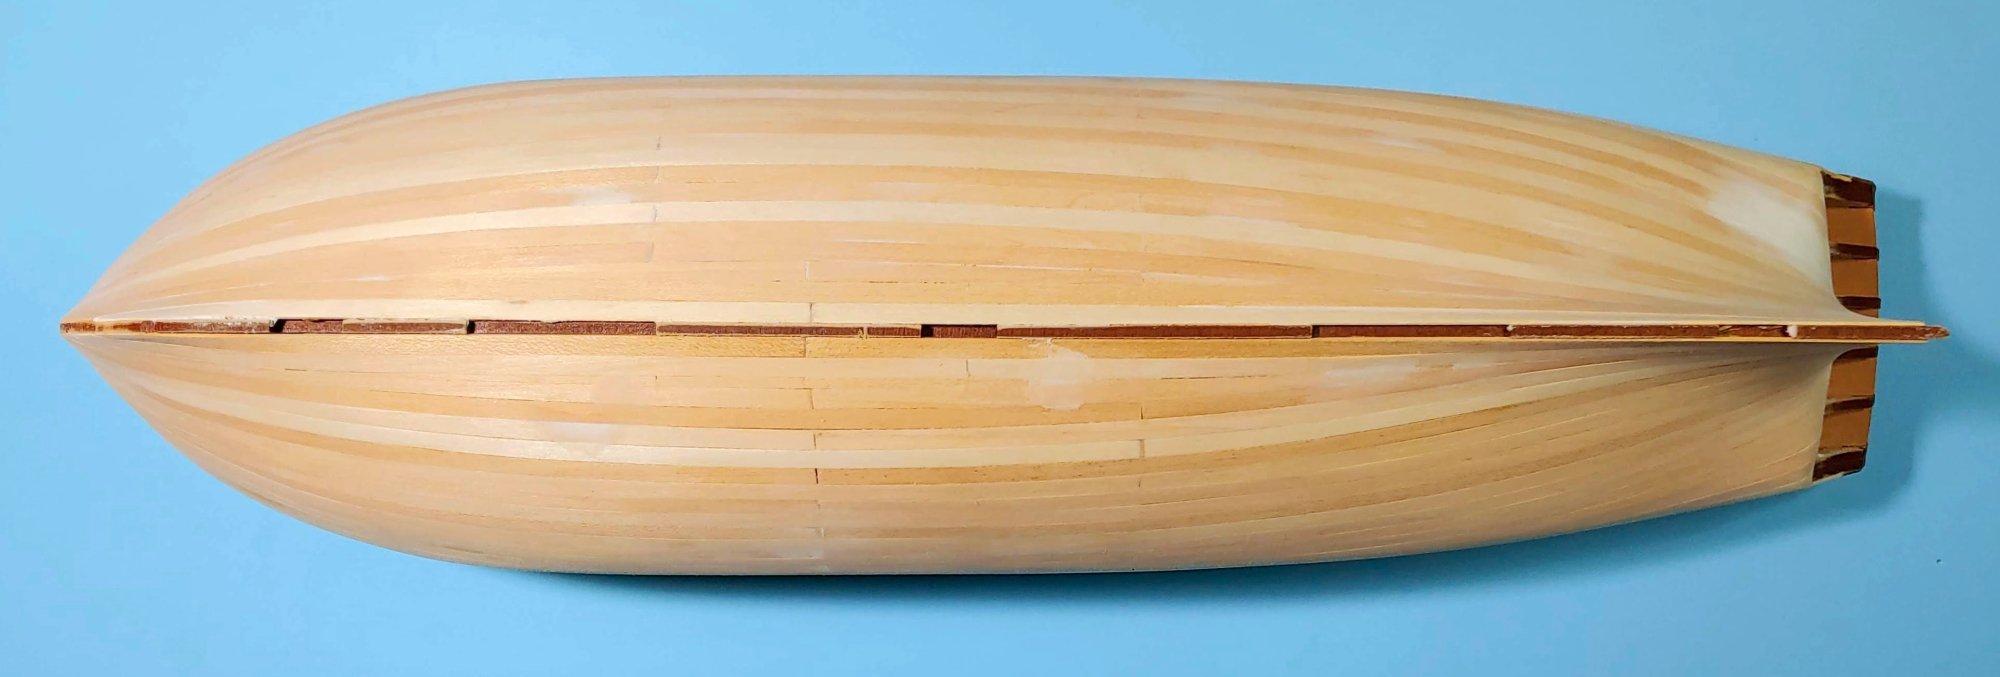
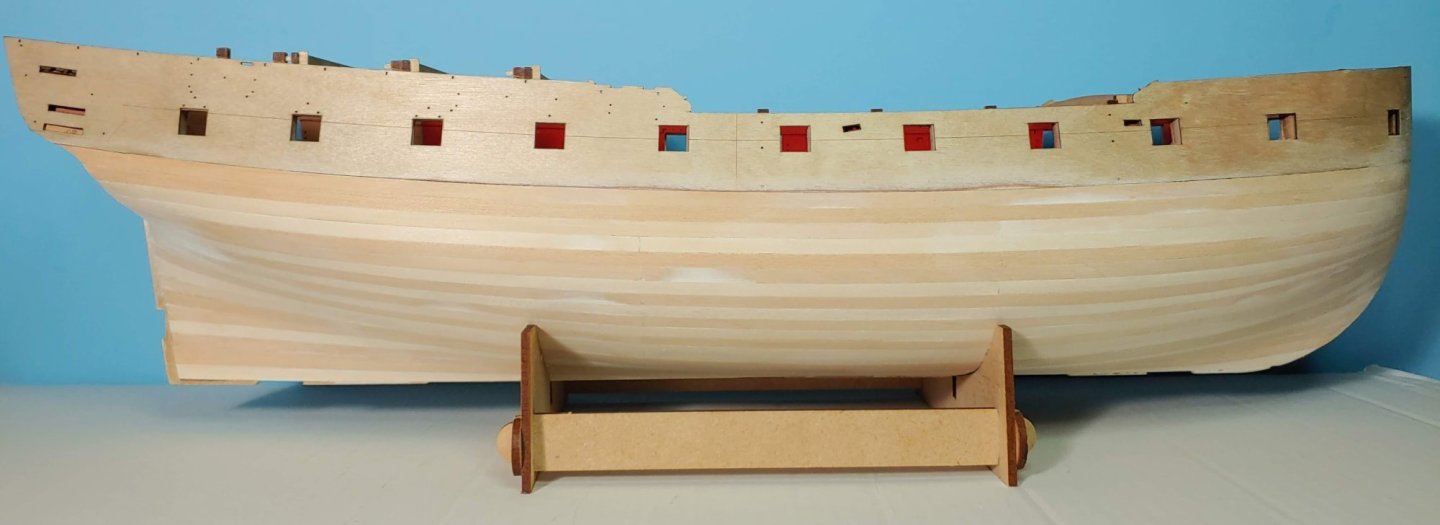
Second planking laid down and sanded. As in the first layer, FF (Funky Fettlin') was done near the keel. It is not a paragon of historical correctness, but once the filling, sanding, and painting is done, no one other than viewers of this post will ever know.

-
You are off to a superb start! Your solution to the coppering challenge is not only effective but, I suspect, less expensive than the BJ alternative as well.
-
Hats off to all who embark on this very challenging build. I discovered too late in my build that the carved hull has a counter clockwise twist to it. You might want to check to see of the sternpost and the stem will line up with each other properly when you install them. You also might want to try fitting the PE transom-upper counter fascia to the stern to be sure that the upper counter portion does not hang out into empty space. Now would be a good time to add the necessary extra material to the stern if it does. Best of luck with this build. I will be following with great interest. KurtH
-
I found that the installation of the sheer poles can insure proper alignment of the deadeyes during my BJ Connie build. The instructions do not show these, but perhaps you could add them anyway.
- 422 replies
-
- 2
-

-
- Vanguard Models
- Sphinx
- (and 1 more)
-
Slowly but surely, the second planking is proceeding. Yeah I know. I did not do due diligence in matching plank colors. If I do not like how the end result looks between the water line and the wales, I can always adopt the color scheme shown in the Pandora AOTS and paint that area black. Nice to have a plan B just in case.

-
Thank you gentlemen for your input.
-
Thanks, Ronald, for your like and your advice. The excellence of your planking job is certainly a testament to the efficacy of your method. I do have a plank nipper which I will try out. I will see how much the squeezing action required aggravates the arthritis in my hands. I definitely should look up the "Chuck Method" for edge bending to see how that is done, as there is likely to be a lot of edge bending if my experience with the first layer is an indication of what the second layer will require. To be sure, soaking will greatly increase the time required to complete the job, but I am in no hurry.
-
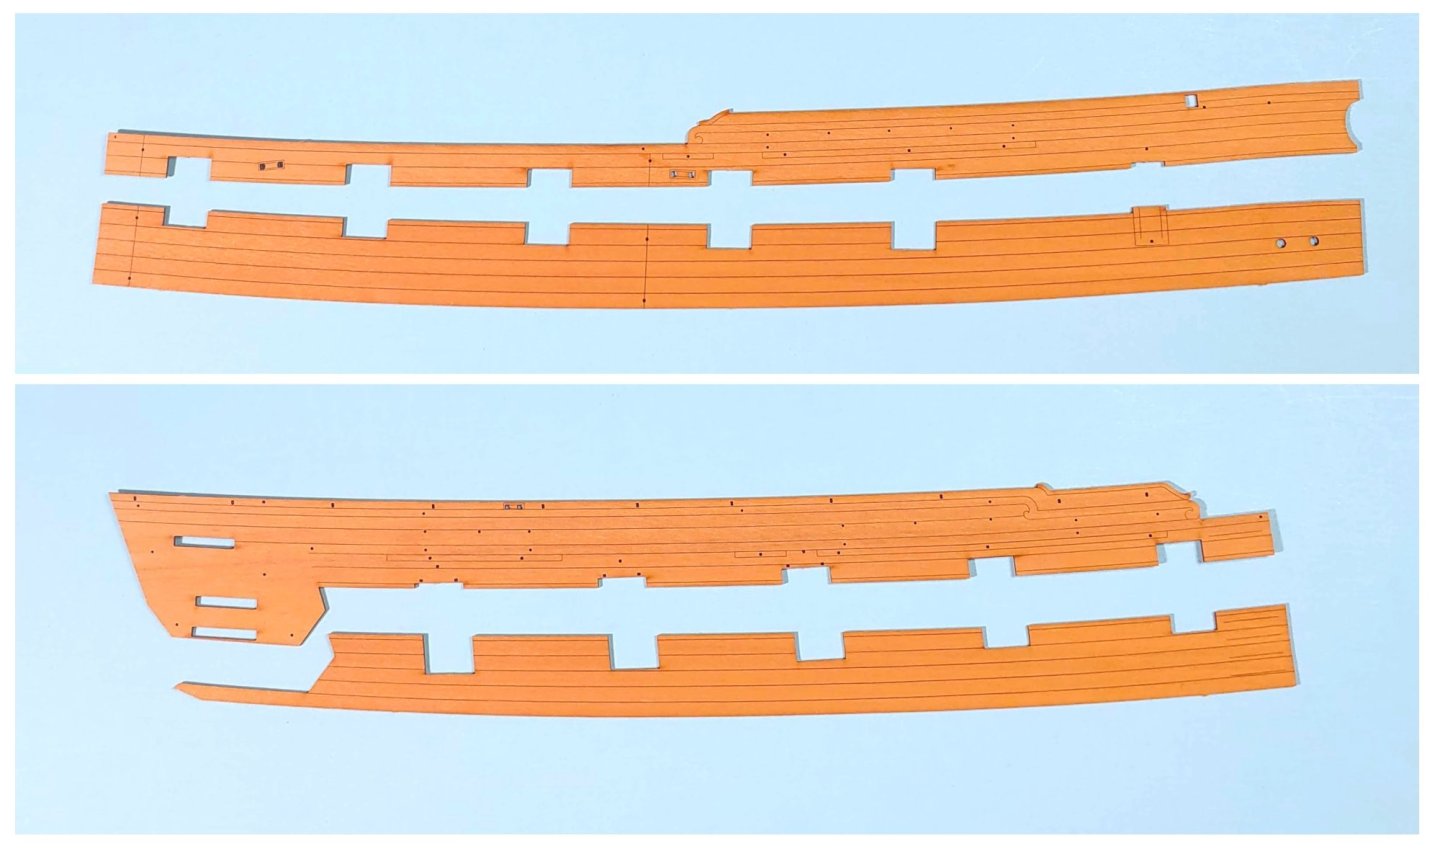
In addition to the planking patterns shown above, two strakes of pre-cut pear planks are provided to get the modeler started on the remaining hull planking: These are installed just below the planking patterns. They were precisely cut and fit perfectly. Even the forward ends butted up against the stem precisely, the angle being exactly right. I recommend beveling this end to get an even better fit. Now to do the rest of the second planking. The instructions say that it can be done with a nipper without soaking. That is obviously true of the prototype build illustrated in the instructions, but it seems to me that on my build, if the edge bending required is anything like it was on the first layer, I will need to soak these planks. I did that with the forward planks shown above, and found that pear is a dream to work with when soaked. Of course, I allowed ample time for them to dry out before installing them. This may mean it will take more time to do the job, but I am in no hurry. I will work slowly and carefully, and hopefully, I will end up with a reasonably presentable hull.


-
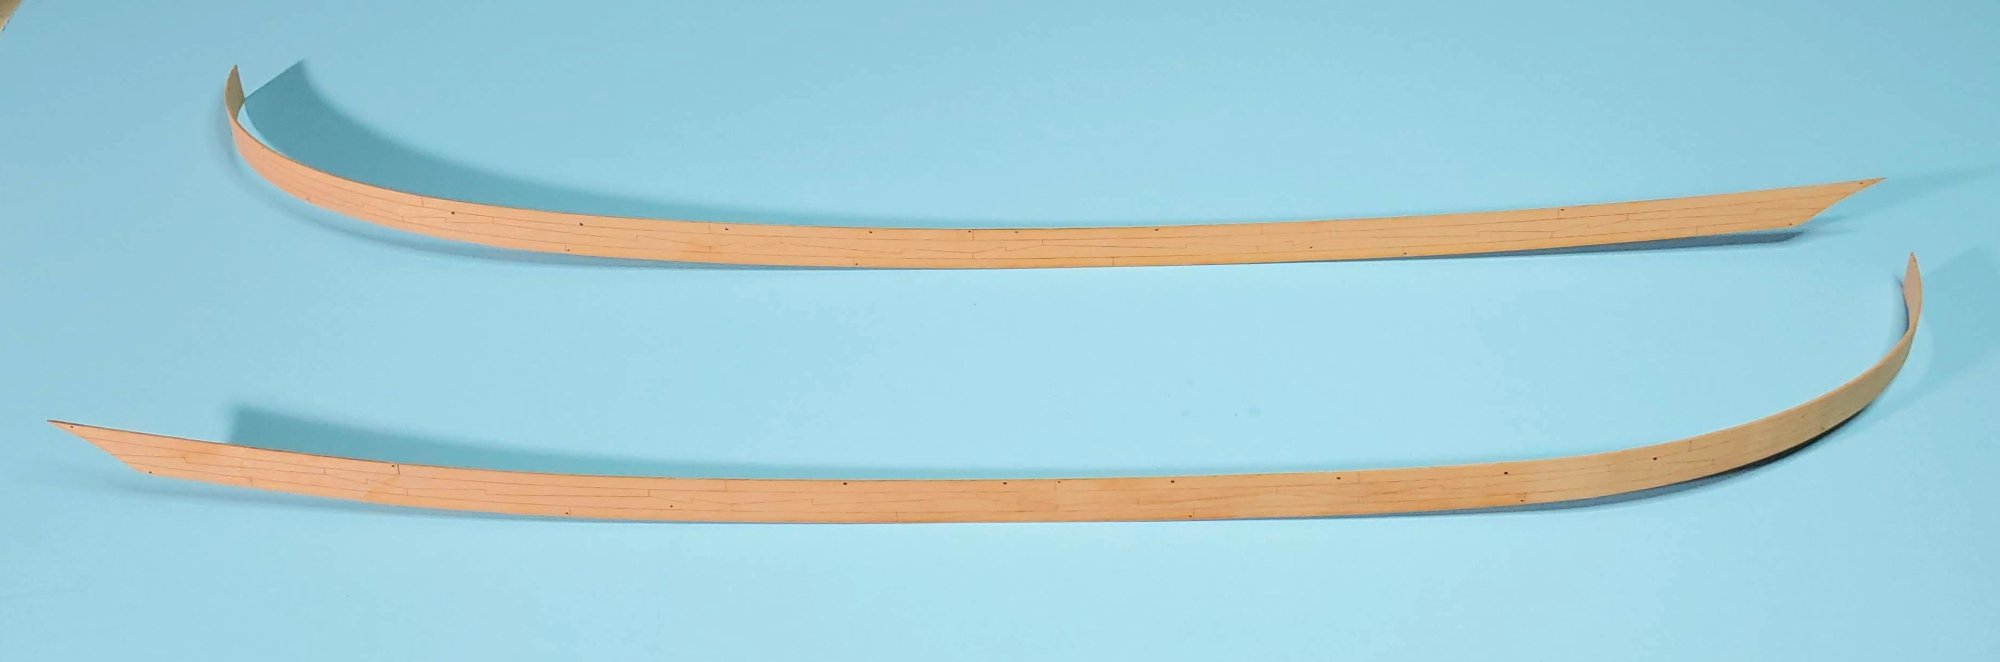
These are the outer planking patterns supplied in the kit: They detail the planking above the wales. After having been soaked in hot water for an hour, then bent and clamped to the hull and left to dry out for 24 hours, they are glued to the hull: Looking ahead in the instruction manual, I see that the horizontal seams will be masked by the waist rail, and the vertical seam will be masked at the stern by the quarter galleries, and at the waist by one of the fenders.

-
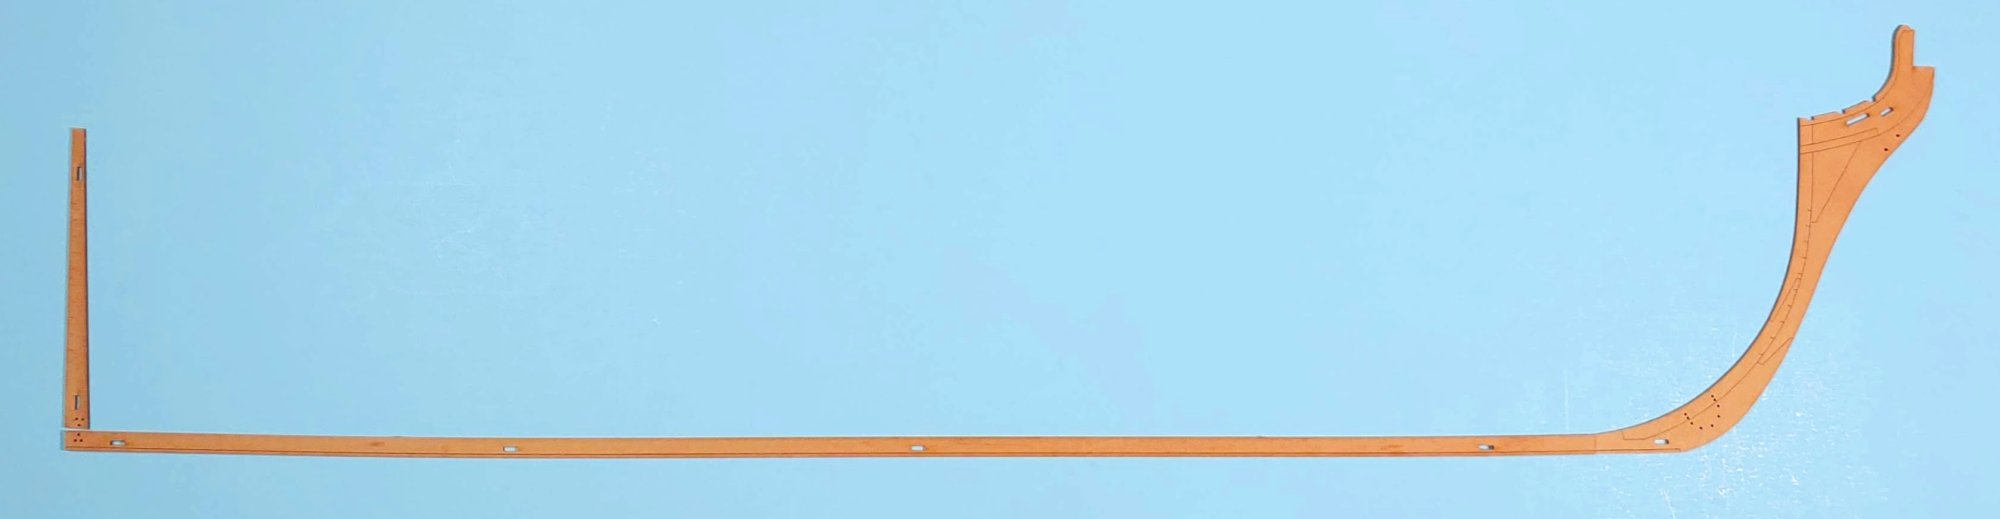
Time to glue on the outer patterns for the prow, keel, and stern post. To insure proper alignment, locator pegs are provided which fit into the little slots you see in these patterns, and into the corresponding slots in the main patterns. To get the closest color match with the outer pattern, I filed the char off the ends of these pegs. I thought that the closer that match is, the fewer coats of white paint will be needed to cover them. I also decided to simplify this process by gluing all the pegs into the outer patterns, making sure to remove any excess glue, then pressing the assembly face down on a clean flat surface to insure that the ends of the pegs are flush with the outer surface of the pattern. This enables me to handle the pattern and the pegs as a single unit and "plug" it into the keel when I assemble it, glue, and clamp it. It is so nice not to have any shift between the keel and the patterns as the clamps are applied! Those pegs are great! Once the glue has set it is just a matter of pressing the apposite pattern into place, allowing the protruding ends of the pegs to insert into their slots, gluing and clamping as before. The efficacy of the design, the precision of the laser cutting, and the quality of the materials made this a straightforward trouble free process. The pegs did protrude just a tad proud of the pattern surface, so I filed them down flush with the square end of one of my diamond files. It was just the right size to file down the end of the peg without disturbing the pattern surface. Here are the patterns glued in place: There are modelers on MSW who can cut out and assemble the various components of the stem knee with absolute precision. I am not one of them, so I appreciate the engraved detail of these patterns! There is the current state of play:


-
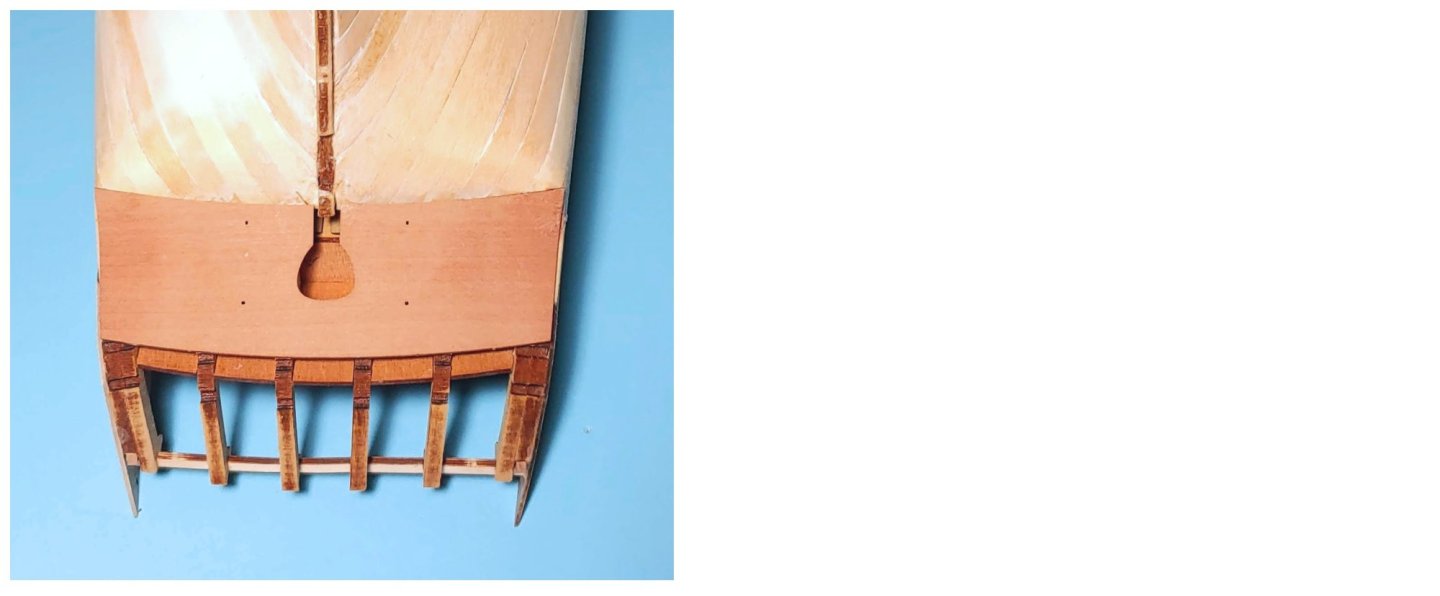
The inner lower counter pattern has been soaked, taped to a cylindrical container, and allowed to dry, and is now glued in place: I believe I got the placement right. What looks like the ends of the counter patterns sticking out is really the bottom of the slot. The keel pattern fit very nicely into the slots. It was slightly warped, but the garboard strakes captured the tabs and held the pattern straight, so no problem. The prow pattern and sternpost pattern also slotted into place very well. Thanks to Chris's wonderful design, the prow pattern is quite strong once the glue set.

-
Thank you so much Ronald. I will be one smug self satisfied modeler if my second layer looks anything like yours!
-
Thank you Jeff. I appreciate your encouragement!
-
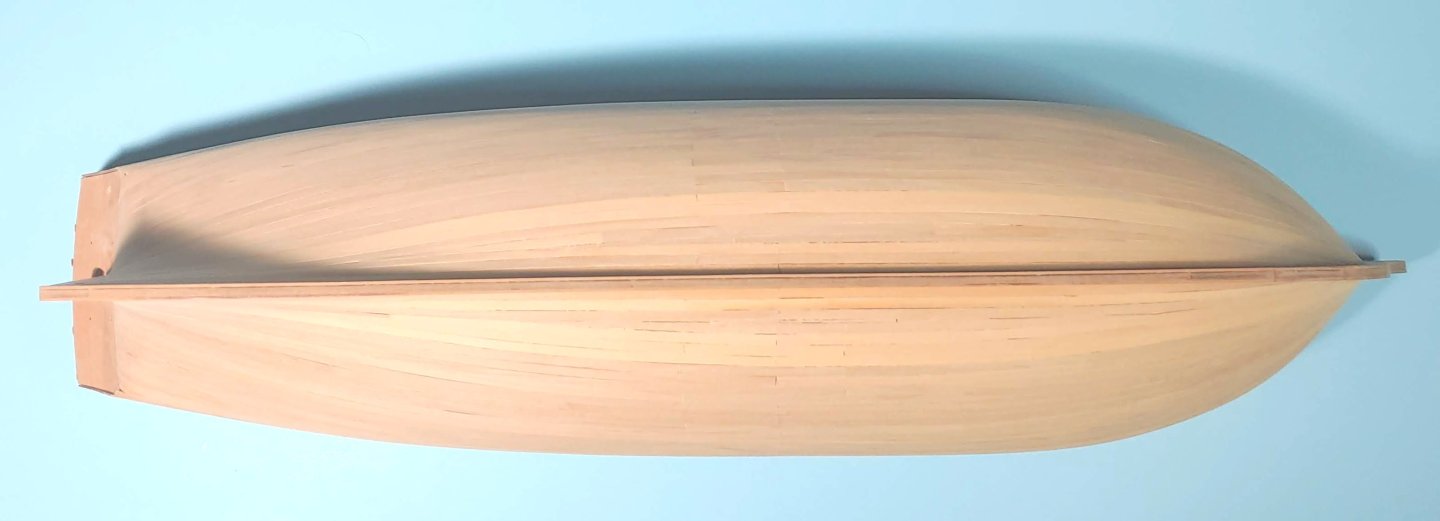
Here are some shots of the model after sanding and filling: I was not as concerned with small gaps between planks as I will be when I do the second layer. I guess I will discover whether or not I sanded and filled enough when I do the second planking. Hopefully, all will be well.


-
I found that when I constructed the stern the oversized metal quarter gallery components forced me to sacrifice the aft most gun port on both sides, so I ended up with 30 guns on the gun deck instead of 32. I understand that a couple of long guns were installed as "shifting gunnades" on the forcastle at various times during Constitution's career. You might want to use the extra guns for that if you run into the same problem that I did. I used MS gun bulwarks carriage red for my model which I thought matched the color I saw on the real ship quite well.
-
I went on line and found Mr. Metal primer, Mr. Metal paint, and Mr. Metal polish. If yours says Mr. Metal primer, then I would assume that you leave out step 3.
-
You may already be aware of this, but just in case - the rope sizes given in the BJ instruction manual are circumference, while the ones on most packages and spools of rope are diameter. I did not catch that, and as a result the rigging of the 24 pounders on my model are way out of scale. I ended up doing the math and writing the correct size into the instructions for all the lines.