Scott Crouse
-
Posts
74 -
Joined
-
Last visited
Recent Profile Visitors
1,364 profile views


-
 TerryPat reacted to a post in a topic:
Maine Lobster Boat by Scott Crouse (bartbandy) - Midwest Products - 1:16
TerryPat reacted to a post in a topic:
Maine Lobster Boat by Scott Crouse (bartbandy) - Midwest Products - 1:16
-
 Cool, do you have a build log of your own on the go? I am sure myself and others would love to see it.
 -
Scott Crouse reacted to a post in a topic:
Maine Lobster Boat by Scott Crouse (bartbandy) - Midwest Products - 1:16
-
robert952 reacted to a post in a topic:
Maine Lobster Boat by Scott Crouse (bartbandy) - Midwest Products - 1:16
-
Scott Crouse reacted to a post in a topic:
HMS Erebus by Ship_Right - OcCre - Scale 1:75
-
_SalD_ reacted to a post in a topic:
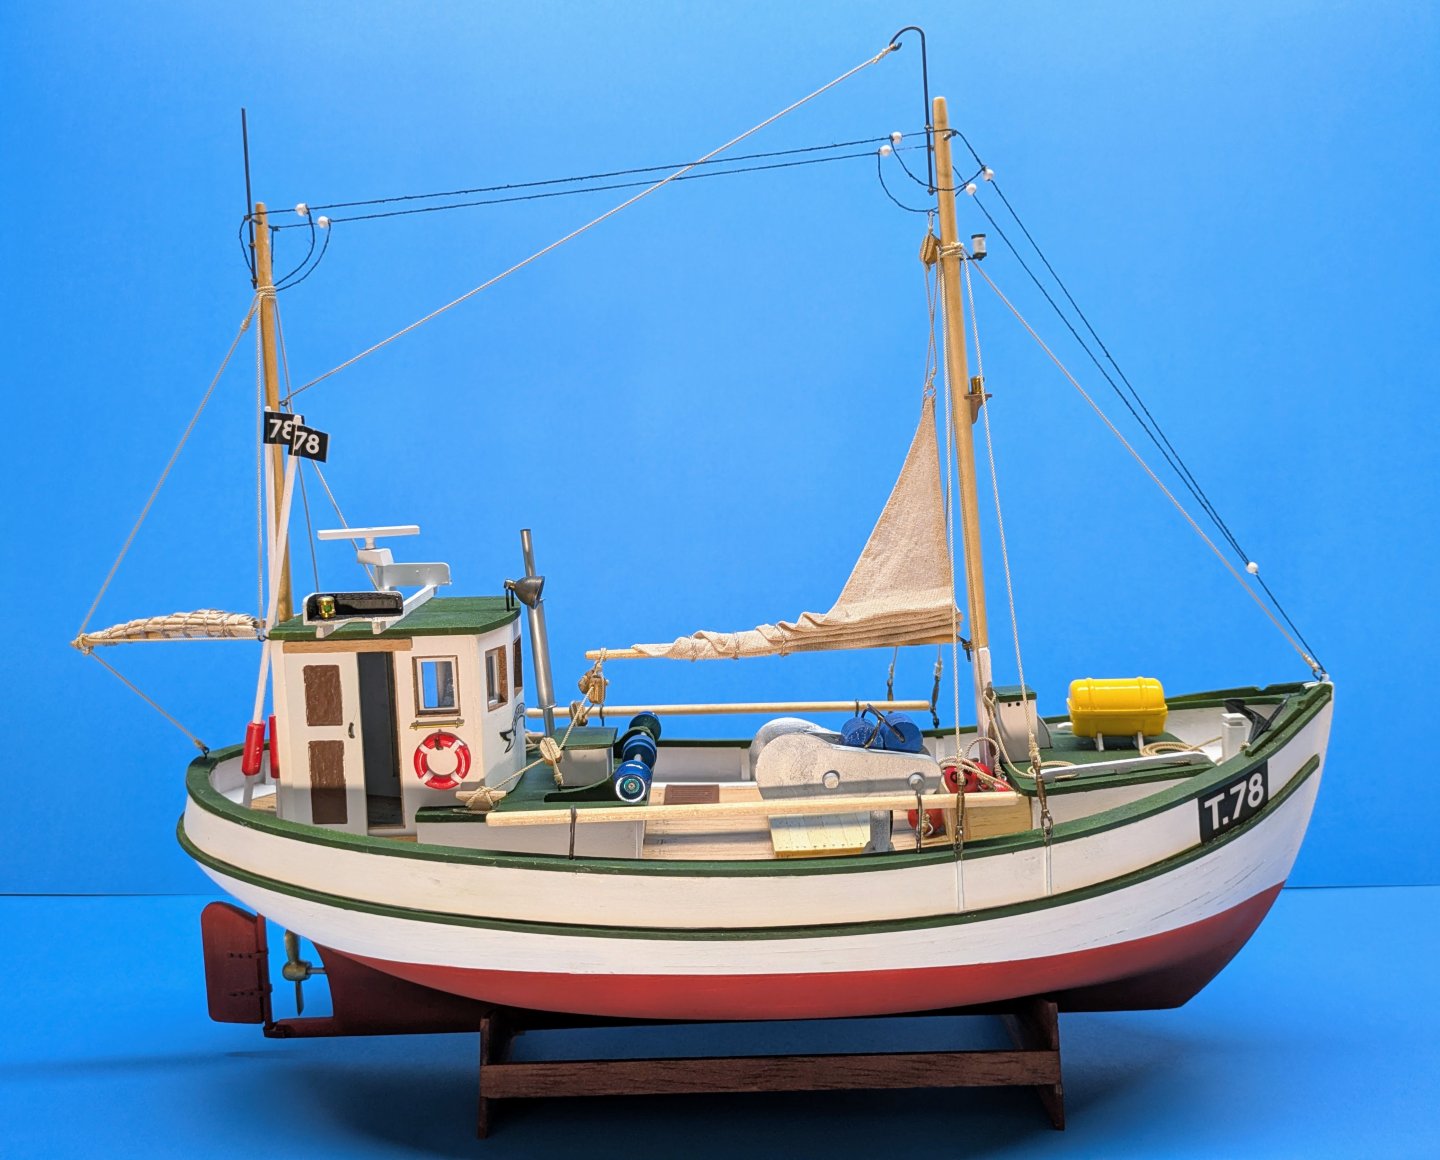
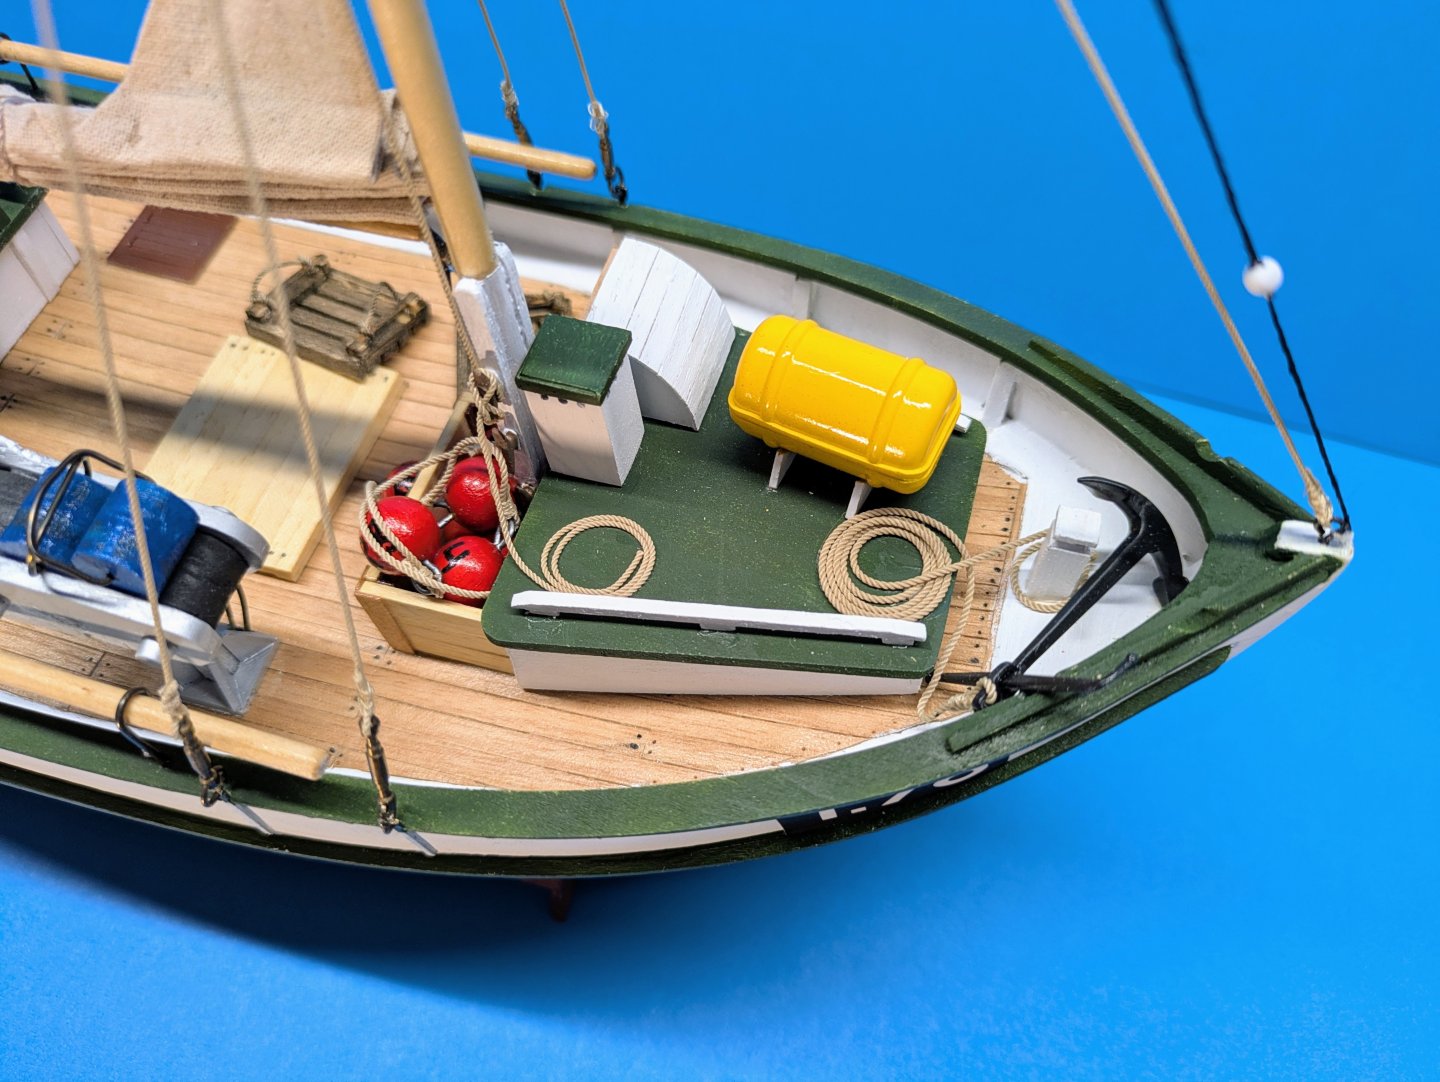
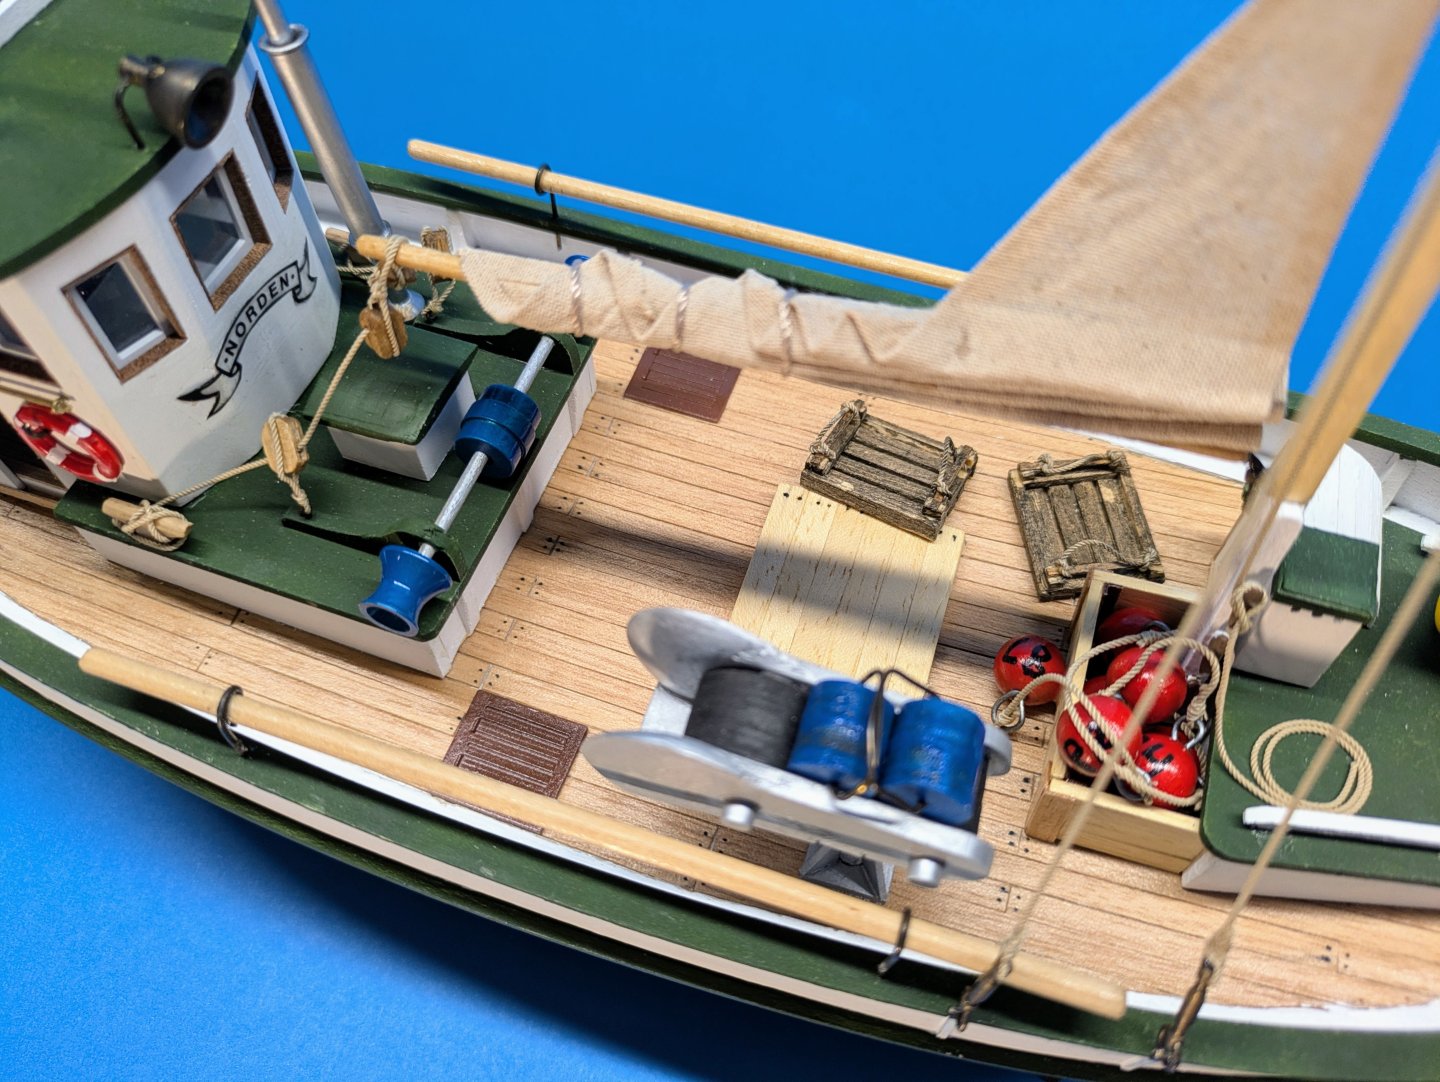
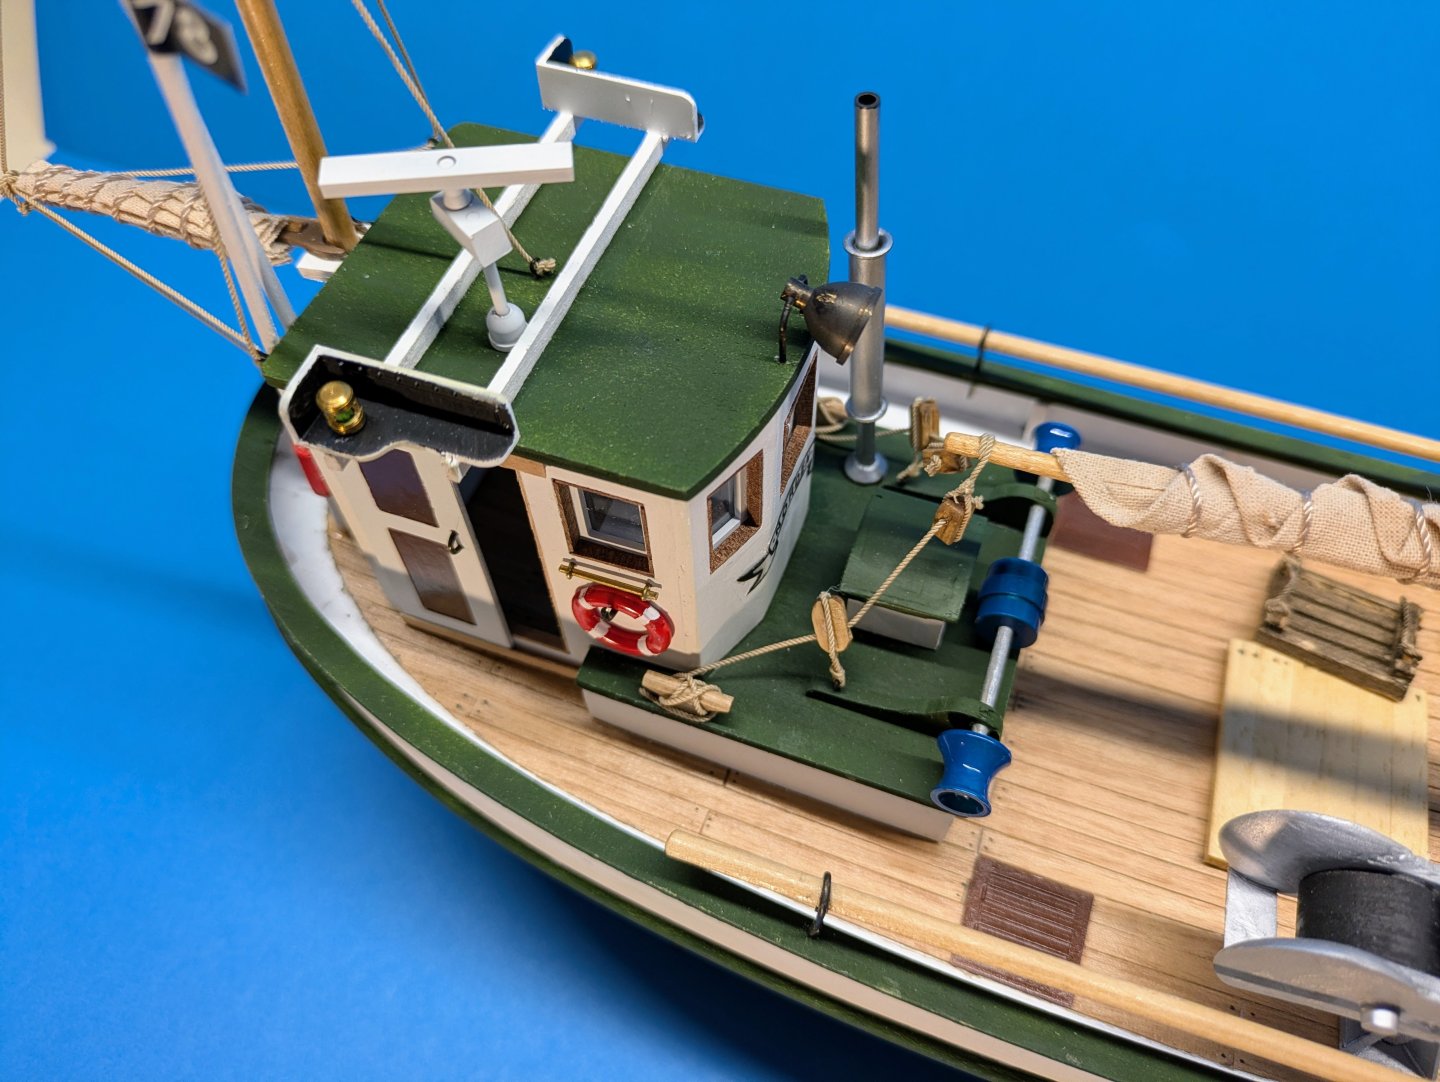
Norden 603 by Scott Crouse - FINISHED - Billing Boats - 1/30
-
JacquesCousteau reacted to a post in a topic:
Maine Lobster Boat by Scott Crouse (bartbandy) - Midwest Products - 1:16
-
yvesvidal reacted to a post in a topic:
Maine Lobster Boat by Scott Crouse (bartbandy) - Midwest Products - 1:16
-
Ryland Craze reacted to a post in a topic:
Maine Lobster Boat by Scott Crouse (bartbandy) - Midwest Products - 1:16
-
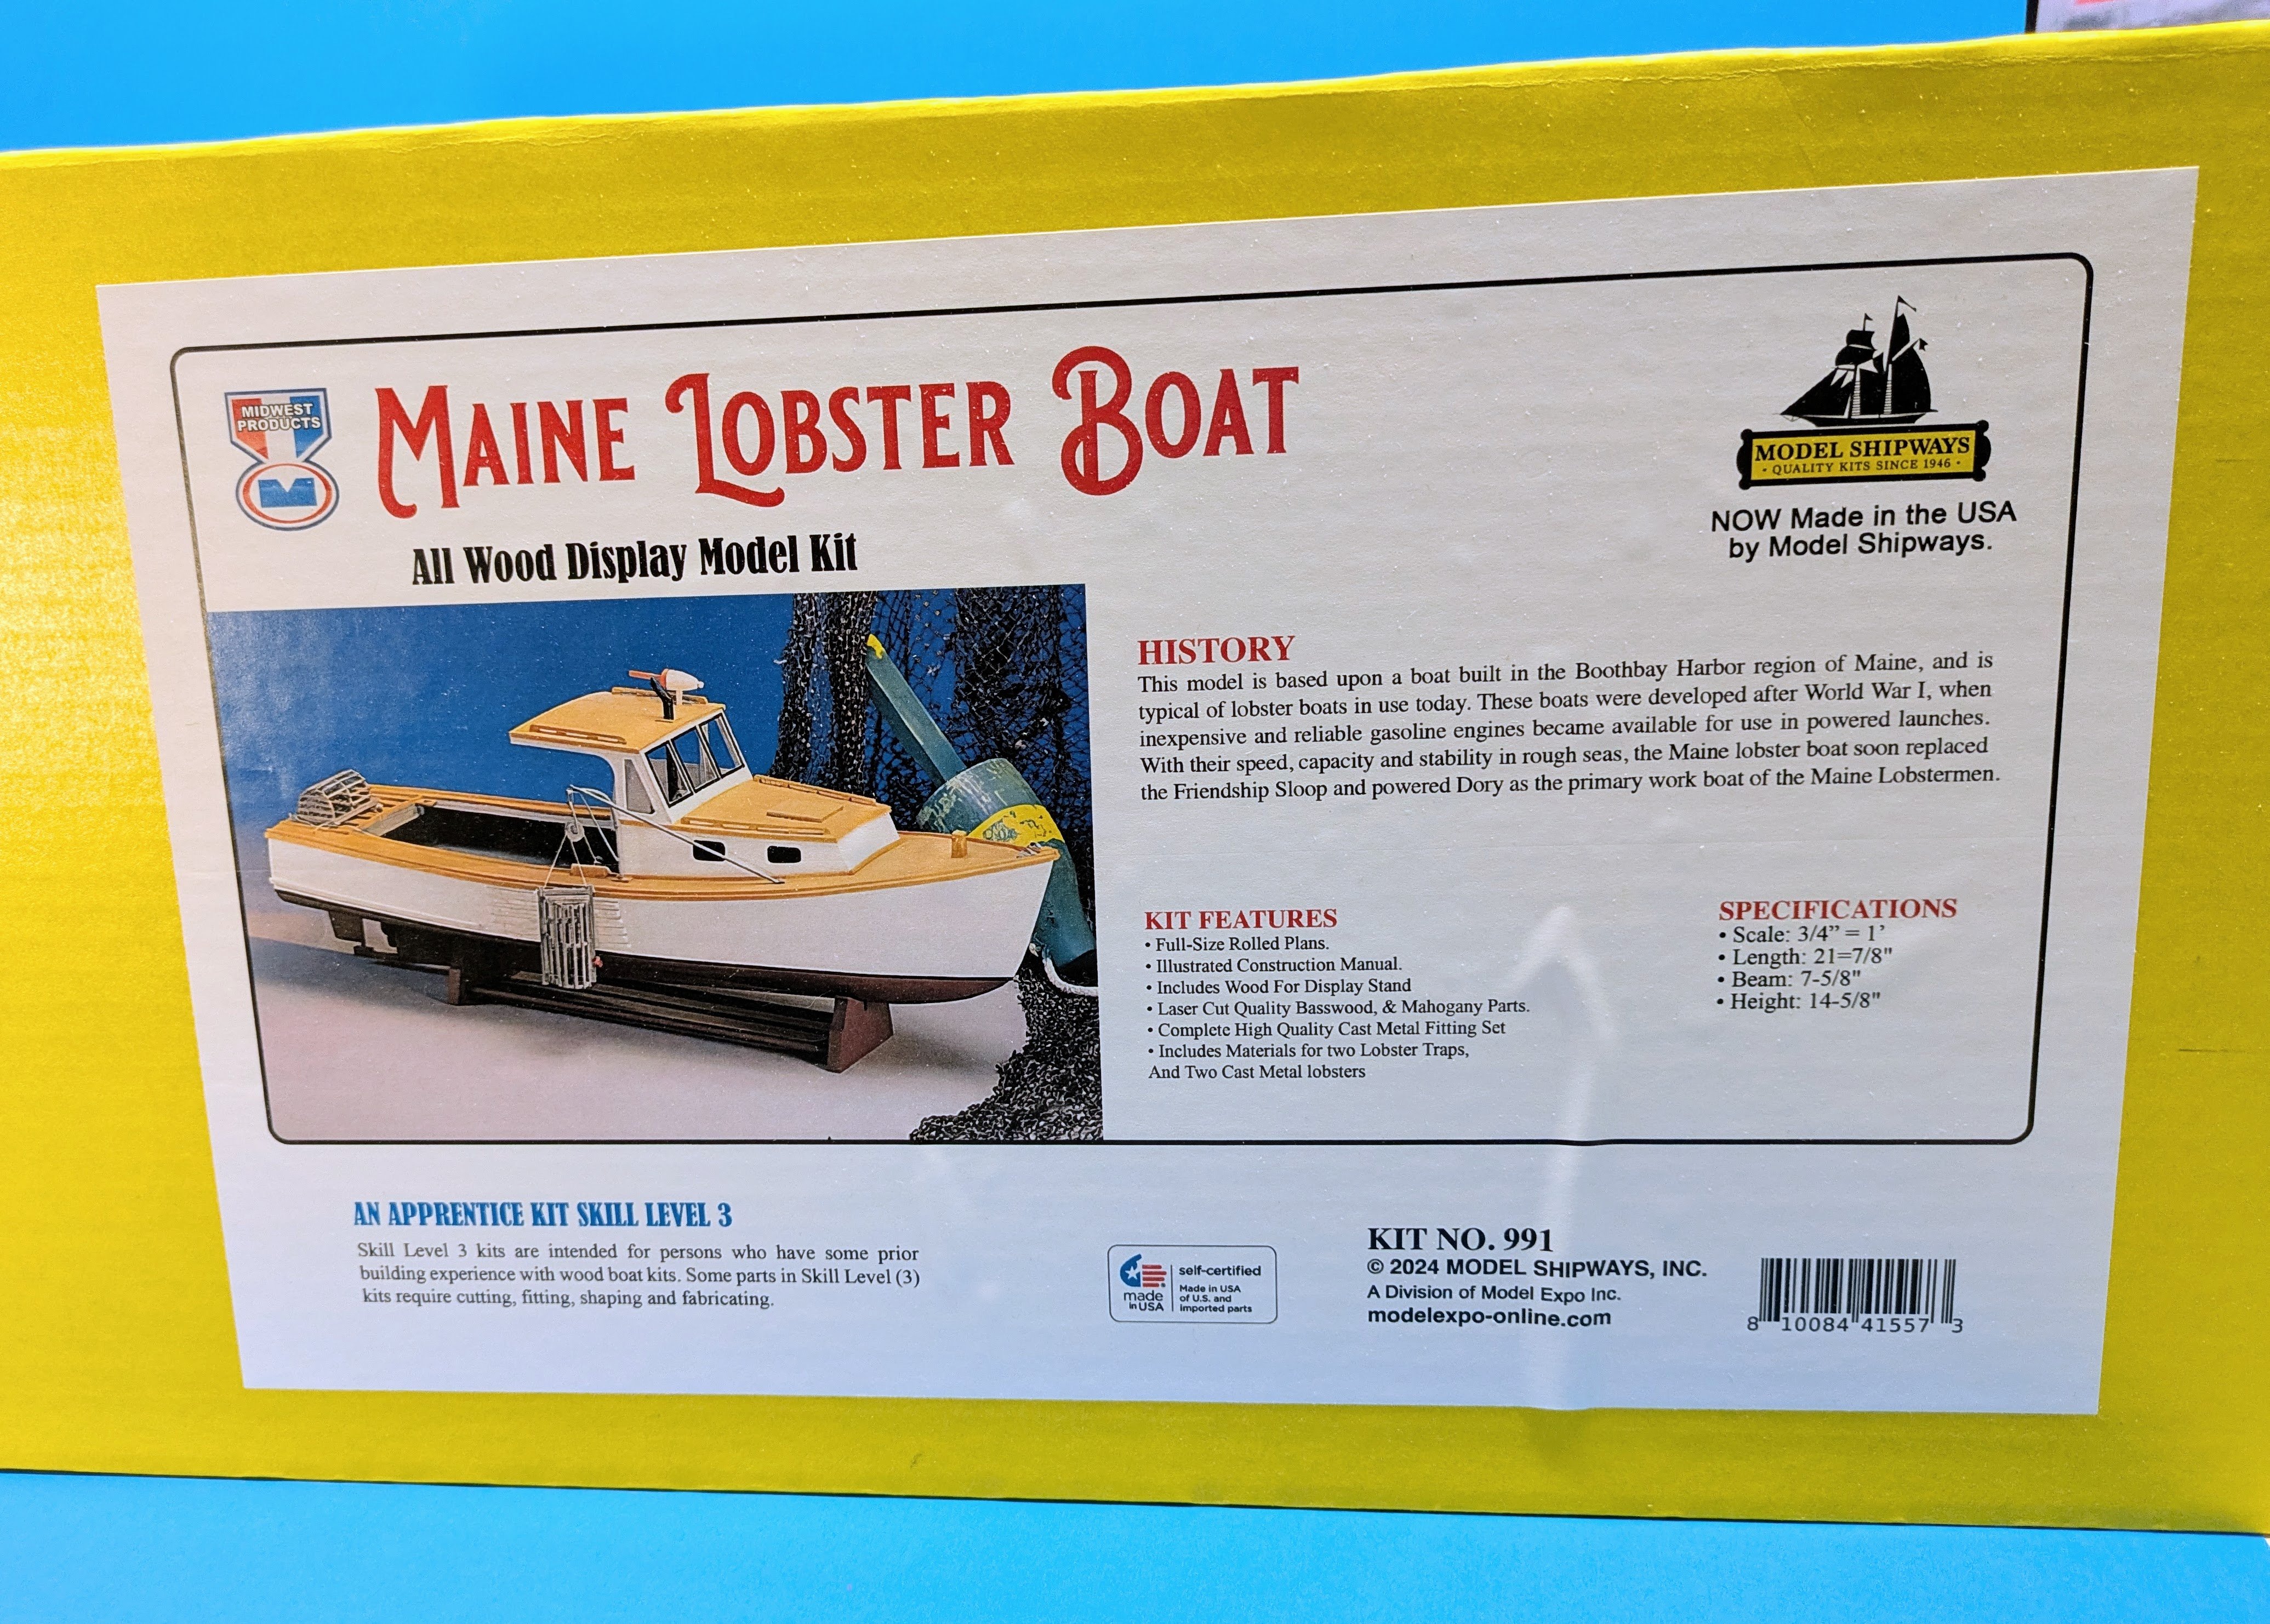
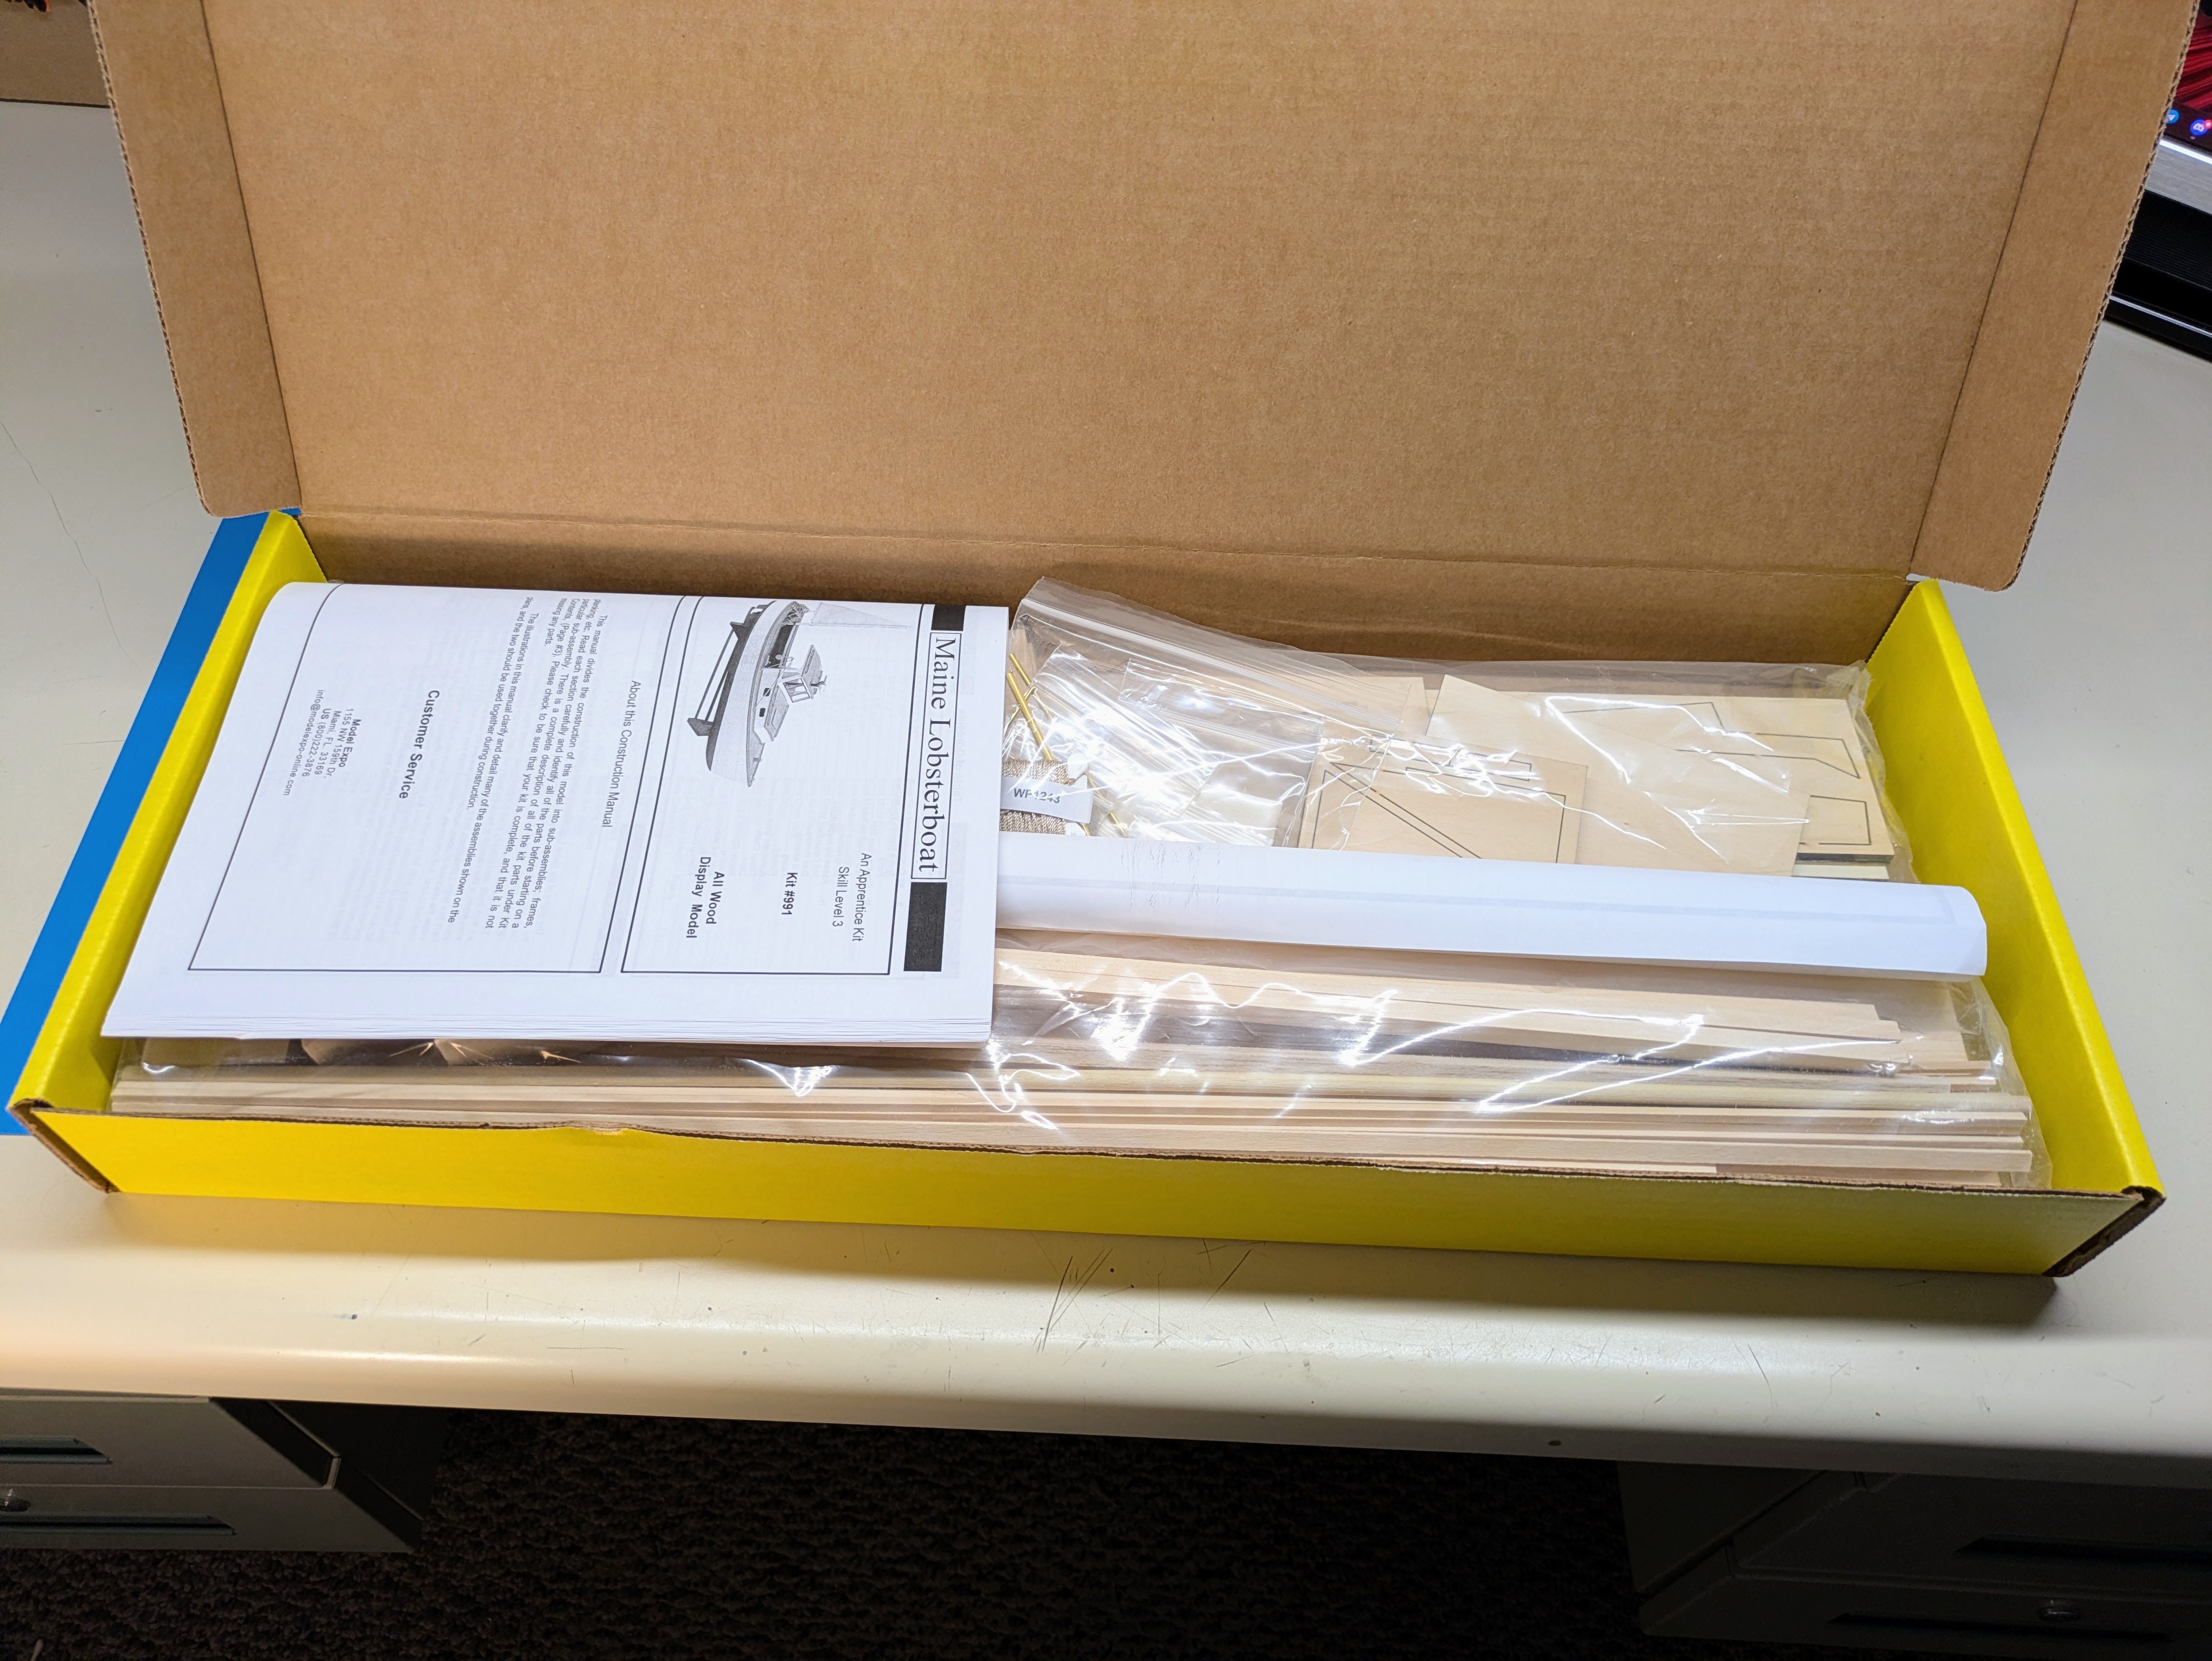
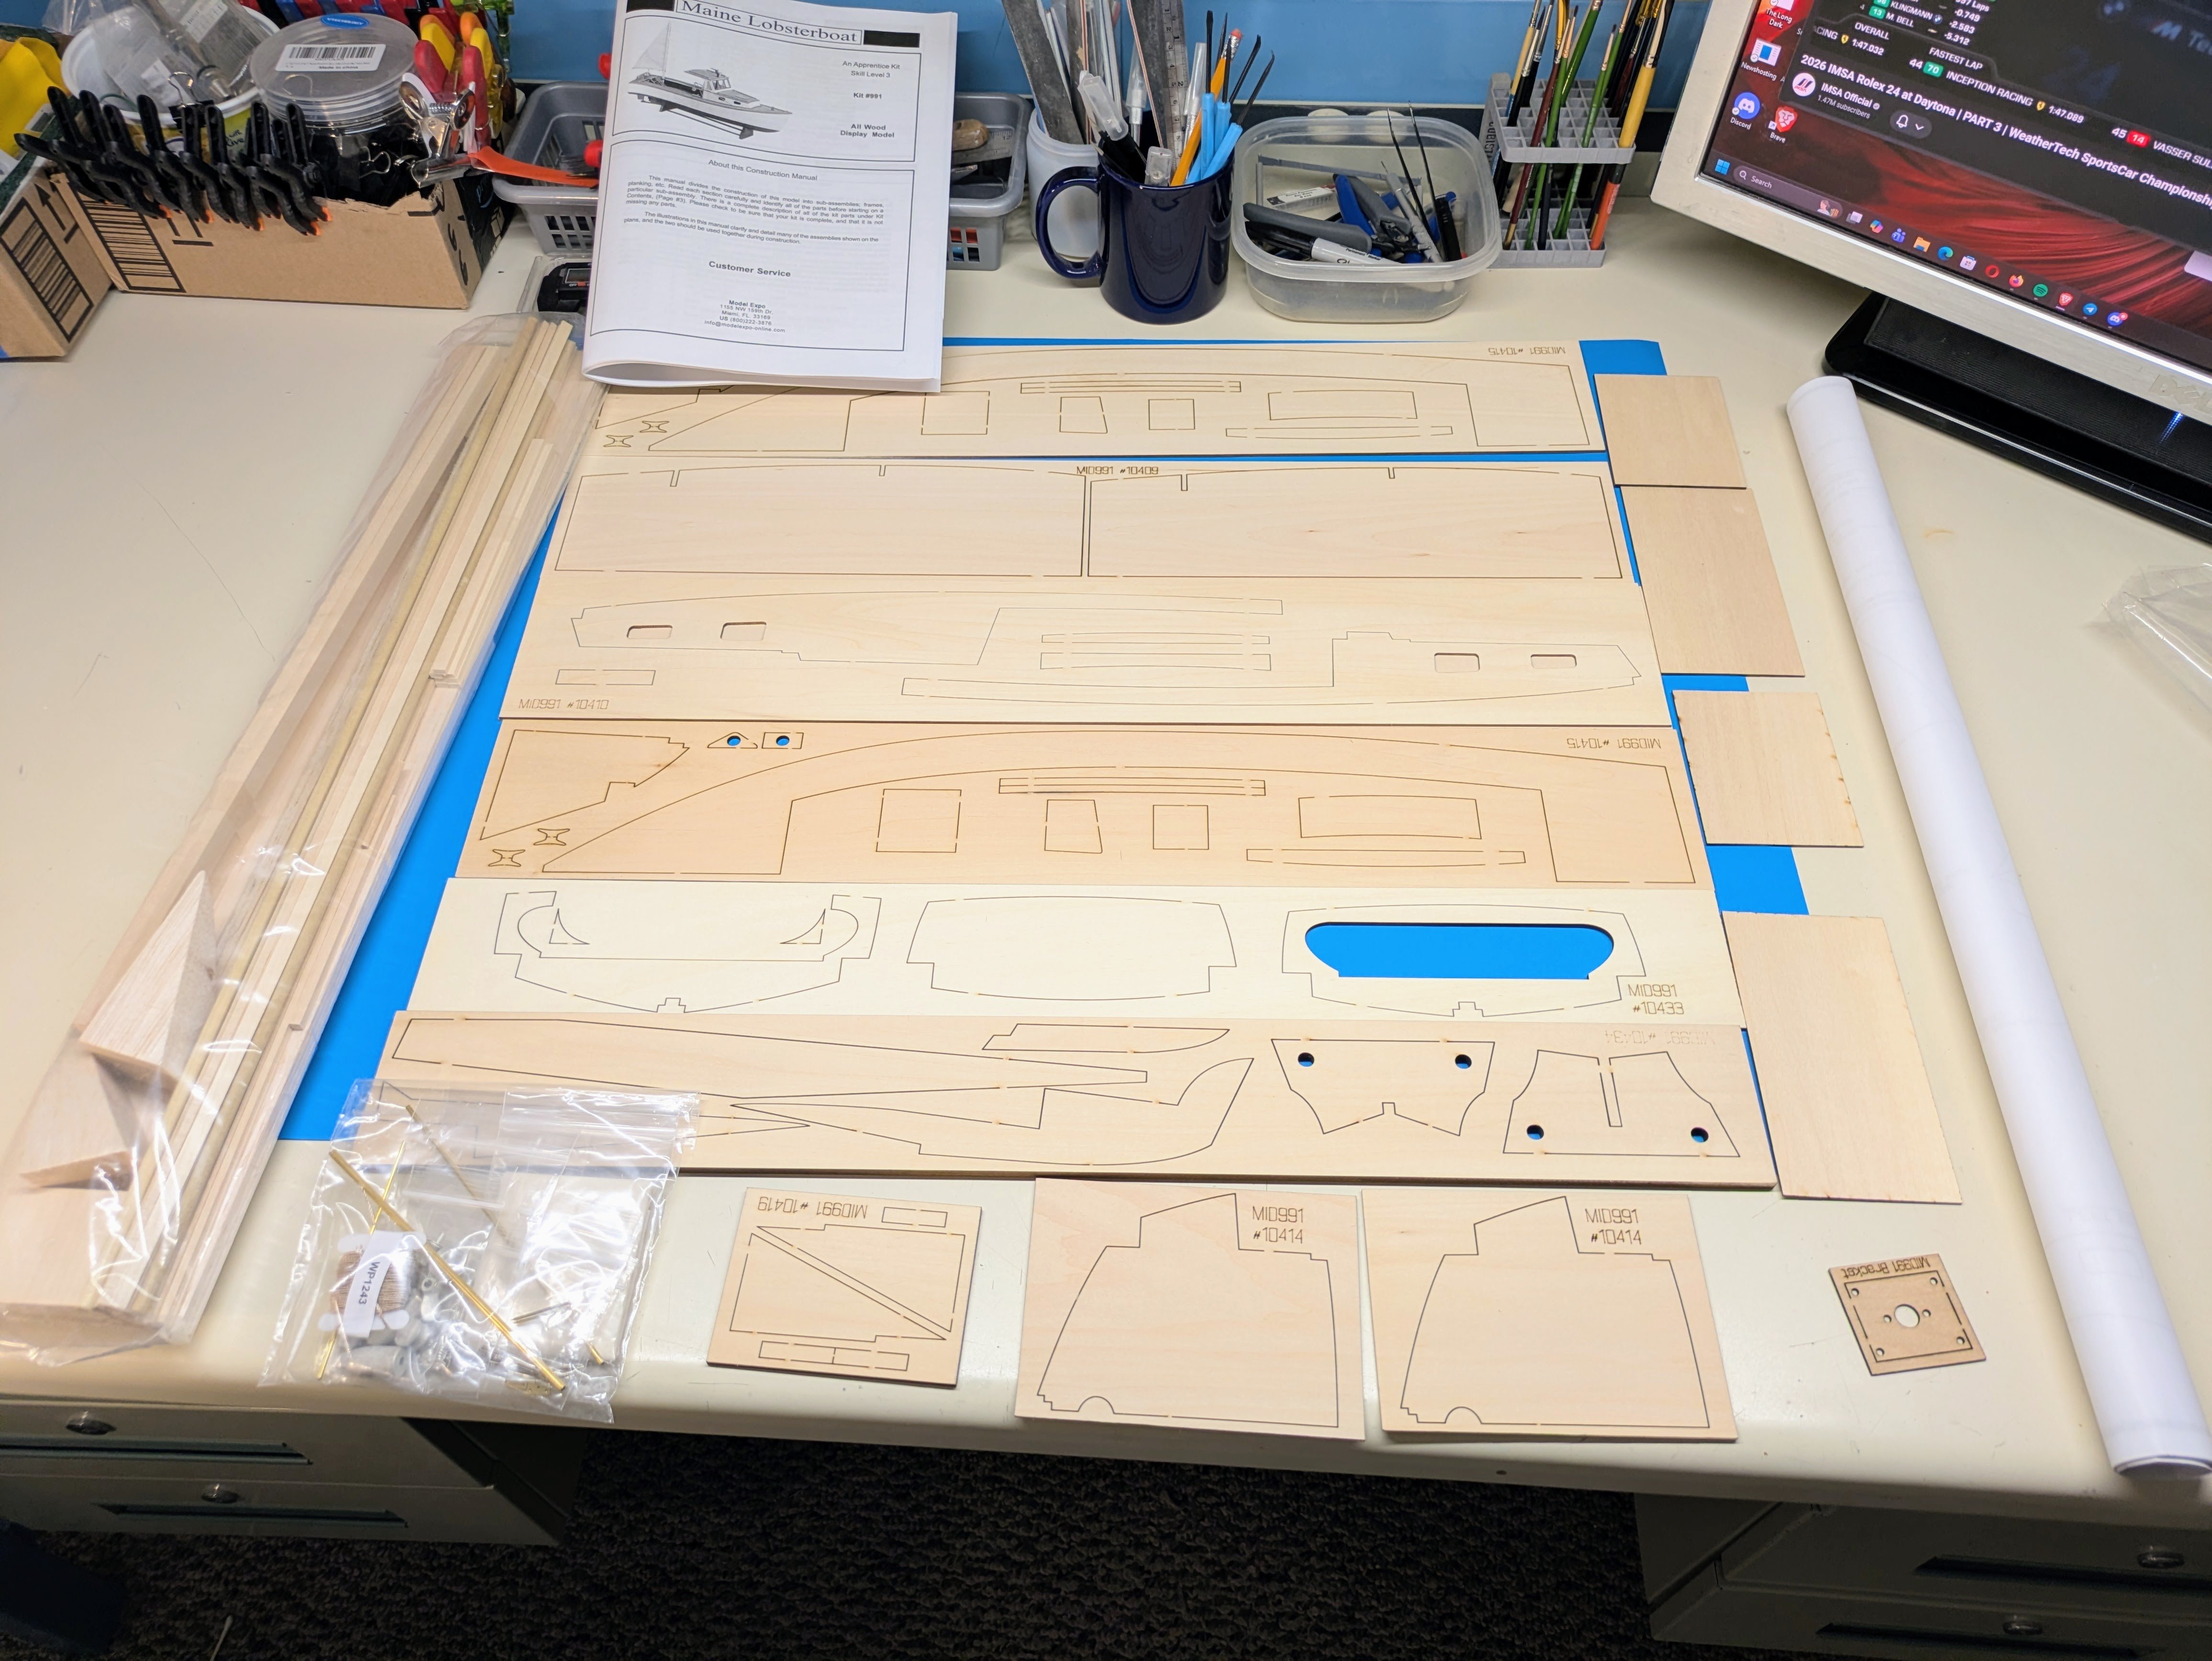
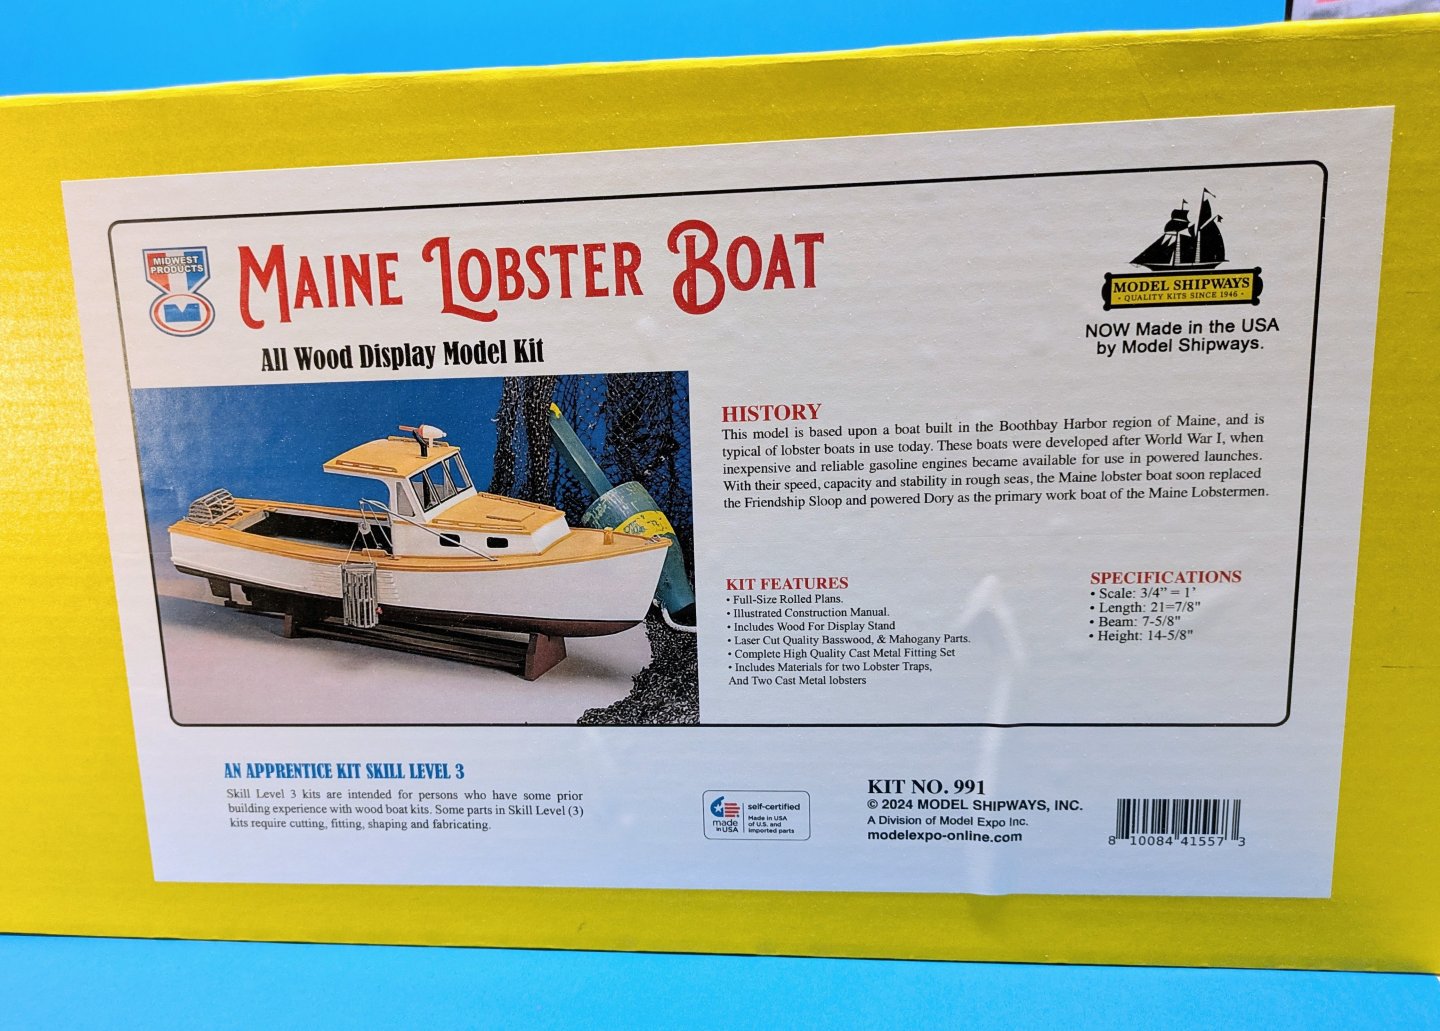
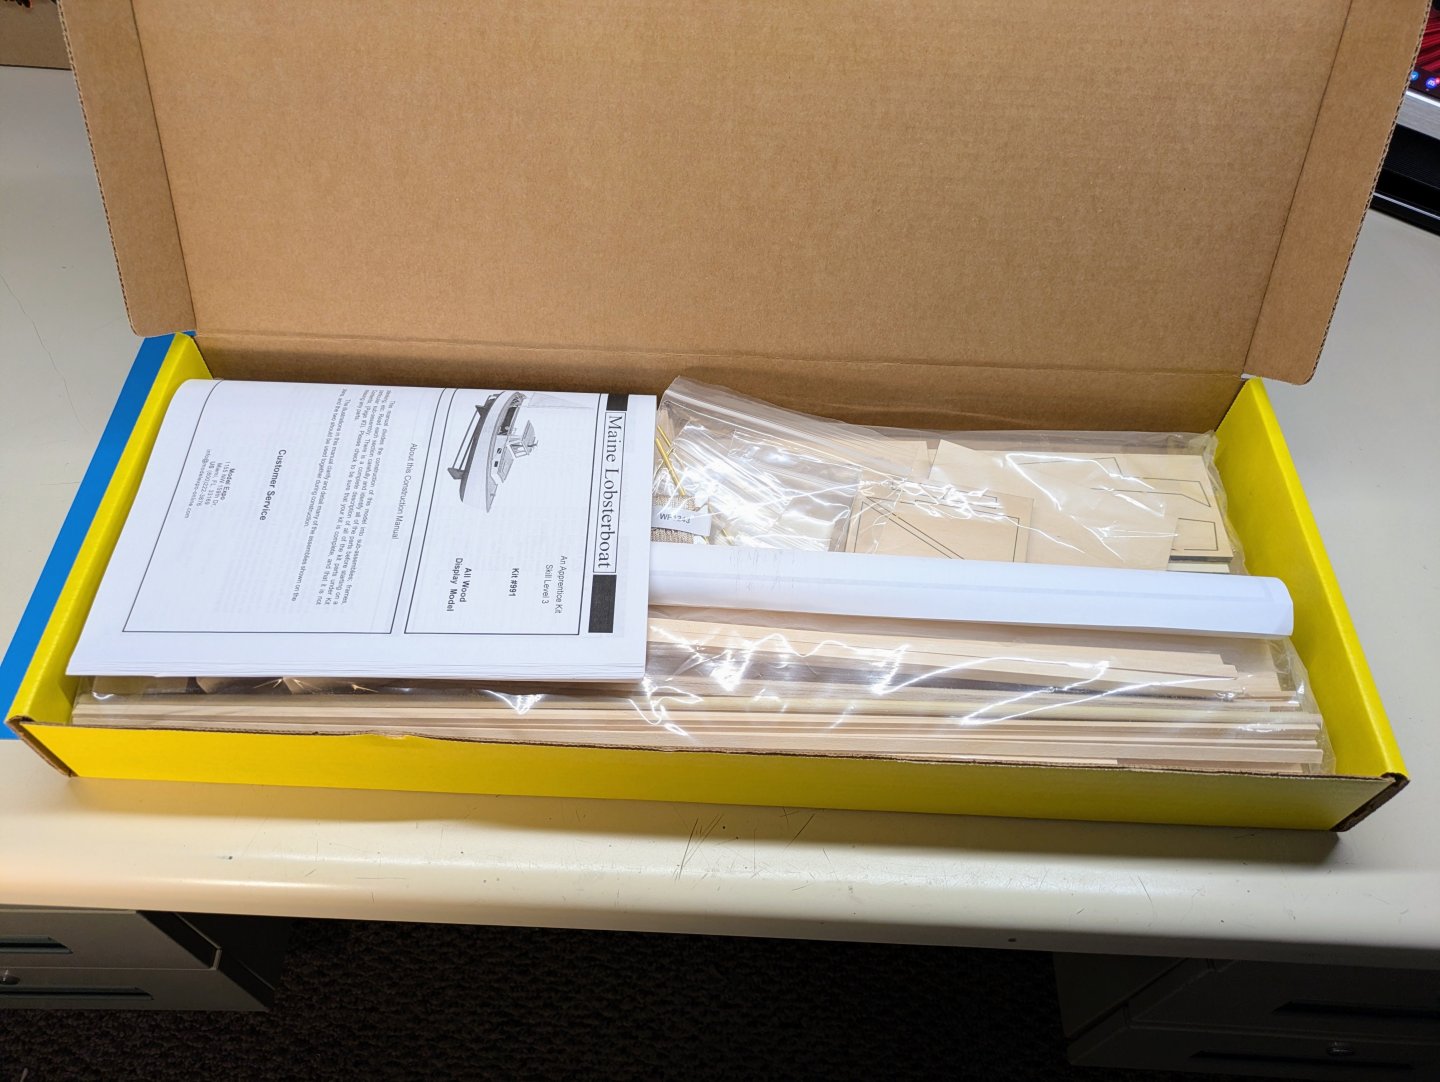
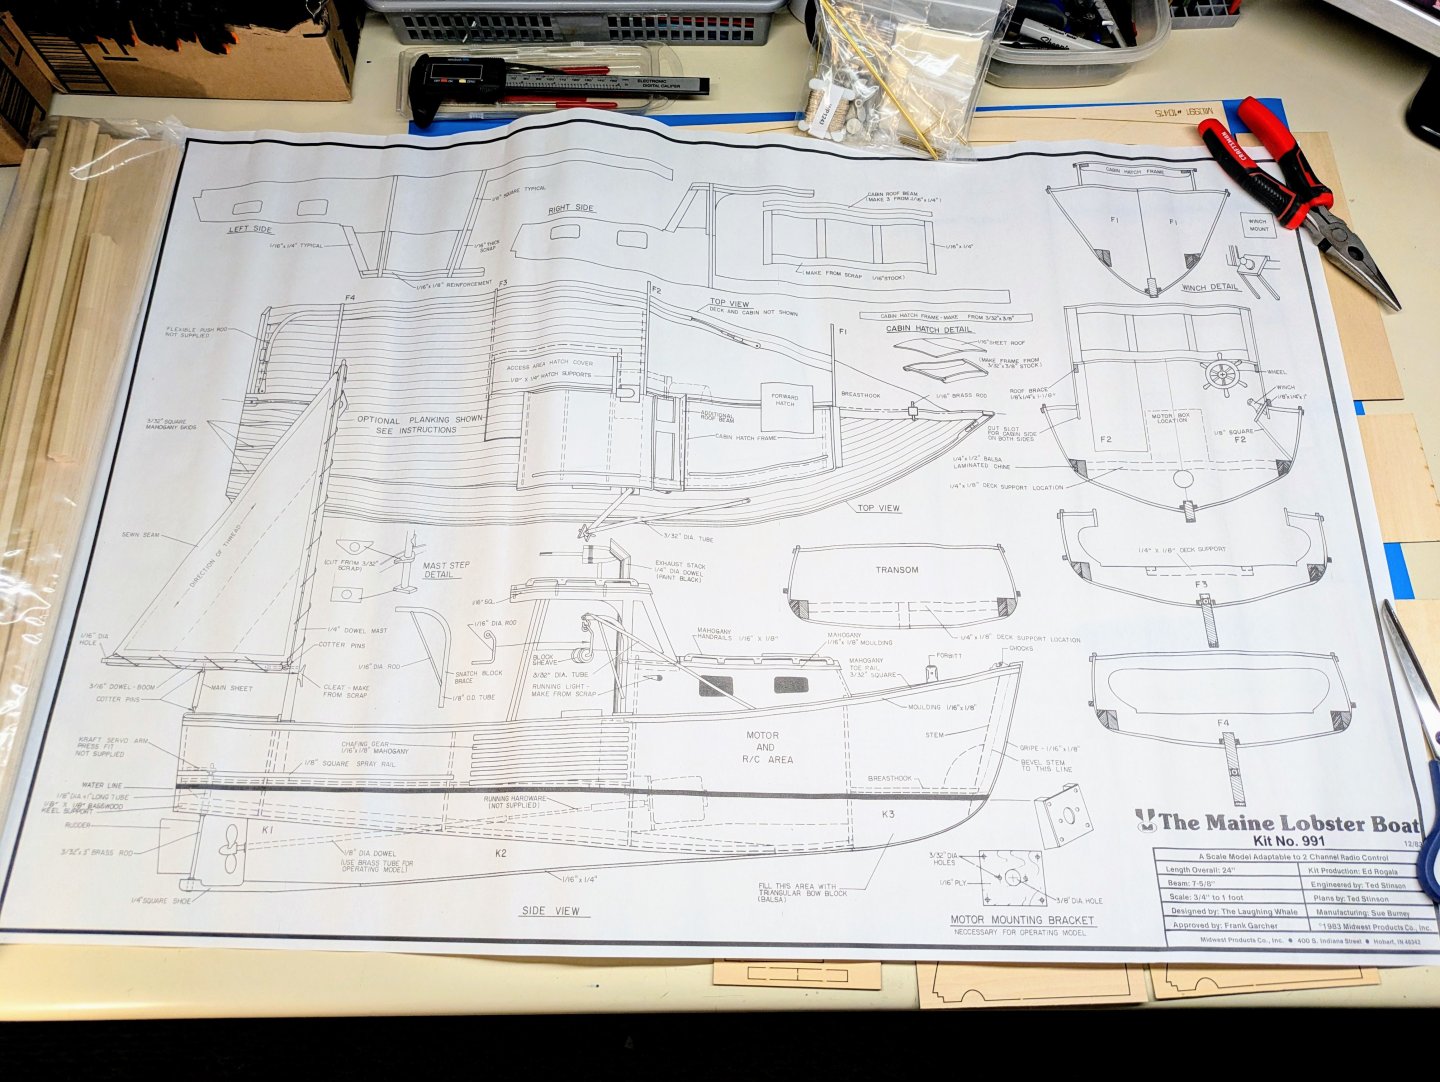
Having grown up on the east coast of Canada, lobster boats are common to me and the livelihood of so many fishermen. Have cracked the box and am studying the manual closely, researching various boats, looking for other build logs and will be starting the build shortly. Just a reminder to those who might be interested, I do stream when I am building so come and hang out and chat about model building. - https://www.twitch.tv/bartbandy

-
Ryland Craze reacted to a post in a topic:
Norden 603 by Scott Crouse - FINISHED - Billing Boats - 1/30
-
Scott Crouse reacted to a post in a topic:
St Roch by Lecrenb - 1:48 scale - RCMP Schooner rigged as schooner c. 1930/35
-
Scott Crouse reacted to a post in a topic:
Norden 603 by Scott Crouse - FINISHED - Billing Boats - 1/30
-
Scott Crouse reacted to a post in a topic:
Norden 603 by Scott Crouse - FINISHED - Billing Boats - 1/30
-
Scott Crouse reacted to a post in a topic:
Norden 603 by Scott Crouse - FINISHED - Billing Boats - 1/30
-
Scott Crouse reacted to a post in a topic:
Norden 603 by Scott Crouse - FINISHED - Billing Boats - 1/30
-
Scott Crouse reacted to a post in a topic:
Norden 603 by Scott Crouse - FINISHED - Billing Boats - 1/30
-
ubjs reacted to a post in a topic:
Norden 603 by Scott Crouse - FINISHED - Billing Boats - 1/30
-
ubjs reacted to a post in a topic:
Norden 603 by Scott Crouse - FINISHED - Billing Boats - 1/30
-
Paul Jarman reacted to a post in a topic:
Norden 603 by Scott Crouse - FINISHED - Billing Boats - 1/30
-
Scott Crouse reacted to a post in a topic:
Calypso by mandolinut - Billing Boats - 1:45
-
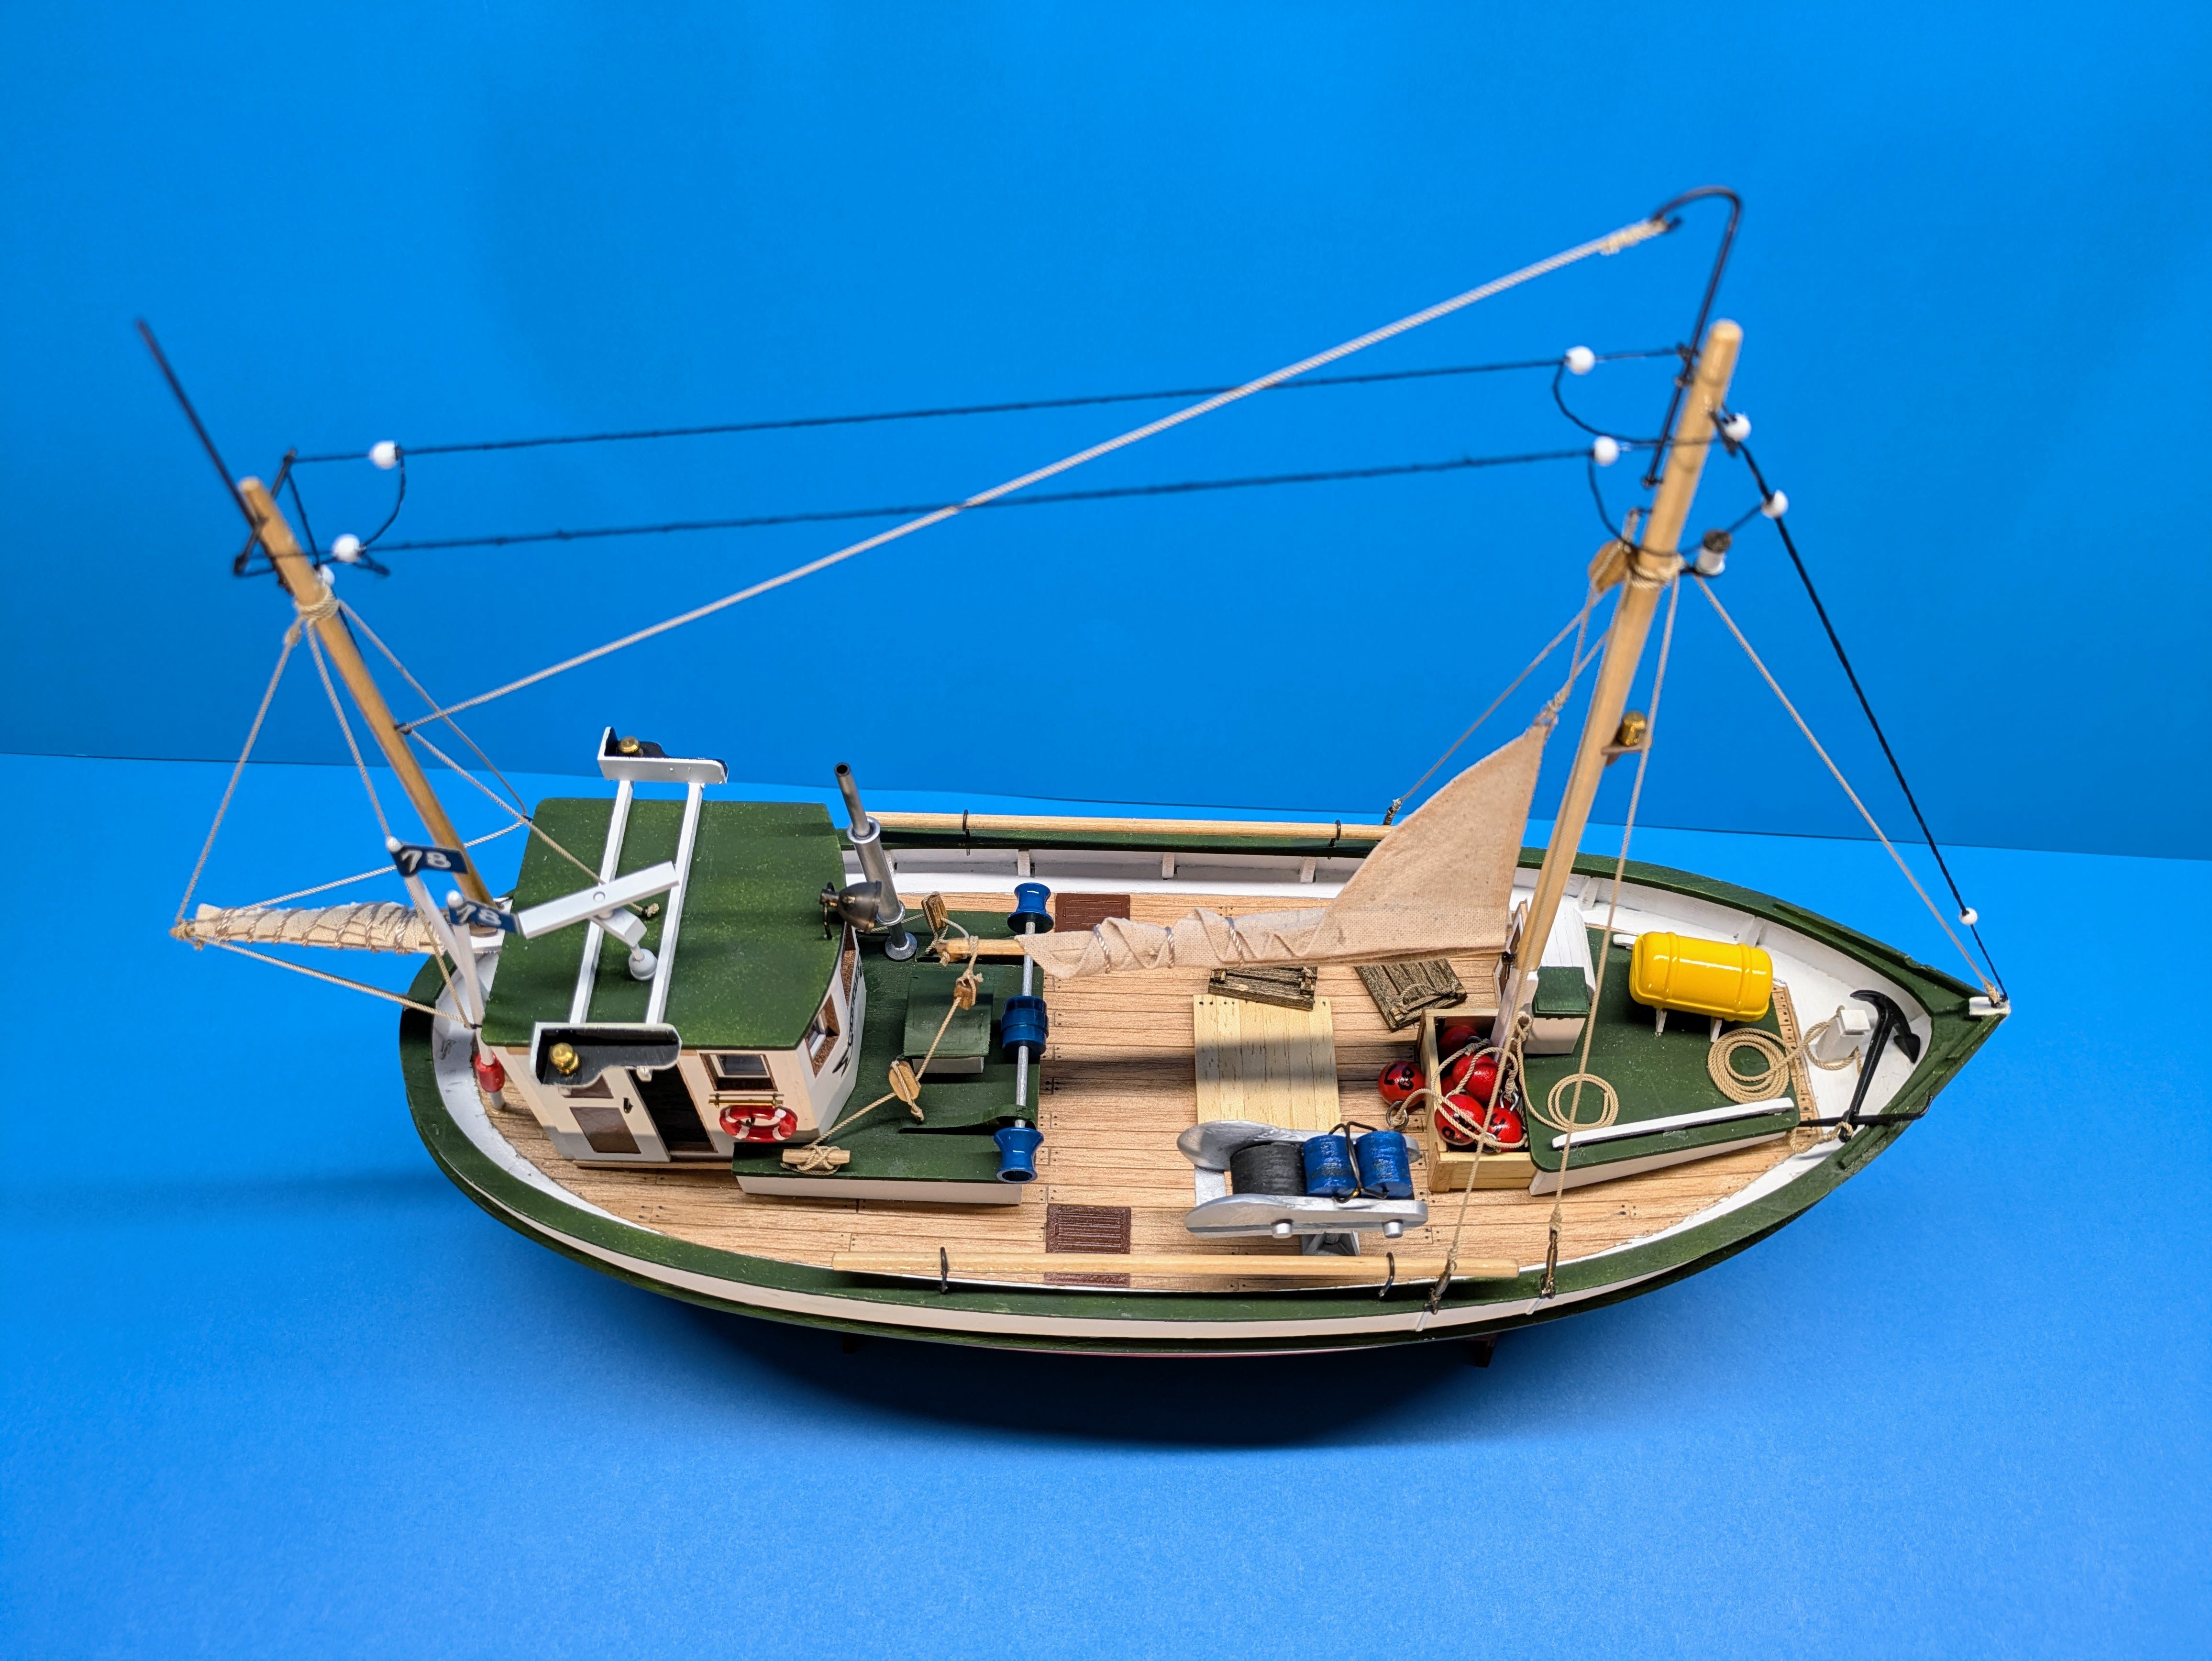
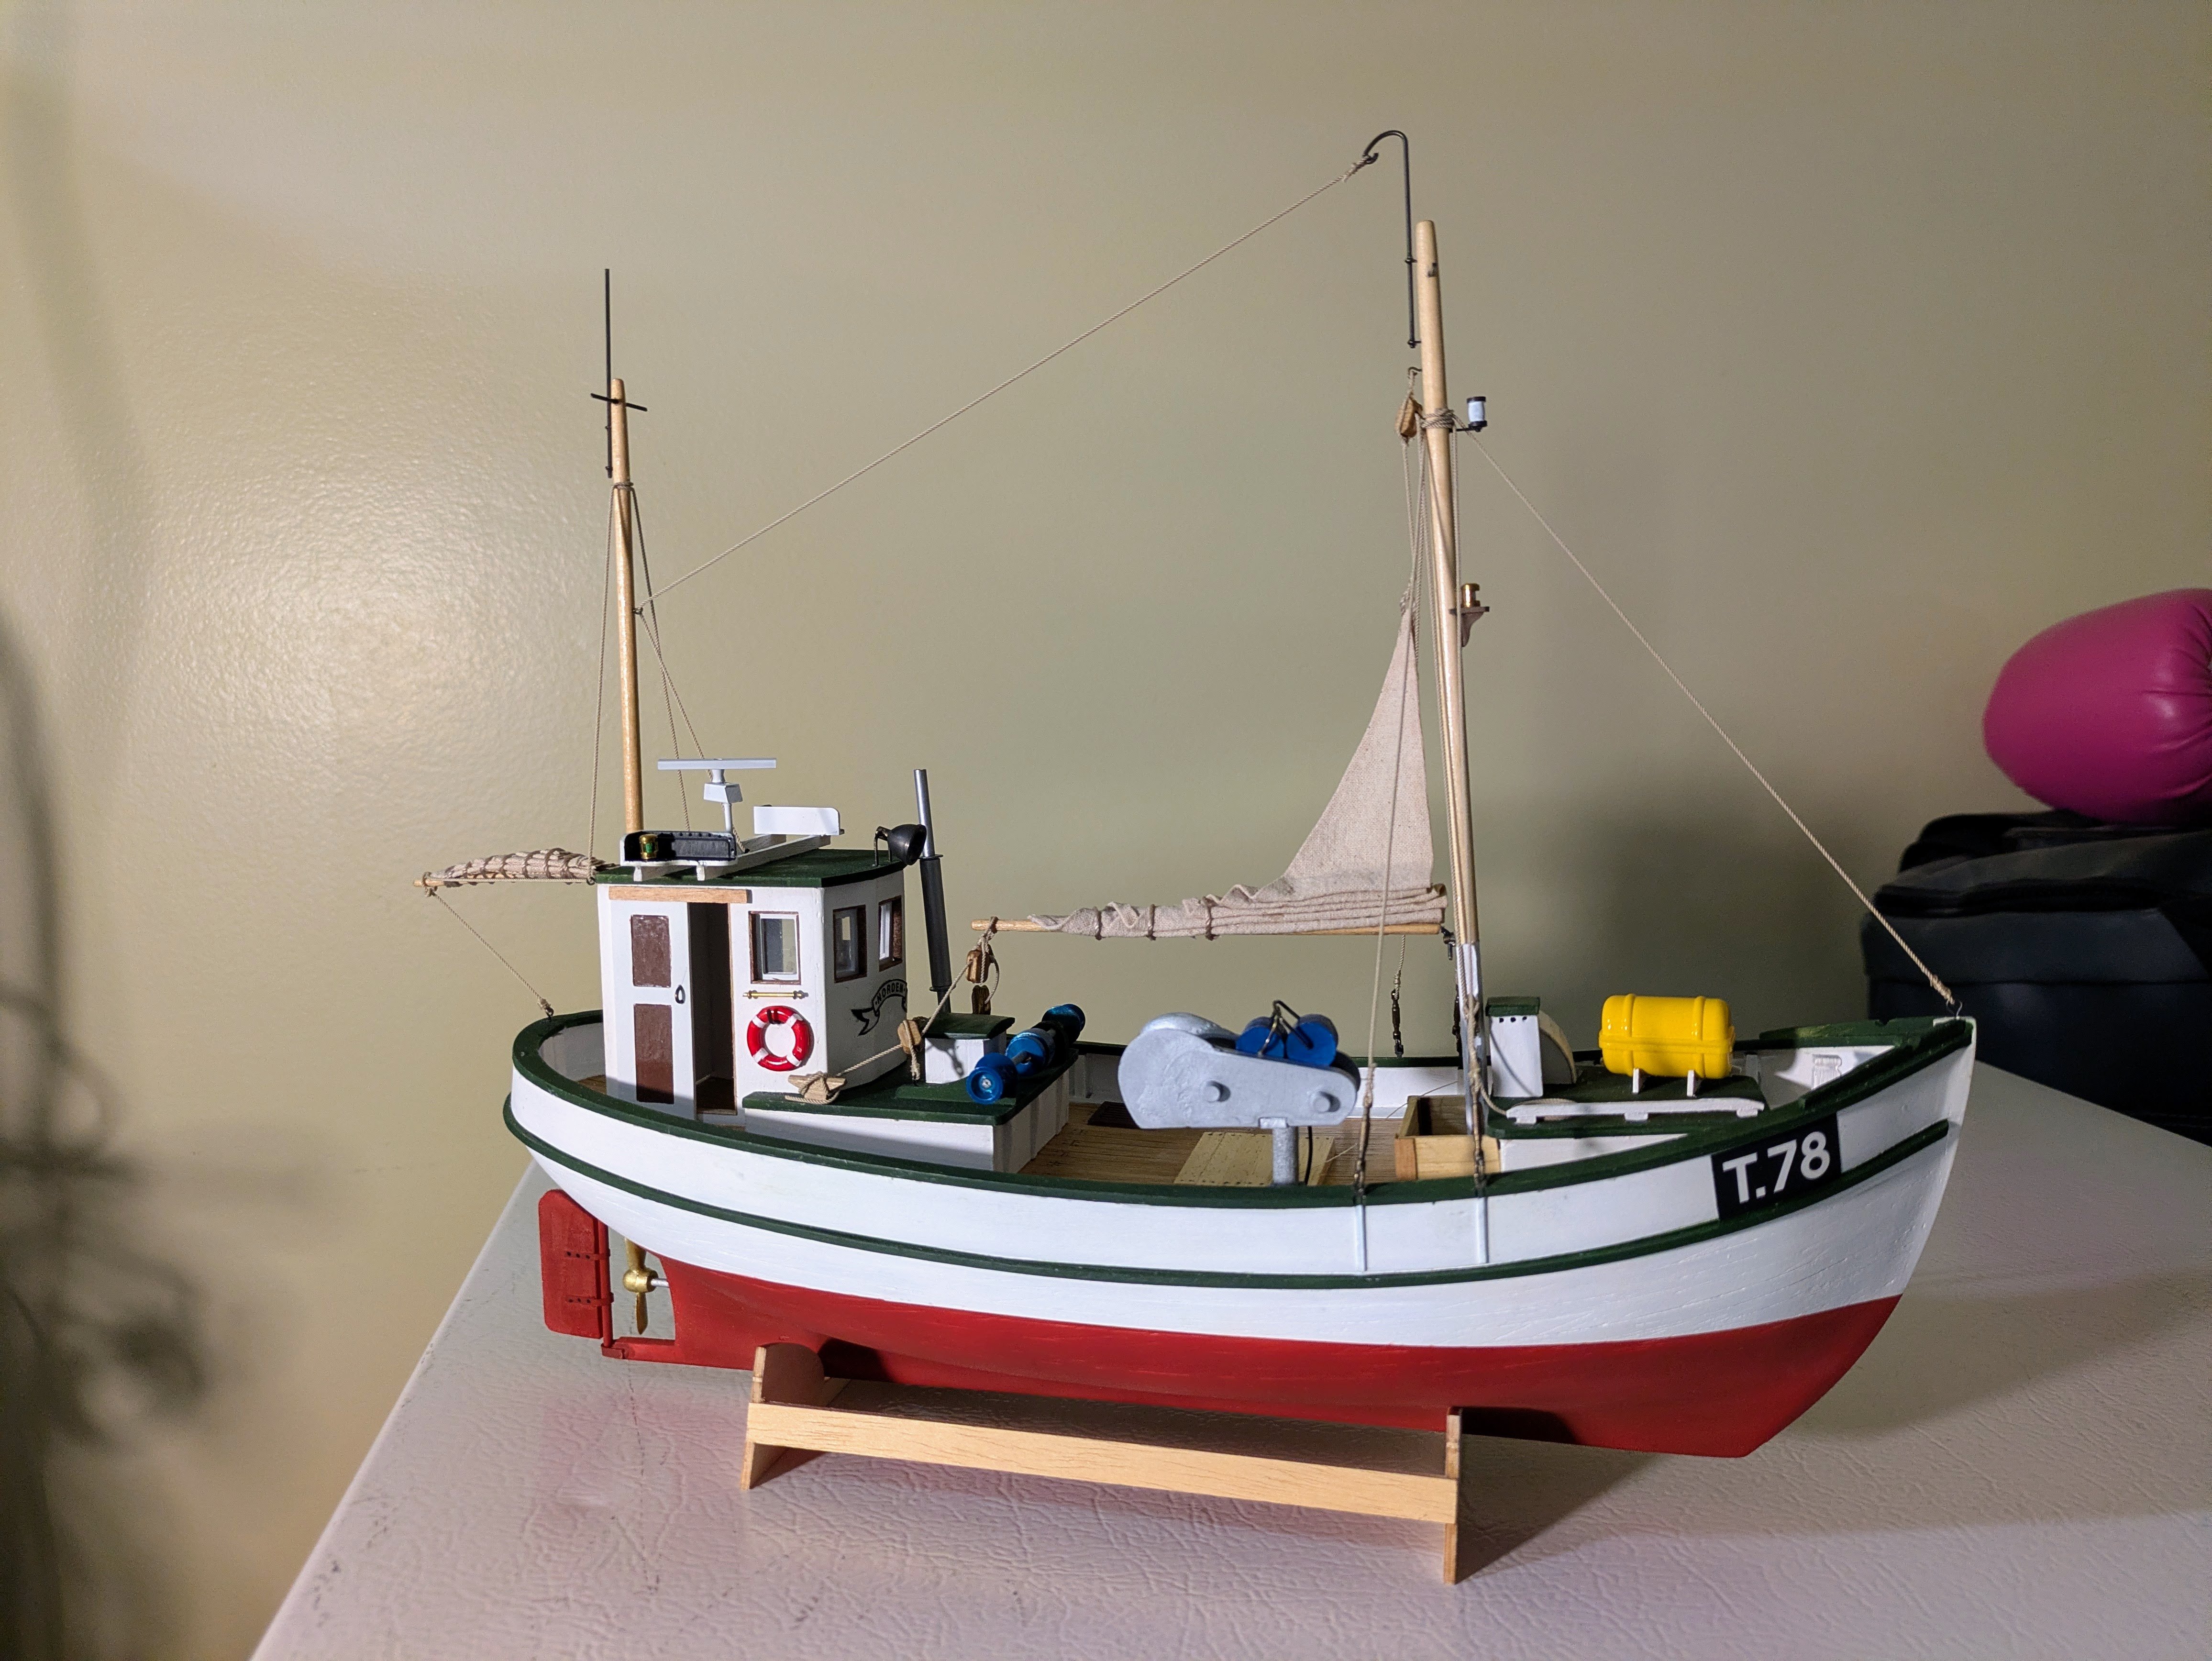
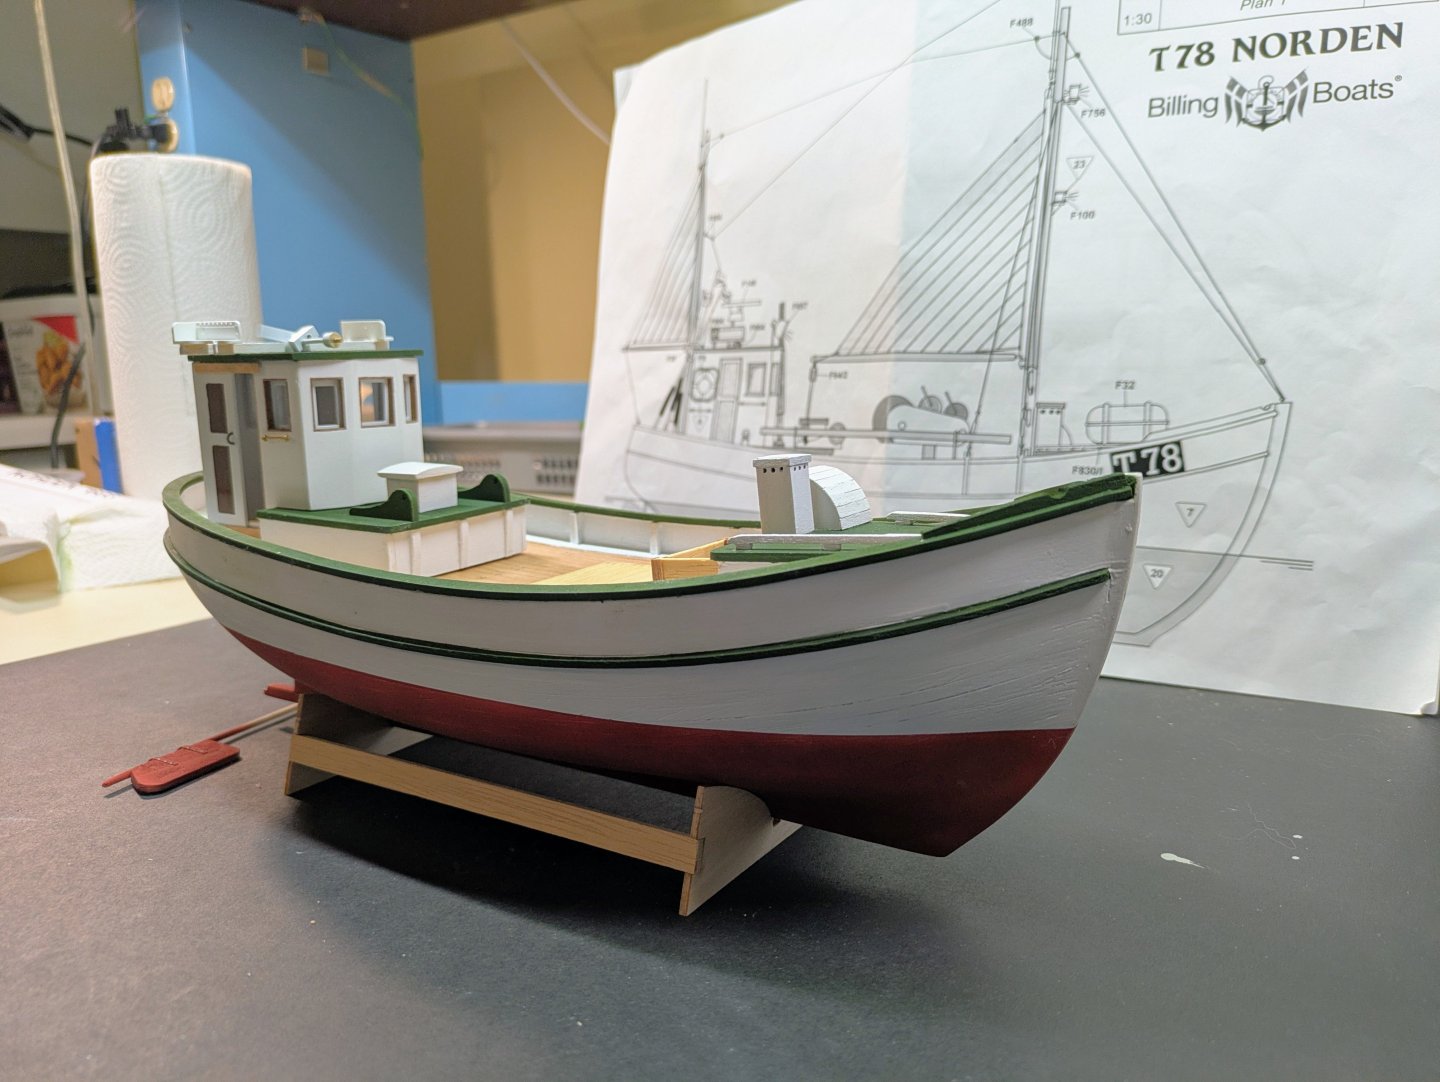
and completed!


-
Scott Crouse reacted to a post in a topic:
Muscongus Bay Lobster Smack by JacquesCousteau - Model Shipways - 1:32 - Rescaled and Modified
-
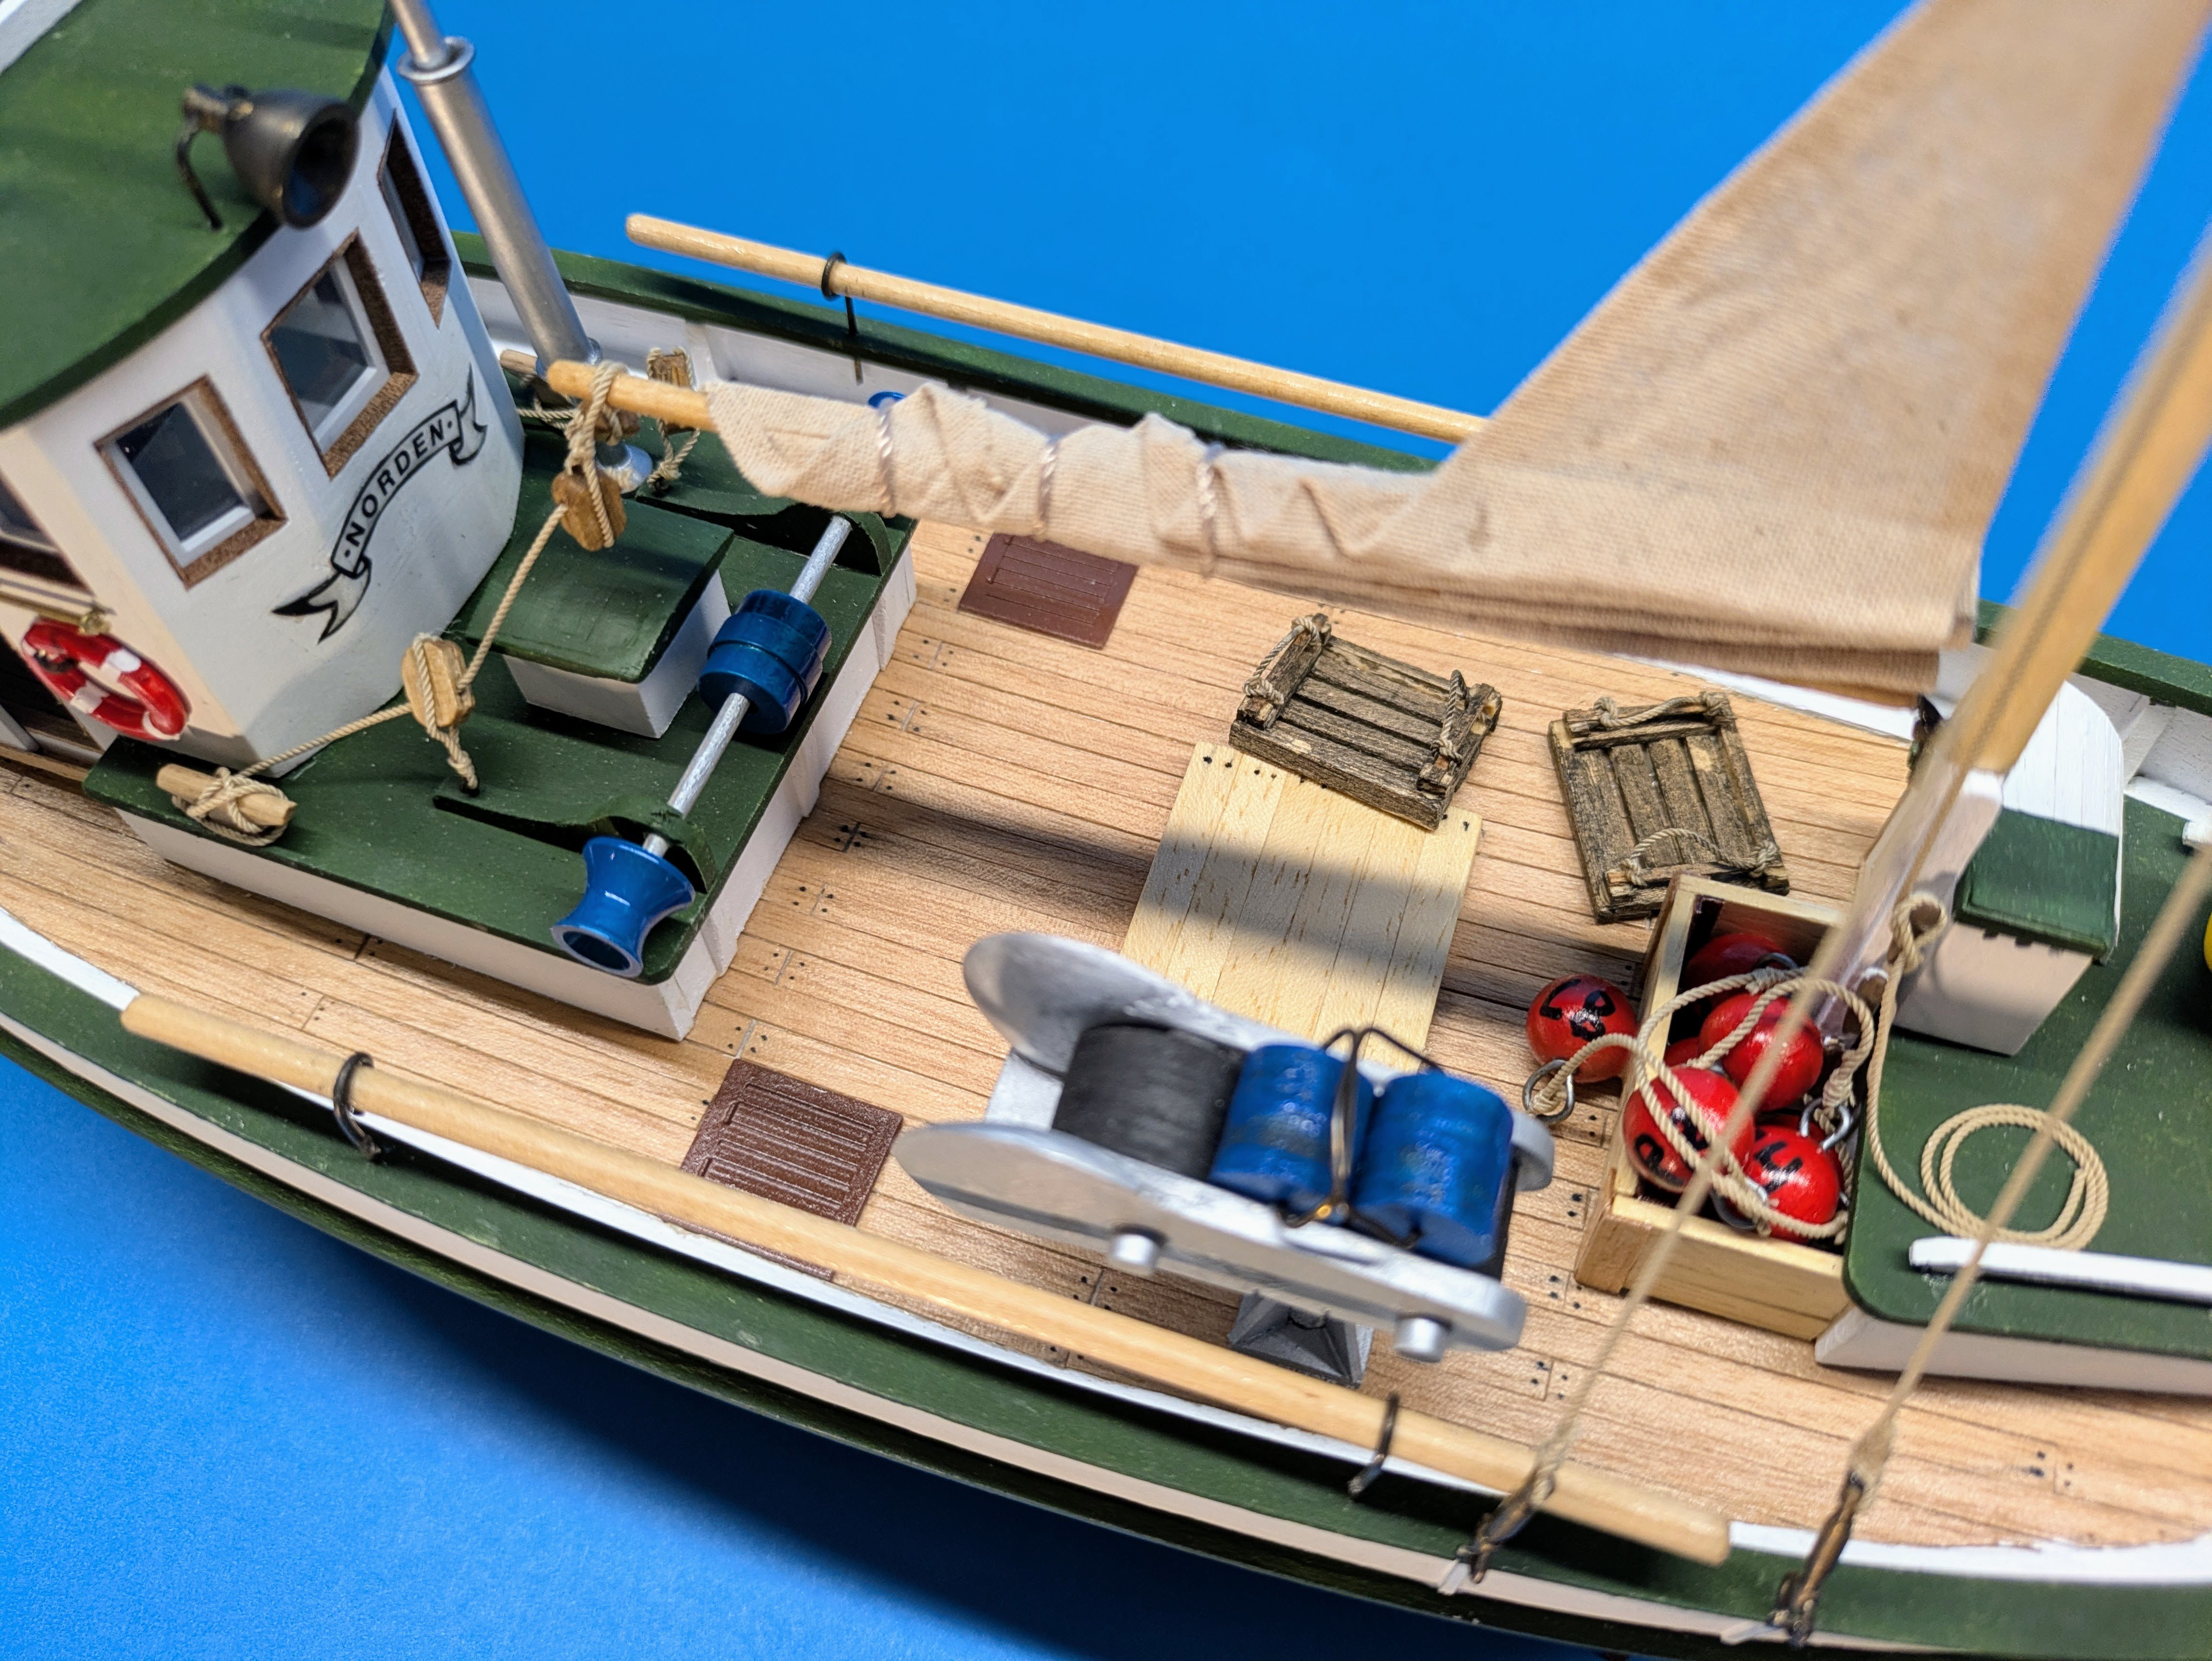
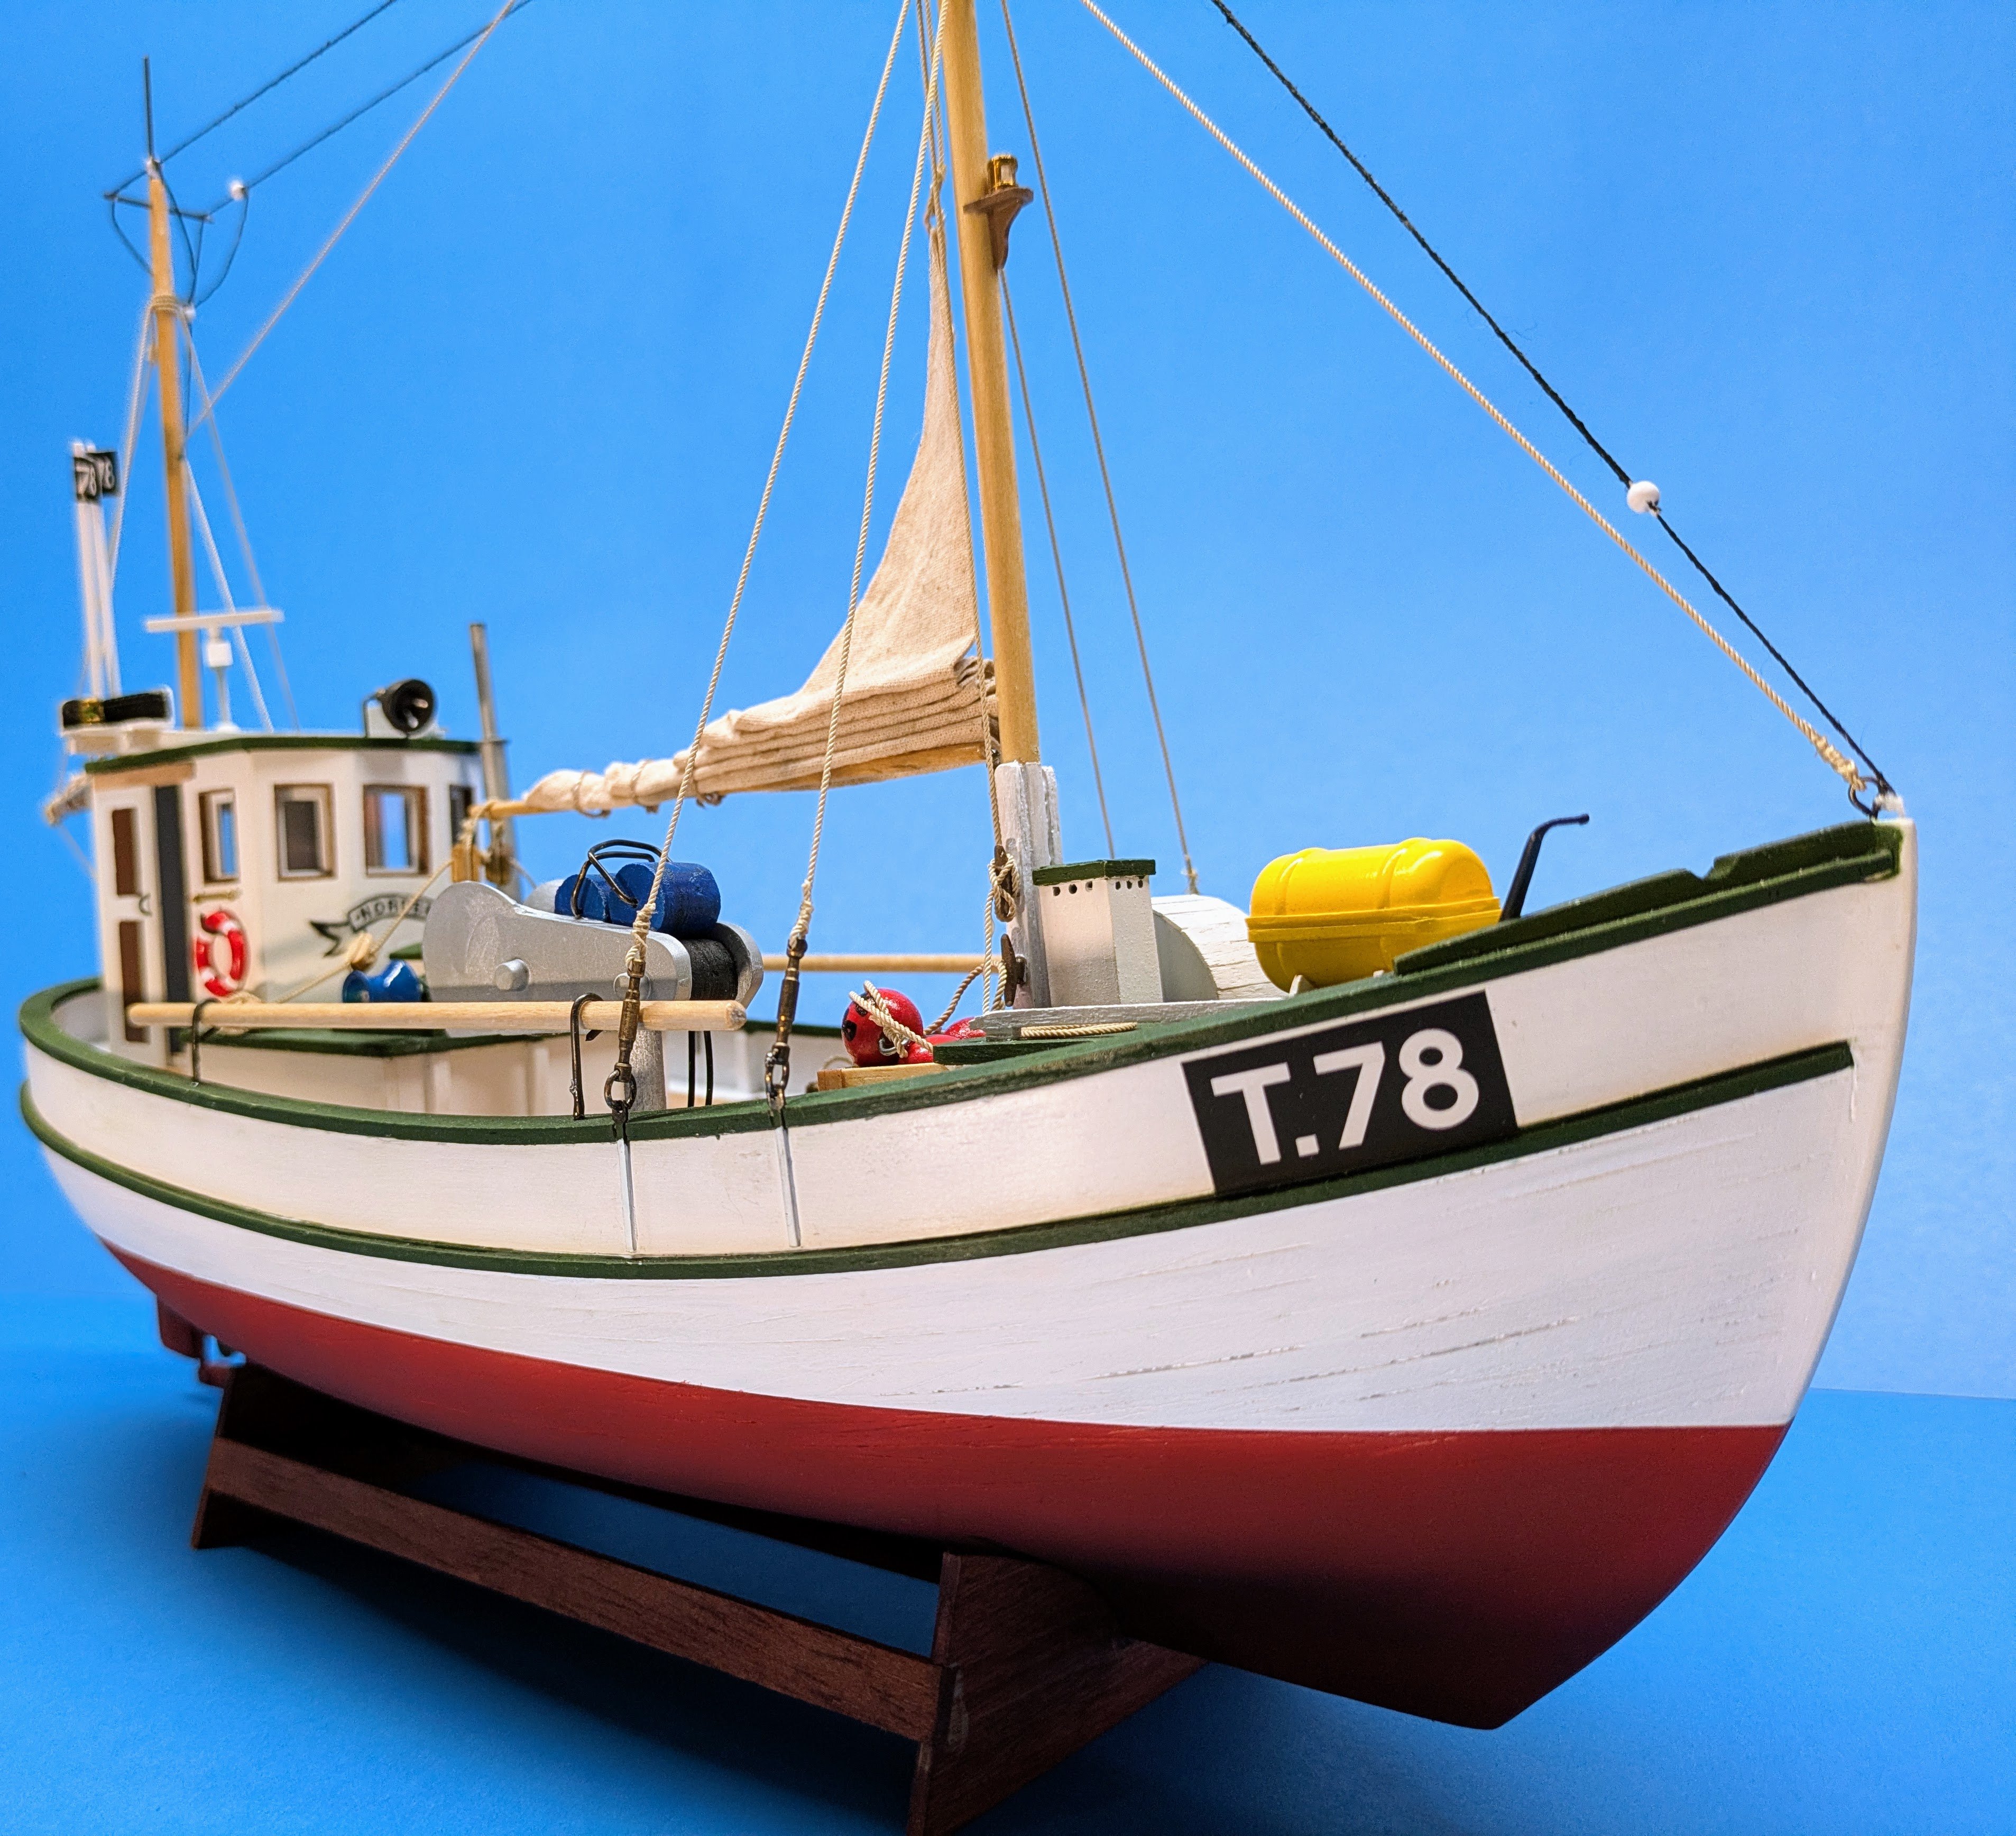
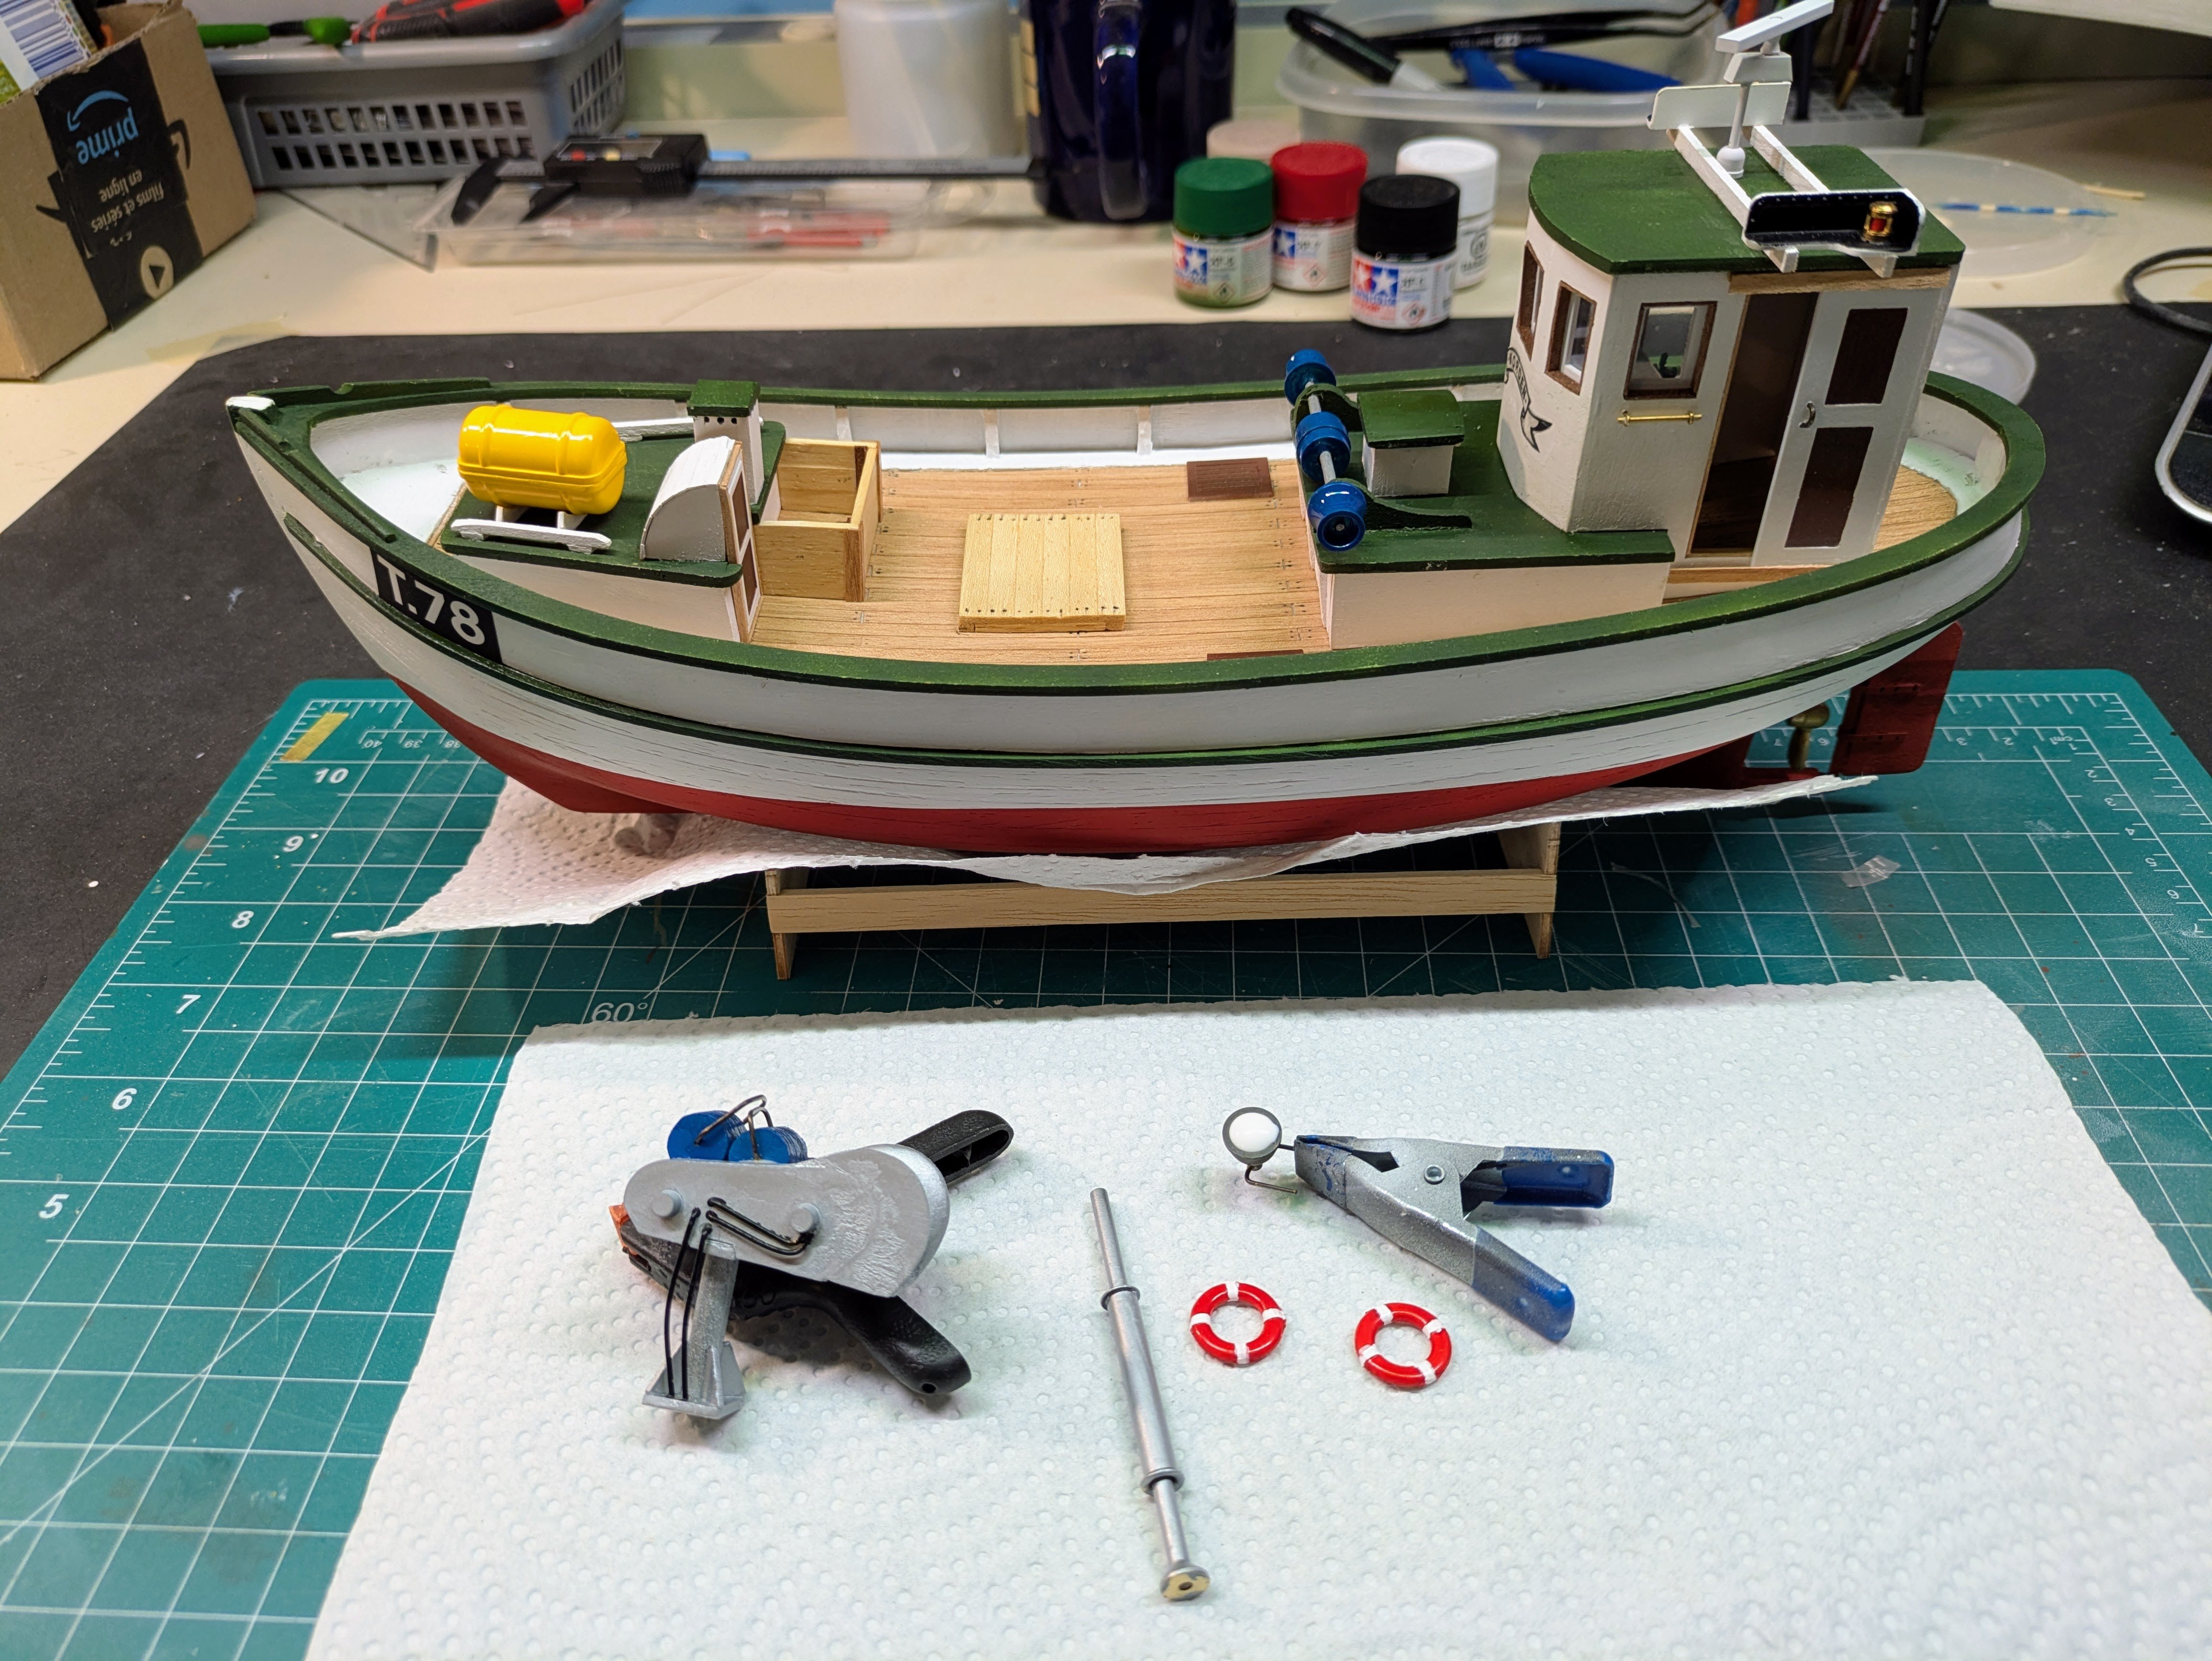
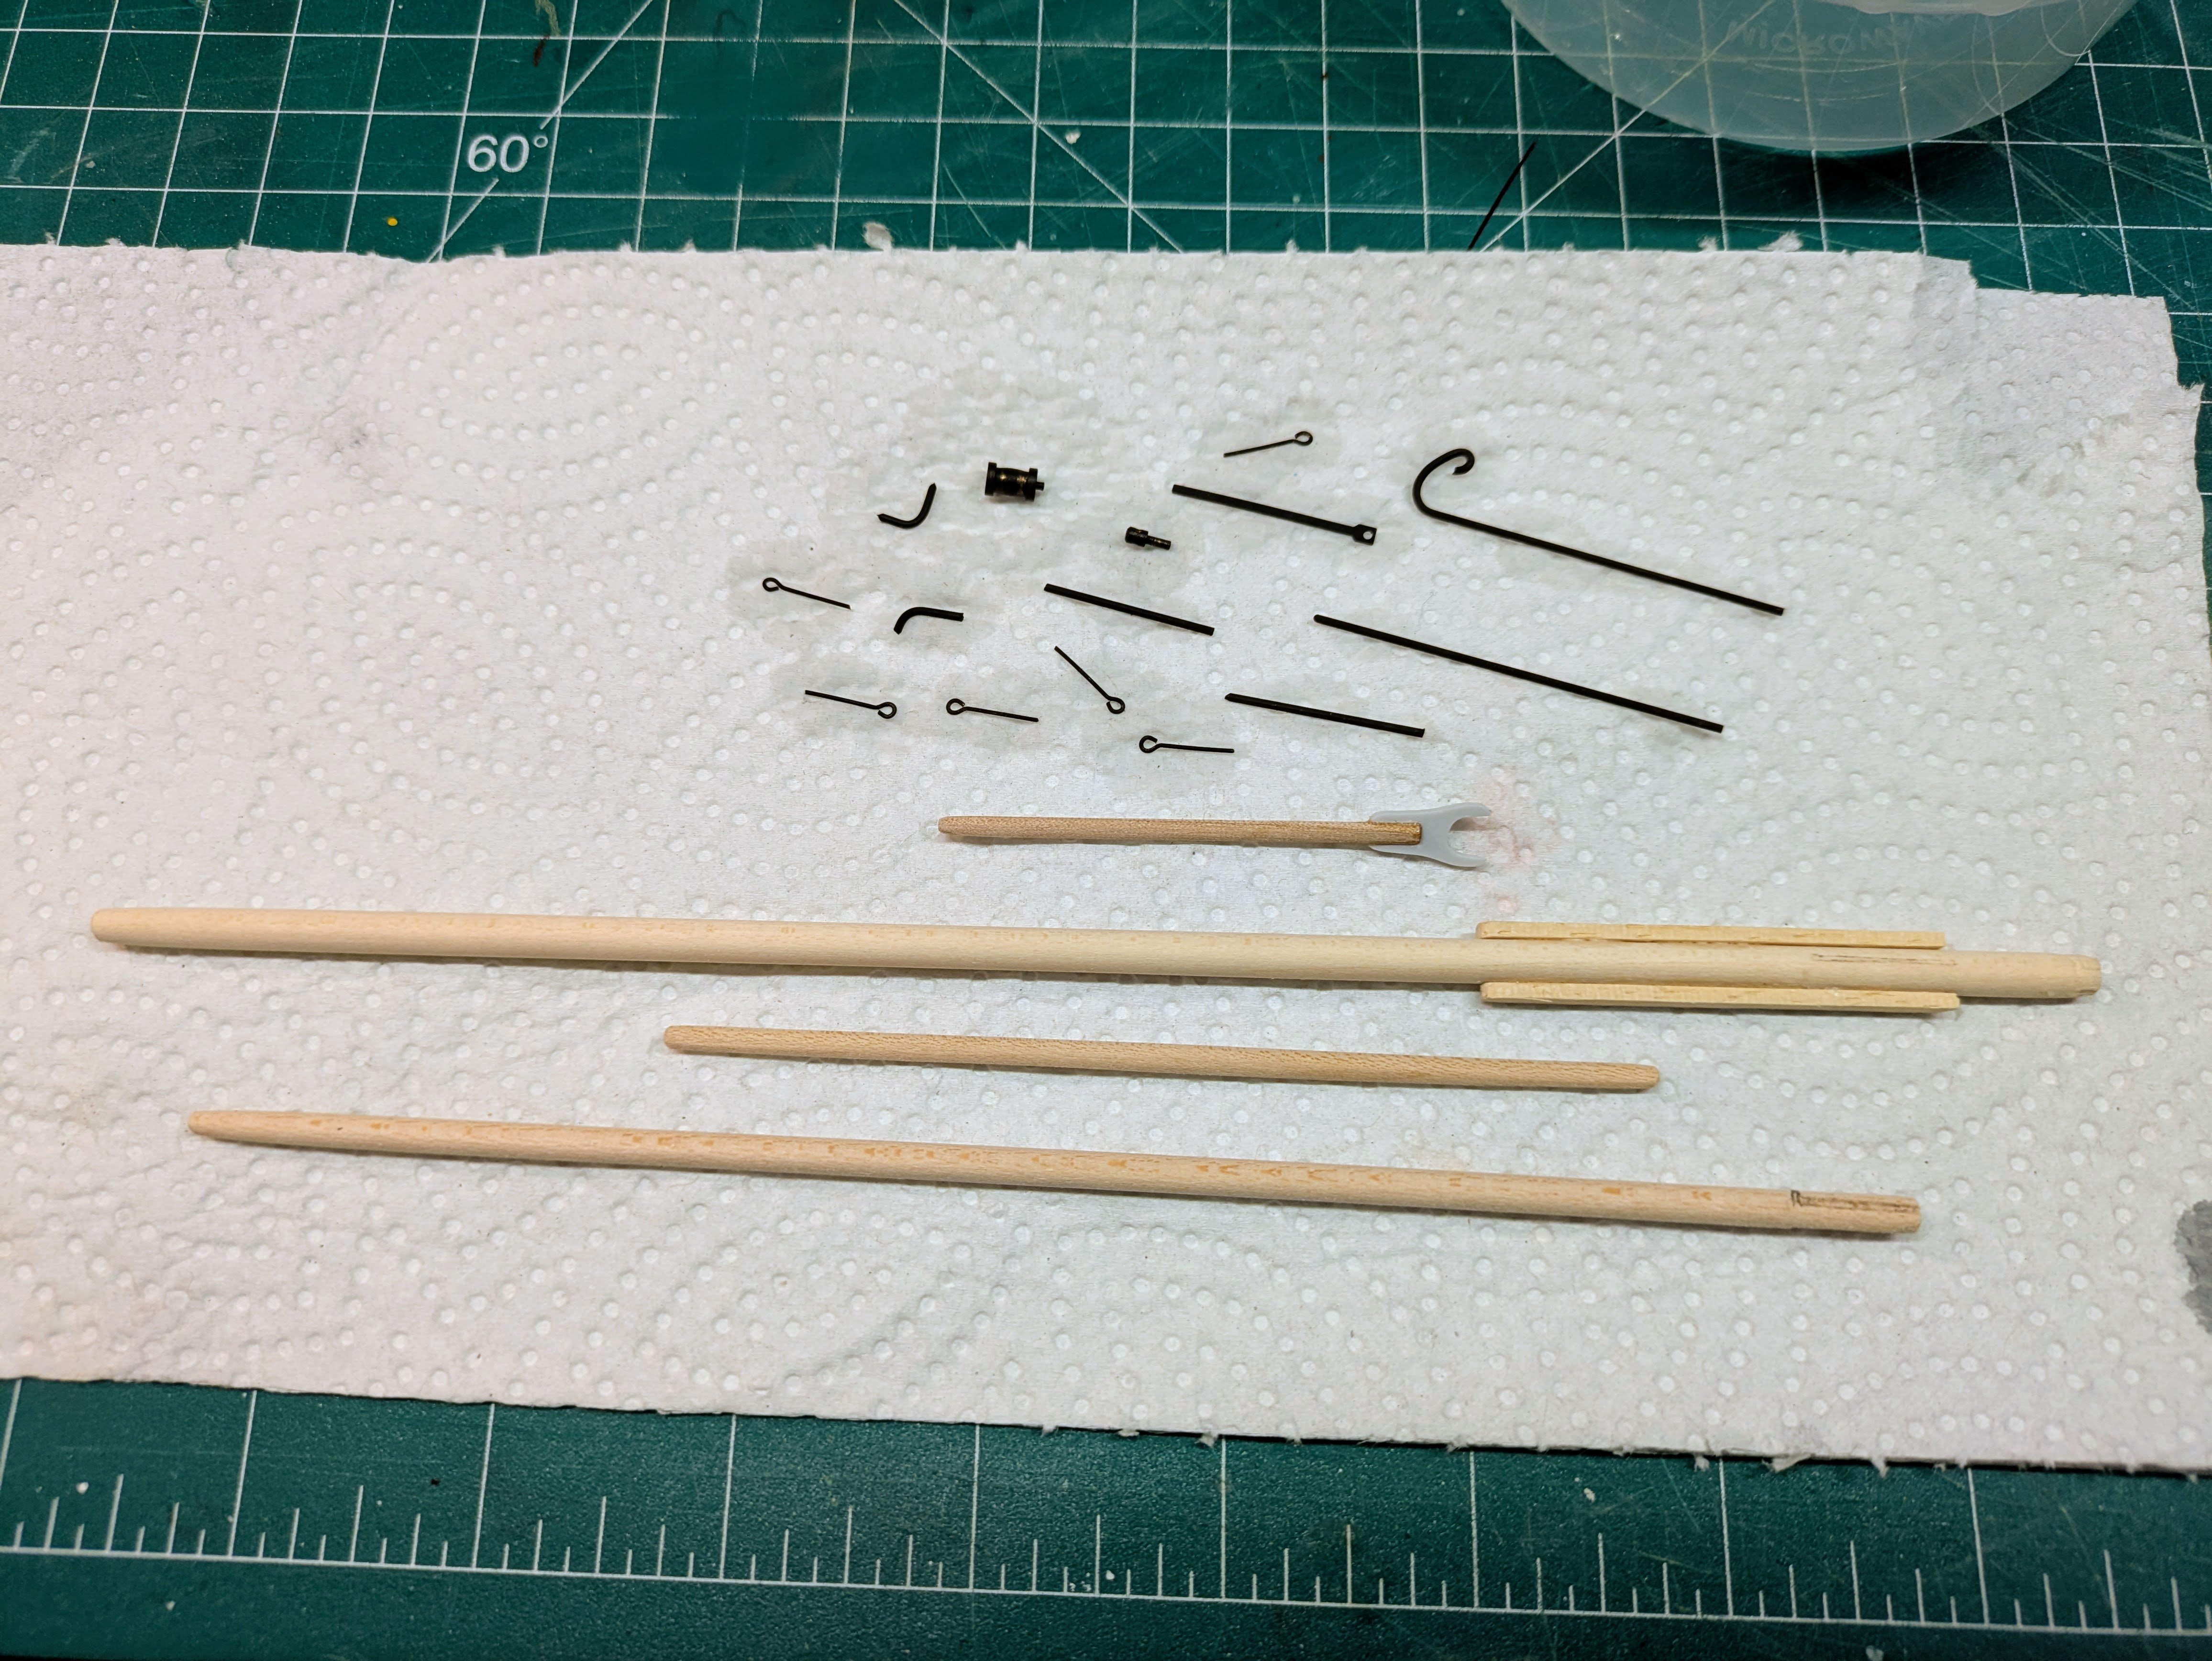
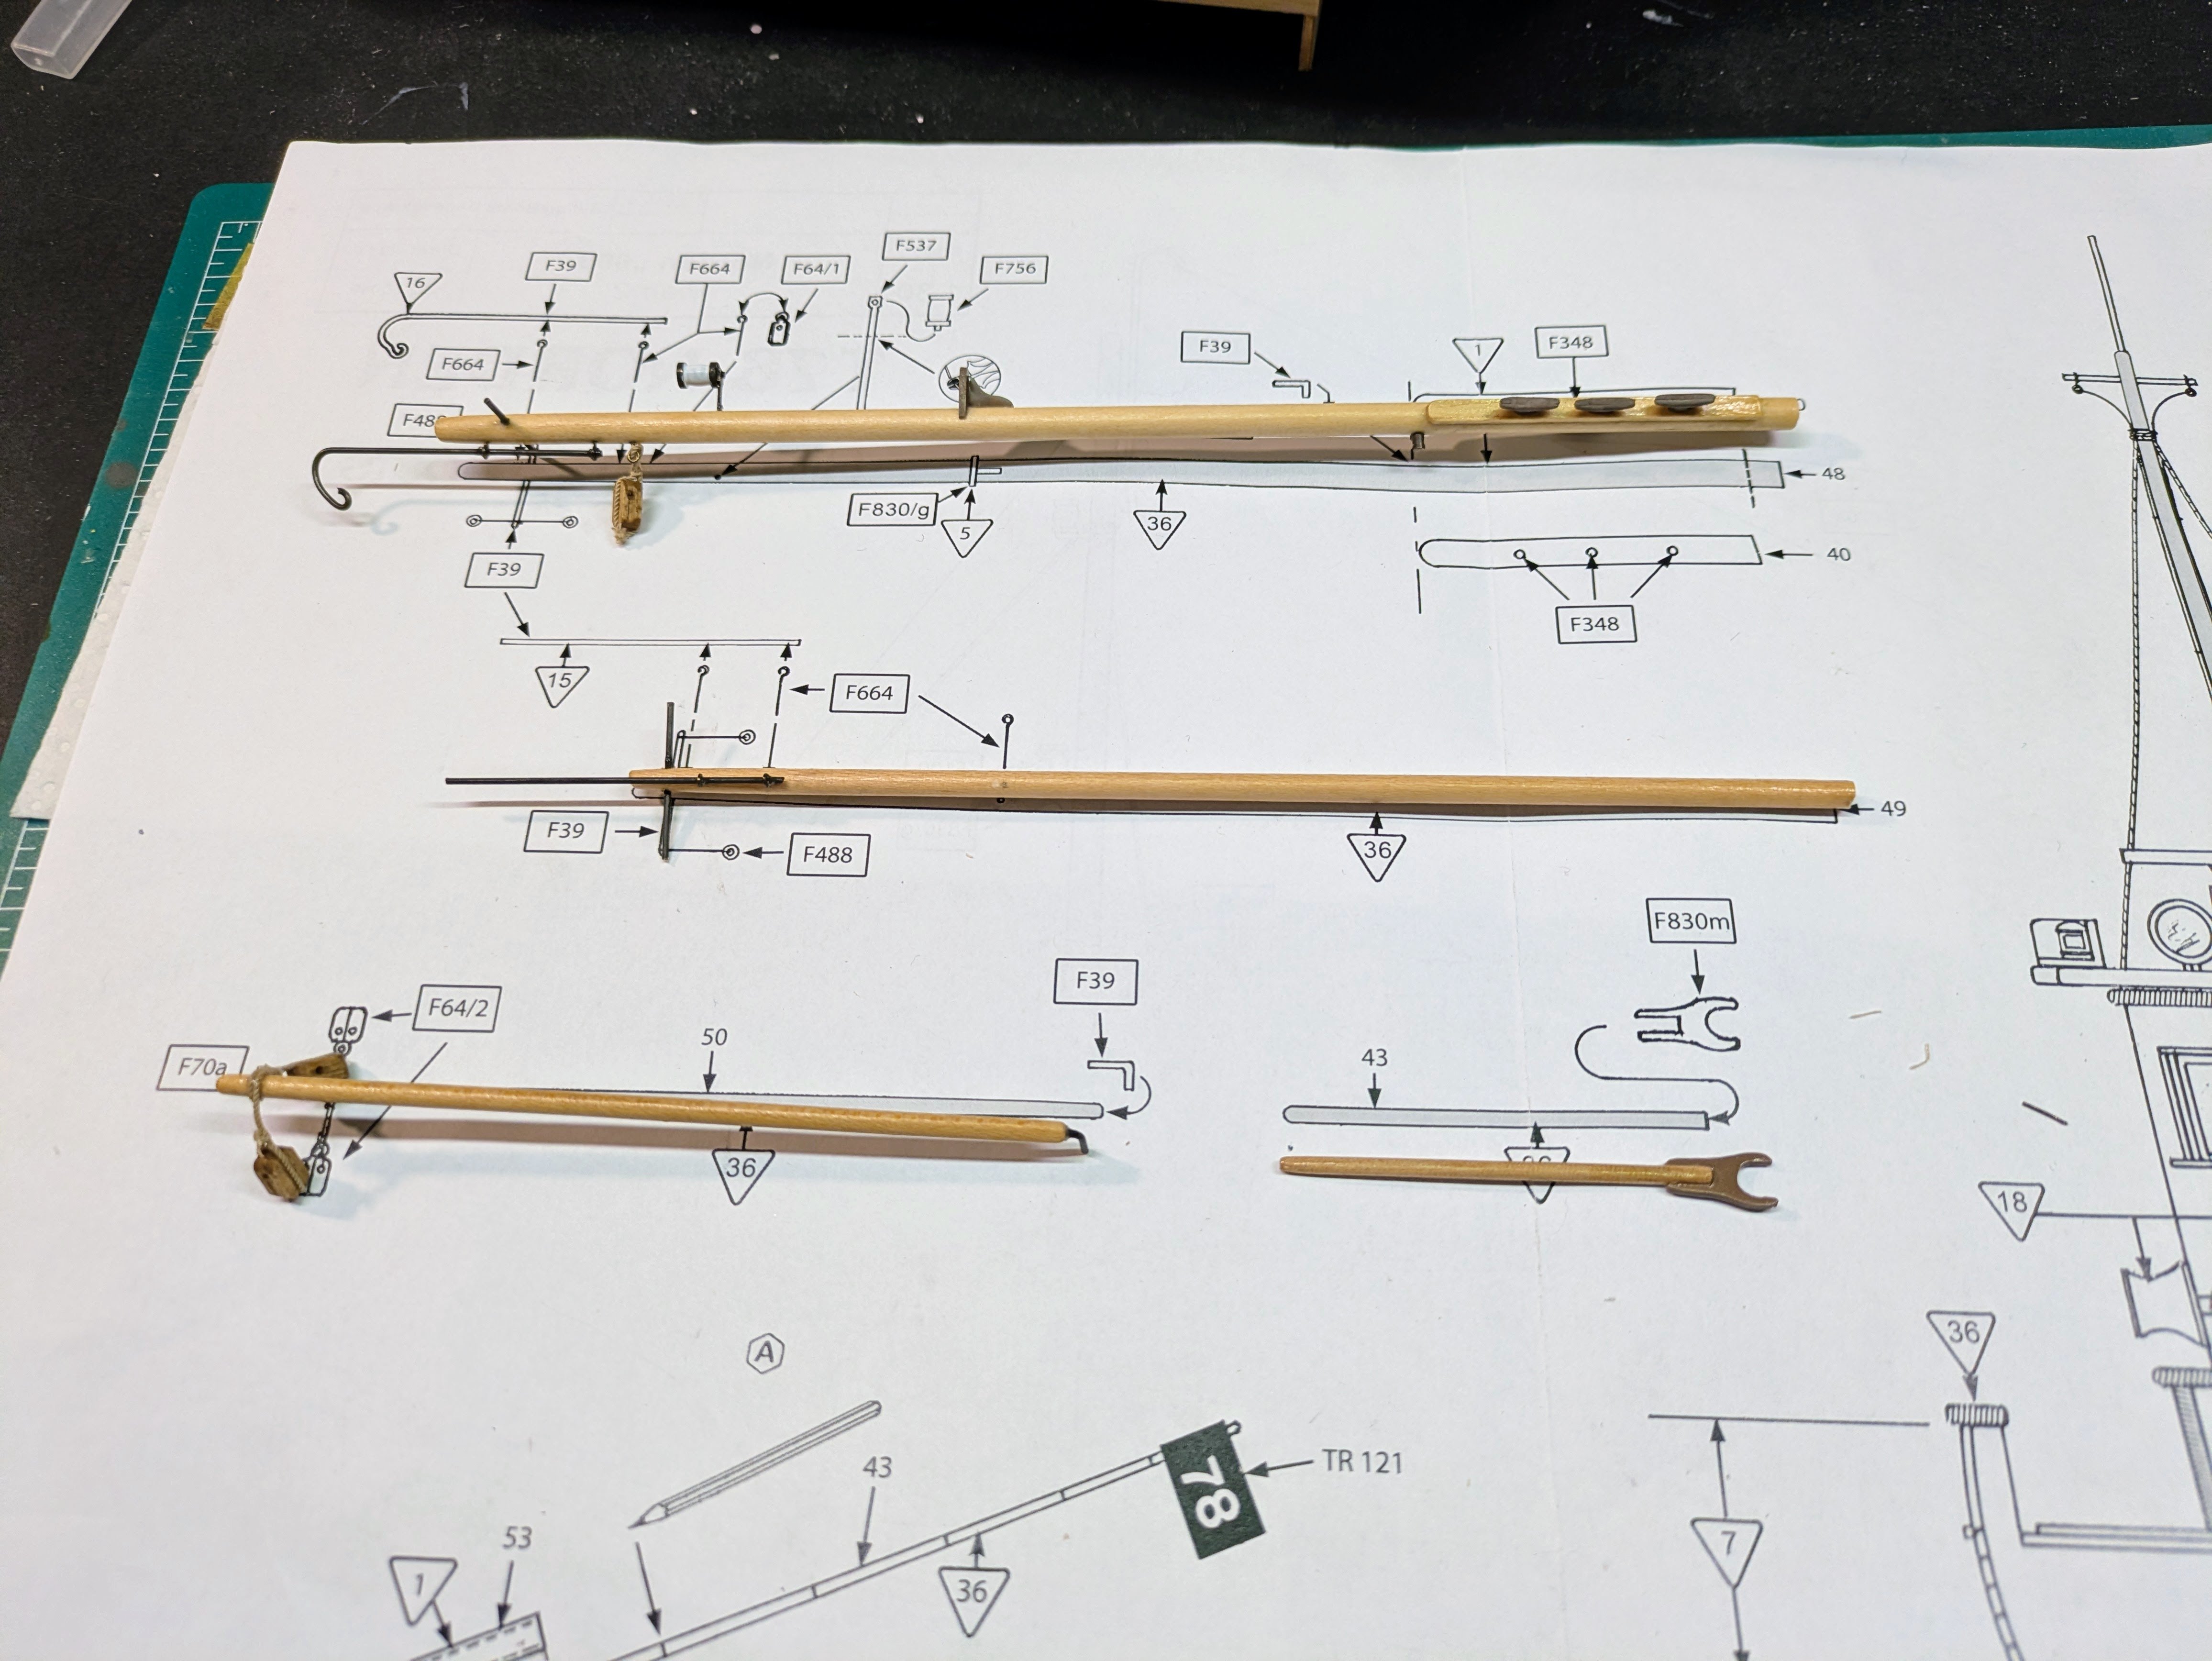
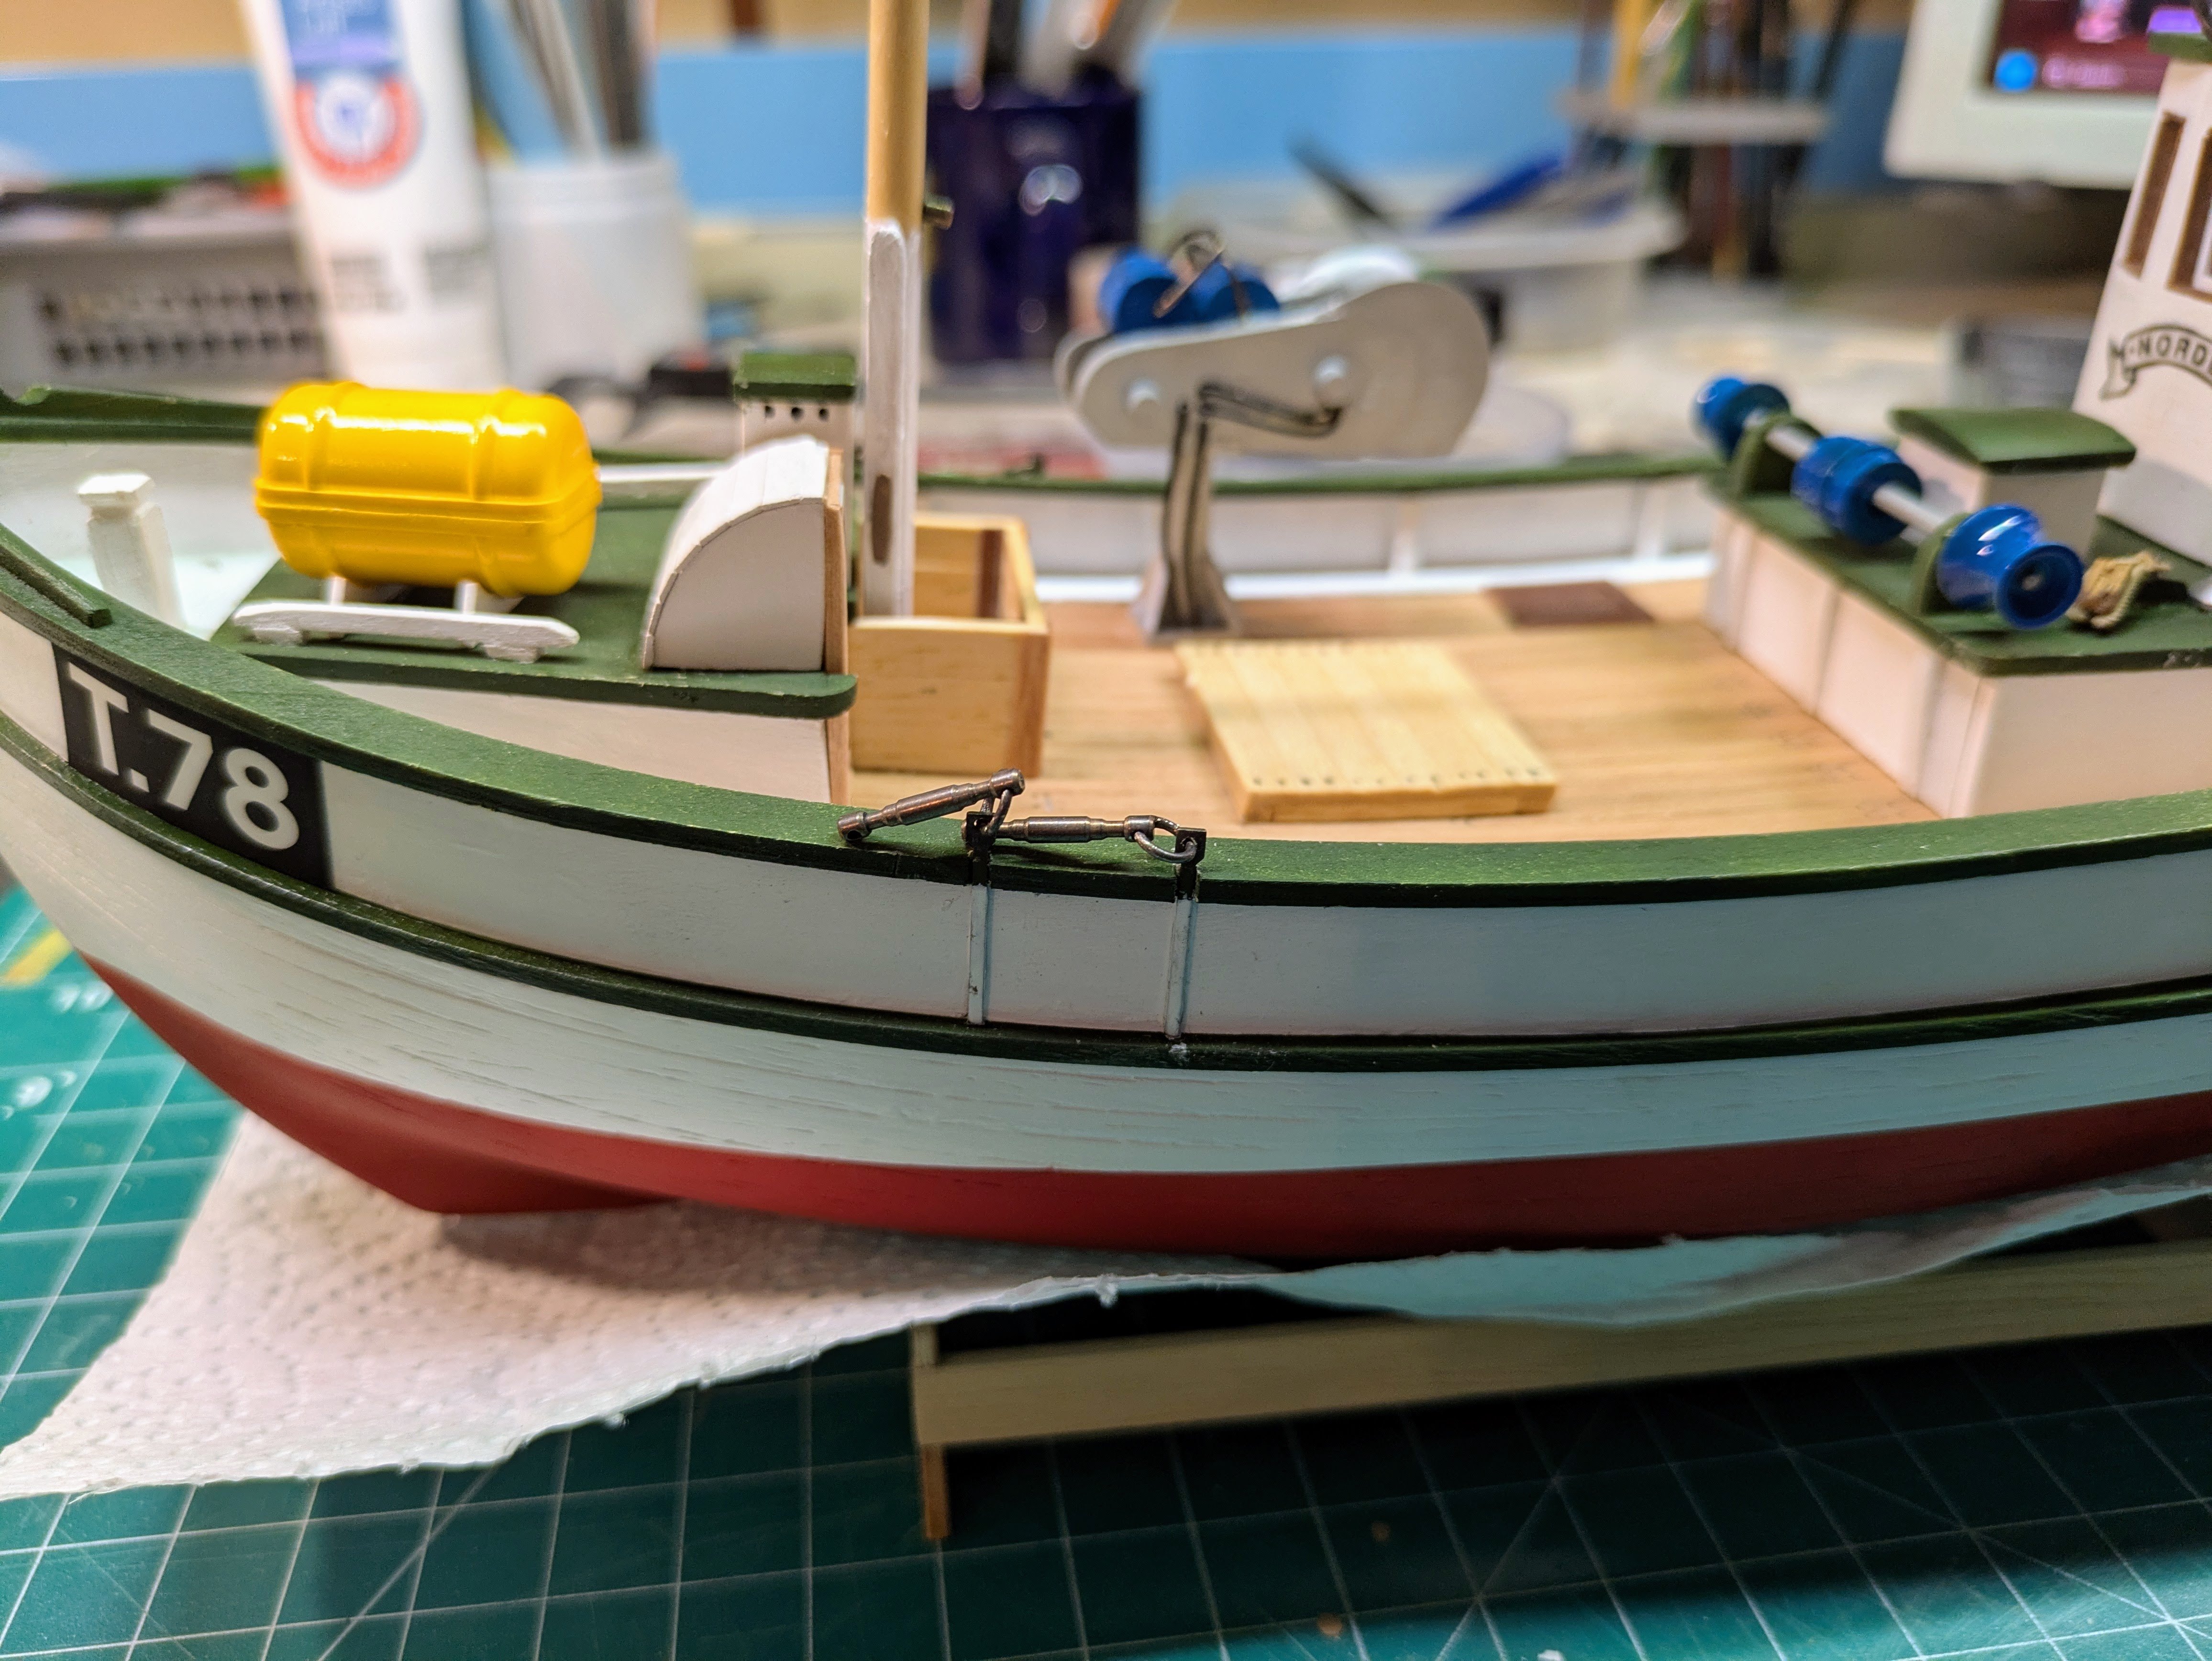
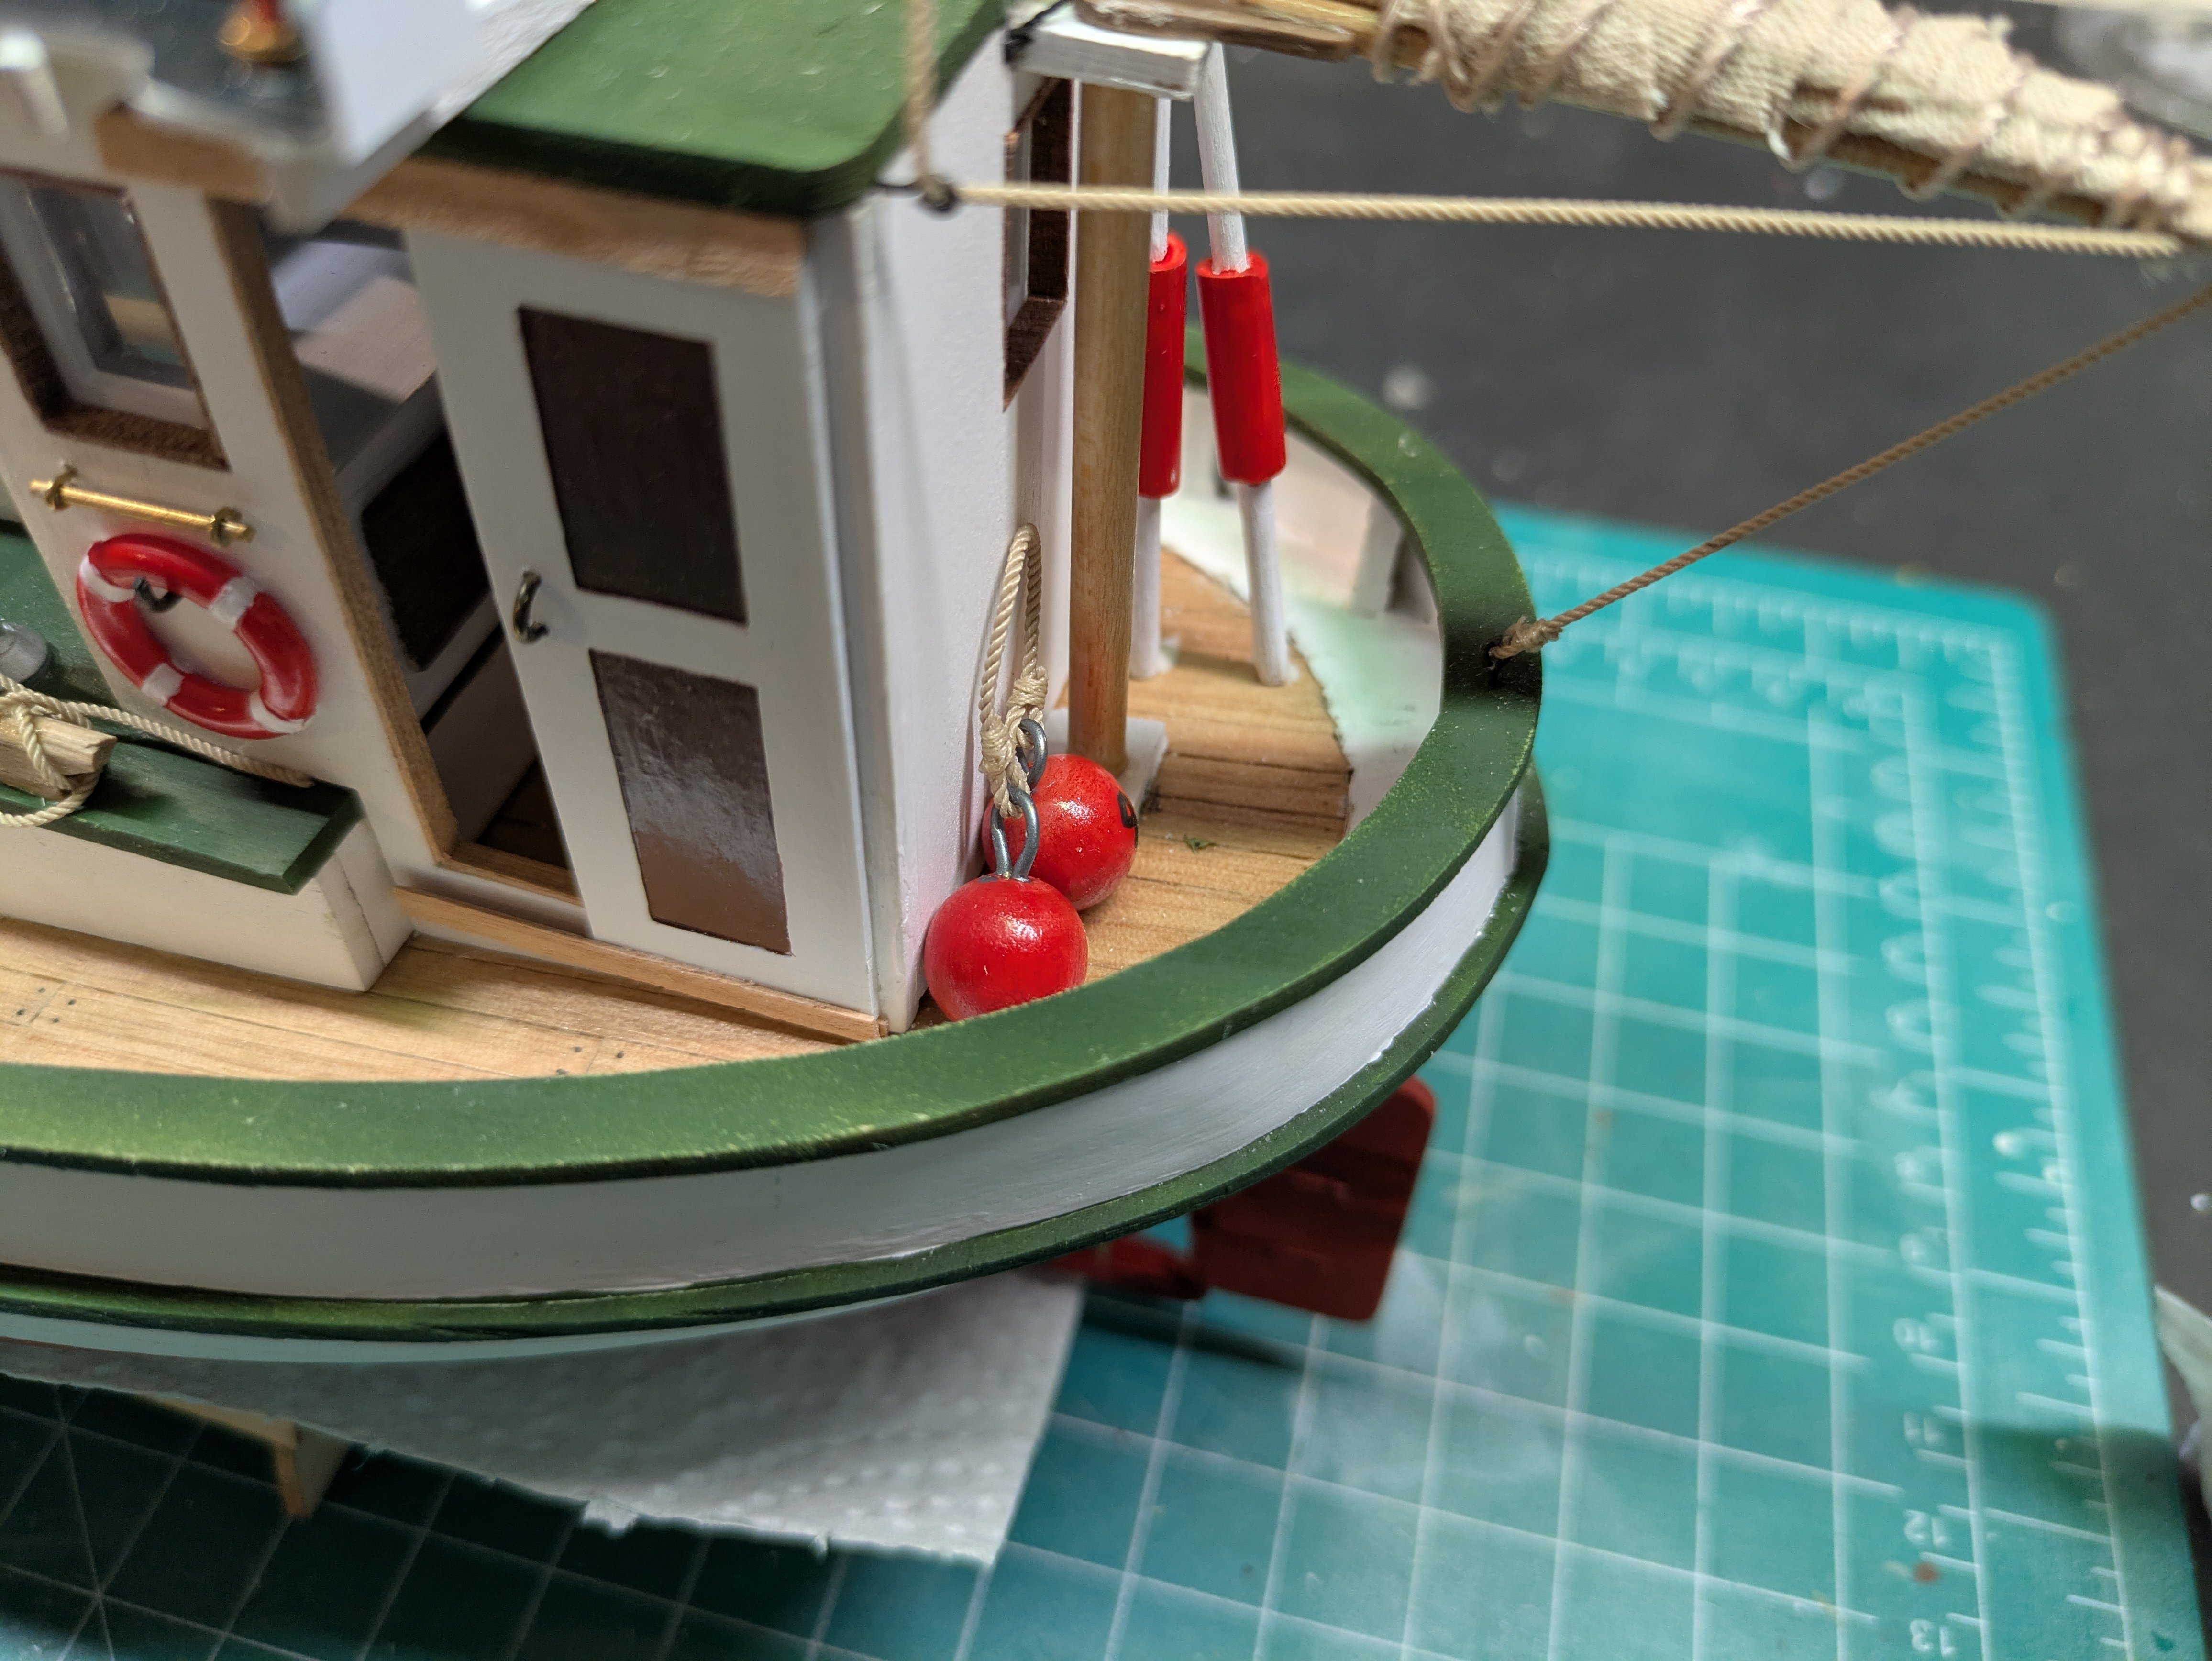
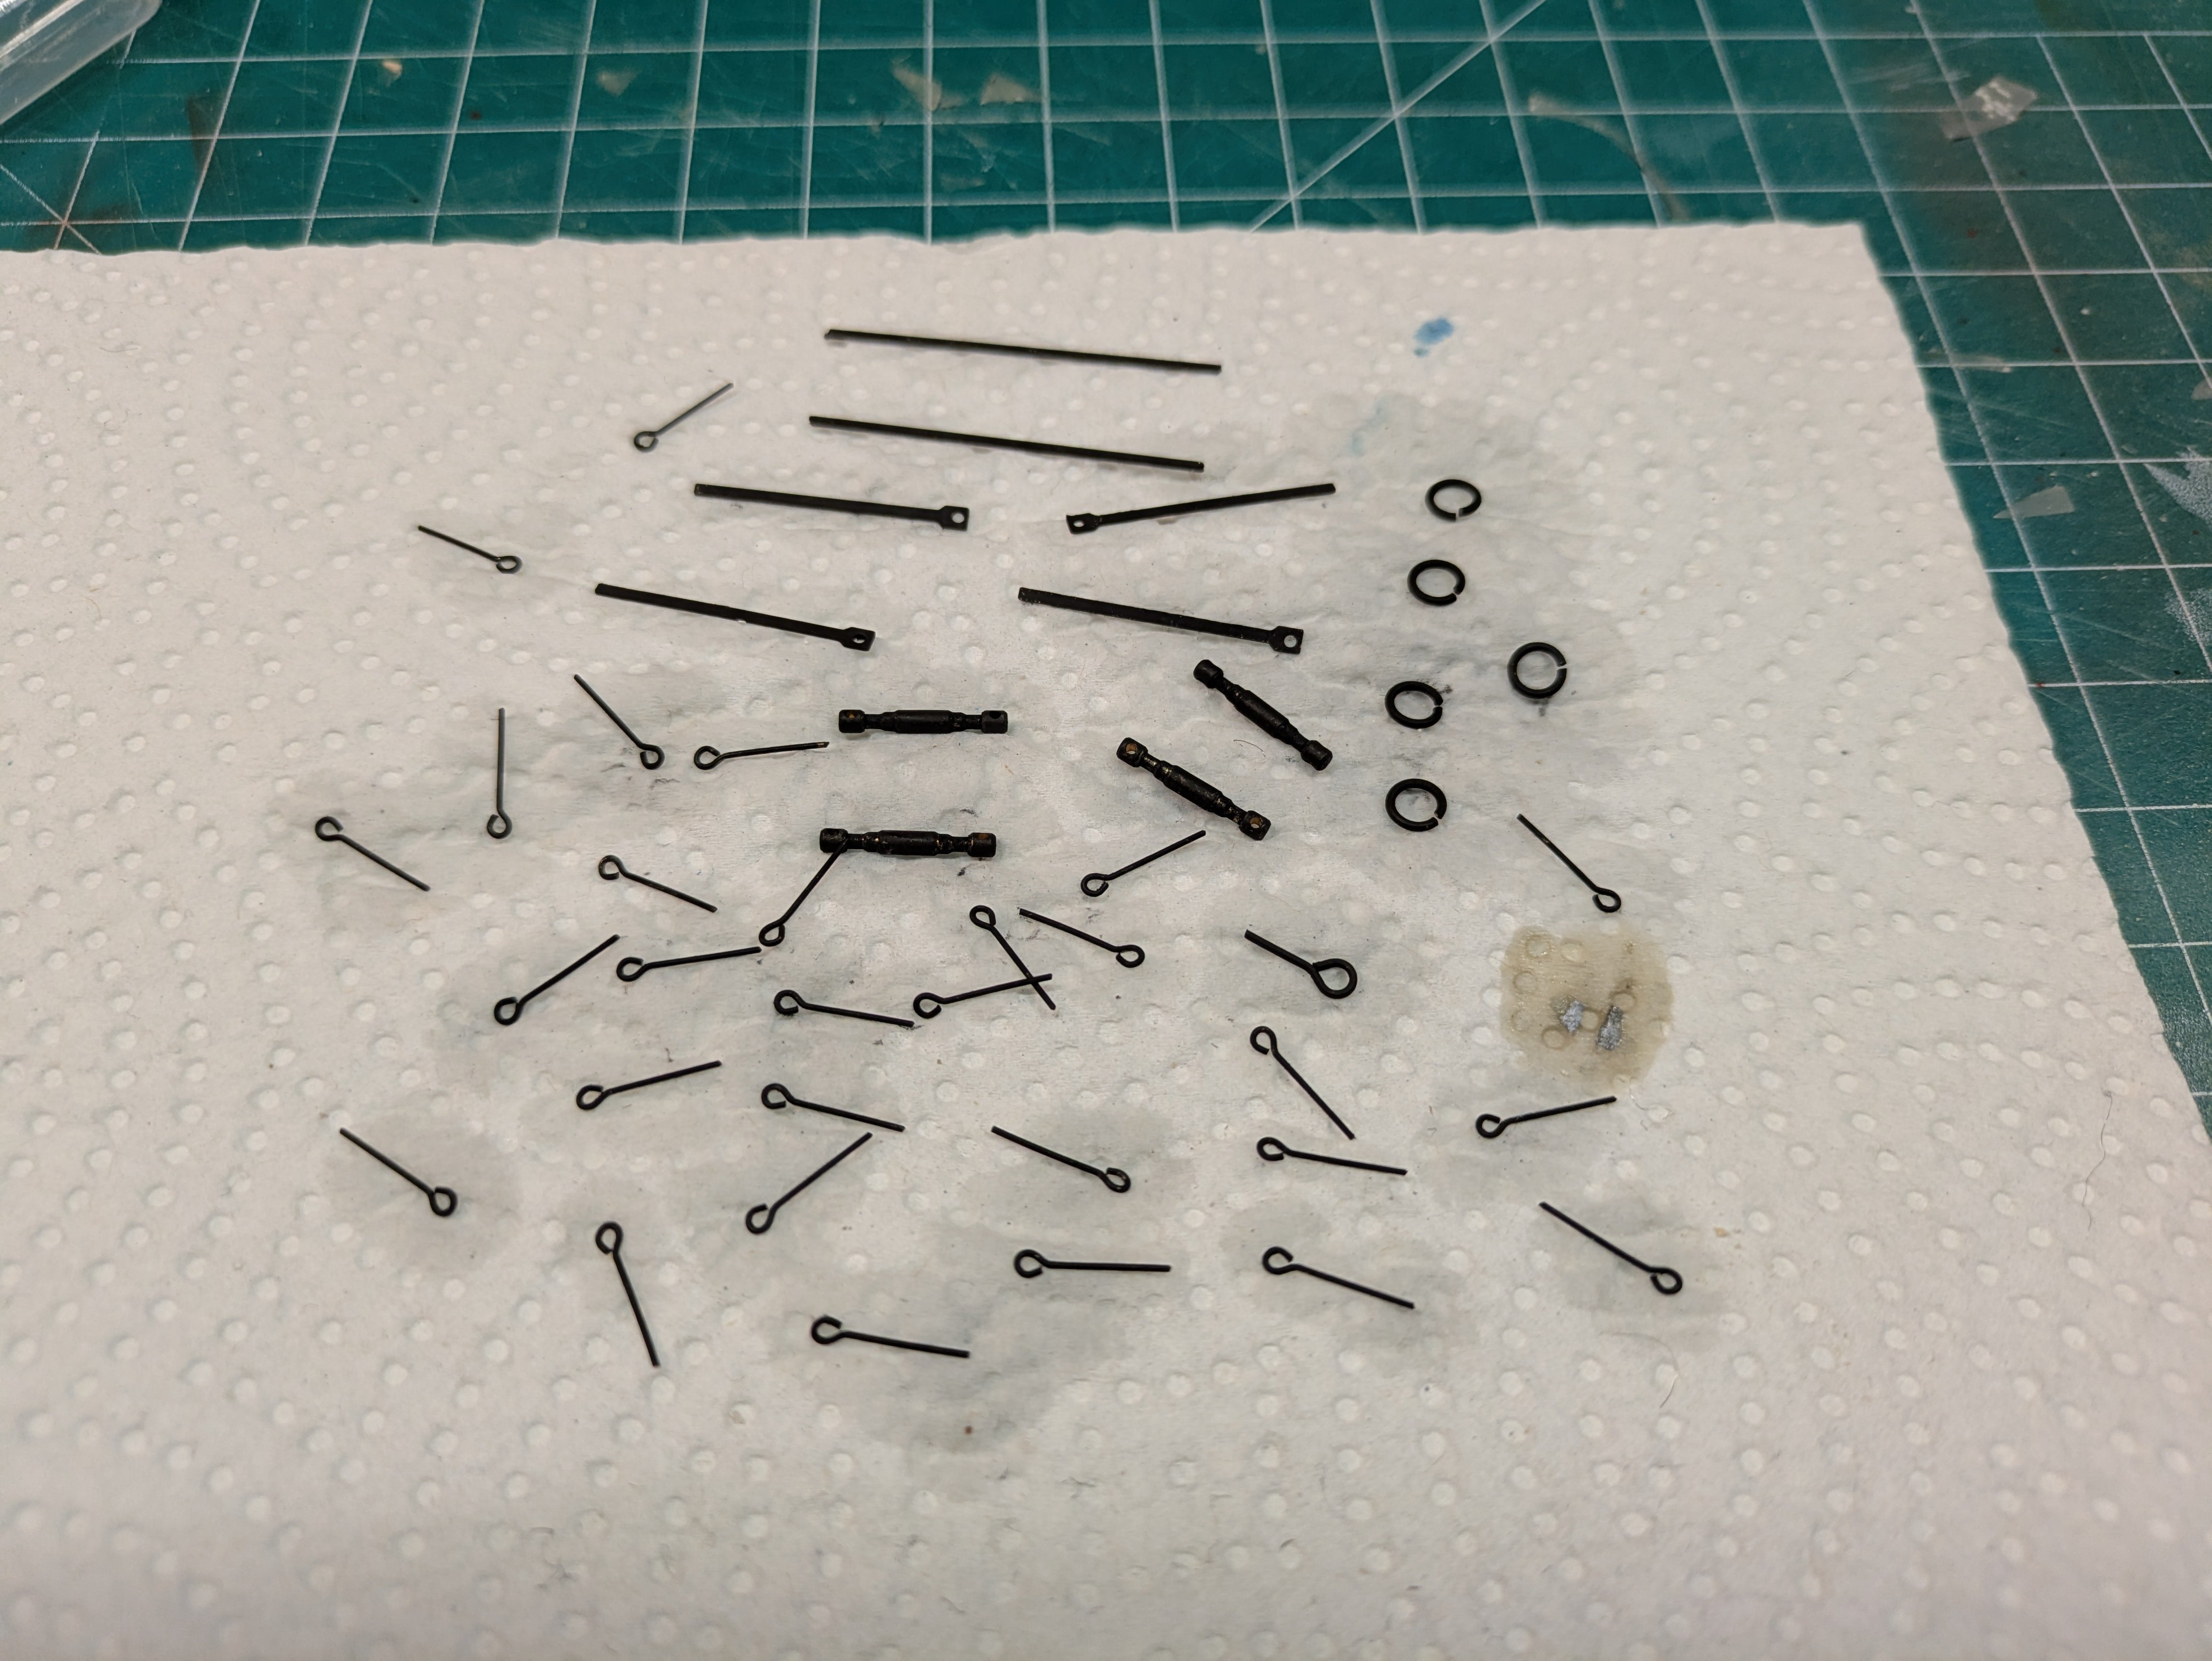
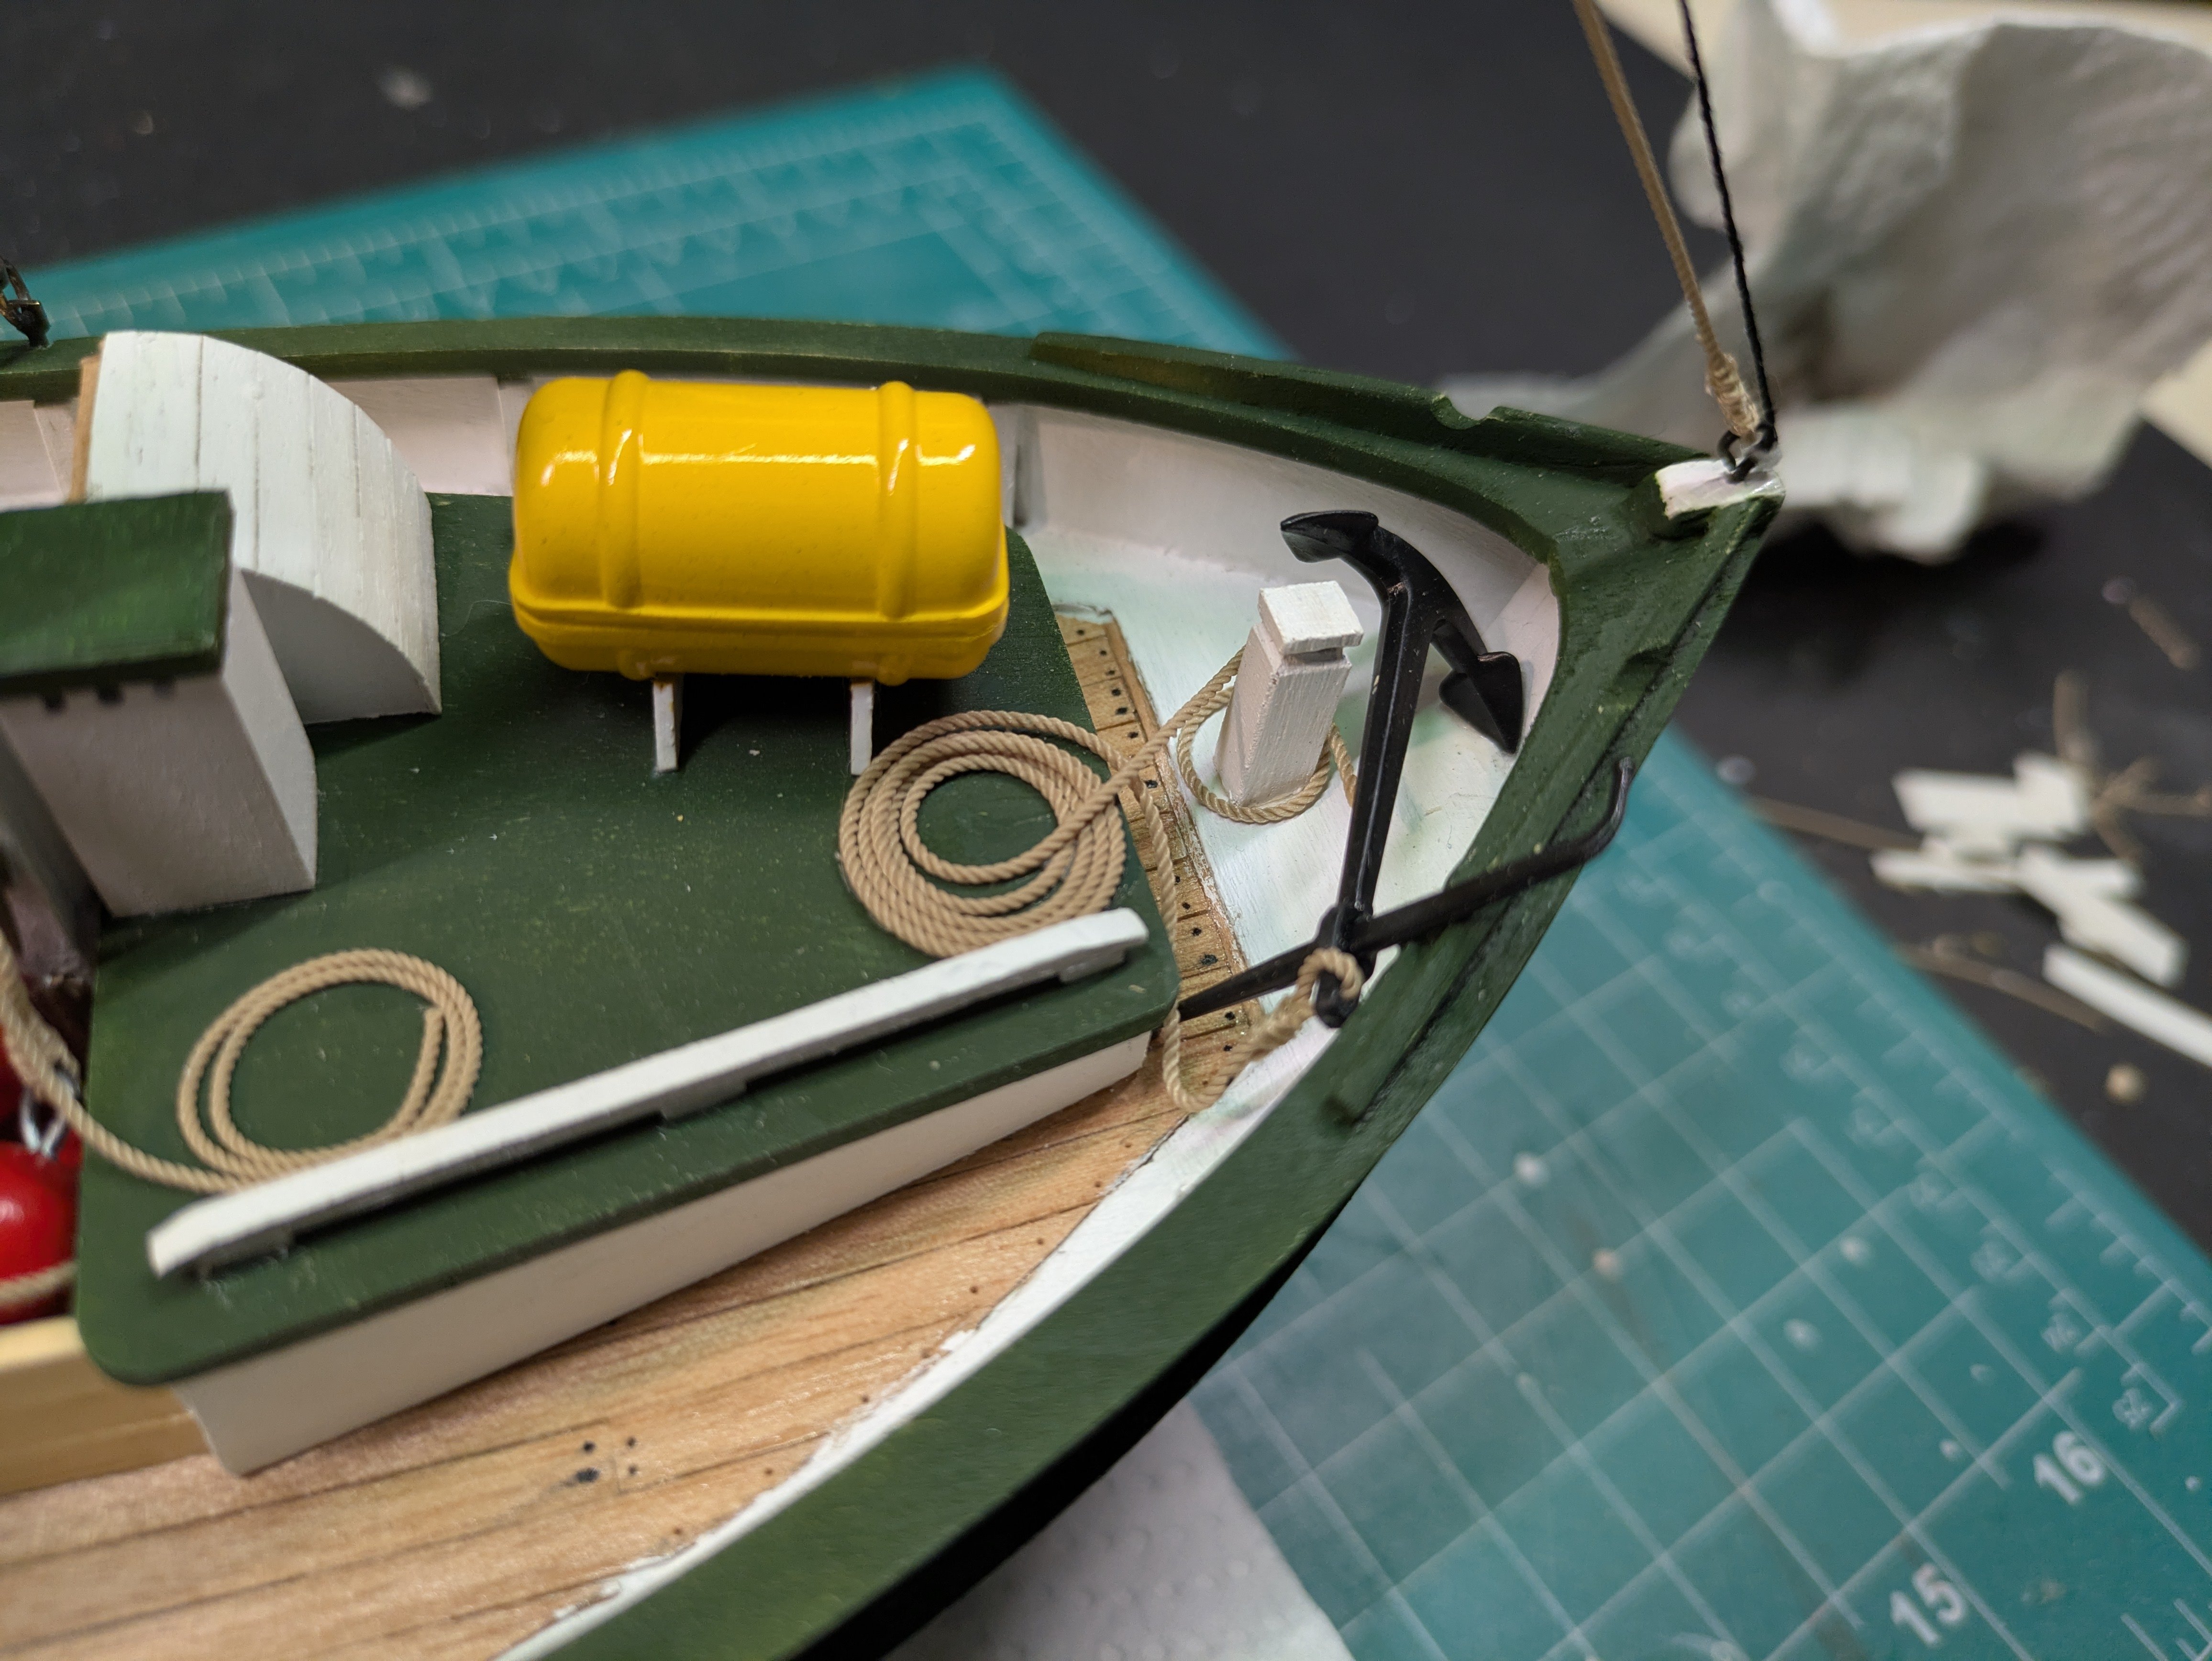
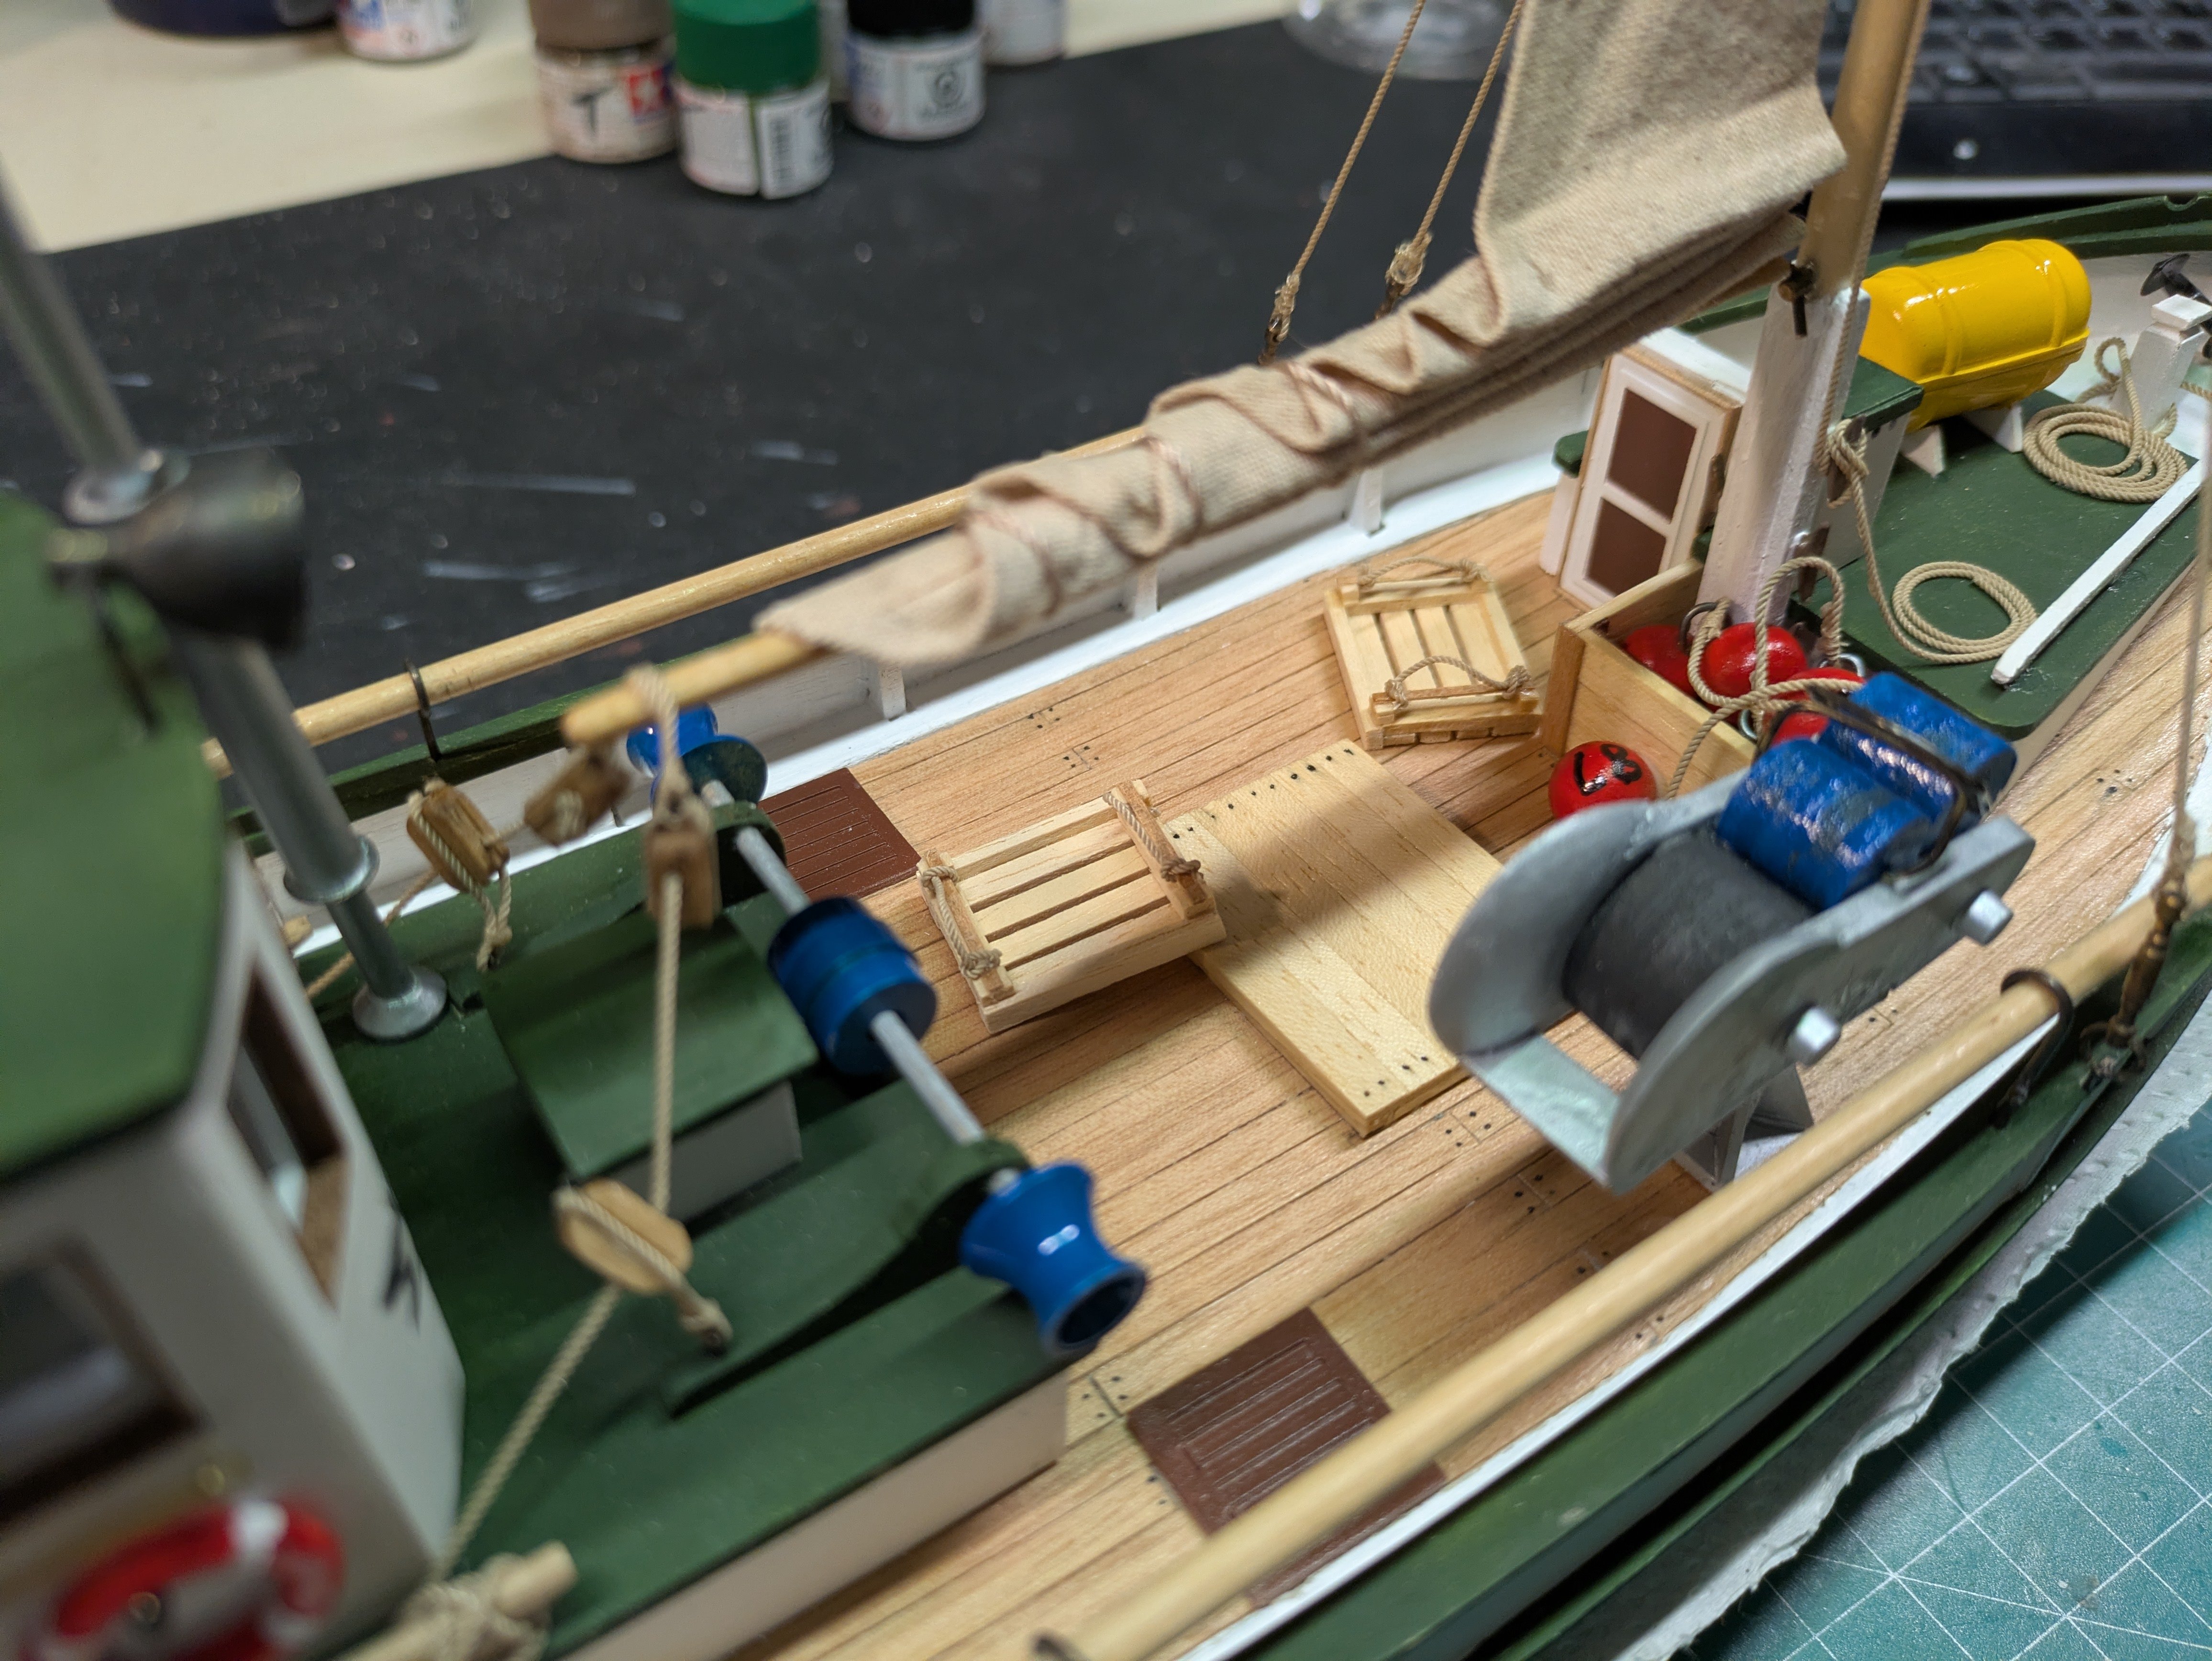
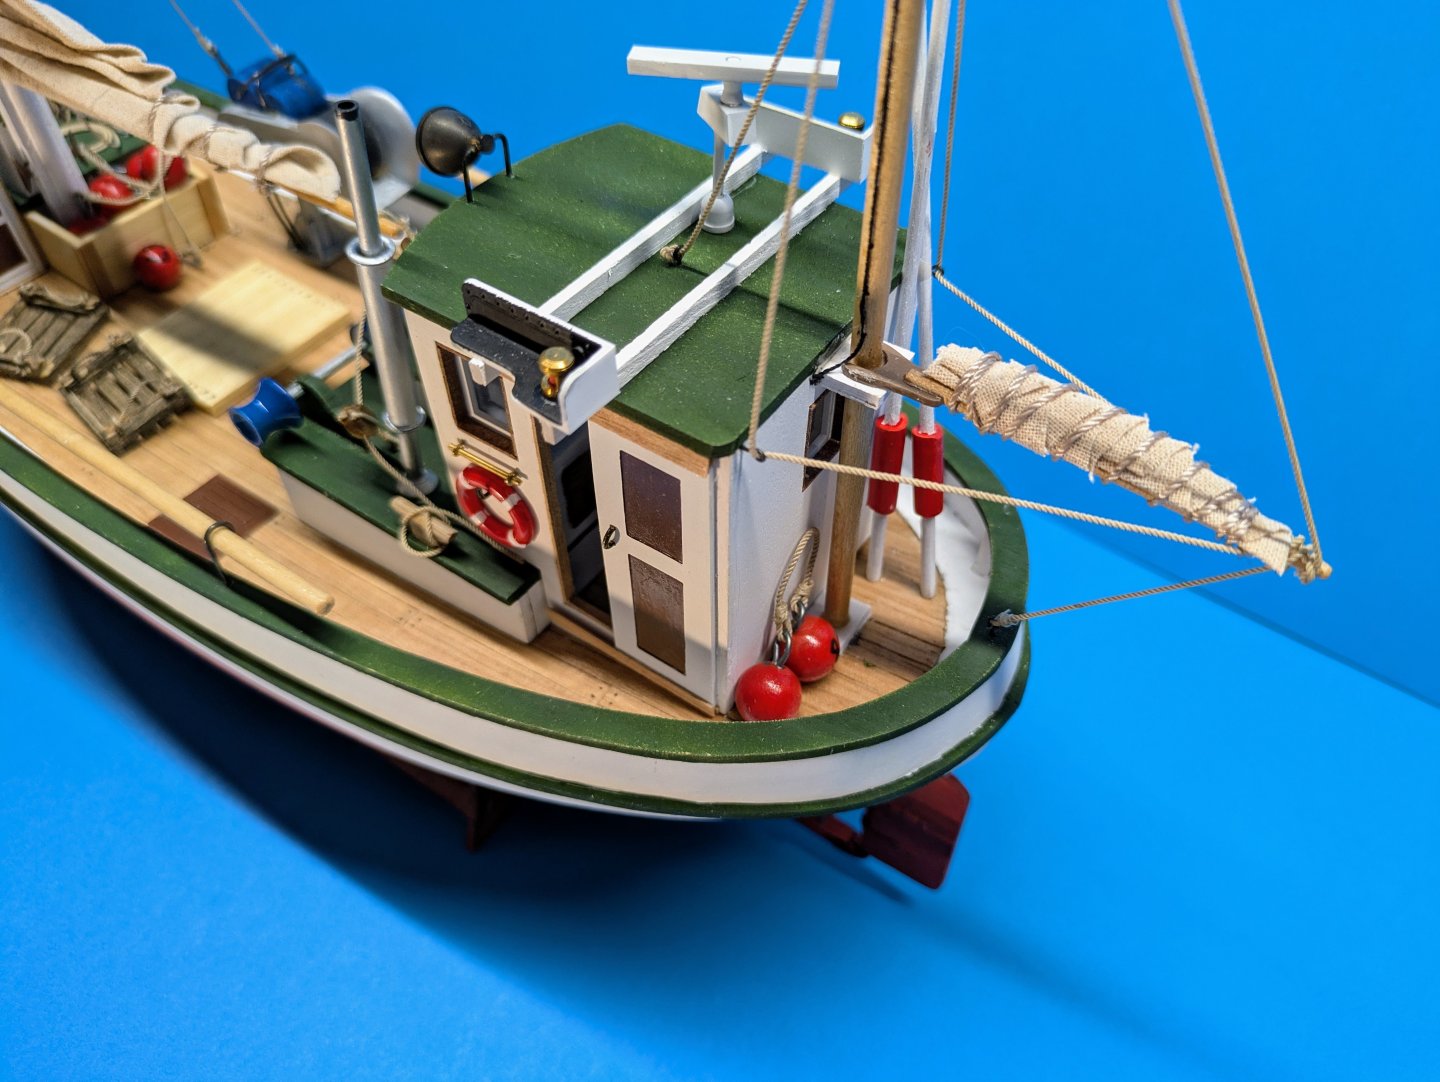
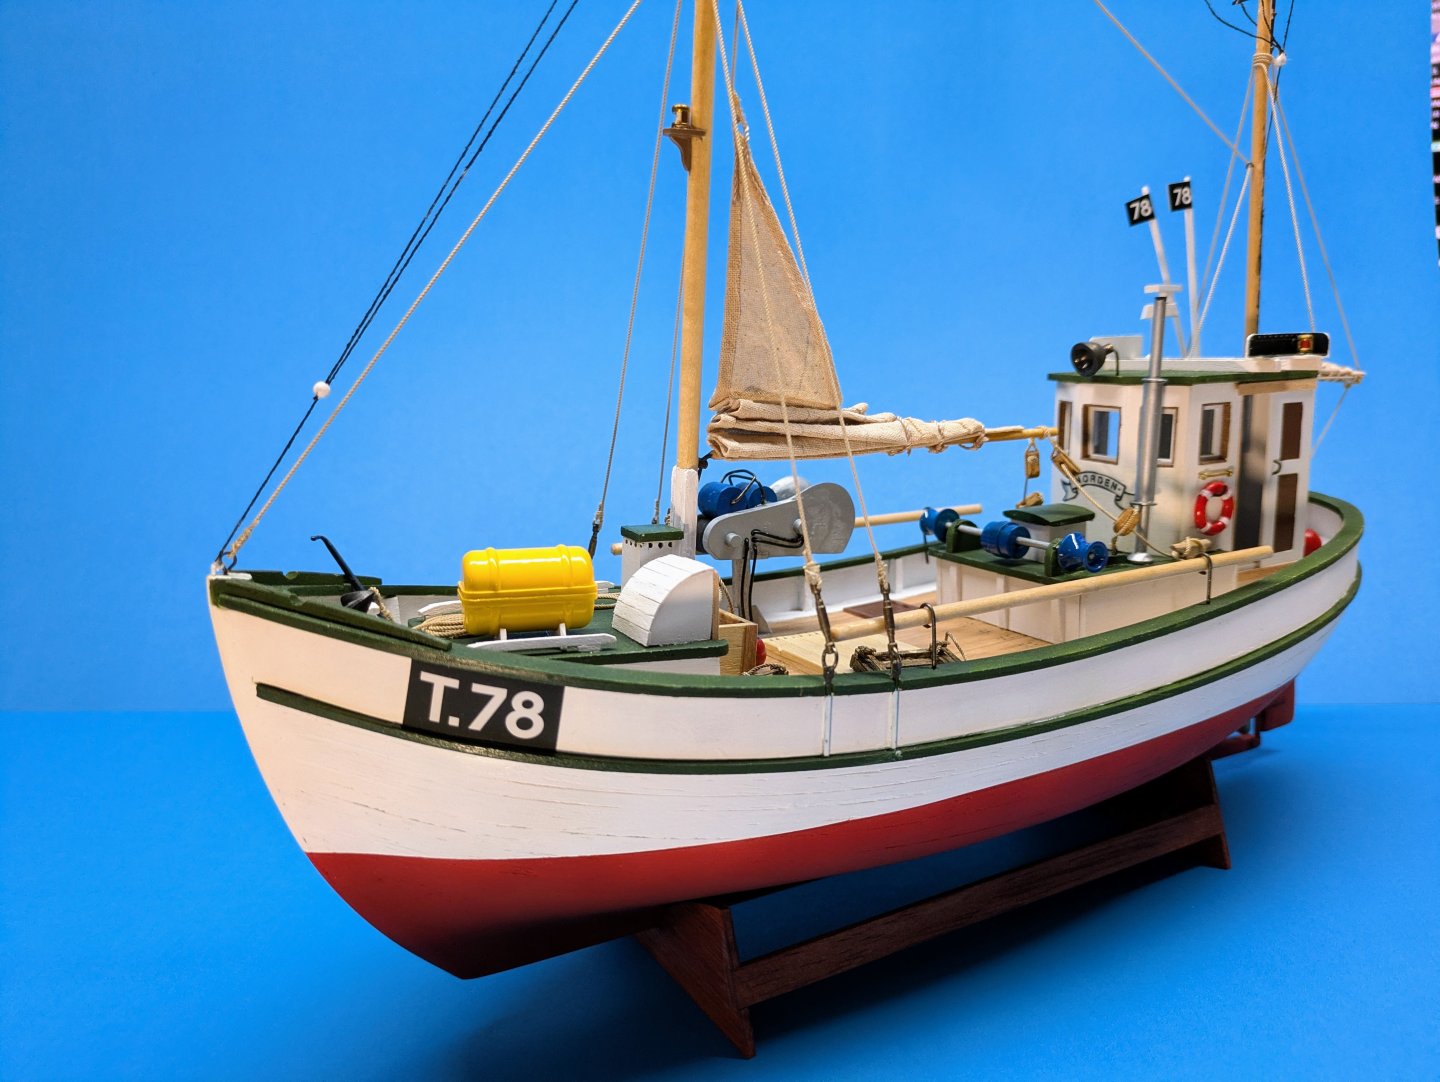
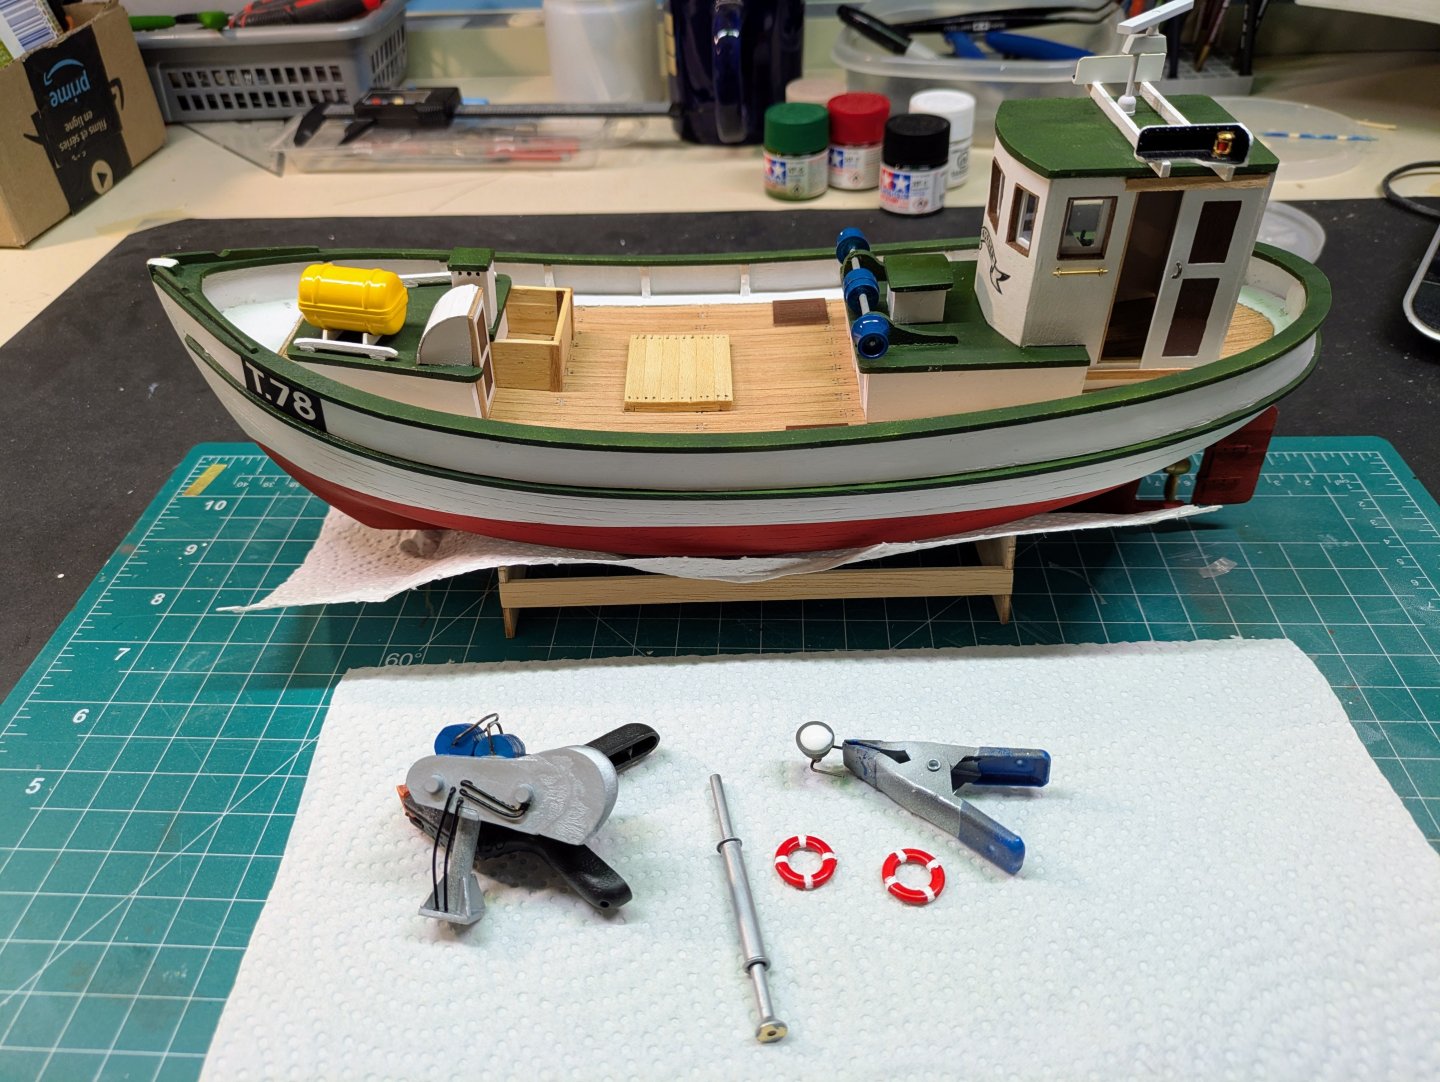
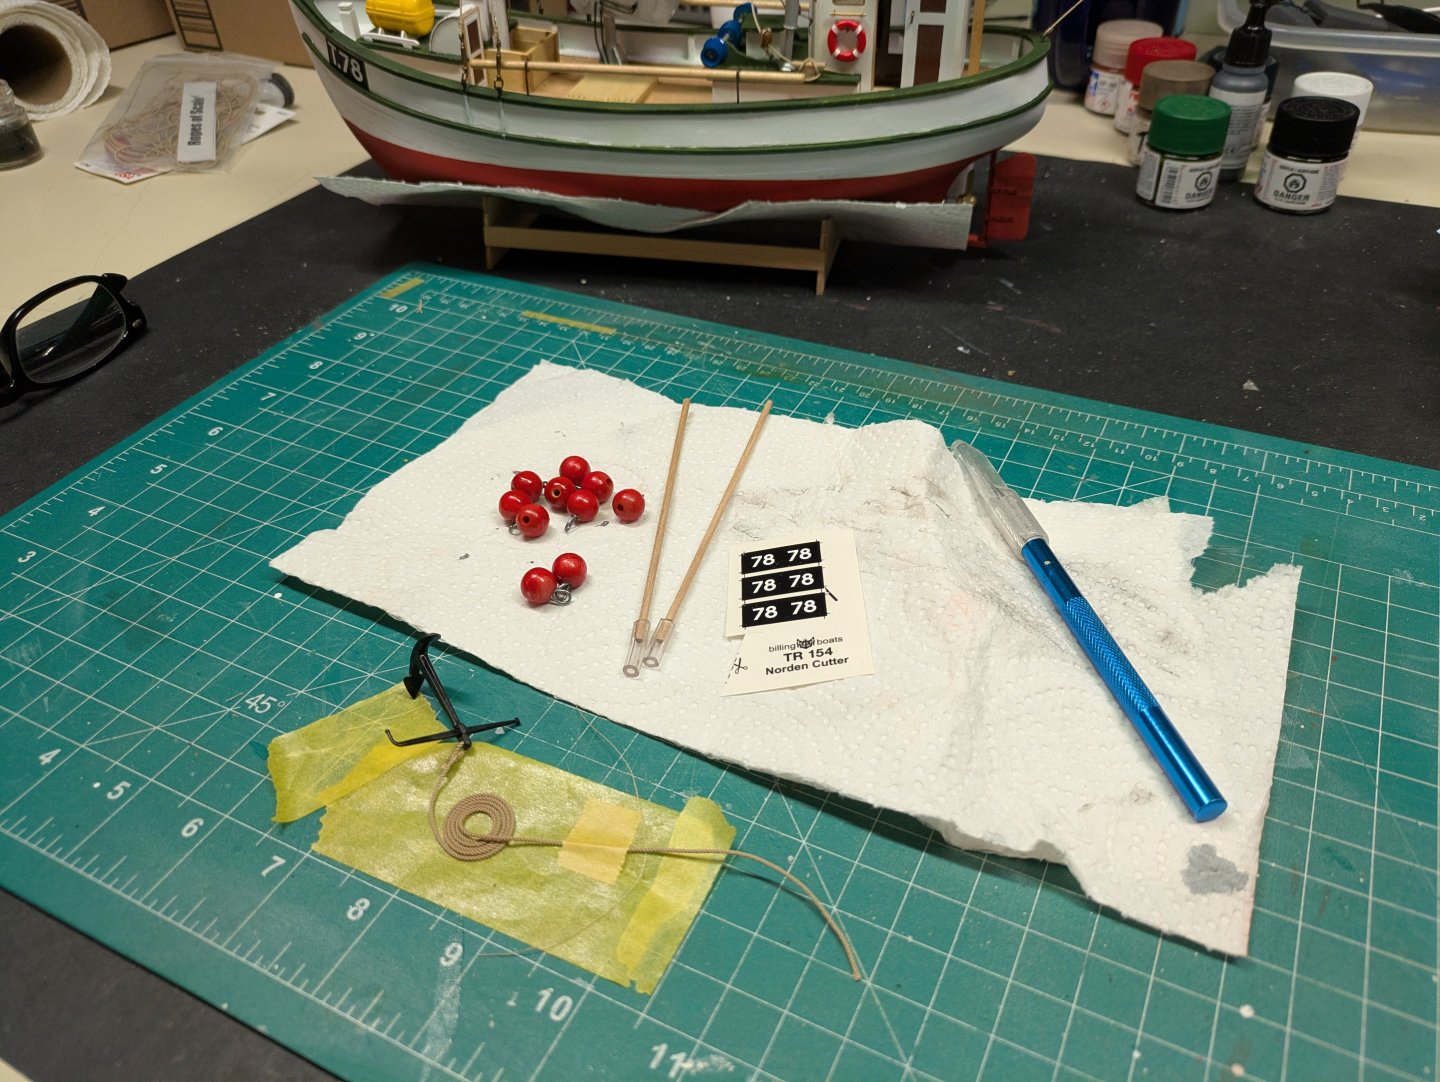
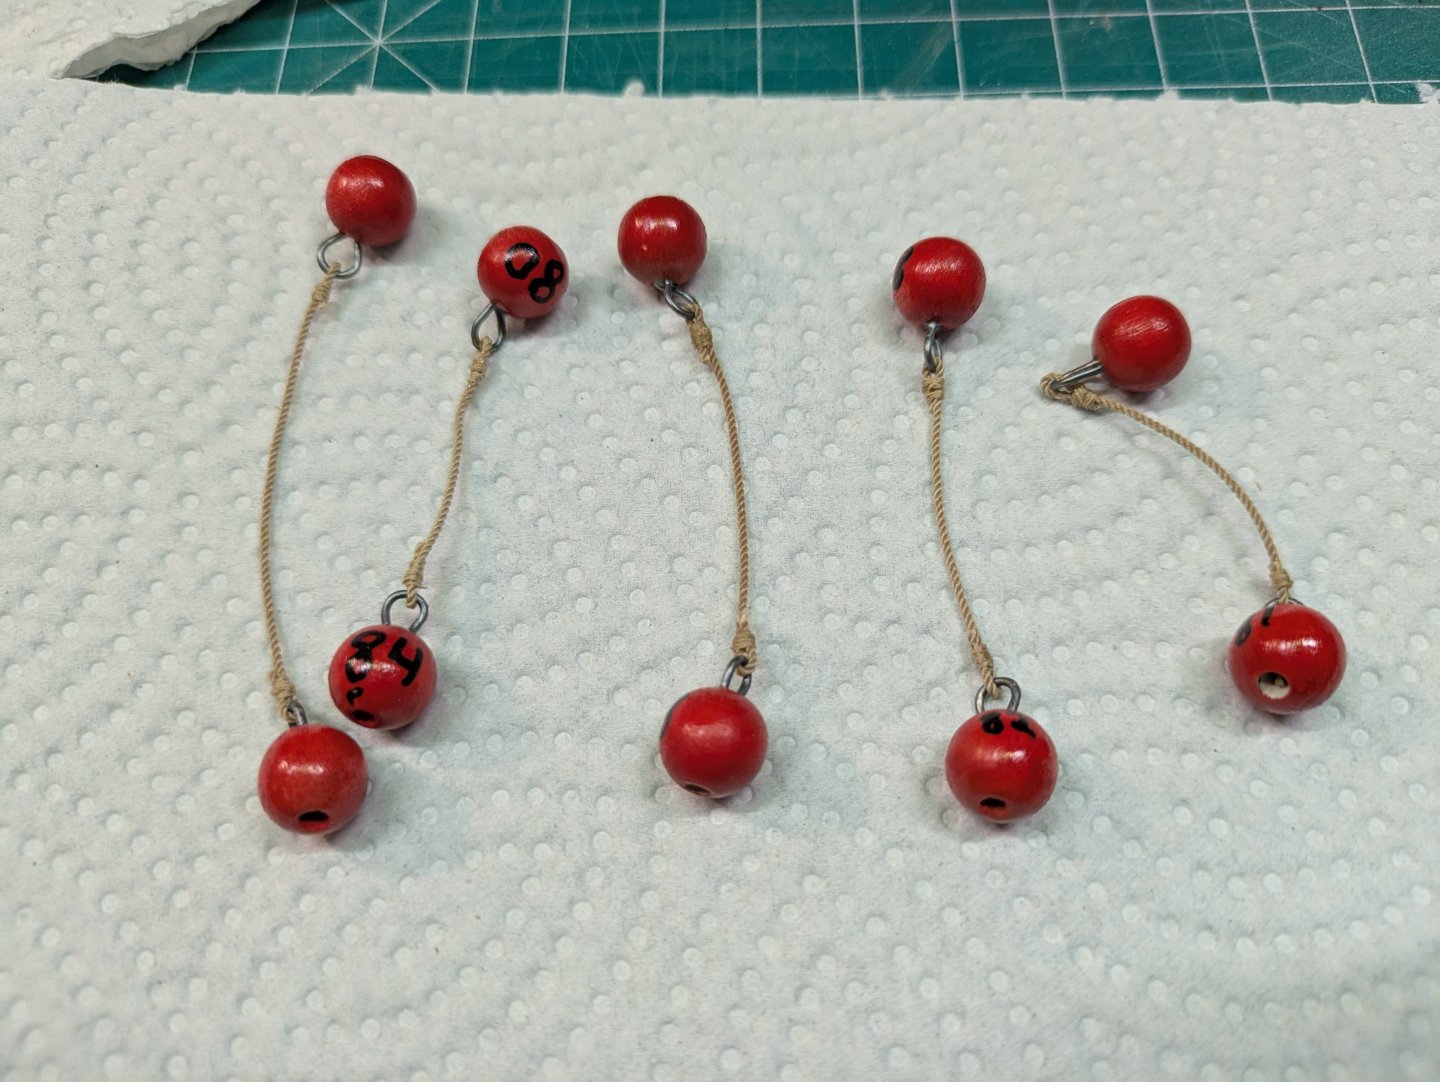
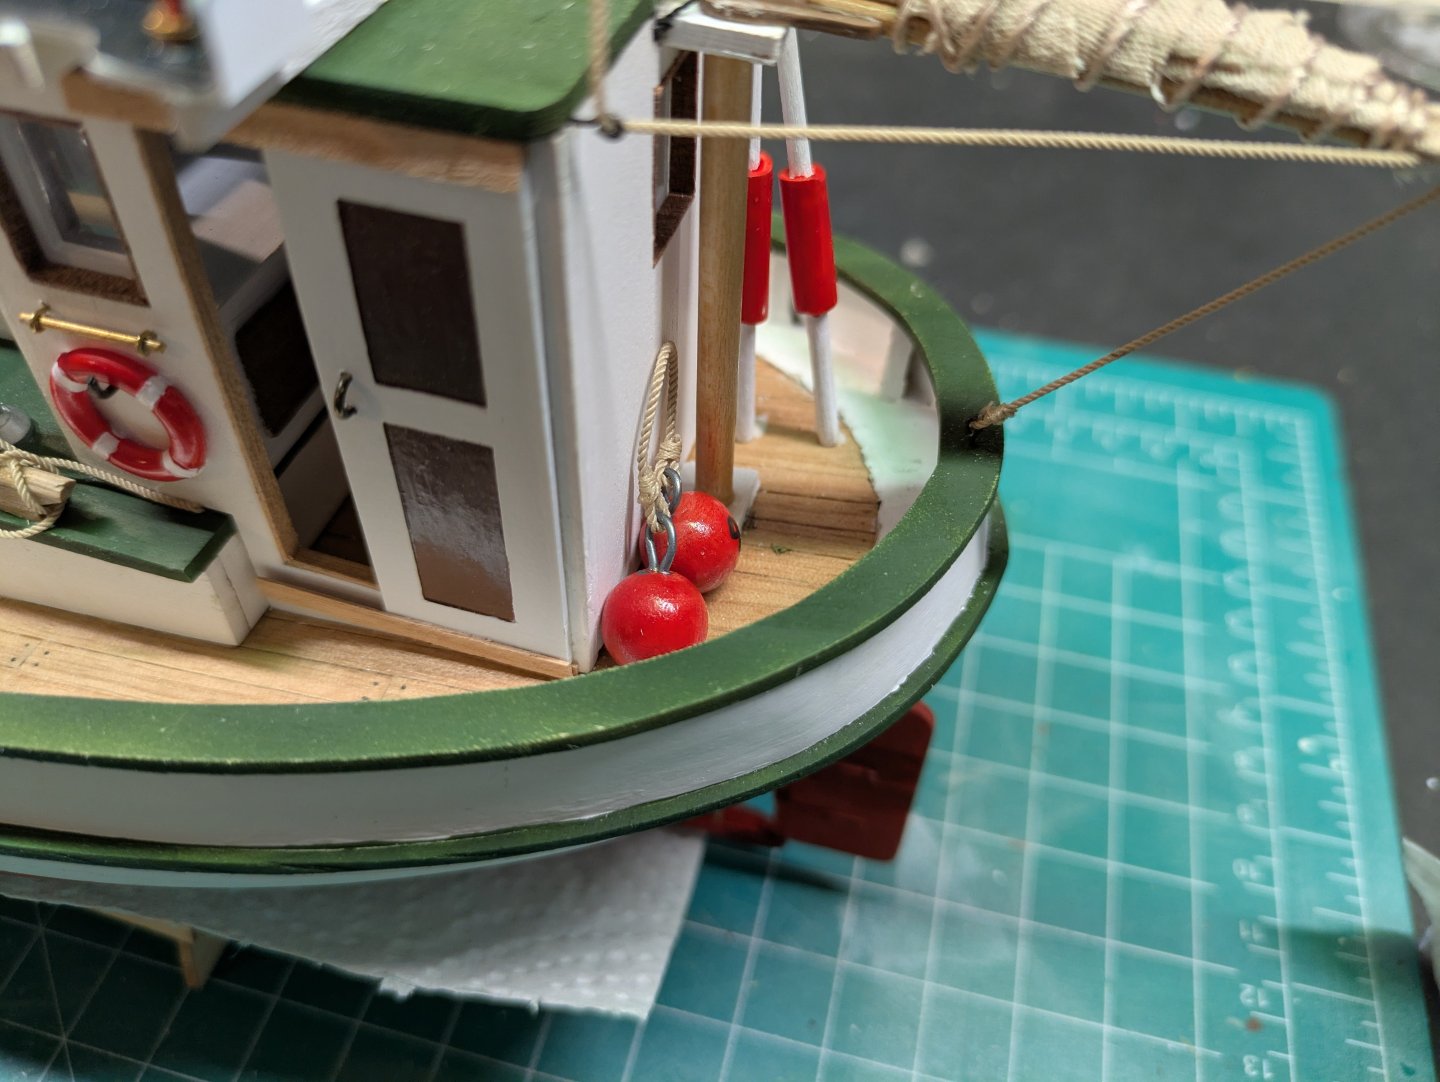
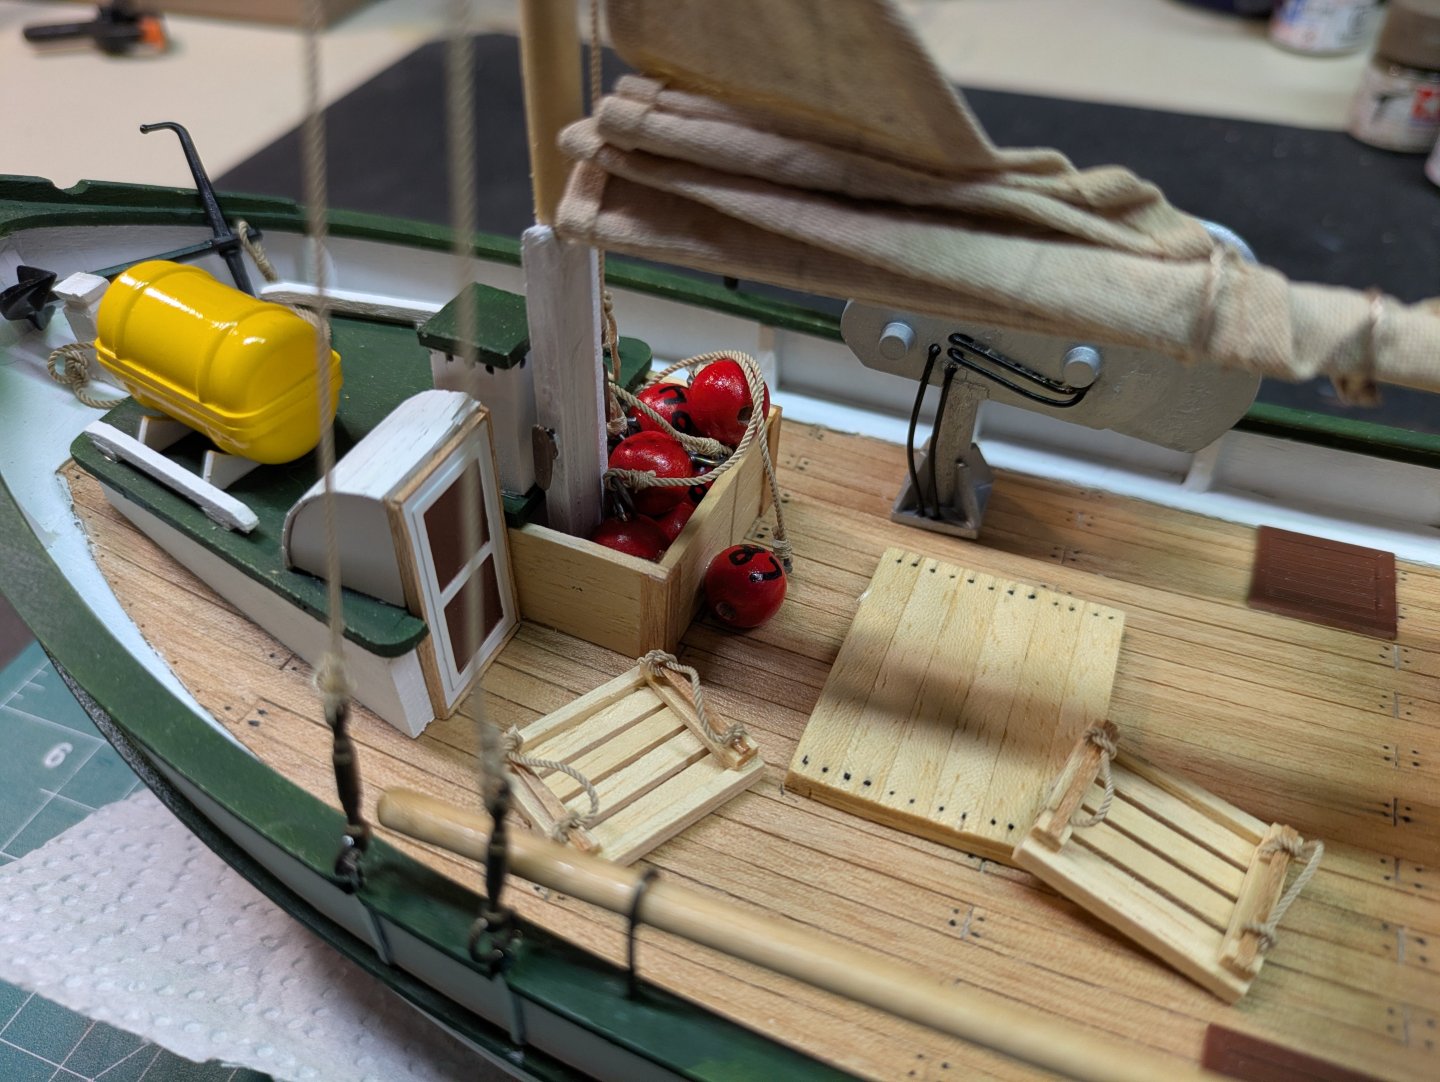
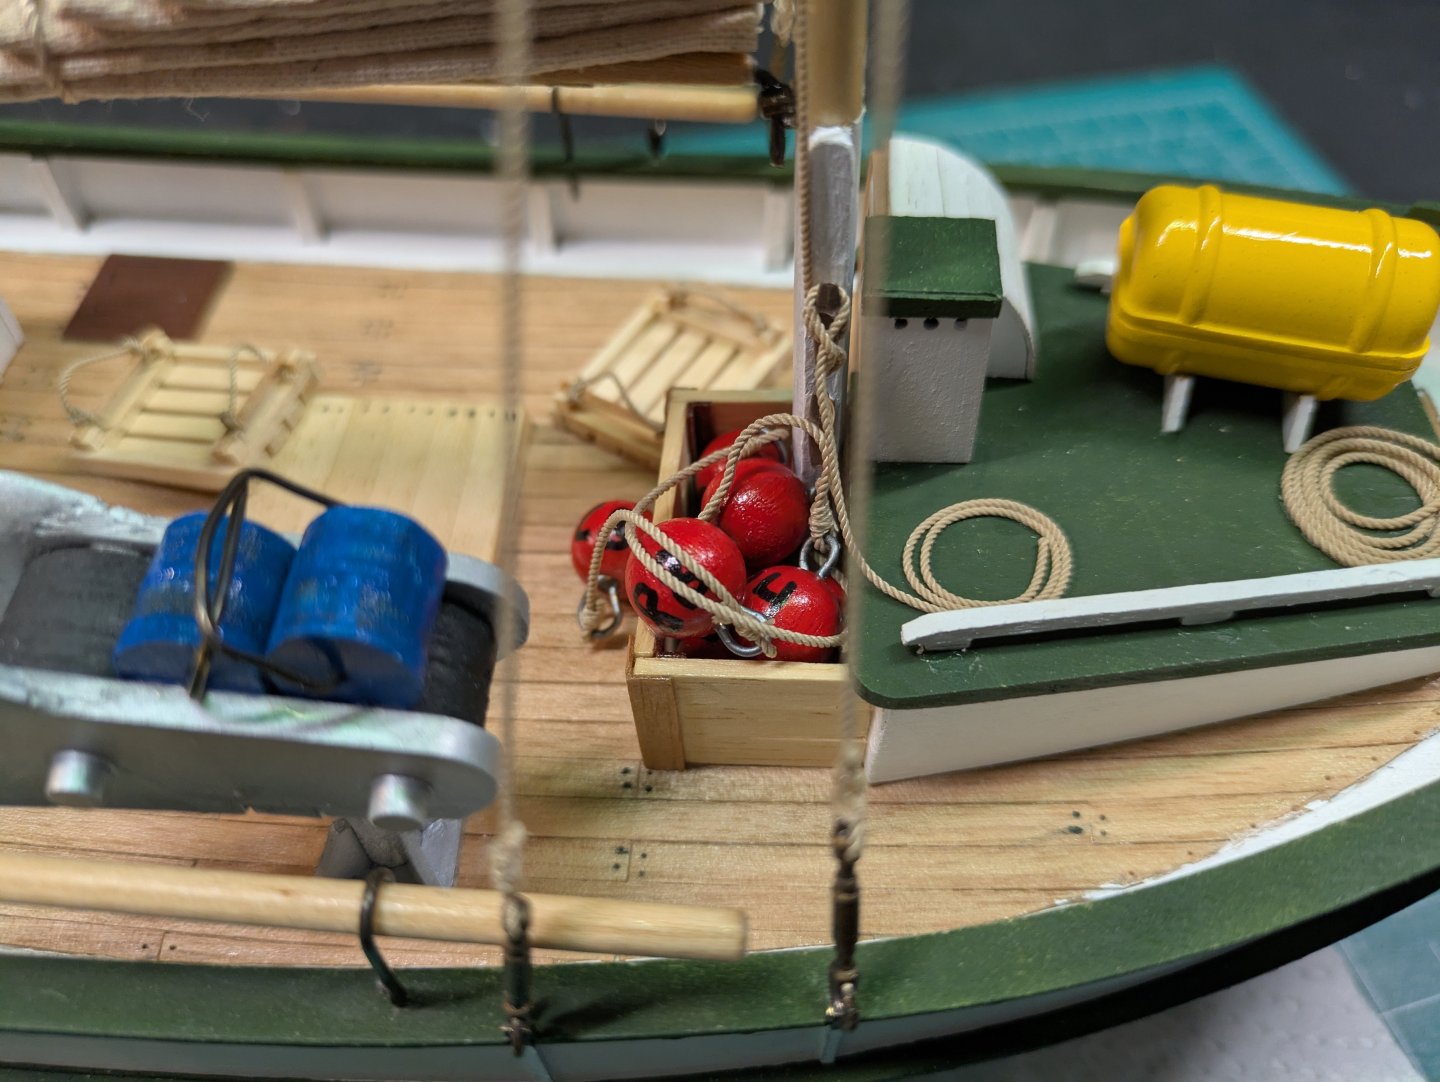
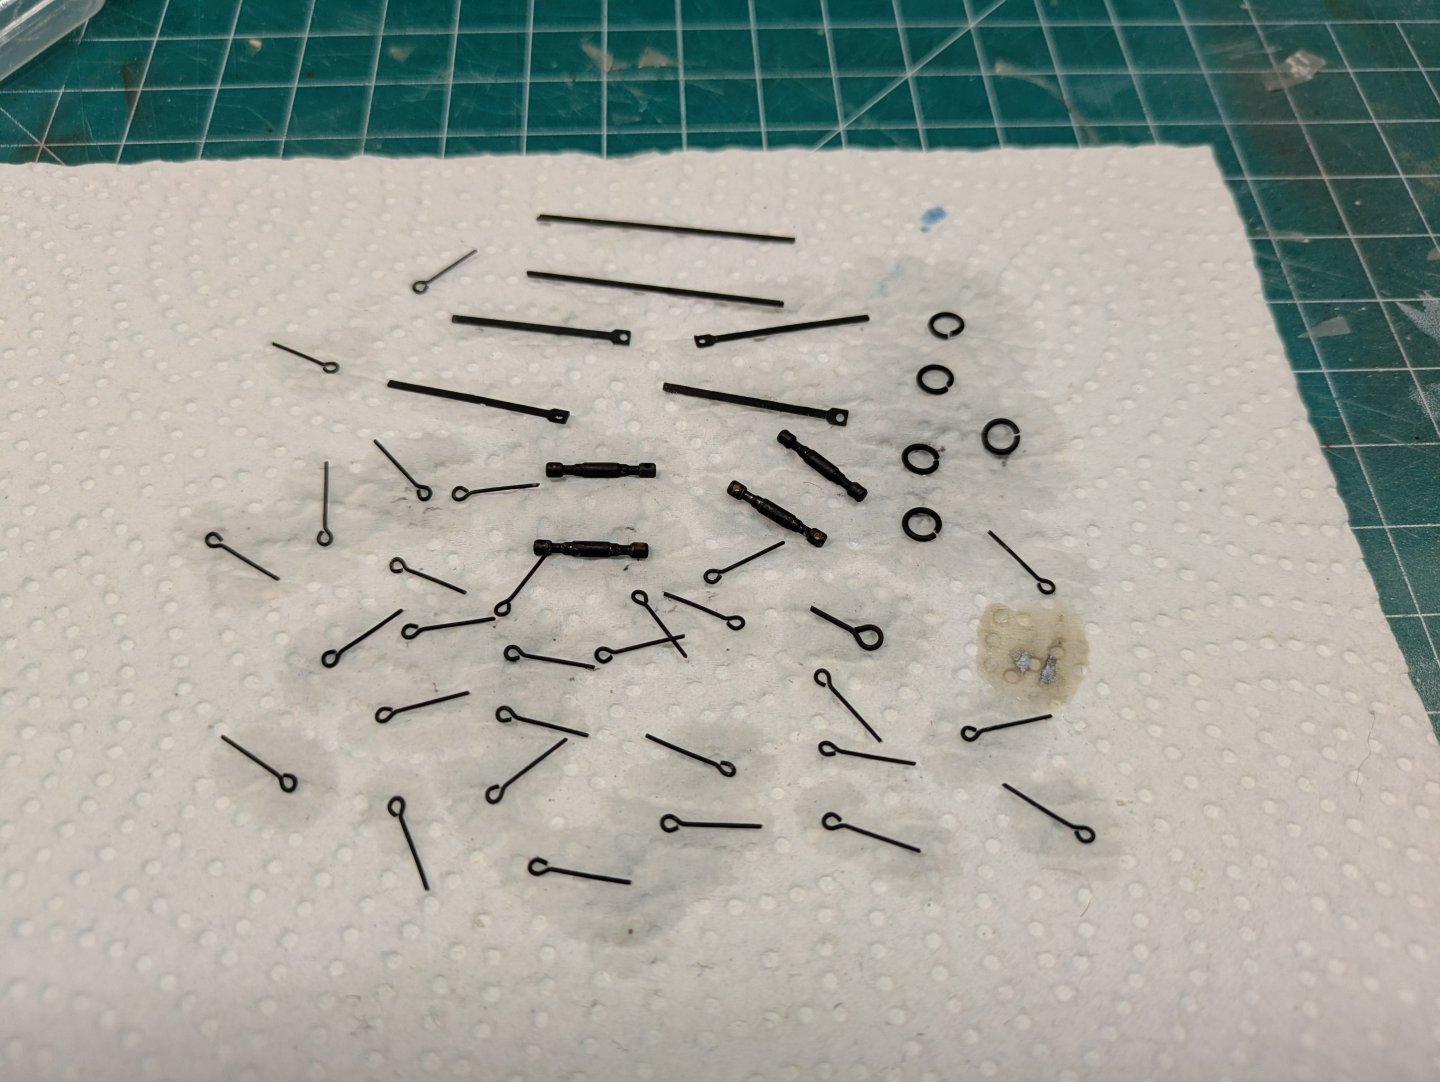
I have been terrible at updating my log this build. Apologies to those who have been following along. This last stretch has me pretty much finishing it up, final pictures will come in the next few days. Filling the light with PVA to create a glass look. Net retriever completed. Didn't like the original life rings so cut the ropes off. Blanked a bunch of the brass and started building the masts and spars. I had some left over sails from another build so decided to use them in a mostly stowed position. Fish net bouy's would have numbers on them, so got the fine marker out I really disliked the plastic fish that came with the kit, so just made some simple fish crates. Going to stain them so they don't blend so much with the deck.


-
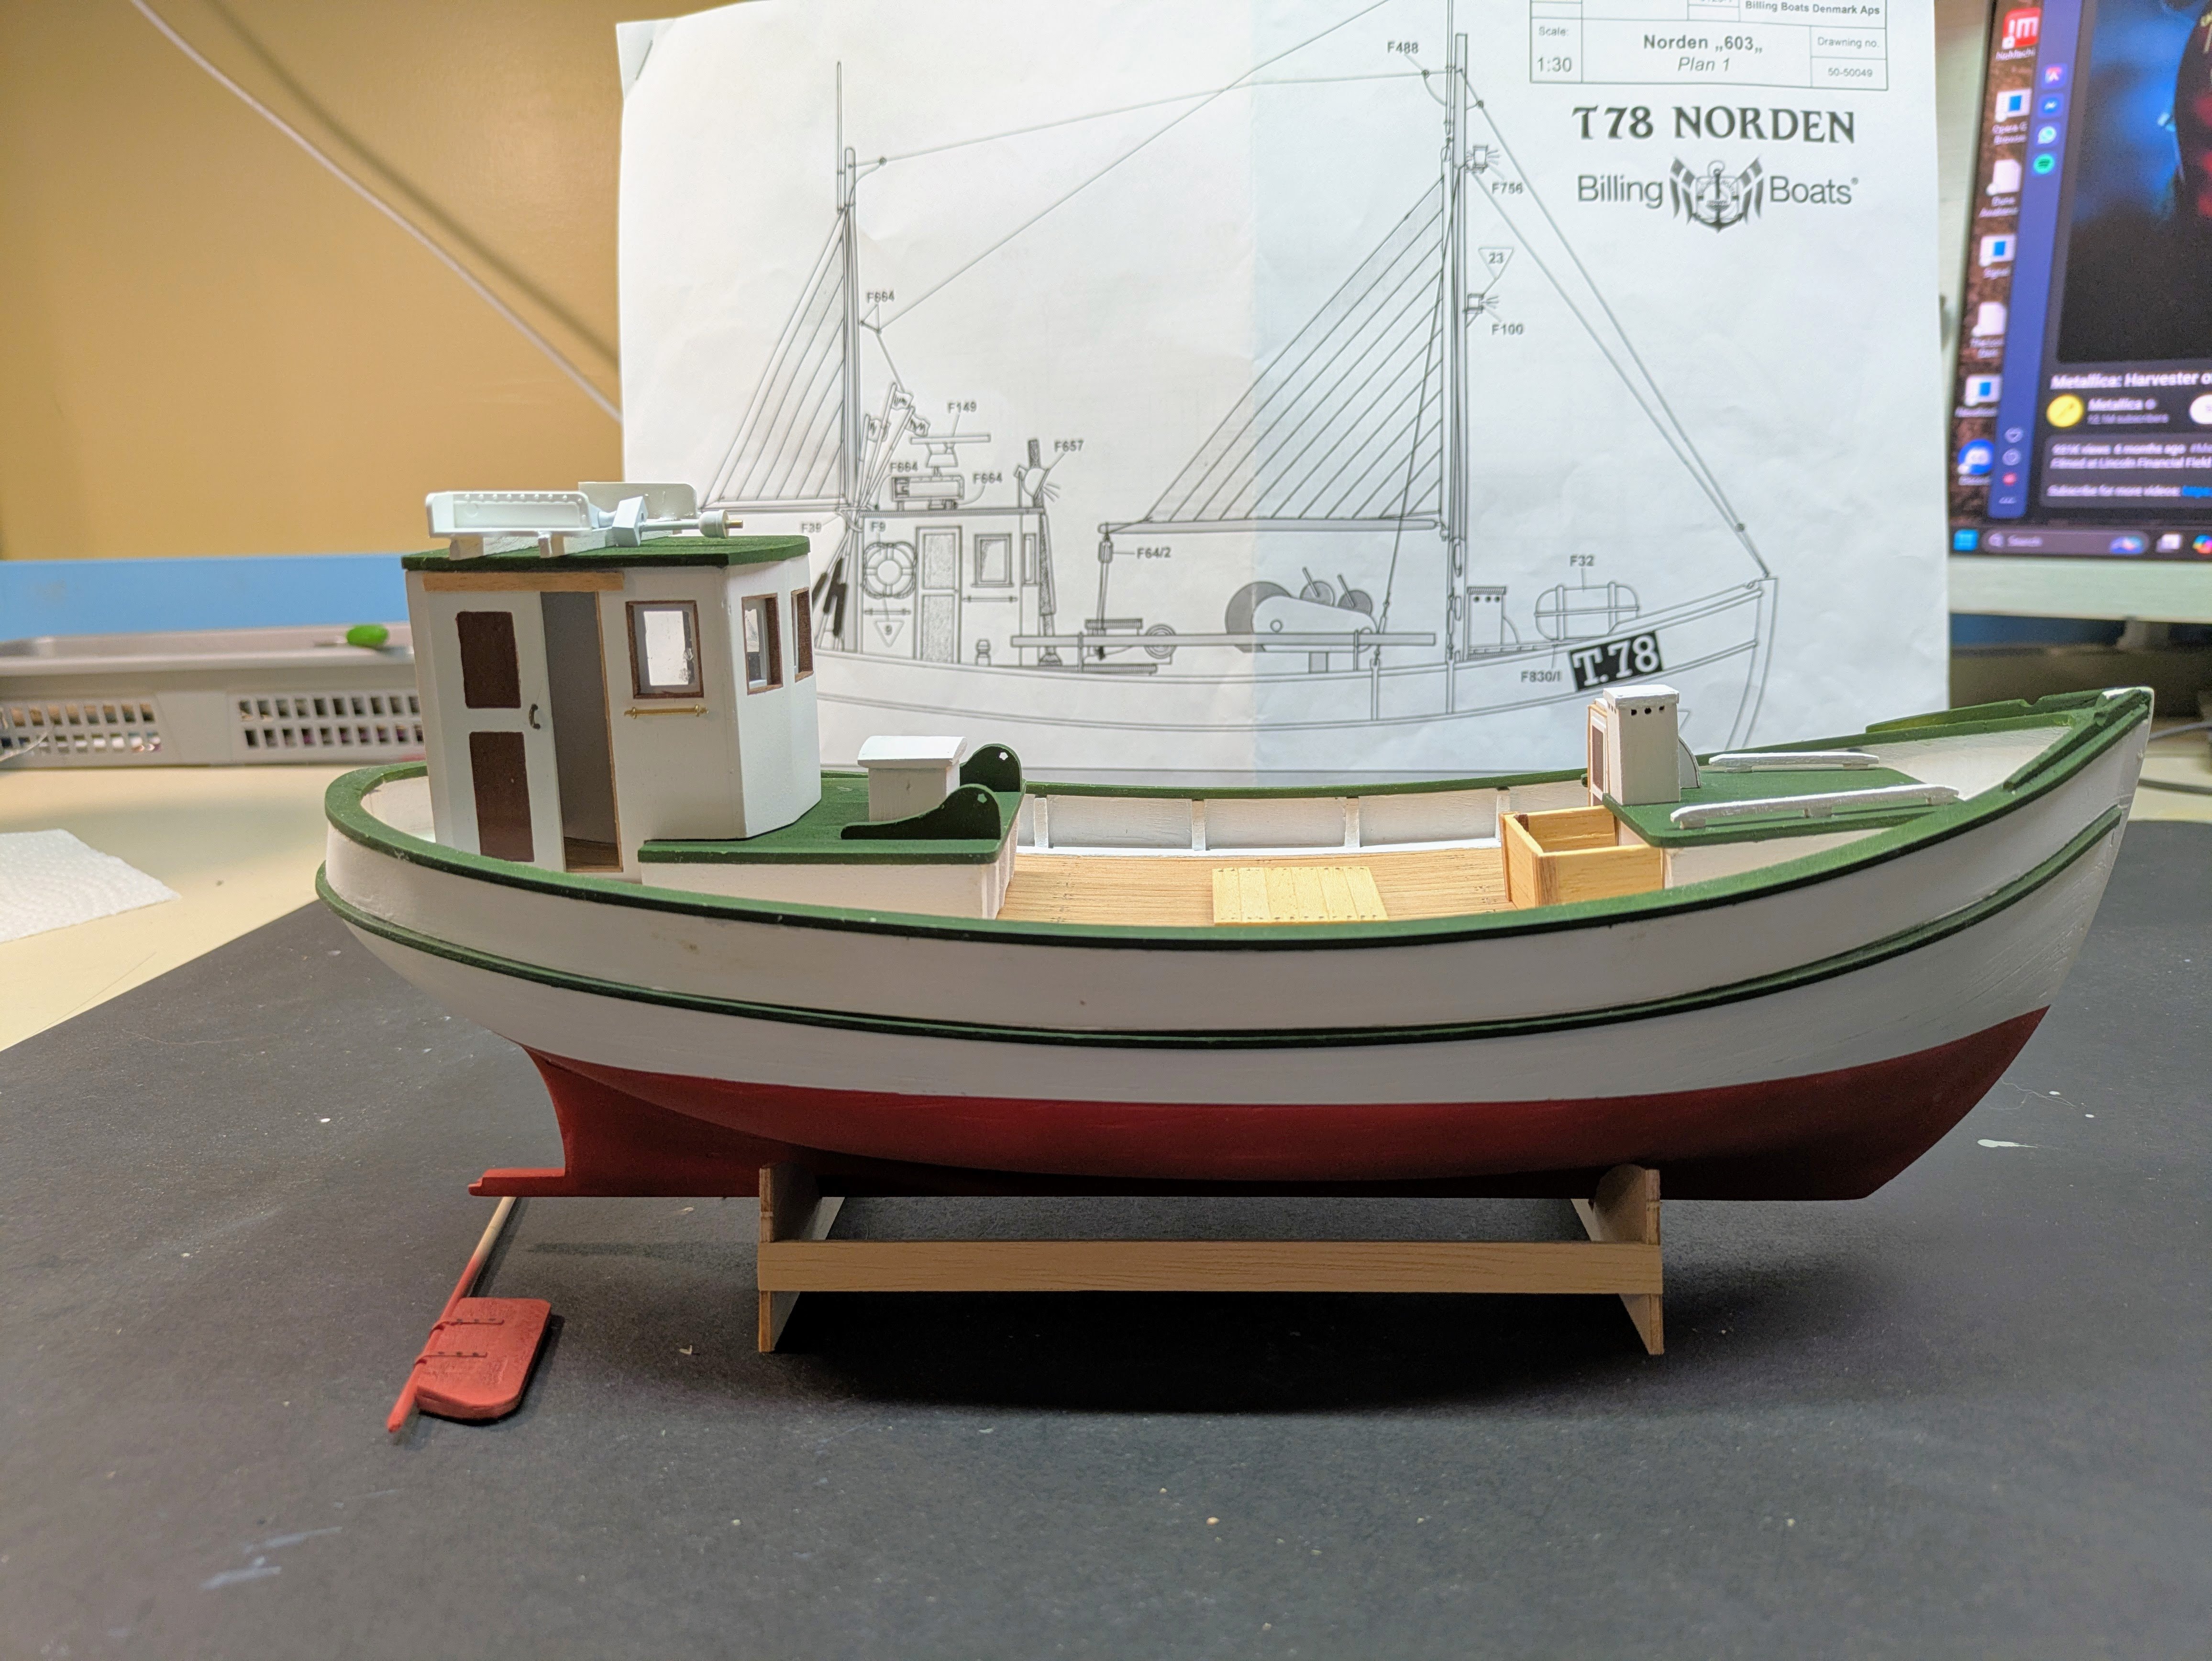
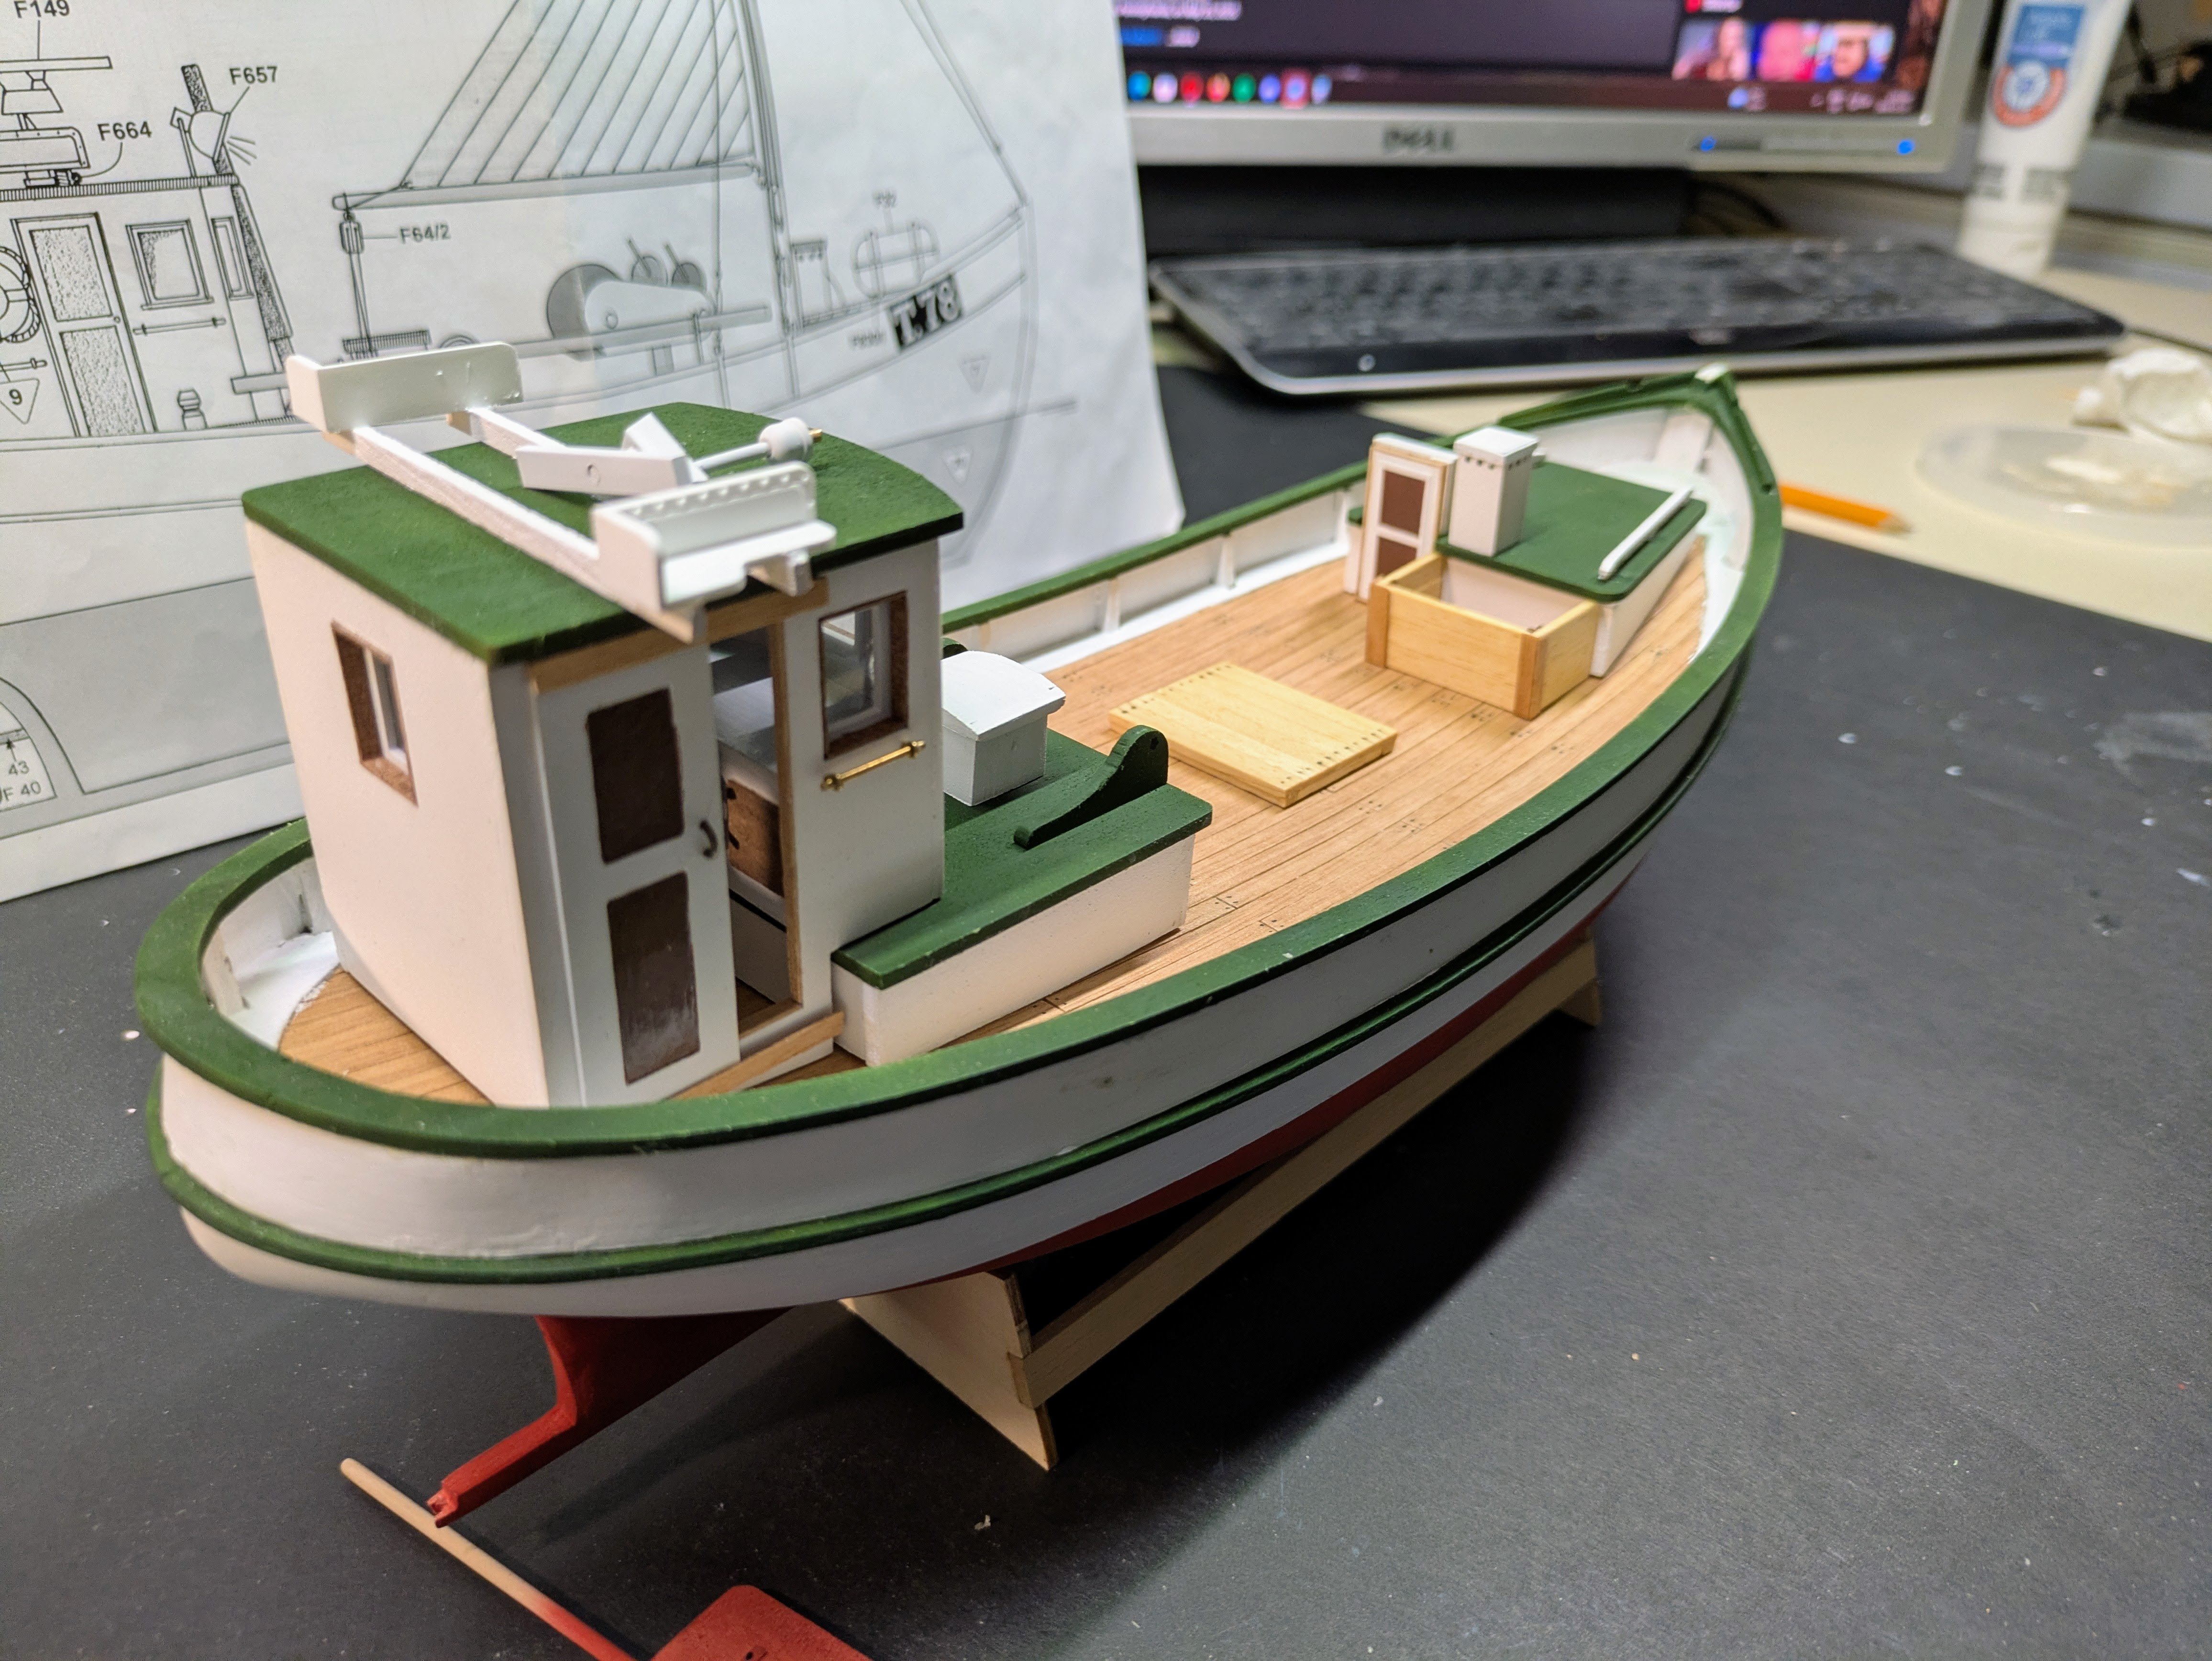
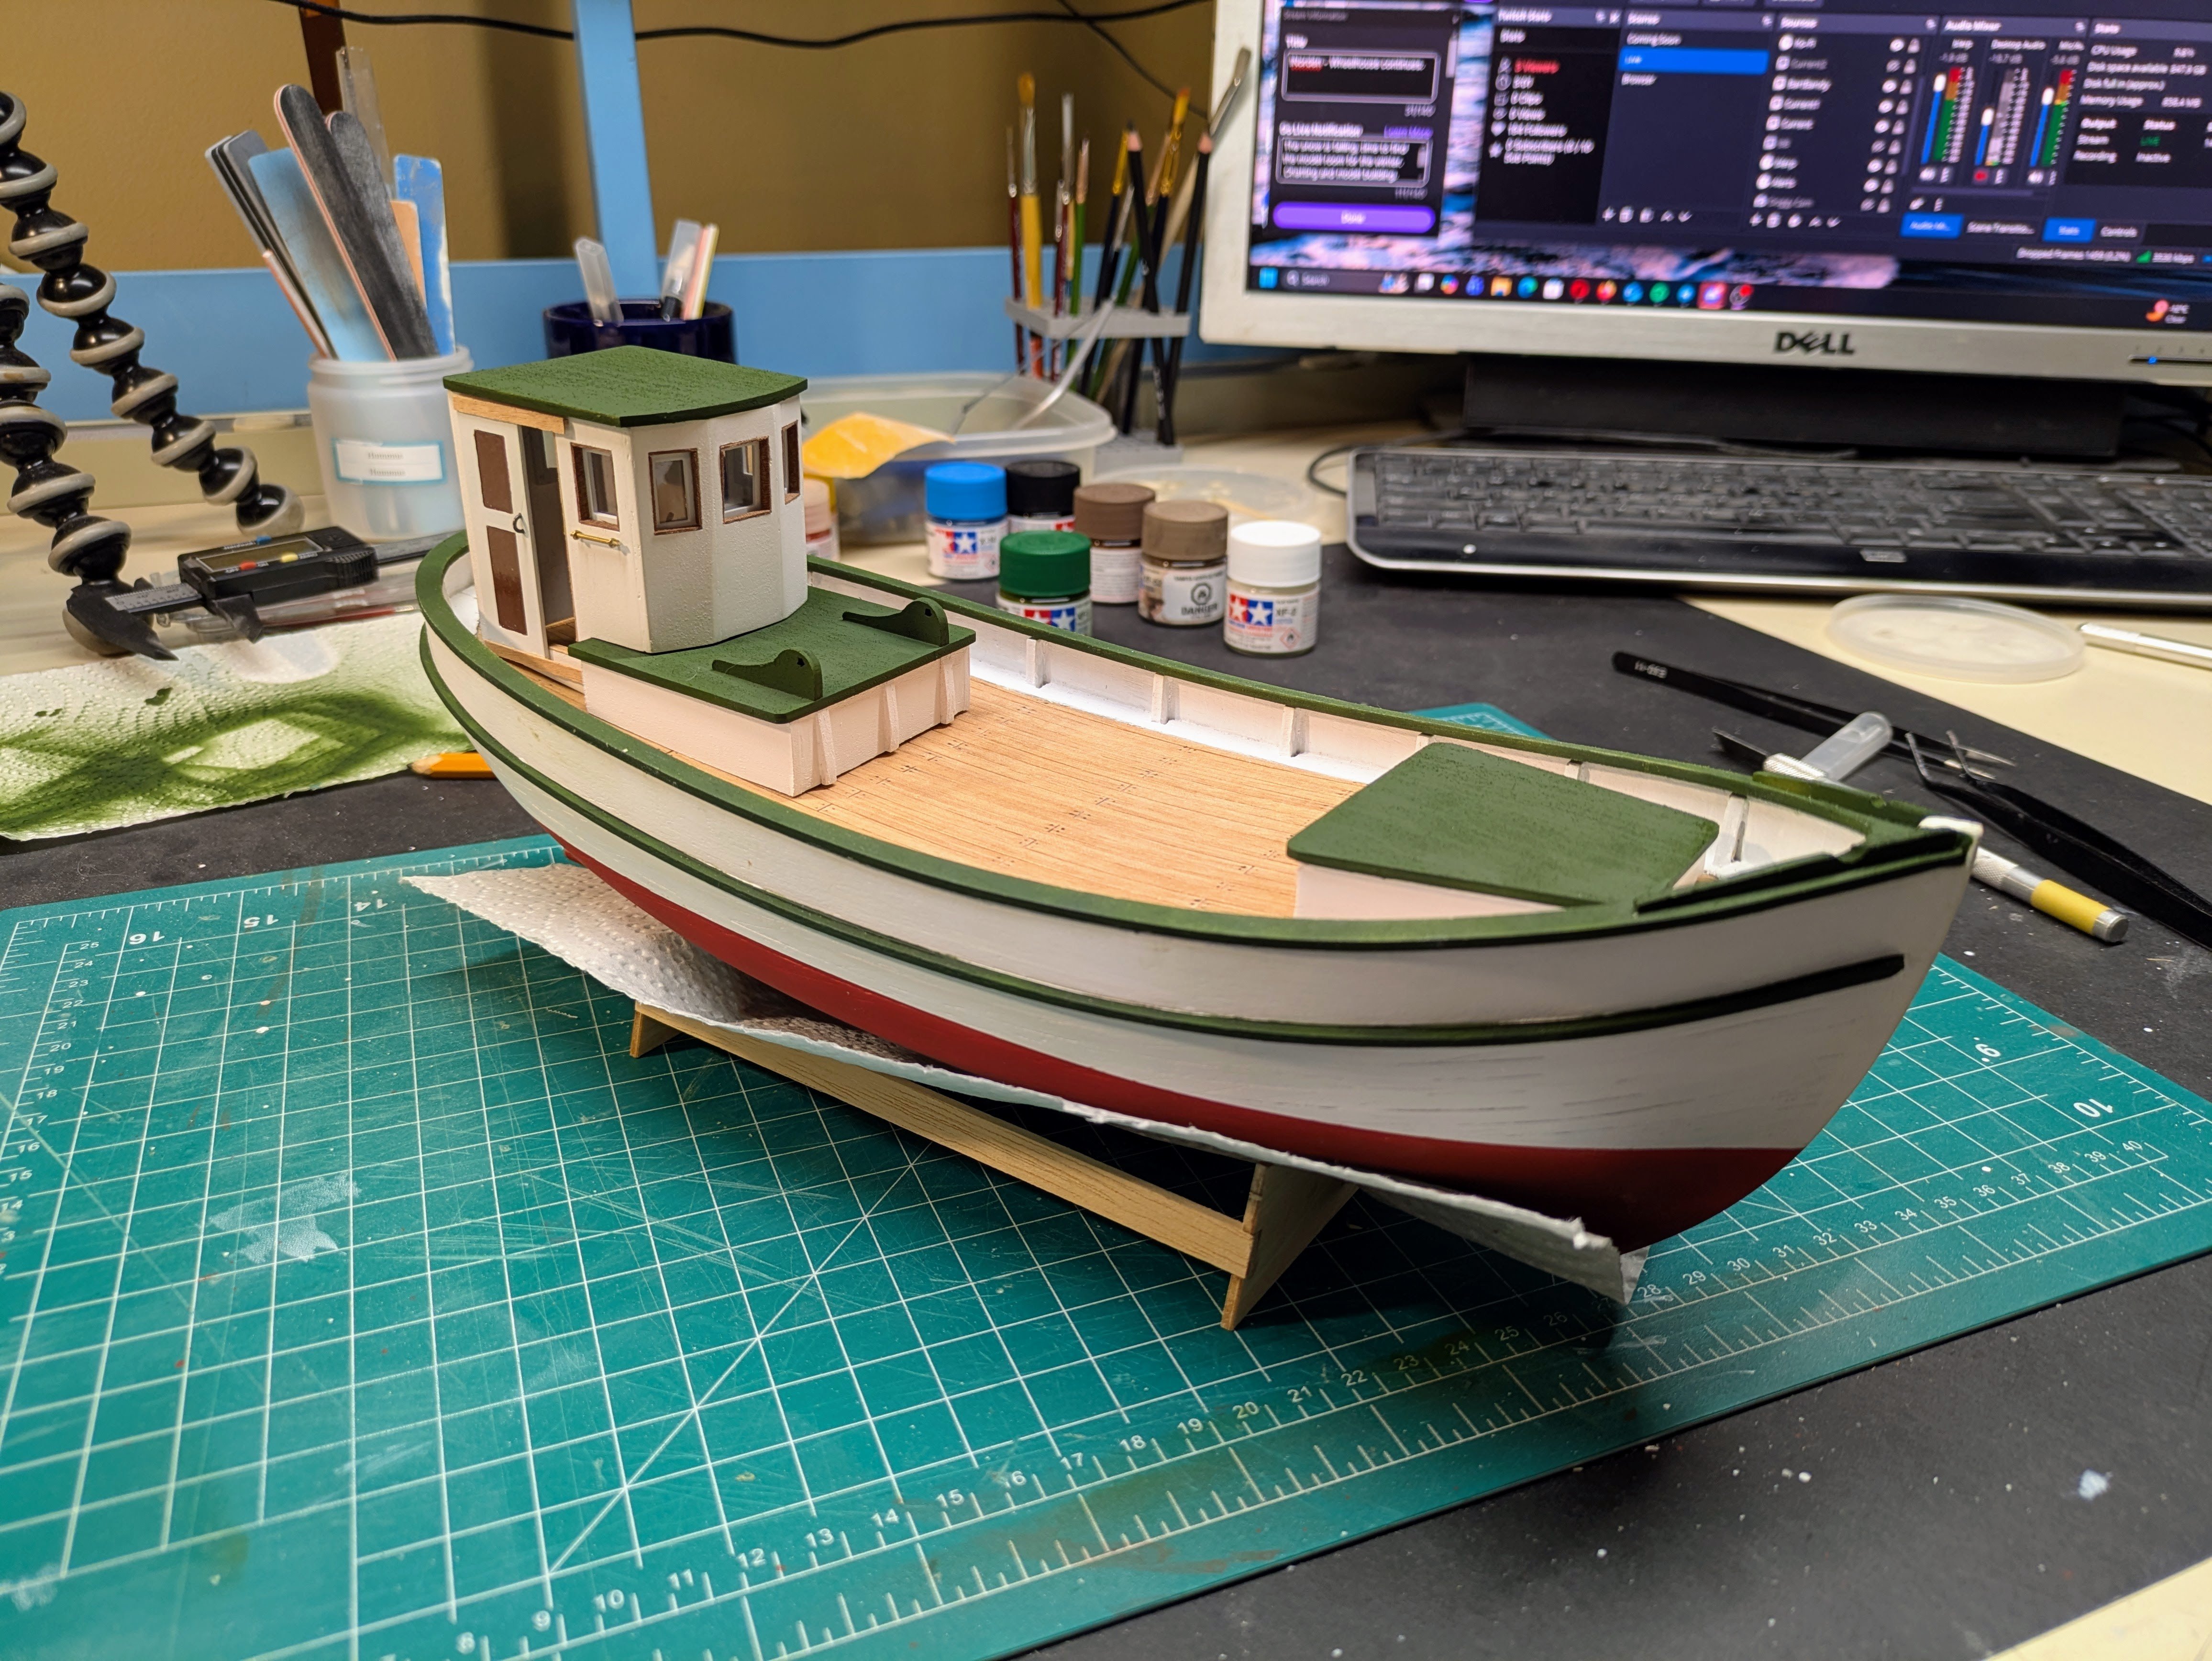
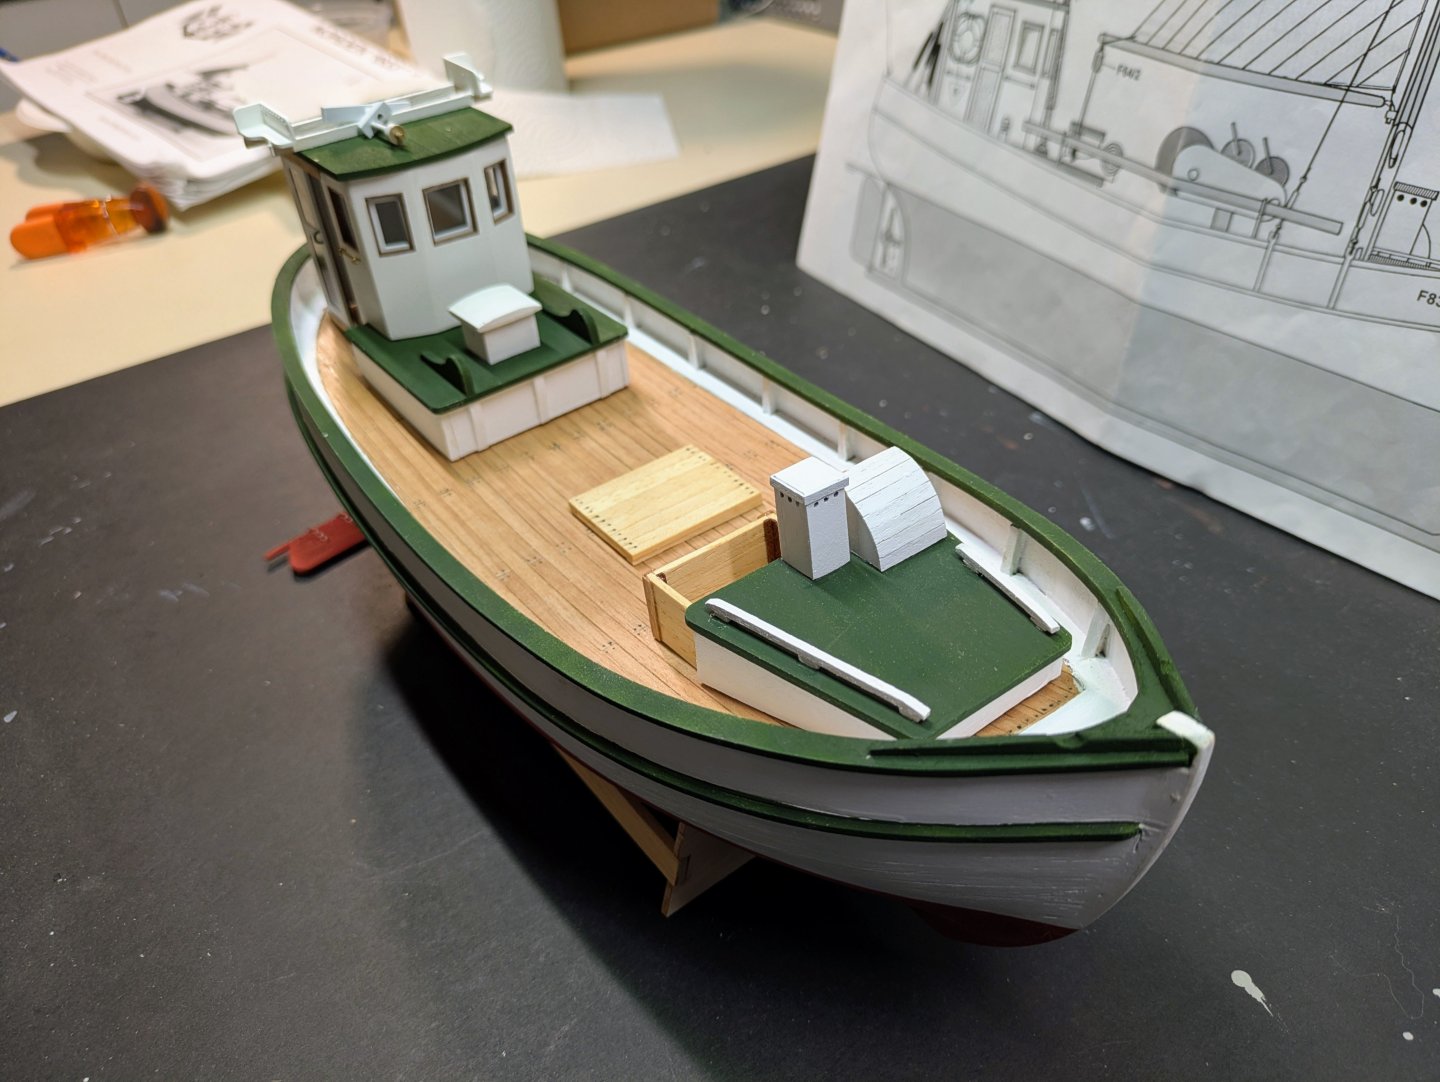
Lots of fiddly litte work this week. Got the wheel house and other main blocks attached to the deck (note to self, in the future build the deck around them), built up a bunch of the smaller parts and an afternoon of painting a pile of the accessories. Will start working on the masts and spars next. Not happy that the decals are peal and not slide. The Norden one on the deckhouse looks like crap so I might remove that one. Hope everyone had a great holidays and Happy New Year to all!


-
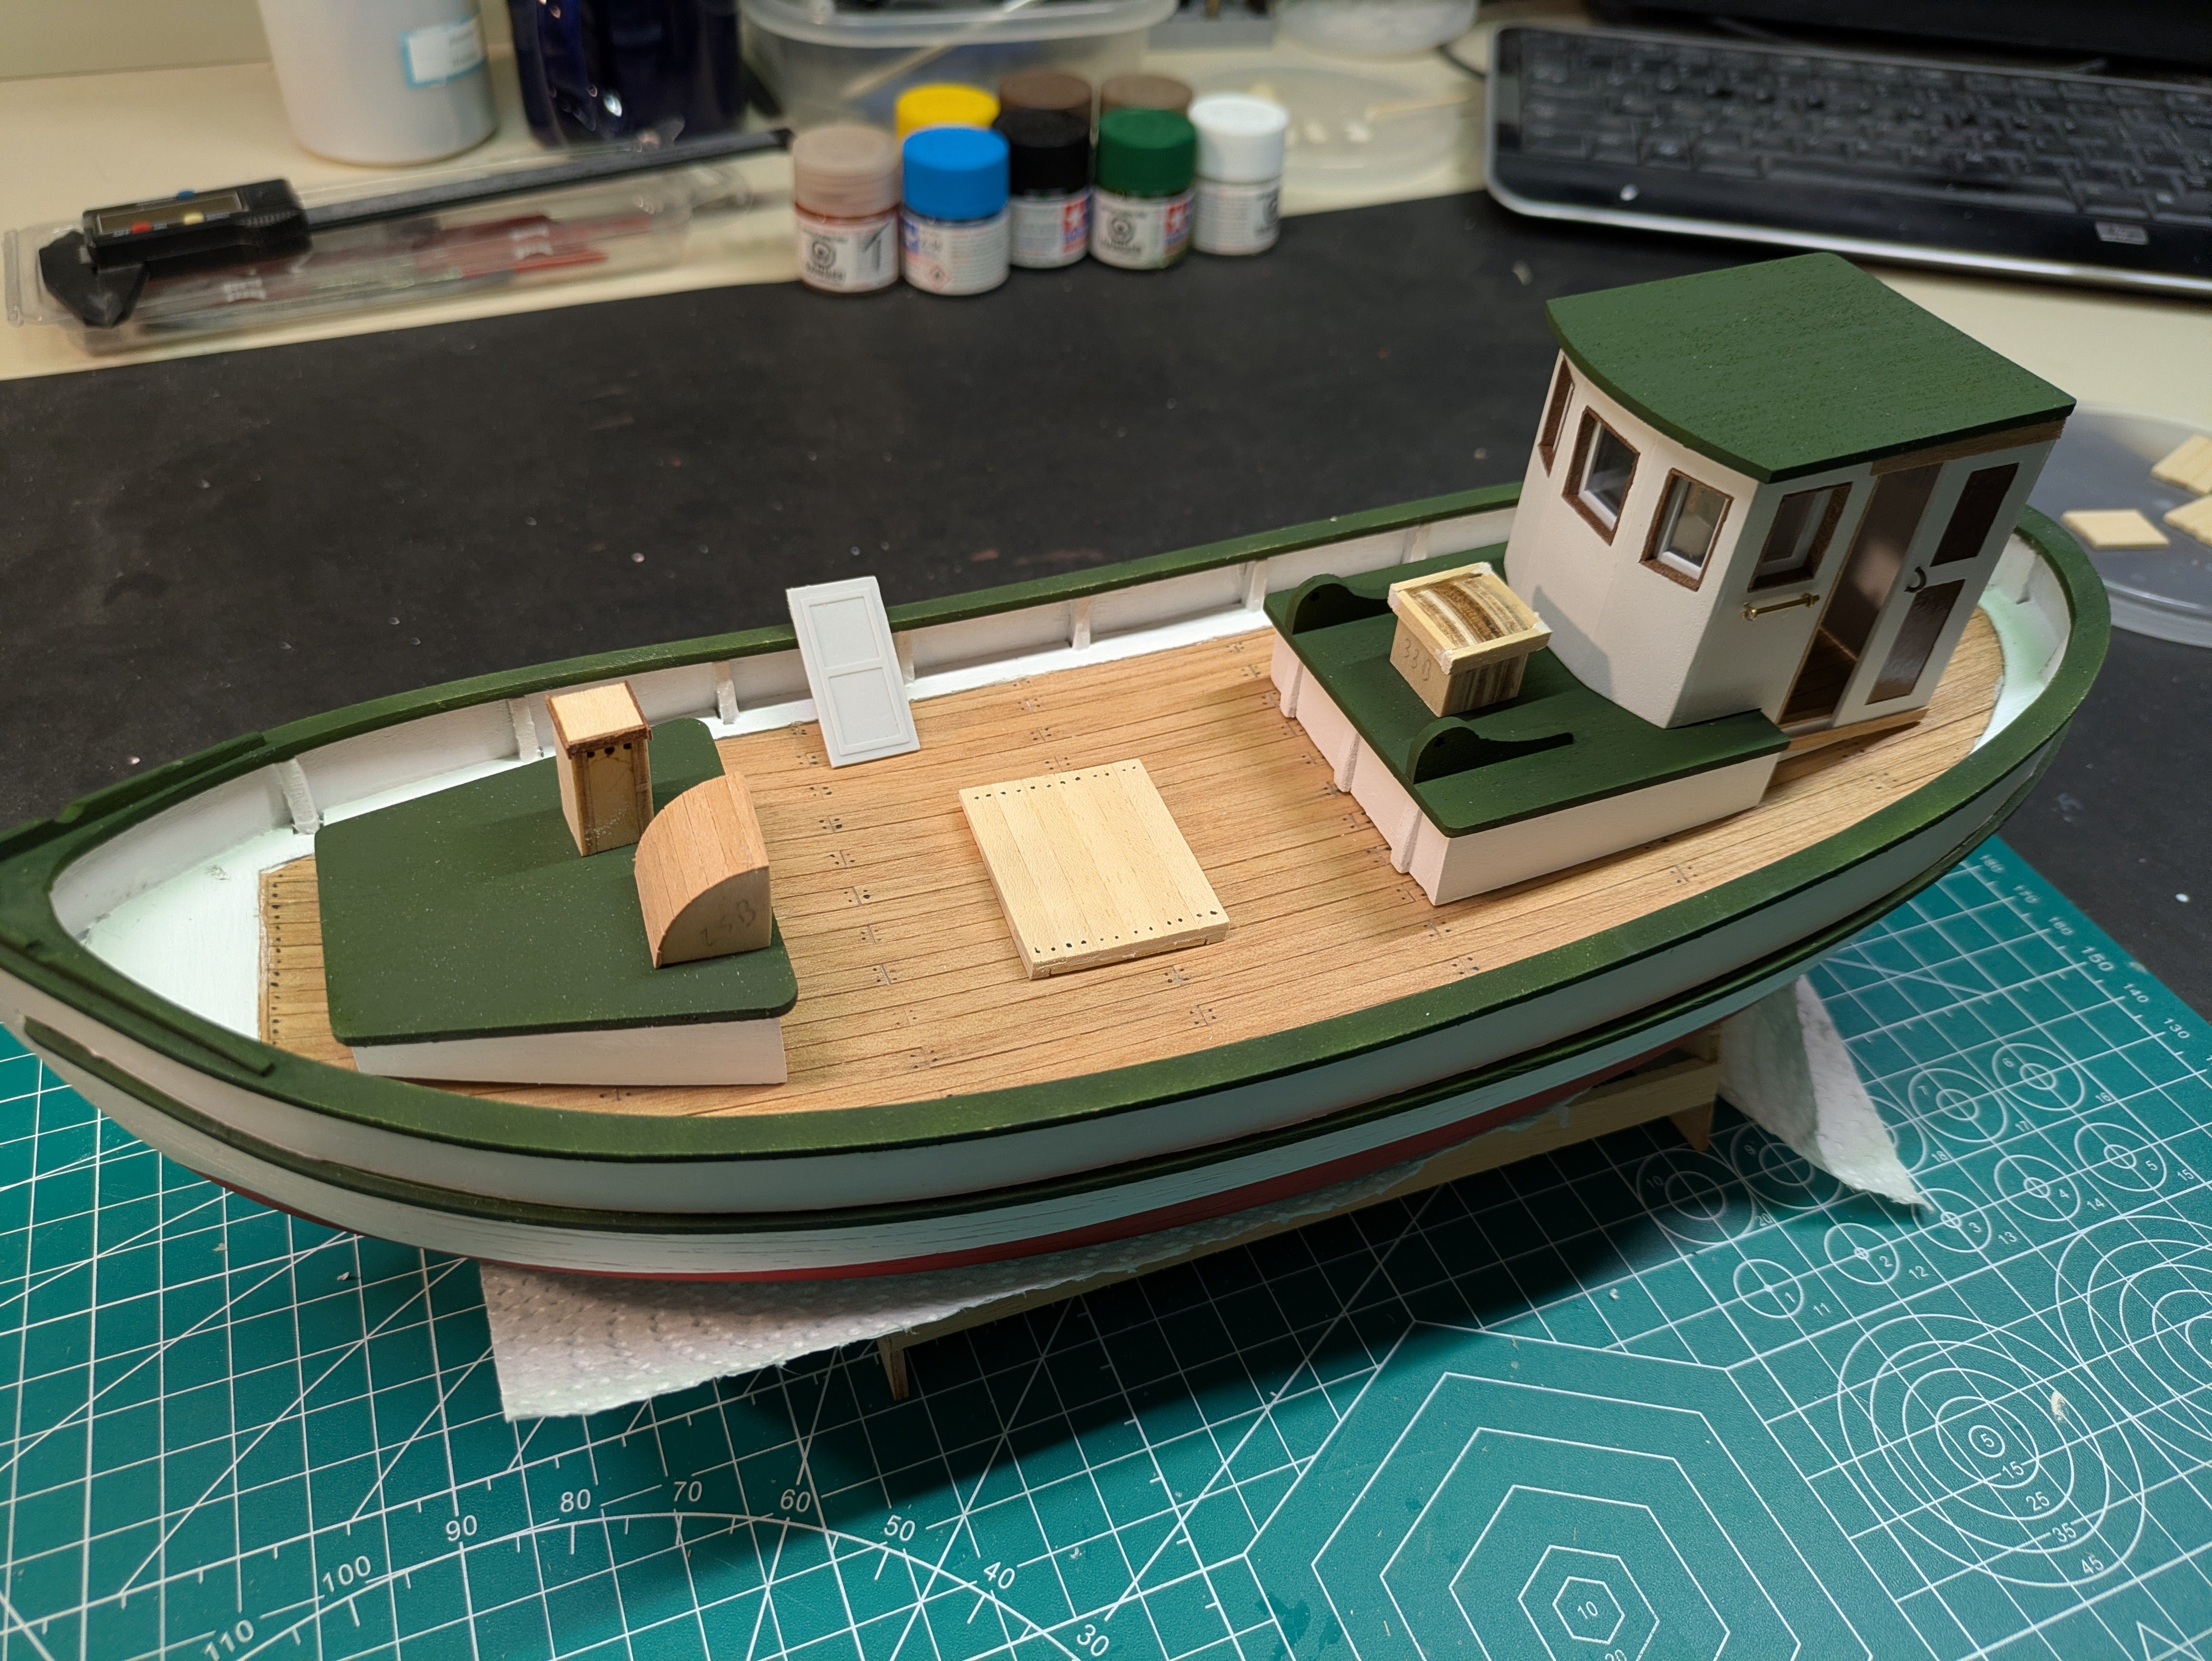
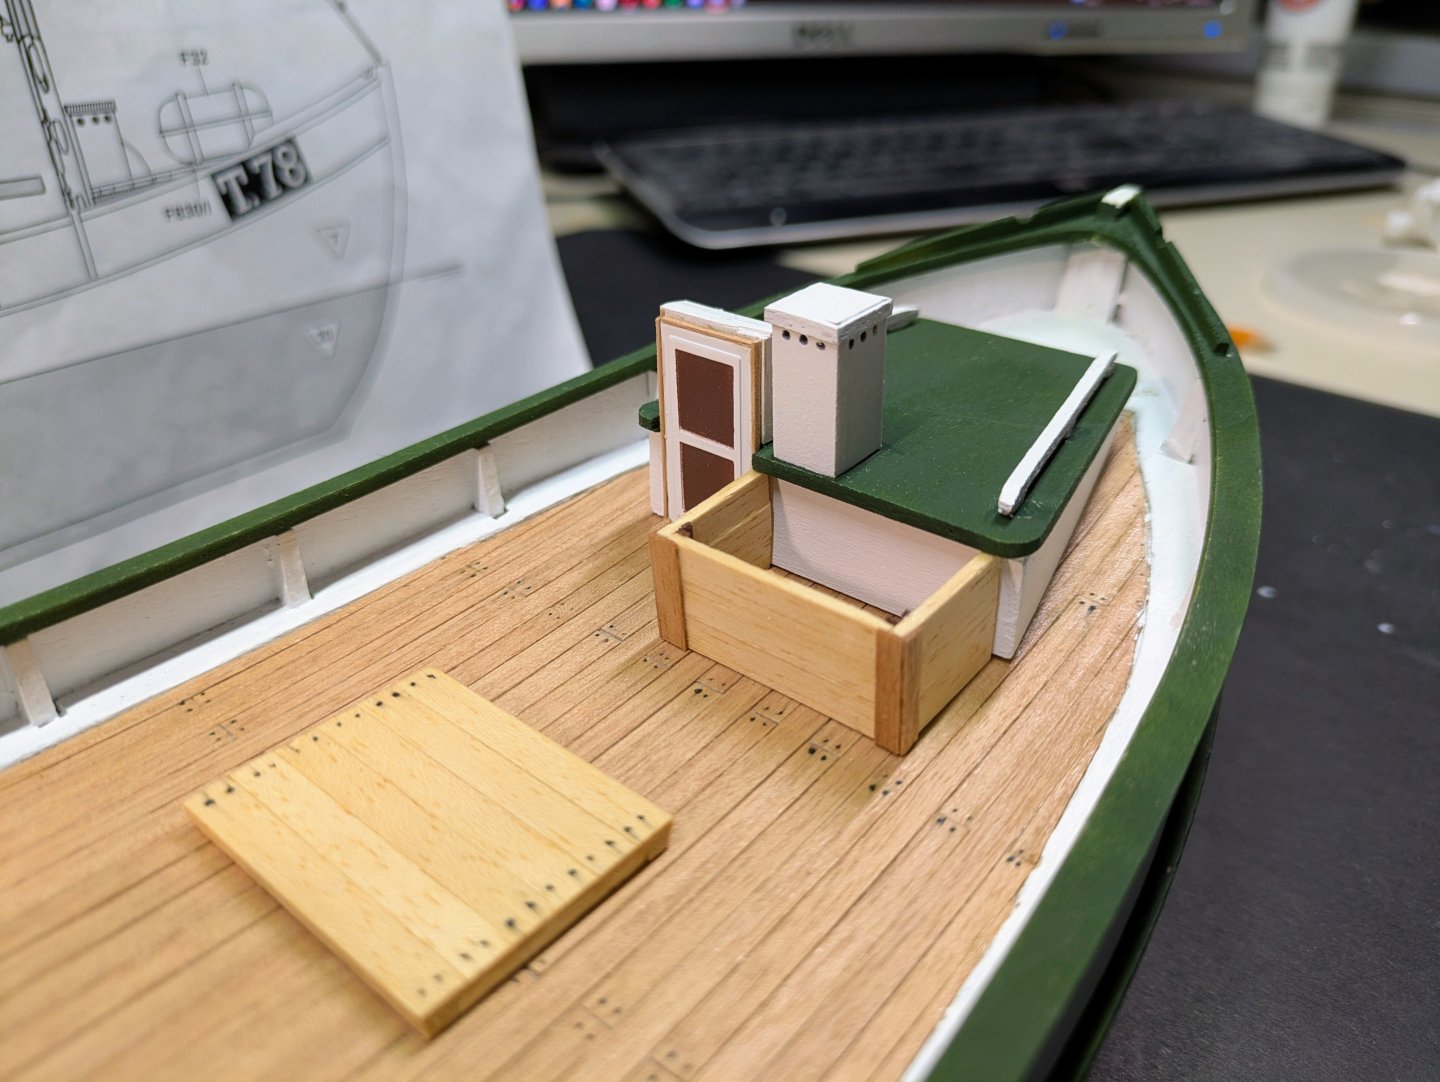
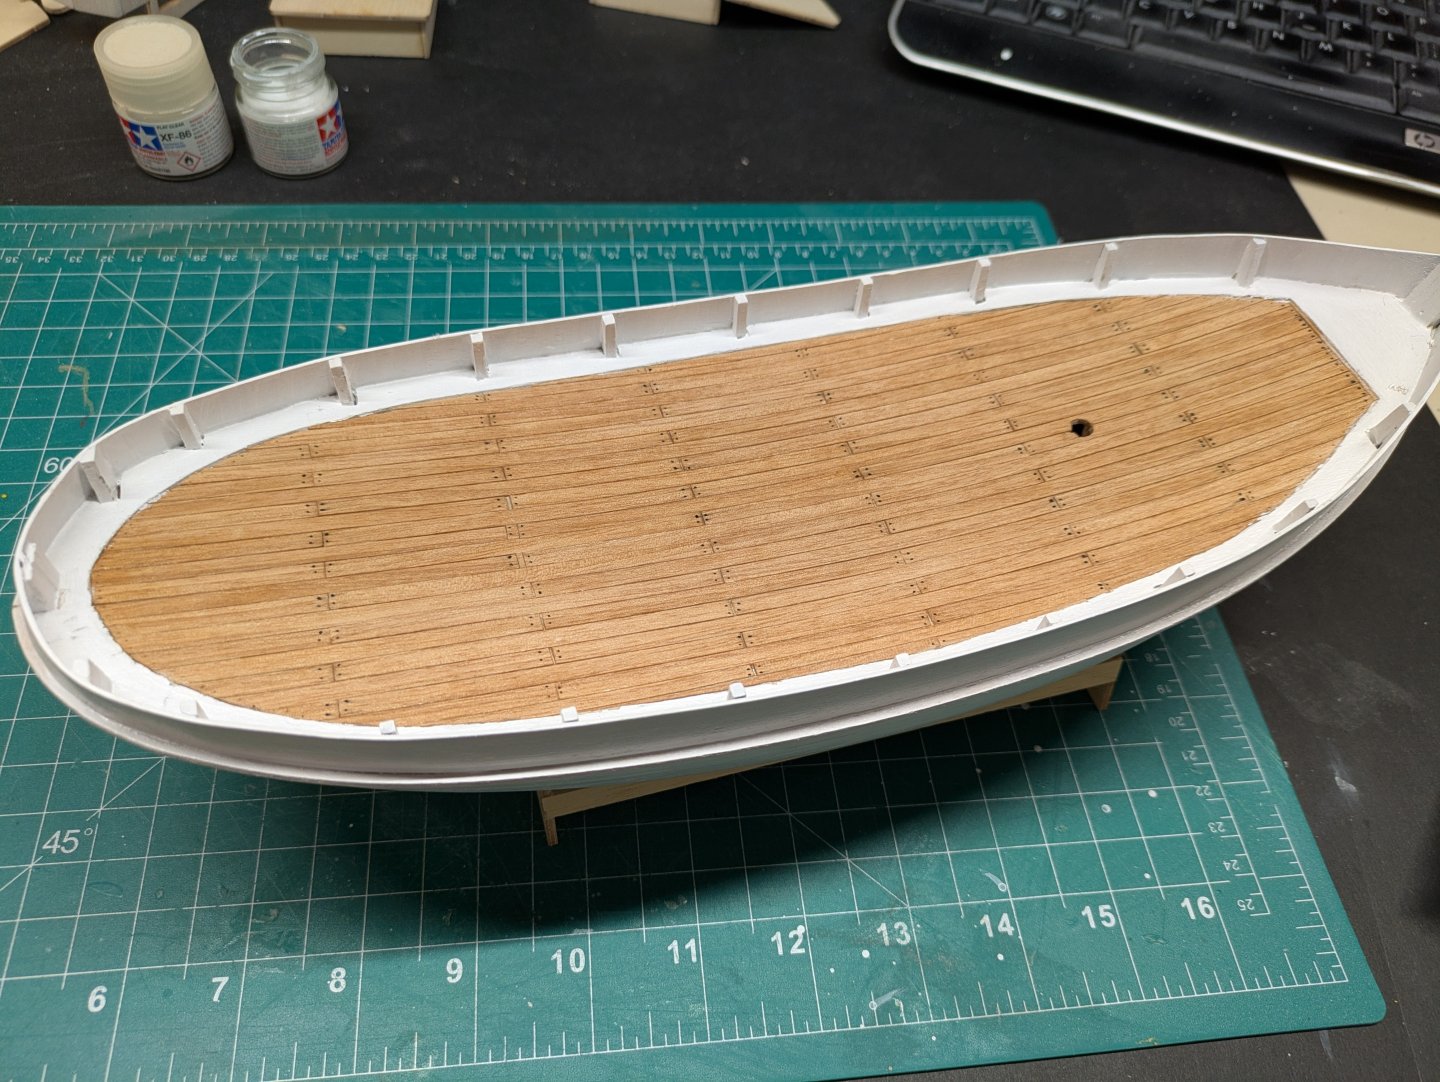
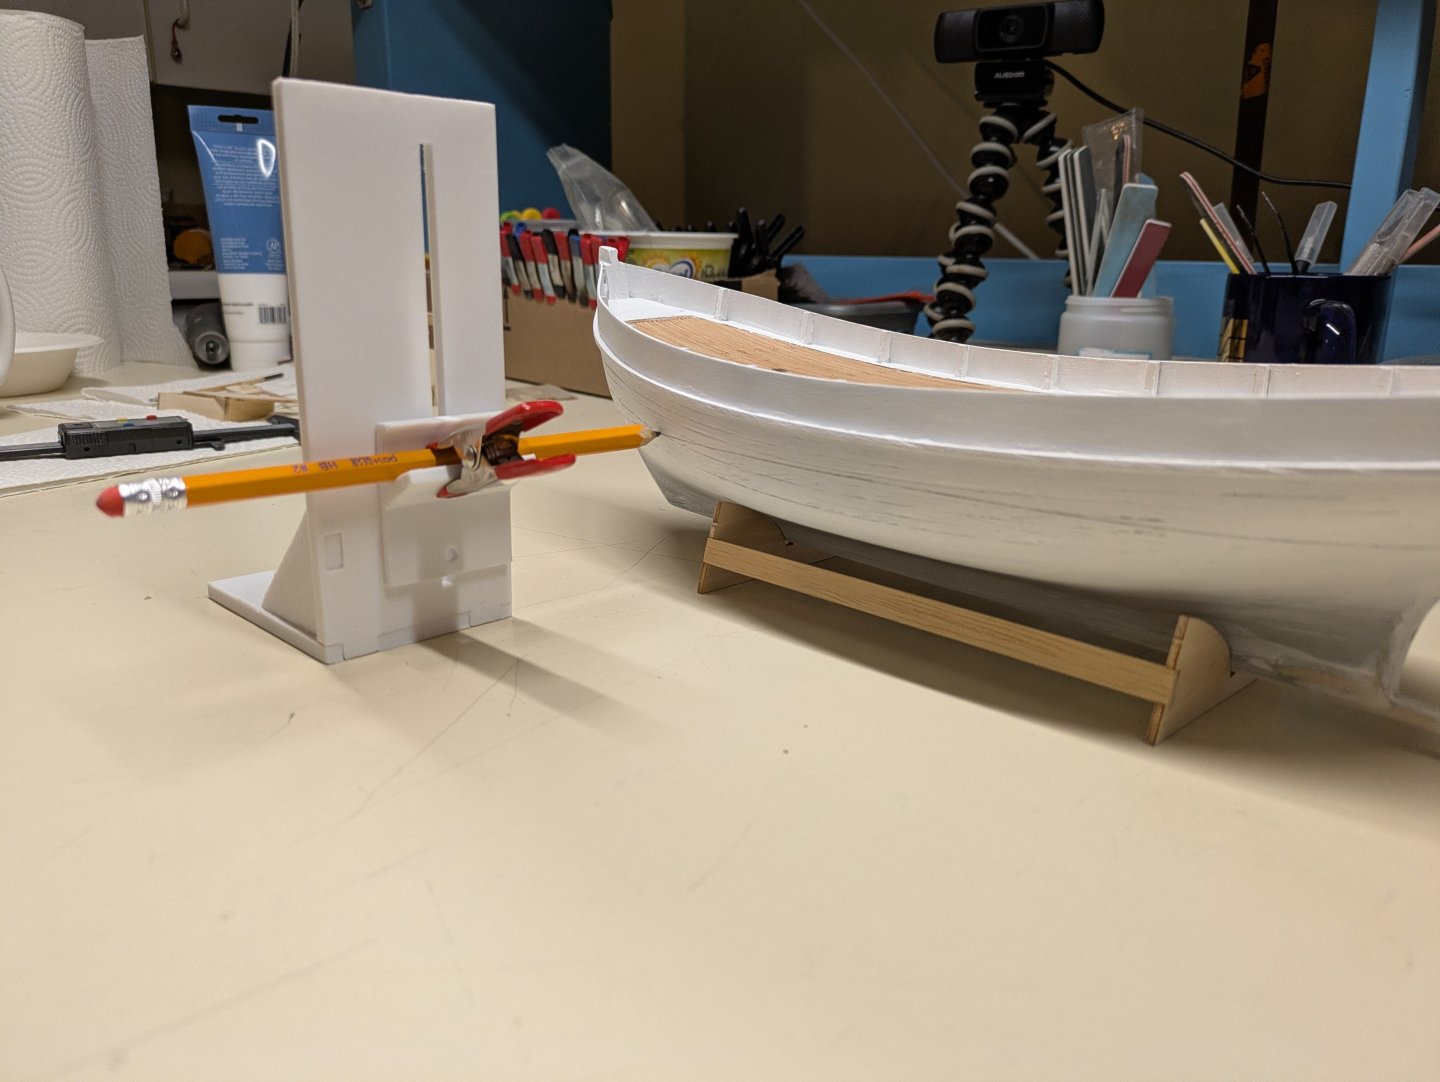
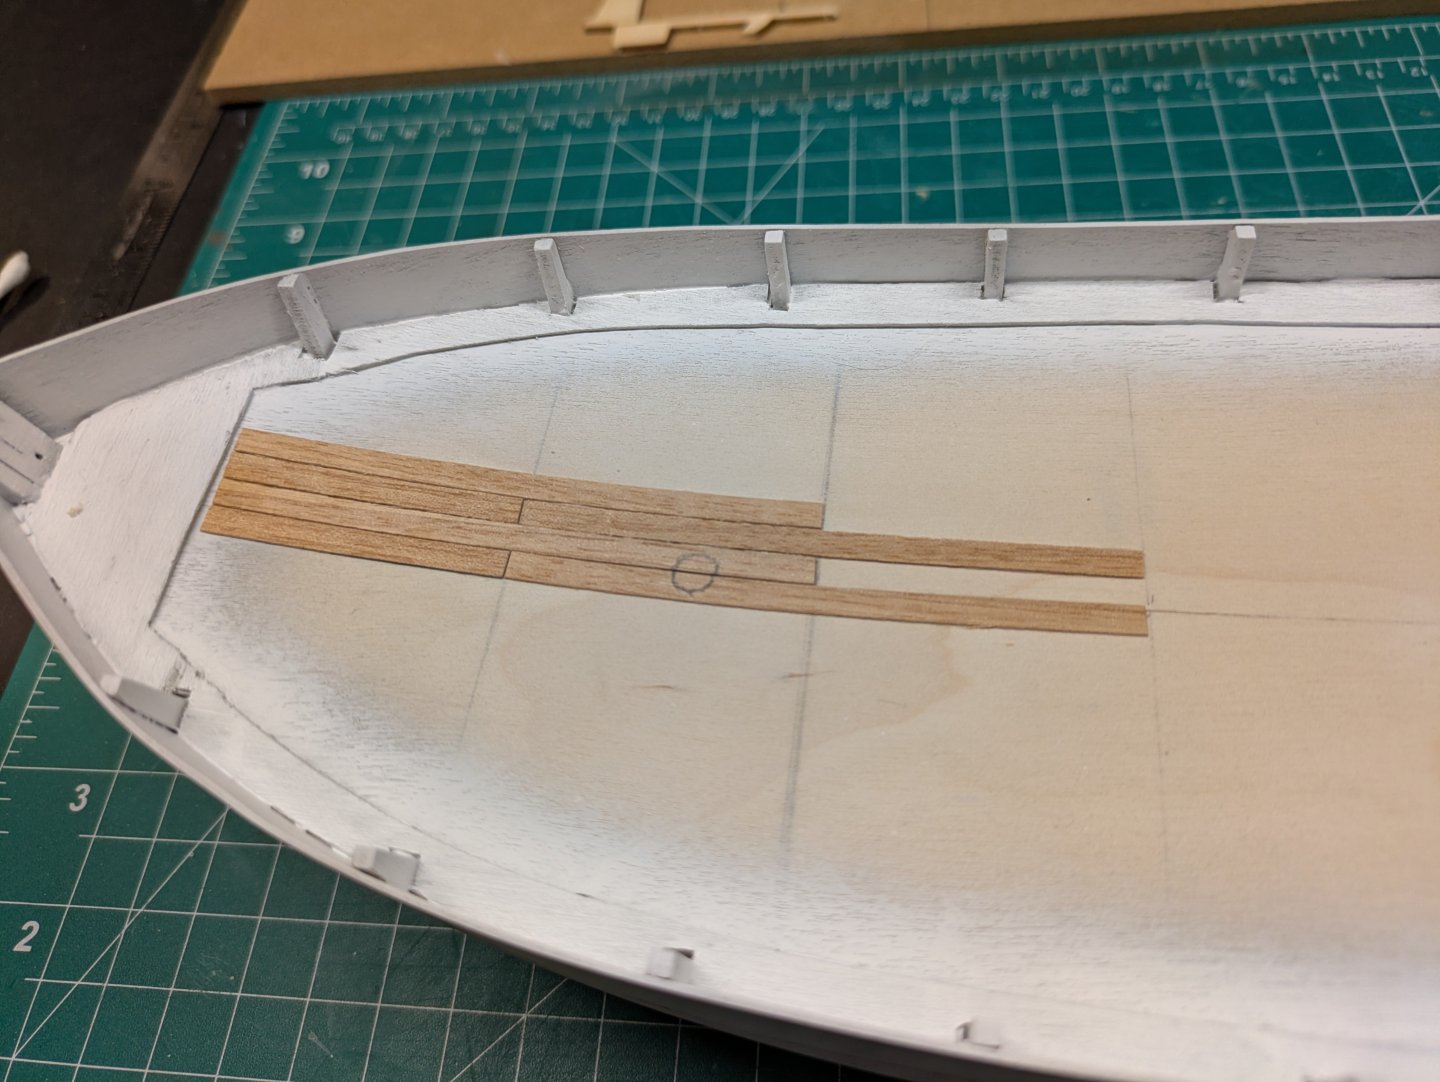
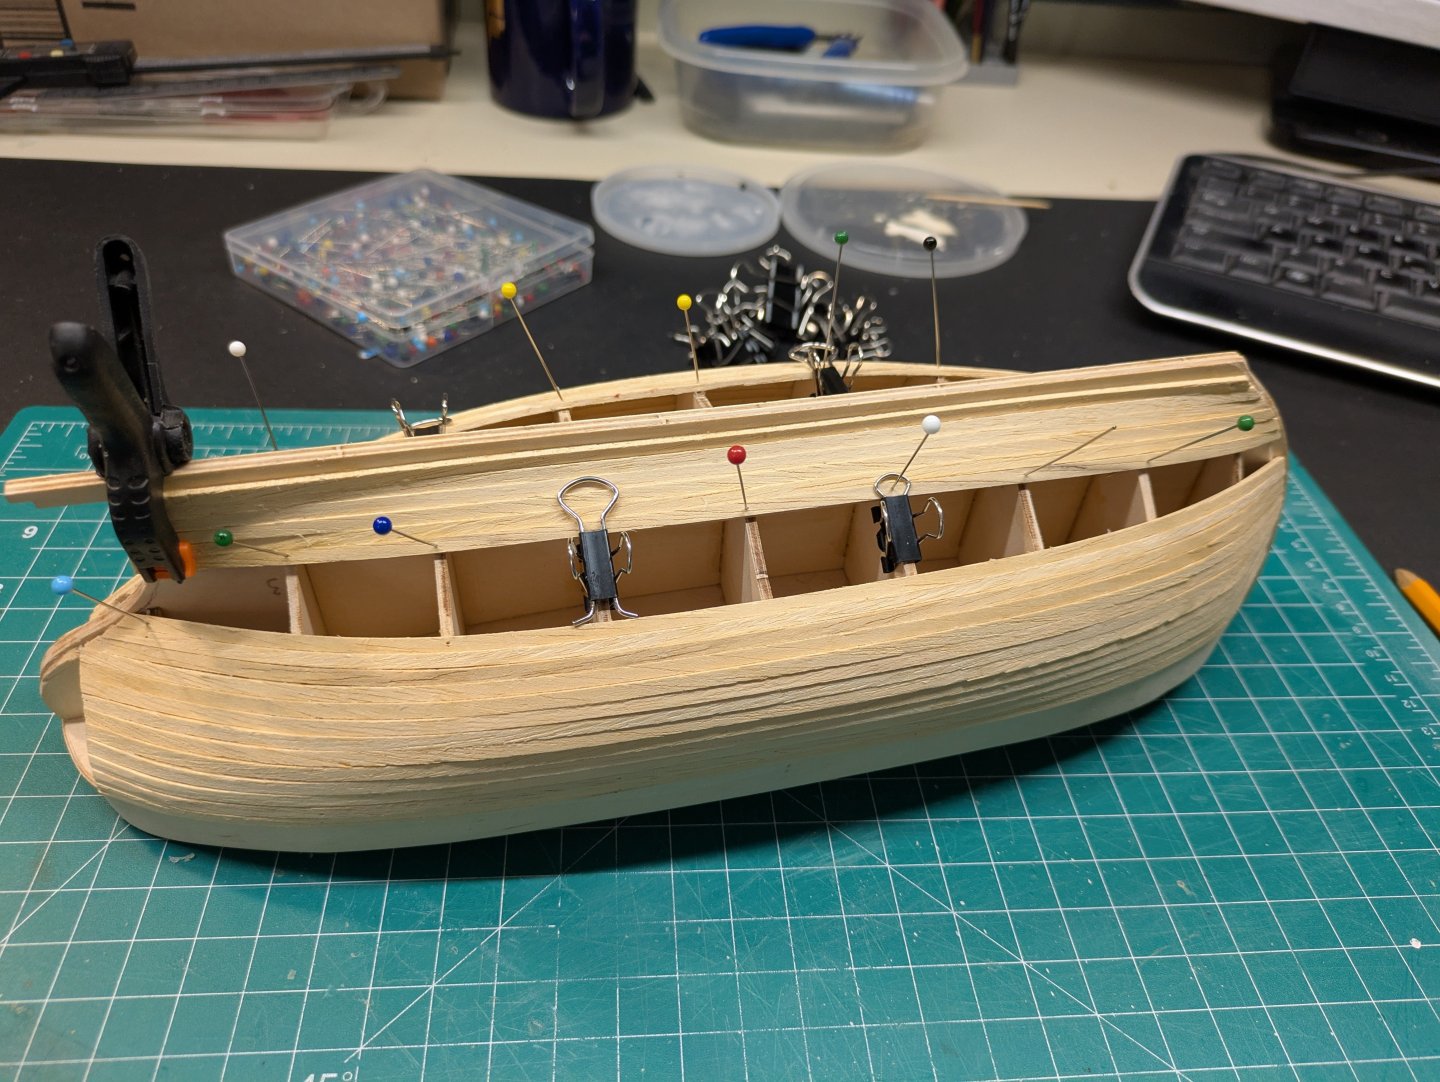
Been puttering away on the deck pieces. Some are glued down now, larger pieces still dry fitting as I figure out the order to lock things down.


-
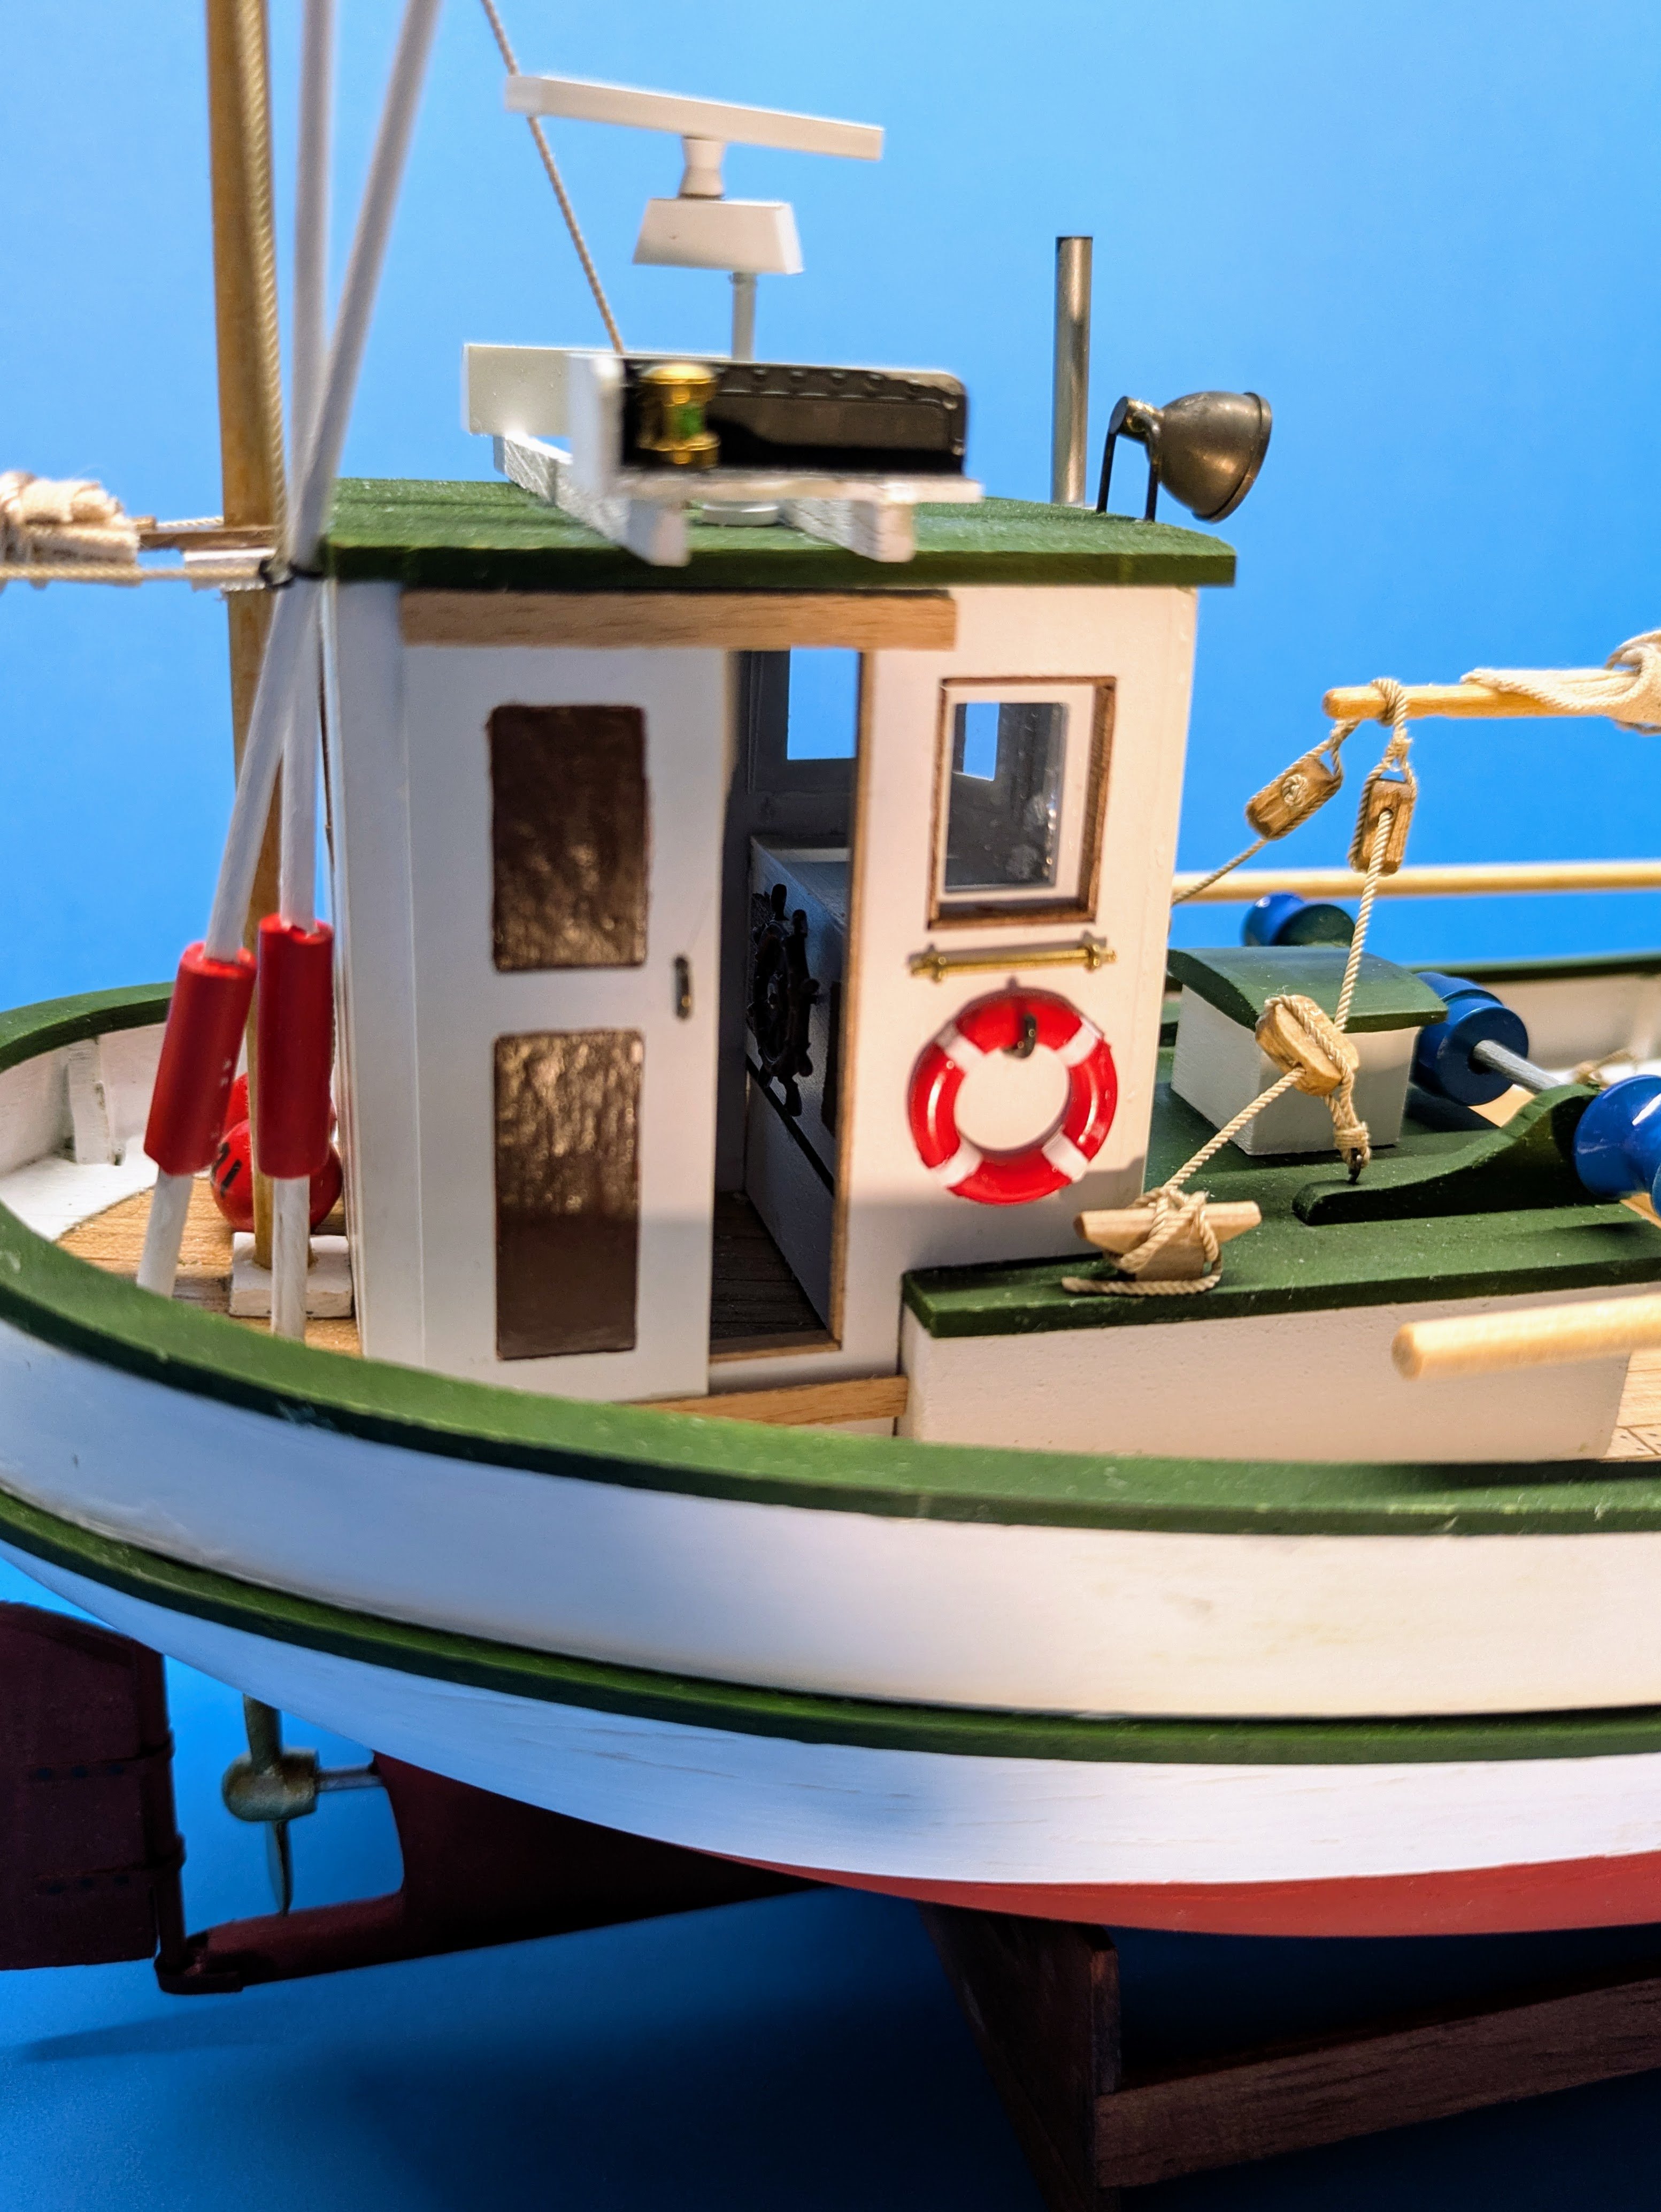
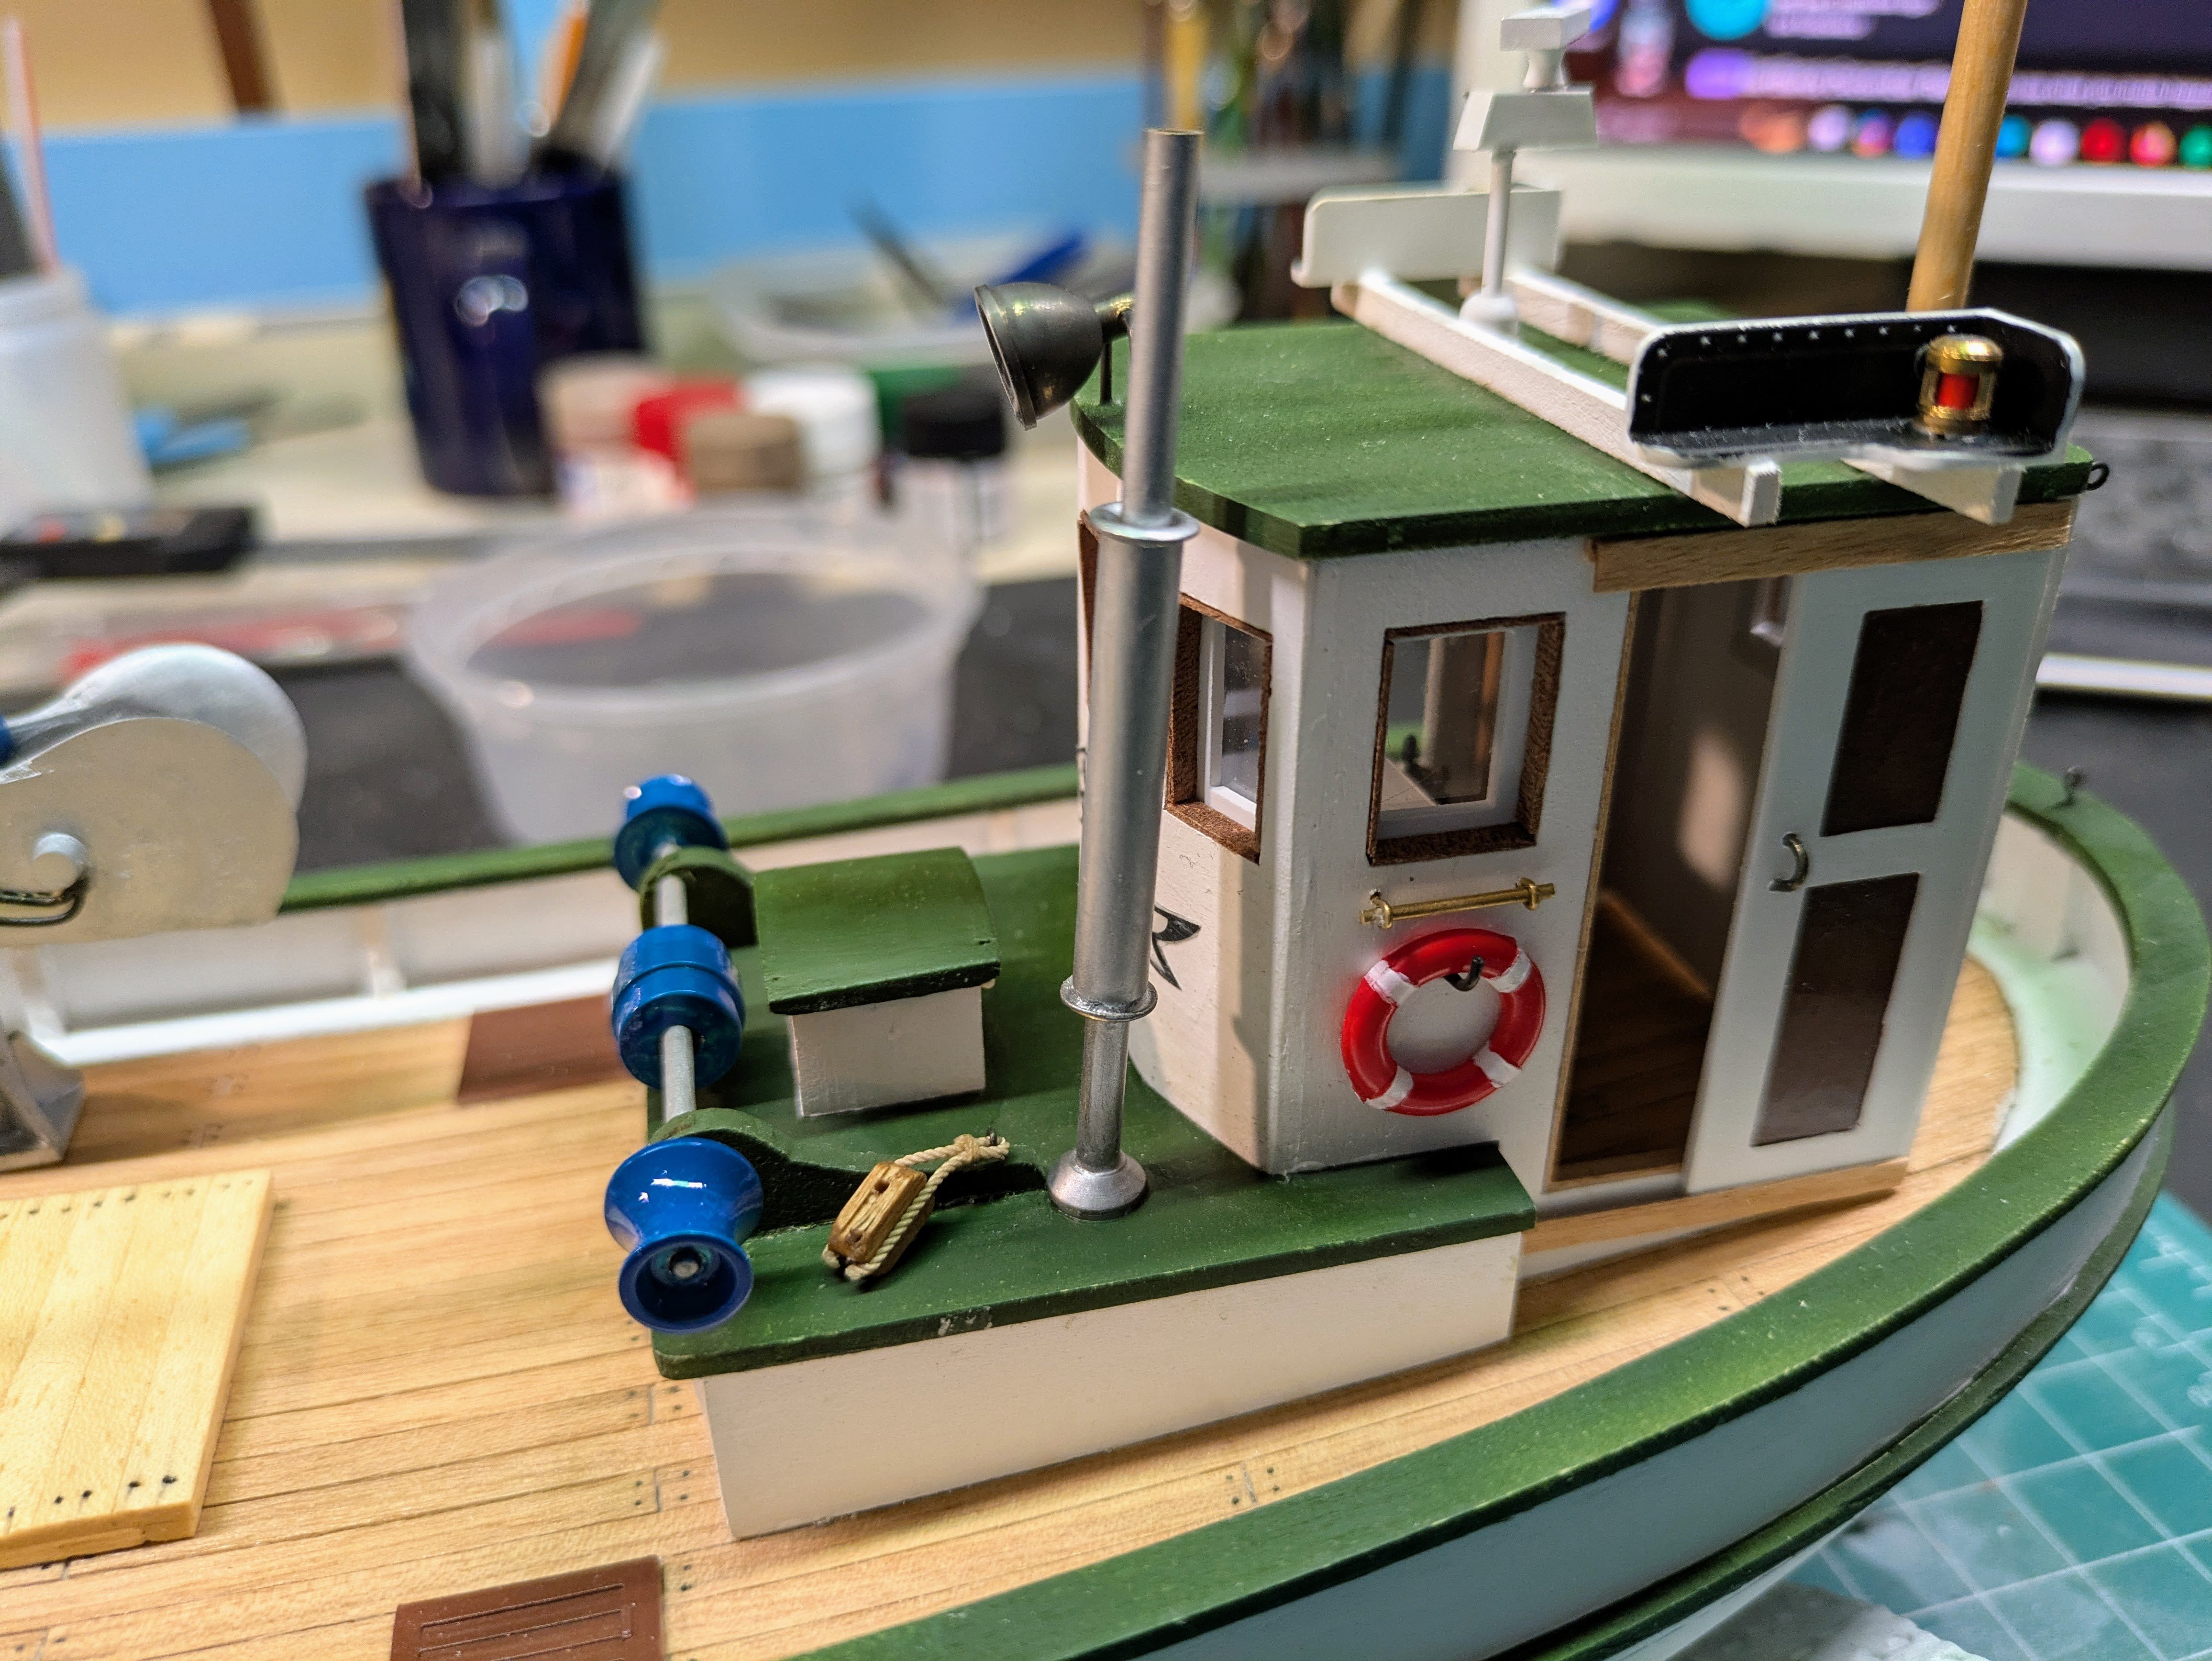
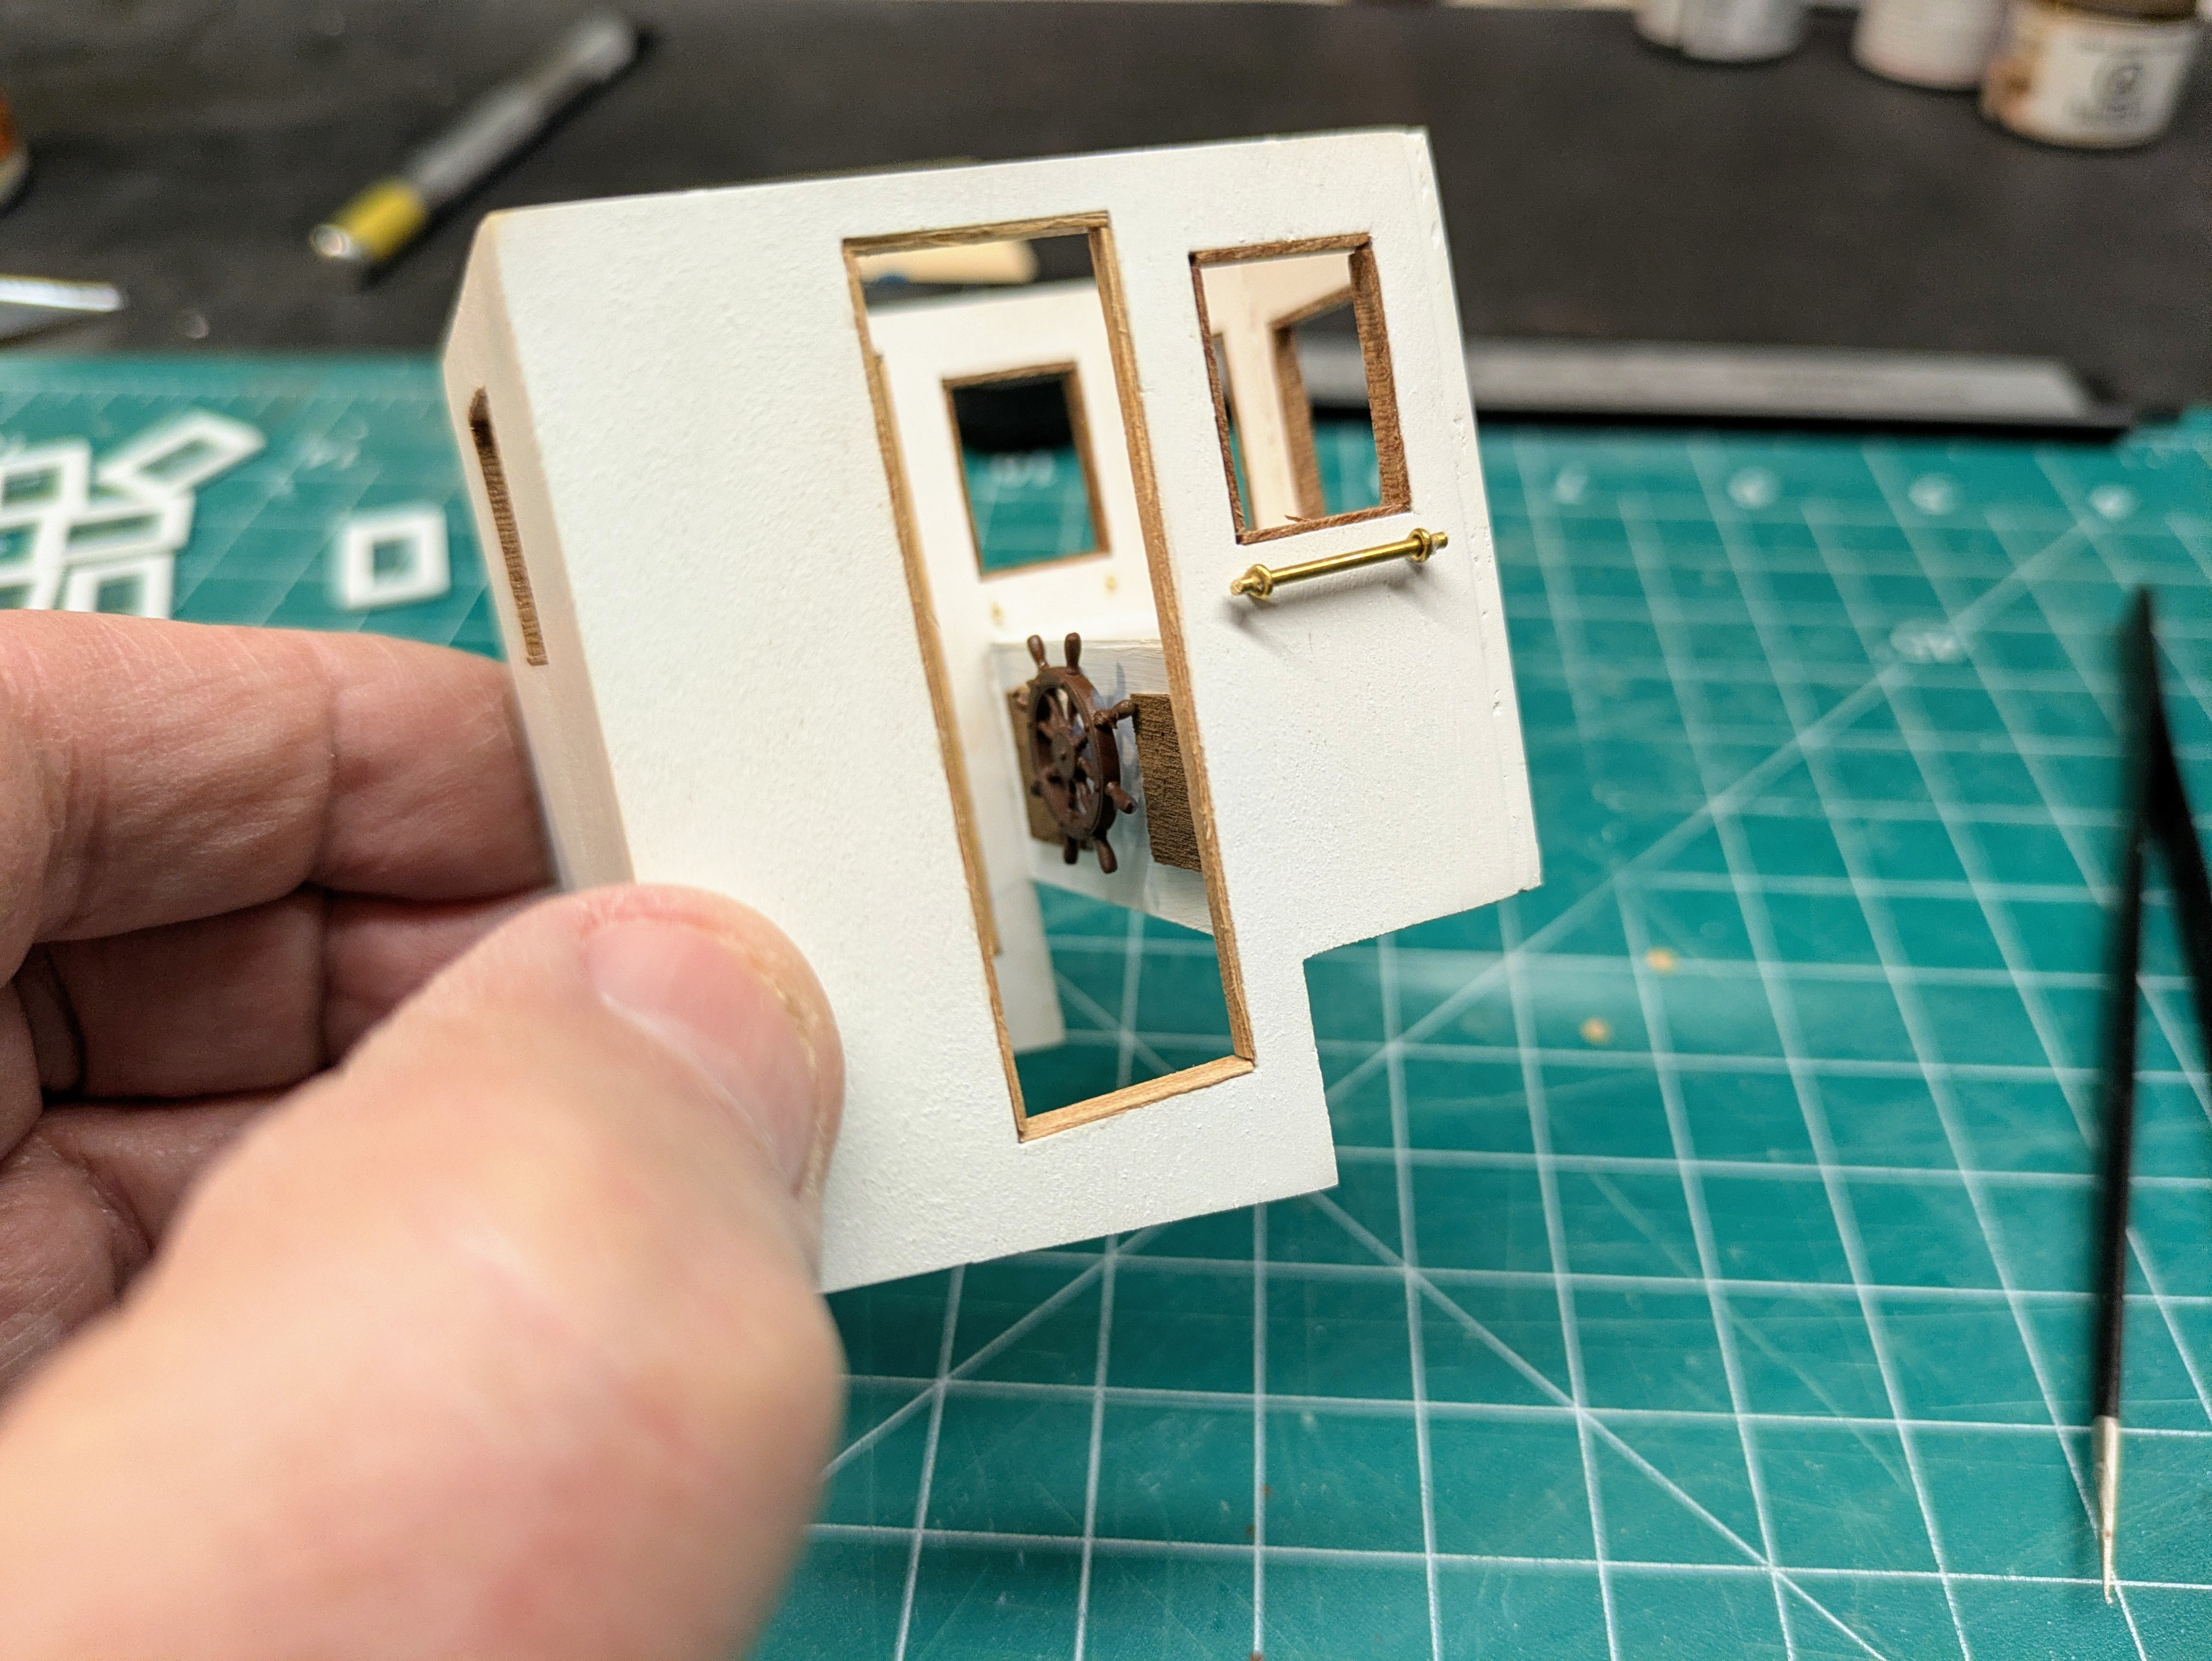
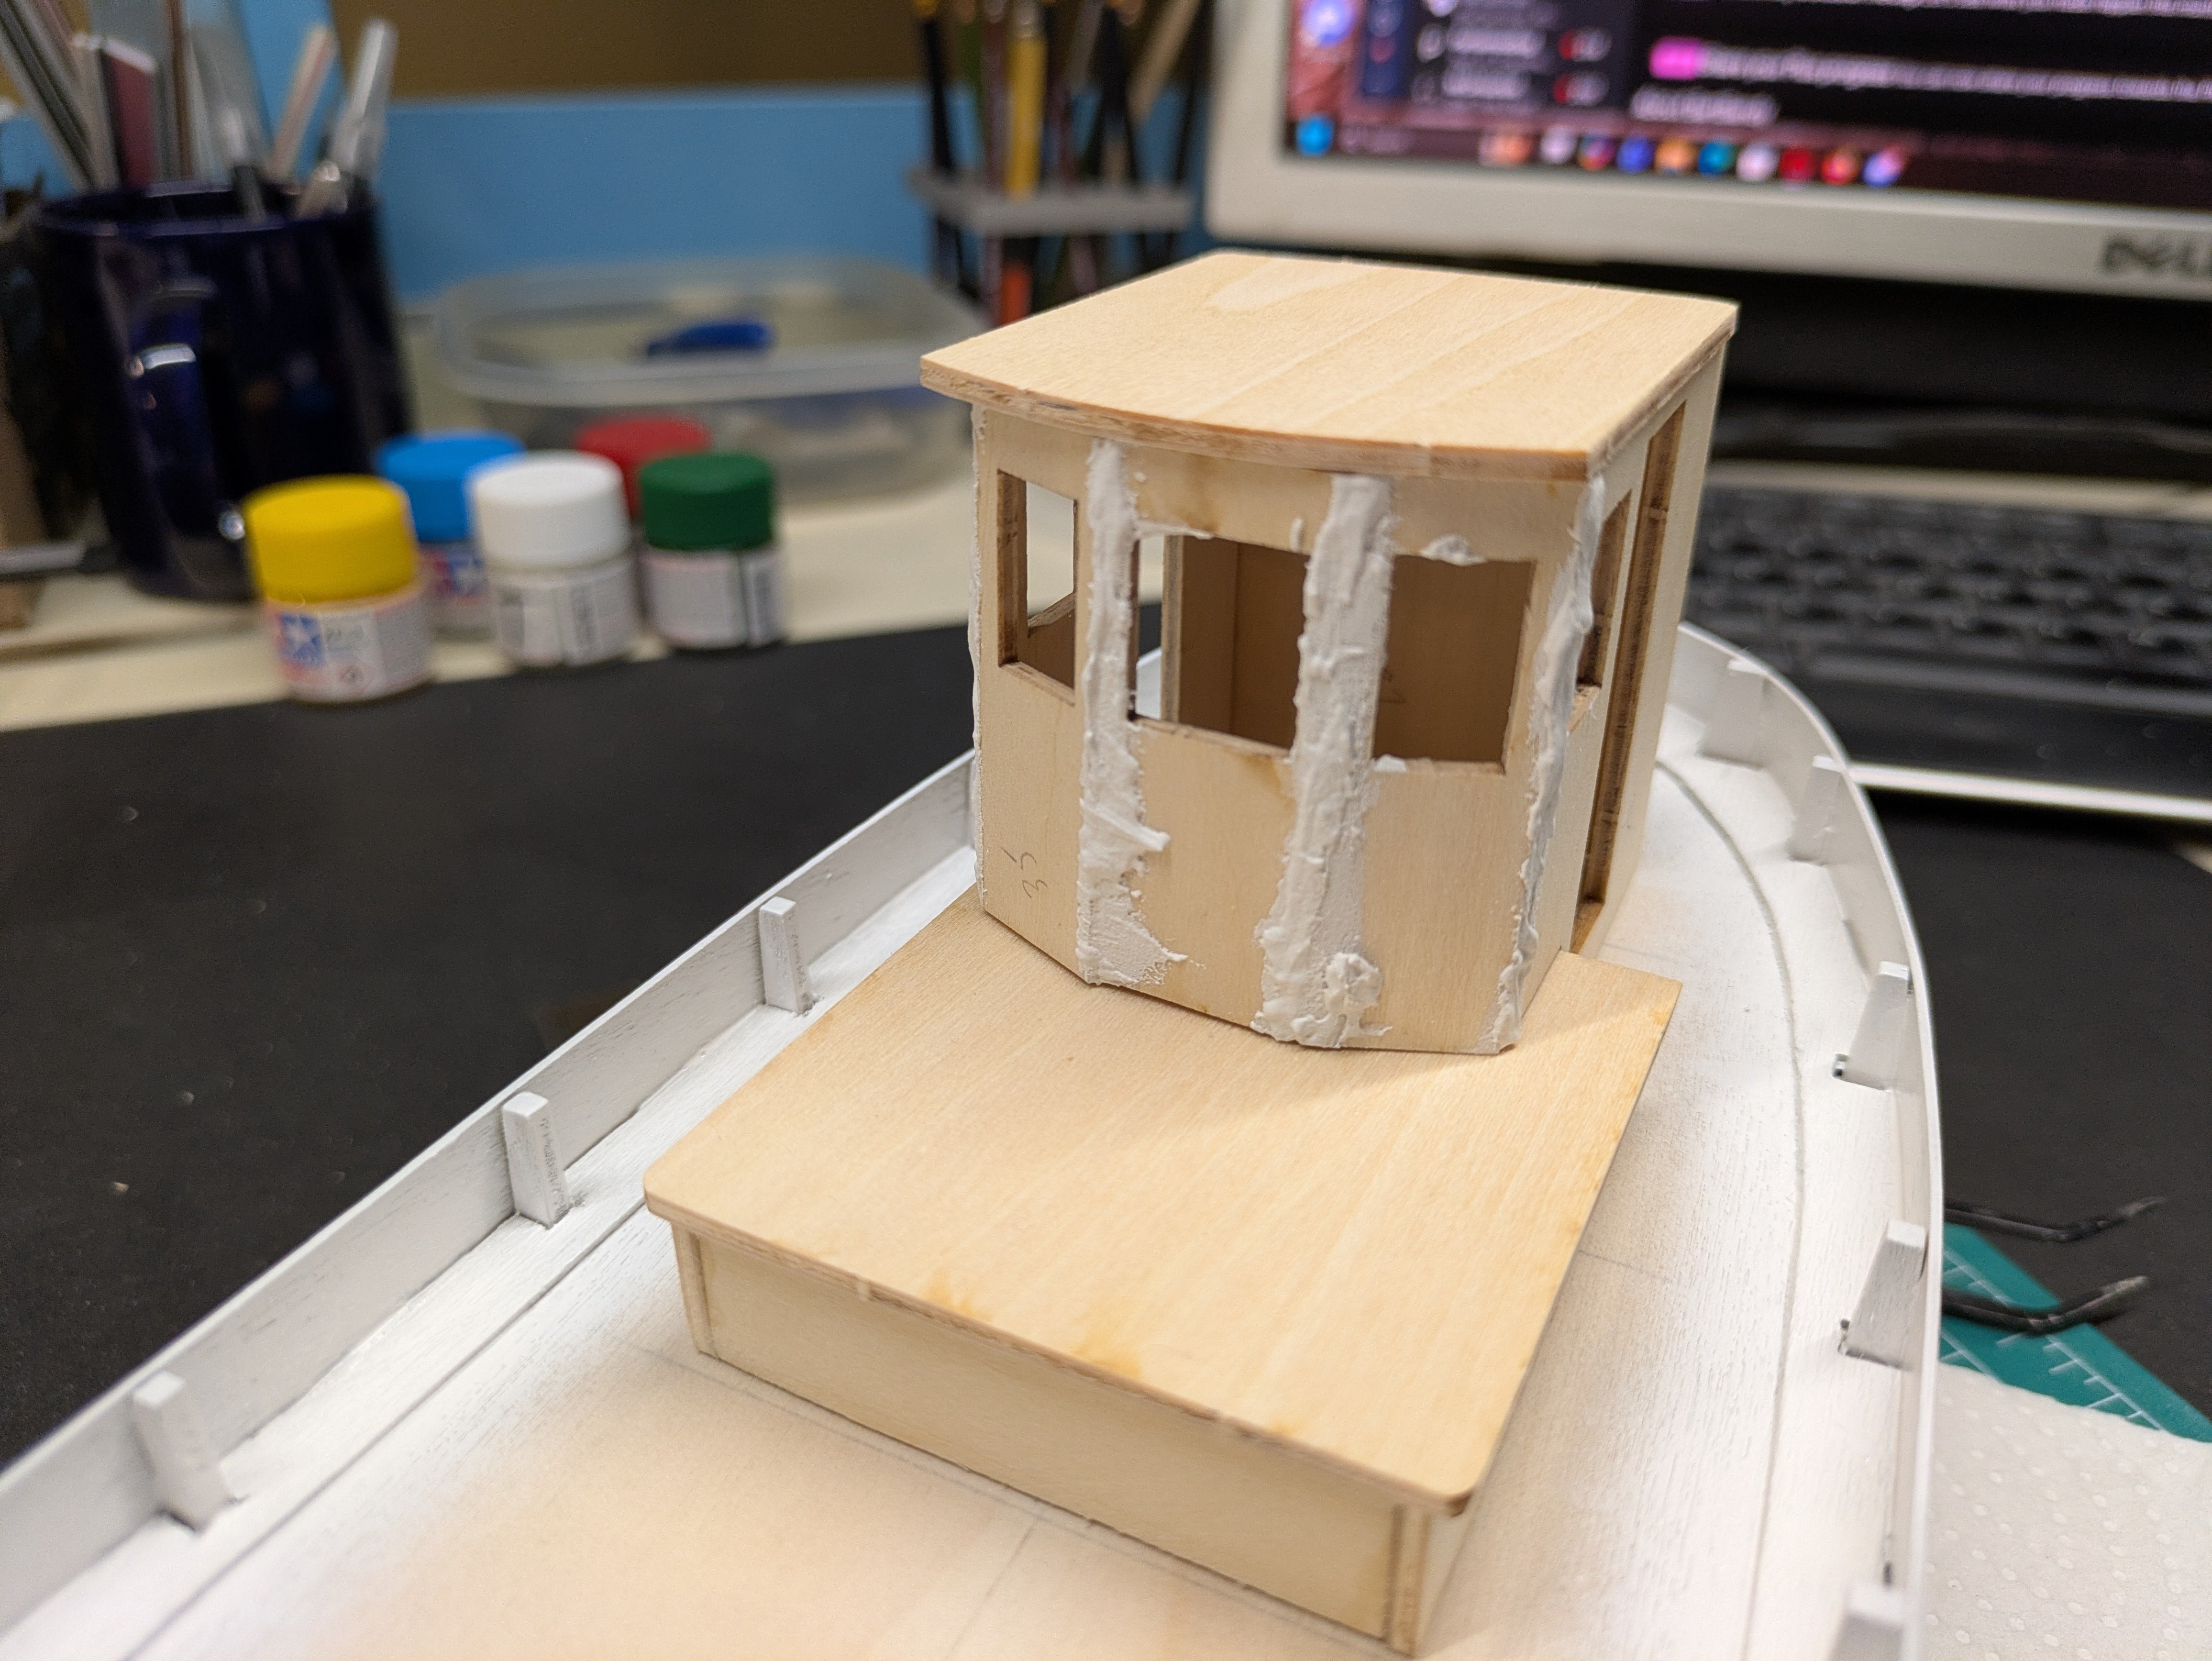
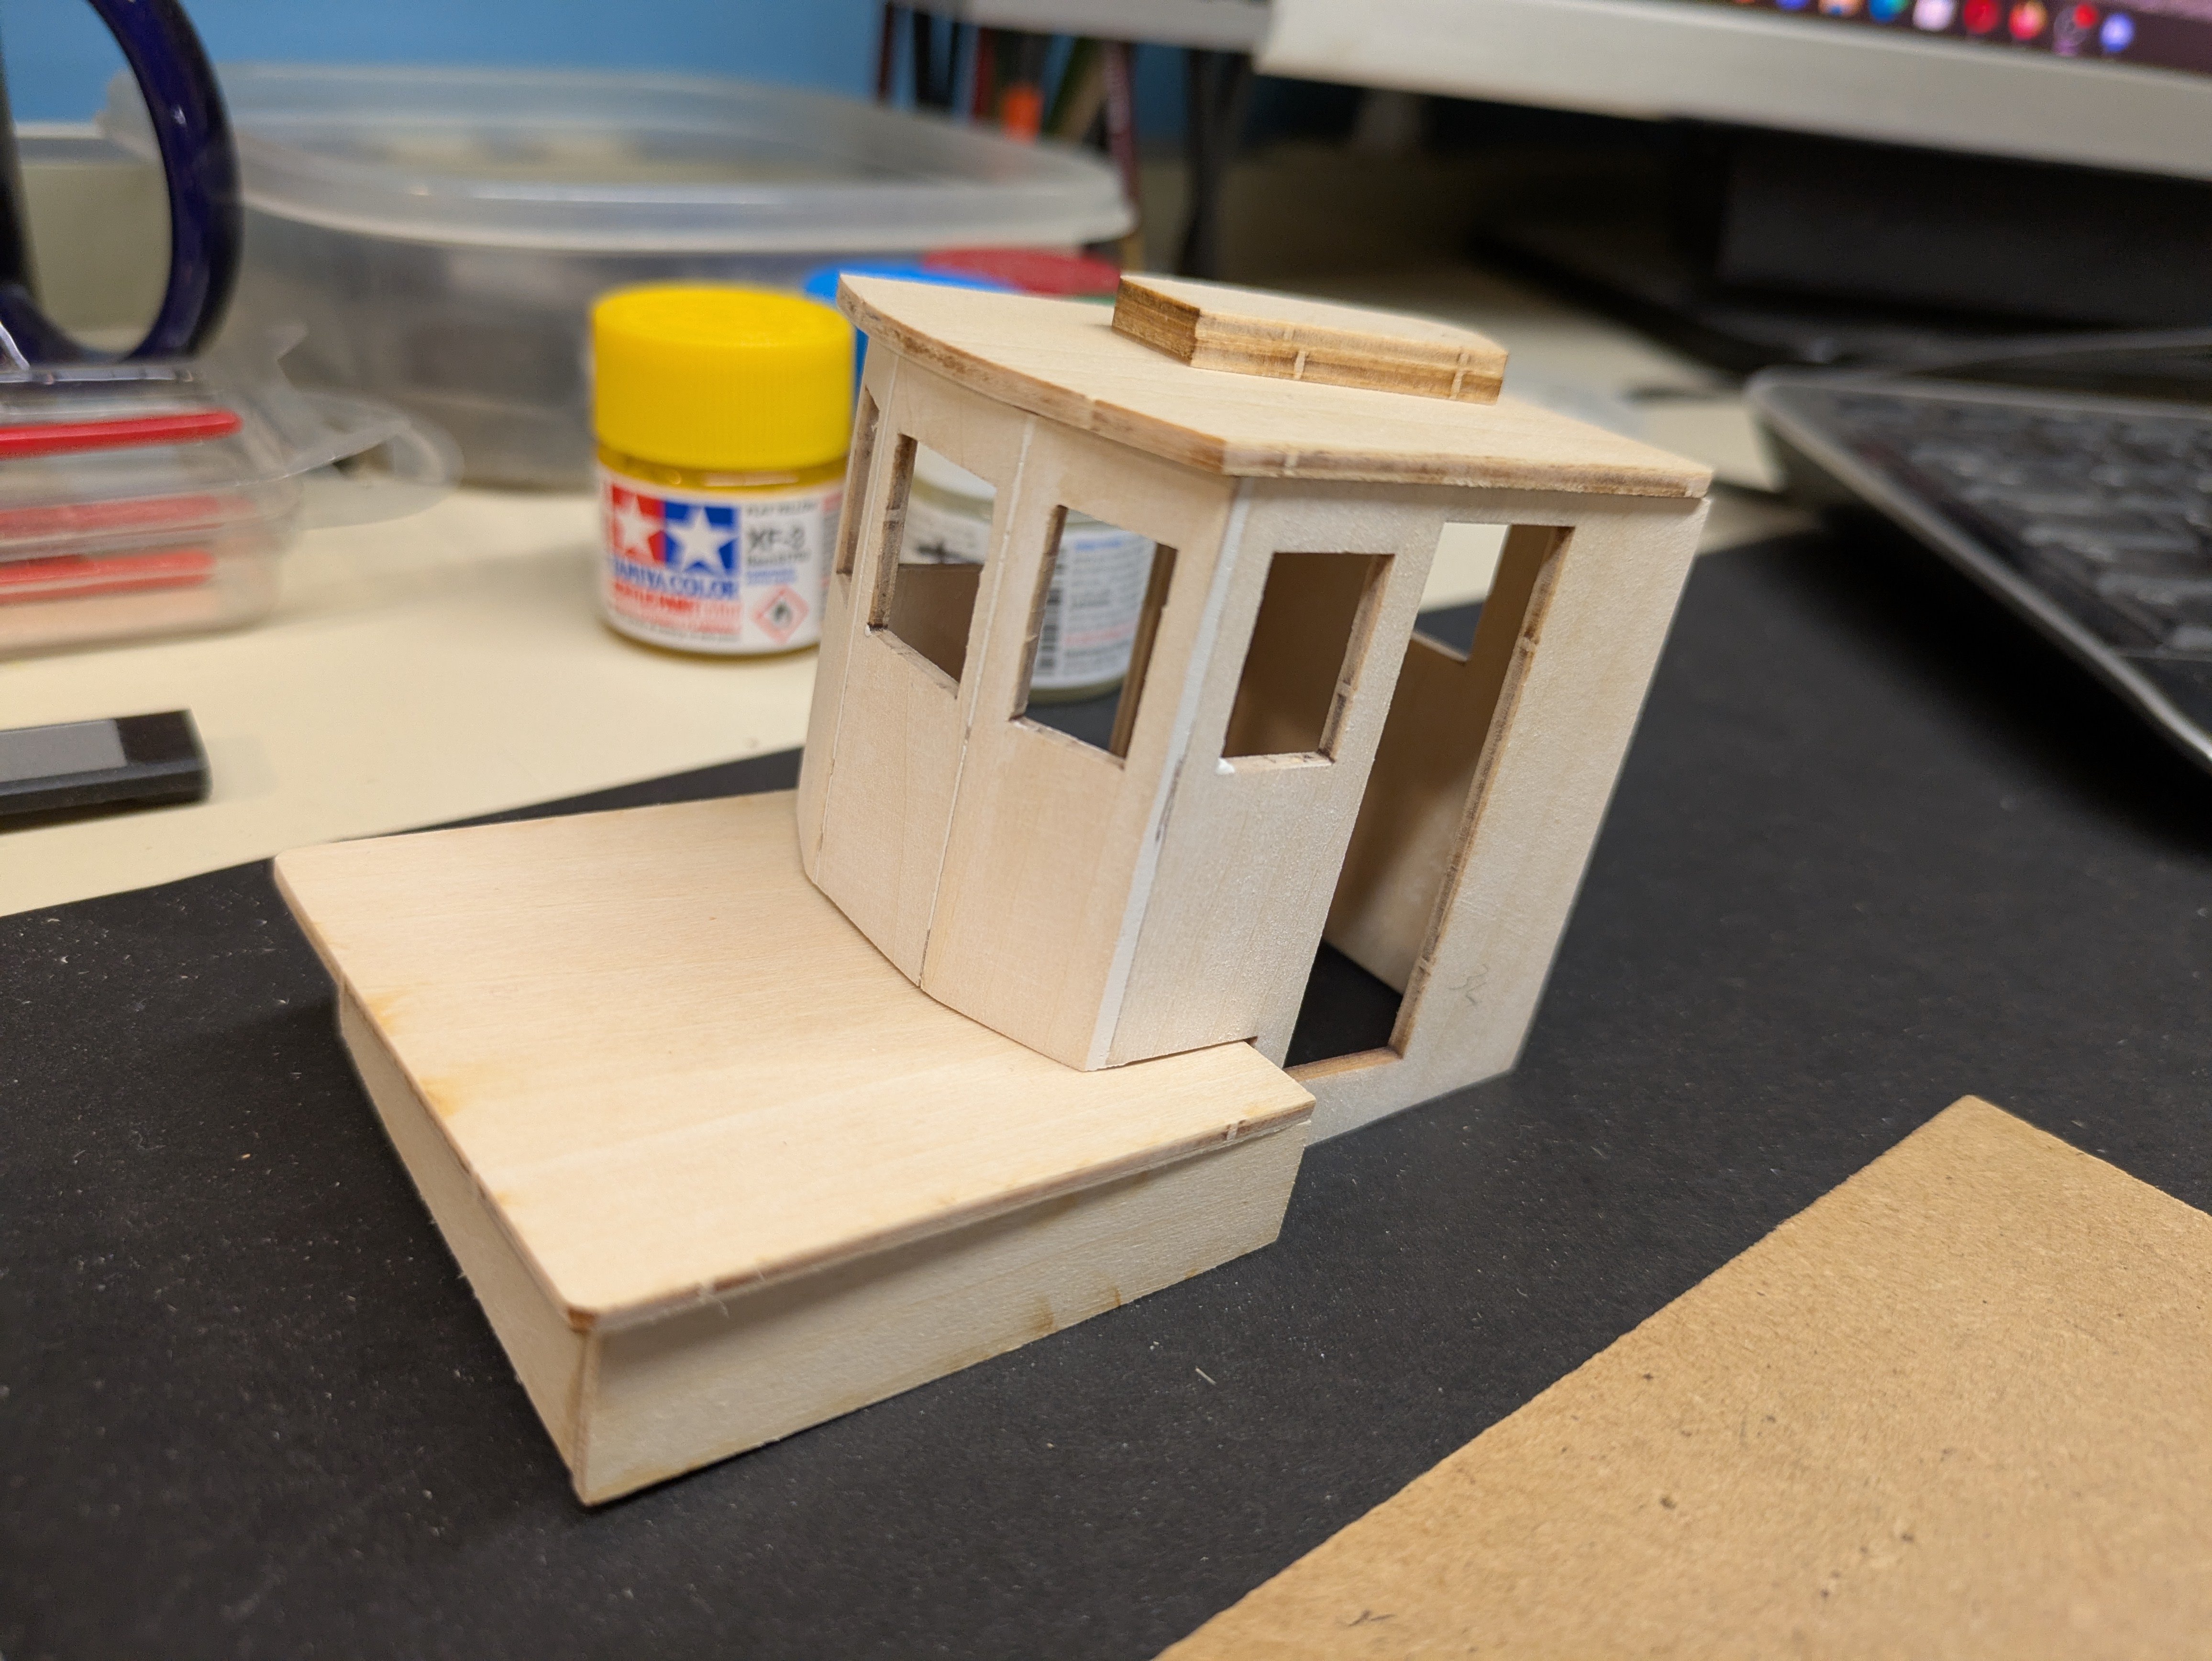
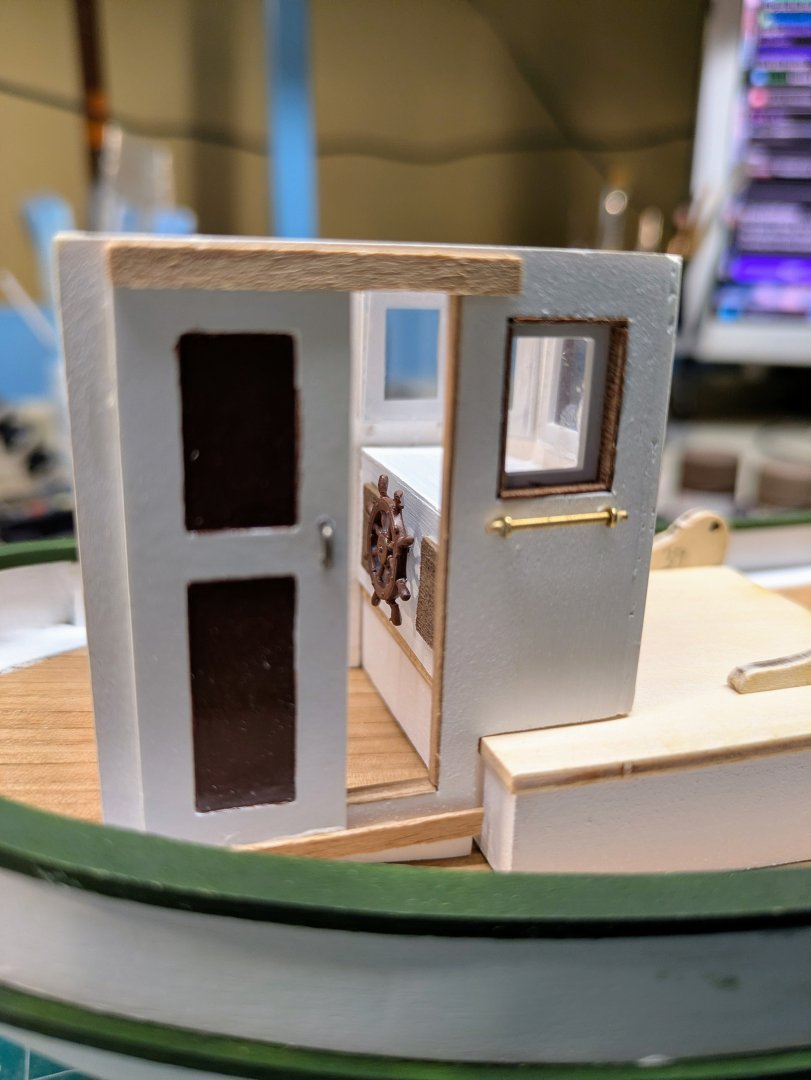
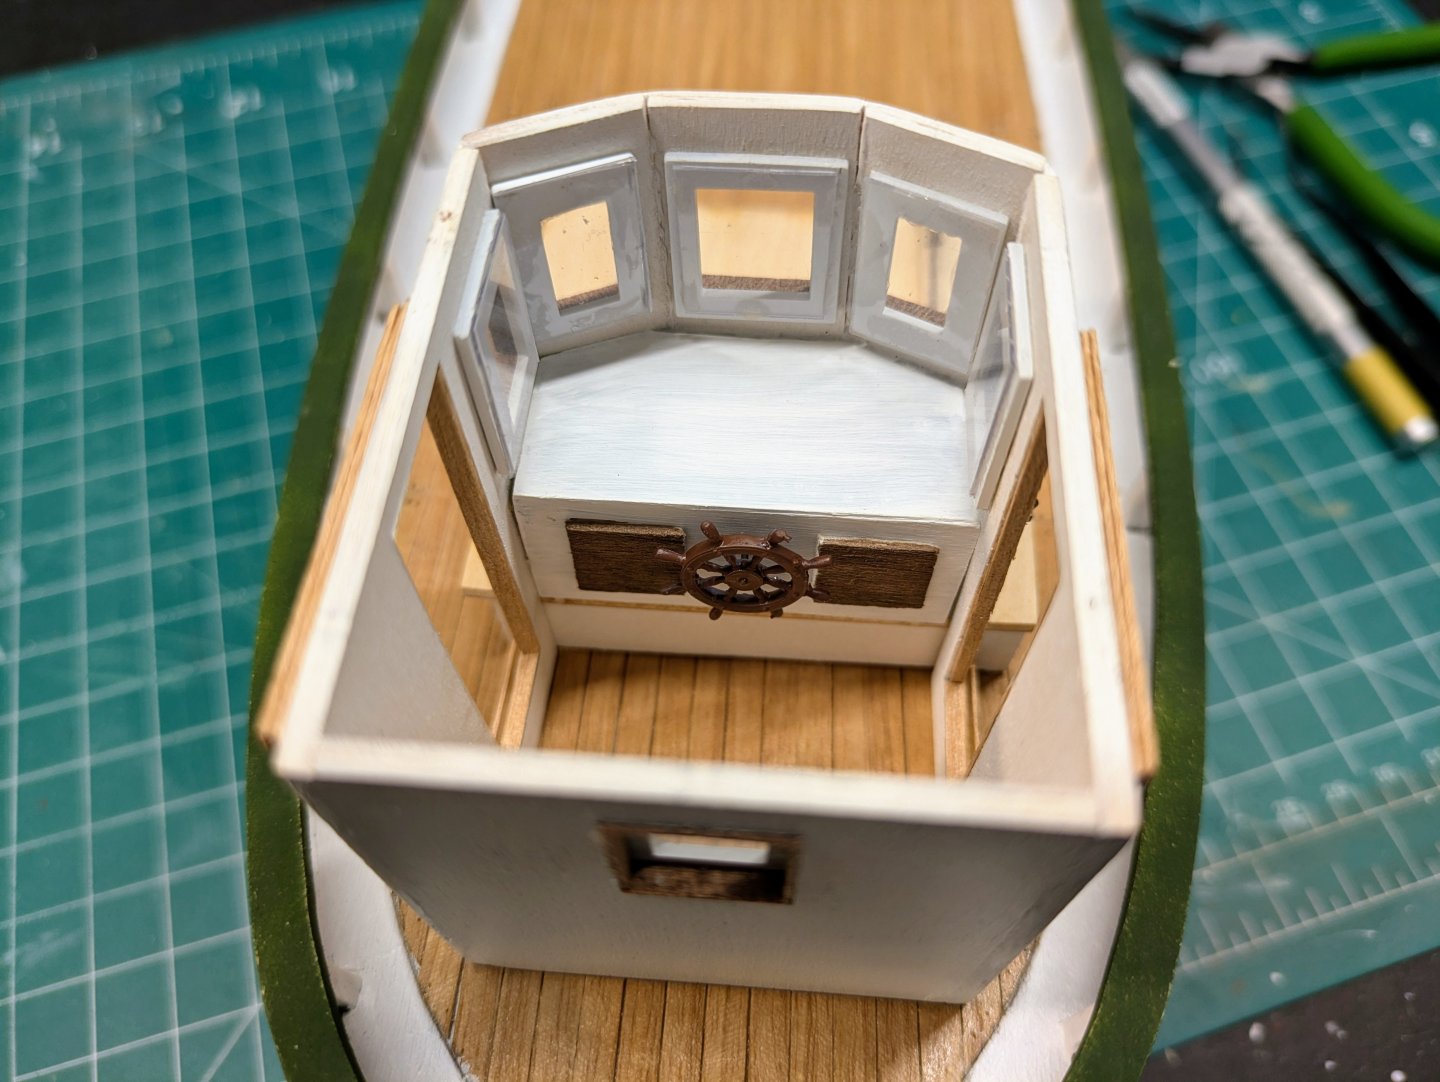
Have had a good few days working on the wheel house. I changed the doors to a sliding door (makes zero sense for them to open inwards on a sea going ship), scratch built a console and 3d printed a ships wheel. Also going to put in a throttle control and radar display of some sort. Windows installed and some painting and dry fitting to see if I like the colour scheme and look. I do


-
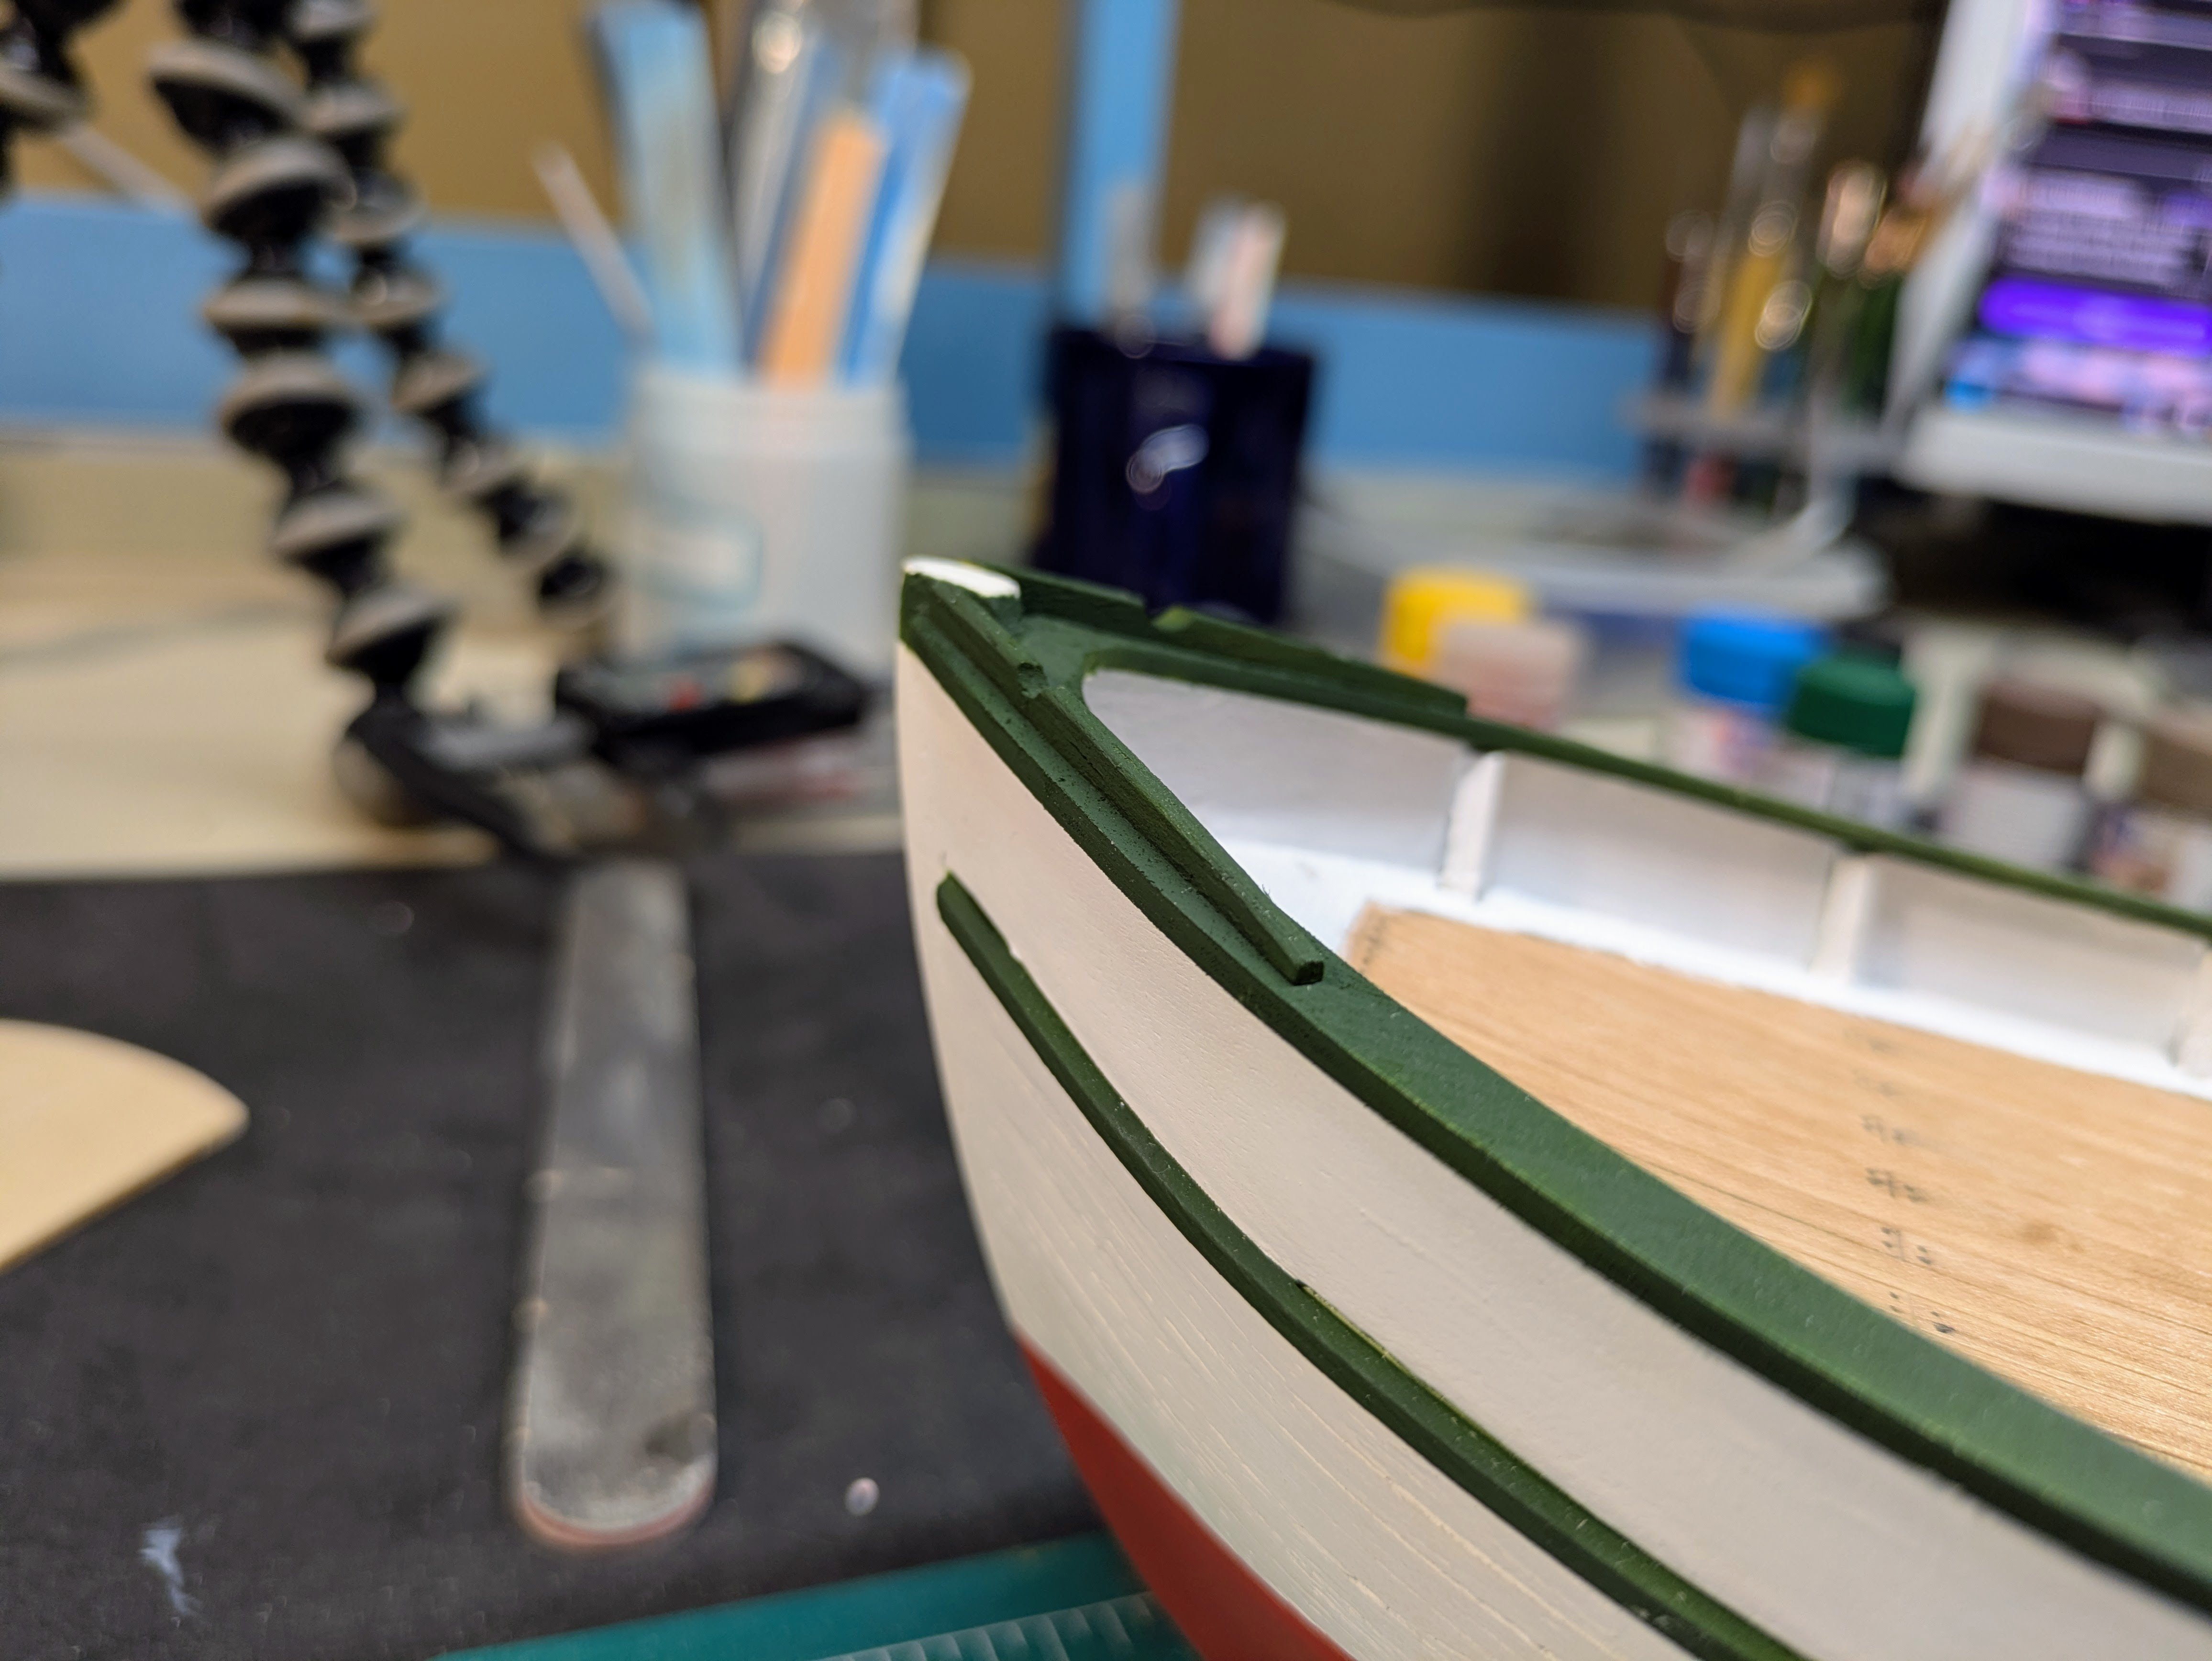
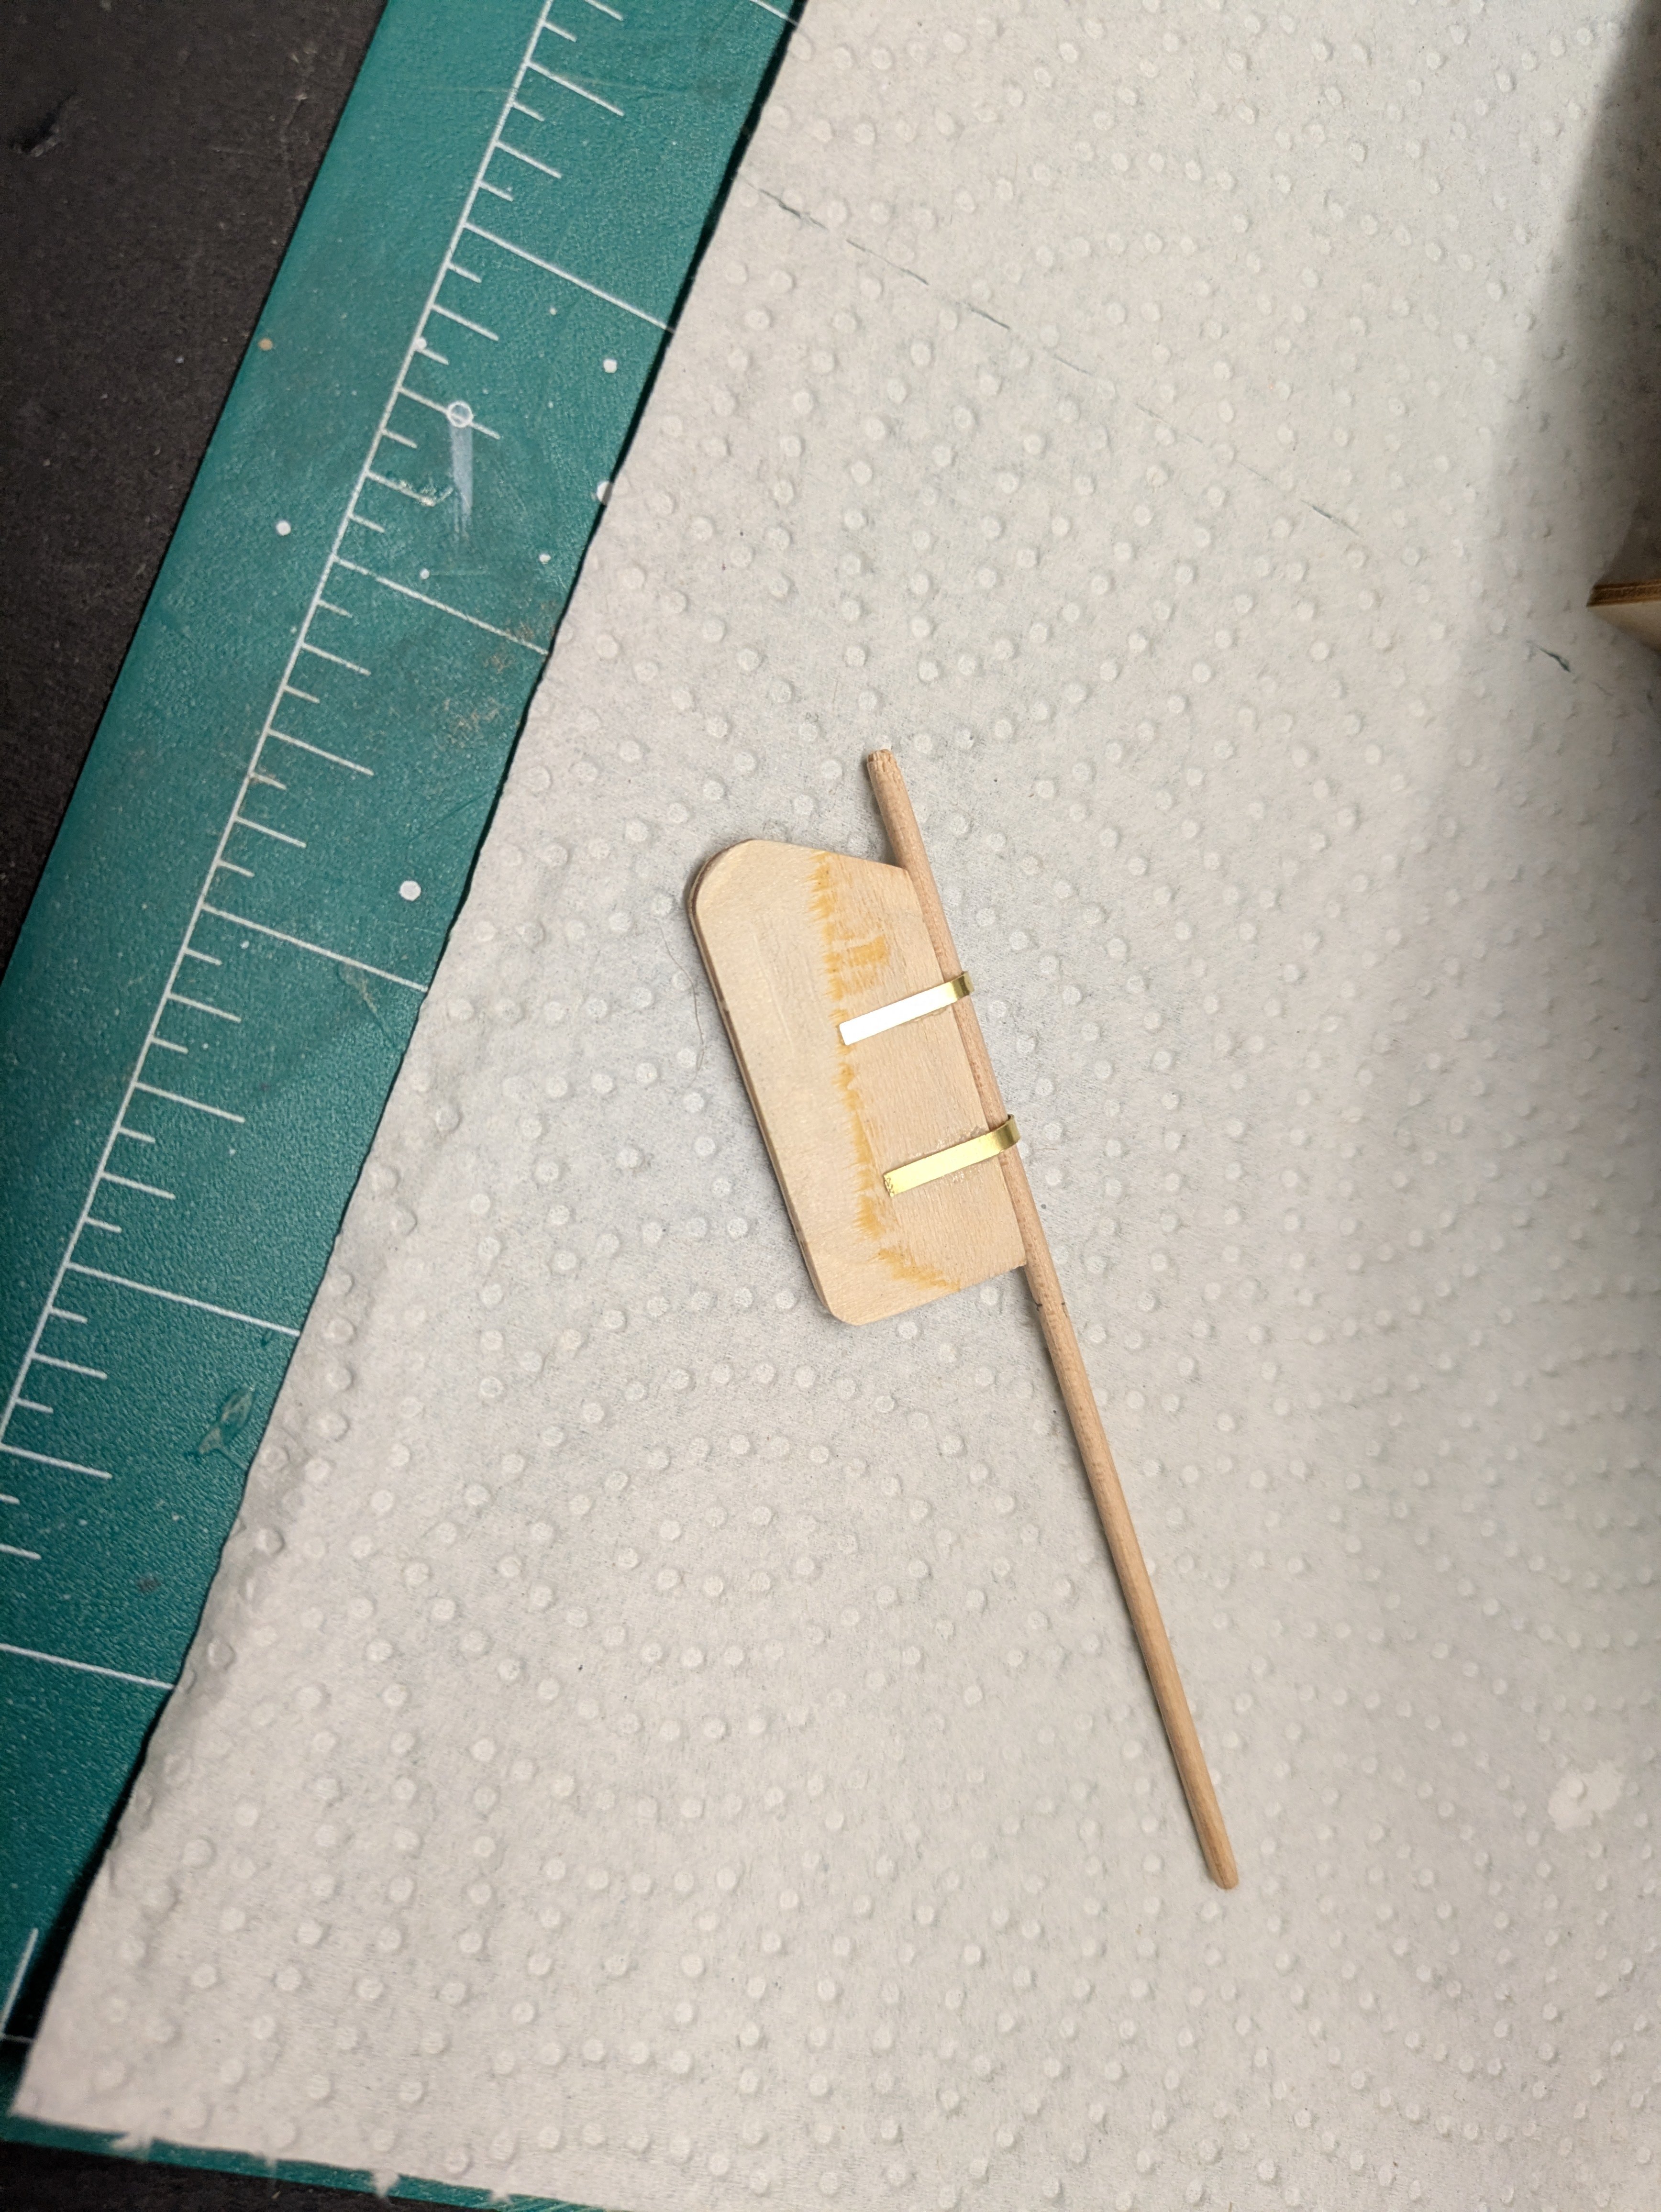
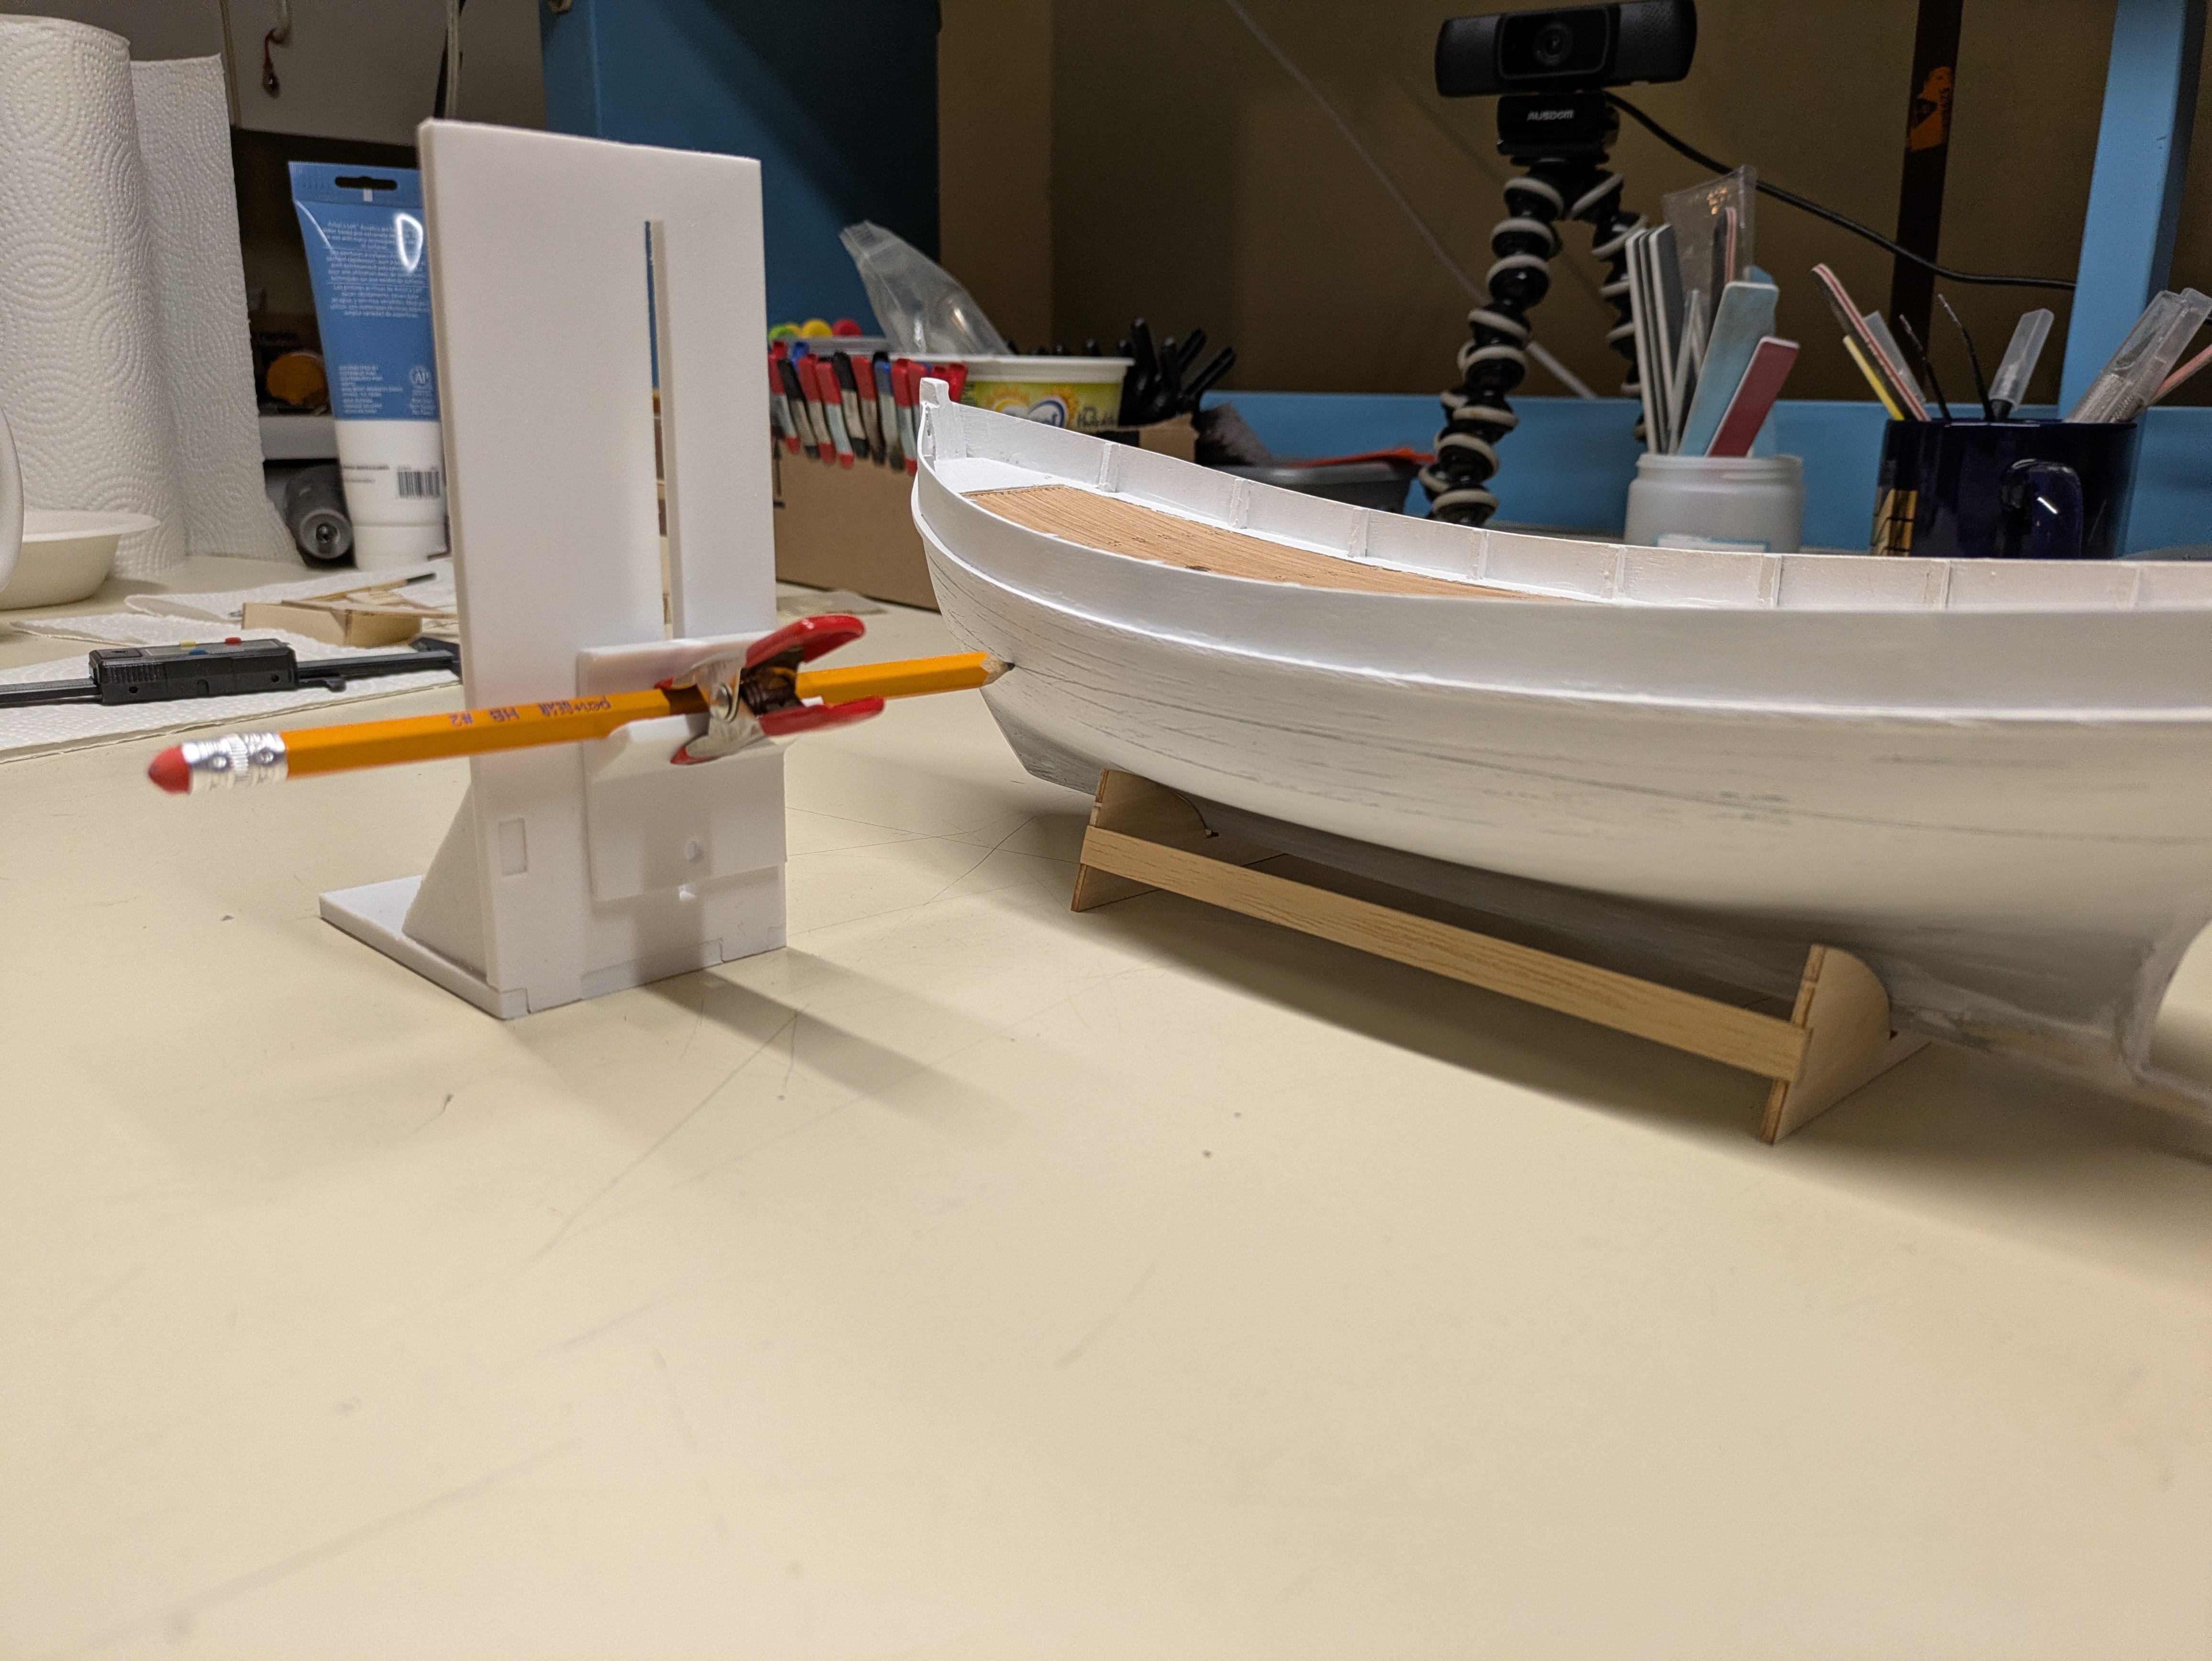
It has been a bit since my last update. Basically finishing up the hull, rub rail in place, cap rails, rudder put together and hull painting. Have started work on the wheelhouse and currently have a ships wheel in the 3d printer .


-
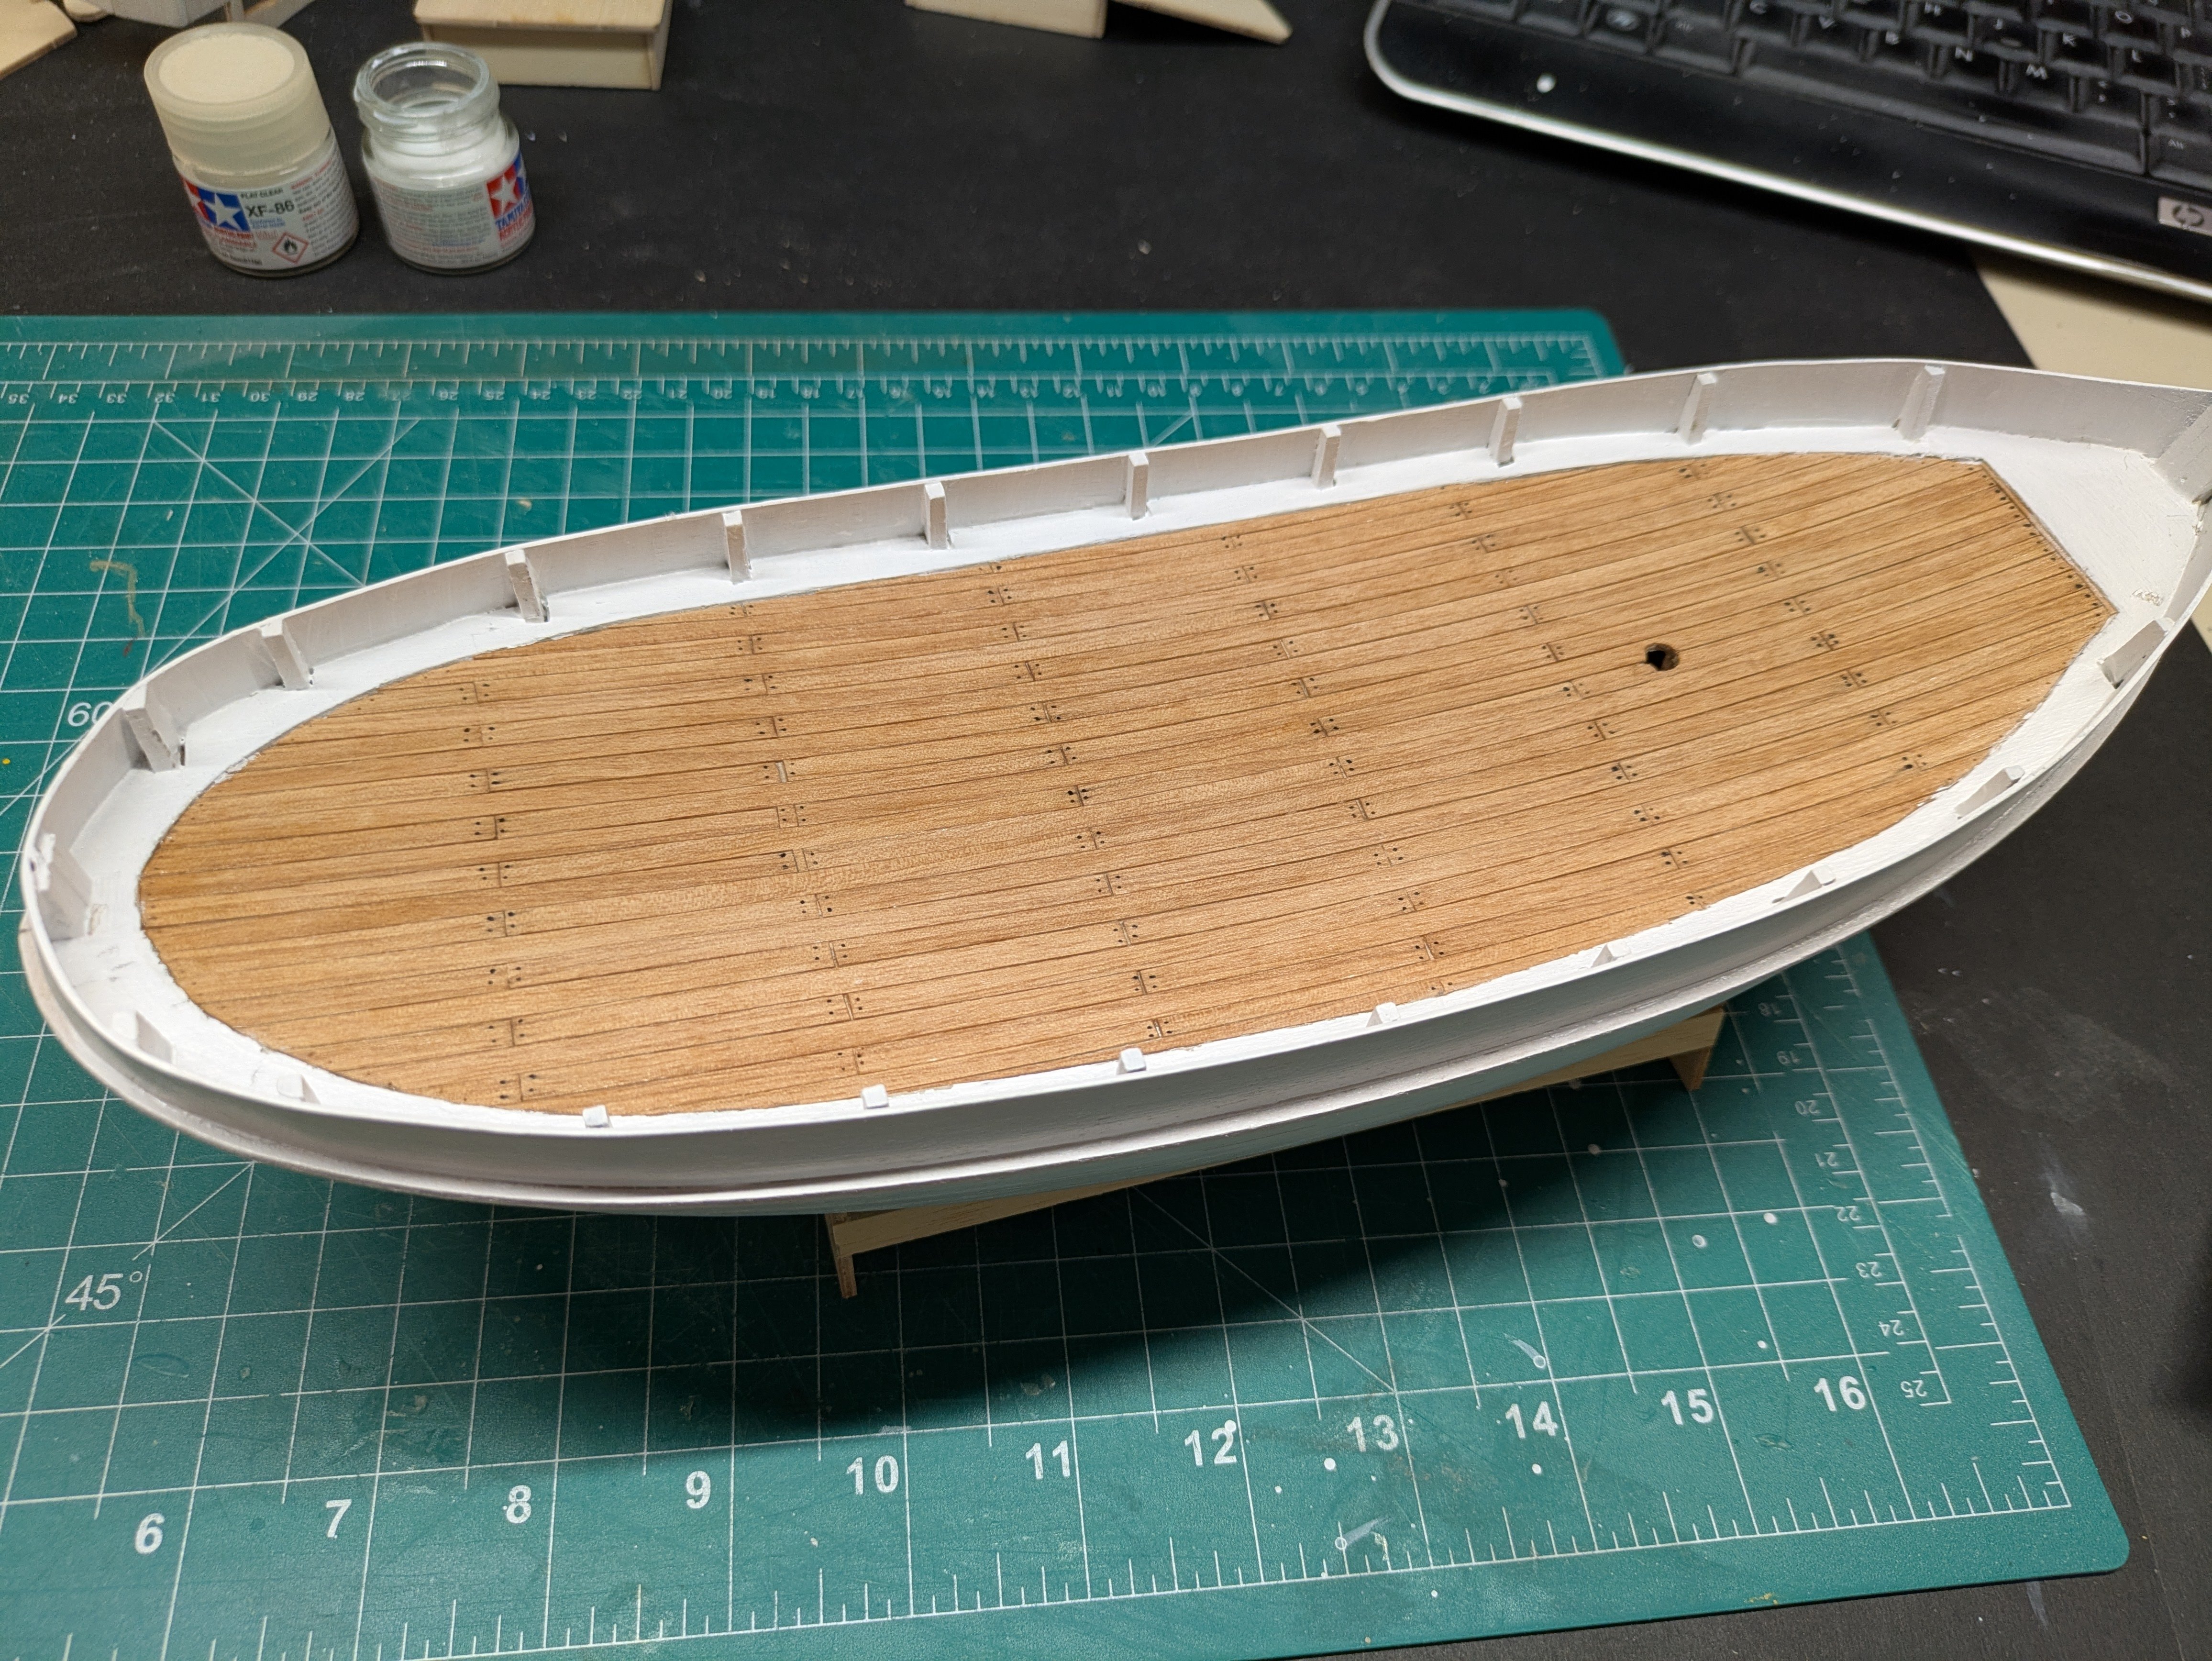
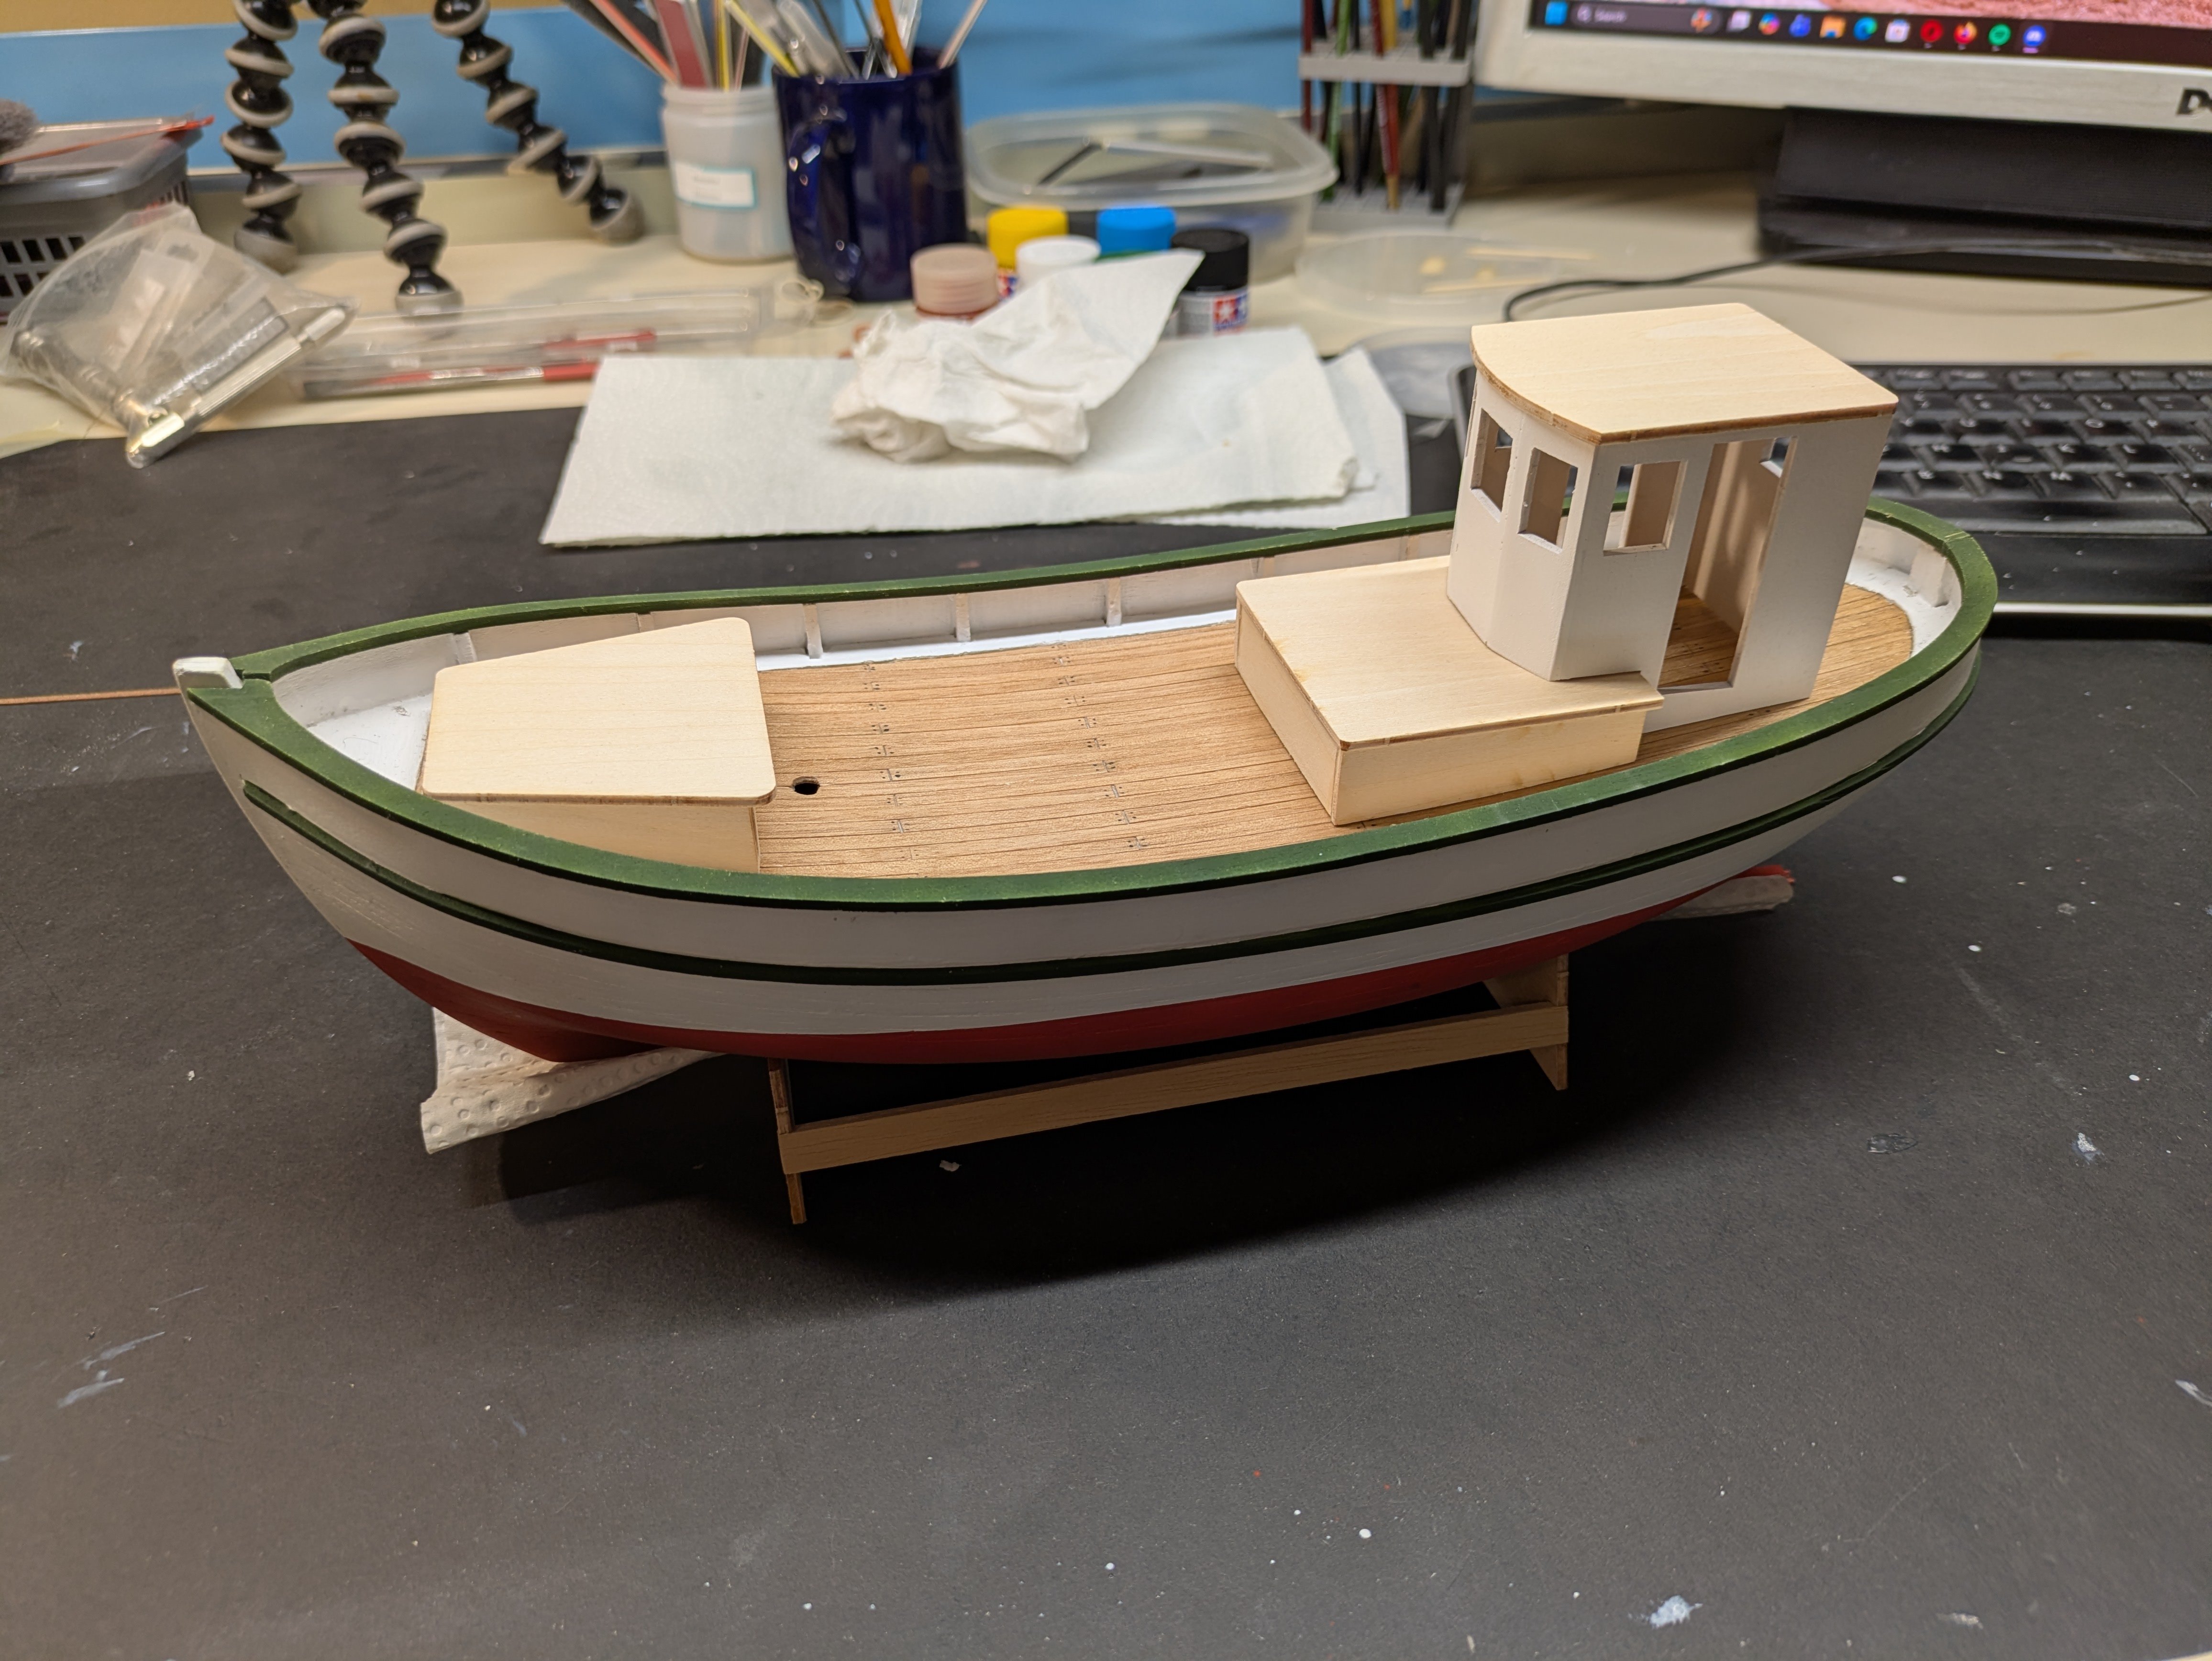
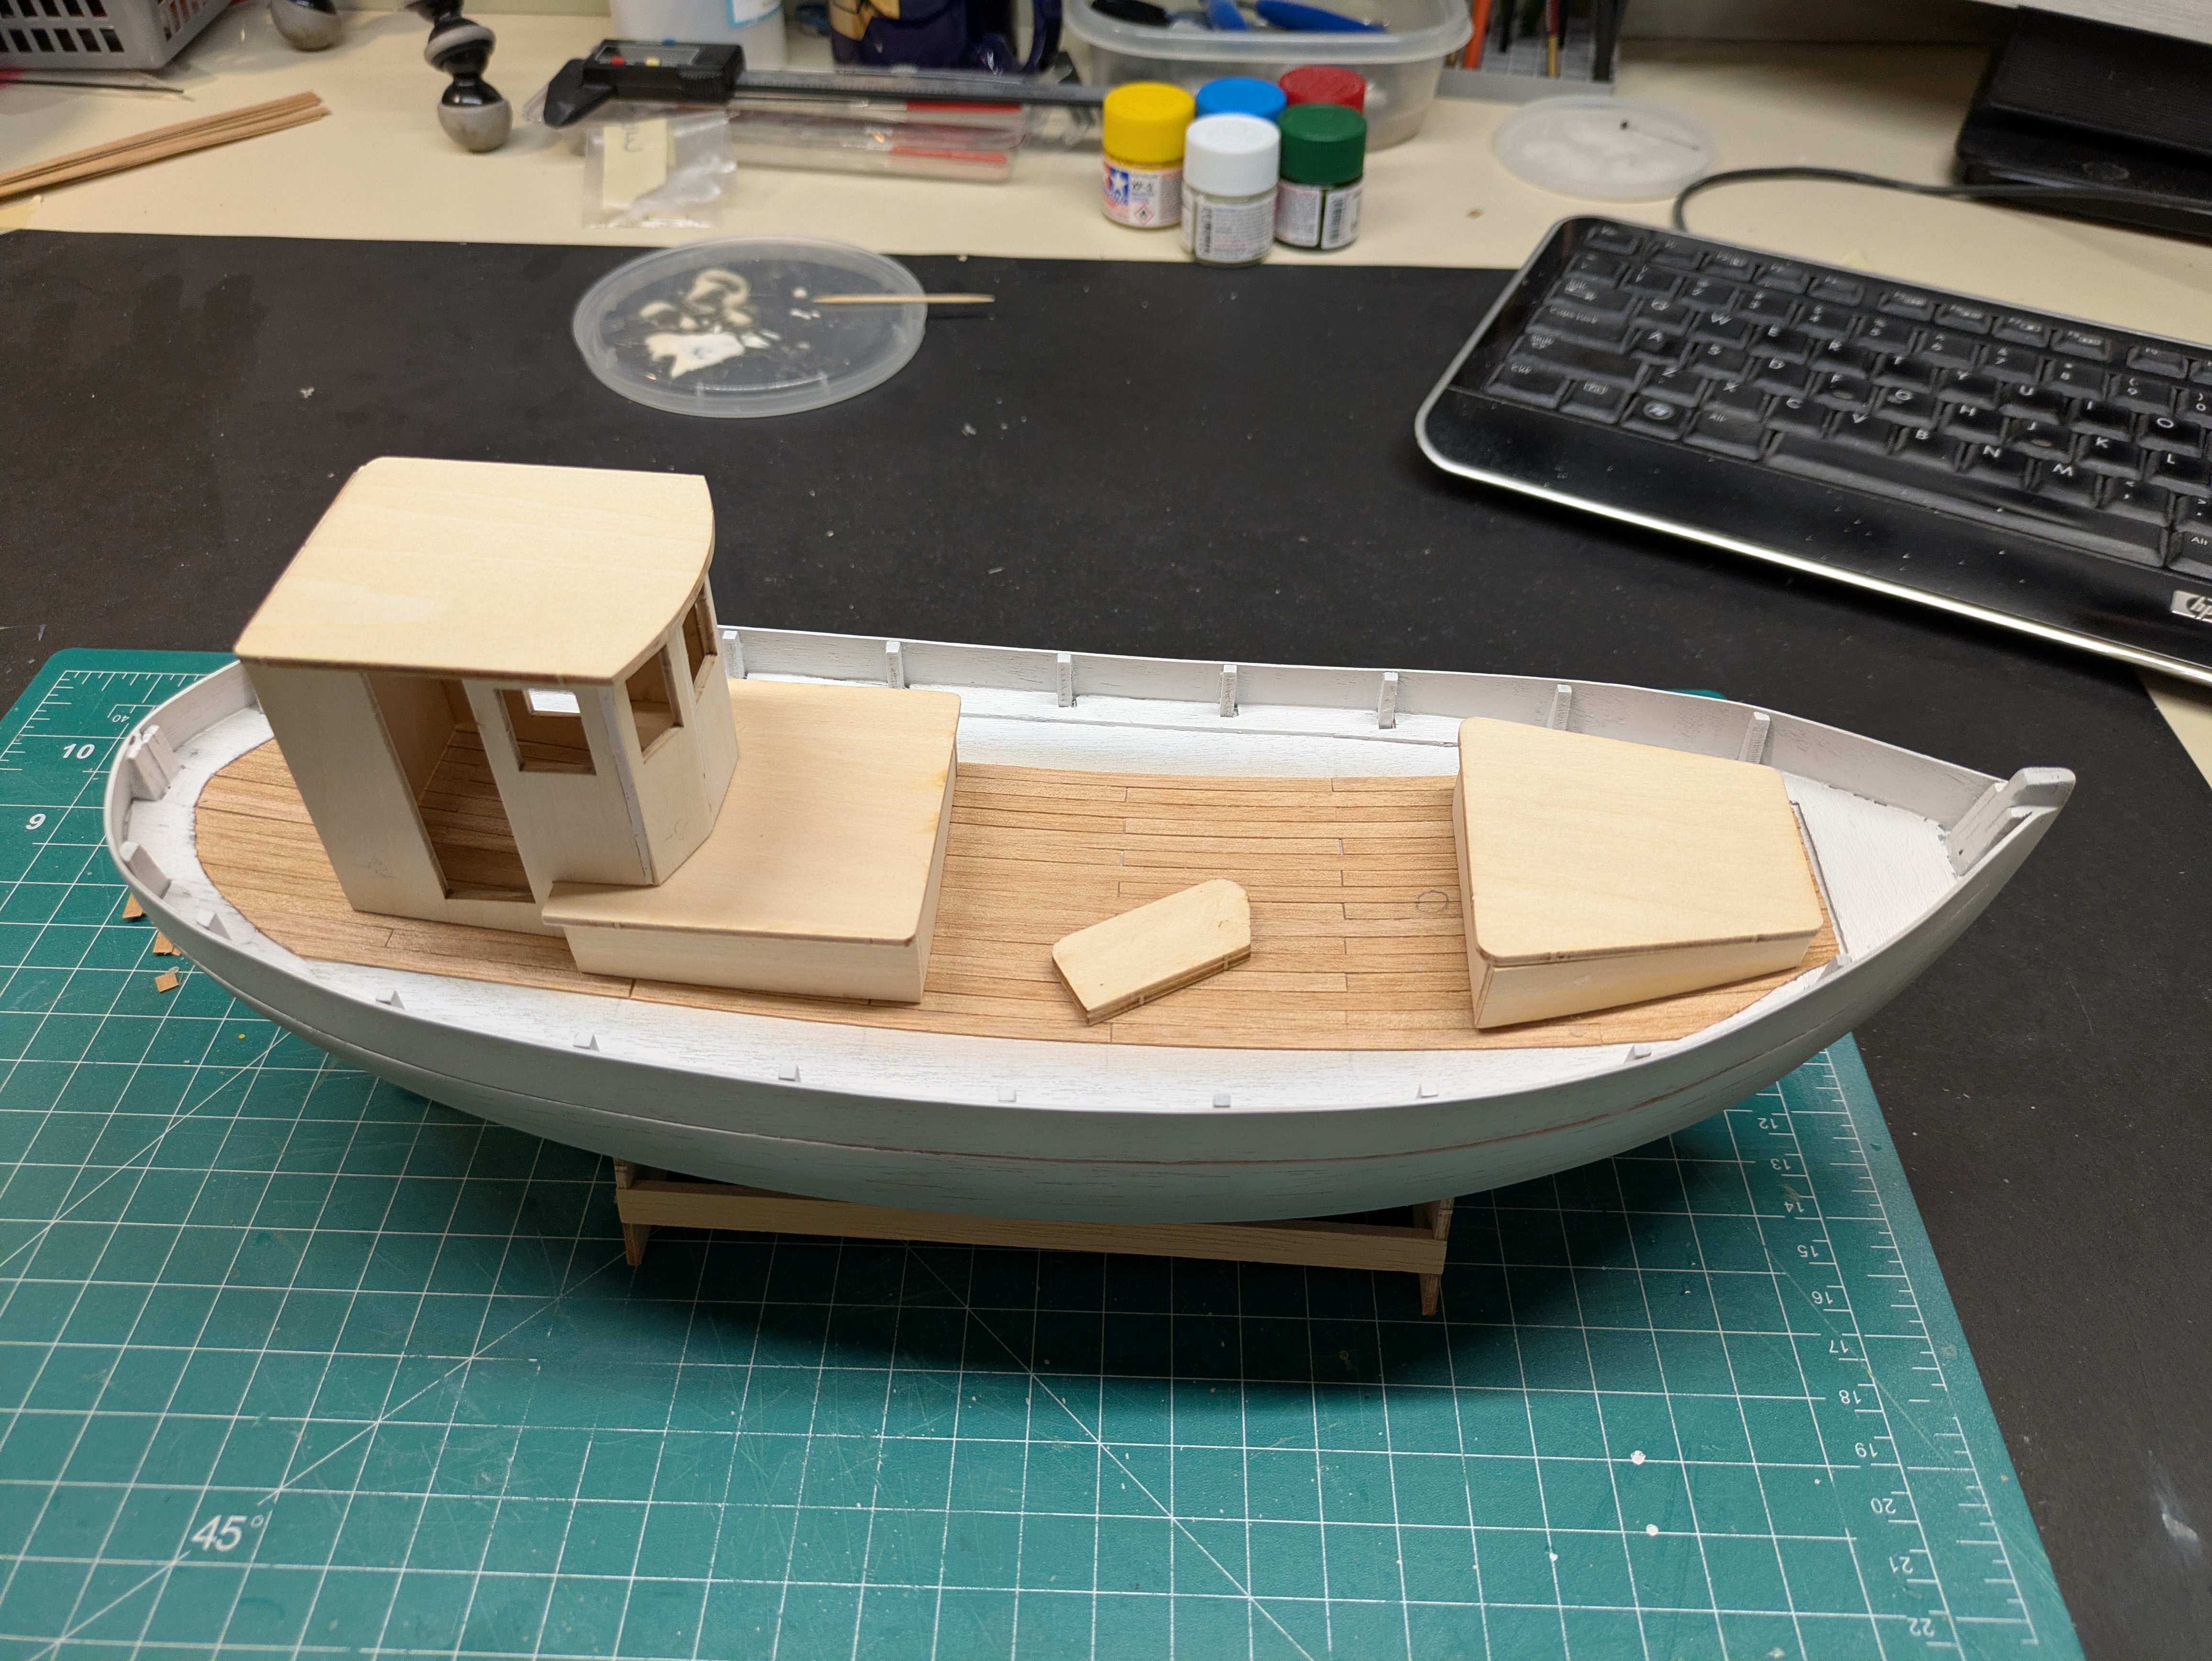
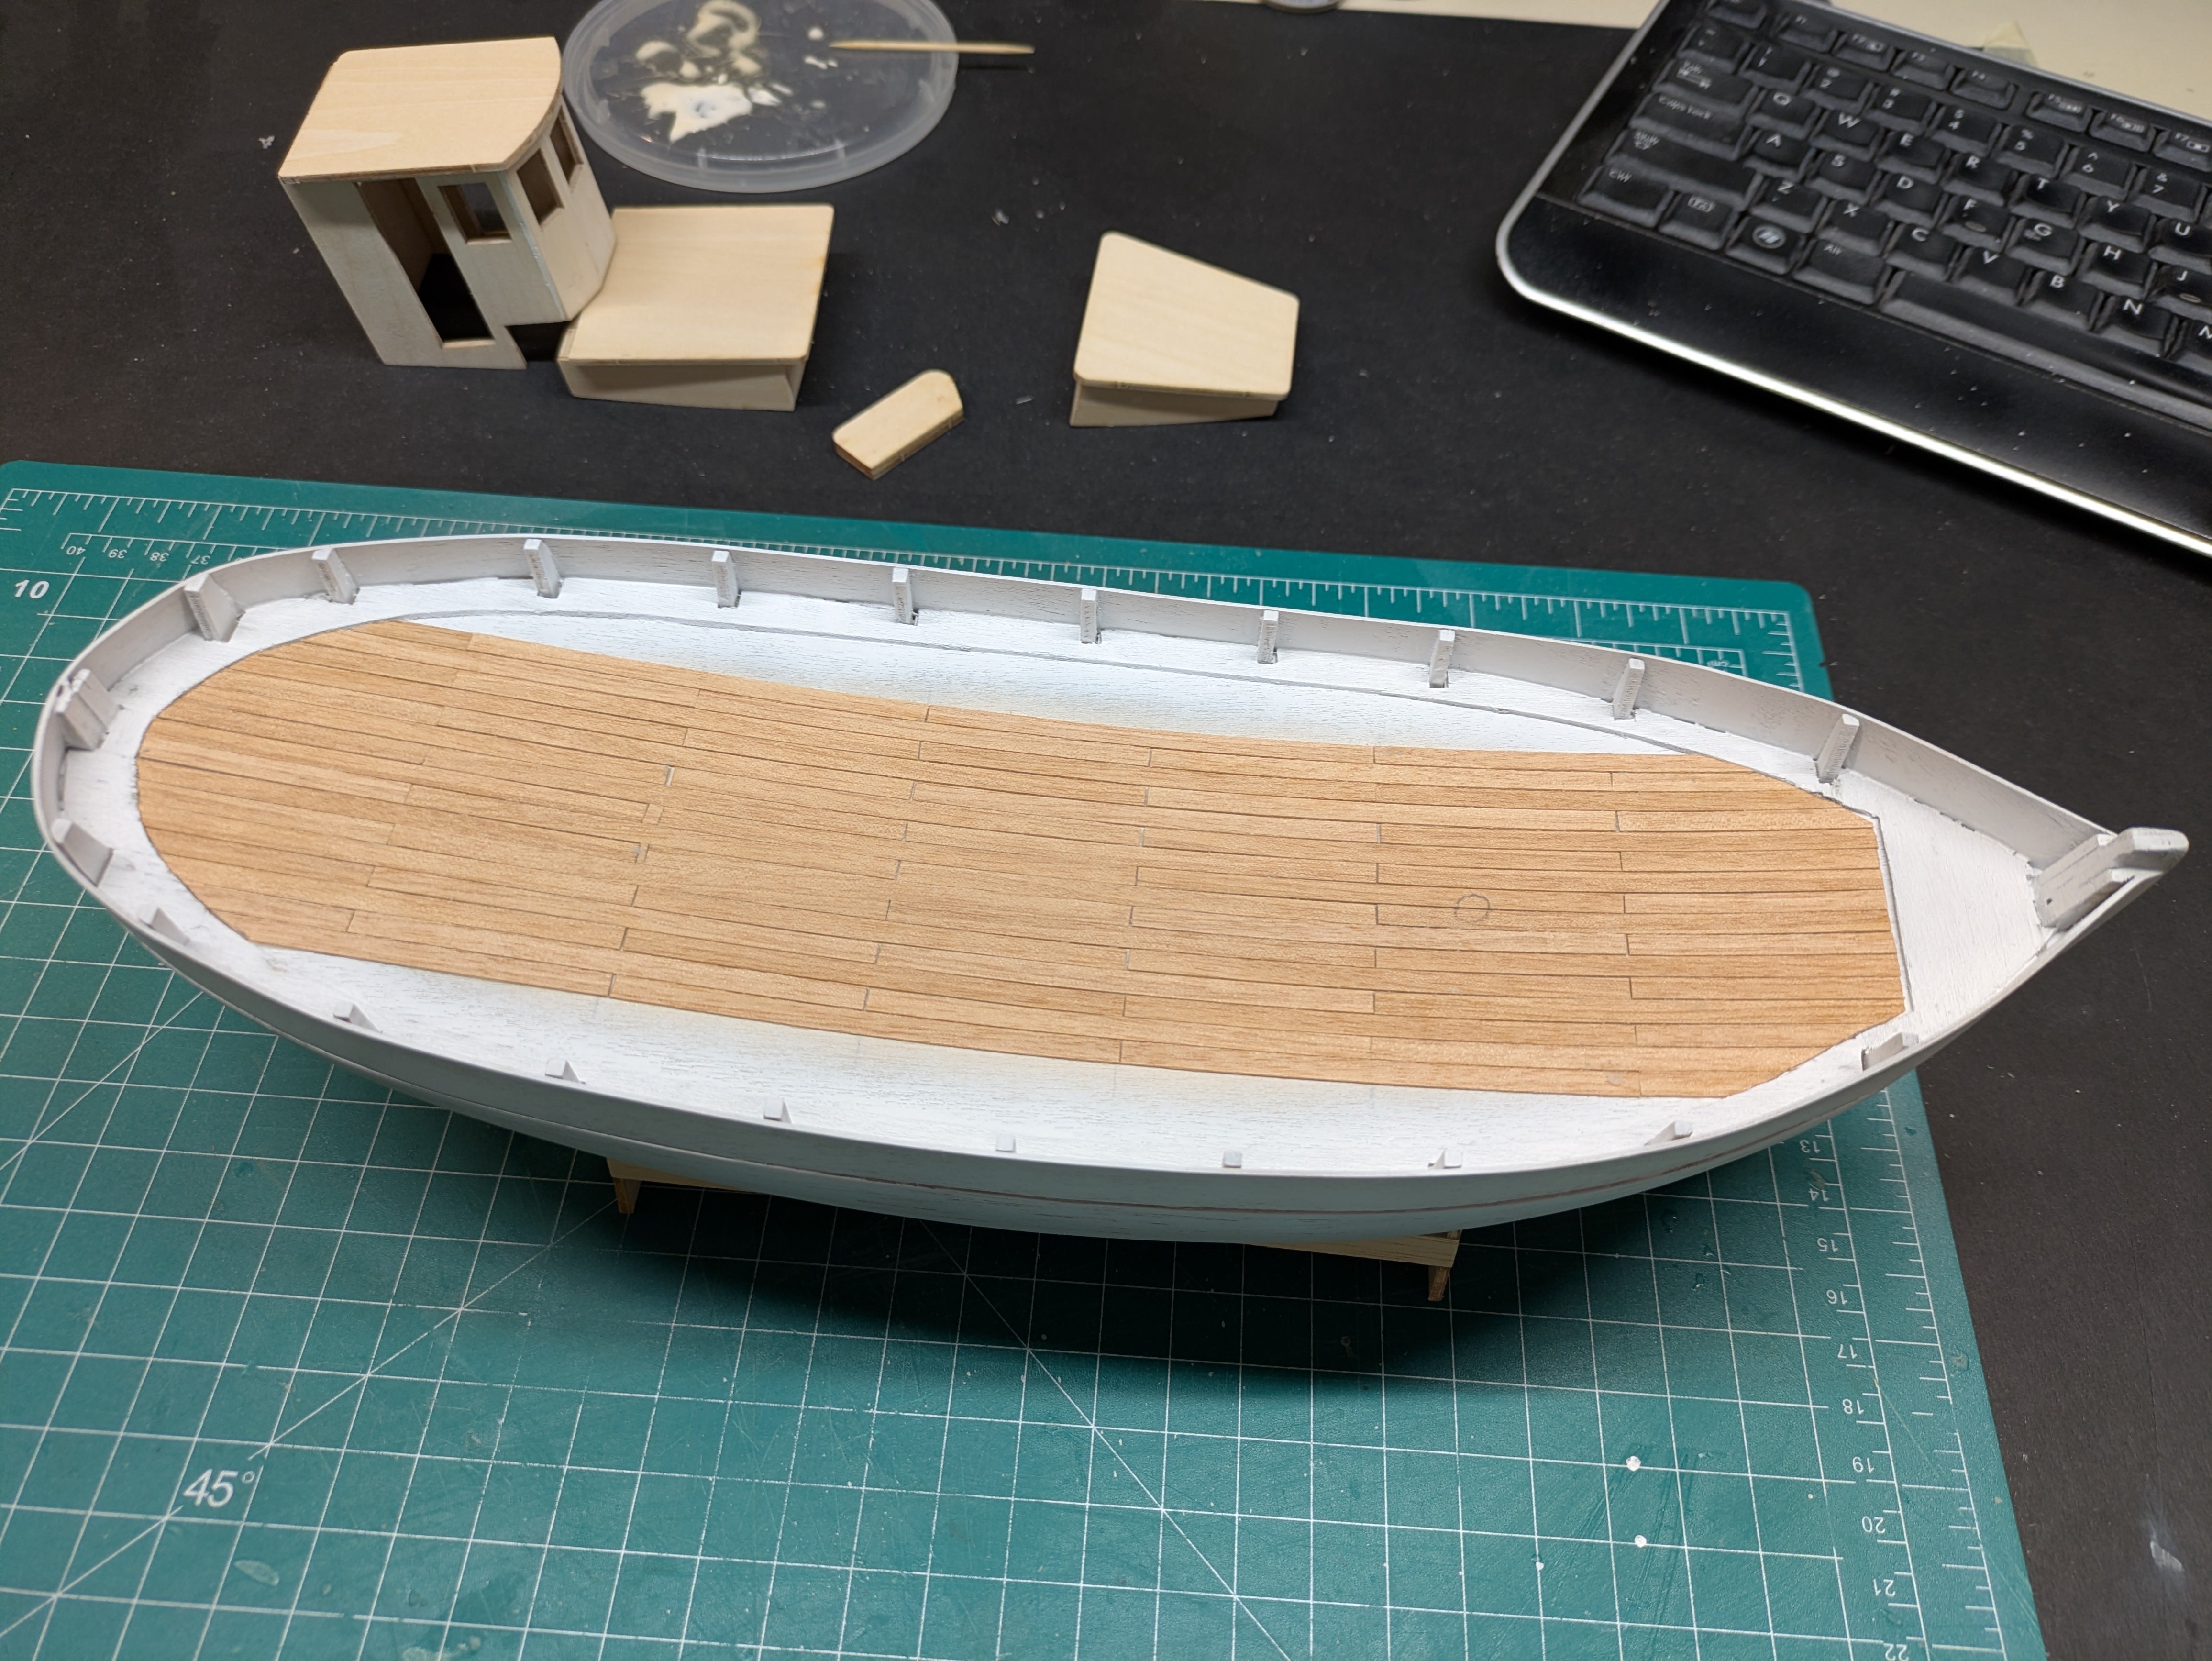
After taking a good chunk of the summer and the fall off from my model dungeon I am back at it now that the snow is falling again Got the deck put down and the start of the pilot house and rudder.


-
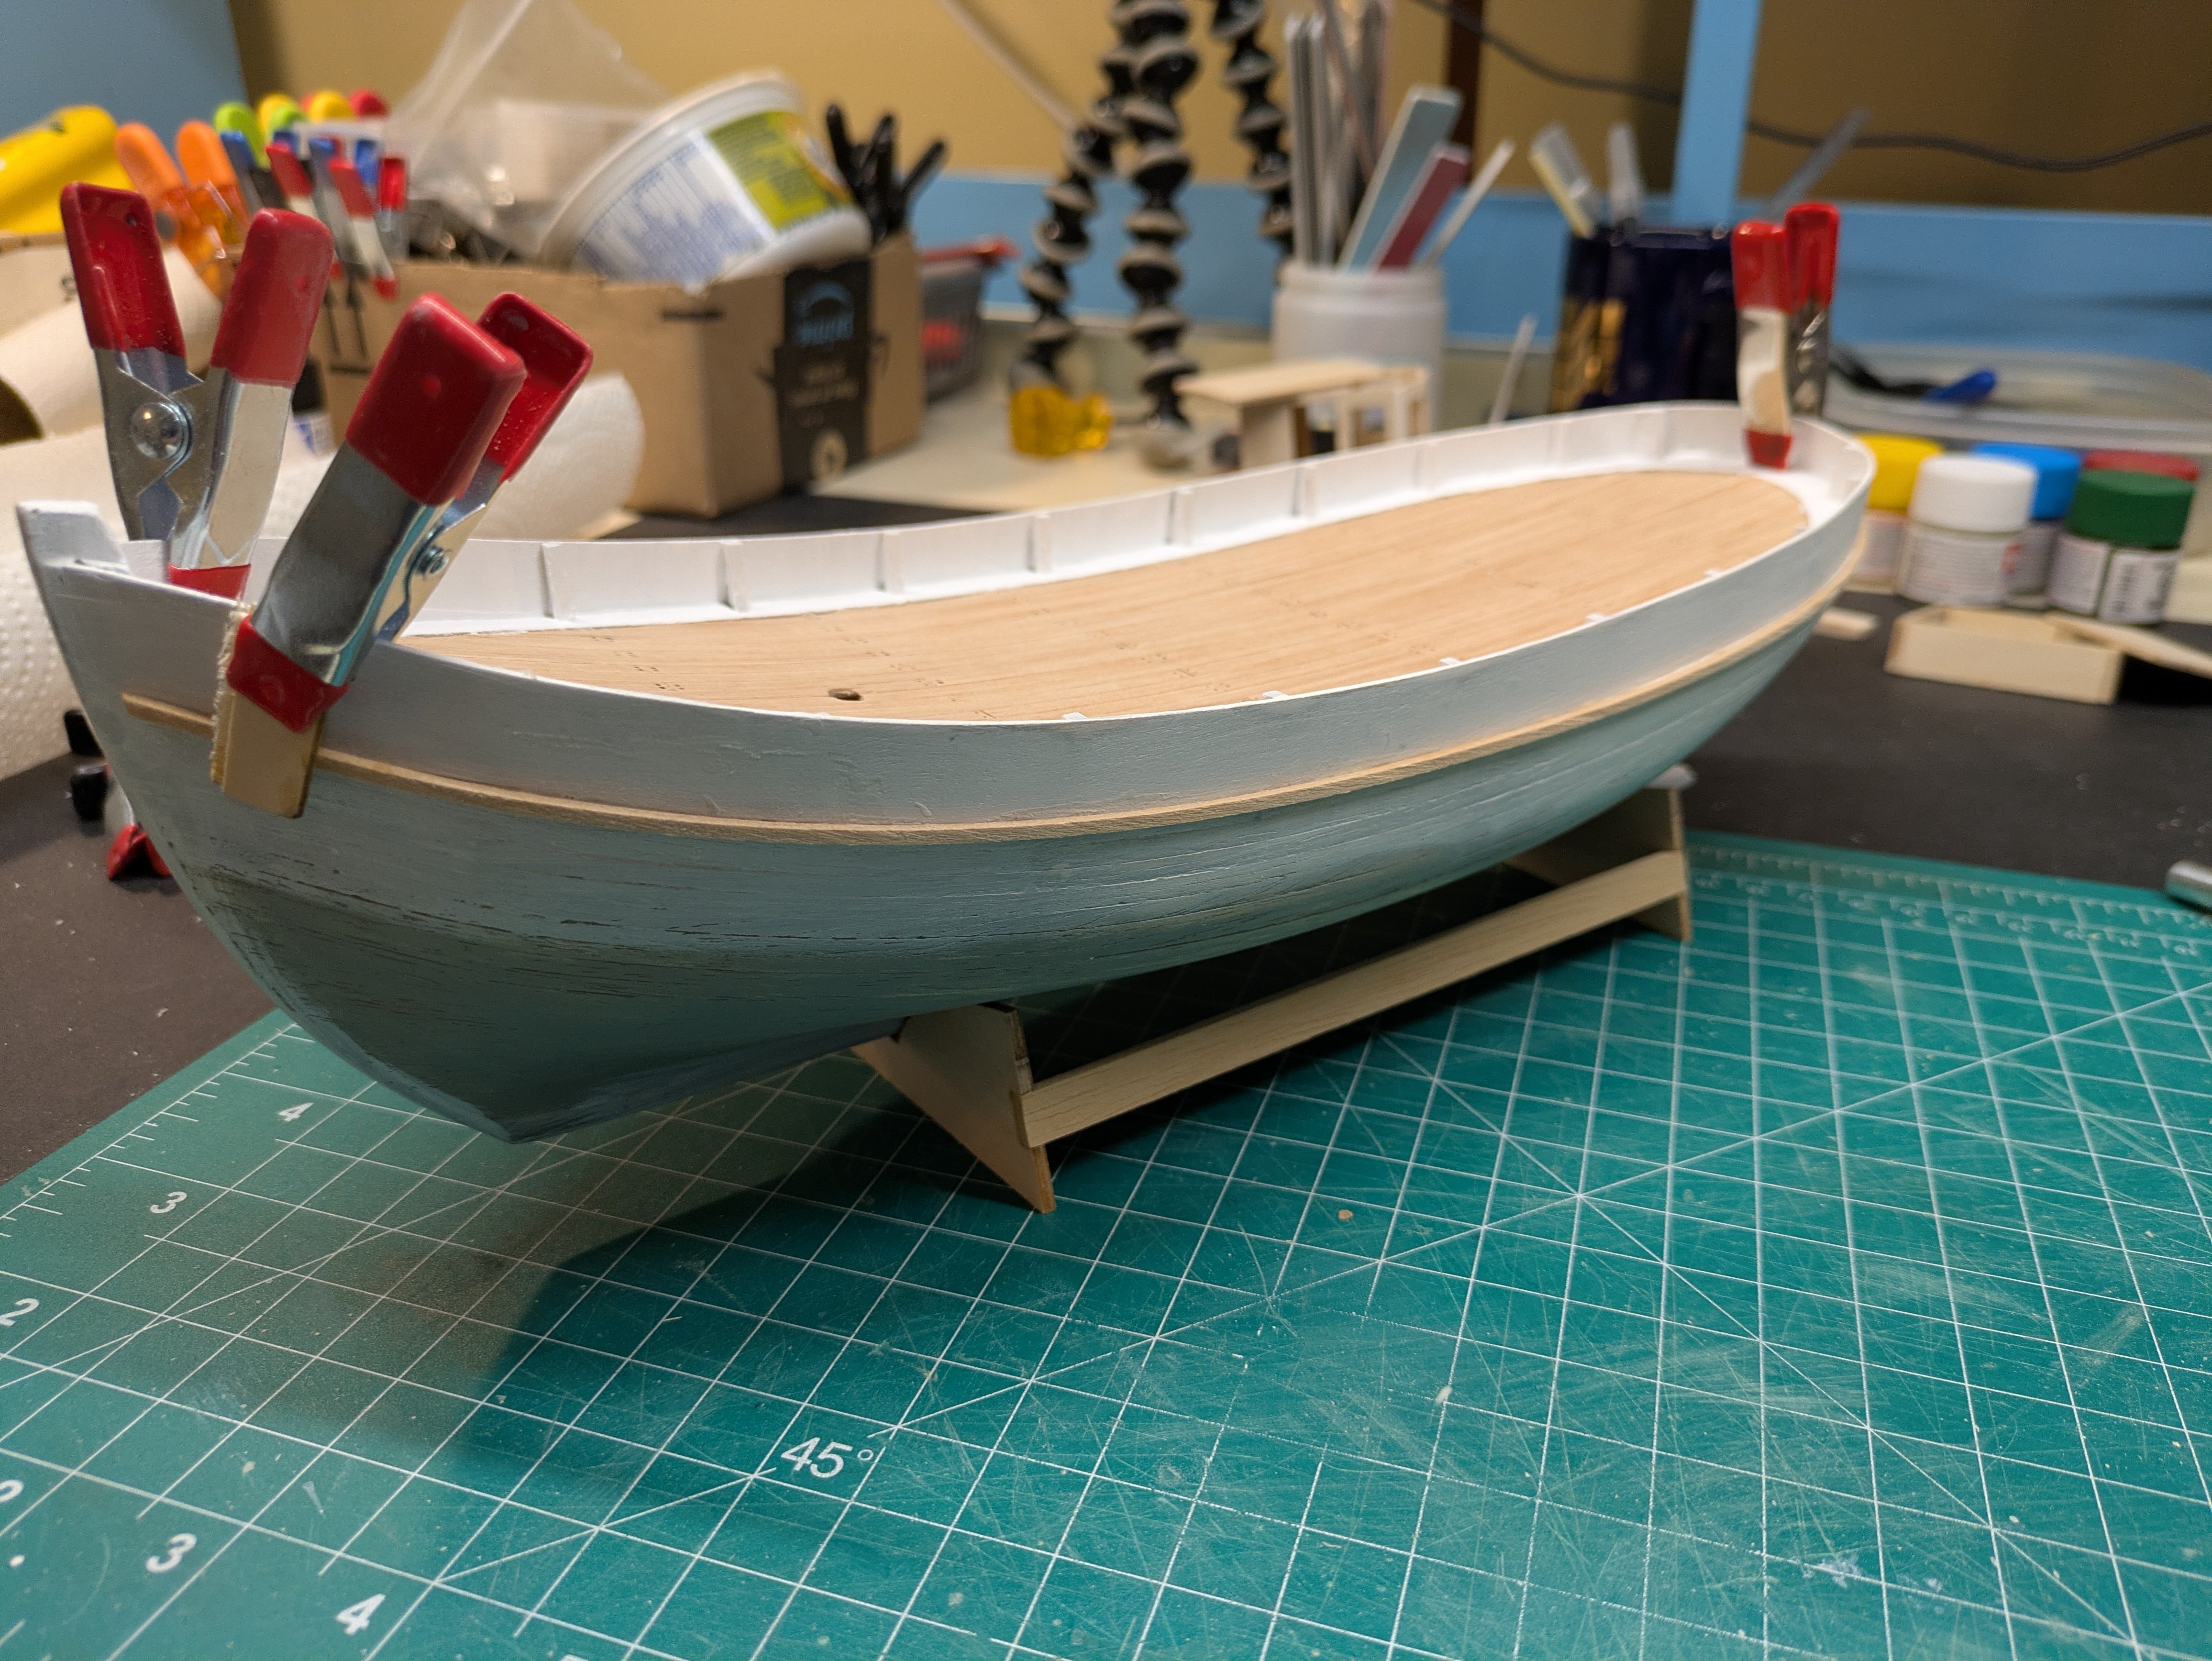
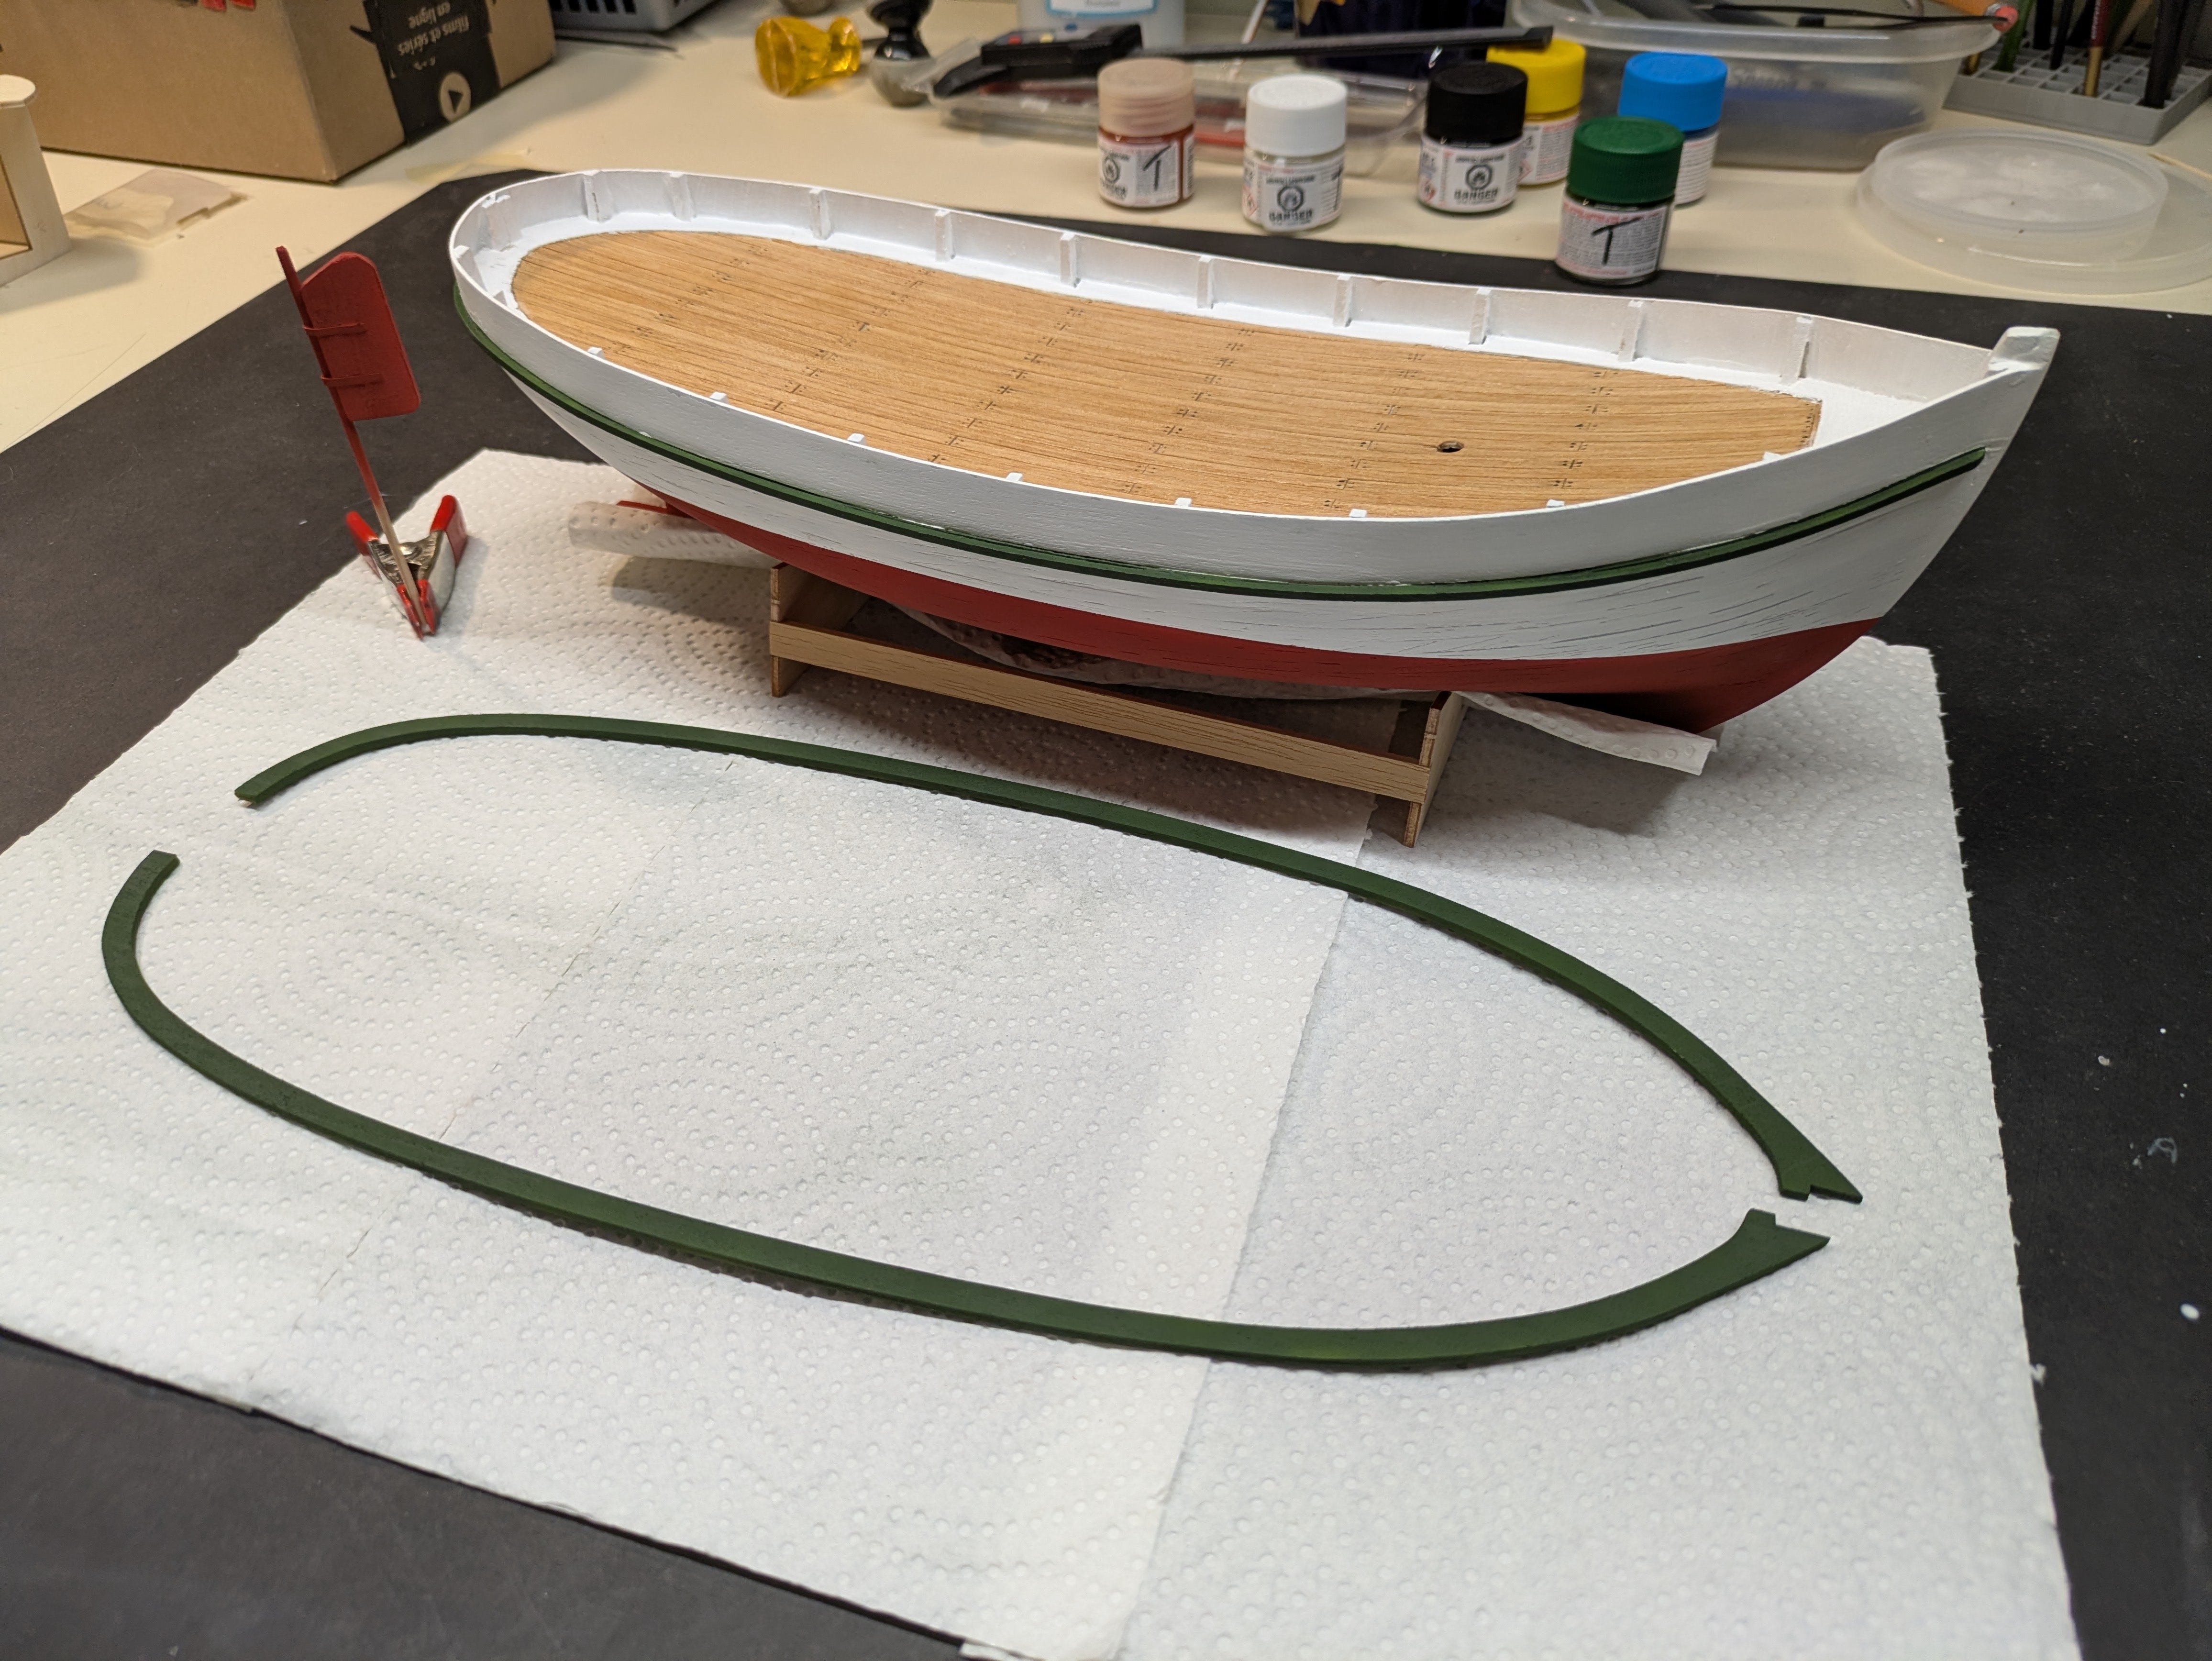
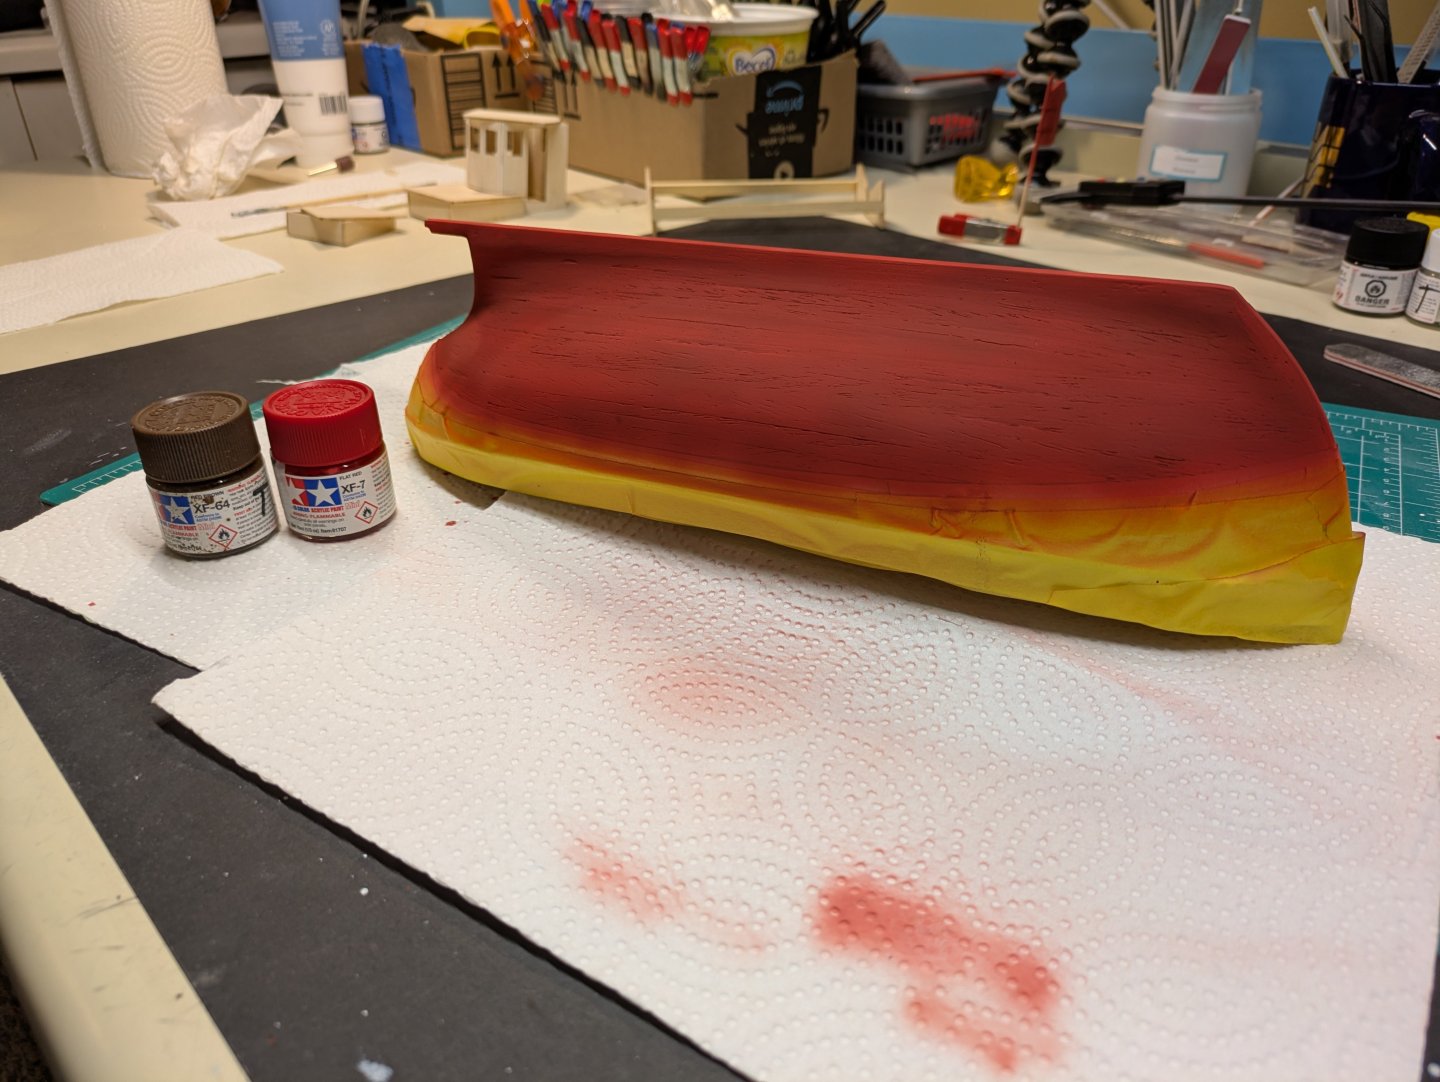
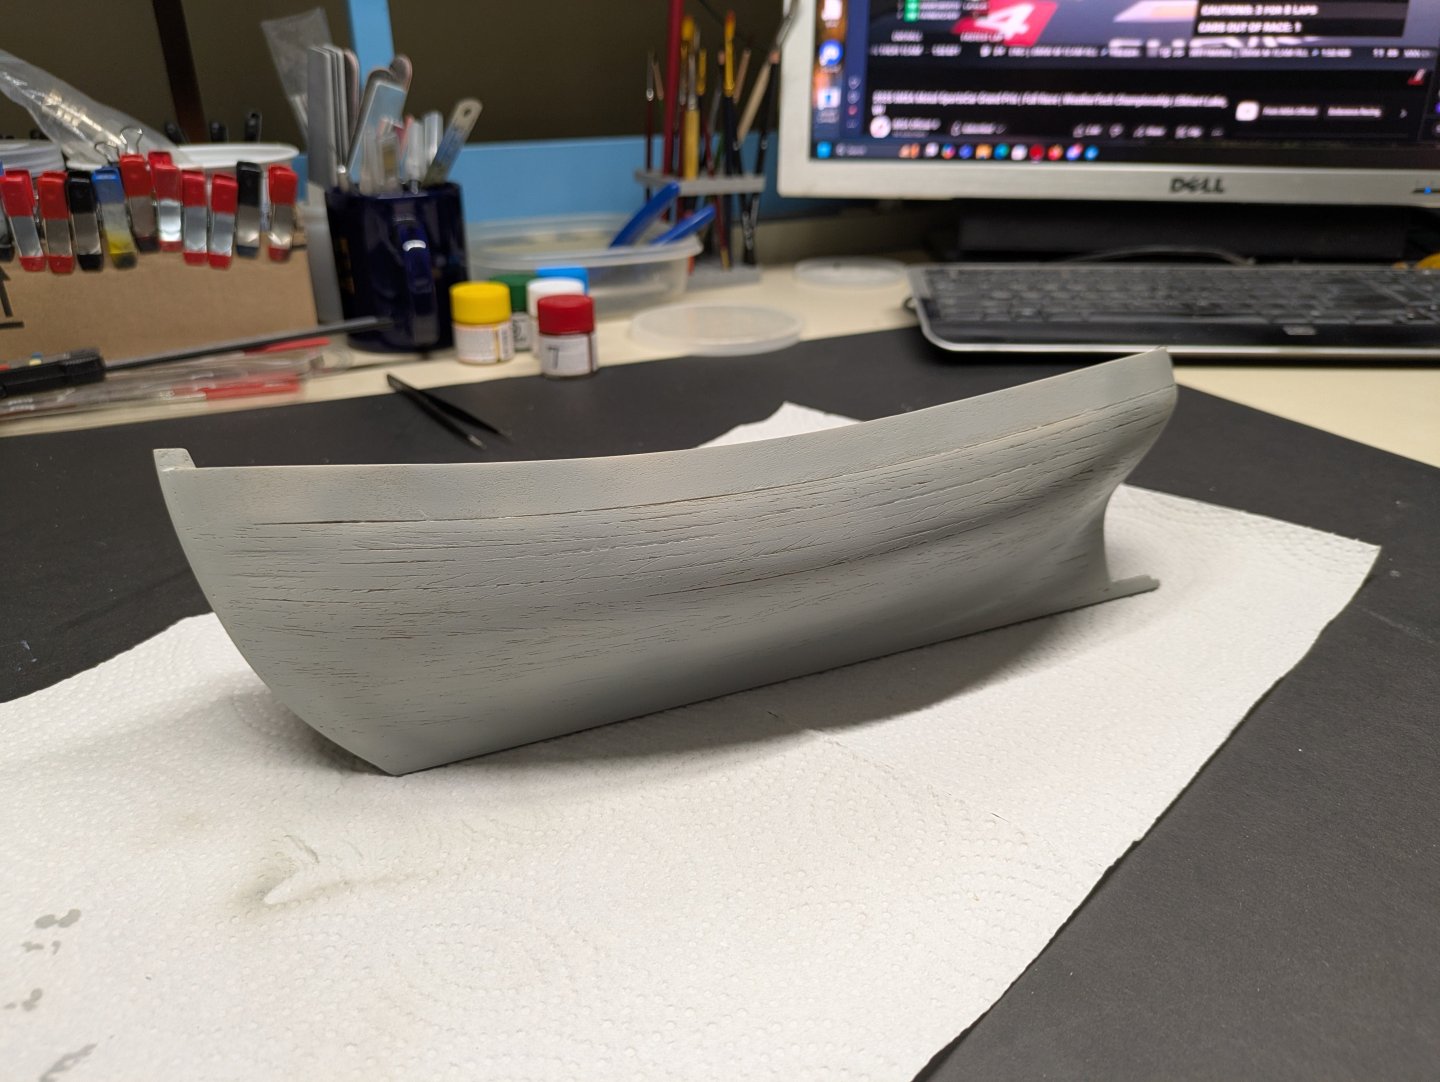
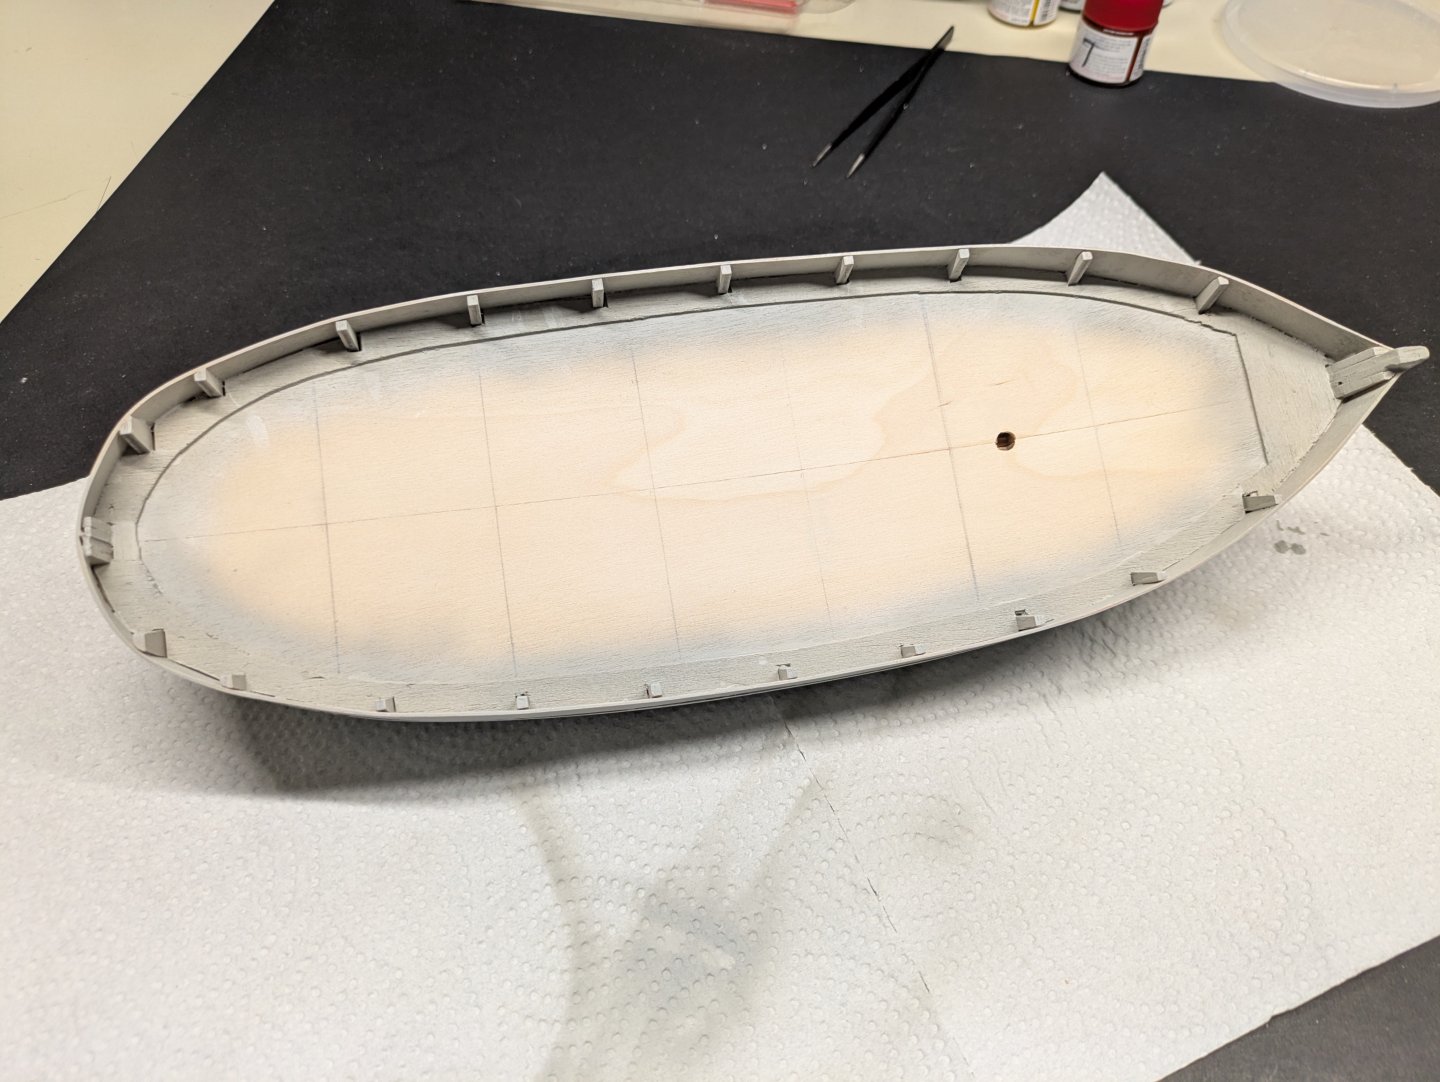
Somewhat productive week. Used the Occre Putty for the first time. It's not bad, you can wipe it thinner with a bit of water if you use too much and dries rock hard. Does seem a bit prone to chips during sanding but one of the better products I have tried. Got the stern blocks in and sanded down along with hull sanding. Did a primer over the whole thing to see how it looks. I want the boat to look wooden planked such as an older boat would be so, went light with the putty. Thoughts? Does it need more putty/sanding or look good for an old wood work boat? Gonna look at it for a few days to decide if I think I like it or not


-
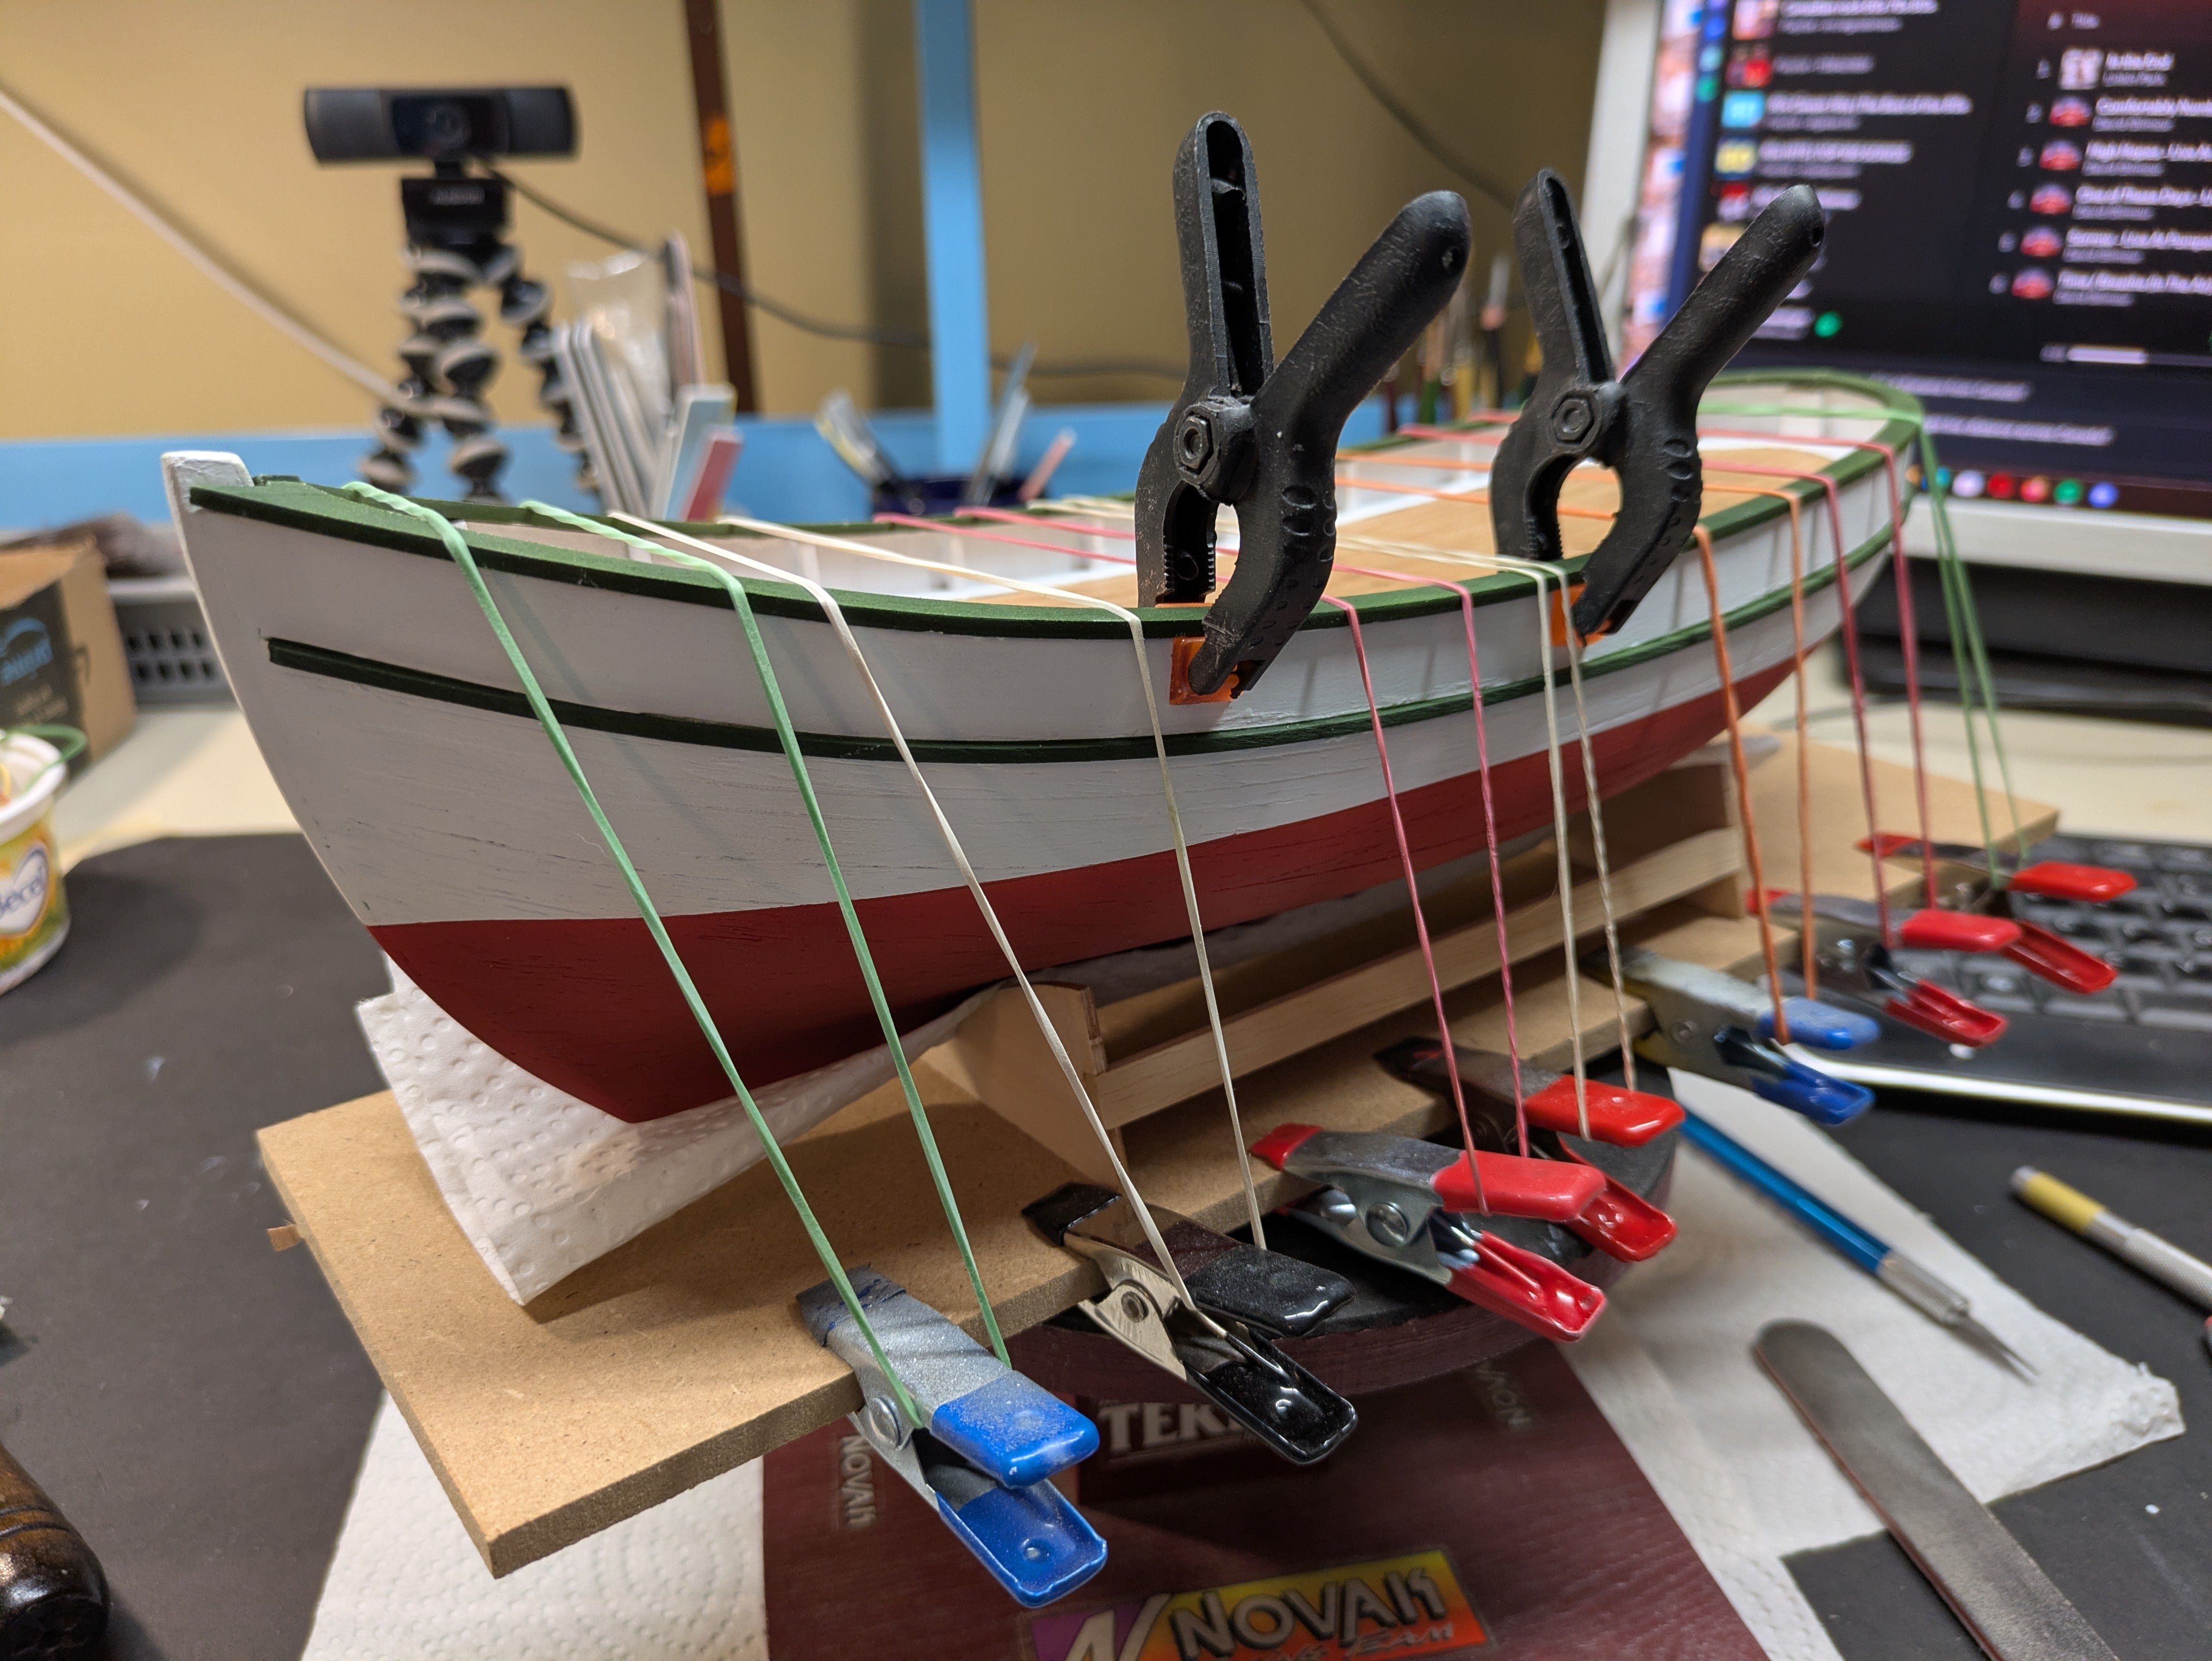
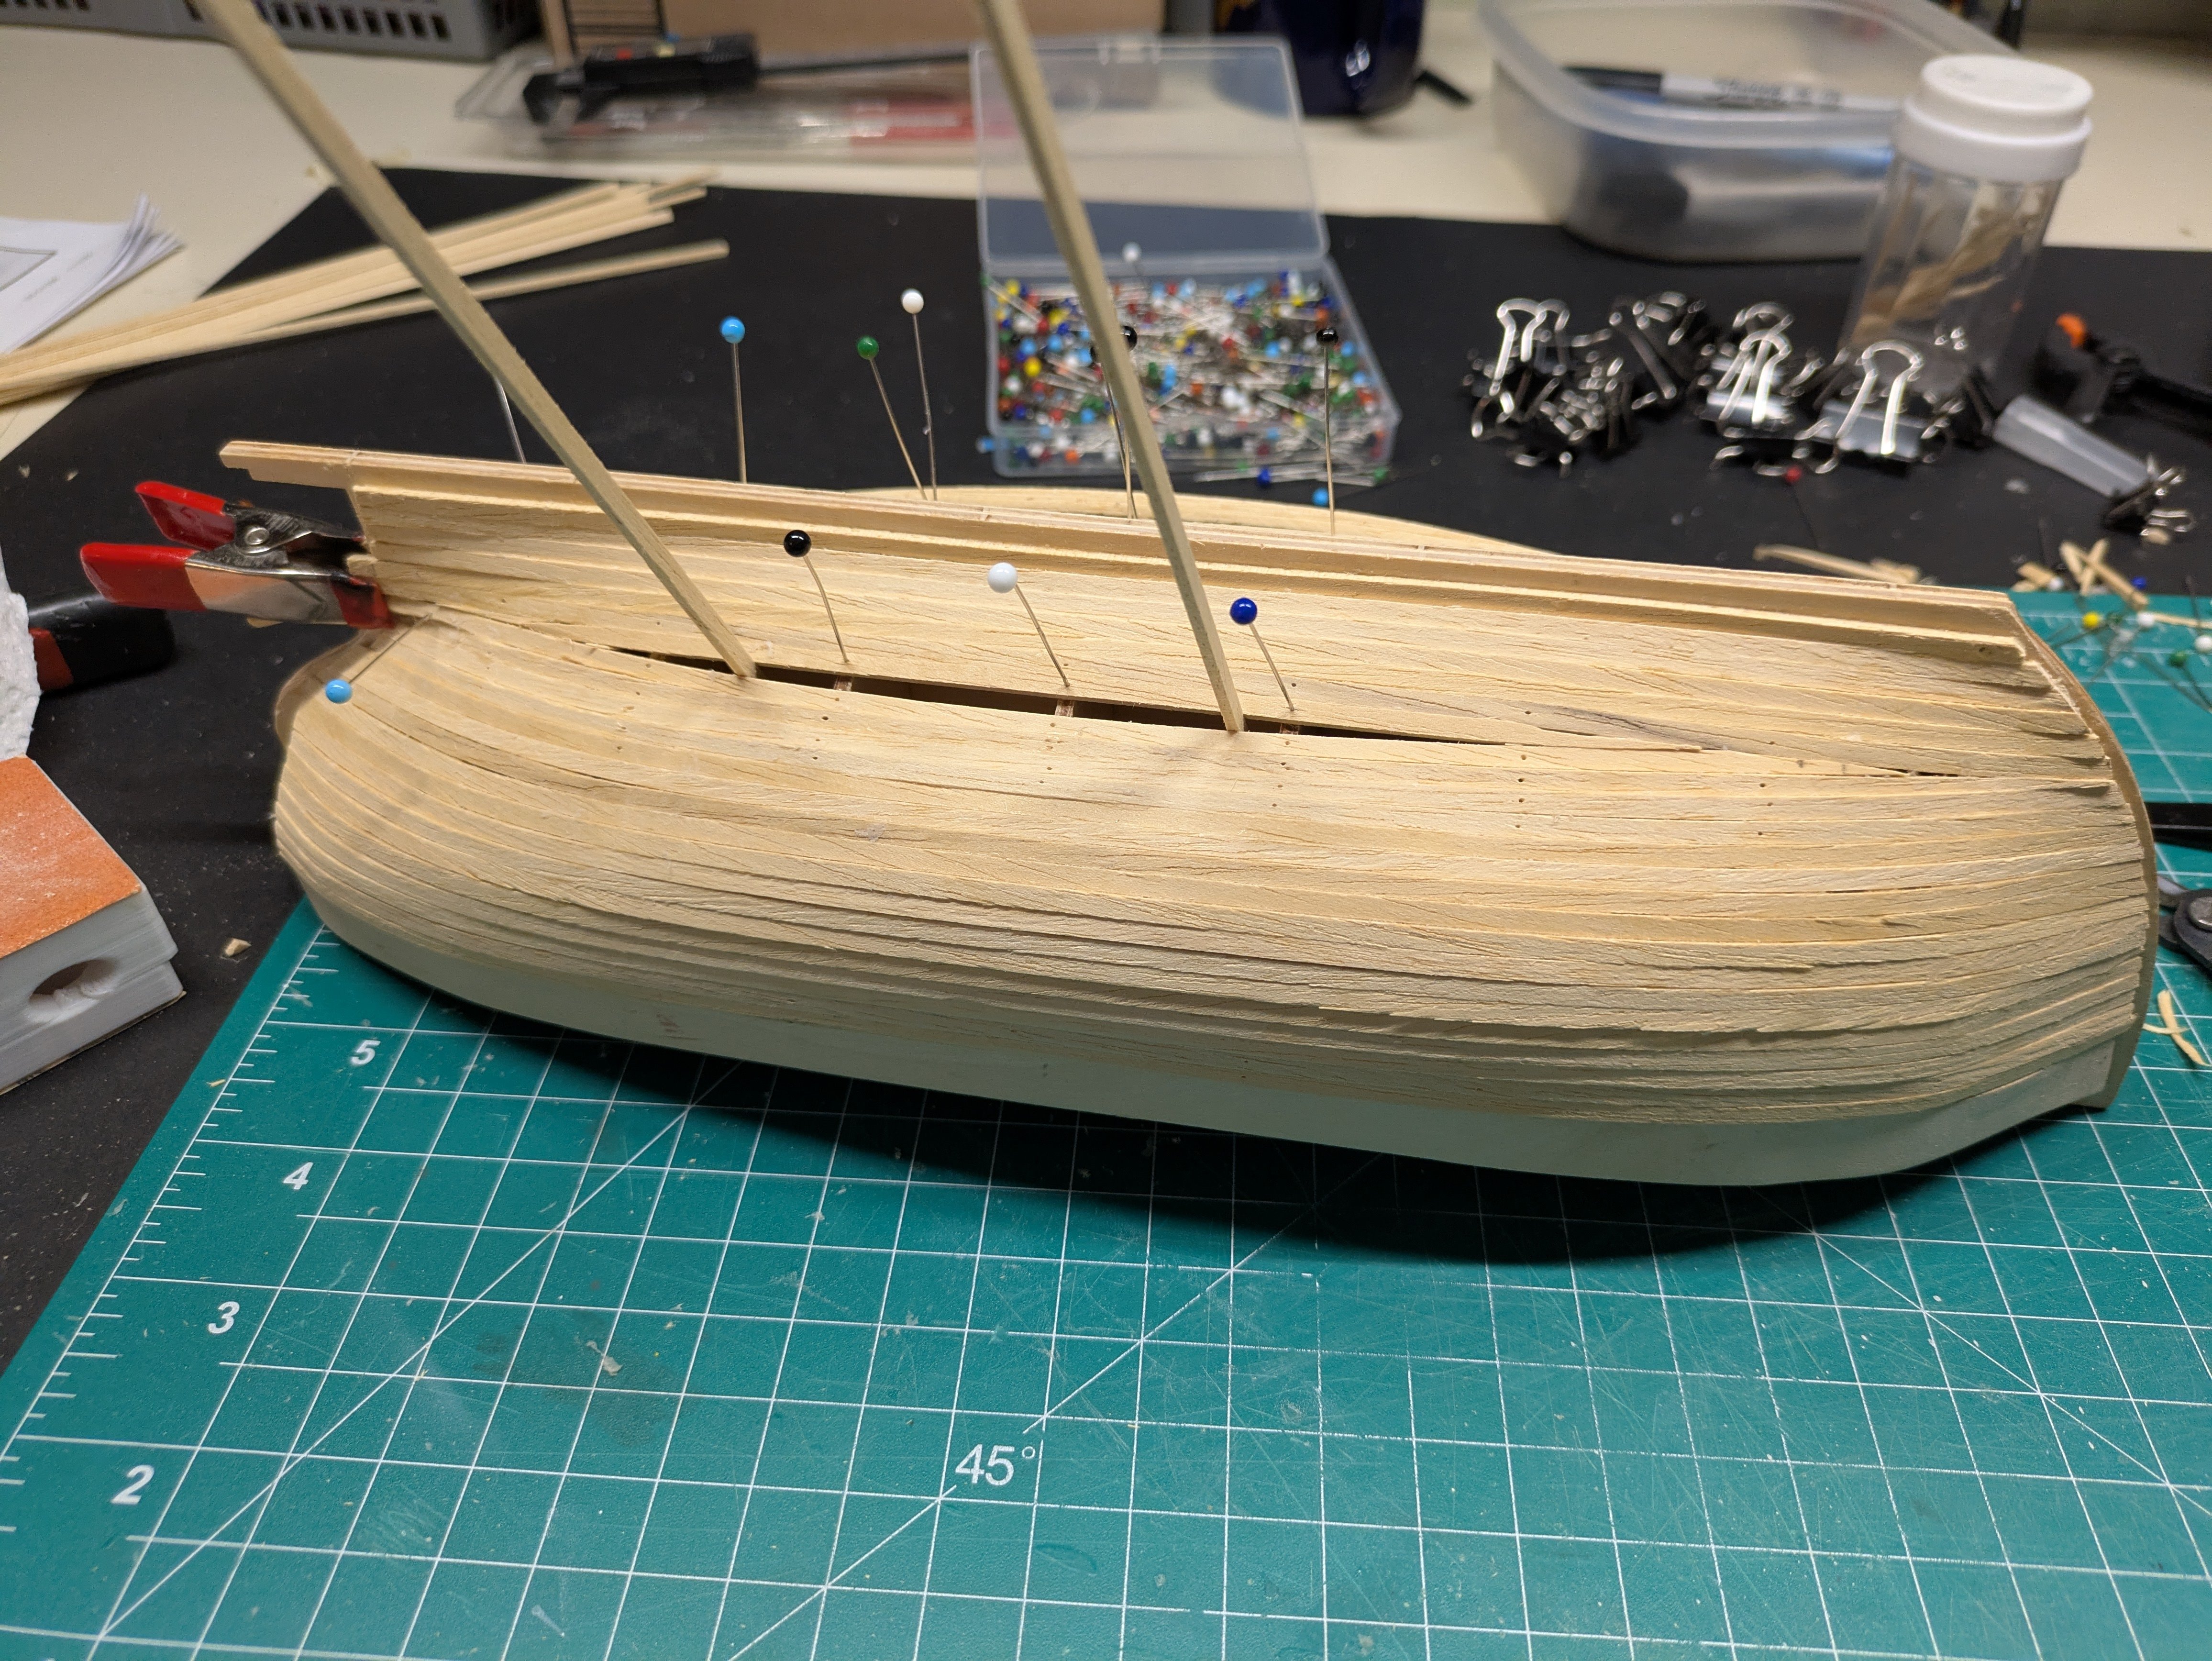
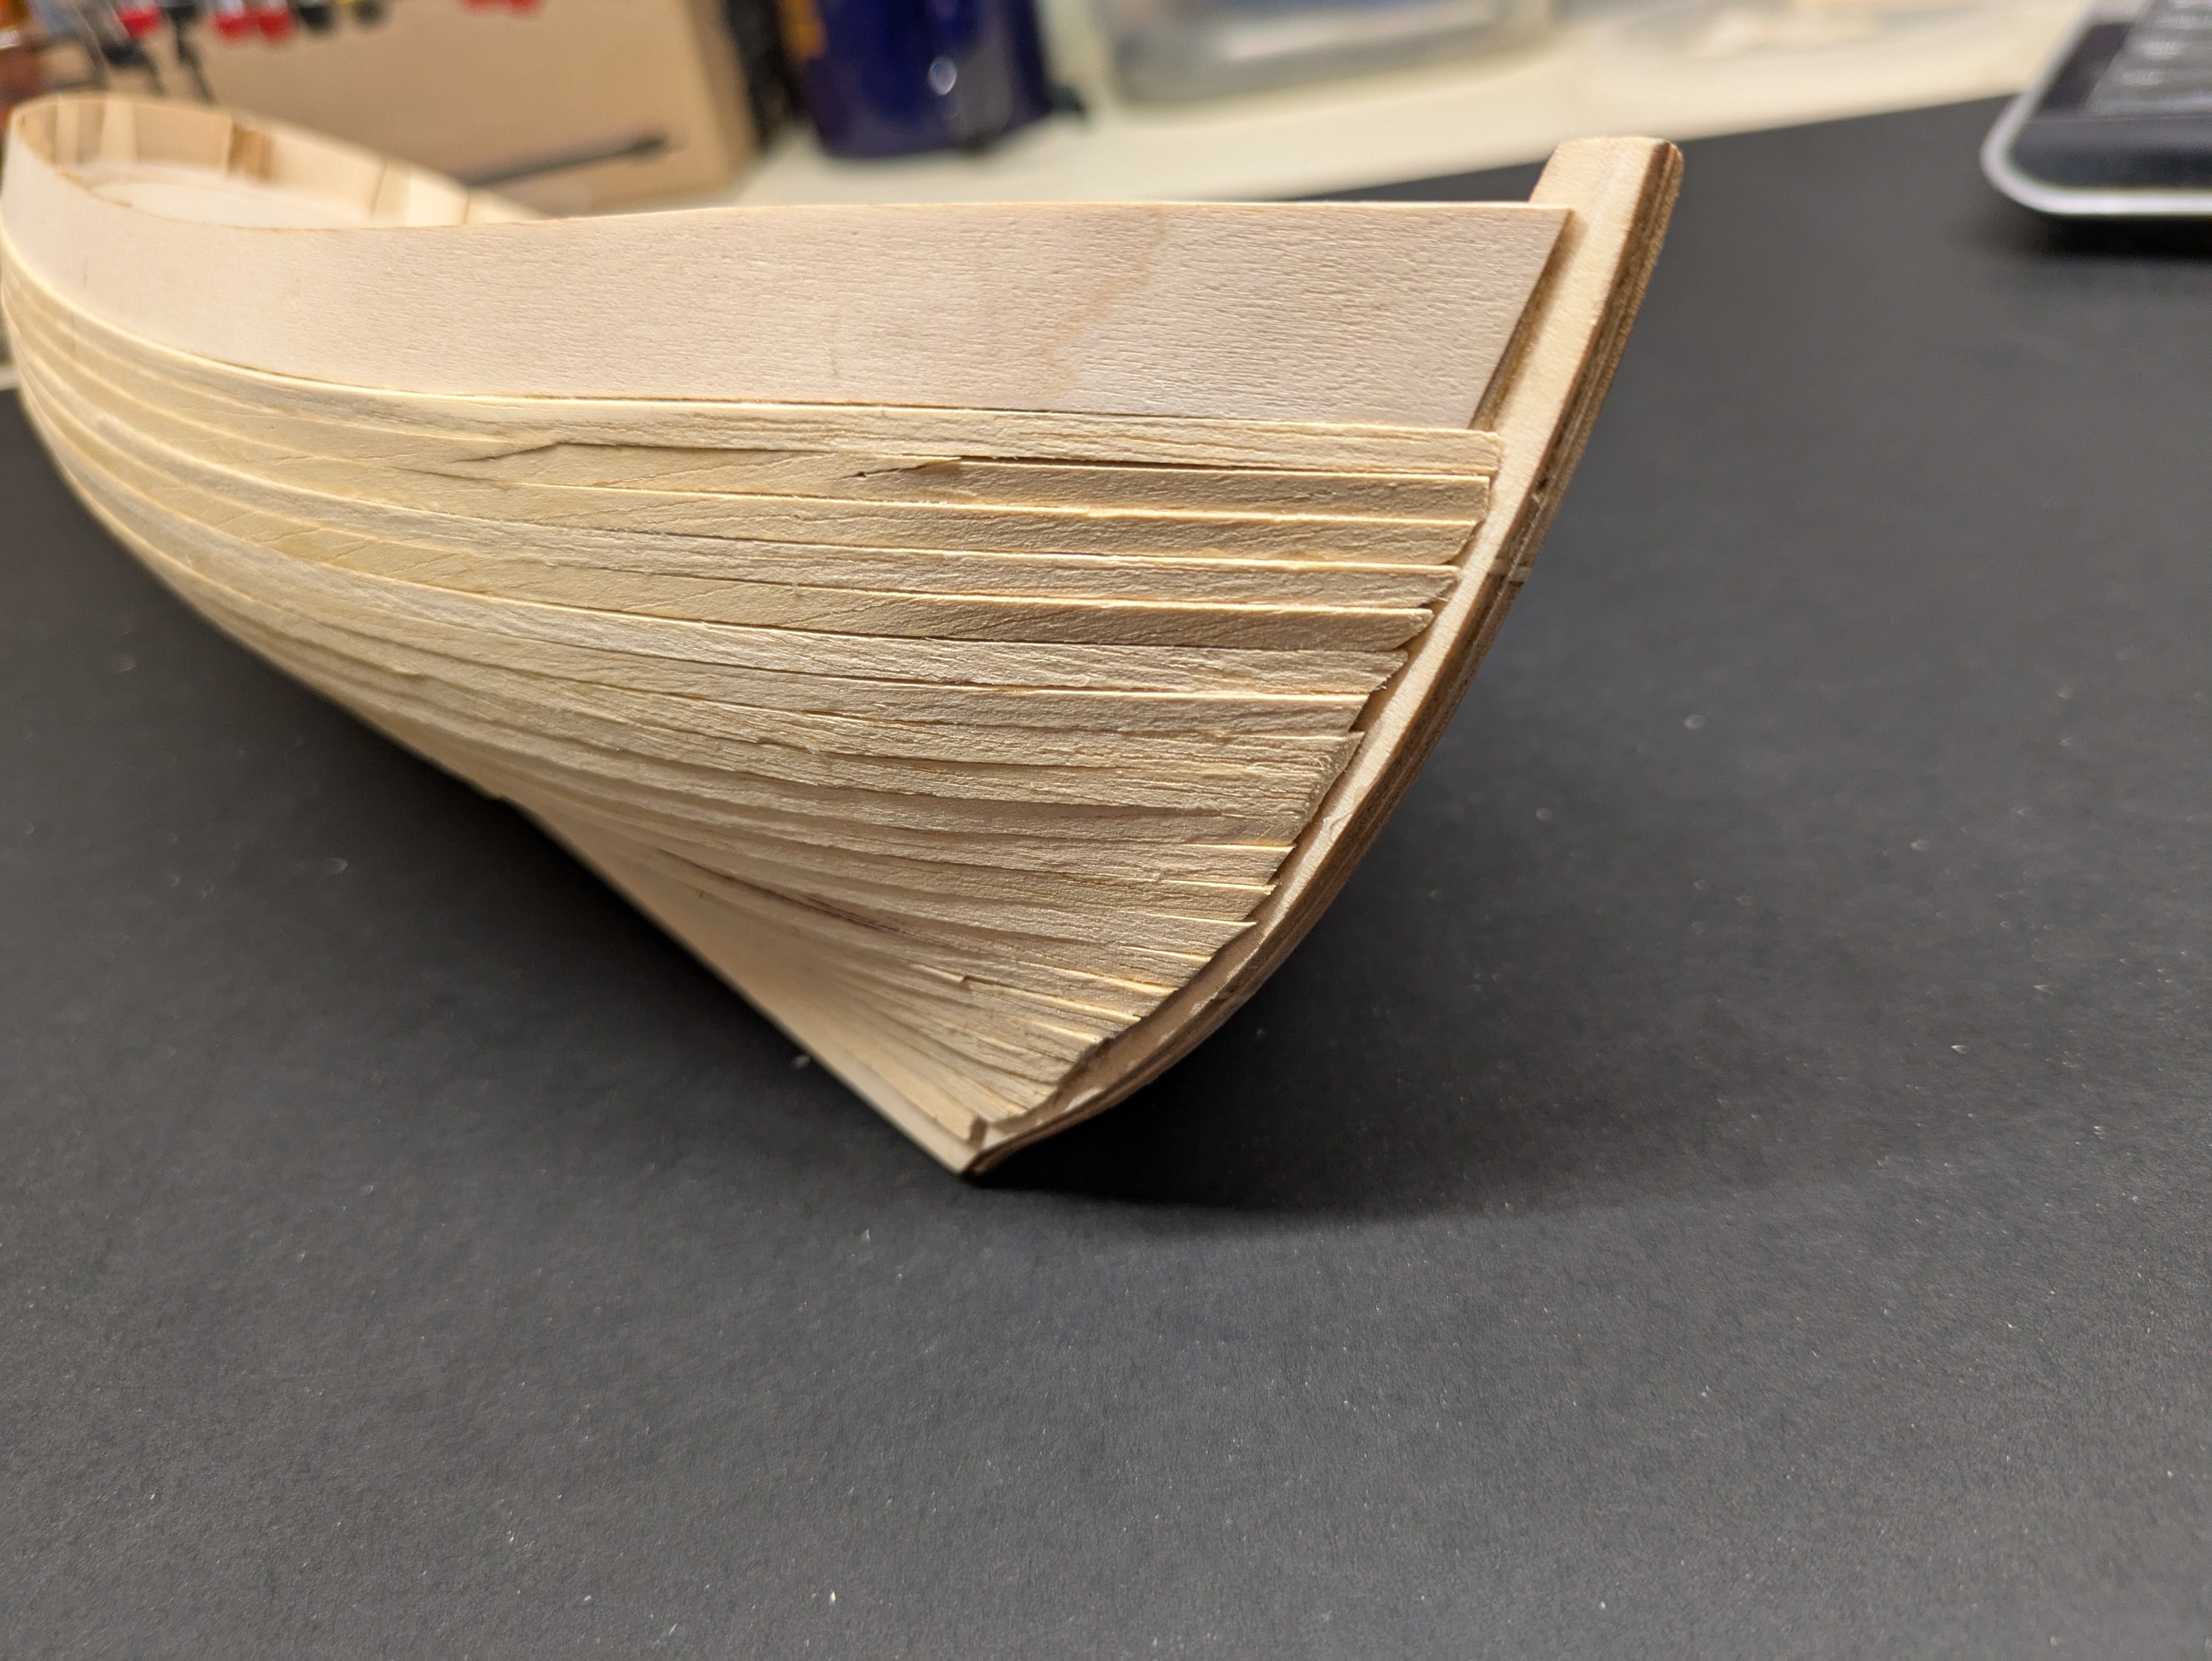
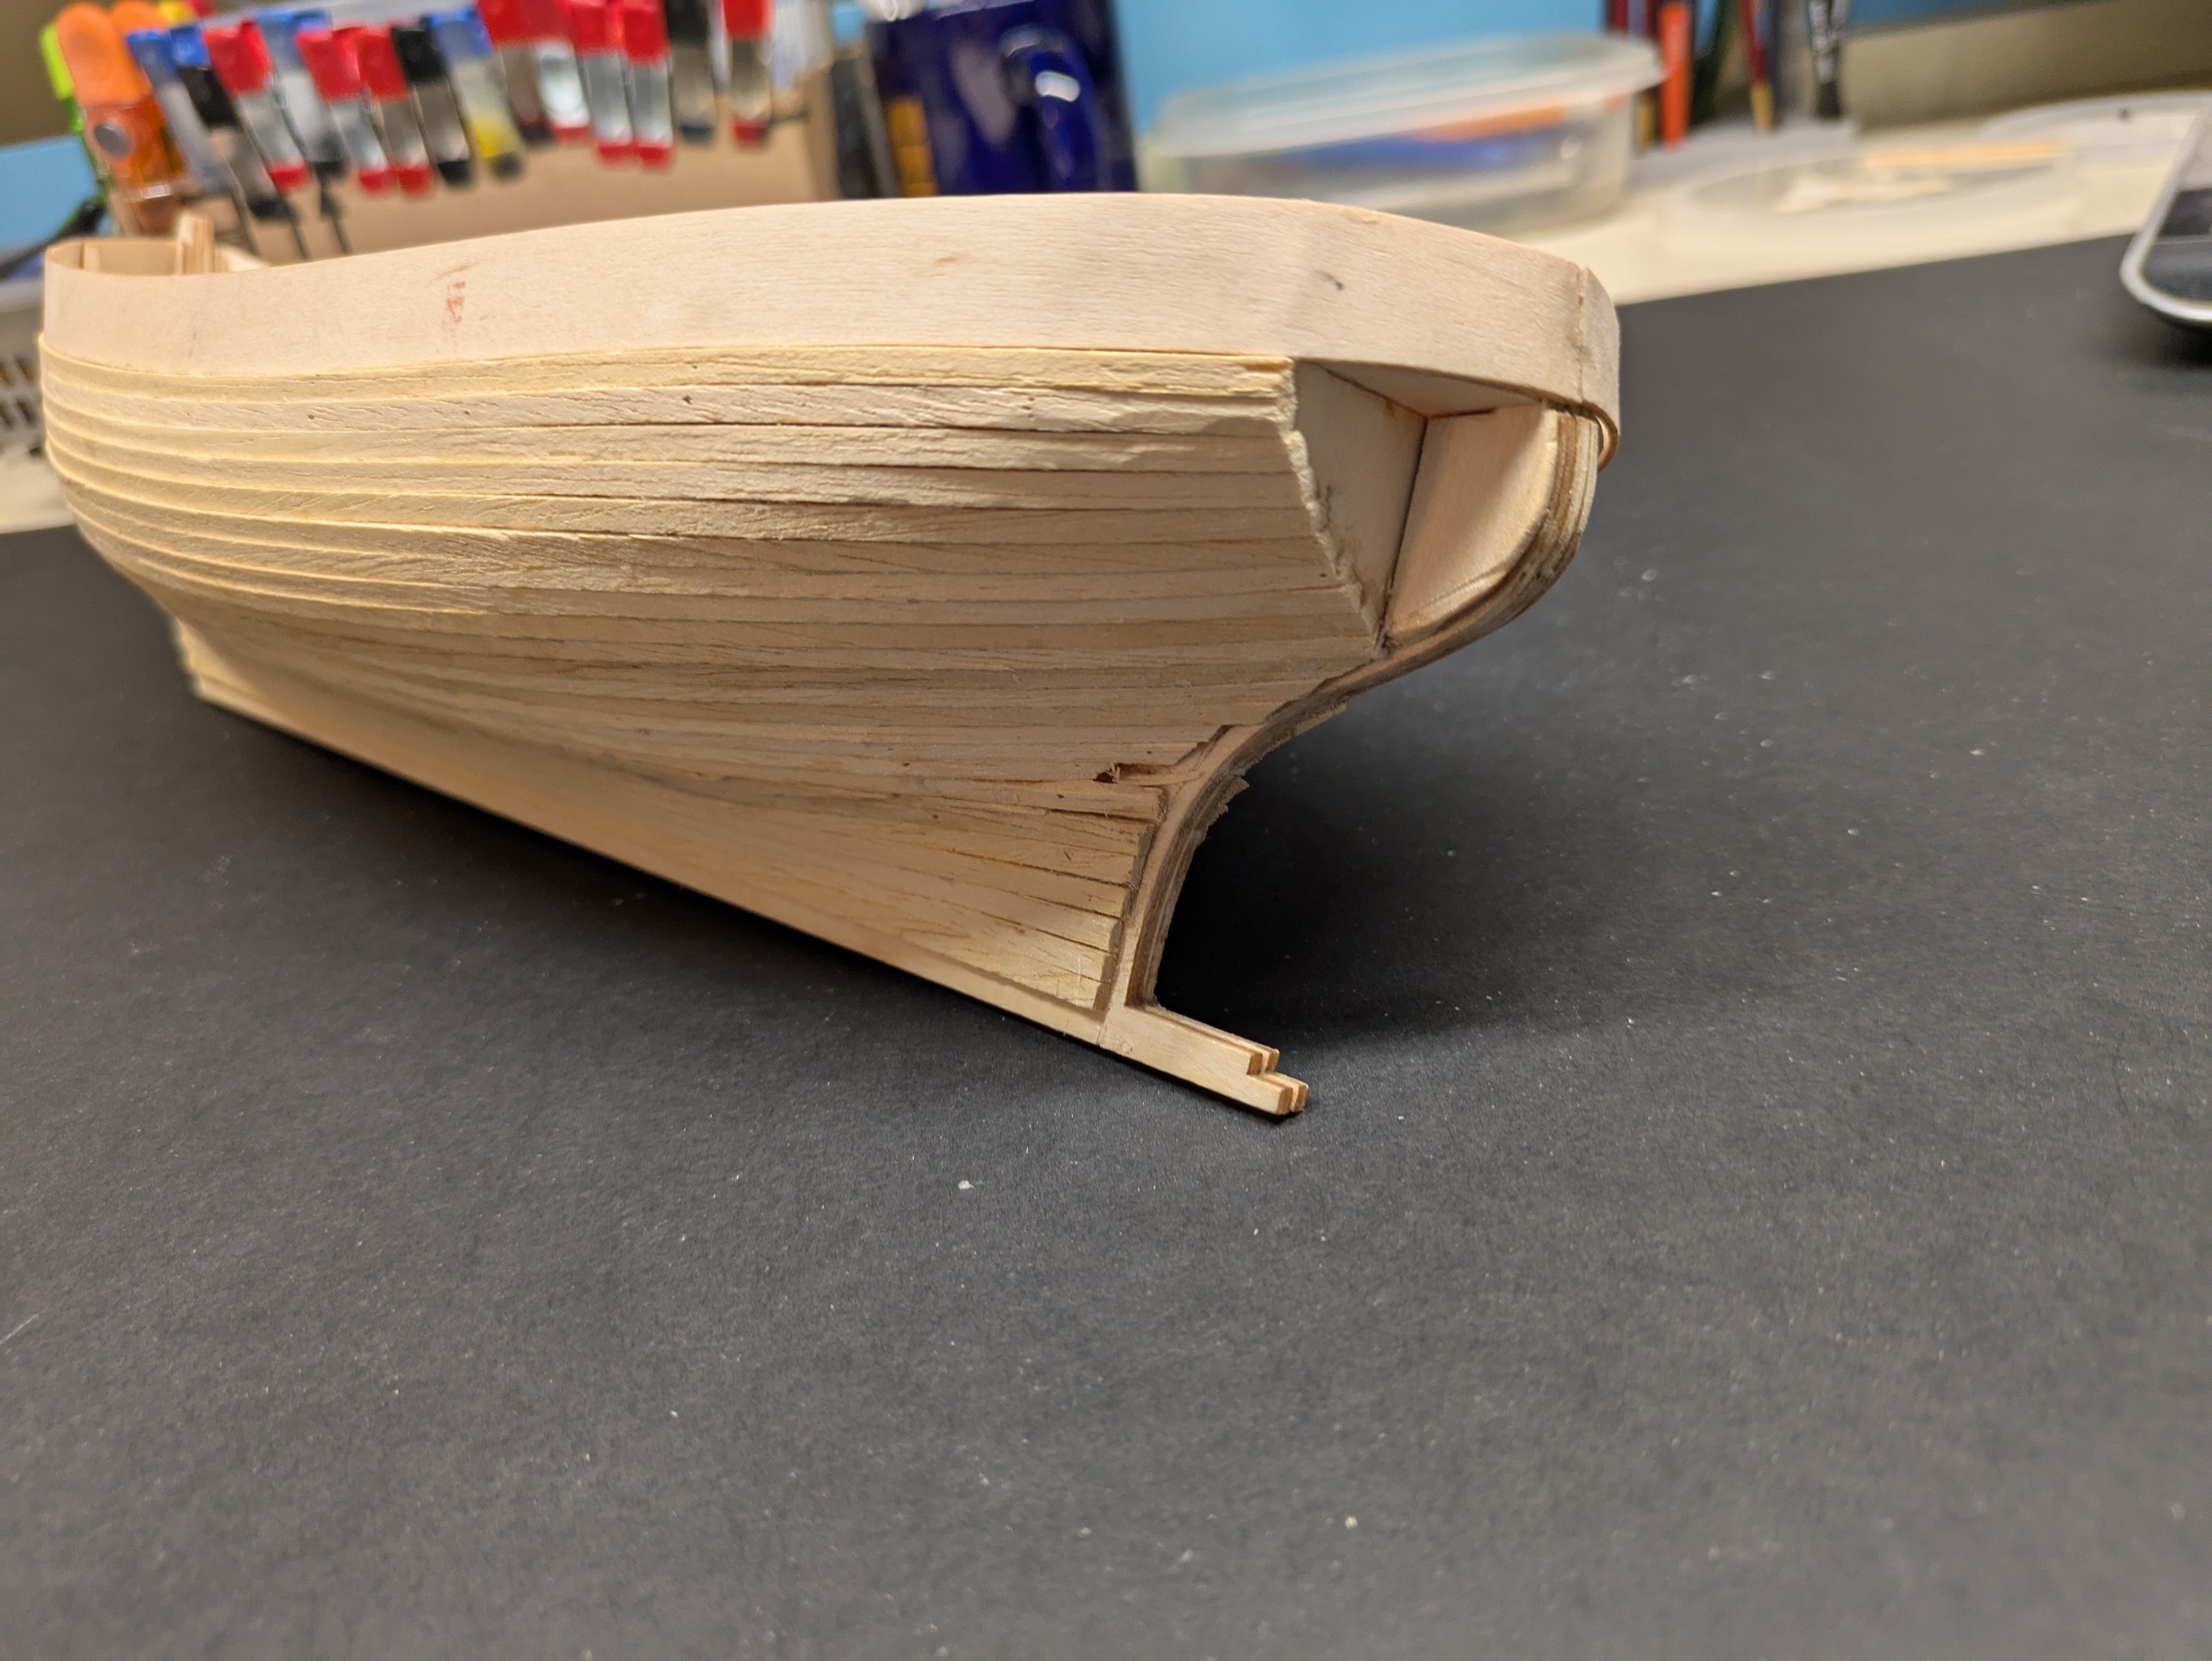
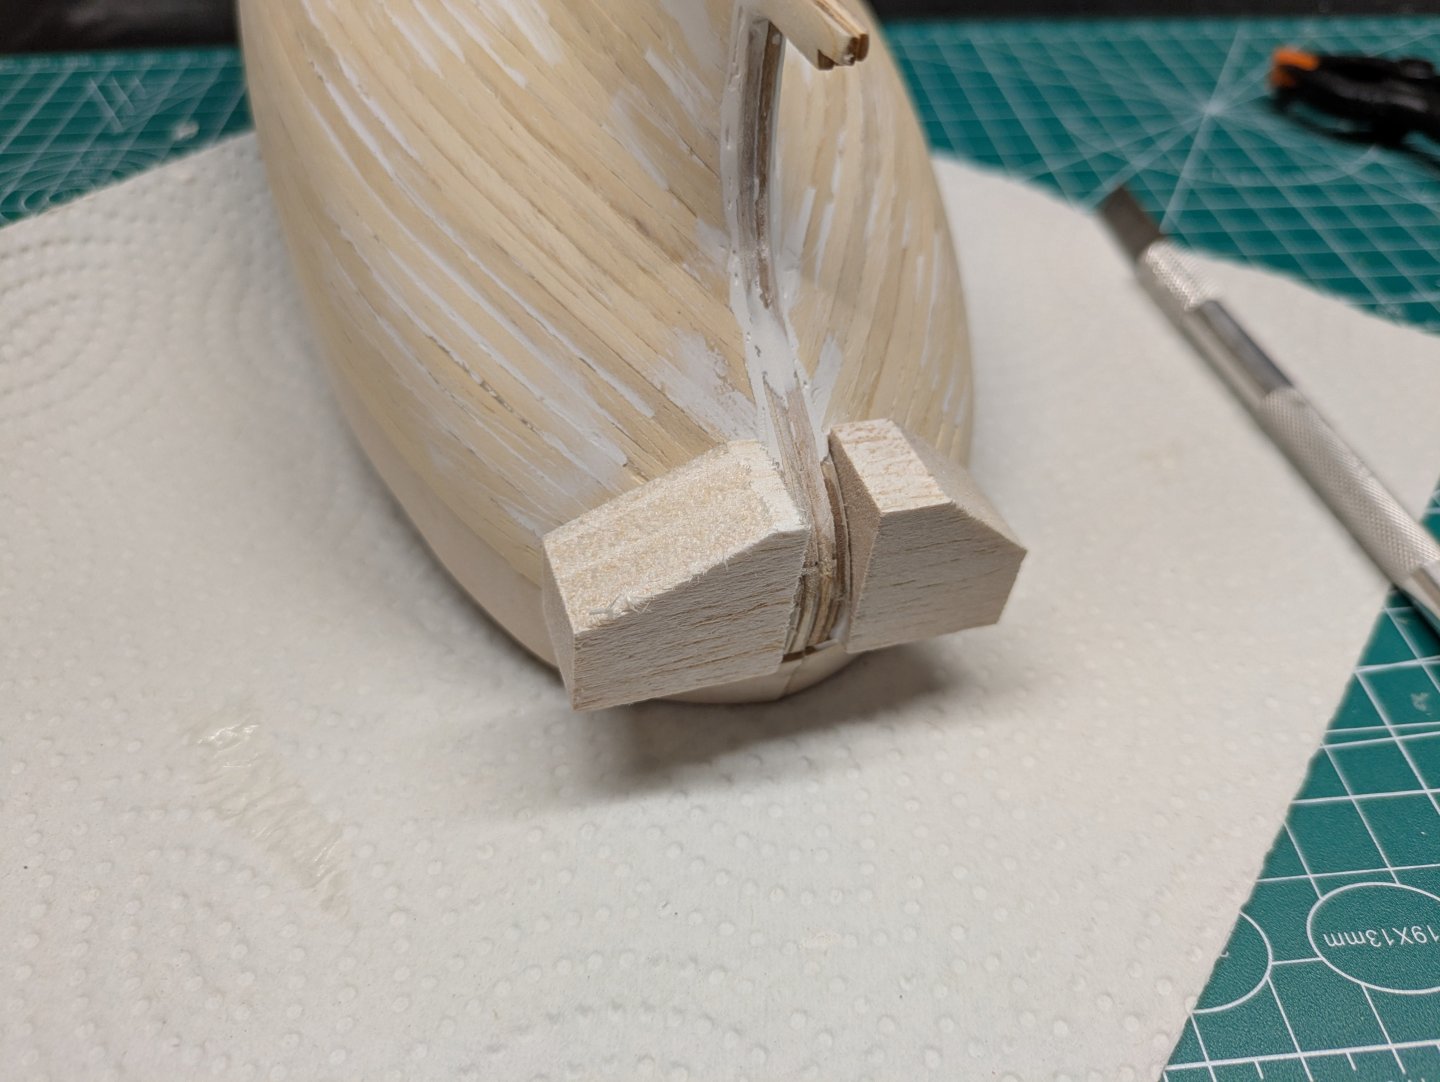
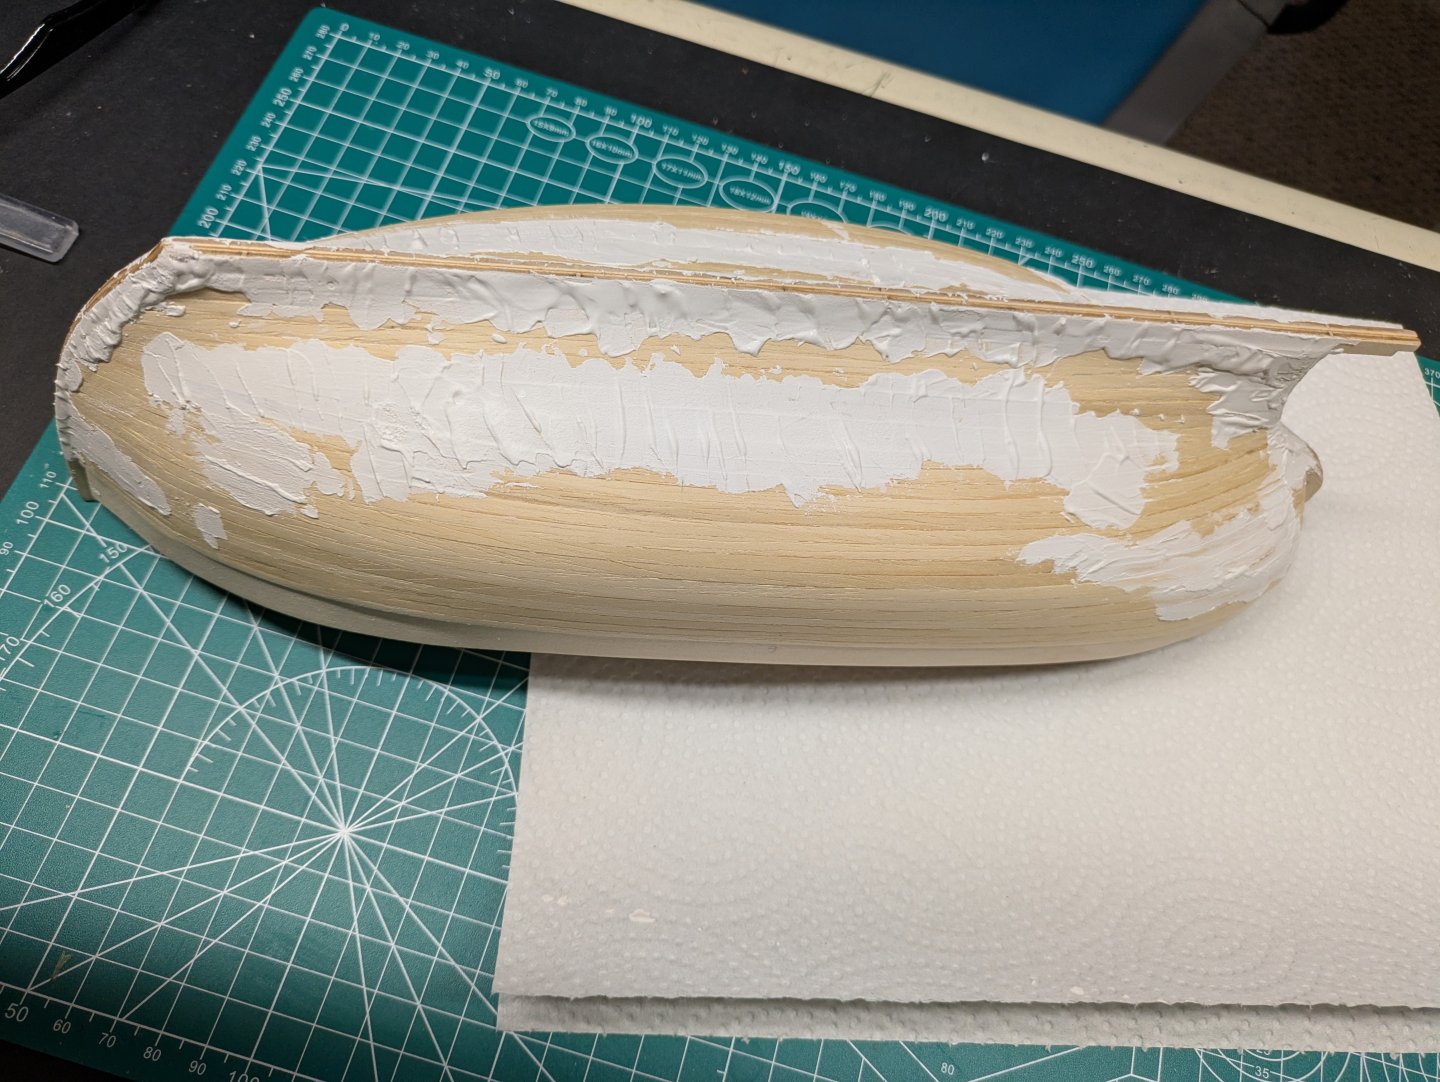
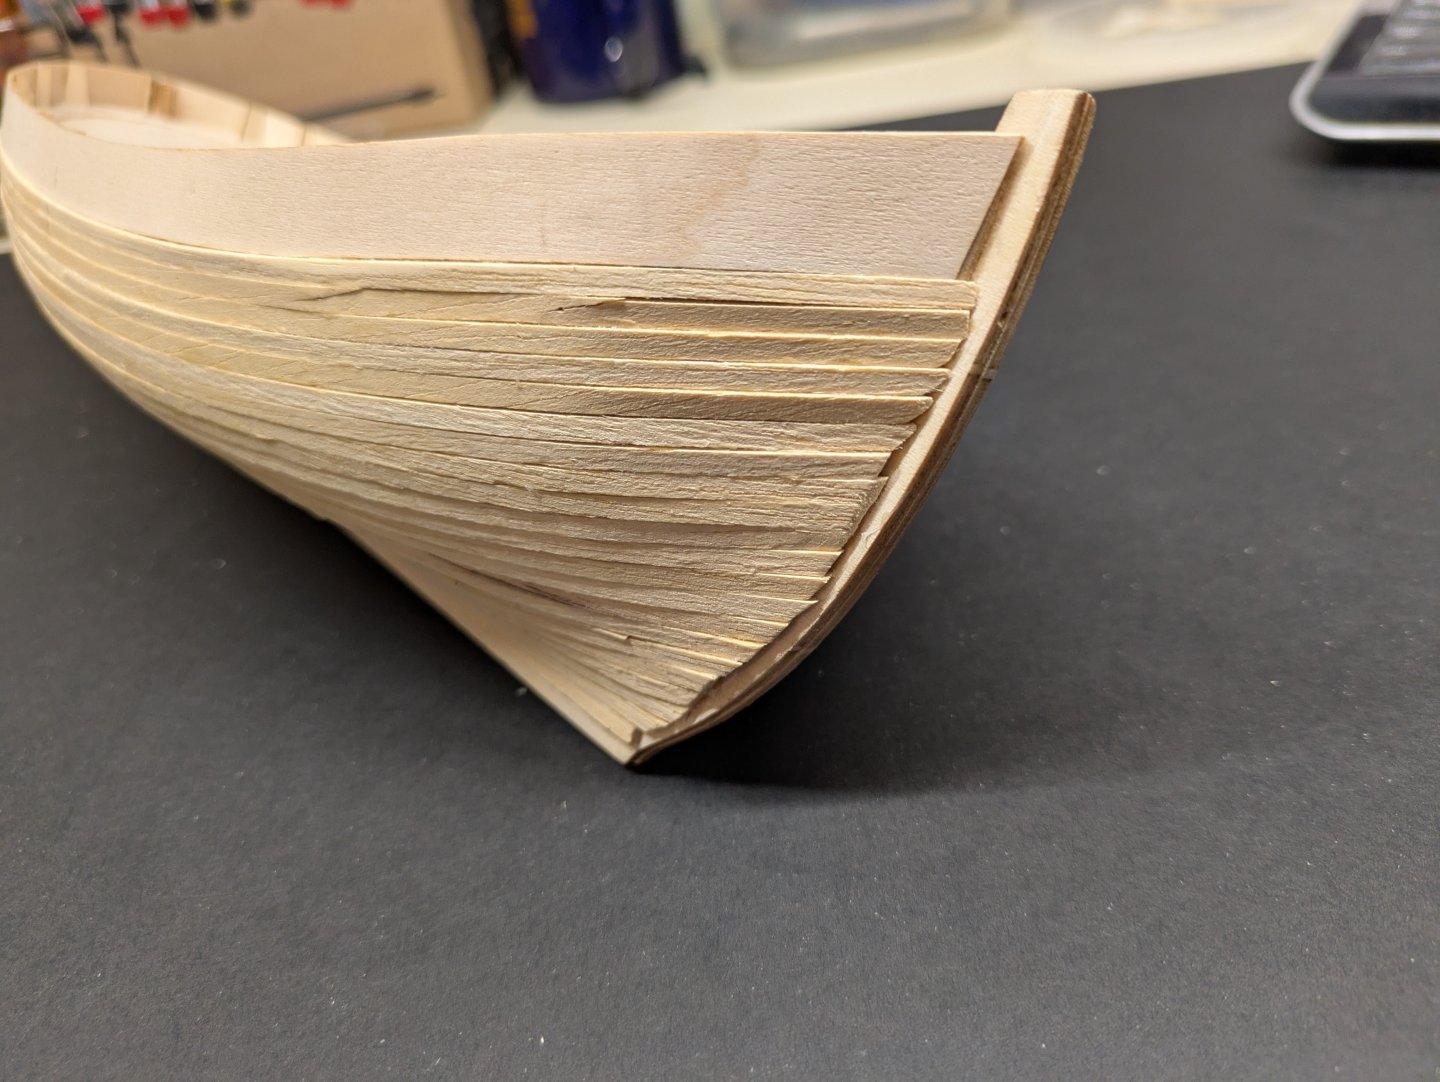
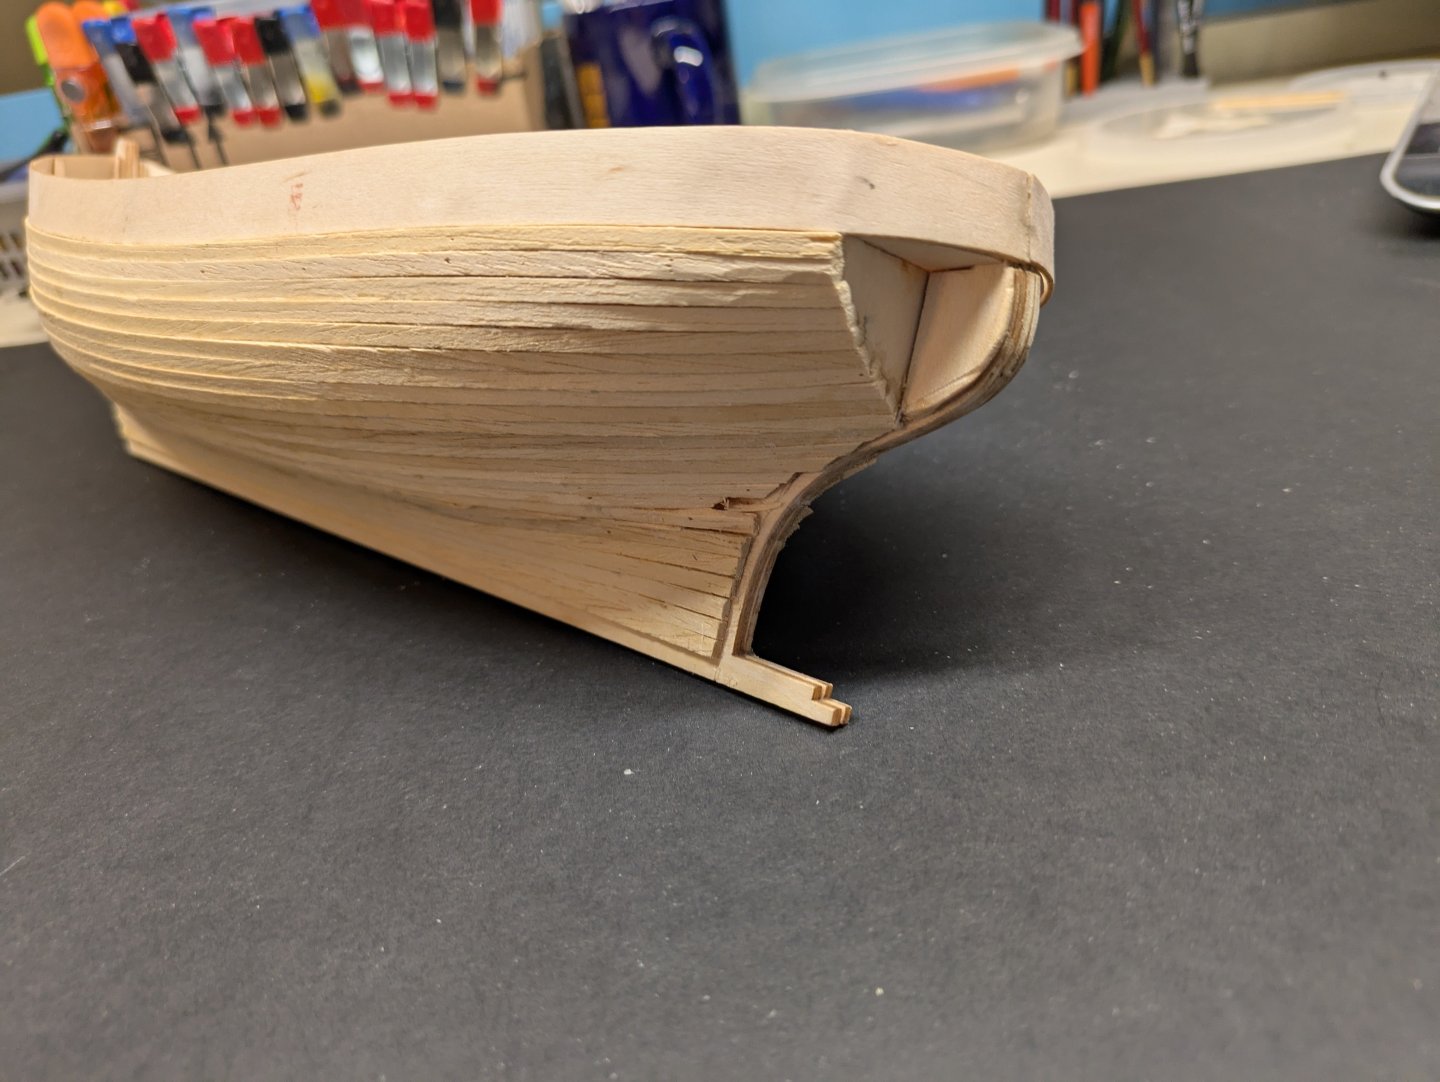
Survived my first official planking. Not the prettiest. Lots of sanding and filling ahead. Holes, cracks, craters to fill. But was not near as bad as I thought it would be. But already I know how I will do it different on my next build. Continuing to learn. Excuse the few blood stains, the top of one of the sewing pins came off and impaled my finger. Dang things.

-
Good job, most definitely HMCS Huron That is very interesting that they have it as HMS on the box when they sell the HMCS Huron in 1/350 (which I built) and I thought that one was small hahaha. So big hand clap for your work at this scale. btw, I have a build log in a google photo album if you would like a link to it for reference. Just let me know if you want it on here.