
Capt. Kelso
-
Posts
167 -
Joined
-
Last visited
1 Follower

About Capt. Kelso

Recent Profile Visitors
2,362 profile views


-
 Capt. Kelso reacted to a post in a topic:
Speedwell Battle Station Kit 1752 by CiscoH - Syren Ship Model Company - 3/8" or 1:32
Capt. Kelso reacted to a post in a topic:
Speedwell Battle Station Kit 1752 by CiscoH - Syren Ship Model Company - 3/8" or 1:32
-
Capt. Kelso reacted to a post in a topic:
Chaperon by John Gummersall - FINISHED - Model Shipways - Scale 1:48
-
aaronc reacted to a post in a topic:
Grand Banks Dory by palmerit - FINISHED - Midwest Products - 1:12
-
Capt. Kelso reacted to a post in a topic:
Syren Ship Model Company News, Updates and Info.....(part 2)
-

Resin ice effects
Capt. Kelso replied to JKC27's topic in Painting, finishing and weathering products and techniques
Impressive! -
Jack12477 reacted to a post in a topic:
Speedwell Battle Station Kit 1752 by CiscoH - Syren Ship Model Company - 3/8" or 1:32
-
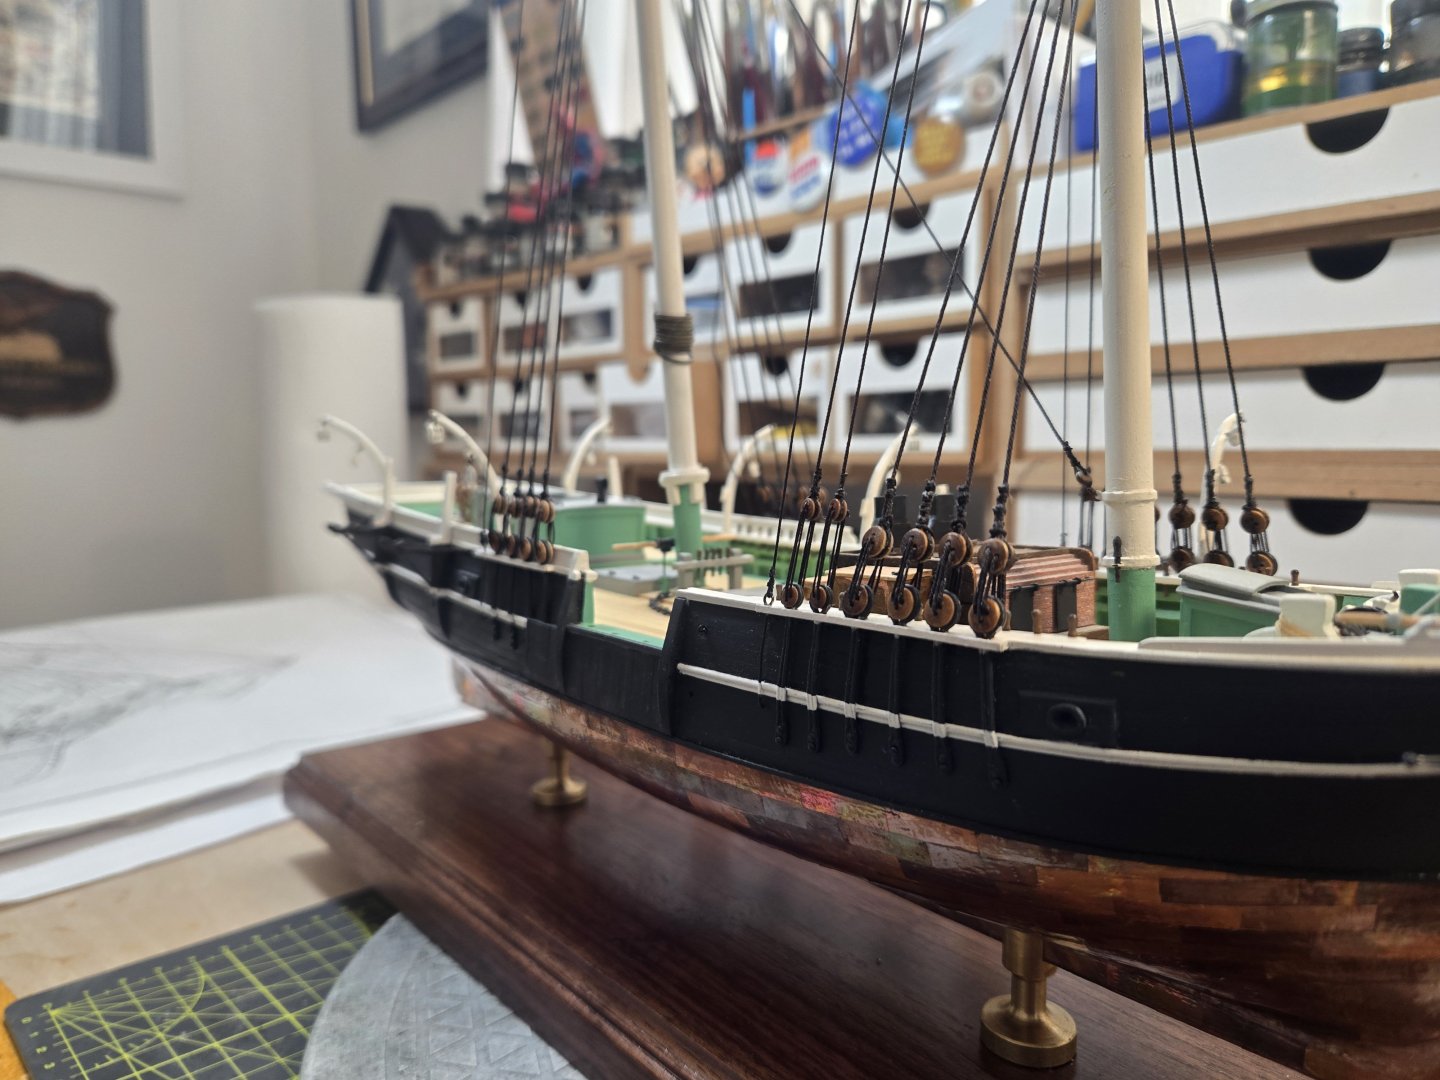
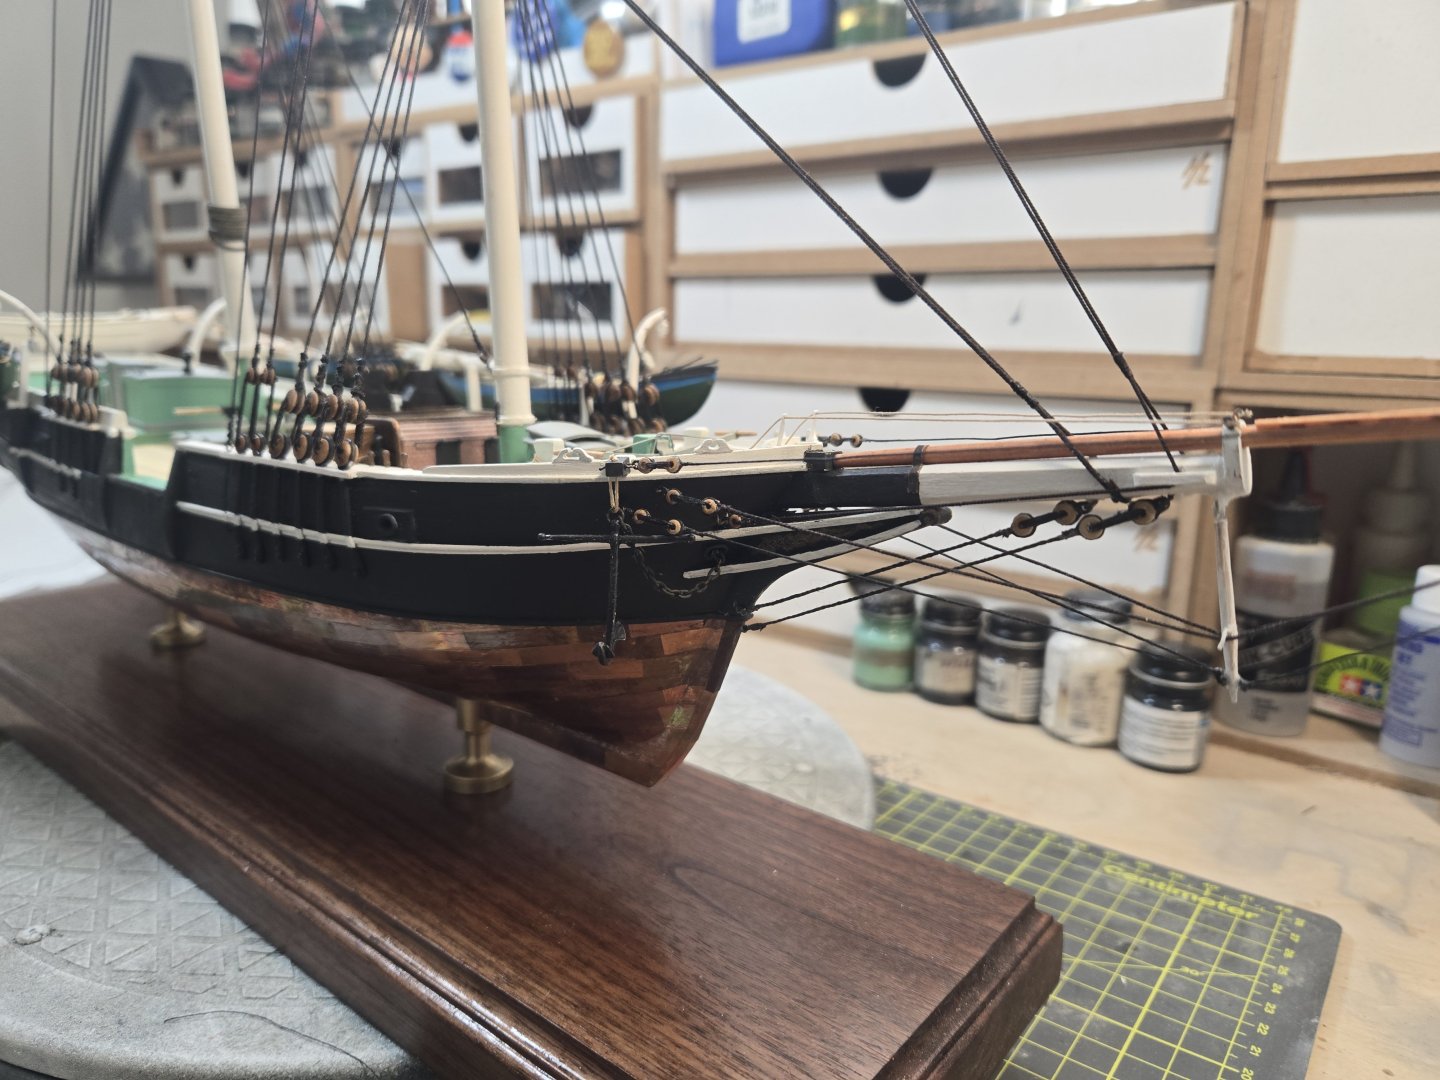
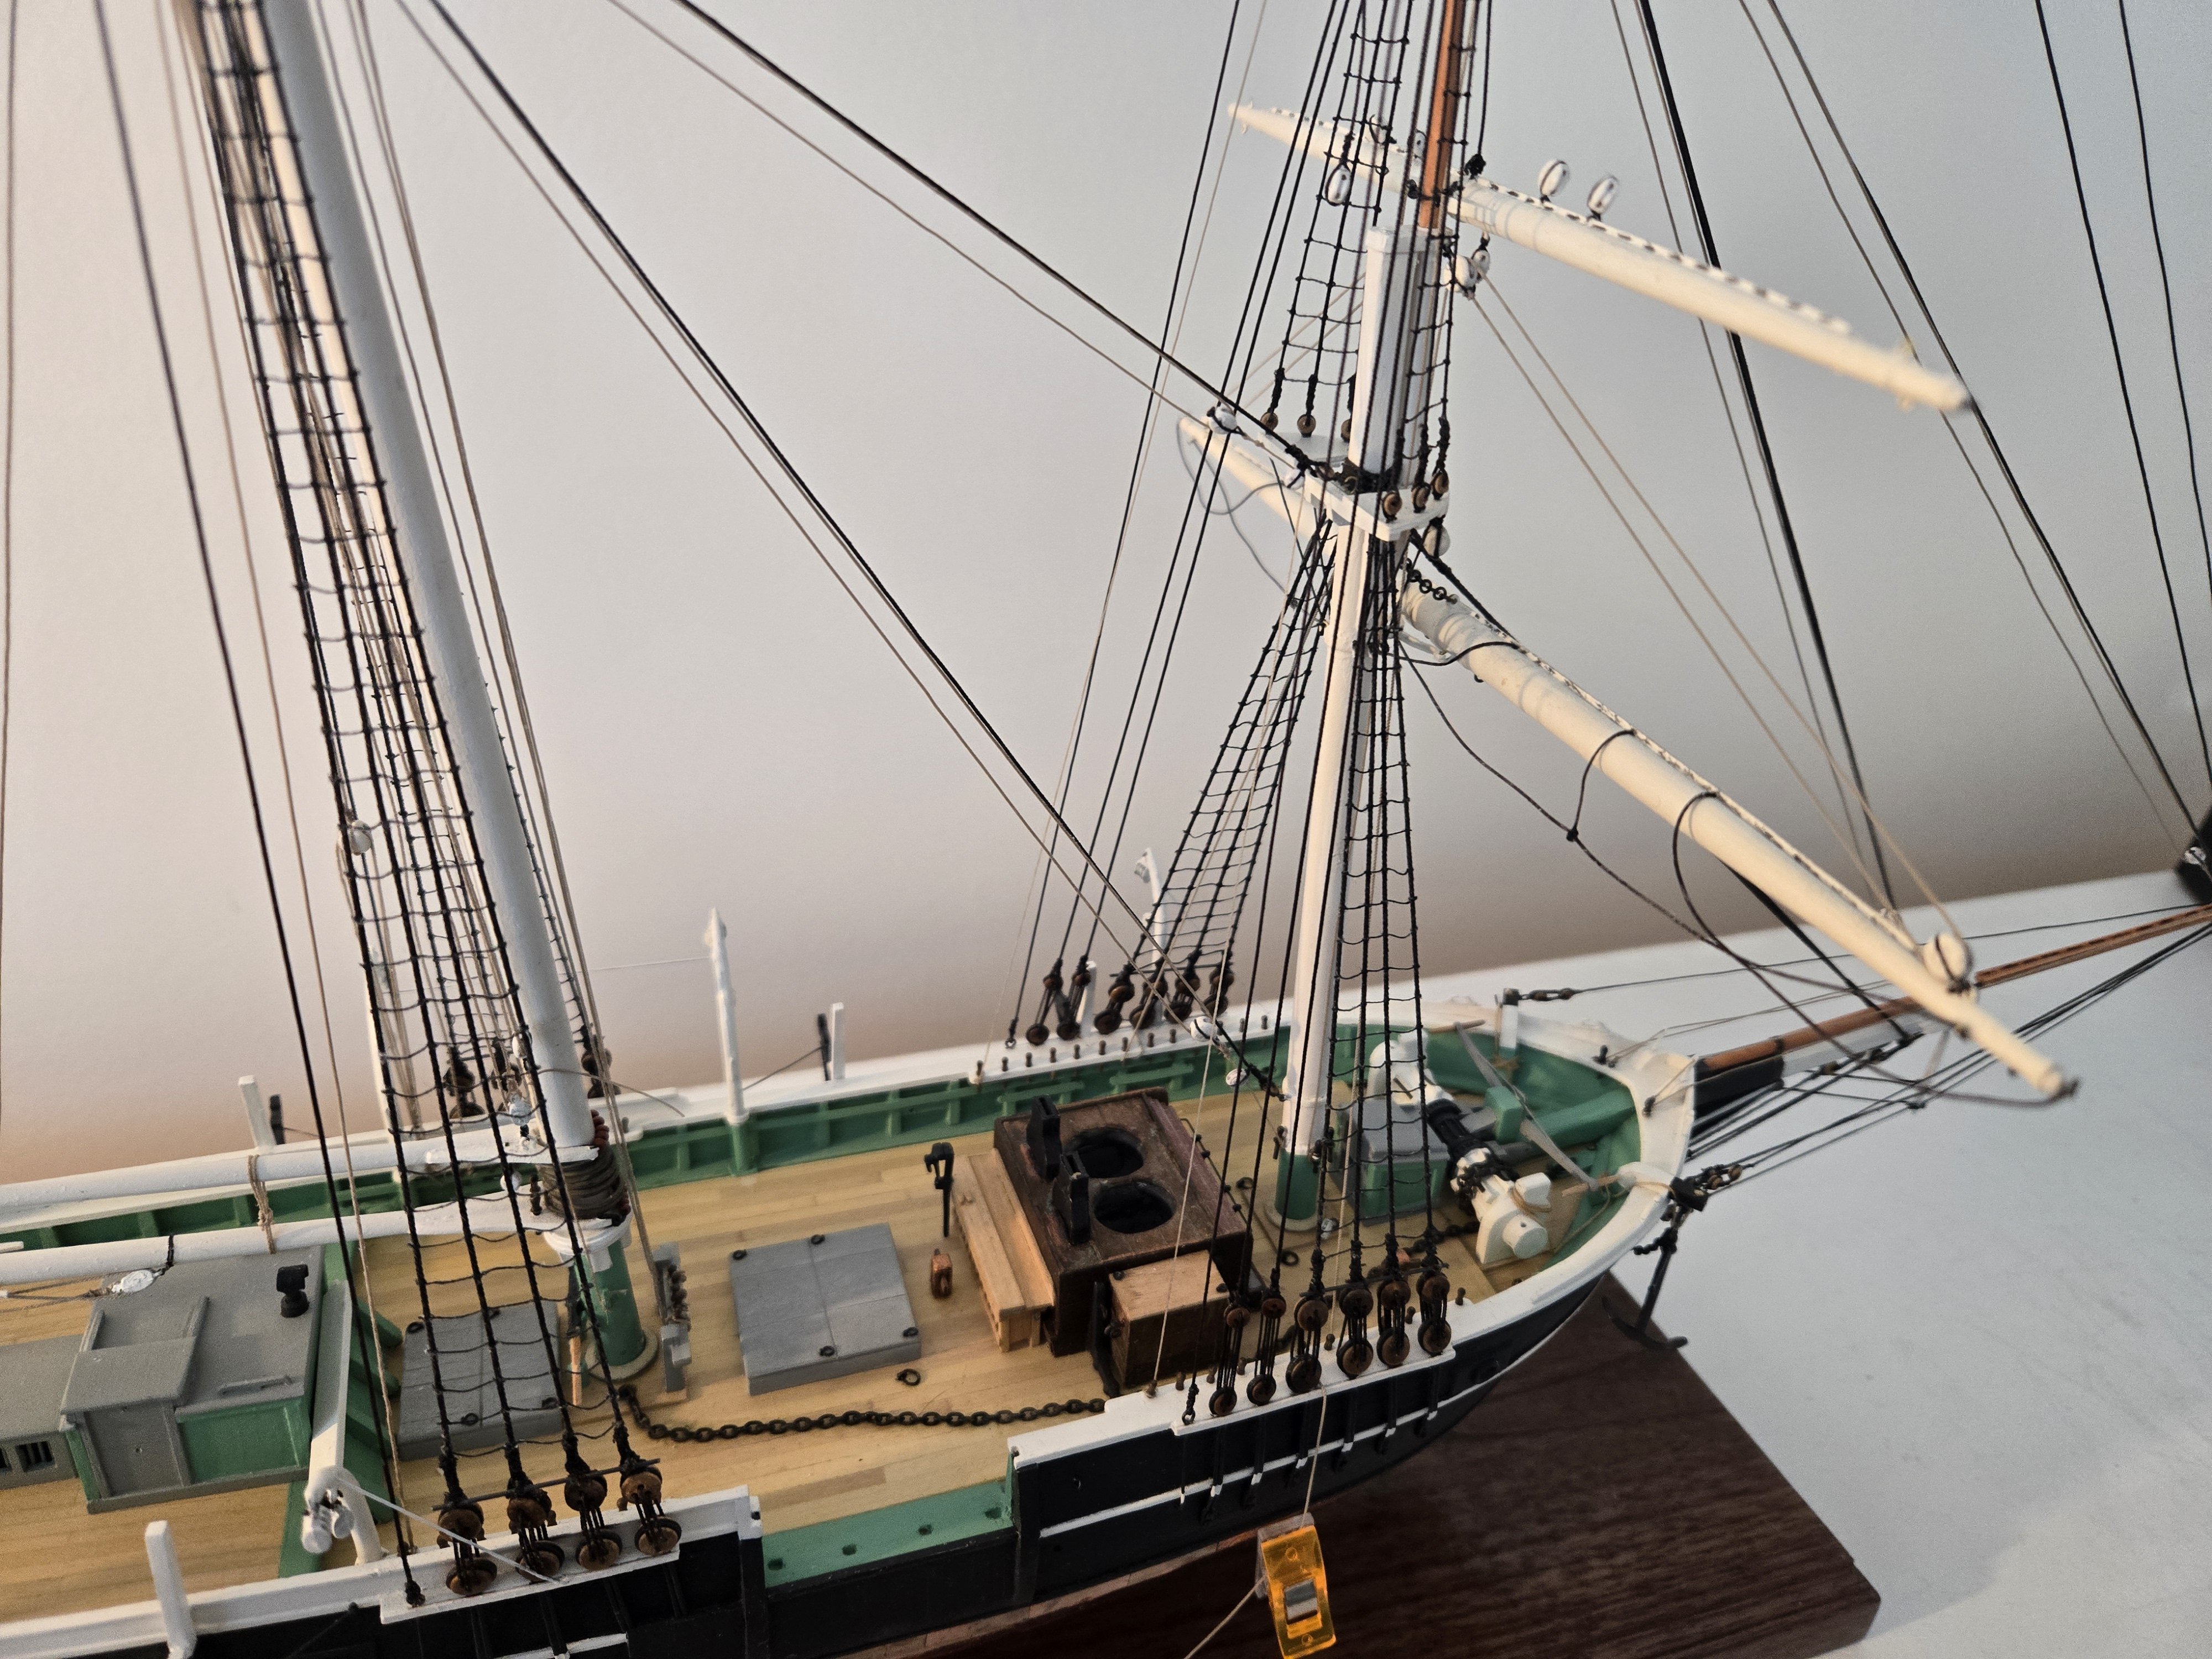
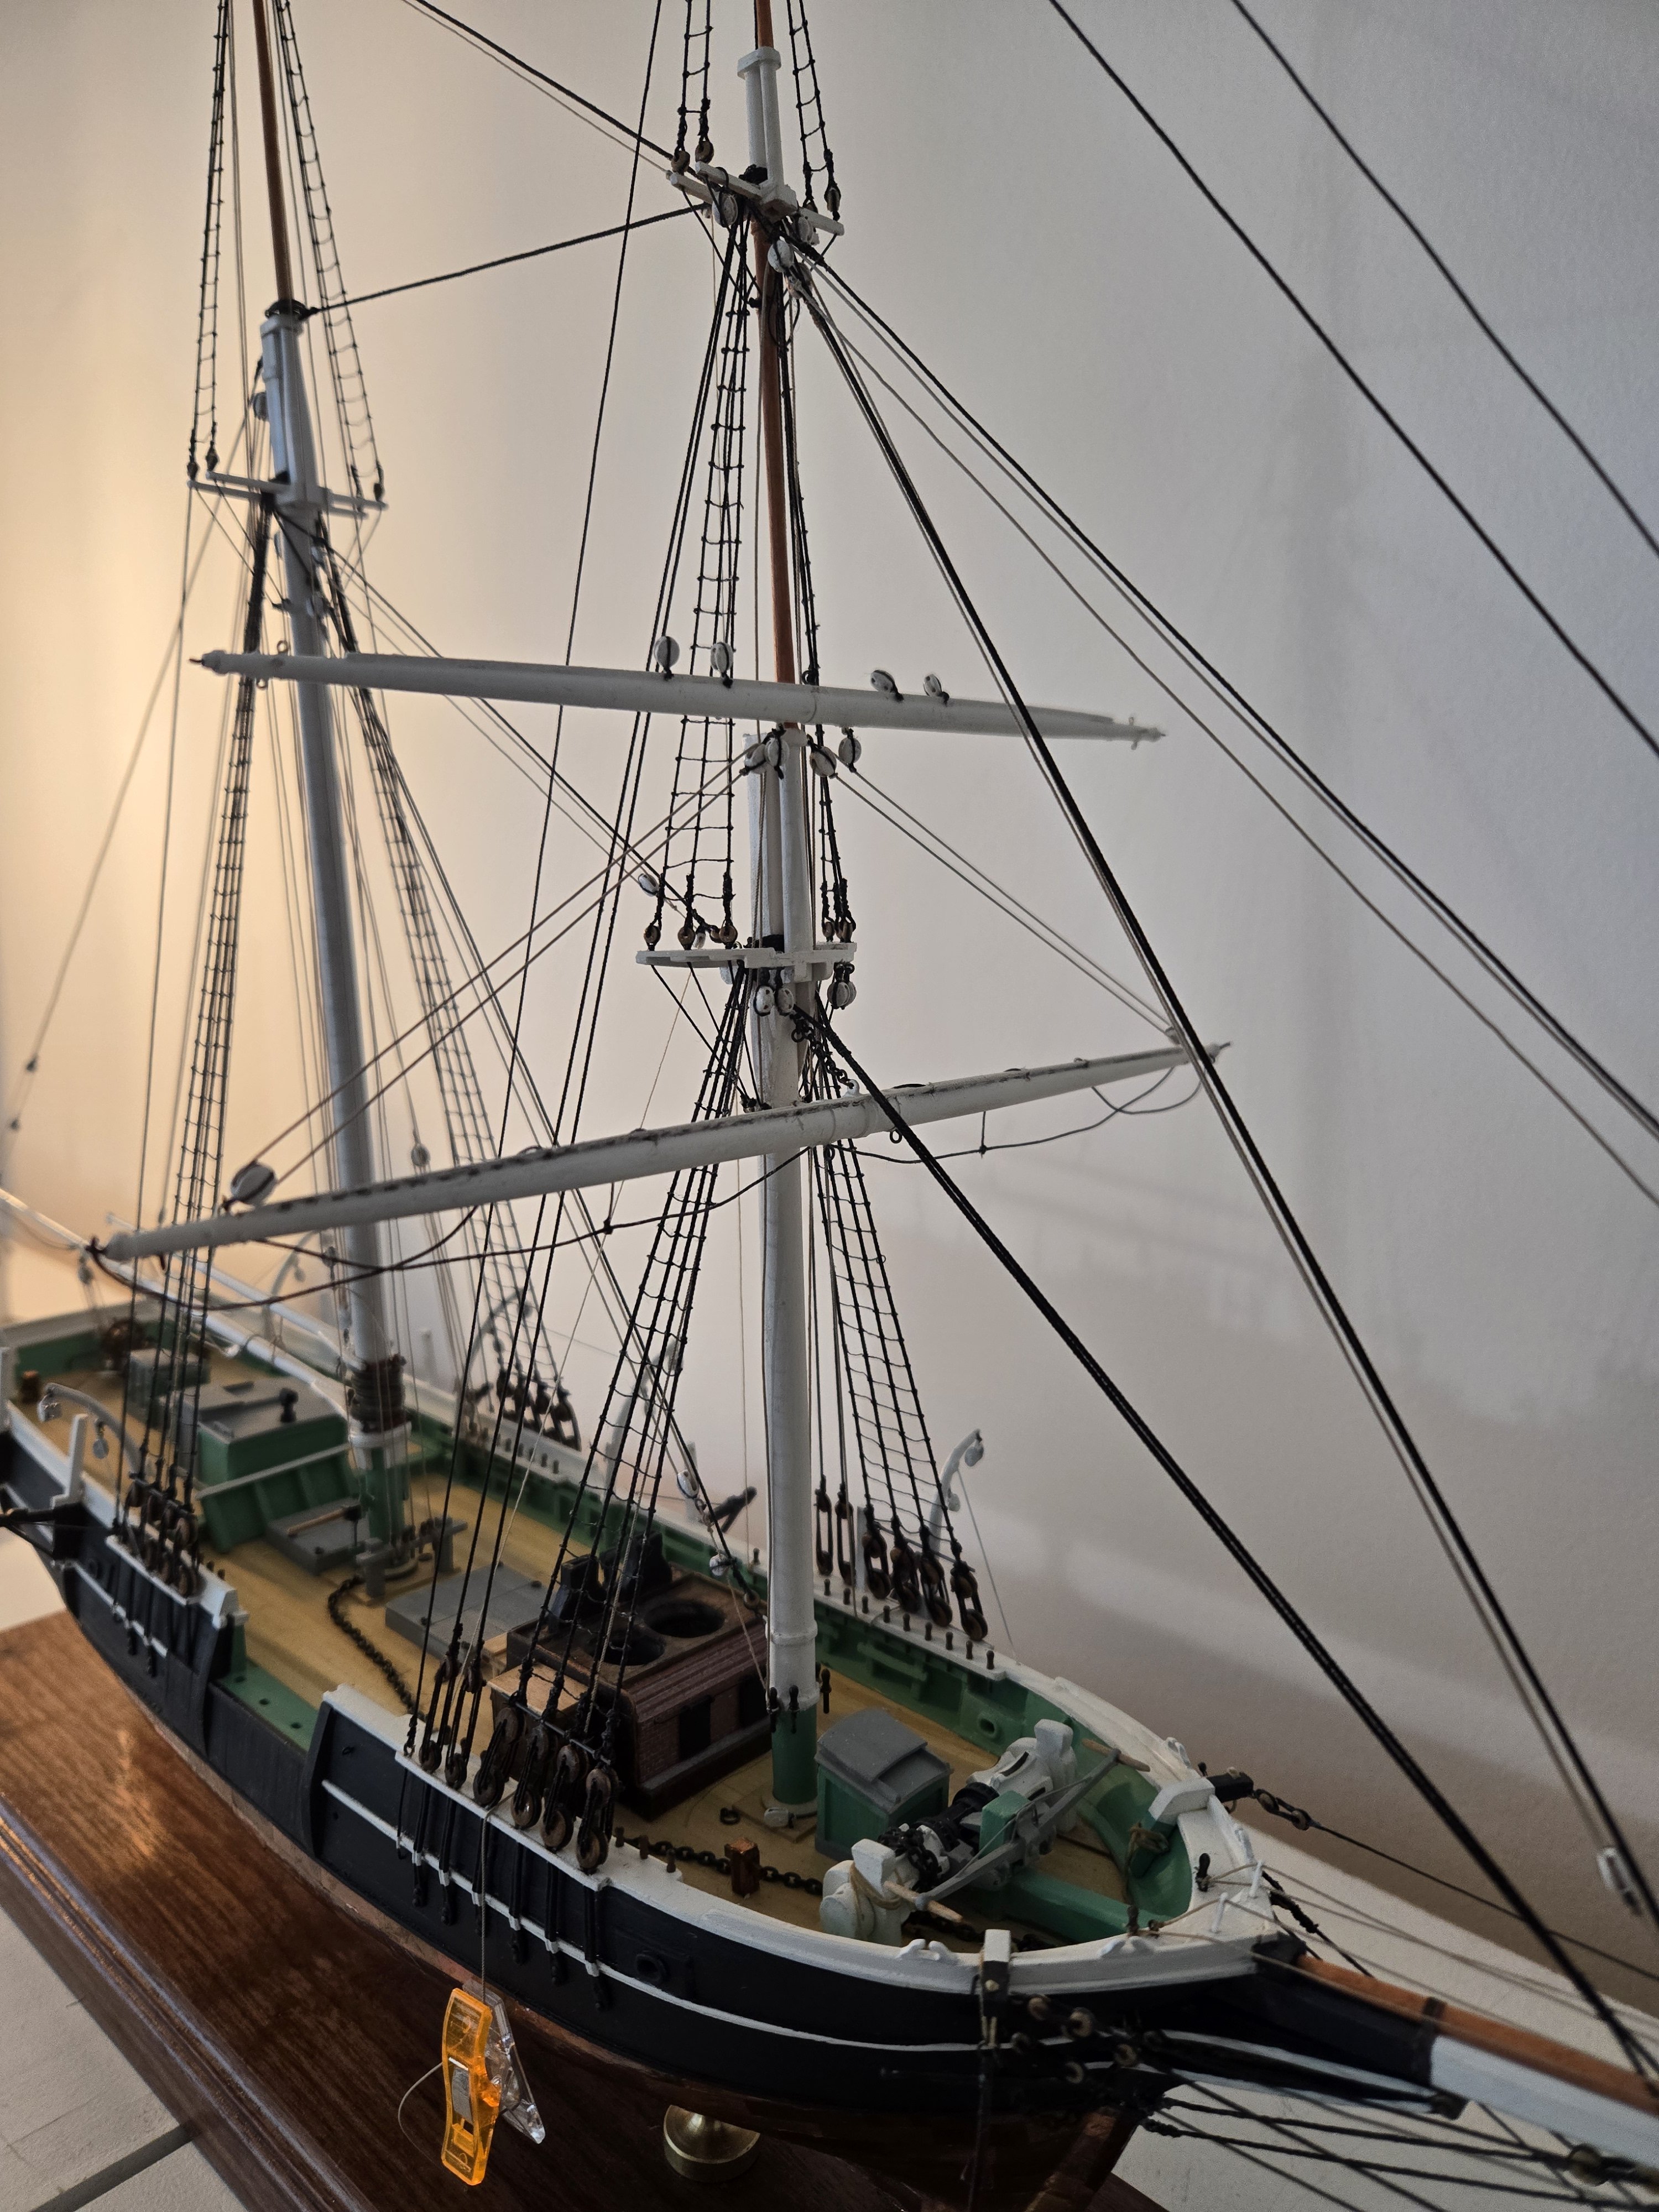
Richvee. At this point I plan on doing the cutting tackle. Some of the bunt and leech lines aren't necessary without sails. Aesthetically it looks better with them, not sure how much I'll add at this point. It's starting to become a slow frustrating process interpreting the rigging plans. Thanks for the tips!
-
JacquesCousteau reacted to a post in a topic:
Kate Cory by Capt. Kelso (Quint) - Model Shipways - 3/16" scale - Whaling Brig
-
Admiral Rick reacted to a post in a topic:
Benjamin W Latham by Fundysnapper - Model Shipways - 1:48
-
Harvey Golden reacted to a post in a topic:
Kate Cory by Capt. Kelso (Quint) - Model Shipways - 3/16" scale - Whaling Brig
-
Richvee reacted to a post in a topic:
Kate Cory by Capt. Kelso (Quint) - Model Shipways - 3/16" scale - Whaling Brig
-
CiscoH reacted to a post in a topic:
Kate Cory by Capt. Kelso (Quint) - Model Shipways - 3/16" scale - Whaling Brig
-
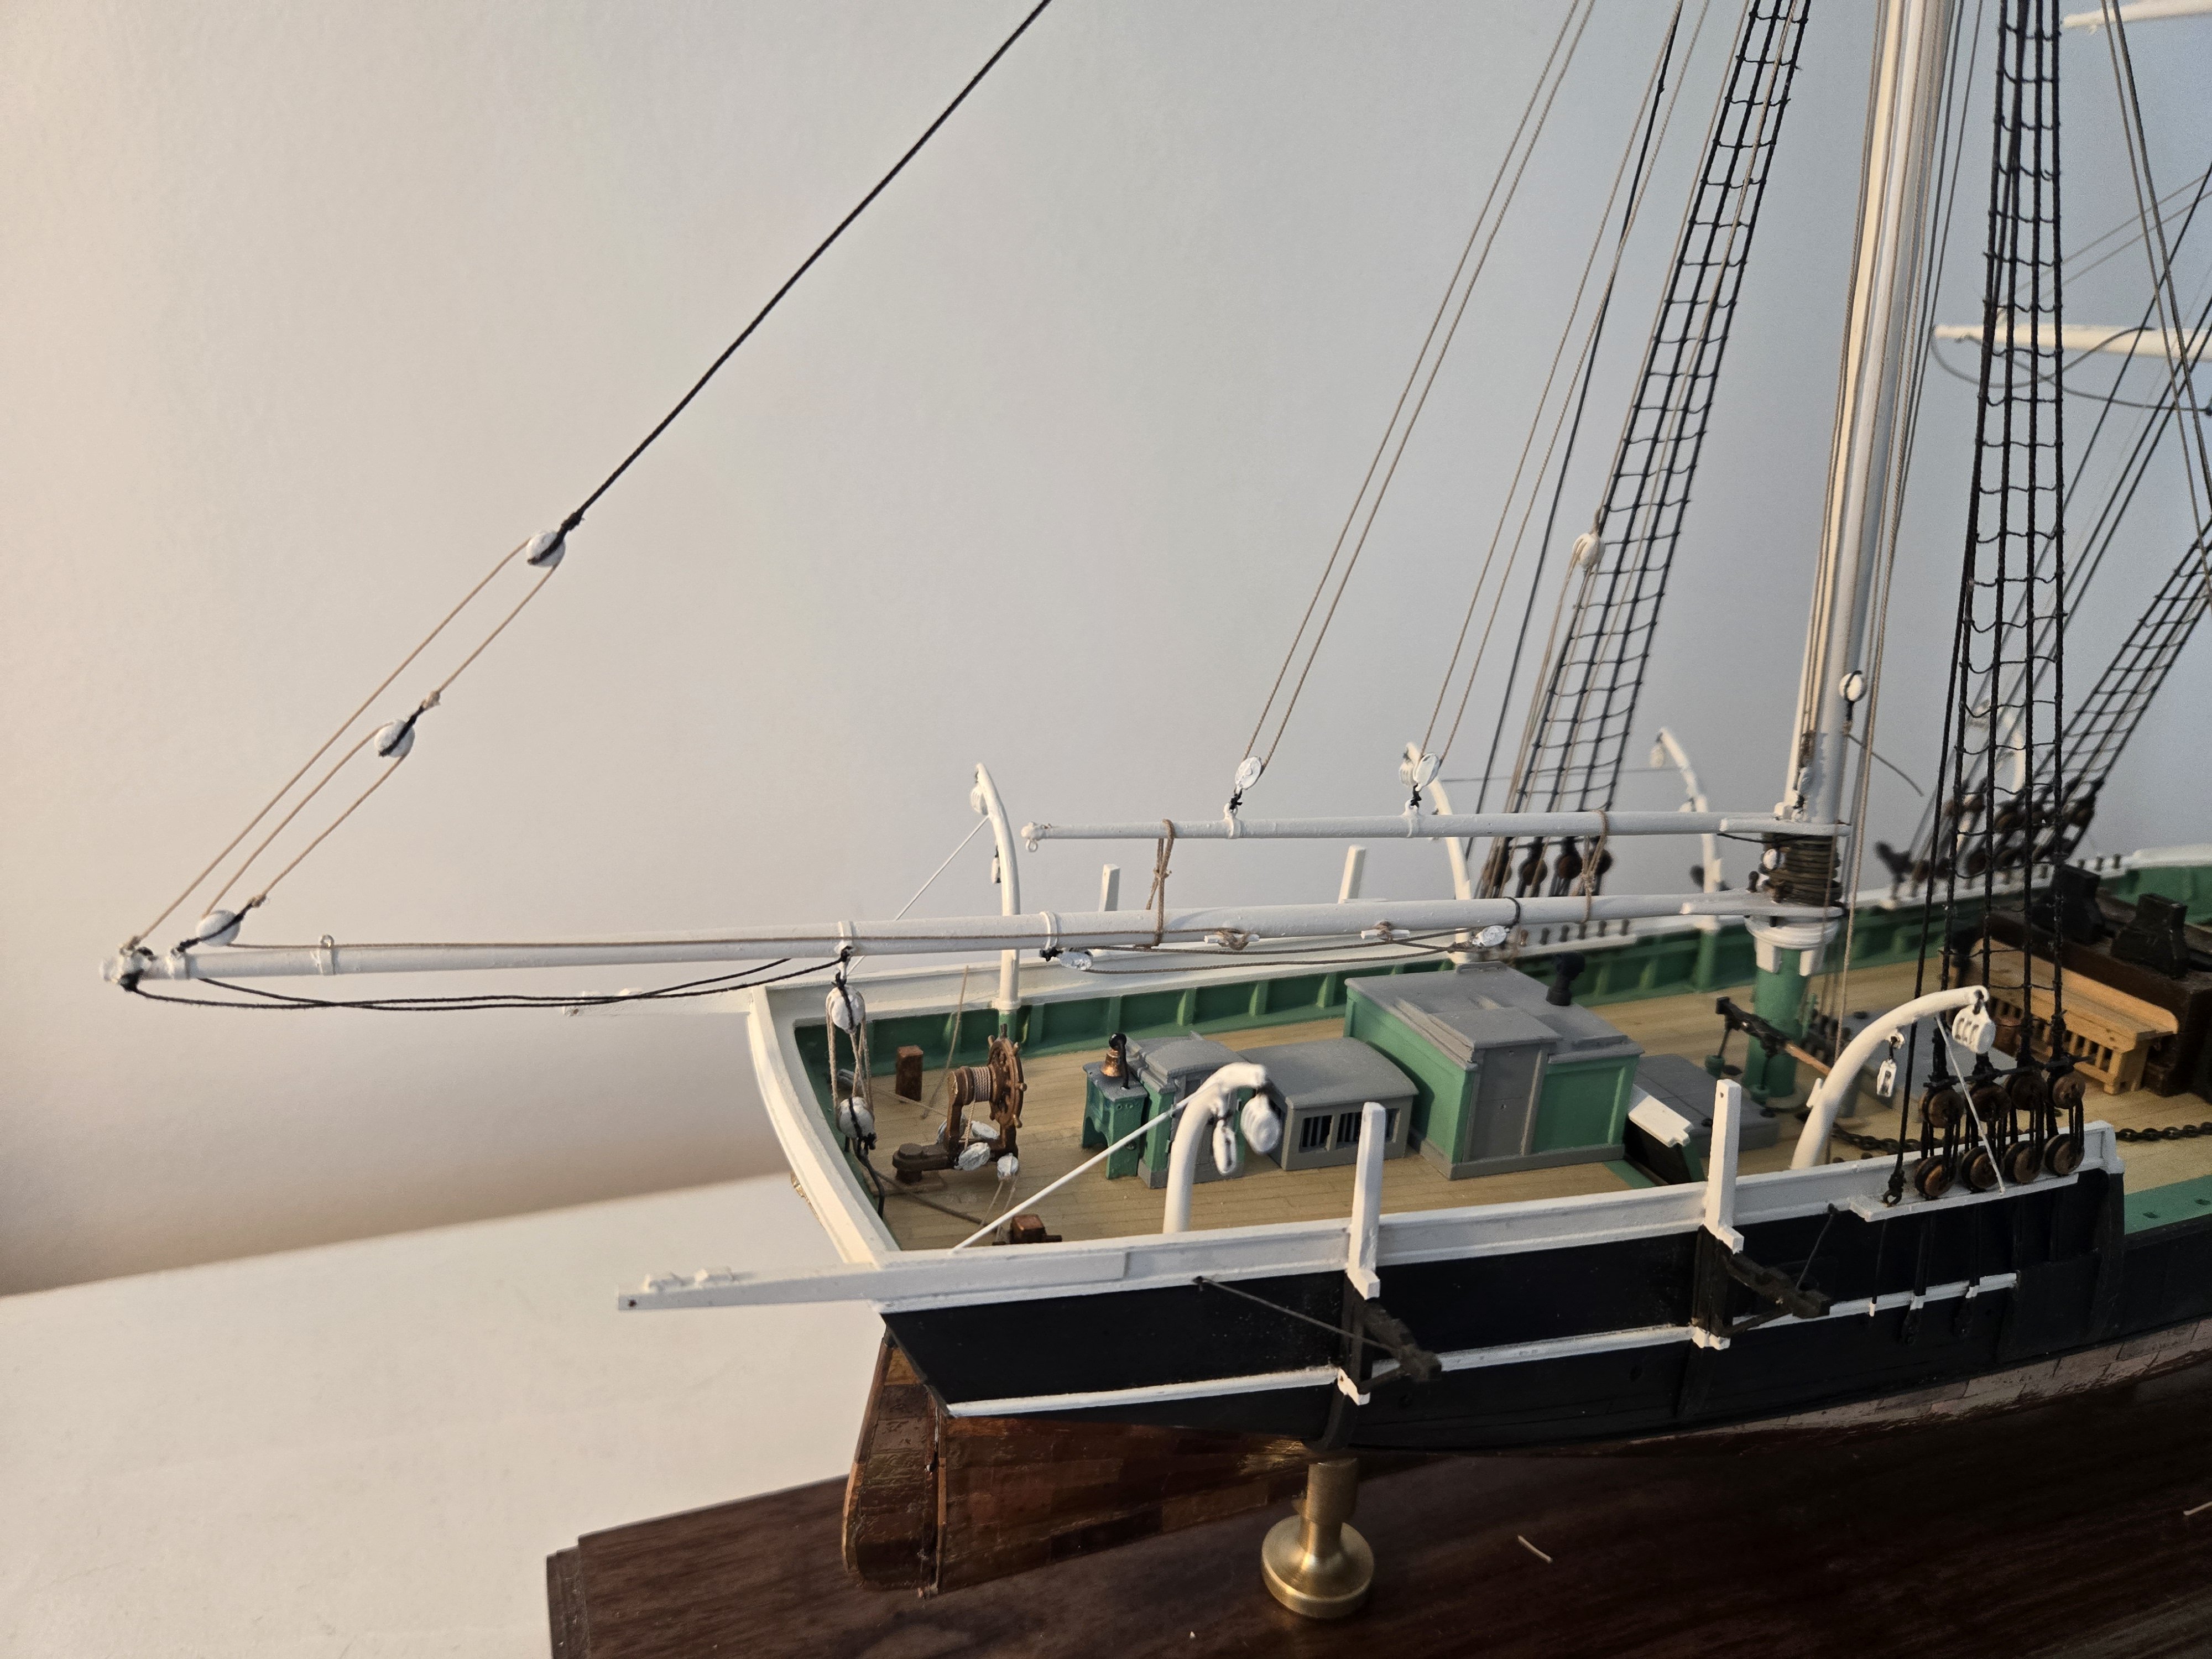
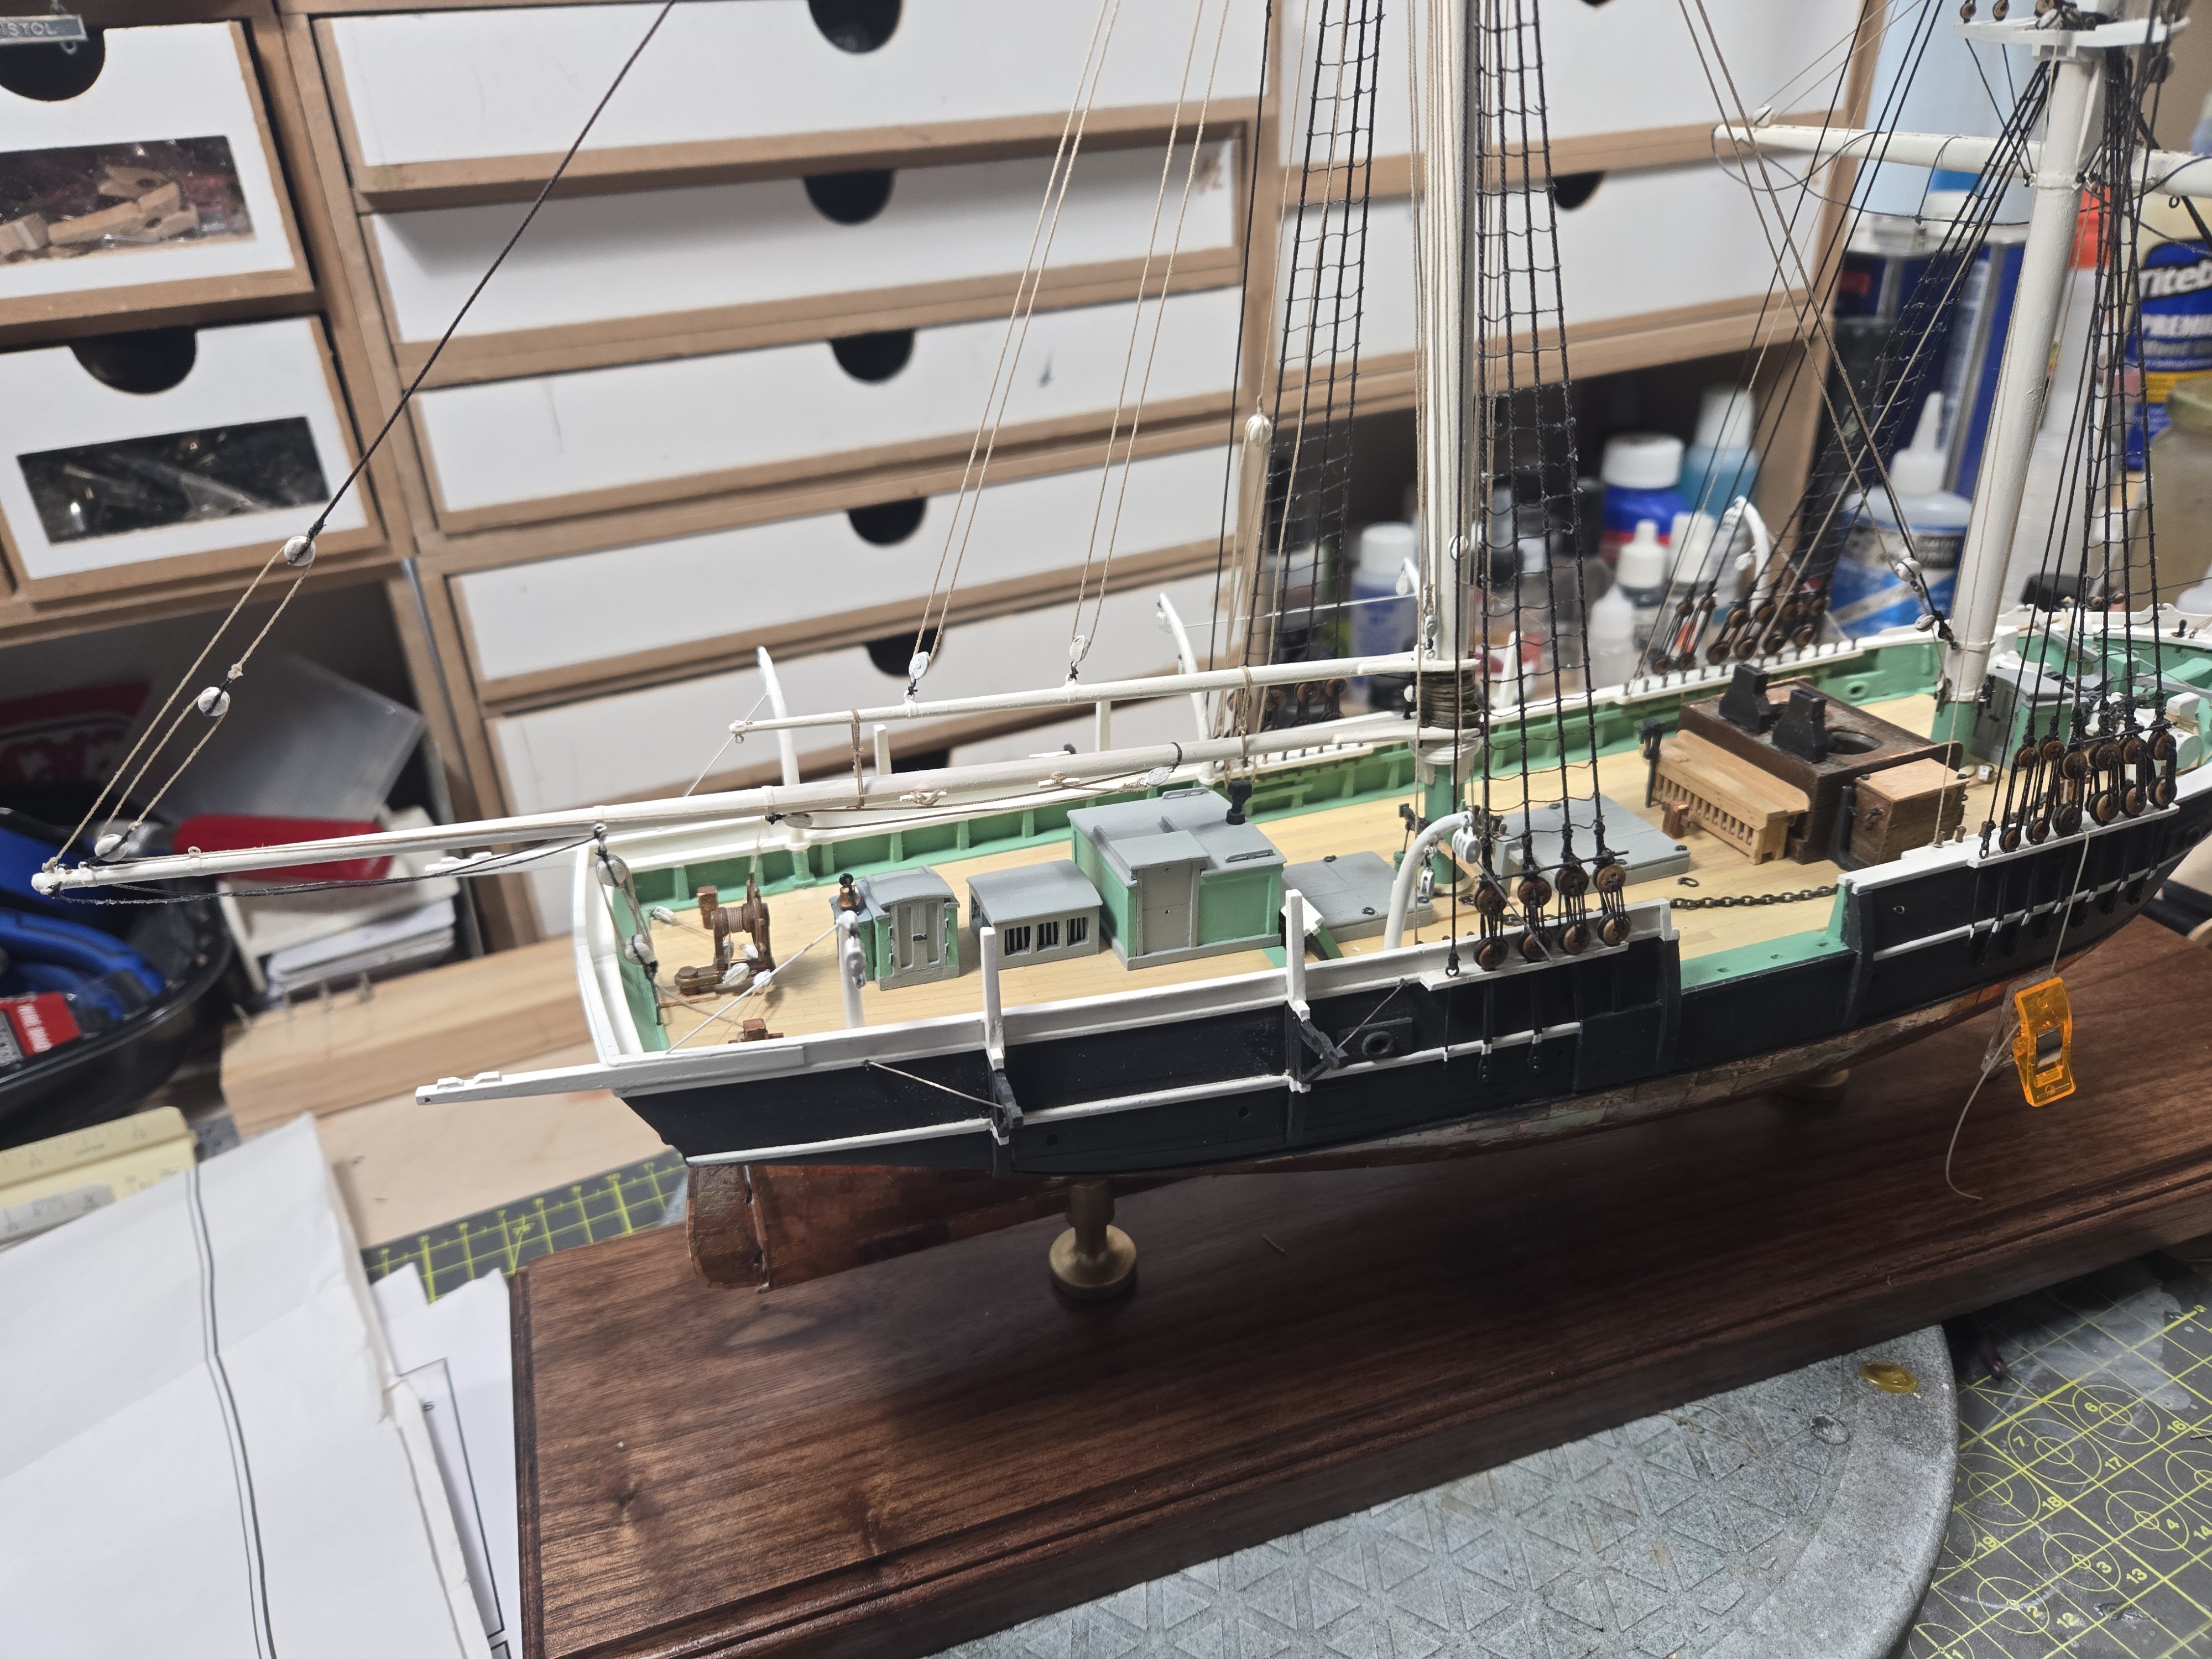
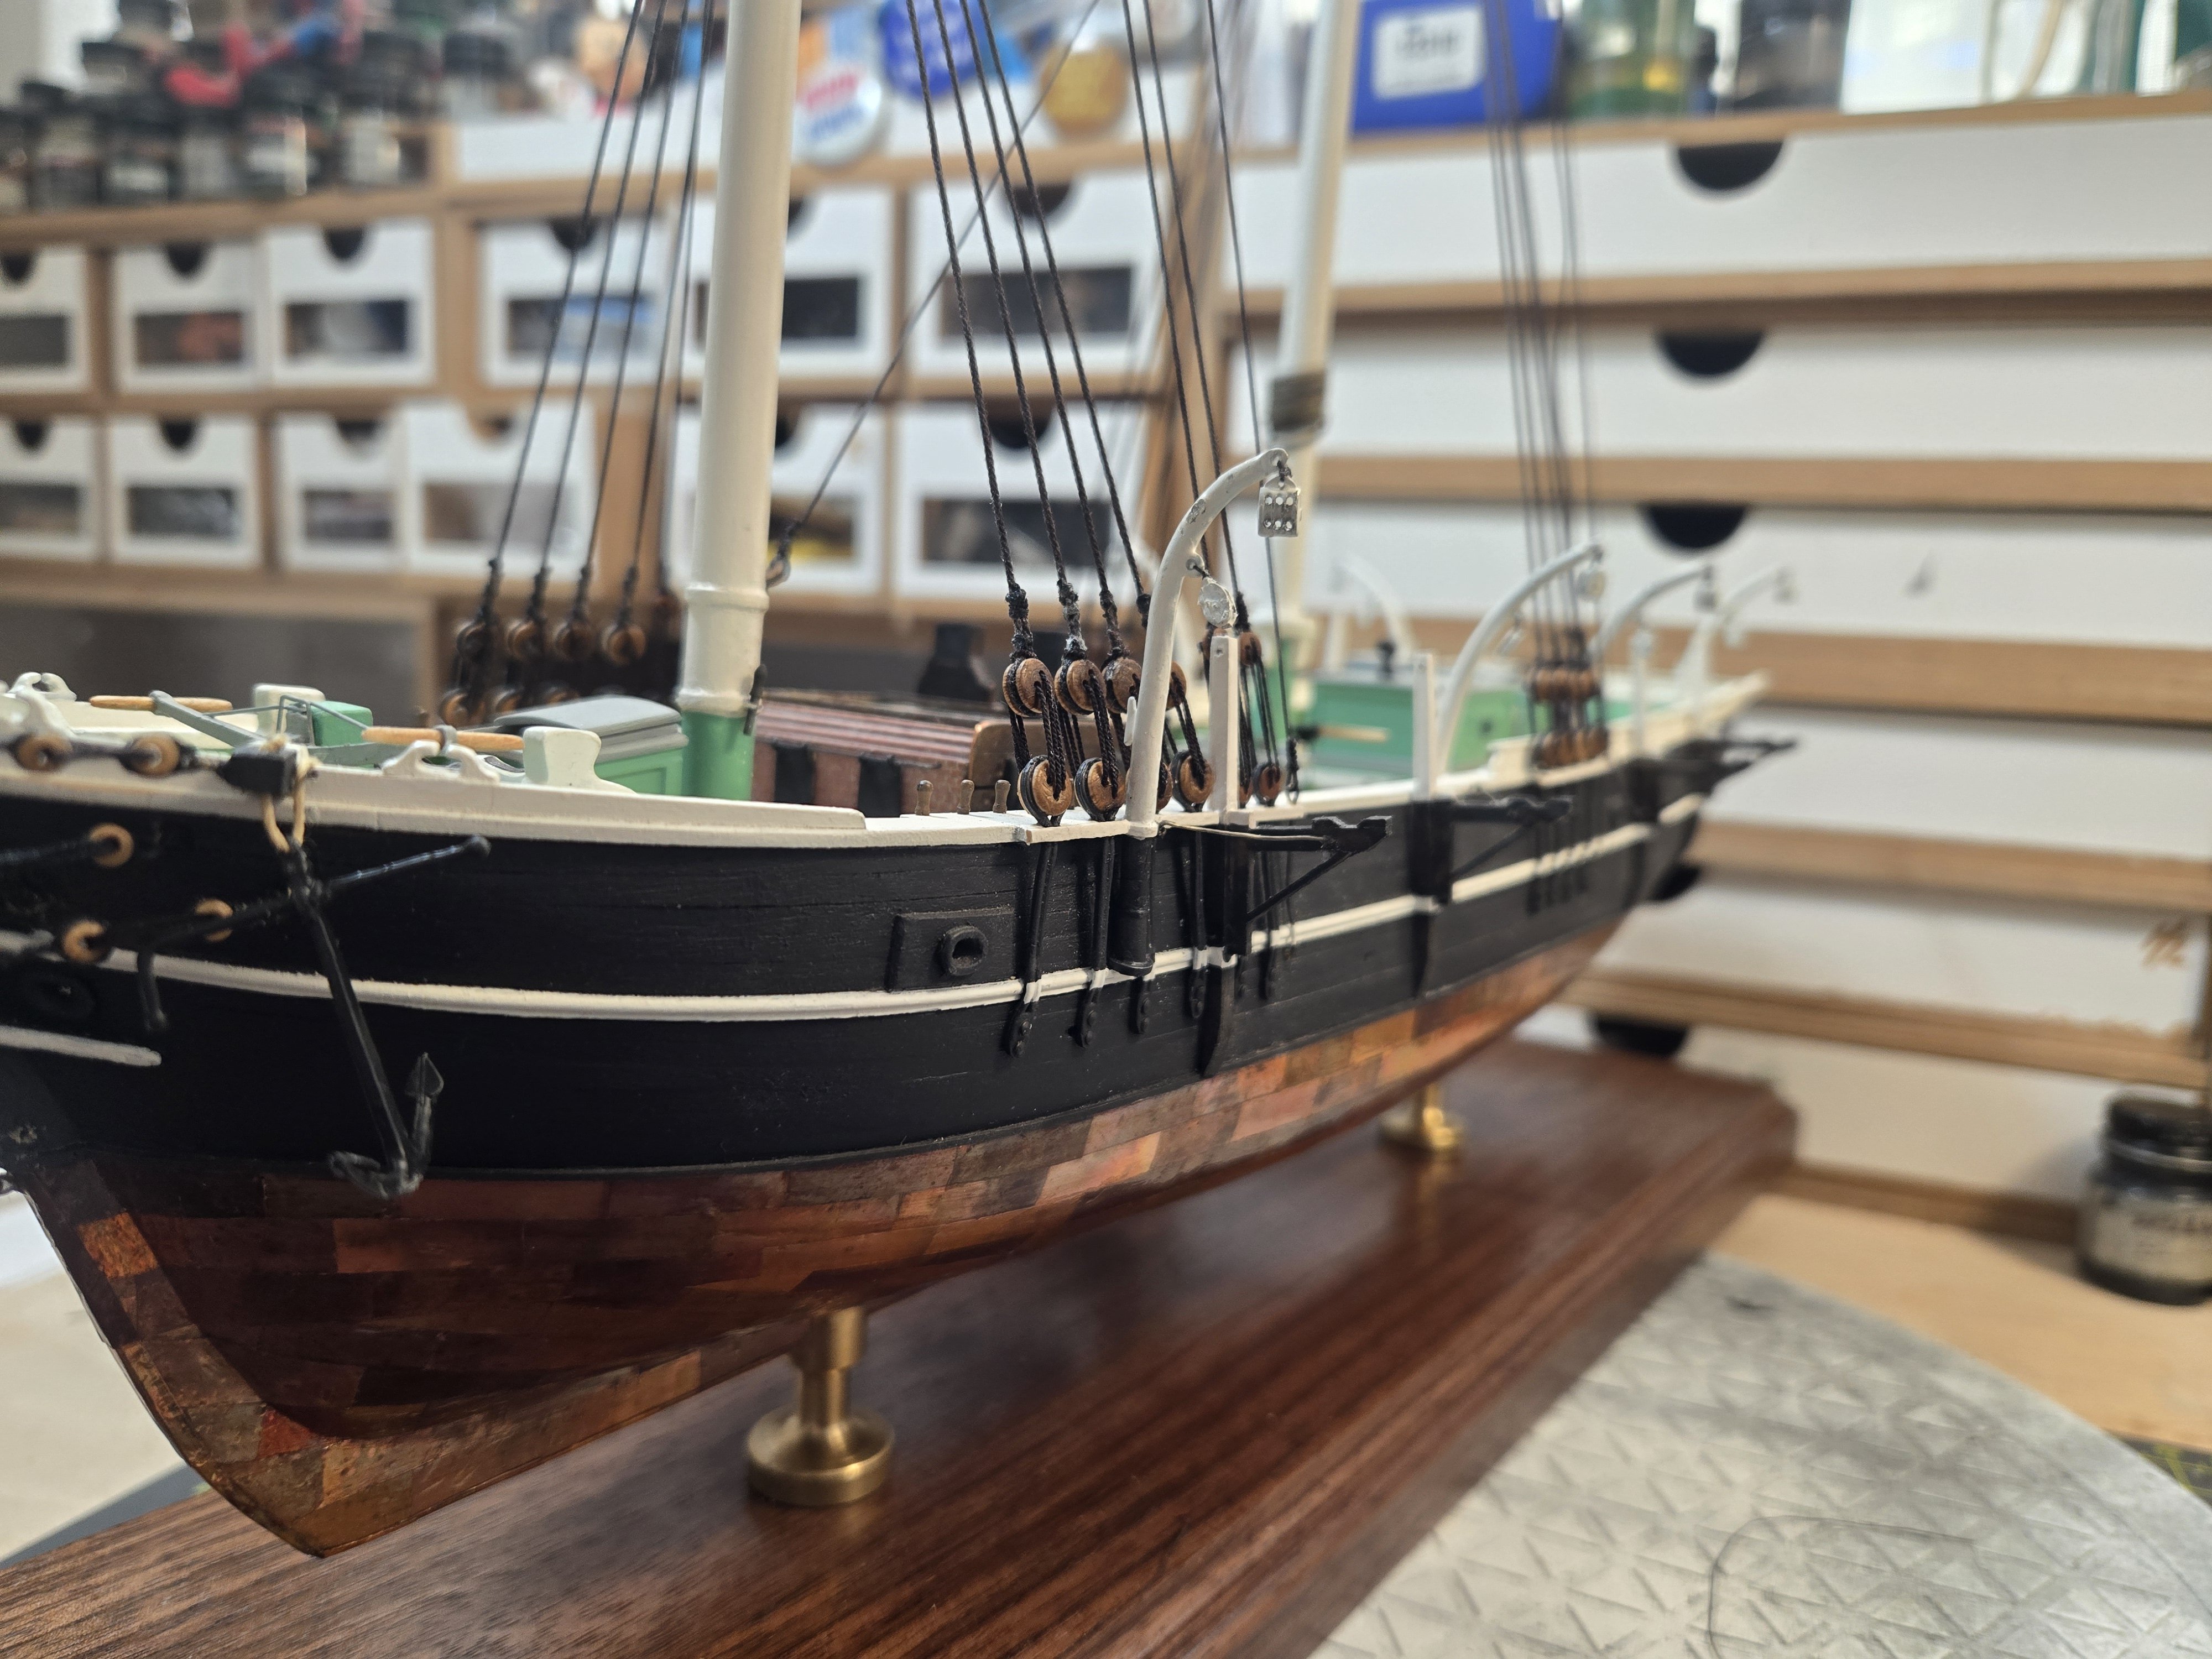
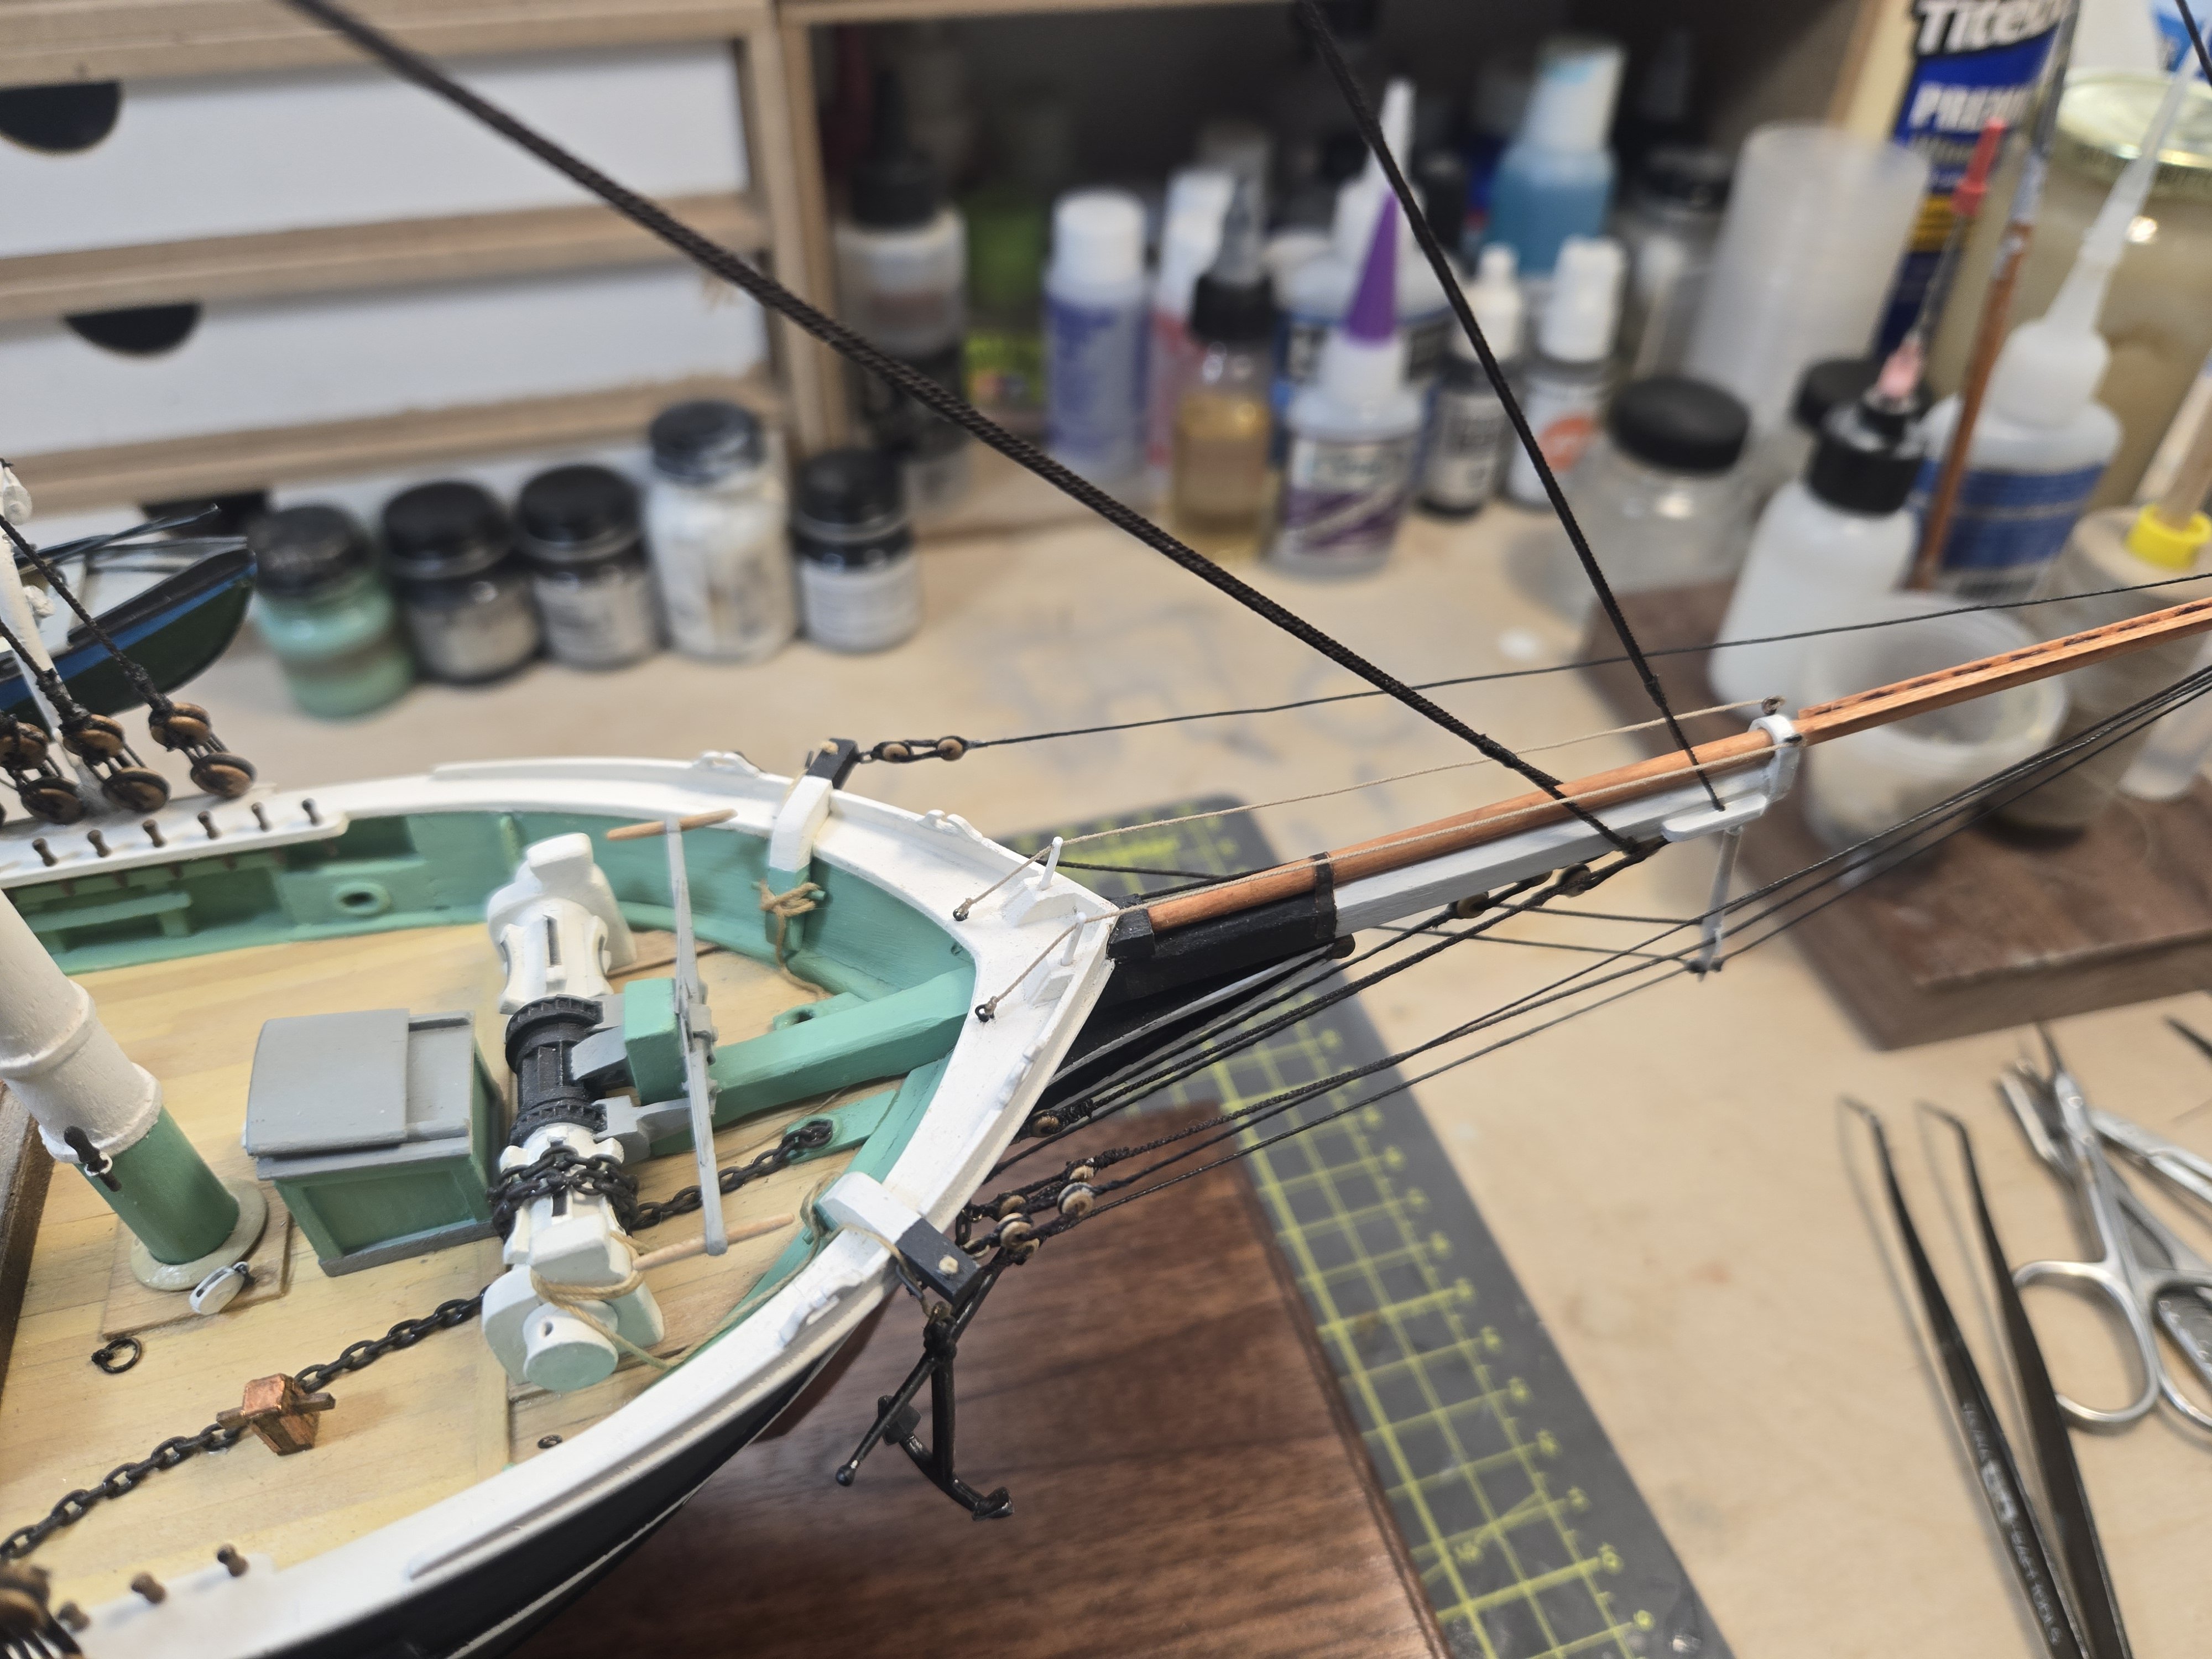
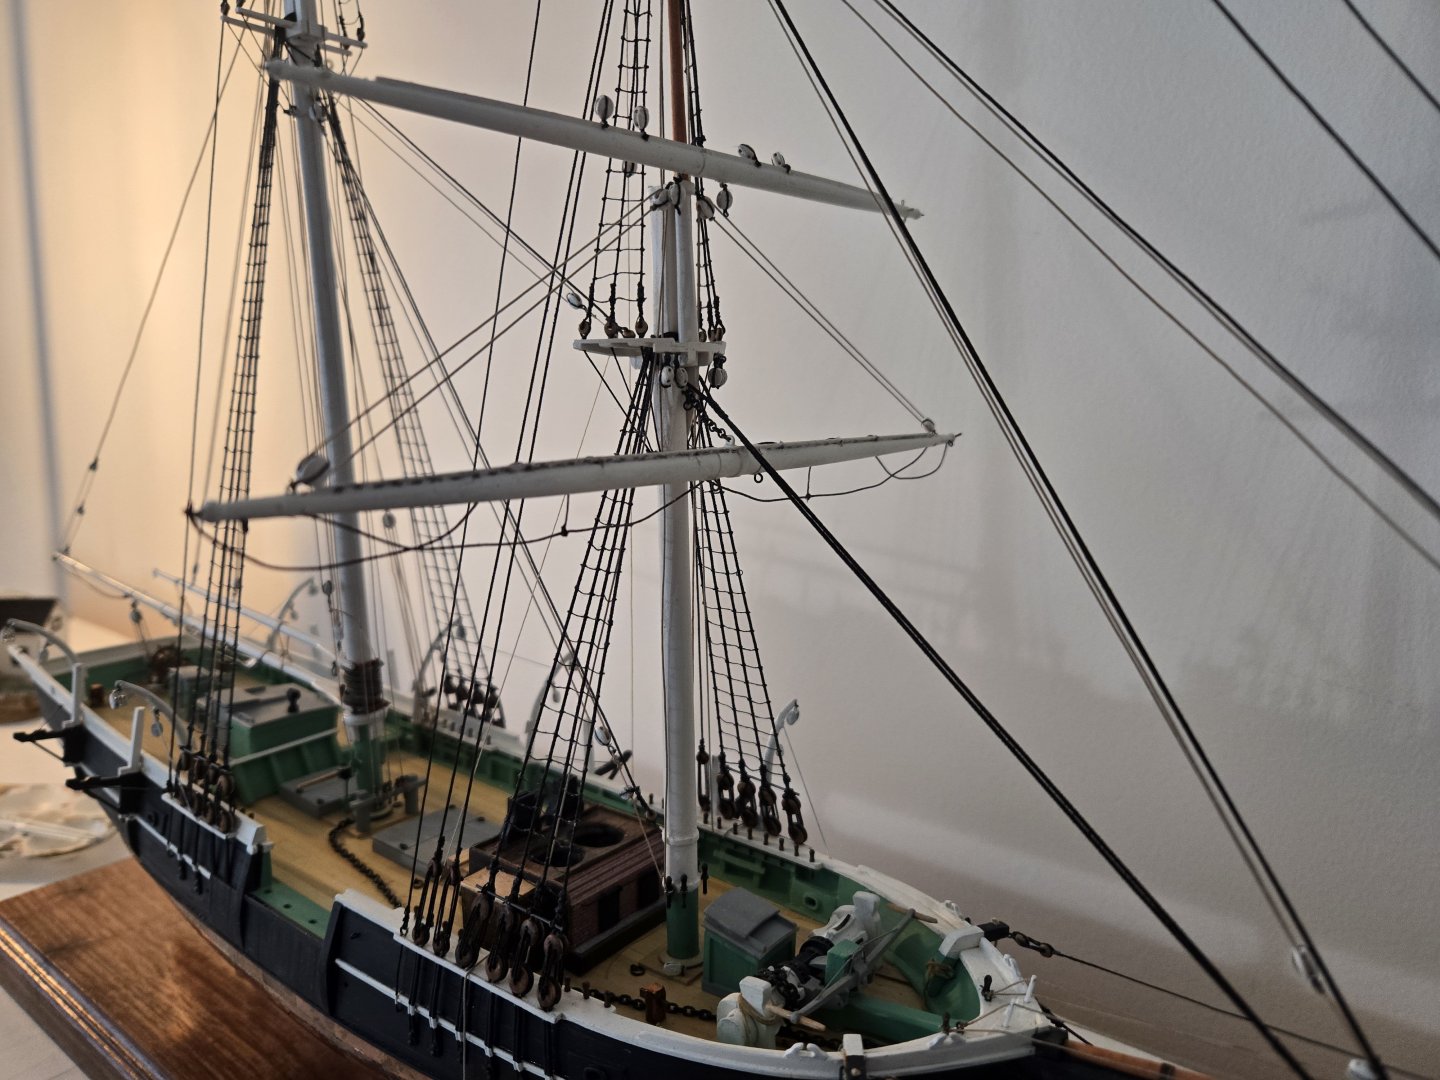
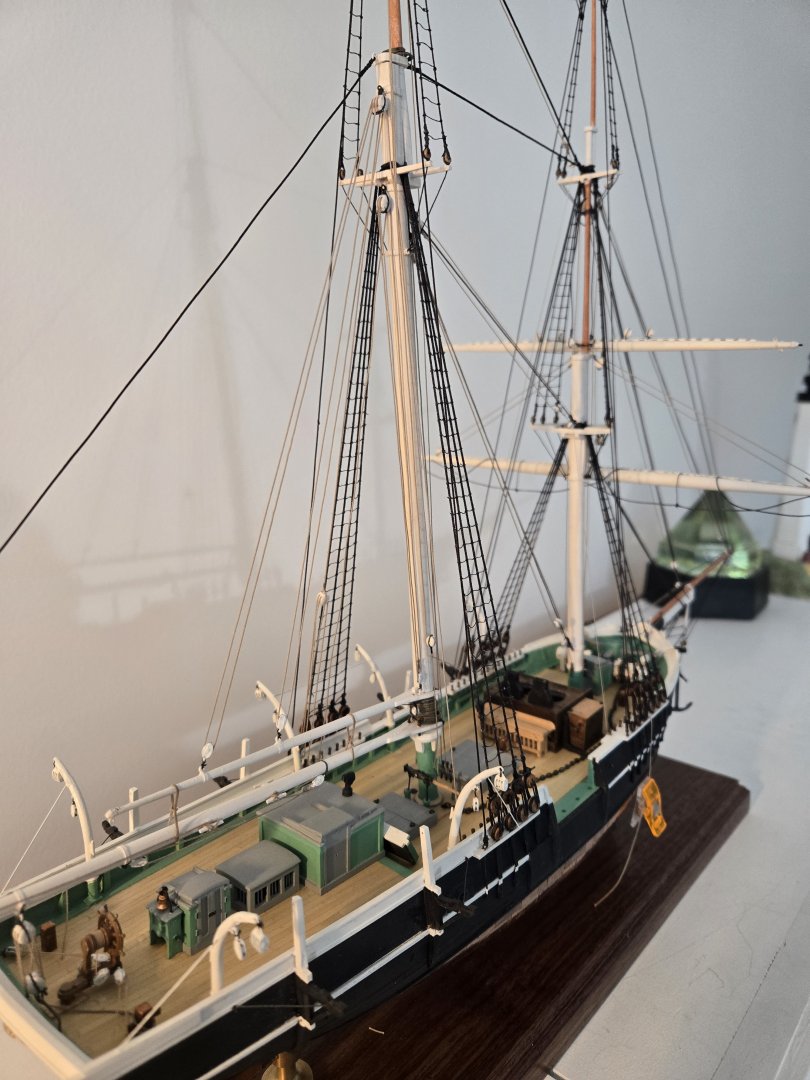
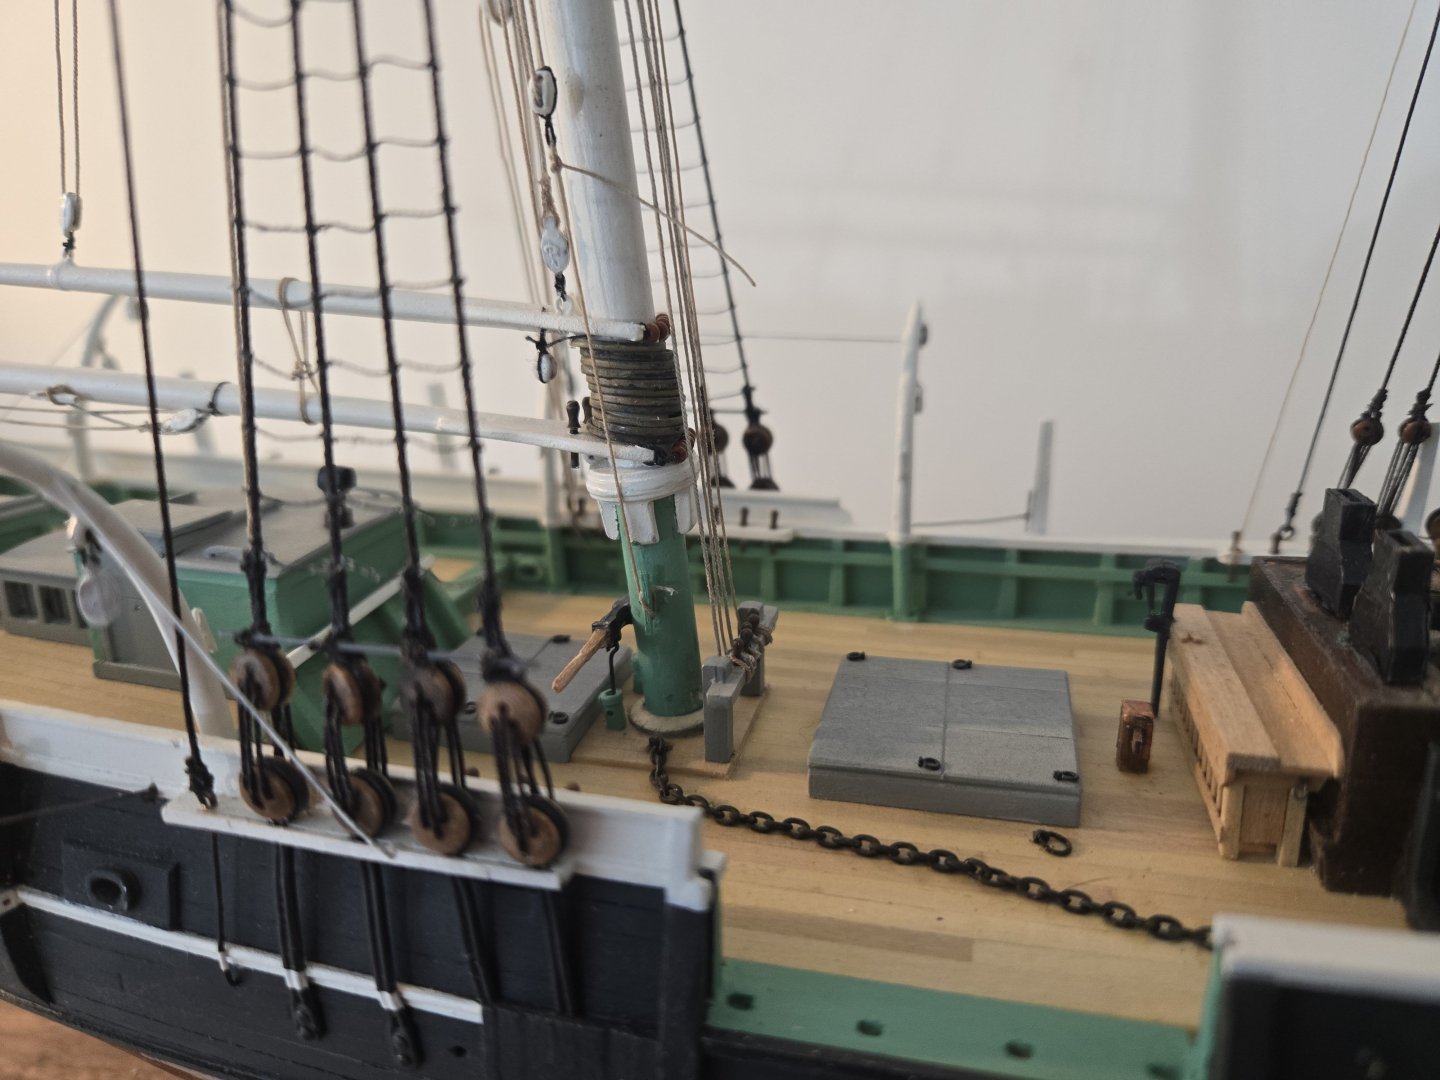
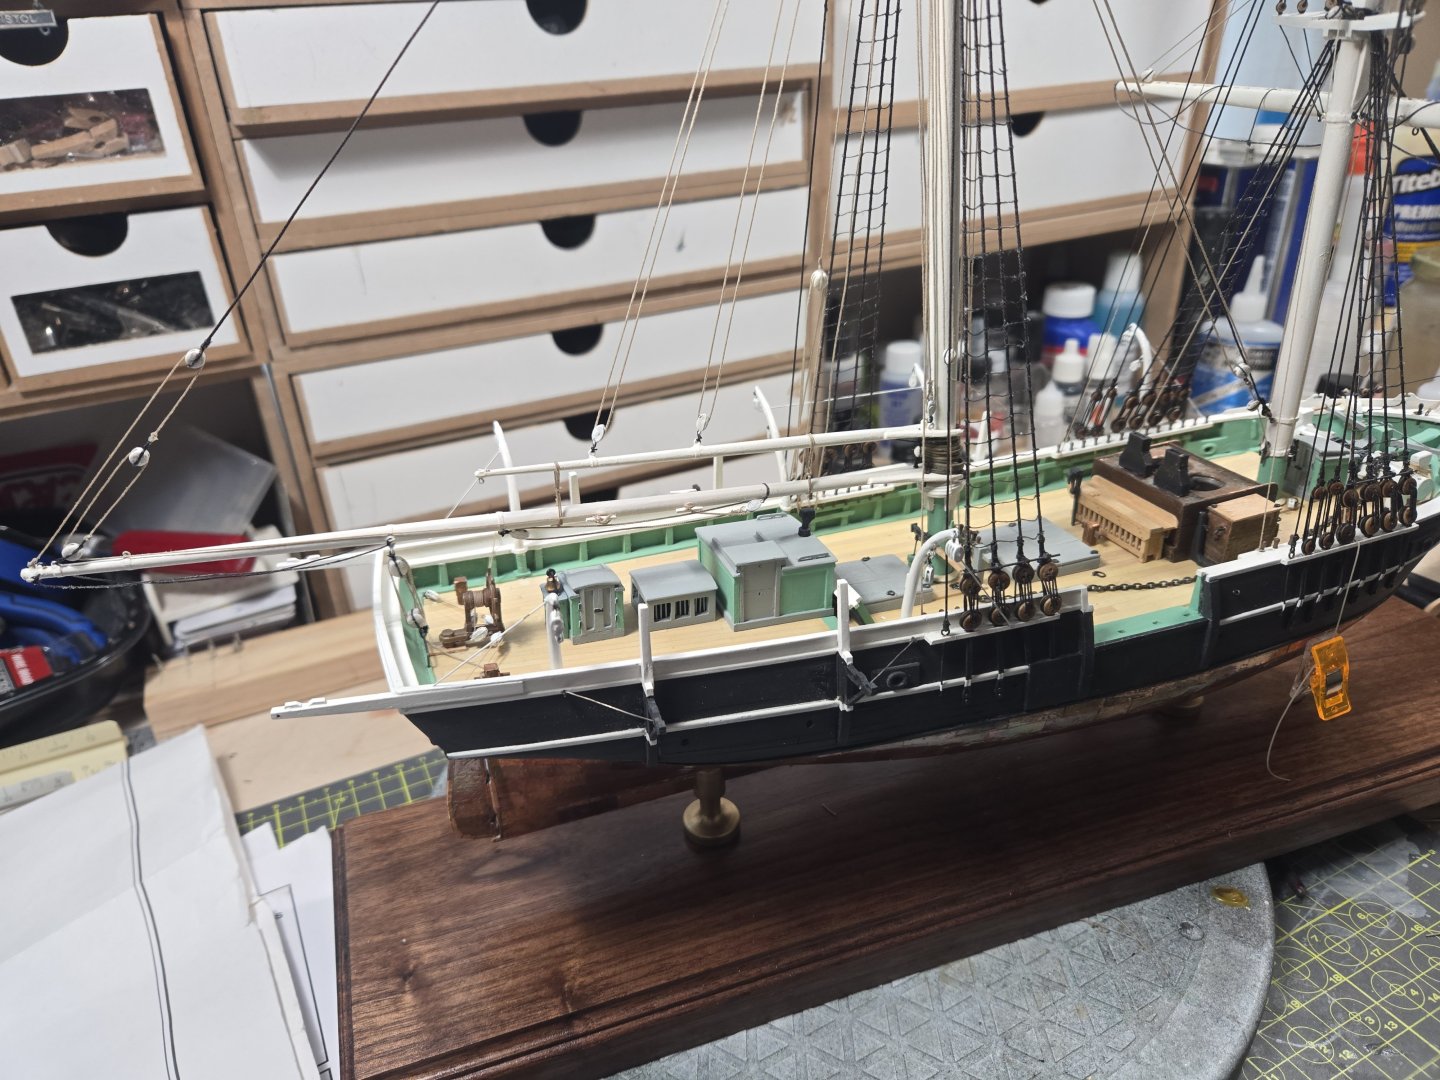
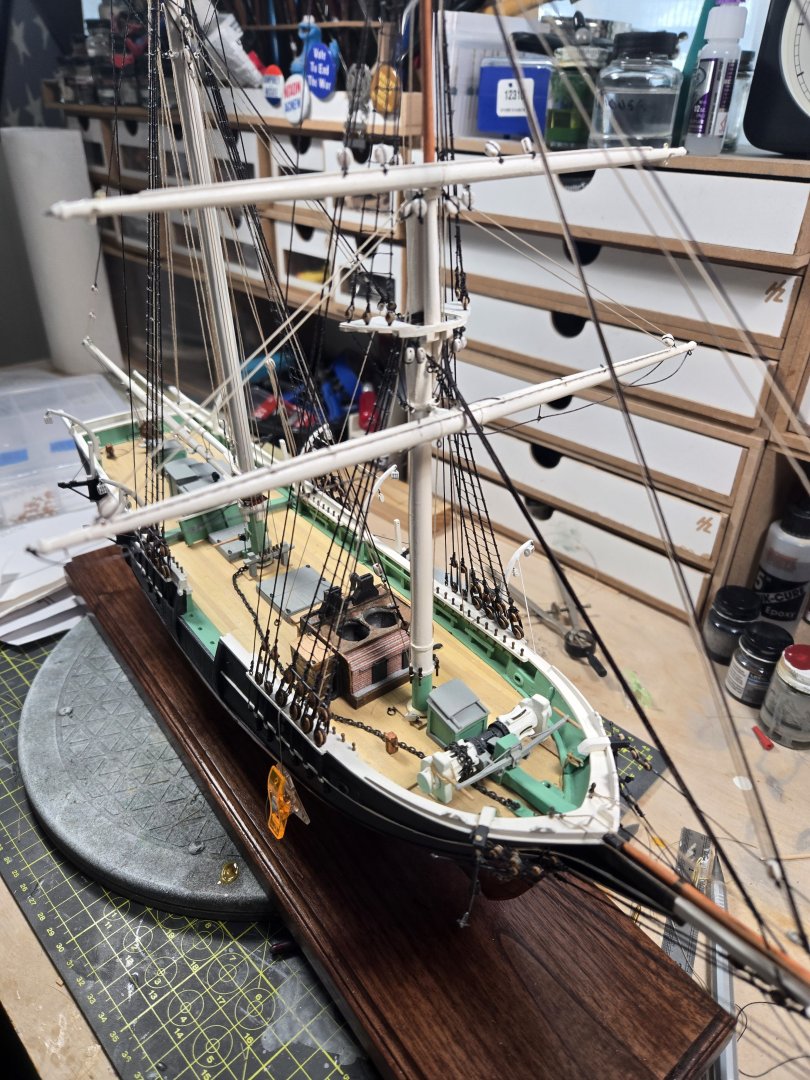
Rigging has been going slower than I expected. Have had difficulty at times trying to interpret the plans. Also, have been frustrated with shaping some of the lines to give a natural appearance. For example, the footropes. I applied coats of beeswax which helped shaped them, but they don't keep their shape. Hopefully over time they'll fall more naturally. If you're building this kit, or plan to, there is lots of tiny detail in the plans which is not obvious, like adding cleats to the masts for attaching hauling lines. Also, there are several eyebolts that need to be added to the cap rail for attaching lines. I didn't find these details until I noted them on the belaying points in the plans. A couple of "learning curve issues", attach as many blocks as possible, especially the Fore Course and Fore Topsail Yards! And I underestimated the amount of running rigging line needed when factoring in hanks and coils.


-
Paul Le Wol reacted to a post in a topic:
Gjøa 1872 by Harvey Golden - Roald Amundsen's Cutter built at Rosedahl, Norway
-
Keith Black reacted to a post in a topic:
Gjøa 1872 by Harvey Golden - Roald Amundsen's Cutter built at Rosedahl, Norway
-
Very impressive!
-
Welcome. Lots of posts regarding the Model Shipways kits on this Forum. May be of help.
-
2025 MSW Holiday Fund Drive
Capt. Kelso replied to ferretmary1's topic in NAUTICAL RESEARCH GUILD - News & Information
At 78, I'm a long-time ship modeler and have always considered NRG as my go-to resource. I've thought about the resource advantages newer modelers as well as myself this Forum provides and encourage everyone to contribute to keep it available! Contribute what you can! -
Capt. Kelso changed their profile photo
-
Sounds like the book would have saved me a lot of frustration!
-
Actually, did not receive the book. I did get the plans directly from New Bedford Whaling Museum. Does the info in the book differ from the plans? At this point I am about 80 percent done with the rigging, between the kit plans and Museum plans I've been able to figure things out. Also, Tom Lauria's build on YouTube has been a tremendous resource. Oddly enough, I researched the build for years, even found old NRG articles from the 80's, no mention of the Ronnberg booklet. Nice job with your Kate Cory build. Thanks for the offer!
-
Welcome!
-
Rick, I'm unclear what you mean by "preserve the etchings/laser engravings"? Do mean still be visible after applying paint over them?
-
I finished this build in April 2025, it was challenging!
- 73 replies
-
- 4
-
-
- Steam Cutter
- Harriet Lane
- (and 2 more)
-
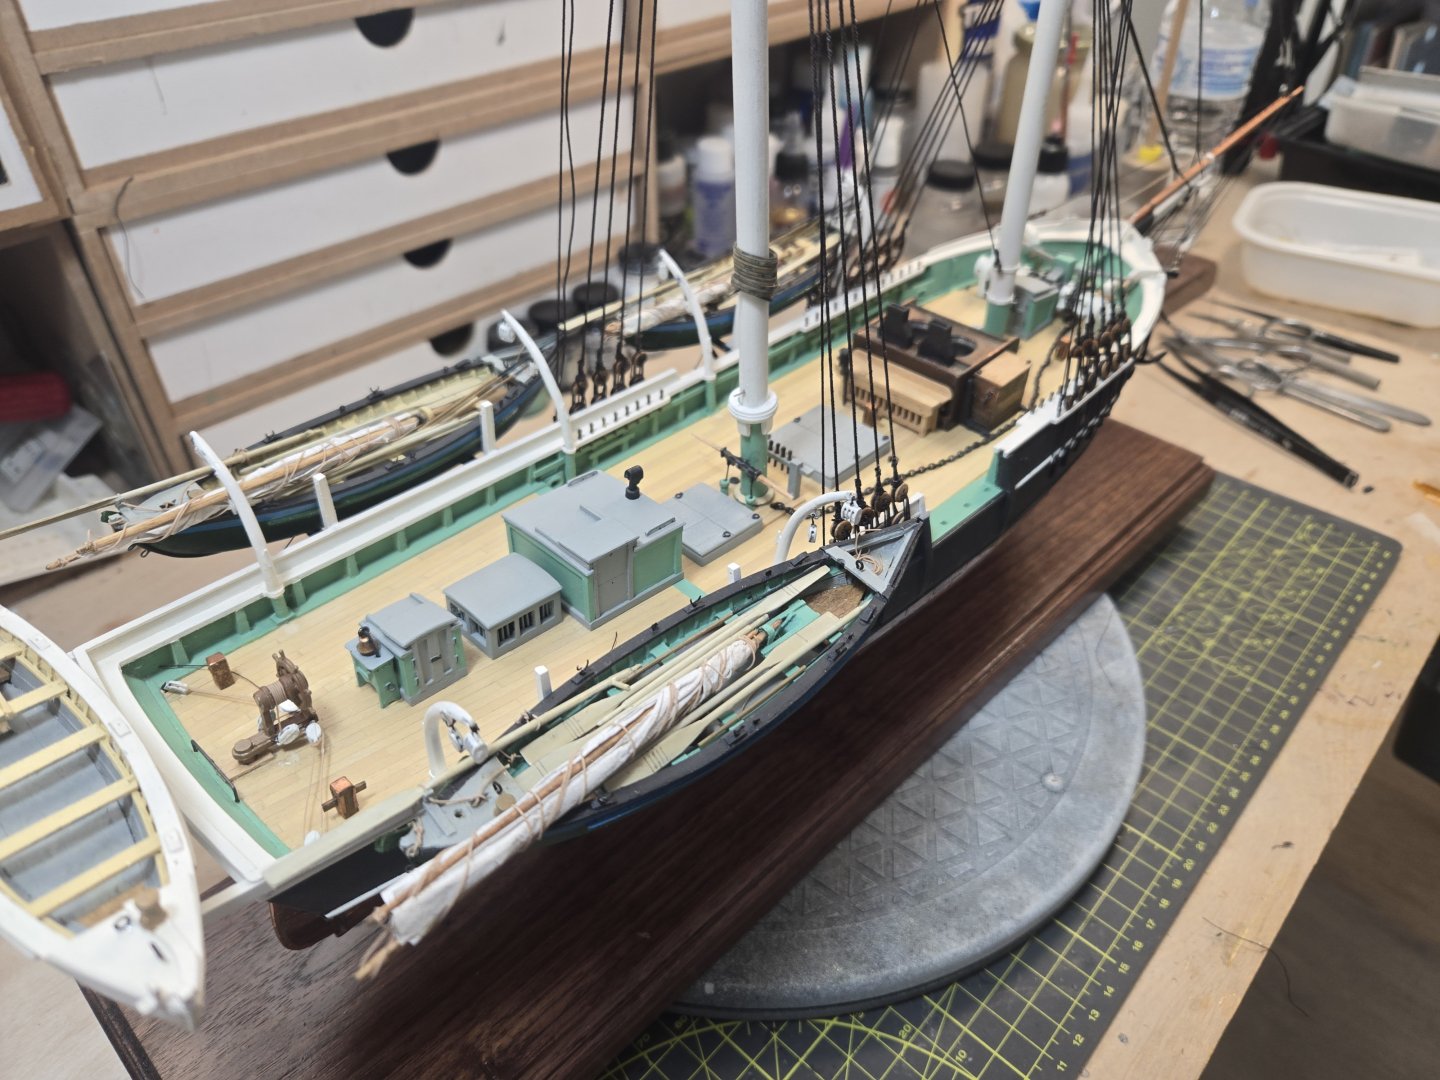
Thanks everyone for the feedback. Chris, actually I never looked at the paint schemes in the instructions and just saw the reference to "red lead". For a build reference I tend to refer to Tom Lauria's build. Tom has been very helpful in answering questions and gave me a paint mix ratio for green used on the bulwarks and deck structures.
-
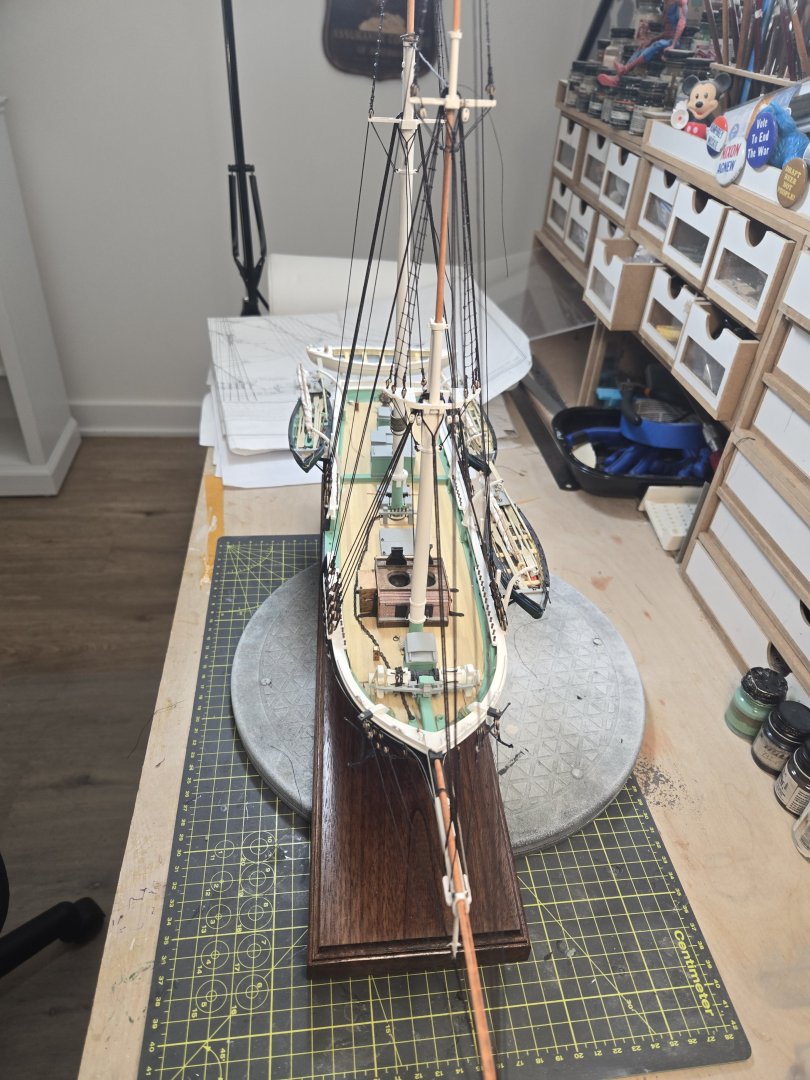
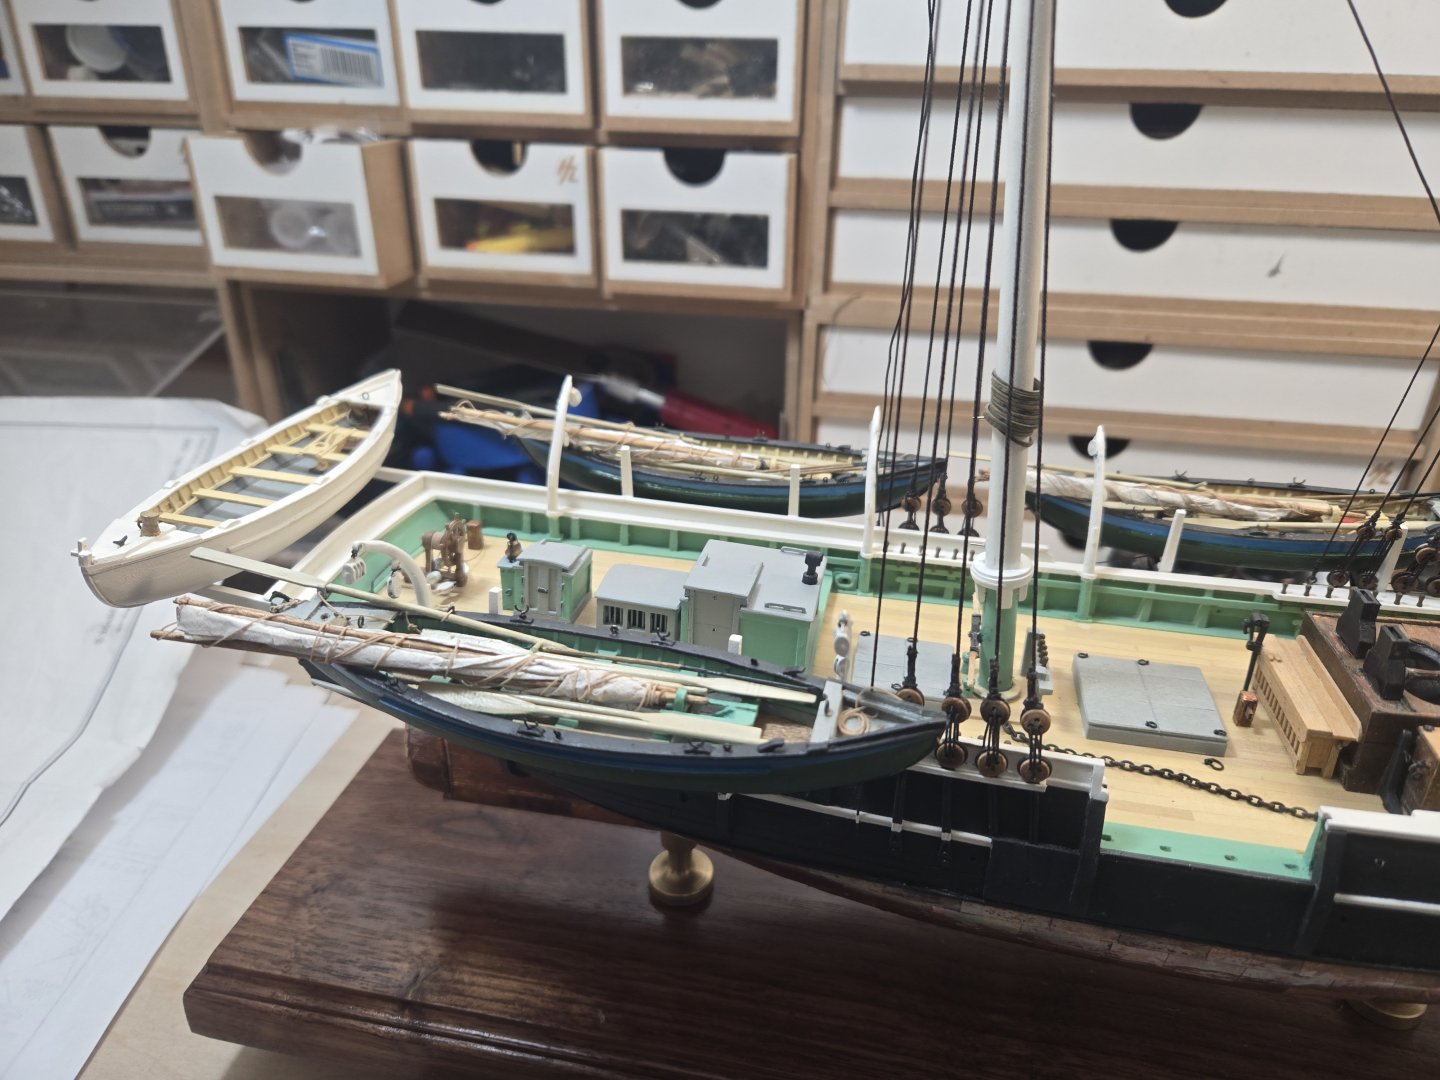
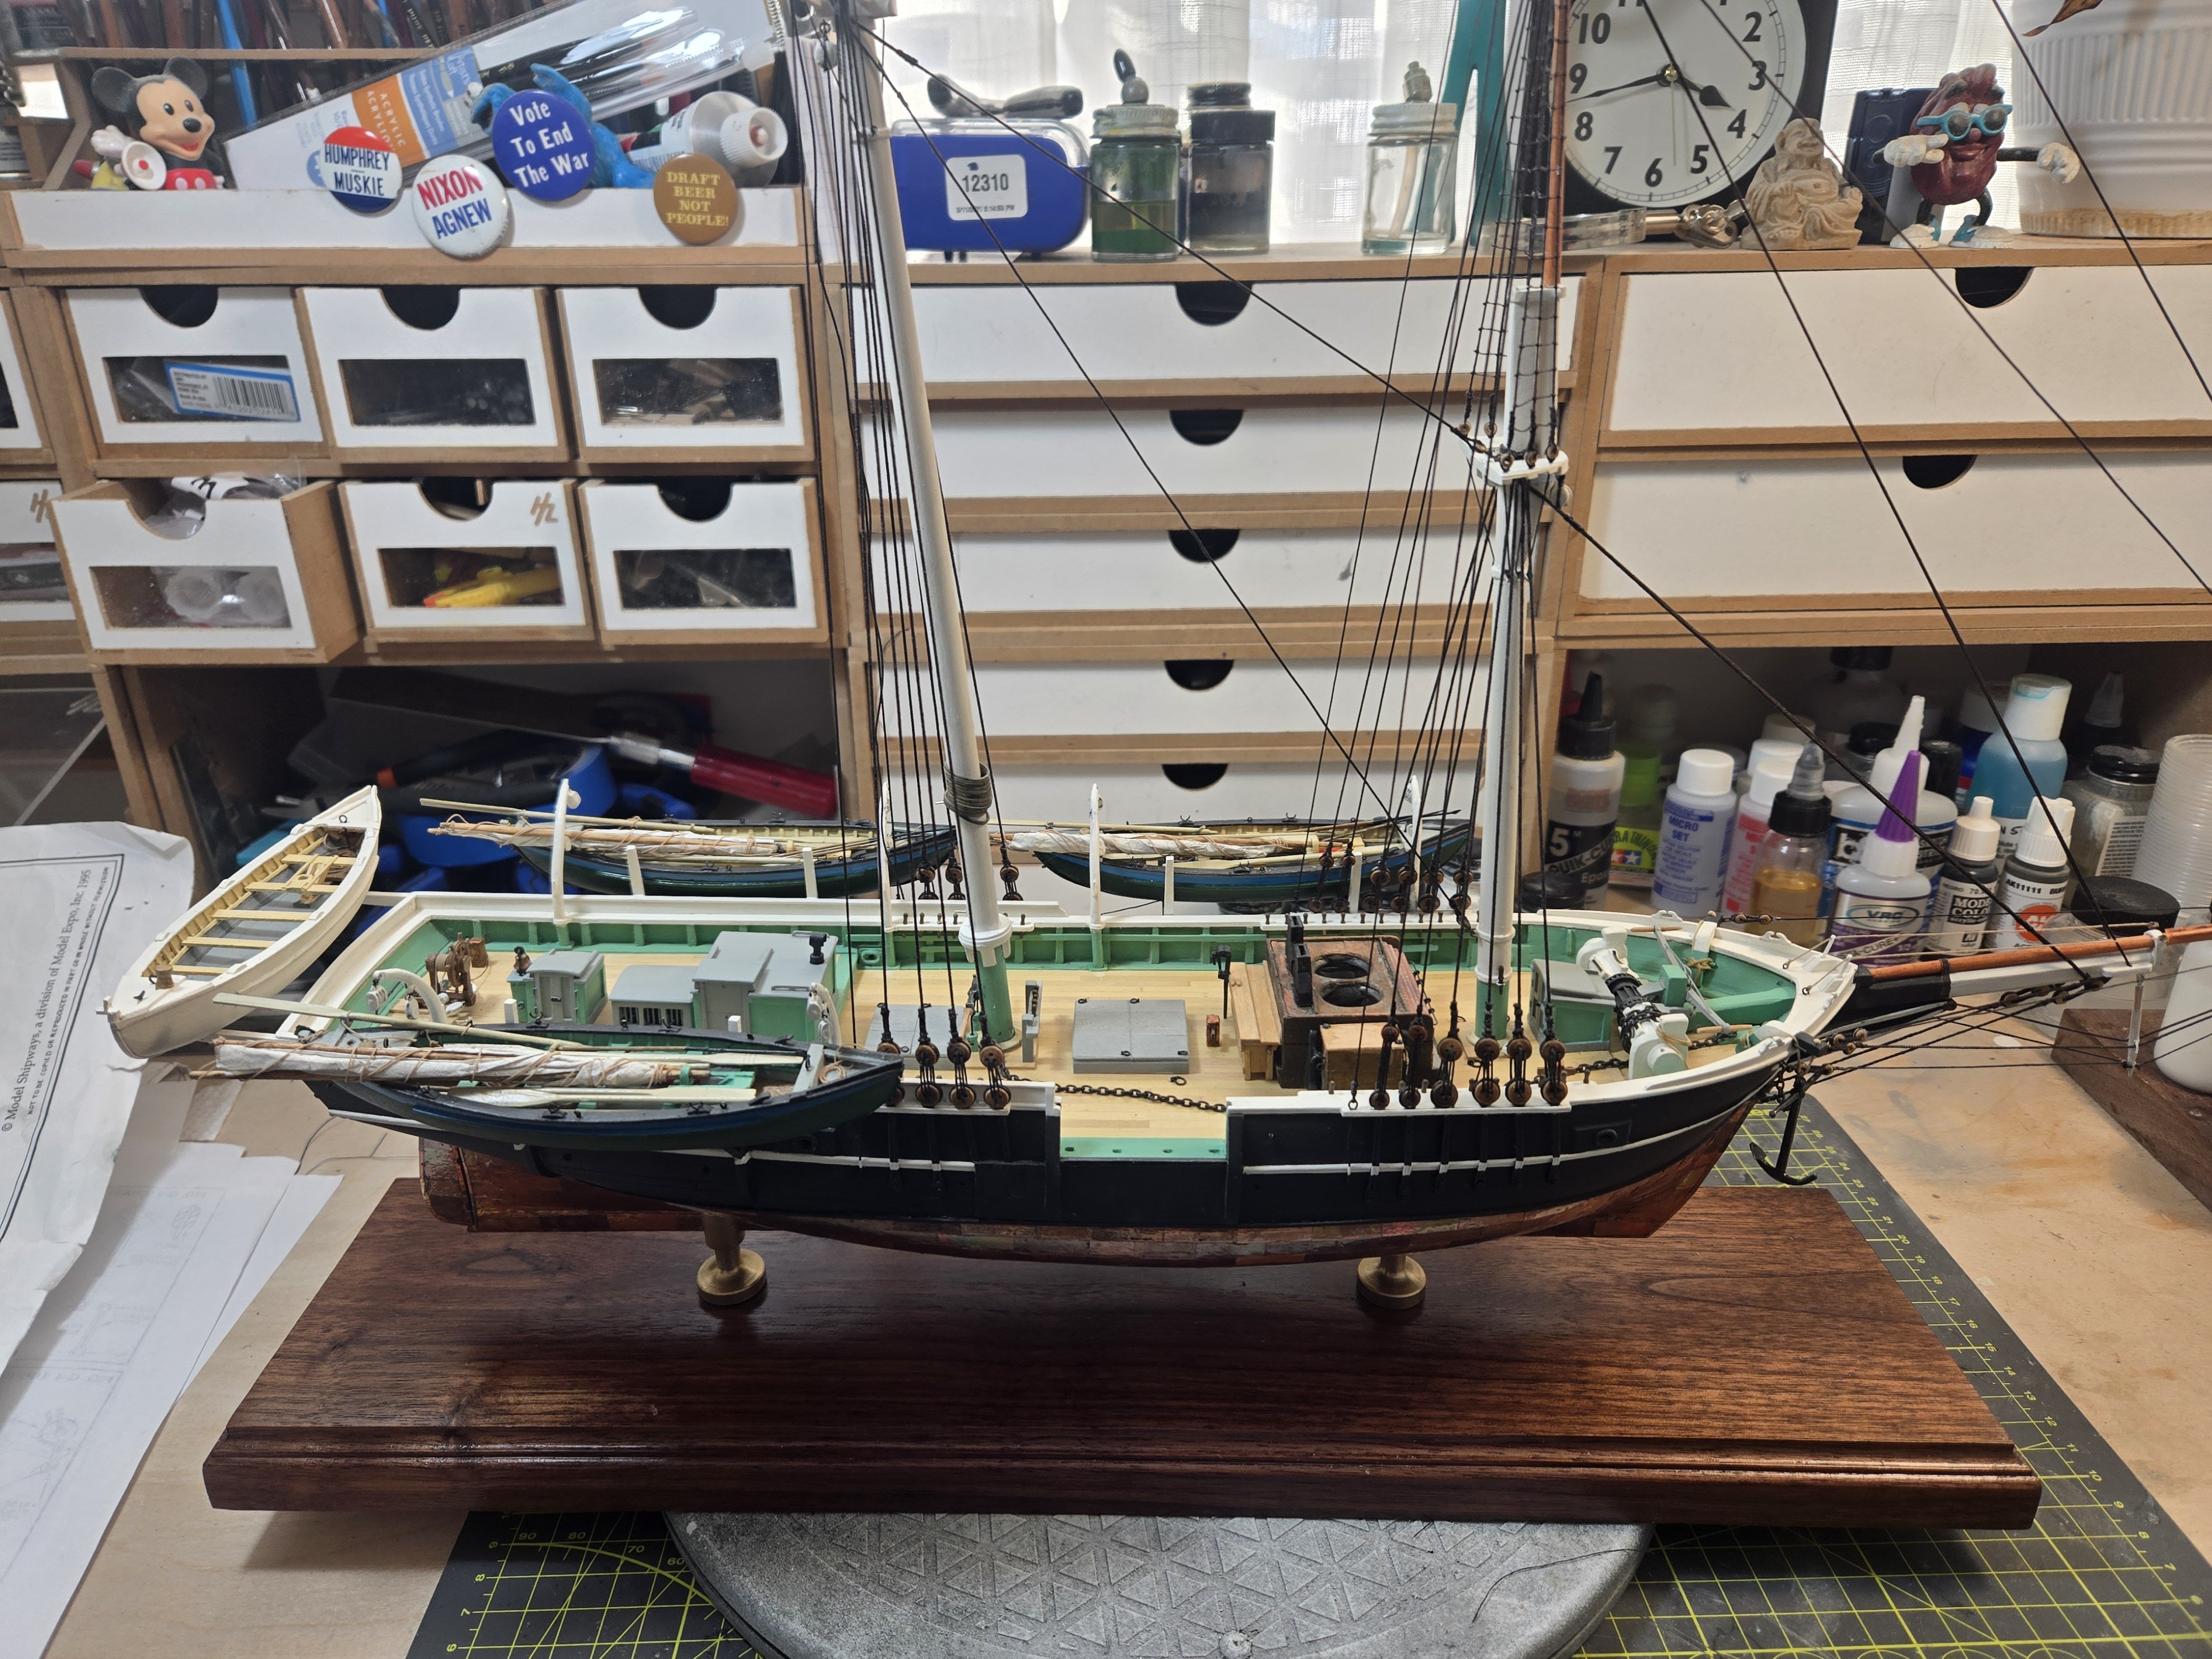
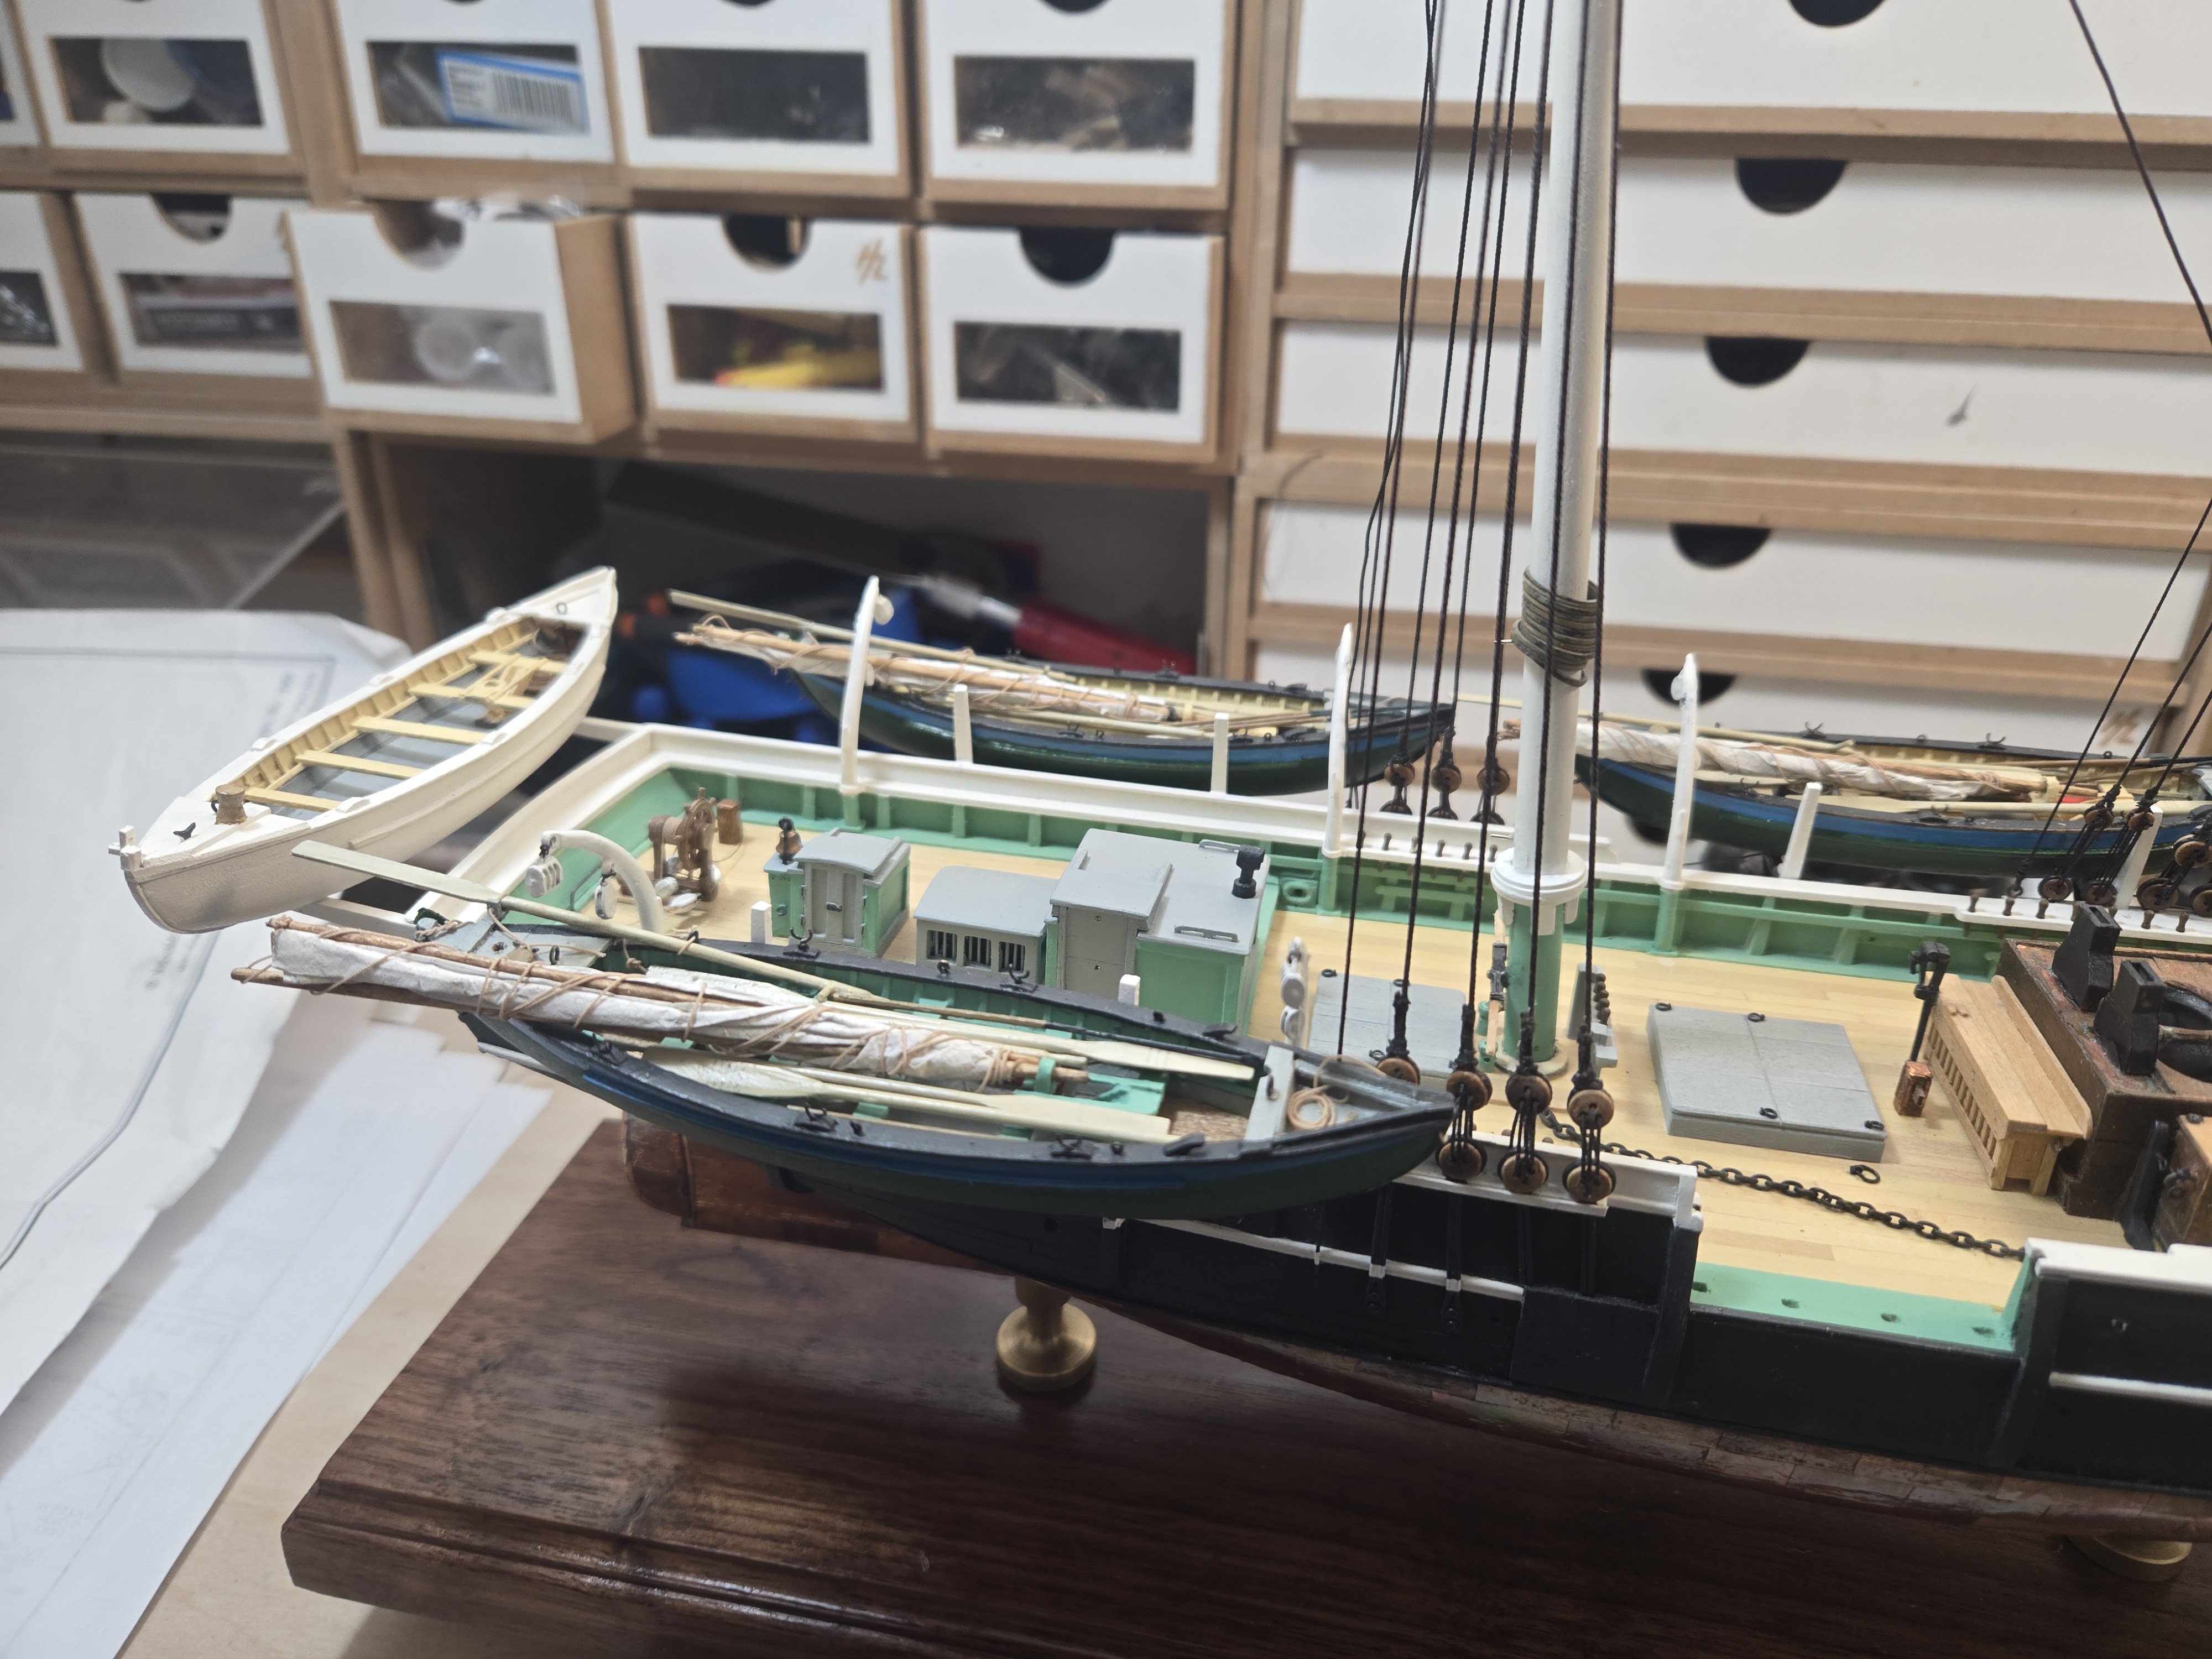
Finishing the standing rigging, next step is the ratlines! Not one of my favorite steps. Decided to stage the whaleboats and am really pleased with the alignment. I've decided to add them last, thinking it would be easier to finish the running rigging without working around them. At this stage I plan on methodically going over the build and doing any touchup and cleaning before the ratlines. Fortunately, I already had finished the yards and boom. So, running rigging should move quickly. Will also start working on the display case. I love this build!!!!!!