
Capt. Kelso
-
Posts
48 -
Joined
-
Last visited
Content Type
Profiles
Forums
Gallery
Events
Everything posted by Capt. Kelso
-
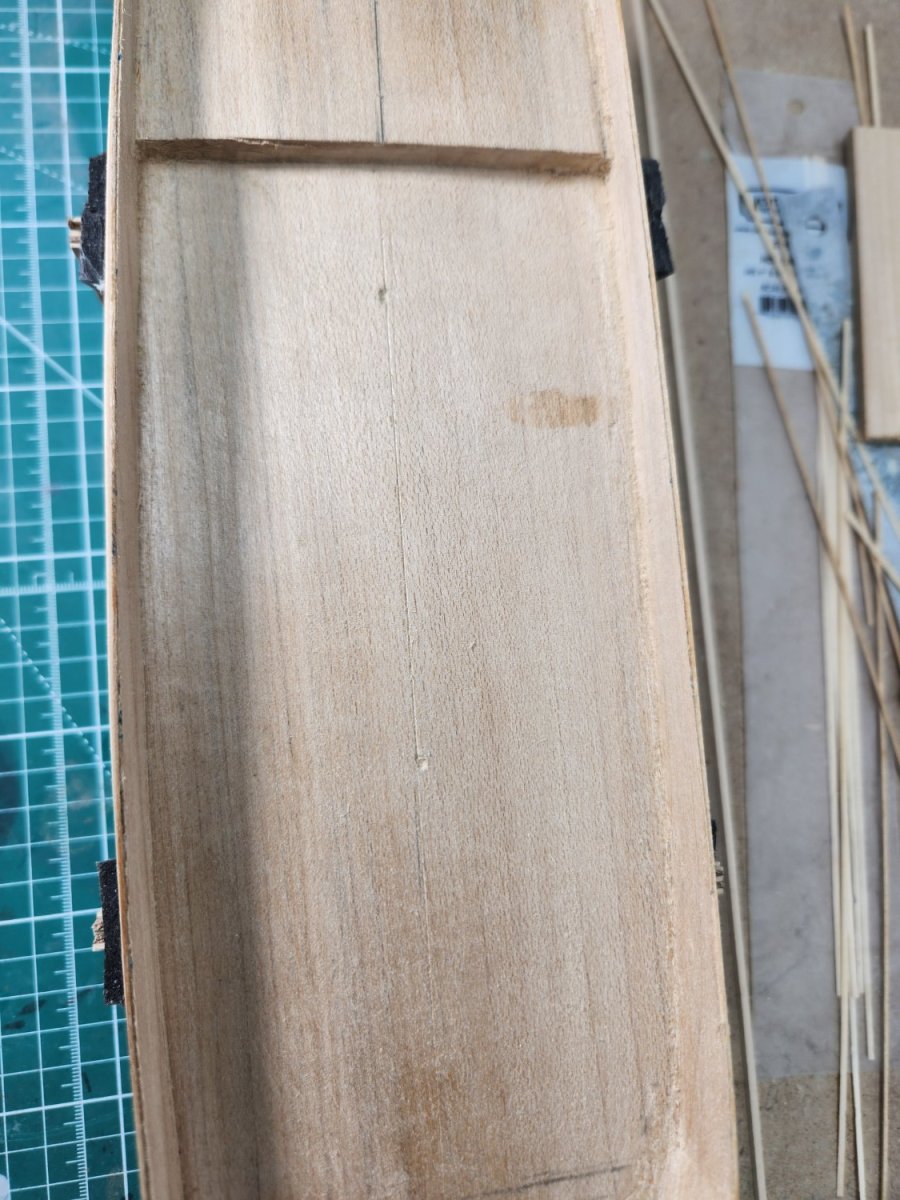
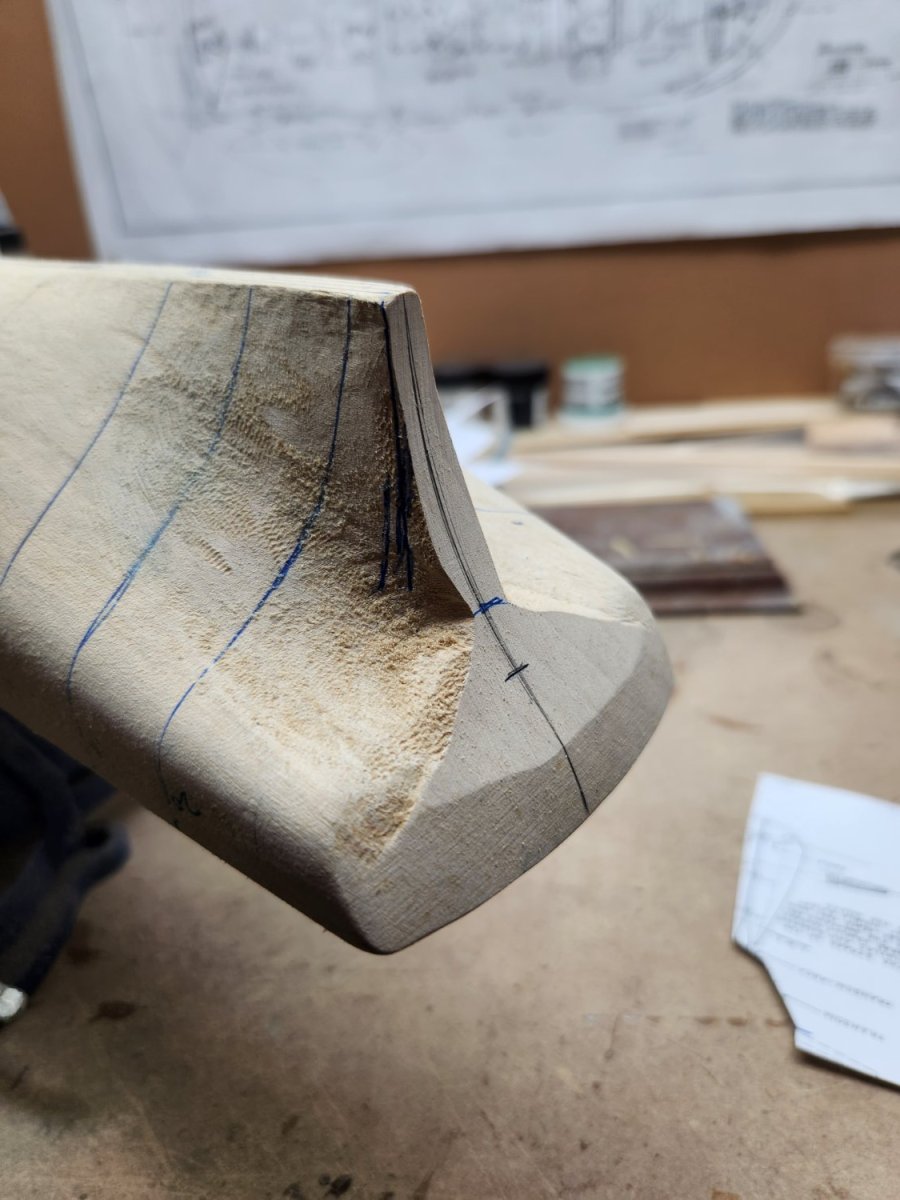
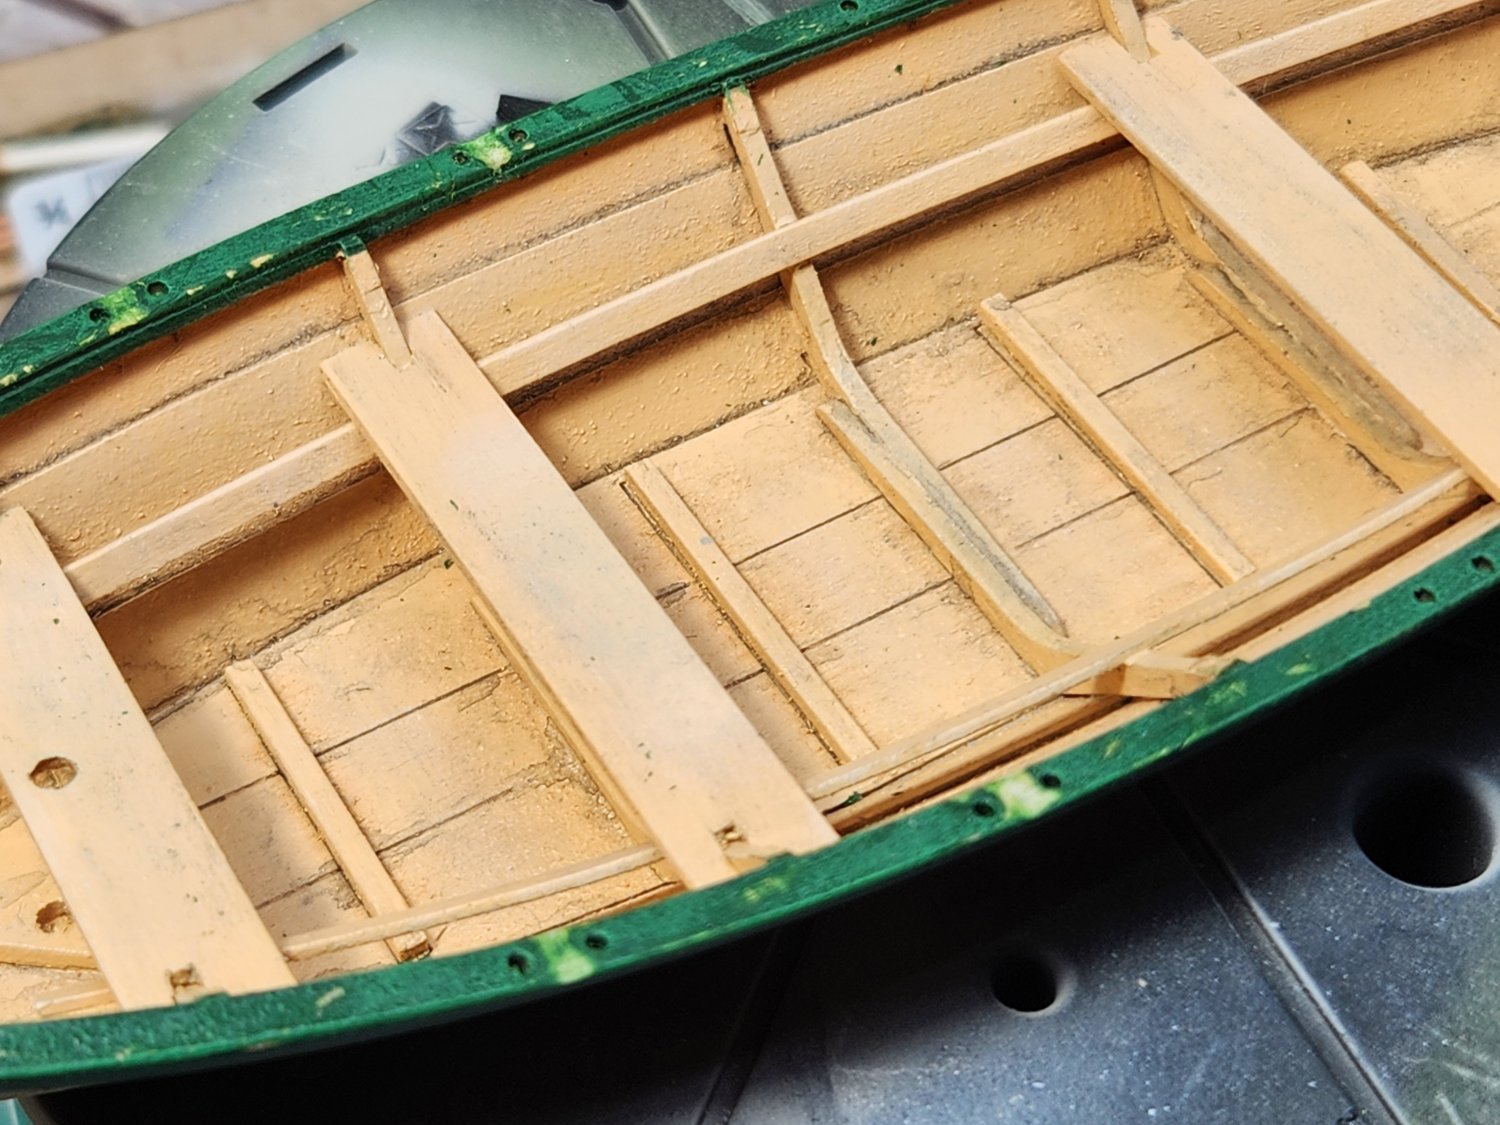
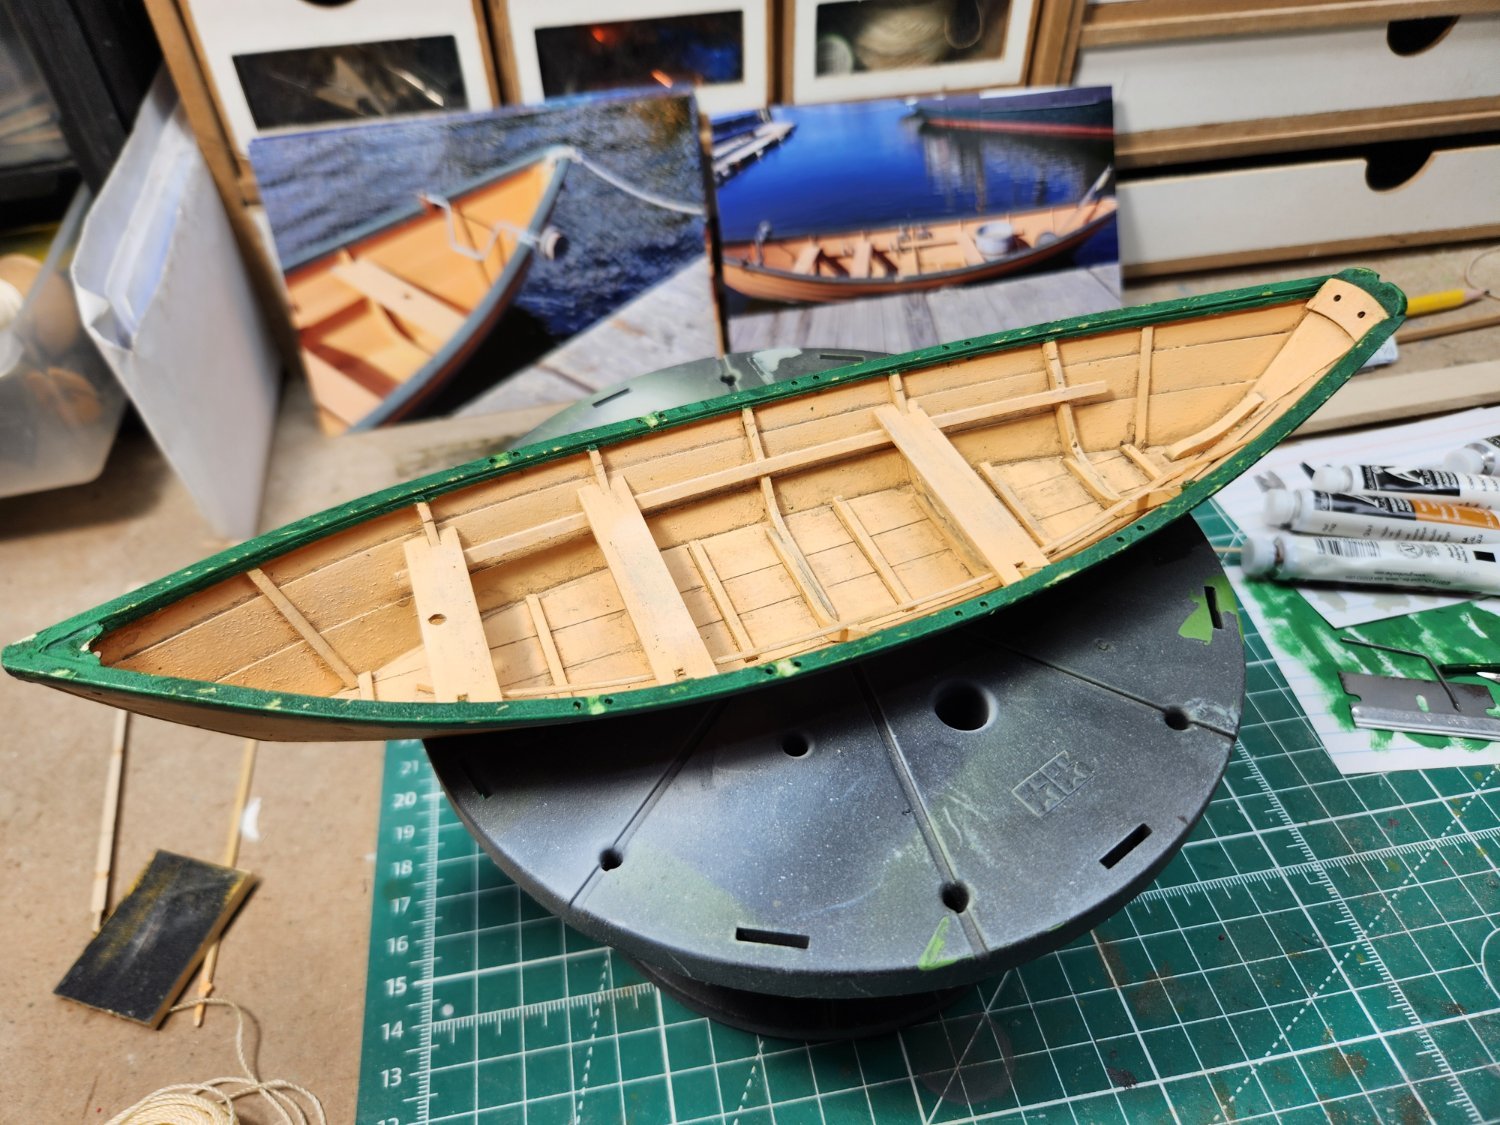
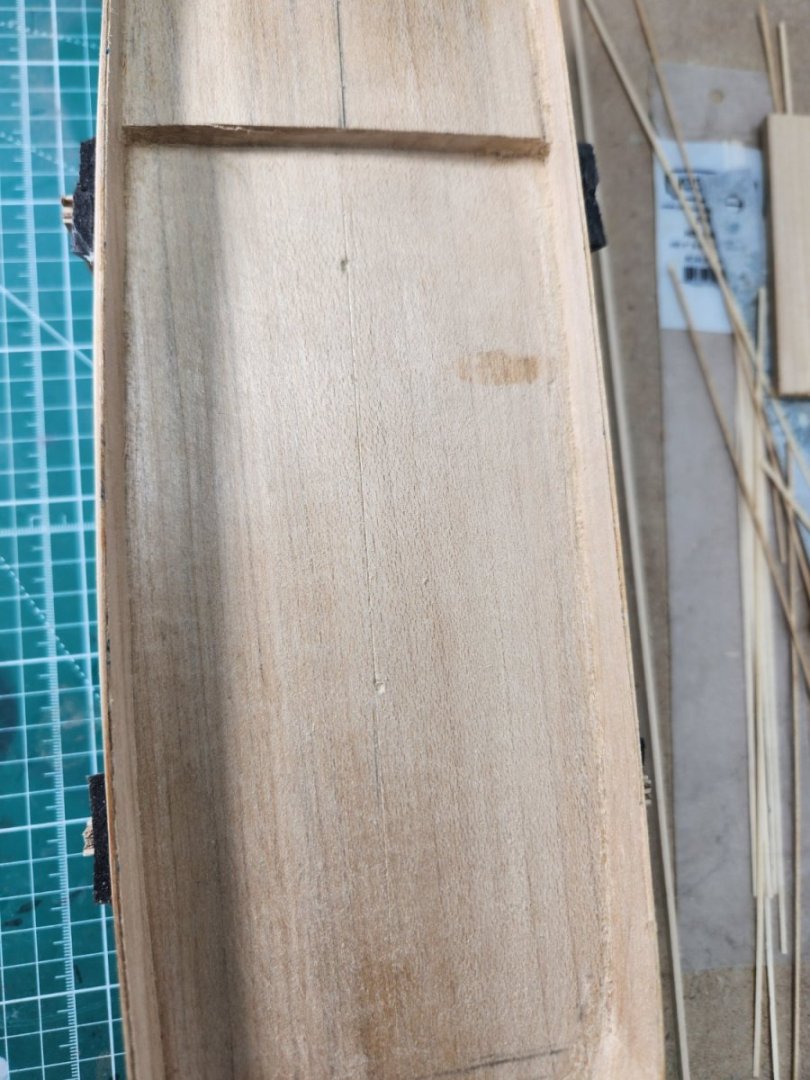
 It's helpful to clean off any burn marks, especially any areas that will be painted. Regarding the width of the frames, don't be too concerned if they are a little wide because they will need to be faired when you start planking.
- 7 replies
-
- 2
-

-
- Grand Banks Dory
- first build
- (and 1 more)
-
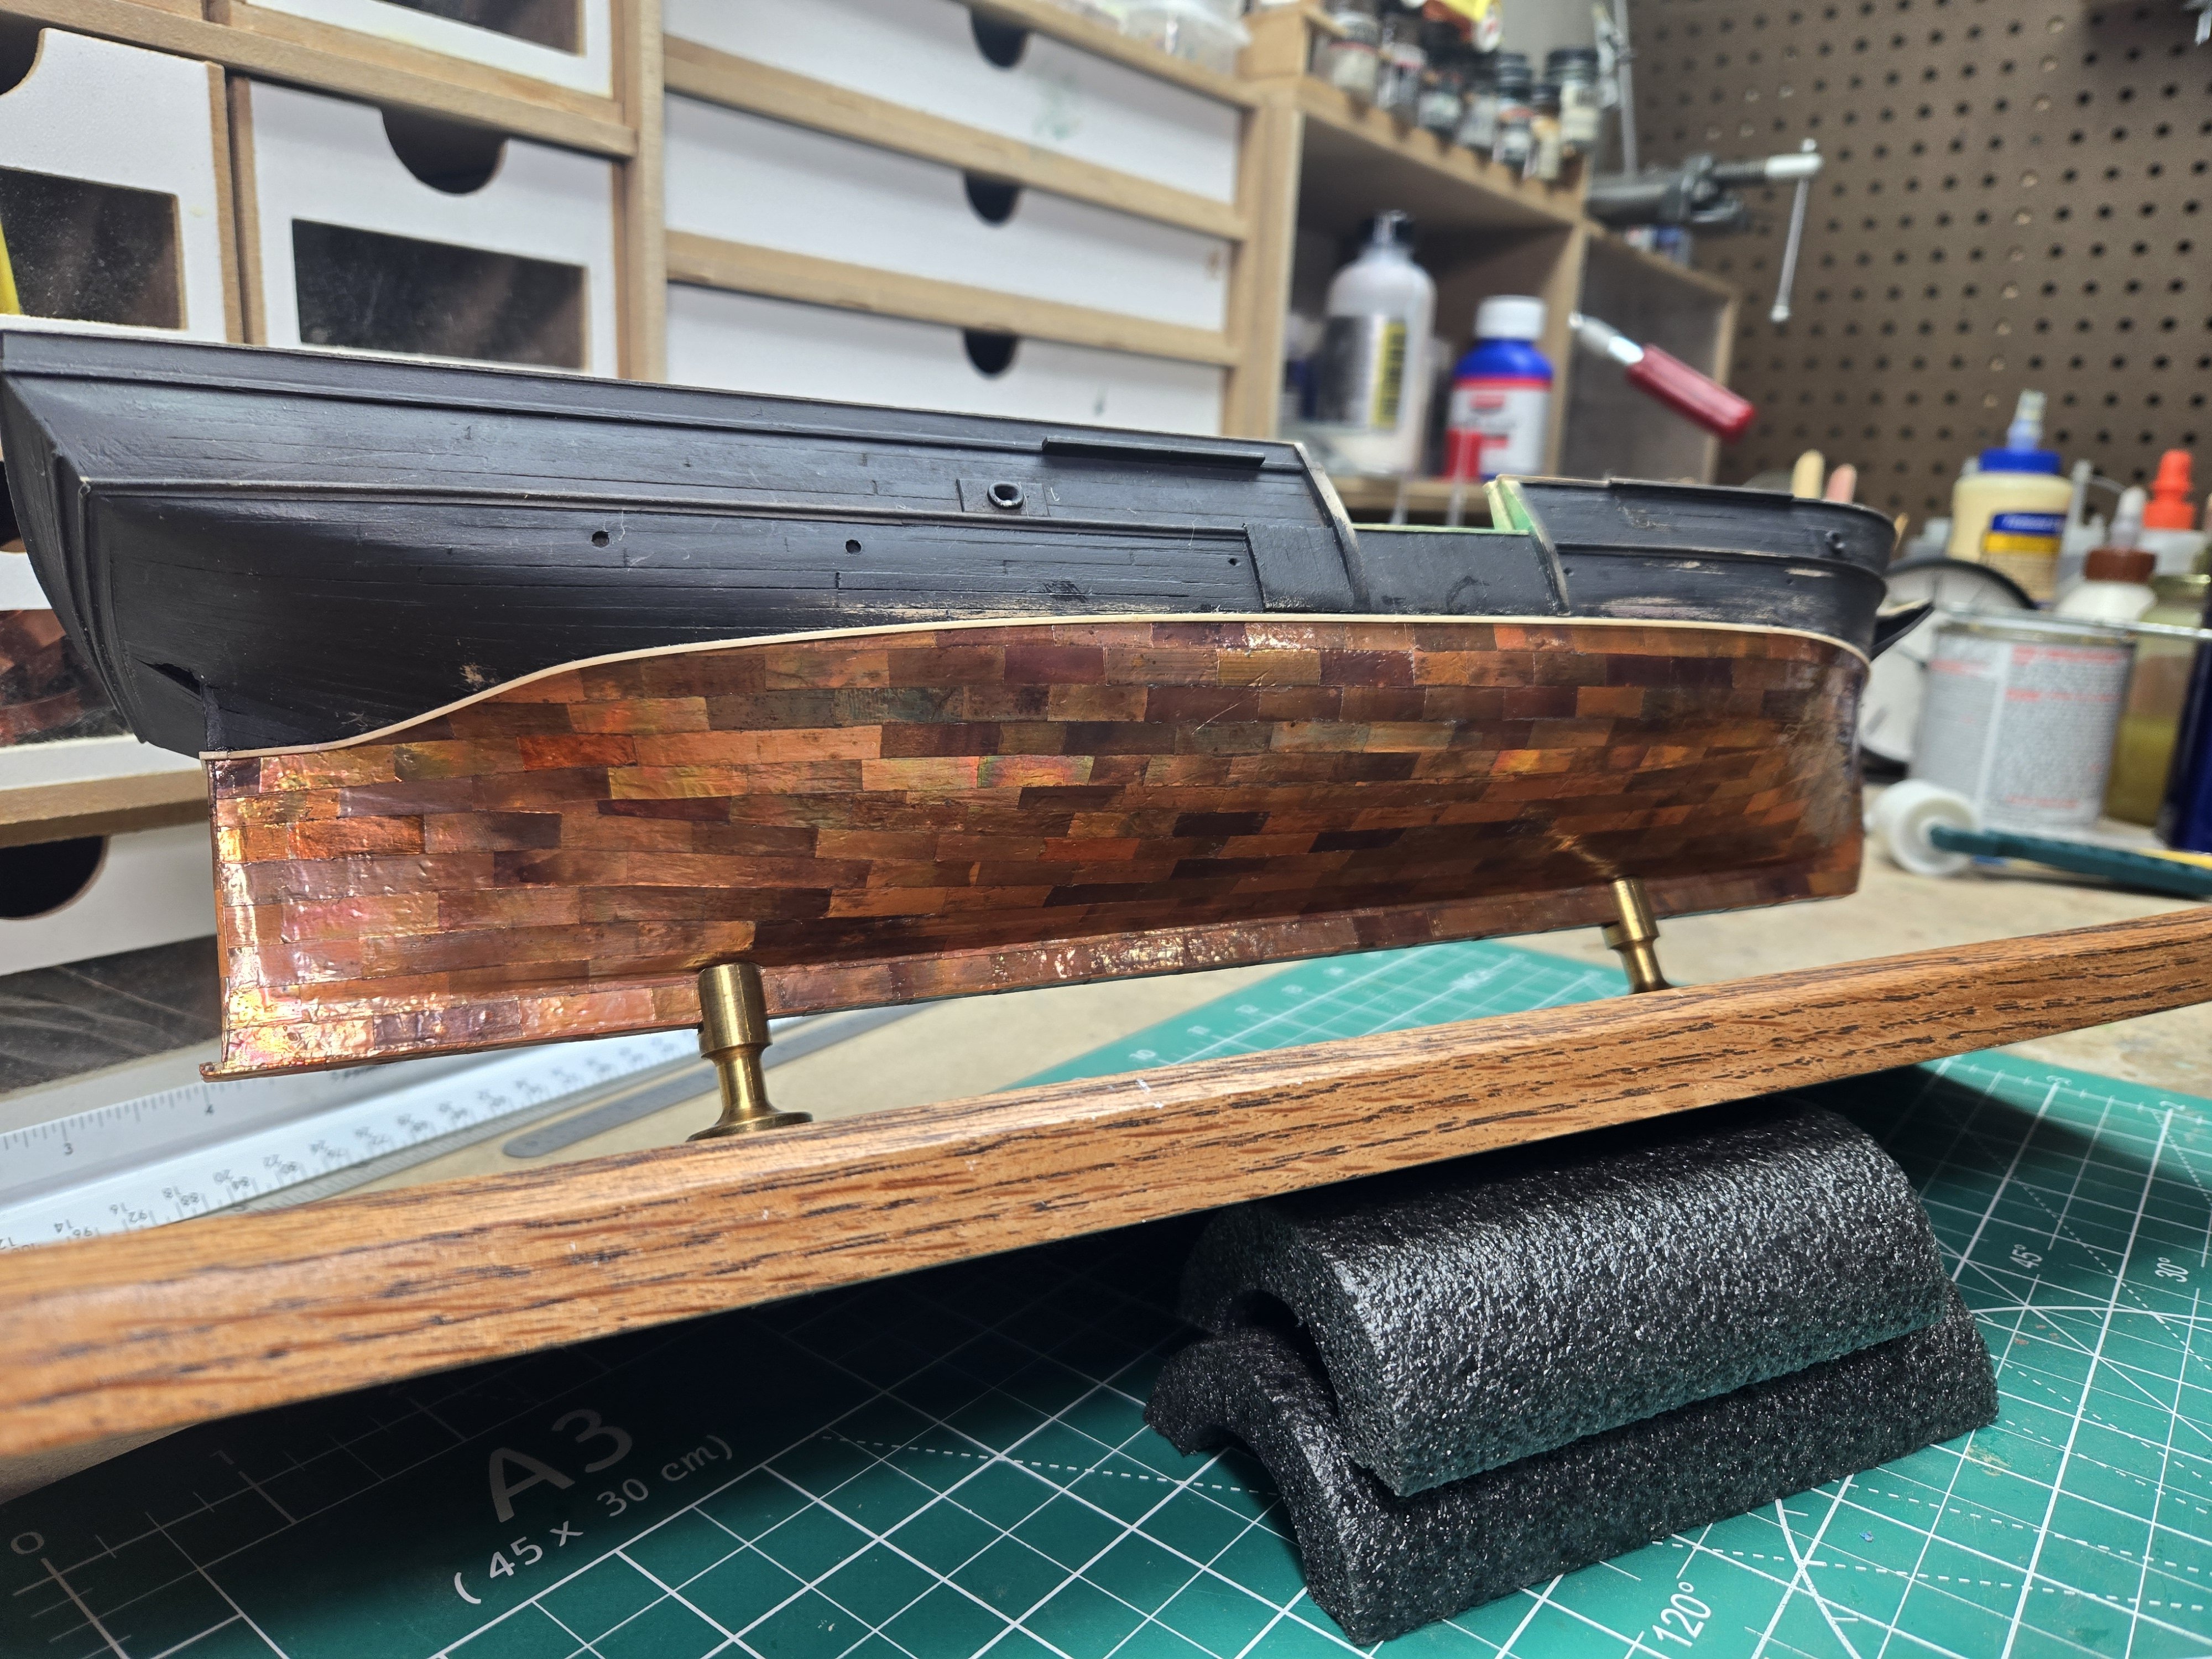
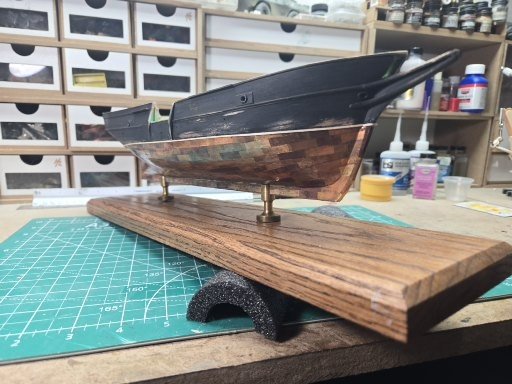
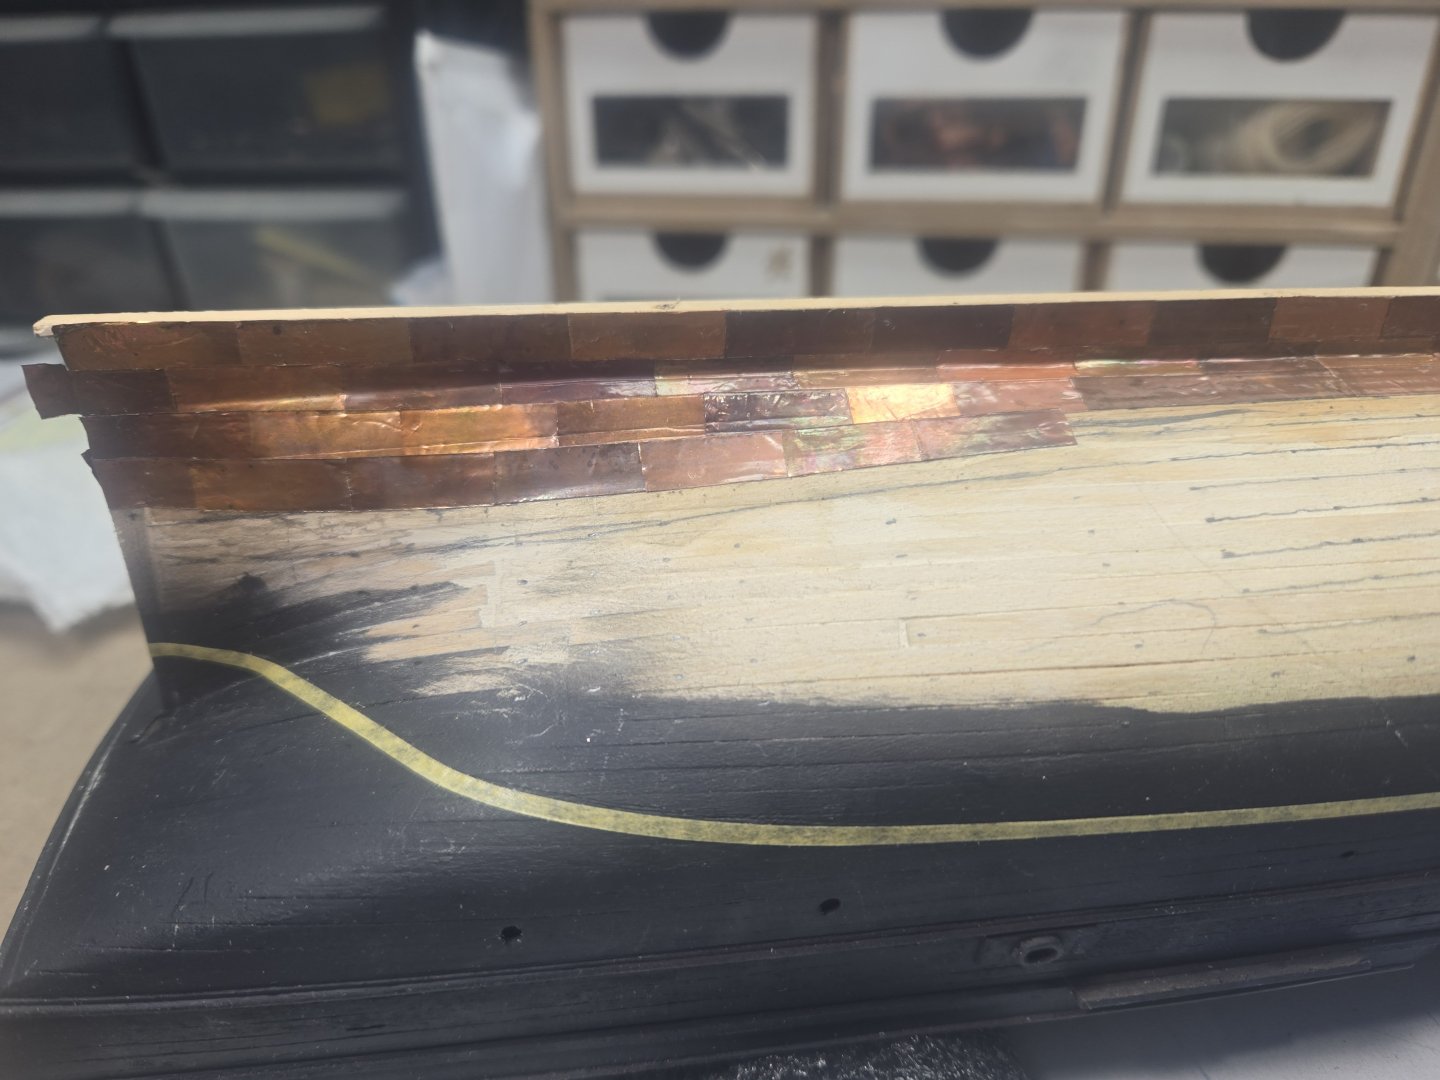
Finished coppering the hull and then mounted on a temporary base. It is important not to use a cradle as it will damage the plates. The thin wood strip is a "wood guard" added at the water line as noted in the Whaling Museum plans. Next step is to finish the rudder, hinges, and give the copper a good cleaning before airbrushing a coat of Dullcote lacquer. This stage of the build was very time consuming and I am anxious to start on the deck structures


-
Looking to buy a vintage Bluejacket Kit, Cabot. Prefer complete unstarted.
-
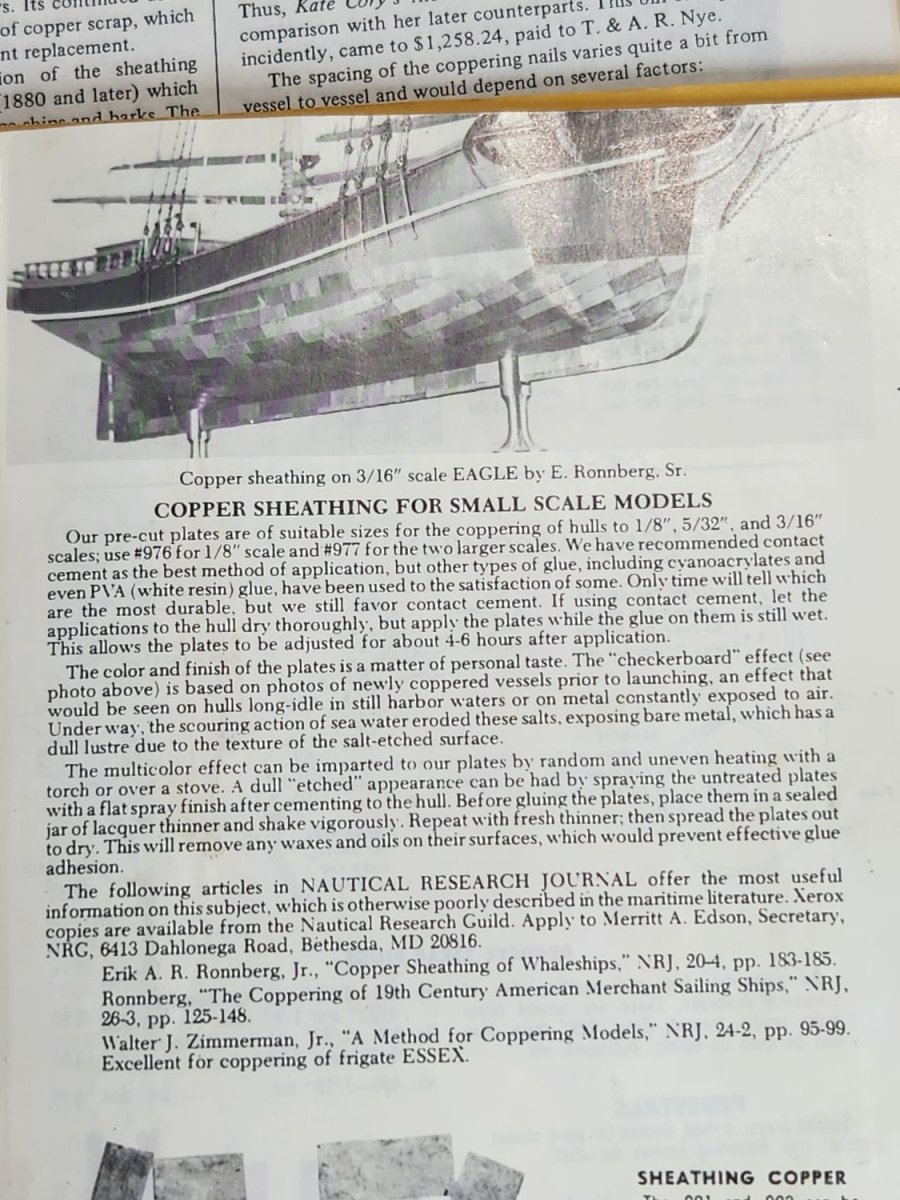
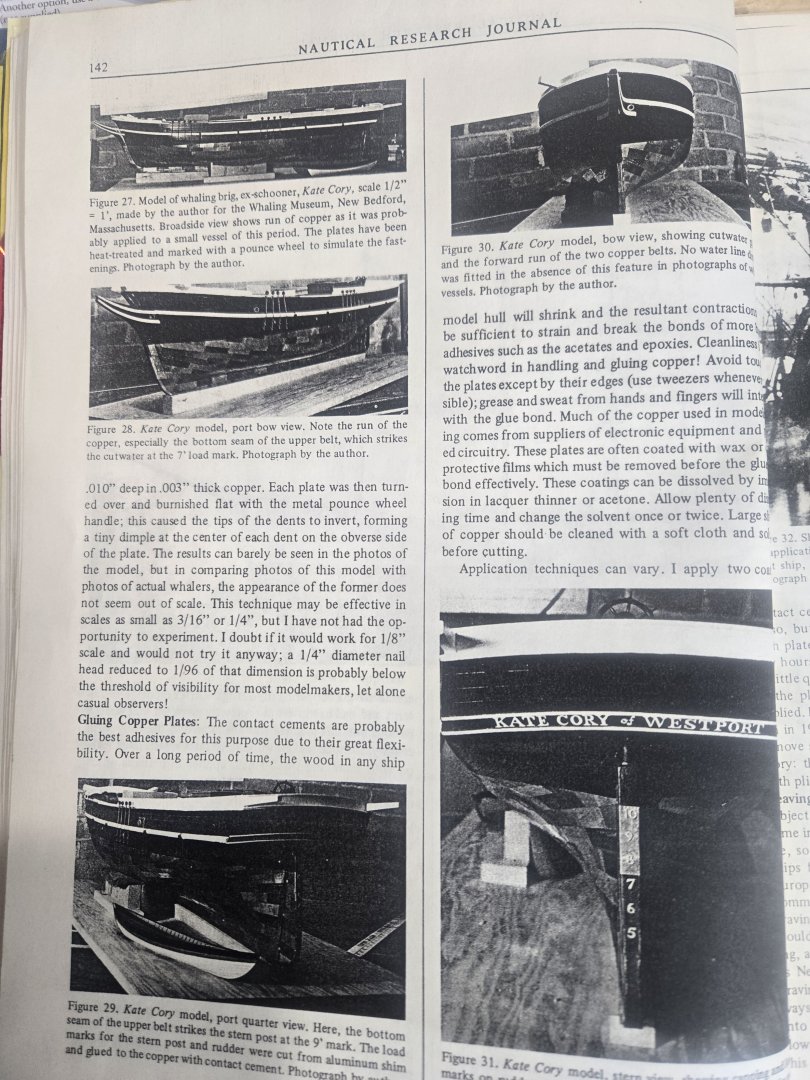
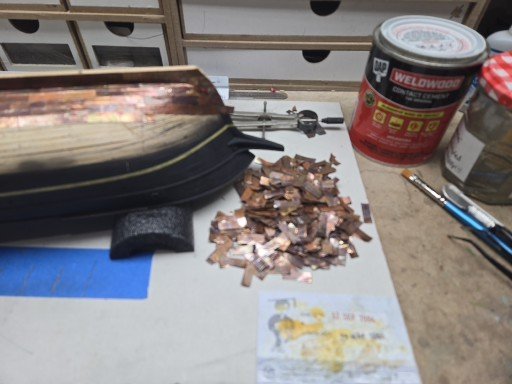
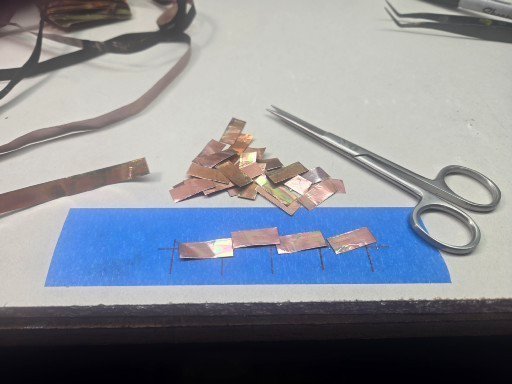
Started coppering the hull. This is a very tedious and time-consuming process, especially preparing the plates. There are many posts regarding "how to" but they basically involve using copper tape. This process involves applying individual plates. For reference material I have books and copies of NRJ articles as noted in my prior posts. These are in addition to plans from New Bedford whaling Museum. The color of the plating is a modelers choice, I choose a dullish color similar to "yellow metal" or" Muntz metal" because after the early 1830's a composite zinc/copper mixture metal was used, Kate Cory was built in 1856. The reference material also contains a comparison of how copper plating was manufactured and stored which also impacted the color, dull versus today's bright color copper used on yachts for example. I made a template from .020 plastic stock to mark the belts. To prepare the plates, first remove the adhesive from the copper tape by soaking the tape with backing attached in a jar of lacquer thinner. Once the backing became loose, wipe the adhesive off the tape with a clean cloth. Then, back in a jar of clean thinner. After the second cleaning, pass the tape over a heat source, I use a small candle to dull the color. This process will not produce a uniform color effect! Next, start cutting, these plates are 1/4" x 3/4" which is close in scale (with overlap) to the 14" x 48" plates used on the Kate Cory. I estimate I cut approximately 400 plates. Once the plates were cut, back in the jar for cleaning, remove fingerprints, etc... Excluding prep time, I've spent 4 hours applying plates, long way to go. Once the adhesive sets, I'll smooth out the plates.
-
Impressive build!
-
When I built my first wooden ship model, Model Shipways Katy, I read an article on rigging written by Erik A. Ronnberg Jr., his "tip" was to dissolve beeswax in a solvent like turpentine (I use turpentine). Soak the thread in the solution and clean it by drawing it through a clean cotton cloth (I use an old t-shirt). The rigging on the oldest model I still have, built in 1992, shows no signs of deterioration and unlike me, the rigging is not sagging.
-
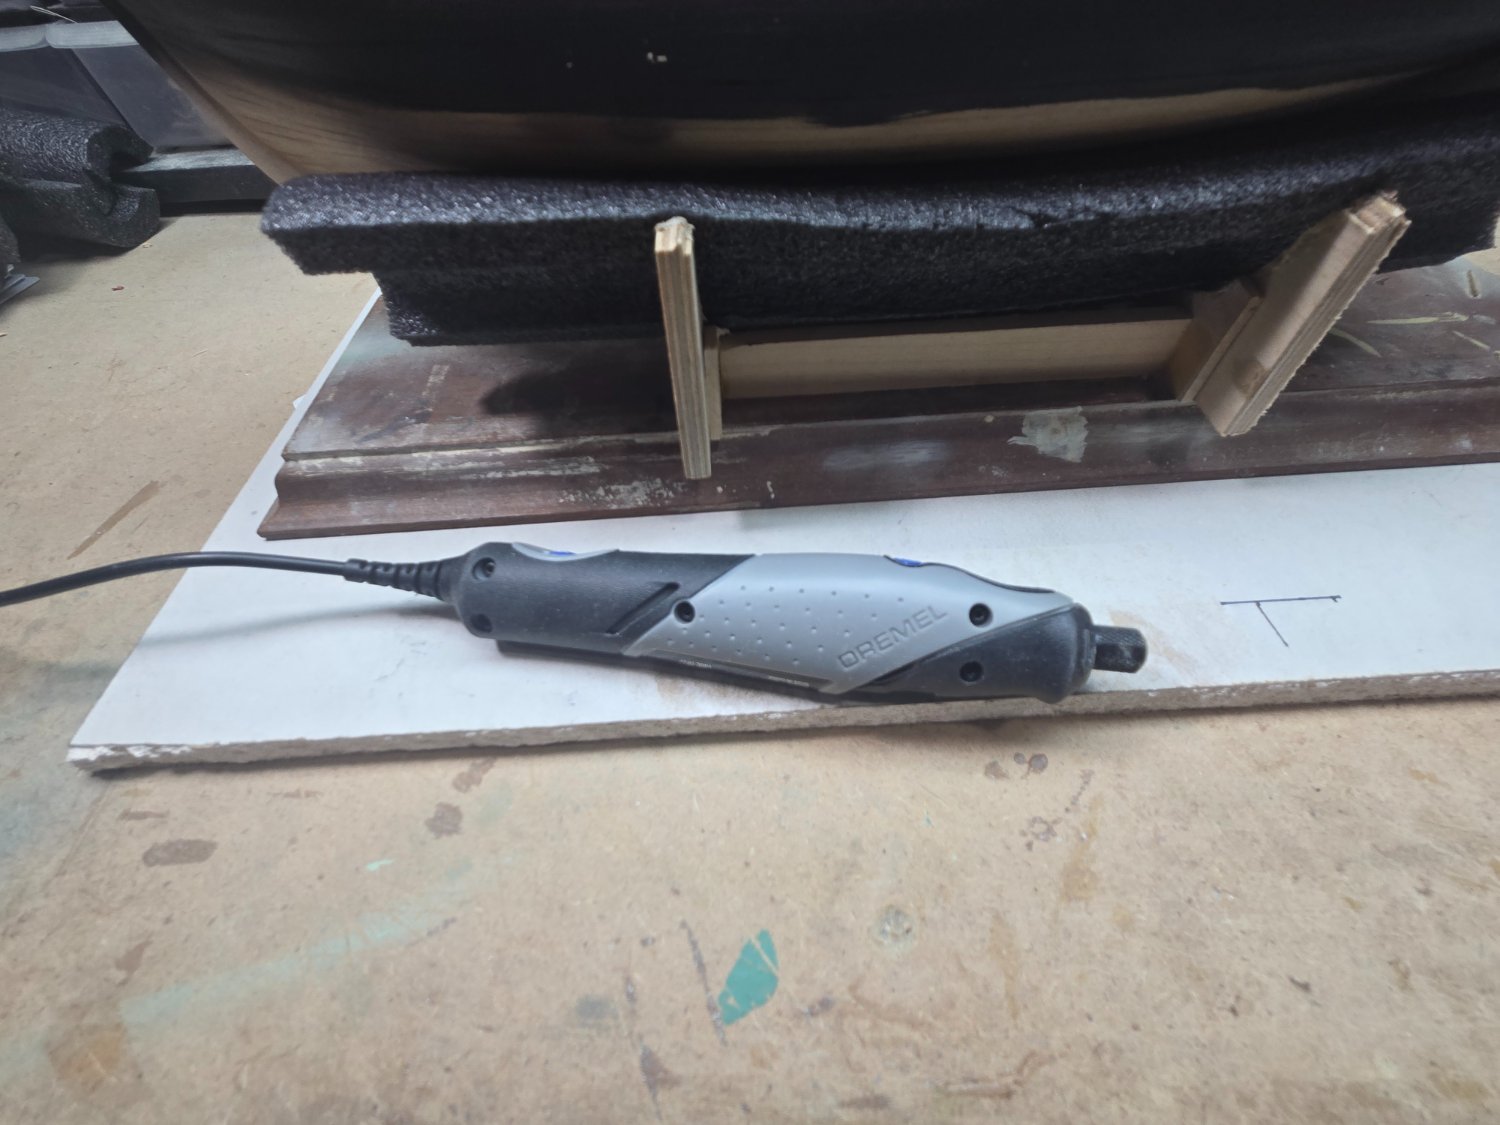
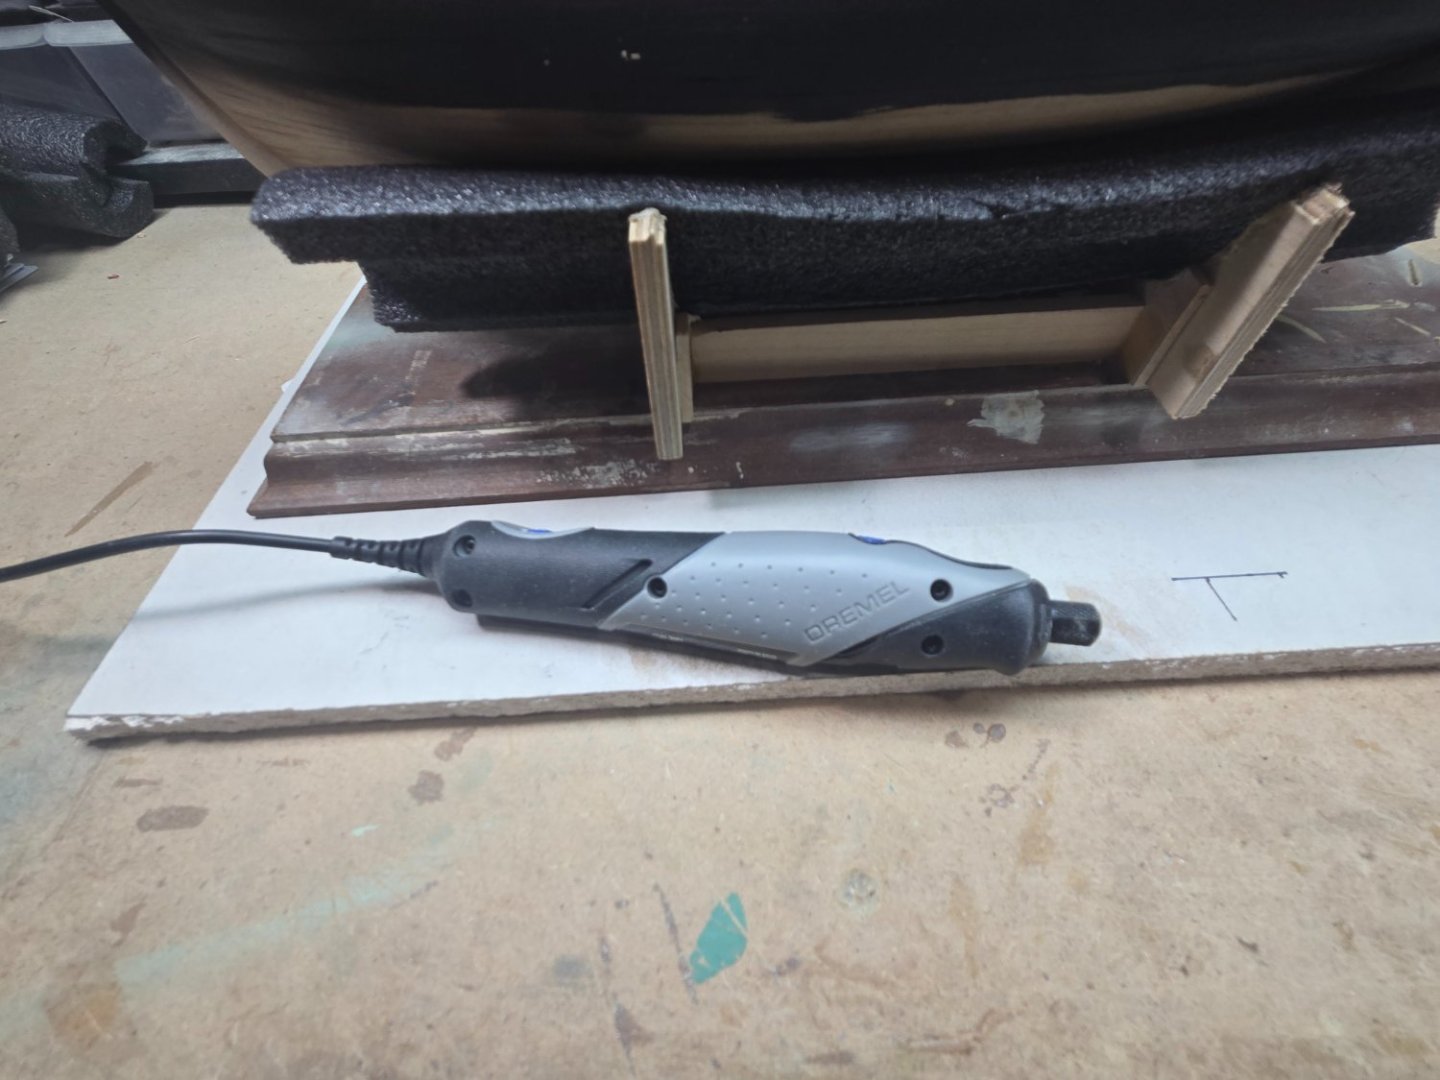
Finished much of the bulwarks and various railings. Used my new Mini Dremel on the pin rails, great tool! I was amazed at how accurate it is, very little vibration, made the task easy. Putting in the gangway was more challenging than expected, plans were somewhat hard to interpret. But it adds a nice detail. I was struggling with the shade of "green color paint" to use on the bulwarks and deck structures. Fortunately, Tom Lauria shared some helpful information on mix ratio's he used for his 1/4" scale build (you can find Tom's build on YouTube). I use only enamel or out of production Floquil paints and after some trial and error feel I have a decent period color representation. As I progress with the build and anticipating next steps, I have found the kit plans are lacking in detail. I am continually reviewing the plans from New Bedford Whaling Museum as well as the two books noted in my initial post. Interestingly, both sets of plans were drawn by E A. Ronnberg Jr. whaling historian. My next step will be coppering the hull. I plan to use a "checkerboard" appearance. It is a tedious process involving attaching individual plates. First the copper is heated to produce variations in color, "yellow metal". The term used to describe the color of the copper plates during that period. This will be my second attempt using this process, my first was 25 years ago, Model Shipways Eagle. It's nice to have something to compare with and note area's "needing improvement". I'll add more background about this process in my next post.


-
Thanks John. I've corresponded with Tom Lauria previously regarding his Kate Cory and schooner Benjamin Latham, always helpful.
-
The African Queen. My First Listing and First build here.
Capt. Kelso replied to a49kid's topic in New member Introductions
Welcome, I was always a fan of the movie as well. FYI, recently I was searching for some scale figures for another Club member and stumbled on a couple available for the Billings African Queen. Just enter "African Queen" in the Ships in Scale search engine. Also, while searching EBay, entered African Queen, found these, Vtg Original Bogart’s African Queen Boat Key Largo FL (5) 35mm Slides. Looks like they contain some good detail for a model. Good luck!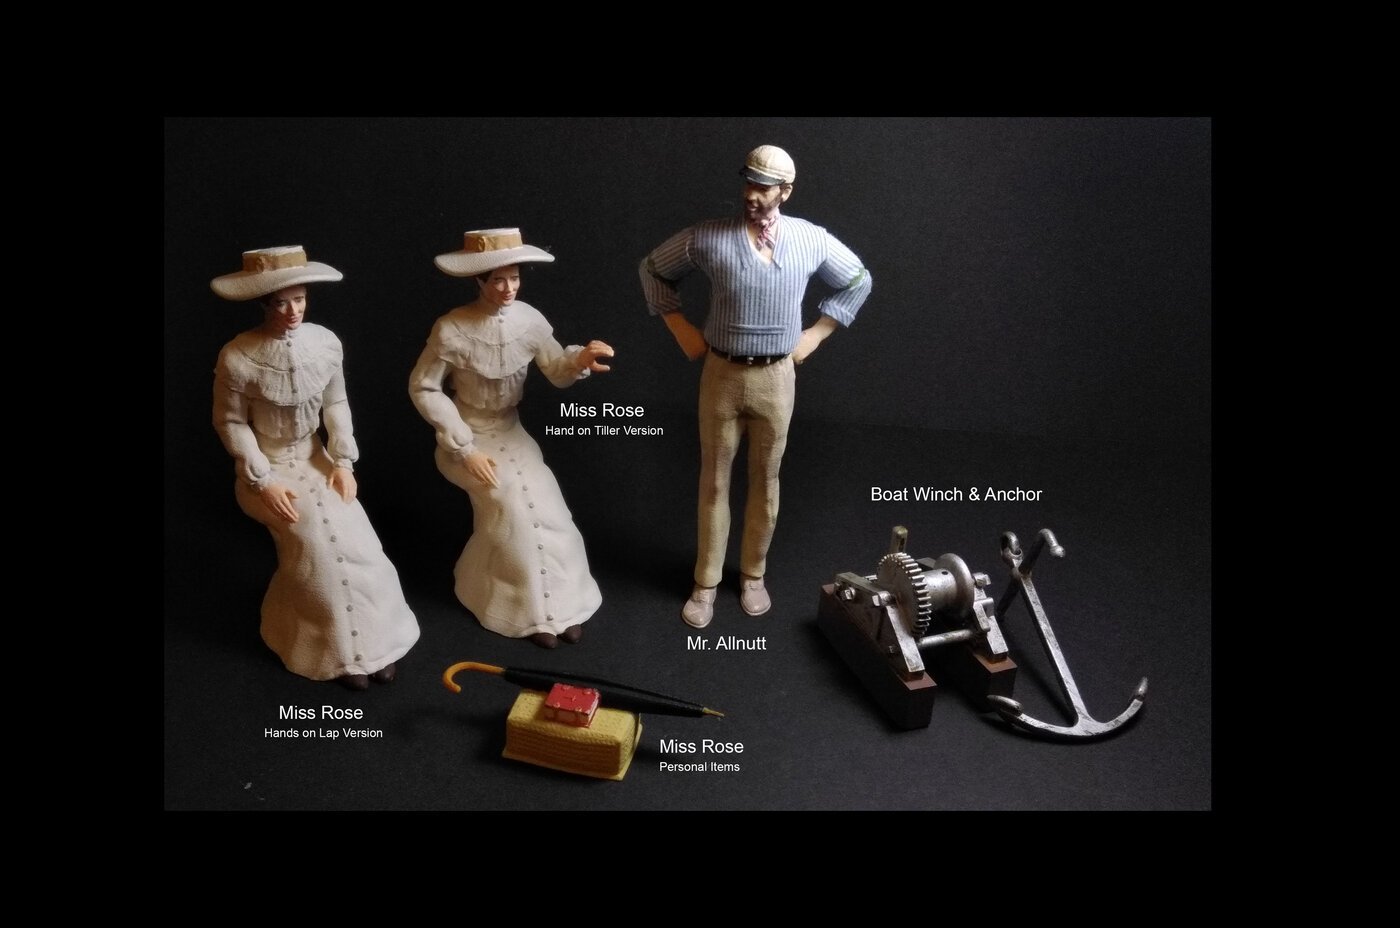
-
Every build is a learning experience. Overall, you did a good job with the basic construction. Personally, as suggested, I would buy a new kit and start over. I believe Model Expo has an incentive for their Dory kit. Once completed, send them a photo and you receive a credit. One further thought, check this site for Dory reference information. It's a popular build and there many tips and tricks noted.

- 9 replies
-
- 4
-
-
- Lowell Grand Banks Dory
- Model Shipways
- (and 1 more)
-
wefalck, I was considering using Vallejo Acrylic for the figures and reviewed some of the plastic model forums for feedback. I did note some recommendations to seal the base coat before applying a wash and highlights. It appears this step helps protect the base coat from damage during the weathering process. I interpreted that to mean damage from dry brushing rather than the wash. This made sense to me as other sites noted acrylic paints are not as durable. I did try using an acrylic wash on one of the line tubs and found it difficult remove once it dried.
-
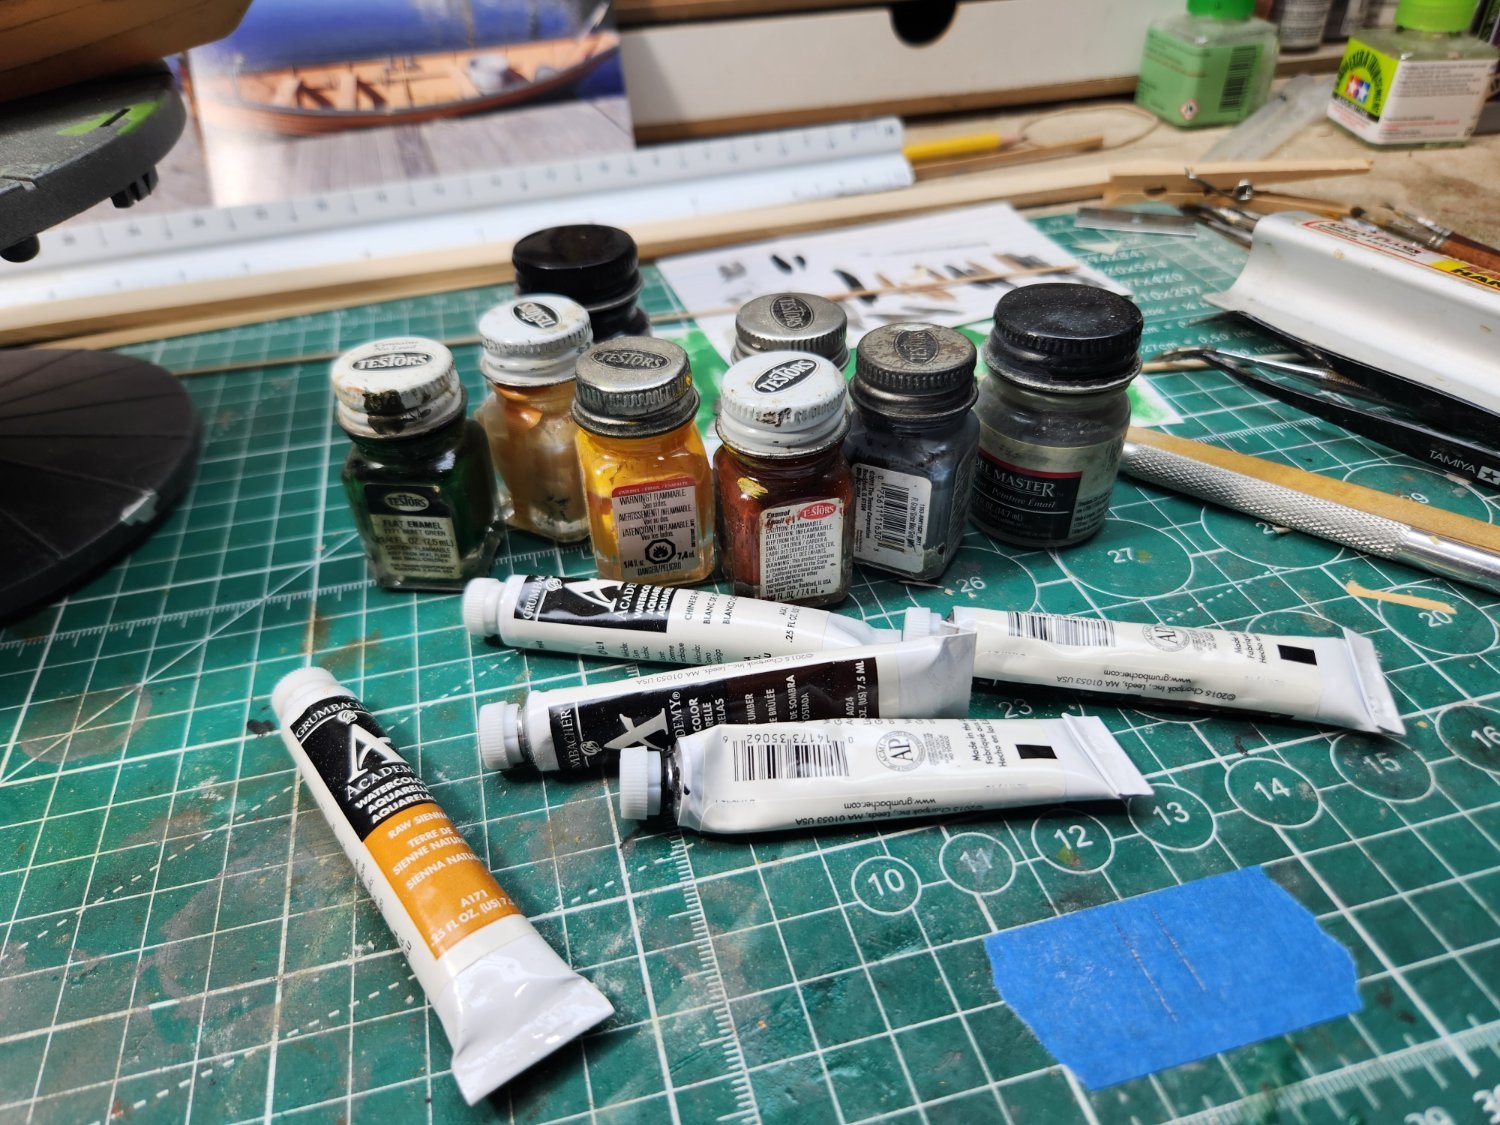
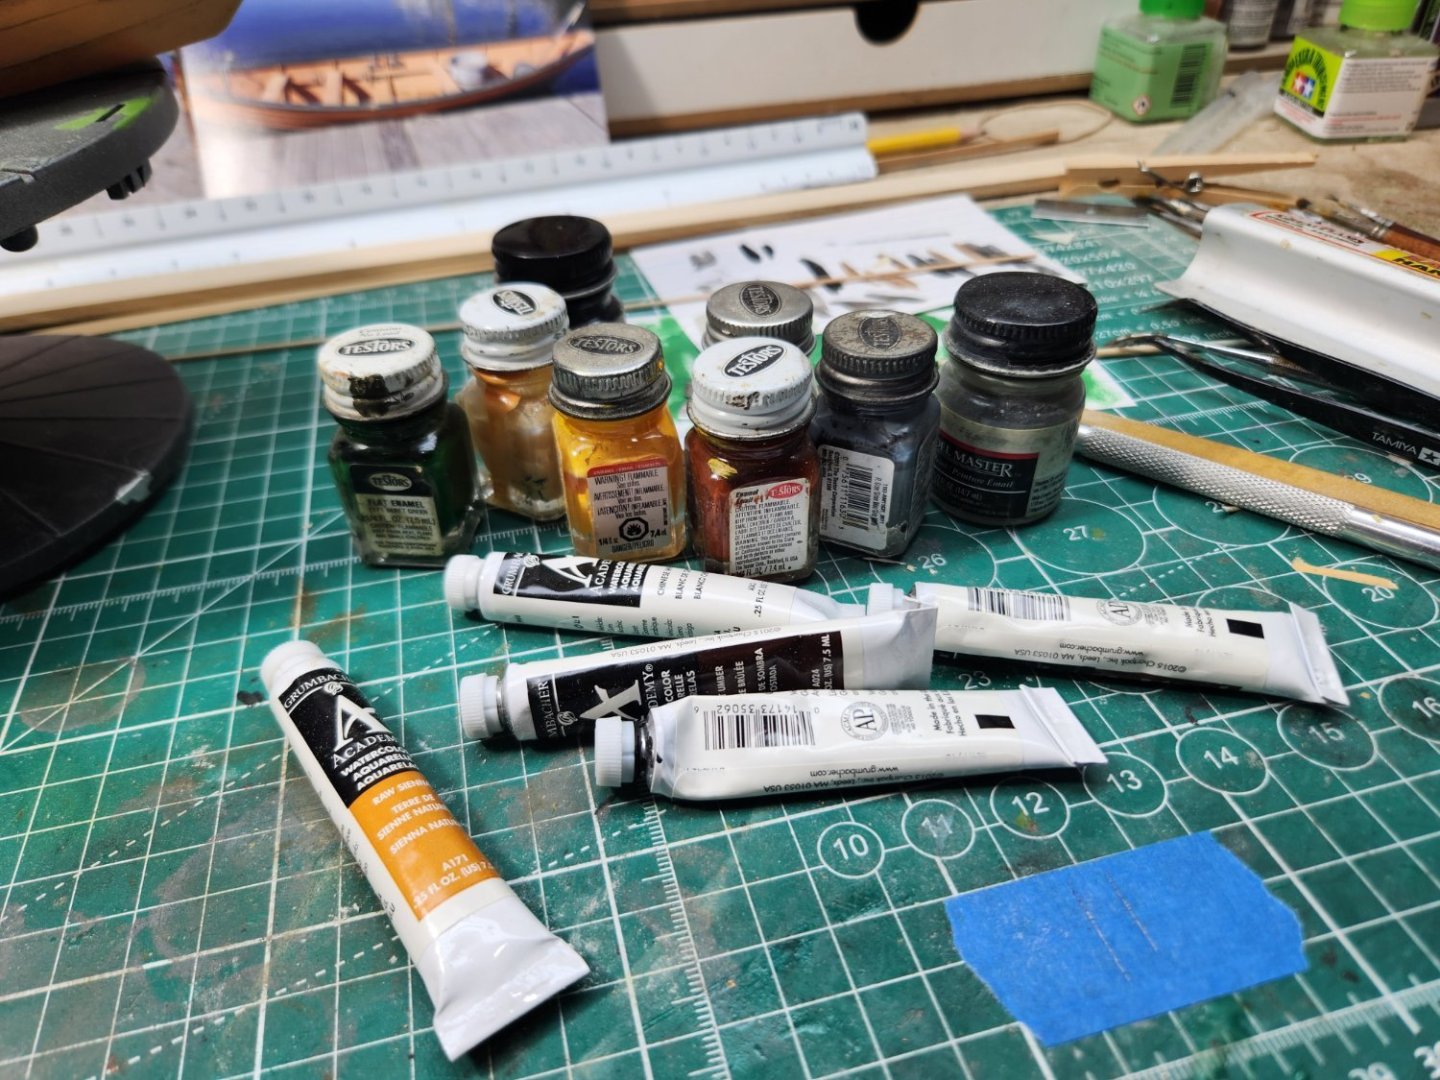
I have not had much success with acrylic paints, especially weathering. So, picked up a tip regarding using "watercolor paints", NOT "acrylic watercolor paint" for weathering and gave it a try. The advantage of using non acrylic is that it is easy to remove, just wipe off with a damp brush or cloth. Or wash it off and start over. And it's easy to drybrush over. I used enamel paints for base colors and highlights. I think if you use acrylic base paint it will need to be sealed before adding a wash. Once the base color is dry, to weather, apply a wash (dark grey in this case), simply thin with water, I add a drop of detergent. Let dry. Trial and error to get the right look. I used the same process on the figures. Once happy with the look used a dry brush technique for the highlights.


- 9 replies
-
- 17
-
-

-
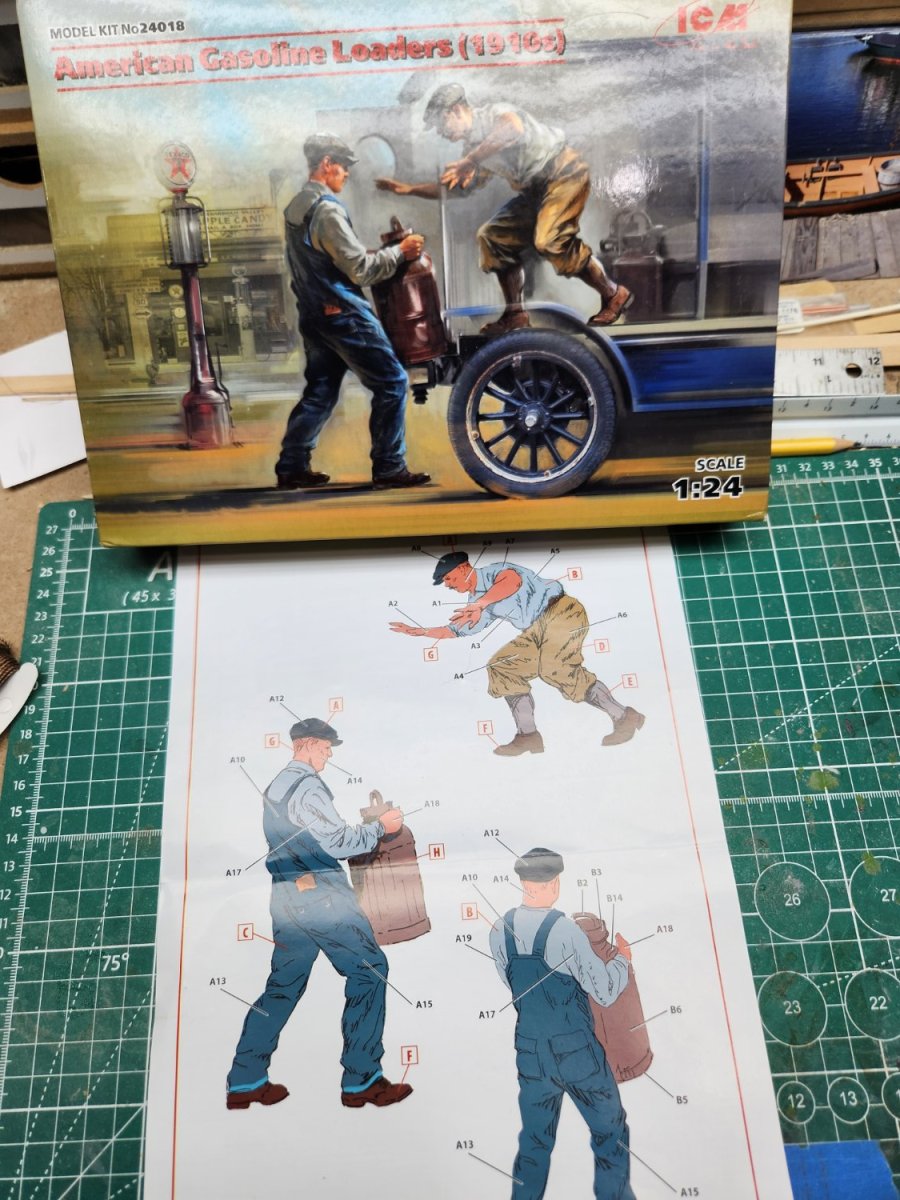
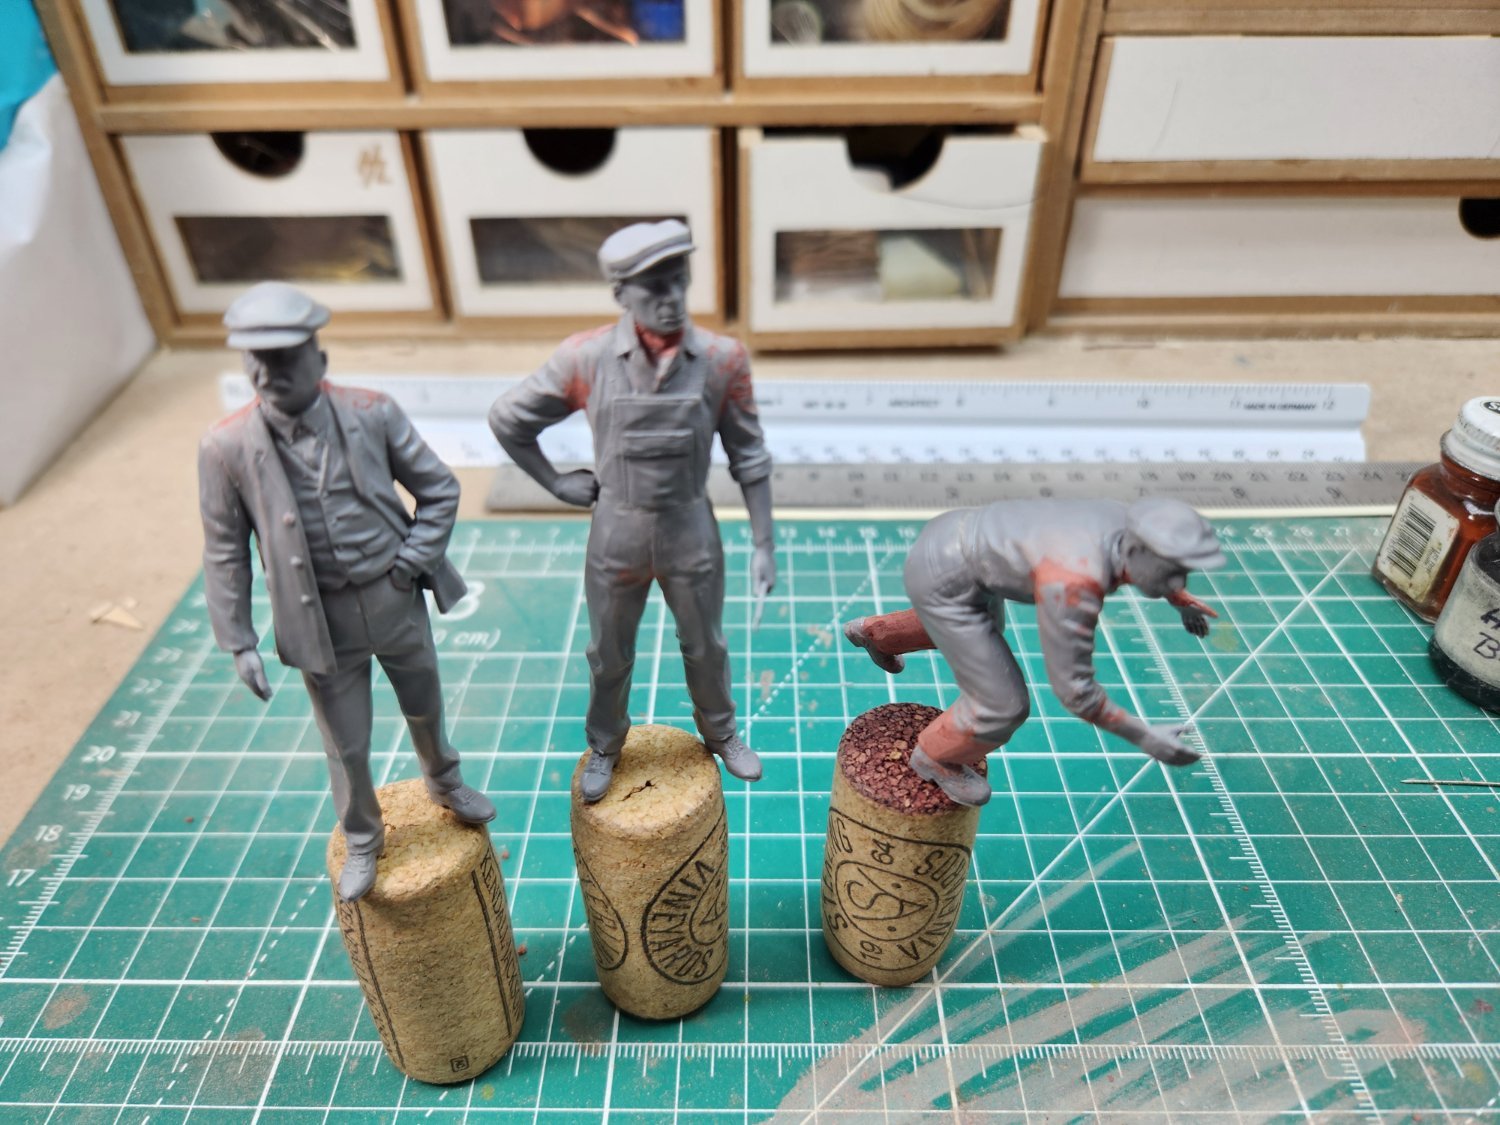
Thanks everyone for the feedback. I luckily found the figures by doing a search "1/24 scale figures" and found a Ukranian kit manufacturer, ICM, that has a line of 1/24 offerings. These figures were produced for their period car kits which happened to match the timeframe I needed. They have the correct style clothing. With some slicing and dicing and a little Bondo putty I got the positions I wanted. I'm considering a 1/24 Lobster Smack diorama using some of the ICM figures.
- 11 replies
-
- 4
-
-
- Model Shipways
- Finished
- (and 2 more)
-
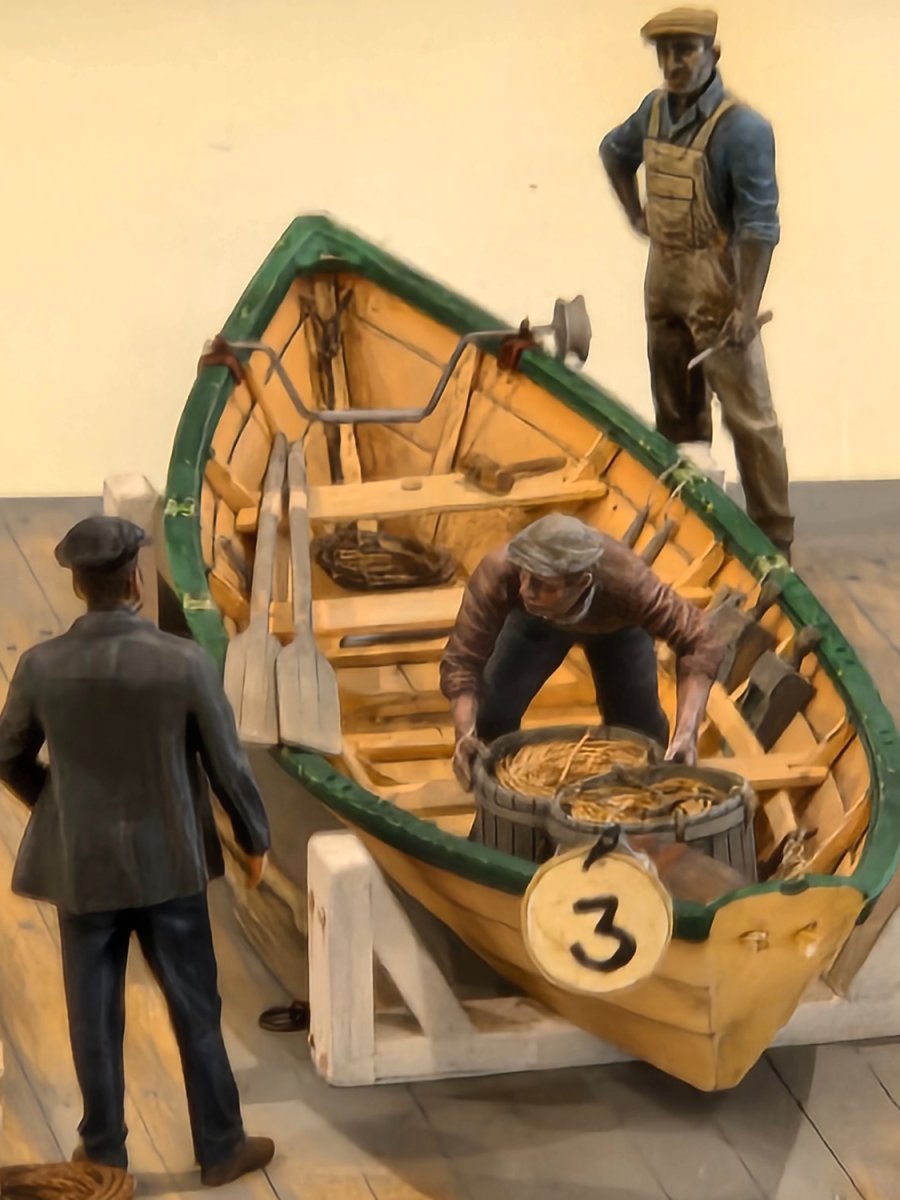
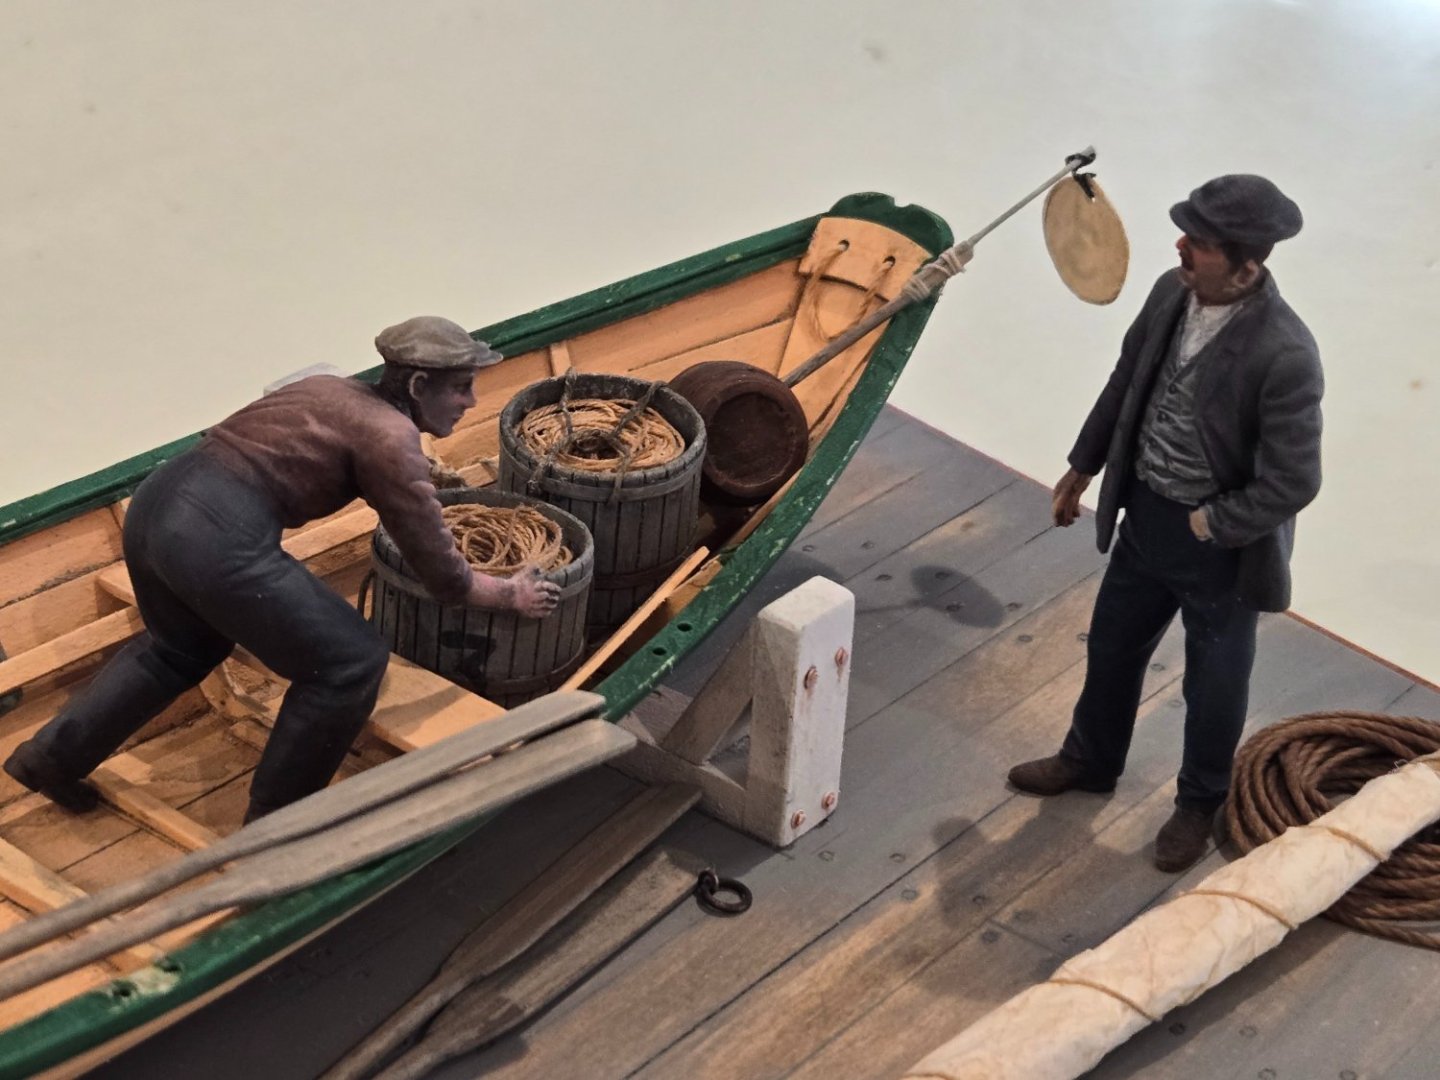
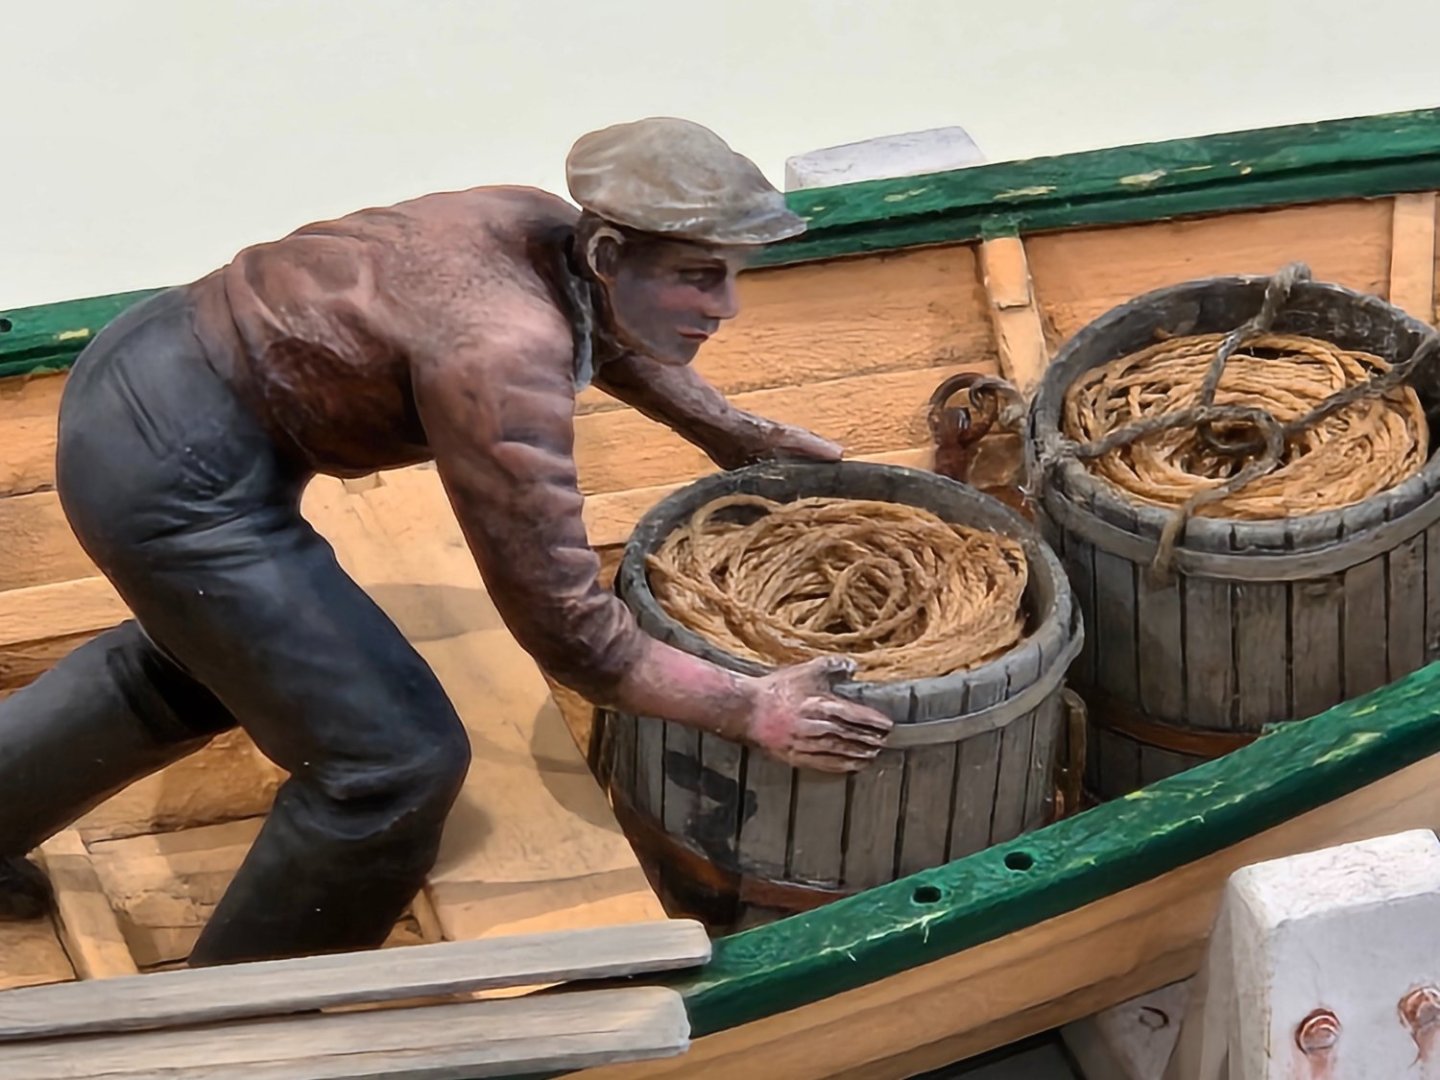
Added the figures. I don't have much experience painting figures but just followed some on-line video's. Originally started out with 5 figures and narrowed it down to 2, Captain and Dorymen. This has been an interesting little project which has allowed me to improve my skills and learn some new techniques after many years away from the hobby. I actually feel more confident now getting back to my Kate Cory.


- 11 replies
-
- 13
-
-
-
- Model Shipways
- Finished
- (and 2 more)
-
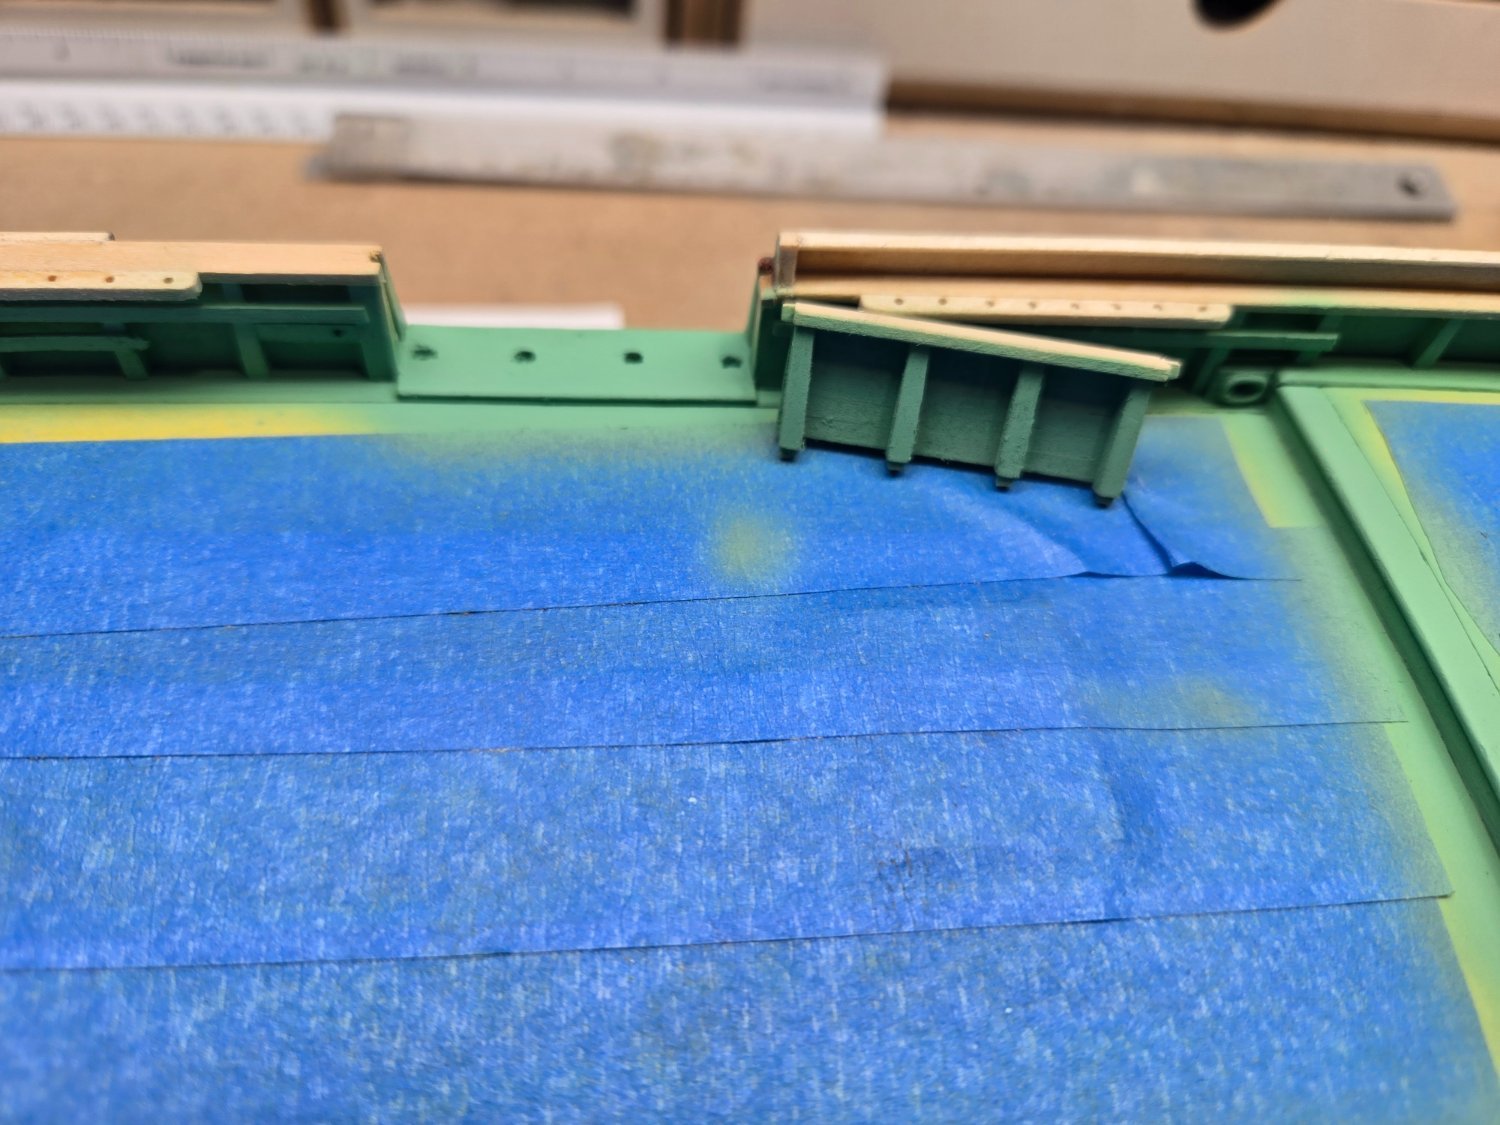
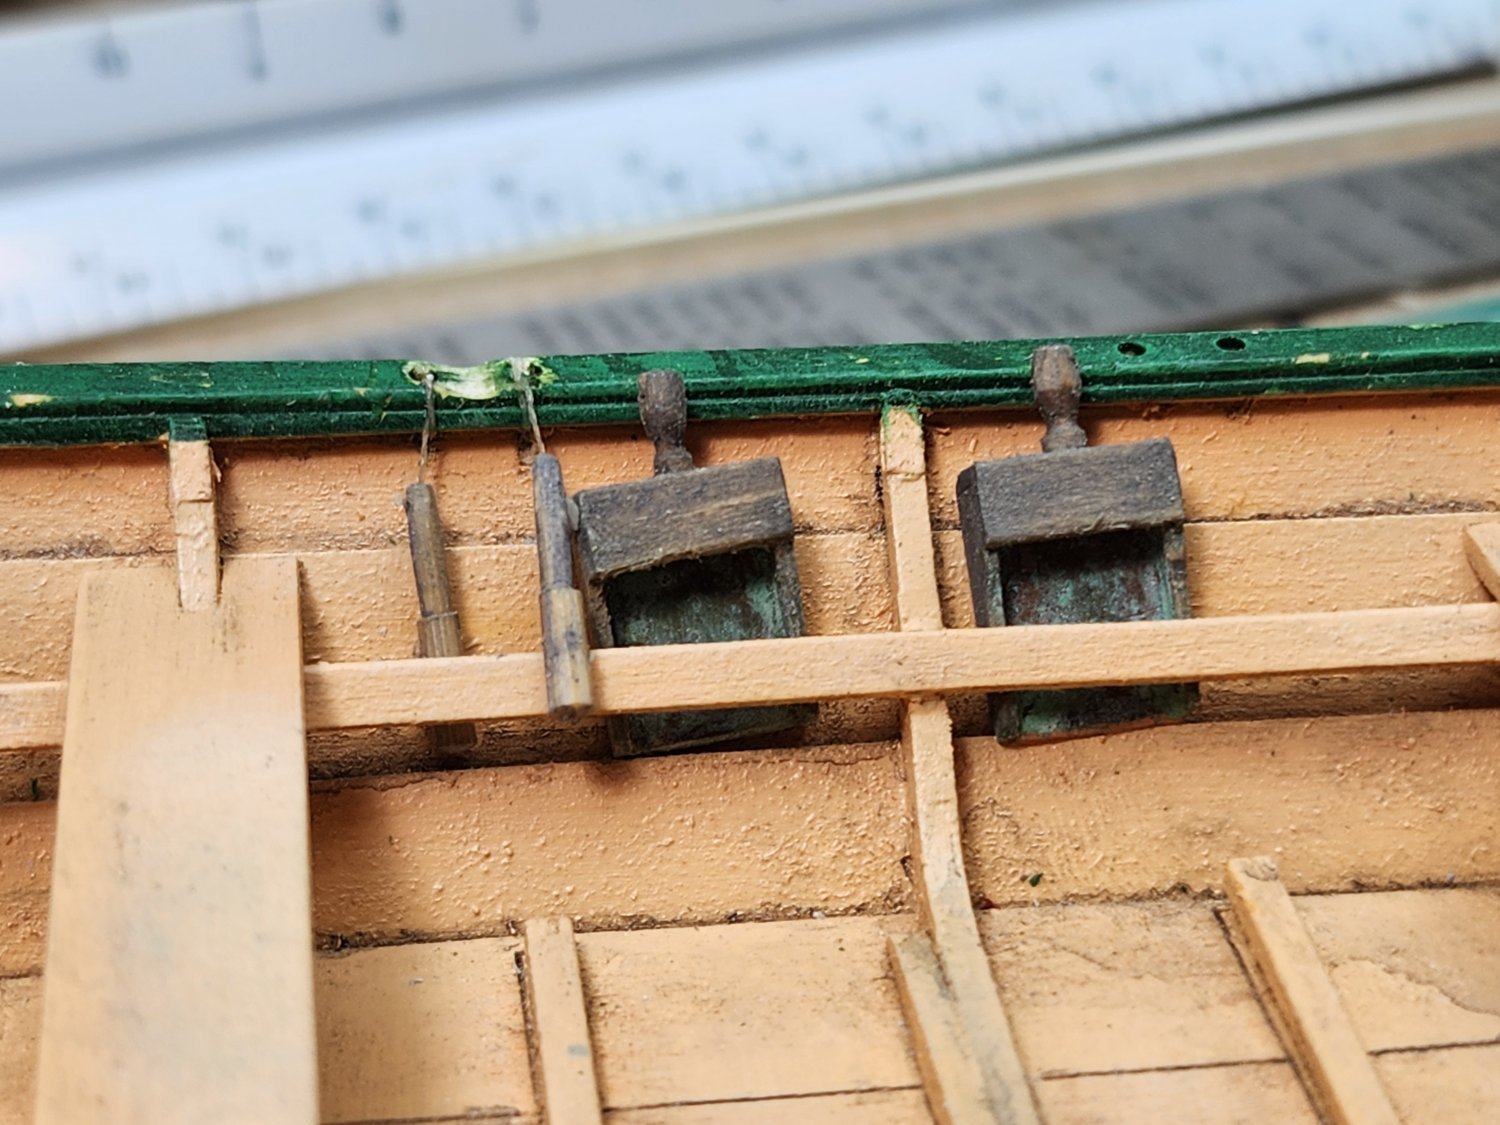
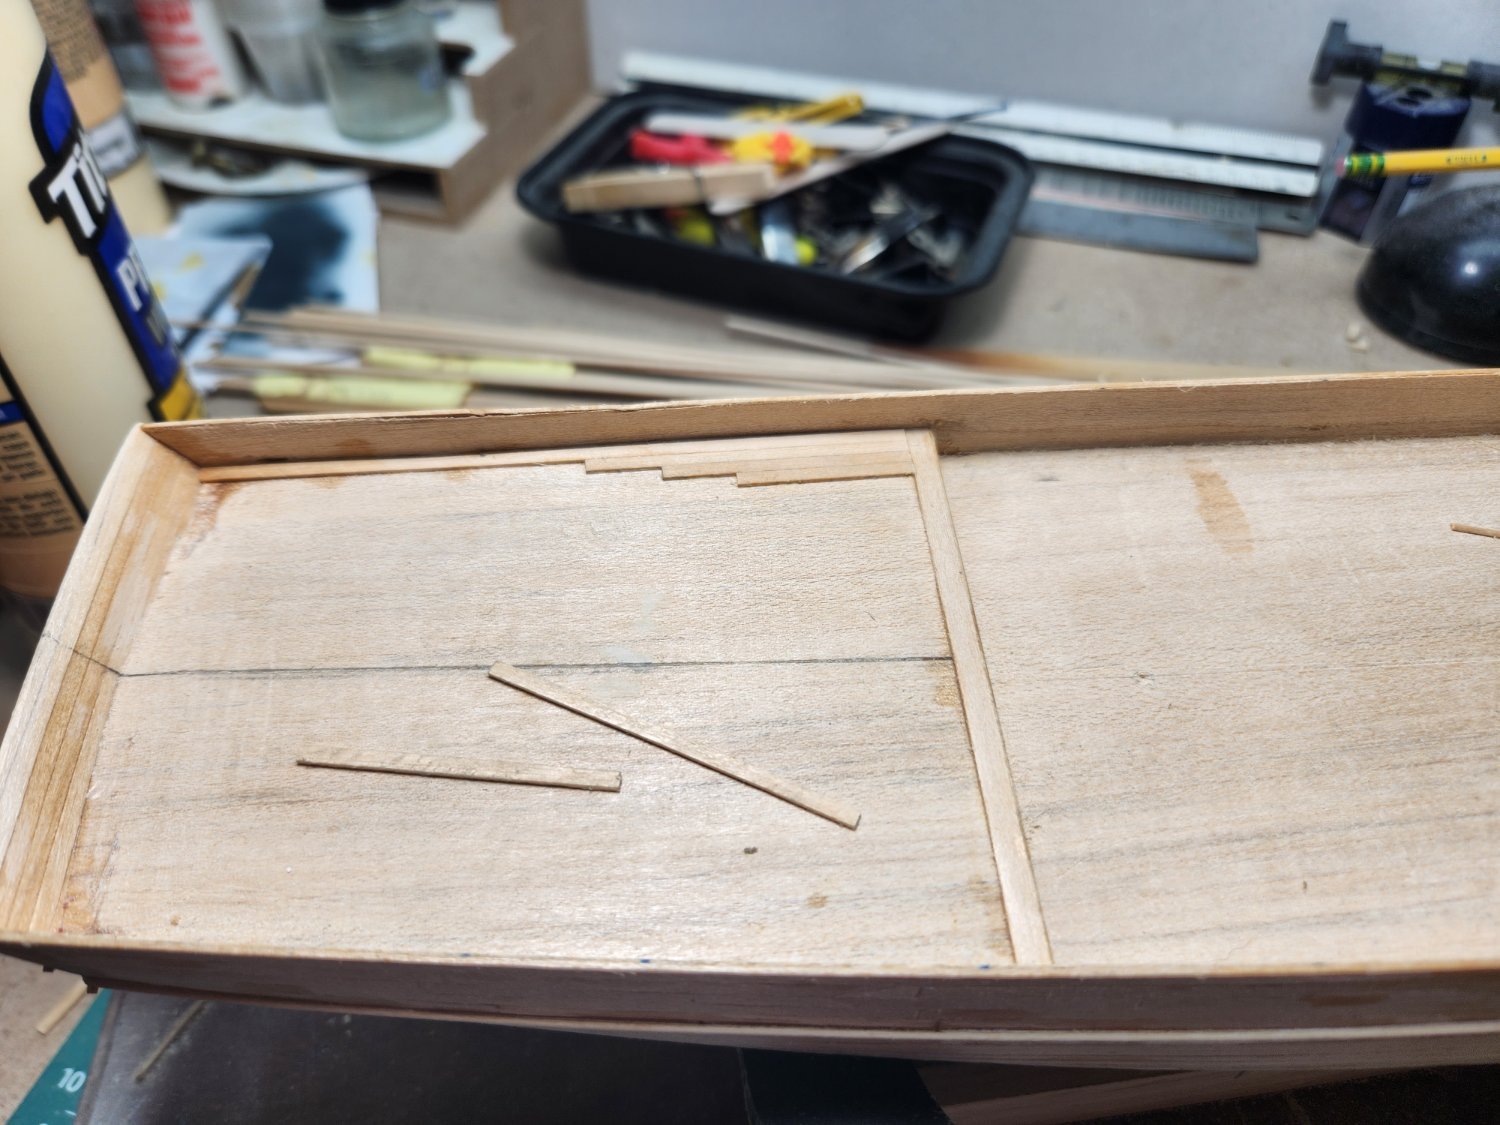
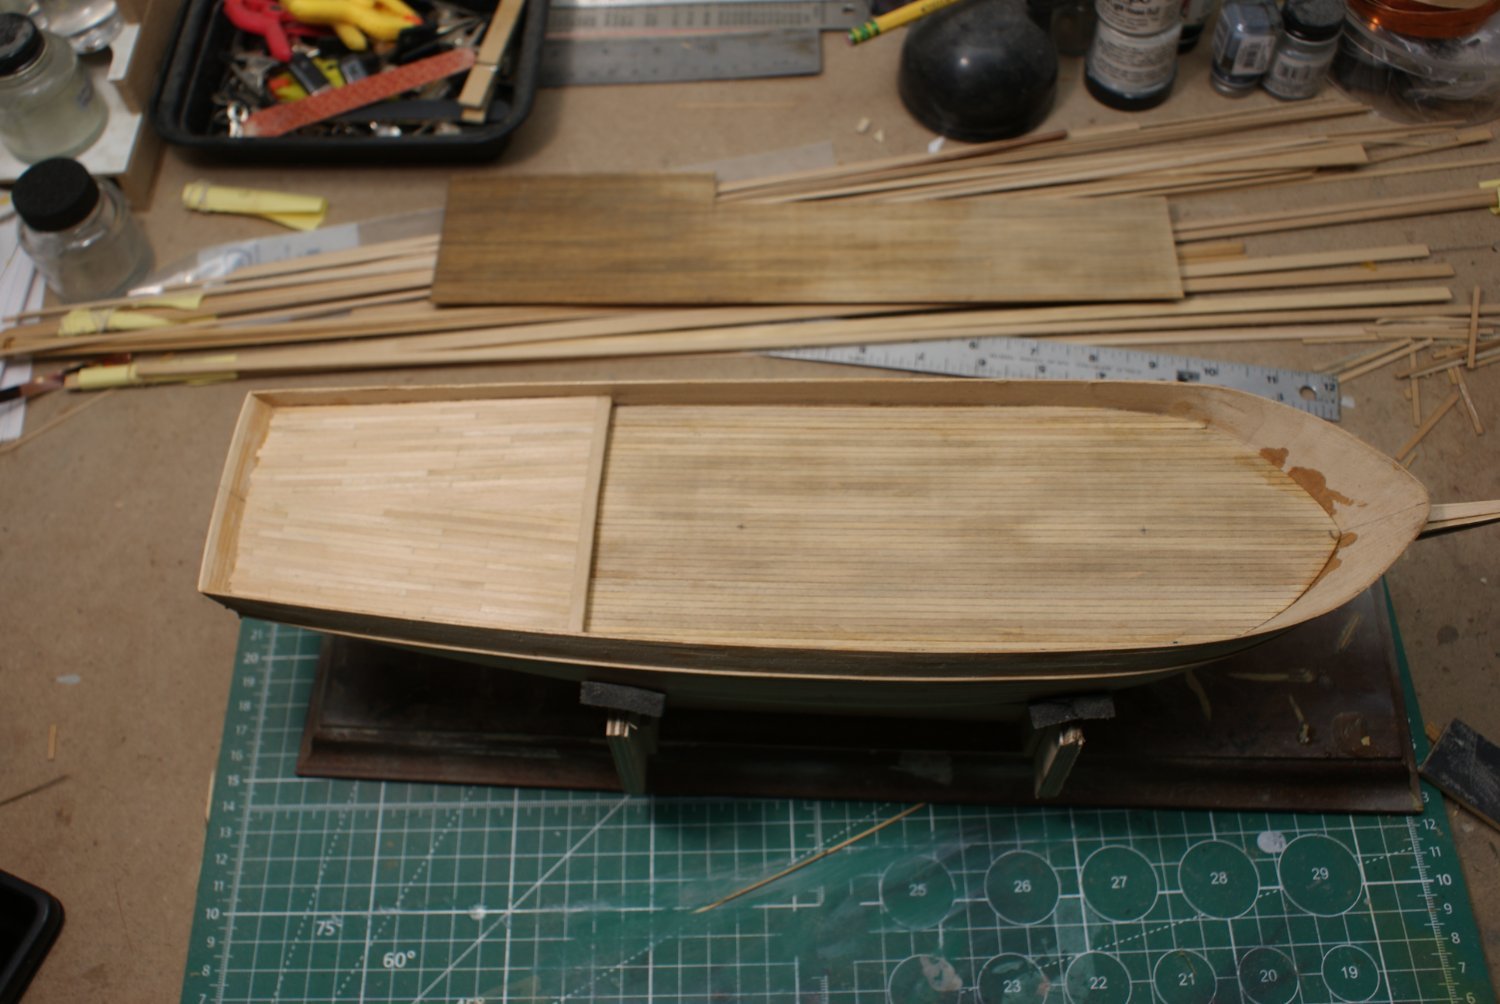
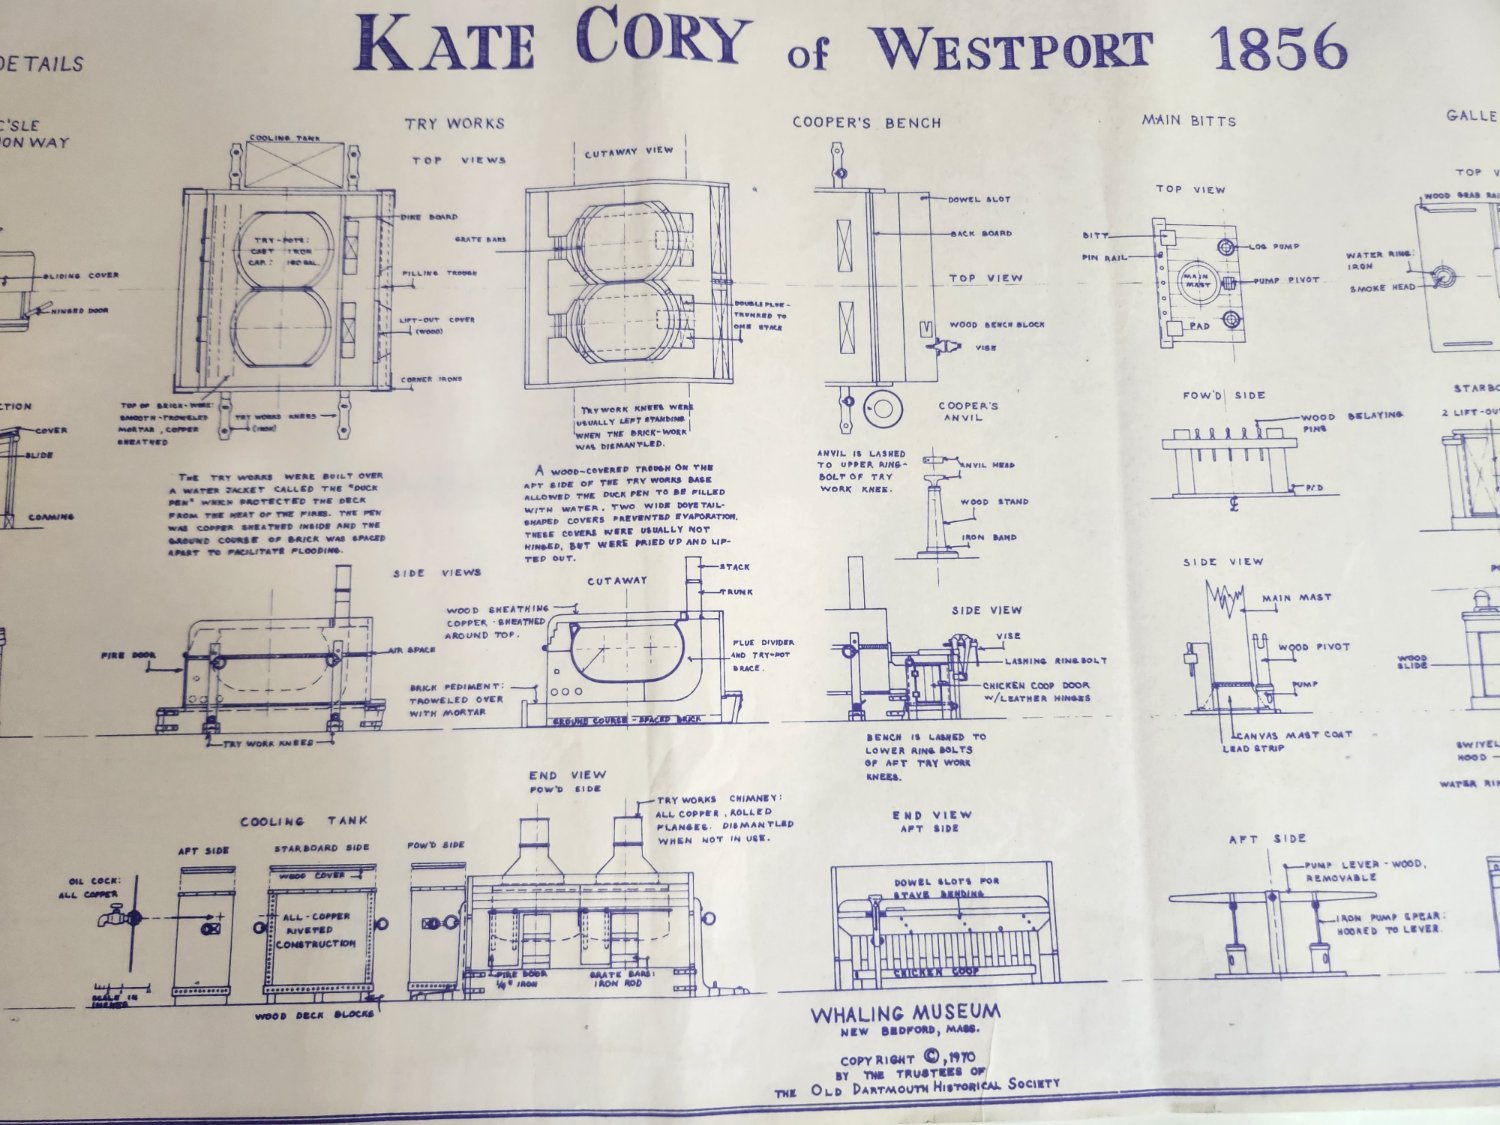
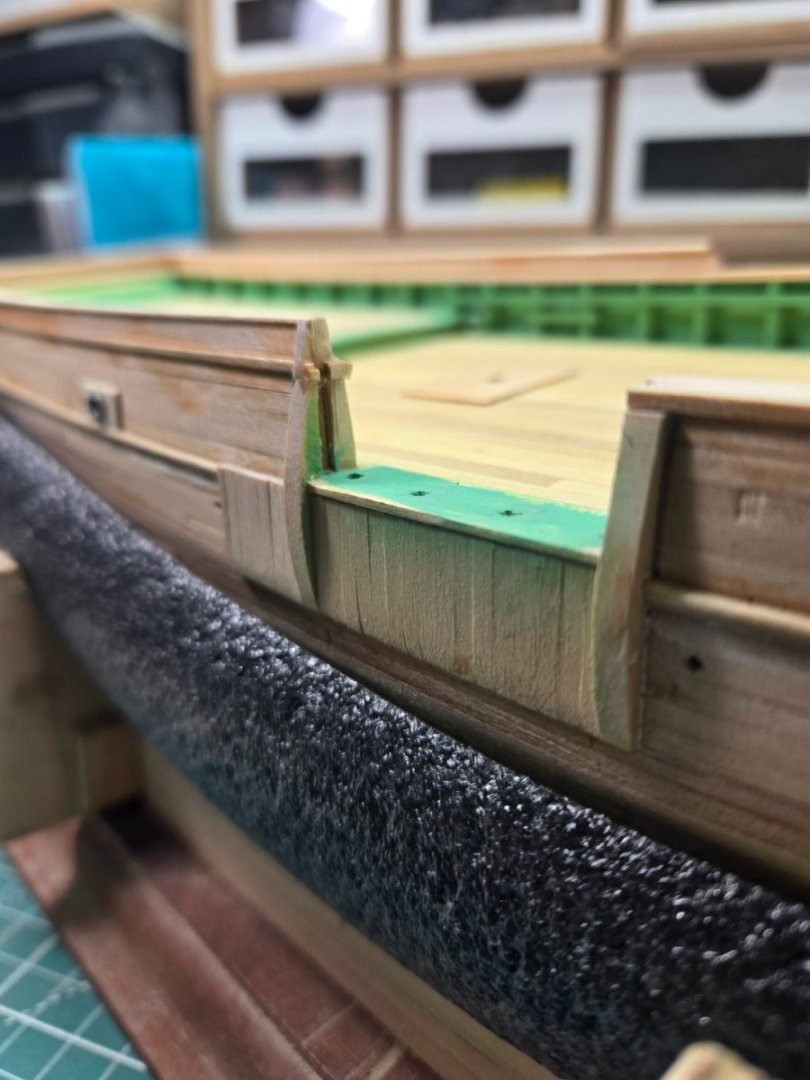
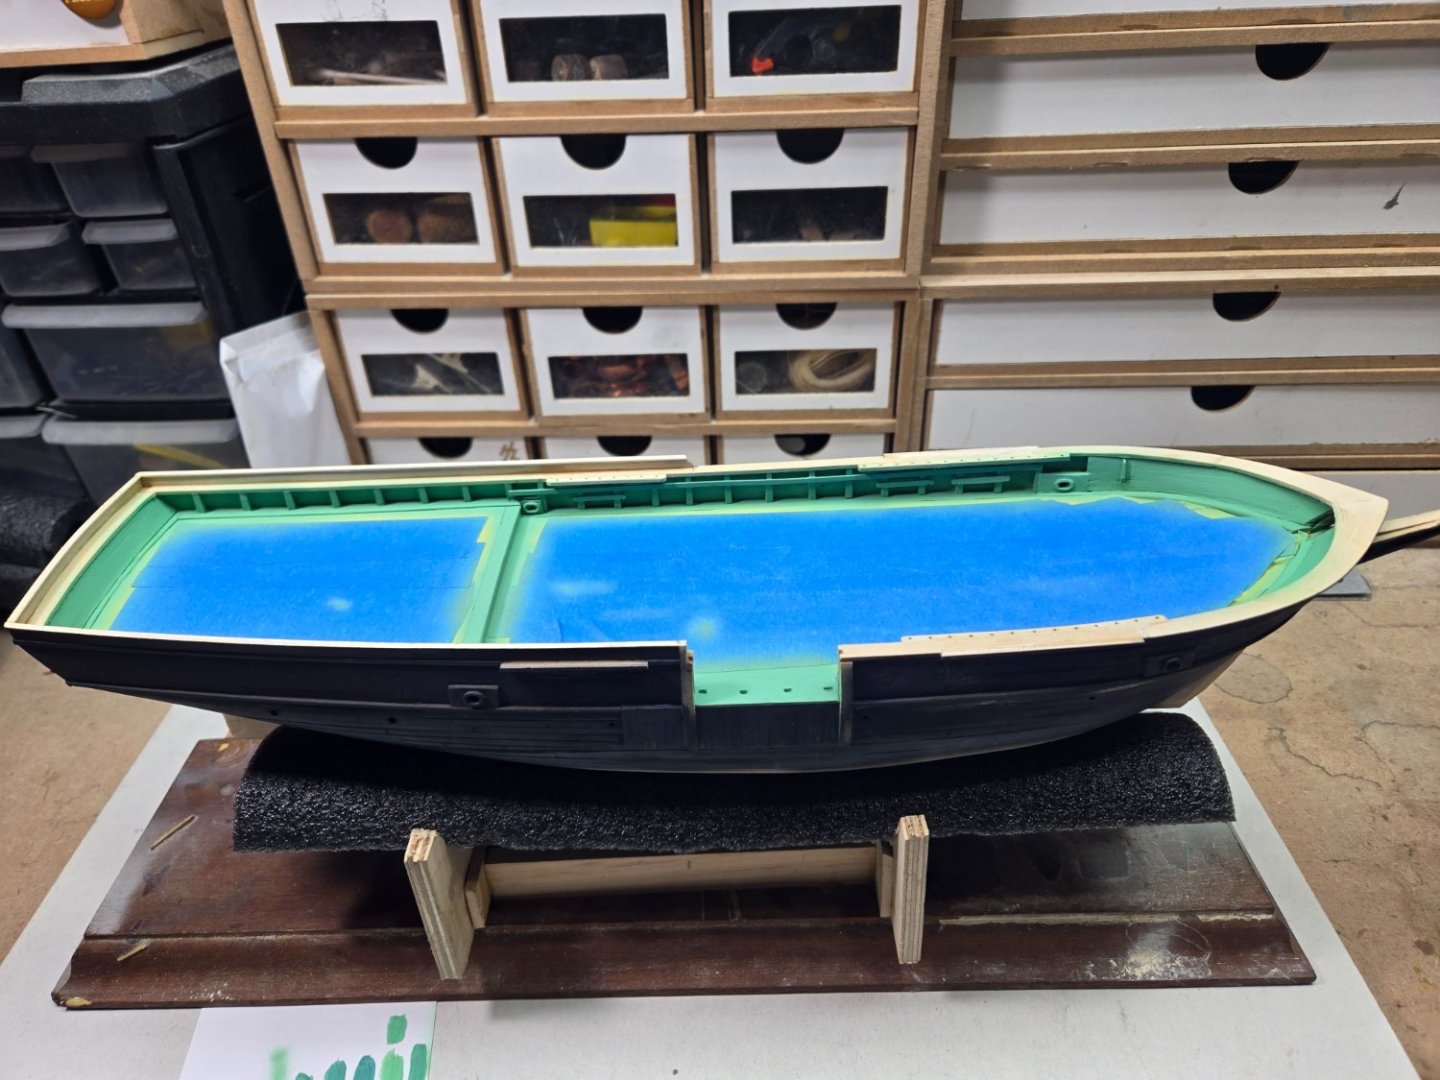
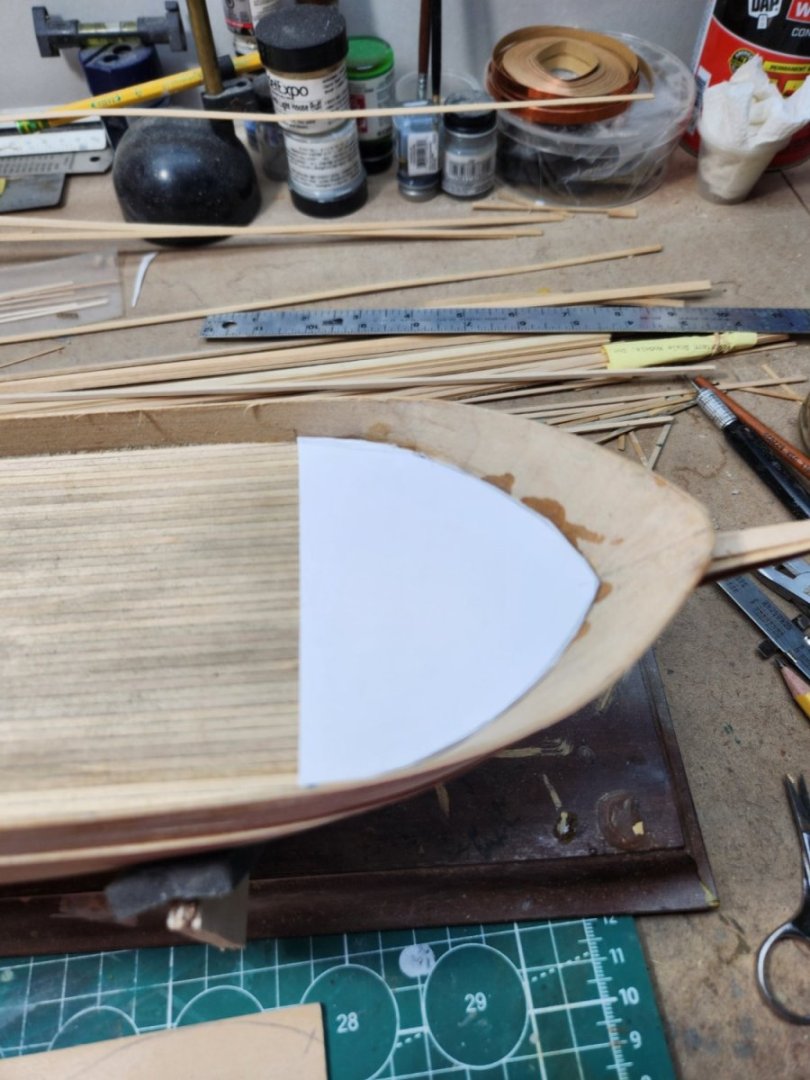
Finishing the deck planking. The instructions note, "on all whalers the main deck was covered with a pine sheathing in order to withstand the wear and tear of the cutting in process, the planking was somewhat wider than the deck plank and was usually holy stoned bright". I have confirmed this was done on Kate Cory but not all whalers. Unlike the main deck, the quarter deck planks are laid parallel to the waterway and not the centerline. I used individual strips for planking the quarter deck and a piece of scribed decking for the main deck which will then be covered with scale 1"x12" wood strips to represent the pine sheathing. The pine sheathing extends to the portion near the bow with the white cut out. I felt it was necessary to add the bottom main deck planking, despite the fact that it will not be seen, to maintain the scale measurements of the bulwarks. Also, I wanted to make sure the plank sheer matches with the level of the waterways. As I was planning out adding the pine sheathing for the main deck, I realized I'll need to add the waterways first as there is a small gap between the pine sheathing and waterways for the scuppers. Another issue I have been trying to resolve is the correct color of the waterways, bulwarks and deck structures. The instructions reference using "medium green" paint and grey. Well, define medium green? There is no historical standard and the only reference I could find was a "verdigris color" paint which is sort of the color of oxidized copper being used. Also, New Bedford Whaling Museum offers a print of Kate Cory which includes greenish blue color for the structures and bulwarks. From my perspective using a medium green paint, which tends to be darker in scale, would not be practical. Especially on a working whale ship. Floquil Paints had a line of historical Marine Colors, which included verdigris. Fortunately, I still have the color chart and will try to match it.


-
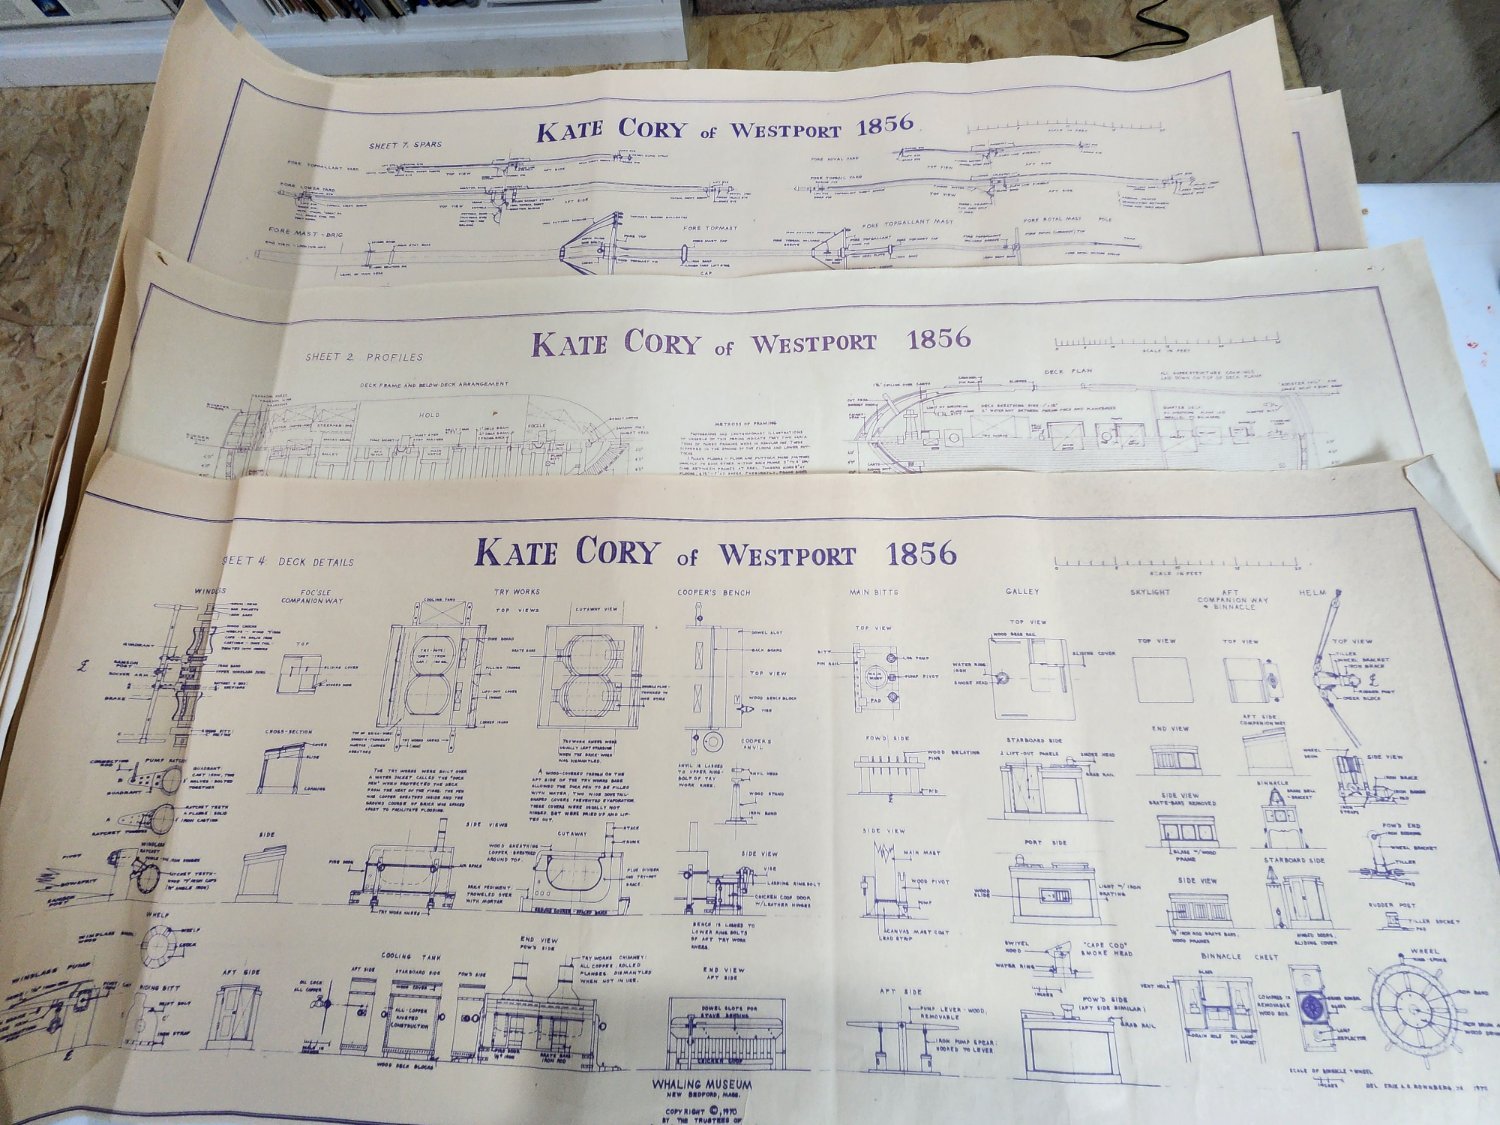
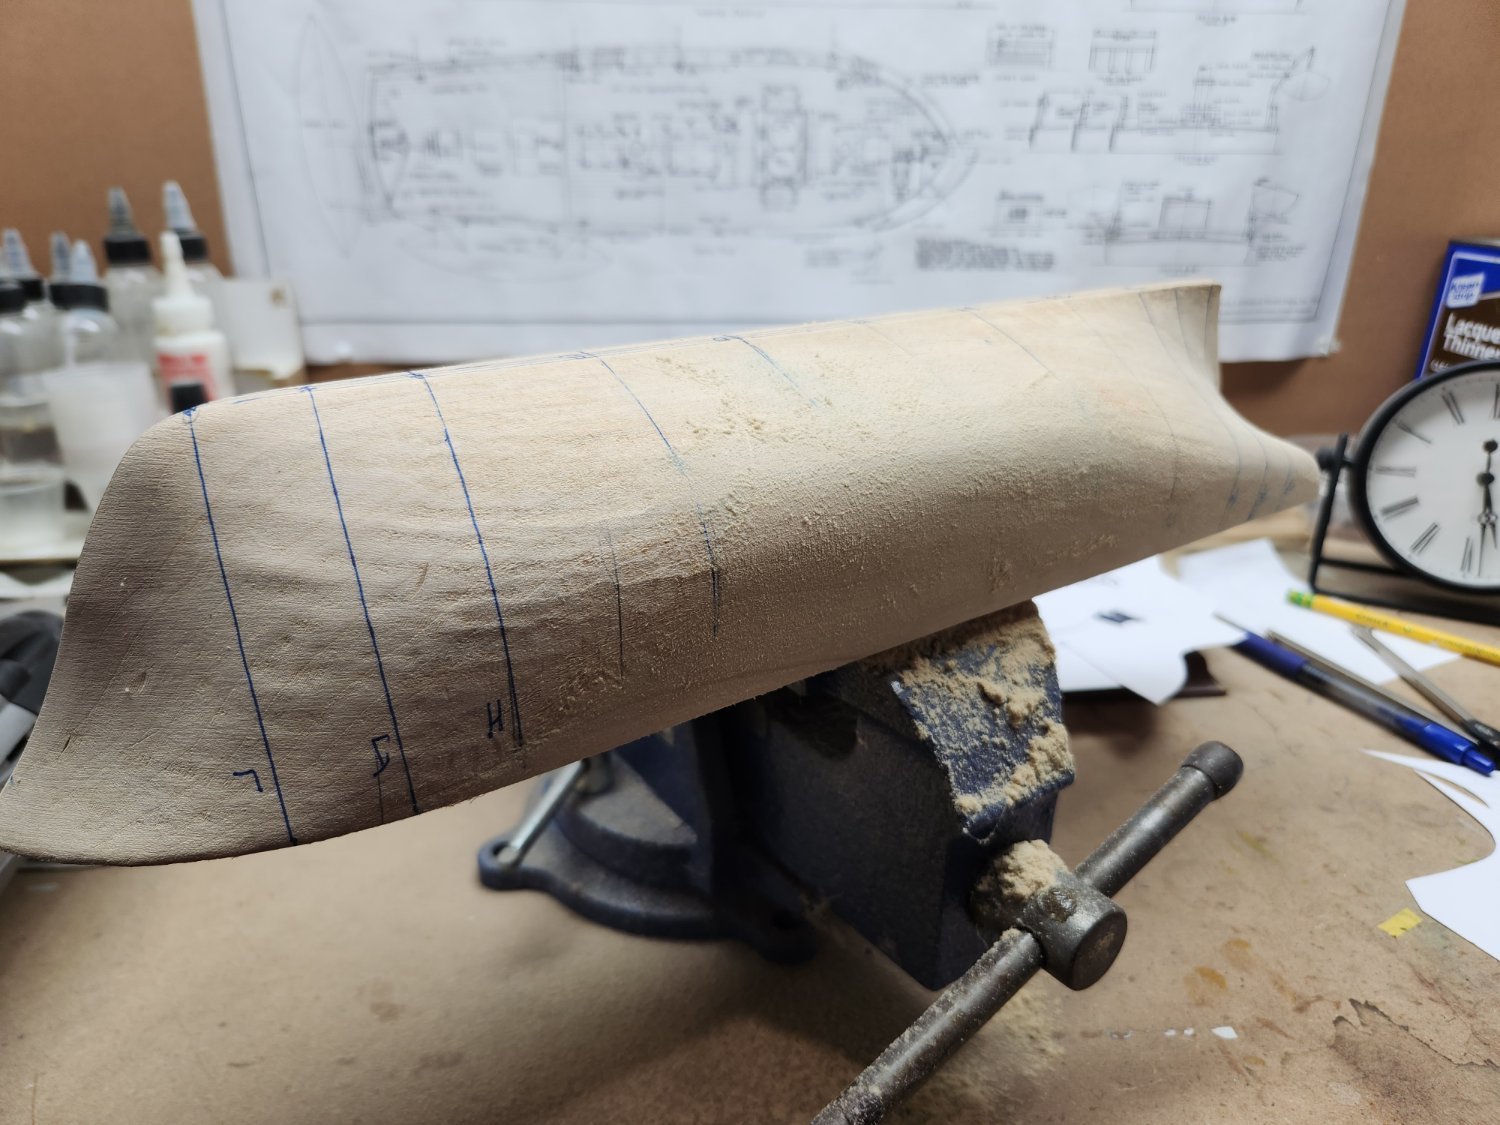
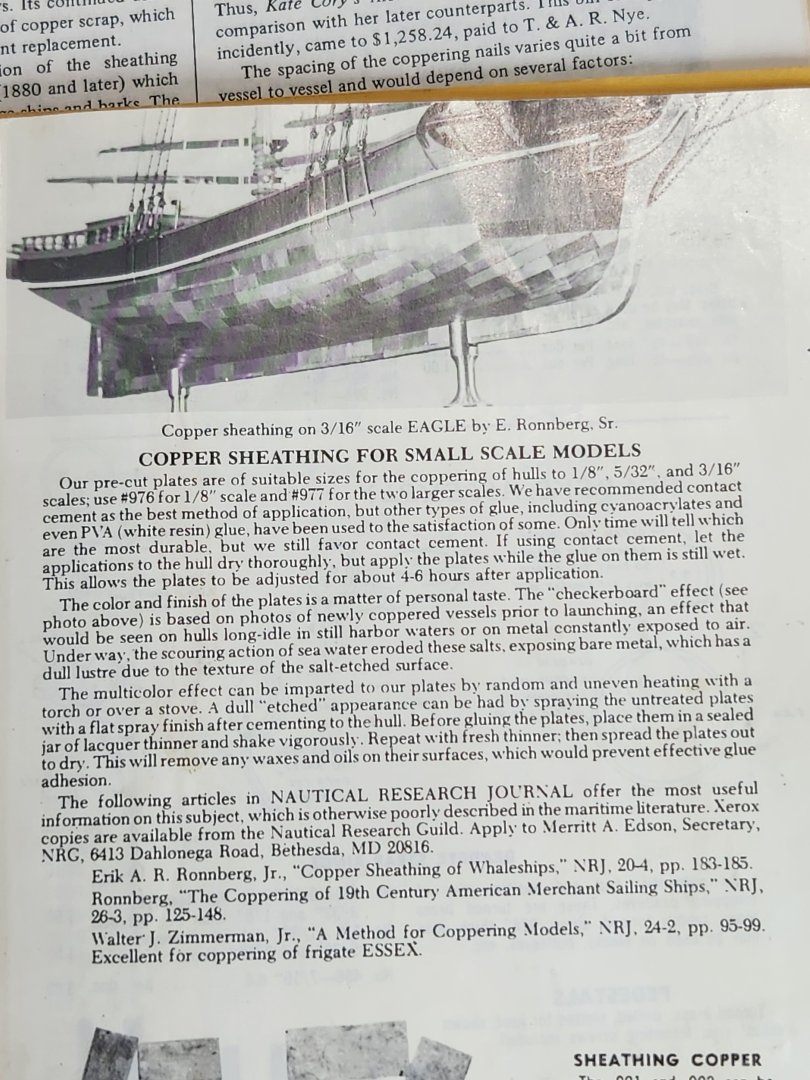
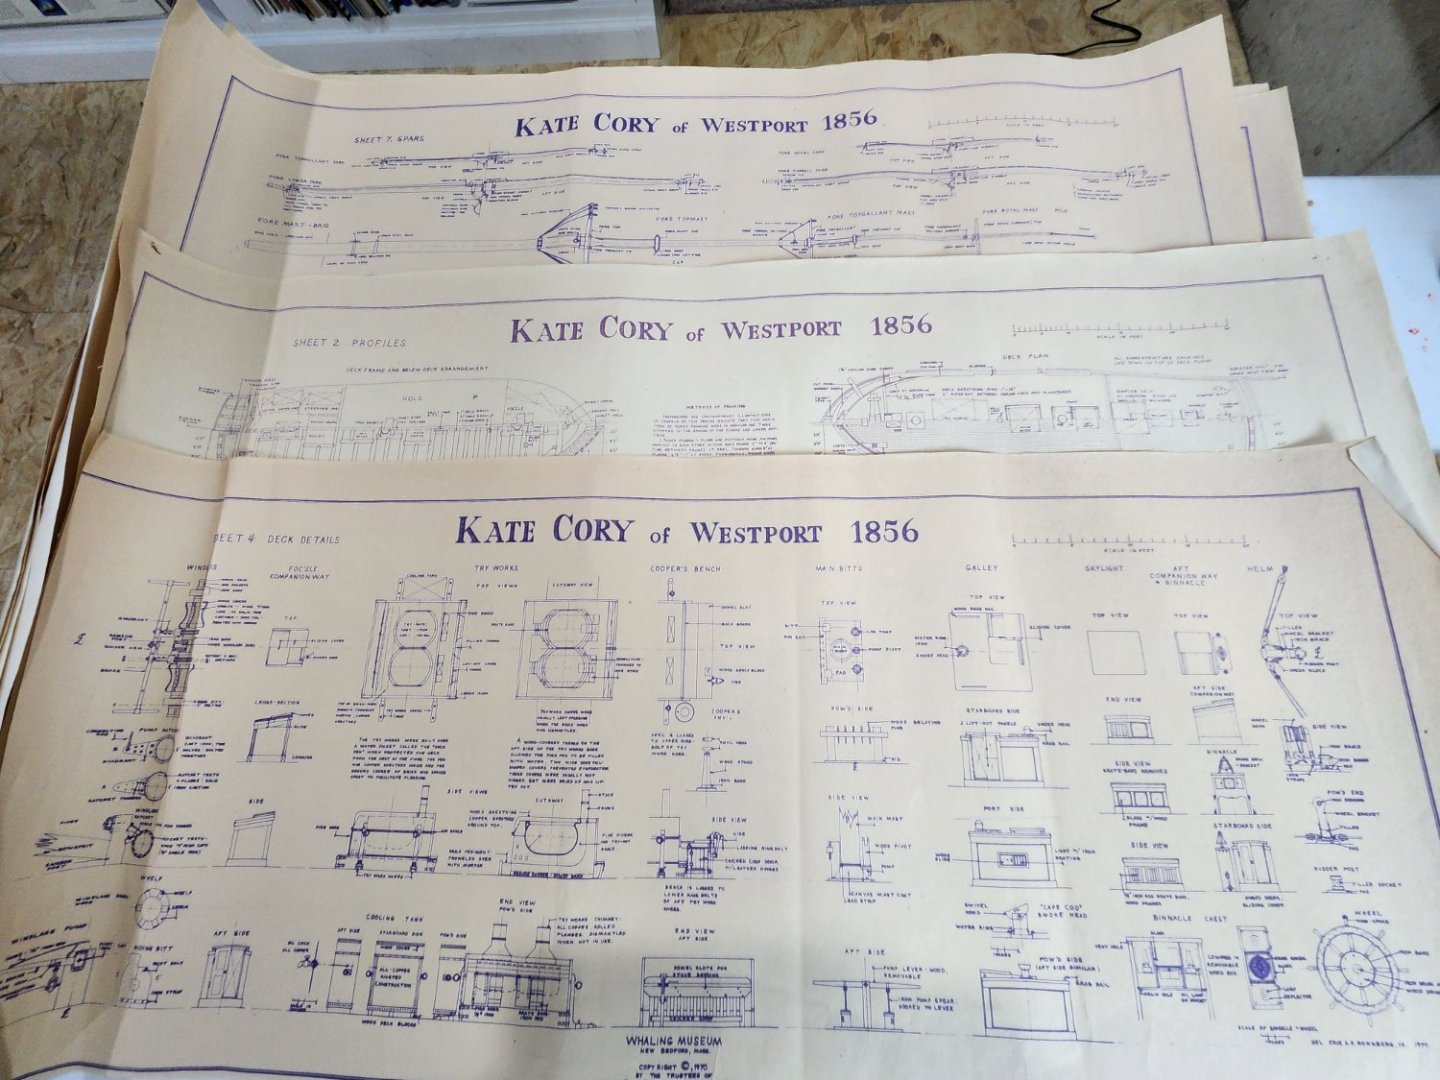
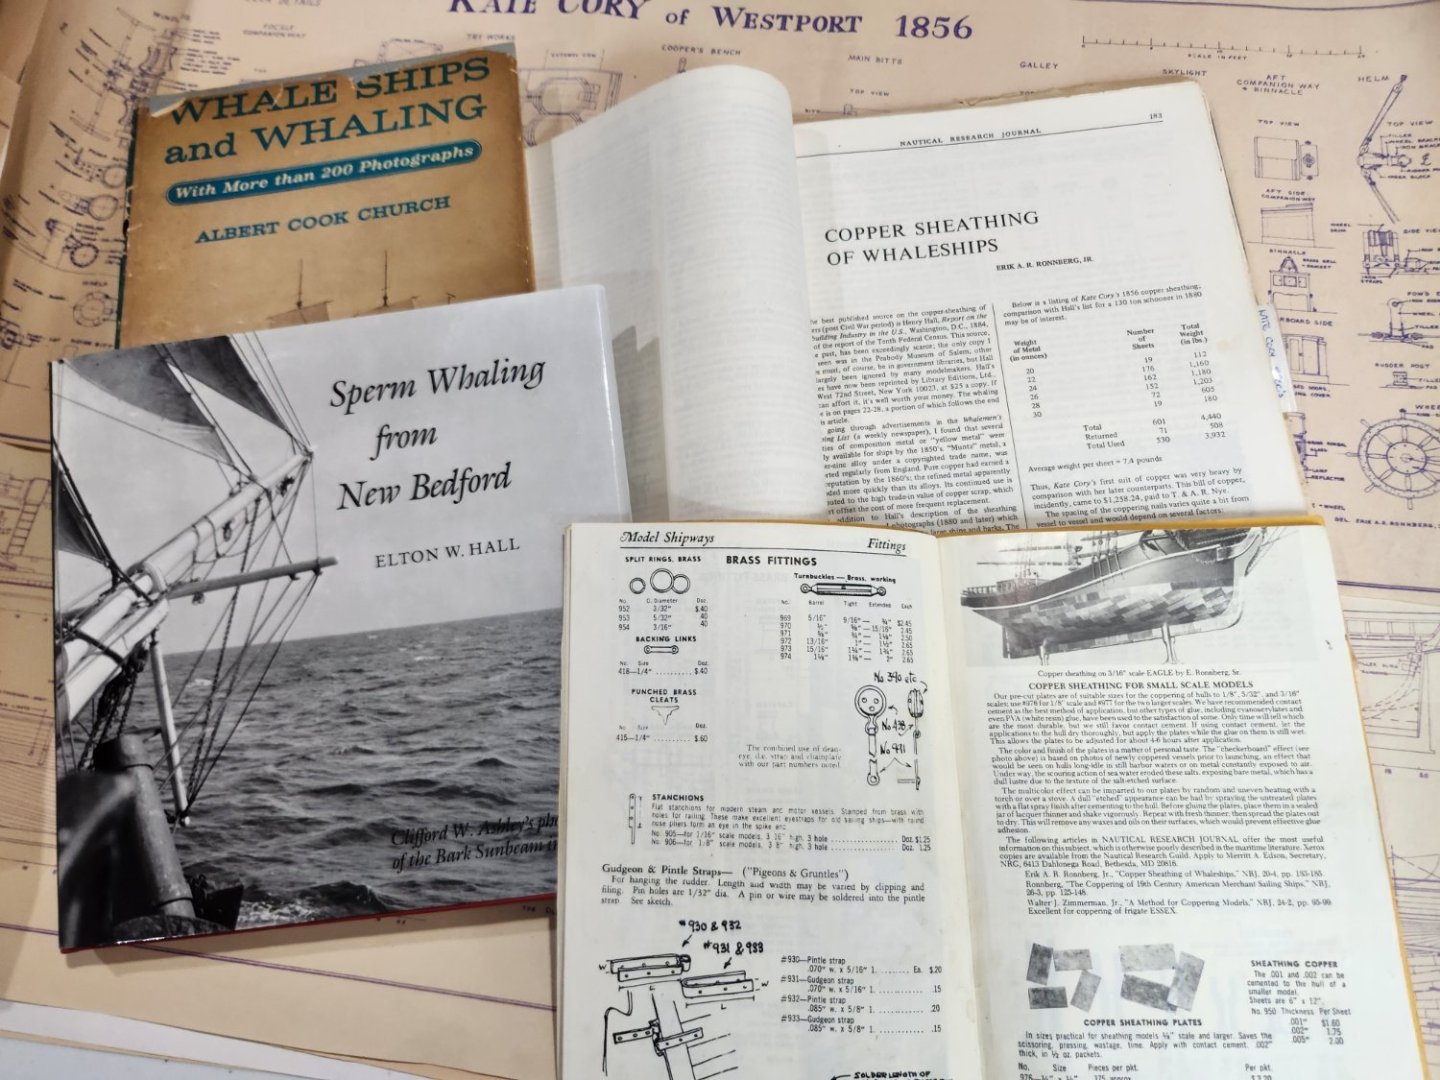
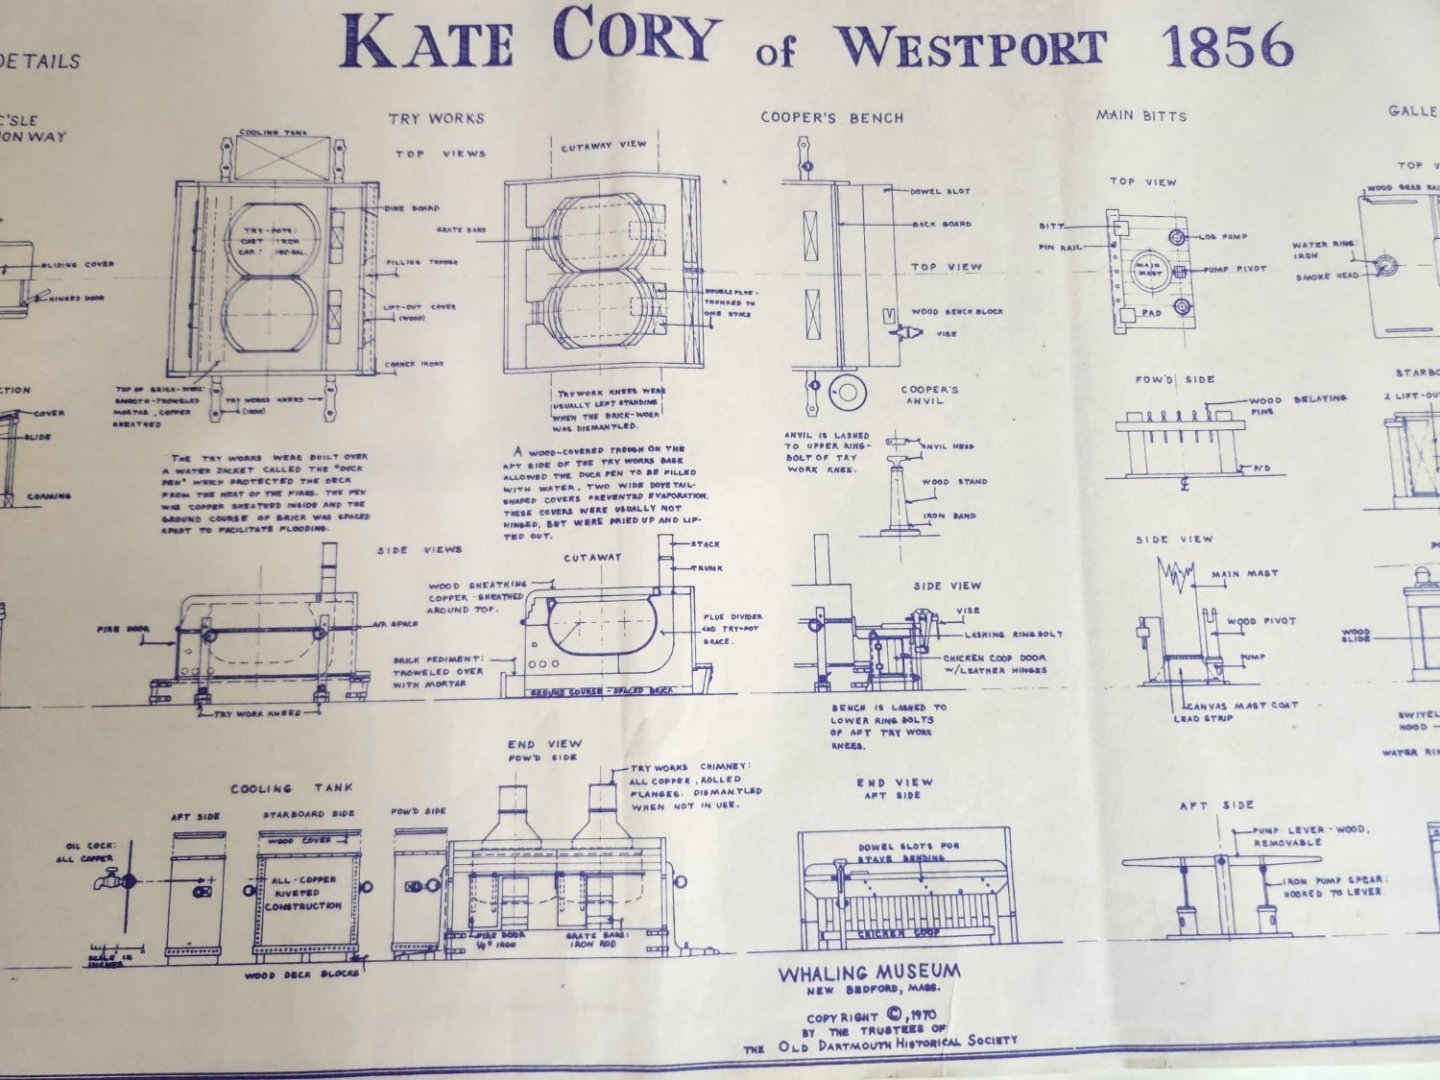
Bought this kit along with a set of plans from New Bedford Whaling Museum many years ago and finally decided to build it. I saw the kit listed in the first Model Shipways catalog I received in 1986 when I was considering the hobby. I decided on a starting with their KATY, 1/4" scale Virginia Pilot Boat. Since then, I have built several other kits along with my other hobby interests. However, completing the Kate Cory has always been one of my primary ship modeling goals. Unlike the Charles W. Morgan, there is not a great deal of historical documentation available regarding this specific ship. The New Bedford Whaling Museum, New Bedford, Ma. (USA) is the only resource I could find that offered credible documentation. This is where I obtained plans by Erik Ronnberg, Jr. which provide significantly more details and views then the kit plans. Additionally, I obtained copies of the Nautical Research Journals referenced in the Model Shipways Catalog regarding Coppering techniques, i.e., "Copper Sheathing of Whaleships", etc. I coppered two other kits using this technique and feel it provides a more realistic appearance. However, one could argue using this process without some weathering of the rest of the model is inconsistent. Despite all the research and obtaining all the documentation I could find, I still felt I needed a good visual representation of the ship. Finally, a key motivating factor for me to starting the project was the 1/4" scratch-built model by Thomas J. Lauria, (https://tjlauria.com/gallery/whaling-schooner-kate-cory/). Tom has many other excellent builds and has been helpful answering my questions. This will be a planked solid hull model. I've never built a plank on frame kit other than a small Dory. Then only other change from the kit is to swap out the solid wood whale boats for a set of updated laser cut boats.


-
Not all build logs are created equal! I've seen build logs posted after the initial build was started. It's a good way to get feedback.
-
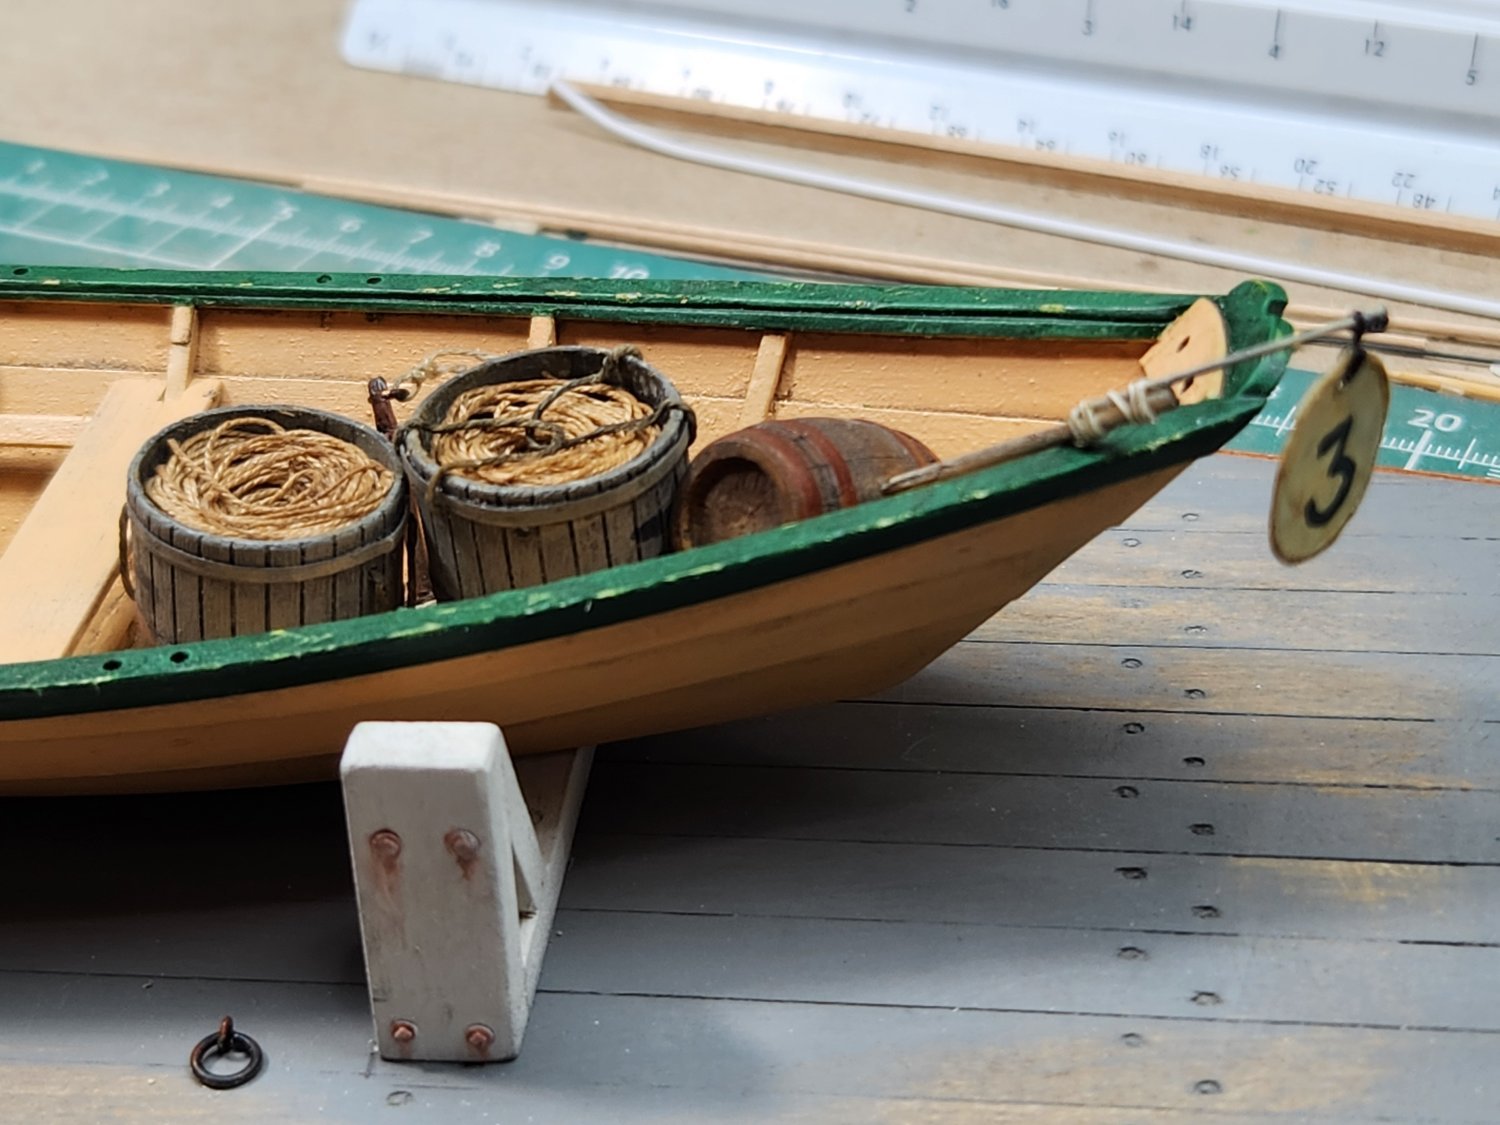
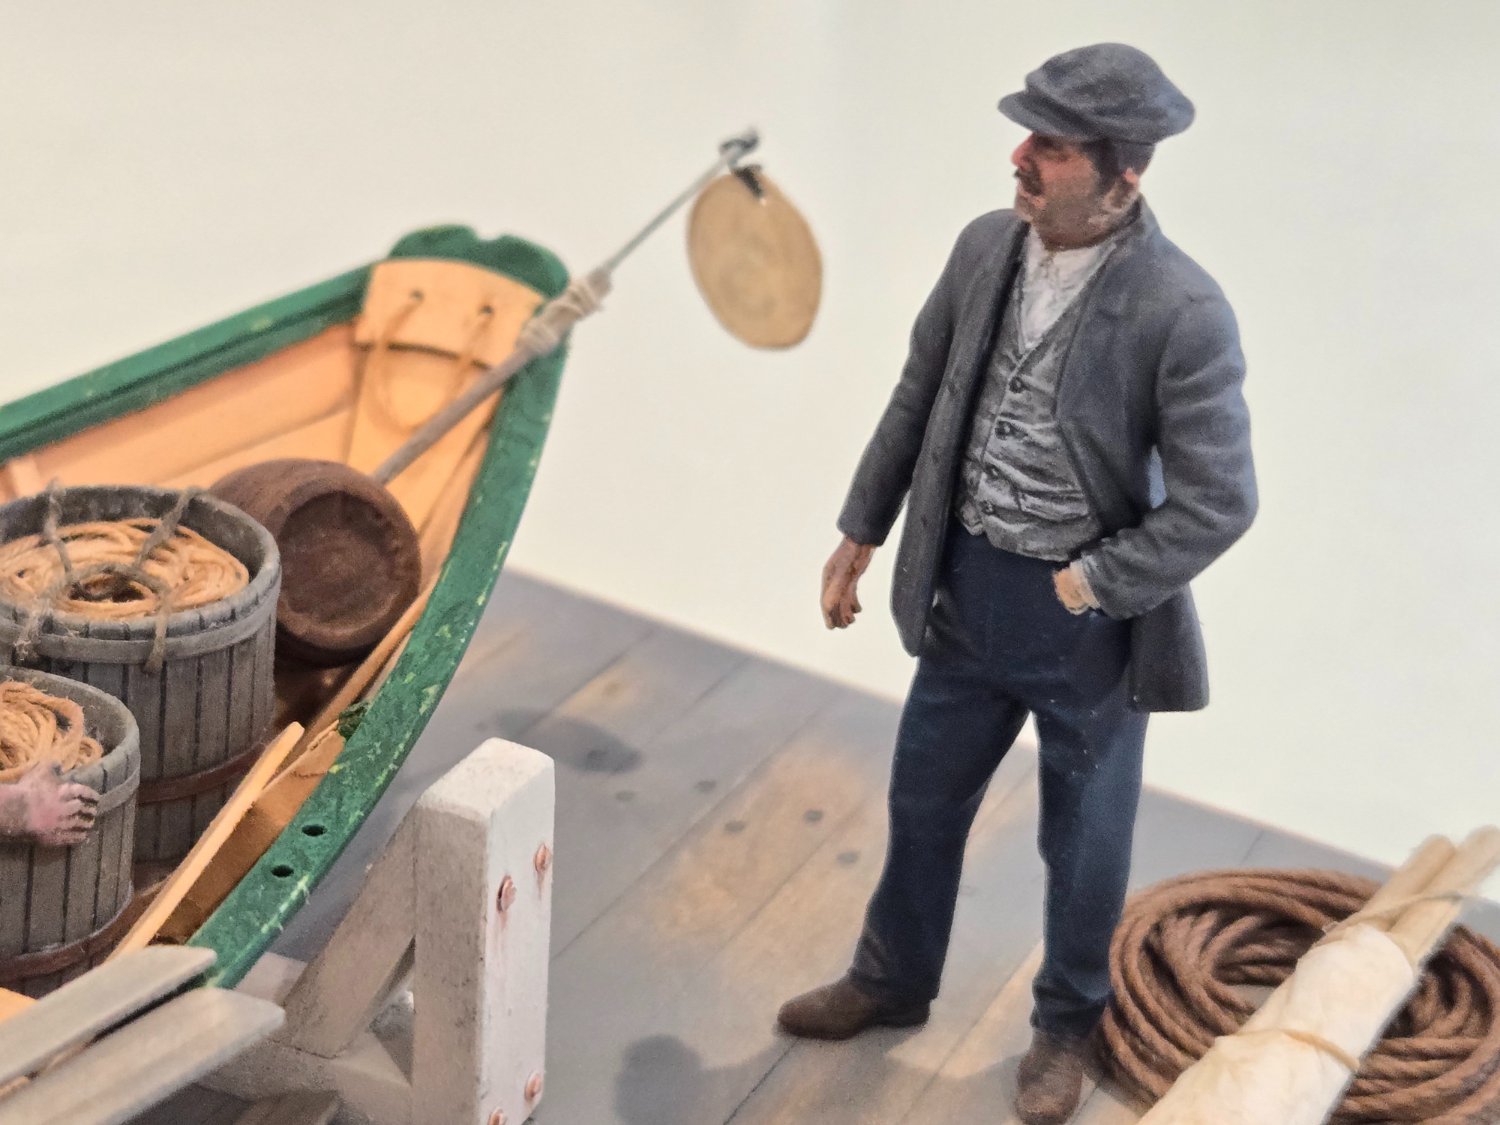
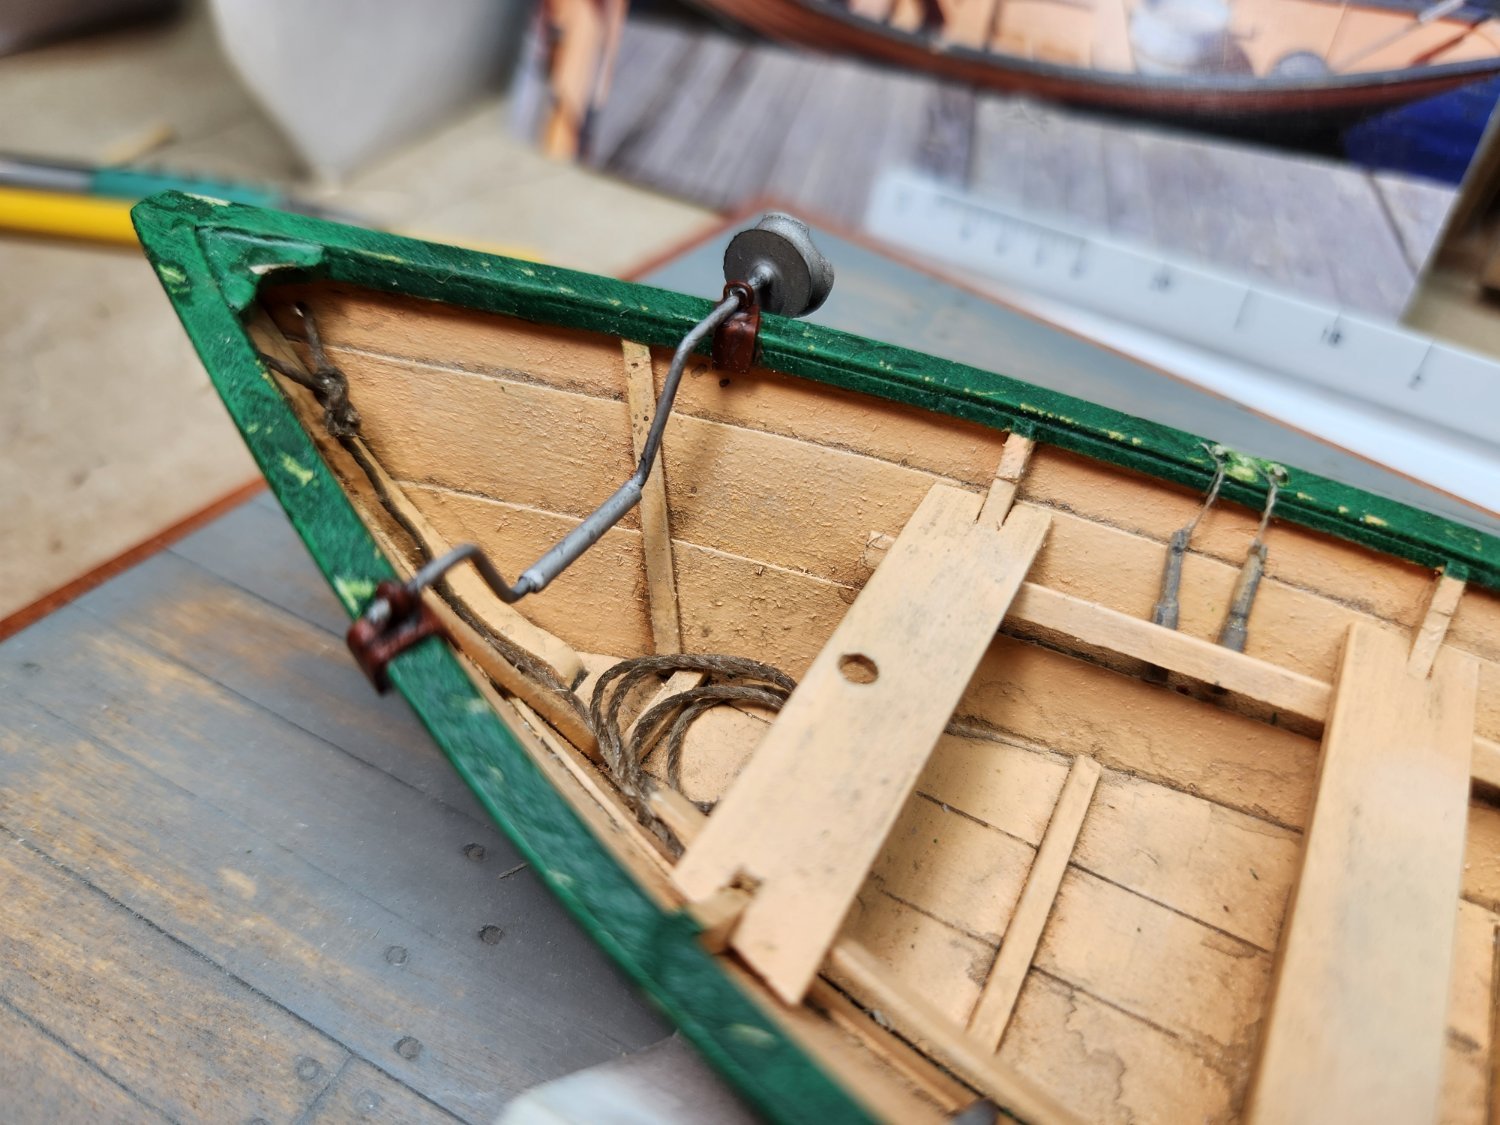
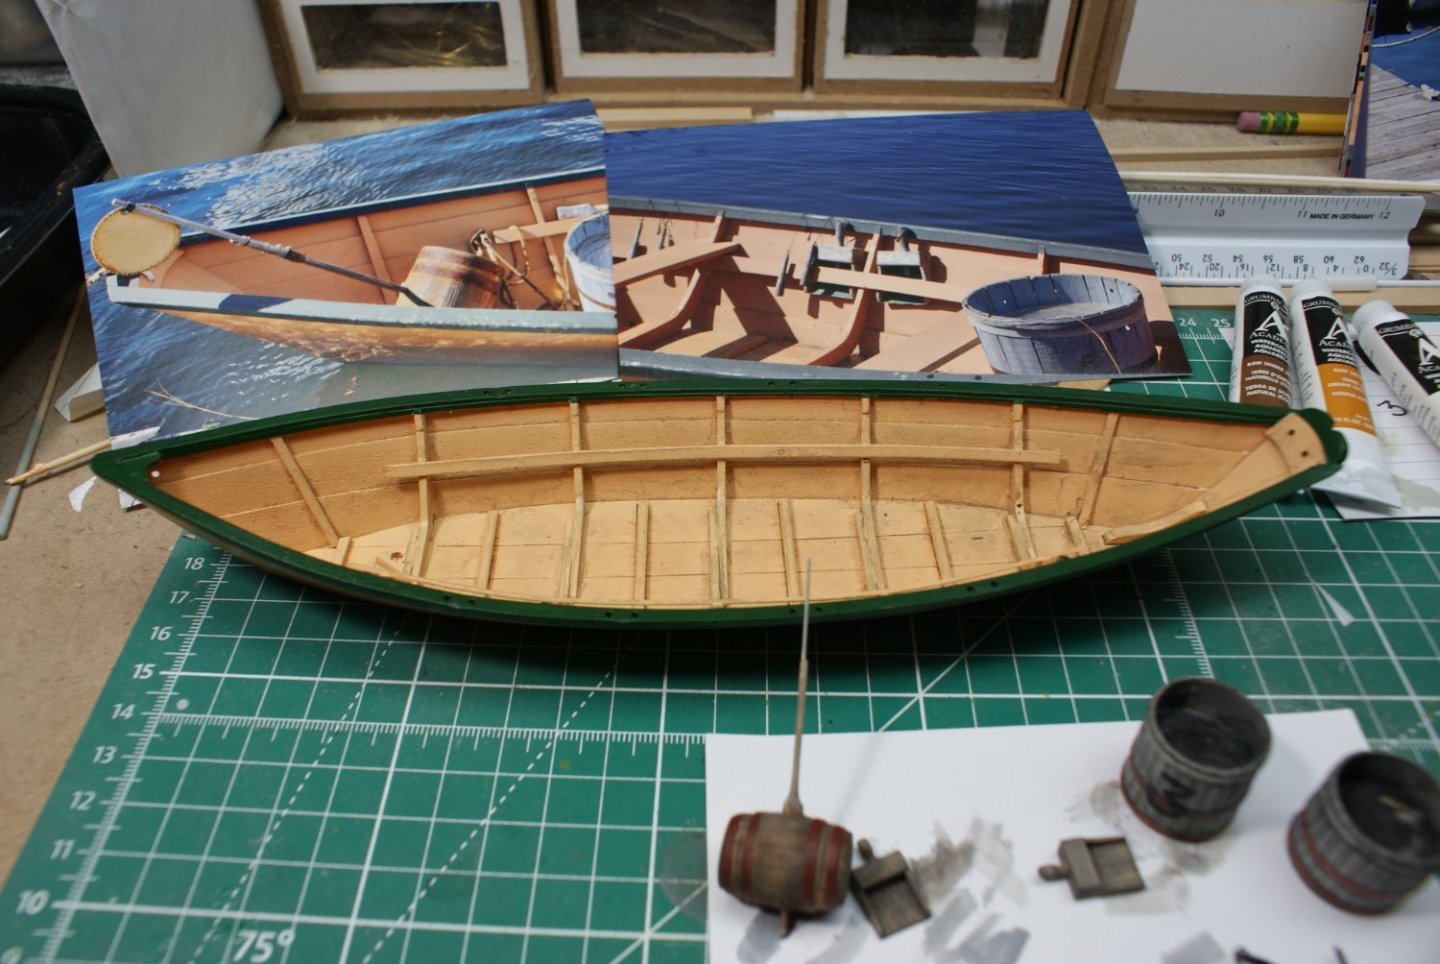
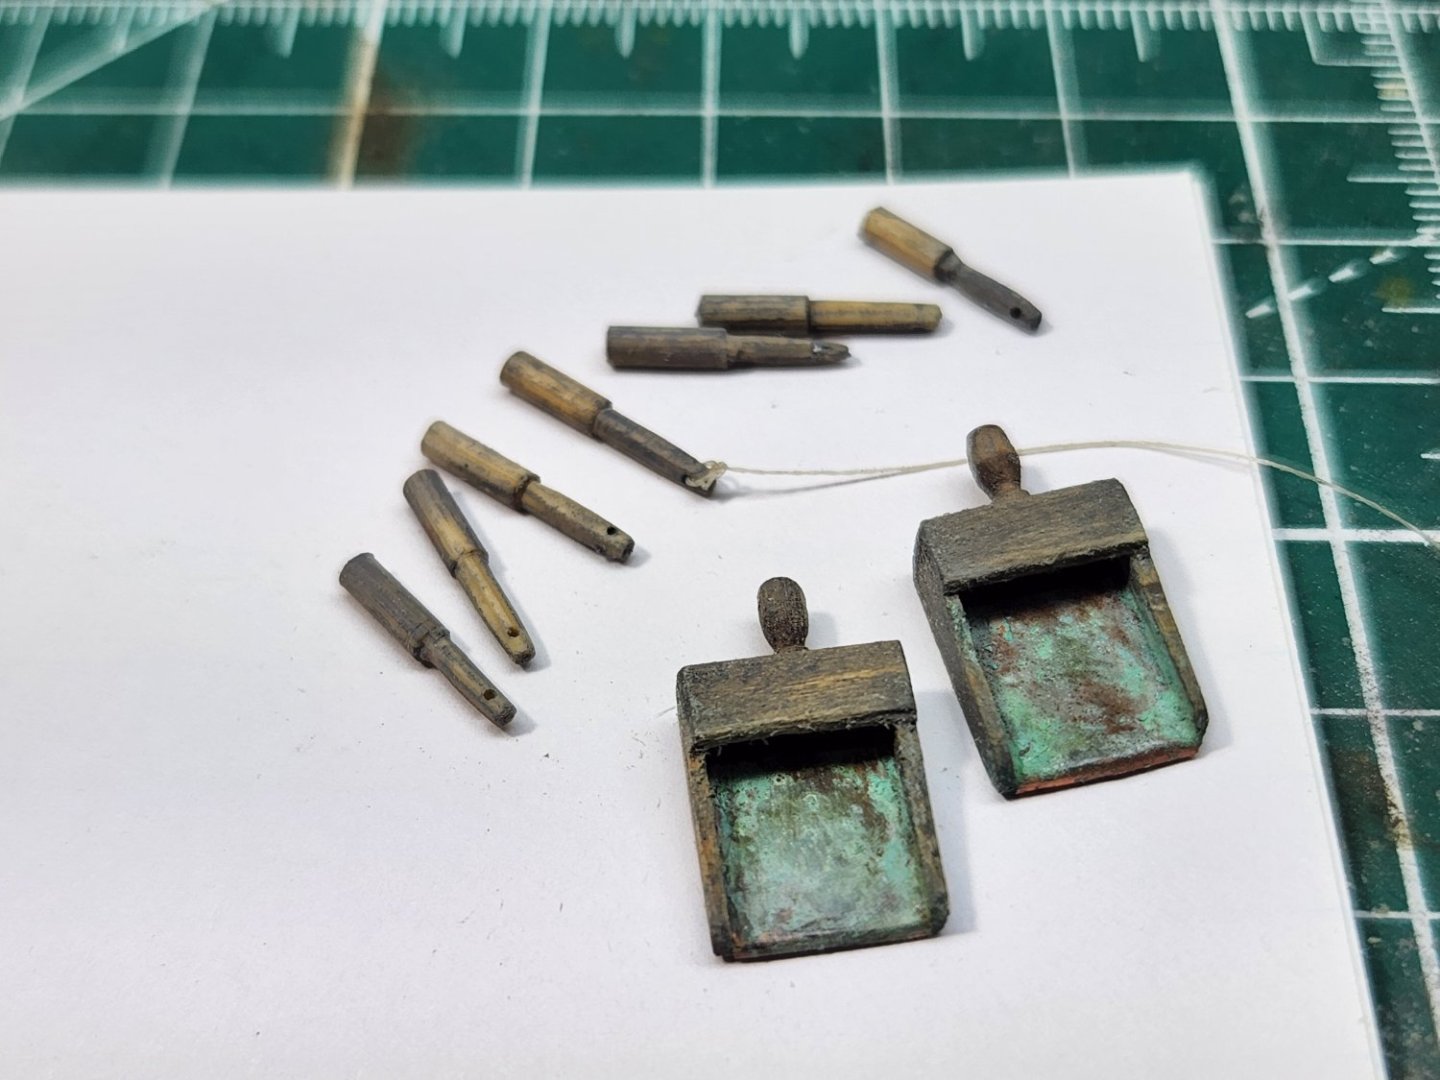
Some updates on the fishing gear. The item on the bow was called a "Hurdy-gurdy" a/k/a gurdy. Used on a dory to haul trawls in deep water. Still playing around with the placement of all the gear.


- 11 replies
-
- 10
-
-
-
- Model Shipways
- Finished
- (and 2 more)
-
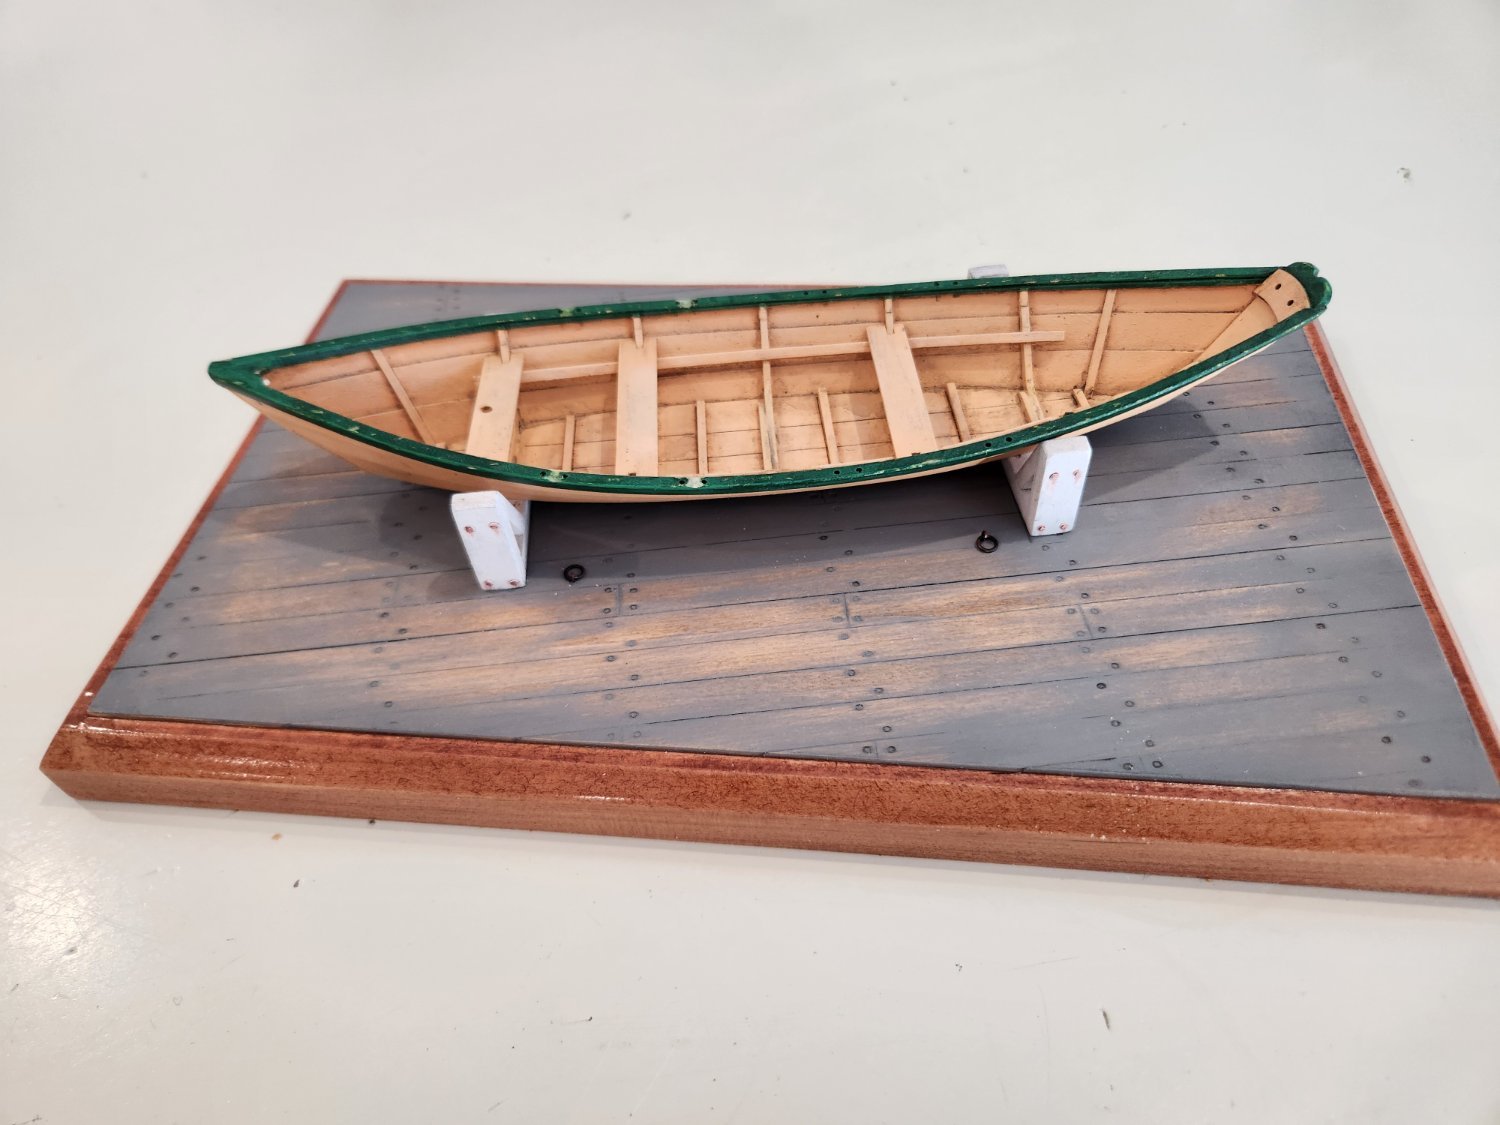
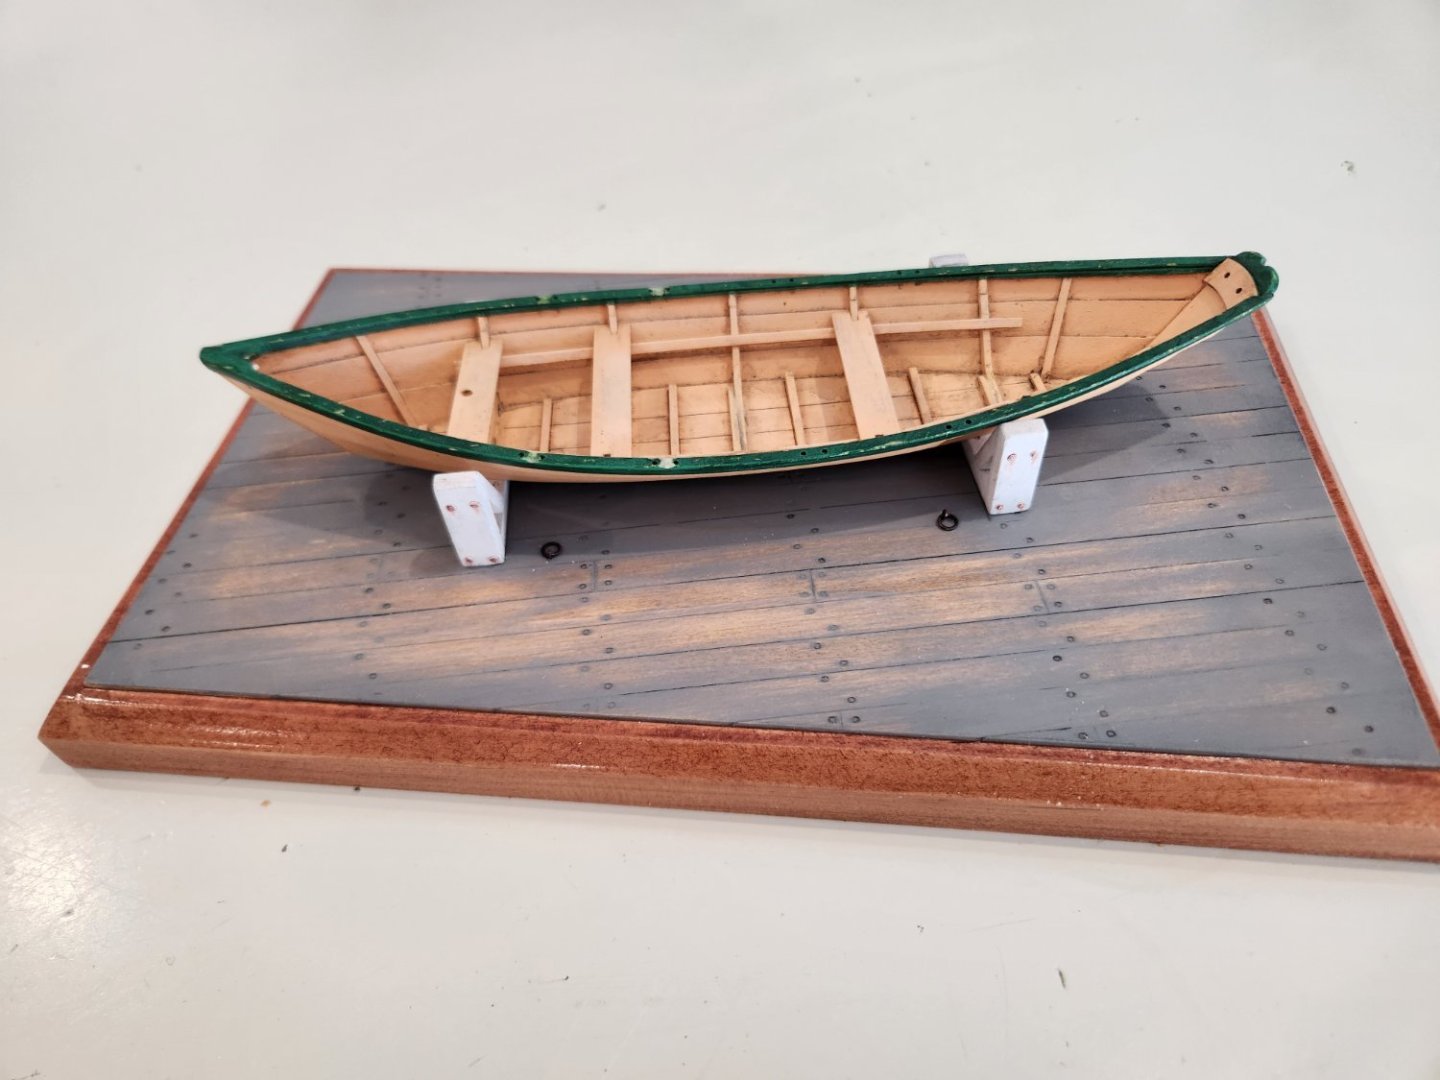
I recently used the sanding technique on a ship deck diorama base. First, I stained the wood, then light paint and some sanding. Whether you paint over the stain or not the process is the same. I also weathered the Dory using watercolor paints. Eventually I want to weather a Schooner, so thought this build would allow me to try different techniques. Good luck.


-
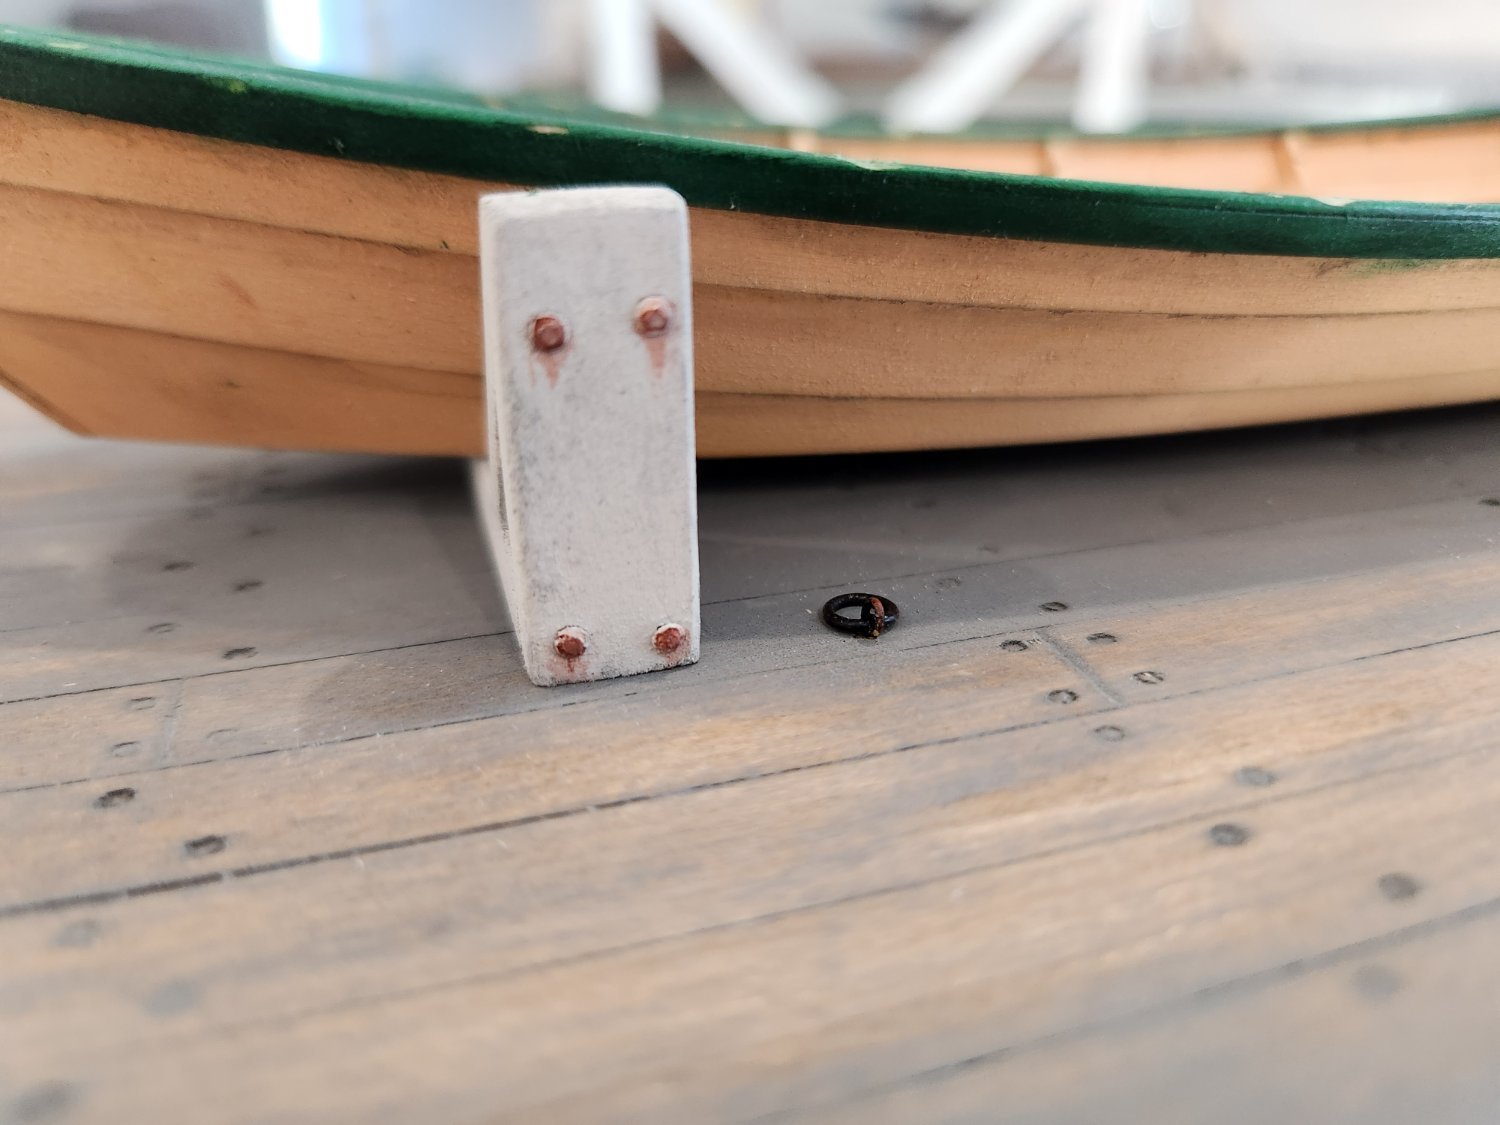
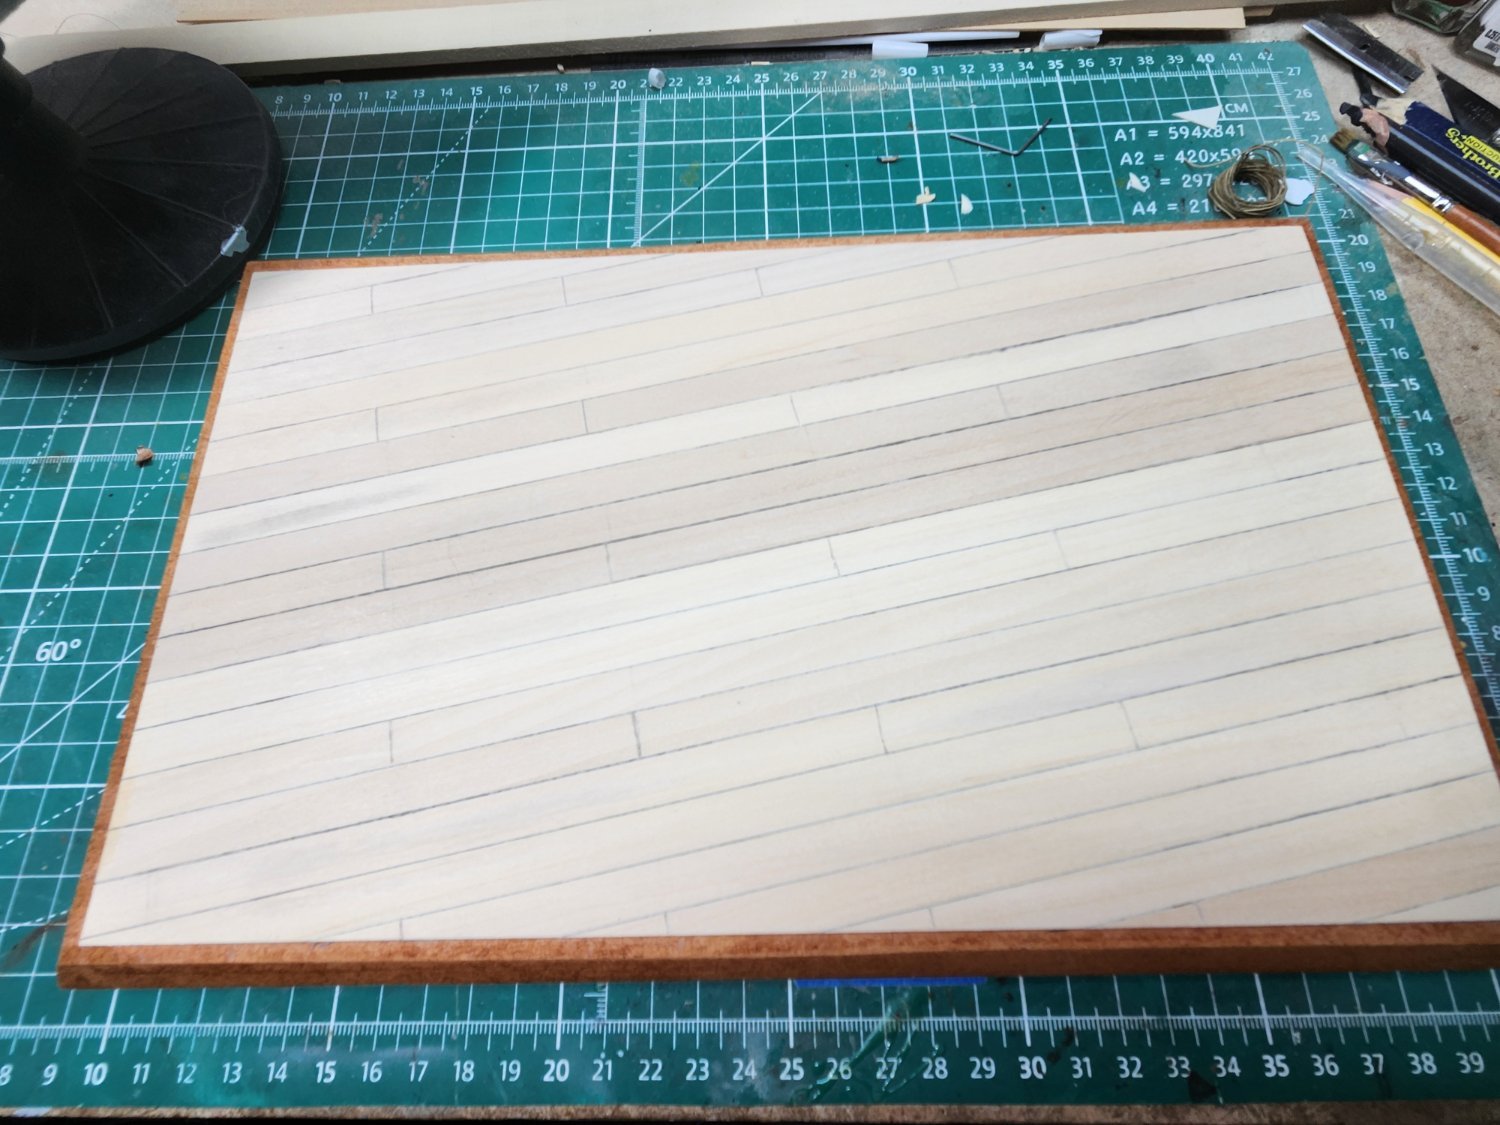
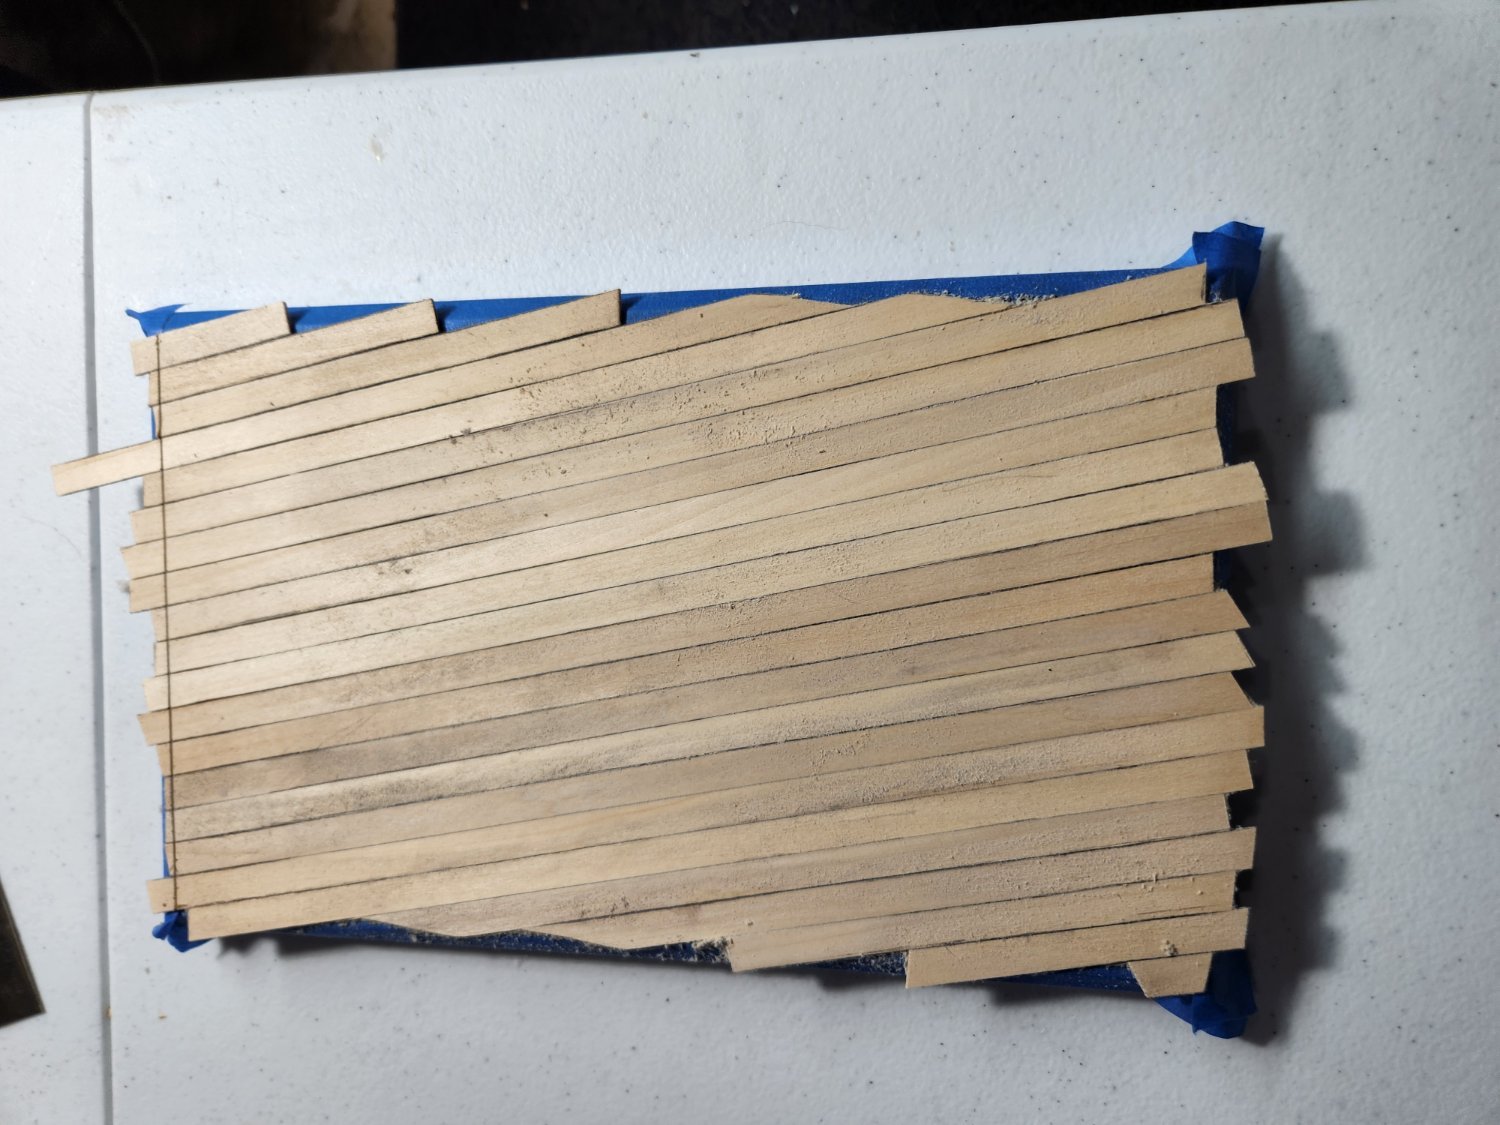
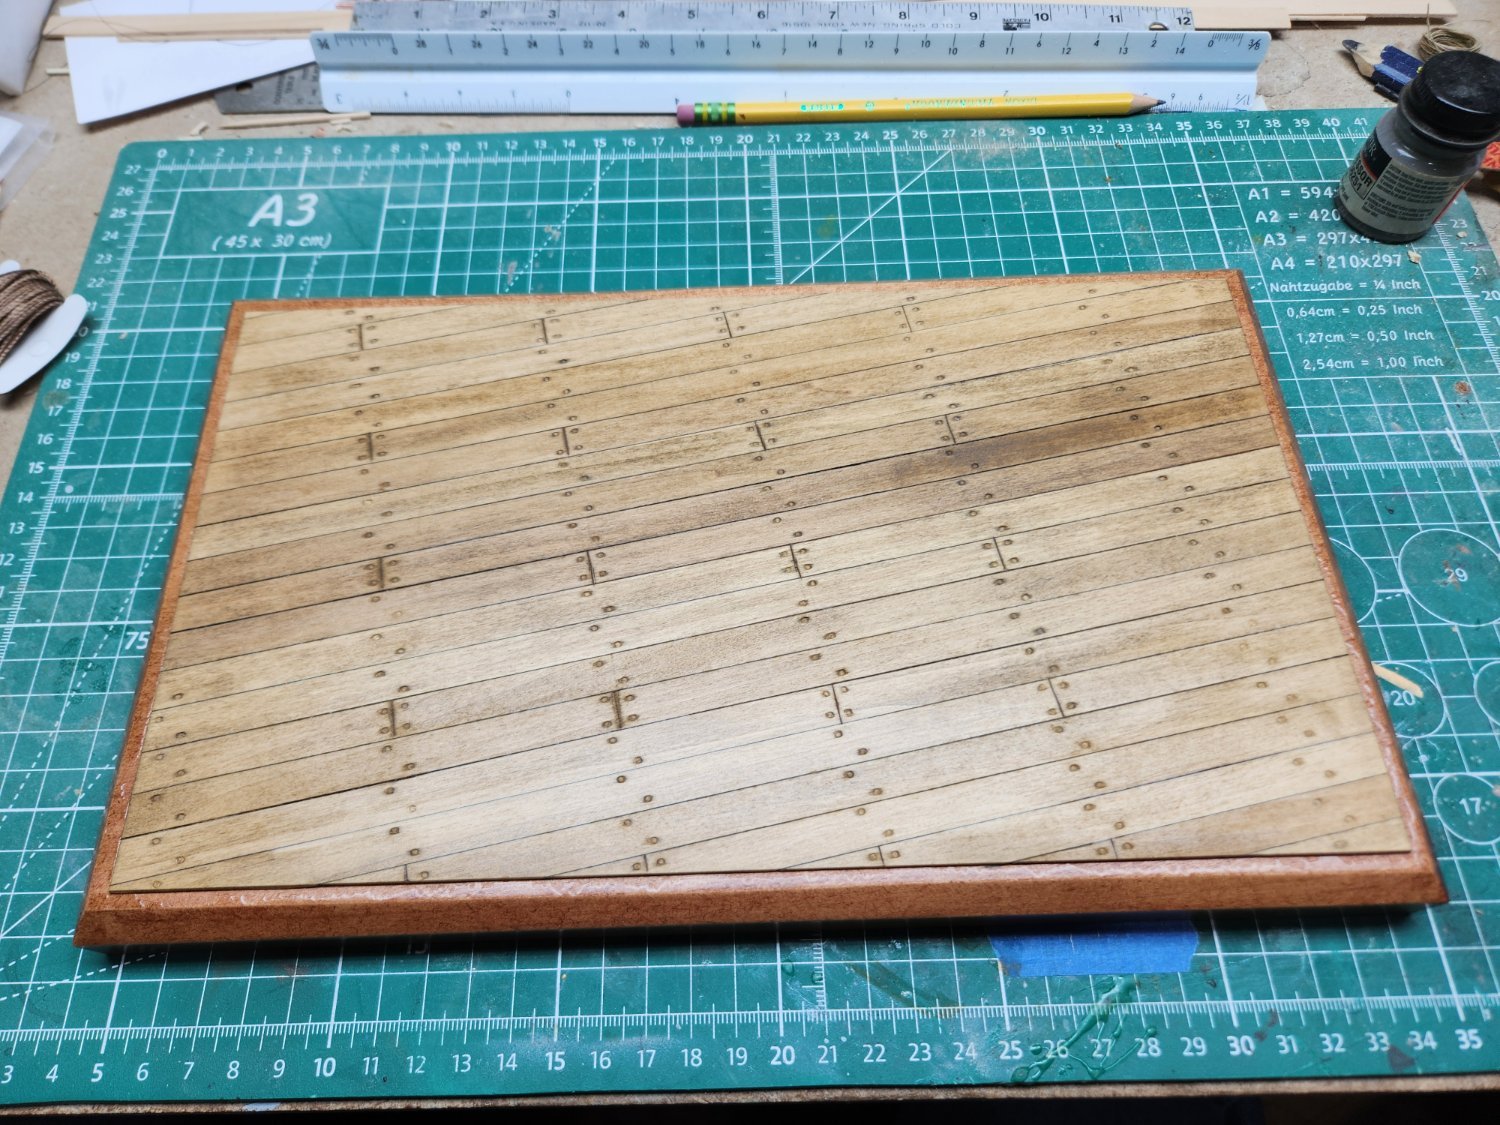
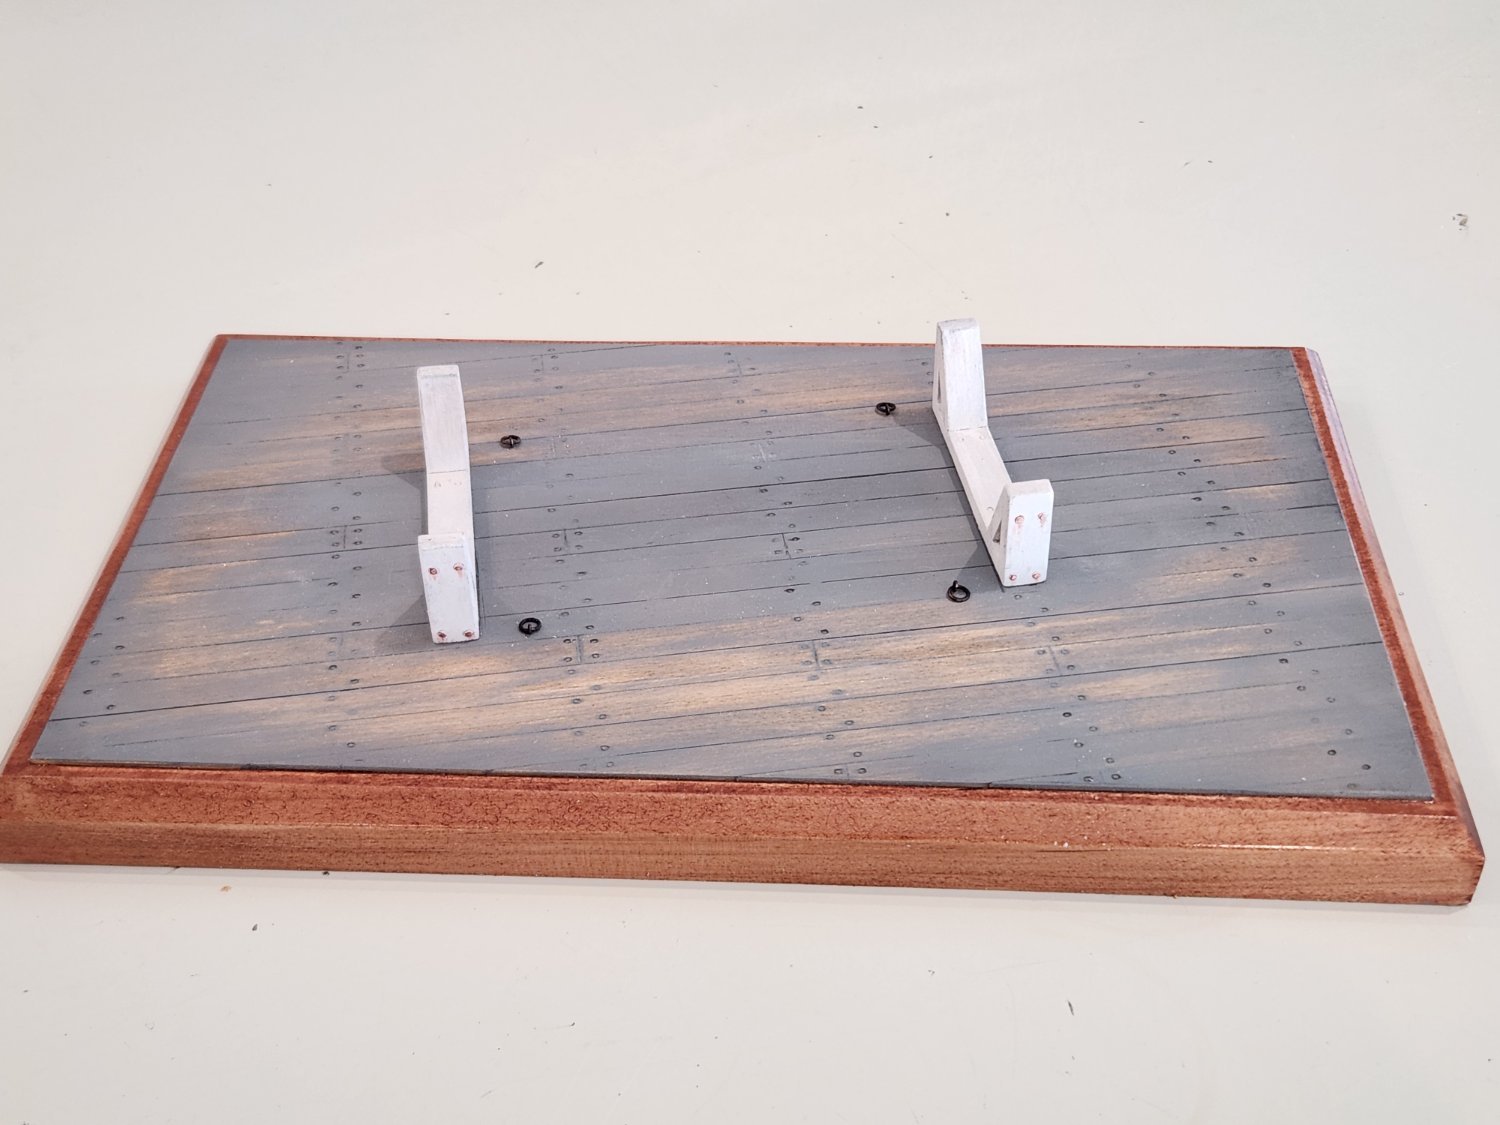
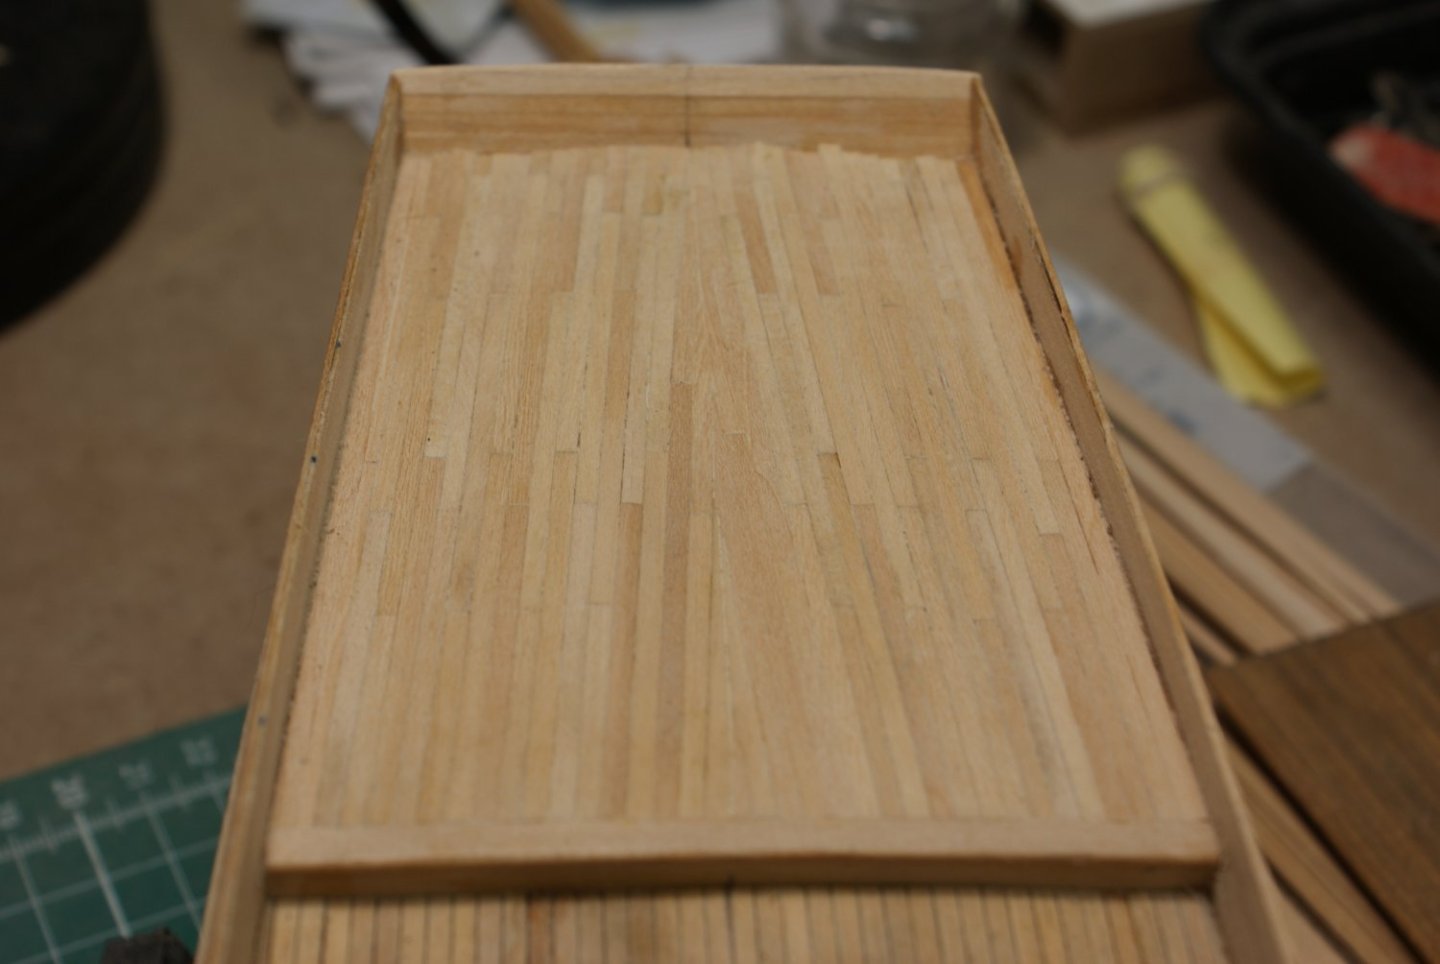
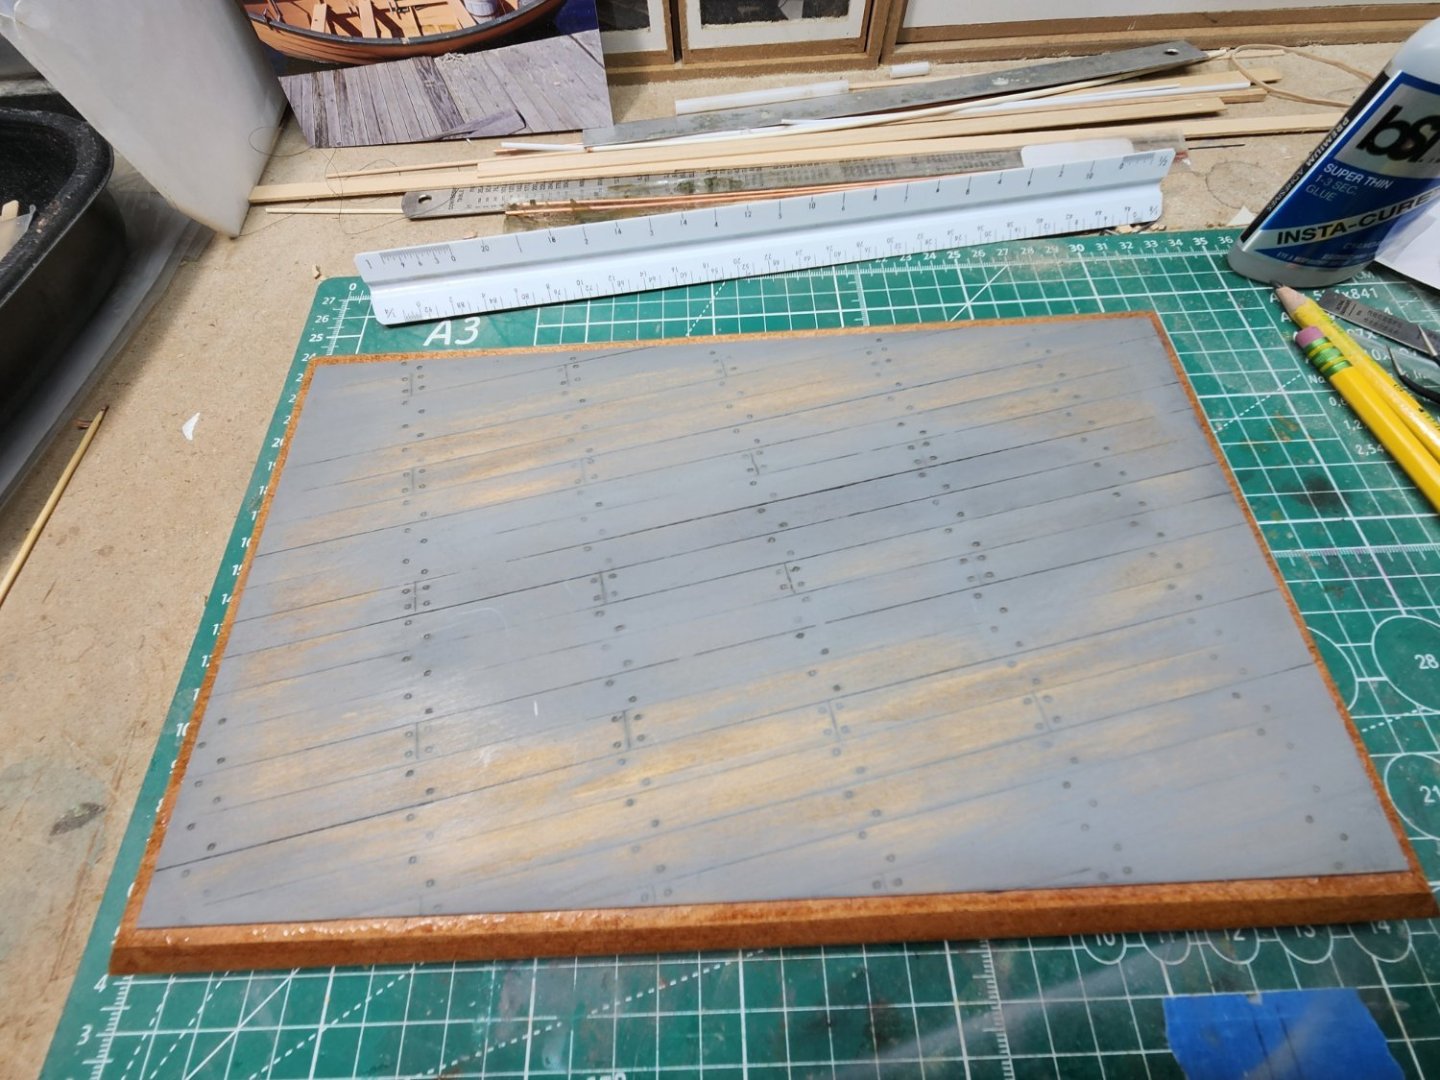
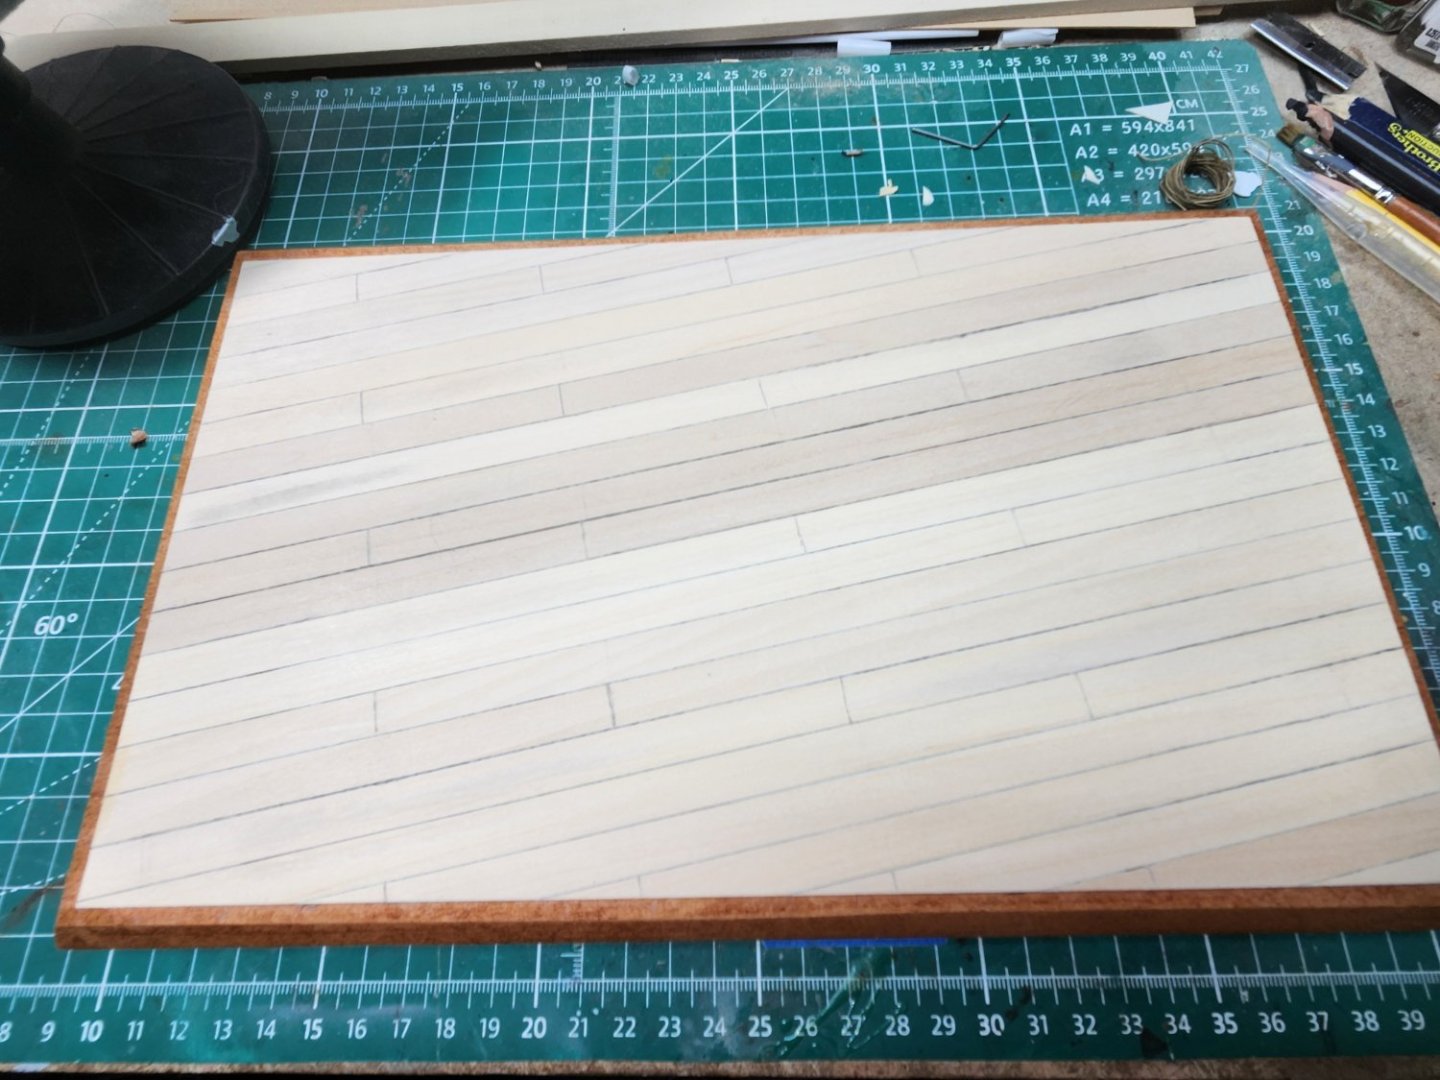
When building the base I wanted to try a different type of weathering technique to show wear and tear. Instead of the traditional use of washes and dry brushing, use sandpaper. Following the planking pattern of the Dunton, I glued basswood strips. Before gluing I ran a dark grey artist pencil along the edges to simulate caulking. Once trimmed and sanded, applied a coat of Oak Stain, then airbrushed a couple of coats of grey enamel. I decided to apply a light wash of watercolor dark grey to enhance the detail. When dried, started very lightly rubbing with sandpaper to simulate wear. Finished the boat cradle/"kids" (can't confirm the correct terminology or design), added some detail, nuts/bolts, which are from Grandt Line. They offer railroad model detail parts such as lift rings, hinges, nuts, etc. which can also be used for ship modeling. Painted the cradle a toned down white, wash of watercolor dark grey, some rust stains. Started scratch building the gear'


- 11 replies
-
- 9
-
-
-
- Model Shipways
- Finished
- (and 2 more)
-
Nice start. From my experience, you may want to consider removing the laser burn on the framing otherwise it is difficult to paint over.
- 11 replies
-
- 1
-
-
- Skiff
- Midwest Products
- (and 1 more)
-
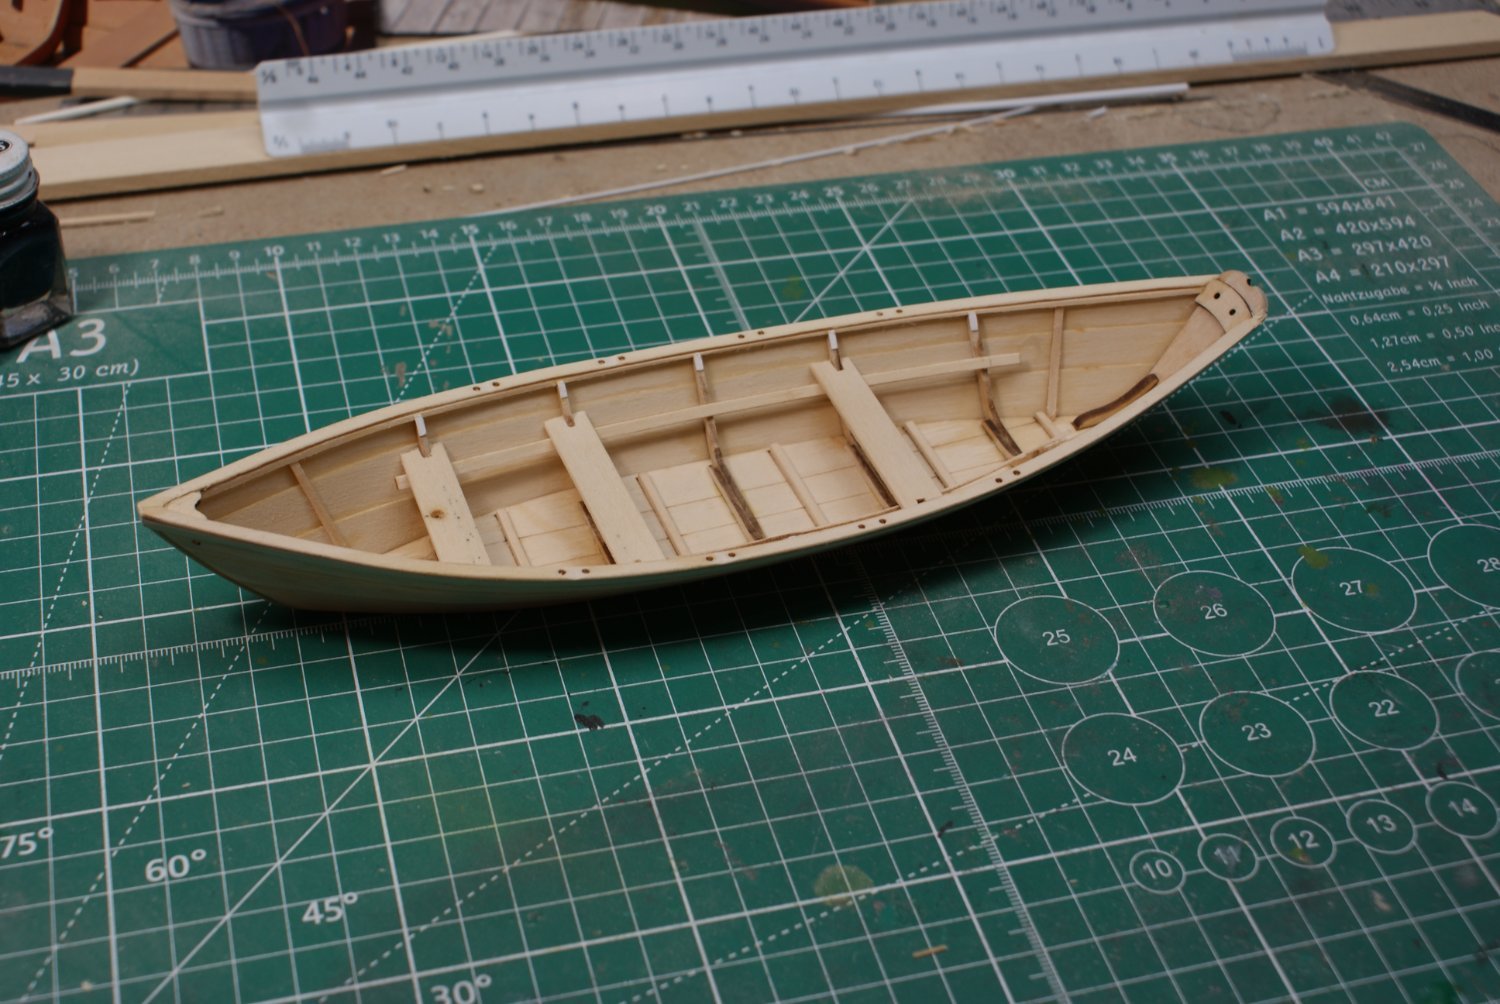
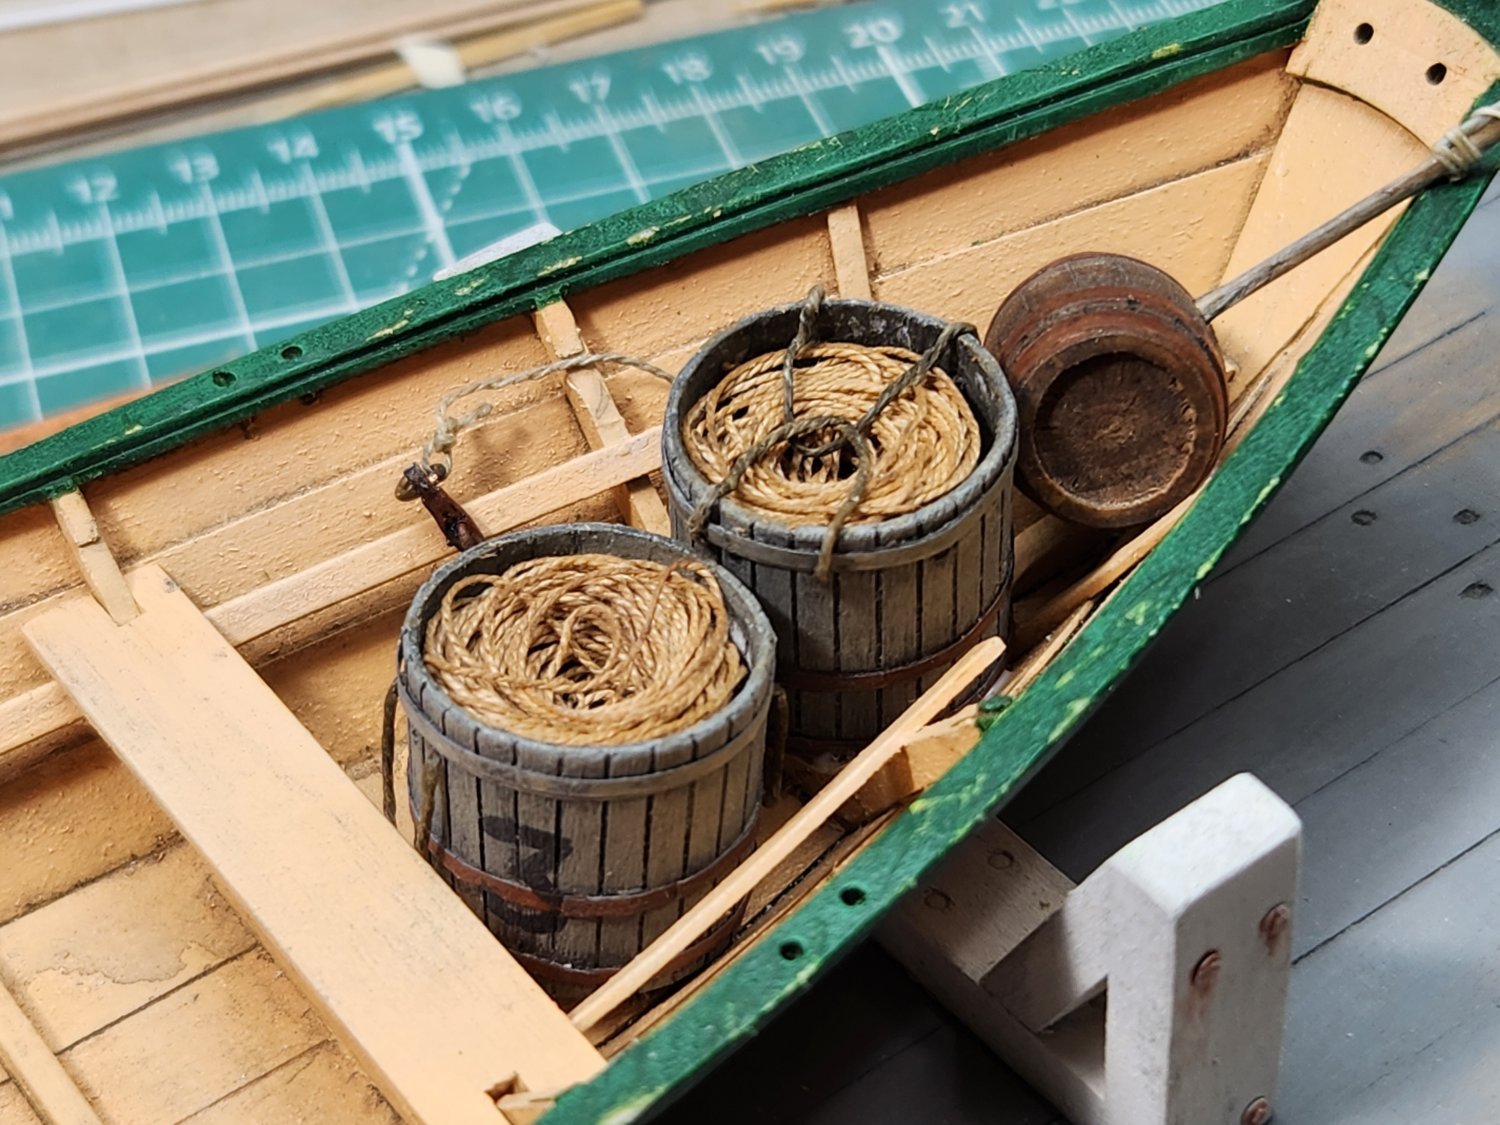
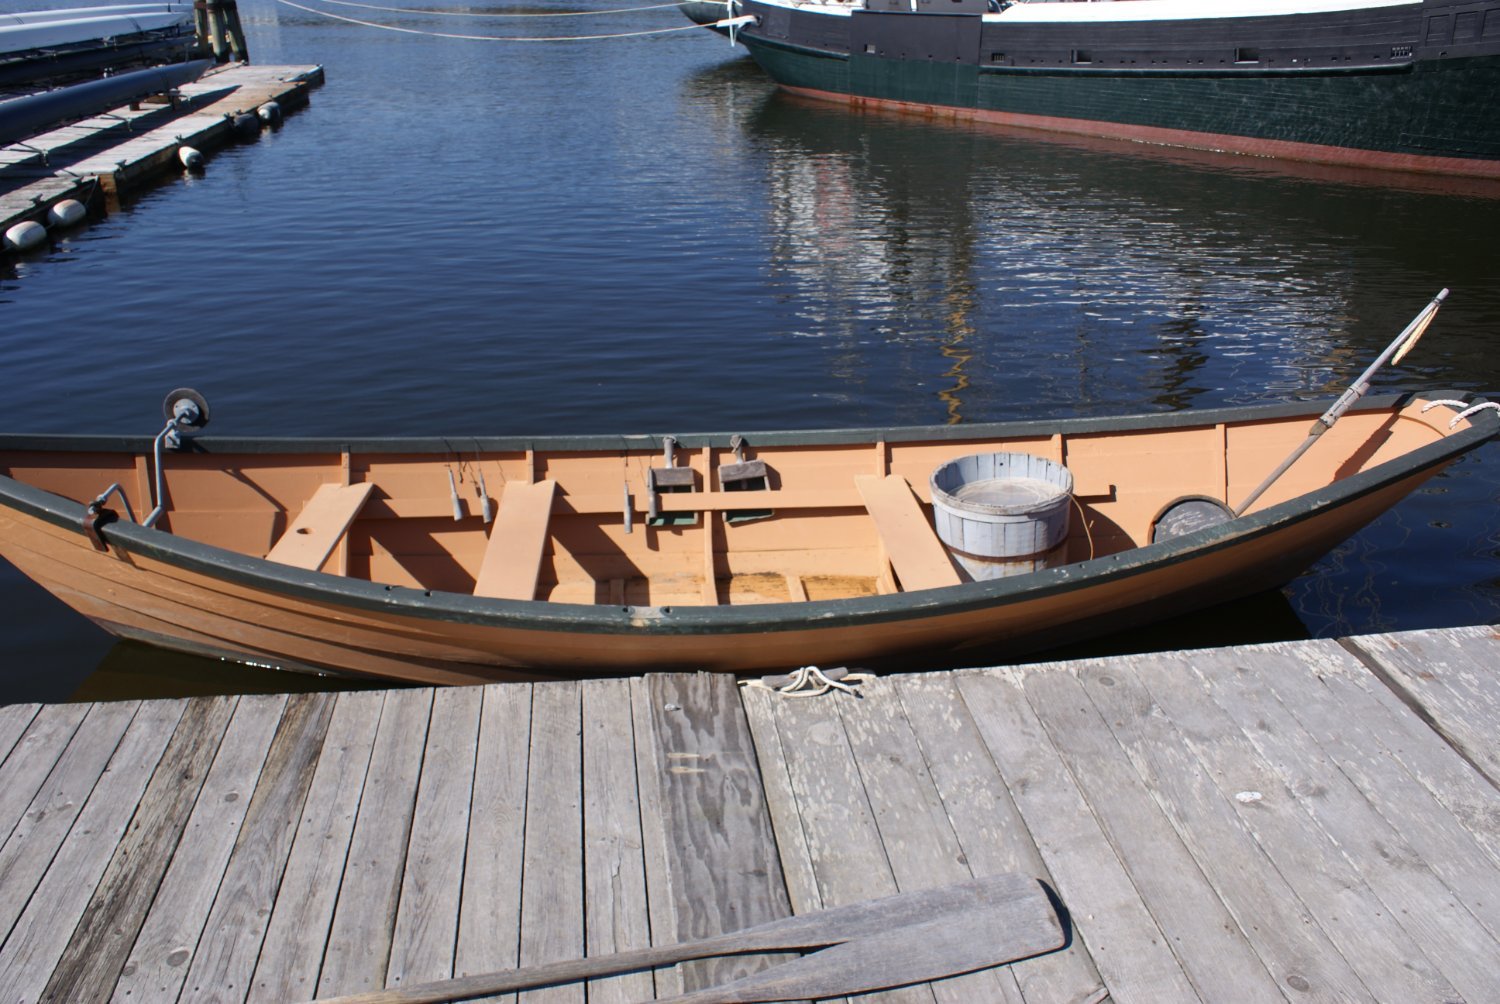
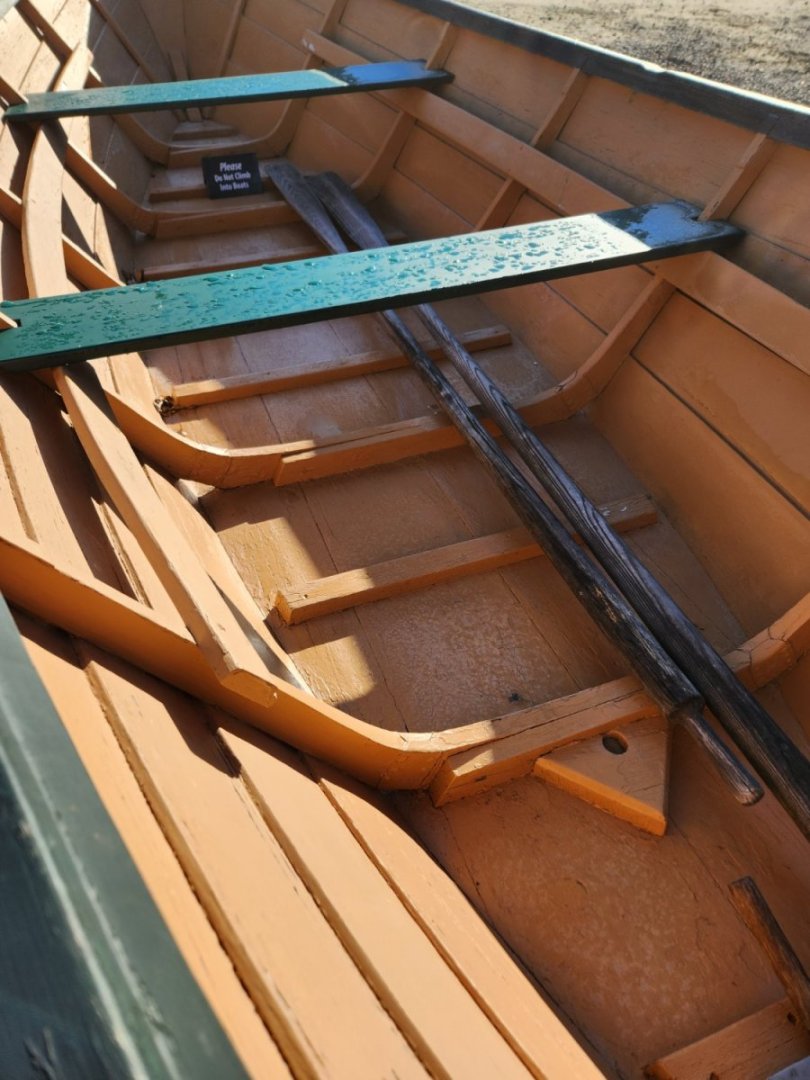
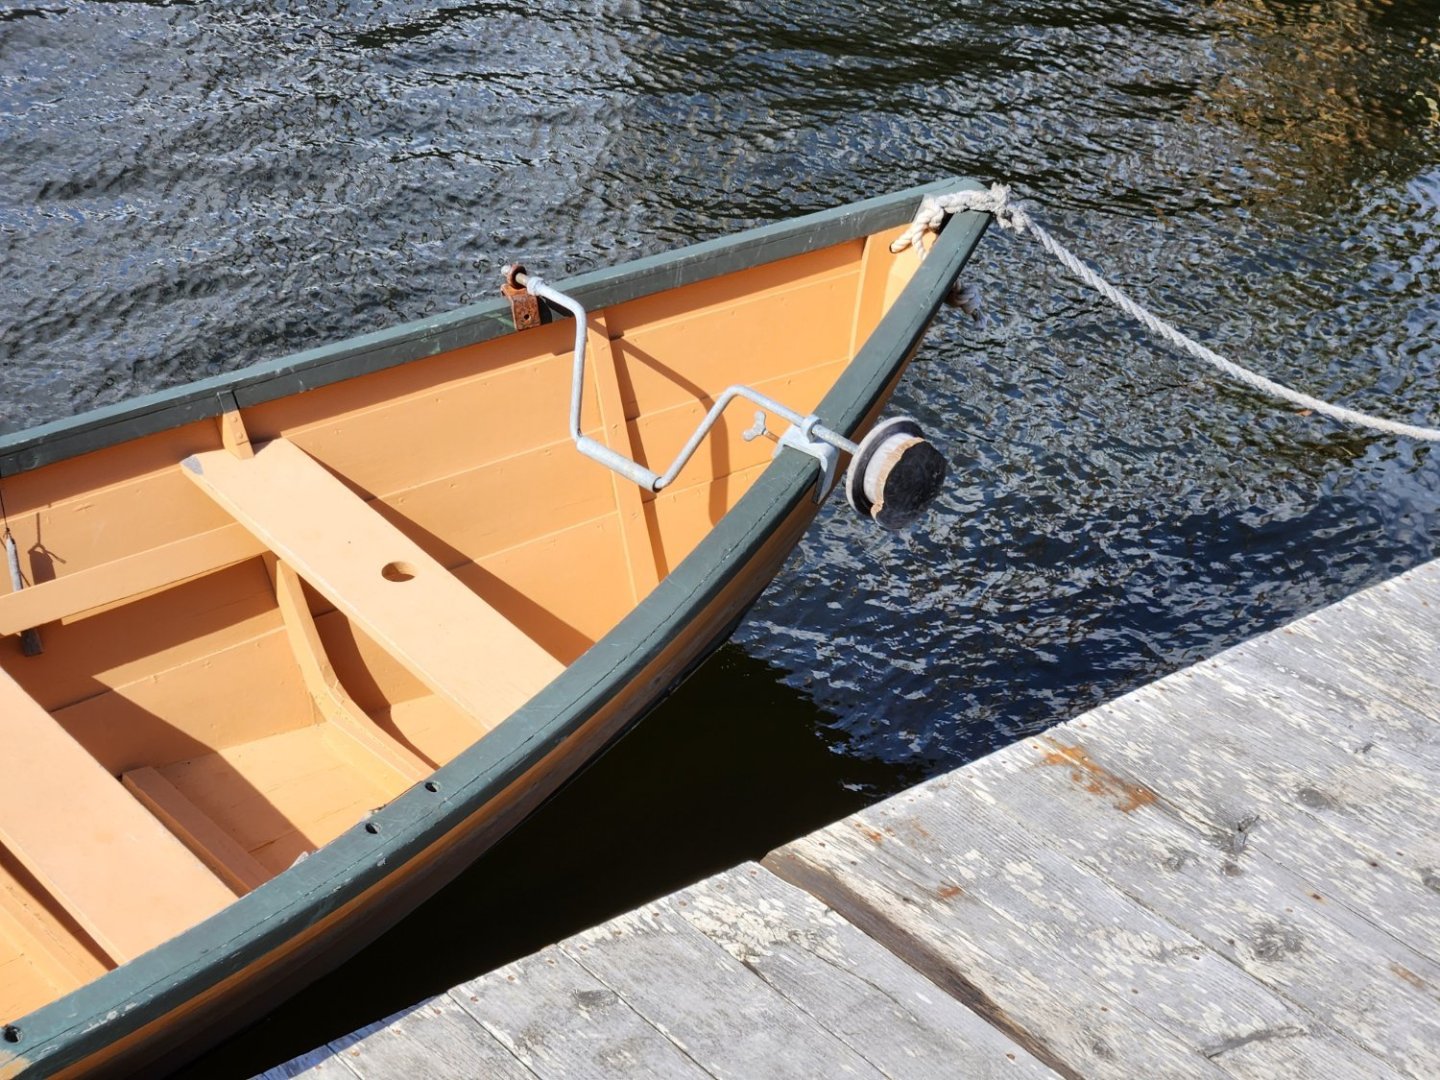
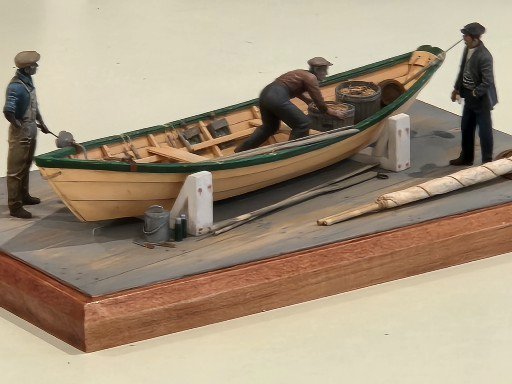
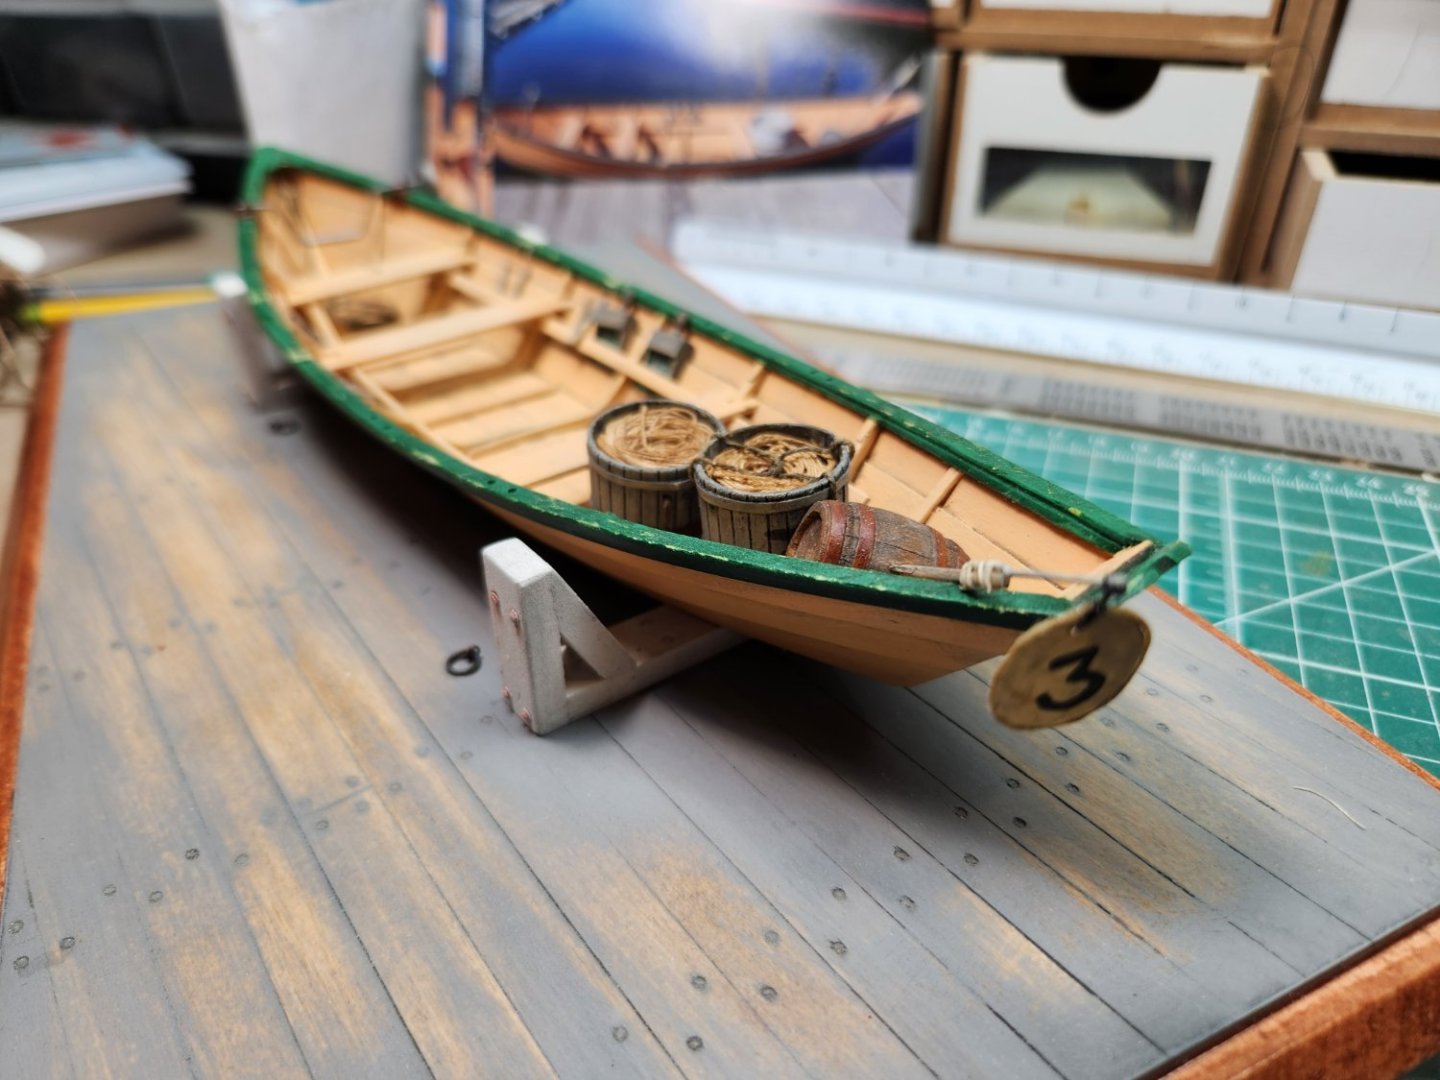
Started this build approximately six weeks ago, it's my first build log. As a volunteer at Mystic Seaport Museum, I regularly pass a Dory exhibit and I thought it would make an interesting subject for a Diorama. My original thought was to recreate the scene in the photo, the boat tied to the dock. However, my biggest concern was modelling the water. If I mess that up, the project fails! Another option I considered was to build a scene of a Dory on a Schooner. So, that's my plan. Decided the base would be a section of deck, the last Dory being prepared for launch from the L. A. Dunton Gloucester Fishing Schooner, circa 1923 (currently undergoing full restoration at Mystic Seaport Museum) for daily fishing. The Dunton carried 10 Dory's stacked five high, port and starboard. She had a crew of 24, Captain, 3 crew, and 20 fisherman (2 per Dory). Dories could carry several tubs of longline trawl that would be set away from the schooner. Each tub could carry as much as 1,800 feet of line with a hook every fathom, or six feet. If a commercially viable fish was found on 50 of those three hundred hooks it was considered a decent haul. Dory's were painted a buff color which would show up in the fog and in bright sunlight, the same color the spars on the mother ship would carry and the dory might have a small rope on the bung, should the boat overturn. There's lots of small detail that can be added, line tubs, dory fog horn, trawl anchor, trawl buoy, bailer's, sail, etc... Fortunately, I found some 1/24 scale figures I think I can modify. To start with, build the Dory! The Kit is the Model Shipways Lowell Banks Dory, "a beginner kit is not just for beginners"! No need to document the build, there are many Dory Build logs. So, fast forward, after few minor kit modifications, base painting, I started the weathering is a work in process in process. I mixed my own batch of base colors using enamel paints. For washes I use "only" watercolor paints". Not acrylic paints. Watercolor paints are much more forgiving, if you make a mistake, just wipe off with a damp cloth or paint brush. I never weathered a ship model; I'm having fun with this! Some dark grey wash, dry brushing and paint chipping, the detail starts to develop.


- 11 replies
-
- 10
-
-
- Model Shipways
- Finished
- (and 2 more)