tomebe
-
Posts
14 -
Joined
-
Last visited
-
 Obormotov reacted to a post in a topic:
HM Cutter Alert by Thukydides - FINISHED - Vanguard Models - 1:64 - first build
Obormotov reacted to a post in a topic:
HM Cutter Alert by Thukydides - FINISHED - Vanguard Models - 1:64 - first build
-
hollowneck reacted to a post in a topic:
Grand Banks Dory by tomebe - BlueJacket Shipcrafters - 1:12 - first build
-
AlexMN reacted to a post in a topic:
Grand Banks Dory by tomebe - BlueJacket Shipcrafters - 1:12 - first build
-
Thukydides reacted to a post in a topic:
HM Cutter Alert by Thukydides - FINISHED - Vanguard Models - 1:64 - first build
-
jpalmer1970 reacted to a post in a topic:
HM Cutter Alert by Thukydides - FINISHED - Vanguard Models - 1:64 - first build
-
Just finished and got up to date on your build log. Just a fantastic build of HMS alert, which I've started as well. Thukeydides thanks so much for sharing all this great info with us. So useful for a newbie like myself. Tom
- 562 replies
-
- 3
-
-
- vanguard models
- alert
- (and 2 more)
-
tomebe reacted to a post in a topic:
HM Cutter Alert by Thukydides - FINISHED - Vanguard Models - 1:64 - first build
-
tomebe reacted to a post in a topic:
HM Cutter Alert by Thukydides - FINISHED - Vanguard Models - 1:64 - first build
-
tomebe reacted to a post in a topic:
HM Cutter Alert by Thukydides - FINISHED - Vanguard Models - 1:64 - first build
-
tomebe reacted to a post in a topic:
HM Cutter Alert by Thukydides - FINISHED - Vanguard Models - 1:64 - first build
-
tomebe reacted to a post in a topic:
The Dory by John Ruy - Finished - Laughing Whale - 1” = 1’
-
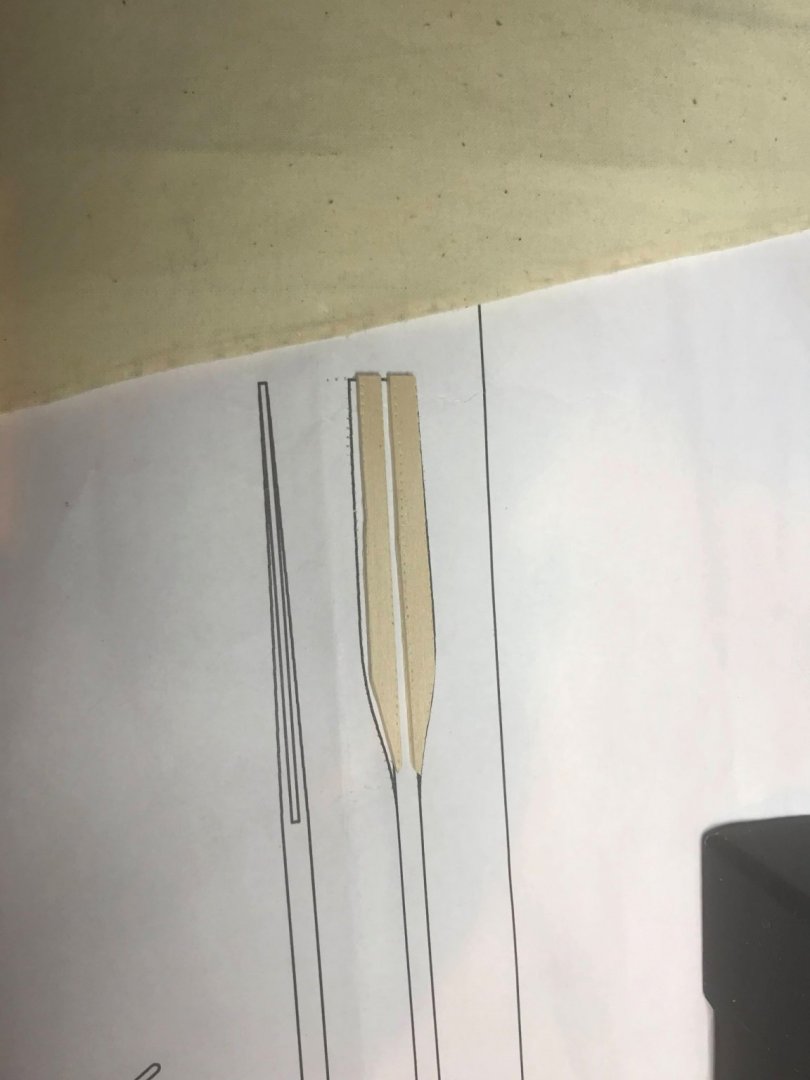
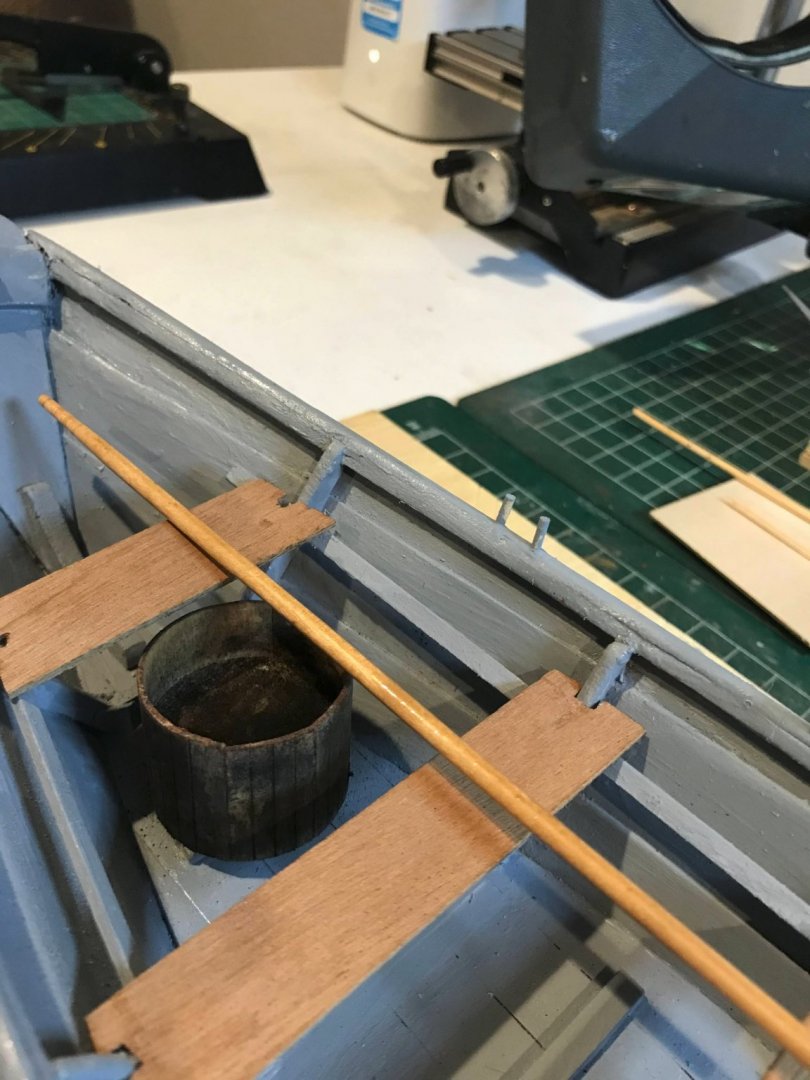
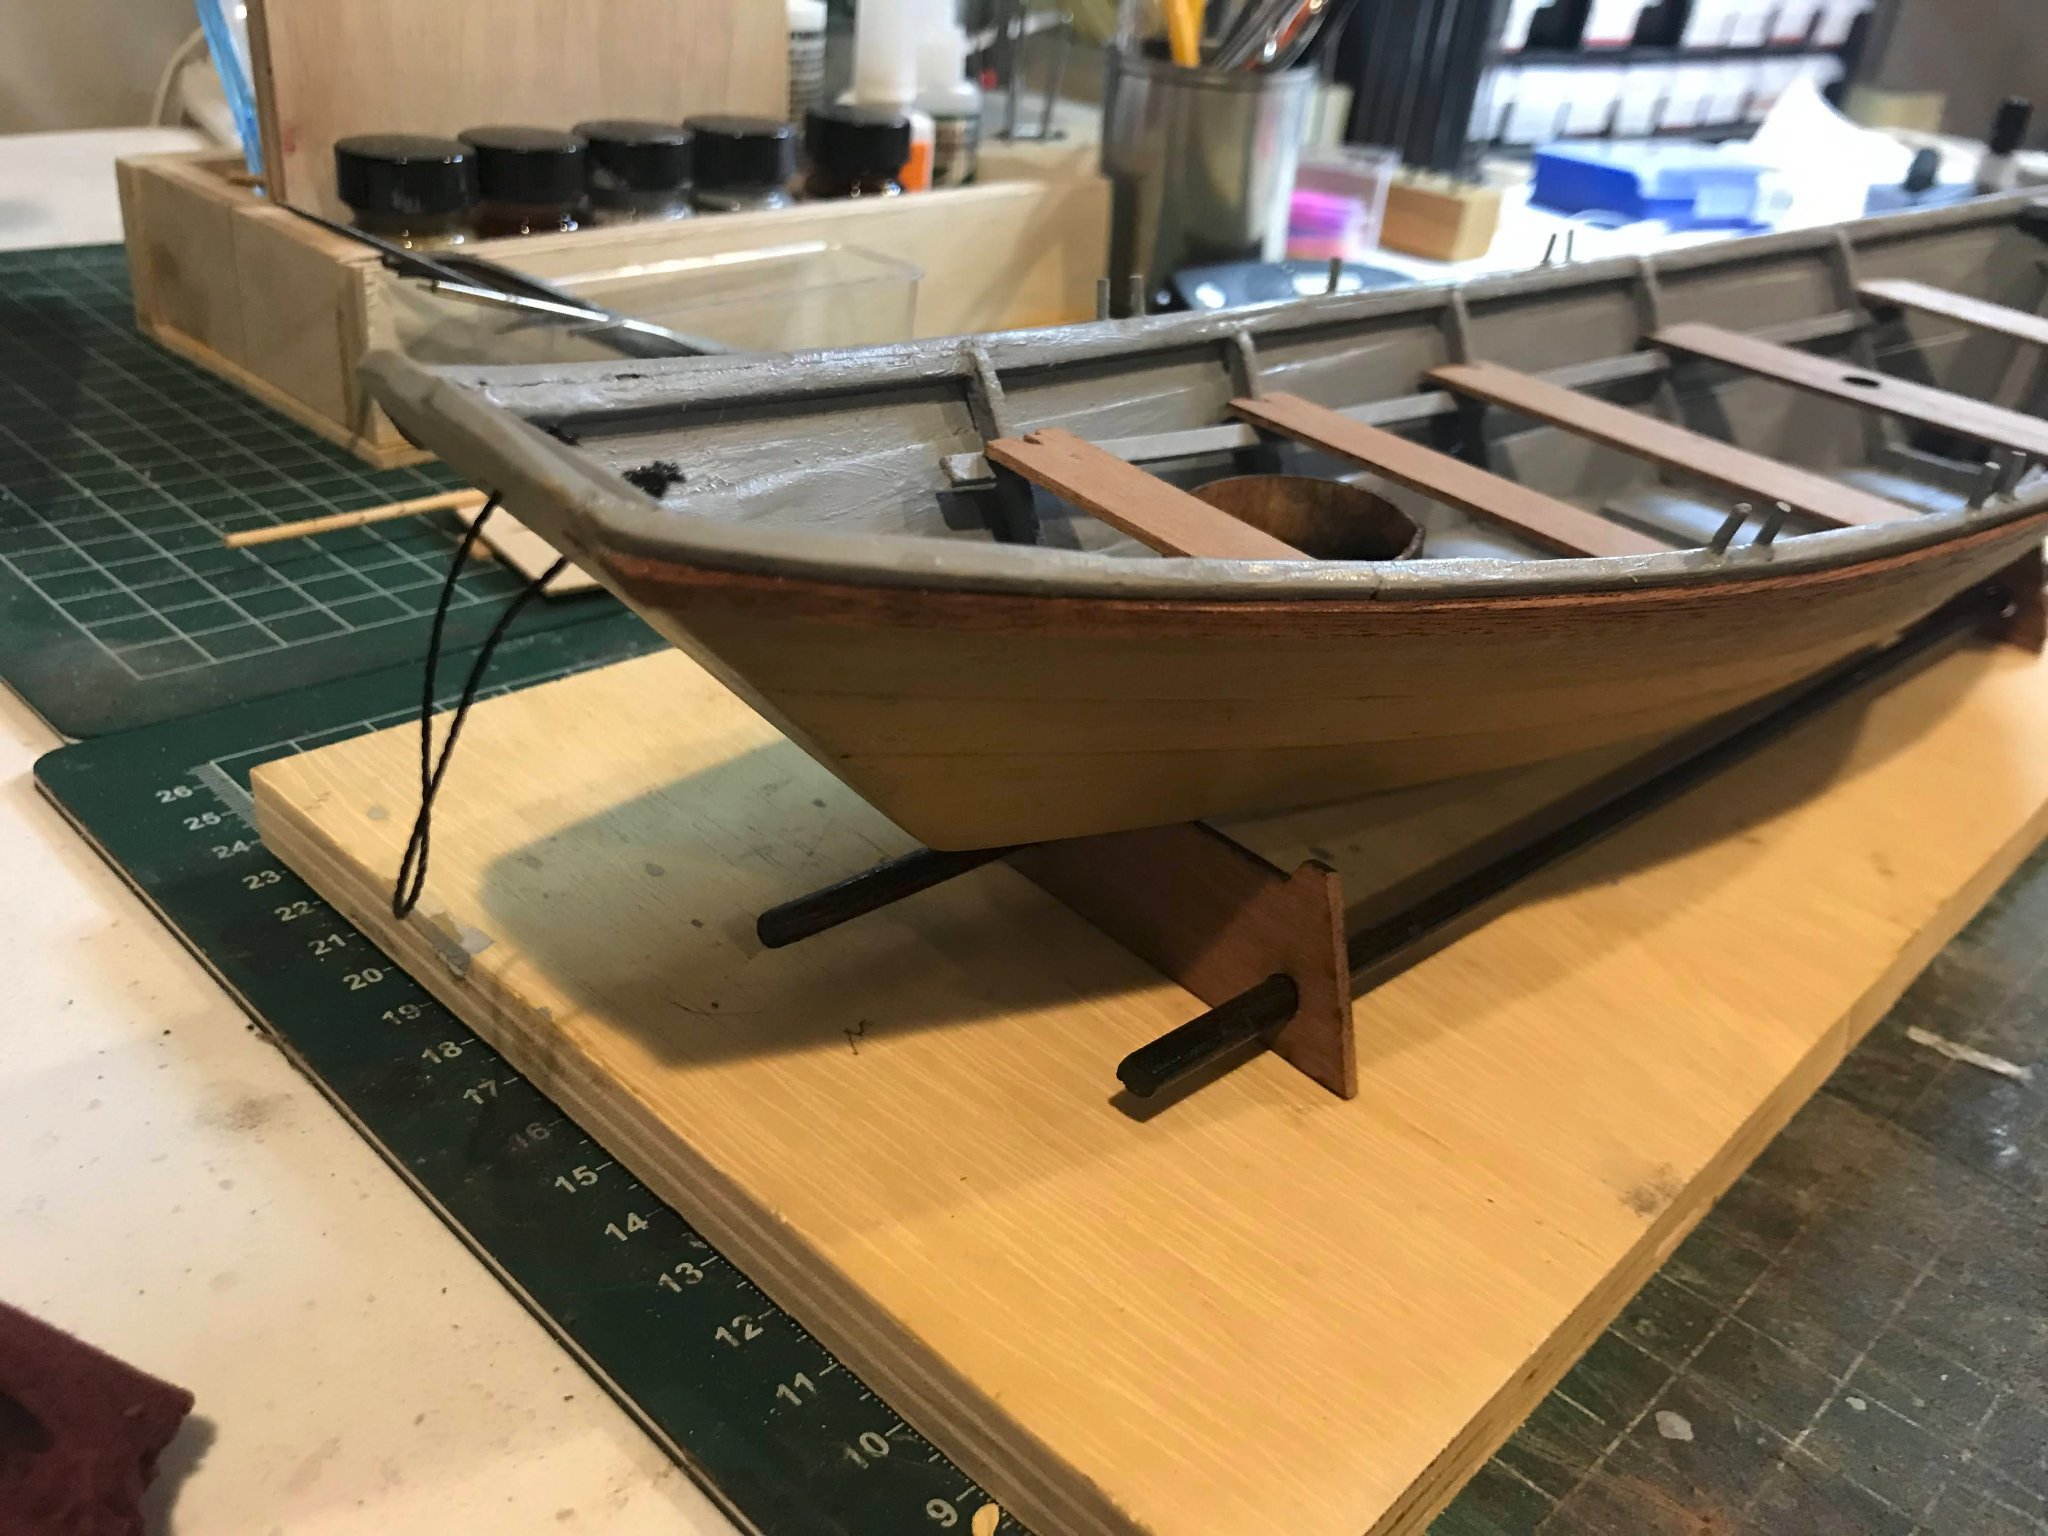
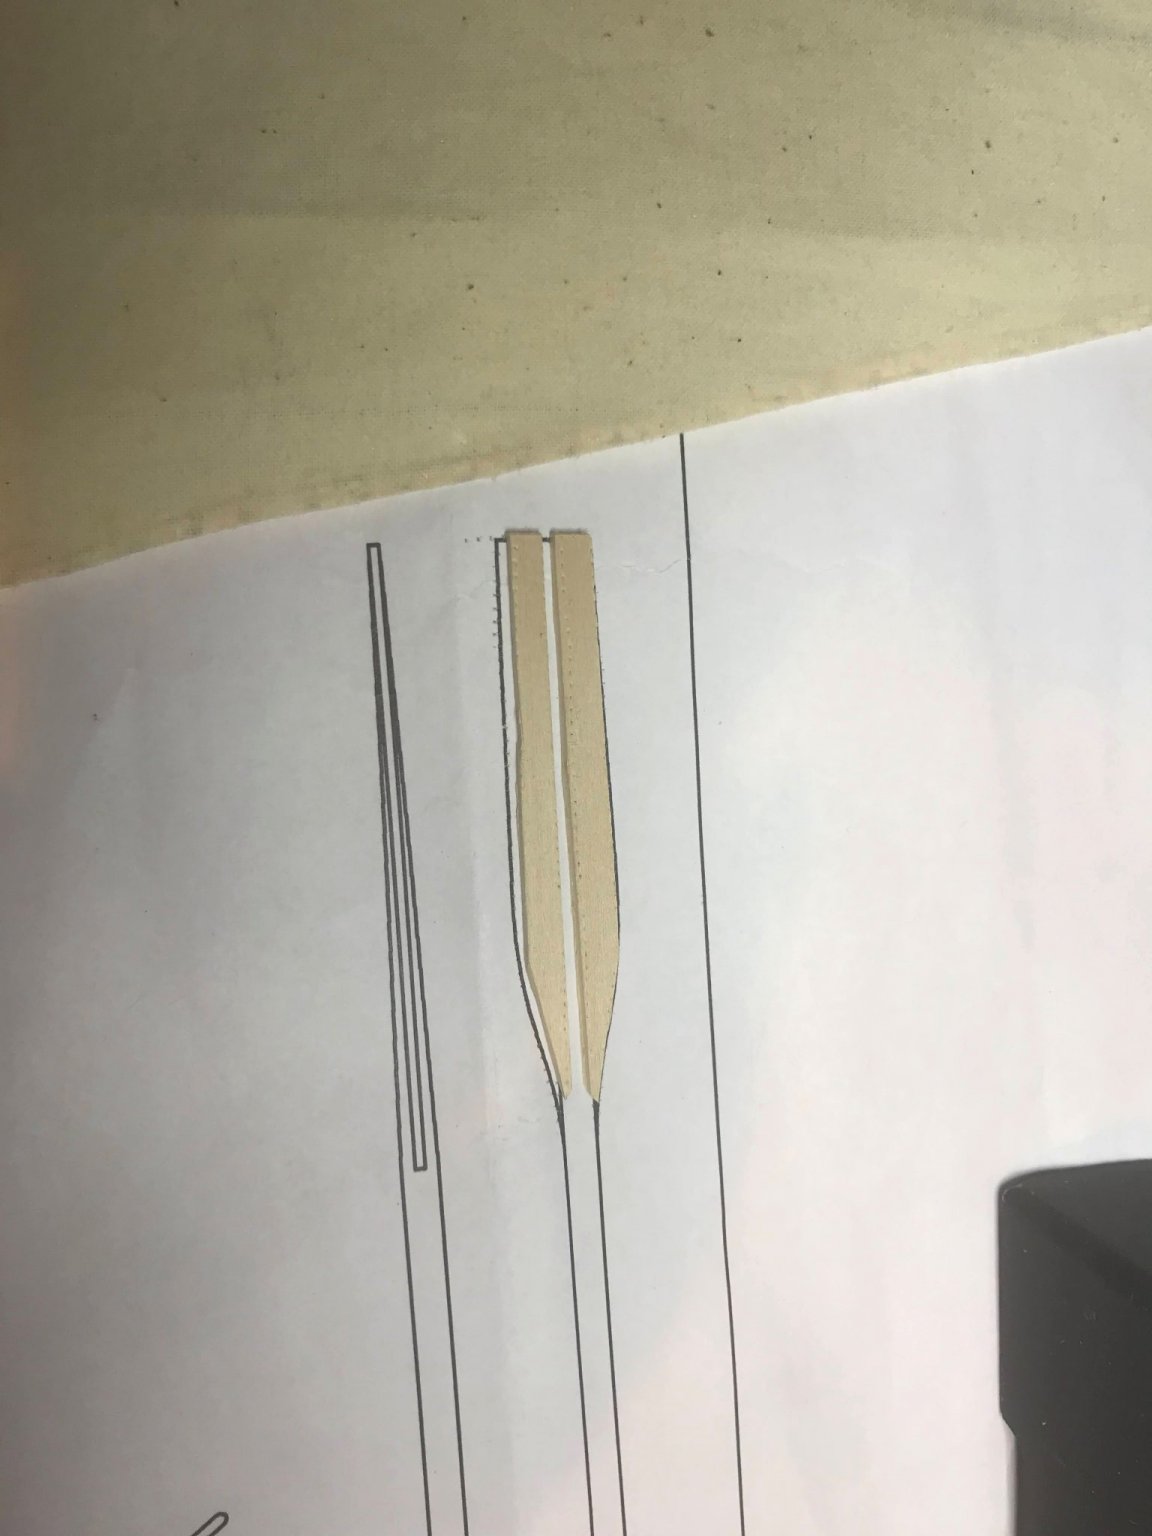
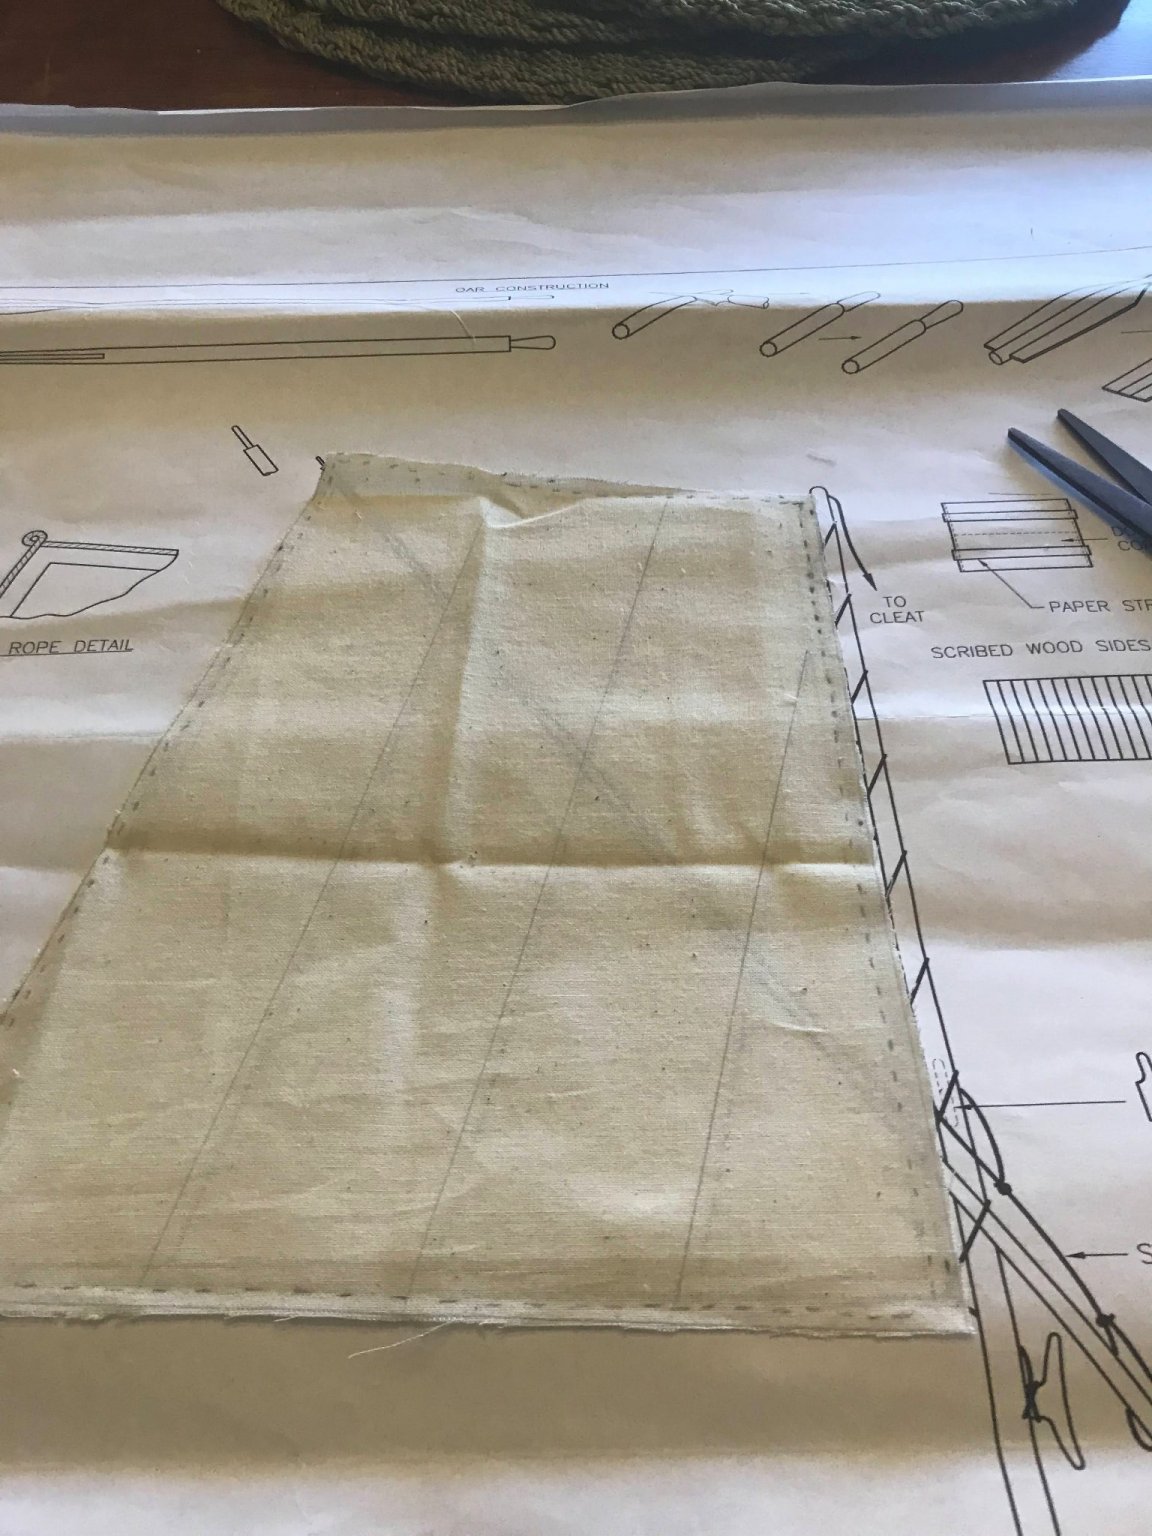
Having completed the basics of the dory hull, and I am ready for applying the sheer band, the thole pins, seats, cap rail, cradle, rigging and sail. Ready for painting and details. I brushed painted the dory using Bluejackets recommended paints for the it. I used a coat of true north primer on the inside, followed by flat dark ghost grey. Outside hull got the flat depot buff. It took a few strokes of 400 to 800 grit paper to get it as good as I could get it All seats are in save for the bow seat, which I had lost. I did find it later, just in time too. I was going to order some mahogany sheet and cut out my own. I added the oar lock or thole pins which I now wish I had added last. My fingers were always in that perfect place to knock them off and no matter how hard I looked, the little buggers escaped me. next came the mahogany sheer band. A little wetting to get it properly bent and not broken and onto the dory. Next was the cradle . The dowel rods were difficult to stain. Neither brush nor soft rag provided the results I wanted. Eventually I dipped the rods into the stain mixture and though it took several days to dry eventually I got what I wanted; a stand with a dark mahogany stain. At this time I had mounted the cap rails and started the process of placing the thole pins The cap rails were difficult to mount, shape, cut etc. I made beginner mistakes here in regards to mounting, meeting each cap end to end. Basically I struggled through it, but got it done in the end. Notice that the hoisting lines are installed, dyed with Indian ink. After trimming back my too-large-knots, I was satisfied with them, fore and aft. I remind myself over and over again that I am a beginner at this and though frustration mounted during various parts of the dory build, I realized I wasn't going to learn anything unless I did everything. Its really that simple. Next were the open barrel and oars for the boat. I had great fun with these along with the cleats for the mast. I bought a dowel that fit the oar plan dimensions and used scrap wood from the kit for the paddles and cleats. The barrel photo is here although my photo doesn't do it justice. I stained it using a antique mahogany then darkened it with weathering powders or chalks if you prefer. 2022 MODEL SHIP CALENDAR - L forming up the oar blades or paddles, then the From the photo there is still lots of work to be done to get in properly fitting the seats and of course more painting. The rig sailing rig is next.
.jpg.780280c1094f3411fd658ef5437c6917.jpg)

.thumb.jpg.a73886428e3ebe82024df29584d854ac.jpg)


- 9 replies
-
- 1
-
-
- Bluejacket Shipcrafters
- Grand Banks Dory
- (and 1 more)
-
AlexMN reacted to a post in a topic:
Grand Banks Dory by tomebe - BlueJacket Shipcrafters - 1:12 - first build
-
JpR62 reacted to a post in a topic:
Grand Banks Dory by tomebe - BlueJacket Shipcrafters - 1:12 - first build
-
Ryland Craze reacted to a post in a topic:
Grand Banks Dory by tomebe - BlueJacket Shipcrafters - 1:12 - first build
-
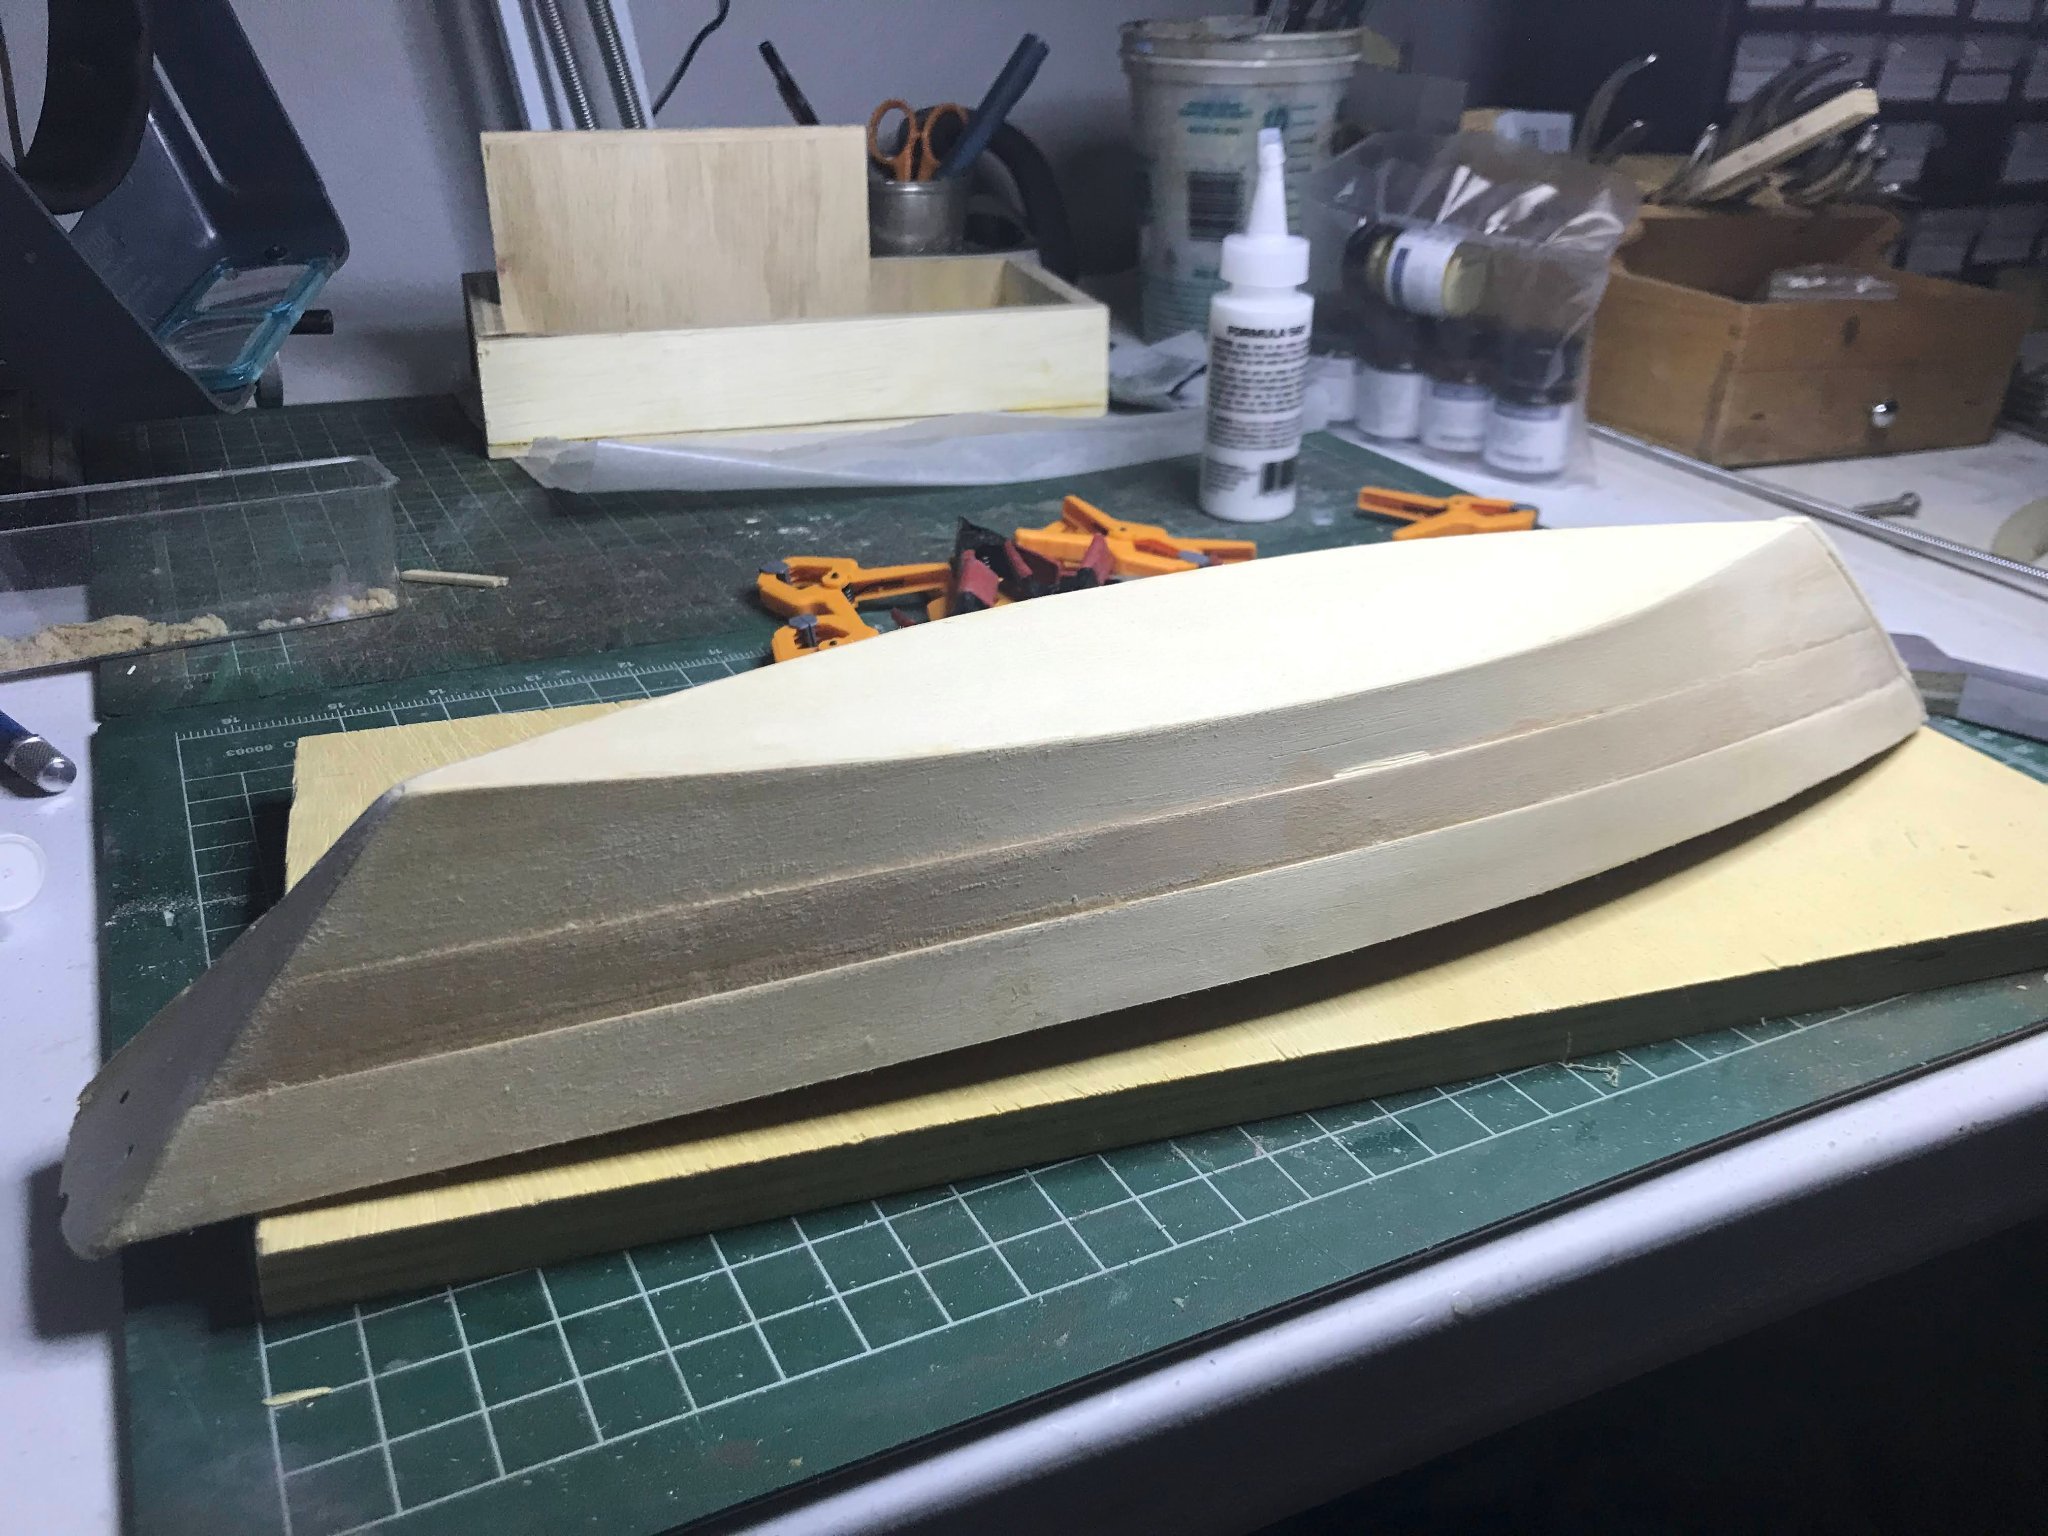
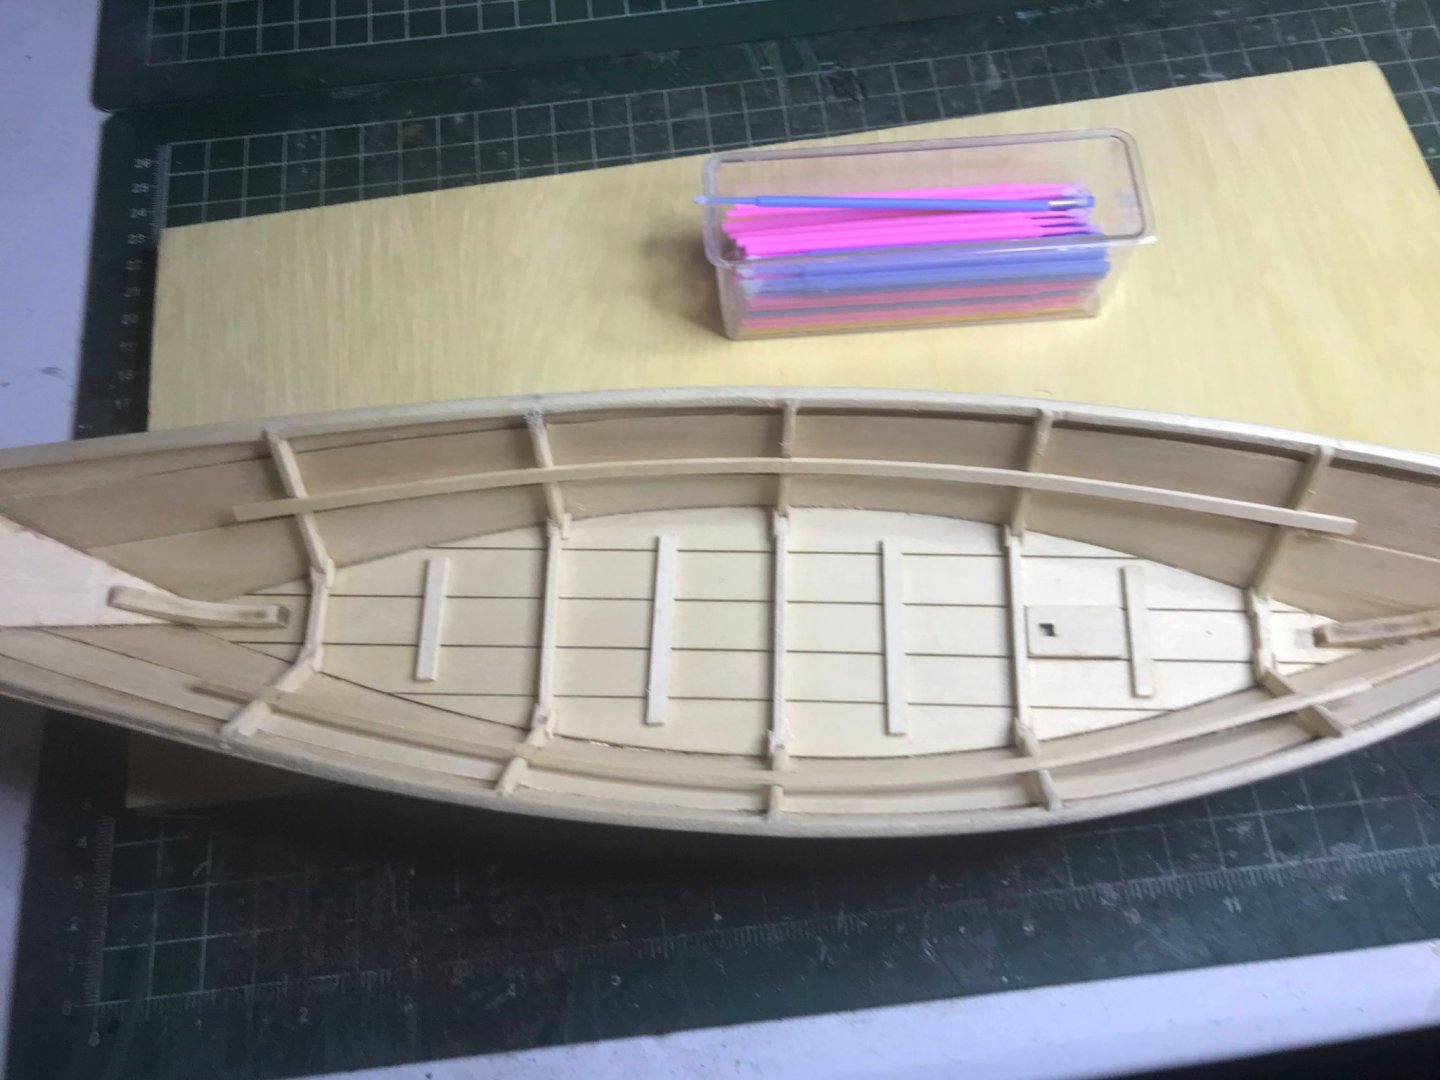
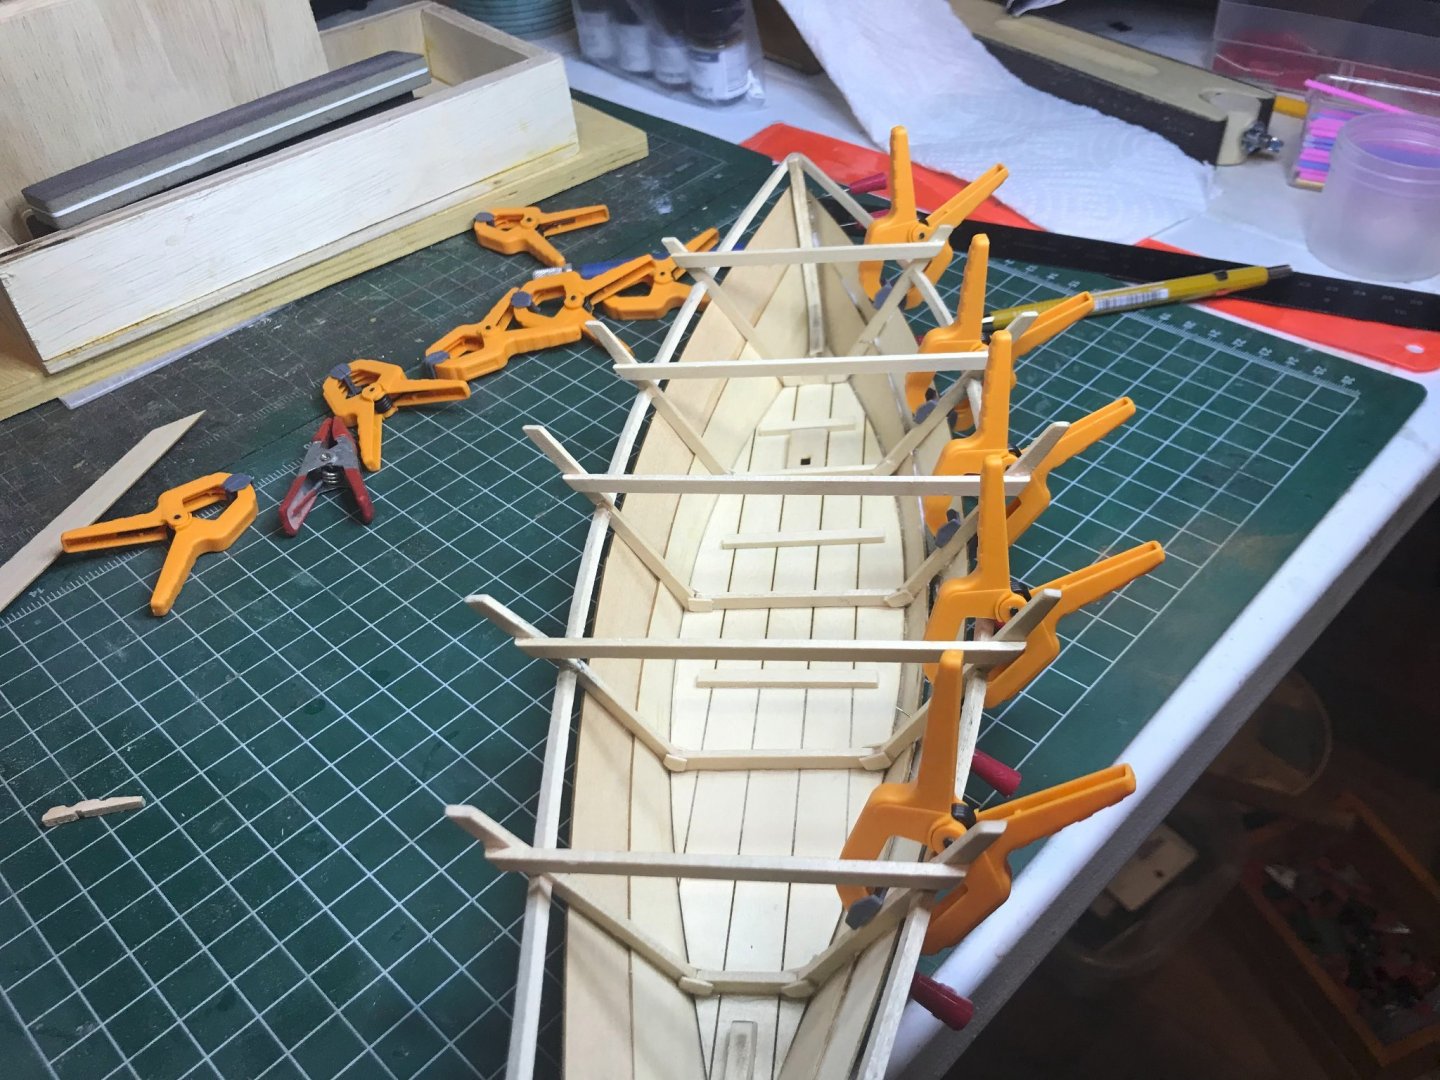
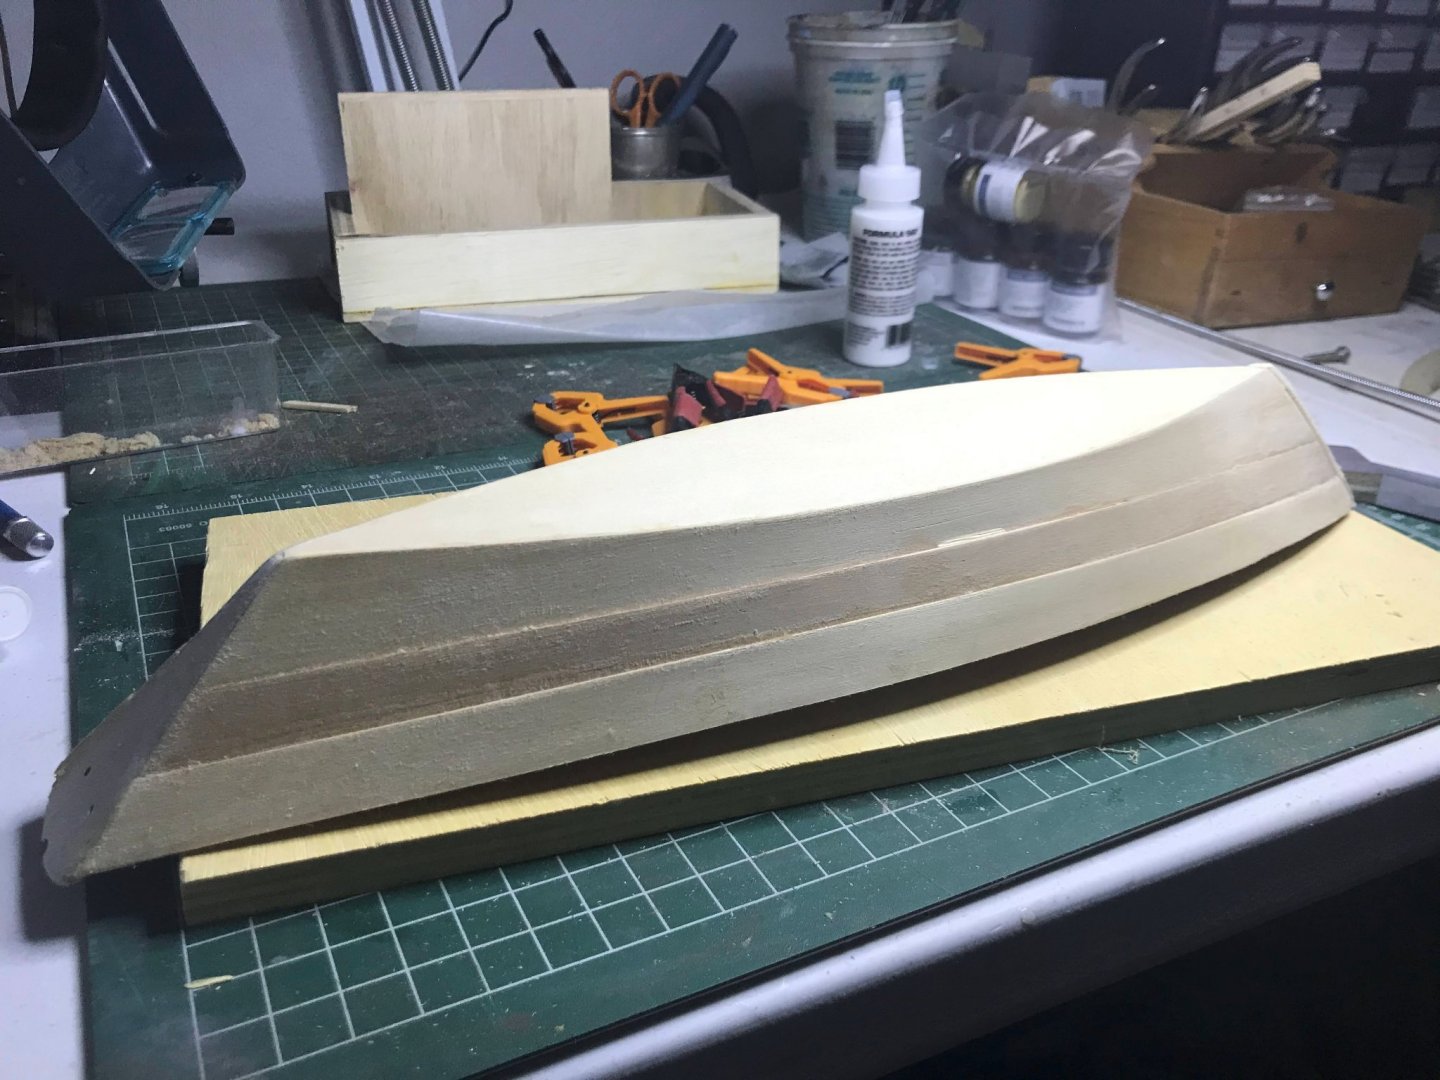
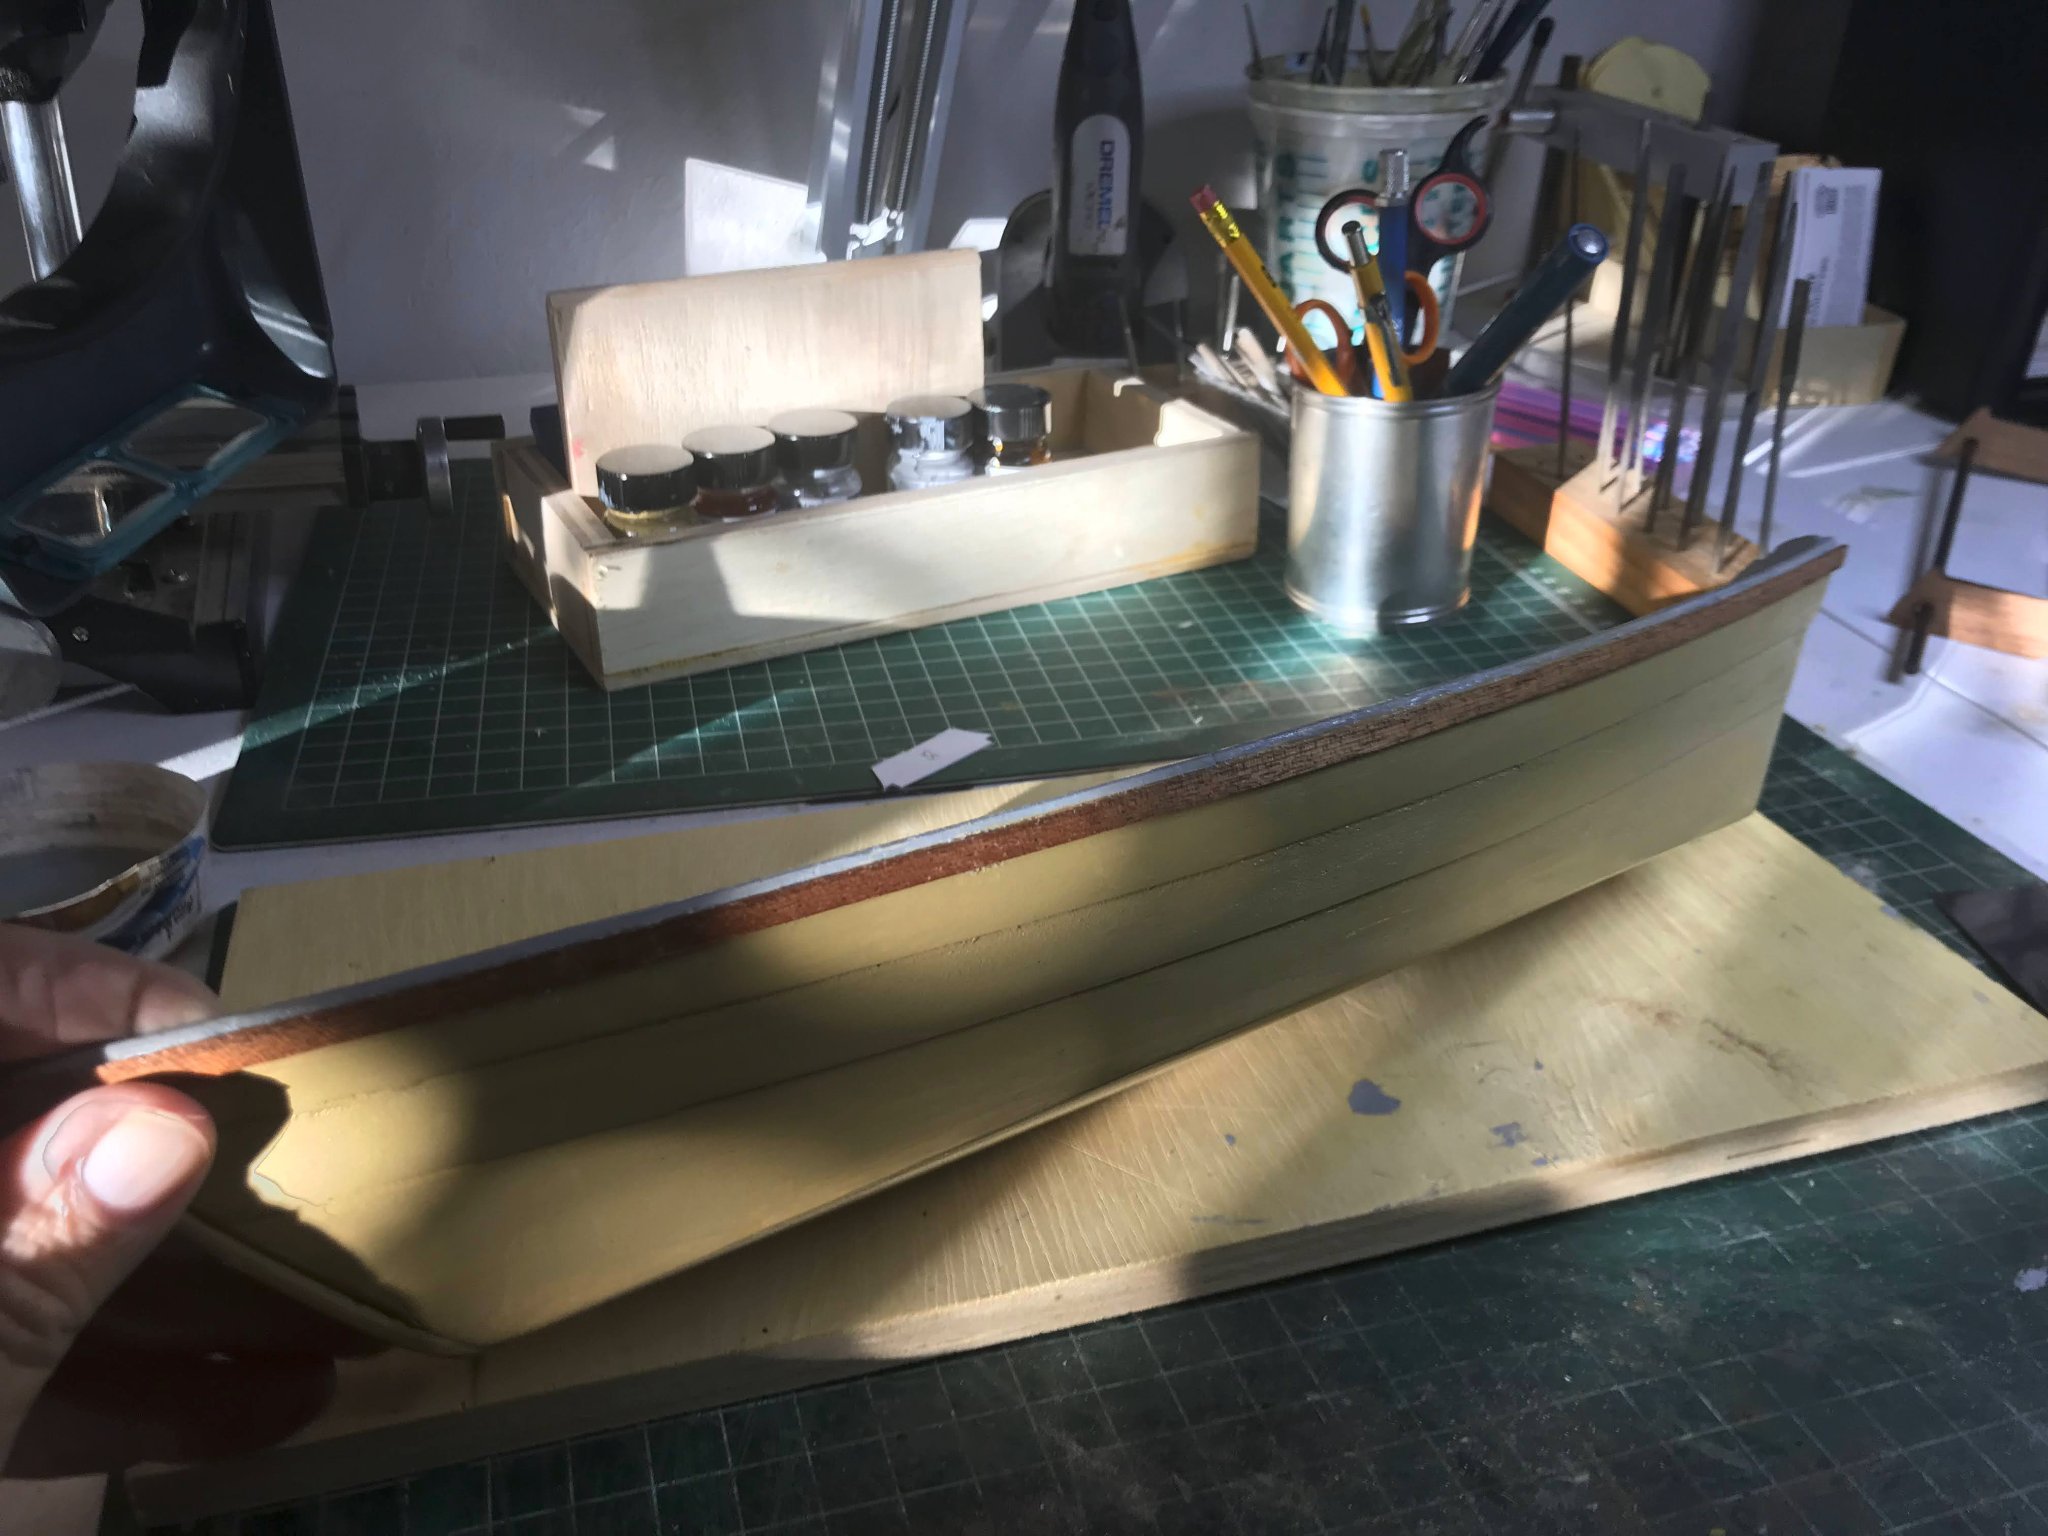
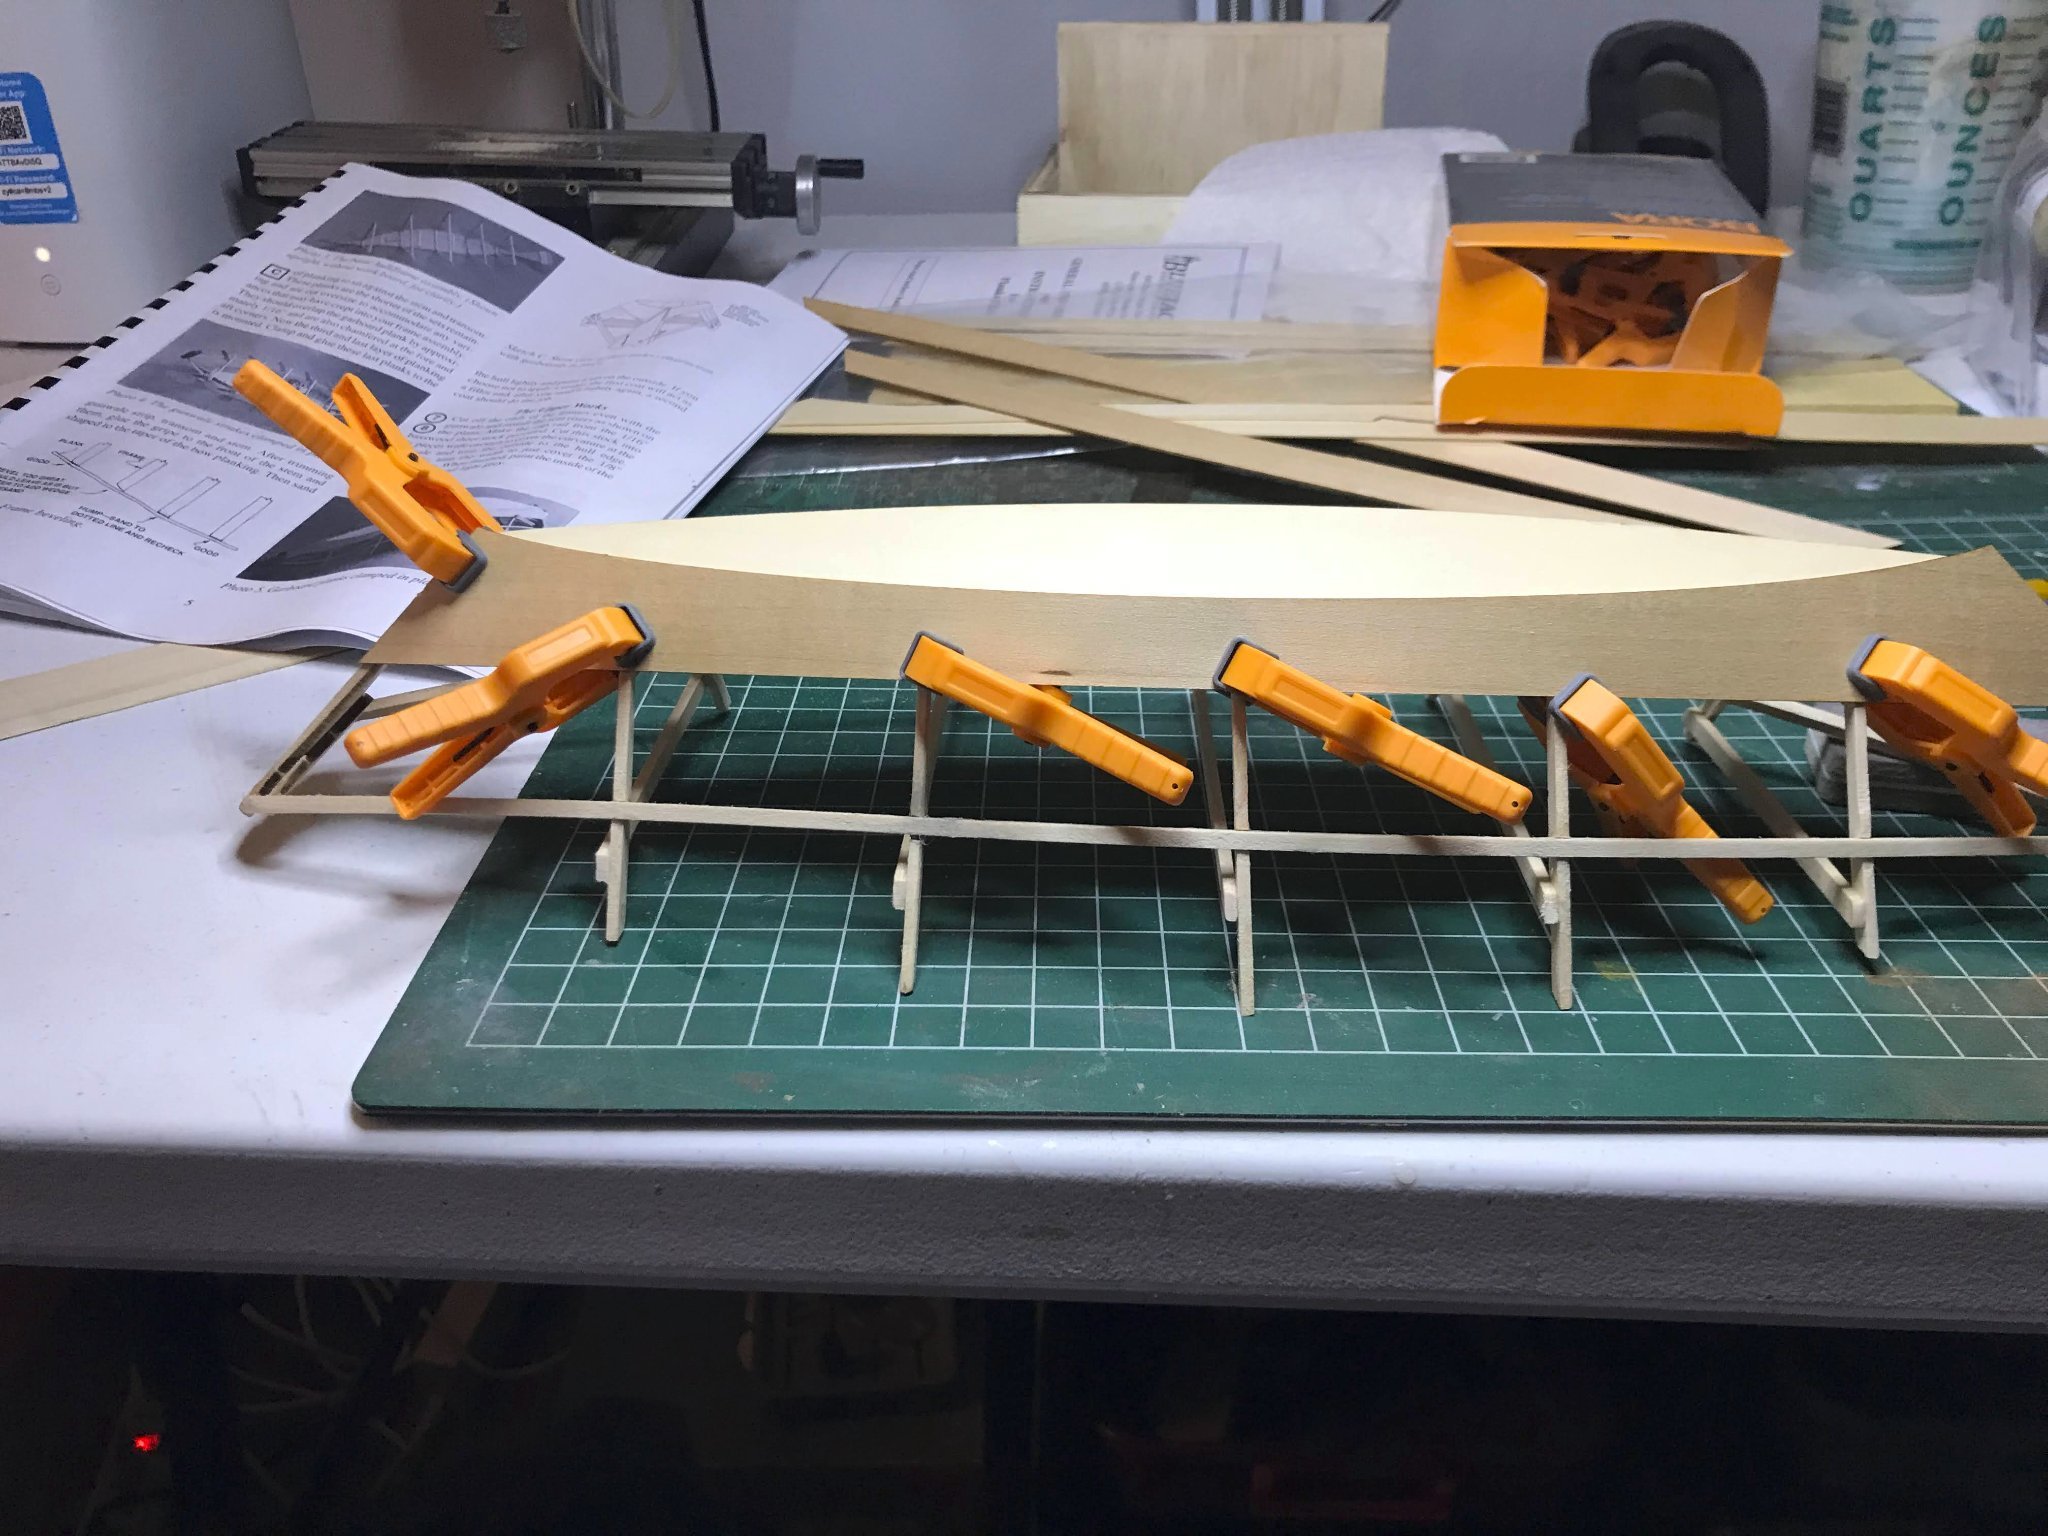
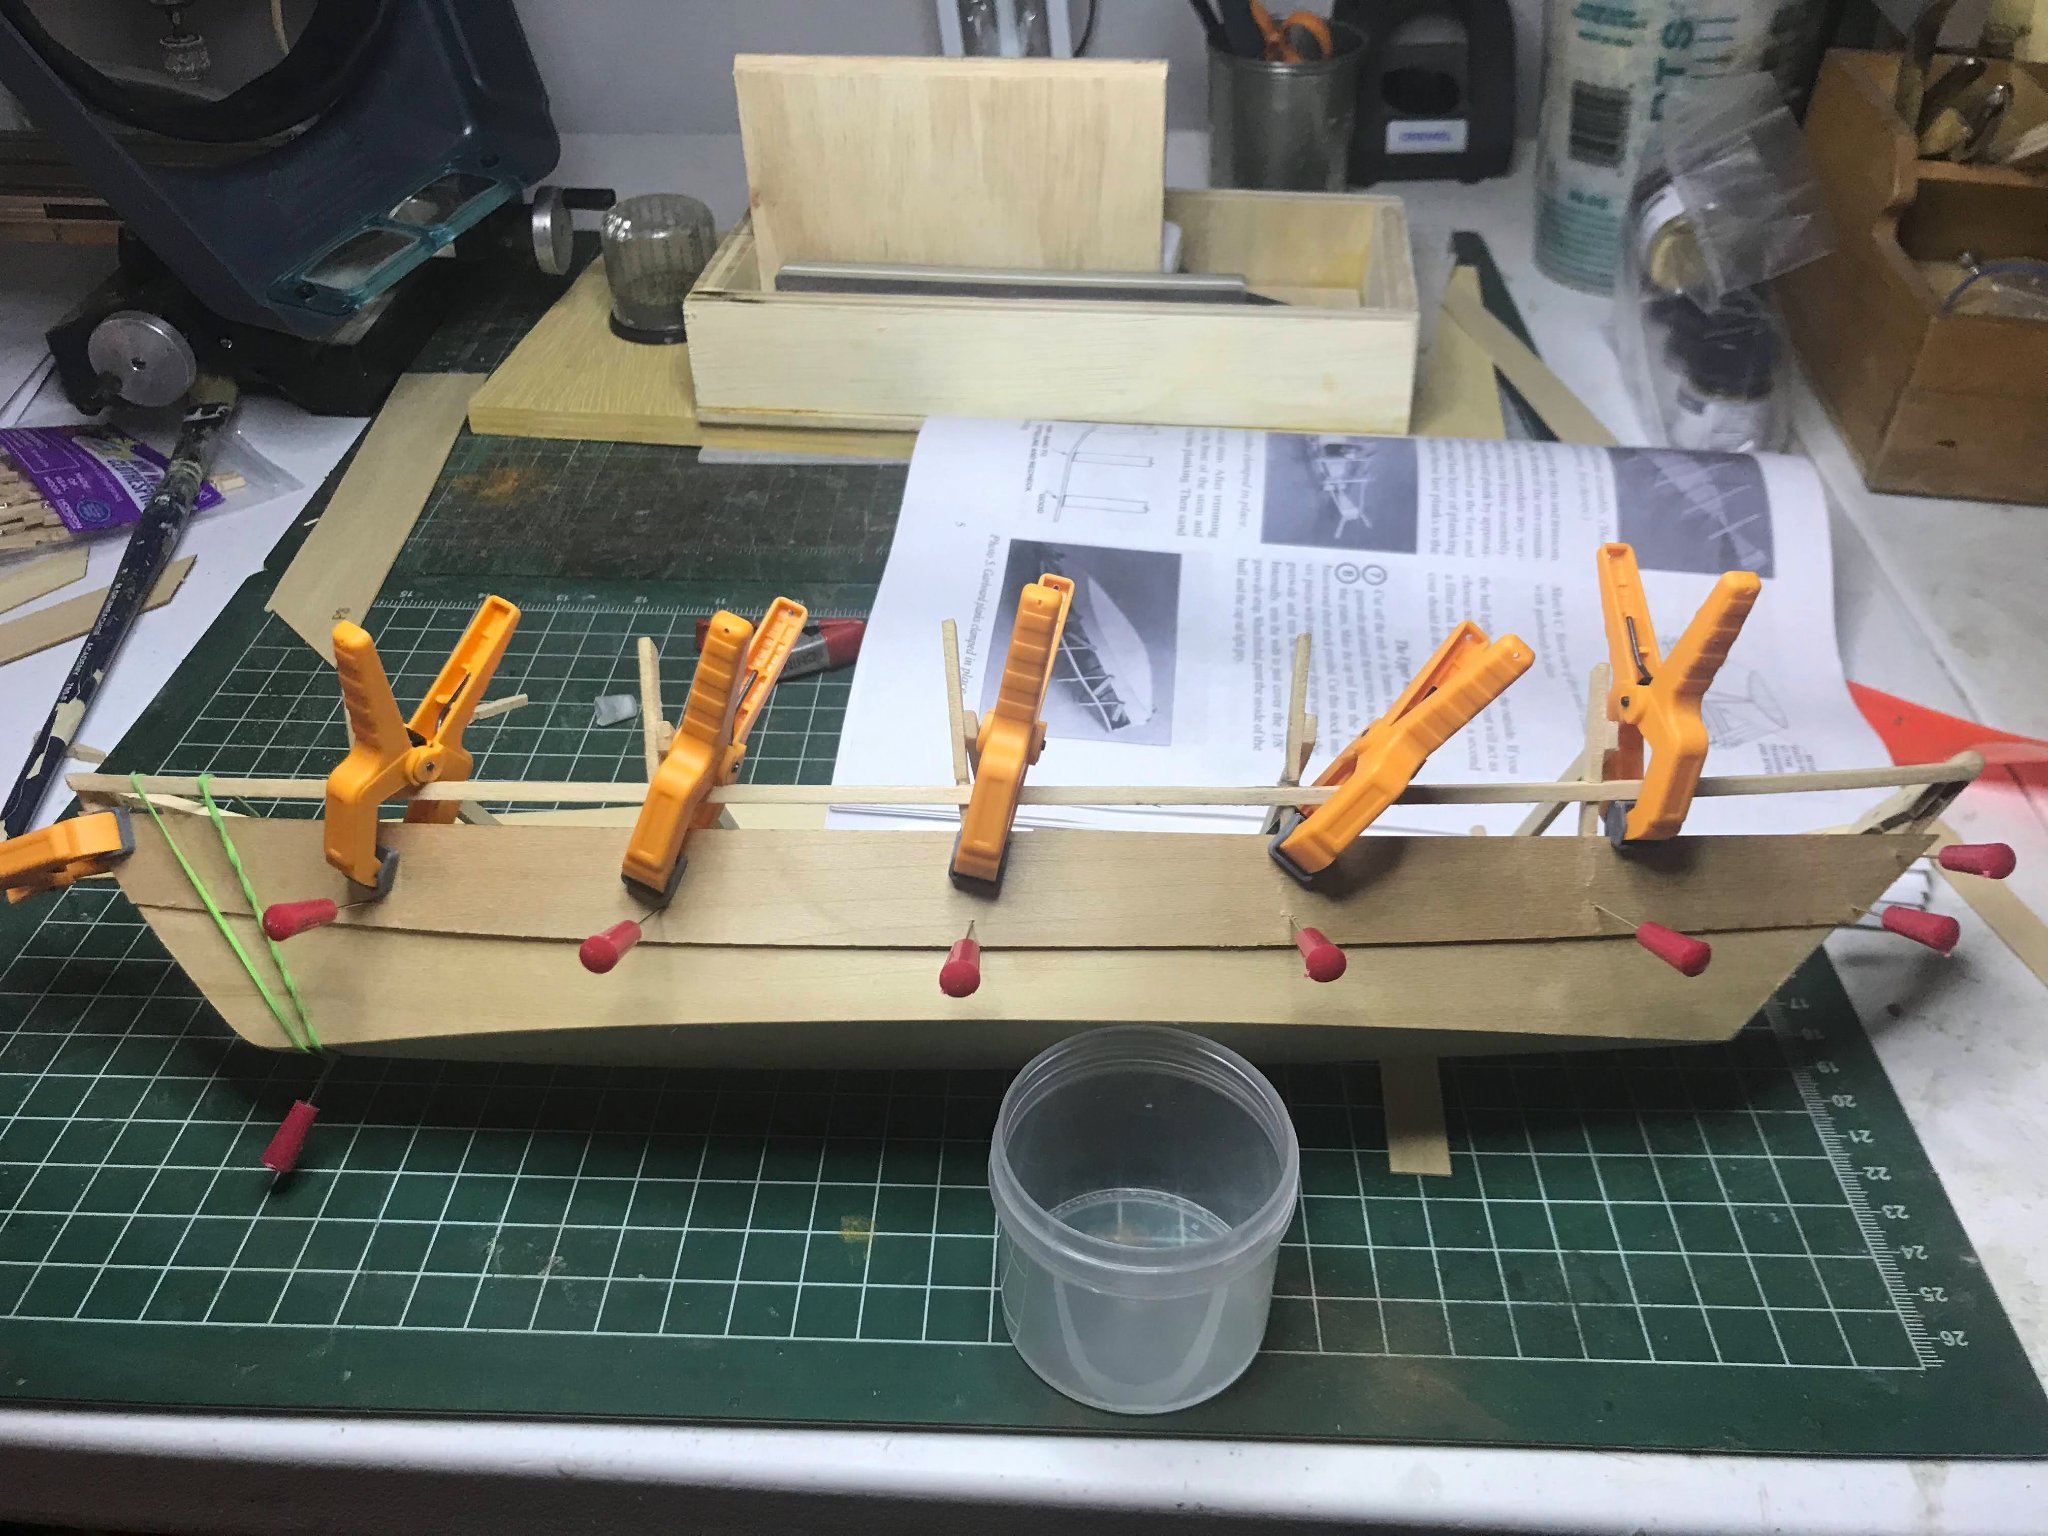
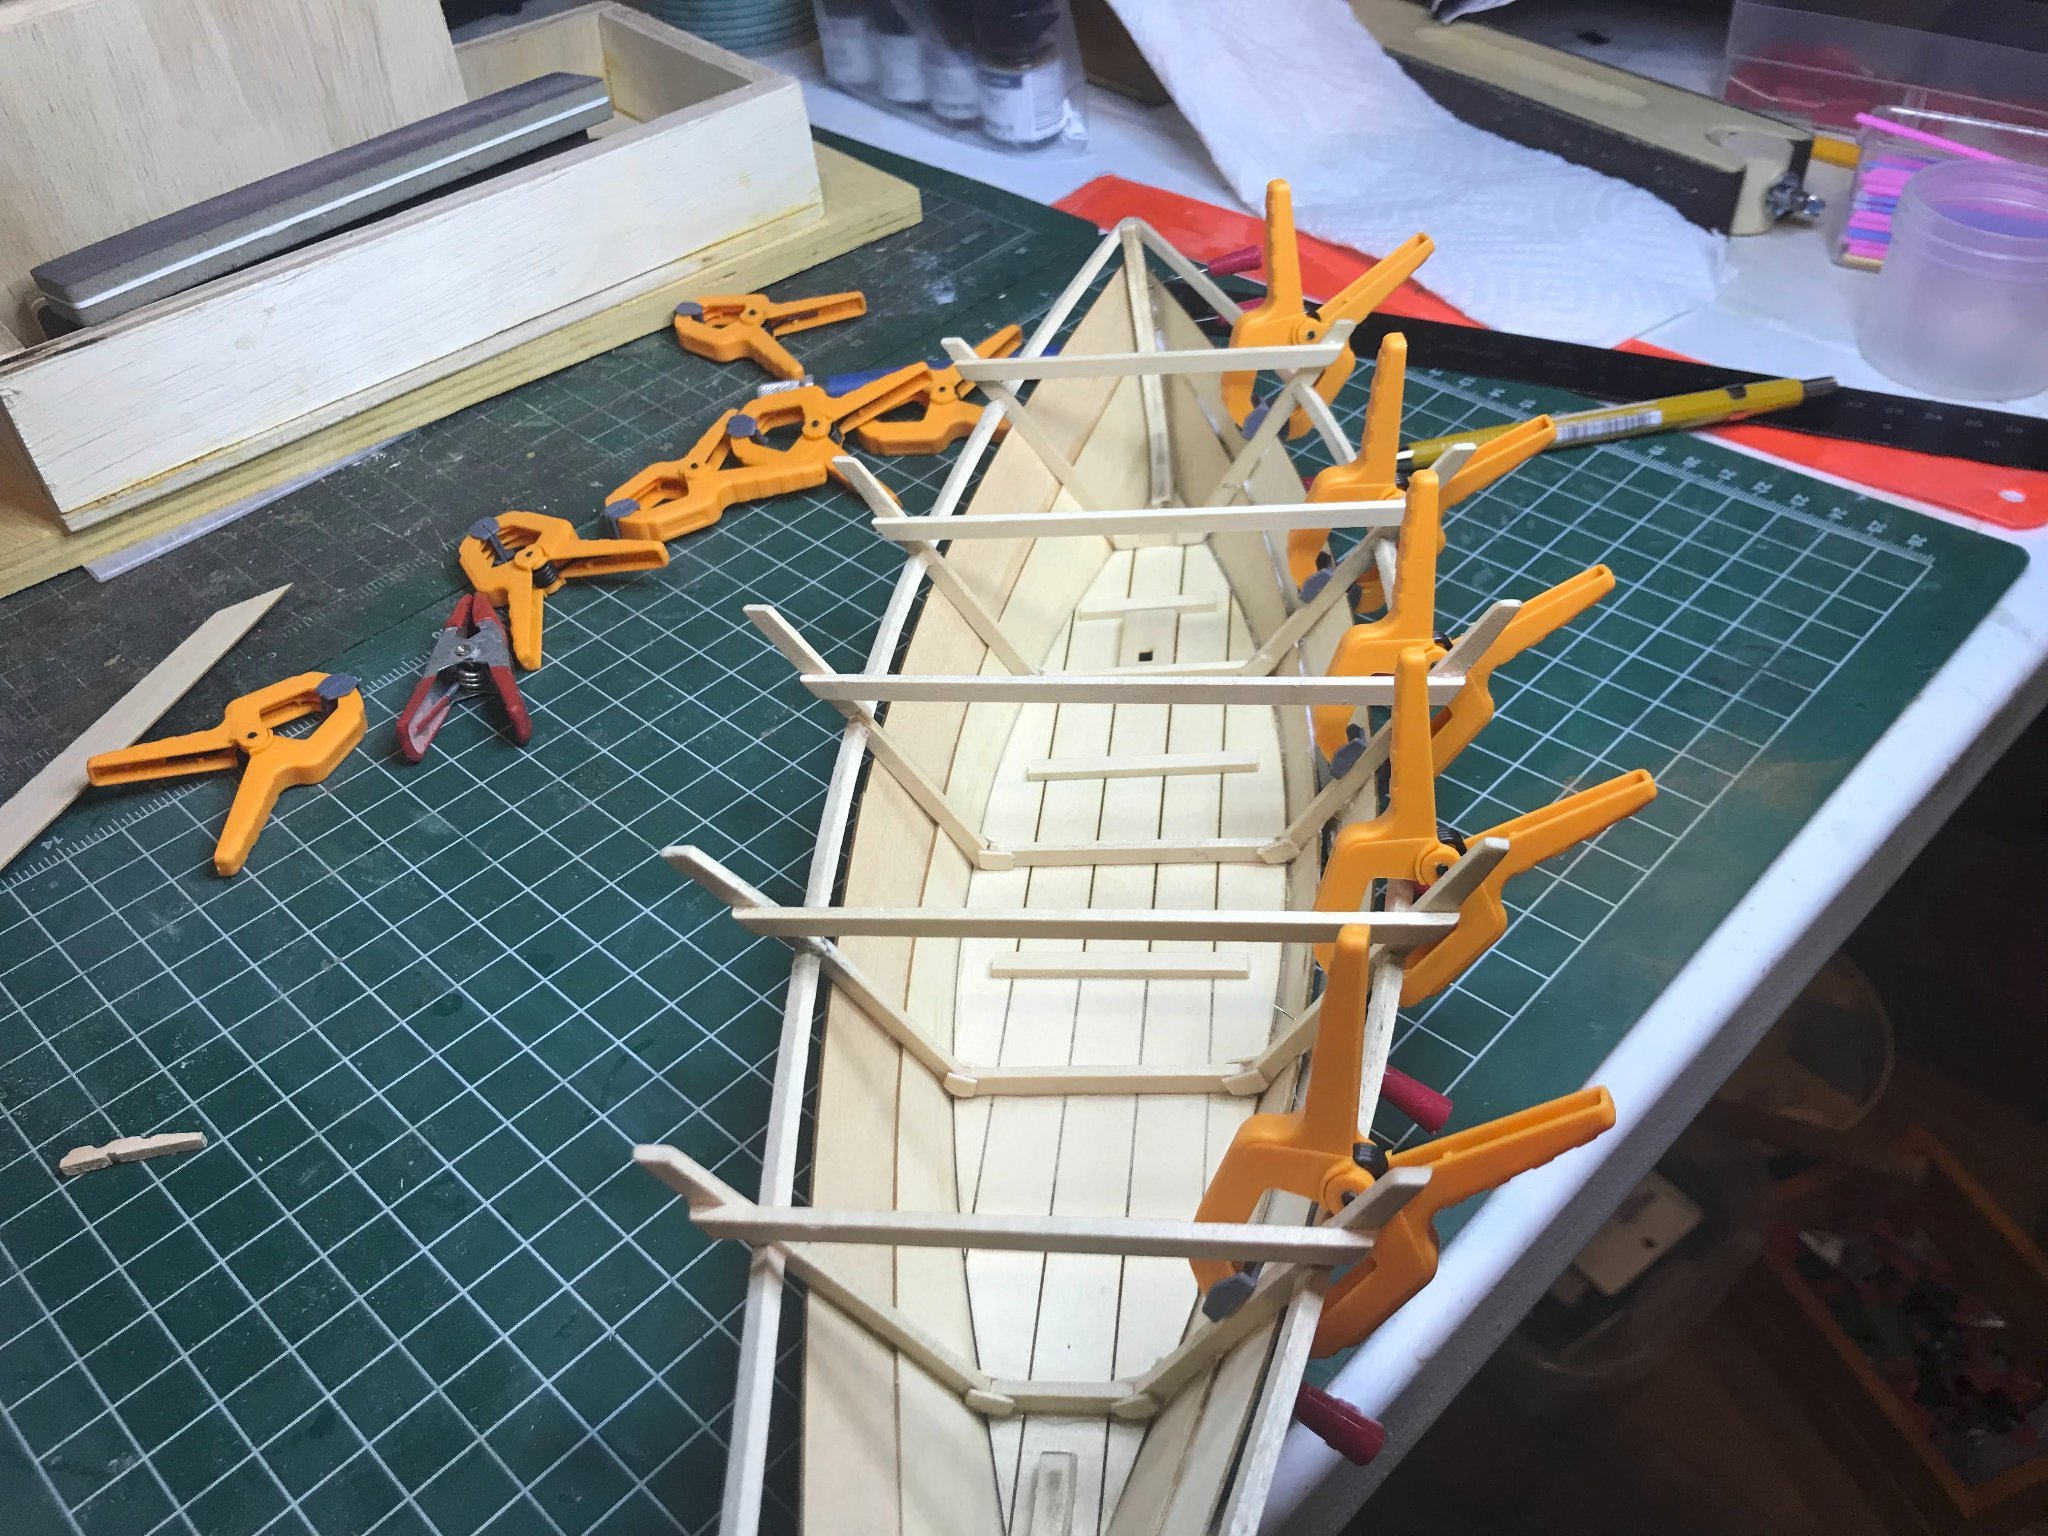
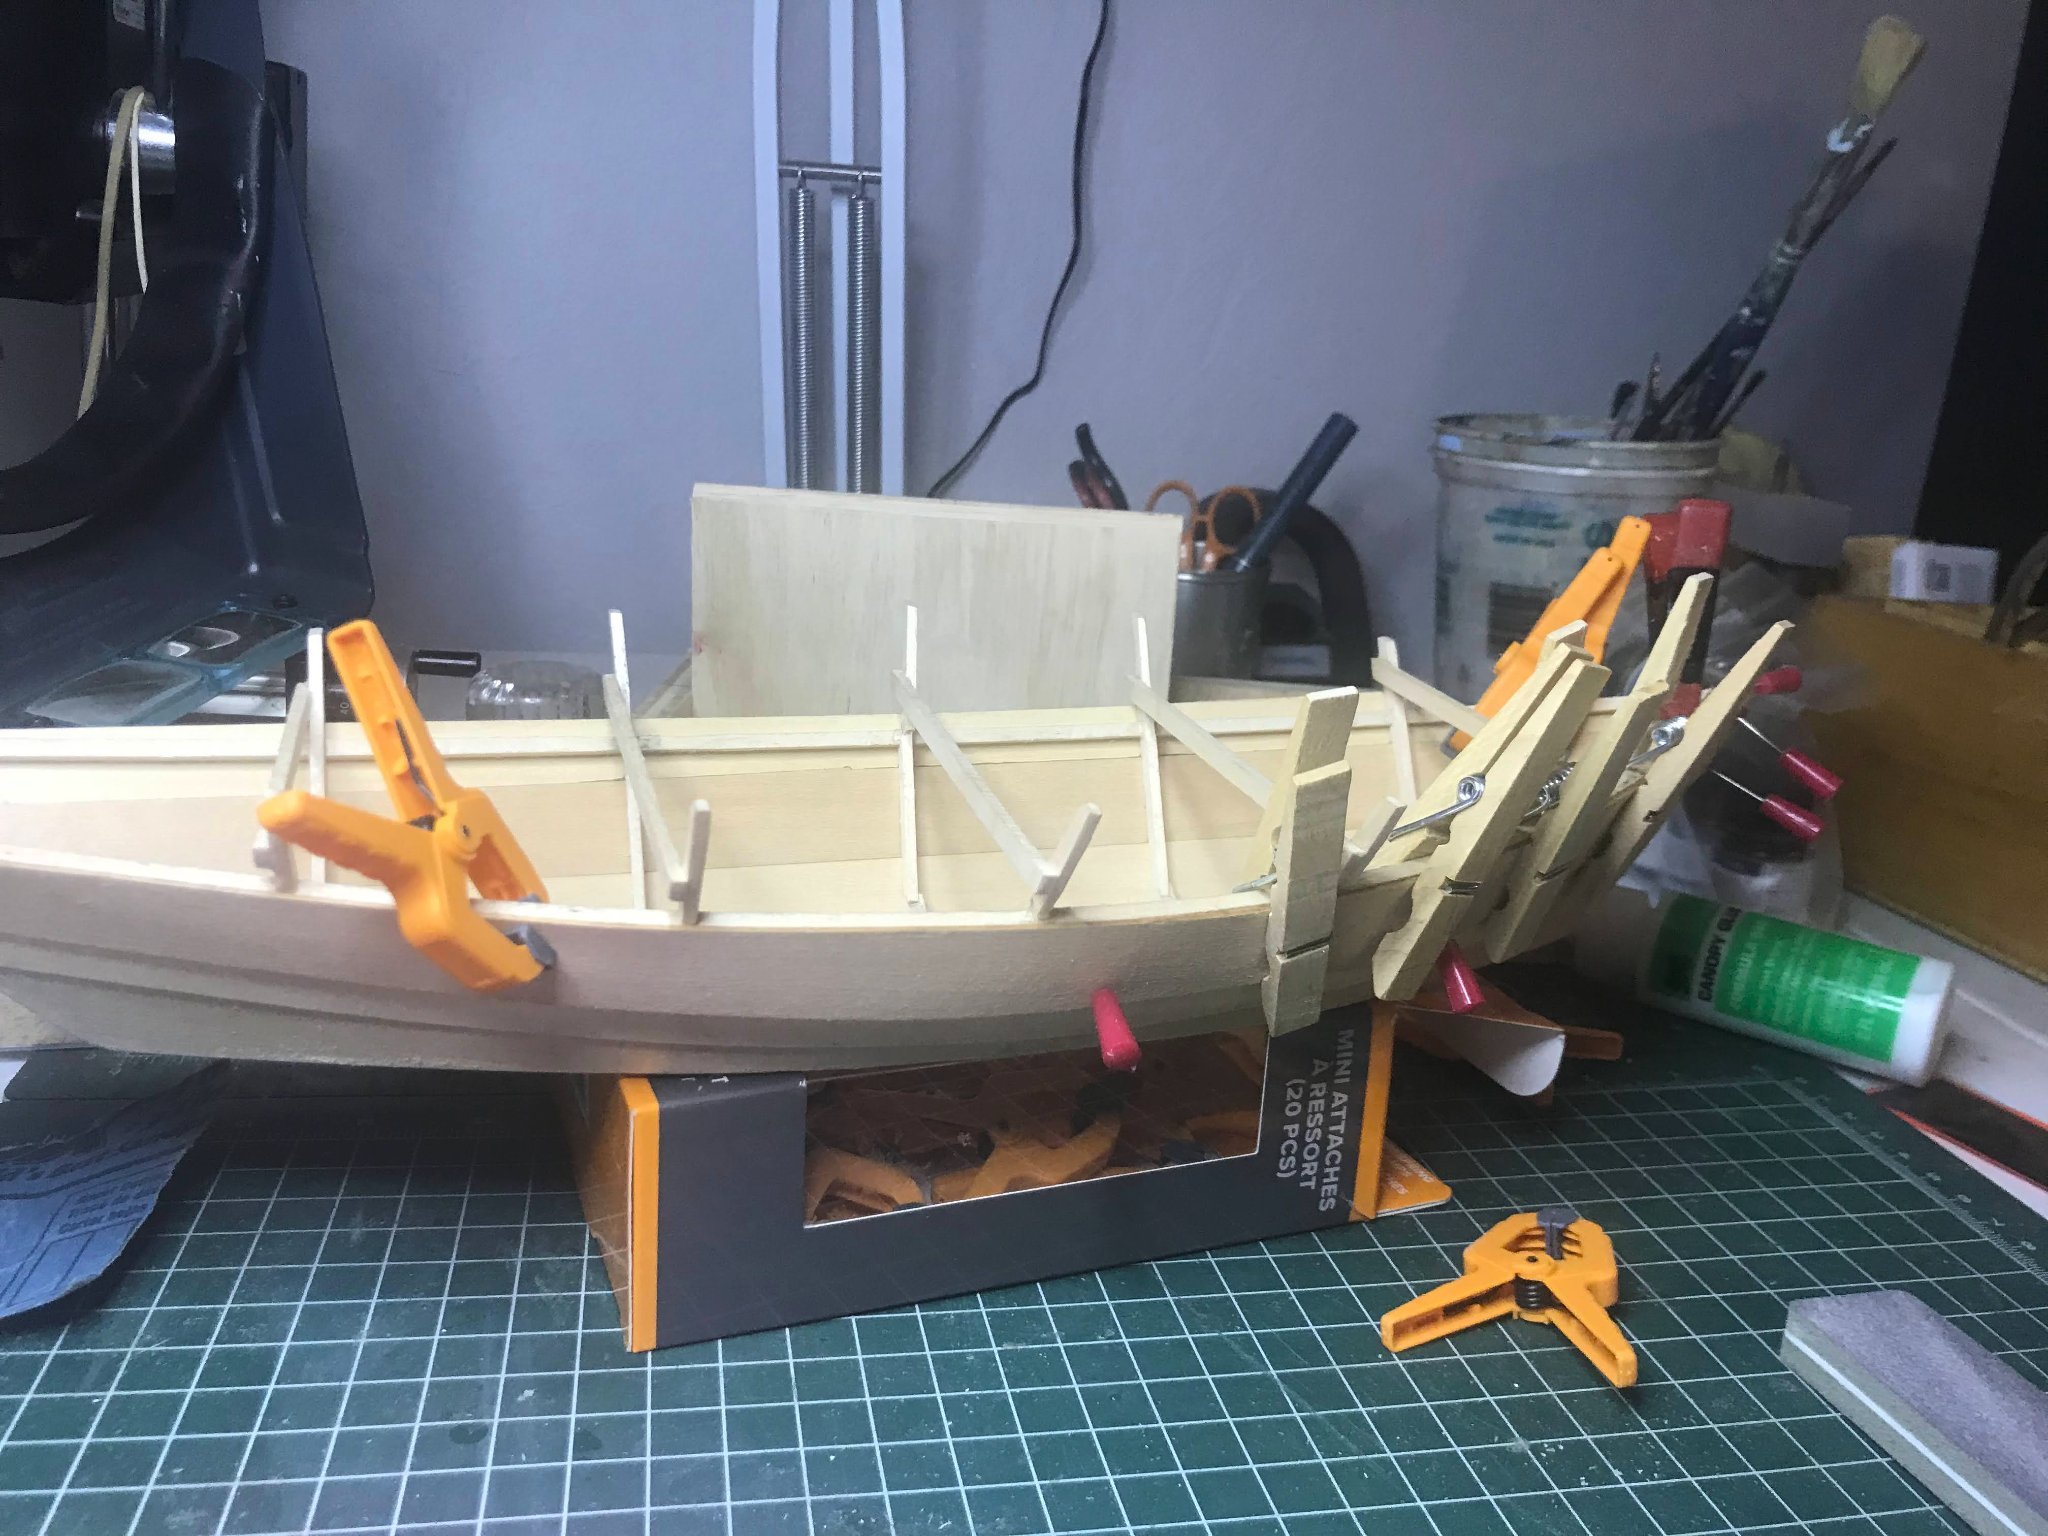
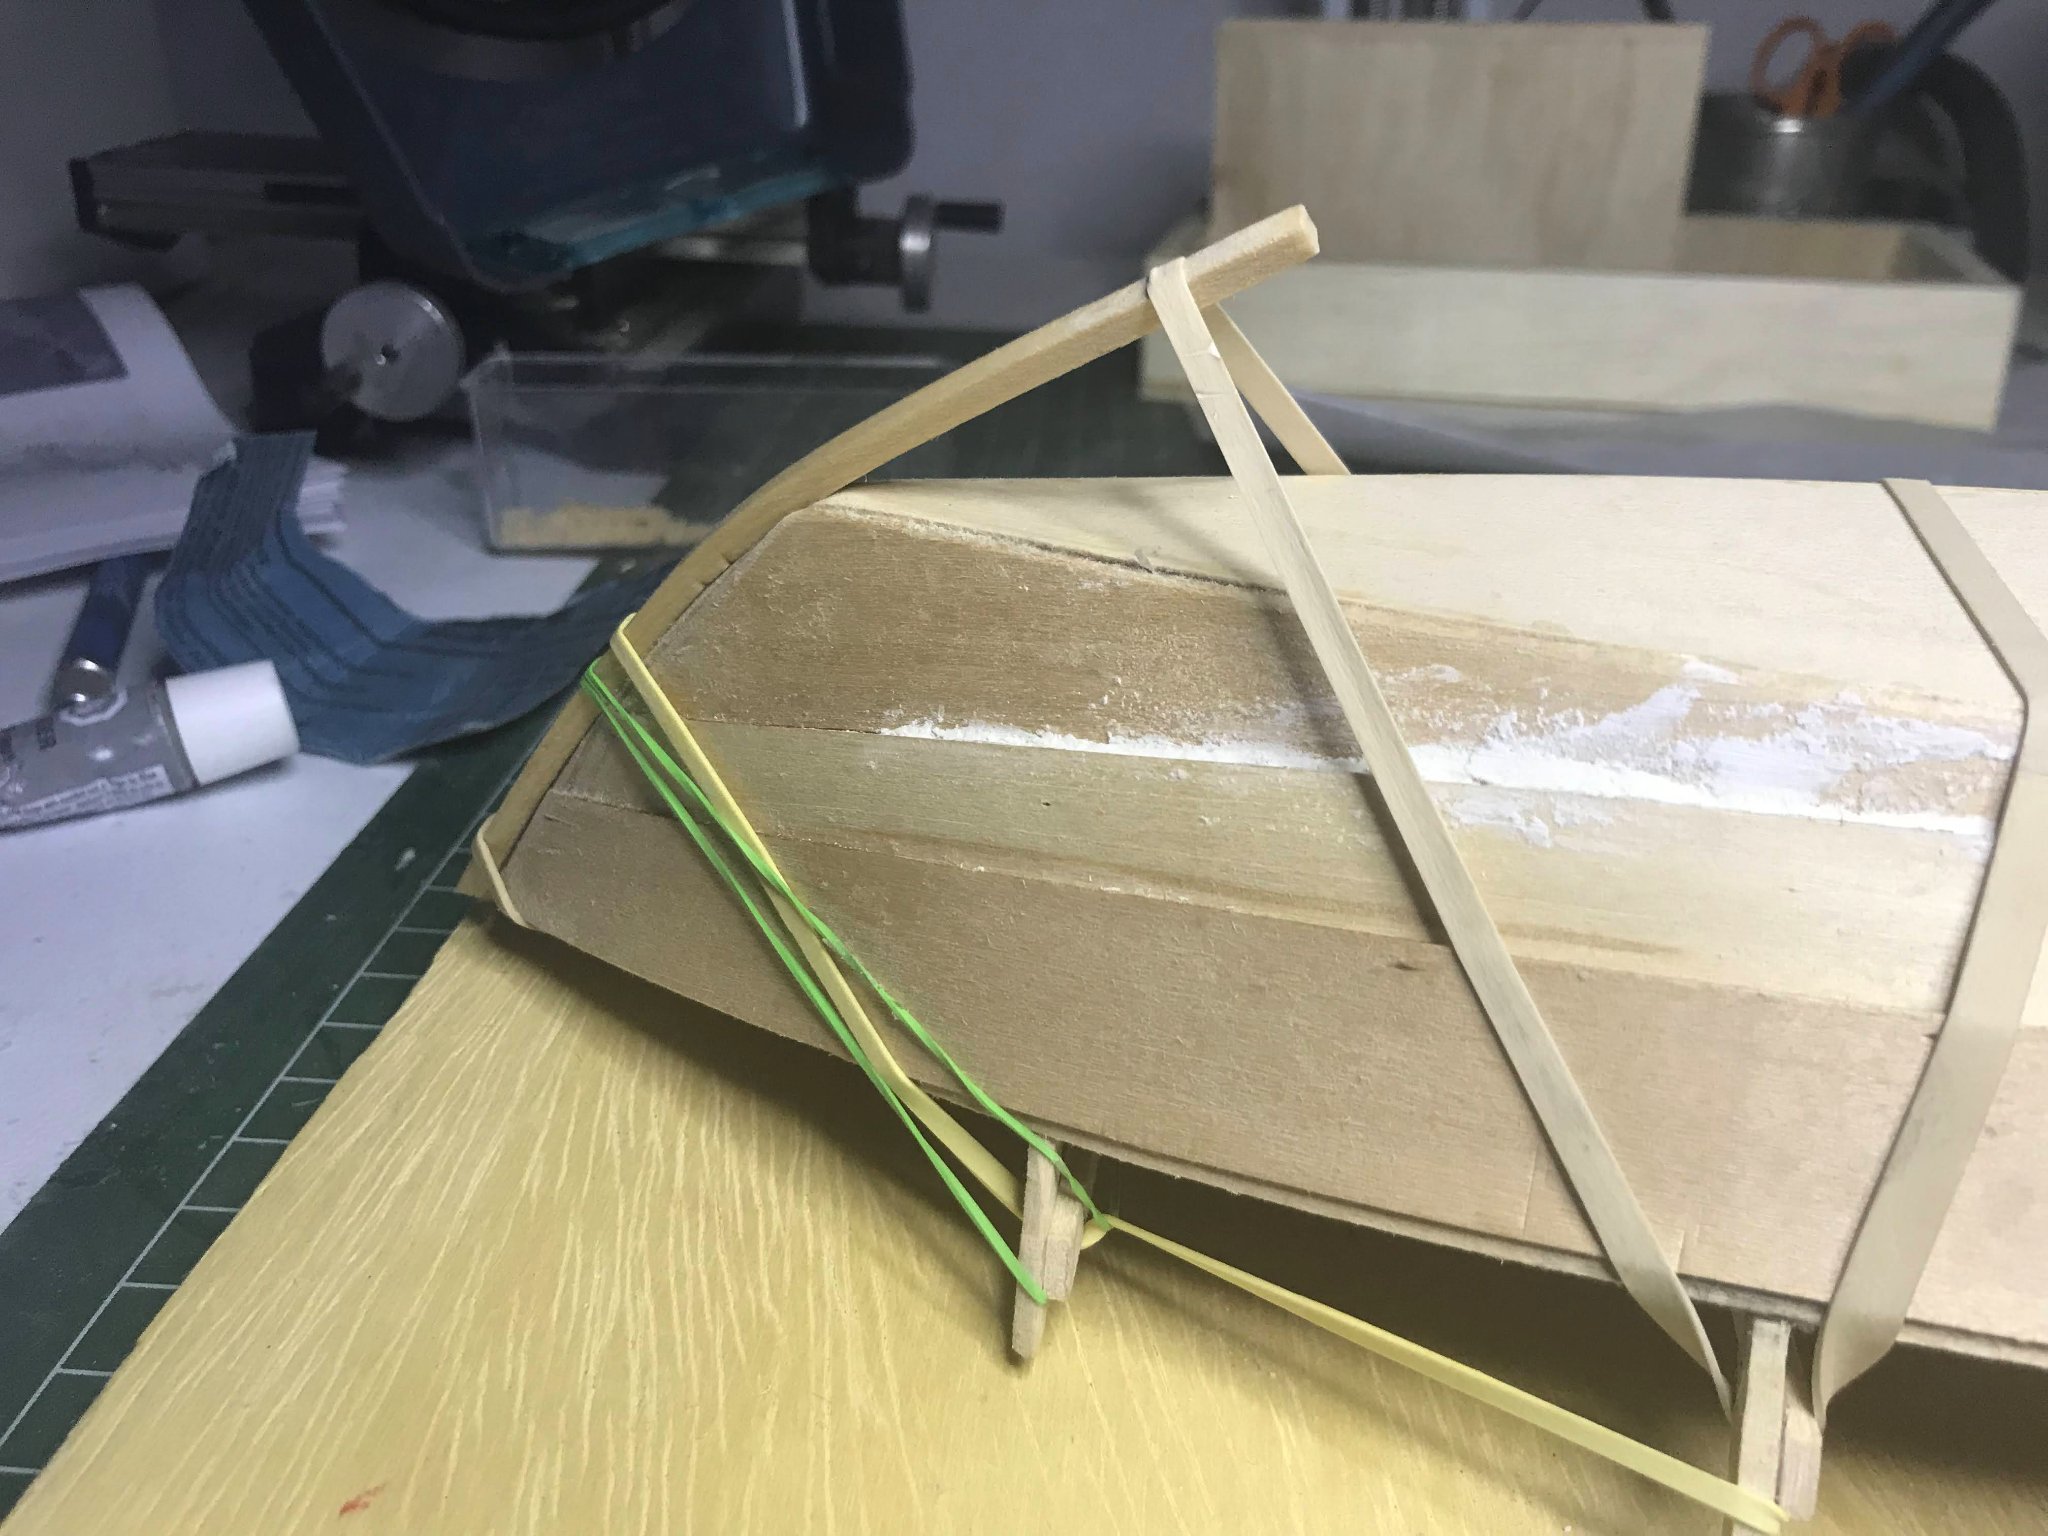
I worked my way through the questions I had regarding gunwale placement. Eventually getting them into a hopefully correct position. It was on to planking then. I planked each piece to port side, then to starboard. I don't know if that effects the stiffening of the planks/frames on a model as it might in a real world wooden boat. But that is the way I planked her. The middle planks were done next. I had problems gluing the middle planks to the frames. Earlier in the build log I had mentioned that my framing was not perfect, and I assume that is where the trouble lied. I used a combination of pins and plastic clamps along with canopy glue to get everything in. Finally ending with the top plank covering the gunwale strip. Once the planks were in place I cut and sanded the fore and aft edges so that they took the required shape and contour at each end of the dinghy. Next I got the gripe dry mounted, then glued in place. As seen from the photo I had already started initial work on filling and sanding the hull. I'll note here that I dry fitted every plank. In some cases boiling water with the plank drawn over it was used to get the correct shape. I fitted them up without the glue, clamped on the boat overnight. I just didn't want to break a plank. The course of planks was completed, the frame tops removed as was the excess planking over top the gunwale. Ready for sanding. I've started sanding and filling and am looking forward to getting the seat risers in. Then I'll be ready for primer. I haven't decided yet as to air brushing or brush painting.


.thumb.jpg.1ea127a063c482c2775bd01e8dd169a9.jpg)

- 9 replies
-
- 3
-
-
- Bluejacket Shipcrafters
- Grand Banks Dory
- (and 1 more)
-
barkeater reacted to a post in a topic:
Yankee Hero by MichaelW - FINISHED - BlueJacket Shipcrafters - 3/8"=1' - 1889 Quoddy Boat
-
Hello Michael, I am searching around for my next build, though I am still working on my Bluejacket Grand Banks Dory. Your build log is great and I learned so much this morning reading through the entire project. I am amazed how the smallest of craft requires so much skill, patience, etc. Thanks for sharing it. Your doing a fantastic job. Tom
- 81 replies
-
- 1
-
-
- Bluejacket Shipcrafters
- Yankee Hero
- (and 1 more)
-
Ryland Craze reacted to a post in a topic:
Grand Banks Dory by tomebe - BlueJacket Shipcrafters - 1:12 - first build
-
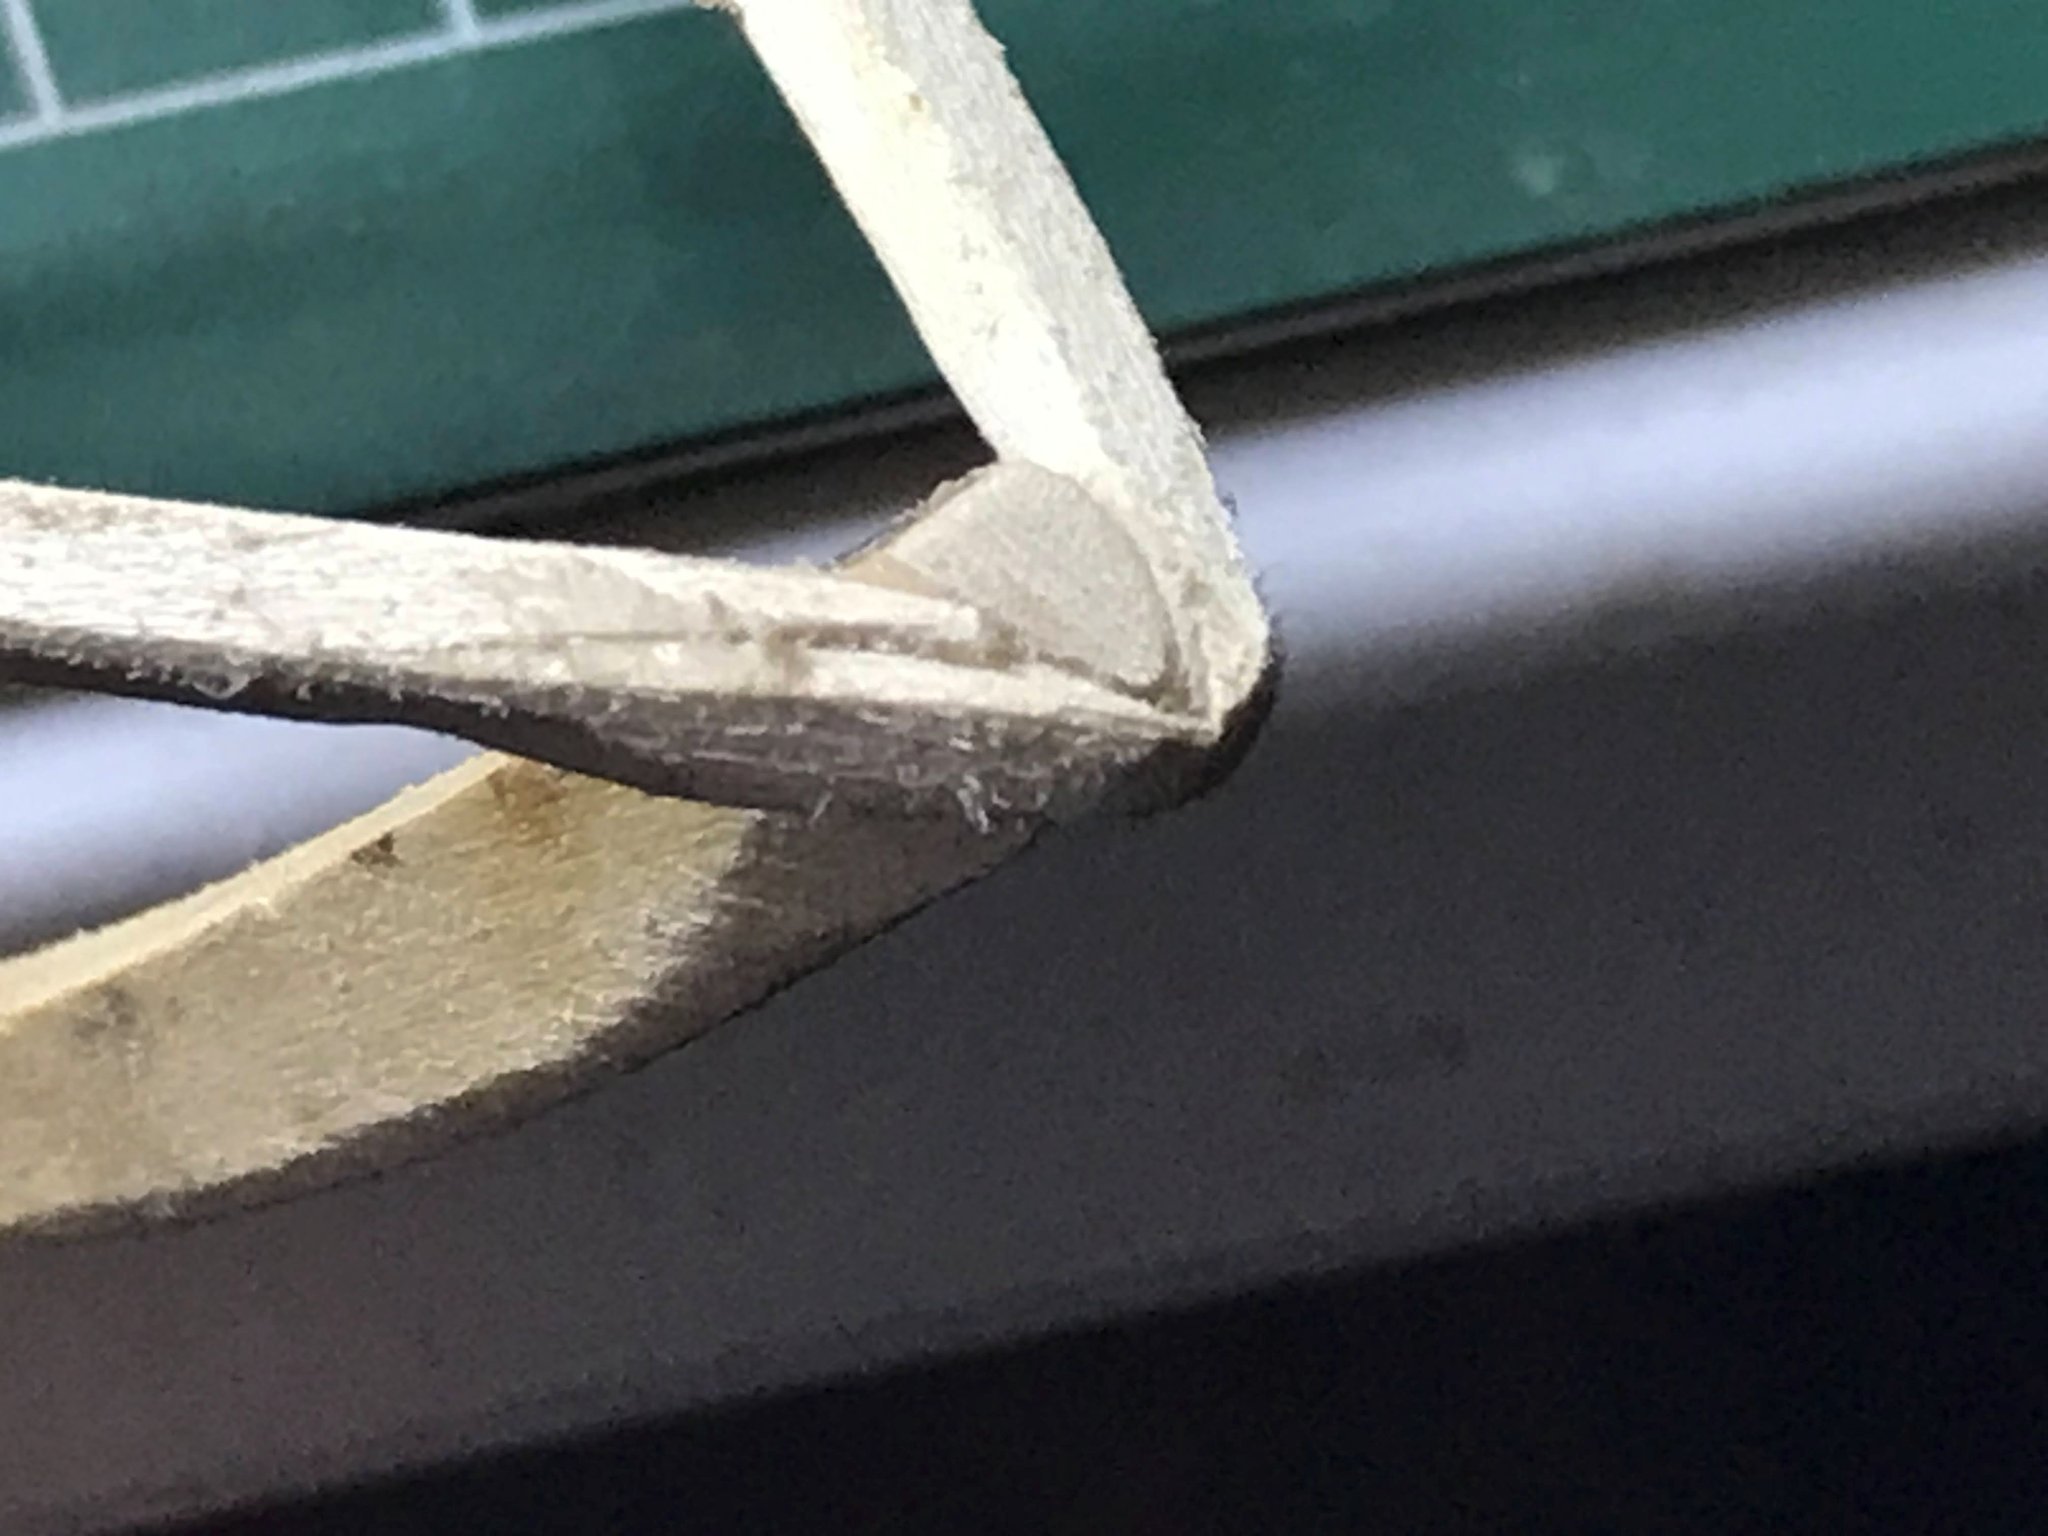
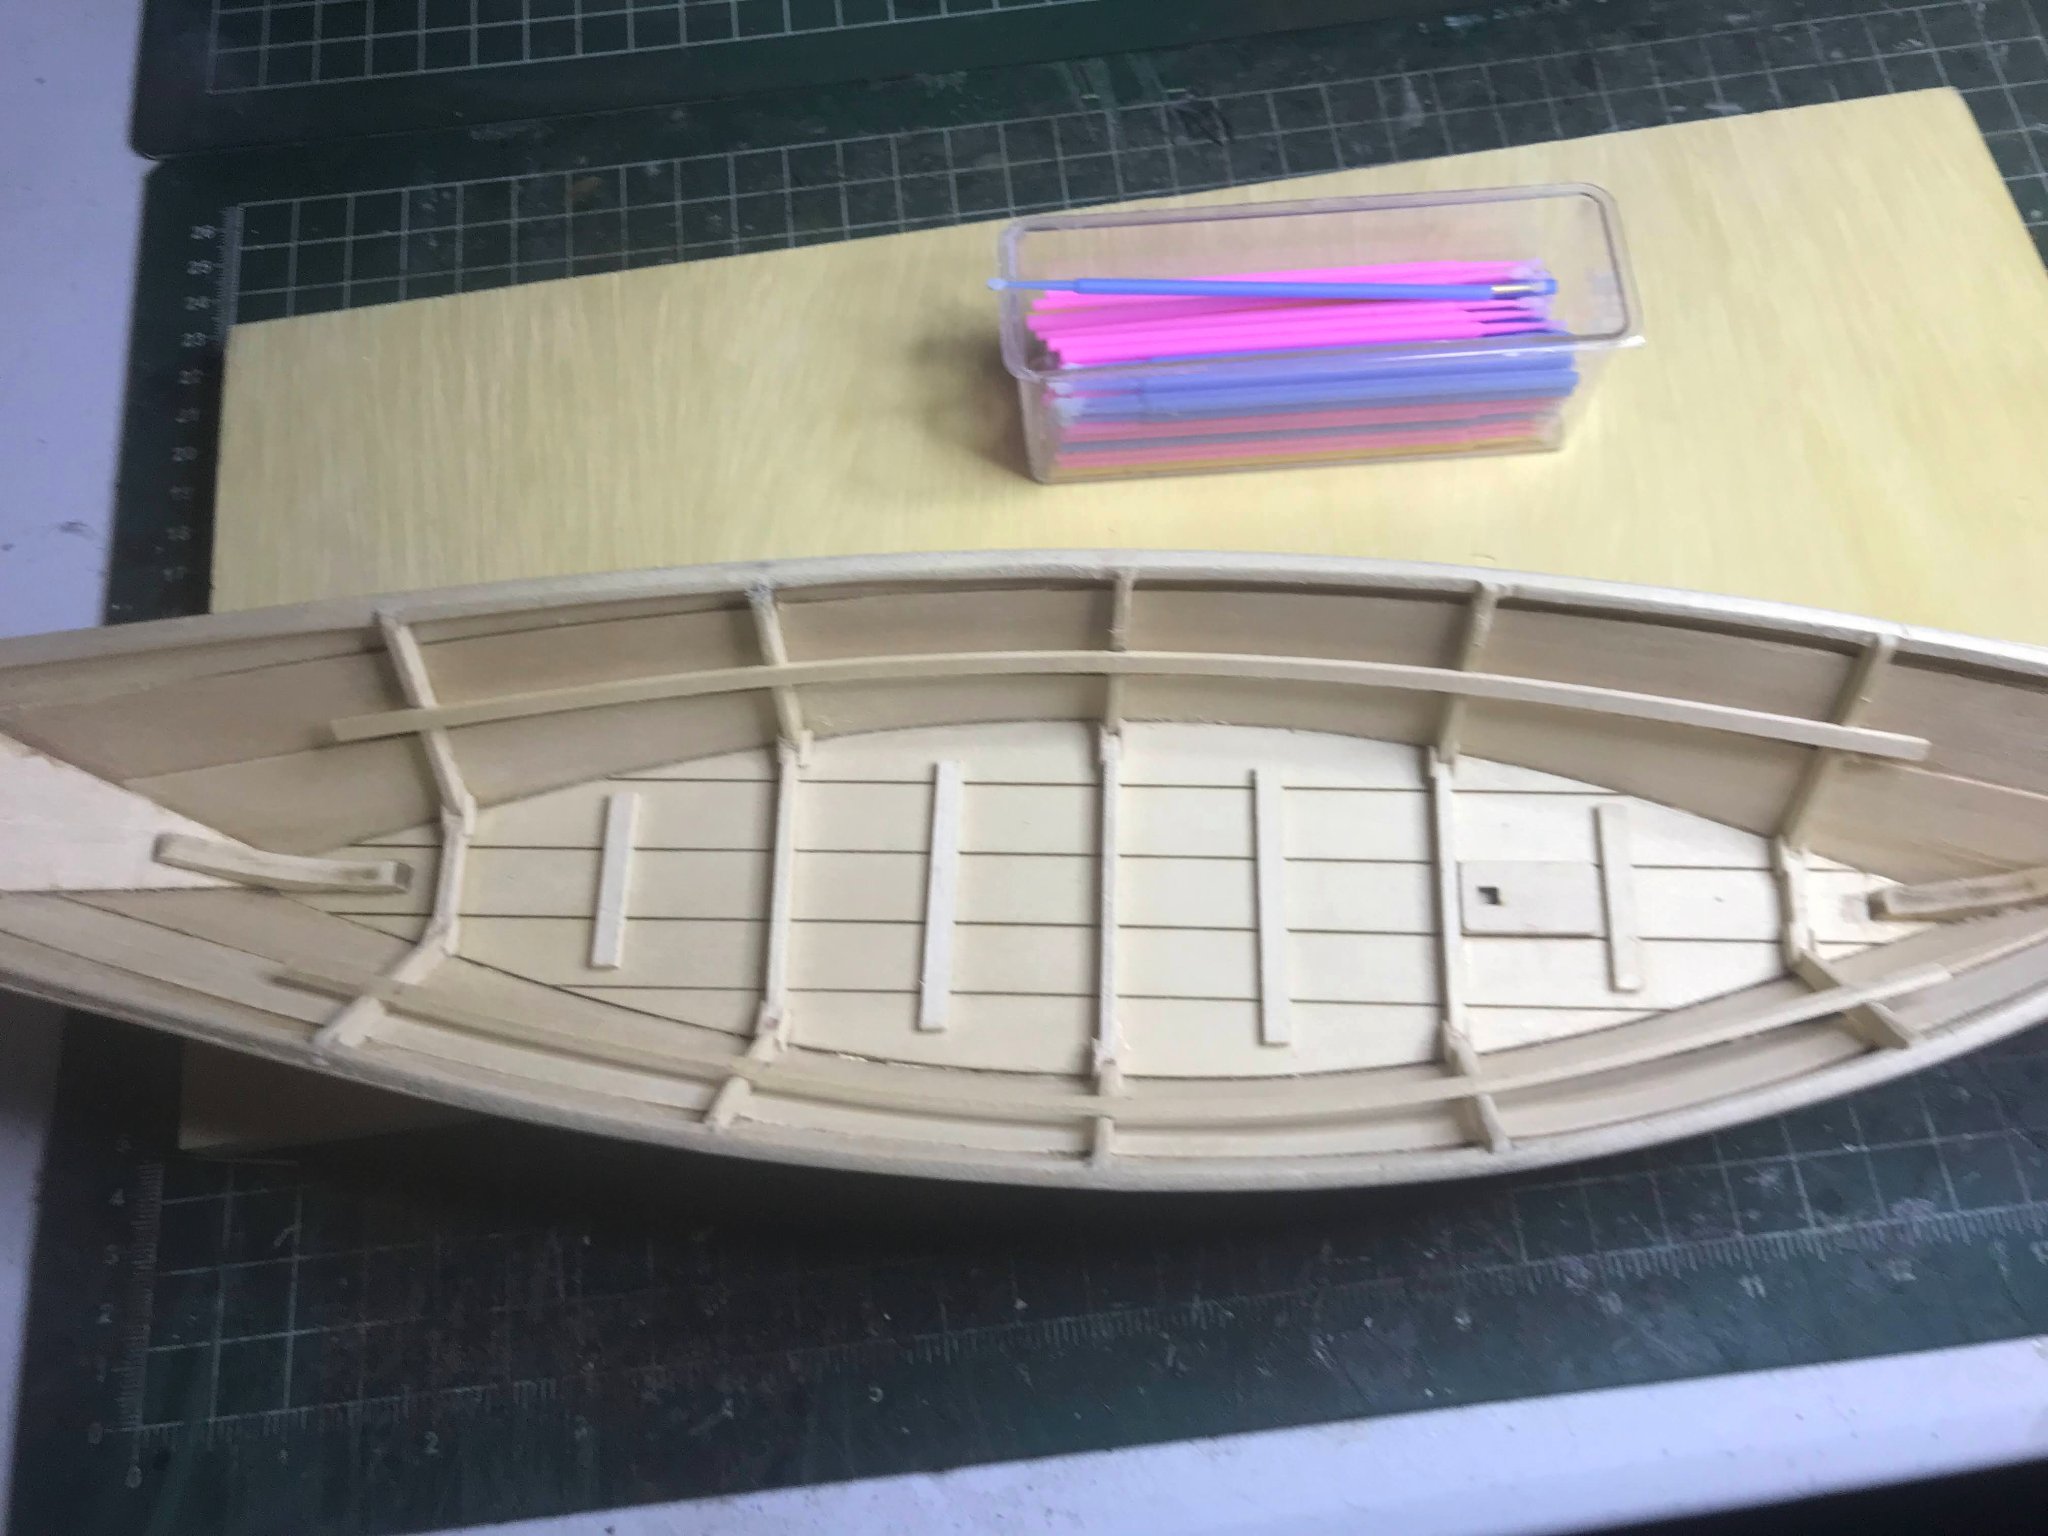
With the frames in place, I beveled them, and used a piece of the scrap to make sure I would have a good fit for the planks. I installed the gunwale, which went surprisingly well. This is when trouble came. I did not understand the placement of the gunwale to the stern. I thought I did, but I think now that the gunwale should be placed on the interior of the stern post and meeting it at the edge. There should be no portion of it sticking out beyond the stern. Obviously if it is, it needs to be either moved or sanded (or both) so the planking fits properly to the stern post. I am going to be more aware of my mistakes so I can correct them at the time they occur. Understanding and discovering a problem early really makes corrections easier. Otherwise I'm left with covering them up as opposed to fixing them proper. r I manage to bust the starboard gunwale on installation, but was able to reglue and sand it to some measure against the bow post. After sanding and smoothing I'll be ready for planking.


- 9 replies
-
- 2
-
-
- Bluejacket Shipcrafters
- Grand Banks Dory
- (and 1 more)
-
Alex, I wish I had better news. I hadn't recognized the issue until I had the 2 gardboard planks installed. I did notice that one side fit was more difficult to cover the full length of the boat, but eventually I got it in place. I've struggled with the planking process especially to end up with a nice tight fit both bow and stern. It has definitely been a learning experience. I continue on though, just to see where I end up. I just soaked the last plank and bent it to the frames in dry fit. When it drys I'll glue it up. Tom
- 9 replies
-
- 1
-
-
- Bluejacket Shipcrafters
- Grand Banks Dory
- (and 1 more)
-
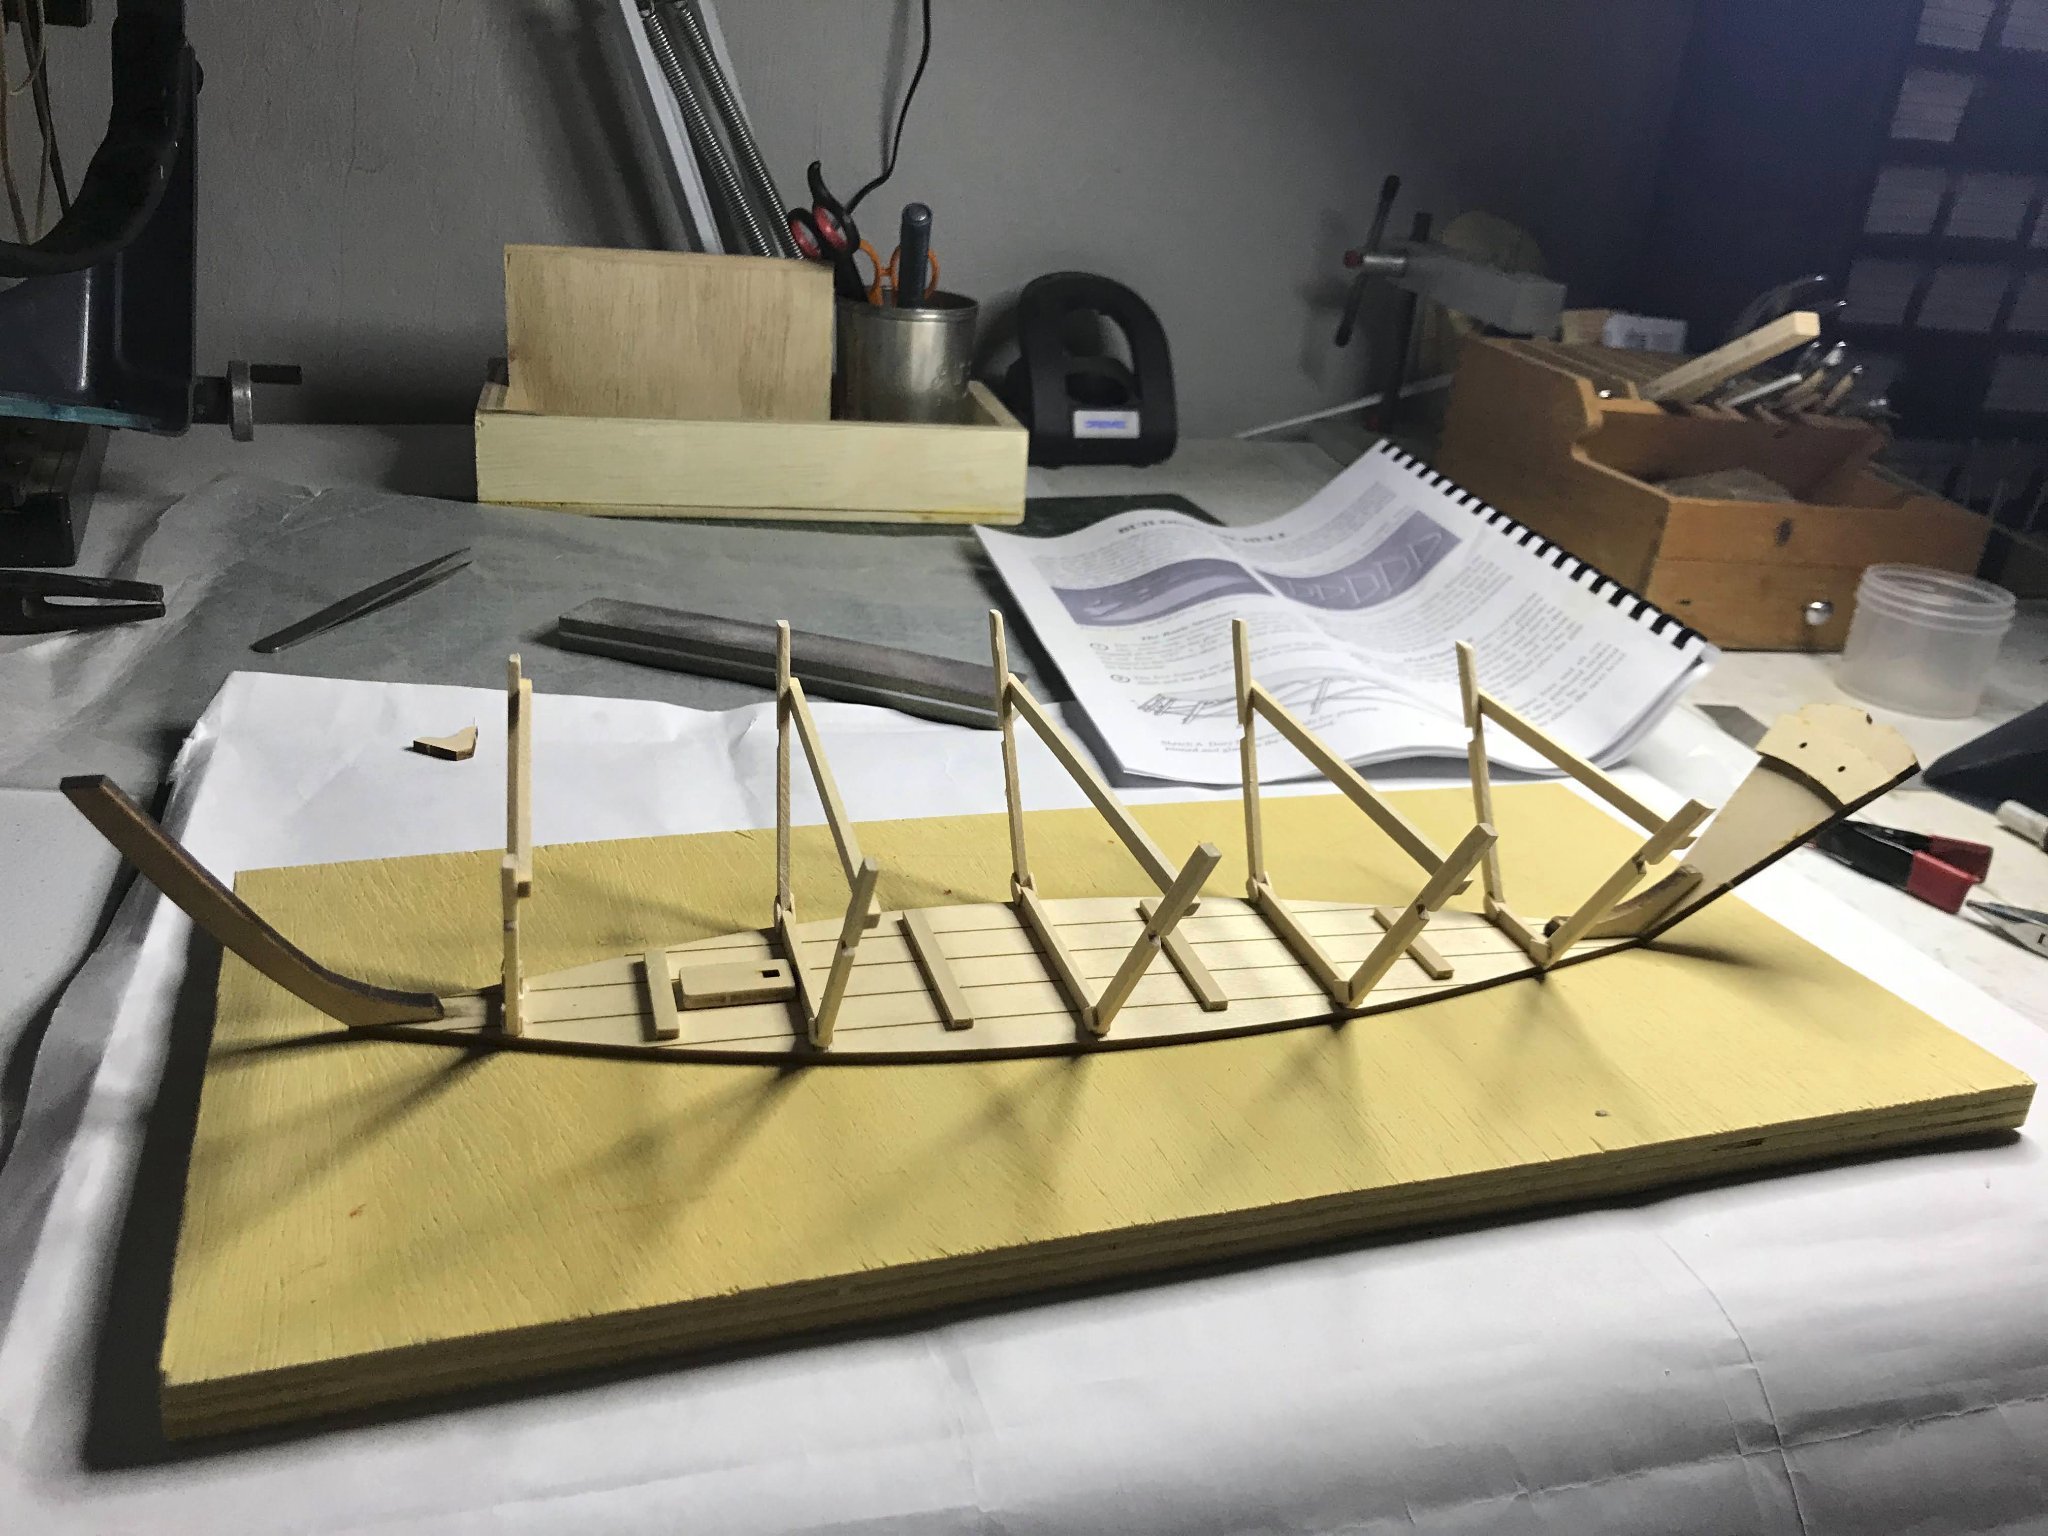
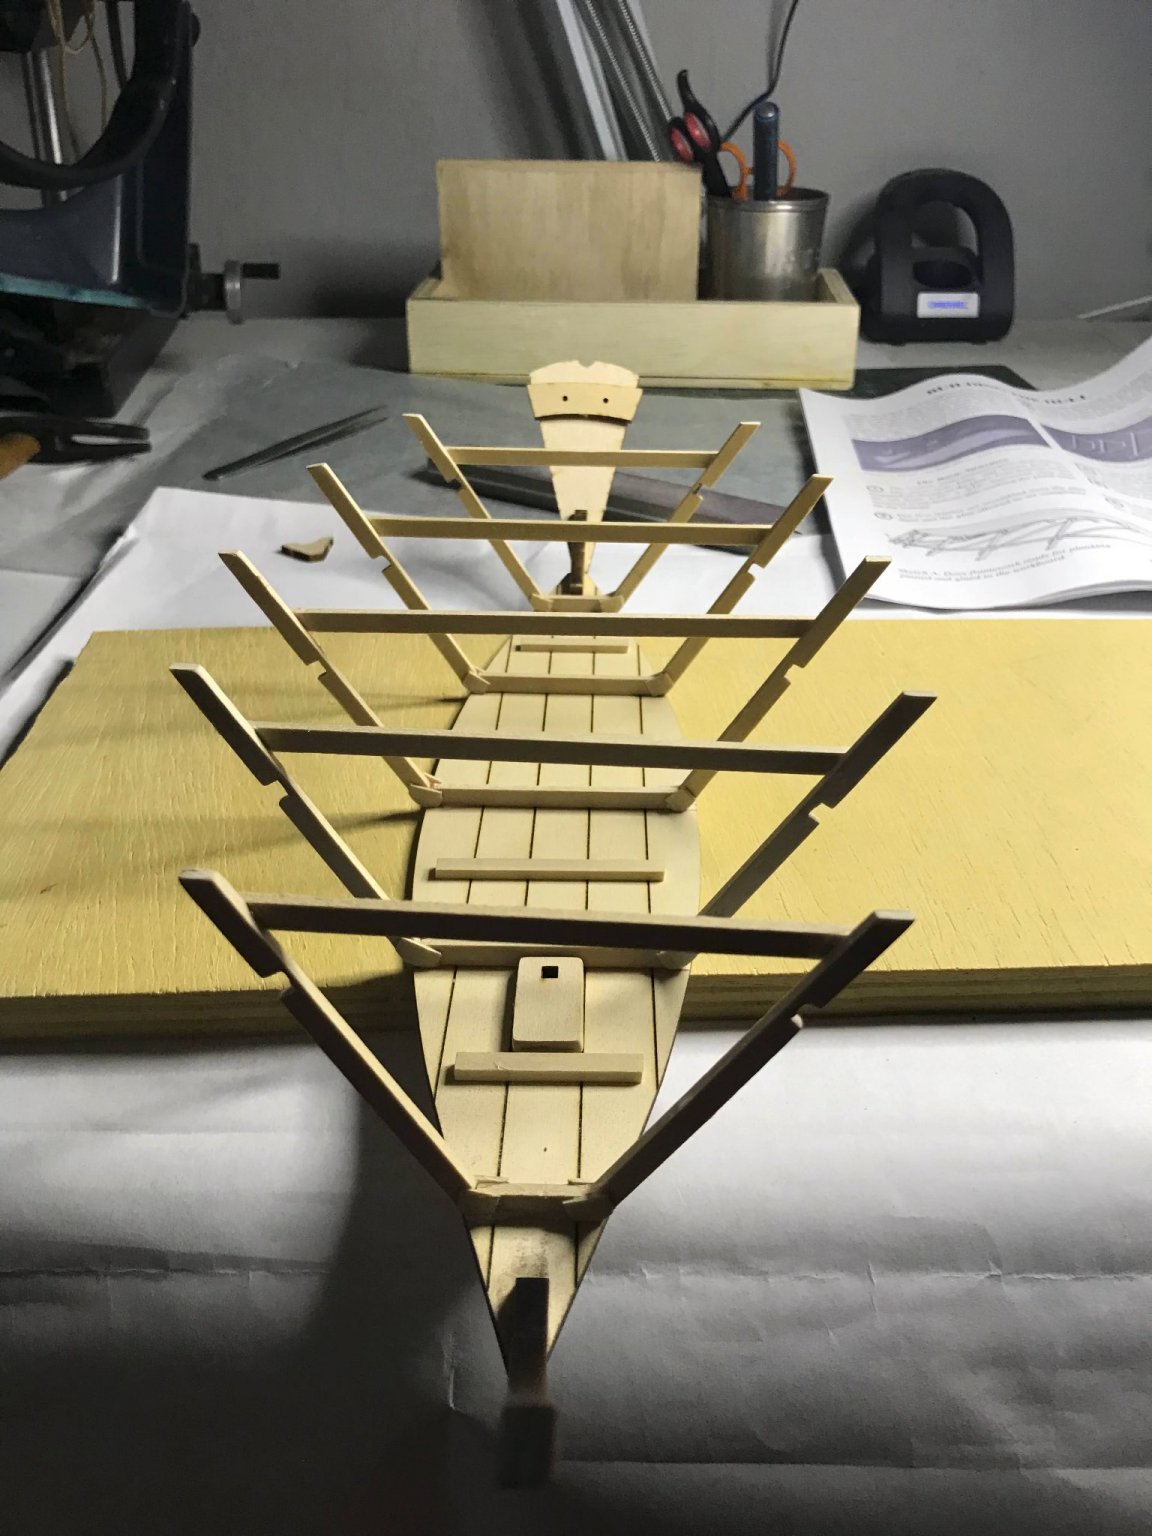
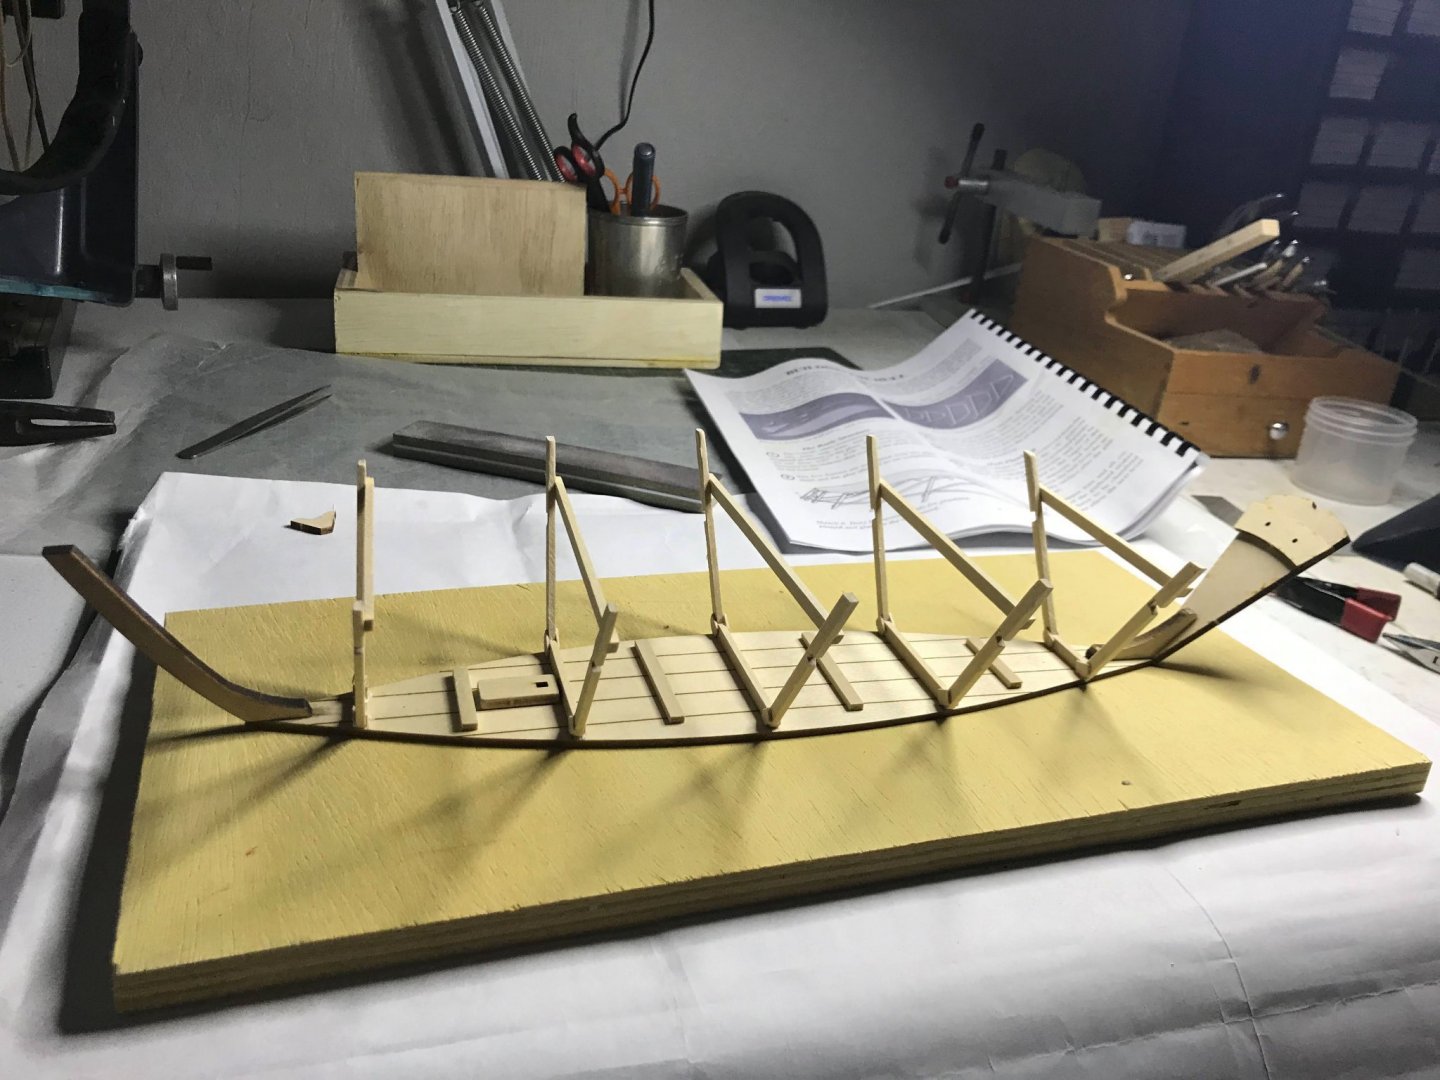
First thanks for the help in the title change. As I read through the faqs for posting I probably passed right over the proper way to title. With the cleats, stem and stern in place it was time to attach the frames. I sanded them to some degree. I also removed any of the frame plate excess that overran the edge of the frame proper. I just wanted to make sure the my contact area with boat bottom was full. Unfortunately, I didn't recognized that the bottom no longer had that fore/aft curve in it. I assume from sitting in my closet for 2 years. This would affect planking. More about that later. The garboard boards were next. and would mount even over the bottom. Here are two pictures of the finished product.

- 9 replies
-
- 2
-
-
- Bluejacket Shipcrafters
- Grand Banks Dory
- (and 1 more)
-
Hey Alex - I finally sorted out the build log and have started one there. I'll look for your own log as well and follow you there - Tom
-
Thanks - I figured out how to do that and have started a build log. tom
-
This is a first time build. I chose the Bluejacket Grand Banks Dory. I always loved the shape and looks of the dories, and as a first time builder look forward to the challenges. As a model railroader I have many of the tools needed for this project, save for specialty items like a plank bending tool. Those tools will come later. Basic tools, basic techniques. I hope to learn as I go and not to blow it all up! Per the instructions I started with the frame build. I used the frame template on the builders sheet. It took a couple of tries before I could sort out how to get the correct angles. I had to toss a couple of botched cuts. I used a 4" x-acto square, lined up to the cut lines on each frame piece. At first I used a pencil to mark the cut line across the board, then use my zona saw to cut a groove along the cut line, with the X-acto square as my guide. After a couple of cuts I skipped the pencil mark against the board, I used the zona and the square to make the cut line, or groove in the wood. This seemed to work as long as I was careful to hold my work piece hard against the template. After each frame piece was cut everything was spot glued against the template and to one another so I could get as good a fit as possible and double check everything. Once the frames were built I glued up the cleats, mast step, transom and bow stem. I apologize if I misnomer some of these parts. I just don't know all the nomenclature yet. Now its onto getting all the frames positioned and glued, and installing the gunwale planks to either side of the frames.

- 9 replies
-
- 7
-
-
- Bluejacket Shipcrafters
- Grand Banks Dory
- (and 1 more)
-
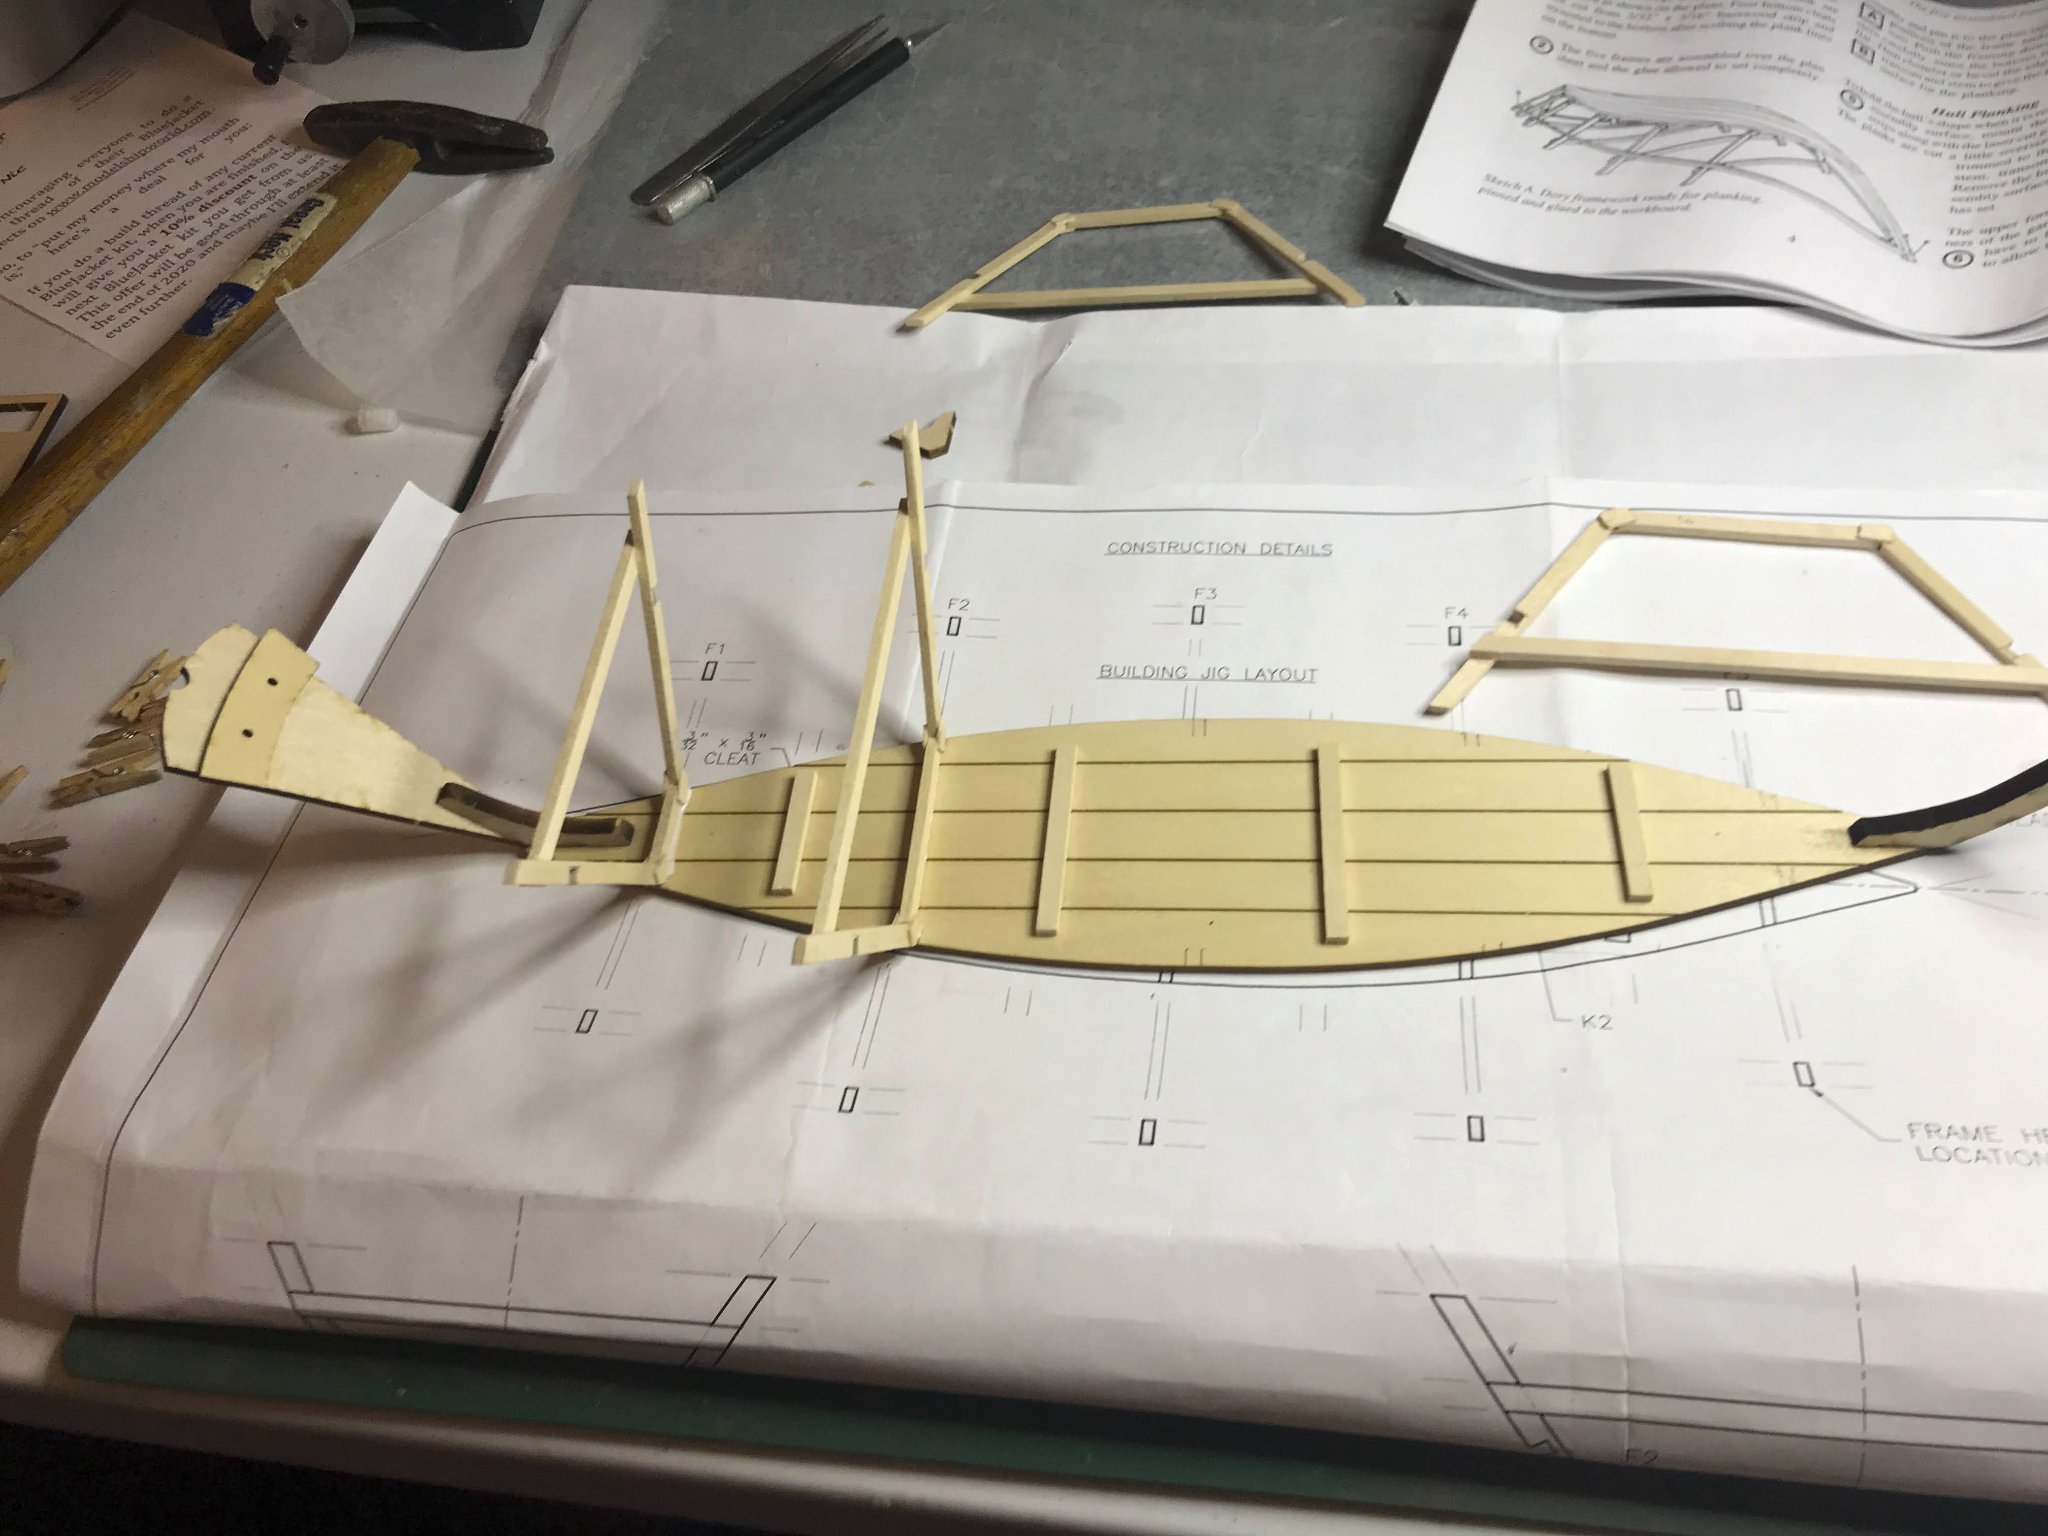
This is what happens when you grow older. First you forget that you made a purchase of the Bluejacket Grand Banks Dory. You forget cuz other distractions in life occur and that kit sits unintended in a closet until late 2021. Then my wife and I go to New England and we visit Vt, NH, and Maine. The next thing I know we're passing through the town of Searsport ME on RTE 1 on the way to Bar Harbor. My wife is driving and I look to the left and see The Bluejacket store. I get excited and tell my wife that's the Bluejacket store where I ordered my dory 2 years ago. "That's nice sweetie," she answers. We eventually make a u turn and stopped at the Penobscot Marine Museum where there were many dory examples. I took photos. It set my mind to pulling the dory out of the closet and onto the workbench when I return home to California. I've started building and am enjoying it, and although I've made a bunch of mistakes as in breaking a frame or splitting a plank I have through reading others first build experiences here, been able to correct everything so far to my skill level. My material handling skills, what needs to be wetted or steamed is in its infancy, although I did manage to bend 1/8" gunwale's to shape using steam from a large cooking pot. More to come obviously - building a wooden model of the dory is really fun. I just hope I don't blow it up! With frames built off the template the photo shows the start of attaching the frames, cleats, the stern and the bow stem.

-
Thanks all - I’m going to order the dory......I watched the video of the kit breakdown and it seems pretty straight forward.... I plan on utilizing this site to answer all the questions I’m going to have. Tom
-
Hello All, I ran into this site only a short while ago whilst looking for a boat building project. I've read some of the material offered here for newbies, although I may qualify as an experienced newbie....I'm not sure. I've spent the last 10 years building a model railroad under the rear deck of my home. Its based on a prototype Southern Pacific railroad branch line. Although many of the structures are of the "fine scale miniature" type, some are completely scratch built......on the other hand there no curves to speak of least on my build. I'm an experienced sailor as well having owned a French built 32' sloop on SF bay for a decade or so and served on the Big E for sometime during the Vietnam era. I'm drawn to this because of the challenge and skill build necessary to create a sailing ship model, but I'm not anxious to try anything overwhelming....in fact simpler is better right now. My railroad will be basically completed in a year/ year and a halfs time......and that is my hobby priority. With that said and having looked around I'm thinking to build the little Grand Banks Dory from Bluejacket Ship Crafters. Would this be a good choice? thanks Tom E. Auburn, Ca
.jpg.a03e2edf863bcdd78d033c0406c351e1.jpg)

.jpg.8aba13f1ffaaa994c33055610ccb1286.jpg)