


Samuel I
-
Posts
14 -
Joined
-
Last visited
Content Type
Profiles
Forums
Gallery
Events
Posts posted by Samuel I
-
-
Behold.

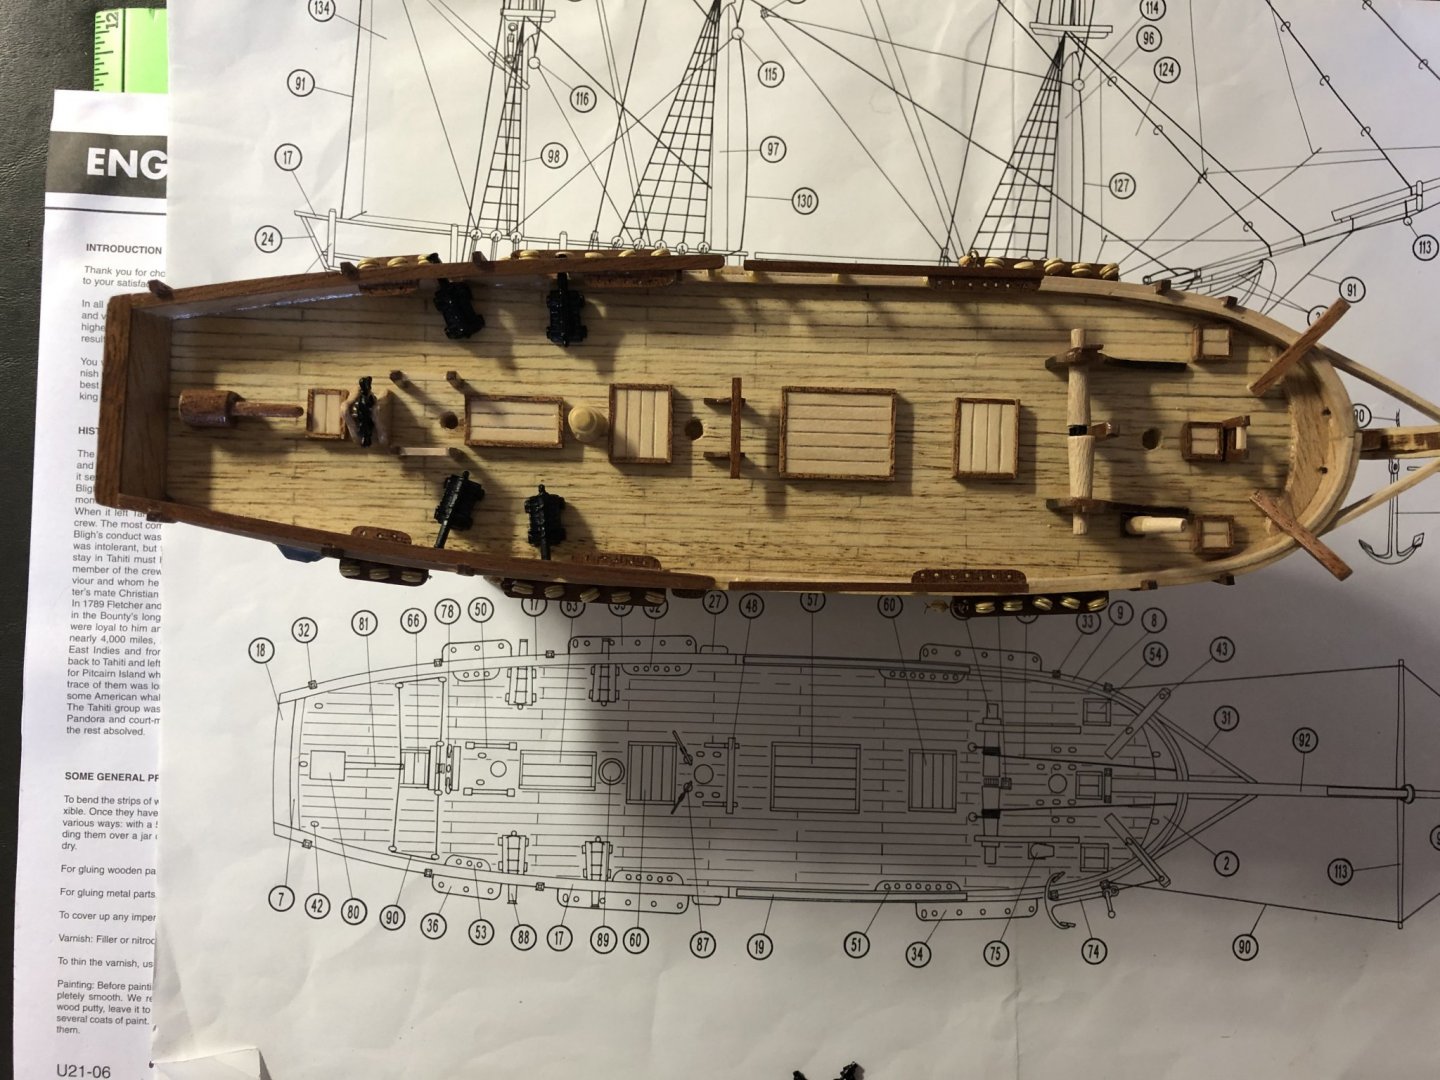
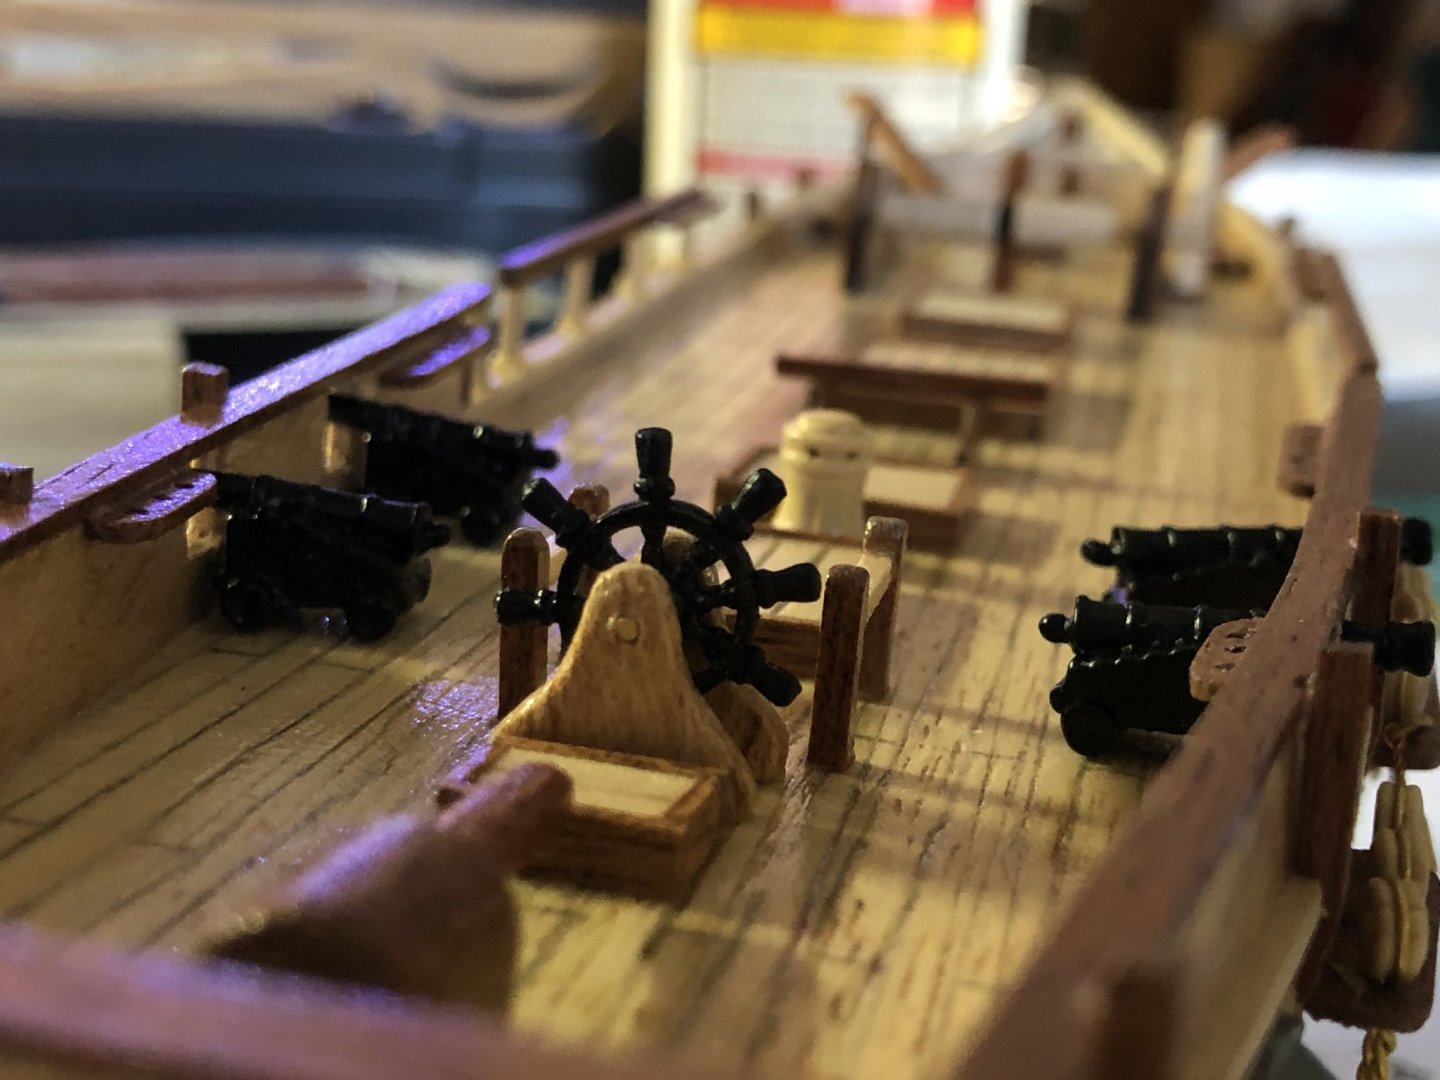
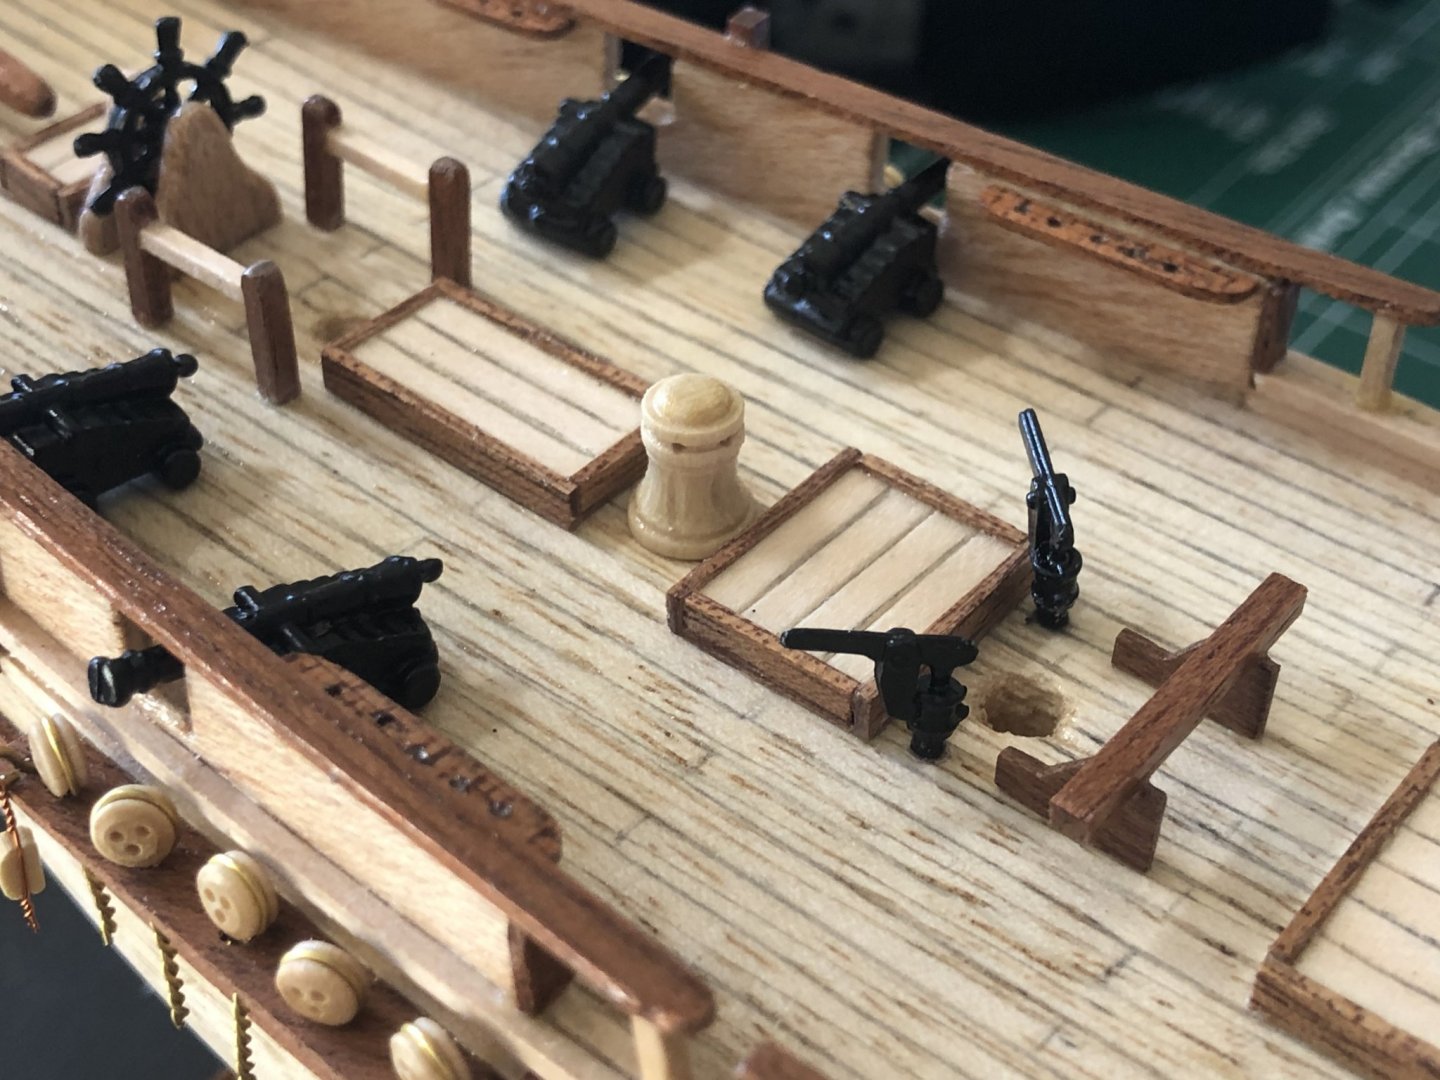
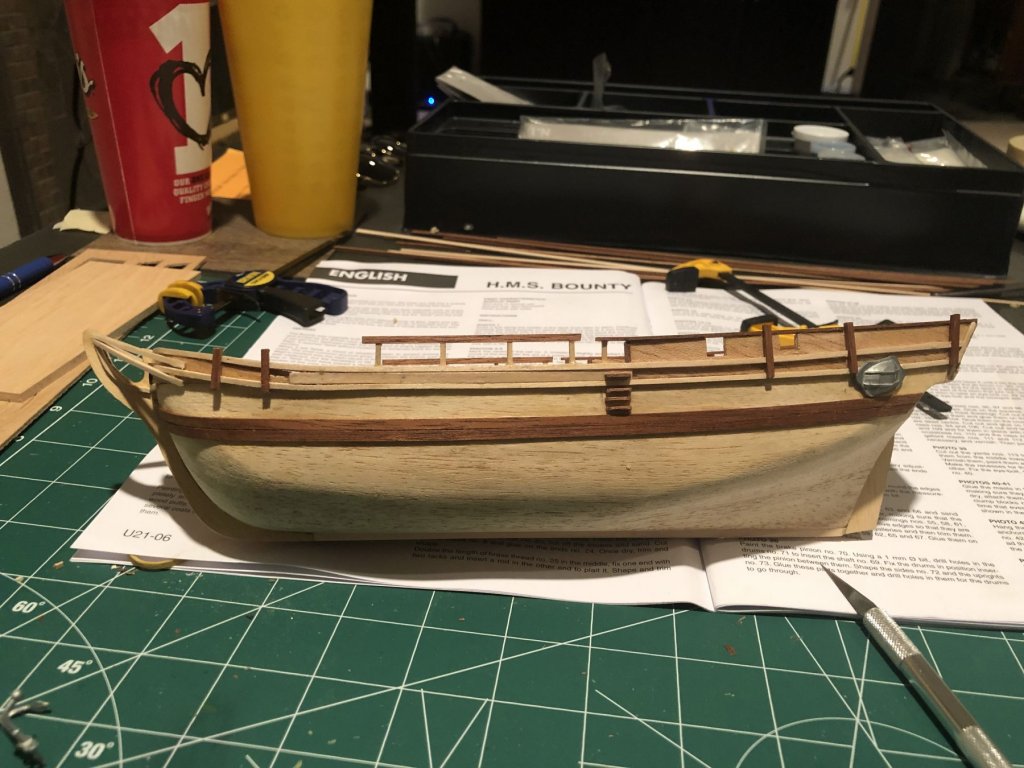
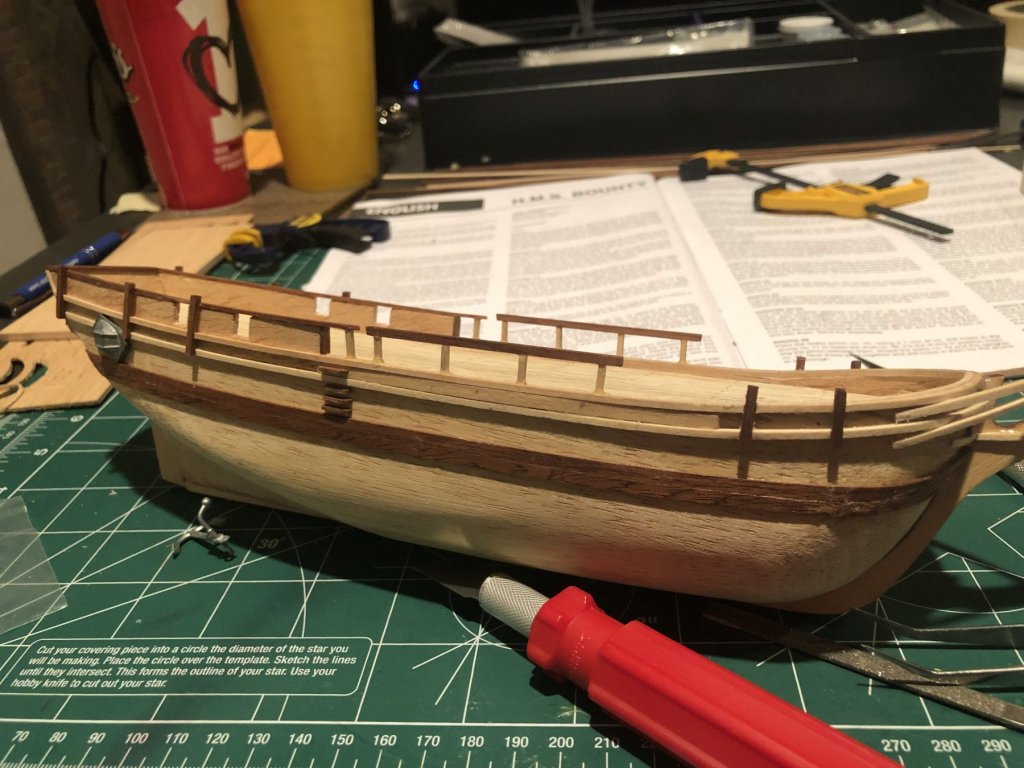
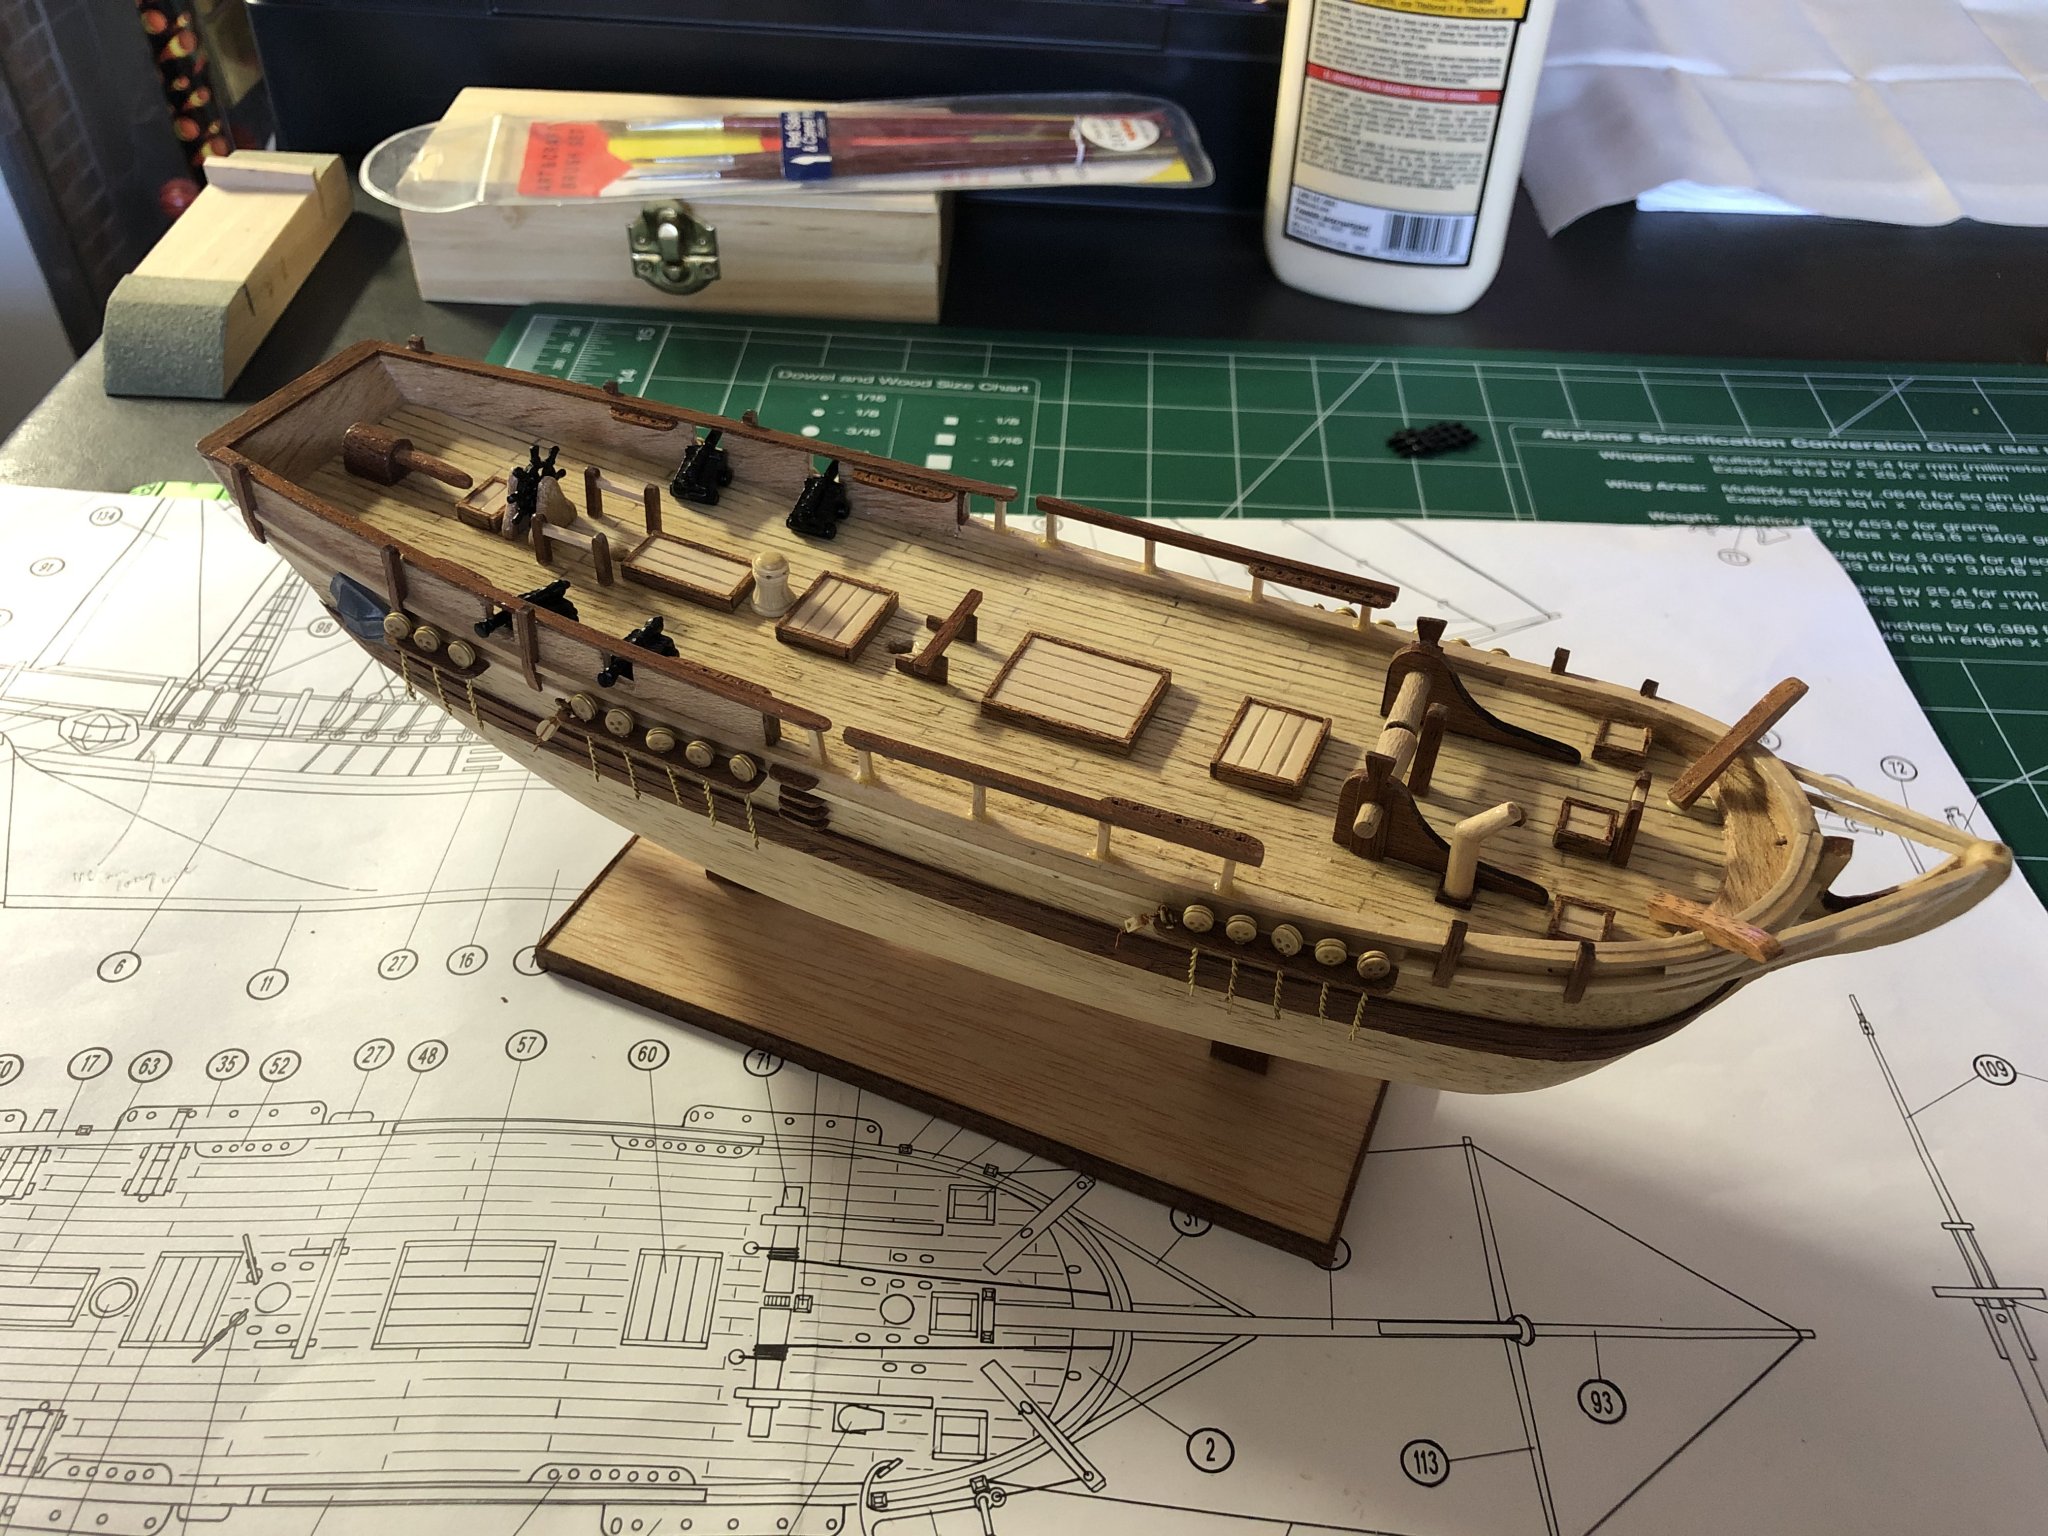
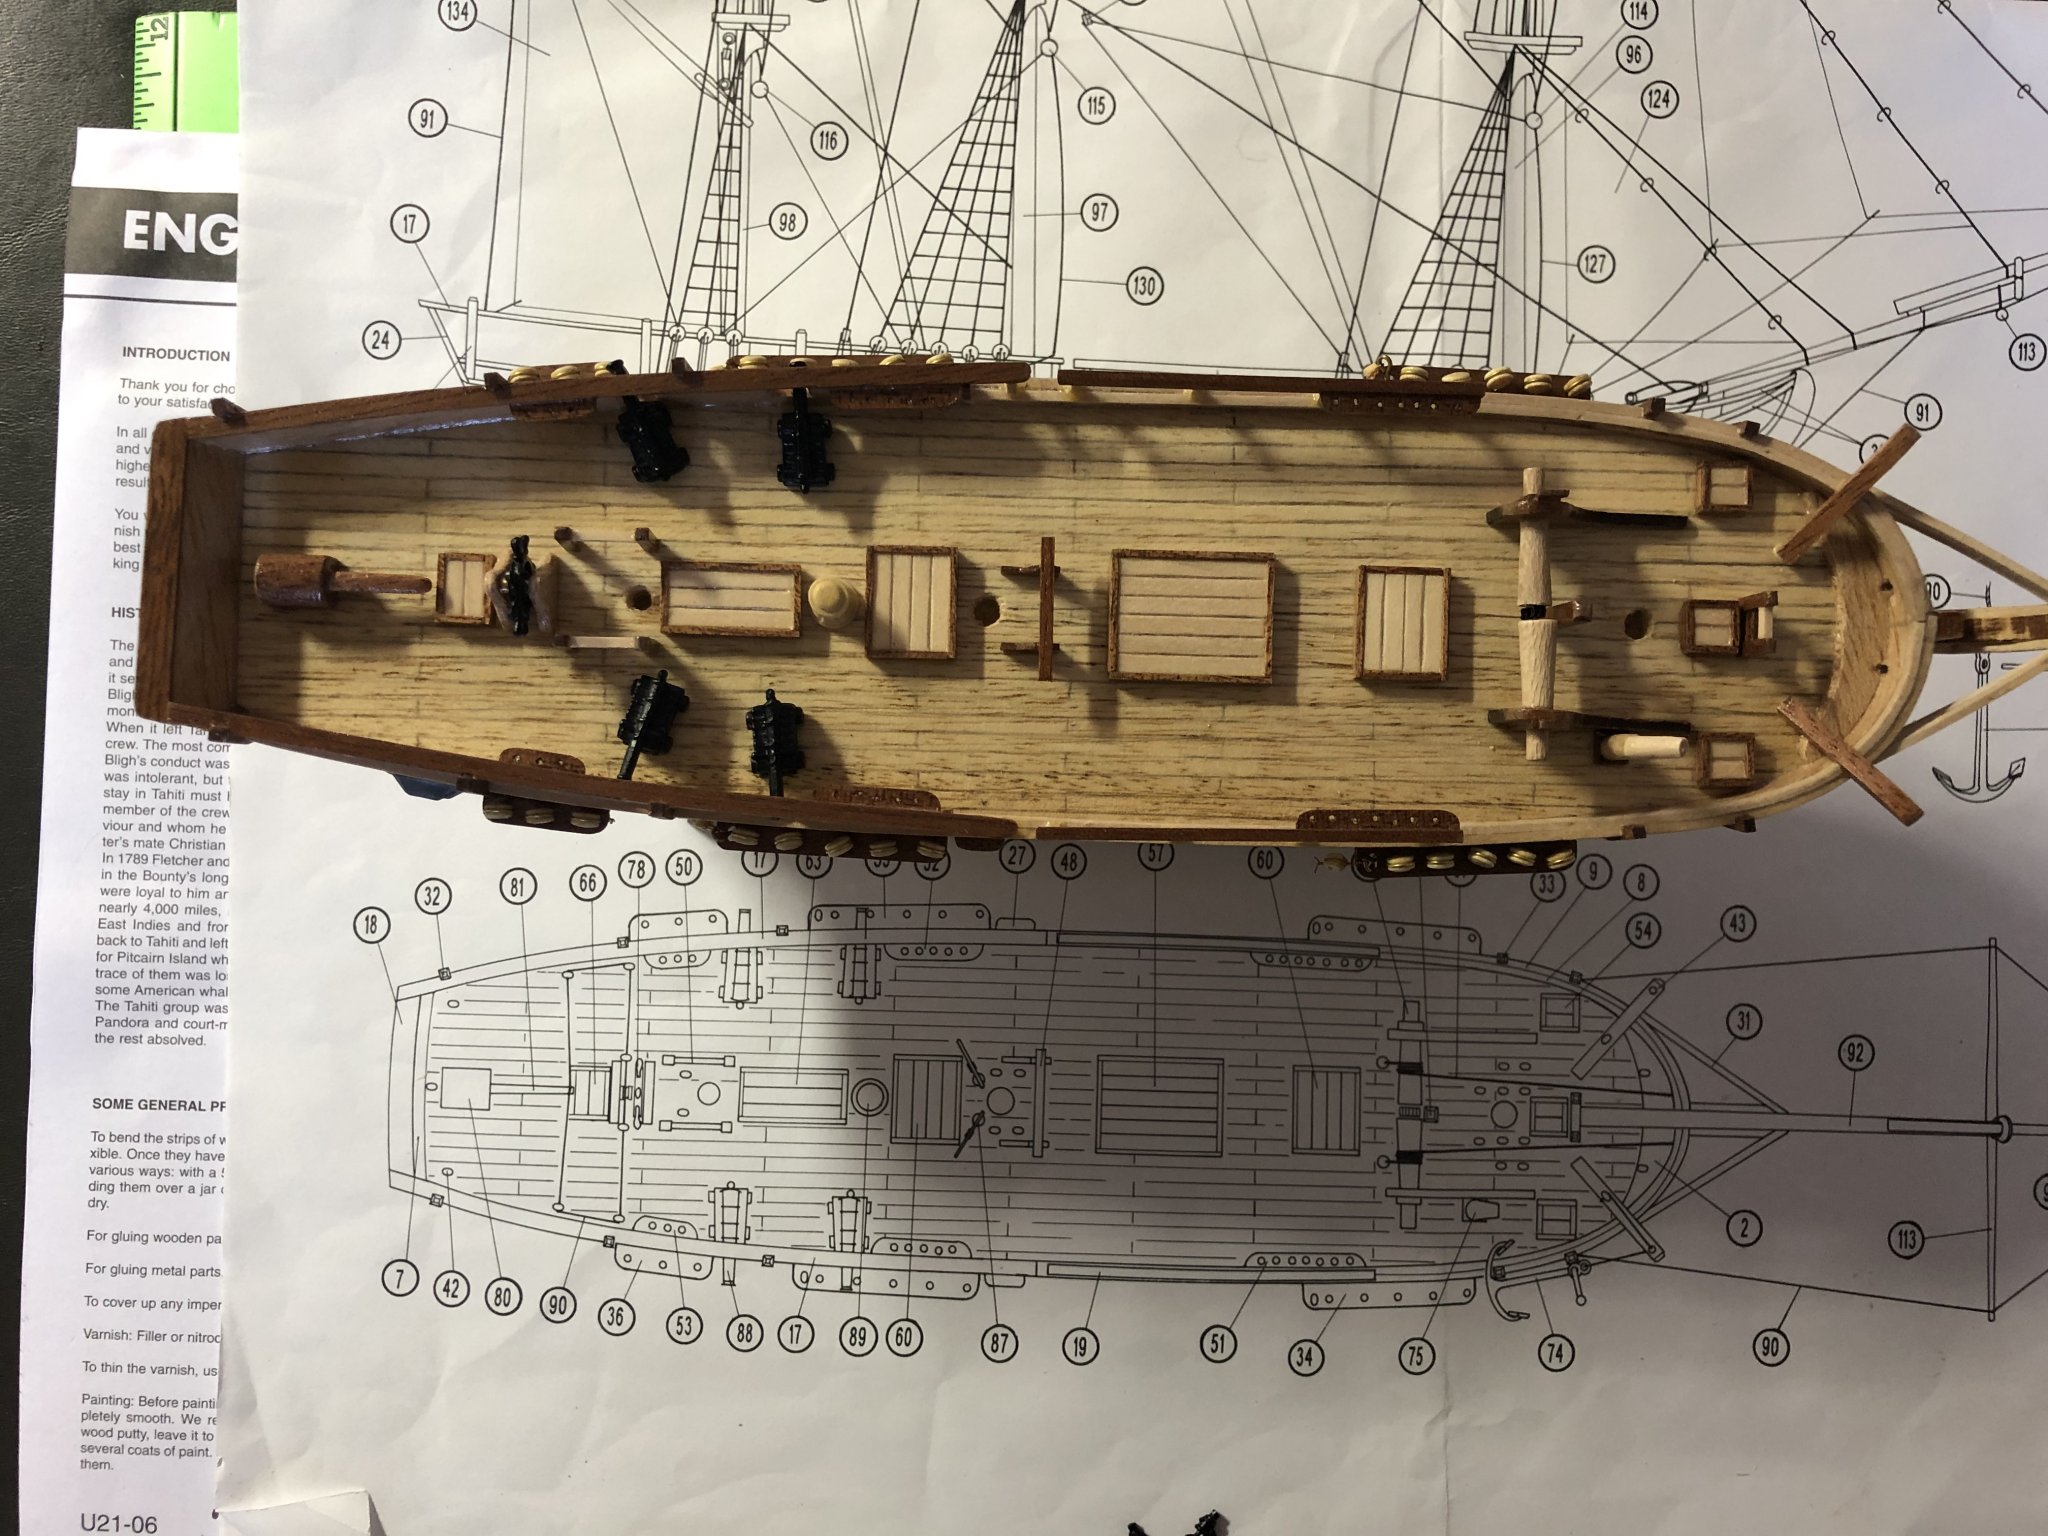
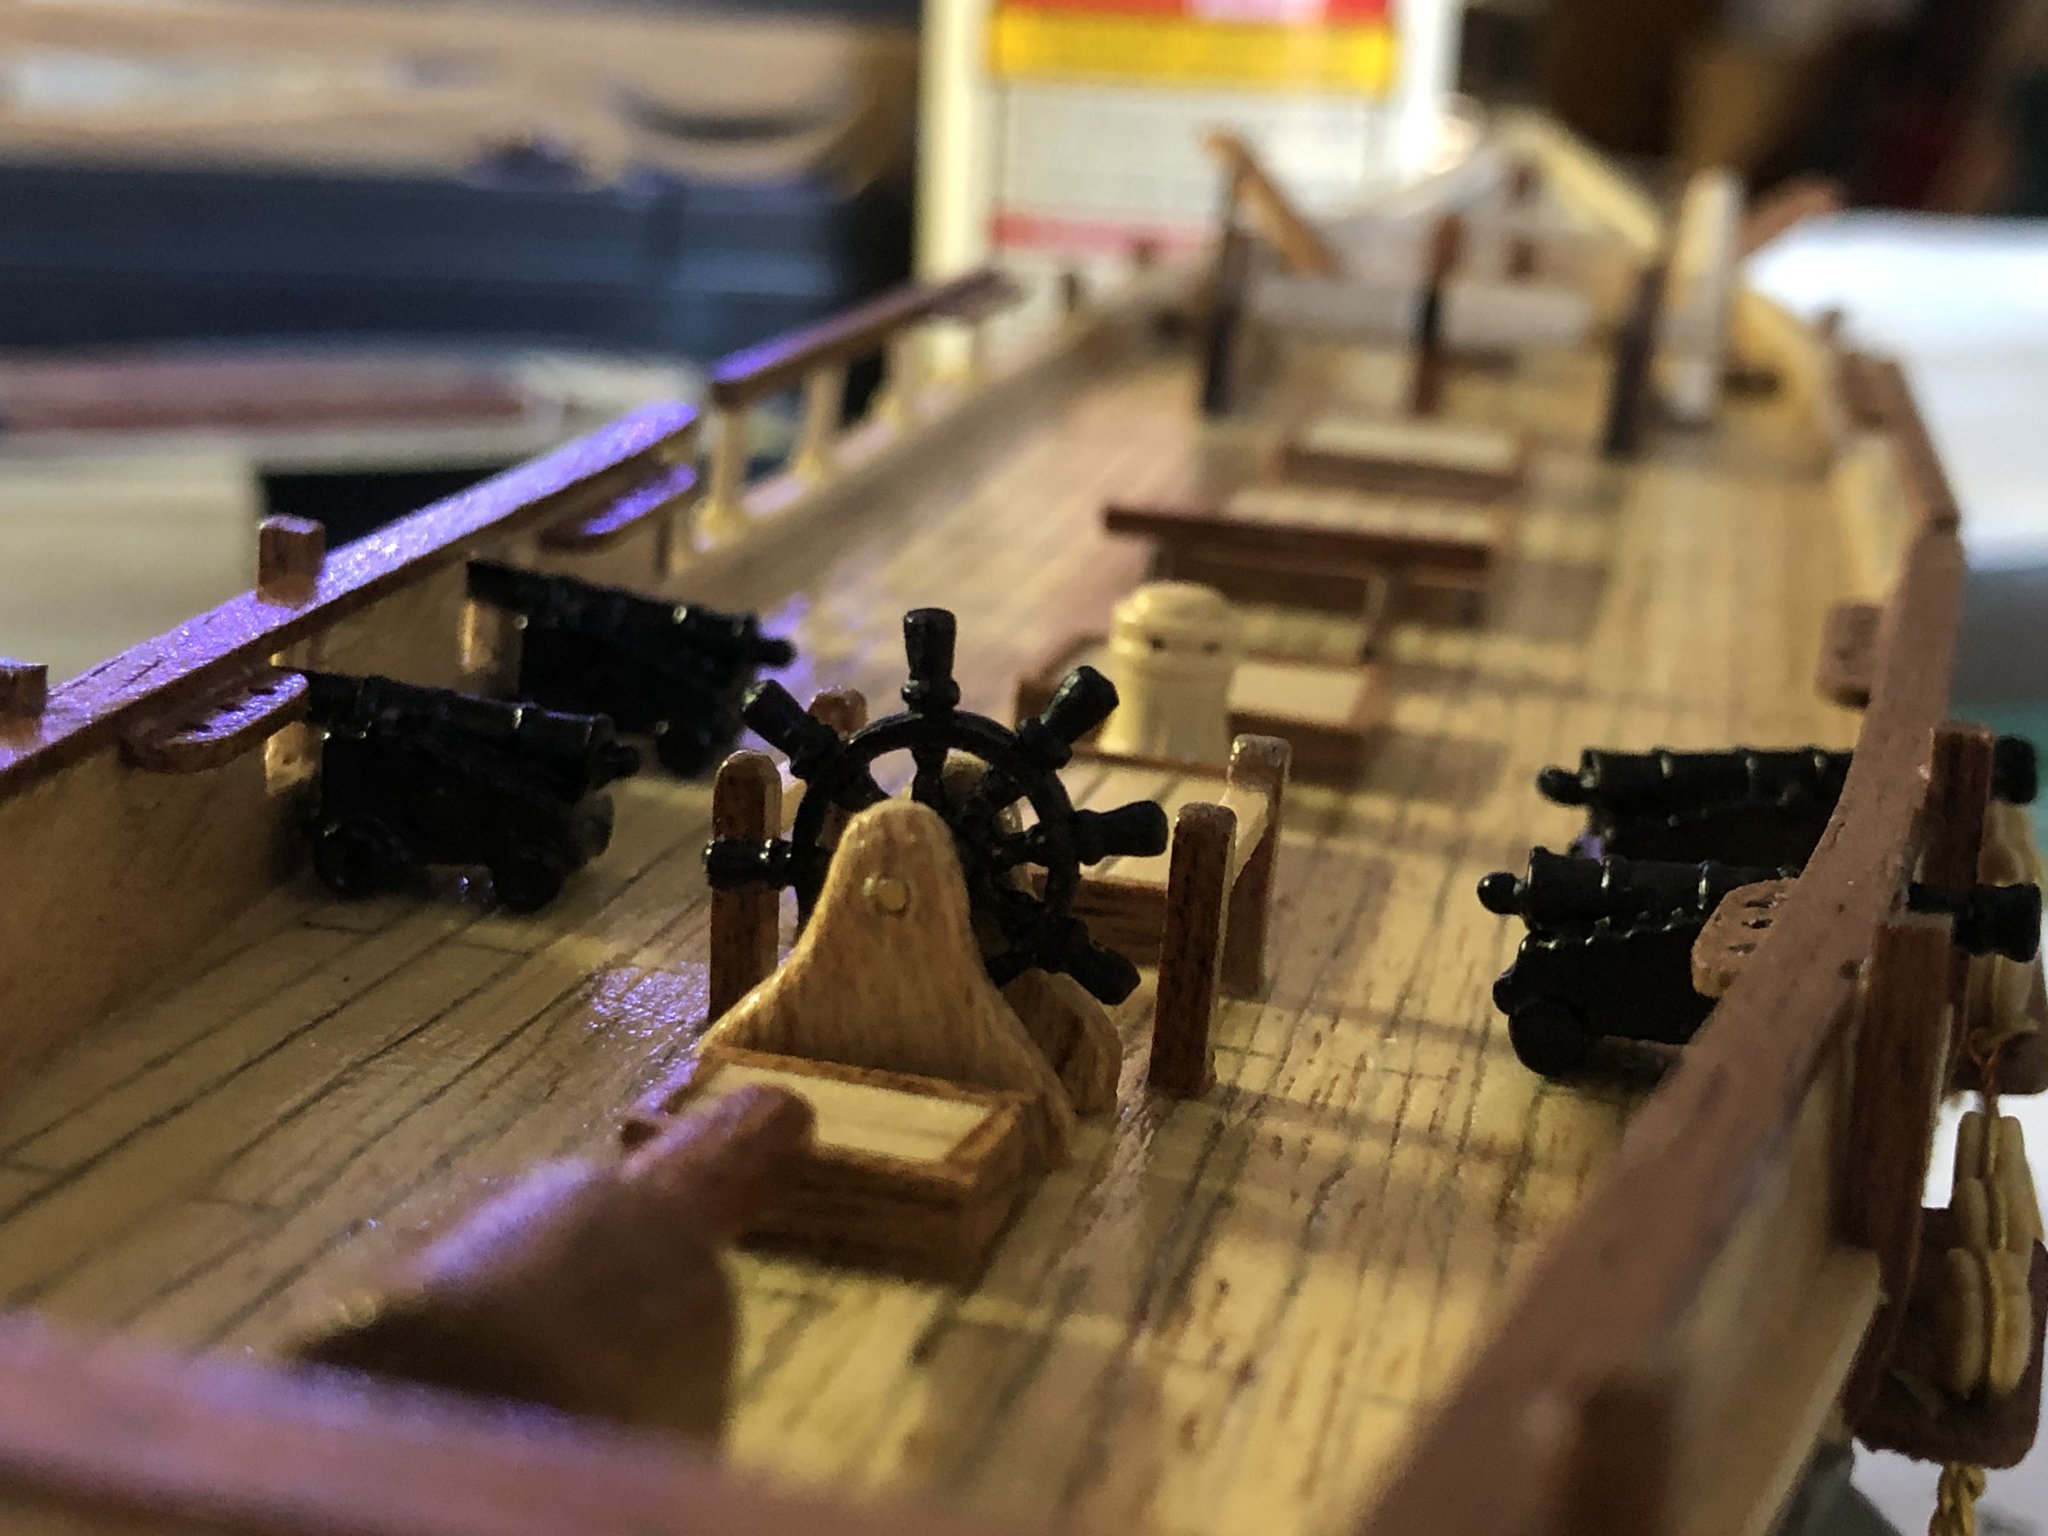
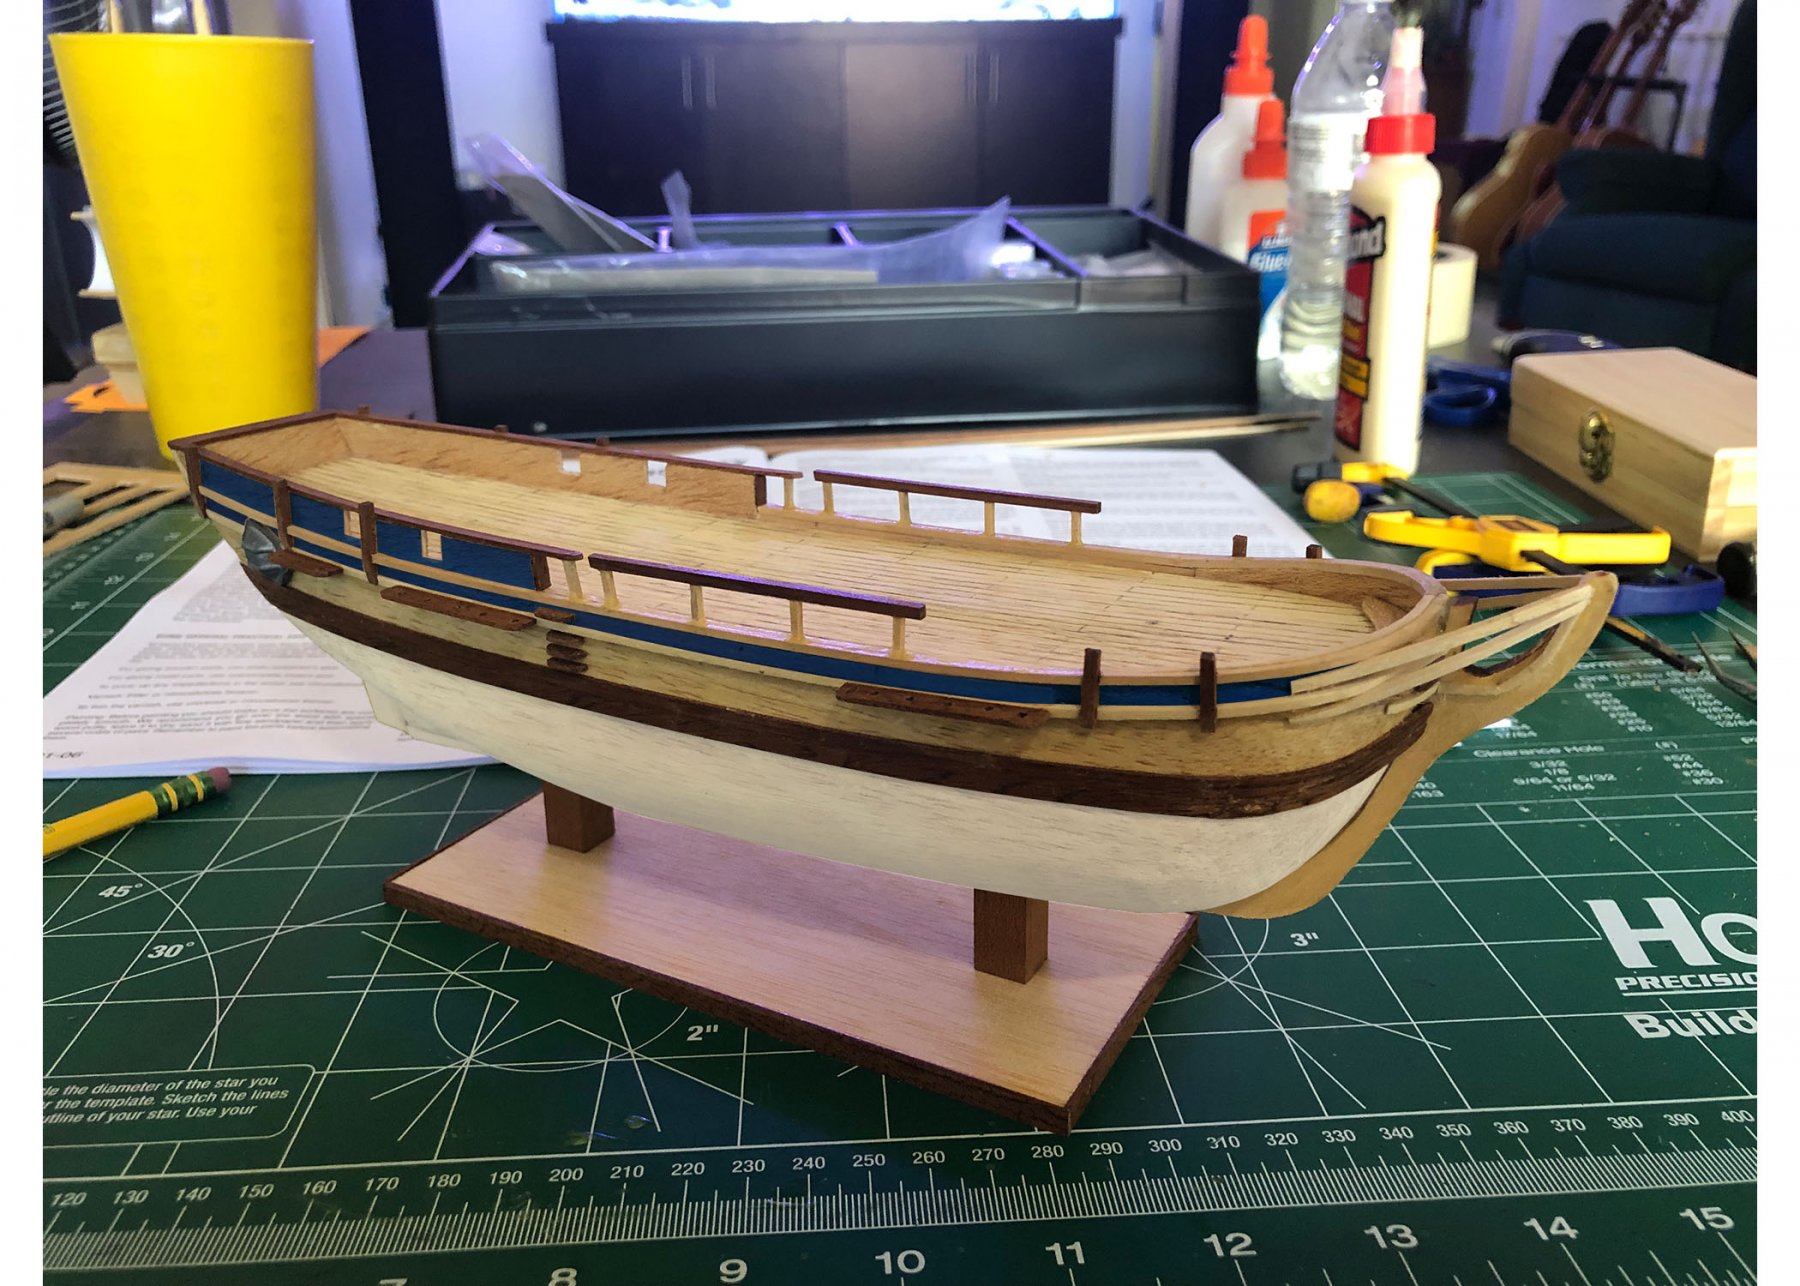
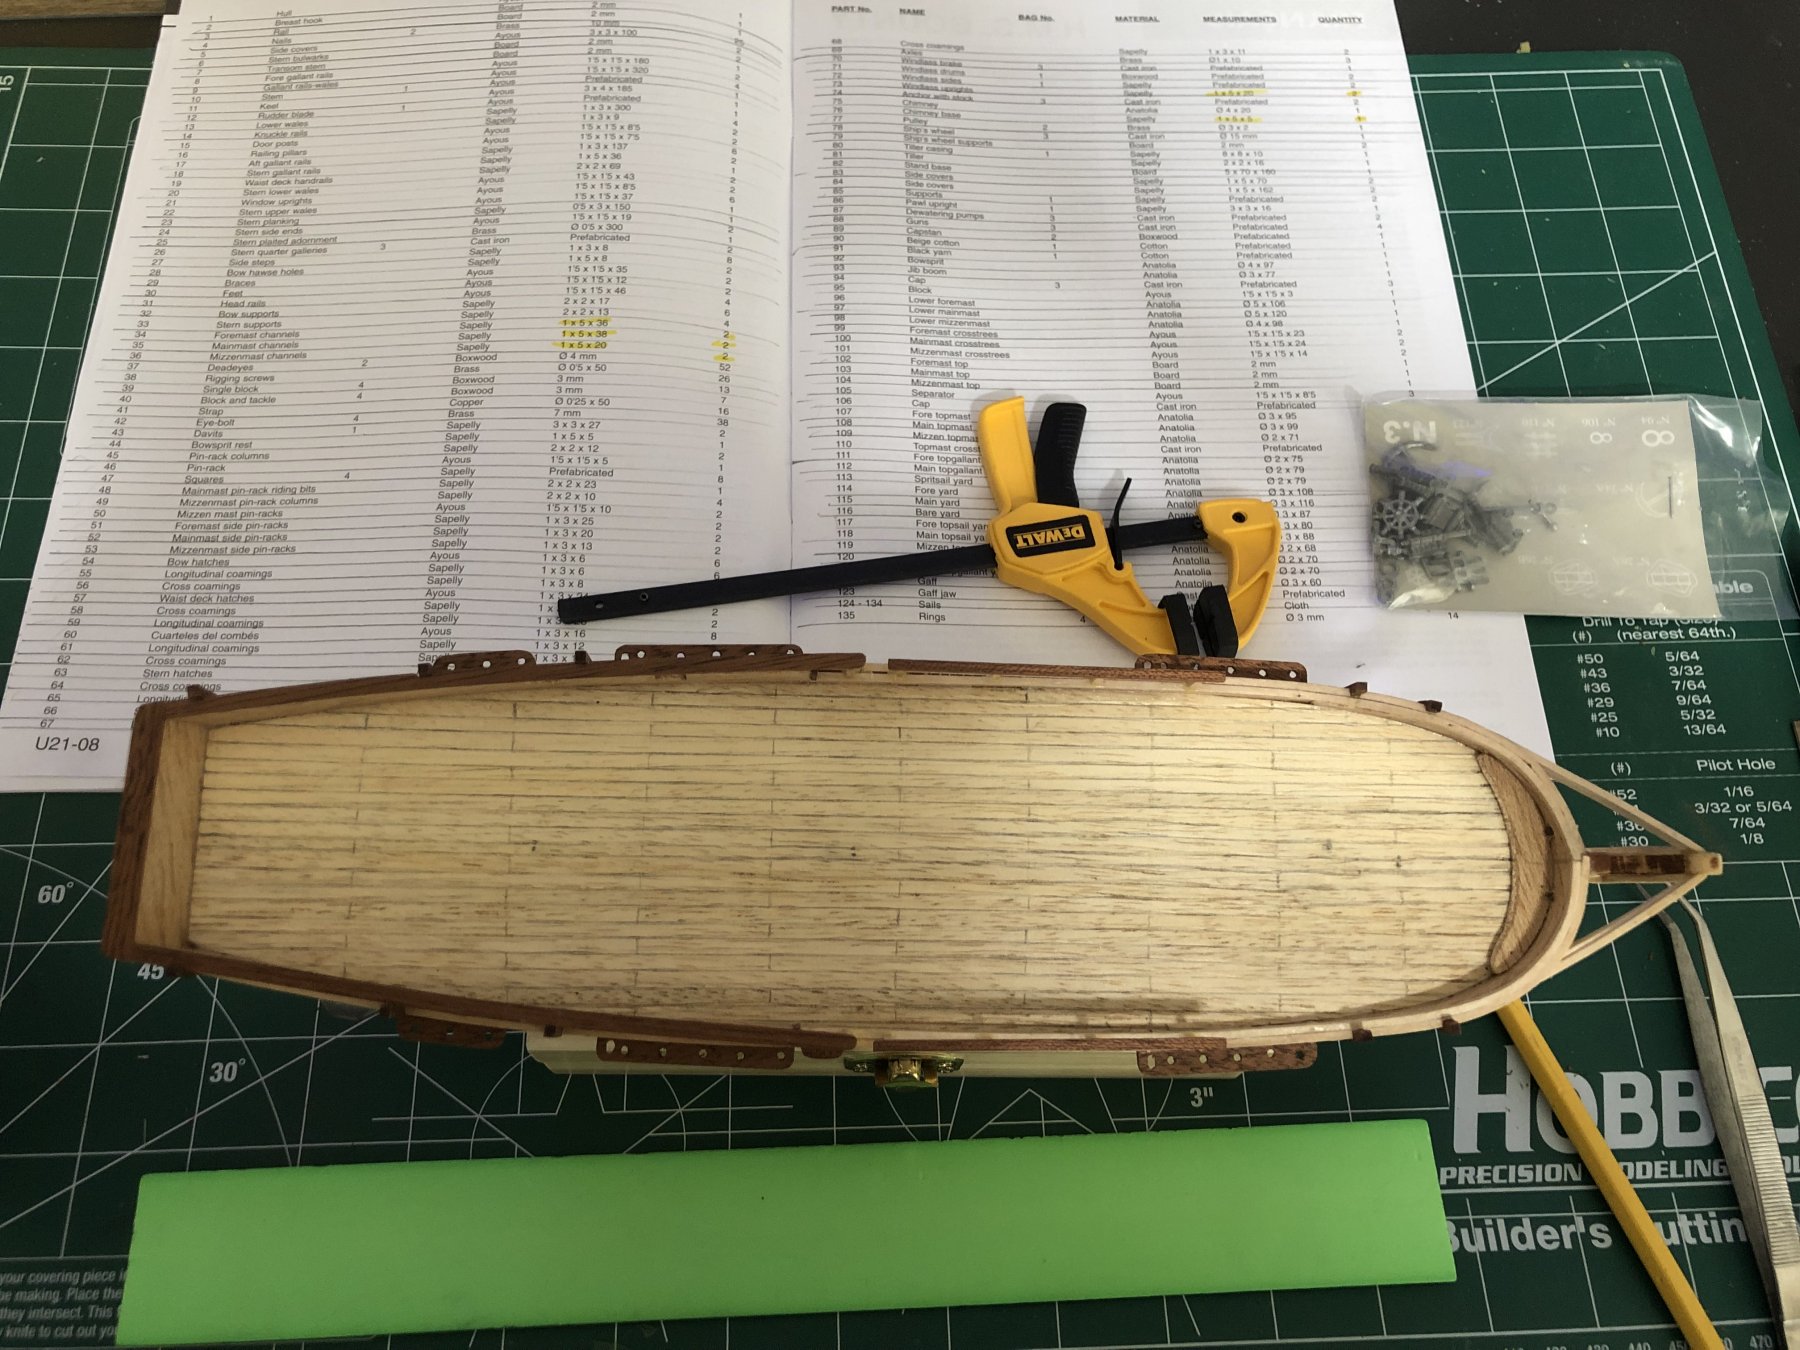
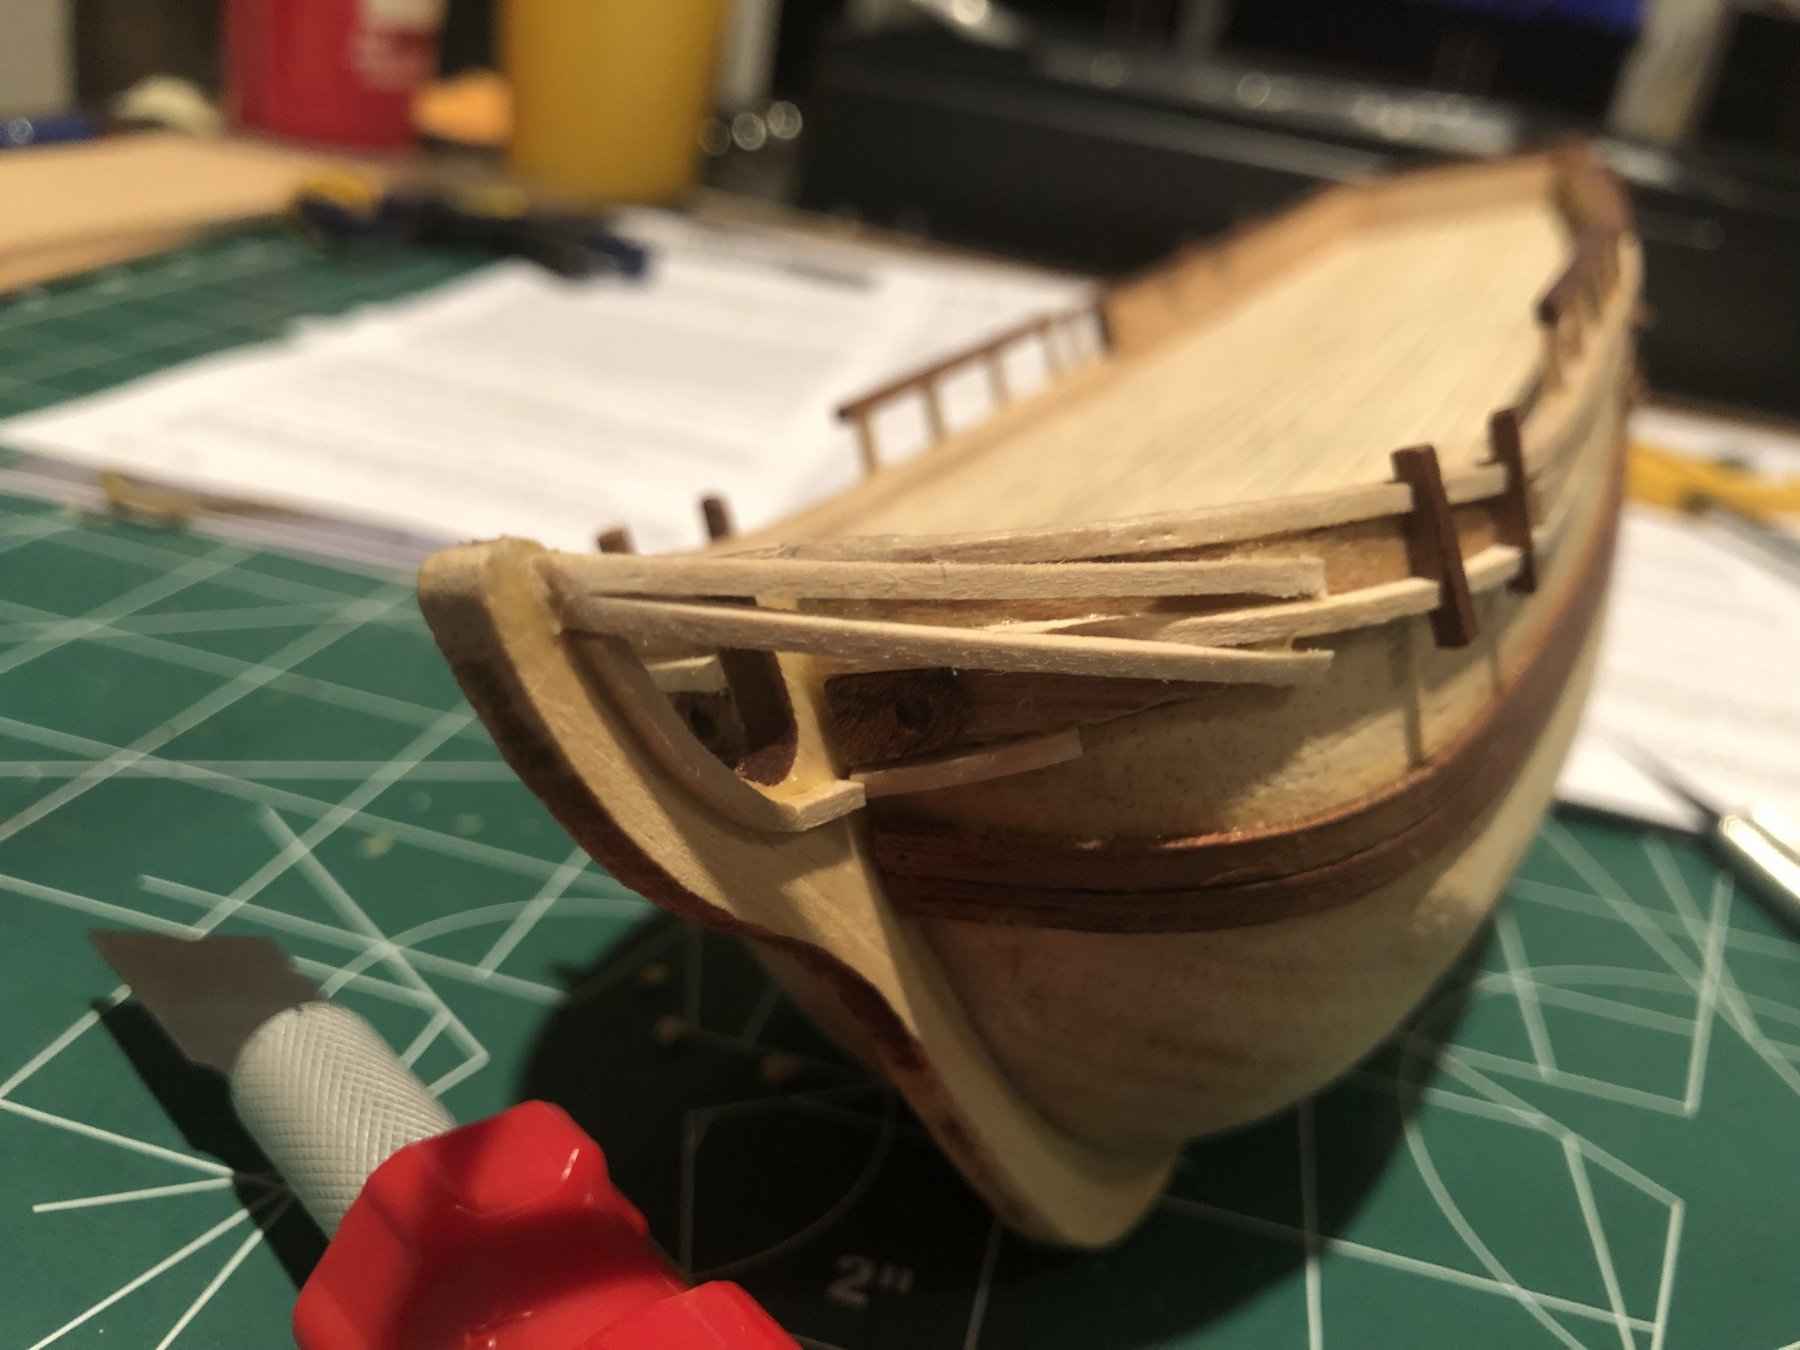
Yesterday I went ahead and decided it was time I put all the deck hatches, and other deck details on the boat. I wasn't sure if I was supposed to drill the holes for the brass eye hooks that will eventually hold down the "ropes" before or after this step, but the instructions said to do this first so that's what happened.
I am very happy with how things are coming along and I seem to be nearing the rigging stage of the build. (Scary) But excited to start it. If anyone has any advice on this or links to either other forum posts or videos that can help it would be greatly appreciated. I have already done a fair bit of research but any additional advice is always welcome.
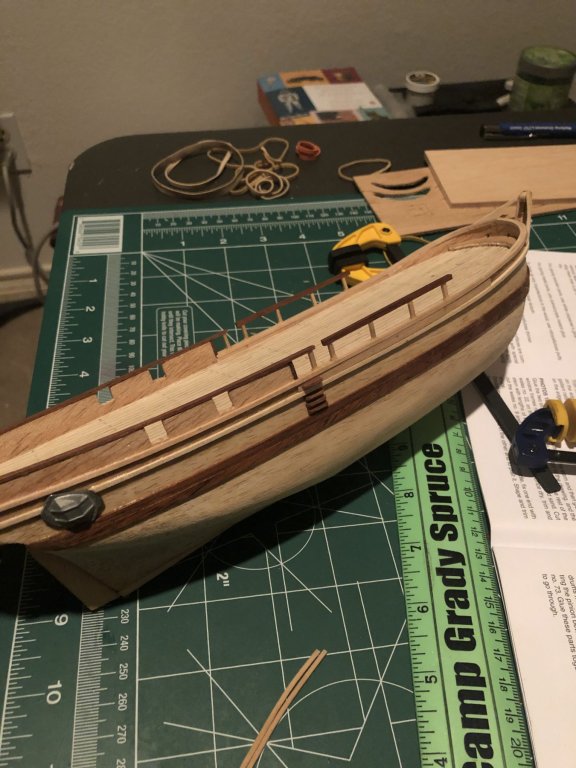
In the meantime, here are some more photos I took of the ship in its current state. Some even have a little tilt-shift look to them. Enjoy.
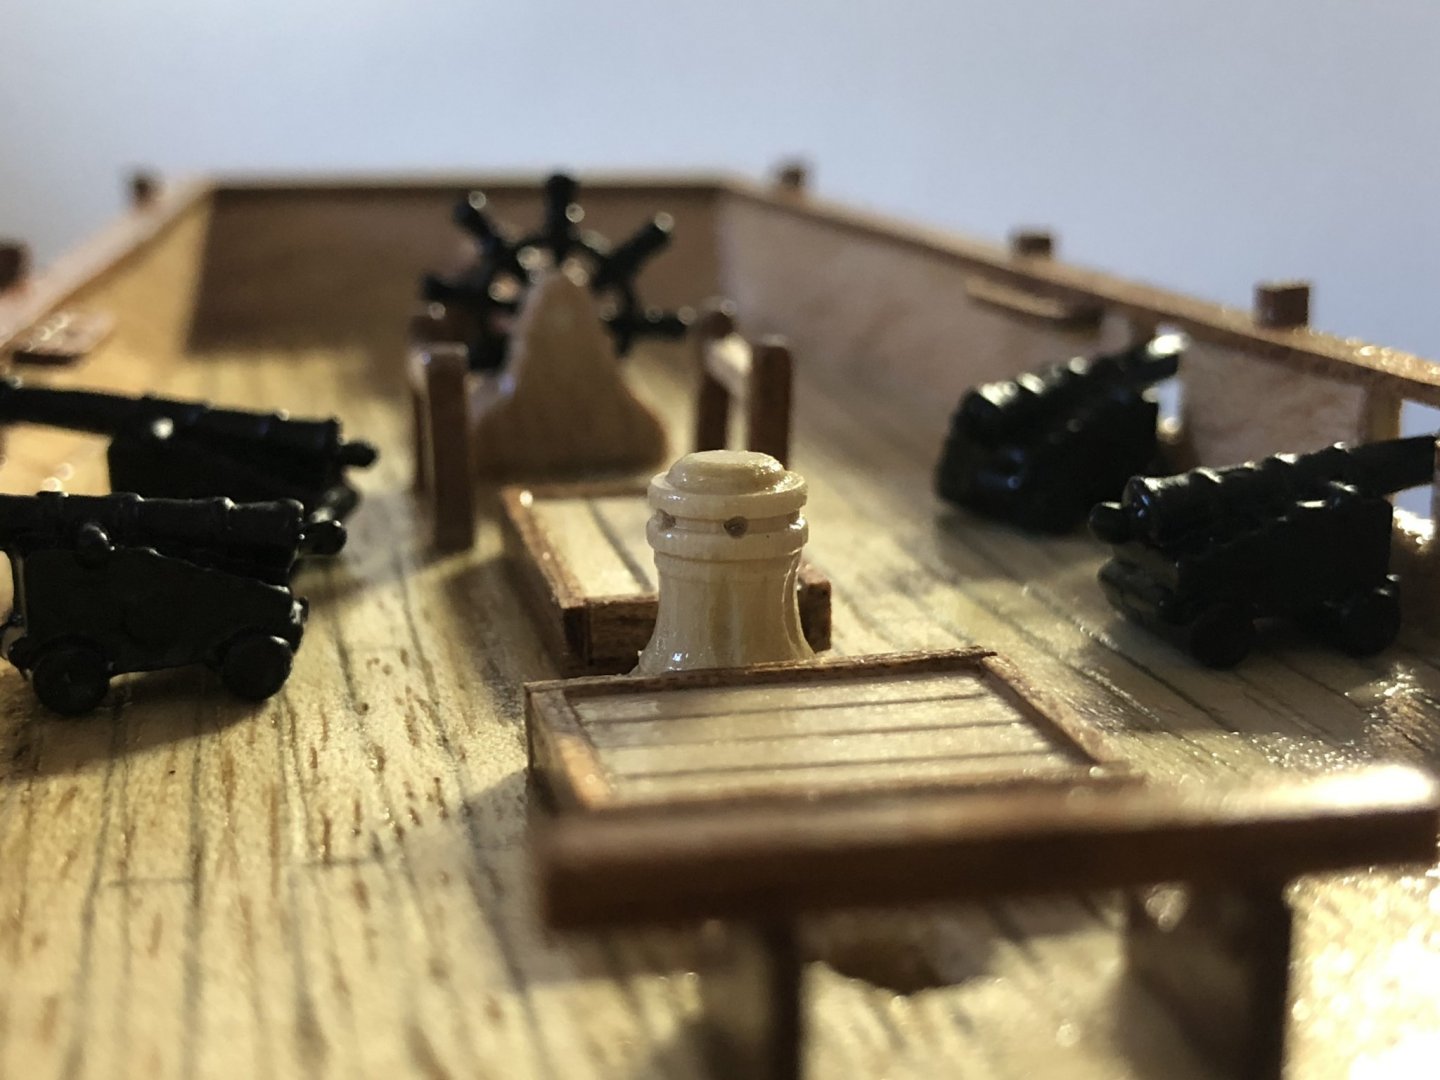
Lastly, I glued on the bilge pumps this morning after doing some touch up paint last night.
As always, I will continue to update here and any words of wisdom about the next stage of the build are always welcome.
Your beholding can subside for now.
- Nirvana, GrandpaPhil and Henke
-
 3
3
-
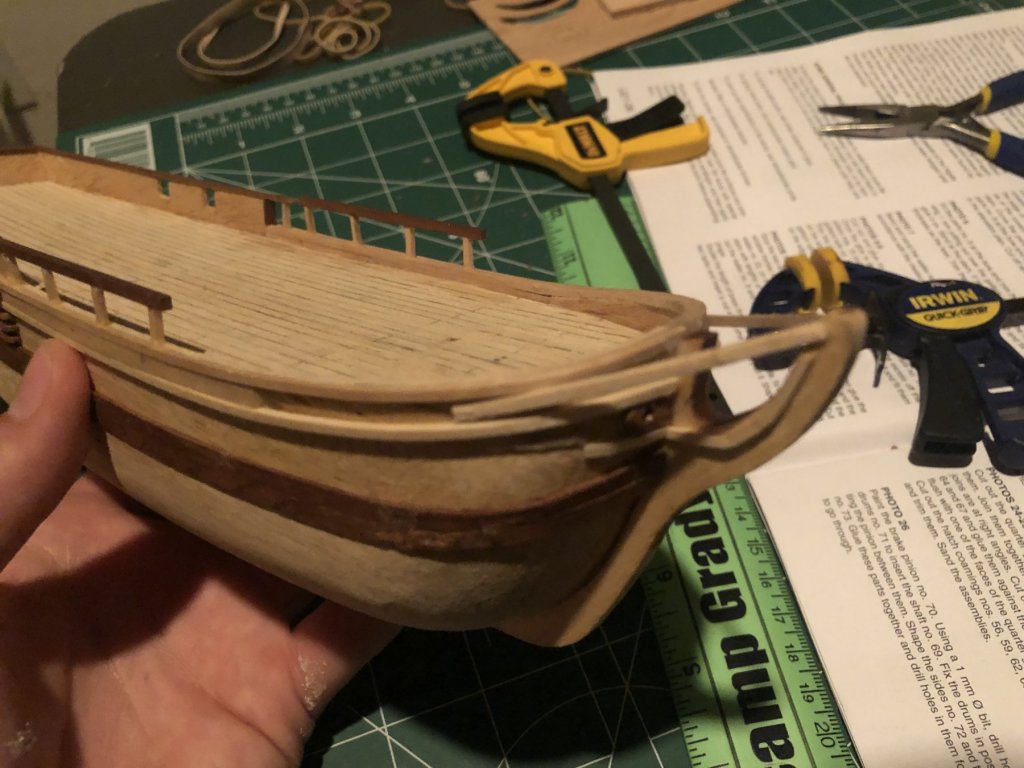
Greetings fellow earthlings,
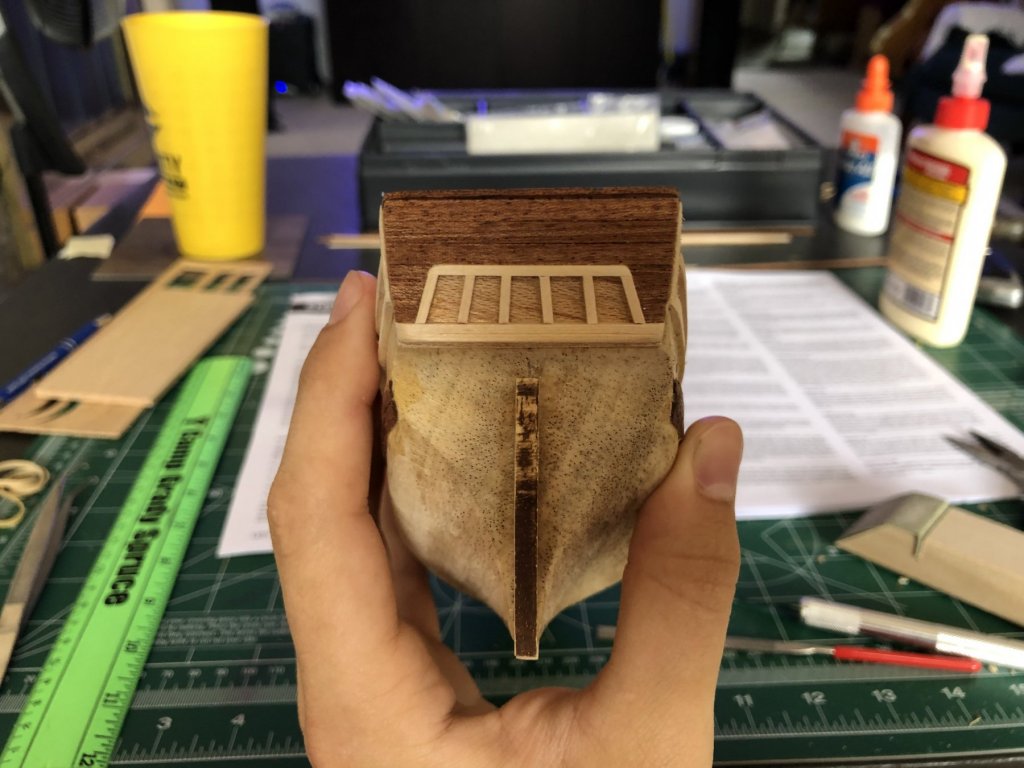
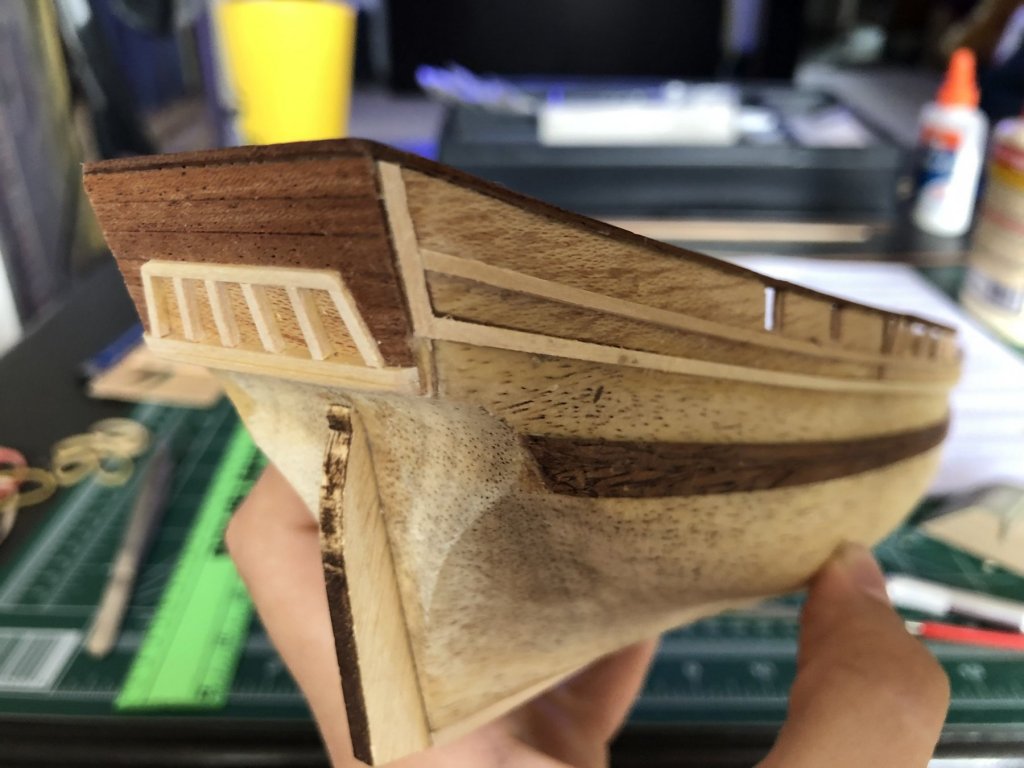
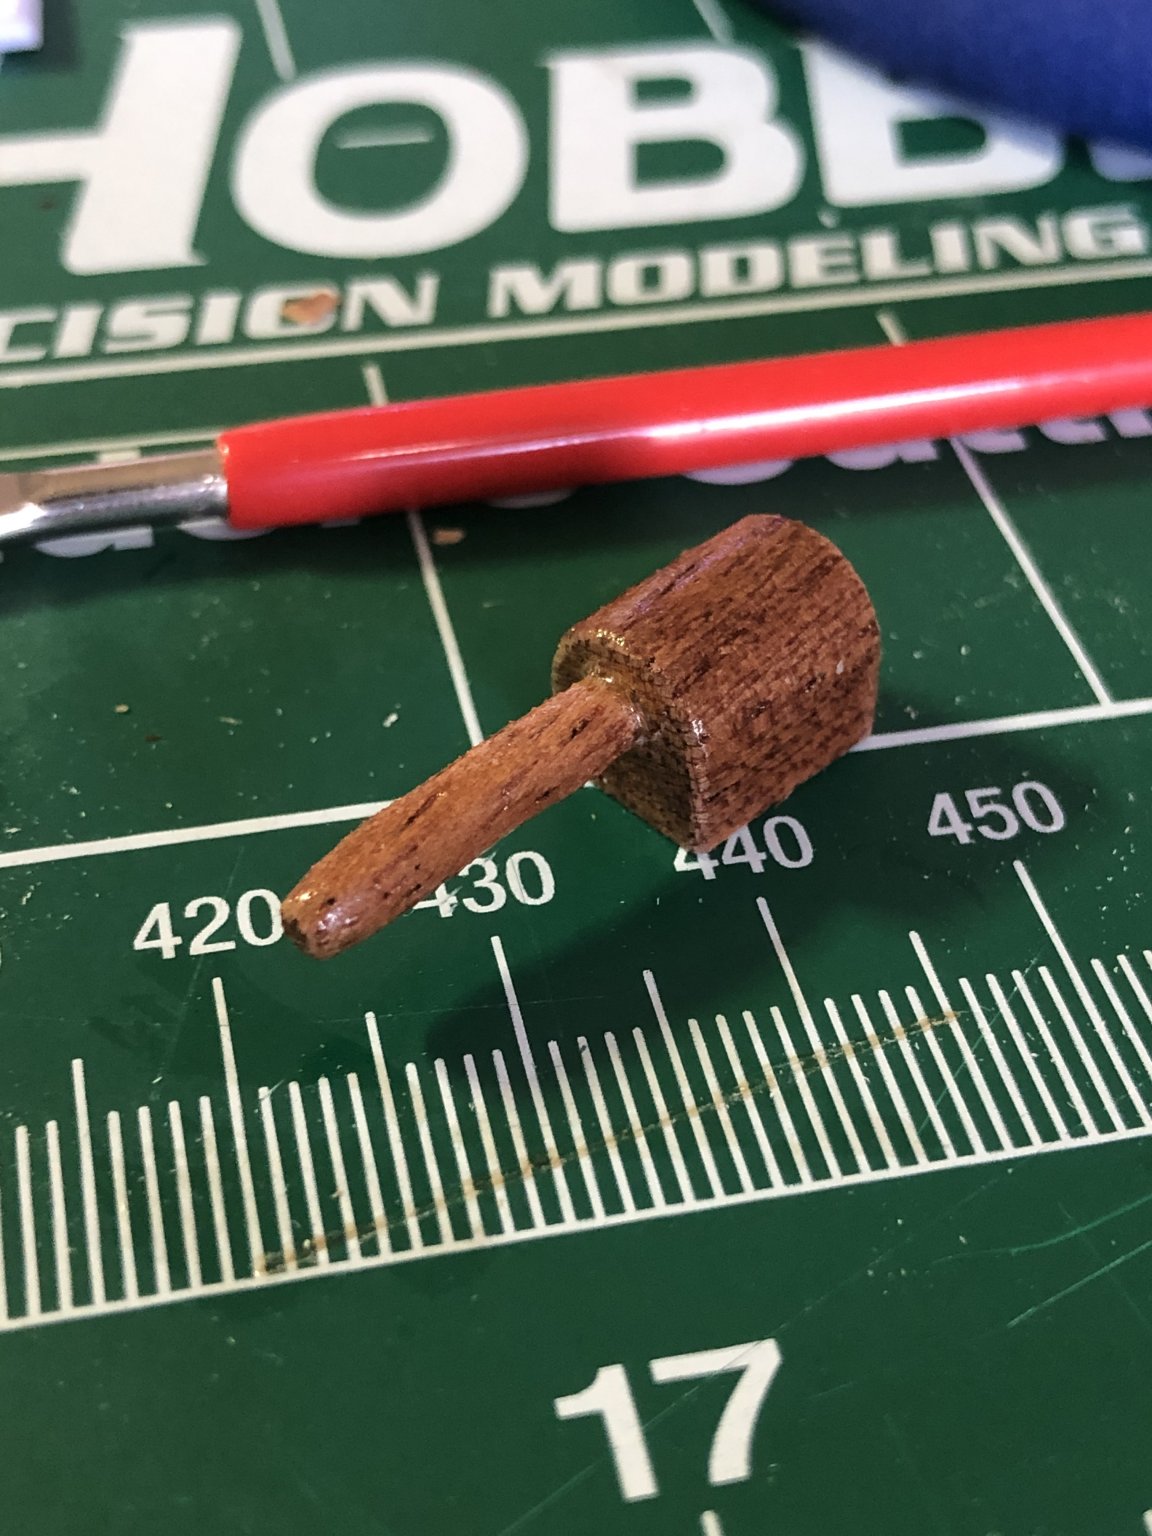
After a long fall semester and a slightly shorter (for reasons that I am sure we are all aware) spring semester, I am back with an update on my progress on the HMS Bounty. Taking the ship out of its storage and setting up the "dry dock" took a while. As did re-reading my posts and notes I left myself so that I could continue the work where I left off. I am very happy to say that I am still enjoying the experience and still consider it to be almost therapeutic. Below you will find photos from the progress I made this weekend.
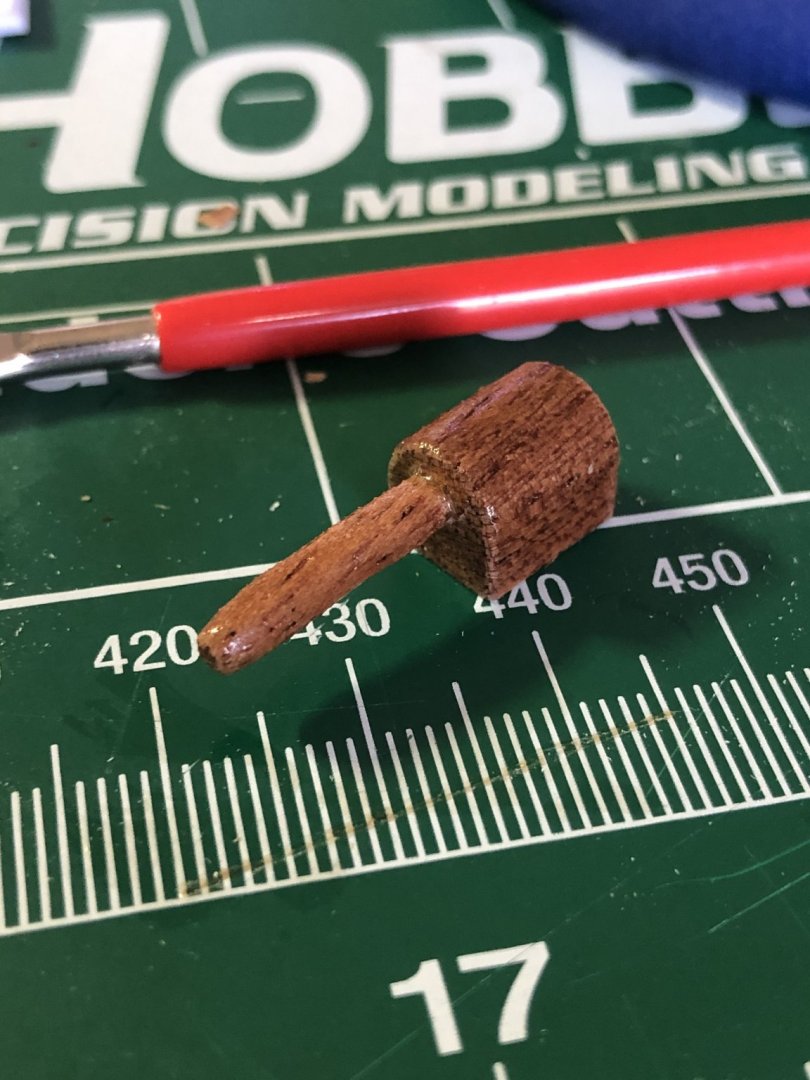
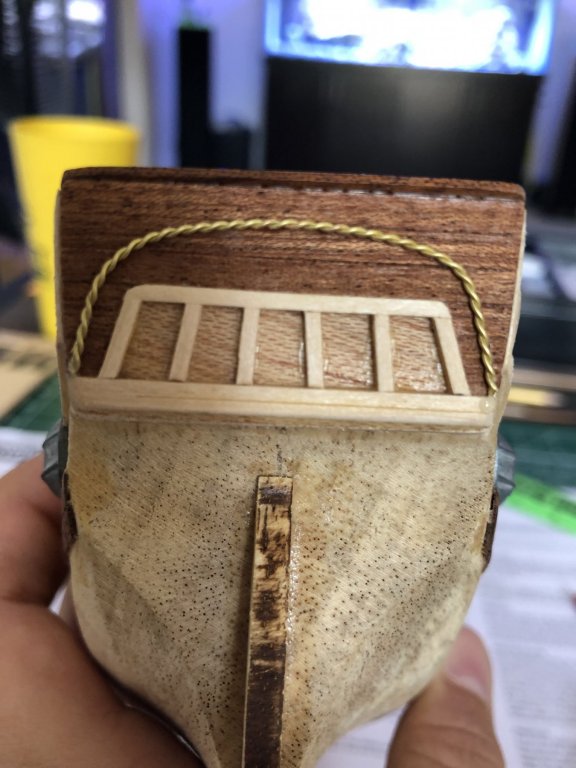
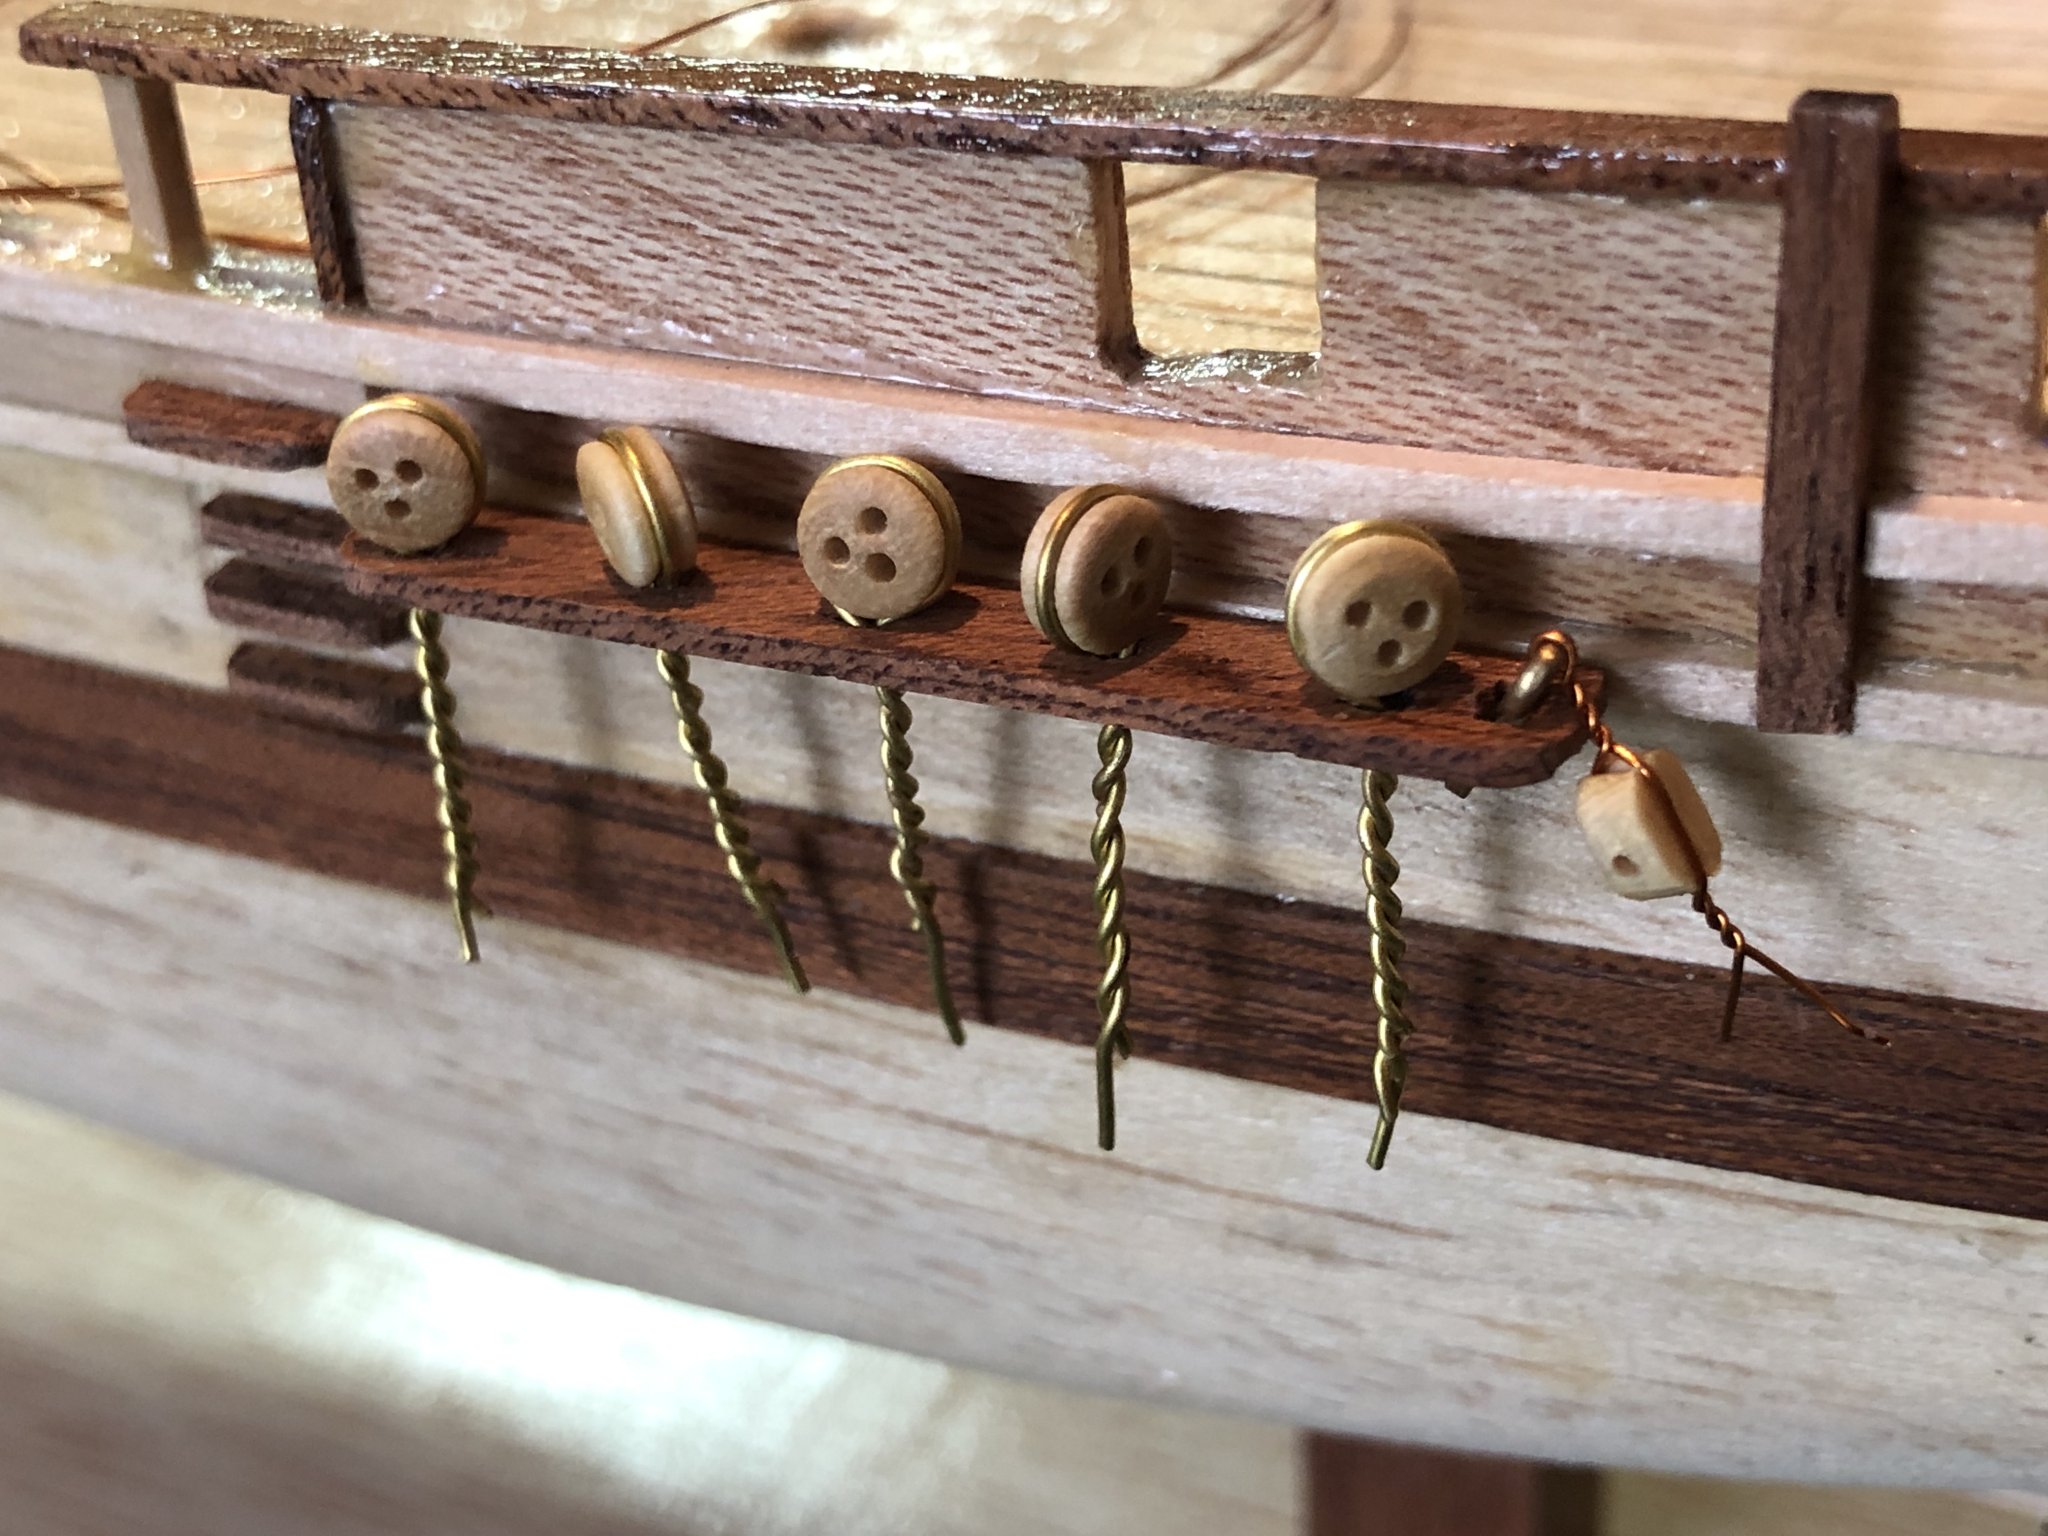
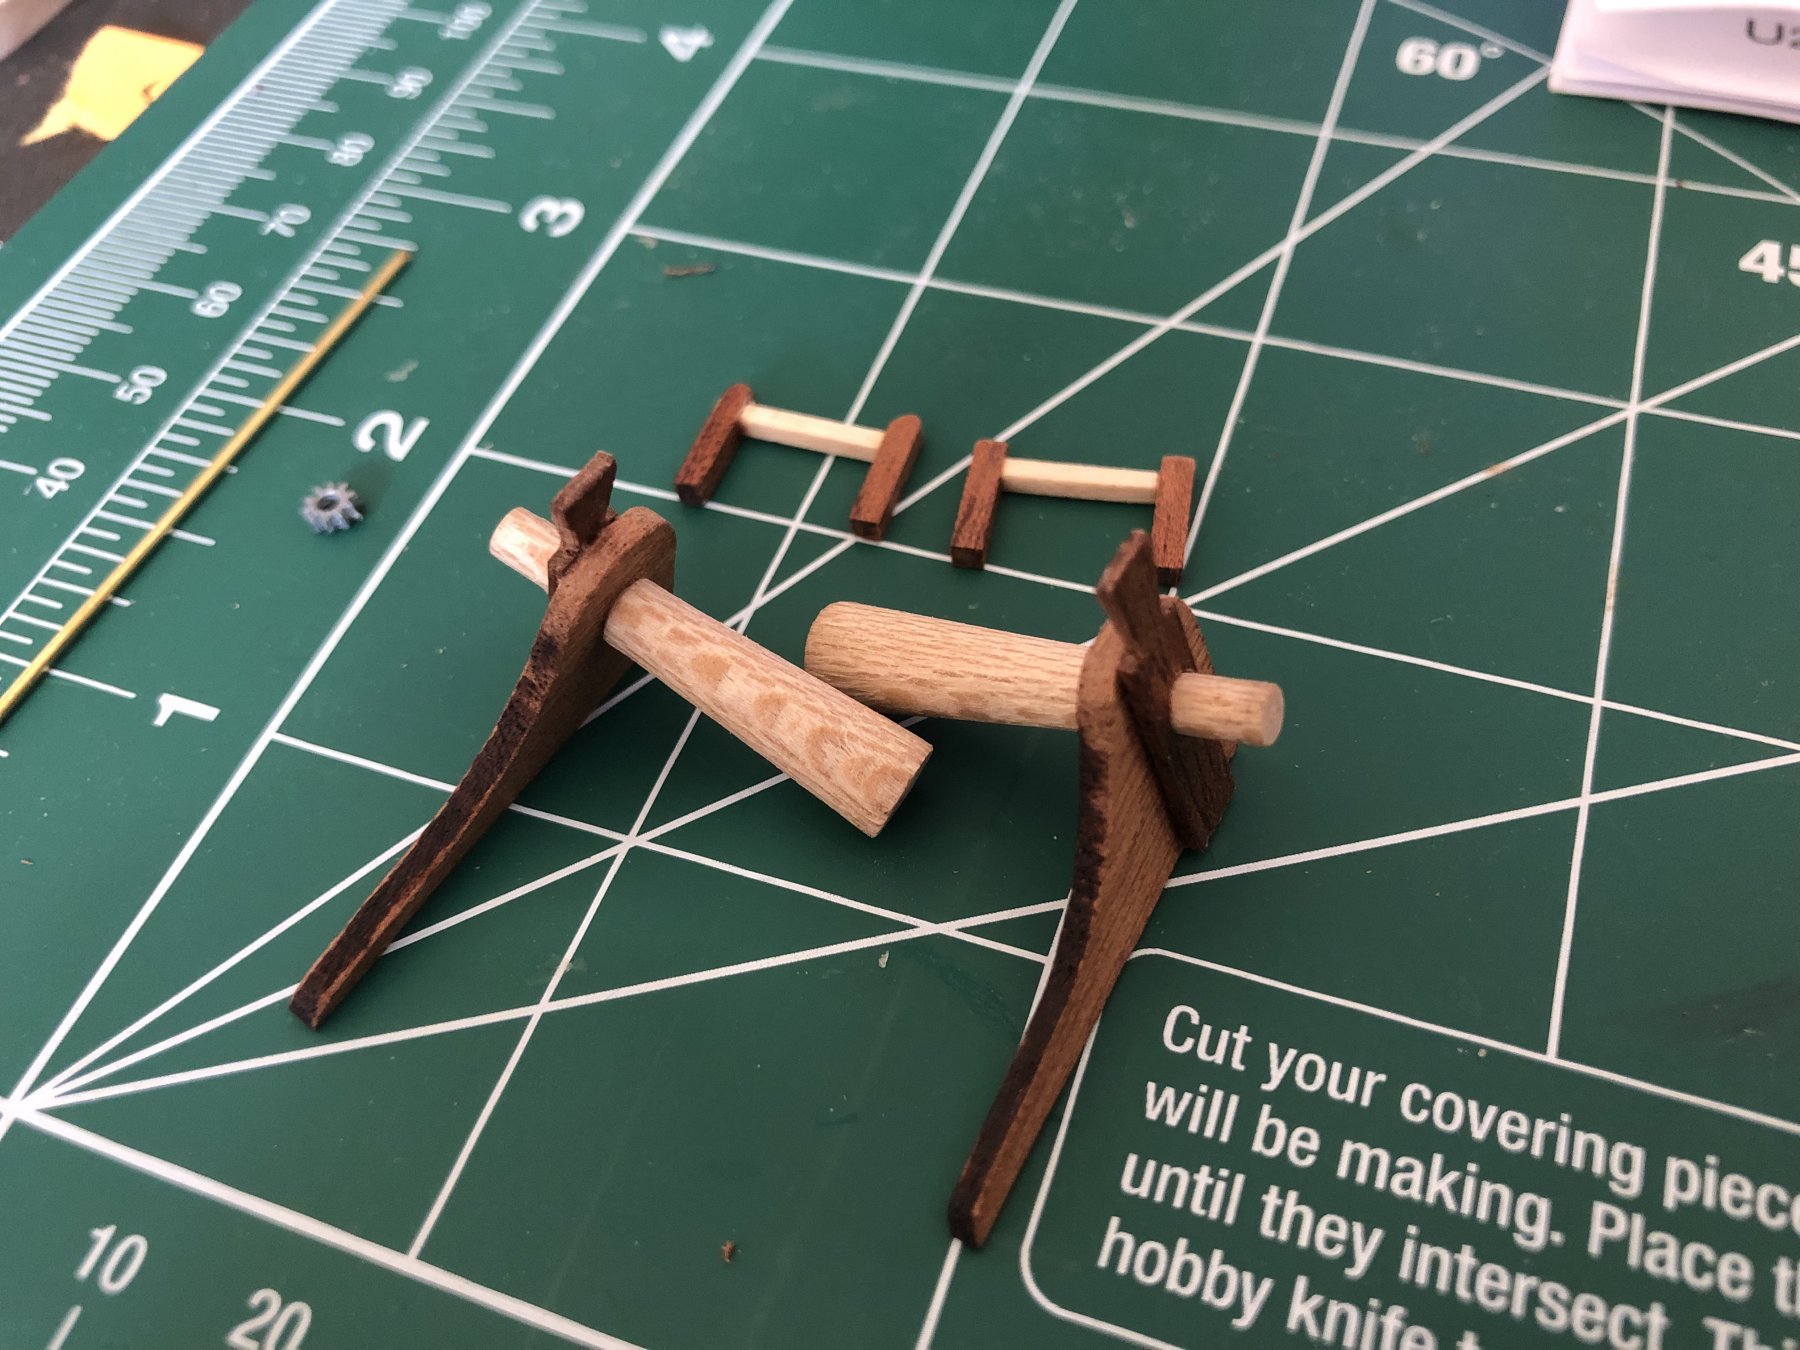
Above is the rudder housing as well as the tiller that will be eventually placed at the stern of the ship. I already coated it in varnish and I believe it is the last of the parts that will be glued to the deck. Next I decided it was time to tackle the dead eyes and their metal twistydoos... (I do not know the proper term)
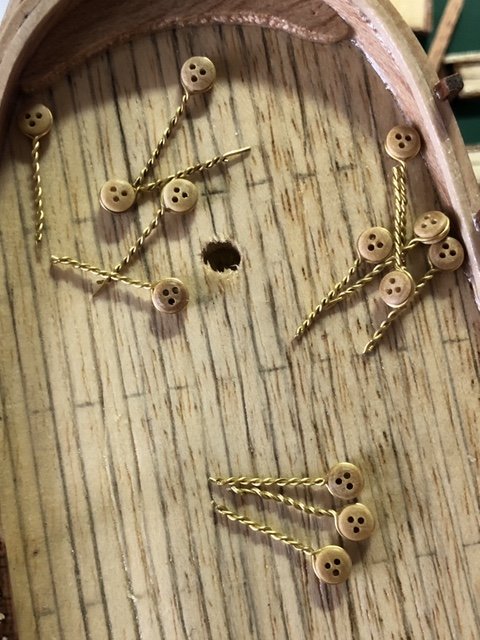
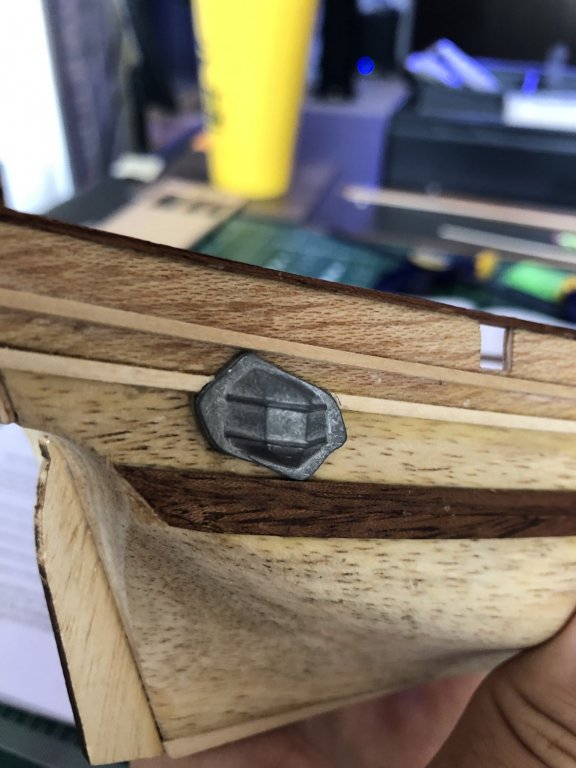
These were a pain and started to hurt my fingers once I was nearing the last of the 26 needed for the ship. (I do not know why this image is so much smaller than my other photos, the file size is also much smaller than the others)
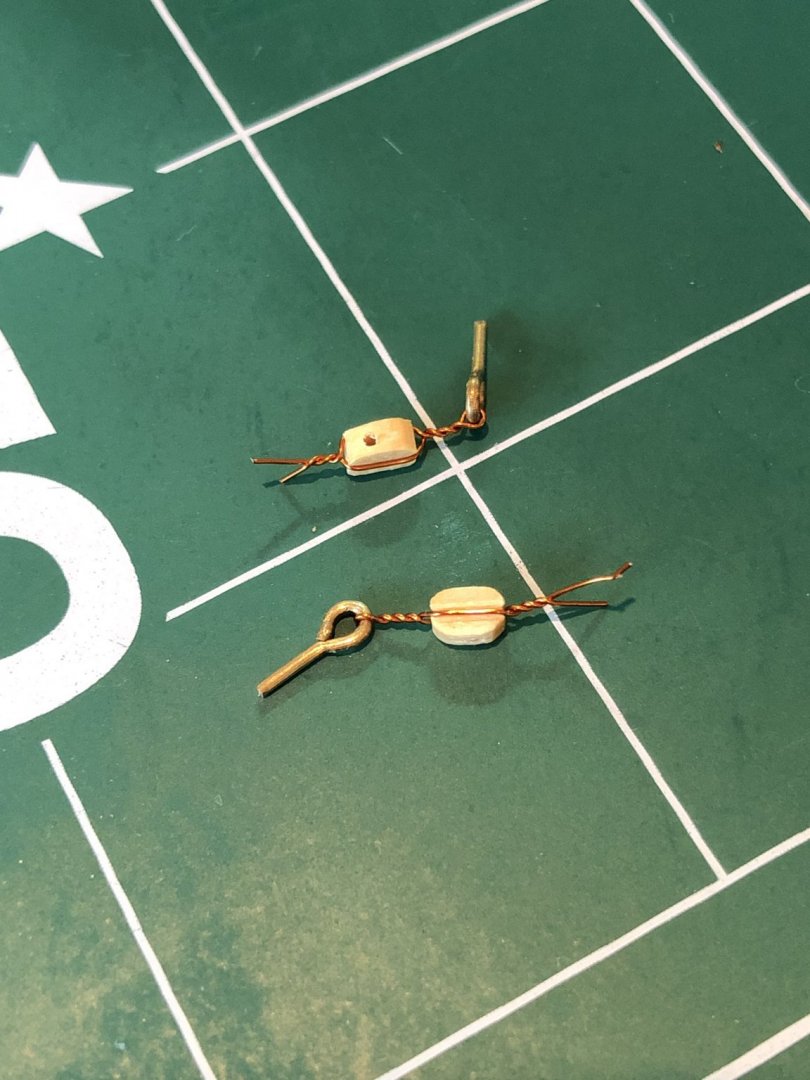
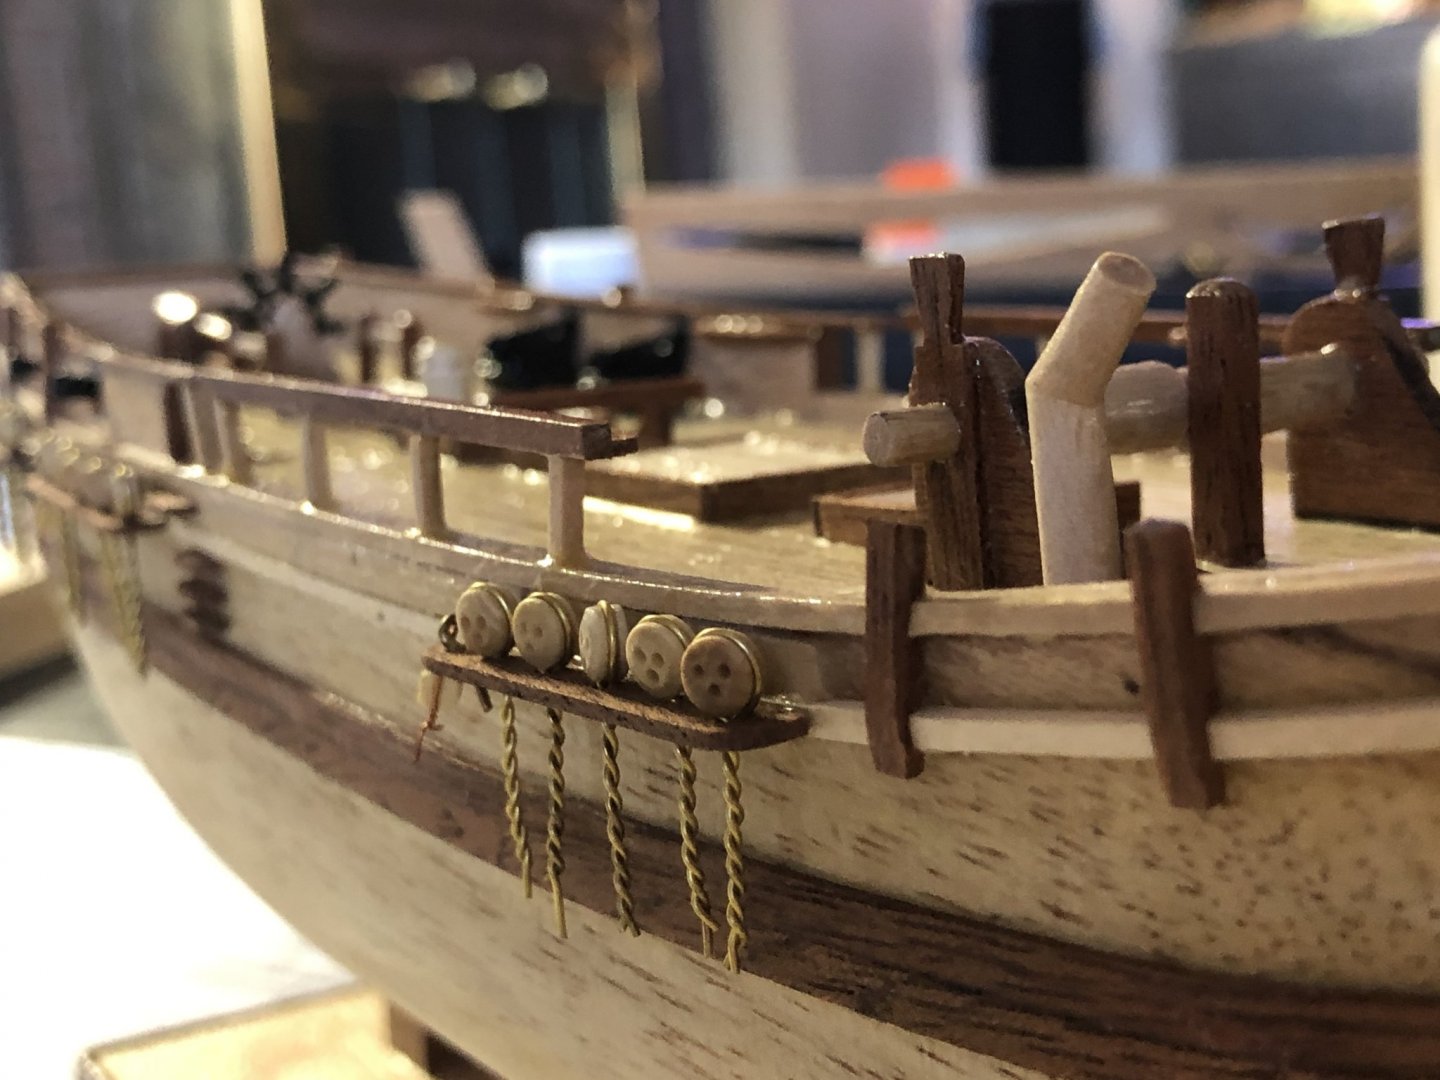
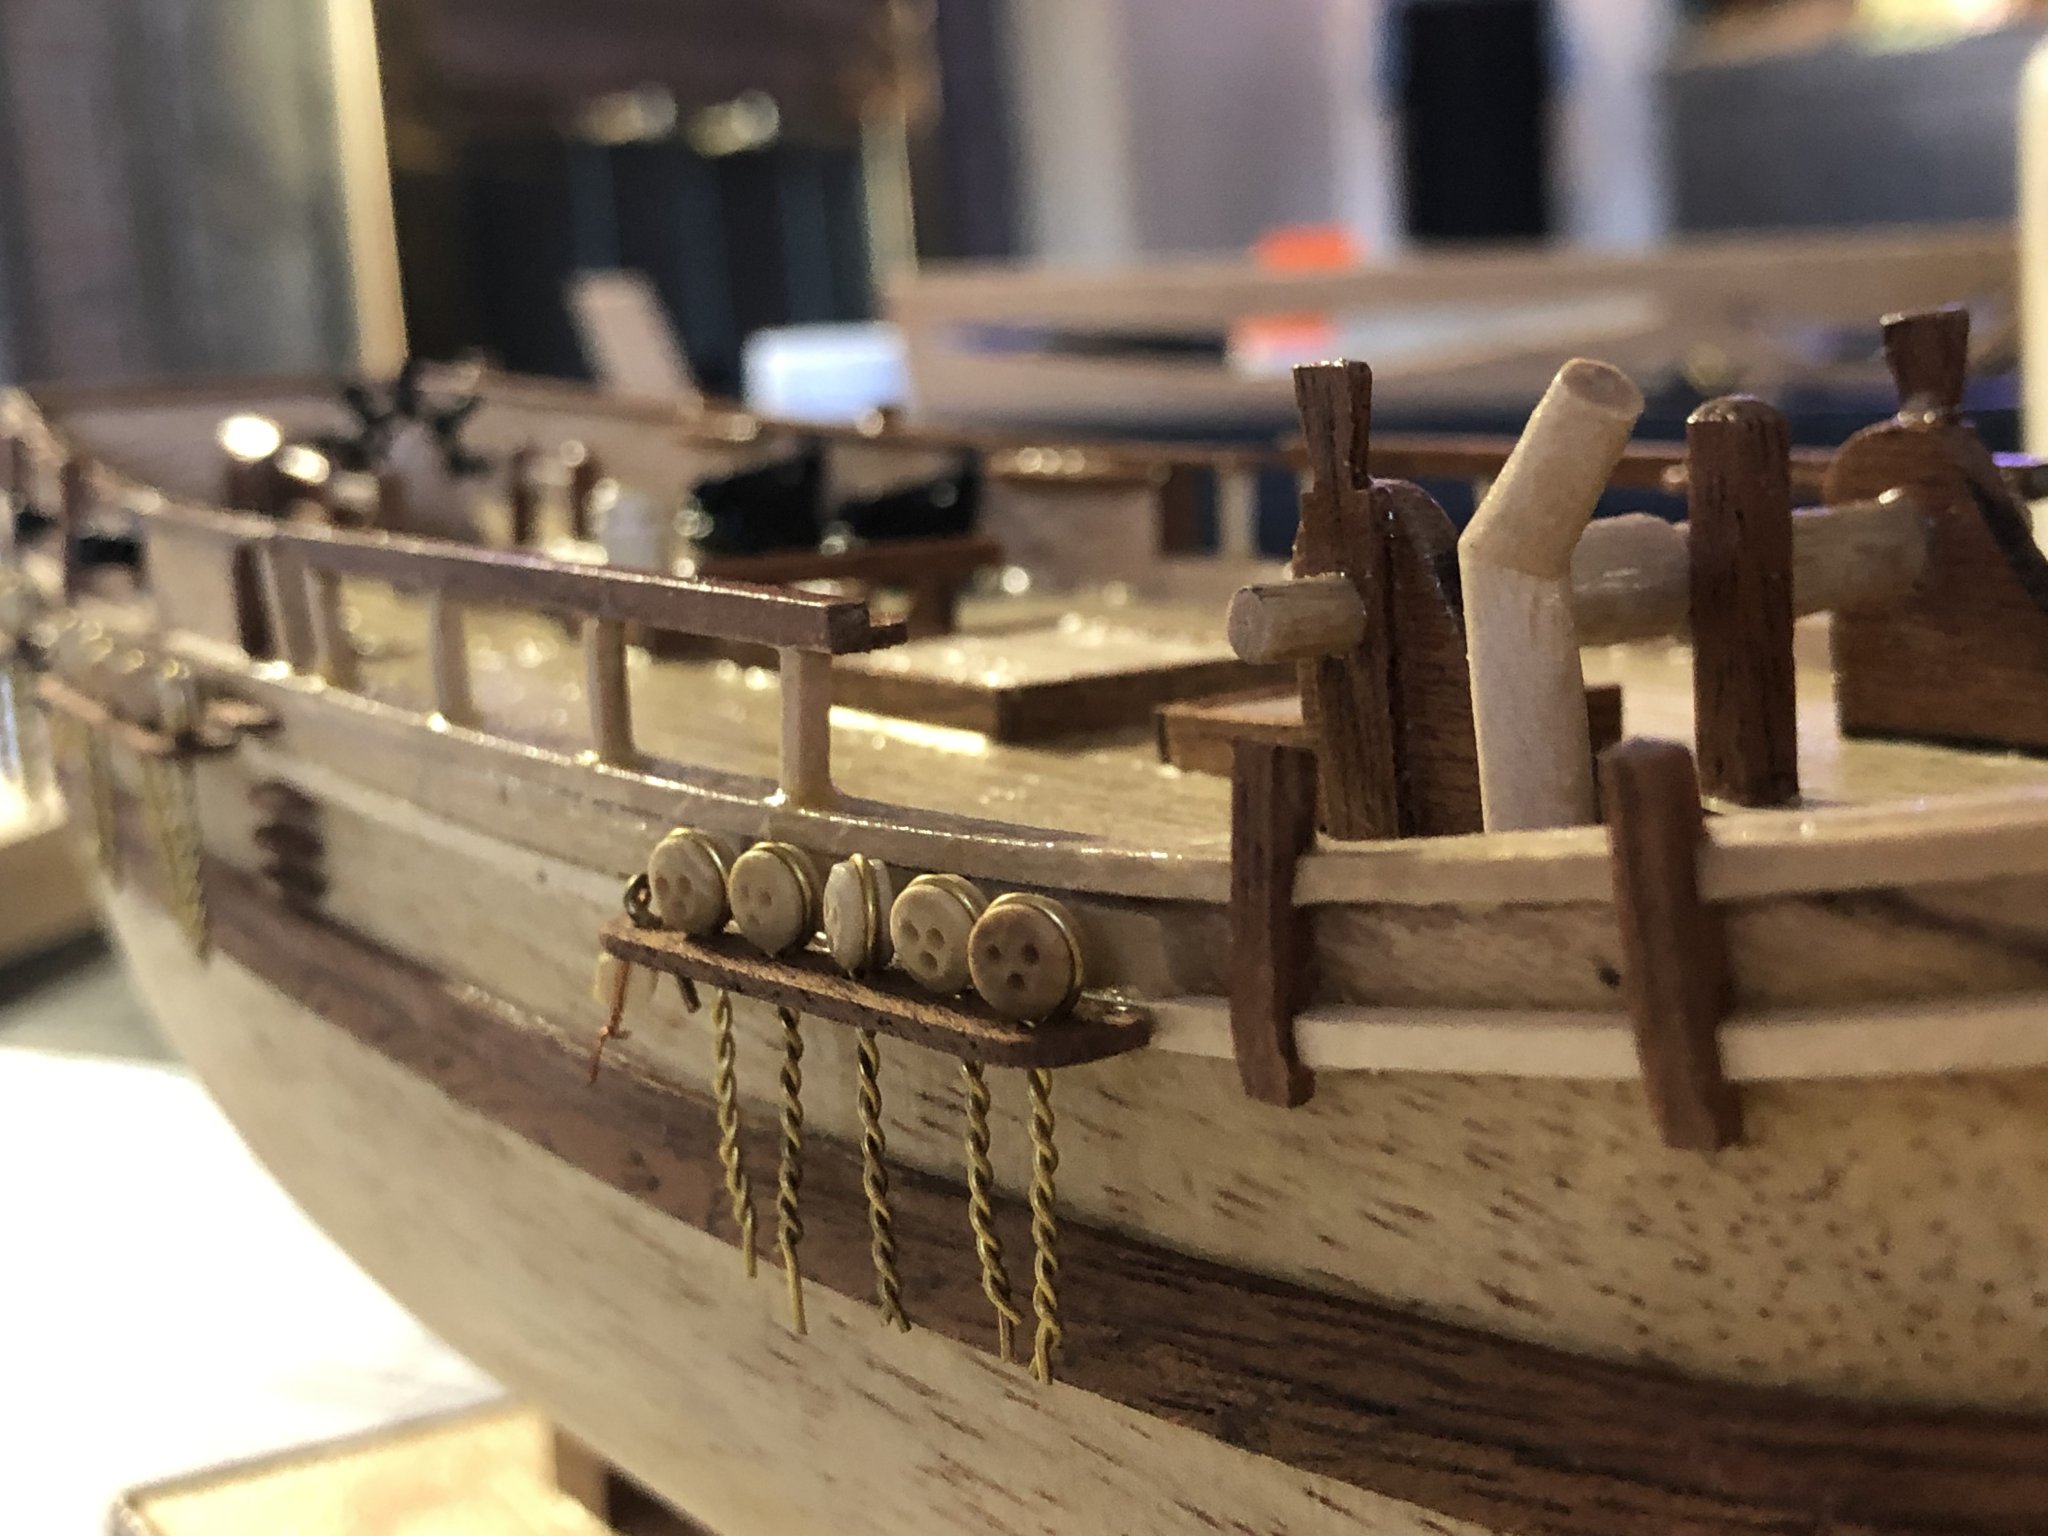
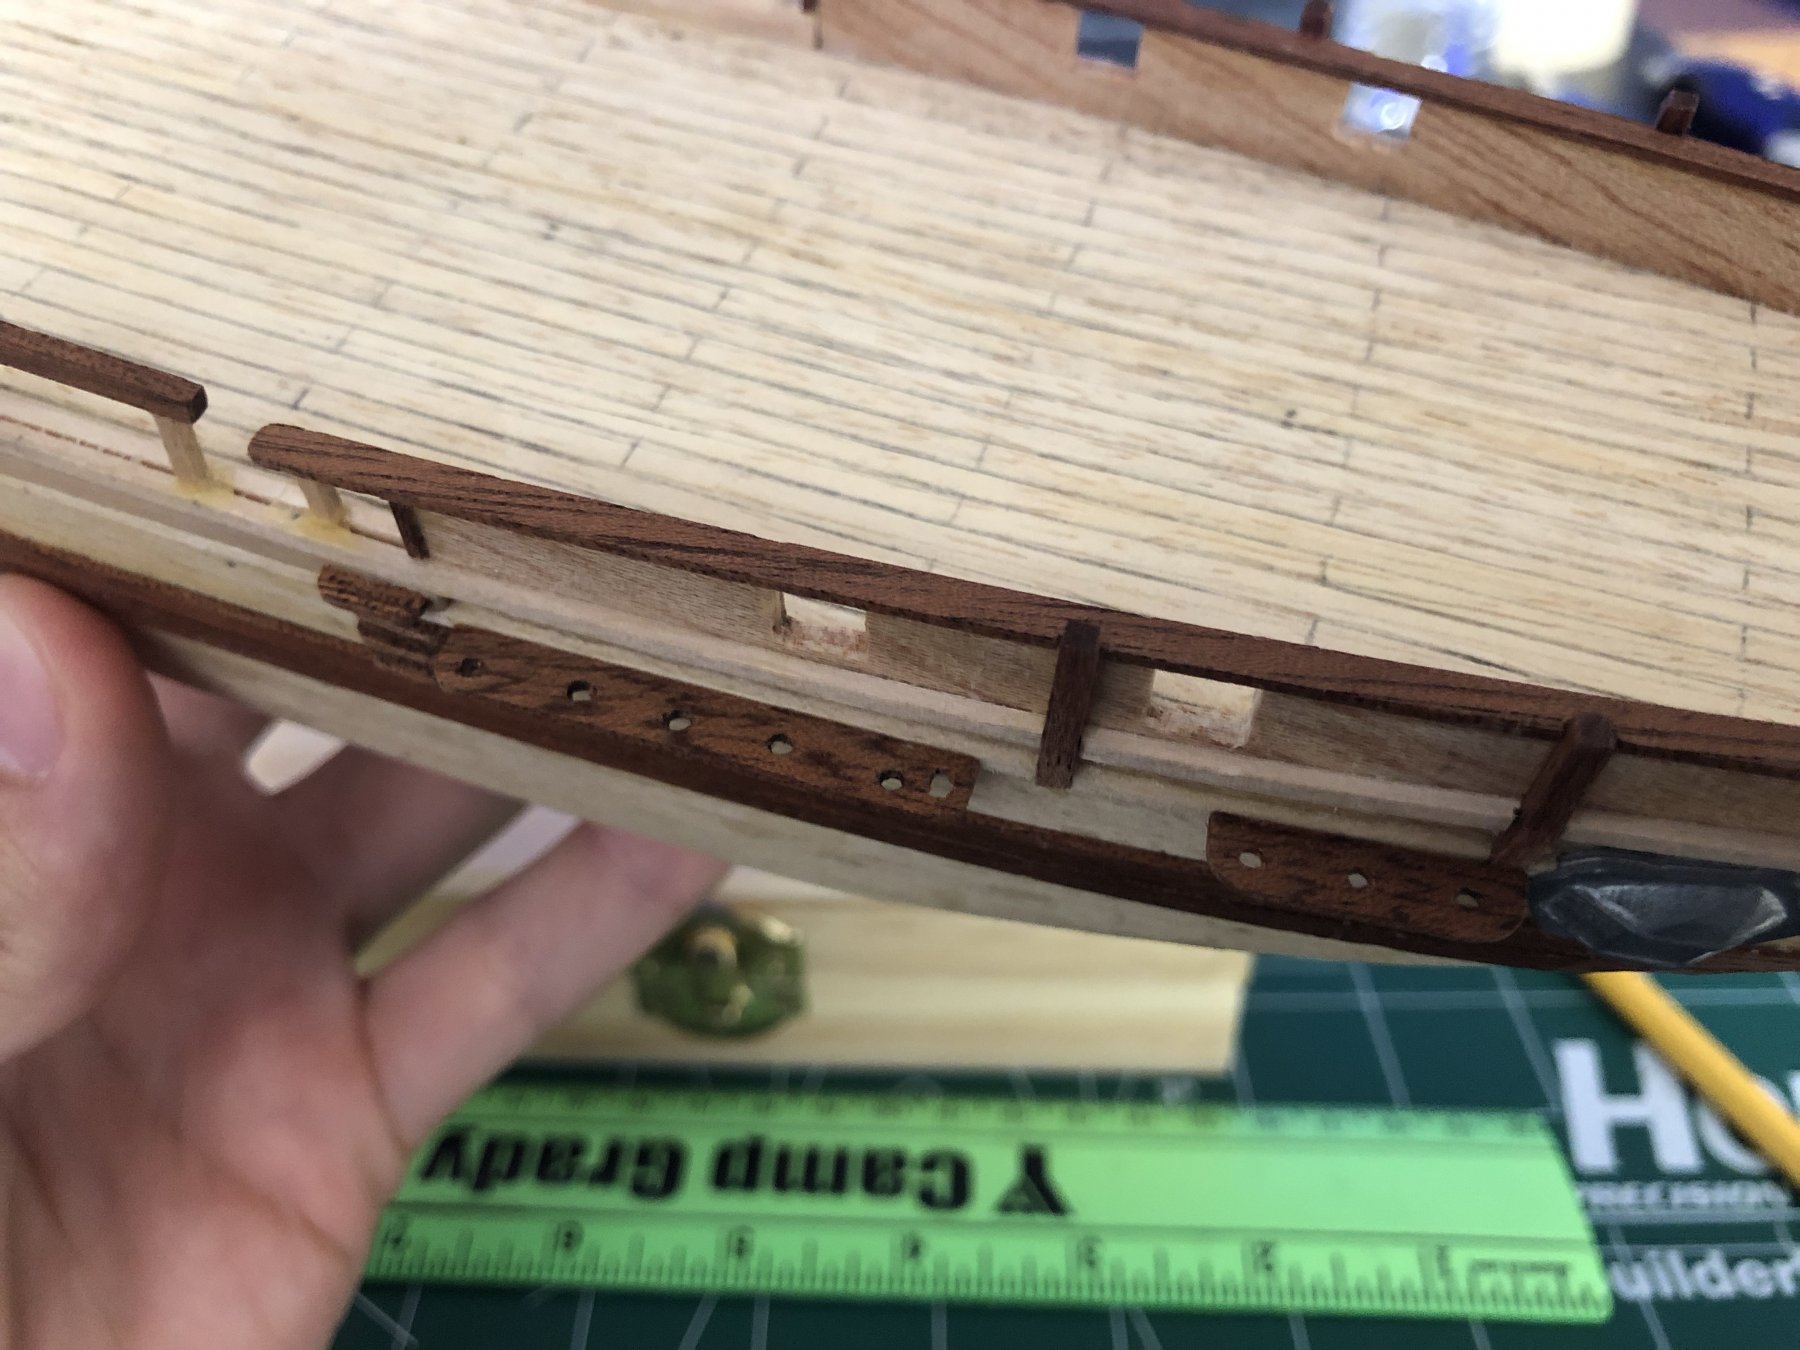
Next was the rigging blocks, these were like the dead eyes very small and very tedious but the wire was thinner so my fingers did not hurt as much.

Here is a photo of them all lined up along the side of the ship. My next step is drilling small holes above the wales and gluing the dangly metal bits to the hull of the ship. I also need to finally decide what I want my paint scheme to be so If anyone reading this has any more advice or perhaps a link to a build that I could look at that would be greatly appreciated.
I will continue to update here with the progress of my build as time goes on. I suspect I will have plenty of time to work on this in the weeks and months to come. (Also, if my images are too large please let me know I can scale them down)
- Nirvana and GrandpaPhil
-
2
-
On 8/26/2019 at 2:07 PM, Doug1963 said:
You mentioned you are a student. Mind if I ask where? I work at the A&M campus in College Station.
Doug
Hey Doug, thanks for reaching out.
I'm an aerospace engineering student at the University of Texas at Austin. (TU) for you. Im starting my third year here and i love it, it is hard work but fulfilling. I also have a few friends who attend CSTAT and they are fully immersed in the passion and culture of the campus. Its nice to hear another Texan!
-
18 hours ago, reklein said:
For your Wales just add a plank over the existing planking. For more material Michaels,JoAnns or Hobby Lobby usually have Balsa and basswood display boxes.
Thanks again everyone, I will check out those hobby stores and make a decision, I will update my decision on my Build-log. feel free to follow along if you want.
-
Wow, thanks to everyone helping me out here. I will take what you have said and do some more research. Im not sure if its something I want to undertake right now, or if If I want to wait to do some planking on my second ship.
- mtaylor and thibaultron
-
2
-
4 minutes ago, reklein said:
A simple solution is to just add planking to the hull. Bluejackets Constitution is done this way. It would be similar to doing a double planked hull and will look better than trying to draw on planks using an awl or some similar sort of instrument.
Thank you for the response reklein. If I do that would I have to double up on my lower wales? Adding planks straight onto the hull would make my wales flush with the rest of the hull. I do not have the extra material to do that, and I'm not sure of where to buy more of it, my local hobby shop does not have the material.
- BETAQDAVE, mtaylor and thibaultron
-
3
-
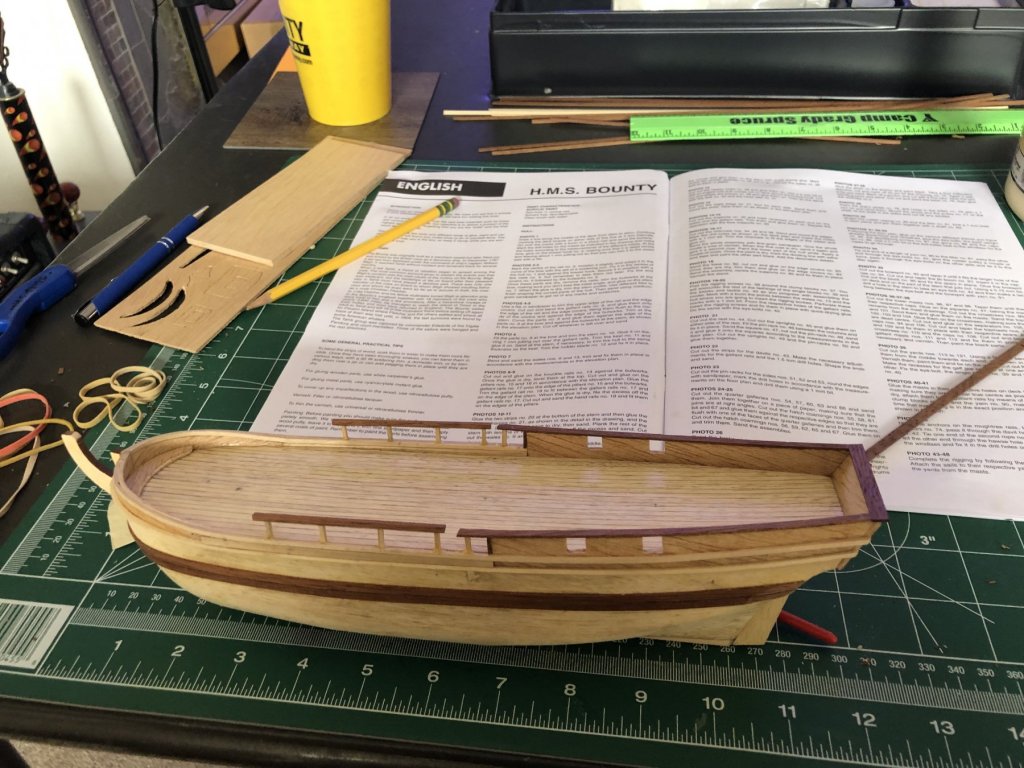
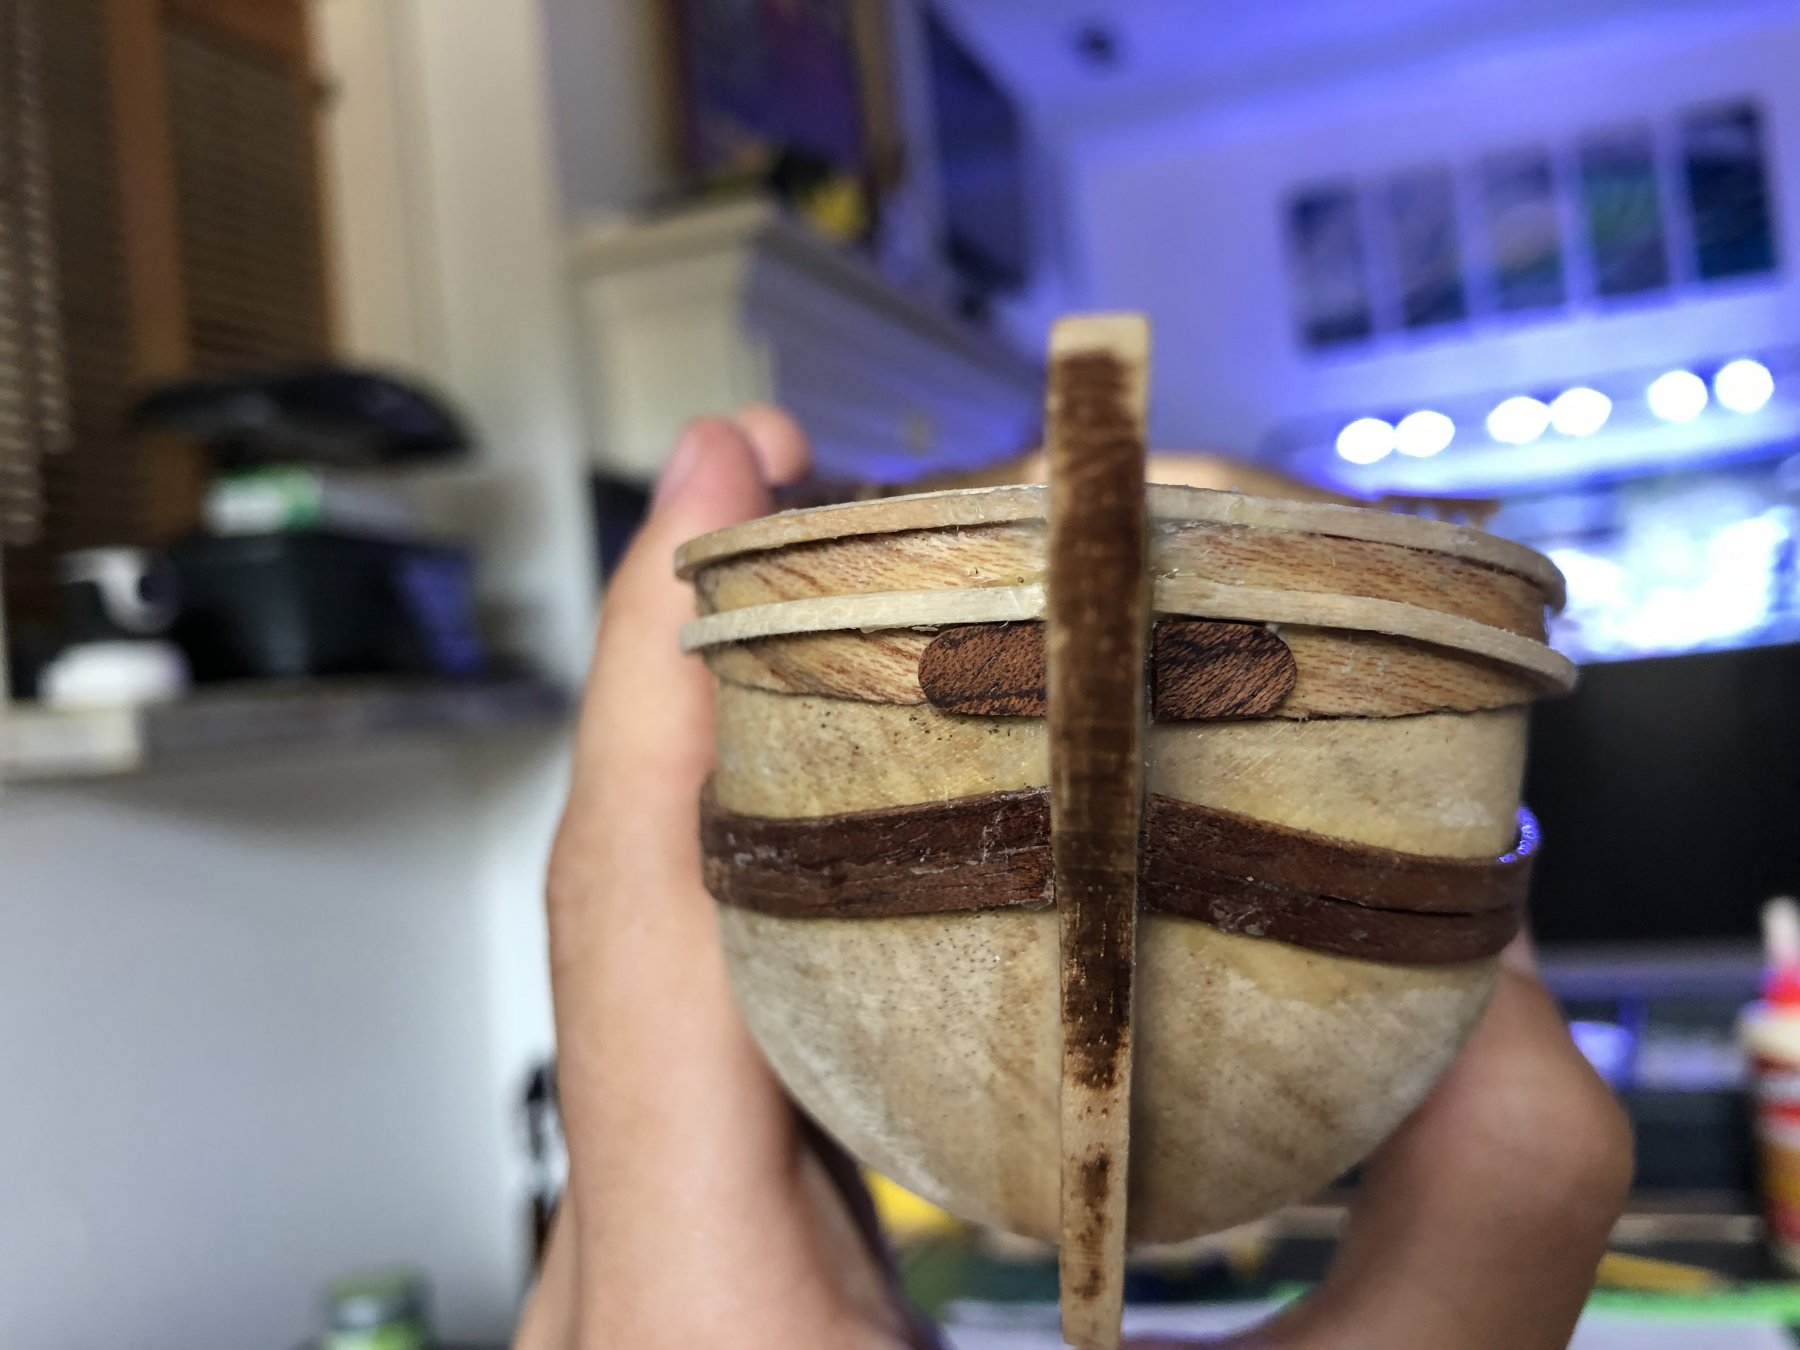
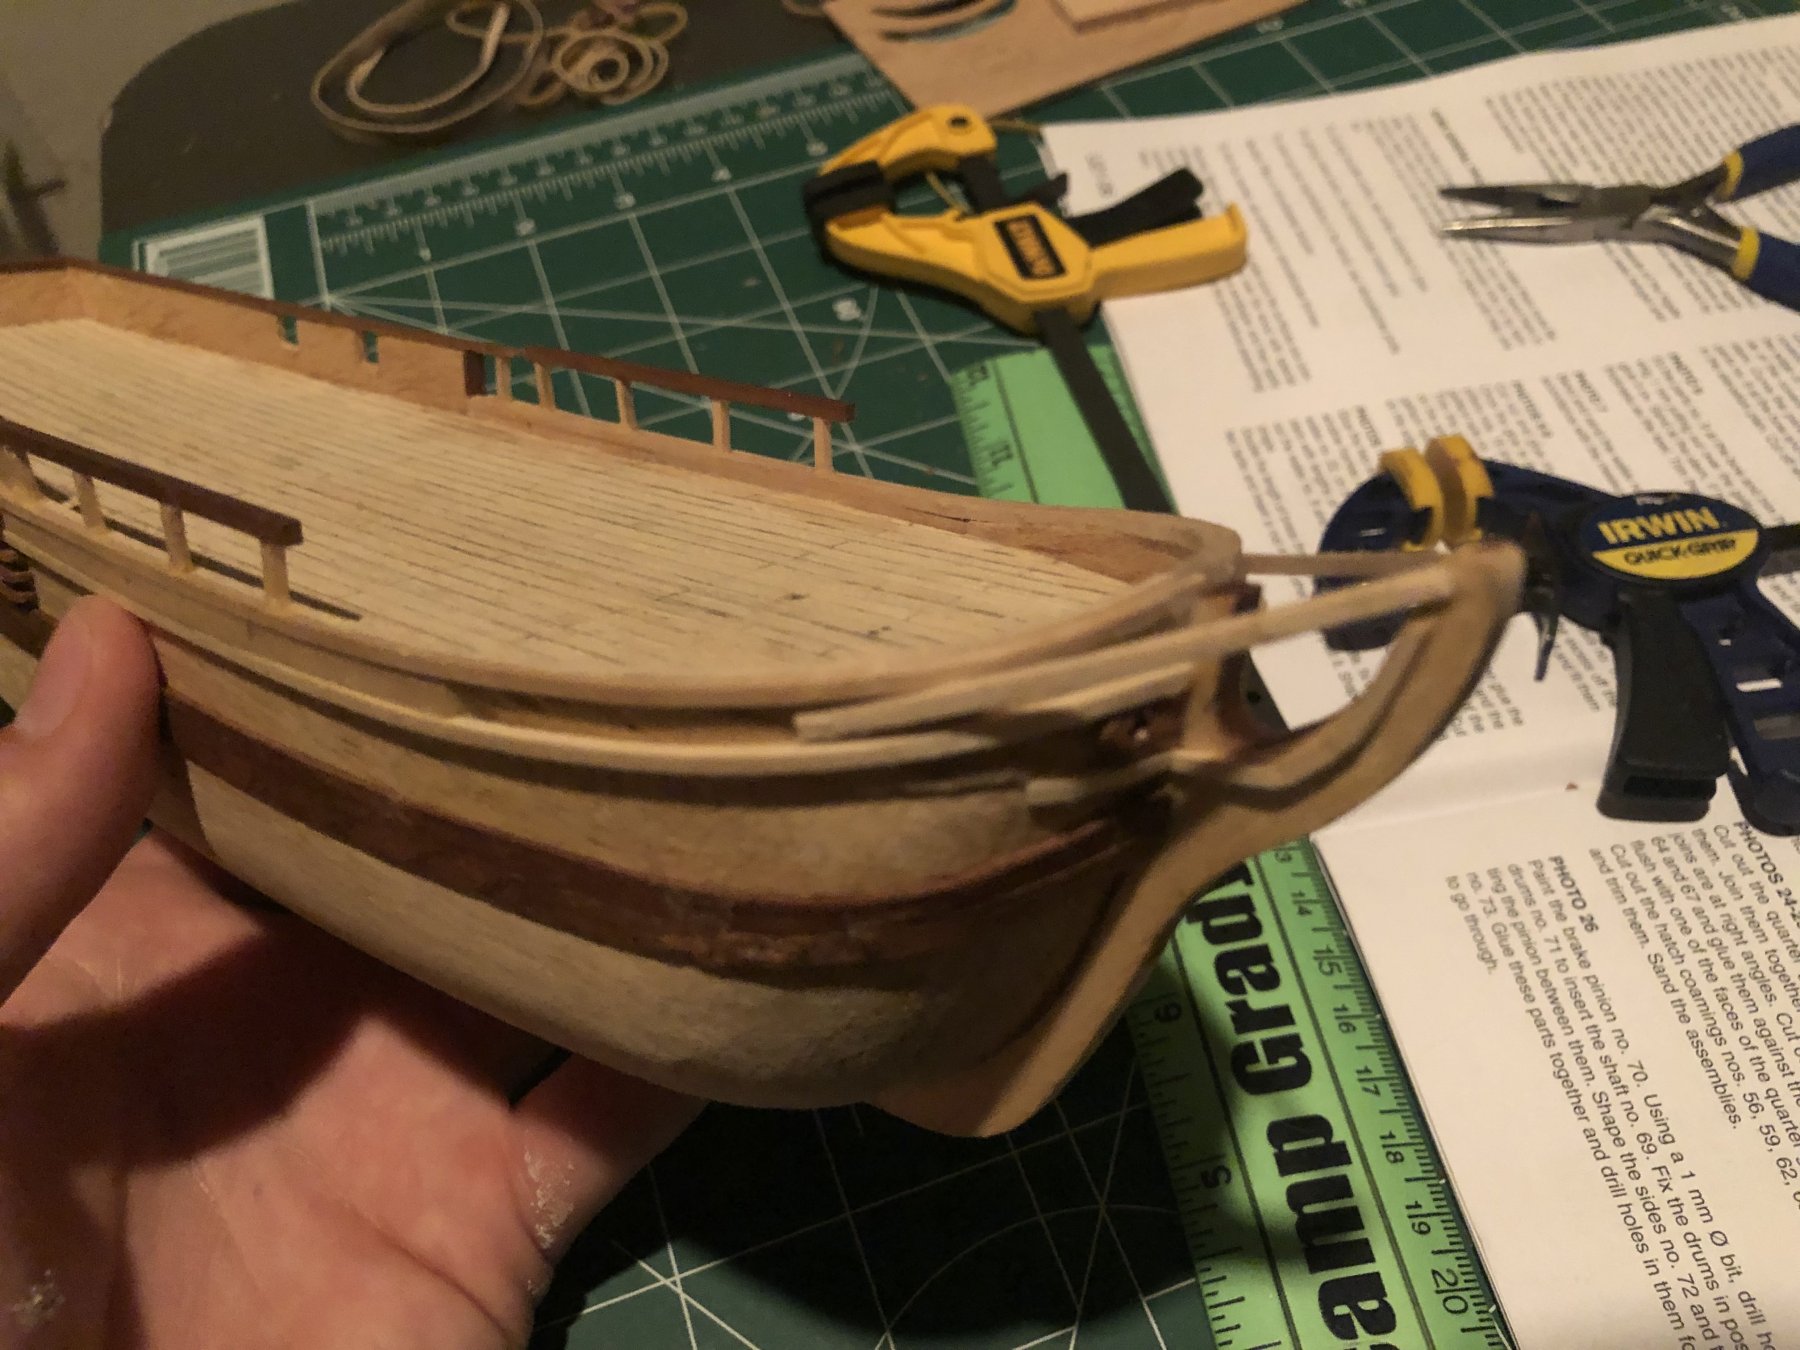
Hello, I have just recently gotten into this hobby and I am now at the stage where I feel its time to paint/stain my ships hull and deck. If you would like to see my progress so far you can check out my build log here. Before I paint and stain I was curious if its possible to add the illusion of planking on a solid hull ship. My kit is from Constructo and came with a pre-carved hull. I would like to add some planking to make it seem more realistic before moving on.
My plan was to take a nail or xacto knife and just make some markings along the hull but I wanted to ask here to see if any of yall have had a similar situation or have any better ideas. I have tried searching it up on this forum site but the only build log that i have seen that has attempted it is by the user moreplovac, and his build of the Sultana. (Which is incredible) He takes a chisel to his hull to remove some wood and then adds planking in before doing anything else, however, i am far past the first steps of my build and this idea of mine is kind of an afterthought.
Any help would be greatly appreciated.
- mtaylor, thibaultron and BETAQDAVE
-
3
-
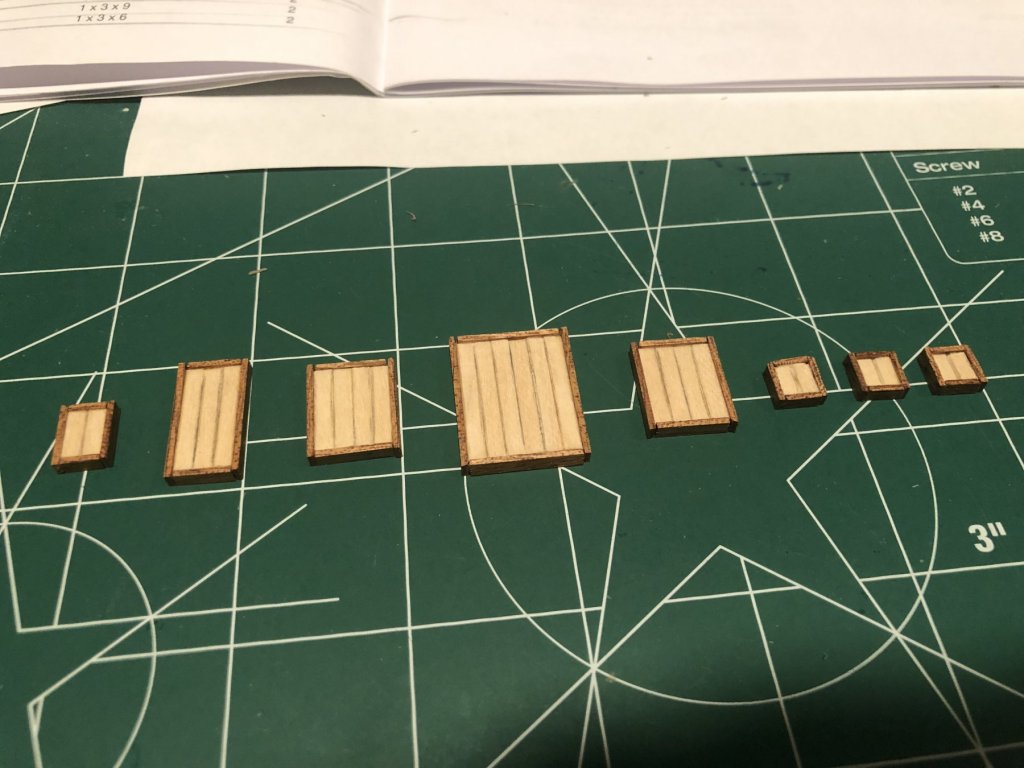
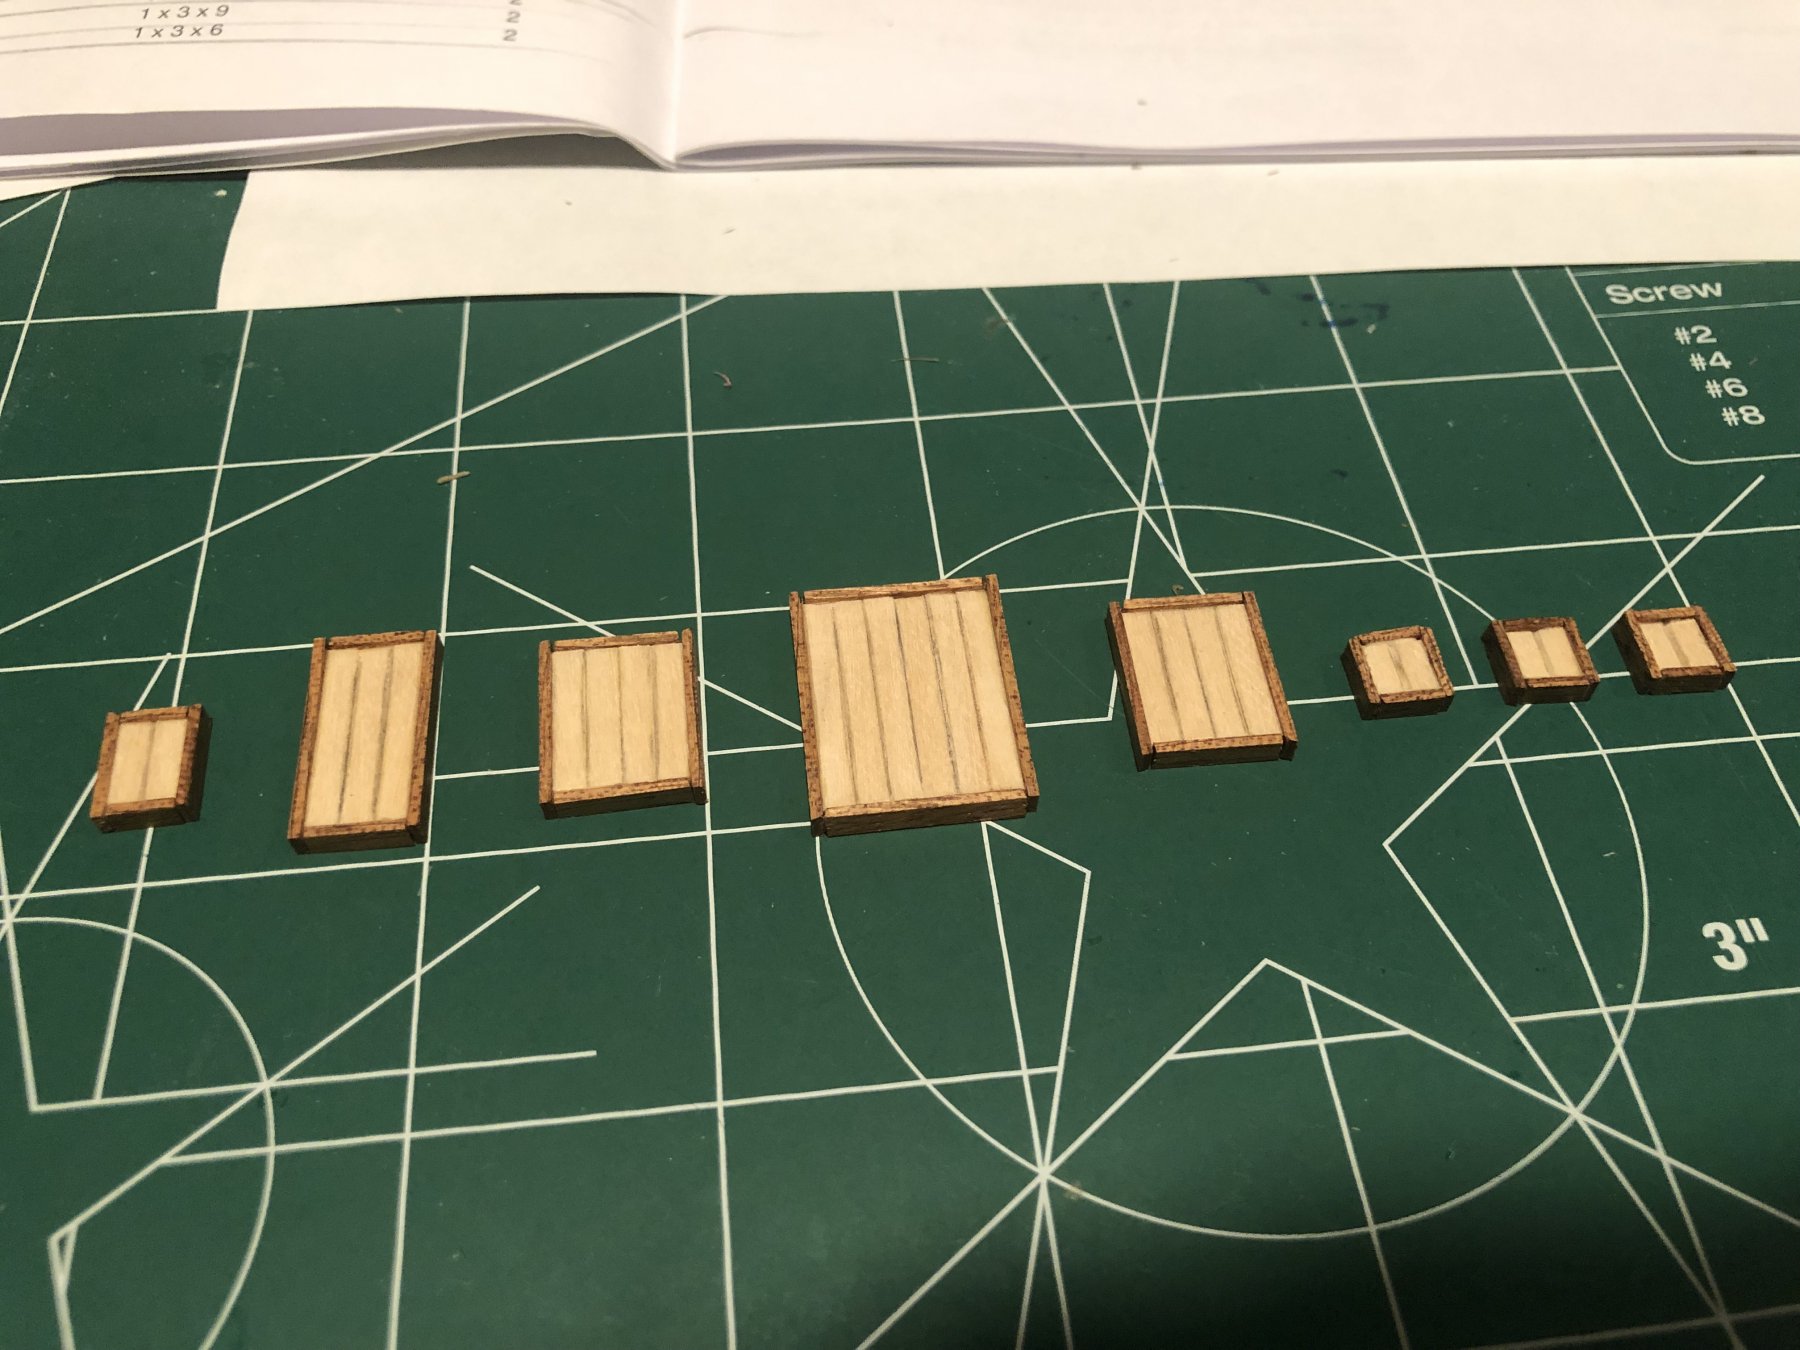
Hello quick update to anyone out there,
I went ahead and built my deck hatches, the mizzenmast pin racks, as well as the windlass uprights and sides. They look pretty good, in my opinion, but I do feel some finishing touches need to be done on the hatches. Im not sure.

I was also able to go to the hobby store and buy some polyurethane varnish and some acrylic paint for my ship. After looking at some various paint schemes I think I like ones where I can still see most of the wood on the ship. Linked below is a build that I really like for its style and the details.
I think I would like to do something similar, however, my ship does not have a darker wood beneath the lower wales. Is it possible for me to stain that wood and then put the polyurethane on it? If that is not possible, I asked my girlfriend to make some Photoshop mock ups of what my ship would look like should I choose to paint the hull white.
Here are the photos.

Black ^

Blue ^
I think I like the look of the blue more, but i have read that black may be more historically accurate. I do realize that at this scale accuracy is going to be very hard to do correctly, but I want my ship to still look the part, even if it is my first go at this thing.
Any advice as far as varnishing, painting, drying, and style would be greatly appreciated. Thank you all, I will update you as more of the ship is complete.
- mtdoramike, Henke, GrandpaPhil and 1 other
-
4
-
Hey Robert!
I just started a build log on this site not too long before you. I am also building the Bounty, however, my ships hull was all one piece and I have made great strides in my build so far. I look forward to seeing how this build progressed and wish you the best of luck!
-
1 hour ago, ccoyle said:
Definitely do as much as possible off the model, then touch up afterwards. Trying to do this on the model will be messy.
4 minutes ago, Henke said:Samuel, I use matt polyurethane varnish.
Thank you ccole and Henke for the advice. I will head to my local hobby shop and look for acrylic paint and polyurethane varnish. Will update when I have some results.
-
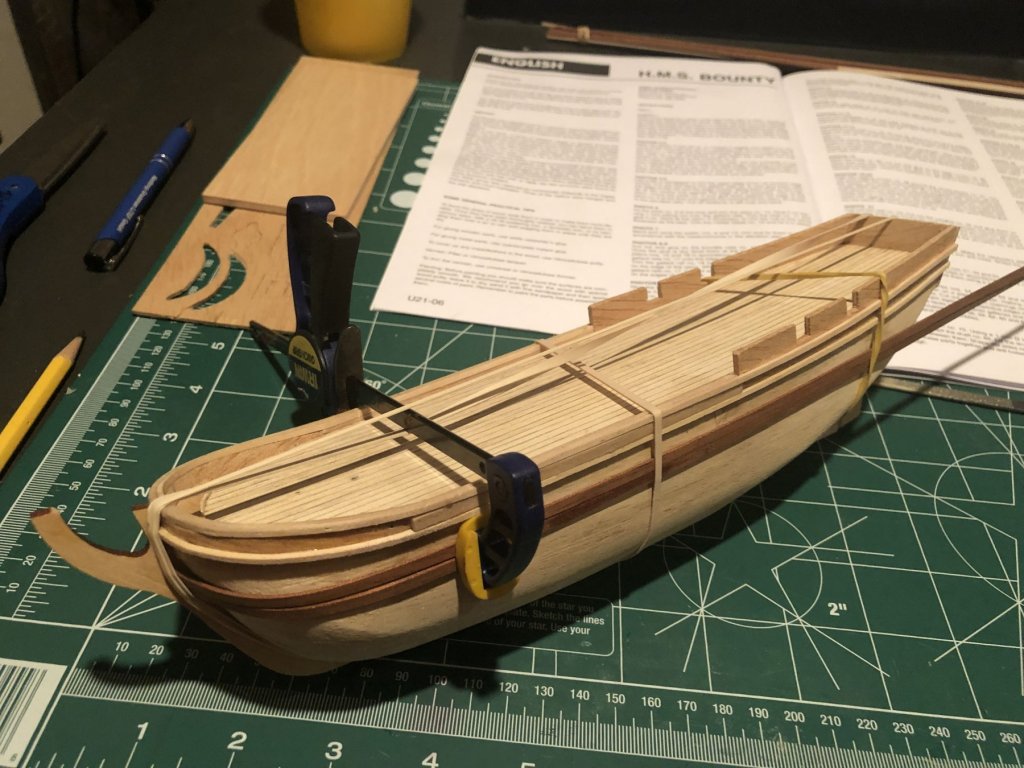
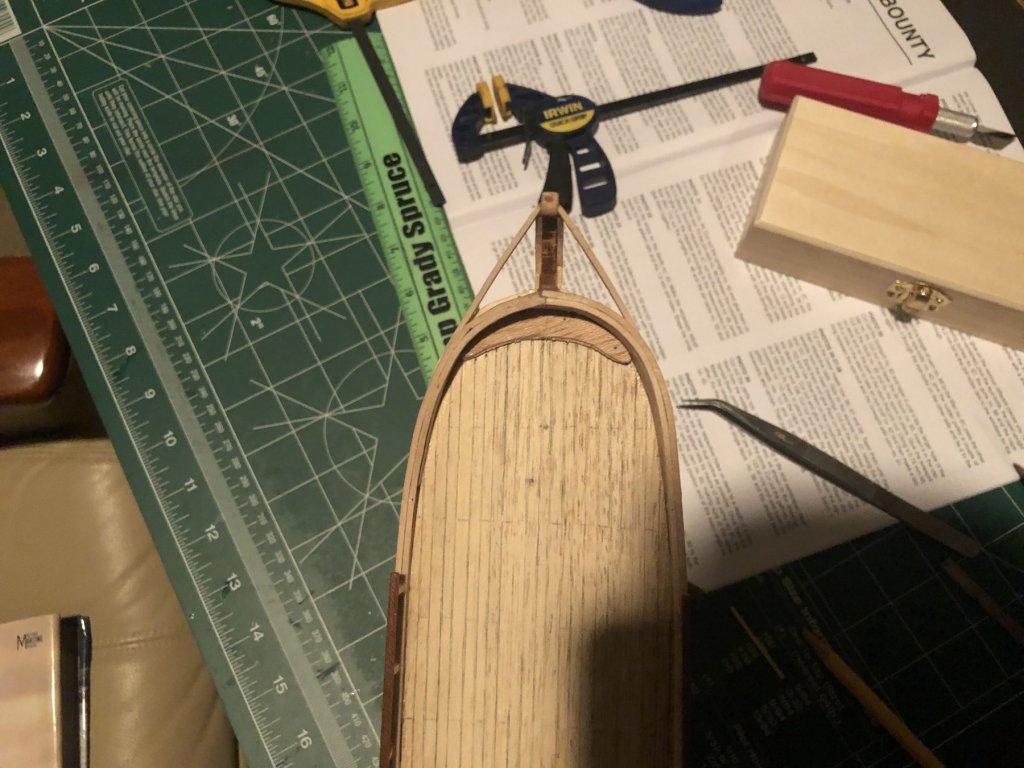
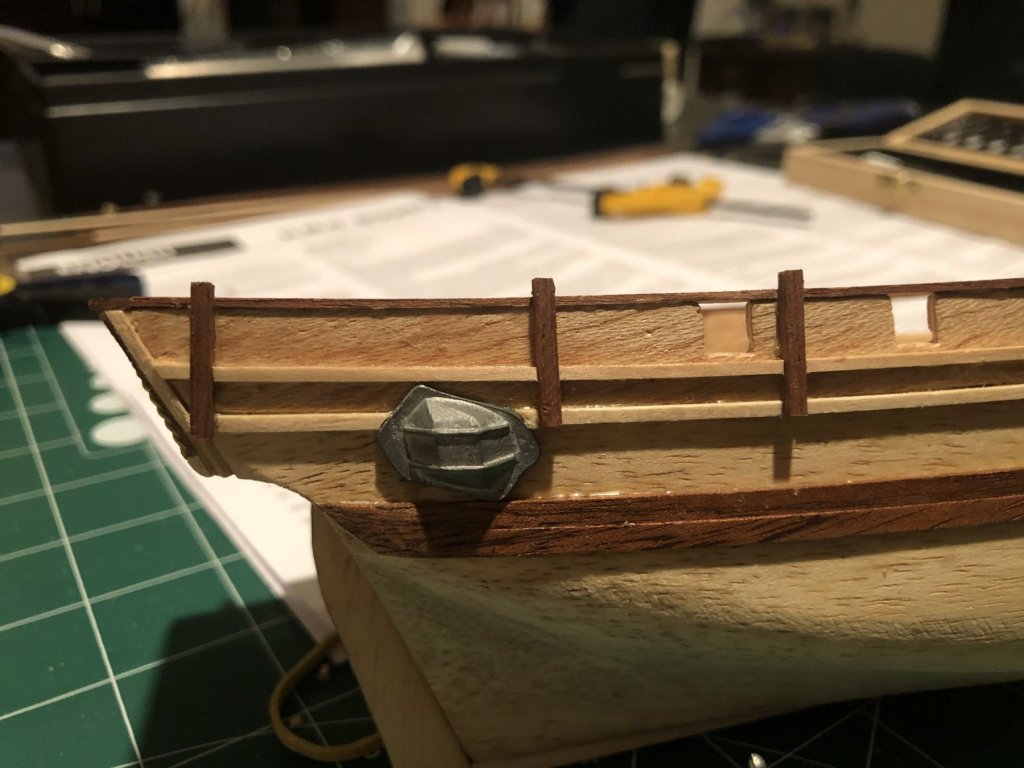
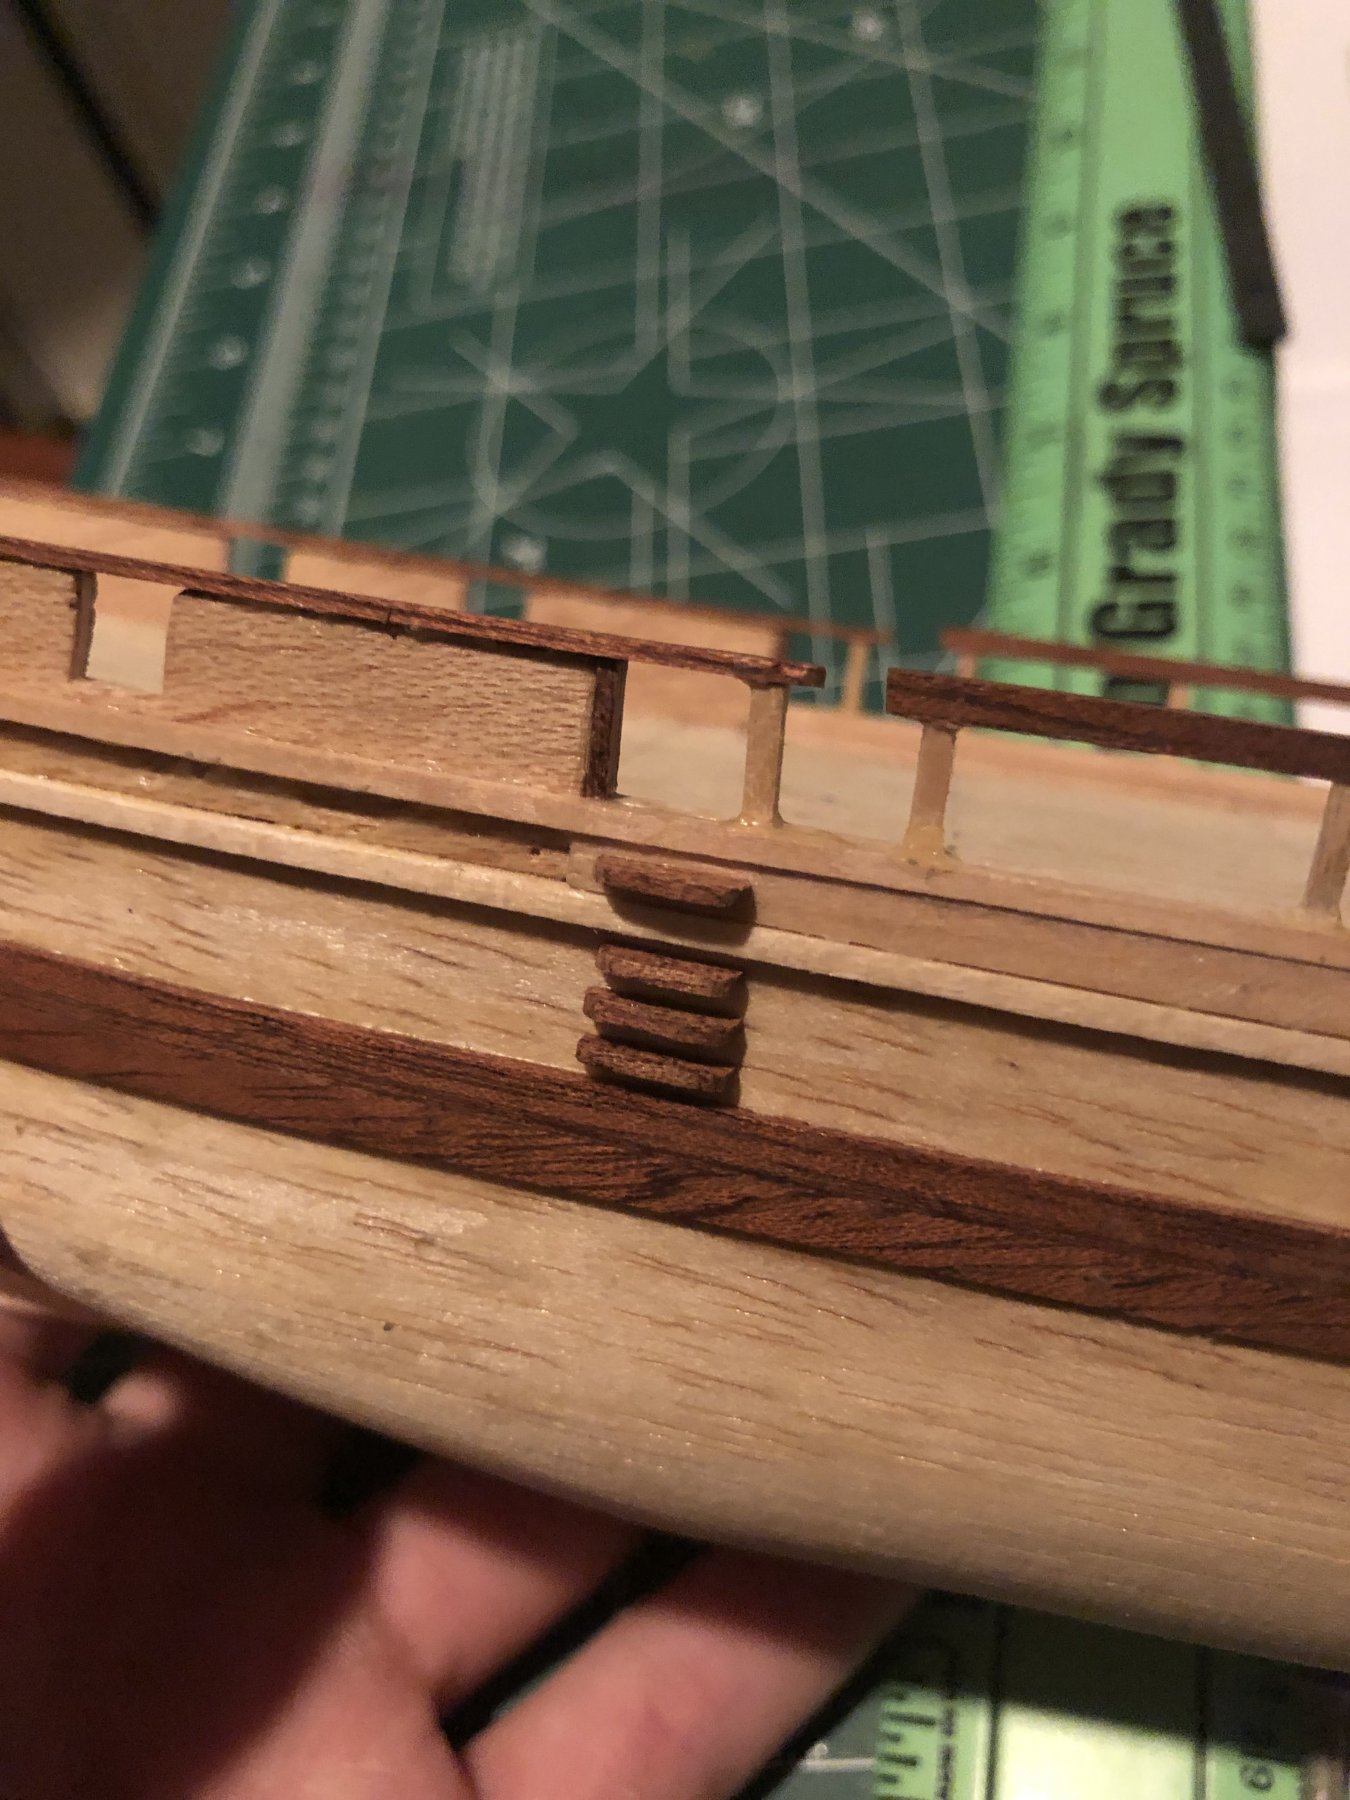
Not sure If I should edit my original post, or add a comment every time I do something. Anyways, this morning I sanded, drilled, and glued on the Foremast, Mainmast, and Mizzenmast channels. The plans said to use a 1mm drill bit, but I only had a 1/16 inch (1.5mm) drill bit available. I don't think its that much of a difference as the deadeyes will not be able to slip through the holes either way. The instructions now tell me to sand the whole assembly, apply two coats of varnish, and paint the bottom of the hull white, and the upper half black. I also plan to paint the cast iron windows and the cabin windows in the back at the same time.
If anyone could give me advice on what type of varnish to use, how to apply it, and what kind of paint is best for this project that would be greatly appreciated. Another question I have is do I also apply varnish to the masts and the deck hatches when i finally add them to the ship? Do I do that before or after I have glued them in place and built up the masts with the connectors. (im not sure of the nautical term) The instructions are not very clear on these "details". Any and all help is appreciated, Thank you.
Here are the photos of my attached channels. A close up, and a birds eye view.


- BLACK VIKING, Nirvana, Duanelaker and 3 others
-
6
-
Hello, My name is Samuel and I am a 20 year old college student from Texas.
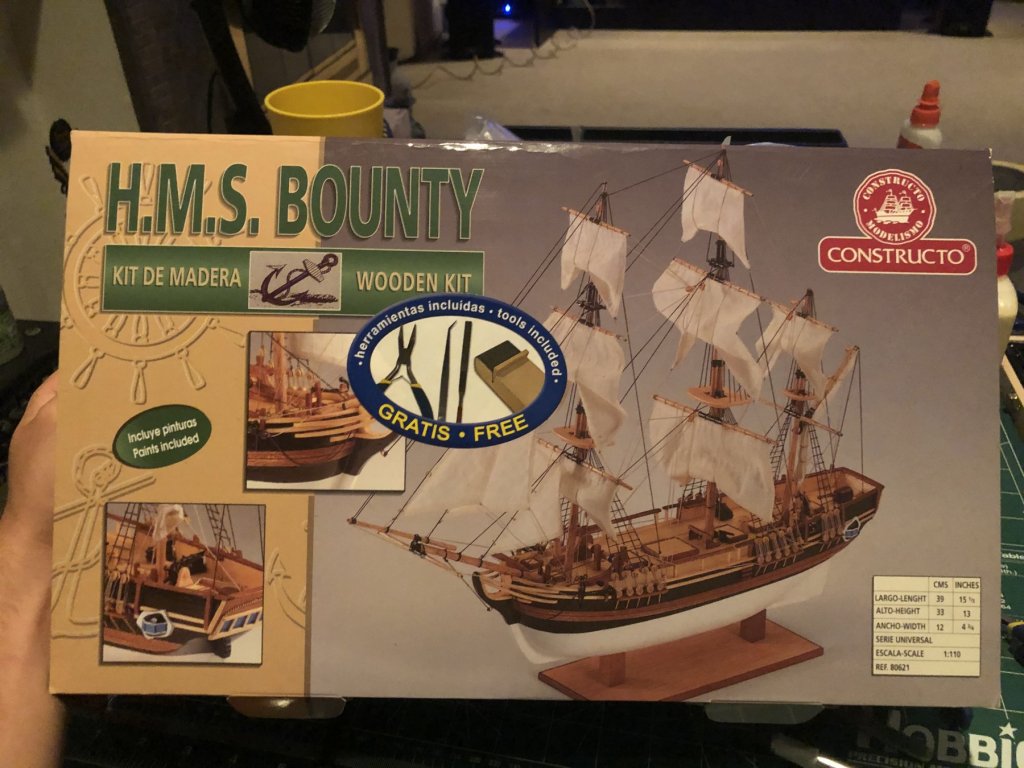
I was gifted a wooden kit of the HMS Bounty 1:110 (Constructo) a few years back and never got around to building it because I was scared of messing it all up. Now as I am a little older I started it as an "end of summer project" and I think I am about 3 weeks in and the ship looks good so far. There is still a lot of work to do, and I know I will not be able to complete it before I head back to school in the fall.
From reading a few posts here as well as various sources online I have come to a few conclusions.
1. The HMS Bounty is quite a famous ship because of the mutiny that occurred on board.
2. Constructo kits are not known for the best materials, instructions, or quality in general. (I'm making it work, so far so good)
3. This hobby is a very relaxing one for myself. (I love the water and I am a certified deep water diver)
Attached you will see a photo or two of the ship in its current state on my makeshift drydock, as well as a photo of the box.
Here is the link to my build log I just started.


- Duanelaker, JeffT, thibaultron and 2 others
-
5
-
Hello, my name is Samuel and this is my build log.
This is my very first build, and I am super excited about it.
Like I said in my introduction post, I was gifted a wooden kit of the HMS Bounty 1:110 (Constructo) a few years back and never got around to building it because I was scared of messing it all up. Now as I am a little older I started it as an "end of summer project" and I think I am about 3 weeks in and the ship looks good so far. There is still a lot of work to do, and I know I will not be able to complete it before I head back to school in the fall.
I plan to post photos of the ship after every addition that I add, and will probably ask a few questions about how to do a particular step(s) and look forward to the day that I can show my friends the work that I put in on this ship.
Attached you will see some photos of the ship once i decided to start documenting my work, and you should be able to see a very slight progression as time passed. I will also be posting a photo of the box and ideal finished product. Let me know if you would like any more photos and I will do my best to post them and answer and questions that you all may have for me.
Here is the link to my "new member post"


- GrandpaPhil, Duanelaker, Nirvana and 1 other
-
4


HMS Bounty by Samuel I - Constructo - Scale 1:110 - First build
in - Kit build logs for subjects built from 1751 - 1800
Posted
Howdy Fitch,
I am so sorry that I didn't respond to you sooner. Due to online learning at the second half of this semester I have had to put my project up for a bit, and so my time browsing this site has diminished. I am happy to see someone else working on the same kit that I am and when you start your build log I will be watching for sure.
As far as paint for the cannons is concerned I ended up going with acrylic paint from my local hobby shop. I am also planning to use acrylic paint on the windows and on the hull of the ship. The brand is "Tamiya Color". I also have used some water based polyurethane varnish to help seal the deck and other wooden parts around the ship. I hope this helps, just like you this is my first go at anything like this.
Good luck!